chris watton
-
Posts
2,333 -
Joined
-
Last visited
Content Type
Profiles
Forums
Gallery
Events
Everything posted by chris watton
-
 I have shrank the file for a 16 footer (3-d print and laser cut parts), which I shall produce in the next few weeks (64th) I say a few weeks because right now, I am laser cutting production parts for Adder and Sherbourne.
 -
The thread diameters are given by the suppliers, but I know 0.1mm is not really 0.1mm, it is thicker than that, so do not put too much stock in the diameters for the thinnest threads - what is suplied is as correct as I can get it. Ratlines were not thick rope as their job was to take the weight of one man at any one time.
- 152 replies
-
- 4
-

-

-
- Flirt
- Vanguard Models
- (and 1 more)
-
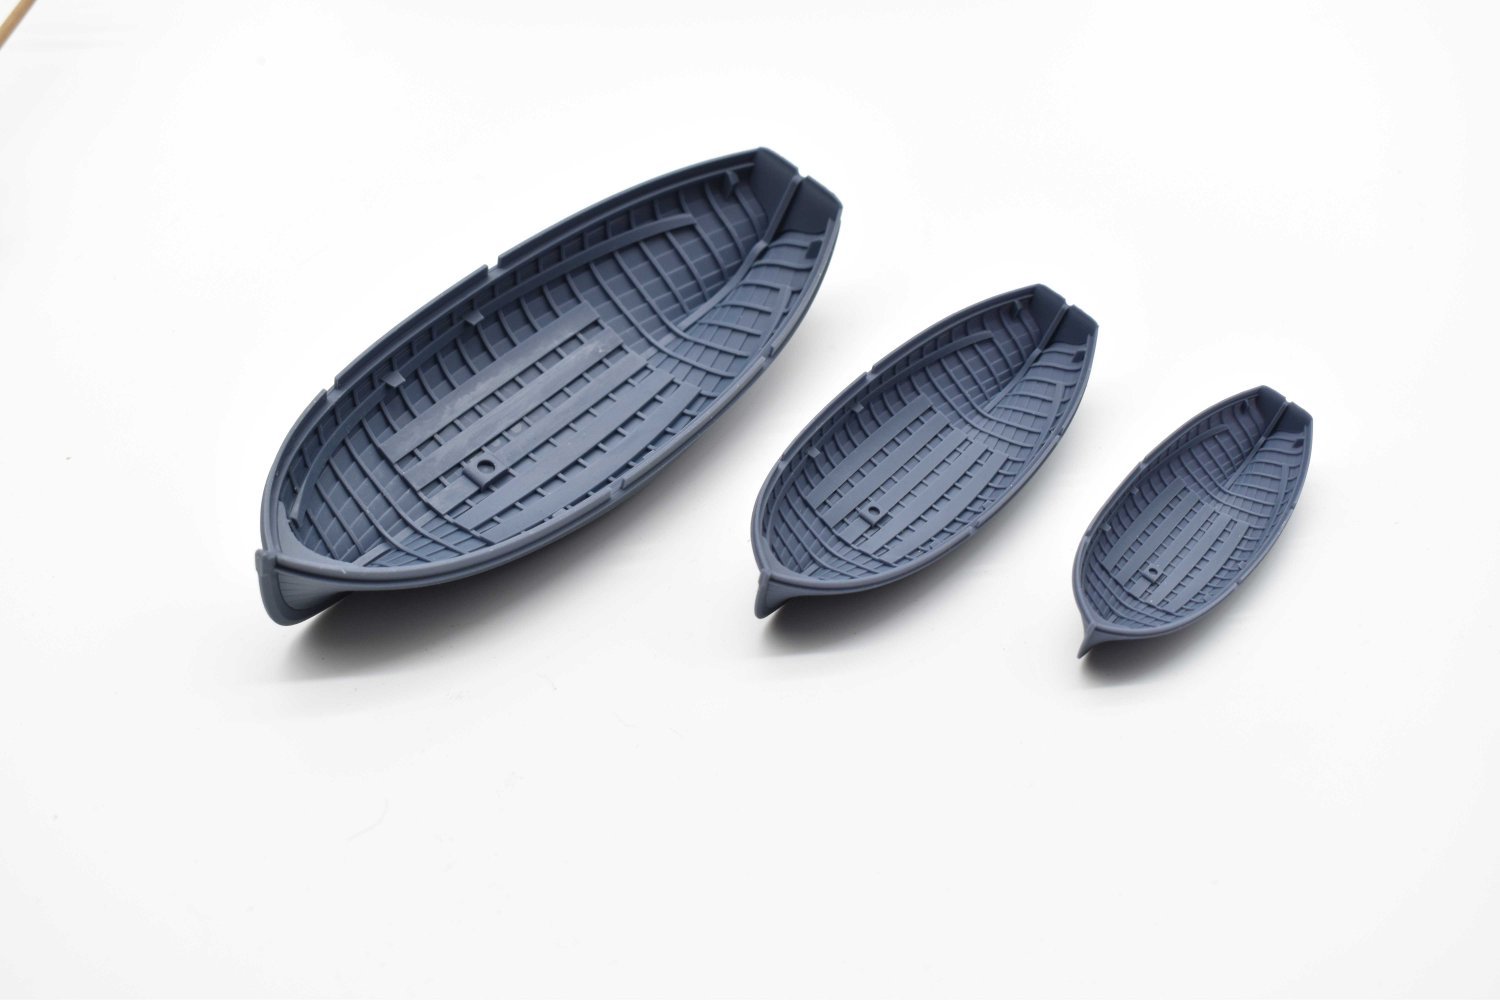
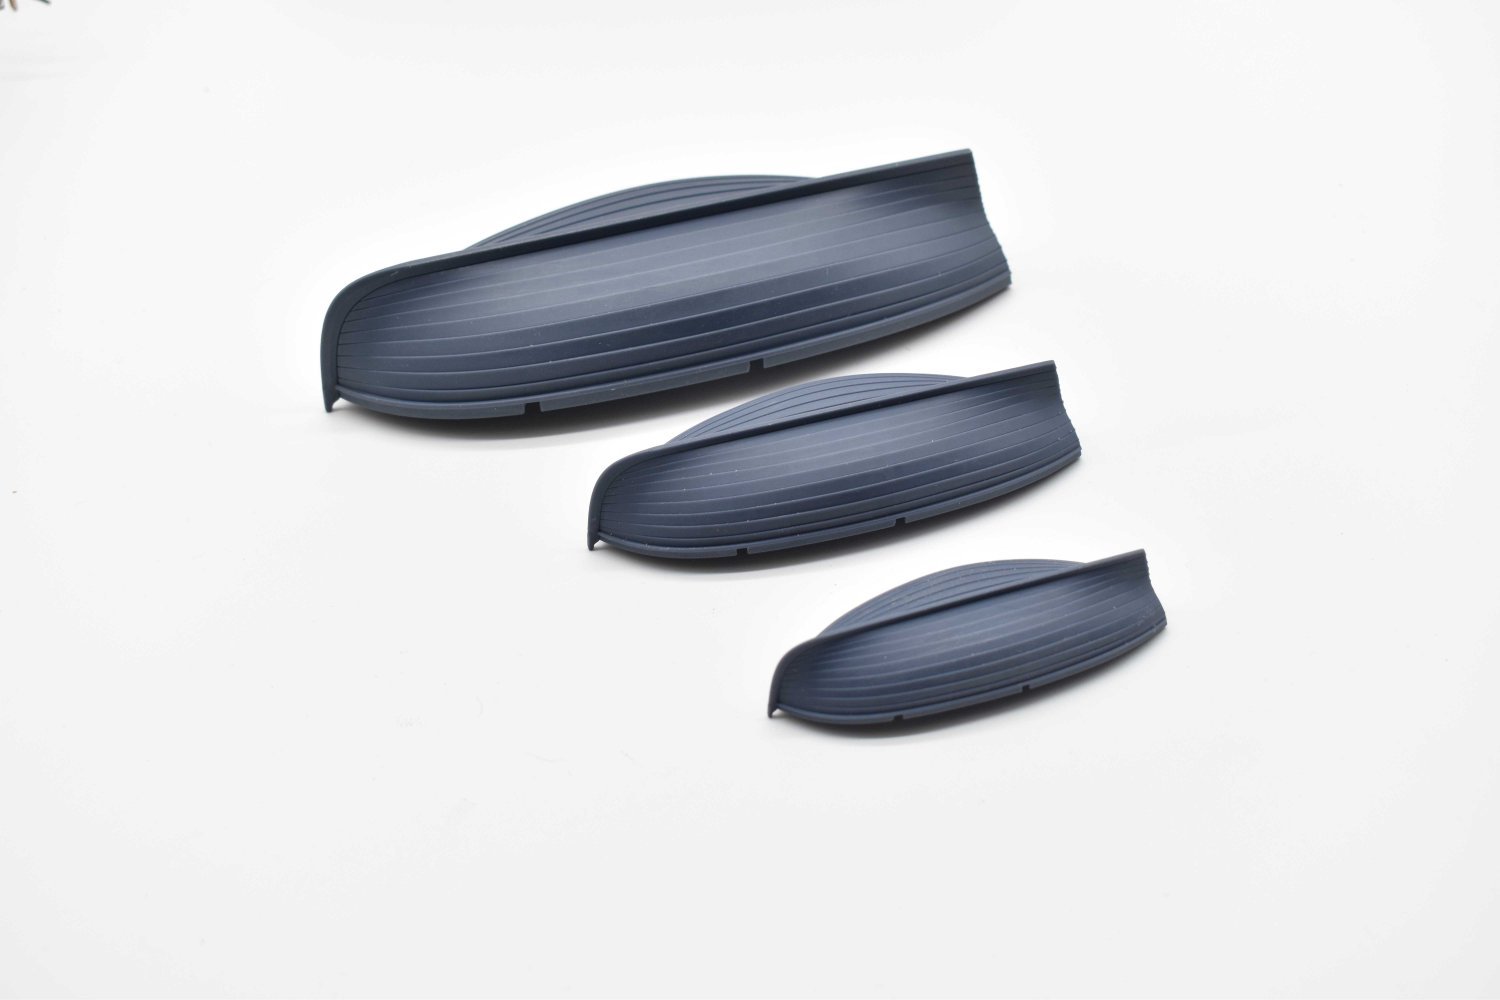
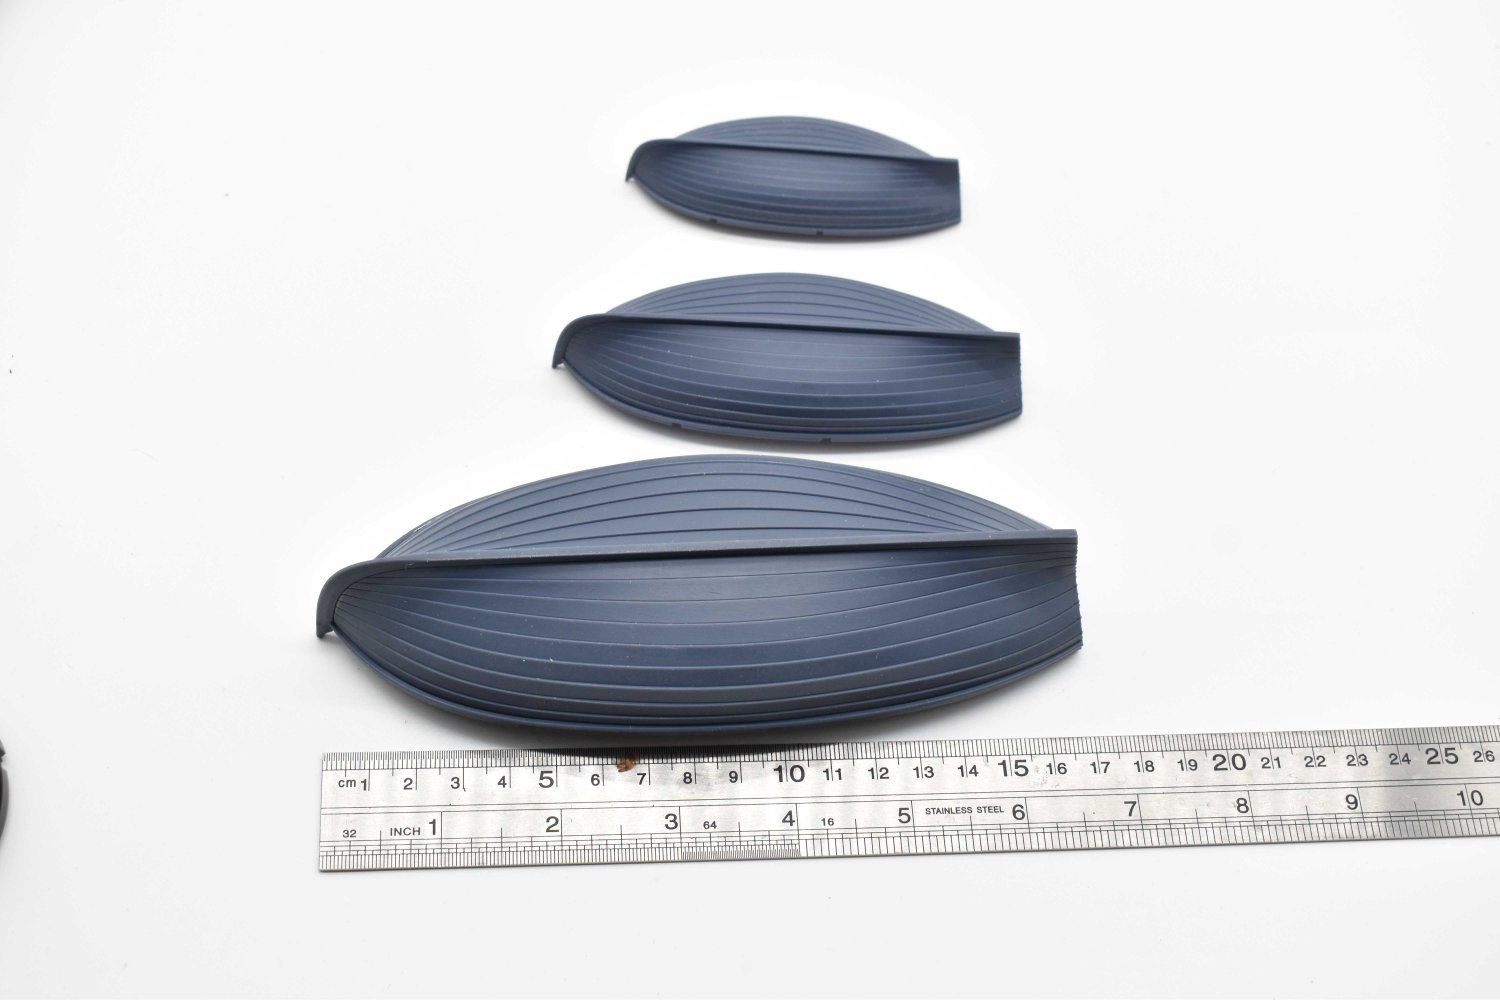
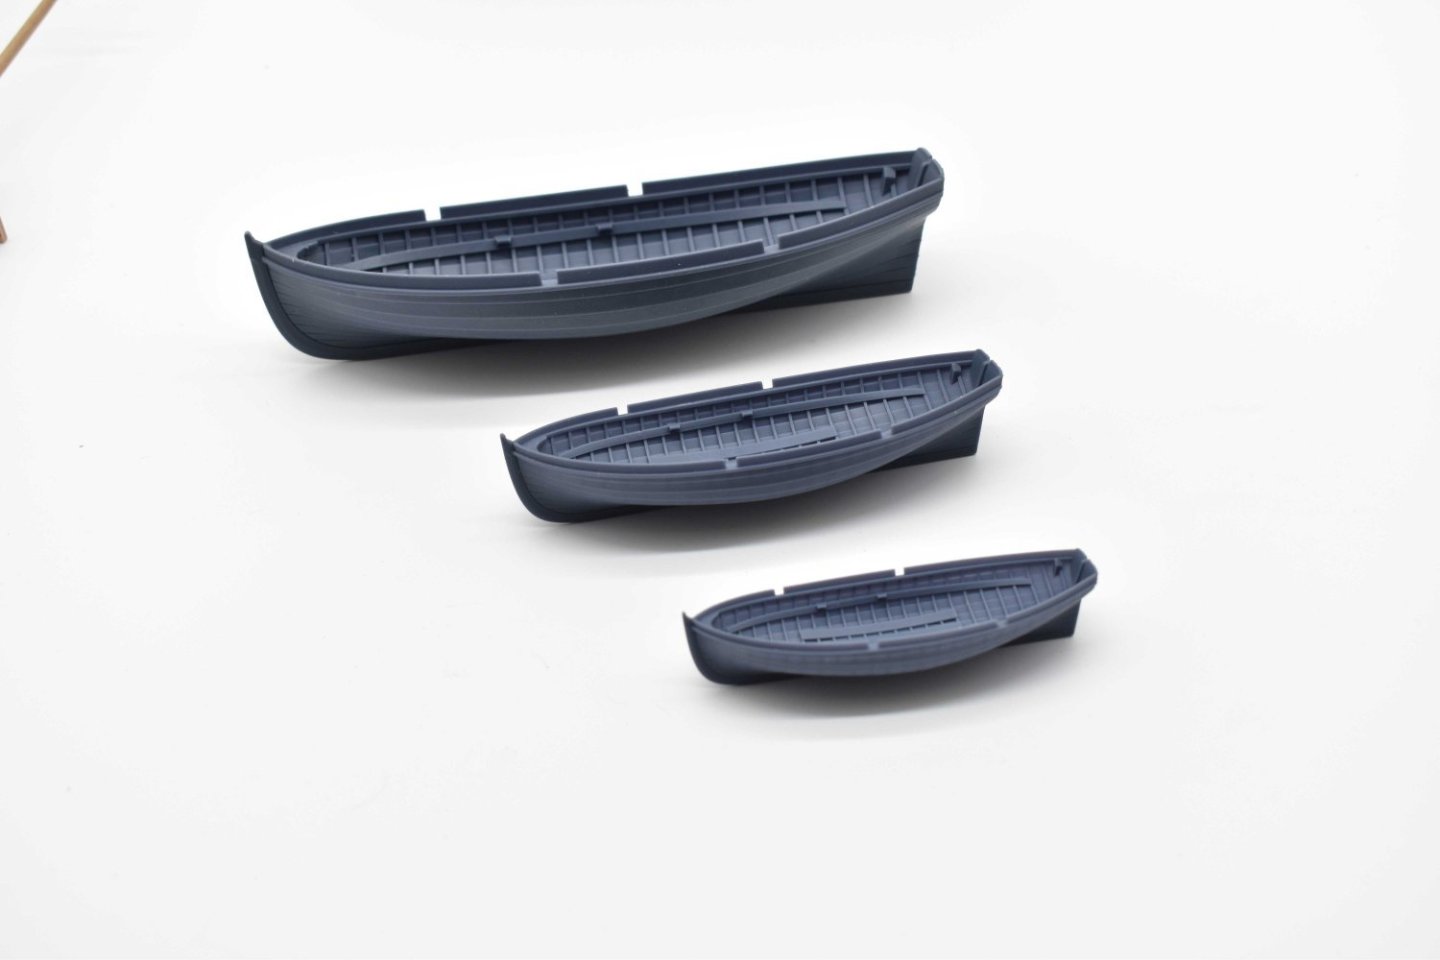
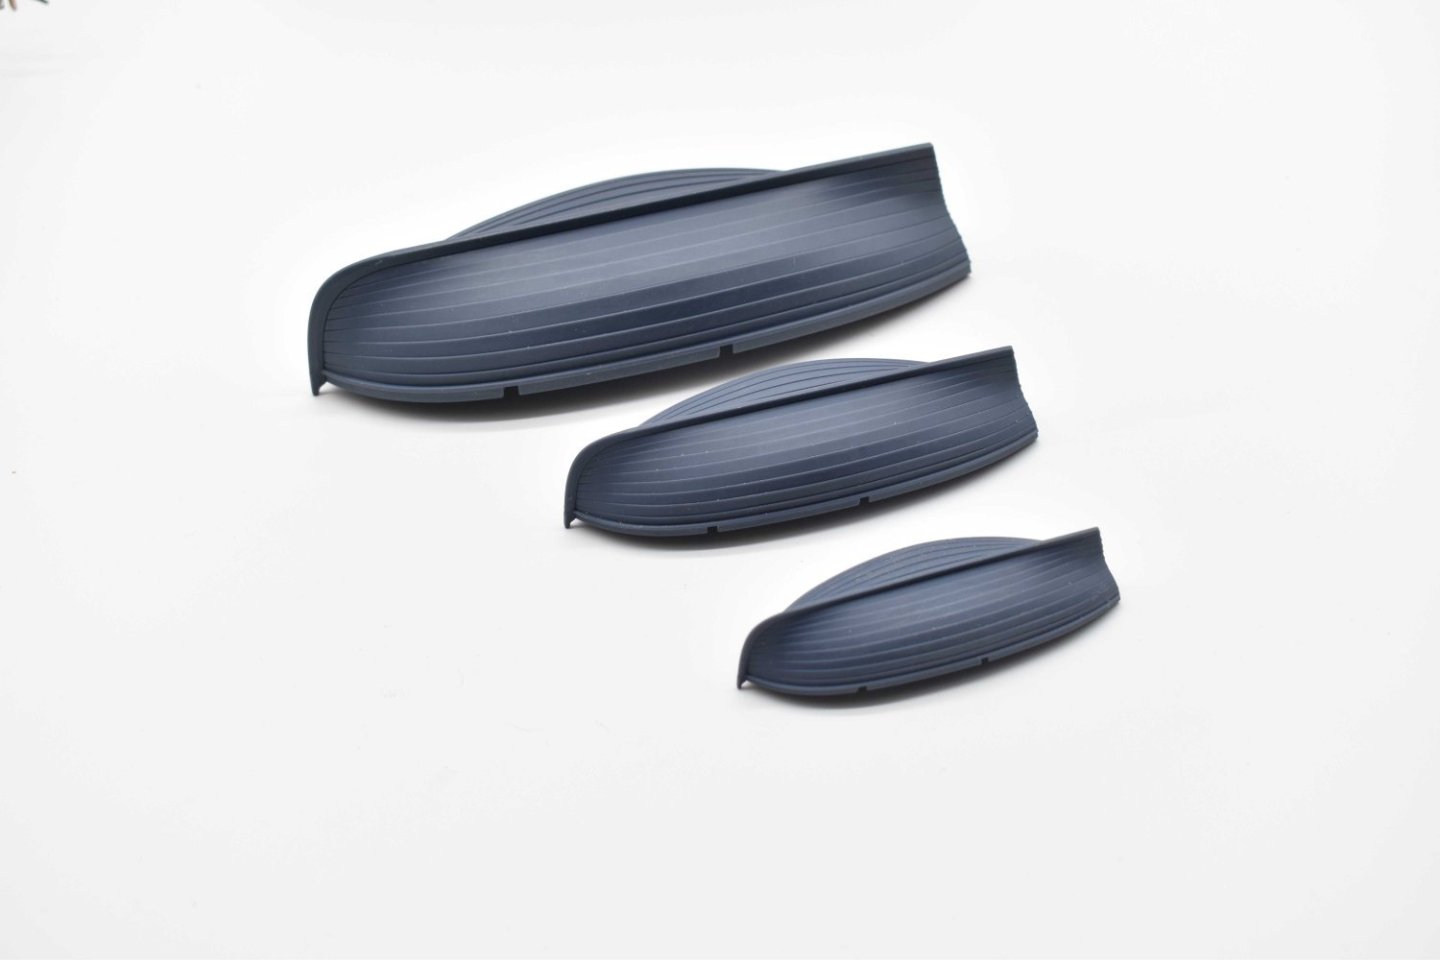
I do plan to have a full suite of these in this form, but they take time. Concentrating on clinker boats first is my priority, as these are never easy to plank in small wood form. Not quick to produce, too, the smallest takes 5 hours to print, the middle size 7 hours, and the 32nd scale hull is 12 hours.
-
Now live: Cutter (full kit – various scales) – VANGUARD MODELS
-
48th laser cutting done, so will be live soon
-
It is not up yet, I need to produce the laser cut parts, which I shall do over the weekend
-
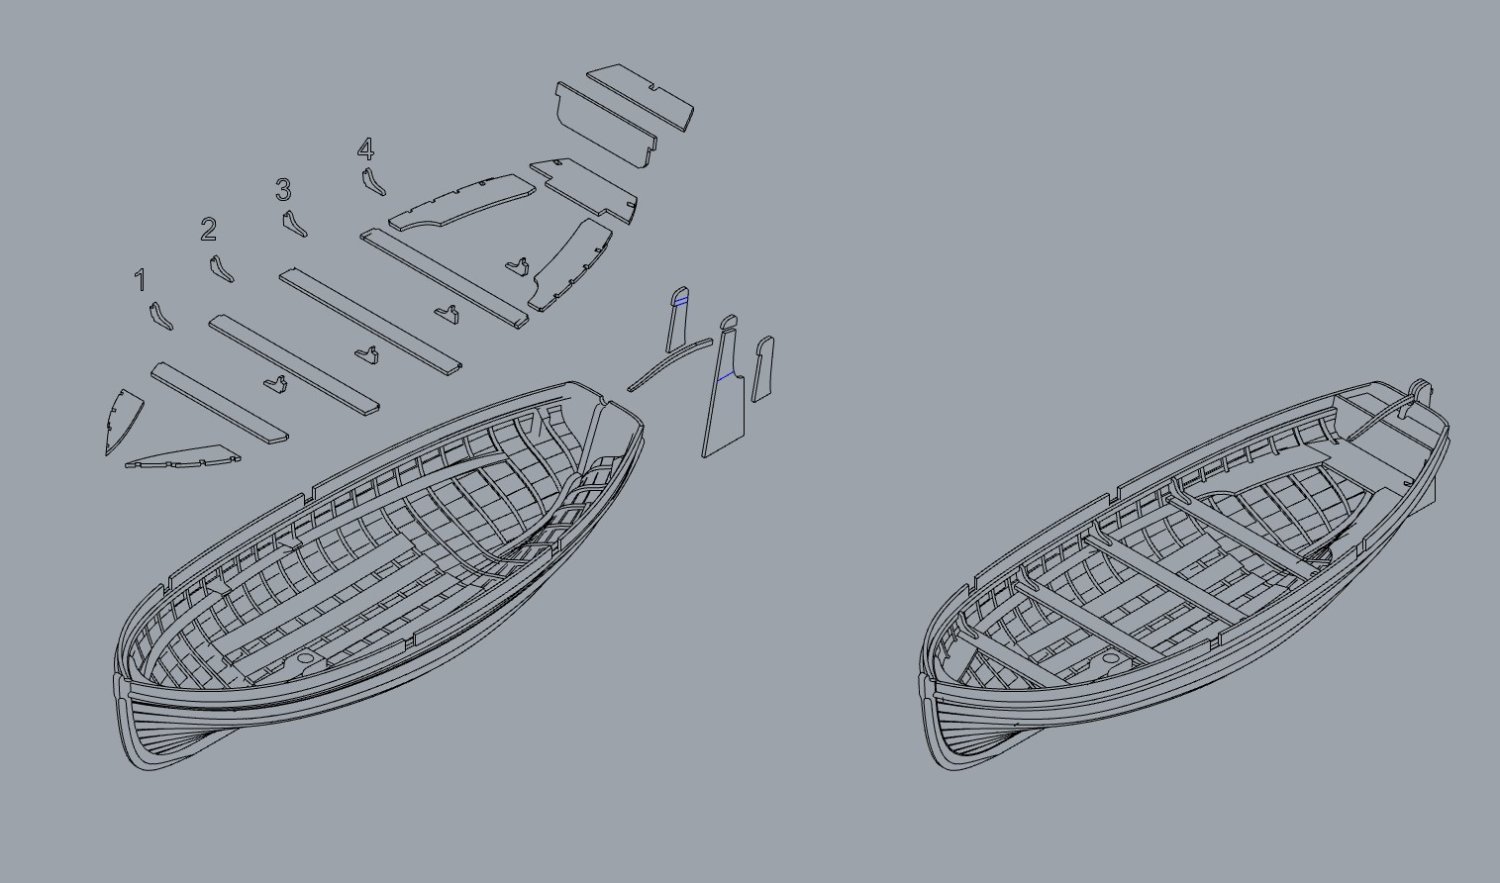
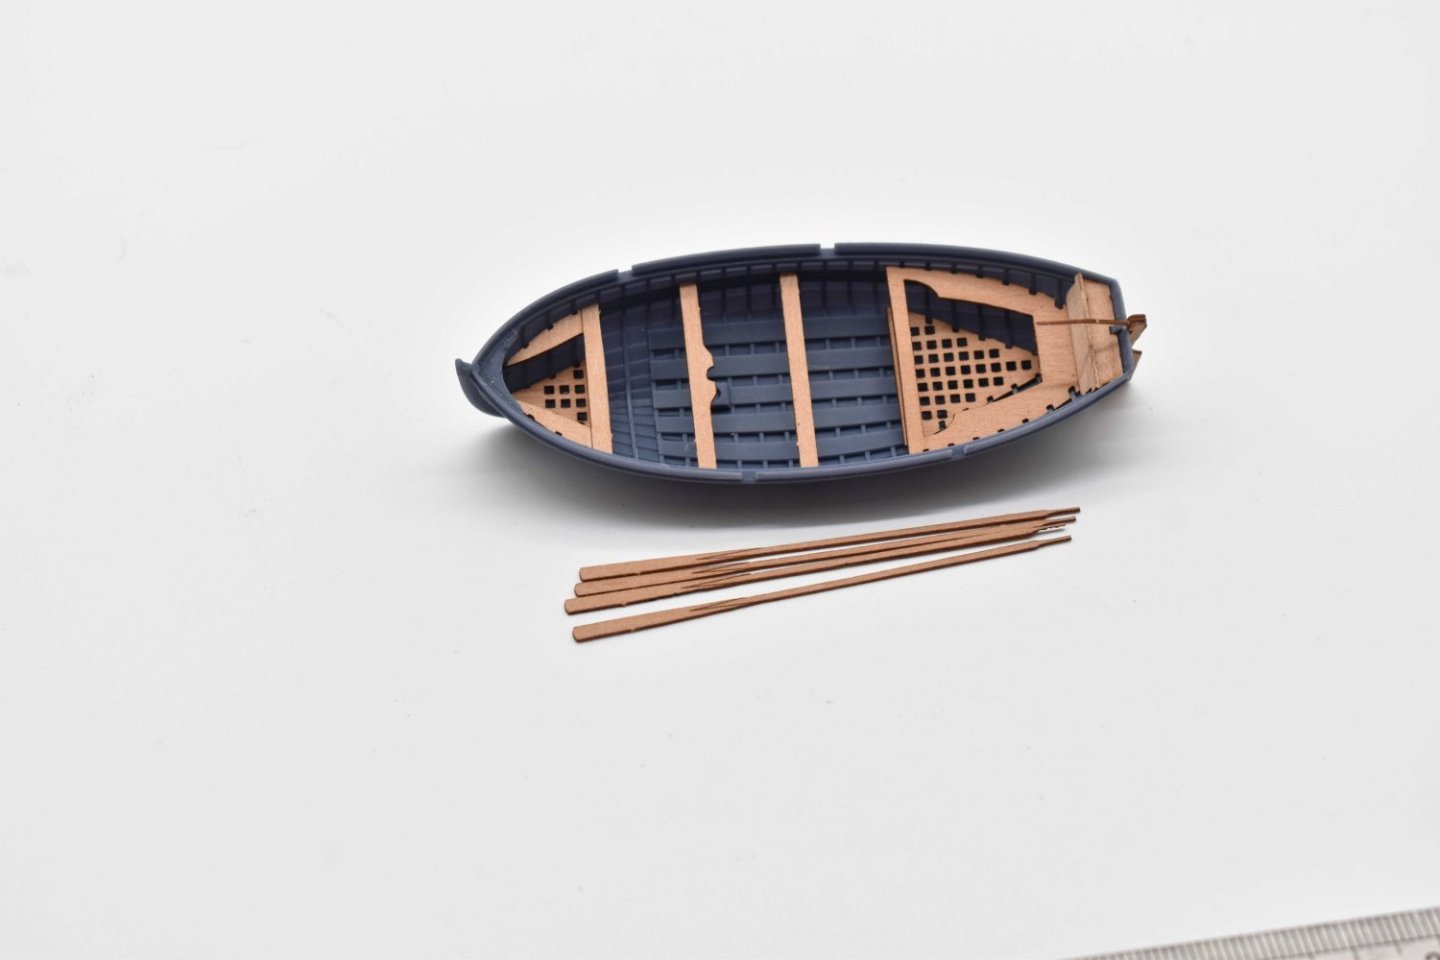
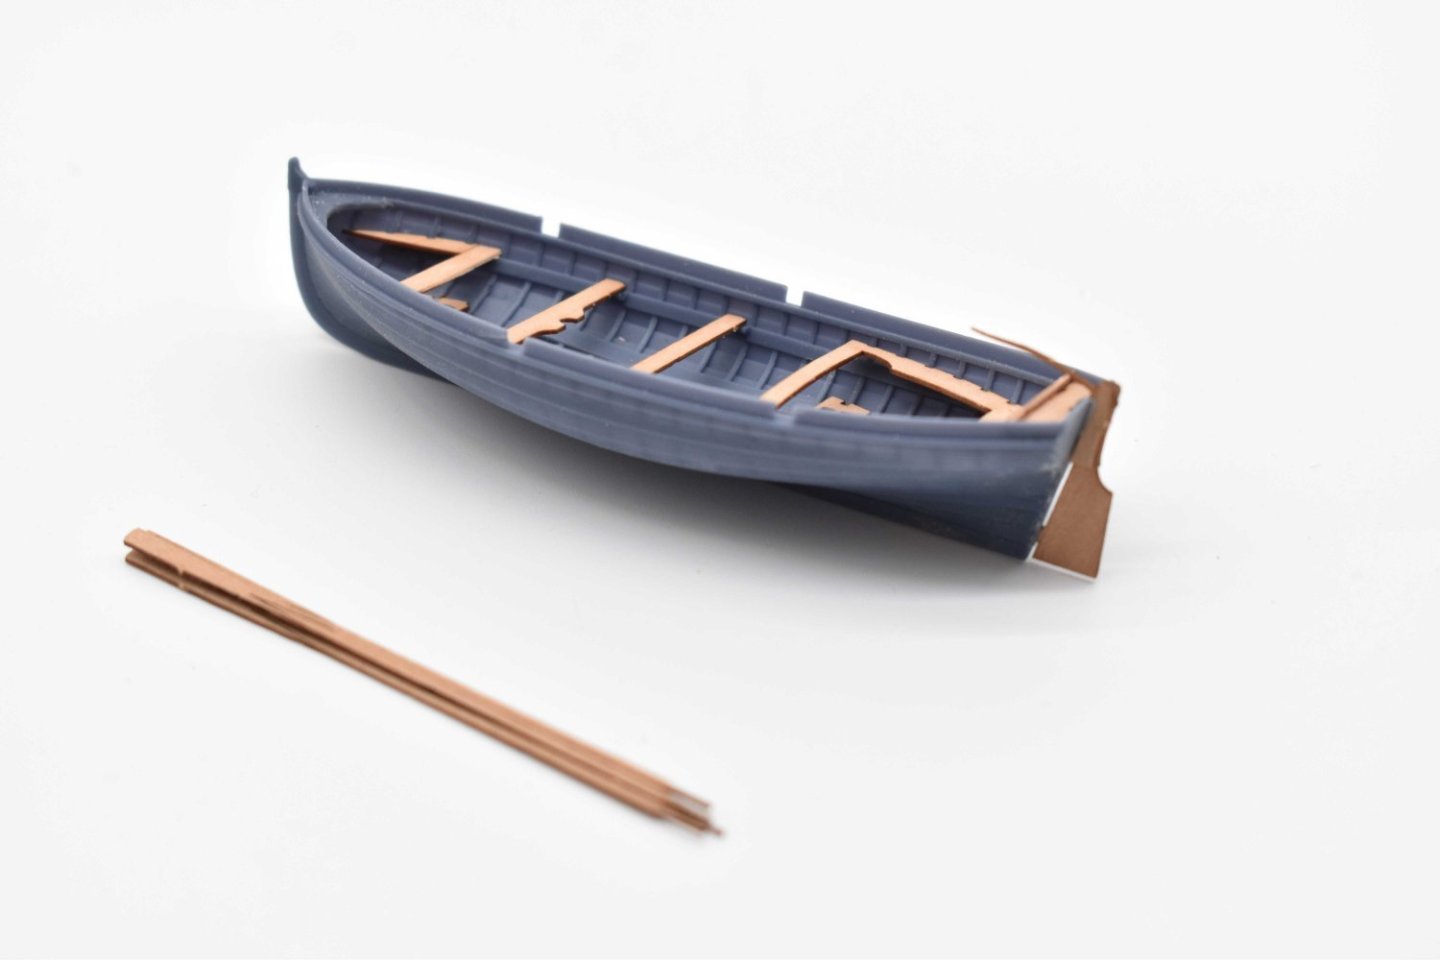
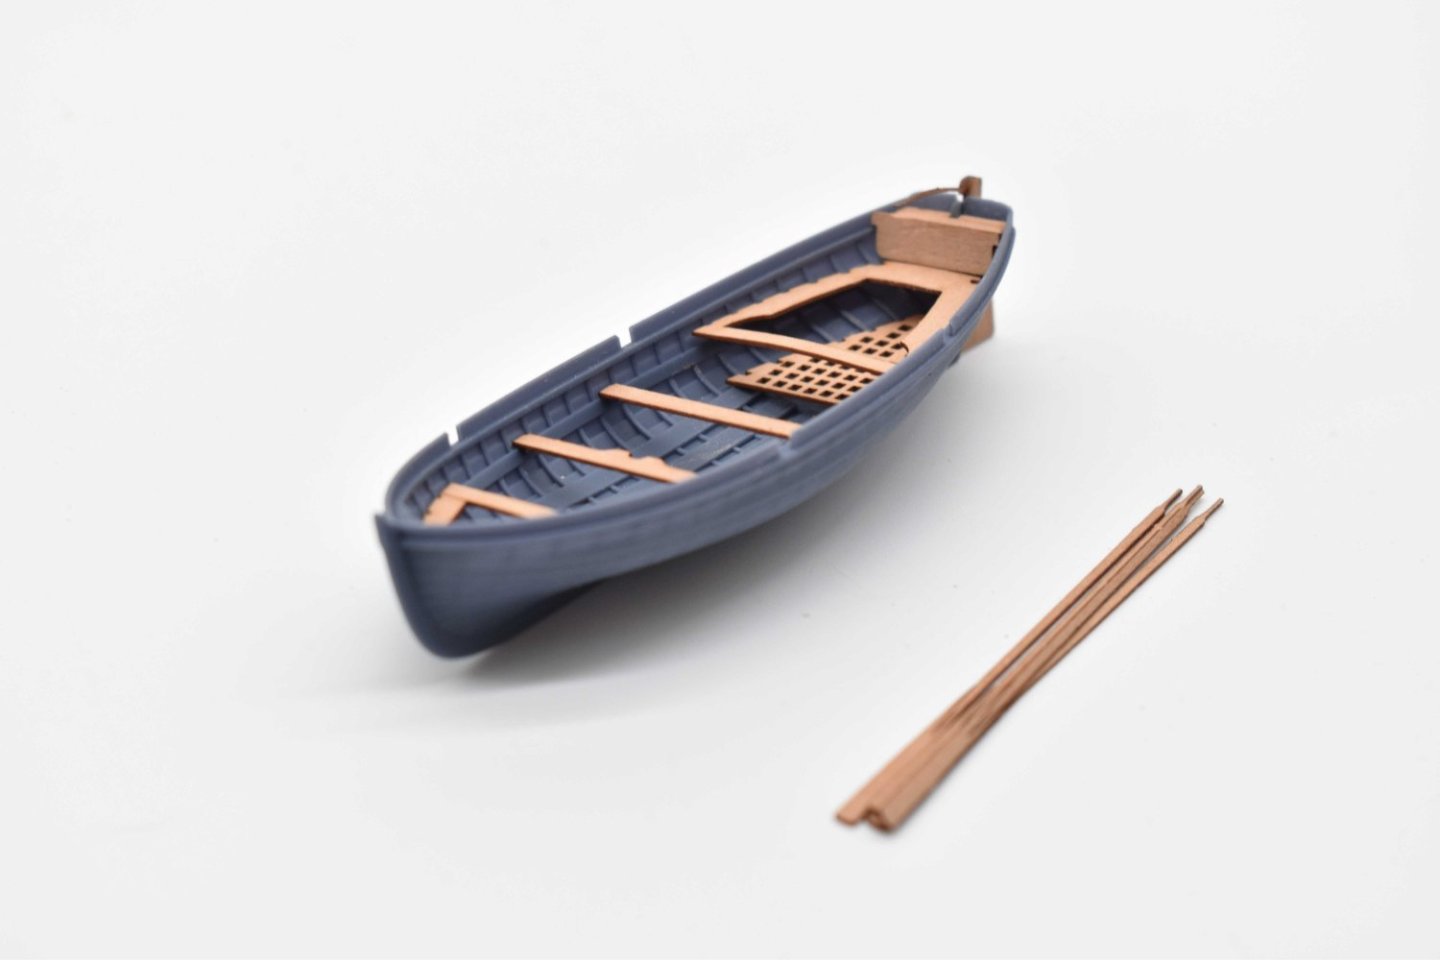
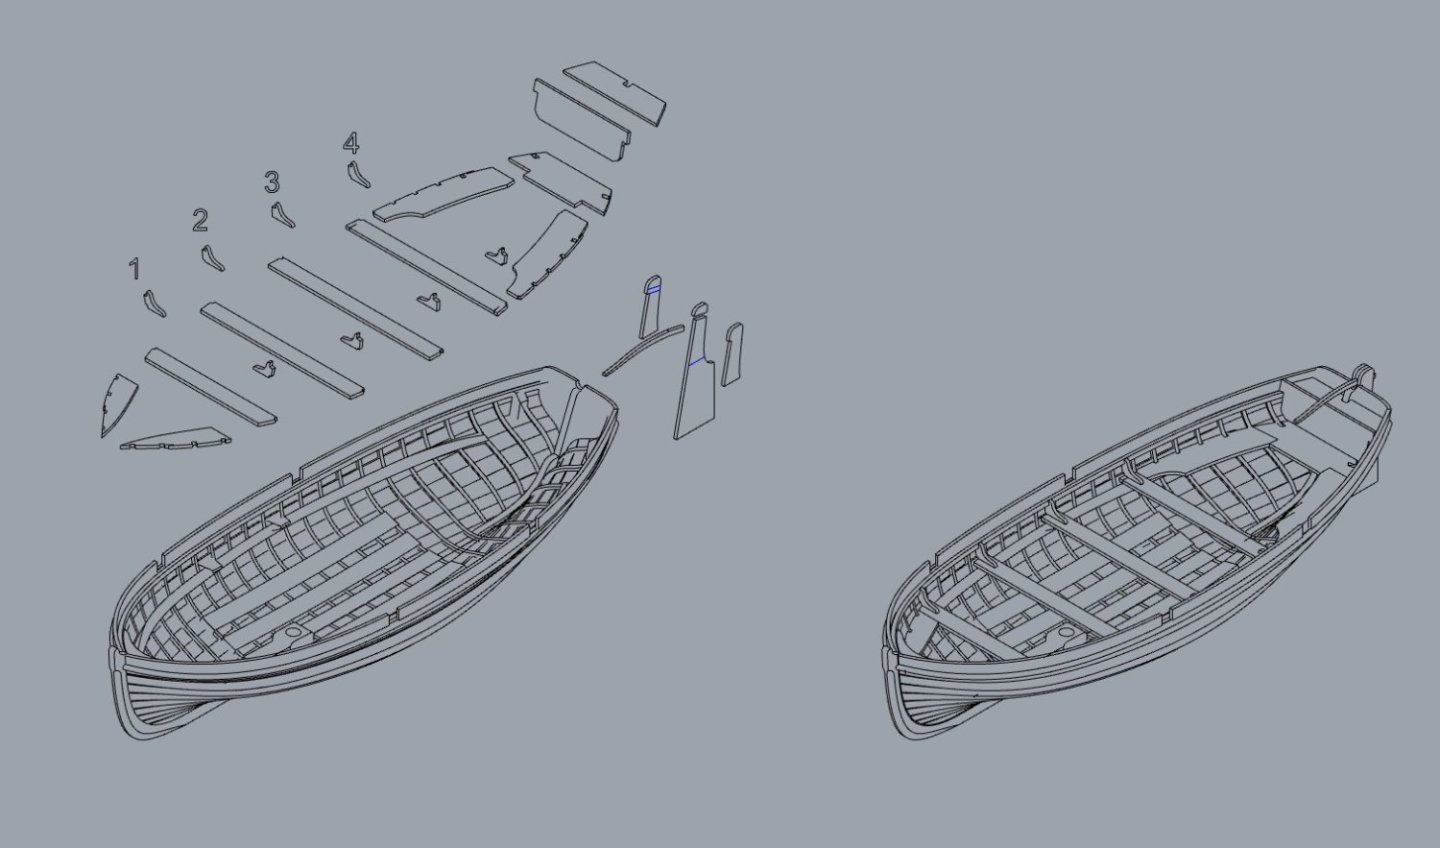
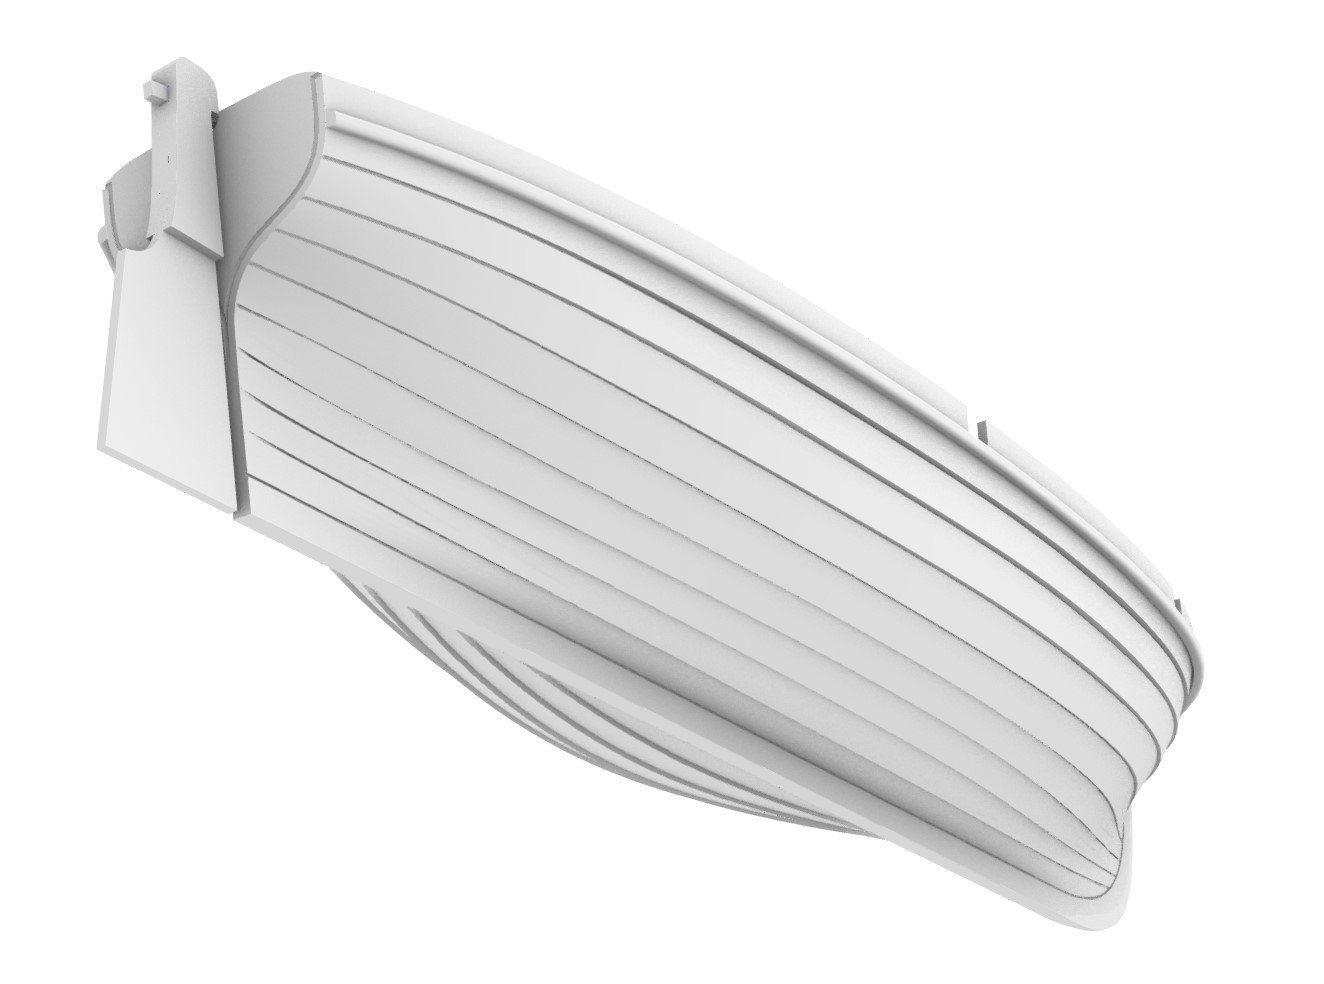
Another small update. I was never happy with the 3-d printed cutters I offered, being quite generic. I aim to put this right by having a new set of boats done over the next year or so. The first is the first of 2 cutter hulls, and the lines used are the same lines I used when designing the laser cut wood 18 foot cutter, so it is more of a direct replacement for the laser cut version. This is much more detailed than the old 3-d printed cutter, with more internal detail and correct hull shape, complete with clinker planking. For now, there will be three scales for this, which will include the hull and laser cut pear thwarts, knees, rudder, fore and aft flooring and oars. Scales will be 1:64th, 1:48th and a few at a monsterous 1:32nd


-
They are certainly much cheaper than the black acetate balls I supply with the kit.
- 648 replies
-
- 3
-
-
- Indefatigable
- Vanguard Models
- (and 1 more)
-
James asked me reply, to test the lag.
-
Thank you I will not do another Cruiser Class, but I have a slightly earlier 18 gun brig earmarked, Diligence Class, Harpy (love the name, and it was in action throughout the Revolutionary and Napoleonic Wars), which has nicer lines (almost like a much larger Speedy) and only a few feet shorter along the gun deck than Snake/Cruiser, being 95 feet (Cruiser Class was 100 feet). But the exact same armament as the later class, 16 x 32 pounder carronades and 2 x long 6-pounder chase guns.
-
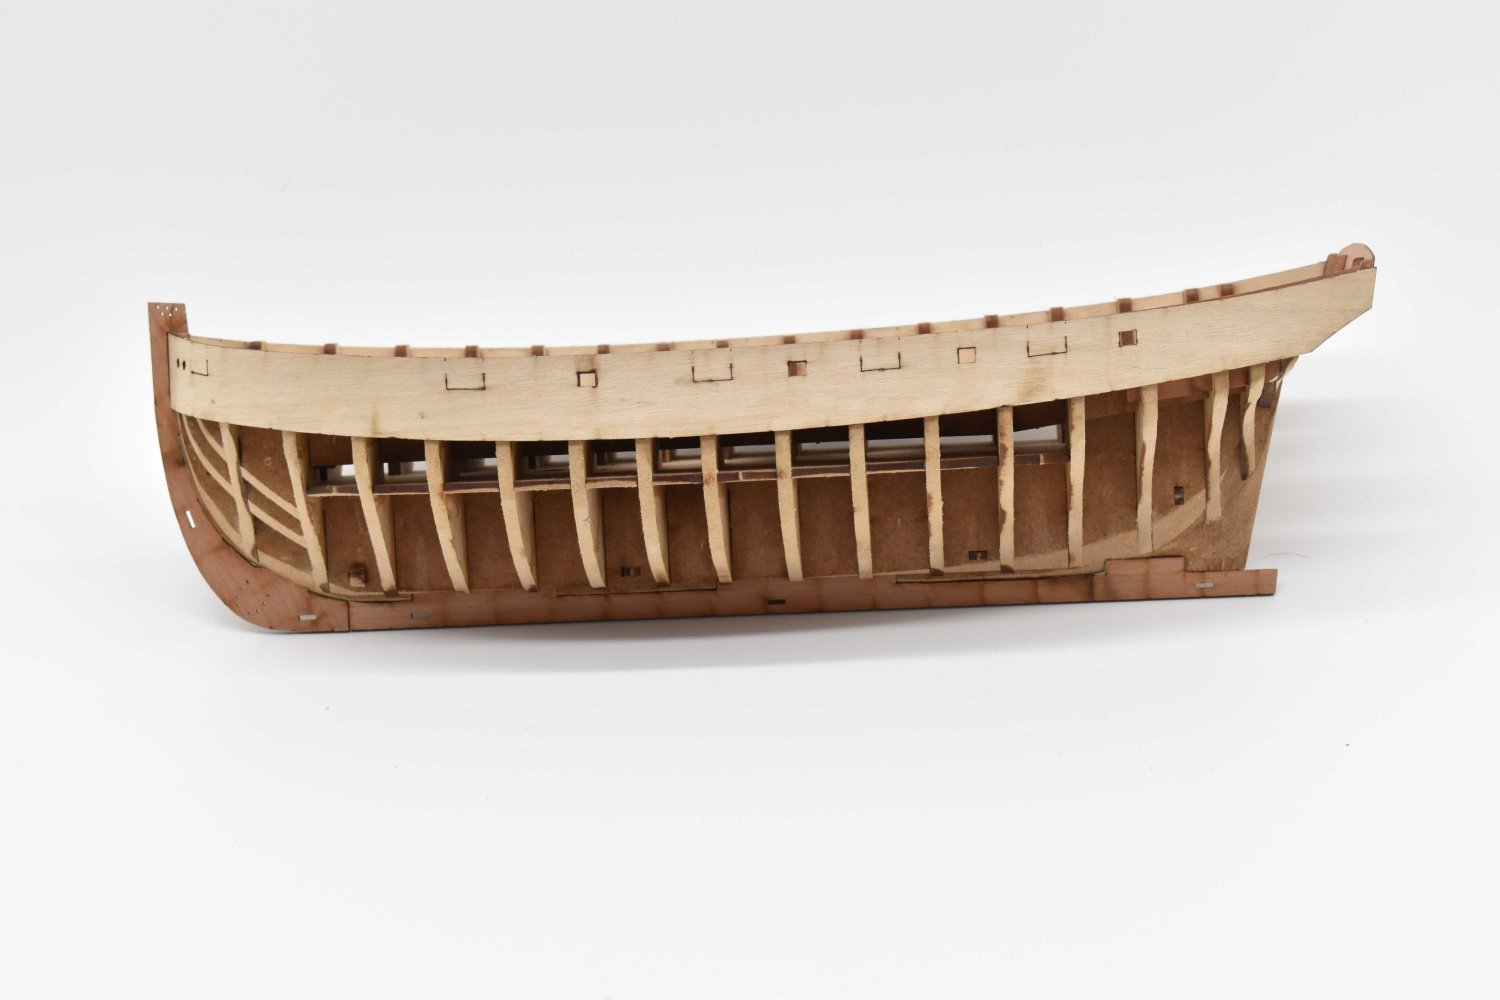
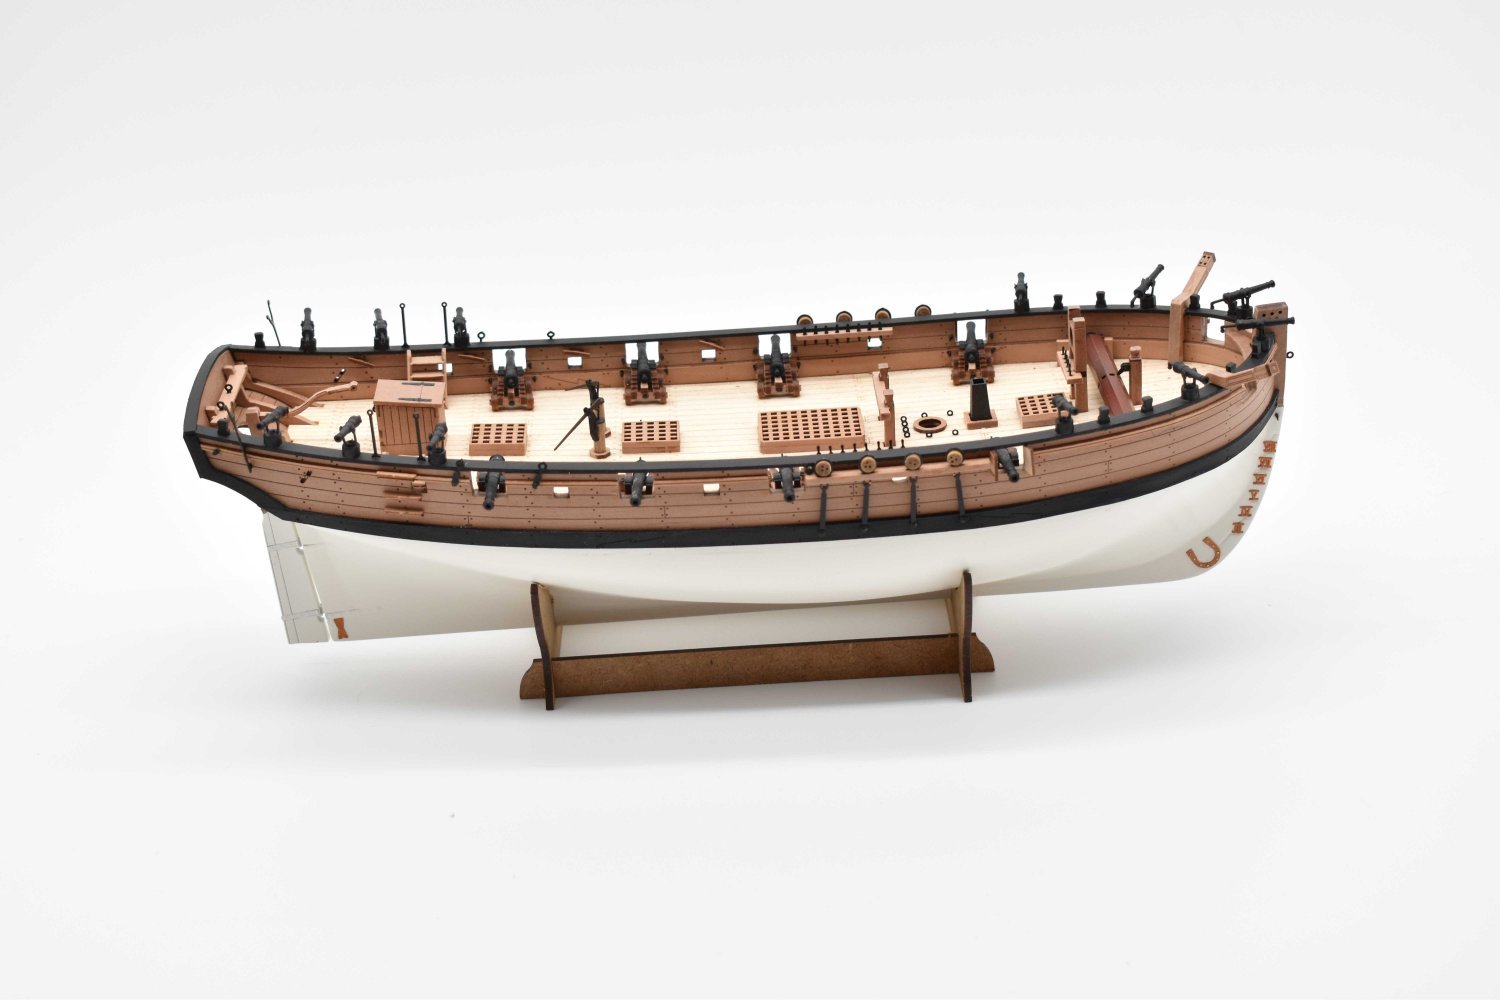
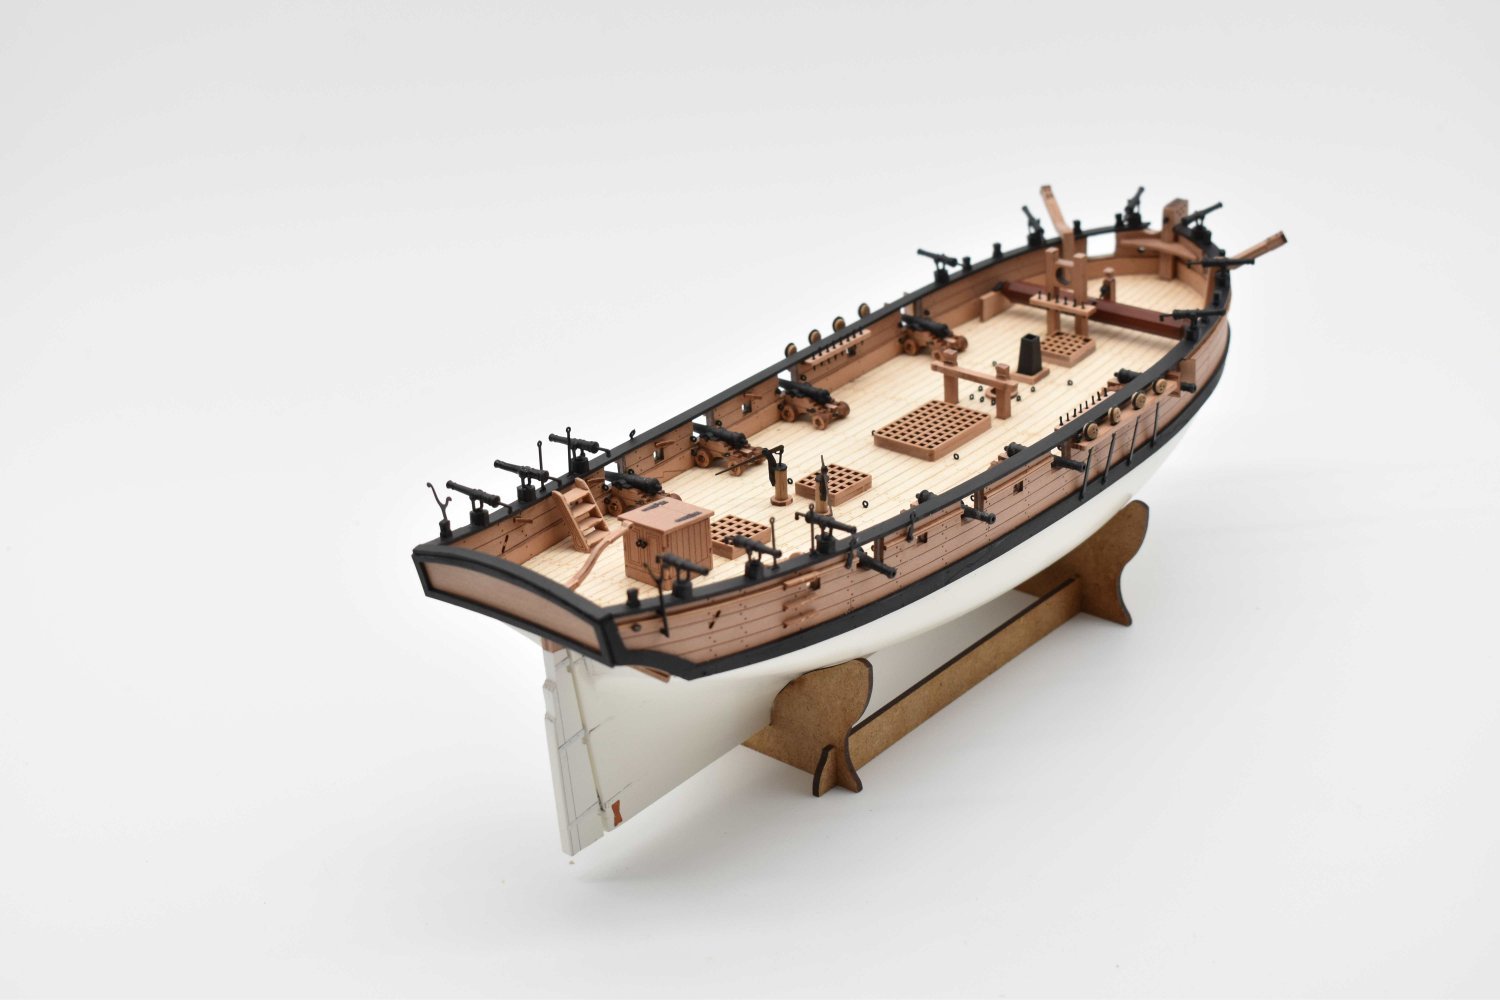
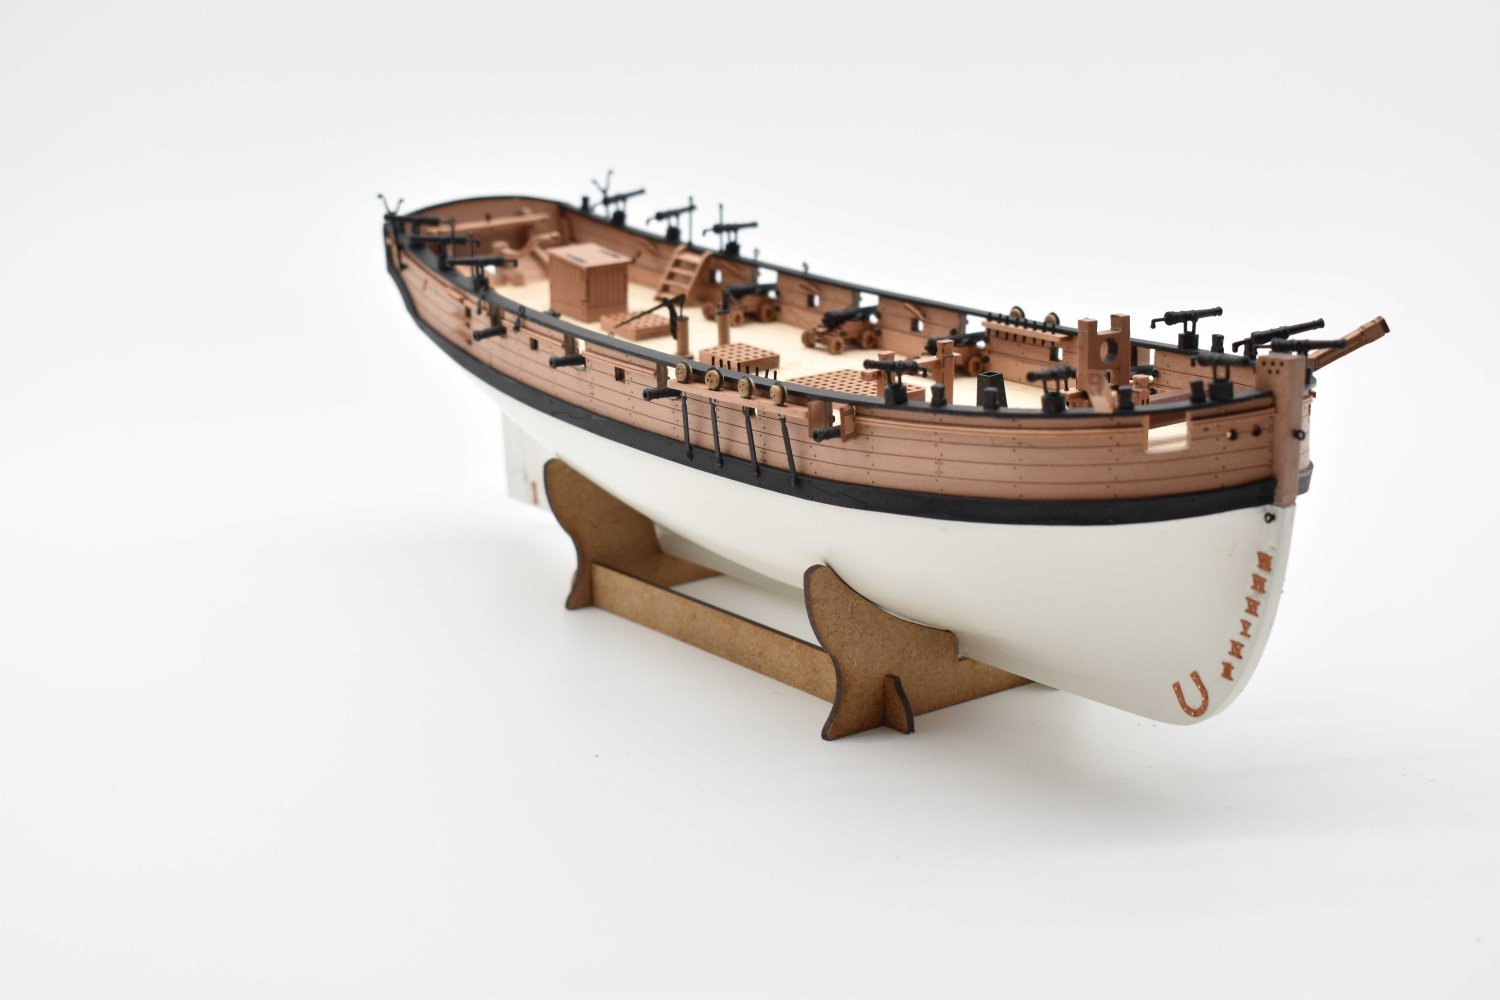
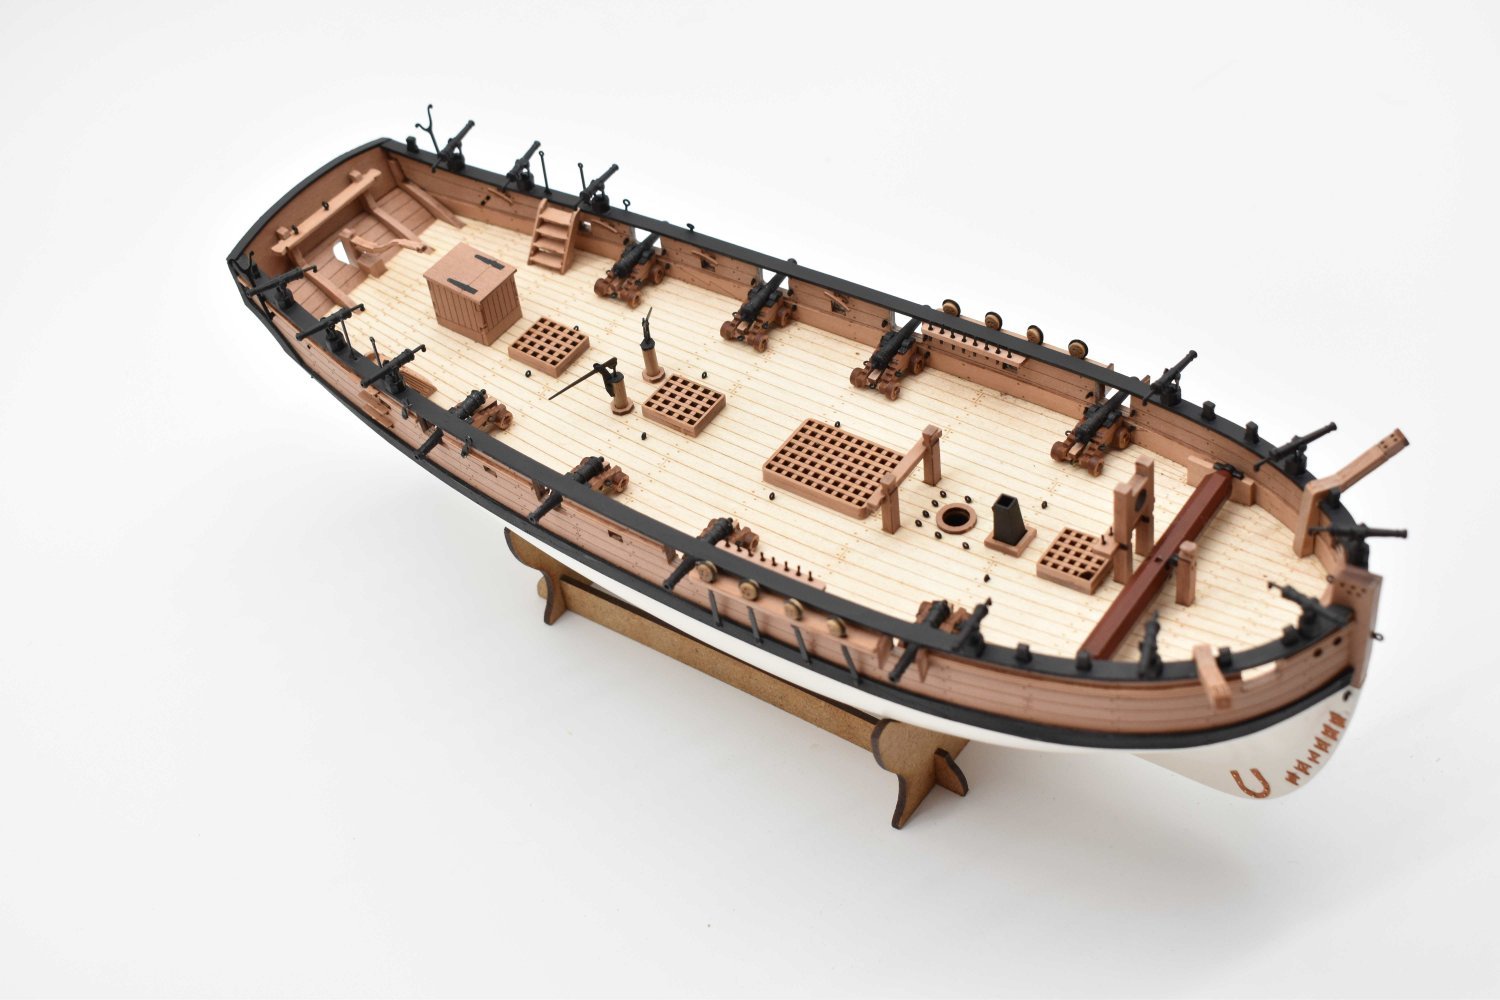
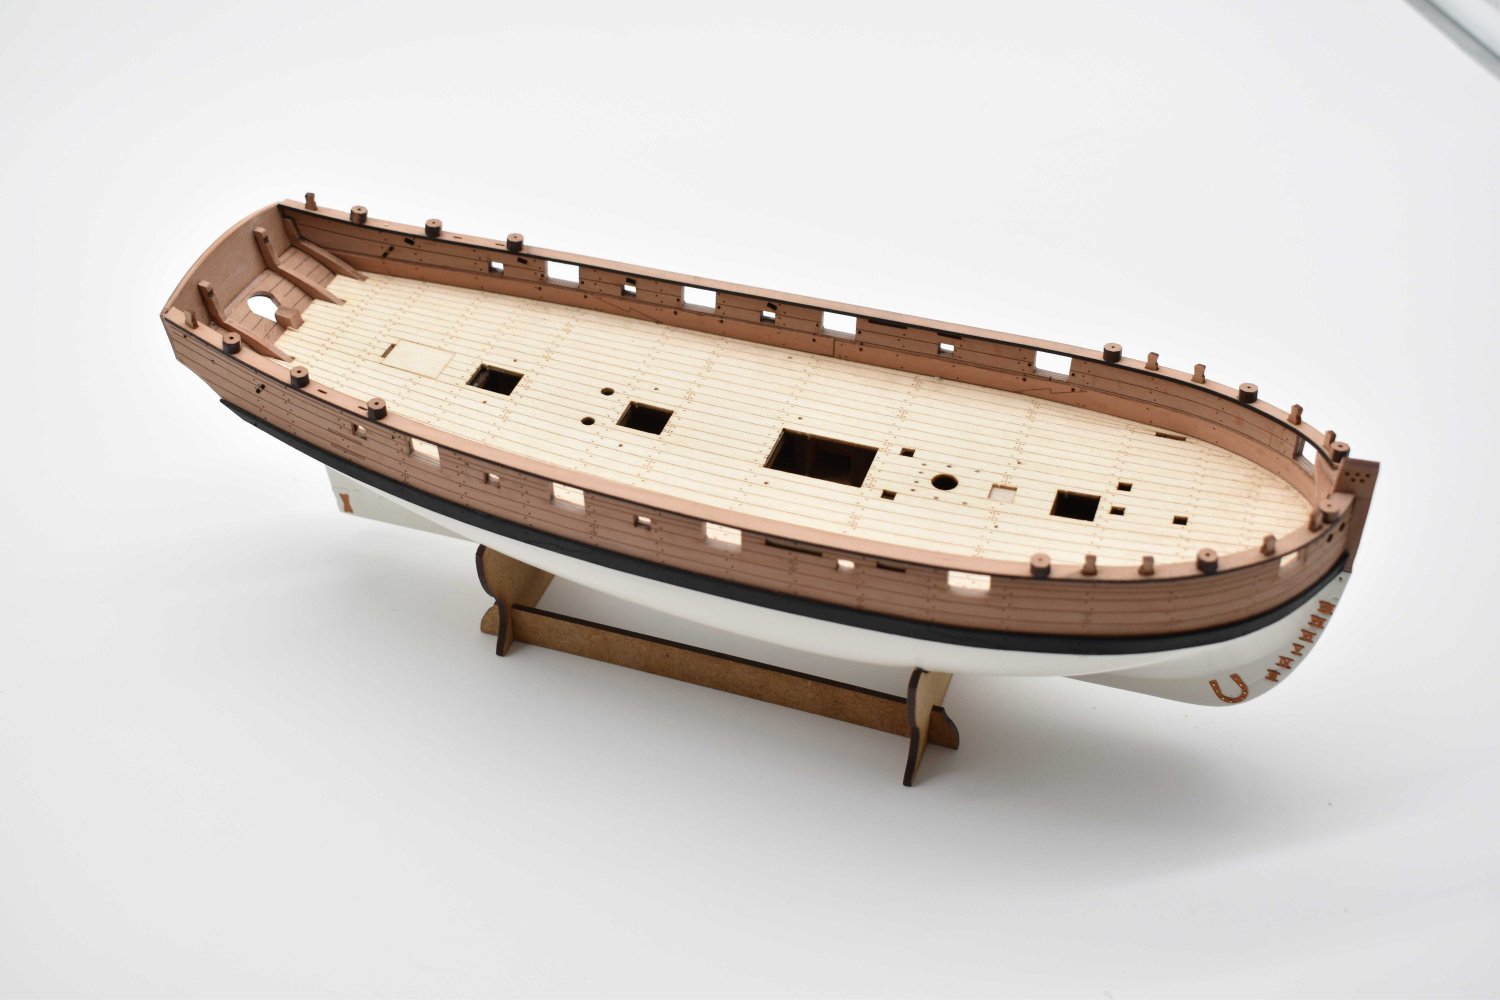
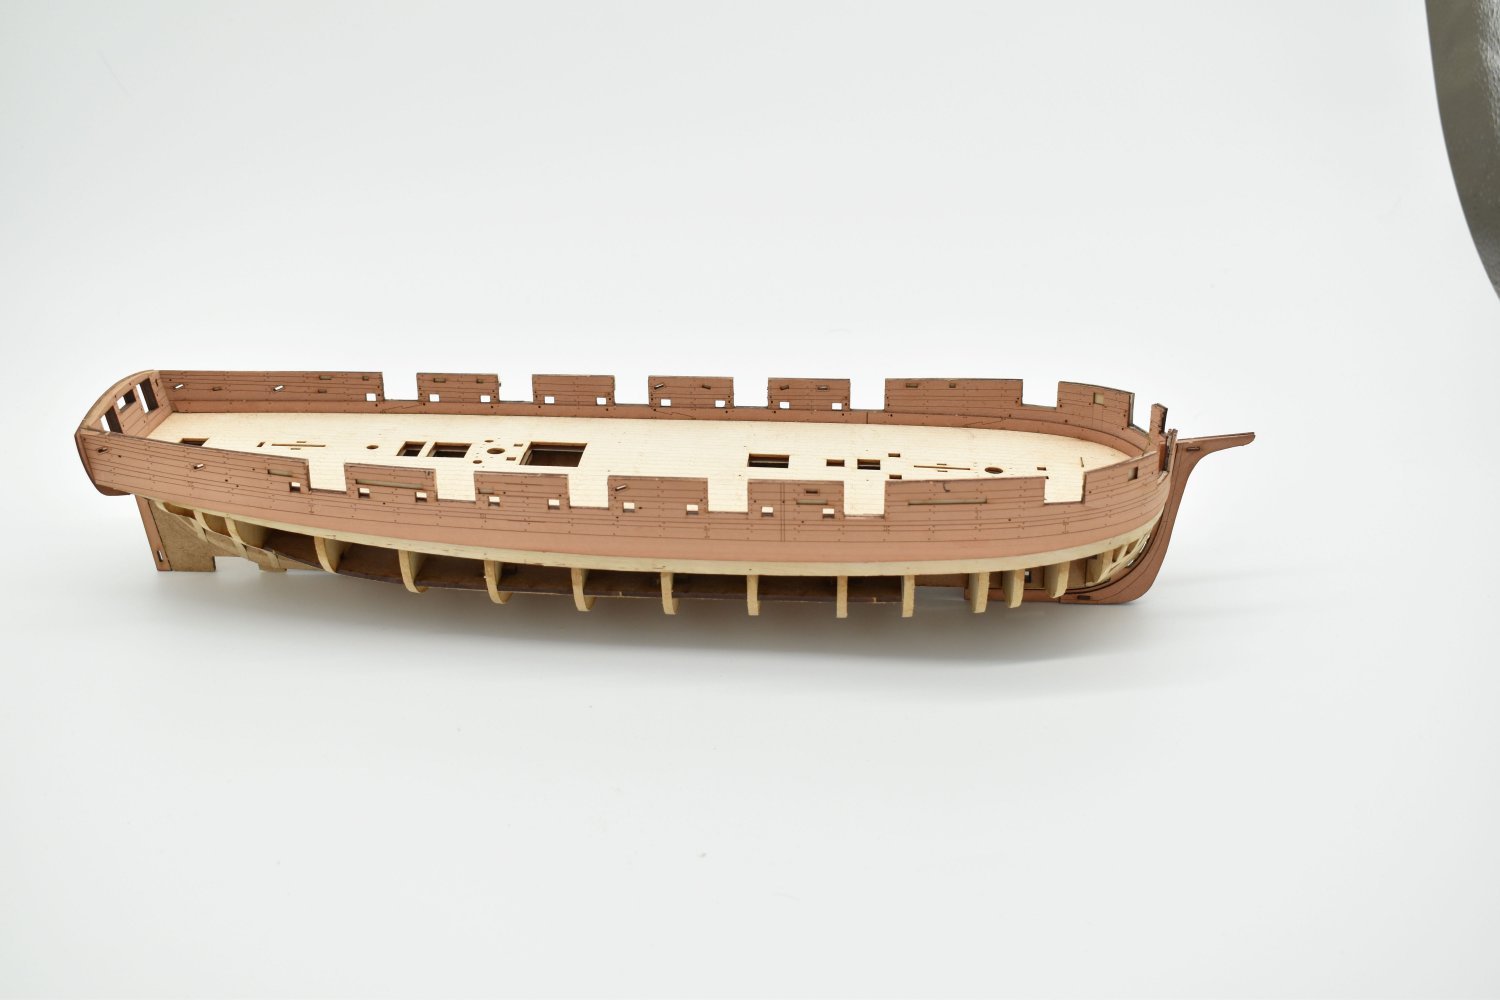
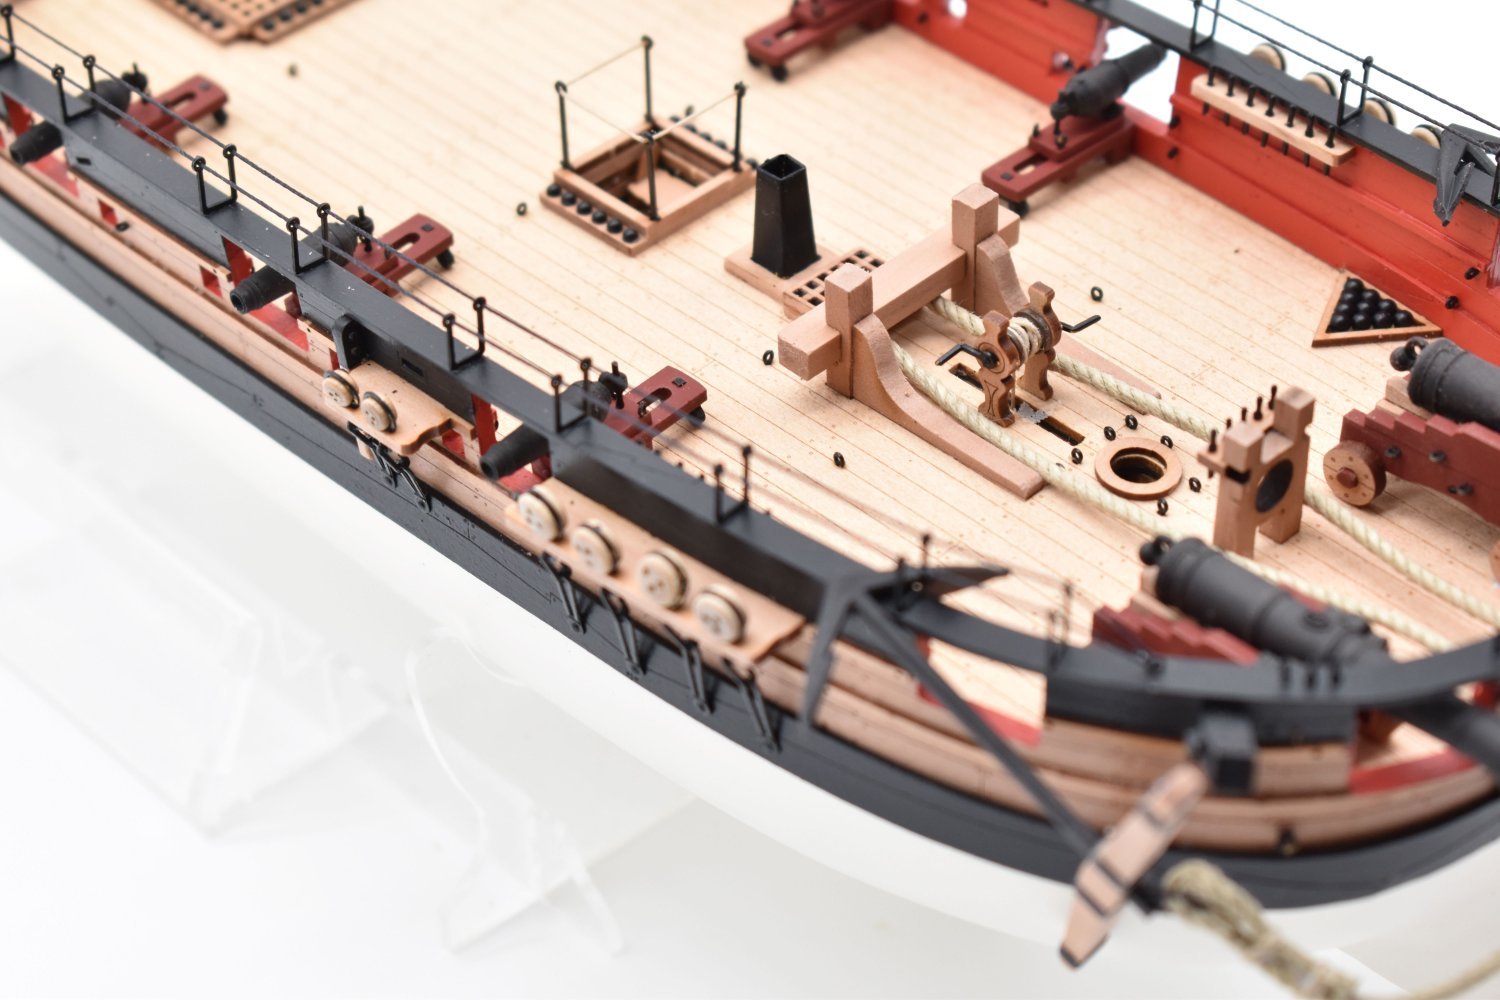
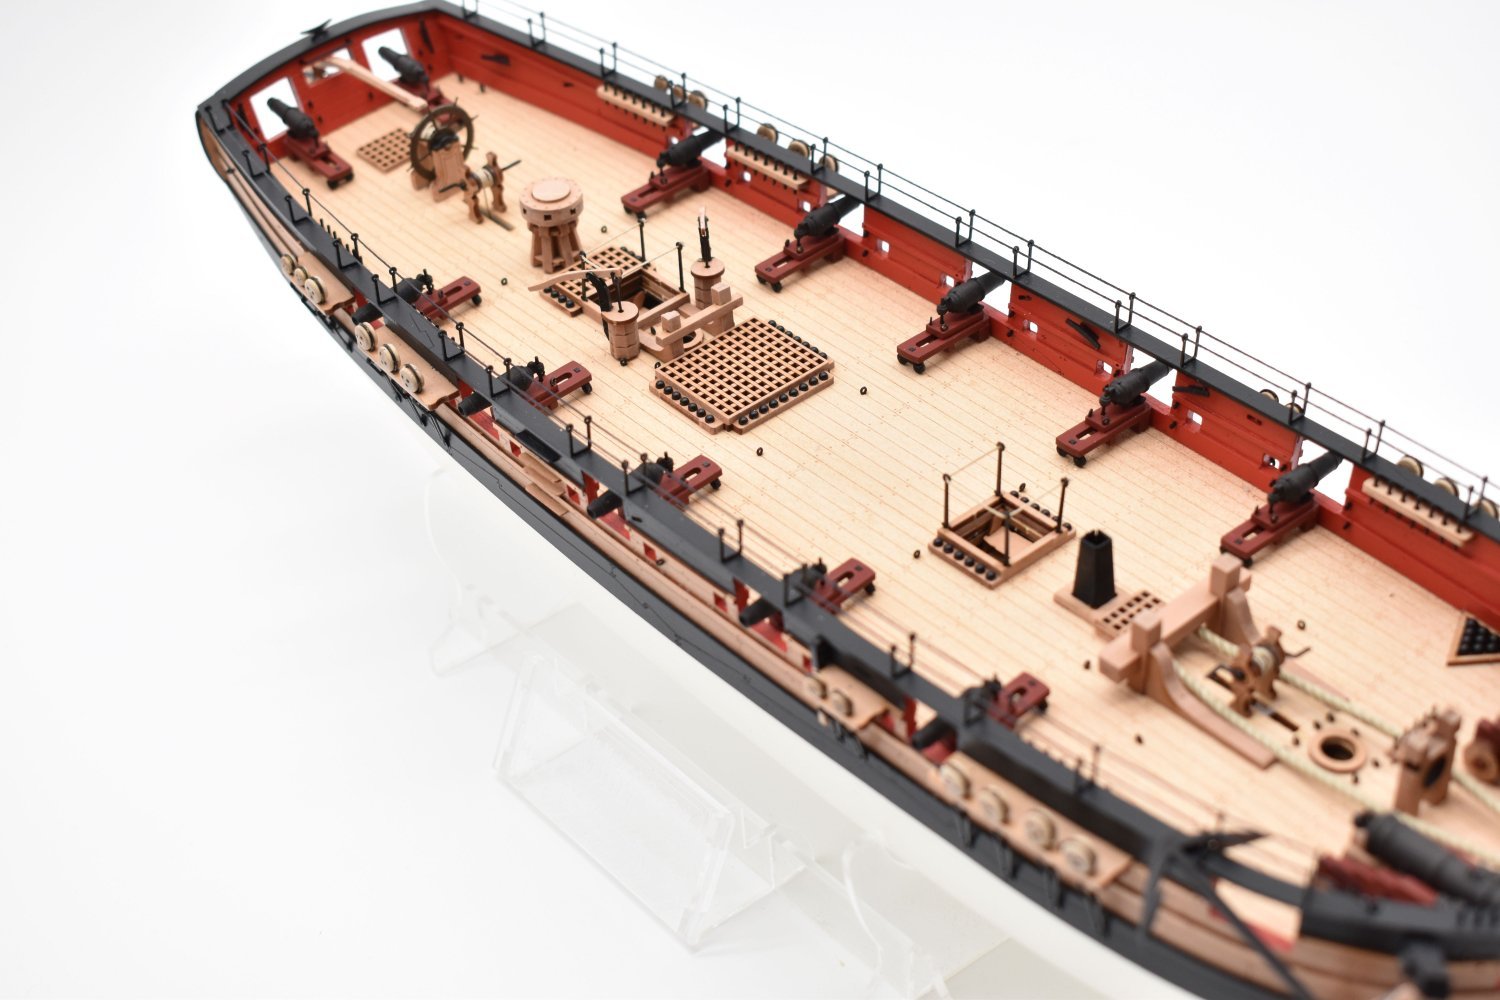
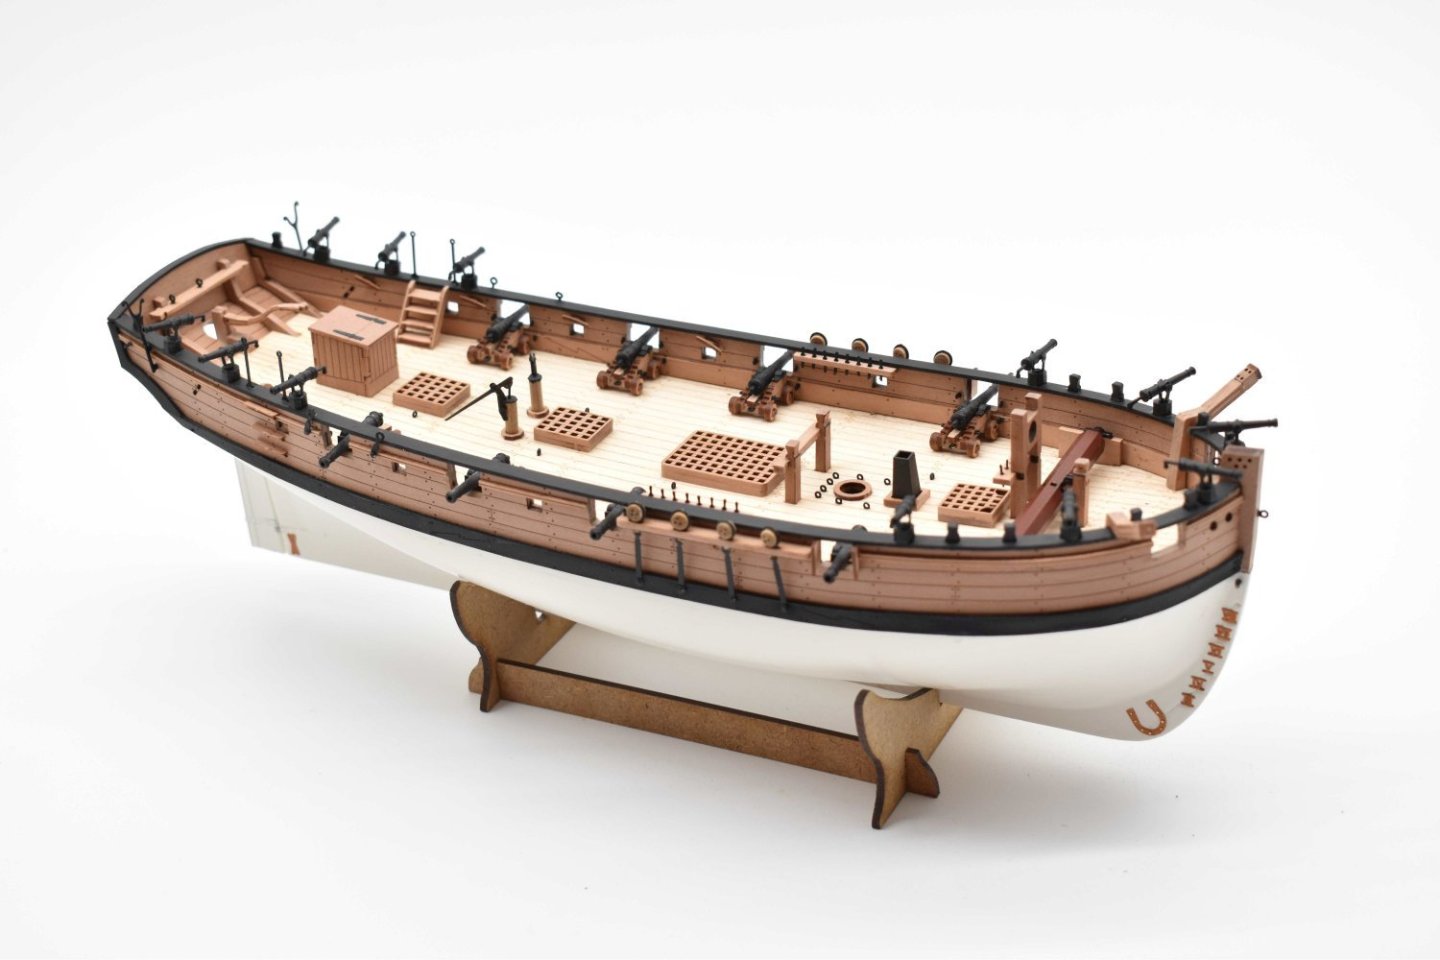
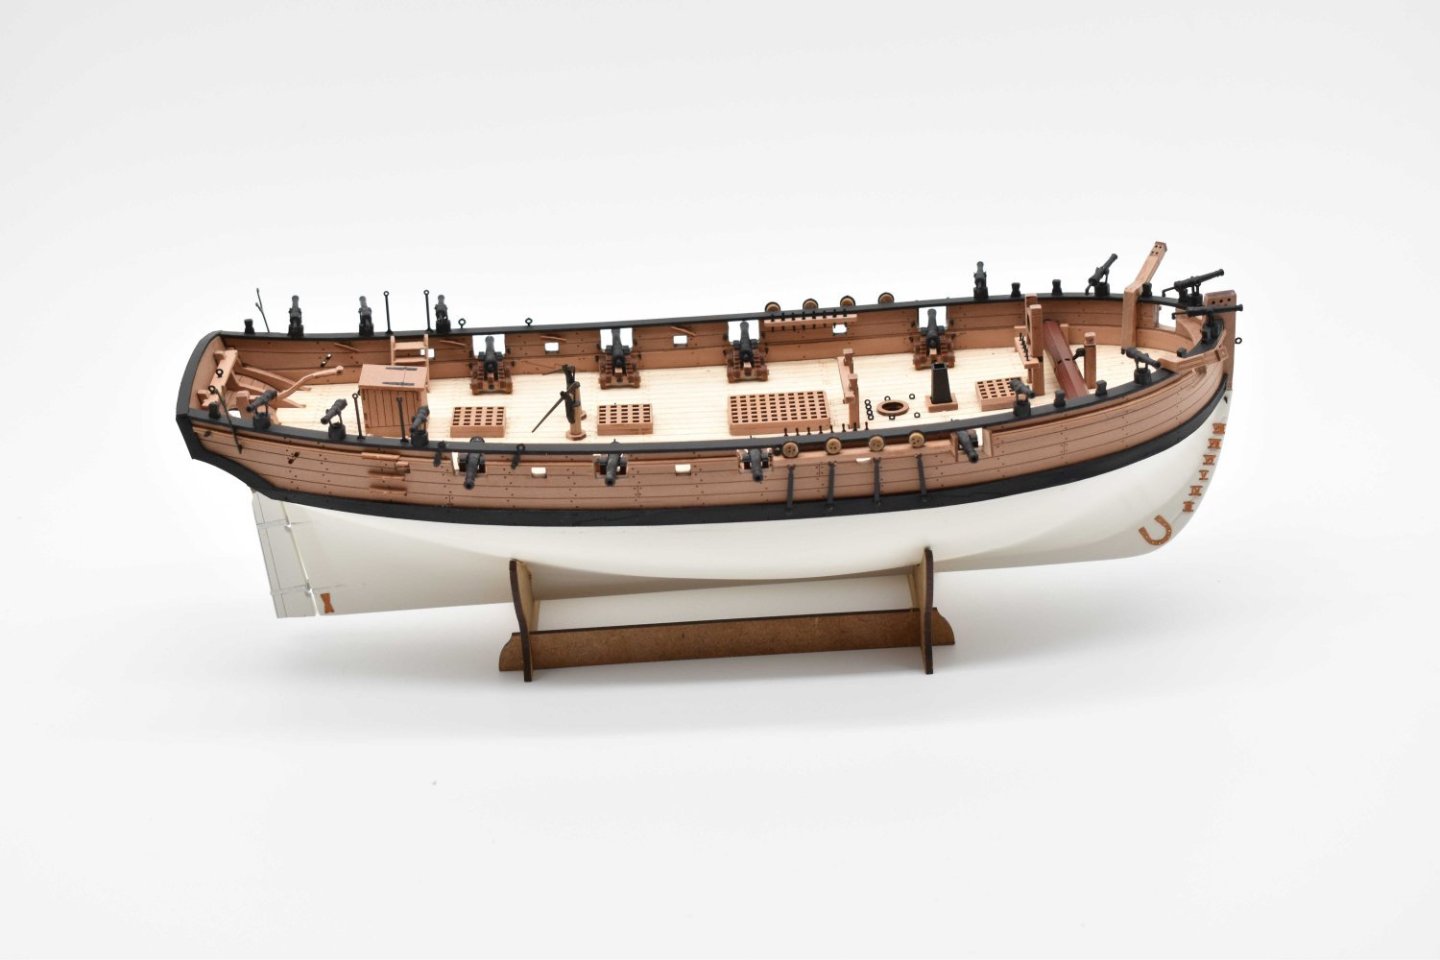
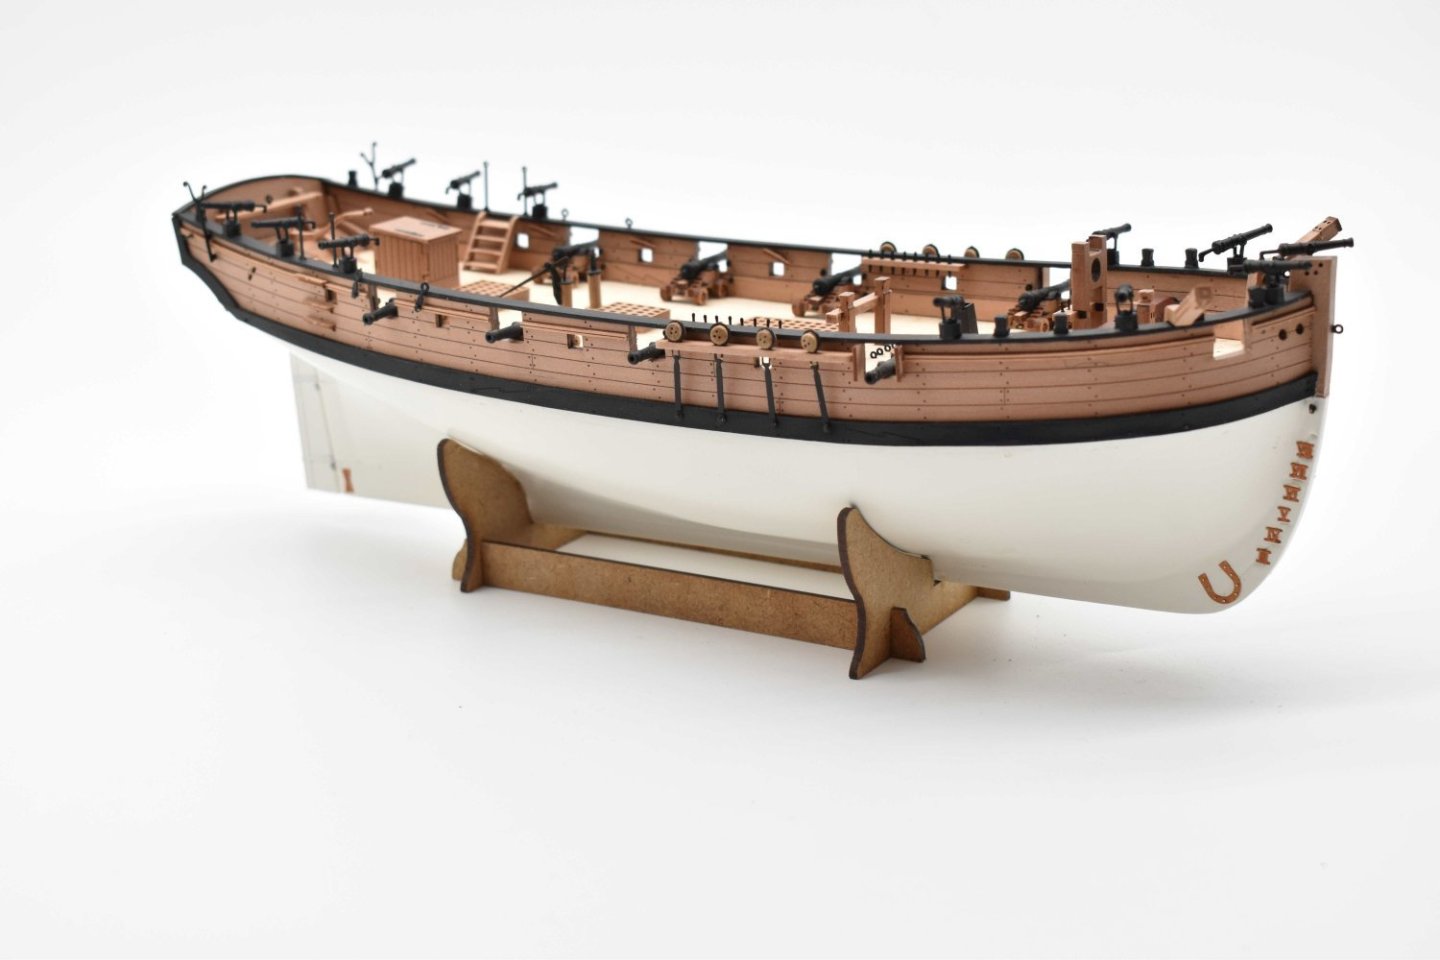
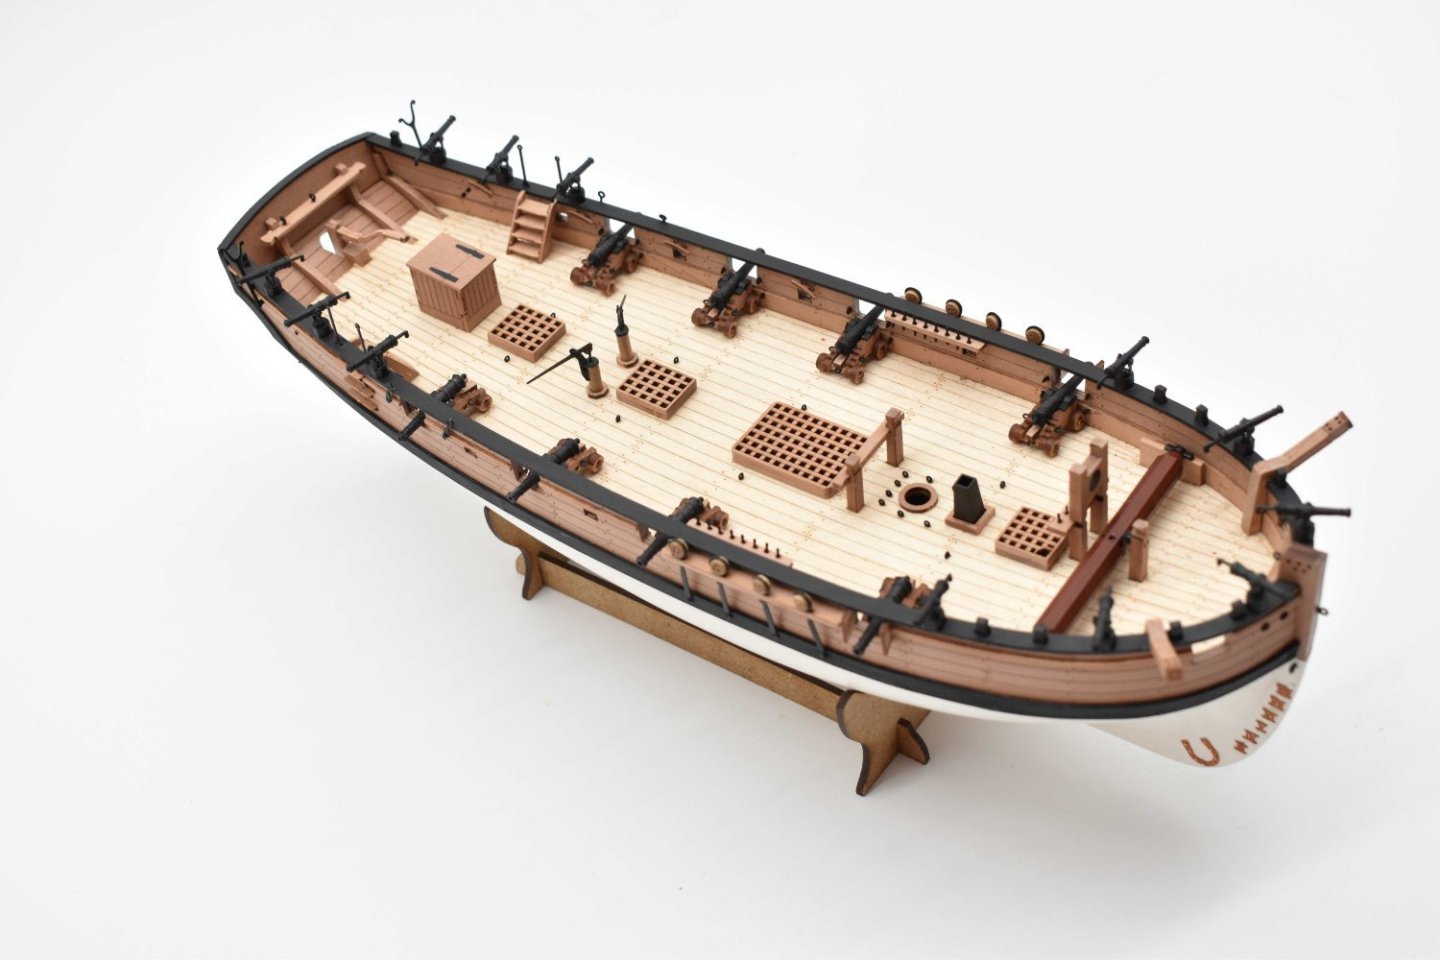
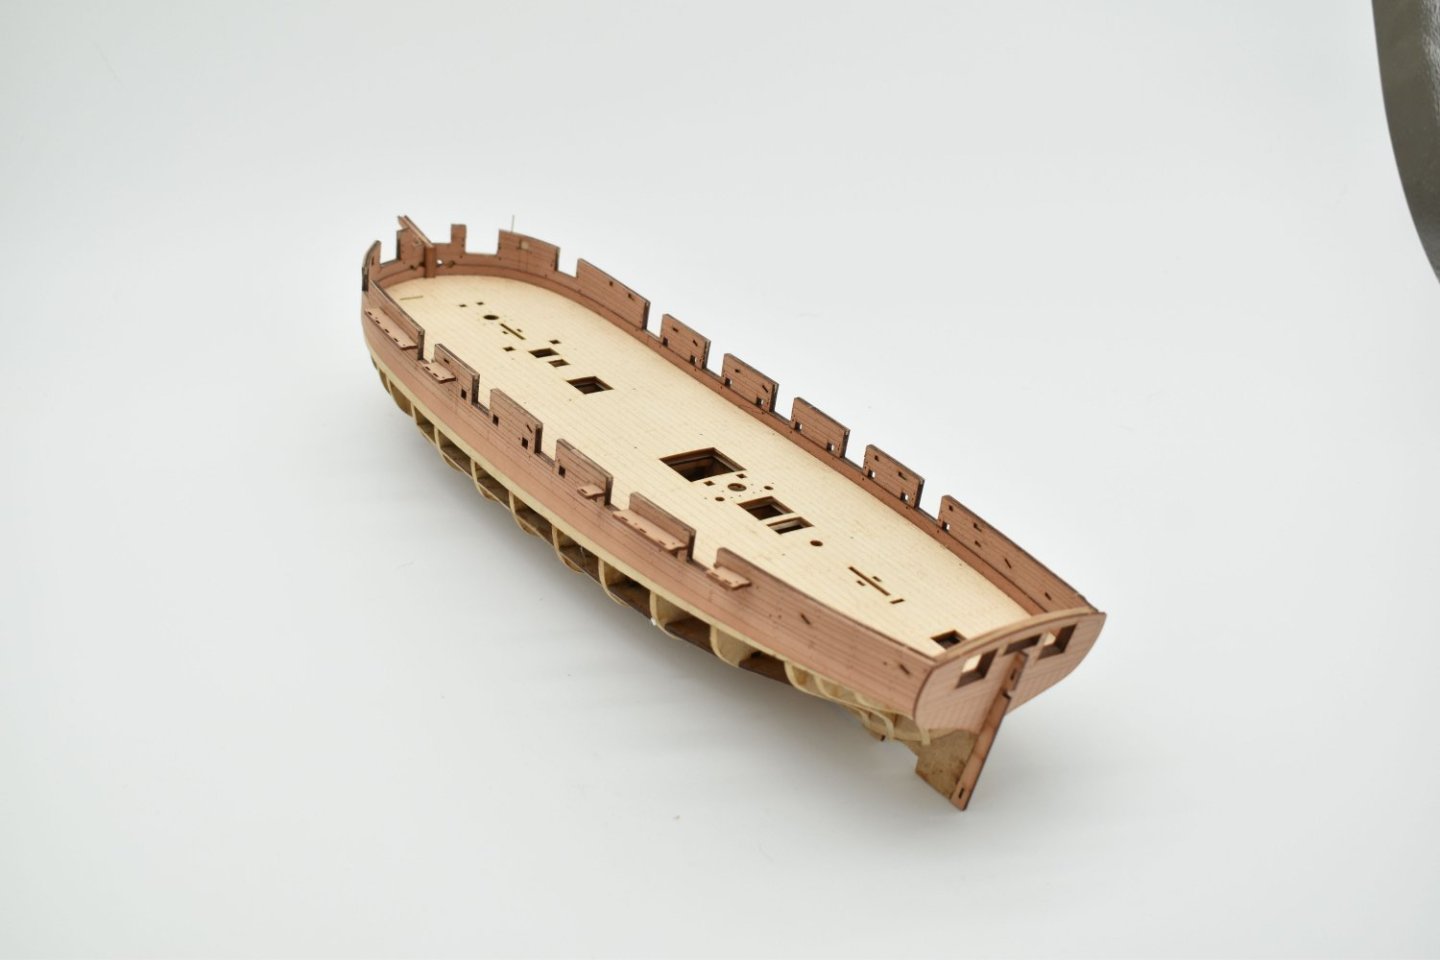
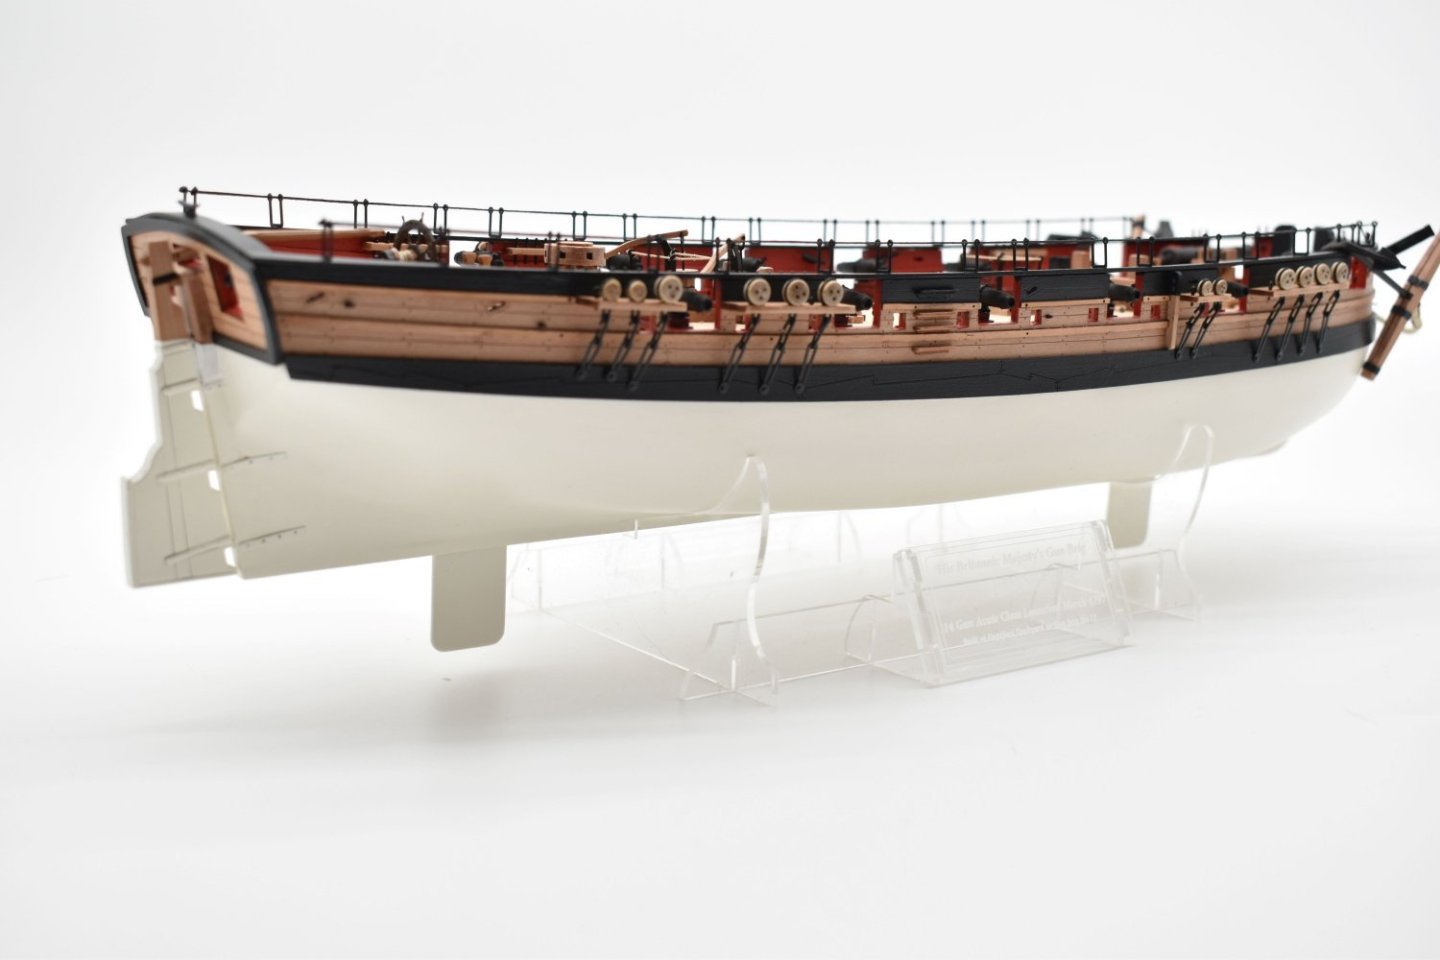
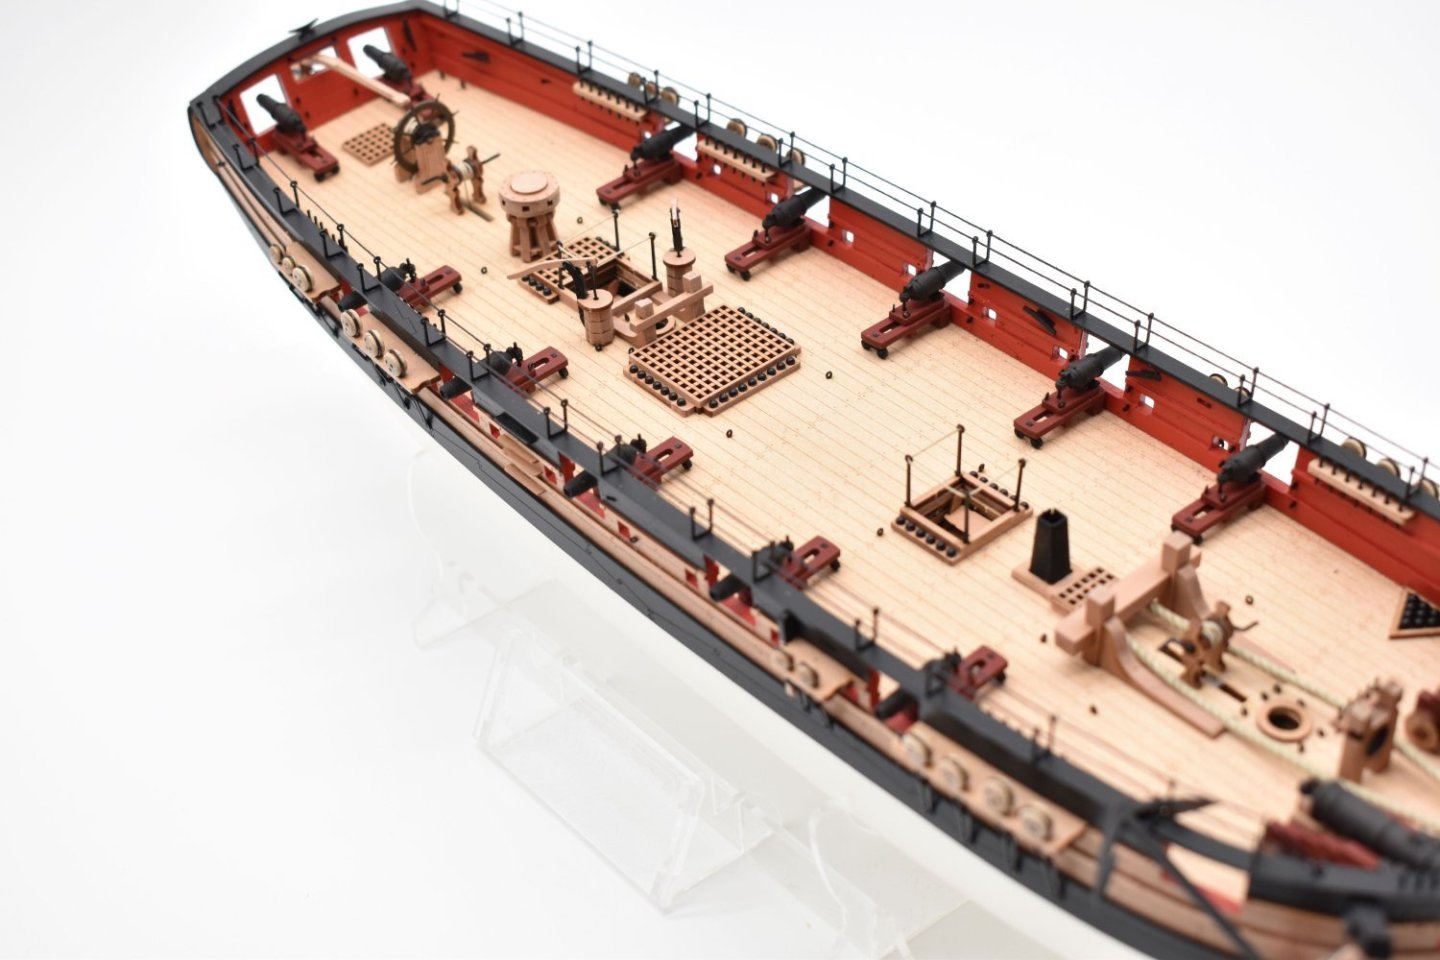
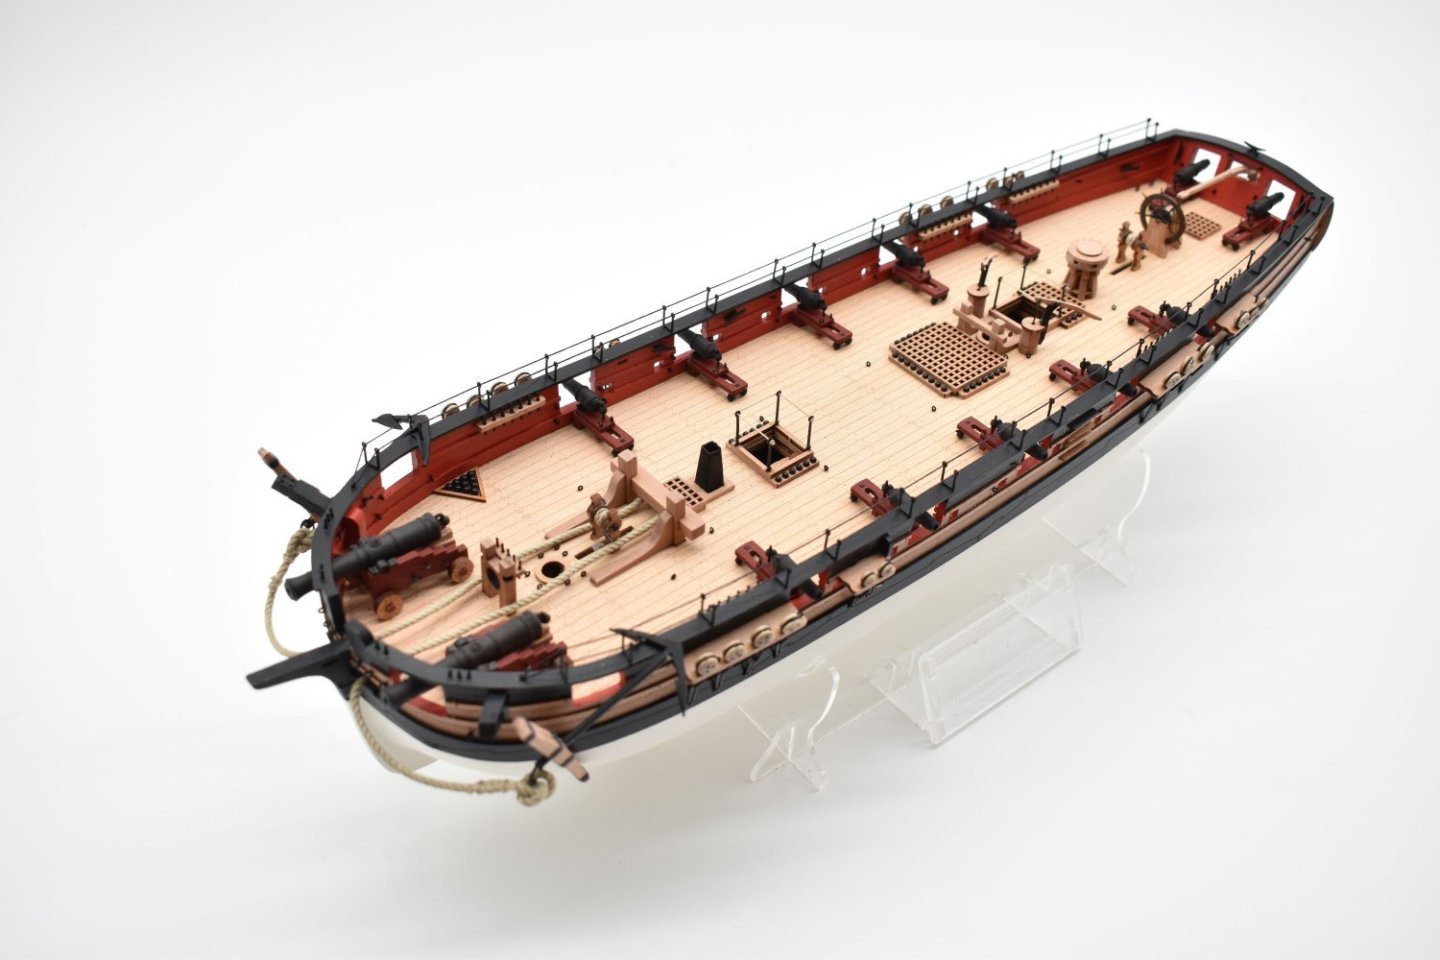
OK, this is the 16th kit and will be released in concert with Adder (both developed together), and it is a revisit, as I felt I wanted to do it a little more justice. Here is the new design for HM armed cutter Sherbourne, 1763, designed by Sir Thomas Slade and using all of the reasearch I could lay my hands on to develop an accurate representation of this cute little cutter. This will be the last for my range of naval cutters, being content with a small (Sherbourne), medium (Trial) and large (Alert) cutter. I have added 8x3 pounders, but in reality, she was armed with 6, and she is shown with 12 swivel cannon, but only allocated 8 for the real version - but some moan if they cannot fill gun port slots or populate all of the swivel posts... As with Trial and Adder, all detail at main wale level and above is all pre cut with laser engraved plank lines and treenails. I decided not to paint the inner bulwarks red so the detail could be more easily seen. Hull just needs a final spray varnish, then it's ready for the masts and rig, which I shall do together with Adder. Oh, 64th scale, if anyone asks...and I haven't skimped on the bulkhead spacing....(17 bulkheads) ETA - the skeletal hull was a pre prototype, and the first time I fitted the parts together from my initial designs.


-
It is strange, in that they all seem to sell well, but do so in phases. For example, one week it will be all Trial Cutters, another week Speedy's, then Sphinx, then a run on Indy's etc.
-
I did try to get threaded bars for the carronades in the appropriate diameter. However, the quotes I got were comical.
- 648 replies
-
- 4
-
-
- Indefatigable
- Vanguard Models
- (and 1 more)
-
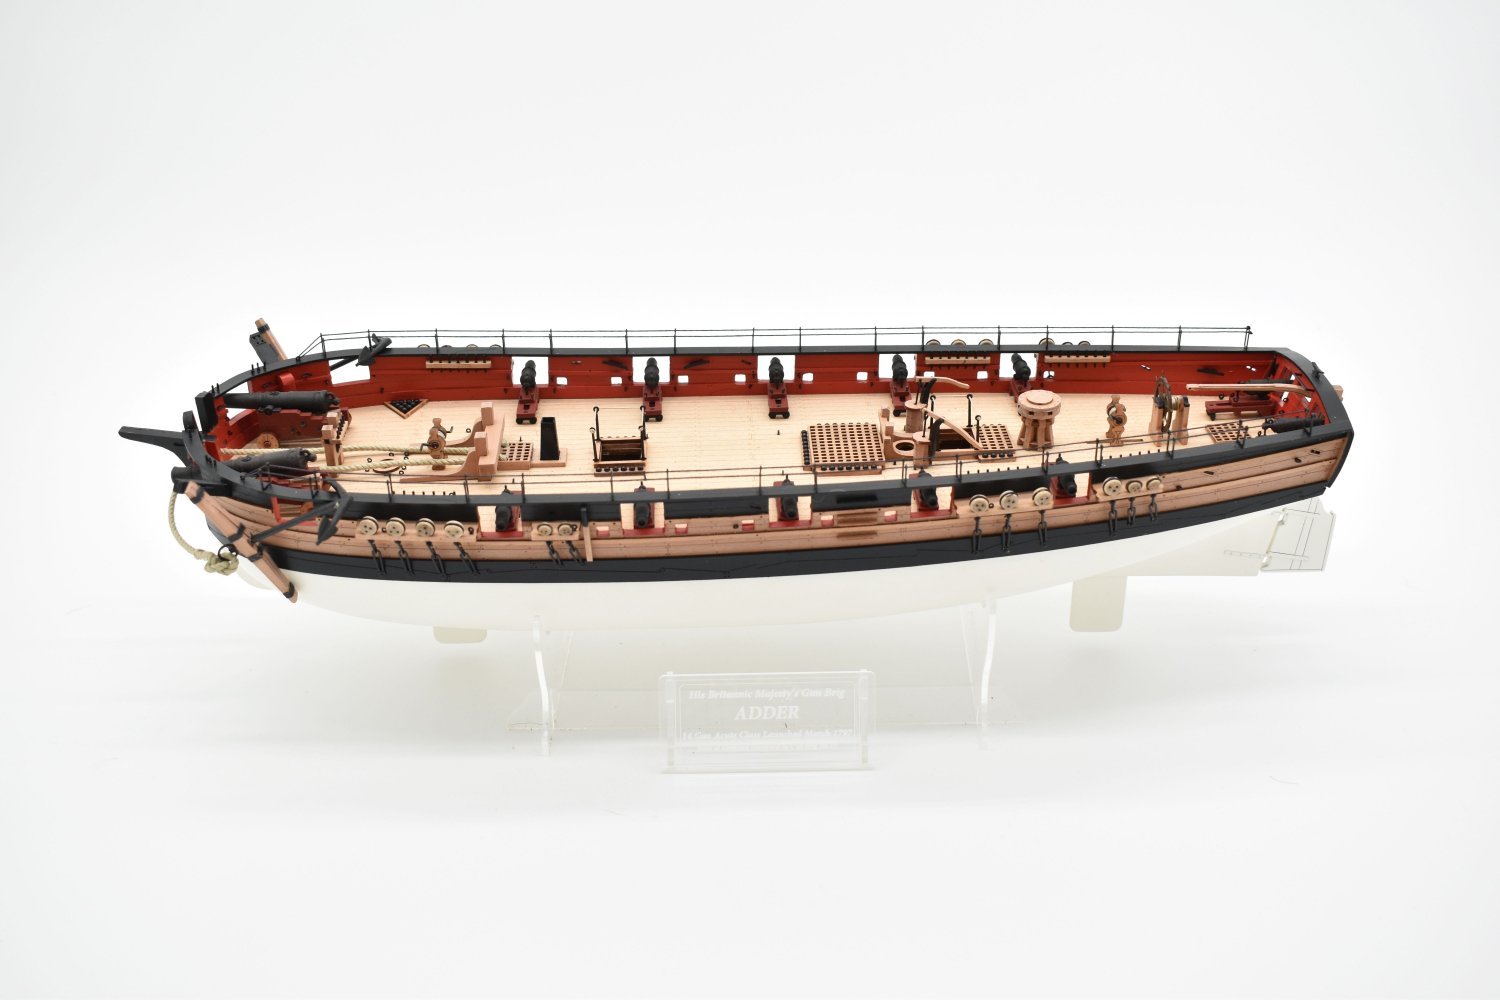
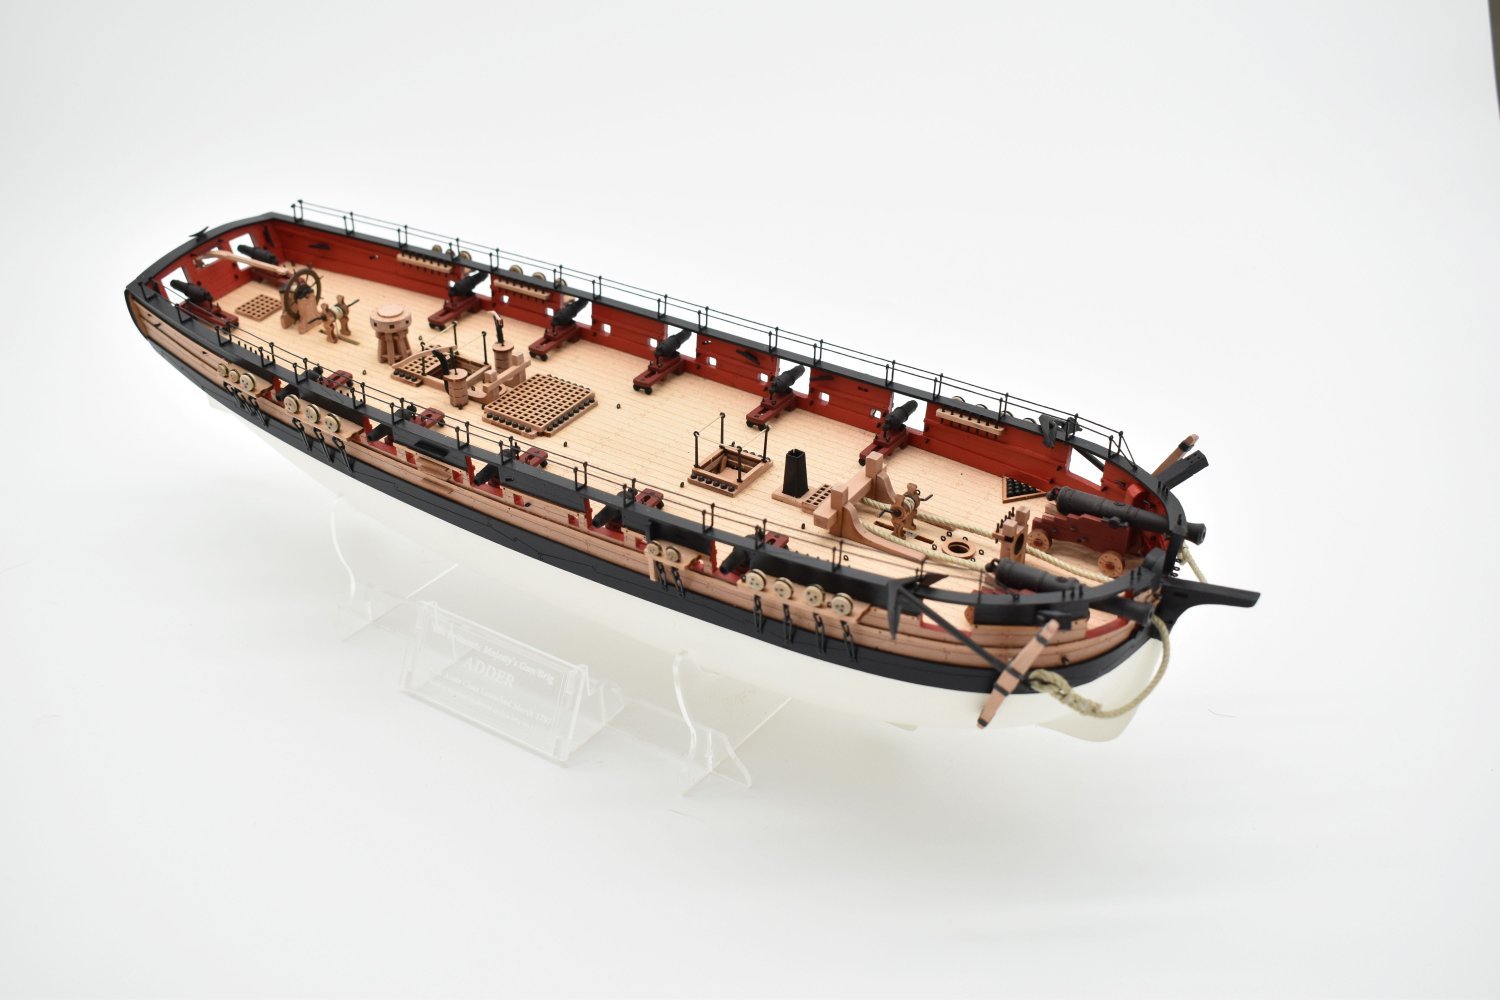
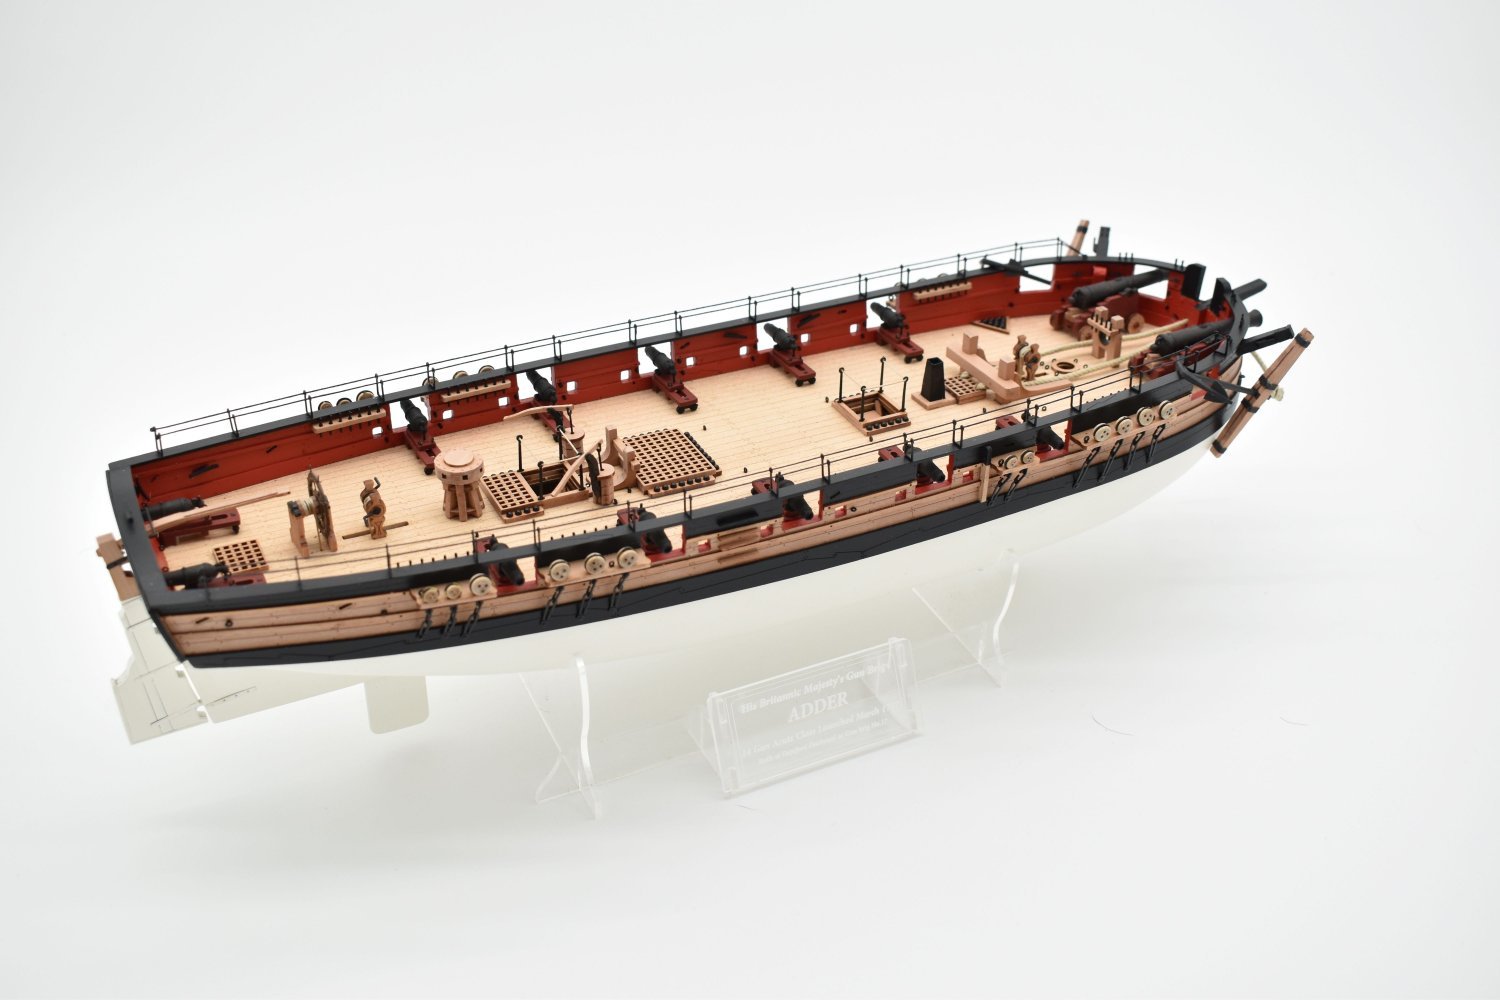
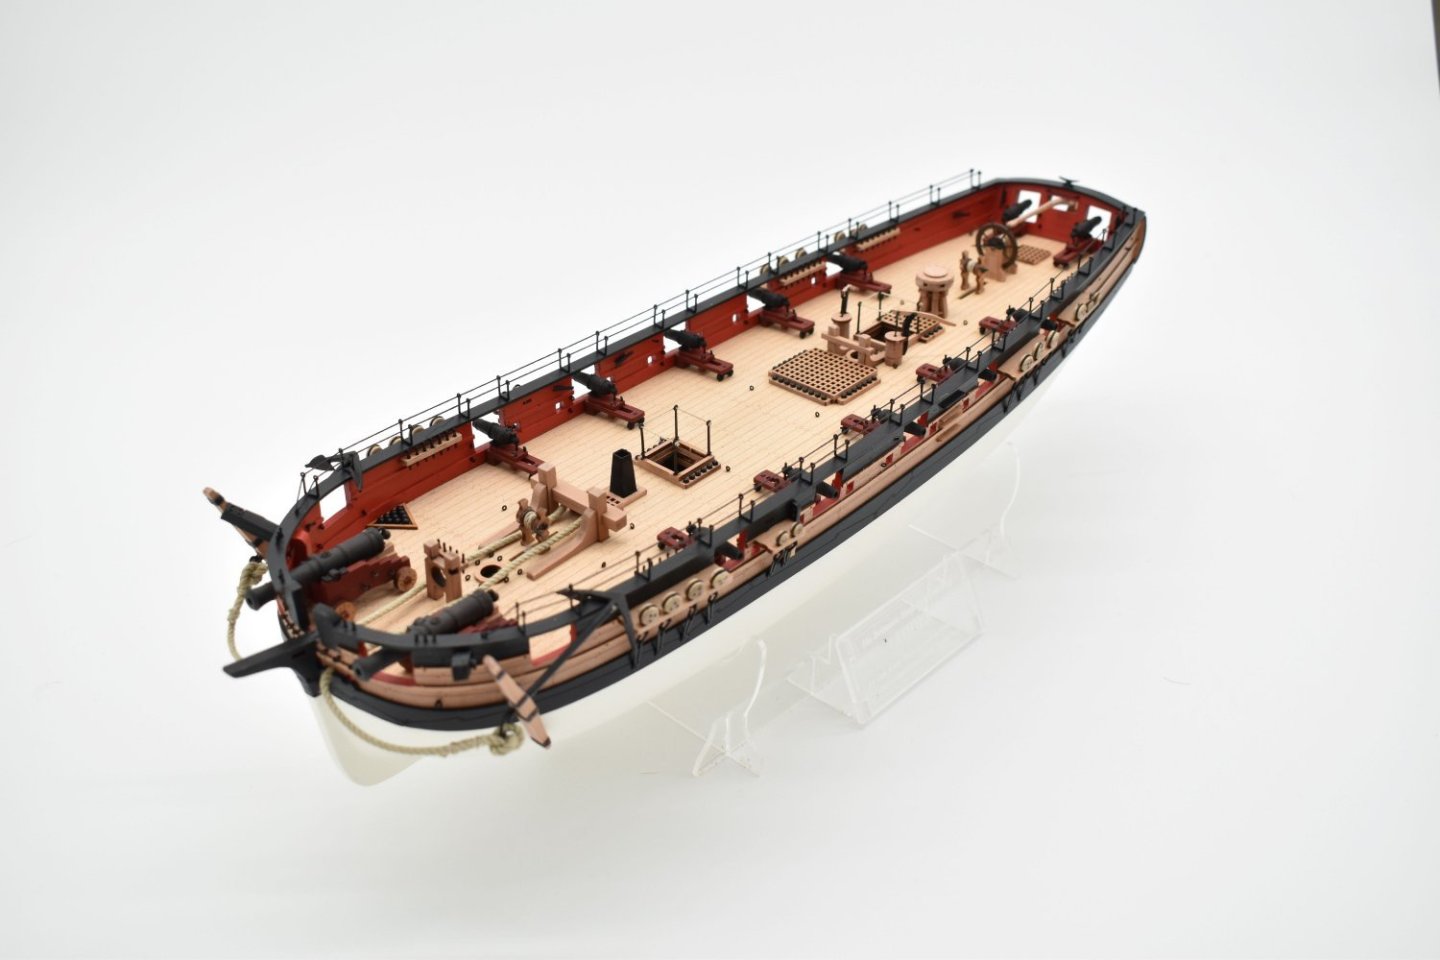
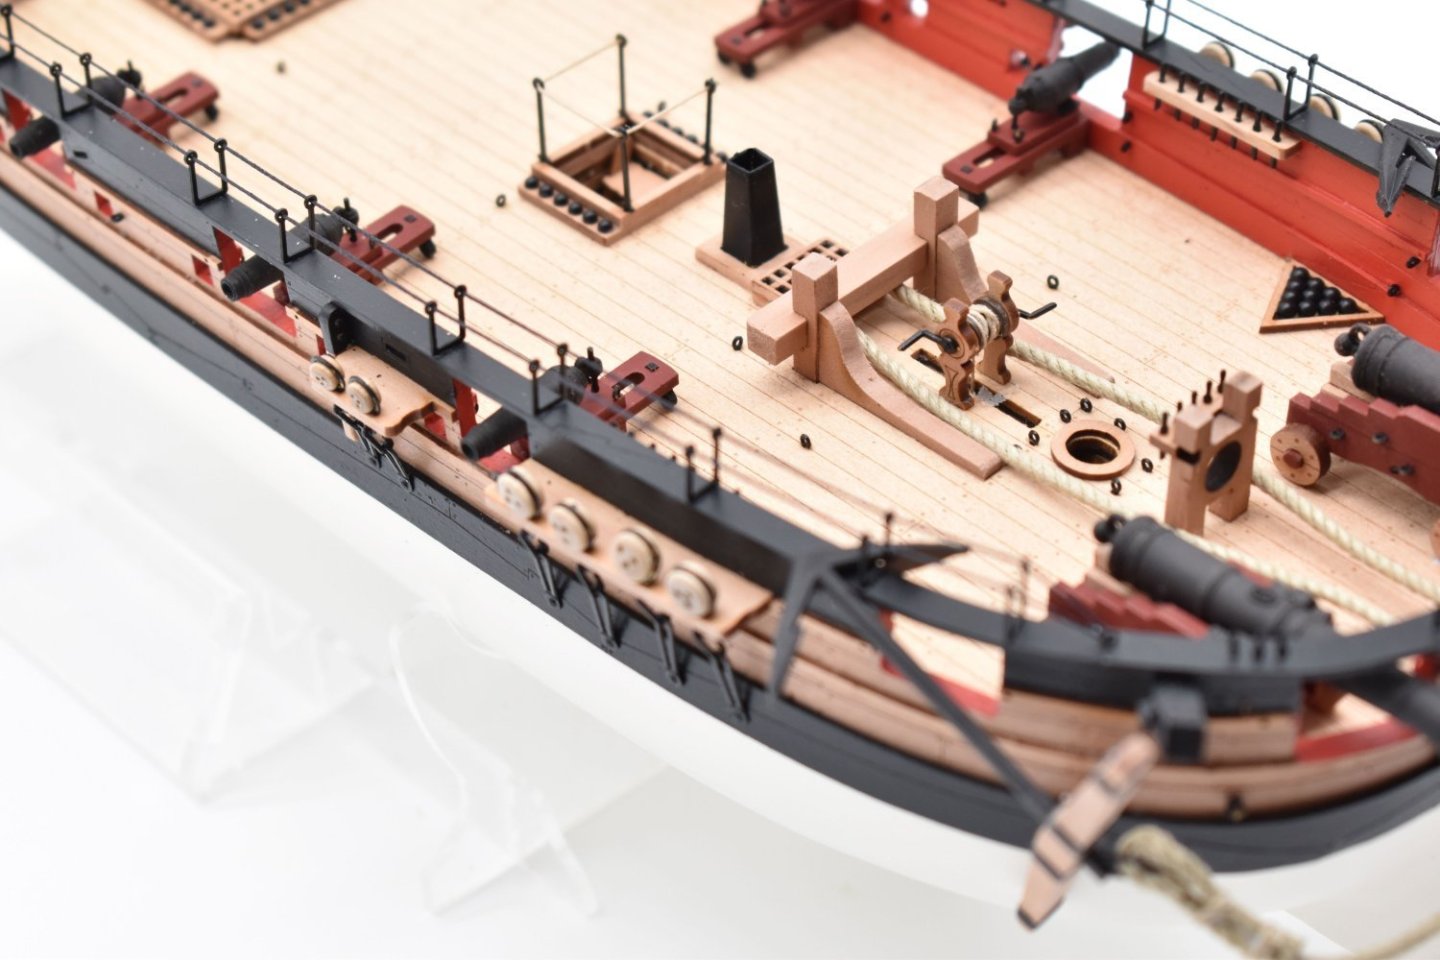
Thank you! These kits with the pre-cut and engraved upper details are a lot quicker to build than standard planking all over kits. However, you do need to be careful in applying them, as they are essentially finished parts, only requiring a light varnish to the finished build. For Adder, I gave the bulwark parts (and wales) a soak and then clamped in place and left for over a day. When the clamps are removed, the curves stayed in place. I think it would also be a good idea to cover the finished outer surfaces with masking tape to help avoid any possible glue marks - but as long as you are careful and do not rush or glue parts sooner than they should be, all should be fine, and once these bulwark parts are fitted, the rest of the assembly should be a breeze. This is because all fittings for the deck and bulwarks, both inside and out have pre-cut (or engraved) positions/slots for everything that is fitted to them, like cleats, eyebolts, belaying racks, channels etc., negating the need to mark anything out onto the model from the plans. (I always hated having to mark out and drill the eyebolt positions in the inner bulwarks, always so awkward to do). This does make the kit more expensive than lagacy kits, but the upside is that the modeller (I hope) has a much better chance of finishing the model and, more importantly, actually enjoying the experience, rather than give up in frustration. I did use my AK paints for most, but for the cannon carriages I used red oxide spray paint, and for the white bottom a can of matt white spray I bought from Amazon for around £5. The whole hull was varnished using my AK water based matt varnish, which is great, easy to apply, dries very quickly and easy to clean the airbrush. I do get emails asking if the black resin parts should be painted. Of course, they should be. Would you leave the hull of a plastic battleship kit in its grey plastic, because it is more or less the same colour as the finished model? Of course not, and the same applies to the cannon, they must be painted.
-
No, that would have been a much later namesake, with all of the 1797 Acute Class being decommissioned well before 1812. Adder was part of a class that was second generation for this specialised type of vessel (The first being Conquest Class in 1794). Later classes like Archer and Confounder are less interesting, as they are nothing more than smaller standard brig hulls and armed with only carronades. Almost a pre curser to the Cherokee Class of brigs, as they were, at that time, expected to operate a lot further from home waters, as the threat of an invasion of Britain receded.
-
I love the wine glass lines of this hull, which is why it is high on my list for a rare revisit.
-
All of my kits are full kits, all include masts and rig. In fact, all plans for this one are already complete, including the mast and rig plans.
-
Yes, in fact, I do mention the drop keels in my post.
-
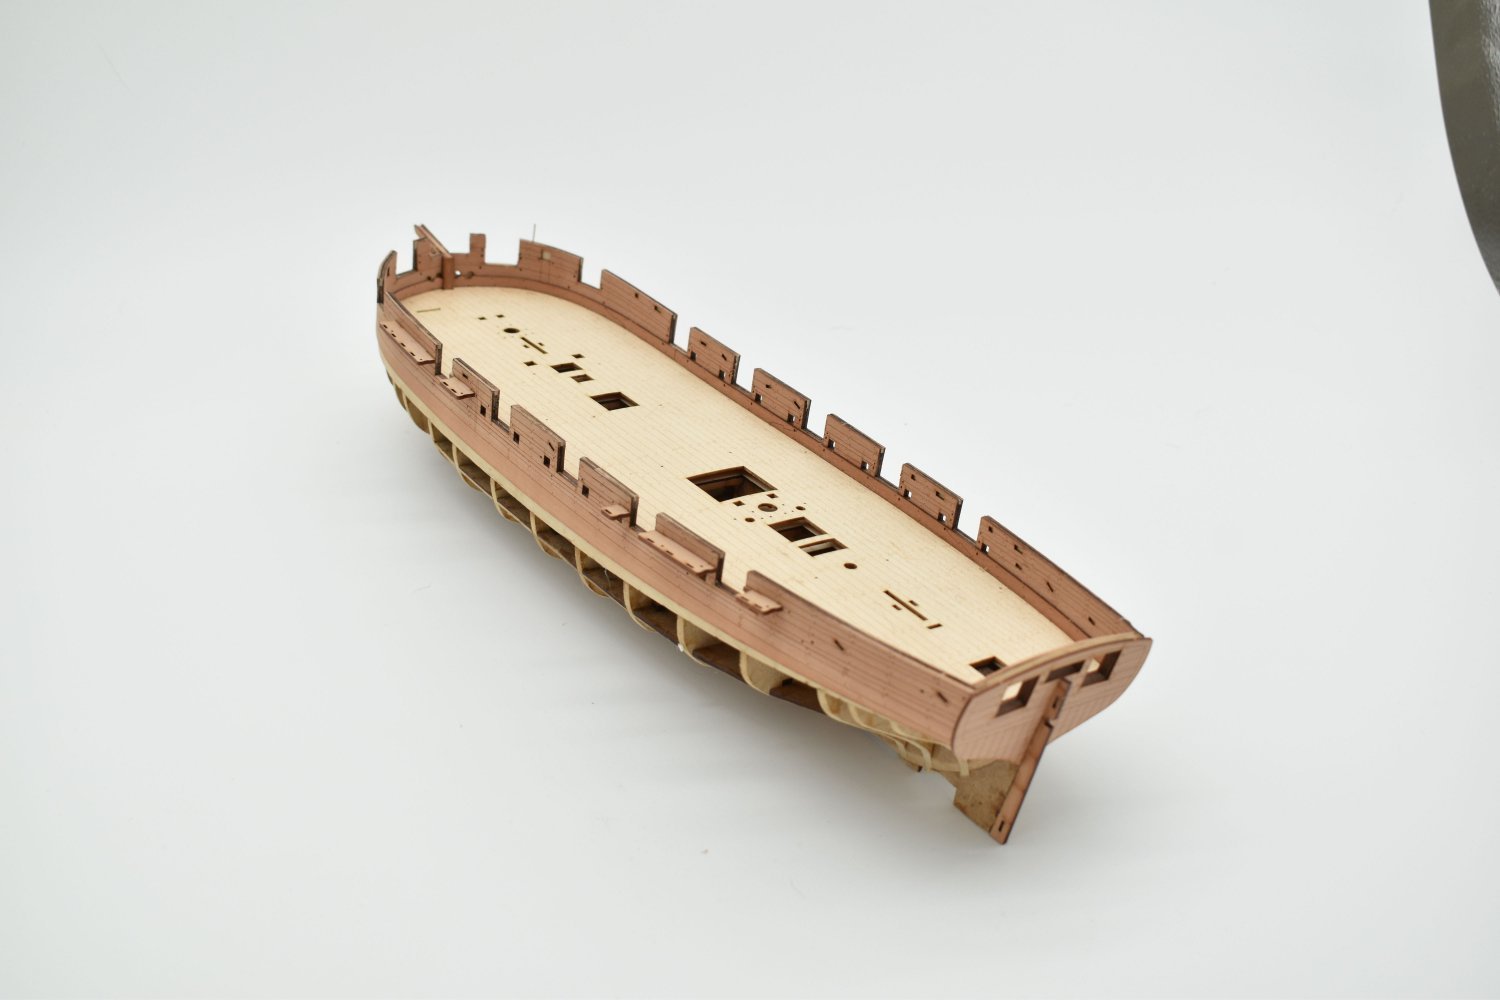
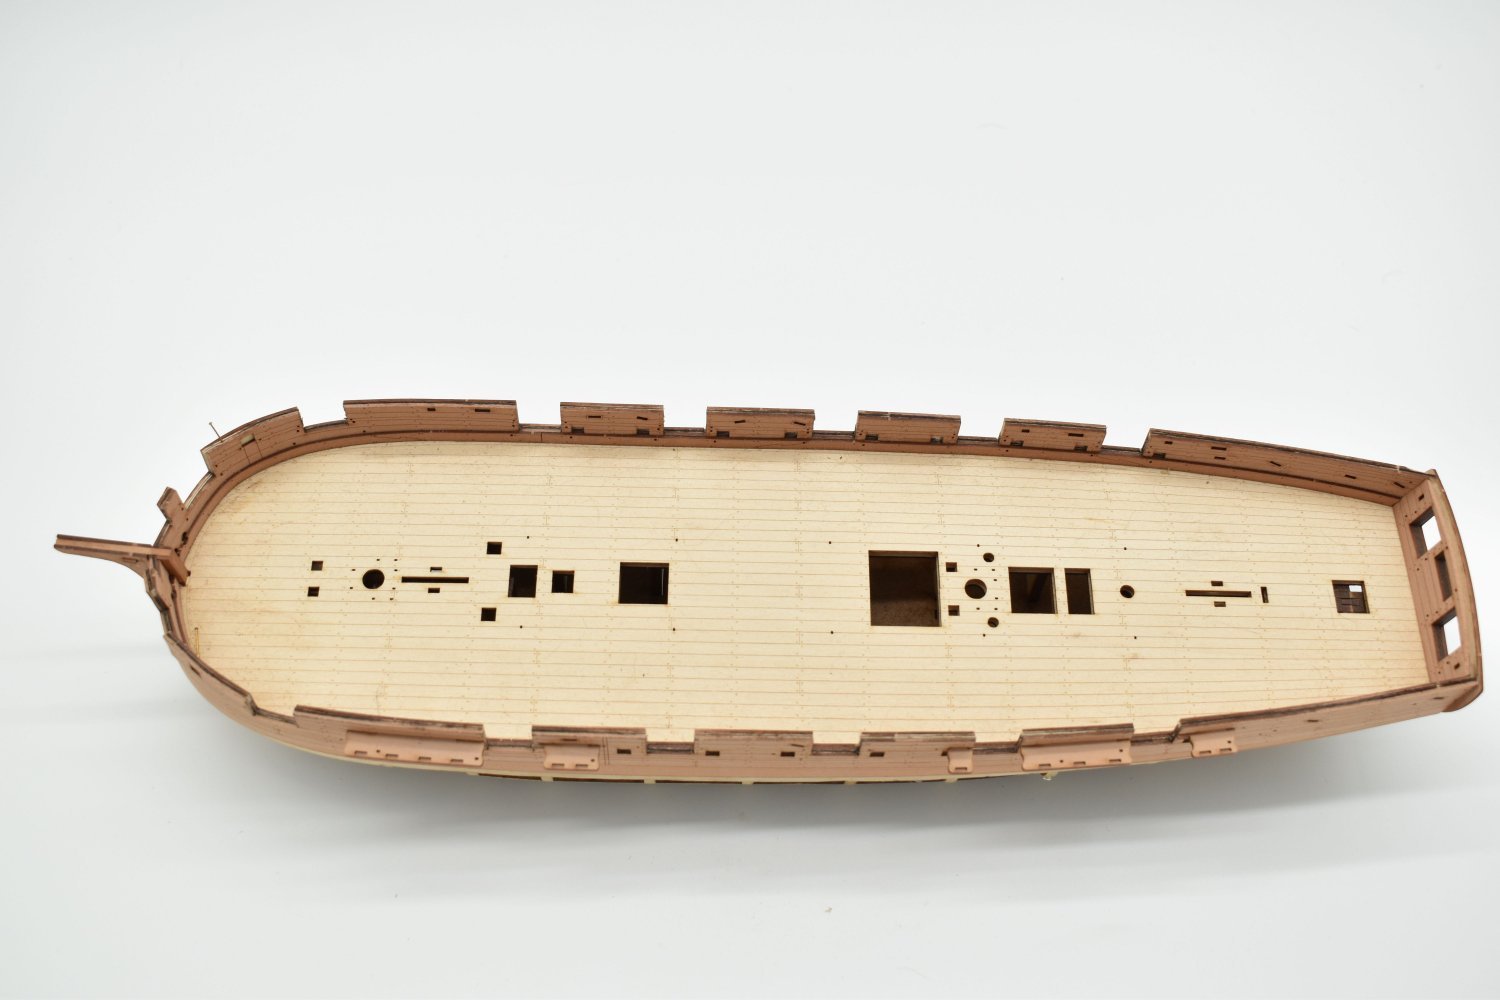
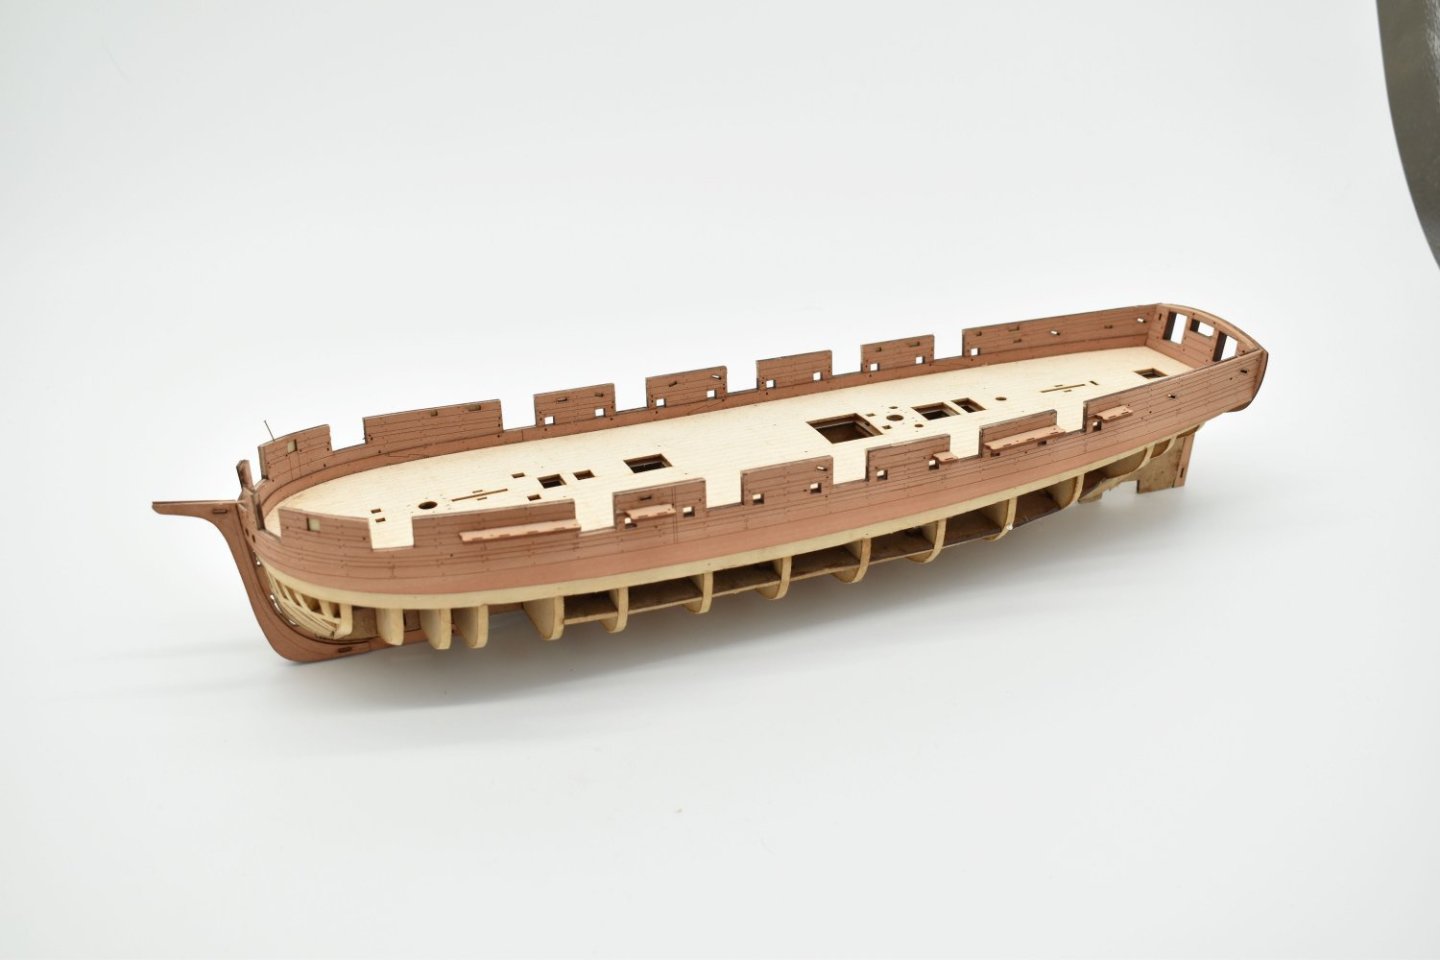
And here are some pics of the 'pre-prototype', the hull I used to getconfirmation (or not) of the main parts fit. The channels were changed, as the original plans had them located in different positions, and the main channels needed changing due to the forward most 'stool' being just a little too forward of the main mast.. This hull served its purpose and is now in the bin.


-
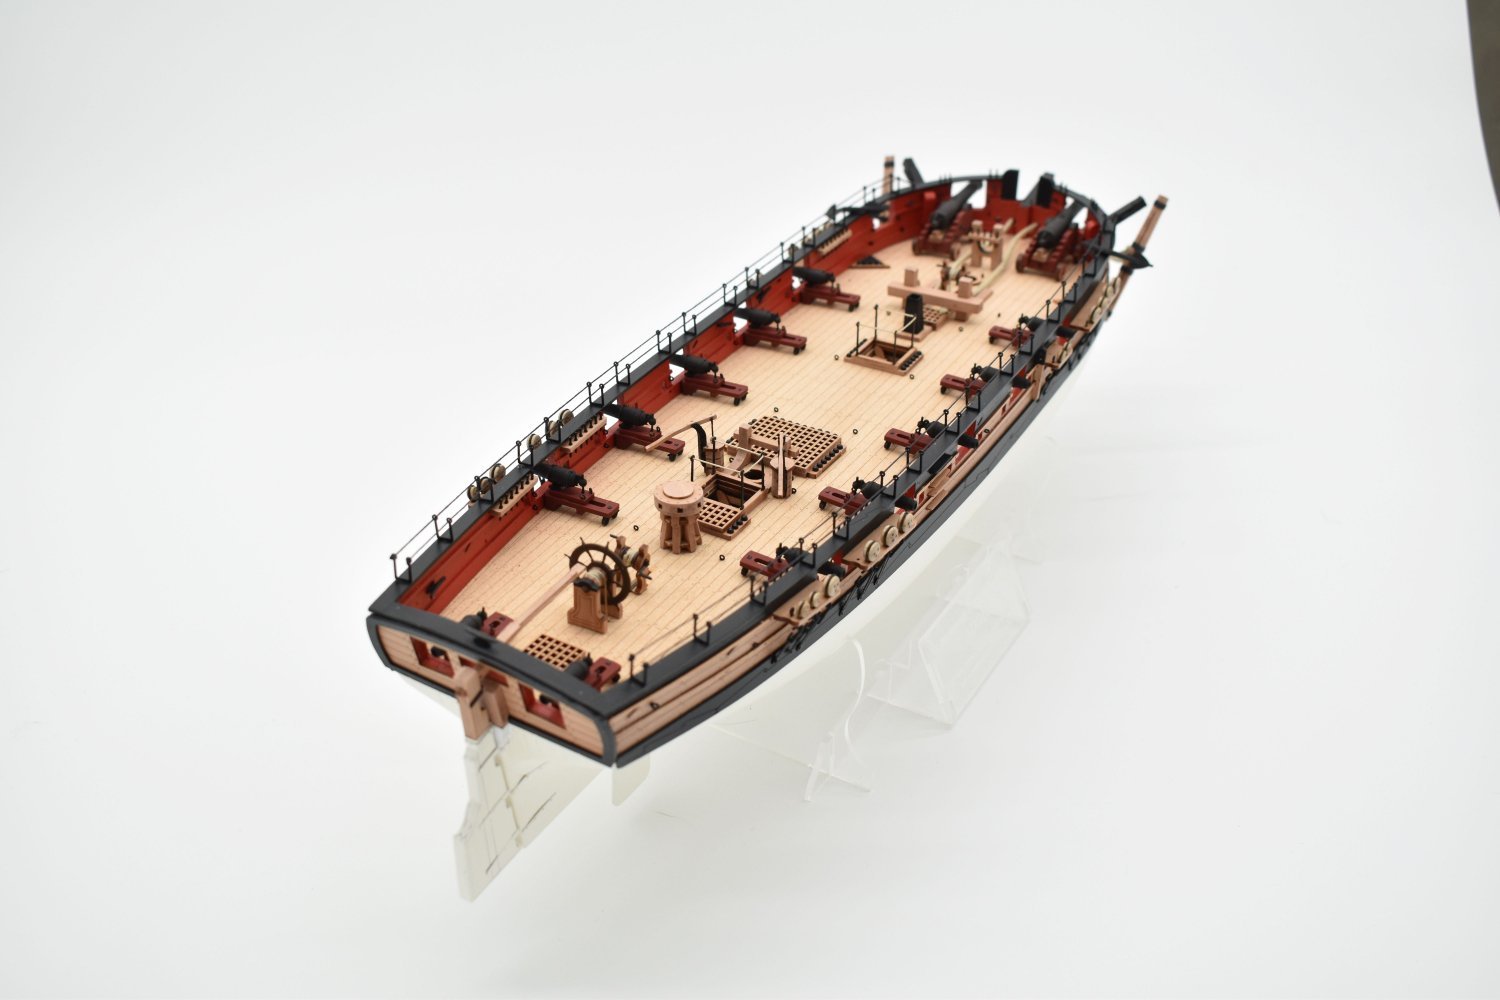
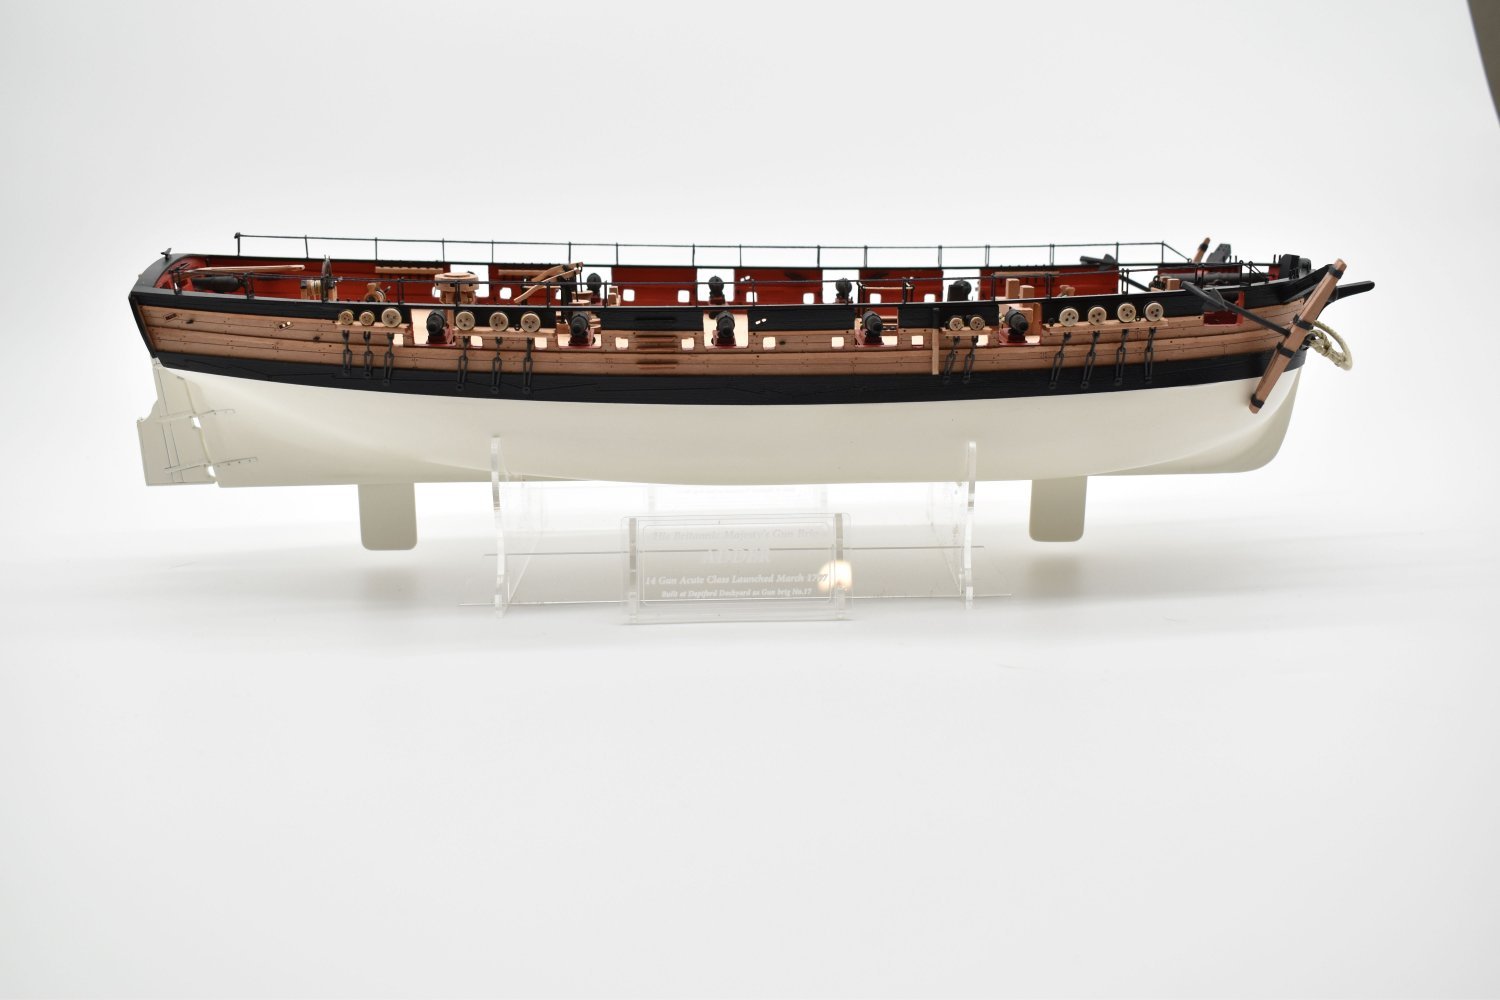
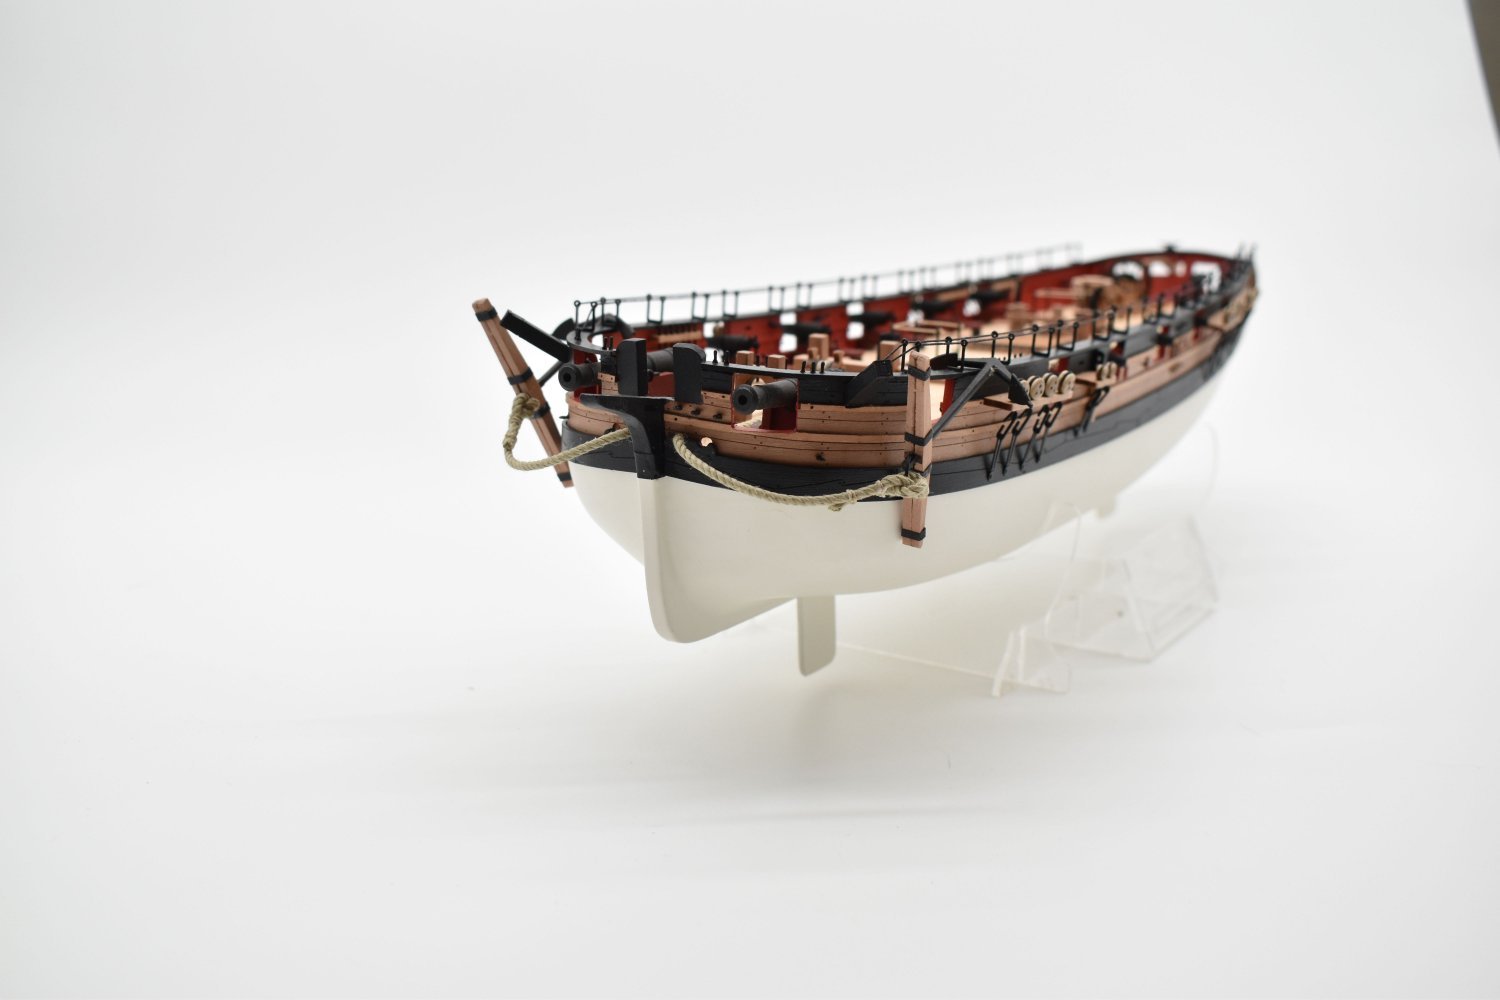
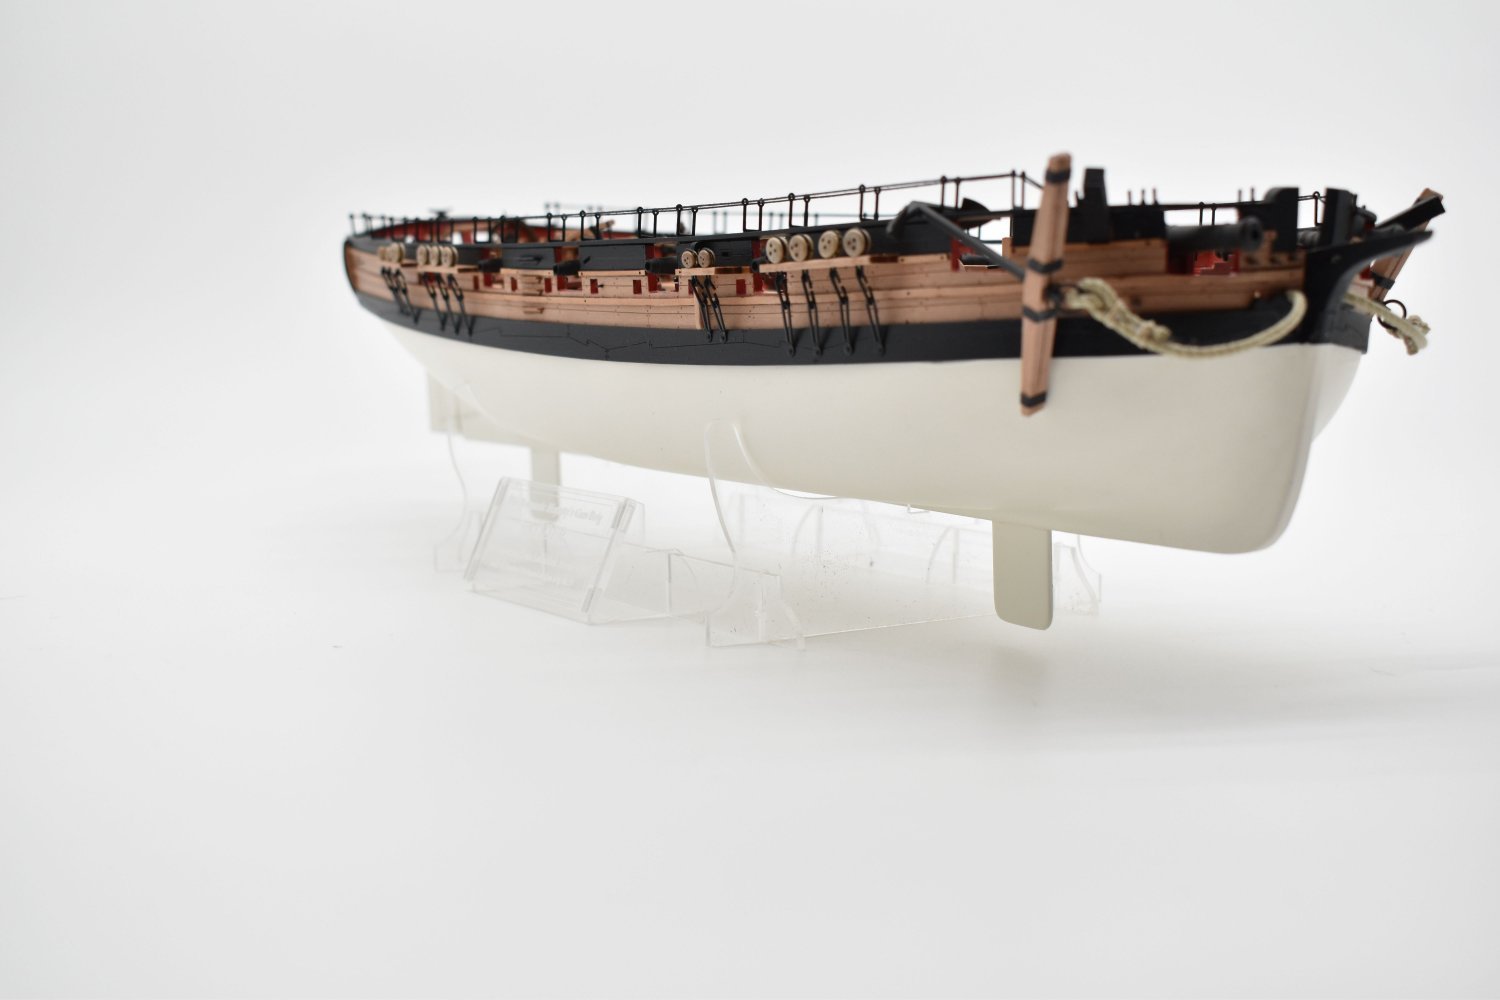
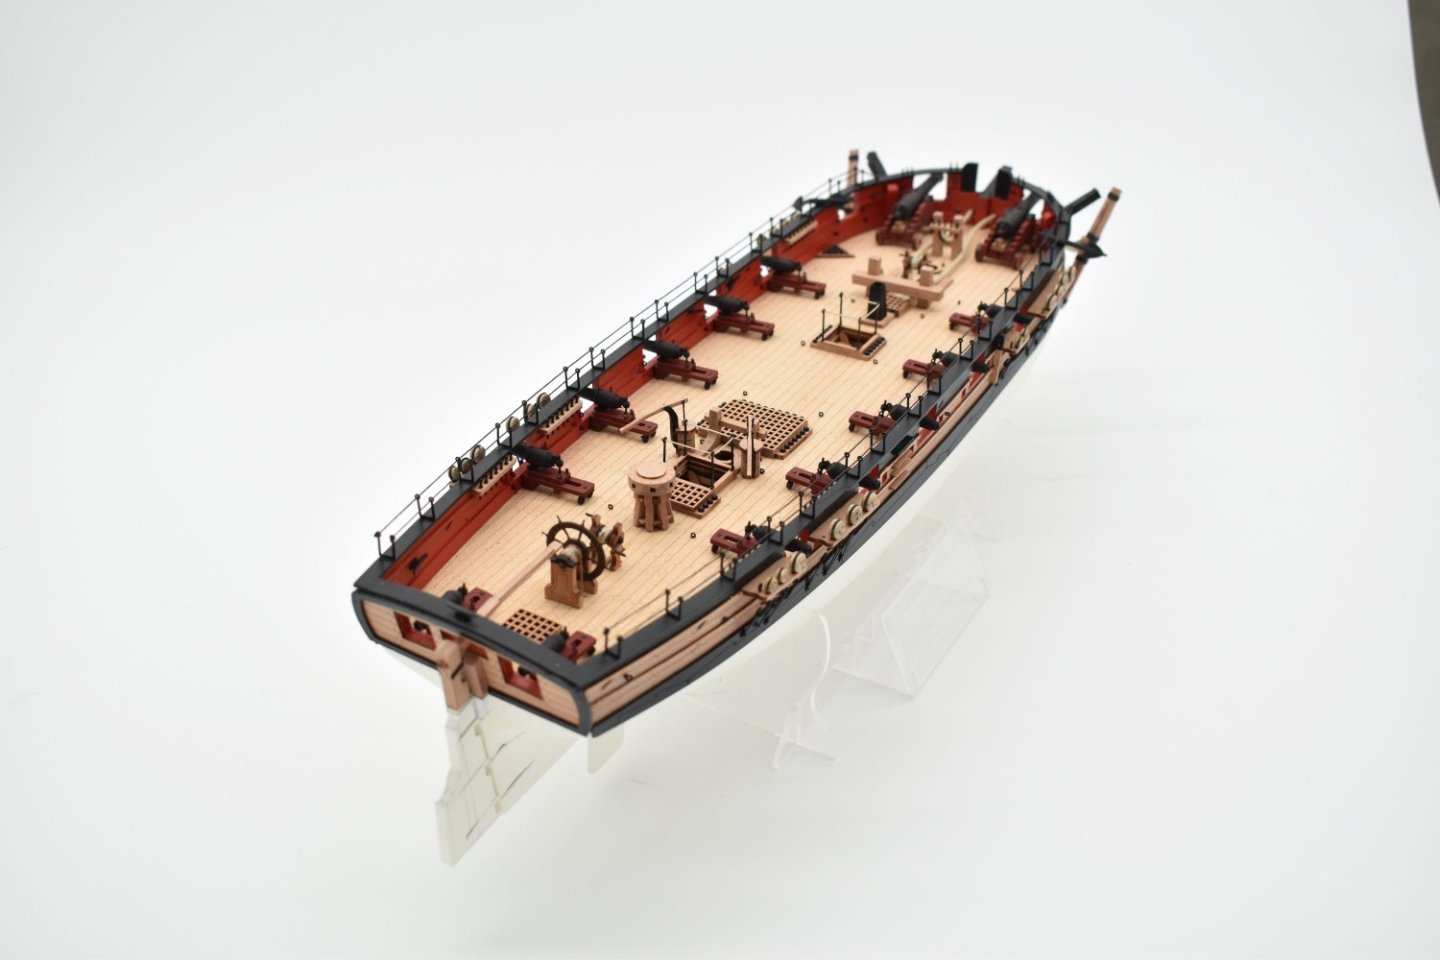
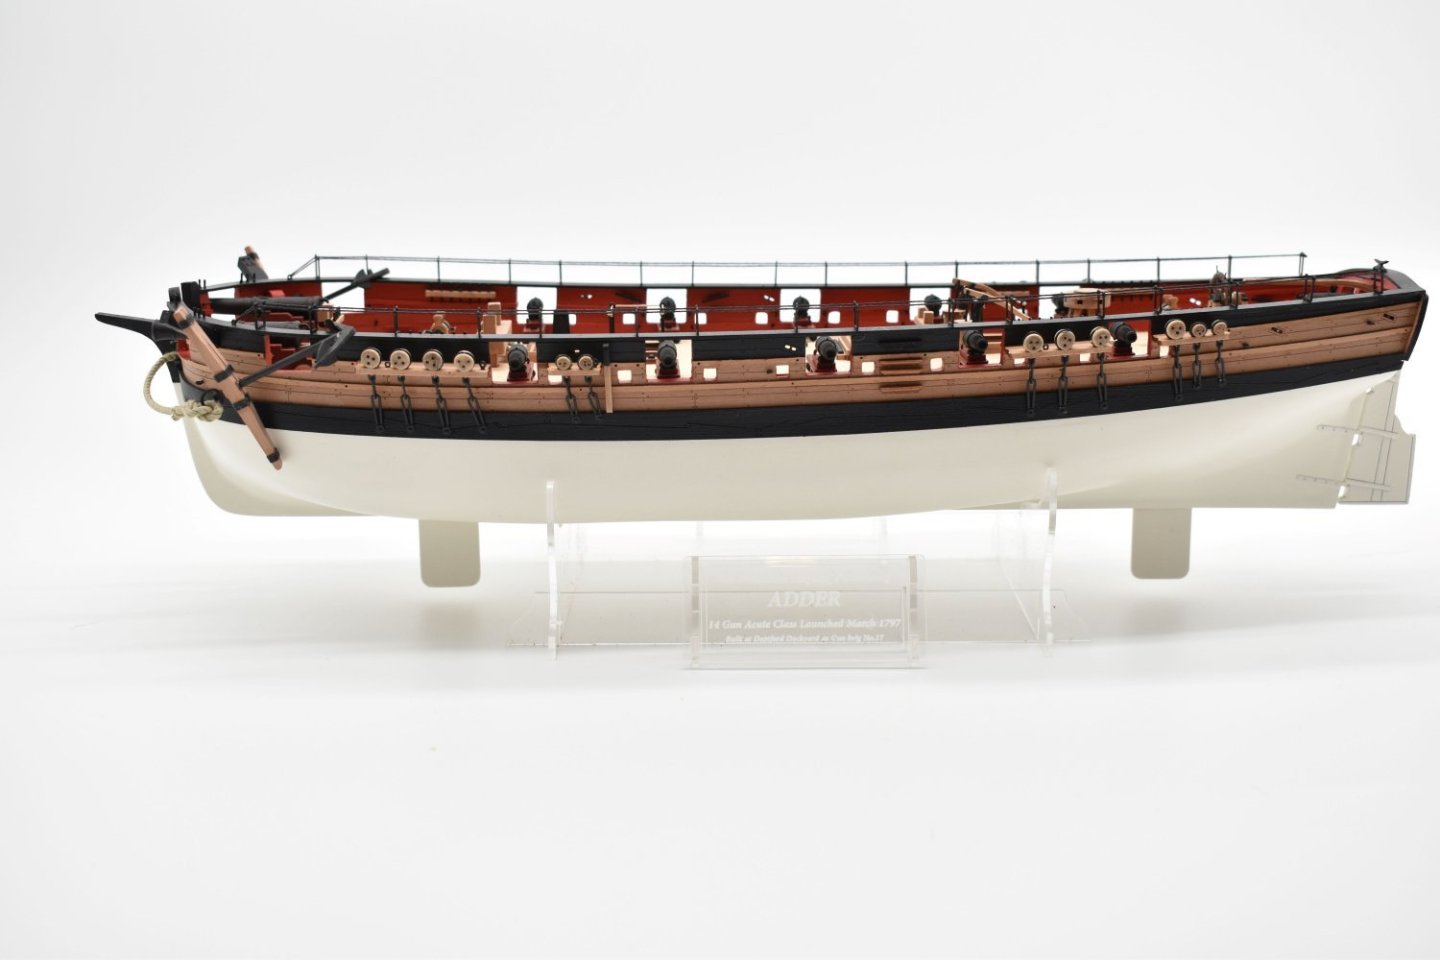
OK, just a little update. I have been very busy, if not producing stuff, then trying to carry on with my next two smaller developments. Today I finally completed the hull detail for kit number 15, the gun brig Adder of 14 guns (1797 - Acute Class). 12 x 18 Pounder carronades and 2x24 Pounder carriage guns. I think this has taken three weeks in total to get this far, perhaps two weeks for masts and rig. Size wise this fits neatly in between Alert and Speedy. The designs were a lot more involved than I initially anticipated, with the bluff bow and foredeck drooping down as it goes forward, presumably to help negate the recoil of the large 24 Pounders. As with Trial Cutter, it has drop keels, and all hull detail above main wale is pre cut and engraved, meaning very little planking required, which is also painted (or coppered) anyway. This was meant to be a nice cheap and simple kit, but as usual, I went too far, and ended up with a very detailed little kit with many laser cut and engraved sheets. Scale - 1:64th (of course..) Hull Length - 406mm Overall Length (Rigged) - 606mm Height Overall - 464mm This class was a Henslow design, and if you don't like the name, there is quite a choice: Acute Adder Asp Assault Biter Blazer Bouncer Boxer Bruiser Clinker Contest Cracker Crash (!!) Sparkler Spiteful All ordered and built in 1797 Adder was actually lengthened in 1798 to 97' along the main deck, so I doubt she was ever coppered in the as built guise. Most seem to have been coppered at a much later date after their launch, hence the white bottom. No idea how well this will sell....


-
Nothing to do with me. I do have Surprise designs, but they have never left my PC. I think this is more a case of copying other manufacturers techniques rather than thinking and innovating for themselves. I see this a lot. It does grate when I see this crap, but I avoid as much as possible and just do my own thing.