Bryan Woods
-
Posts
551 -
Joined
-
Last visited
Content Type
Profiles
Forums
Gallery
Events
Everything posted by Bryan Woods
-
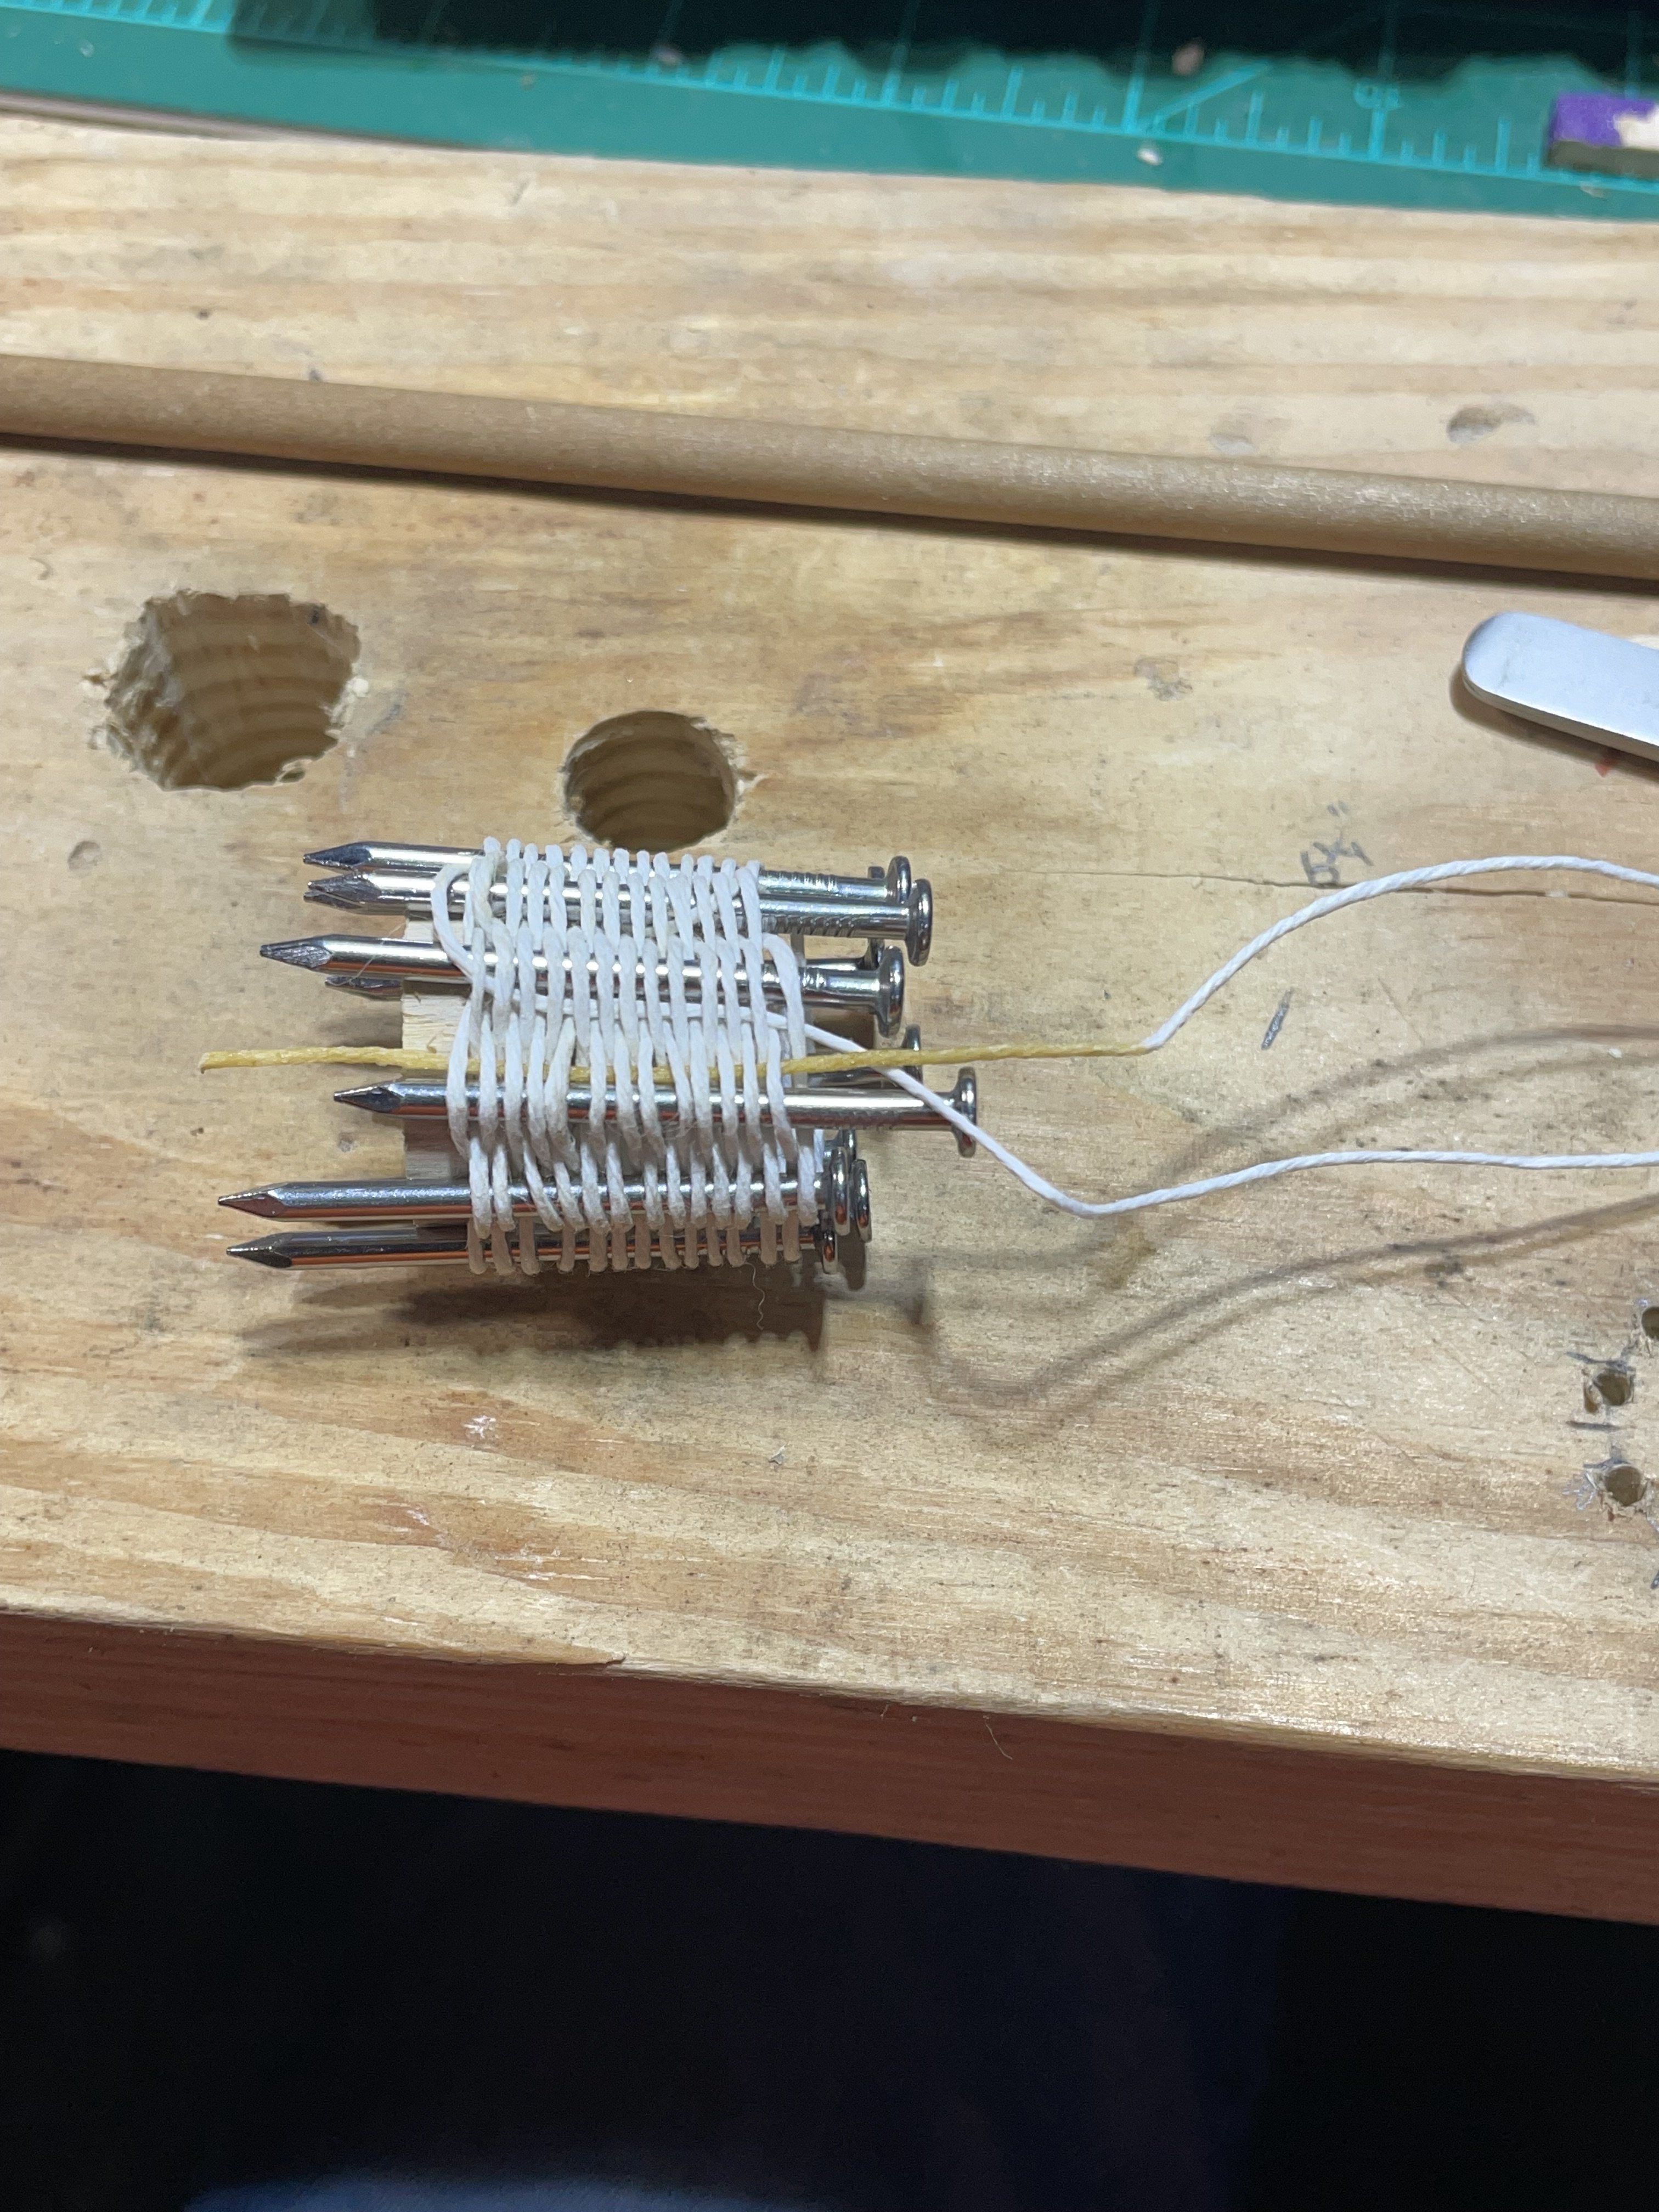
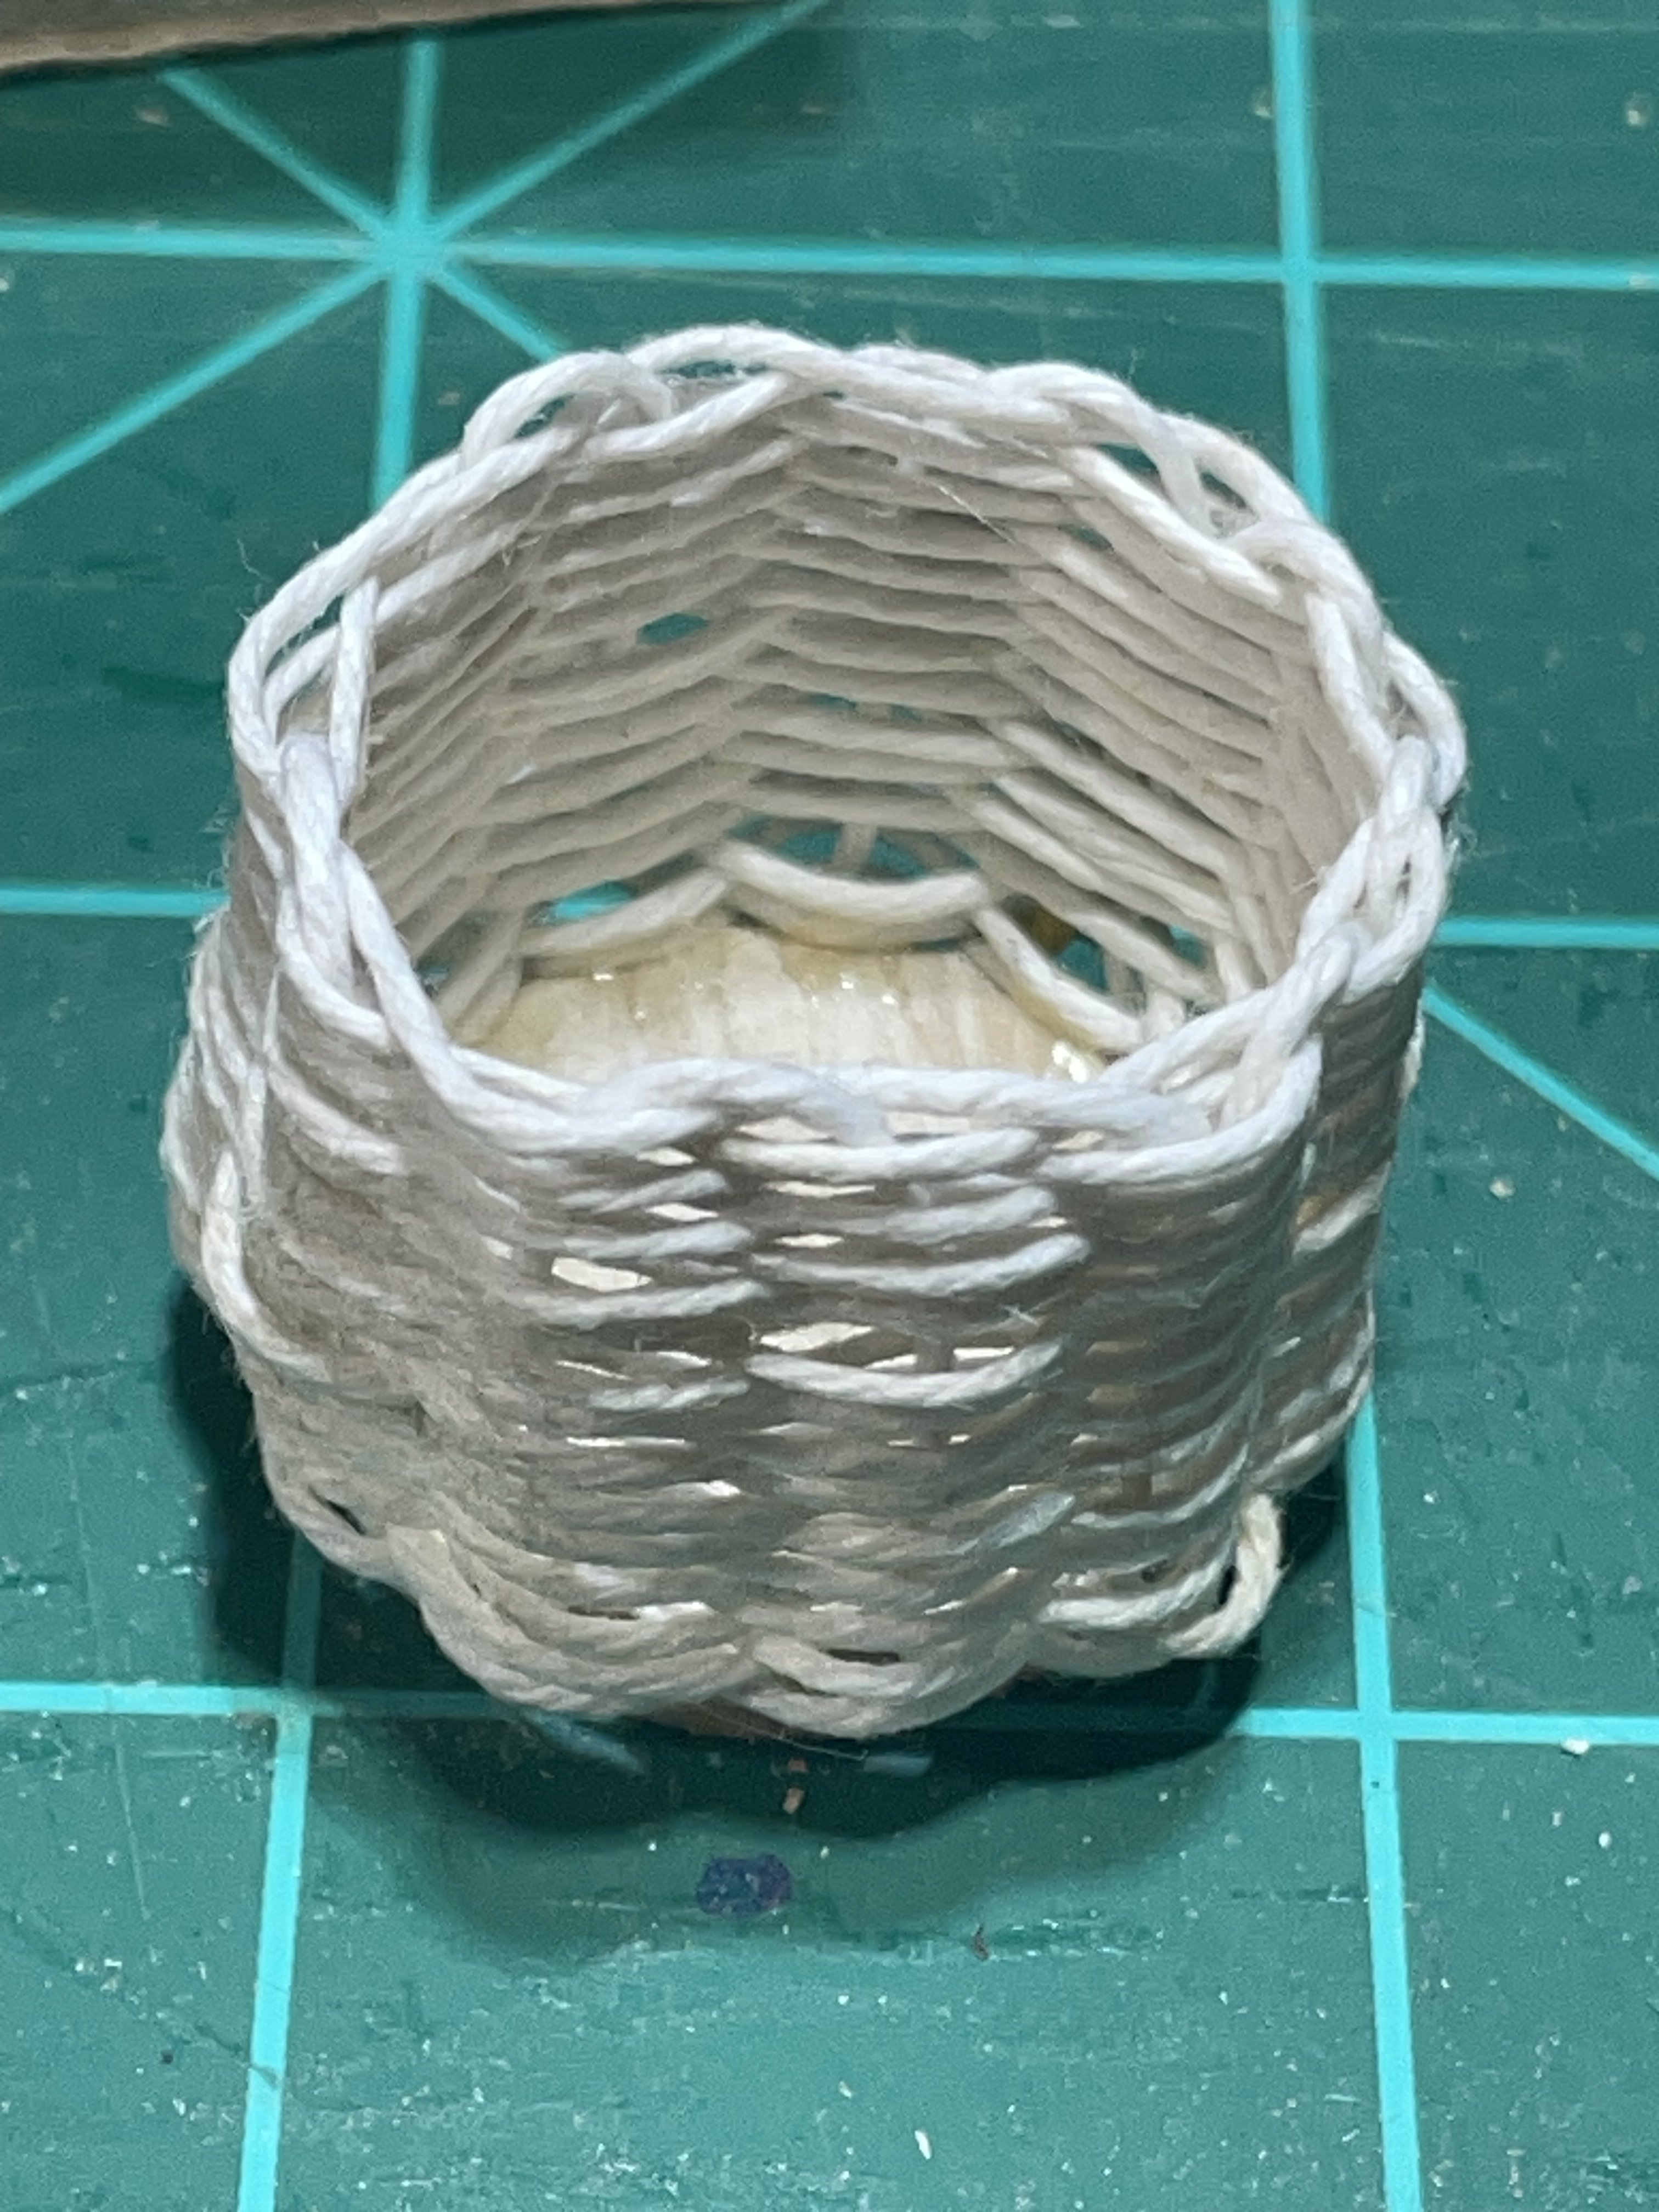
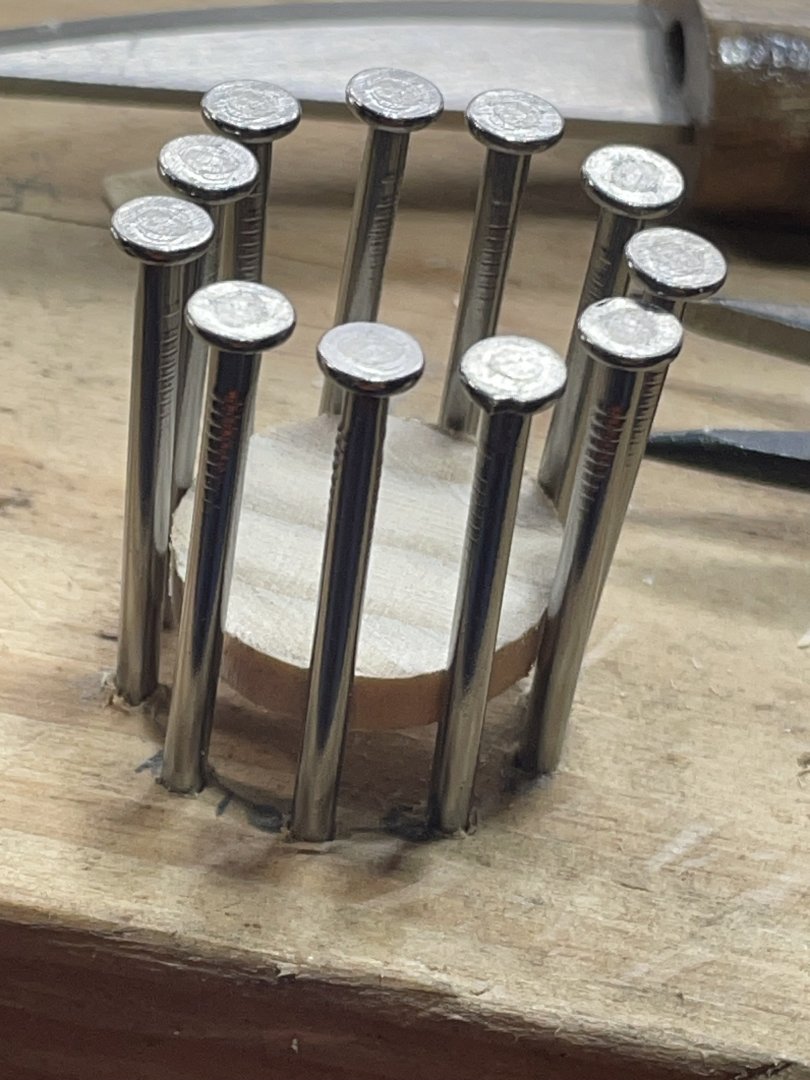
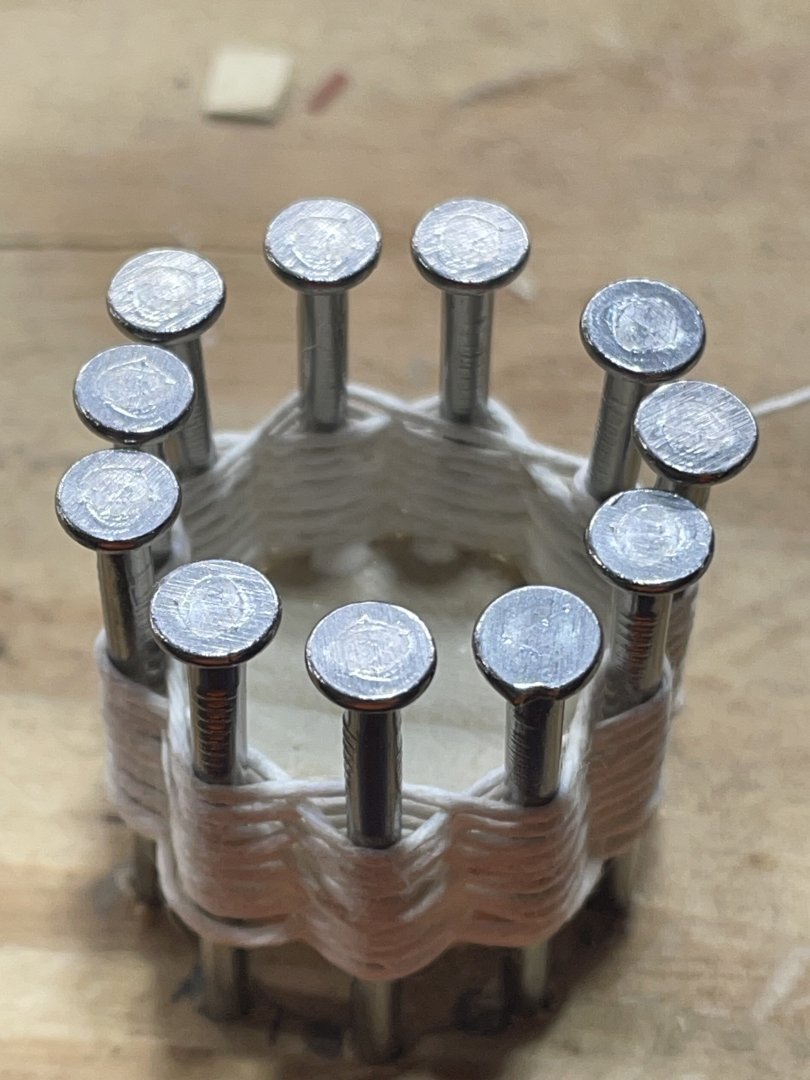
 I haven’t had much time to progress to build lately. When I do get to it , I’ve been making extras to add to it. One of the items I made with the Scott Miller Sea of Galilee boat was a basket. Here’s the simple steps I used. Place an odd number of nails in a board, just enough to hold them. You will need to remove them later with the thread attached. I cut a thin dowel for the bottom, and it also held the nails straight, making it easier to work with. Then just alternate in and out to the desired height. I used a syringe to pipe small amounts of PVA inside to attach the bottom threads to the wooden bottom. Next you must remove all the nails, being careful not to disturb your weaving. This basket is the diameter of a US quarter. You will need about a foot or more of thread to finish it. I coated about two inches of the end to stiffen it. Then pass it between the threads beside the nail back and forth, up and down until you make it all the way around. I just keep going until I run out of thread and end at the bottom where I glue it off. it just needs painted now.


-
The Mossy Shipyard by Bryan Woods - 1:1
Bryan Woods replied to Bryan Woods's topic in Non-ship/categorised builds
Work is slowly being done on insulating and wall board. I’m still waiting to receive two electrical components that will be in the wall. We did get the first of the wall board up:-)
-
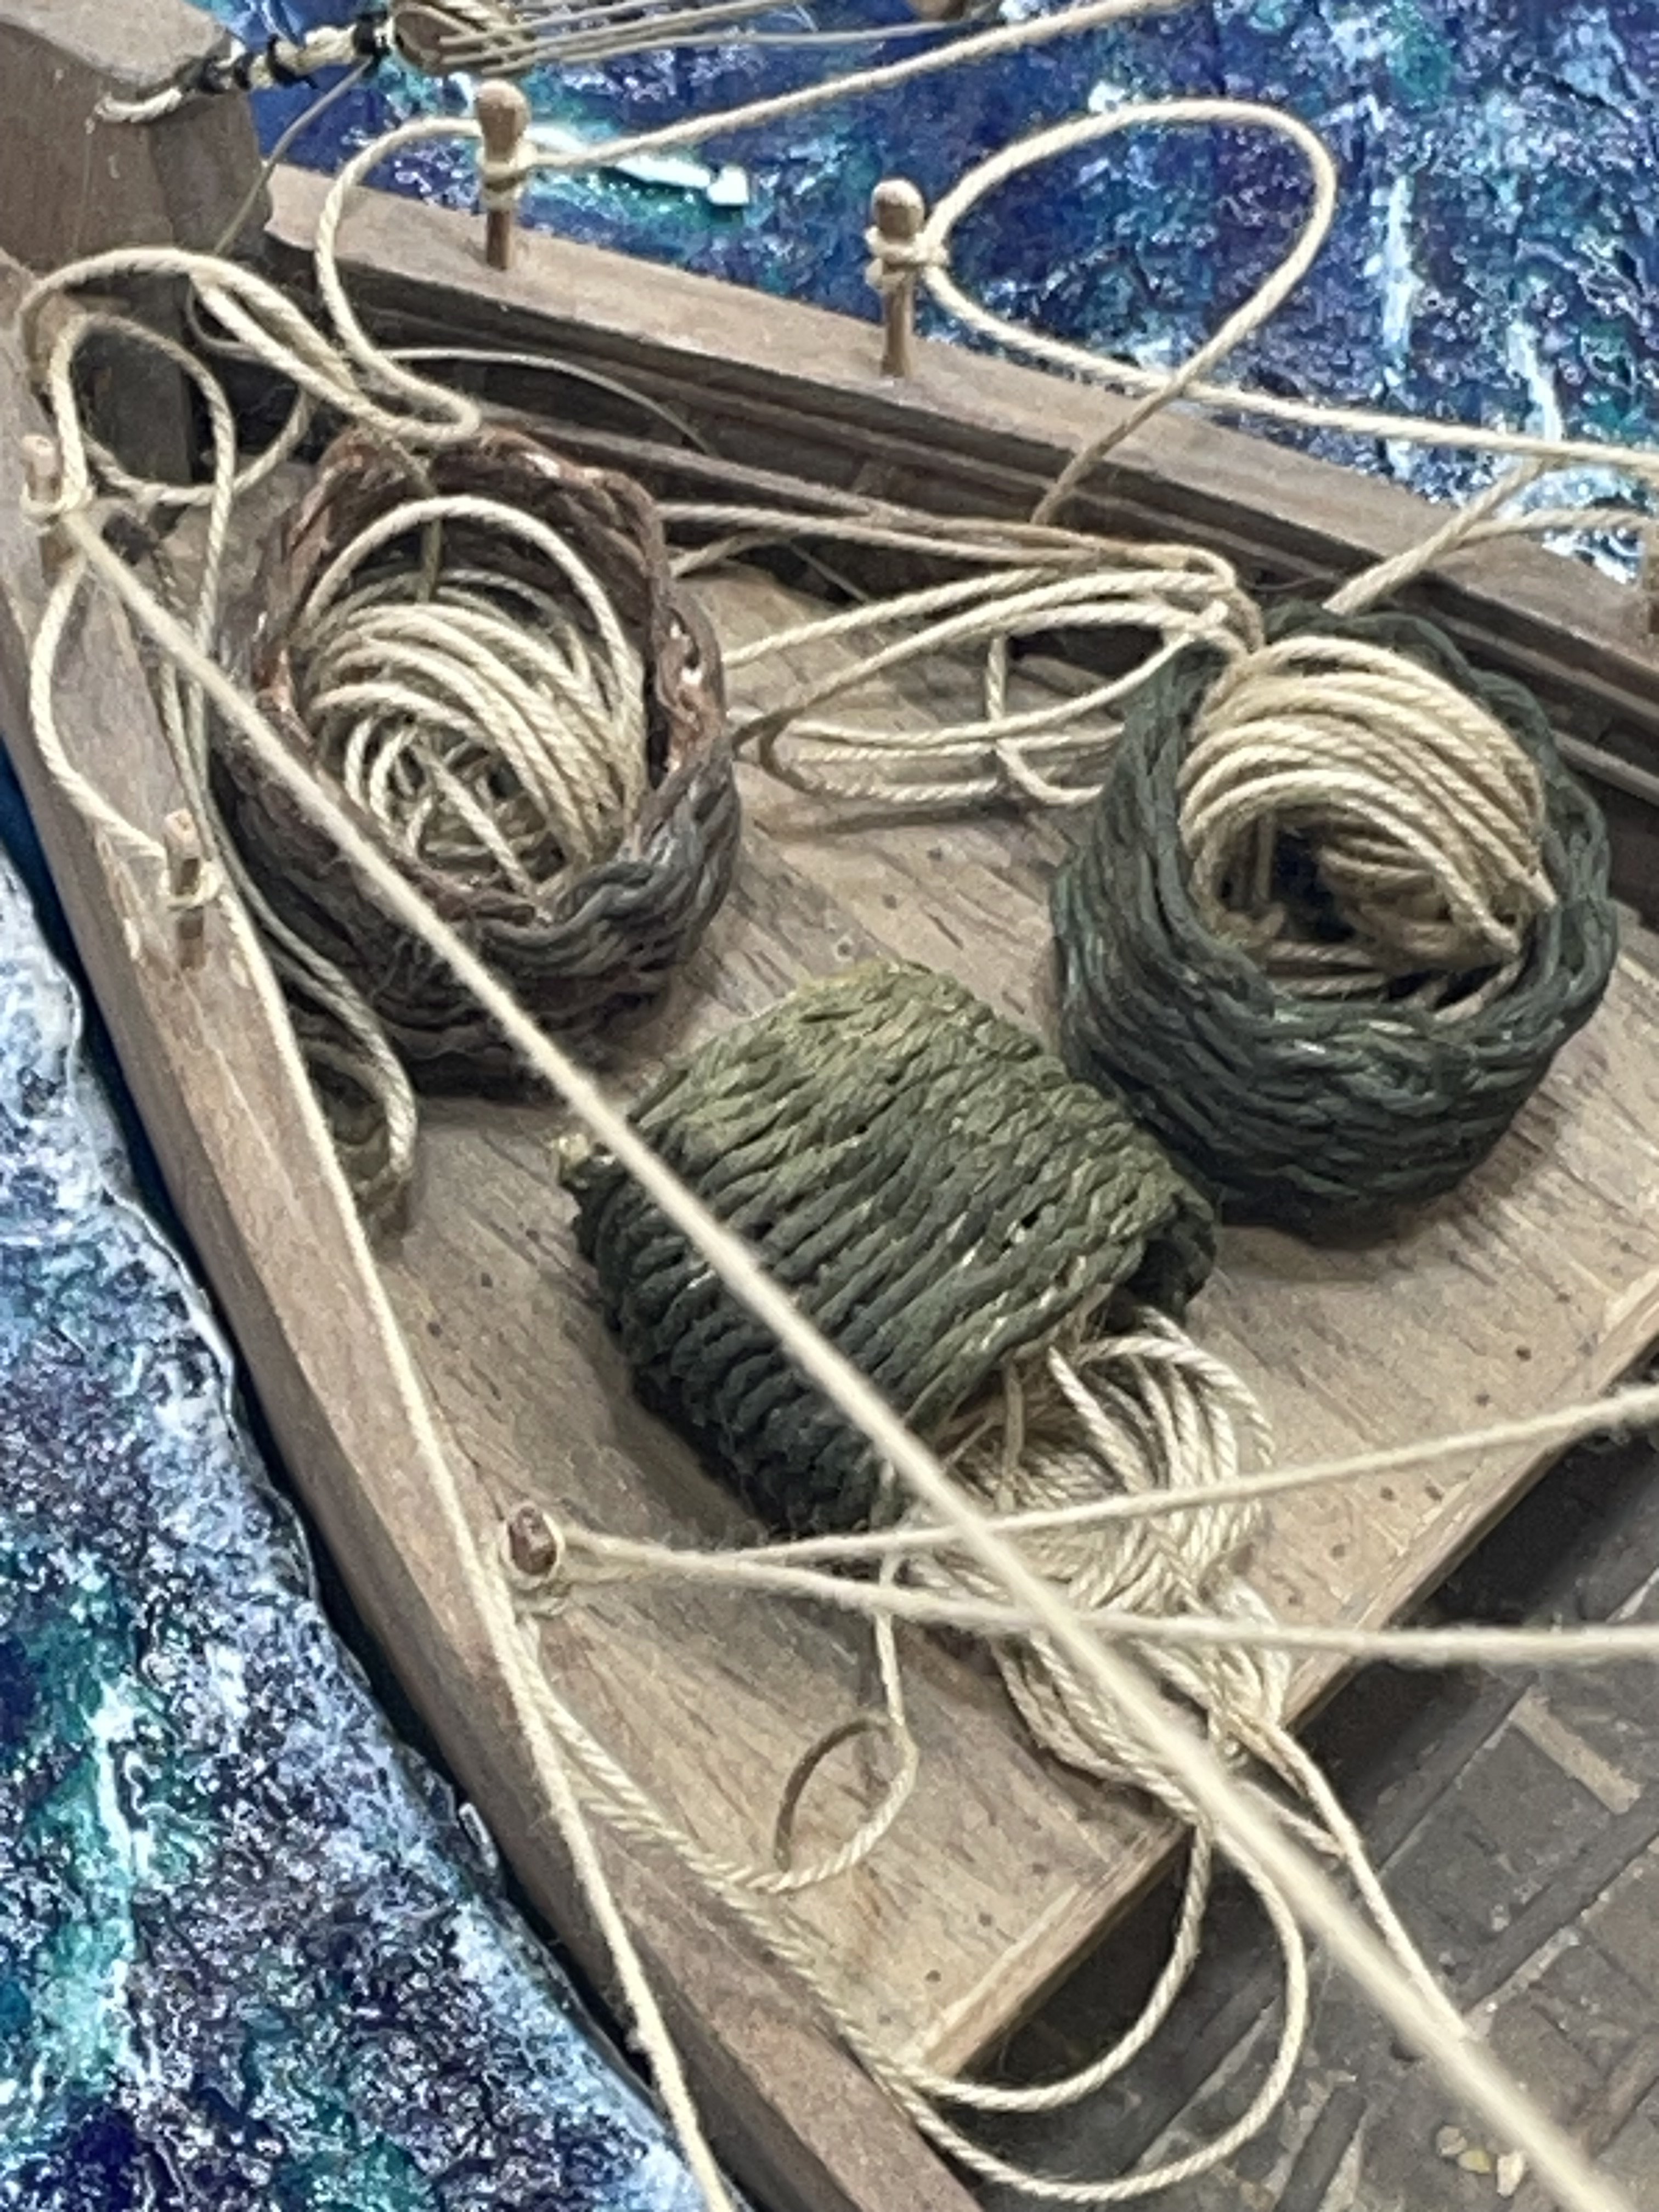
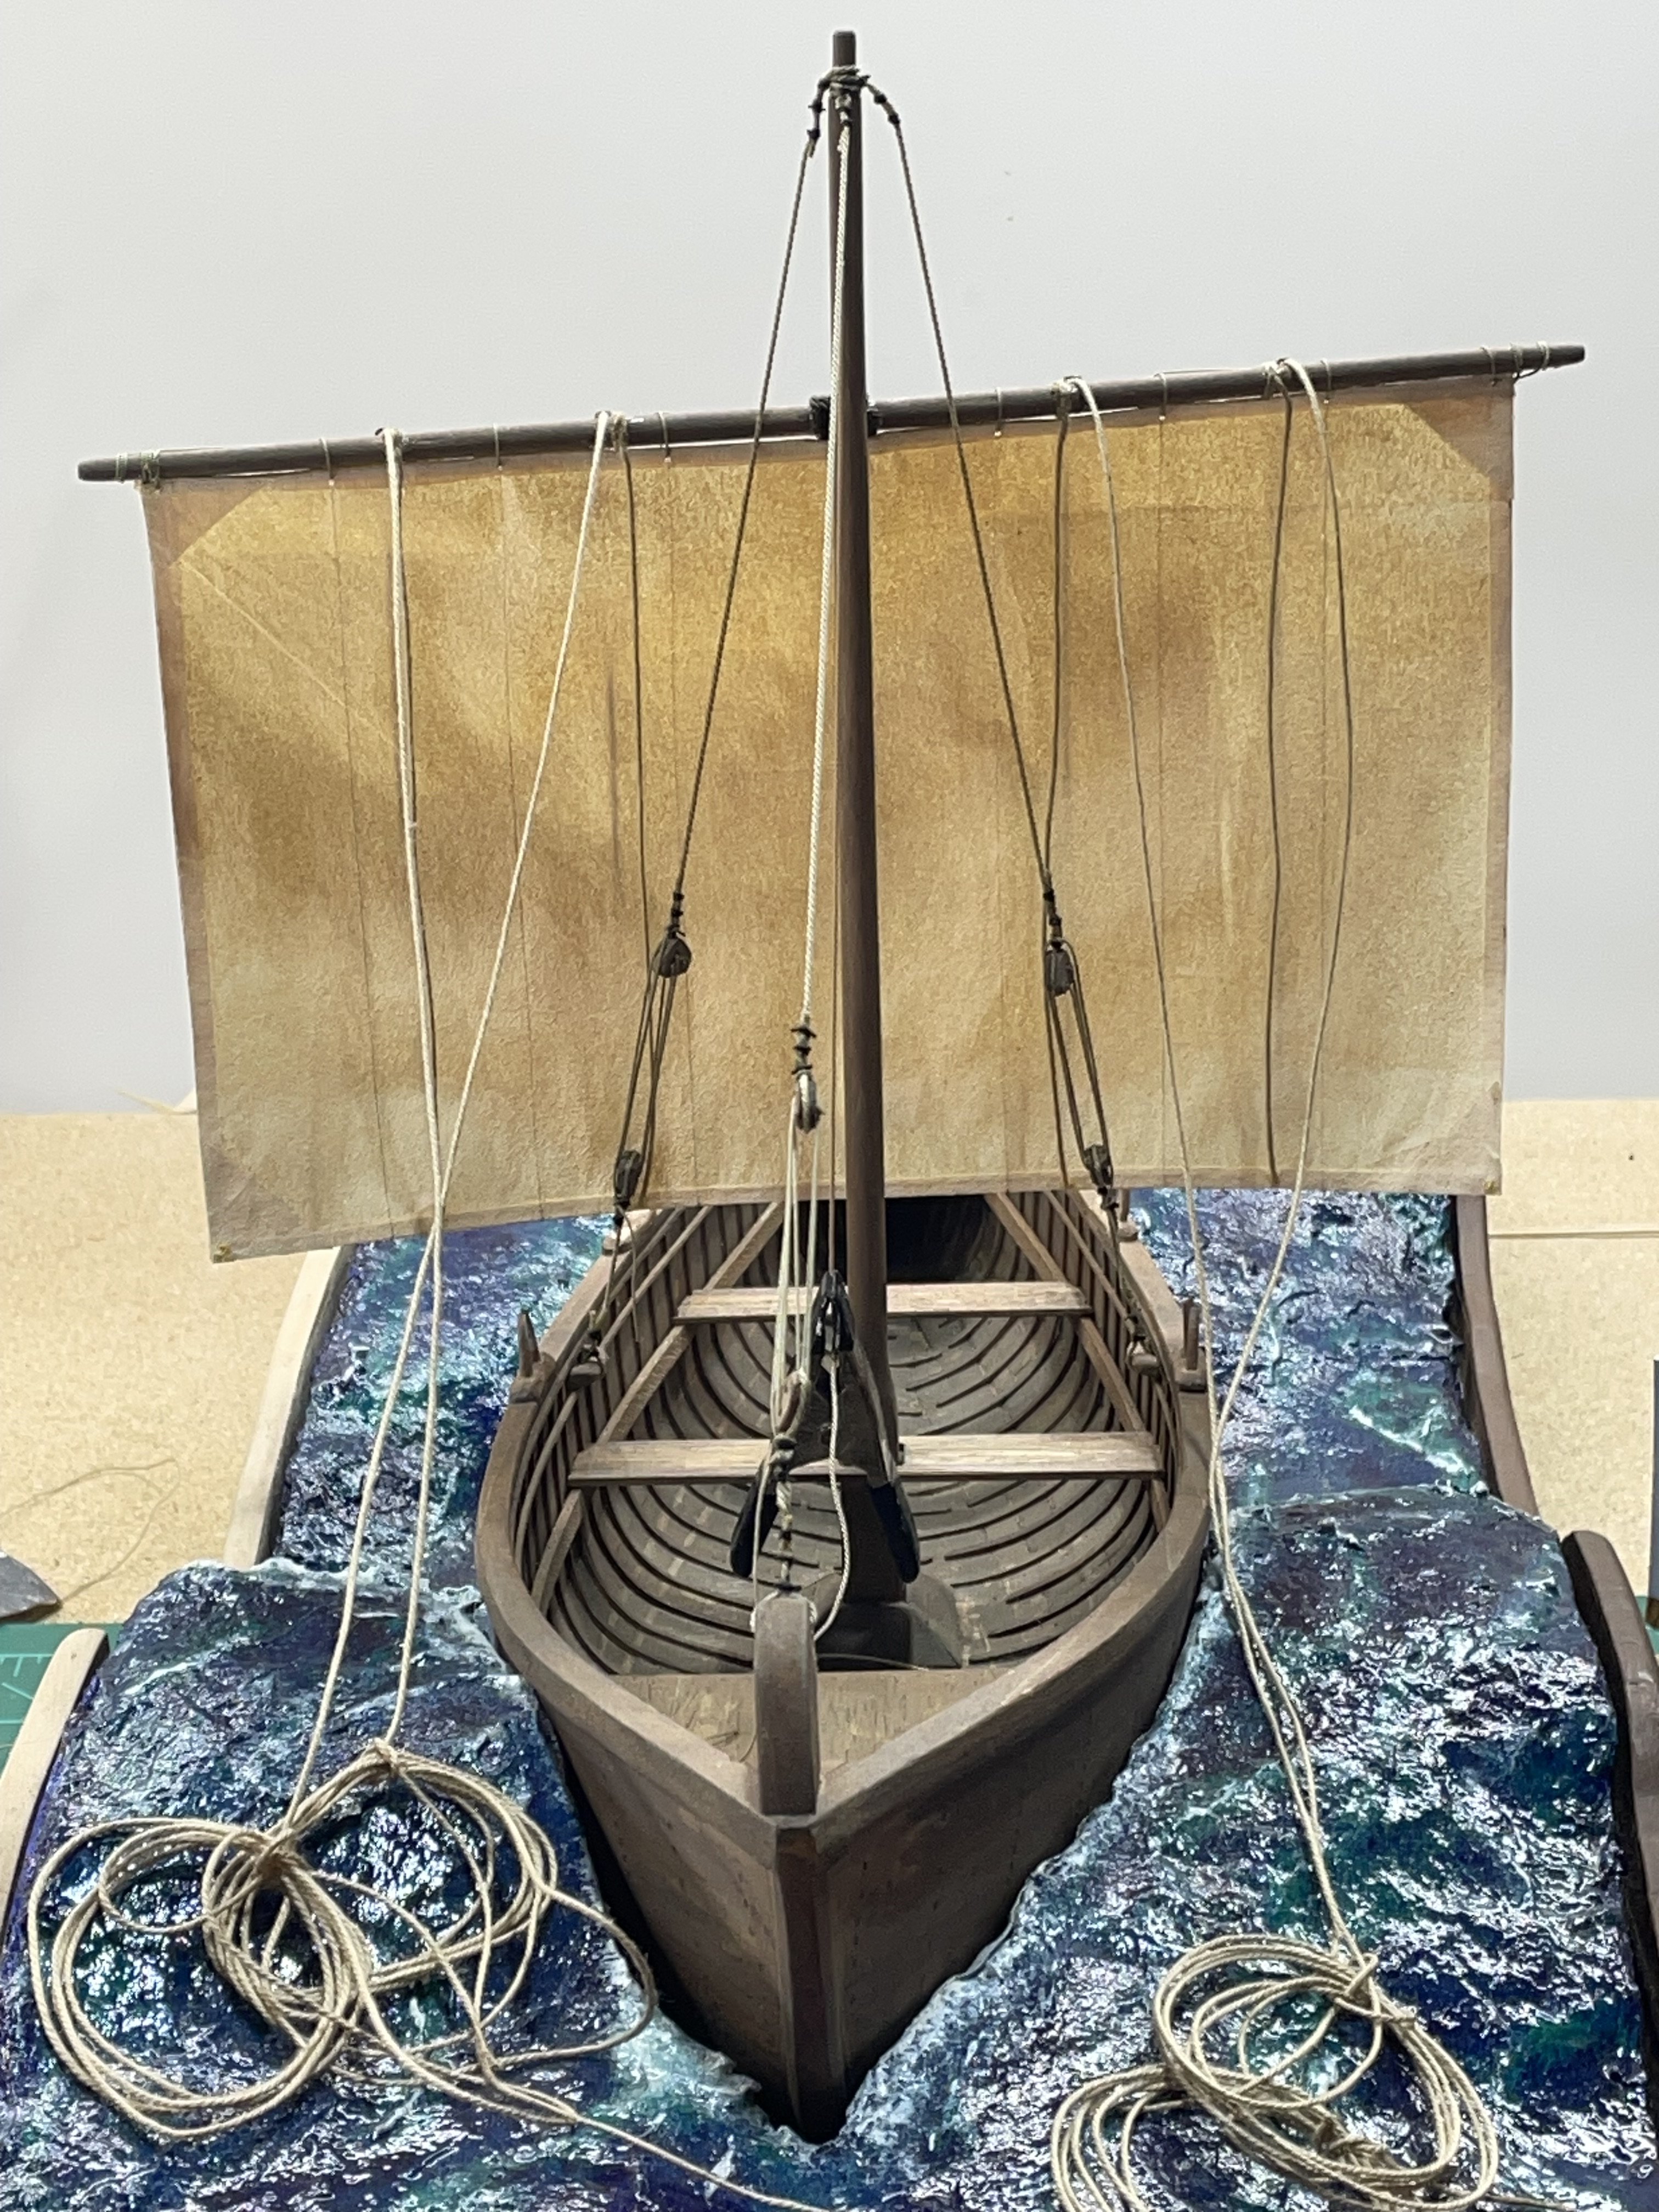
I still have a few more lines on the running rigging left to do. I have depleted my stock of ropes so for all the running rigging I’ll be using a supply of Levi’s button hole thread I got after the factory closed years ago, here in town. It’s a little big, but it’s what I got. Here’s from the bow. From the stern.

-
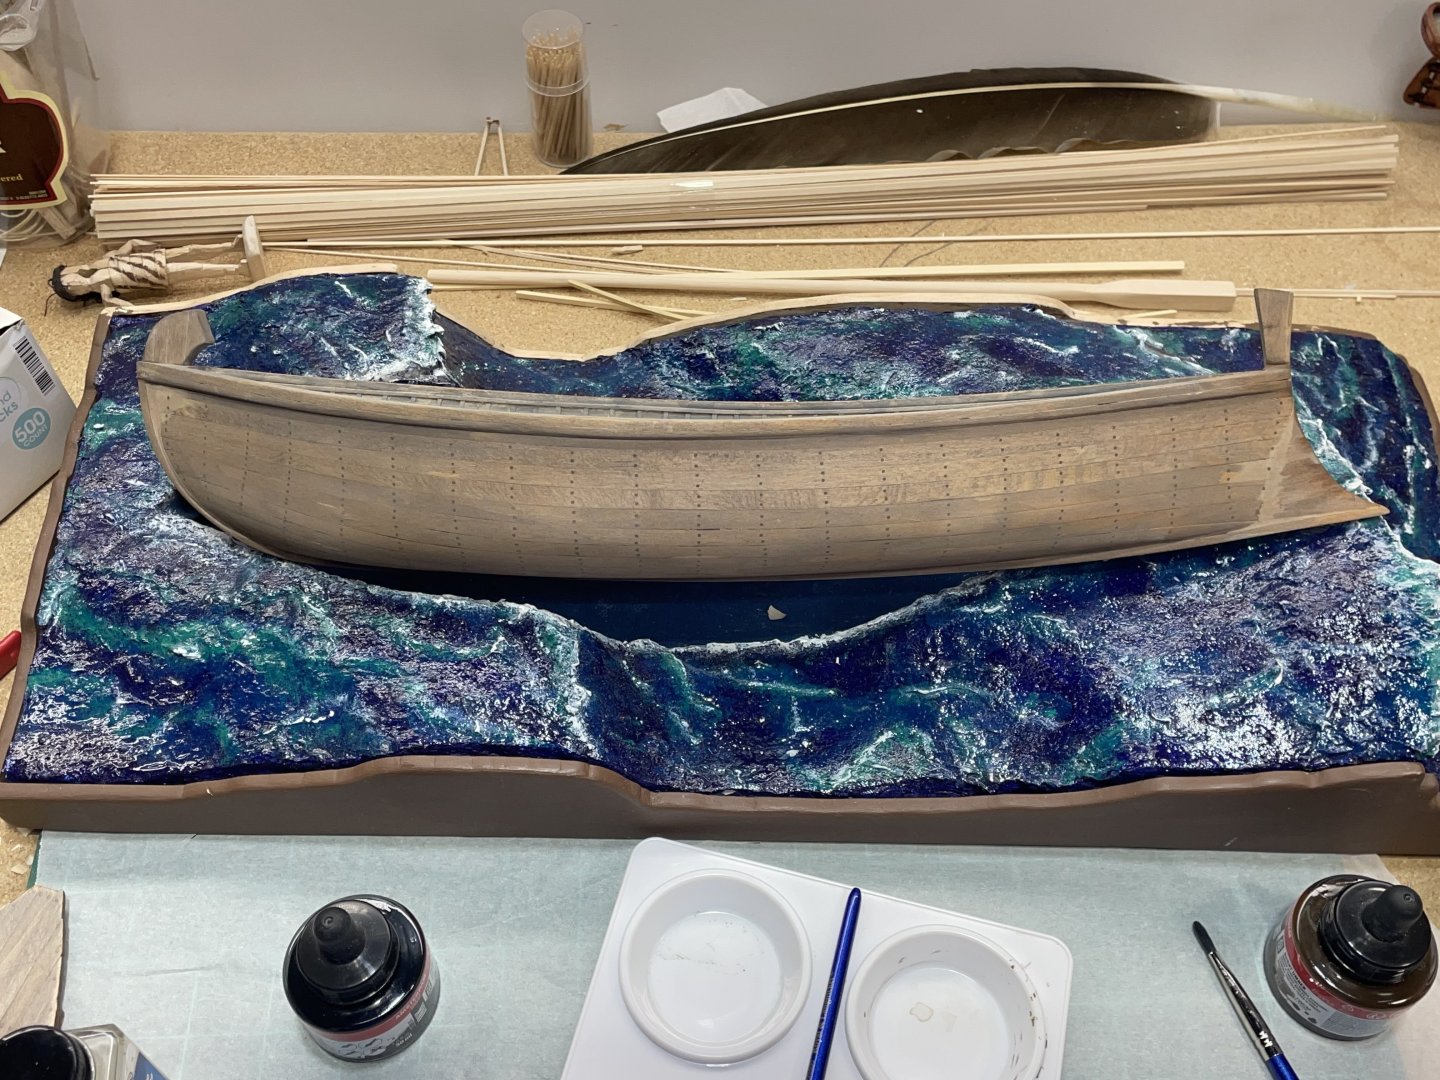
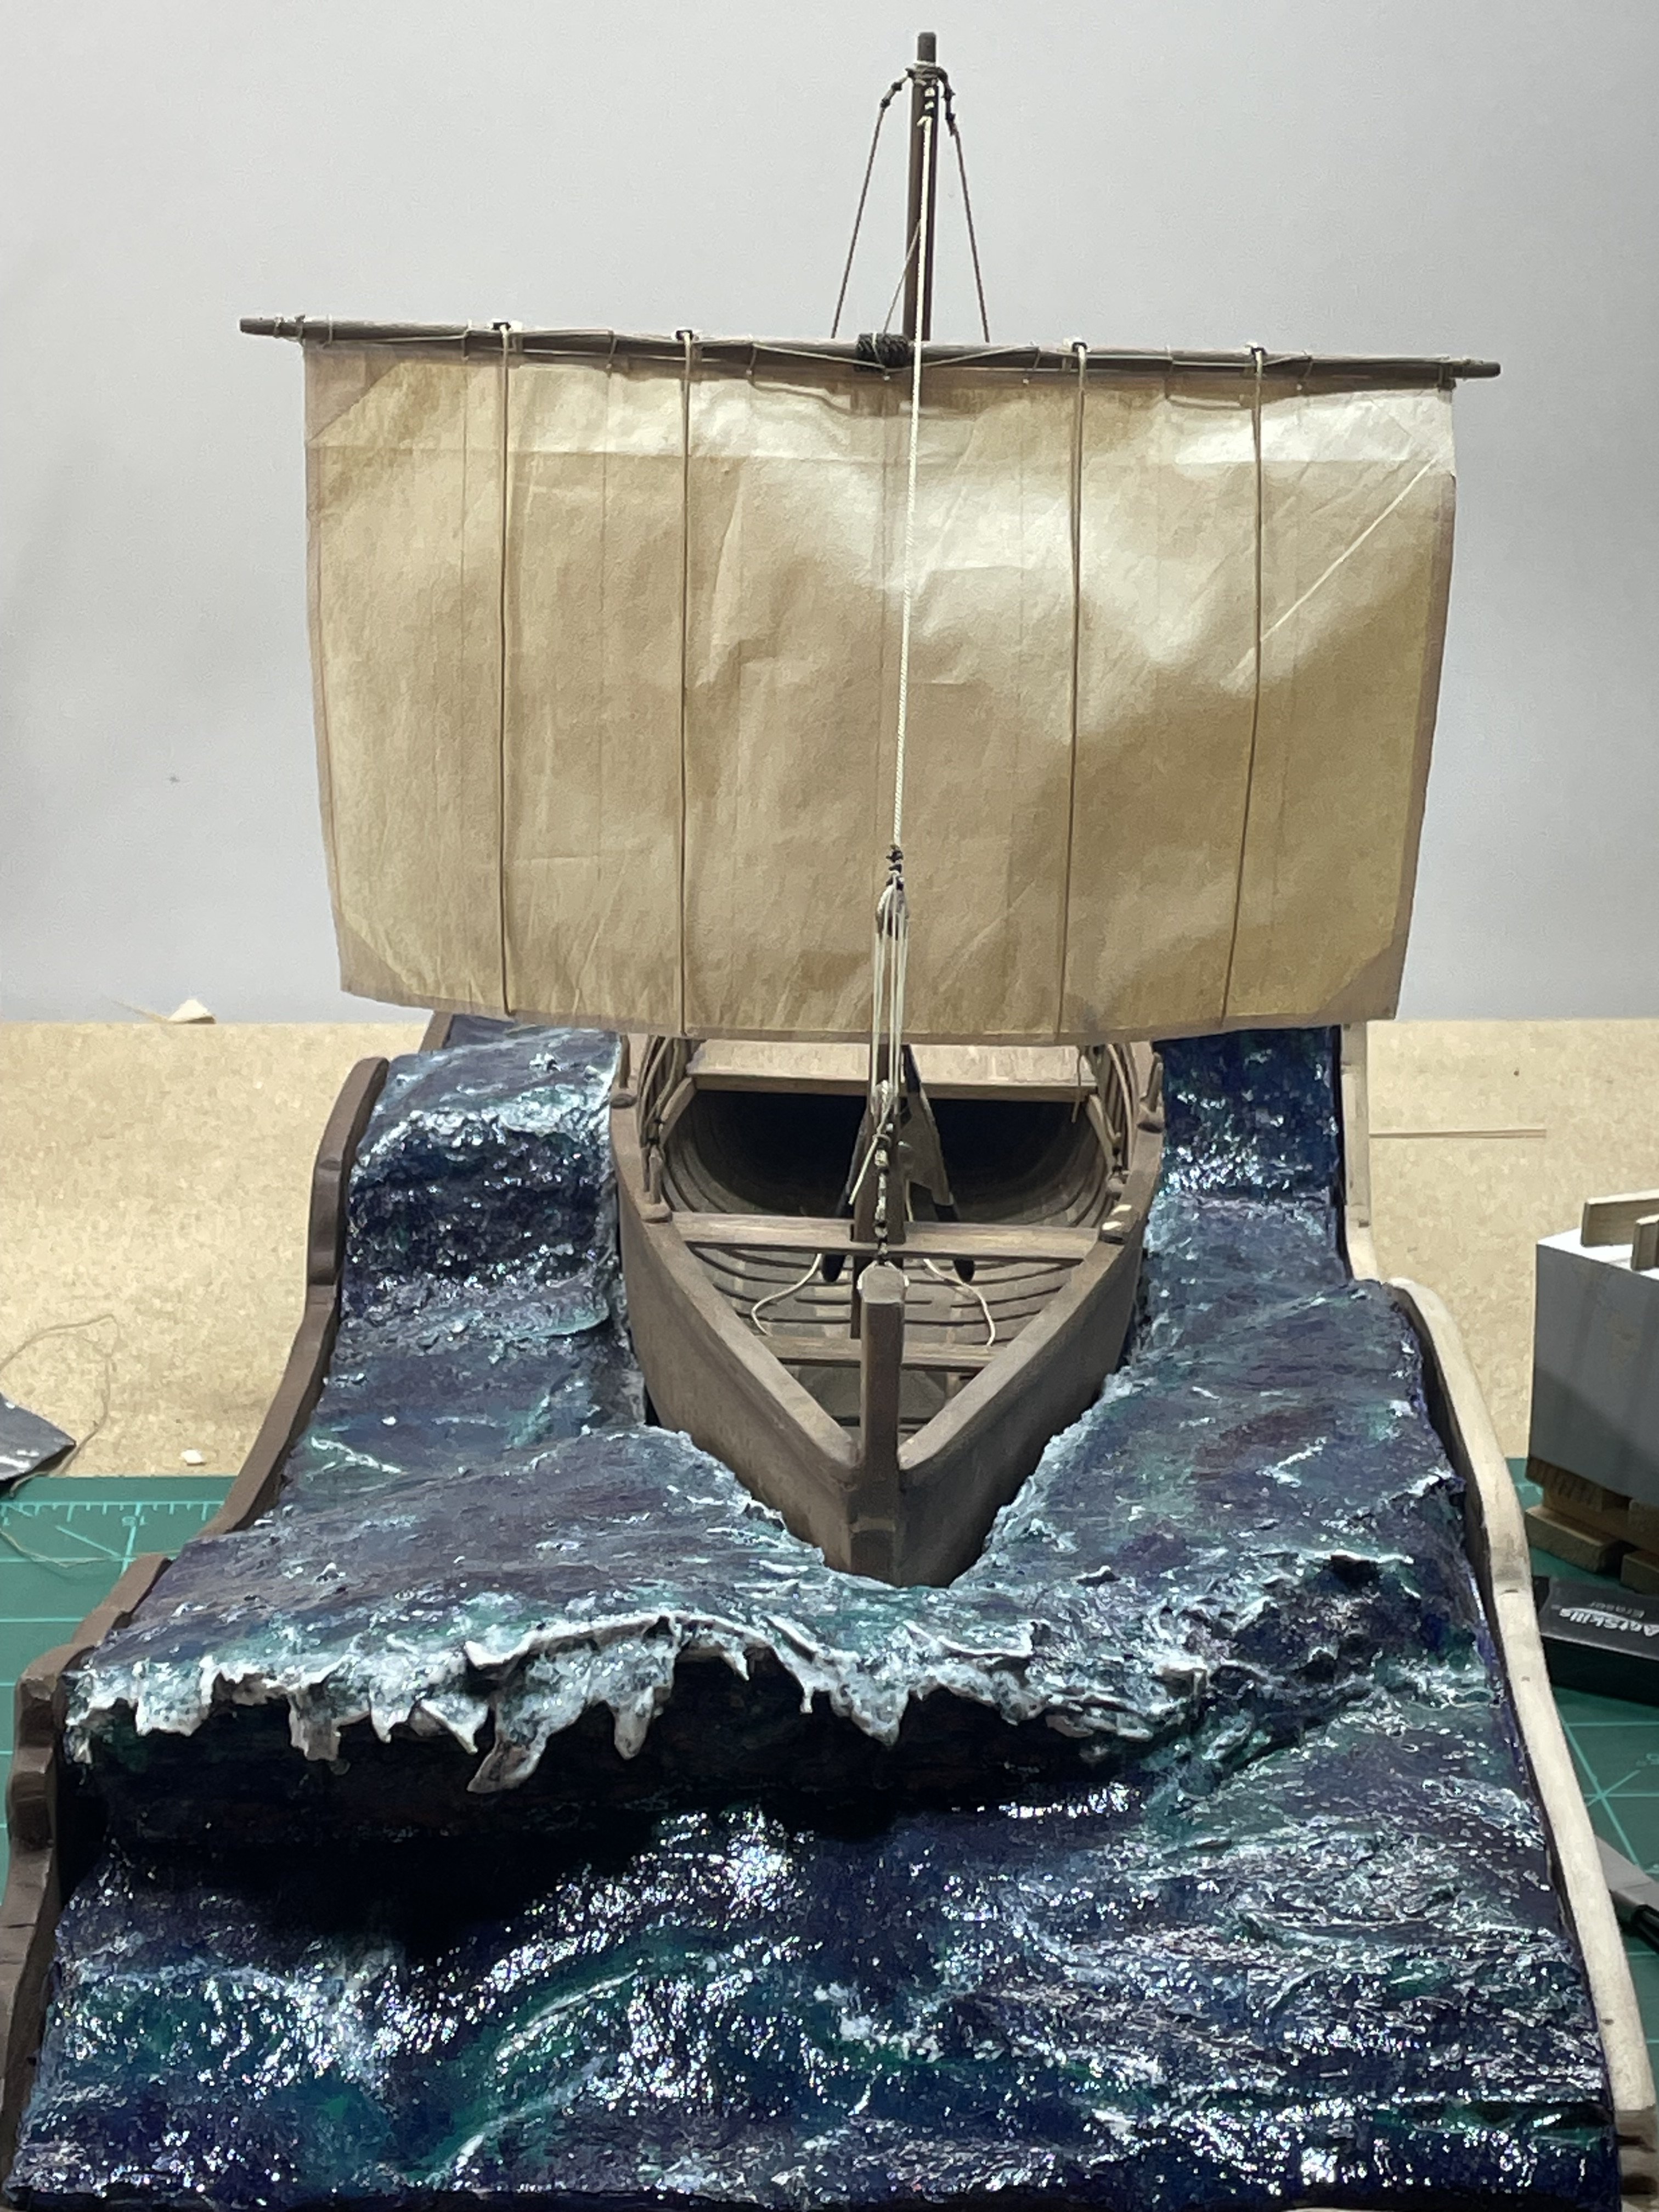
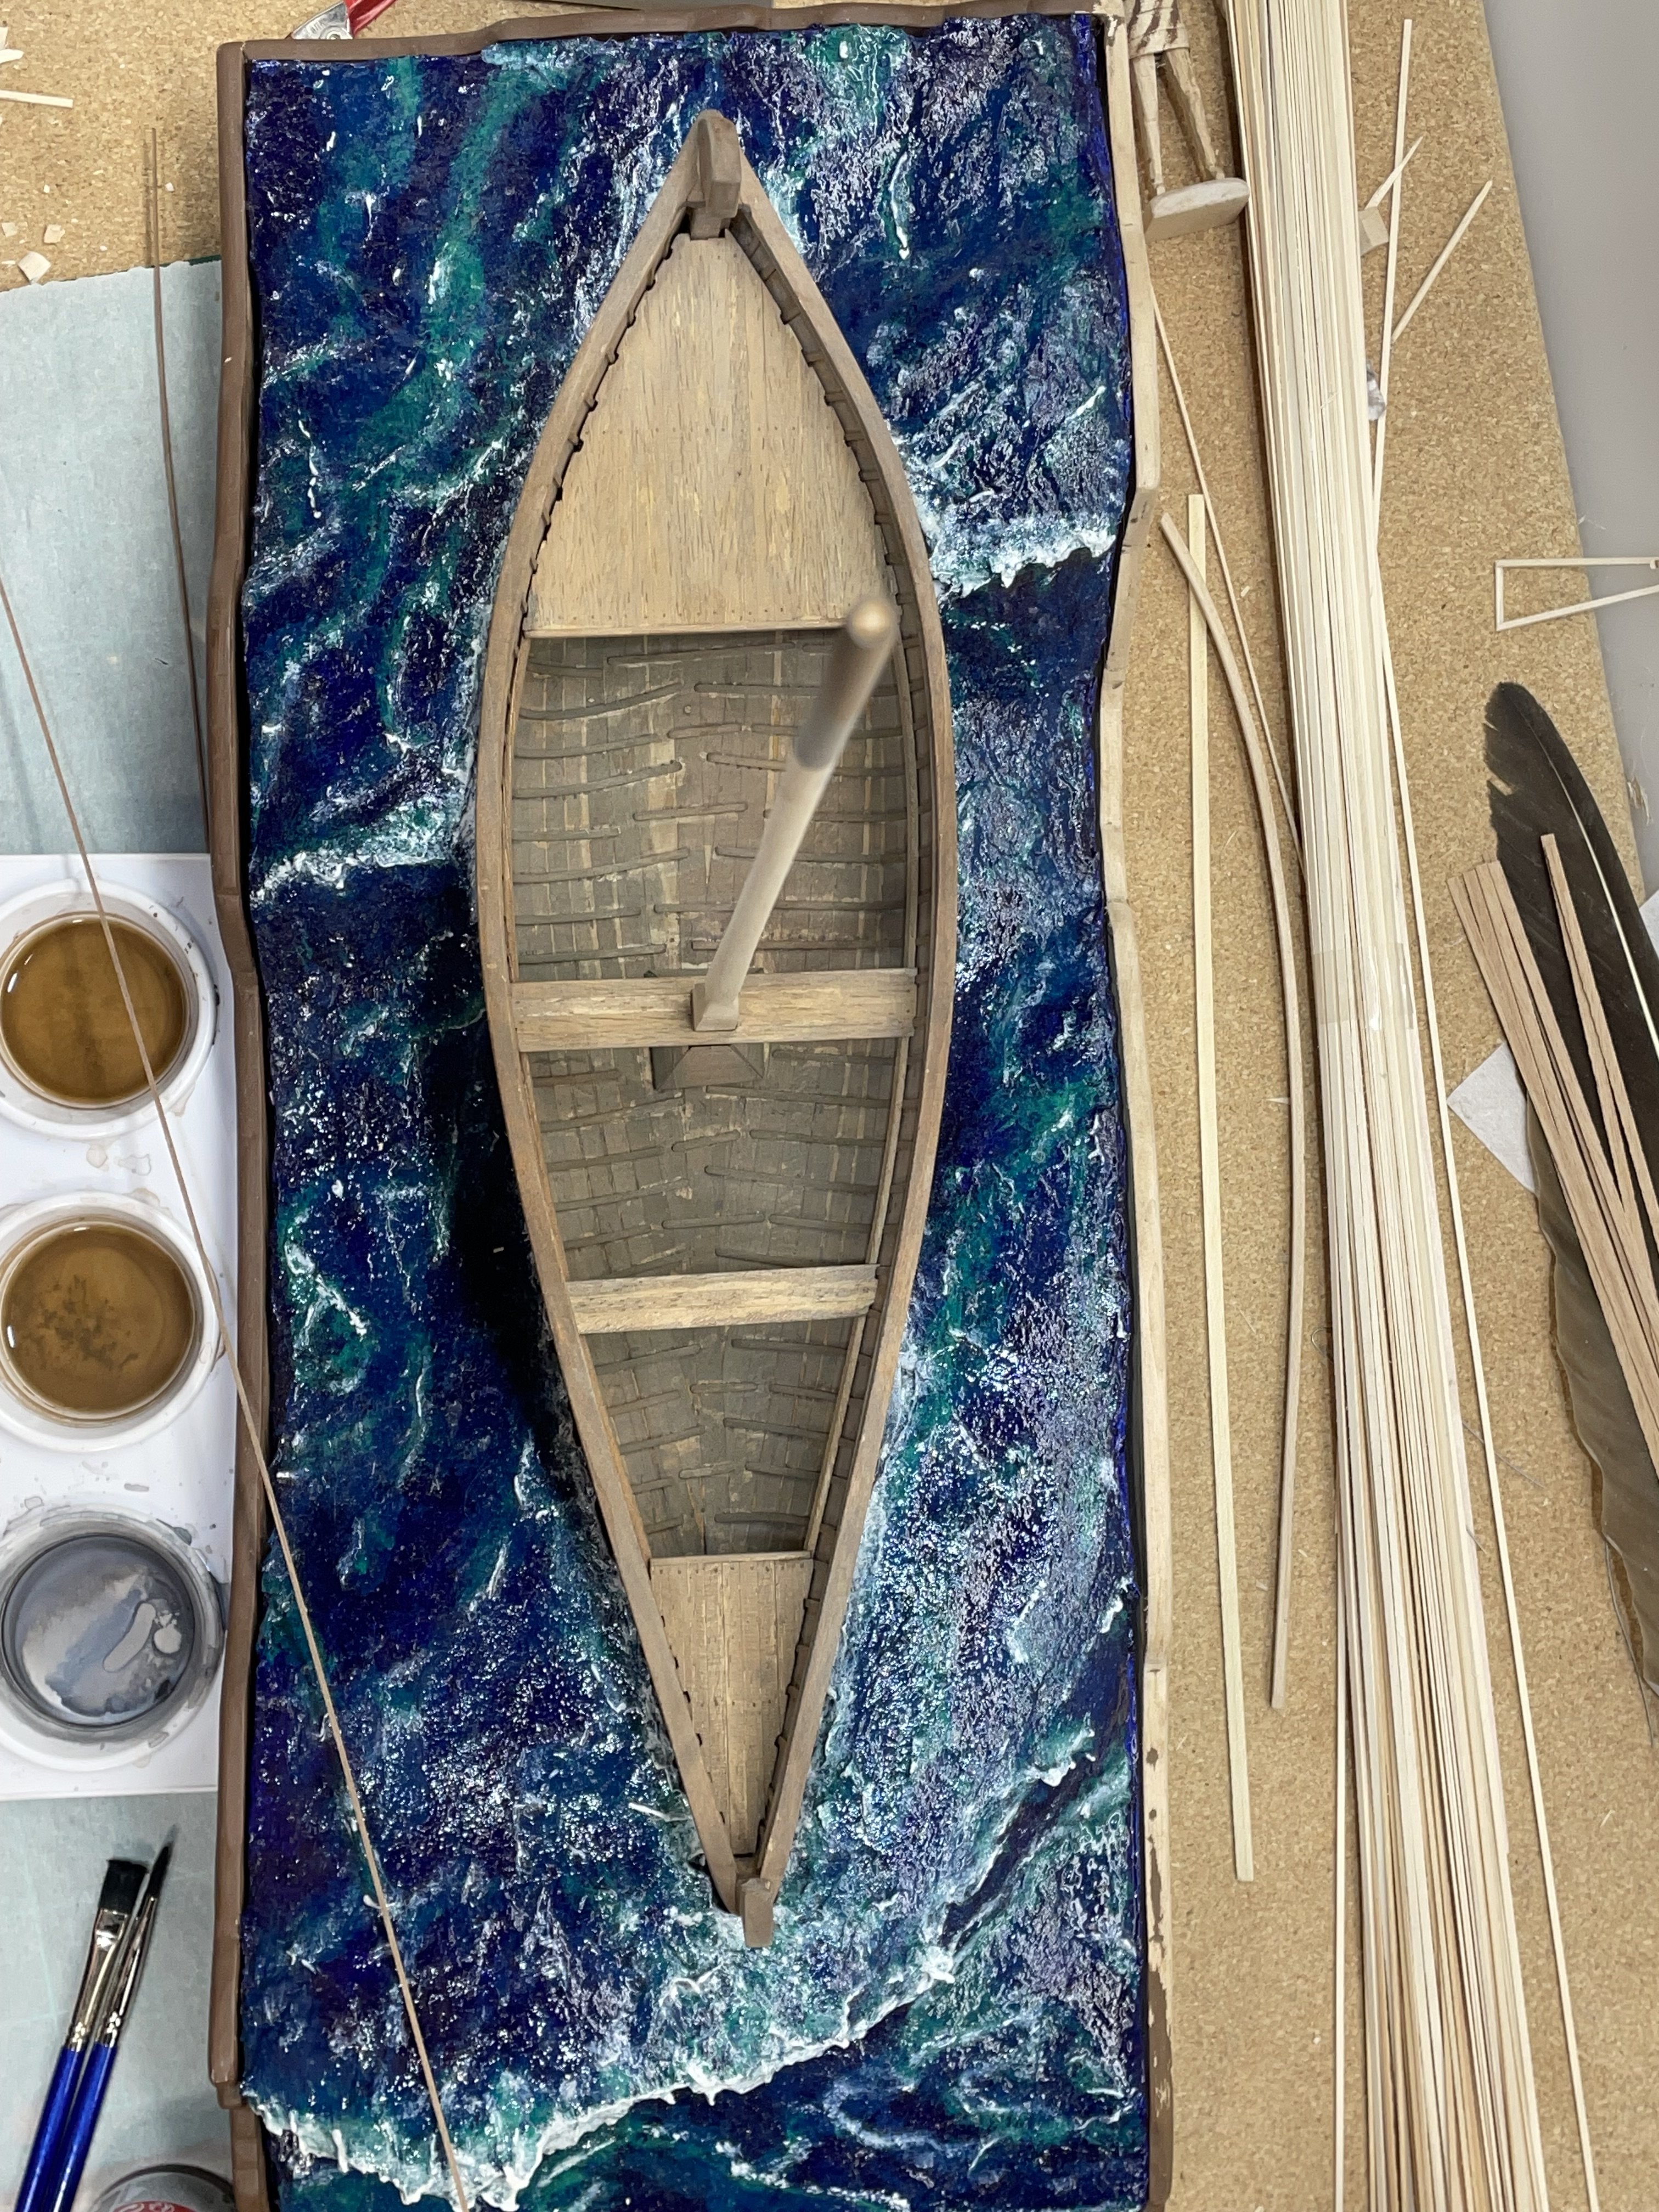
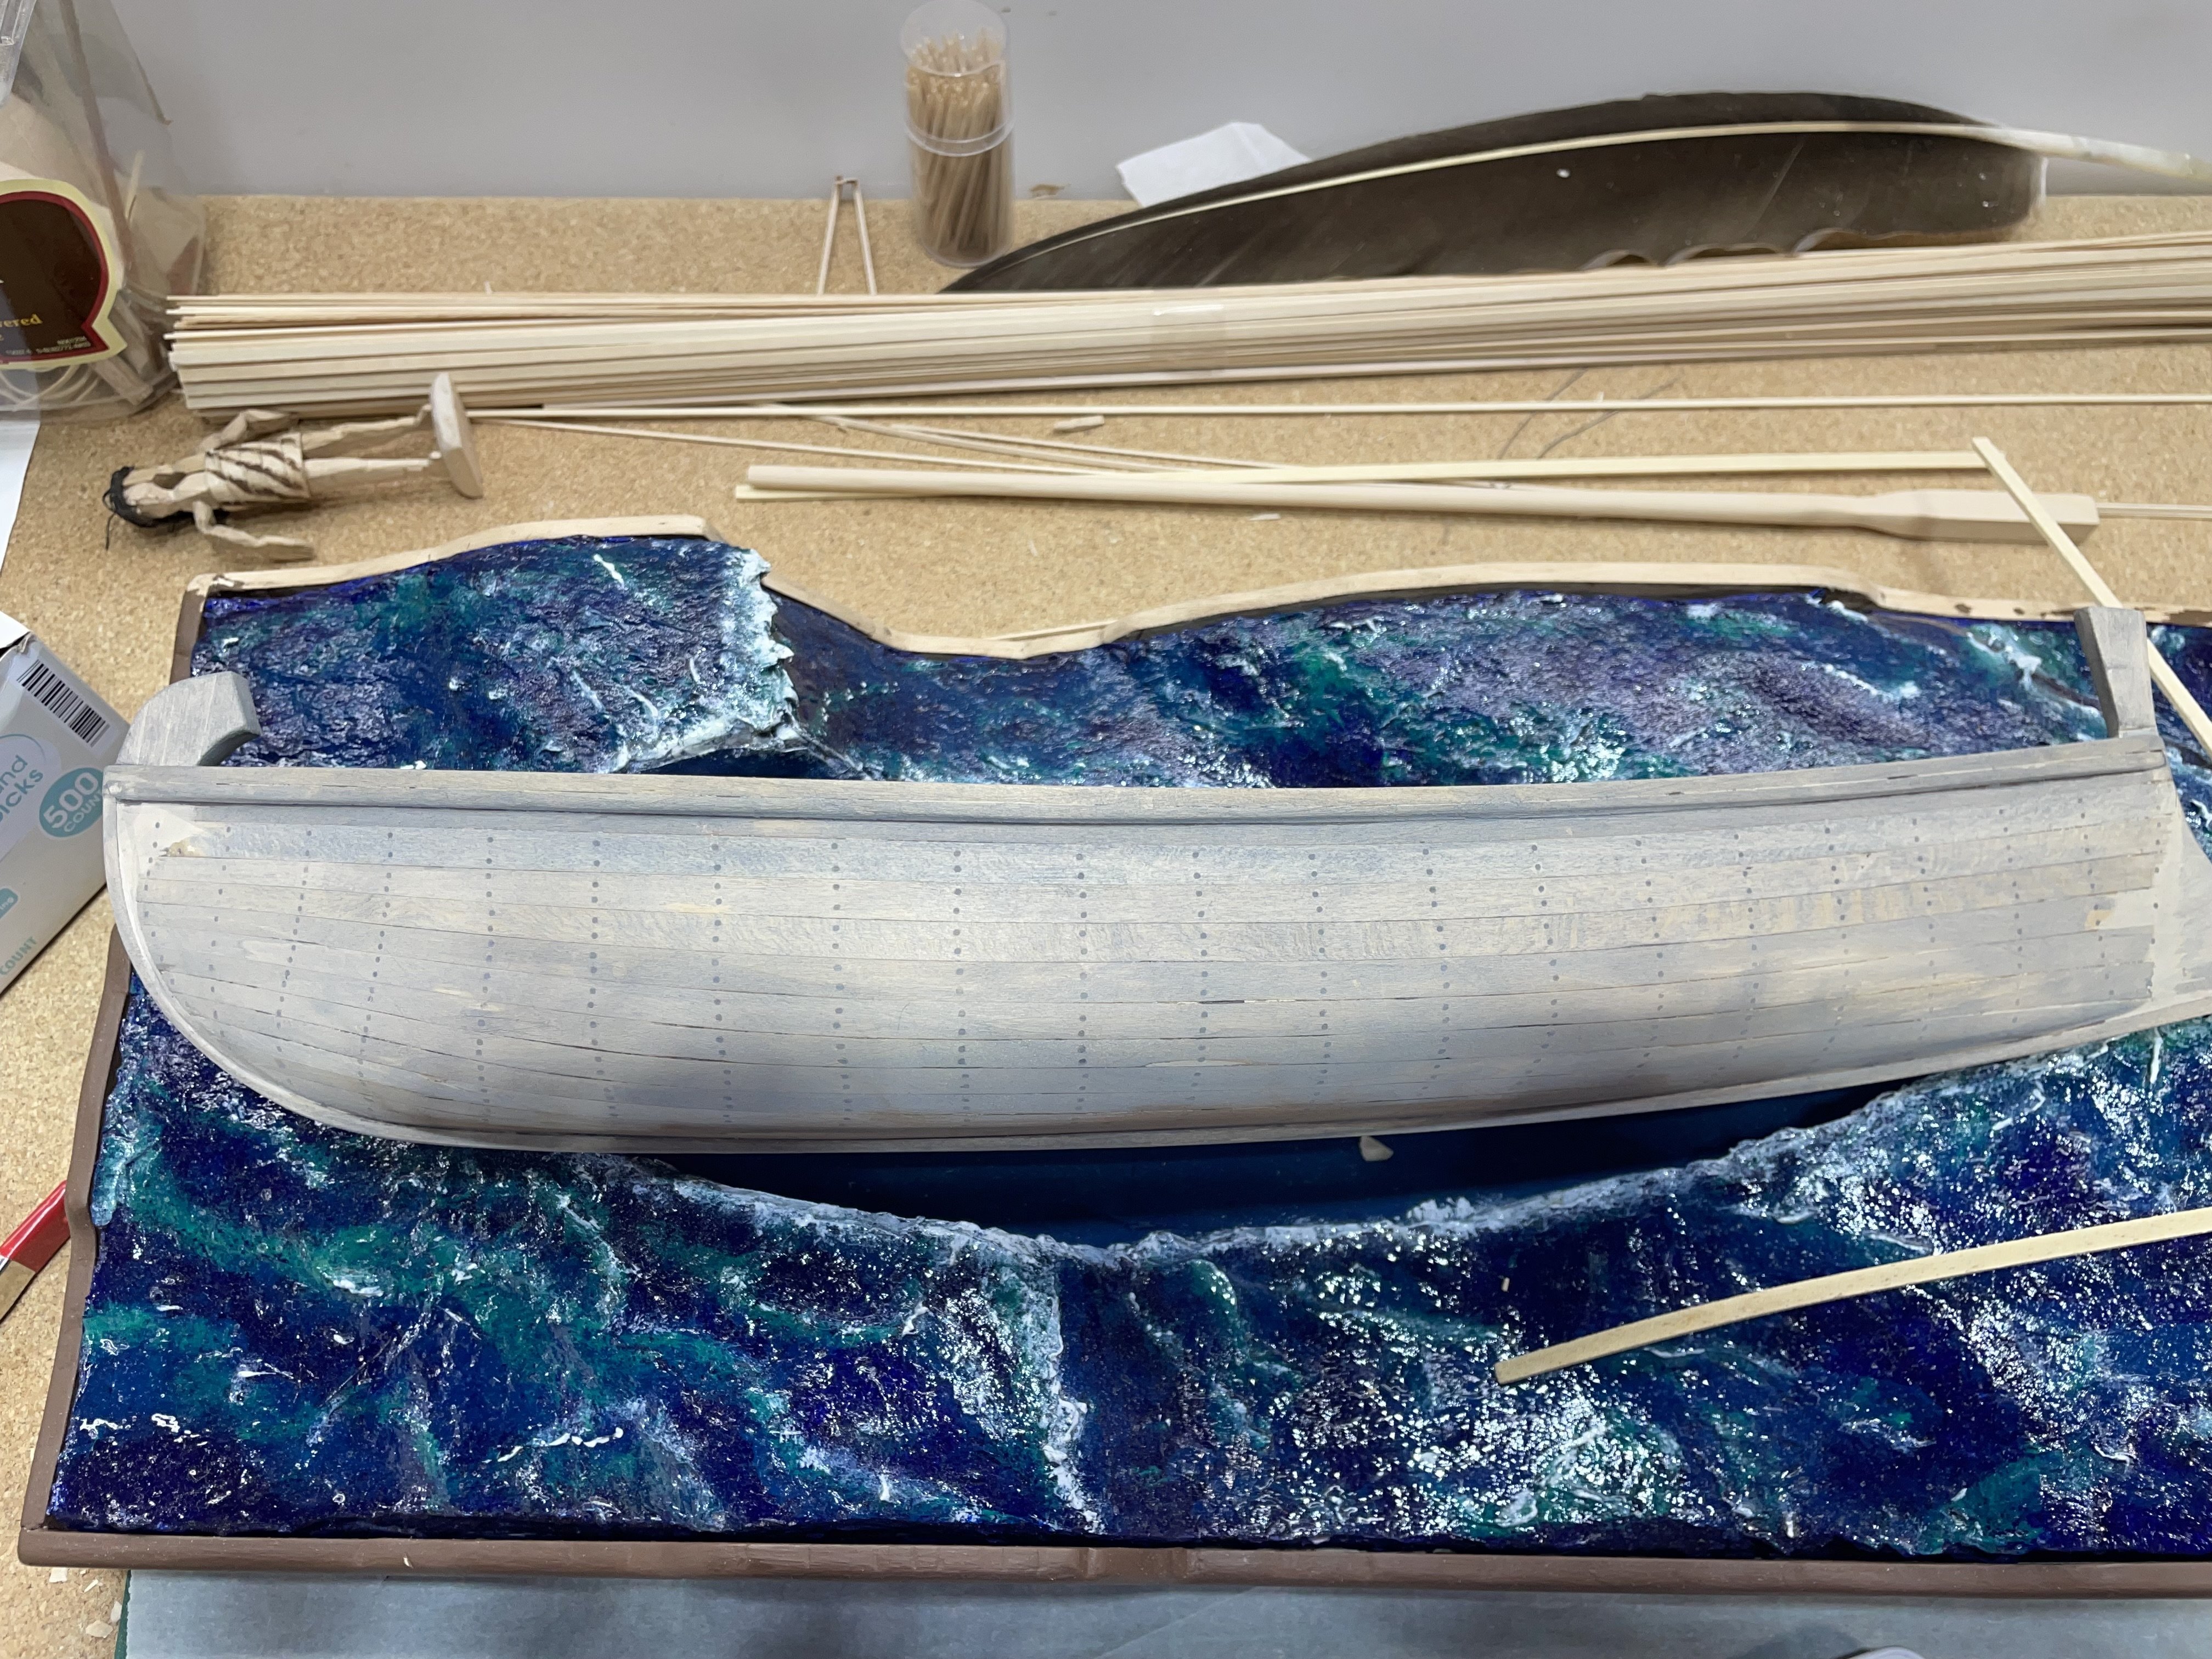
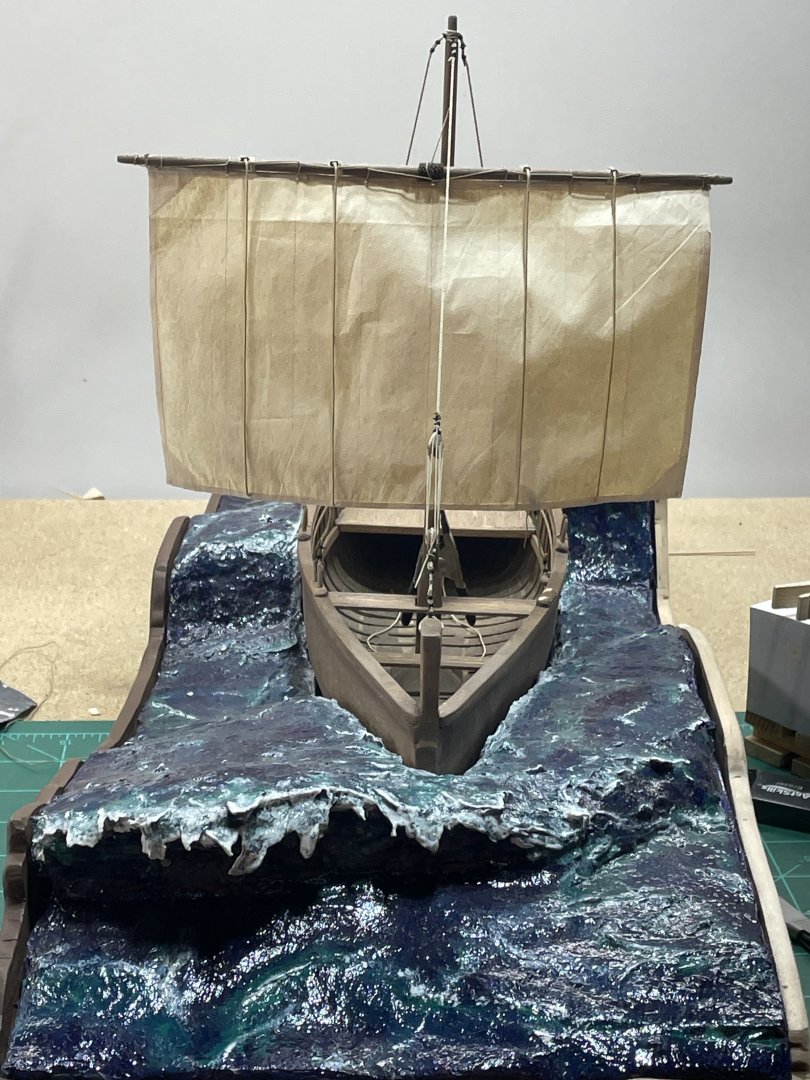
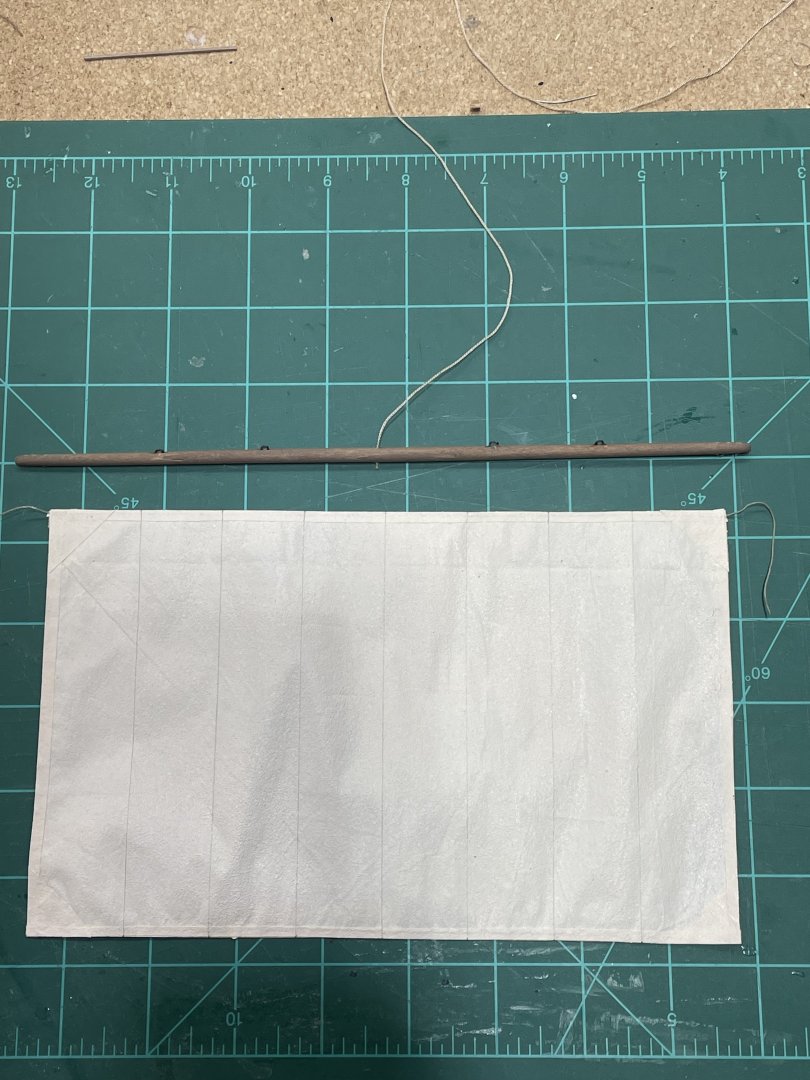
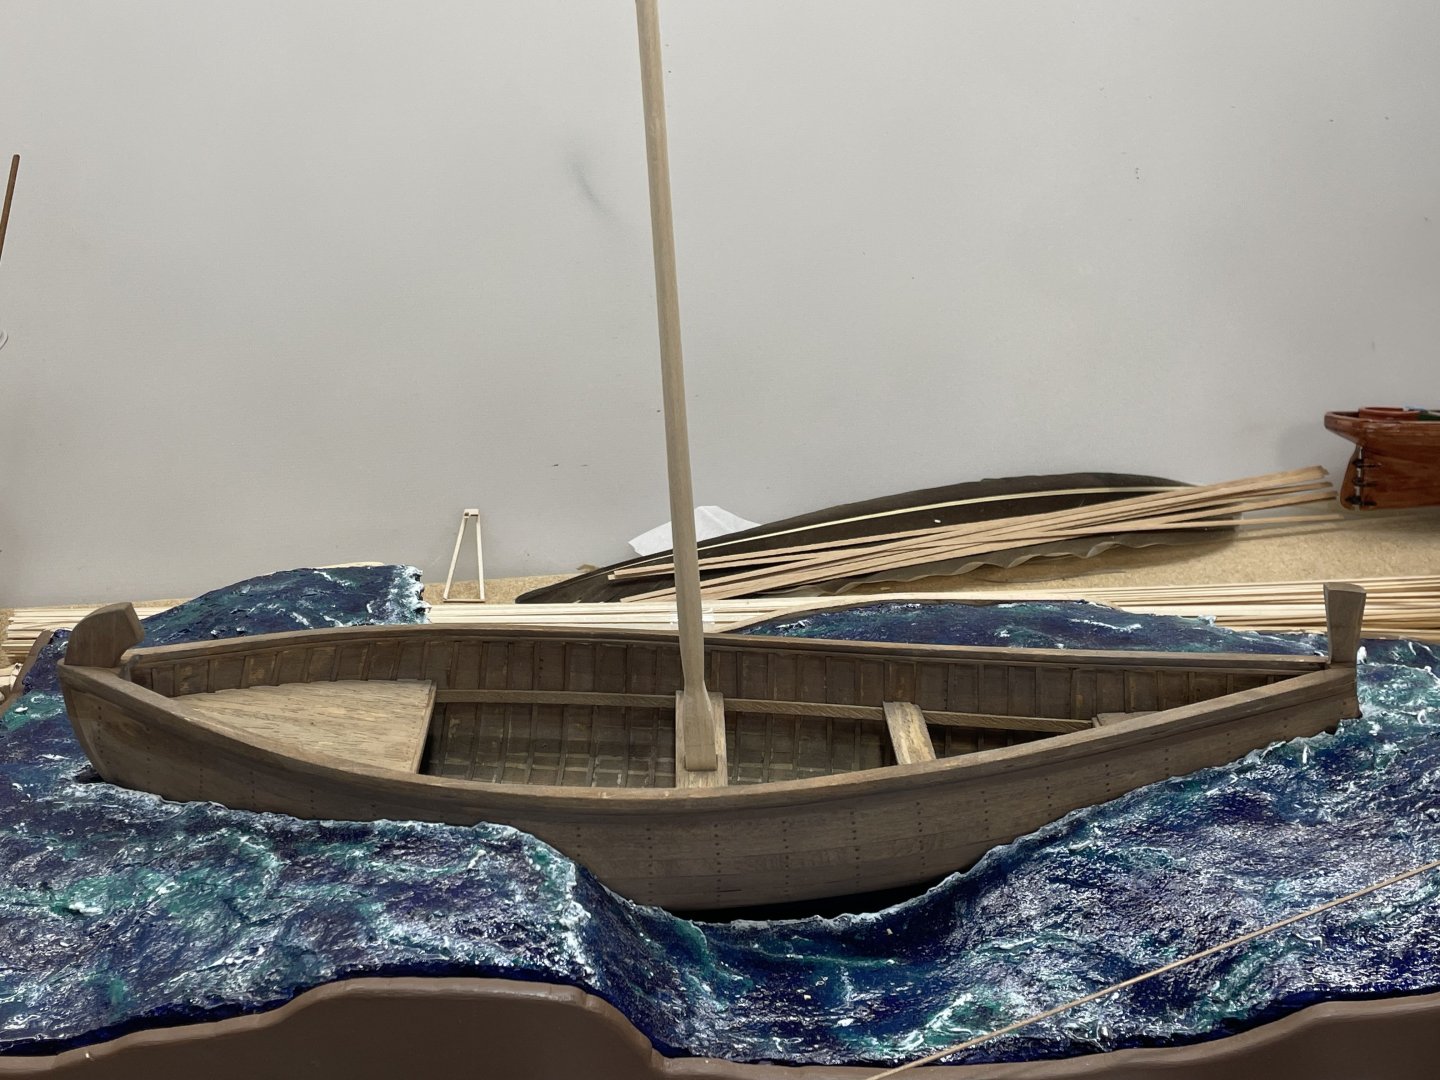
Over the last week I was able to finish the stays and started on making the sail and yard. Just looking at the boat in the sea, while working on the sail. I’m wondering if not enough boat shows. I have to leave off the quarter rudders if it stays in the sea. Plus you don’t see the breakwater. I may make a stand before it all finished. Here’s where I’m at on the sail. I used artist tea paper, I’ve found it to be thin, light and durable once a thin coat of acrylic paint is rolled on.

-
The Mossy Shipyard by Bryan Woods - 1:1
Bryan Woods replied to Bryan Woods's topic in Non-ship/categorised builds
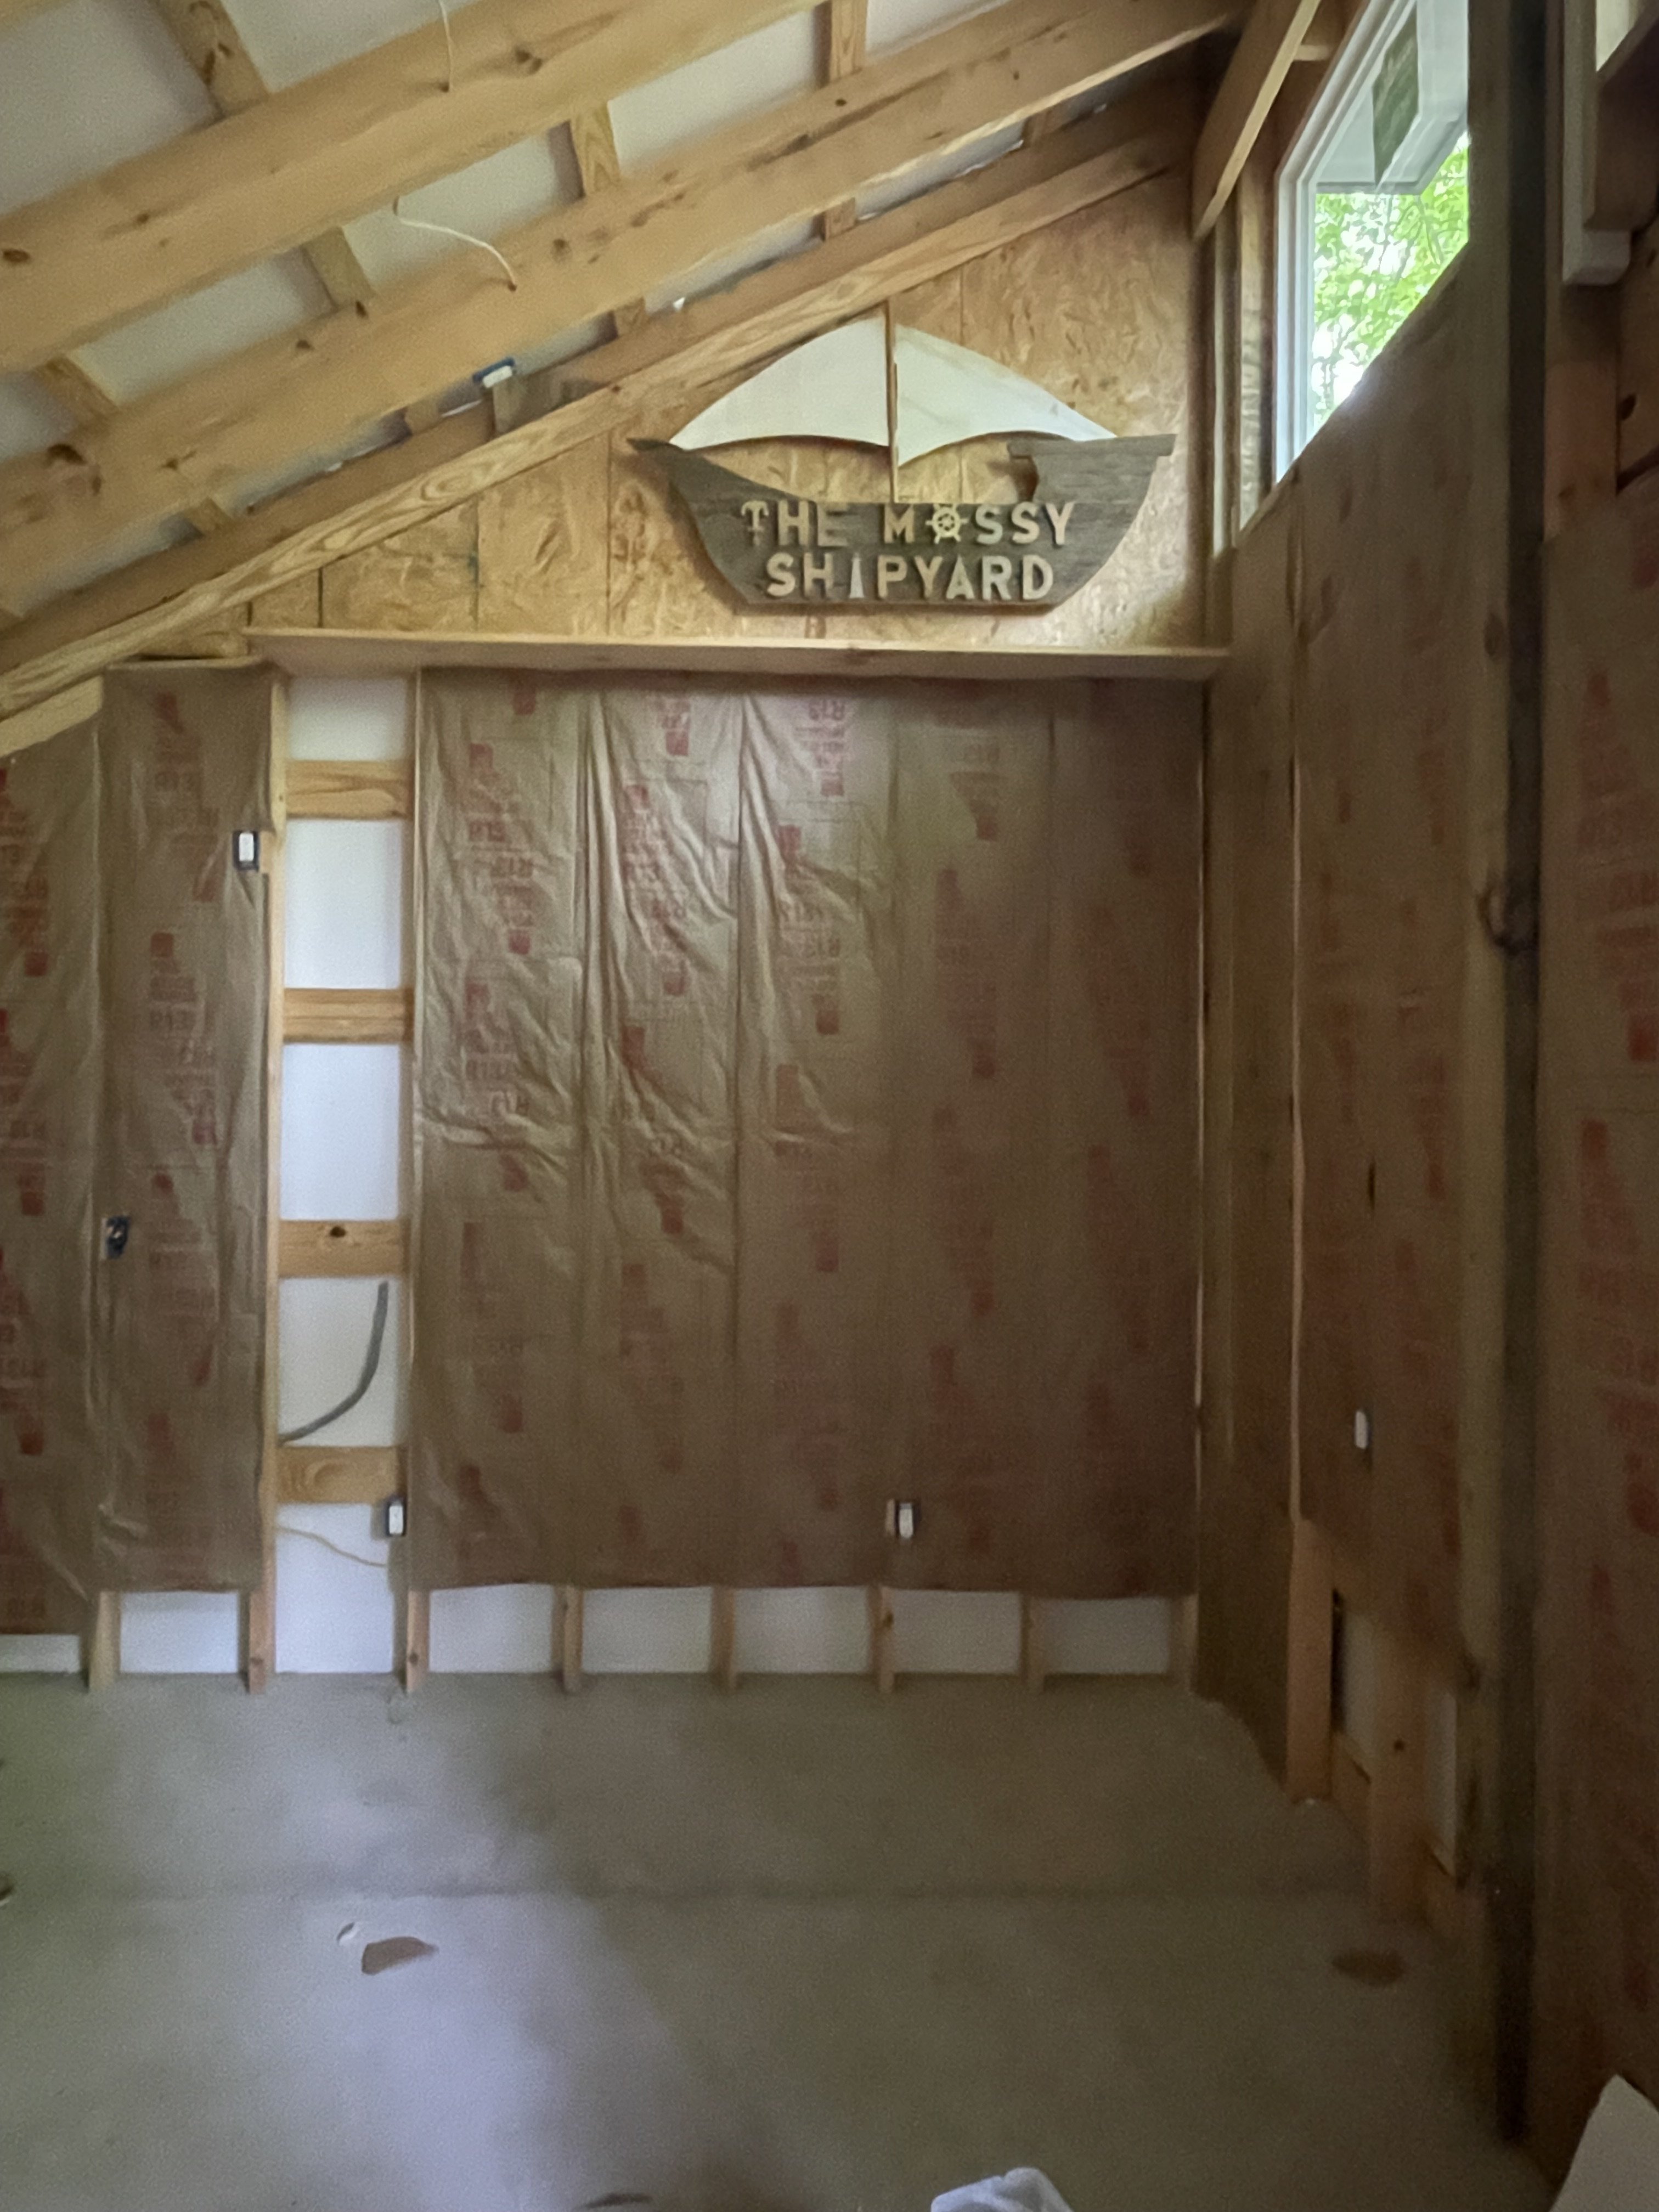
Yesterday, I had a visit from a friend that’s a retired teacher. He had made me a sign for my shipyard. He clams he has no knowledge of ships at all, but I think he did a great job. I know it took some time to cut out the letters. I’ll hang this one on the inside wall at the height of the windows. I’m still trying to finish the inside framing and a few electrical loose ends. Then we should be ready for insulation and OSB wall board. Thanks for stopping in:-)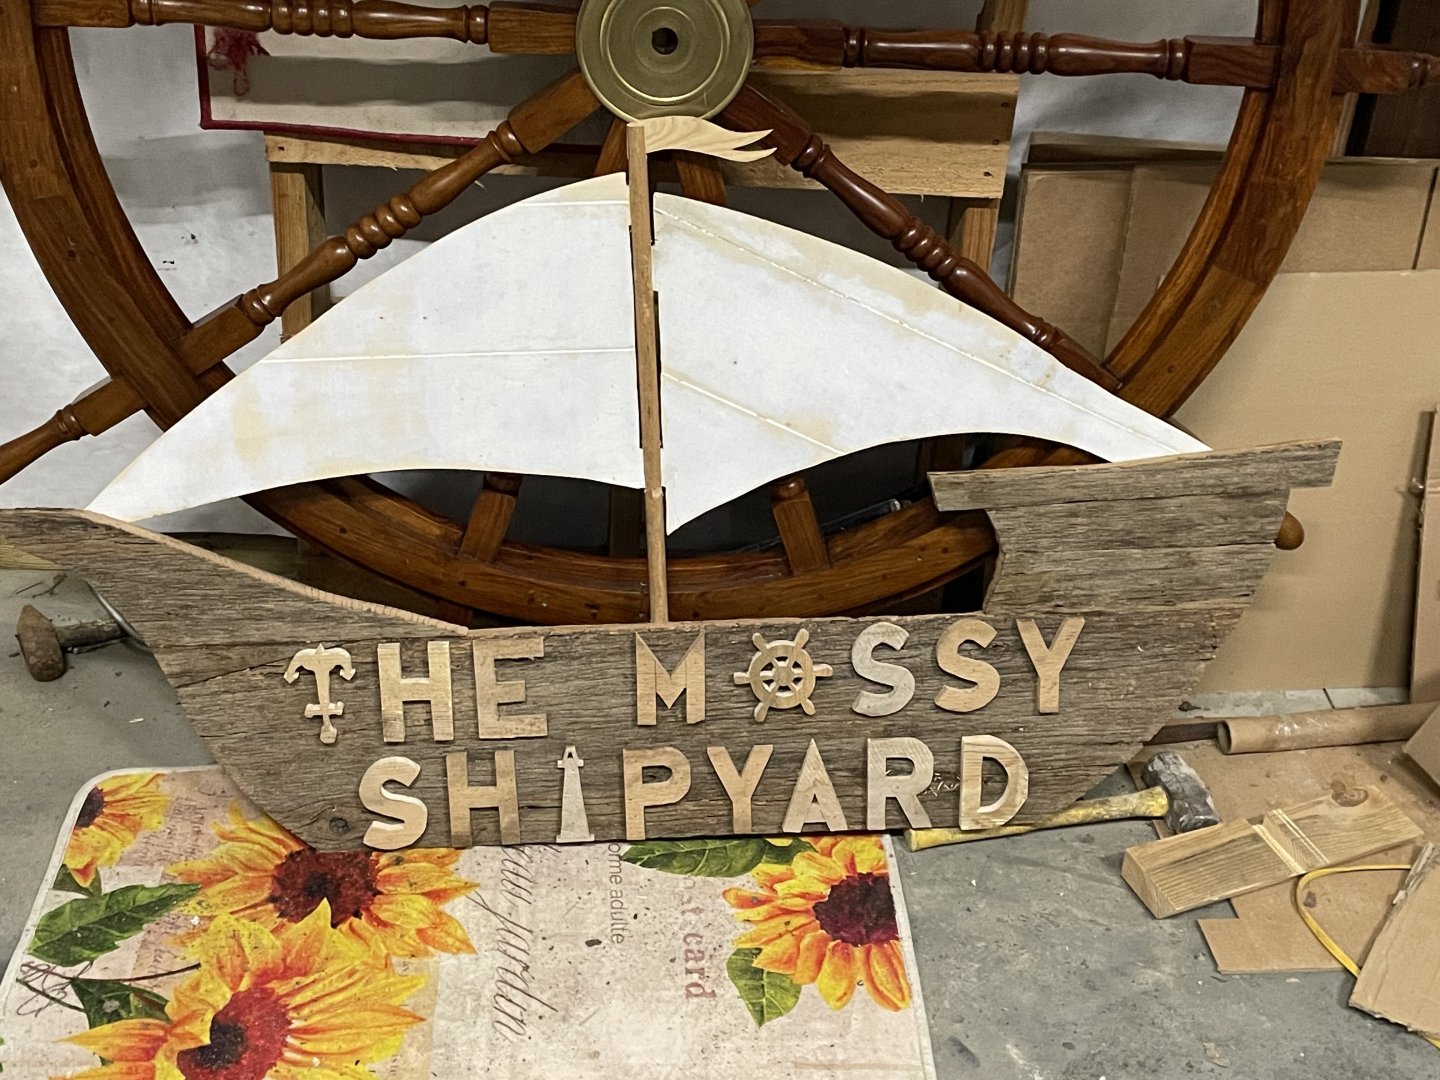
- 42 replies
-
- 10
-

-
The Mossy Shipyard by Bryan Woods - 1:1
Bryan Woods replied to Bryan Woods's topic in Non-ship/categorised builds
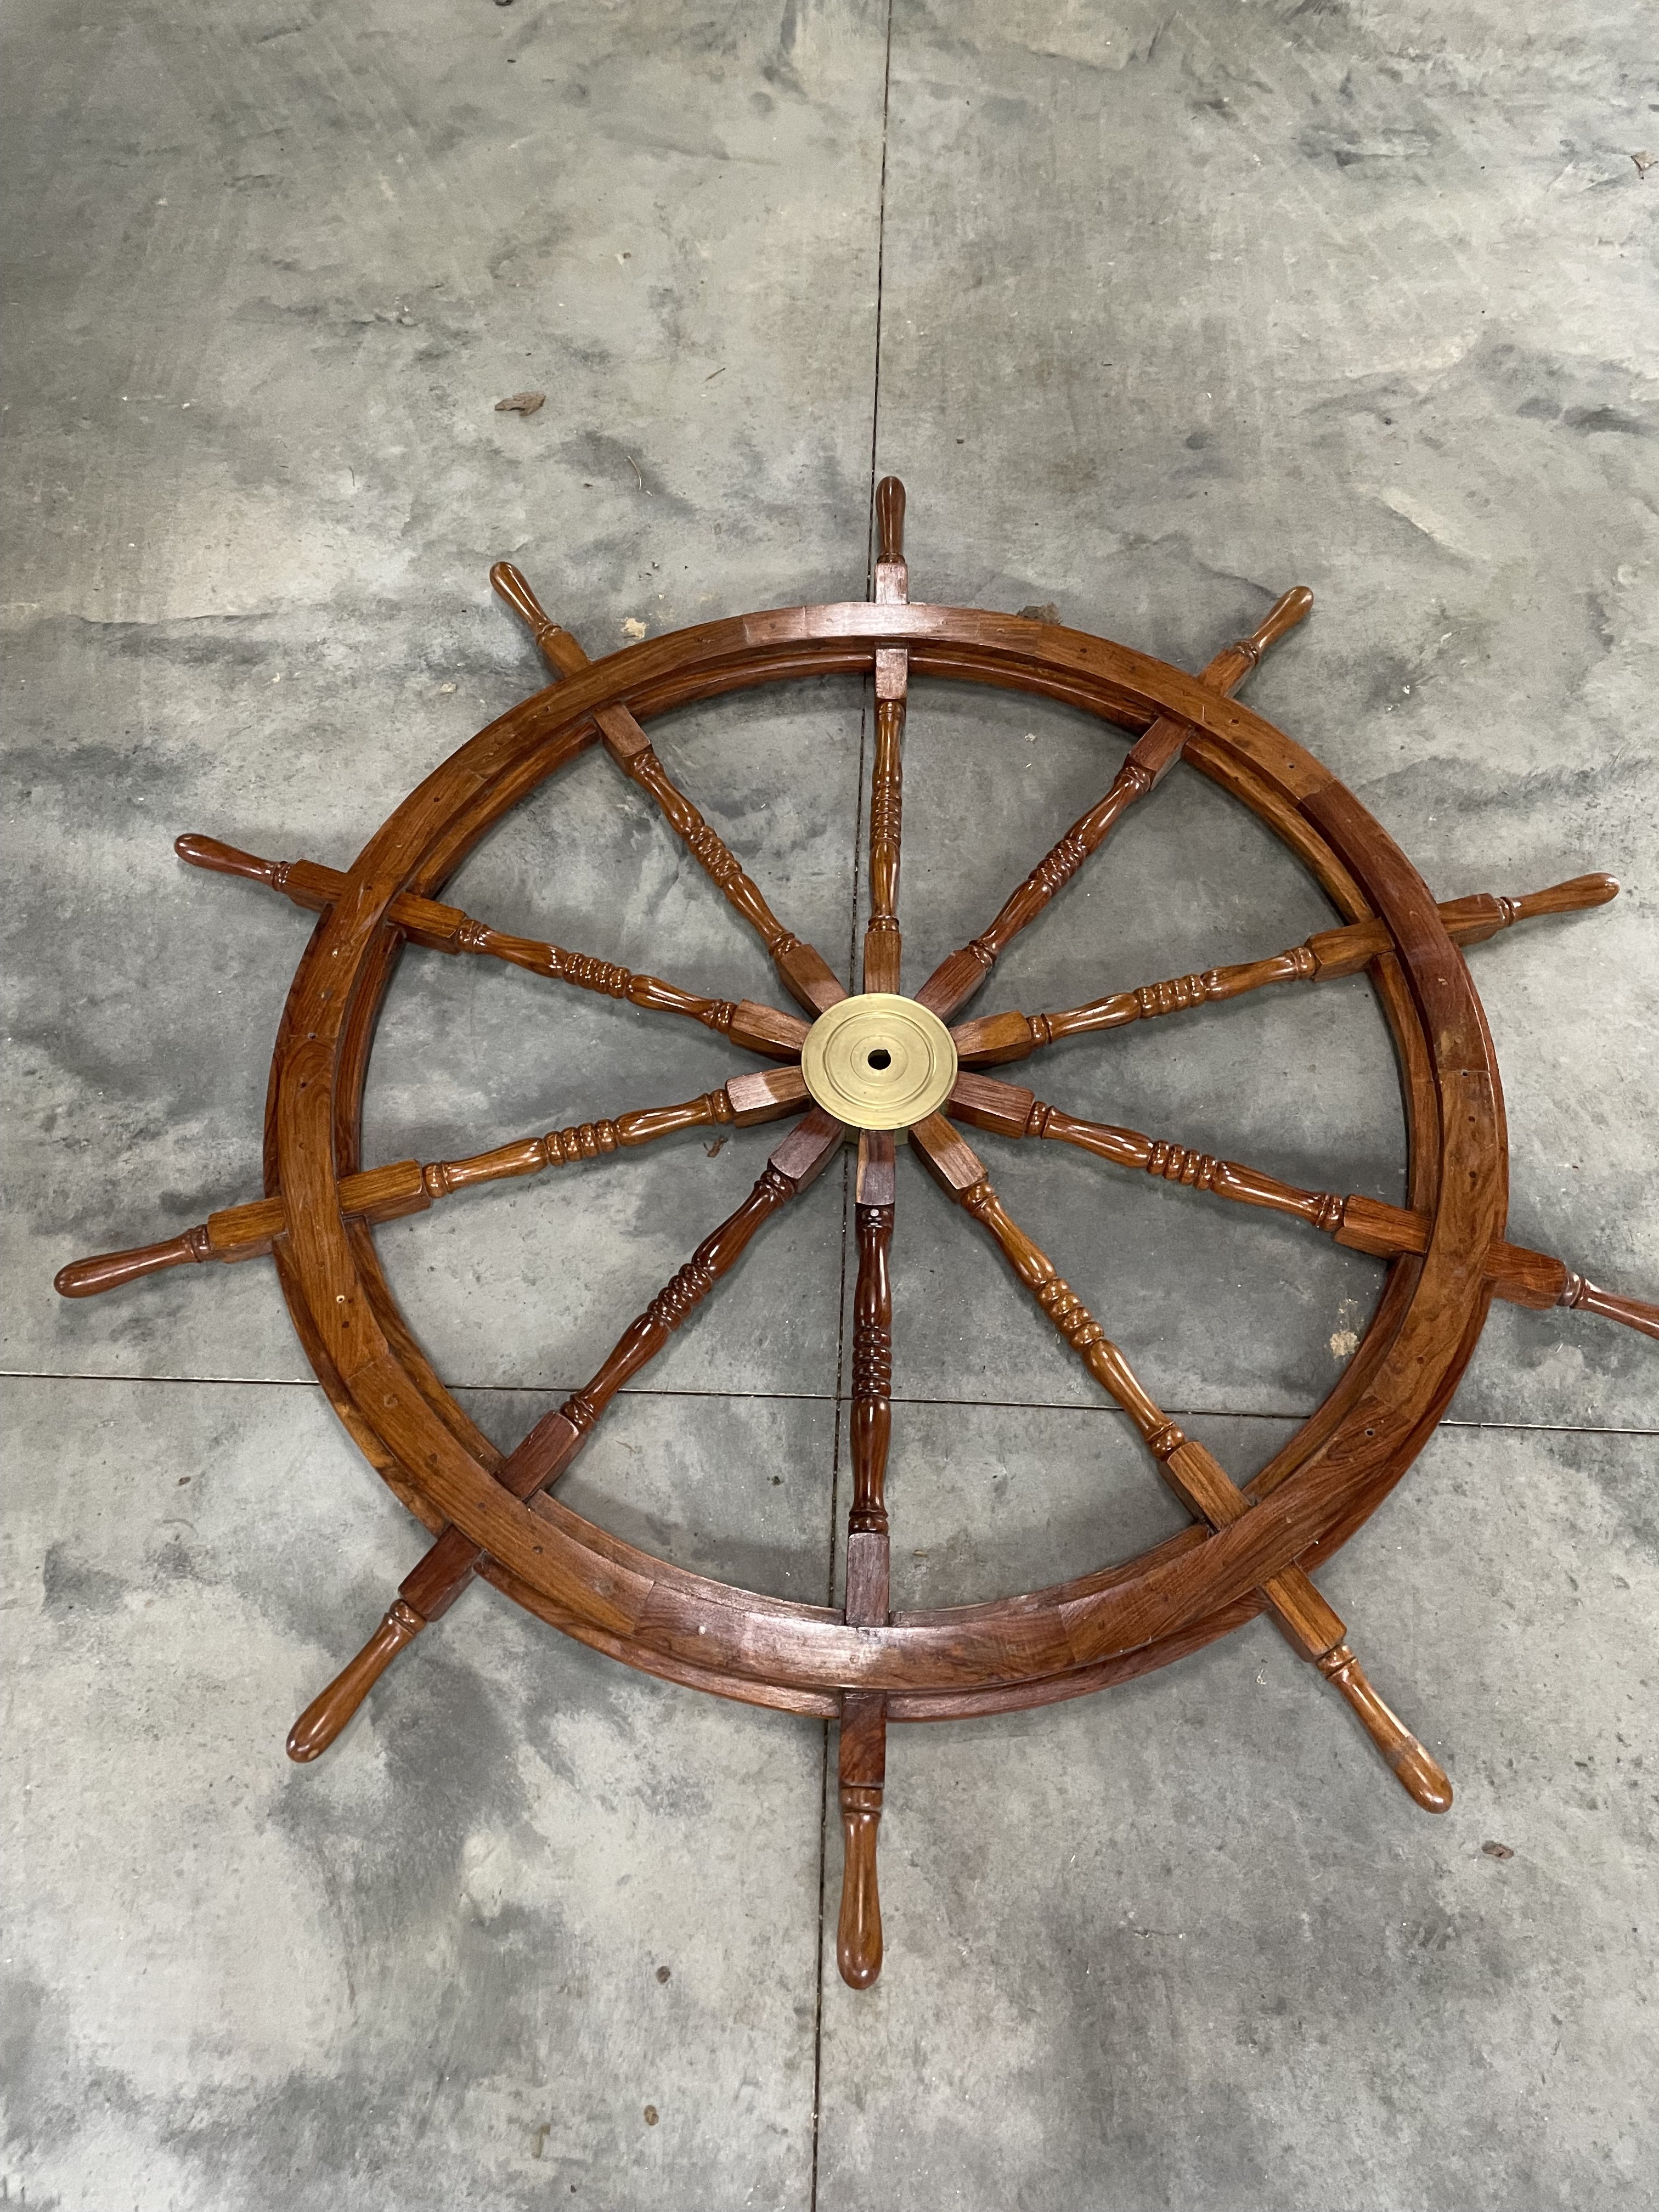
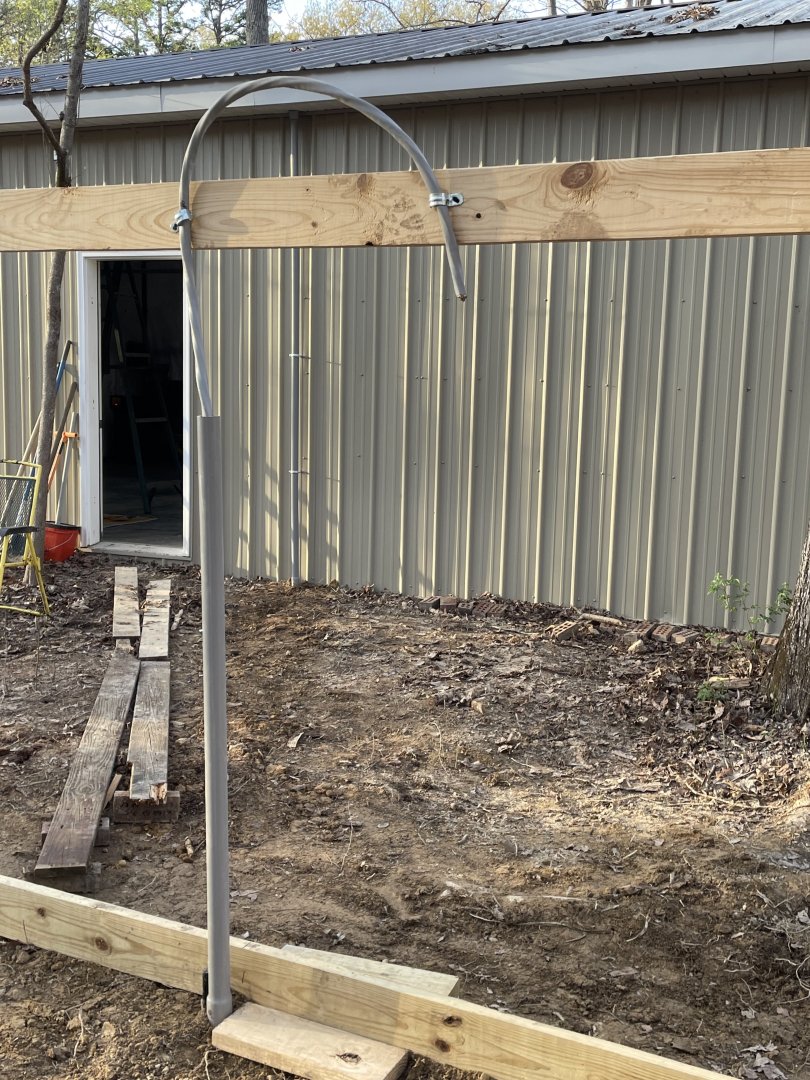
Standing back looking at the front of the shipyard, I thought it needed something on that blank wall. Would you believe in the hills of middle Tennessee I would find the perfect art that would identify my shipyard at first sight! This wheel is 6’ diameter. We picked it up this morning on a short drive for less that the cost of a nice kit:-) Now I have to decide what I need to use to weather proof it. It was decor not the real thing I believe. Then comes the “how to hang it on the wall” 🙂
-
The Mossy Shipyard by Bryan Woods - 1:1
Bryan Woods replied to Bryan Woods's topic in Non-ship/categorised builds
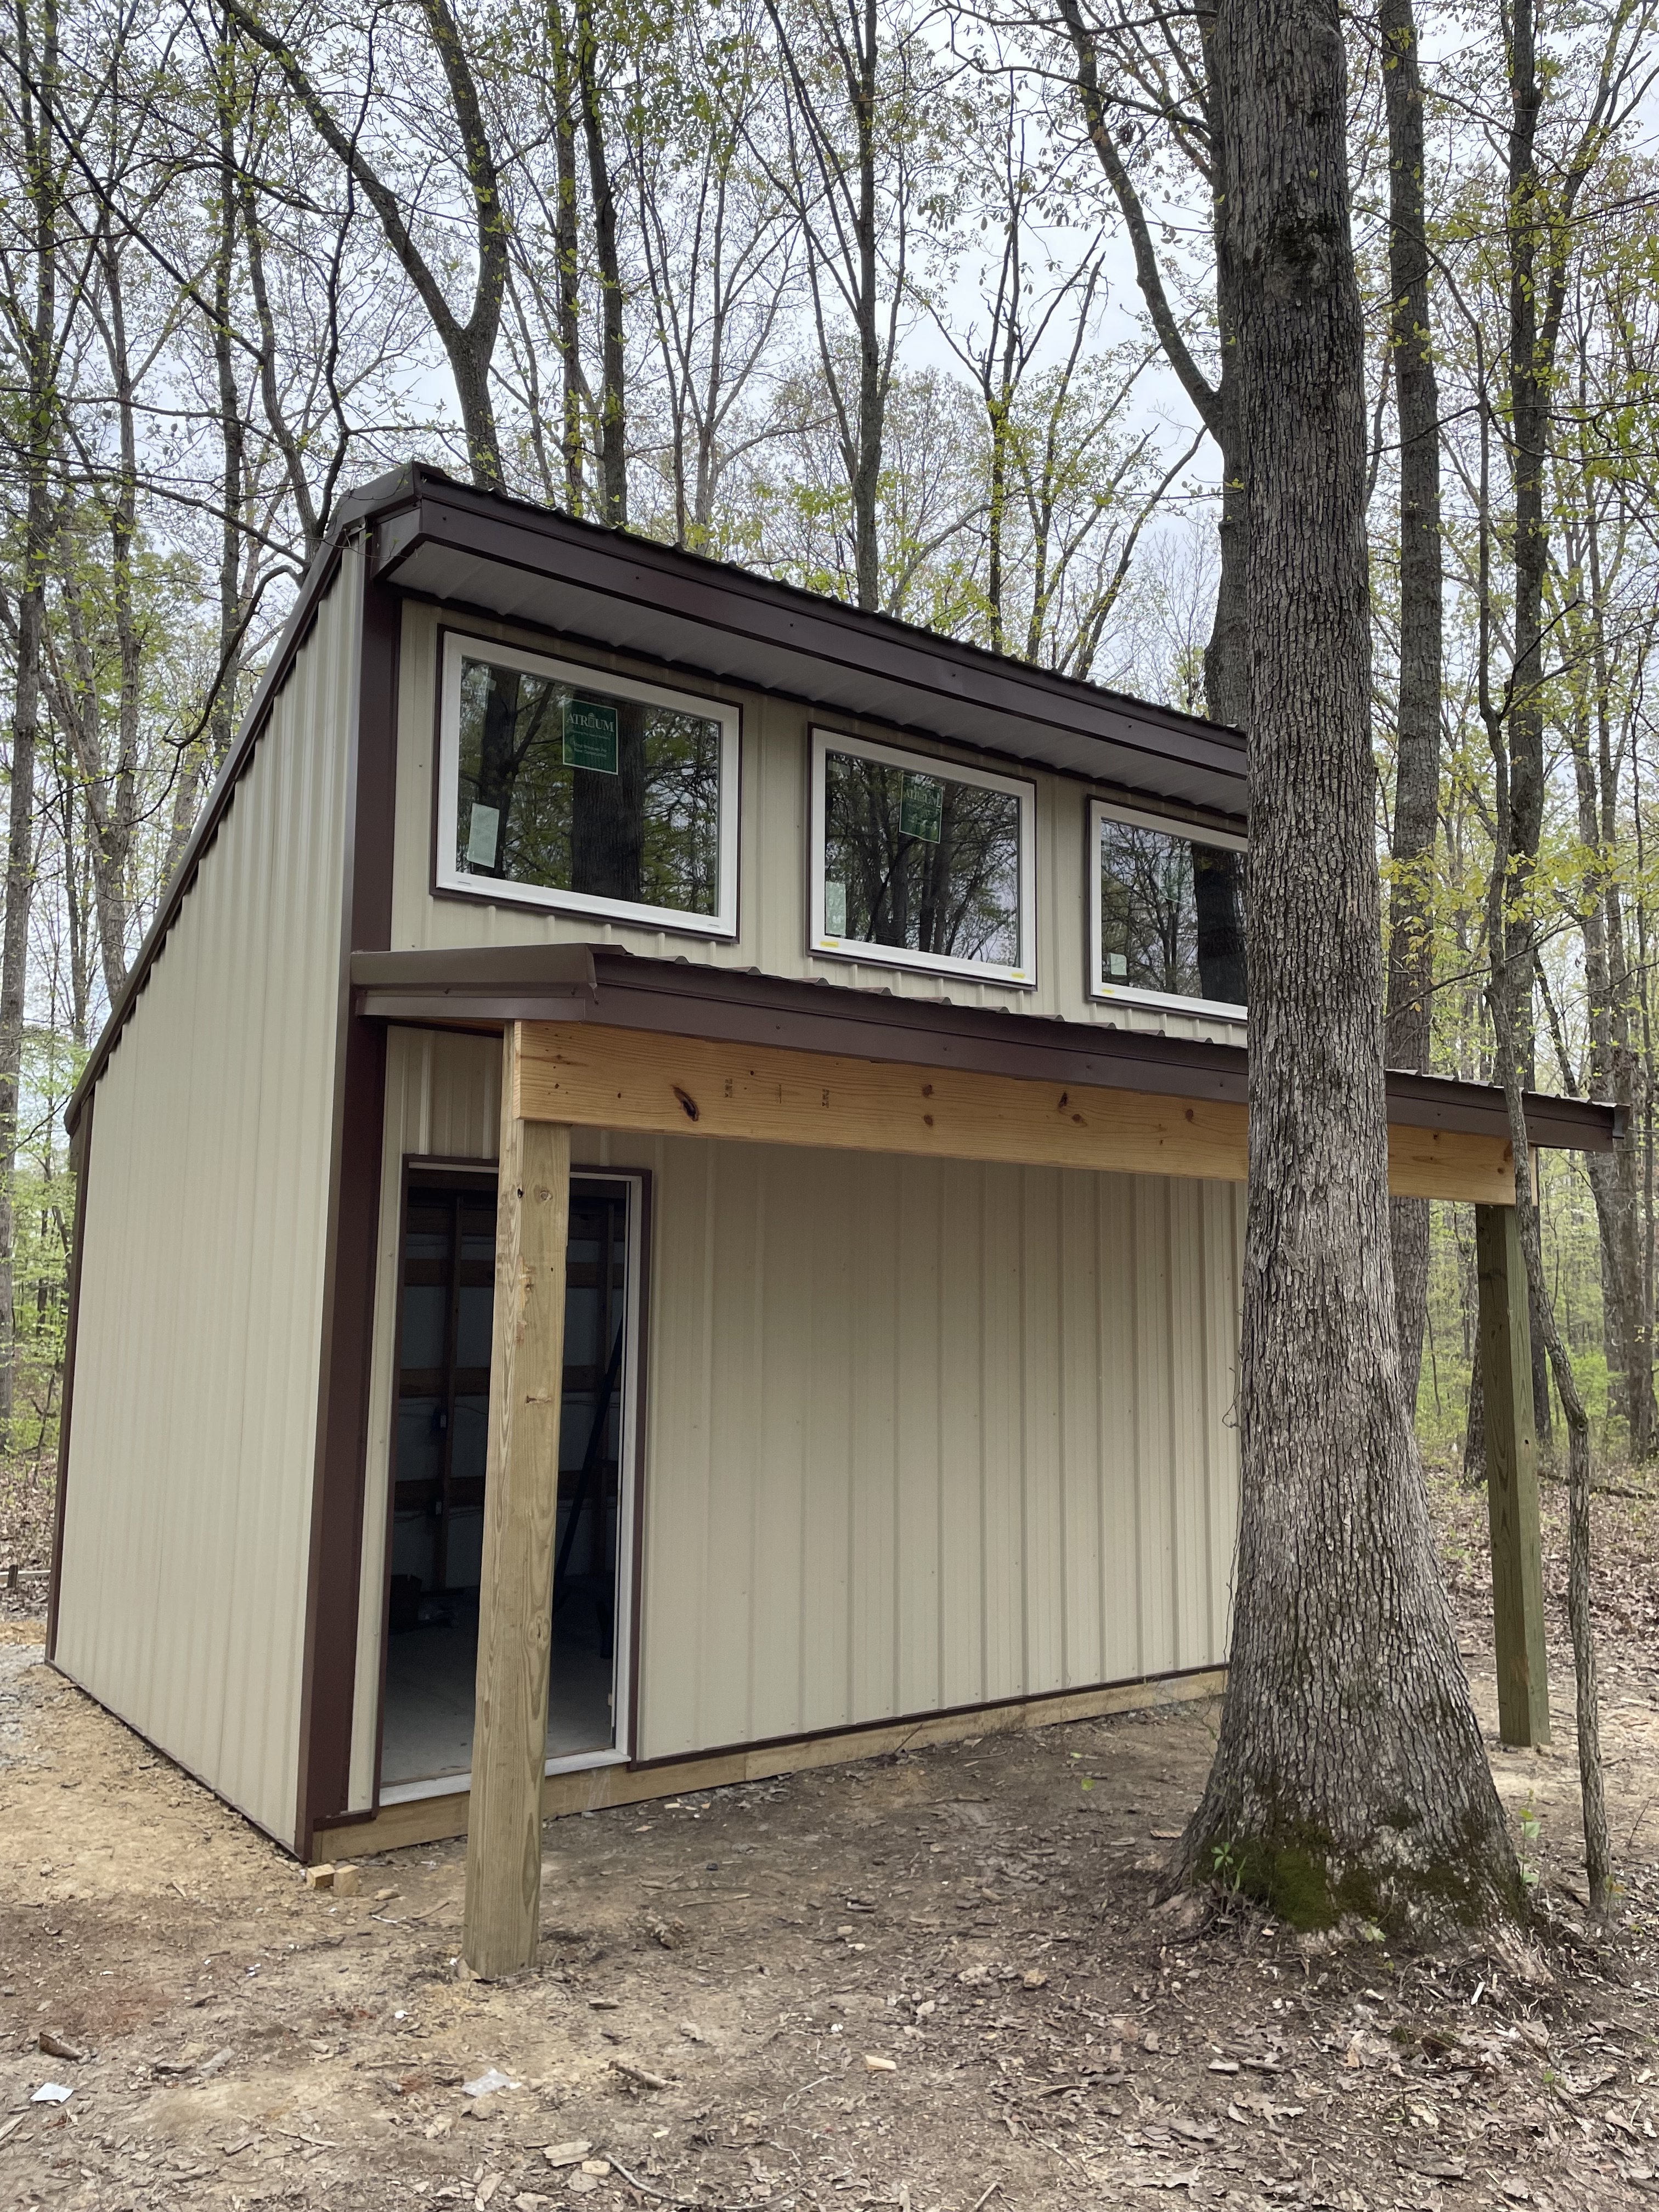
Contractor was here yesterday and finished up today. They left a lot of big lumber I need to do something with. Next up will be getting the electrical receptacles installed and the power turned on.
- 42 replies
-
- 11
-
-
The Mossy Shipyard by Bryan Woods - 1:1
Bryan Woods replied to Bryan Woods's topic in Non-ship/categorised builds
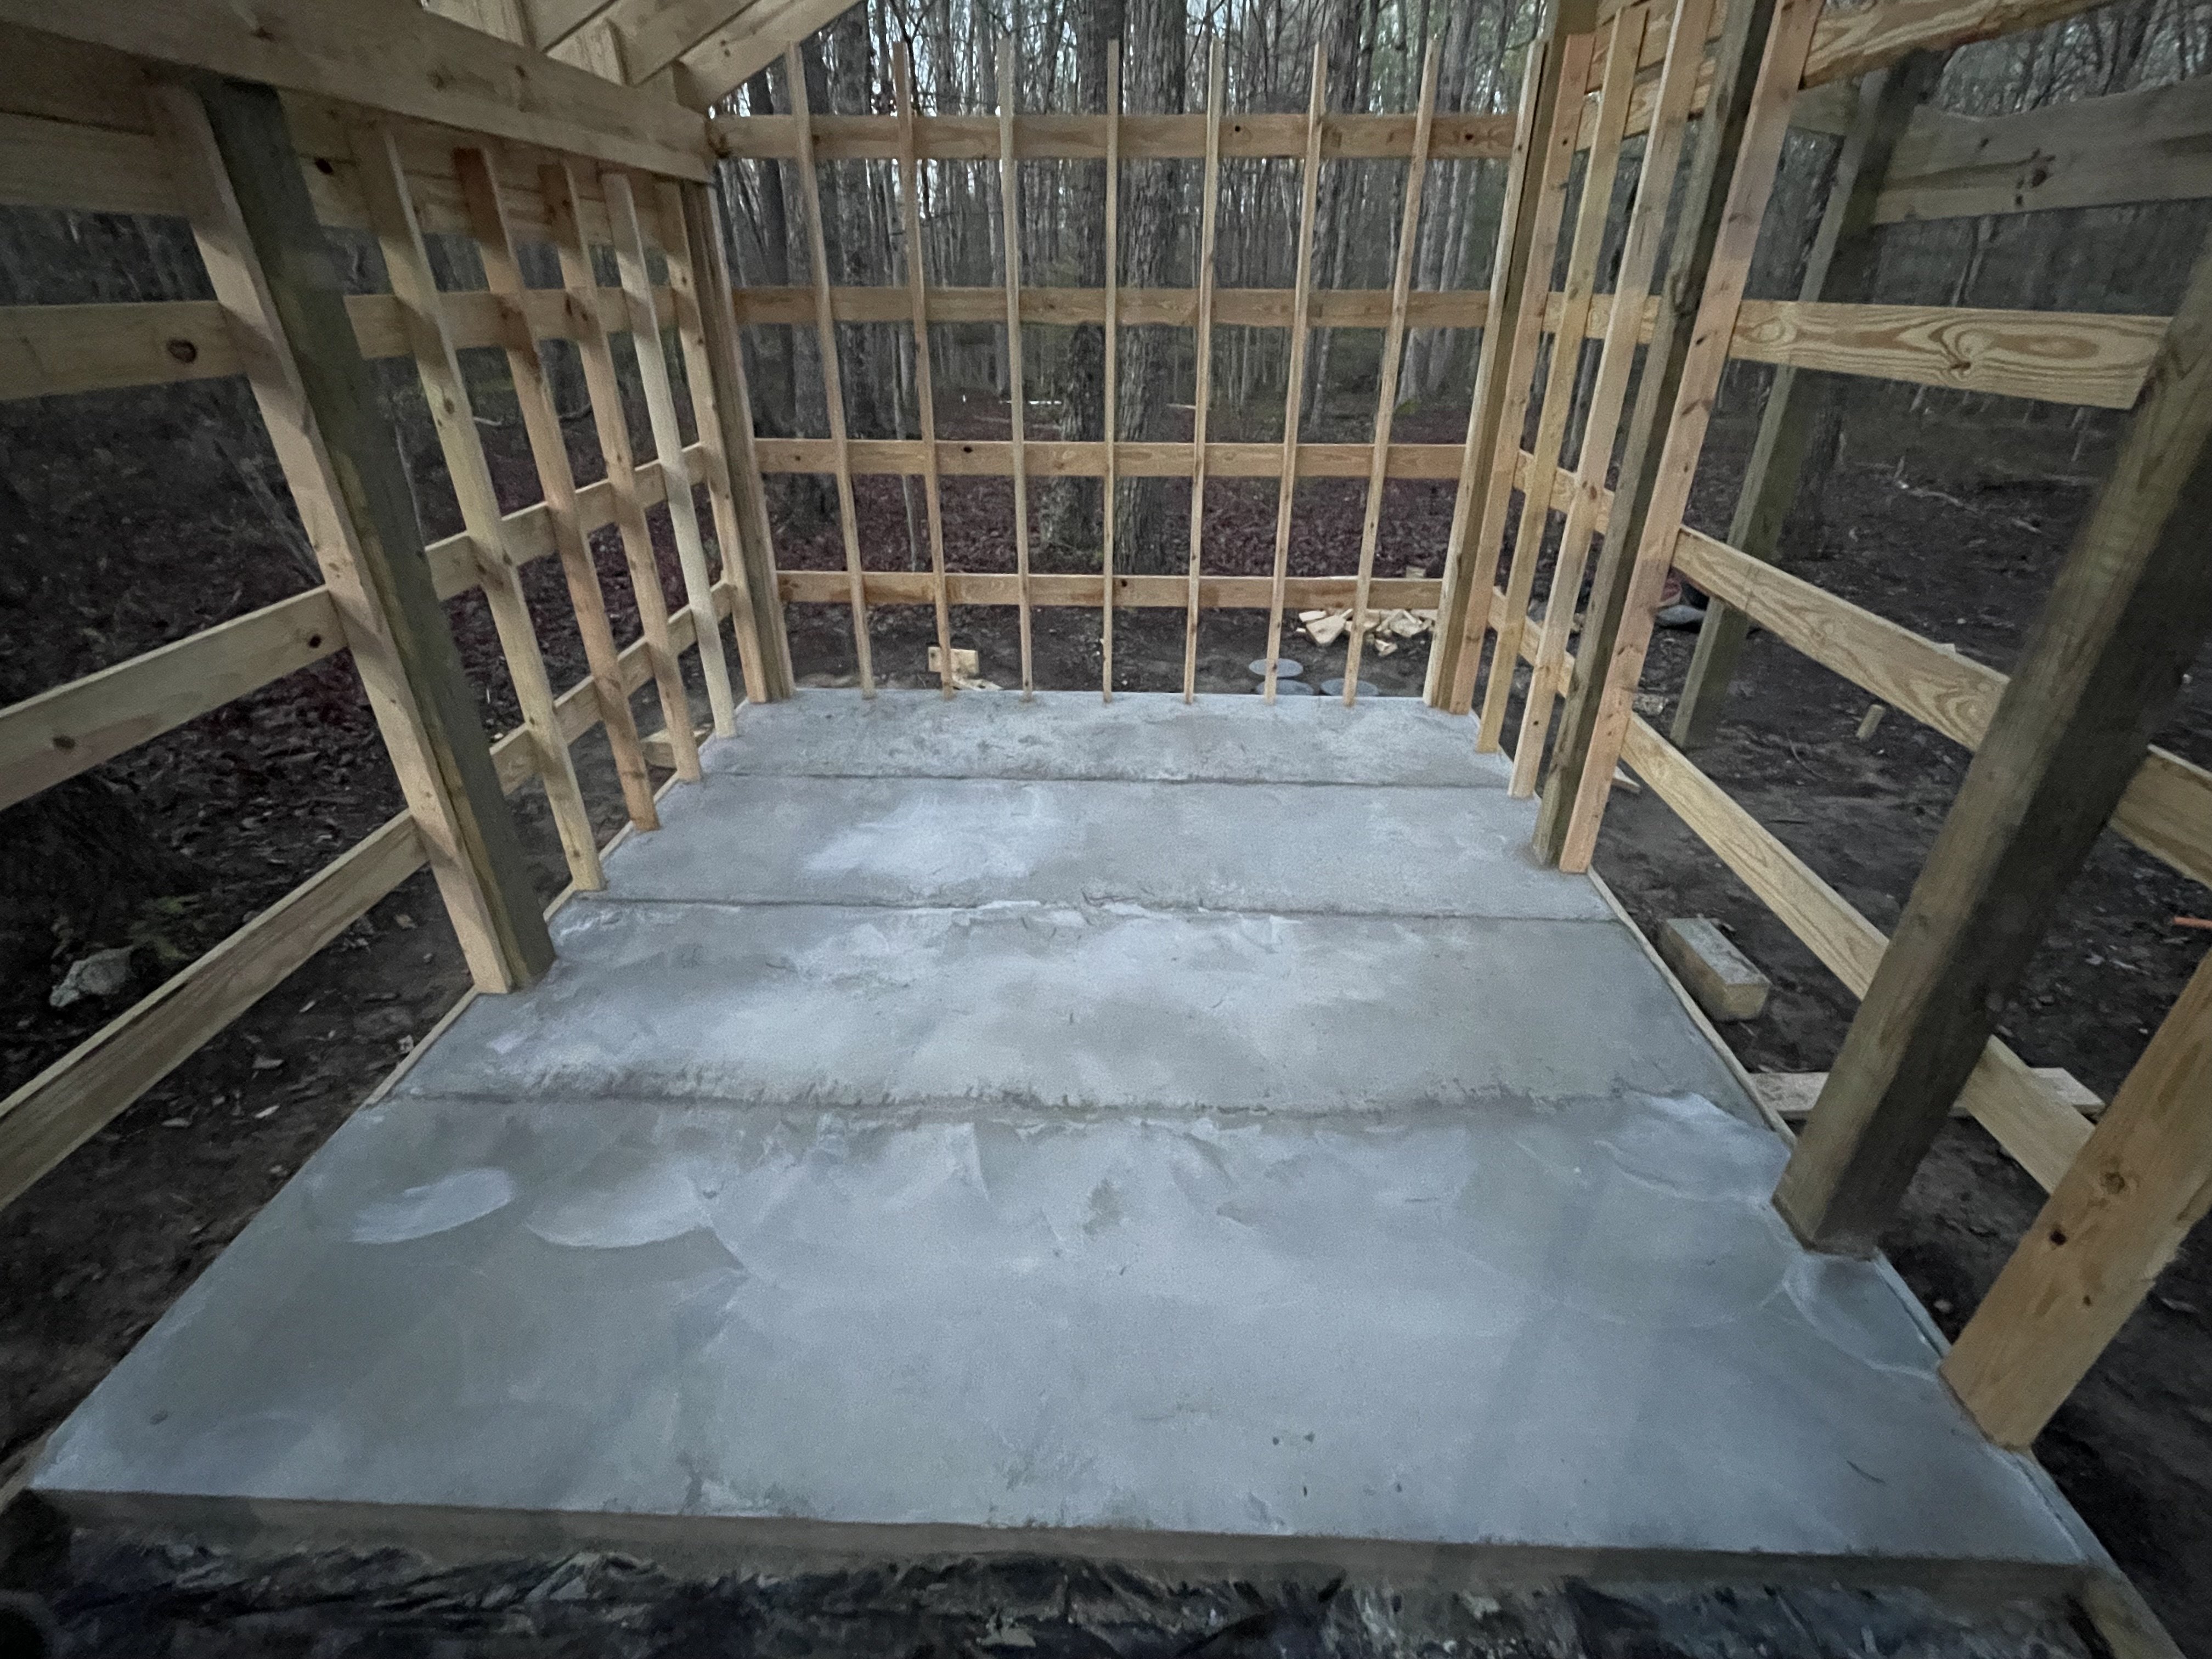
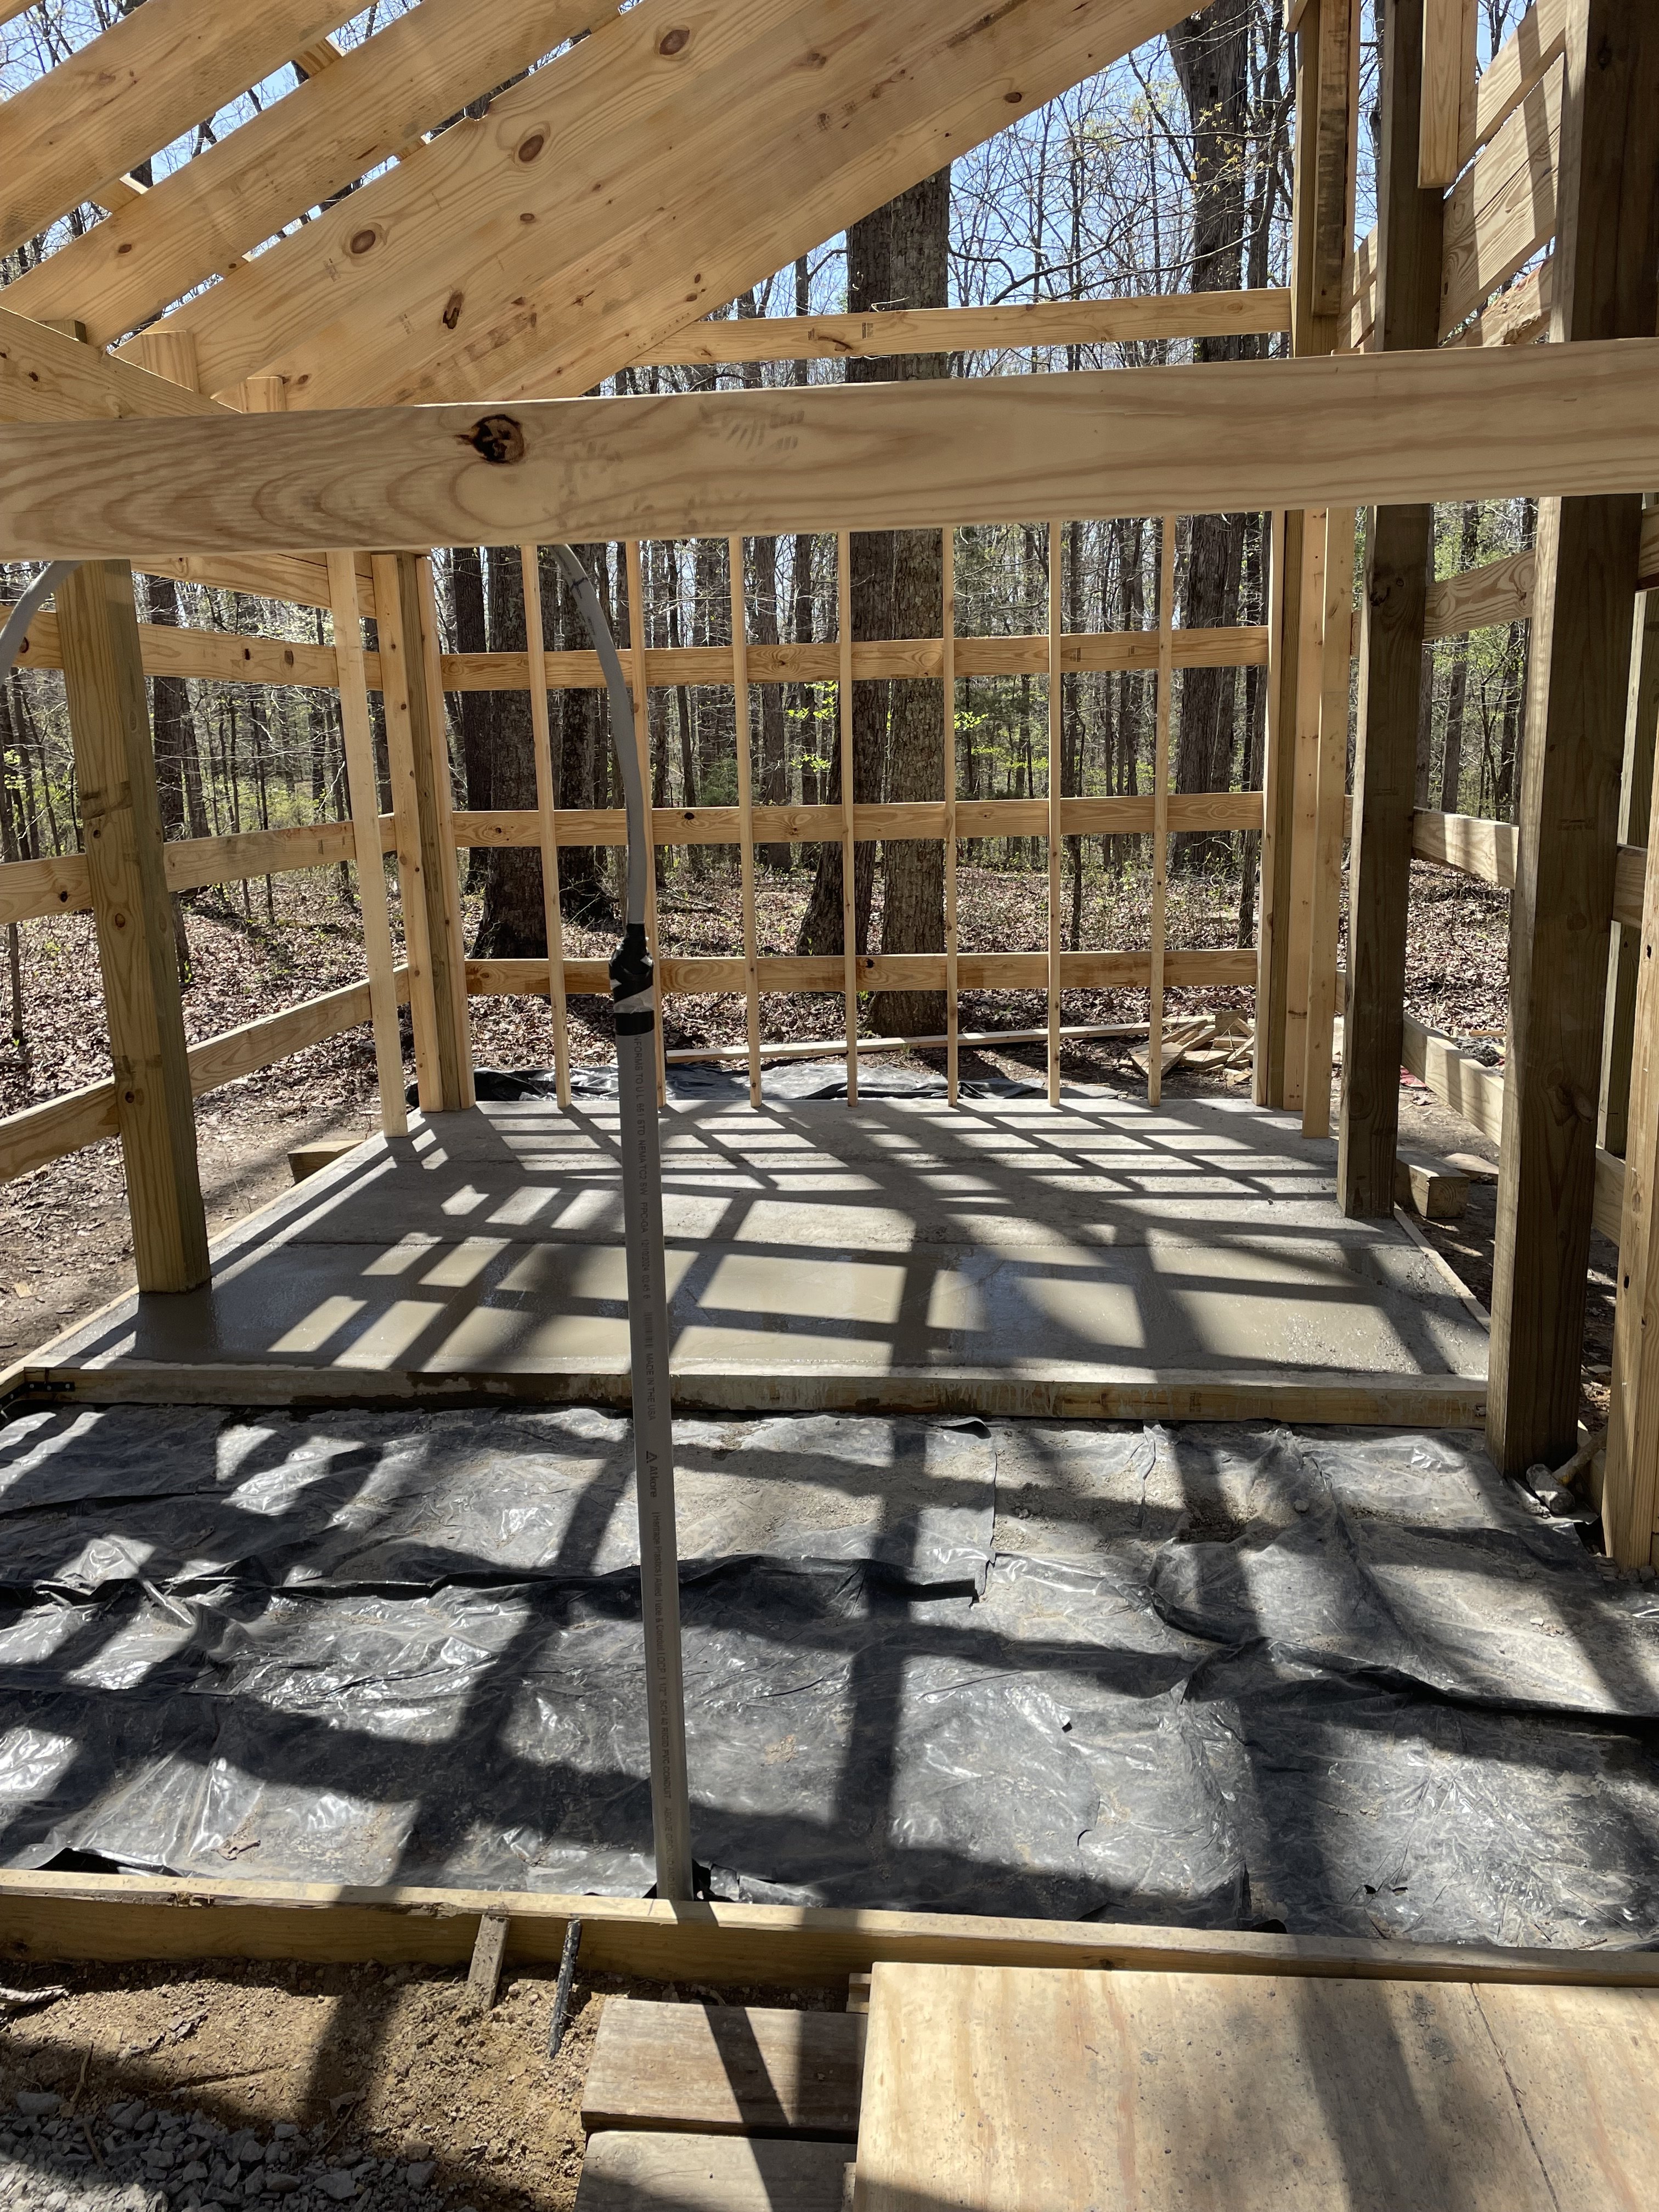
Hey Yves, I’m no concrete man but it’s done by others around here, for a moisture barrier to keep it from migrating up through the slab. It maybe our fluctuating hot and cold most of the year. -
With the Mossy Shipyard being built, I haven’t had the steadiness of hand or focus of mind to do much on the Kinneret. But as of yesterday I caught up with the things I can do on the shipyard until the contractors do the rest of their work. I have no clue when they may be back. I was able to get one of the stays up this morning. My chinching thread was to short, I’ll have to replace it.

-
The Mossy Shipyard by Bryan Woods - 1:1
Bryan Woods replied to Bryan Woods's topic in Non-ship/categorised builds
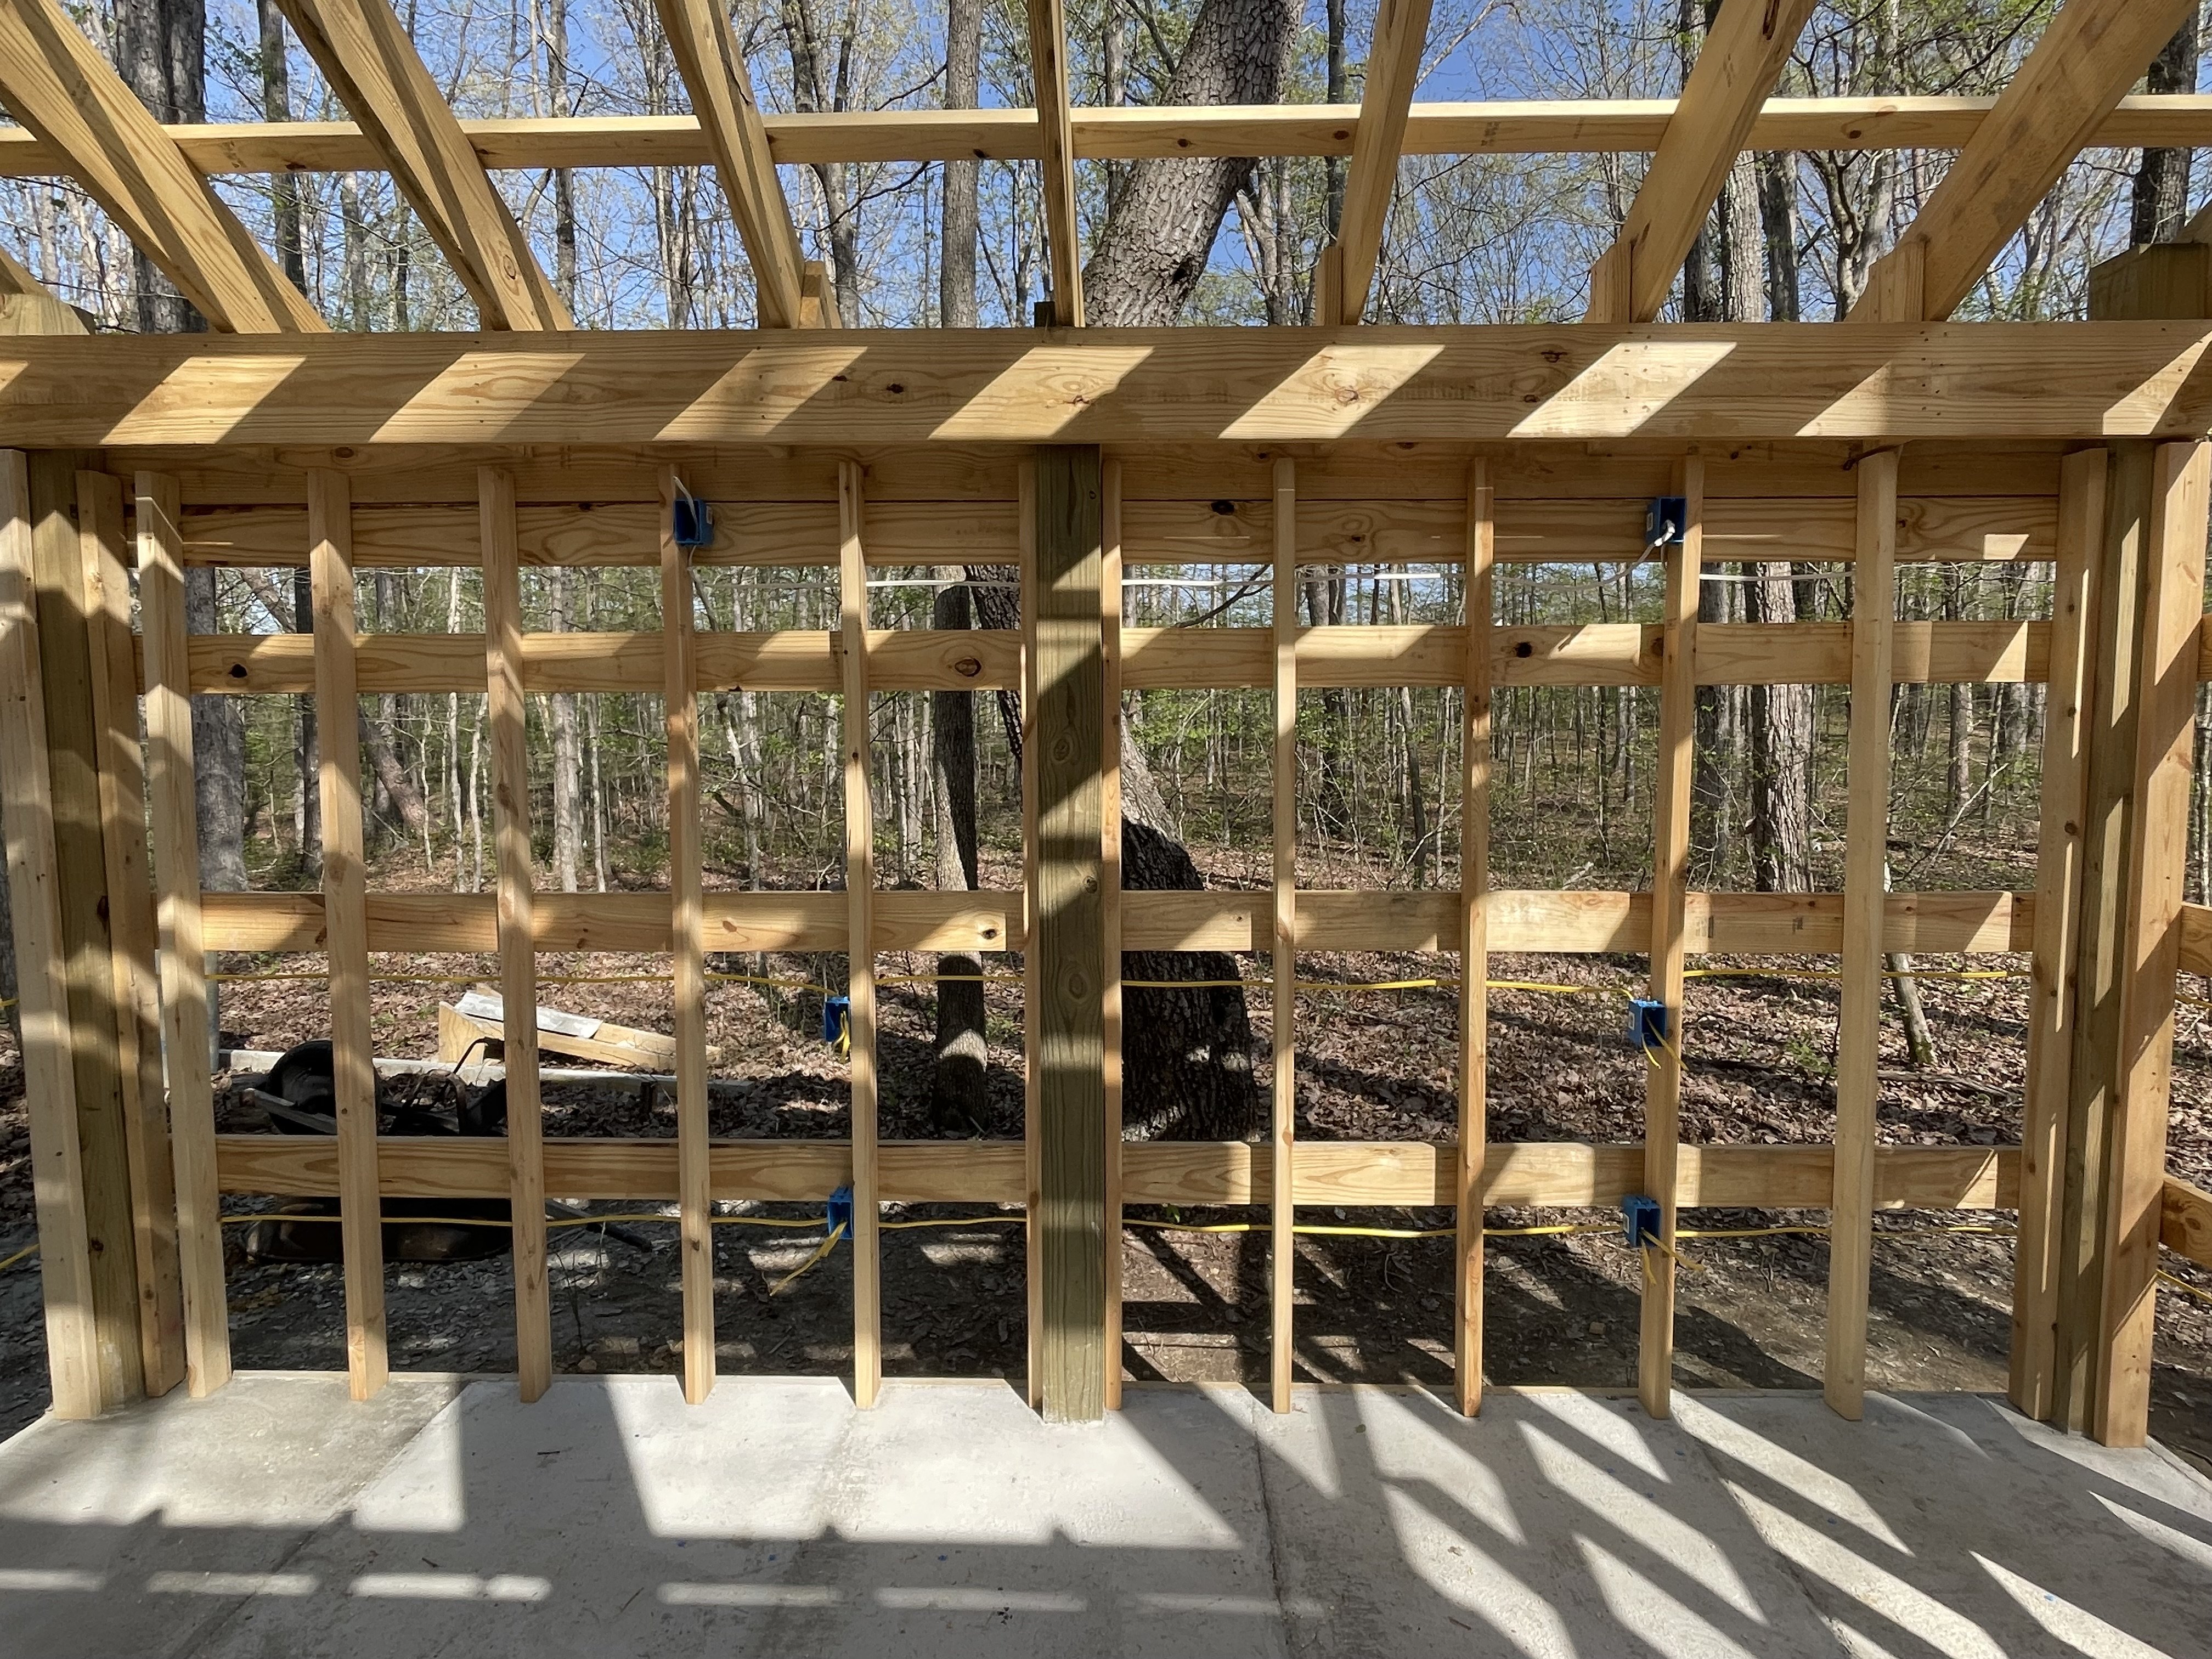
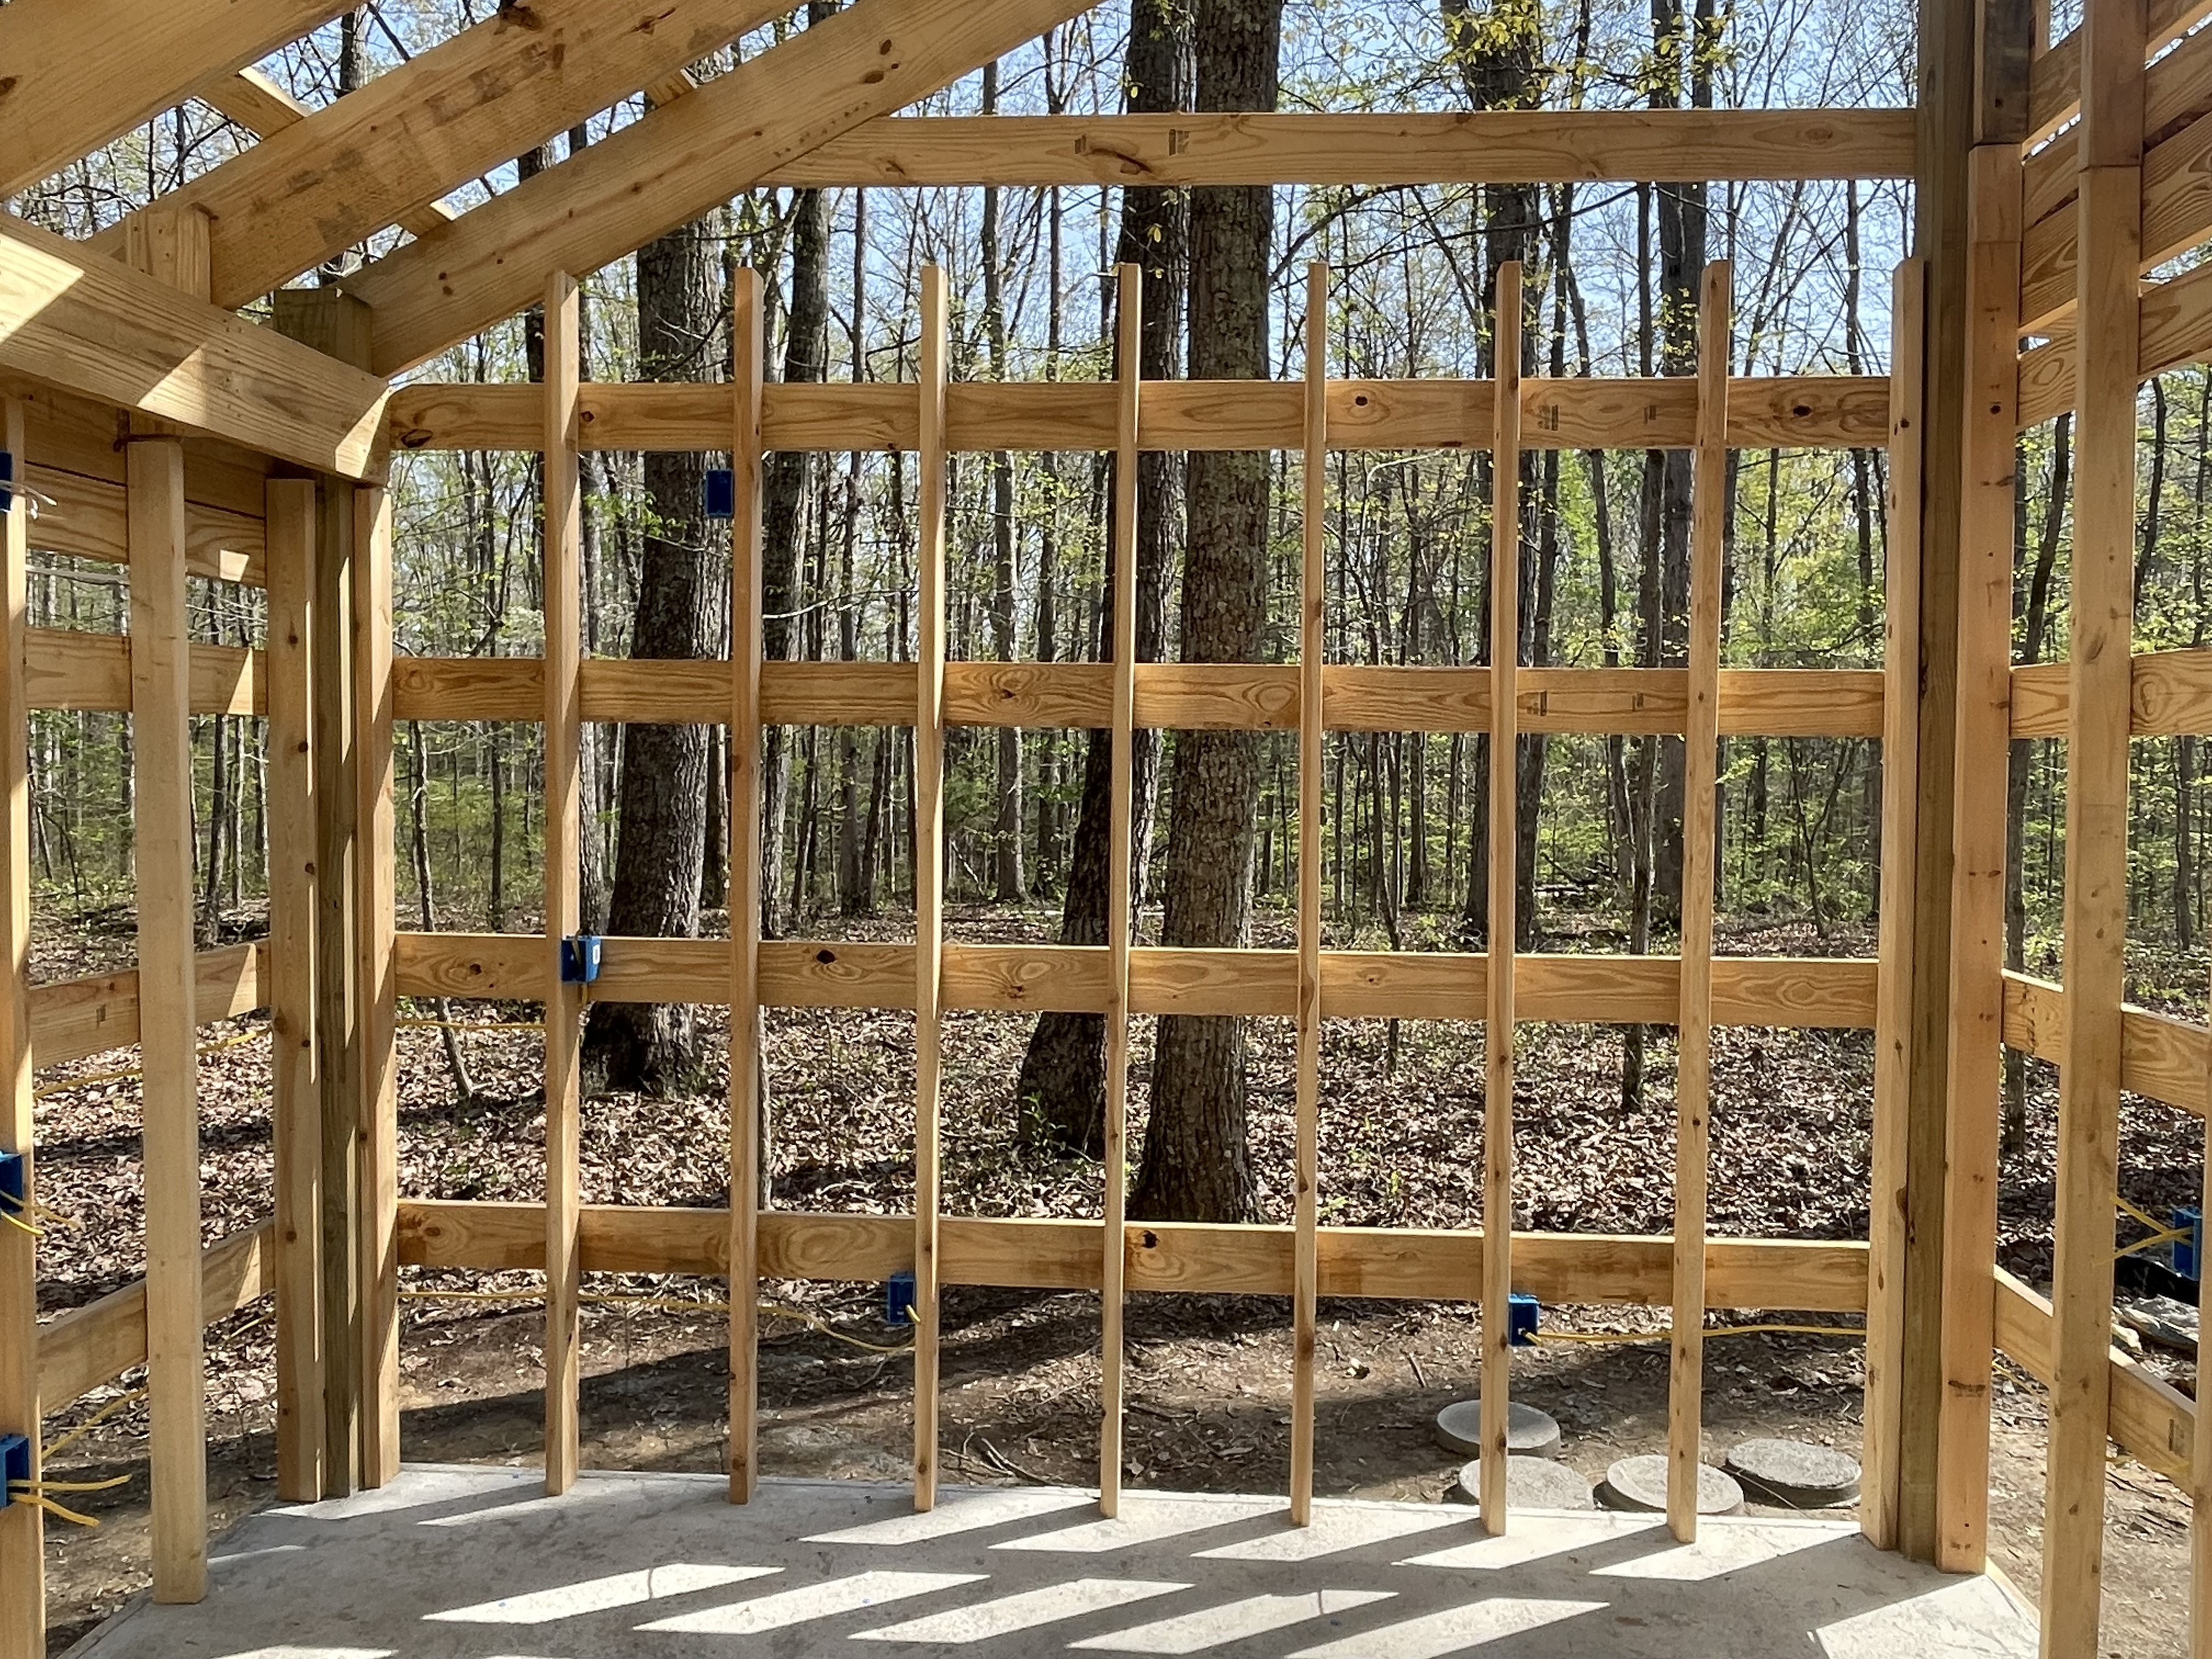
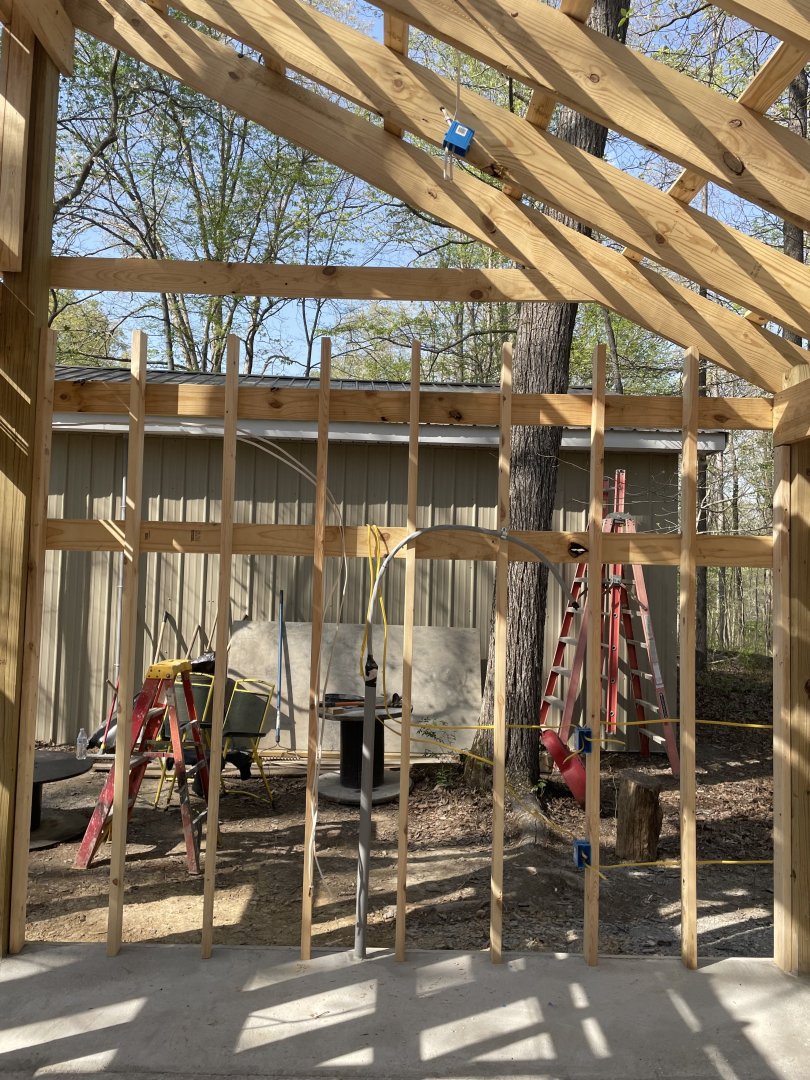
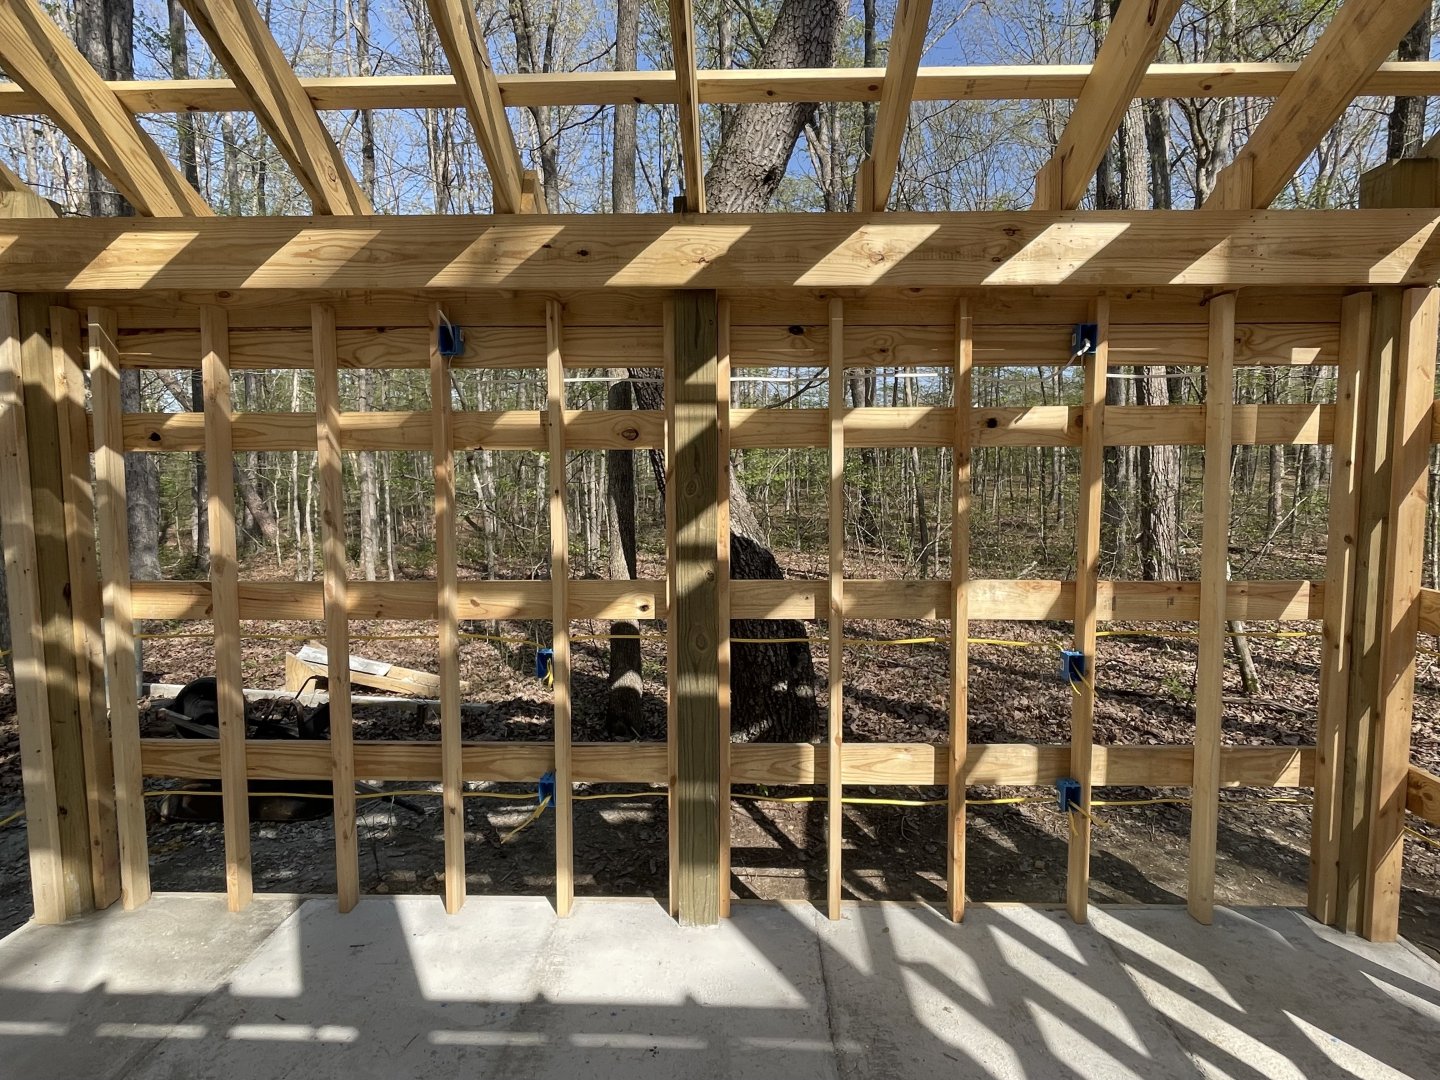
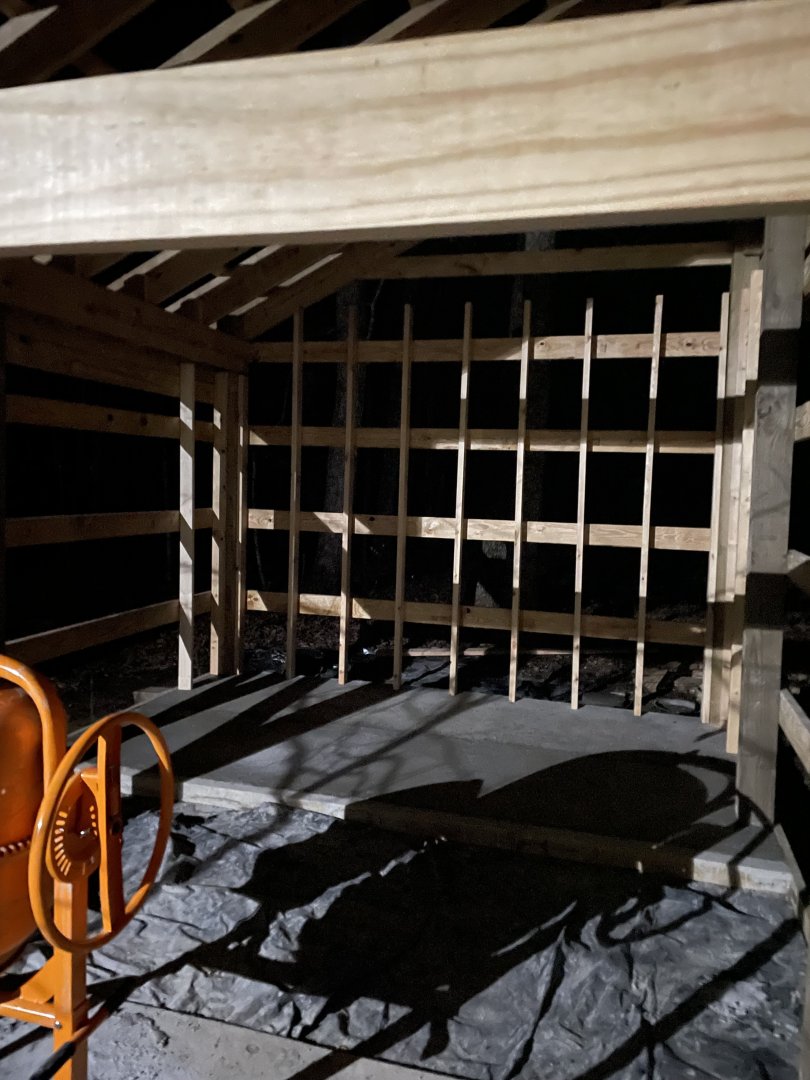
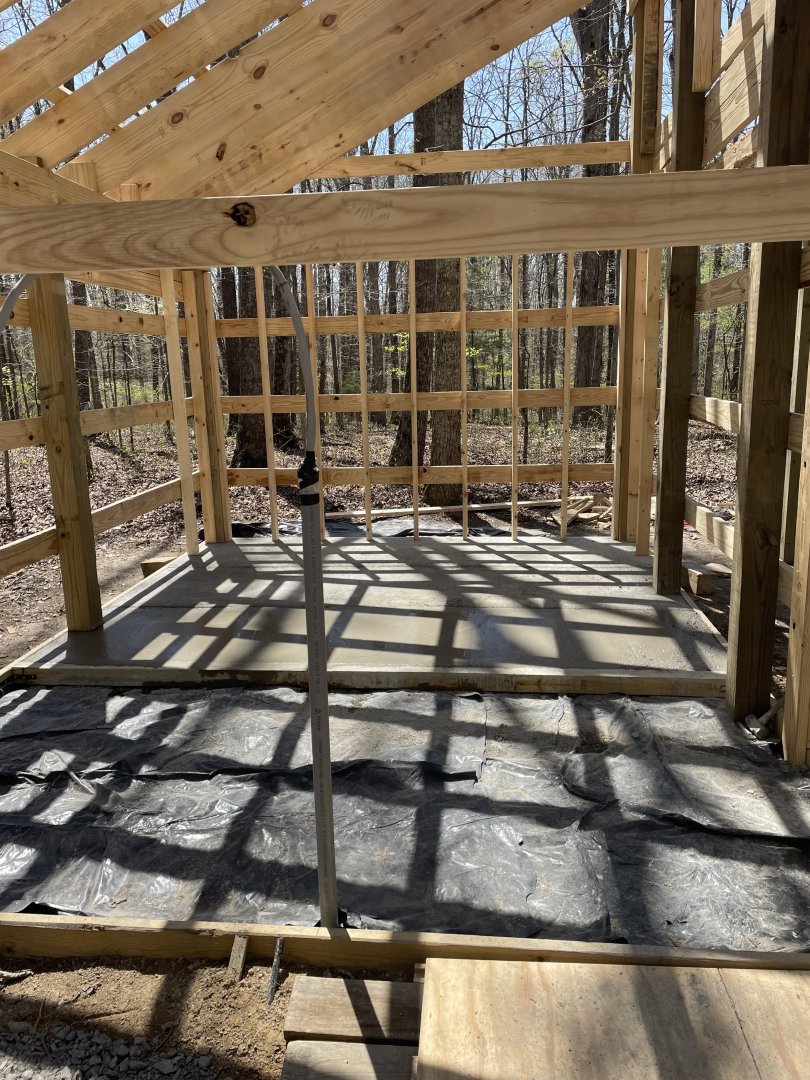
The concrete was finely finished on Saturday. I was able to attach the interior studs as the concrete cured. I’ve only been at this hobby for 2 years. That made it hard to design the work spaces. I’m sure I’ll need a plug or a light at another spot. On the north wall I put 2 outlets one 18” and 1 at 3’. I’m not for sure what will go here. The east wall is where I’ll work. I made two stations will plugs above and below the future counter. Also above each station at the ceiling I put an outlet from the light circuit for some kind of under cabinet lighting. On the top left of the south wall I’m putting an outlet for an air filtration unit that will hang. Below it will be a switch to control that outlet. So that leaves the west wall for my favorite concrete finisher:-) In her past time she’s trying to catch up over 3 decades of pictures to journal and crop and place in photo albums. That takes both of our minds to remember who it is and where it was:-) Then for the over head lights I put 3 outlets at 2’ off the walls and 6’ in between each other. They will be 5000k dimmable leds. The contractor only likes a little framing and the metal siding. The rest will be for us to do.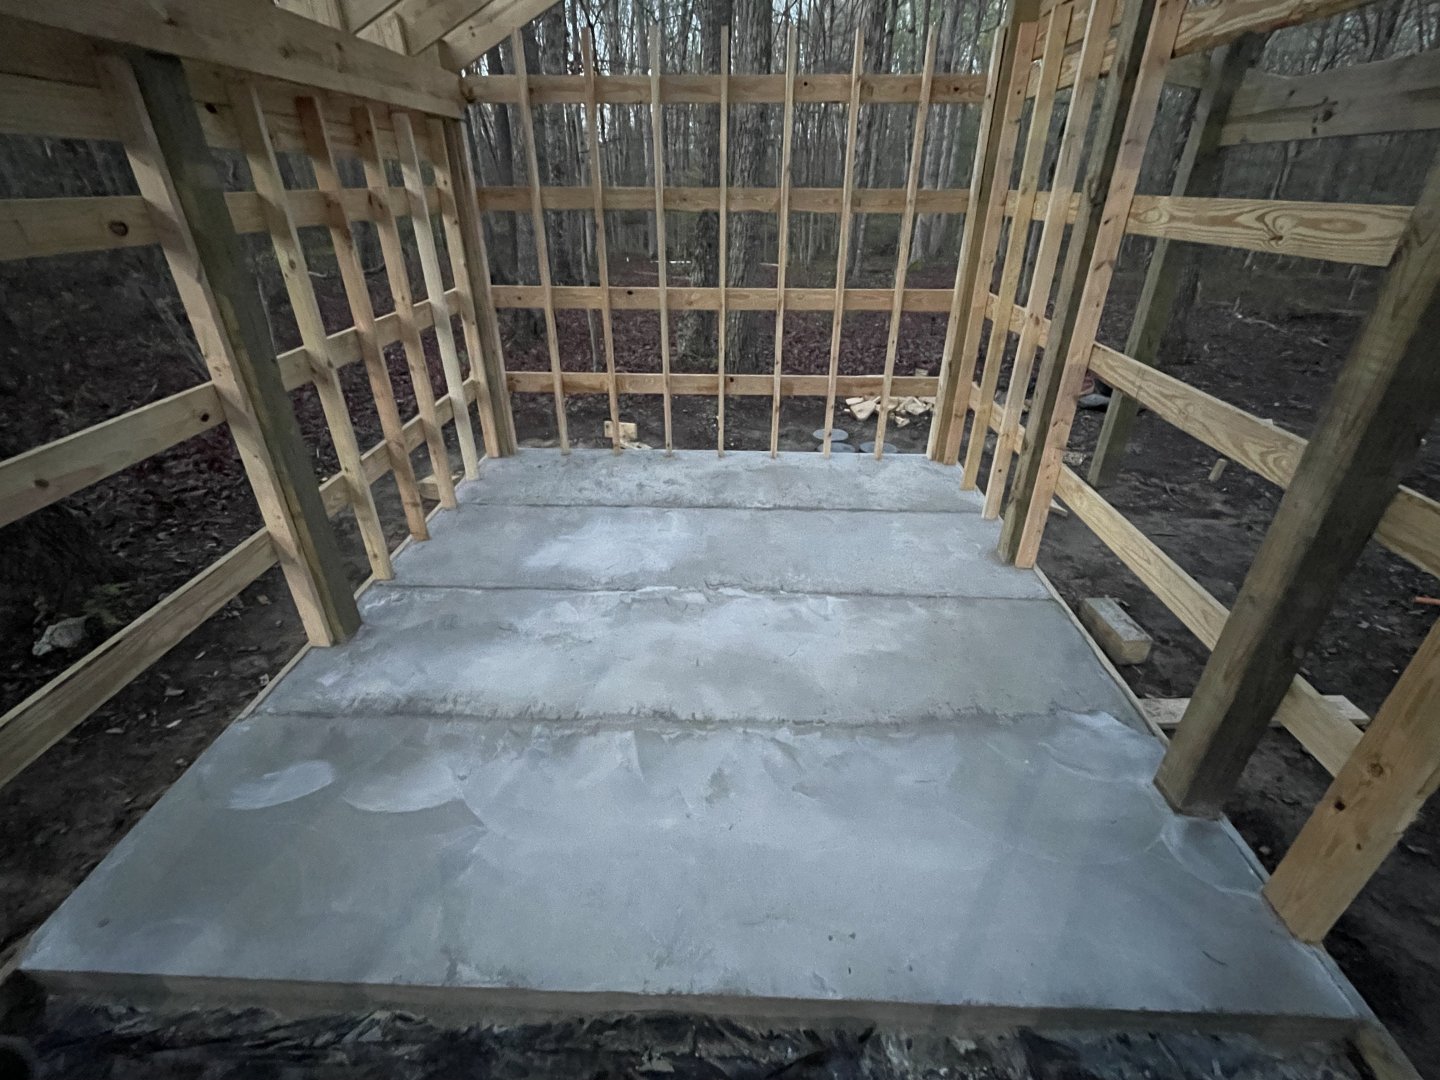

- 42 replies
-
- 12
-
-
The Mossy Shipyard by Bryan Woods - 1:1
Bryan Woods replied to Bryan Woods's topic in Non-ship/categorised builds
The Lord has given us another beautiful work day here in middle Tn:-) We are ready for another pour soon as I finish breakfast.
-
The Mossy Shipyard by Bryan Woods - 1:1
Bryan Woods replied to Bryan Woods's topic in Non-ship/categorised builds
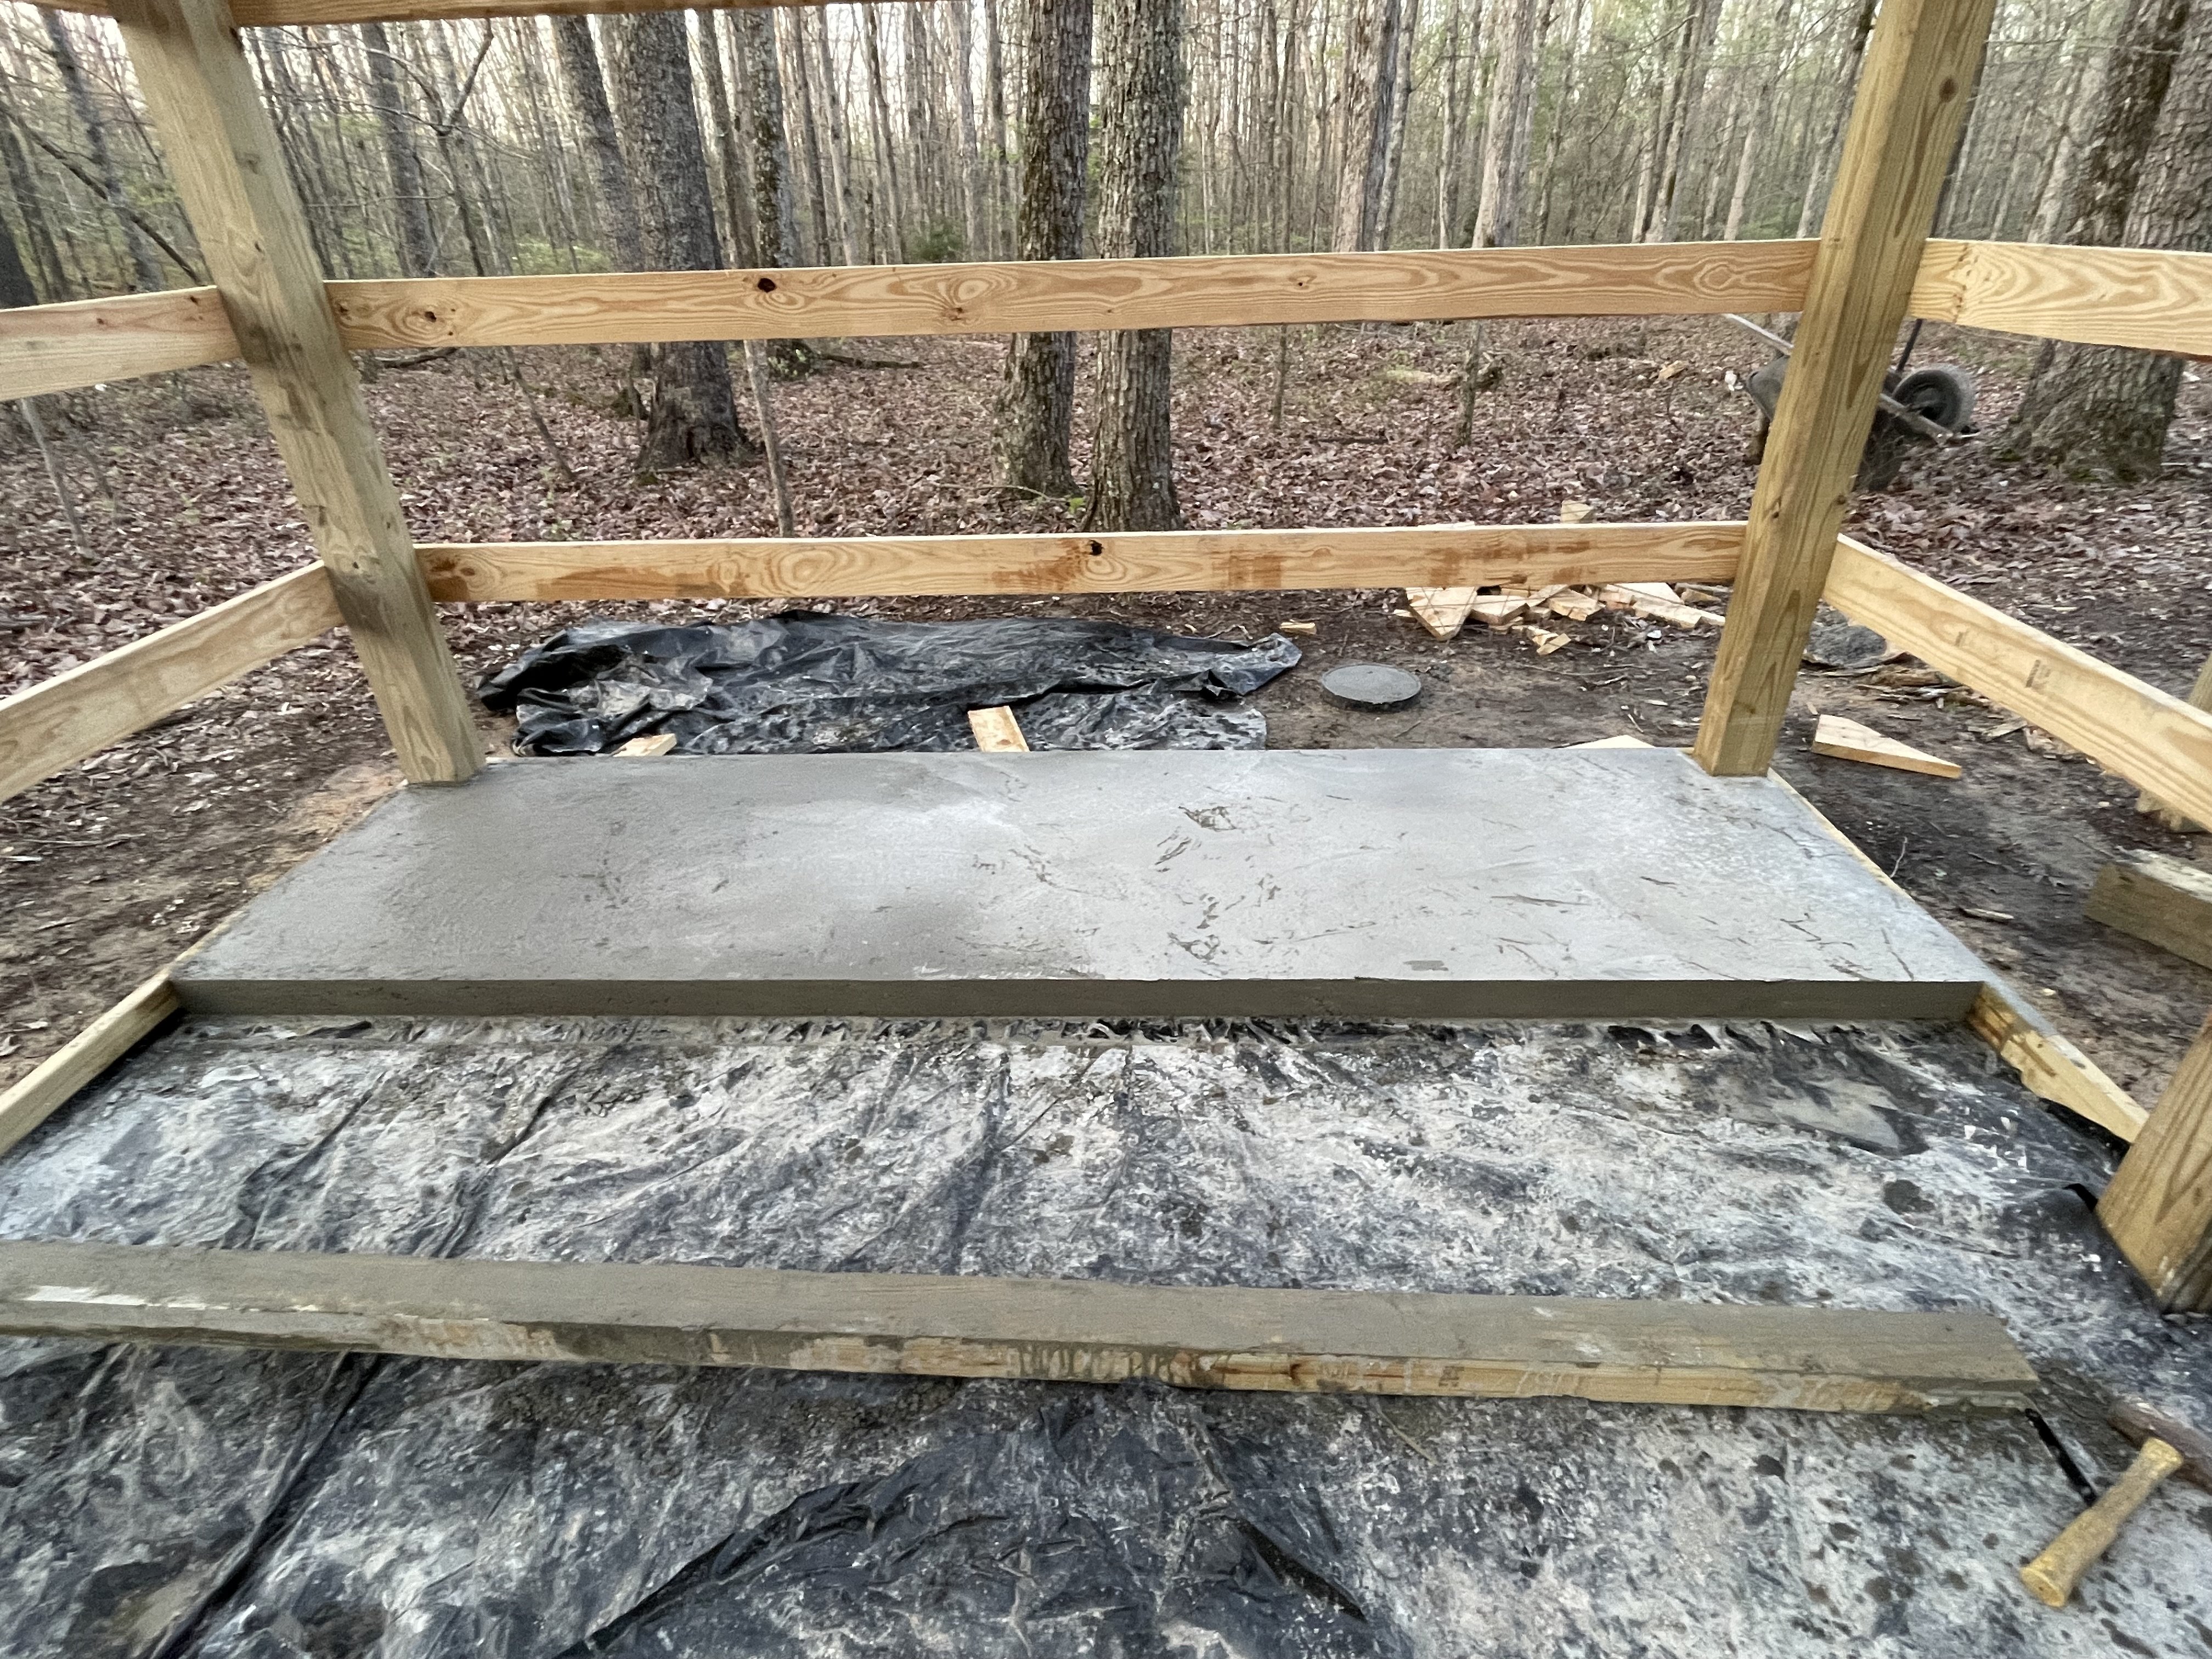
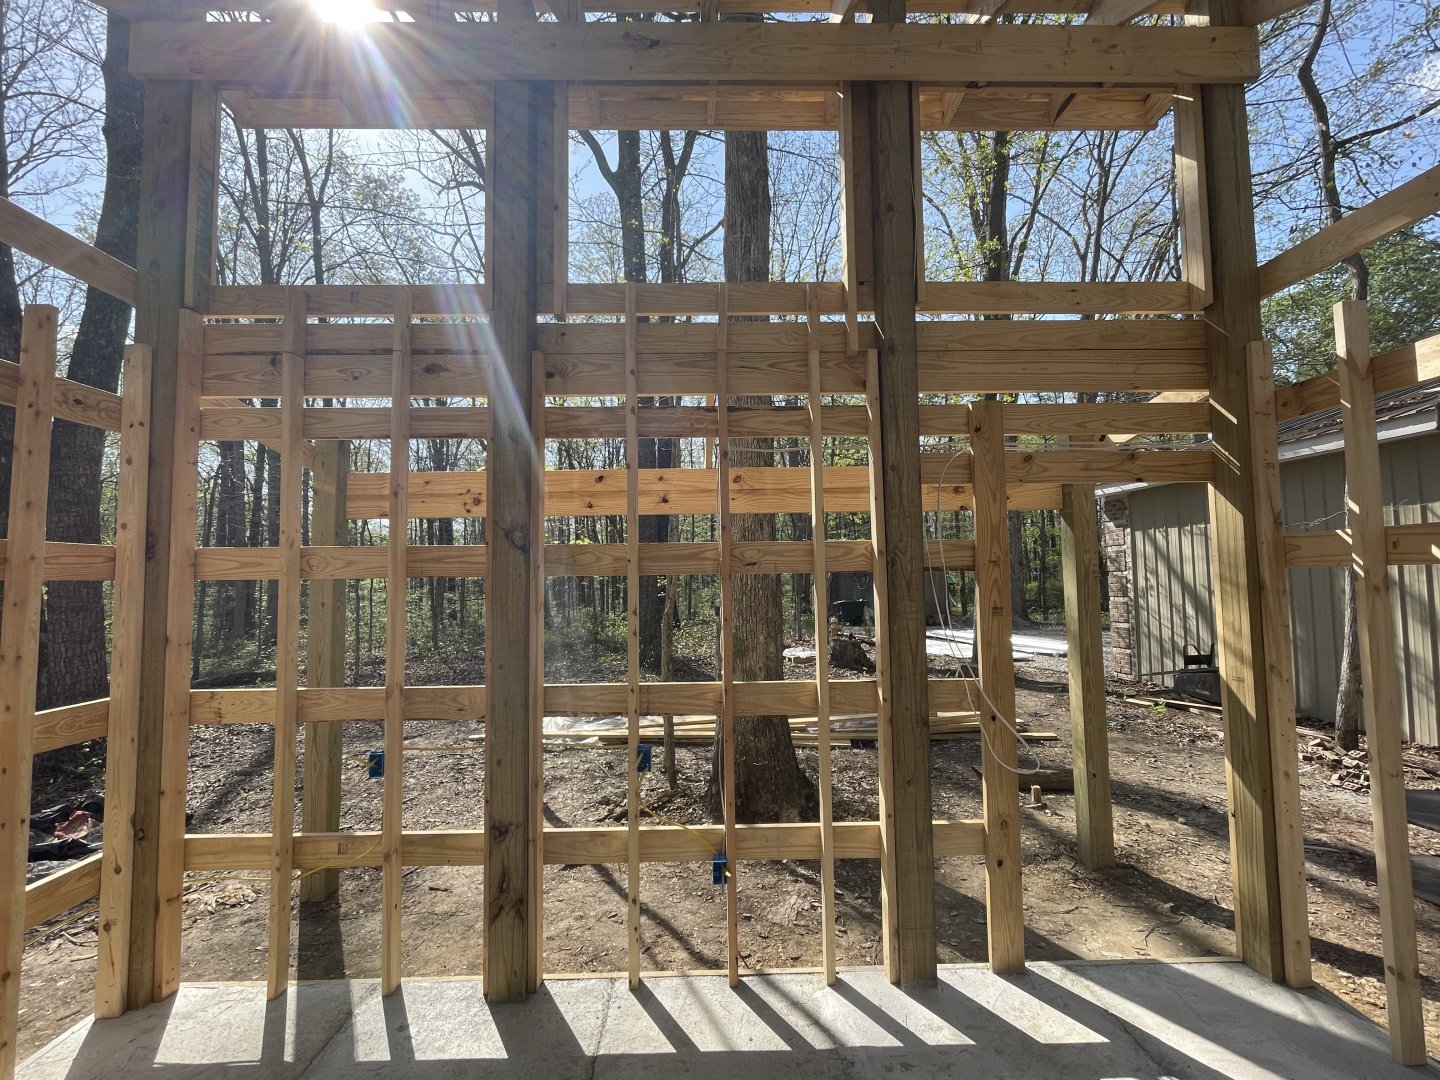
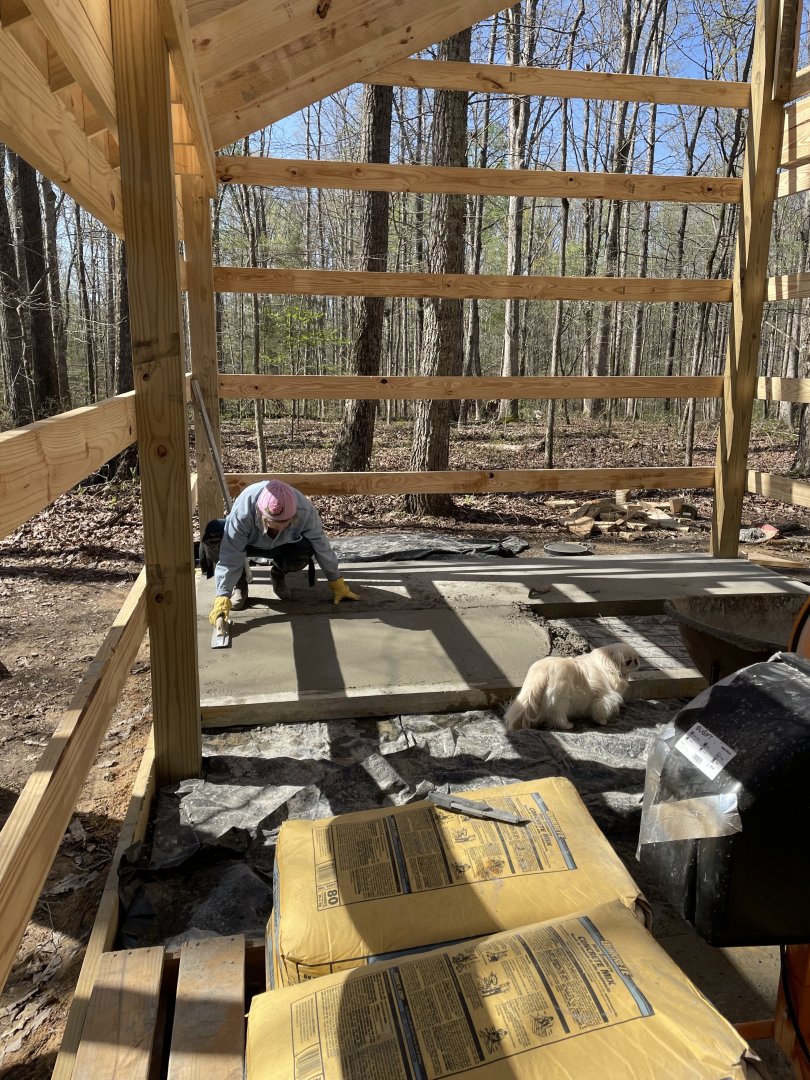
The last 3 days have been very physical. We mixed 20, 80lb bags of concrete a day. The first day was a slow start. The main problem was figuring out the best way to get the concrete out of the mixer to the spot we needed it. My homemade shoot was not making it happen. We ended up moving the mixer out and using the wheelbarrow to get it there:-) Yesterday I was able to put studs on the inside, after that section had cured. This was the first pour. Second day working. She had her hands full fixing puppy prints. Second pour done. Todays progress. Two more pours. Hopefully one tomorrow and one Saturday.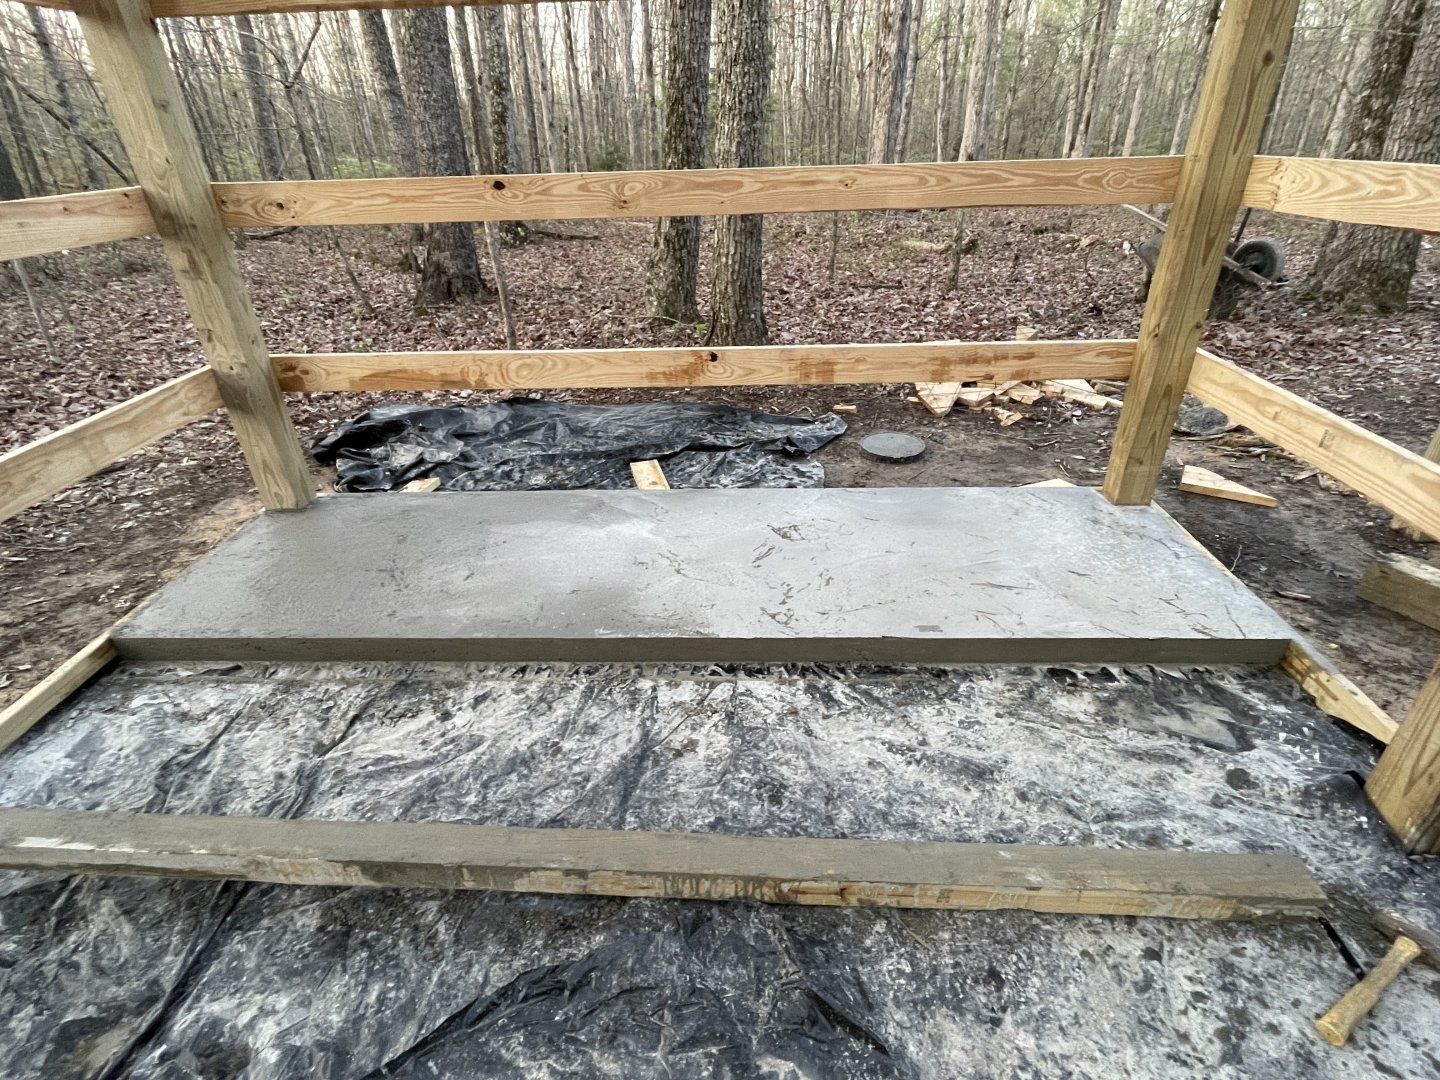
- 42 replies
-
- 11
-
-

-
I might use your build log on this one and use that Lego kit with this bottle I saw at the great American Junk Hunt:-) I got small hands:-)

- 106 replies
-
- 4
-
-
-
- Kentoshi-Sen
- bottle
- (and 1 more)
-
The Mossy Shipyard by Bryan Woods - 1:1
Bryan Woods replied to Bryan Woods's topic in Non-ship/categorised builds
We’re all ready for the first of five concrete pours. I would like to get 3 in this week if possible.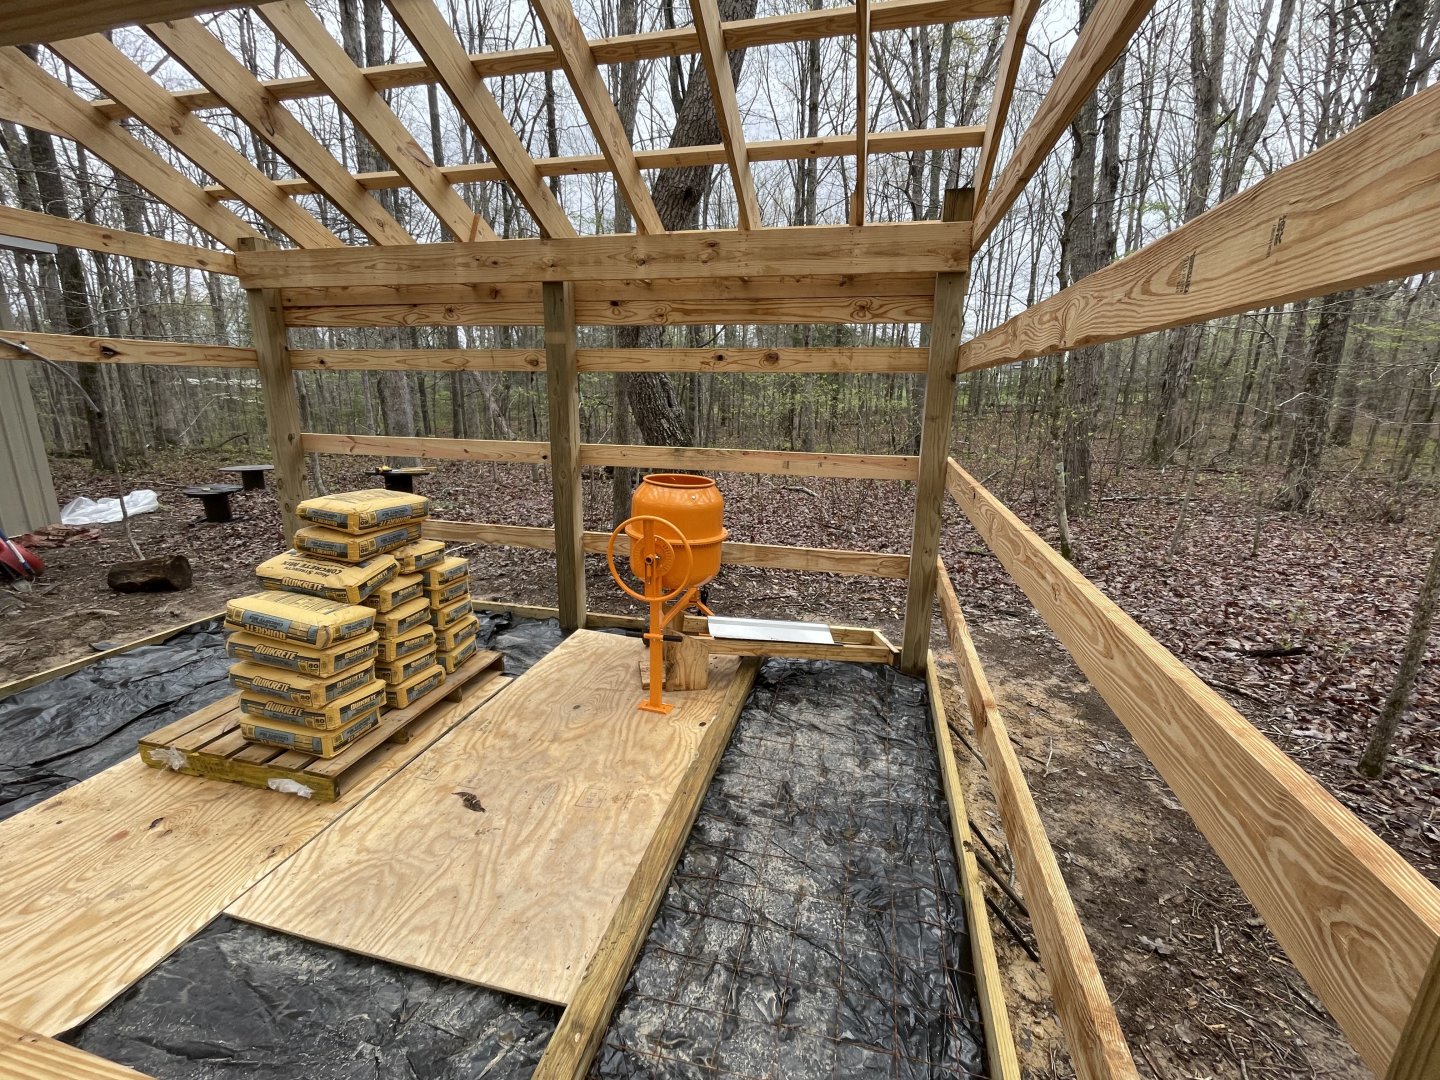
- 42 replies
-
- 10
-
-
The Mossy Shipyard by Bryan Woods - 1:1
Bryan Woods replied to Bryan Woods's topic in Non-ship/categorised builds
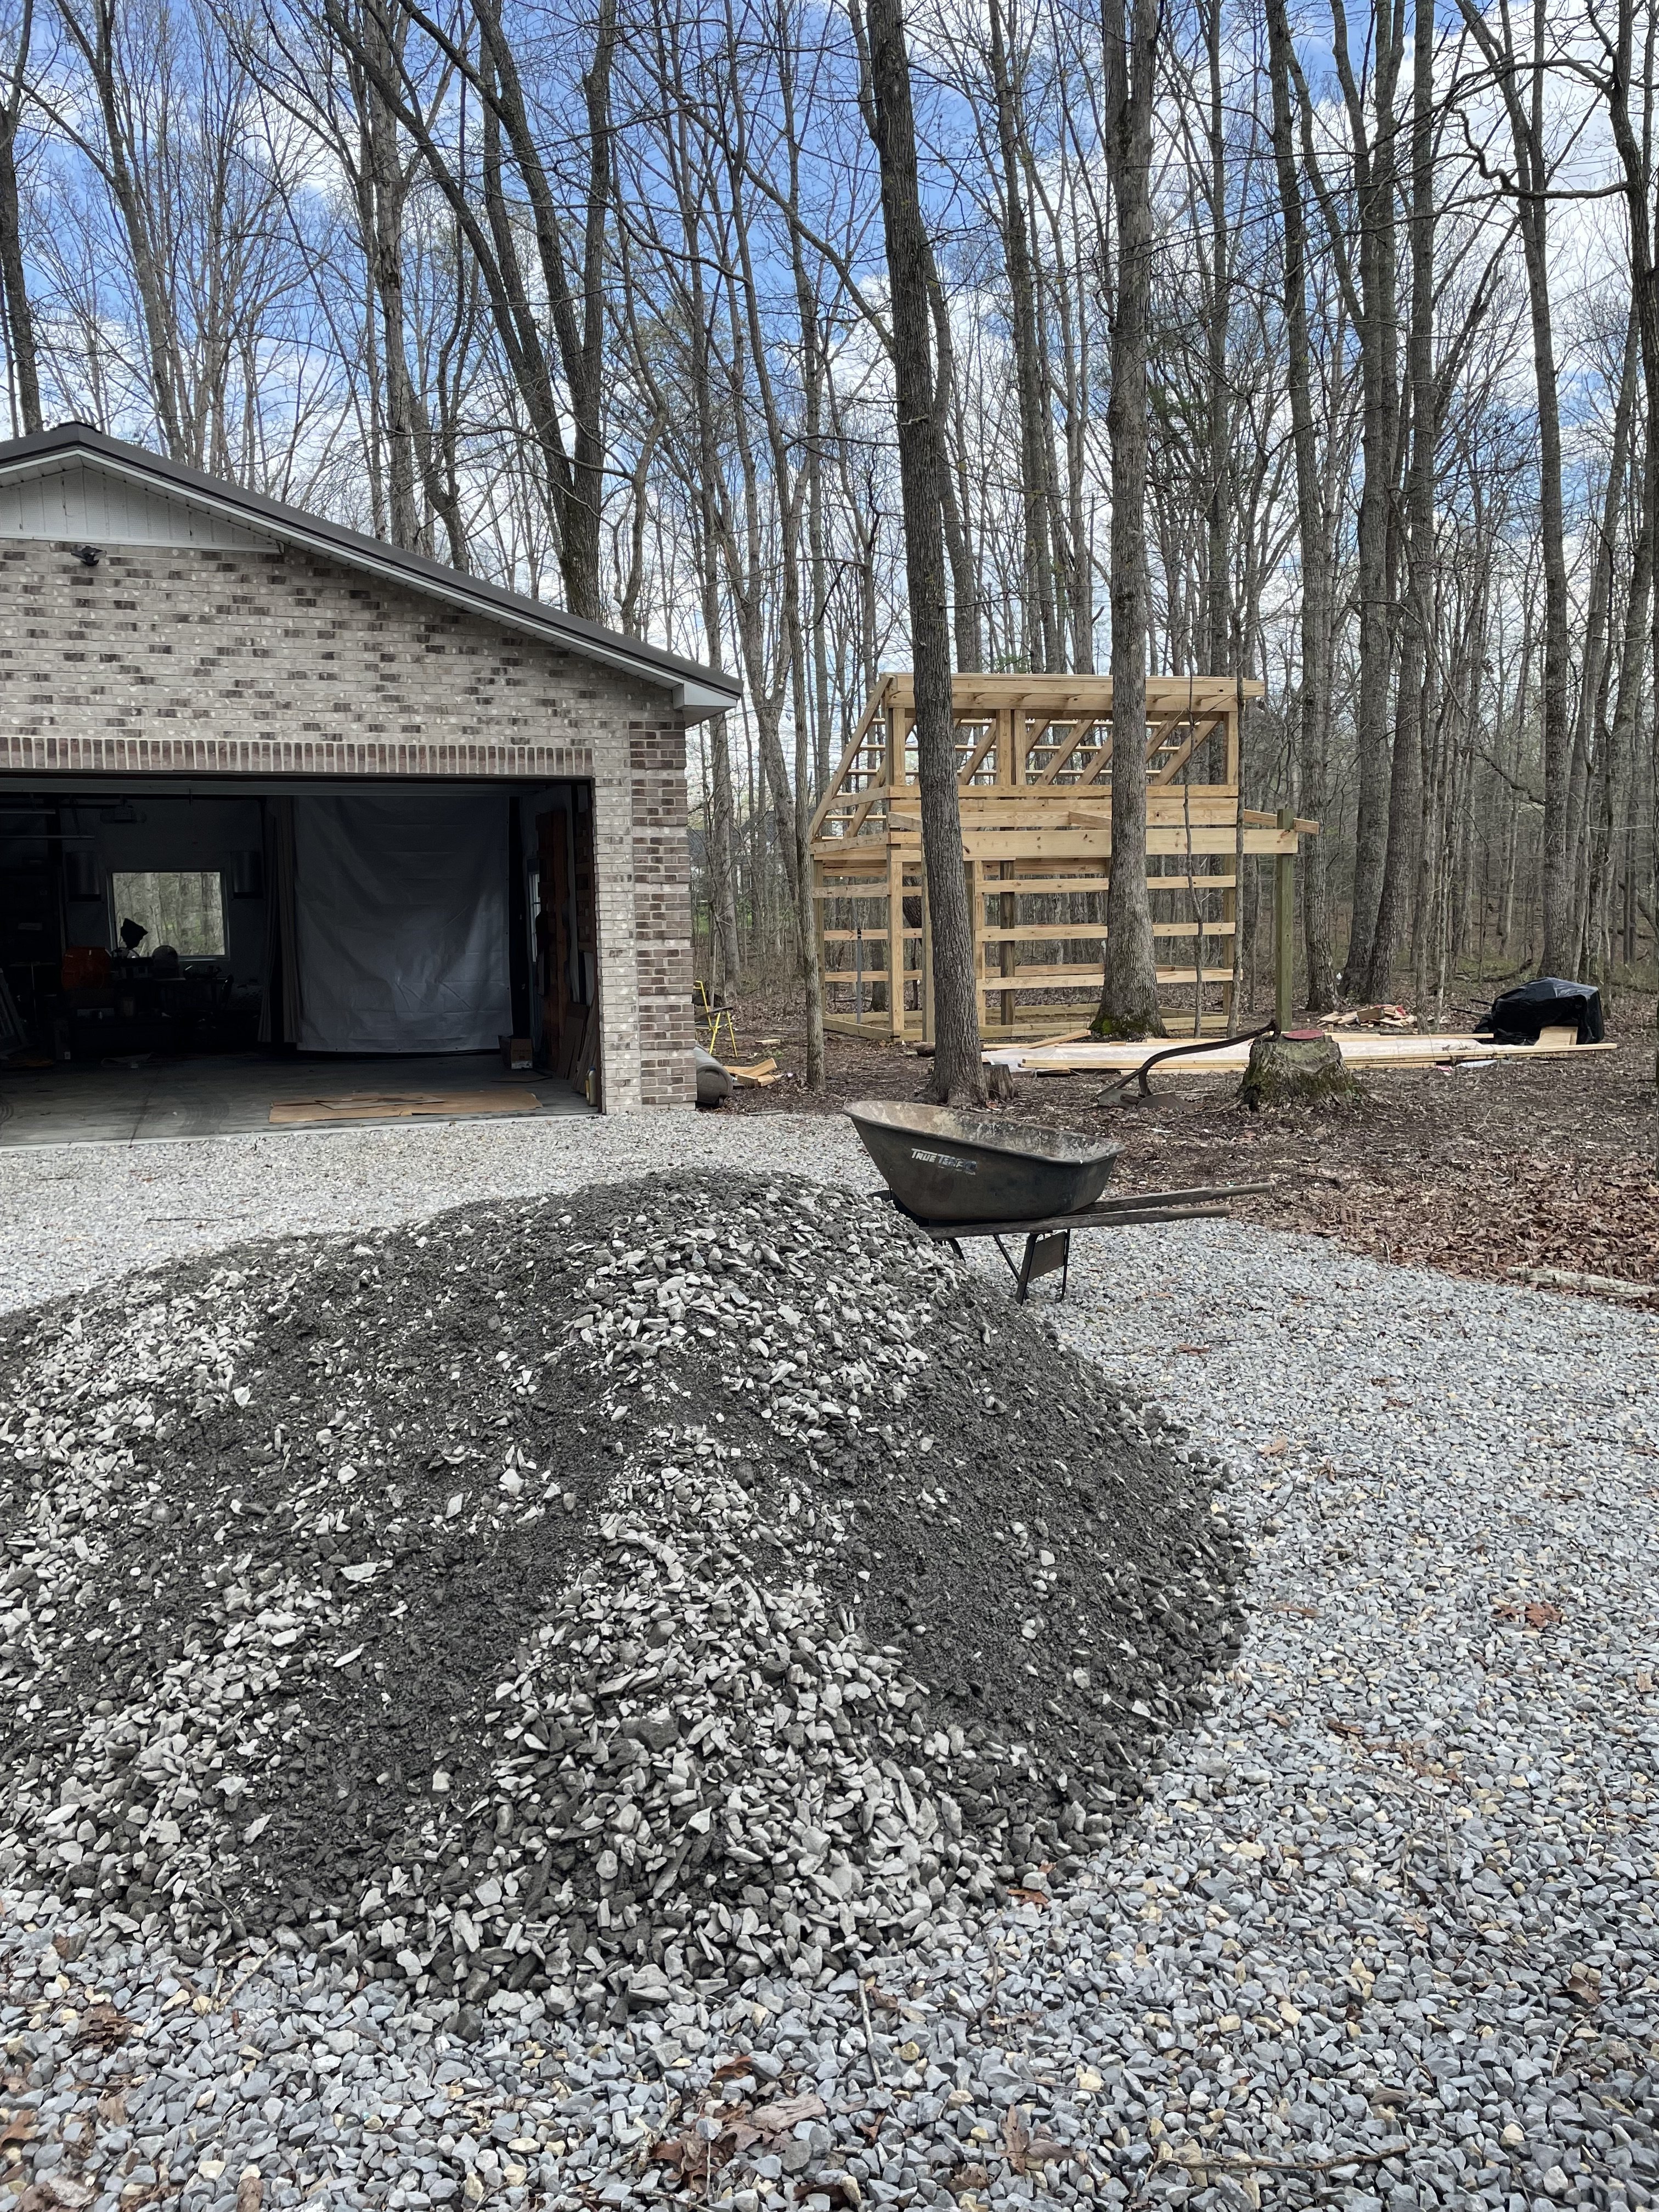
The gravel was delivered today. He brought 6 tons. We only had to move 3 tons. Grandkids have soccer tomorrow but maybe by Monday, weather permitting we may be ready for the first of five pours for the floor.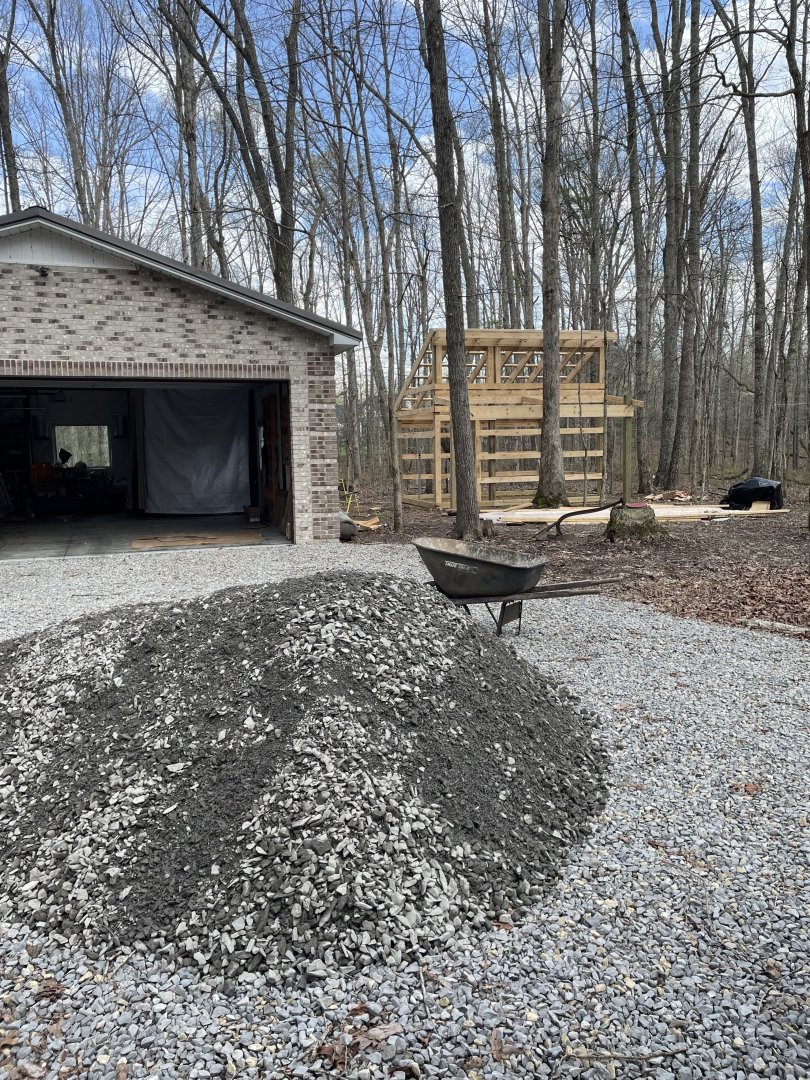
-
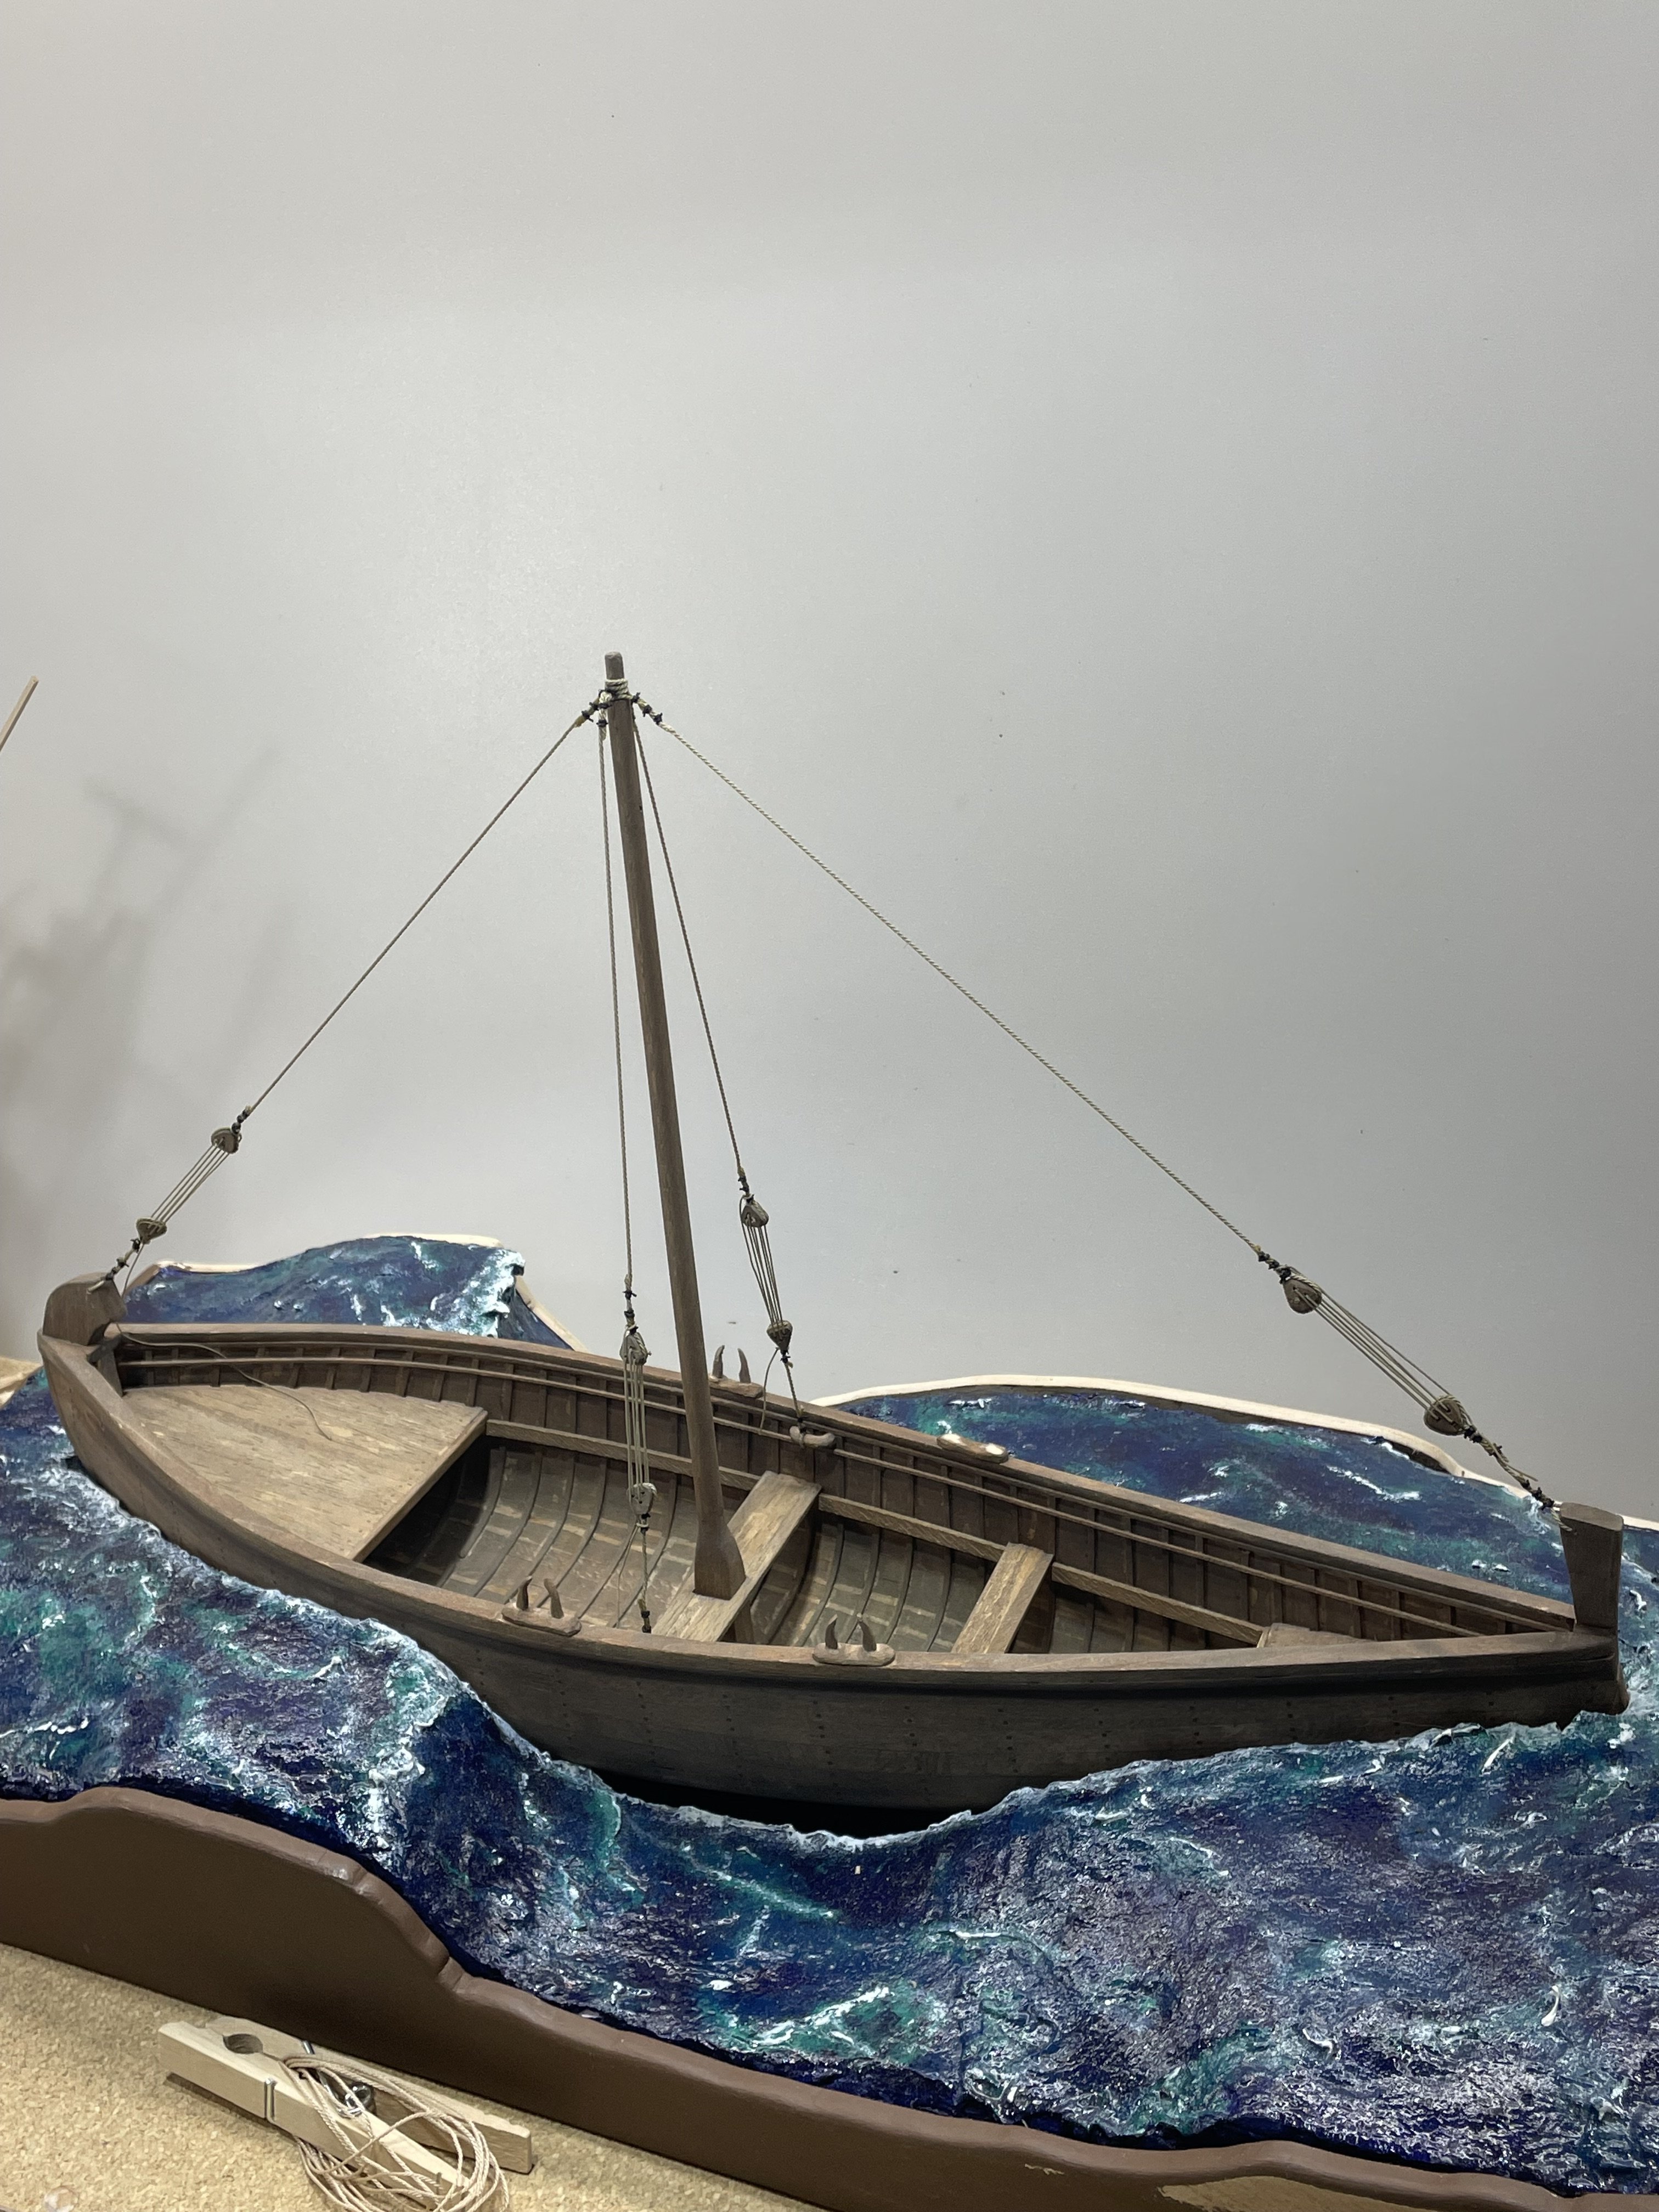
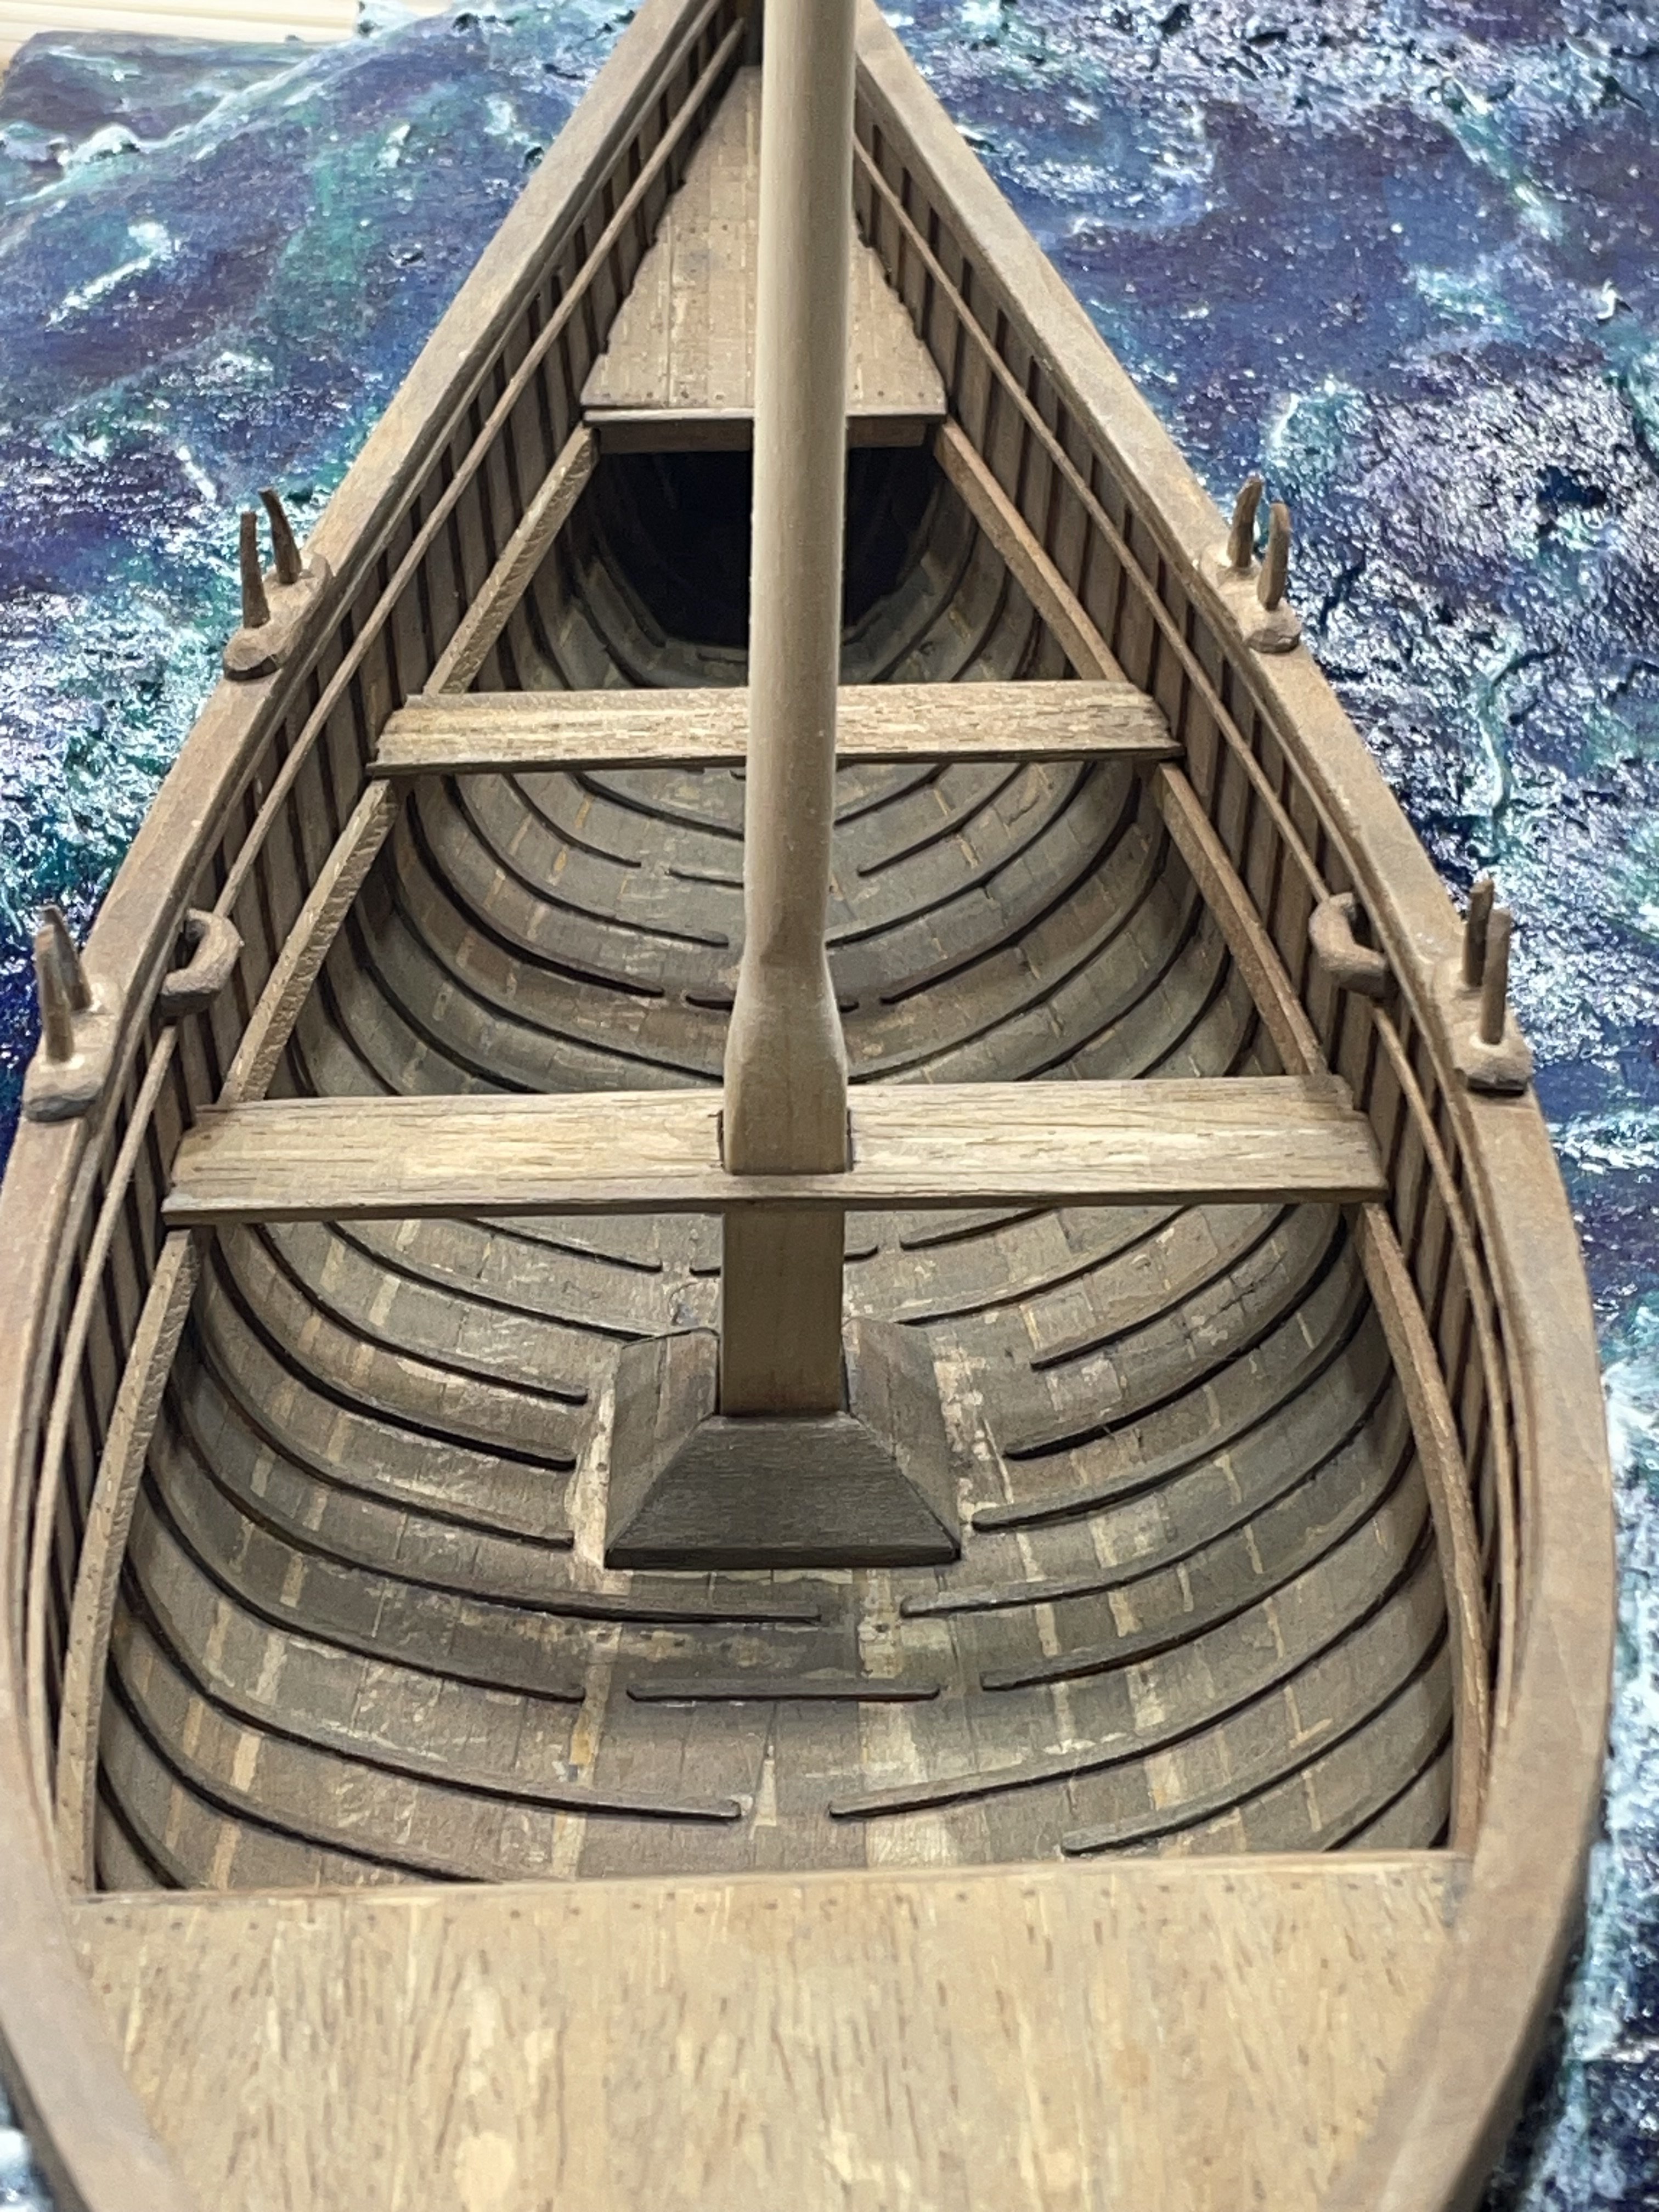
I found a little time to finish the inside. I got the decks and thwarts glued down. I put a tie rail, that’s what I call it:-) below the cap rail. The oarlocks are on for now, I’m probably going to break them off before I get it done. I’m steady sanding the mast down daily. Trying not to get carpal tunnel:-) still got the yard to make and paint them both before the rigging starts.

-
The Mossy Shipyard by Bryan Woods - 1:1
Bryan Woods replied to Bryan Woods's topic in Non-ship/categorised builds
Well we got the rain… still coming down. We have a county wide power outage. So probably no gravel today. This creek is normally dry, it only fills with rain water from all the ridges. This morning I walked down hoping it hasn’t started uncovering the counties main water line. I can deal with no power for a while but no water is a completely different story:-)
-
I haven’t got to spend much time this week on the Kinneret. I tried some oil under the stern deck and it was going to shine way too much. Seeing shiny and flat beside each other made me lean to a not as shiny coat. I think it will give the boat more of an authentic look. When time is available I’ll give it a coat of dullcote top coat.

-
The Mossy Shipyard by Bryan Woods - 1:1
Bryan Woods replied to Bryan Woods's topic in Non-ship/categorised builds
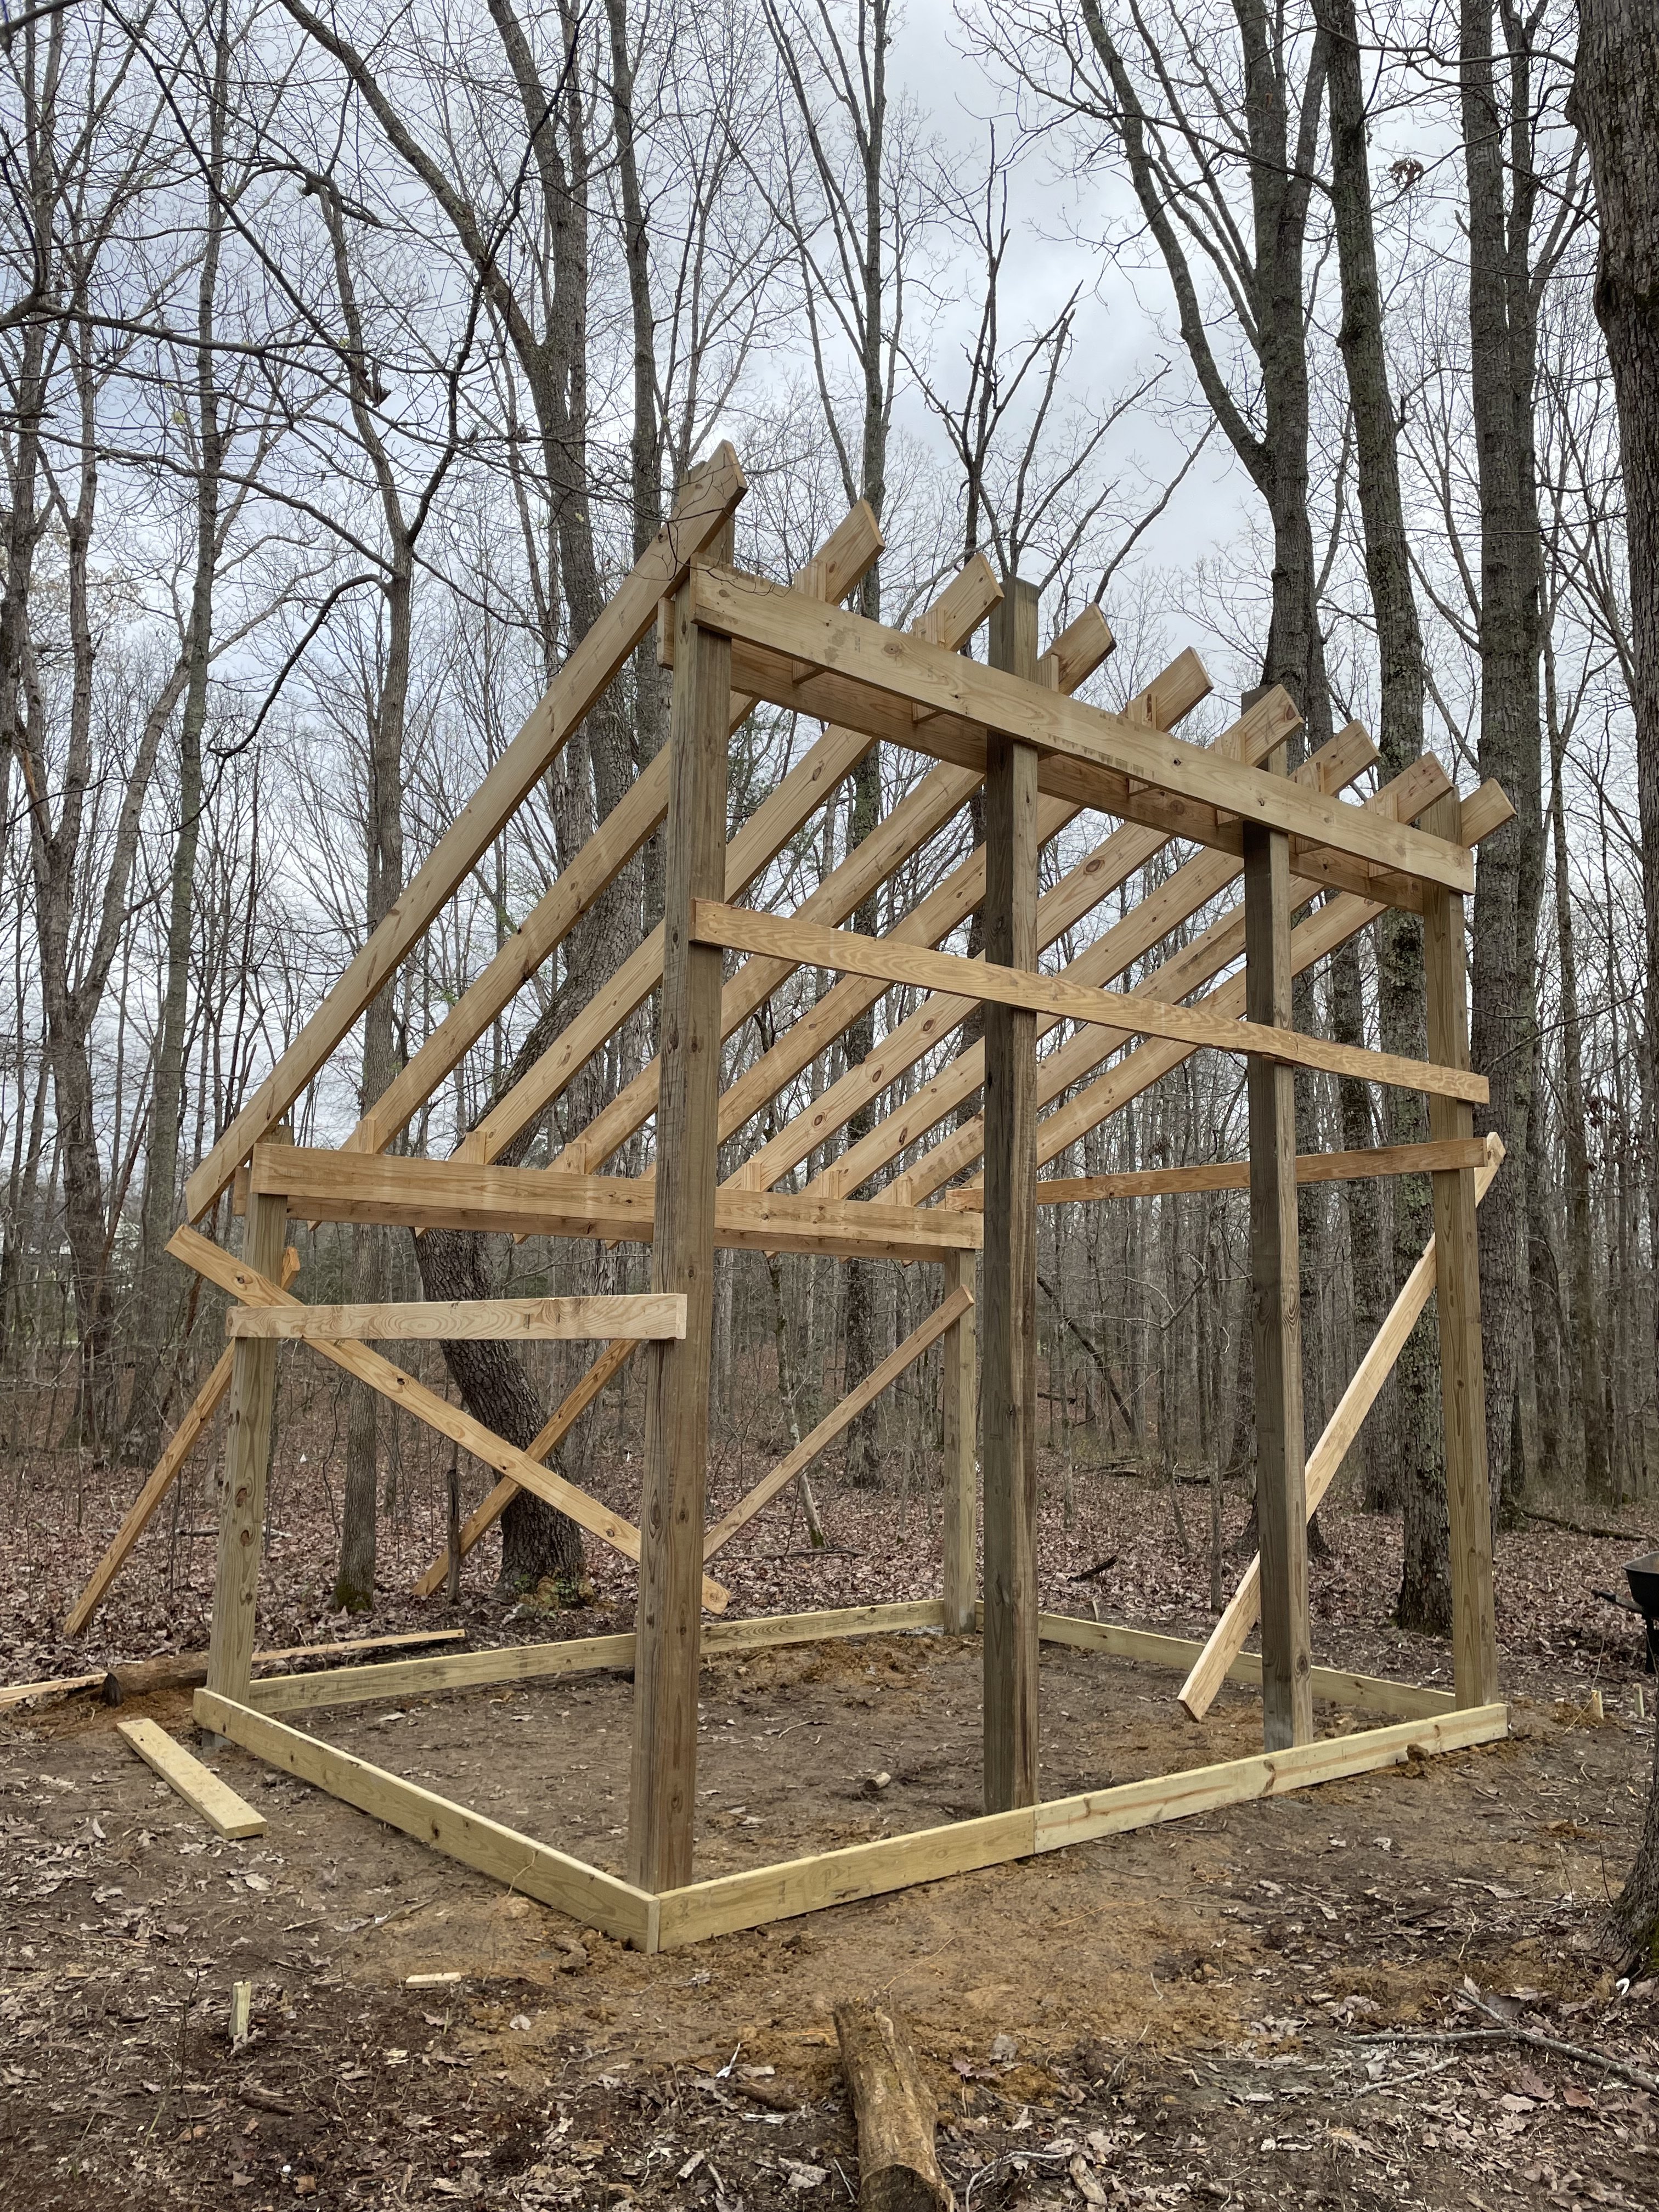
The framers showed up again today. It’s starting to take shape. Lucky Me! It’s supposed to rain for the next 5 days. That means the guys bringing the gravel can’t dig on their other jobs and can squeeze me in. I might be wheelbarrowing in the rain for a few days. Thanks for all the likes!

-
The Mossy Shipyard by Bryan Woods - 1:1
Bryan Woods replied to Bryan Woods's topic in Non-ship/categorised builds
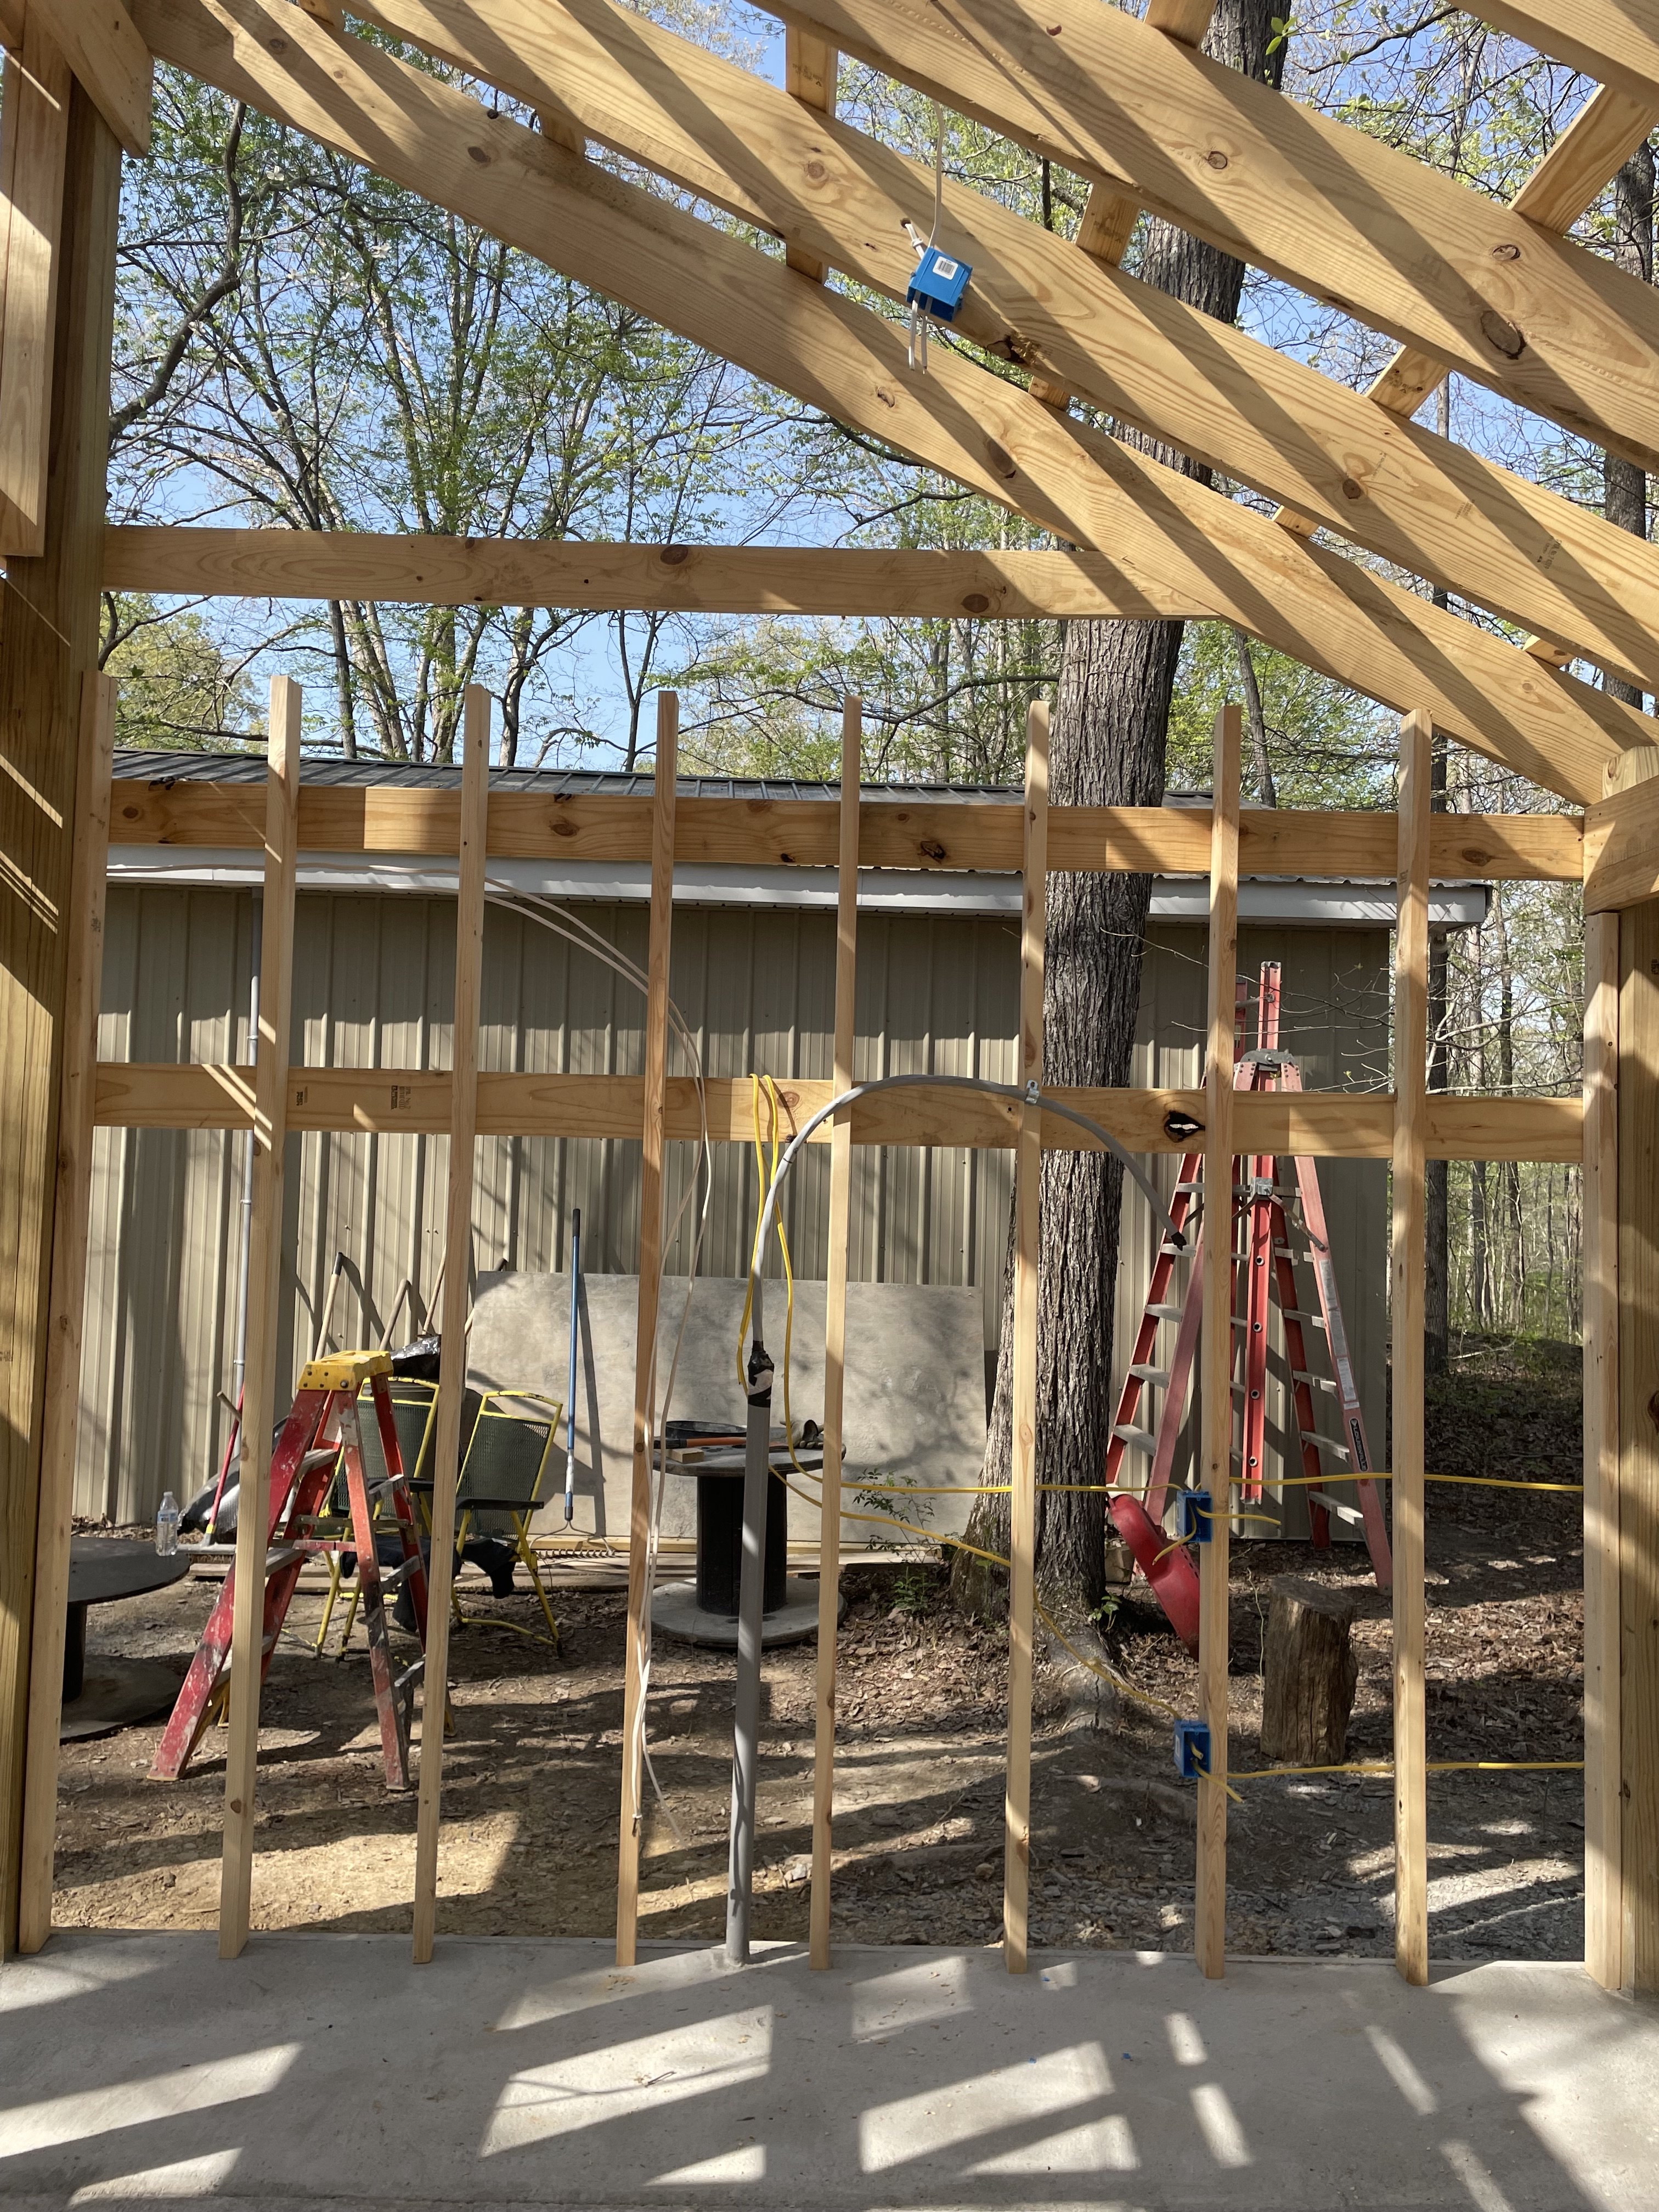
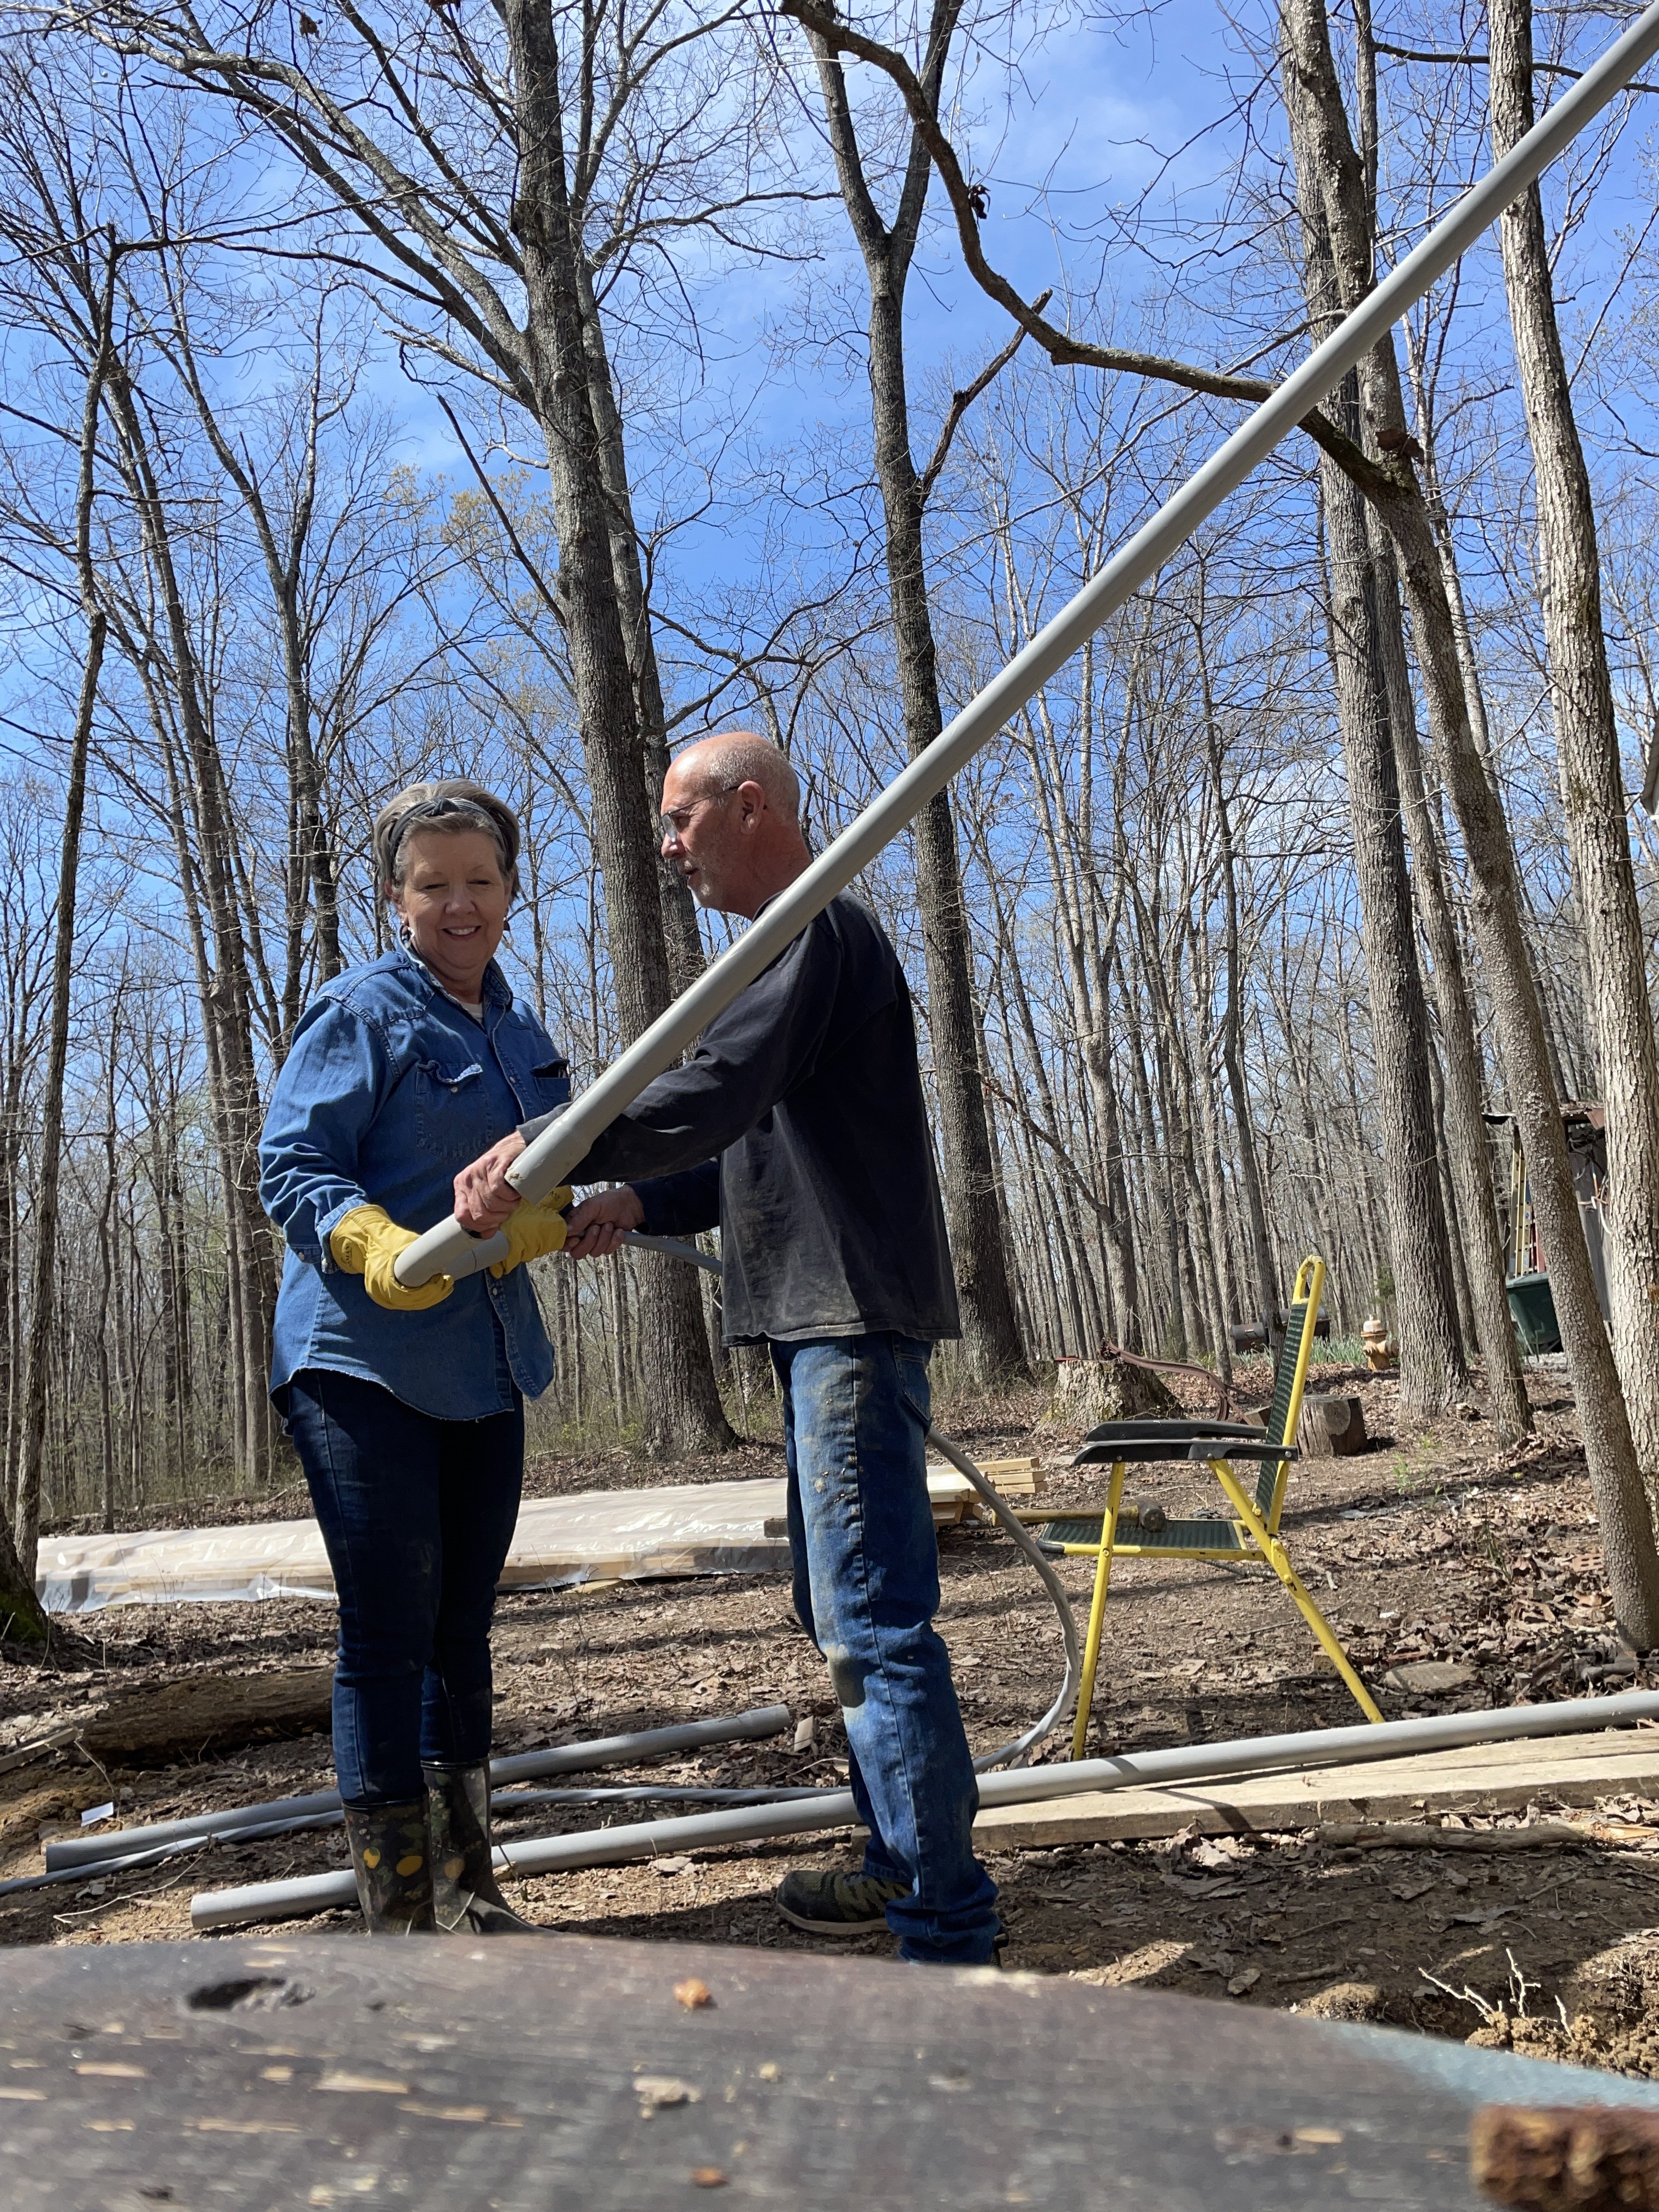
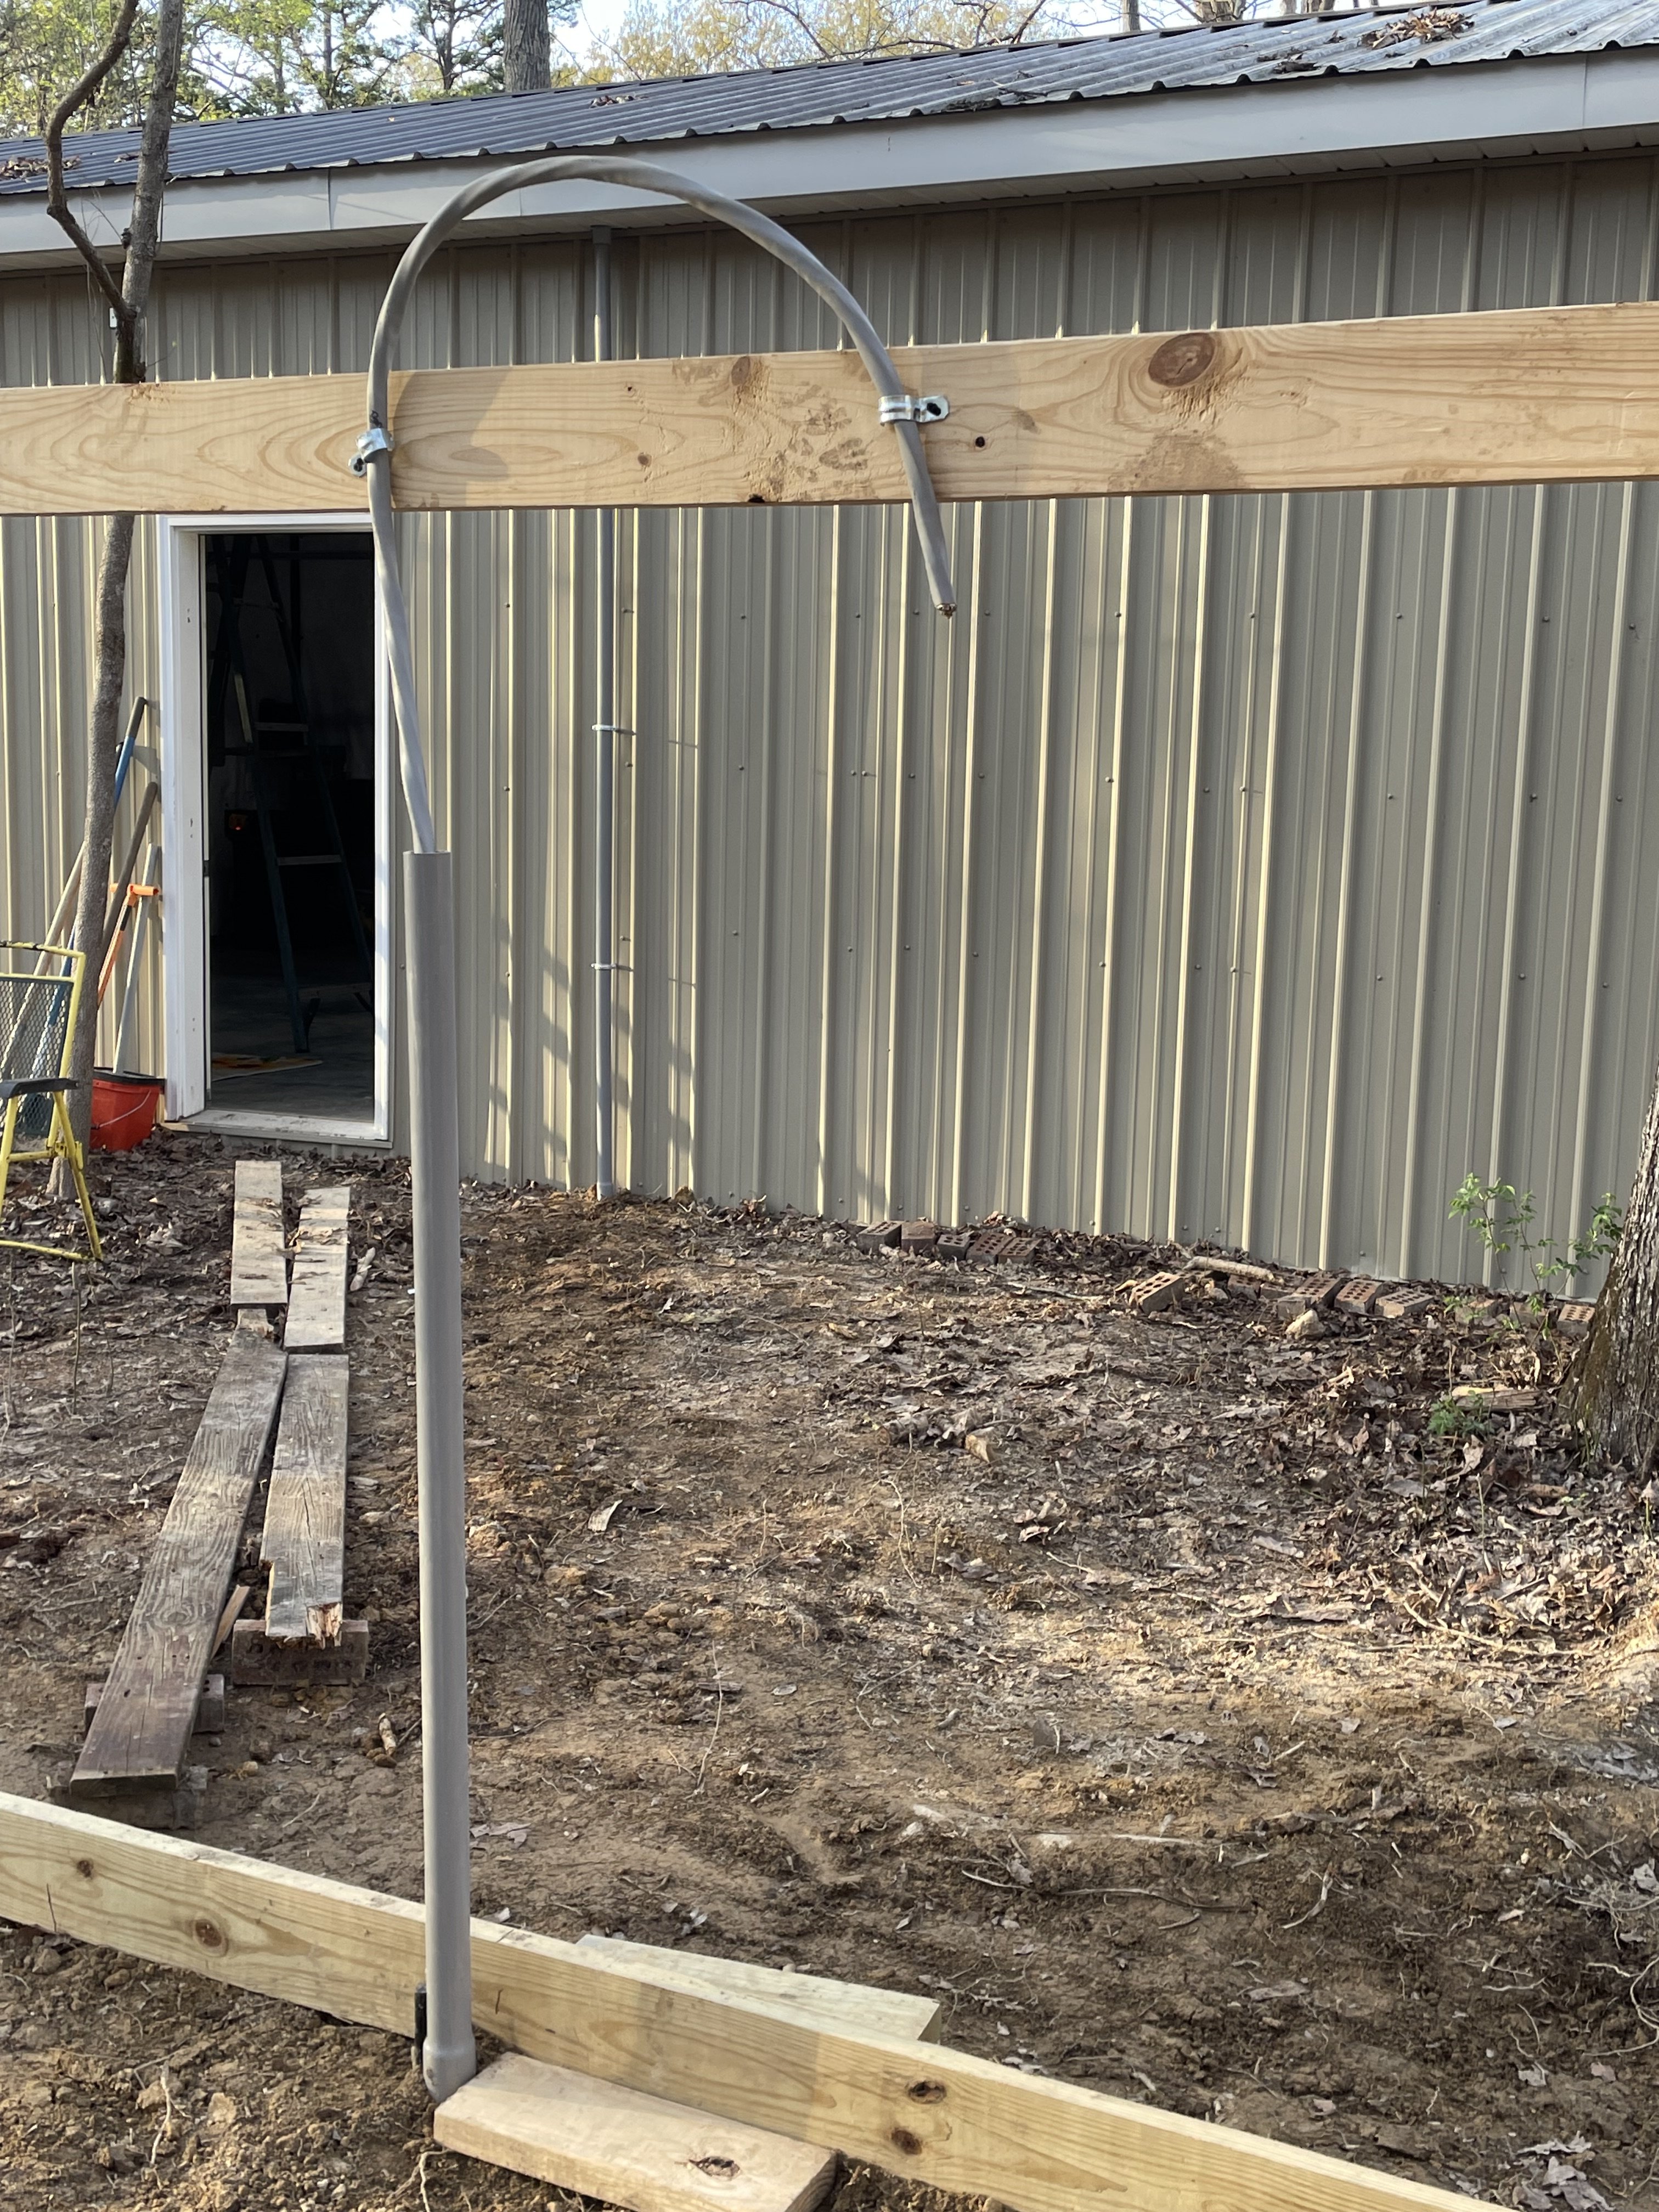
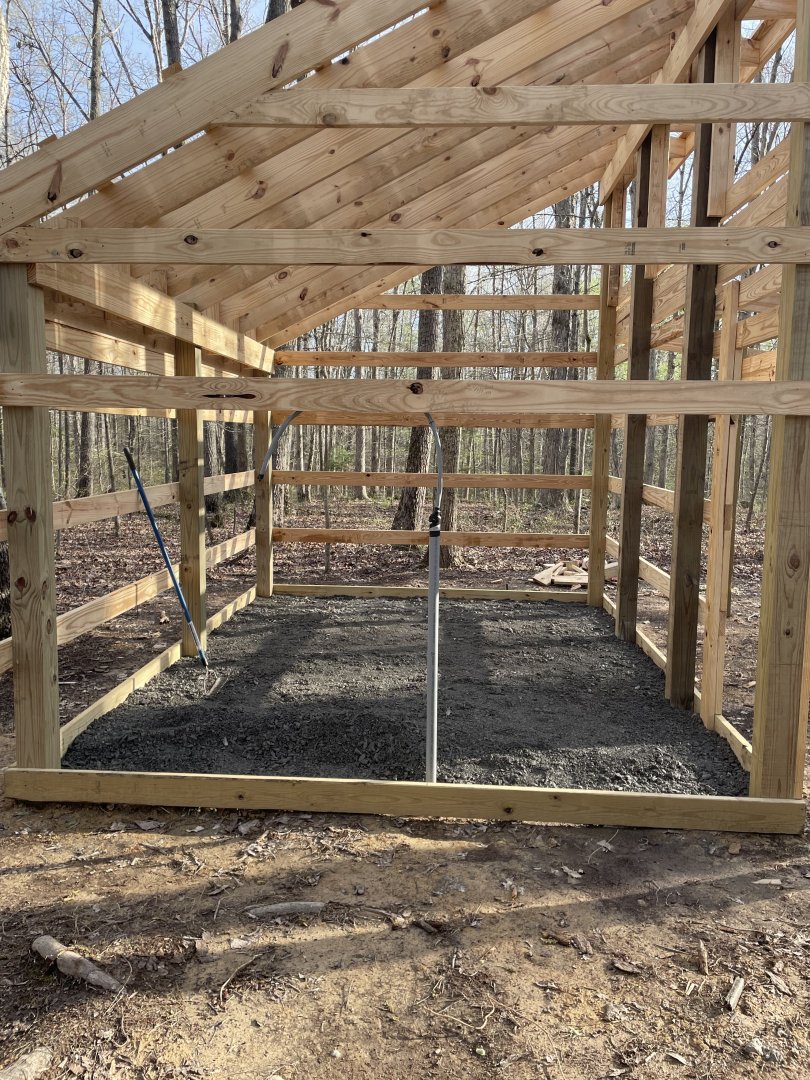
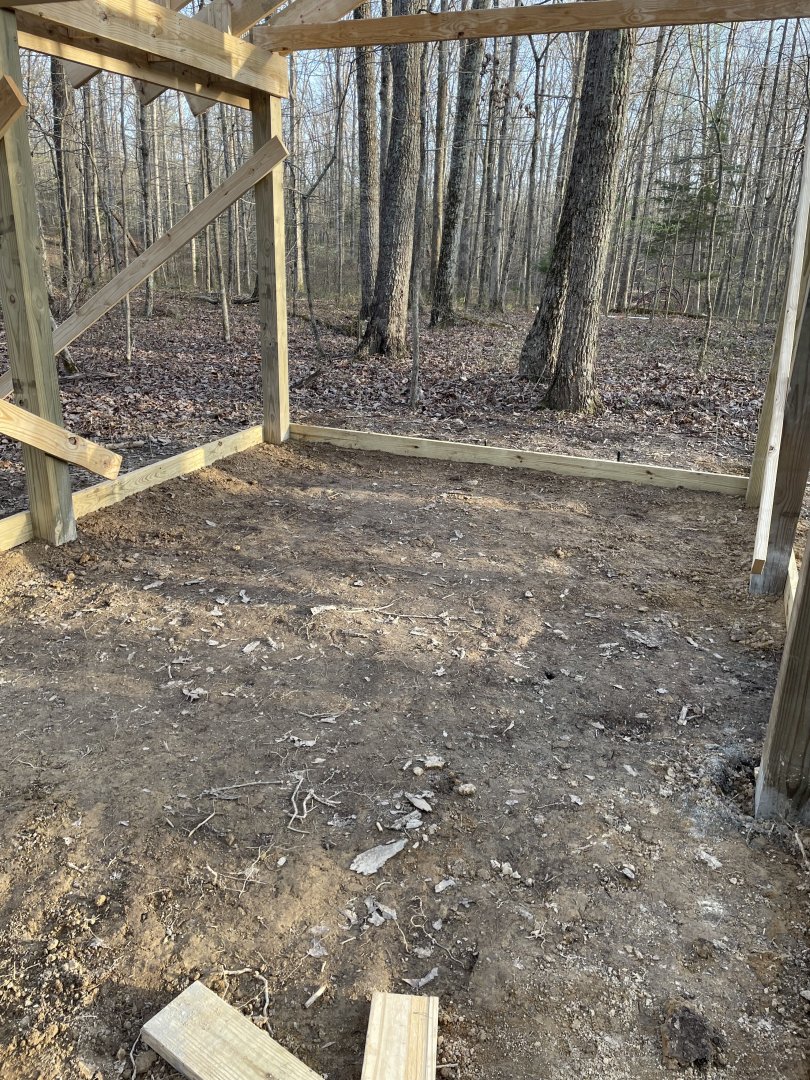
Yesterday we had a productive day. With my wife’s help we got the ditch dug conduit run , cable installed and the ditch filled. Then I spent the day cleaning up the dirt piles left behind from all the post holes that were dug. It’s supposed to rain for the next 5 or 6 days. The soil is mostly clay, when it’s stepped on it packs down hard. After the rain it would be impossible to work. So I packed the dirt in the cracks at the bottom to prevent the gravel from rolling out. Today I’ll just need to get the cable run in the trusses of the garage and over to the electrical panel. After that we’ll be waiting for the gravel to get delivered.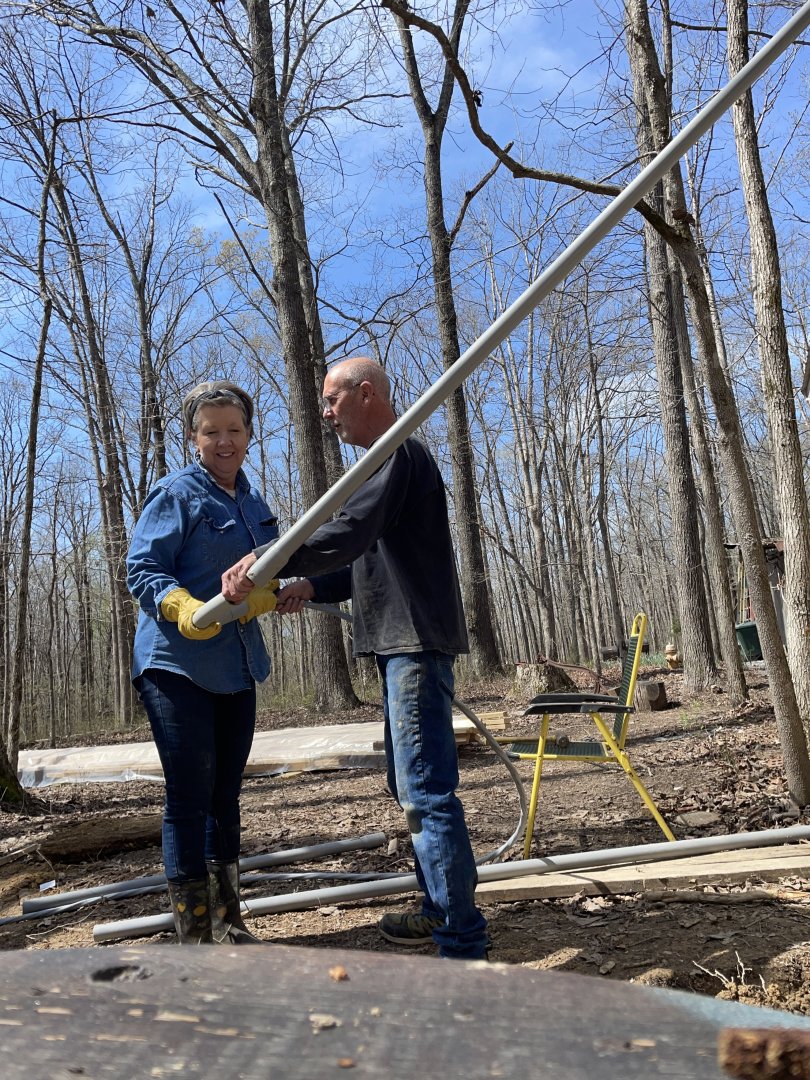
-
The Mossy Shipyard by Bryan Woods - 1:1
Bryan Woods replied to Bryan Woods's topic in Non-ship/categorised builds
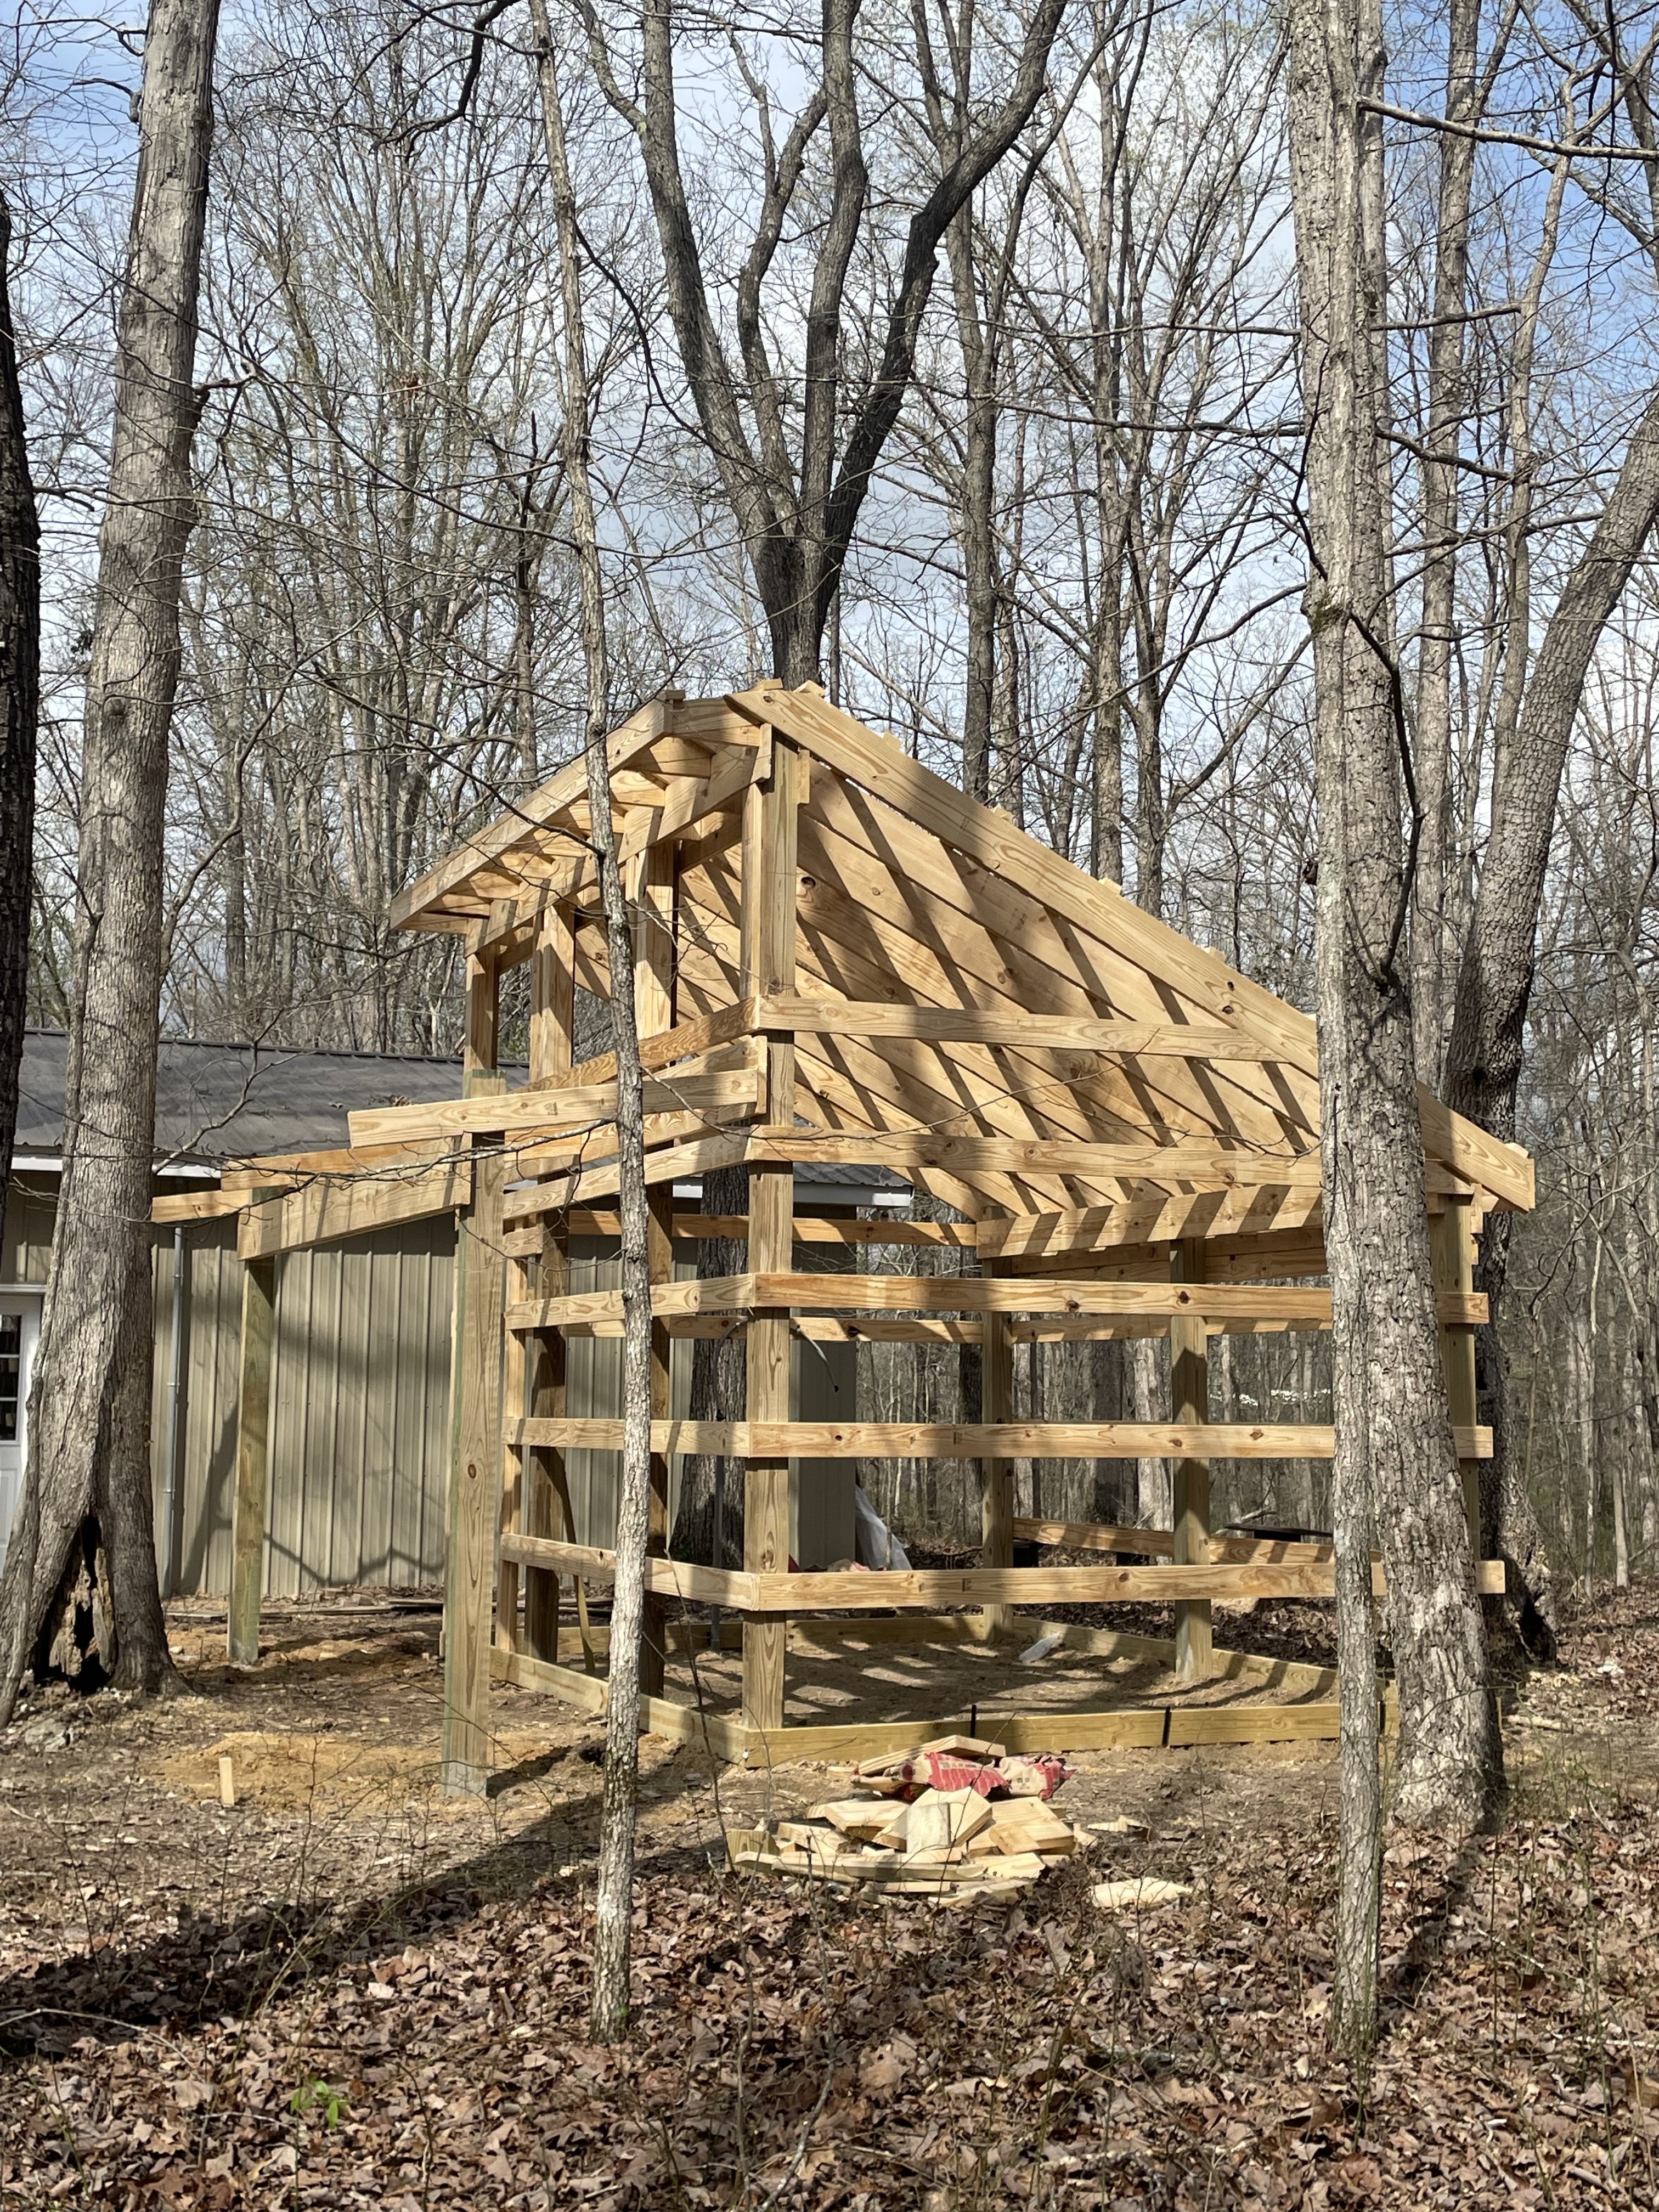
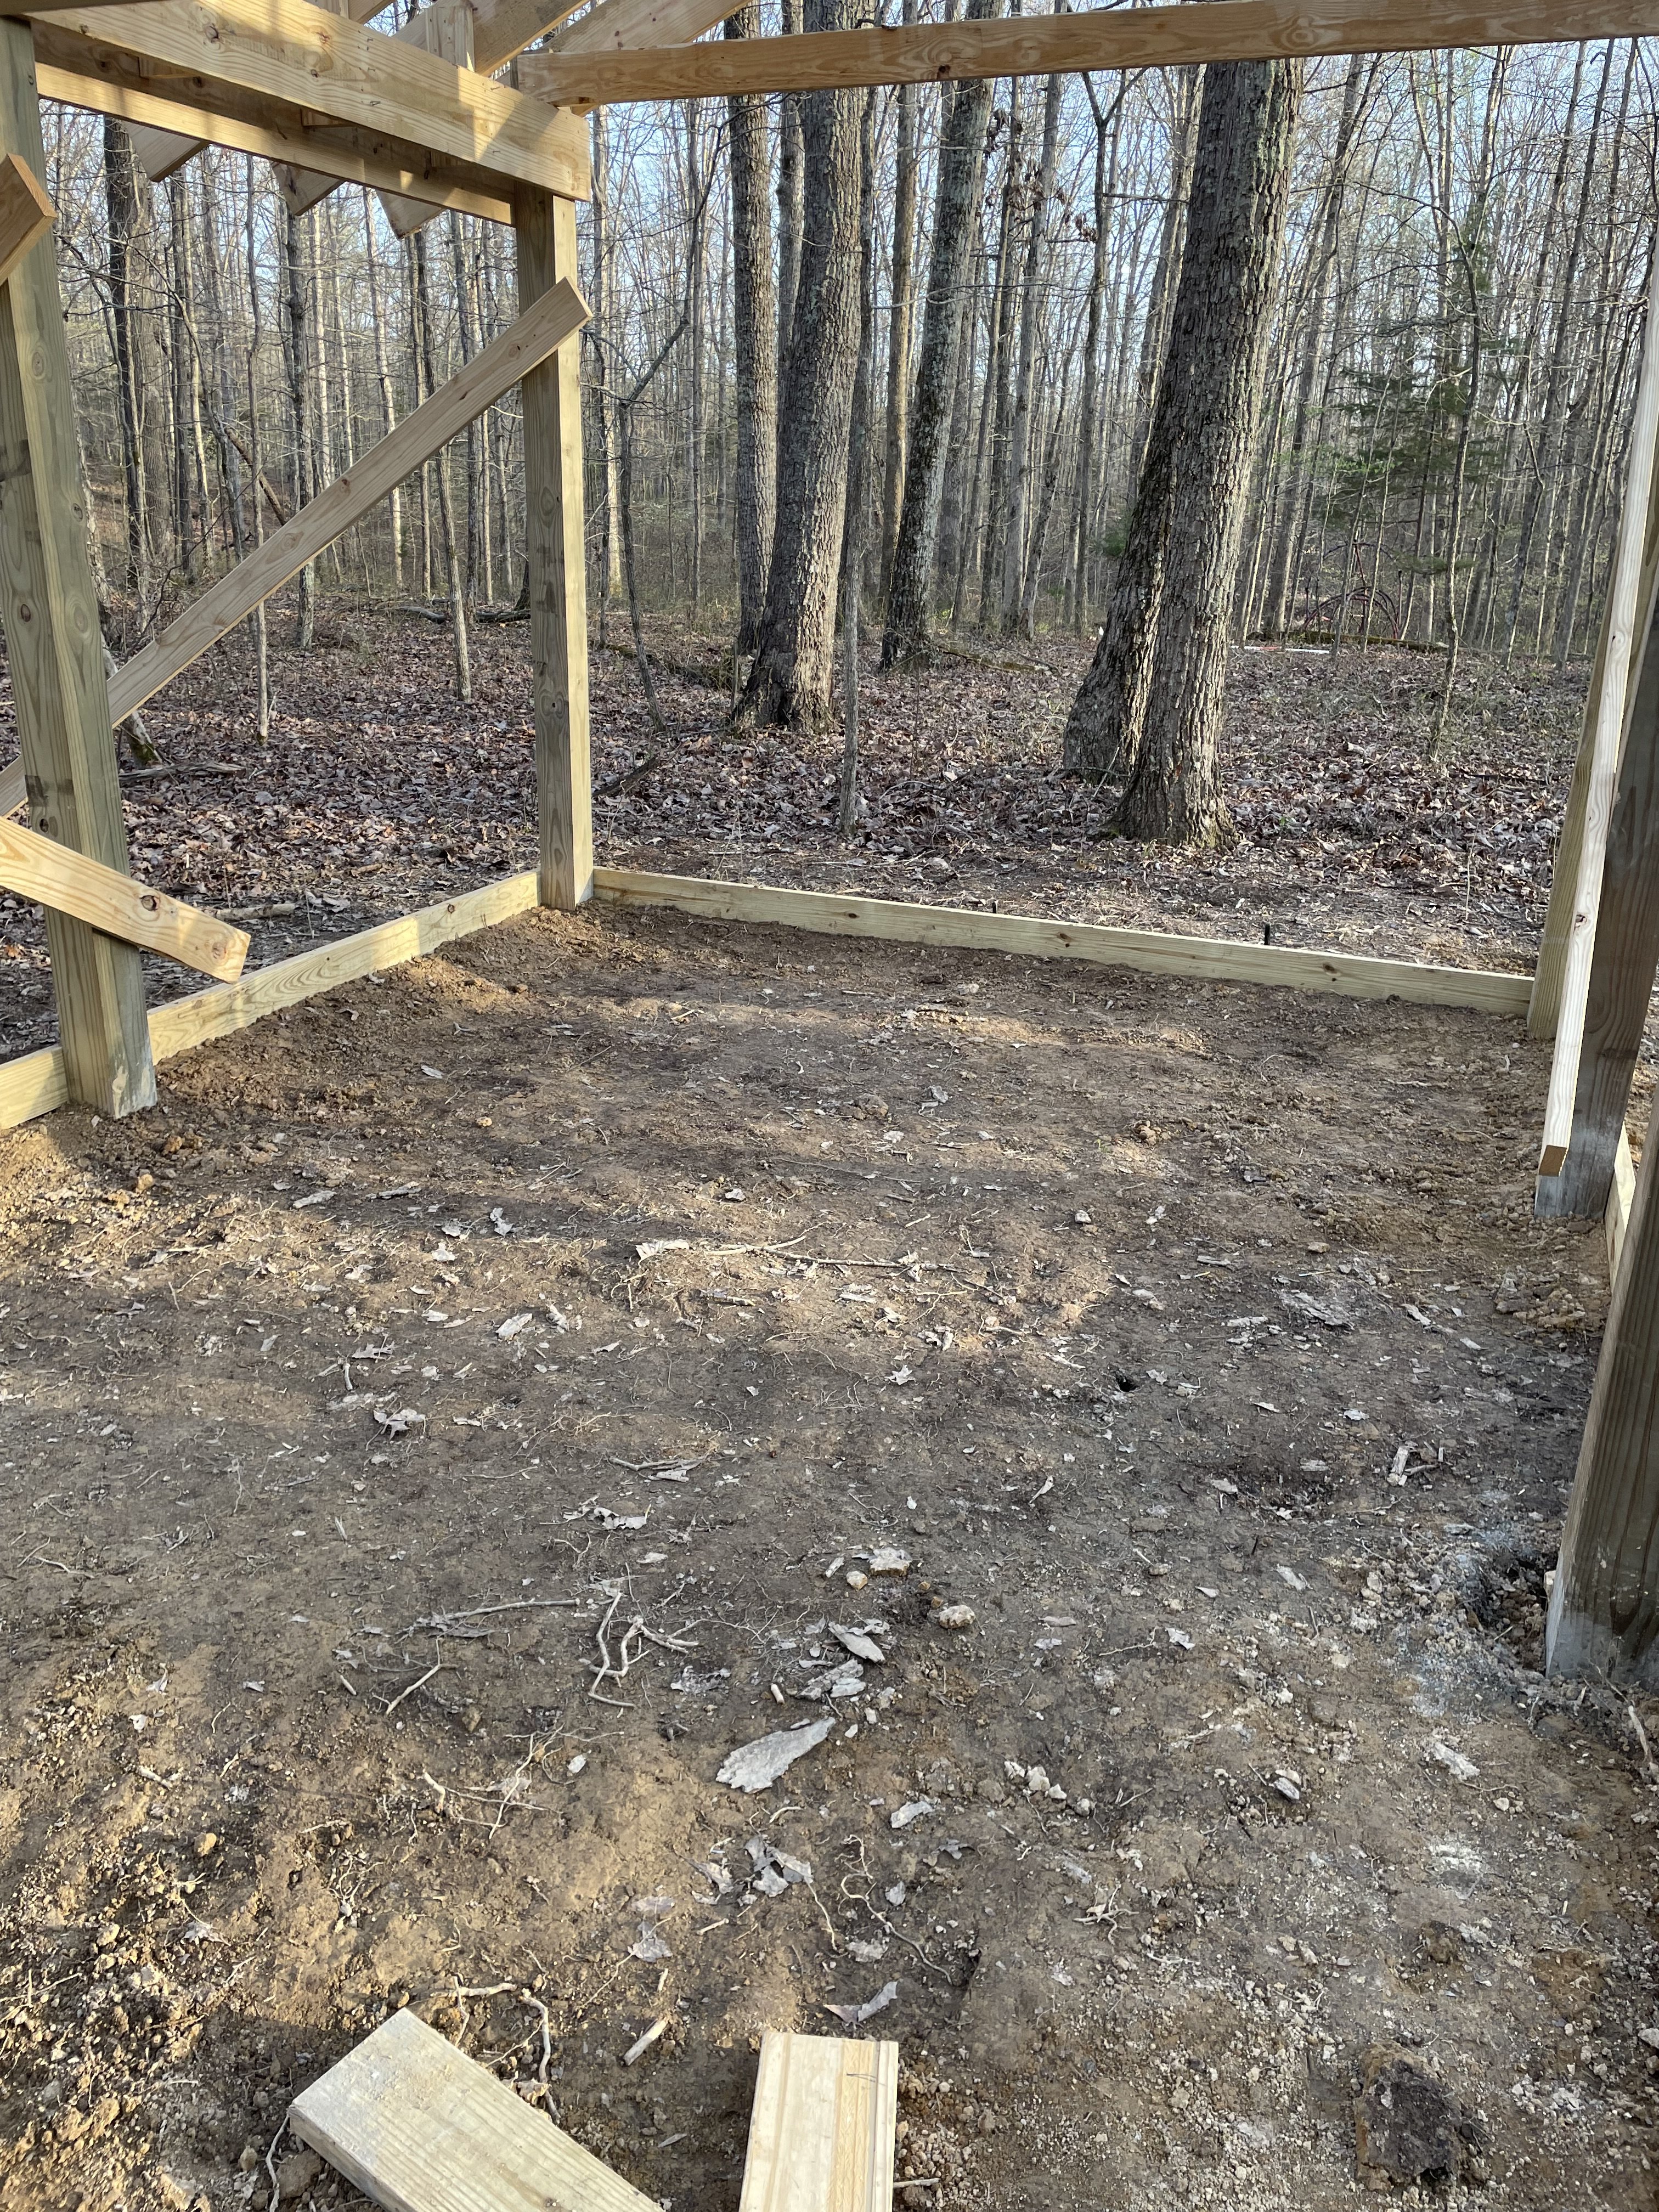
Three young men’s progress today. Tomorrow I’ll start running the electric service cable to it.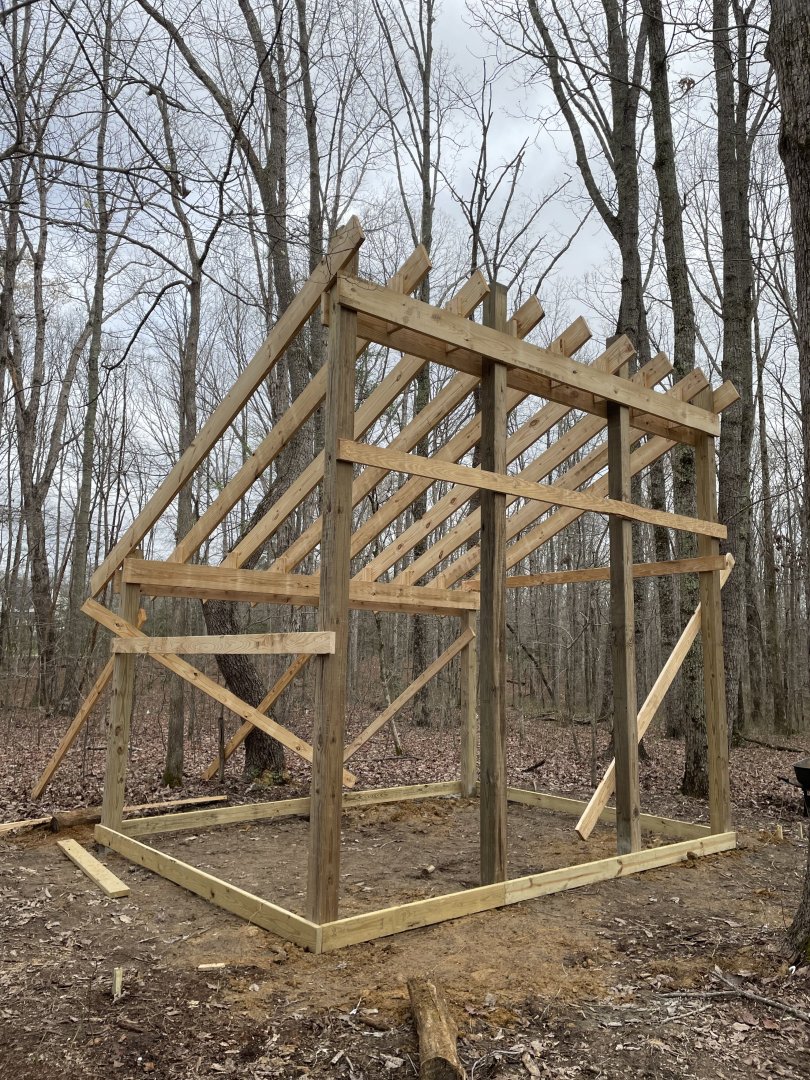
-
The Mossy Shipyard by Bryan Woods - 1:1
Bryan Woods replied to Bryan Woods's topic in Non-ship/categorised builds
They did have trouble getting the trailer close enough. He had to go back down the drive and back up:-/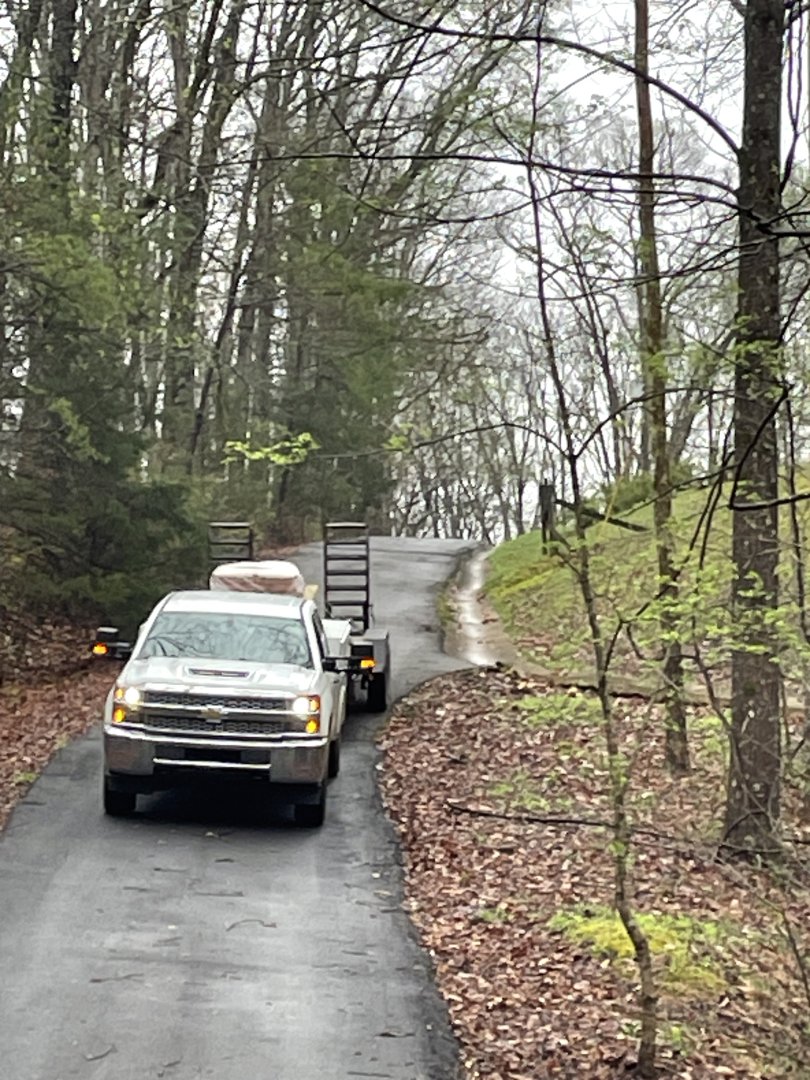
-
The Mossy Shipyard by Bryan Woods - 1:1
Bryan Woods replied to Bryan Woods's topic in Non-ship/categorised builds
They are so use to us, it wouldn’t be a challenge:-) -
The Mossy Shipyard by Bryan Woods - 1:1
Bryan Woods replied to Bryan Woods's topic in Non-ship/categorised builds
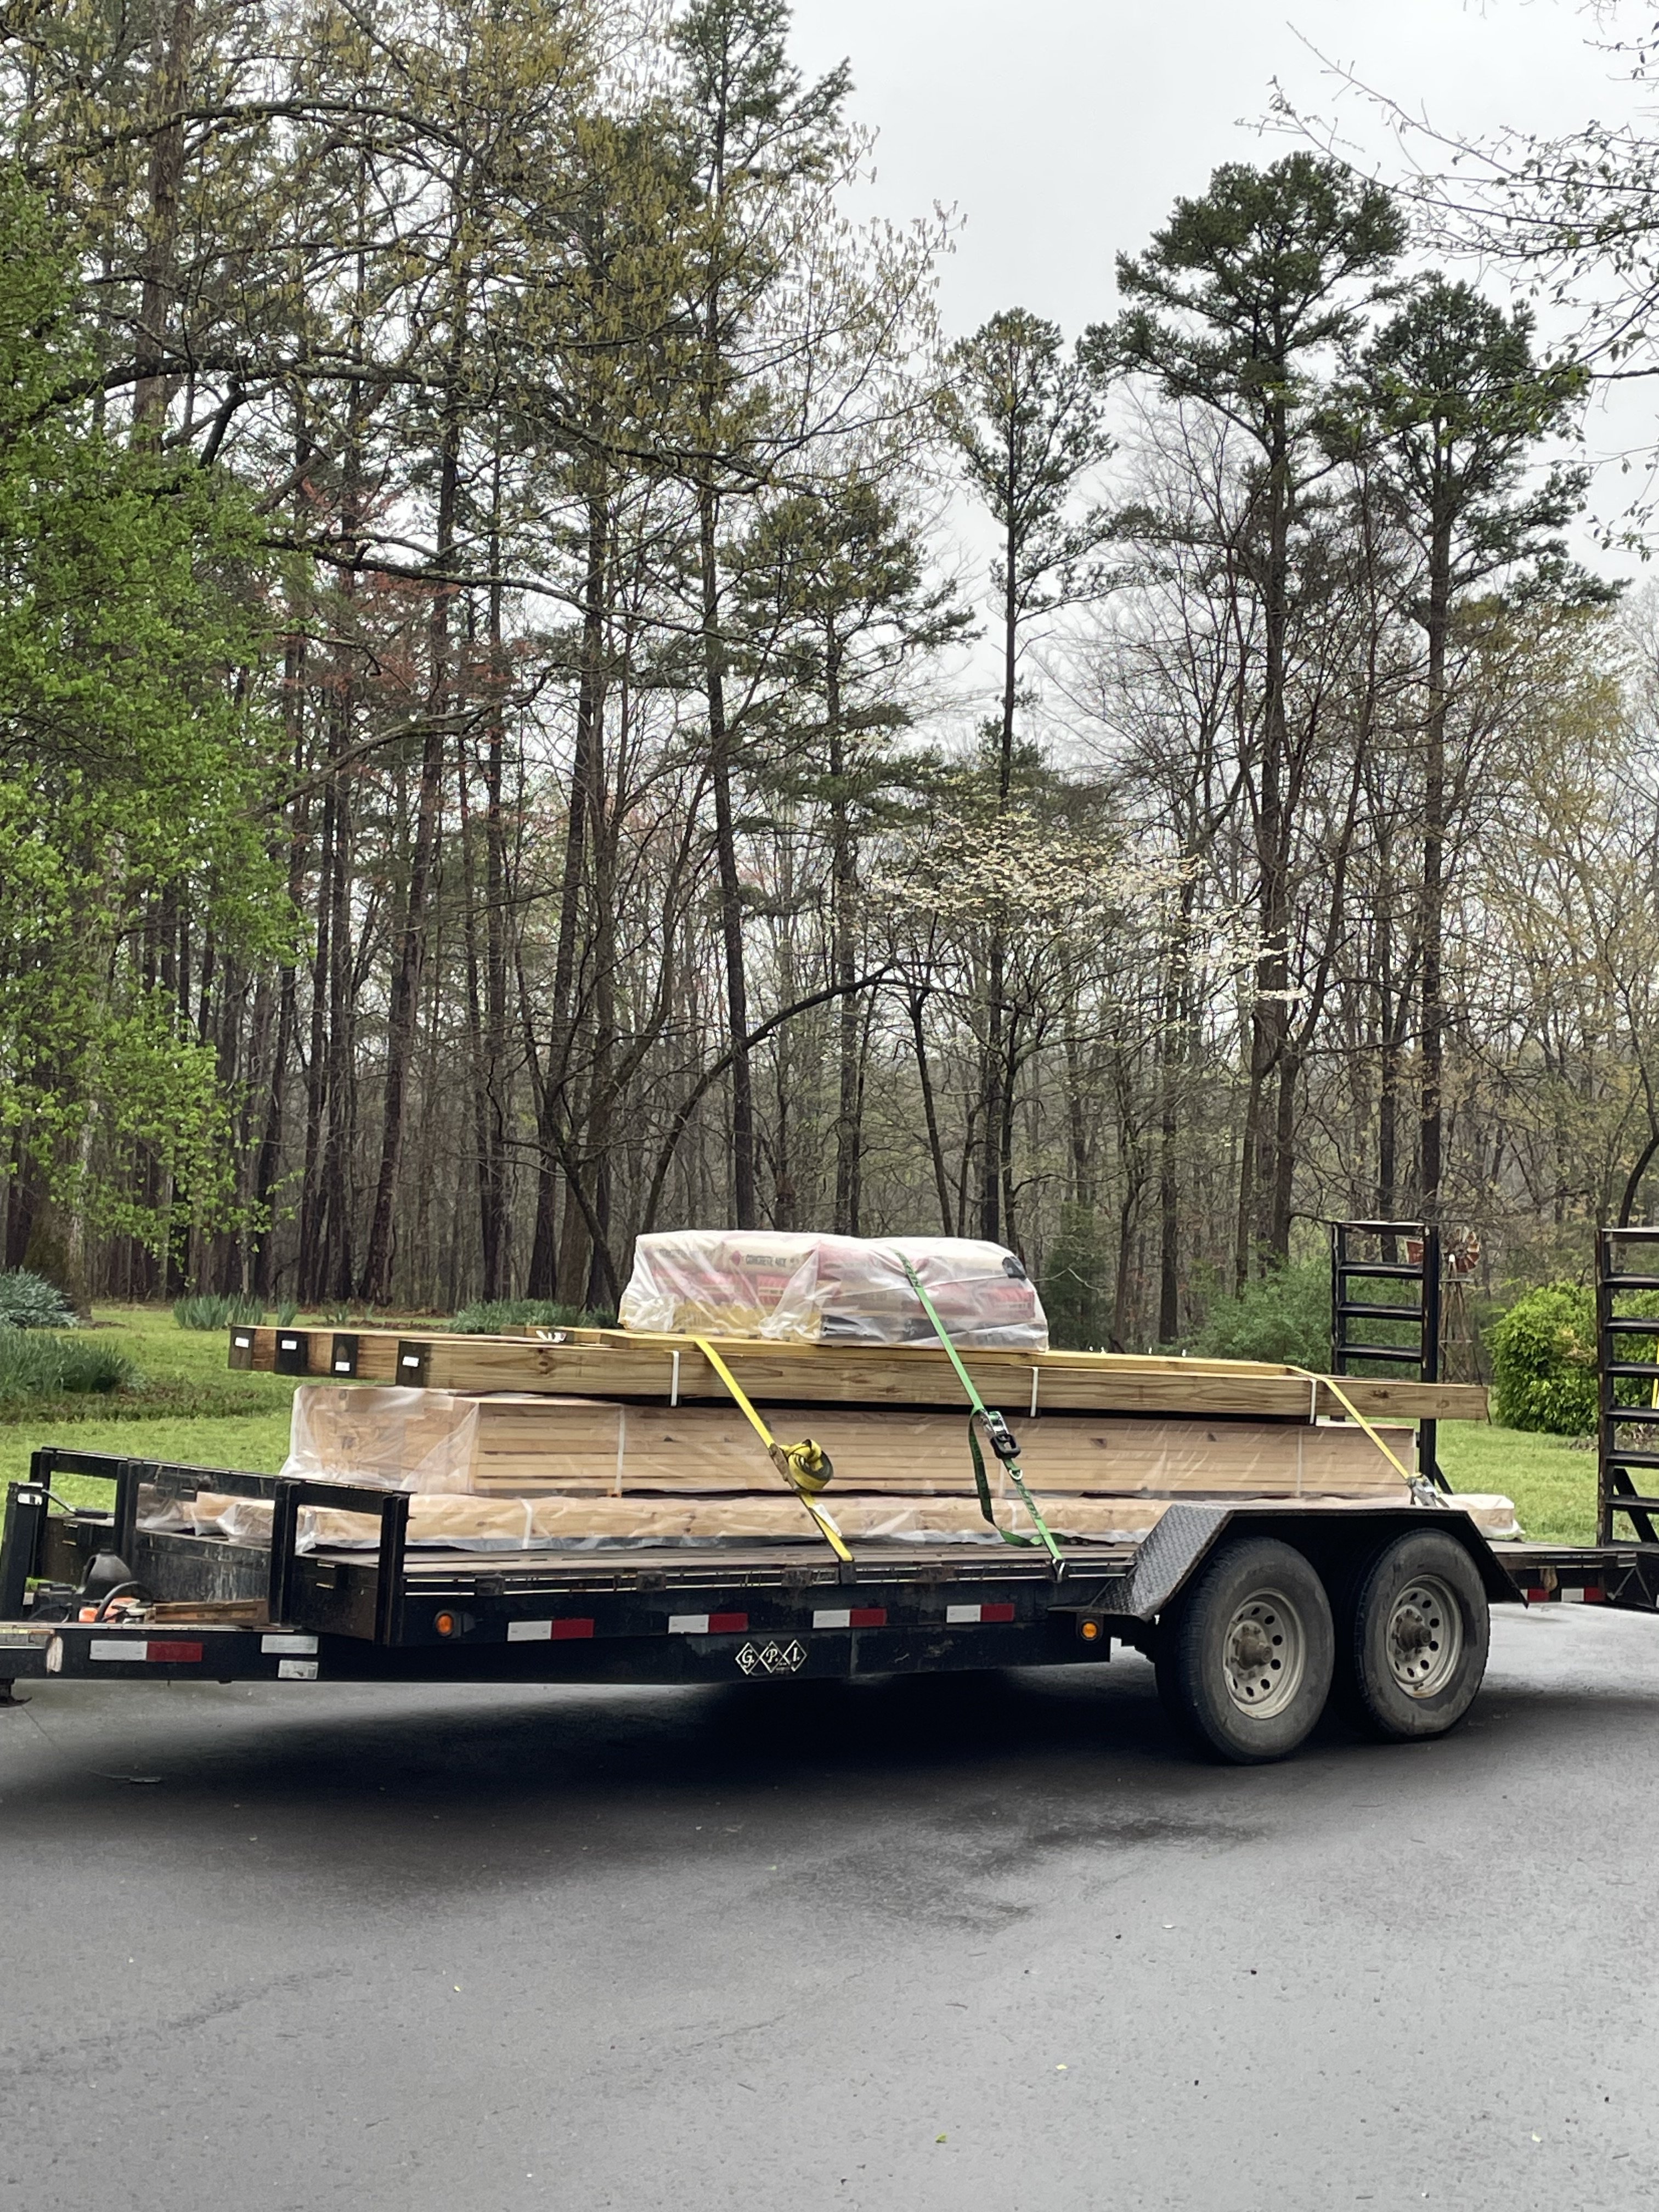
Framing materials for the shipyard showed up today! We’ll have to see how much gets done today.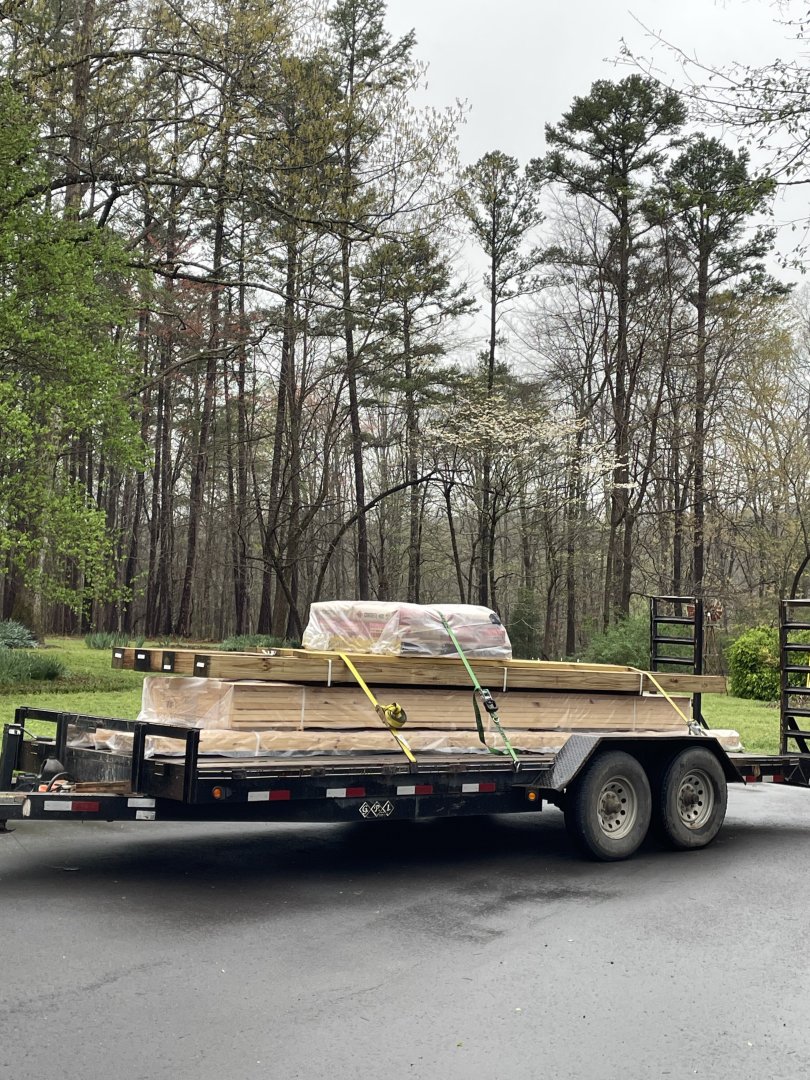
- 42 replies
-
- 10
-
-
Here’s the coat of gray. Then burnt umber. it kinda looks old. After it’s all done I’ll probably coat it with oil, I think it needs a little shine if it’s going to be decor. I’ll wait till tomorrow and see how it looks before I paint the inside.