HOLIDAY DONATION DRIVE - SUPPORT MSW - DO YOUR PART TO KEEP THIS GREAT FORUM GOING! (Only 72 donations so far out of 49,000 members - Can we at least get 100? C'mon guys!)
×


Bryan Woods
-
Posts
551 -
Joined
-
Last visited
Content Type
Profiles
Forums
Gallery
Events
Everything posted by Bryan Woods
-
 Chris, that hull look great! Nothing like mine did. I’ve found the problem with stain is where there is glue on the outside the stain doesn’t take well. The last build I stained I was careful with the glue and tried to sand off any I saw before I stained. Personal experience is a great teacher and it tends to stay with you longer:-)
 -
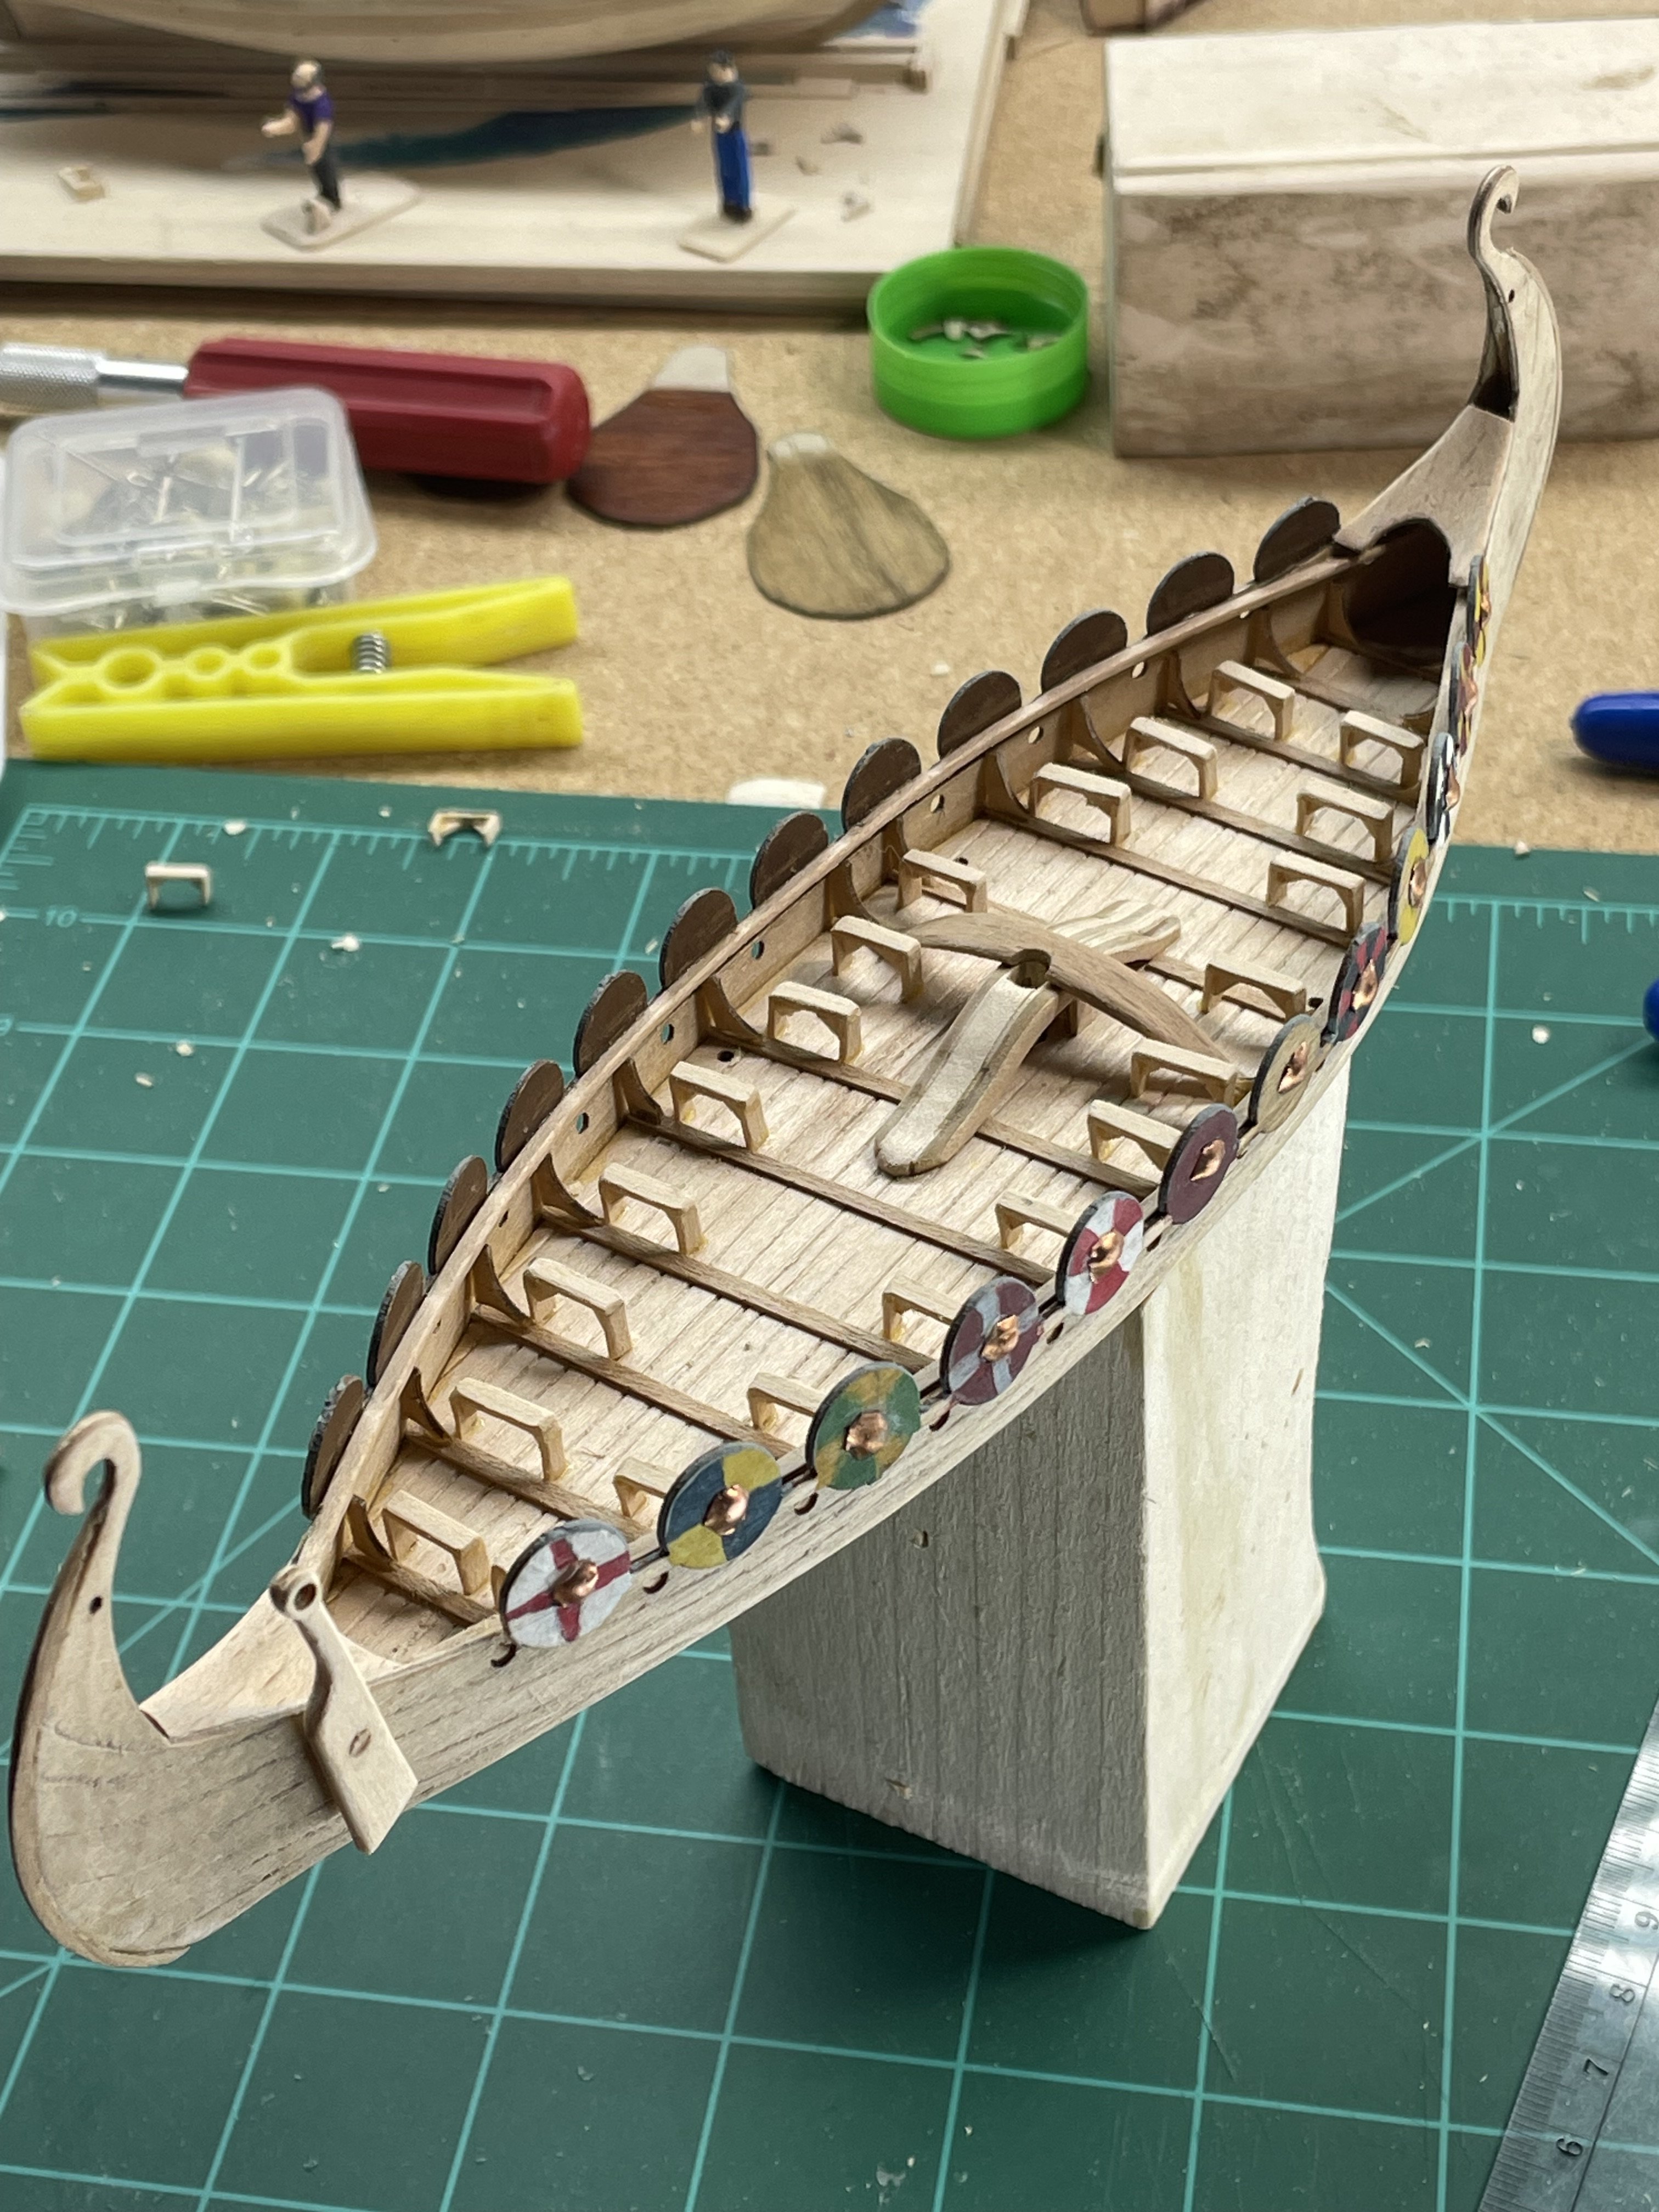
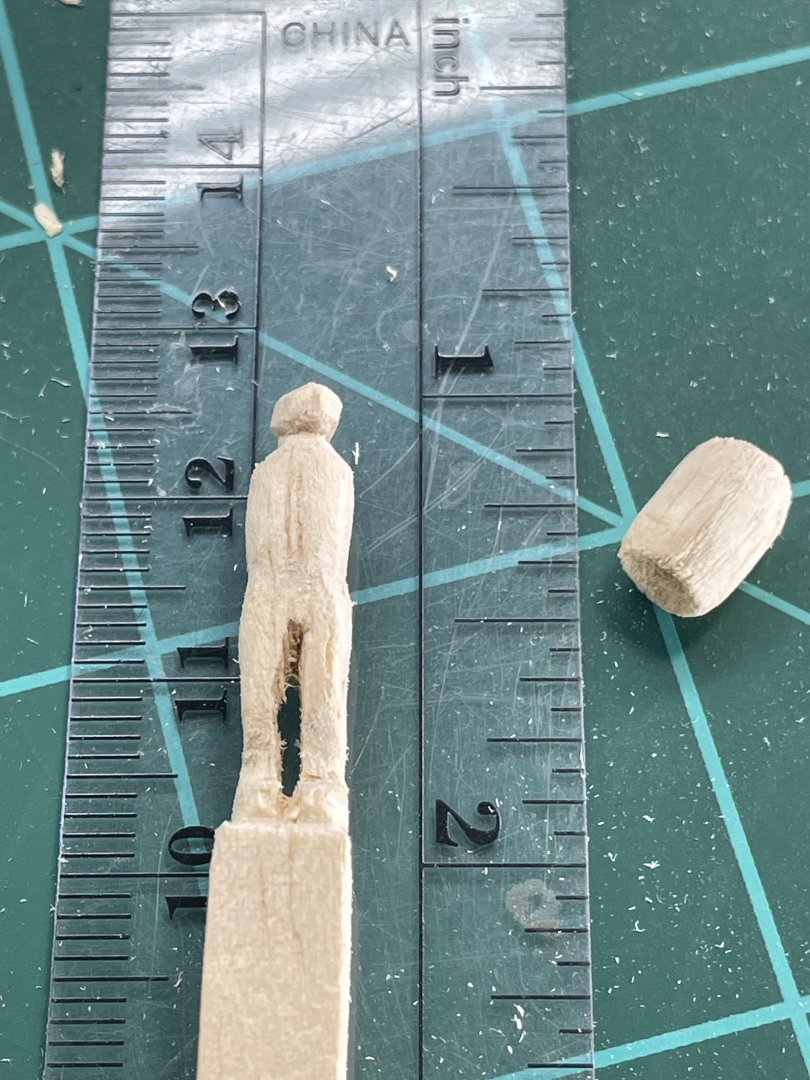
I got the seats built and installed this morning. I’m hoping to have a scale Viking figure before I finish the build. If I can keep a steady hand.

- 16 replies
-
- 3
-

-
- Oseberg
- Billing Boats
- (and 1 more)
-
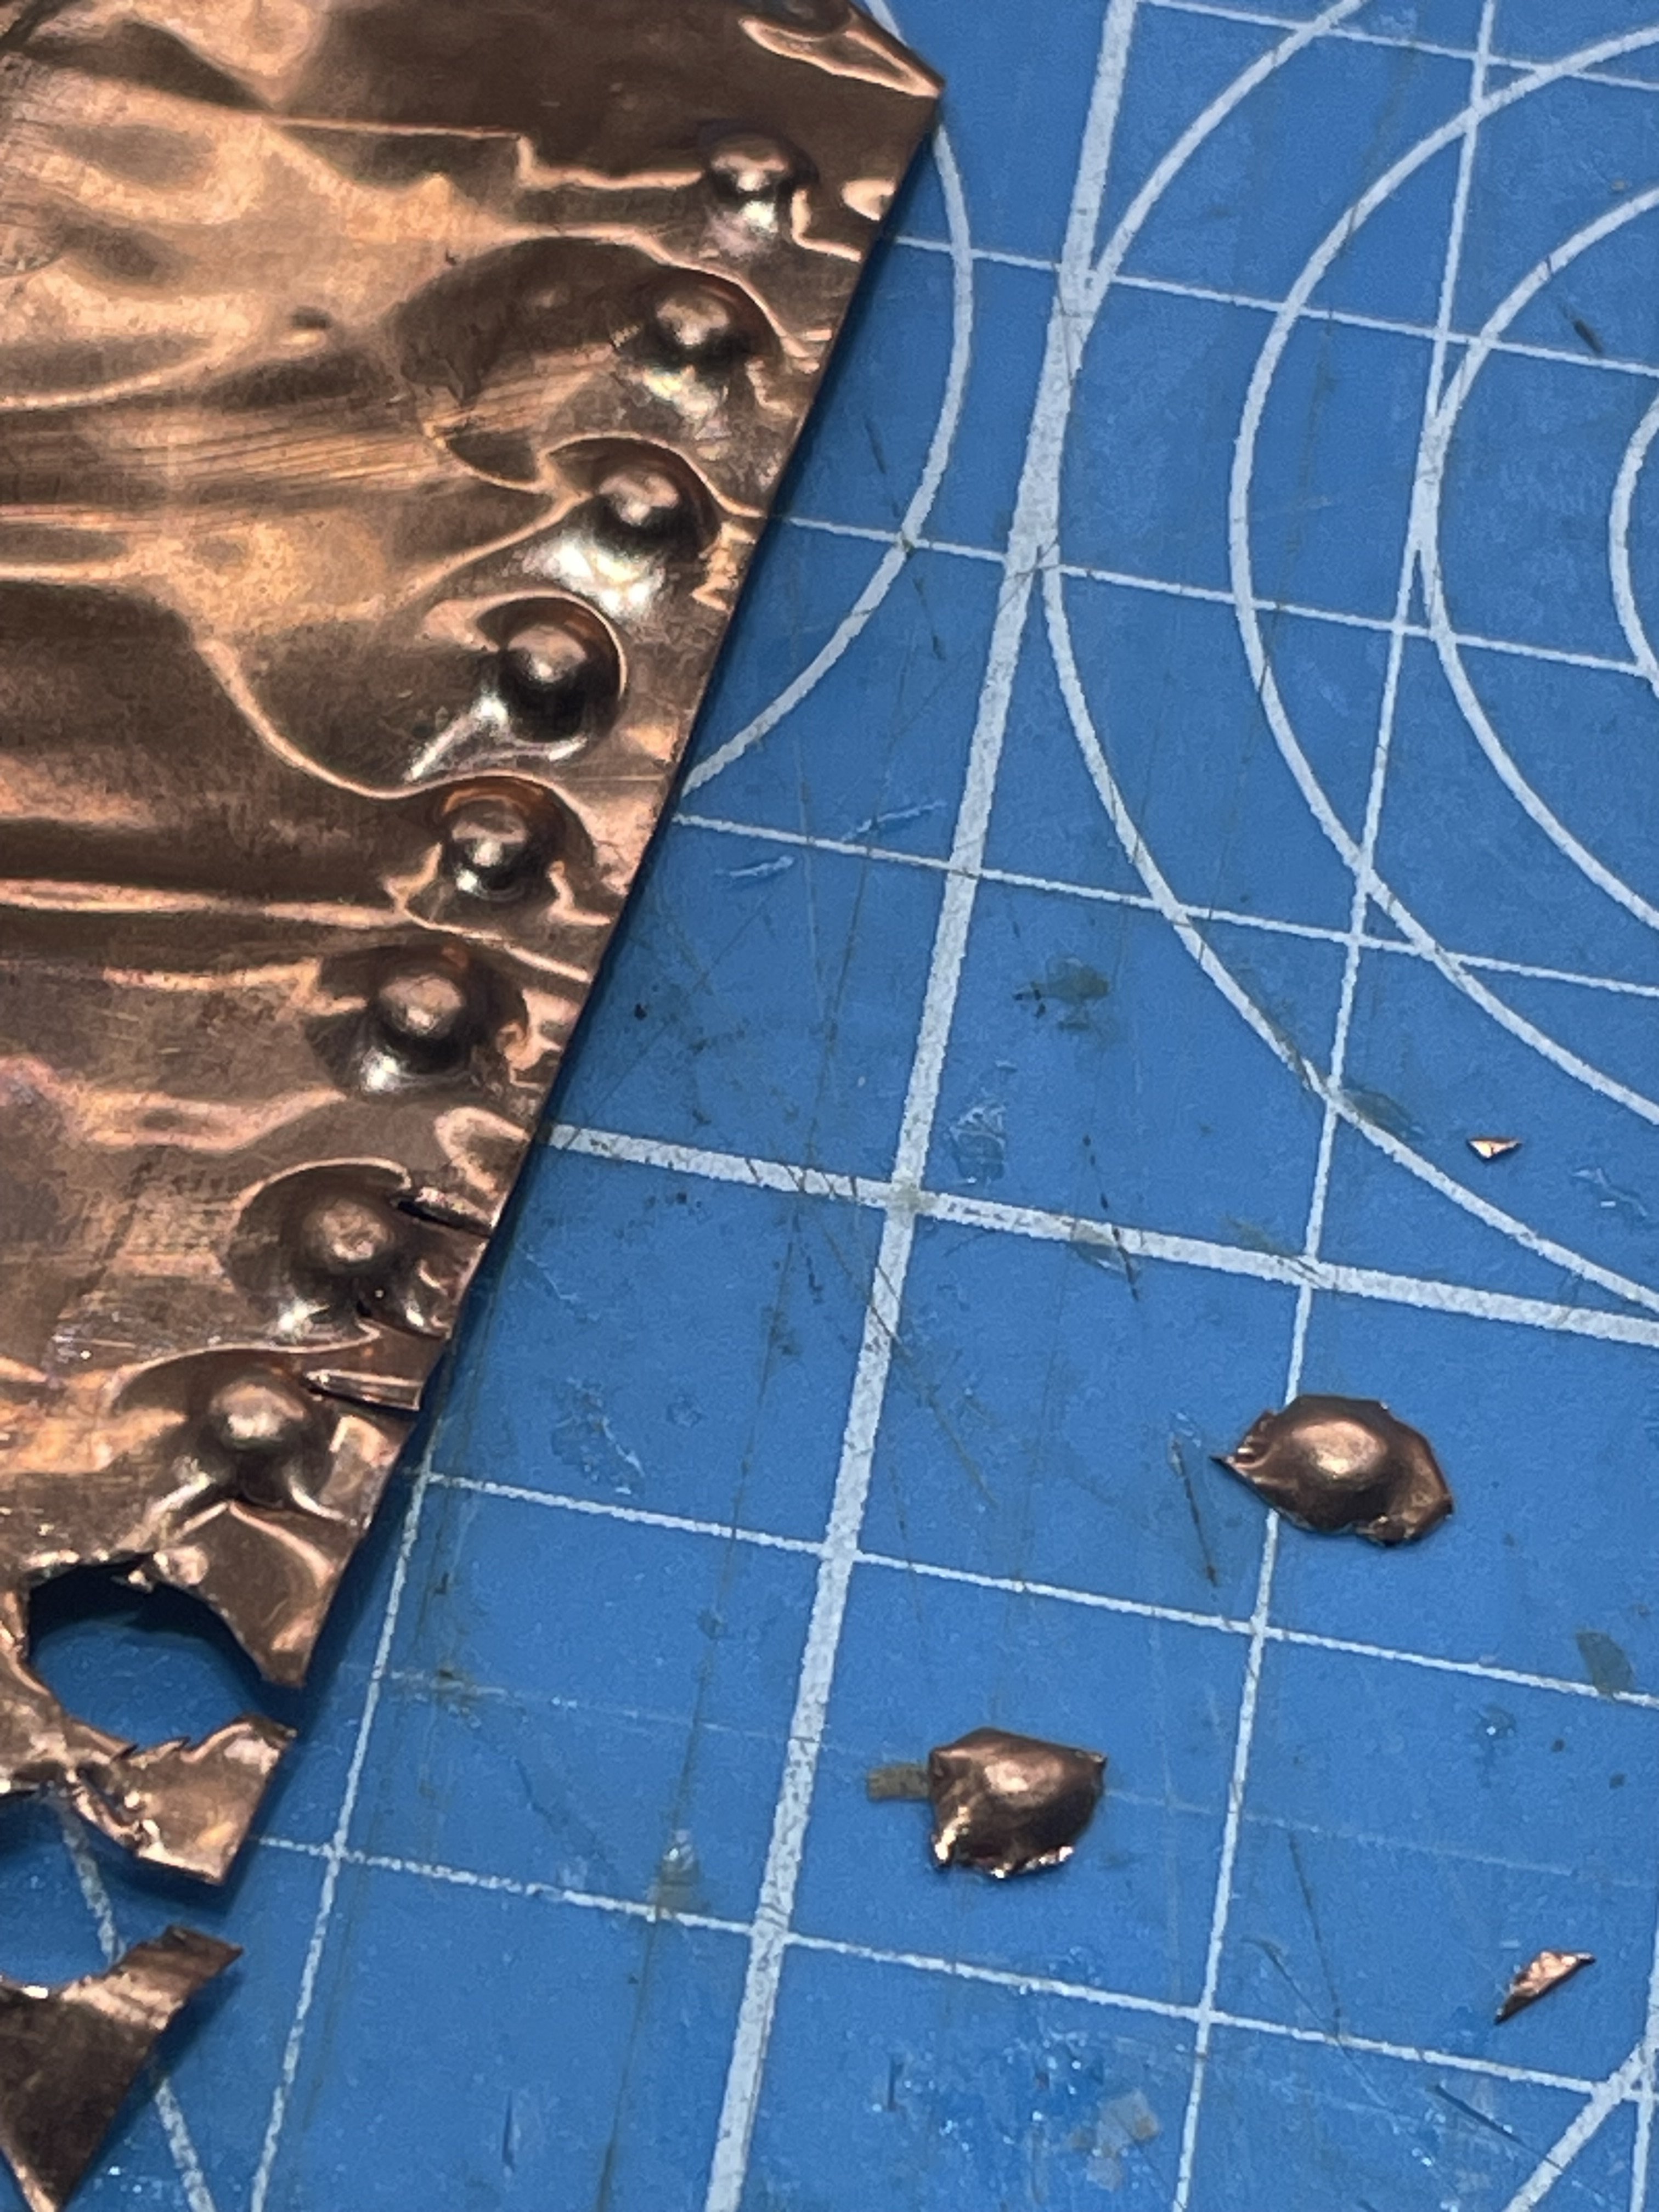
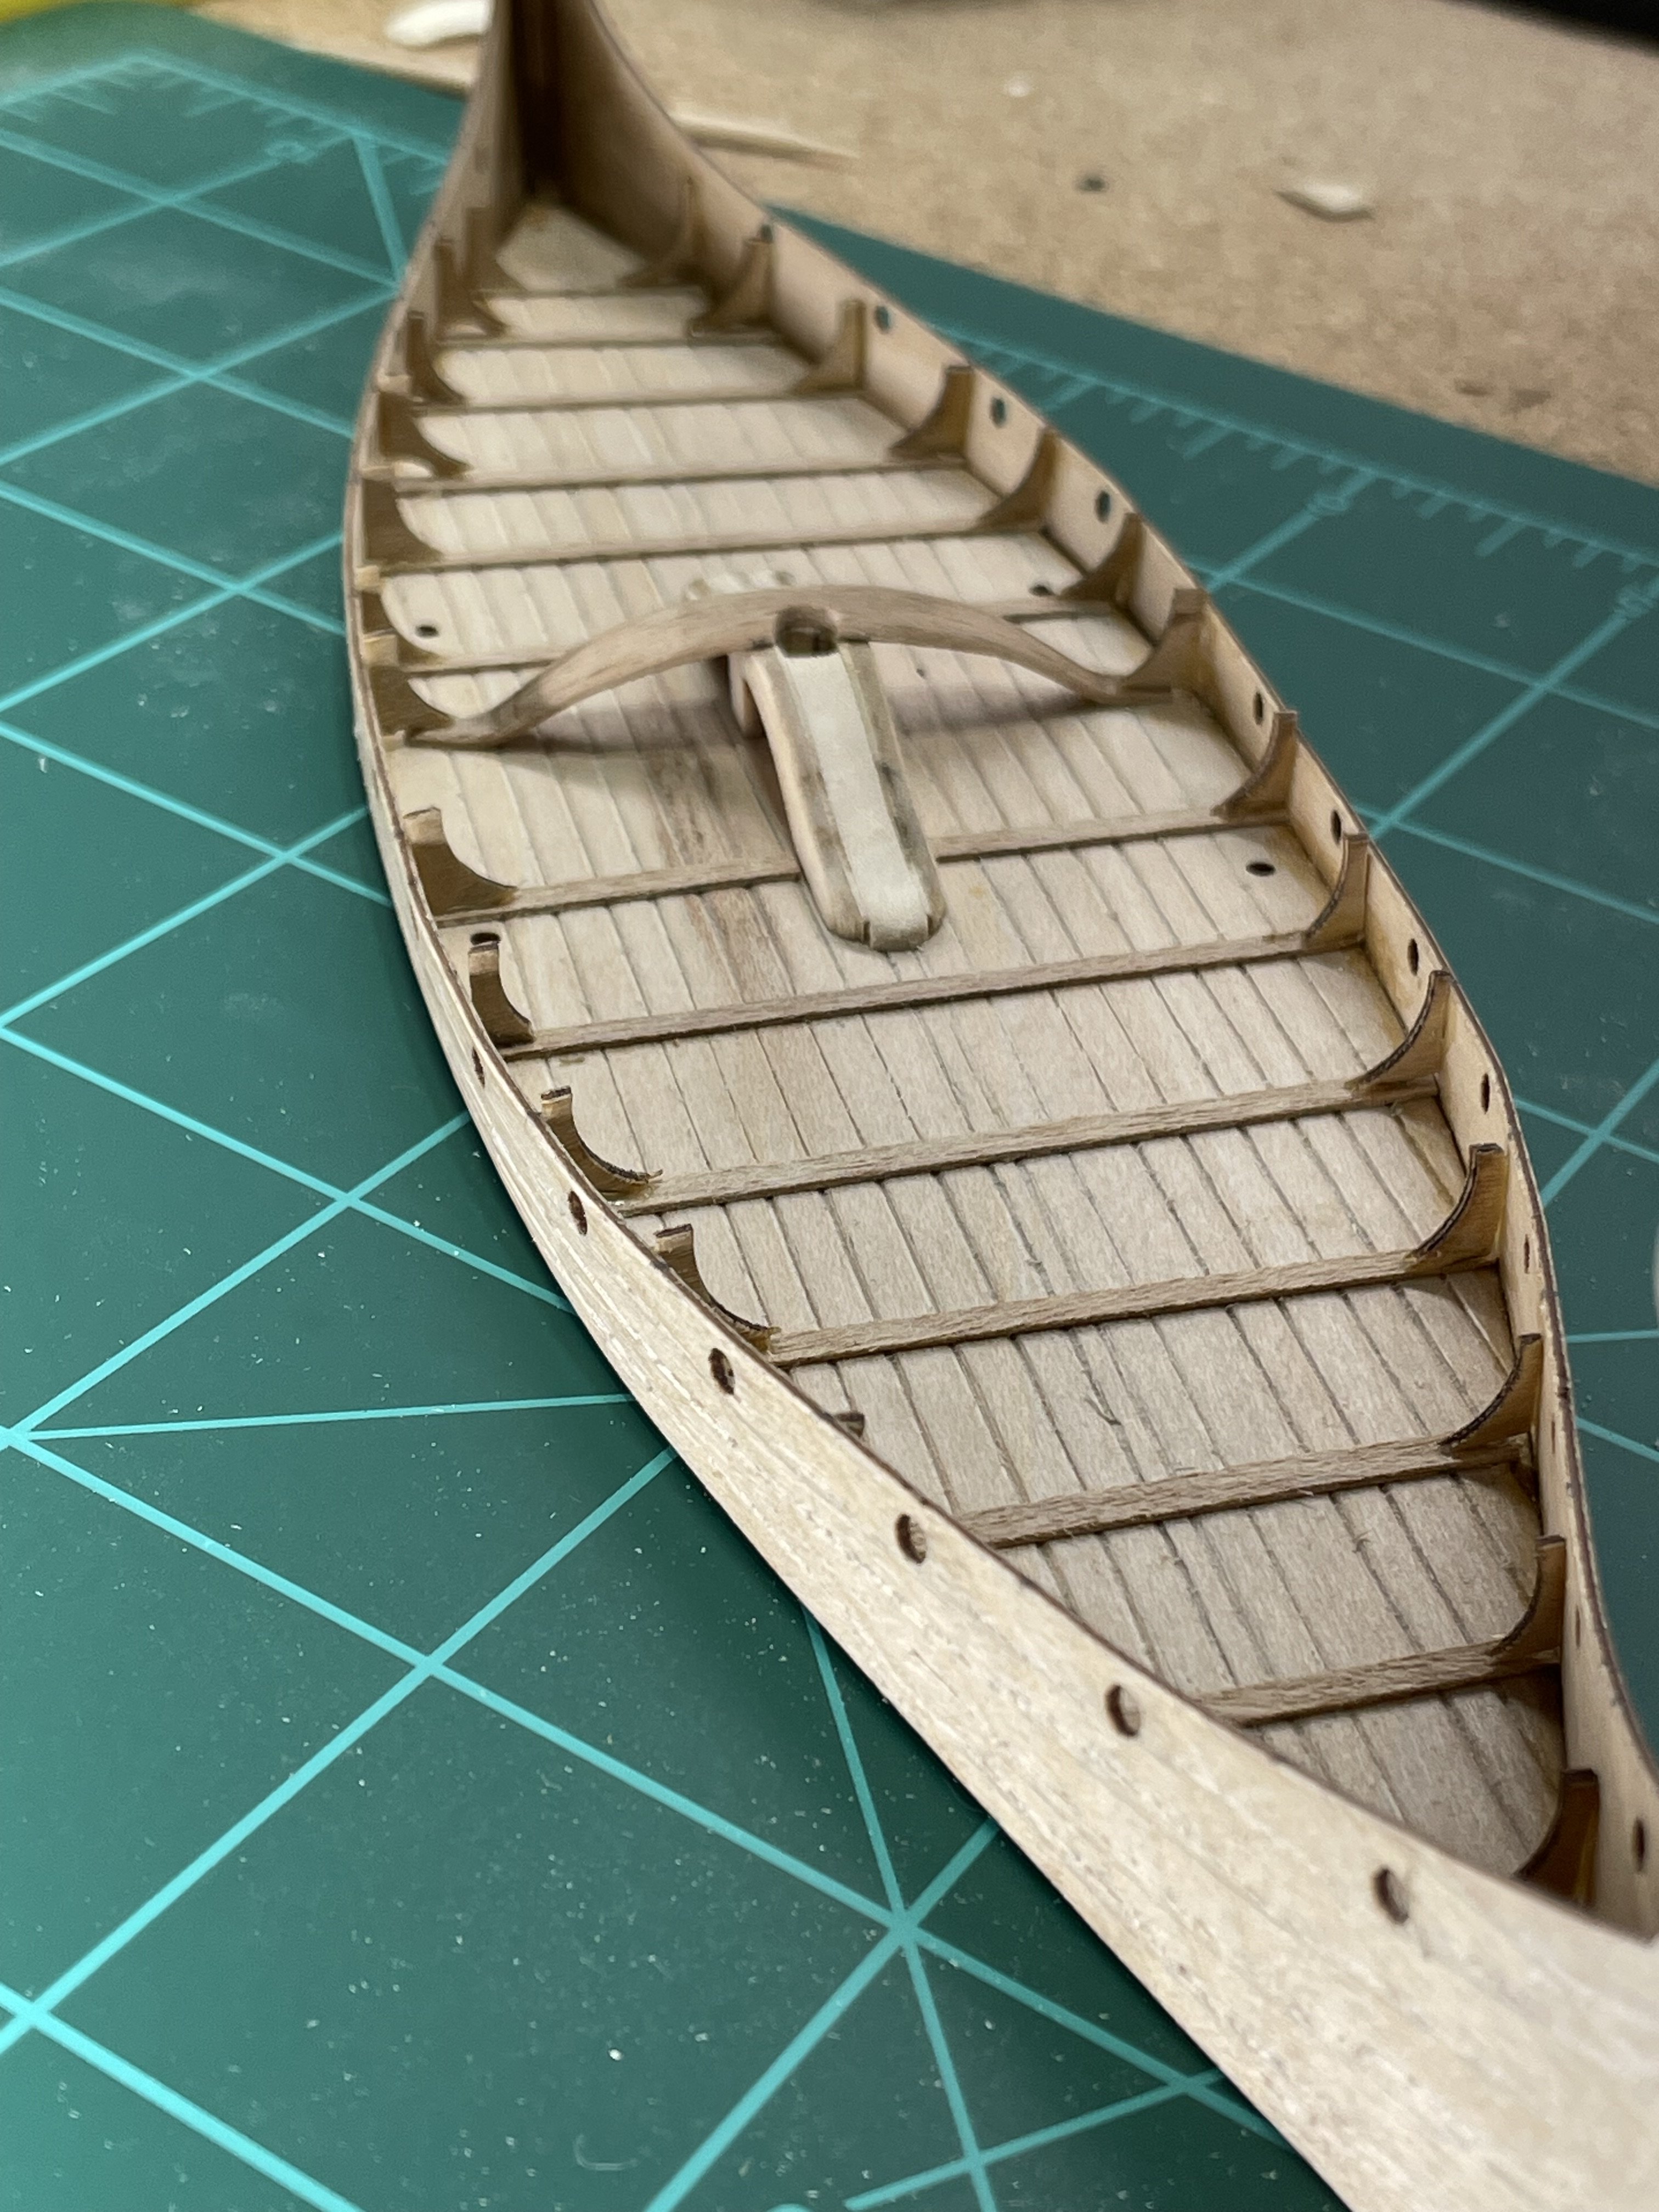
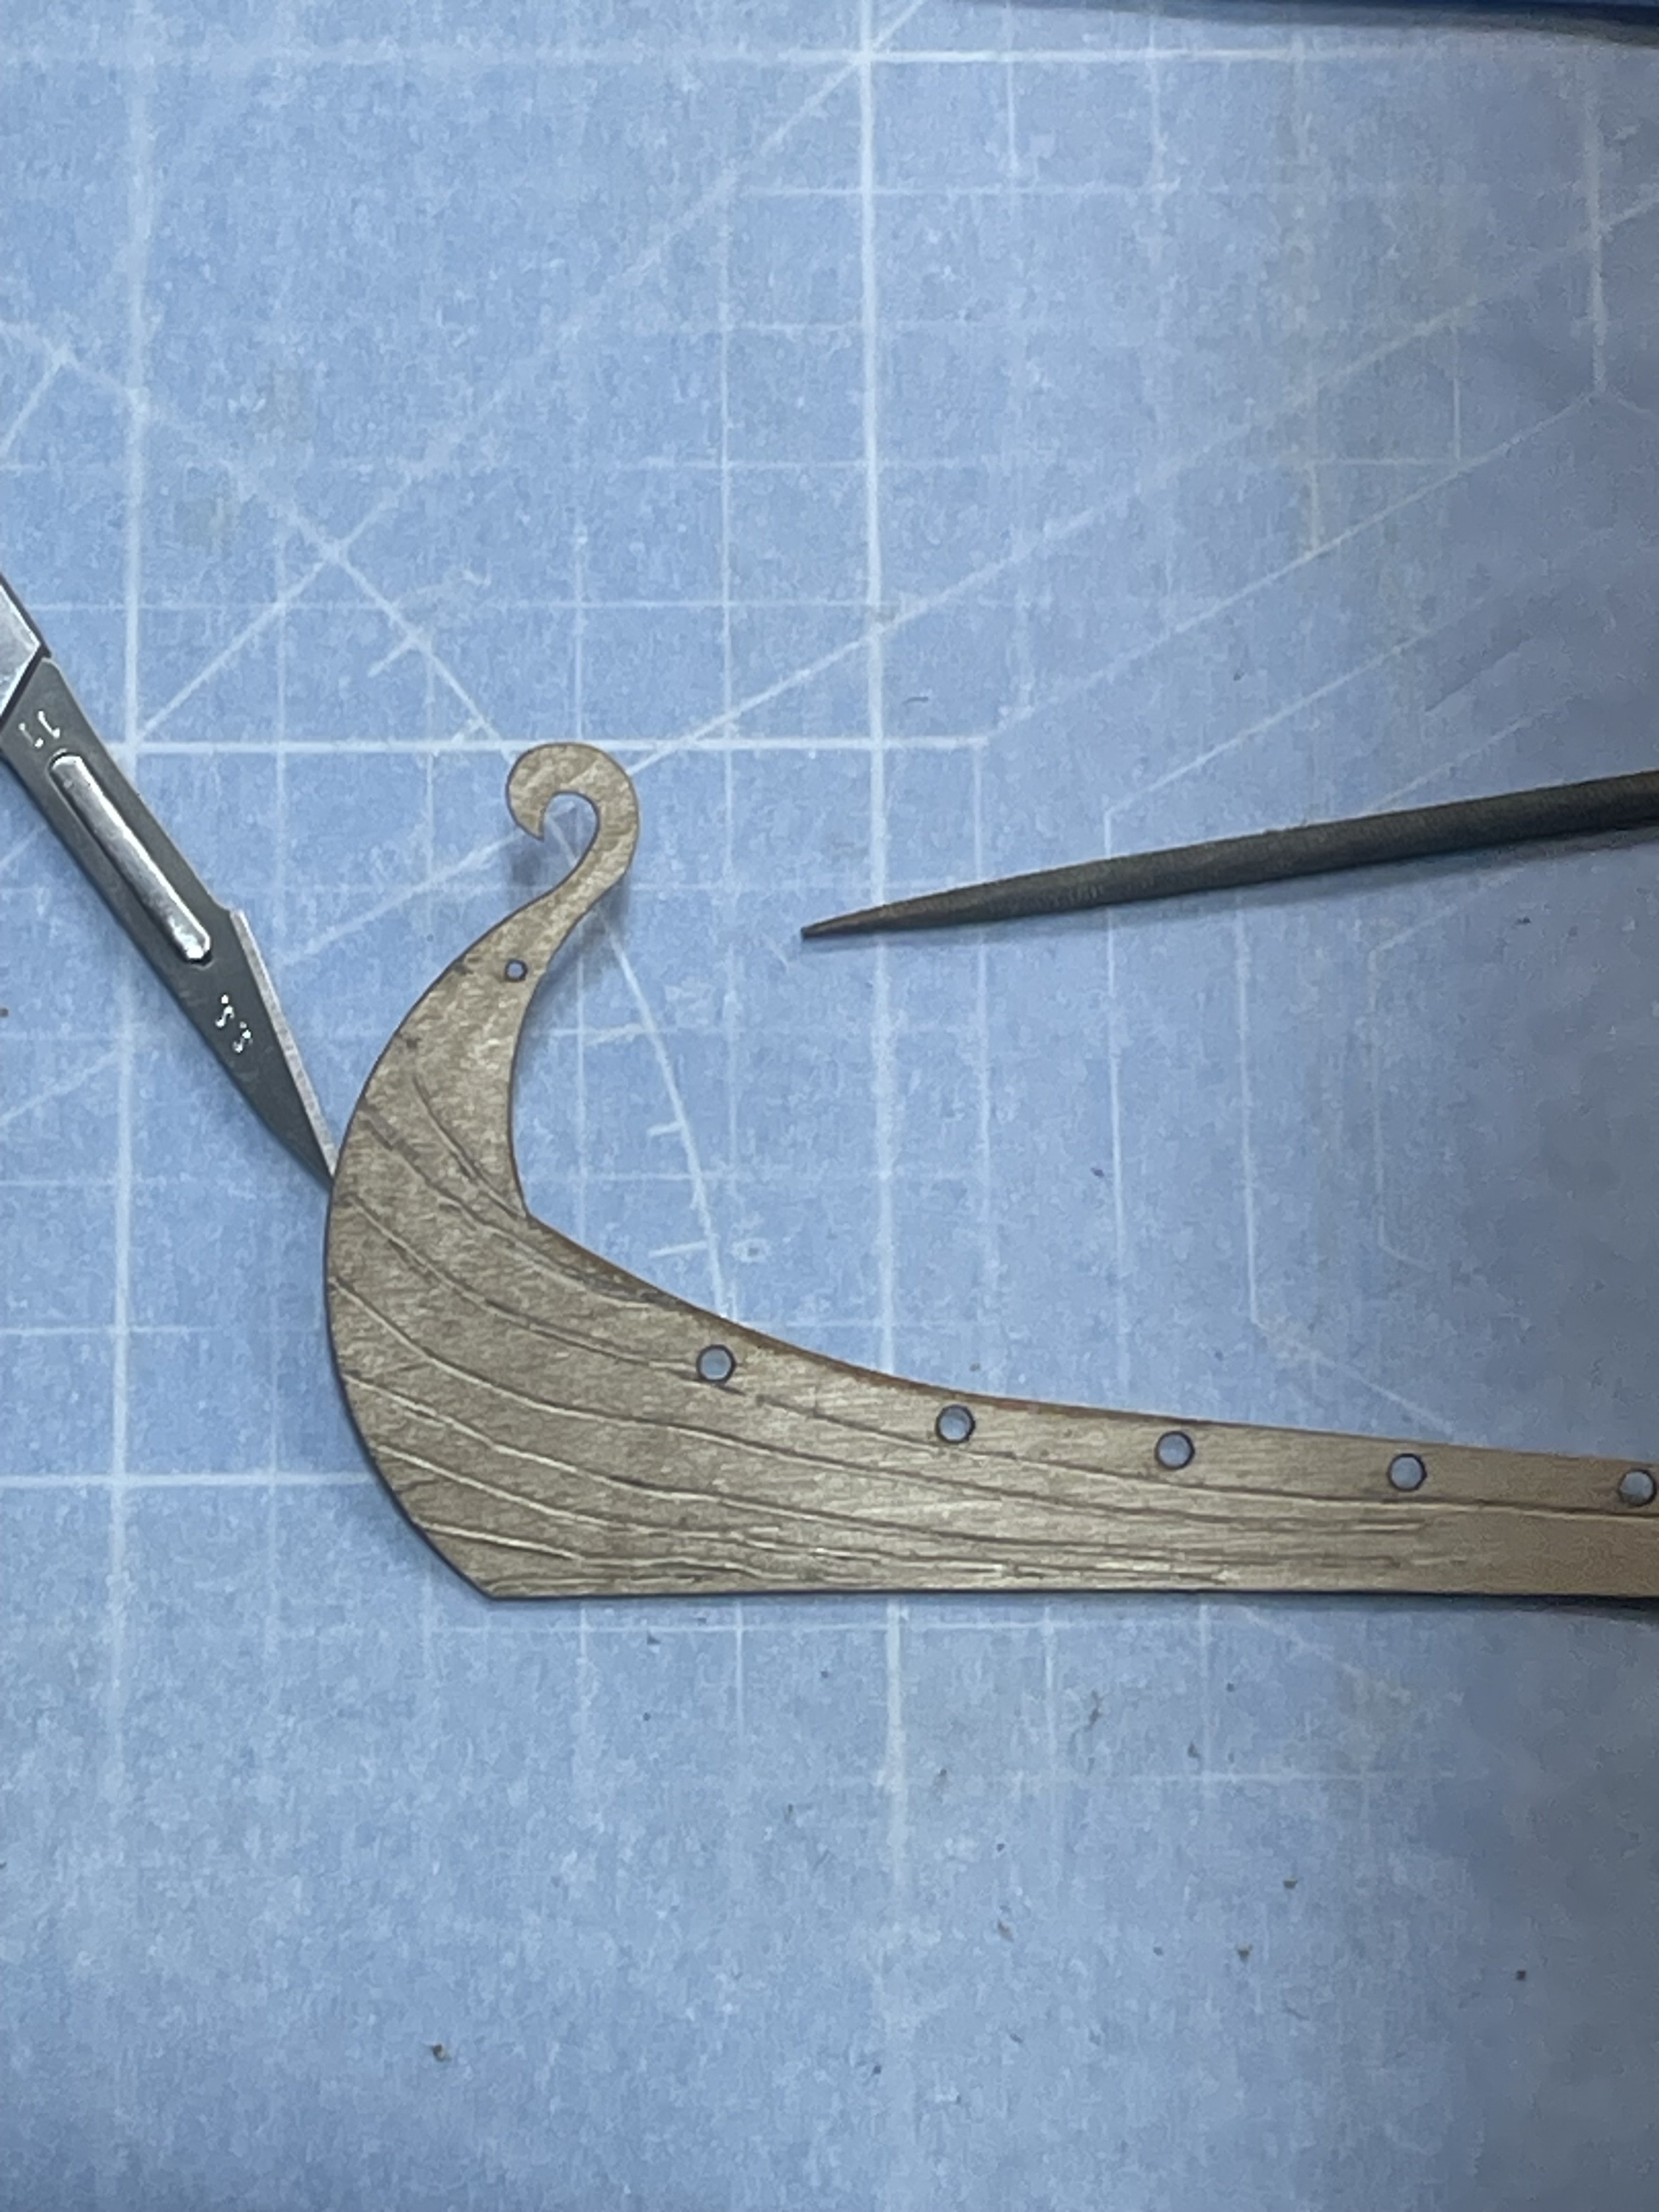
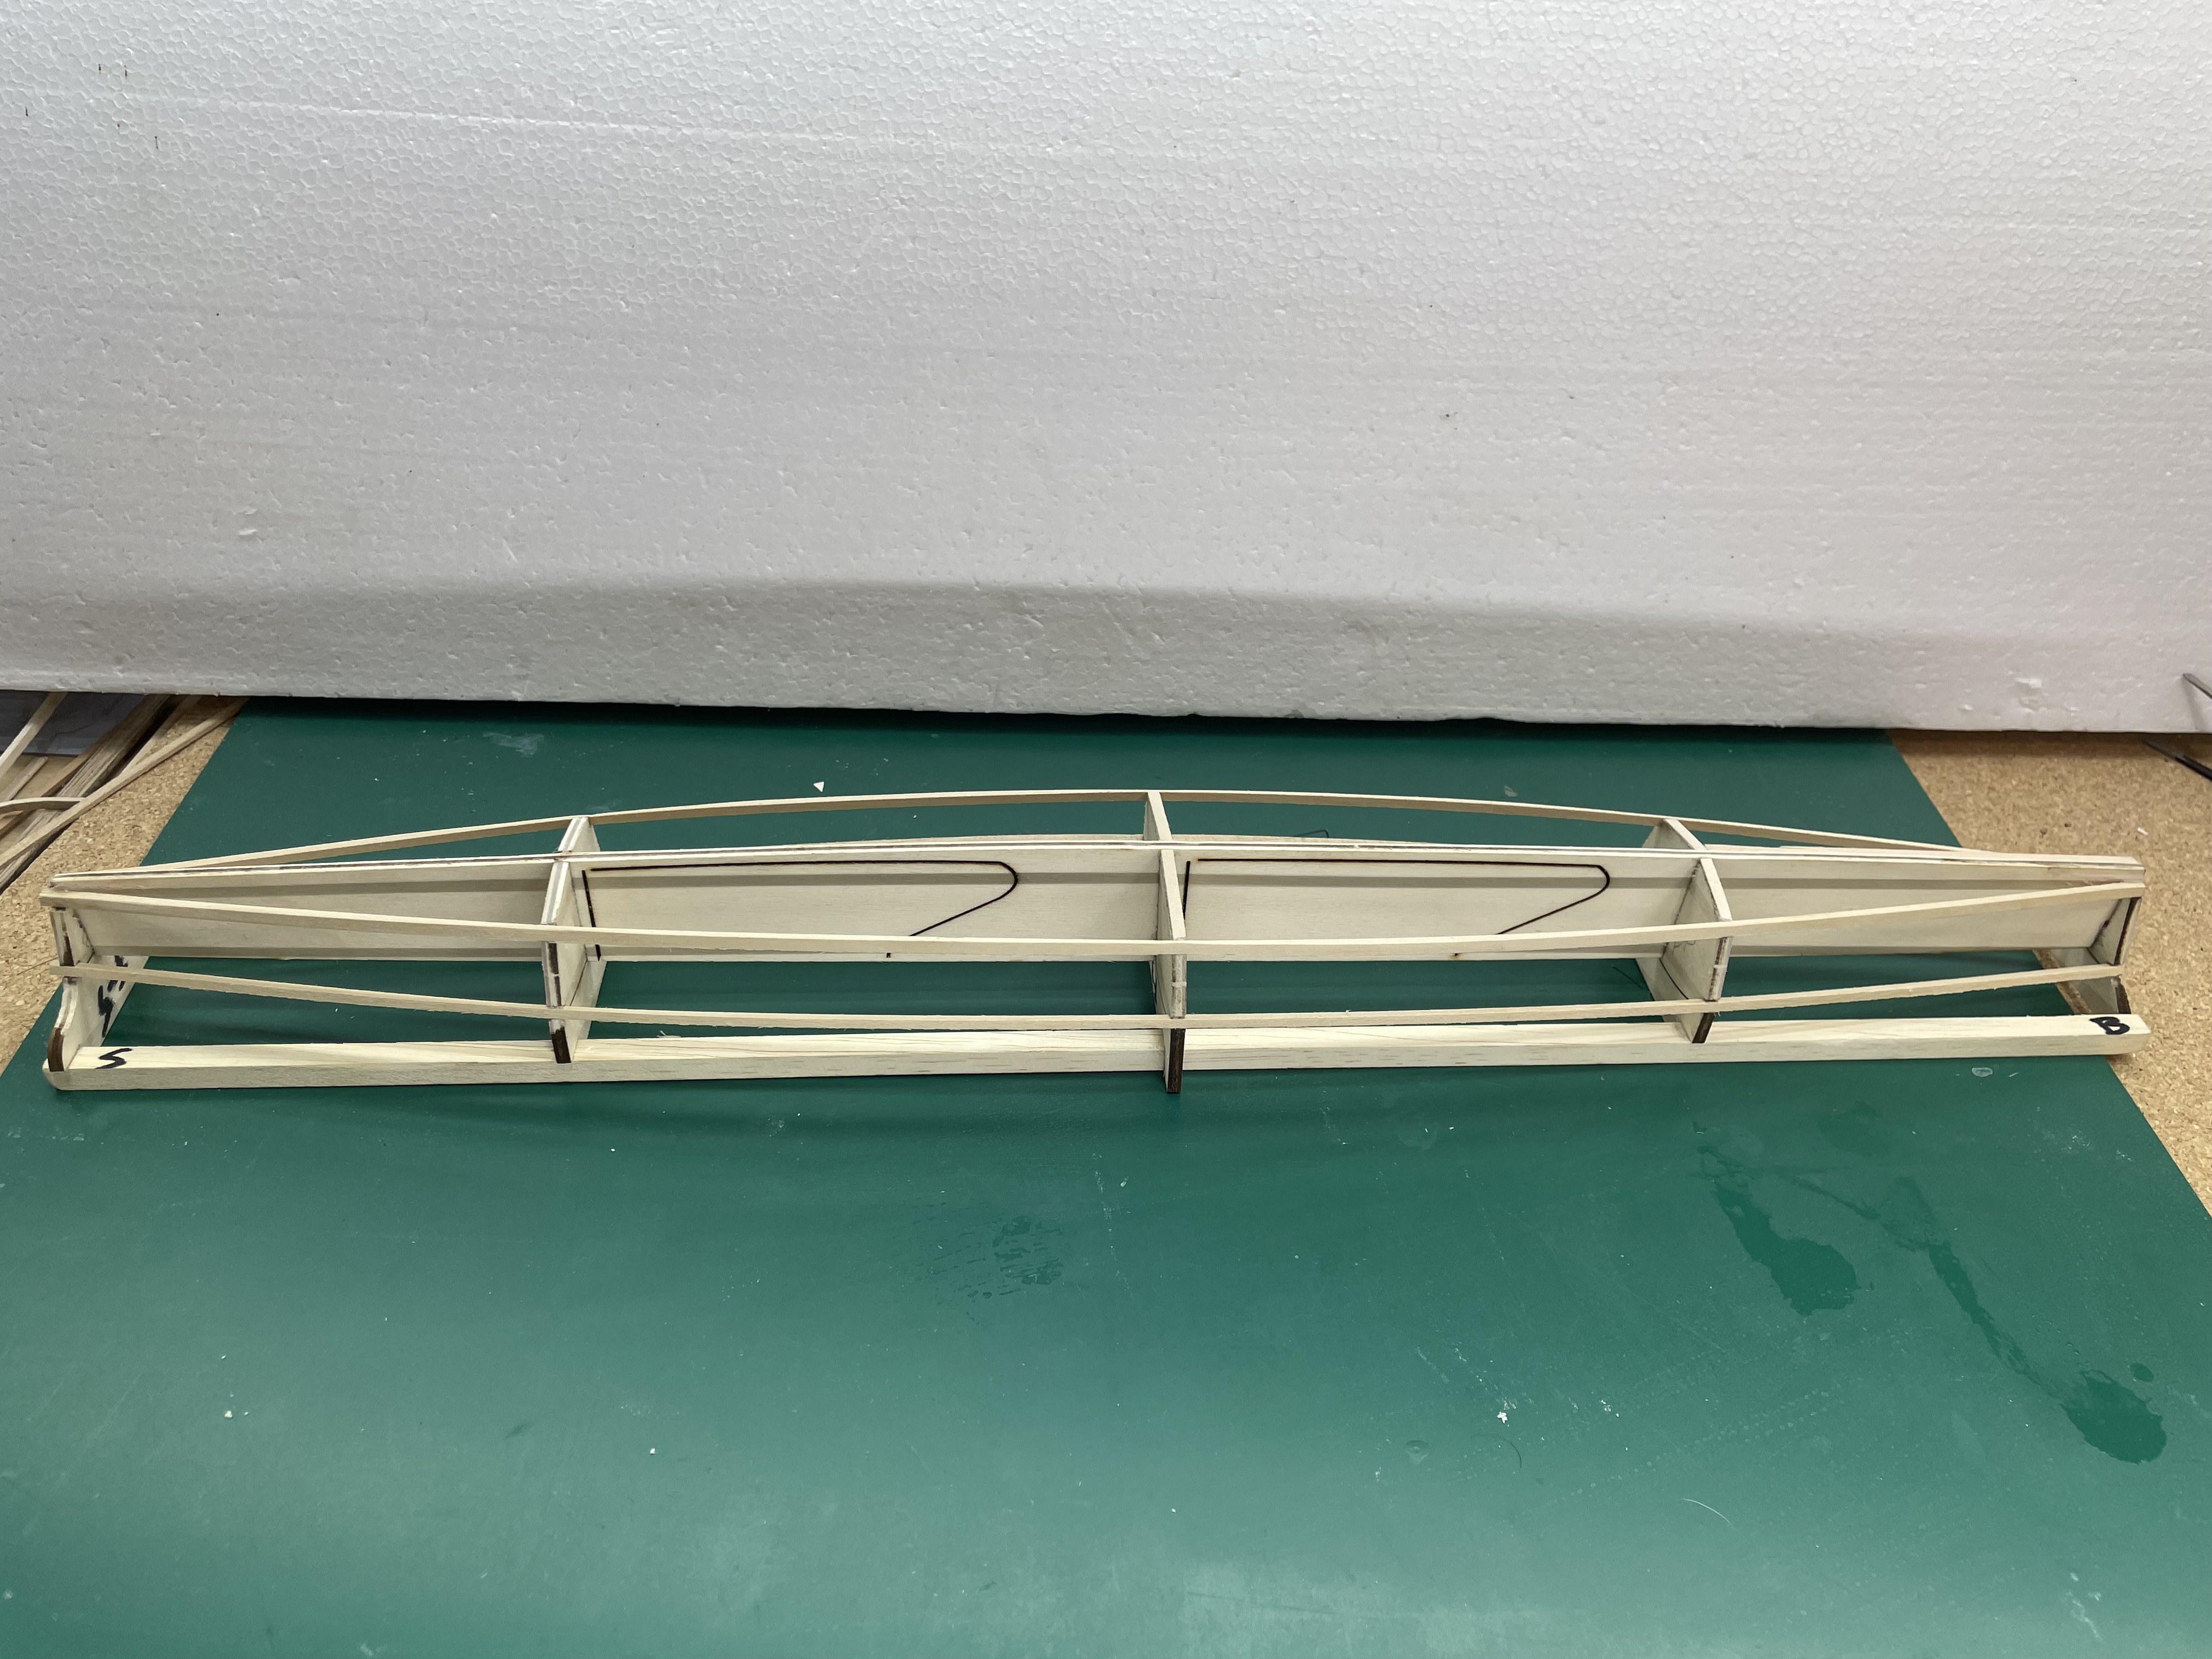
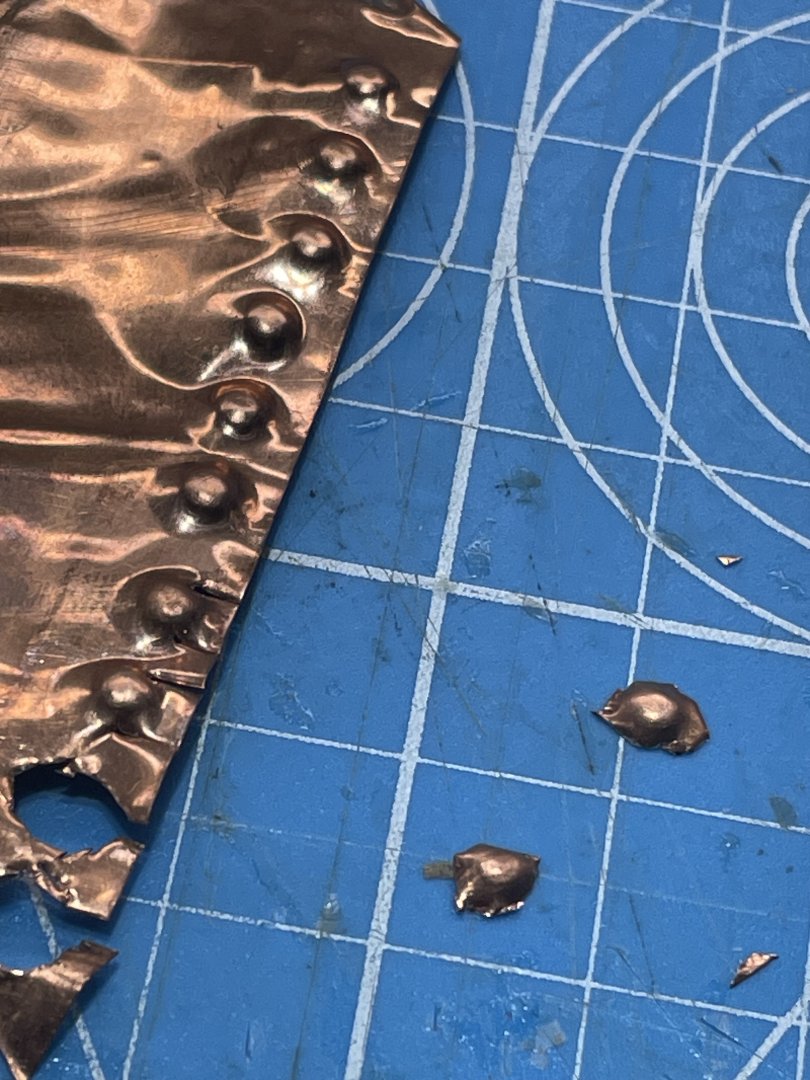
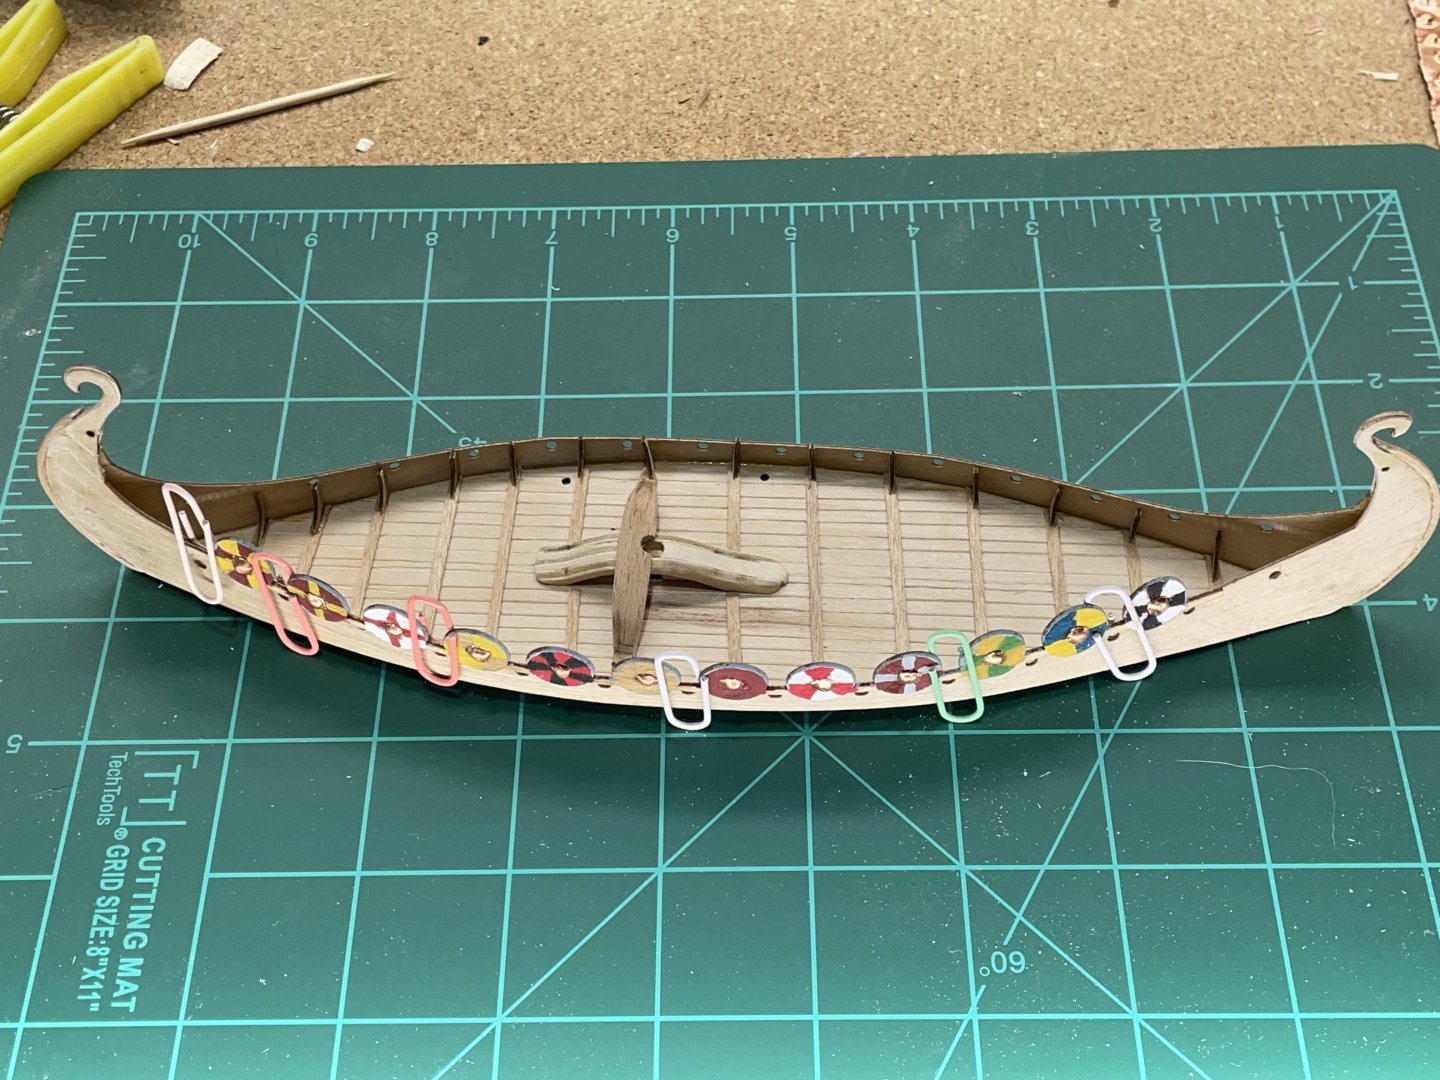
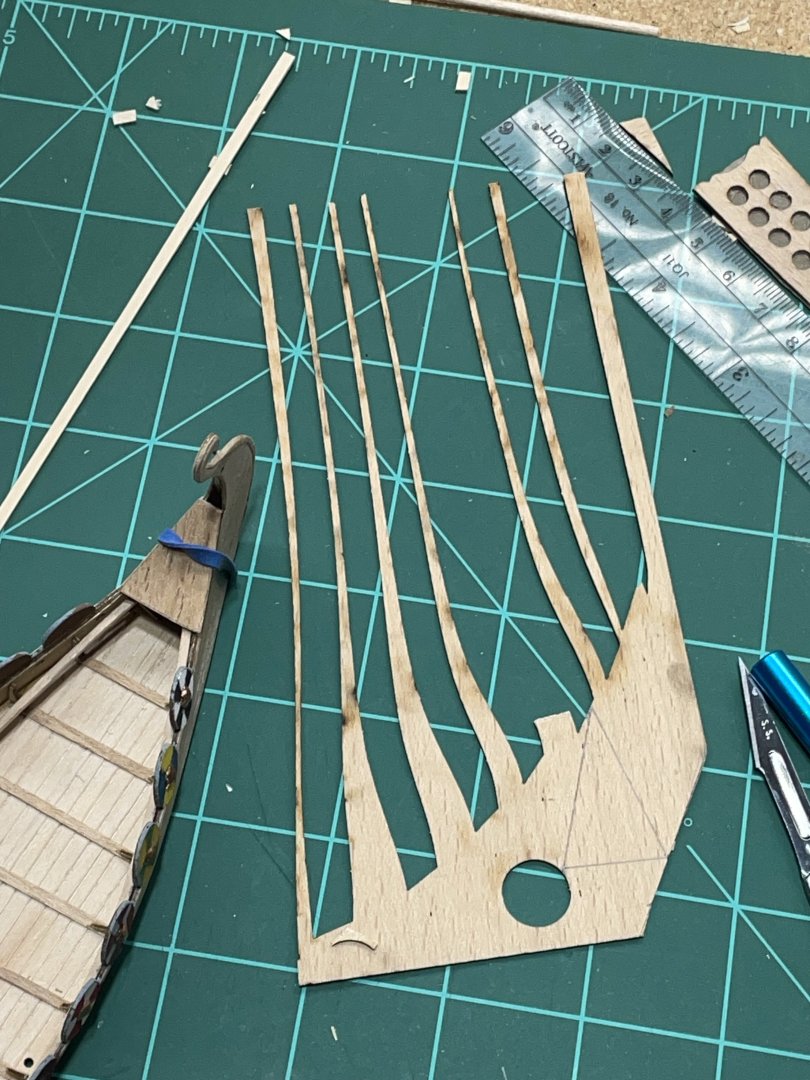
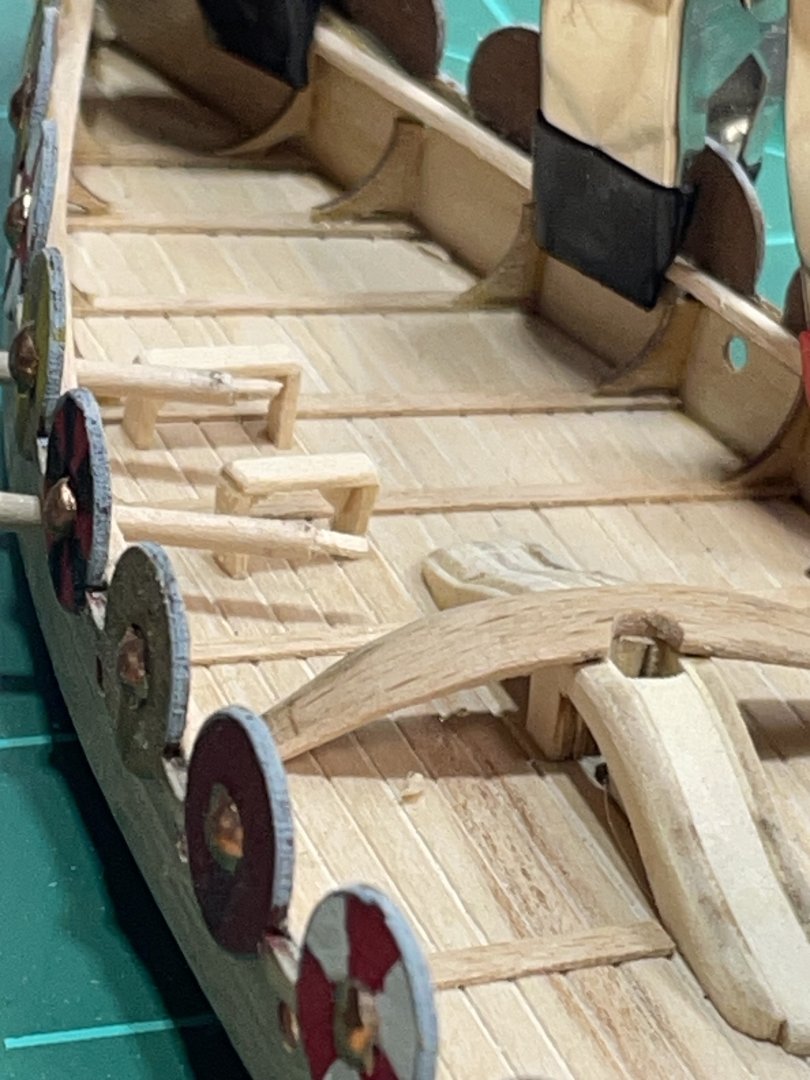
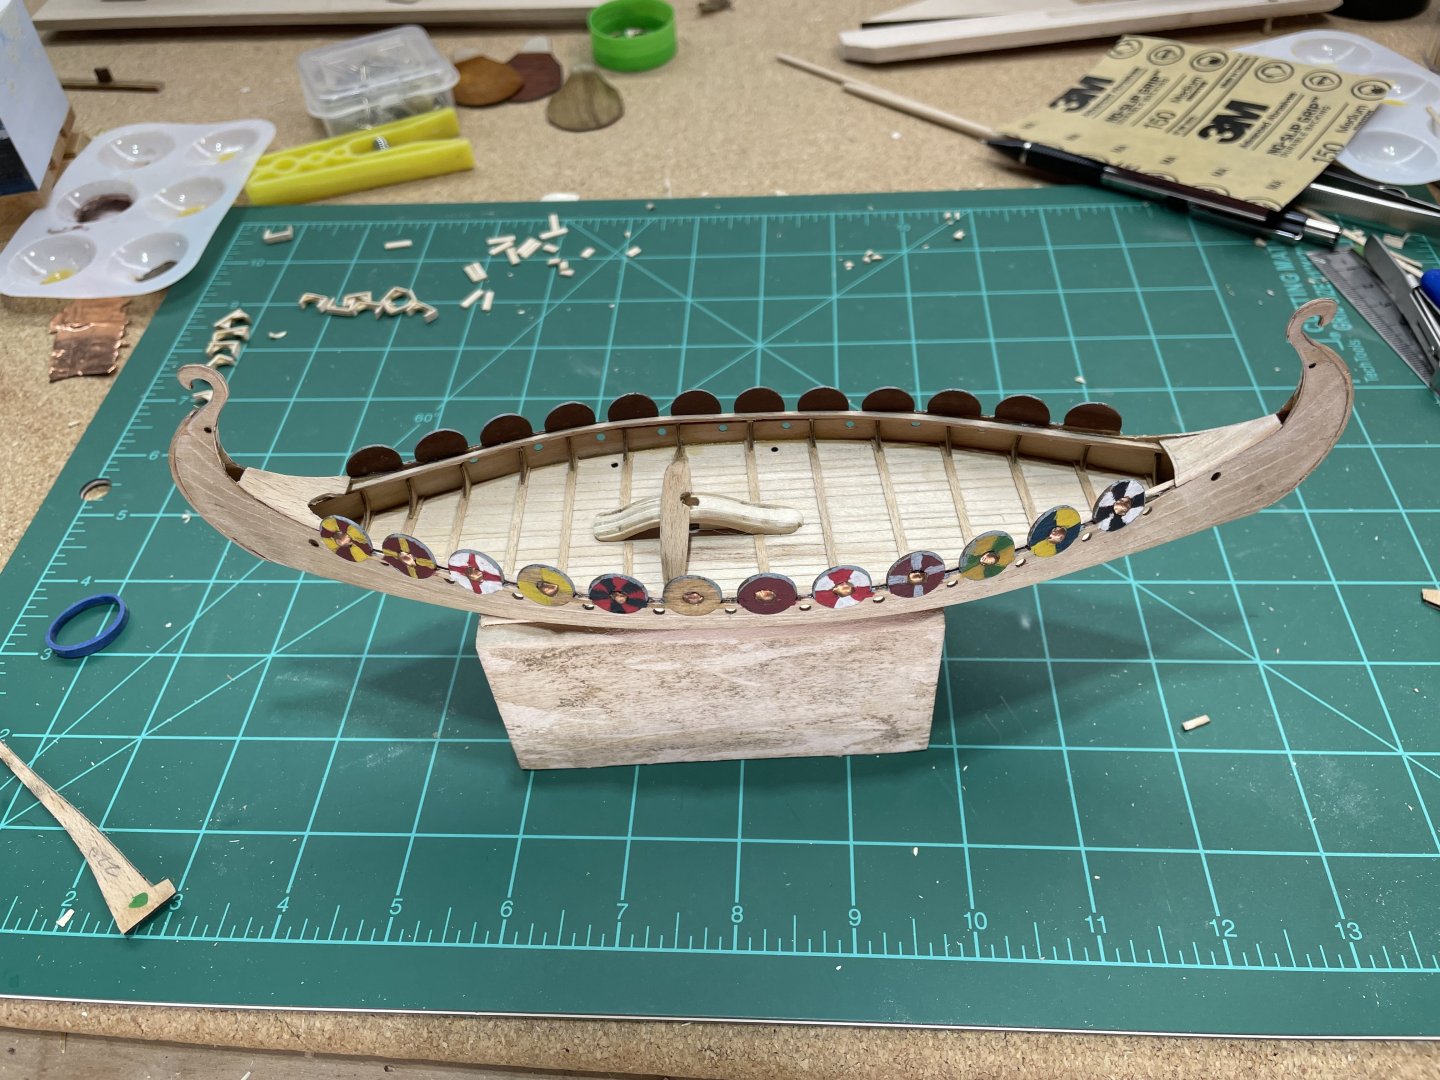
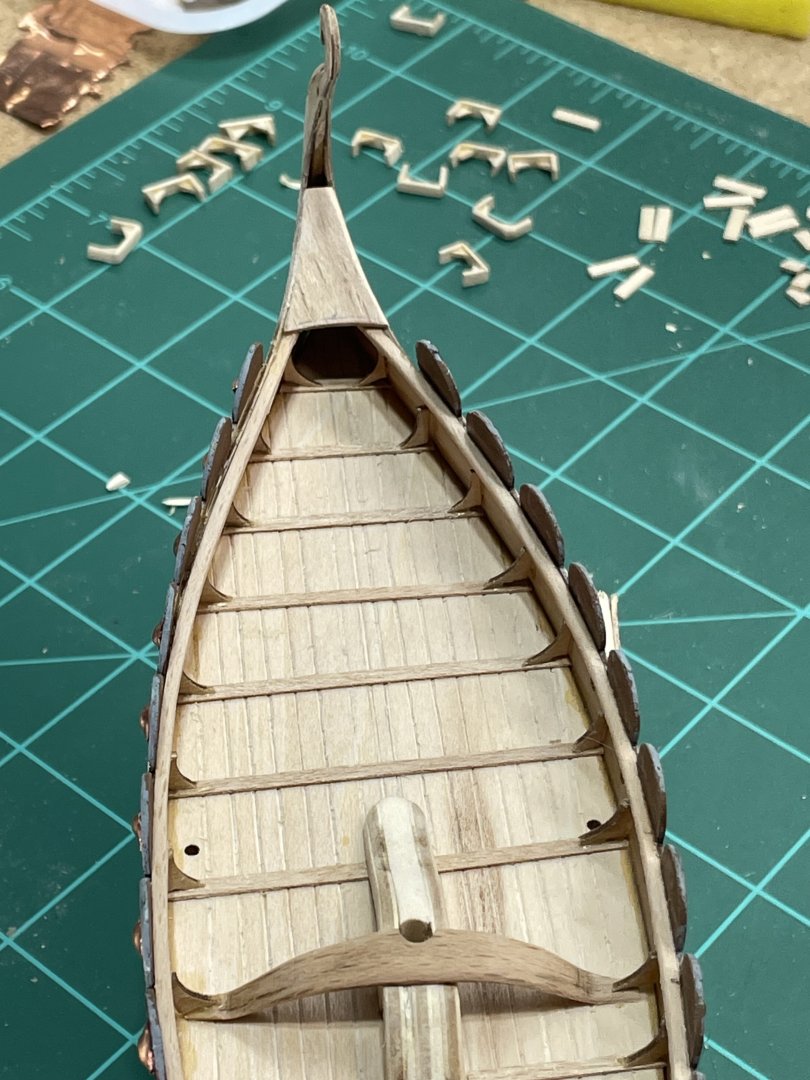
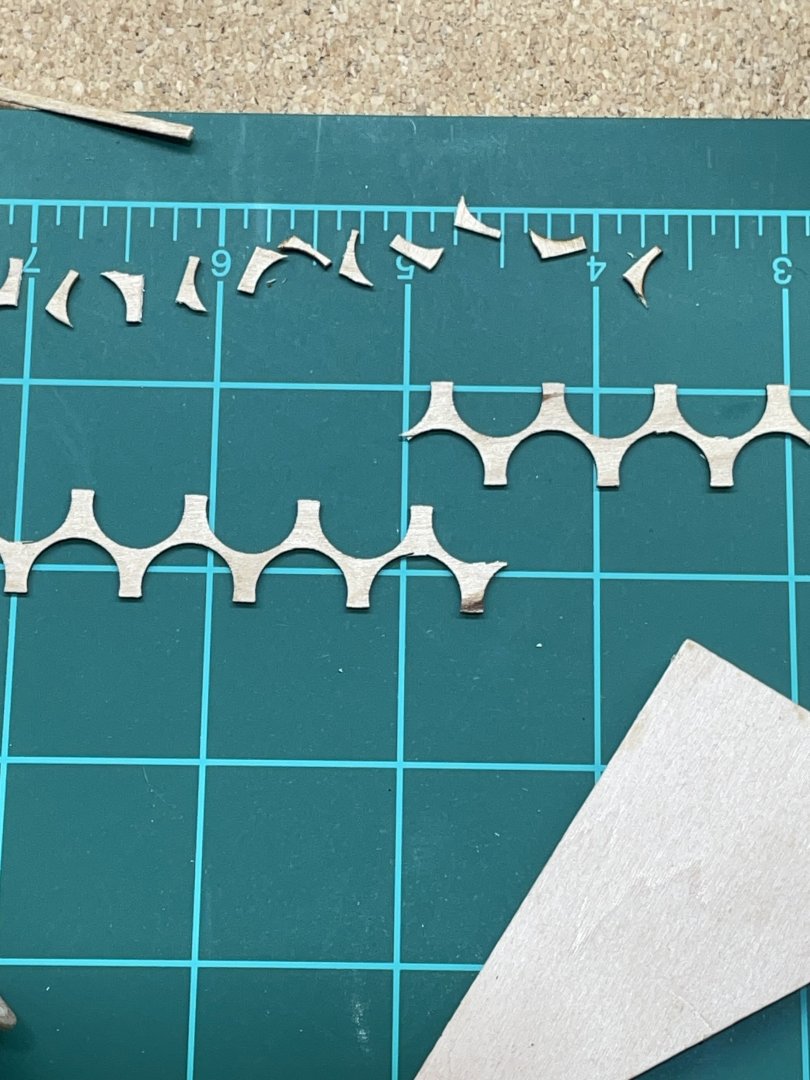
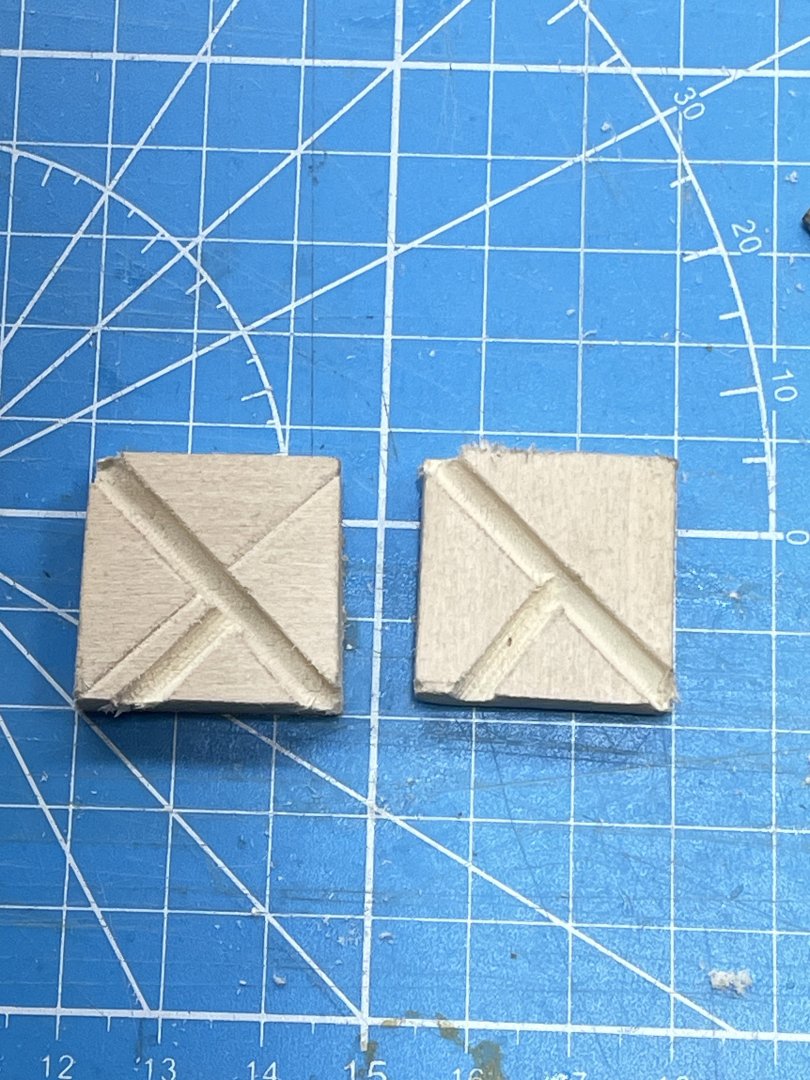
I found some shields online I could copy the designs. They may have not been painted, but it sure adds to my build 🙂 I took some copper foil and impressed a paint brush in it, than cut them out for the dome in the middle of them. After gluing one side on, it needed cap rails I thought. I got some scrap wood sheets from another build and cut them down to work. I wanted to fill in some of the area at the bow and stern. So I used some more of that scrap wood. So now I’m trying to think of anything else I can make to put on this deck. How about 24 benches? I’m not for sure they look like the ones they had. This should keep me occupied for a bit.

- 16 replies
-
- 5
-
-
- Oseberg
- Billing Boats
- (and 1 more)
-
Glen, does everything seem bigger than usual?
- 301 replies
-
- 6
-

-
-
- Constitution
- Bluejacket Shipcrafters
- (and 1 more)
-
Me either Eric. I’m learning you get what you put out. Simple builds leave more time and room for imagination and that’s what makes everybody’s unique. It’s a great use of my time:-)
- 33 replies
-
- 2
-
-
- midwest products
- kayak
- (and 1 more)
-
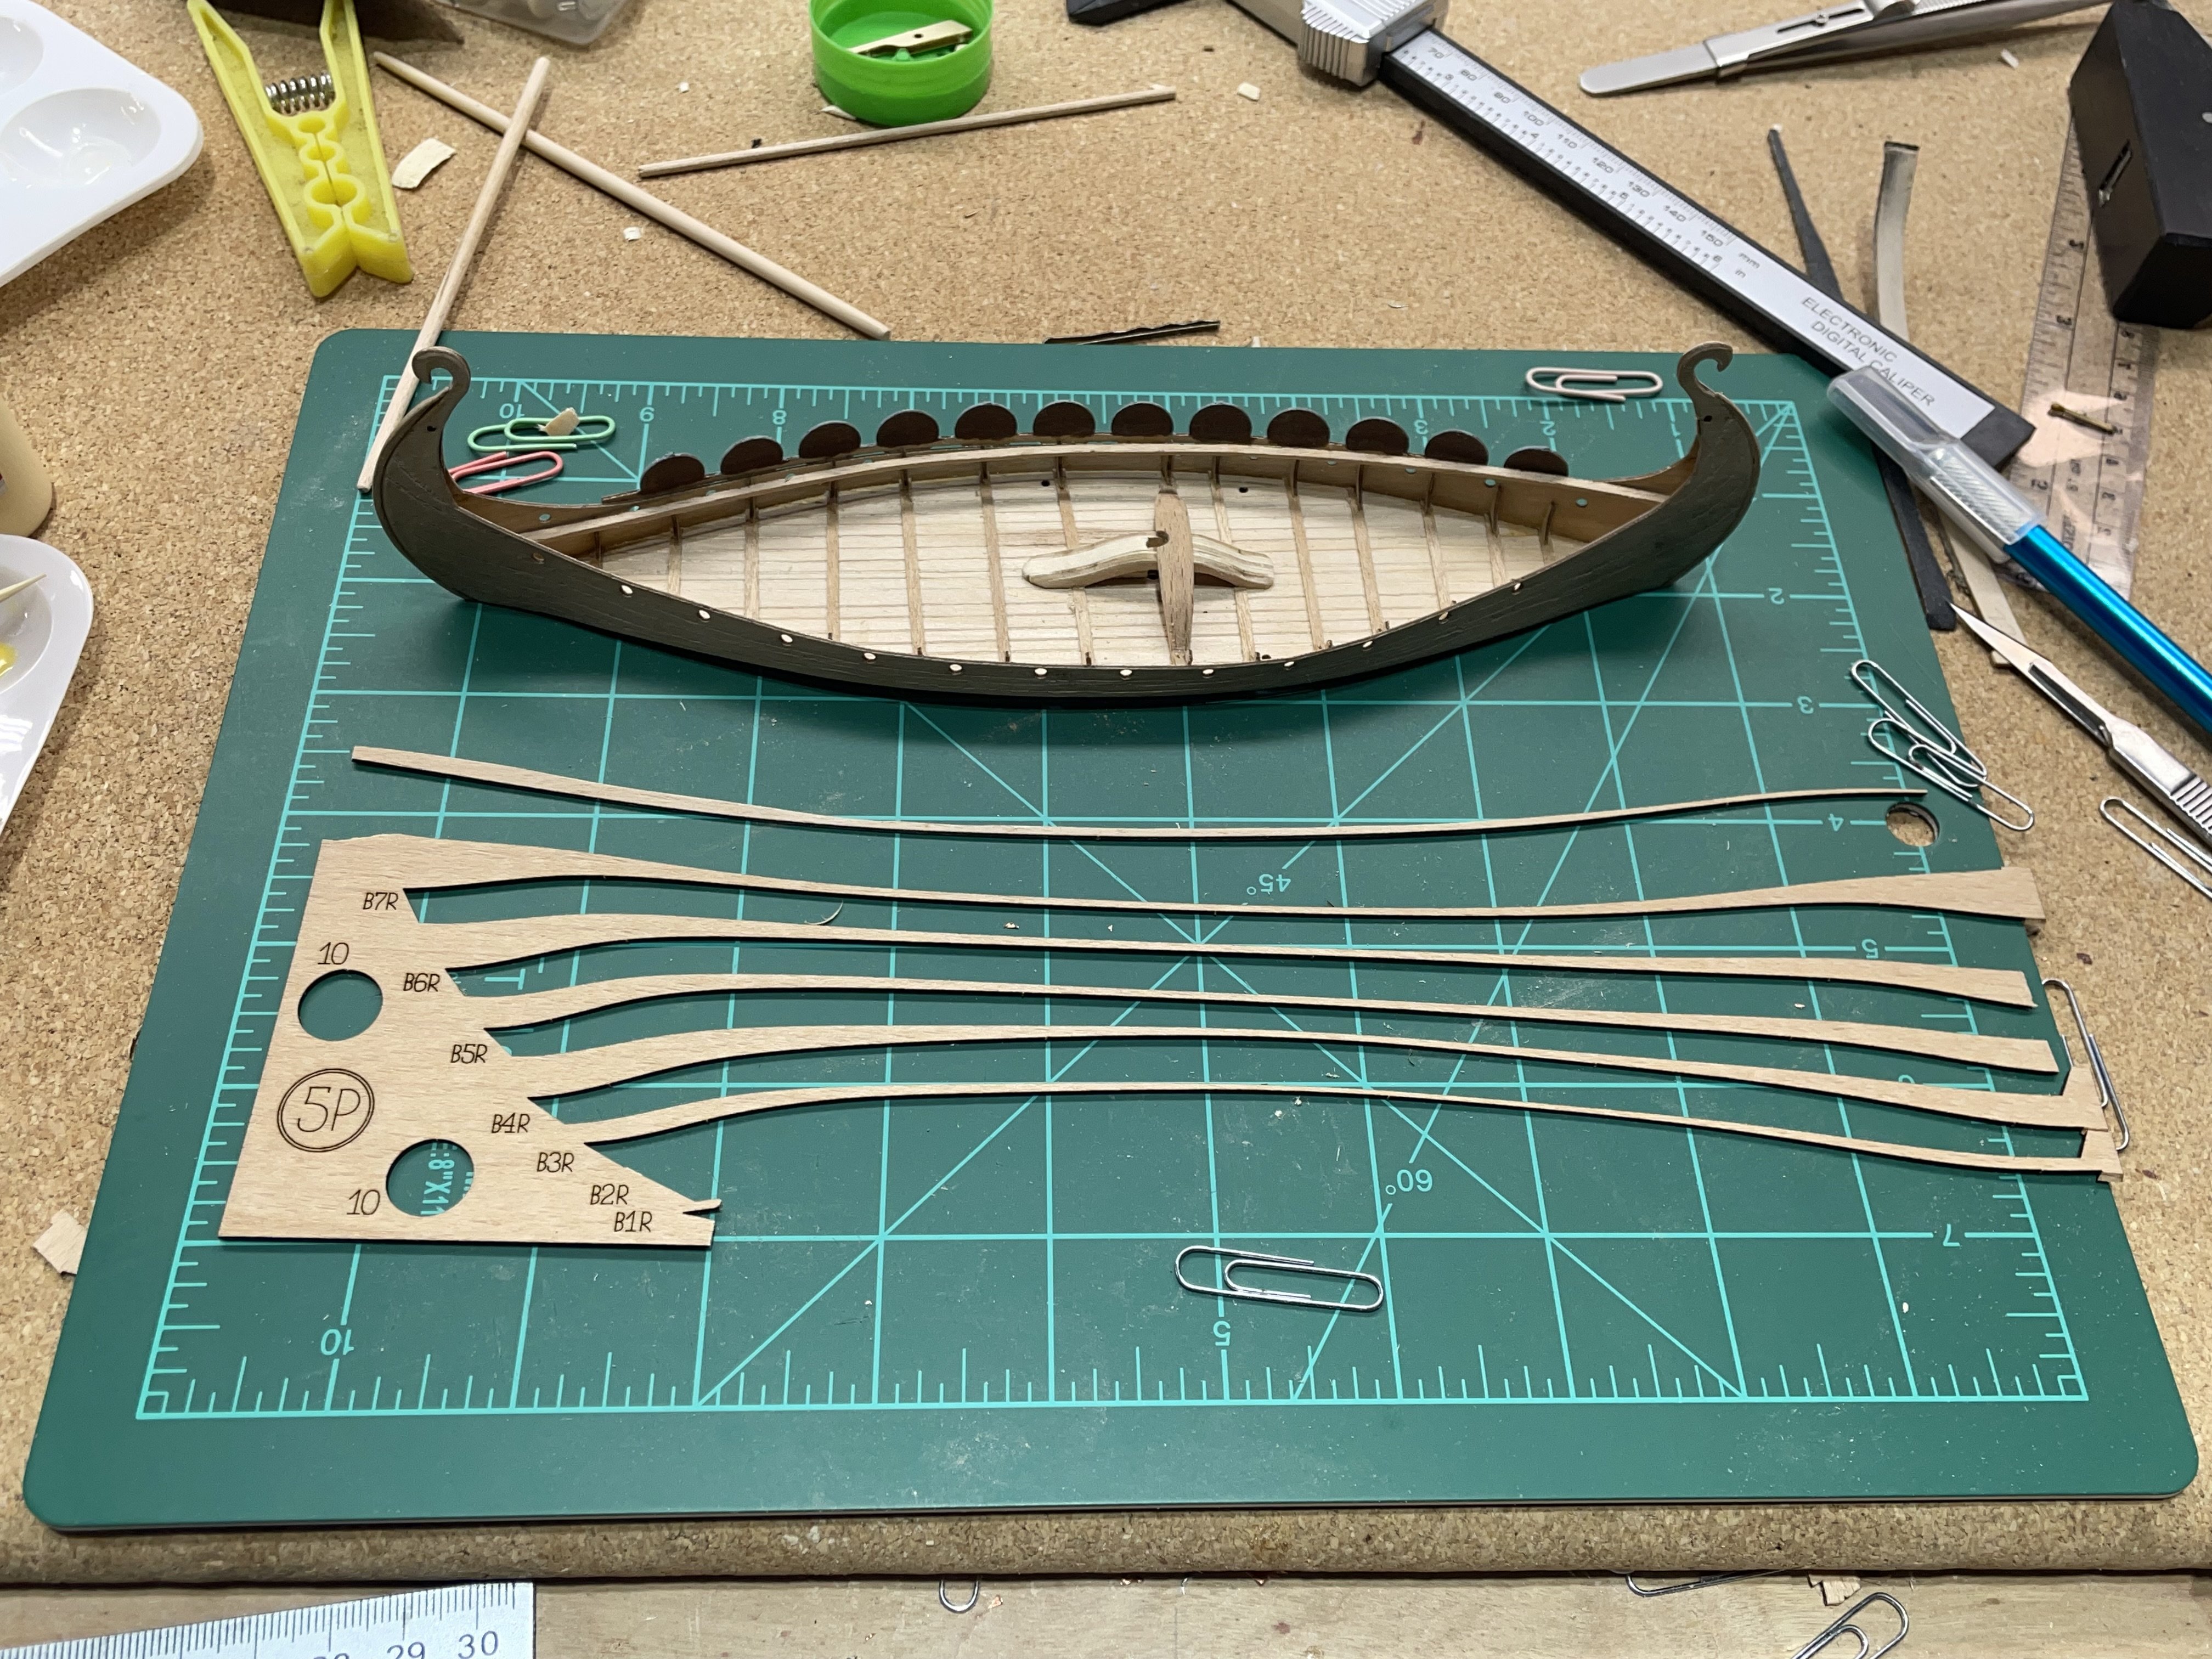
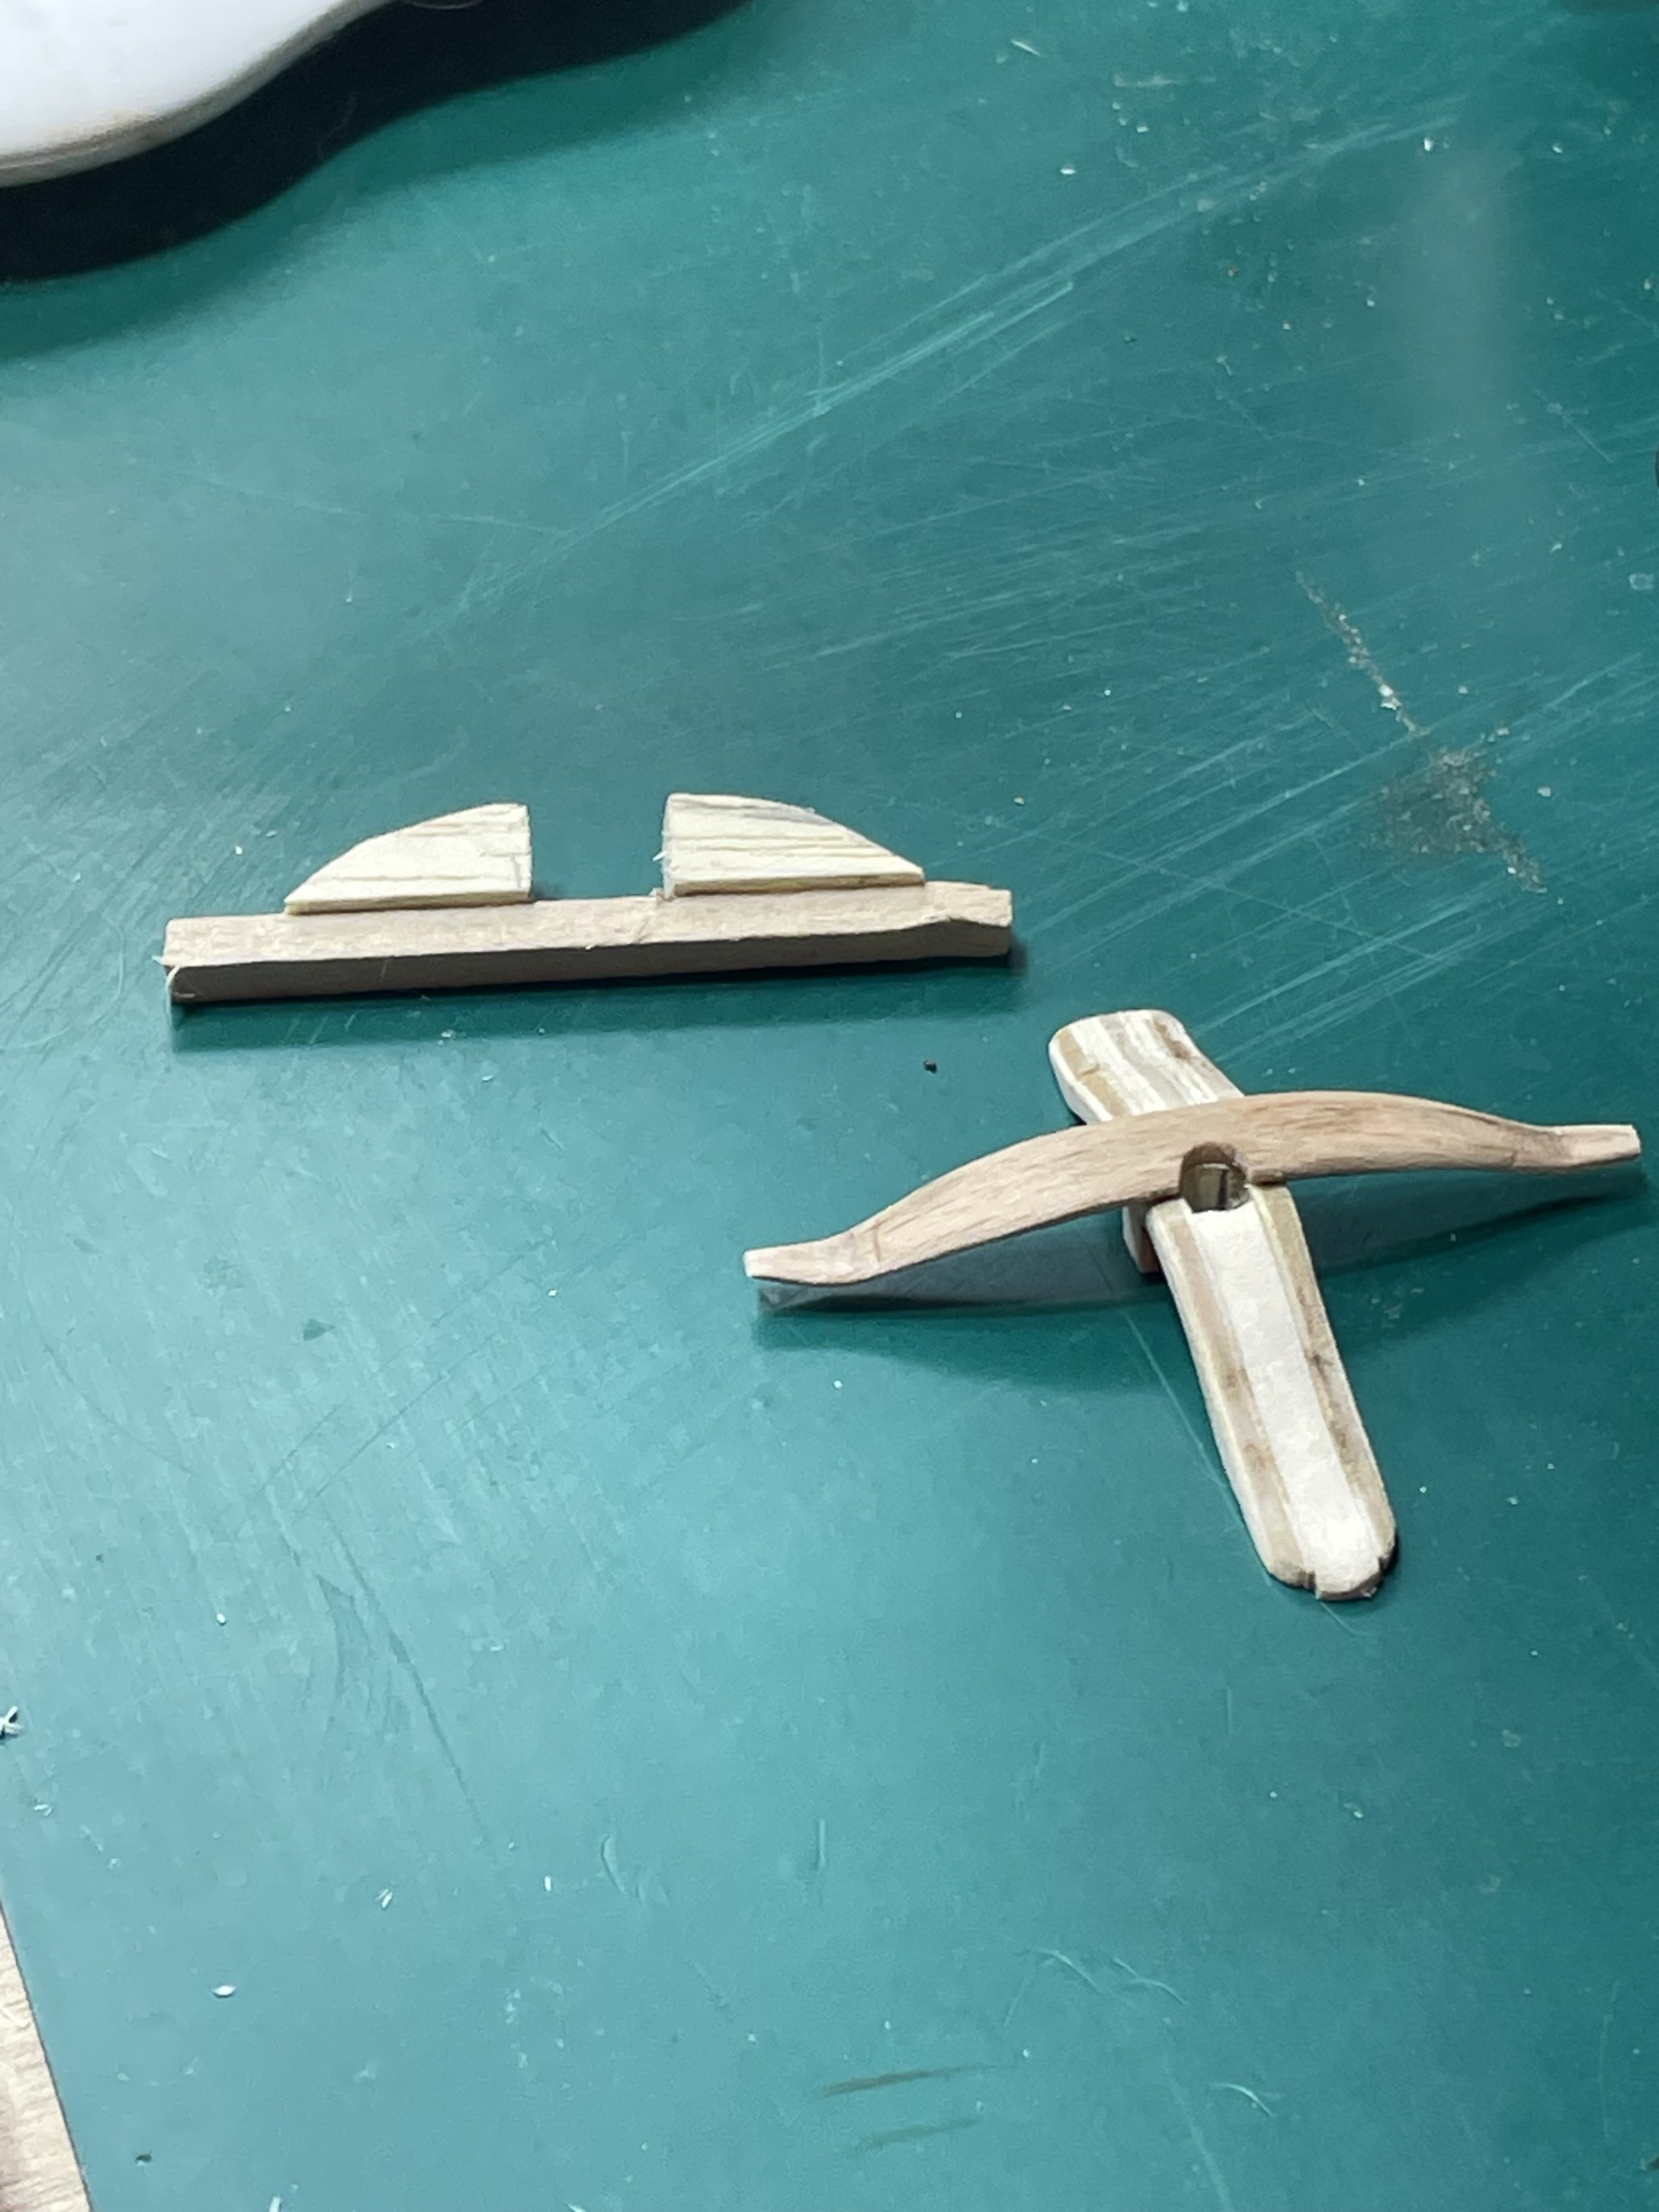
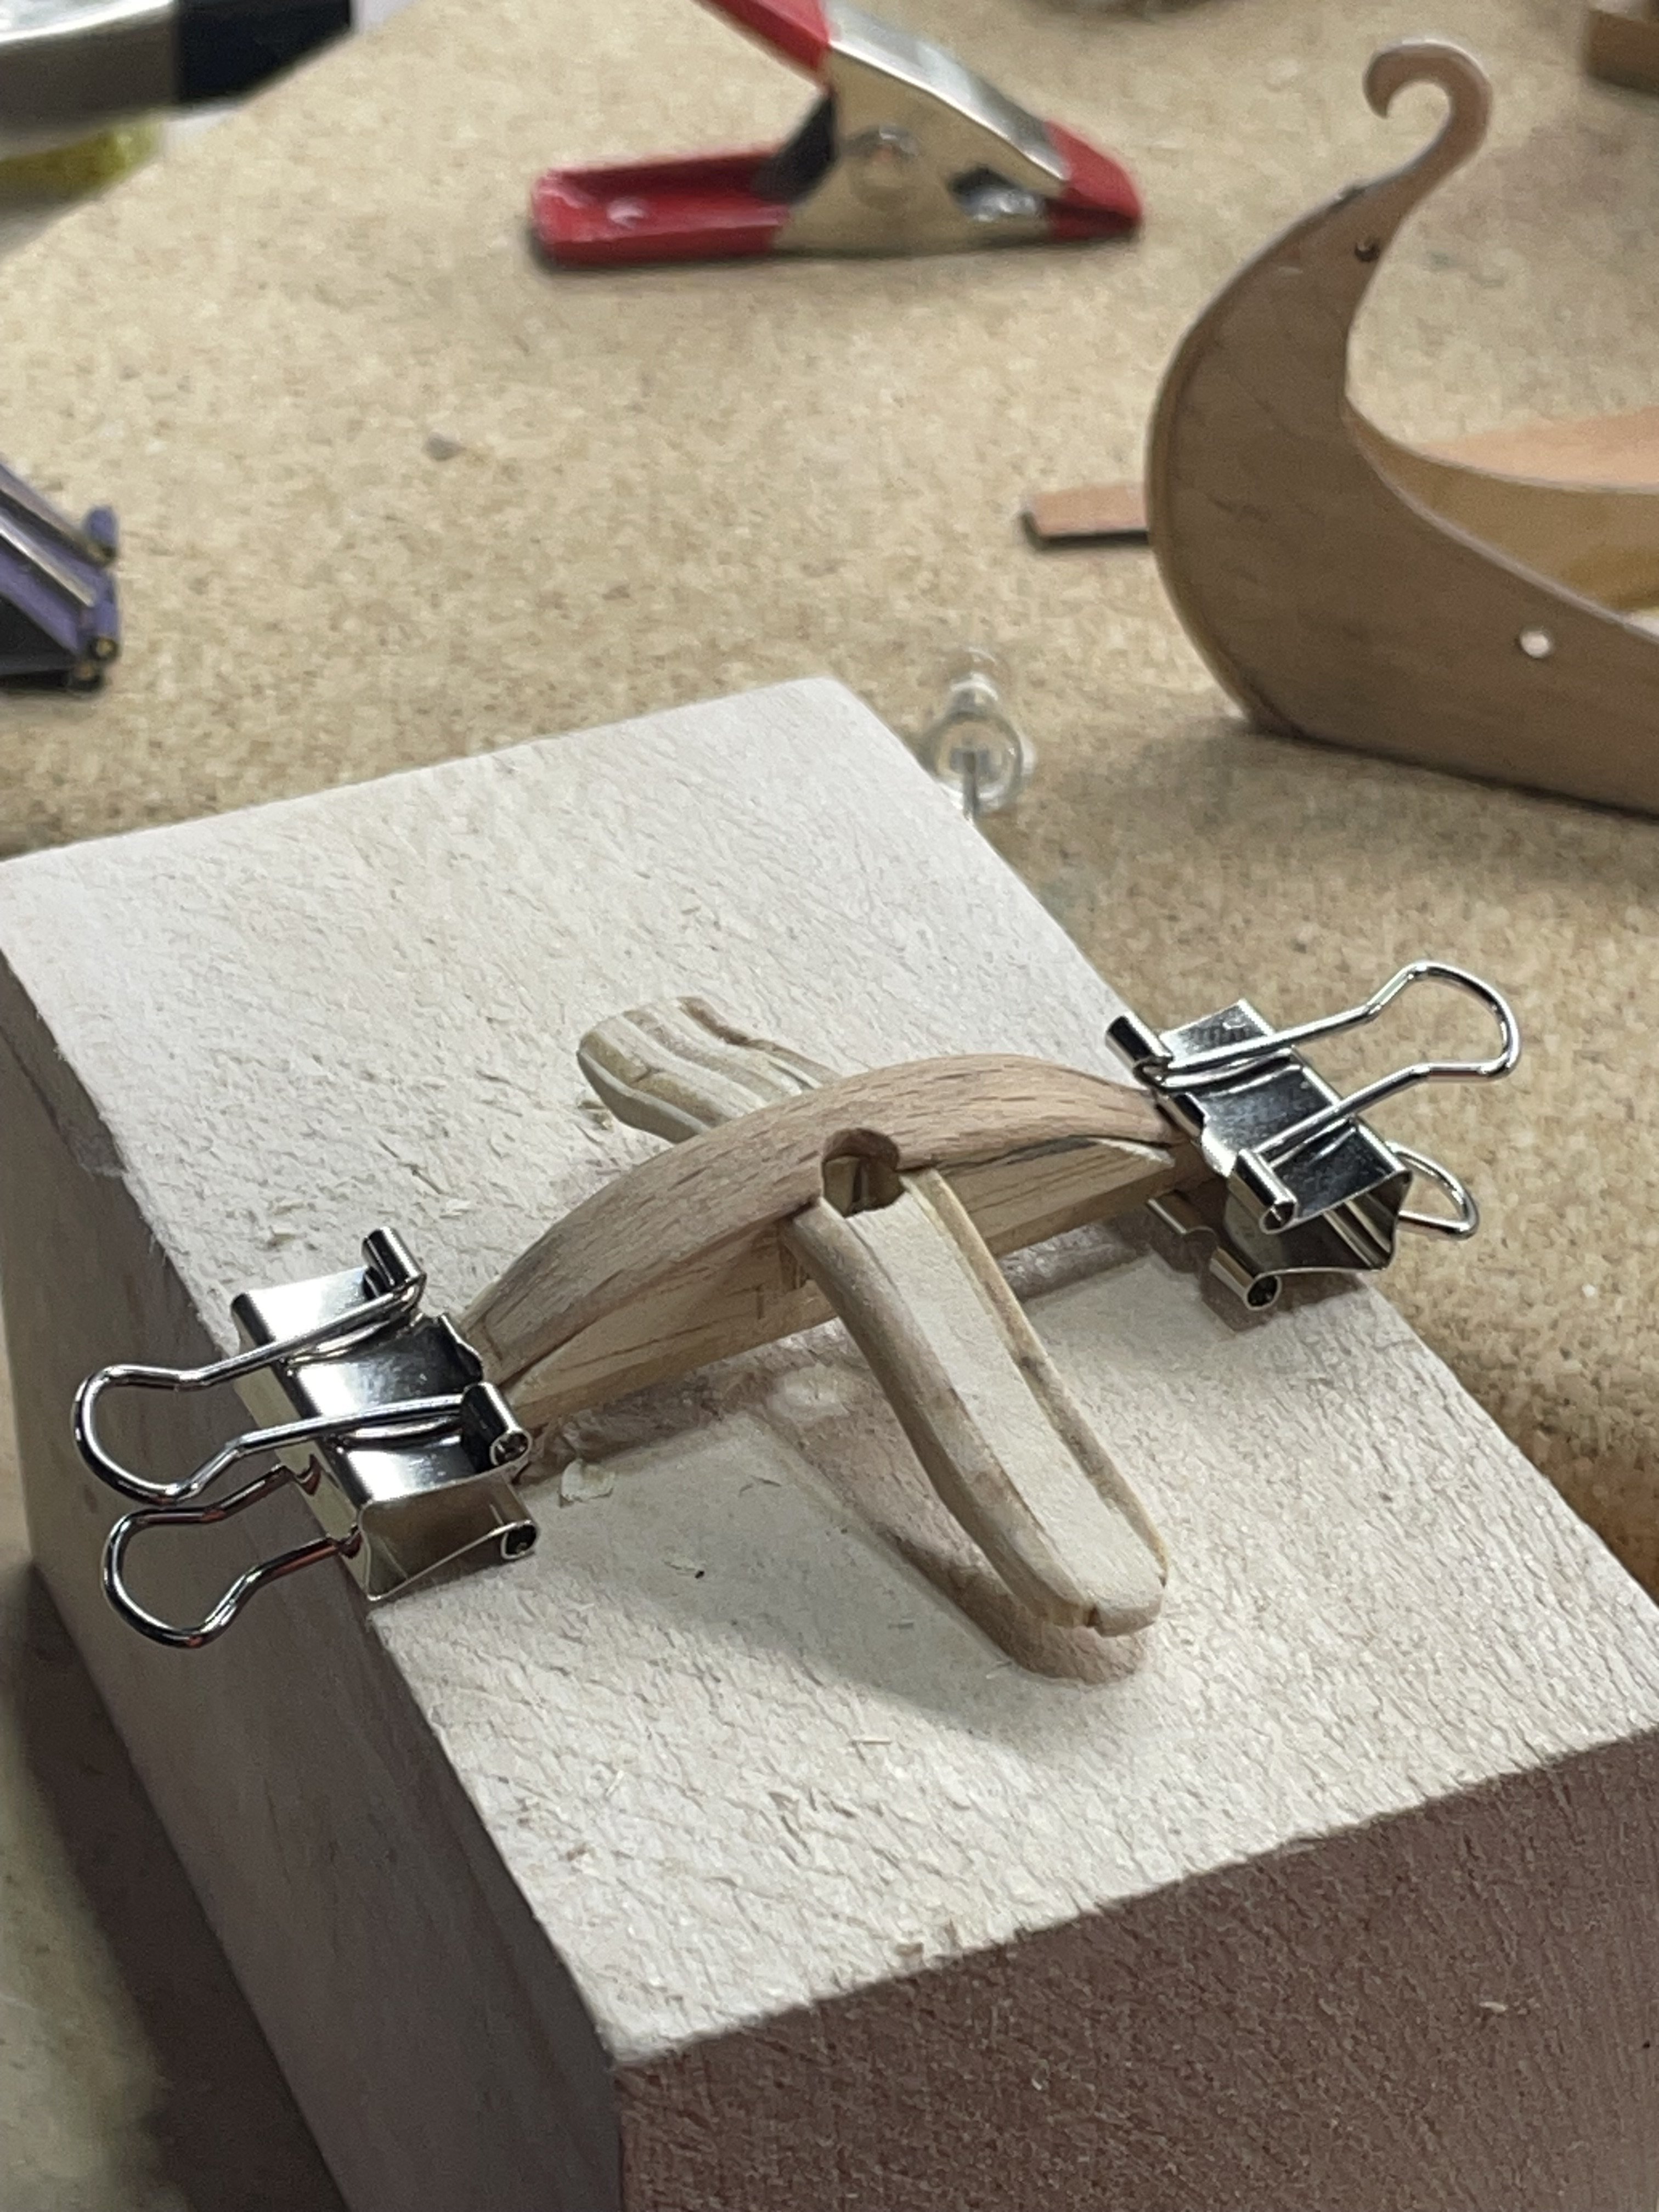
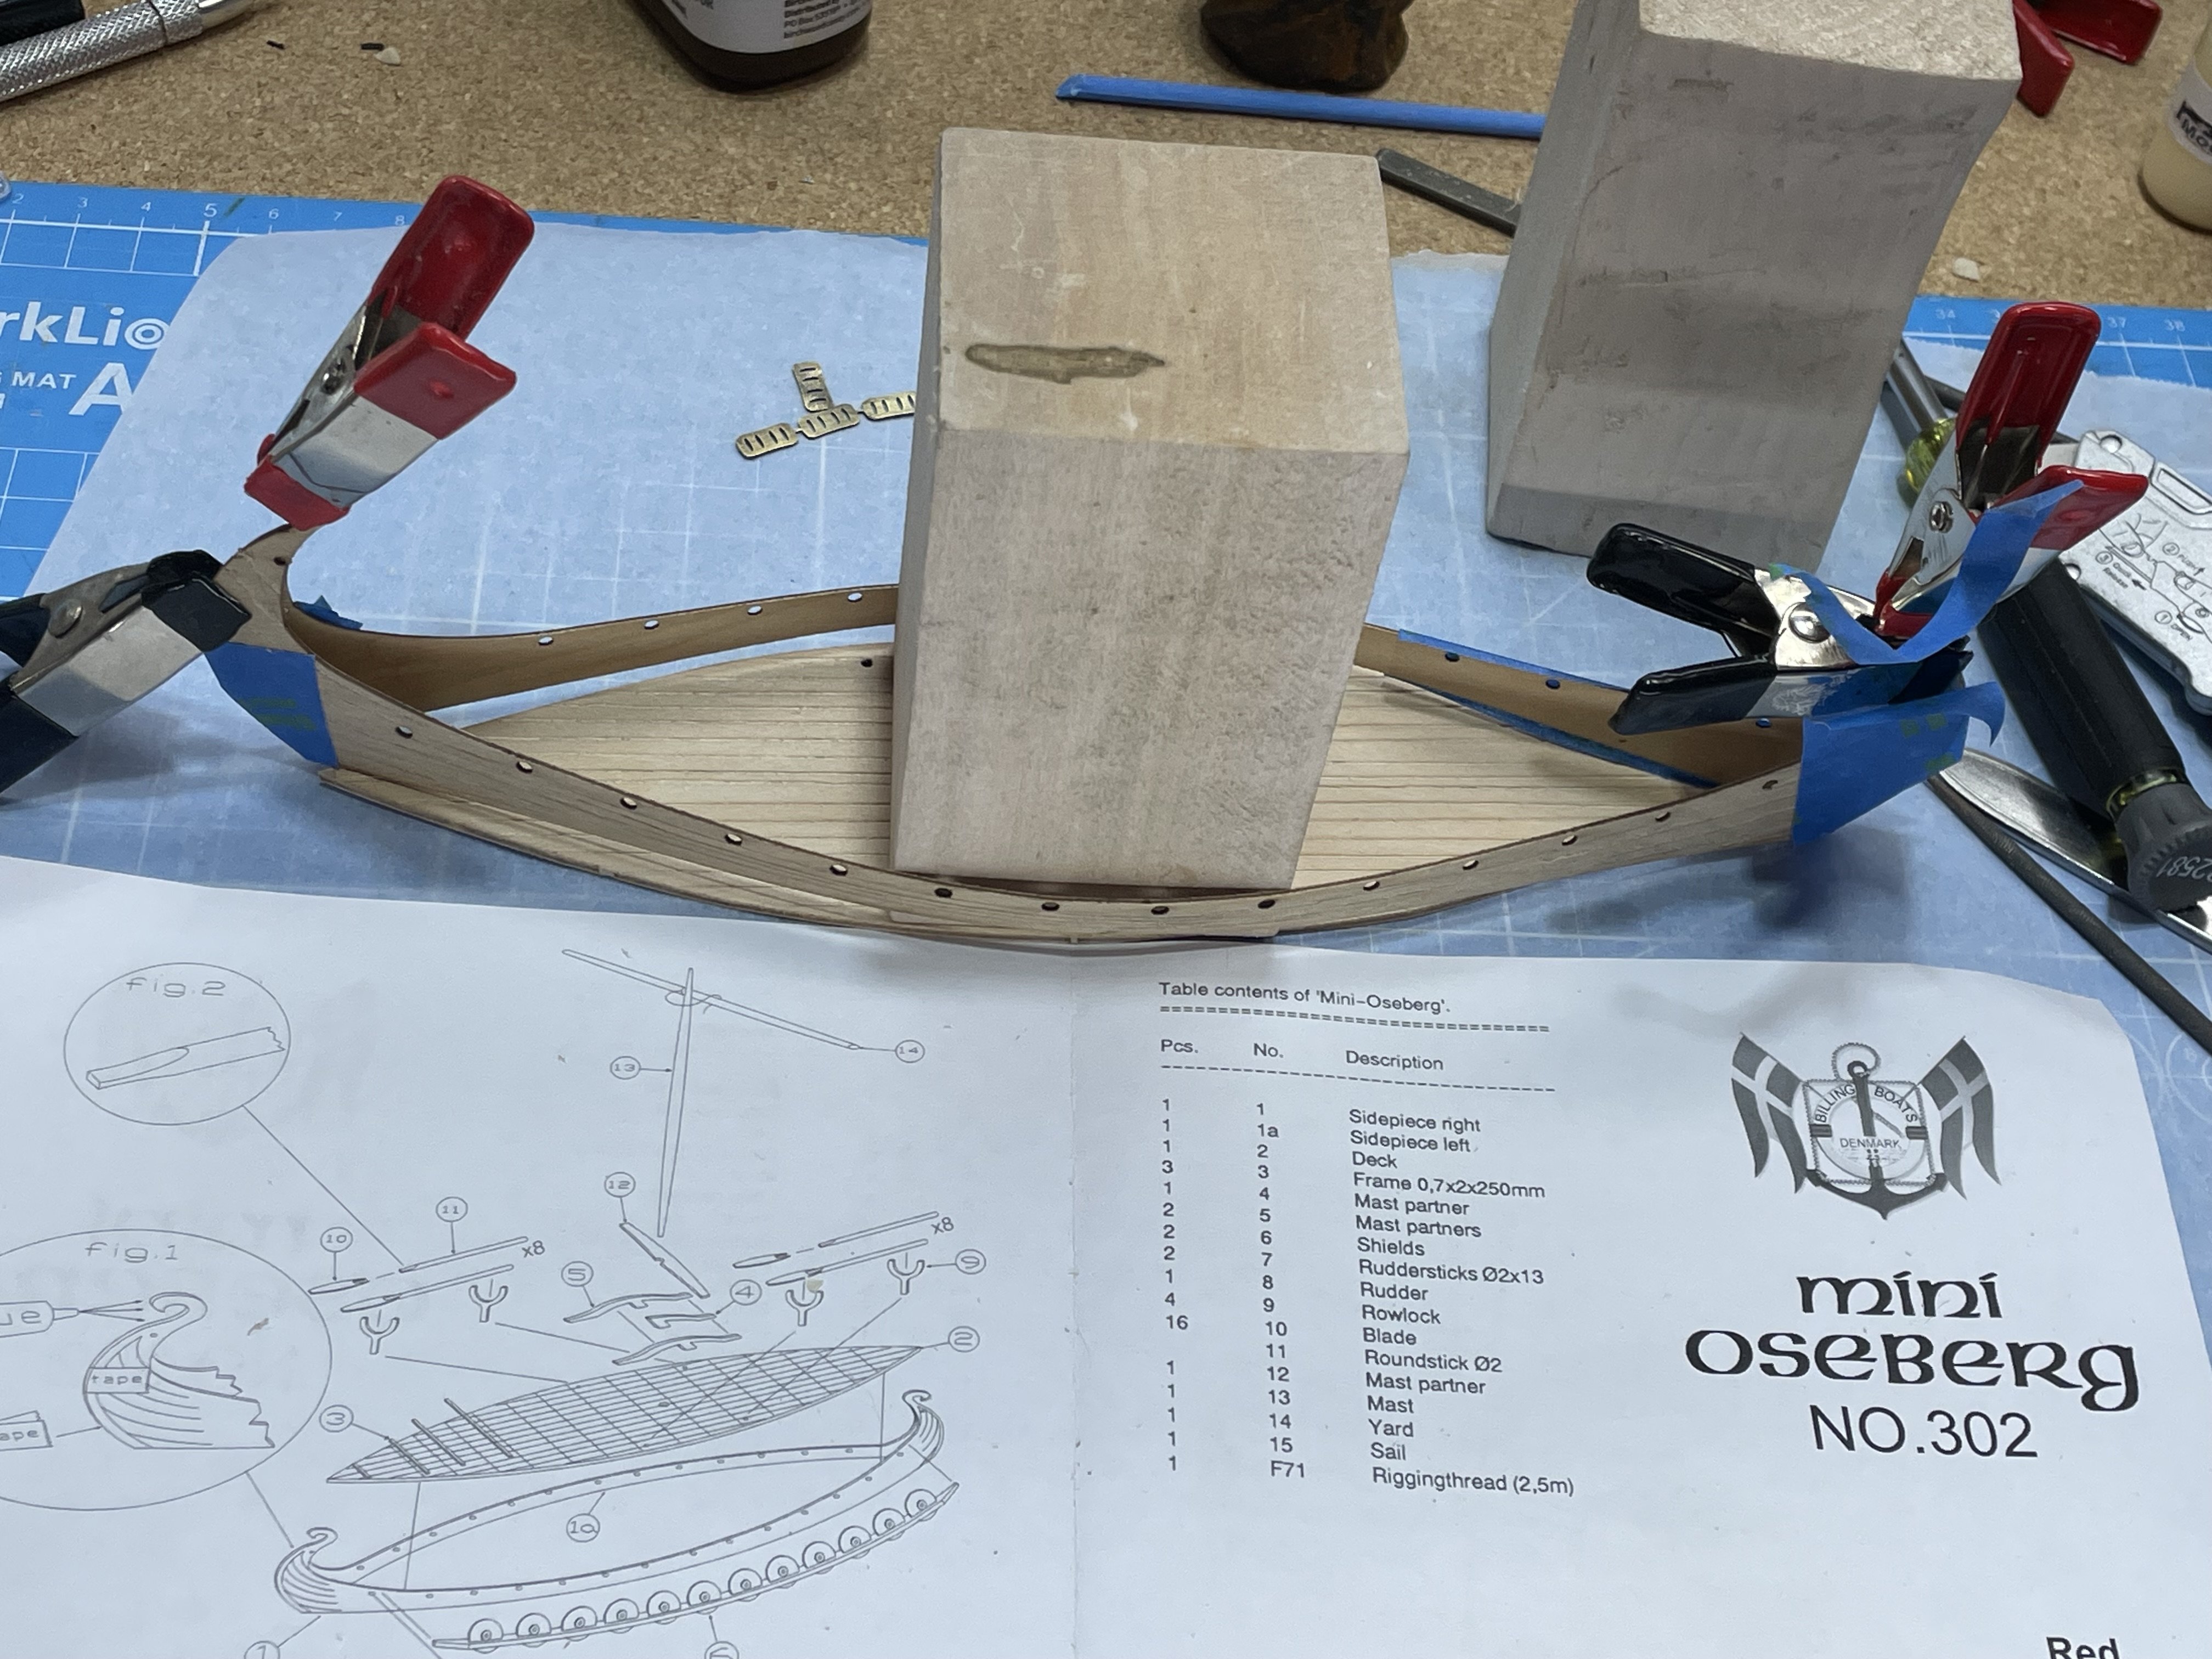
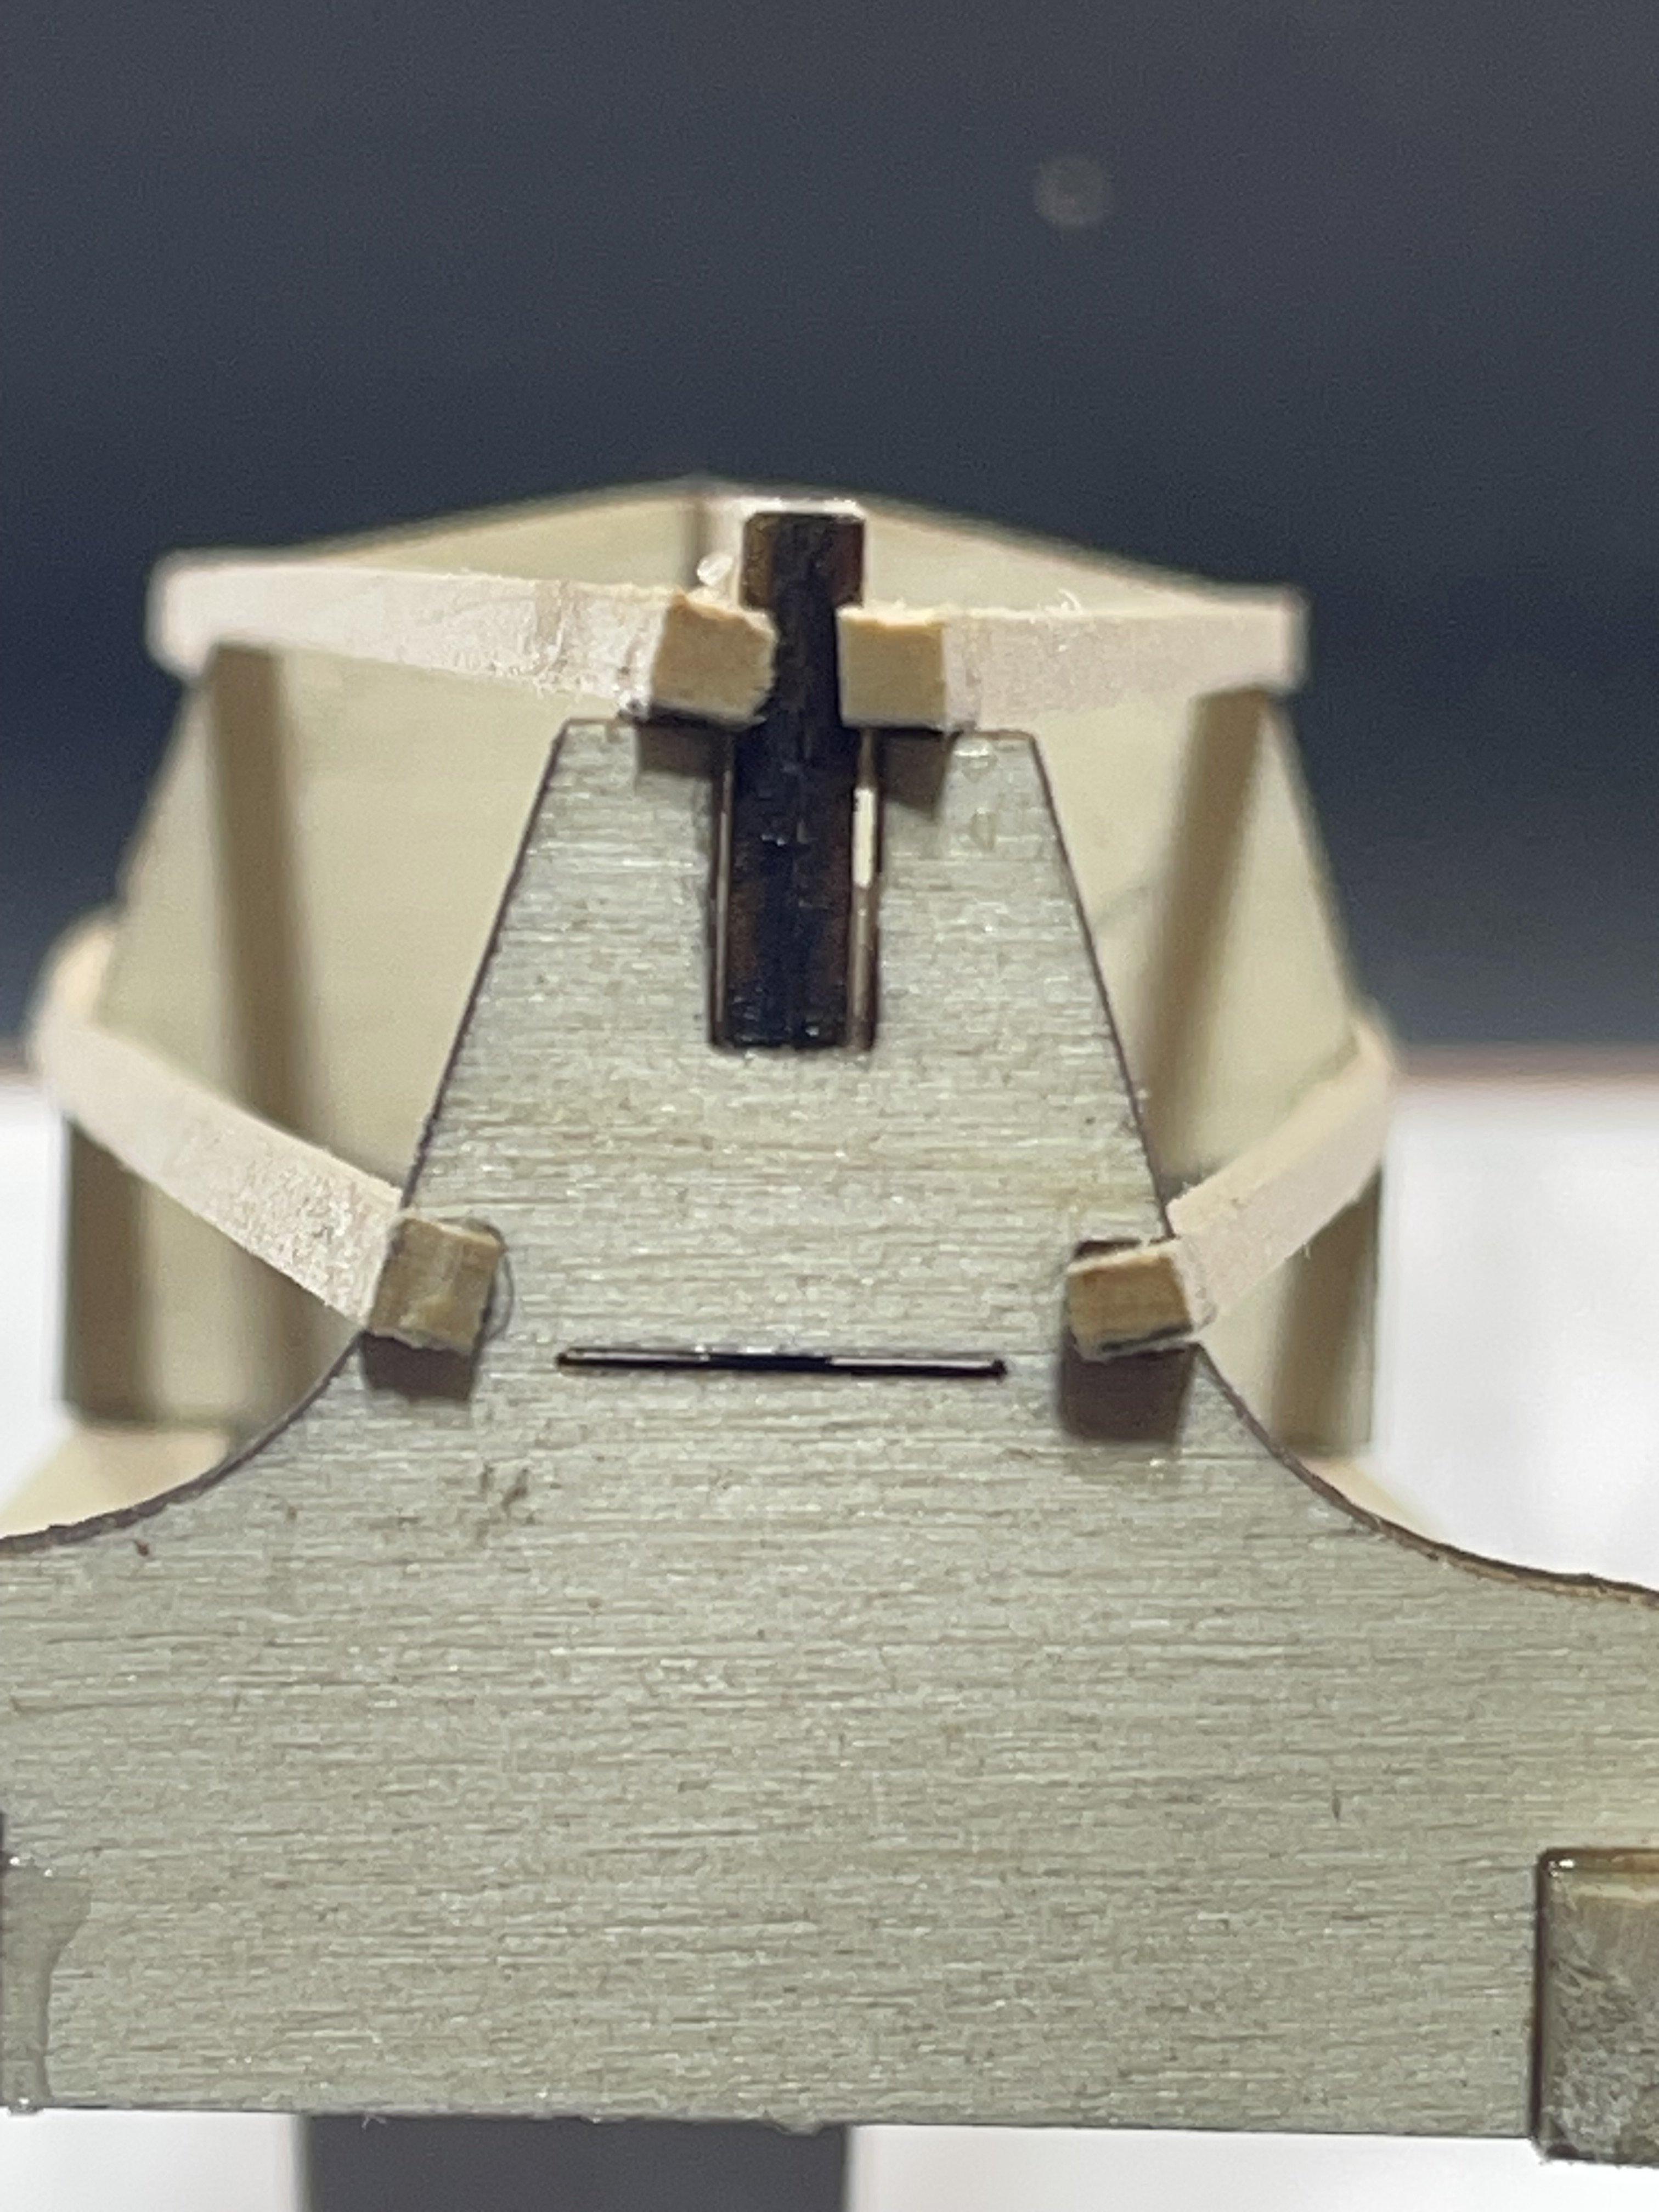
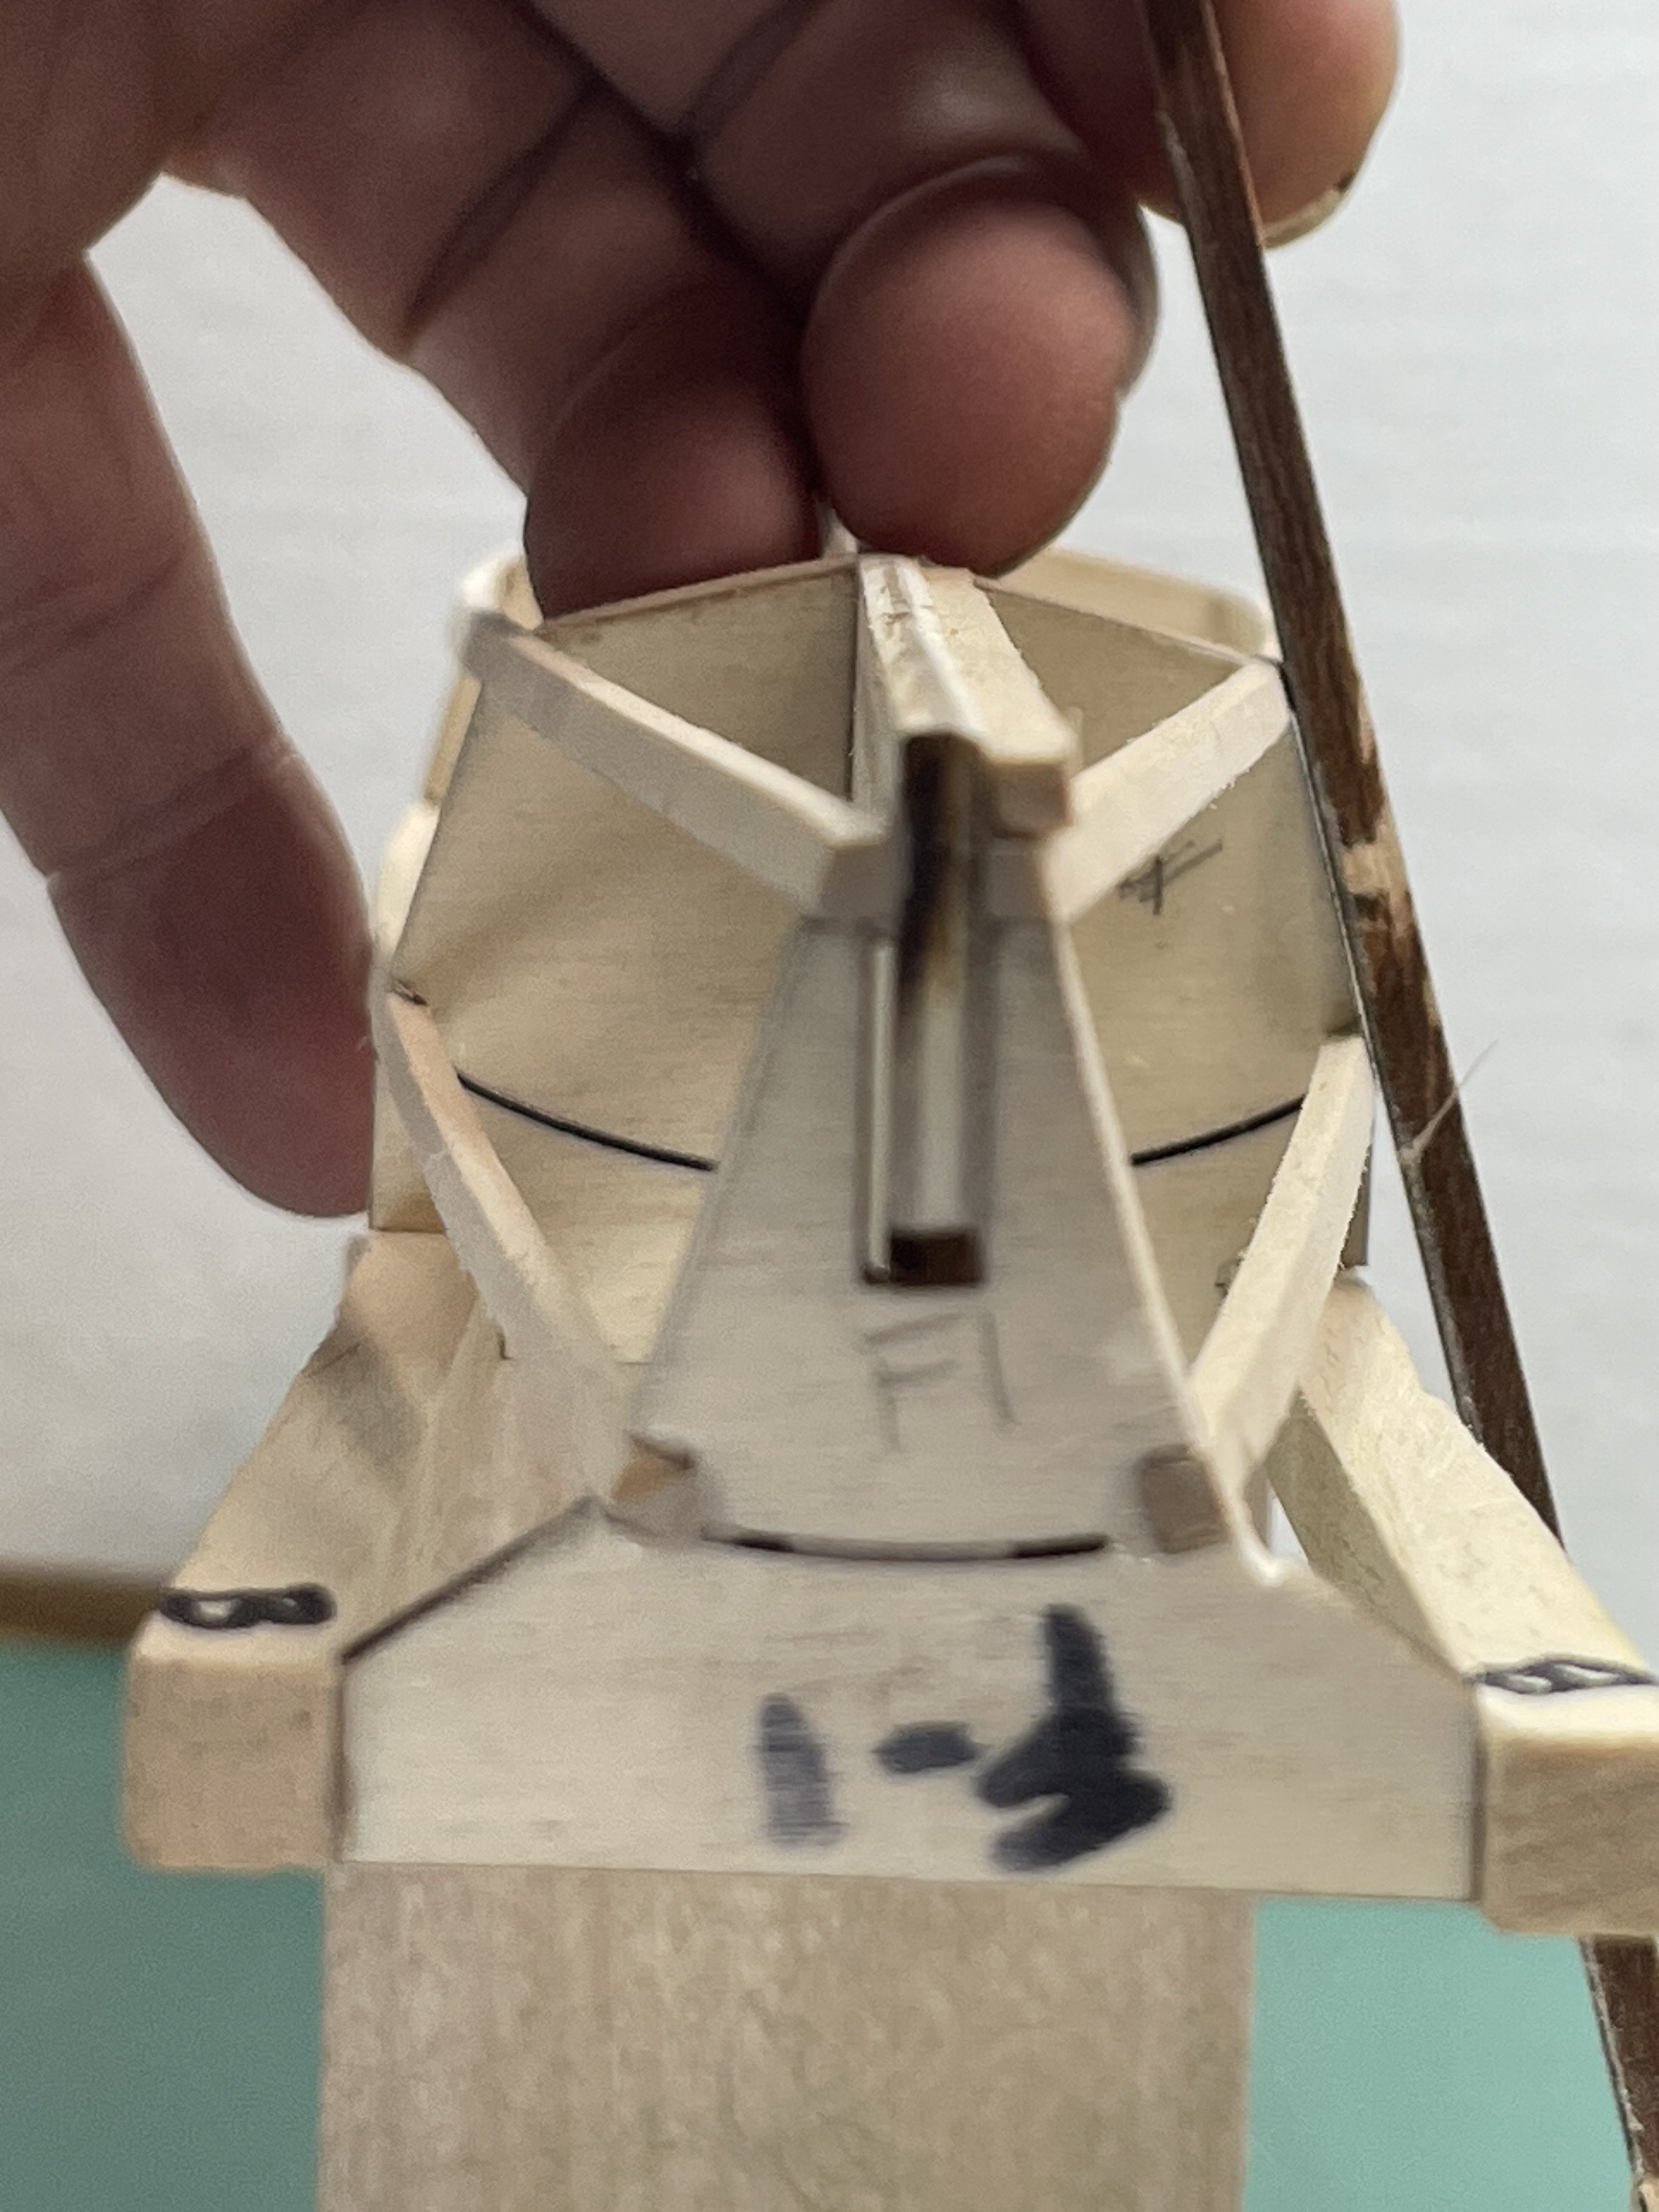
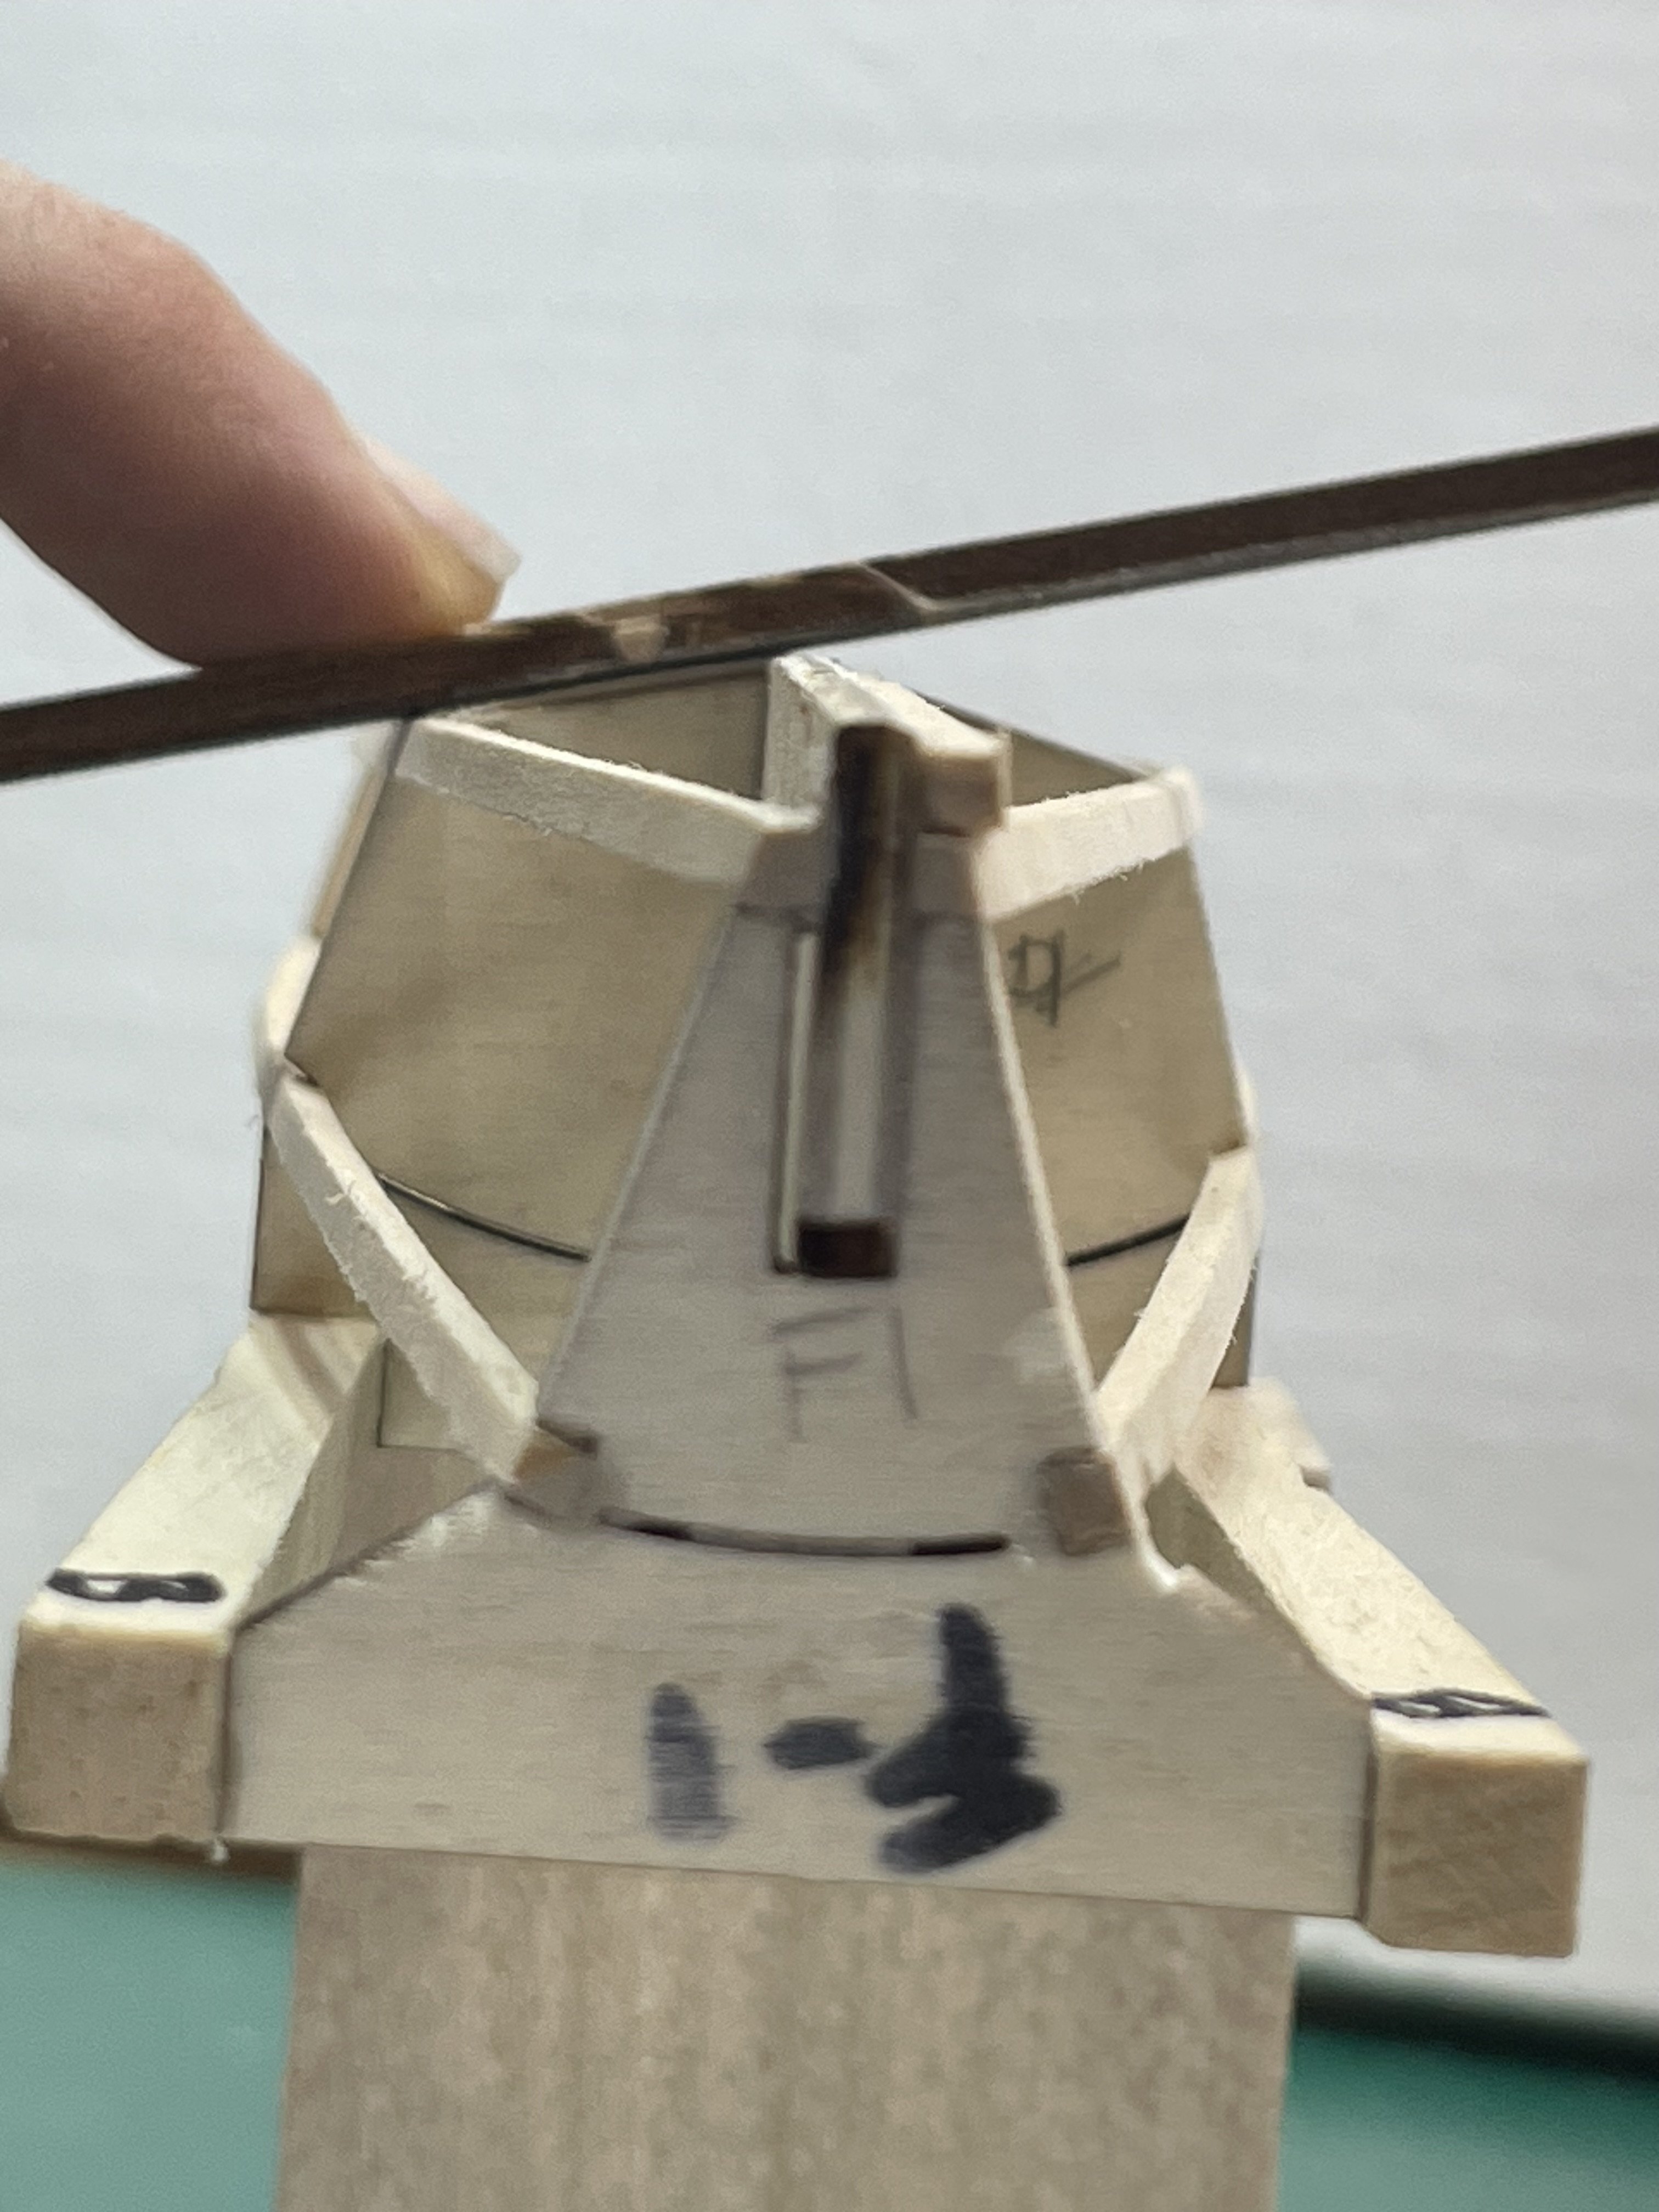
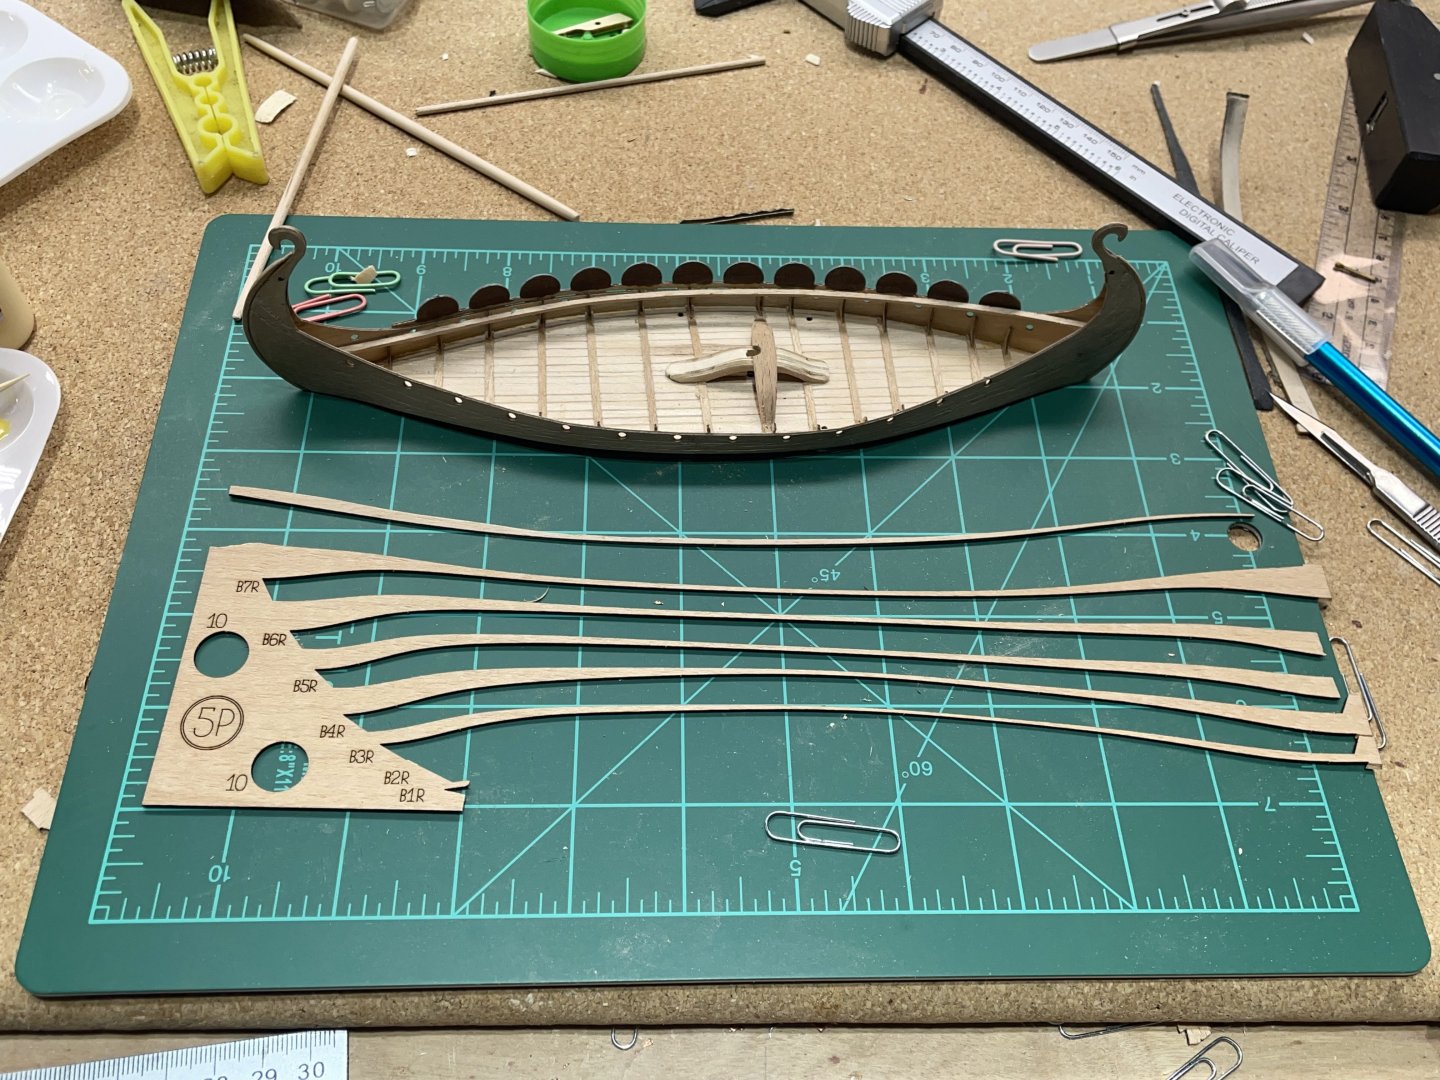
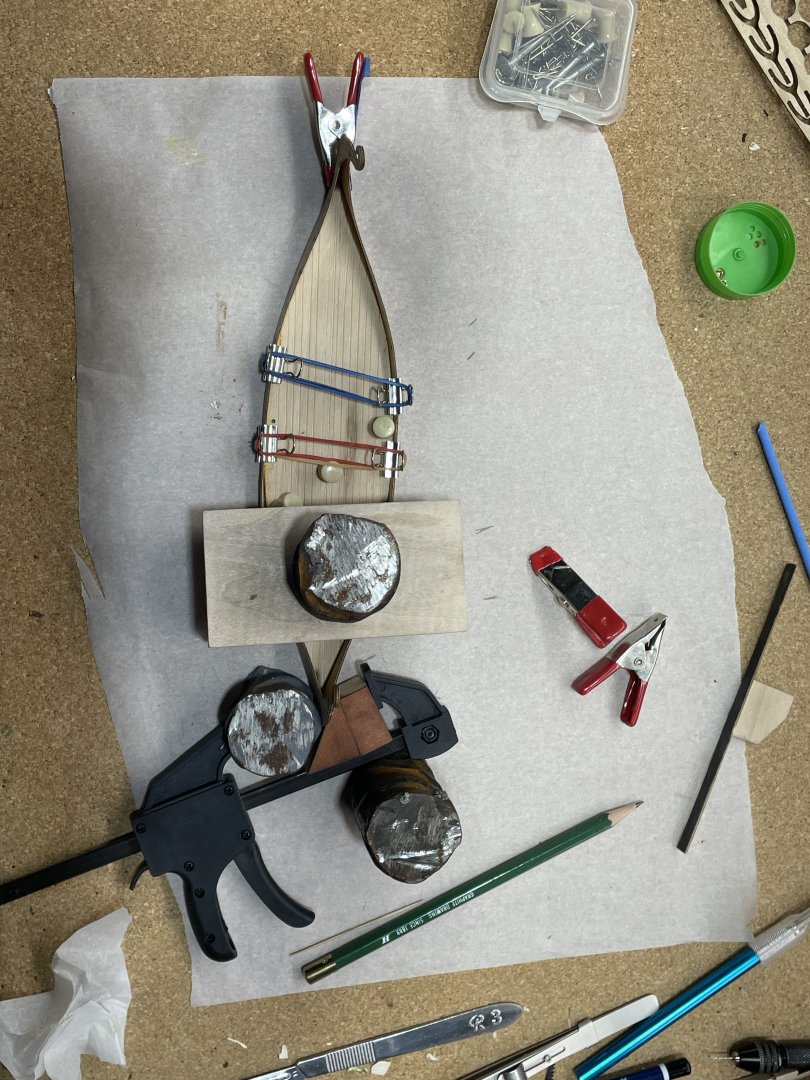
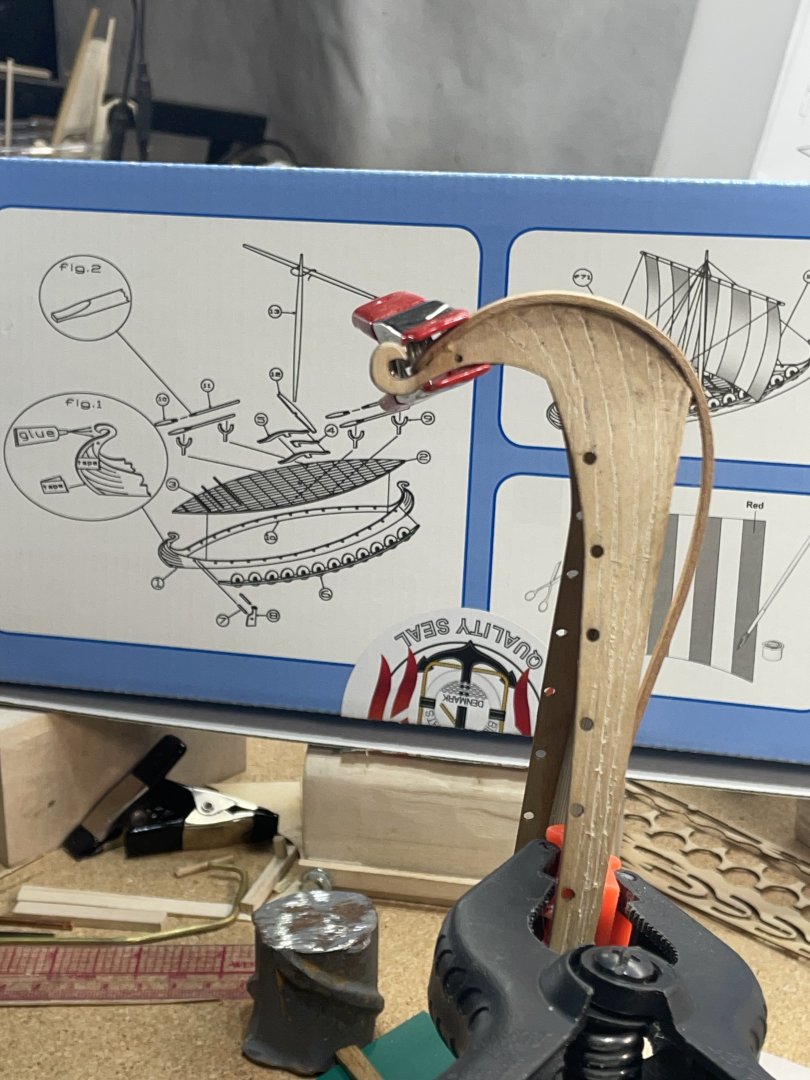
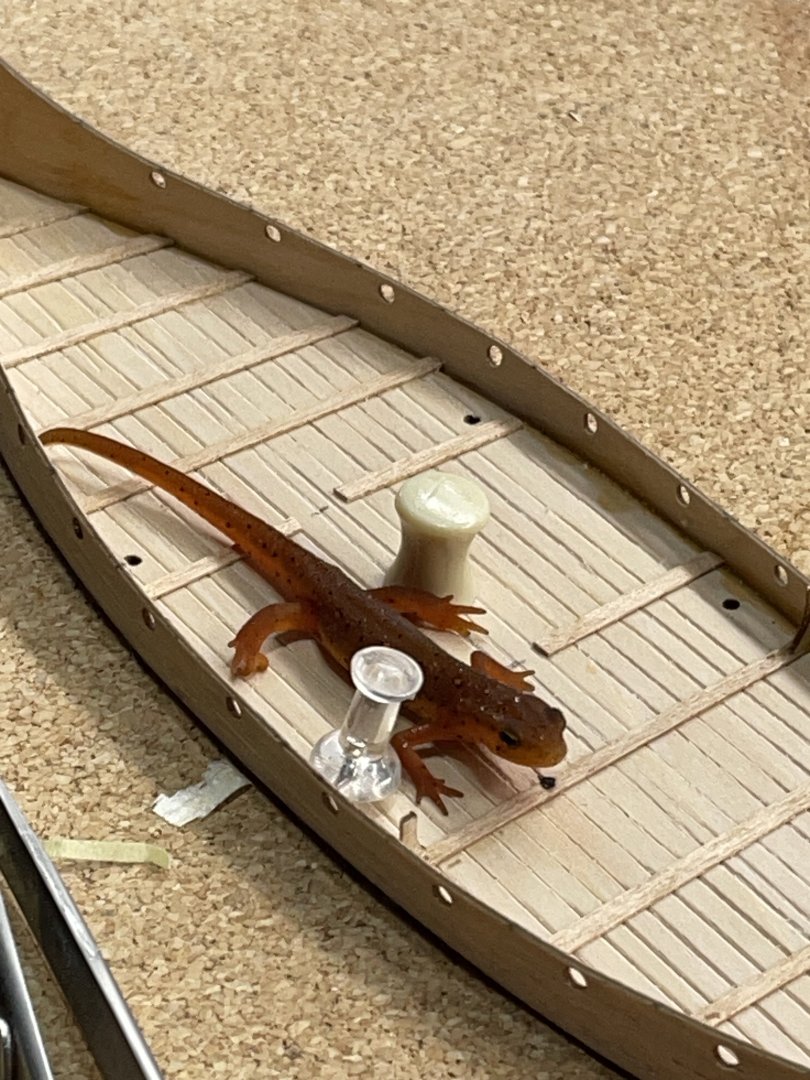
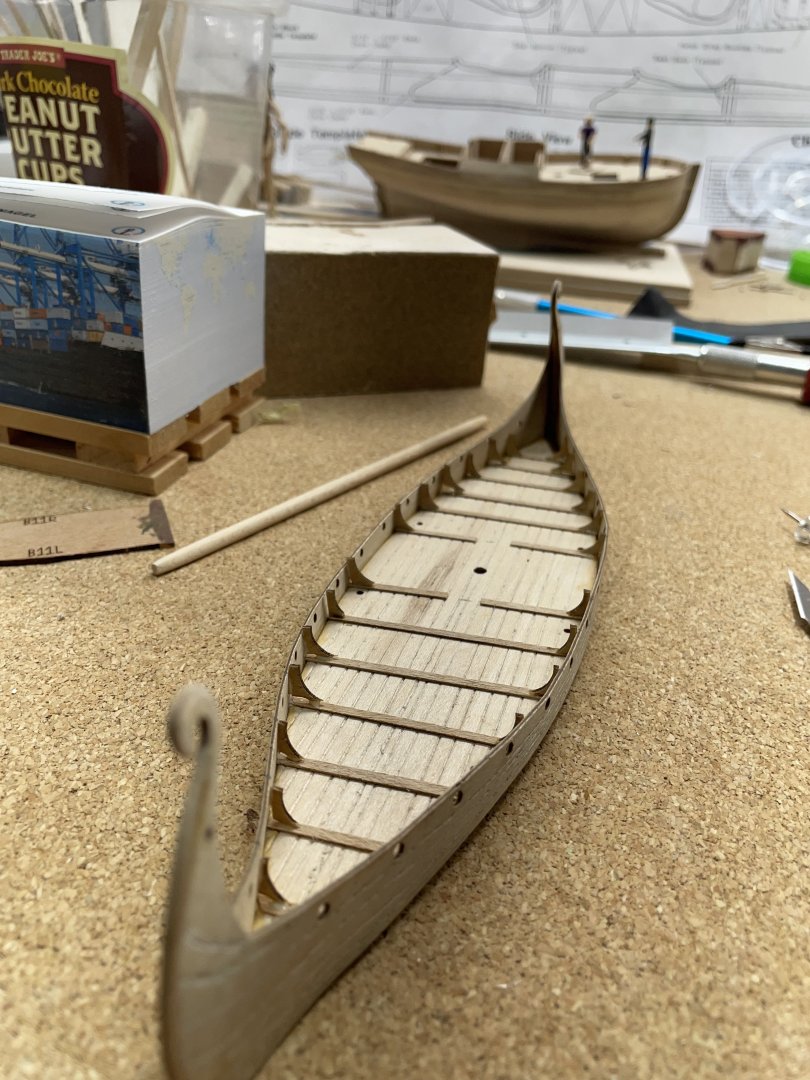
After trying many different ways, I got it glued on. I took a small piece of cherry and bent it for a false keel on both ends. Sanded it down. I glued the strips across the deck. Which I think are actually the tops of the frames. That part of the boat is missing:-) The only picture I got of that step was when I found a newt outside and brought him into the shipyard for a photo shoot. I really wanted the tops of the frames that show through the deck. I tried making them, but they looked like they were just scraps I picked off the floor:-/ I looked at the wooden sheets left from the parts and decided I could make the wood that went around the shields work. I was pleased to find Billing Boats secret hidden parts. About the mast step. It consisted of 4 parts. The picture shows only told e placement order. I broke the flat piece that goes on top trying I figure out the best position. It was easy to make another, but it was quite a bit thicker. I ended up pushing them all close together and filling in with wood to make it solid all around the mast. I made a jig so I could successfully bend the piece I broke earlier. i got it glued on and that brings this log up to date. Next will be the shields.


- 16 replies
-
- 4
-
-
- Oseberg
- Billing Boats
- (and 1 more)
-
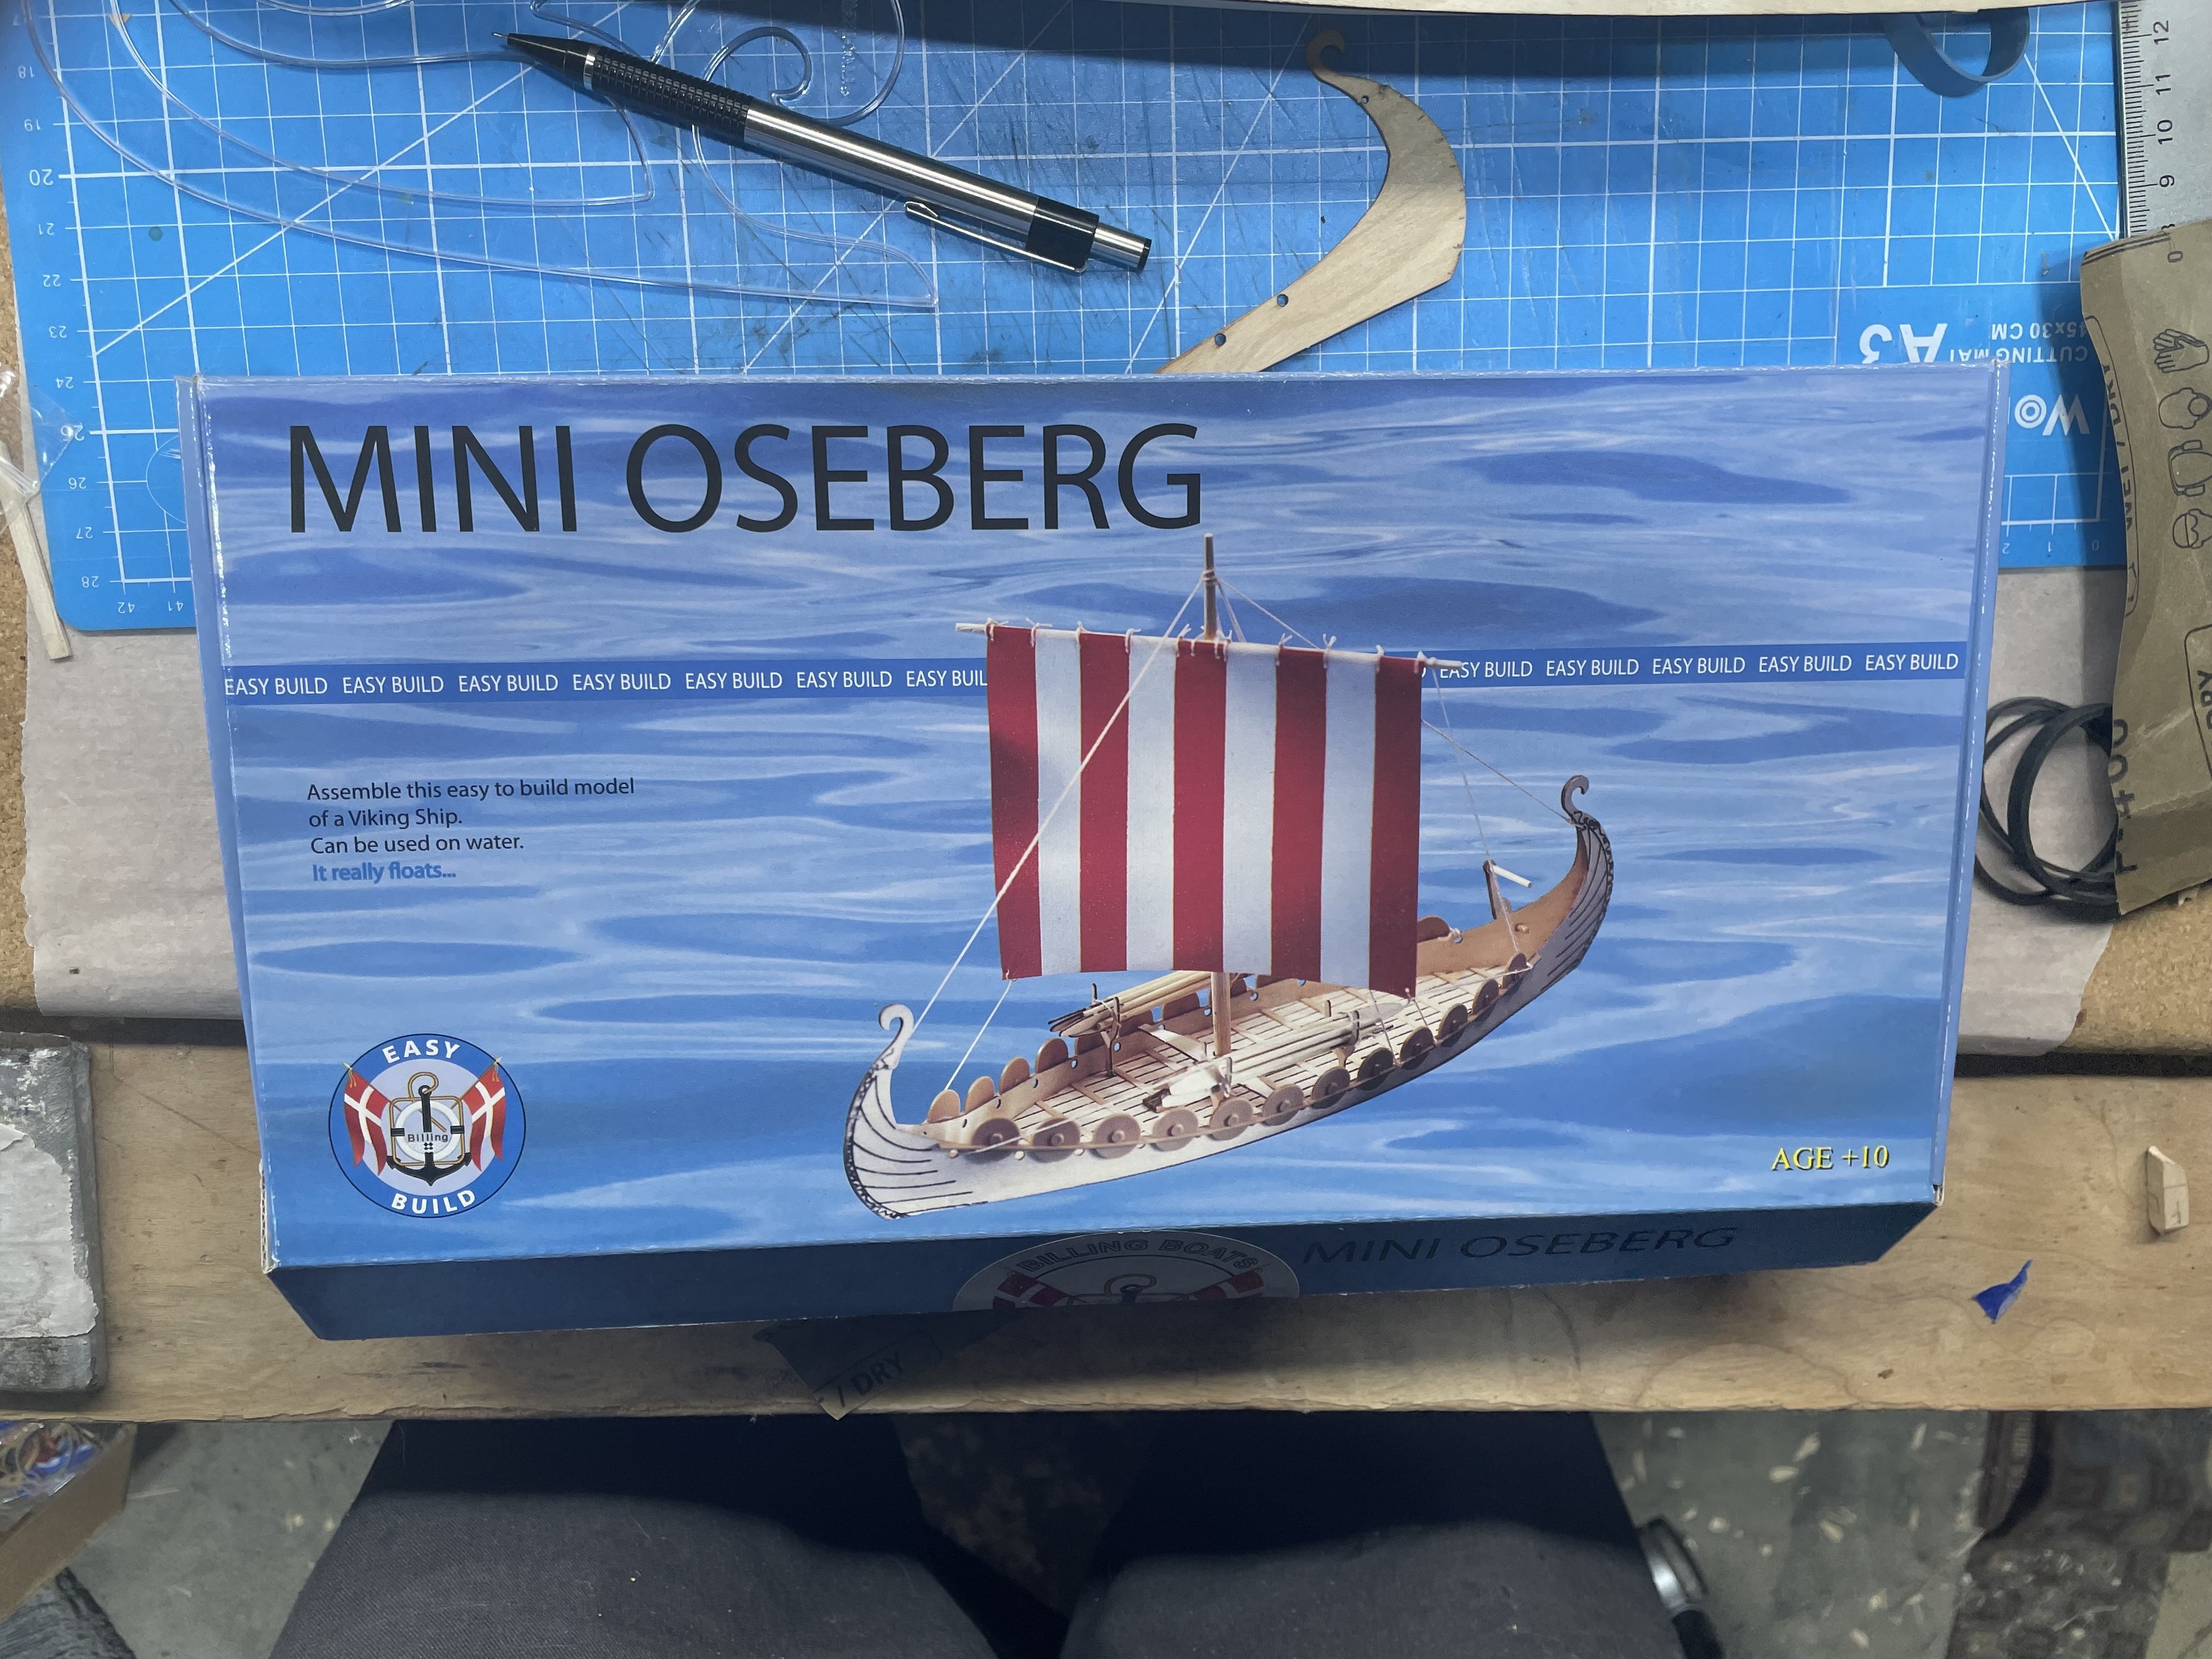
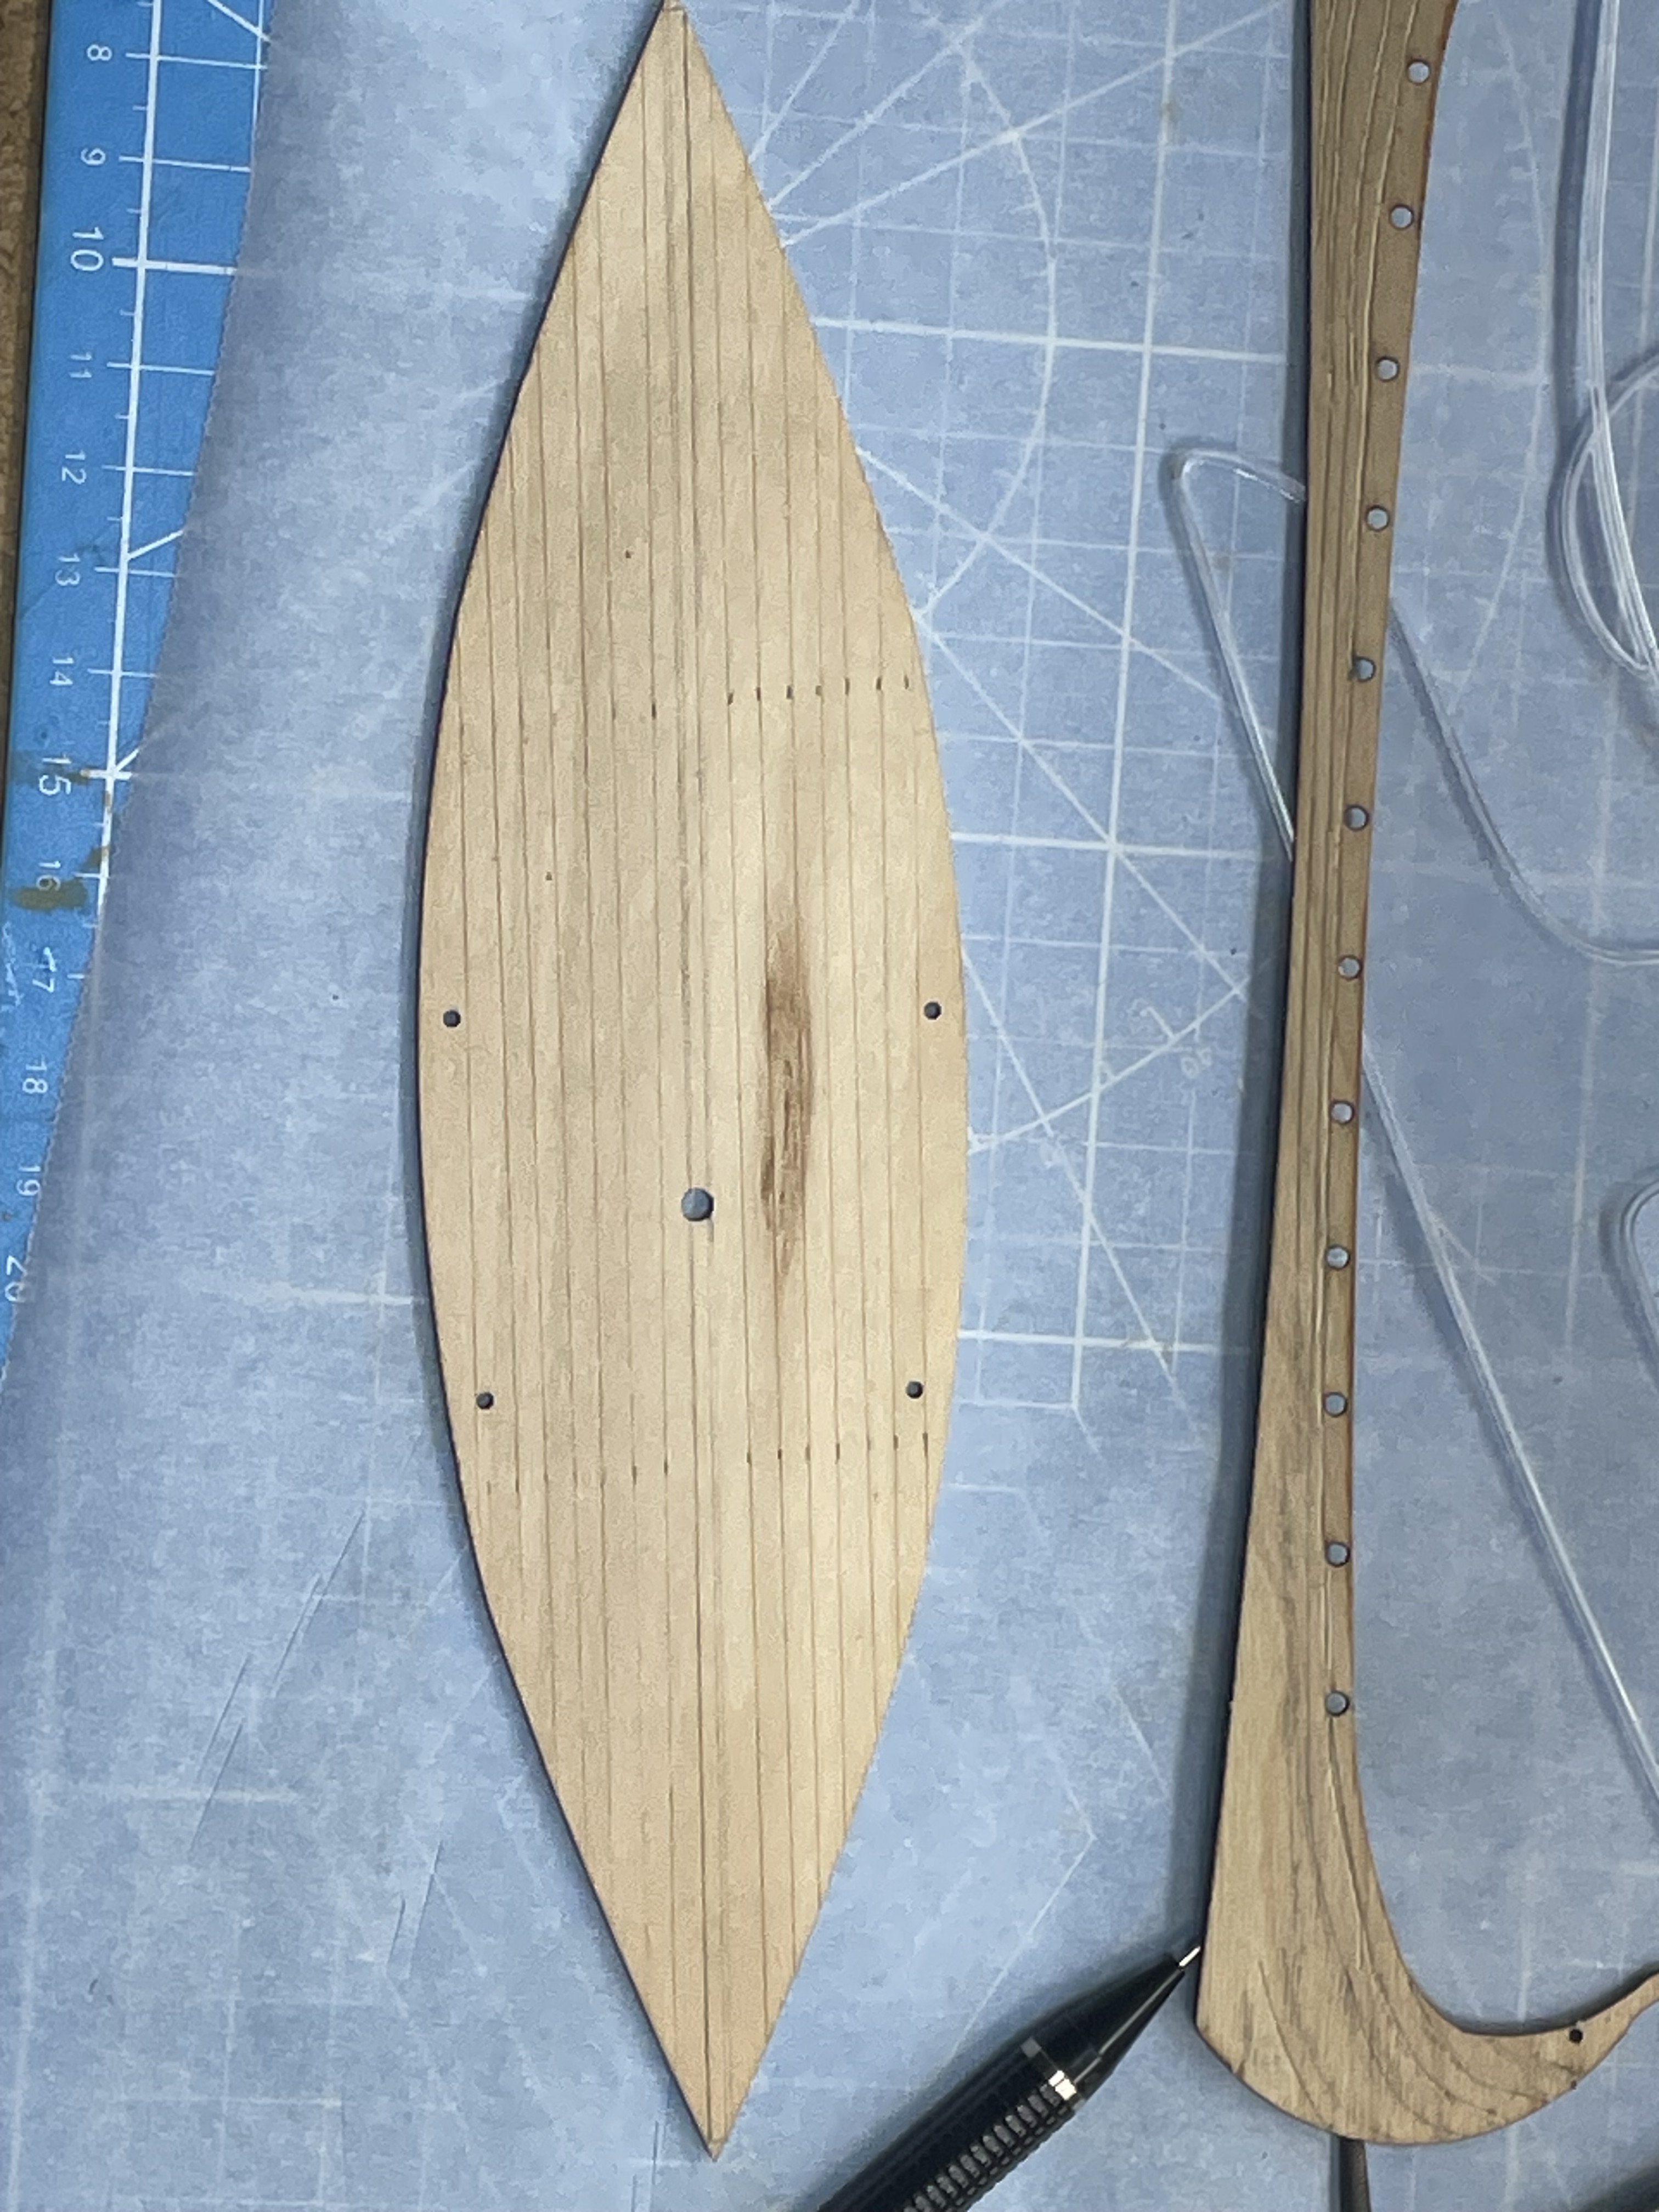
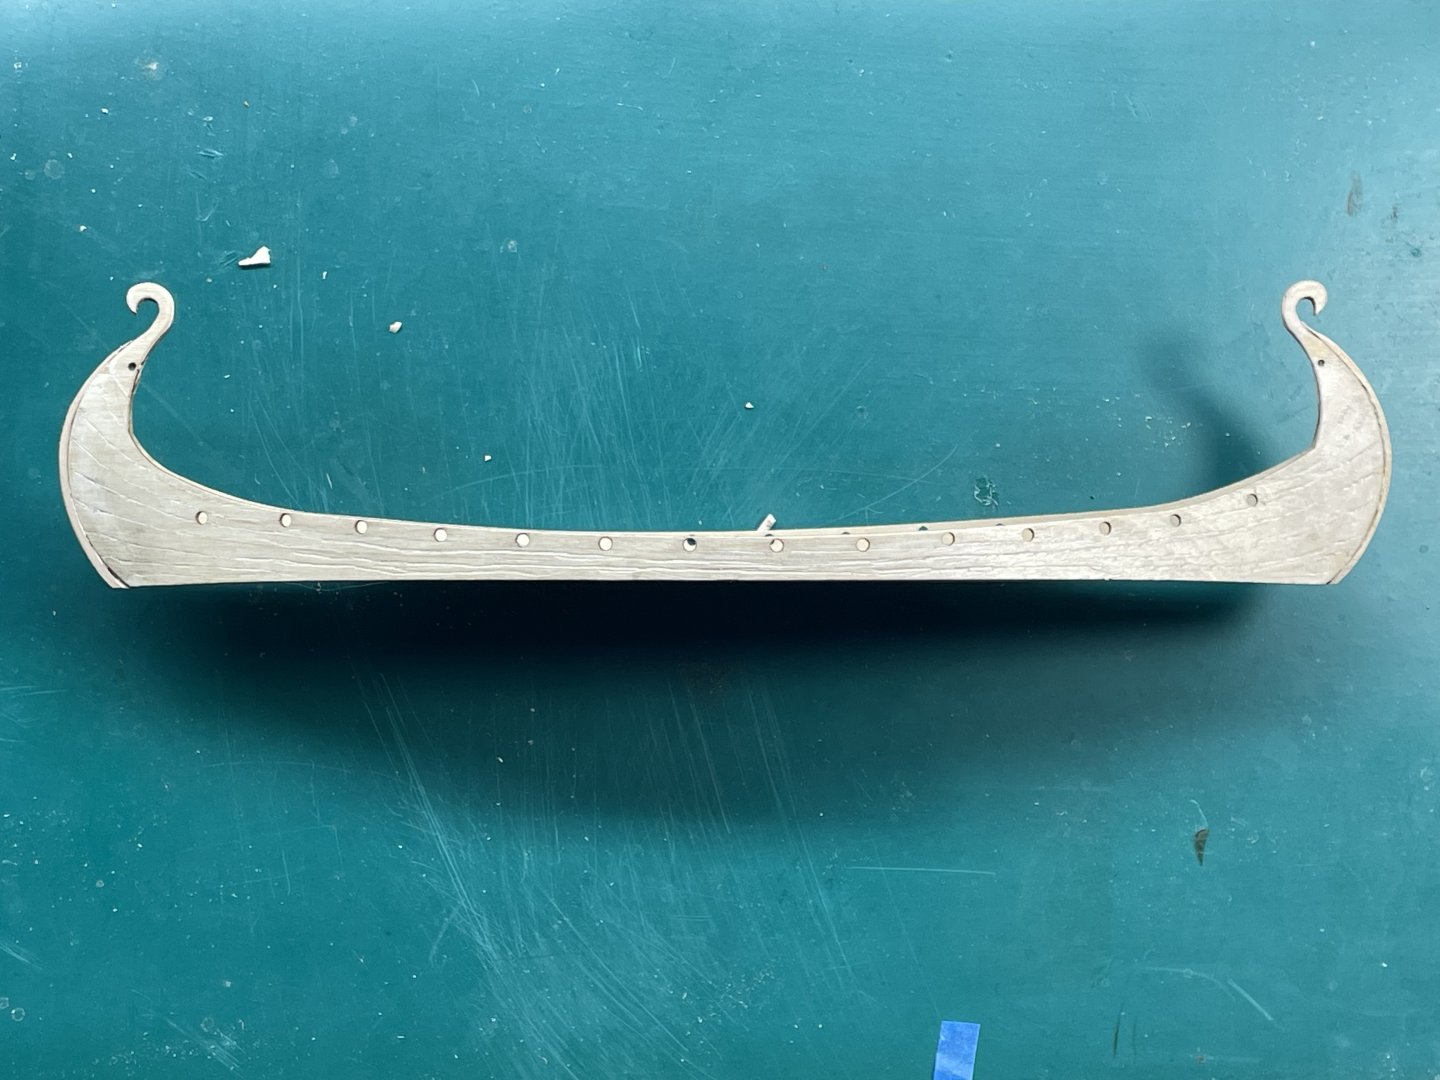
I started this build earlier when I had down time on my last build. It’s a really simple build. Ages 10 + and the box said it can be used in water, it really floats:-) The hull consist of two sides and a bottom. If I choose to paint it, I was afraid it would look like I didn’t meet the age requirement. I chose to just scratch the planks on 🙂 That turned out pretty good I thought when I stood back and looked at it. So I did the deck too. They actually put the entire construction manual on the back of the box for quick reference. After gluing the bow and stern together, I was wishing I could find one of those 10 year olds to give me a idea on the best way to get this bottom glued on straight:-)


- 16 replies
-
- 3
-
-
- Oseberg
- Billing Boats
- (and 1 more)
-
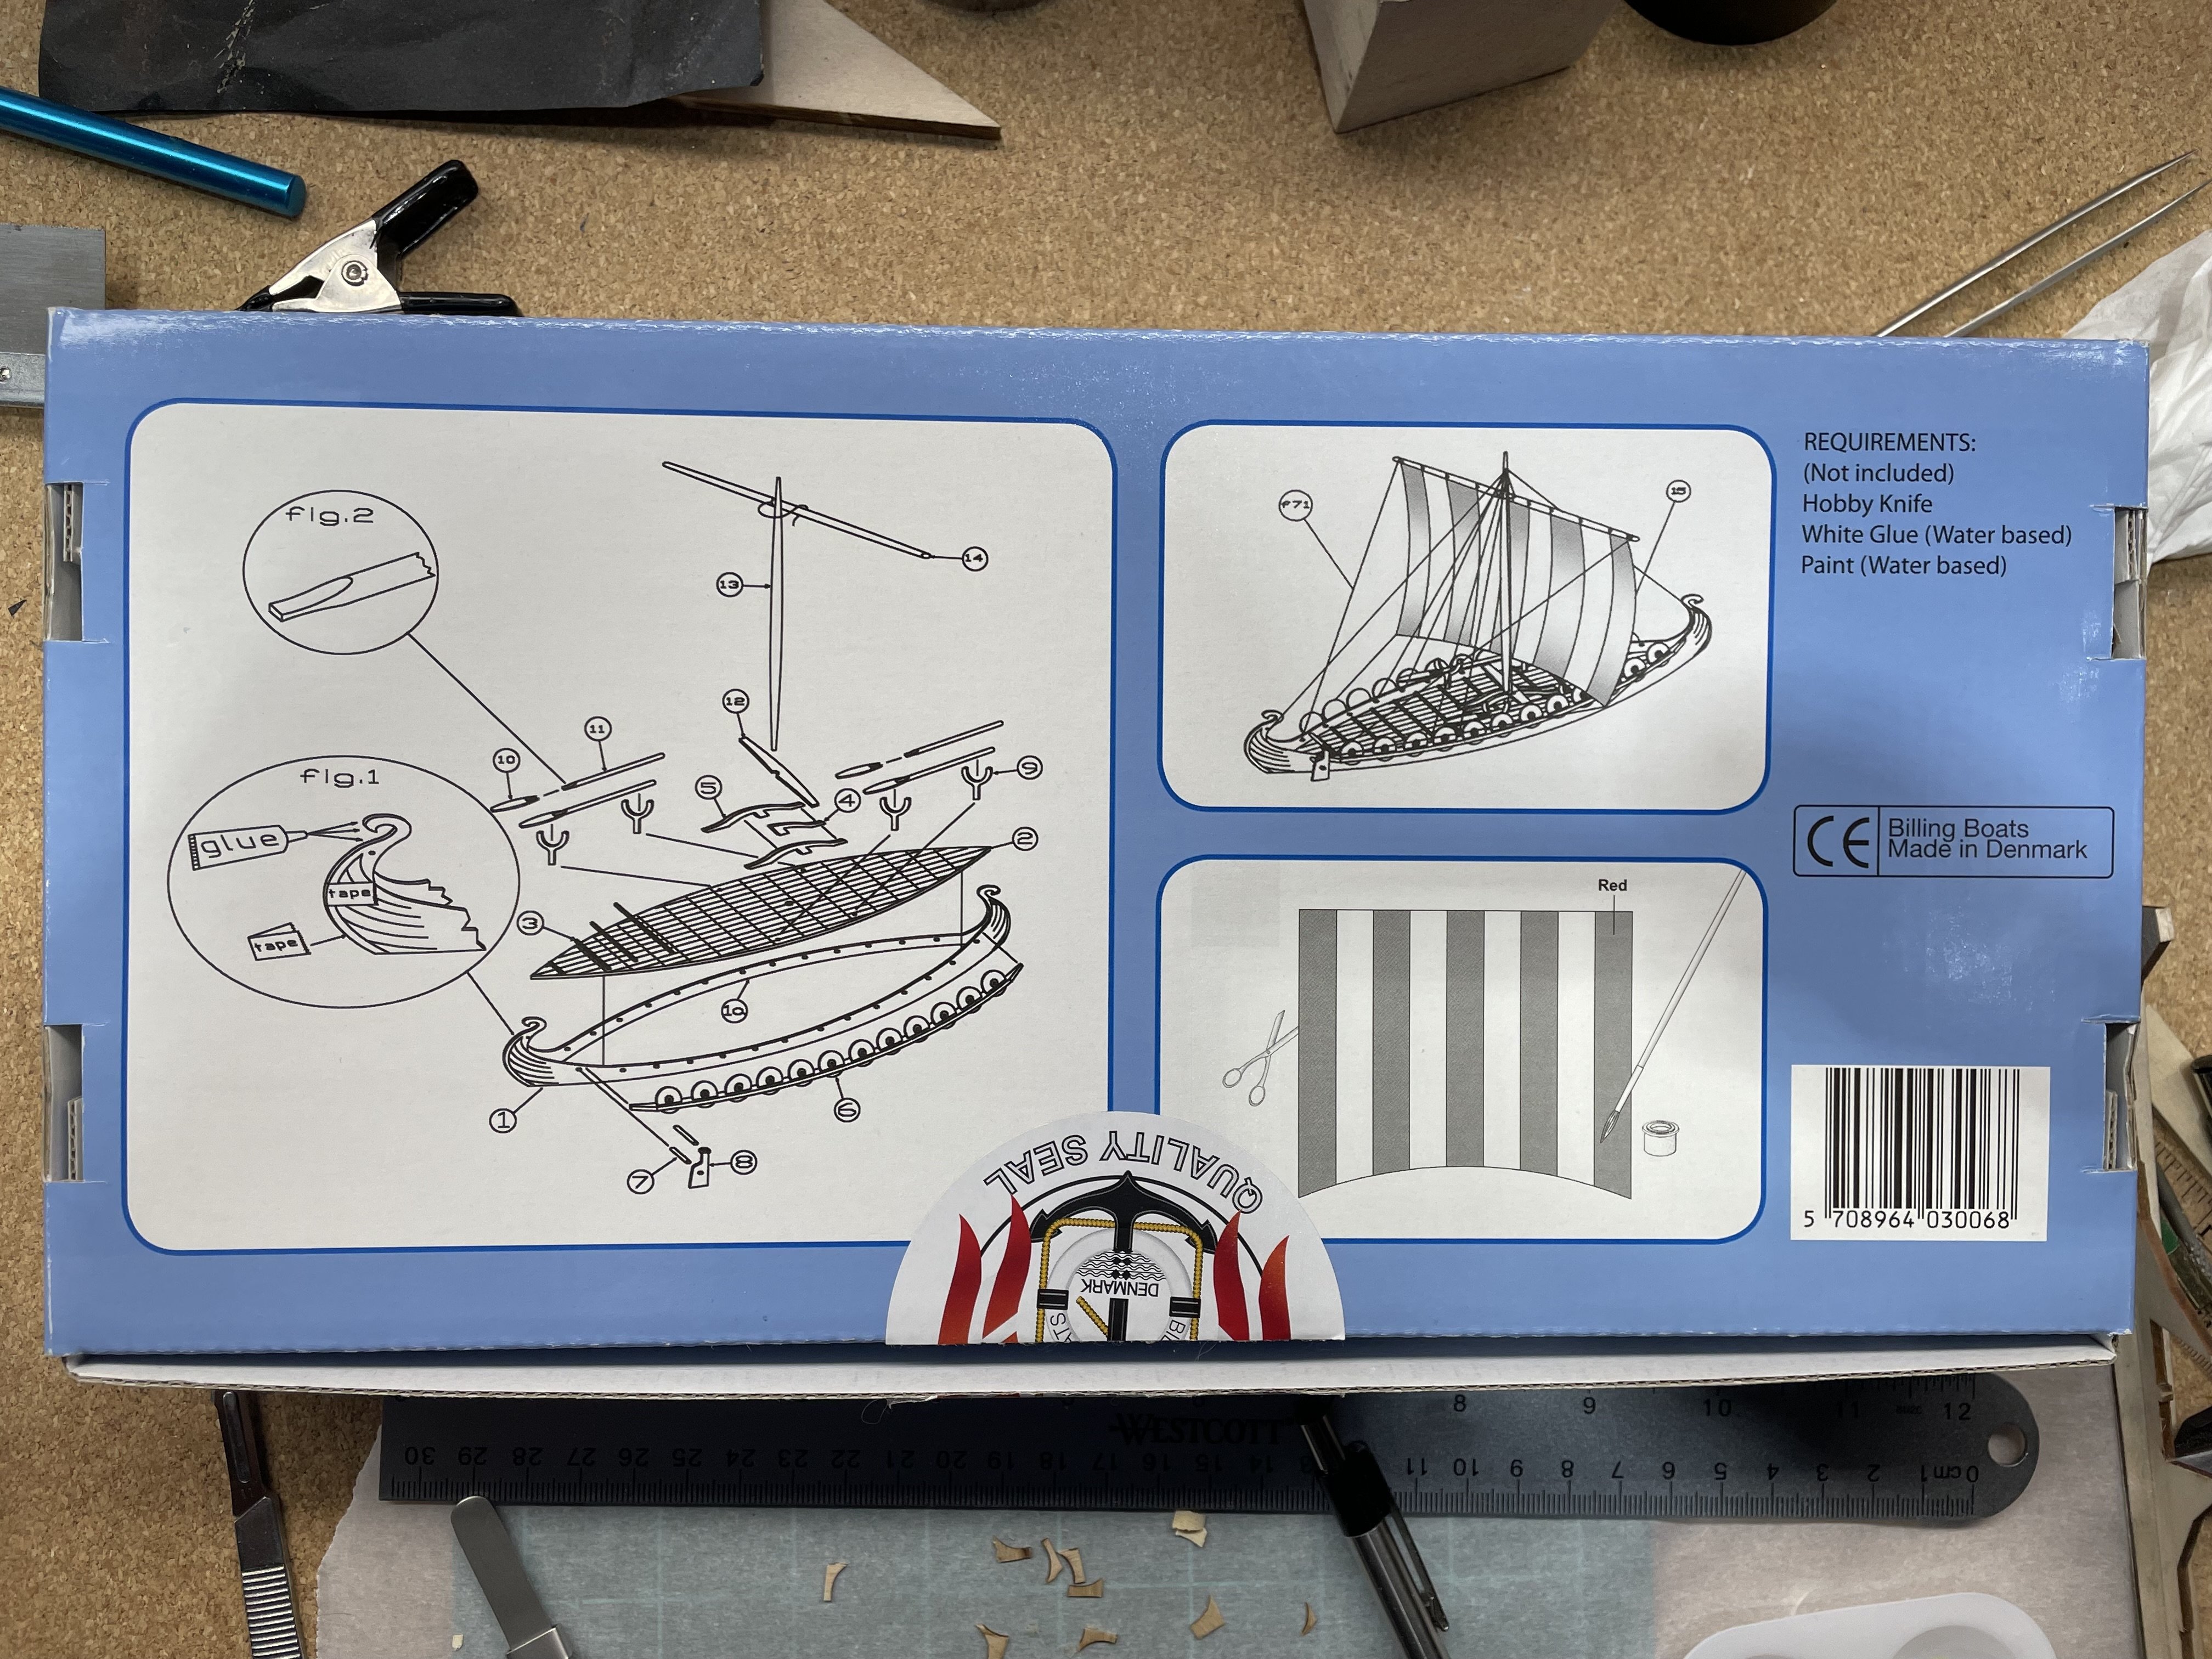
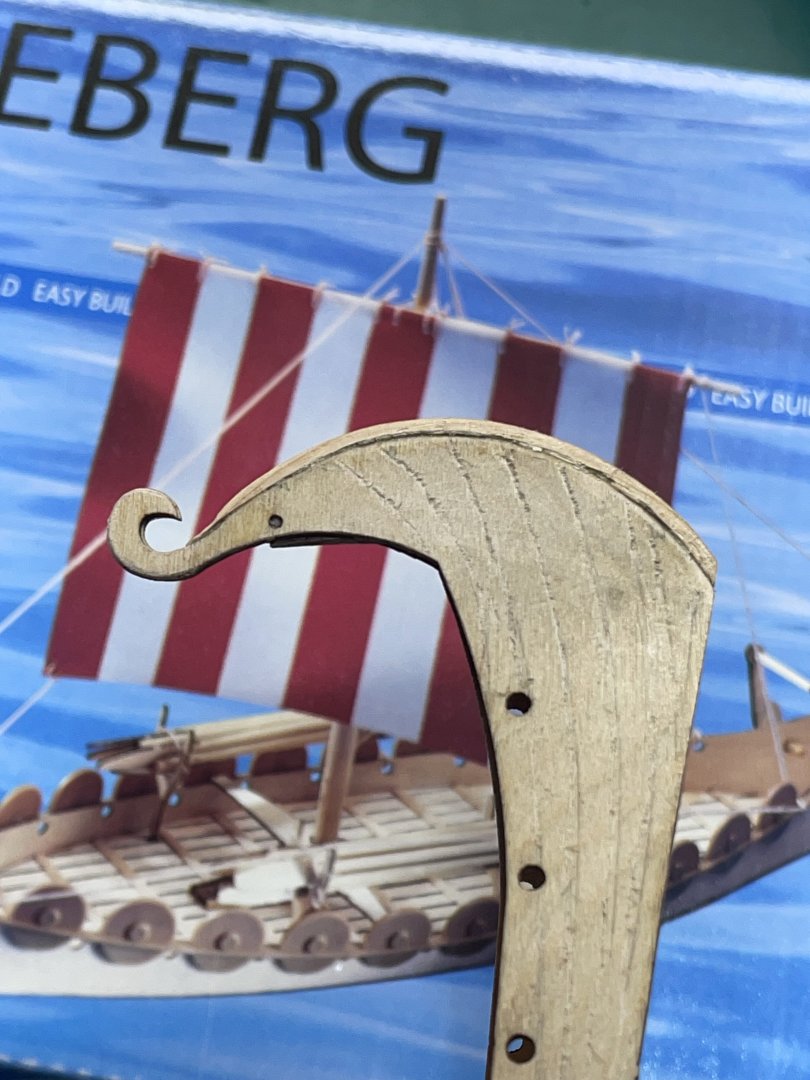
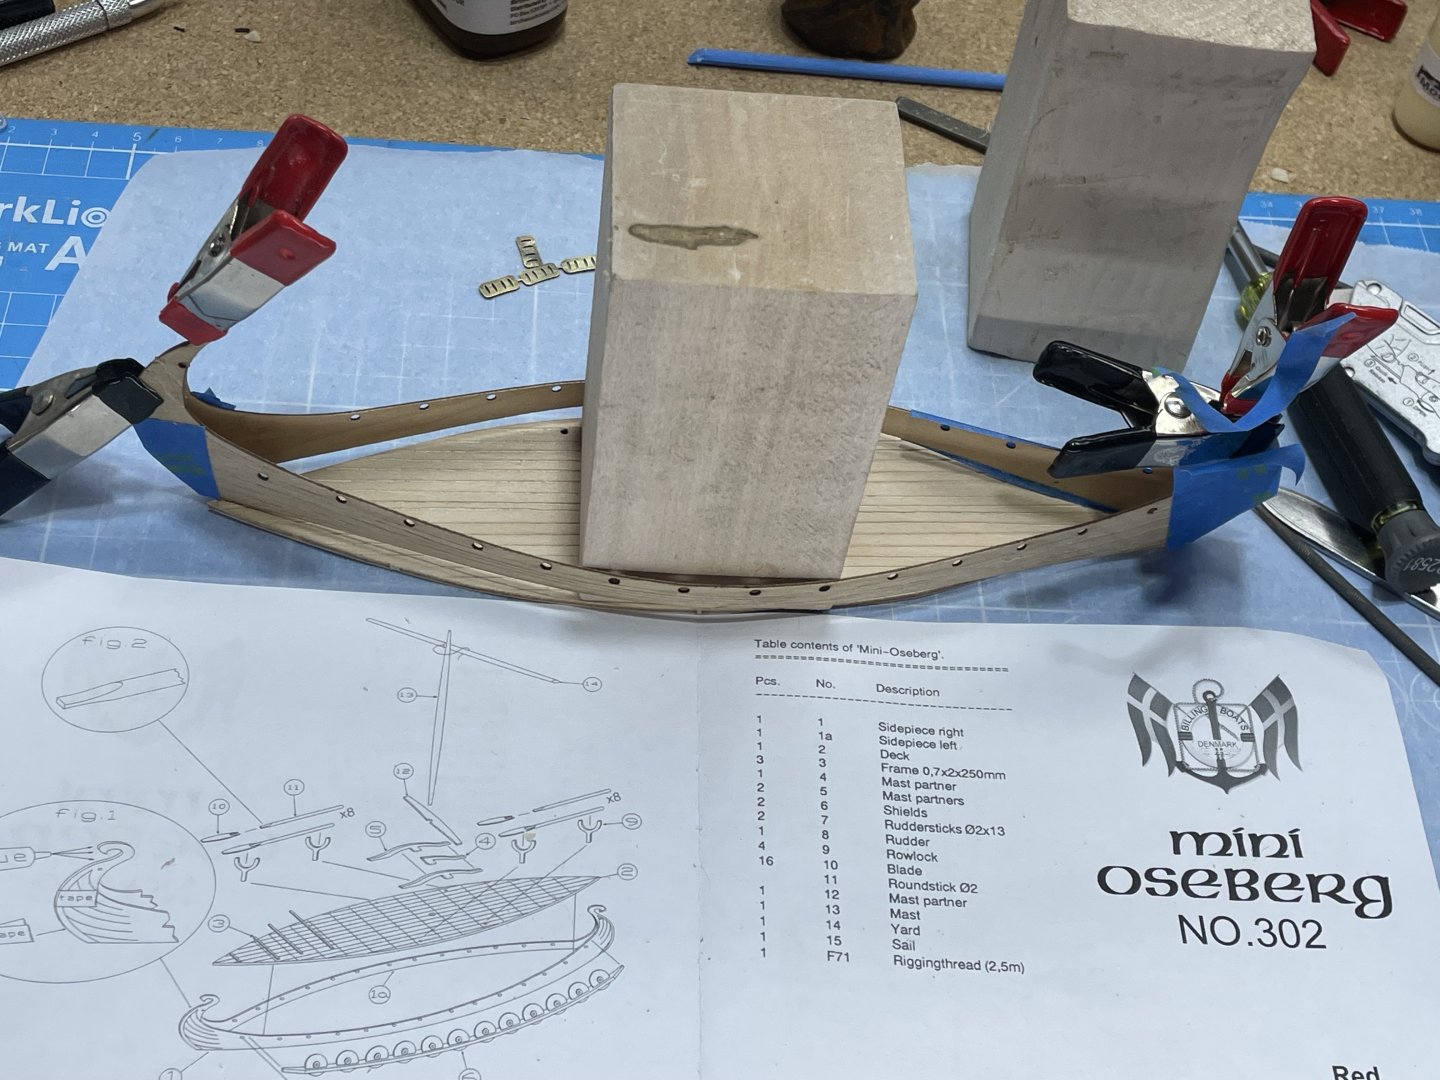
Thank you John for the kind words. At this time I’ve started a small kit I got on sale for $9.00 🙂 . I’ve been off and on it between other small builds. It’s mini Oseberg no 302 by Billing Boats. I was just going to start a build log on it and catch up to my current progress. I’ll link it in my signature when I start it.
- 49 replies
-
- 1
-
-
- muscongus bay lobster smack
- Model Shipways
- (and 2 more)
-
Glen, that’s a wonderful way to share your abilities with others. I’m going to watch even though by the looks of it, I’m not in that league yet:-)
- 301 replies
-
- 6
-
-

-
- Constitution
- Bluejacket Shipcrafters
- (and 1 more)
-
Good stopping point. Congratulations on your anniversary. Have a wonderful trip!
- 56 replies
-
- 1
-
-
- grand banks dory
- Midwest Products
- (and 2 more)
-
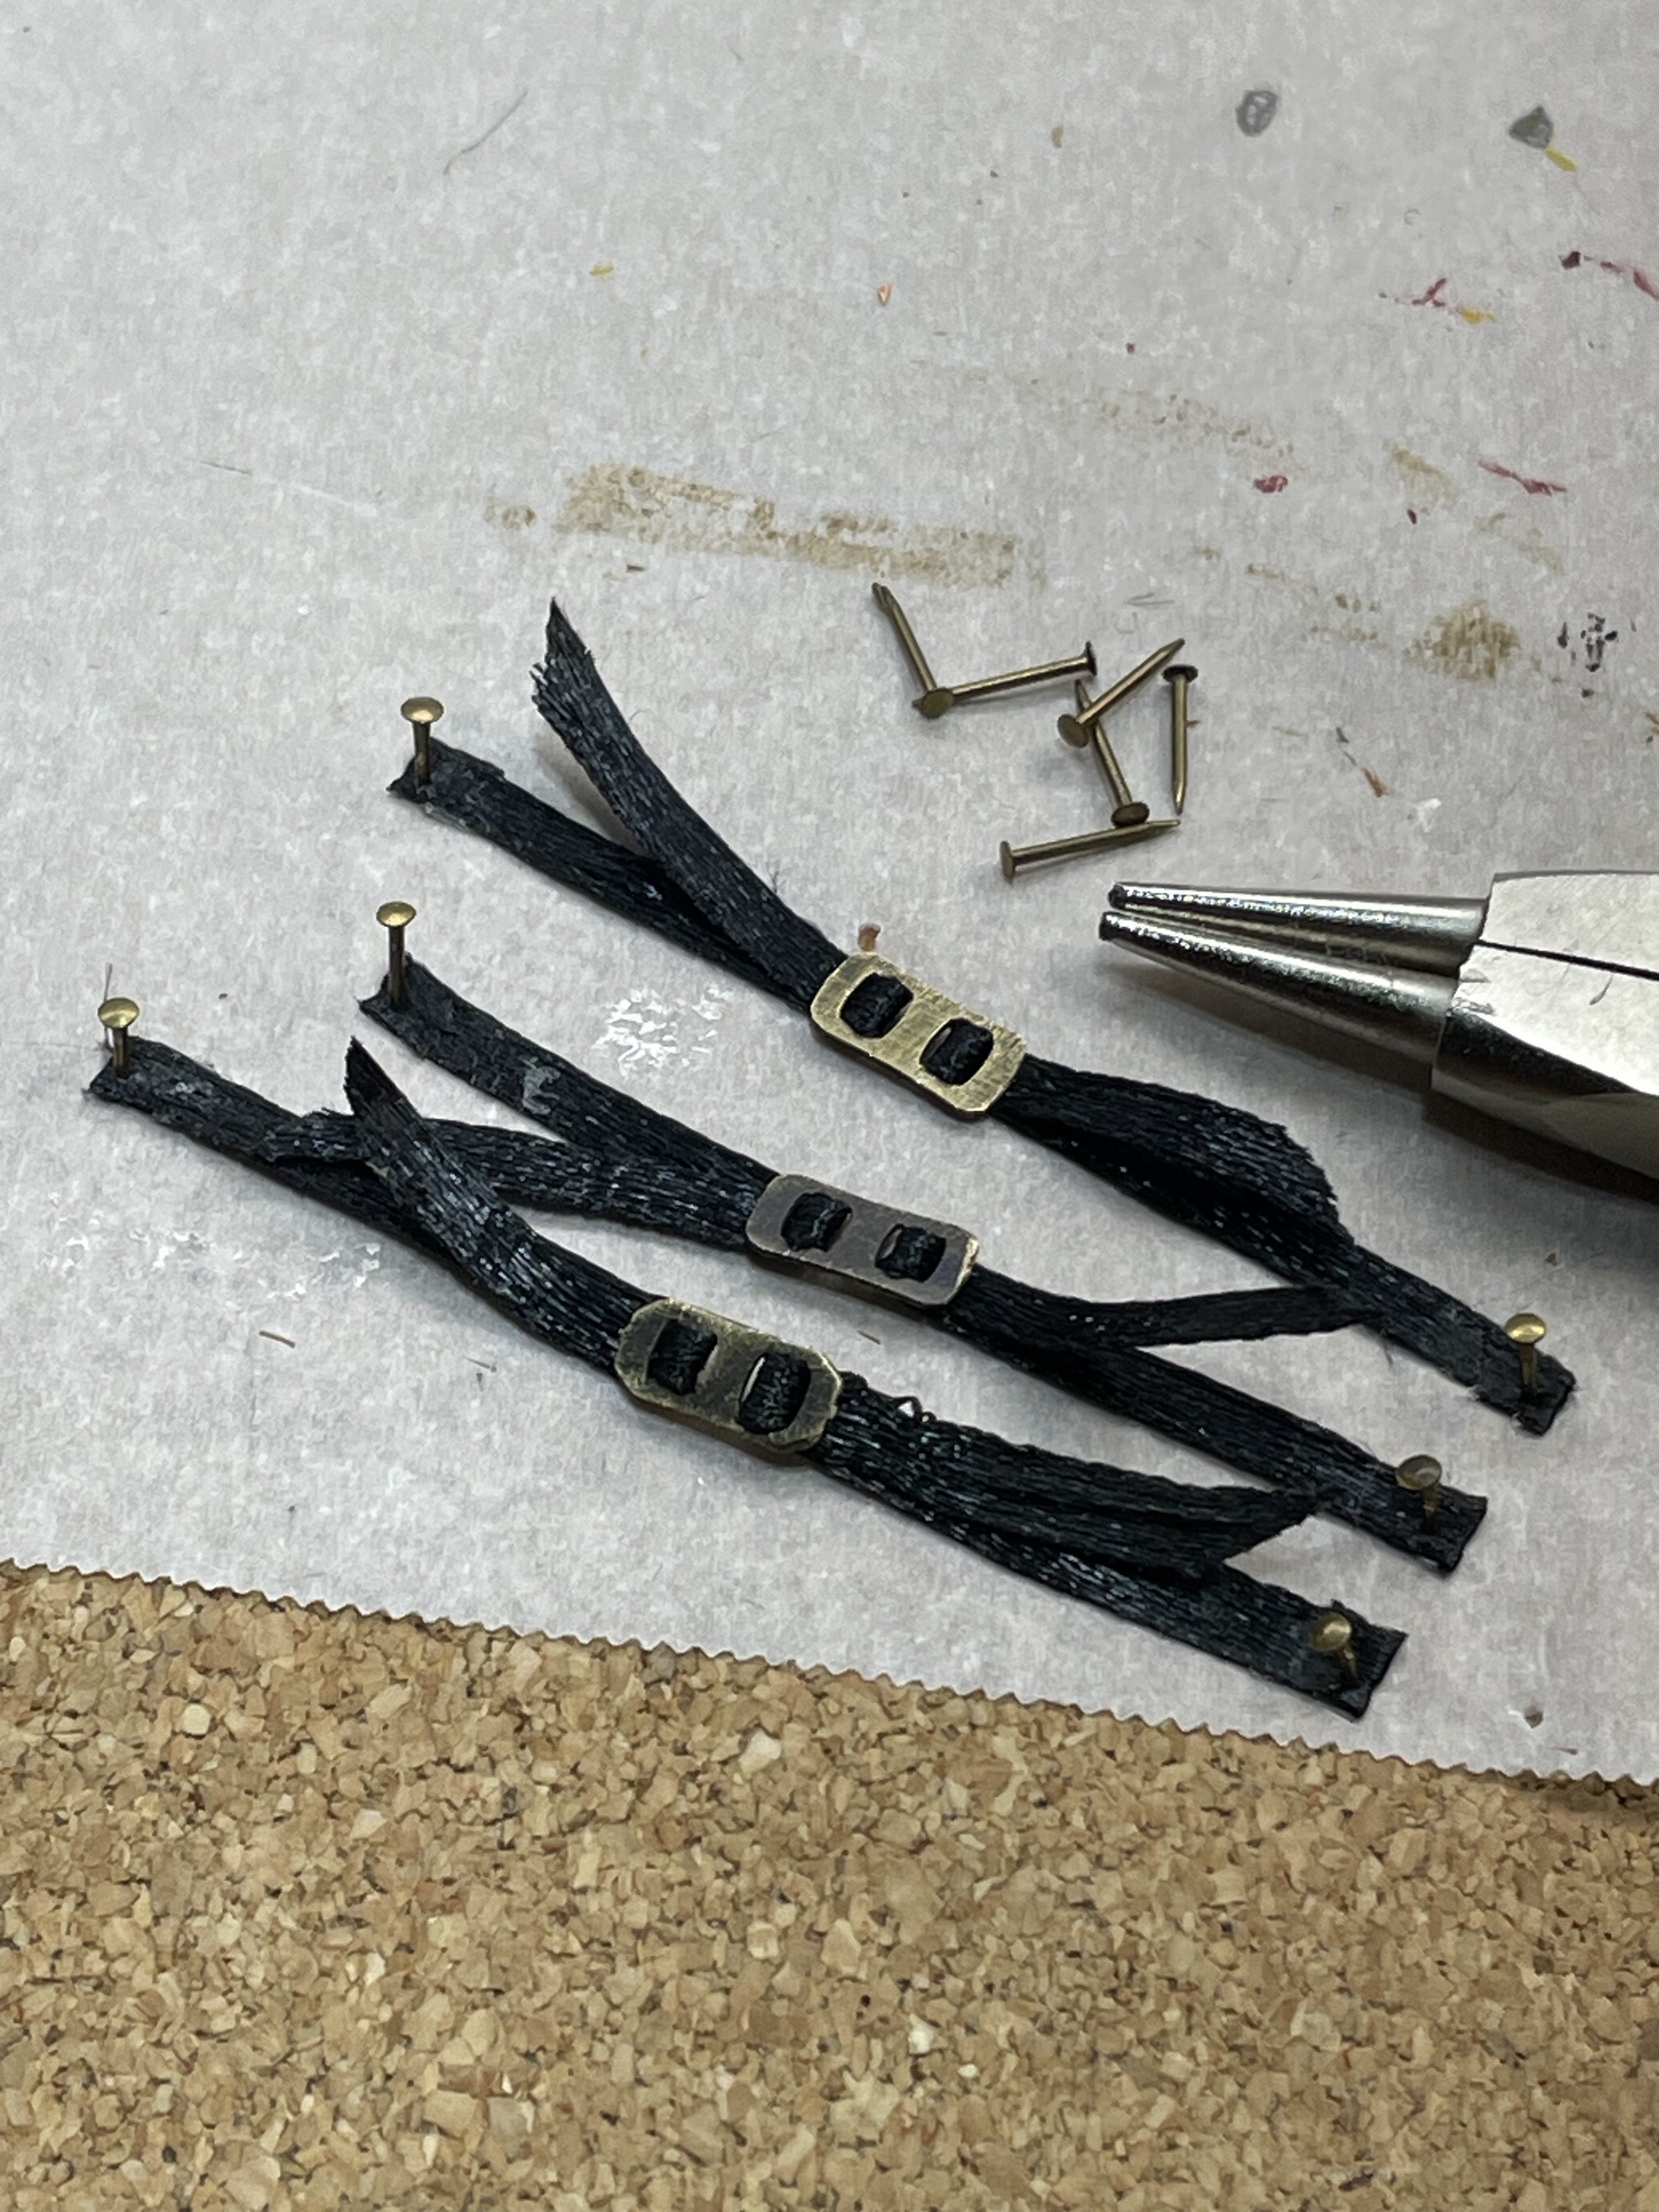
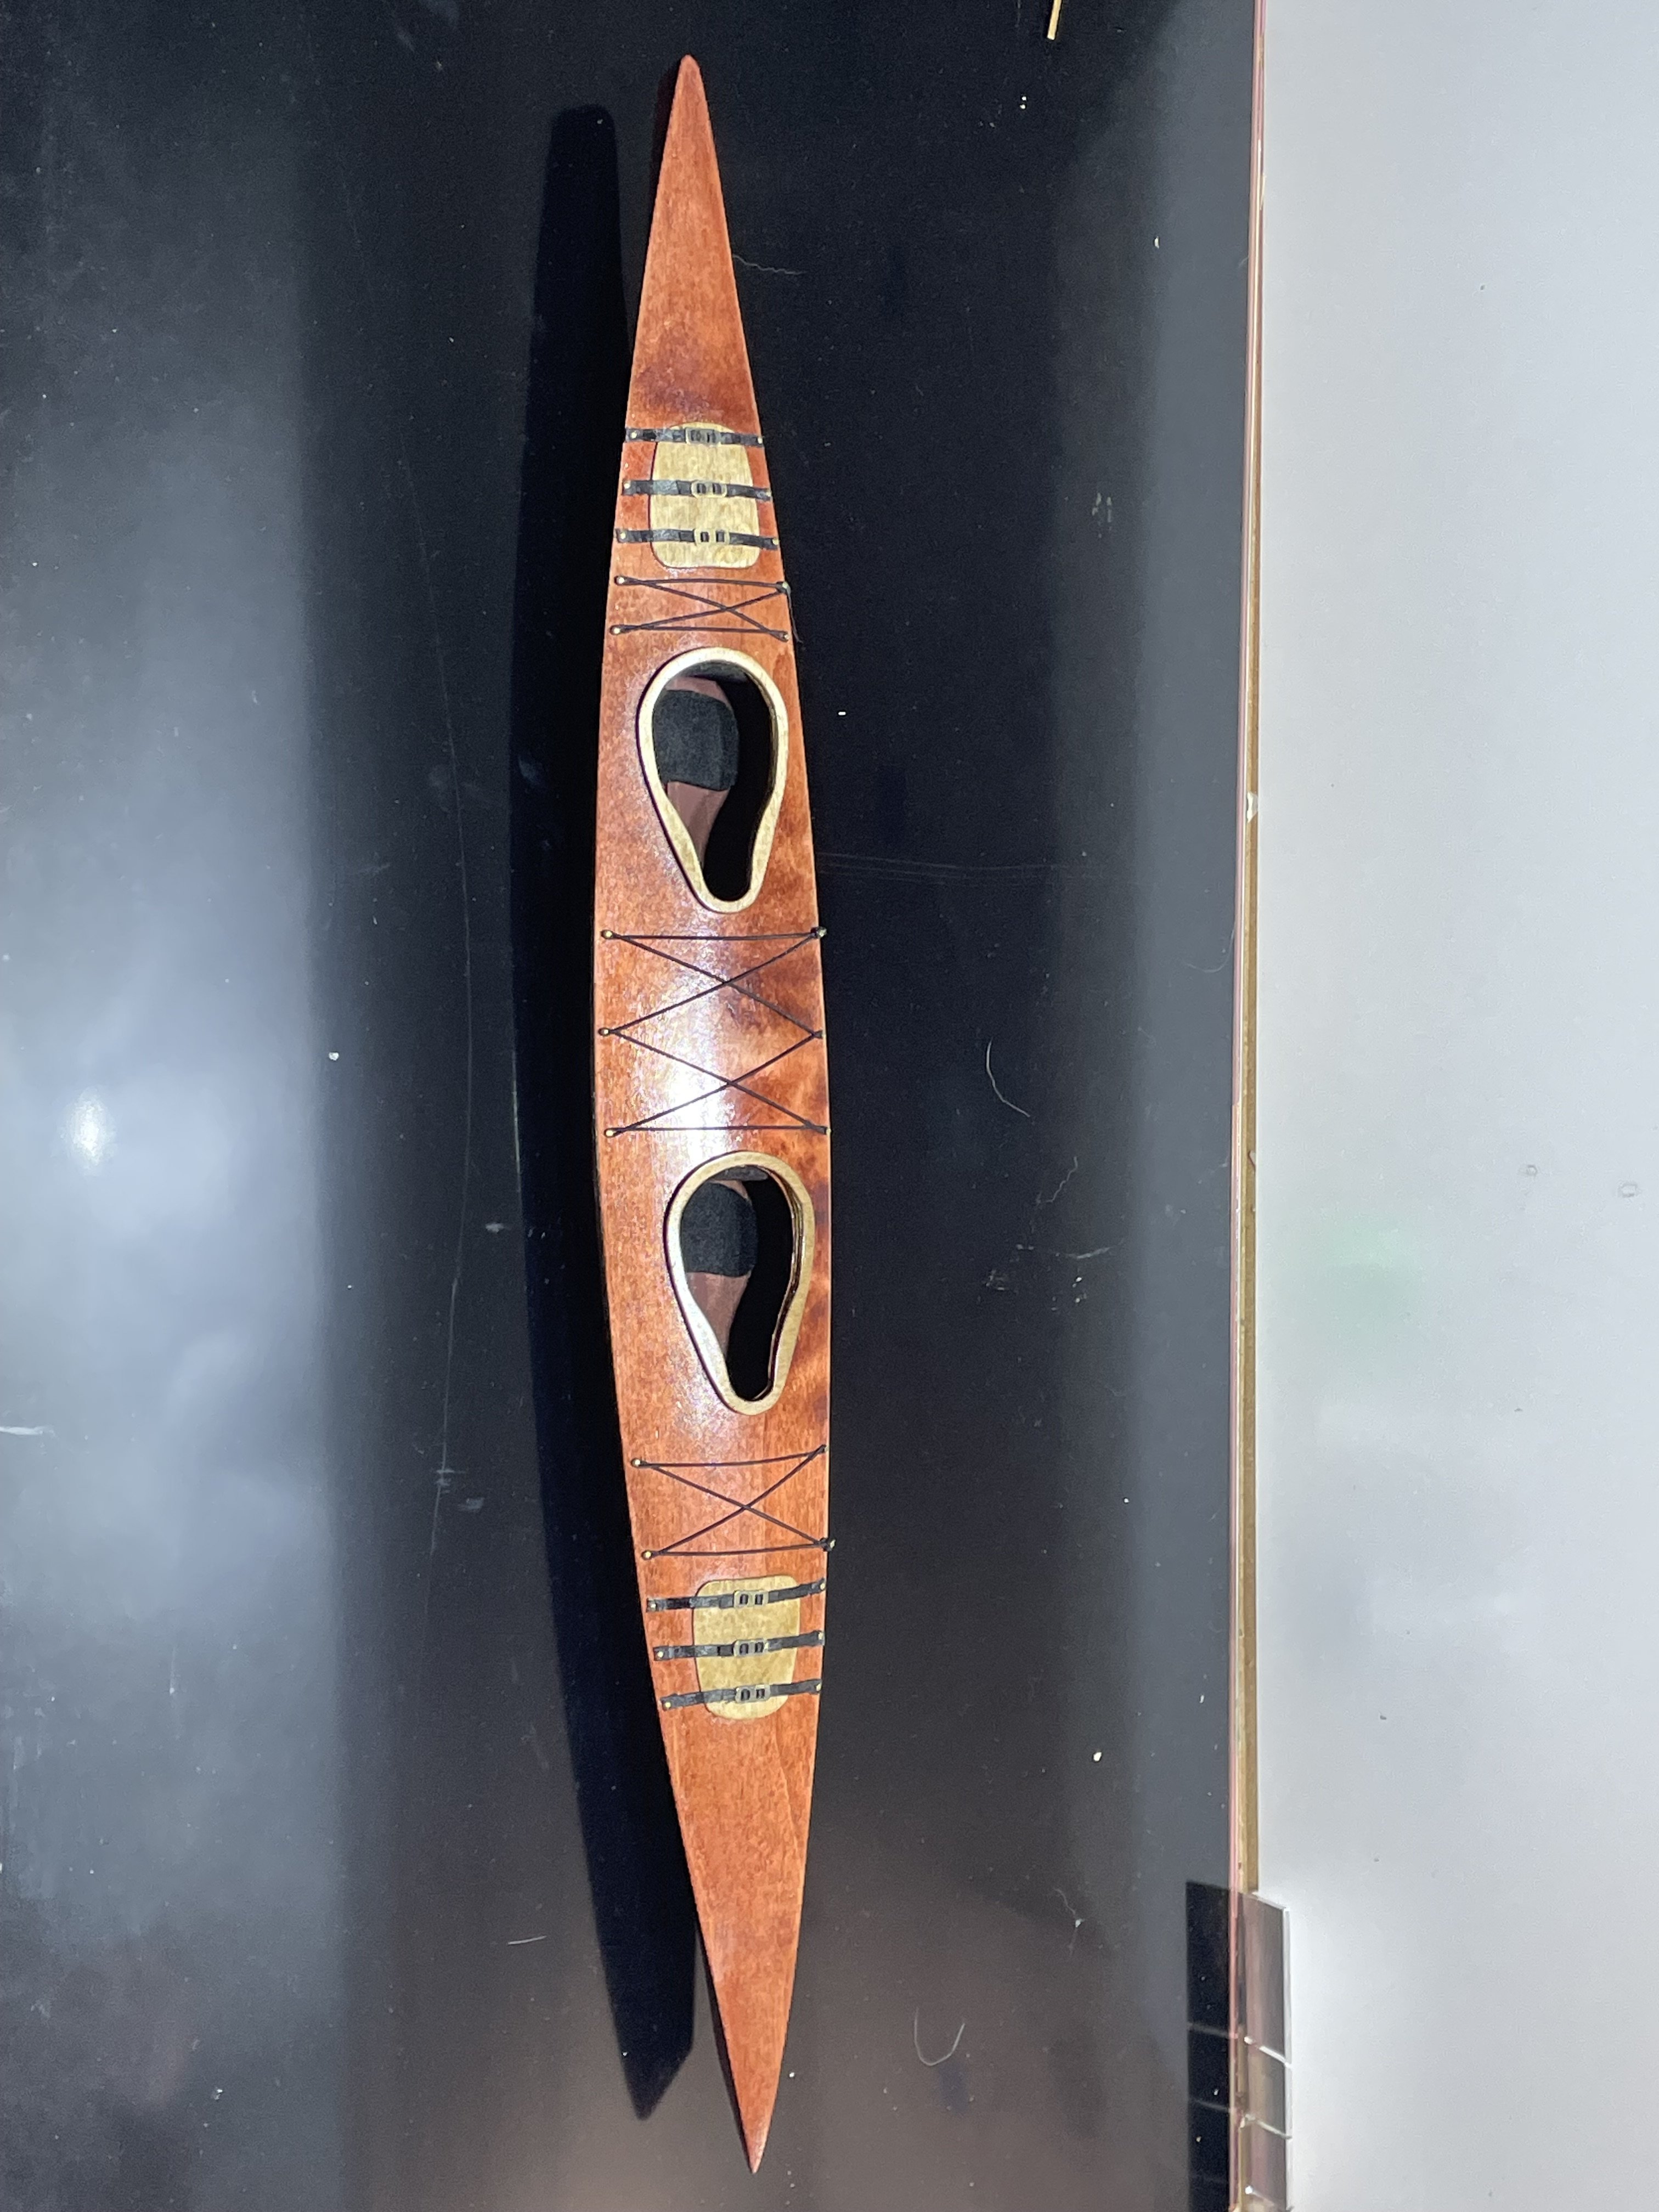
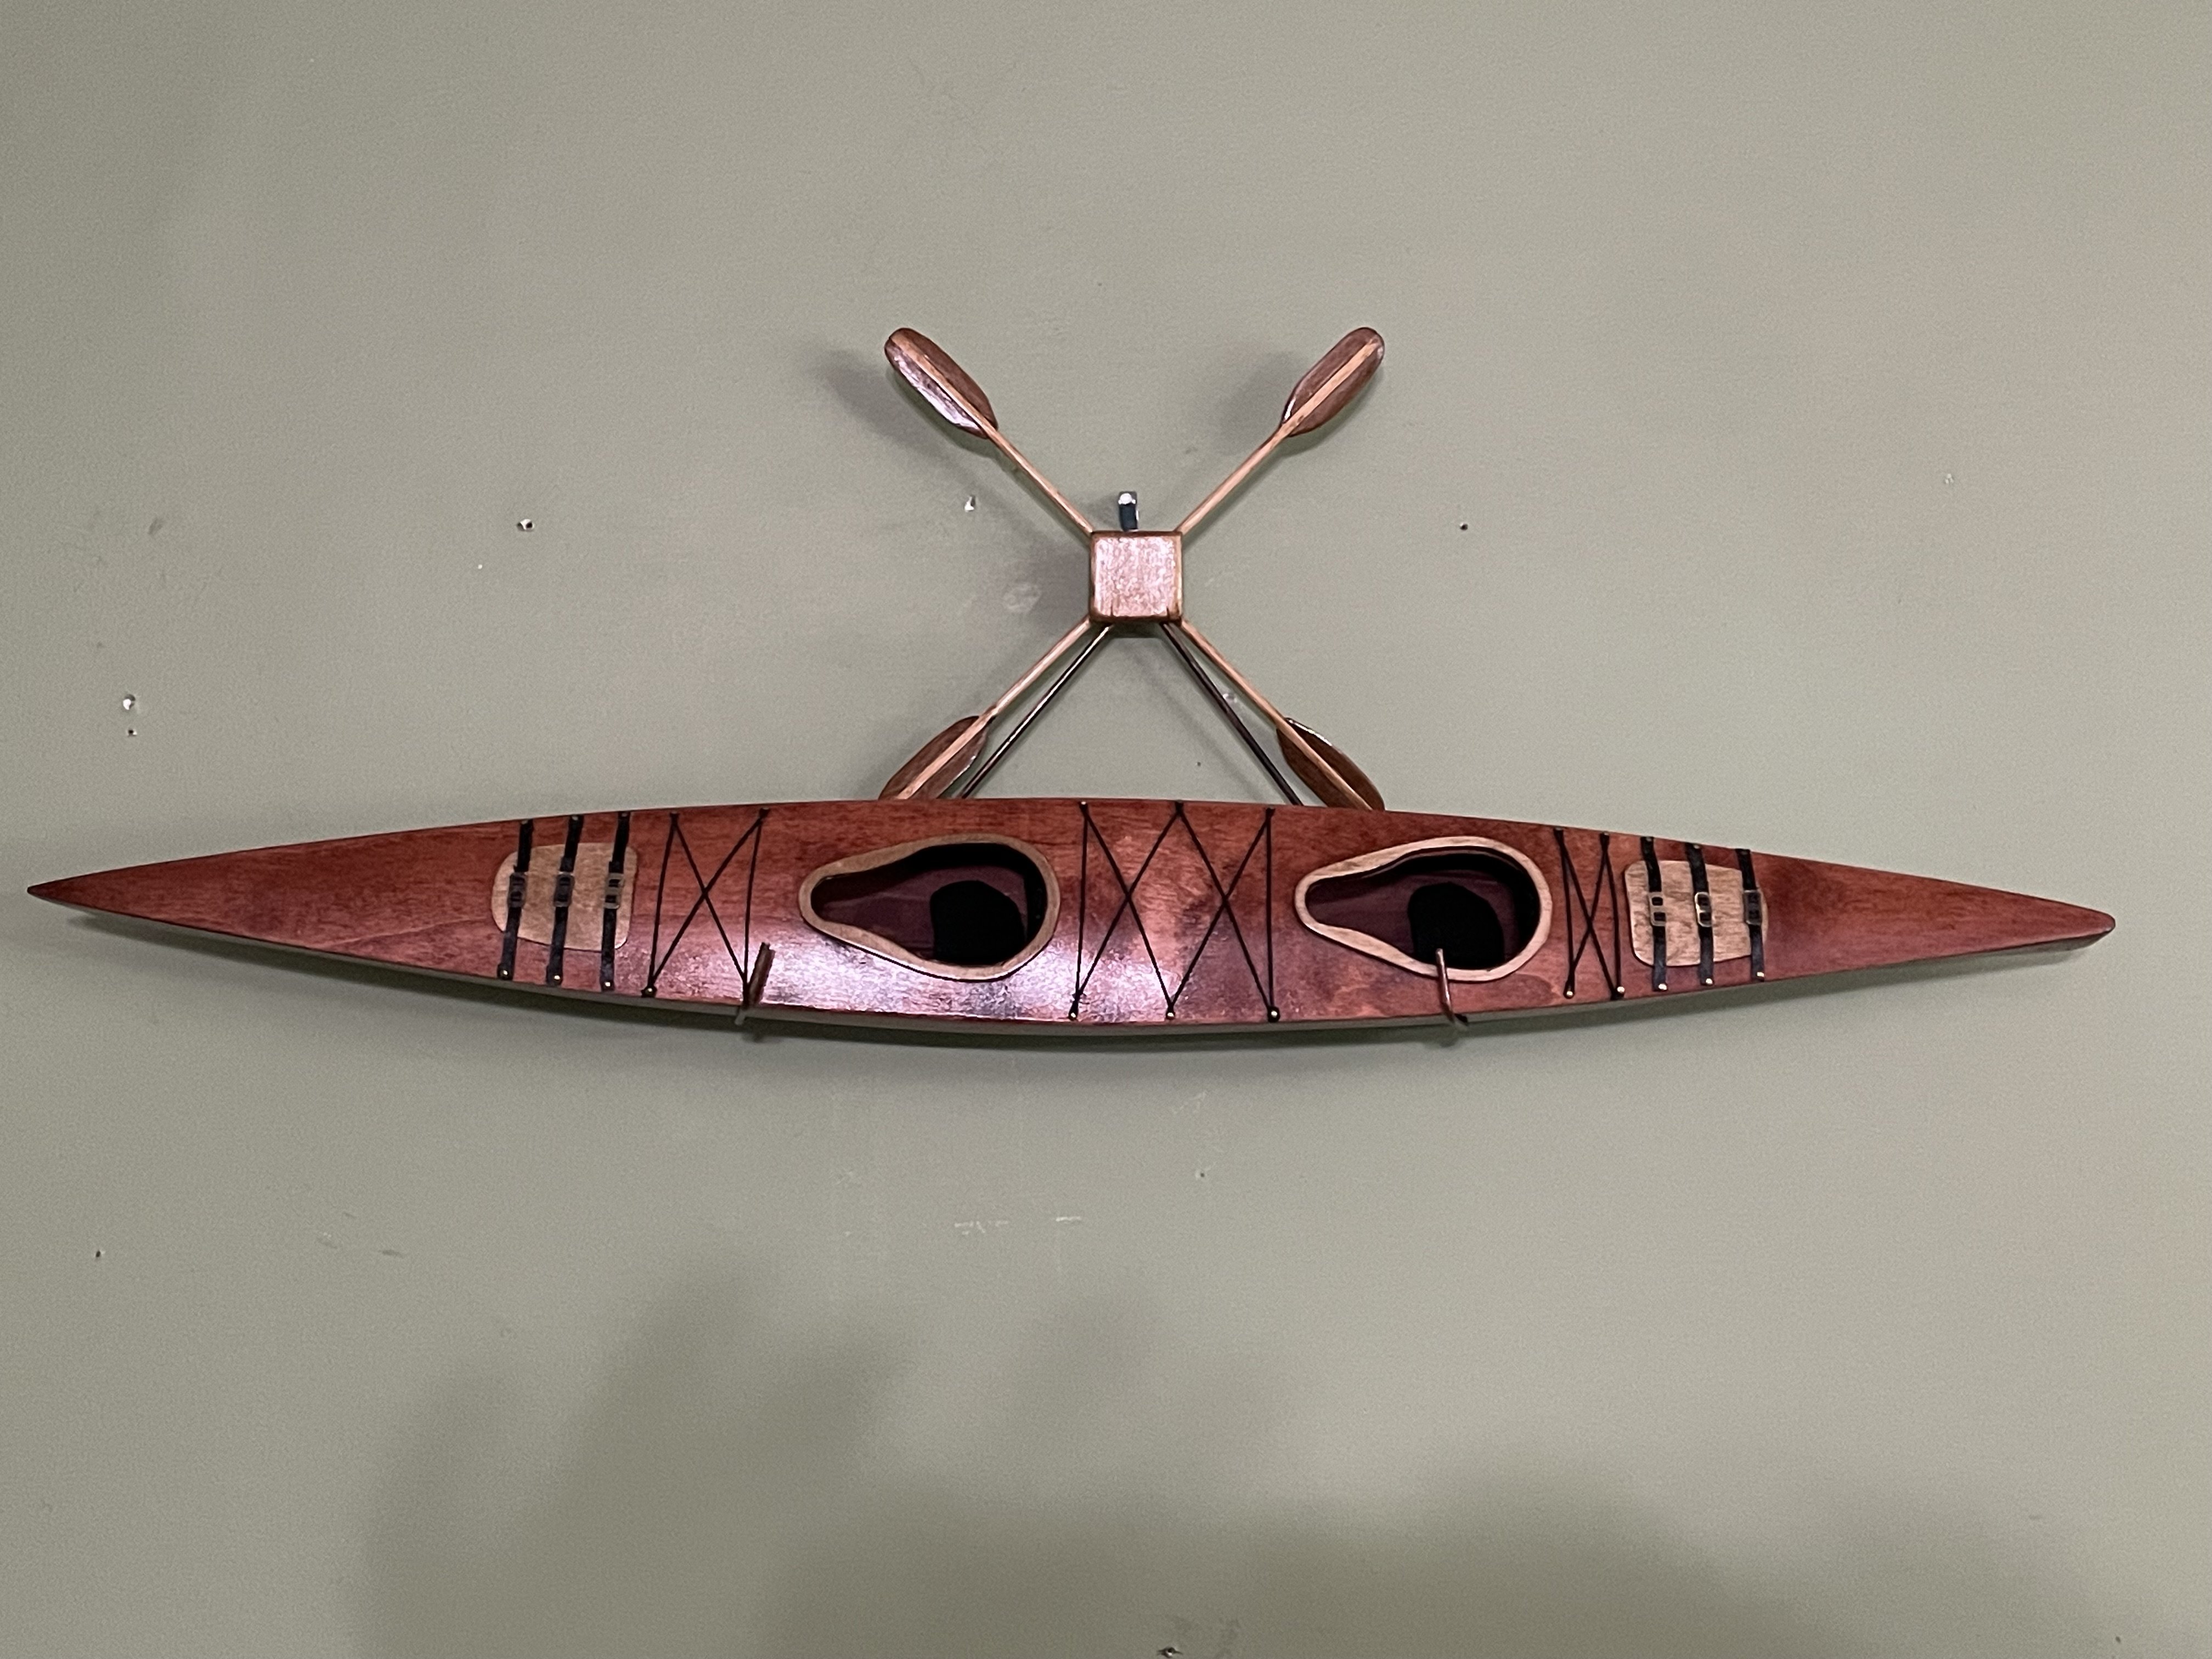
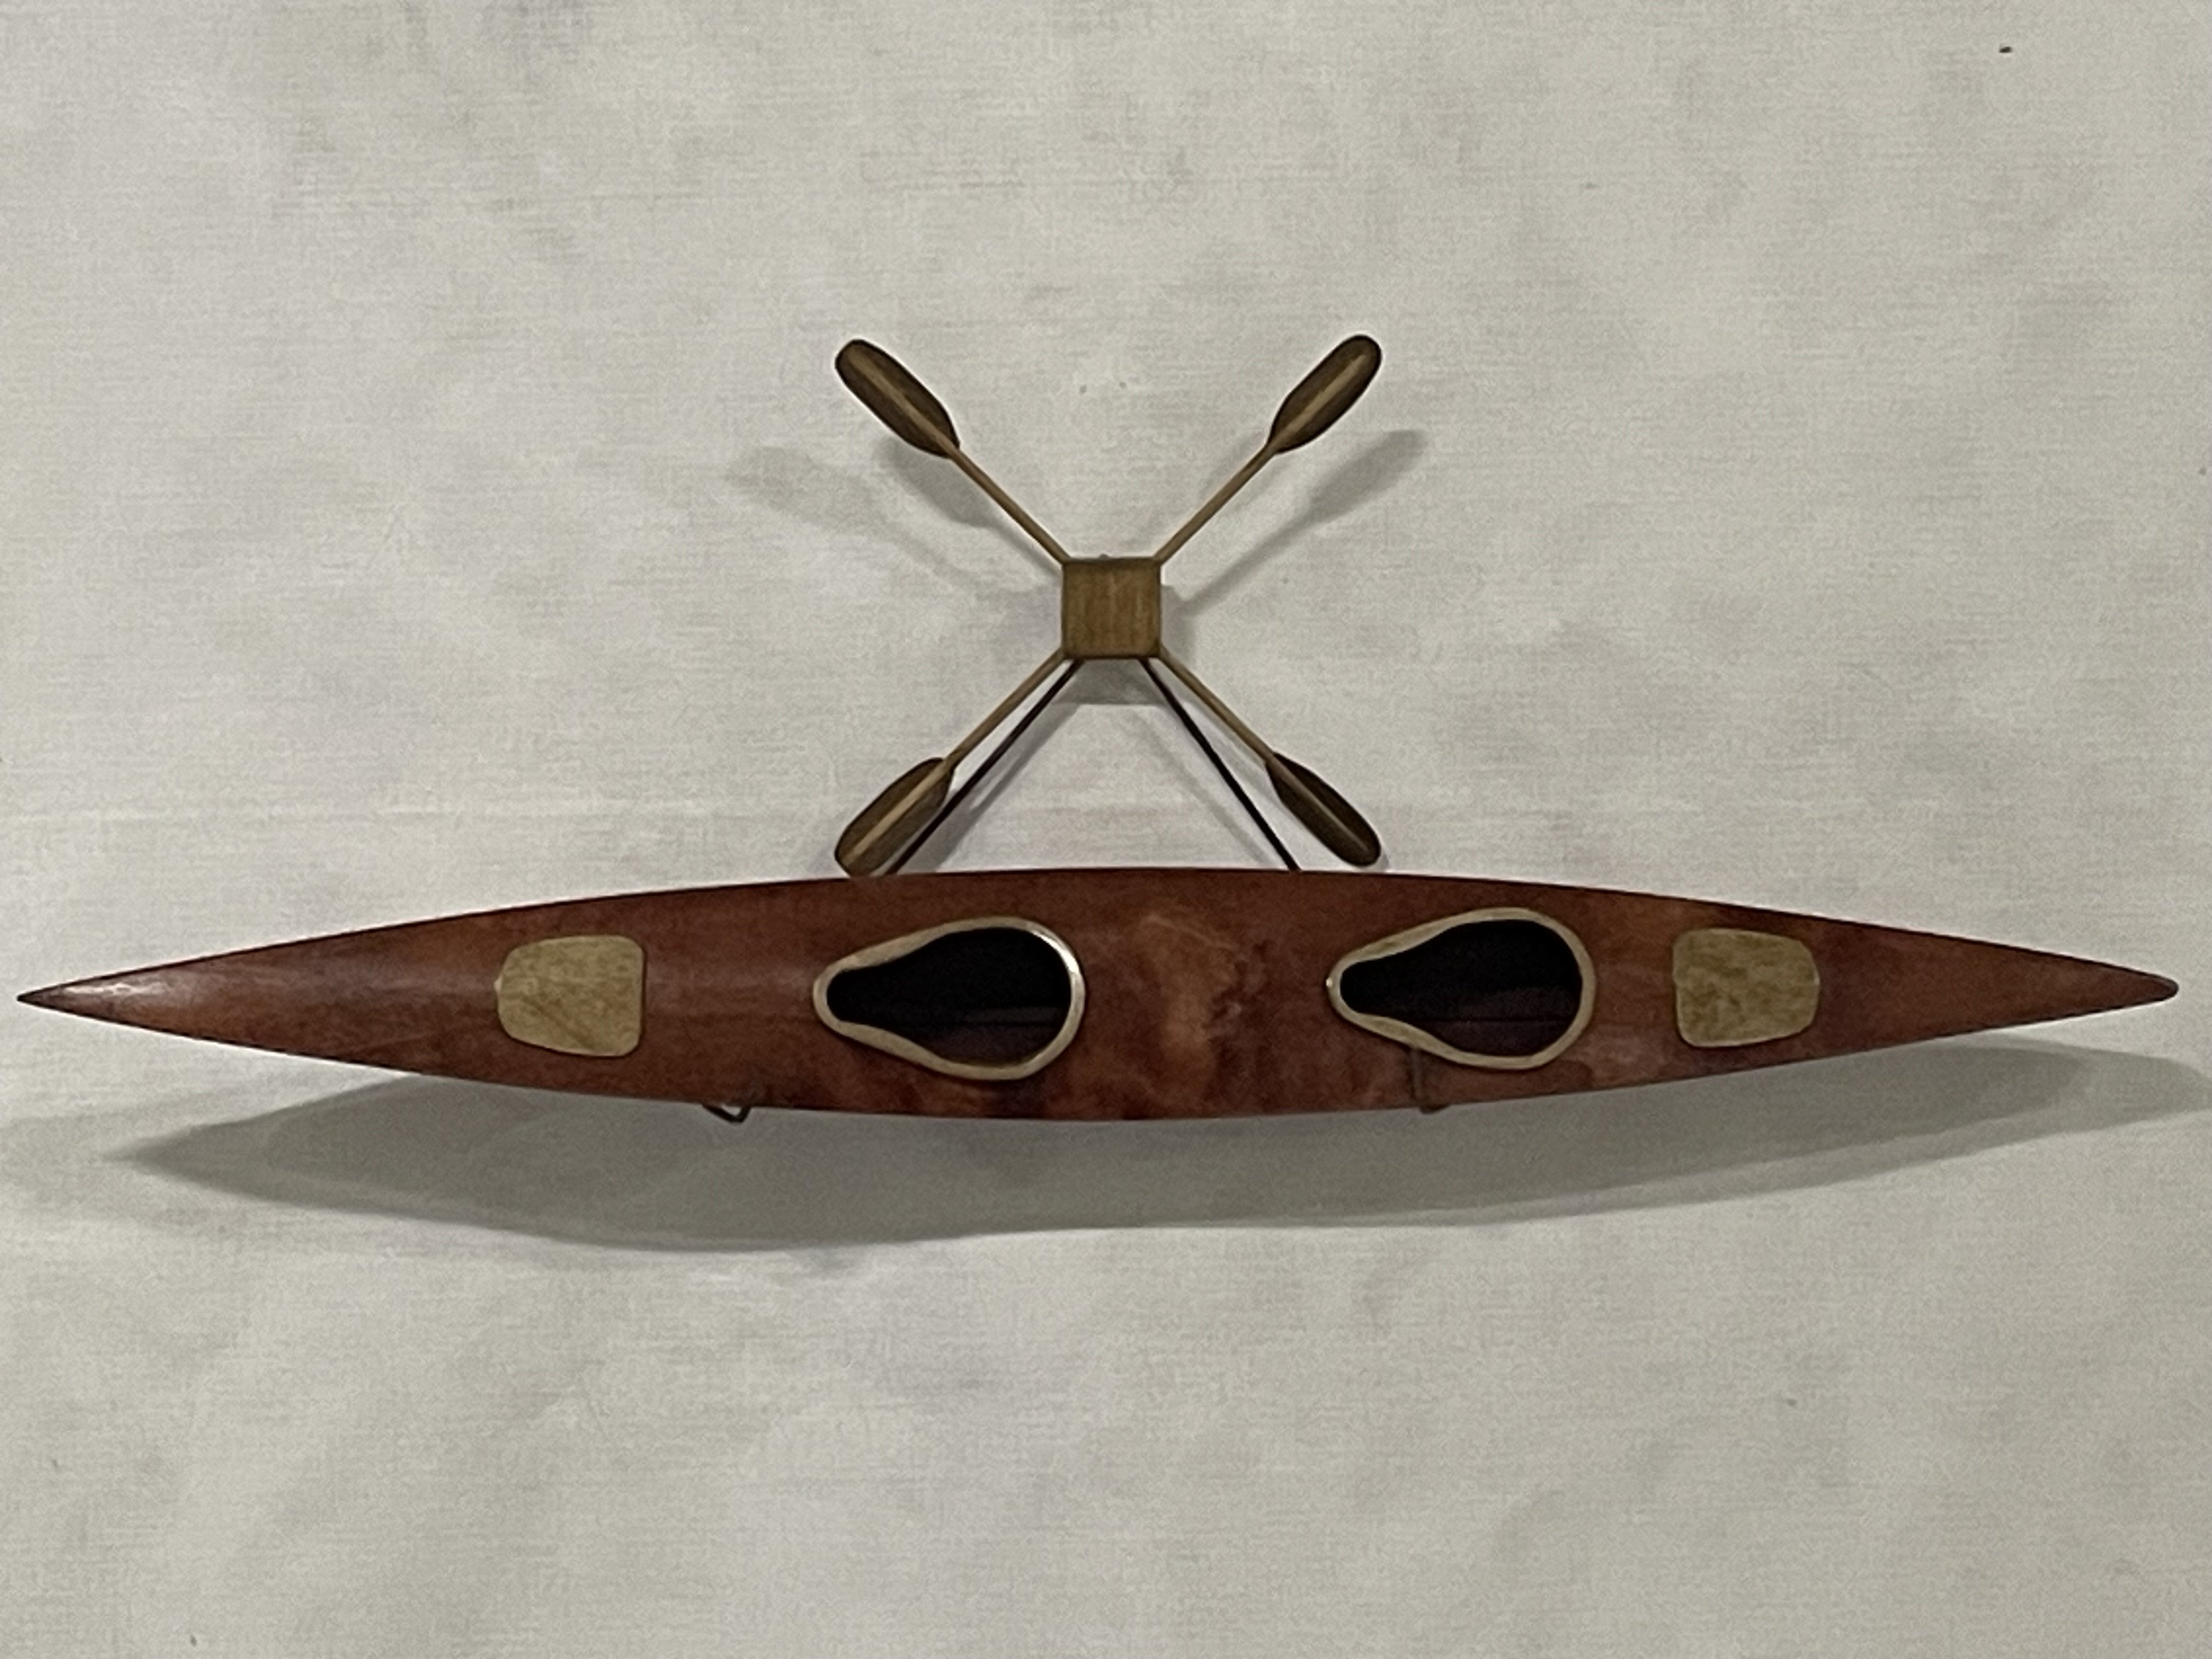
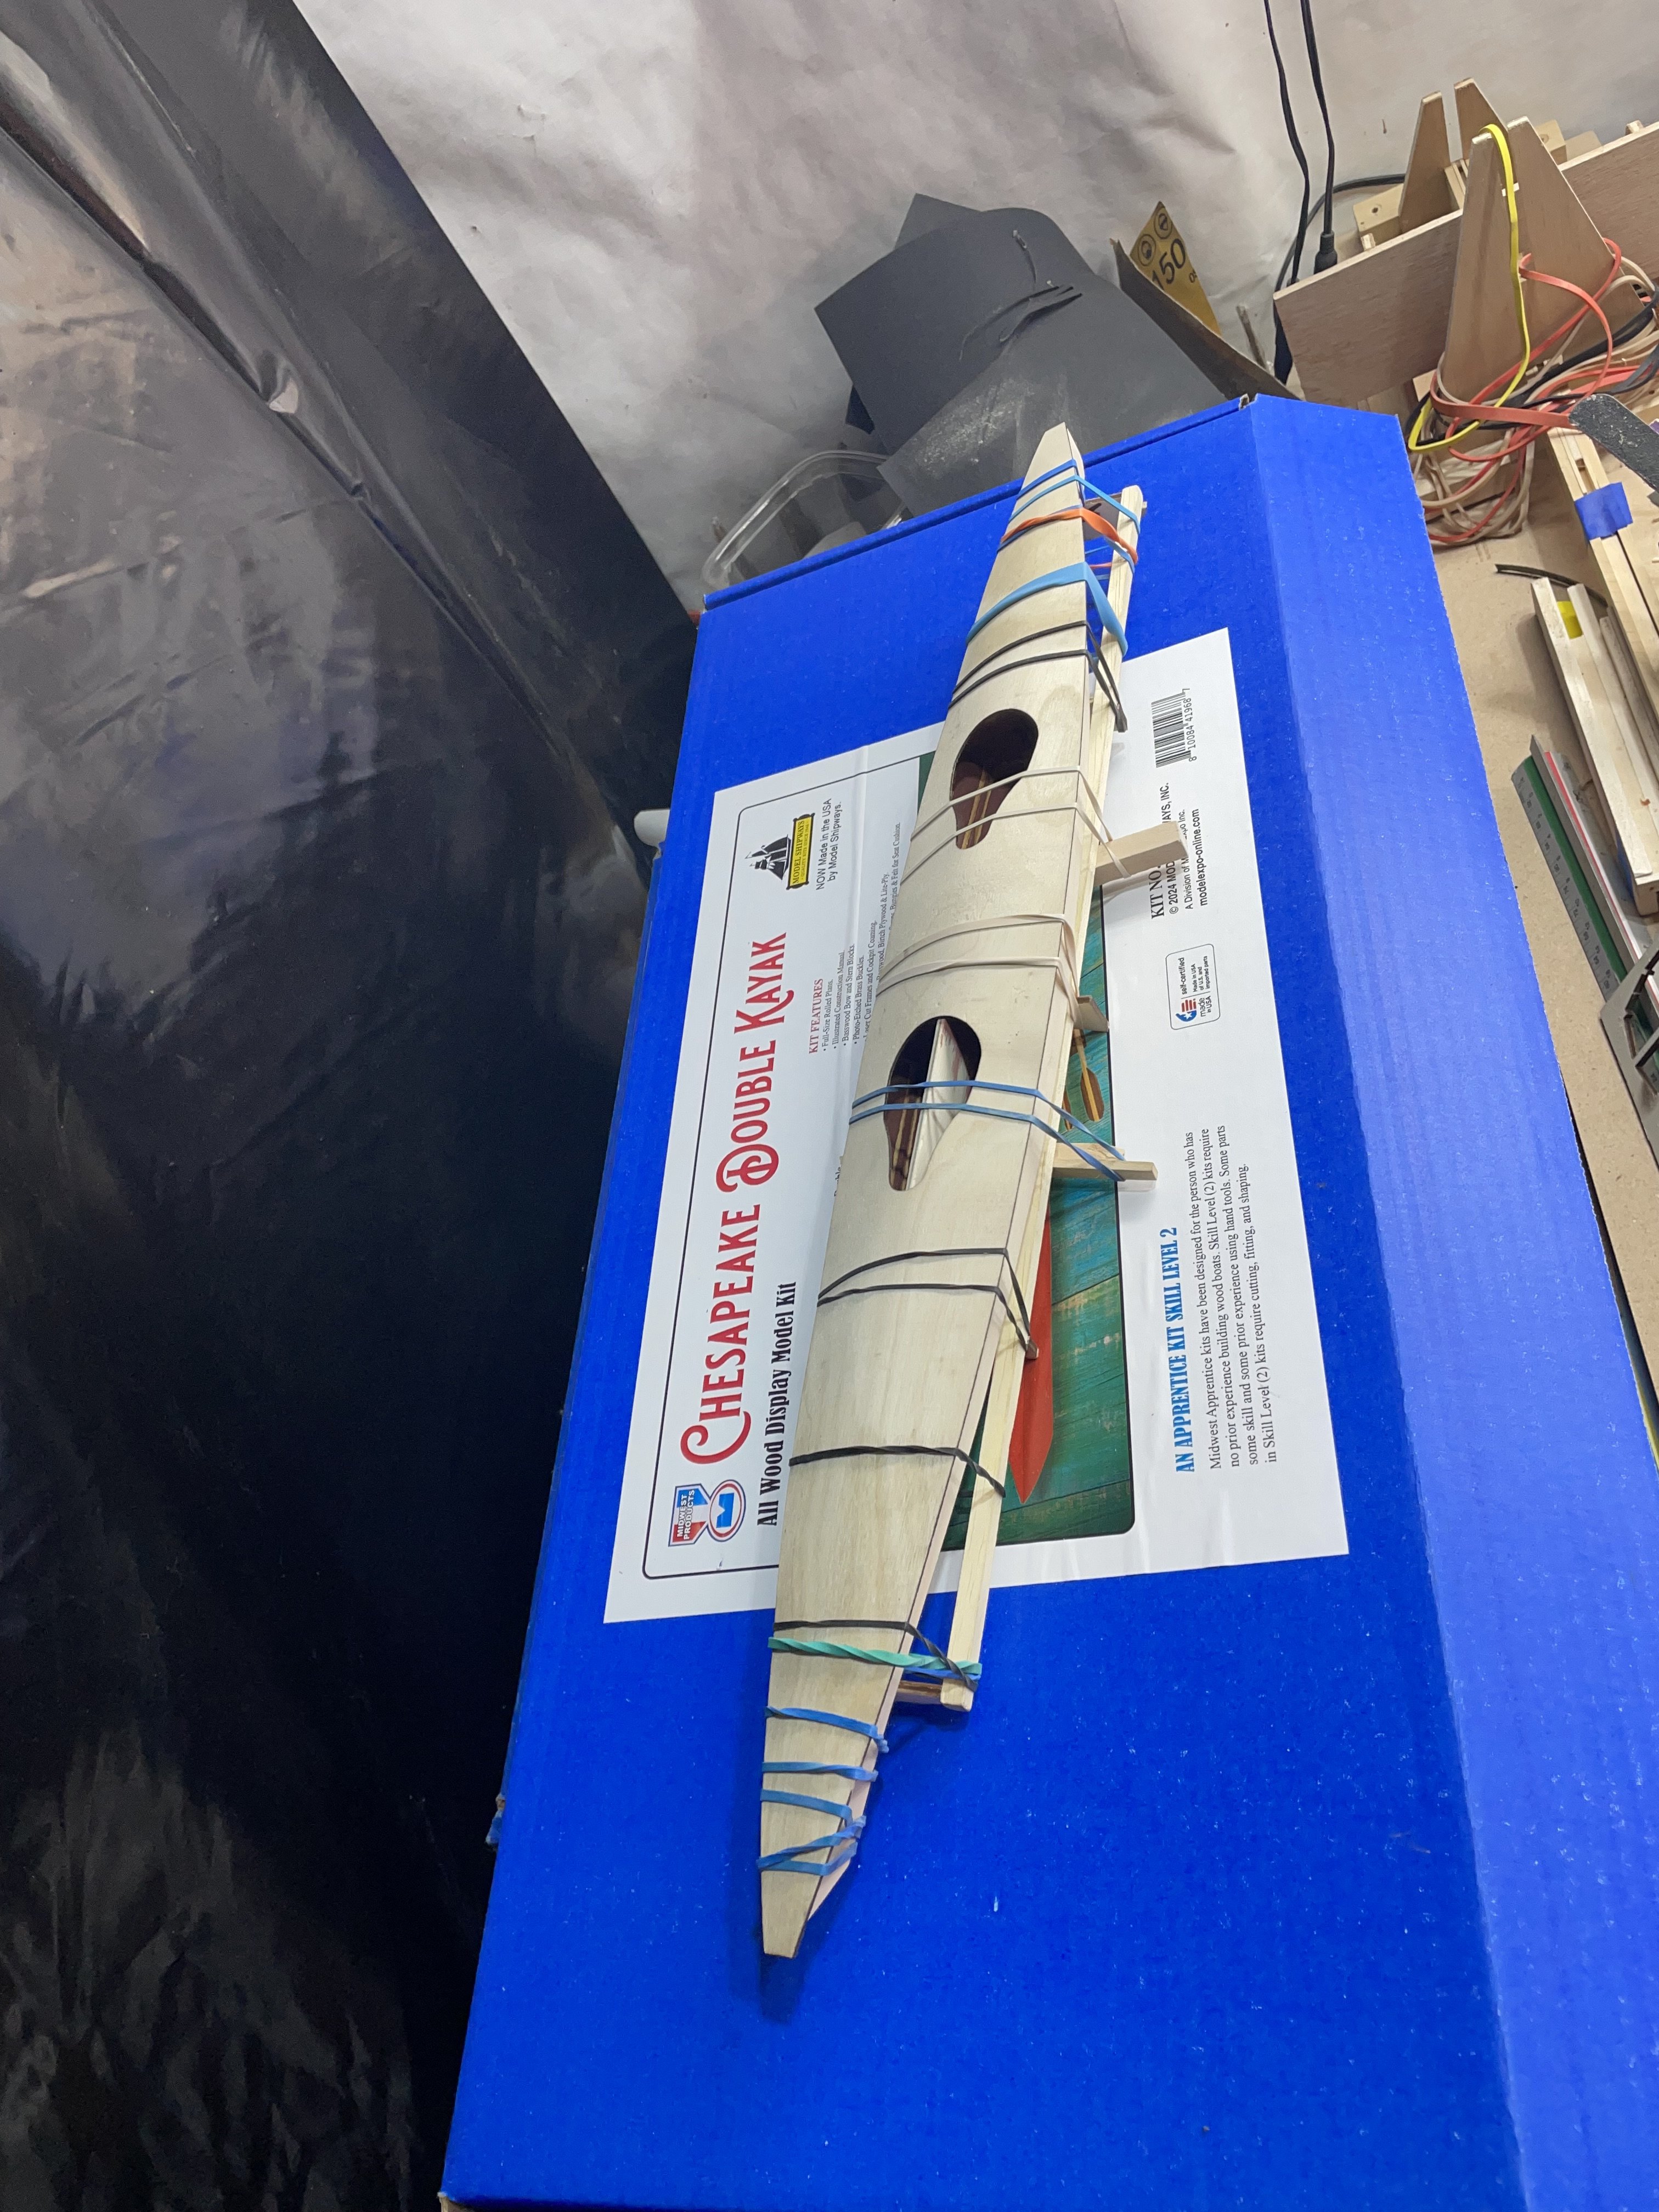
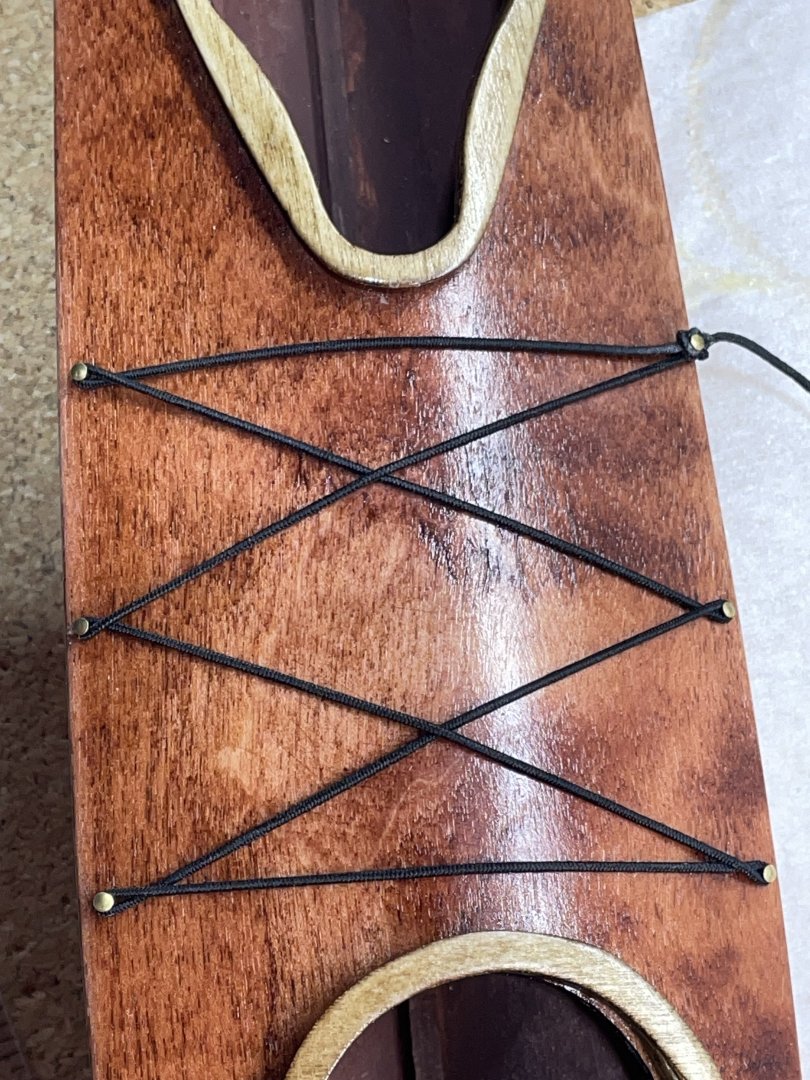
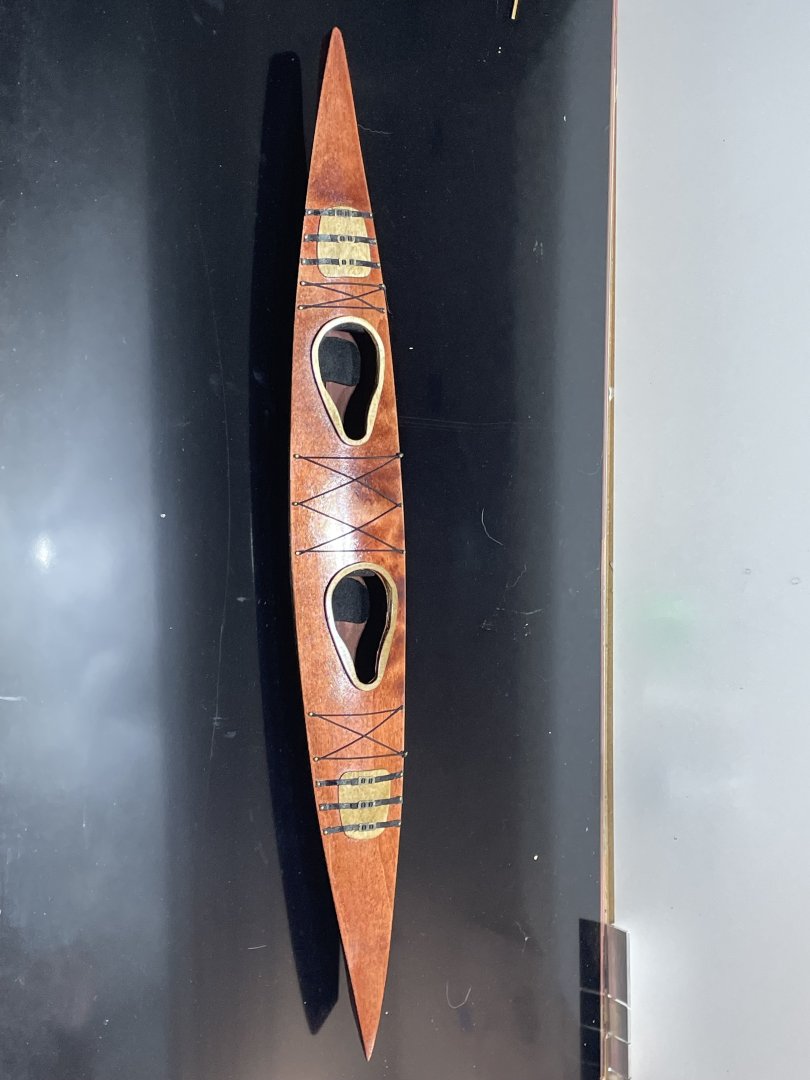
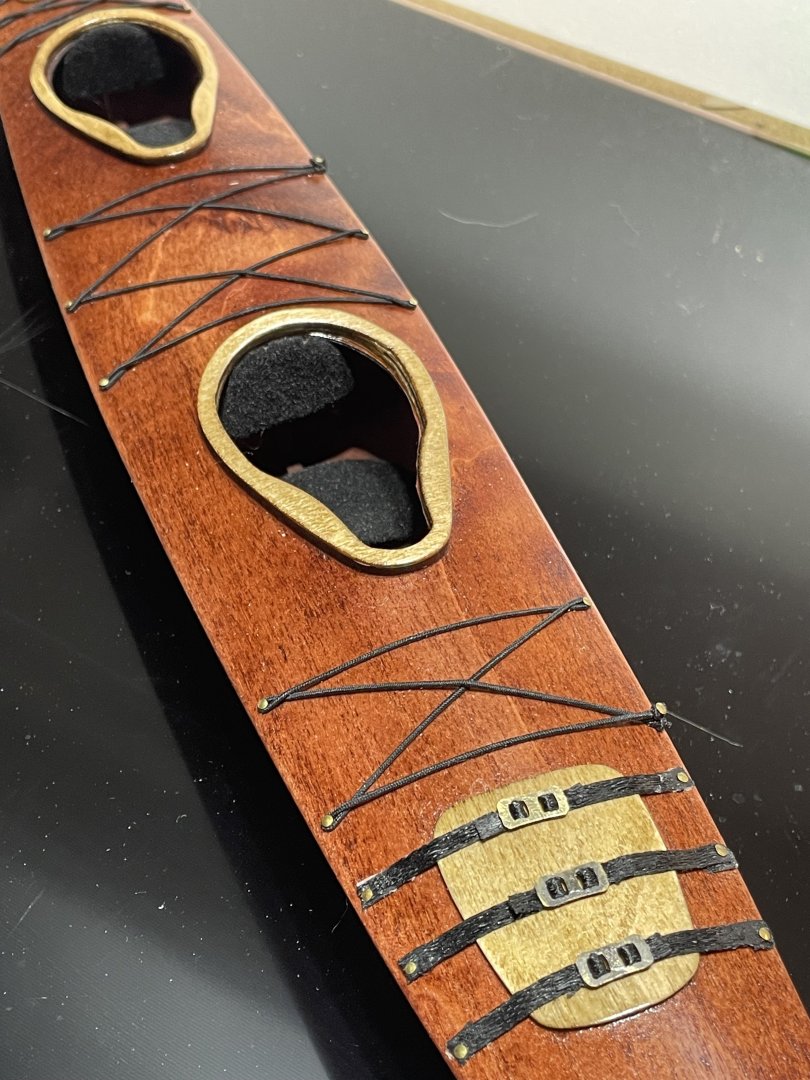
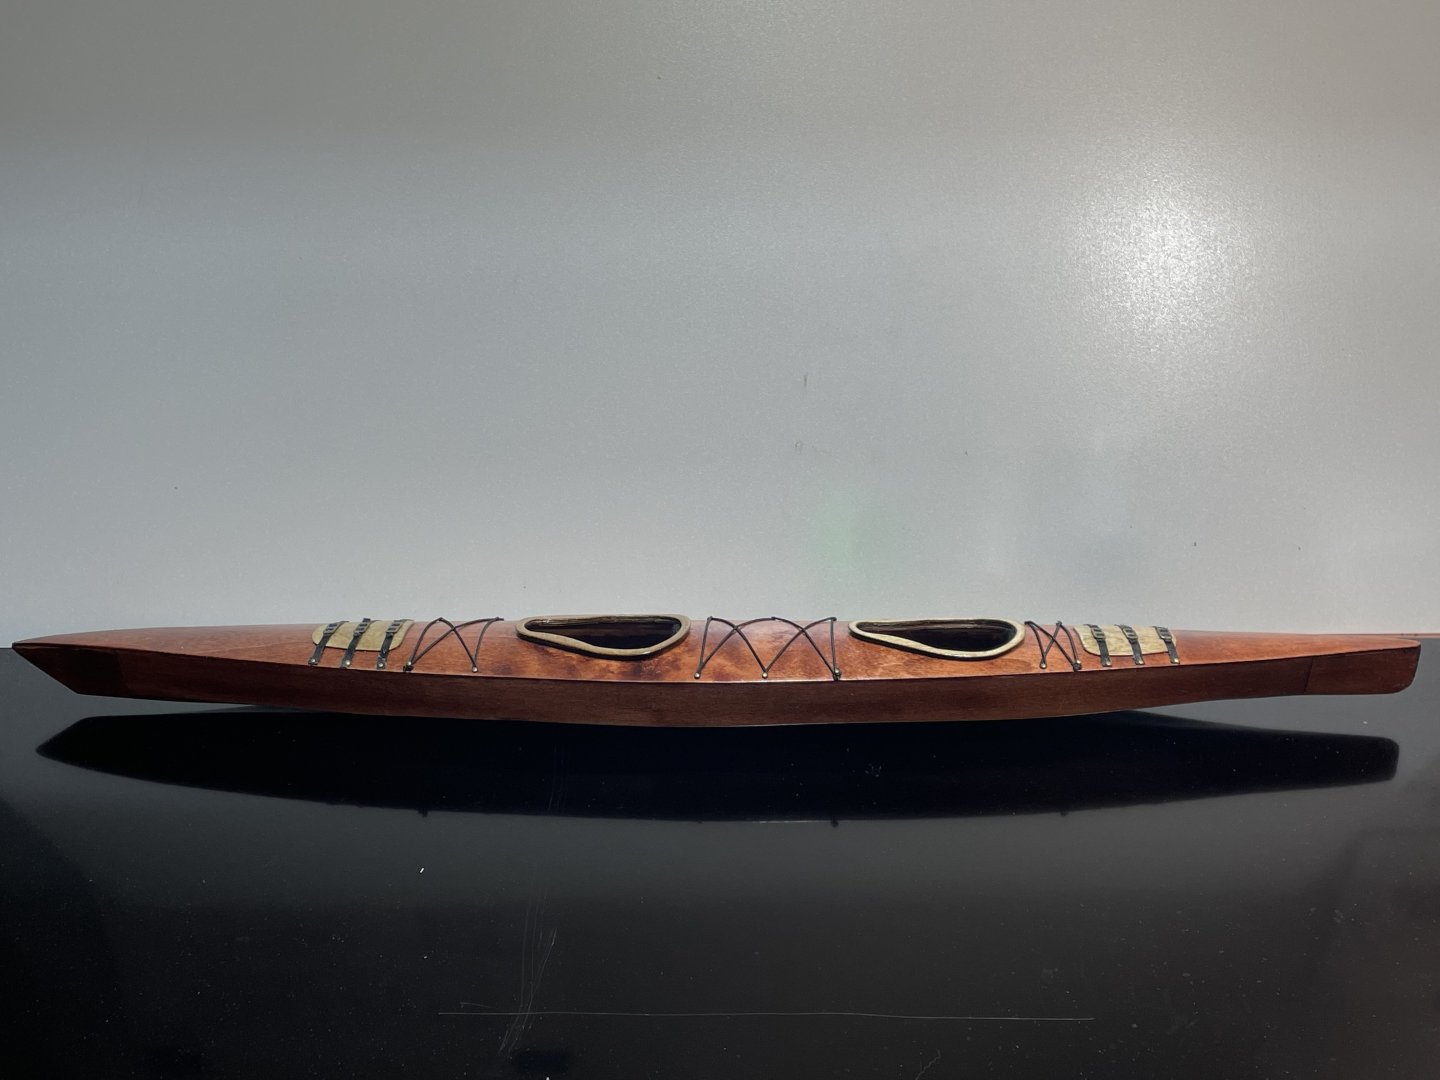
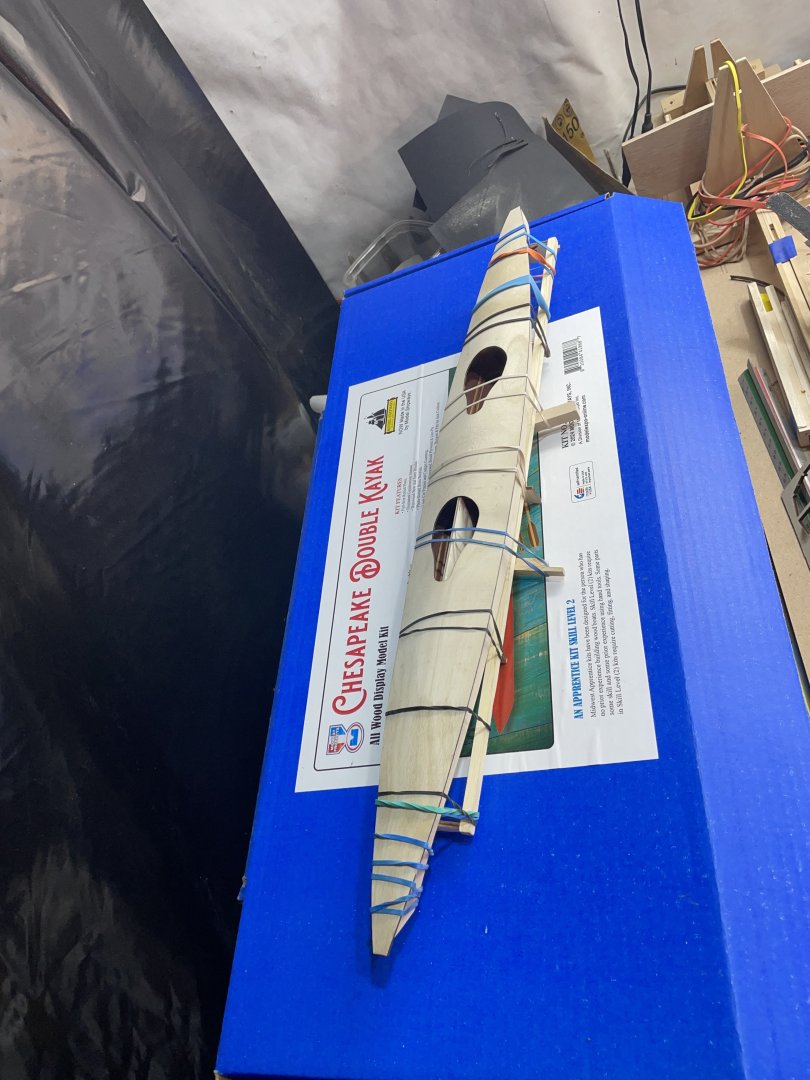
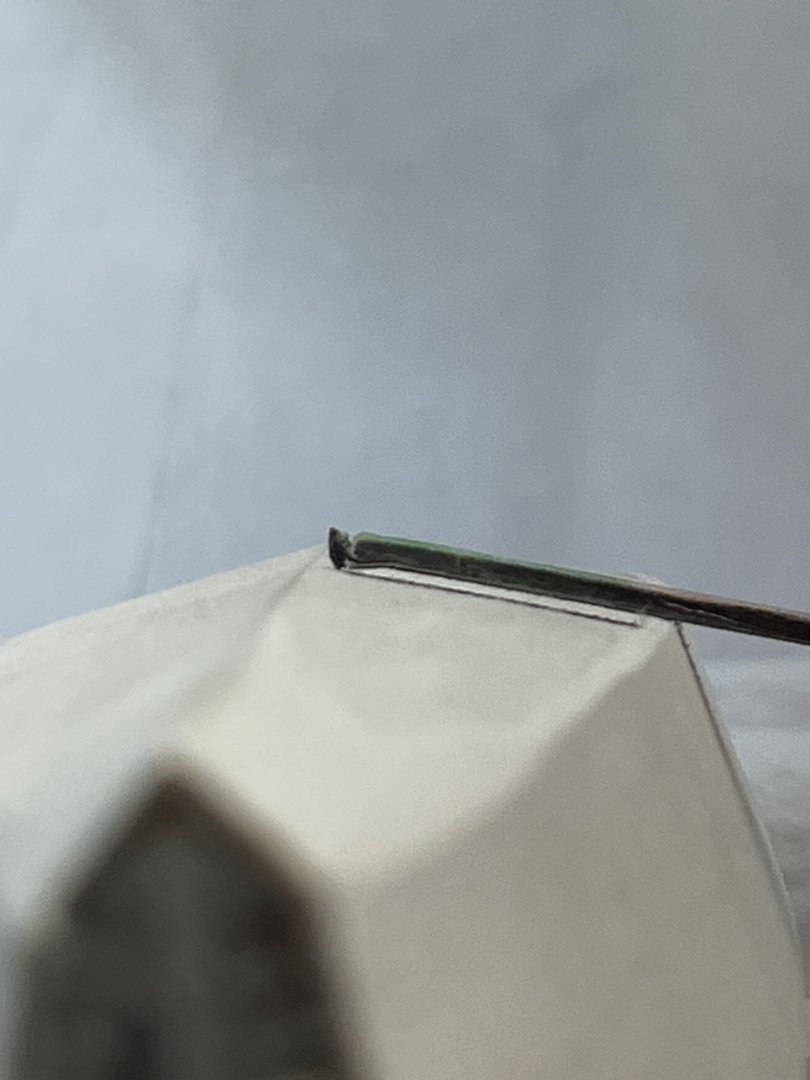
After the finish had dried I taped off as square as I could, for the straps and bungees. After I drilled the holes for the nails. I assembled the straps and placed the nails on either end. The bungees went quickly. So that completes this build. Thanks for the views and likes!


- 33 replies
-
- 11
-

-
-
- midwest products
- kayak
- (and 1 more)
-
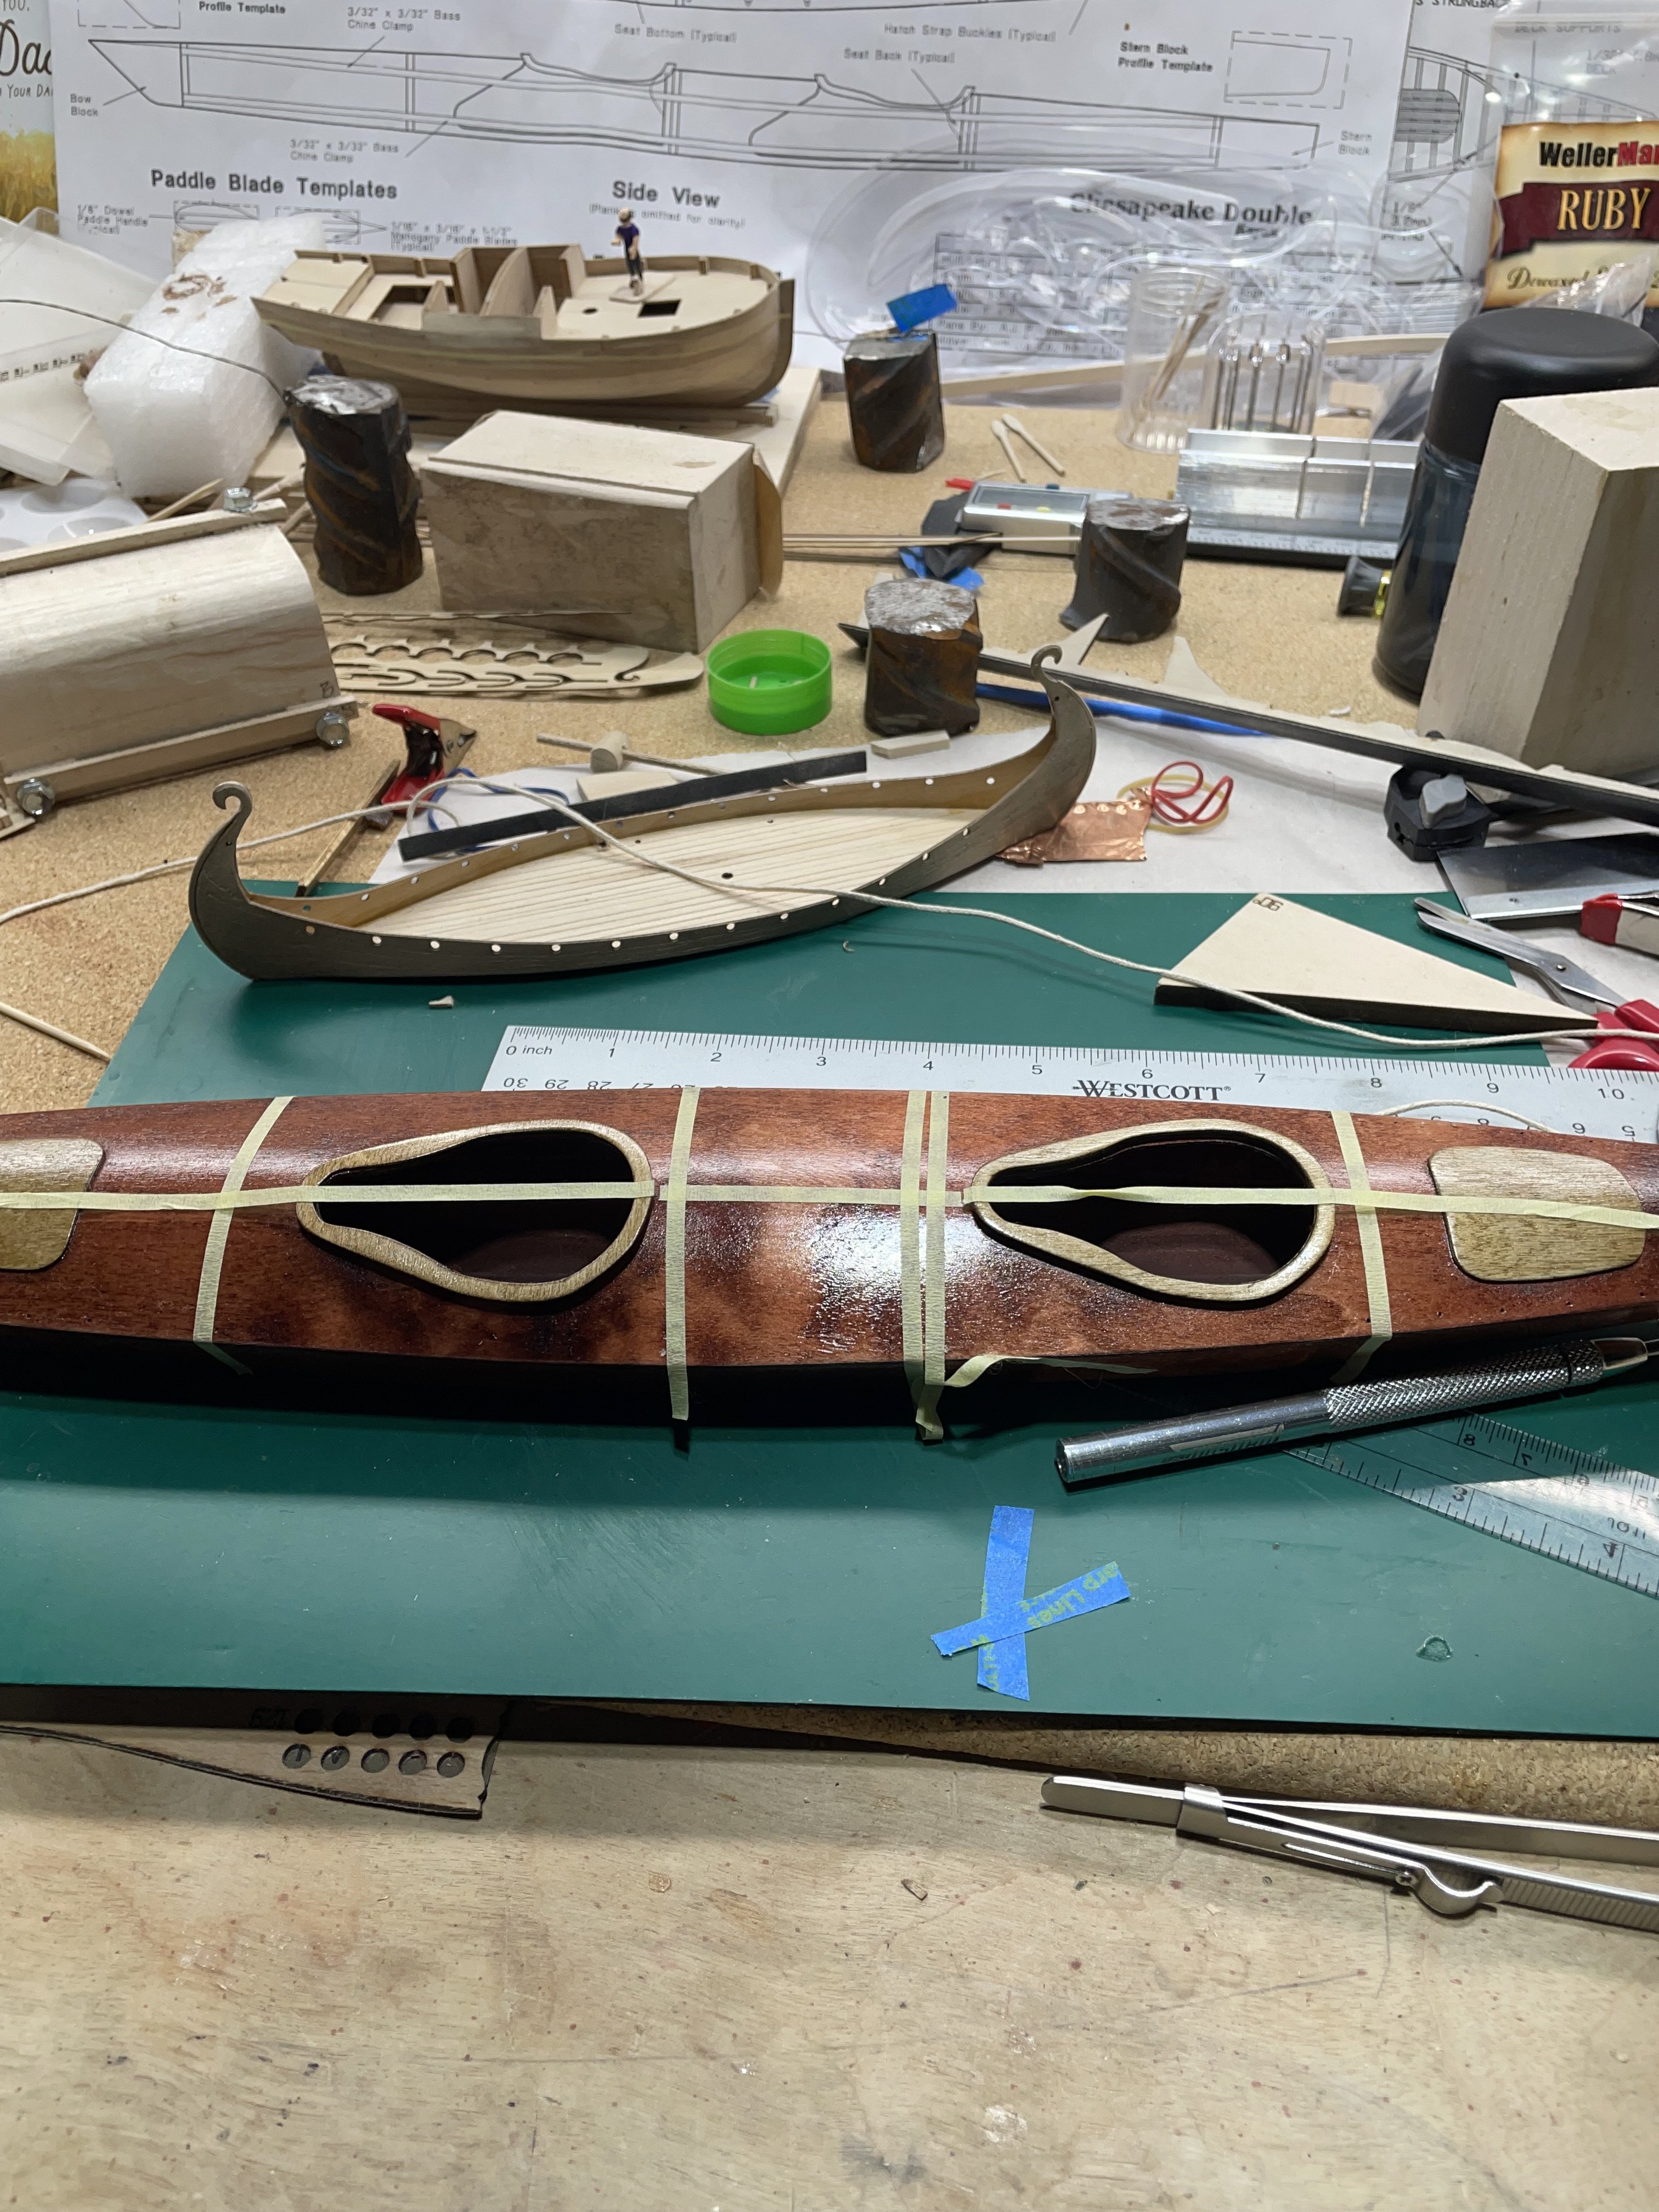
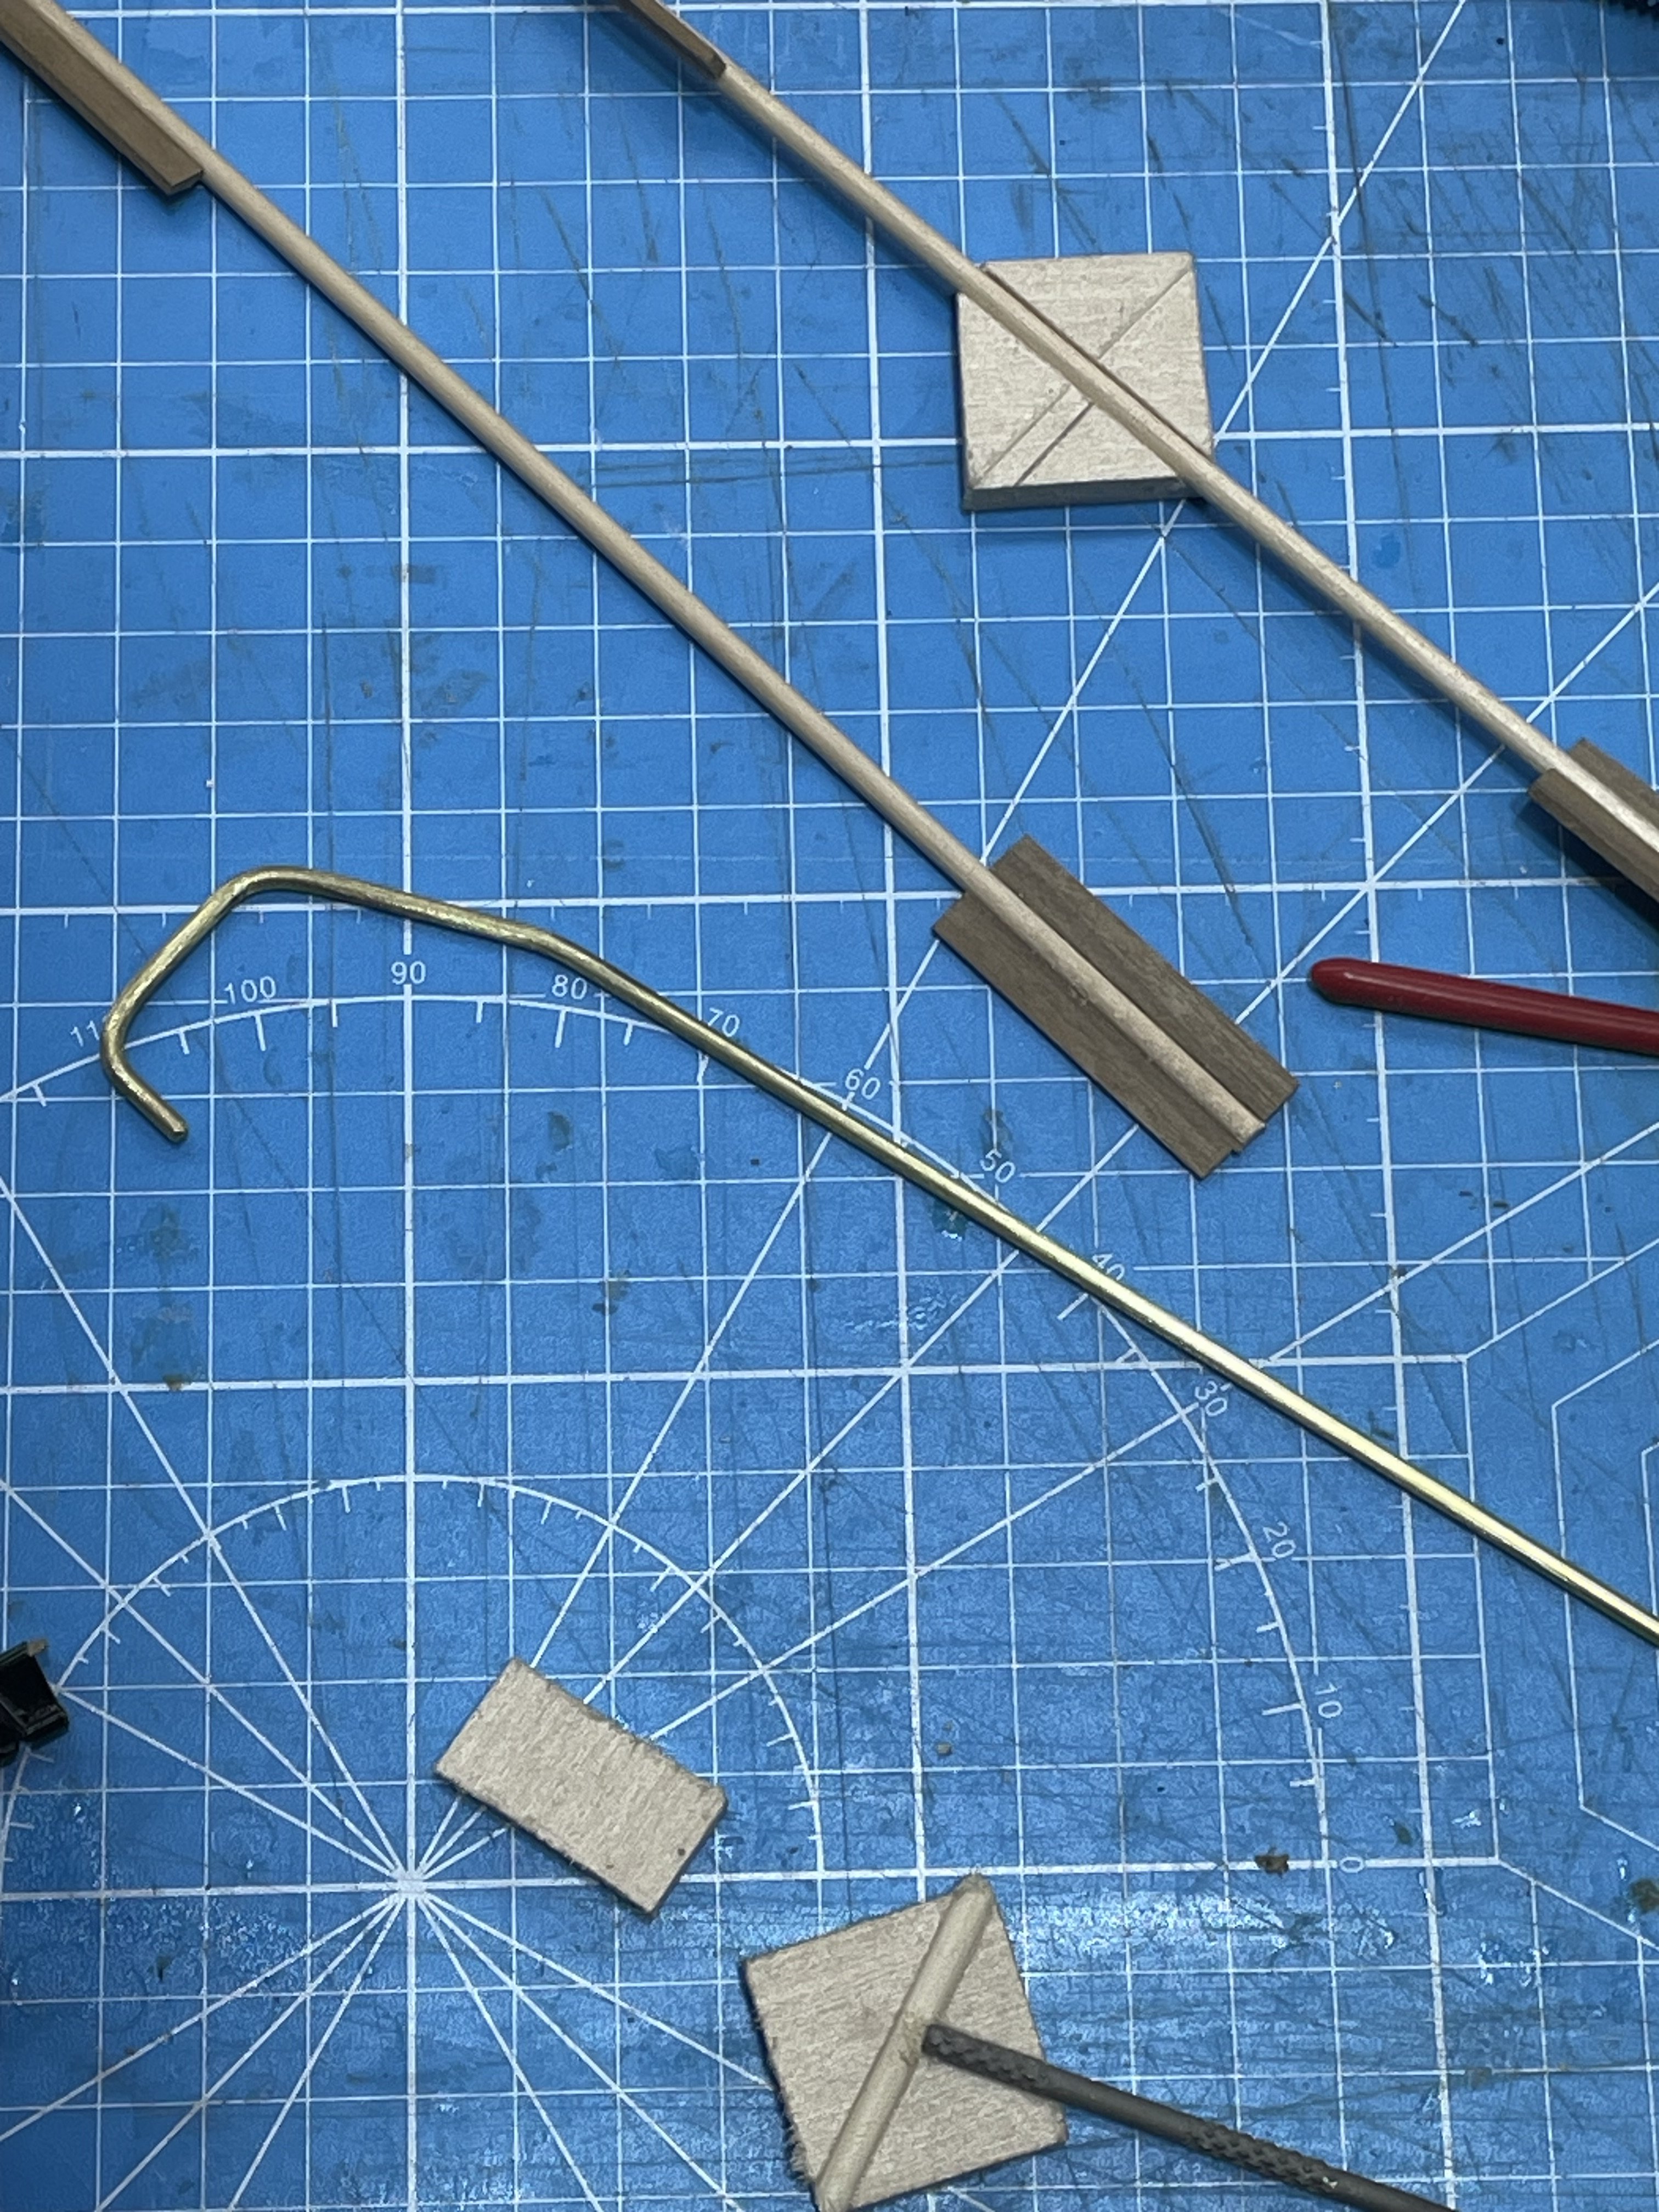
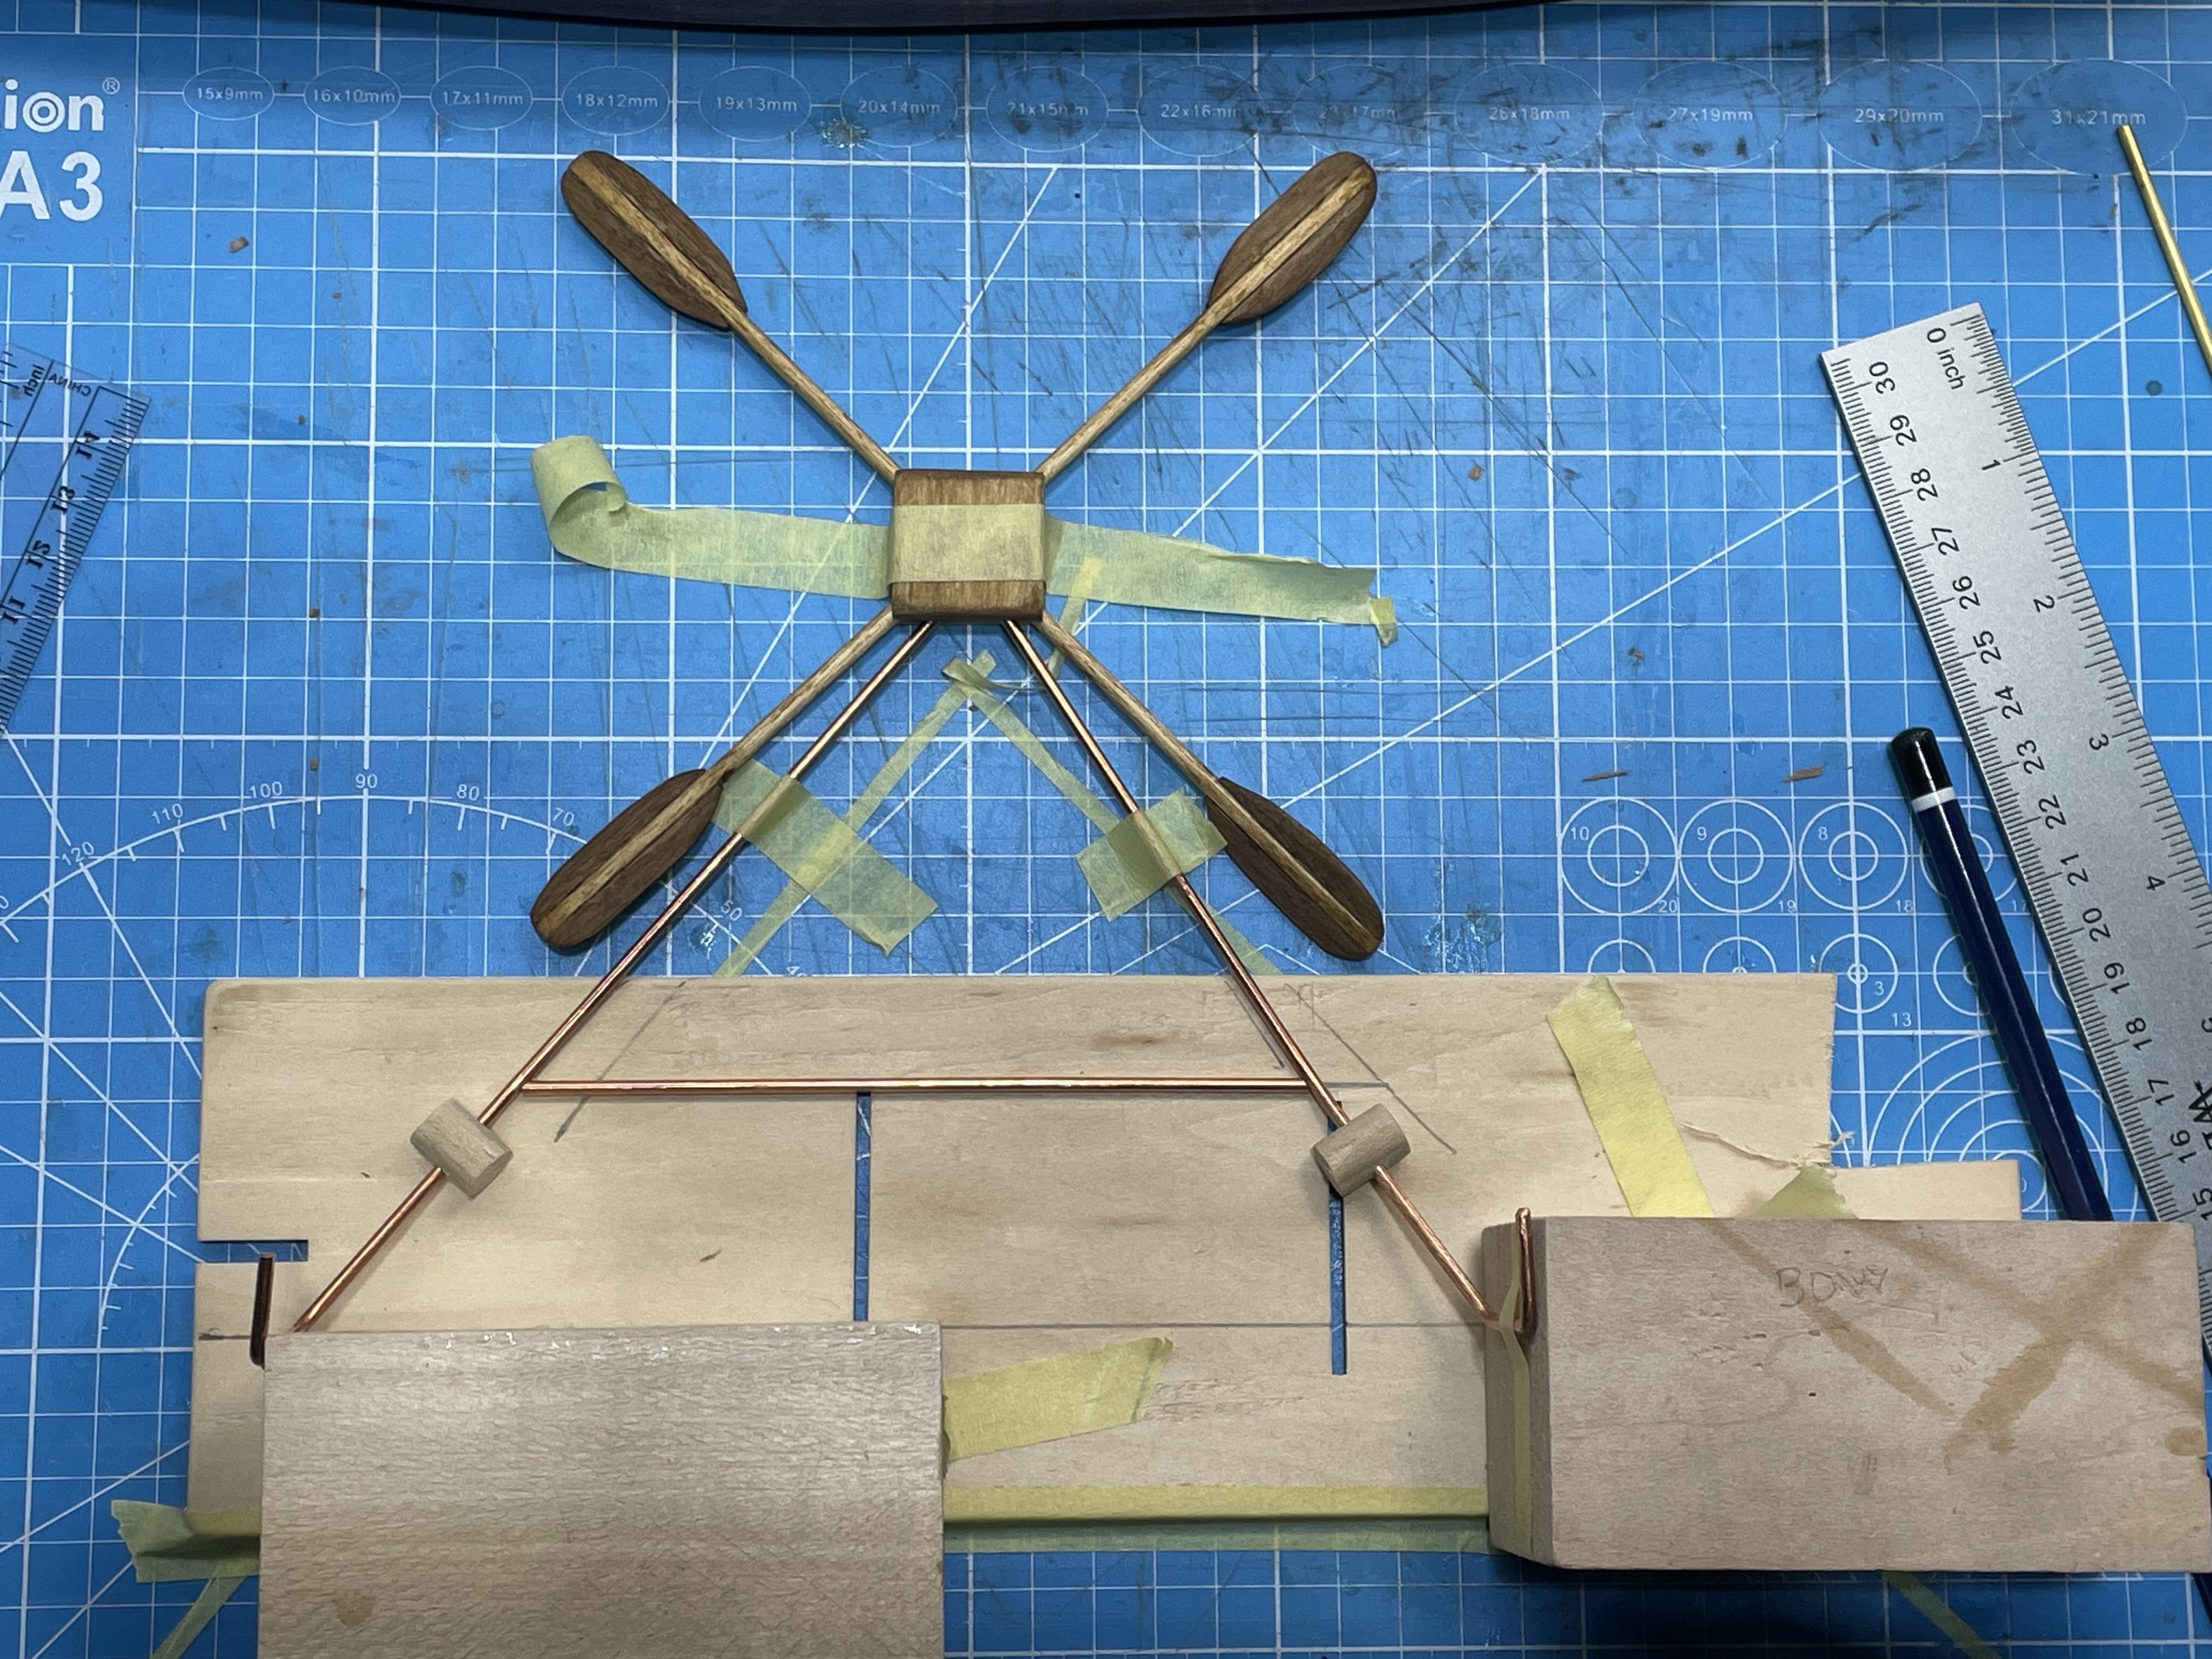
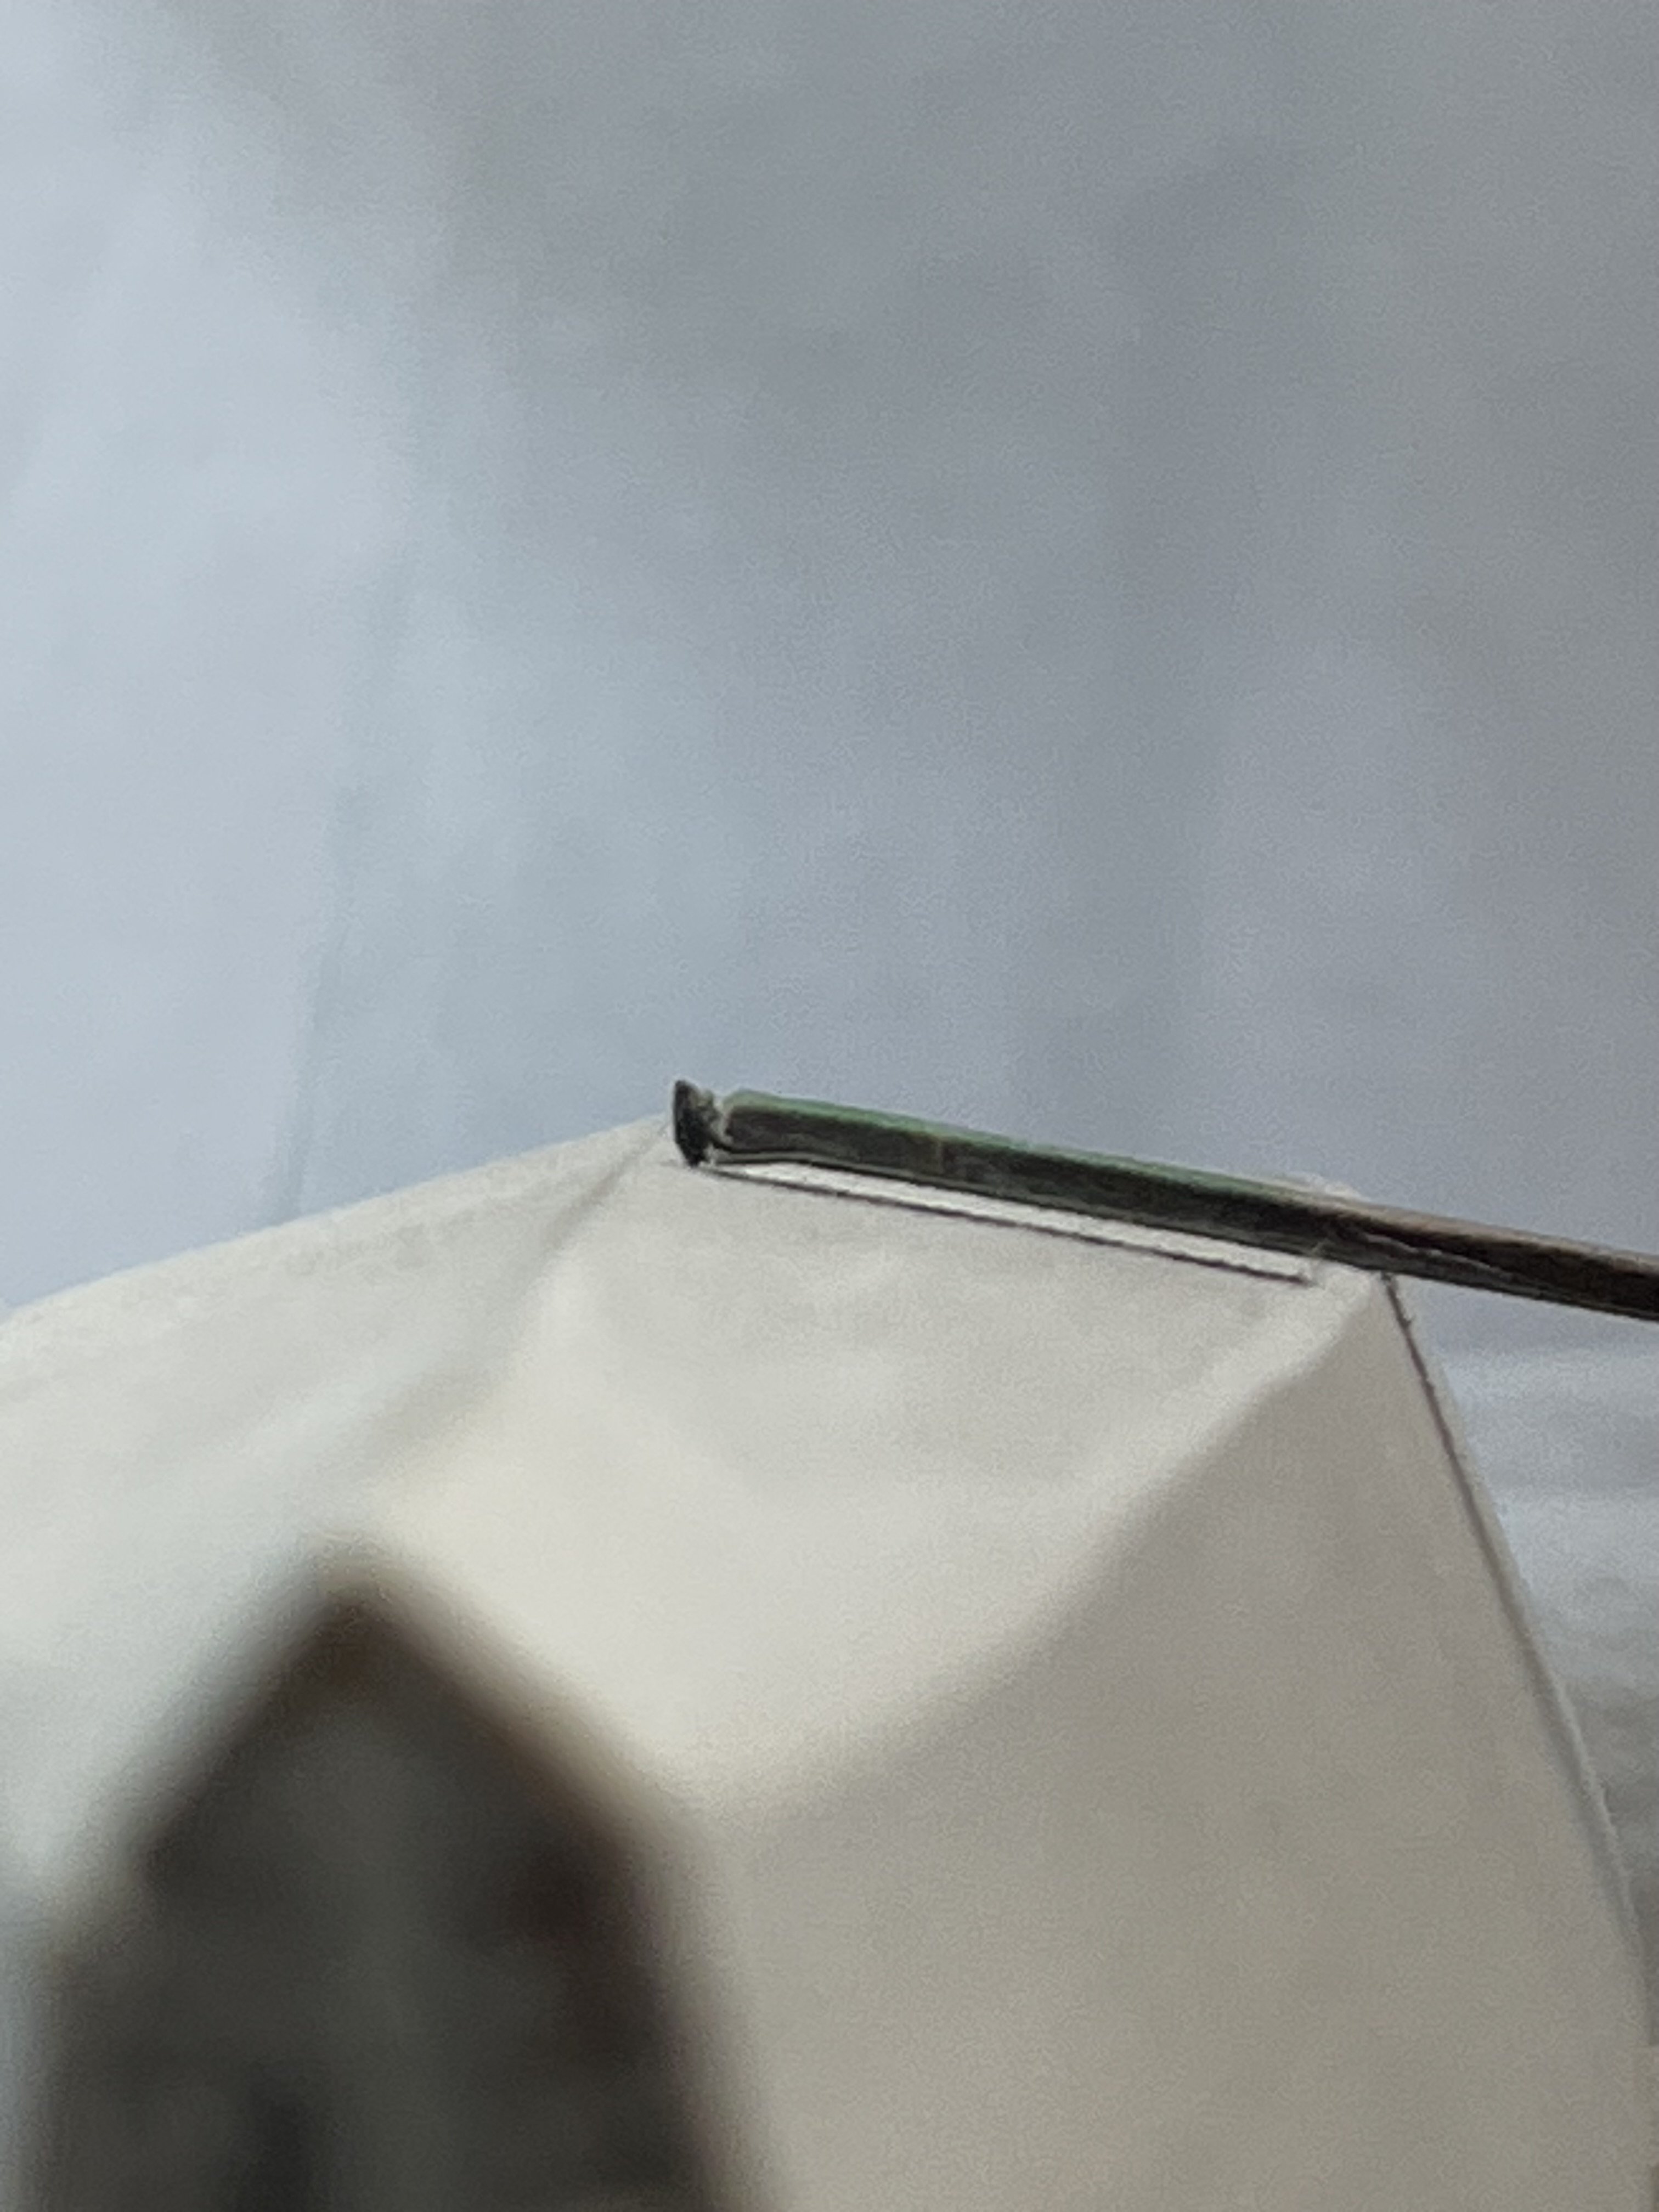
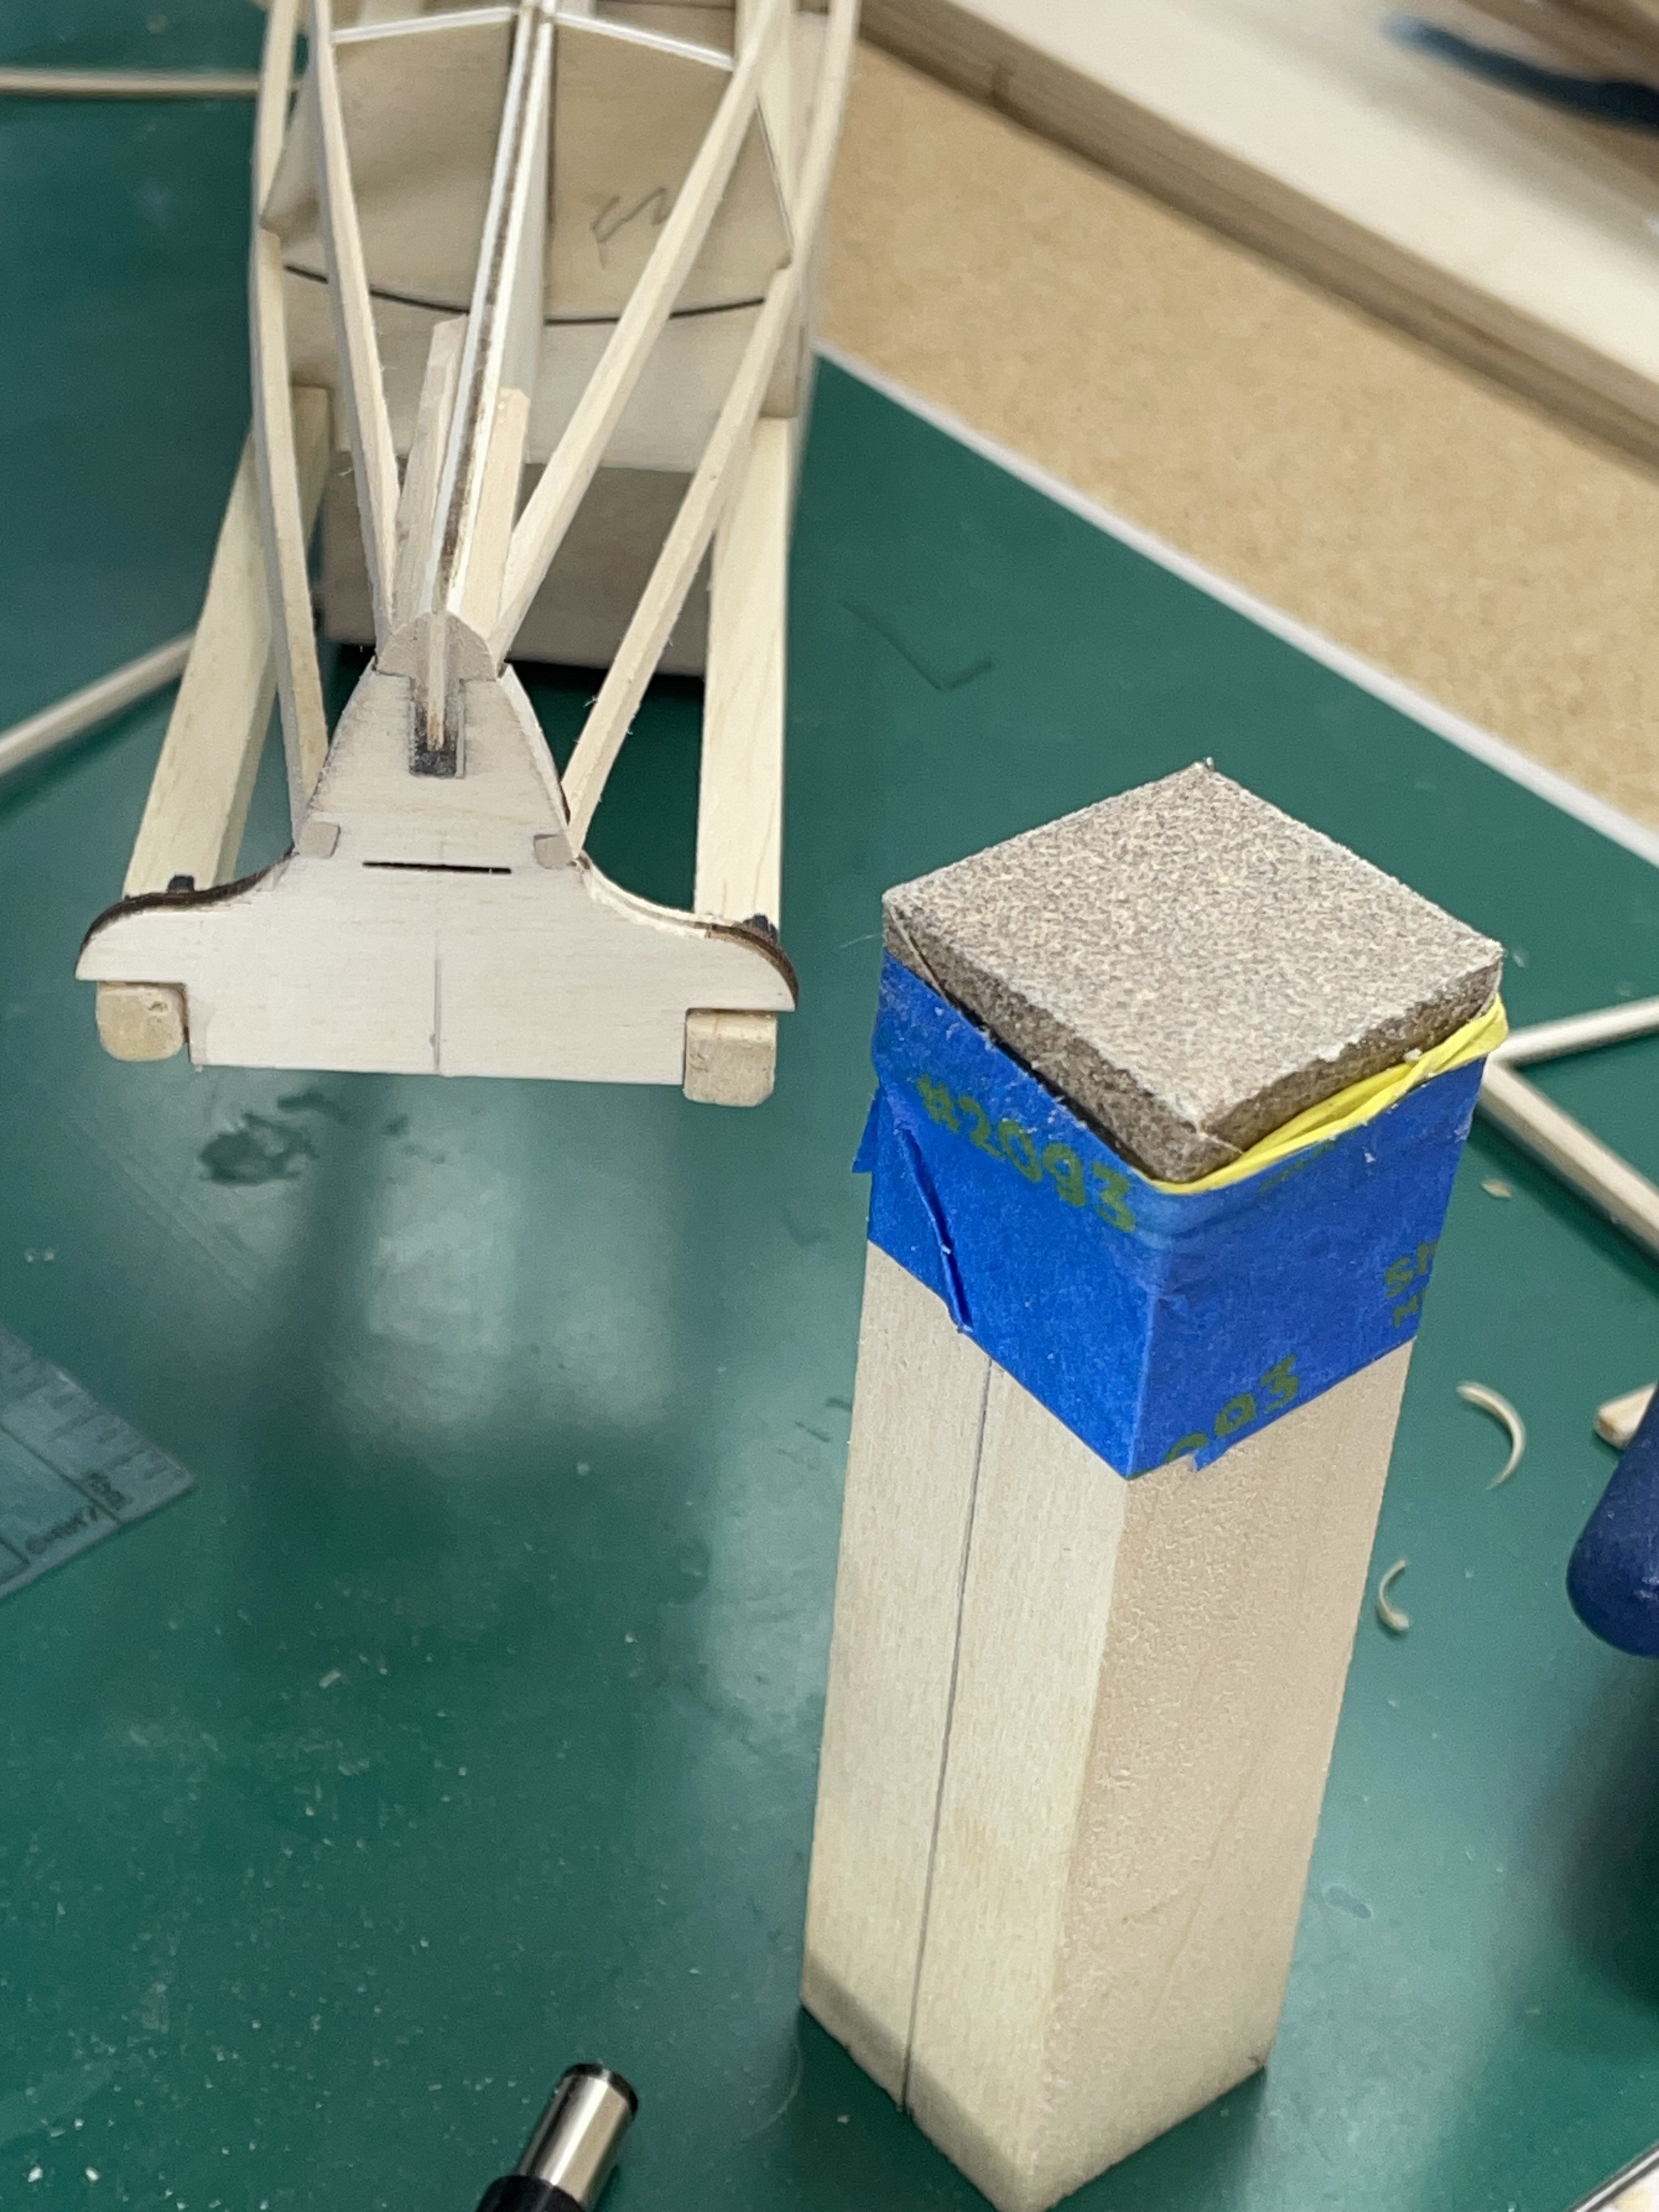
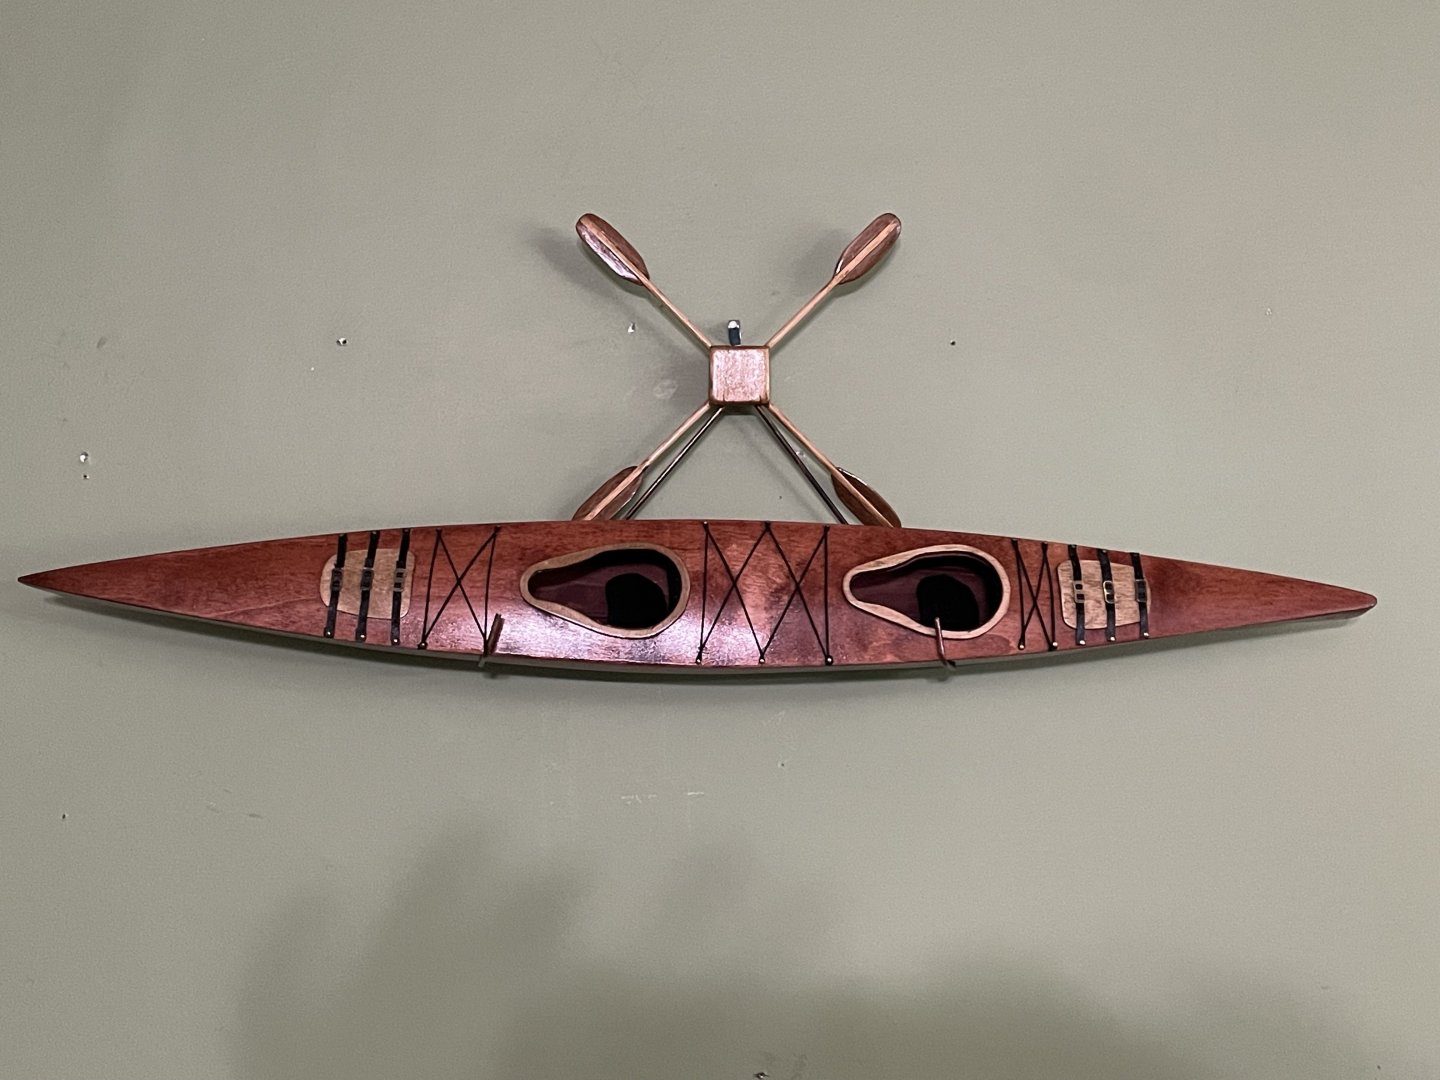
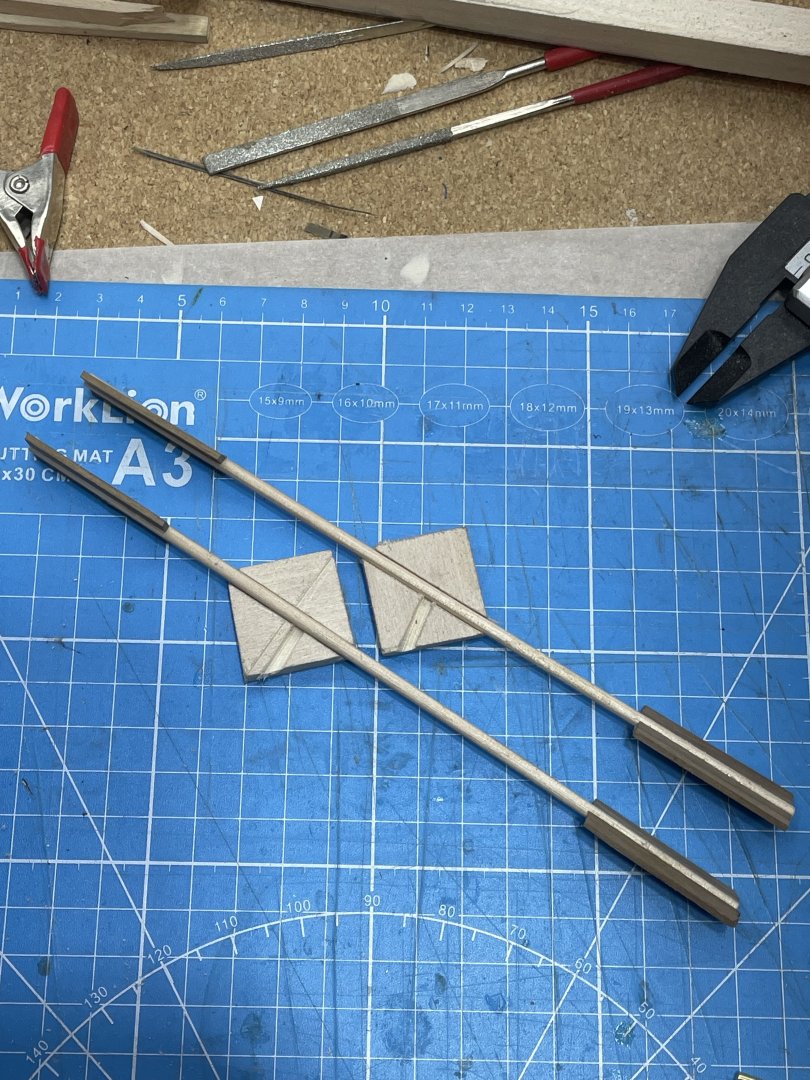
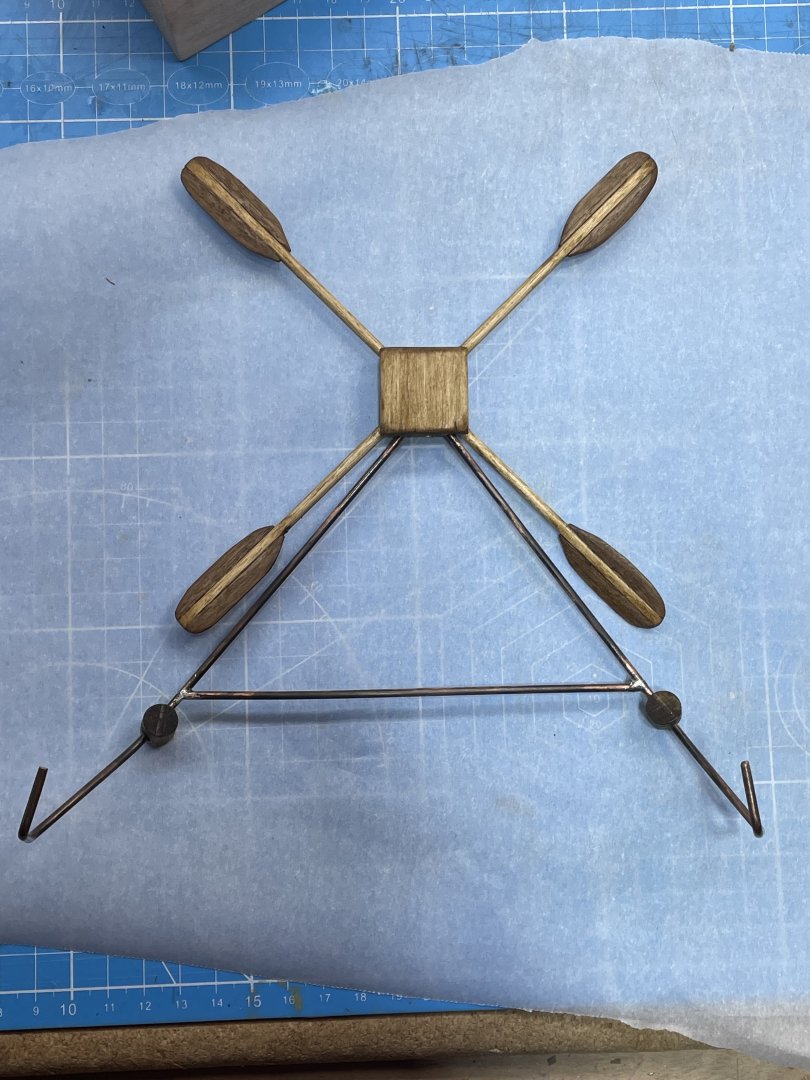
While I am waiting on the finish to dry on the kayak, I am focused on the wall mounted bracket. I really didn’t know what to do with the oars, so they became the bracket. I started by bending a 1/8” brass rod, which I only had one:-/ I couldn’t find another 1/8” brass rod locally, but I did find some 3/32” copper rods. I cut two 1” square by 1/4” thick blocks and filed a diagonal groove for an ore. Then a shorter groove is for the copper rod. I mirrored the other side. Now is when the imagination has to take over. I had to build a jig to hold everything still, while I tried to solder a brace between the two rods. I finally got it. My iron was almost too small to heat up both wires at the same time. I rigged the iron to lay underneath without me holding it. Then after about five minutes it took the solder. I hung it on the wall and put the unfinished kayak in it . The only comment I’ve got is, why are the oars like that? 🙂


- 33 replies
-
- 8
-
-
-
- midwest products
- kayak
- (and 1 more)
-
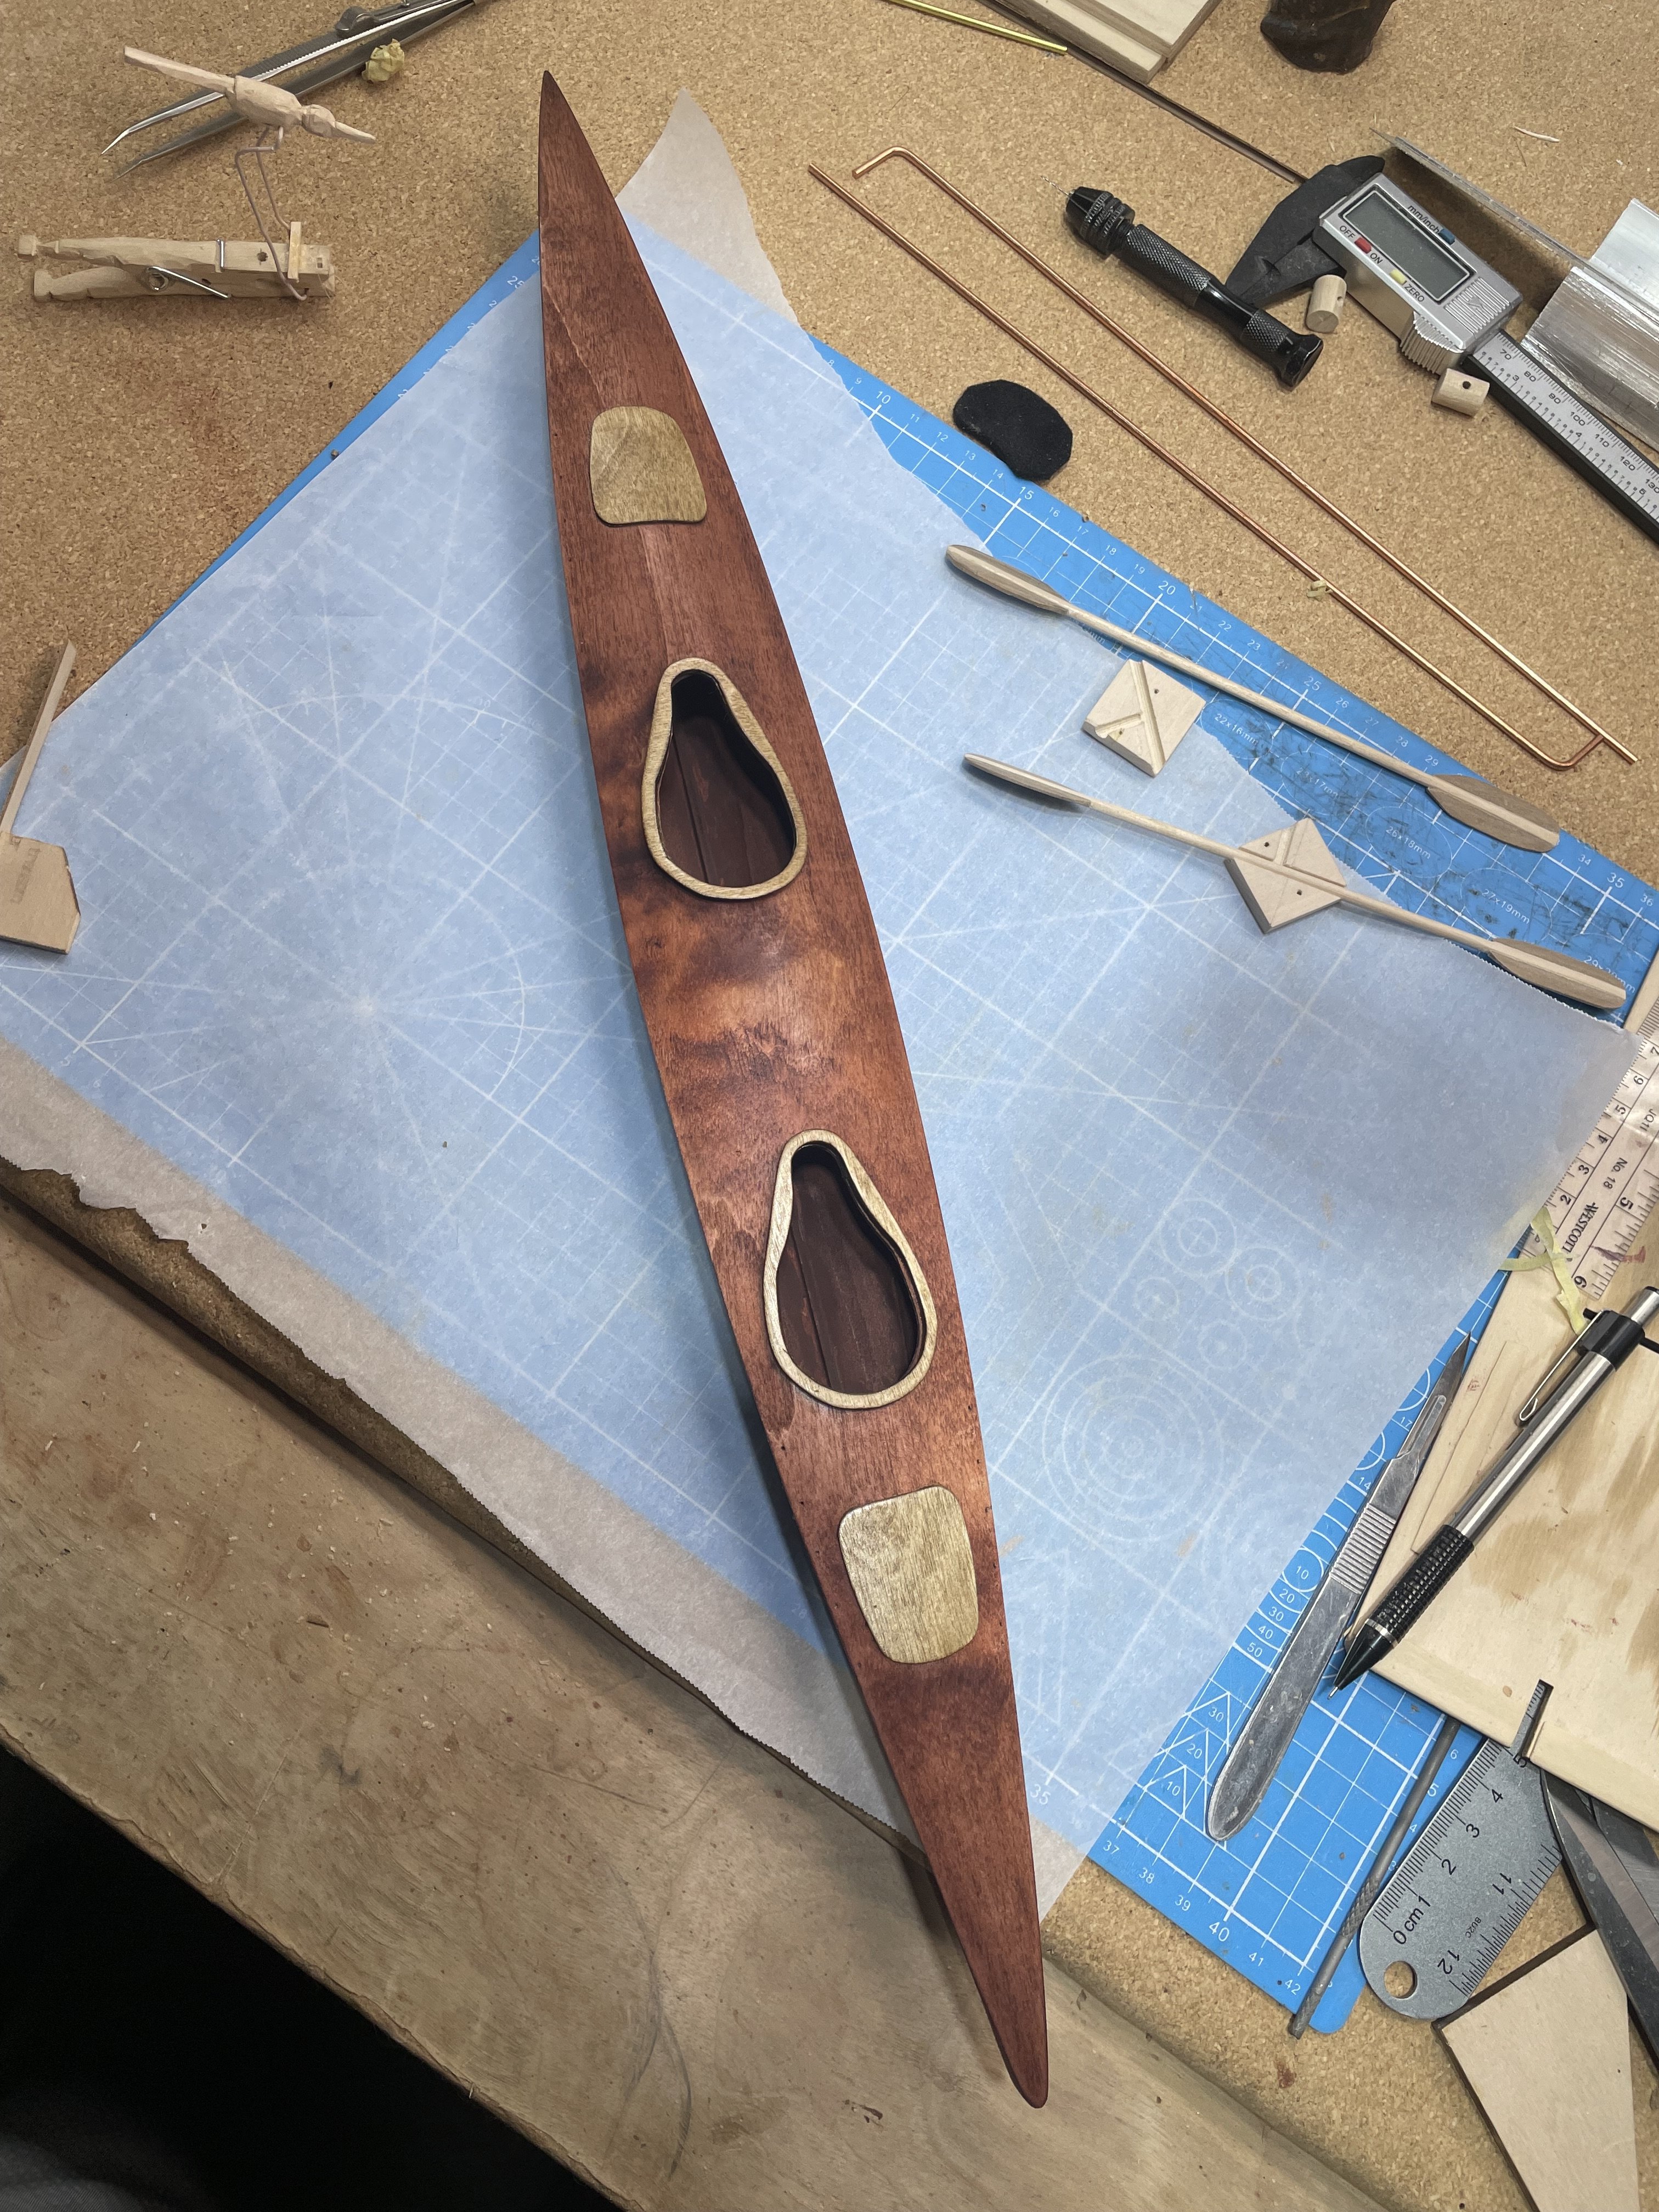
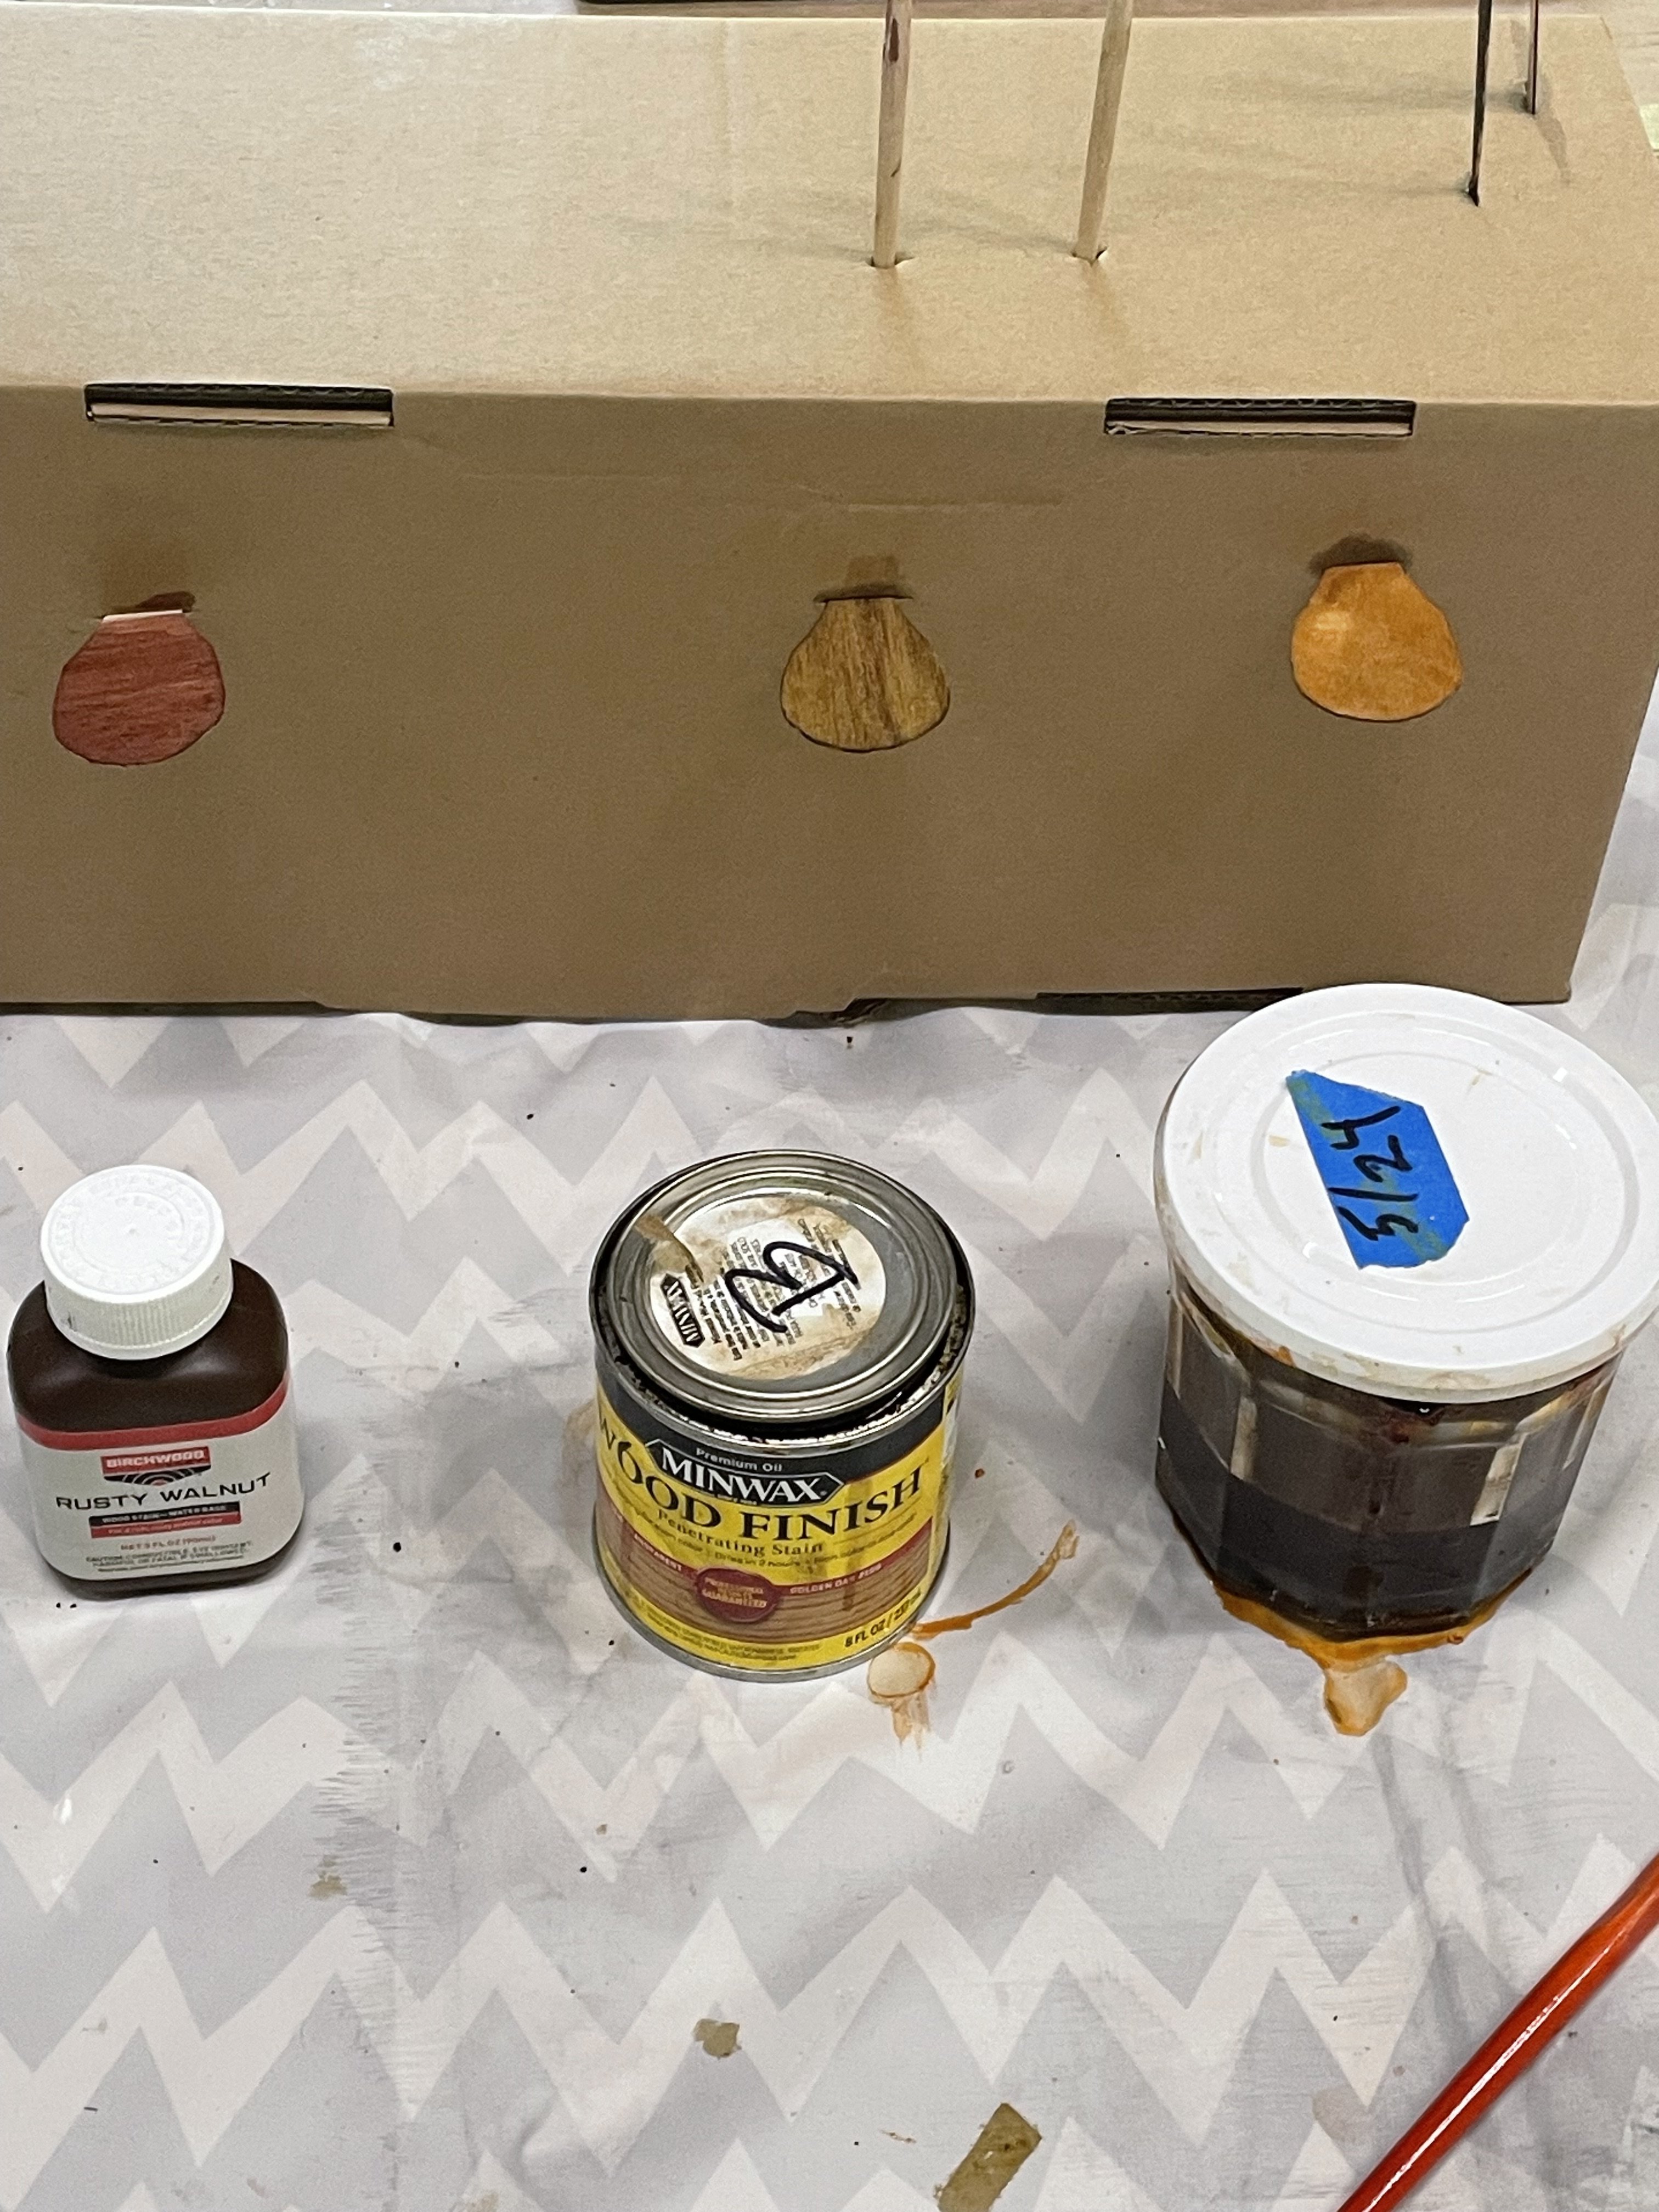
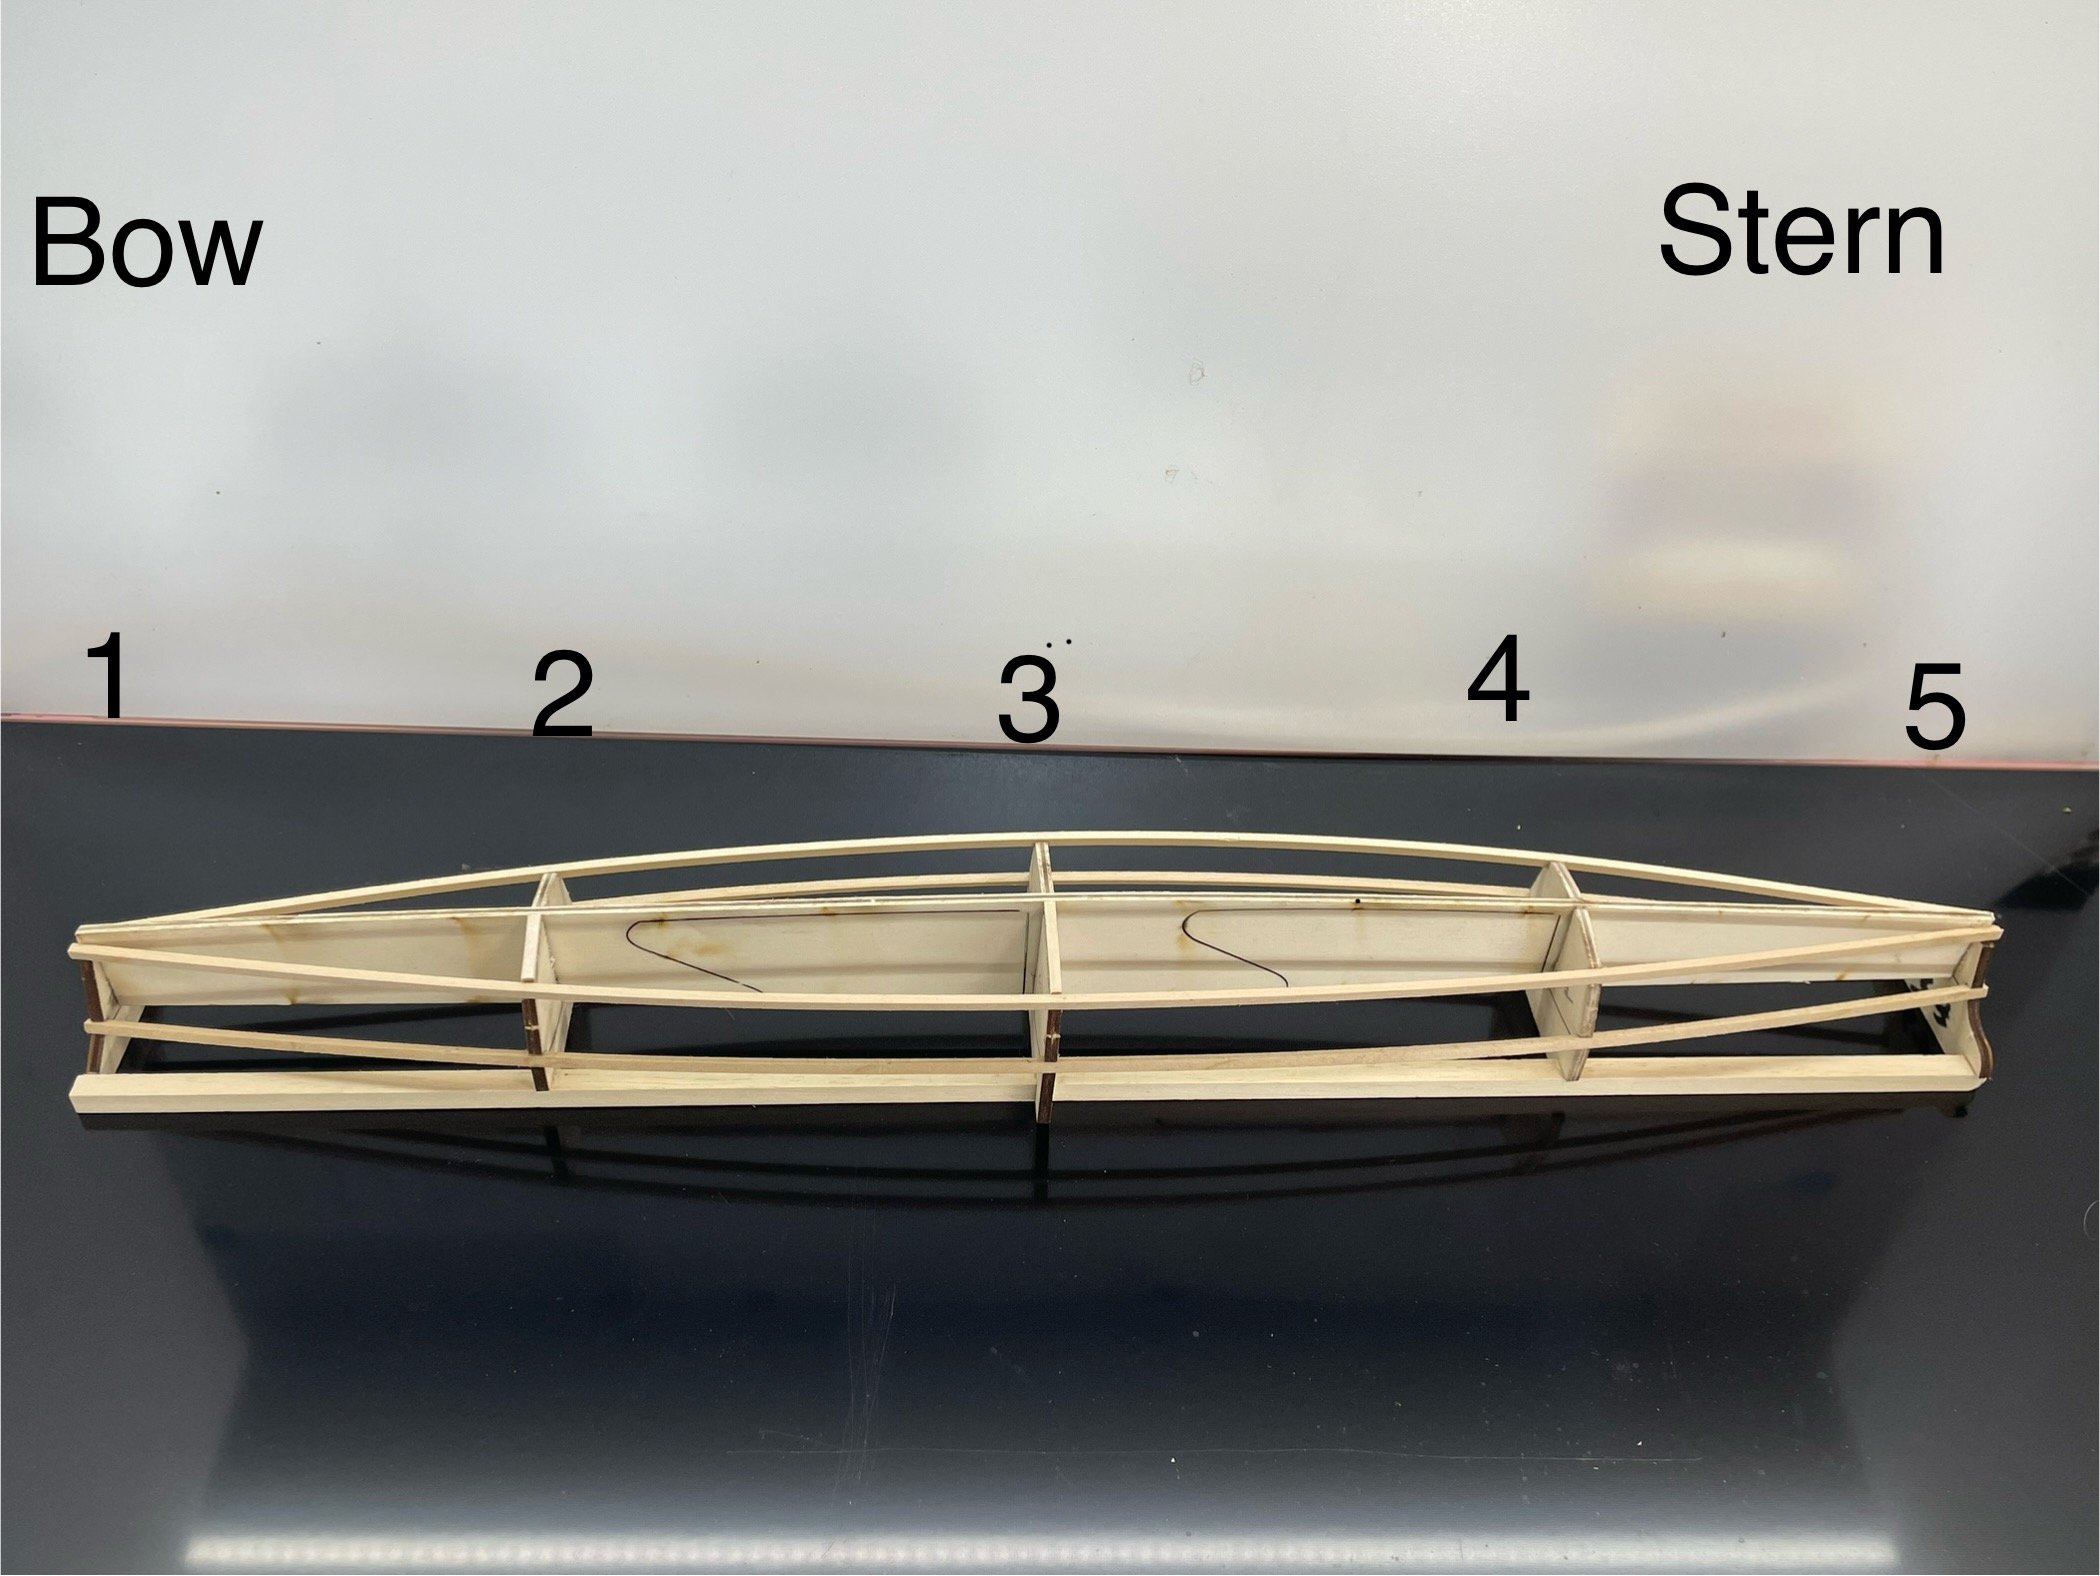
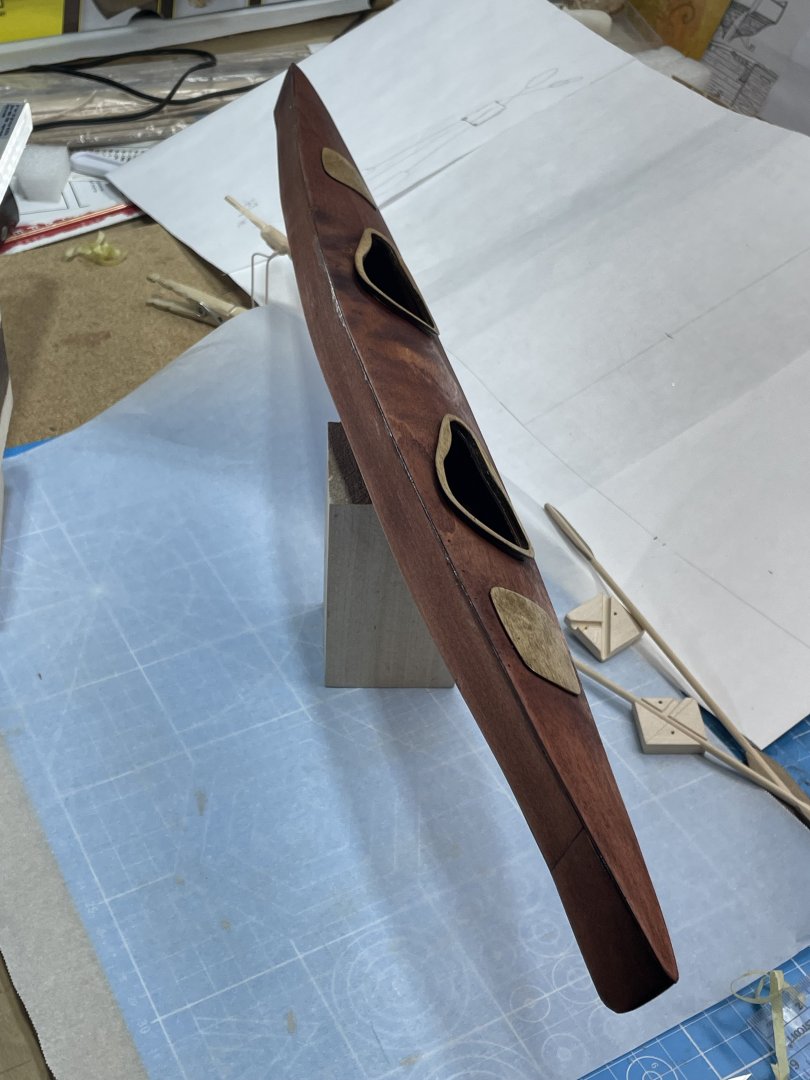
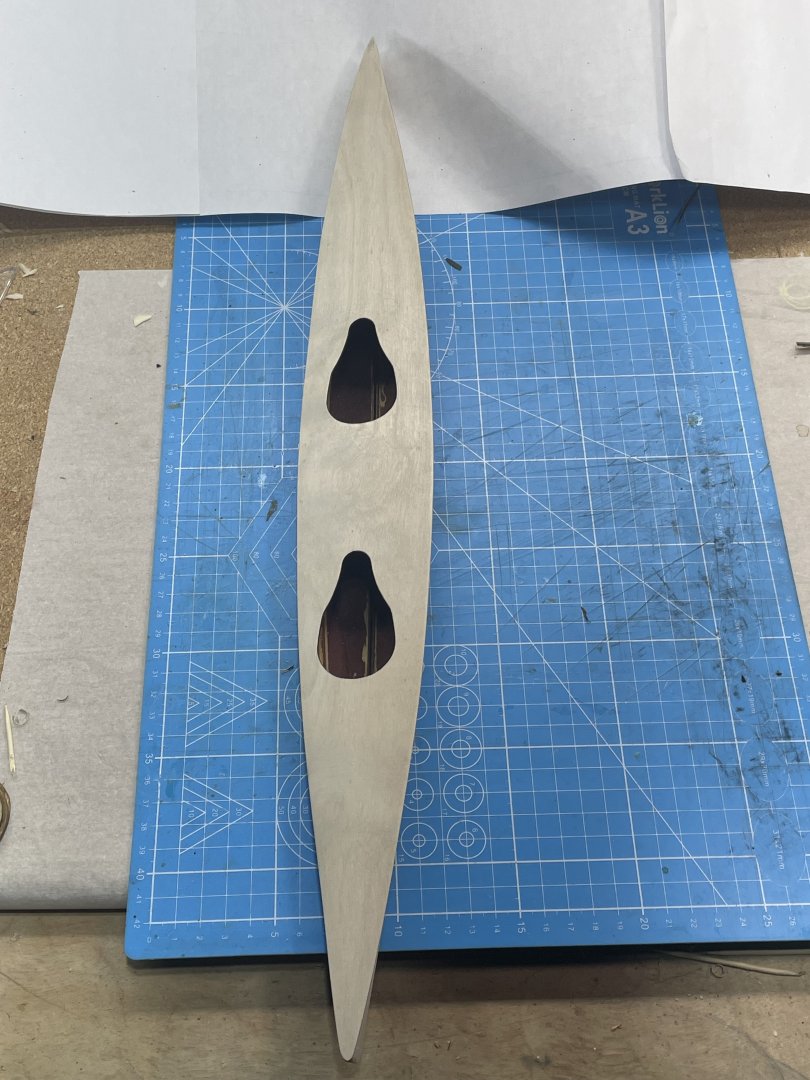
I finished sanding the hull. Stained it with rusty walnut stain. Then I stained the two hatches and both of the coamings golden oak. After gluing them on, I’ve put one coat of tru-oil gun stock finish on. It will probably get several more of them before I put on the deck fasteners and the hatch straps. This thing is long and skinny and hard that get a good picture of it:-) I plan on this being hung on the wall. I got the ideal, but it hasn’t all come together yet.

- 33 replies
-
- 9
-
-
-
- midwest products
- kayak
- (and 1 more)
-
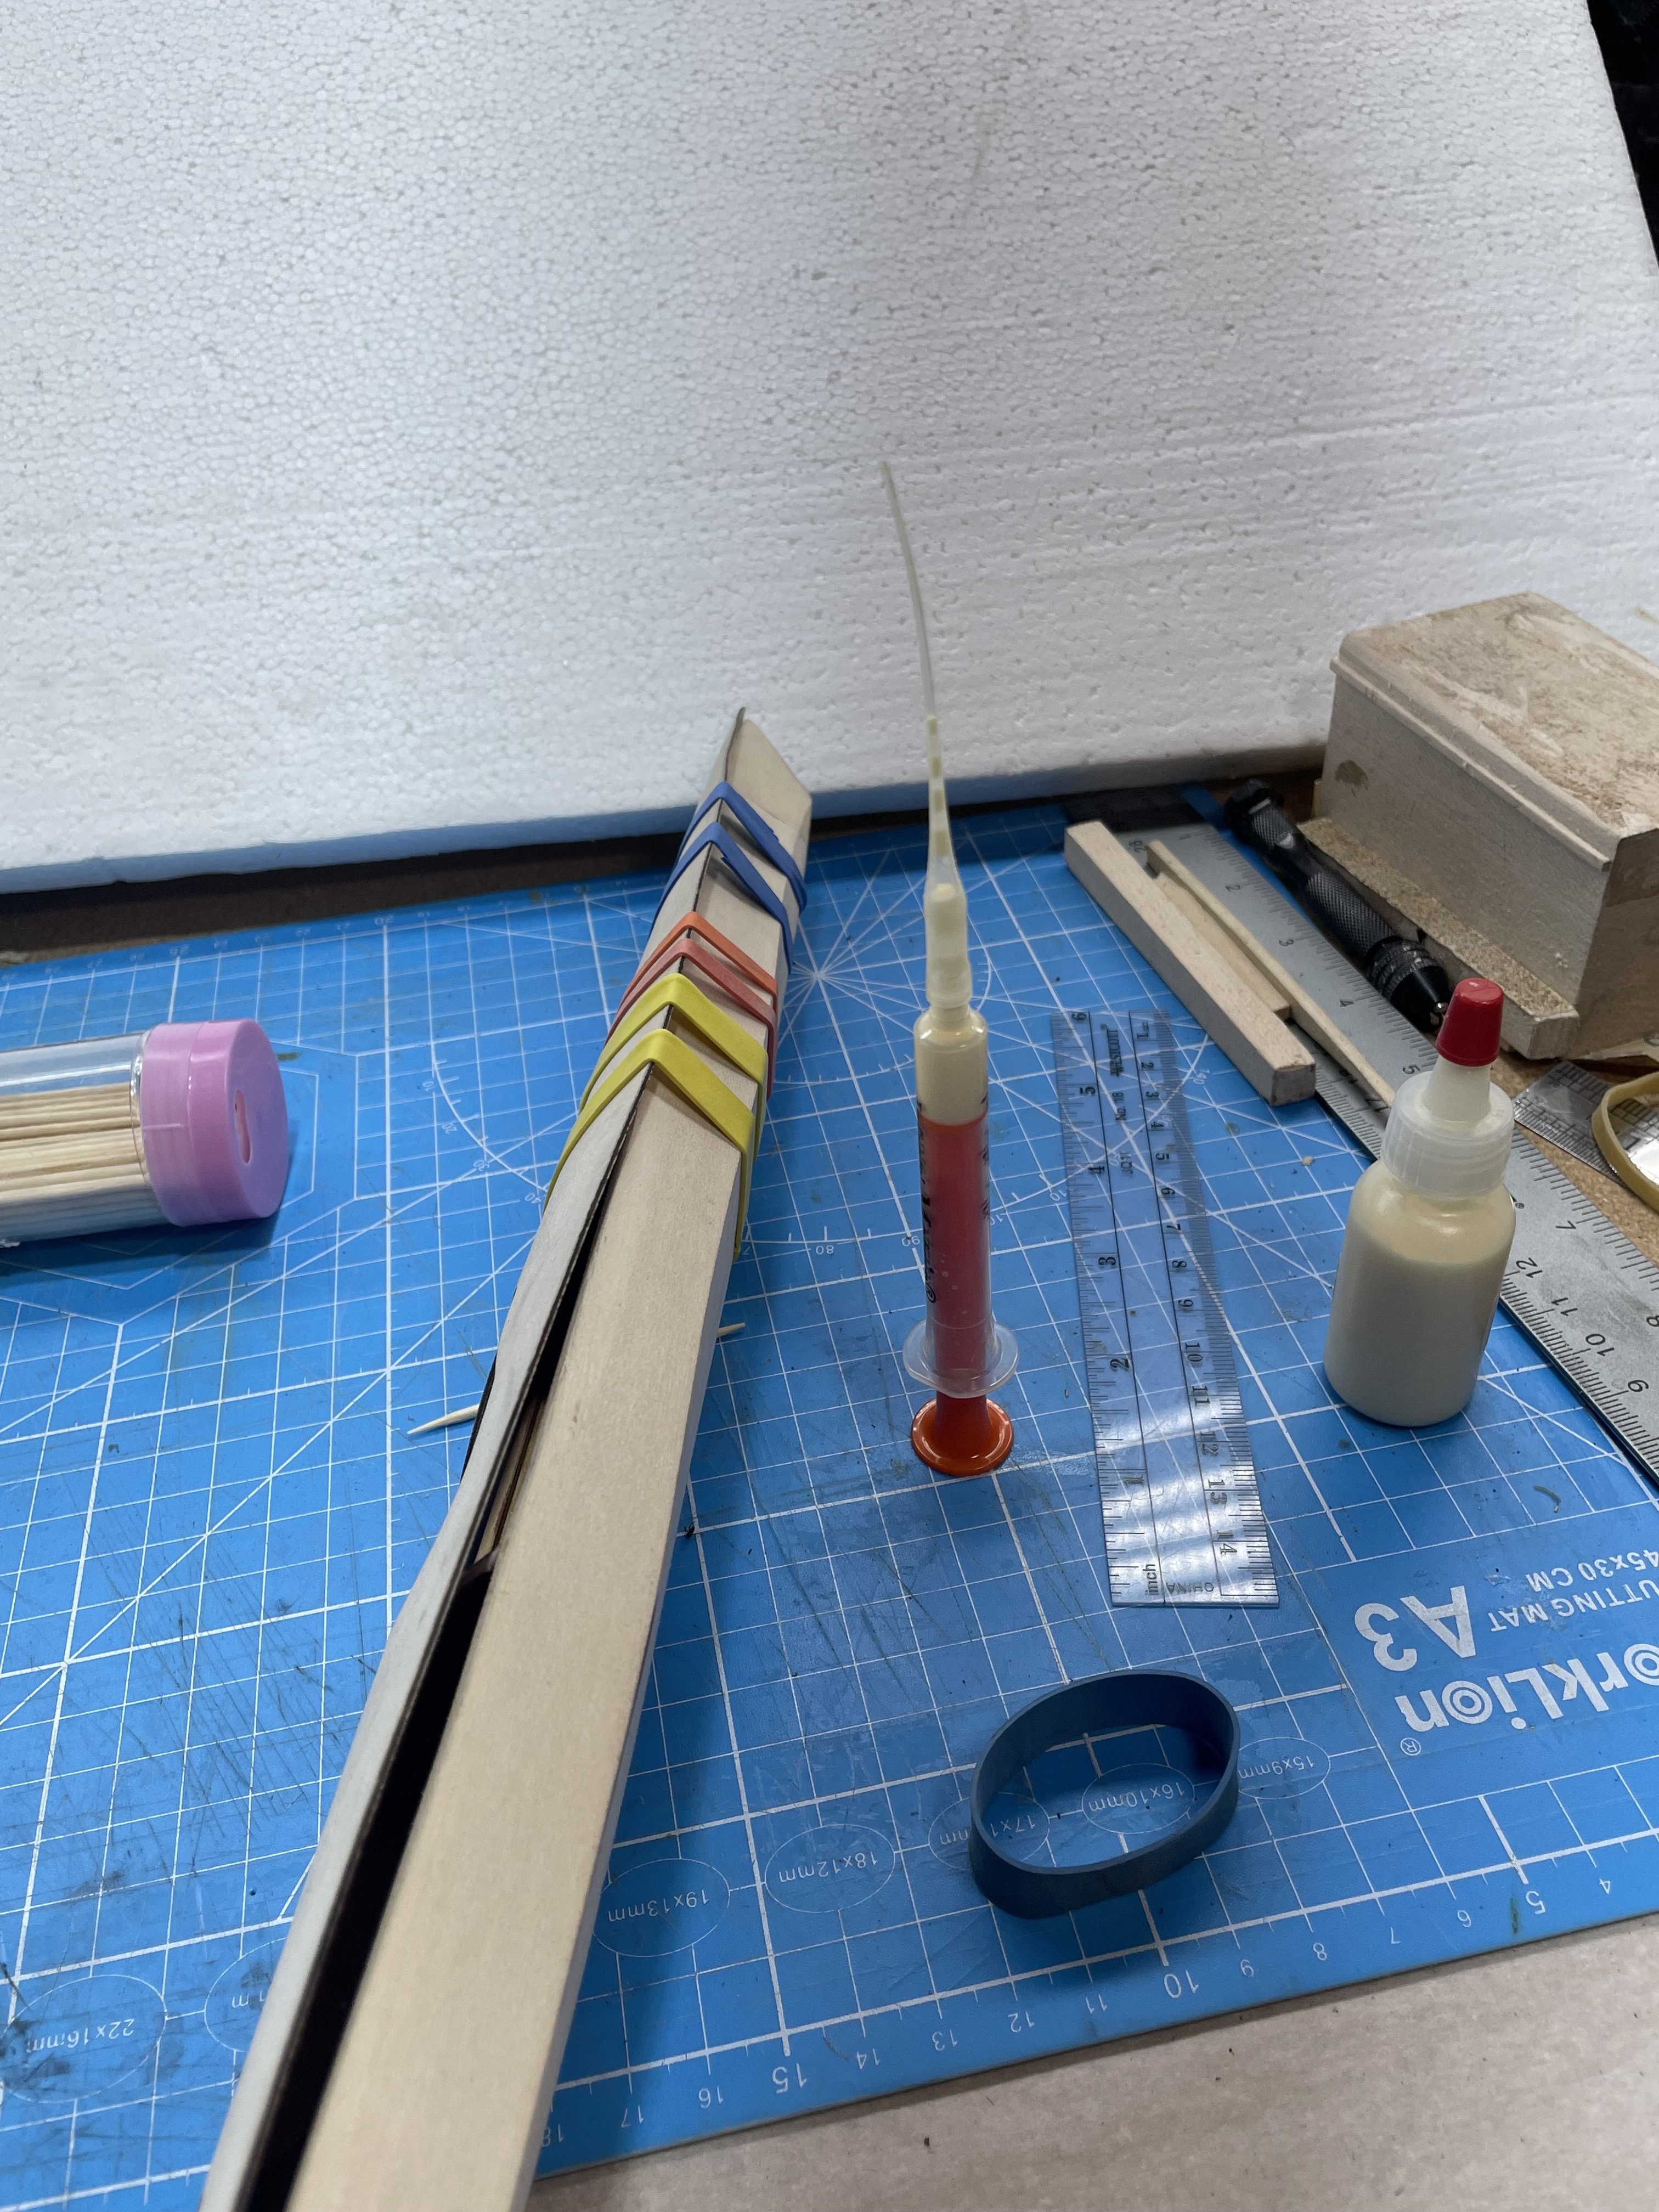
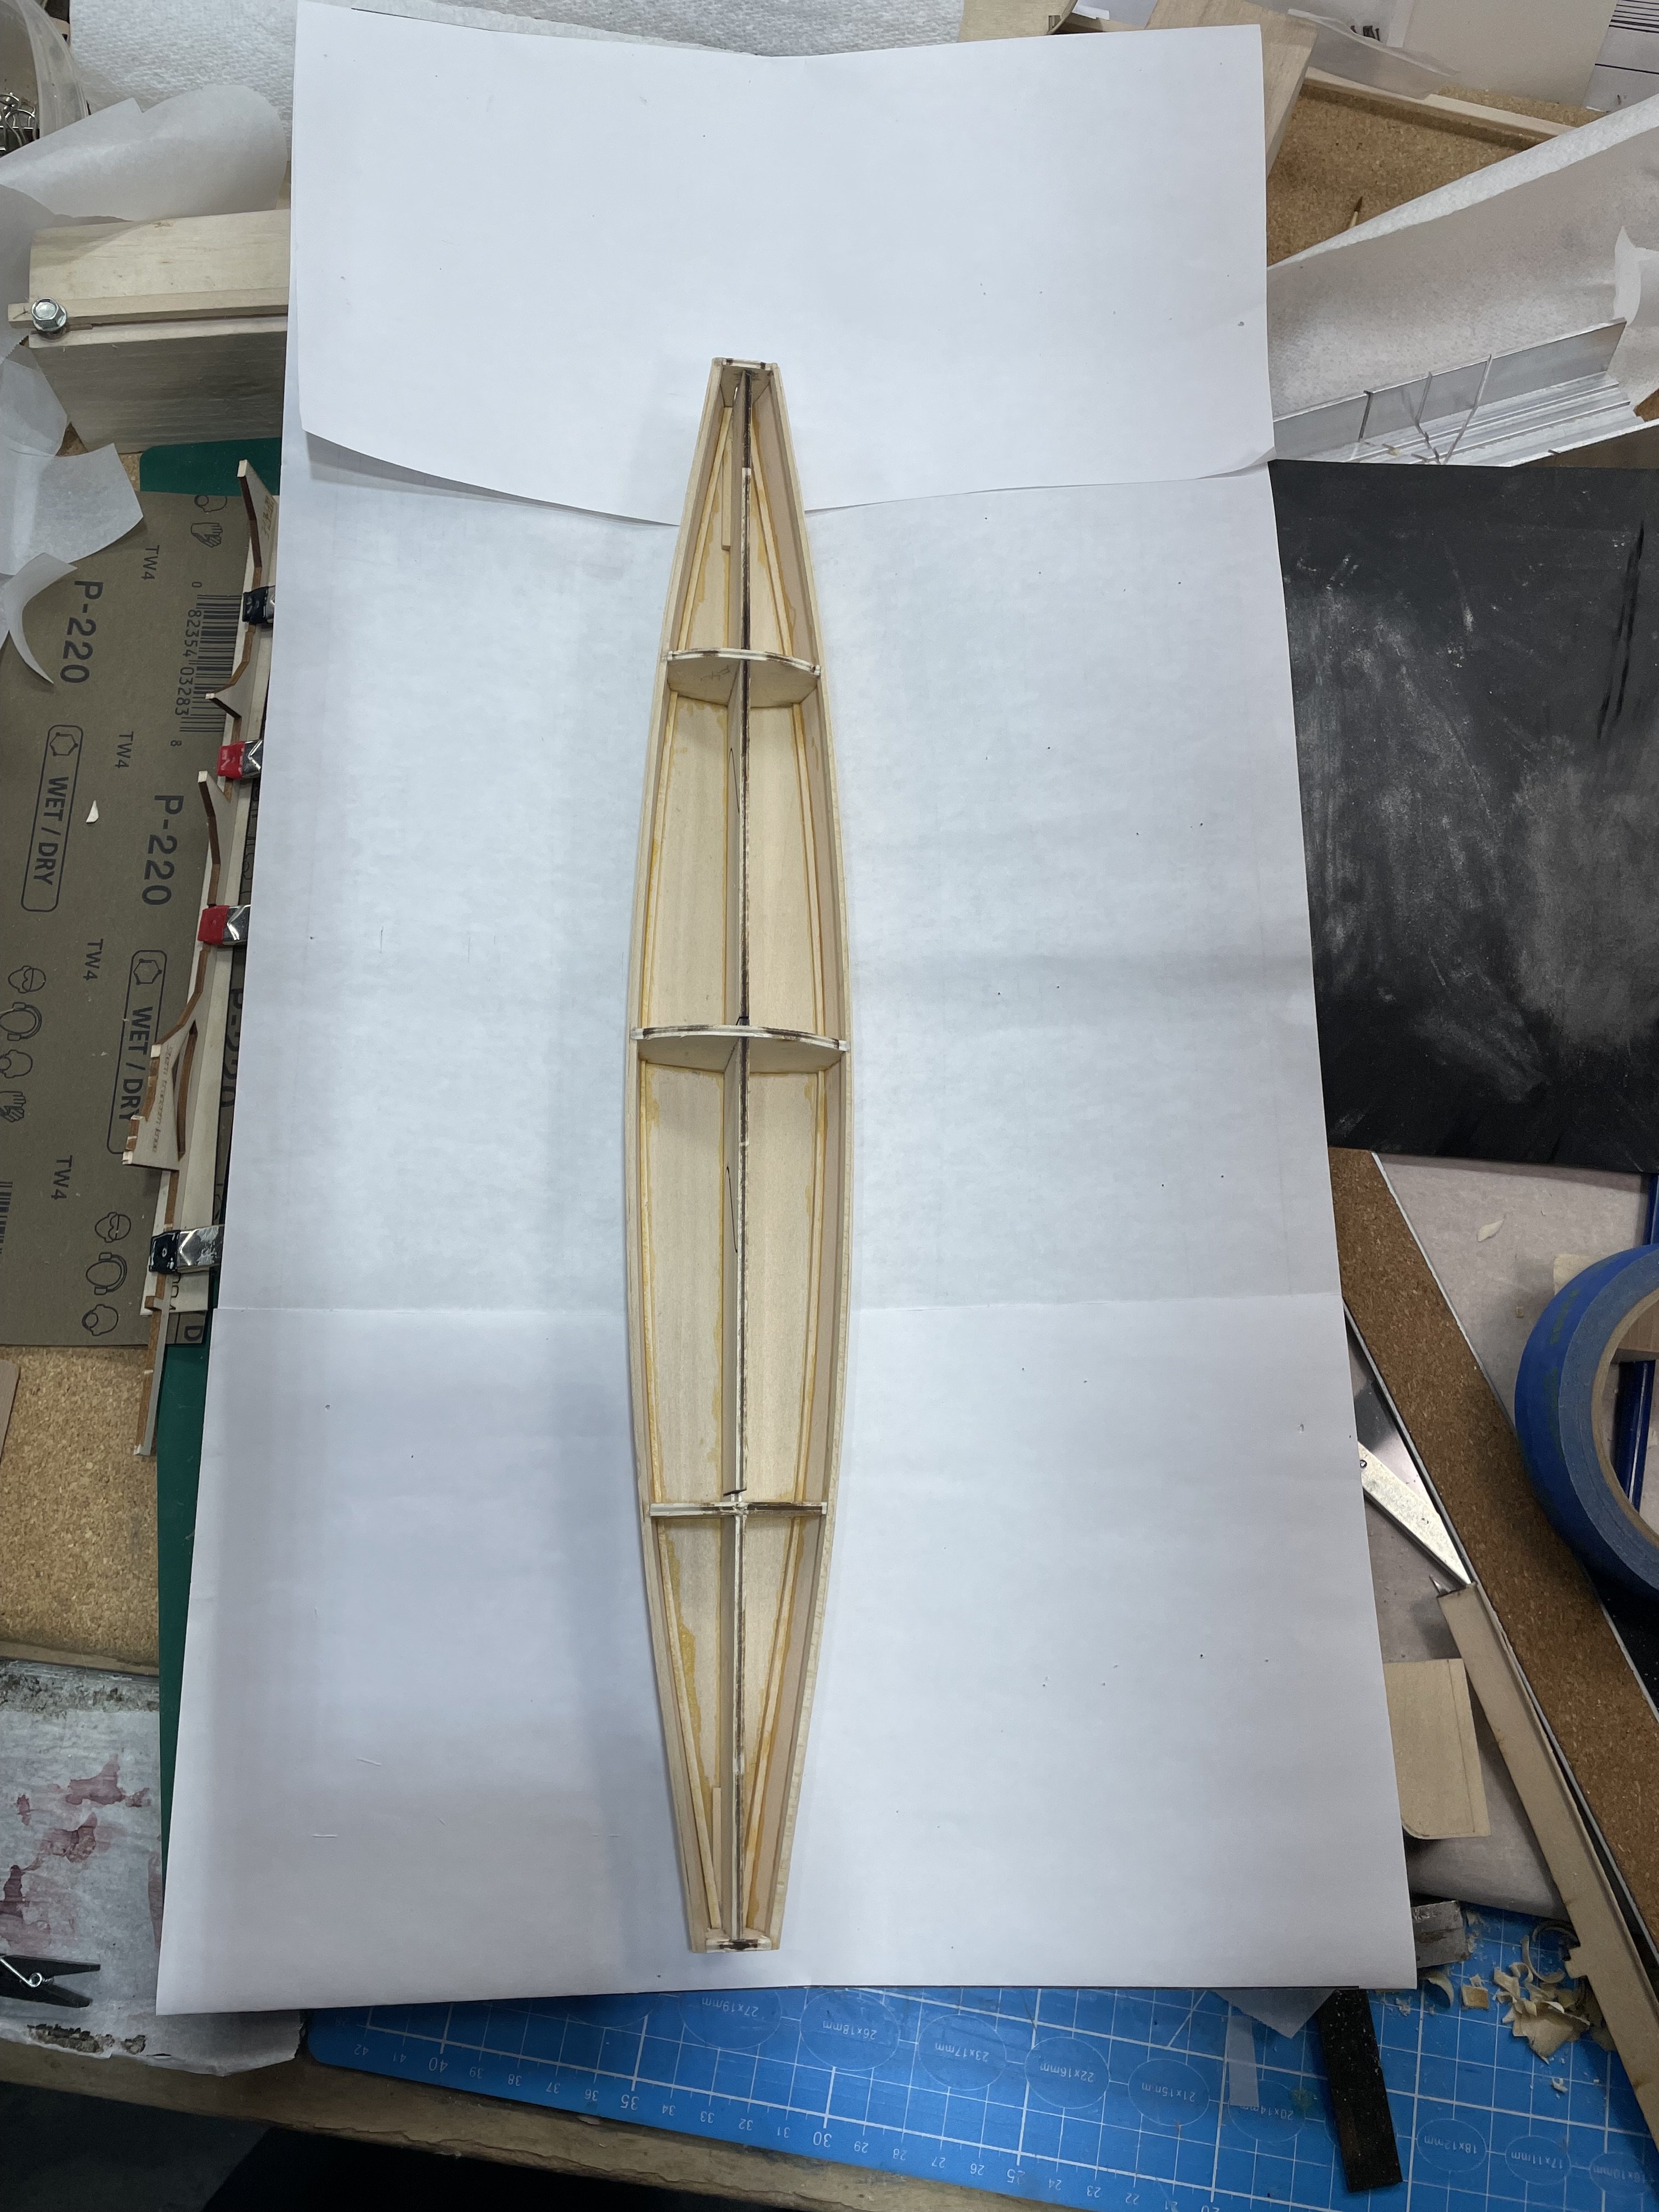
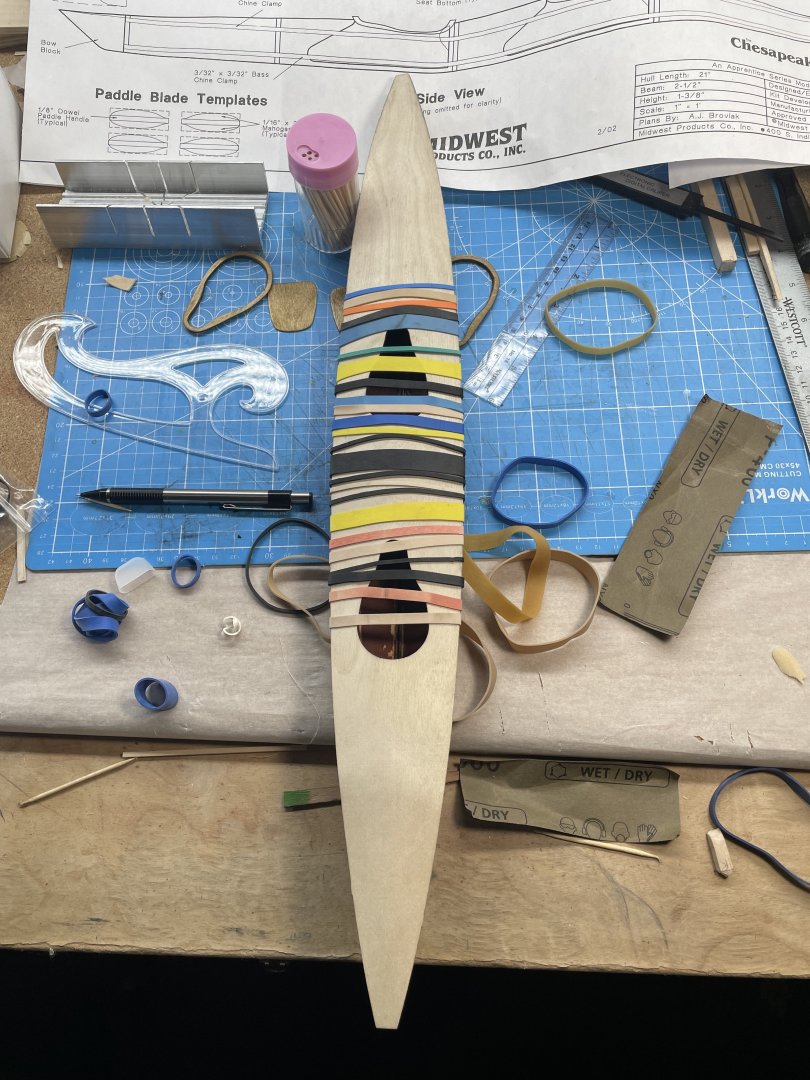
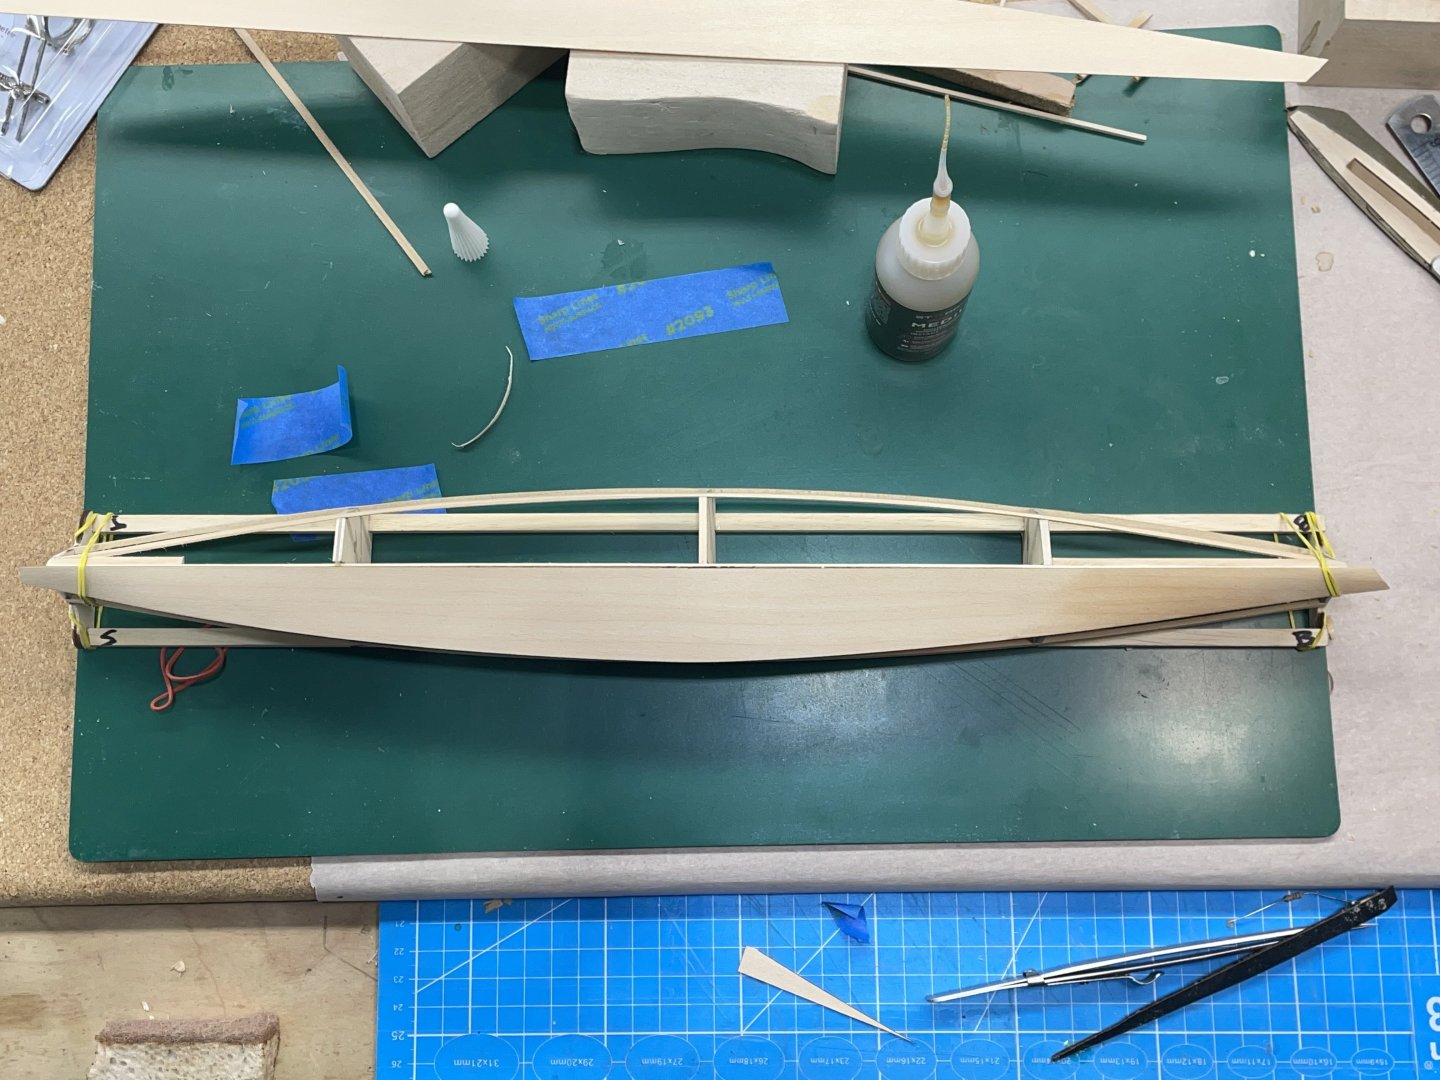
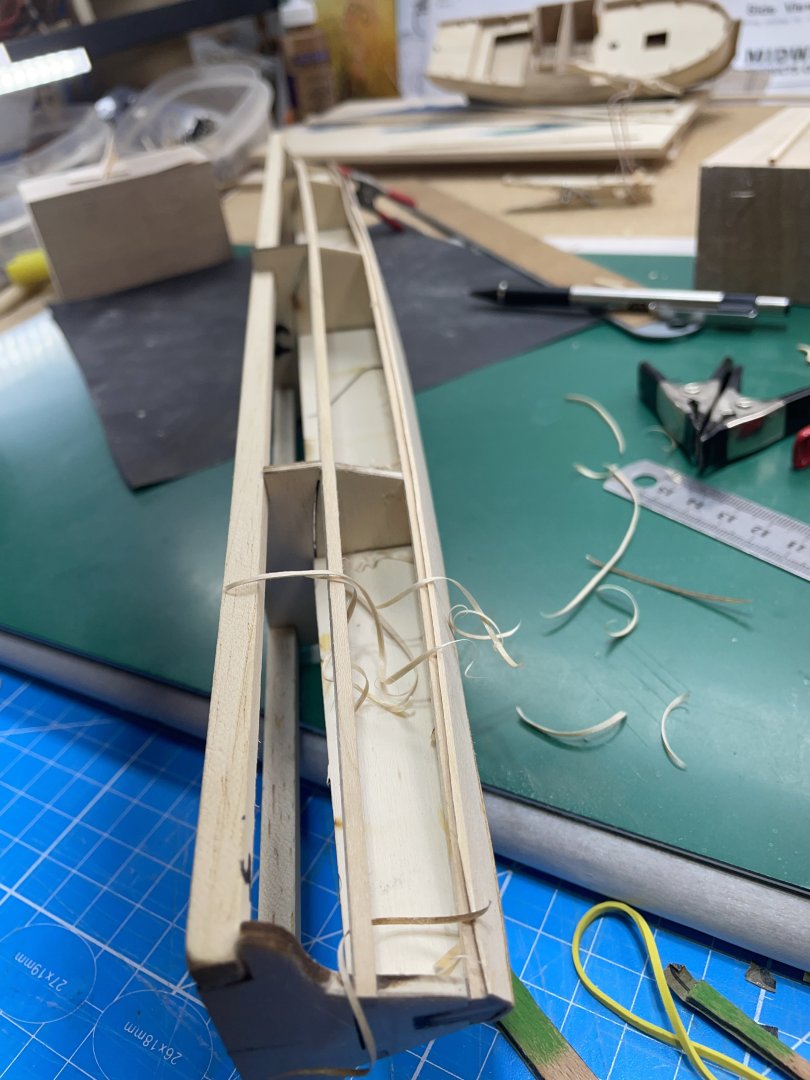
To install the deck I glued first the center spine at the middle frame. Then the spine from there to bow and then to stern. After all that had dried, I glued both sides from the bow up to the first frame. After that had set a bit, I glued from the stern up to the next frame. The center was done last. i used a infant medicine syringe with a micro tip and yellow wood glue. I also used the tips on the medium brown CA for the planks on the bottom and sides. Mainly because there was not many way to clamp, that I could think of. i’ll do a little more sanding before I start to finish it.


- 33 replies
-
- 6
-
-
- midwest products
- kayak
- (and 1 more)
-
This is what I got from Amazon and used to make the sails for Captain John Smith’s shallop. It was pretty durable. I did have some wrinkles in it . That just gives me plenty of room for improvement.
-
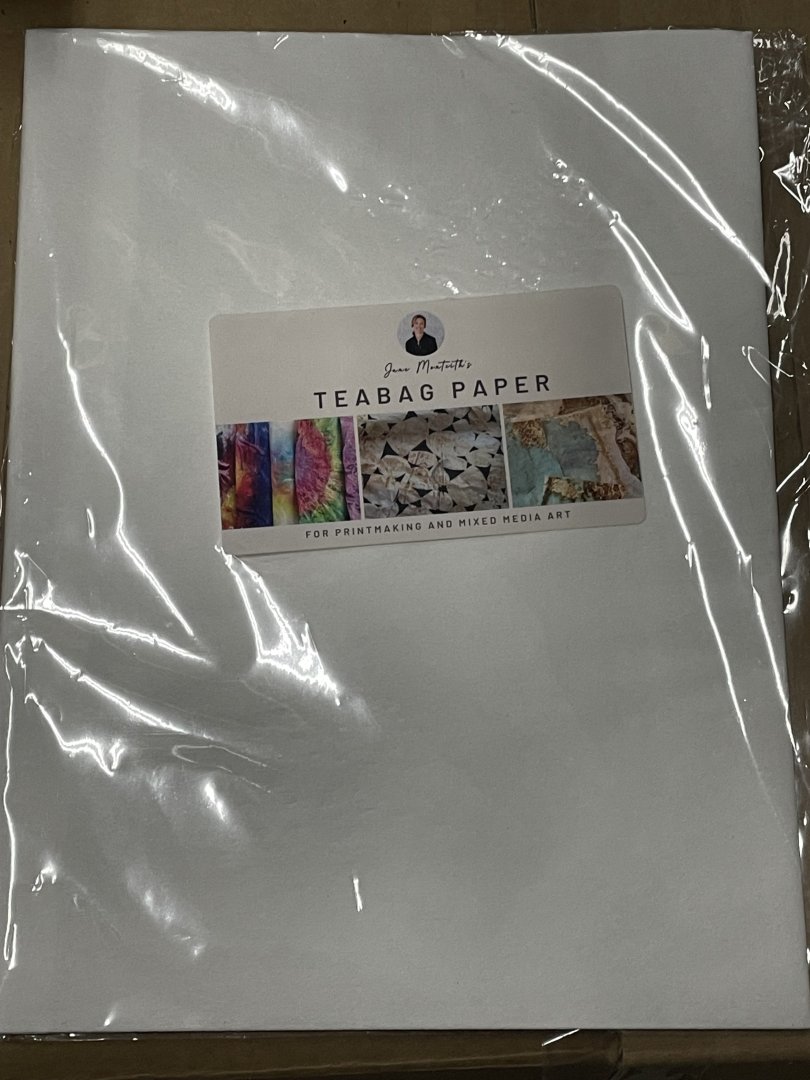
Has anyone ever used artist tea bag paper for sails? Is it similar to silk span? Thanks:-)
-
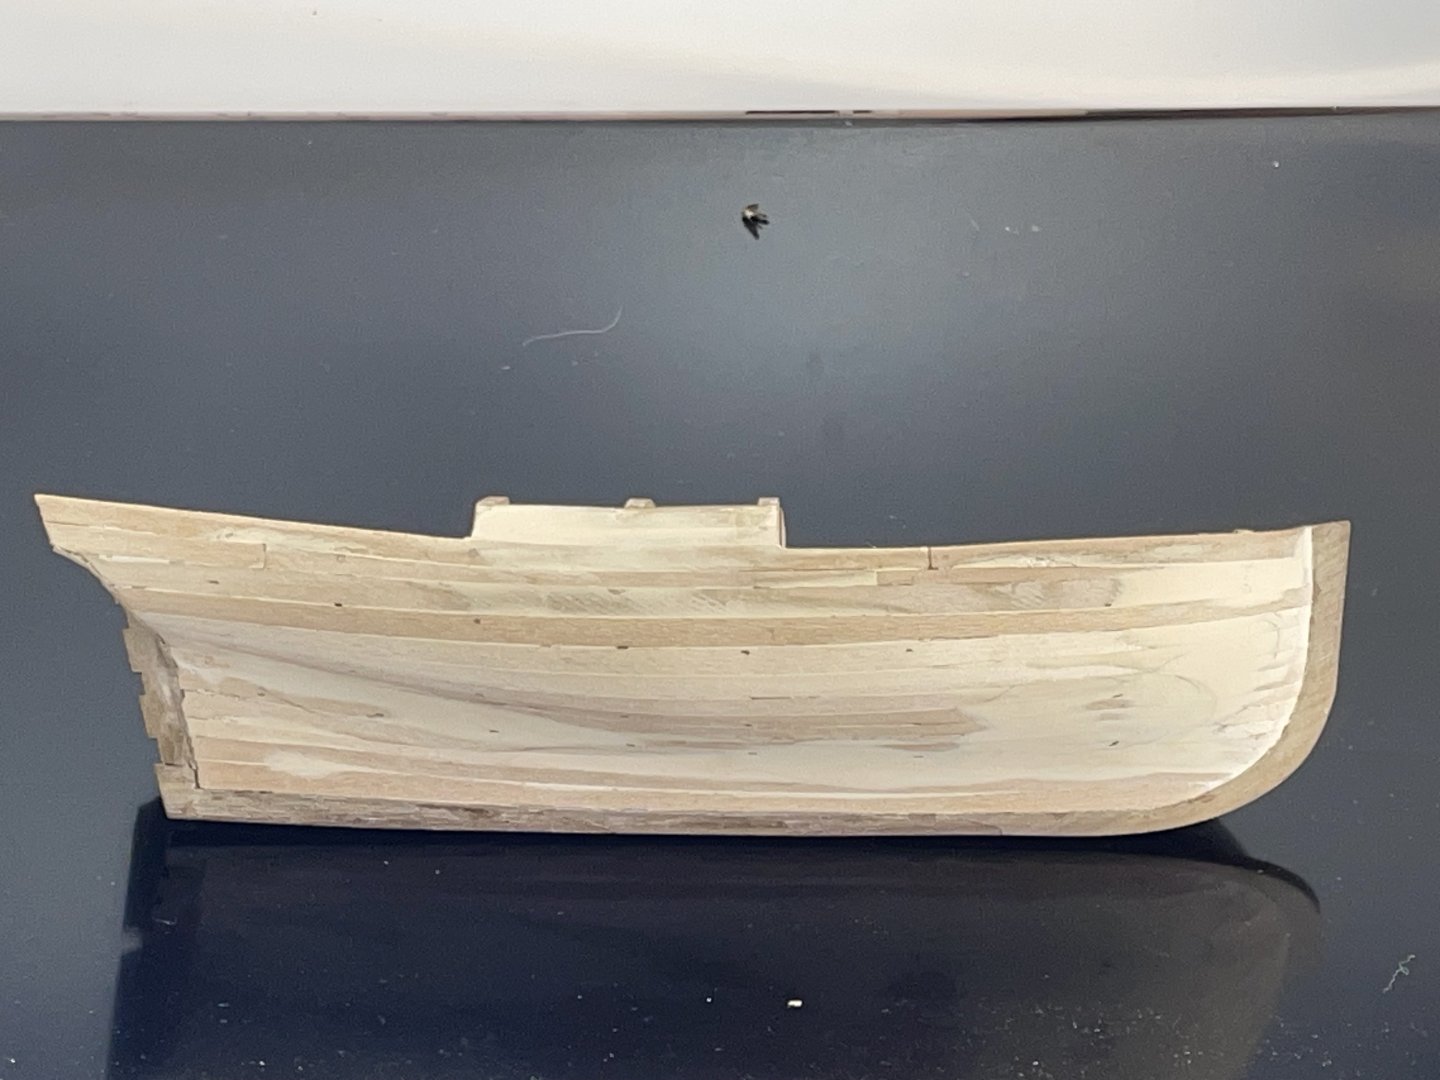
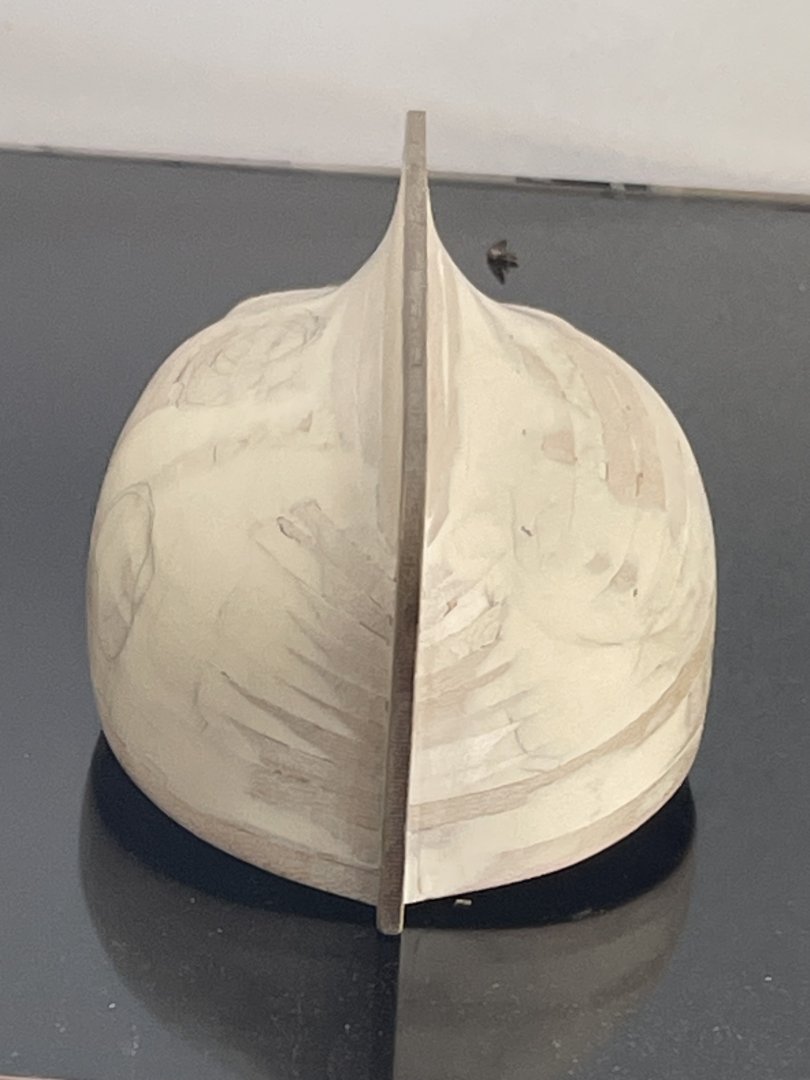
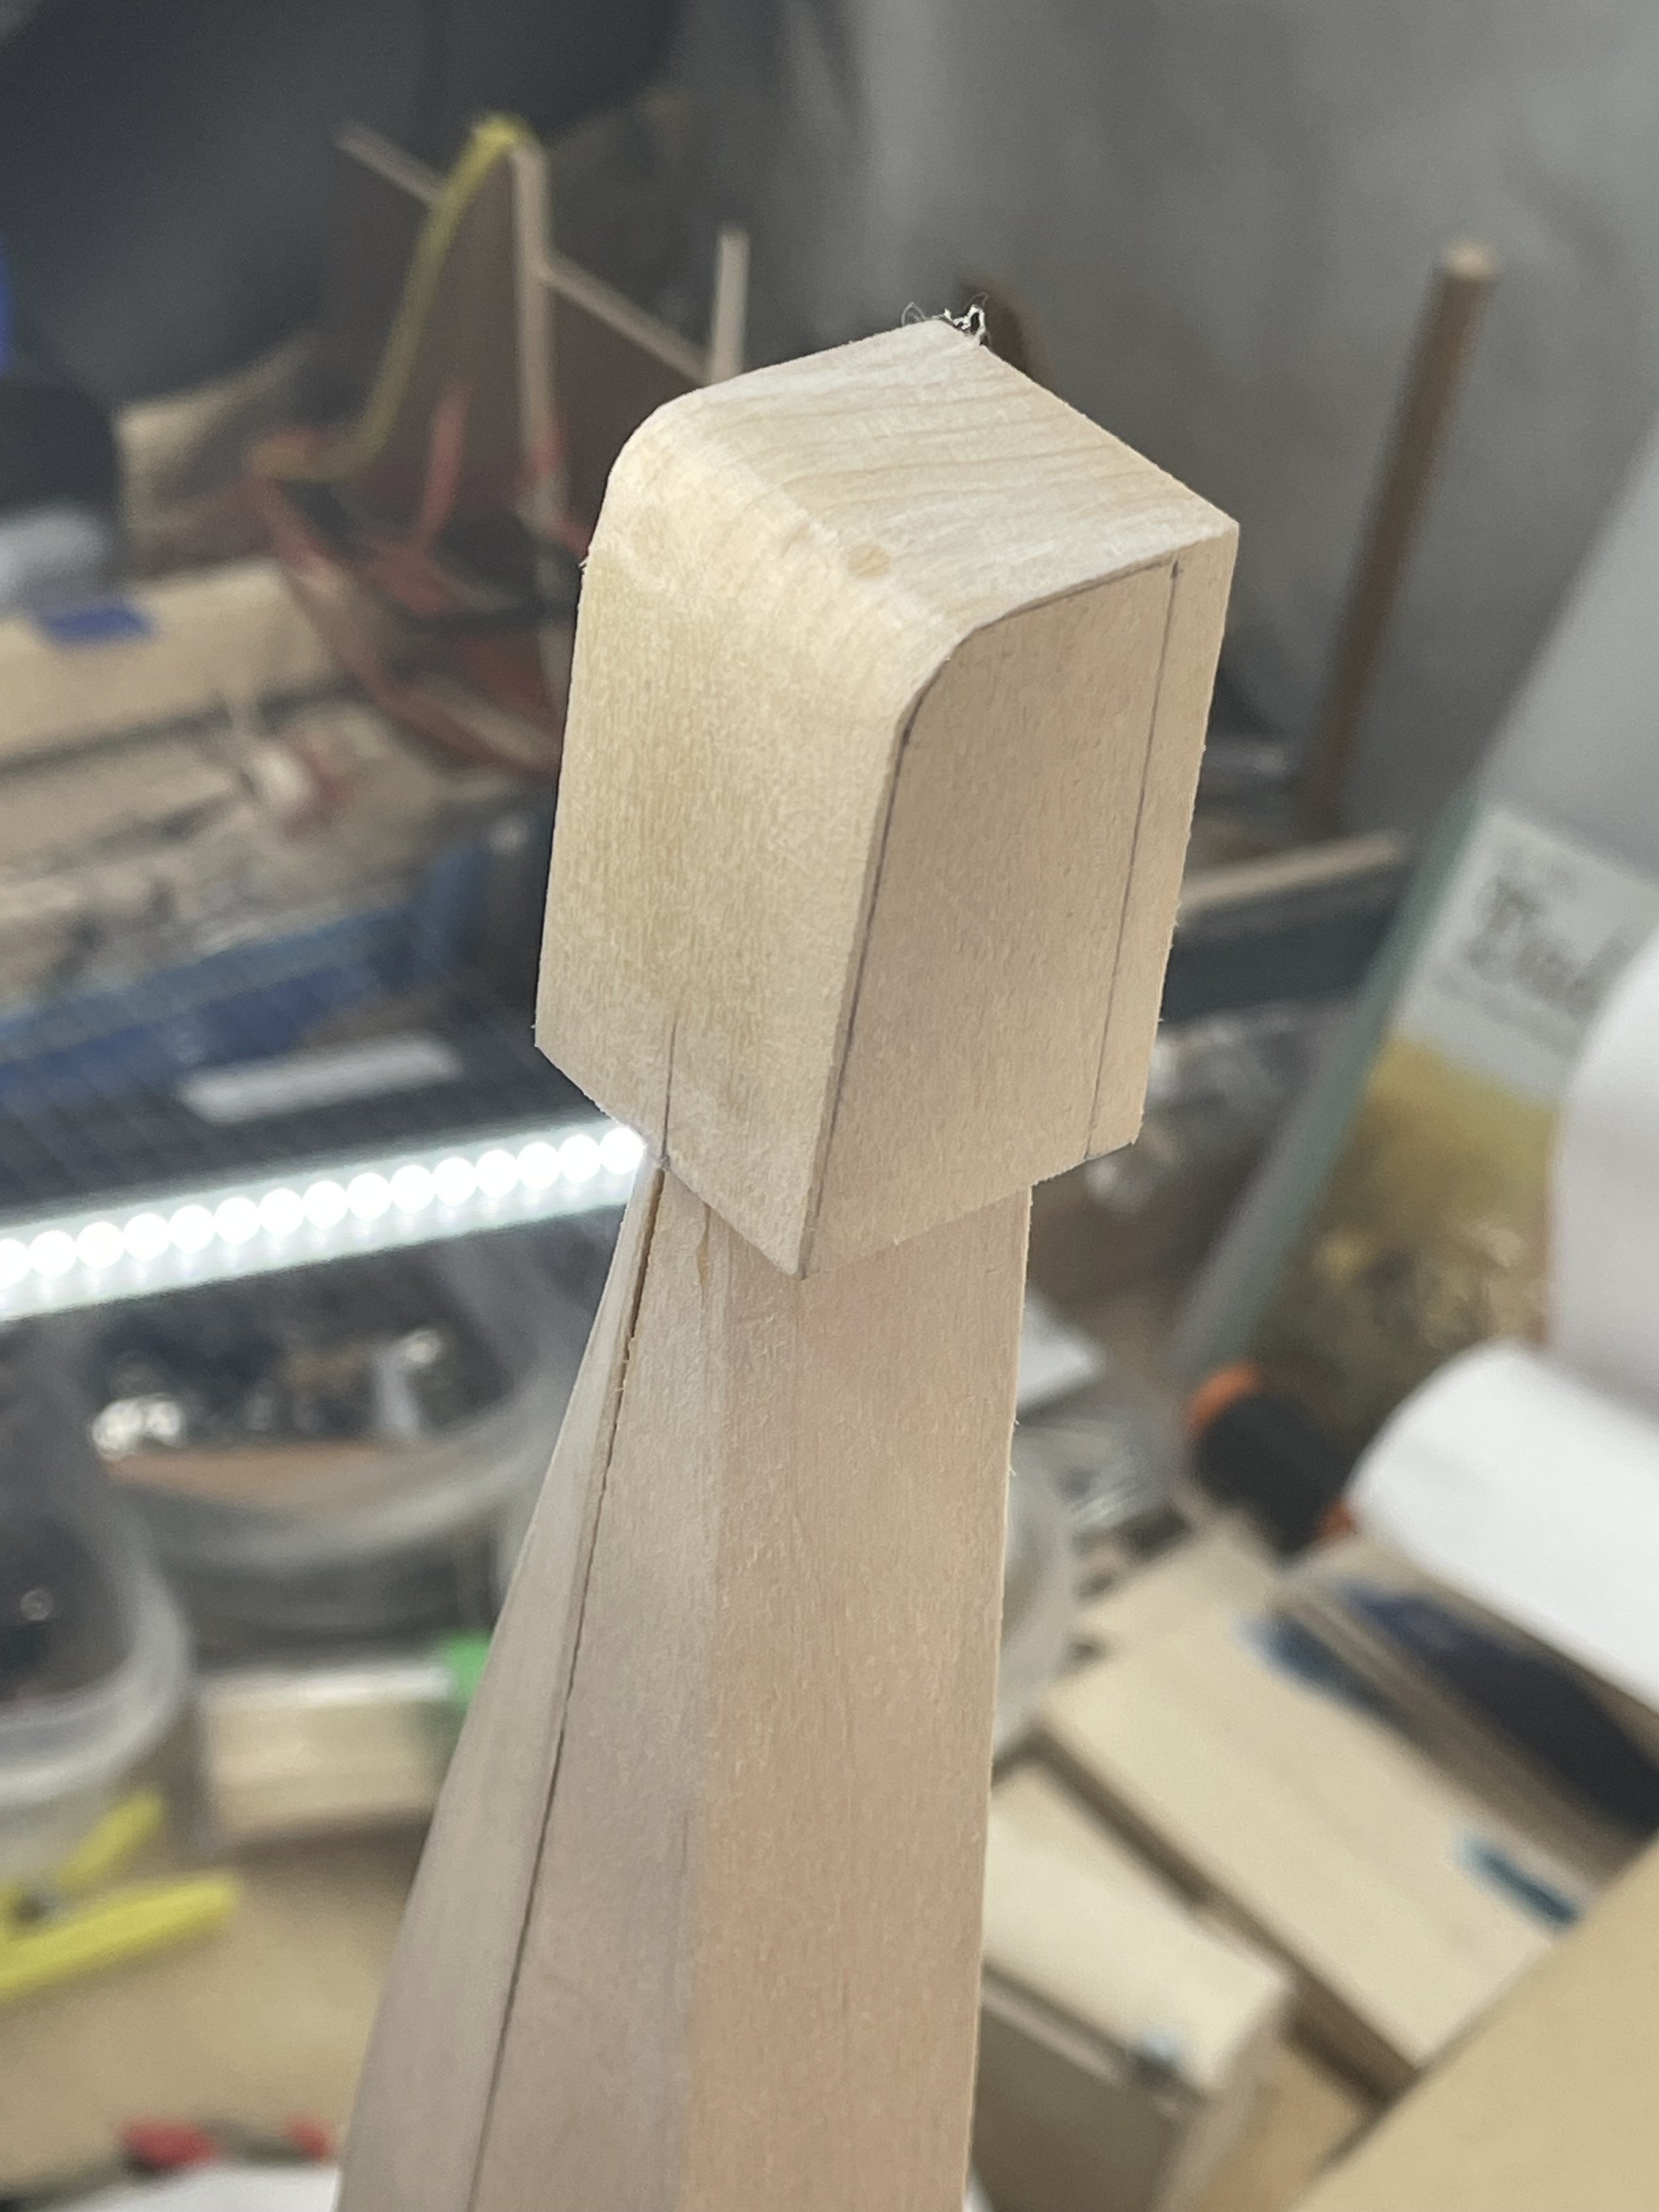
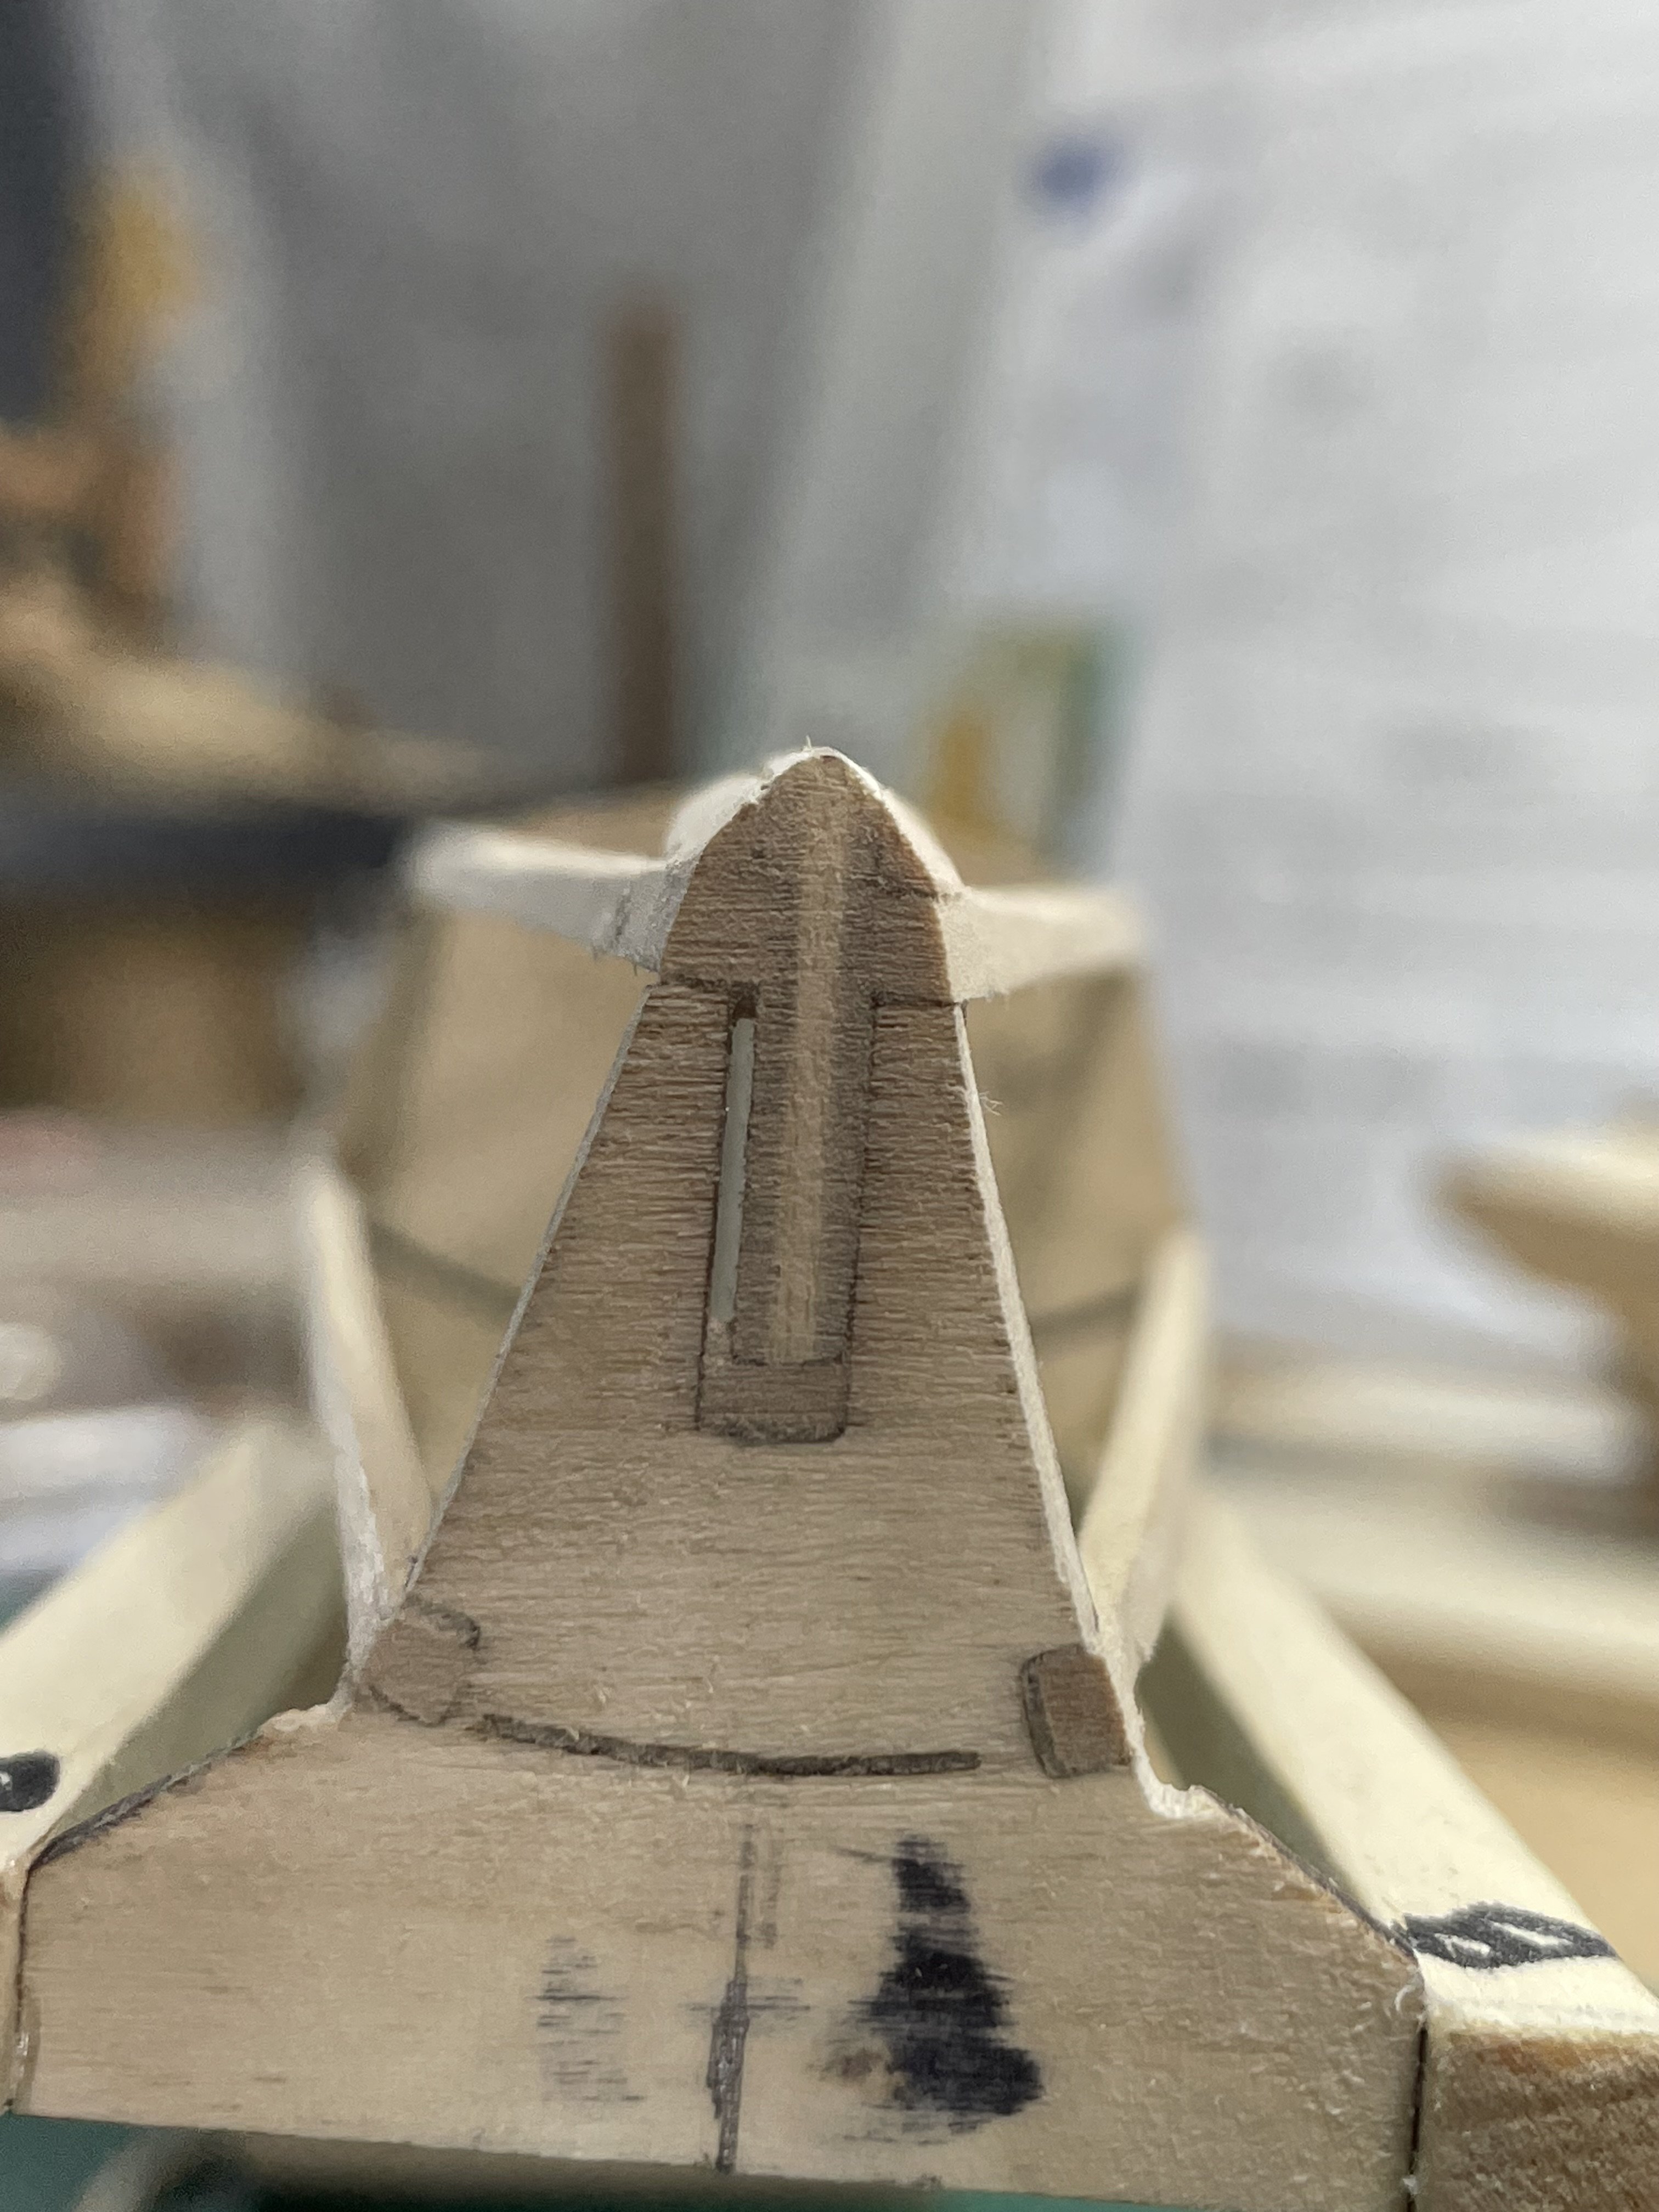
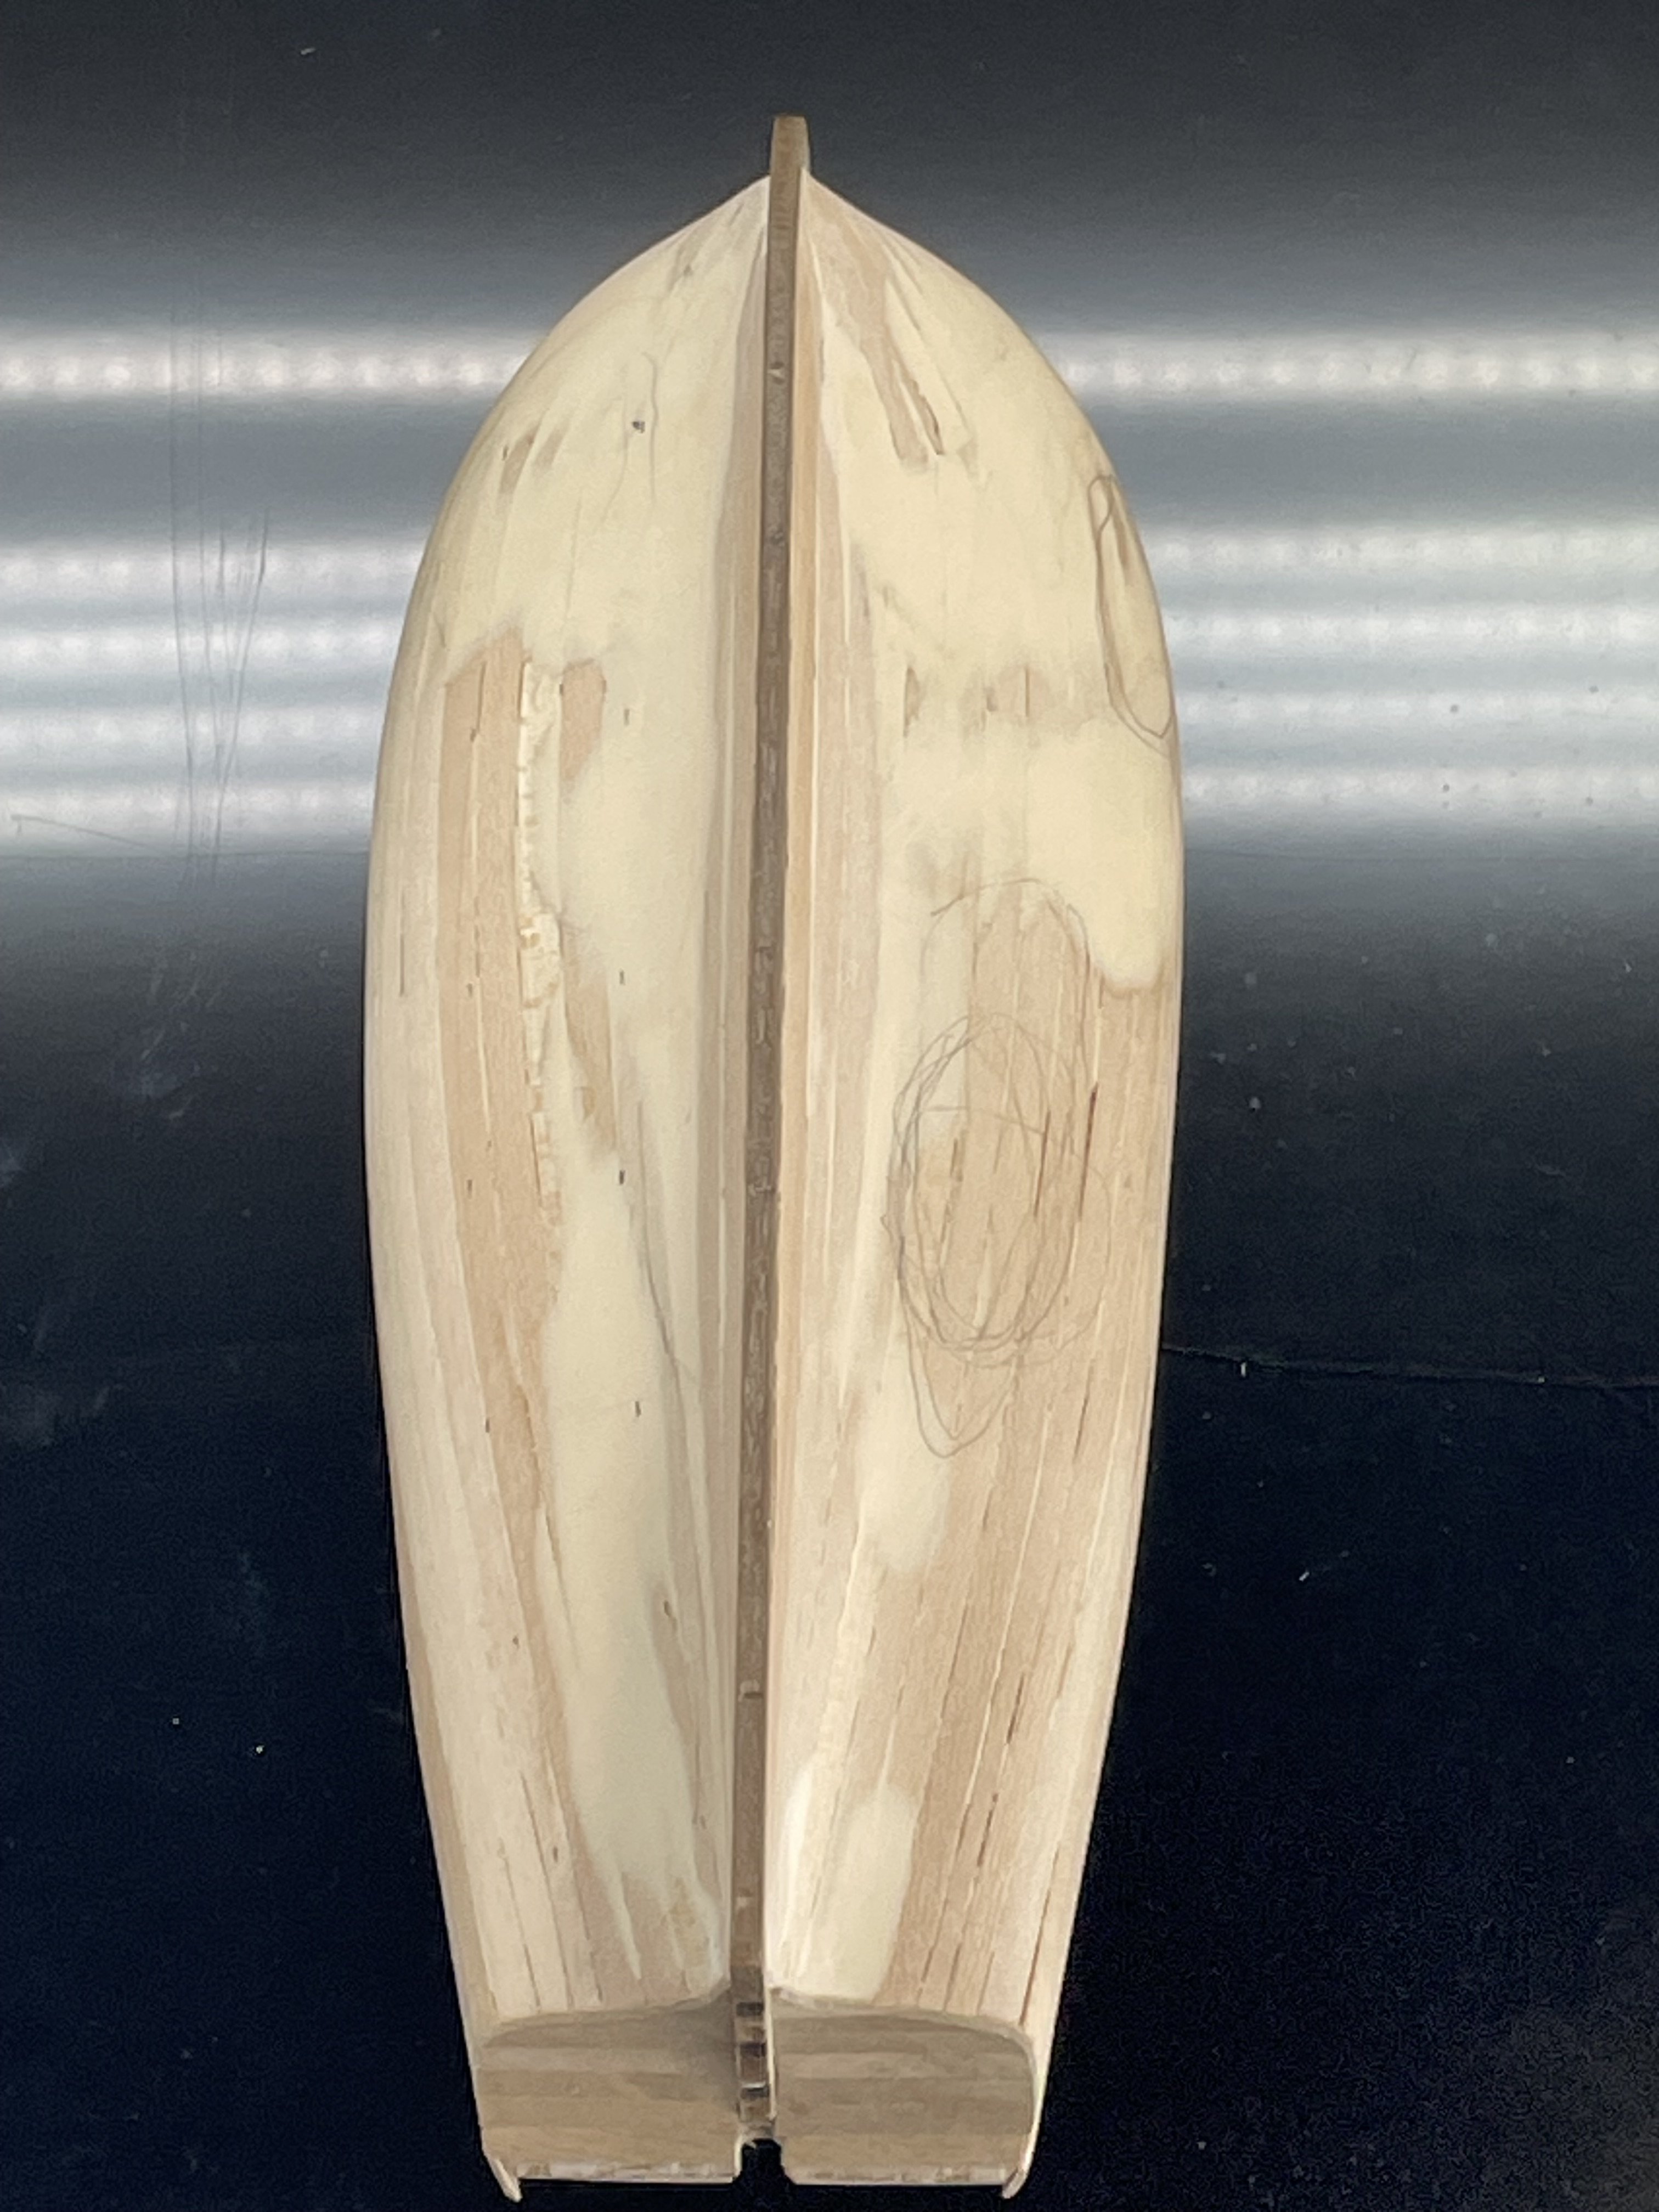
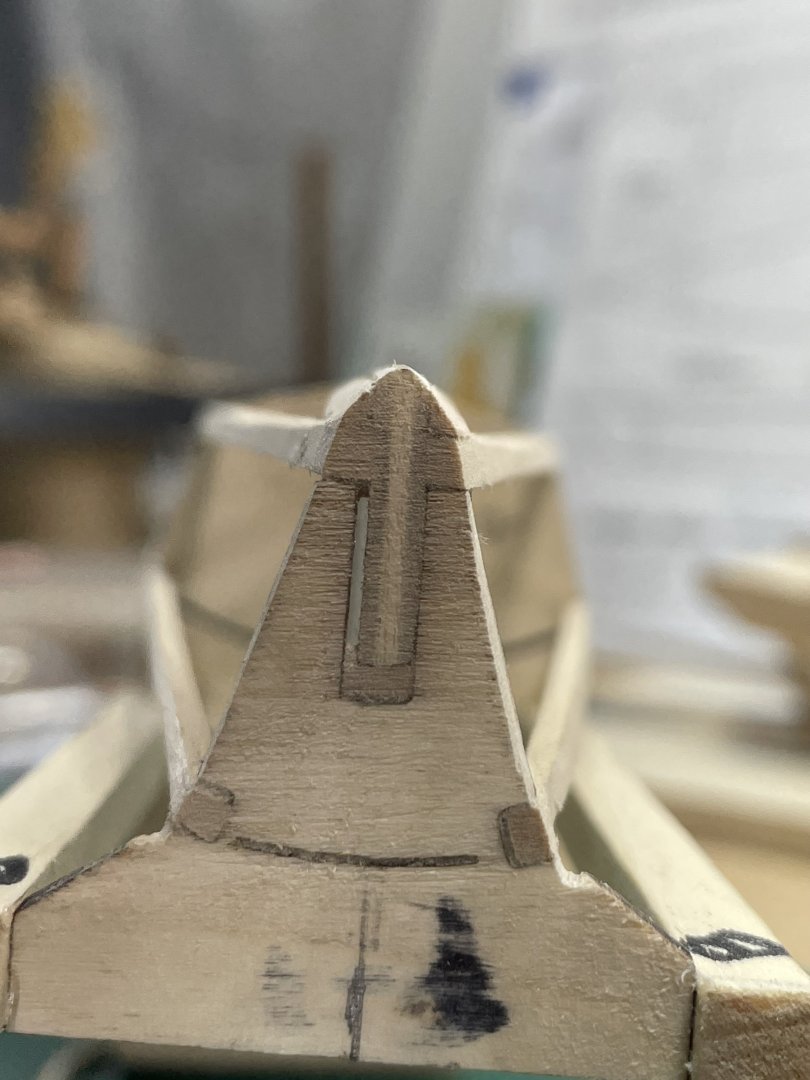
The blocks on the bow and stern turned out to be a lot easier then I was expecting. Here’s the stern before and after. I still have a bit of sanding to do before I’m ready to install the deck. It’s made of beech plywood I think. It’s really stiff and the char is so black and messy. It gets on my hands then easily transferred in forms looking similar to fingerprints, who would guess:-) I dampened the deck leaving the char on. I will trim it off with a knife after it’s installed. I held it down on the hull with rubber bands to shape it. I’m planning on staining the entire boat. I have tried to be careful with the glue. I’m sure it will show up in some places. Here I did three samples of stuff I have on hand.


- 33 replies
-
- 10
-
-
- midwest products
- kayak
- (and 1 more)
-
Thank you John, on this build I’ve spent a lot of the time focusing on sanding the edges, trying not to change the shape of the hull.
-
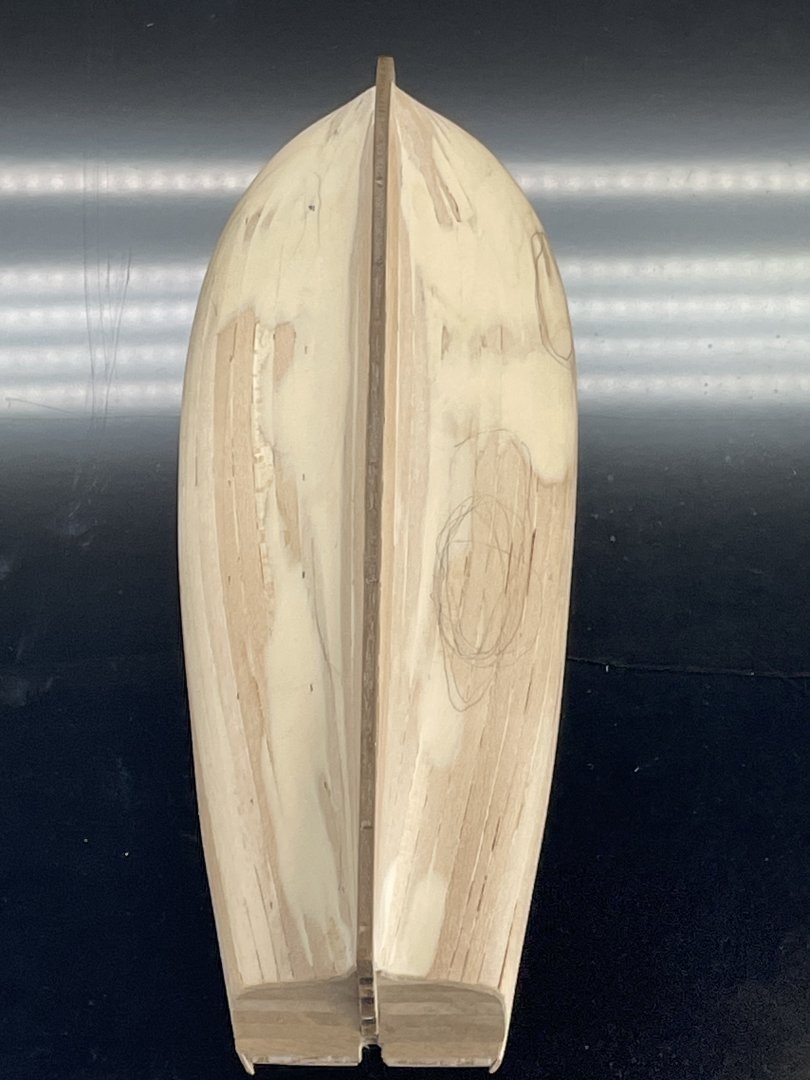
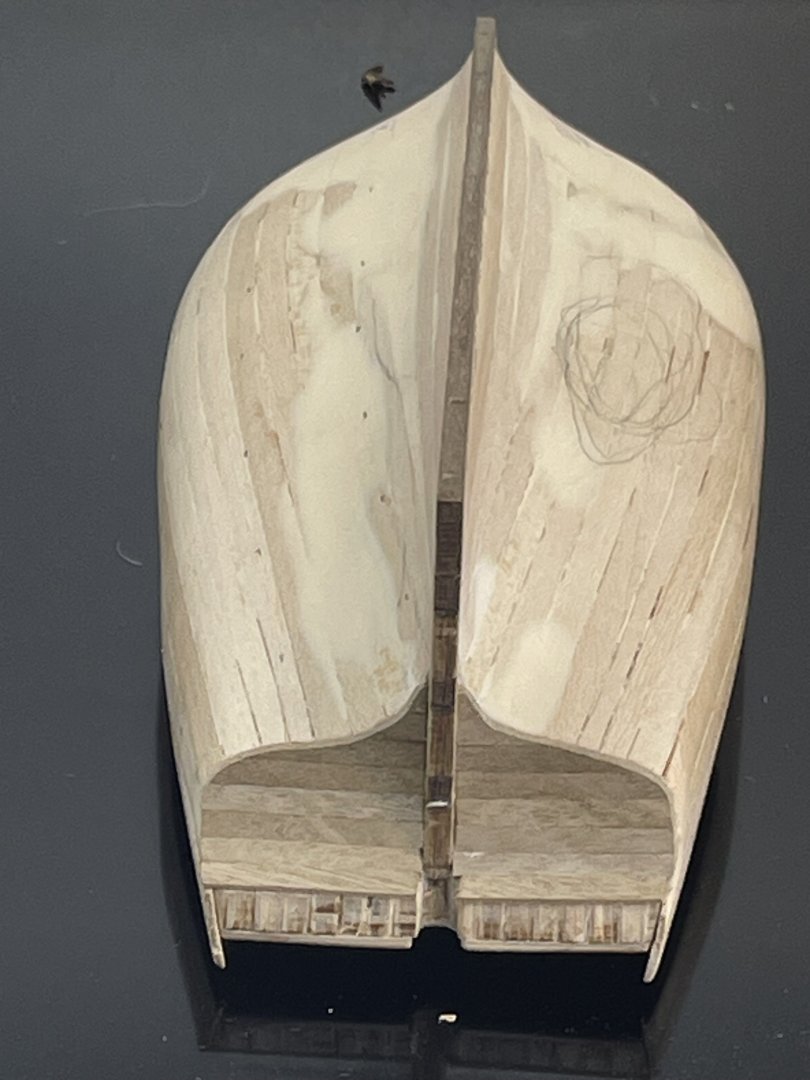
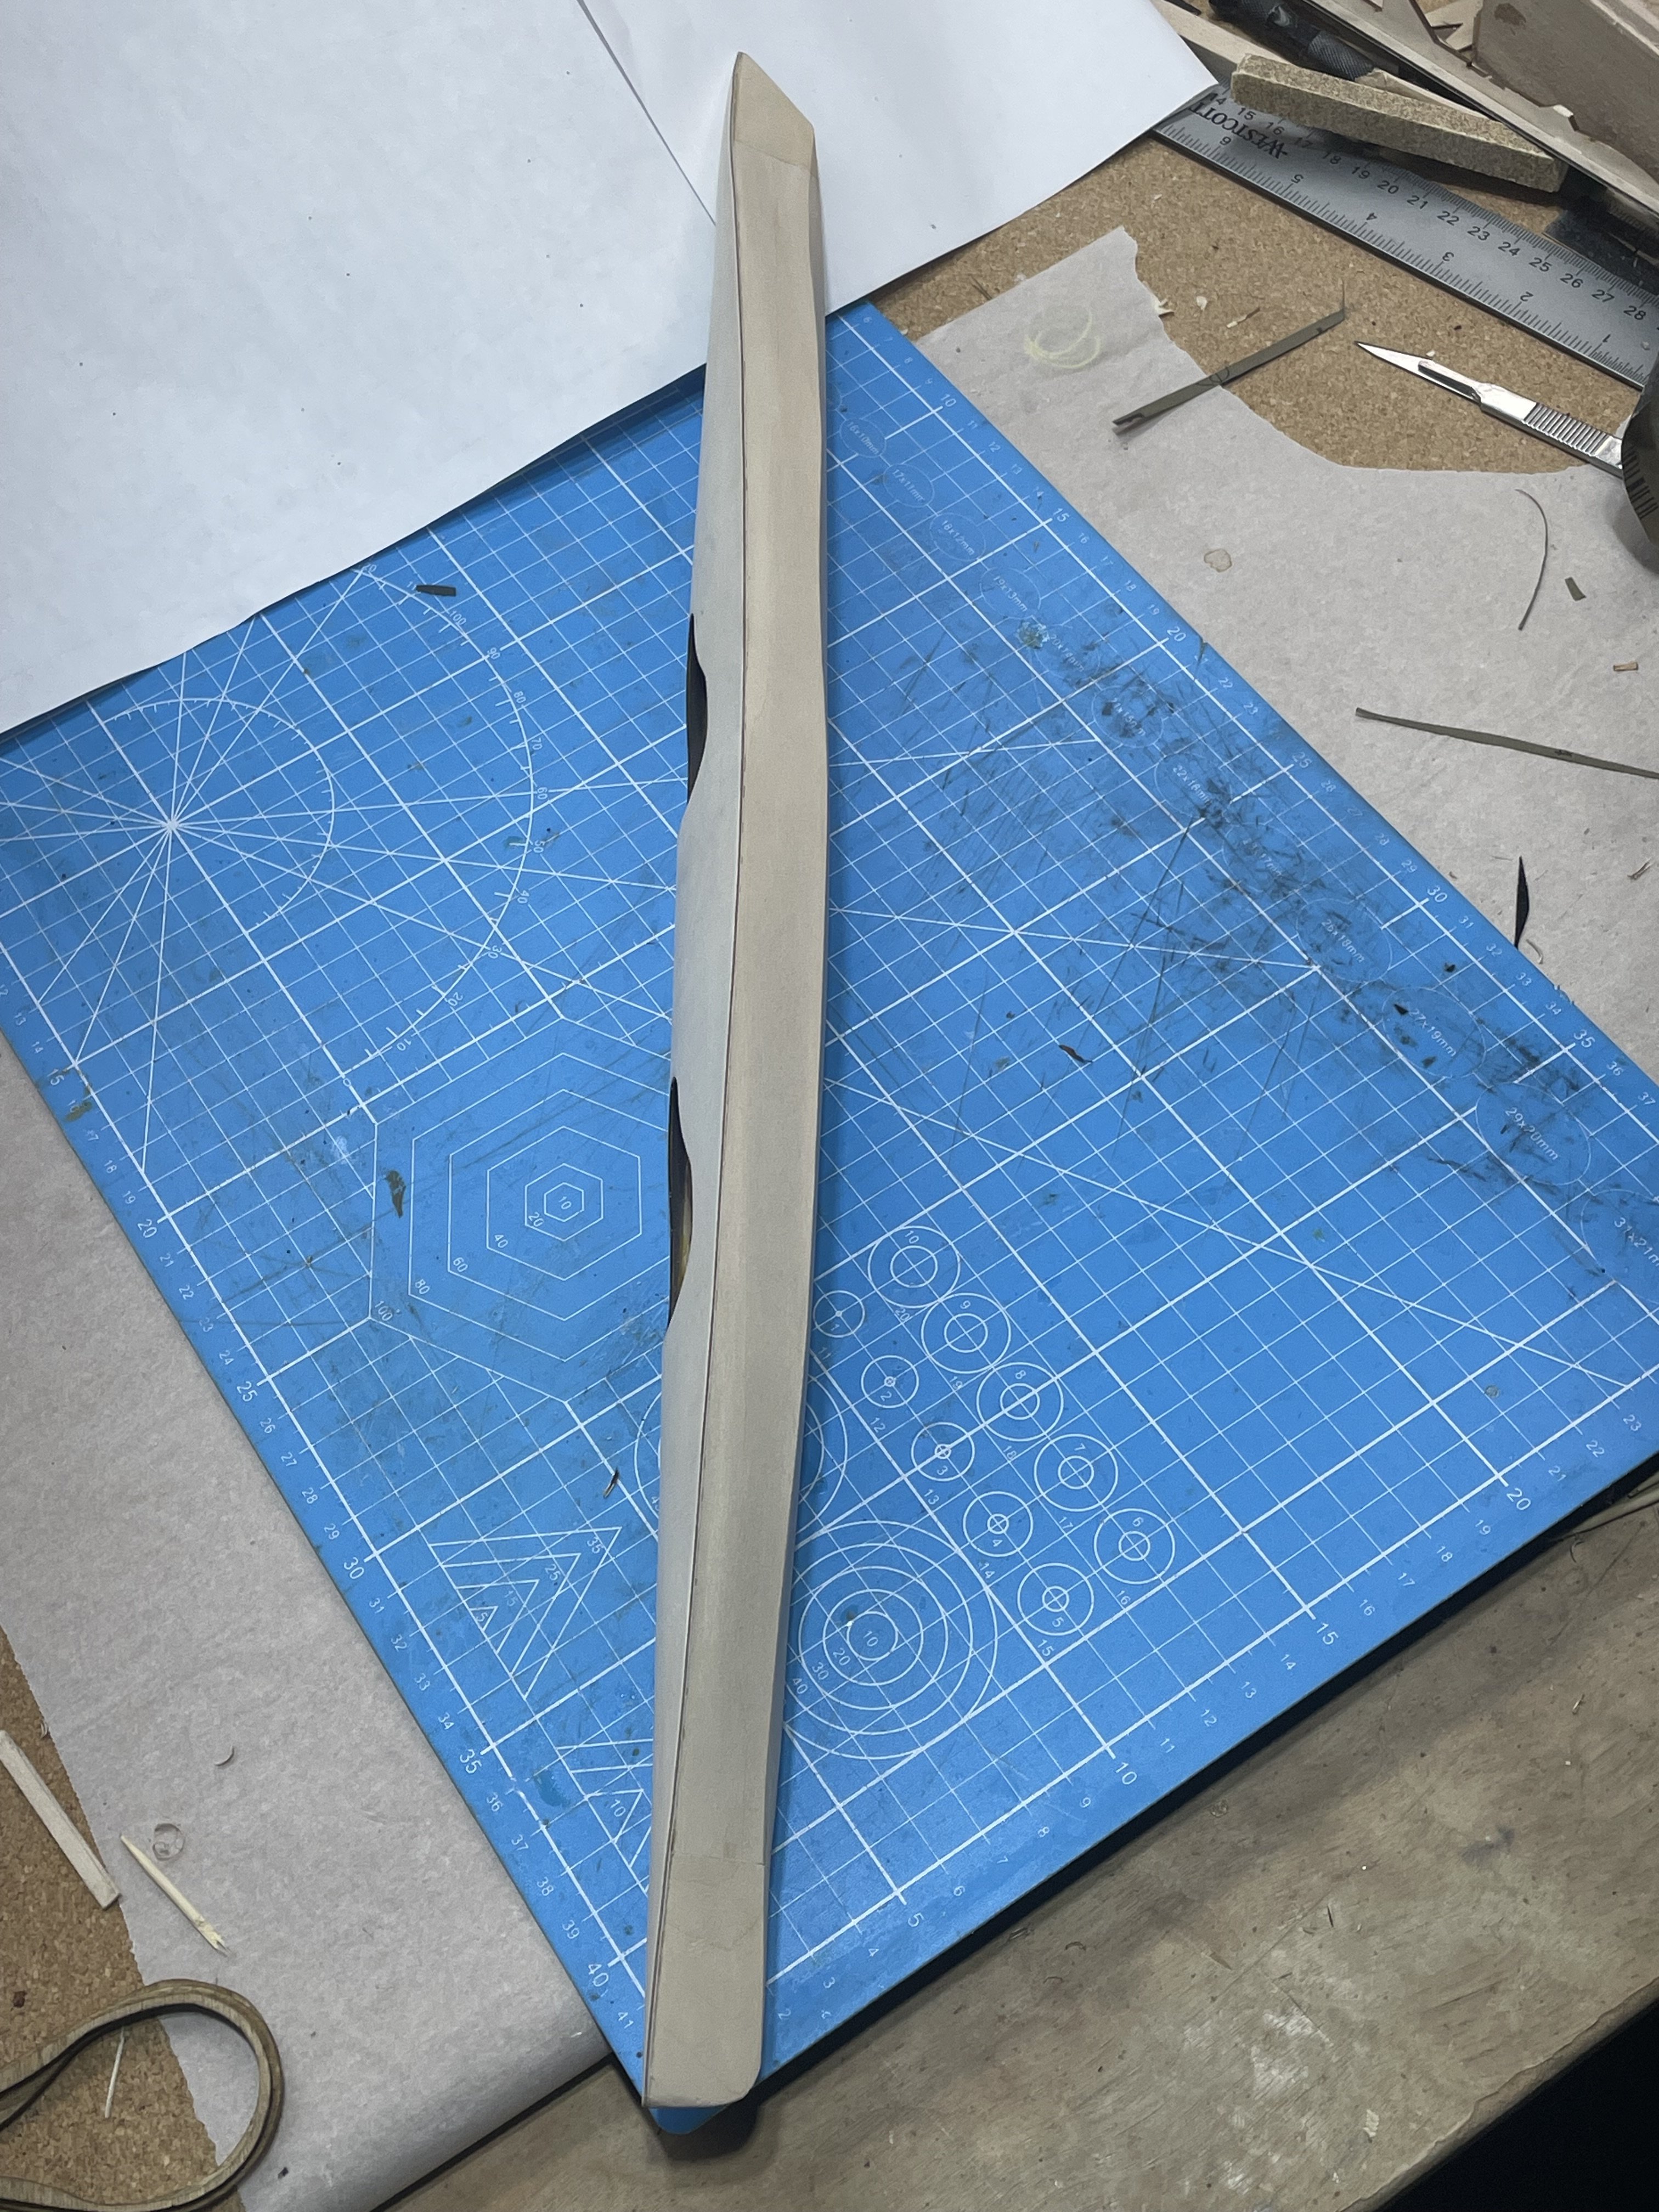
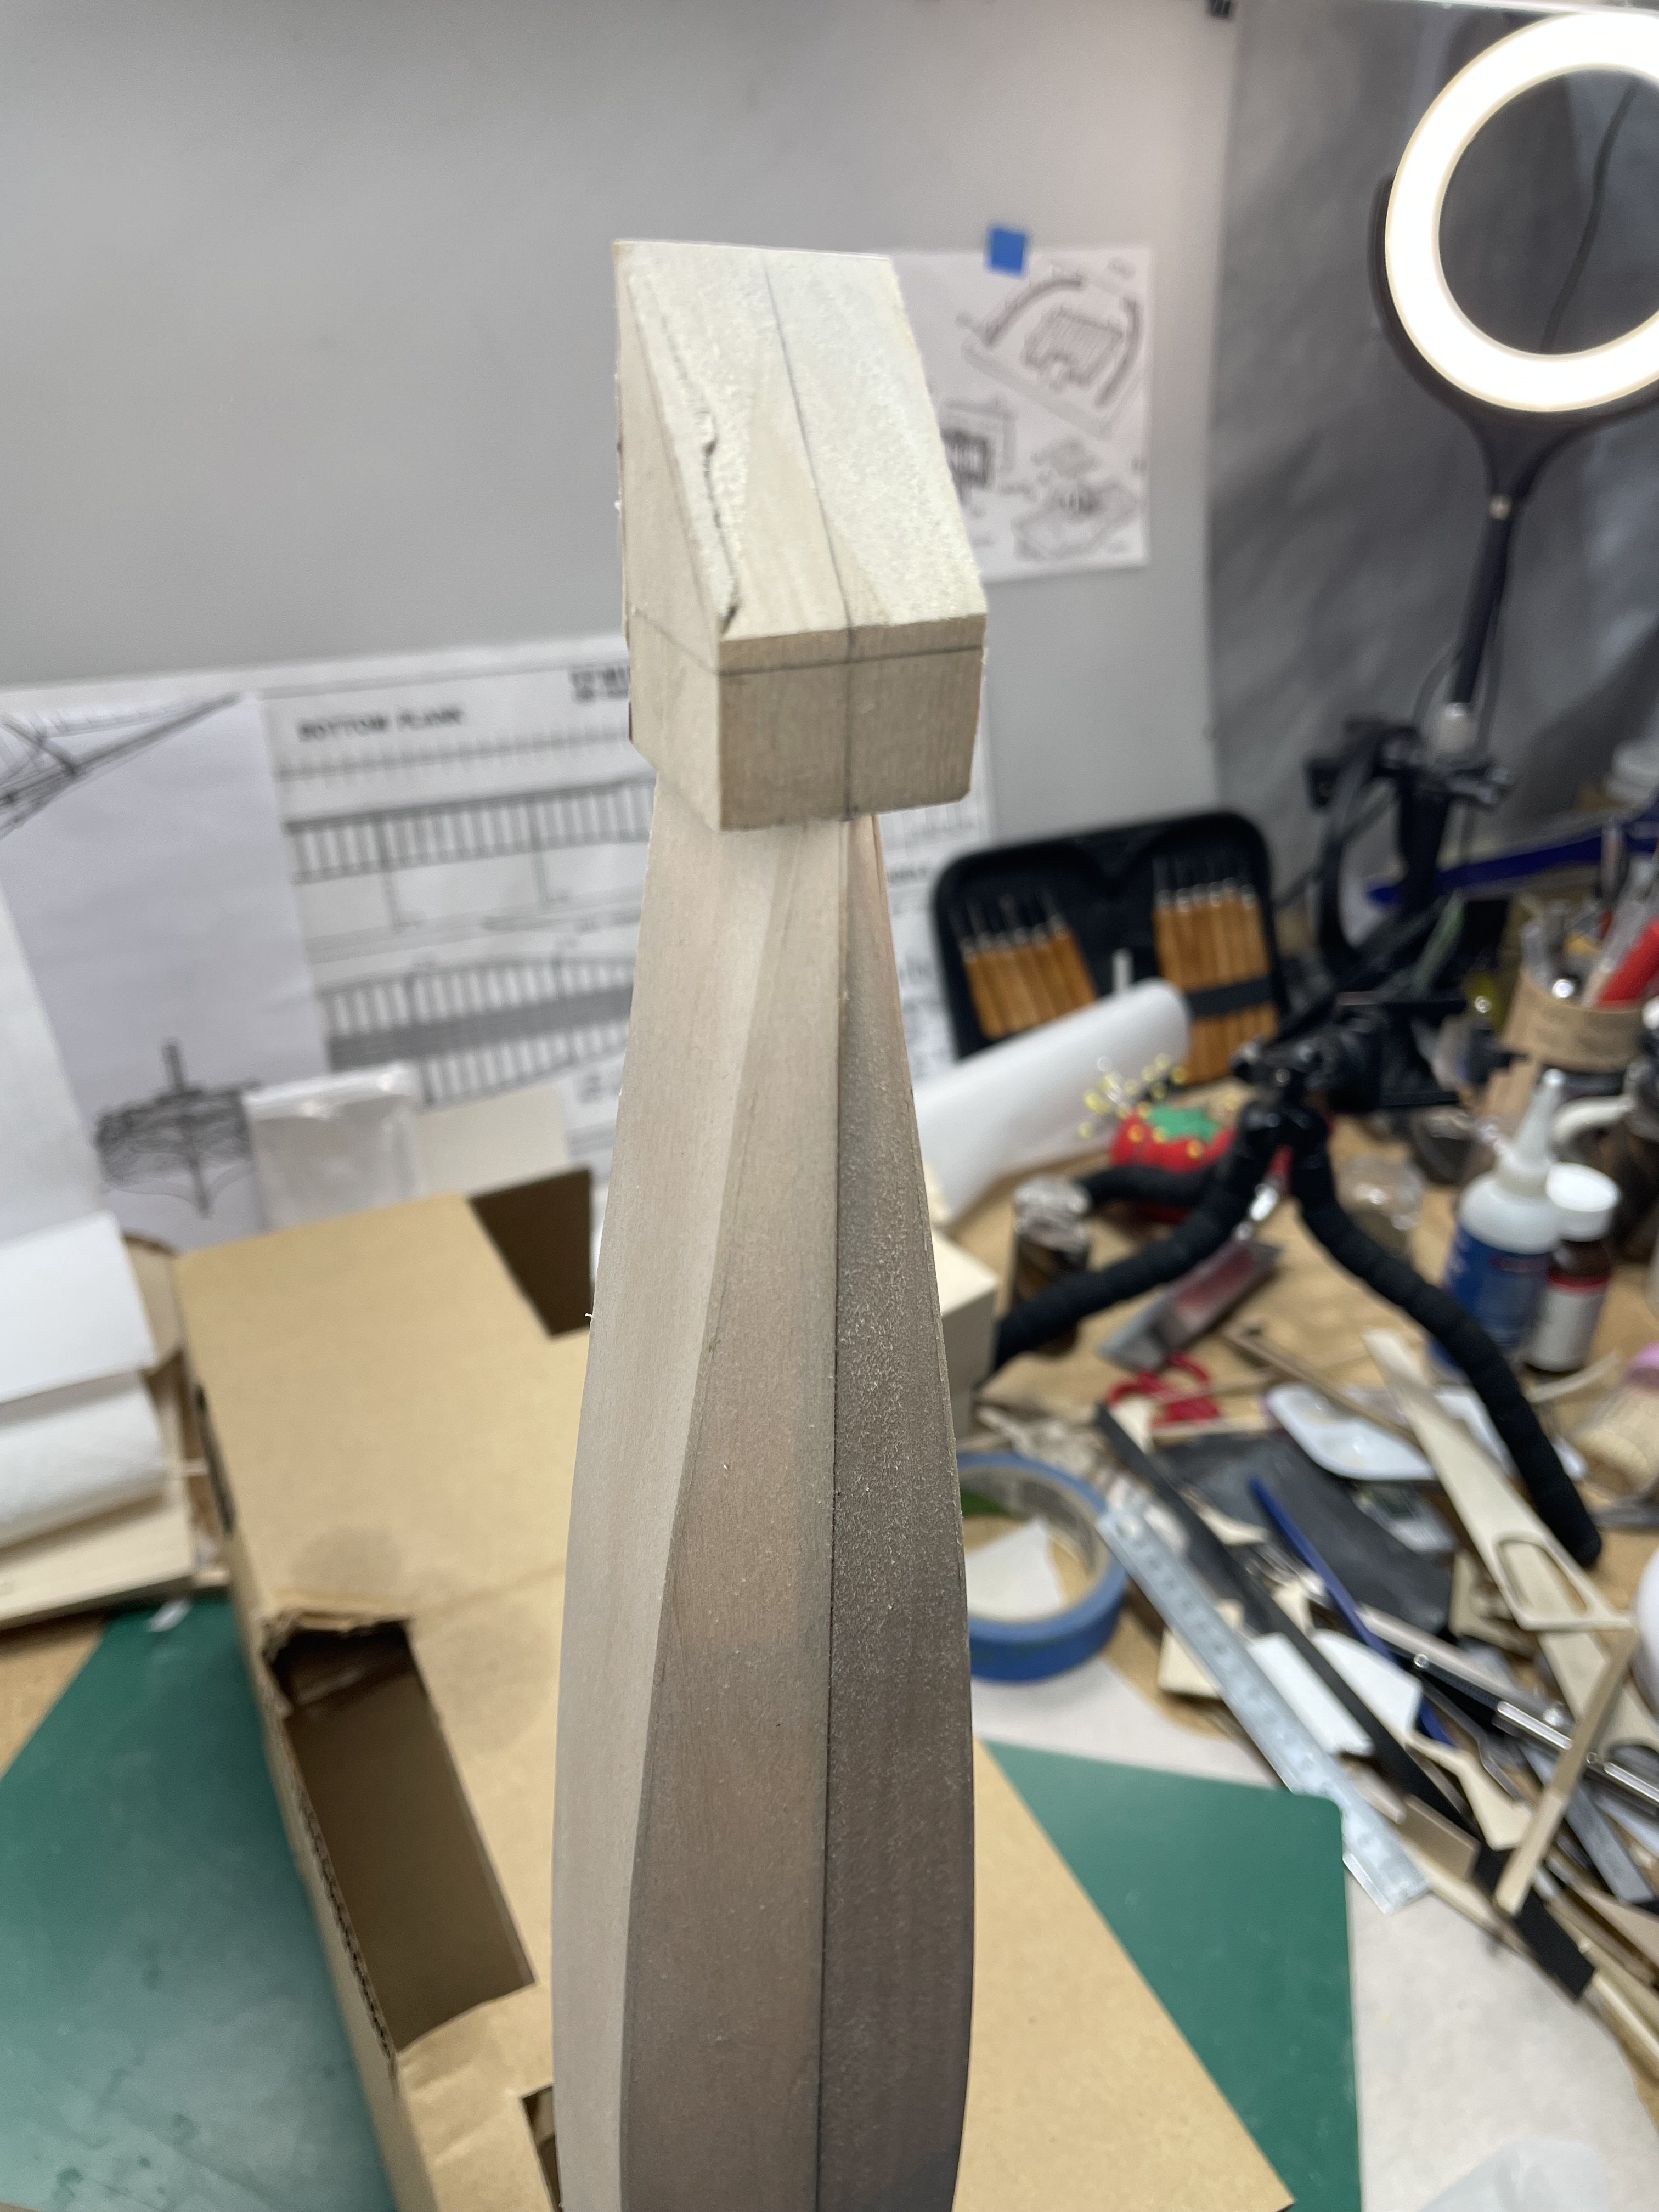
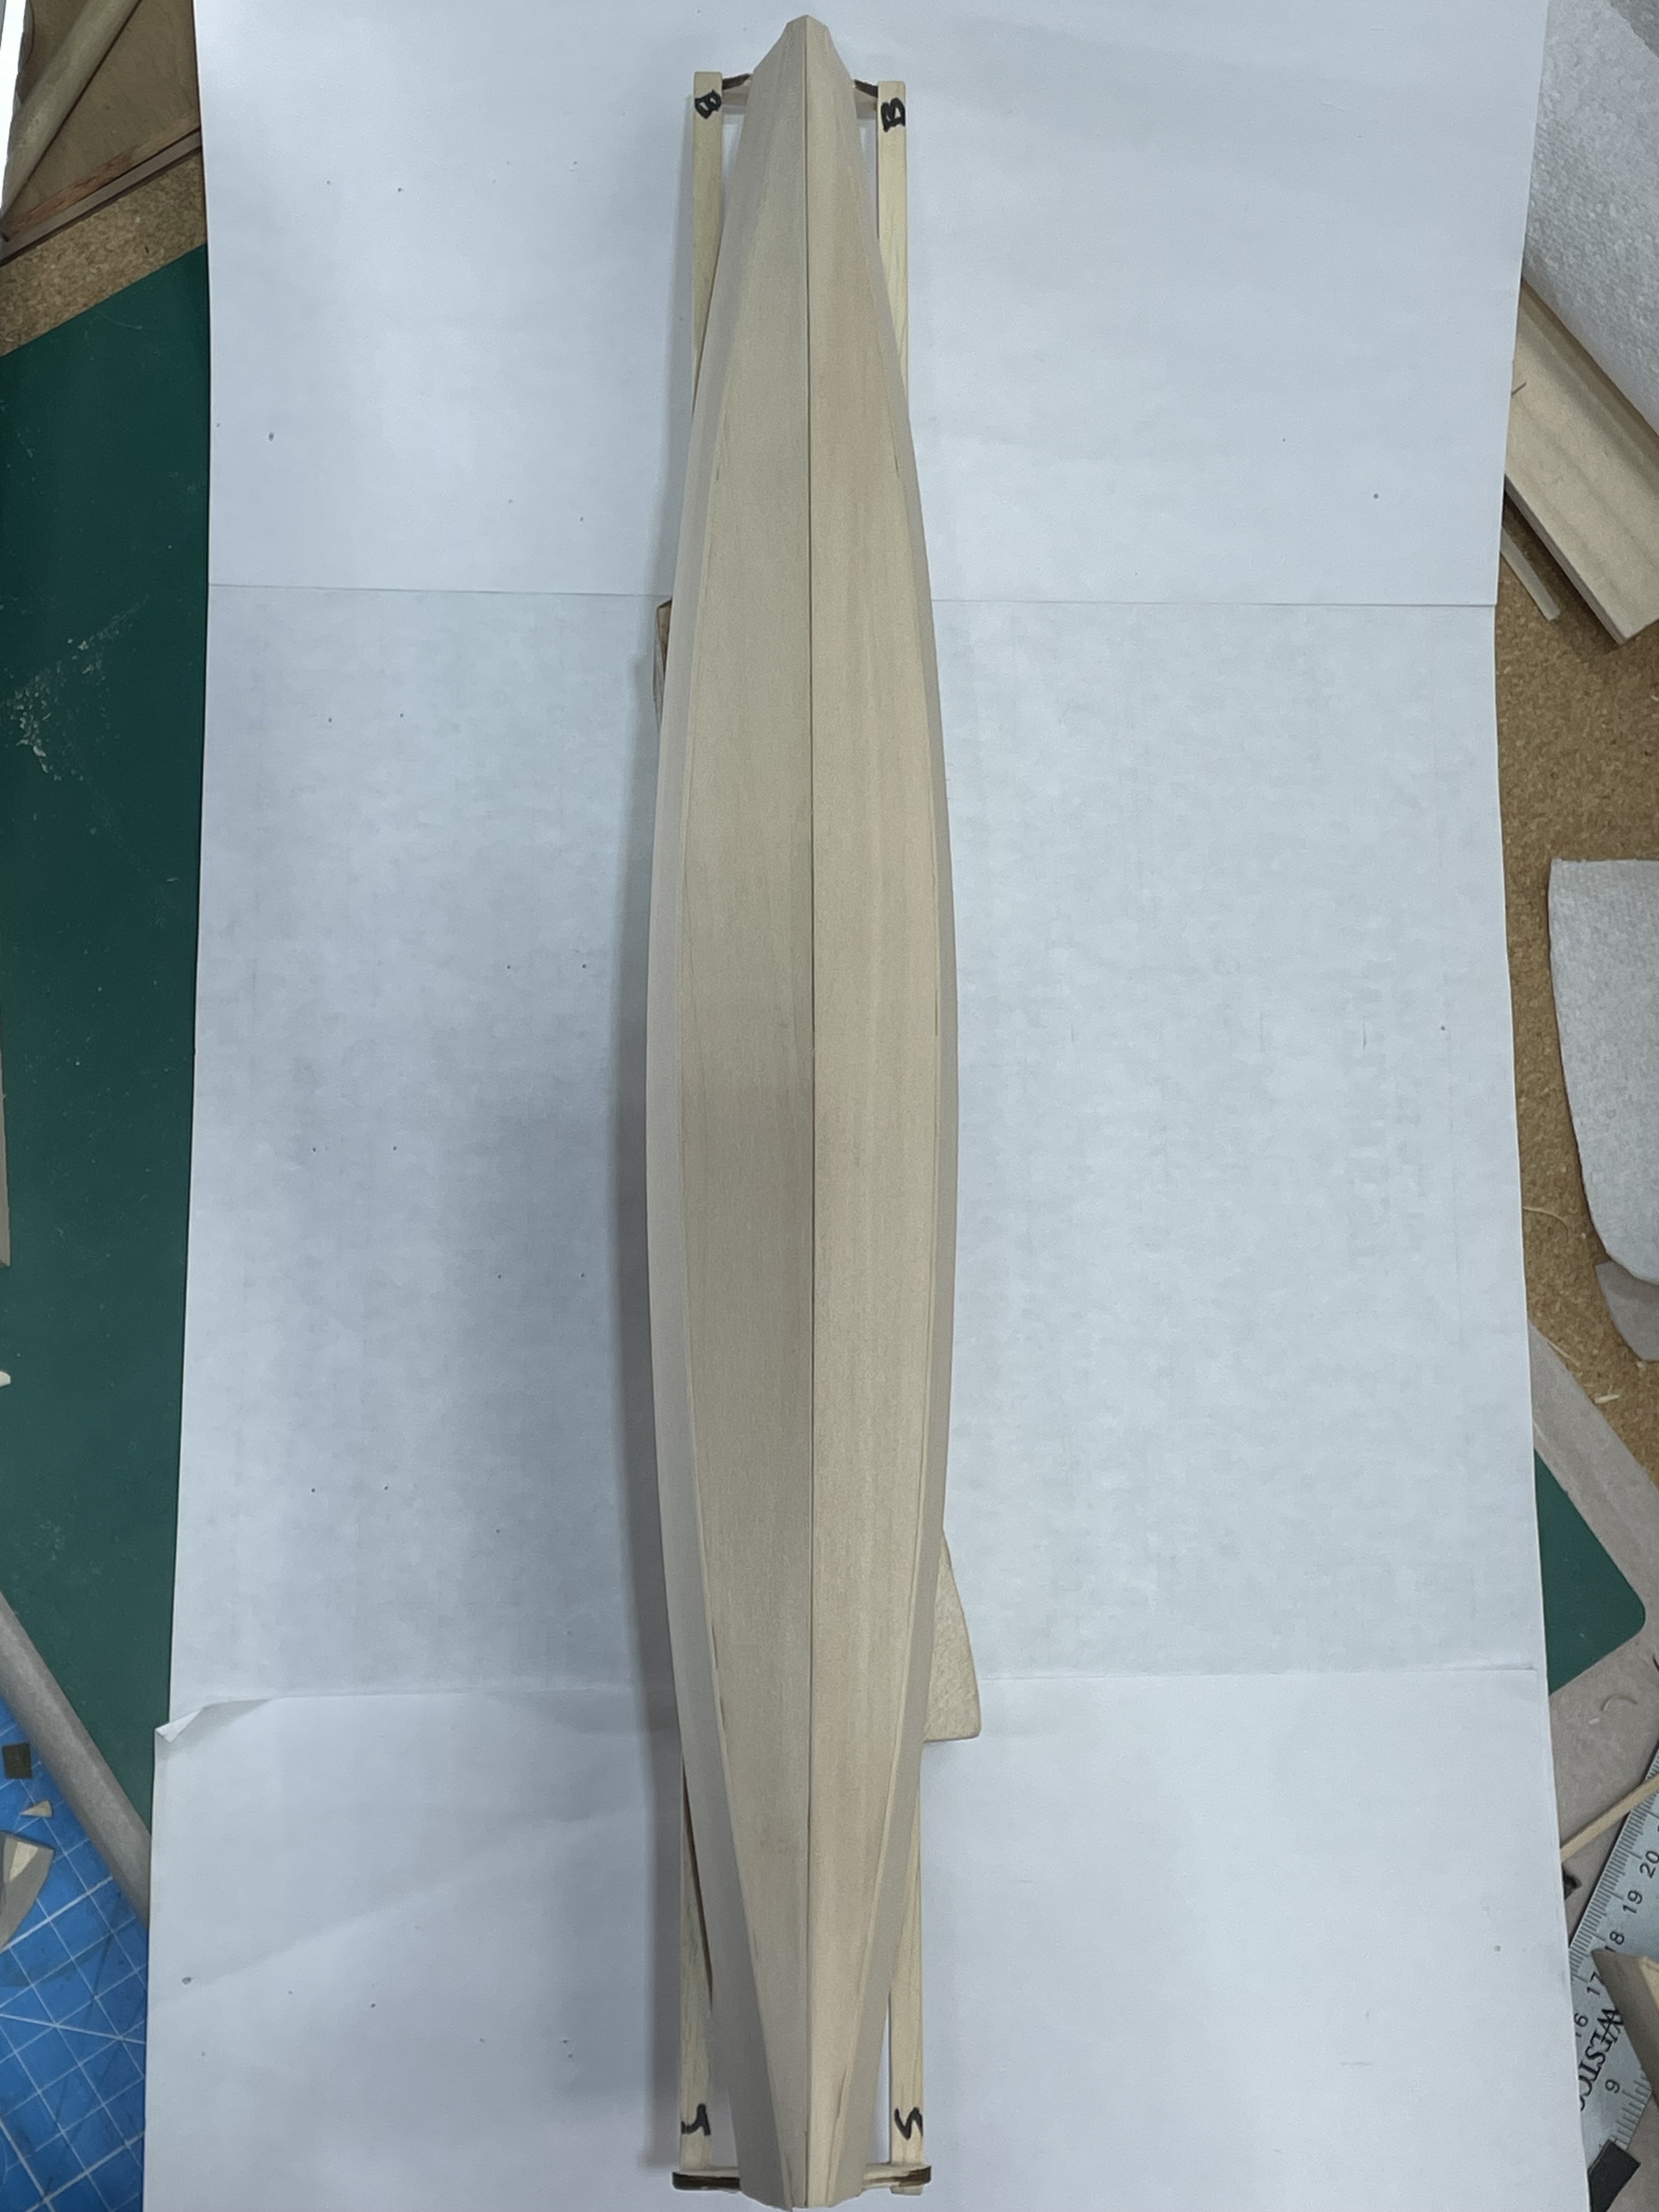
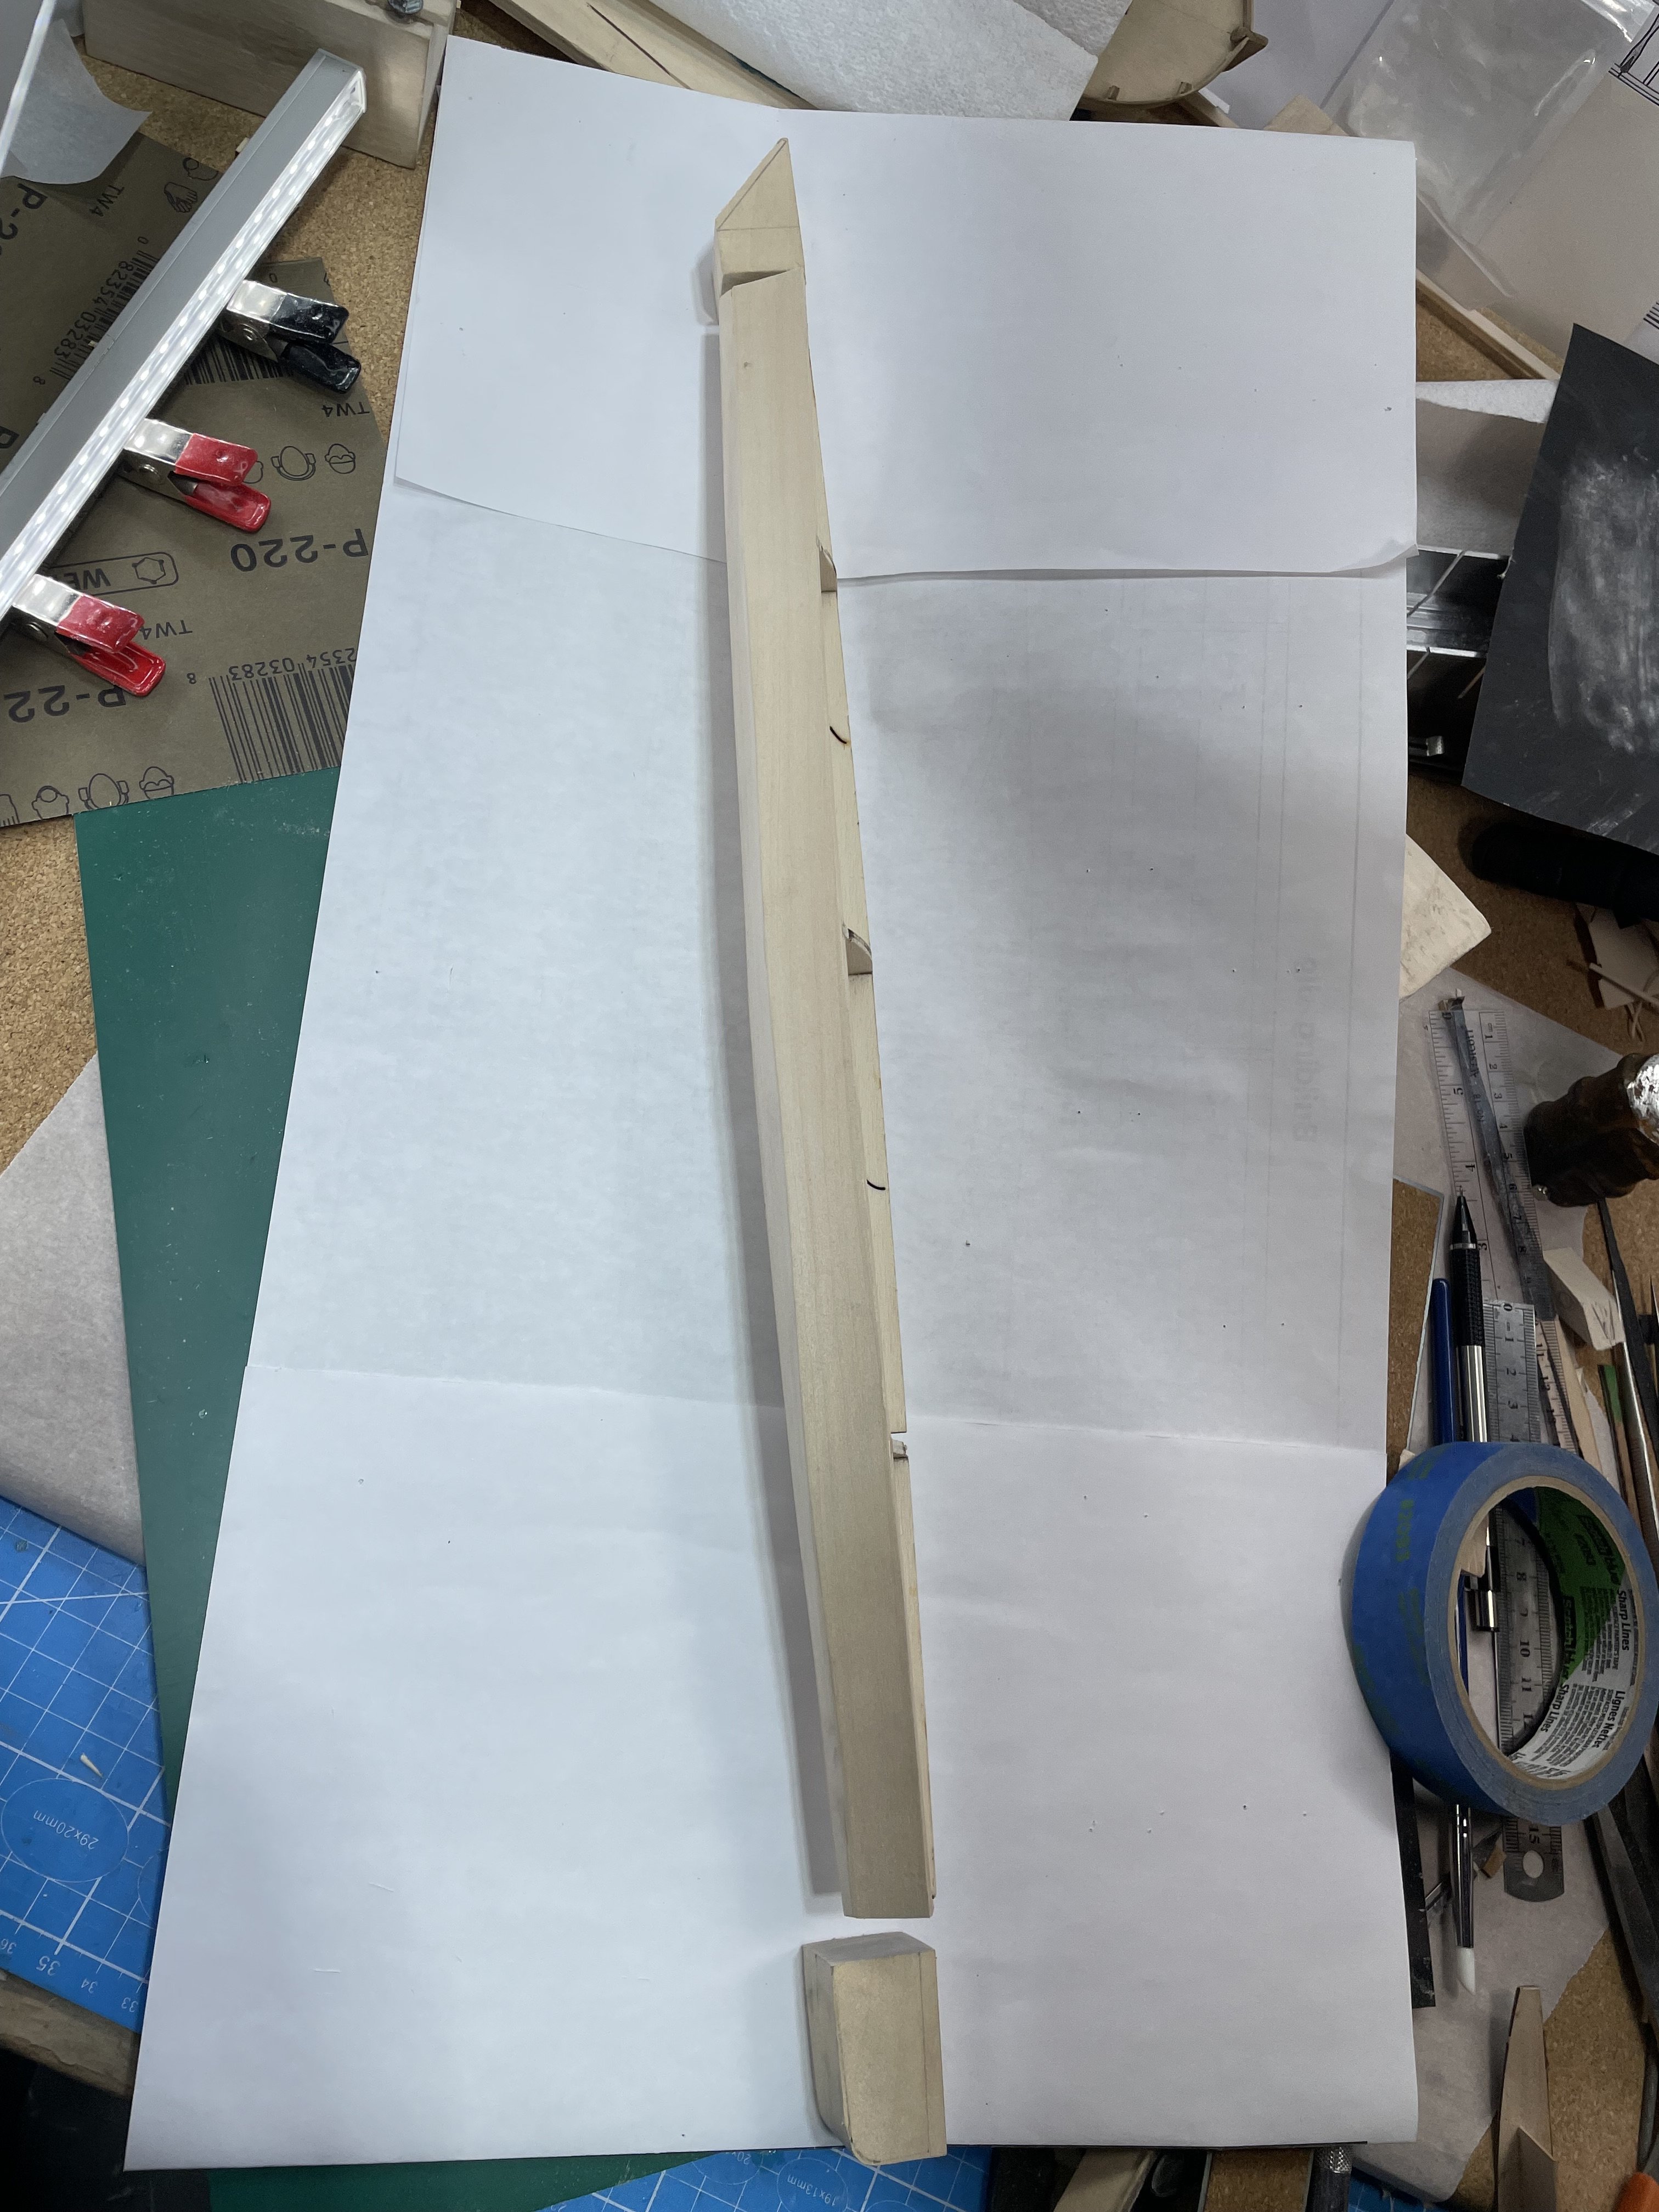
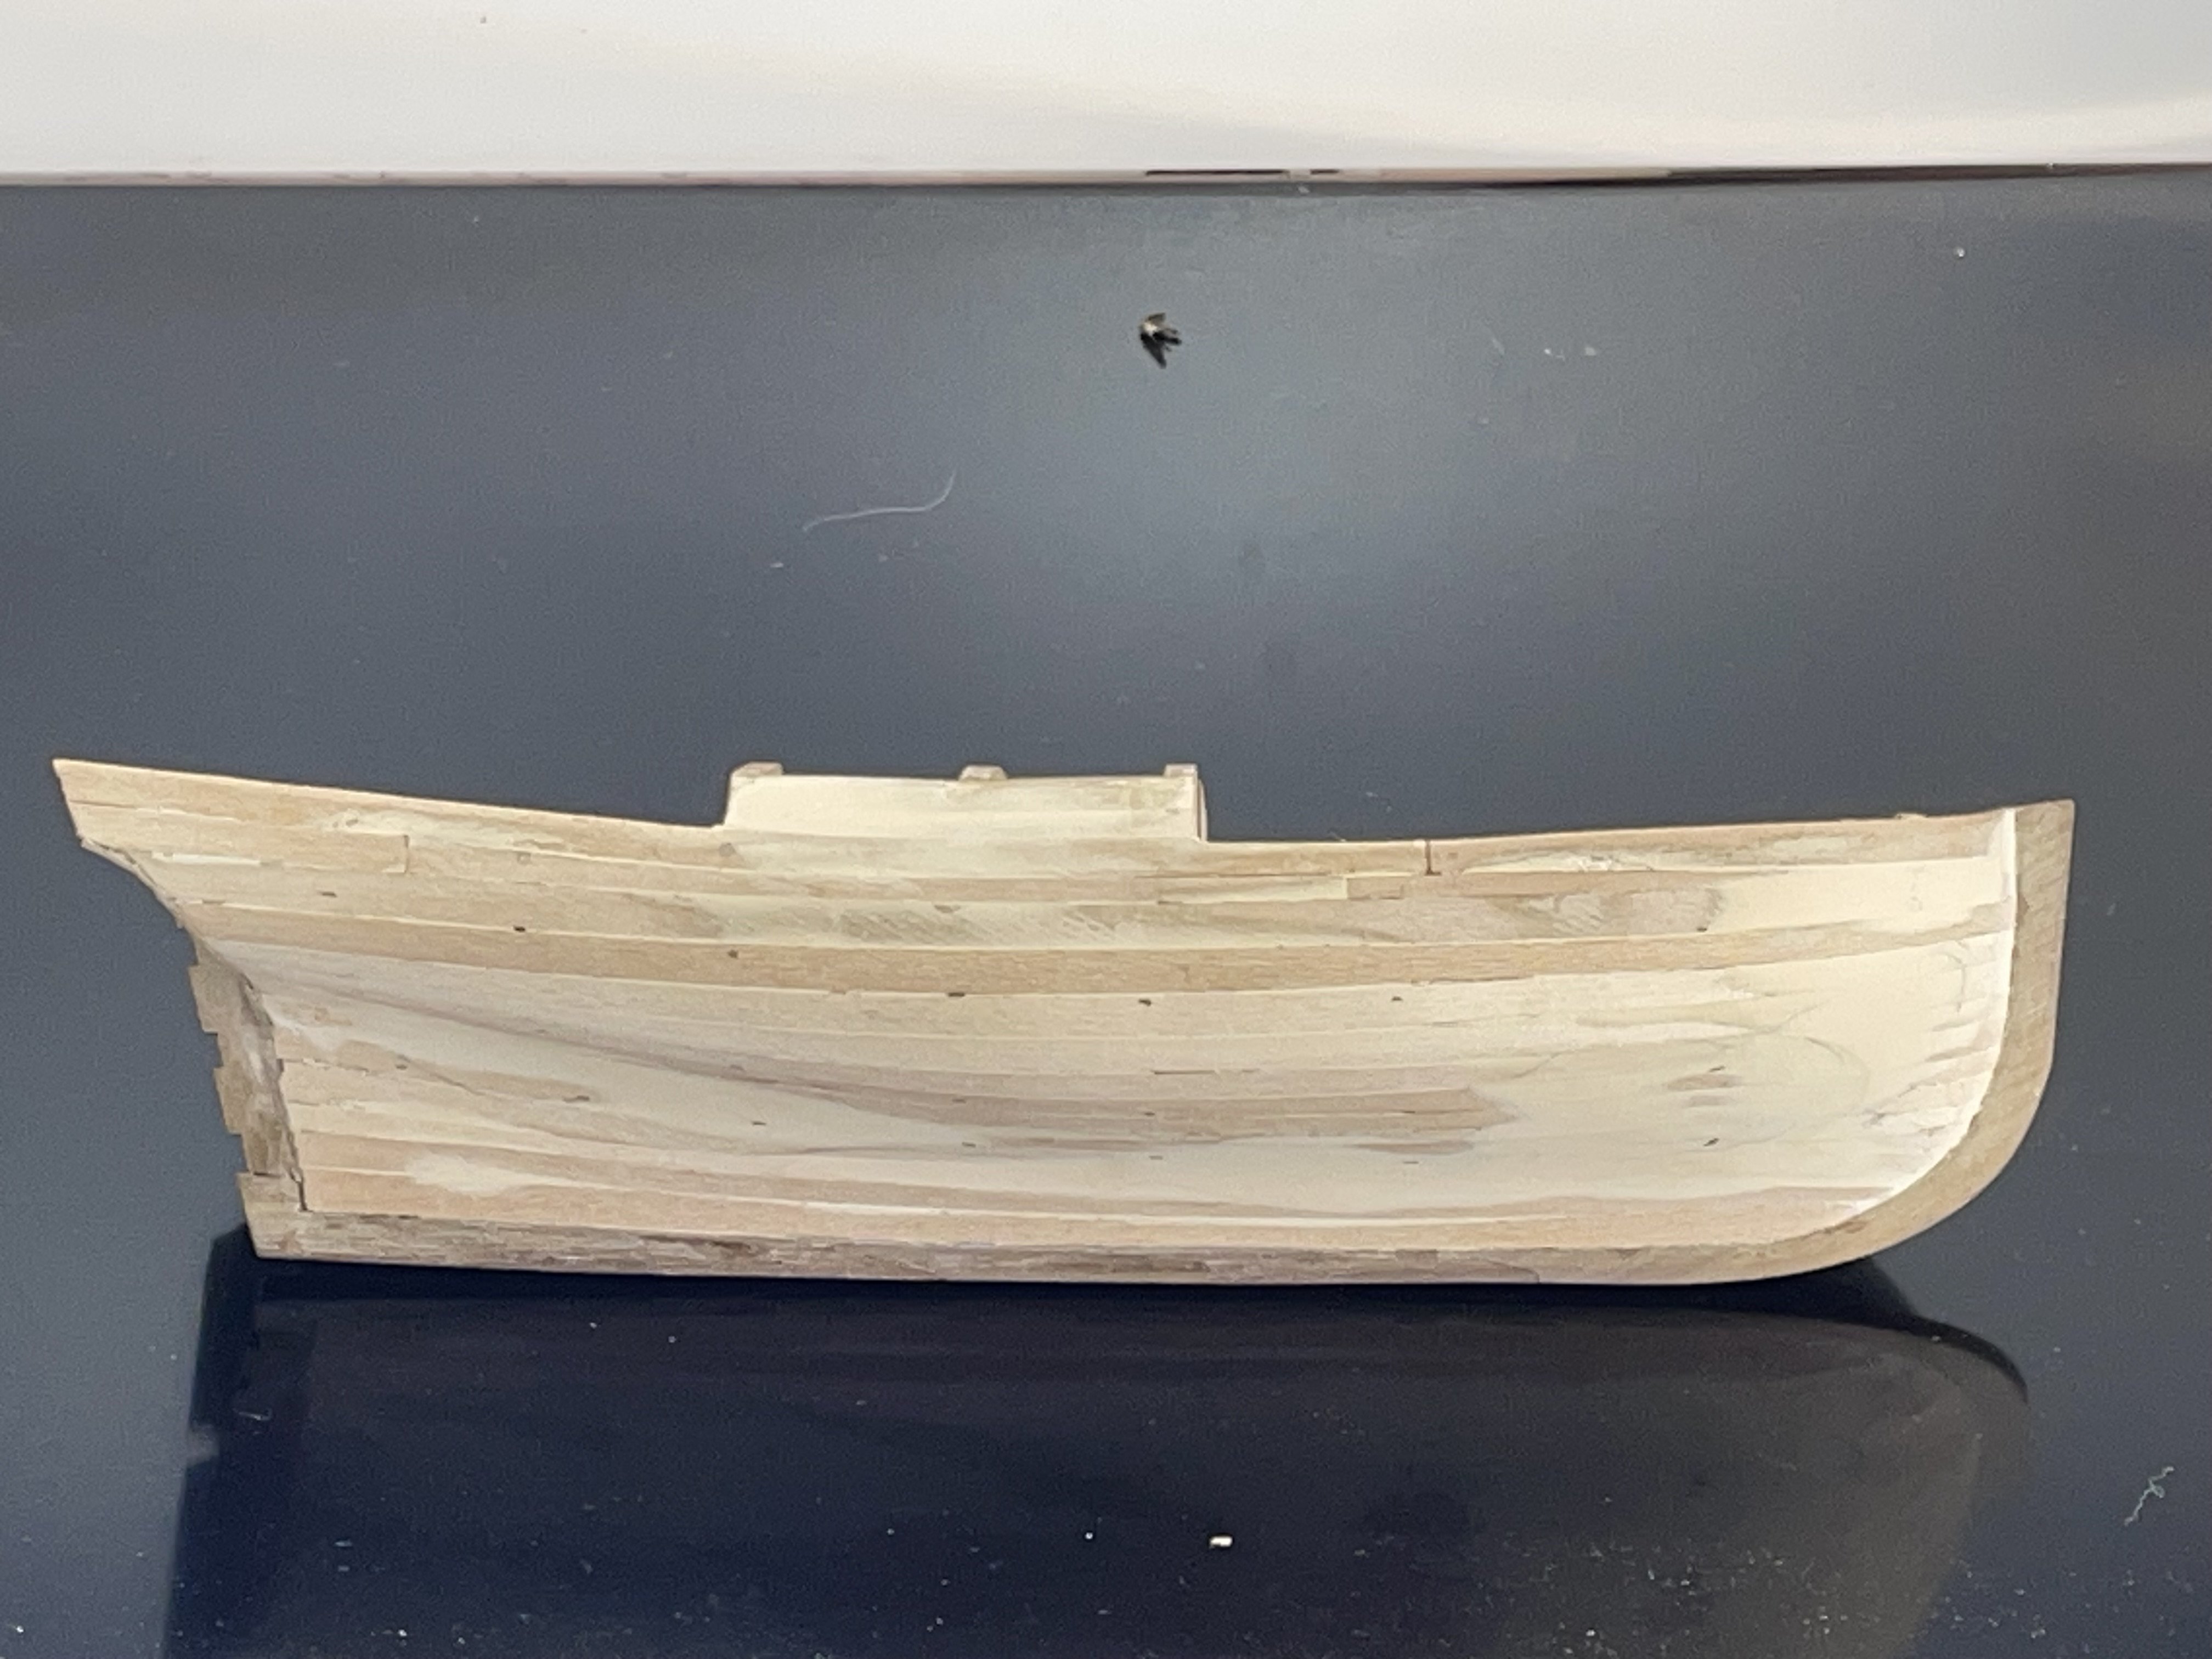
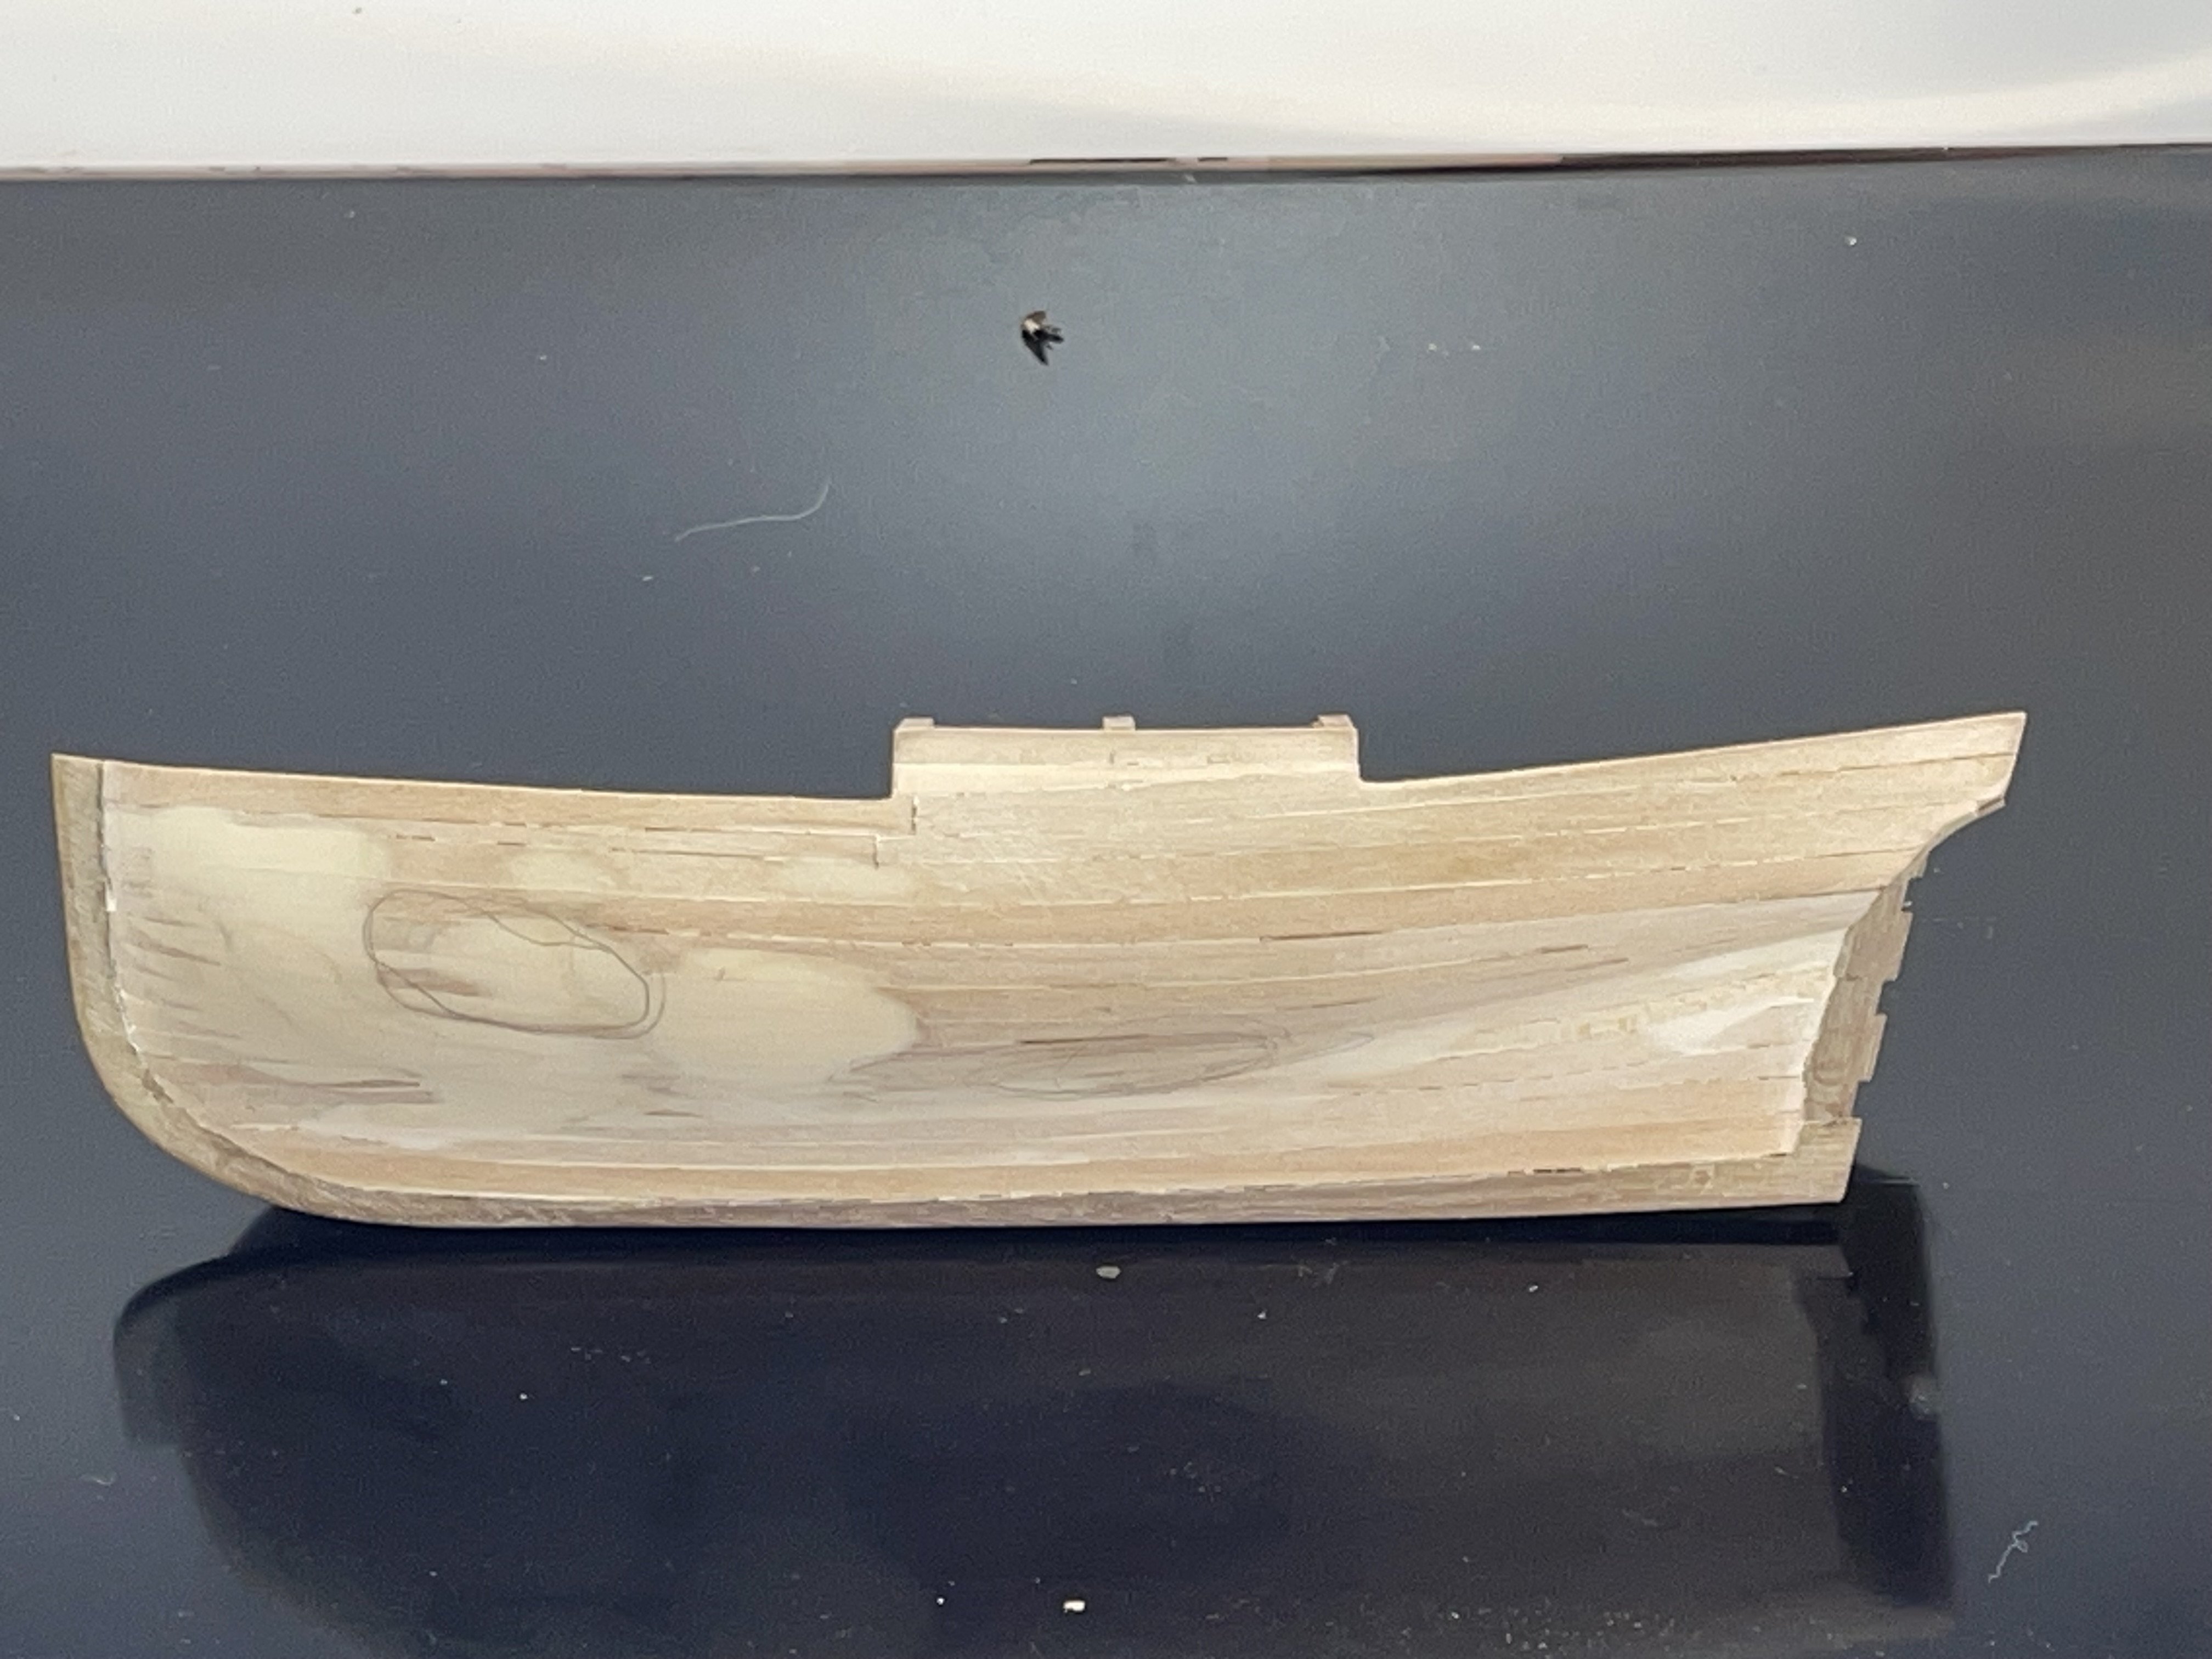
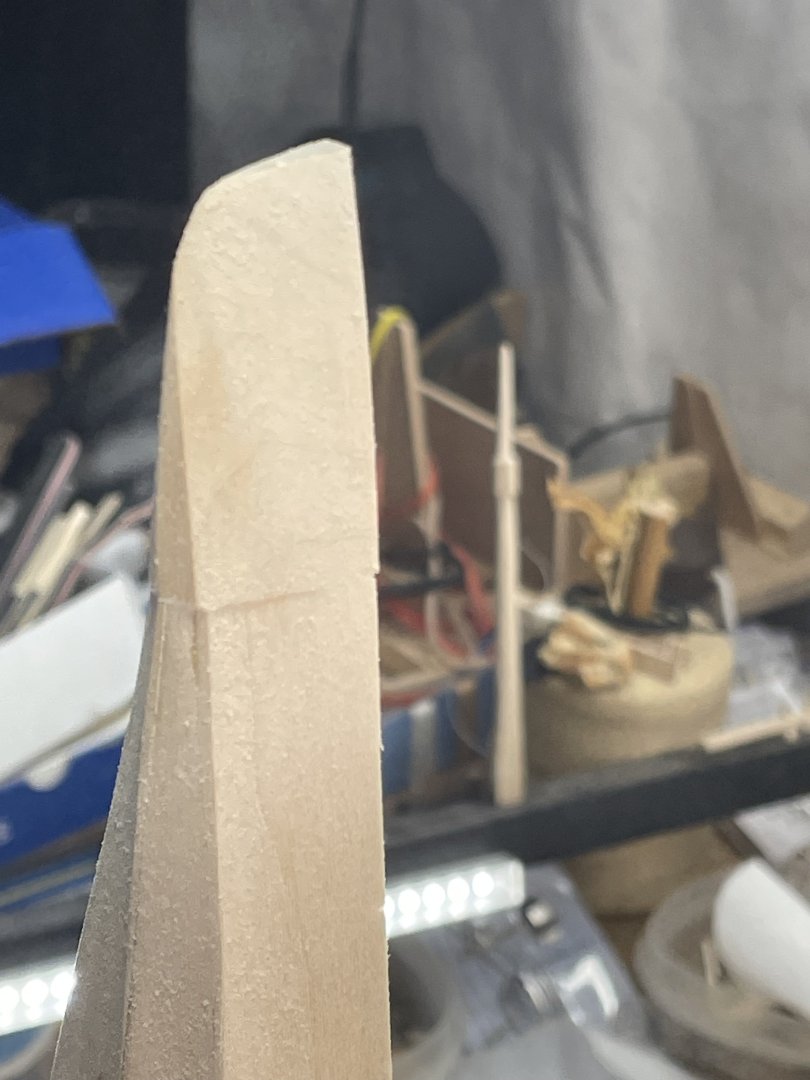
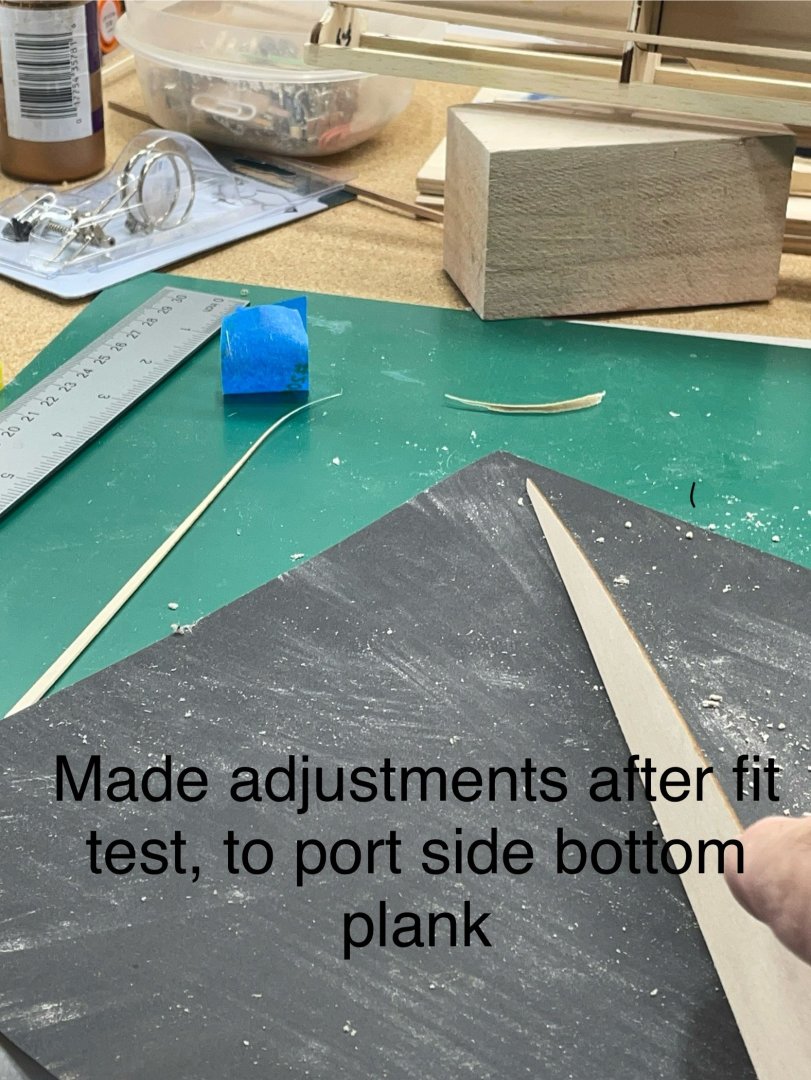
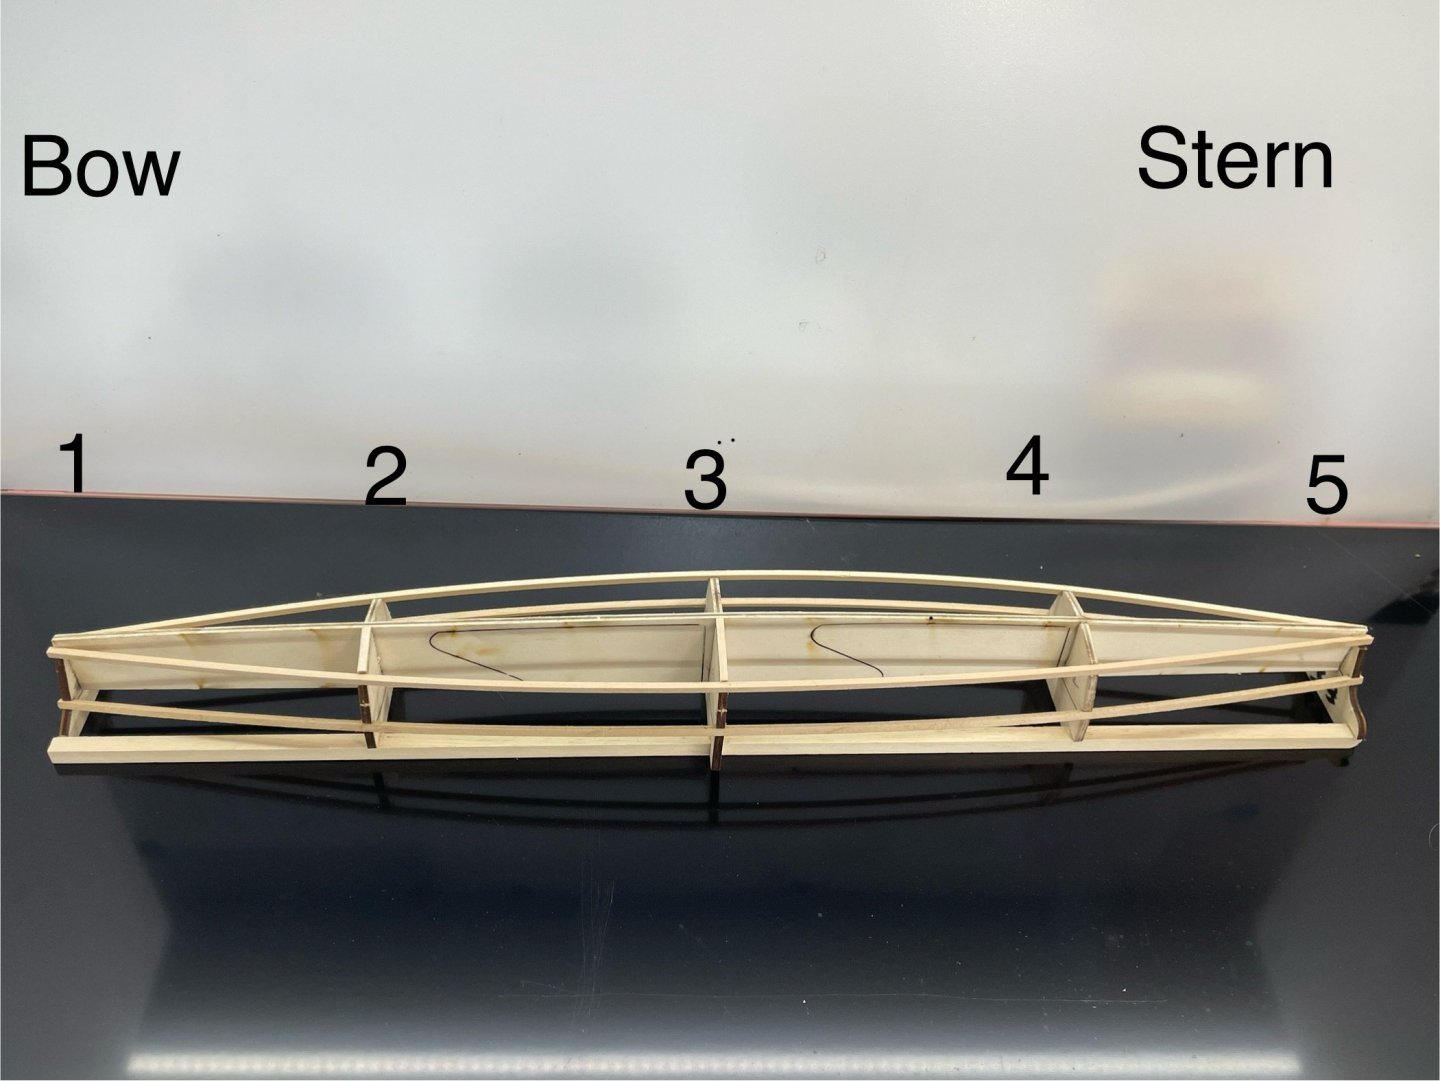
Both side planks went on easily. I then trimmed and sanded to overhanging planks at the bottom. Next the hull was cut loose from the strongback. The next step is gluing the bow and stern blocks on. I got to say I’m a little nervous at carving these ends.


- 33 replies
-
- 3
-
-
- midwest products
- kayak
- (and 1 more)
-
You have had a lot going on up there:-) Those times may seem not the best now but later they will bring a smile and good memories of your build. It looks great!
- 207 replies
-
- 3
-
-
-
- vanguard models
- Duchess of Kingston
- (and 1 more)
-
I finished adding wood at the bottom of the bow and stern. Used the supplied 1” material for the bow and stern blocks, to make a sanding block for the ends of the kayak. After gluing the 3 center frames I turned it over. Before gluing the next plank. Then glued it to the center frame and worked towards both ends. I used a knife to trim the excess wood off. Then sanded flush with the chime and sheer clamps. Next the two side planks will be installed the same way as the bottom.


- 33 replies
-
- 6
-
-
- midwest products
- kayak
- (and 1 more)
-
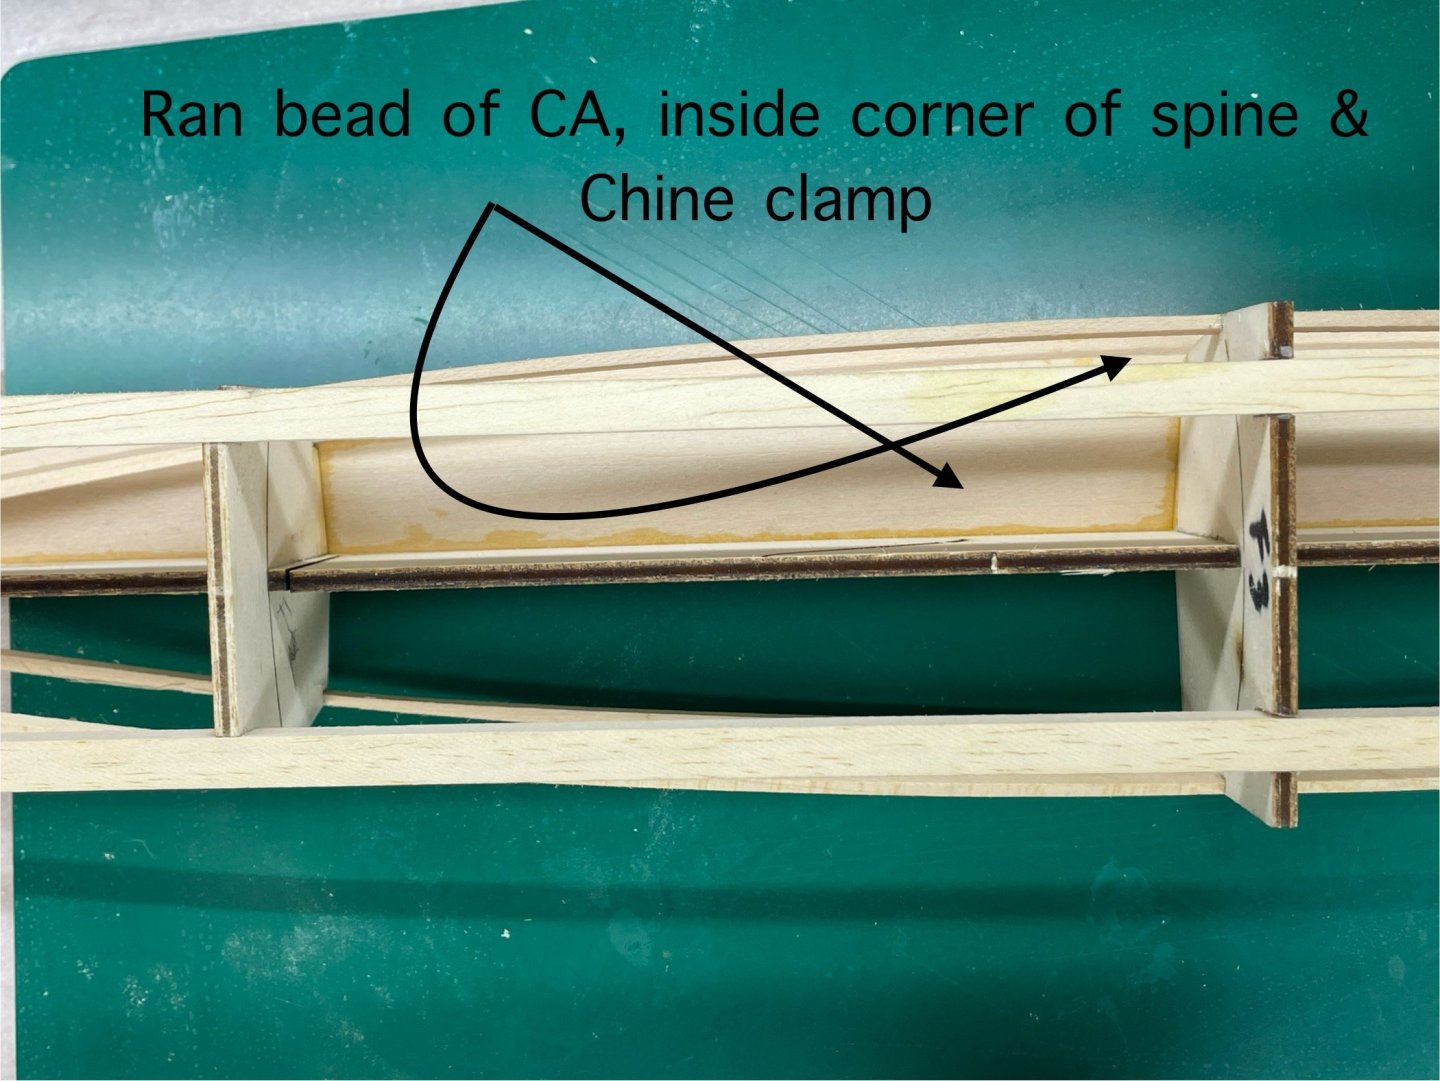
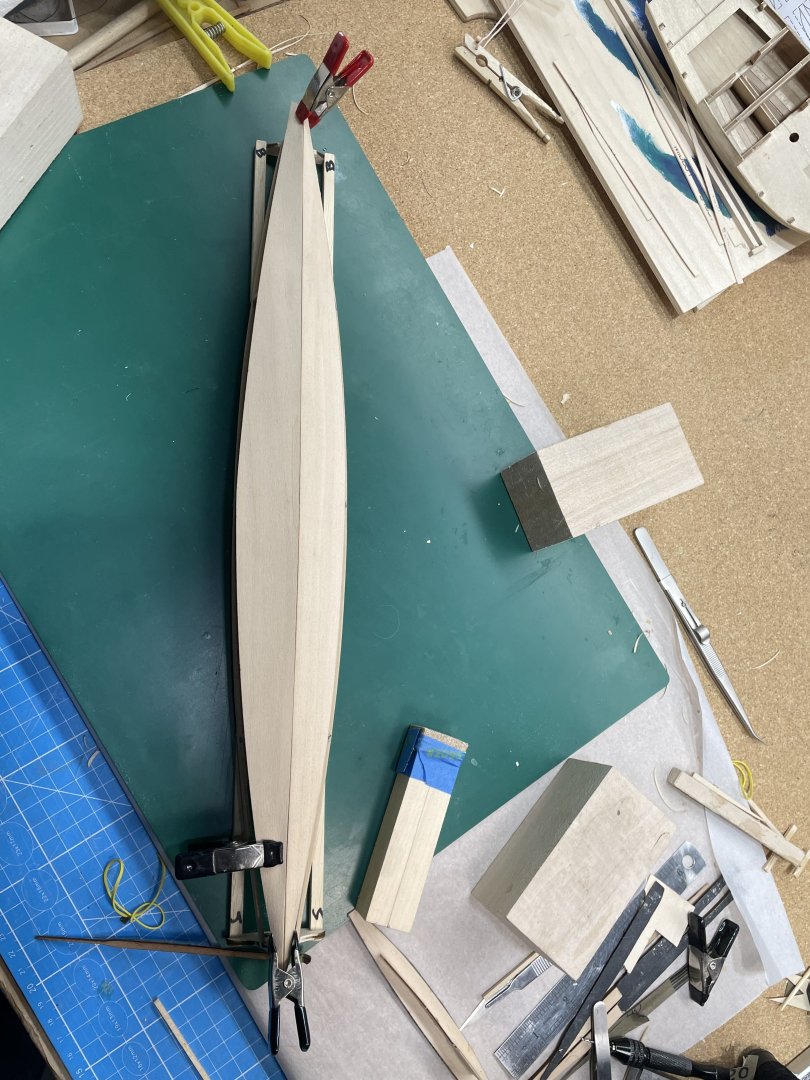
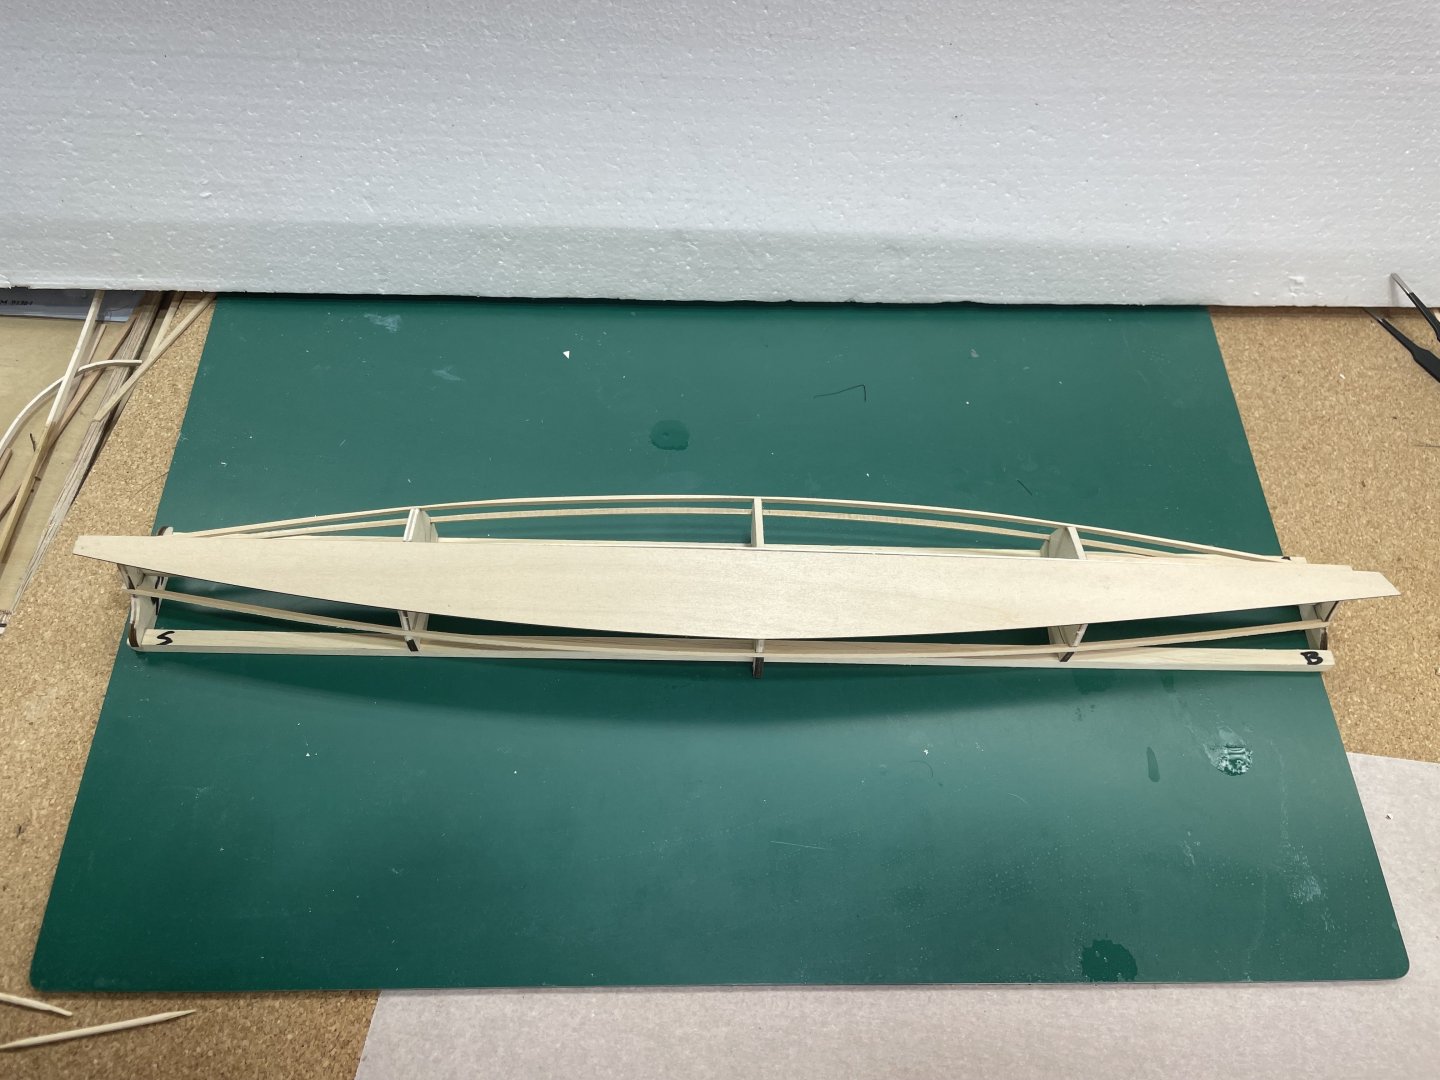
Next step was to glue the sheer clamps and the chine clamps ( that’s another word I’ll have to look up, if I want to use it ) to the notches in the frames. Only frame 4 lined up with the bottom on the spine. I added wood to frames 2 and 3 to reach the spine The kayak is inverted until it gets planked. Here’s where I started building them up. The sheer and chine clamps need to be sanded down flush with frames. The bottom angles up to each side from the spine. On the port side I’ve added a piece of wood, and will sand it down to give me more surface to glue down the plank. 0n the sides, the only way I could tell how much to sand. Was to keep an eye on the width of the bottom of the chine clamp. I’m still checking over the fairing job, and still need to add the the wood at the bow and stern. My work area is unbearably hot, I’ve been doing to sanding in the rocking chair on the porch. That’s drops of sweat on my the mat. I didn’t take a lot of time to these pics. Here’s the bottom plank just laying where it goes.


- 33 replies
-
- 6
-
-
- midwest products
- kayak
- (and 1 more)
-
I haven’t forgotten the Gretel. I need to devote more time learning, but sometimes that means less building:-) I did sand down the first planking and put the second planking on the transom. one of these days I get back on it. Here how it stands.