HOLIDAY DONATION DRIVE - SUPPORT MSW - DO YOUR PART TO KEEP THIS GREAT FORUM GOING! (Only 13 donations so far - C'mon guys!)
×


Bryan Woods
-
Posts
544 -
Joined
-
Last visited
Content Type
Profiles
Forums
Gallery
Events
Everything posted by Bryan Woods
-
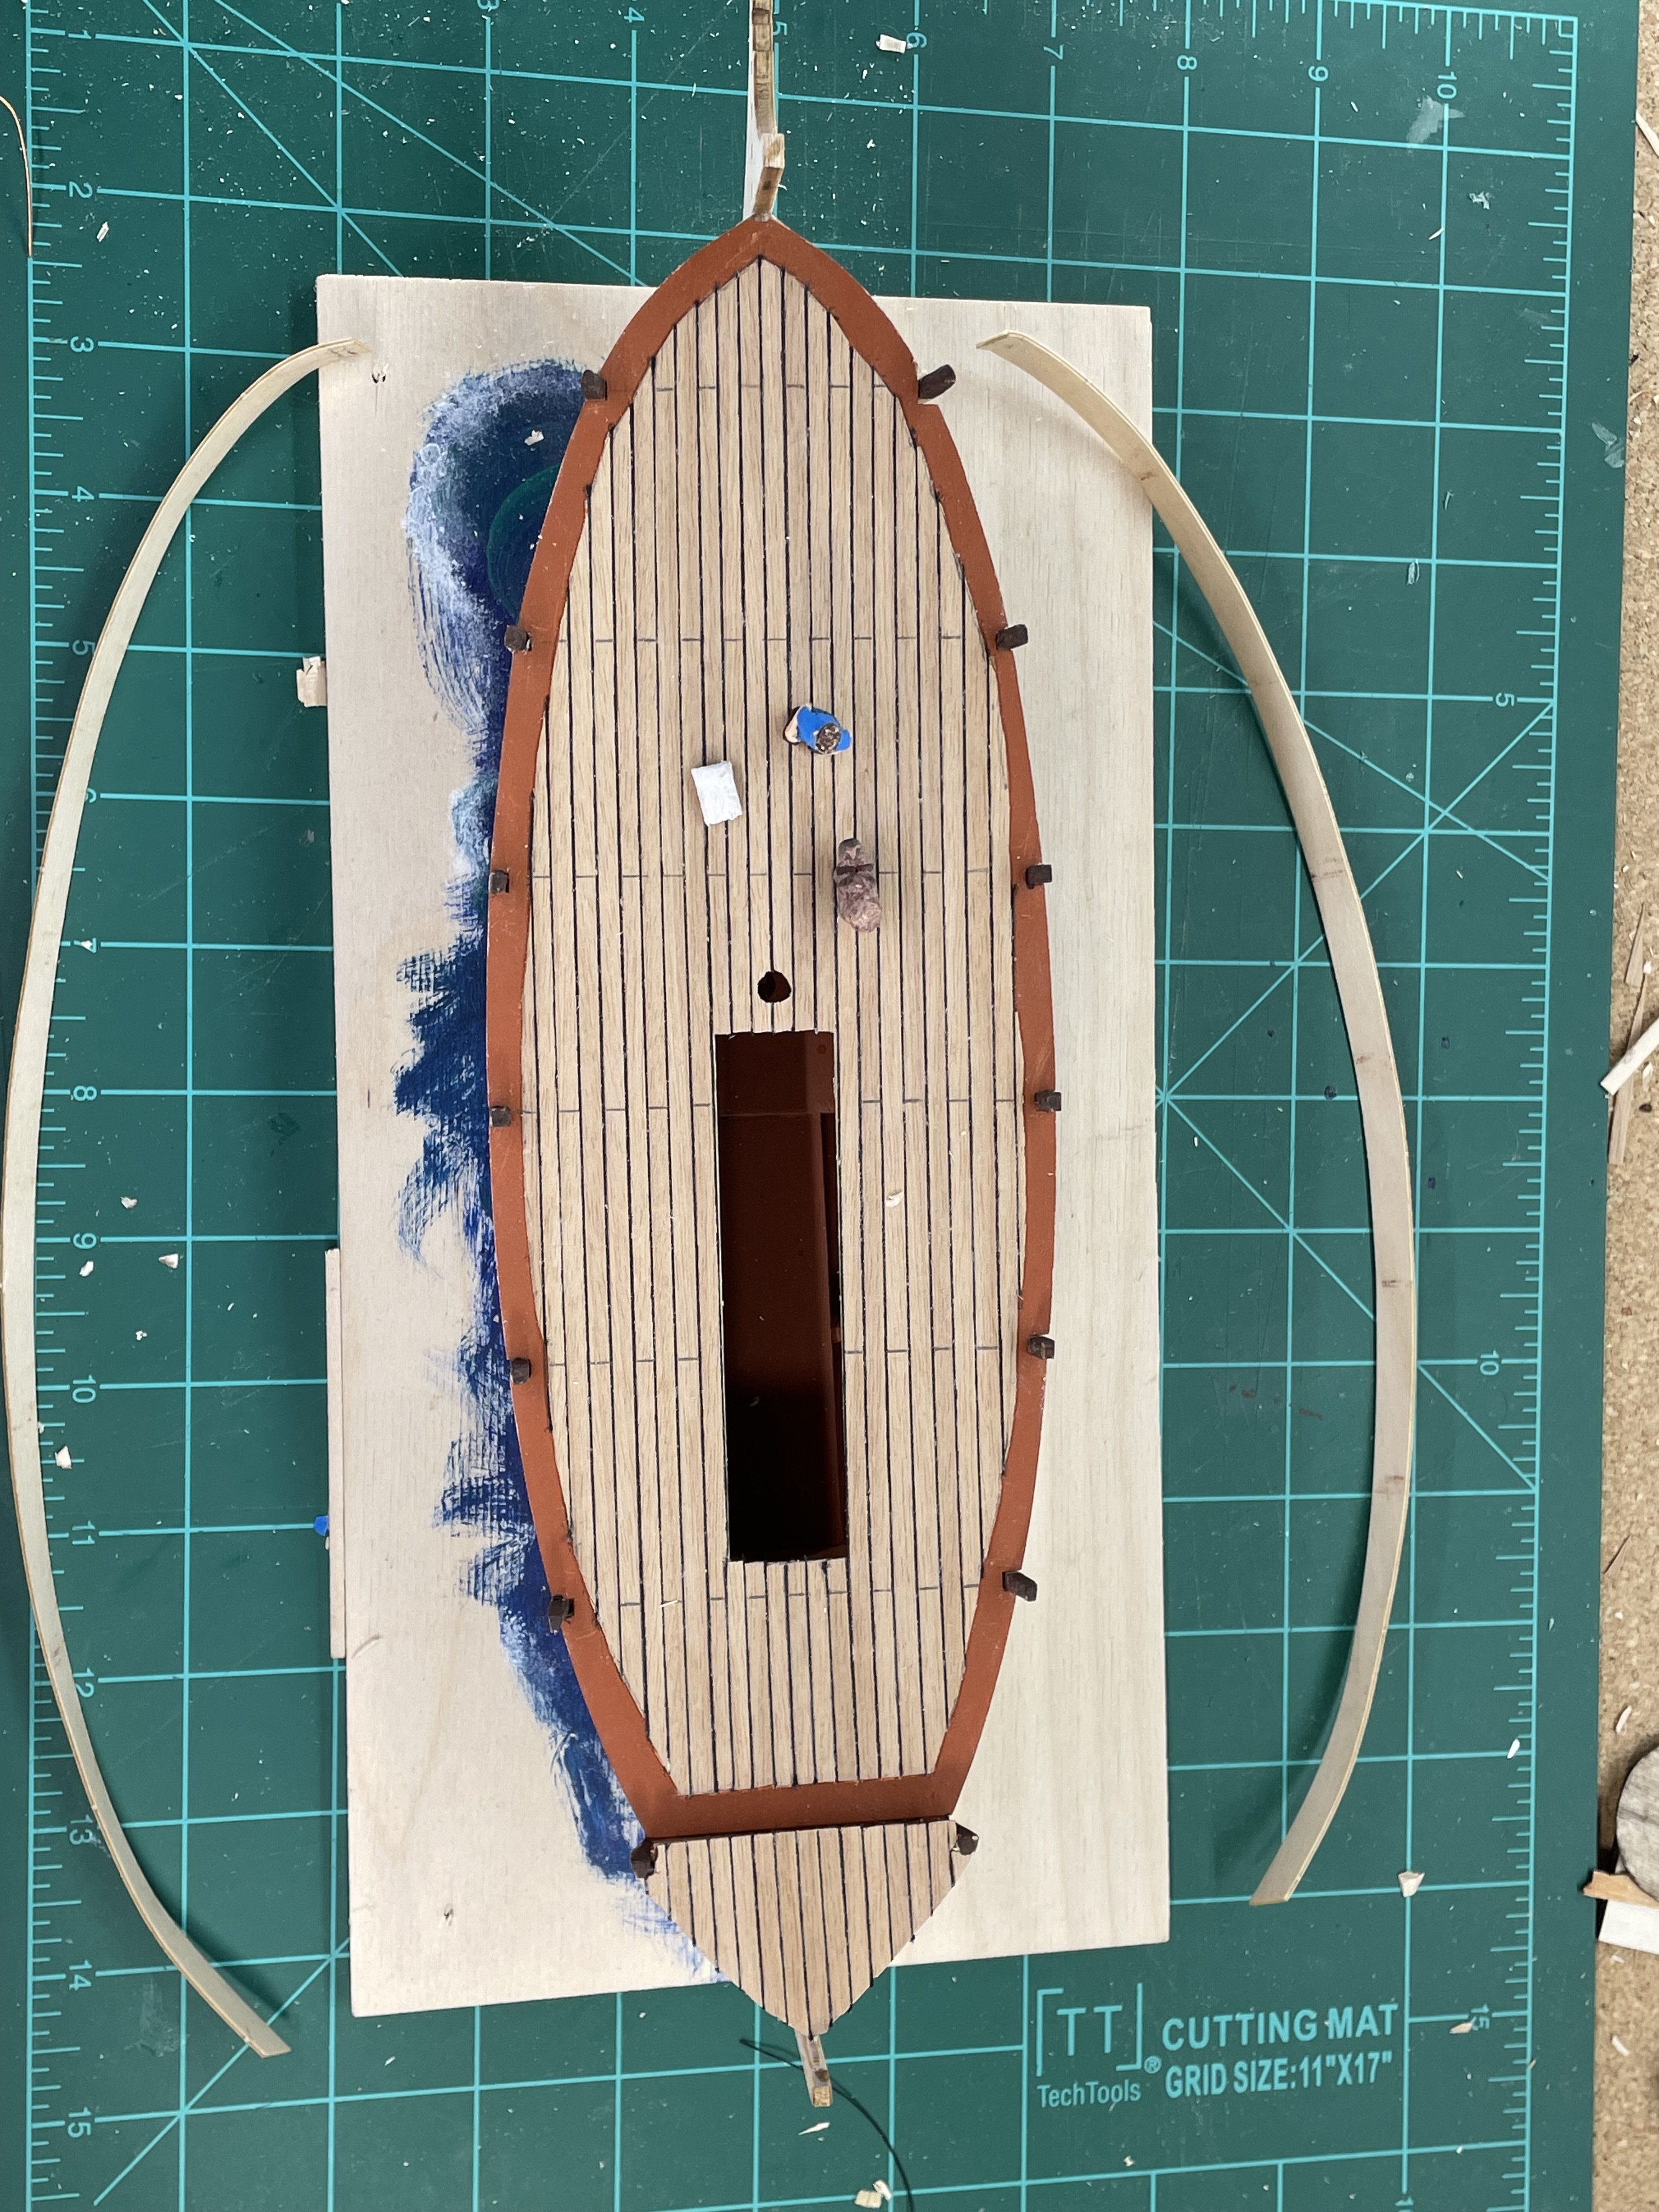
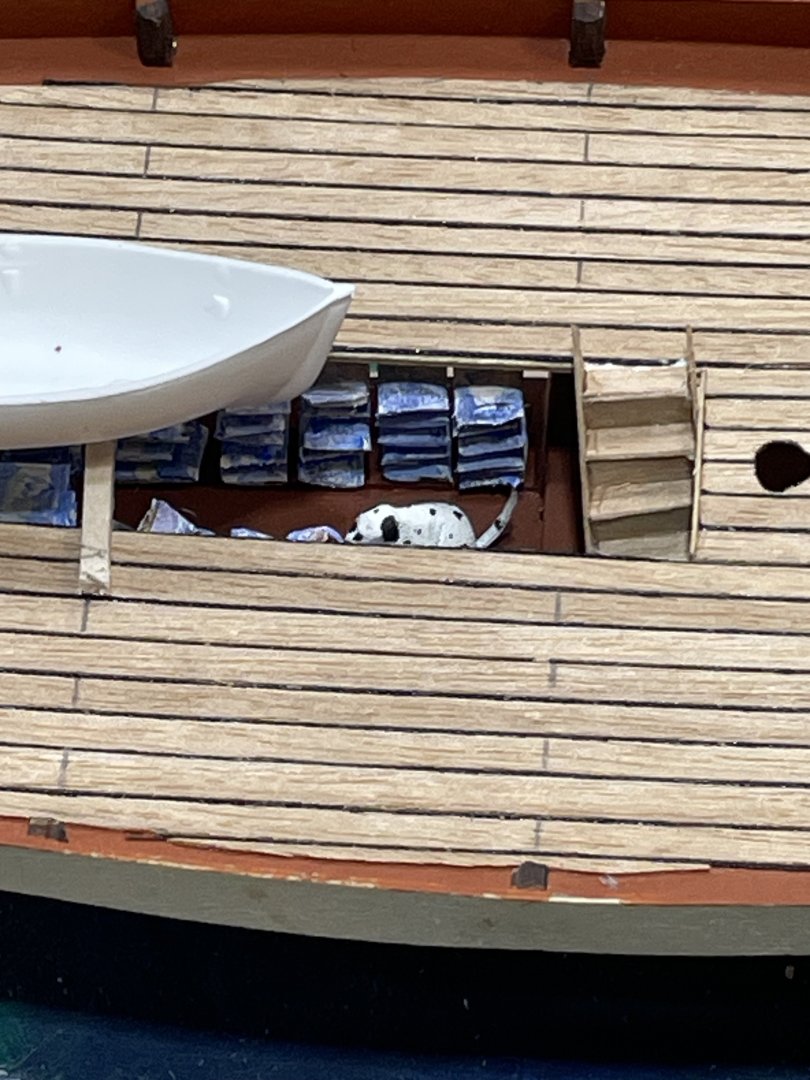
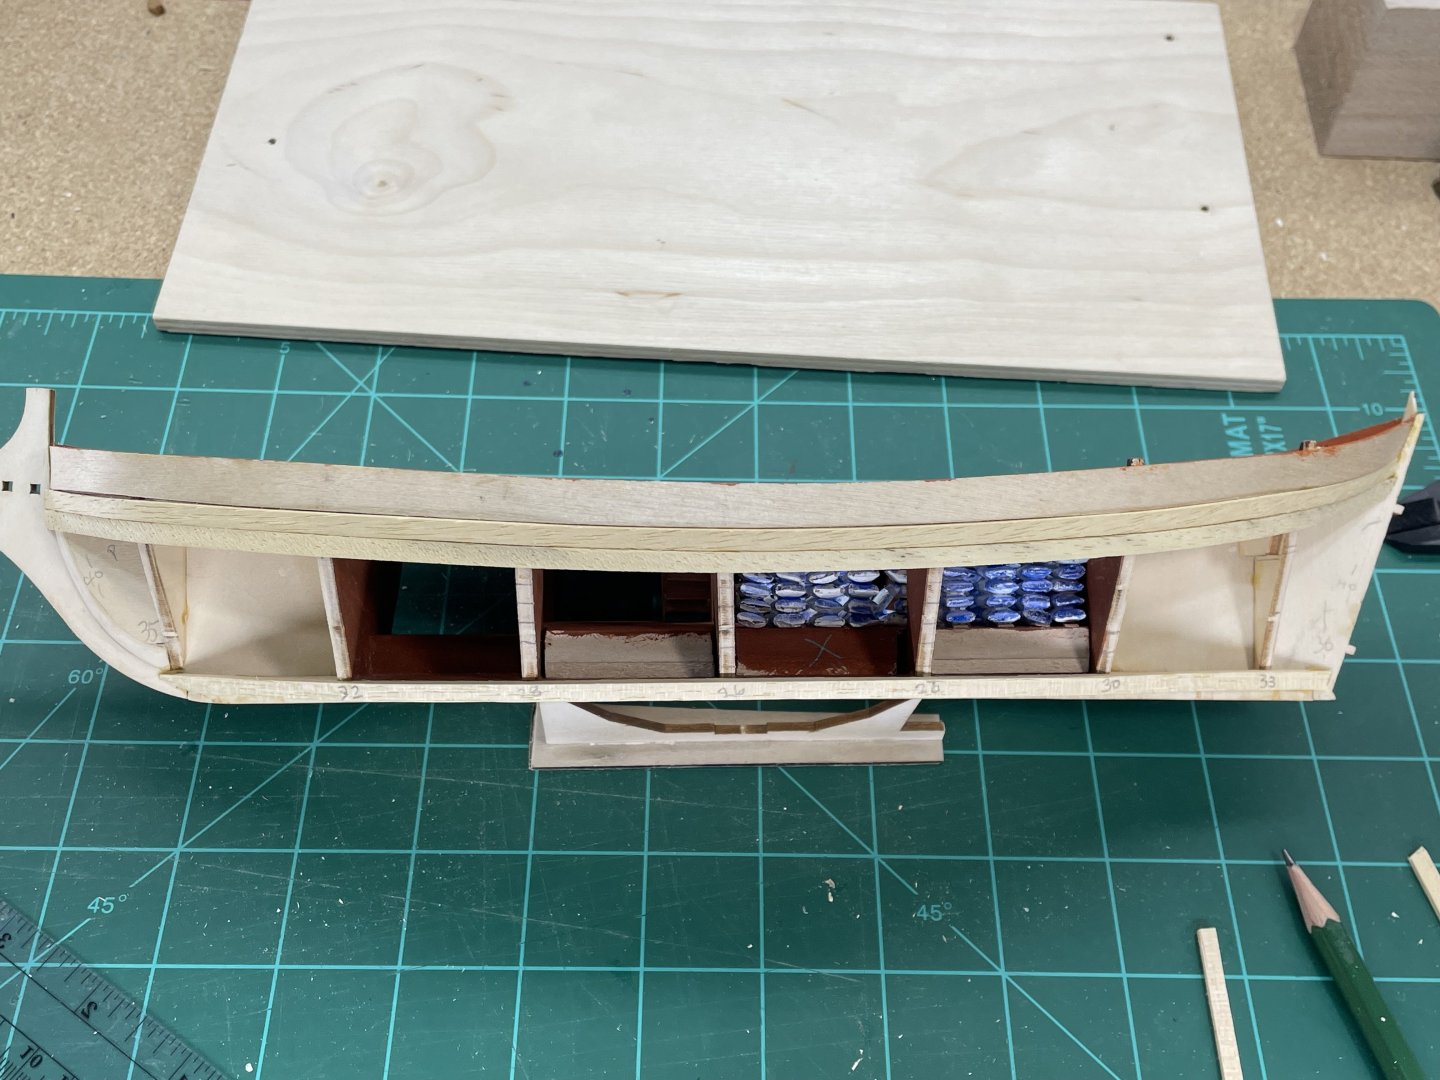
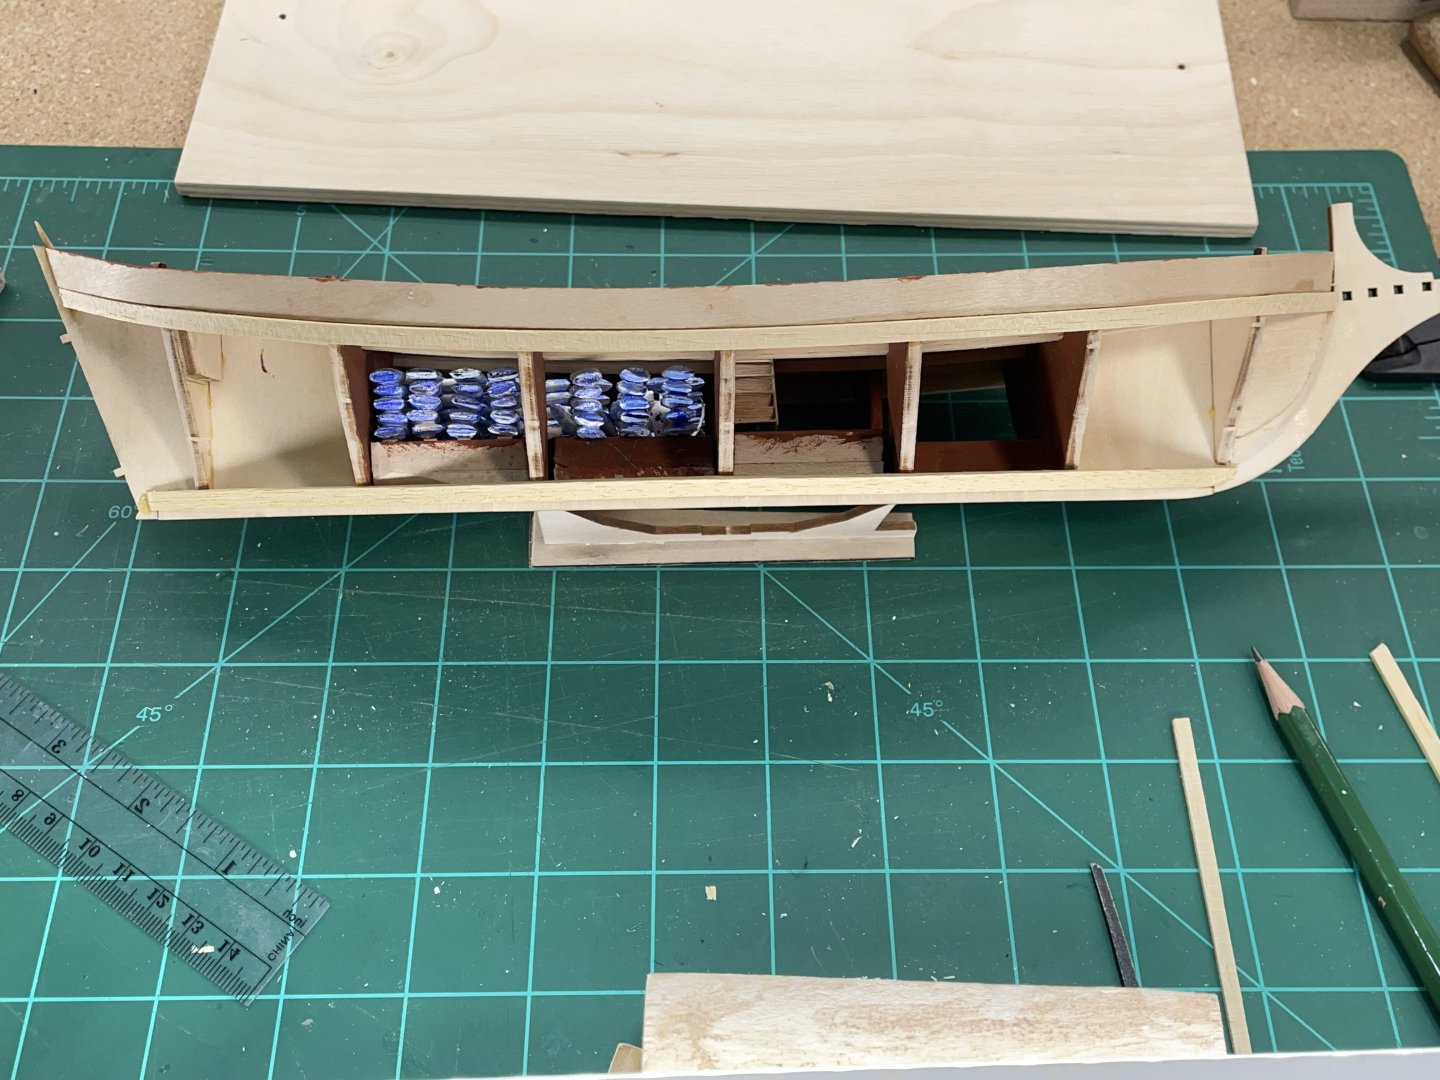
 Thanks Jacques. This boat is going to be displayed in a neighboring town’s pet shop that’s owned by my friend Kirt. He only sales one brand of food so that’s what I filled the boat with. I plan on trying to carve as many pets as possible for Captain Kirt’s crew 🙂 I really enjoy a build more when I get to personalize it for a specific home. Thanks for asking about it:-) The entire time I was making the 100 feed bags I was thinking I maybe the last to see them:-) Here’s a few more shots.
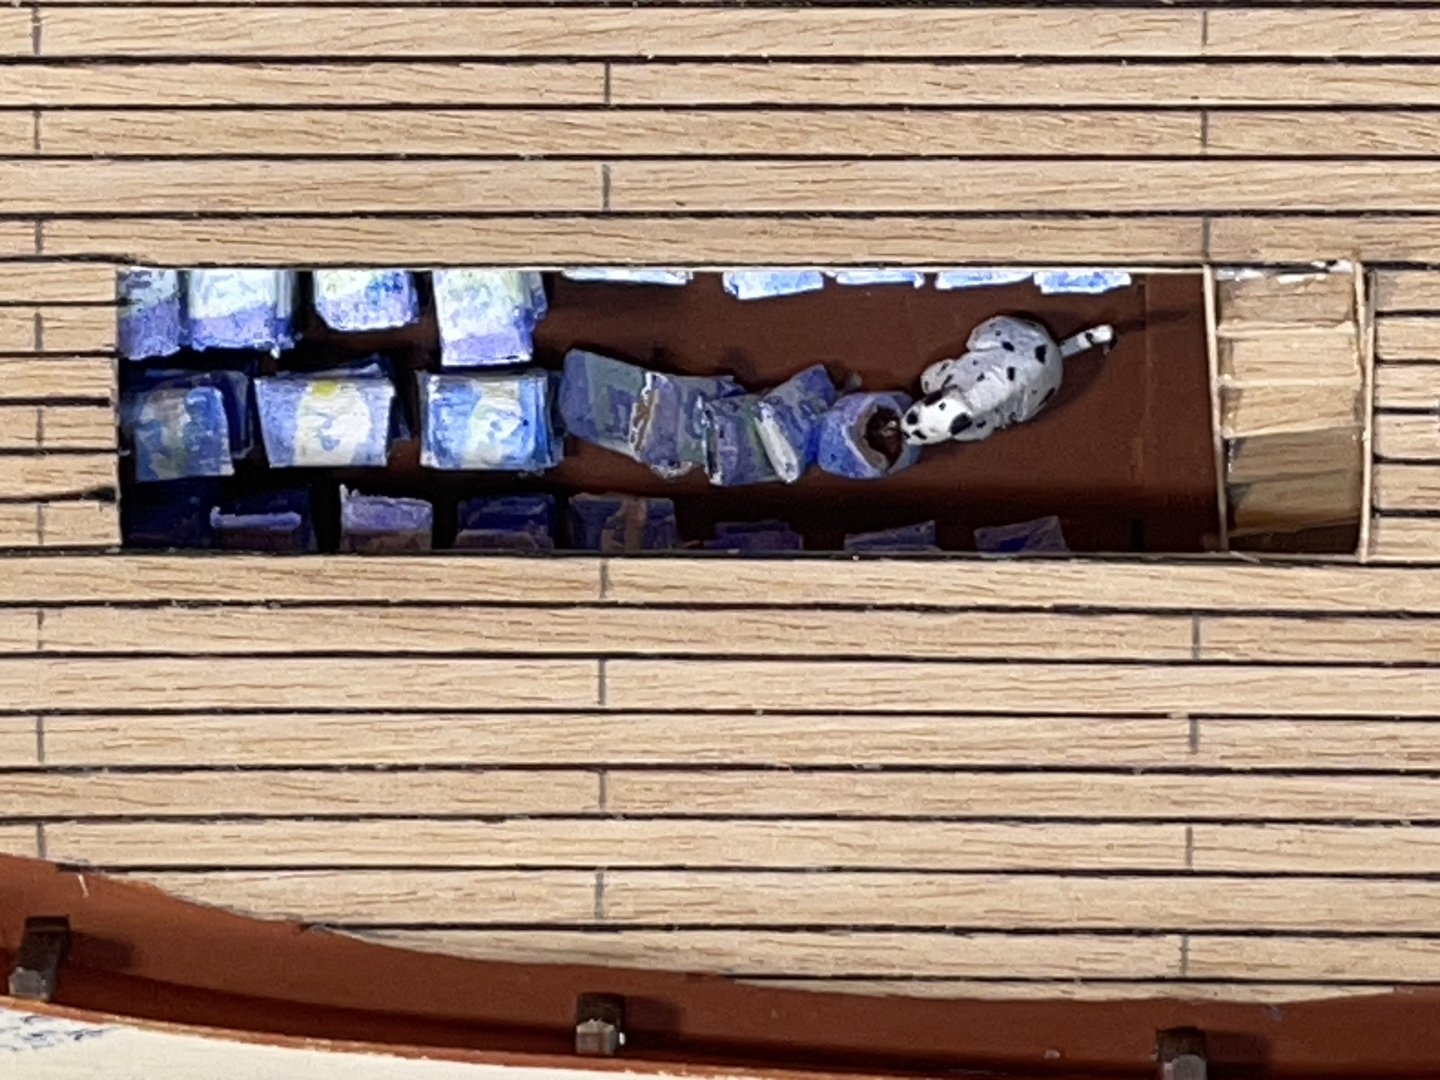
- 55 replies
-
- 7
-

-
- Le Martegaou
- billing boats
- (and 1 more)
-
I’ve spent the last 2 weeks making the cargo, which mostly will be covered up by the lifeboat. But for the few curious ones that will peek through the crack. It will cause them to ask. What’s that? 😁 I’ve started the planking and it’s been going on smoothly. Hopefully nothing unexpected will crop up. The flat bottom seems to make the planking look simpler. The stern and bow are both about 3 planks wider than the middle. I’ve got an uneducated plan in place, hopefully I’ll learn. I’m planning on painting the hull so I foresee no problems that can’t be covered:-)
- 55 replies
-
- 4
-
-
- Le Martegaou
- billing boats
- (and 1 more)
-
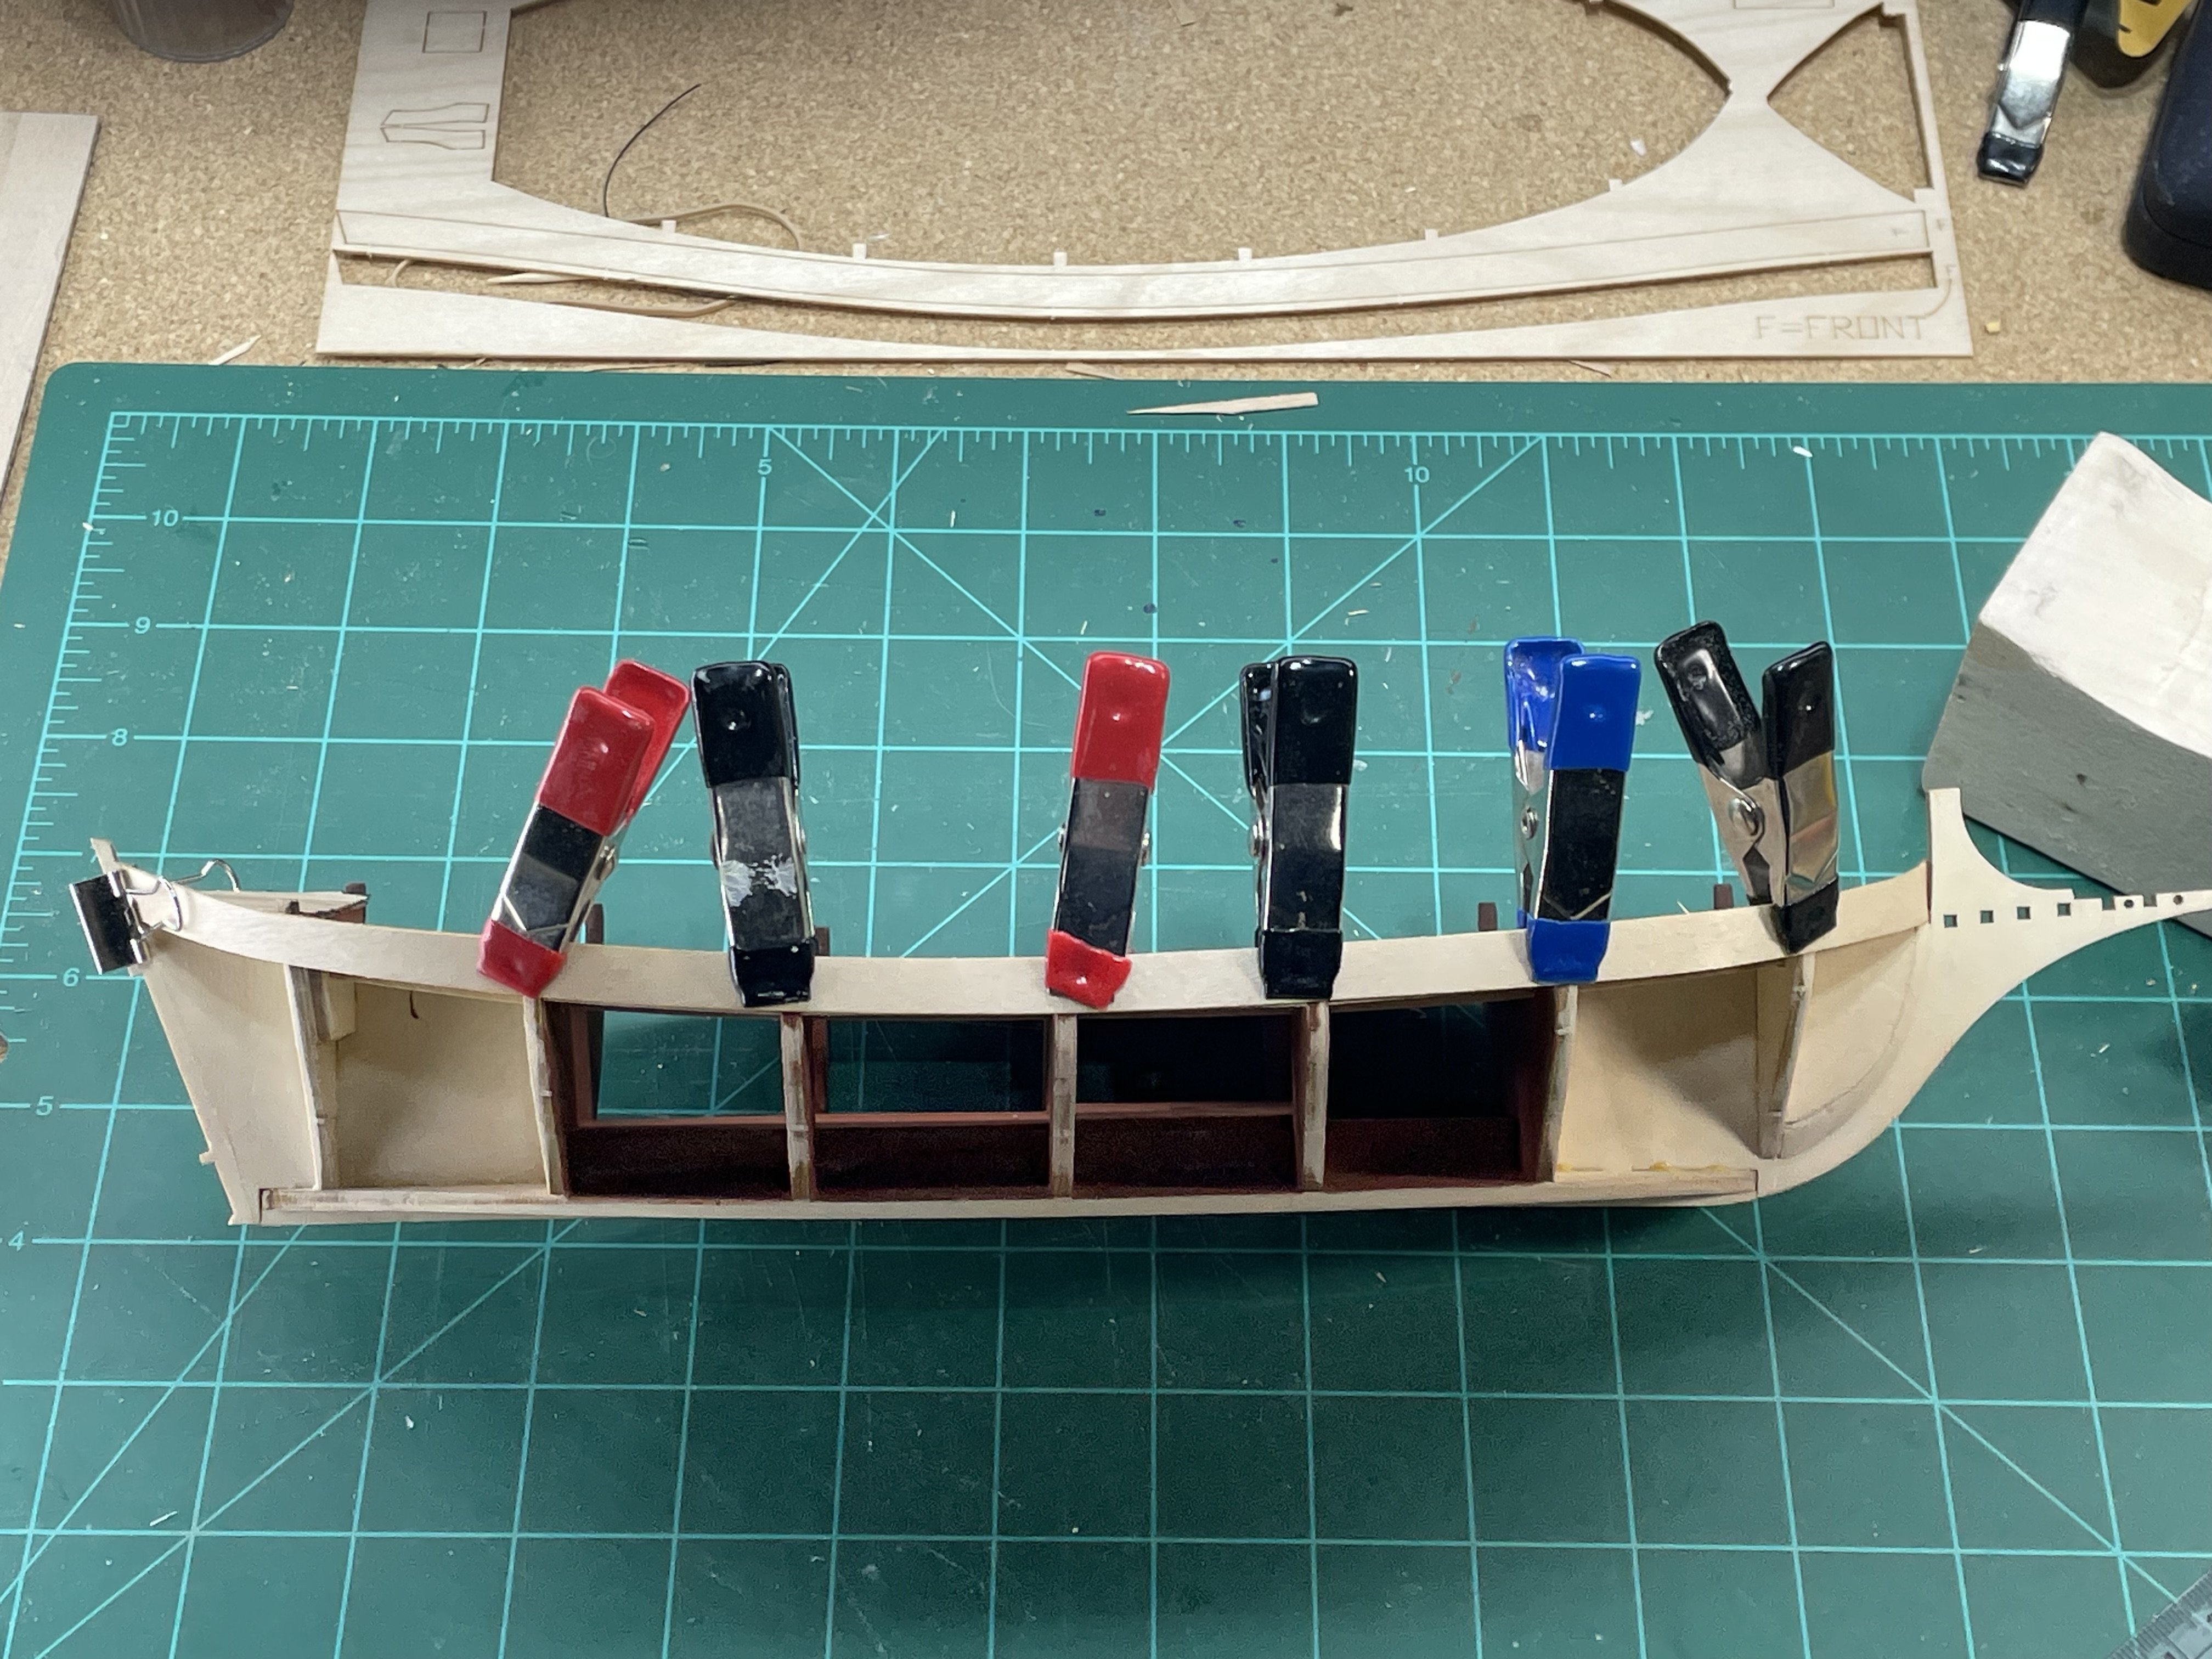
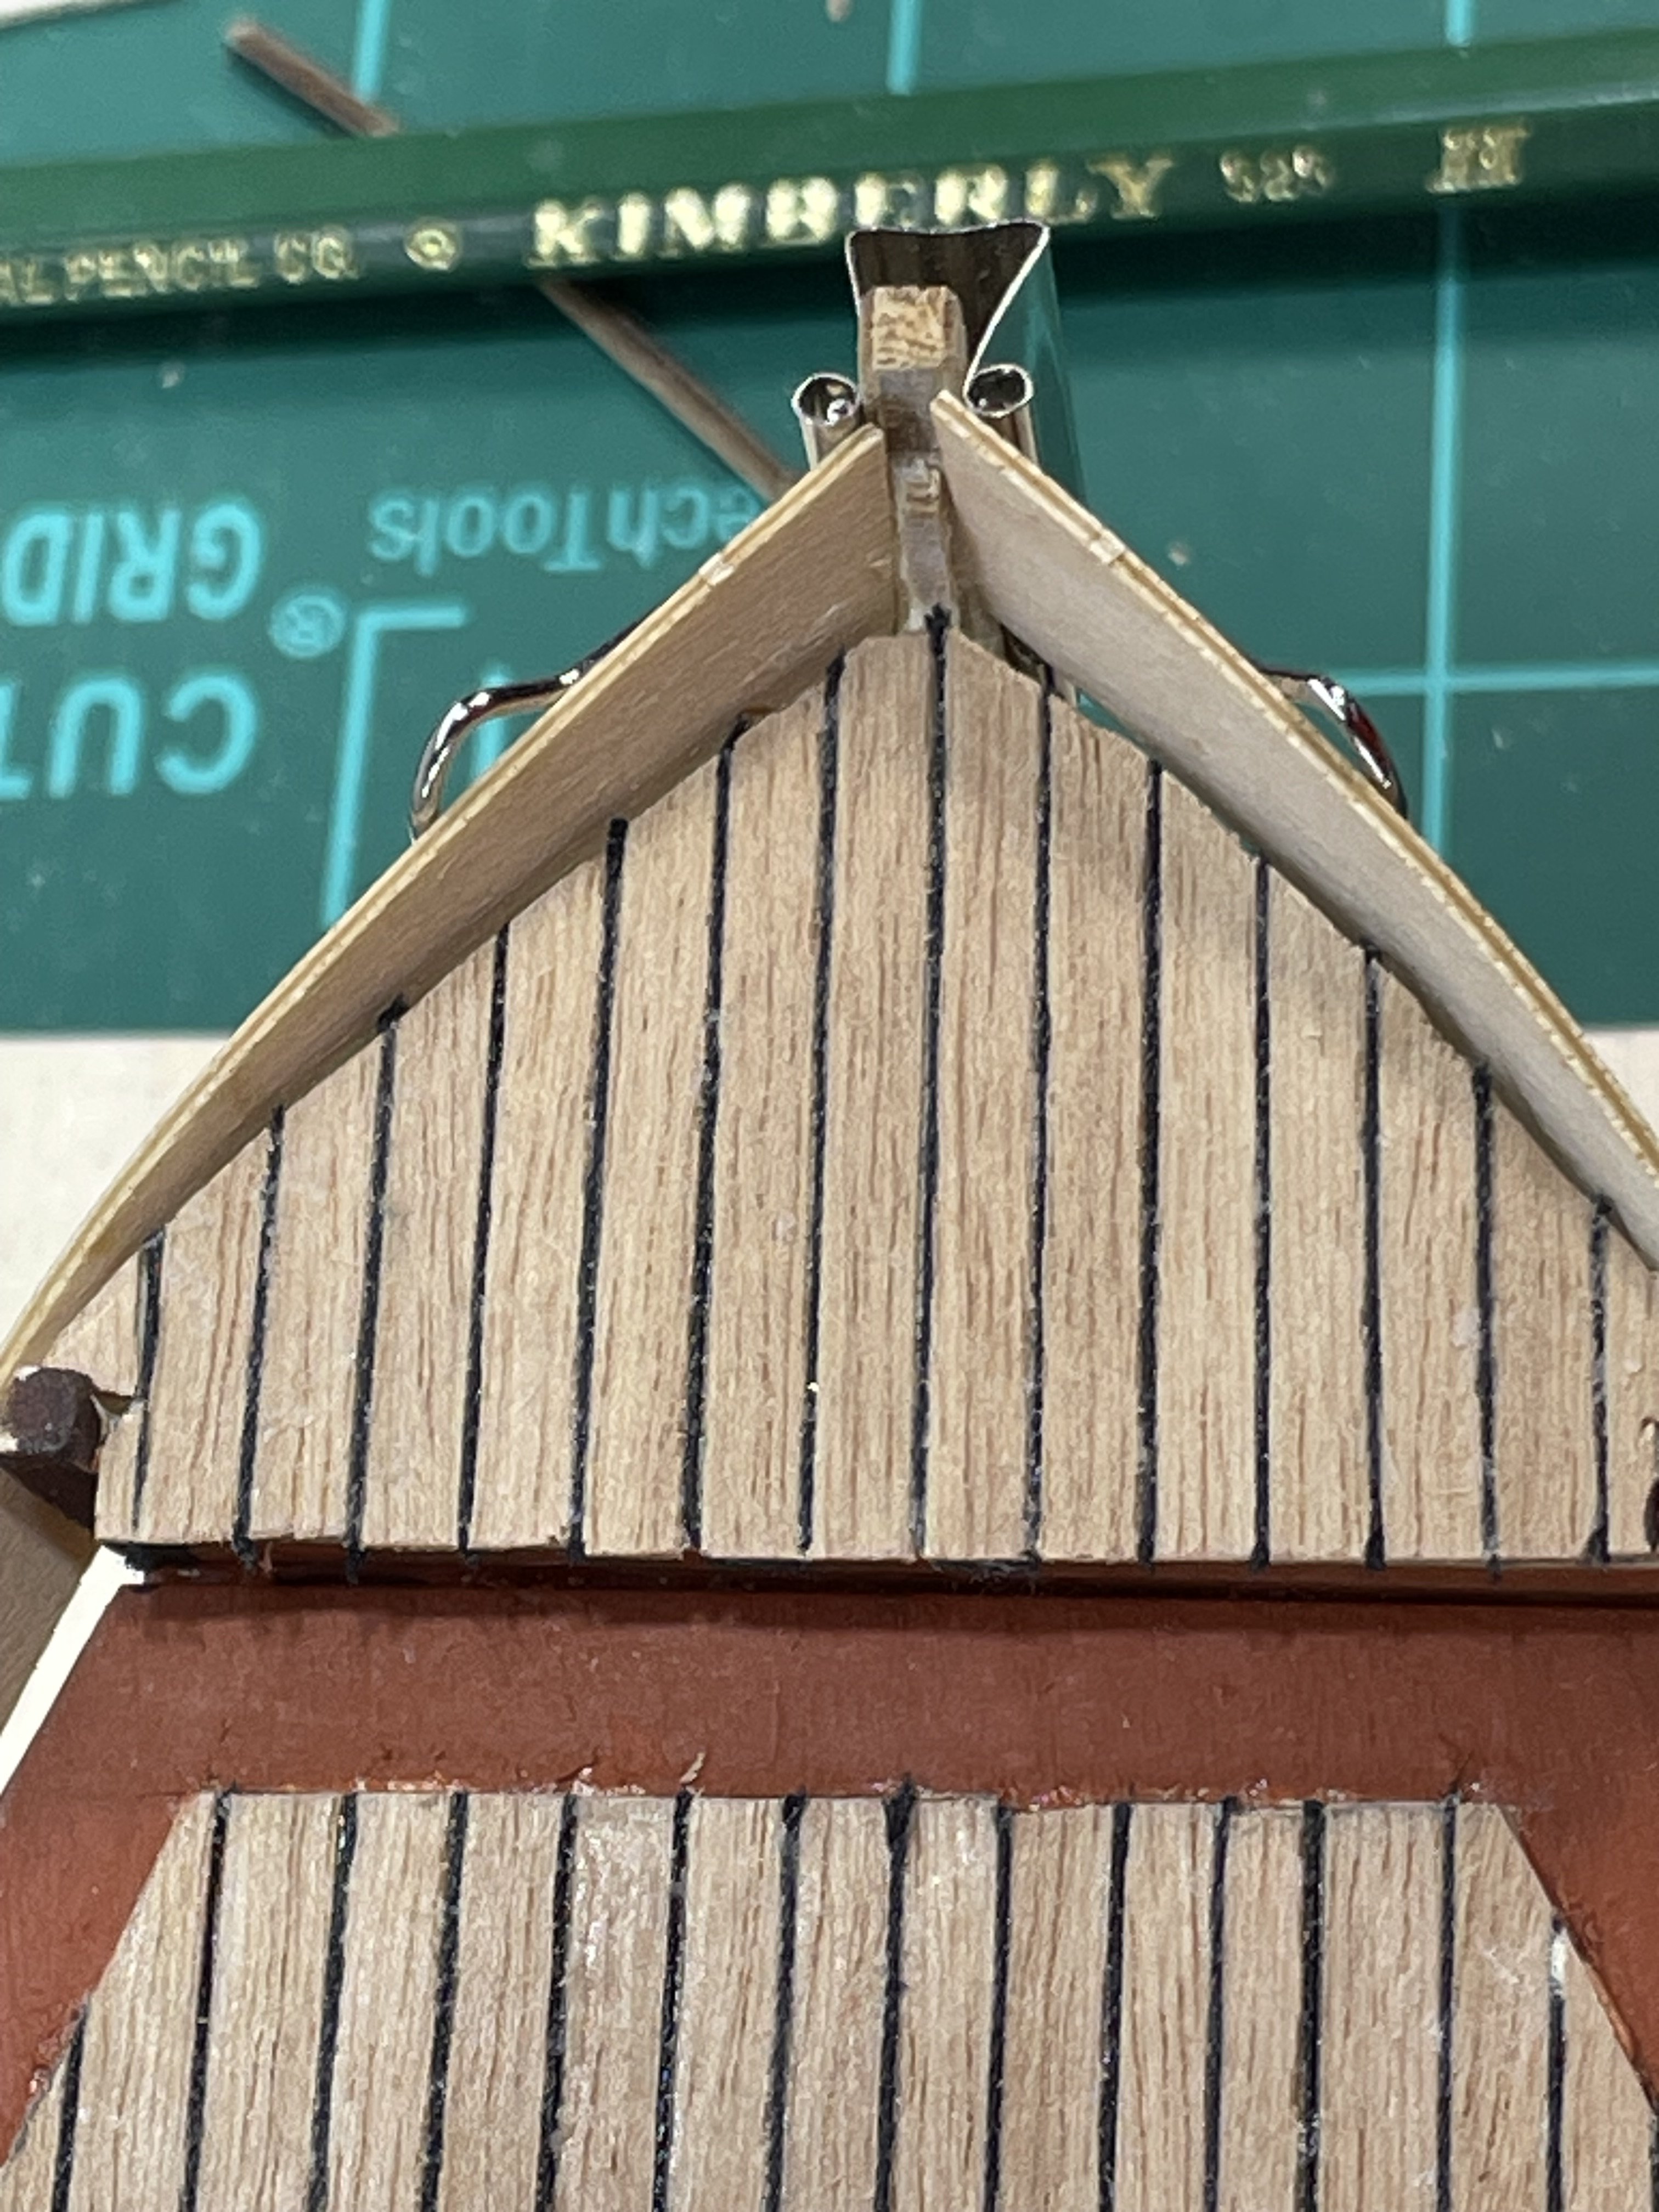
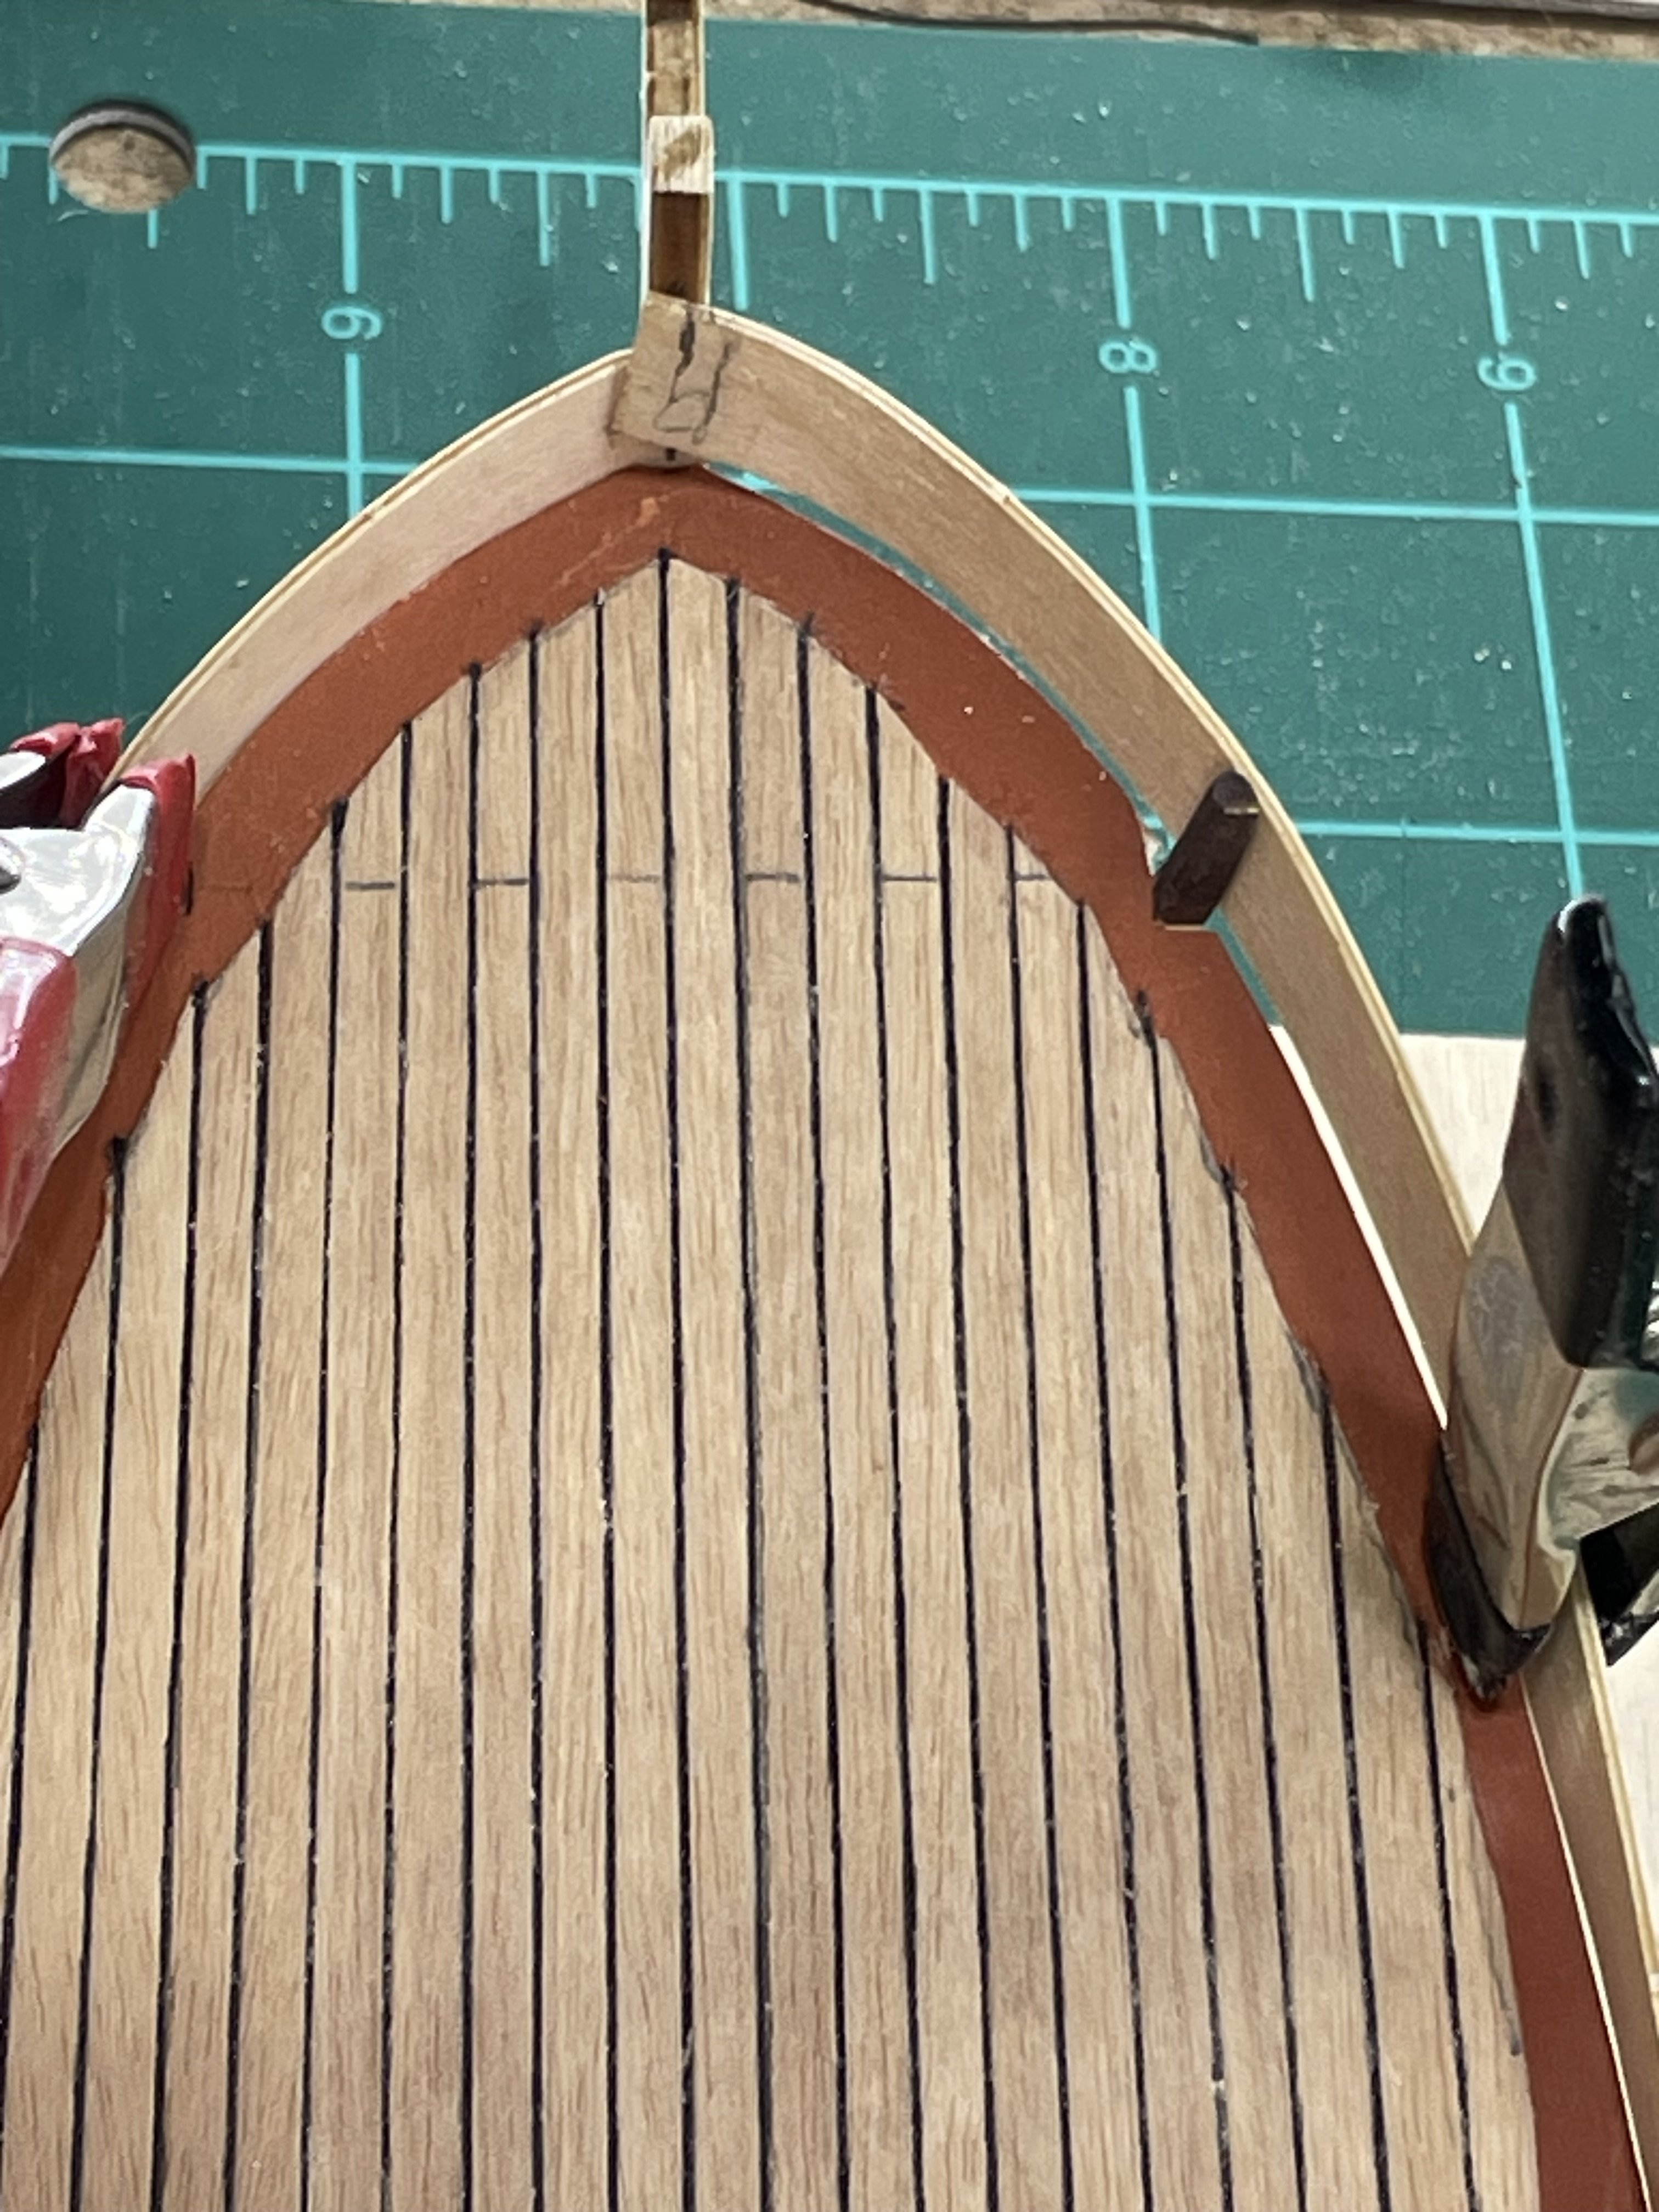
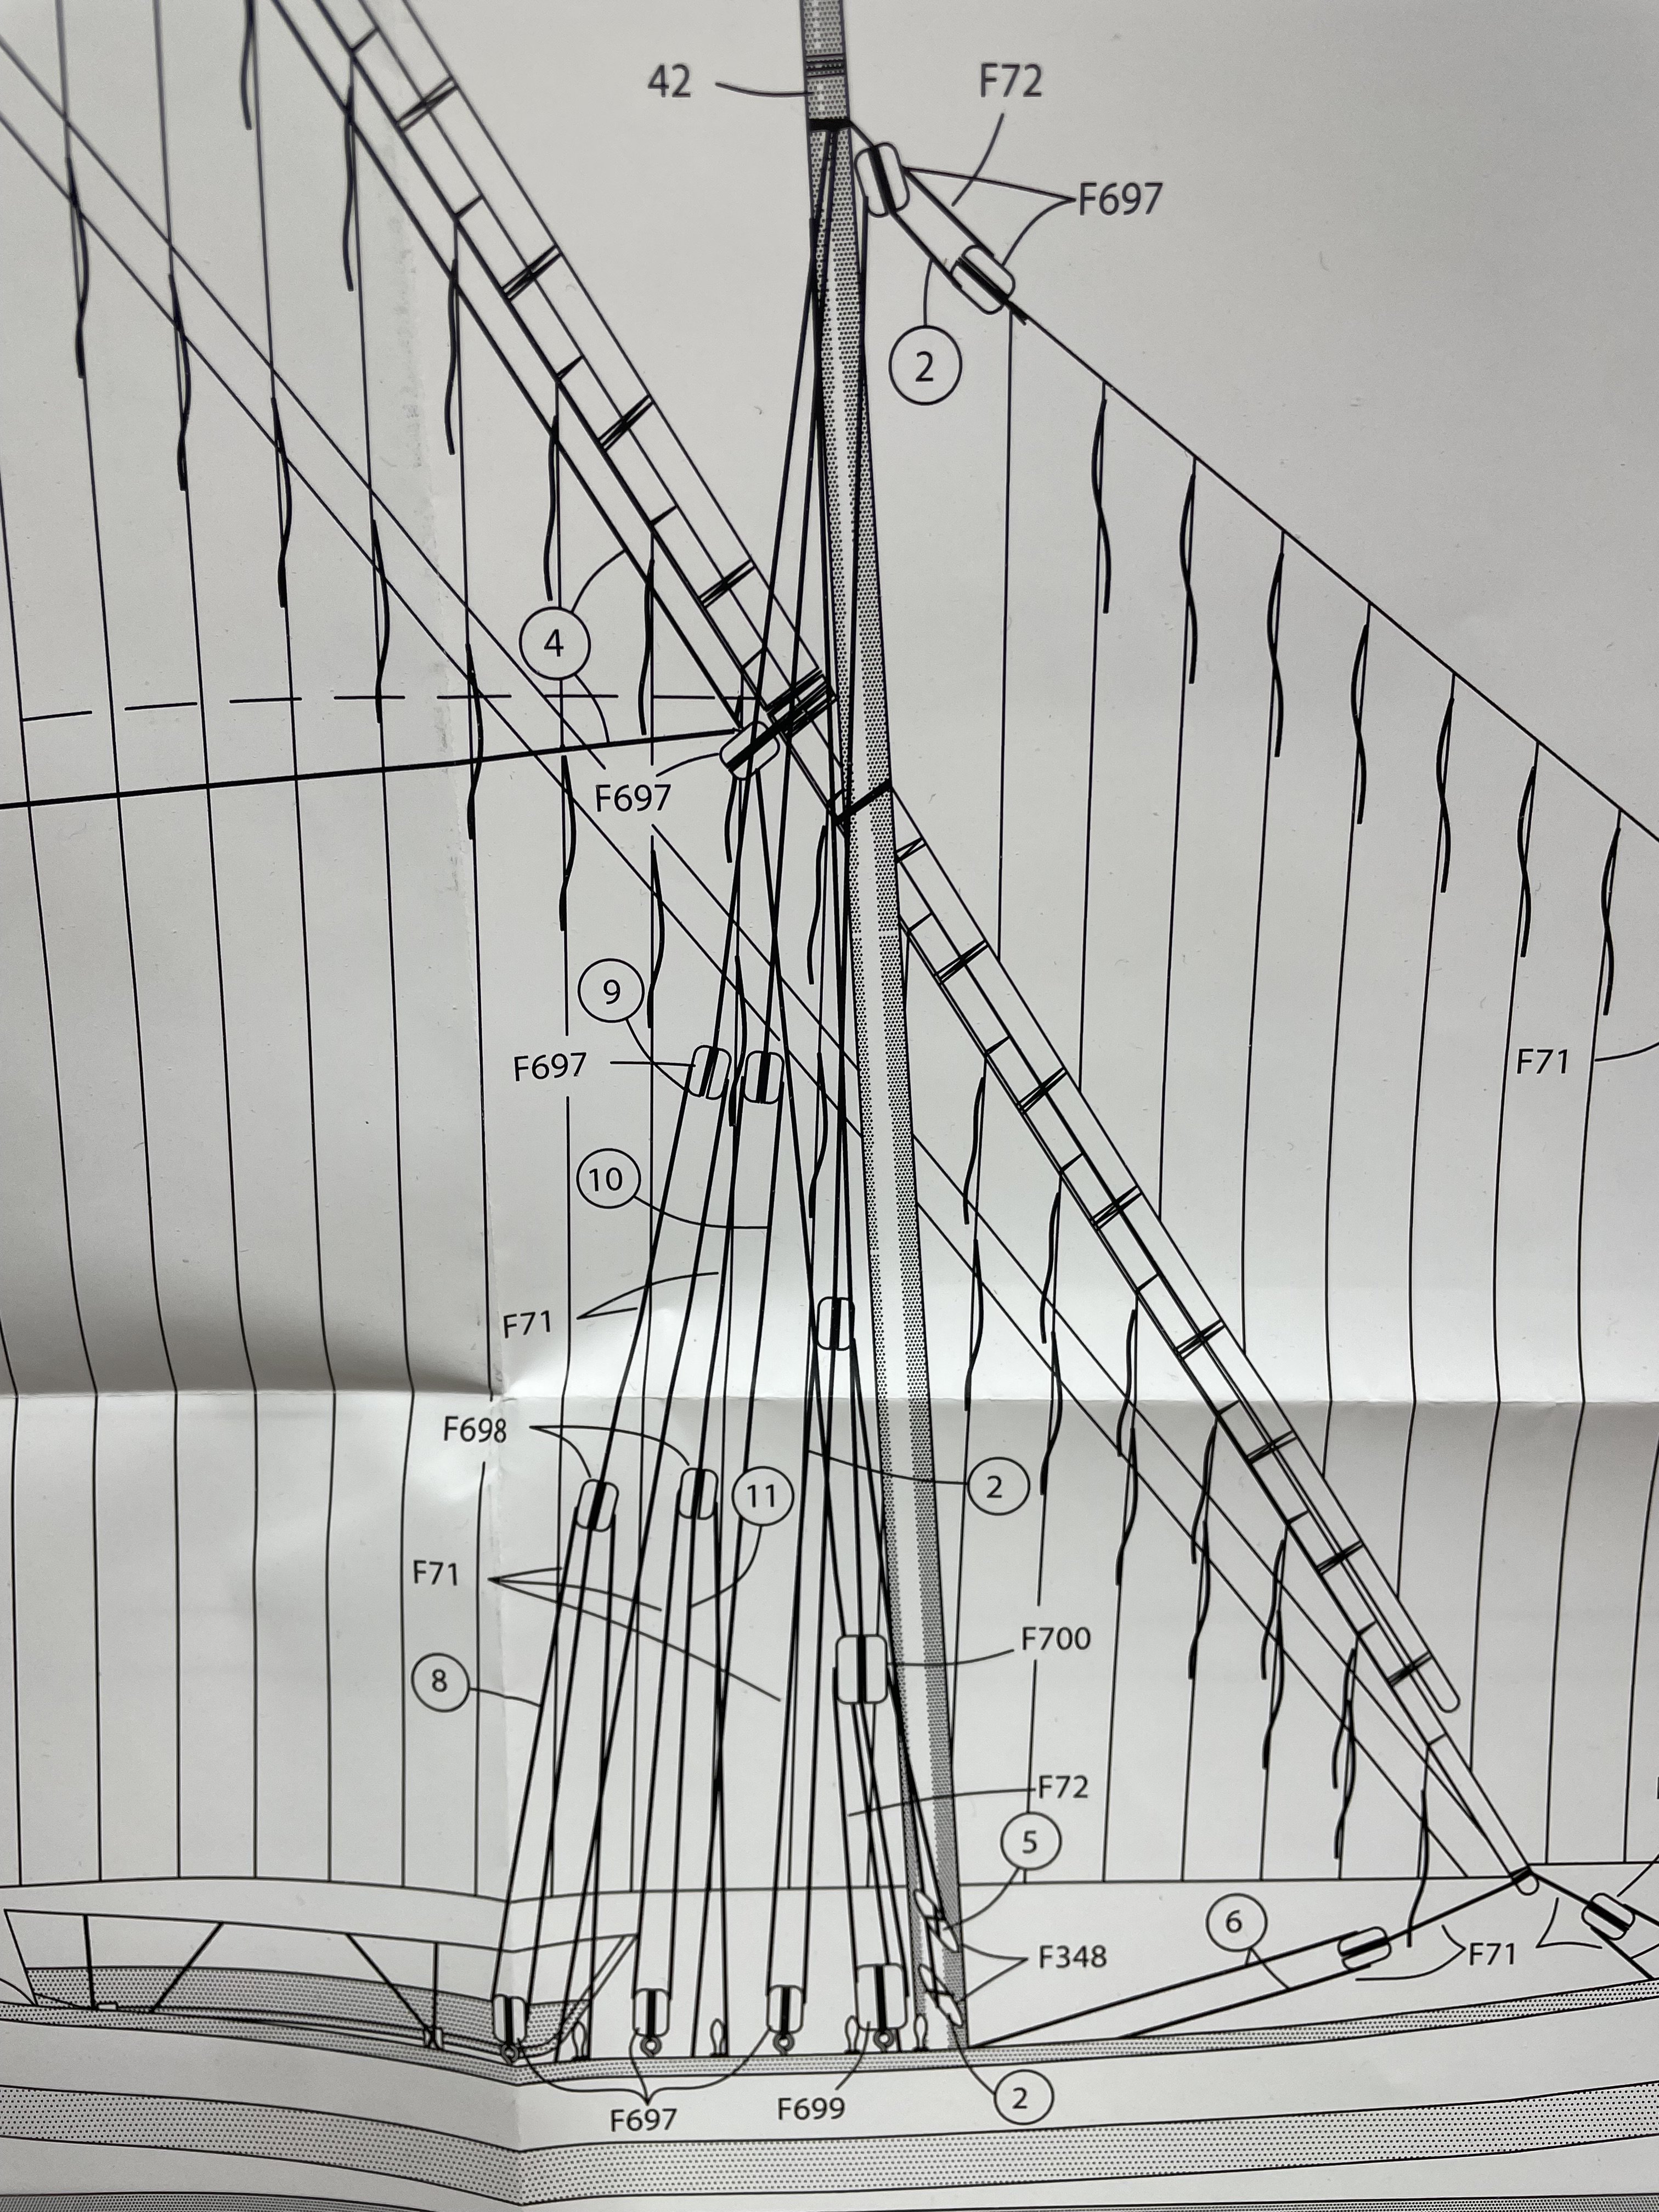
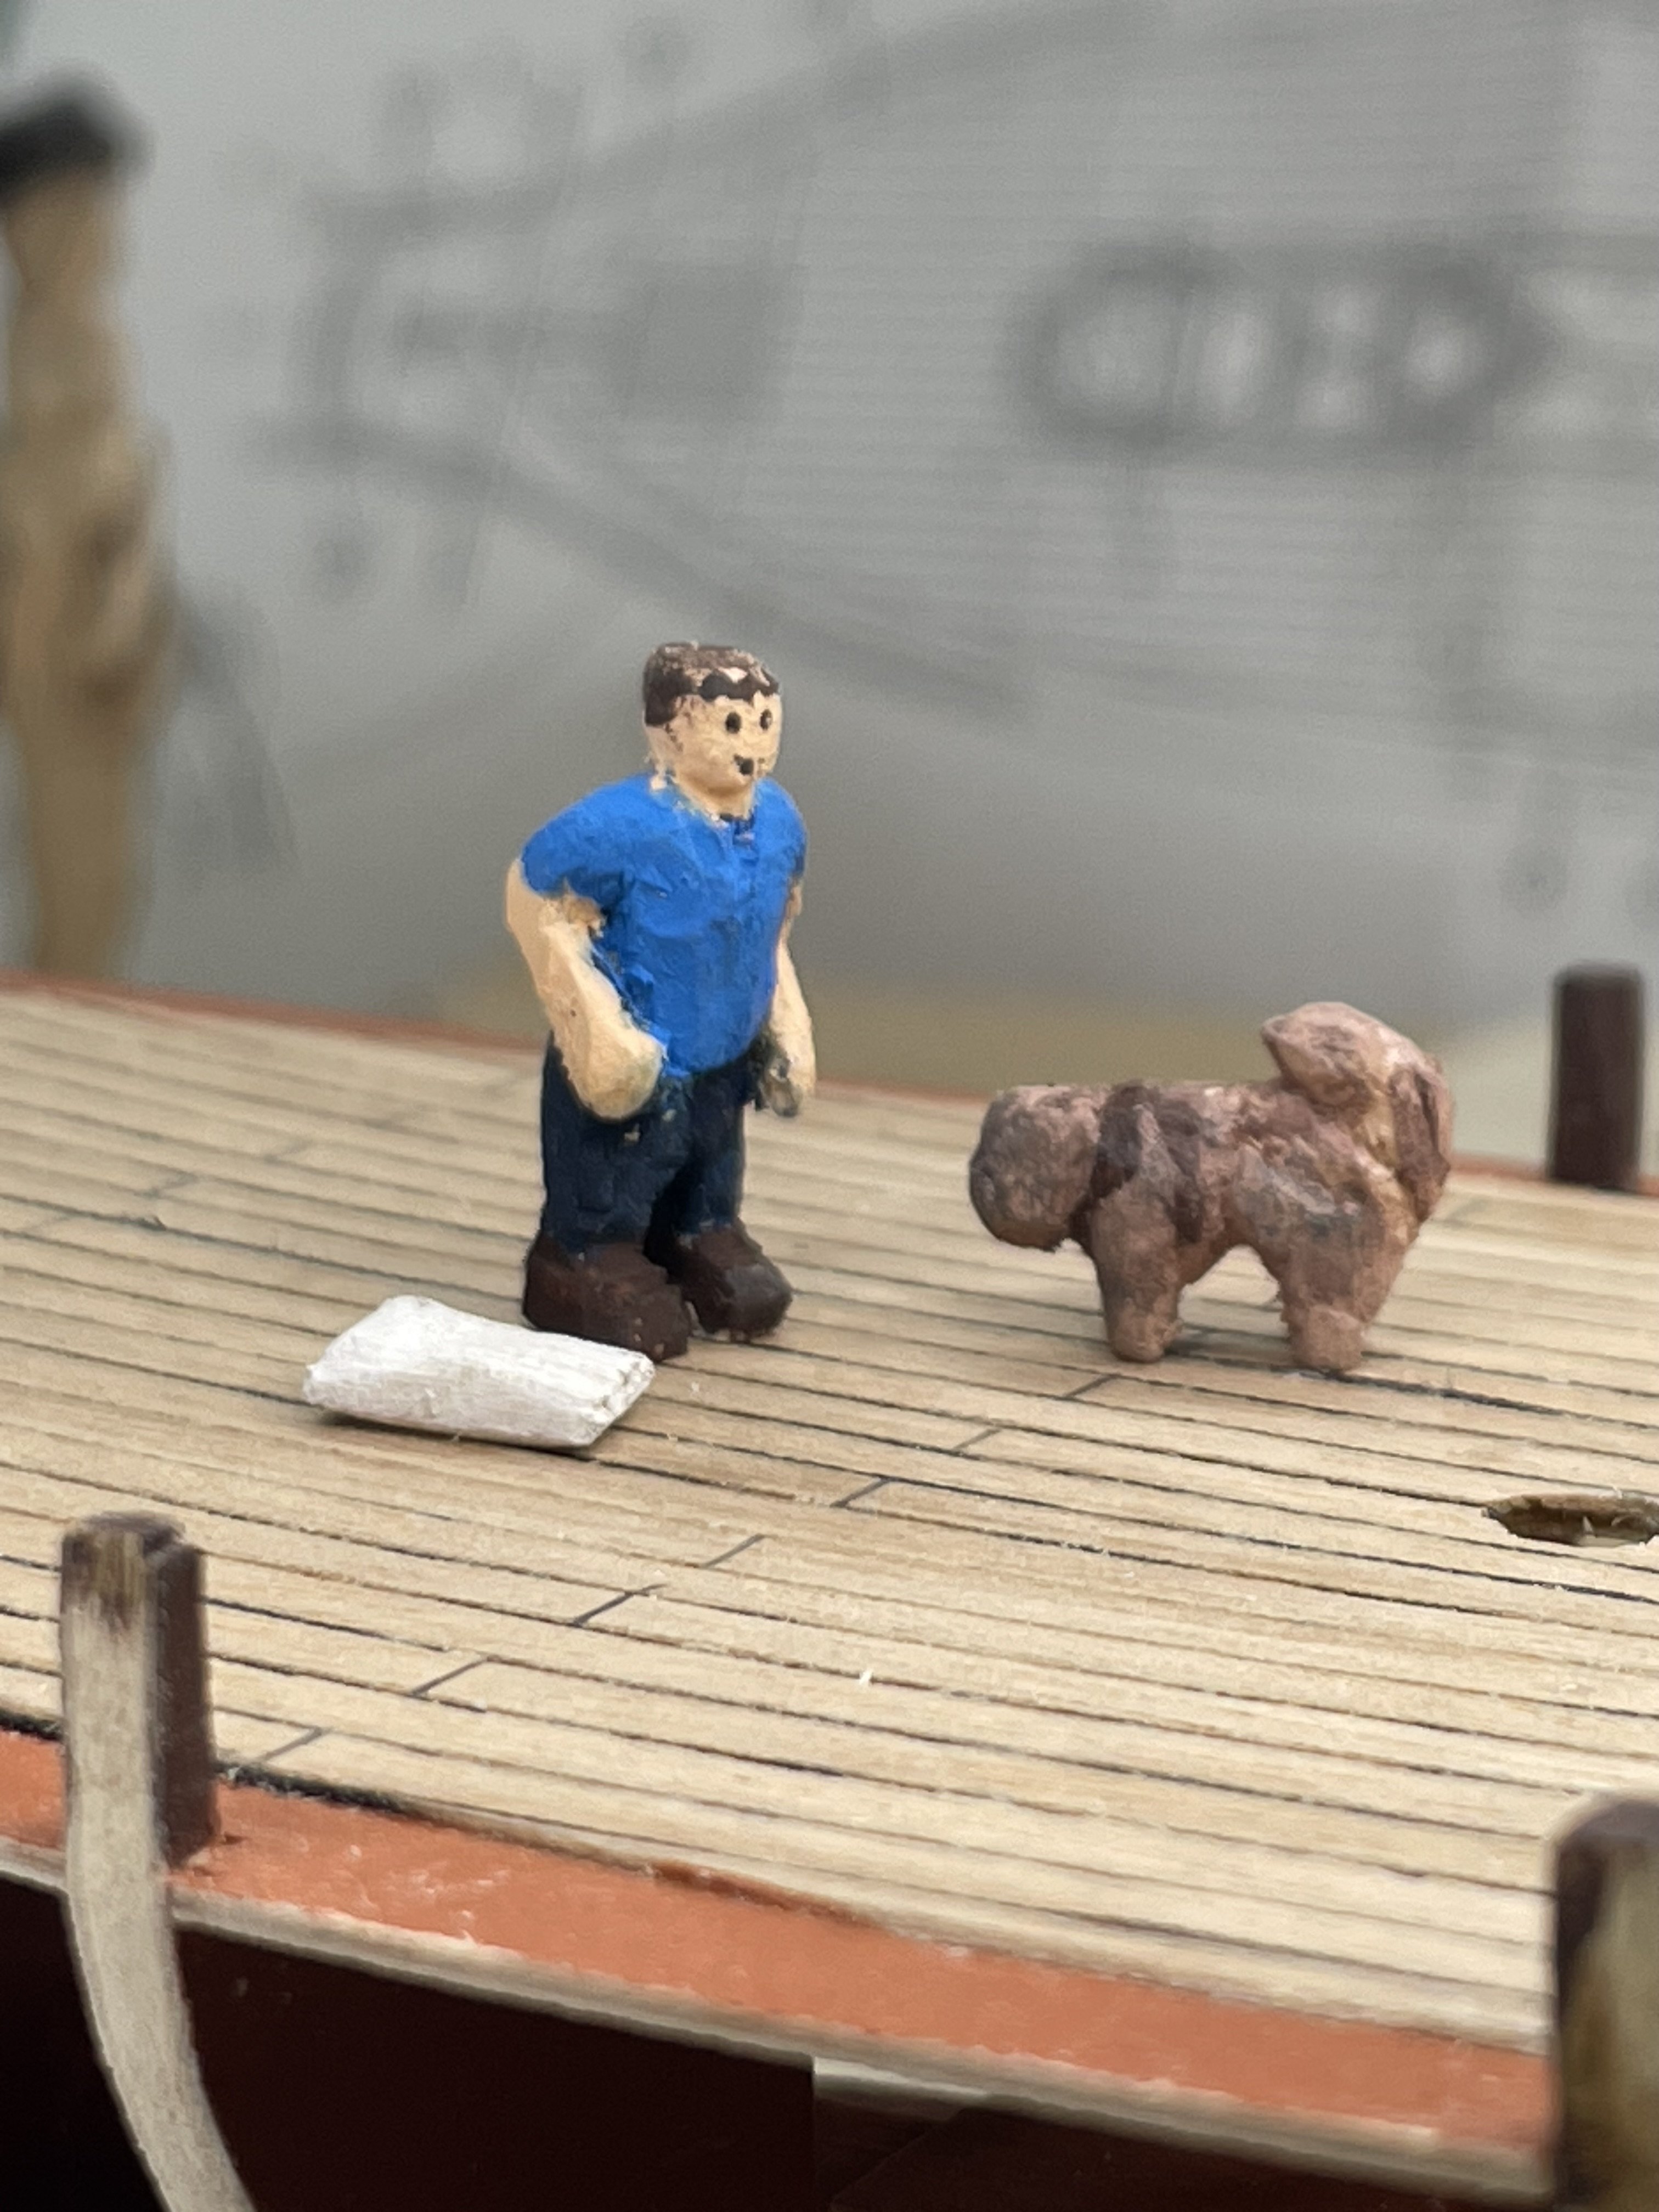
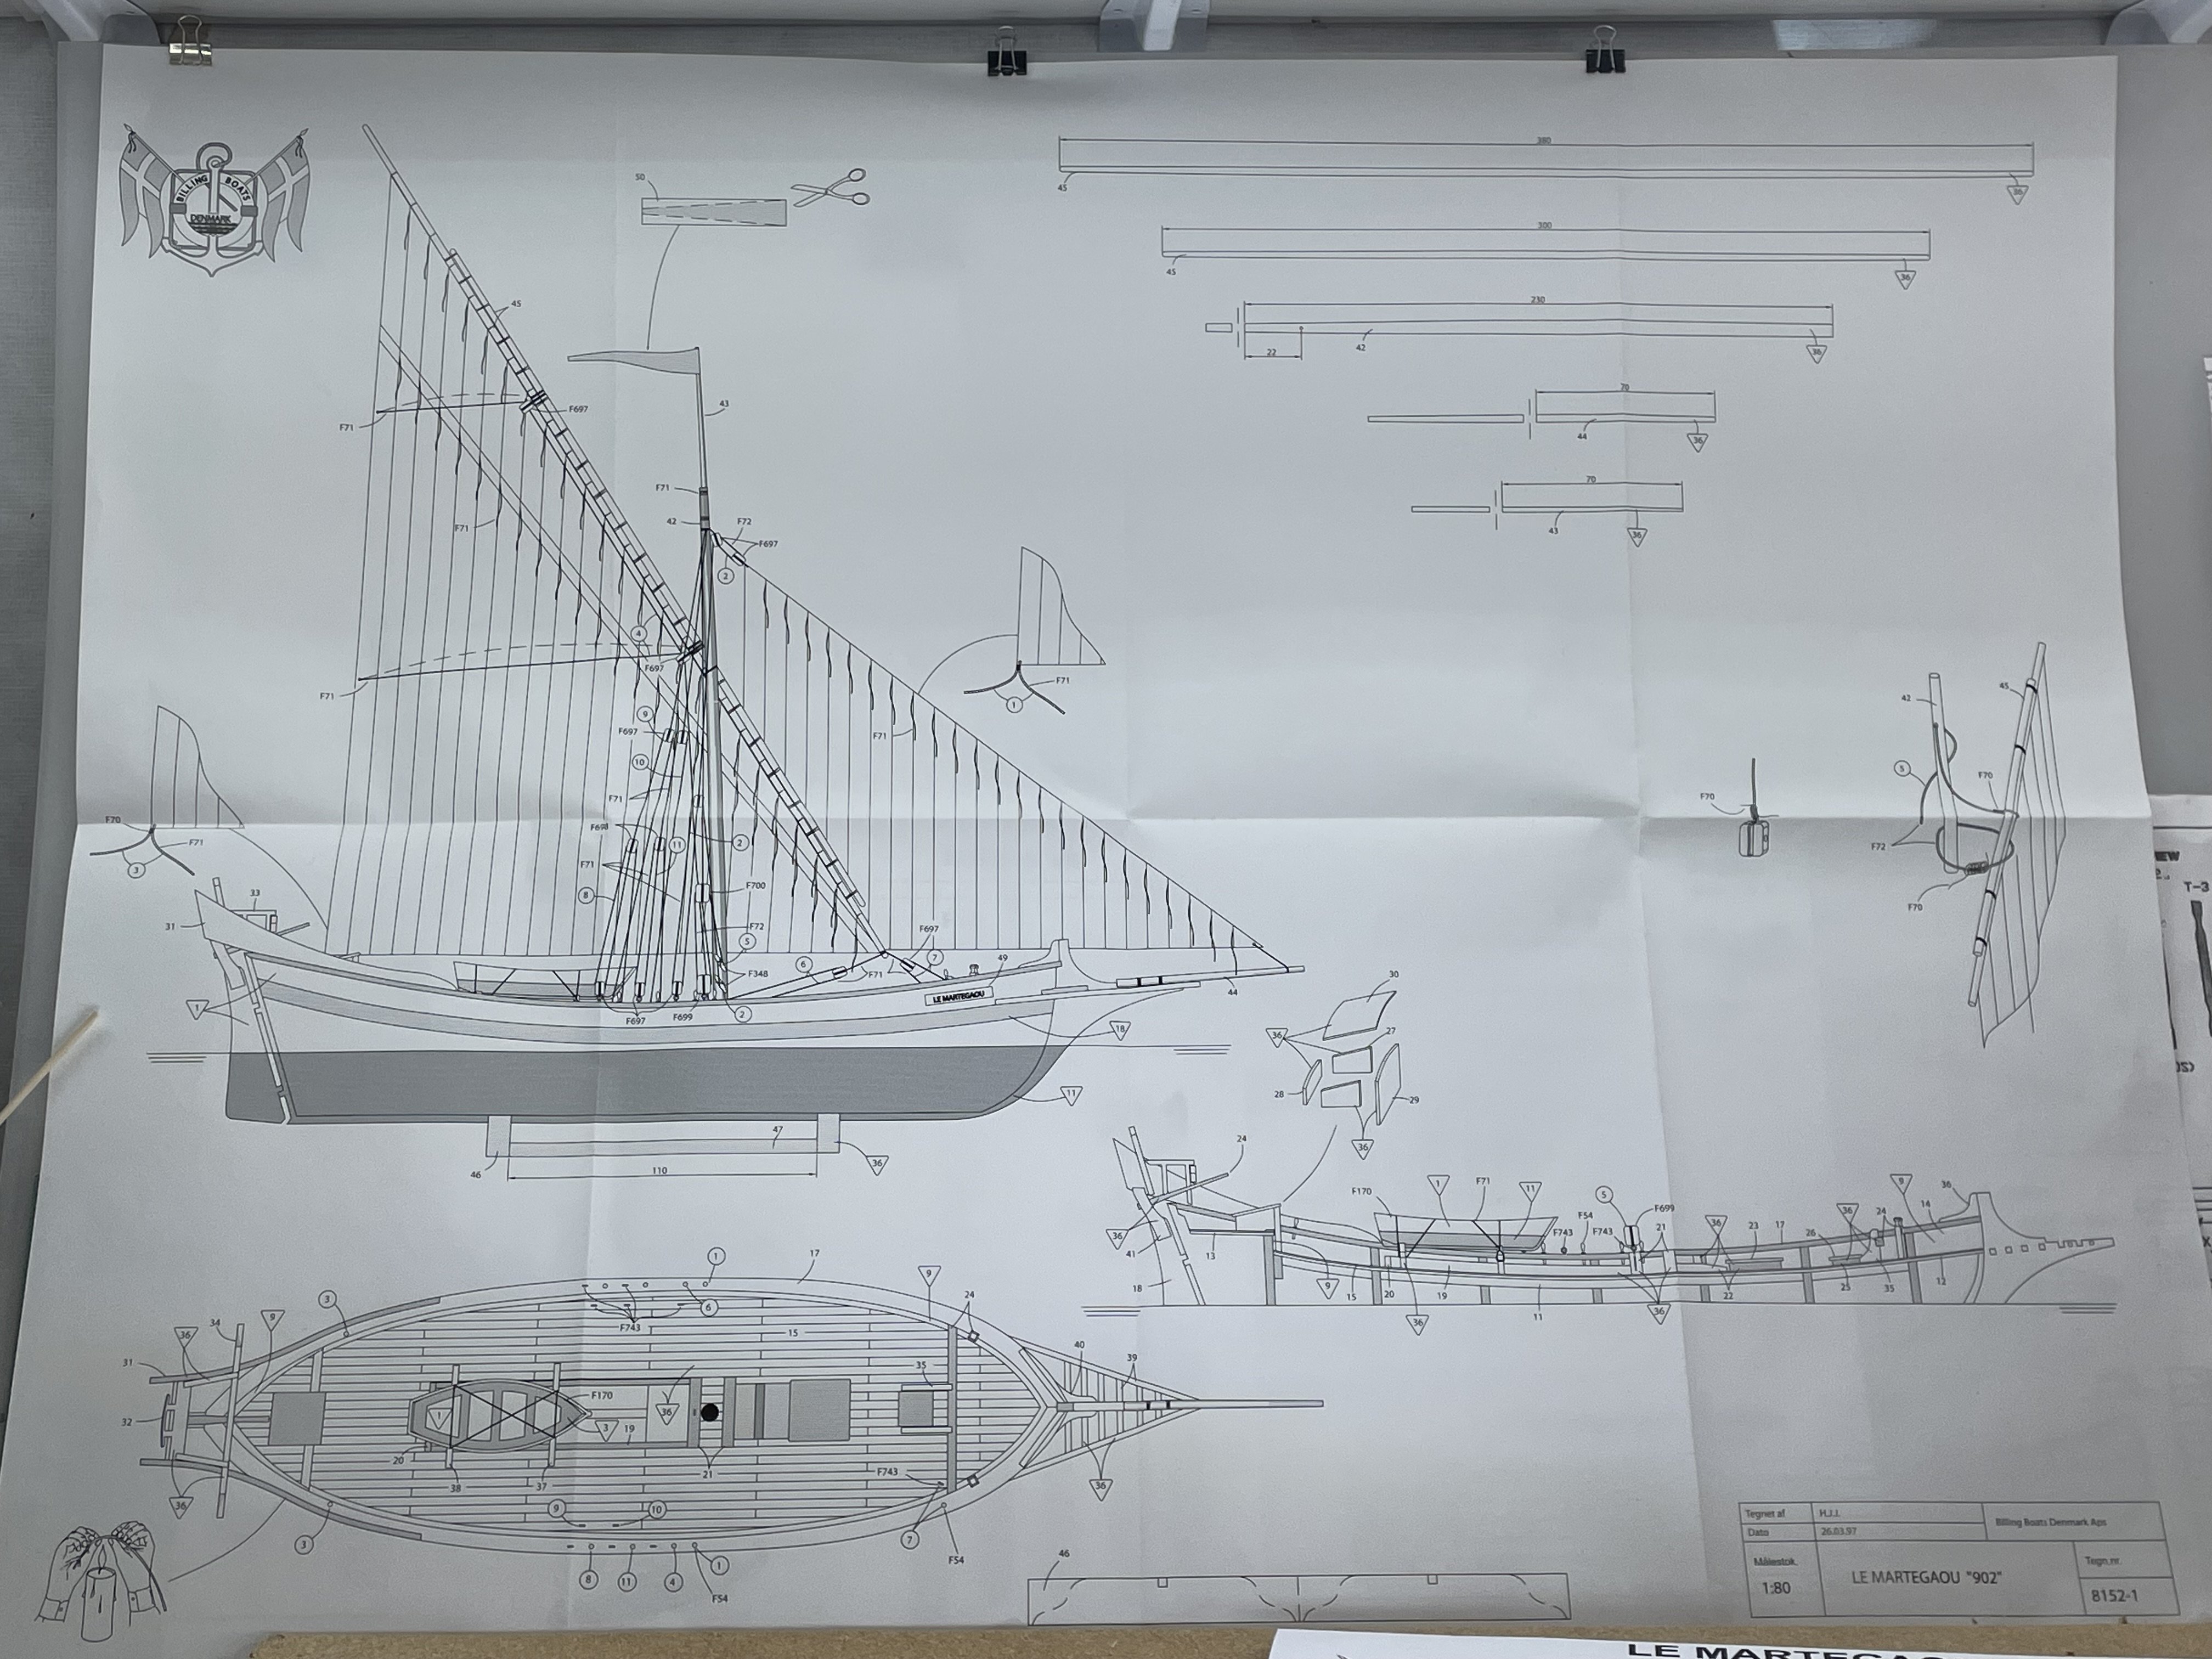
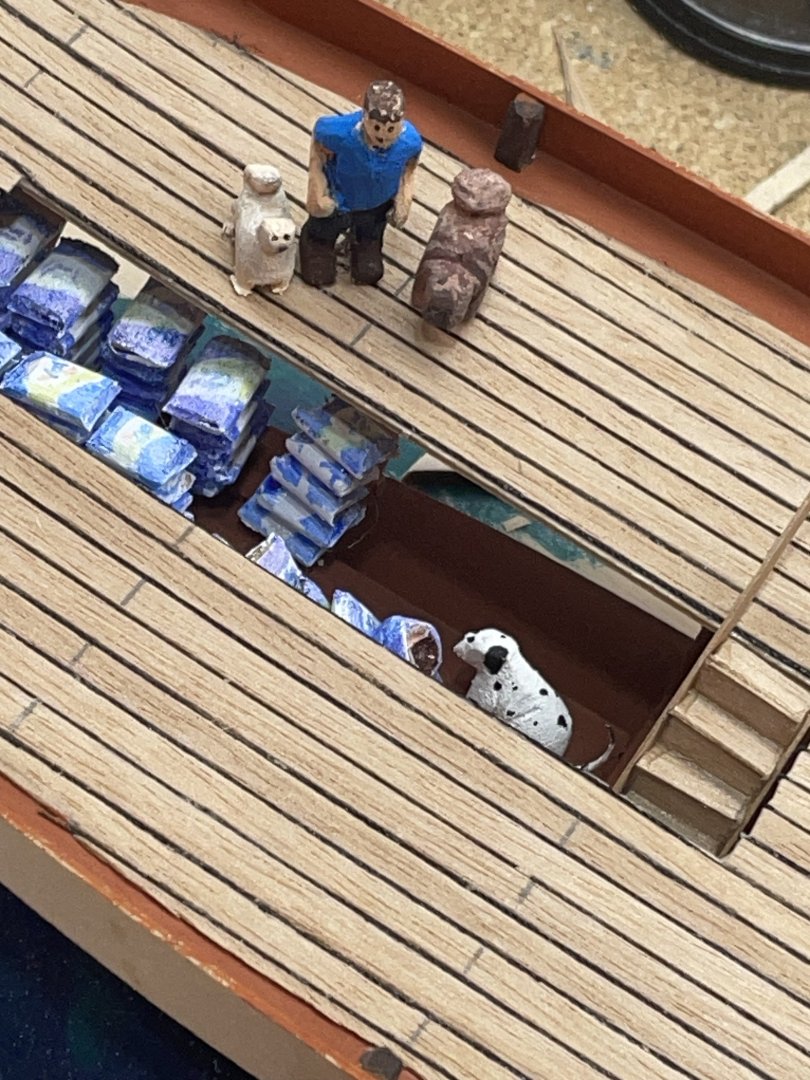
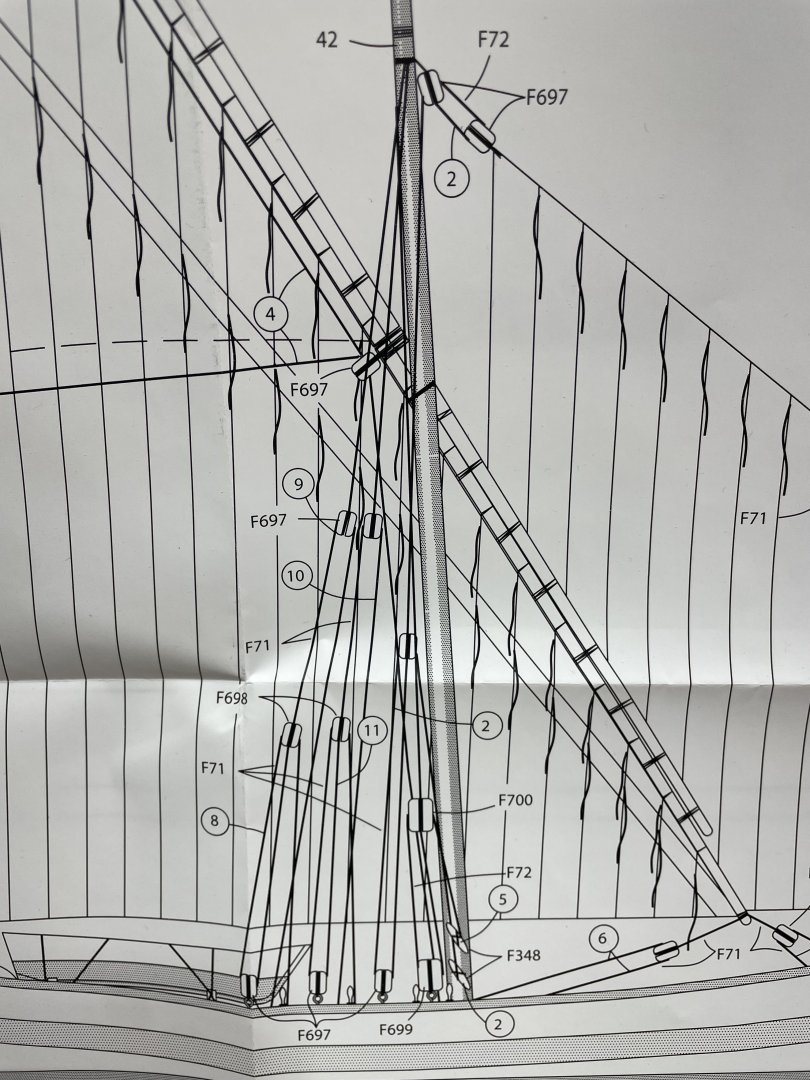
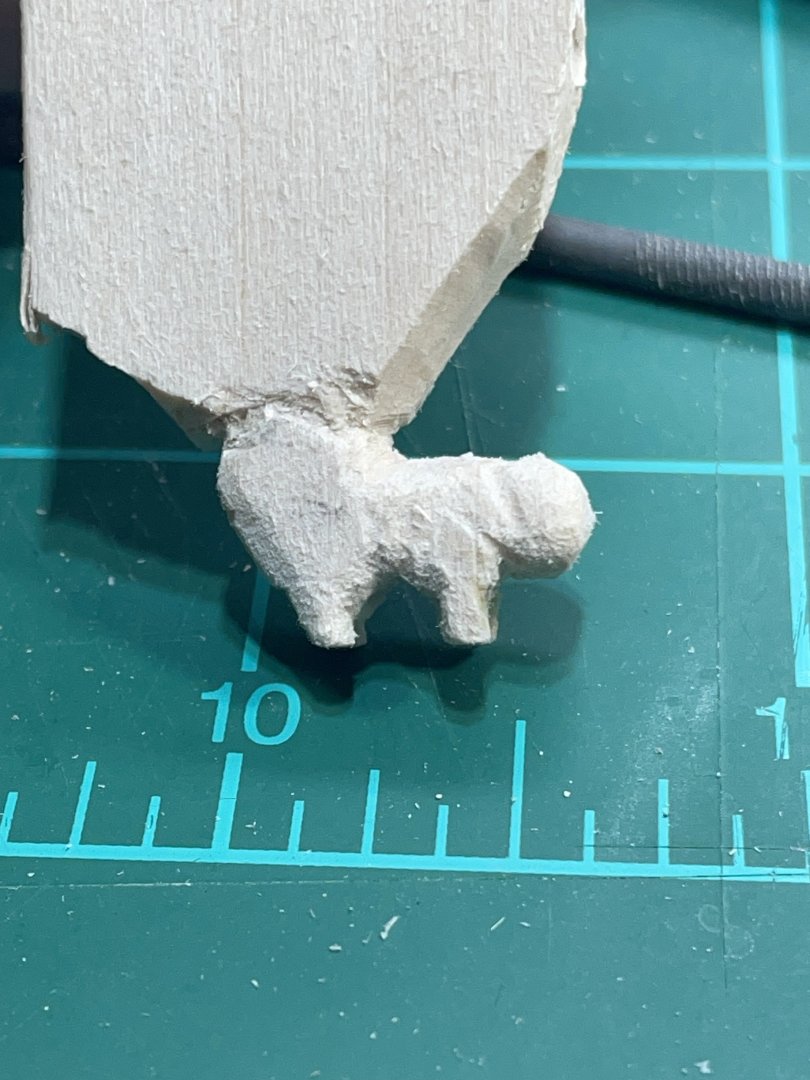
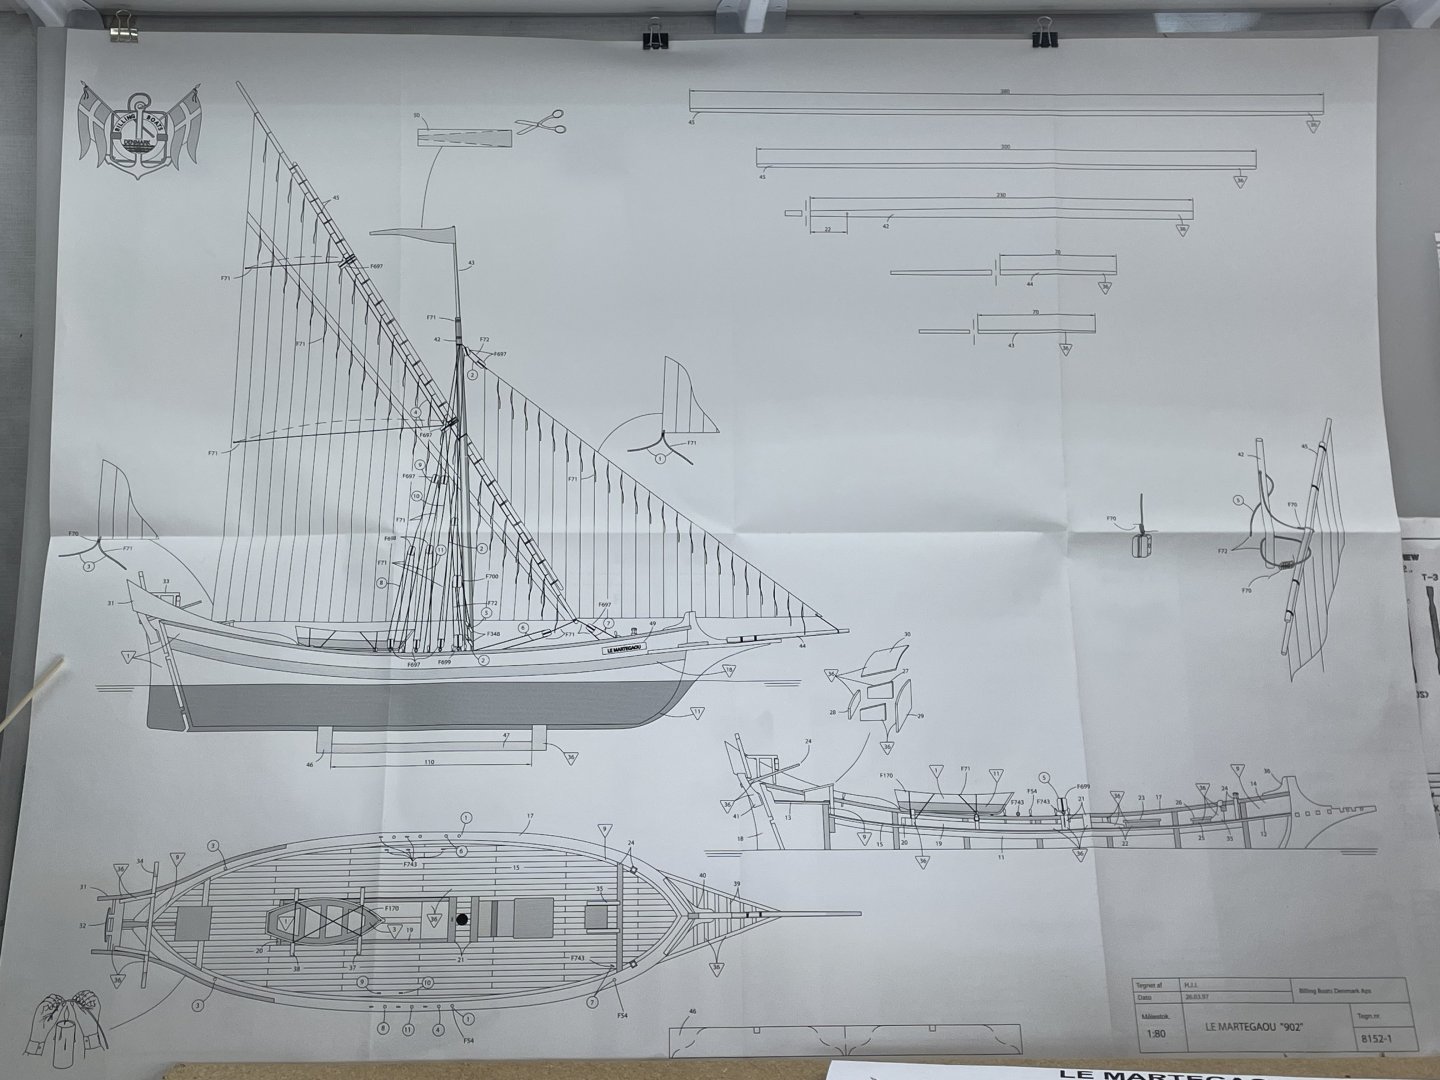
The deck slipped right on with no problems. After fairing the hull I softened the bulwarks and clamped them to the hull to let them dry. on the stern I cut a groove so I had a stop for the plank. At the bow, I may cut the excess off when I glue it. While I was setting thinking about which end to start gluing. I started looking at the rigging. The drawing is all there is, and it looks like spaghetti hanging on a fork to me 🙂 If anyone has any helpful tips on that subject, please speak up 🙂 Just in case here’s the rest of it:-) After all that filled my brain, I wasn’t feeling like a gluing session, so I carved a scale figure. First was a pekingese. She’s a little bigger than scale. That was as small as I could go 🙂 Then Captain Kirt. I plan on getting started back in the morning. Here’s Captain Kurt and Macy. You can see them better in this one.


- 55 replies
-
- 6
-
-

-
- Le Martegaou
- billing boats
- (and 1 more)
-
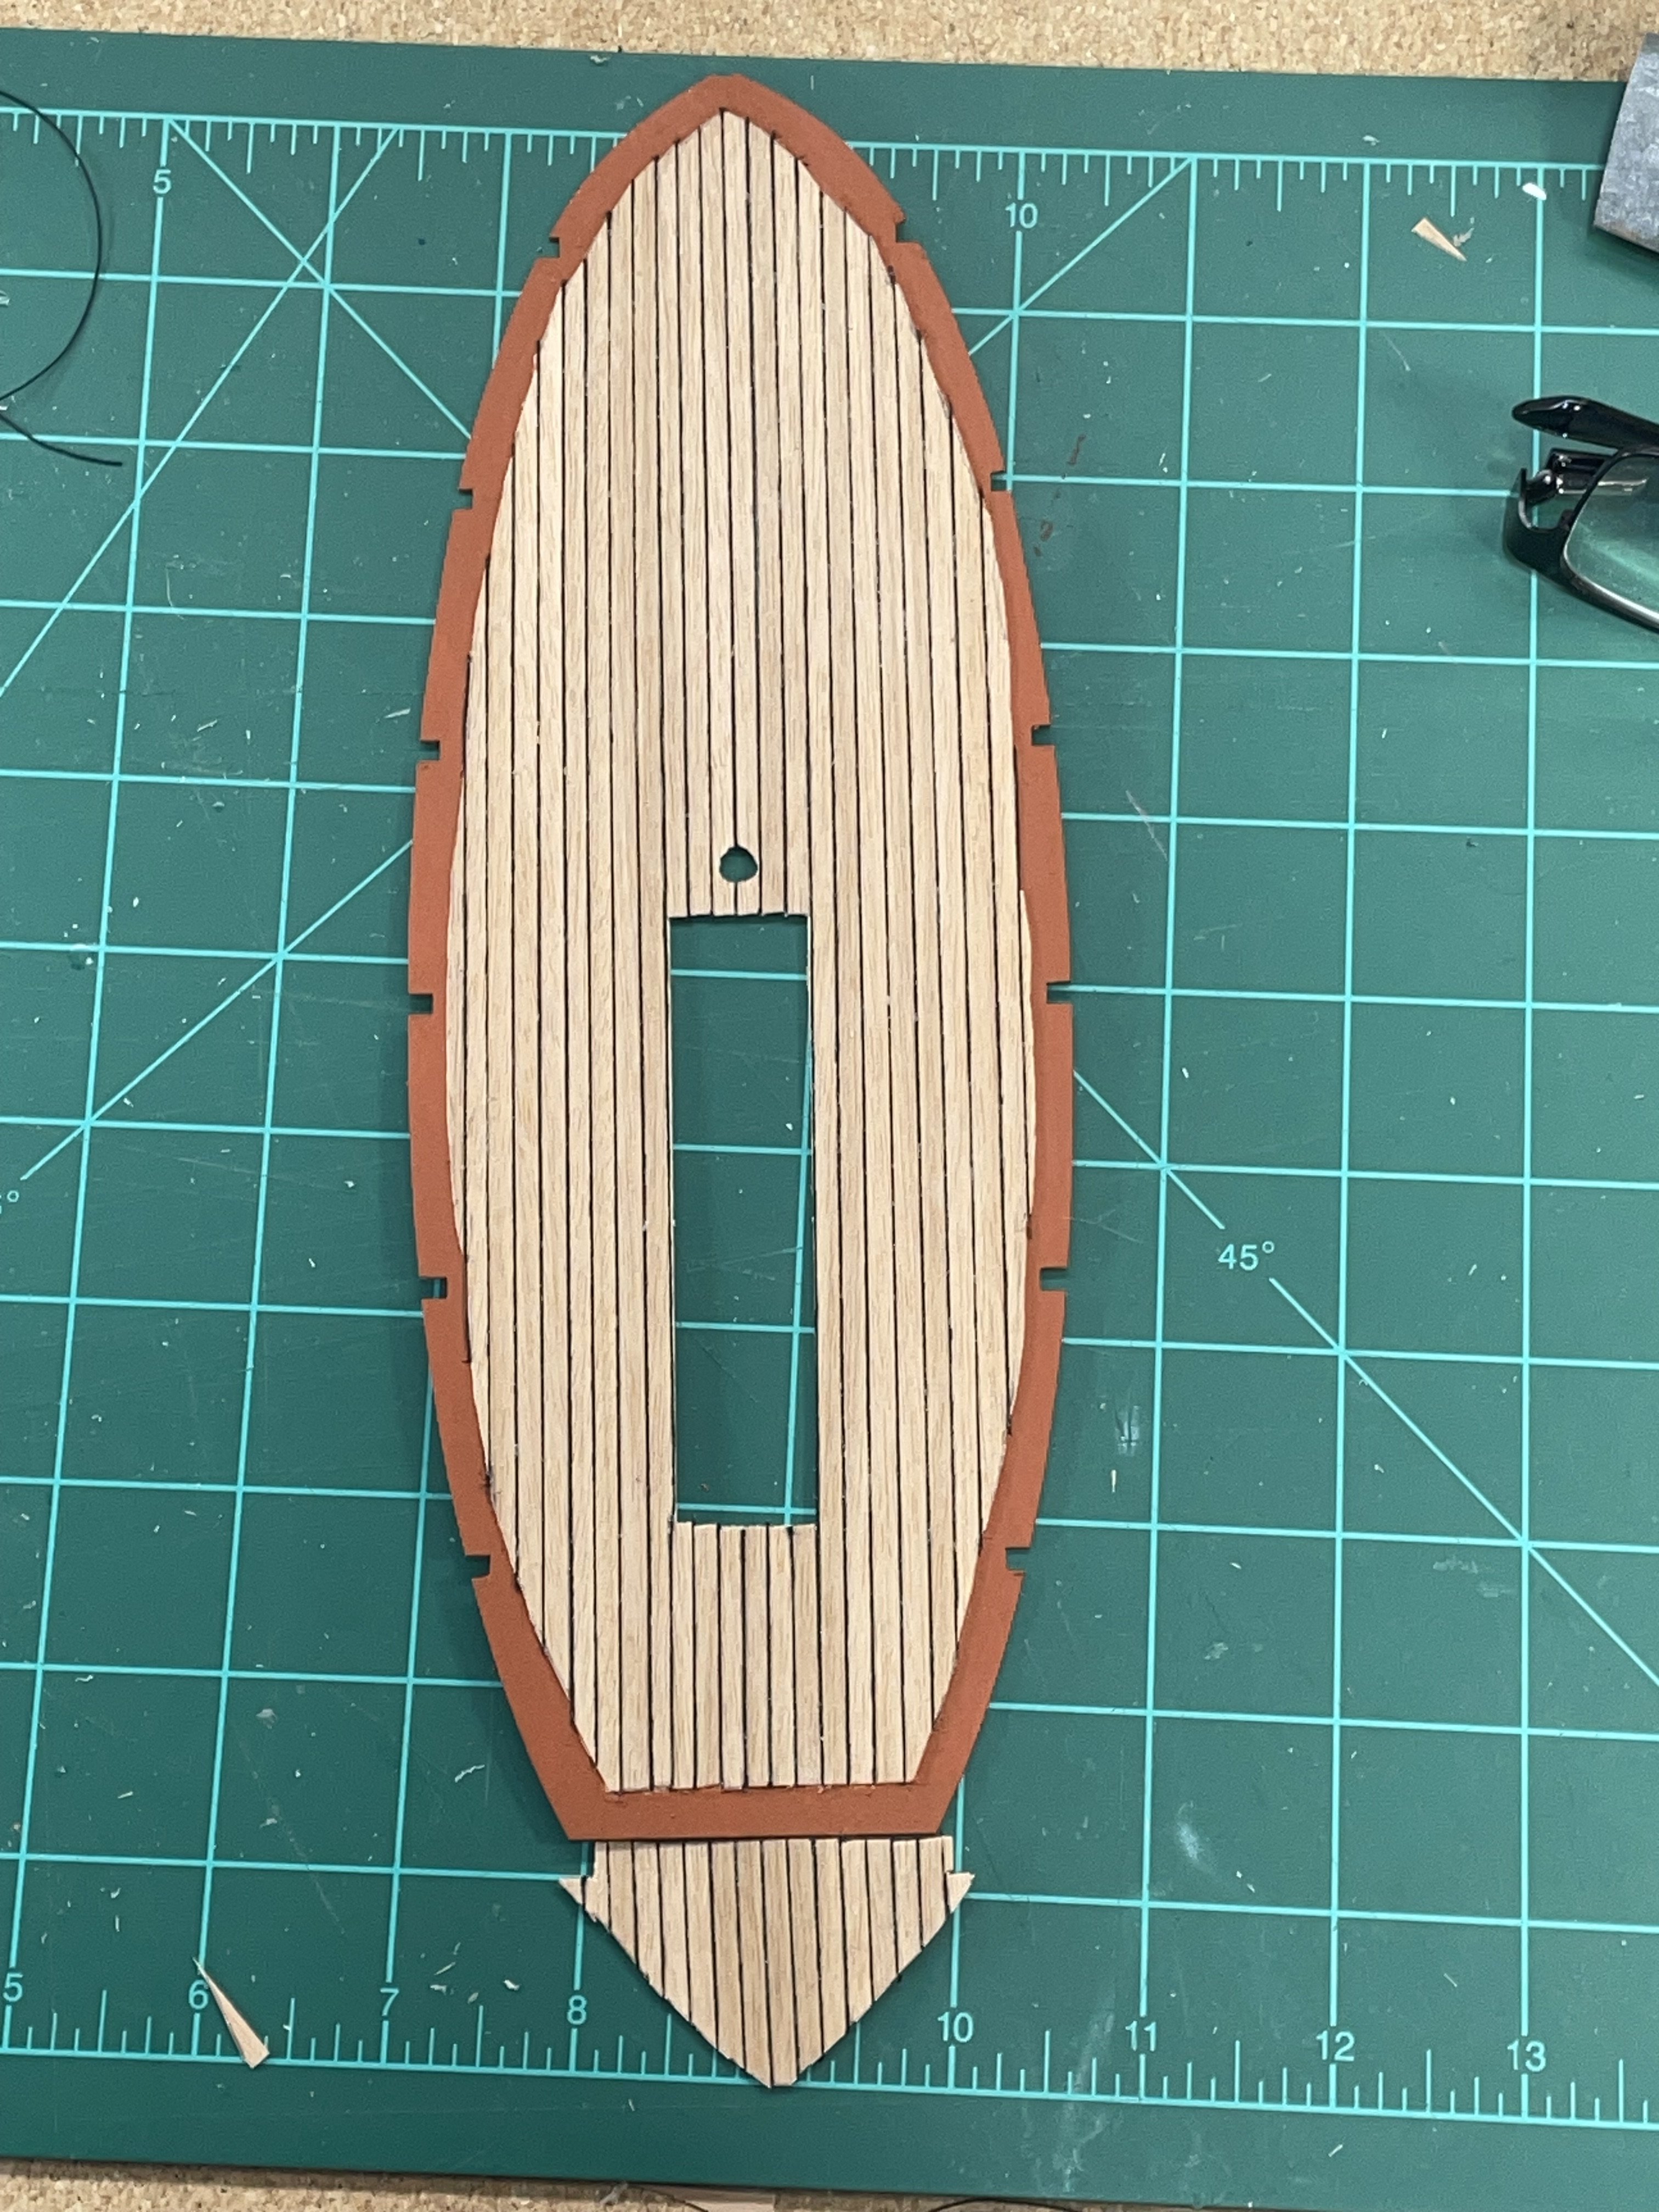
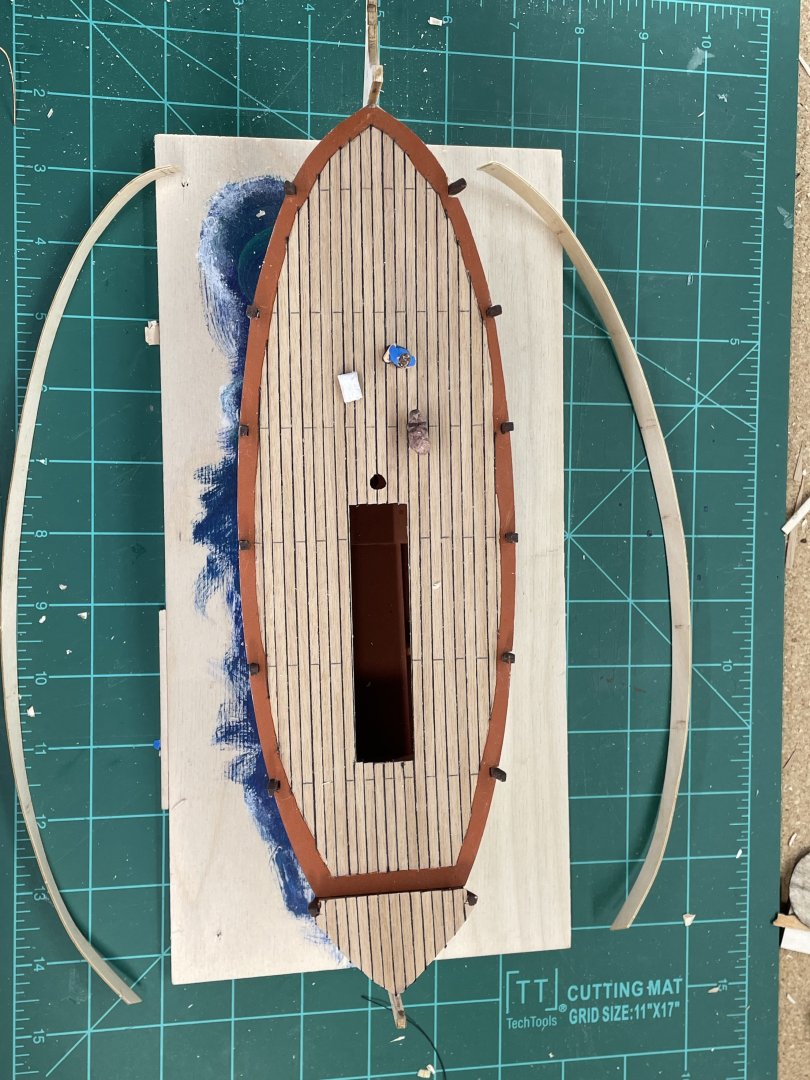
Reading through the other build log on this sight, they laid black thread between the planks. It really defines the planks. I was excited to get it going. In fact, I don’t think I did all the other non- boat related things yesterday I was supposed to:-) I think it was well worth it. That said, I find if it takes me days to get done, what could have been done in hours. I don’t spend as much time finding my mistakes.

- 55 replies
-
- 7
-
-
- Le Martegaou
- billing boats
- (and 1 more)
-
I learned to focus beveling those tiny planks, making that turn to the bottom:-) You’are doing a great job ! Almost off that strongback!
- 24 replies
-
- 2
-
-
- Indian Girl canoe
- Midwest Products
- (and 1 more)
-
You’re extra additions really put a wonderful personal touch on her.
- 38 replies
-
- 3
-

-
-
- Chesapeake Bay Flattie
- Model Shipways
- (and 2 more)
-
Nice work, I love the deck!
-
Frames all glued, mast step installed. I did a bit of painting in areas that I would probably make a mess of, later in the build.

- 55 replies
-
- 6
-
-
- Le Martegaou
- billing boats
- (and 1 more)
-
Thanks Mike, I like the quick builds:-Enjoy your build and make sure you show us your work.
-
Thank you John, I’m glad to hear things are improving. I donated this kayak to the humane society to put in a silent auction. I think it got $25.00:-) Which they were pleased. I don’t have any place to store the models I build, so I try to find a home for them. The one I’m working on now is going to a pet shop where we purchased our first dog:-) I’ll try my best to personalize it, which adds another level of excitement to the build for me:-) I hope you get the enjoyment I did from the build. And I know the receiver of your gift will be grateful.
-
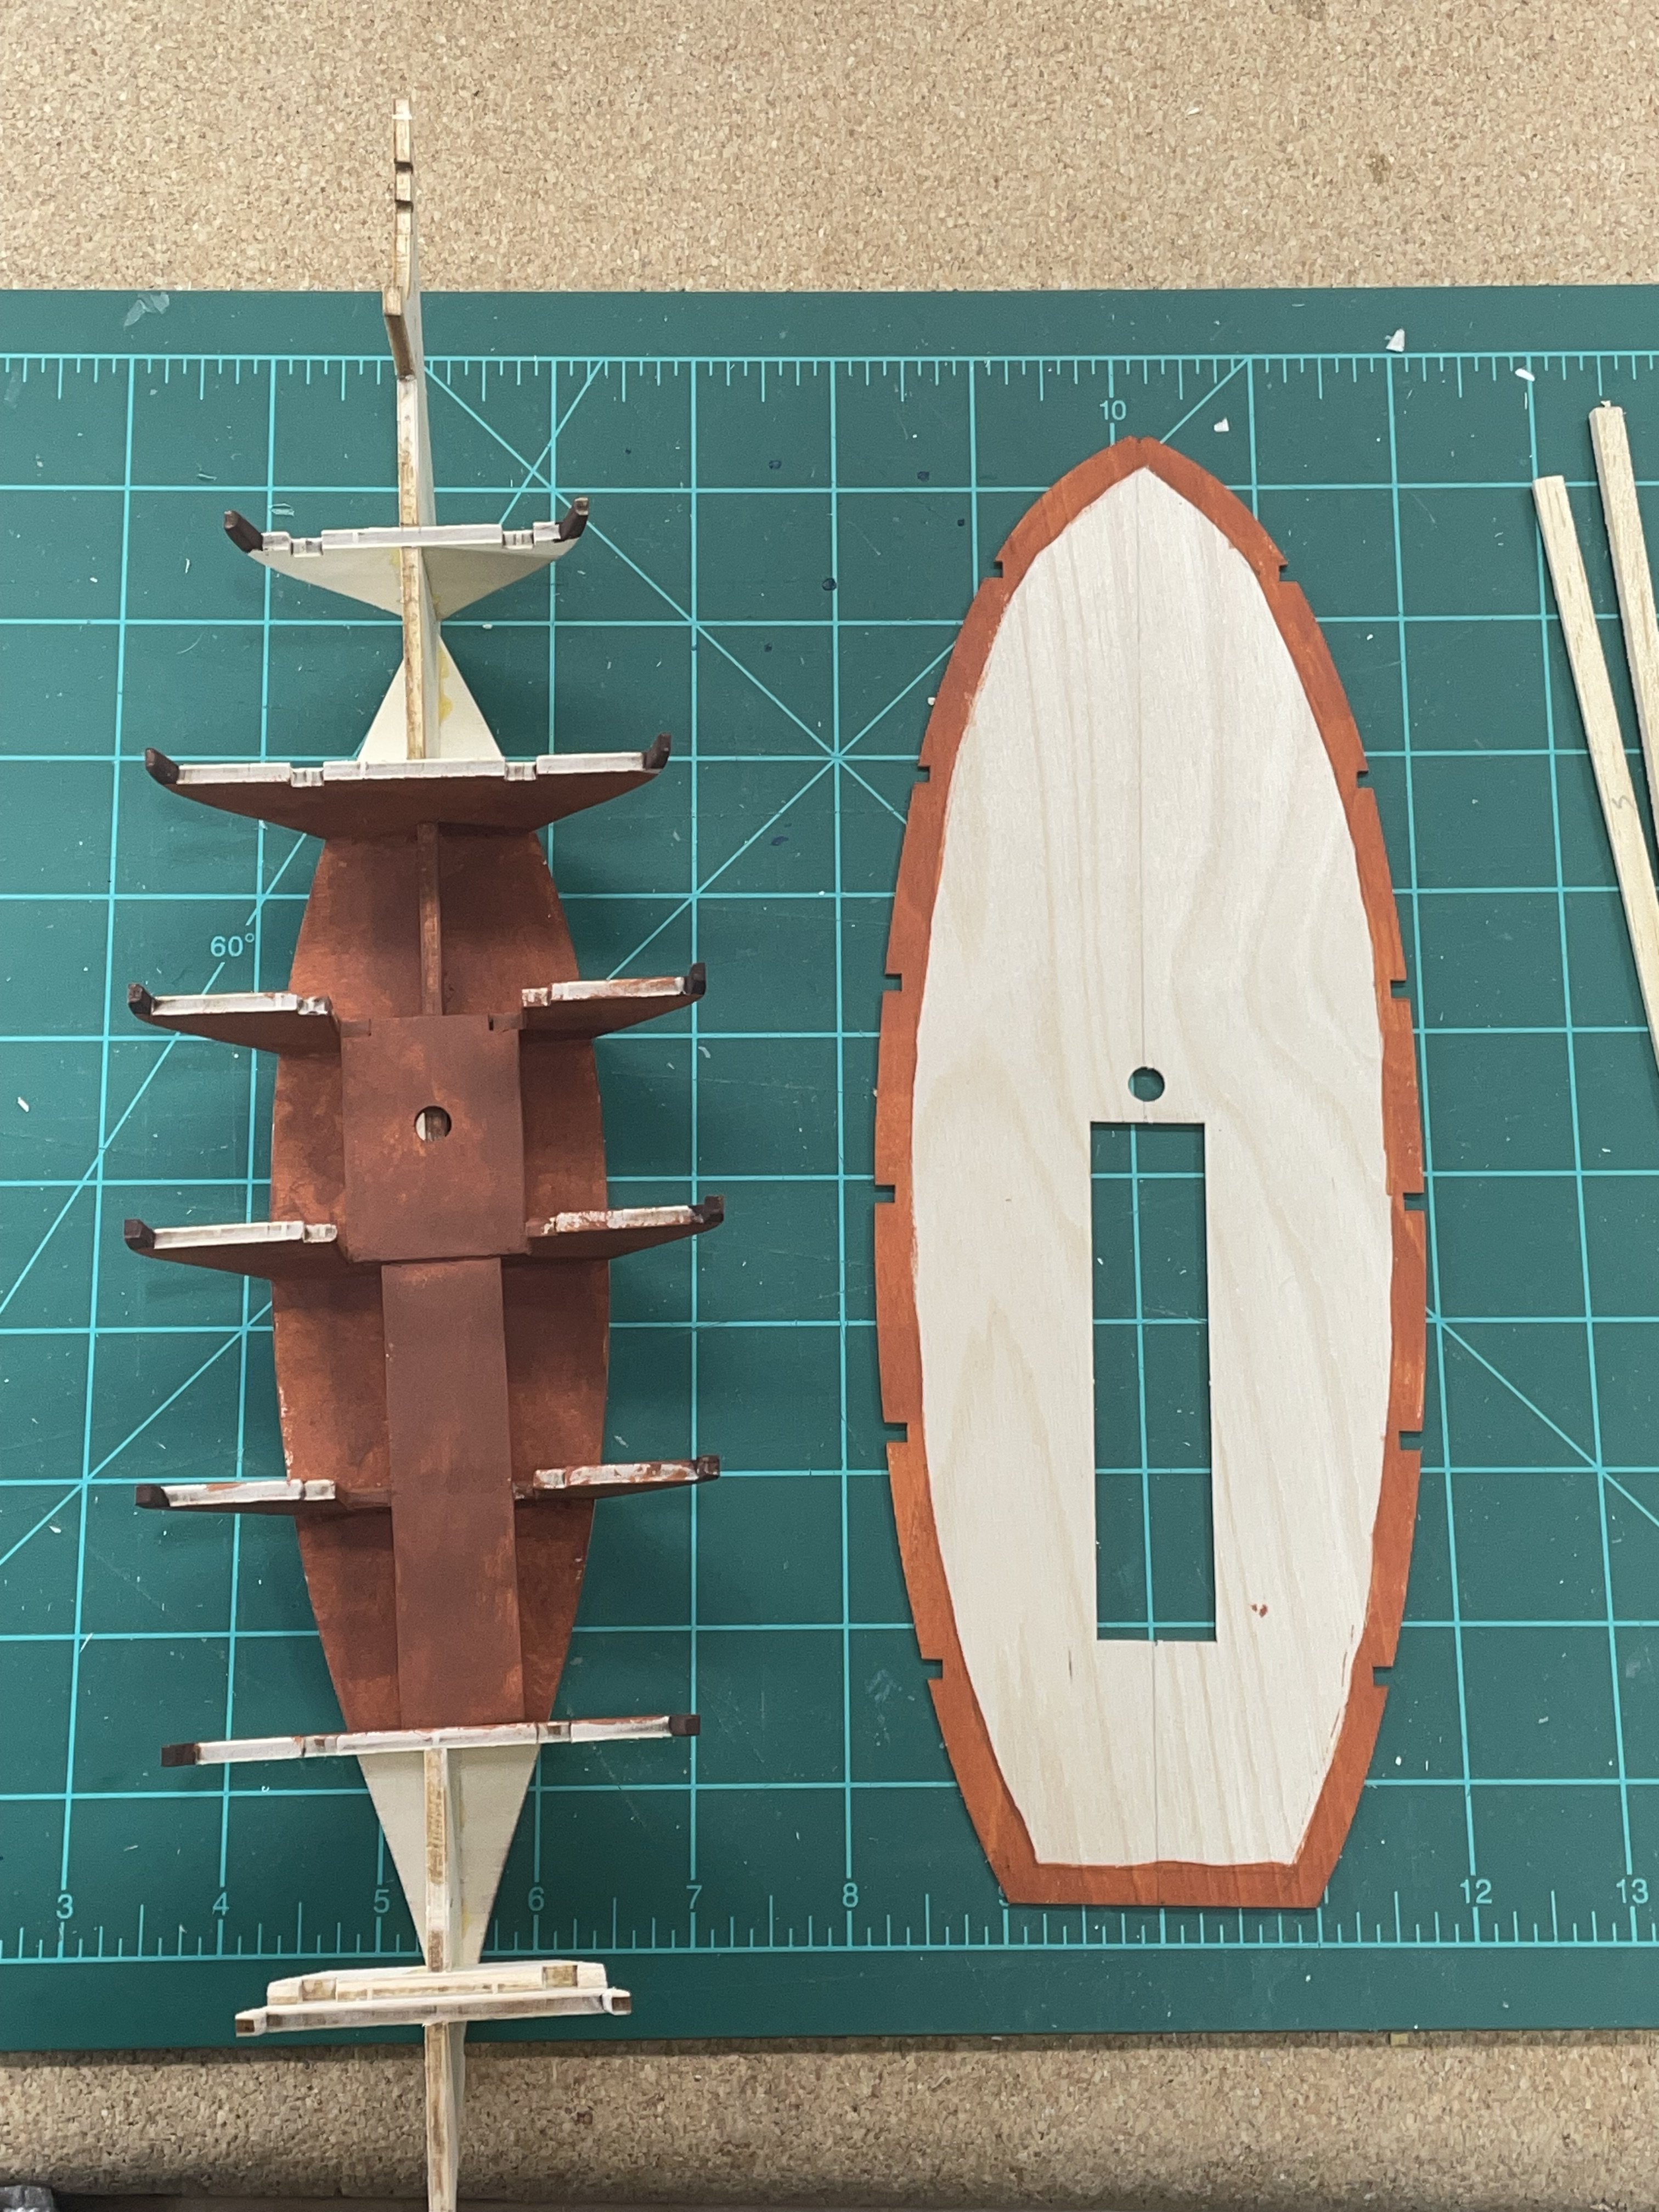
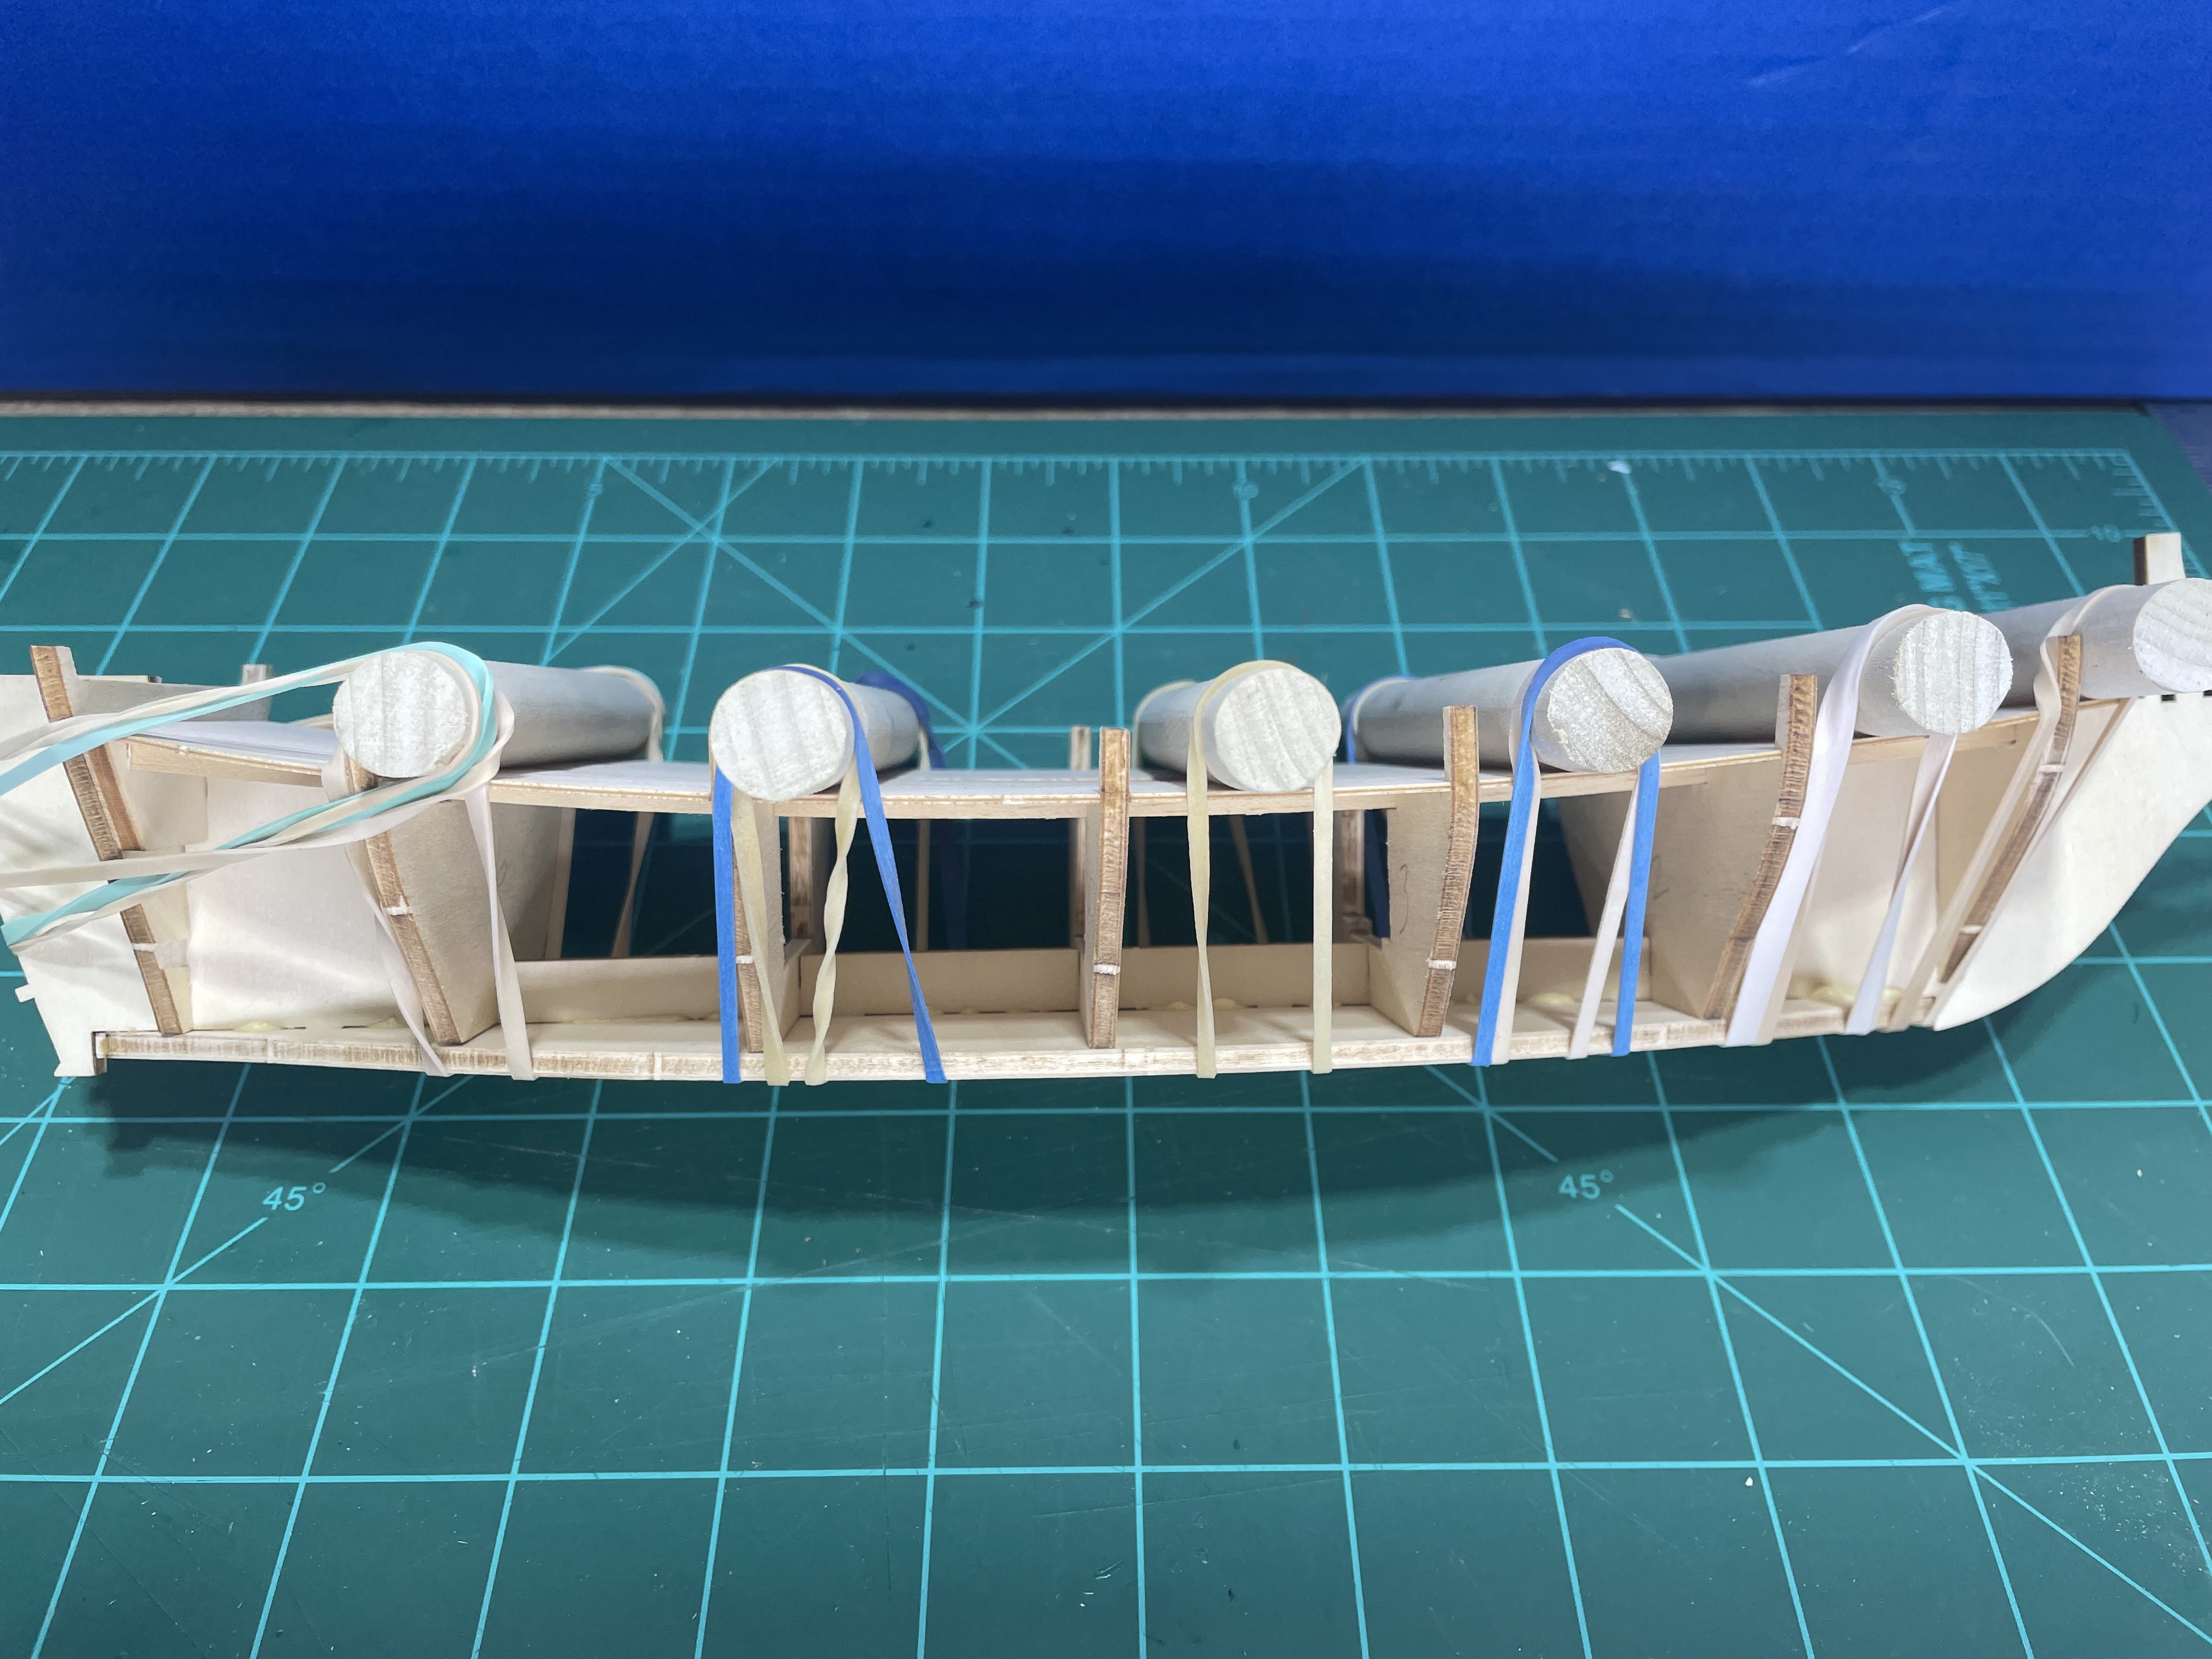
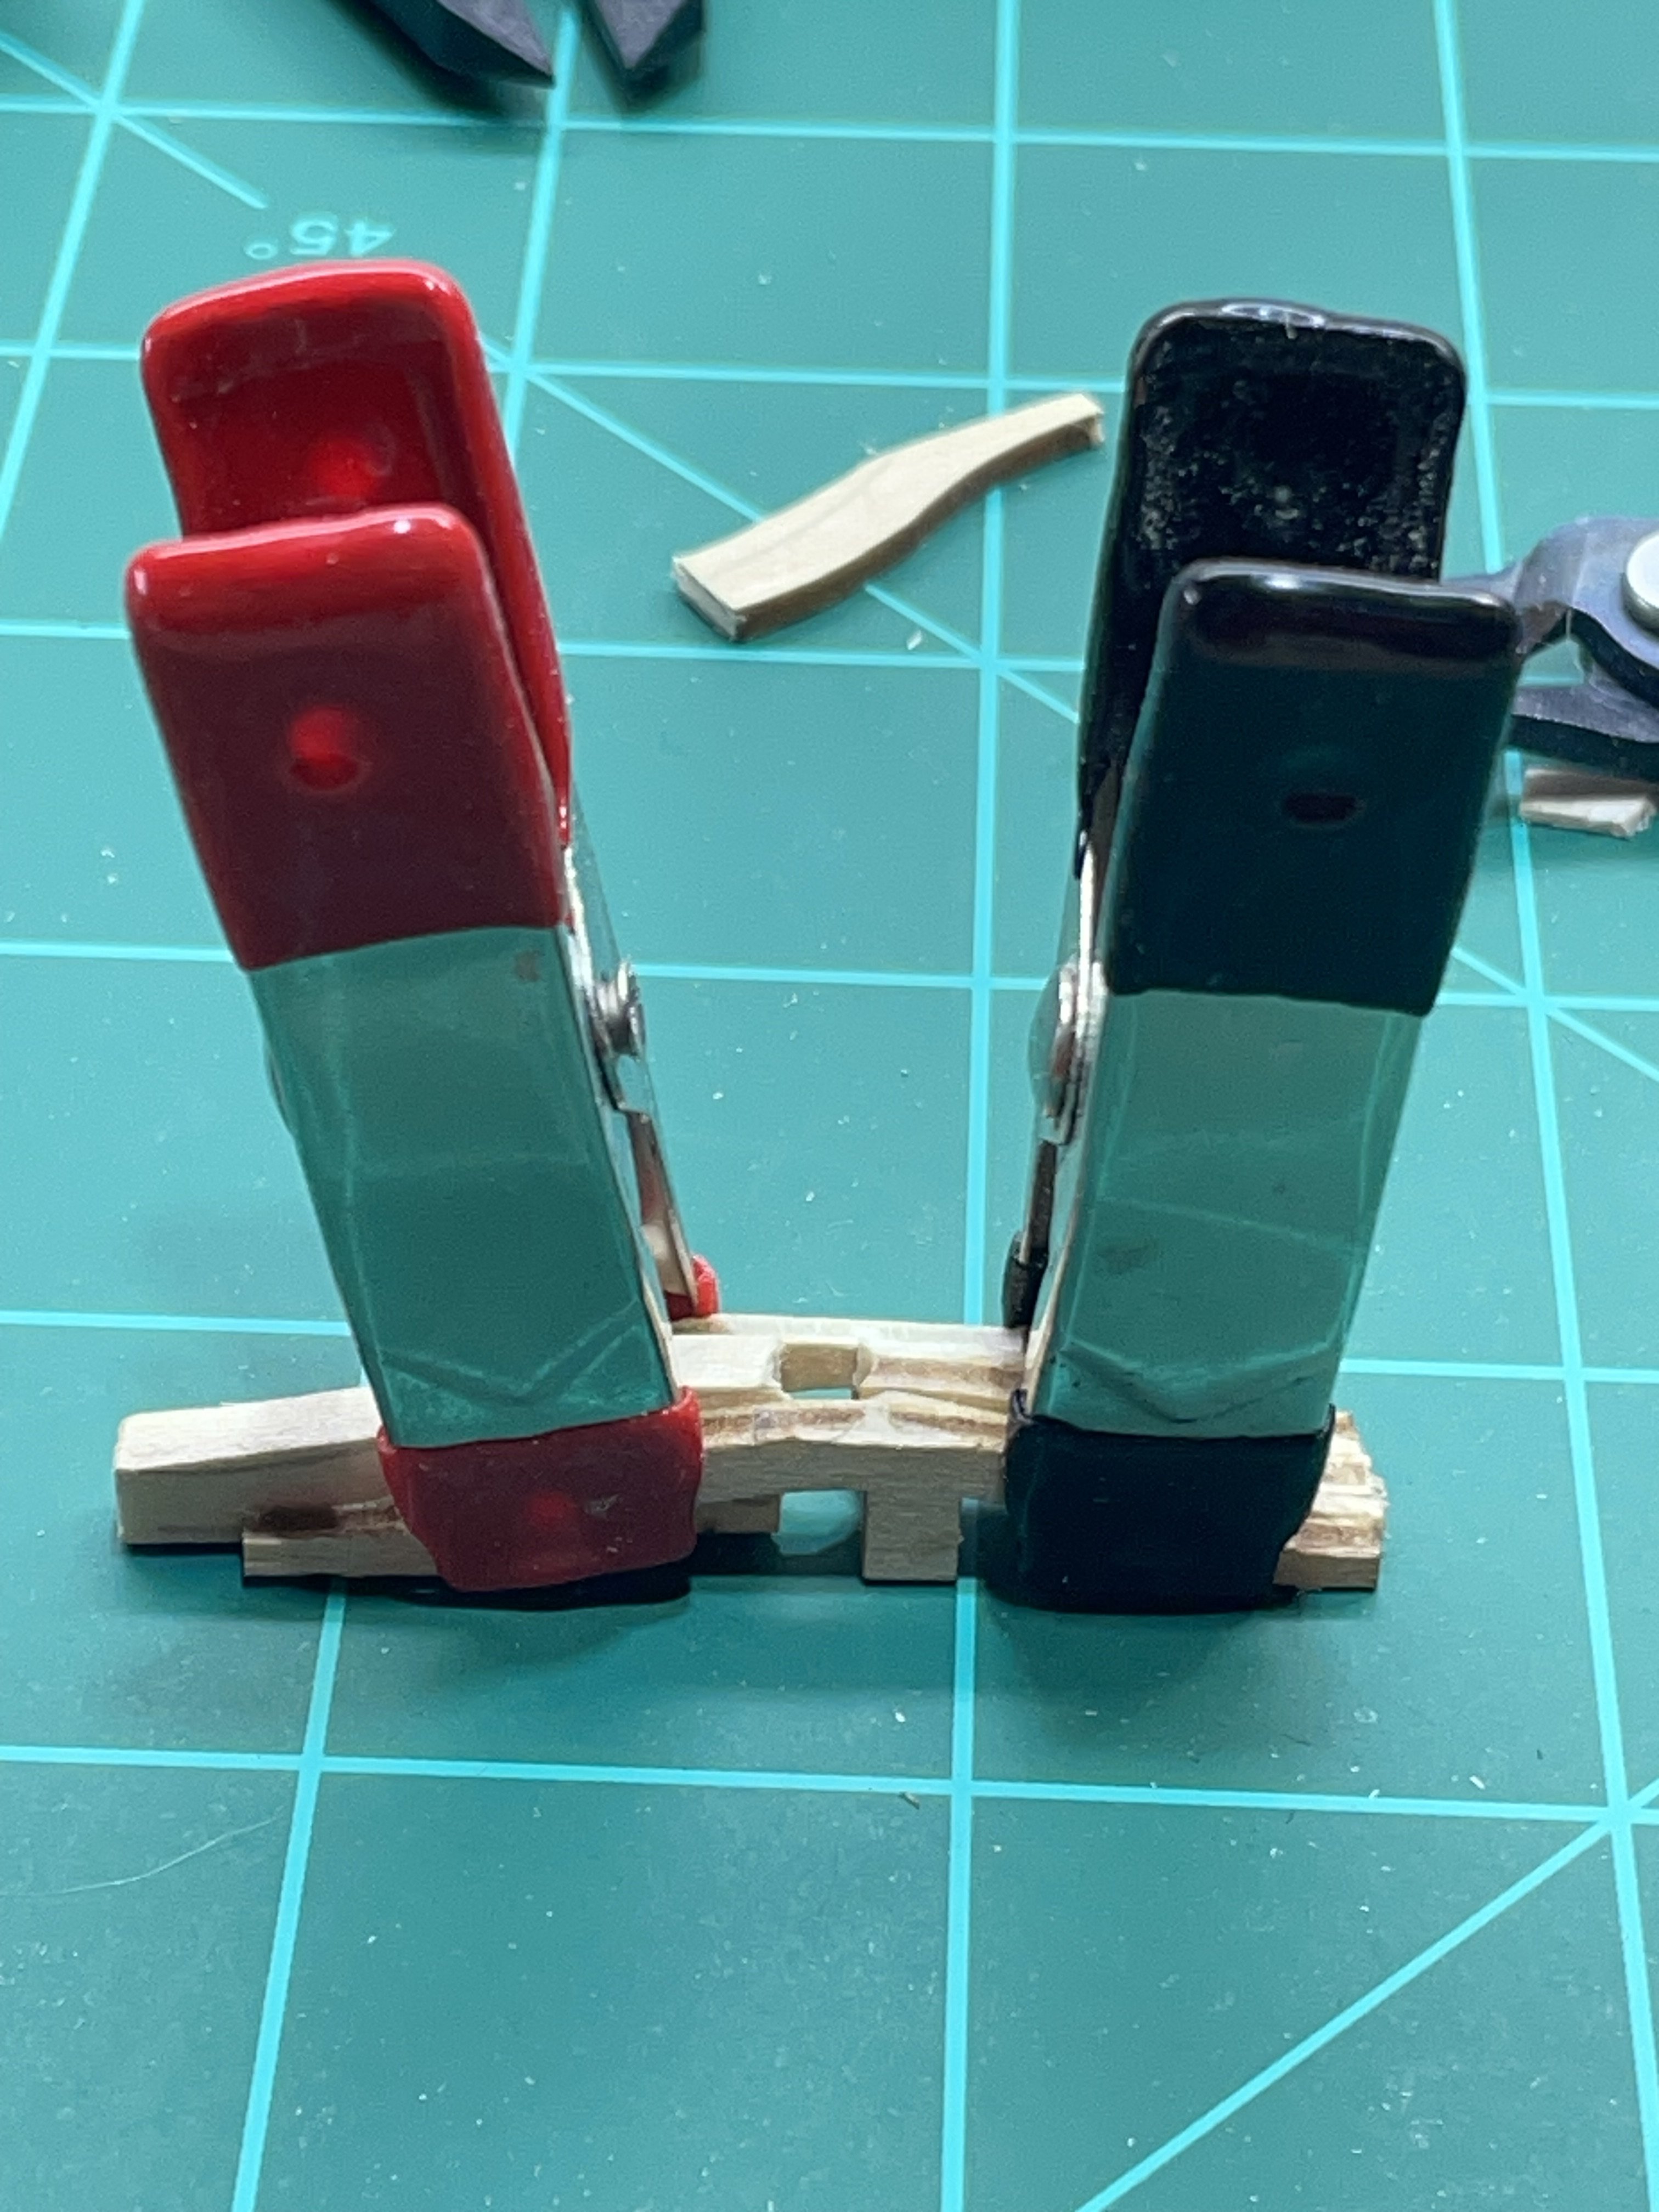
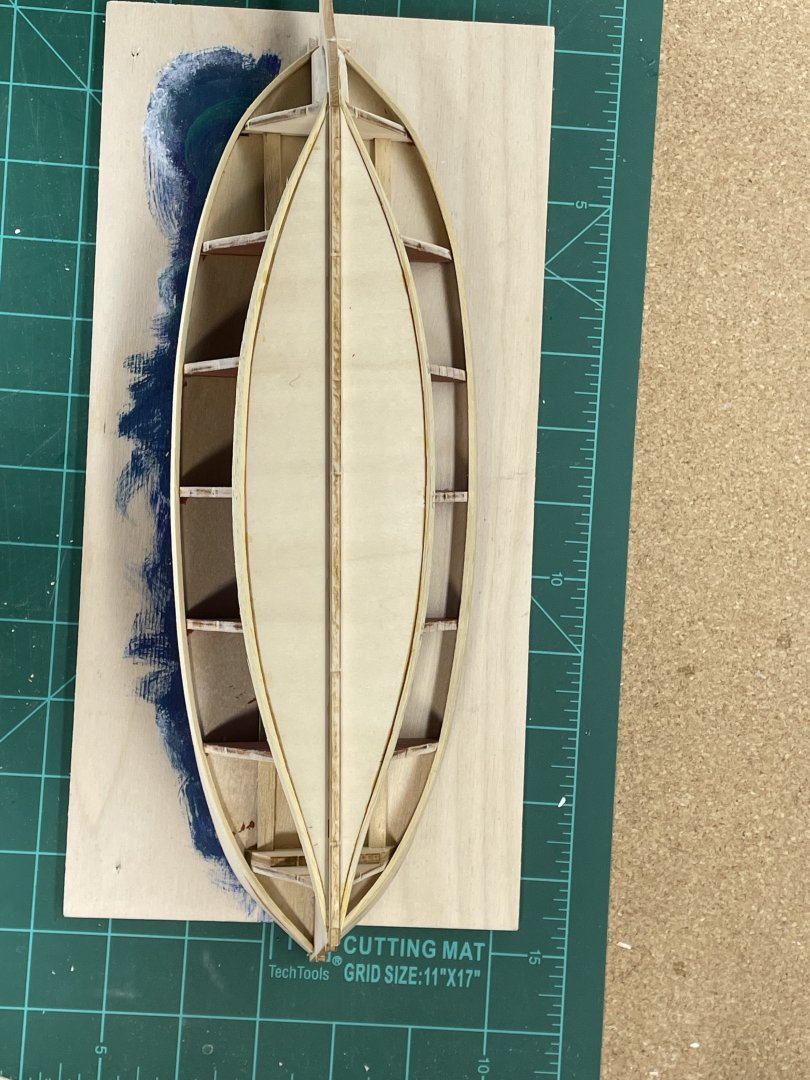
Well if my plan came in a dream, I can’t remember it:-) I sat down and carefully removed the bottom. Tried to imagine the order things should be done and decided to glue the spine to the bottom first. I skipped over the areas where the frames connect. Then I reassembled the deck supports and deck and held it down with rubber bands. I added extra bands on the frames that needed more tension. After the spine sets up, I’ll remove the deck and glue the 3 center frames next, then replace everything till it sets. Like I planned earlier, repeat for the frames at the stern and bow.

- 55 replies
-
- 6
-
-
- Le Martegaou
- billing boats
- (and 1 more)
-
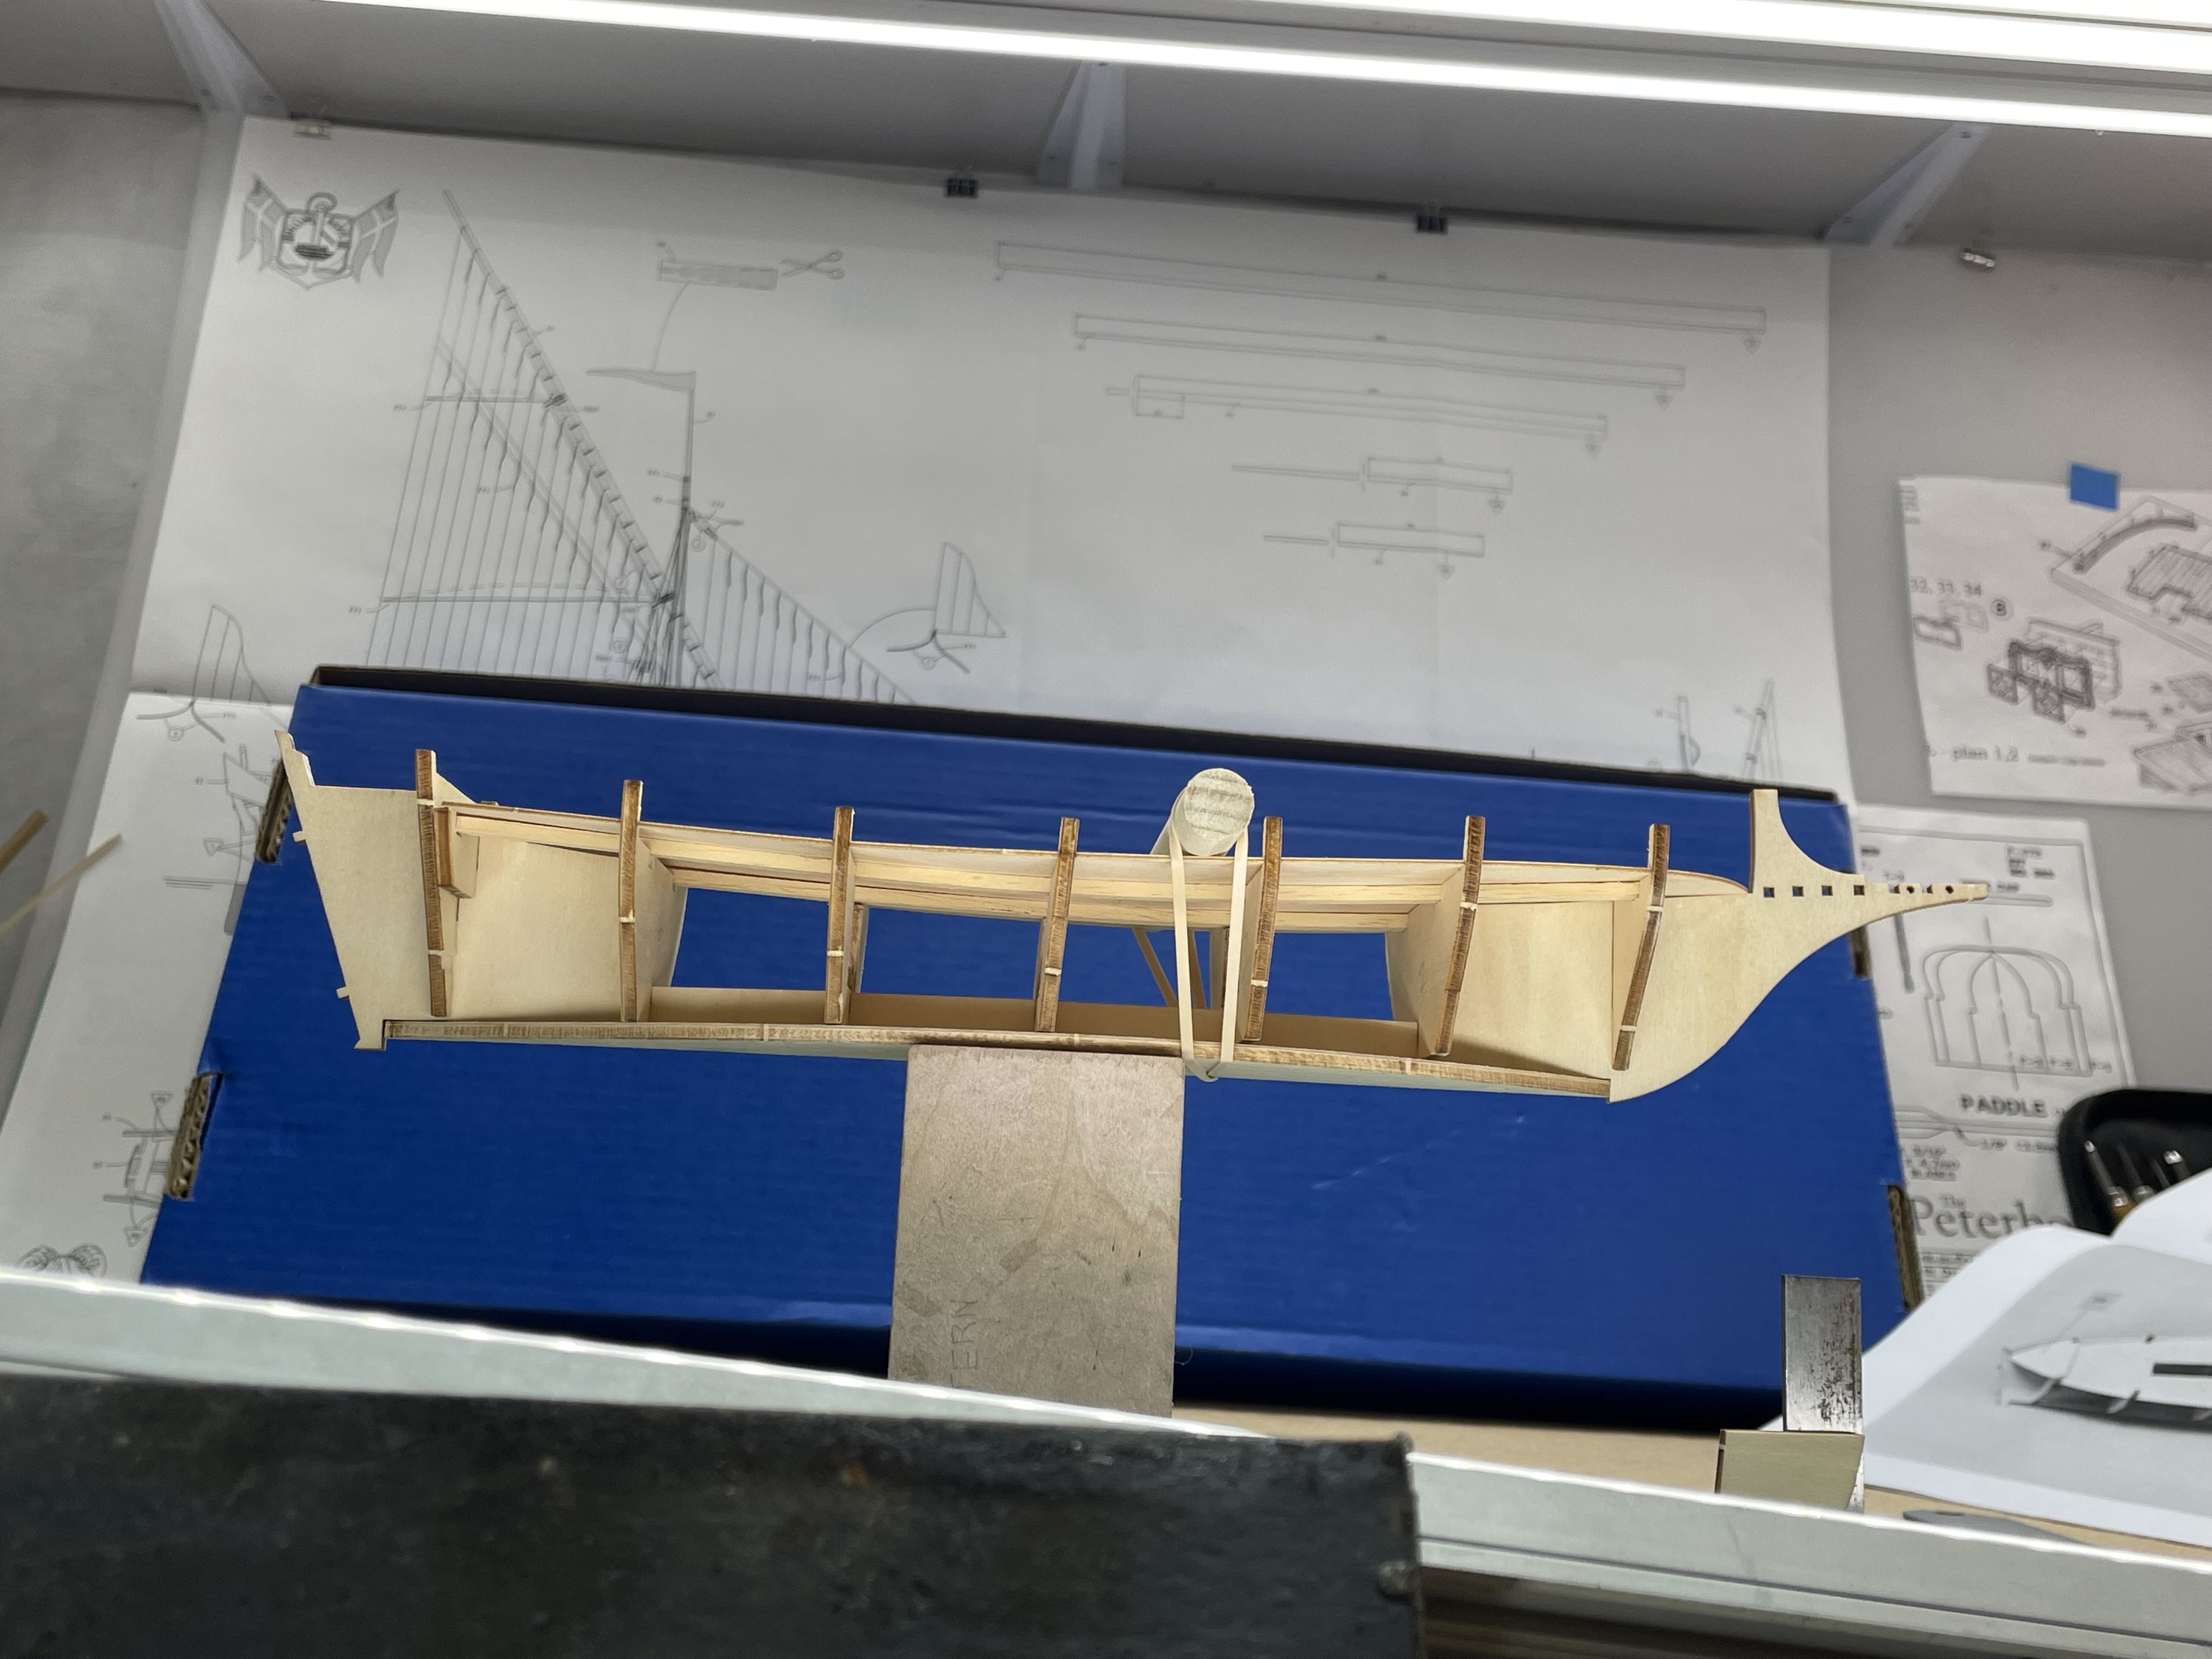
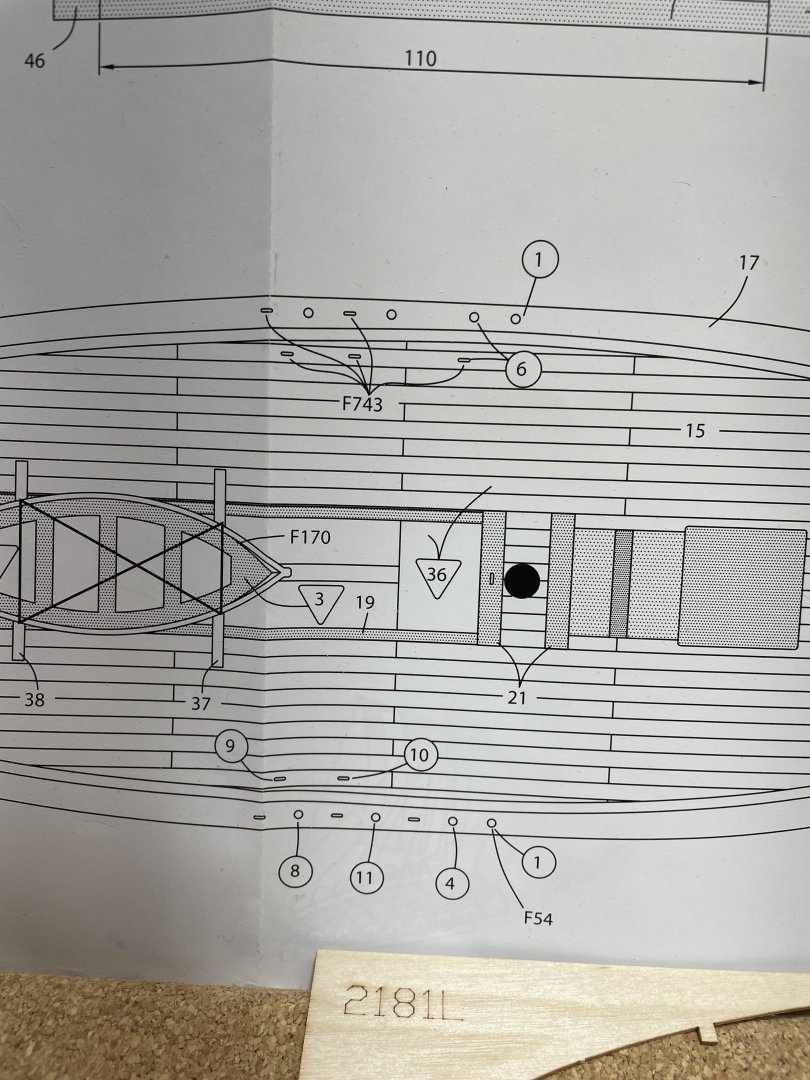
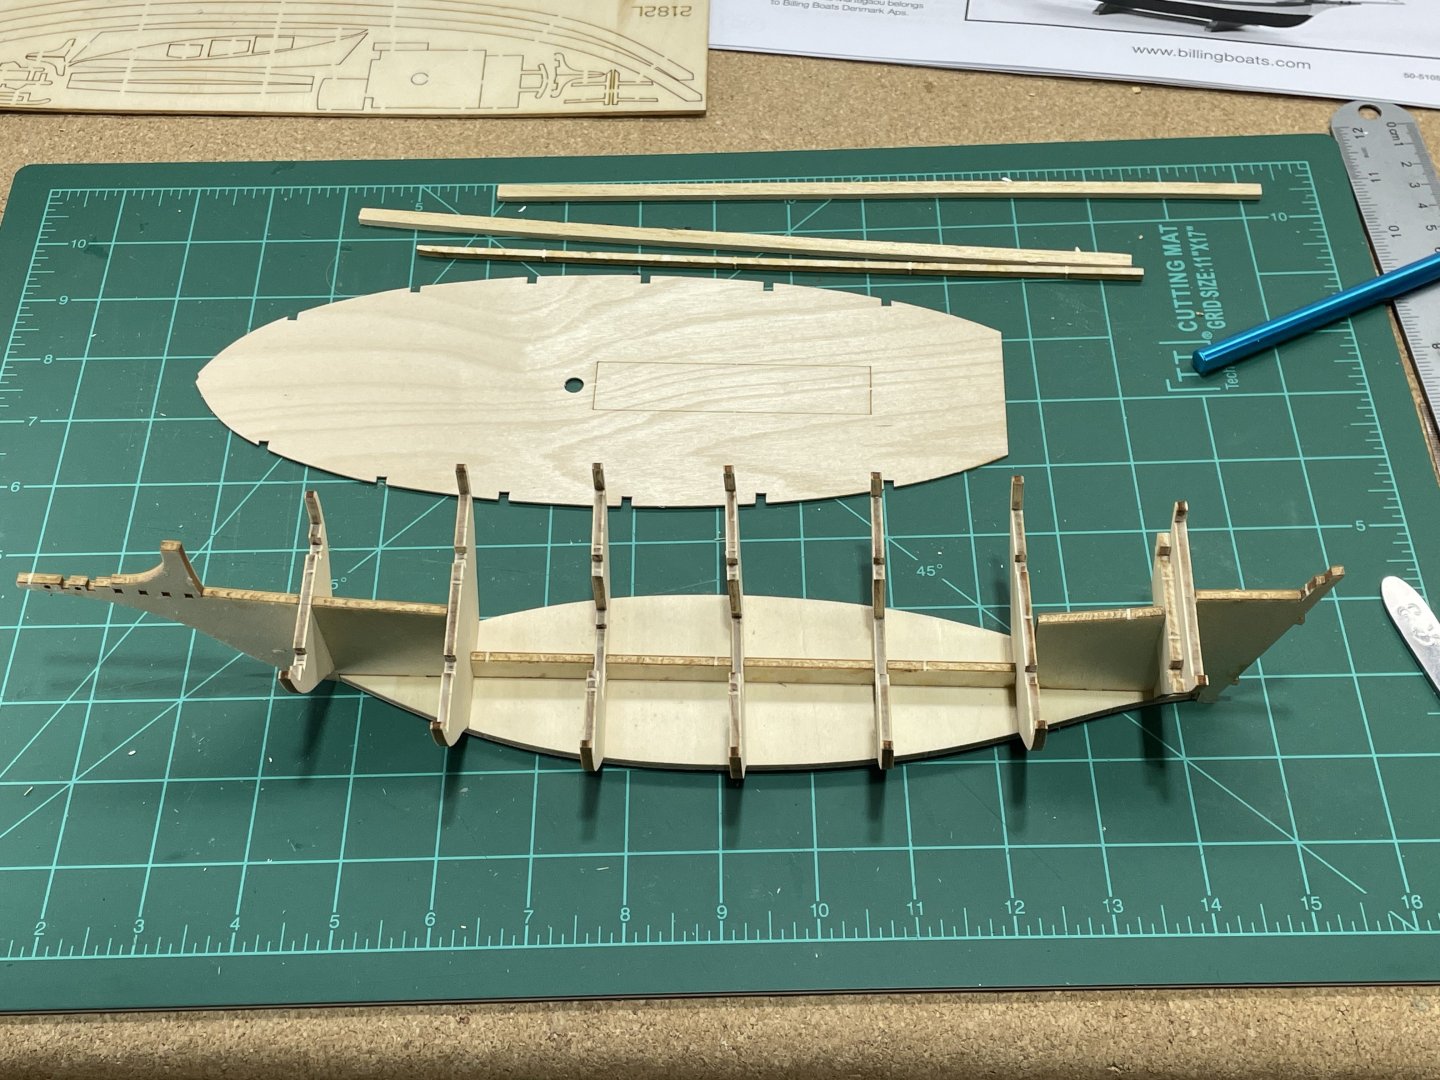
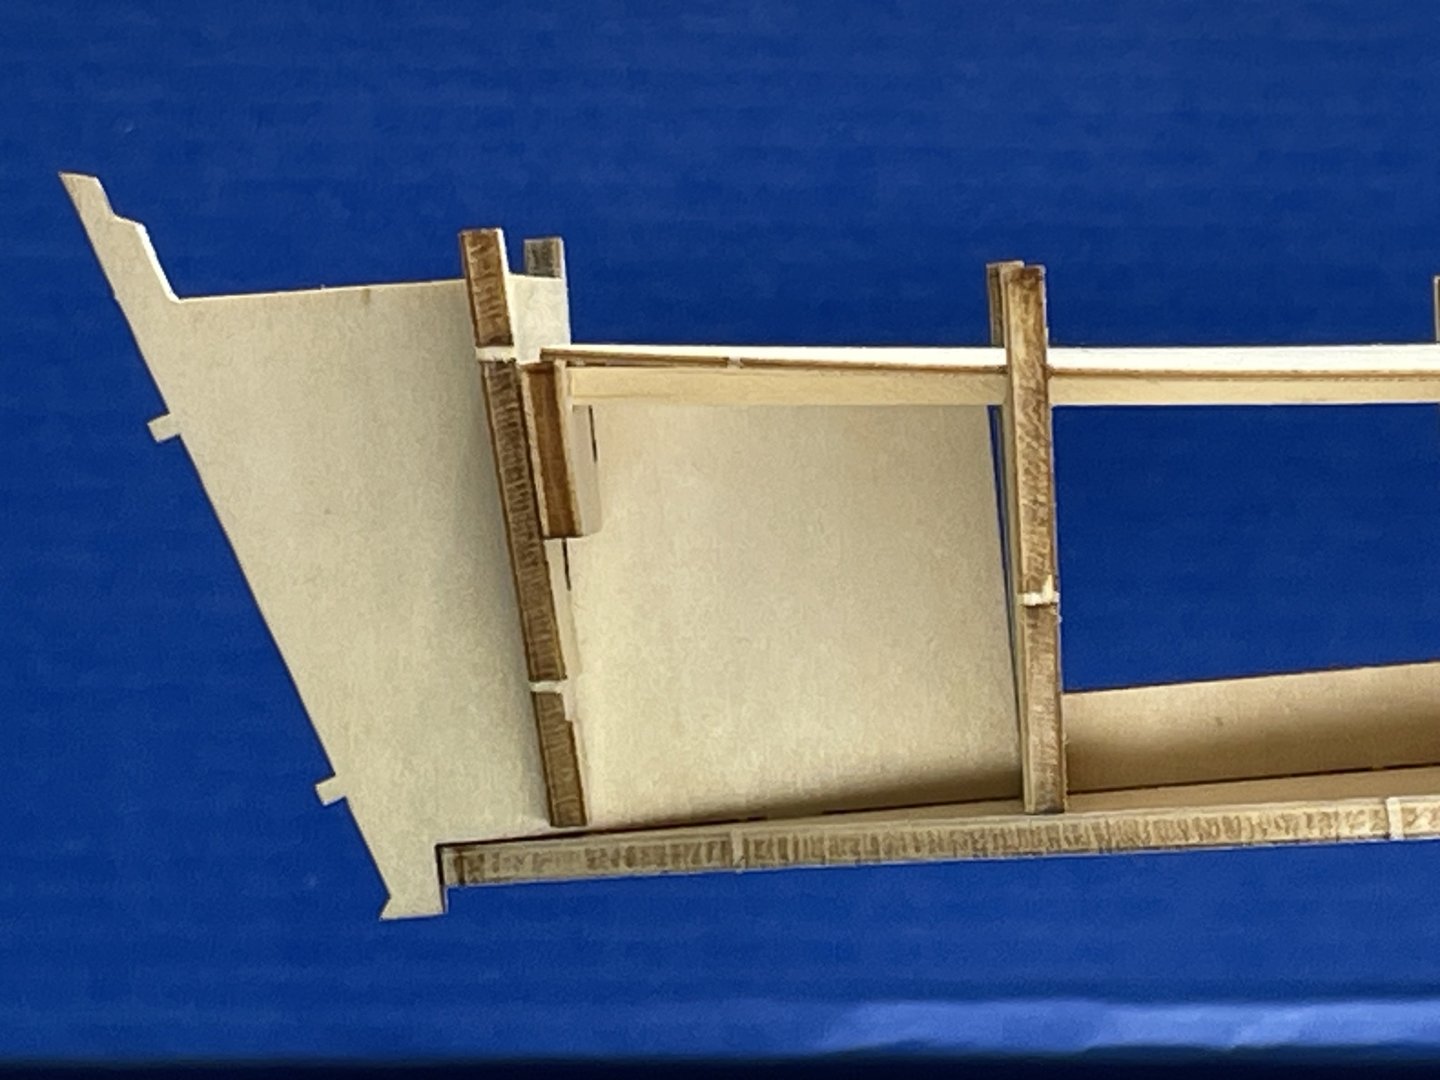
This is a flat bottom boat used to move goods on the river and coastline of France in the 1800’s. I was thinking it would be easier planking experience with only half the hull:-) I read all the instructions about 20 sentences and 6 black and white figures. This build looks like it could be a challenge for me. The spine, bottom and frames are 3mm plywood. I spent about a hour freeing them from the sheet. After cleaning some of the charr, I dry fitted all of them and placed the deck on hoping to see the plan in my head. It didn’t come to me instantly. Looks like I may try finding it in a dream tonight:-) Some of the questions I have right off the bat are. It doesn’t look like the notches in the deck line up perfectly with the frames. The middle one looks out of plum to me. I’m thinking I may glue the spine to the bottom and the 3 center frames all at one time and dry fit the deck to hold them in place. Then maybe do the 2 at a he stern and then the other 2 at the bow? The stern dips down a little, leaving a gap between the spine and frame 7 and also a small one (you can’t see) at frame 9. 8 is that little piece holding the deck up. There is one other build log here, He did one at a time. I’m not sure I will have the success he had, doing it like that. Any suggestions are welcome. I guess these things wouldn’t be as entertaining if they went together easy without a lot of thought:-)

- 55 replies
-
- 6
-
-
- Le Martegaou
- billing boats
- (and 1 more)
-
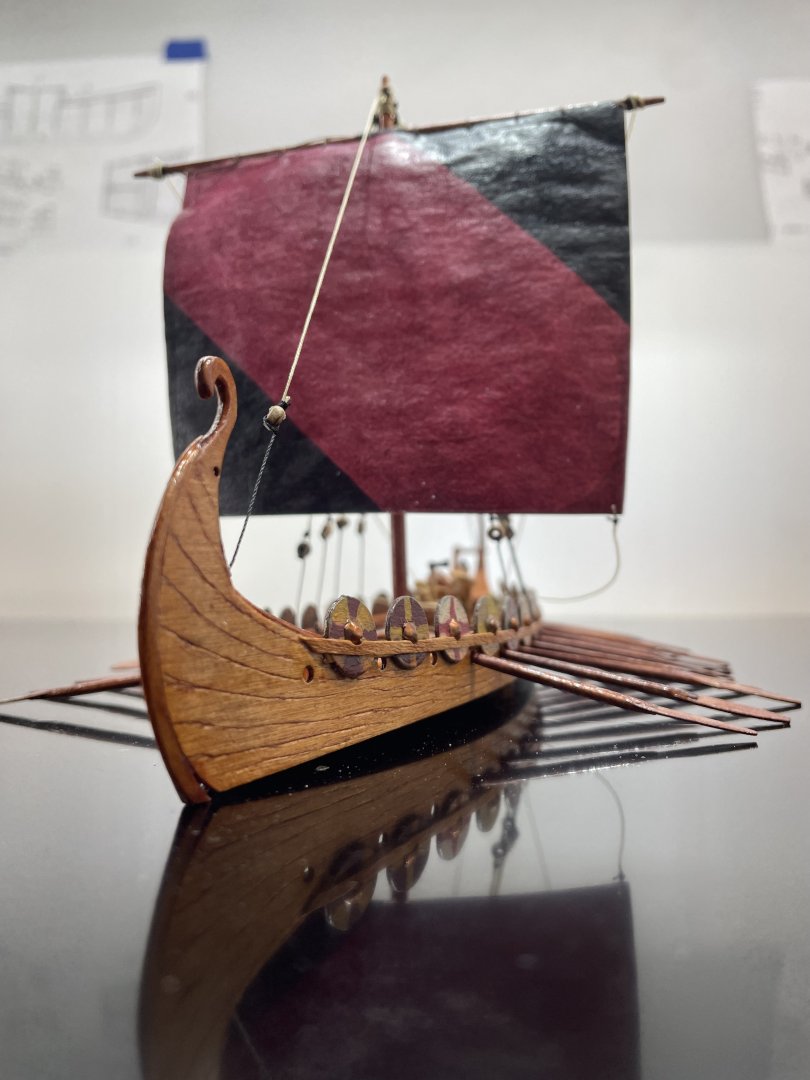
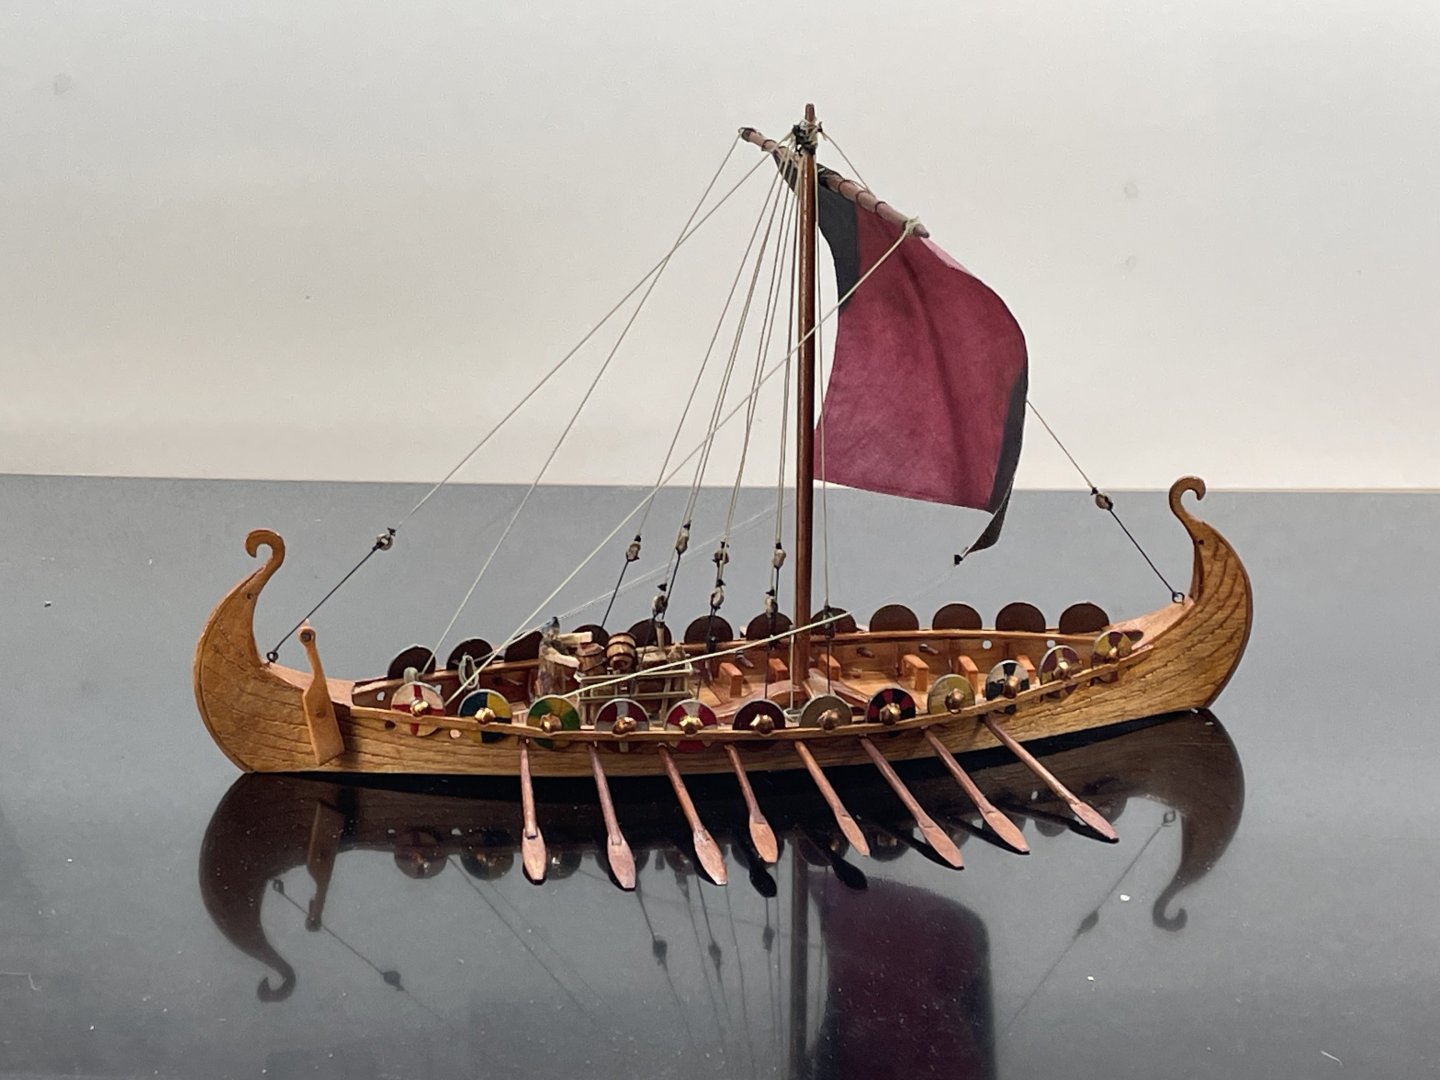
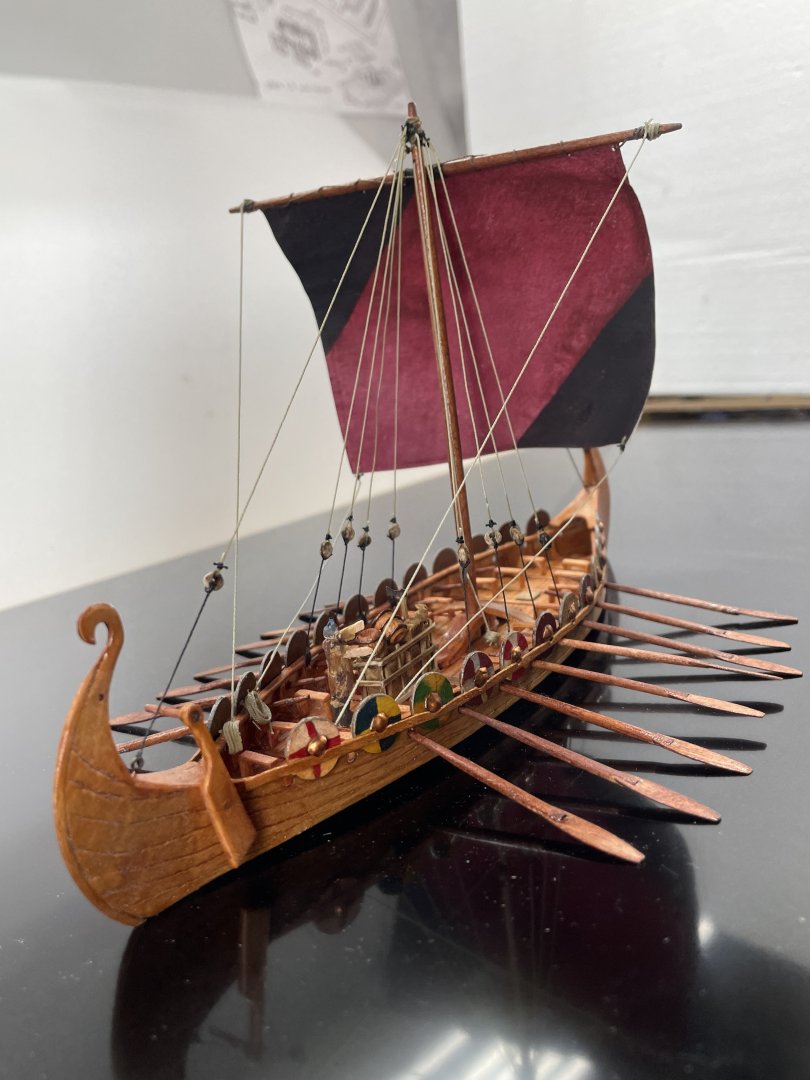
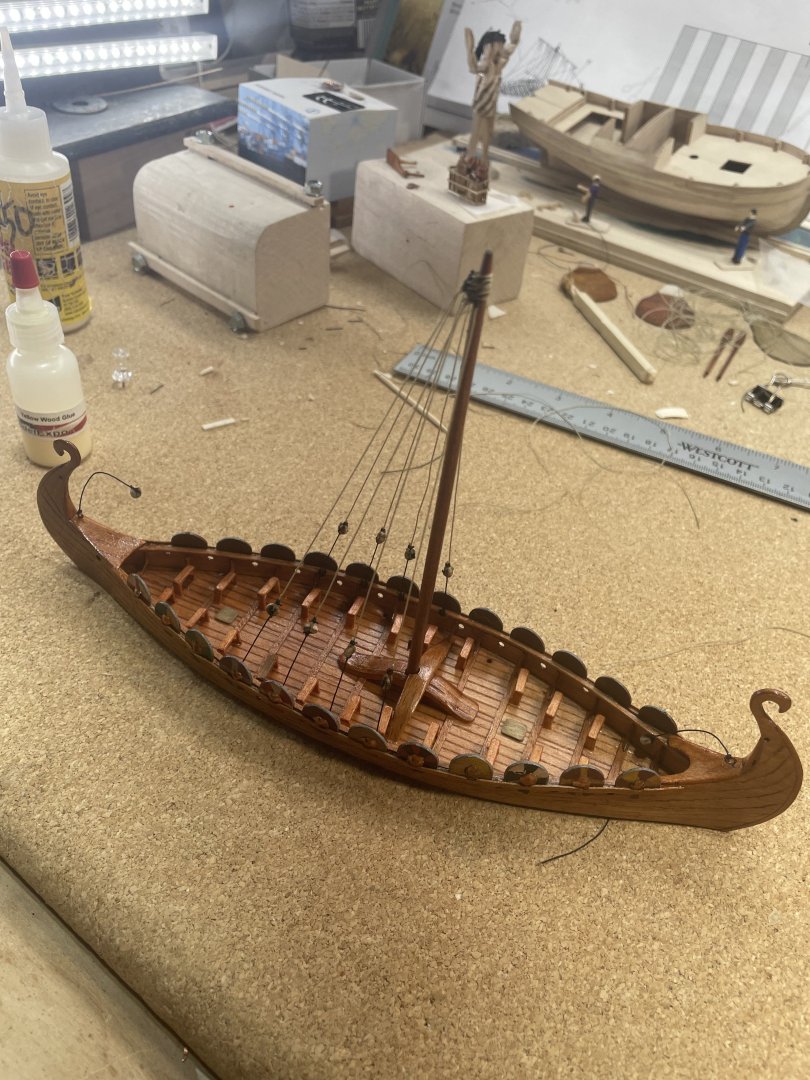
The sail went up and oars installed. I must say, I only paid 10 bucks for this kit and used only left over materials to do the extras. Which provided me with about a month of enjoyable entertainment:-) Here’s some pics of the finished ship.

- 16 replies
-
- 6
-
-
-
- Oseberg
- Billing Boats
- (and 1 more)
-
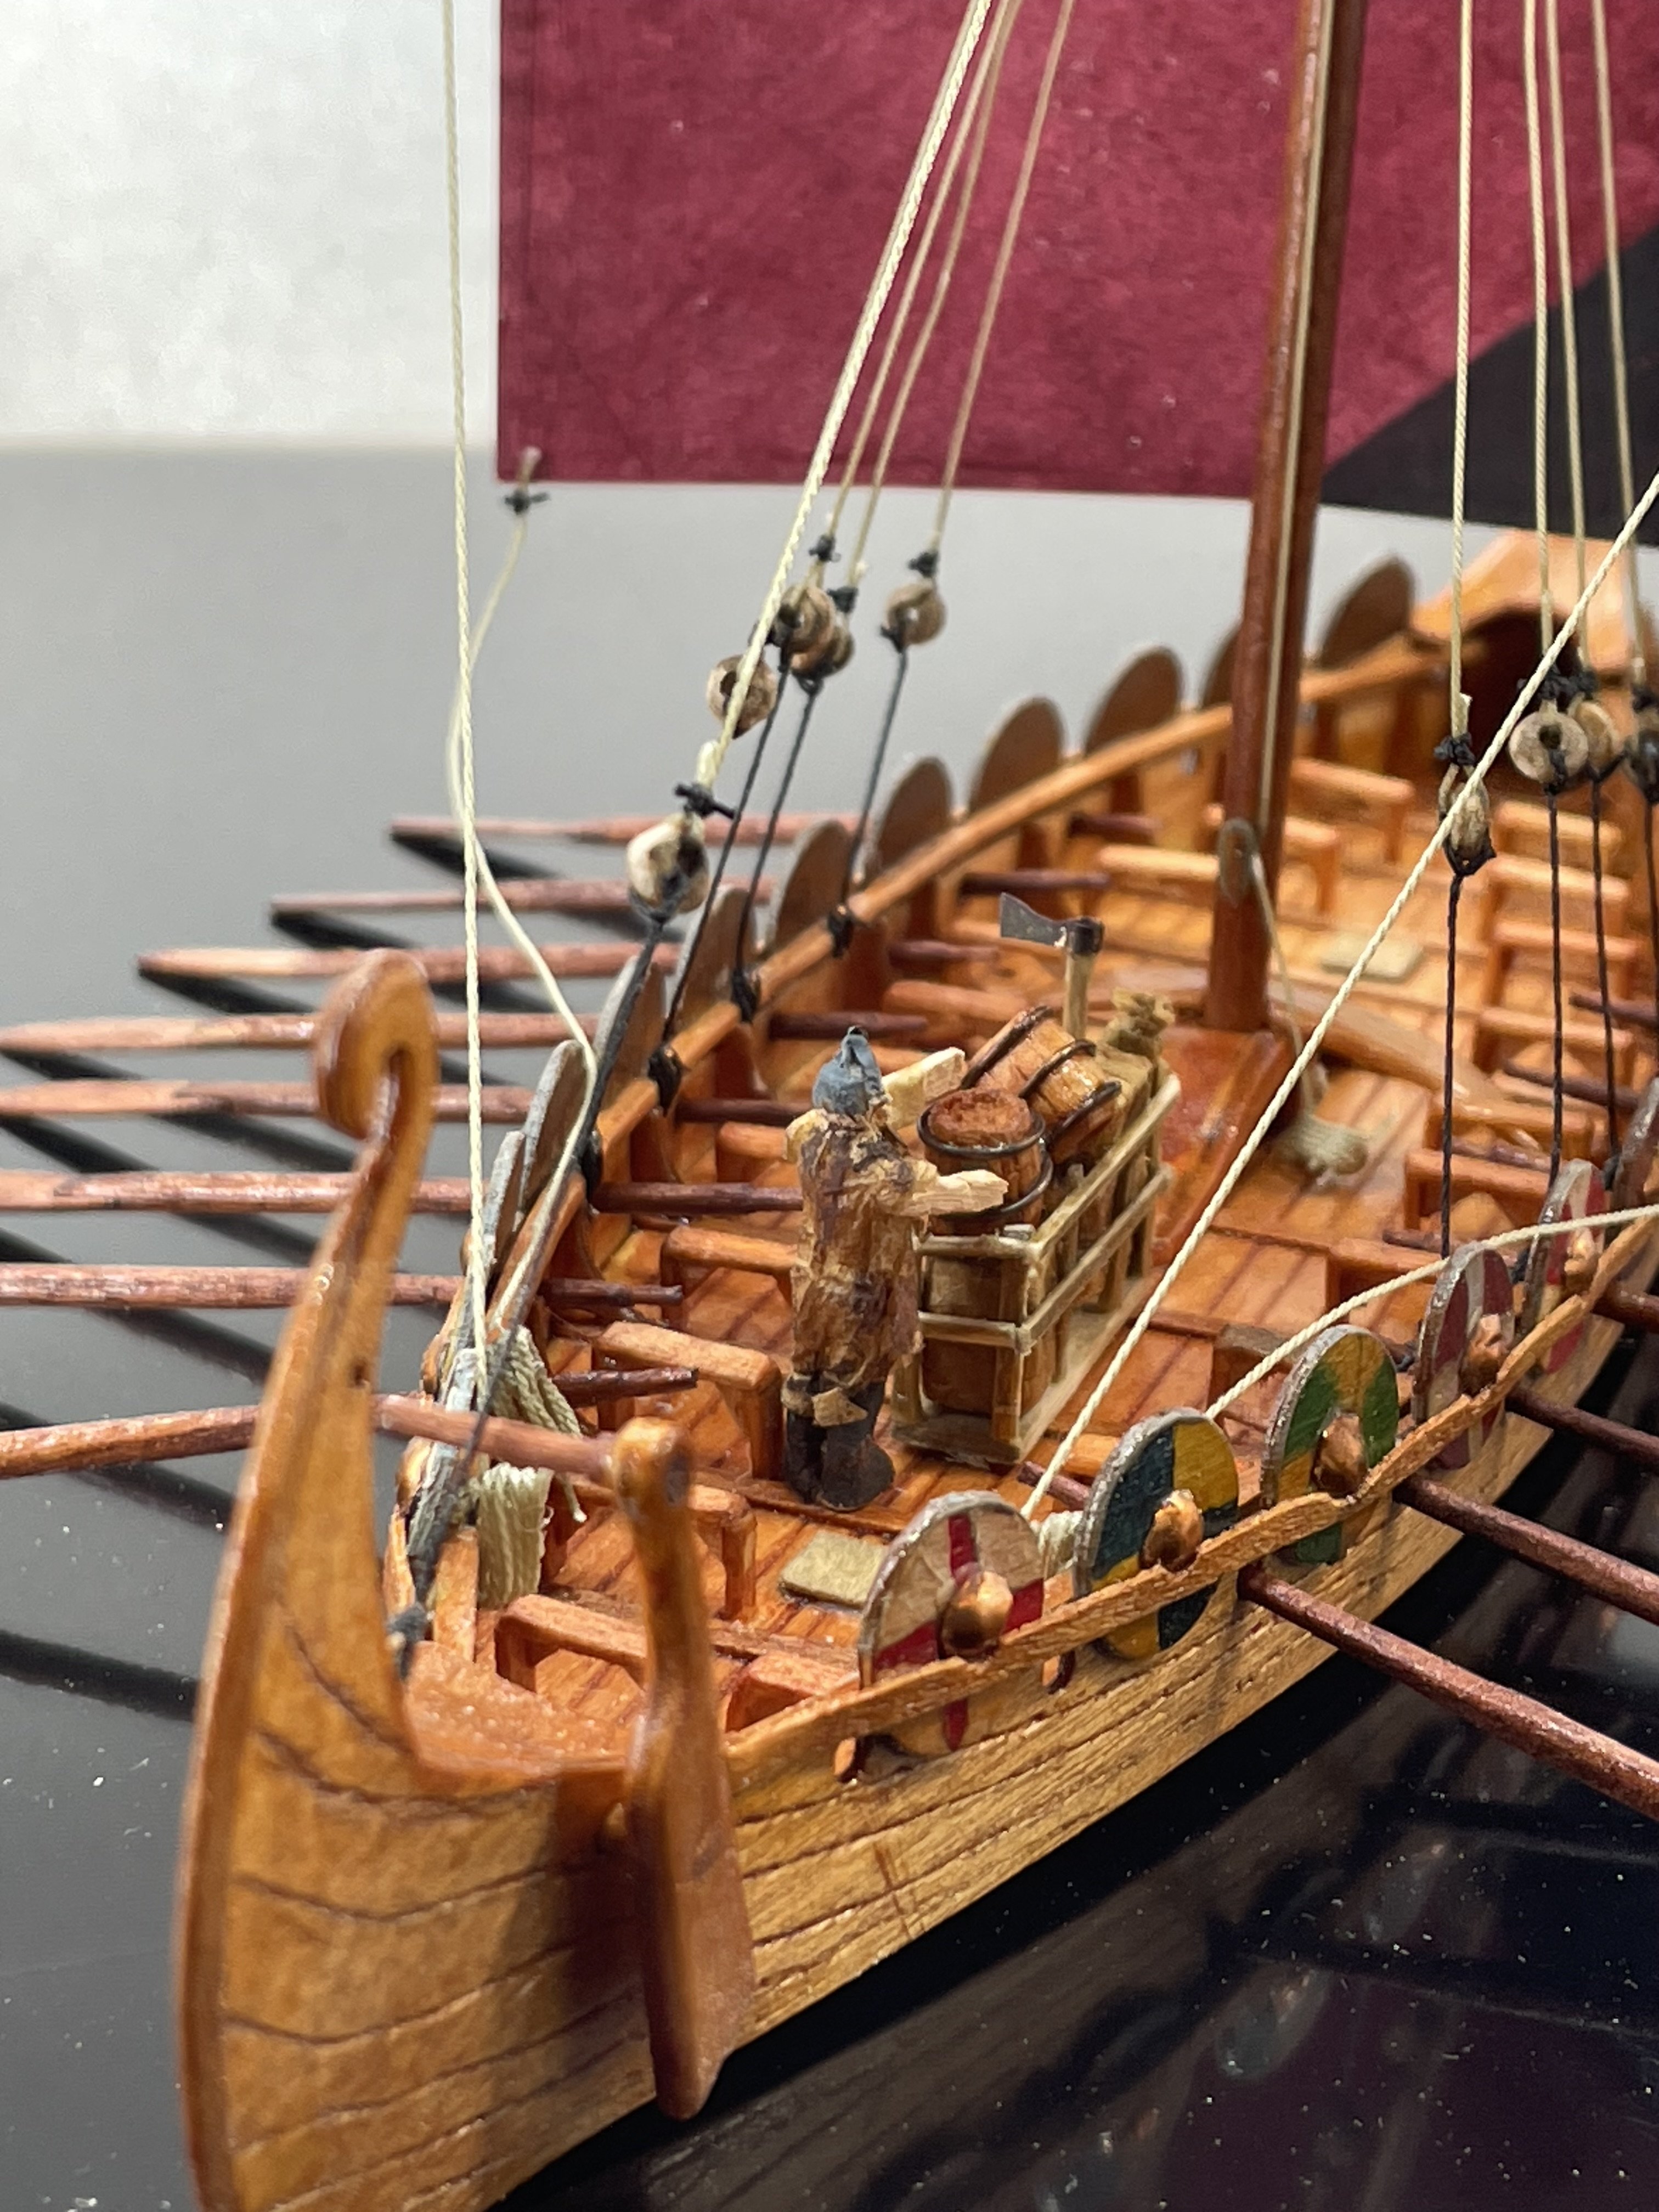
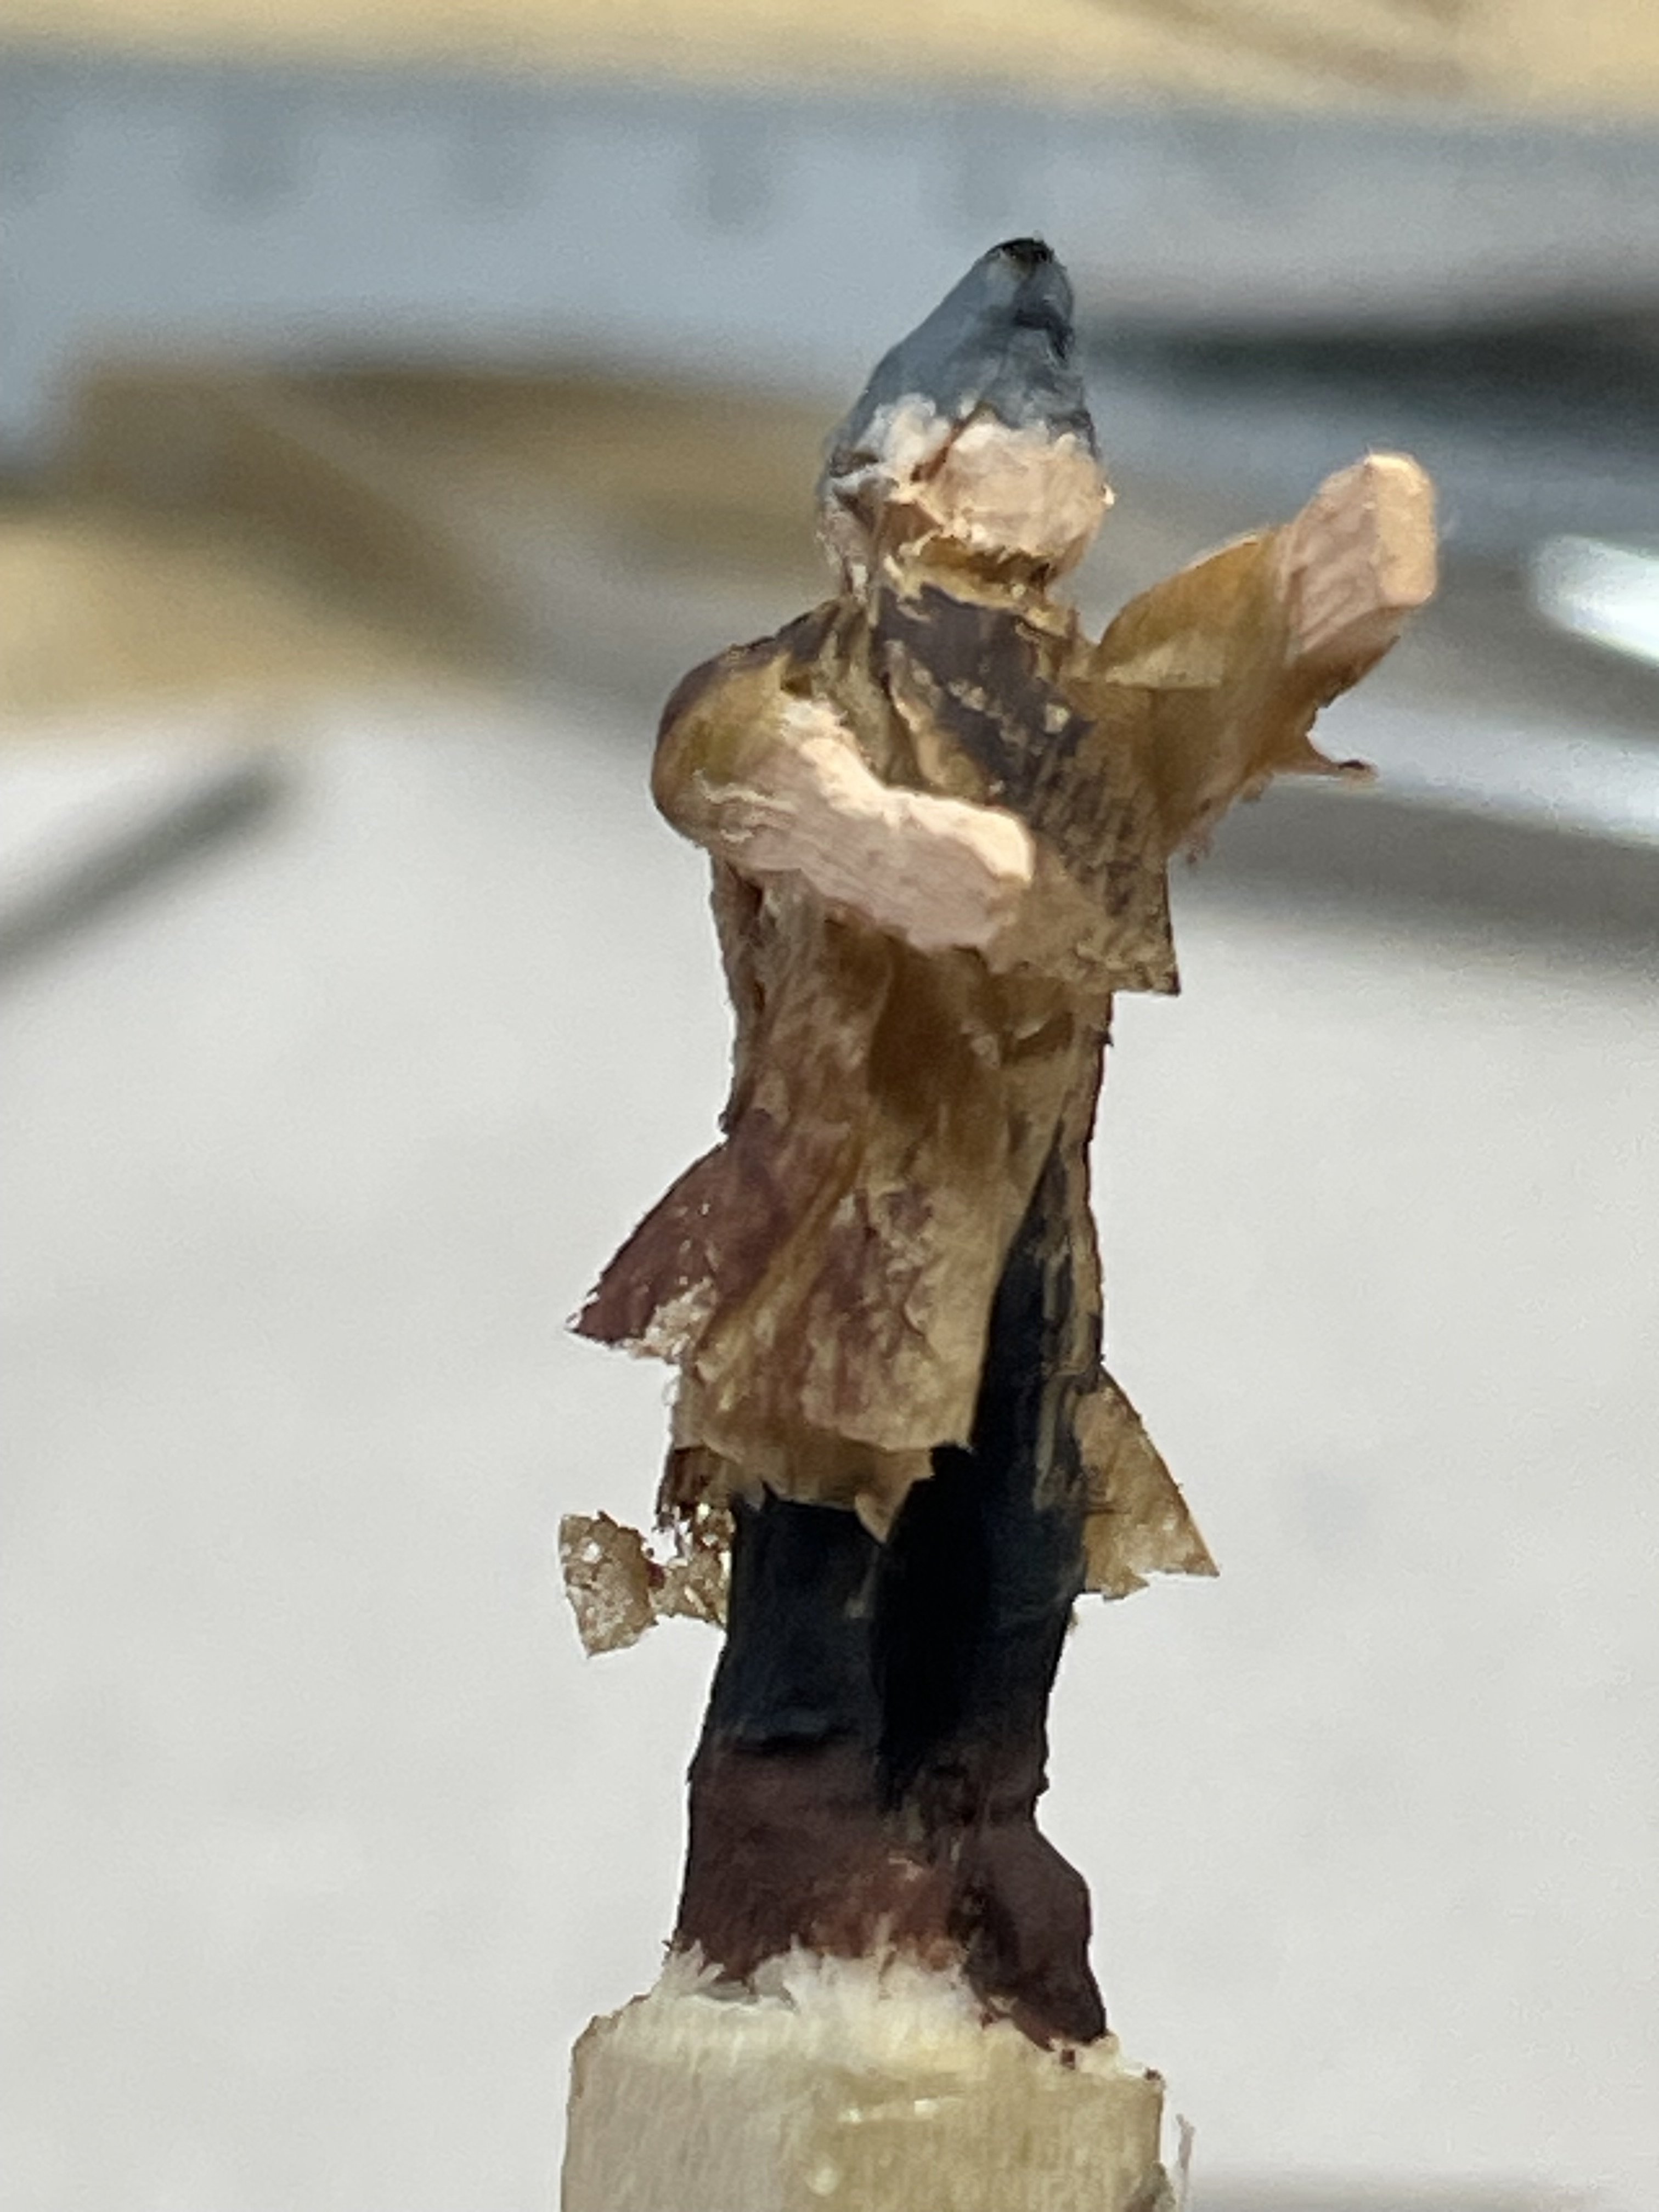
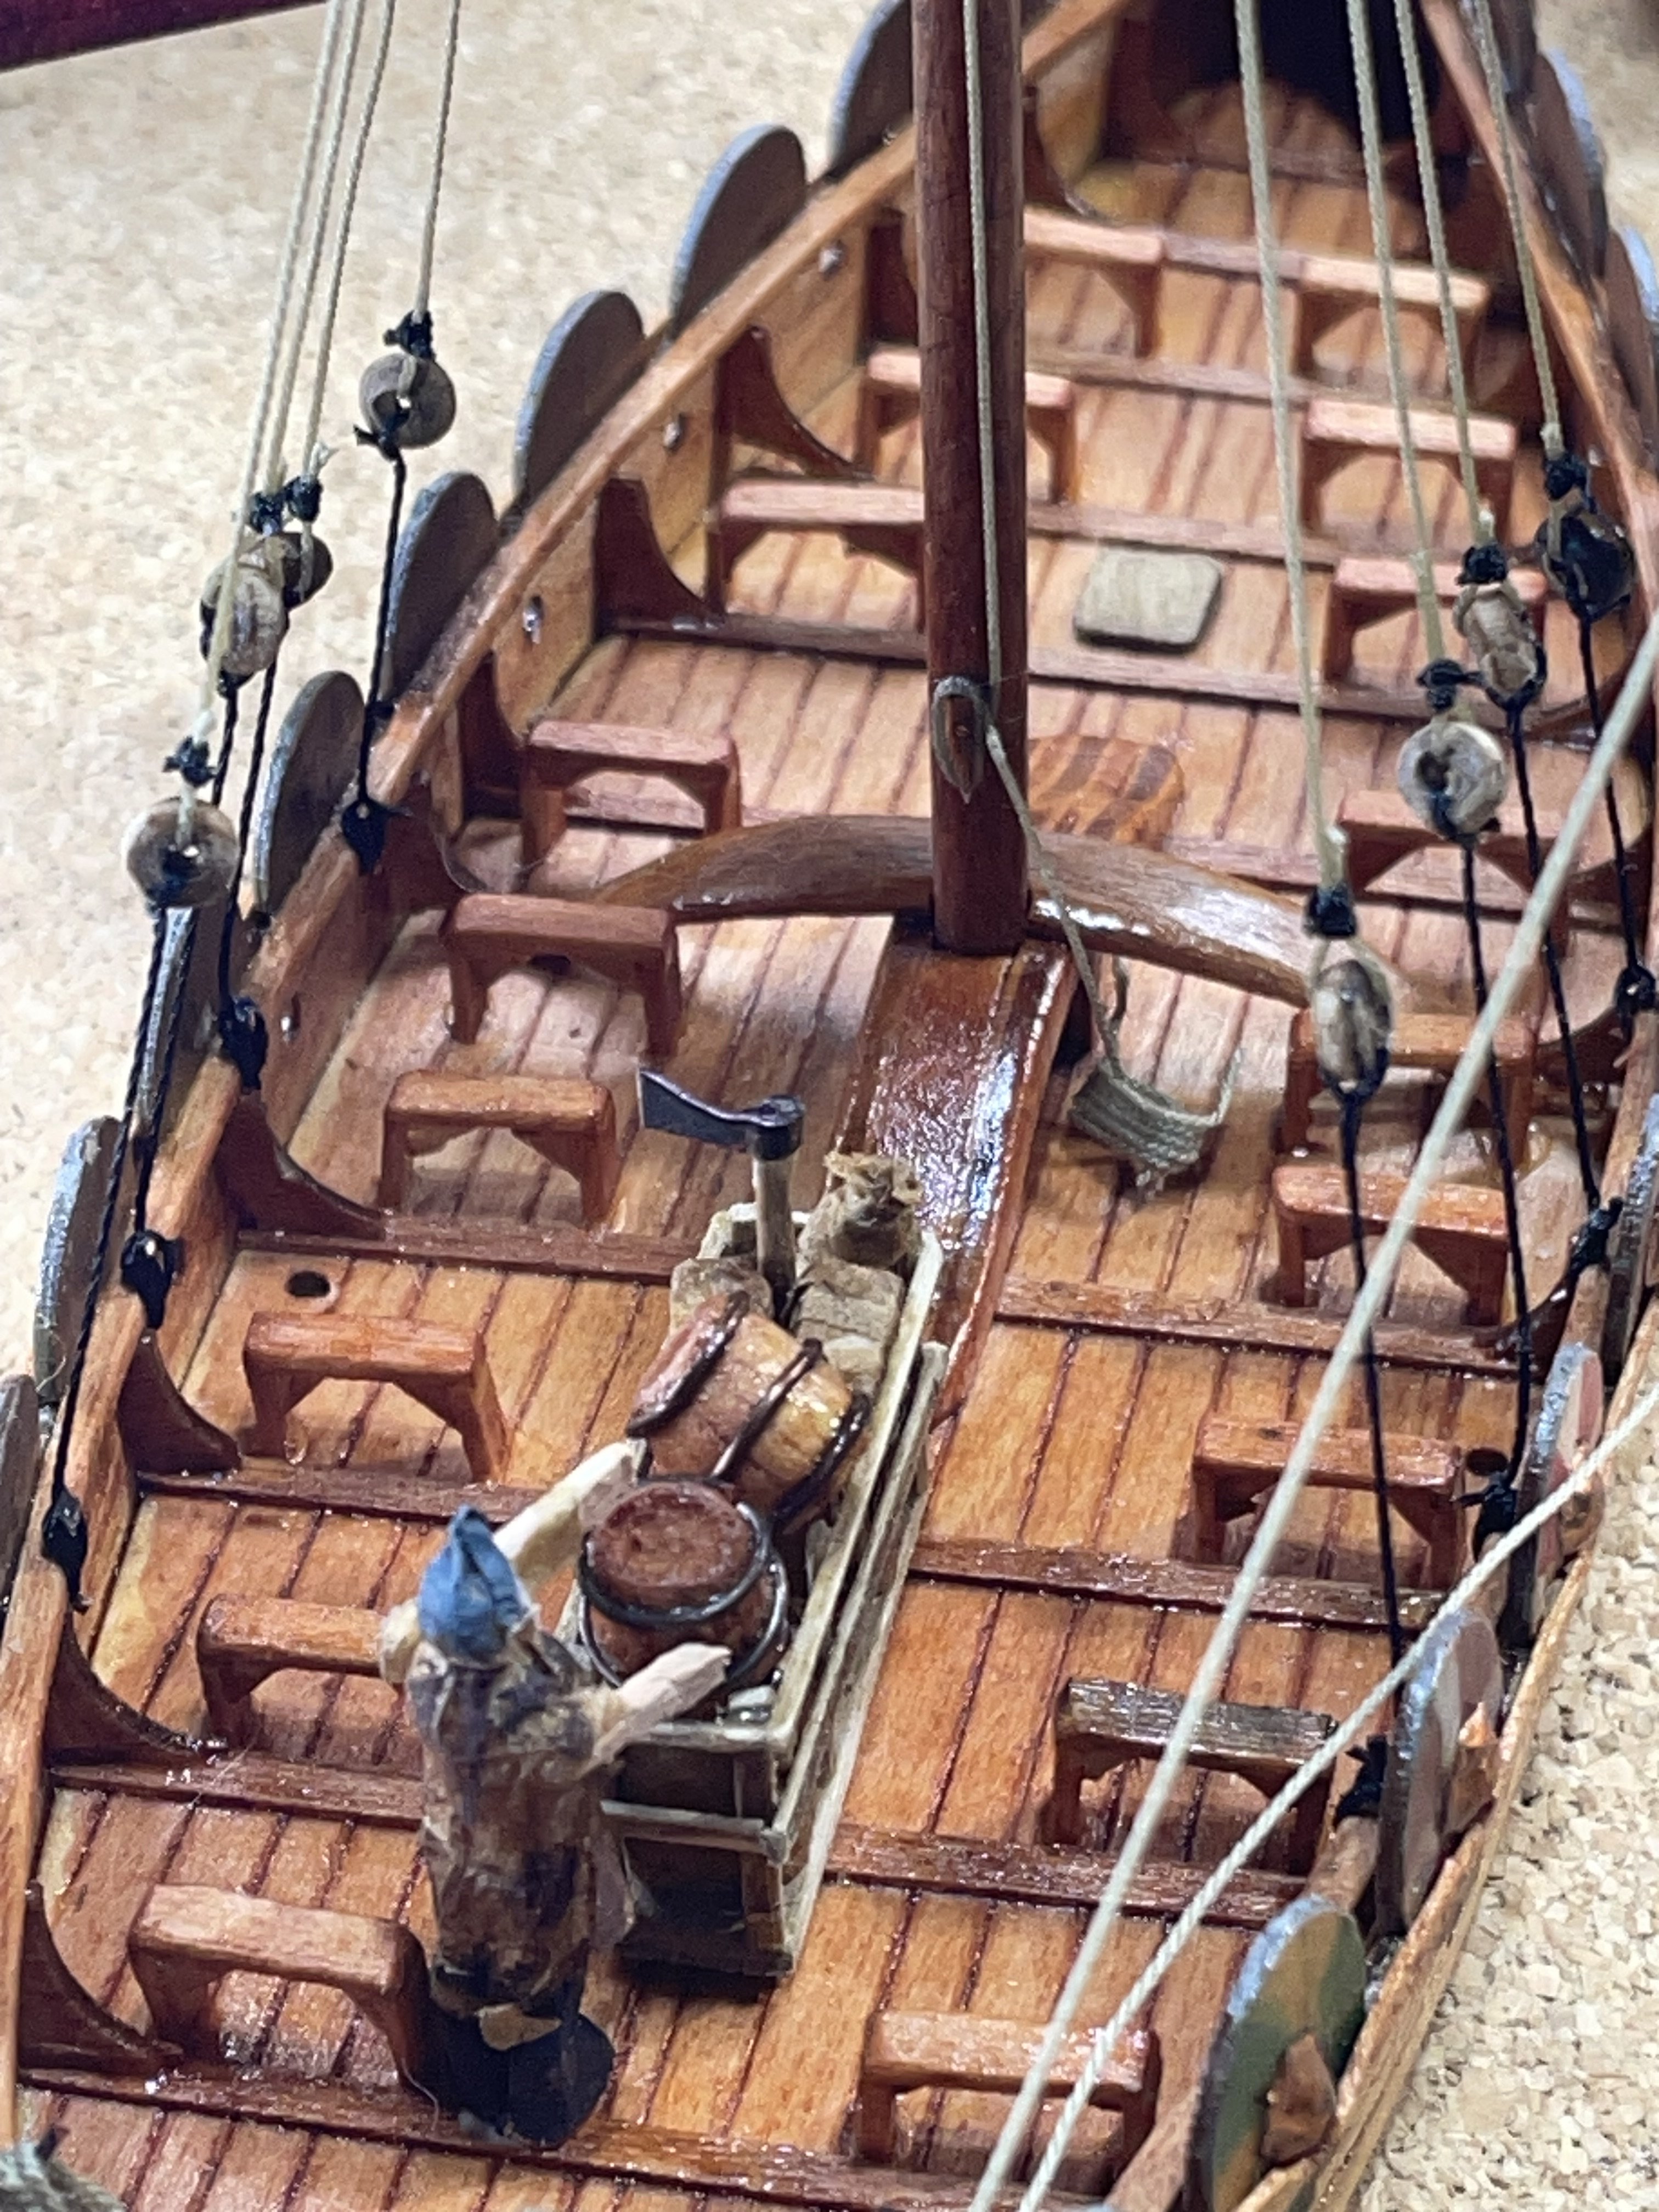
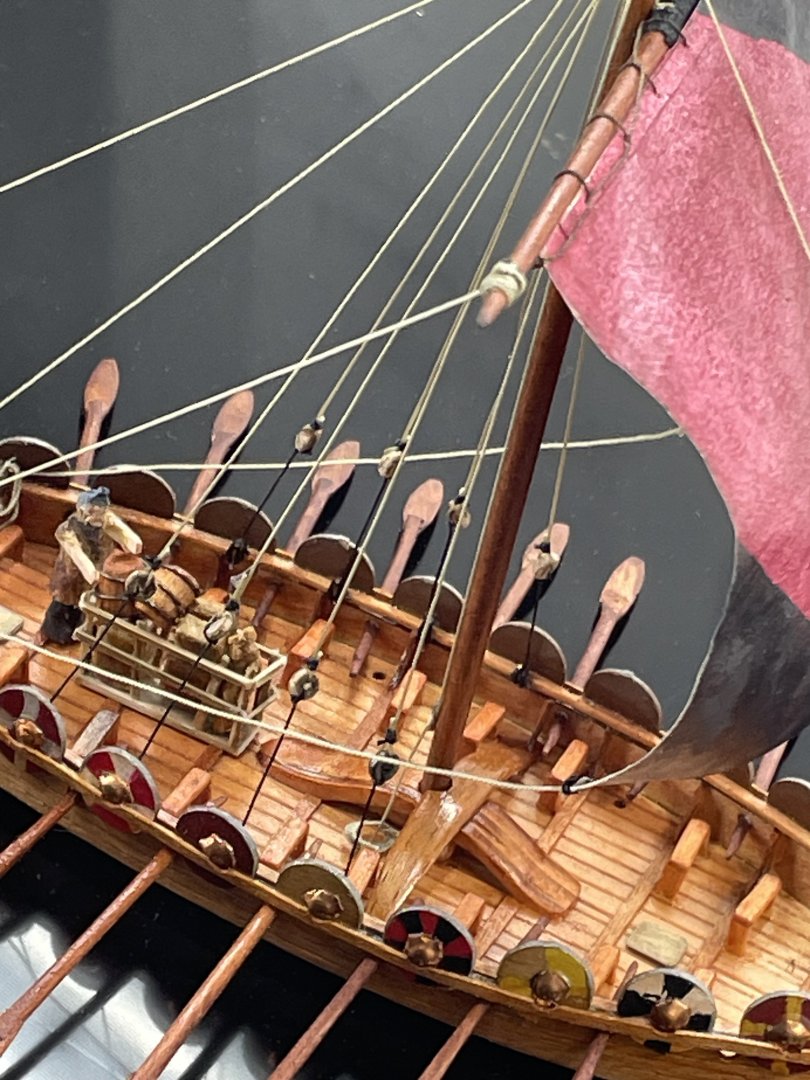
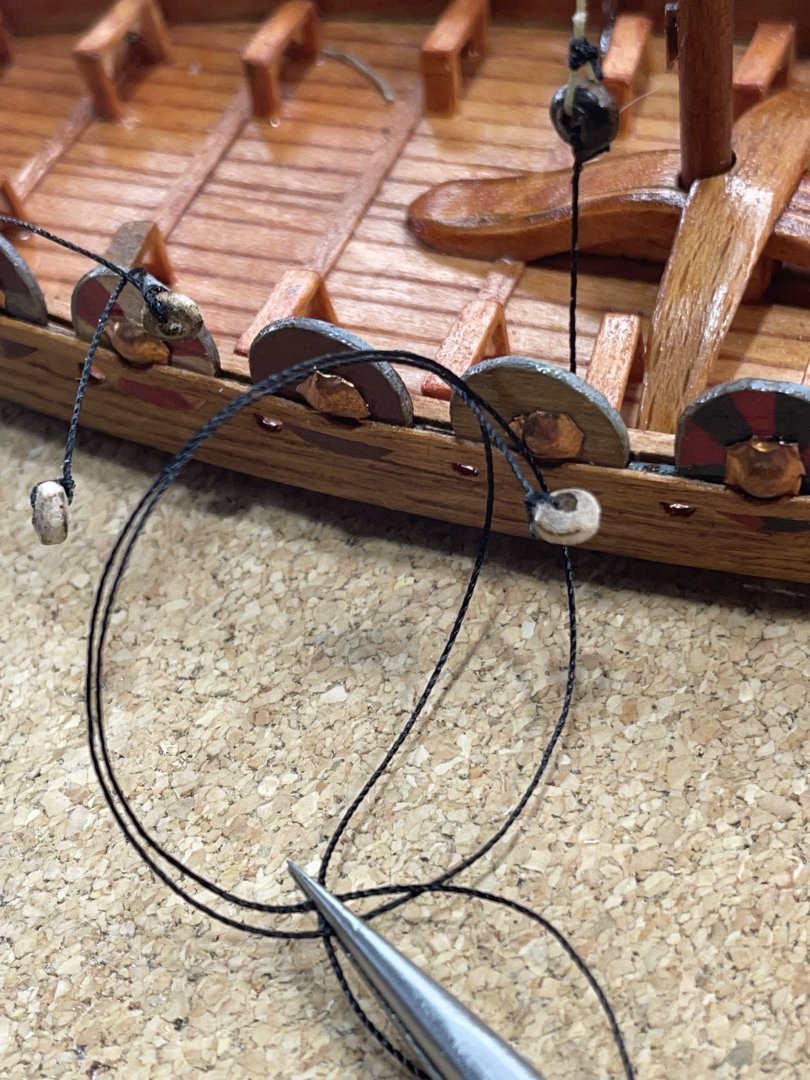
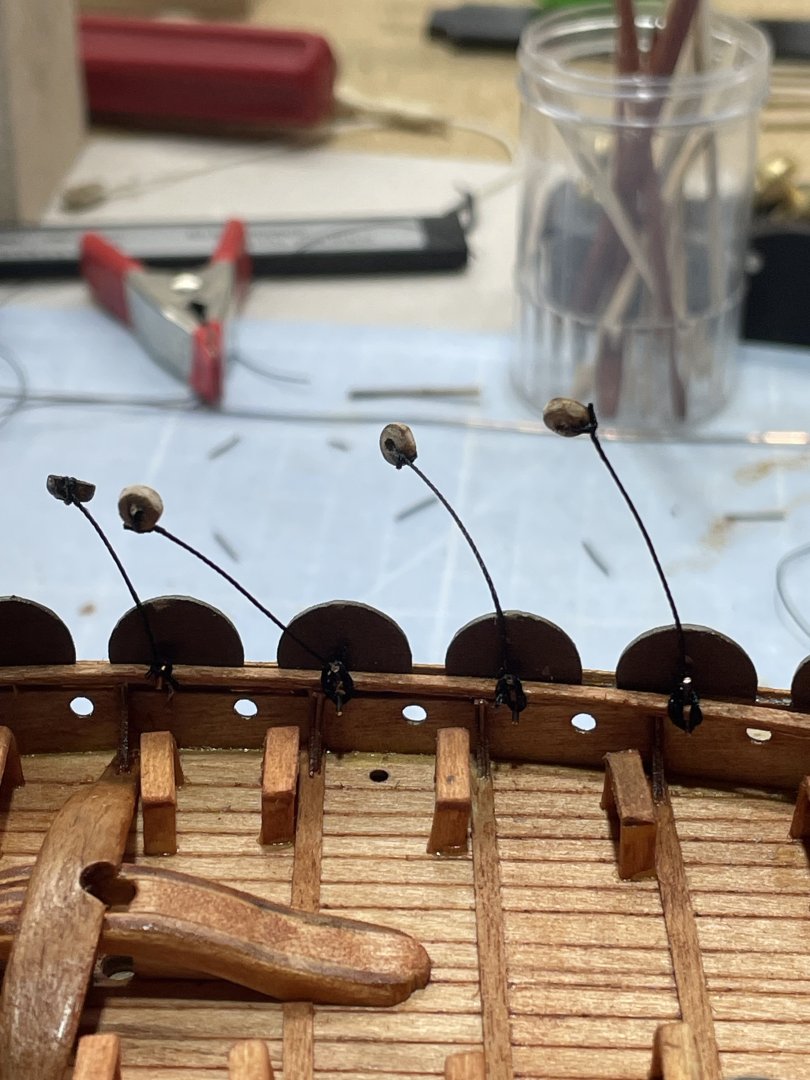
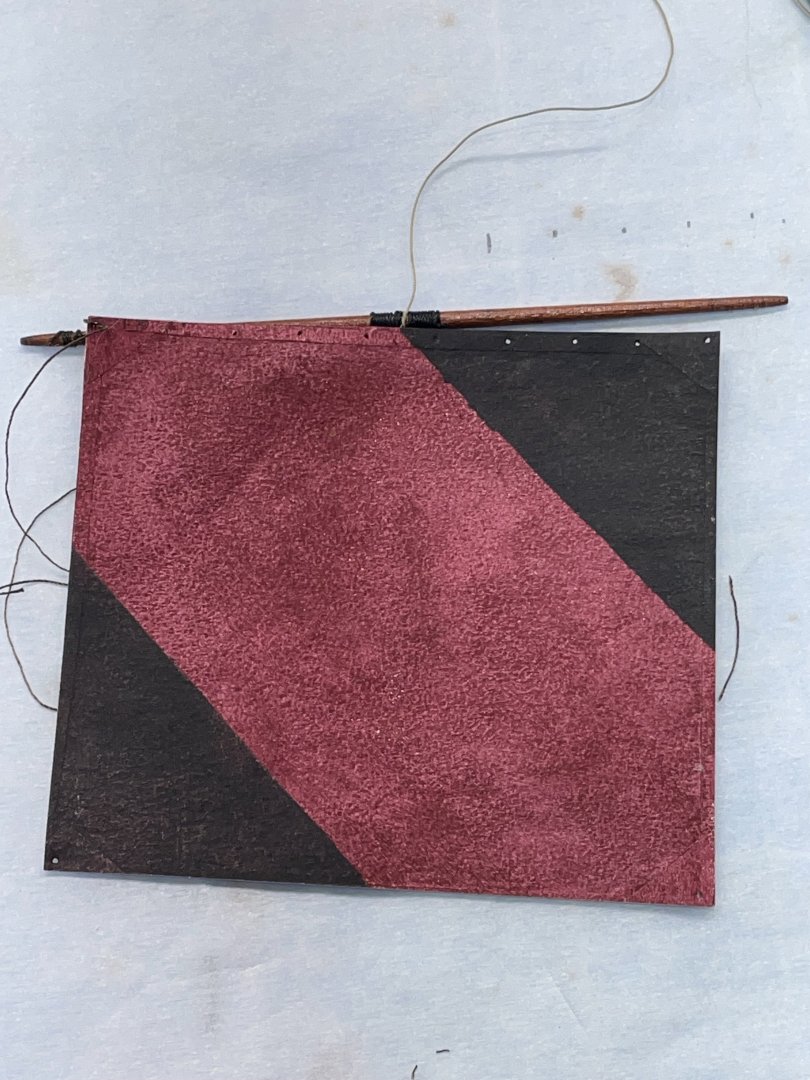
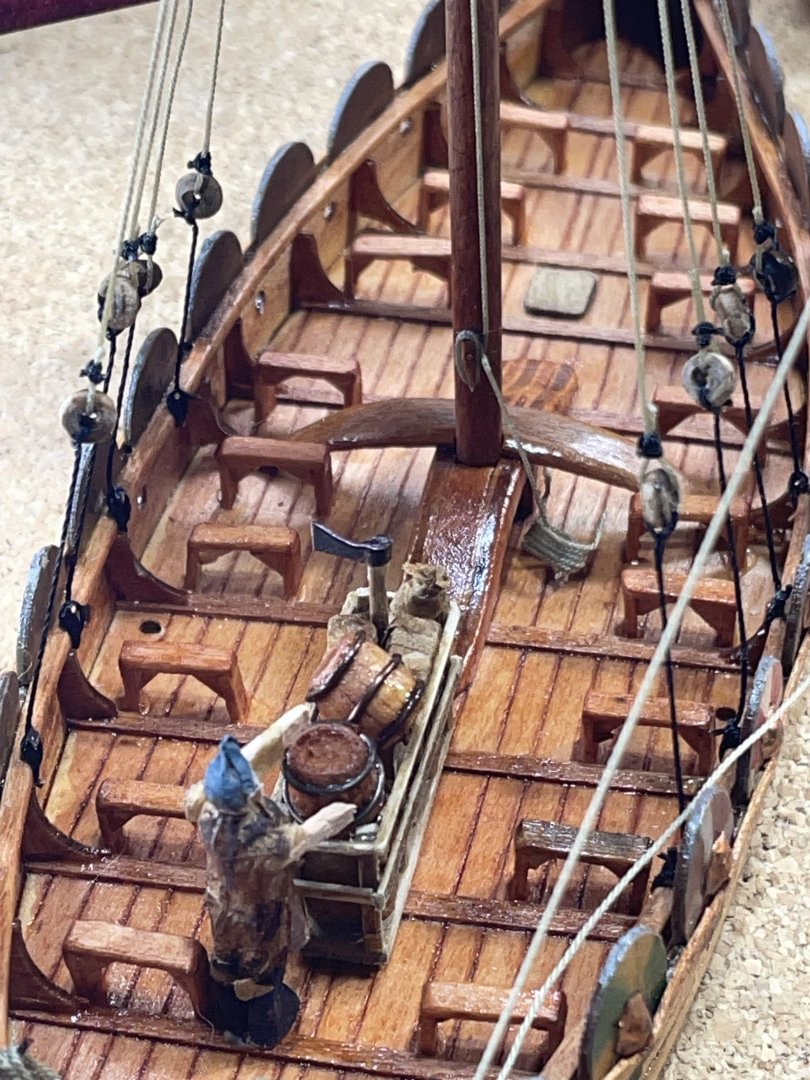
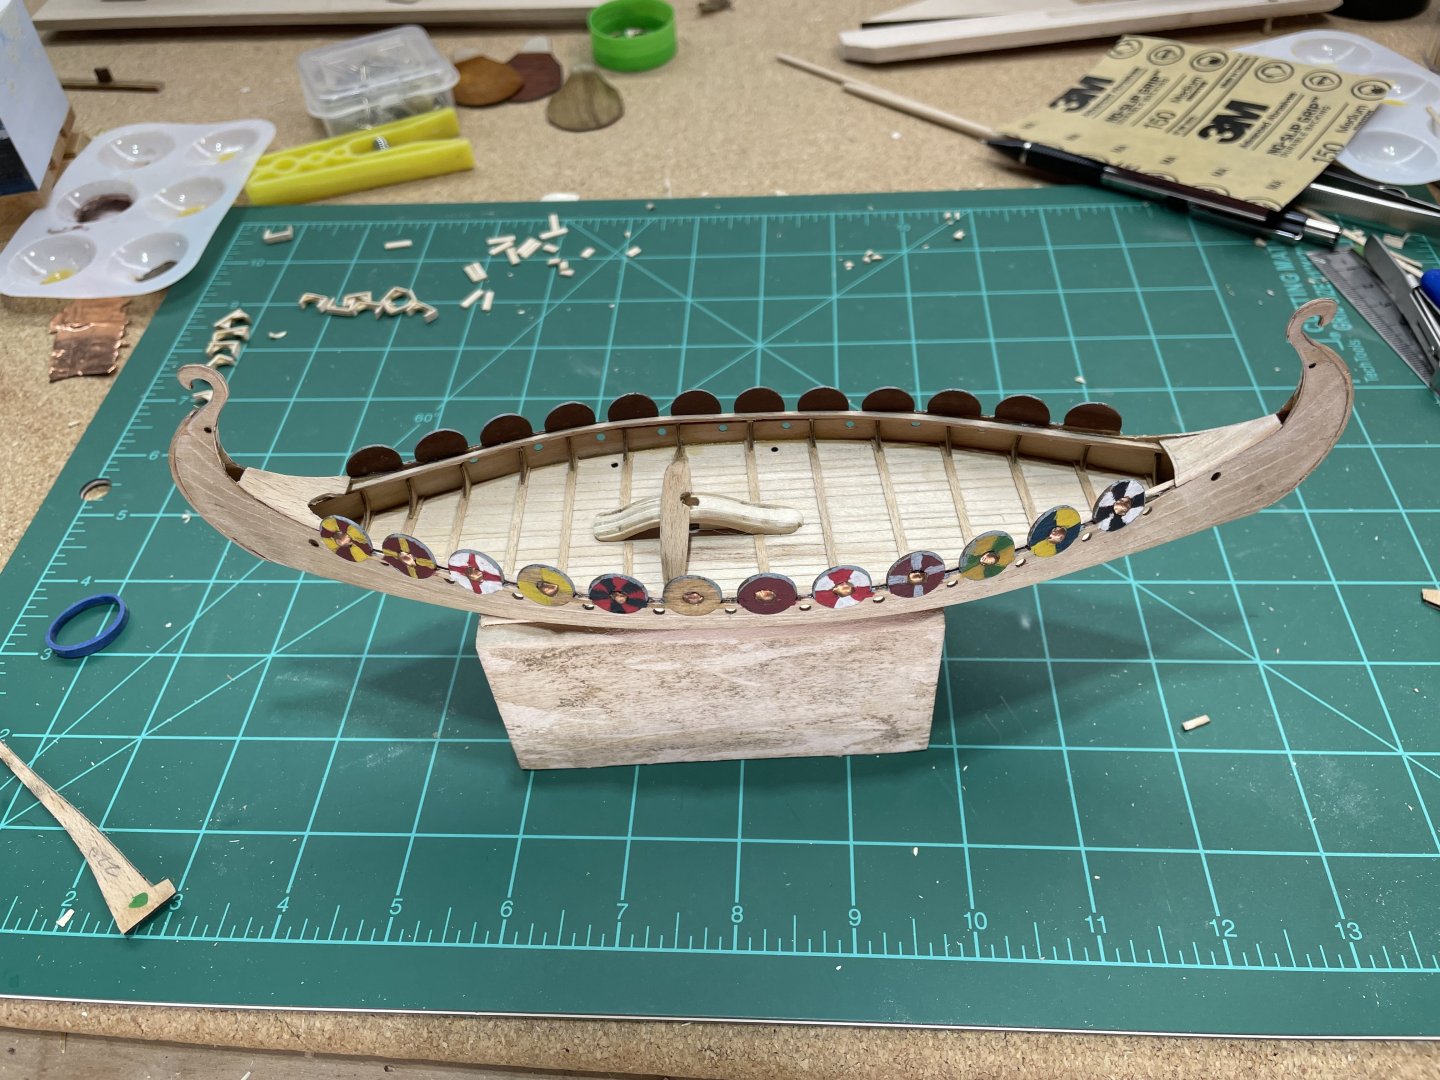
Benches installed and the finish completed. I drilled holes in the rail and poked copper wires in them to tie off the shrouds. After attaching the stays to the top of the mast. I pre knotted a clove hitch, clamped it and dropped it over the shroud. After threading it through the sanded down wooden bead that I’m pretending to be a block. I slide it up, tighten it and touch it with CA. i’ve started on the yard and sail. I used tea bag paper and just painted it. I finished Ragnar, It’s the right season, he kinda looks like a pumpkin head:-) Anyway he’s just going to be securing the supplies. I’m going to hang the sail next then the fore and aft stays. Oh yeah all the oars have to be sanded down a mm to fit in the holes. I’m not sure about the oar holders. The kit said to put them where I put the benches. I think they maybe out of scale, a little large.

- 16 replies
-
- 5
-
-
- Oseberg
- Billing Boats
- (and 1 more)
-
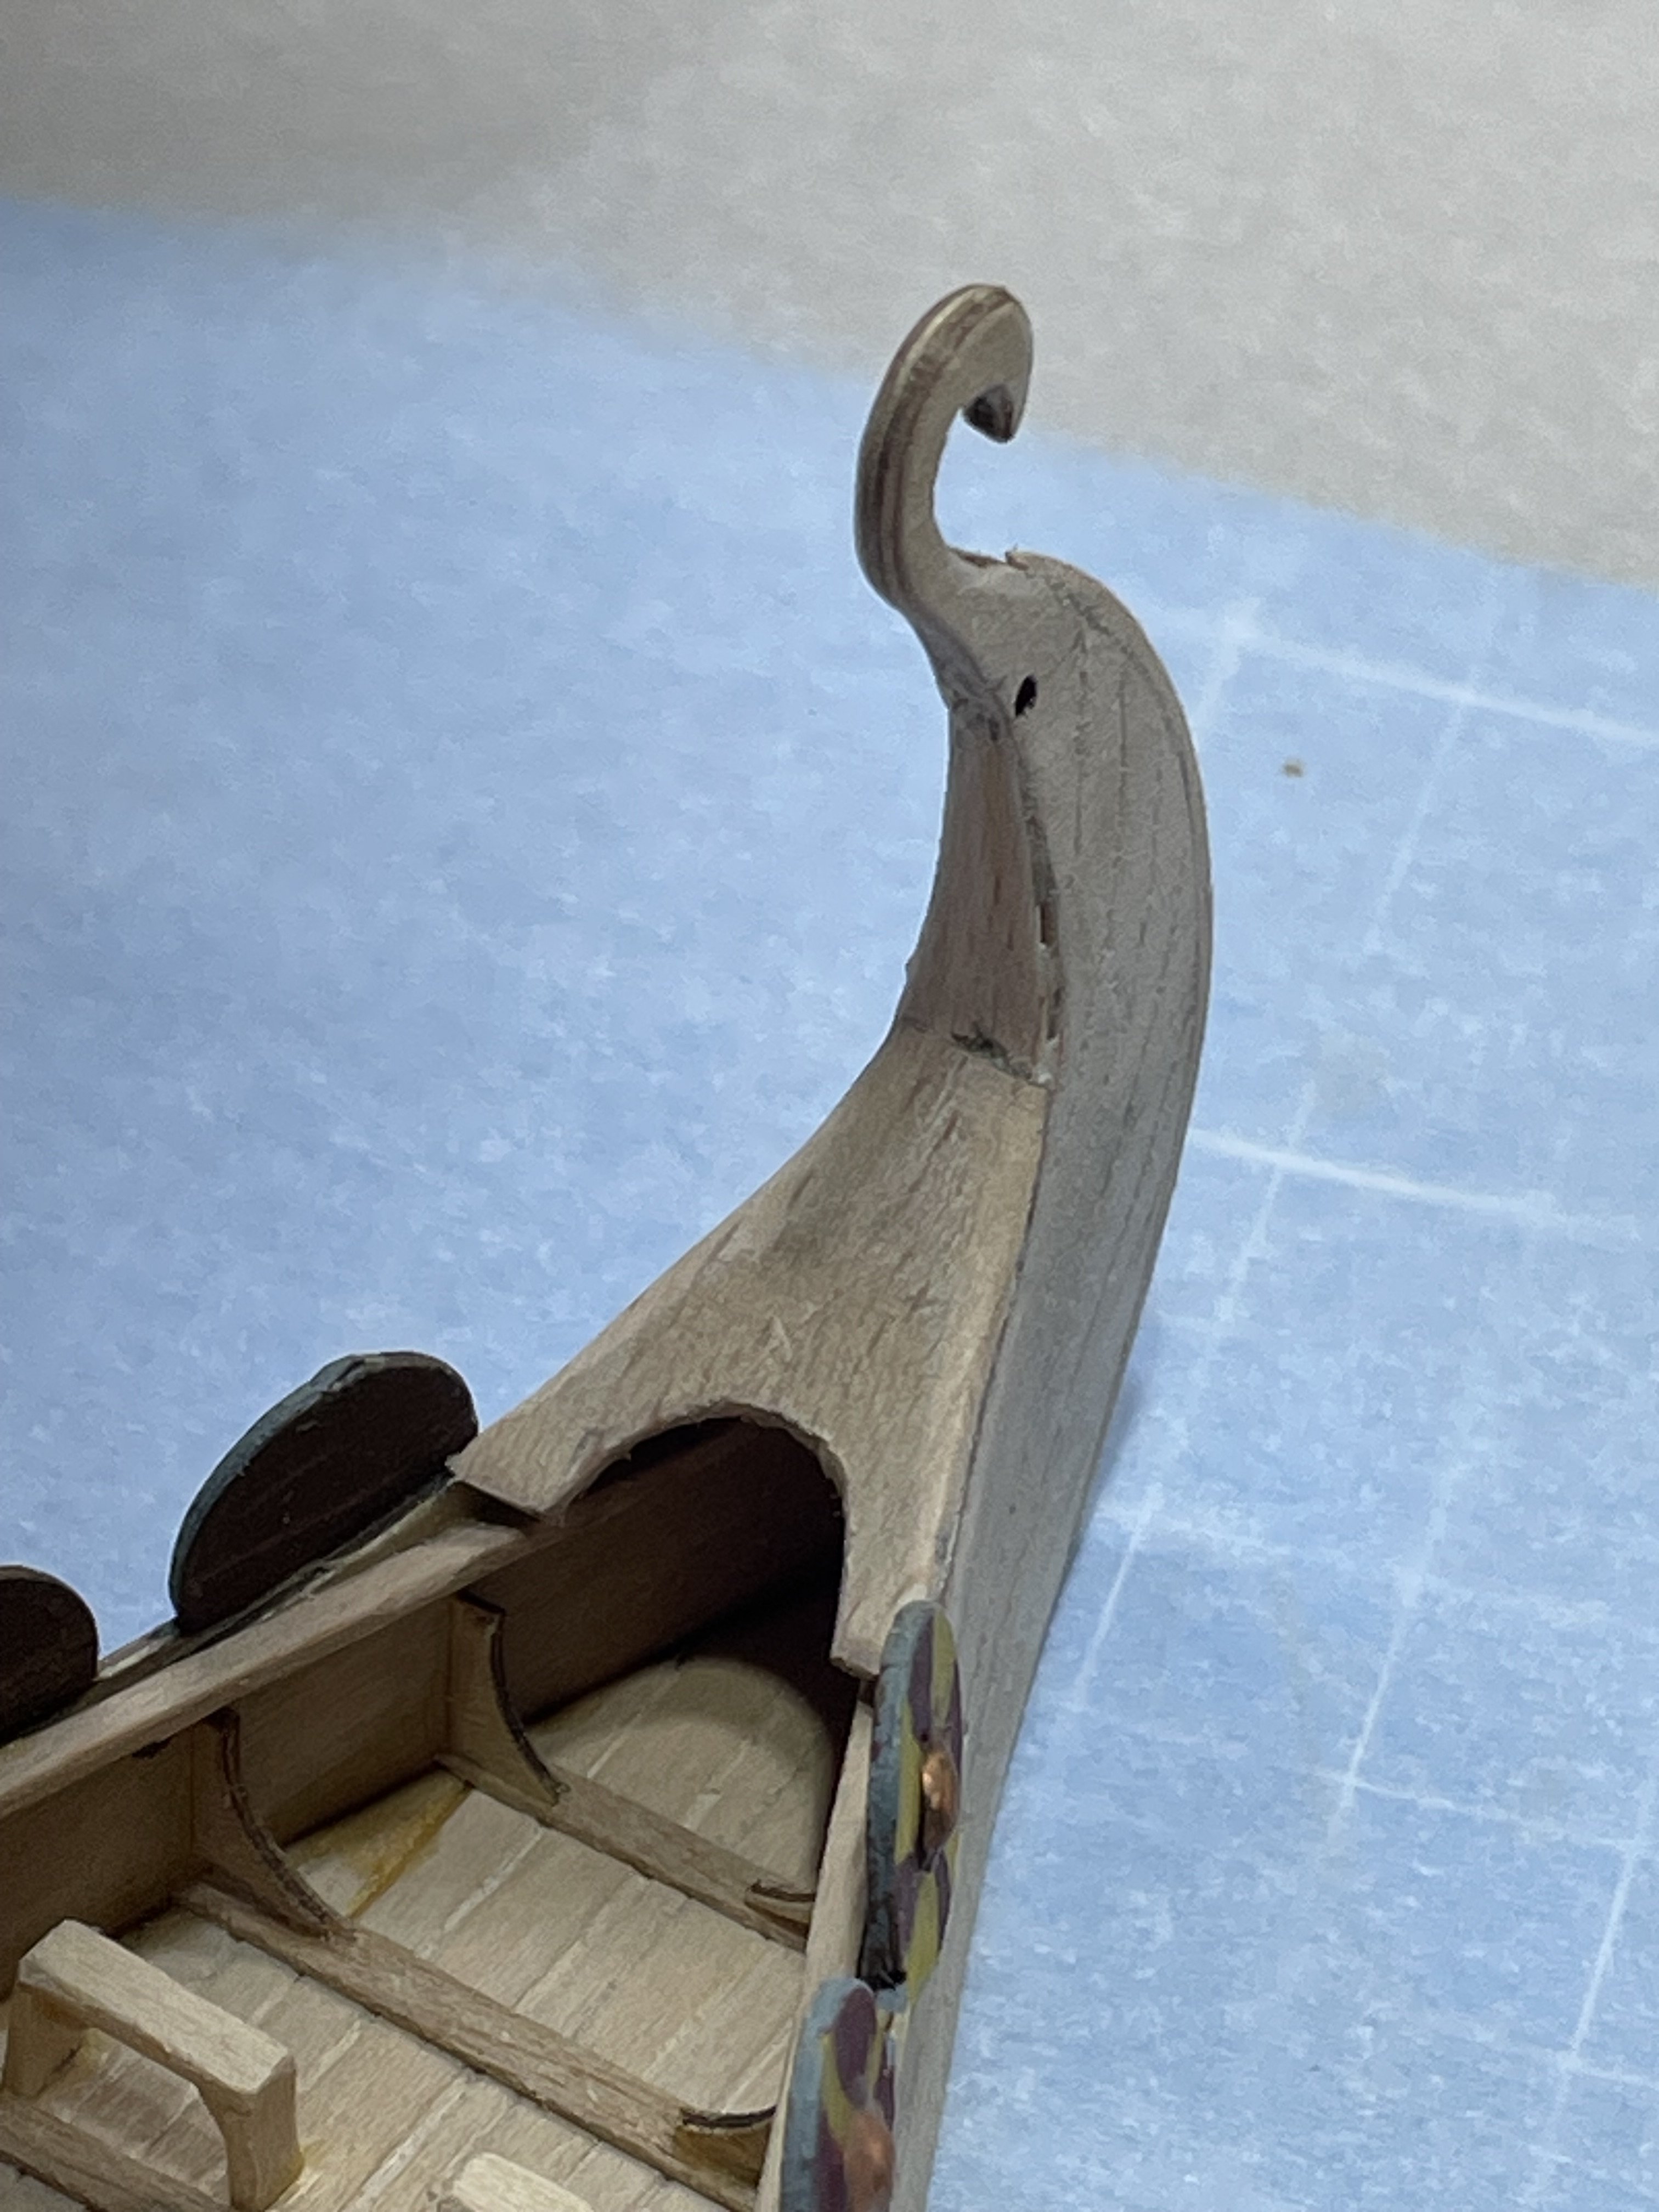
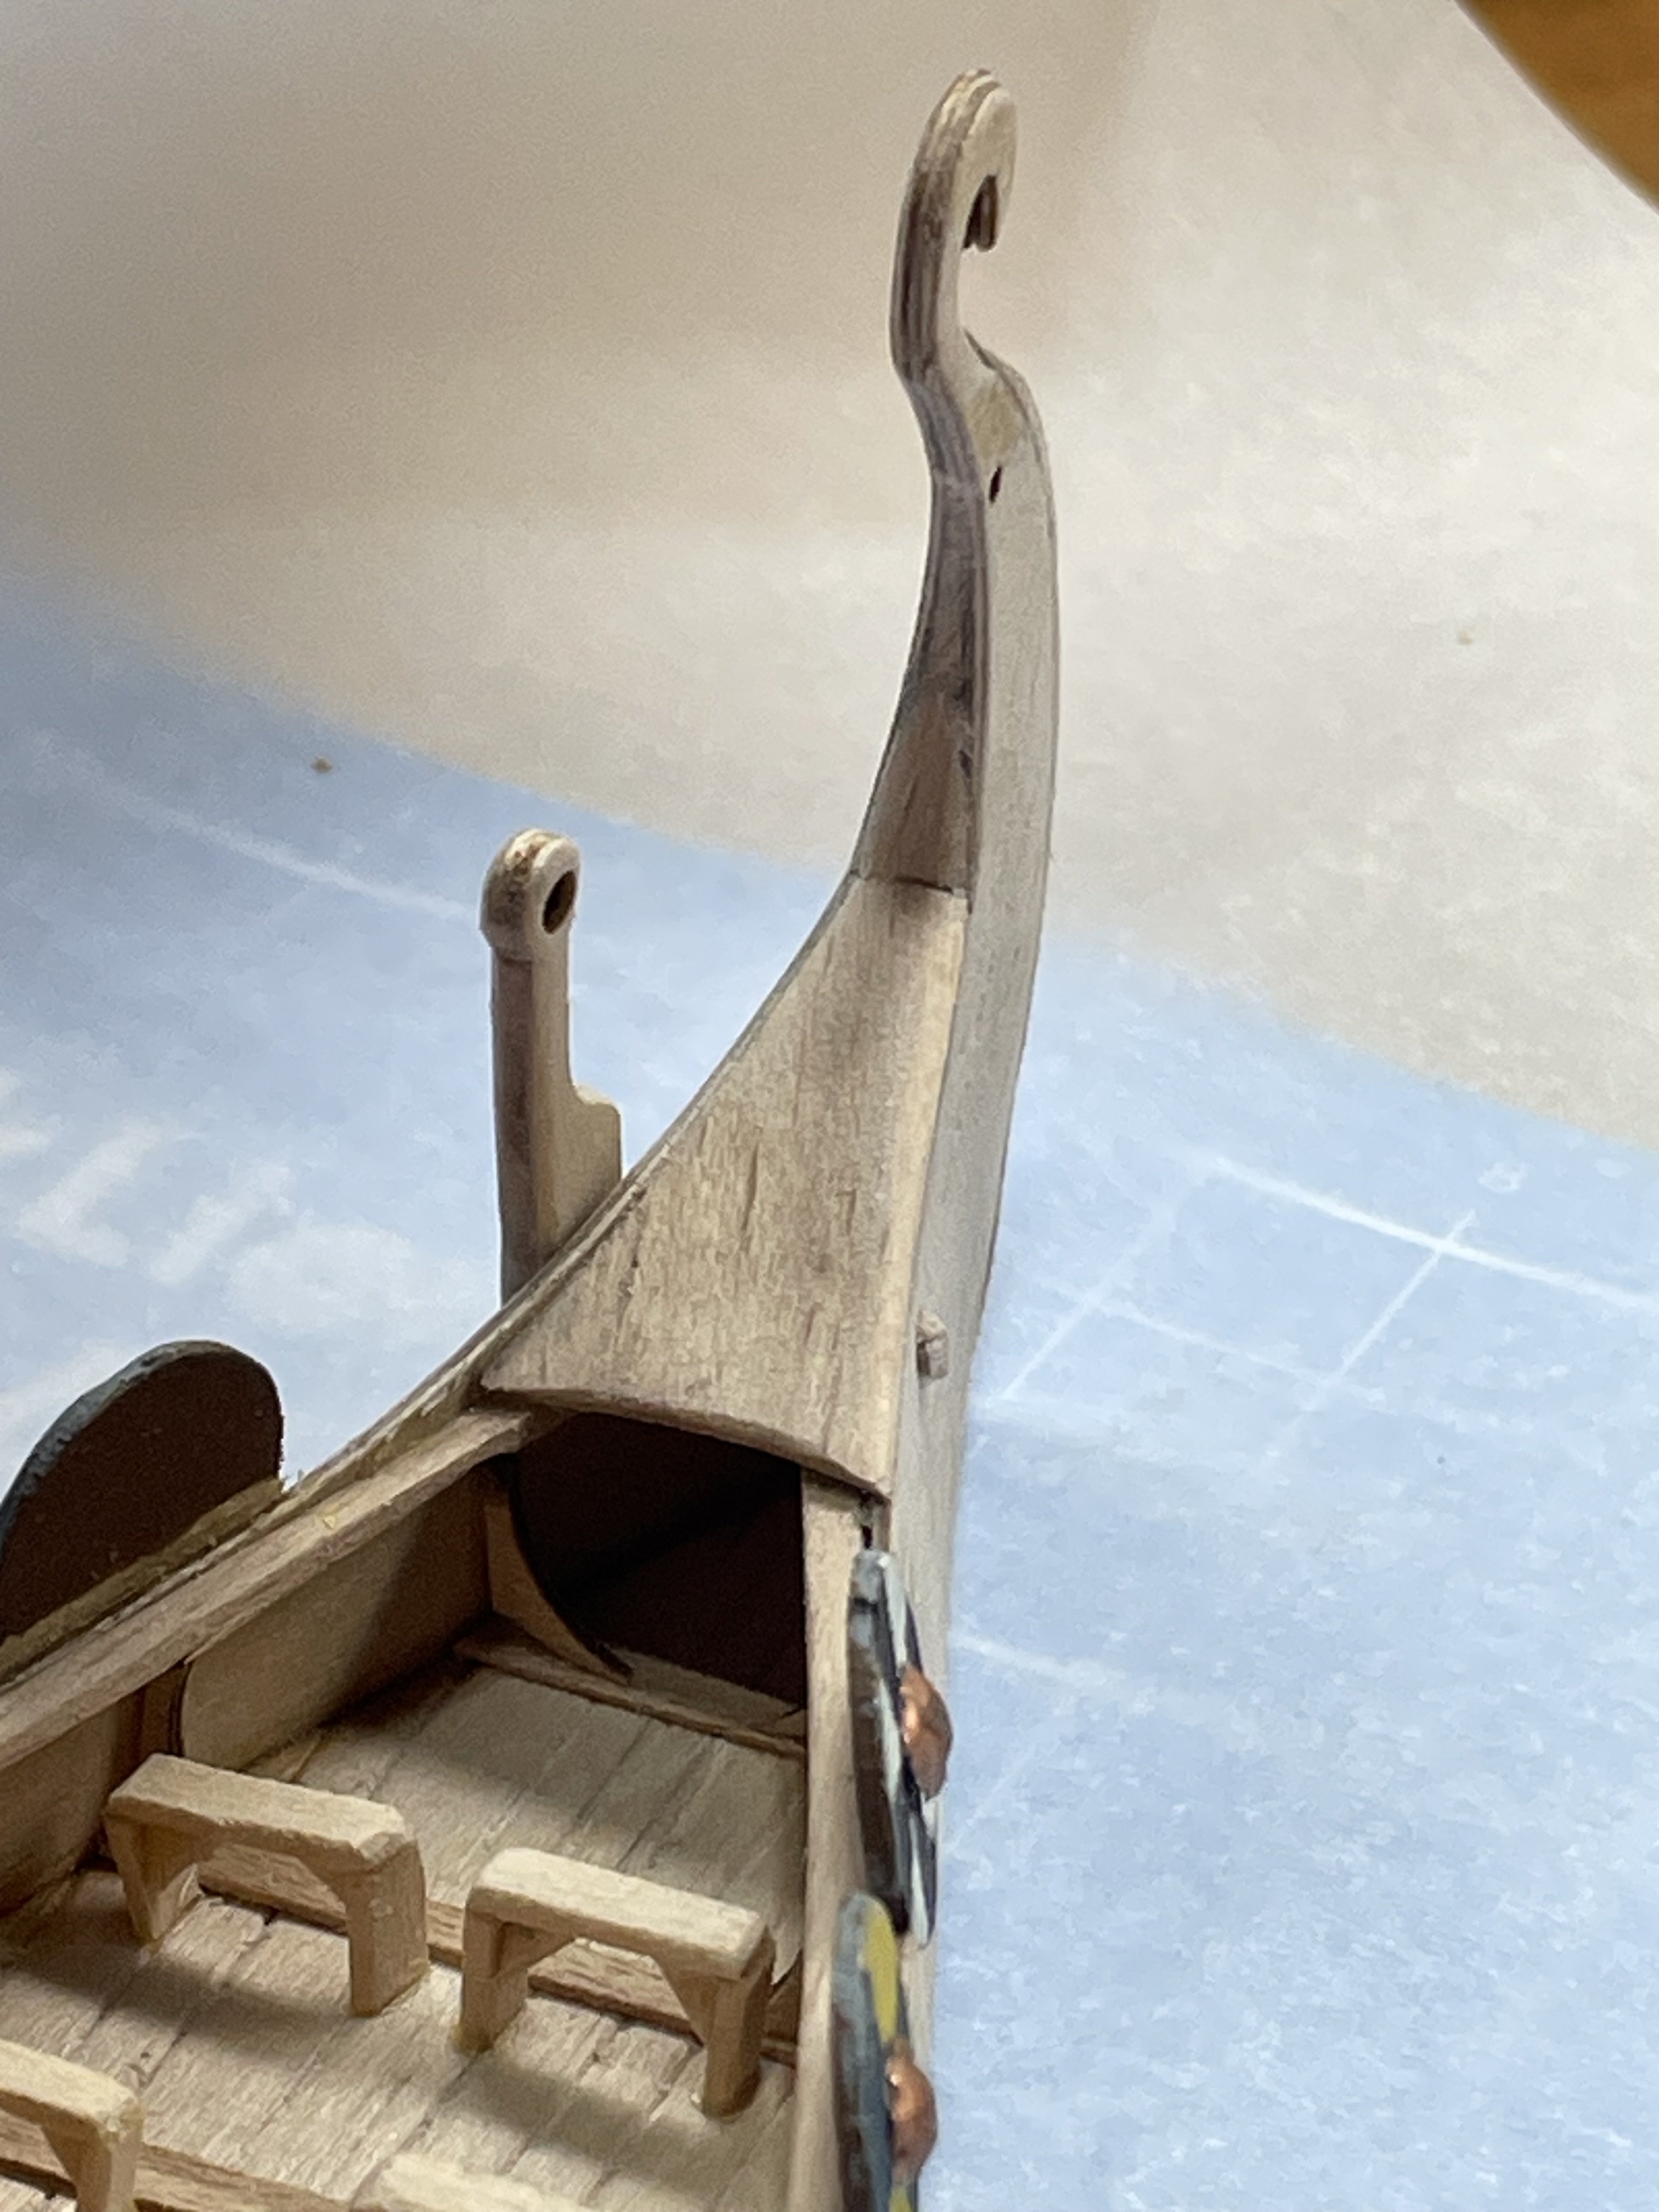
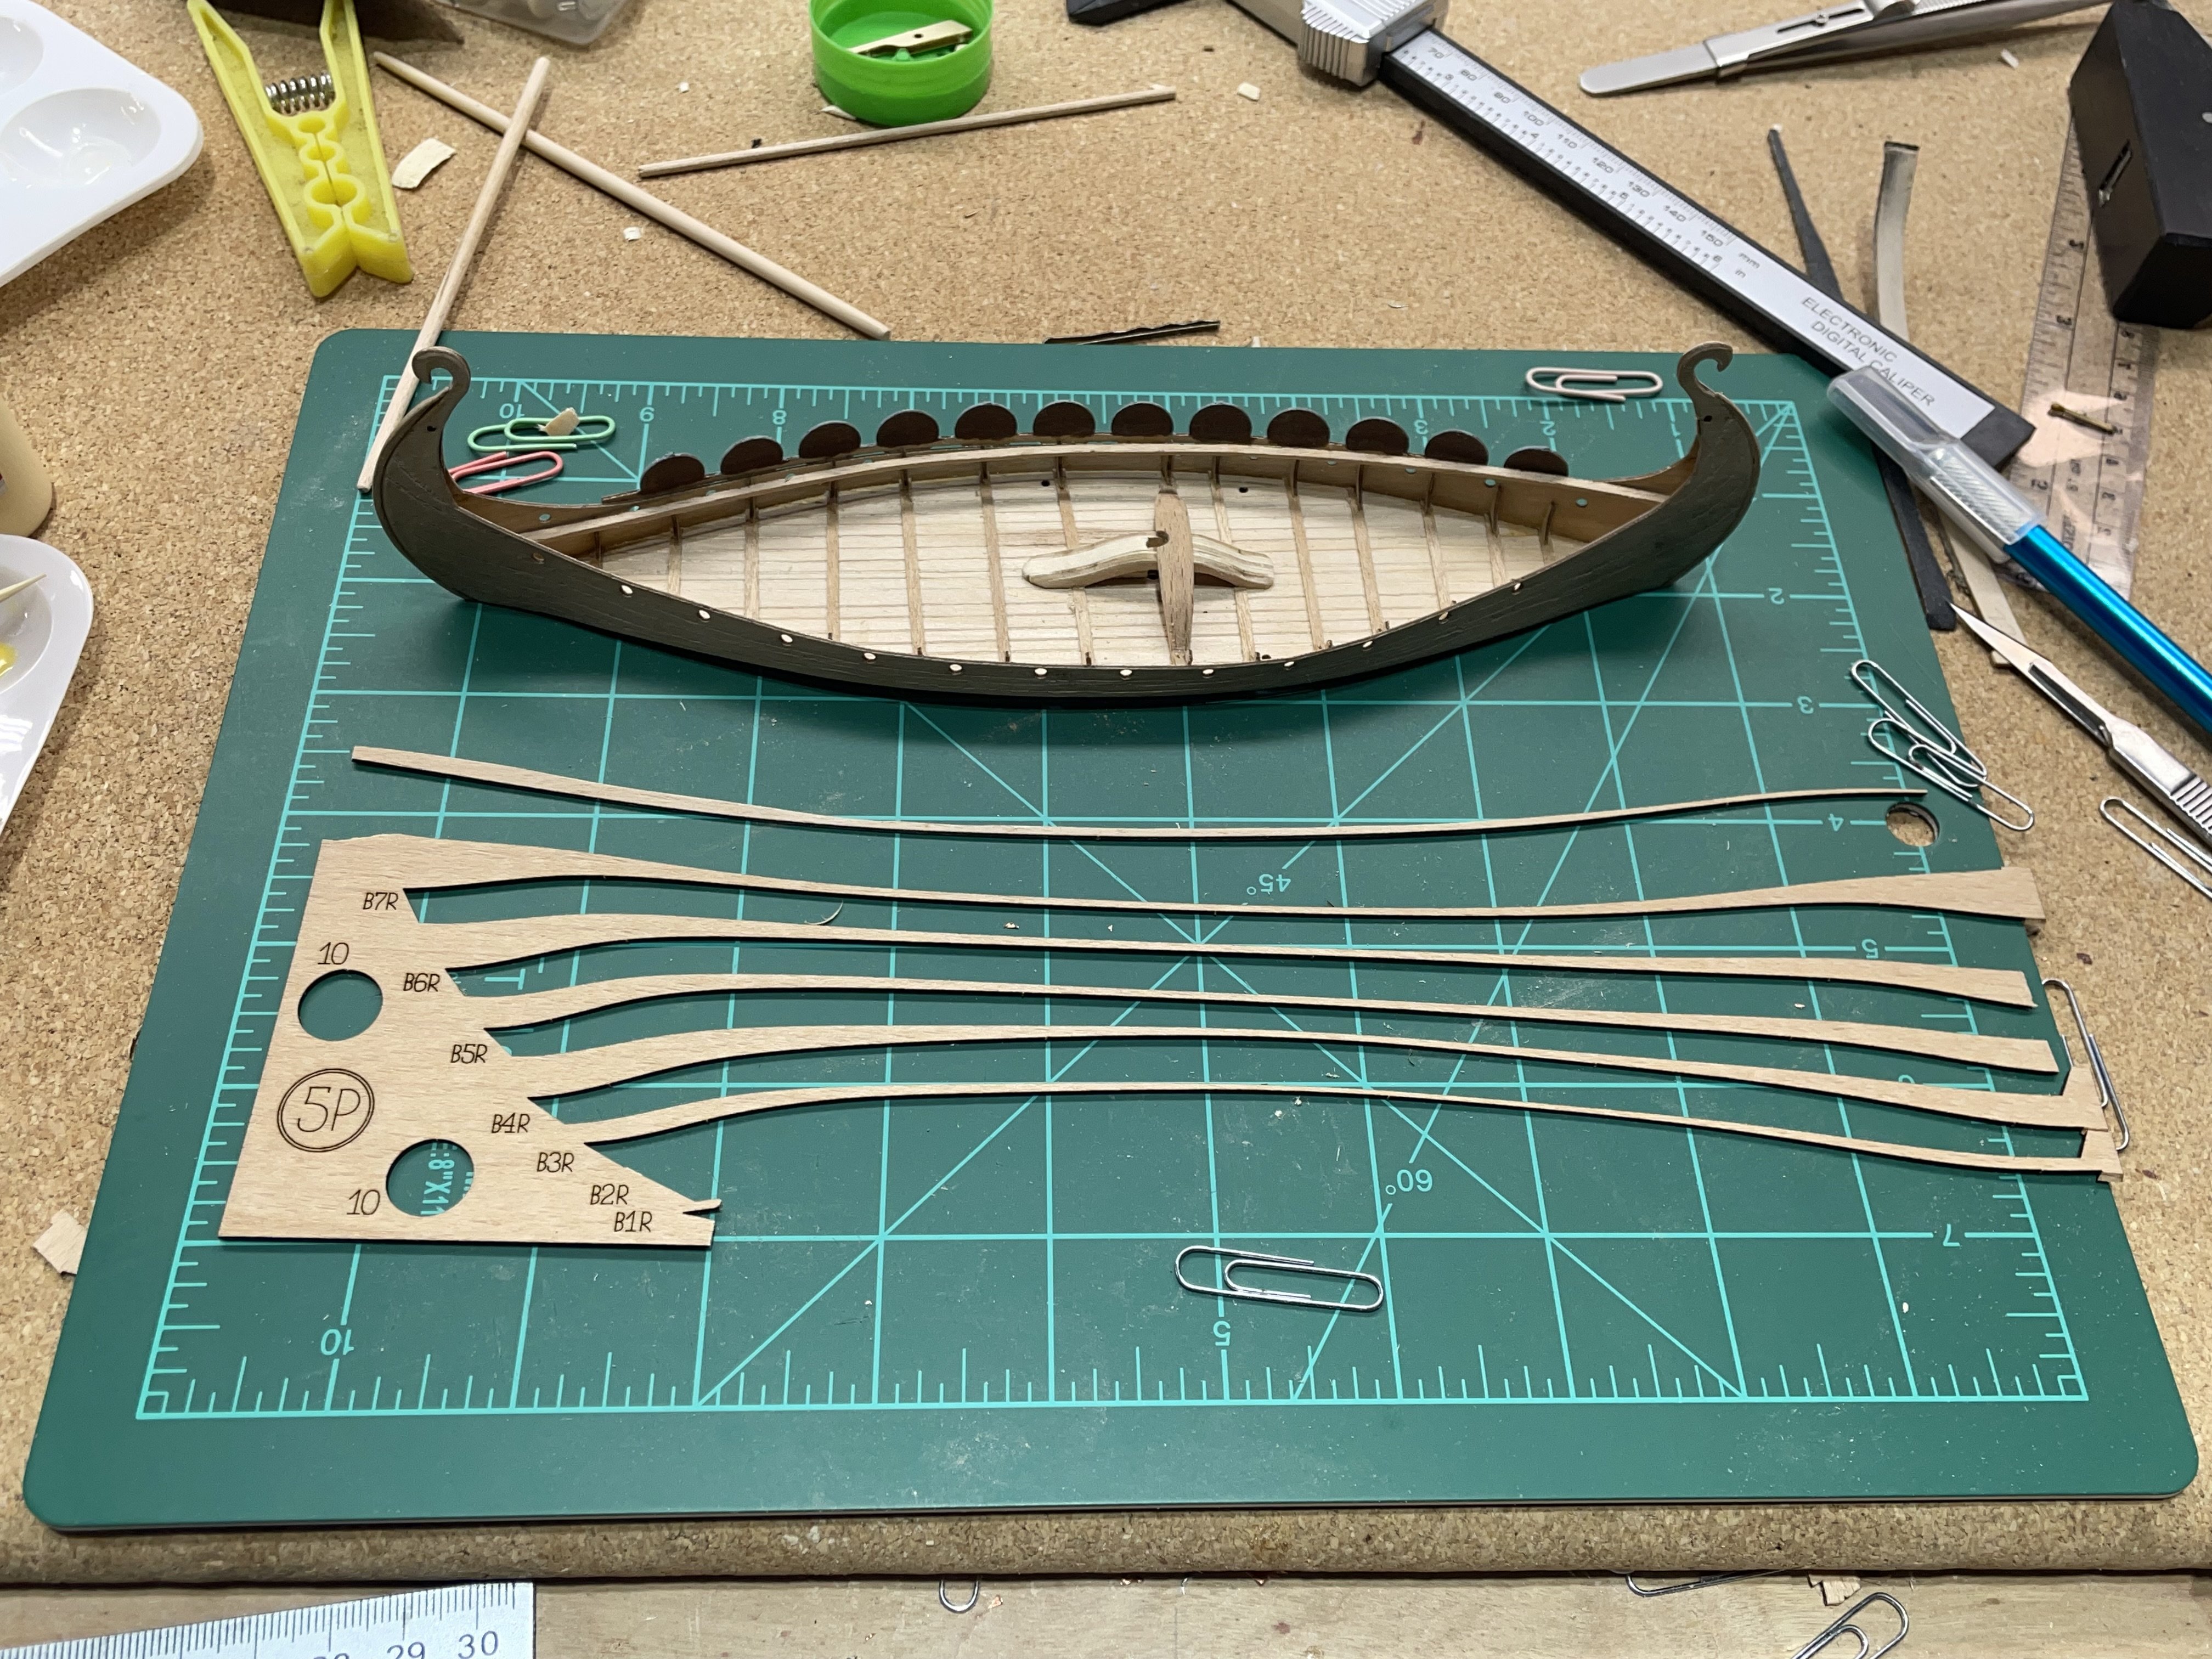
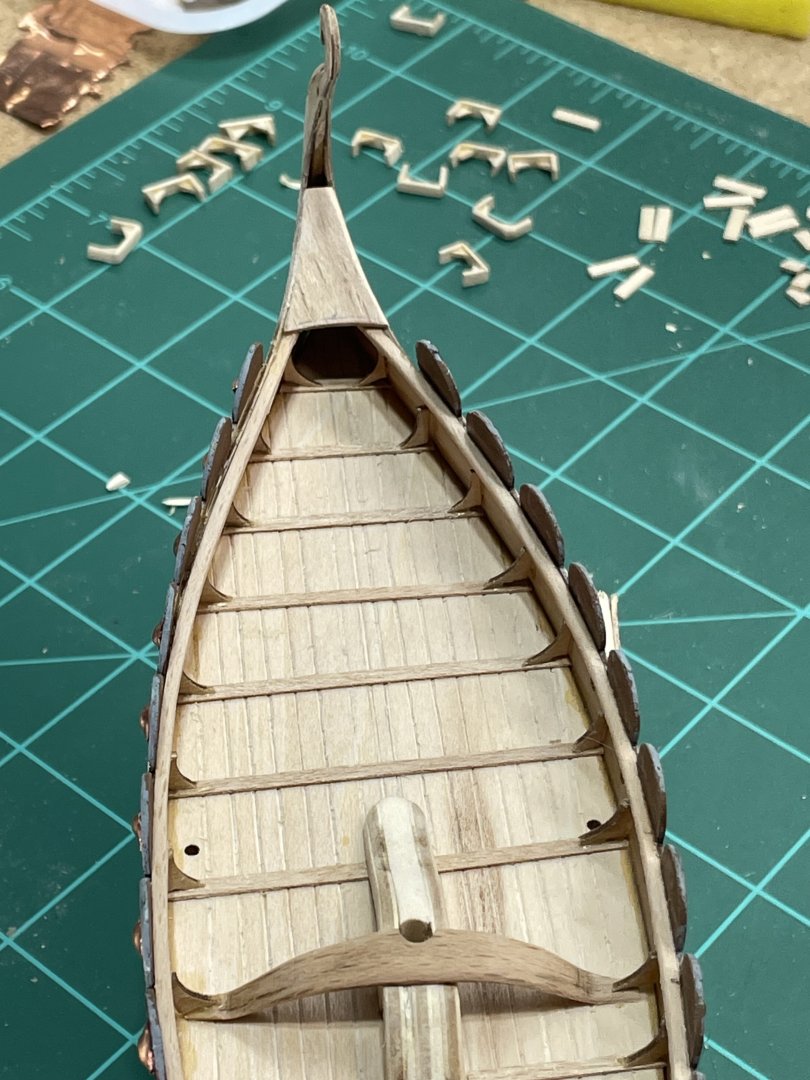
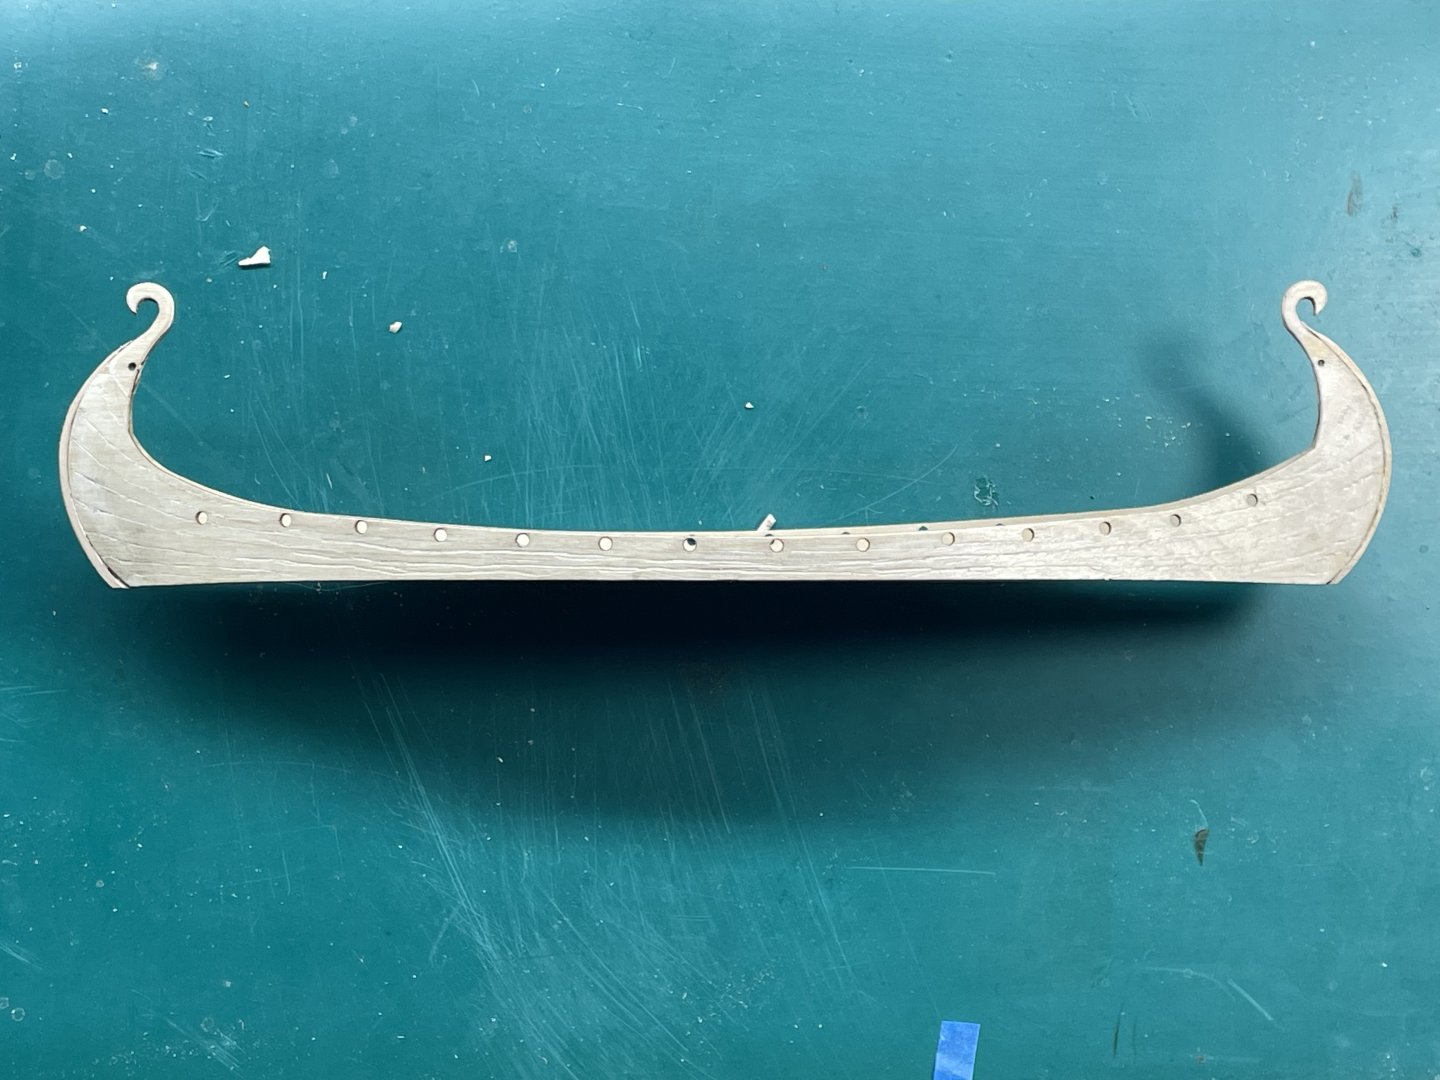
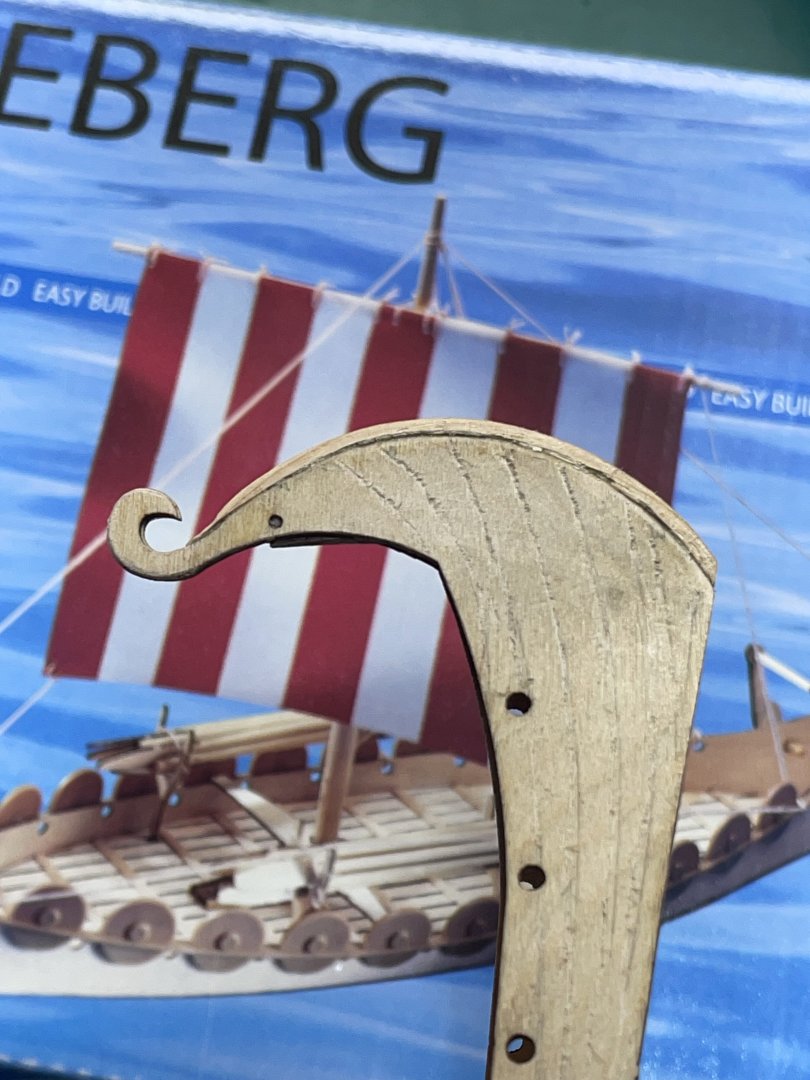
This morning I finished sanding down the bow and stern stems, where I had added wood. I put one coat of shellac on, not thinking I still have to add a rail to hold the shields on. After it’s dry I’ll add those rails ,and then give it a few more coats.


- 16 replies
-
- 4
-
-
- Oseberg
- Billing Boats
- (and 1 more)
-
Chris, that hull look great! Nothing like mine did. I’ve found the problem with stain is where there is glue on the outside the stain doesn’t take well. The last build I stained I was careful with the glue and tried to sand off any I saw before I stained. Personal experience is a great teacher and it tends to stay with you longer:-)
-
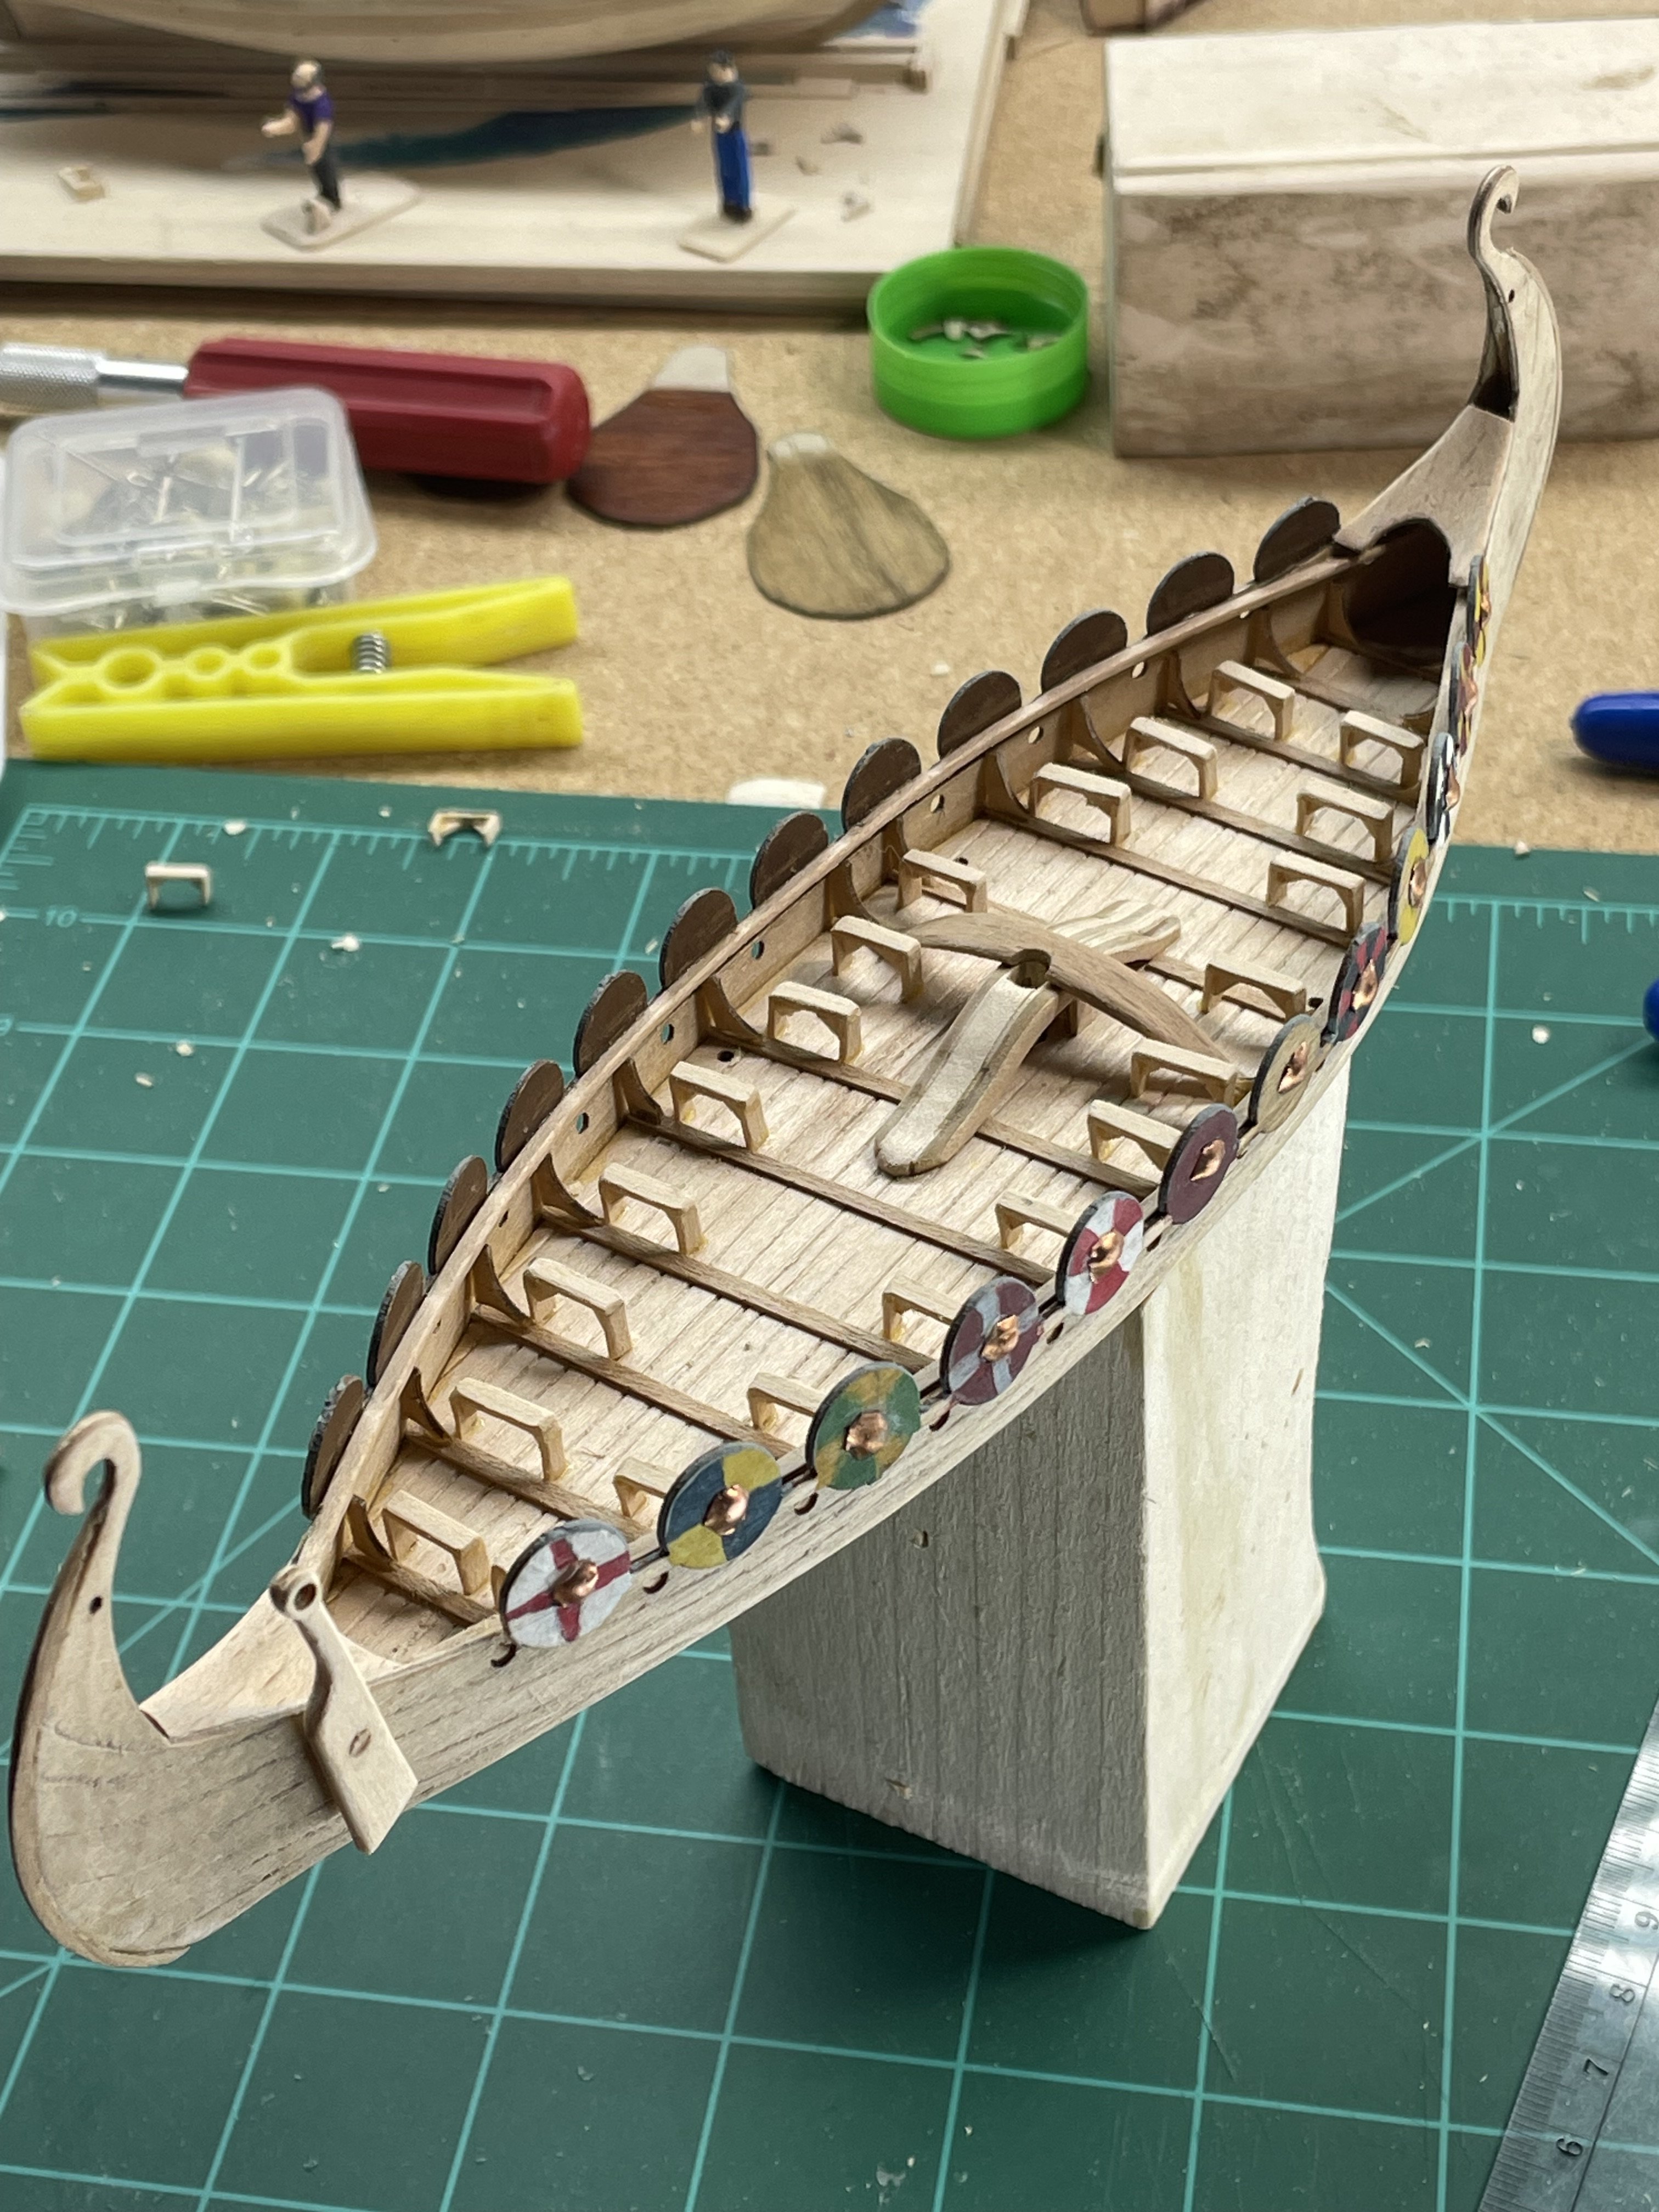
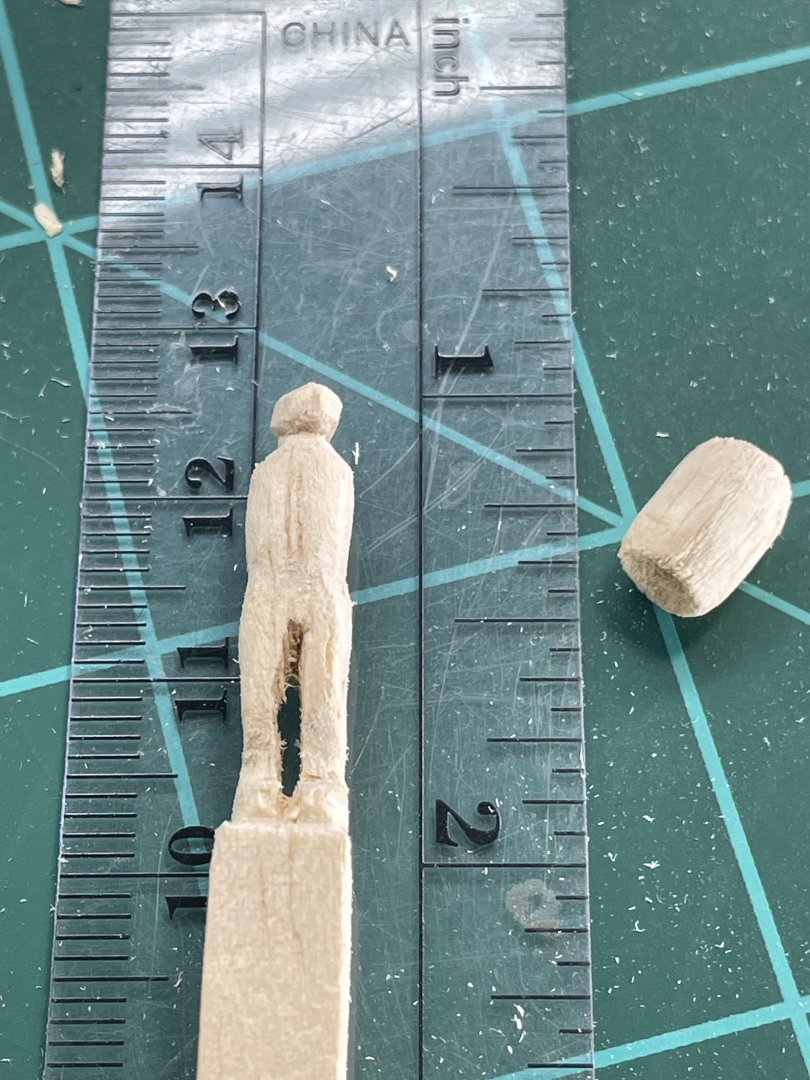
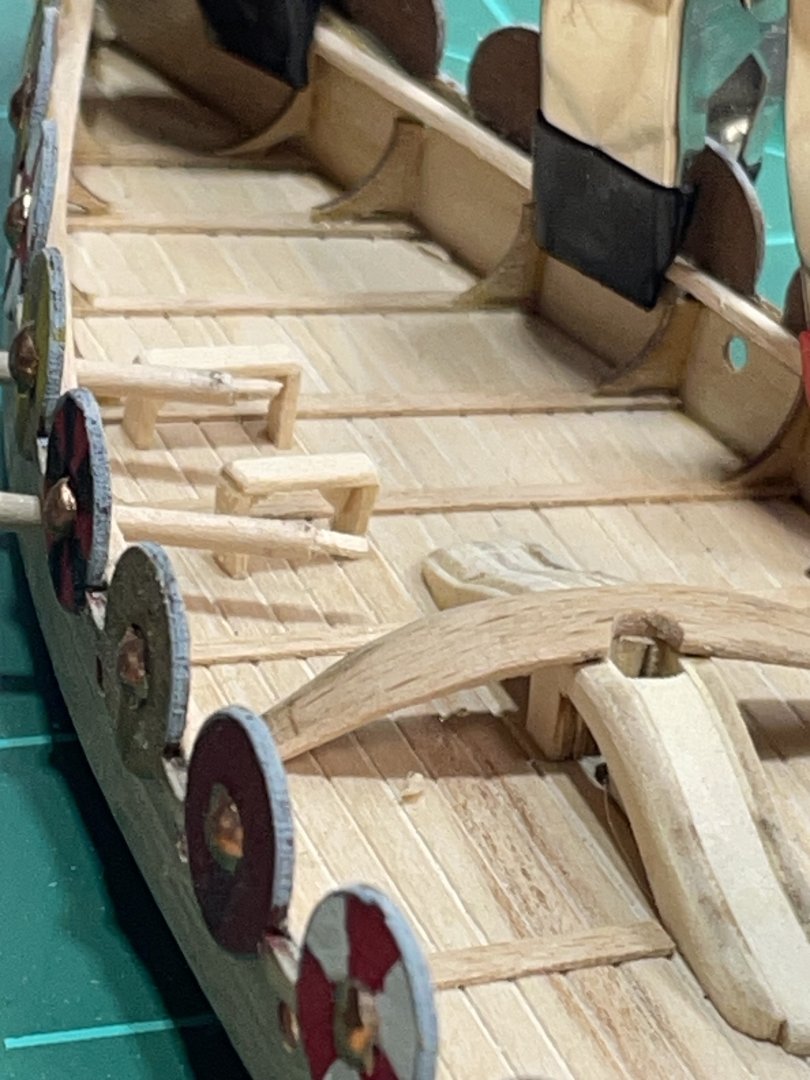
I got the seats built and installed this morning. I’m hoping to have a scale Viking figure before I finish the build. If I can keep a steady hand.

- 16 replies
-
- 3
-
-
- Oseberg
- Billing Boats
- (and 1 more)
-
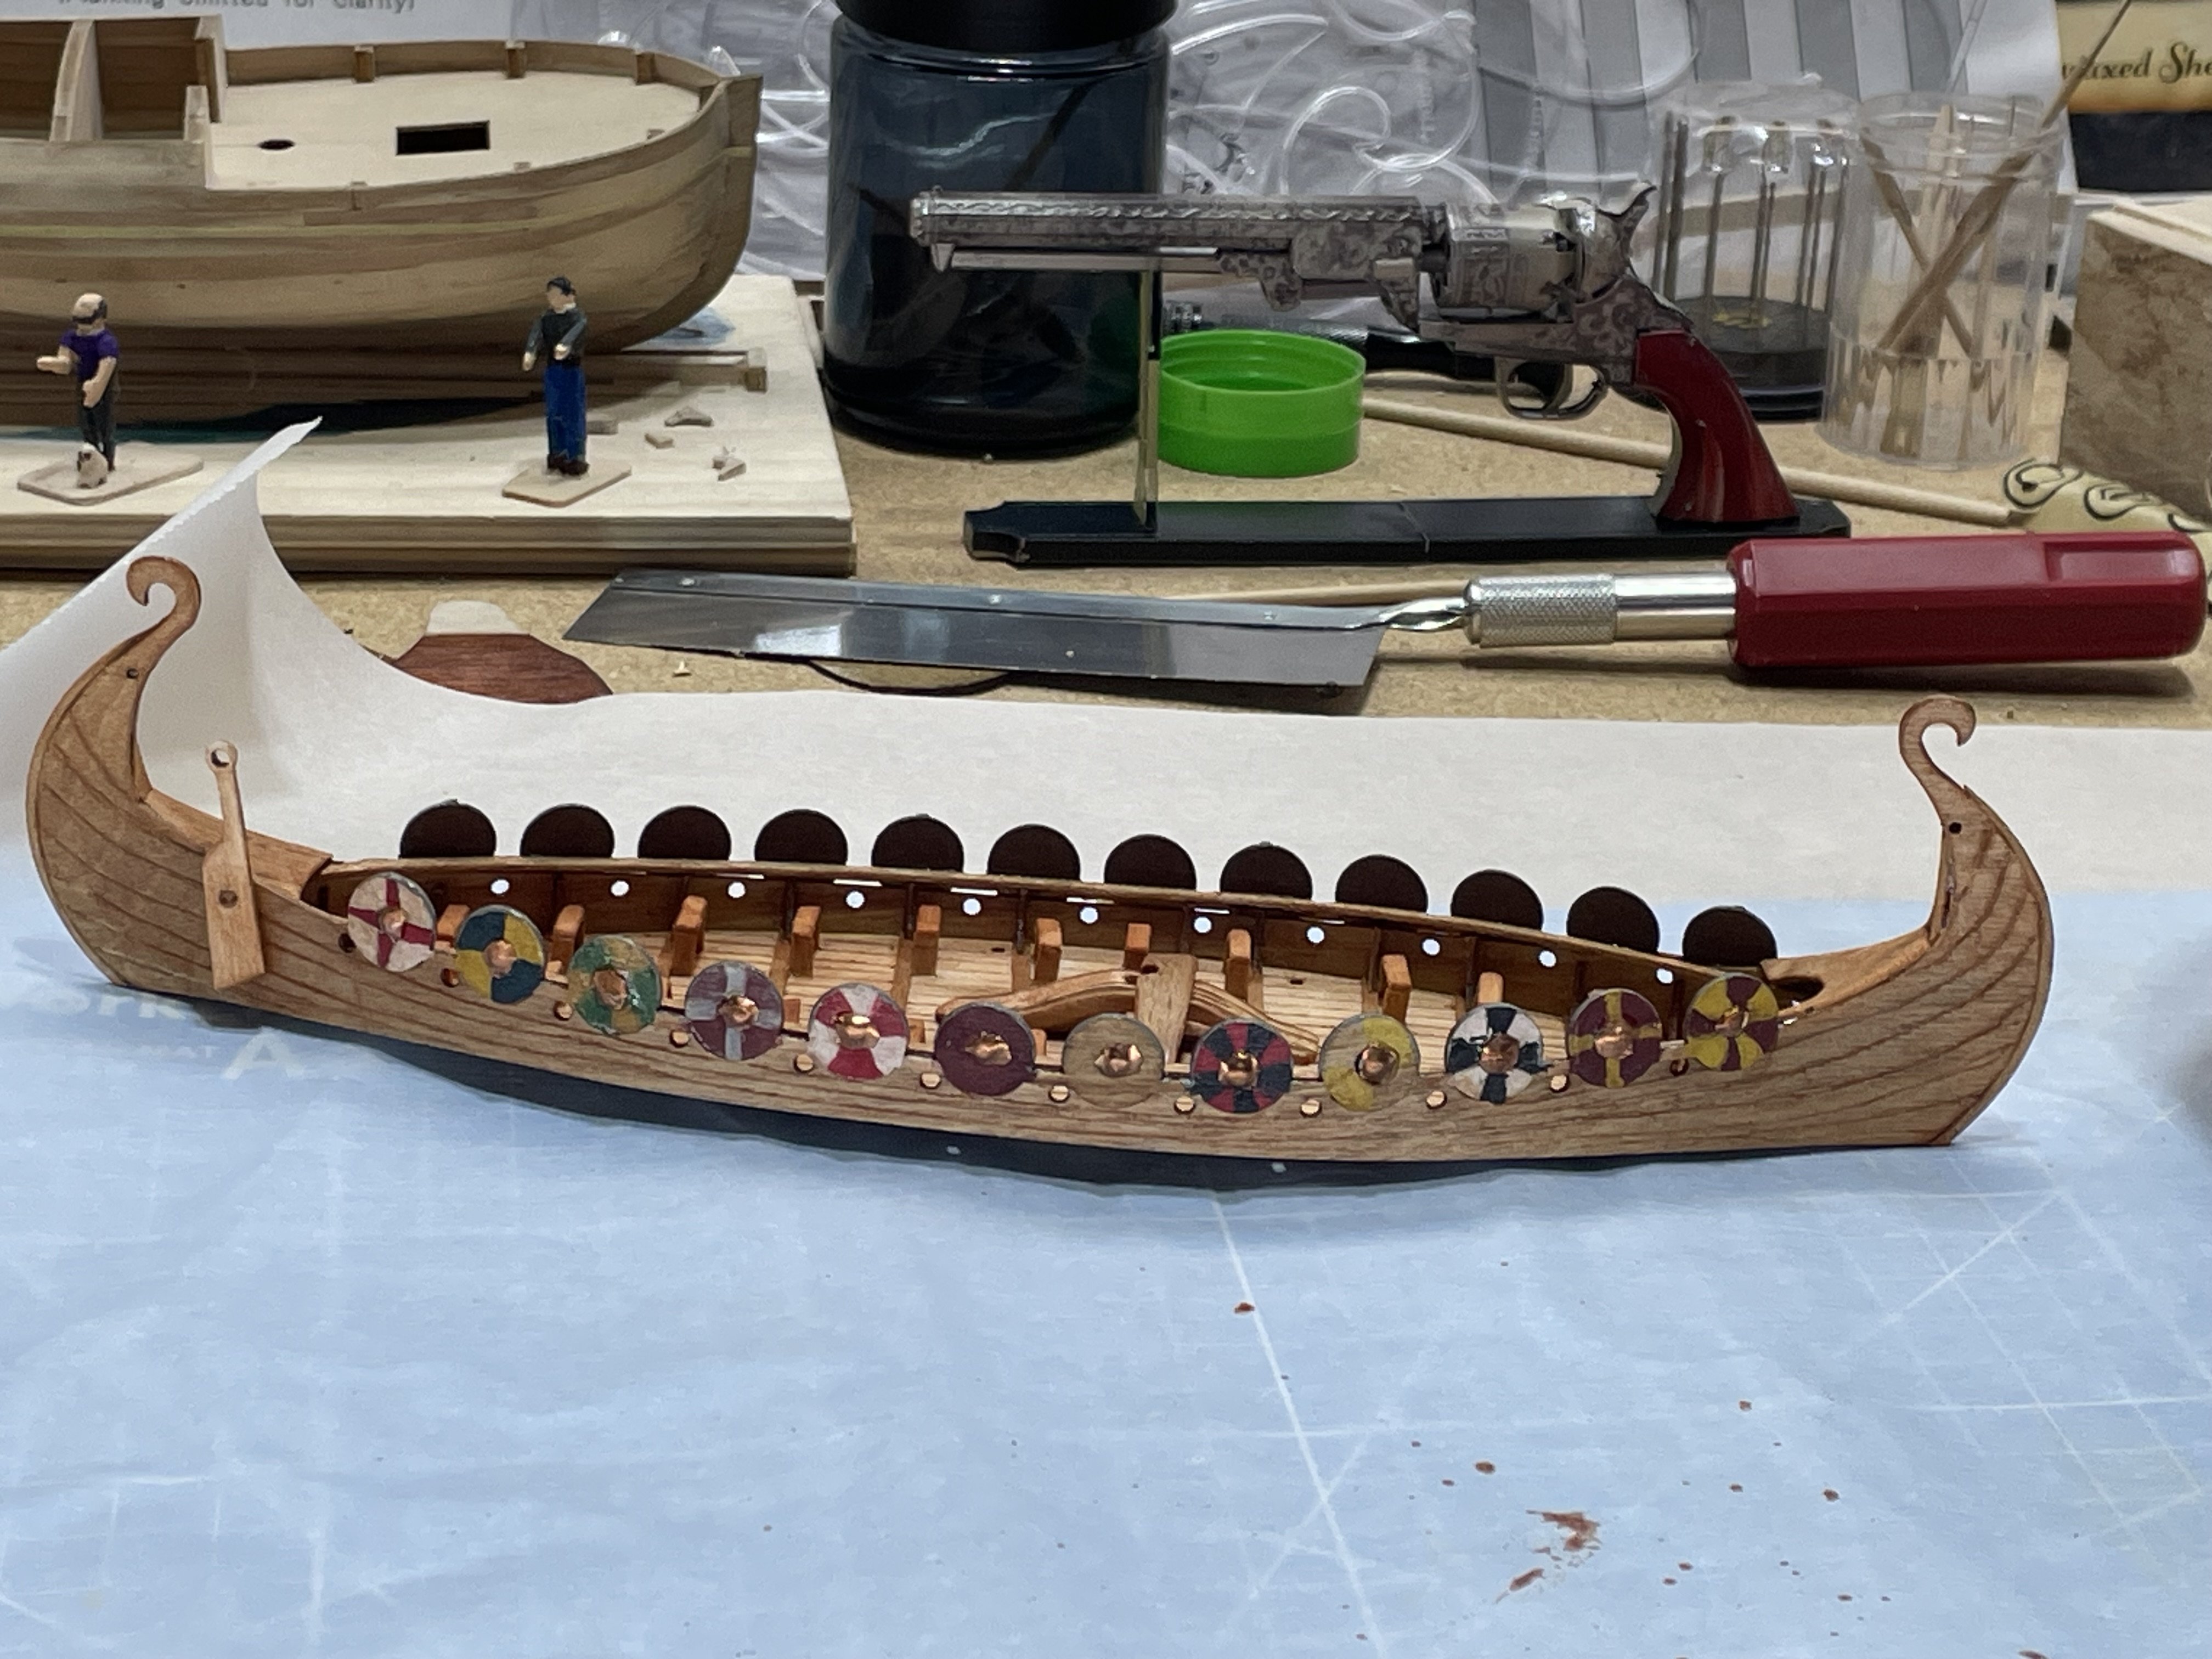
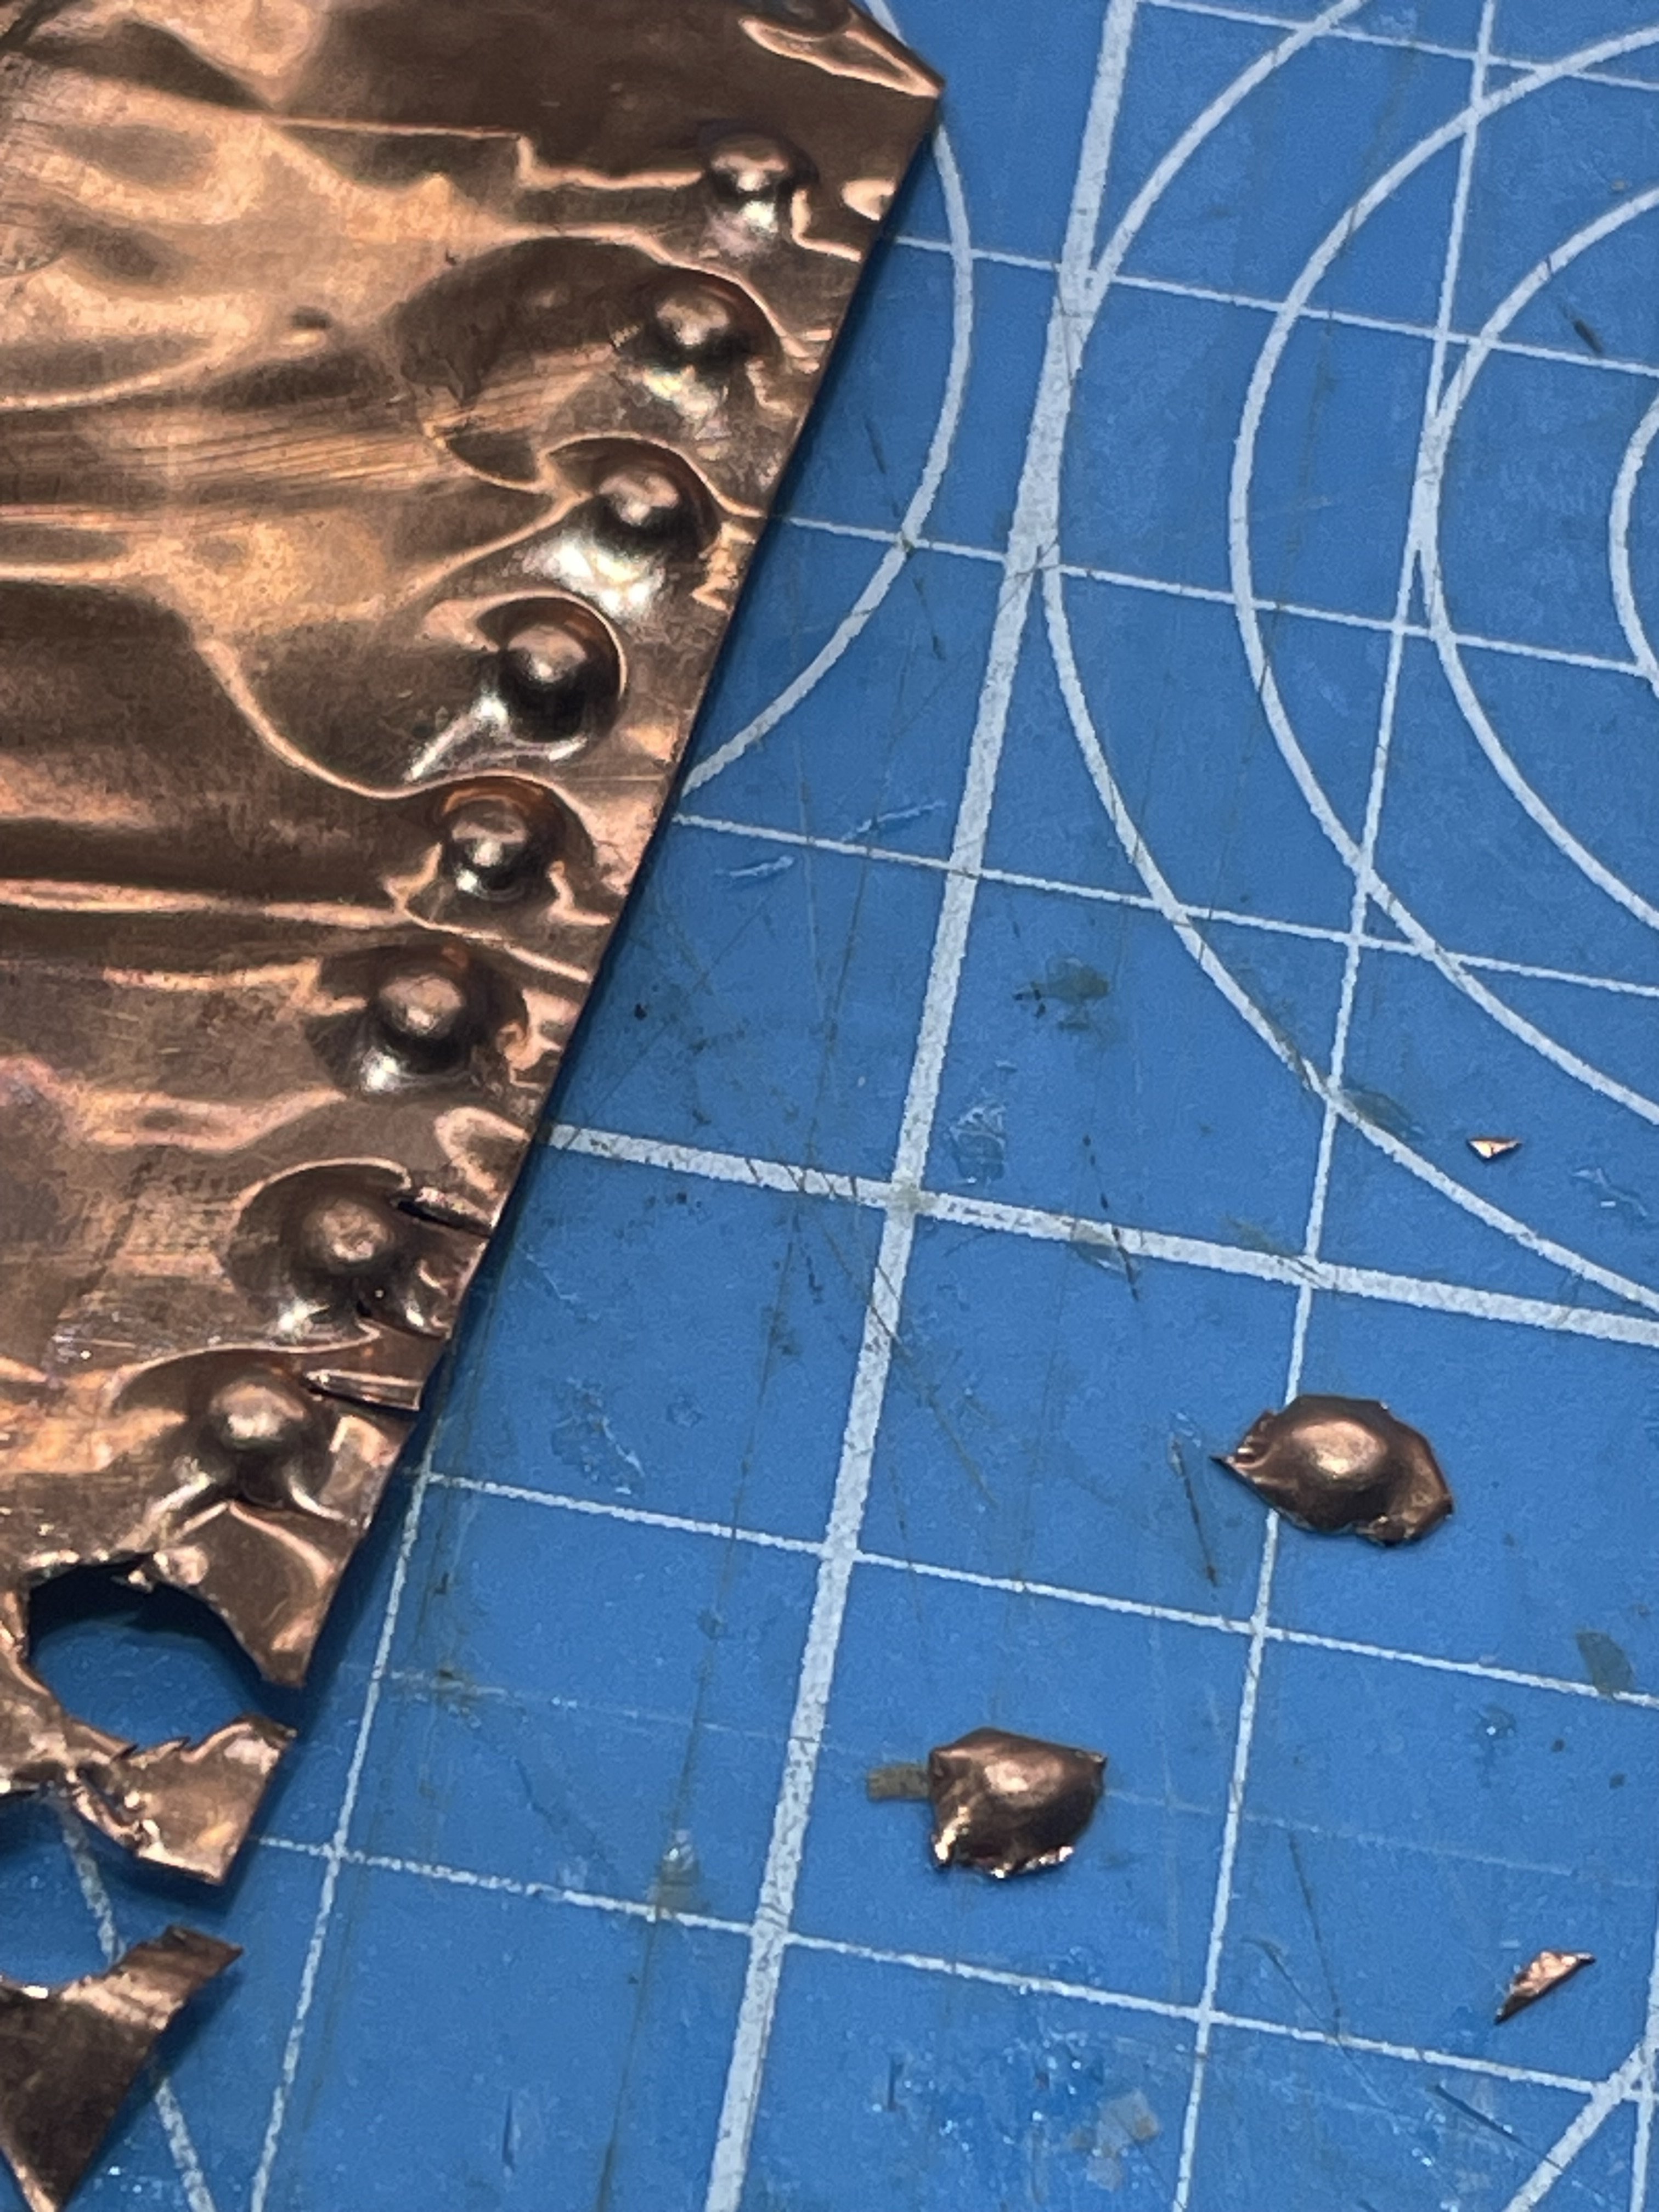
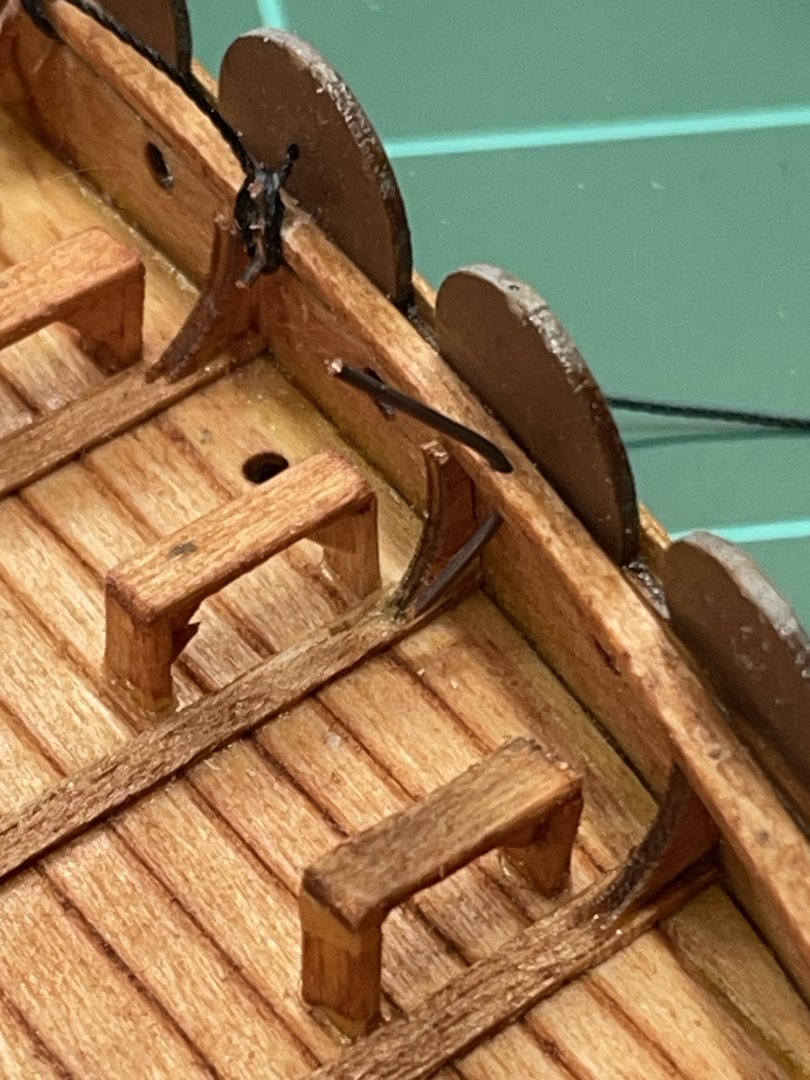
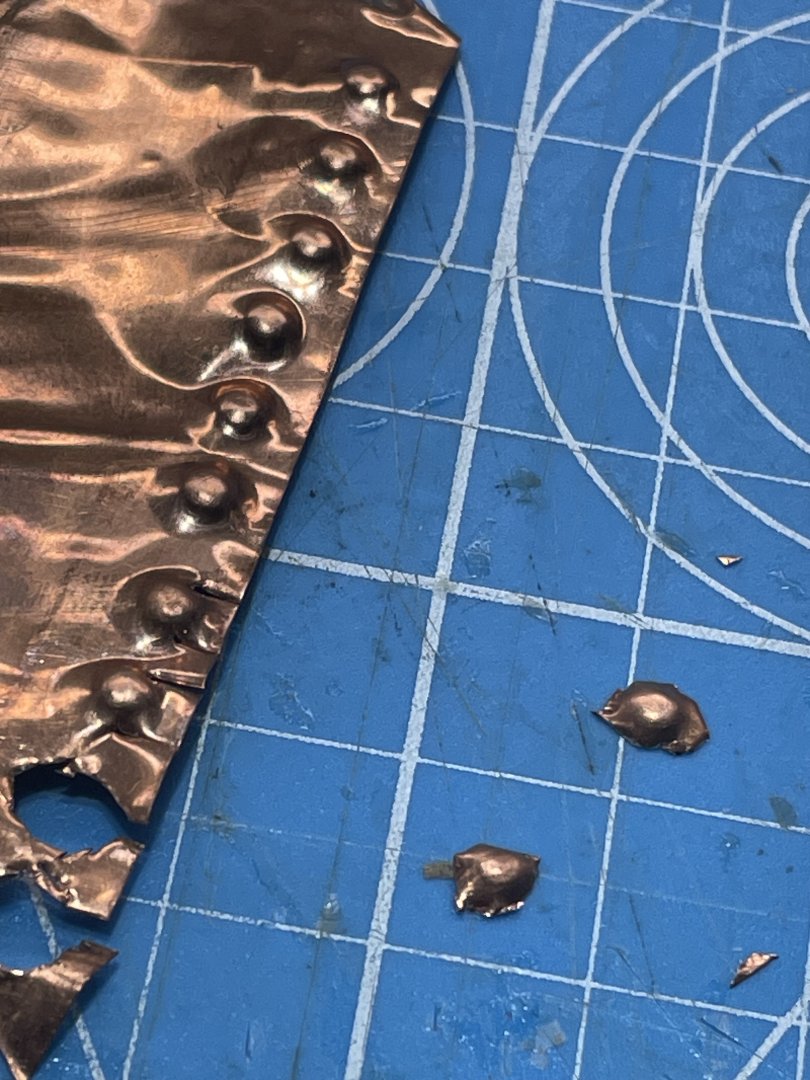
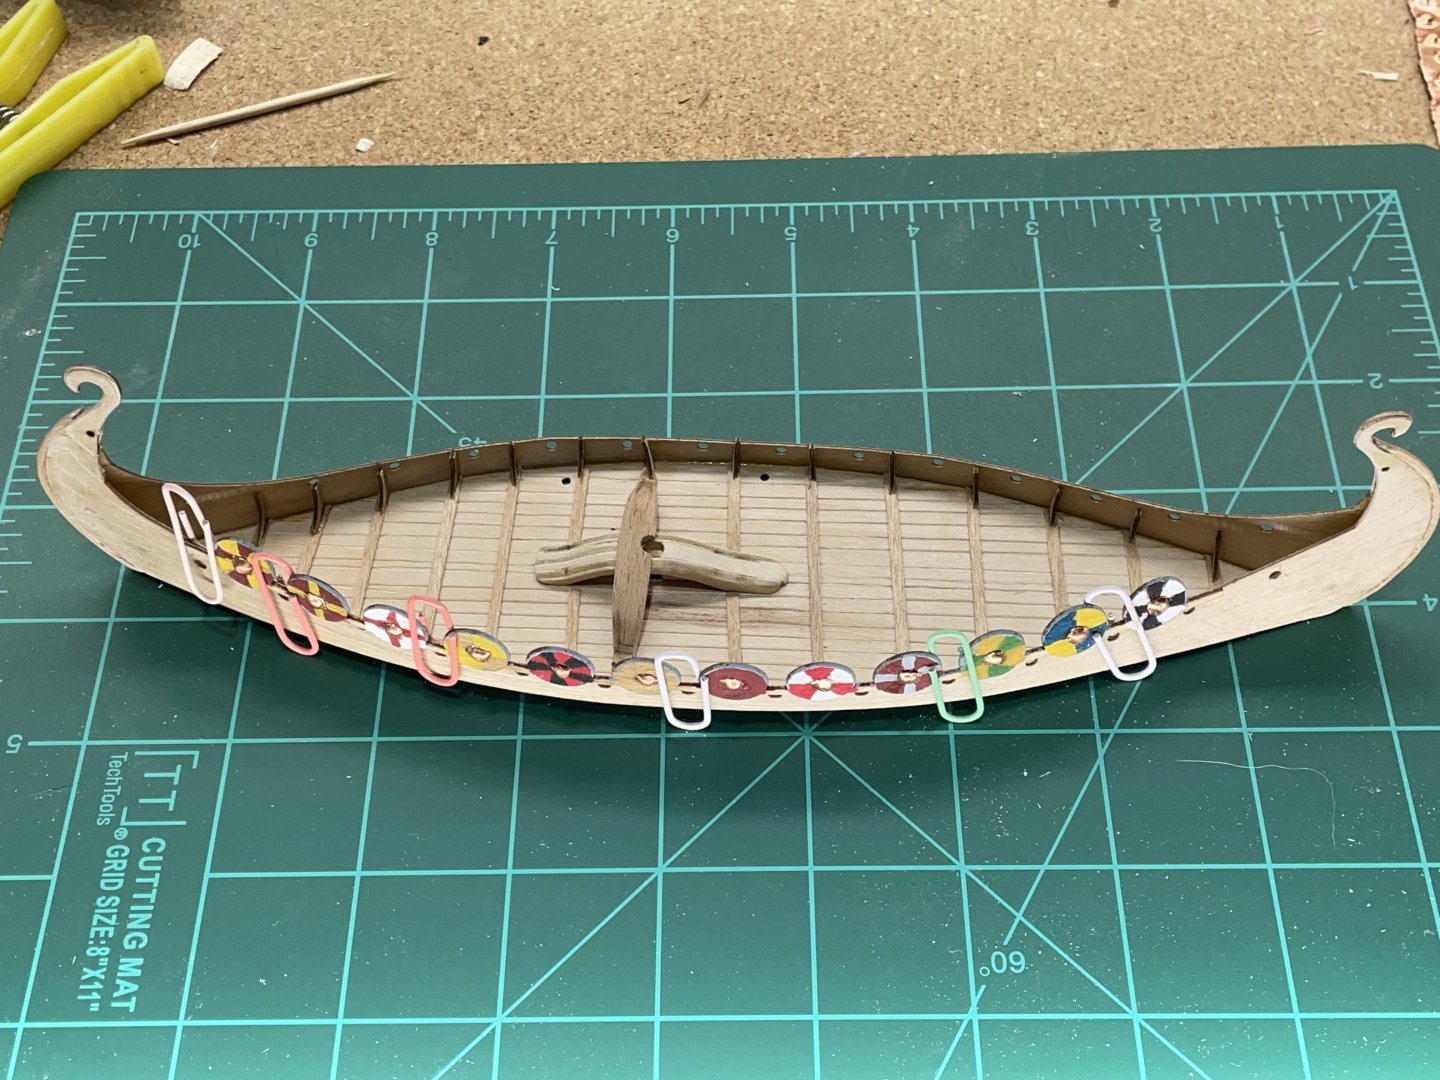
I found some shields online I could copy the designs. They may have not been painted, but it sure adds to my build 🙂 I took some copper foil and impressed a paint brush in it, than cut them out for the dome in the middle of them. After gluing one side on, it needed cap rails I thought. I got some scrap wood sheets from another build and cut them down to work. I wanted to fill in some of the area at the bow and stern. So I used some more of that scrap wood. So now I’m trying to think of anything else I can make to put on this deck. How about 24 benches? I’m not for sure they look like the ones they had. This should keep me occupied for a bit.

- 16 replies
-
- 5
-
-
- Oseberg
- Billing Boats
- (and 1 more)
-
Glen, does everything seem bigger than usual?
- 301 replies
-
- 6
-

-
-
- Constitution
- Bluejacket Shipcrafters
- (and 1 more)
-
Me either Eric. I’m learning you get what you put out. Simple builds leave more time and room for imagination and that’s what makes everybody’s unique. It’s a great use of my time:-)
- 33 replies
-
- 2
-
-
- midwest products
- kayak
- (and 1 more)
-
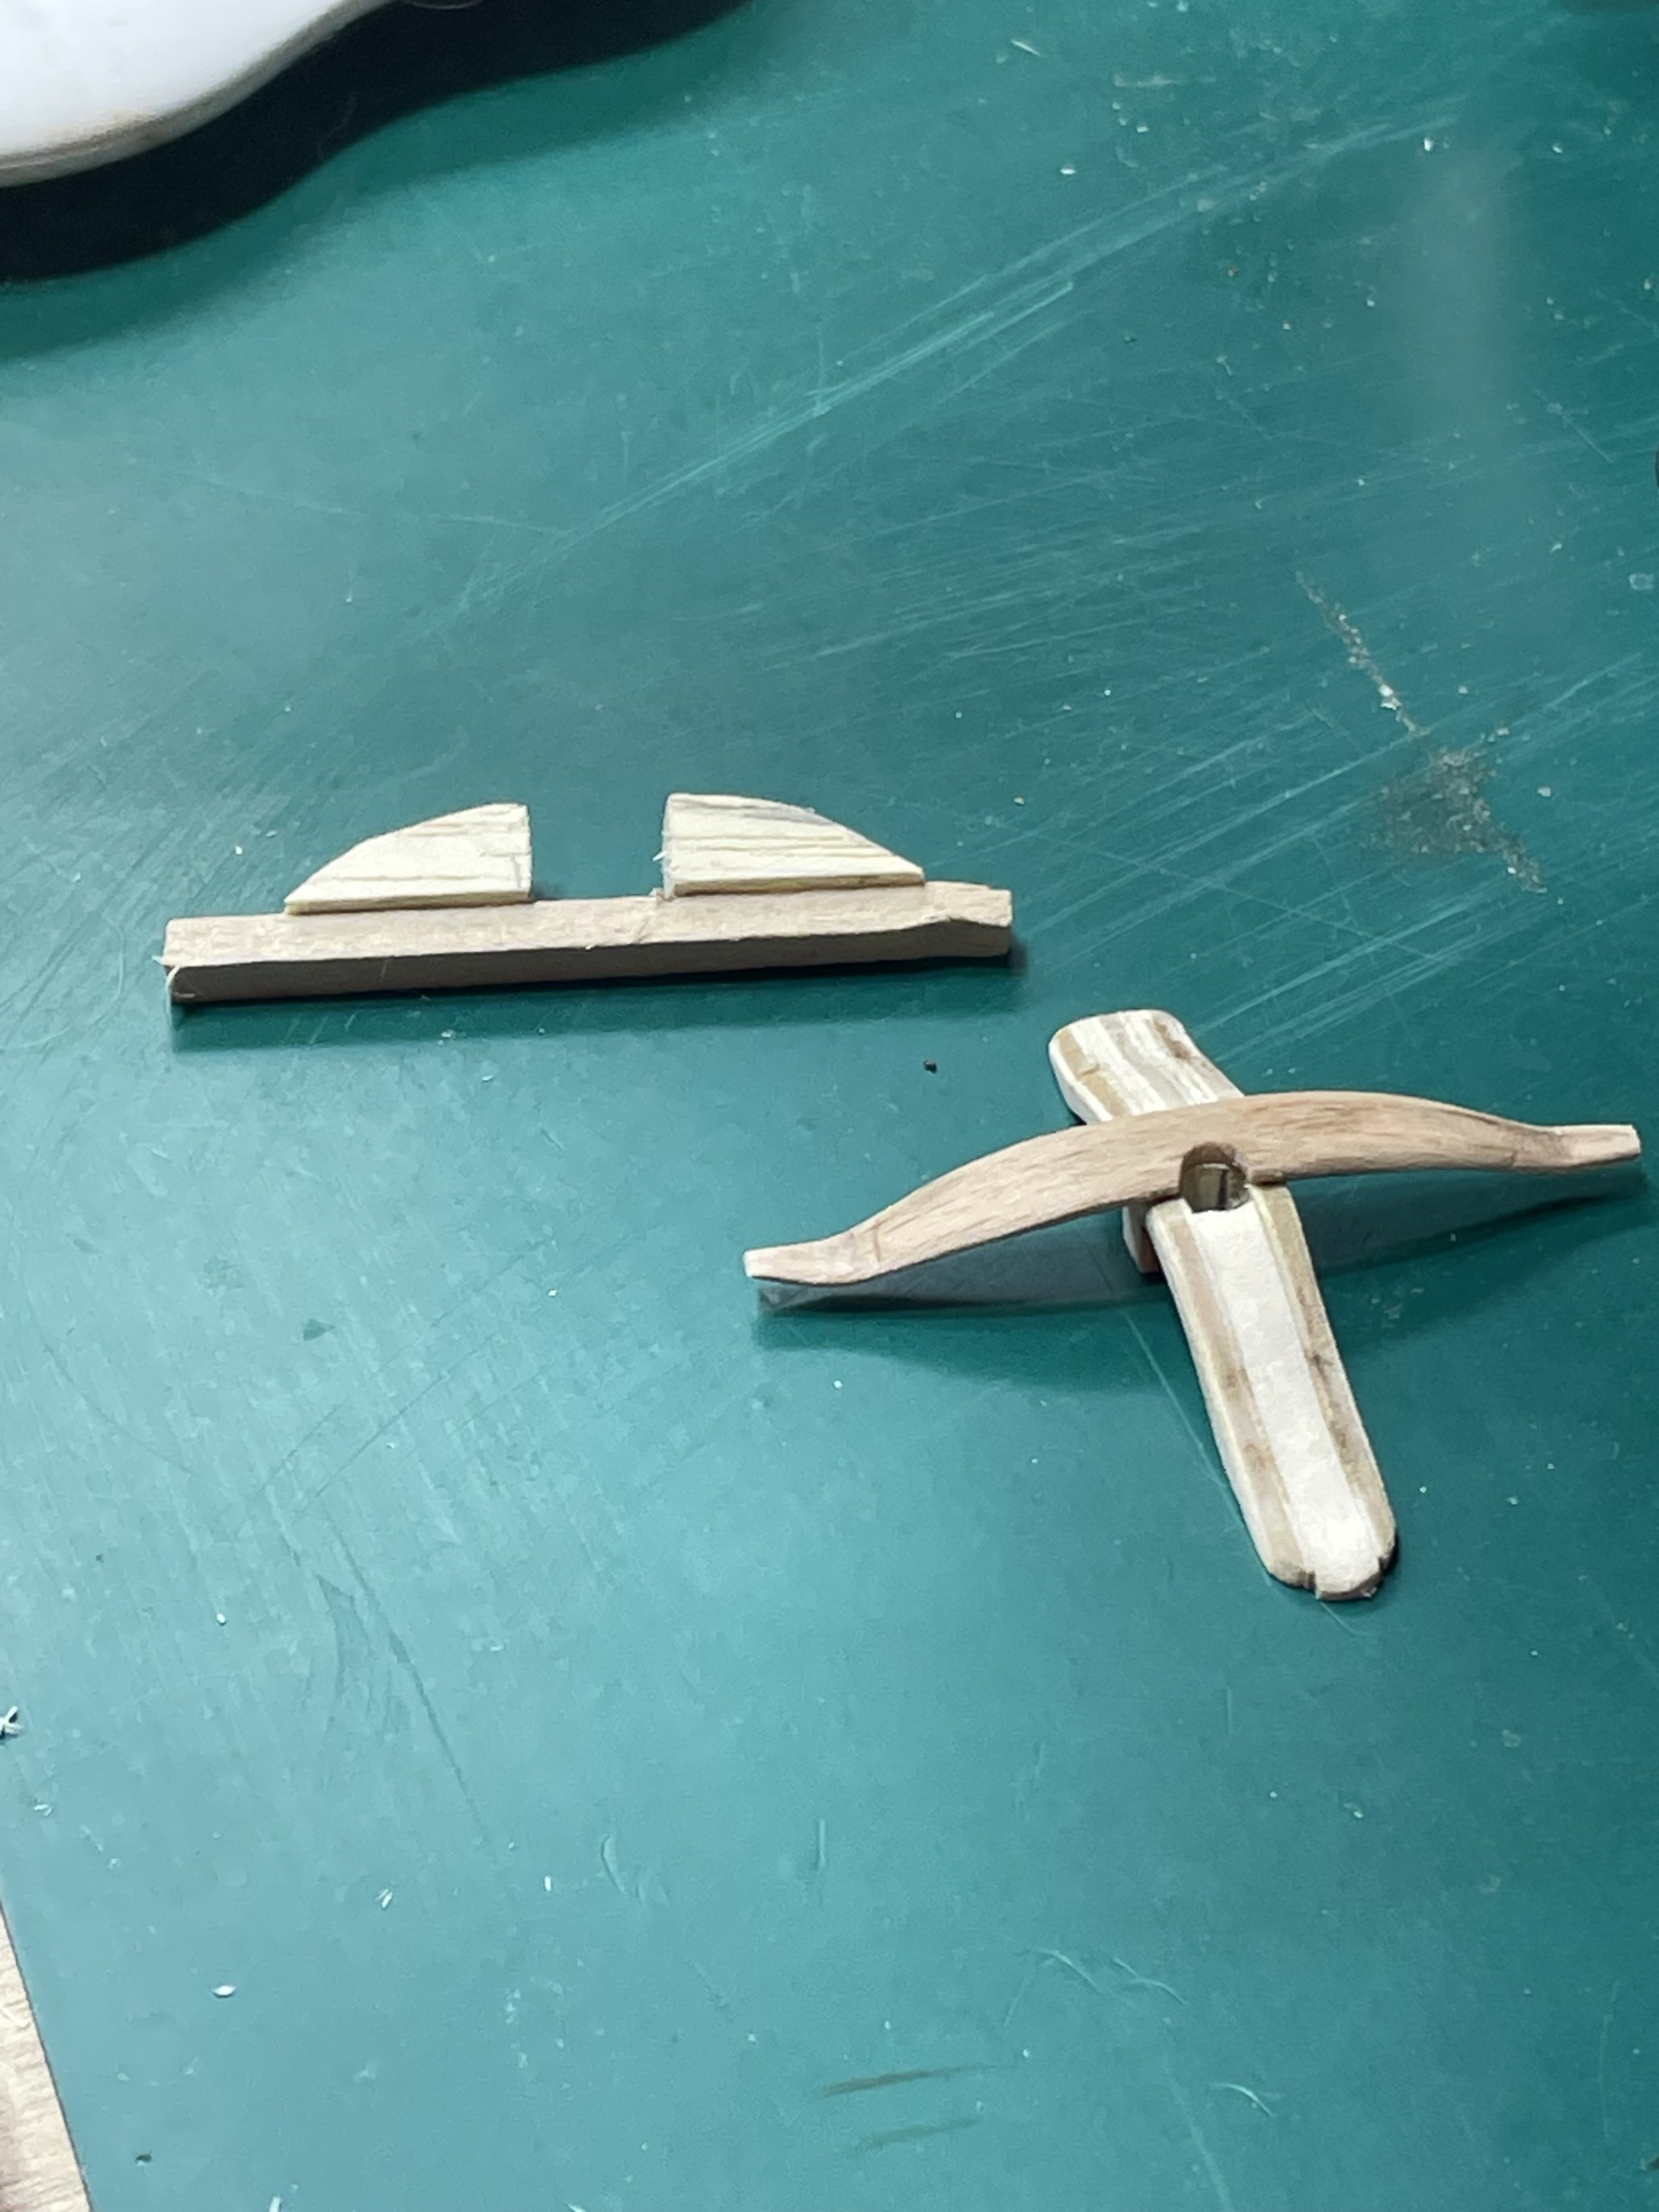
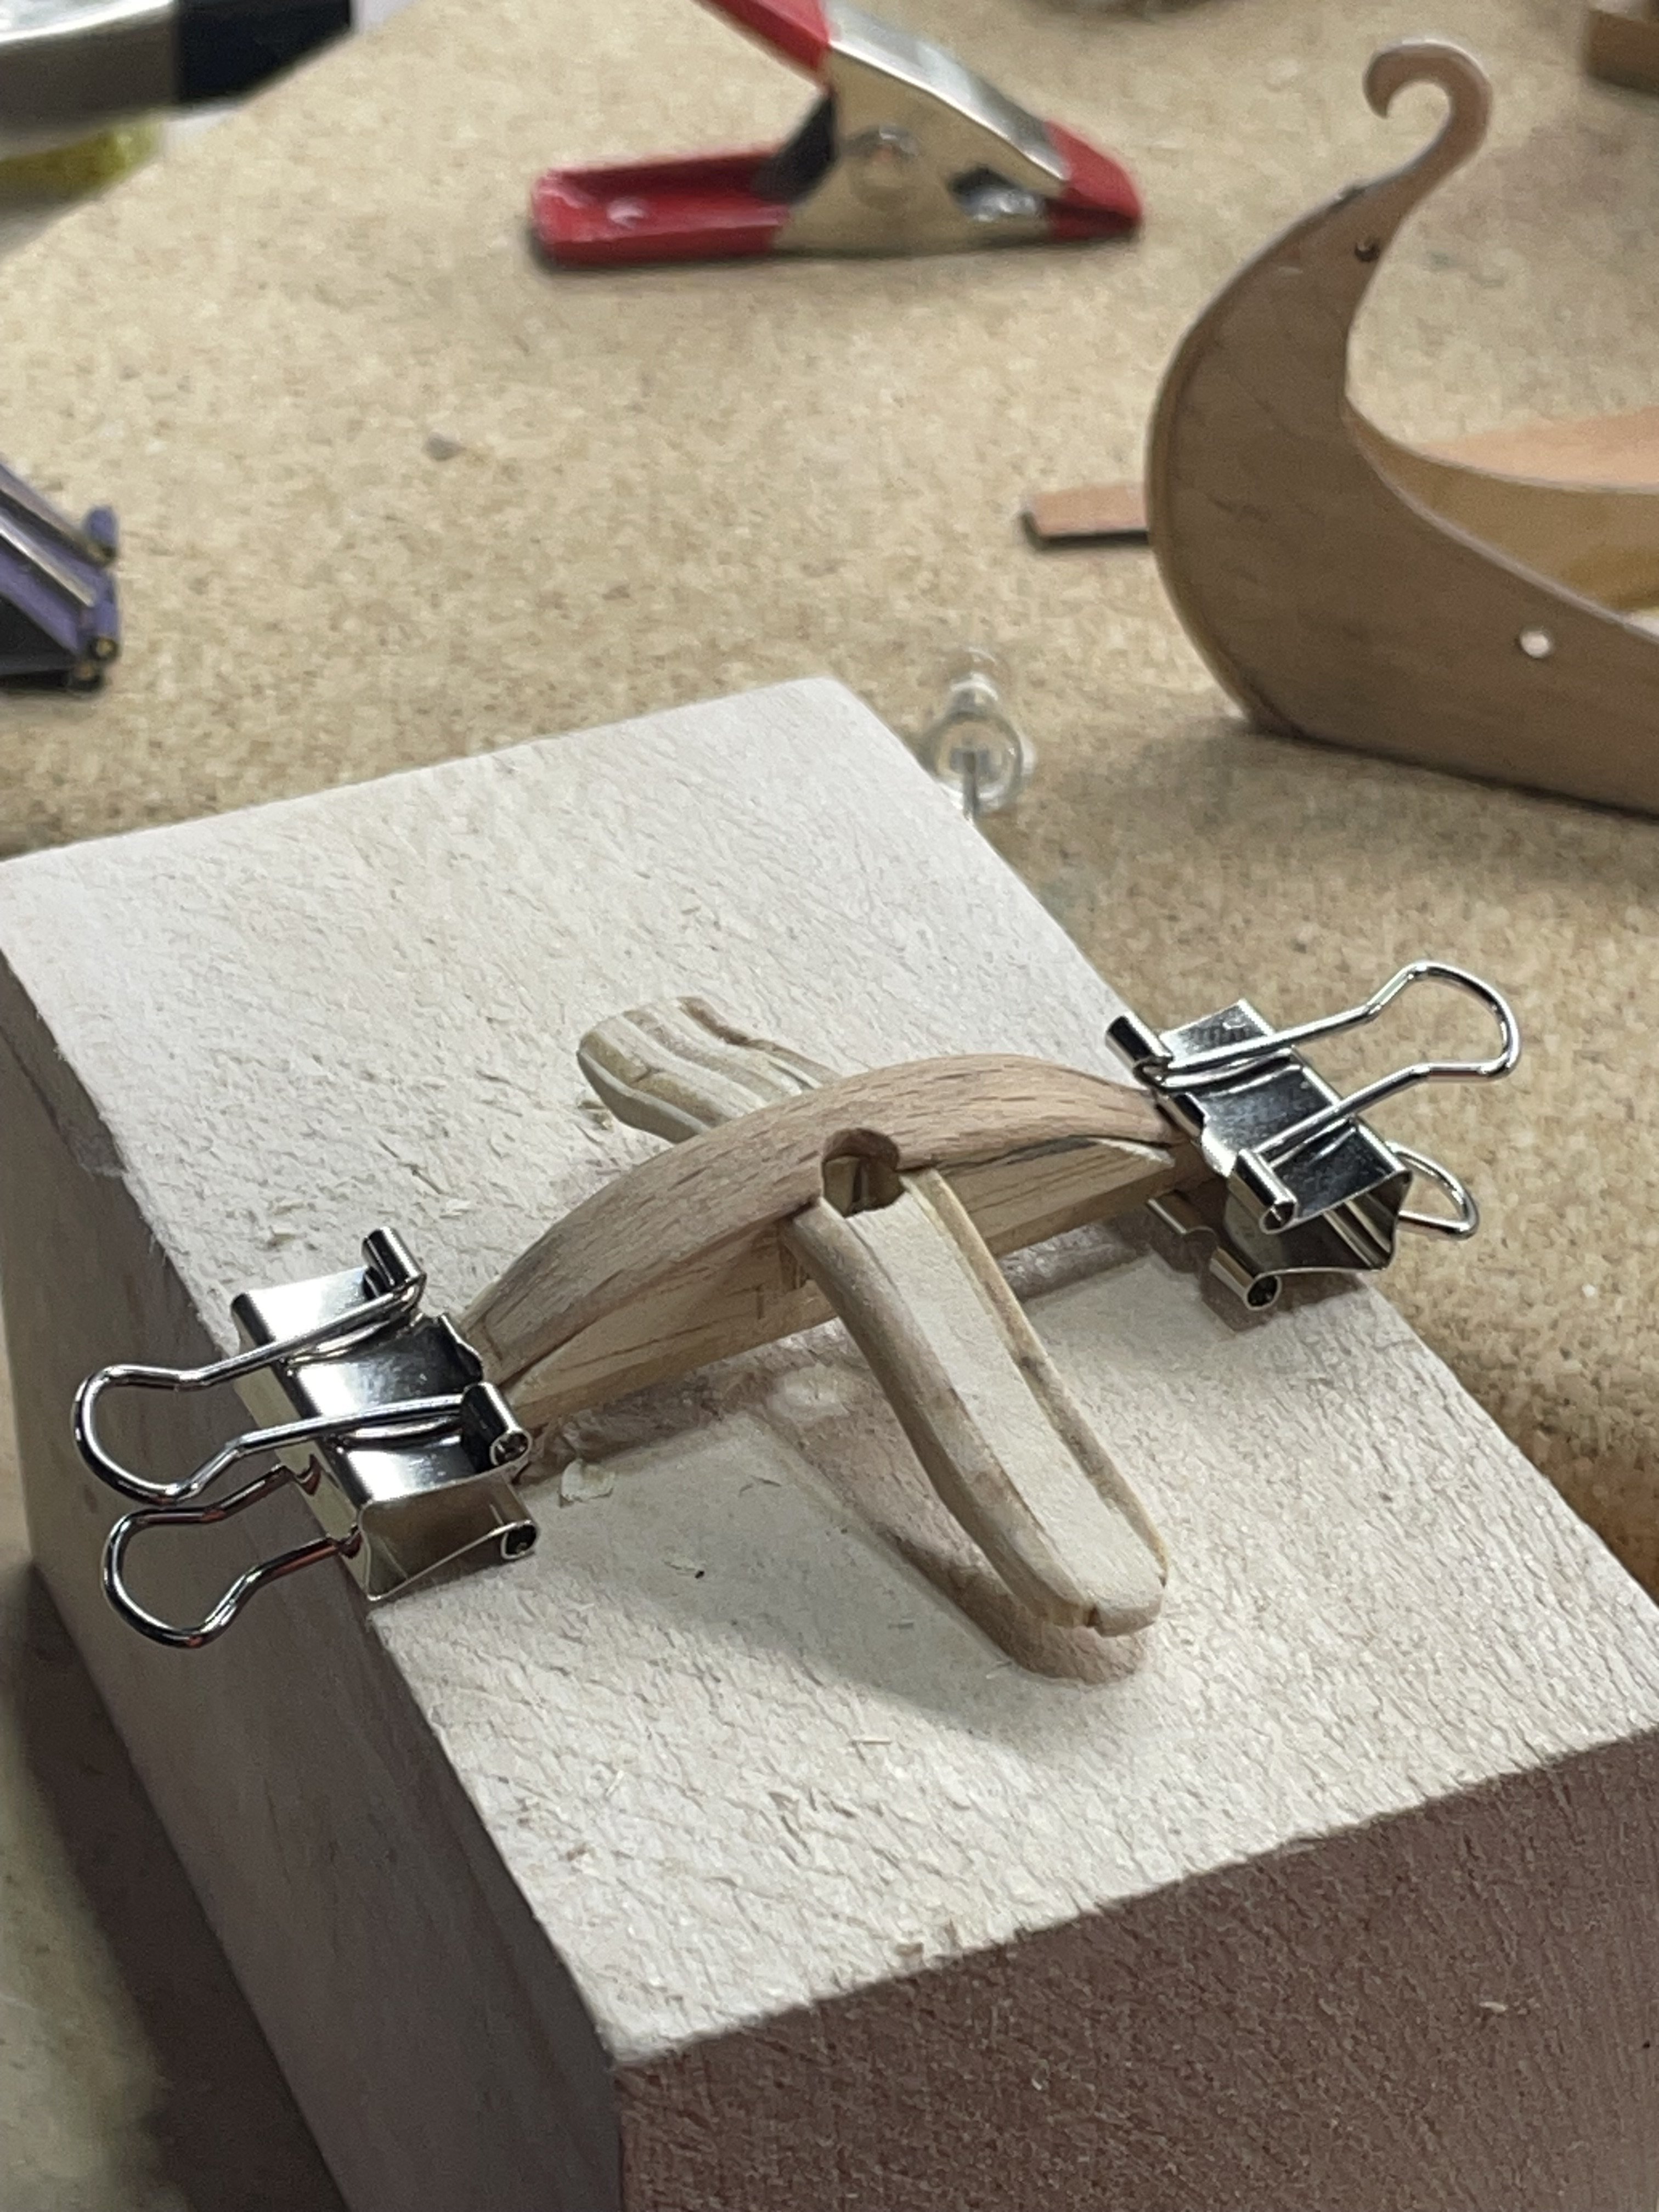
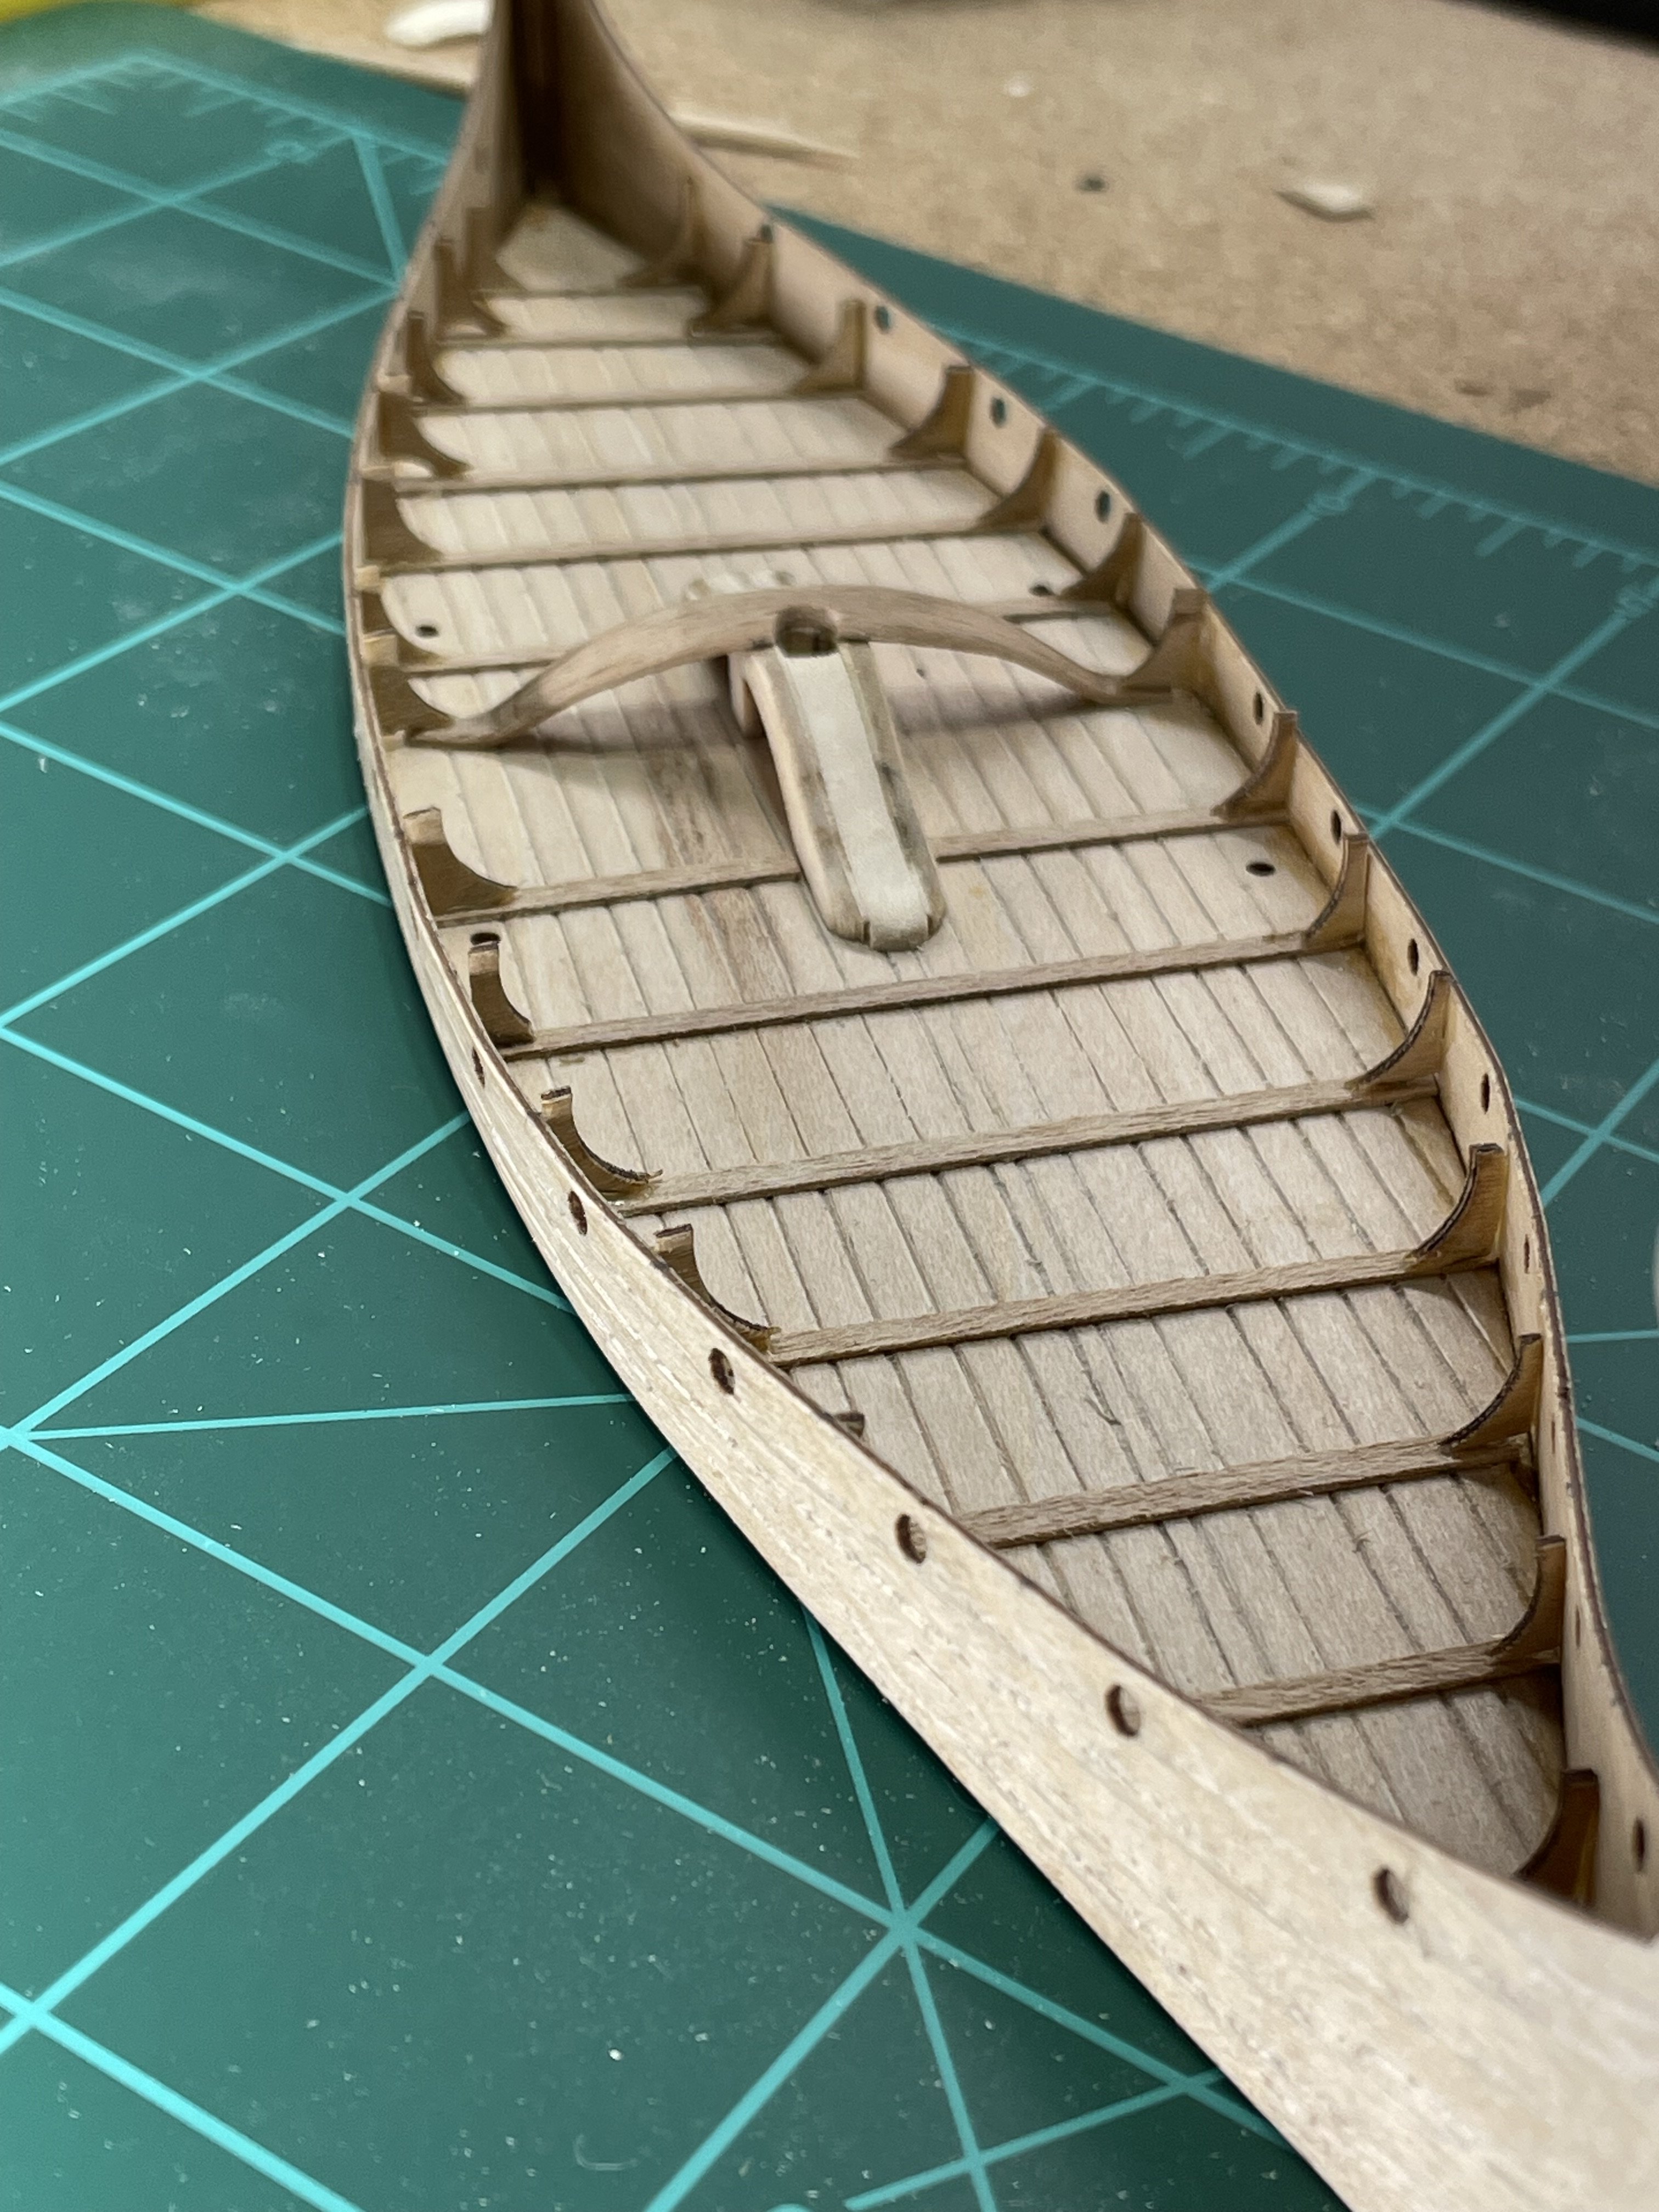
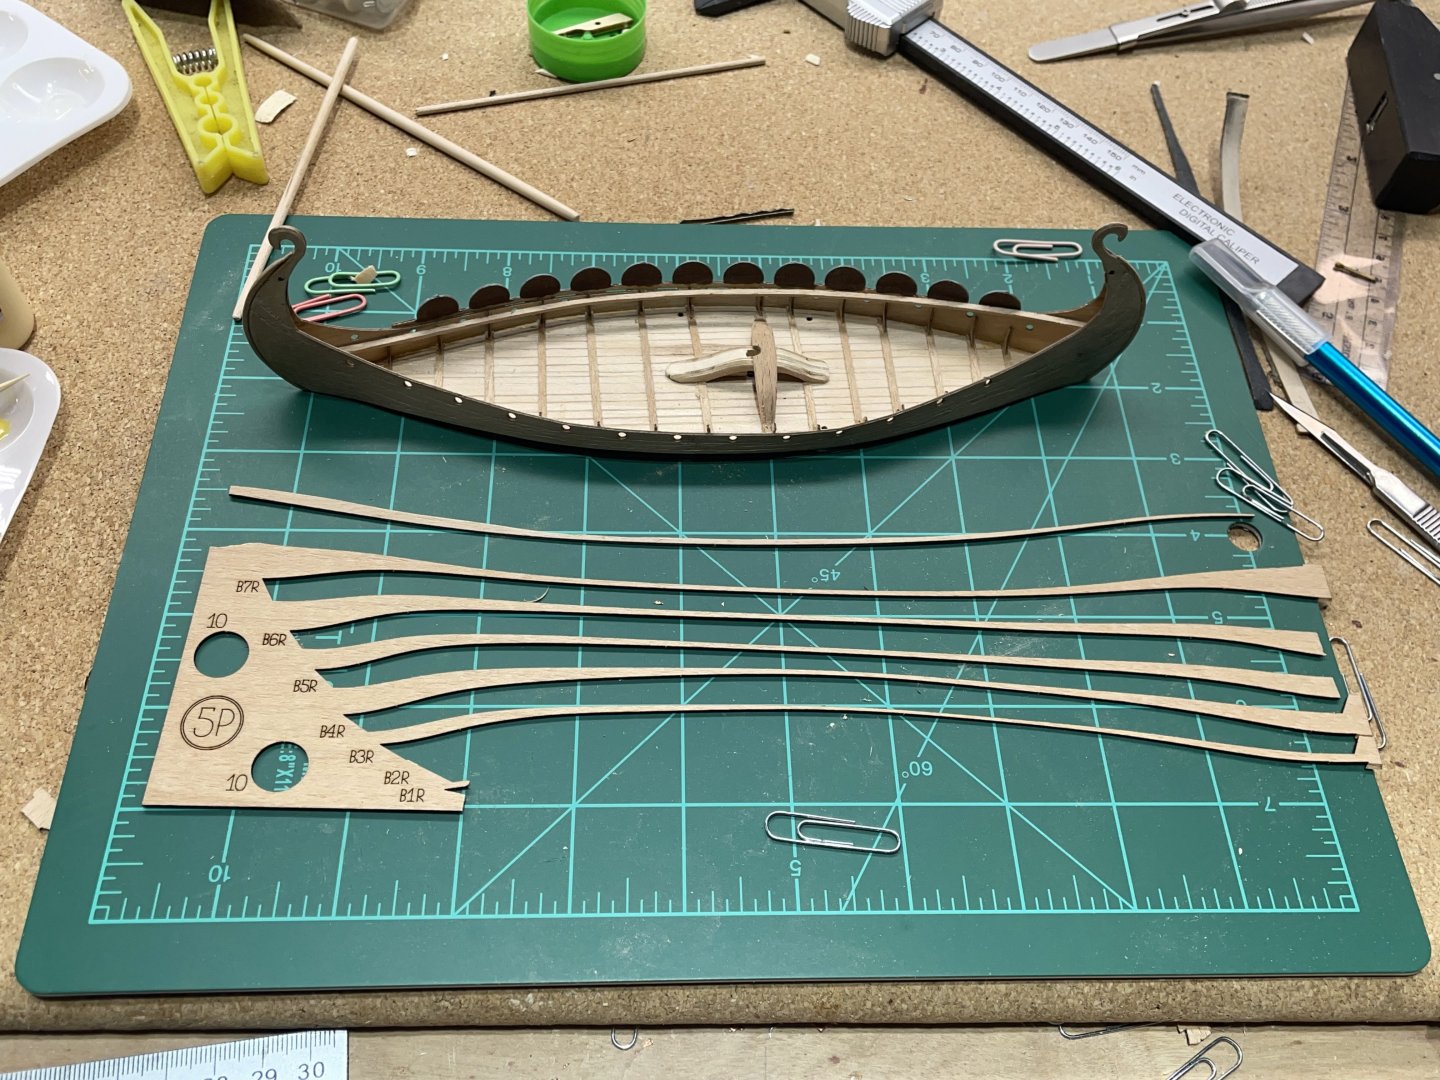
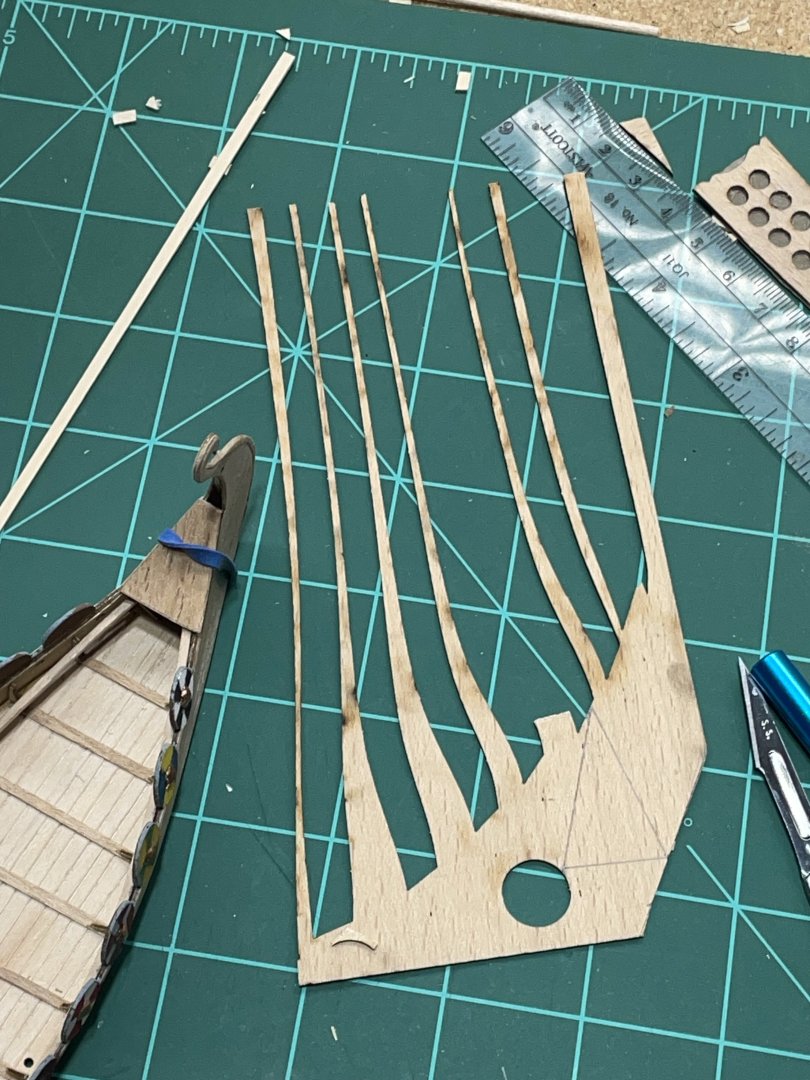
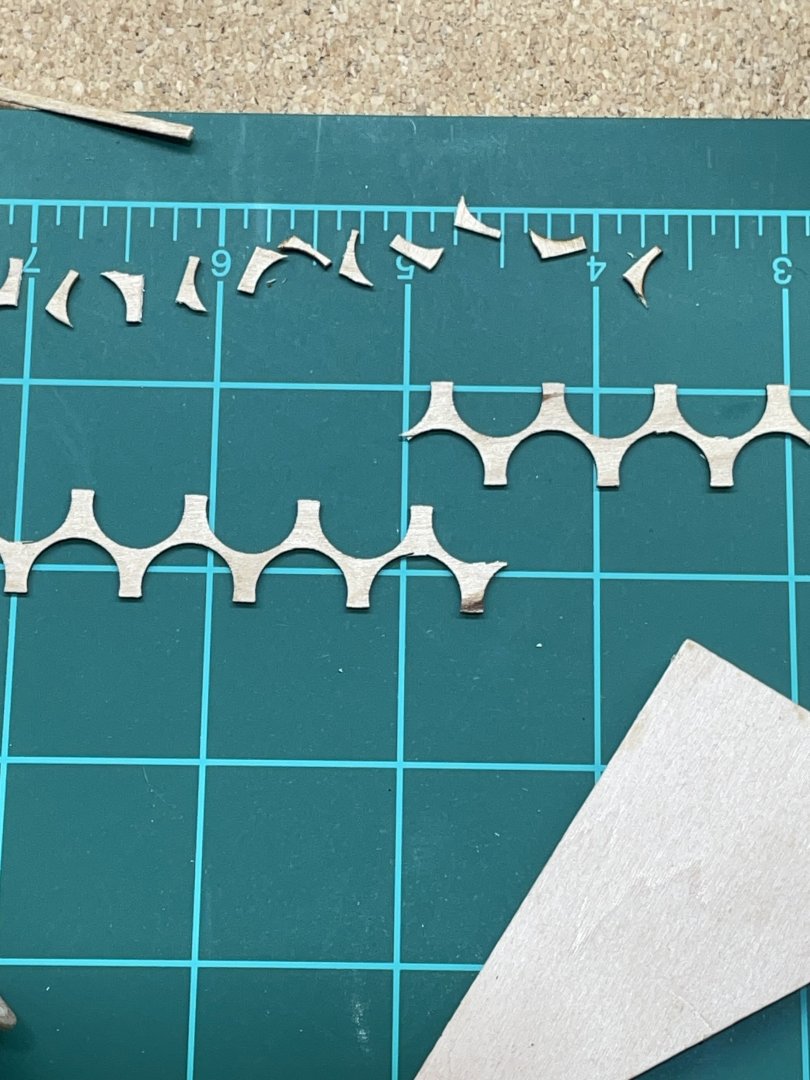
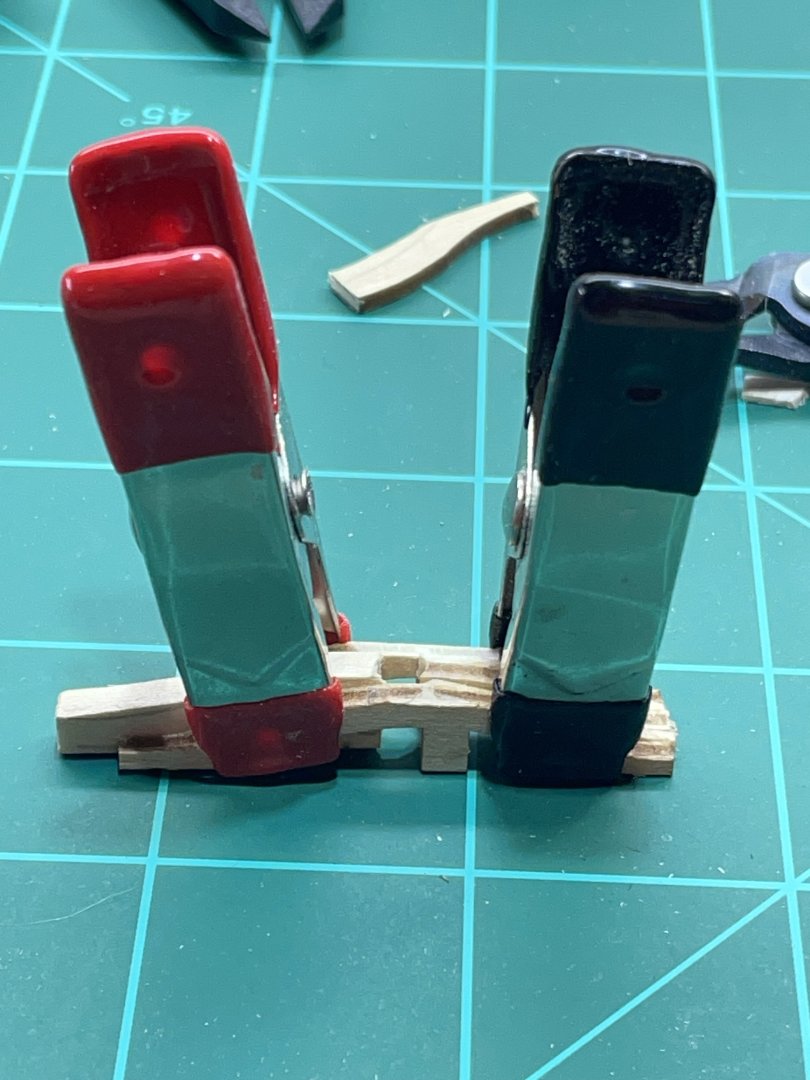
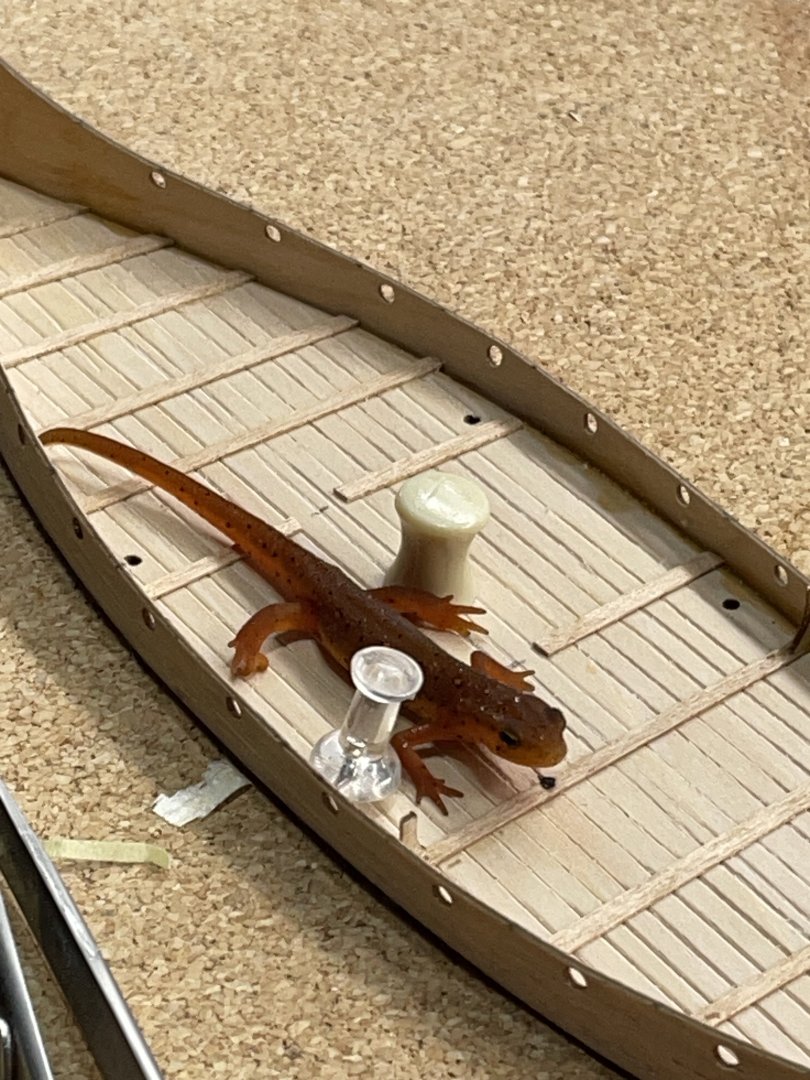
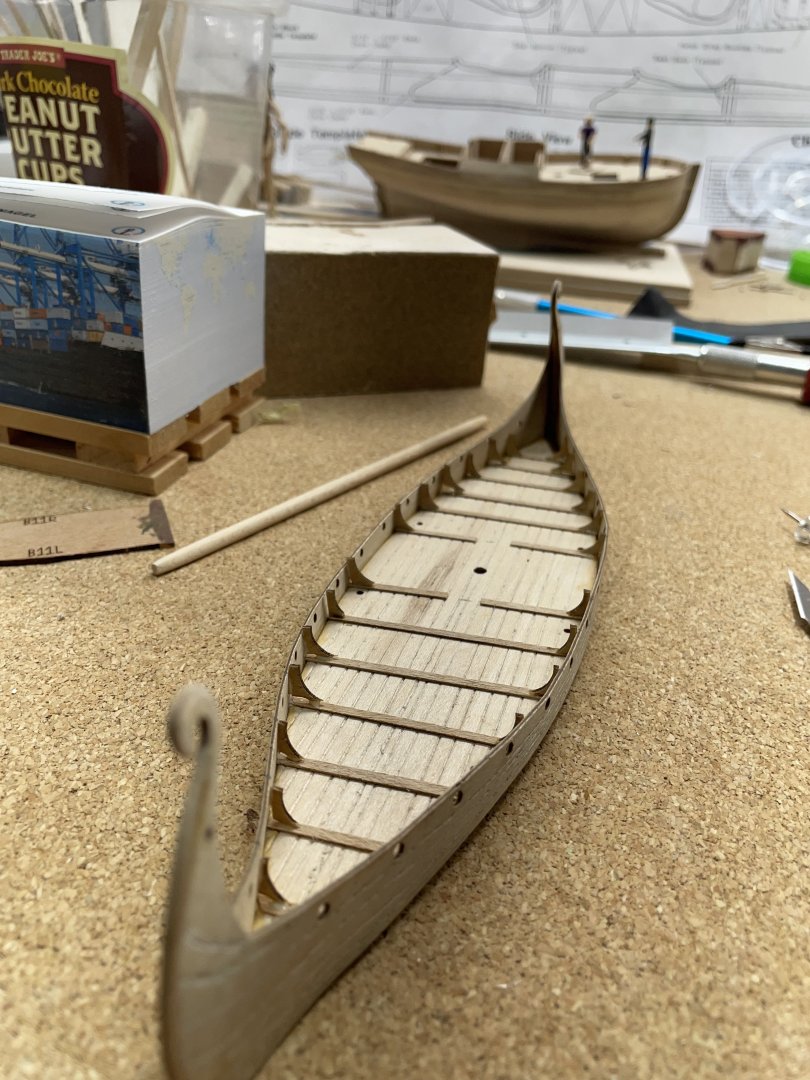
After trying many different ways, I got it glued on. I took a small piece of cherry and bent it for a false keel on both ends. Sanded it down. I glued the strips across the deck. Which I think are actually the tops of the frames. That part of the boat is missing:-) The only picture I got of that step was when I found a newt outside and brought him into the shipyard for a photo shoot. I really wanted the tops of the frames that show through the deck. I tried making them, but they looked like they were just scraps I picked off the floor:-/ I looked at the wooden sheets left from the parts and decided I could make the wood that went around the shields work. I was pleased to find Billing Boats secret hidden parts. About the mast step. It consisted of 4 parts. The picture shows only told e placement order. I broke the flat piece that goes on top trying I figure out the best position. It was easy to make another, but it was quite a bit thicker. I ended up pushing them all close together and filling in with wood to make it solid all around the mast. I made a jig so I could successfully bend the piece I broke earlier. i got it glued on and that brings this log up to date. Next will be the shields.


- 16 replies
-
- 4
-
-
- Oseberg
- Billing Boats
- (and 1 more)
-
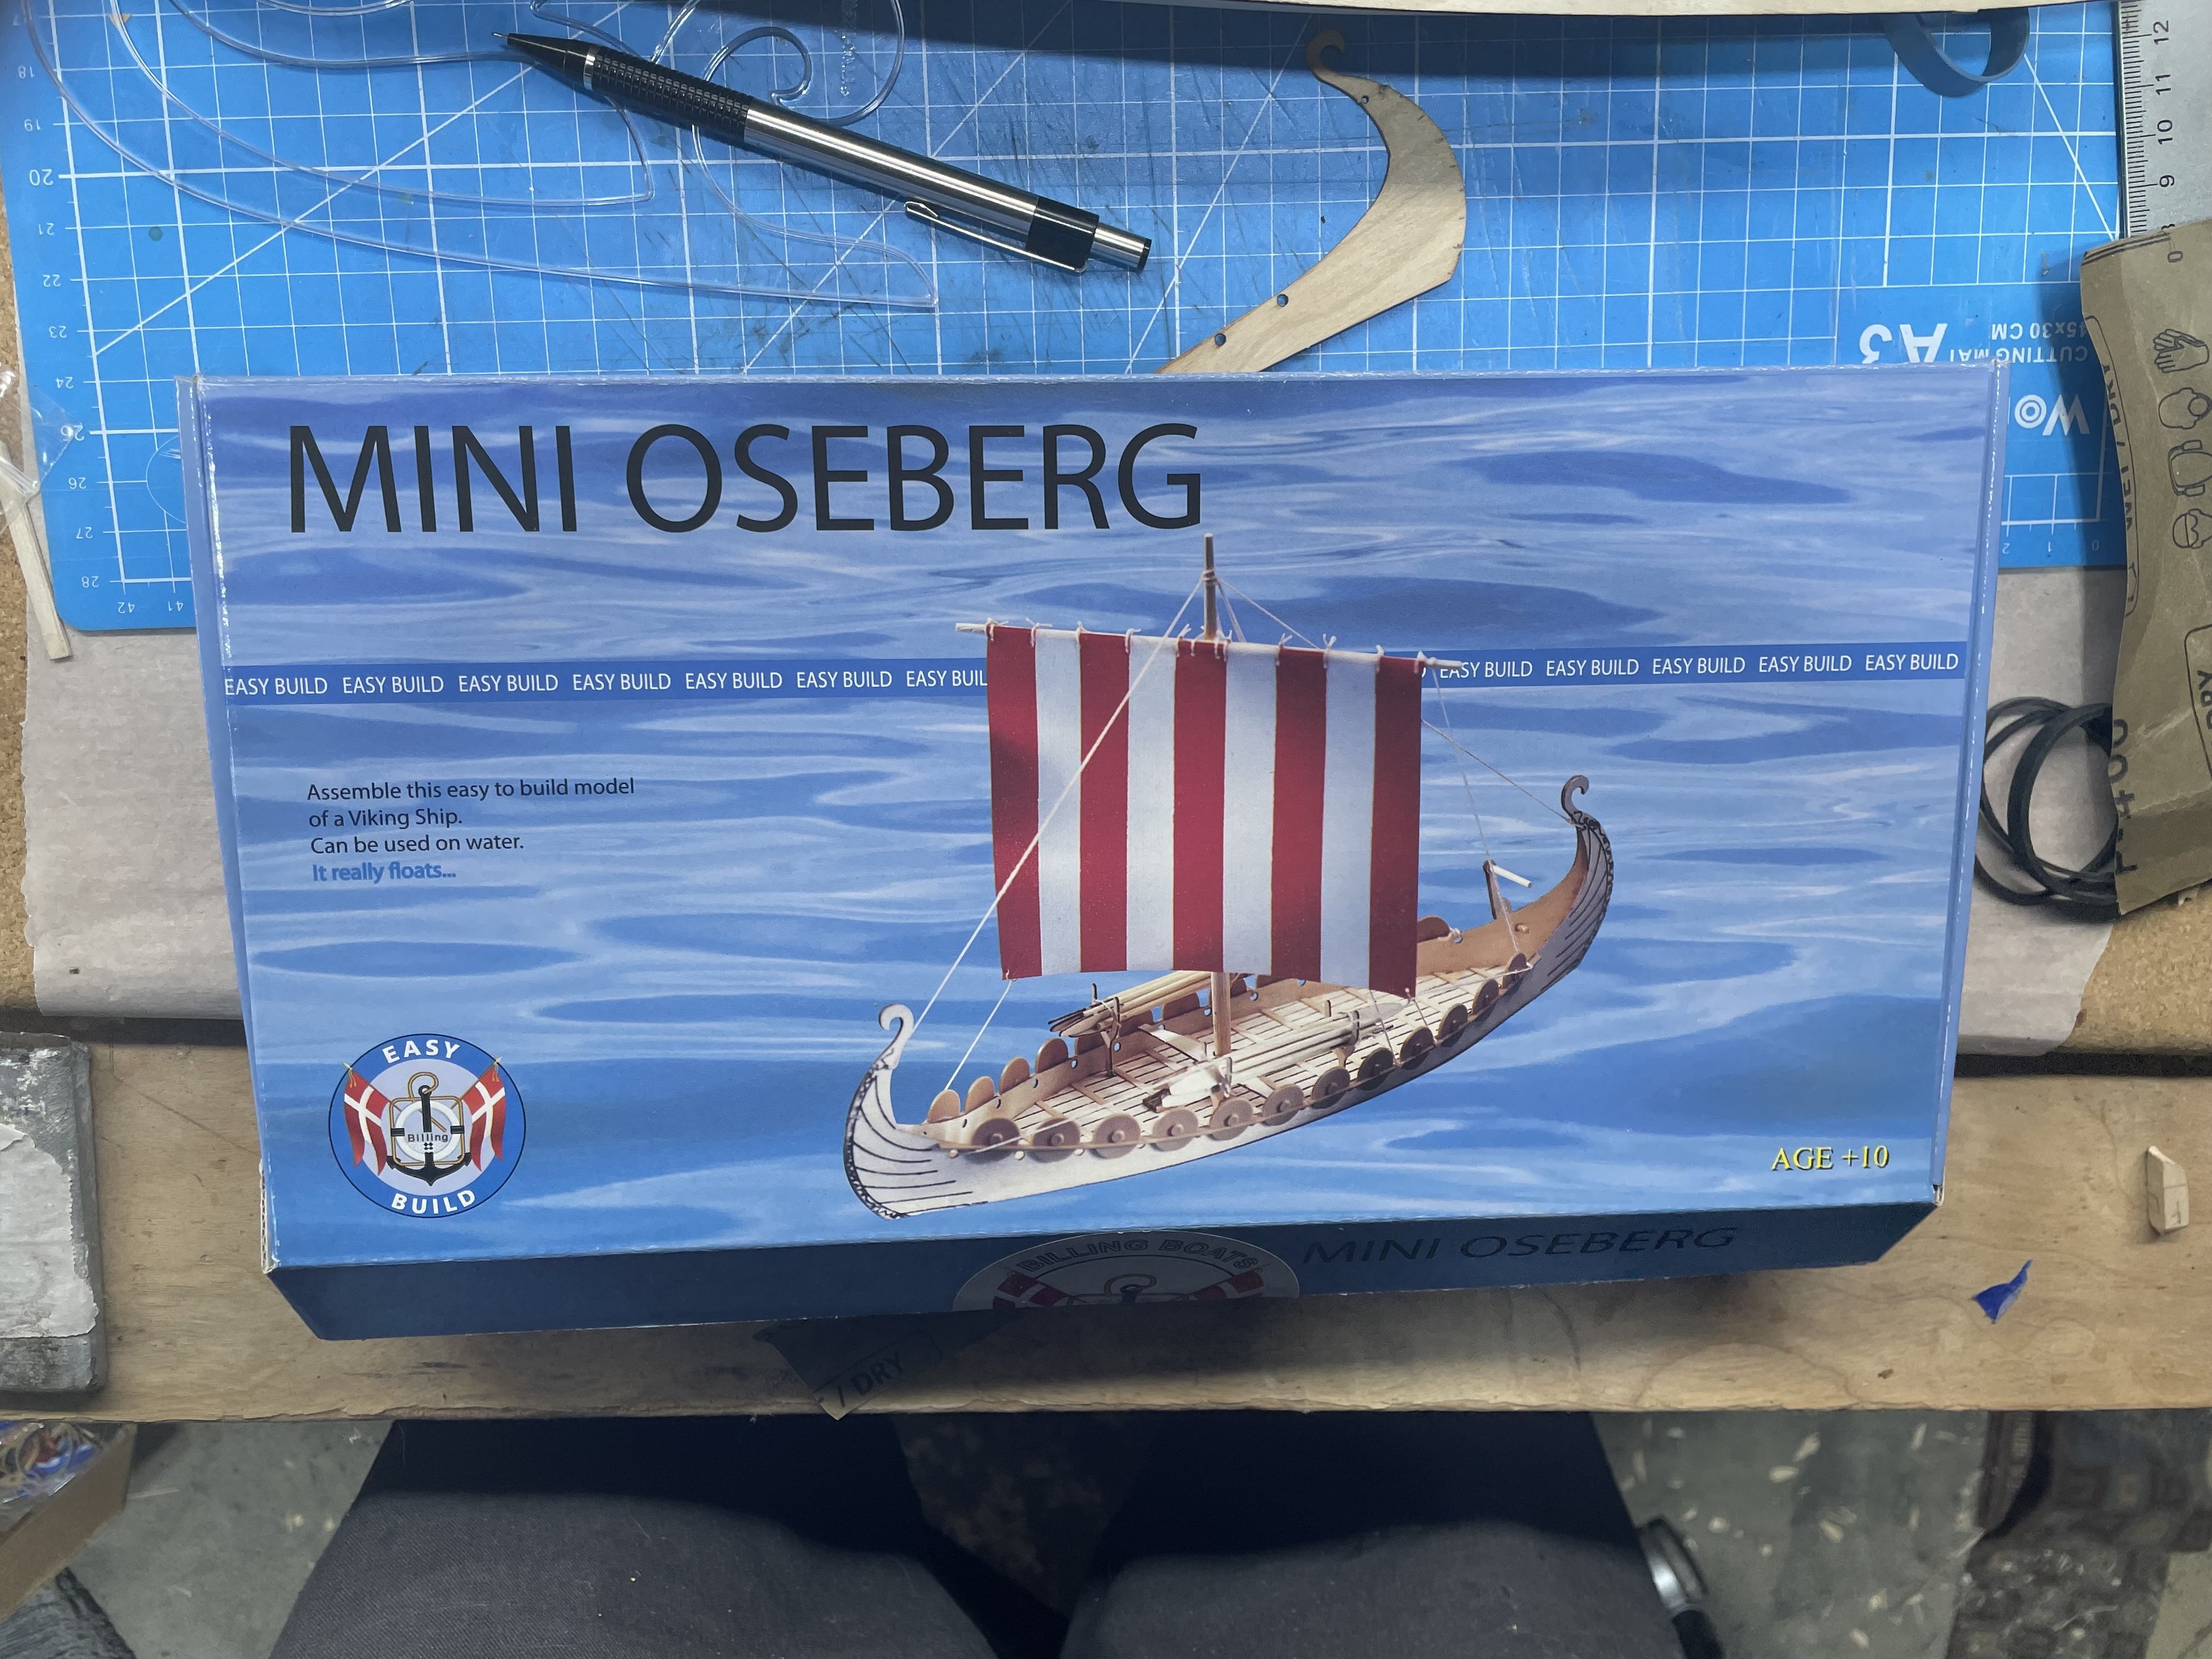
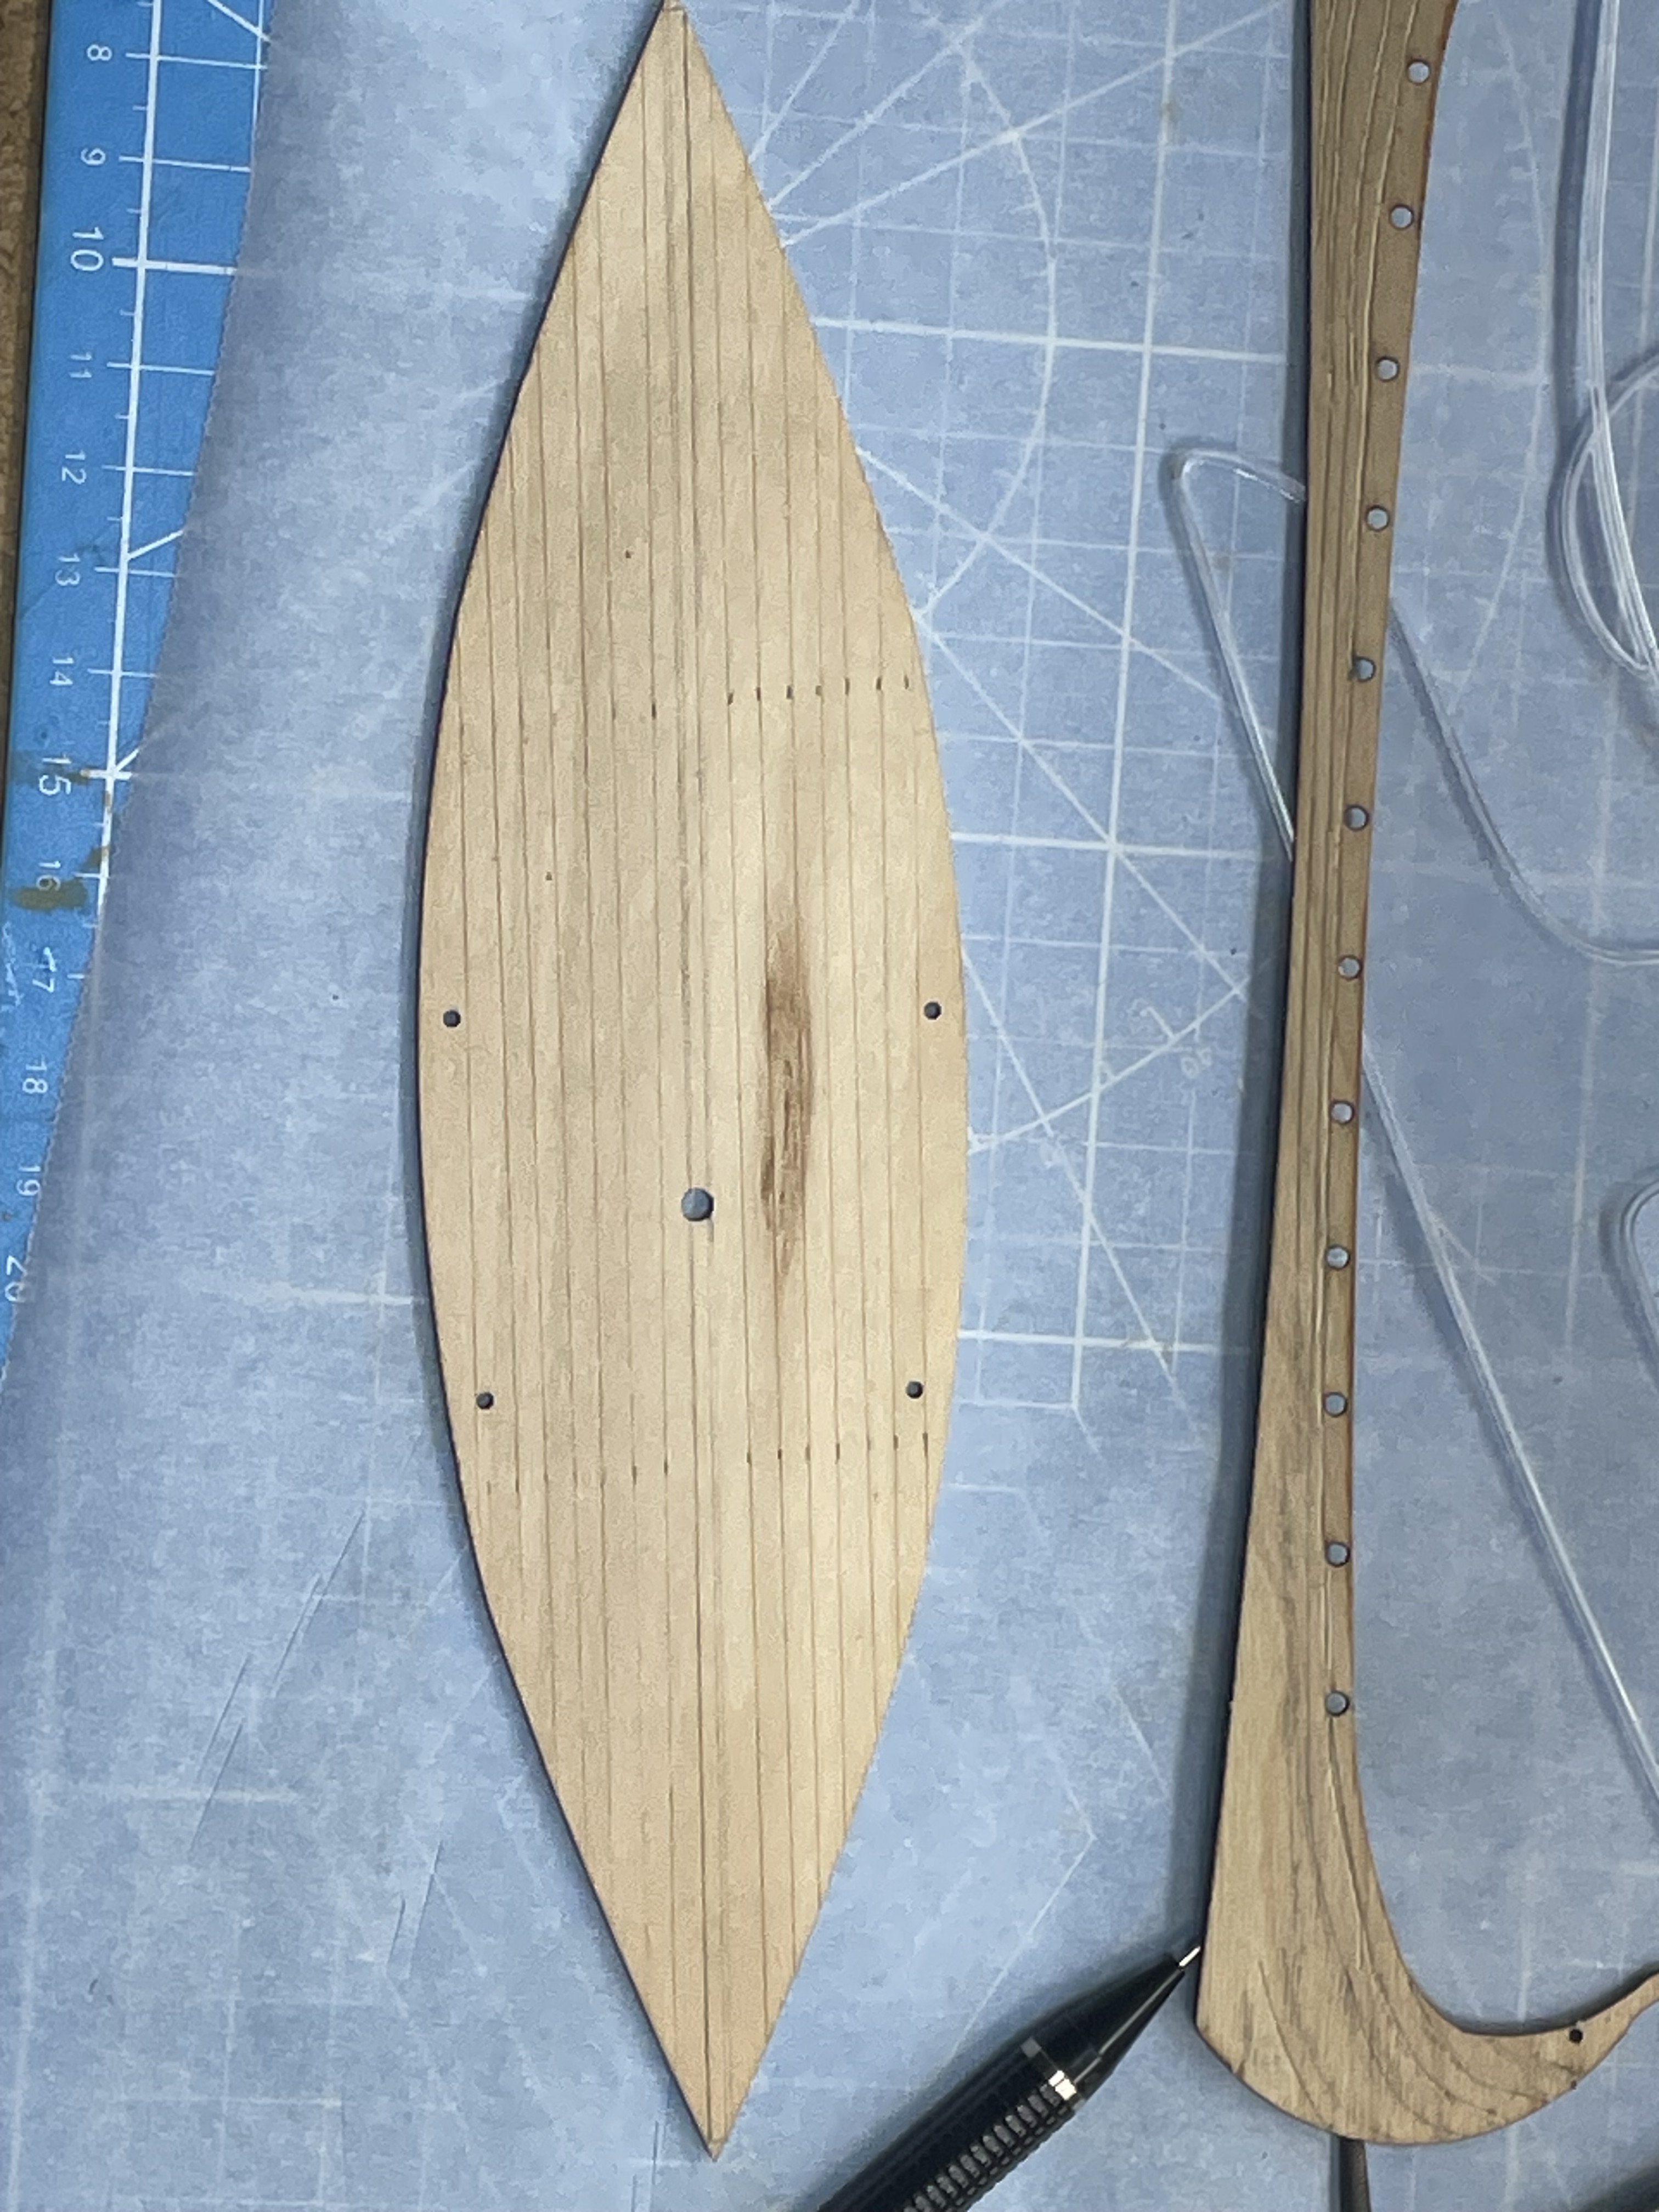
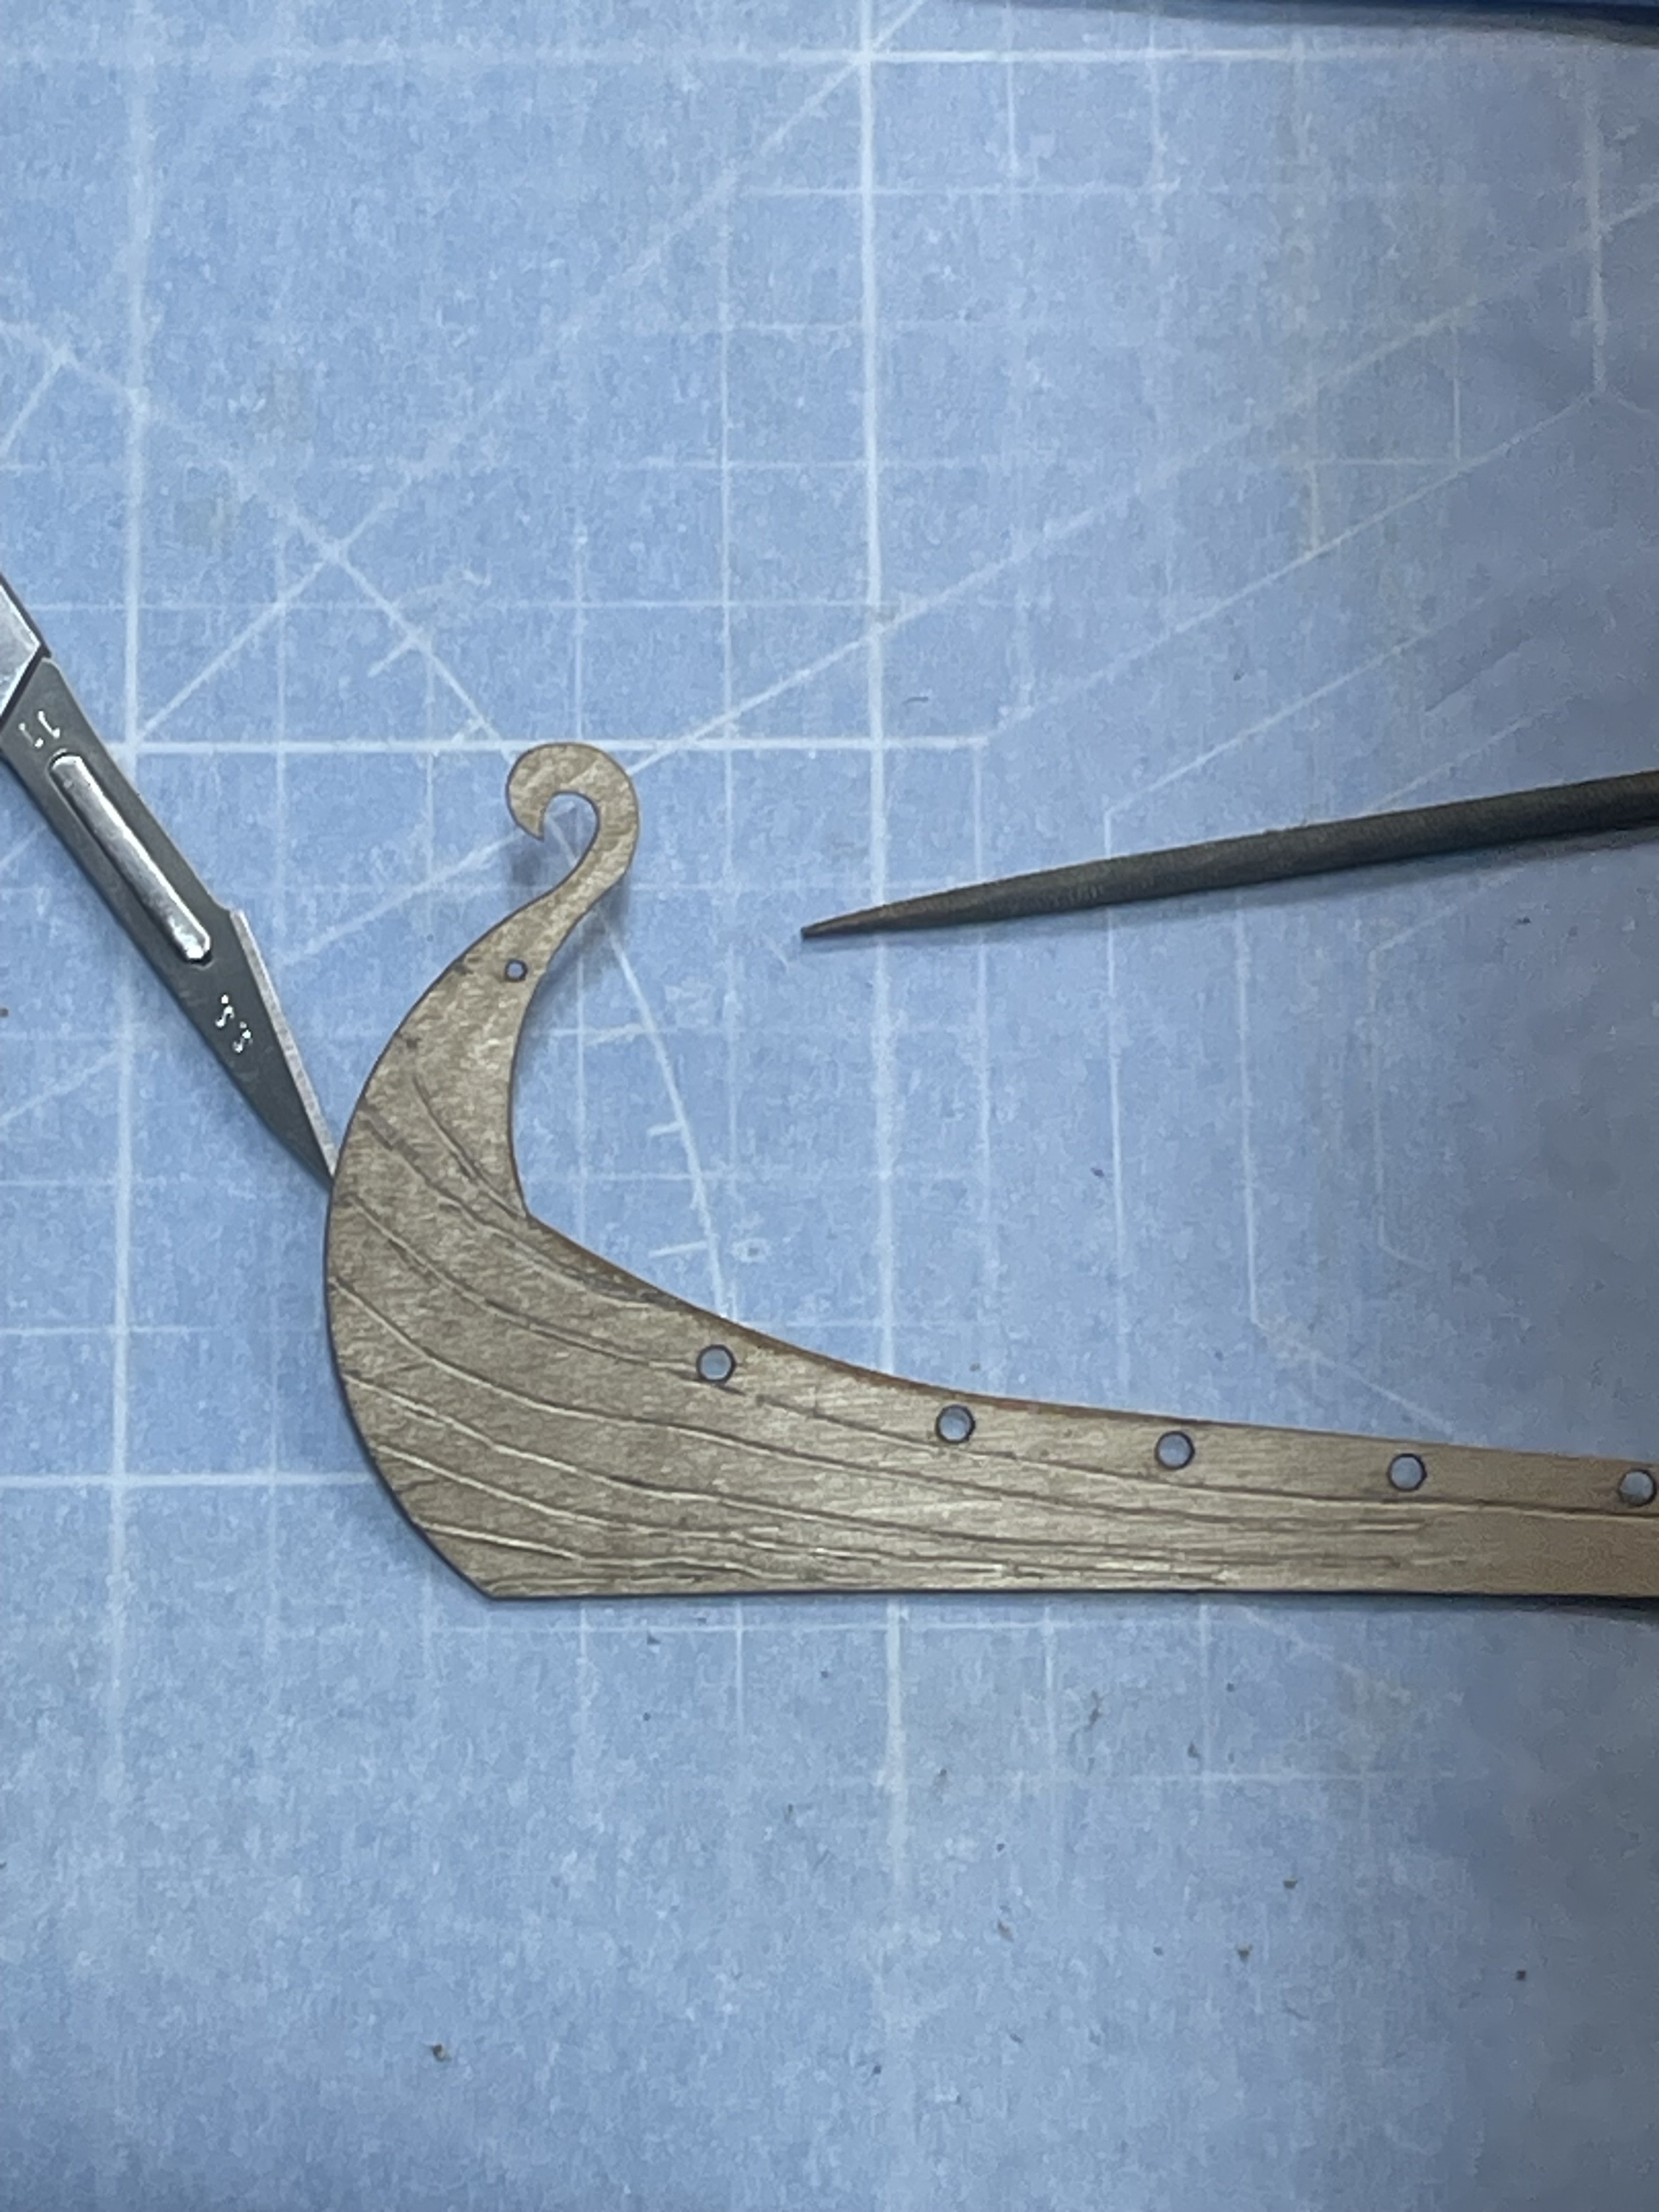
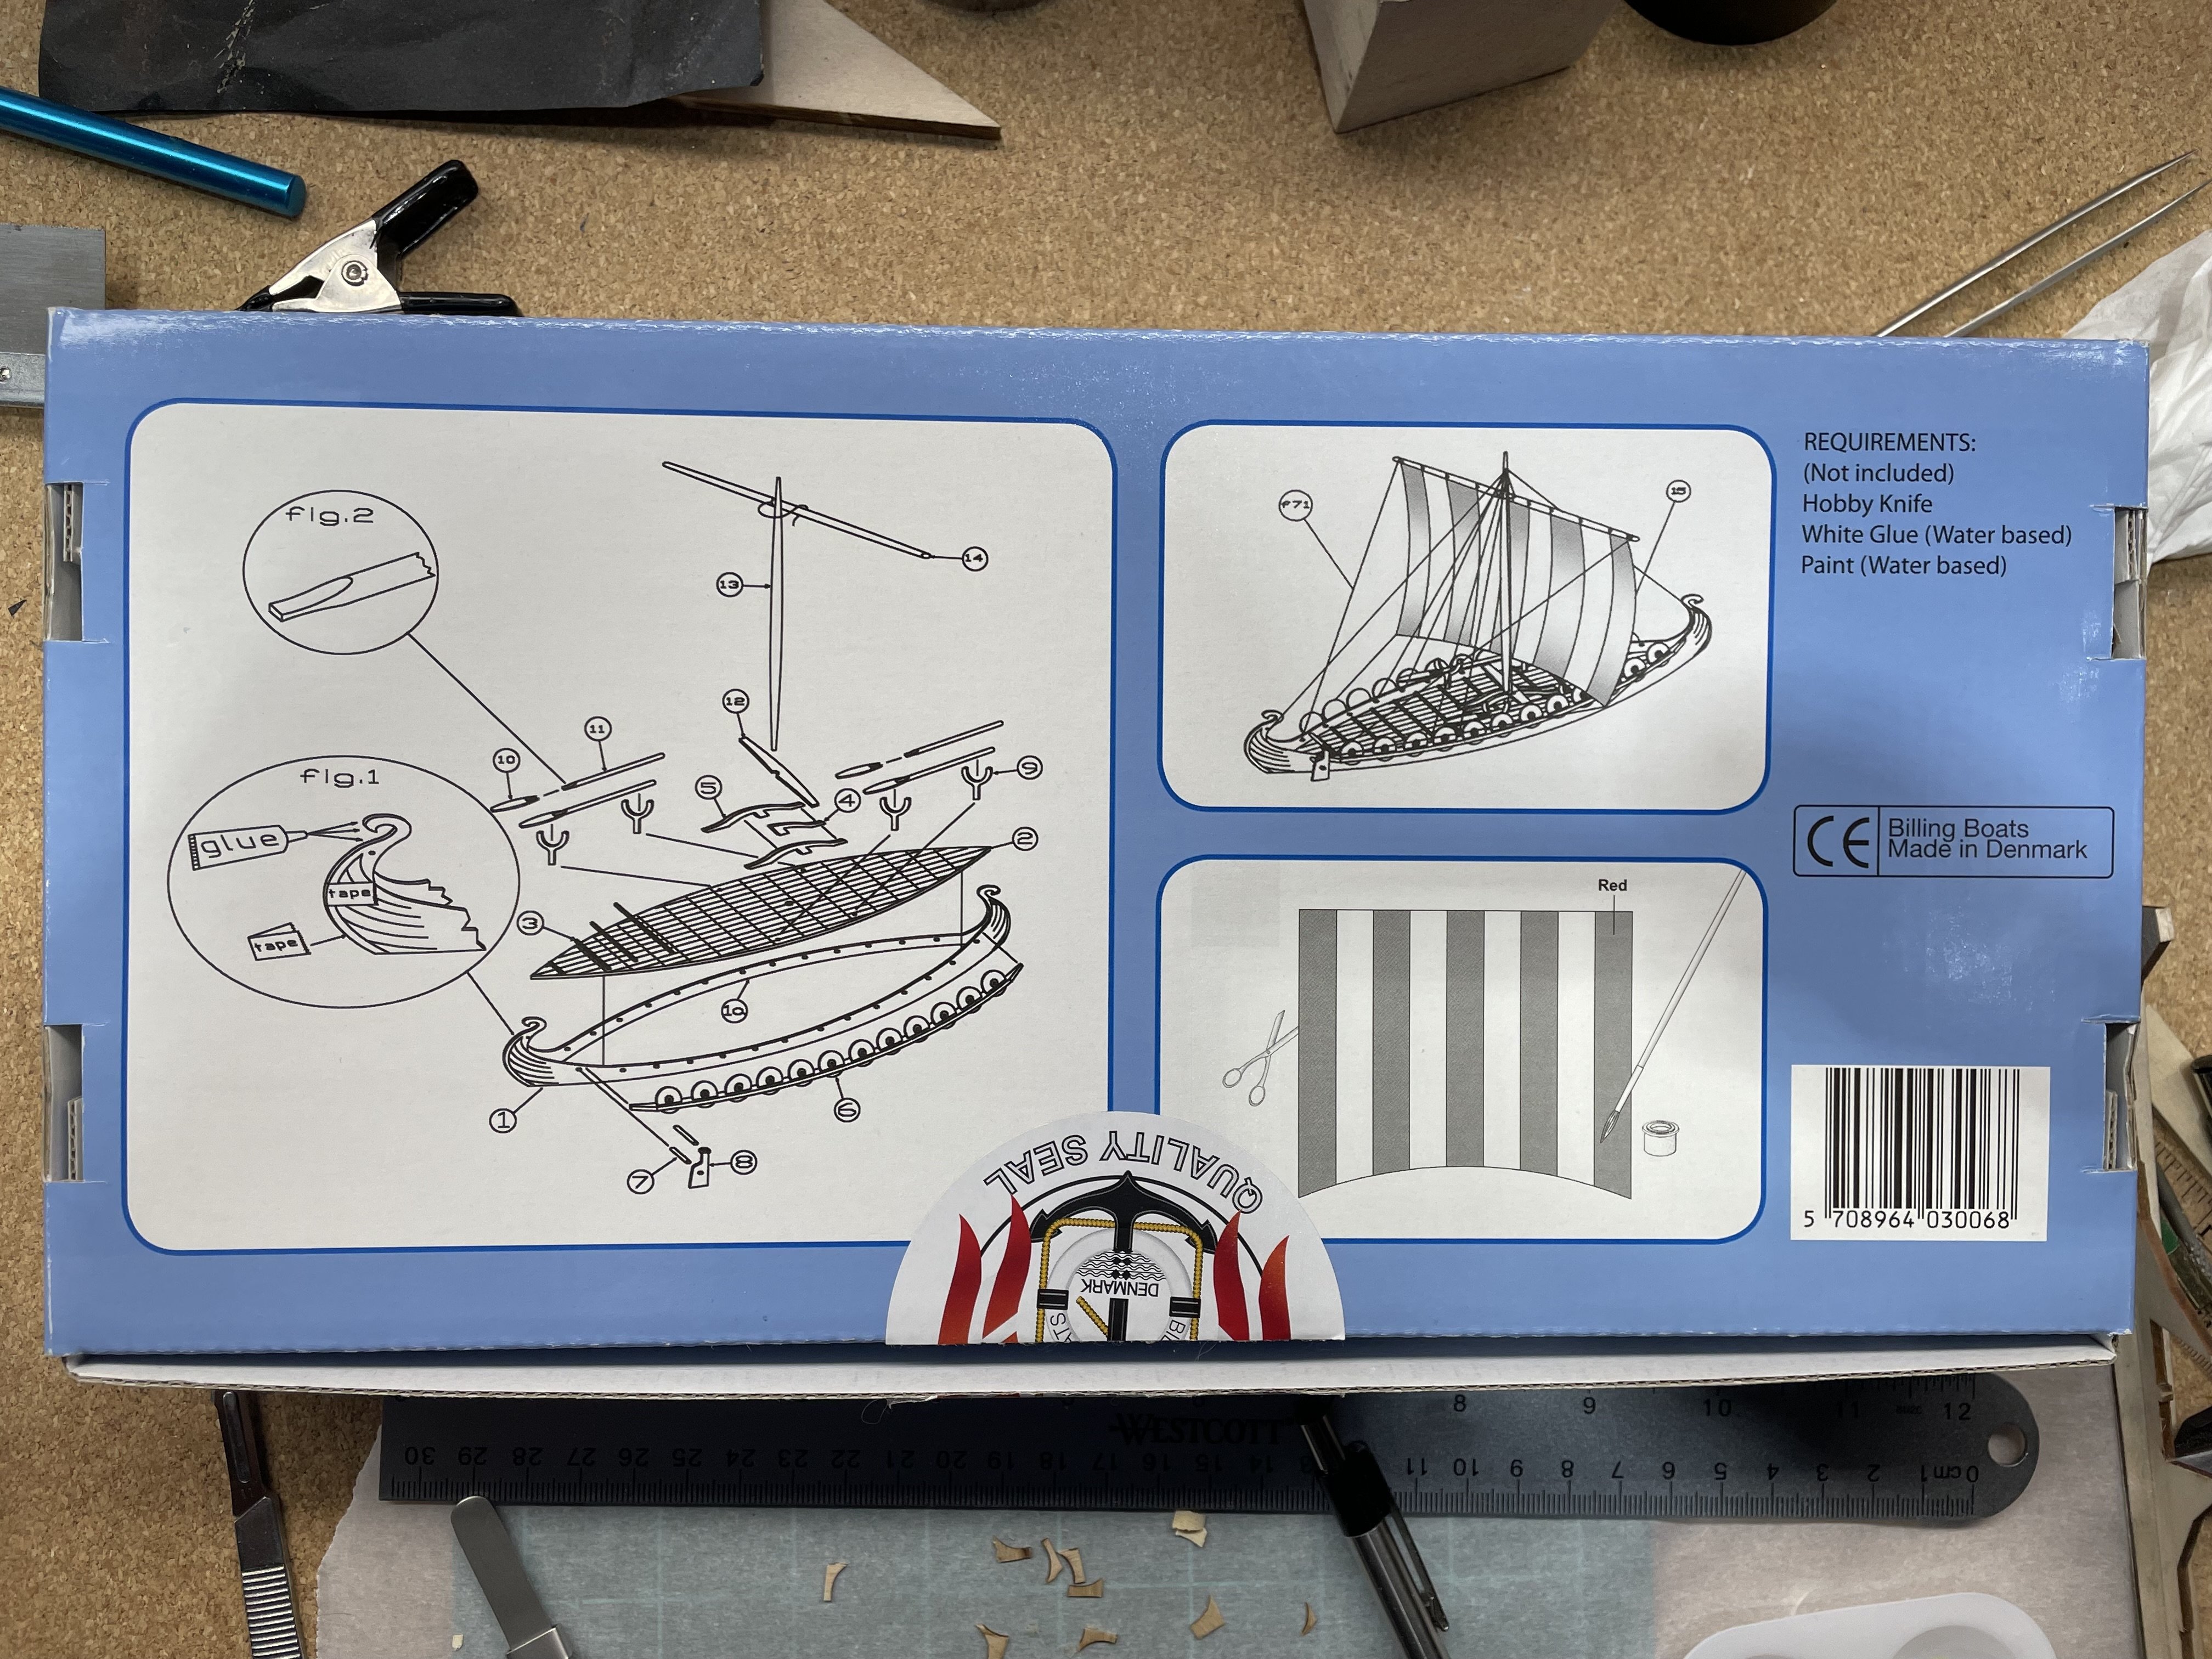
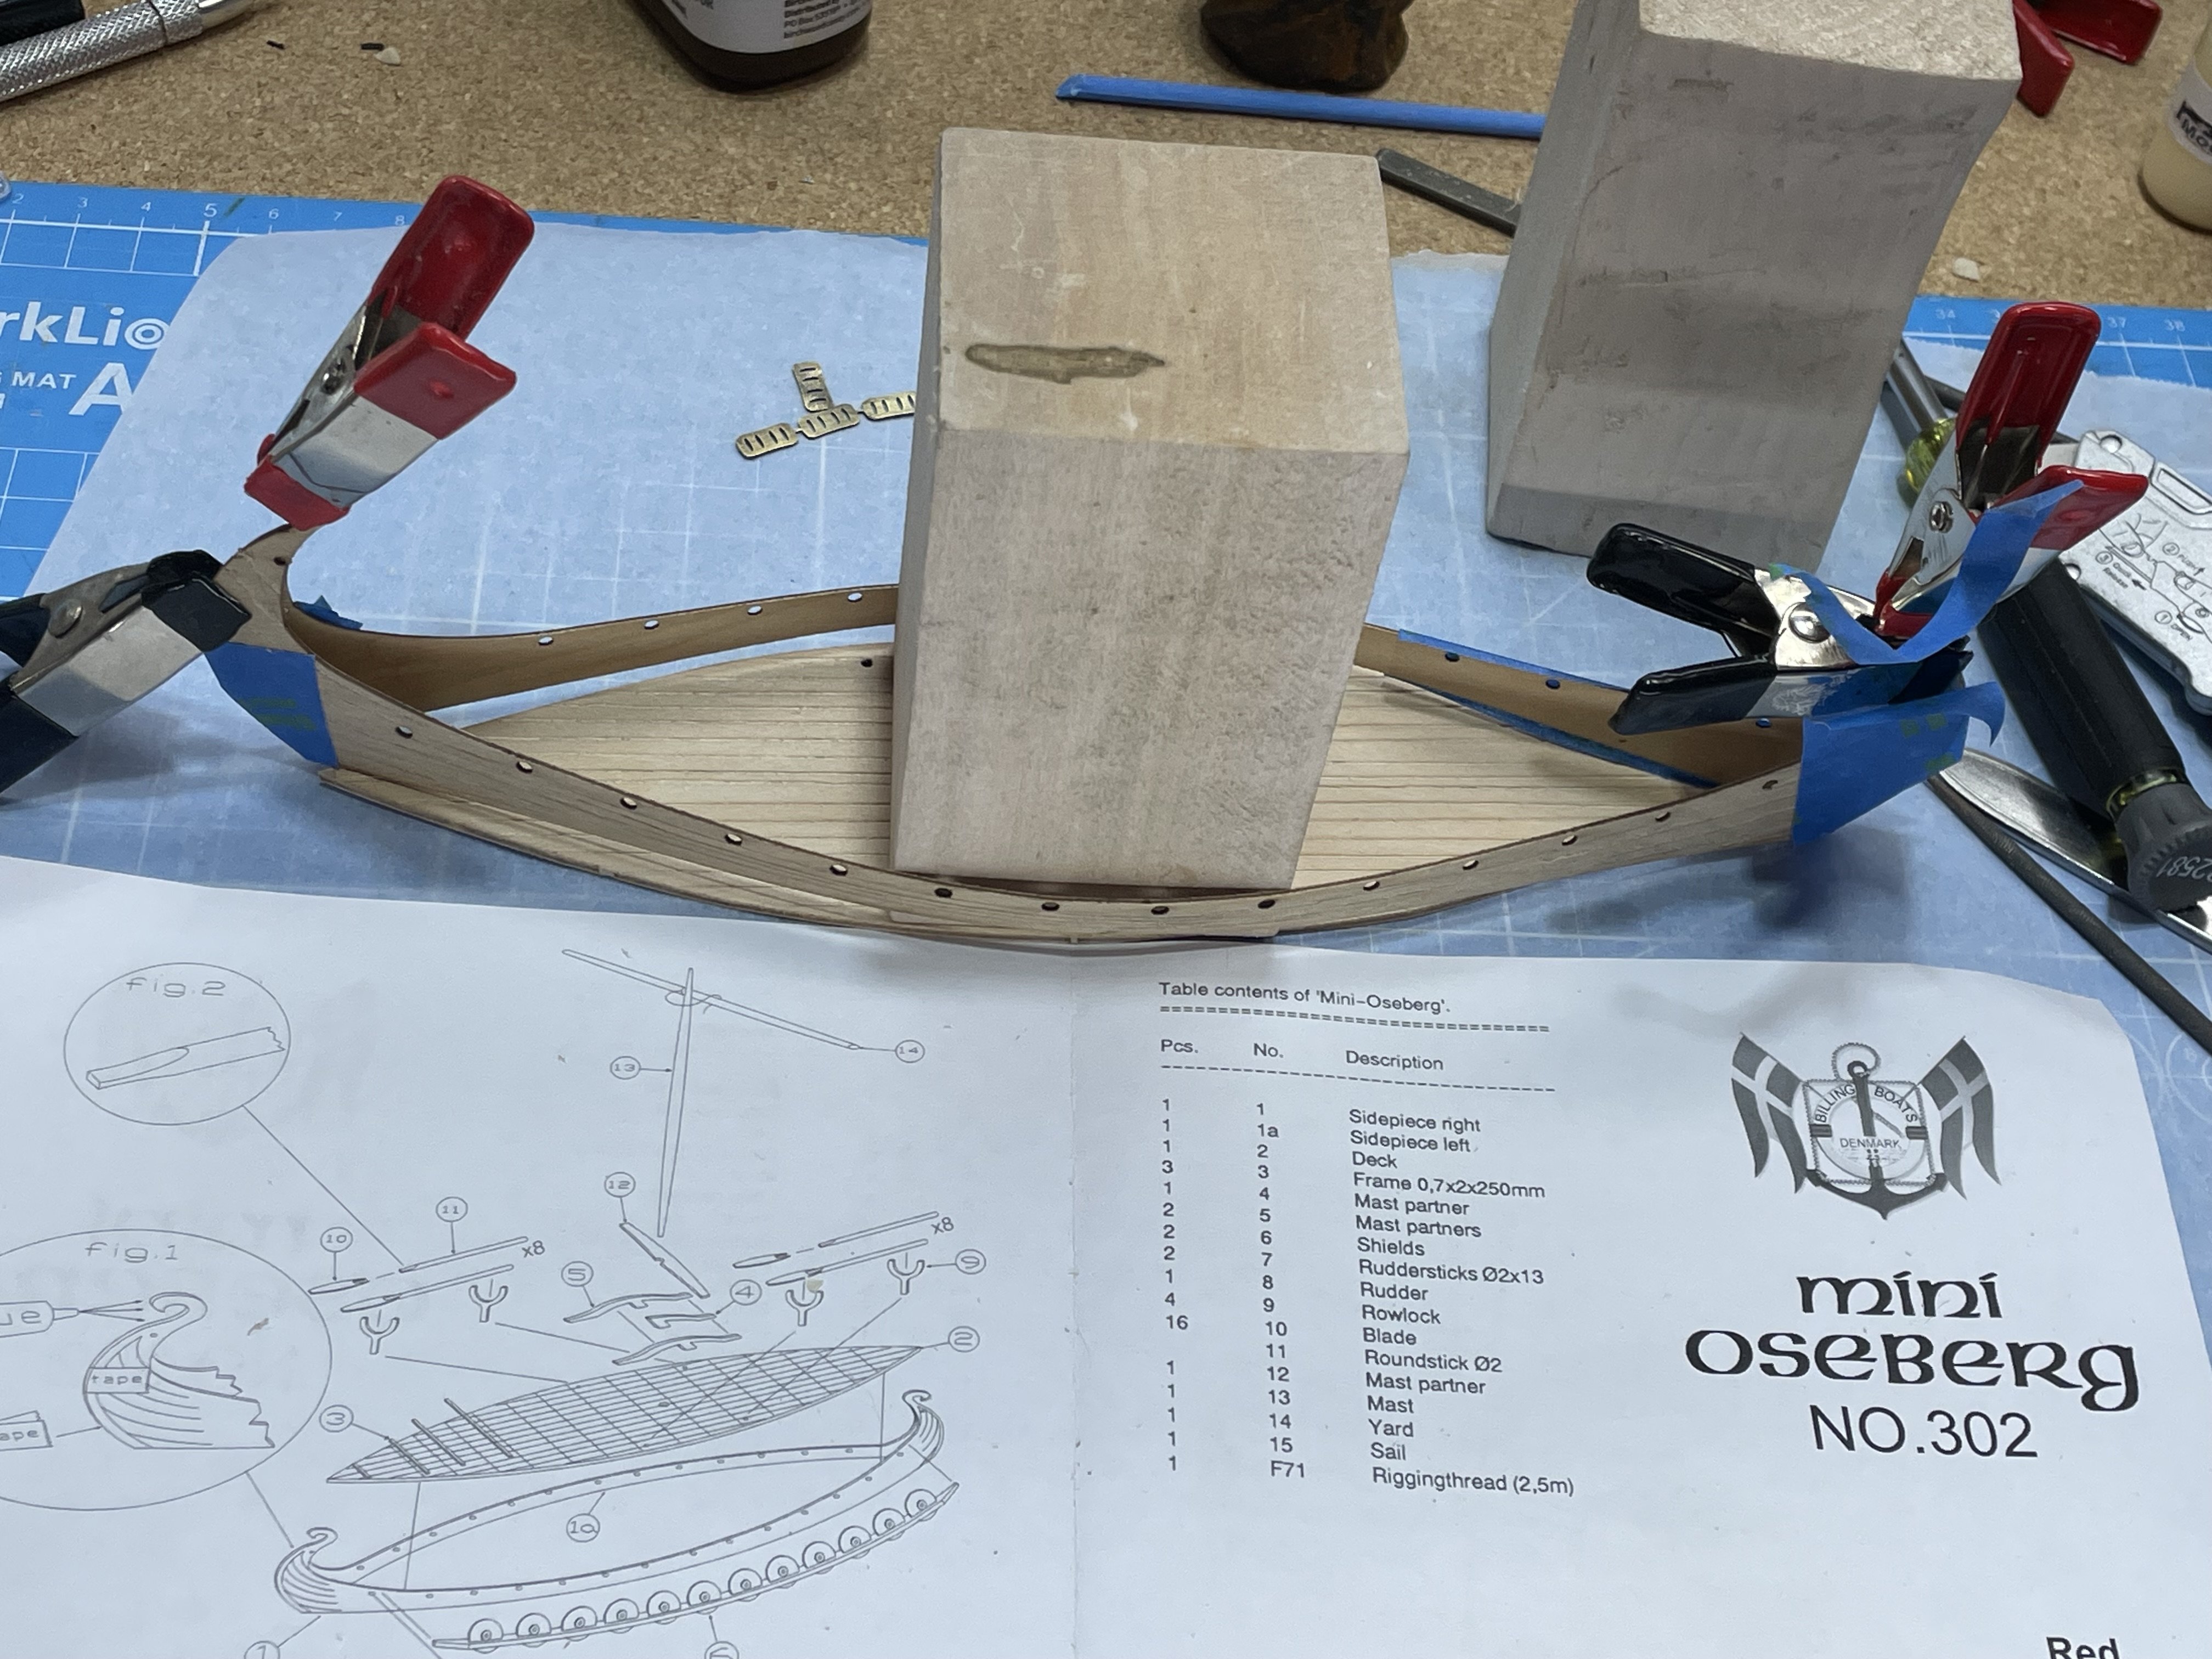
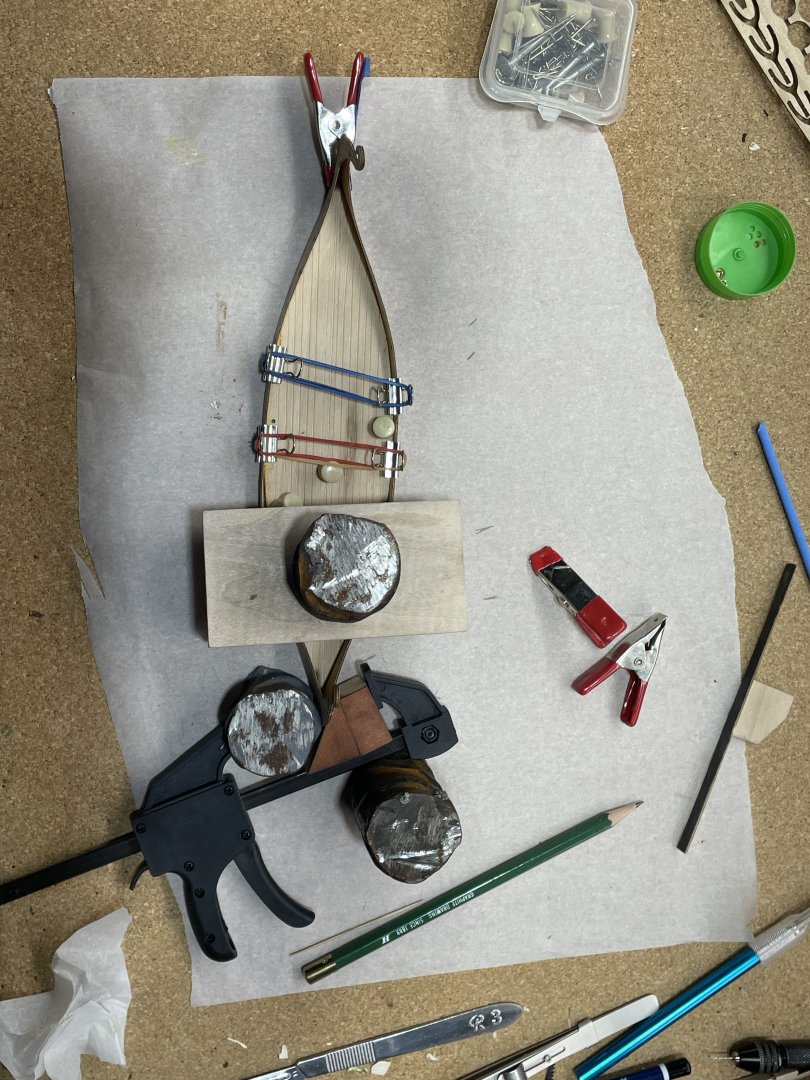
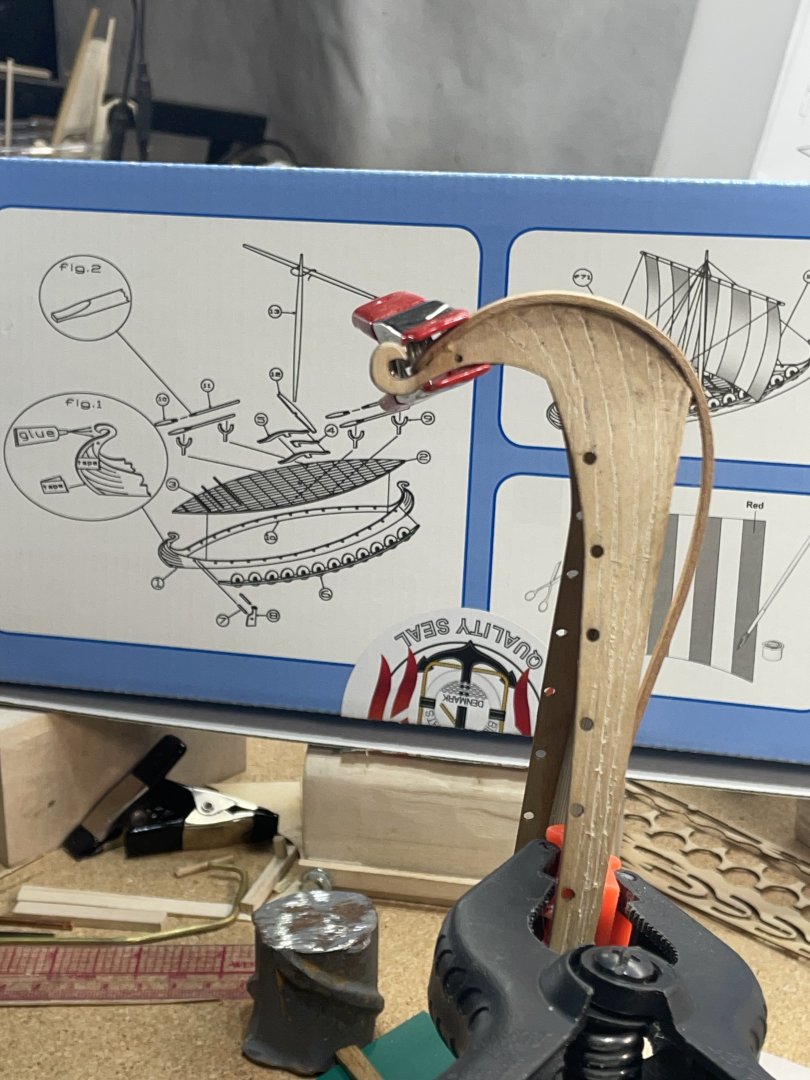
I started this build earlier when I had down time on my last build. It’s a really simple build. Ages 10 + and the box said it can be used in water, it really floats:-) The hull consist of two sides and a bottom. If I choose to paint it, I was afraid it would look like I didn’t meet the age requirement. I chose to just scratch the planks on 🙂 That turned out pretty good I thought when I stood back and looked at it. So I did the deck too. They actually put the entire construction manual on the back of the box for quick reference. After gluing the bow and stern together, I was wishing I could find one of those 10 year olds to give me a idea on the best way to get this bottom glued on straight:-)


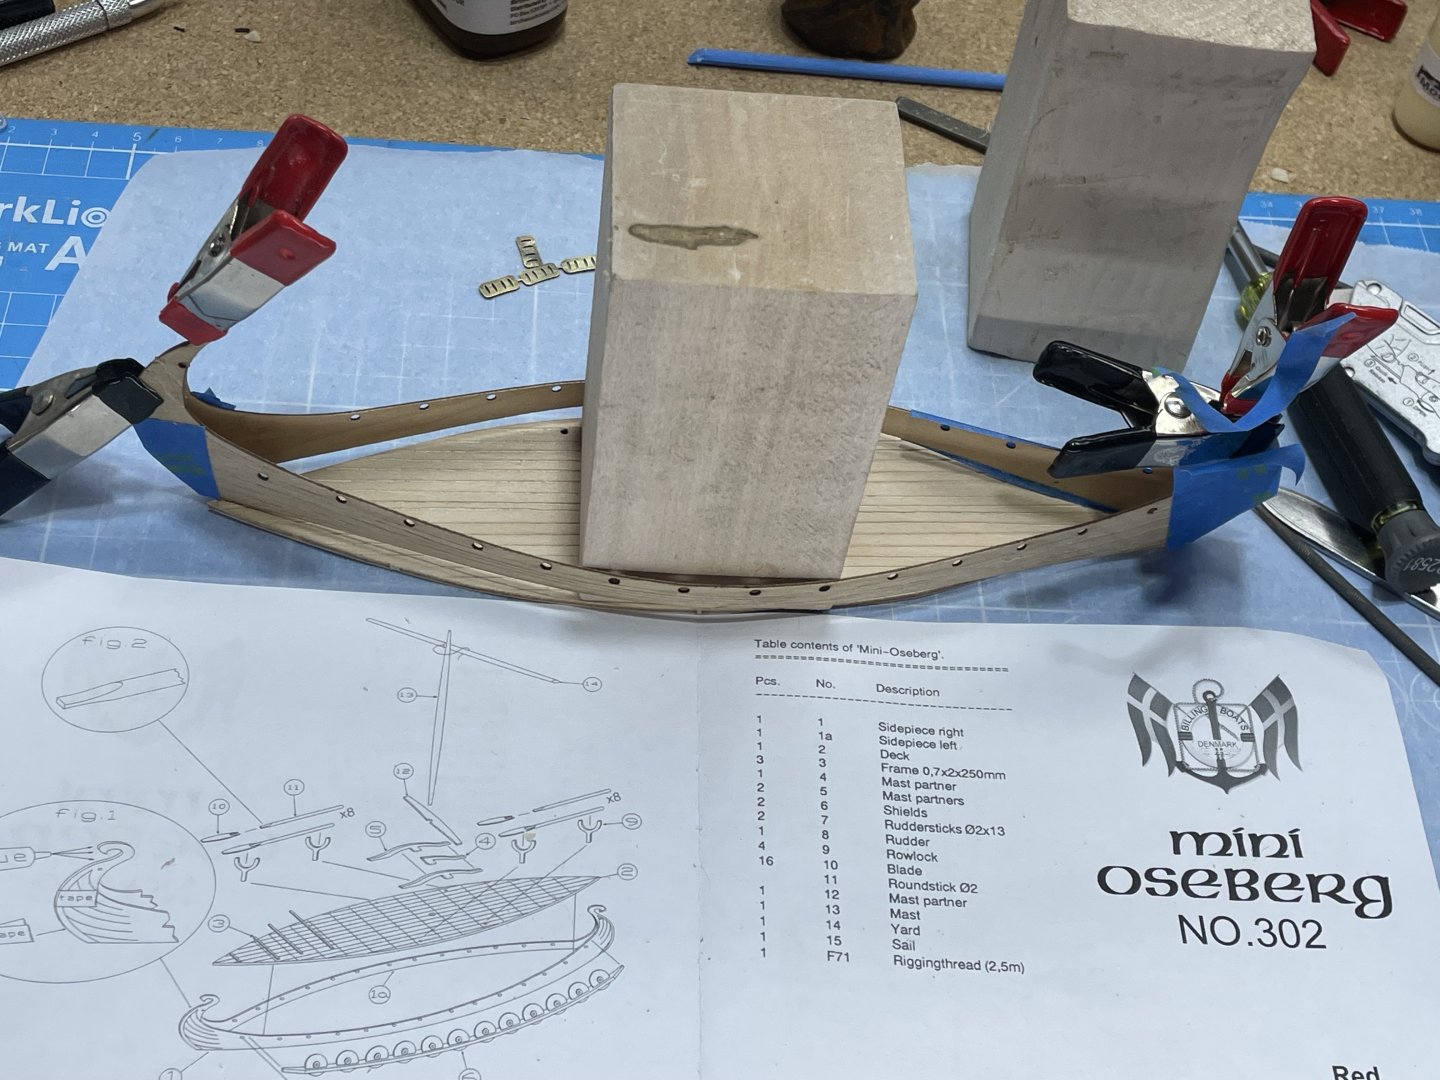
- 16 replies
-
- 3
-
-
- Oseberg
- Billing Boats
- (and 1 more)