DONATION DRIVE - SUPPORT MSW - DO YOUR PART TO KEEP THIS GREAT FORUM GOING!
×


Der Alte Rentner
-
Posts
1,007 -
Joined
-
Last visited
Content Type
Profiles
Forums
Gallery
Events
Everything posted by Der Alte Rentner
-
 I don't know if you're still using the MSW site, but if so, can you let me know if you shaped the supports per the plan, and made the rails to fit? or if you made the rails first and shaped the supports to fit them? Thanks Der Alte Rentner?
 -
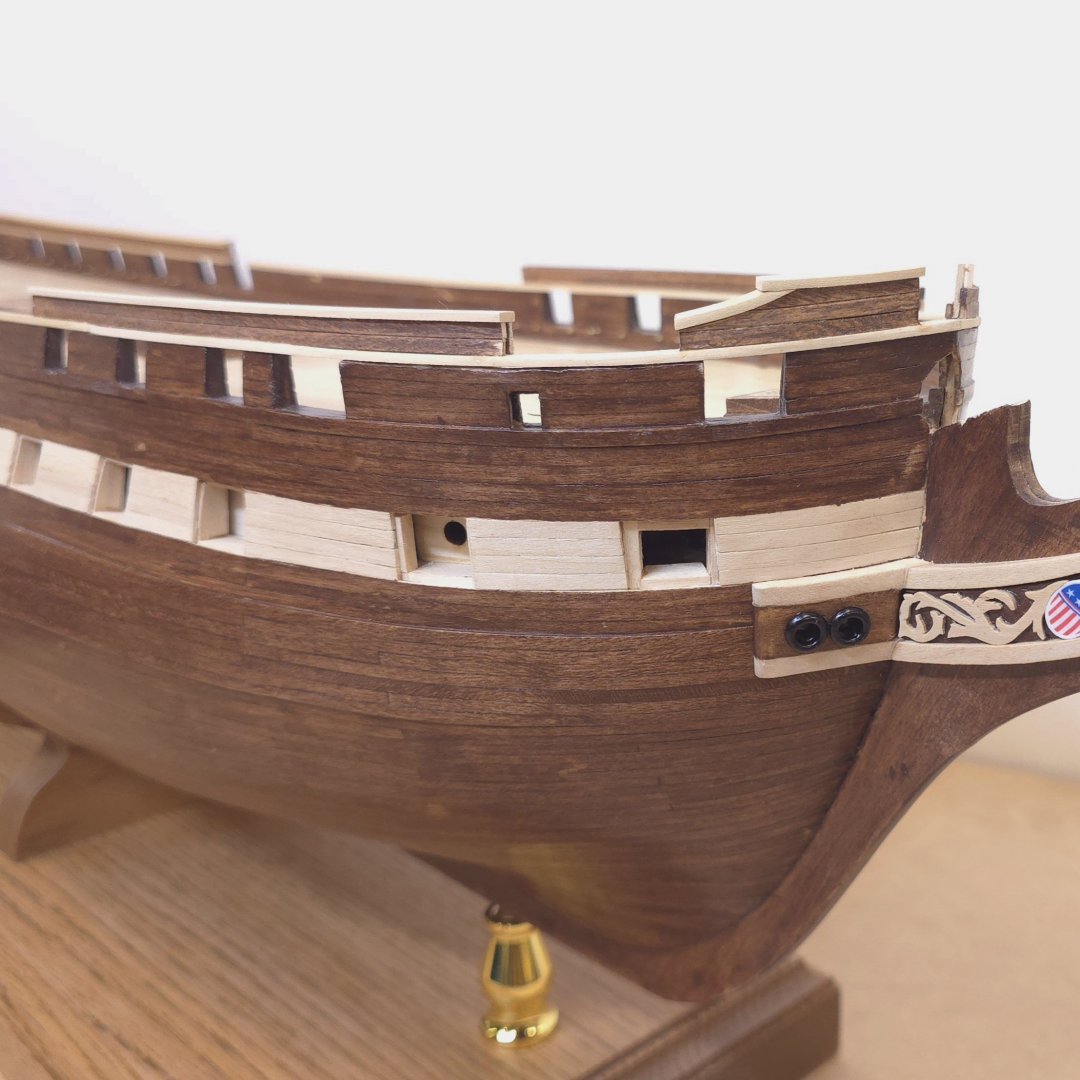
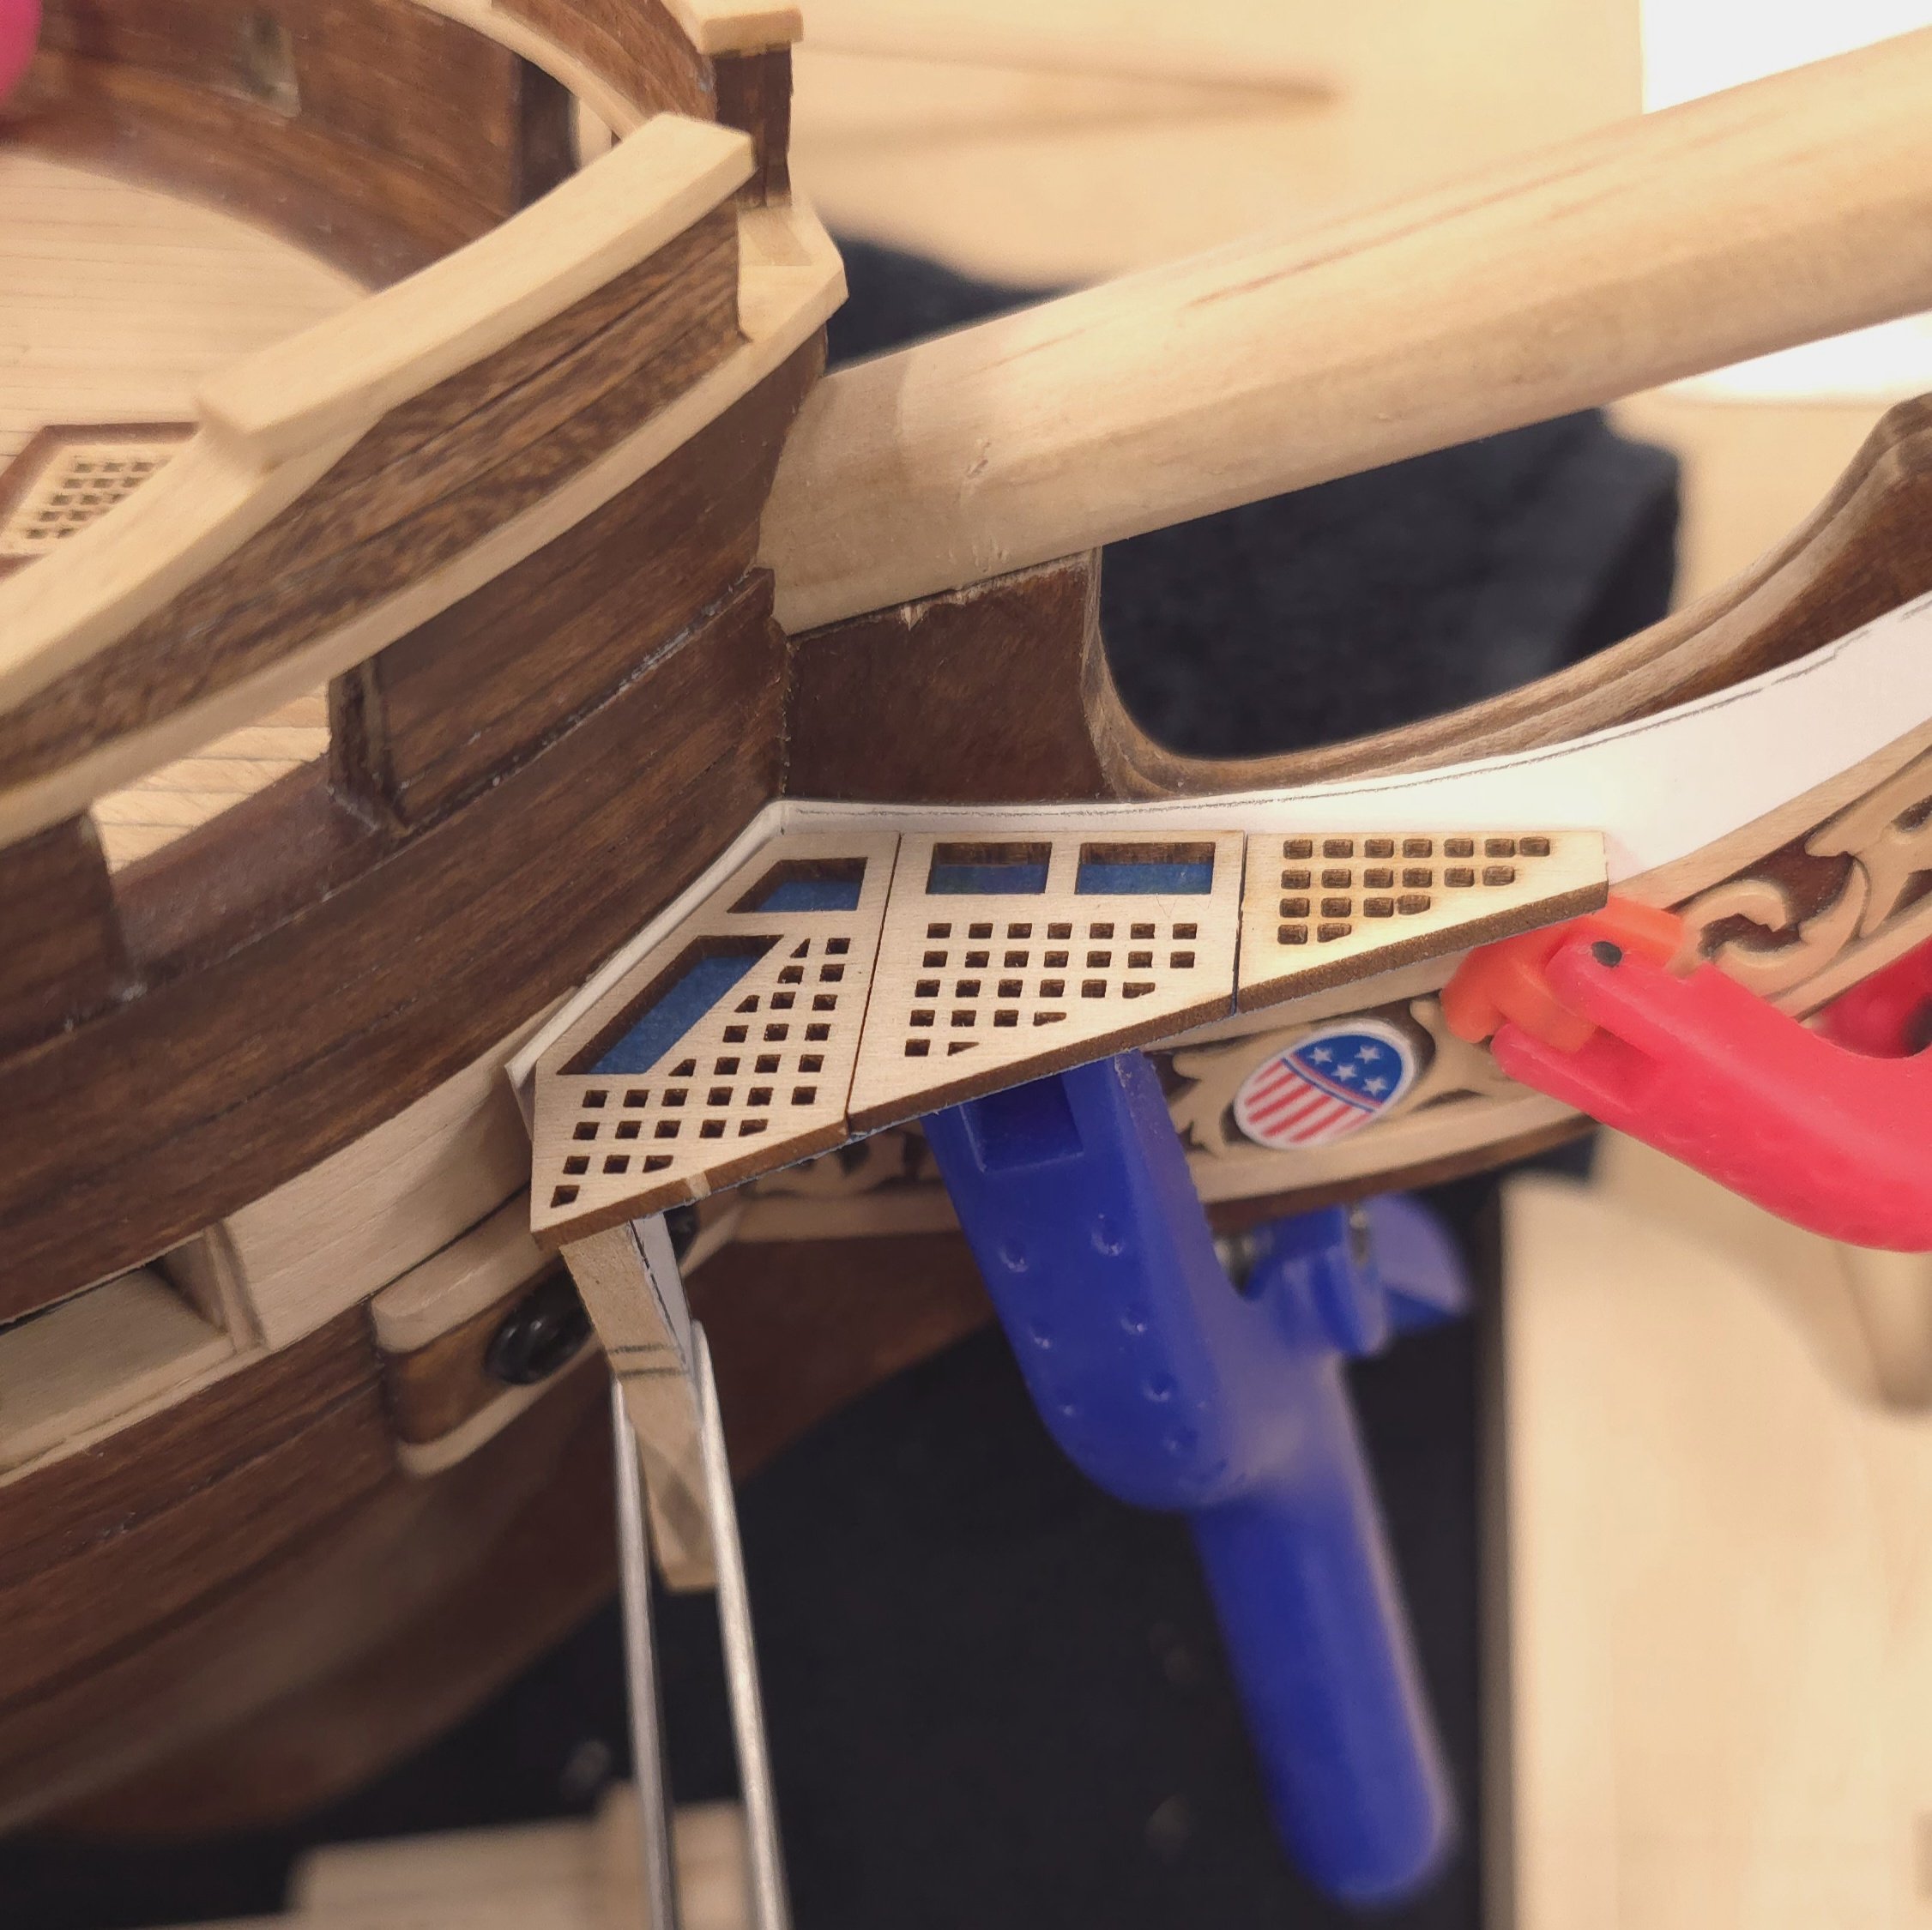
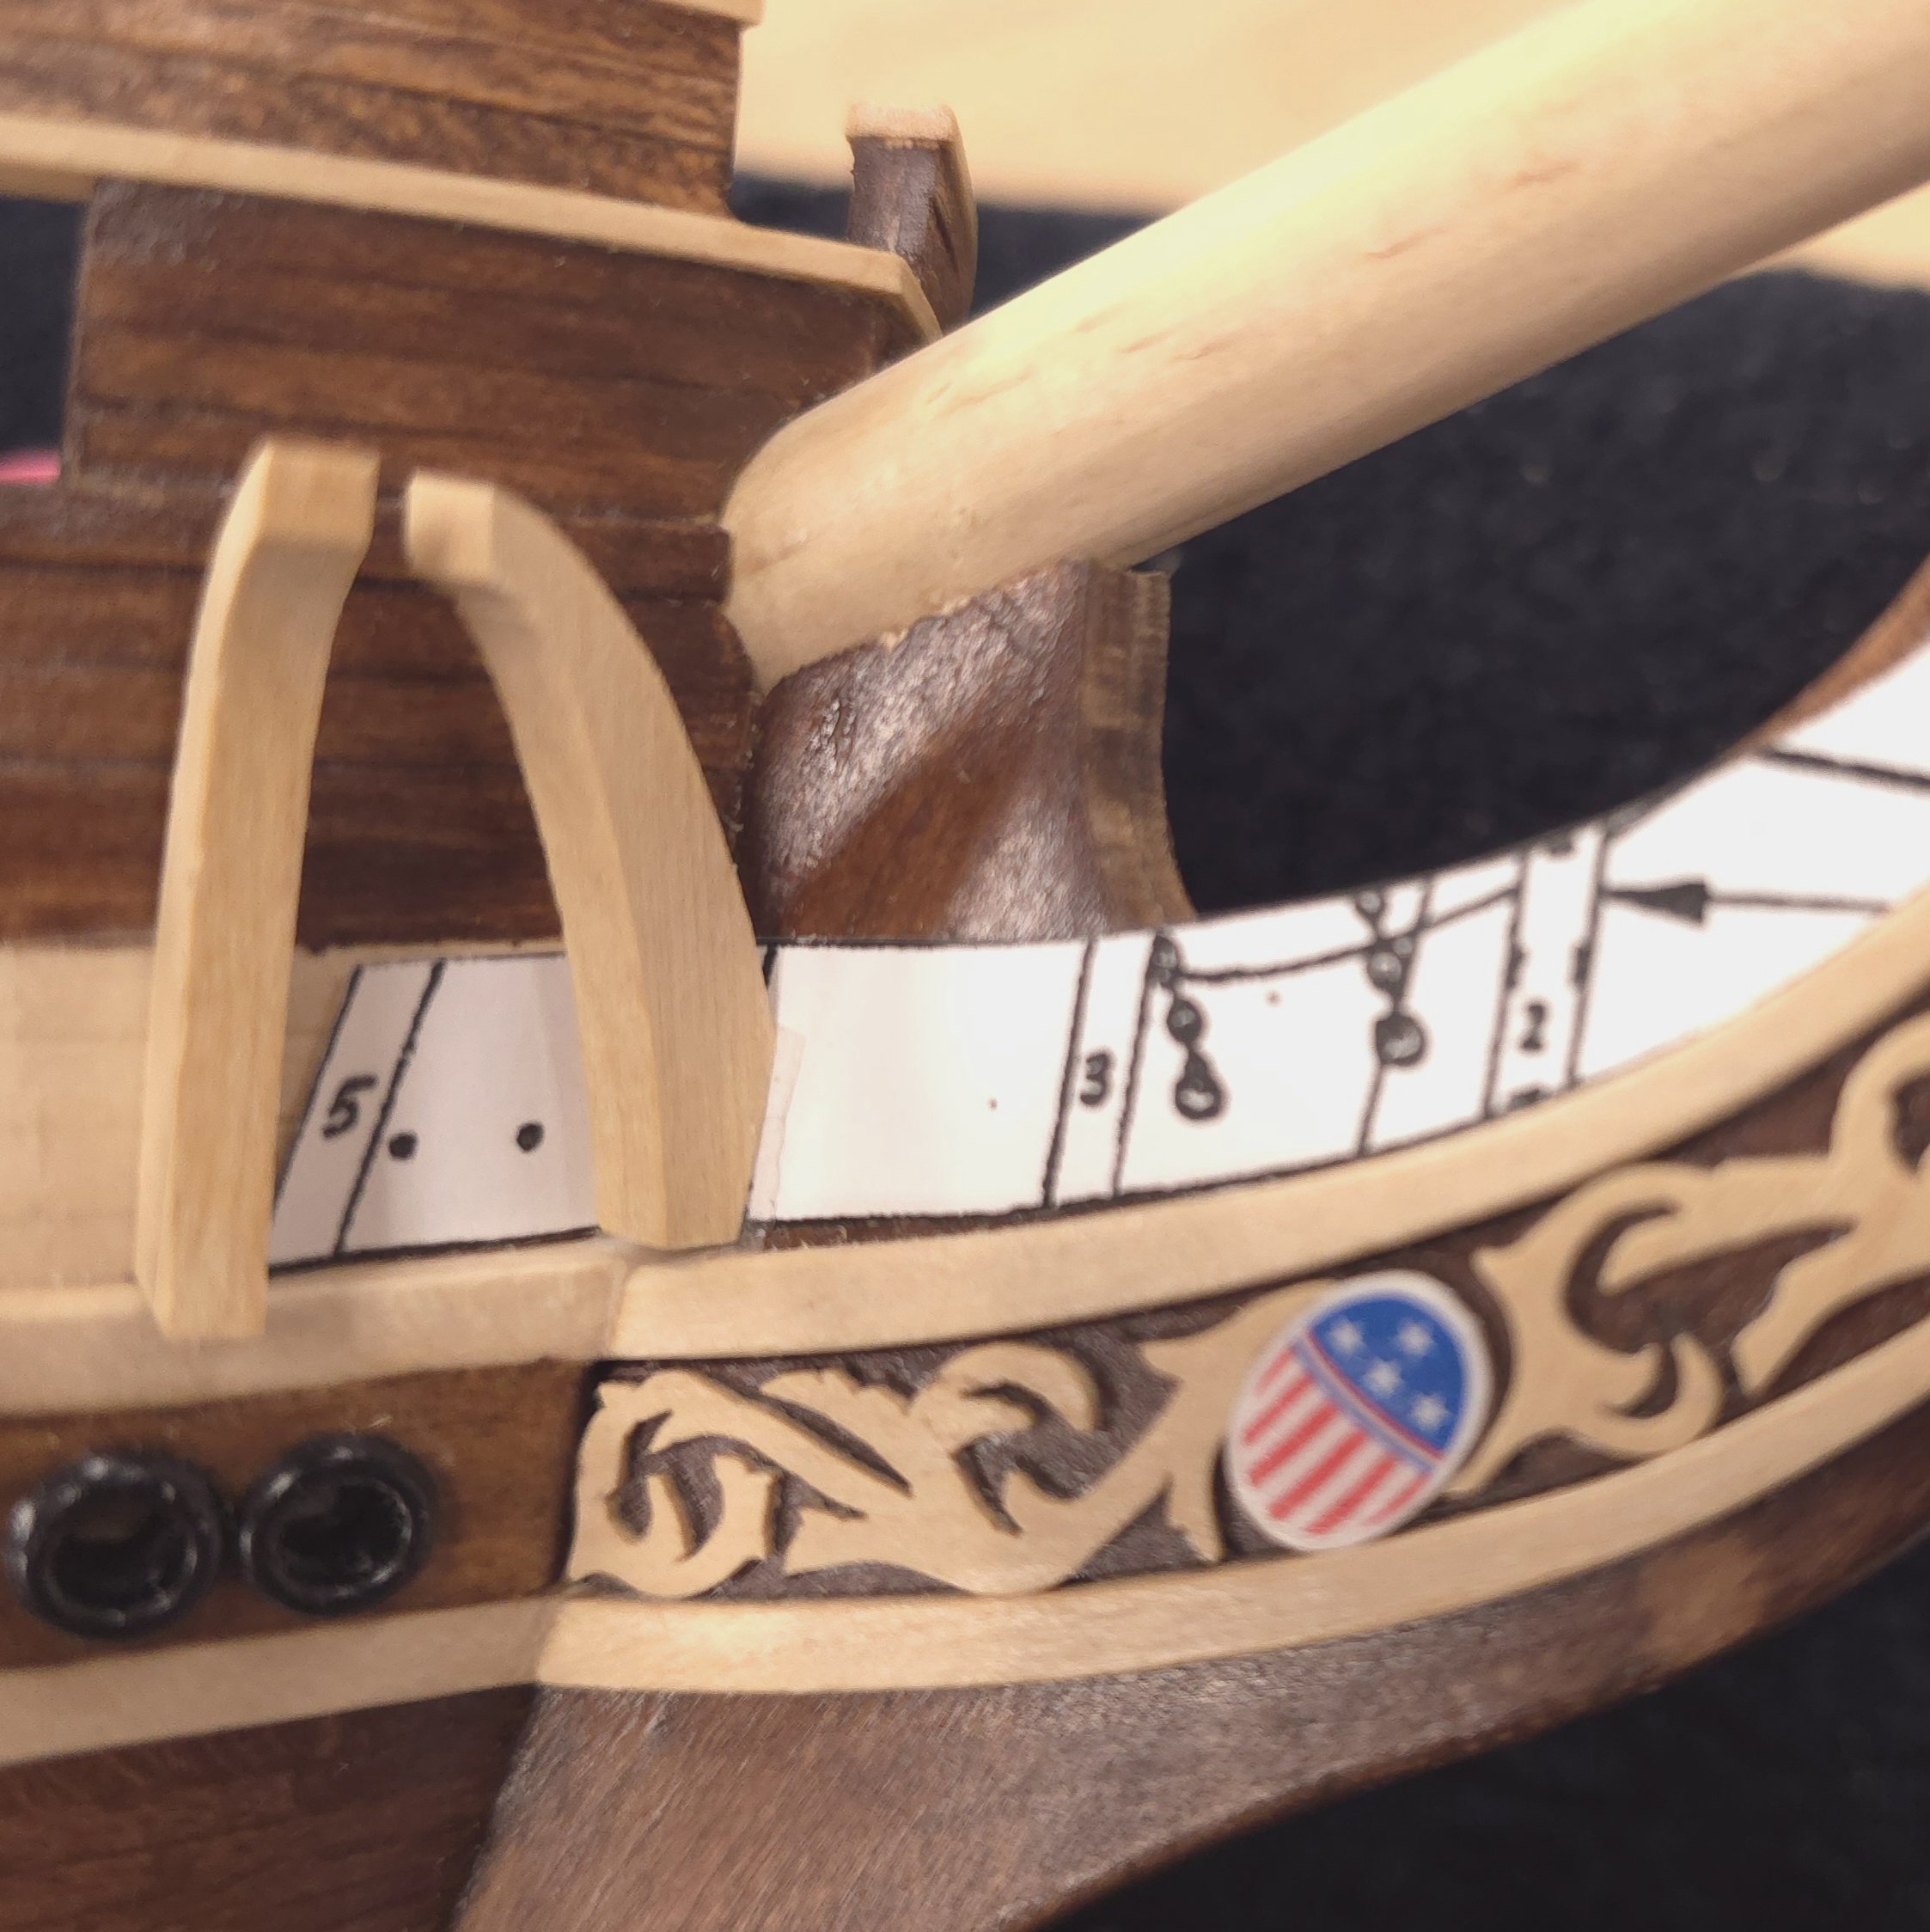
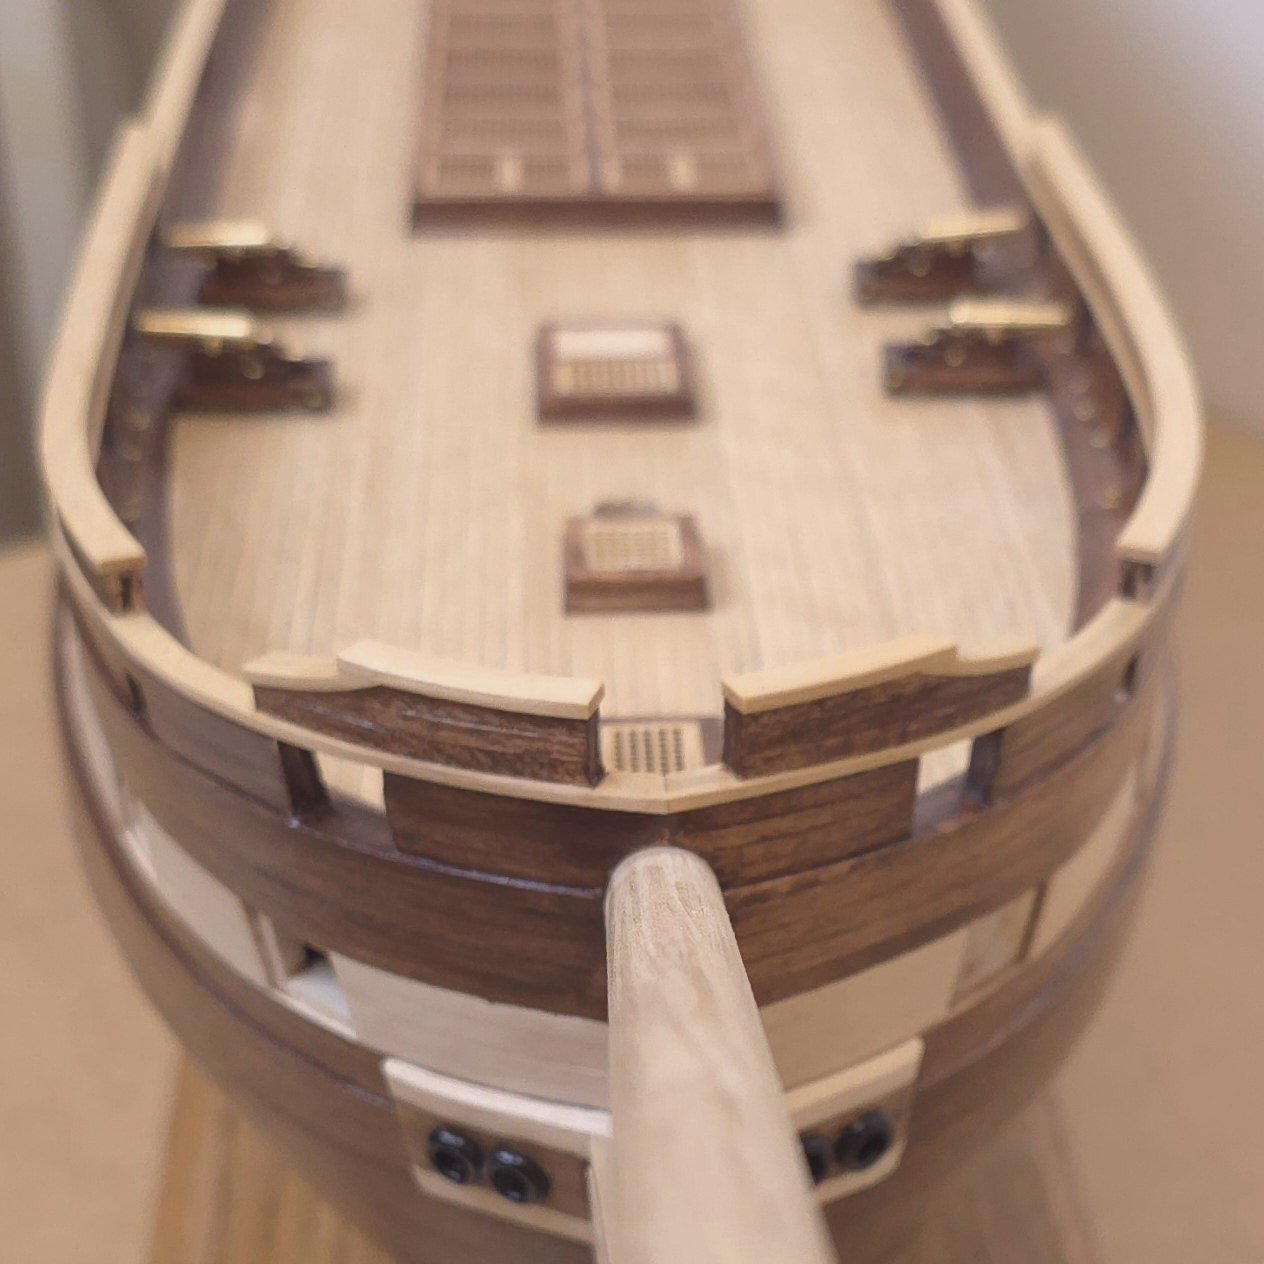
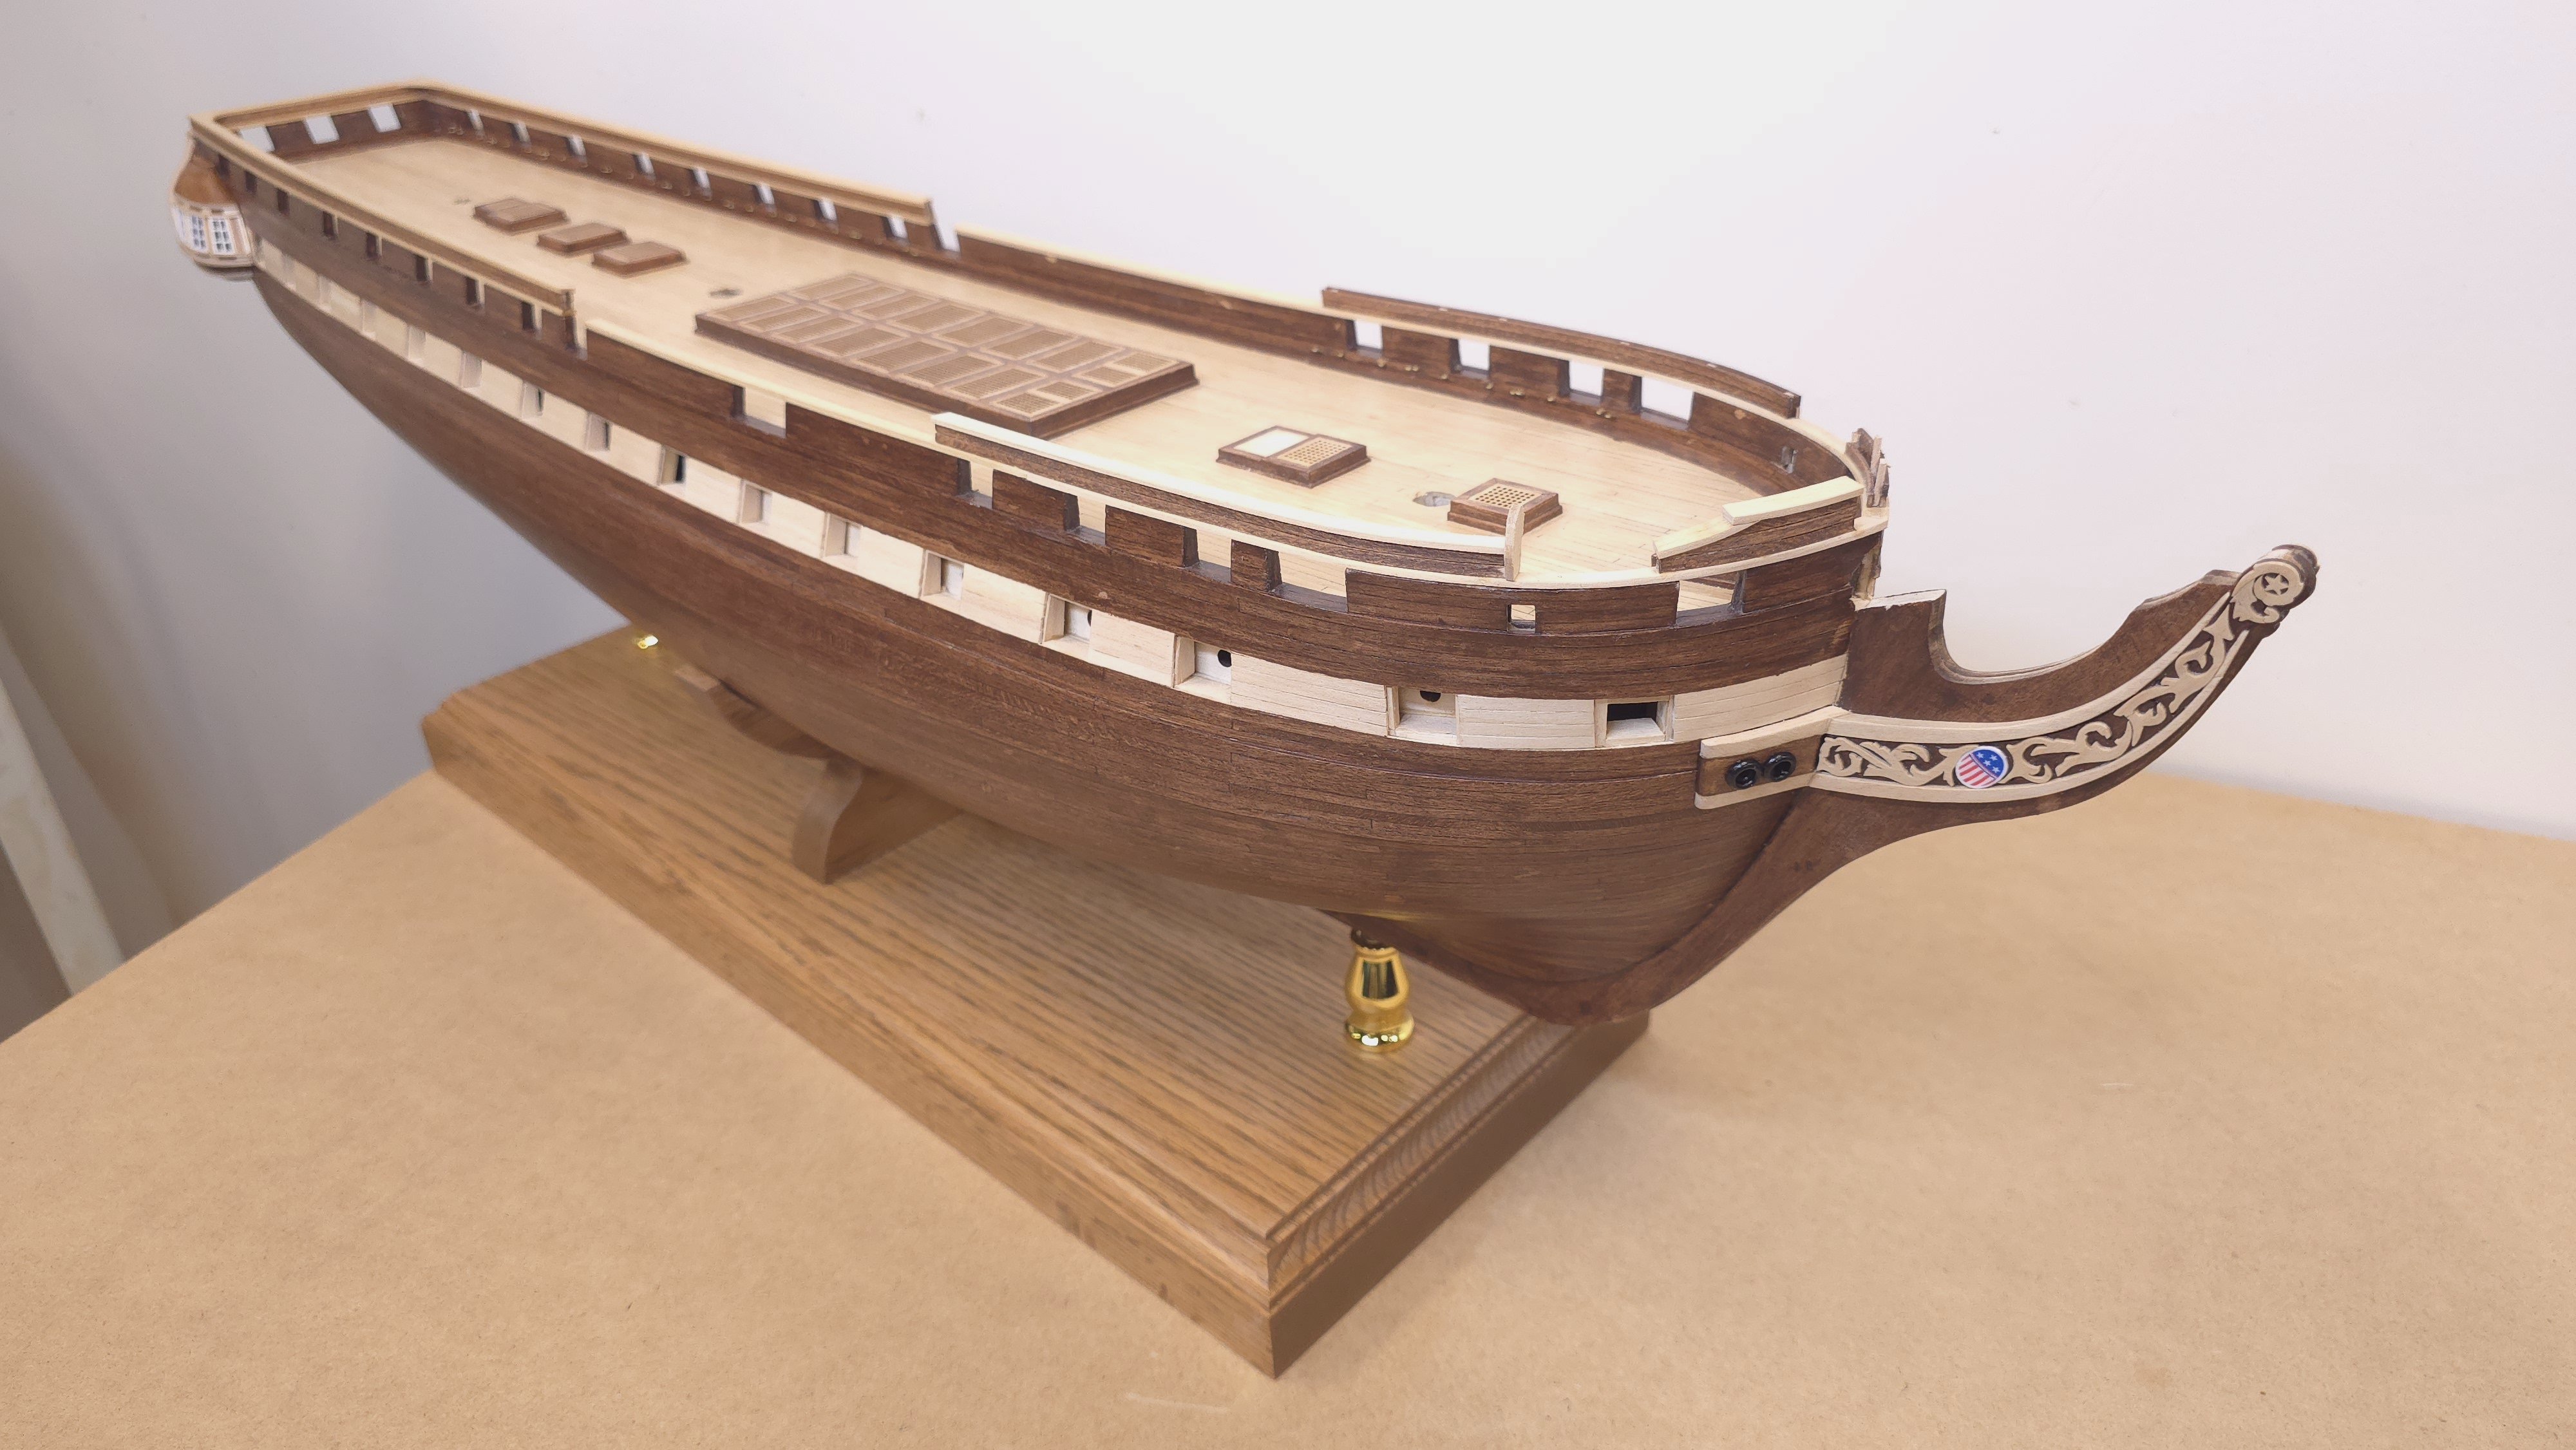
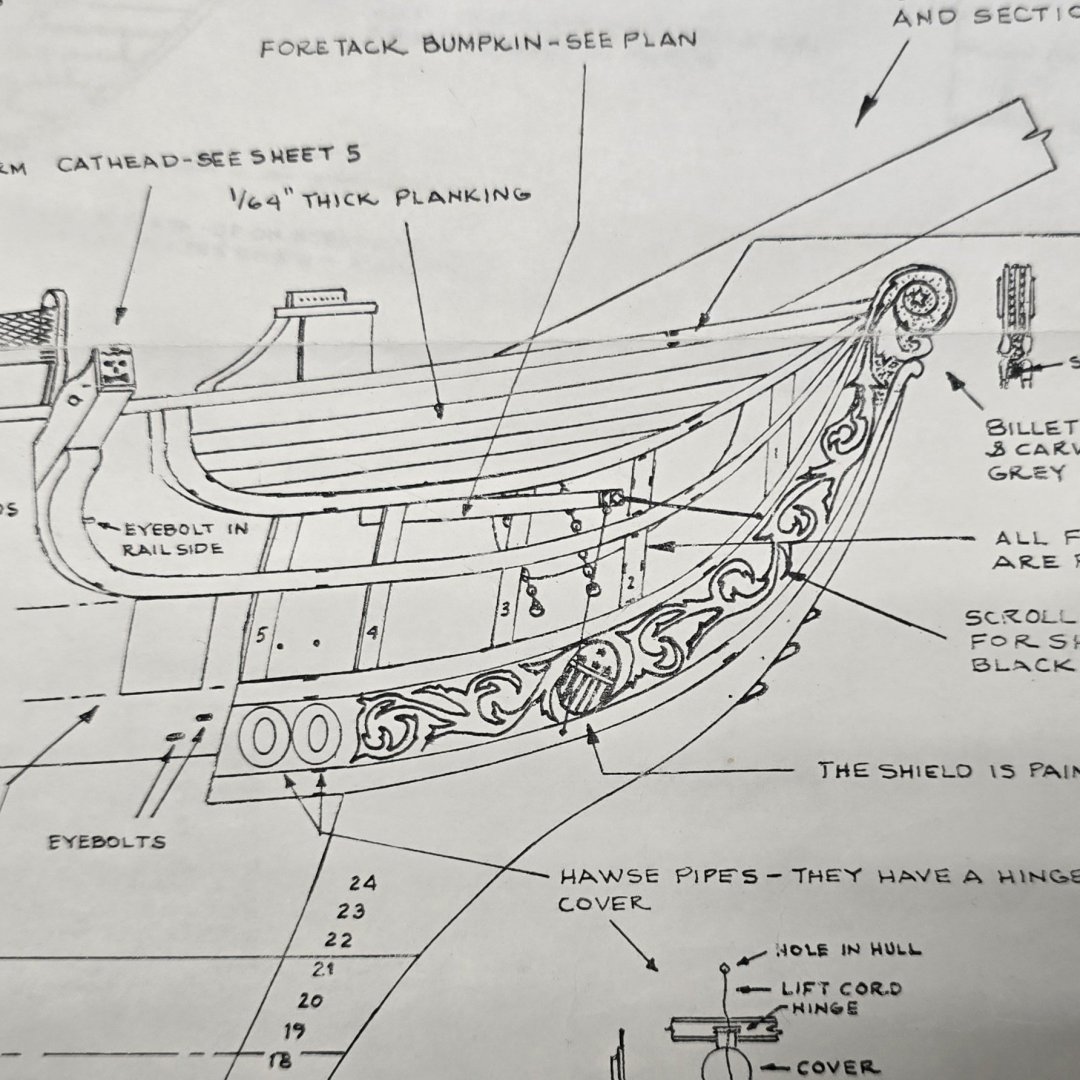
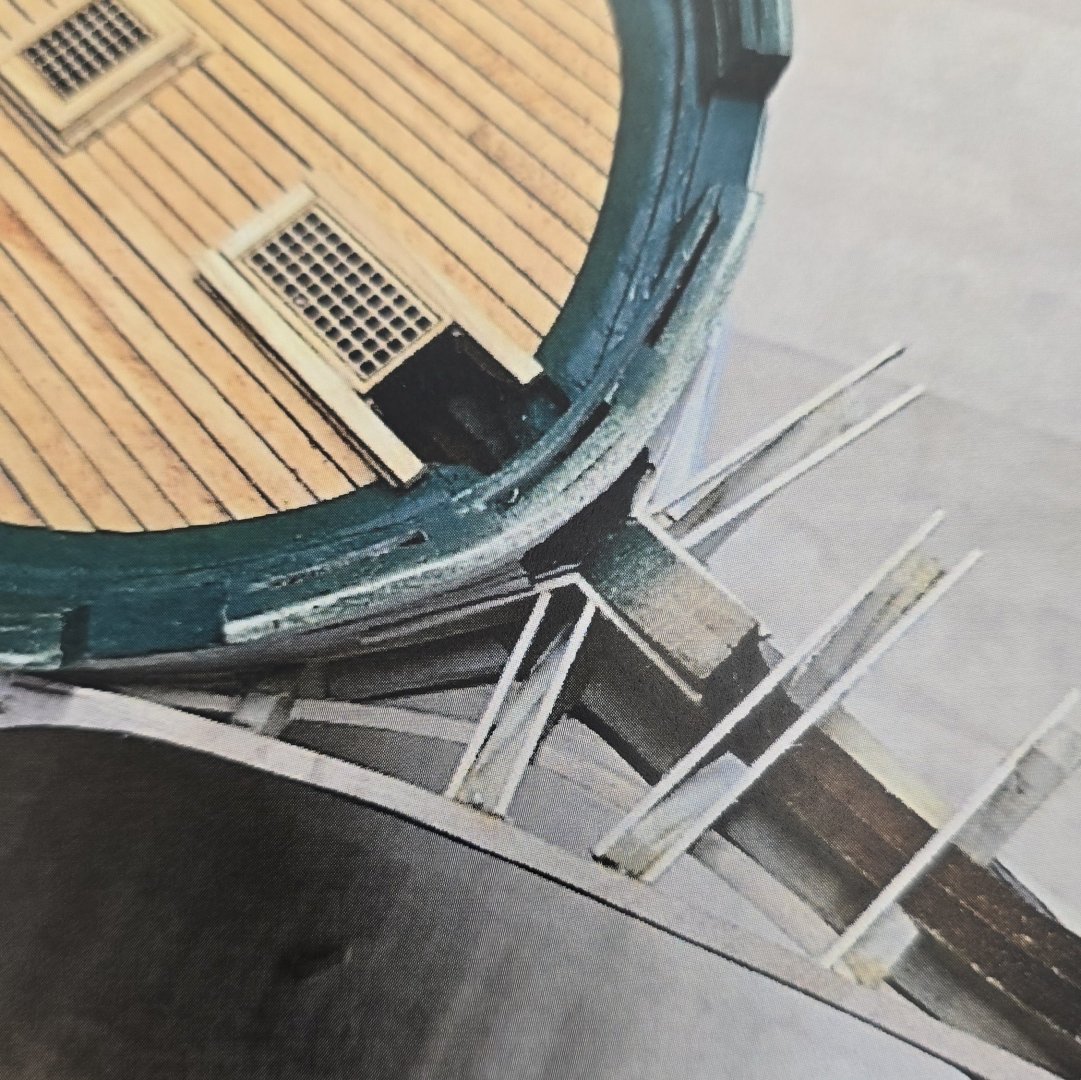
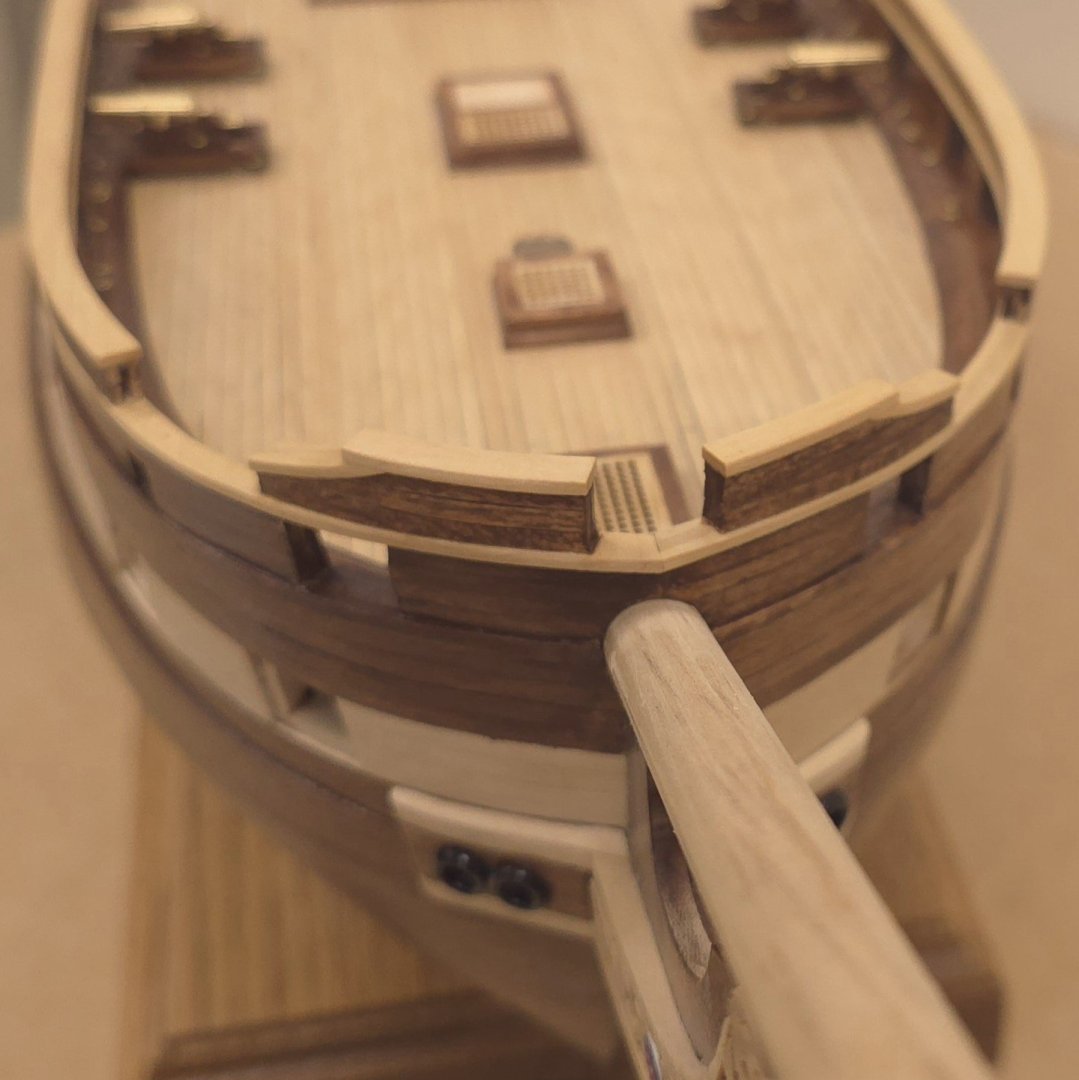
Here I thought the galleries were the most difficult part of this build to date. I've been back and forth between the shipyard and my PC to try to formulate a plan. I really would like to install the timbers/supports first so that shaping the rails is easier. I'm still going over build logs. I think the fifth support, the stern-most one (Hunt numbered them 1 to 5 from the stem), is angled slightly to the stern. My goal will be to try for even spacing along the upper ends where they meet rail 2. I did fabricate a rail 2, out of 1/8" square stock, and using my trusty plank bending iron, managed that compound bend. Unfortunately, it appears to sit too far inboard and doesn't leave enough room for the grating. Back to the drawing board to see what's what. It'll have to wait until Monday though, as family obligations will occupy most of the rest of today and tomorrow. Six years? 🤔 The more I look at the photos of your build, the more convinced I am that you nailed it in terms of the supports. And this one helps me tremendously to visualize where the grating placement needs to be. On the bumpkins: I just checked page 7 of the plans, which shows the bulk of the rigging. I see the bumpkins, but don't think anything is rigged to them. That it didn't occur to me to look for them in the actual photos of the Constitution, is a clear sign I need to worry about early onset Alzheimer's. 😁 And for what it's worth, I have a blowup of this view pinned up near my work bench a reference. That's where I got the notion the spacing should be even between the supports. I wish Conny wasn't painted black. It would be so much easier to pick out details in photographs. Oh well. Thanks again, Unegawahya
-
Turns out I have to agree with Hunt. The plans are wrong. Using the top view as my reference, I found where the timbers need to align with the grates. Those Timbers need to be forward of where the plan suggests they are in the broadside view. I'll figure out where Timber five goes later. Got to go see an eye doctor, so this is all I've got for today..

-
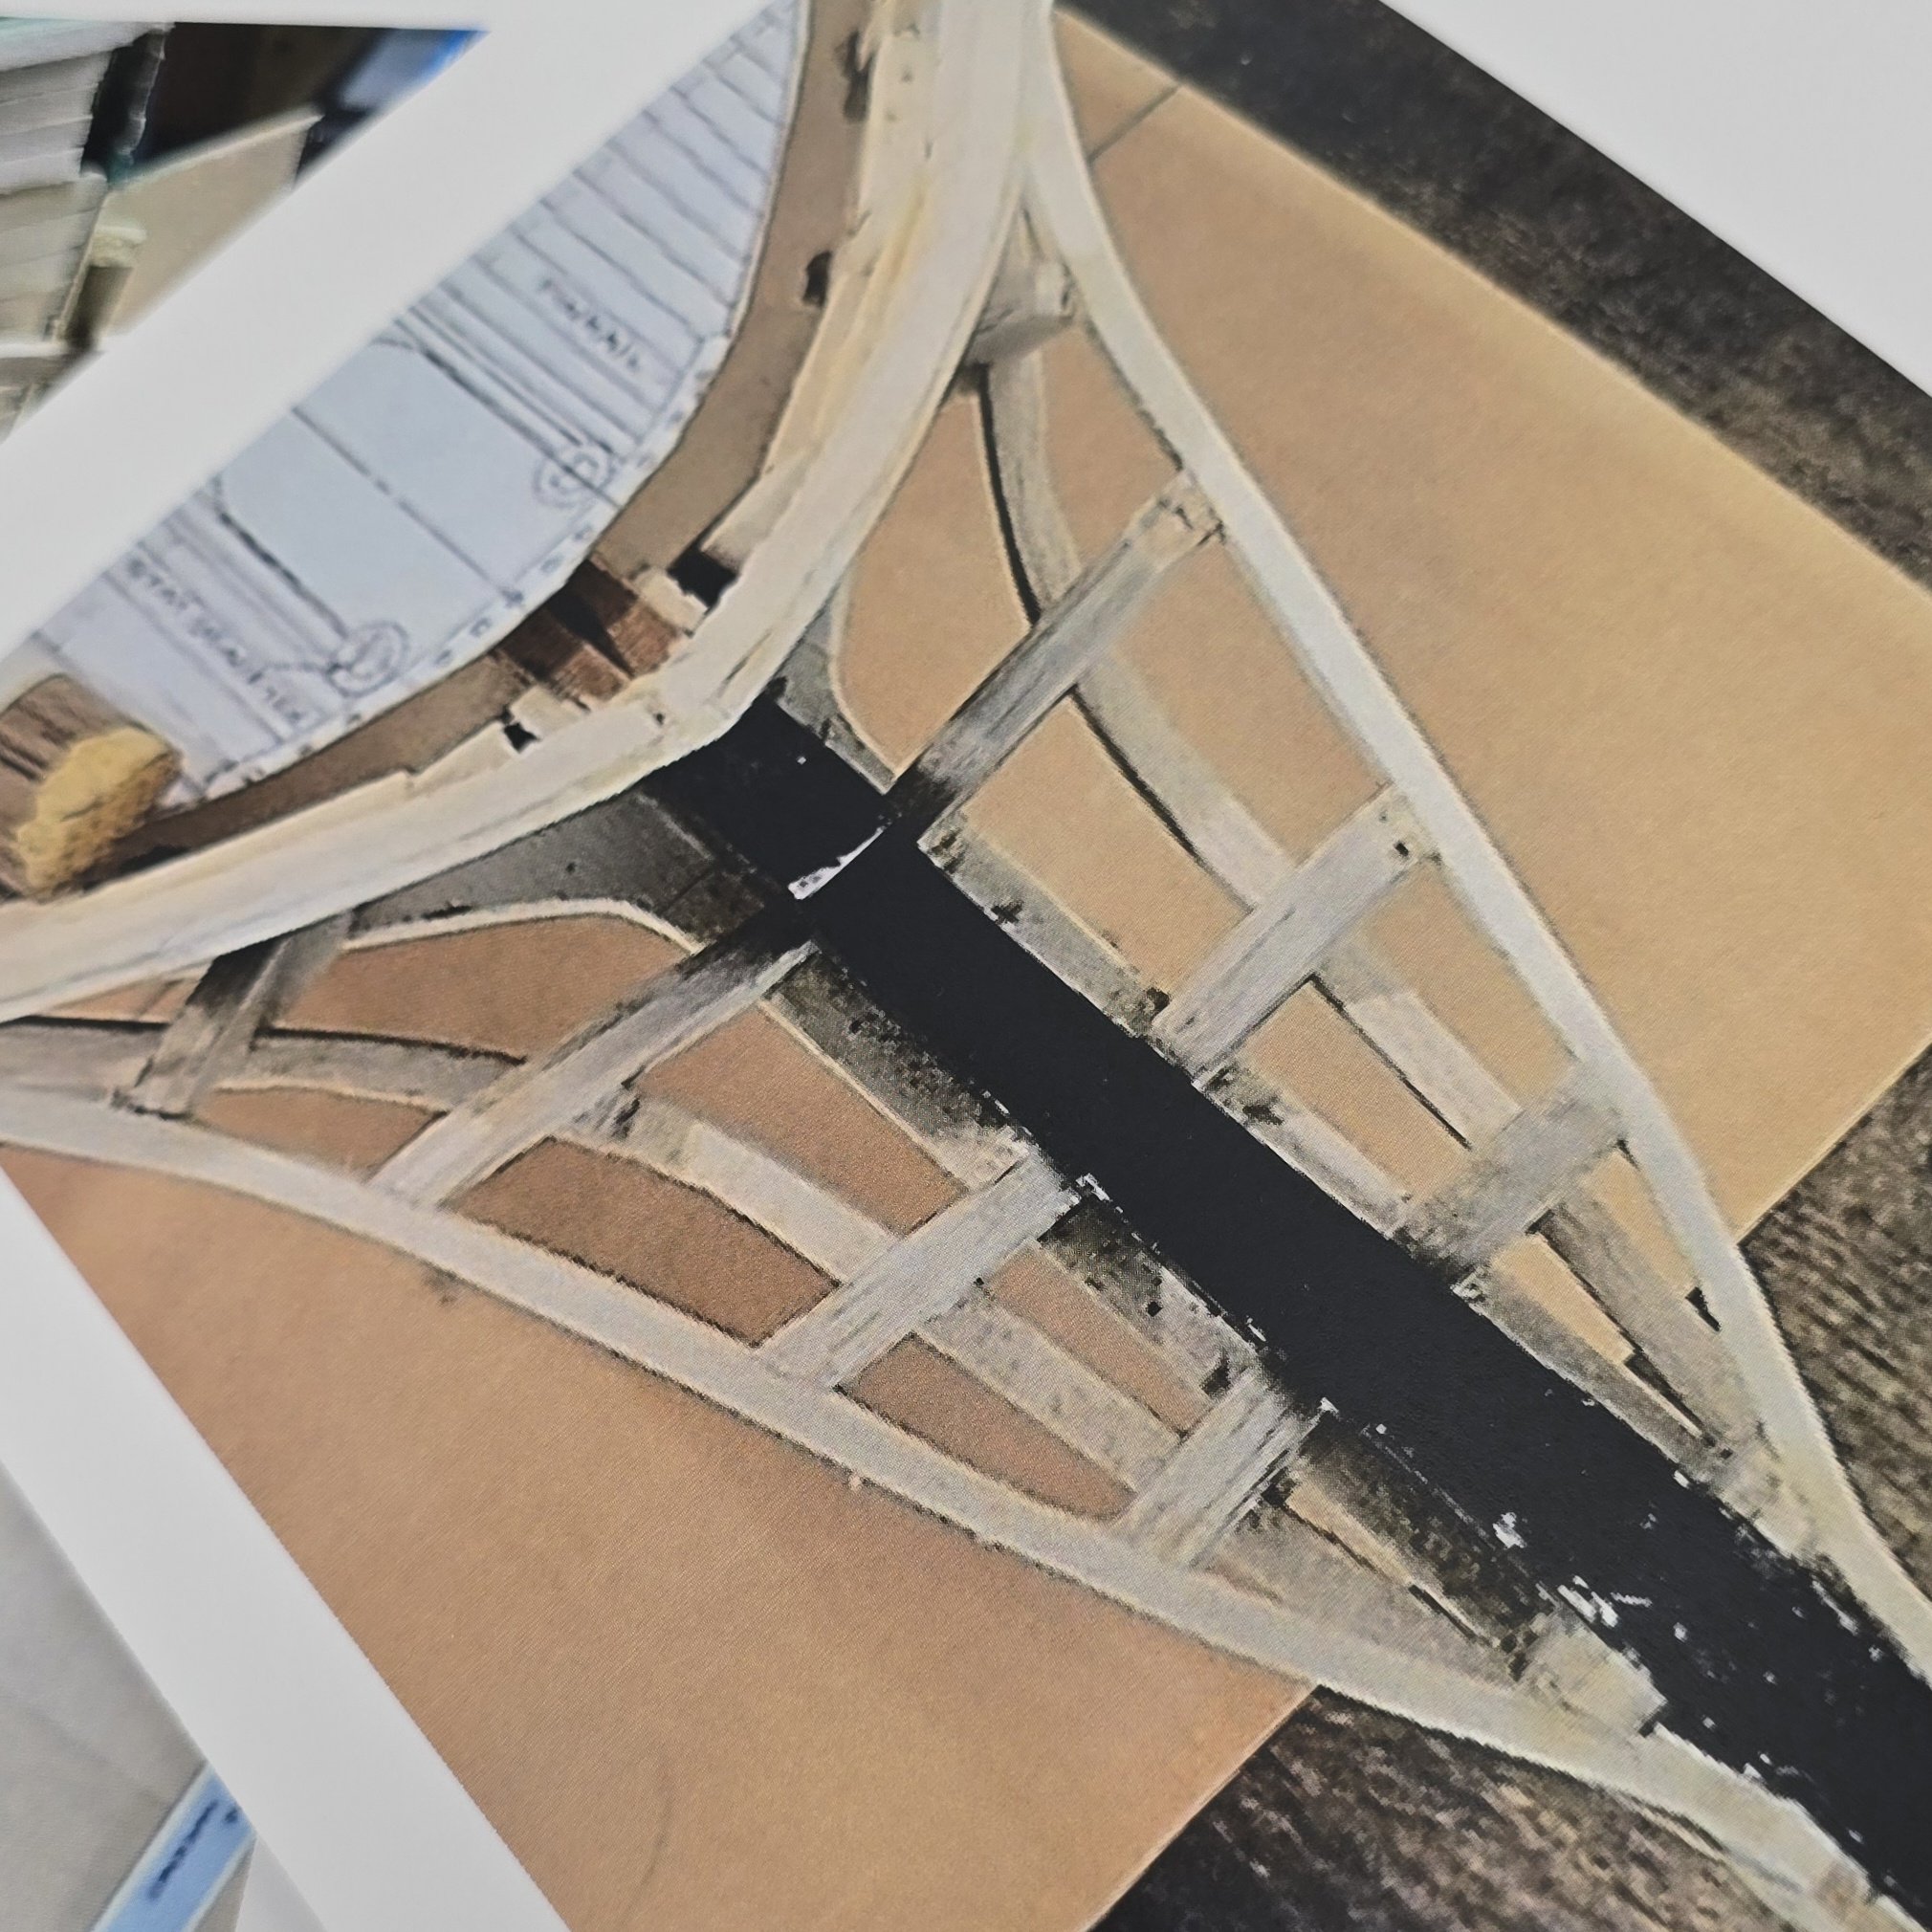
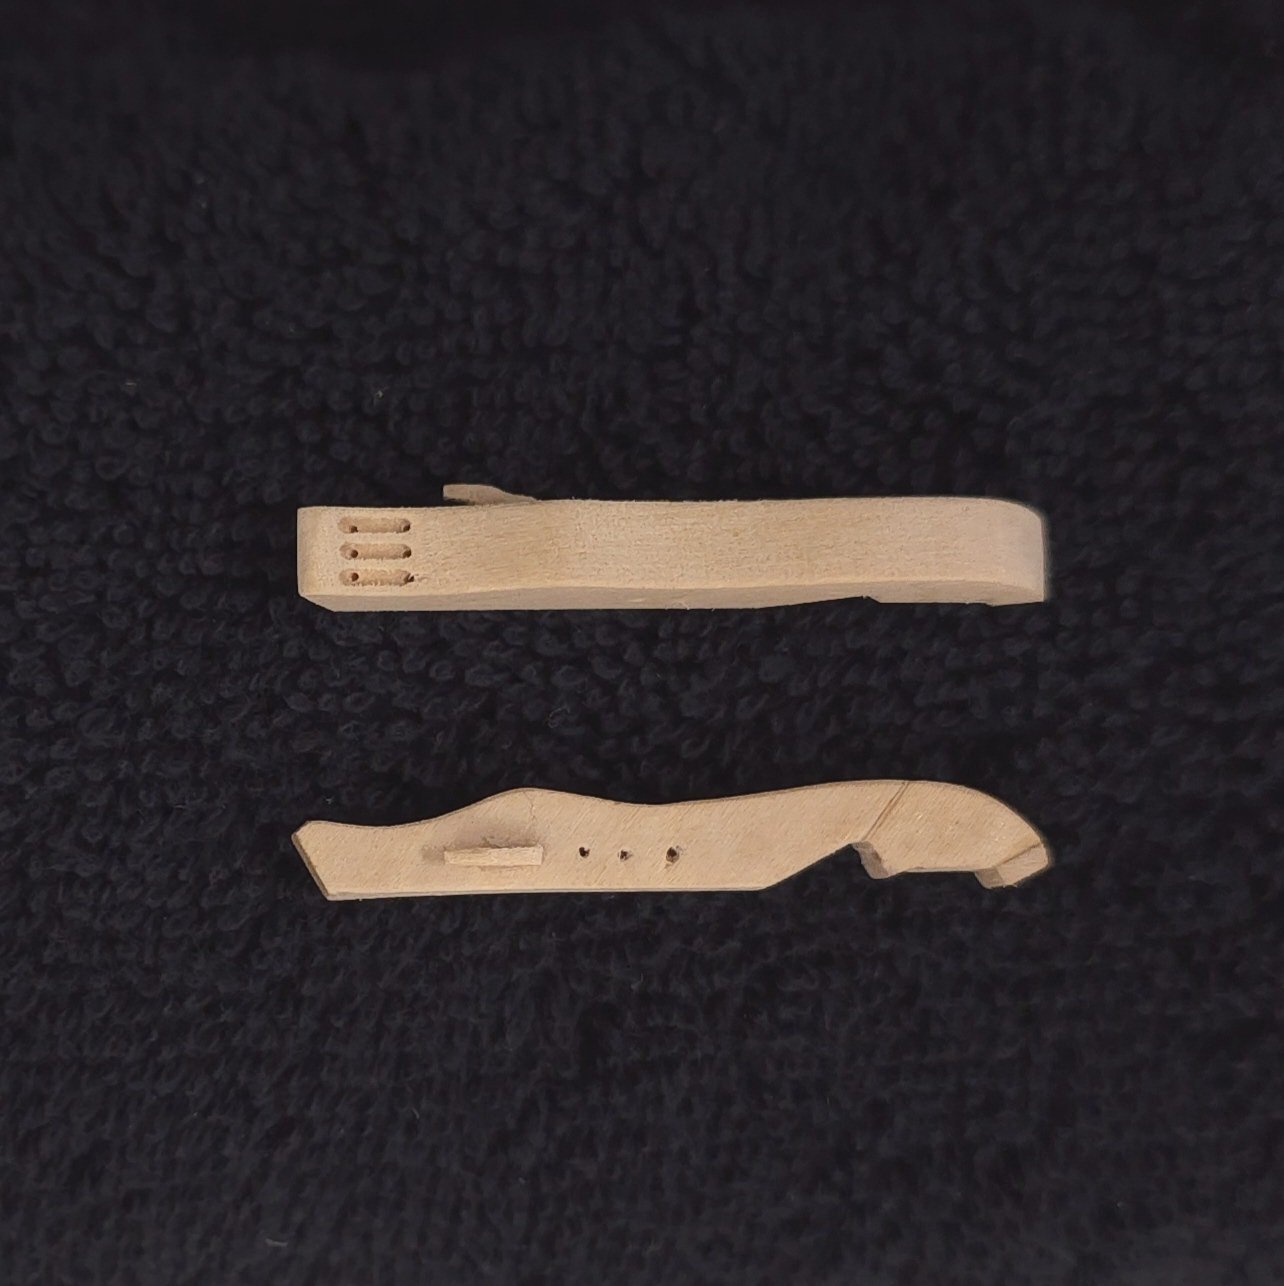
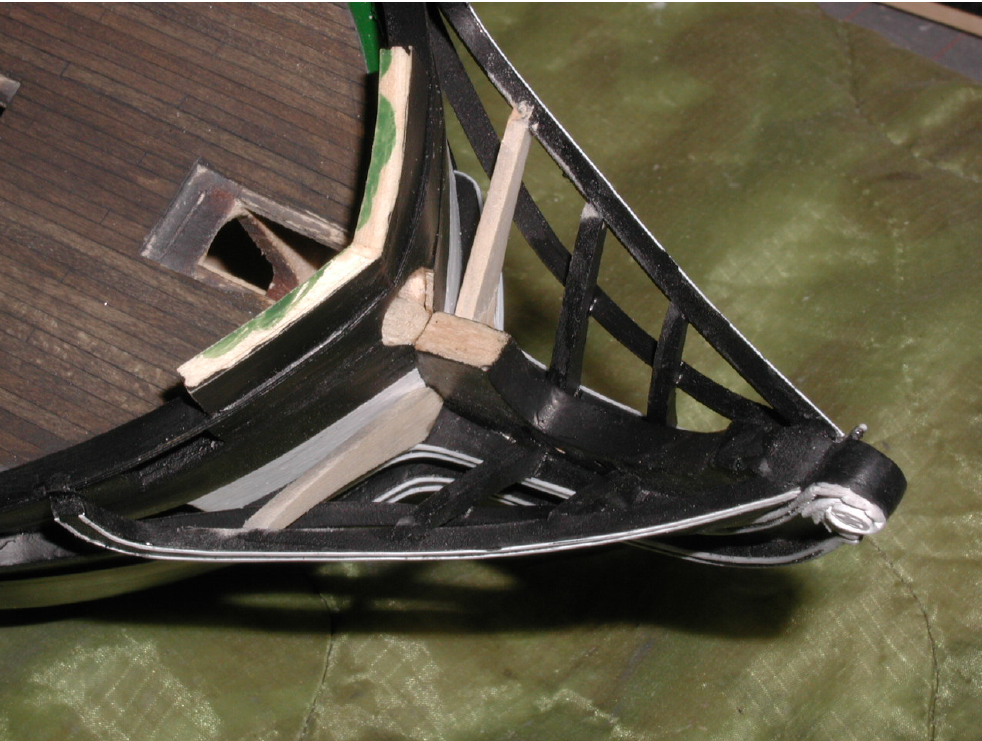
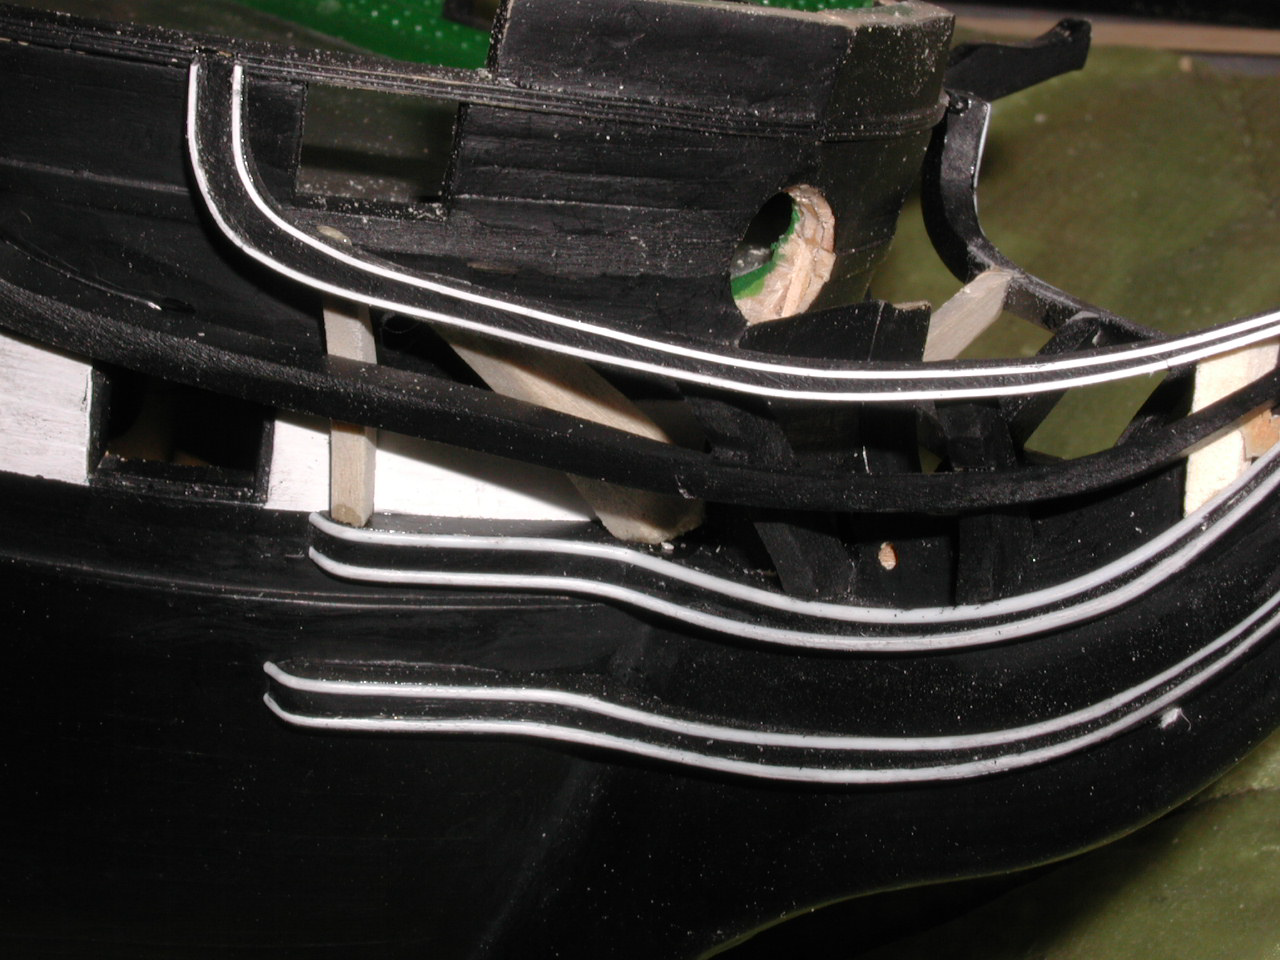
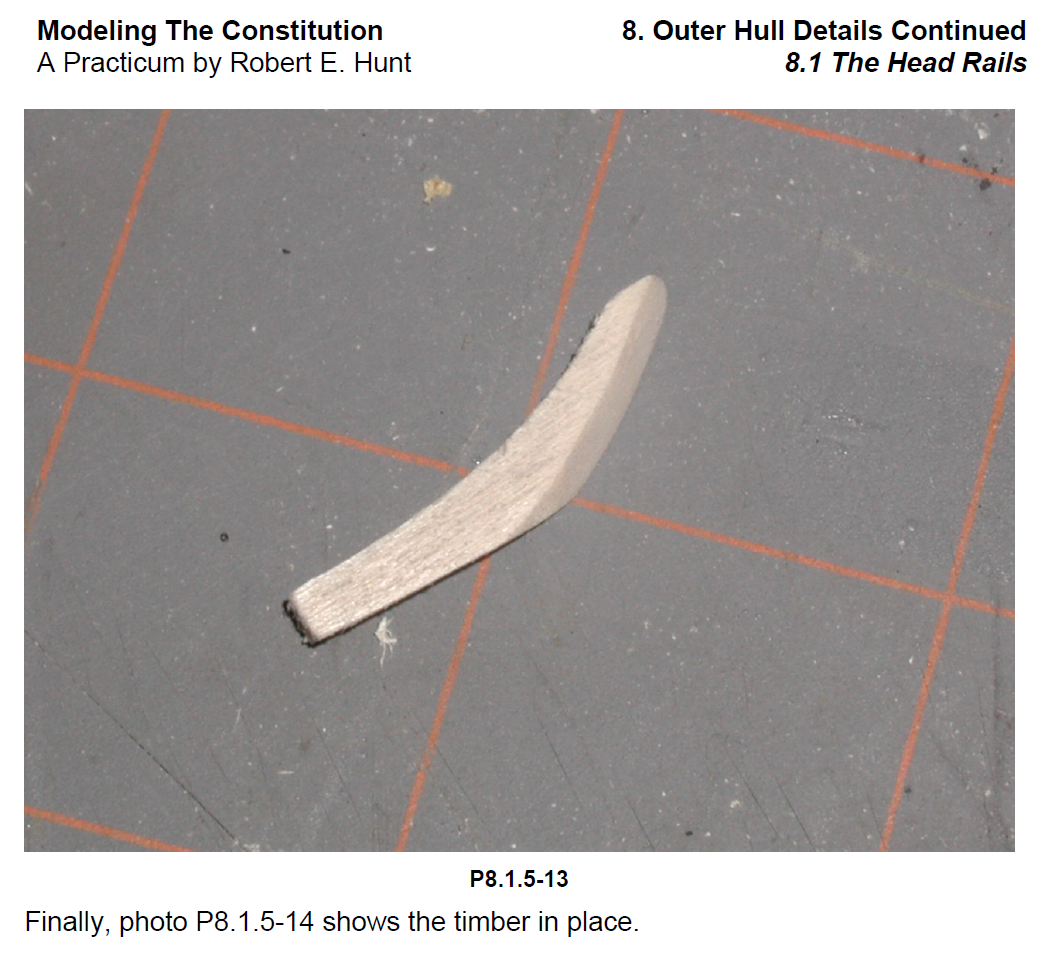
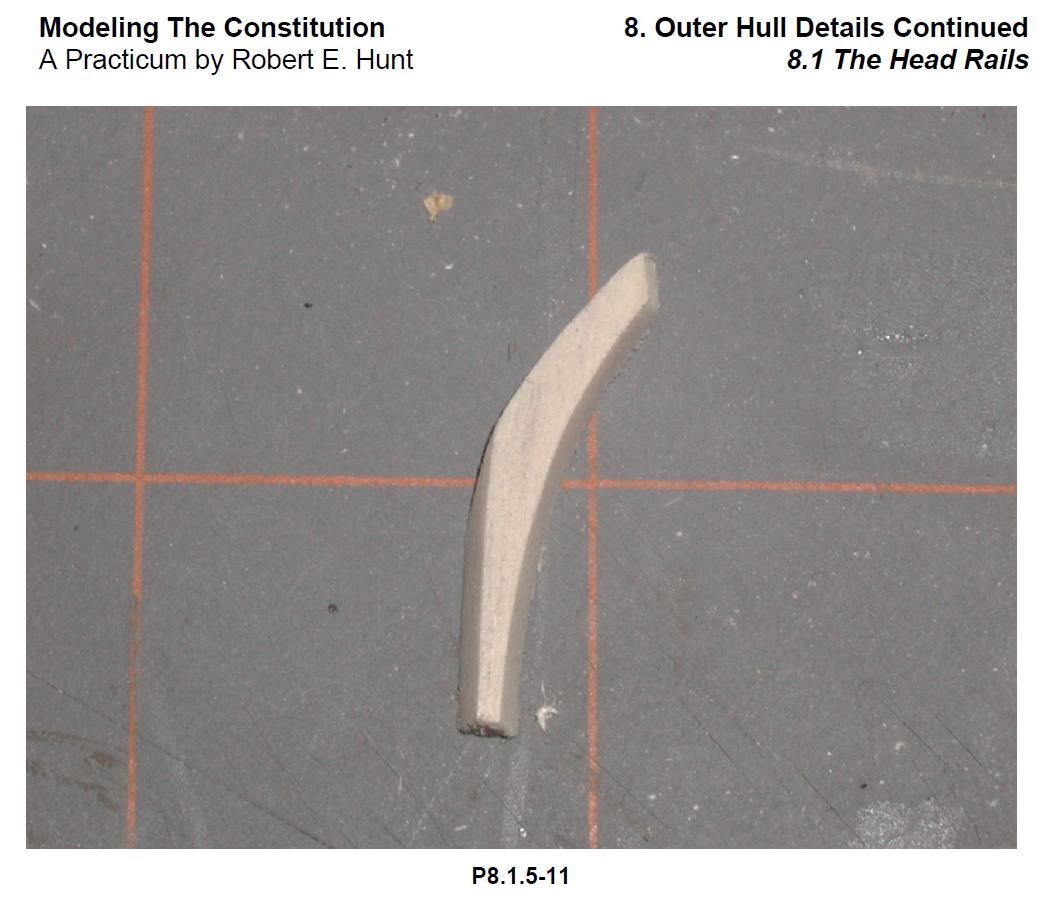
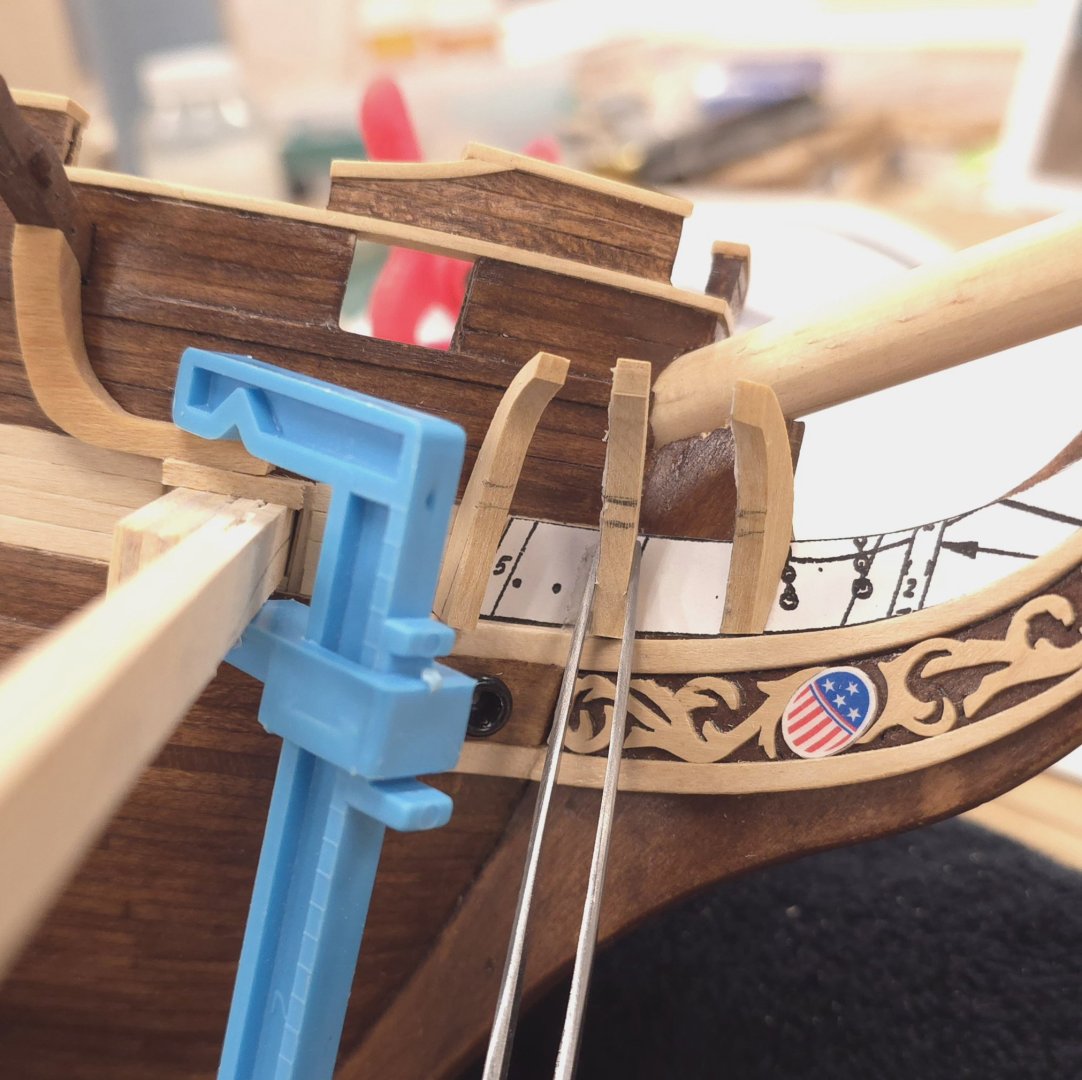
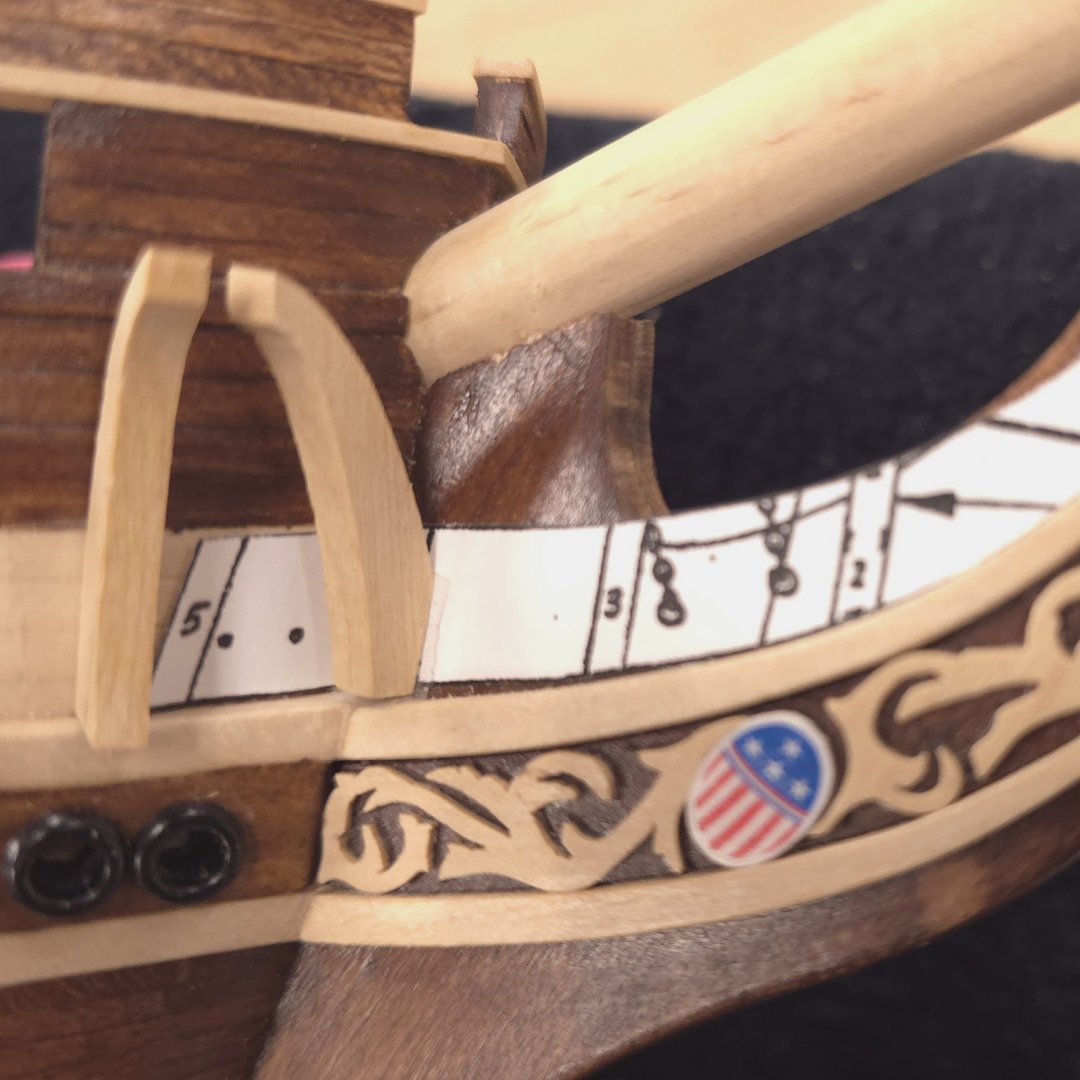
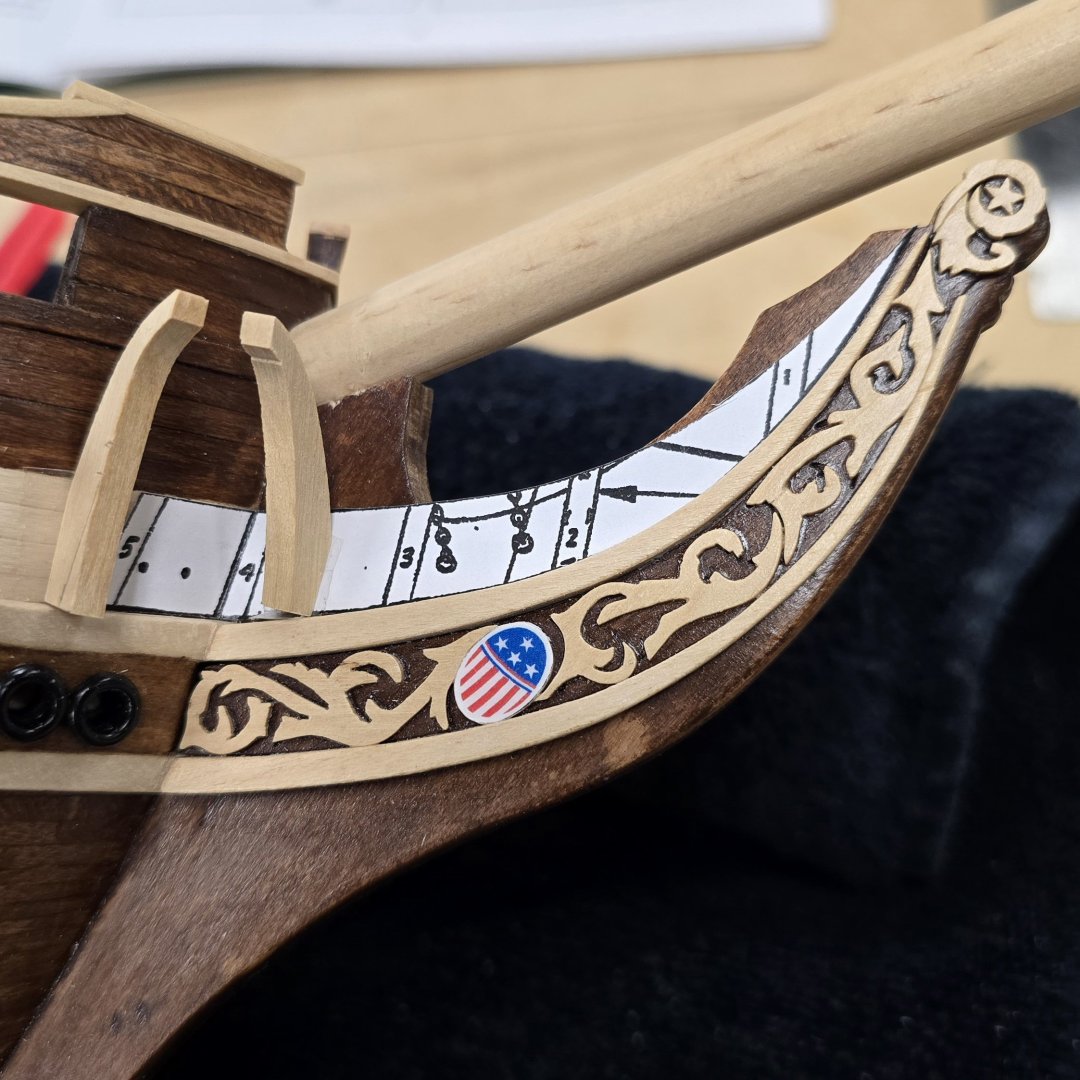
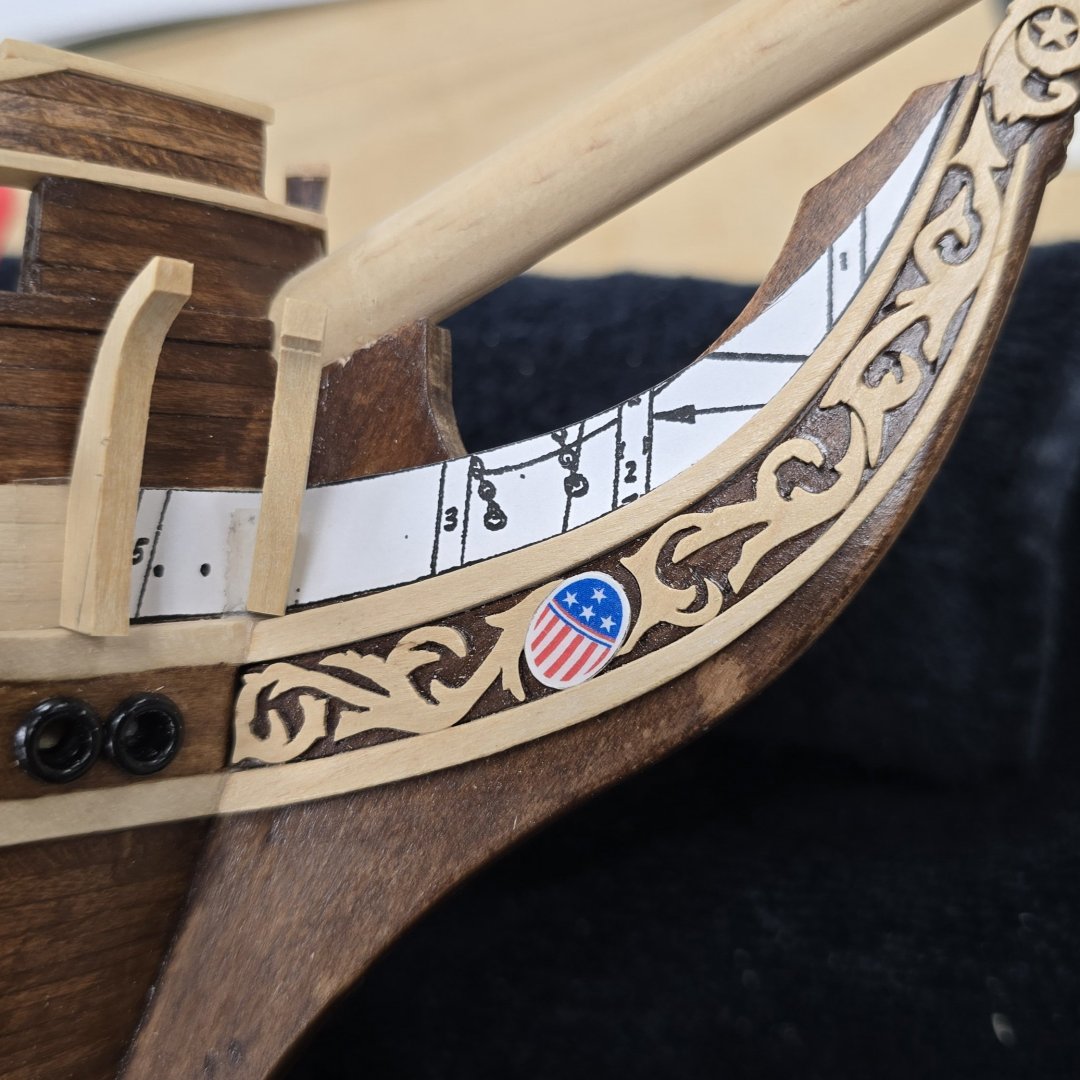
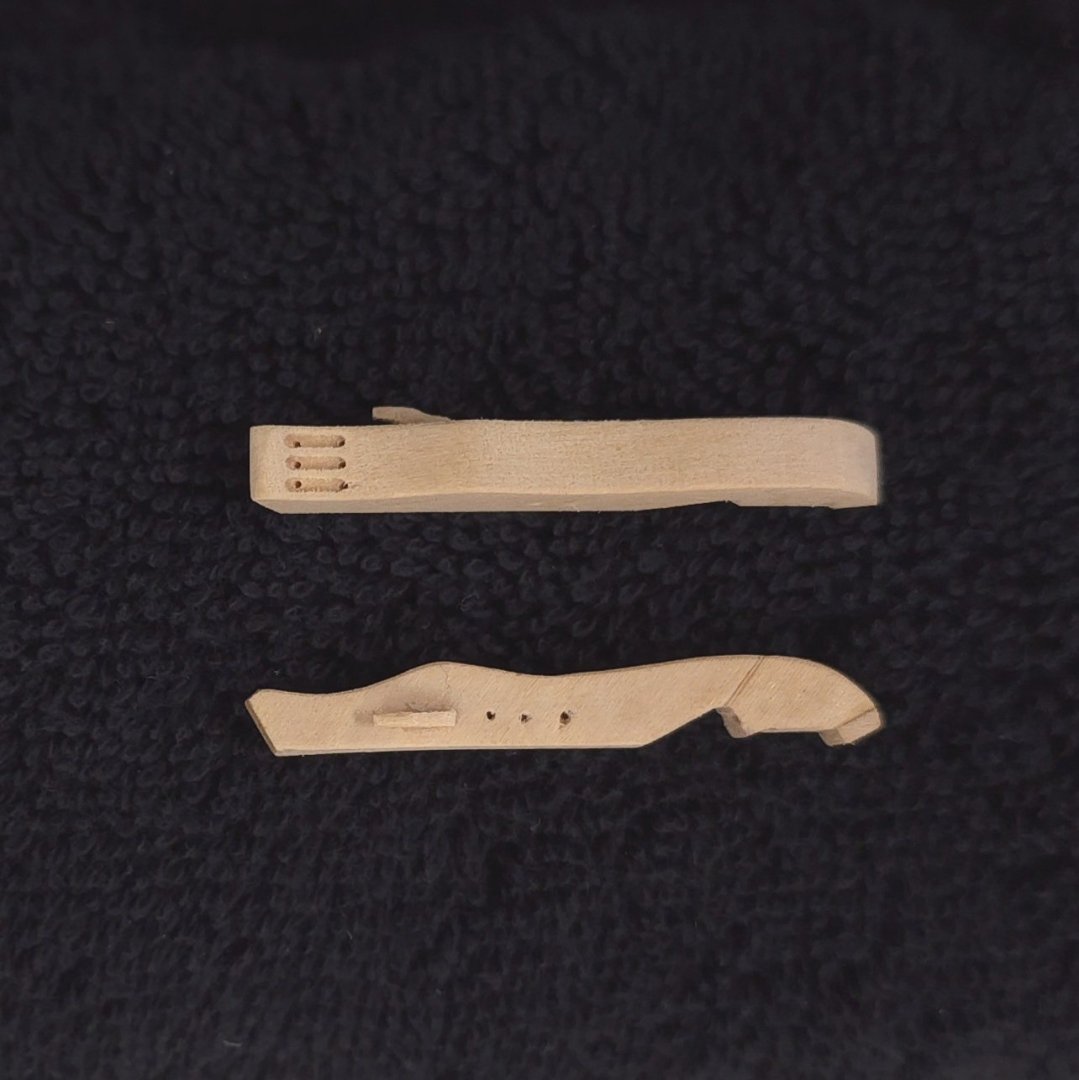
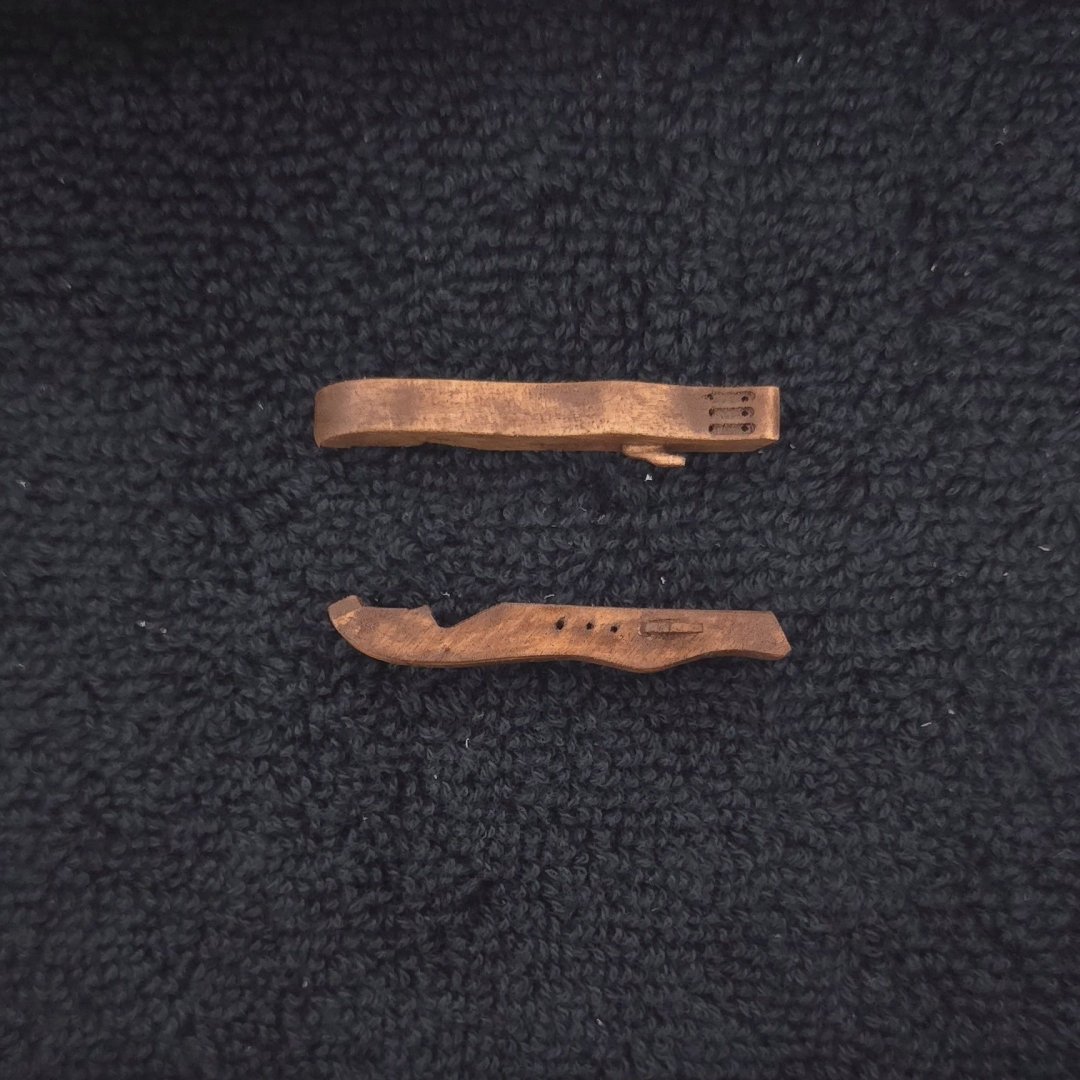
I noticed that the 5th support didn't appear until after the rails were in place. Also that 4th one was affixed to the stem, not in the corner, which seems to be the consensus view but contradictory to the plans, where 4 would be on the stem but touch the bow. I've been trying to keep the spacing at the tops of those supports relatively even, hence my attempt to angle #4 at the bow. I'll get continue to experiment with placement to find a solution that satisfies my aesthetic. Thanks for the pictures, especially this one: (Hmm, comparing yours again to mine, I think mine are too thick, perhaps adding to my difficulty). Hey, where are the fore tack bumpkins? I checked your build log, and don't see it anywhere. I checked the Practicum to see when Hunt installs them. They supposedly go between supports 3 and 4, but there's no evidence that Hunt installed them. And these are noticeably absent in this photo, which, by the way, really shows off the supports! This one is helpful in that it shows the relationship between the timbers (supports) and the grating. And then I found these, in the Practicum! (You know, I've got the hard copy of the Practicum at the shop and refer to it constantly, yet I don't seem to be able to find stuff until I'm sitting at home in front of my PC with its 42" monitor.) Timber 4: Timber 5: For what it's worth, even Hunt acknowledges difficulty making and placing these timbers. "The last timber (number 5) is the most difficult one. It sits at the outer edge of the cheek and is on an angle but still touches the third rail. Frankly, this timber was the most difficult of them all and I could not achieve the same look from the bow with this timber as the historic photo shows. I'm a bit disappointed in the structure but don't see anyway to improve or fix it. I'm not sure what the problem may be that is causing the overall look but will live with it as I fear I will seriously damage the model if I try to find a fix. Photo P8.1.5-11, P8.1.5-12 and P8.1.5-13 show the timber before being applied to the model." Back to the shipyard for me for more experimentation, and Thank you Unegawahya for your thoughtful response! Best
-
Still struggling to find the correct course, but I may be getting close to a support-first approach. Support 3 needs to be a little taller, so the mating face for rail 2 is in the right place. I think the key will be to get the slots for rail 3 correctly aligned. From there it should be downhill, in theory.. 🤔
-
That's pretty much how I started, but as mentioned, I've flipped the process on its head. I just copied everything I posted here over the last couple of months into Word, cleaning and editing as I went. The printed log, as a result, will be less busy than these posts, making for easier reading. Sticking with "Just the facts, maam". (How old do you have to be to get that reference? (don't answer that Gregg!))
-
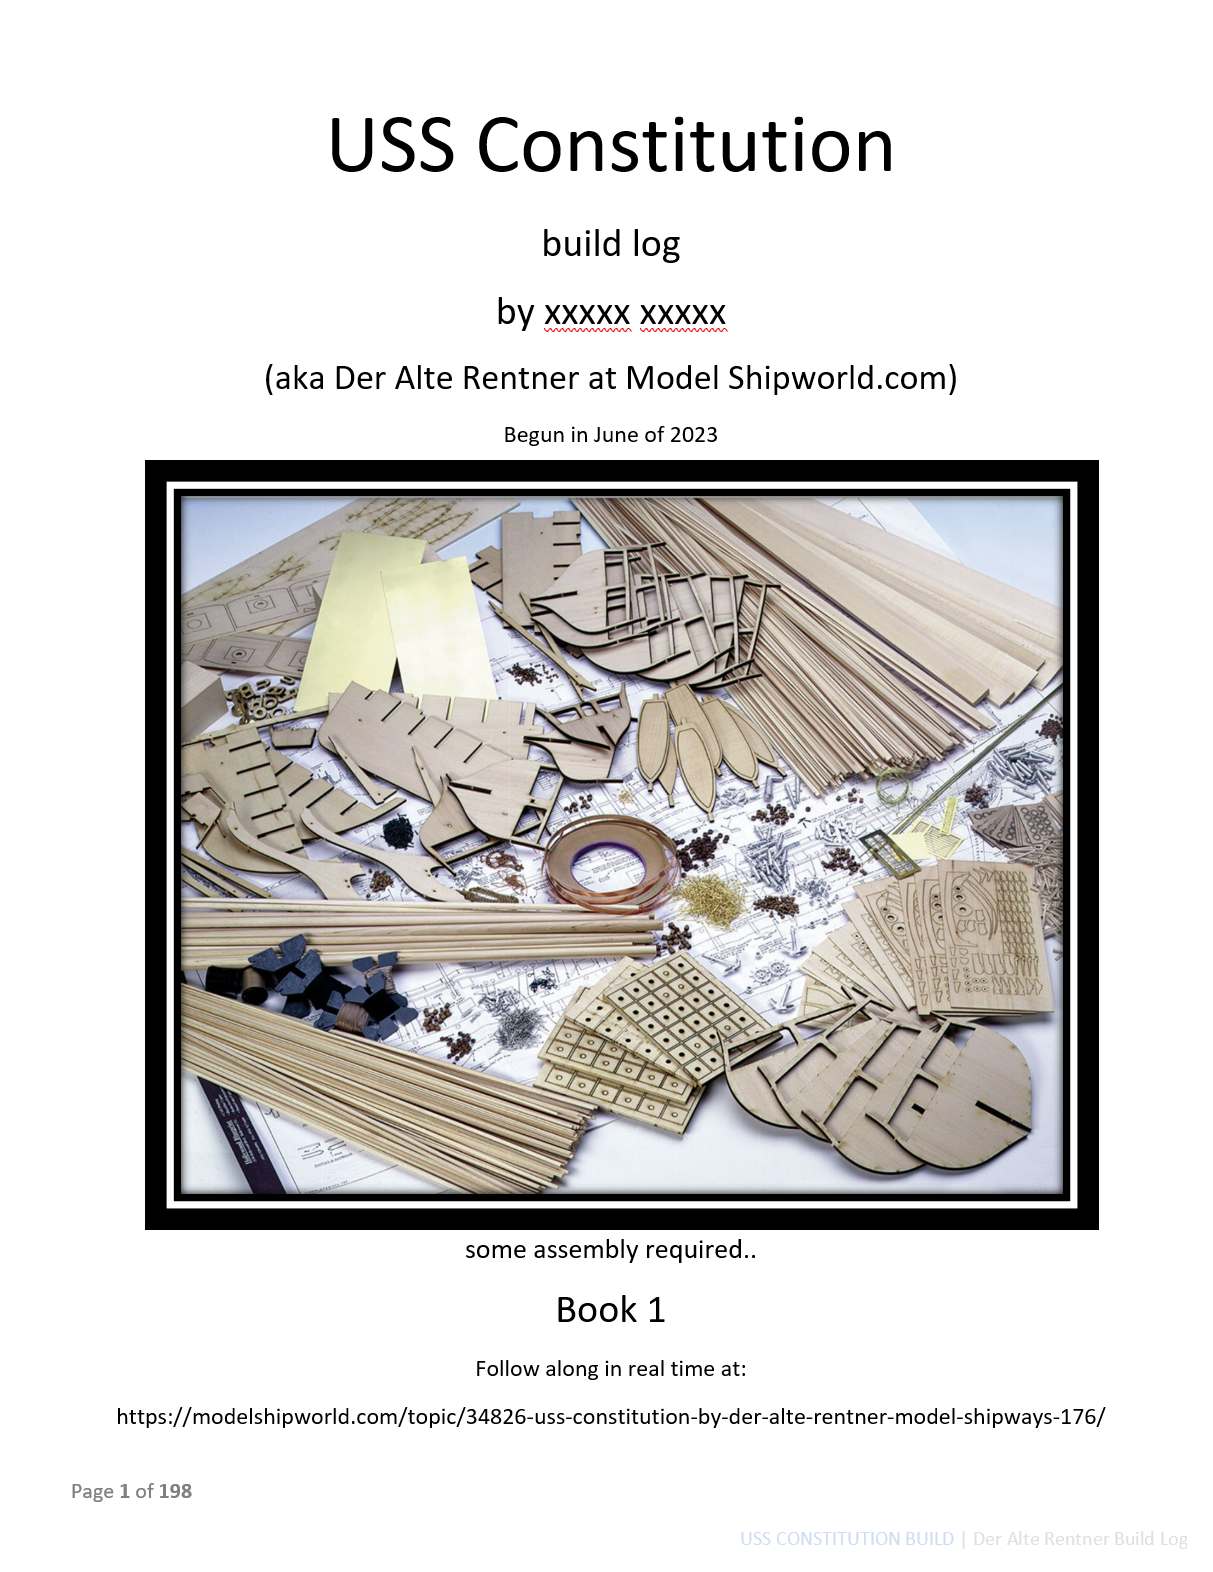
Okay guys, you can look now.. *and you know who "you" are.. As long as I'm adding P.S.s, On the subject of gathering pdfs directly from this site, that would really help my new work flow. I actually post here first, then cut and past into a Word Document at home for my personal log, which I am printing in annual editions. Volume one was printed last June. Volume two is due to hit the presses in June this year. Cover Page of vol. 1:

-
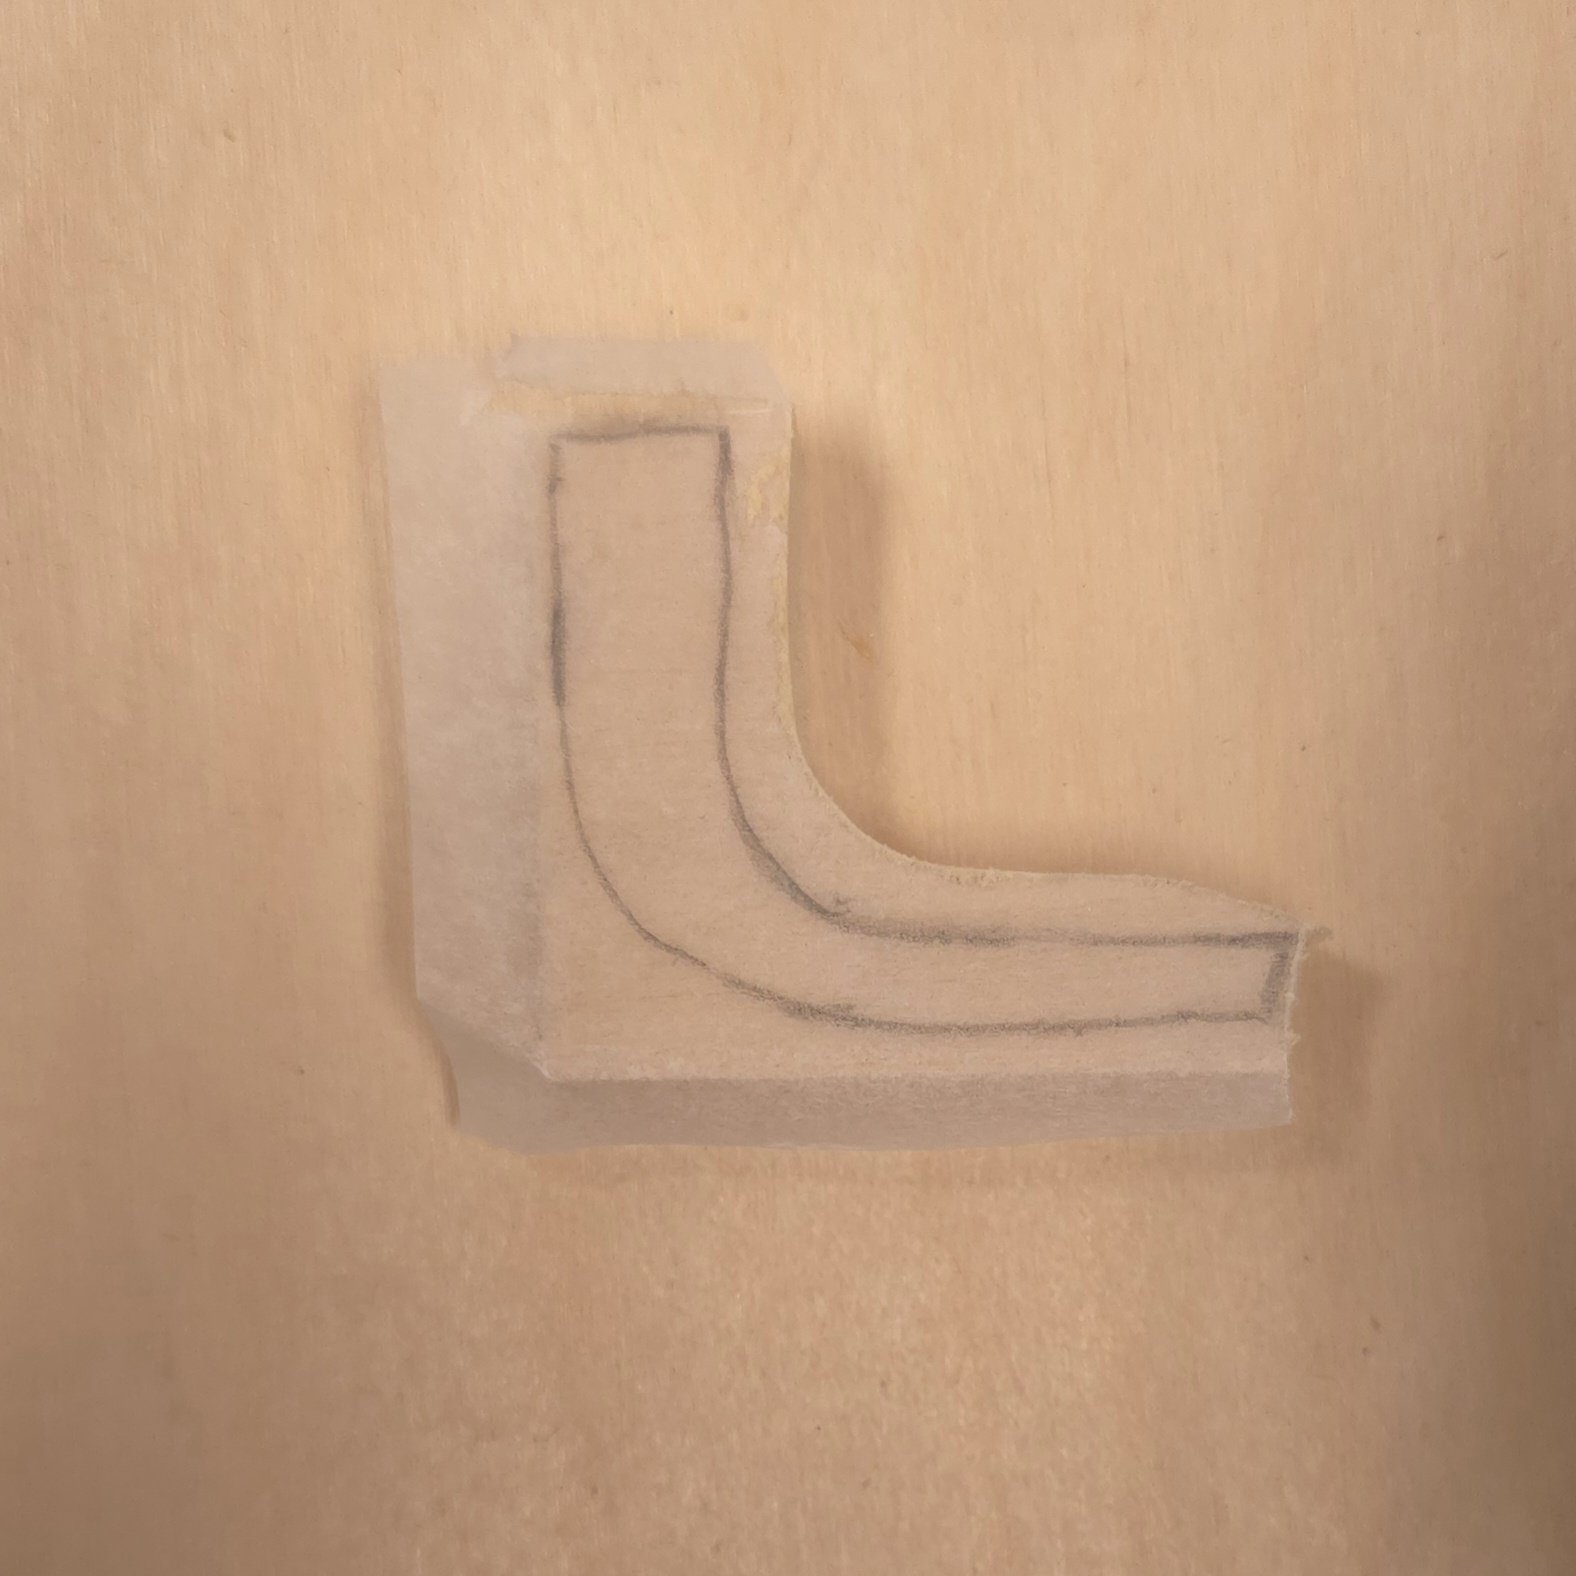
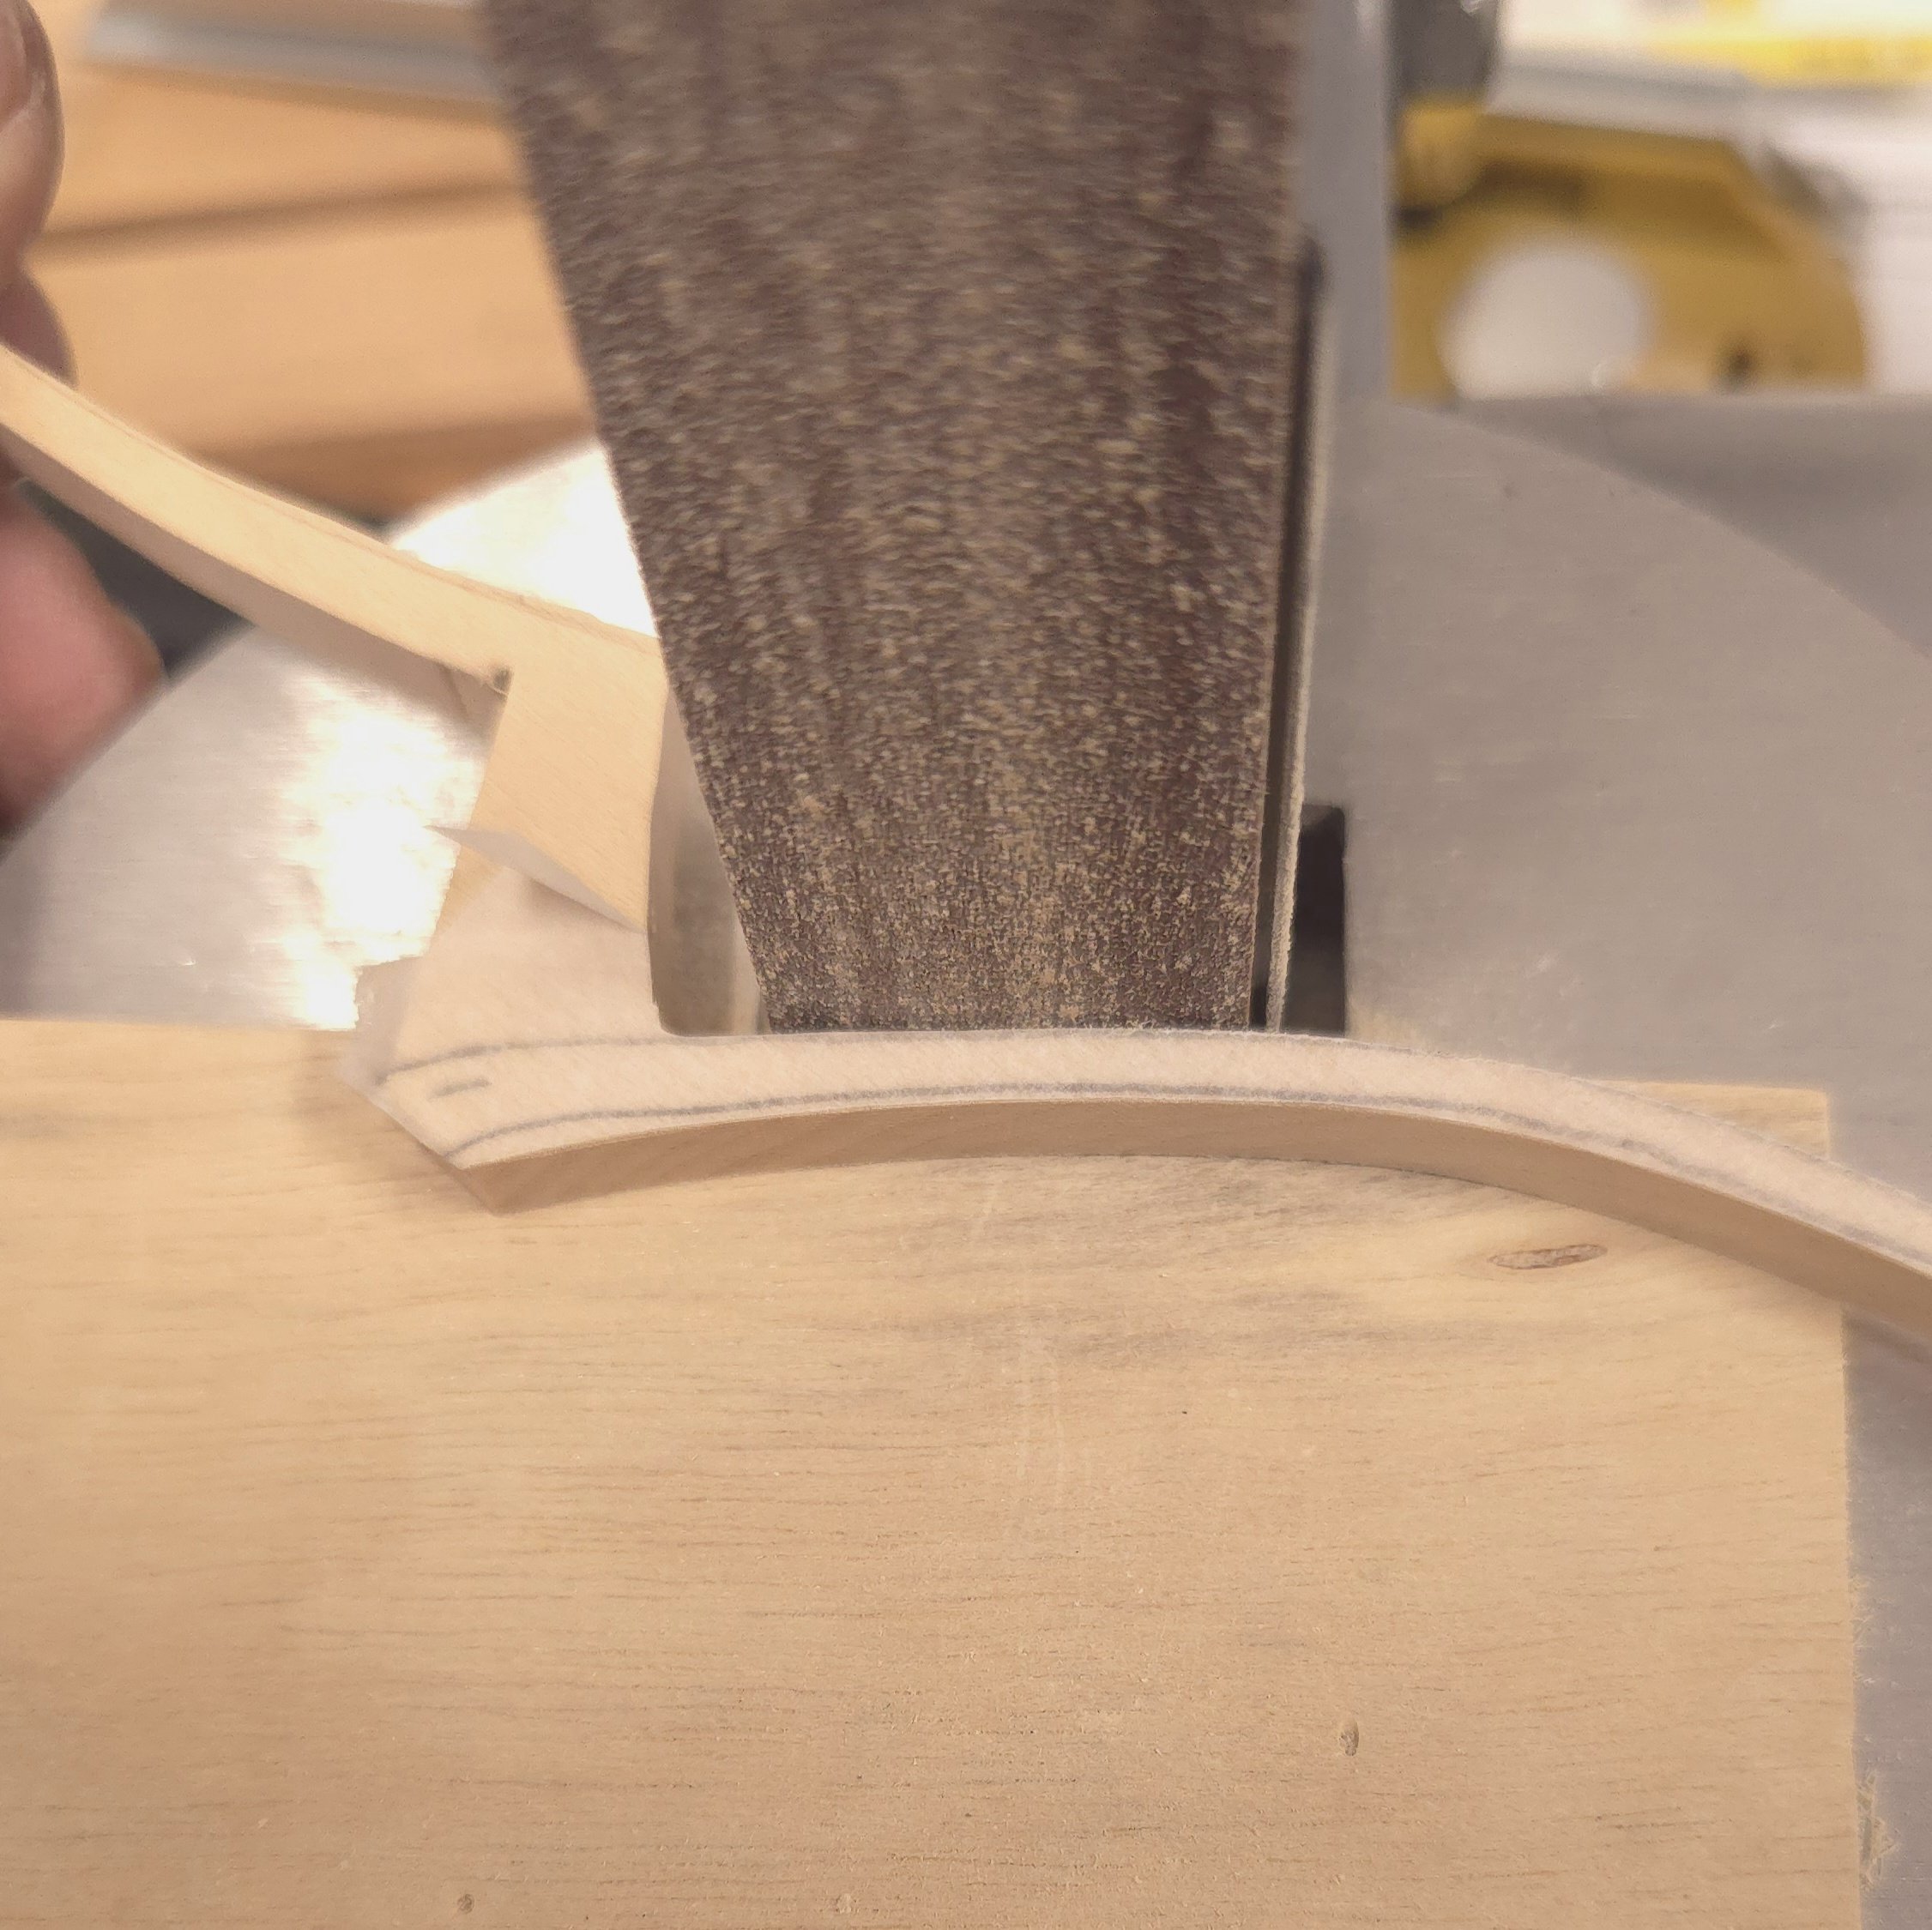
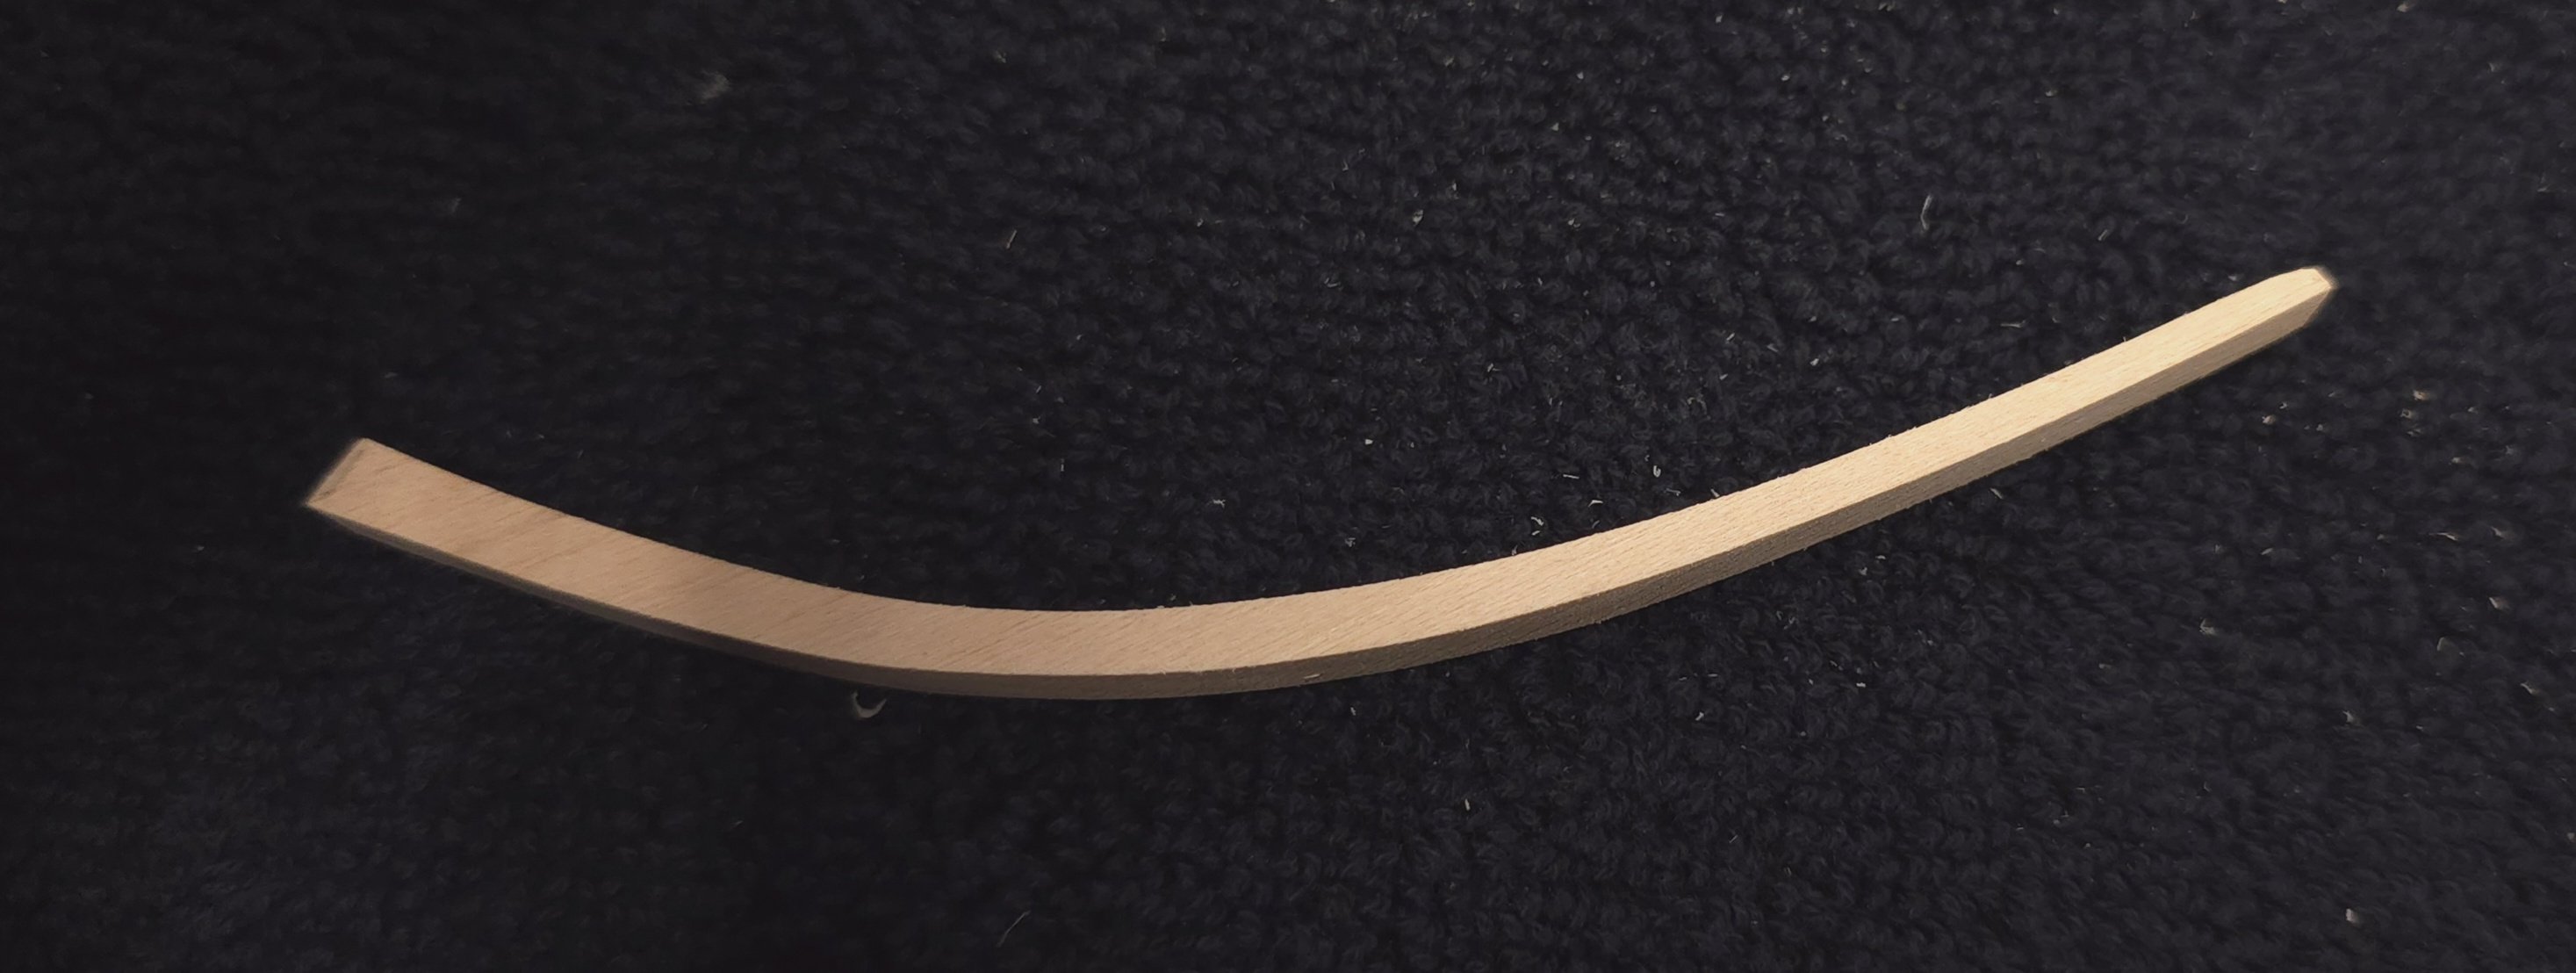
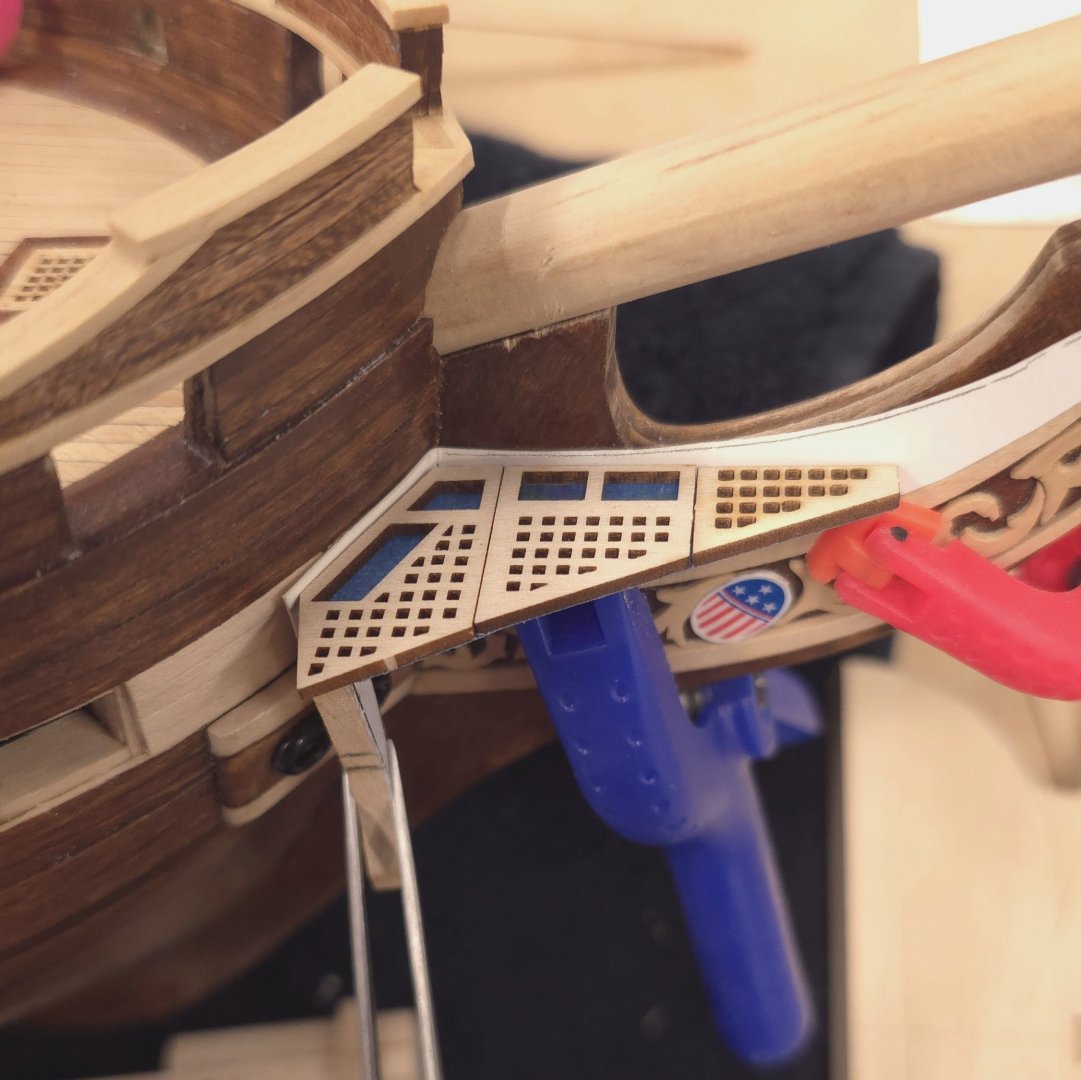
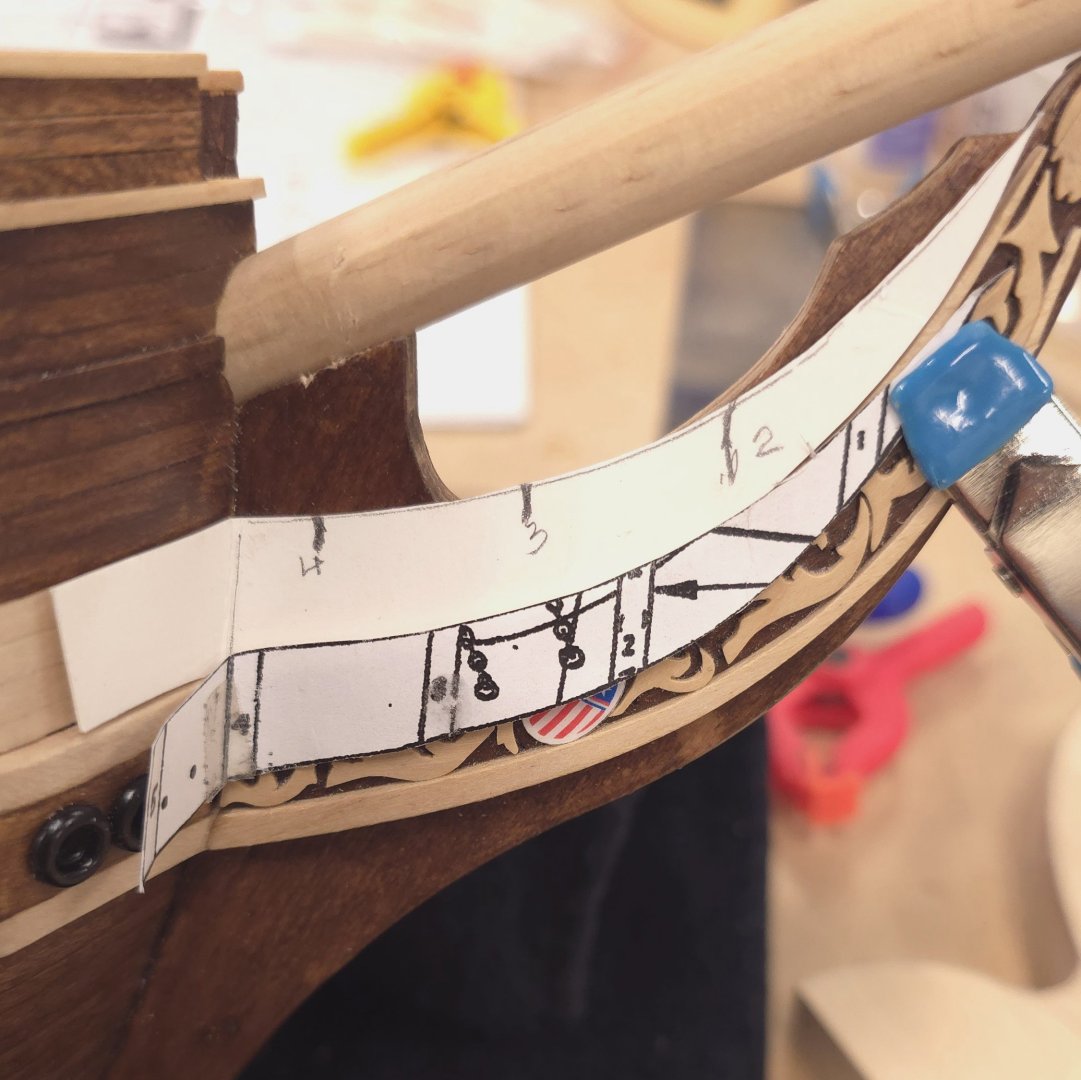
I'm beginning to see why people deal with the rails before they deal with the supports. First a recap of construction efforts to date: 1. Begin construction of the end of rail 3 that fits below the cathead. 2. First try at the forward portion of the rail. (I'm hoping I can bend this to fit after tapering later). 3. Construct support 5 and see how it fits. First problem encountered. Where do I trim to this support? Outboard to match the knee and keep the distance from the hull of the notch (not yet cut out, just marked)? Or on the inboard side, moving the mating areas for the rail inboard as well? 4. Construct support 4 and see how this fits into the grand scheme of things. More problems encountered. If placed where the plans suggest, the angle is atrocious in proximity with support 5. Or farther forward as done by several builders? The latter doesn't really solve the odd angle problem. 5. Bevel the end so that it fits at a 45 degree angle where the stem meets the hull? As done by yet others? 6. Scratch my head and stare at the plan a little while longer hoping for inspiration? Pour myself a double and call it a day? 😁 Yep!


-
Hmmm, I thought you threw the question out to the public at large, and dove. I was going to comment that the benefit of doing an open hull version is that there would be much less hull planking. But that wouldn't be enough incentive for me to launch into such an ambitious build. Leaving it to you to lead the way.. And as you rightly point out, I'll be deep into my seventies by the time I start that. Arthritis and deteriorating eyesight will also be contributing factors. As for getting my current build done before I'm 77, see my new post below..
-
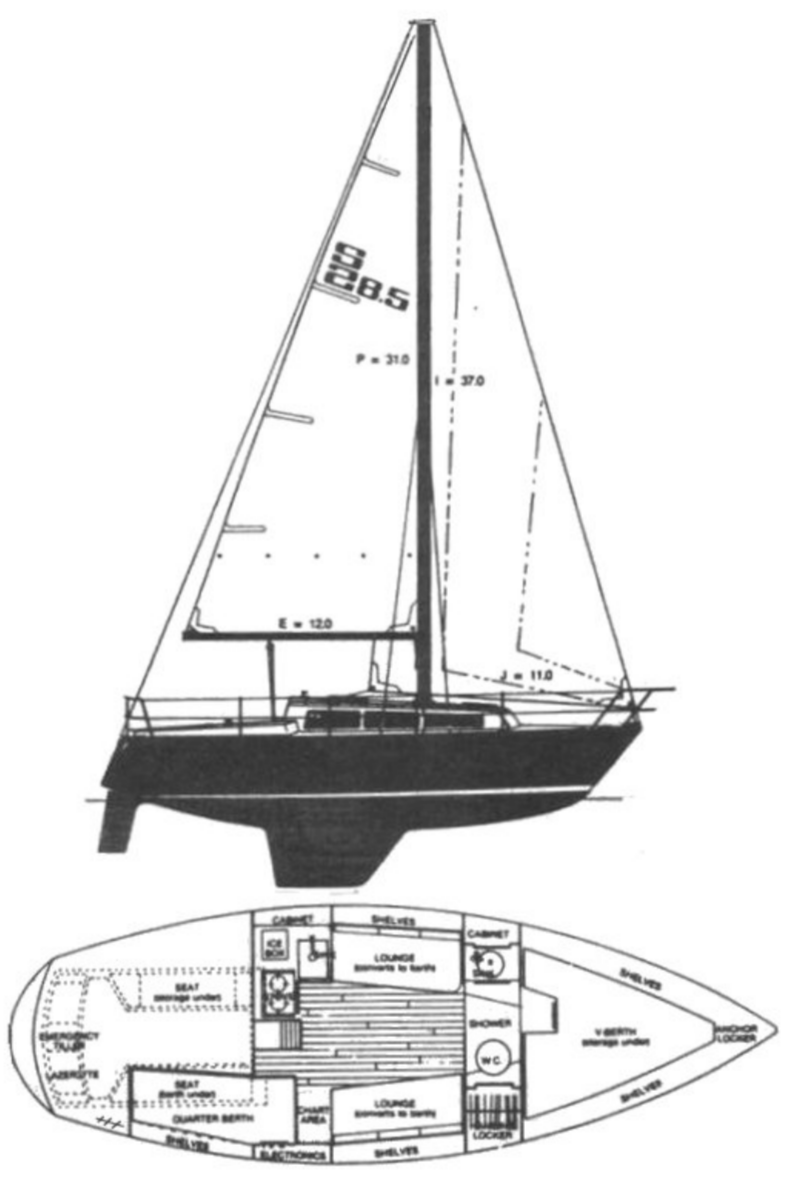
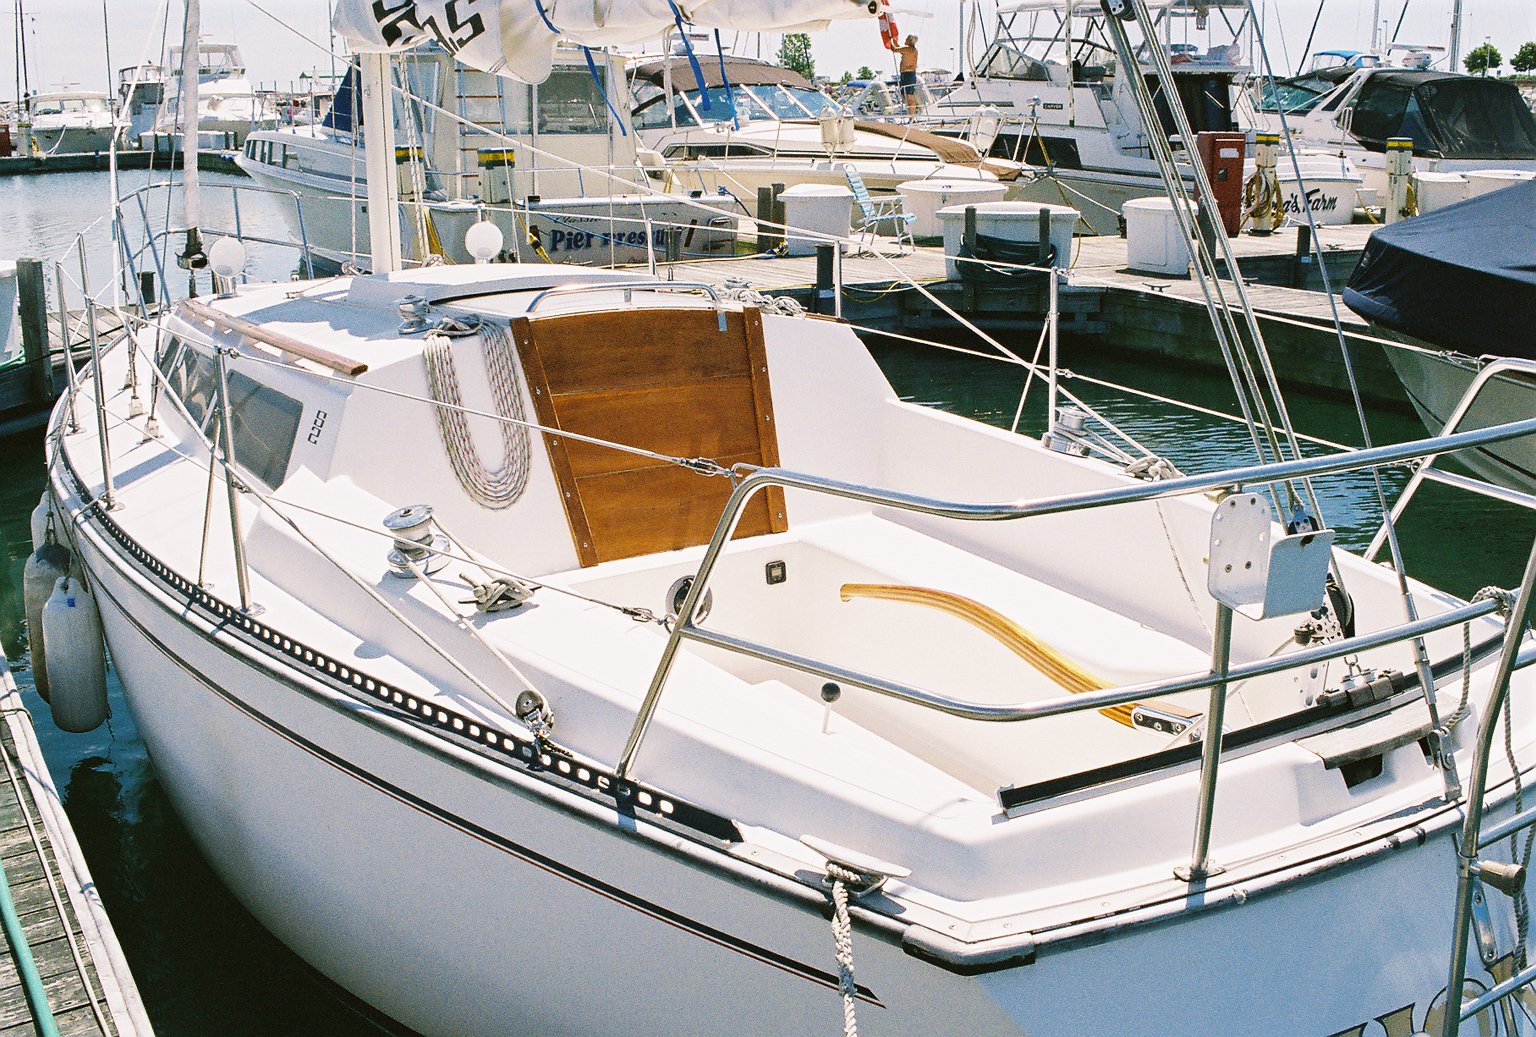
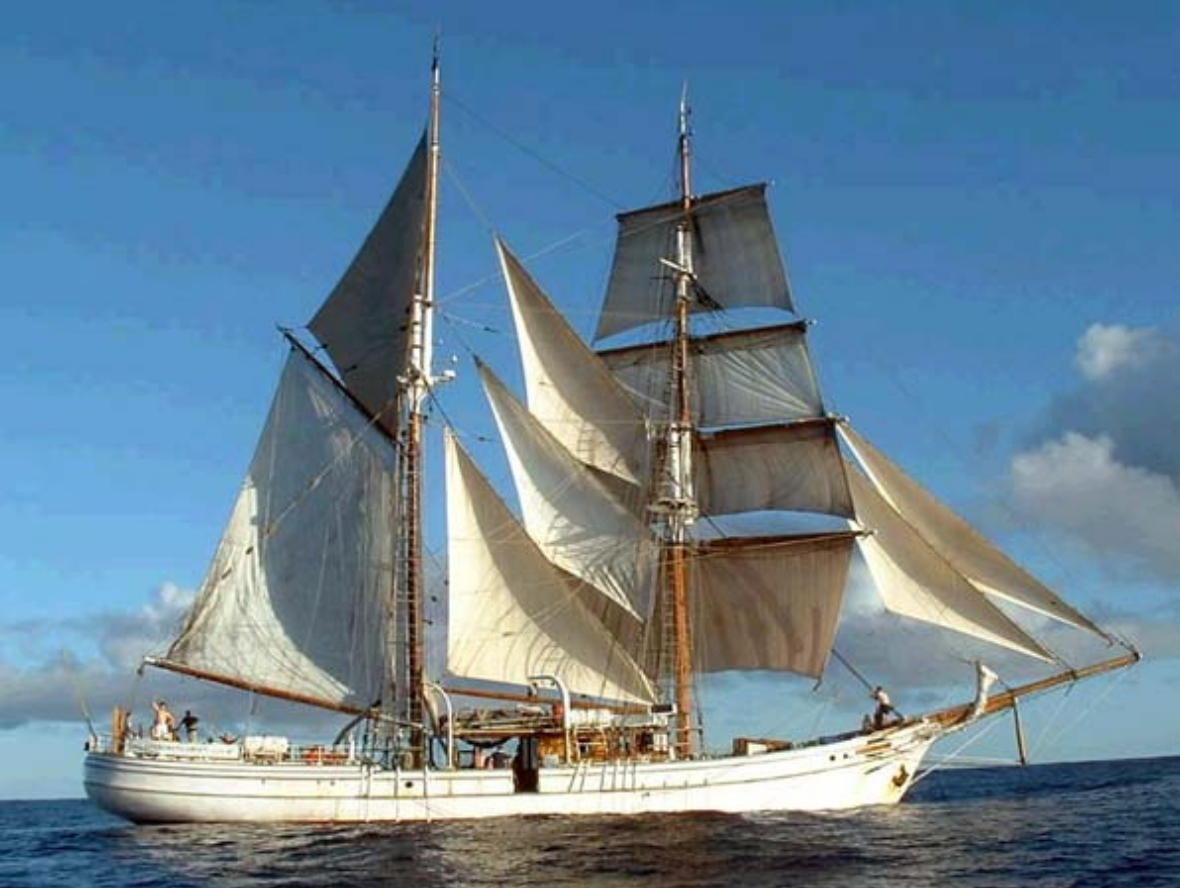
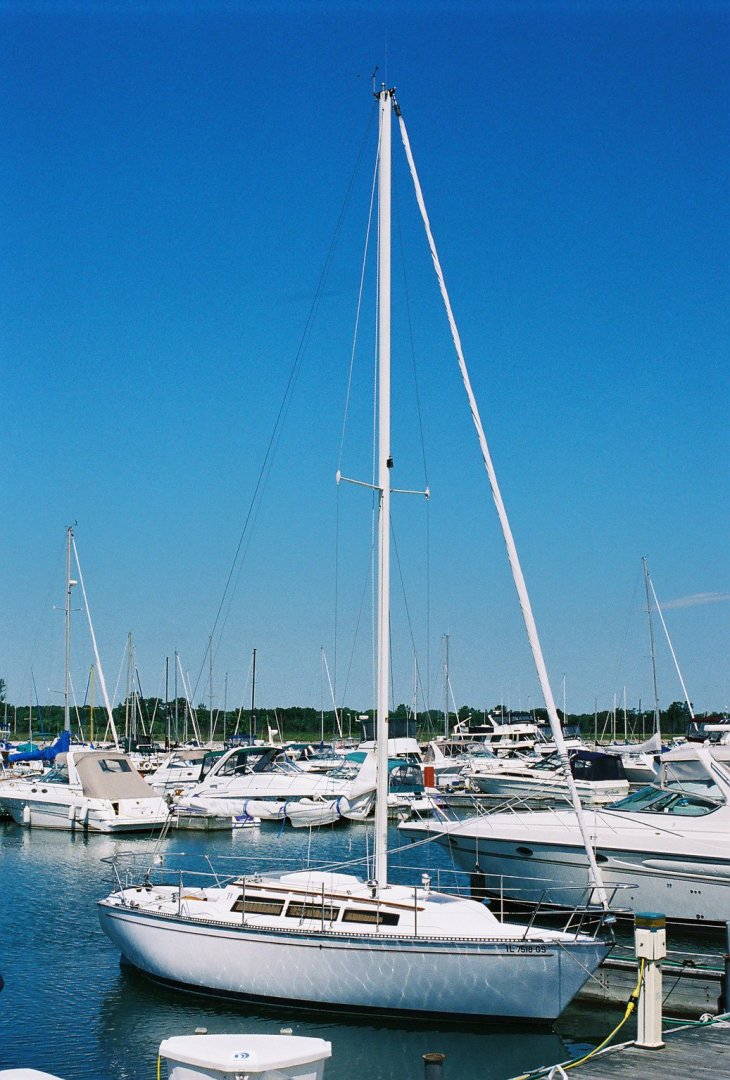
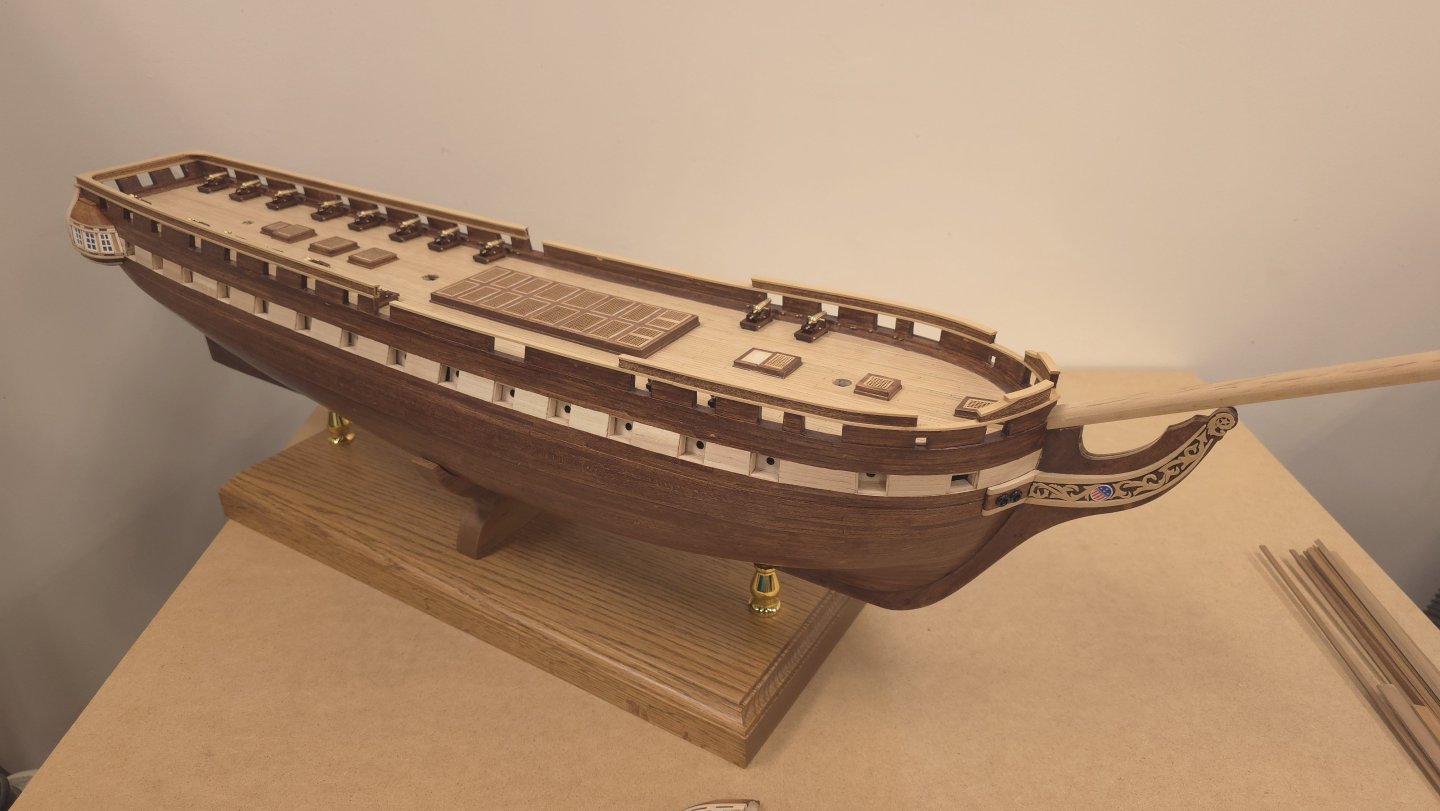
If I live long enough.. 😉 Every time I'm in the shipyard, I add another year to the estimated time of completion of this version of the Constitution. Ask me again in 5 years.. That's quite the impressive kit - the HMS Victory, though the price of admission is quite steep. In all honesty, probably not. I think I'd rather tackle a scratch build of my first boat - an S2 8.5 shallow draft sloop. If I'm going to stare at something in a display case in my twilight years, I'd rather it be something that reminds me of my 20+ years of sailing on Lake Michigan. Plan B would be to see if I can't find plans for the Soren Larsen, which I crossed the Tasman Sea on in the early 90s. BTW, the images in my profile are of her.


-
One cannot argue with success. That's about as perfect a pinstripe as I think I'll ever see!
-
I think Tony may have gotten the bending jig idea from KMart.. (in his post #143 - Oct 2022) And Mustafa, here's yet another way to tackle the pinstriping! From KMart's build log: "I decided to use 1/64 inch wide architecture tape for the stripes. Found it on Amazon. About $7 bucks for a single small roll. Only tape I found that small. Didn't want to try to glue anything on (wood or styrene strip) as I think they would be very hard to position. Tape lets me peal off and try again / reposition as needed until its positioned right. The question is how long will tape stay attached. (long term) I do plan to clear coat (matt) it when its done. Hopefully that helps"
-
I didn't know it was possible to download a pdf of someone's completed build. That's something I would gladly do. How do you go about doing that. Also, I just added a link to KMart's build to my post #591. He tackles the rails by making the supports first. Thanks for checking in..
-
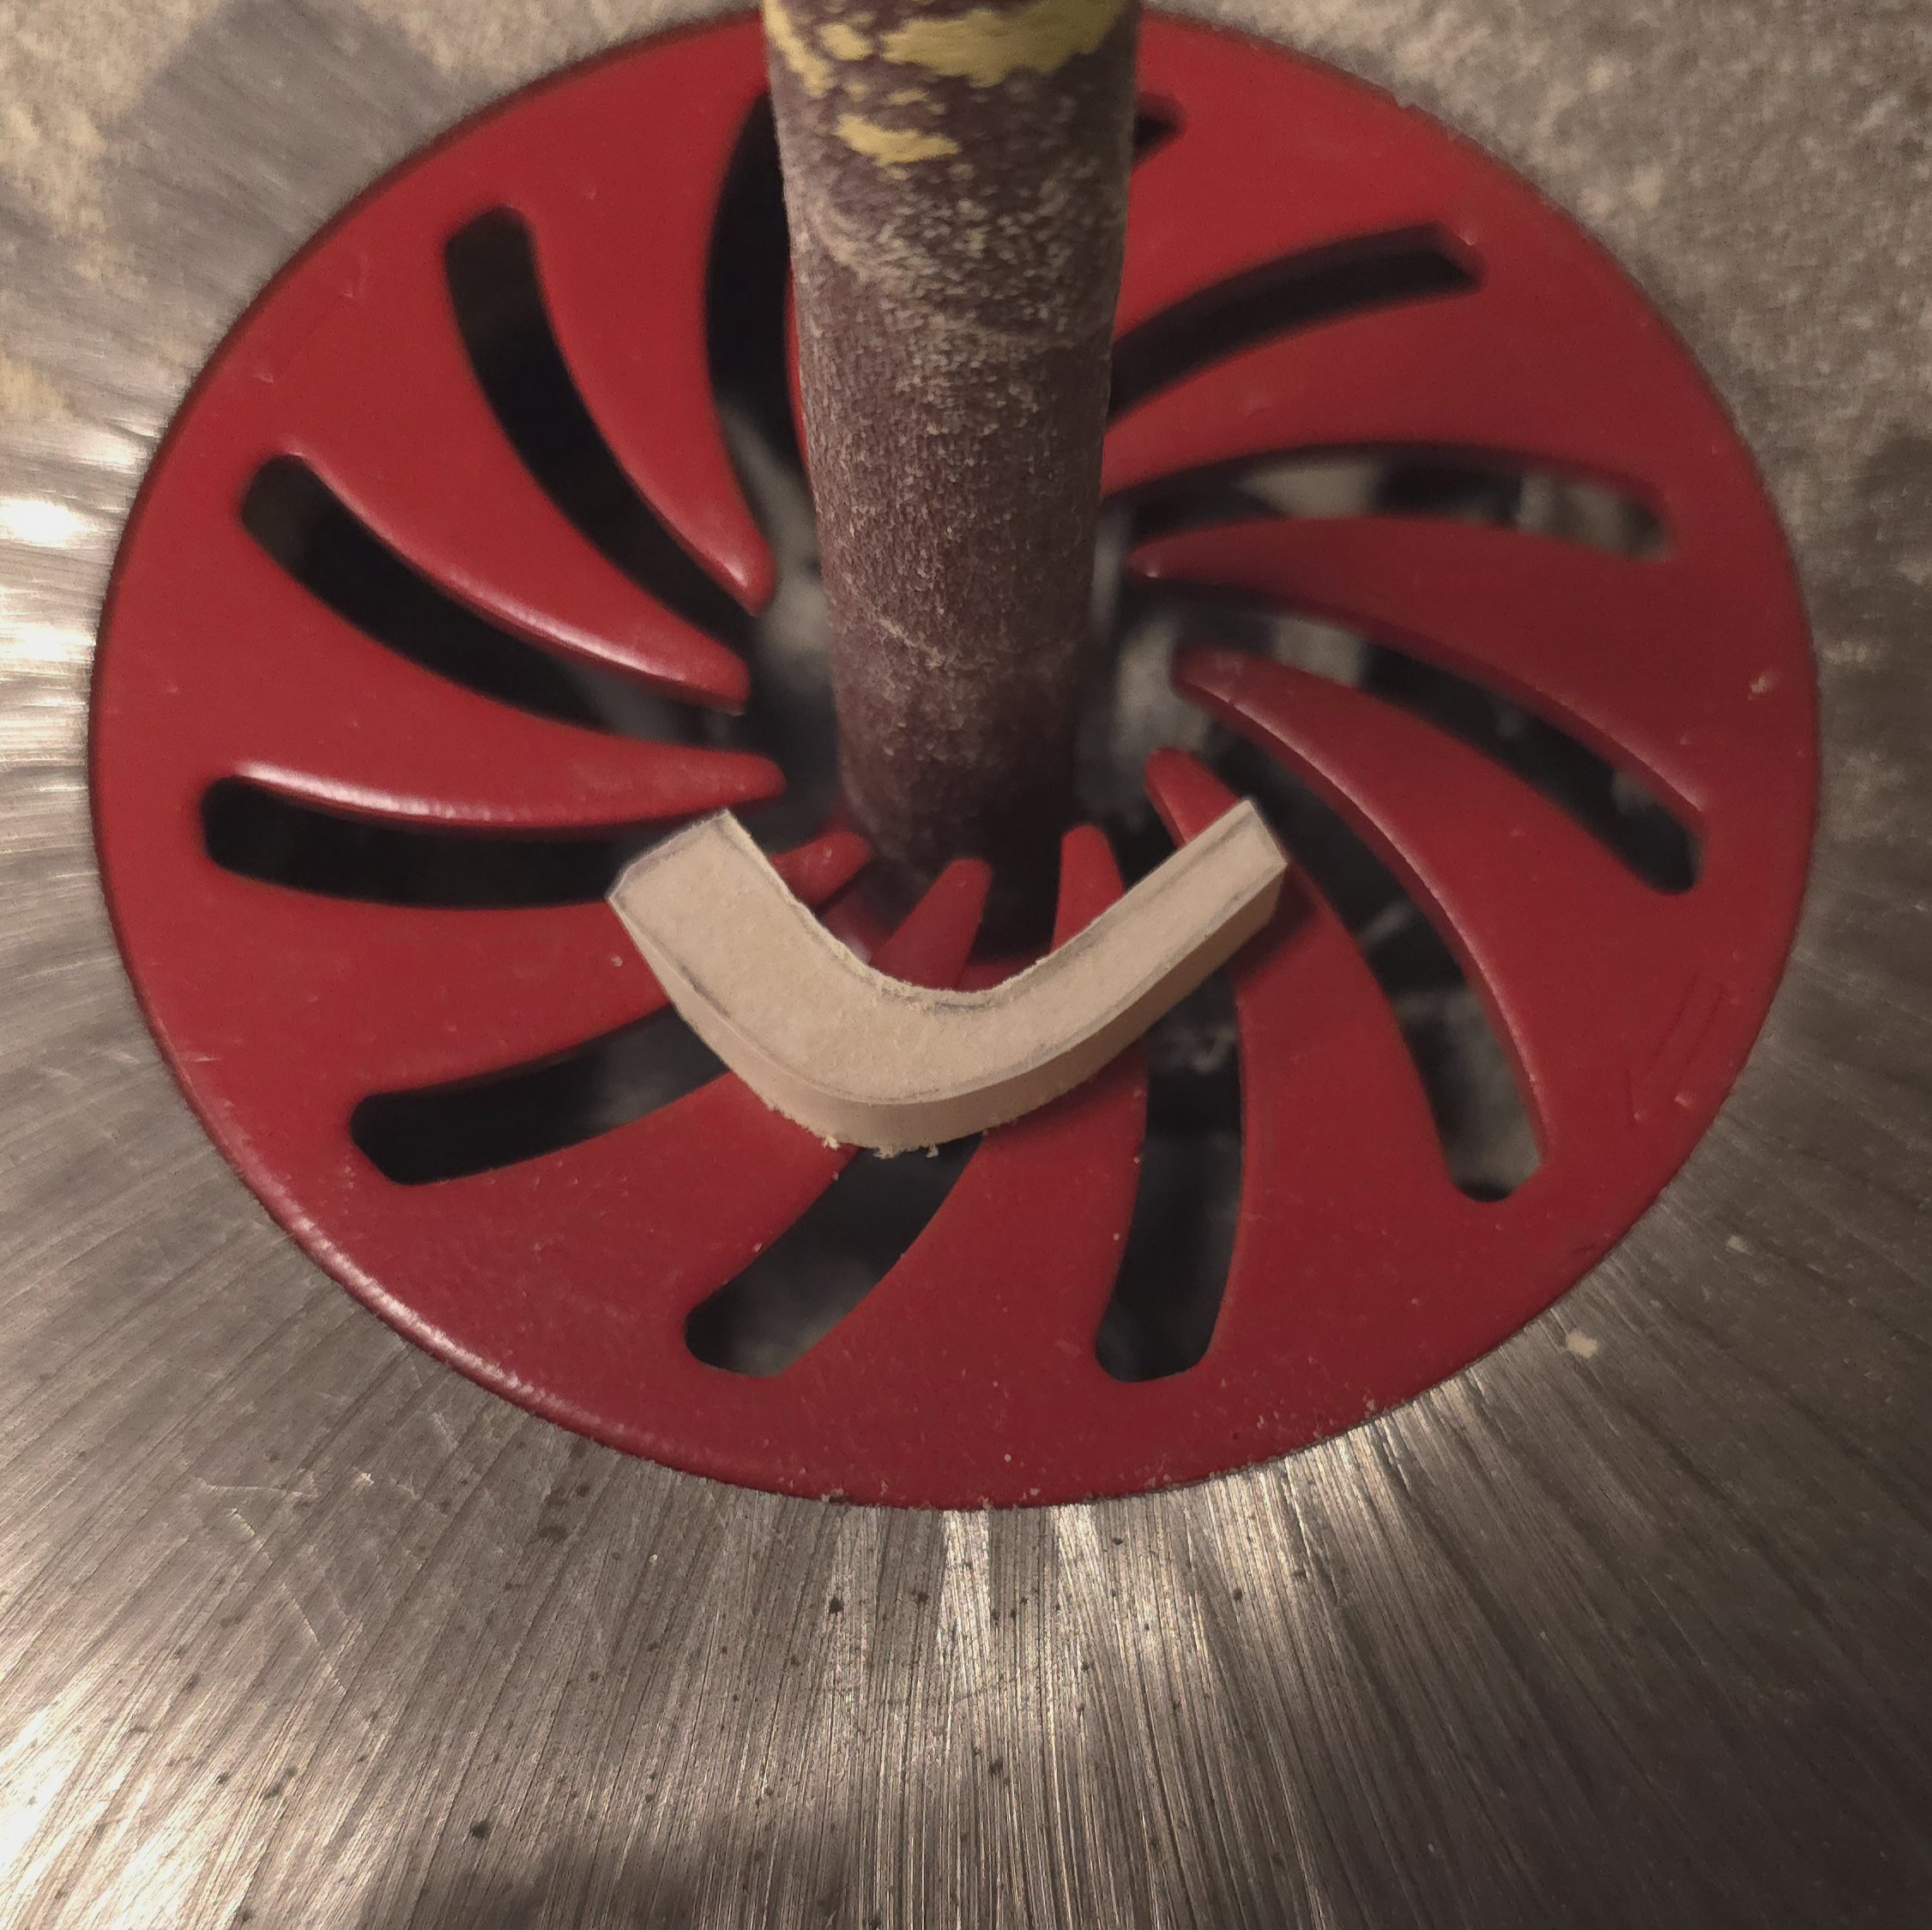
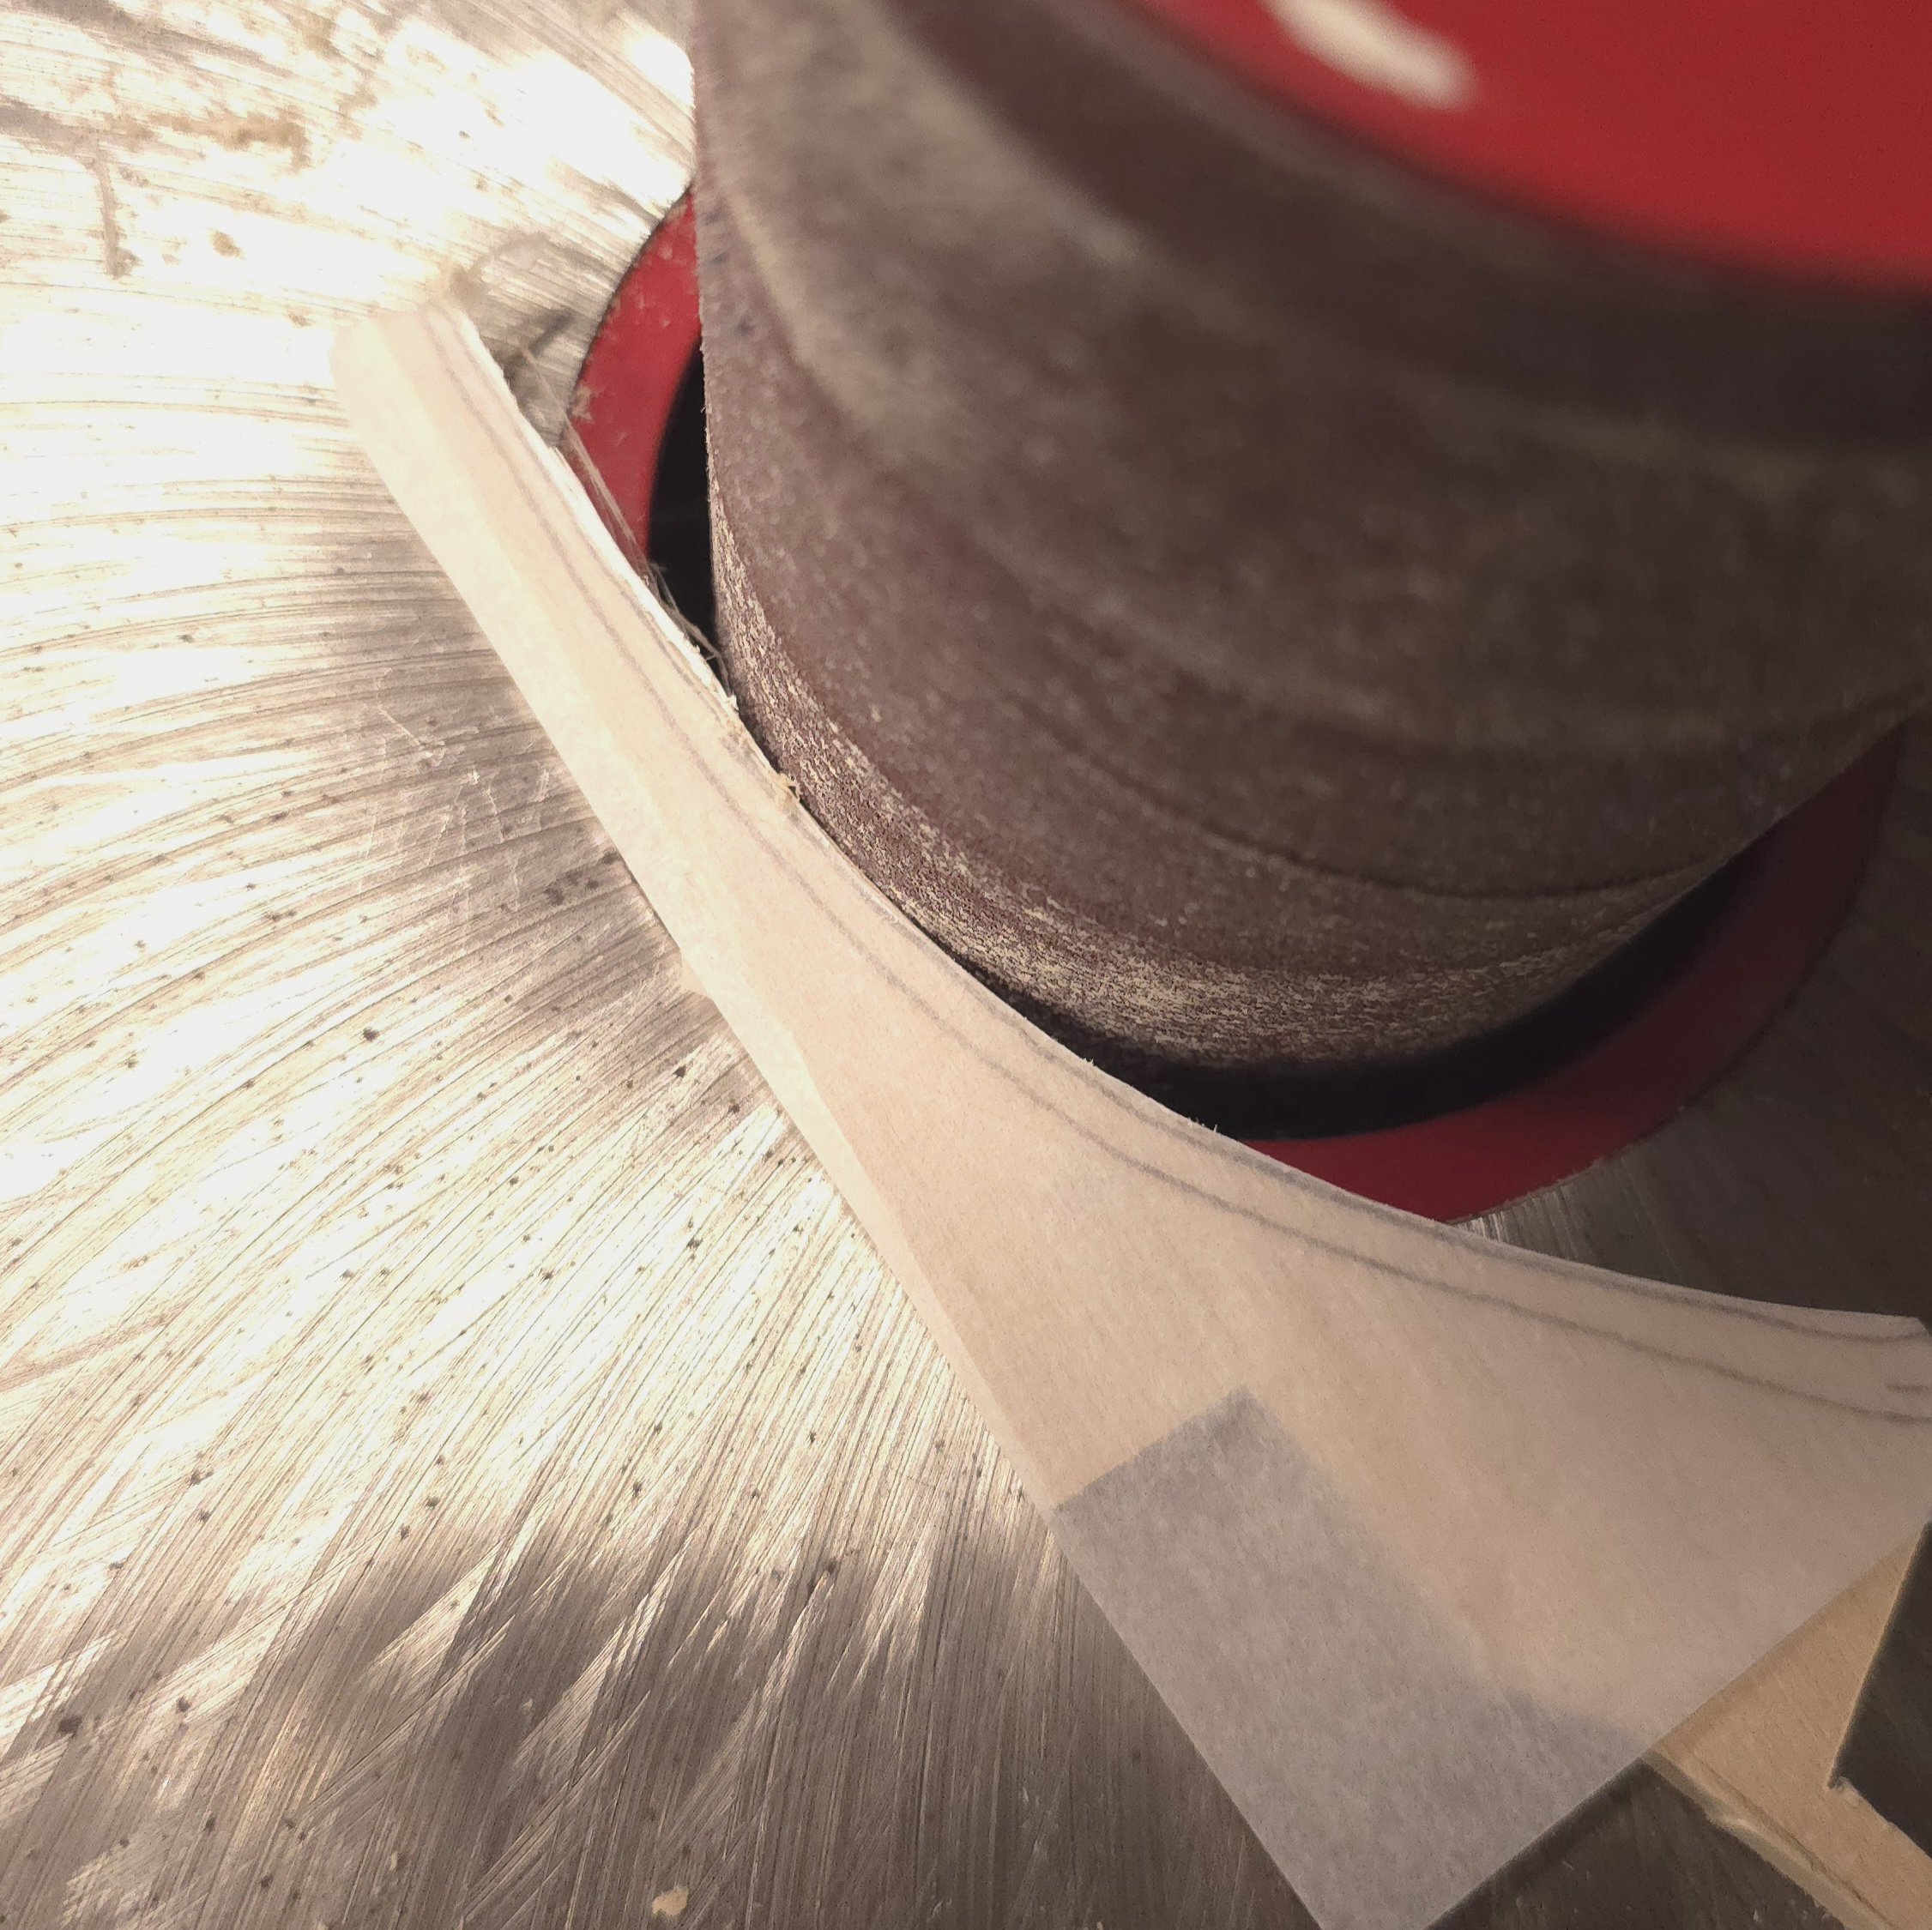
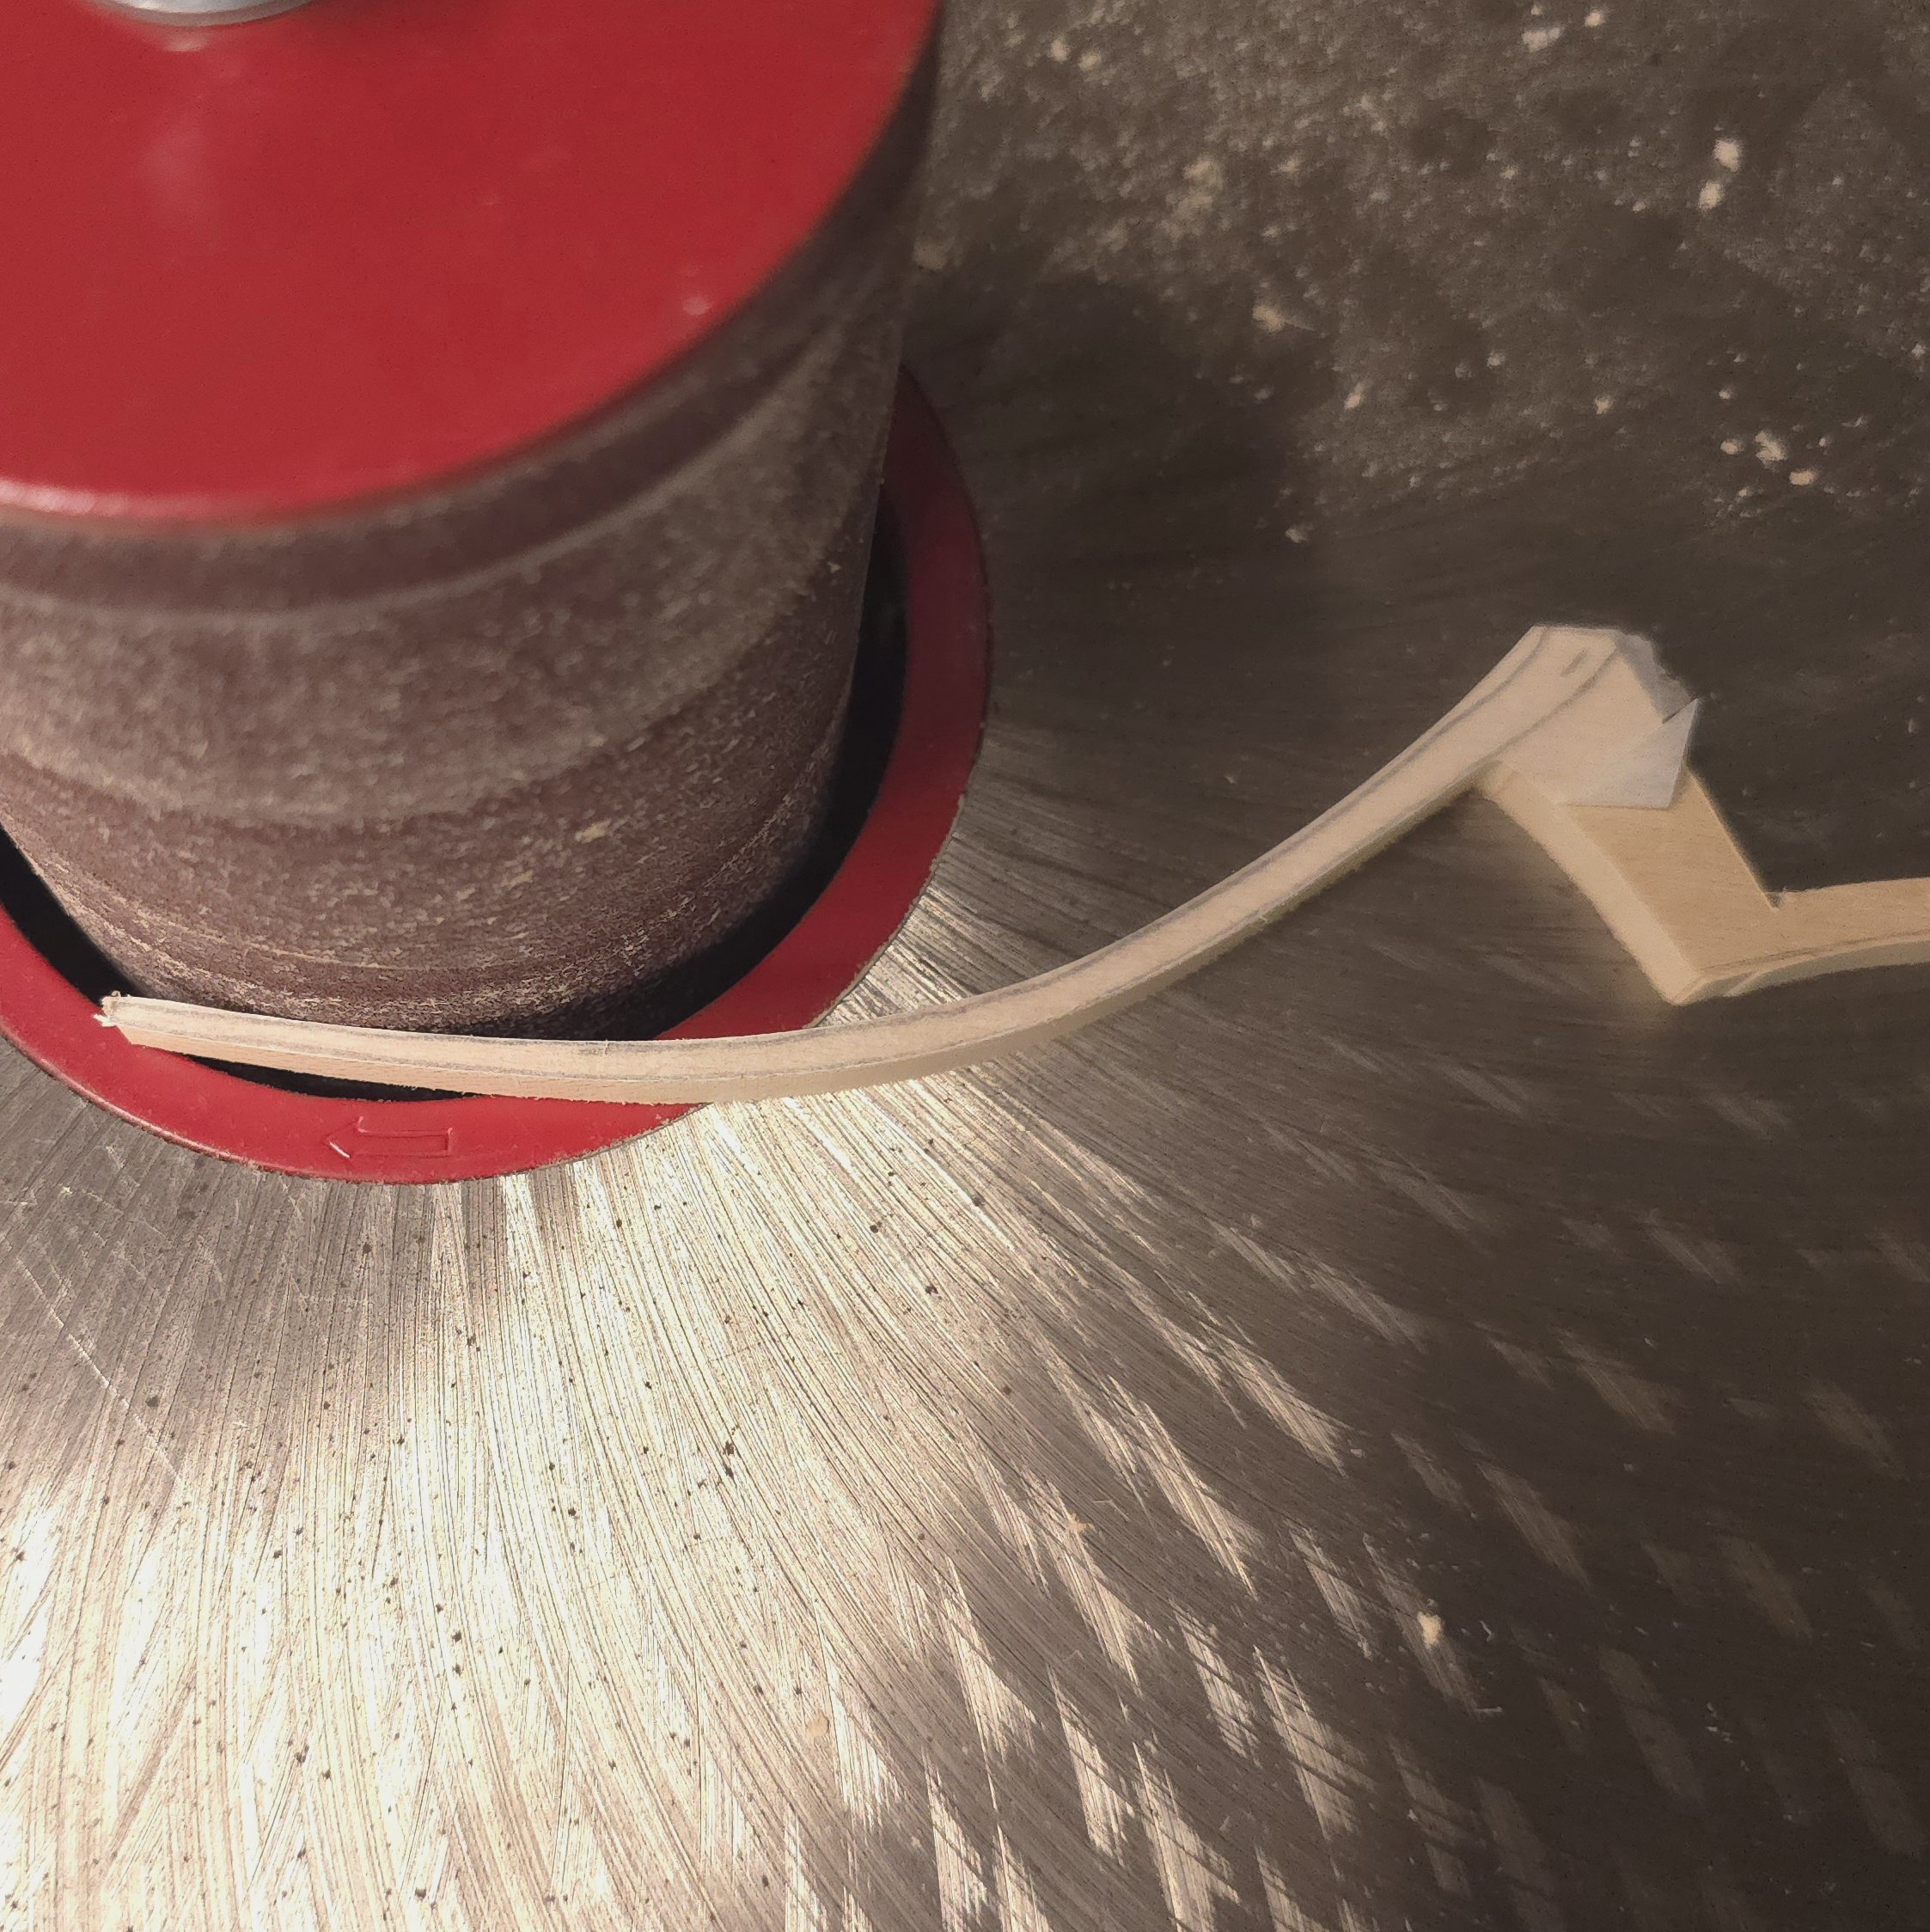
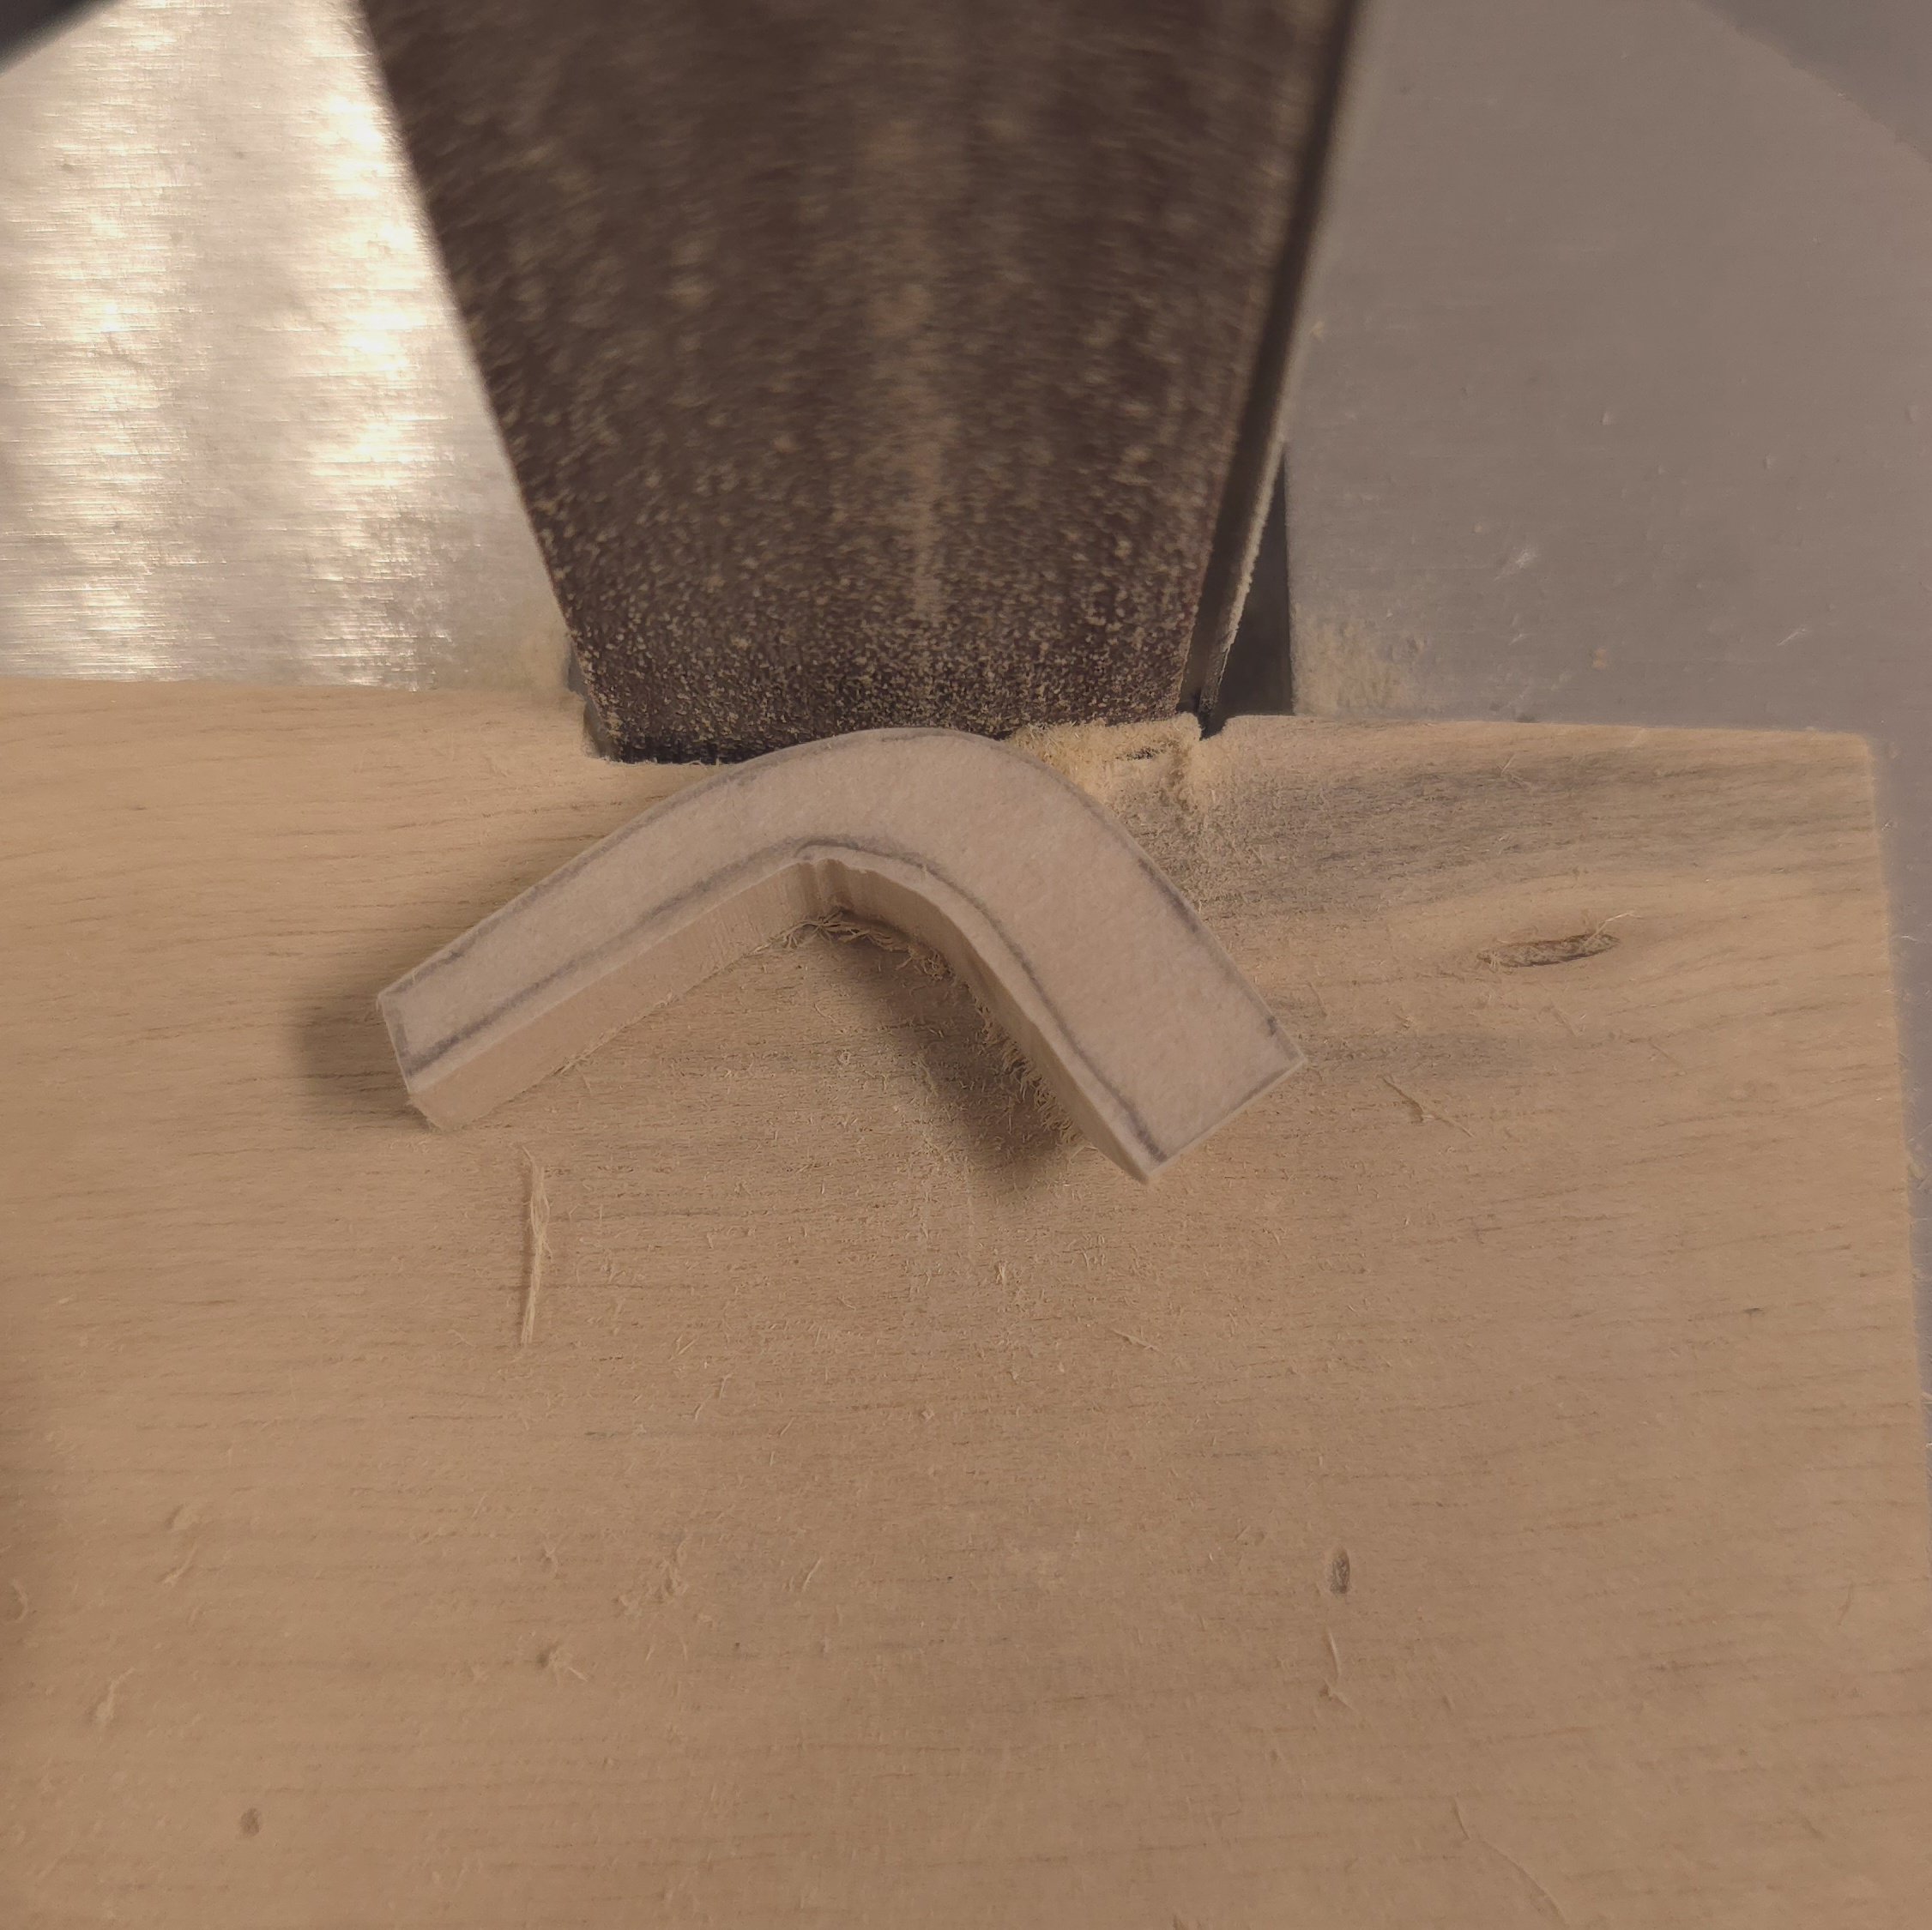
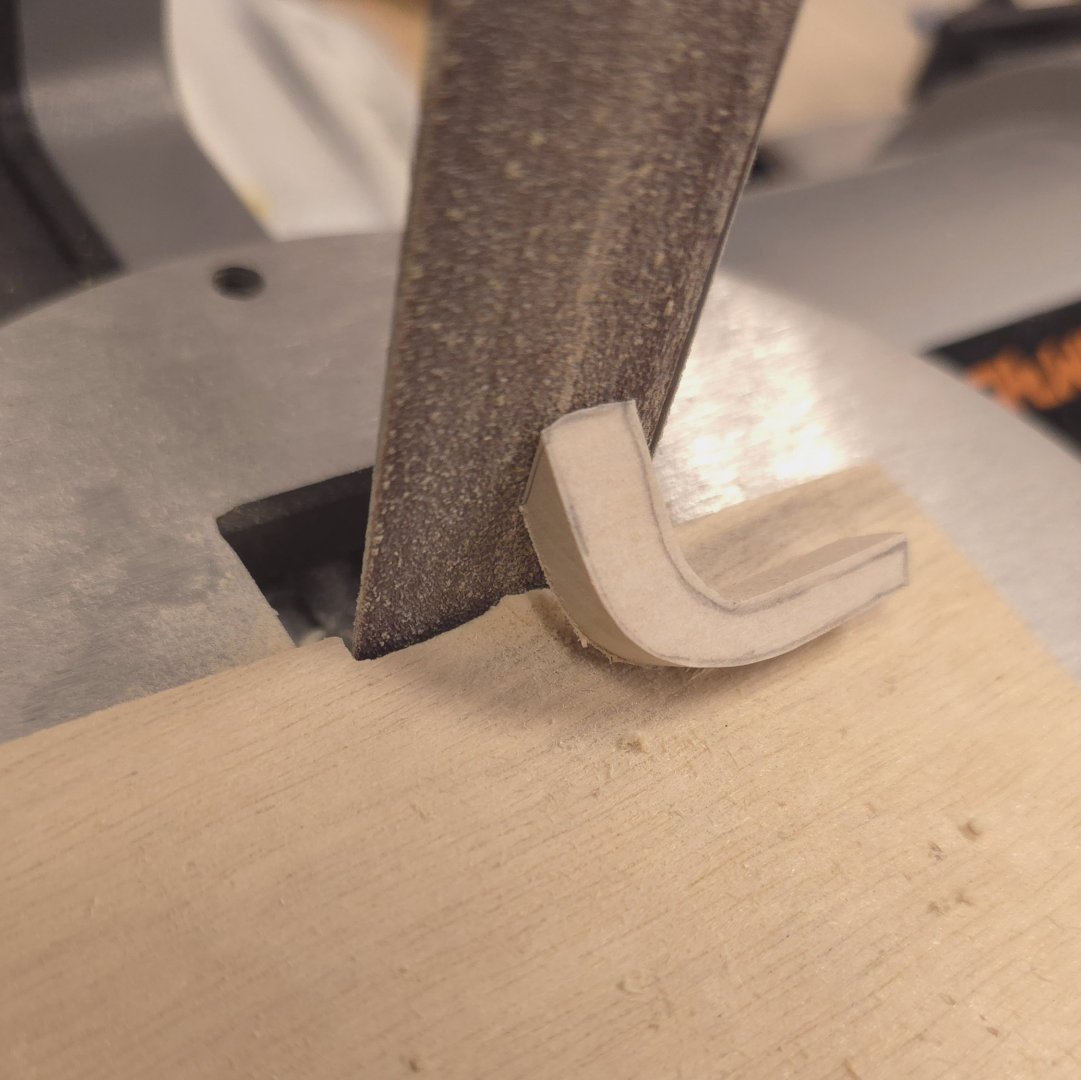
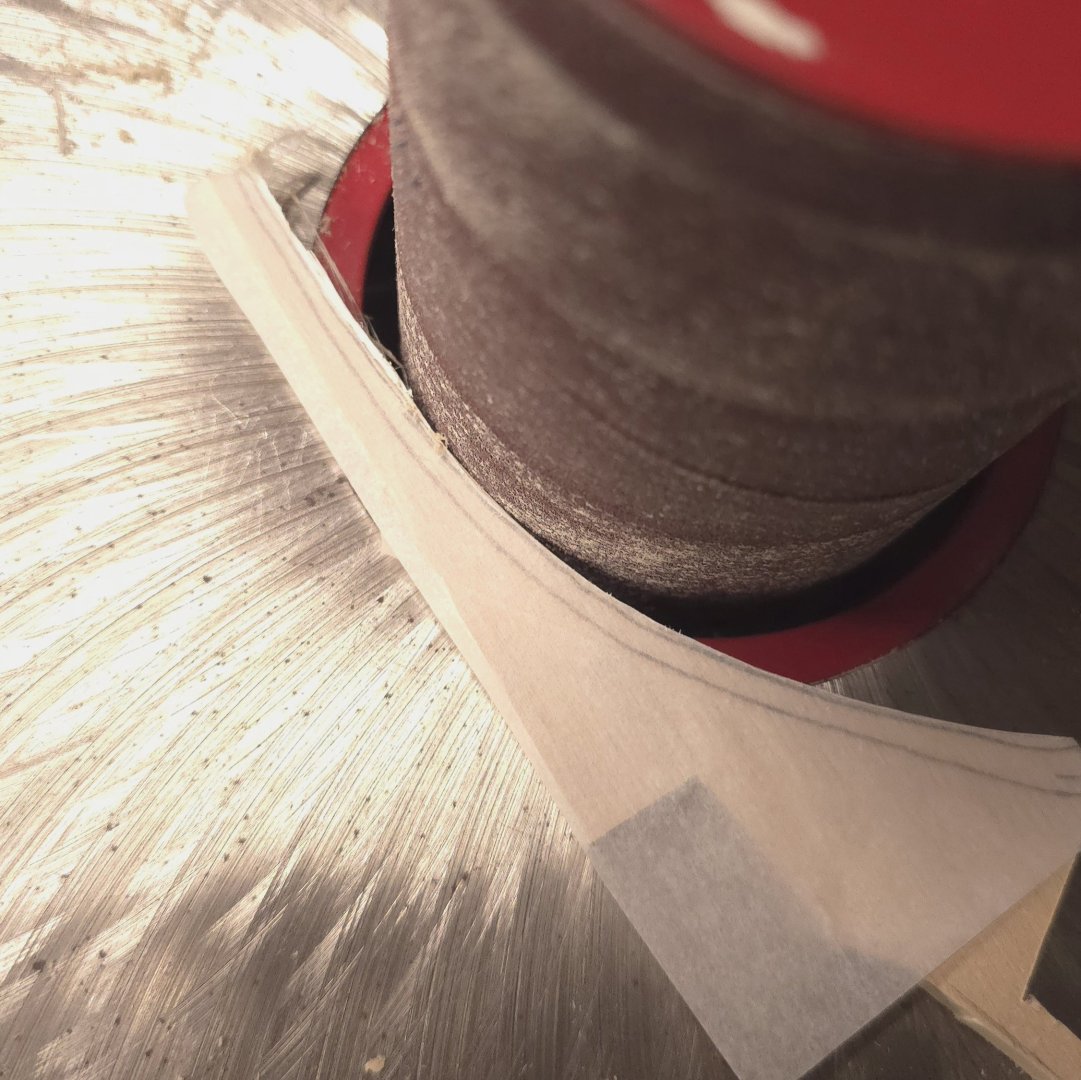
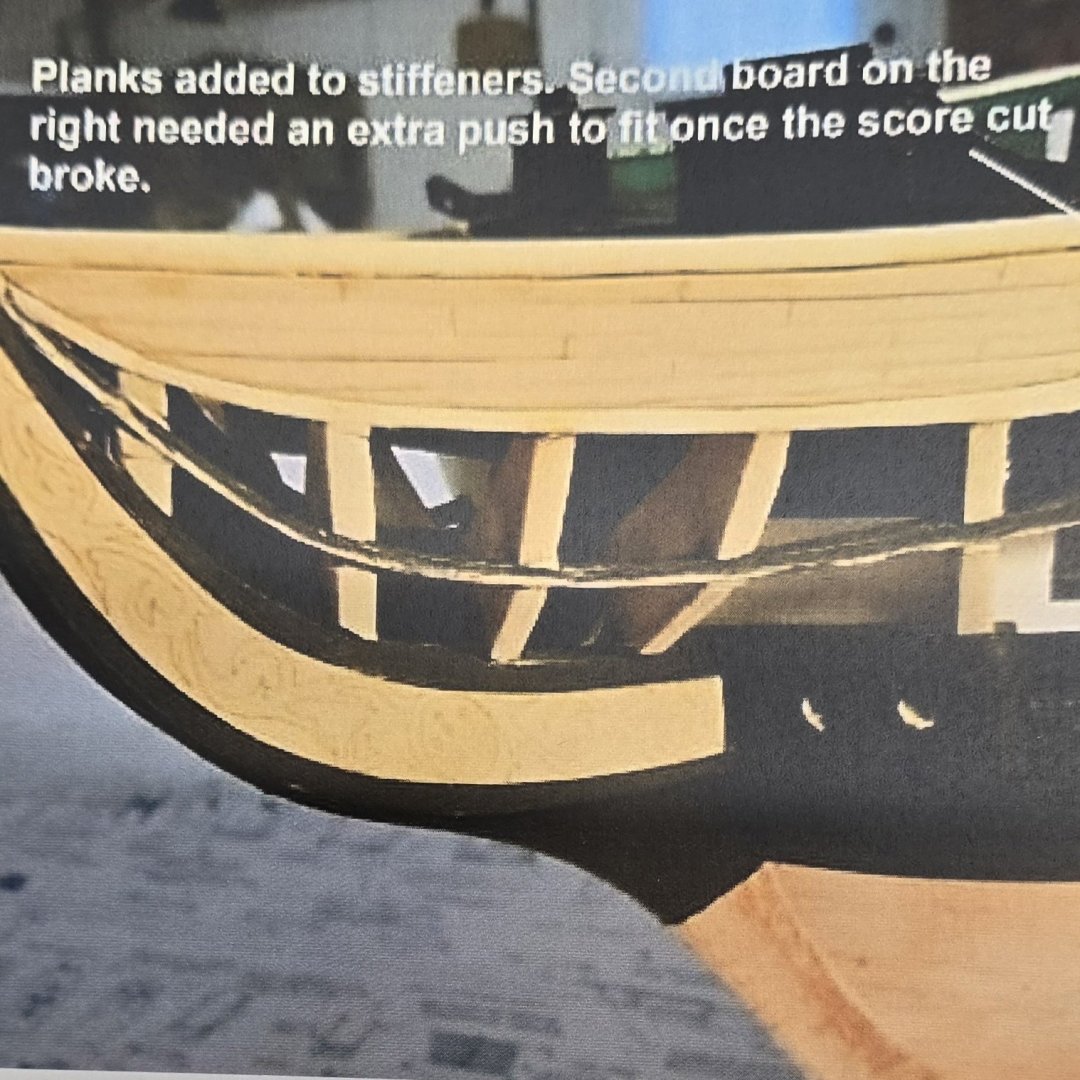
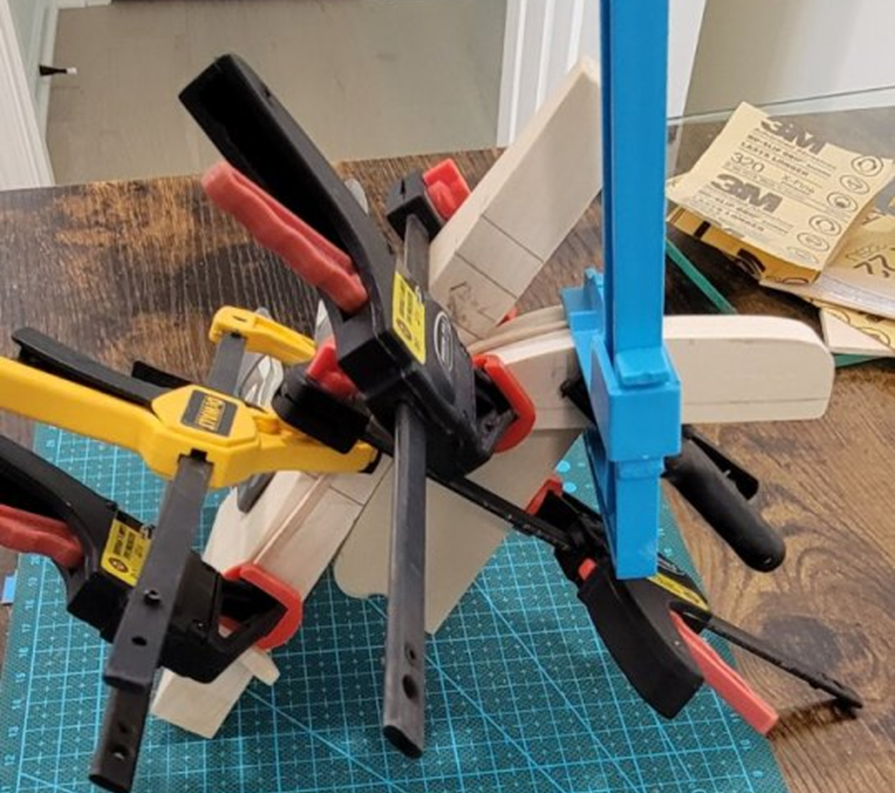
Those are really great photos! The first two tell a very interesting story. I wonder how long it will take me to figure out how to make that bending tool? Also, the more I look at all of these builds, the more I come to believe that the supports need to come first. This should help in shaping the rails themselves. I tried making the starboard side third rail today, and I think the only way I can salvage it is to introduce the compound bend shown in Tony's photos above. At what point in this build do things get easier? 🤔 Thanks again Mustafa.
-
The styrene solution is the one employed in the Hunt practicum. It's a fairly easy material to work with and may have been an easier route for you to take, Mustafa. But yours is definitely an out of the box alternative solution. And, the more I look at Unegawahya's work, the more I'm impressed. Cheers
-
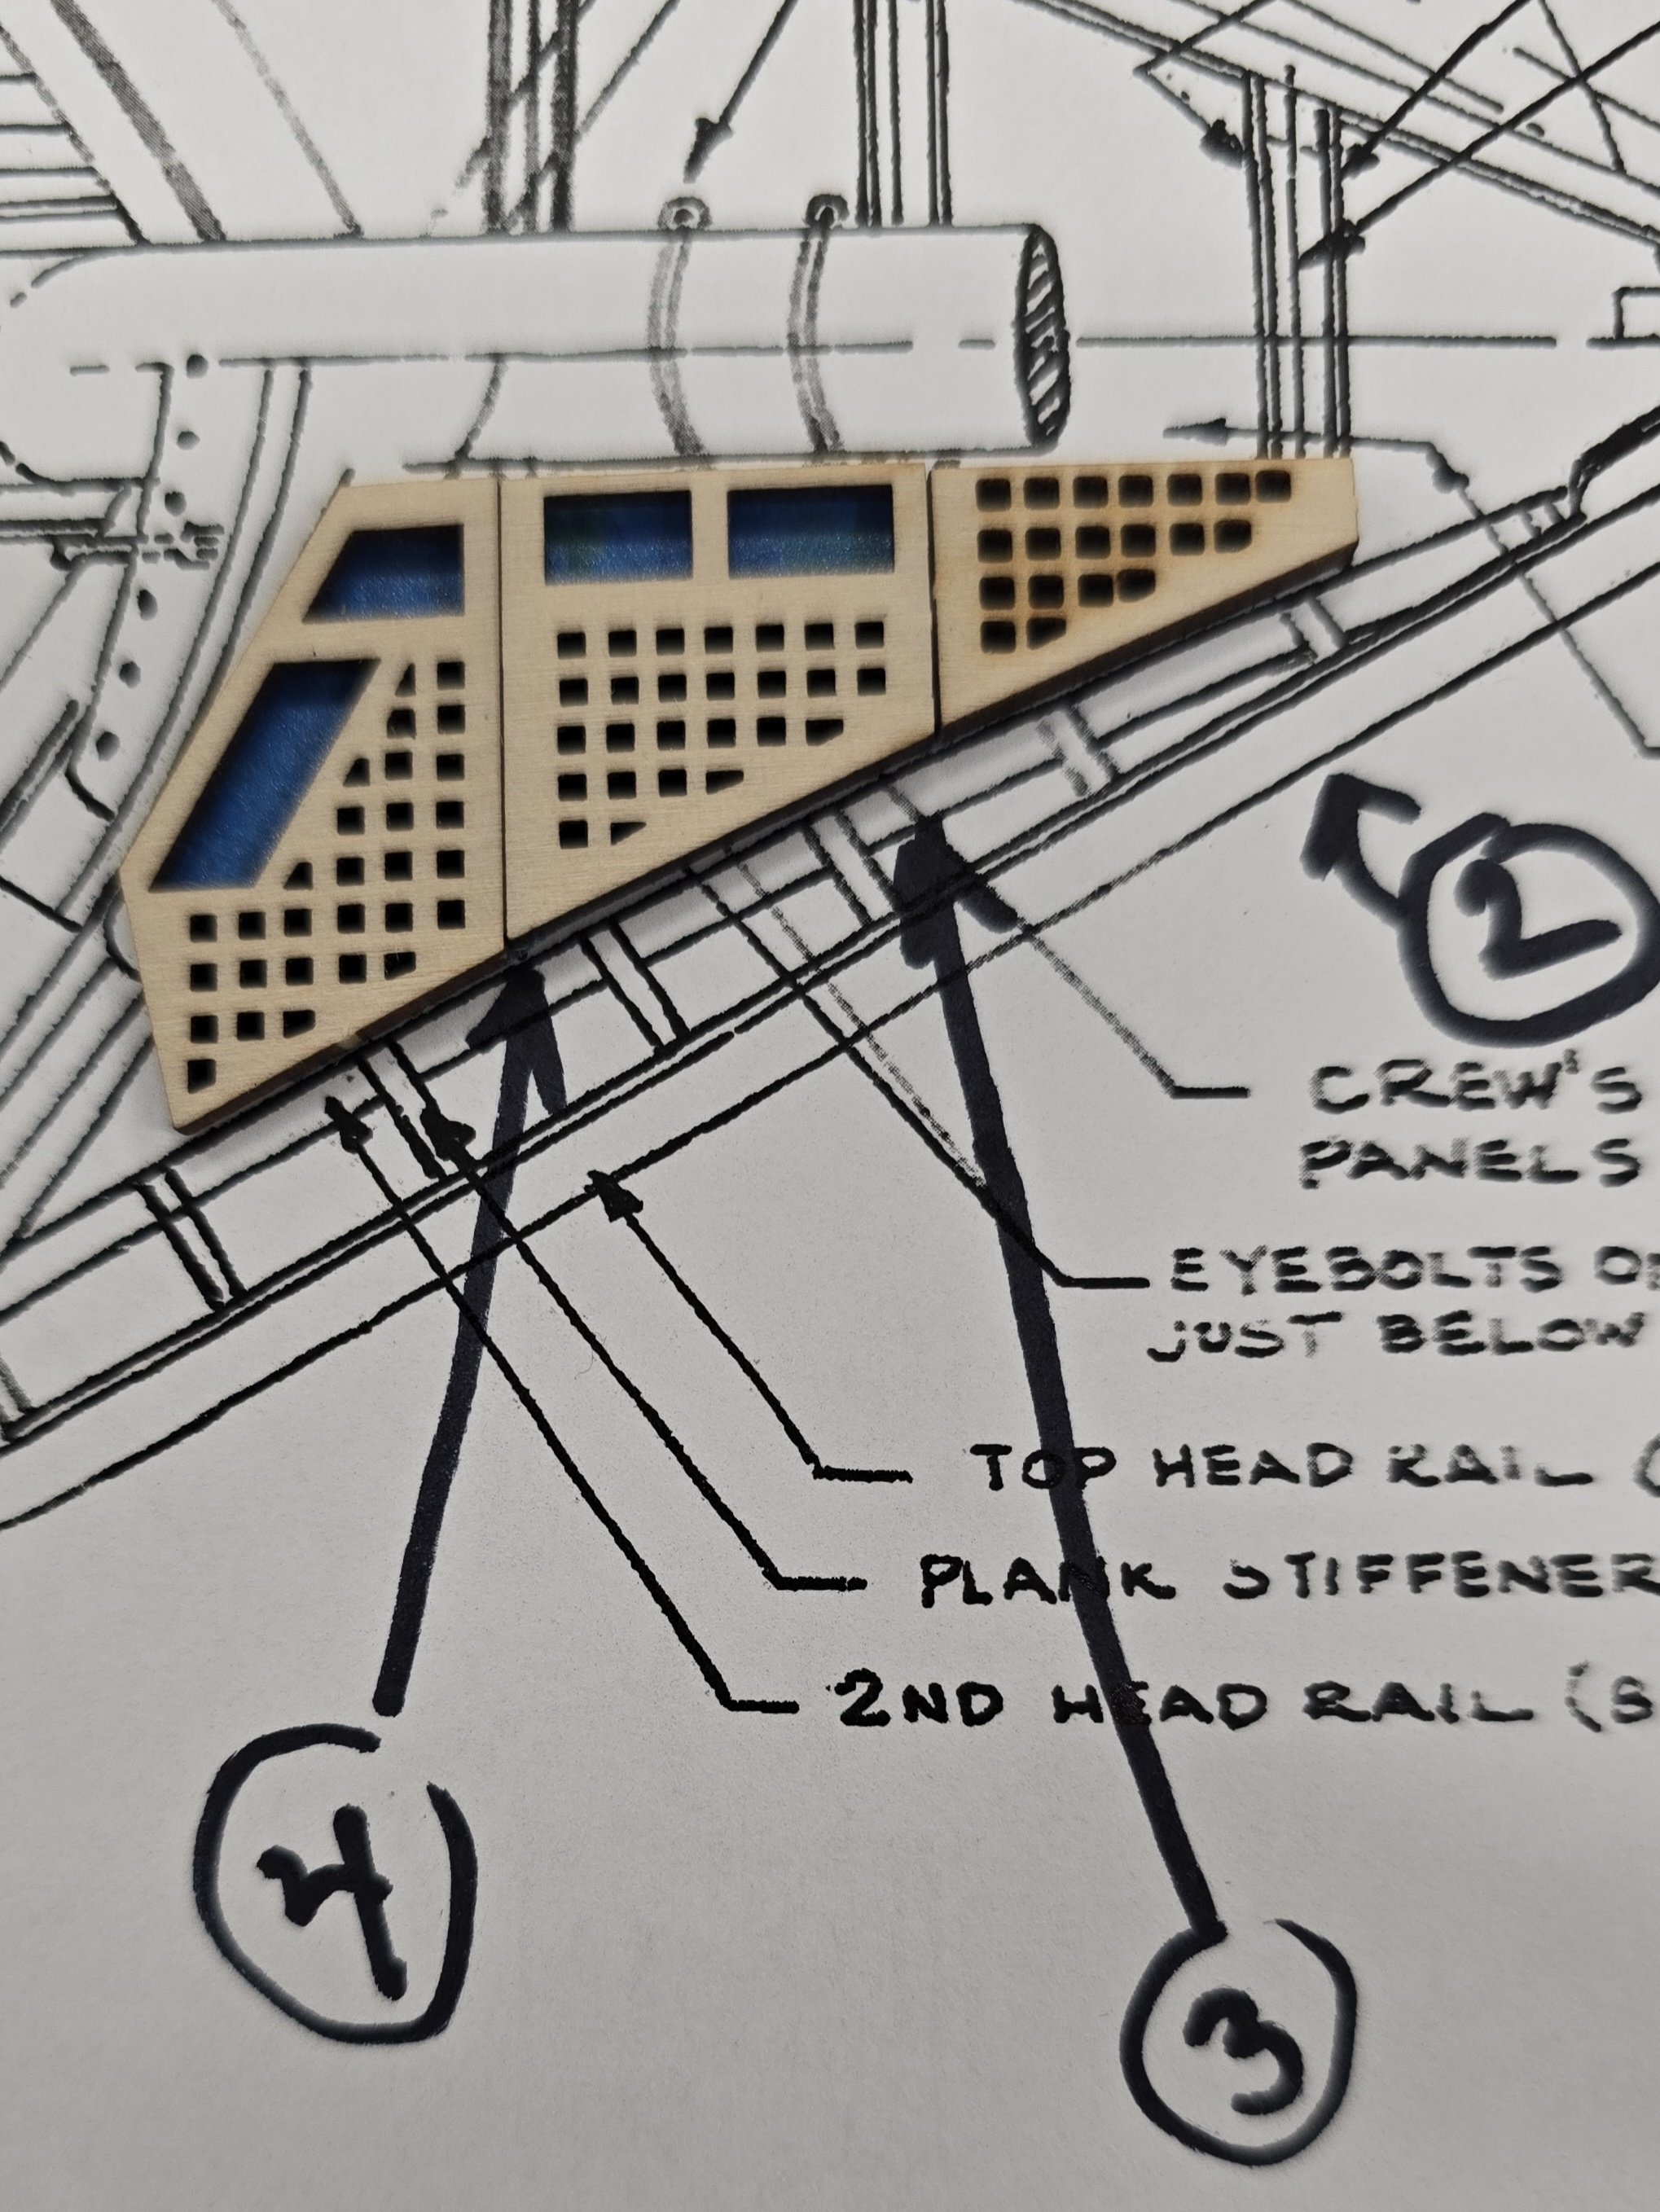
There has been discussion about the 3rd rail at Unegawahya's site, but since he's well past that point, and I'm still gathering information, I thought I'd stay out of his hair and ponder the issue here. My usual go to reference on matters such as these is XKen's build log. But on this subject he's a little short on detail. ERS Rich however, has quite a lot to say and, from what I've seen, has the best documentation of a way to go about dealing rails 3 to 5. I know I won't construct the actual rail the way that ERS Rich did, but the photographs he includes in his log are the best I've seen to illustrate how to deal with the supports for rails 3 to 5. And of course there's Jon's (JSGerson) log, which follows the Hunt Practicum's methodology. Here, I don't care for the two (three?) part construction of rails 3, 4 and 5. Also, not keen on the idea of adding the supports for those rails - after they're installed. However, I continue to be impressed with the amount of research and attention to detail that Jon brings to the table. Geez Jon, you built the catheads as a laminate! Just added Usedtosail's log entry. He constructs the rails differently than either ERS Rich or Jon, and takes a middle ground approach on the supports. If you go to page 1 of his build log, his is the best index of anyone's. Drill baby drill! Unfortunately, the photographic detail is a tad disappointing. He painted the supports and rails and it's hard to pick out some of the details. April 28: After looking at photos Mustafa provided of a build at another site (look ahead a few posts), I remembered someone else tackling the job by making the supports first. This was KMart. I just added the link to his build where he begins making theses. The wool gathering continues.. As I find other methods to consider, I will add them to this post, so as to keep the links in one place for easier reference. I'm going one step further and bookmarking this post so I can get to it more easily as well. May 4, How could I not have added a link to Xken's build? He's solidly in the camp of build the rails first, add supports and grating later. Sadly, not much of use here except for a view of the head area after construction, which helps me visualize how it should fit in to the scheme Added it below.. See the links below:
-
USS Constitution by mtbediz - 1:76
Der Alte Rentner replied to mtbediz's topic in - Build logs for subjects built 1751 - 1800
Like you, I've been distracted with family matters for a few days and haven't had time to get to the shipyard. I'm looking at every picture I can lay my hands on to see the shape of the third rail, before I start construction. Now that you're back to work, maybe I can tap into your expertise in a couple of days. Amazing result on the pinstriping! -
Could you please add a couple of photos from the top so I can see detail on the curve in the rails?
-
Words I'll continue to live by. 😉
-
I stand corrected. As good as yours look, I can only say, press on! Say, are you actually making the netting? If not, what materials are you using?
-
Jon, Again, I don't plan to install the catheads until later, so as not to risk damage as I handle the hull for subsequent work. I predrilled the holes for the eyebolts that are between the cleat and the bulkheads. So, adding them later wouldn't be a problem. Having said that, Unegawahya's point about the pinstriping and supports below the catheads is valid. Since this is the next area I'll be tackling, I'll be giving the matter a lot of thought. Thanks to you and Unegawahya for the photos!
-
Nice work. Looking about your spar deck, it's dawning on my how much I still have ahead of me. Daunting, to say the least. and anticipating a comment by Jon, you look to be building Conny as she appears today. In which case, why the hammock stanchions and netting? Lastly, fantastic looking canopies! I paged back to review your techniques. May I say, you could hold a Master's class on the subject. I don't think I'm going to bother, but as nice as yours look, I may reconsider..
-
Thank you kind sir. Positive feedback is always appreciated.
-
I'm ready for a twelve step plan to deal with that addiction.. Having said that, after pretty much an entire day at the shipyards, I got to my first coat of poly on the top gallant rails and went back to dealing with the cat heads. I need 24 hours for the stain to dry, then I'll coat it them with poly. I don't think I will install them or the gangway boards until I'm about ready to do the rigging.

-
Mustafa, feel free to post on my blog anytime. As you mentioned to me several times, that's what this website is here for. Also, I agree that the smaller eyebolts are the better fit when it comes to scale. Meanwhile, back at the shipyard.. Top Gallant rails are more or less done on the starboard side. Port side will have to wait until tomorrow or wednesday. Sigh, why does this fiddly work take so freaking long?