Der Alte Rentner
-
Posts
1,018 -
Joined
-
Last visited
Content Type
Profiles
Forums
Gallery
Events
Everything posted by Der Alte Rentner
-
 No pix today. That tweaking is slow going, with the double-sided tape turning out to be quite the bear to remove. Also, starting to formulate a spardeck carronade construction plan for my short stint as snowbird in Feb.
 -
Thank you Unegawahya. ( I see that Gregg got here before me.. 😁)
-
No, you're not wrong. Sone of the pieces are a smidge oversized - as they stand right now, but I plan to whittle these to fit. I couldn't cut to the inside of the lines because, as you may have noticed, I took the filled-in images as my guide. It was hard enough to get close to the edge. I can't imagine actually trying to eliminate the line with the scroll saw. So I will be tackling the overages here and there with files and sandpaper. If worse comes to absolute worst, I'll make a slightly wider trailboard. Depending on my luck with shaping those trim lines, I may skip them all together, rendering the point moot.
-
It will most likely be a year or more before I get to this point , but going by the principal of, better to have it and not need it than need it and not have it, I will gratefully accept your offer! ( I'm pretty sure that Gregg will also be chiming in shortly..) BTW, Beautiful workmanship. thanks.
-
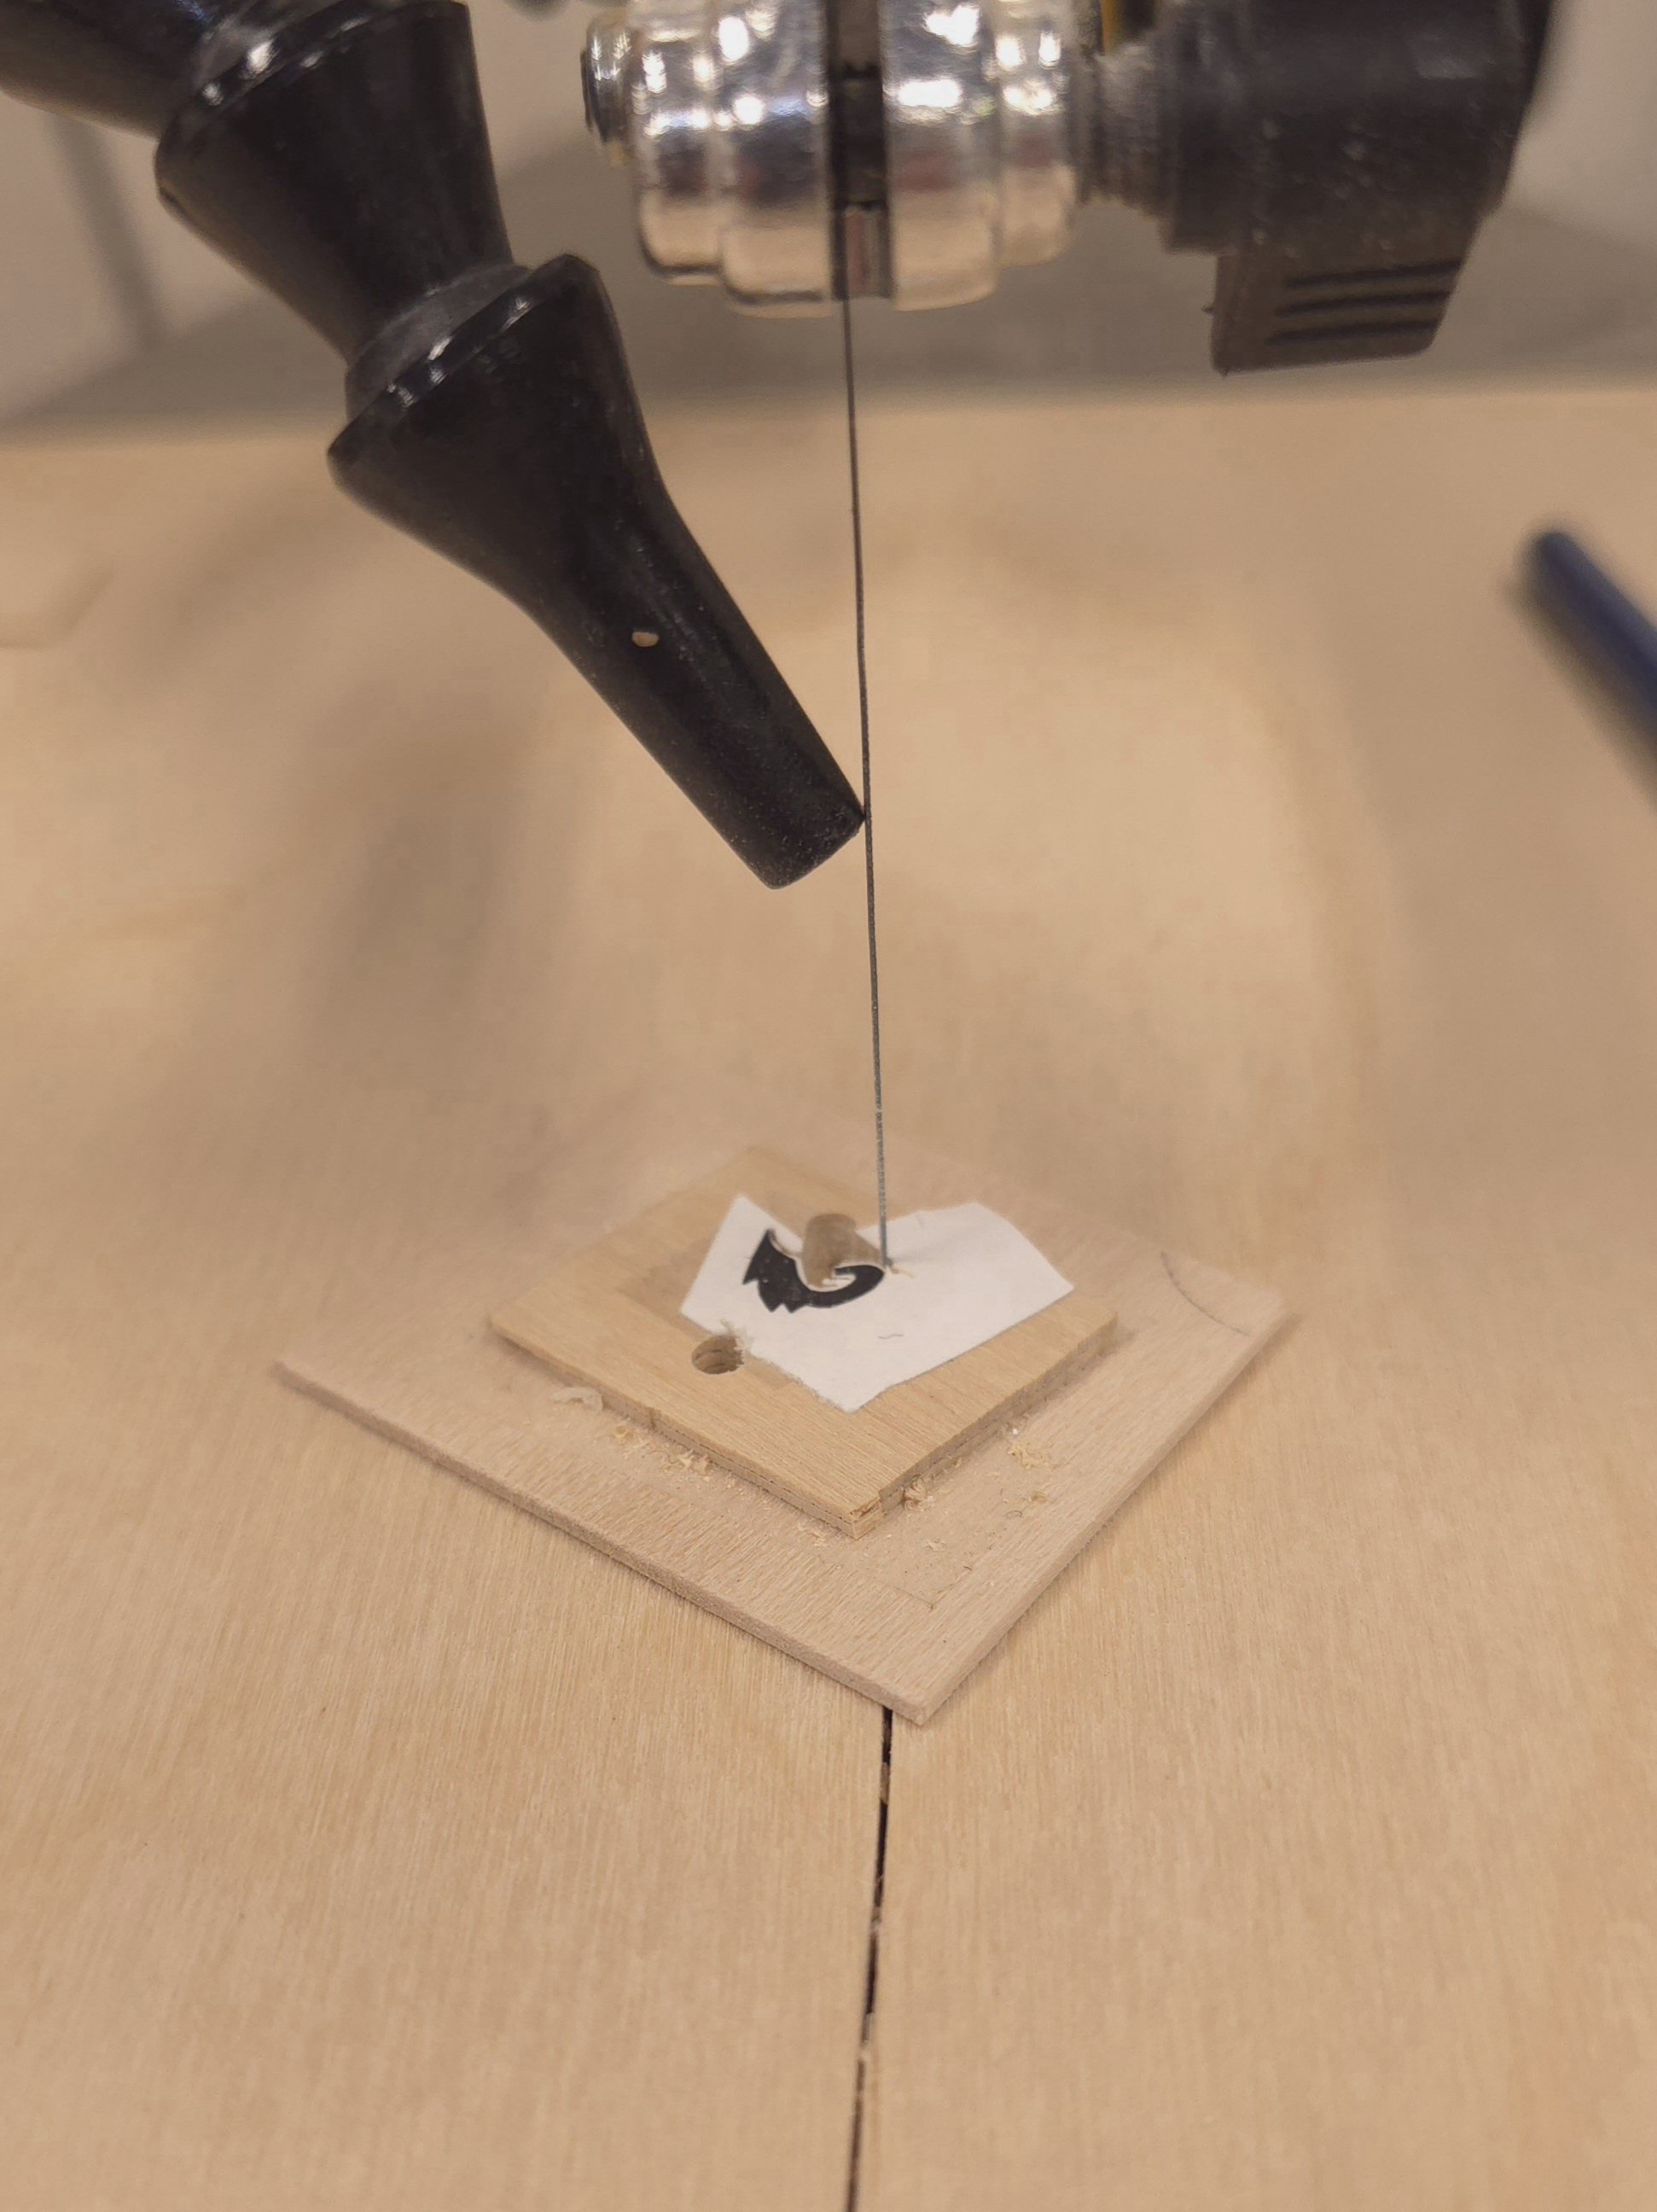
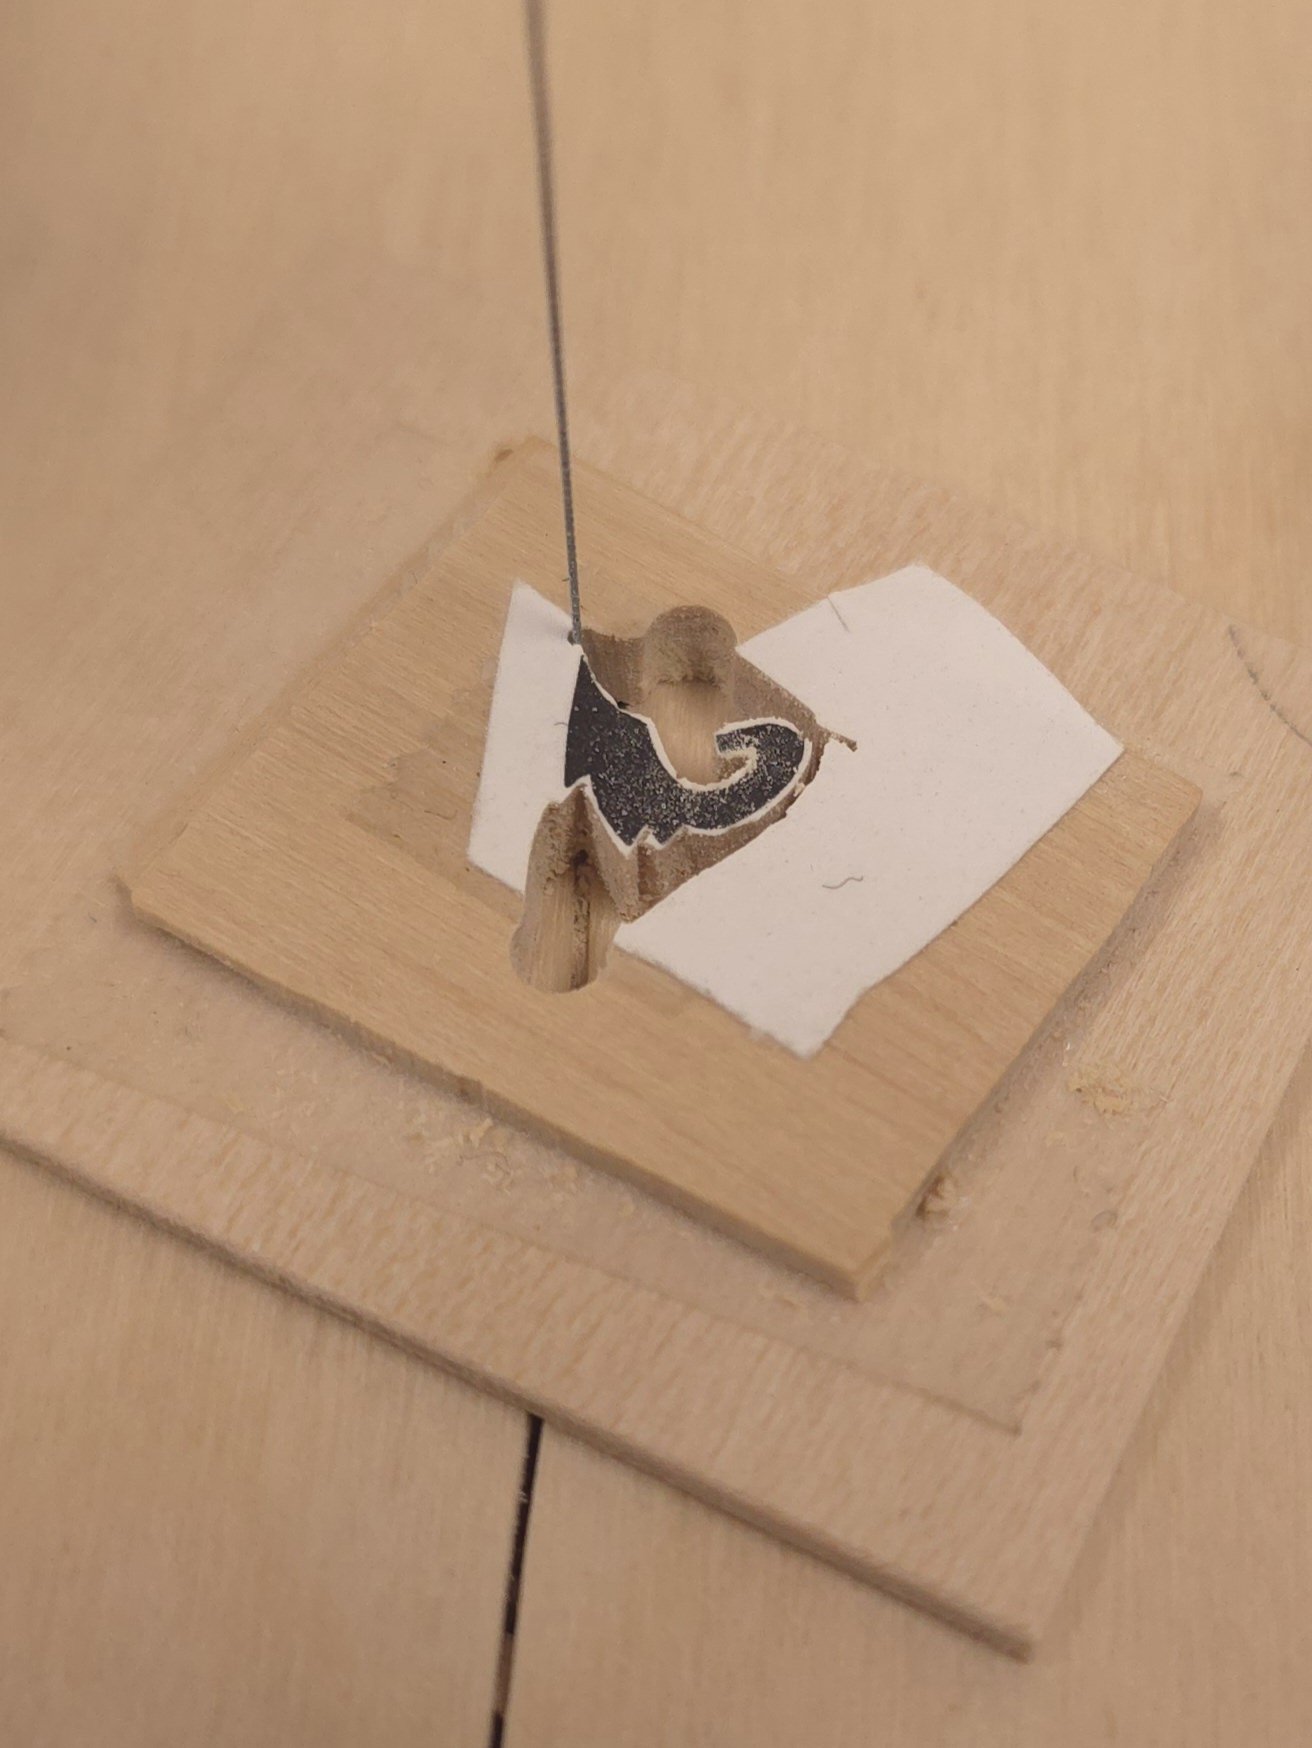
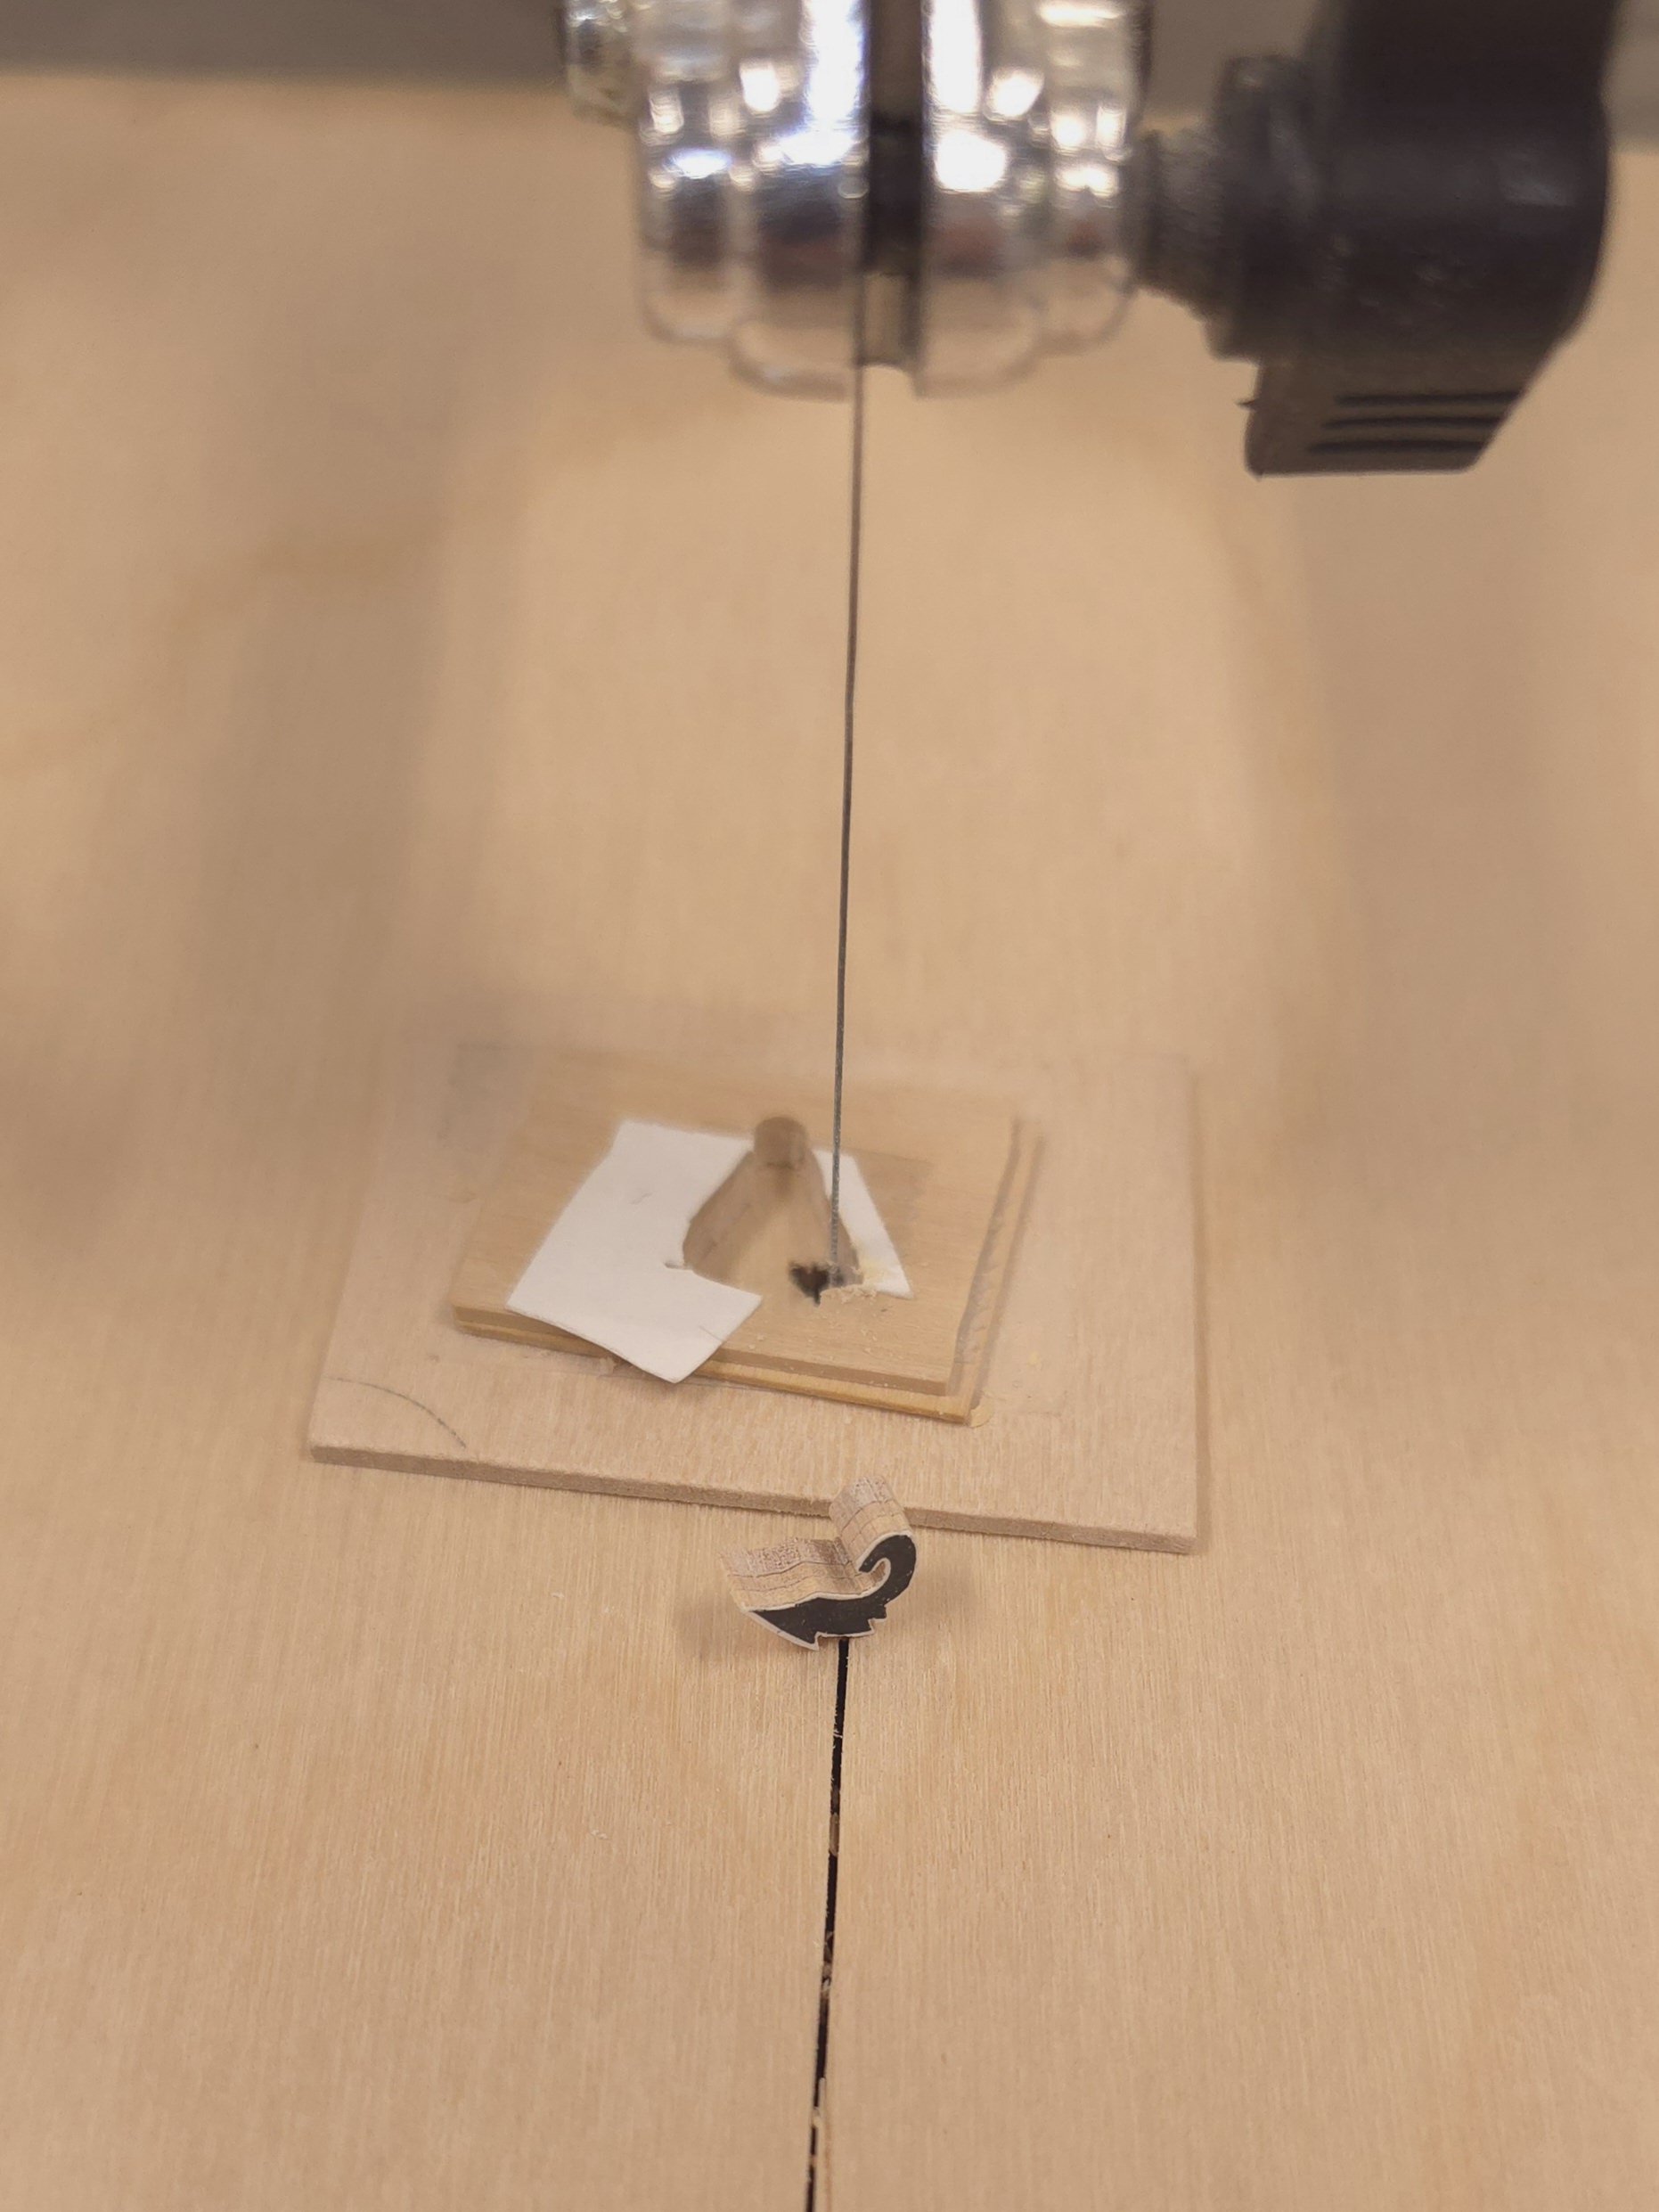
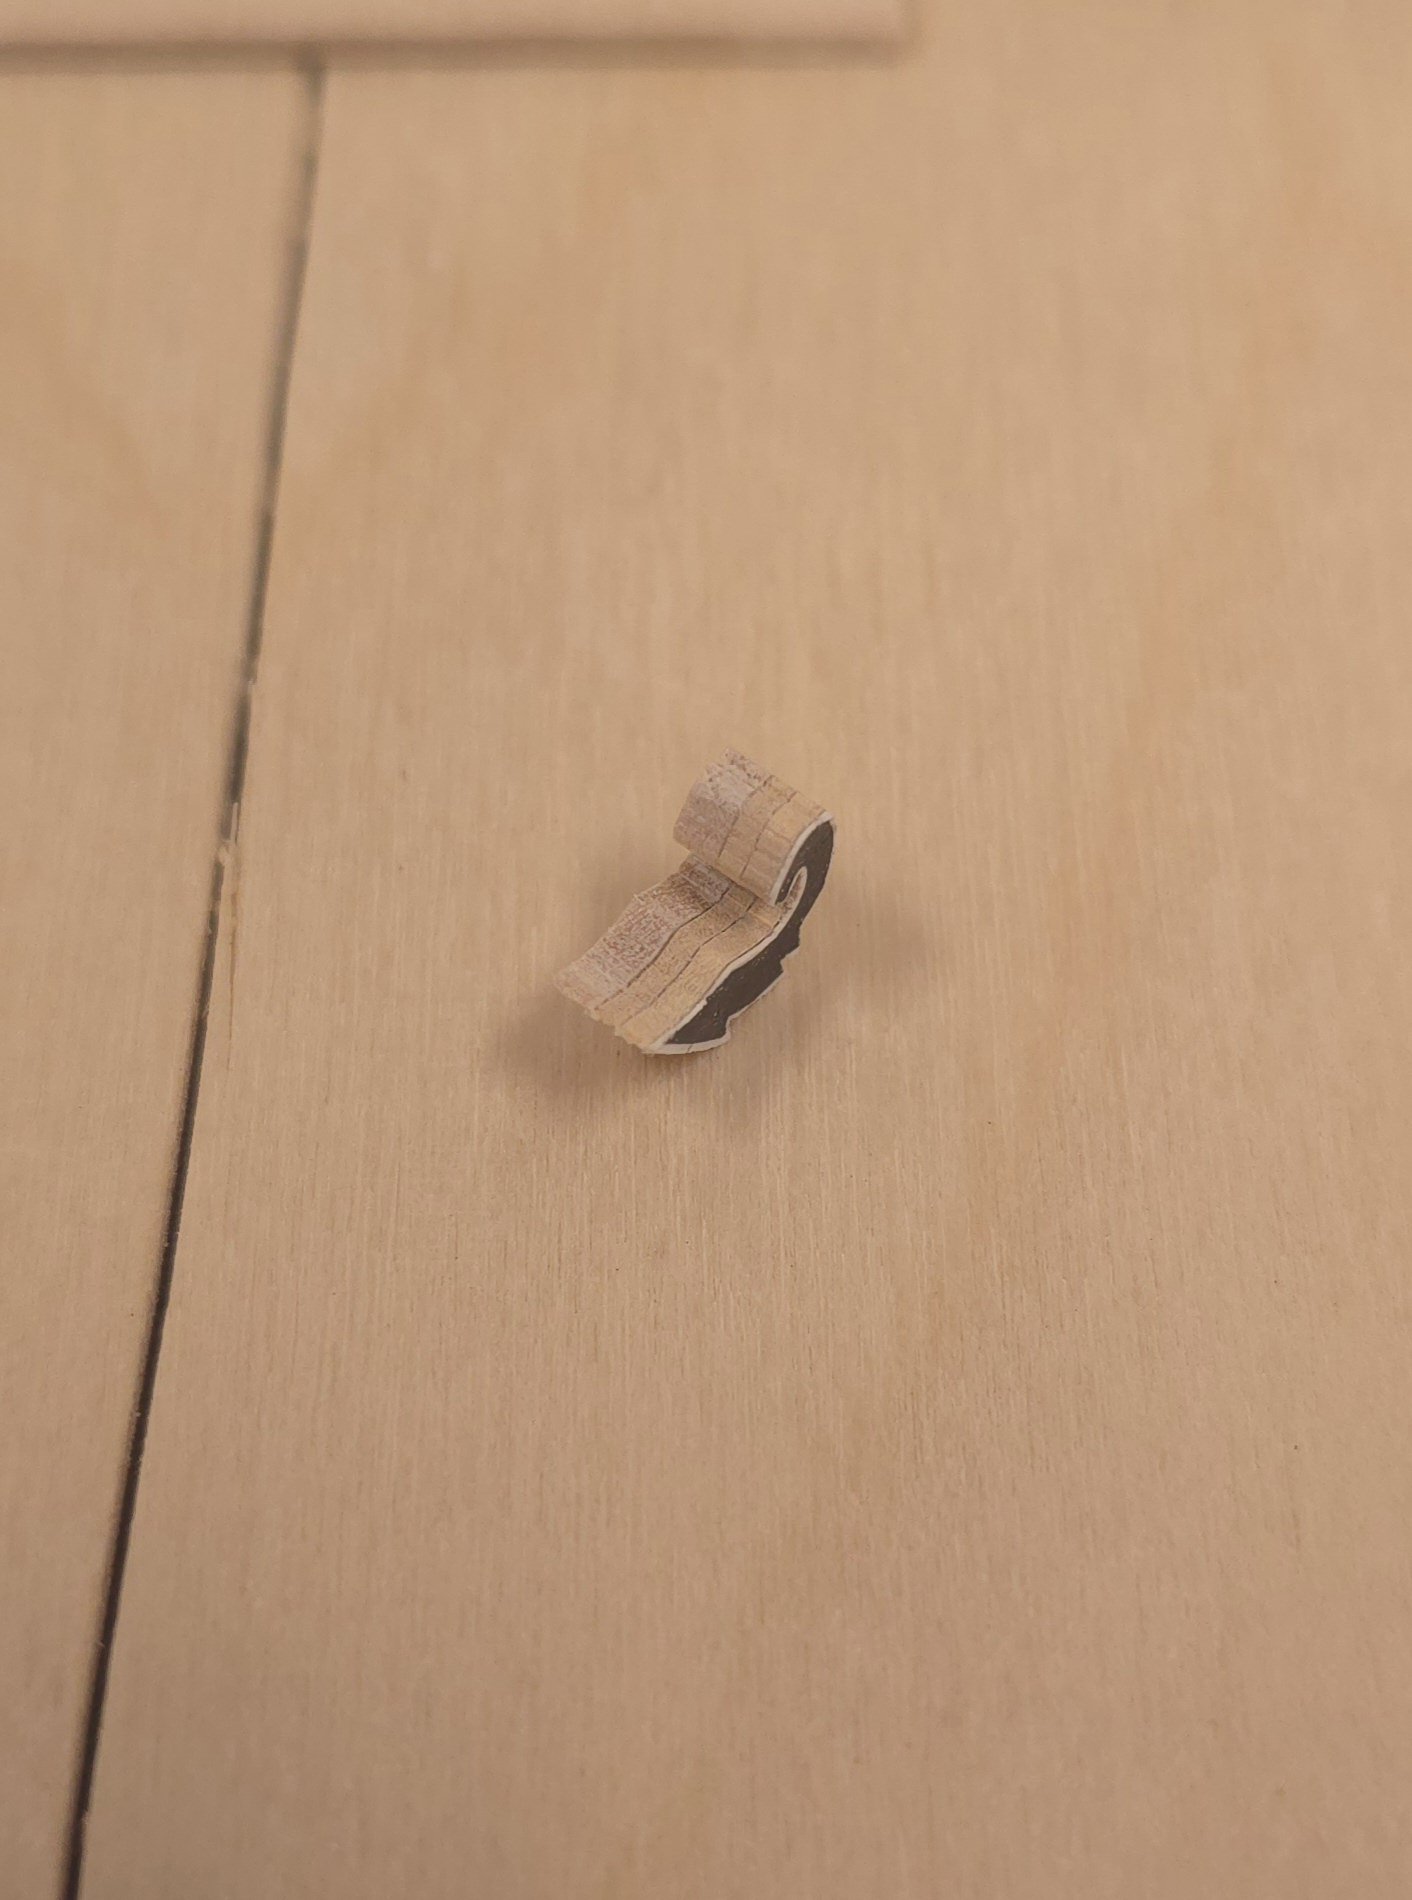
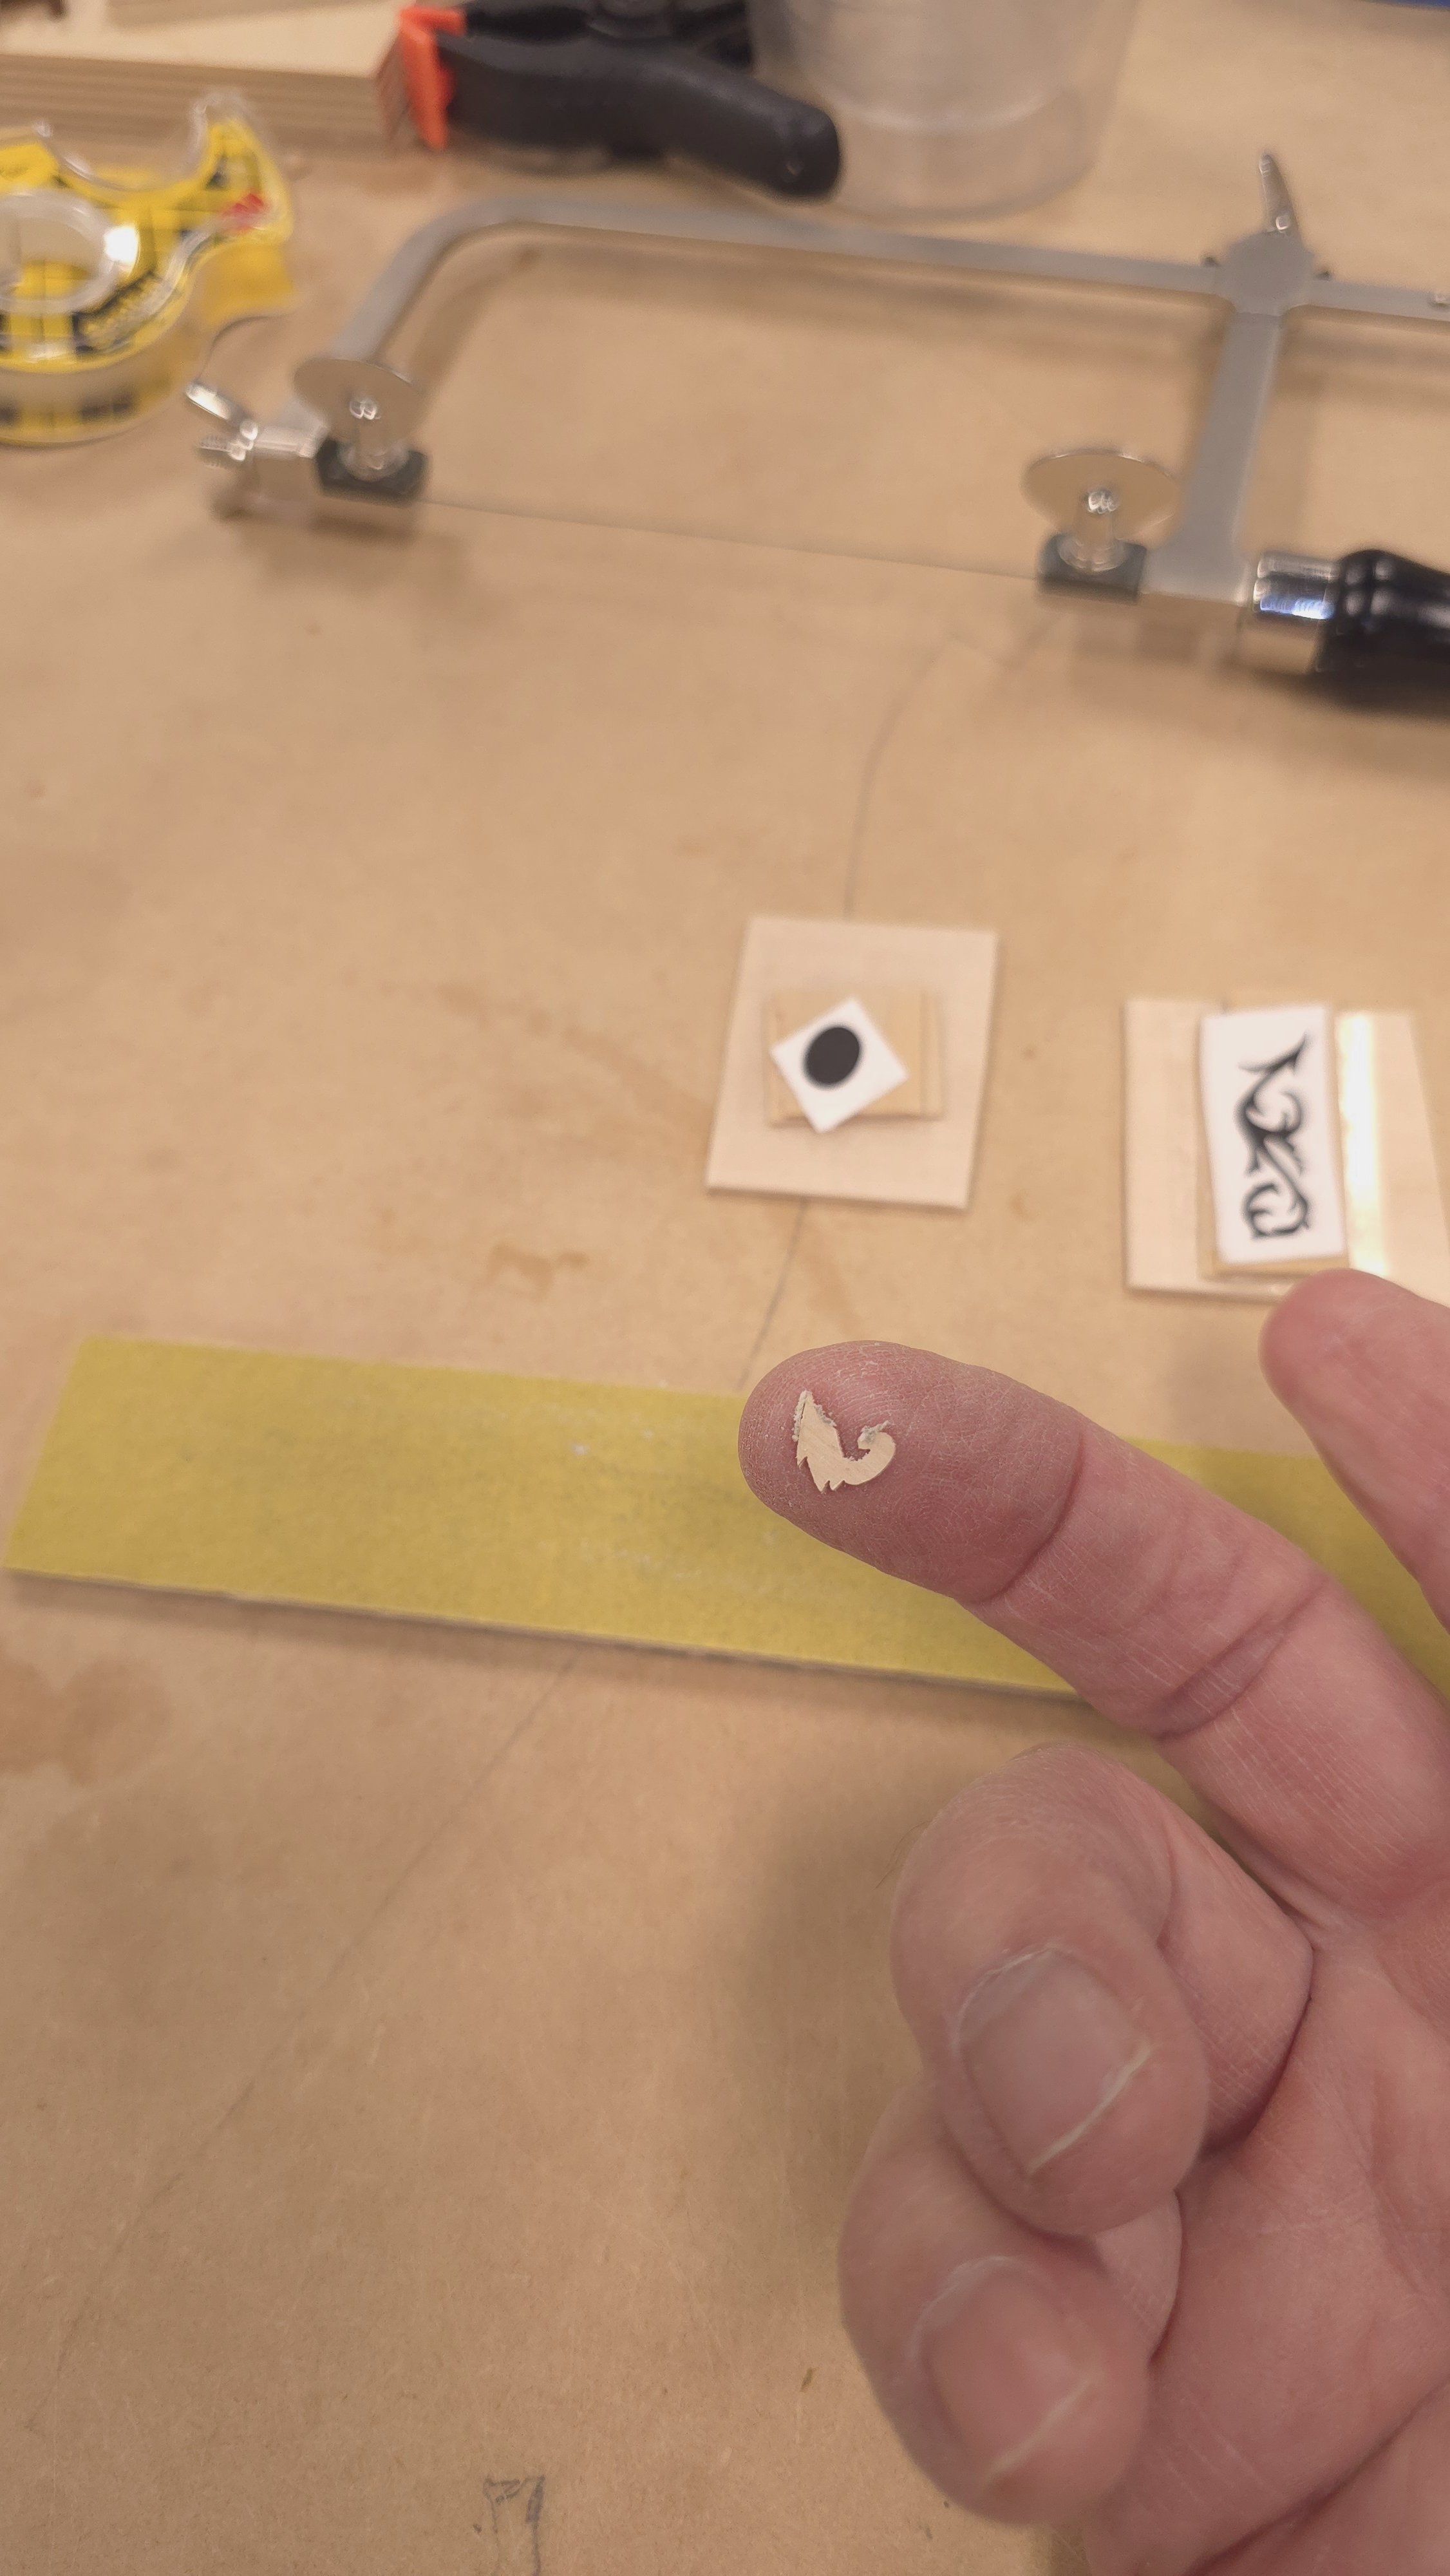
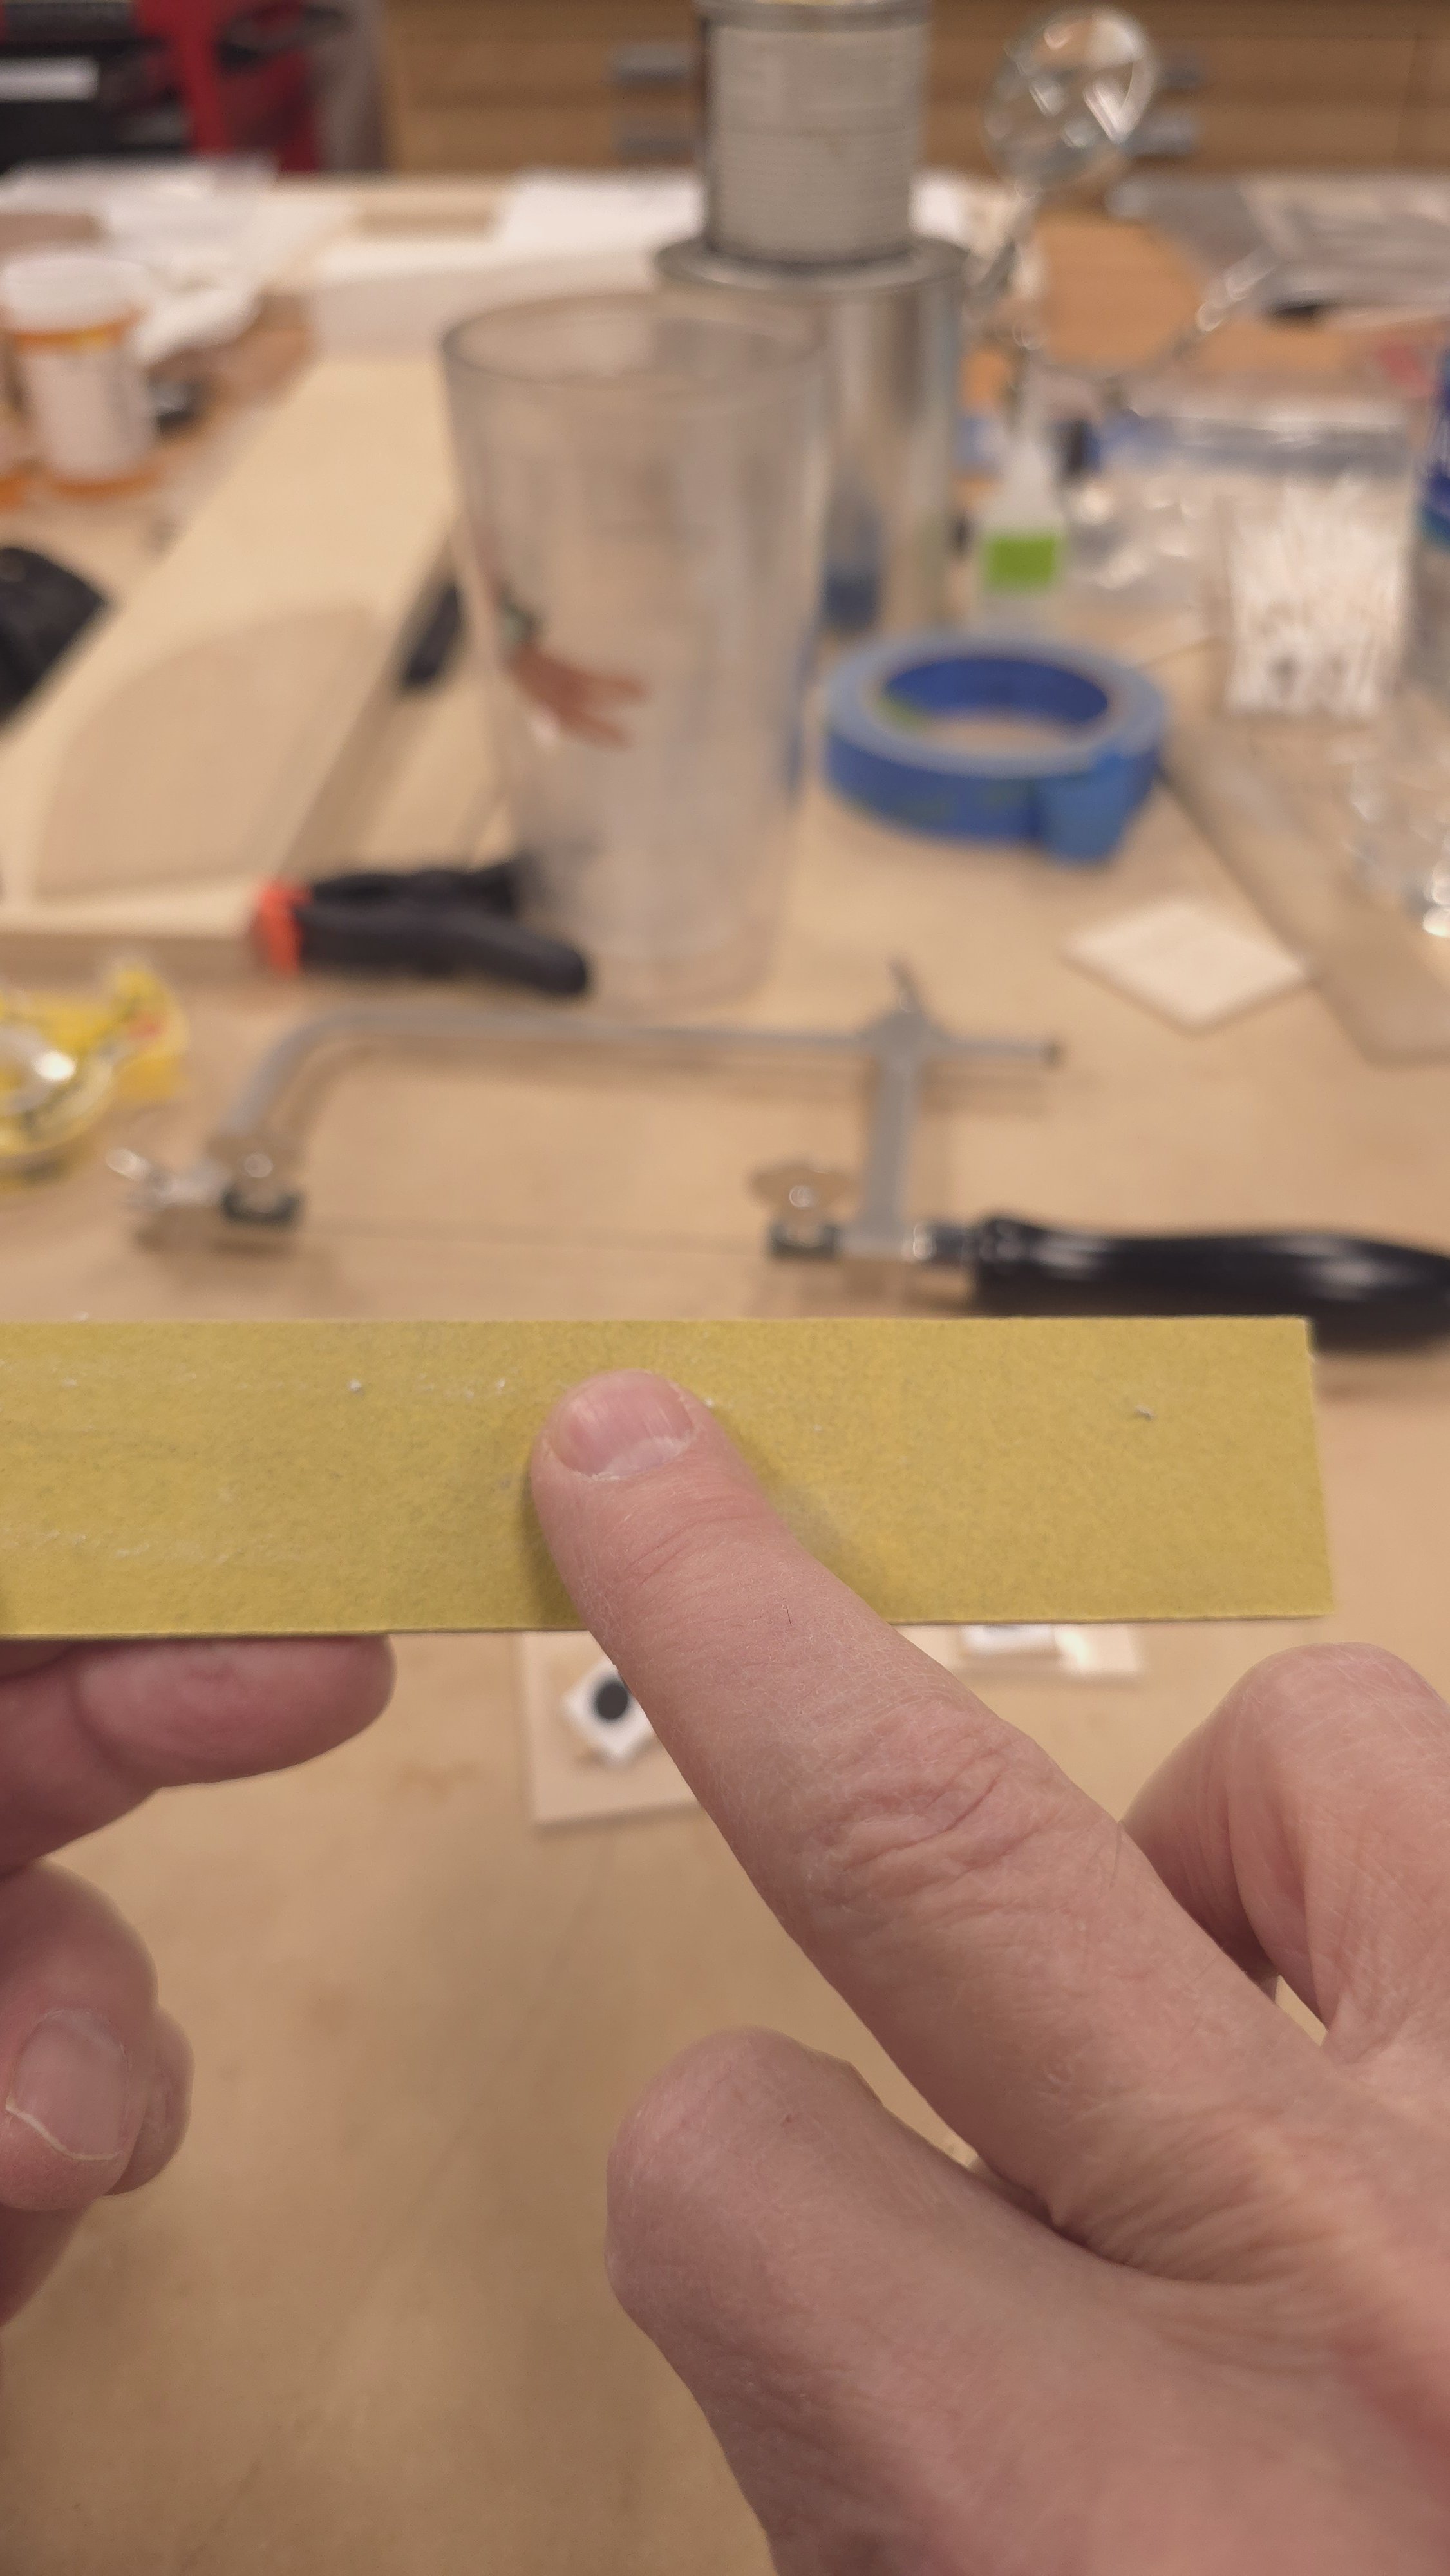
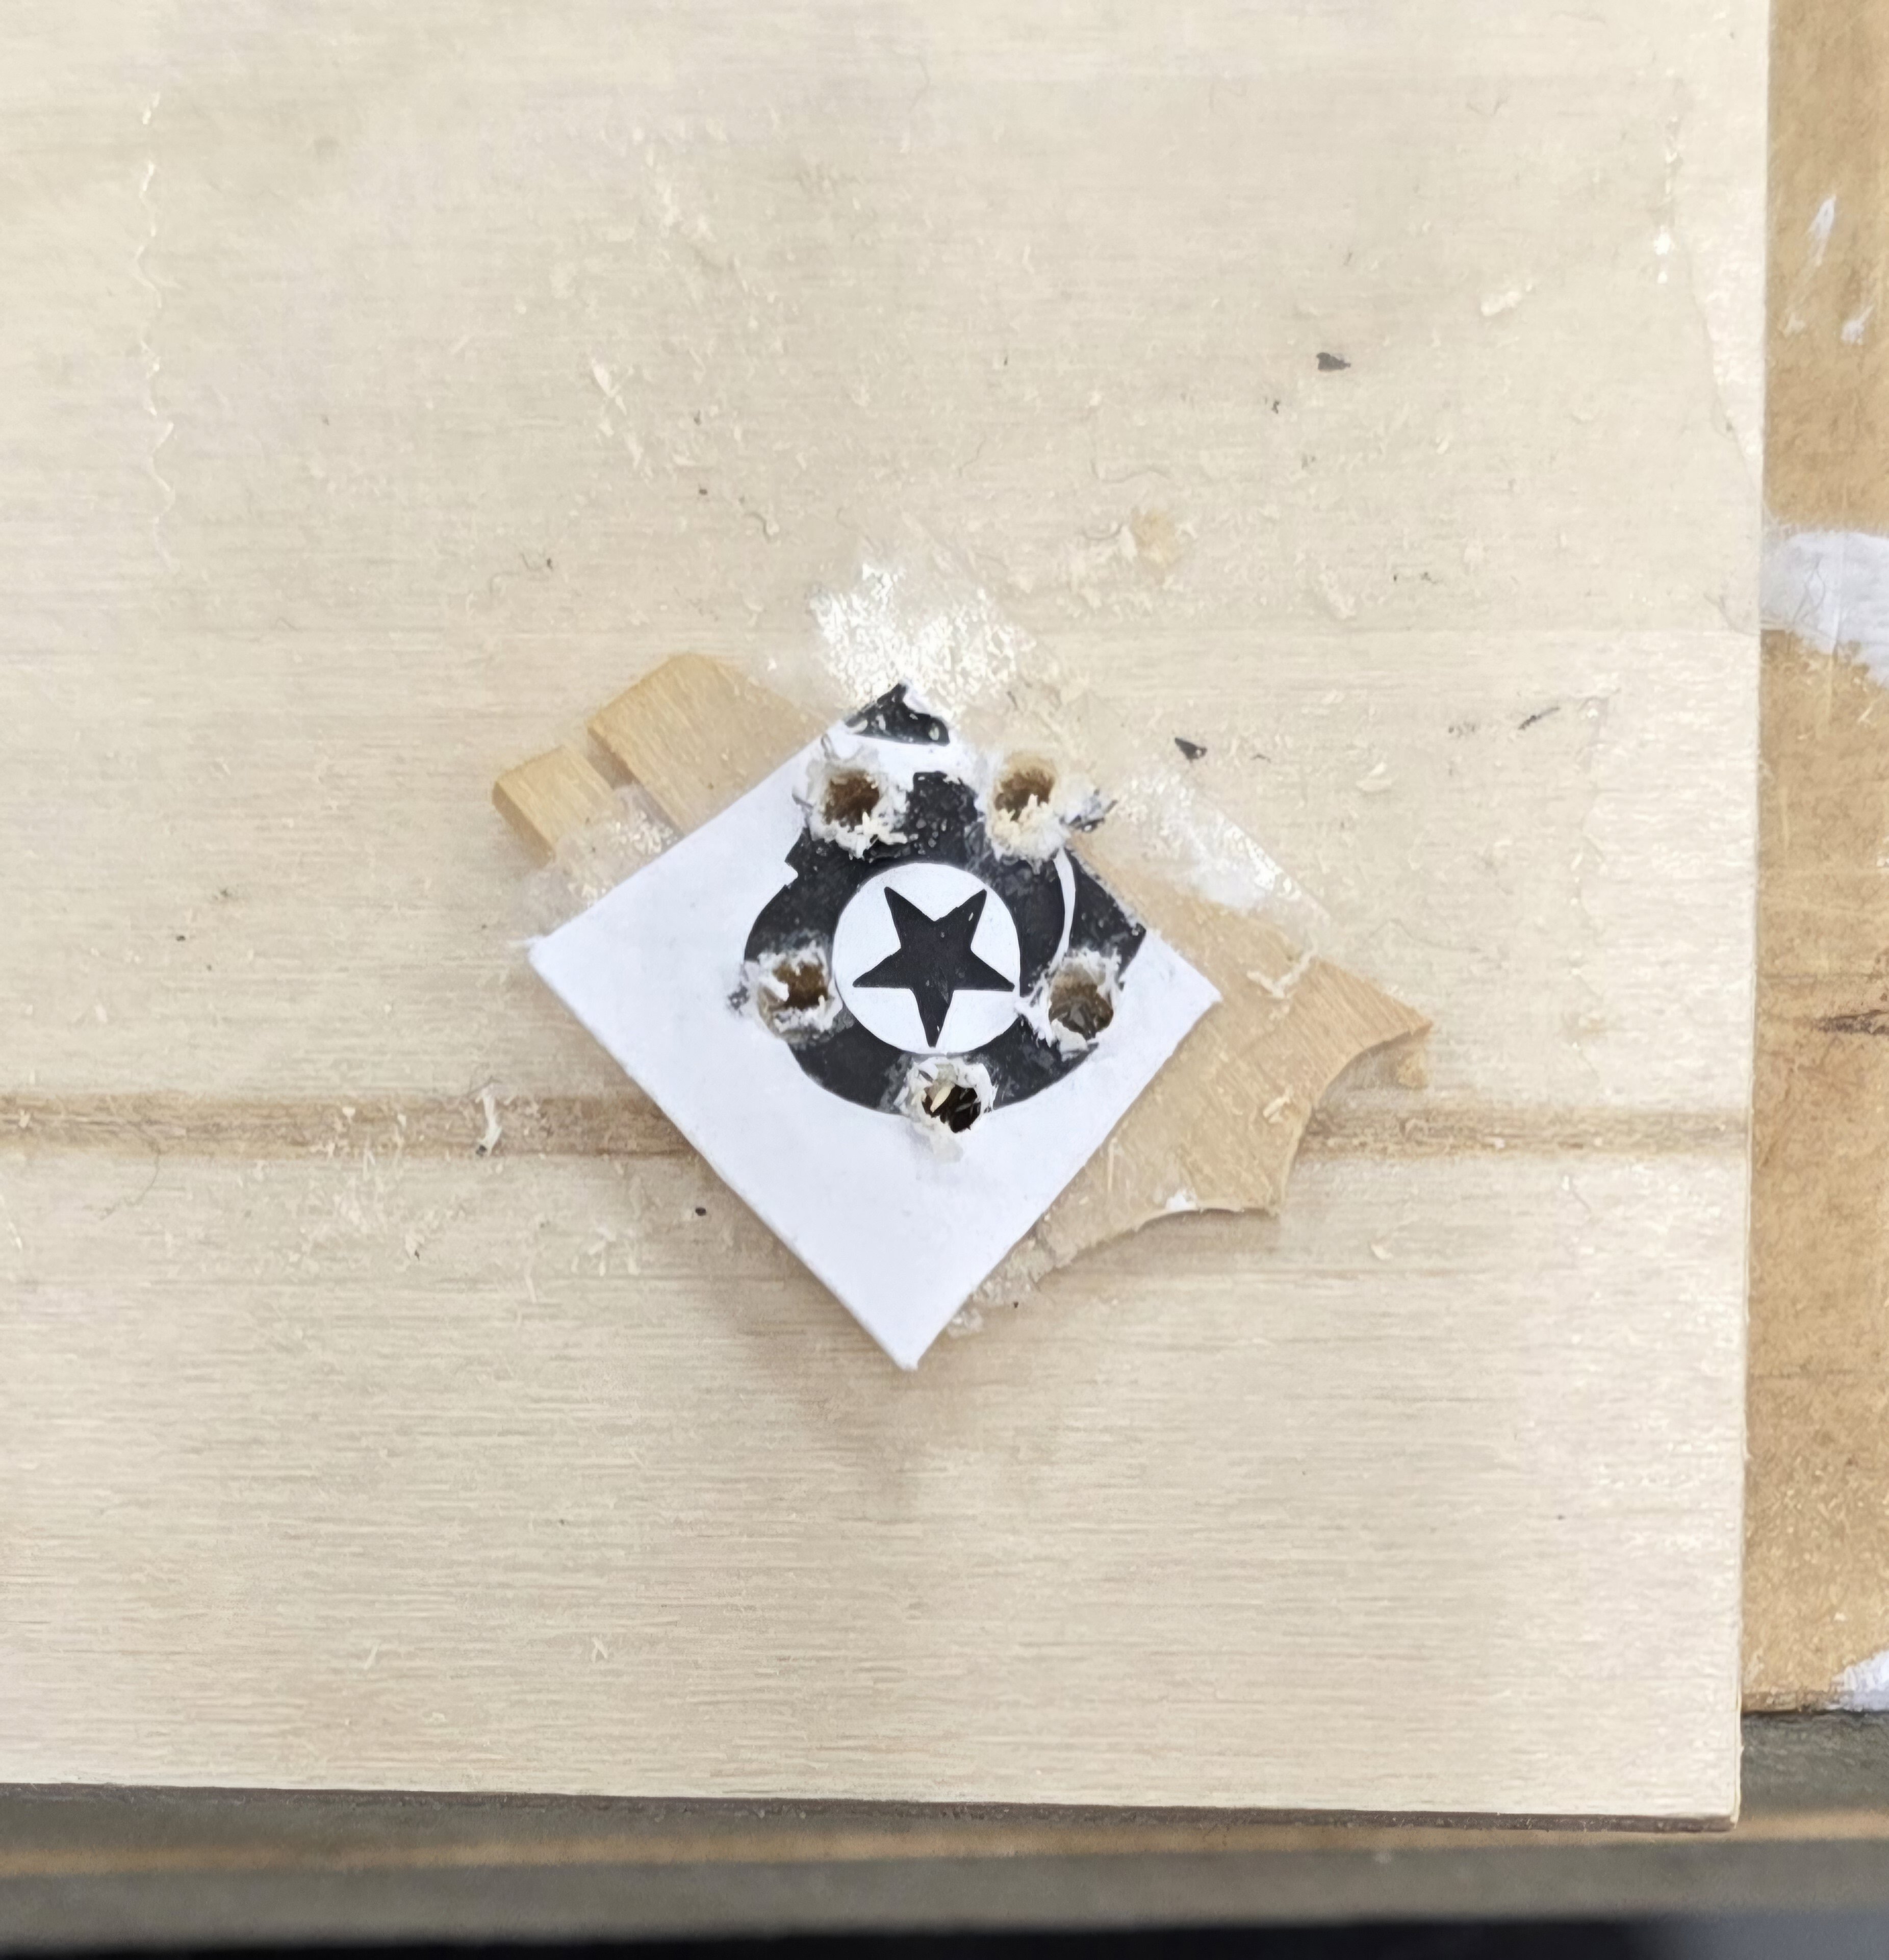
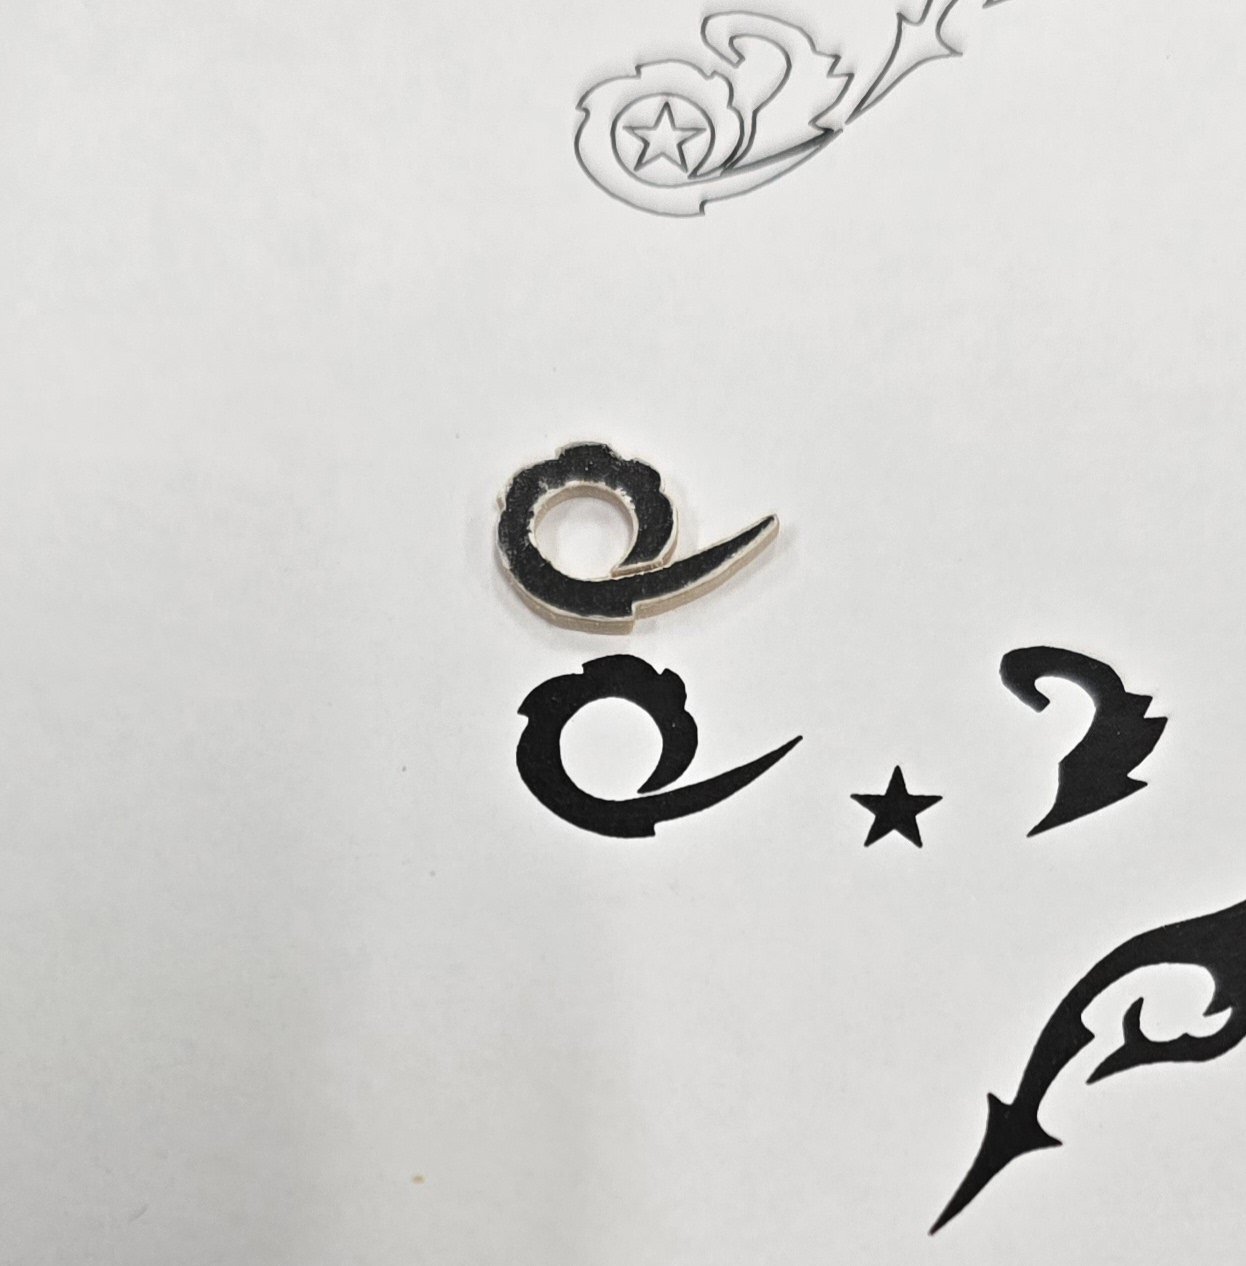
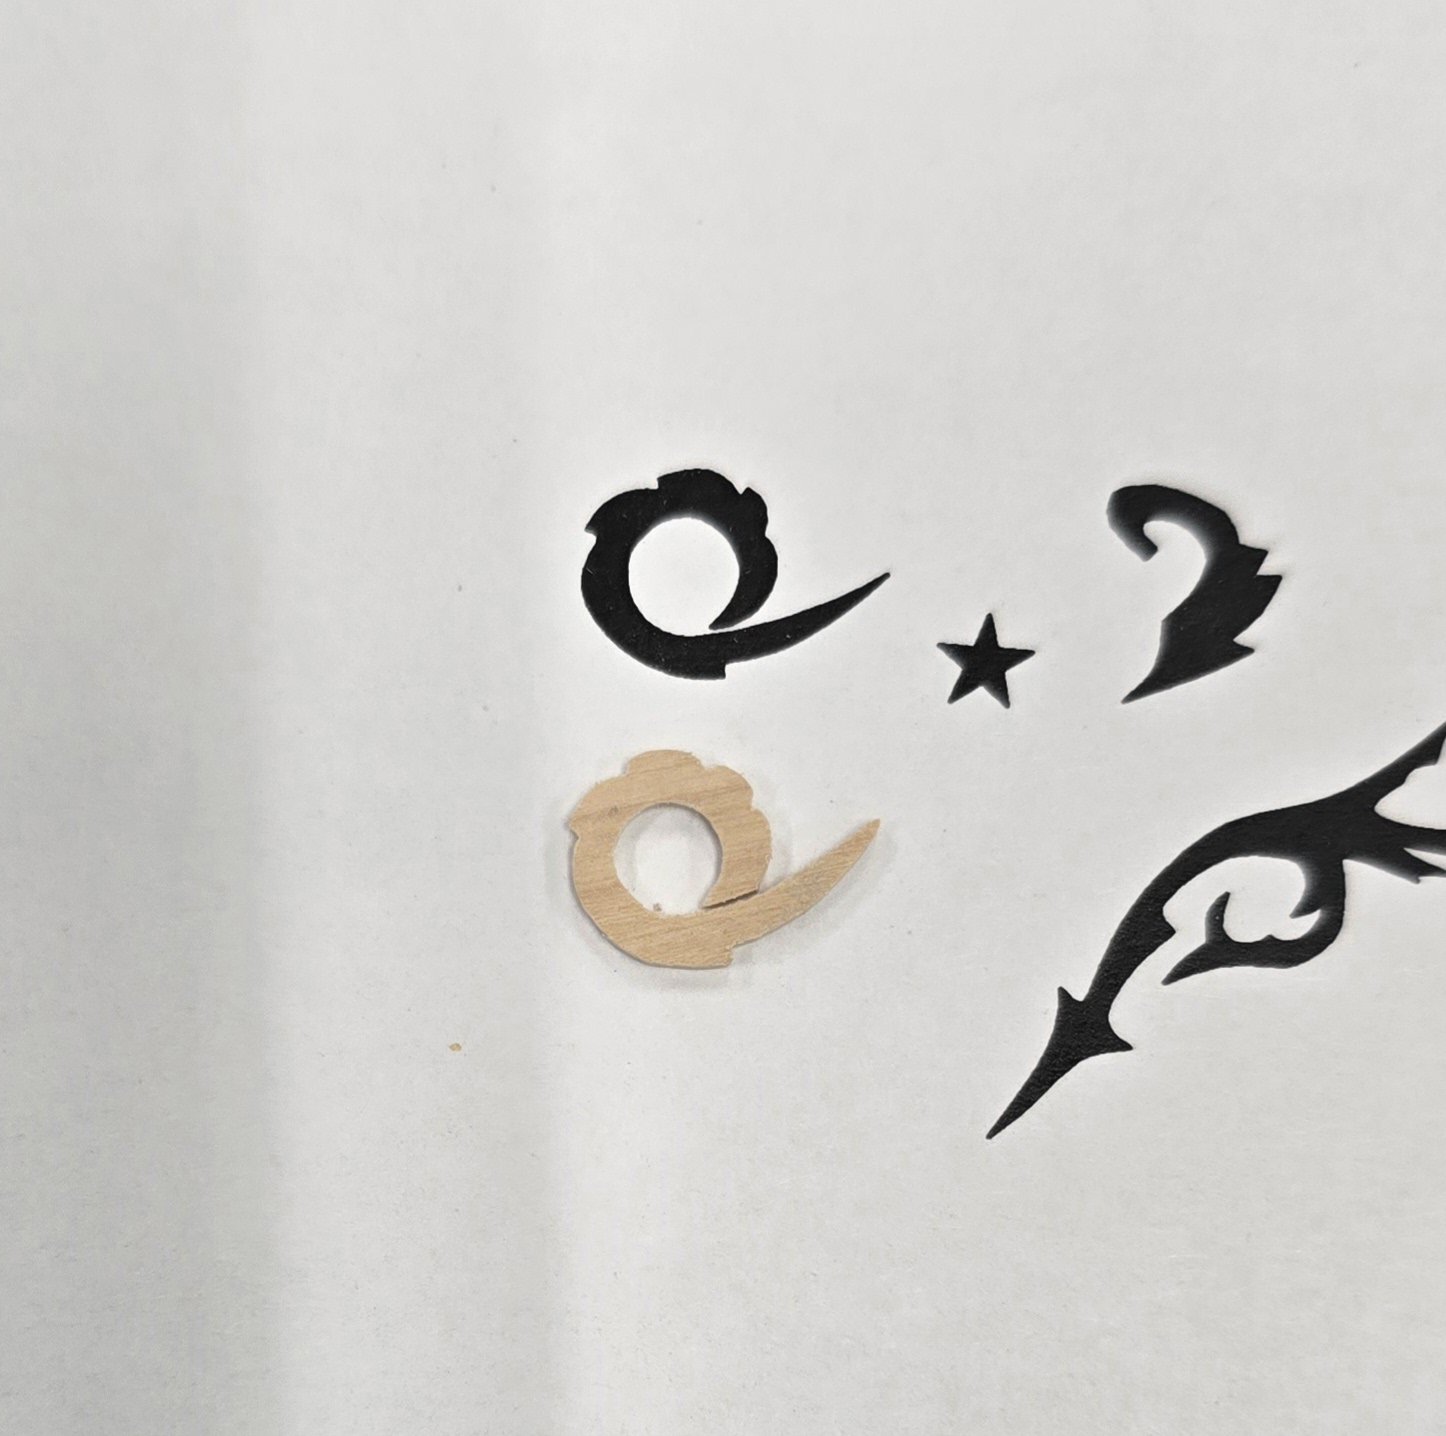
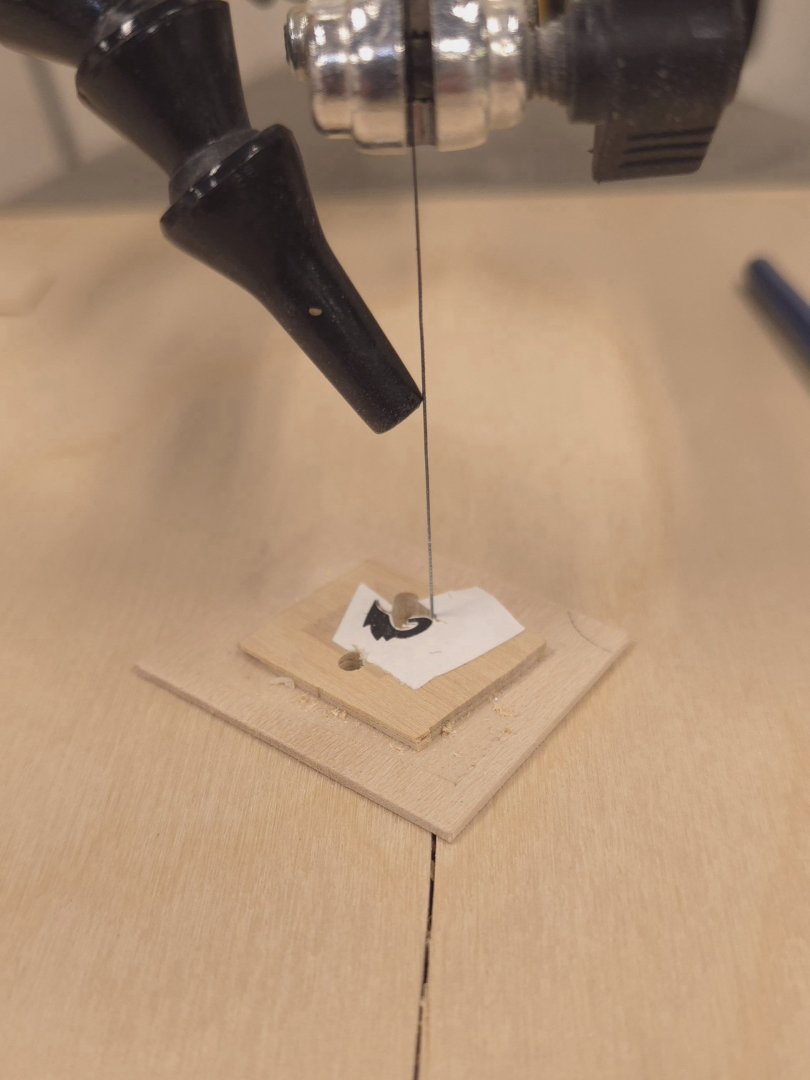
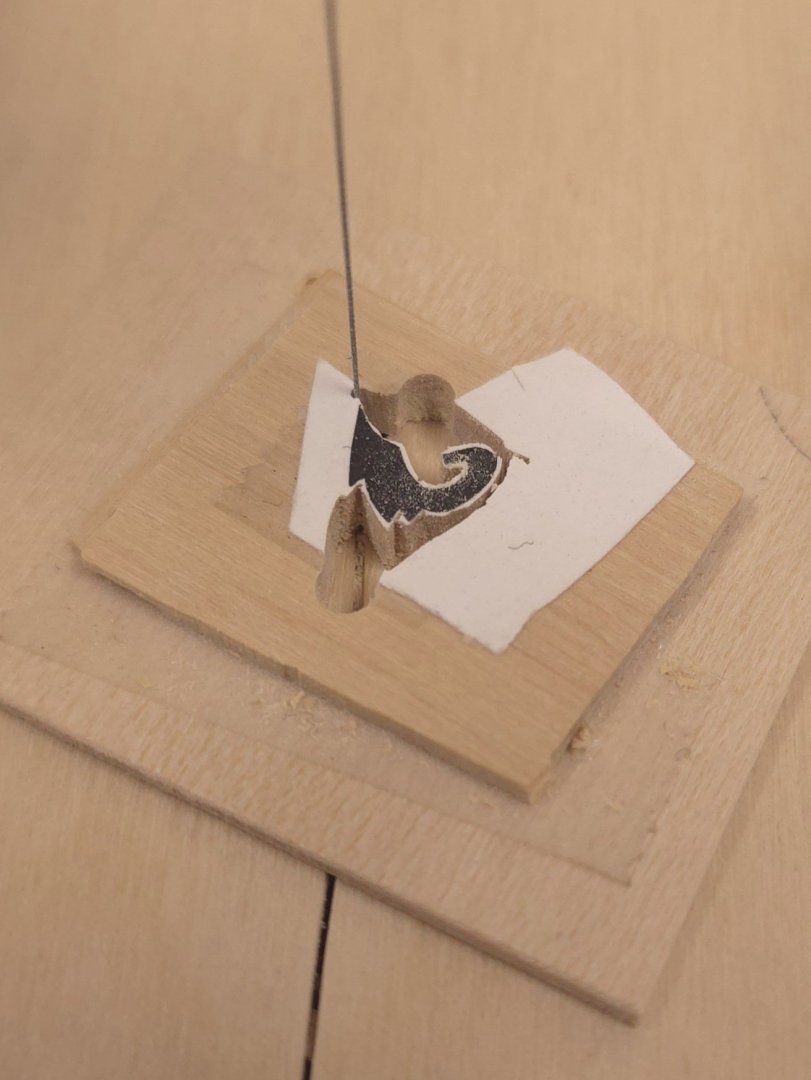
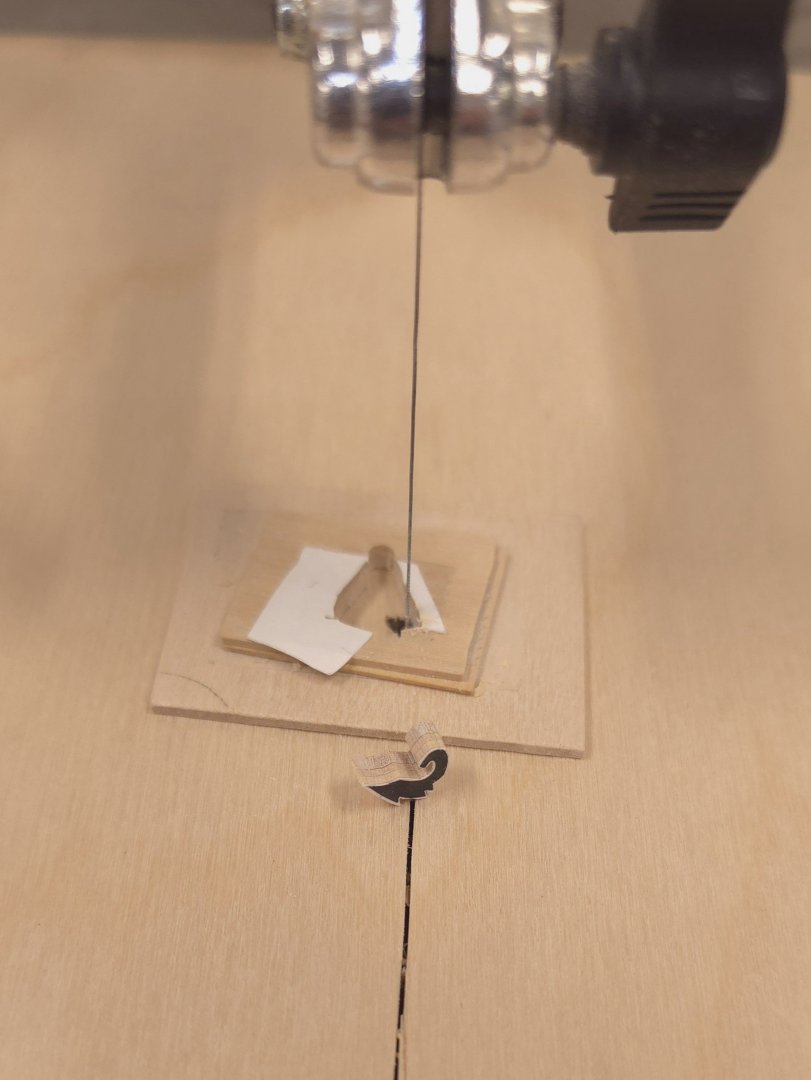
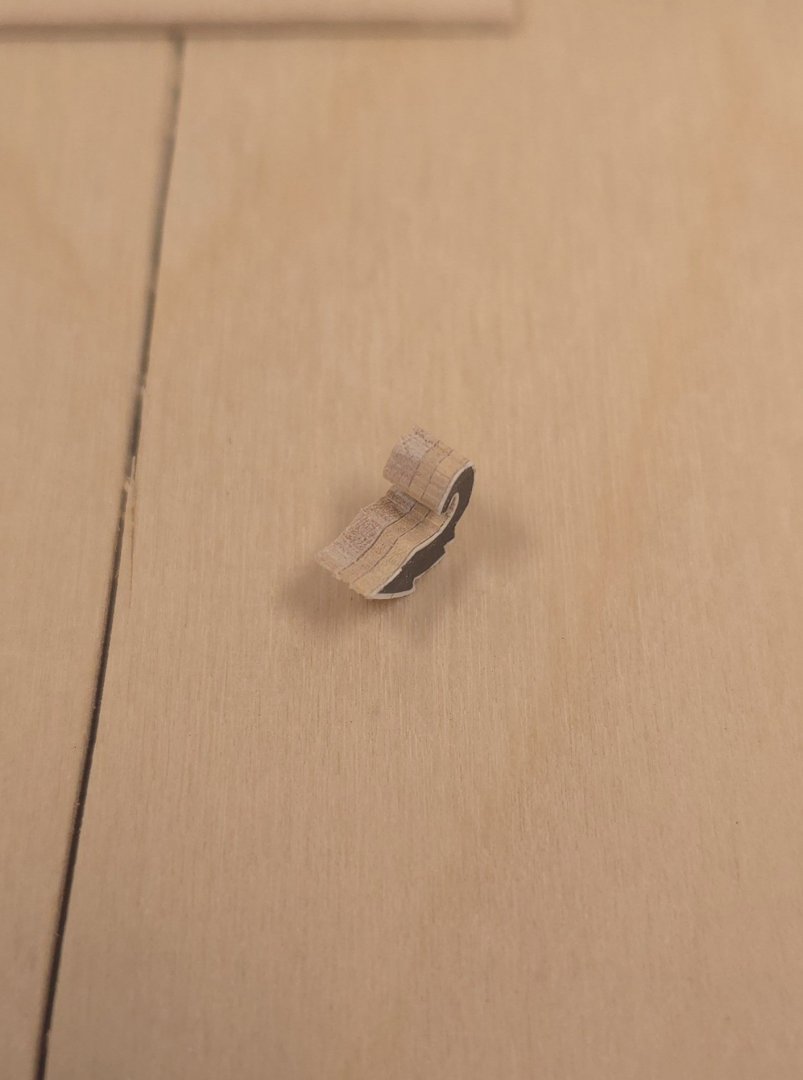
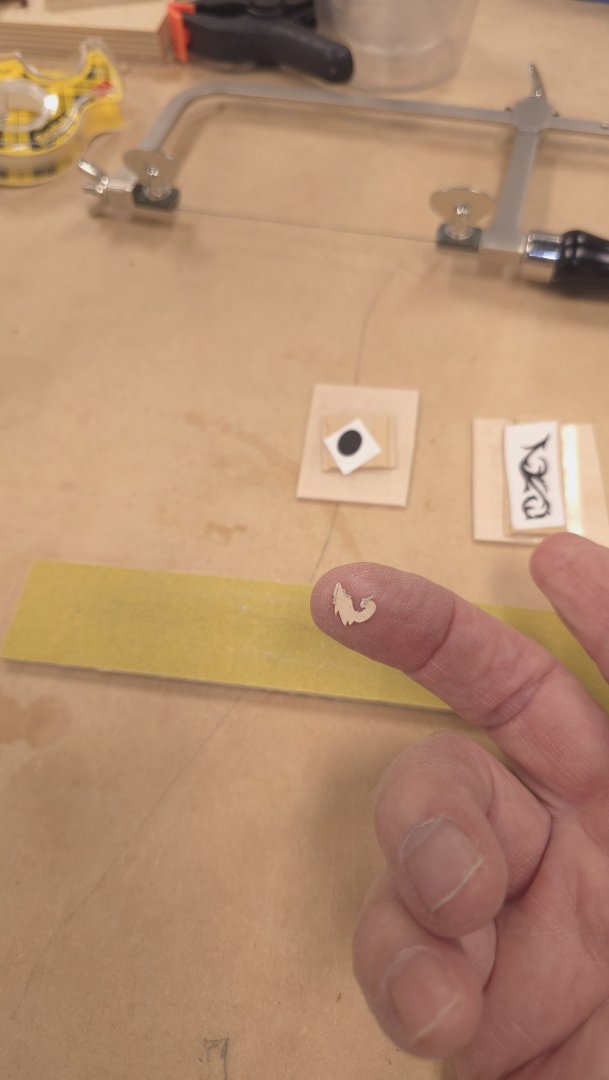
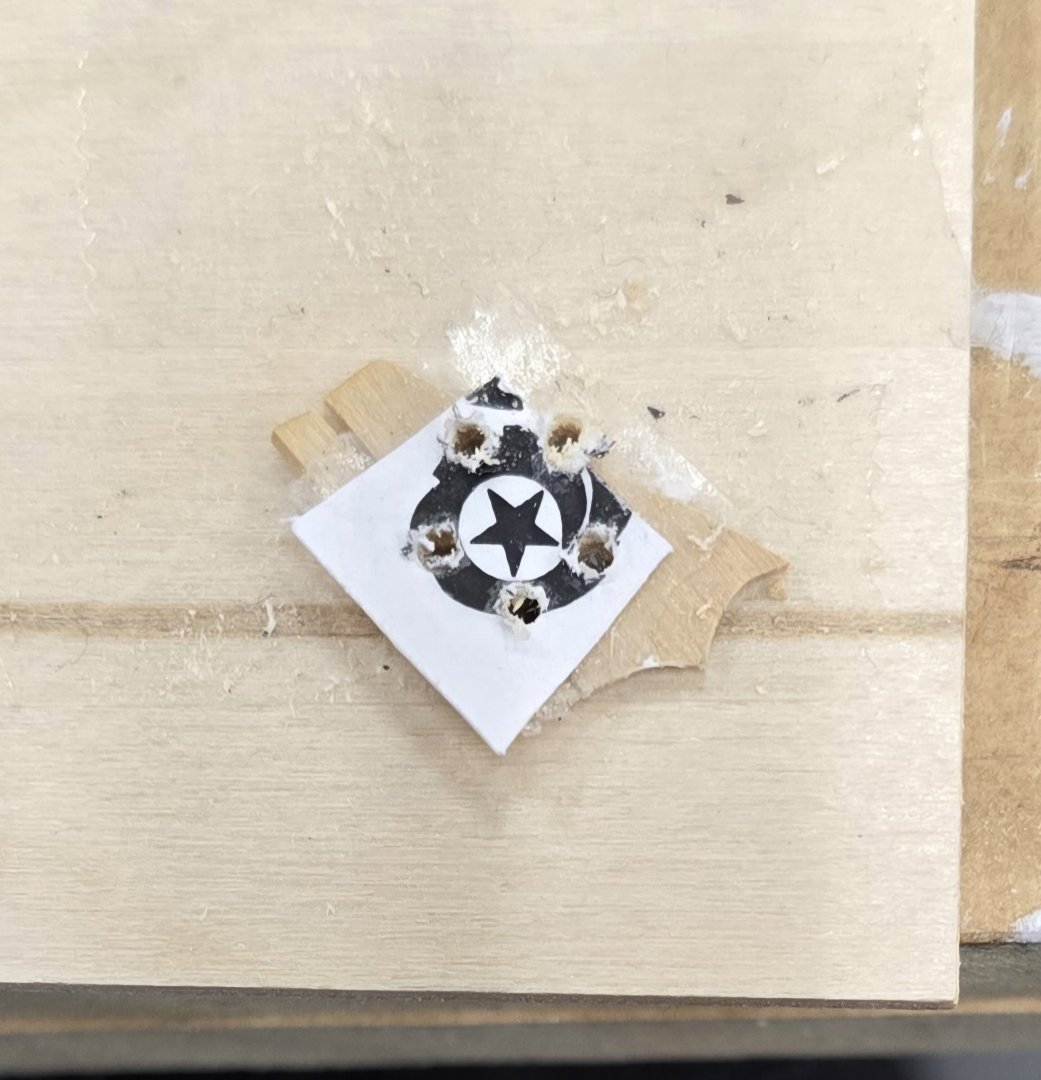
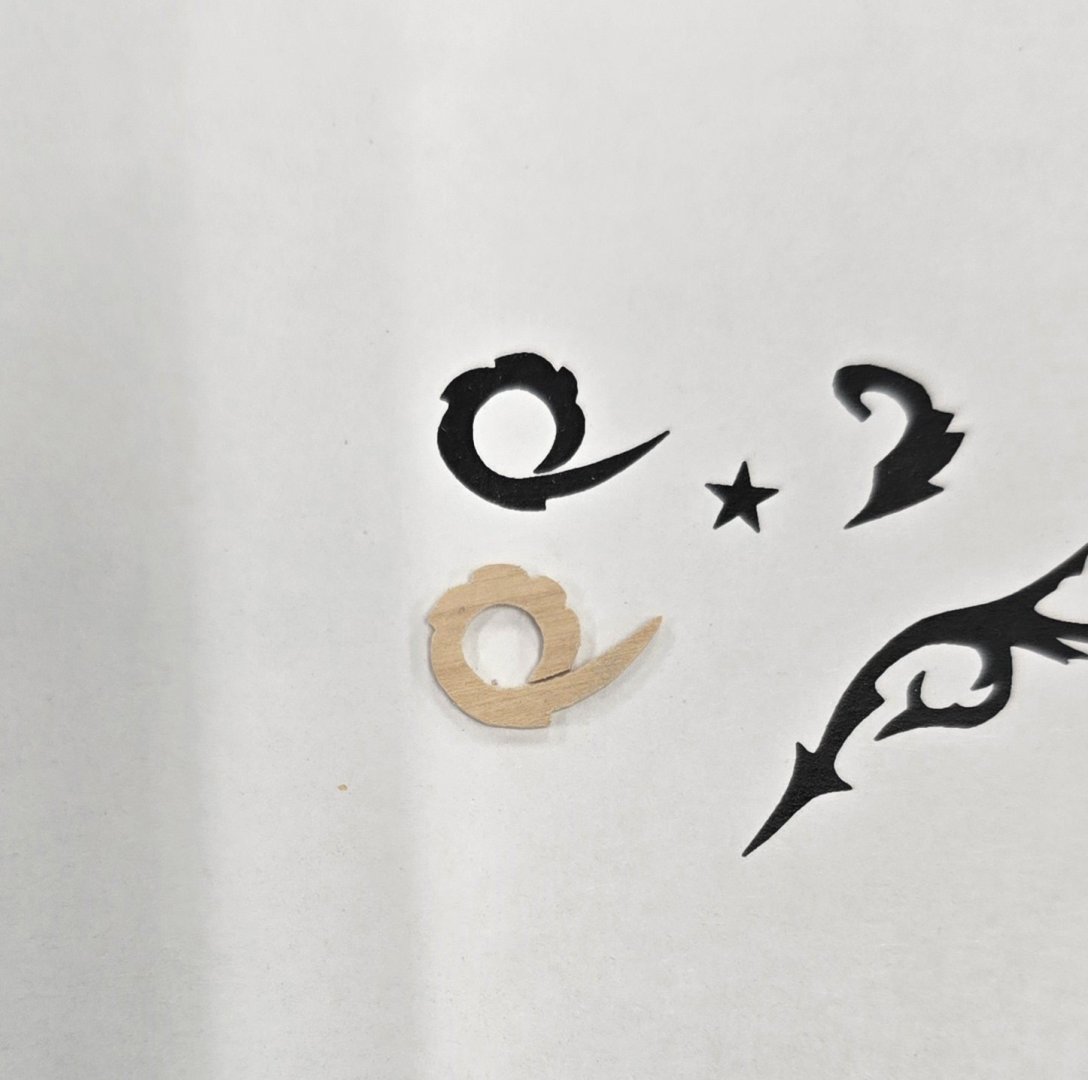
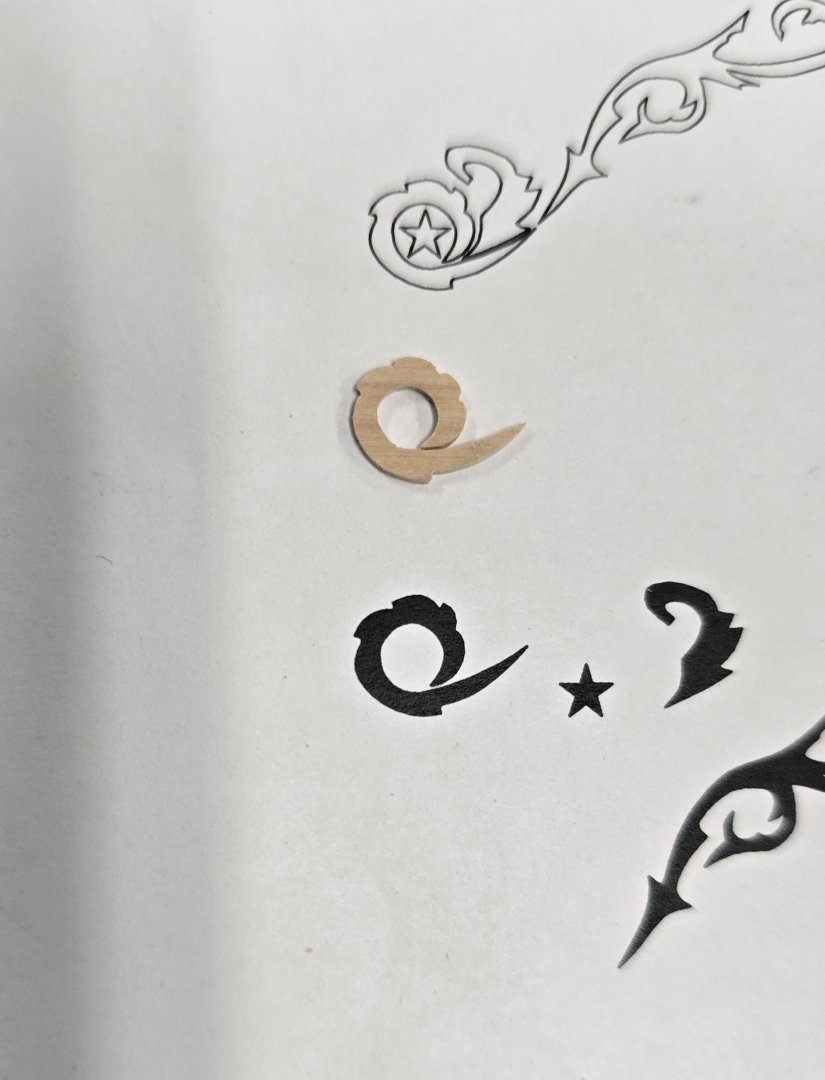
I found a way to make this process quicker and more precise. In a dream last night I fixed the Jewelers saw blade to my scroll saw. This morning it took a look at my scroll saw and saw that it not only would accept my Jewelers saw blades, but that the machine has a speed control. By dialing the speed down to the slowest possible, and tightening the blade vertically, I was able to get very accurate cuts, unlike what I was managing with the handheld Jewelers saw. I drilled a couple of pilot holes in the assembly and fed the blade through the hole and bolted it tight to the scroll saw. To cut the work in half, I taped two pieces of the boxwood together, taped the pair to a back plate of Basswood, and taped the template on top of the top piece of boxwood. Once again I applied a thin layer of white glue so that the template didn't disintegrate as I was cutting around it. I'm now cutting two shapes in one pass. At the end it's just a matter of carefully separating the three pieces of wood. Getting the tape residue off of the parts turned out to be fairly simple. The scroll work piece stuck to my finger easily as I passed it over 320 sandpaper. A little fine-tuning with files and sandpaper, Presto! two more pieces finished.. No I'm not giving everyone the middle finger. The tip of my index finger is missing, hence the use of the next one in line. Looking at the pictures of the remaining scroll work to fabricate, I think I may have to cut the longer piece in two or possibly even three. We shall see..


-
You have no idea..😁 But thank you.
-
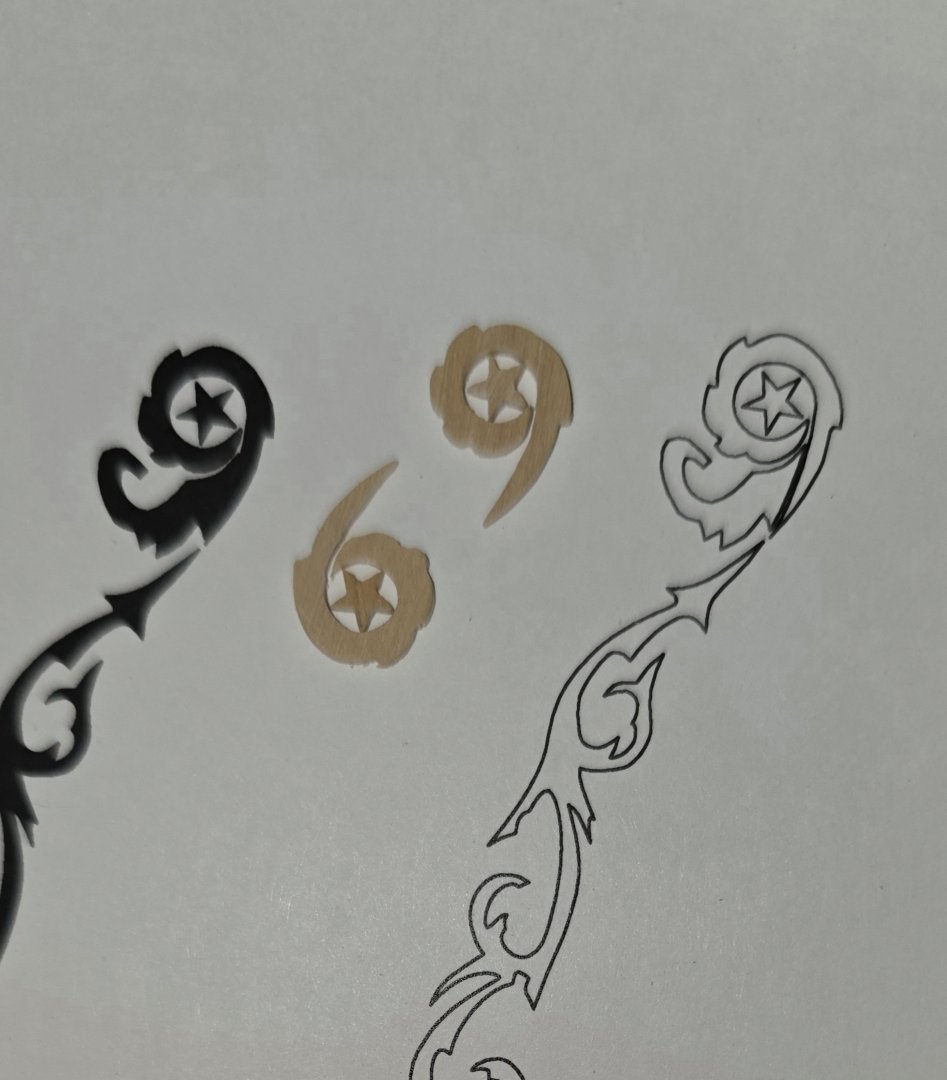
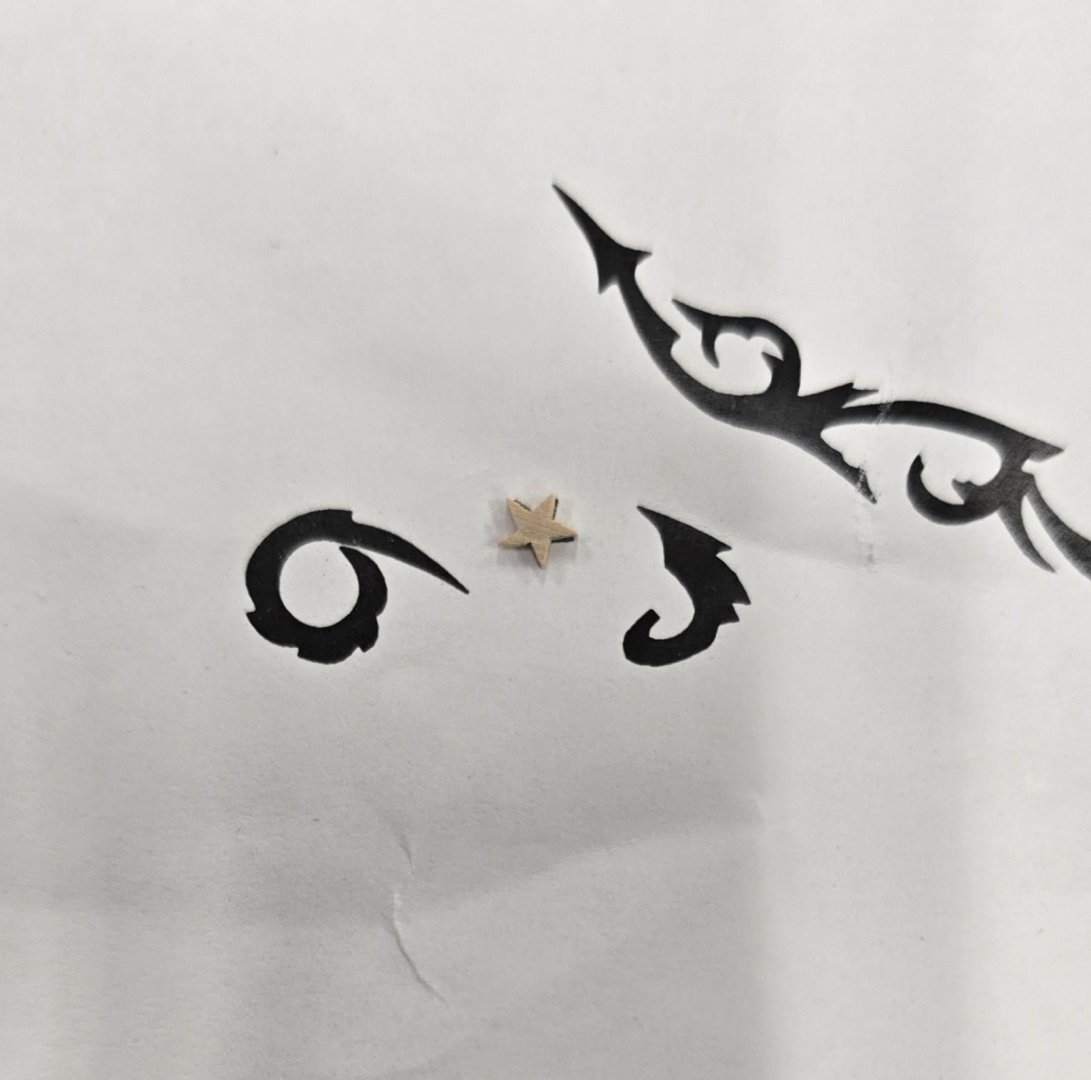
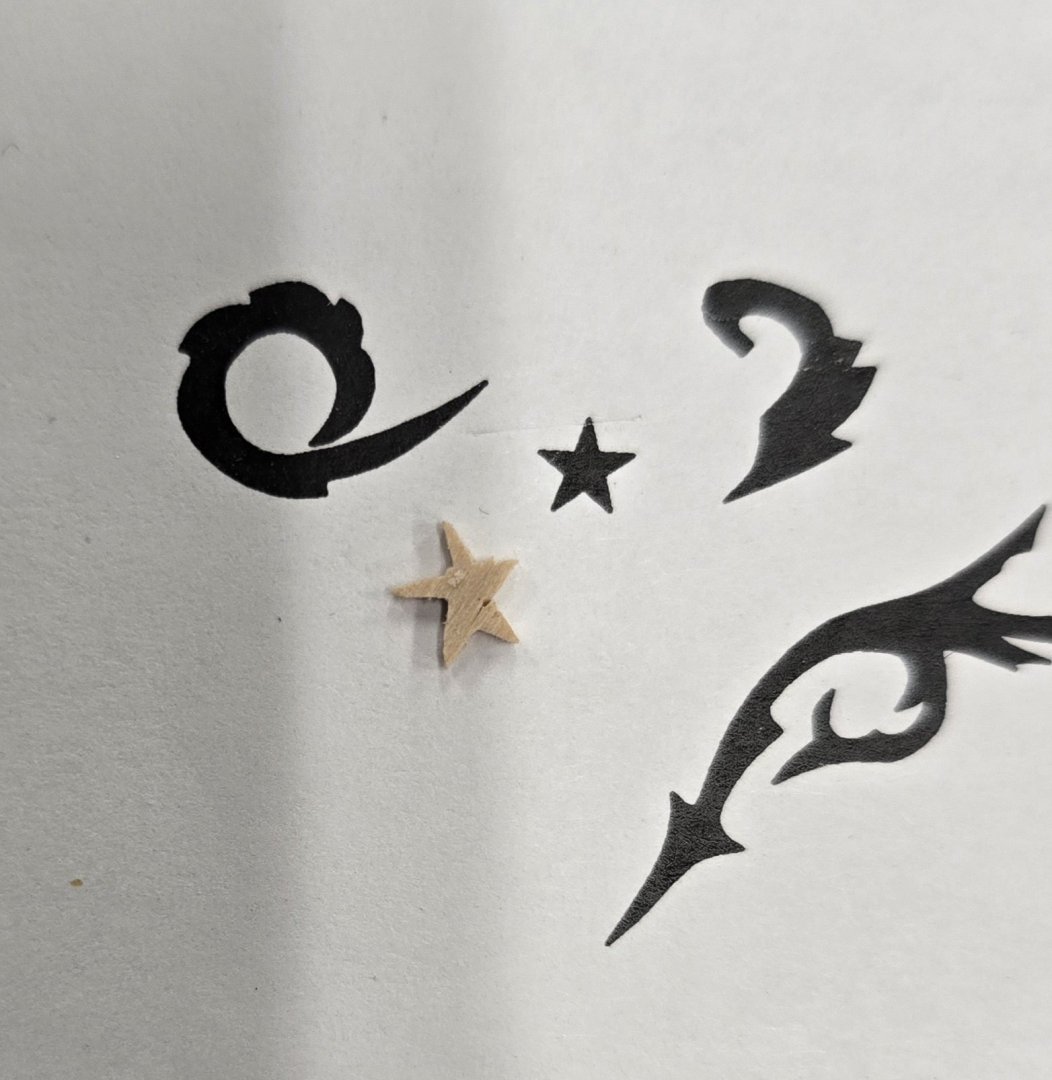
As you can see, I don't need them for the bow. But as brutal as these two stars were to carve, I'm happy to take a break on the stern, and will be ordering from the site you provided the link for above. I will, however, be skipping that third little star in front of the billethead.
-
I don't want to say how many hours I spent in the shop today on this, but I'm hopeful that the worst part of this scroll work is over.
-
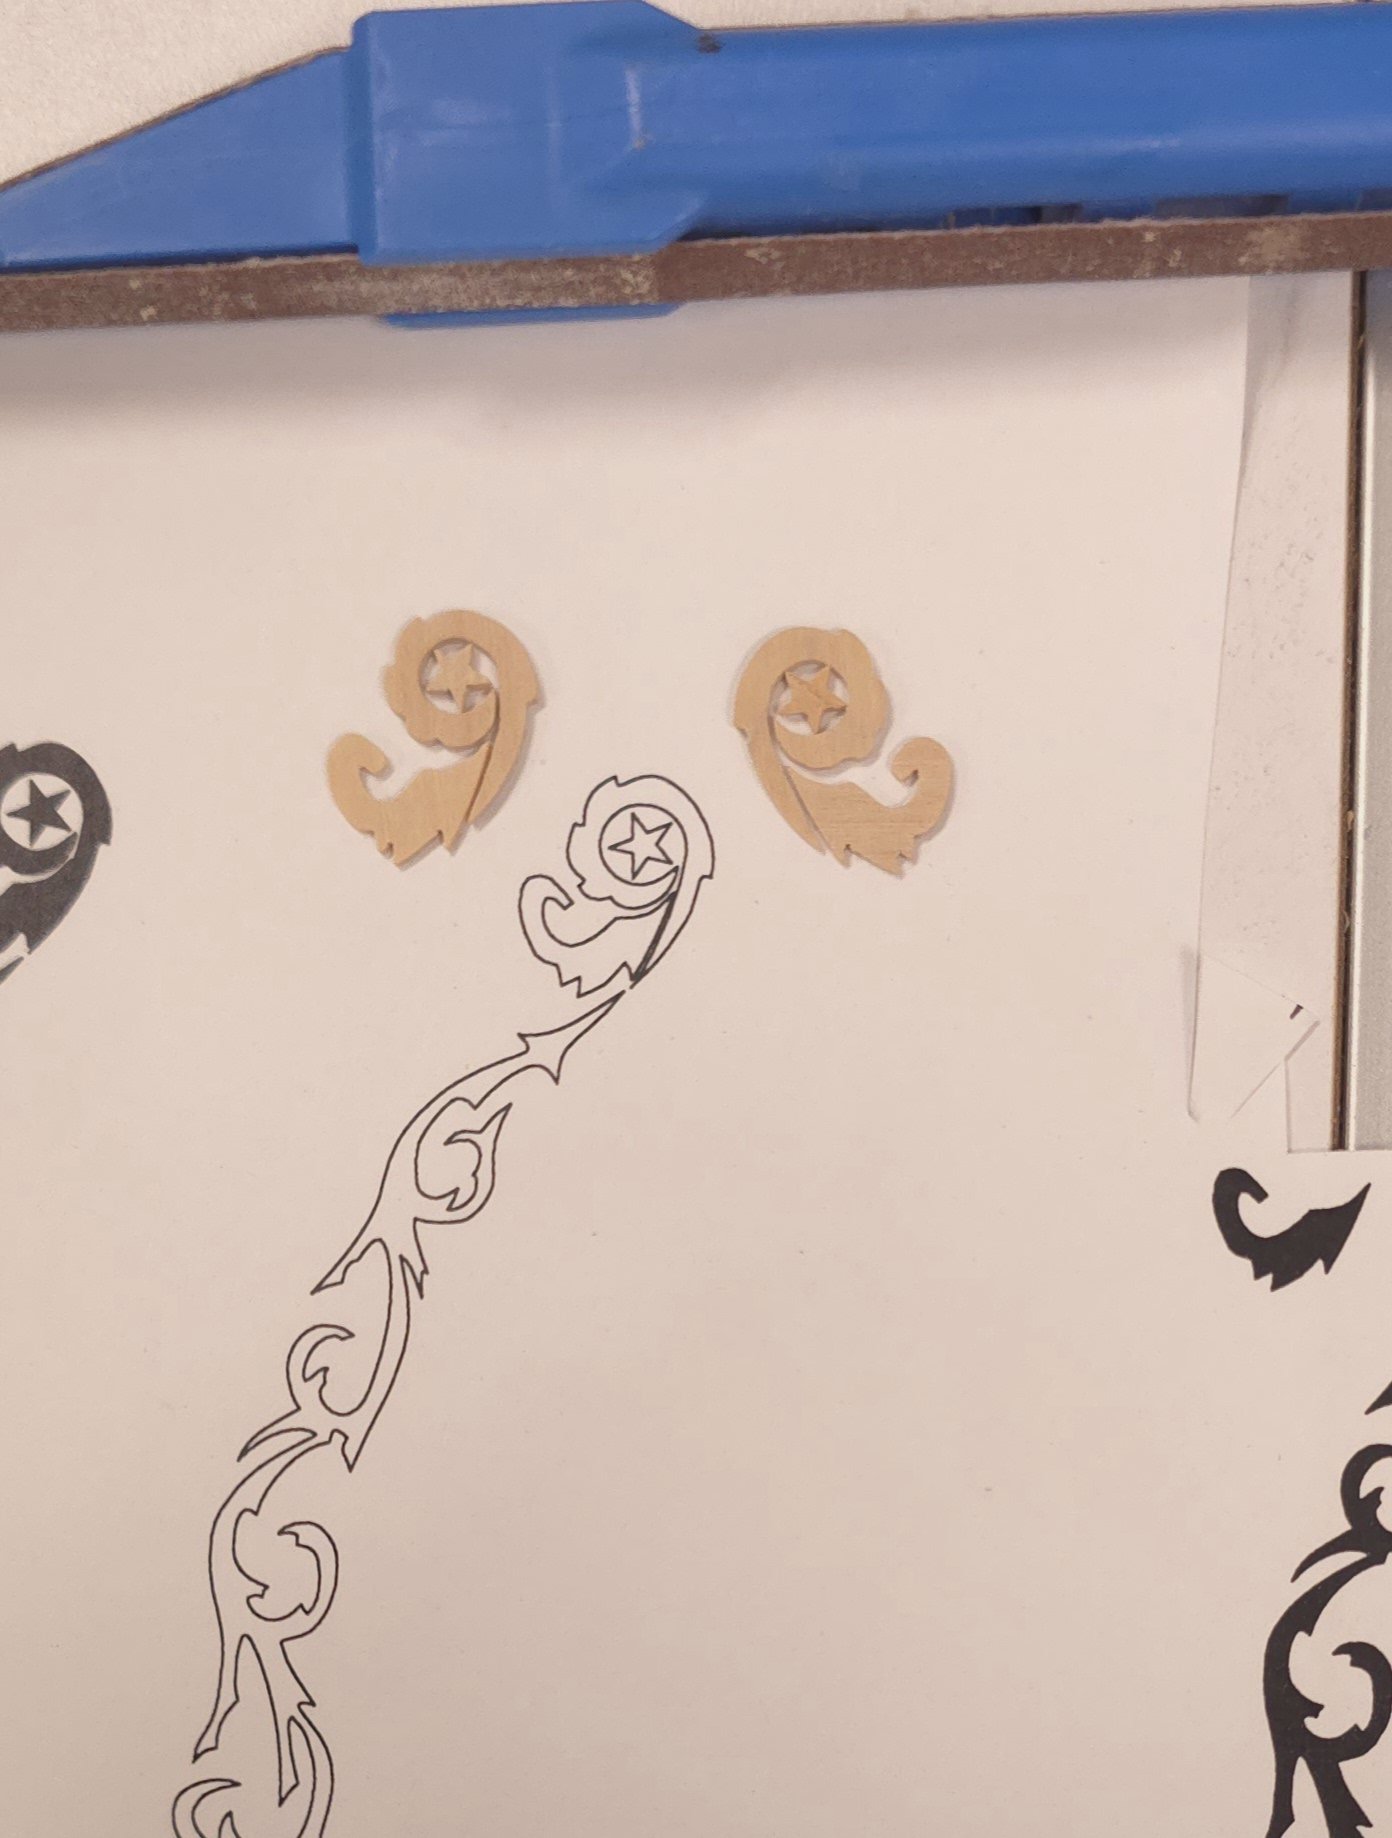
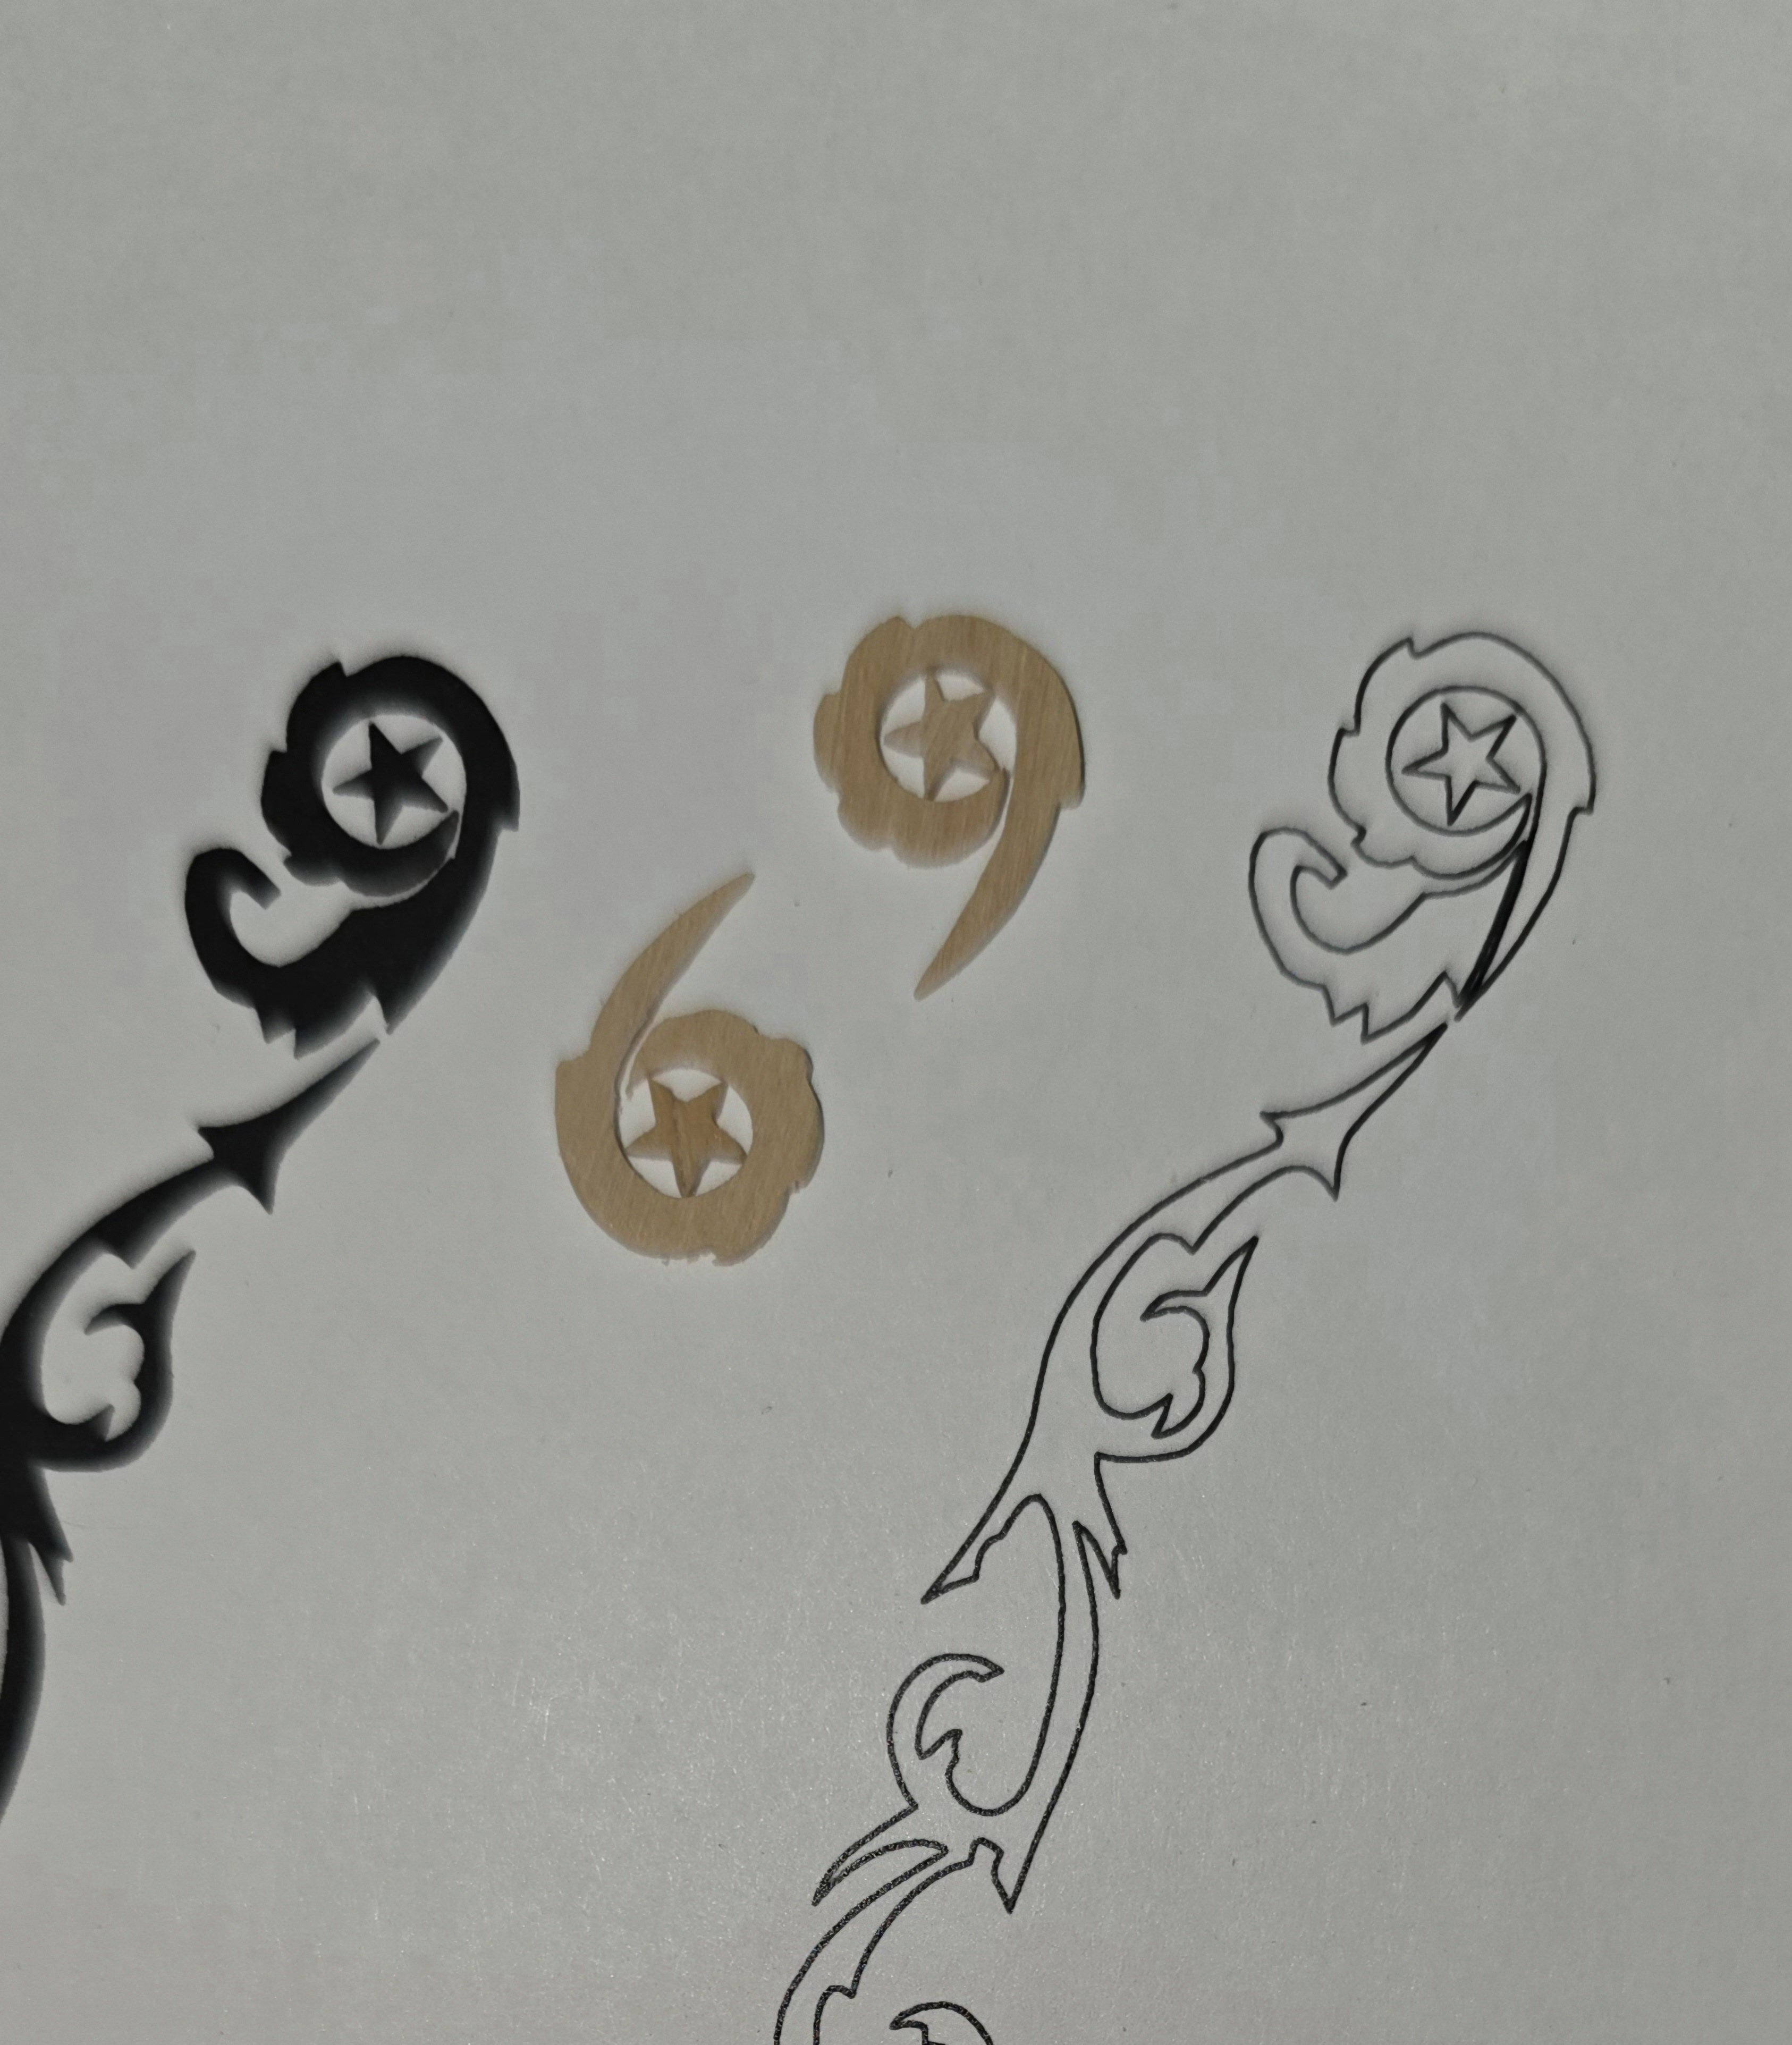
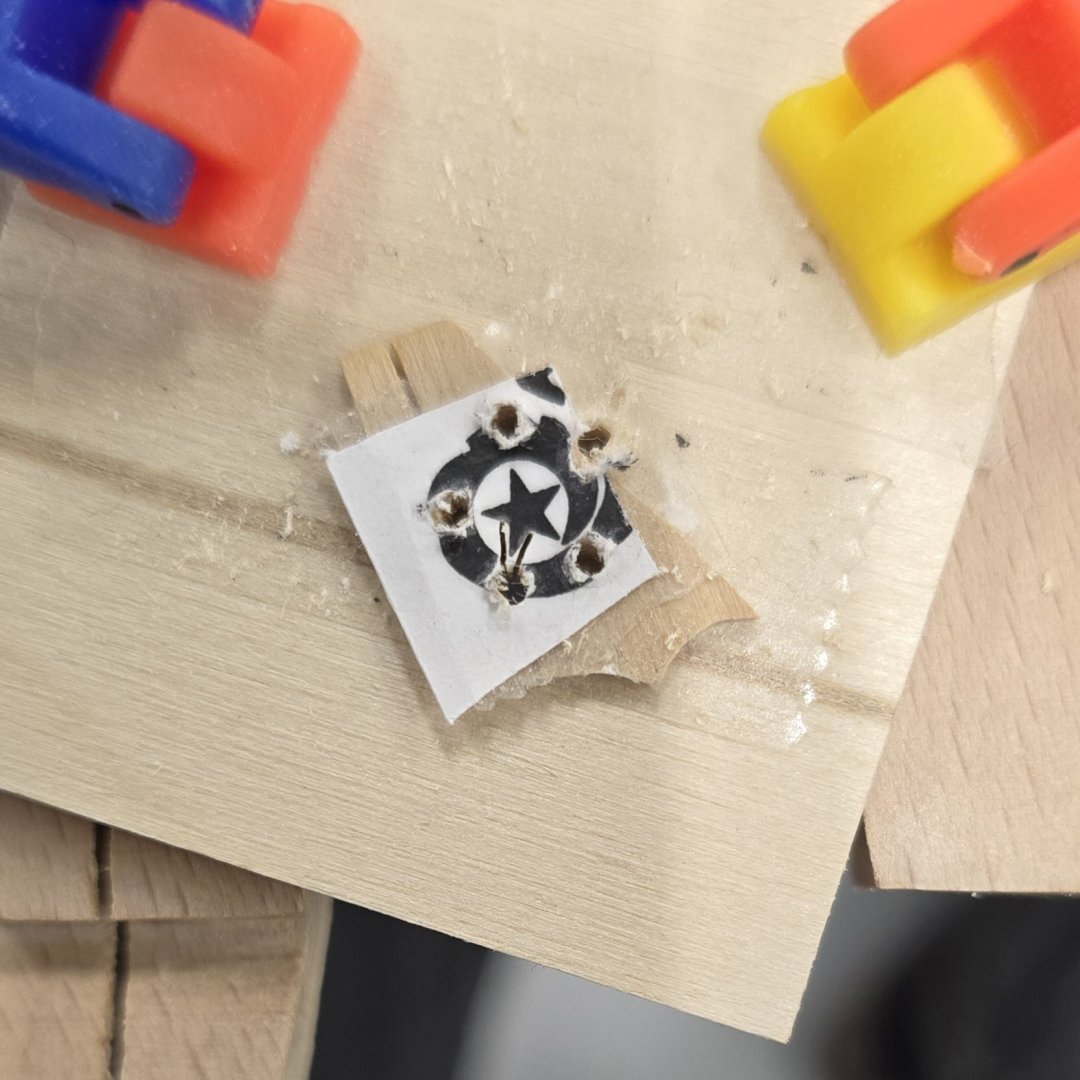
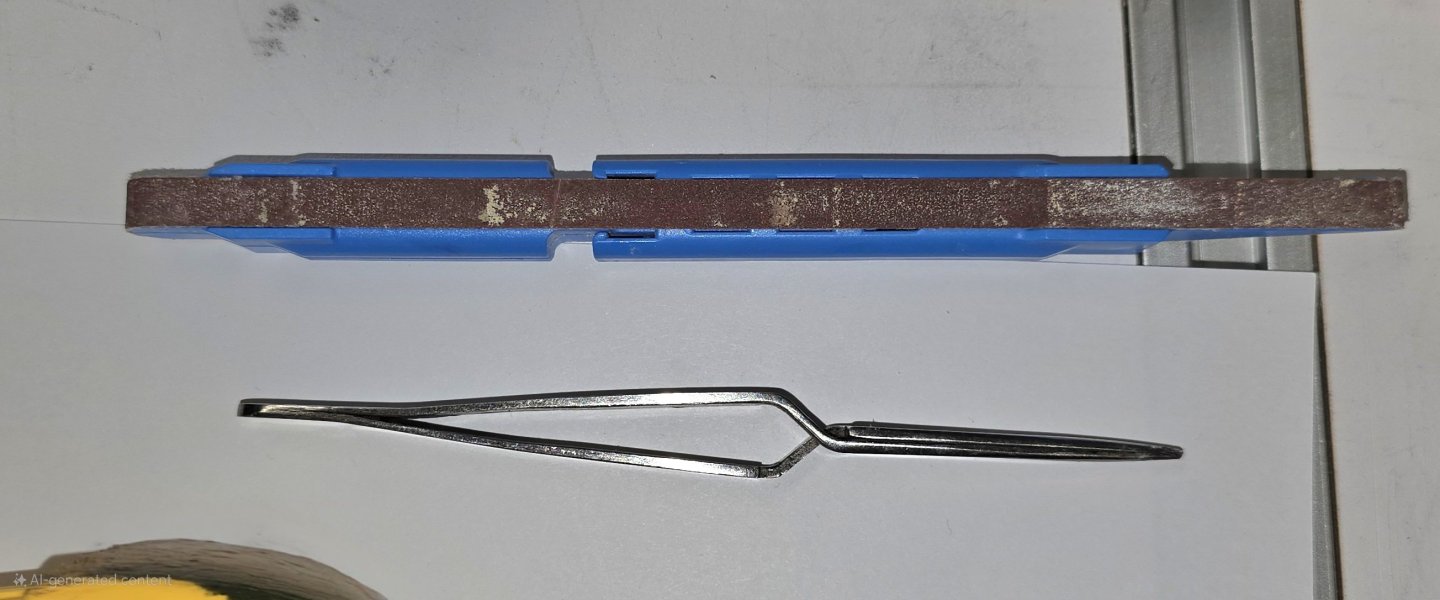
I might yet be in the market for some of those uniform ribbon Stars. Can you tell me where you purchased them? Having said that, my second pass delivered better results than expected. In case anybody is wondering, I had to disconnect the blade from the Jewelers saw, feed it through the hole, then carefully reattach it. Slow going, to be sure.. I won't mind making one more for the scroll work at the bow, but I would sure love to save the labor for those I still need to make for the transom. I managed to do without ring clamps by taping the 1/32" material to a larger backing plate. When done cutting, I simply separated the star from the backing plate. The only tools I needed to get the better shape after that, were these.
-
Not so fast? Stars will be the biggest challenge. Round 1. Fail. I have some ideas that hopefully will prove successful for round 2.
-
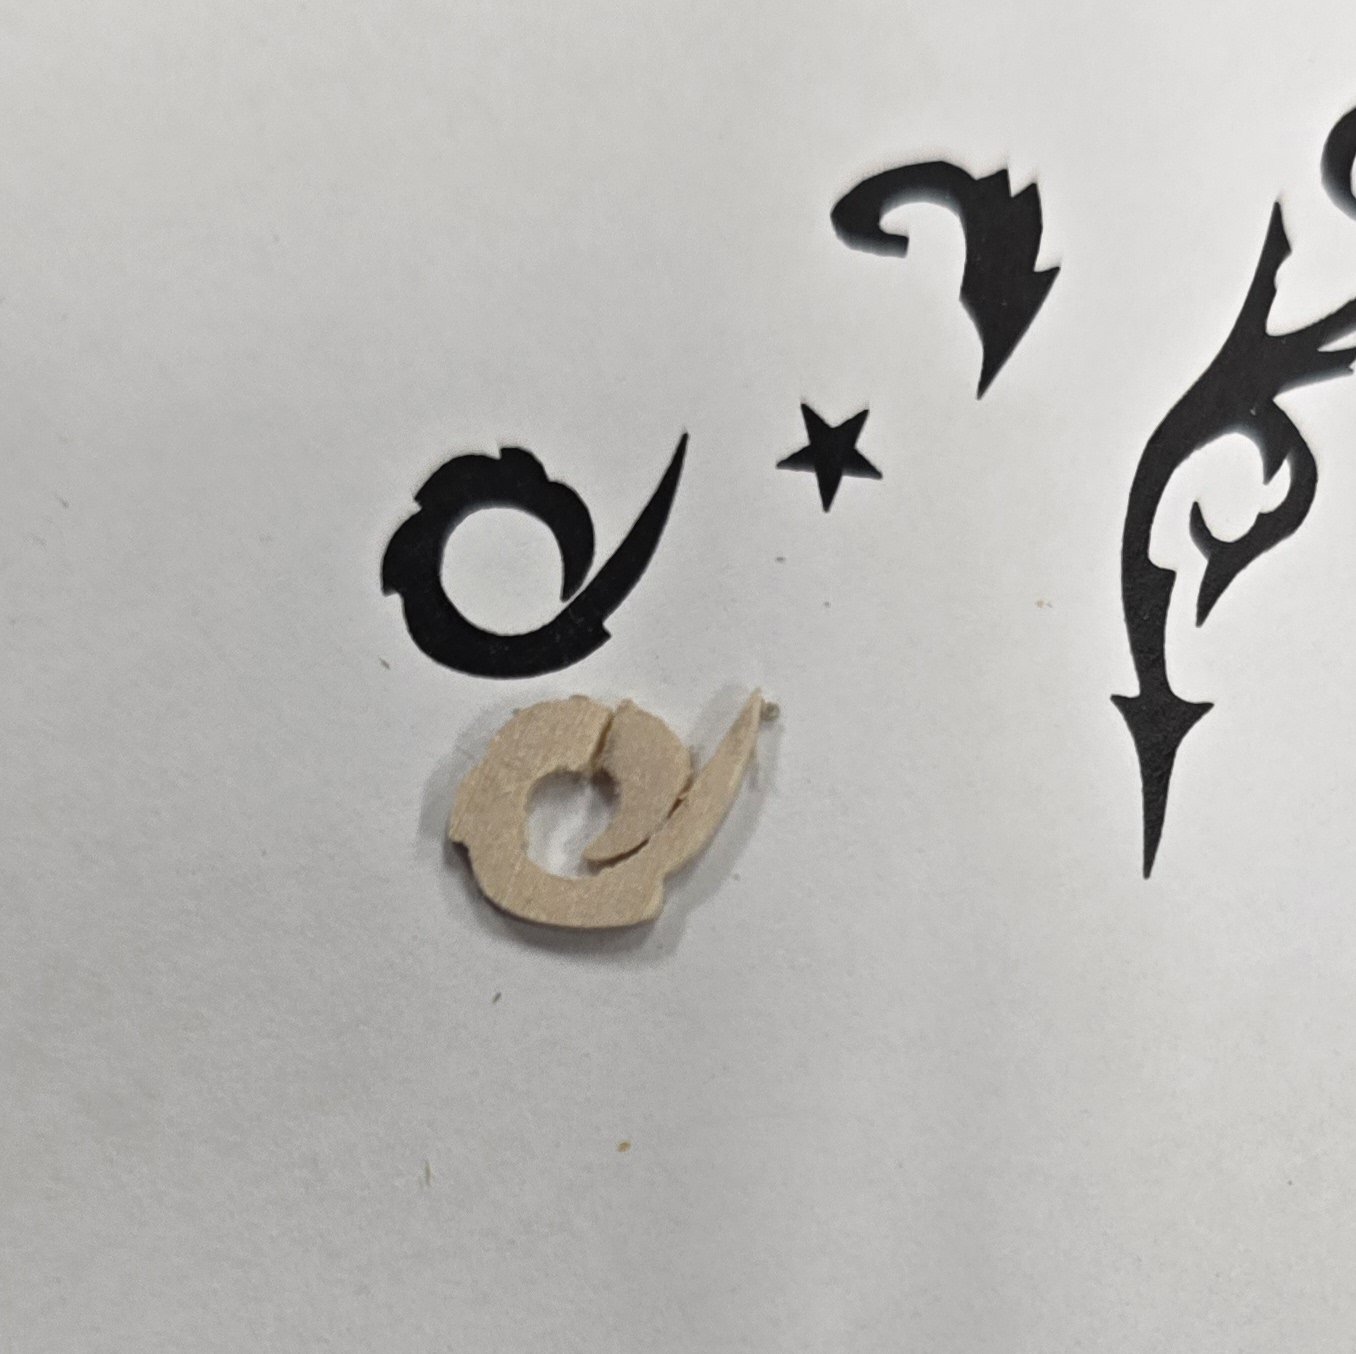
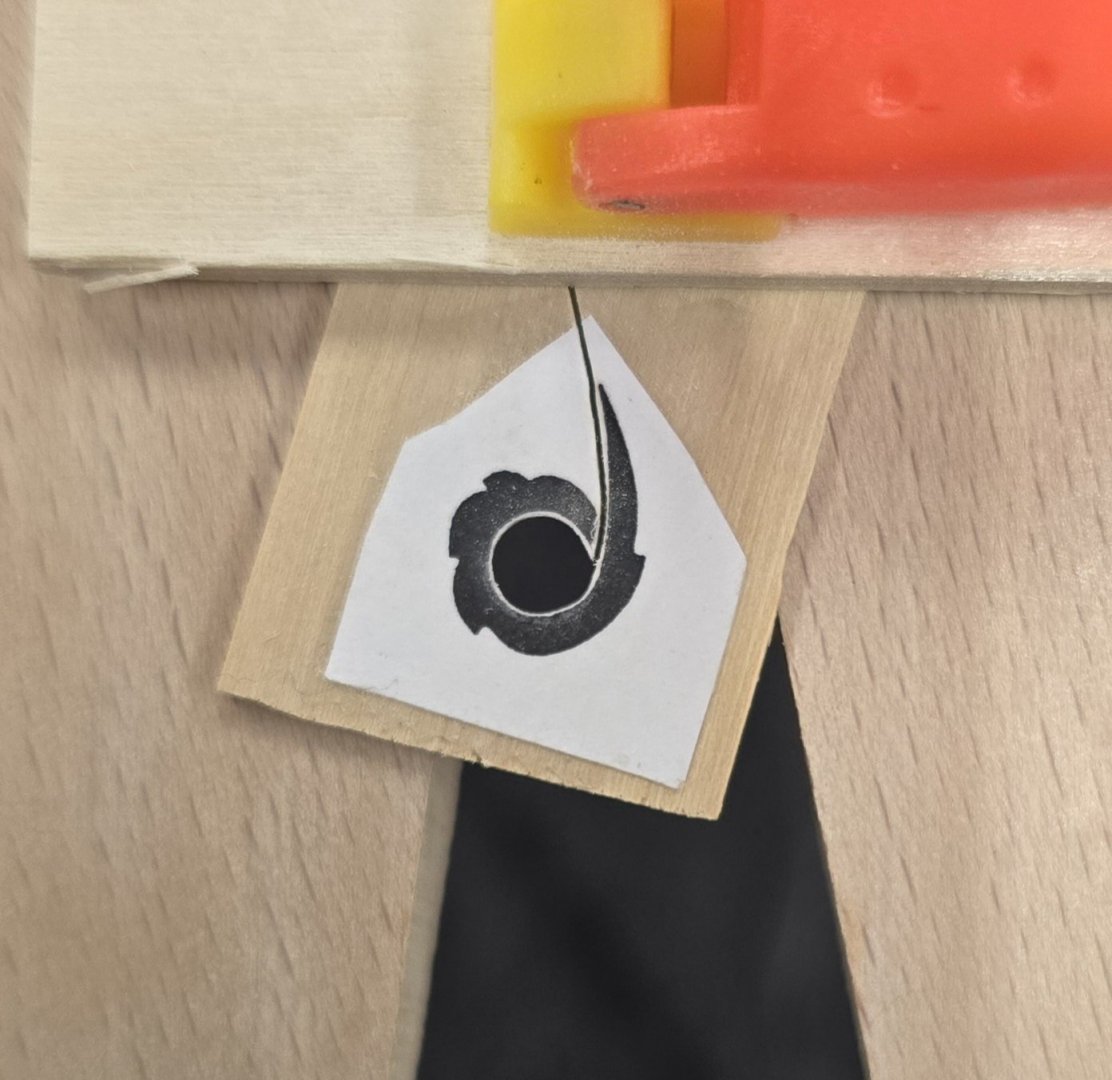
Funny you should mention that. Using some 32" boxwood sheet, some double-sided tape, a paper template, some Elmer's white glue, a Jeweler's saw, and an incredible amount of patience and tenacity, the ornaments are indeed achievable. I used the double-sided tape to a fix the template to the boxwood. Then I covered the template with a thin film of Elmer's white glue and let it dry. This was so that the paper wouldn't shred as I was cutting with the Jewelers saw. Making it much easier to follow the lines this way. A little clean up with some sandpaper and Diamond files, I got the first ornament out of the way.

-
USS Constitution by mtbediz - 1:76
Der Alte Rentner replied to mtbediz's topic in - Build logs for subjects built 1751 - 1800
If the intent is to be able to view Mustafa's masterful craftsmanship on the gun deck from above, a single sheet of plexiglass or acrylic, or possibly multiple smaller panels (call them windows?) would seem to adequately suffice. It makes no sense, in my view, to try to make plexiglass strakes. There's absolutely no way that that could be made to look good. And it would most likely simply muddy the "window pane". I say, go for one large panel or several small strategically placed windows. -
Round one with a jeweler's saw and 1/32" basswood. Fail.. Interestingly, the hardest part of this is finding ways to hold the part as less and less remains to be cut away. Some strategy will need to be employed going forward. Next up, fabricate some 1/32" boxwood and try again..

-
Very interesting and unique approach! I look forward to seeing the end result. As far as the discoloration in the materials you're using, I personally would opt for character, leaving the natural color alone, and covering it with a matte finish.
- 233 replies
-
- 1
-

-
- Model Shipways
- constitution
- (and 5 more)
-
USS Constitution by mtbediz - 1:76
Der Alte Rentner replied to mtbediz's topic in - Build logs for subjects built 1751 - 1800
I had a thought about your spar deck planking. Since you want to show off the gun decks, but still need some sort of surface, on parts of the spar deck, for other stuff, why not use plexiglass or acrylic in place of wood planks for those areas? Put some decorative lighting in between decks, and that ship would ROCK! -
Outstanding workmanship! ..and I remind you that I placed an order with you some time ago for a pair of those hand-crafted wheels. You can add the canopies and skylight to the order too, now that I'm window shopping.. 😁 Um, why do you think you'll have trouble removing the hull from the mold? What's going on with the rubber band(s)? and, hells bells, you seem to be putting more effort into the molds than most of us would even consider for making the boats themselves.. You, sir, have waaaay too much time on your hands! But keep it up. Your work is a wonder to behold.
-
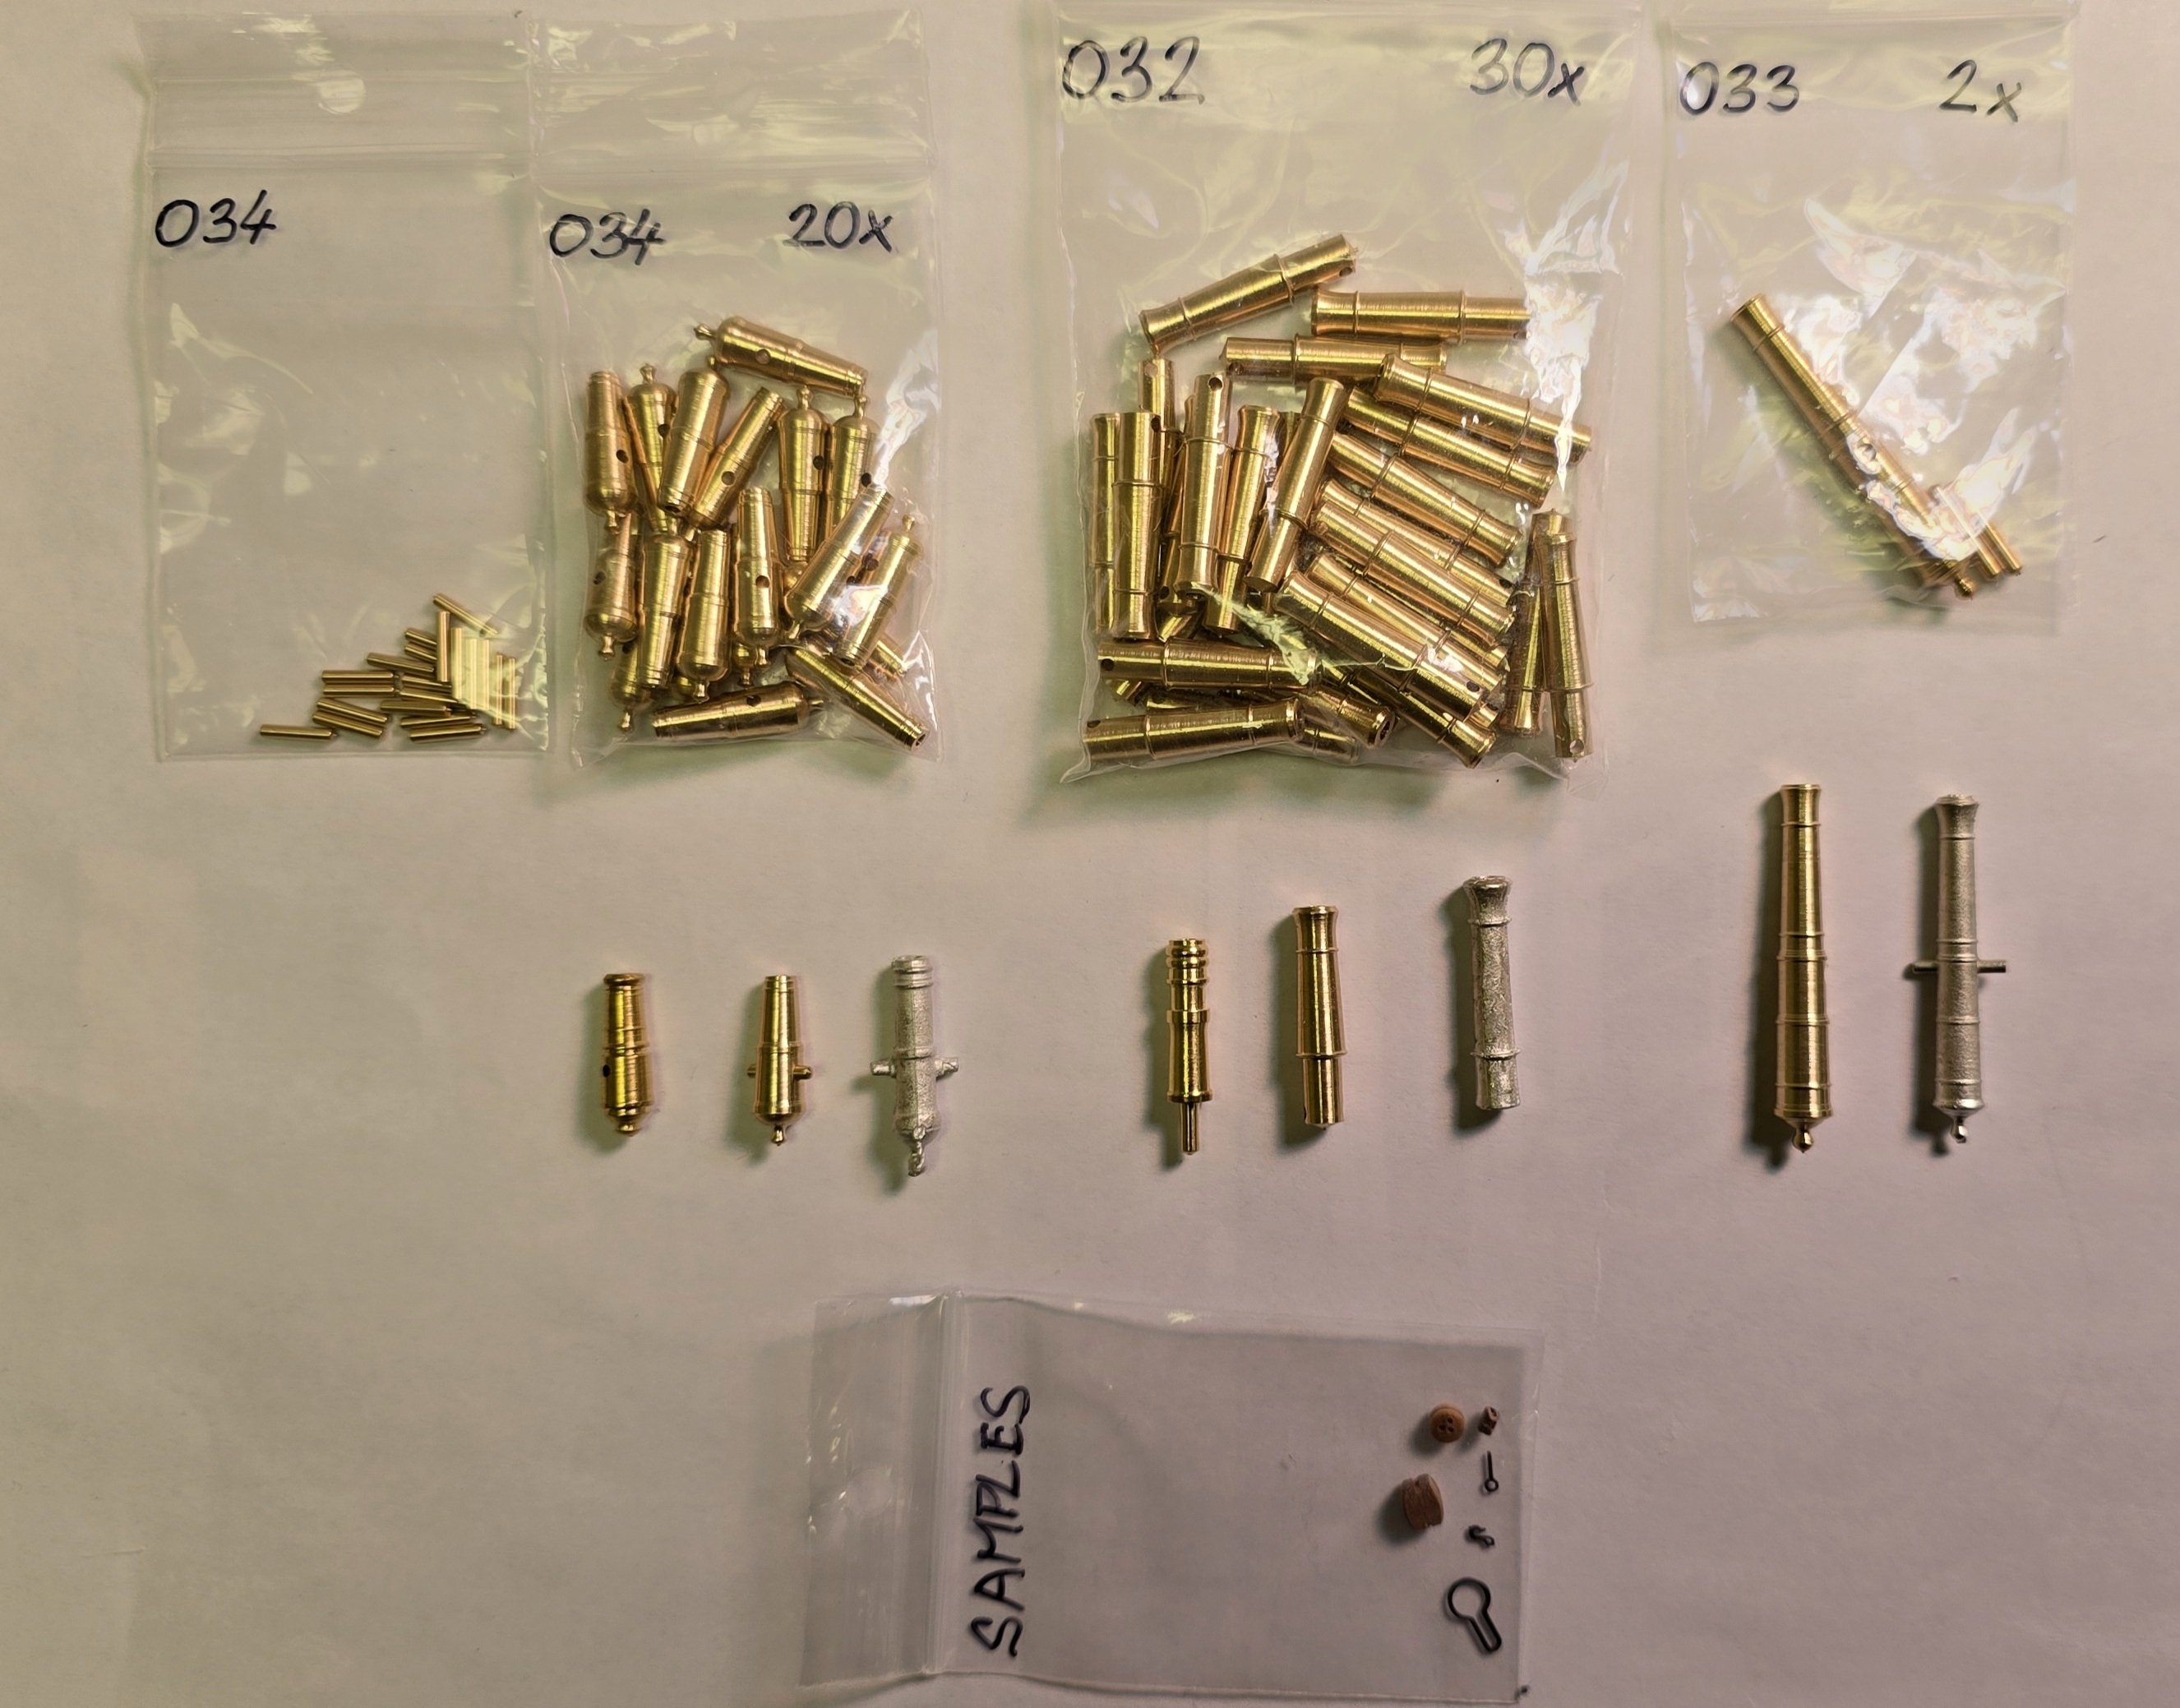
Quick update. Cannons and carronades arrived. My first impression is, wow these are well made. As expected, the carronades provided with the Constructo kit are almost identical to the ones provided by HiSModel, though the latter are a smidge longer. The HiSModel units come in two pieces, the barrel and a pin. They fit together beautifully. I'll use those on Conny. The dummy barrels were what I wanted most, because I didn't want to have to whittle the inboard ends of the shafts to fit the gunport holes. The diameter of that end of the barrel was exactly 11/64". I needed to ever so slightly enlarge the 5/32" holes in the gunport back plates that came with Conny - the ones I used on the starboard side, as well as the custom-made ones I fabricated for the port side. Perfect fit. Many tedious hours of filing saved. Well worth the premium. Bow chasers looks good too. HiSModel also included a small "sample" pack. I haven't dug into which rigging components these are, but I'll rummage through the kit box and see how they compare to those supplied by model shipways. Left to right in: Constructo, HiSModel, Model Shipways (Constructo did not provide bow chasers.)

-
Yes, Clement will experiment with a laser cutter, which has the potential for burn marks. But, he's also going to try using his resin printer to produce the parts. Ideally, I'd prefer boxwood without scorch marks, because I hope to go with the unstained finish for the scrollwork and stained backing. However, I can also go with painting the scrollwork white, carrying forward the look from the gallery windows which I made out of styrene. In the latter case, I can then opt for styrene for the trim pieces. I am prepared to try to make the trim out of basswood, holly or boxwood, if I see terrific results on the first option. Or, my attempt to cut the shapes out of boxwood using a jeweler's saw, which would mitigate the scorch marks that will likely be present on the laser cut parts. The little I've worked with the jeweler's saw has me skeptical that I can achieve the results I desire. We'll see what Clement comes up with.. As for 3D detail for carving the fiddlehead components, thanks but I don't think I'll be getting THAT fussy. I'm not programming the resin printer or laser cutter and I certainly don't know how to translate the details from the US Navy plans into usable input for either device. As you aptly observed, from a foot away, no one will notice anyway. I'm really only doing the bass-relief so that I can easily keep a sharp delineation between the back board and the scrollwork. (stained vs natural finish) Thanks for chiming in. Peter
-
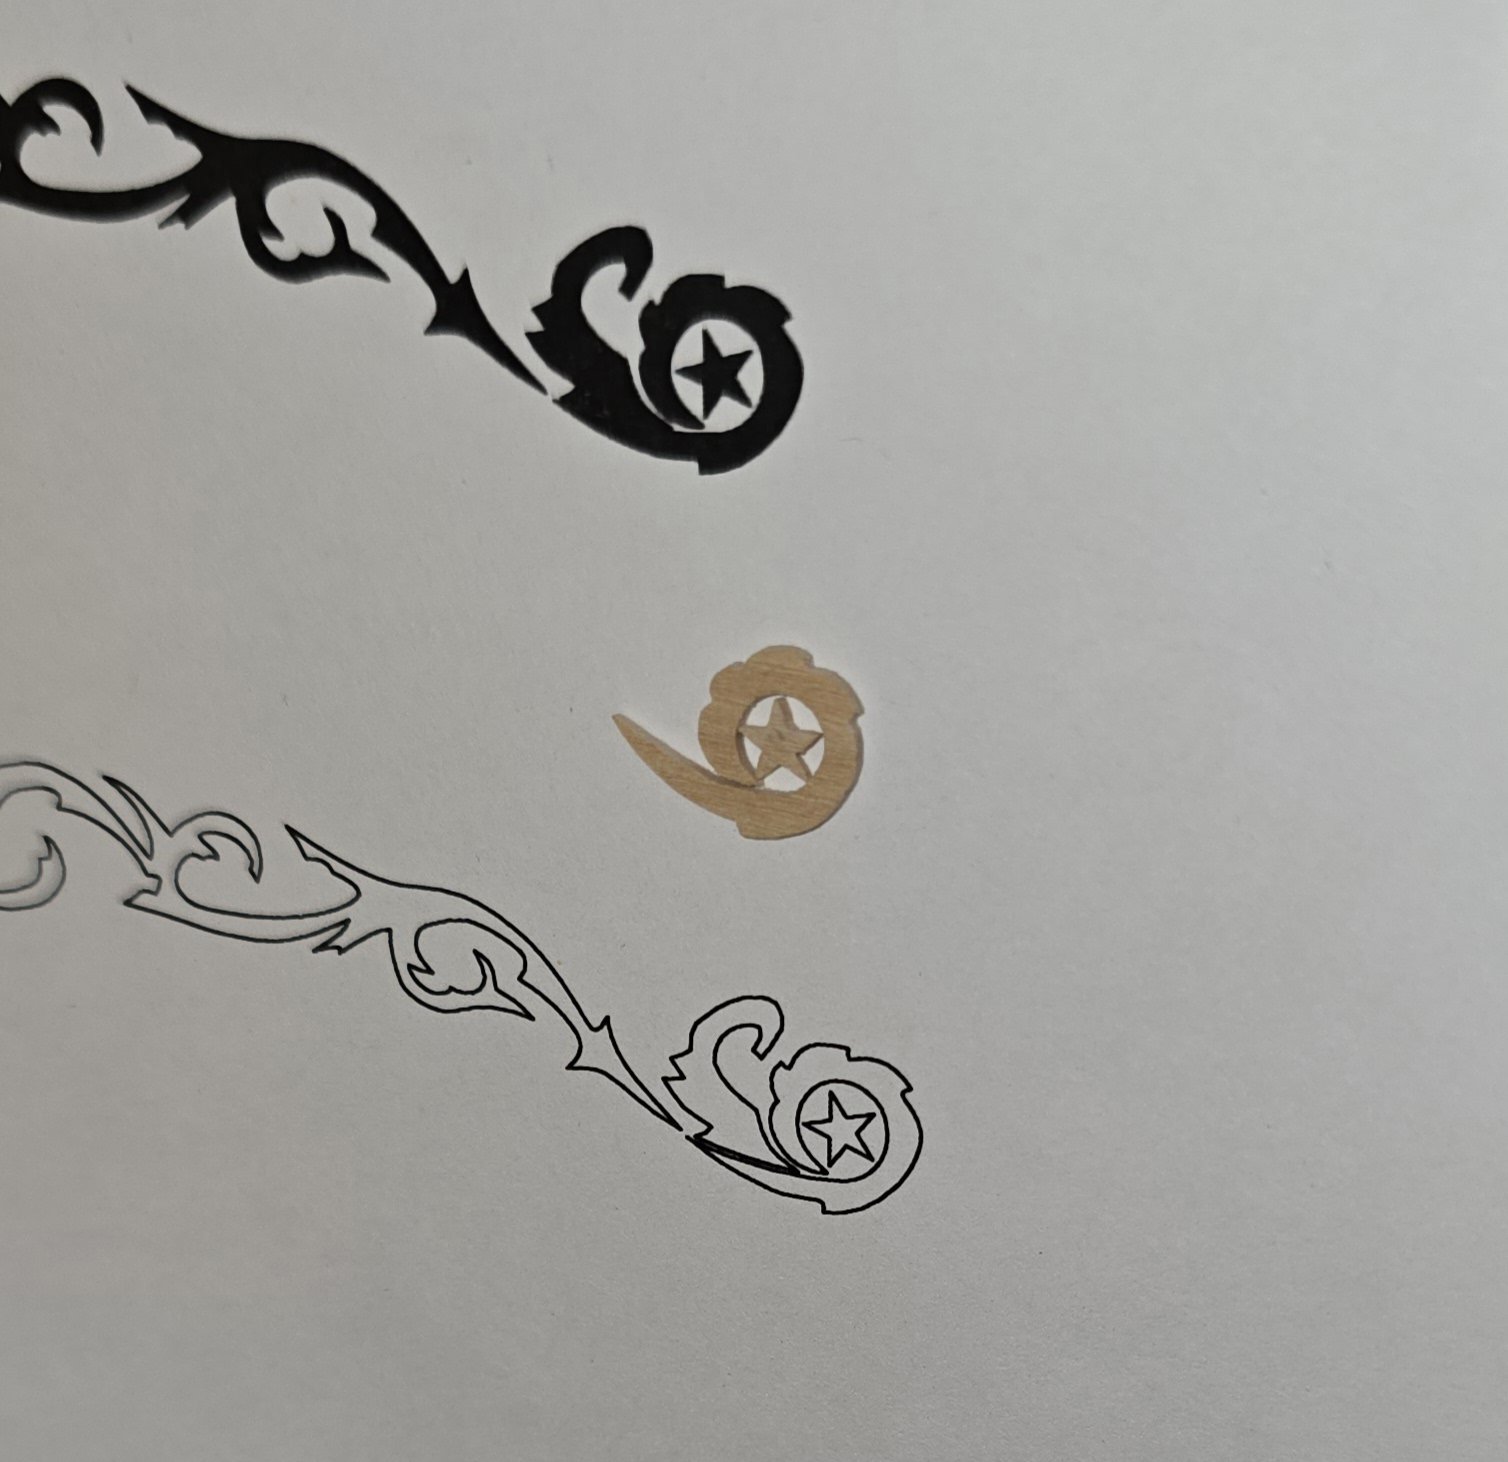
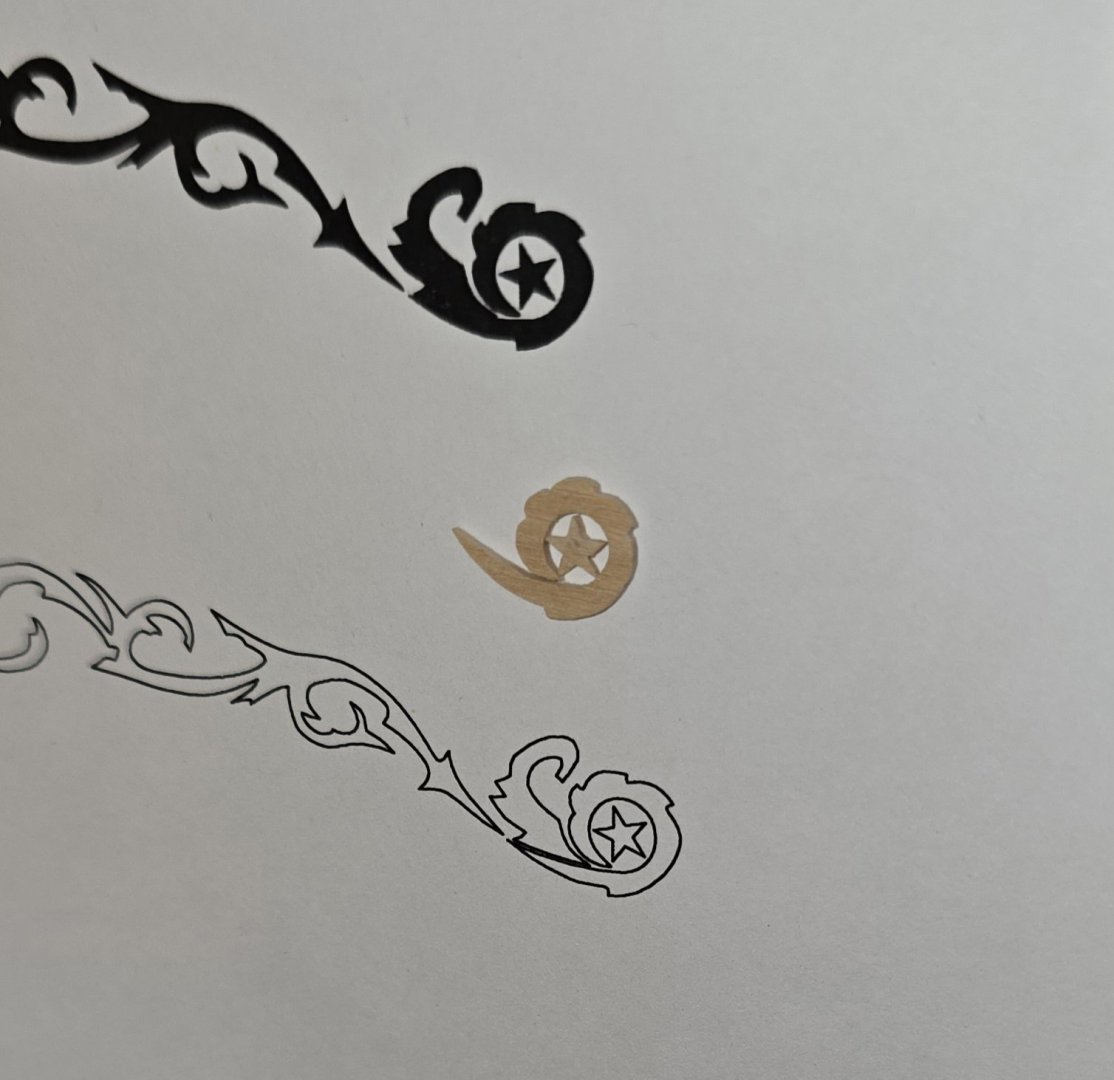
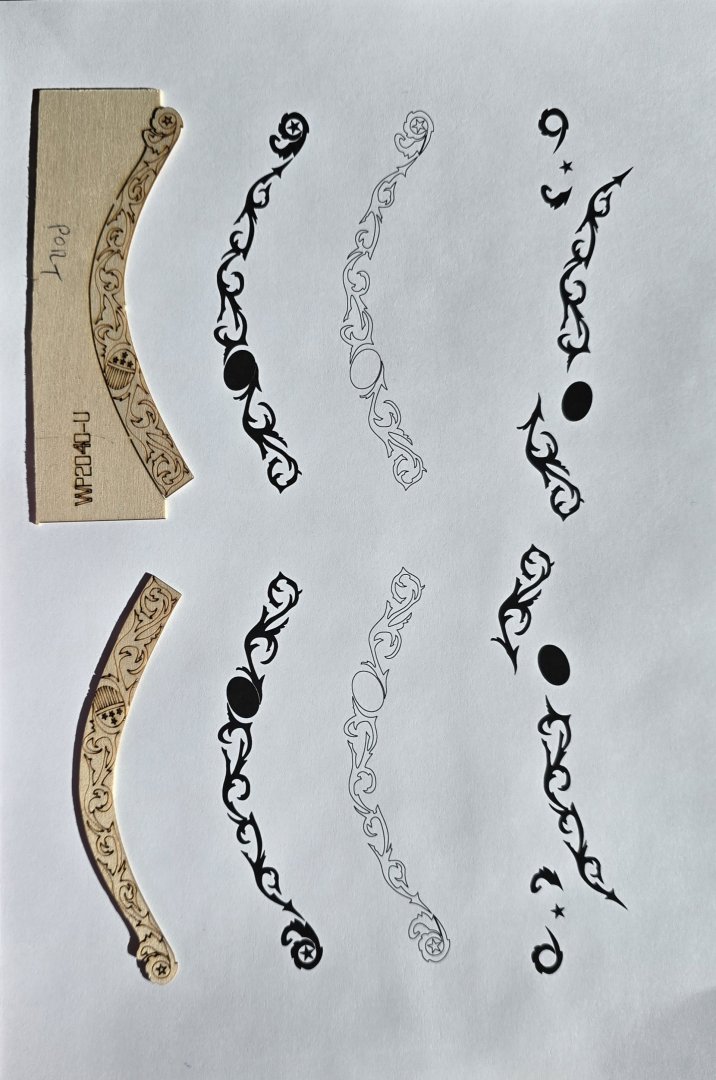
Not much time spent in the shipyard. But I finally received my supply of boxwood sheets in various thicknesses, so I can go to town when I get back to the shop. In the mean time, I've been relearning Corel Draw so I could get better photos from which to cut out the scrollwork shapes for the tailboards. That led me to a discussion with my friend Clement about providing him an SVG file (Scalable Vector Graphic) for him to tinker with. He's going to try to print me the individual components. The idea is to do what XKen did in creating a bass-relief of the scrollwork vs just painting those shapes on. I'll attempt to attach the .svf file for anyone who might find it useful. Bow Scrollwork - final vectors only with fill.svg and here are pictures of the effort: ++++++++++++++++++++++++++++++++++++++++++++++++++++++++++++++++++++ + Bonus update! Those cannons from HiSModel will arrive sometime today! + ++++++++++++++++++++++++++++++++++++++++++++++++++++++++++++++++++++

-
I just did. Thanks for the suggestion.
-
I already have some sheet stock ordered from him in thicknesses of 1/16", 1/32", 3/32 and 1/4" in boxwood. I suppose I can rip some strips from that and hope it bends as severely as needed for the stripes. XKen made it sound like basswood would take a better bend, and another contributor at his build log suggested that holly was the best. Modeler's Sawmill doesn't provide either. Hence my search for another supplier. I really would like to see how holly flexes. I do have some Ace Hardware 1/32" basswood. I guess I'll put on my sawmiller's hat tomorrow and start ripping my own strip. If you're going to paint the hull black, I think you'll enjoy working with styrene. I don't know how seriously I'd worry about it discoloring over time, as other contributors have reported elsewhere at MSW. But it was an easy material to work with for the gallery windows. Thanks Gregg.
-
Can anyone recommend a supplier for #8000 (.0208 x .0208 x 11") basswood, boxwood or holly strips? Xken used this material to do his bow stripes. I don't wan't to use styrene because I'm trying to stick with the stained/unstained contrast scheme. I've tried an internet search and struck out - the few sites that showed it were out of stock. I suppose I could try making my own, but if someone knows someone.. 😉
-
Jon, I can't thank you enough for having provided this photo to XKen, way back in 2016. It answers a big question for me on how to tackle the tailboards. Thanks again. Peter
-
Funny you should say that. You should look at the discussion on cannons at Musafa's (mtbediz) build. You'll need to buy replacements for the half barrels that came with the kit. Furthermore, you probably won't like the carronades that came with the kit either. At present the Syren Ship Model Company's (https://syrenshipmodelcompany.com/) cannon store is closed. But I'm pretty sure that by the time you're ready to build the gun carriages, the site will be back in business. Or you could see if Mustafa's friend will make some for you..😁 Do you have a lathe?
- 233 replies
-
- 2
-
-
- Model Shipways
- constitution
- (and 5 more)
-
USS Constitution by mtbediz - 1:76
Der Alte Rentner replied to mtbediz's topic in - Build logs for subjects built 1751 - 1800
I'll chime in for the dark grey as well. Looking good!