Der Alte Rentner
-
Posts
1,018 -
Joined
-
Last visited
Content Type
Profiles
Forums
Gallery
Events
Everything posted by Der Alte Rentner
-
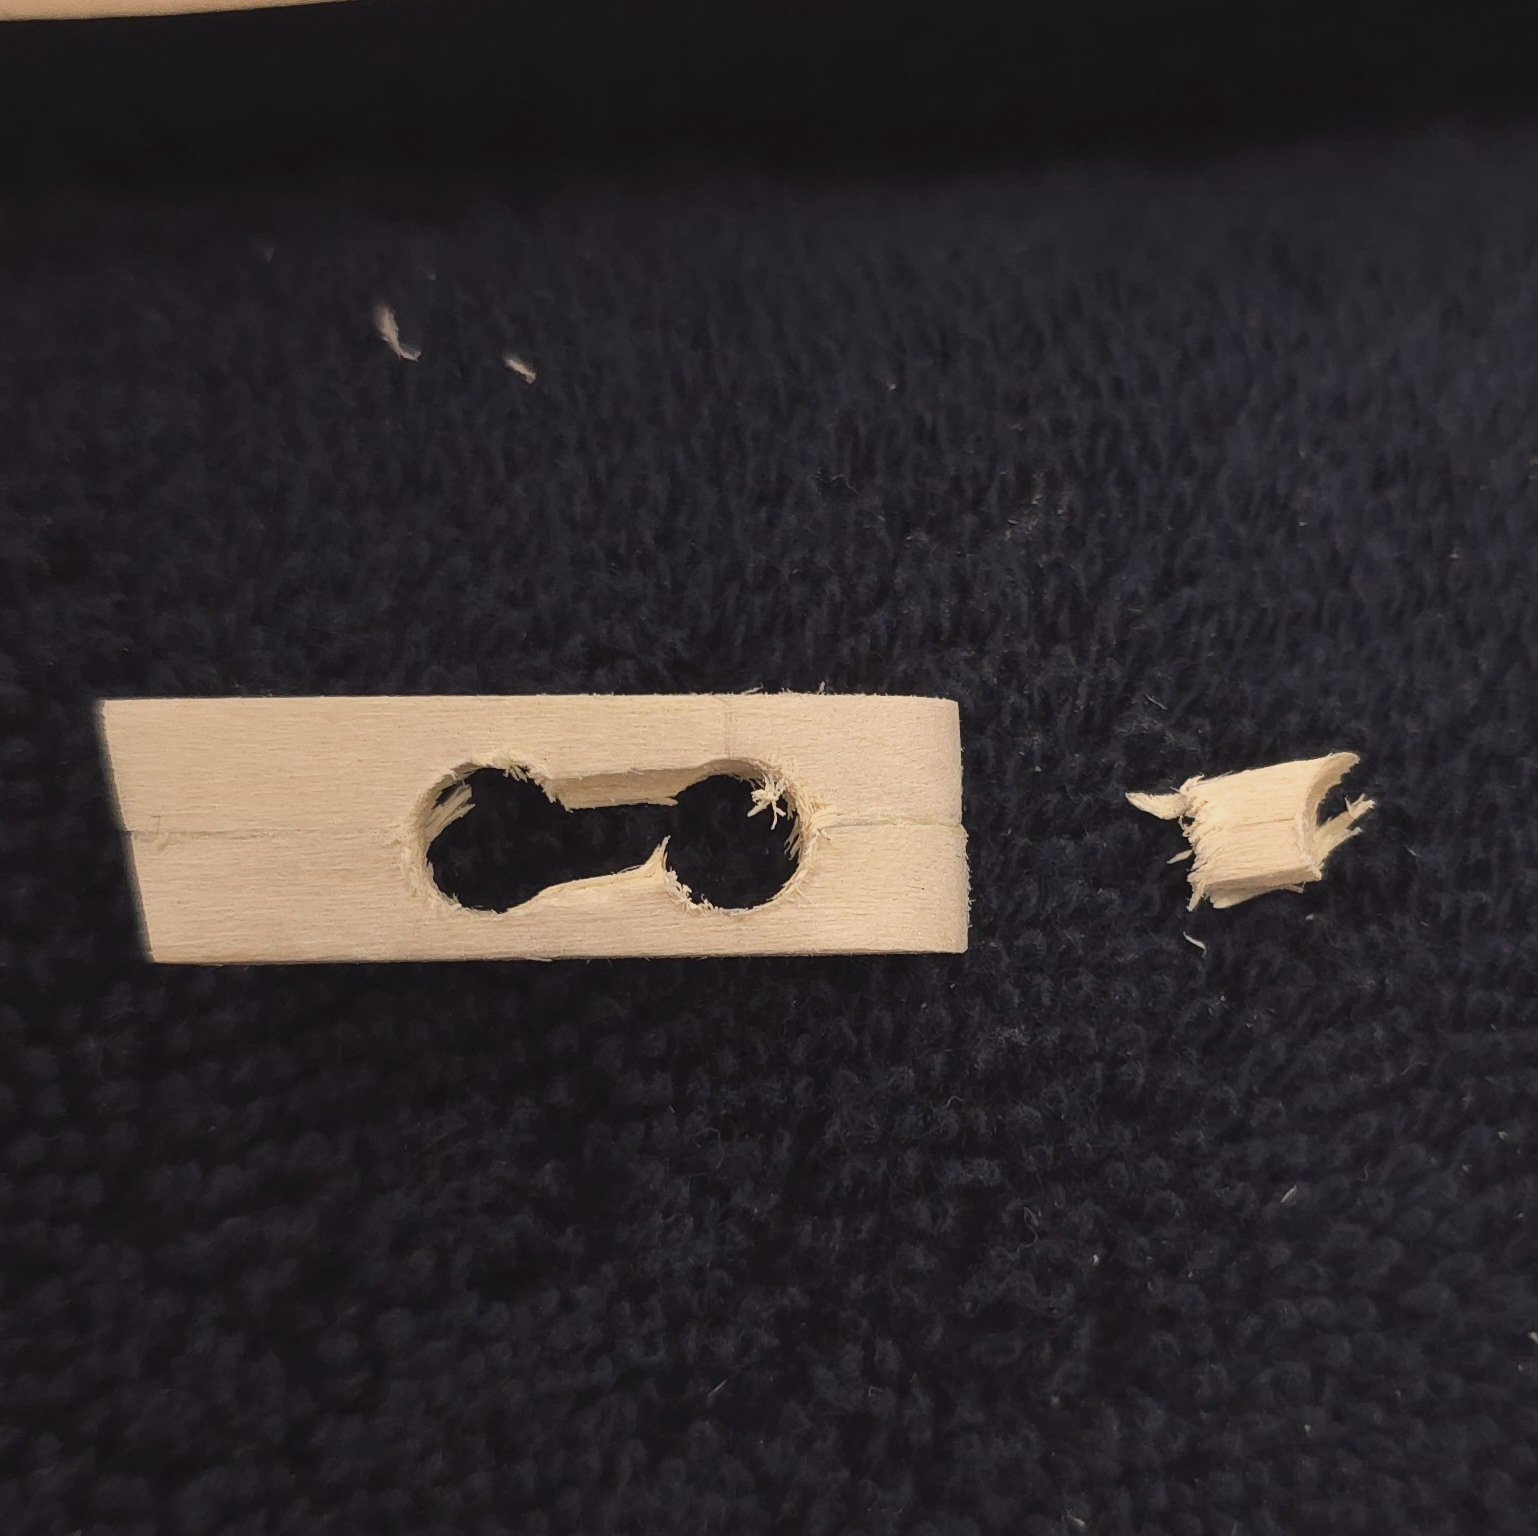
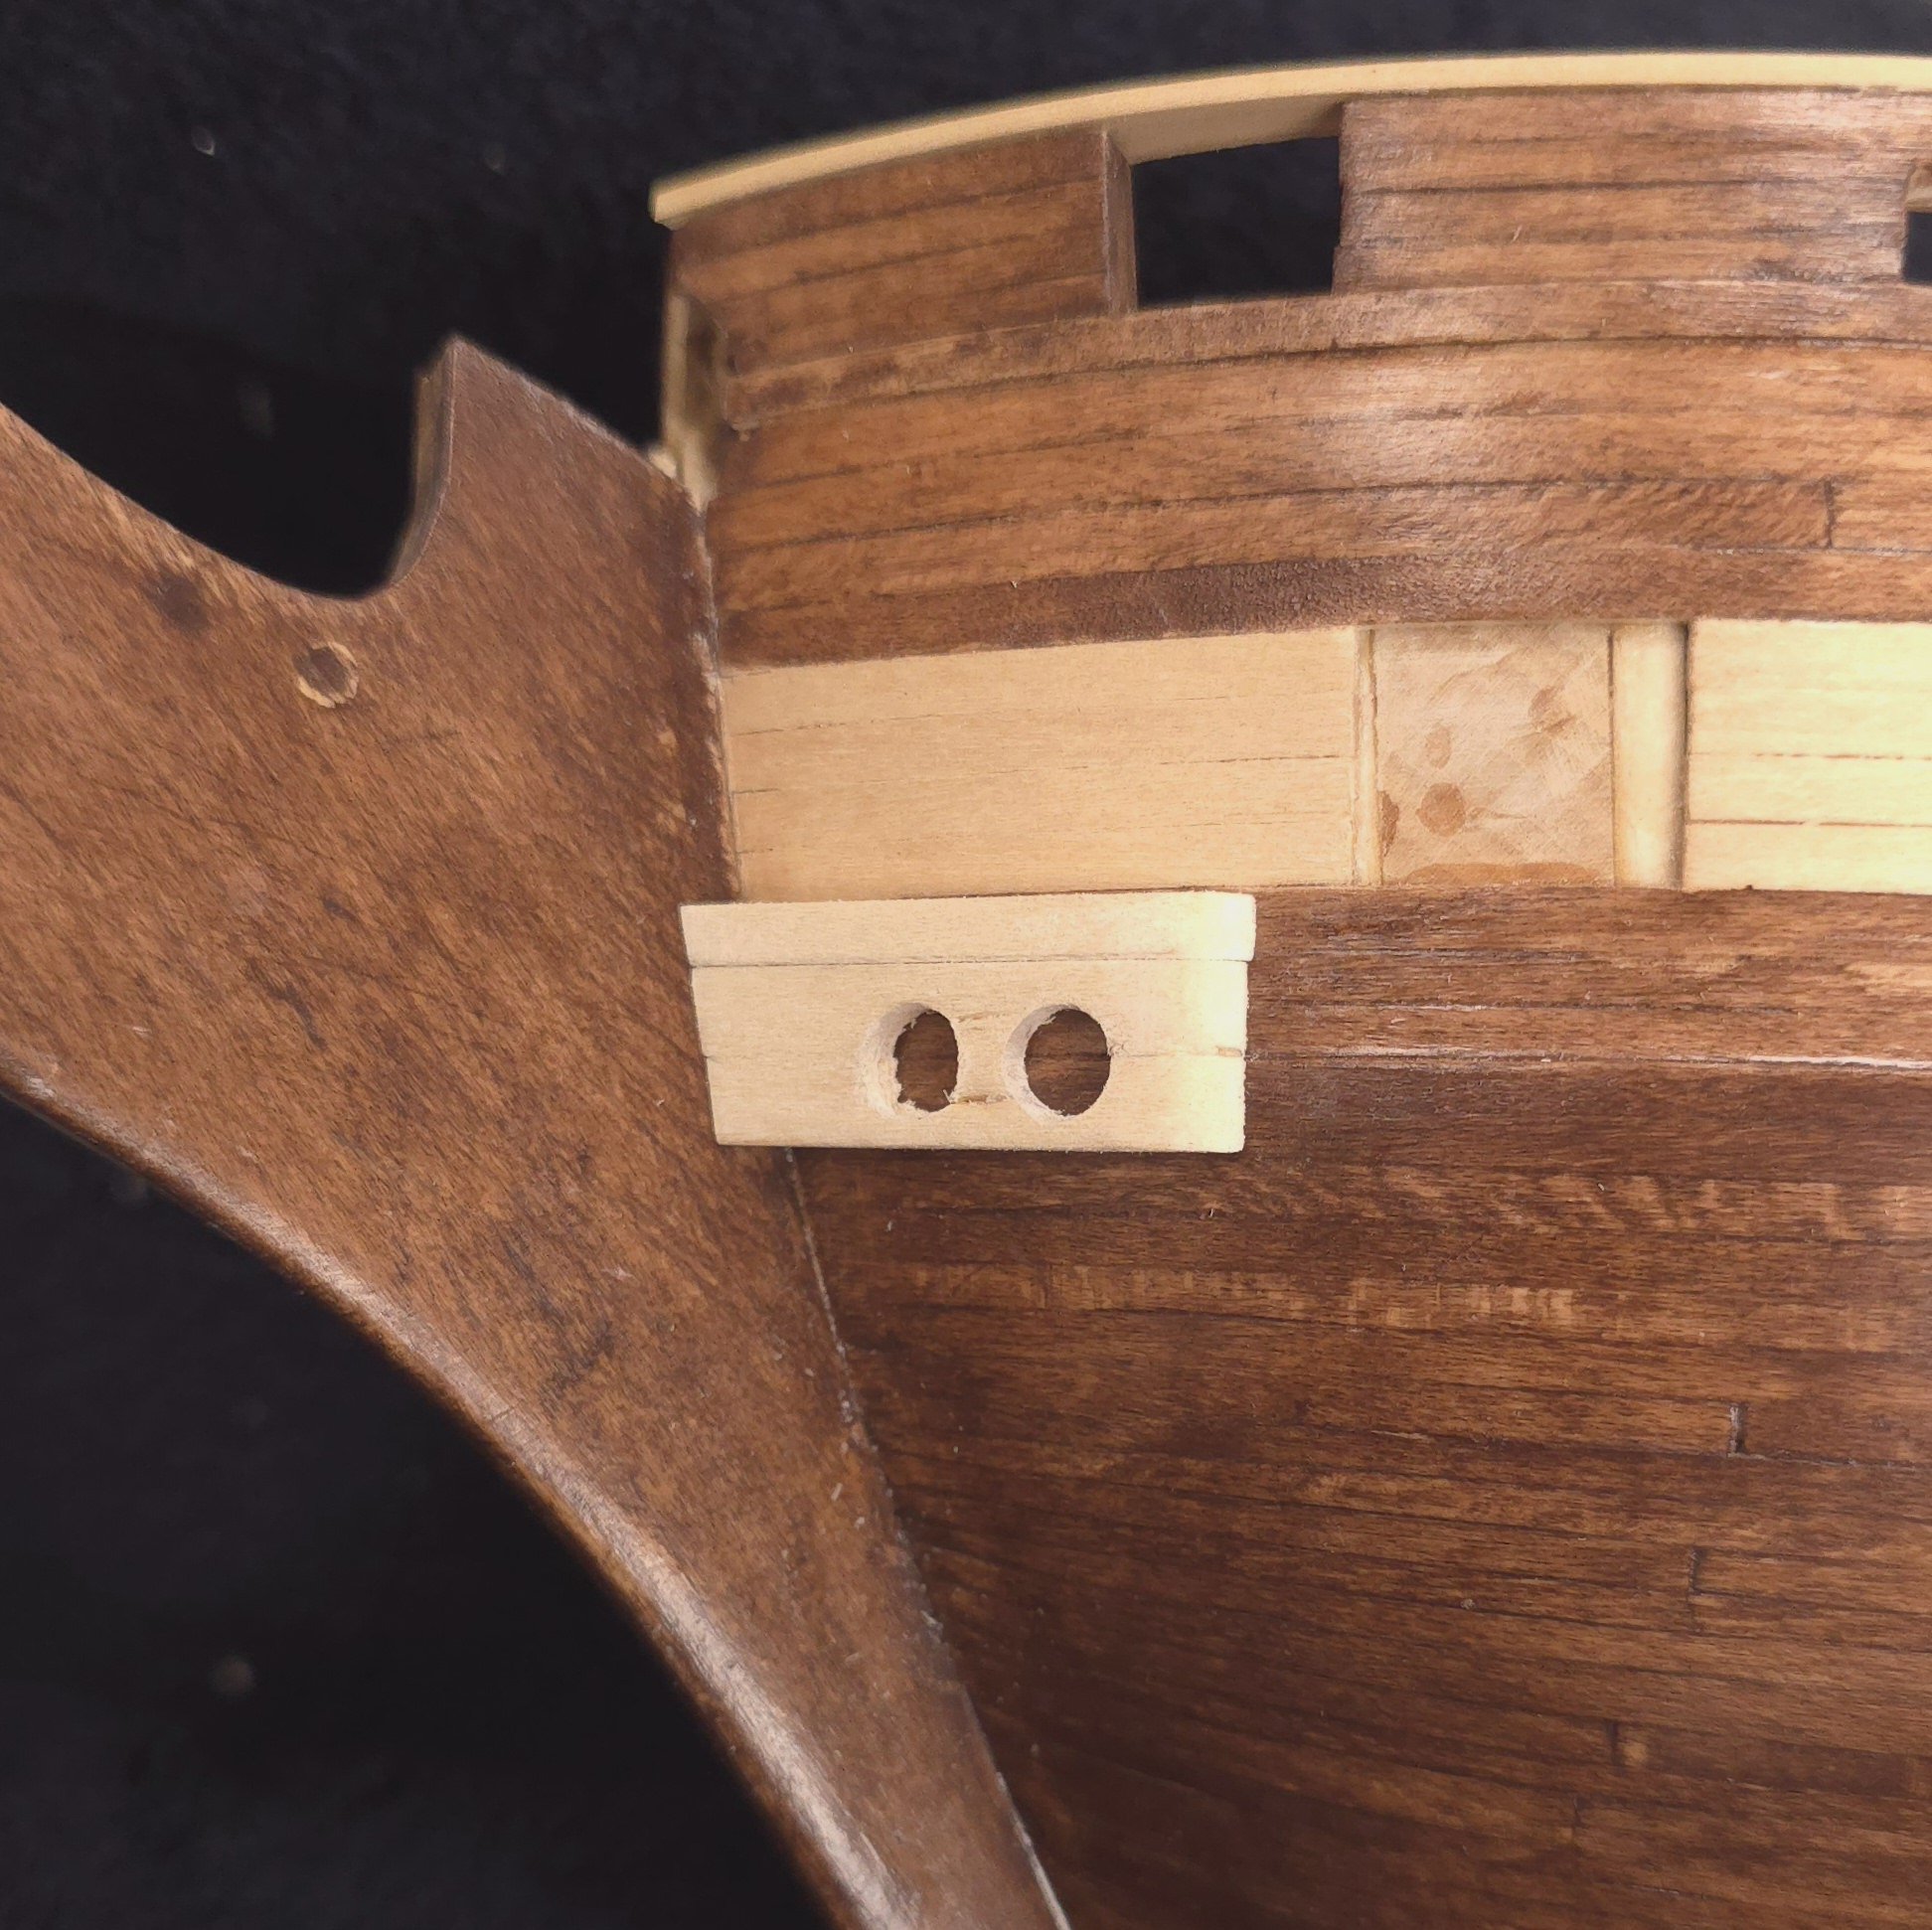
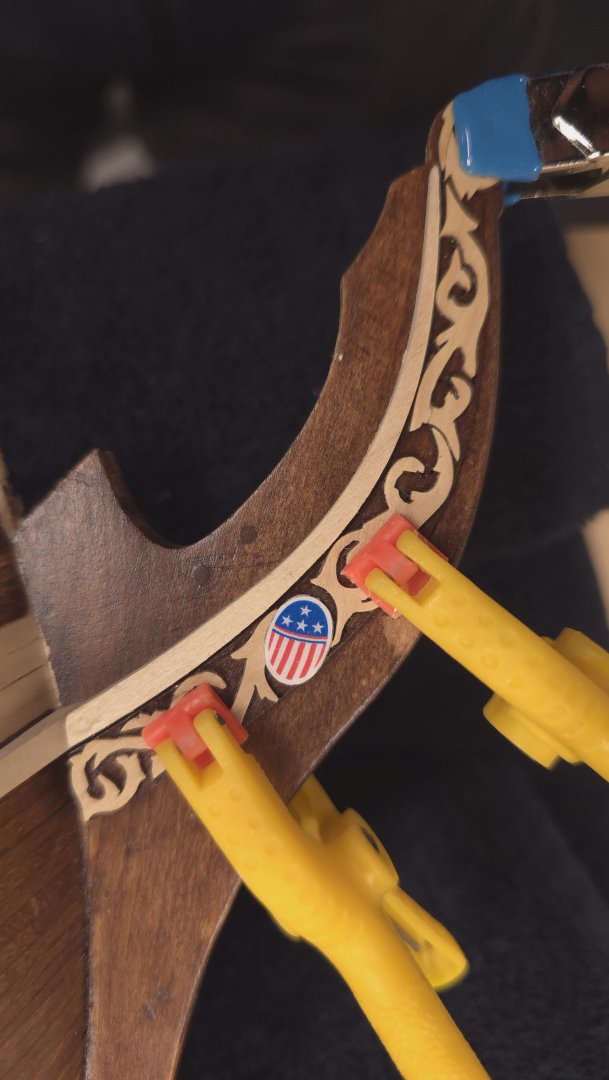
 Ha! This just goes to show you, there's more than one way to skin a cat. I was going the other way around, as you know. And I had three of the four pieces cut and fit. I decided to use two 3/16 inch sections in the center for the hawse pipes, because of the differences in thickness of the wale at that point. Since the middle section was going to be stained, I decided to drill the holes for the hawse pipes and this happened.. I'll did the best I could to glue that piece back into place. Since it will be stained and the hawse pipes will cover most of the sin, this should suffice. But it did dampen my spirits for a time today.
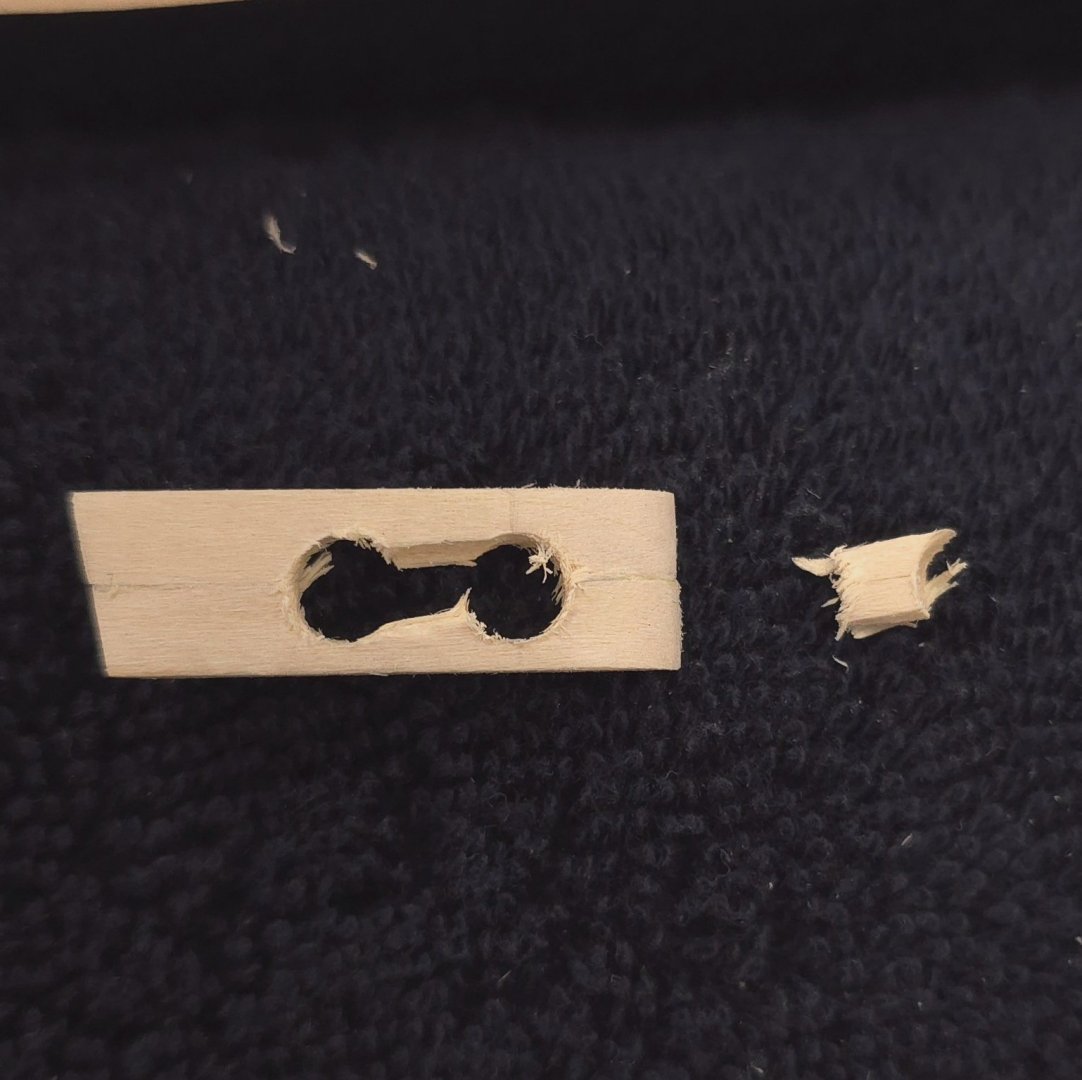

-
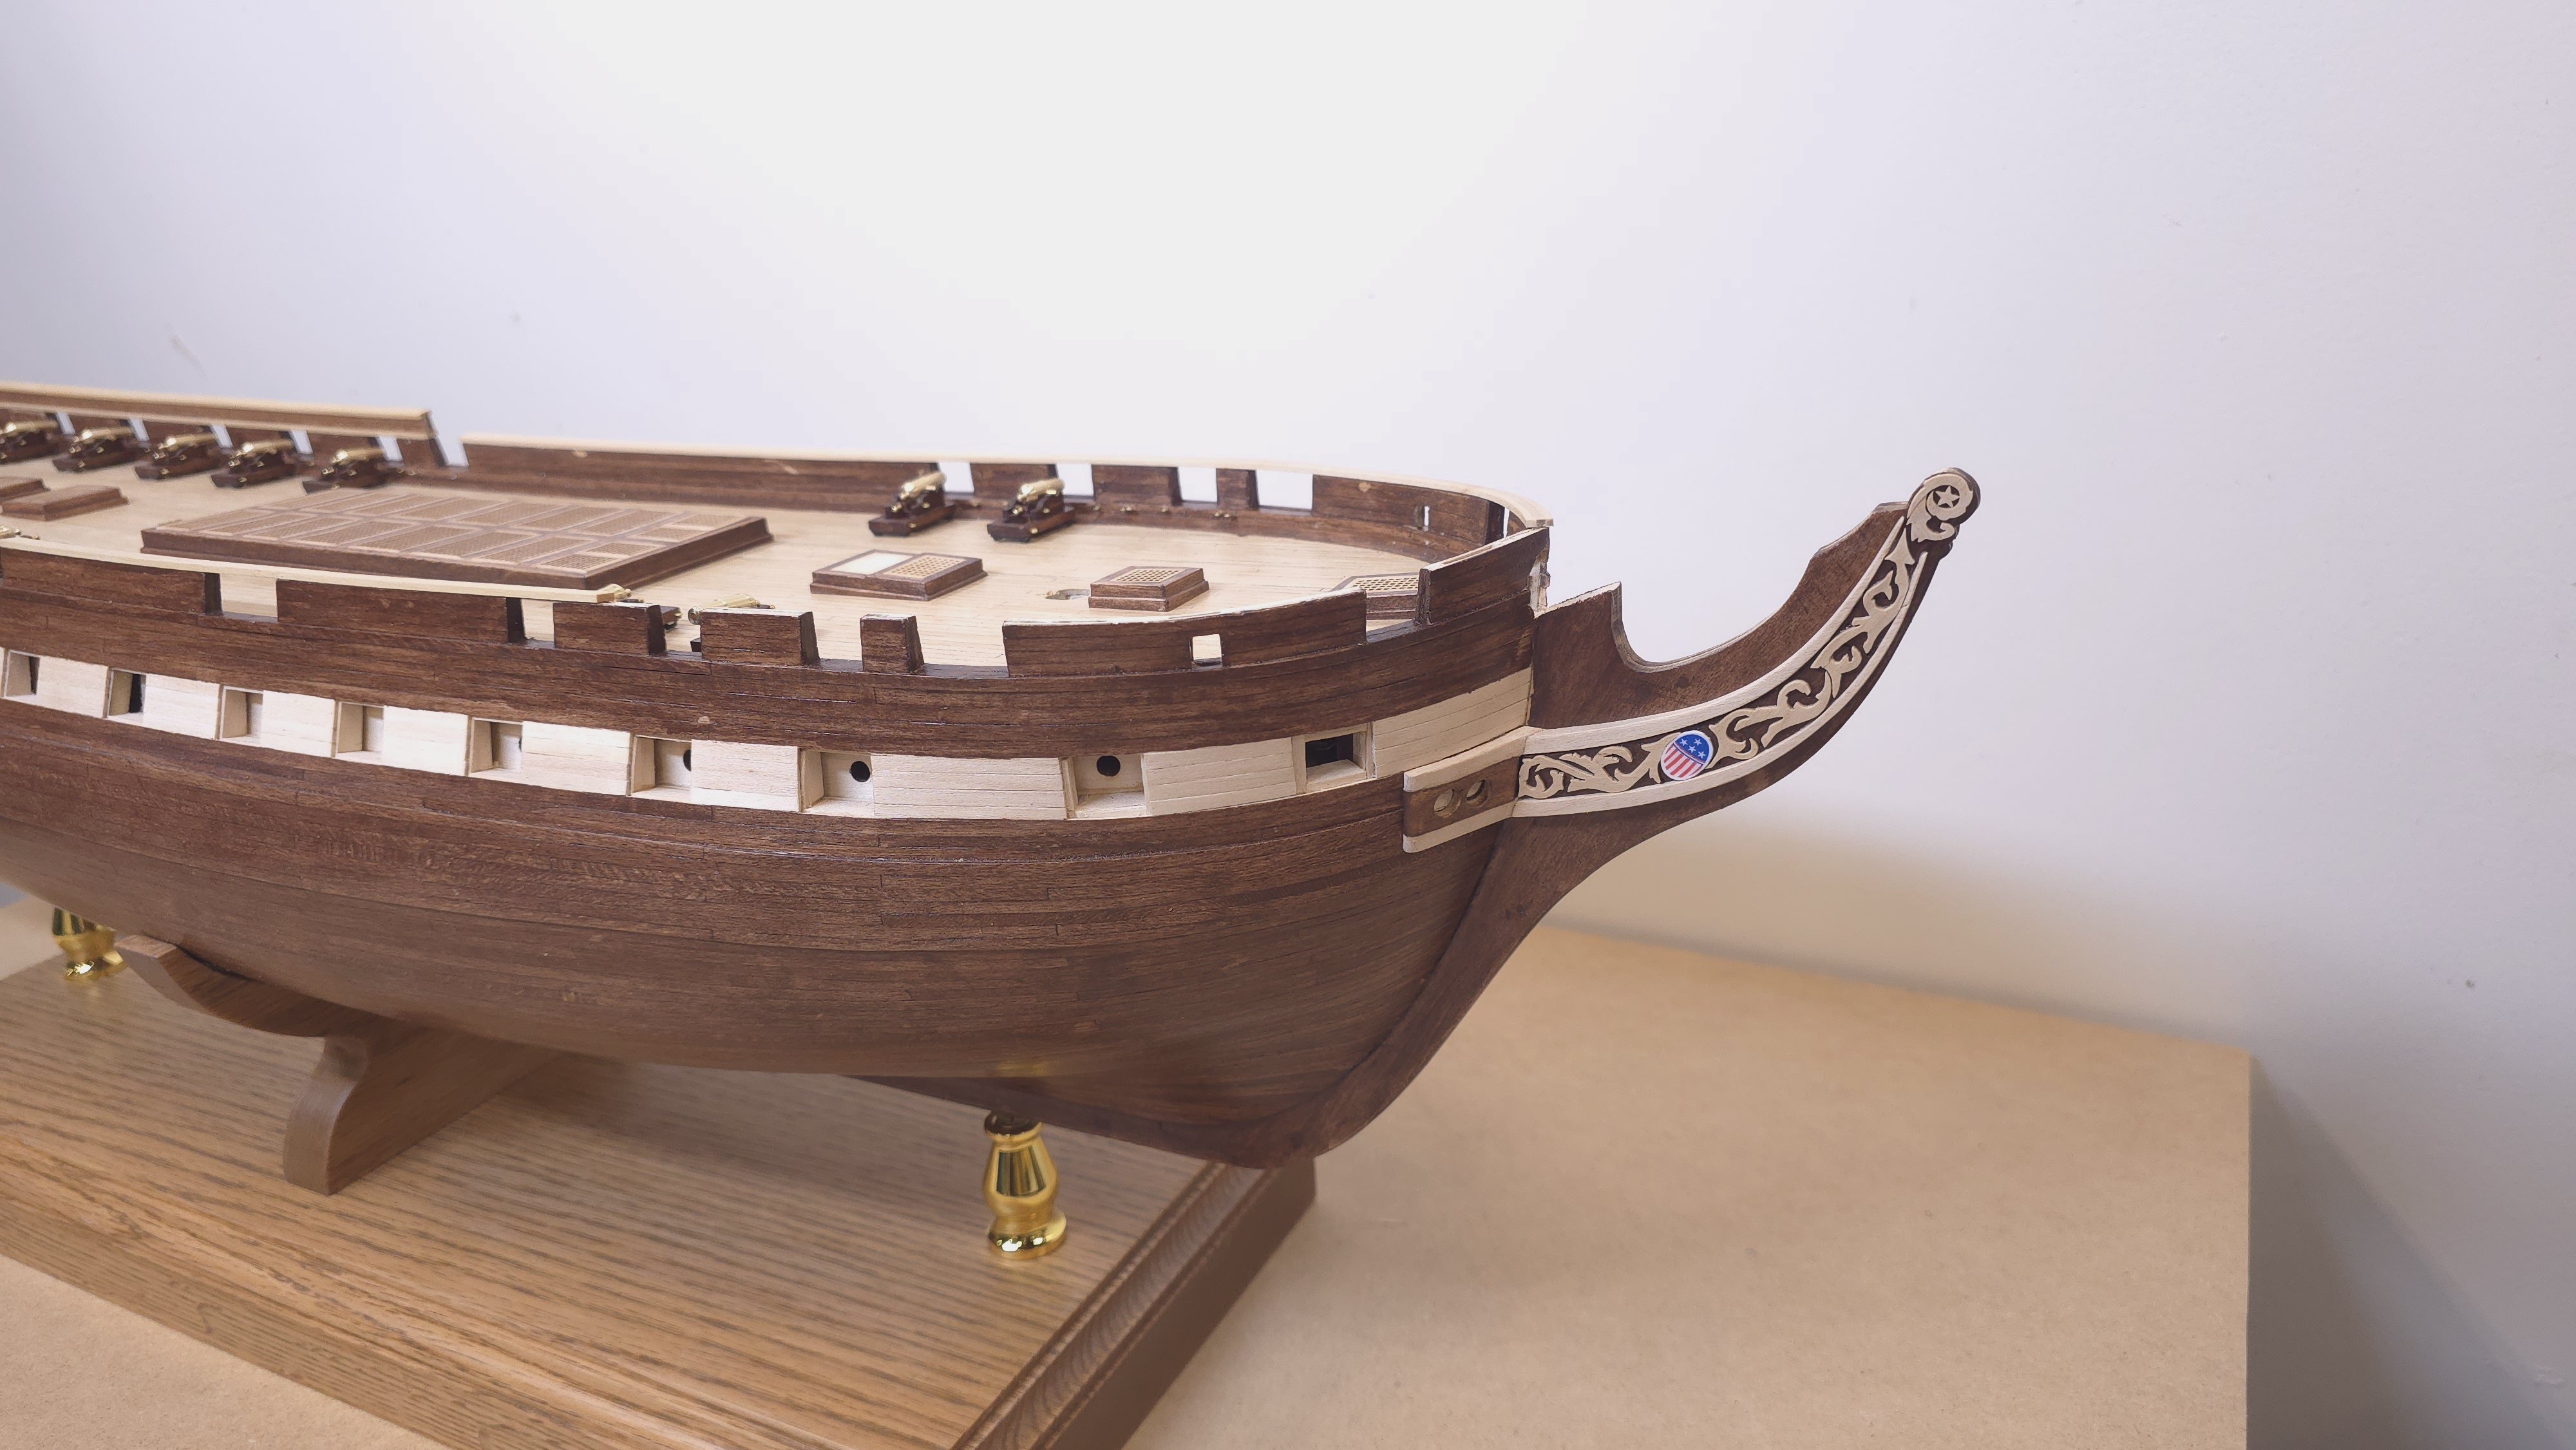
There were no posts at the beginning of May of 2024, but with some digging, I was able to find a May 30 post where he displayed 3 photos. Reluctant as I was to join yet another blog site, I did register to see if's posting anything more recent that that. I would love to see how he tackled the pinstriping. I did see that he coppered the hull. I'm not sure I like the look. But I'll add it to the list of things to ponder in the coming weeks. Thanks for the lead Jon. P.S. I just went back to the site and couldn't find the earlier post with the three pictures, but I did find this: Indeed, John and I are on the same page on the color scheme. Though I suspect the scrollwork and galleries were pre-fab and provided by the kit maker - Mamoli. Zooming in as best I could on the bow, I saw that this was a simpler approach than the one we're all dealing with. And! It does encourage me to stick with all stain on the three head rails. No pinstriping! That should make life easier. Also, the more I look at the copper plating, the less I like it with the natural finish. Lastly, I'm starting on my second set of cheek knees but taking a much different approach than the Bob Hunt hockey stick method. I I'm going to attach the parts that attach to the hull first. Then, the trailboard with scrollwork, and after those are in, I'll fabricate the last two parts of the cheek knees. I think this will be much easier. (I can't tell you how many times I broke the hockey sticks during the test fitting process on the starboard side assembly.) This was taken a few days ago, but I was feeling the need to show more than just the snippets I have of late.


-
USS Constitution by mtbediz - 1:76
Der Alte Rentner replied to mtbediz's topic in - Build logs for subjects built 1751 - 1800
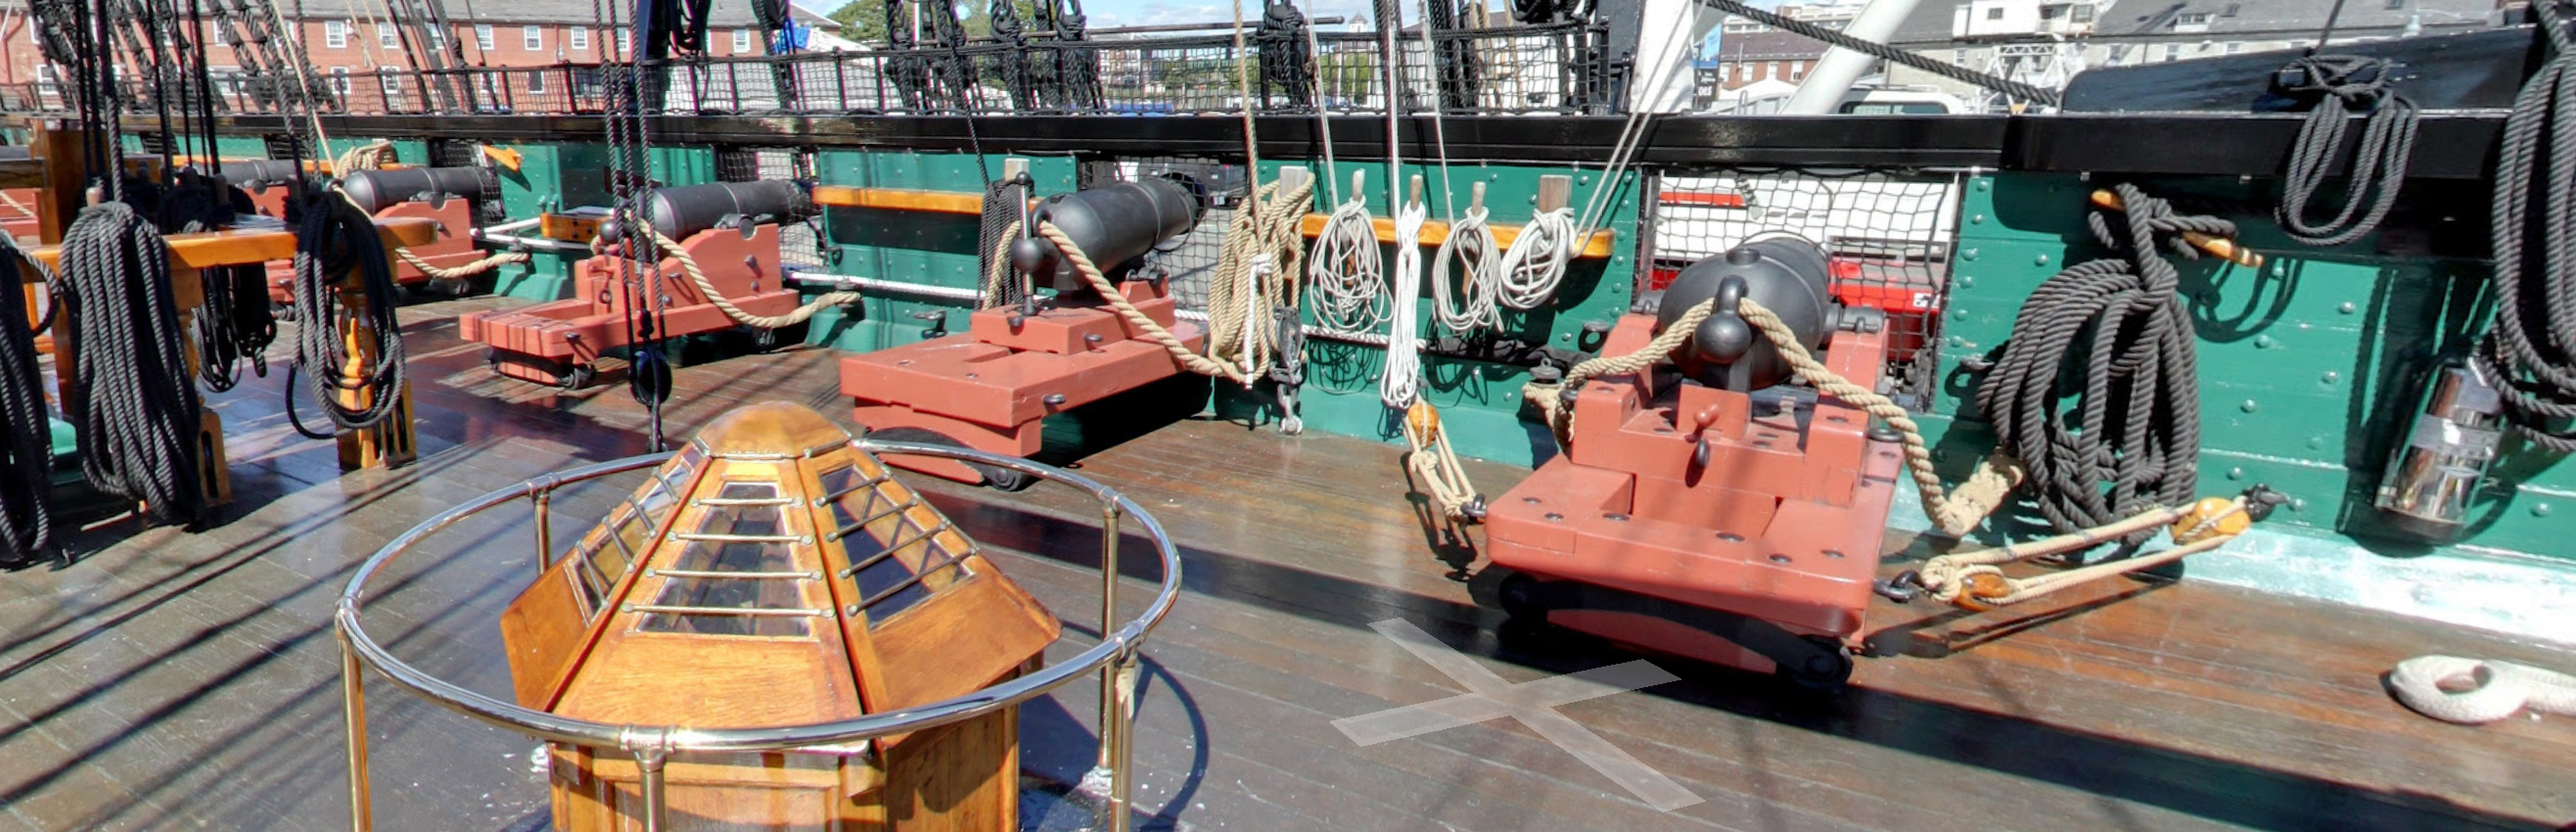
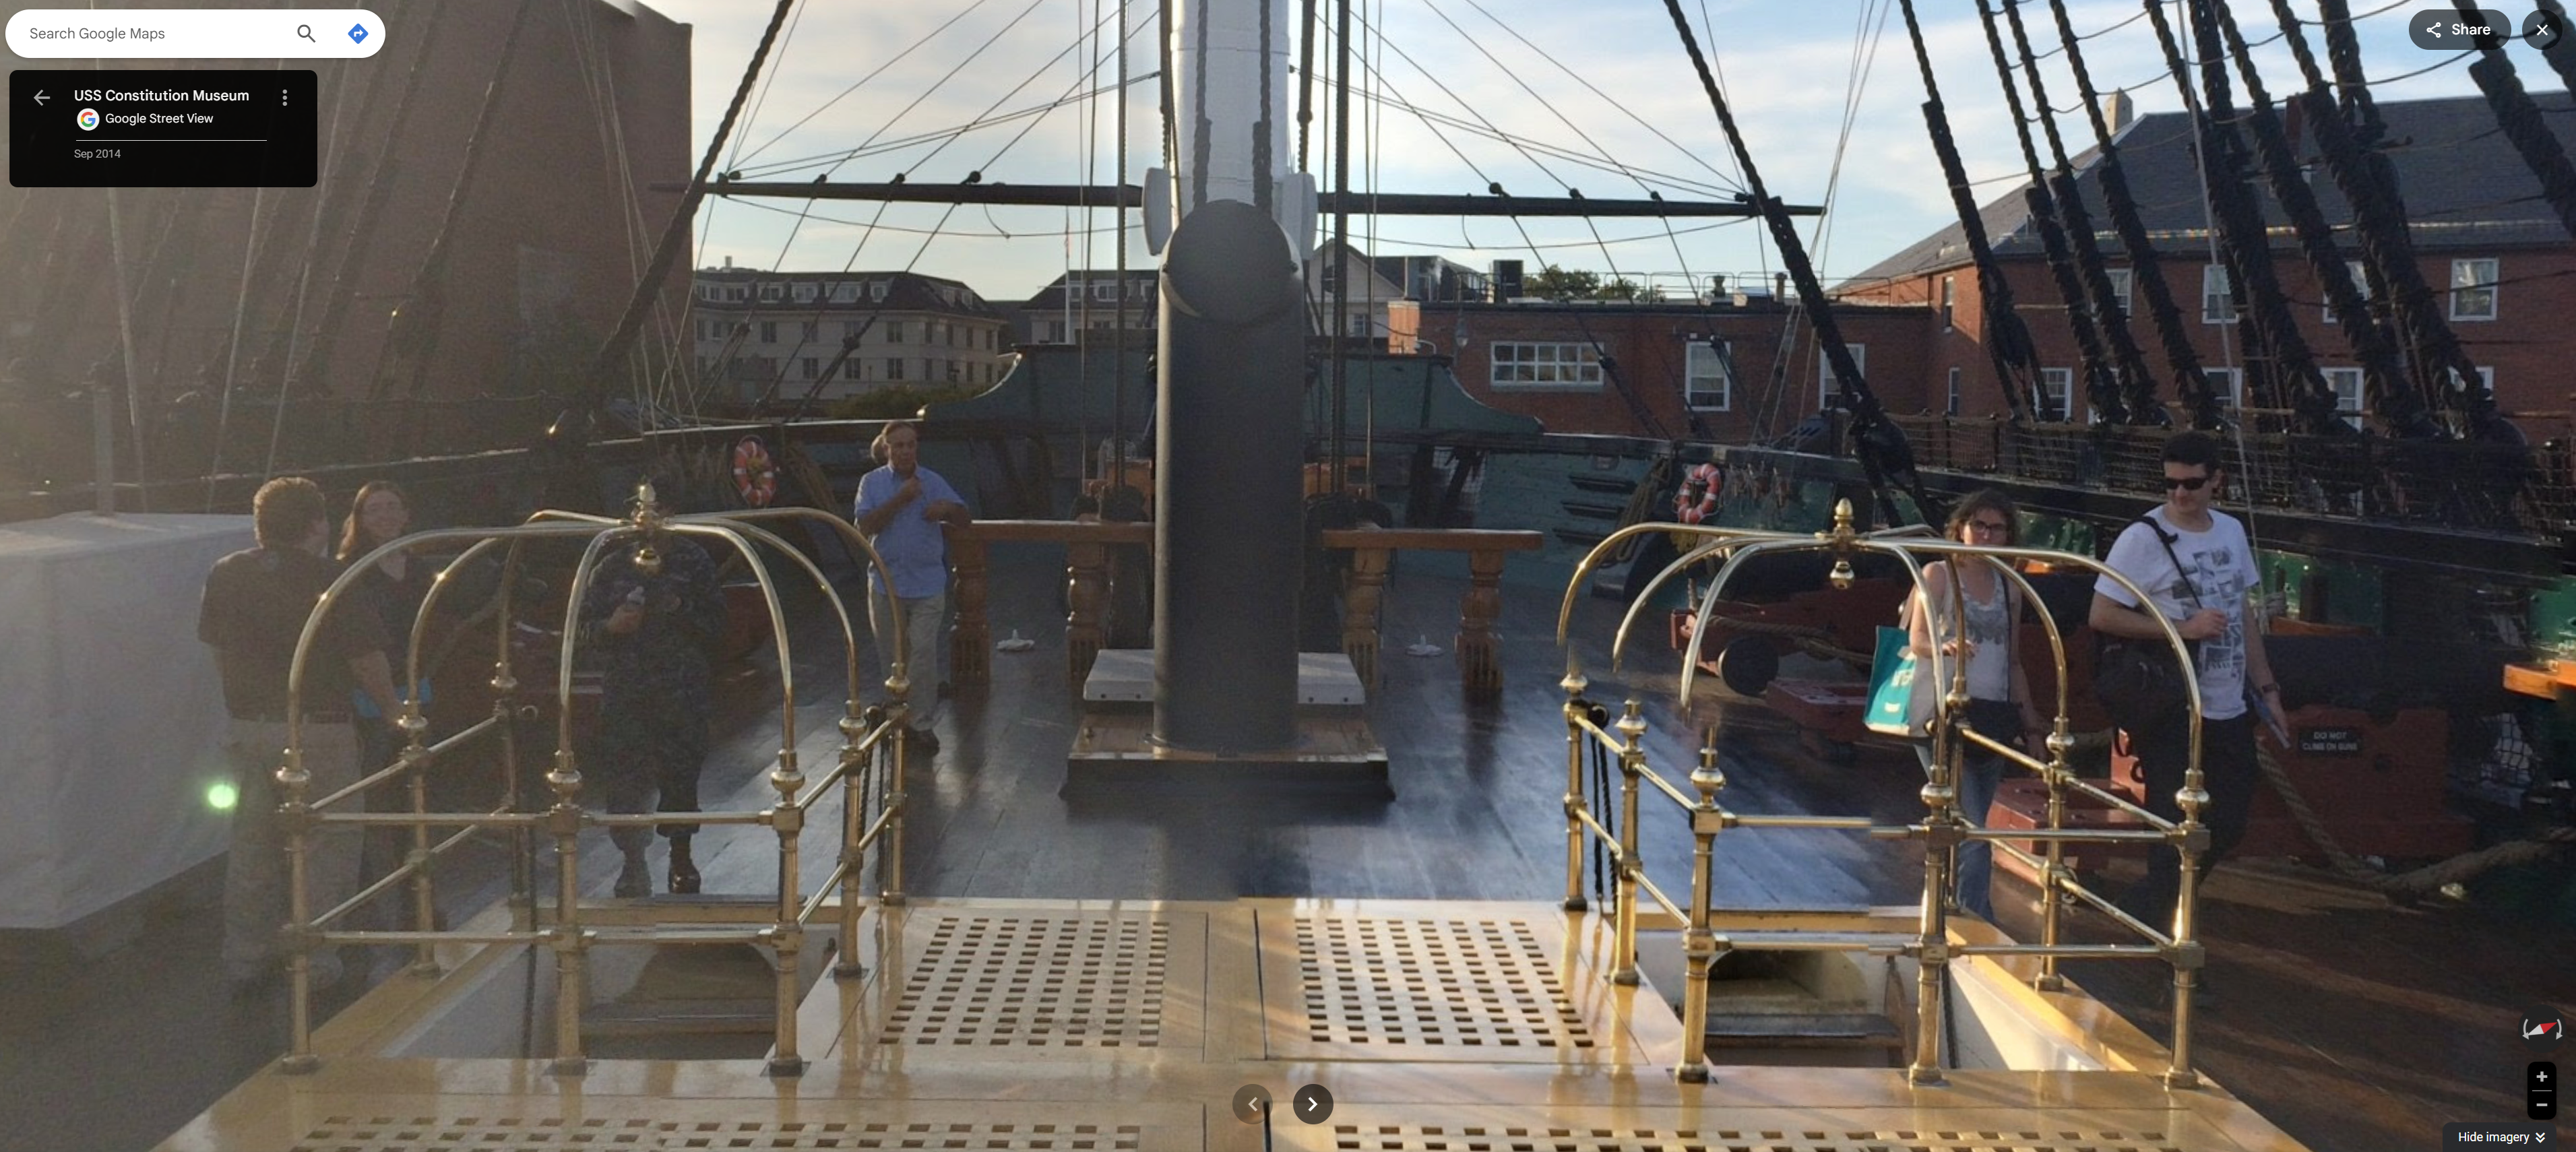
Holy cow! Sorry I inadvertently stirred up a hornet next of controversy bringing up the discrepancy on the carronades. I finally got access to the Museum's 3D tour and, low and behold, the topgallant rail at the bow is still there. So the Google link is the go to link to see Conny as she exists today. As far as the carronades are concerned, I'm committed with the brass ones I acquired and I'll continue following Jon's guidance and remain the captain of my own ship. Due to endodontist and dentist visits ad nauseum, I've been sidelined for a few days. Hopefully back to work tomorrow. Nice work as always Mustafa. You are an inspiration to us all.. and because this response posted on a new page, I didn't see the posts about MSW website access. I've had no problem there. -
USS Constitution by mtbediz - 1:76
Der Alte Rentner replied to mtbediz's topic in - Build logs for subjects built 1751 - 1800
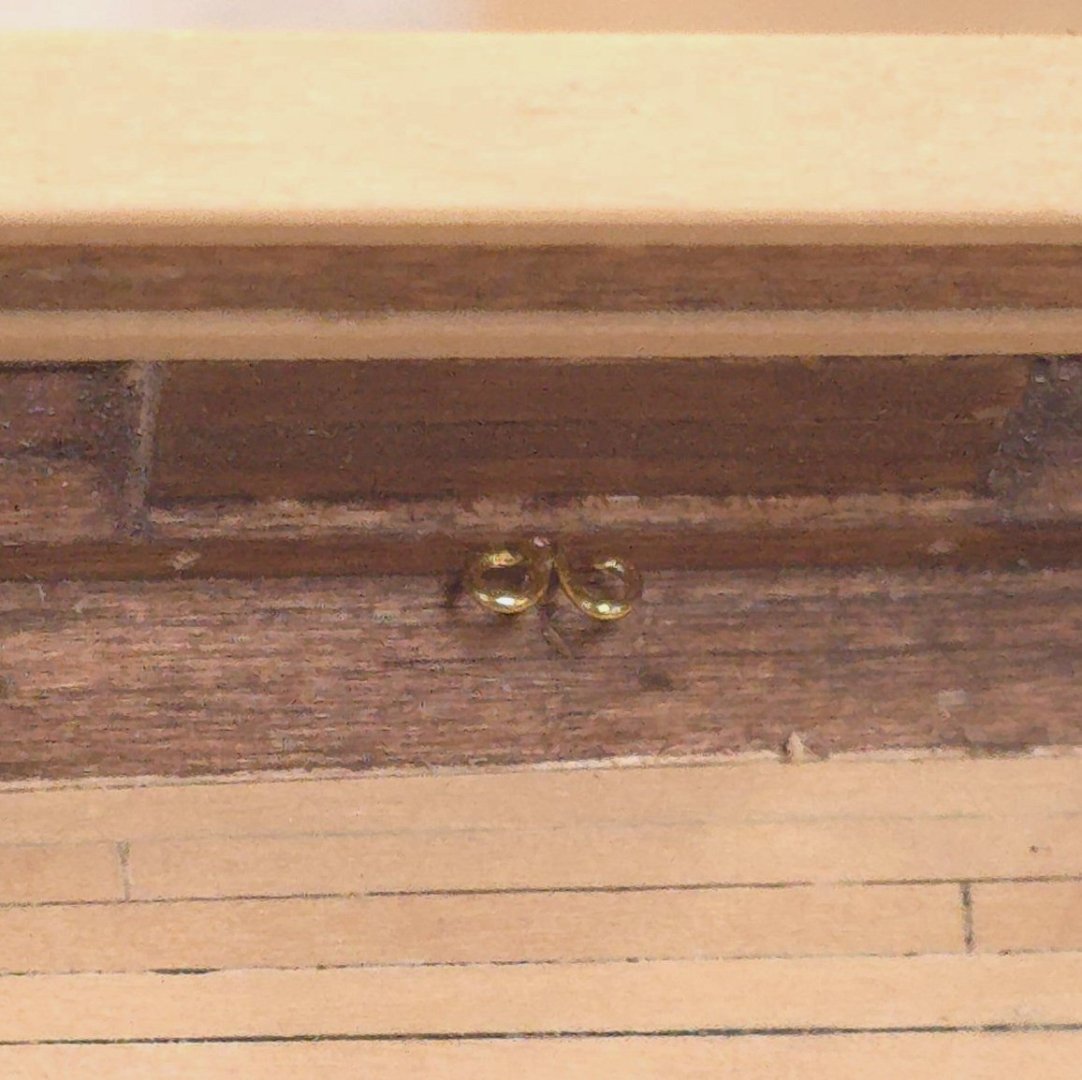
Works like a charm. Thanks for sharing. I've bookmarked the link. But I did notice one small detail. There's a carronade and carriage on the starboard side that differs from the rest. It's the one in the middle of the photo. Just an FYI to those sticklers for detail..
-
USS Constitution by mtbediz - 1:76
Der Alte Rentner replied to mtbediz's topic in - Build logs for subjects built 1751 - 1800
So, I just tried to take the tour myself. Something seems to be amiss at the site, After selecting all I got was this: The logo at top left of an otherwise completely blank page. Clicking on the logo delivered me to a page that appears to be an ad for Guided. However, I did find a link to Google's 3D tour of the spar deck and see that Mustafa is conforming to that version. I did take examine all 360 degrees of the Google exhibit, which confirms that the only place the topgallant rail exists is at the bowsprit. I wasn't looking forward to adding the rail at the bowsprit, and like what I've seen in Jon's photos above. While I am happy with the rails I constructed amidships and aft, I am considering jettisoning them, just so I can bail on the bowsprit. It'll be a while before I get to that, since I'm still laboring with the cheek knees, so, we'll see.. There is something to be said for the KISS principle - Keep it simple s***** P.S. If I decide the risk of causing unwarranted damage in dismantling the after rails is too great, I am heartened to learn of Mustafa's technique here. Thank you sir, you are the master!


-
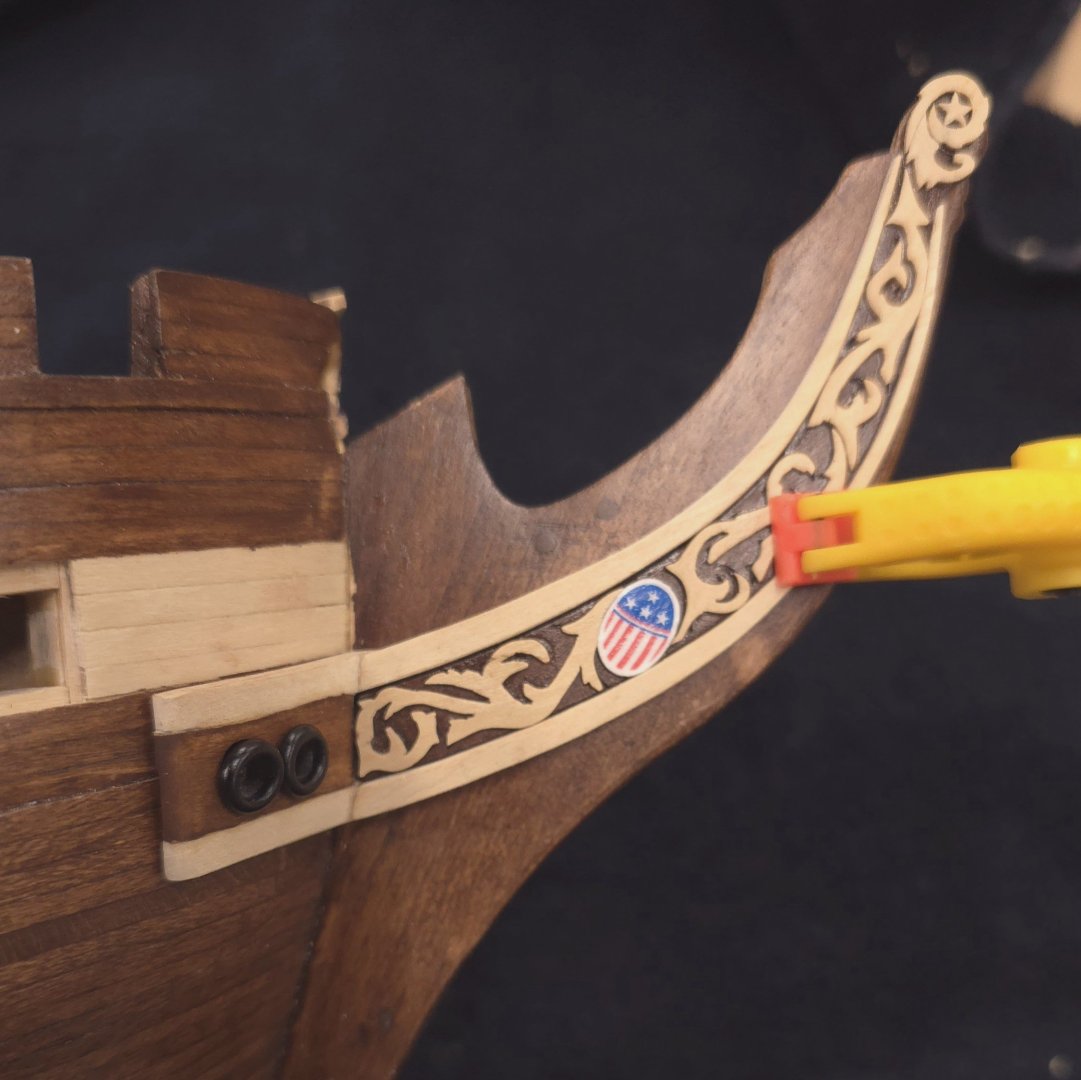
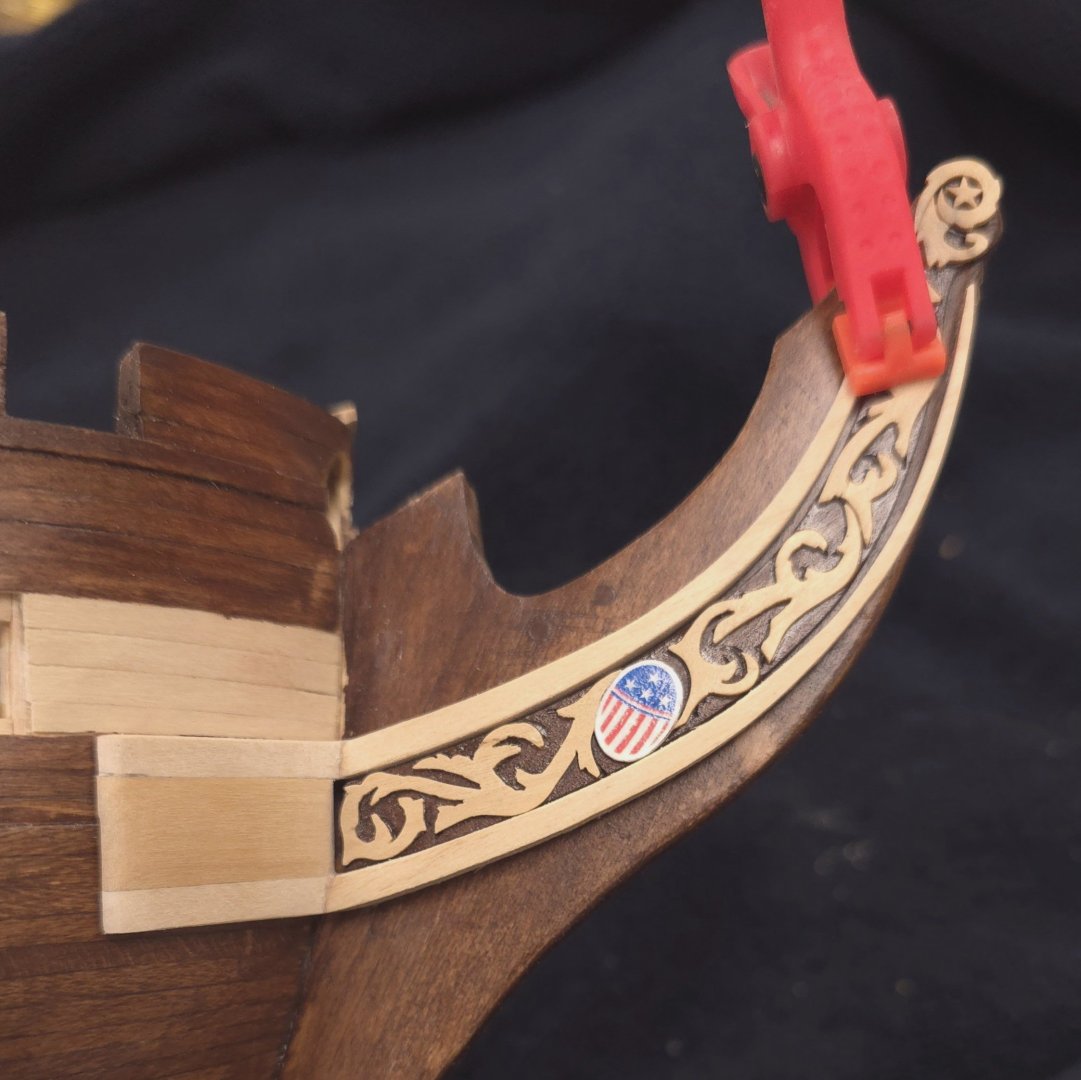
Drat, I had hoped to be able to just edit the above post with some new pictures, but a couple of my model ship World friends already chimed in on that, so, here's my last post for the day. I think I've settled on the color scheme. This isn't entirely finished yet, some sanding and top coat required, but I'm calling it a day.
-
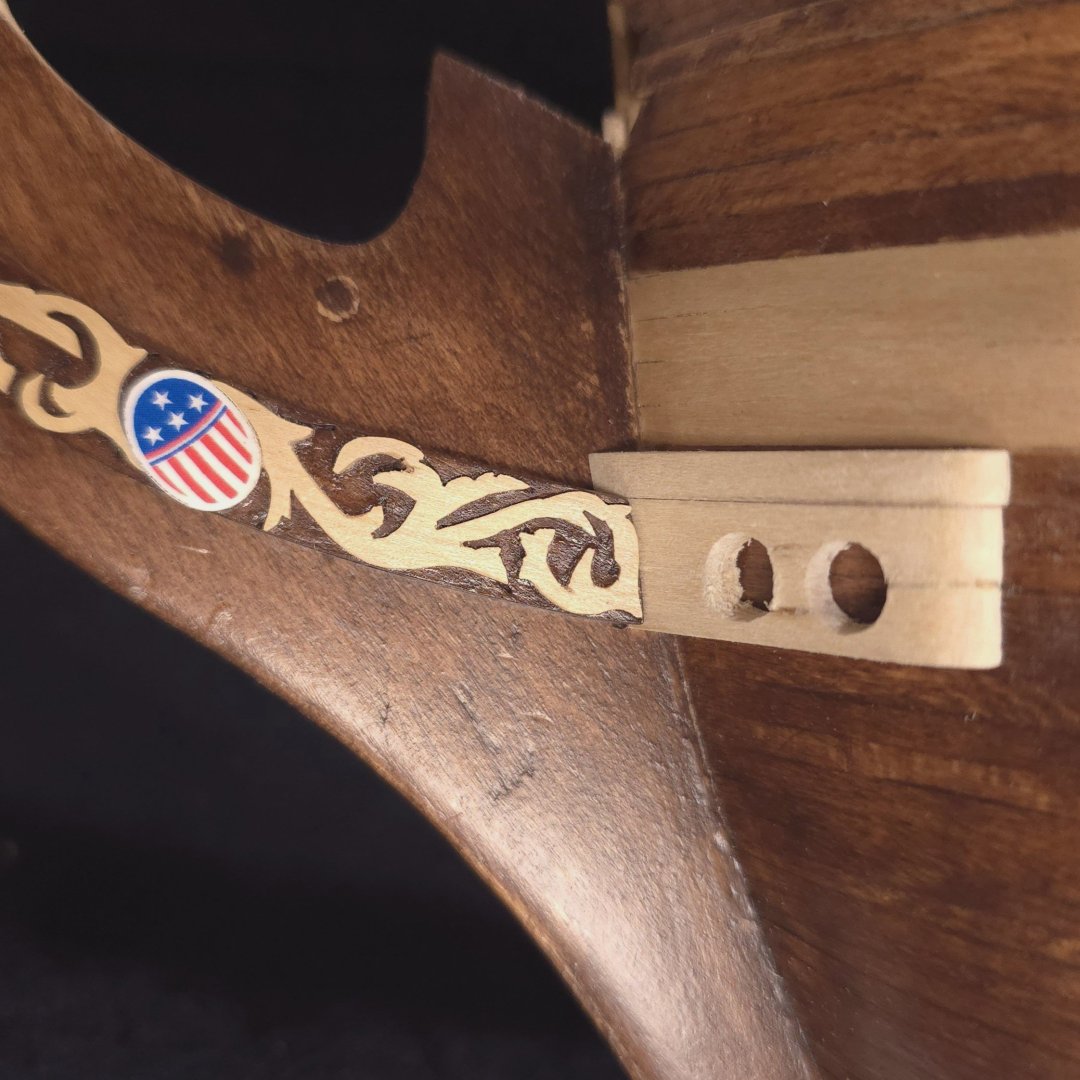
Tough slogging on the bottom cheek knee. I still have to drill holes for the Hawse pipes and to decide on a color scheme. Having experimented with several options on trying to emulate the narrow light colored stripes, I think I'm calling it a day on that as an option. Either the entire assembly will be stained brown, or only the center panel between the cheeks. So much time, so little progress.
-
USS Constitution by mtbediz - 1:76
Der Alte Rentner replied to mtbediz's topic in - Build logs for subjects built 1751 - 1800
Oooh, I'm going to be monitoring this discussion closely! I'd love to be able skip the bow rail. In fact, I don't think I'd mind removing the rails midships and aft, which I only added because I was following the practicum and not paying attention to these builds.. -
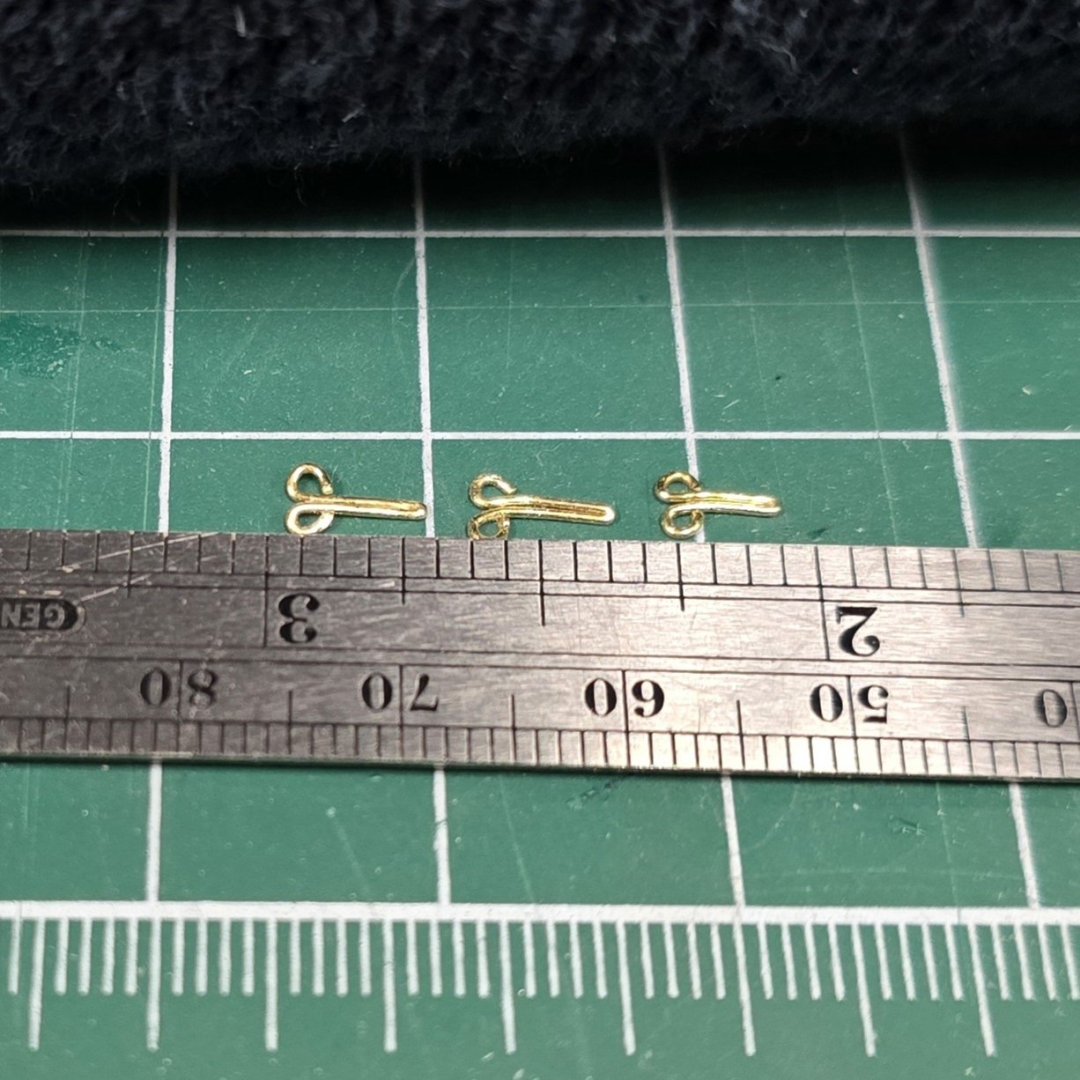
Shopping online today, I found that ModelExpo sells .75 x 6mm Brass Jackstay Eyebolts in 500 piece lots for about $15. They also market their 60 piece set at Amazon. Given what ModelExpo charges for shipping, I would have preferred Amazon, but the 500 piece option was not available there. Bottom line, all in price via ModelExpo for 500 1/32" eyebolts (aka jackstays) - $21.98. Oh well..
-
Guaranteed.. I still can't believe how much shaping I had to do to get level planks, and that was just with the one layer. You'll be fine.
-
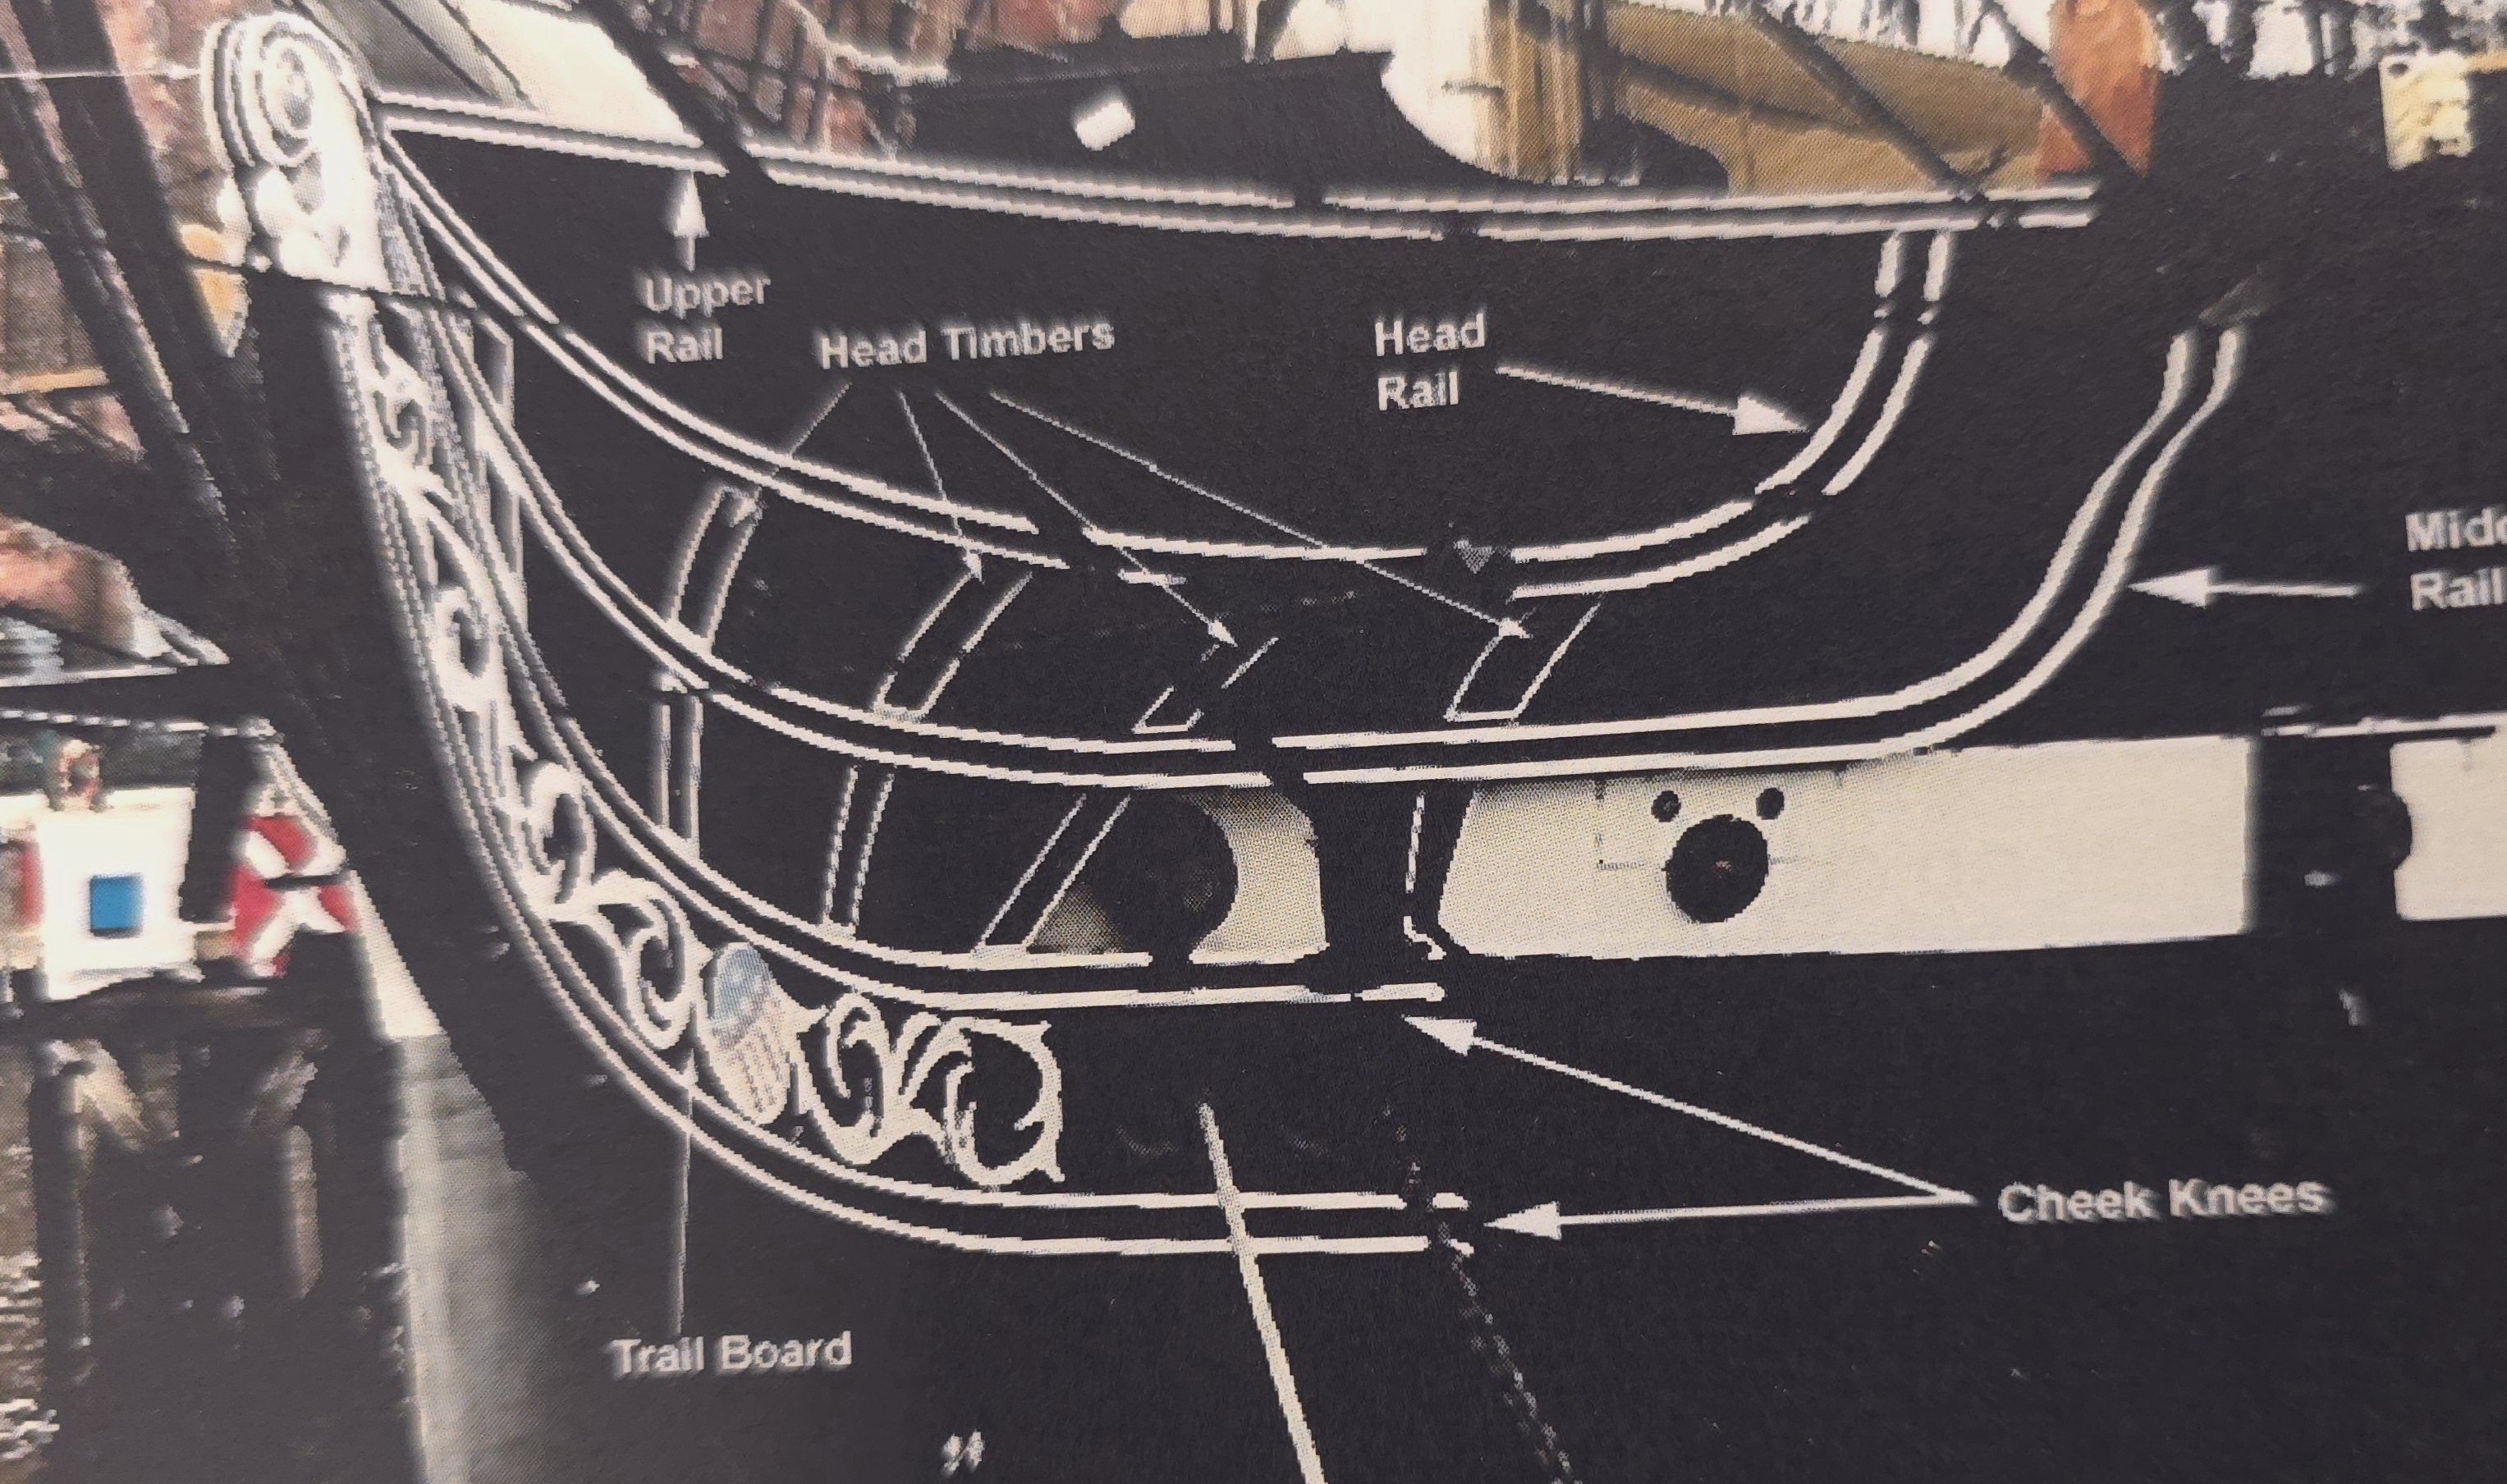
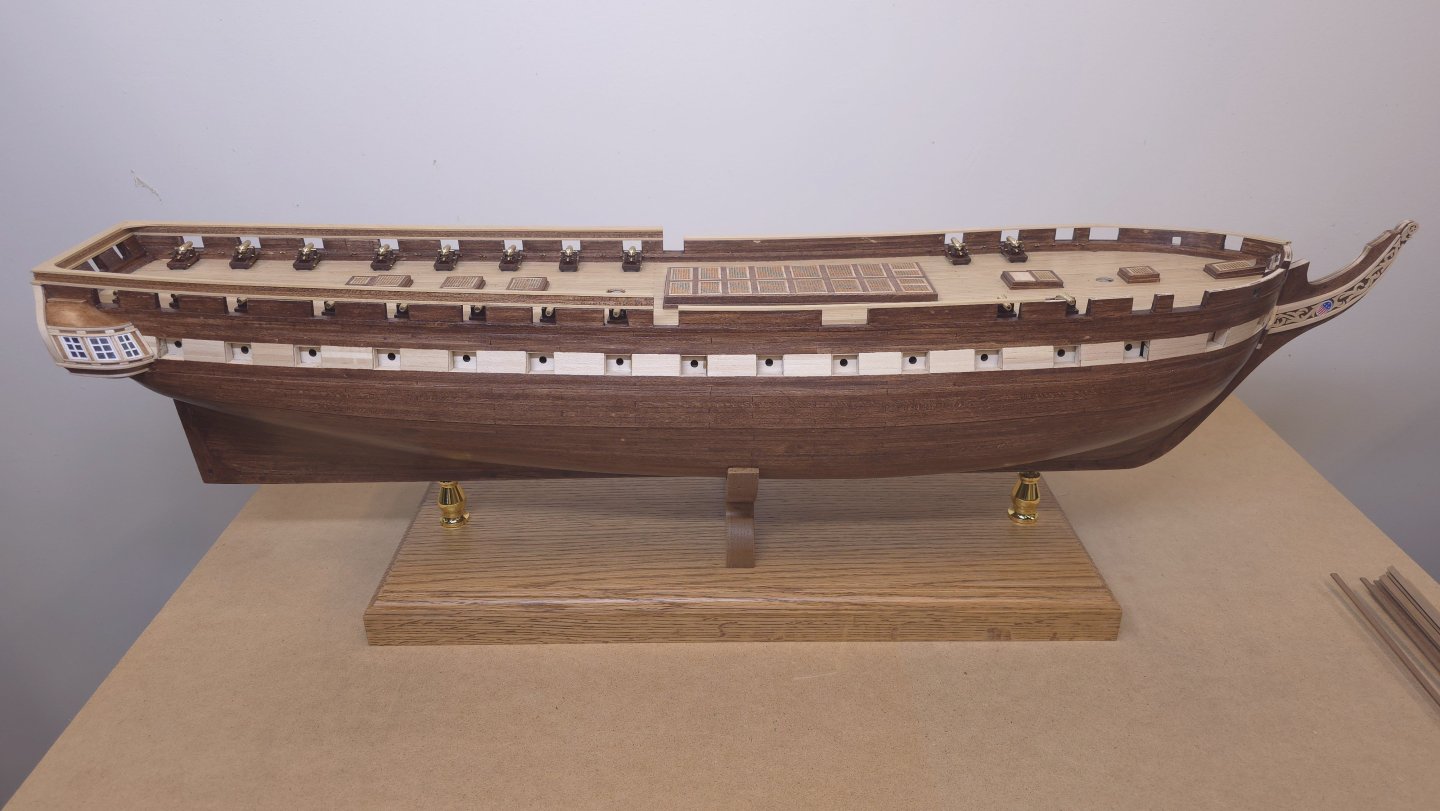
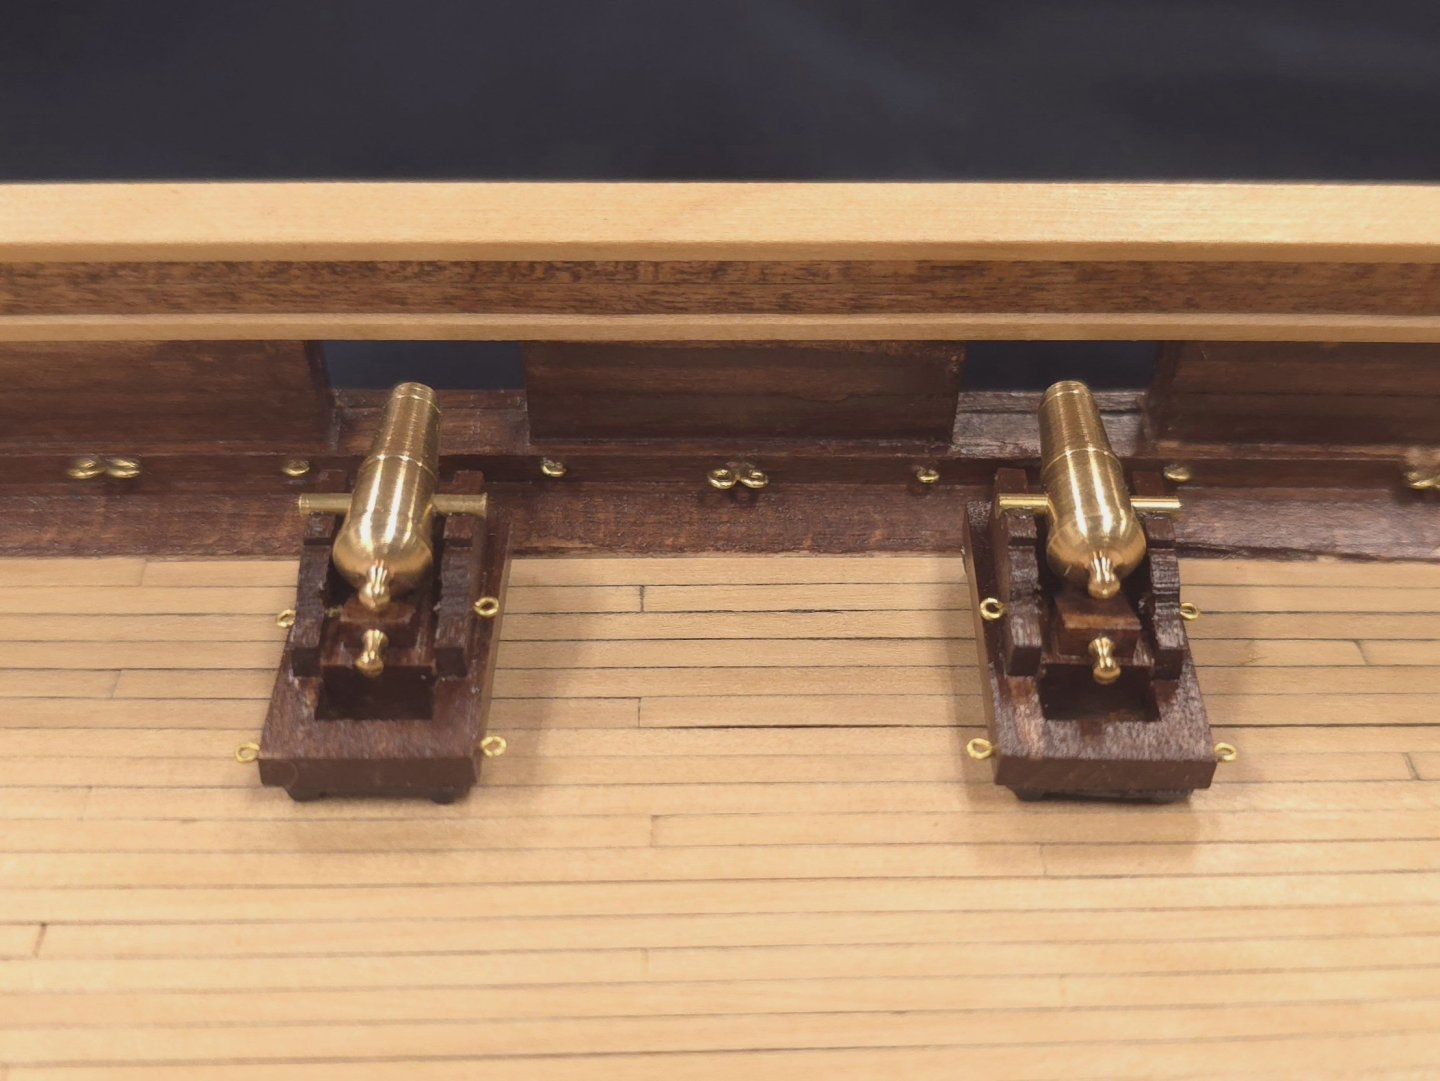
Drat, by switching my phone to camera mode while entering this post, I just lost all the text I had already typed. Well, let's see if I remember it.. The Spar deck now has two coats of poly and all of the eye bolts, both single and double, that I intend to use, are in place. So, putting rigging the carronades aside until I no longer have to turn the hull on its side (or upside down), I have shifted my attention back to the hull. Specifically the trail board, the scroll work, and the cheek knees. Unfortunately my decision to go with the stained / natural finish contrast scheme is coming back to haunt me yet again. Do I try to go with a light/dark contrast, as most people employ in the standard black/white finish on their Constitutions? Do I opt for an all stained, or an all natural finish instead? If I try to emulate the dark stripe down the middle of the cheek knees, how do I do it cleanly? This photo excerpt is from the Hunt practicum - chapter 8, HP 8.1-1 on page 2. Here's what I'm staring at.. Decisions, decisions..

-
Is it just me or are the gun deck ports slightly concave vertically? The Spar deck ports look great.
-
Man, that's fine workmanship..
-
At the rate I'm going, you'll have plenty of time to catch up. Given what I've seen of your productivity, I might be looking to your build log for tips and techniques before I'm done. Again, congrats on a fine build, and thanks for the stroll down memory lane for me (check your post 25 and 26). Here's hoping you get that shipyard clearance soon.😁
- 58 replies
-
- 1
-

-
- Santa Maria
- Ships of Pavel Nikitin
- (and 1 more)
-
Nice work Gregg, Sorry I've been AWOL on this project. I failed to add it to my Managed Content list (until today). I'll be keeping an eagle eye out going forward. This time for sure! 😁
-
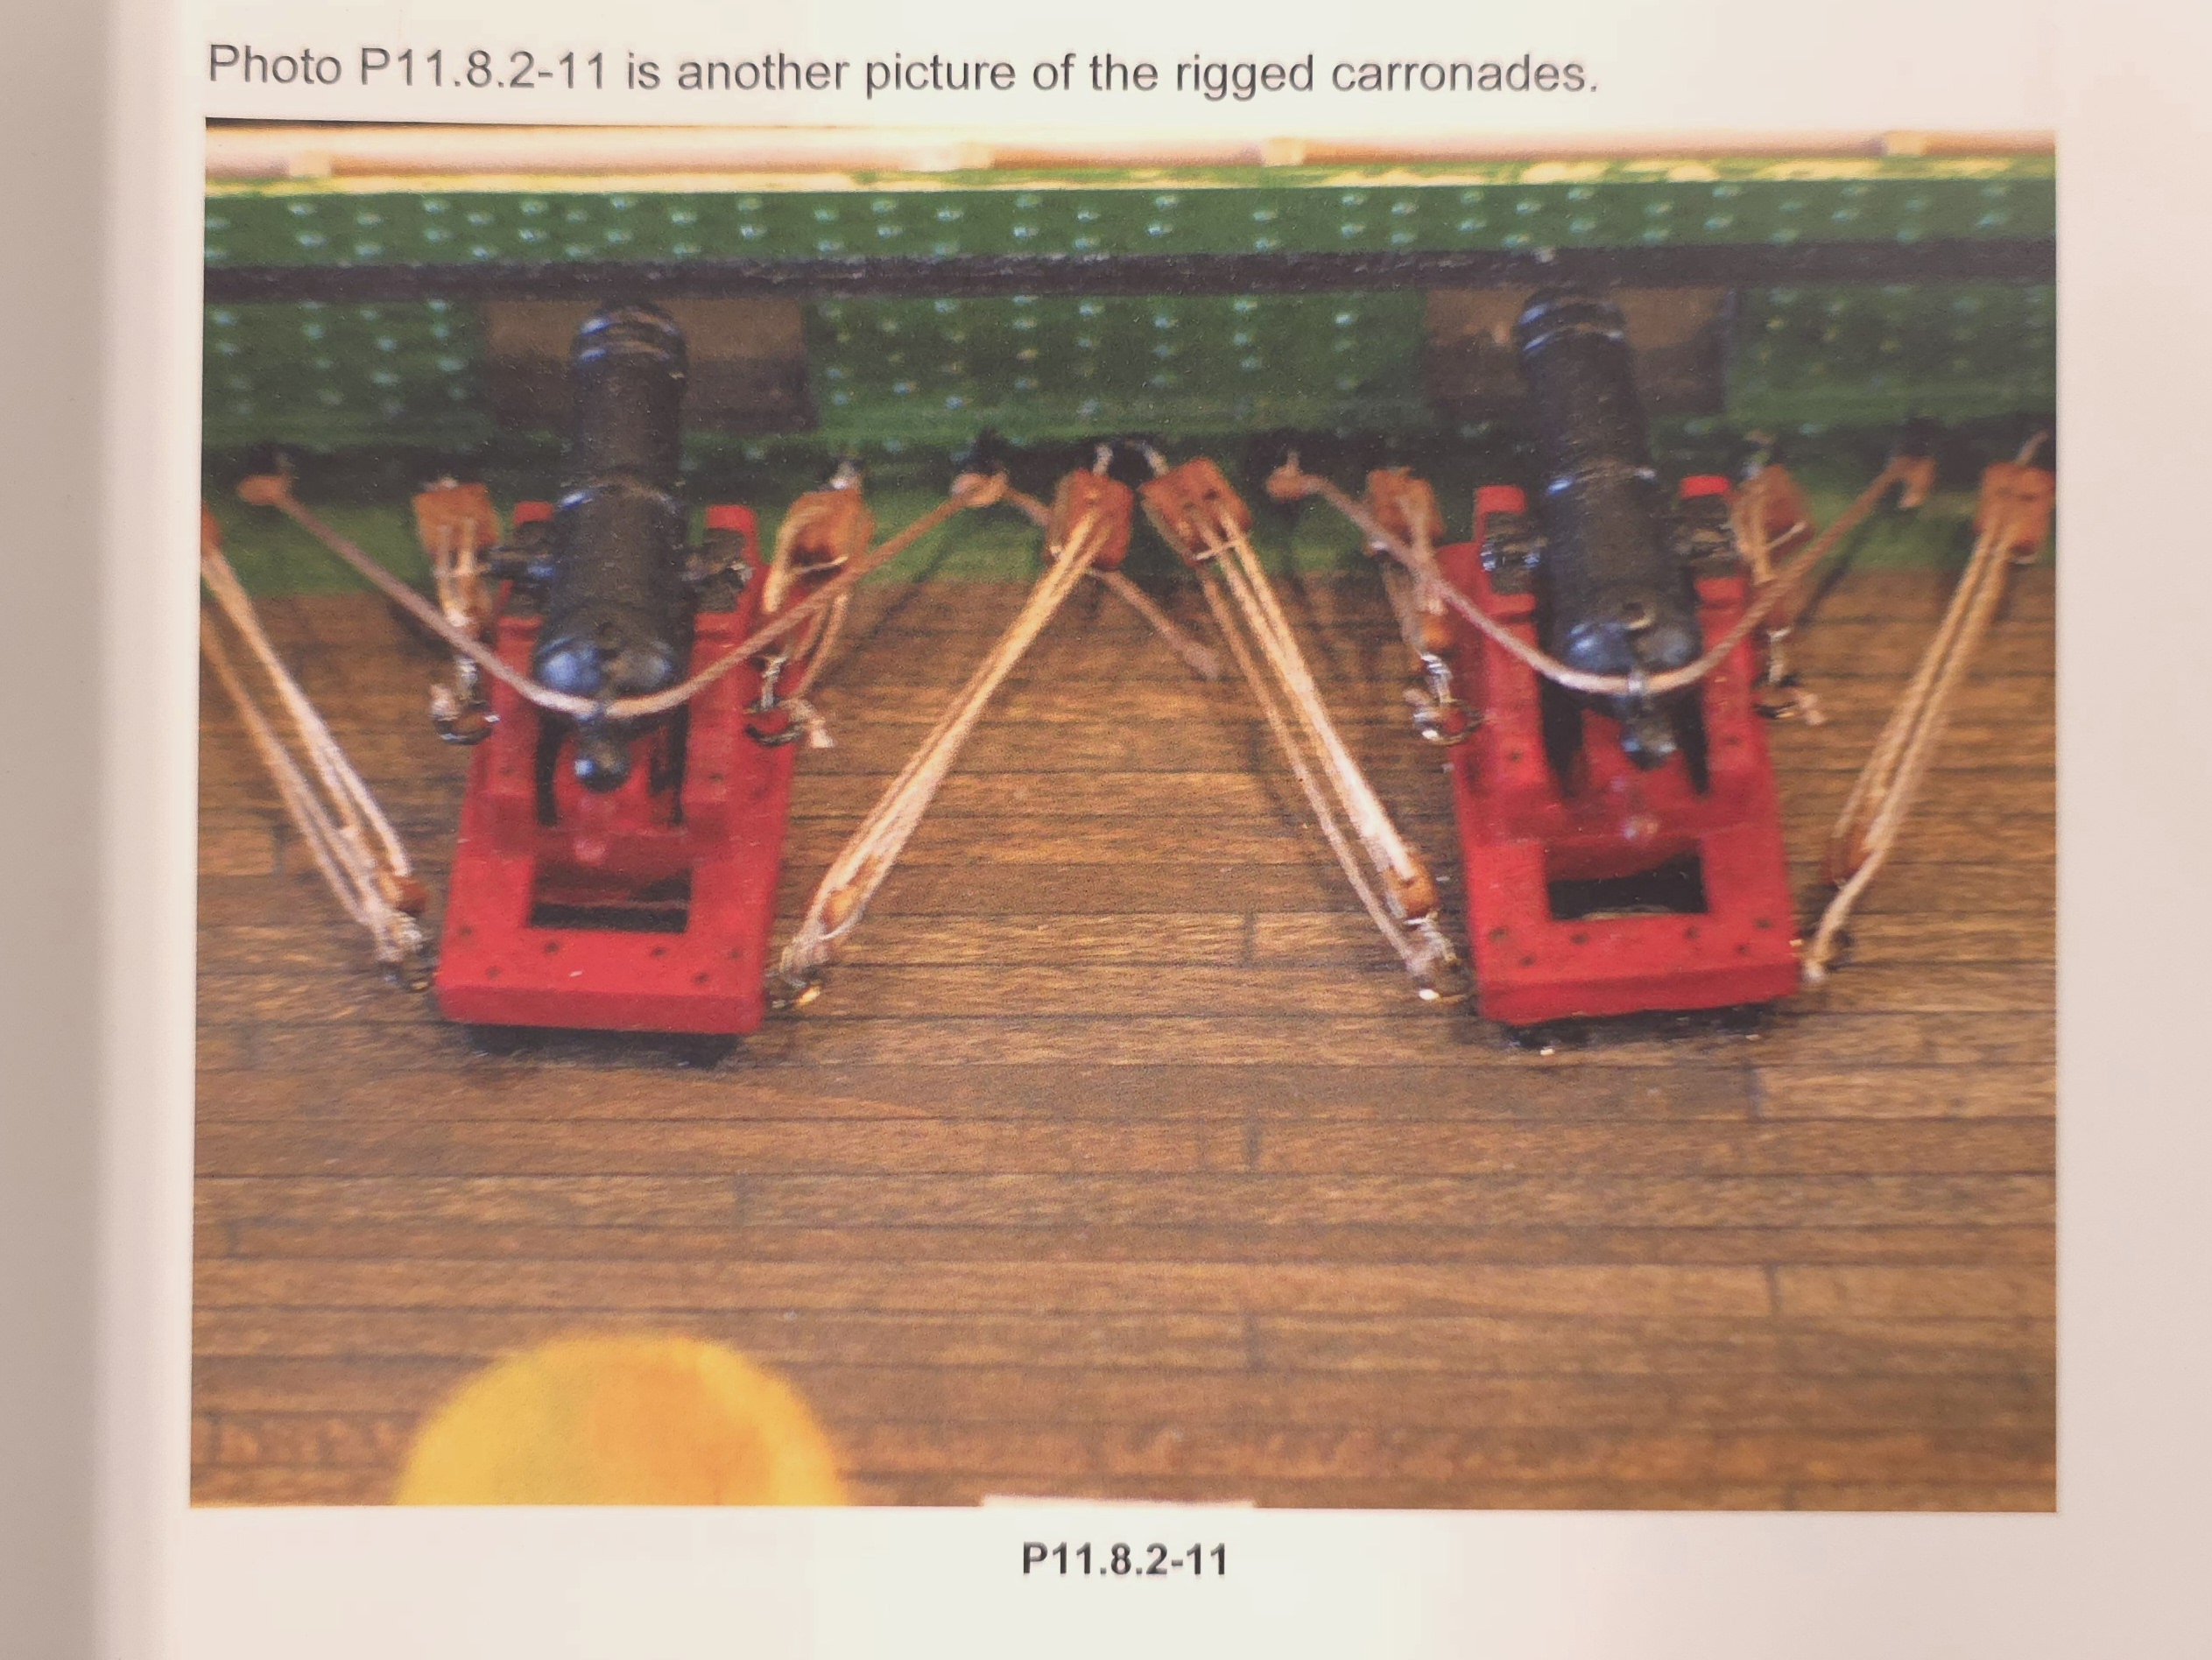
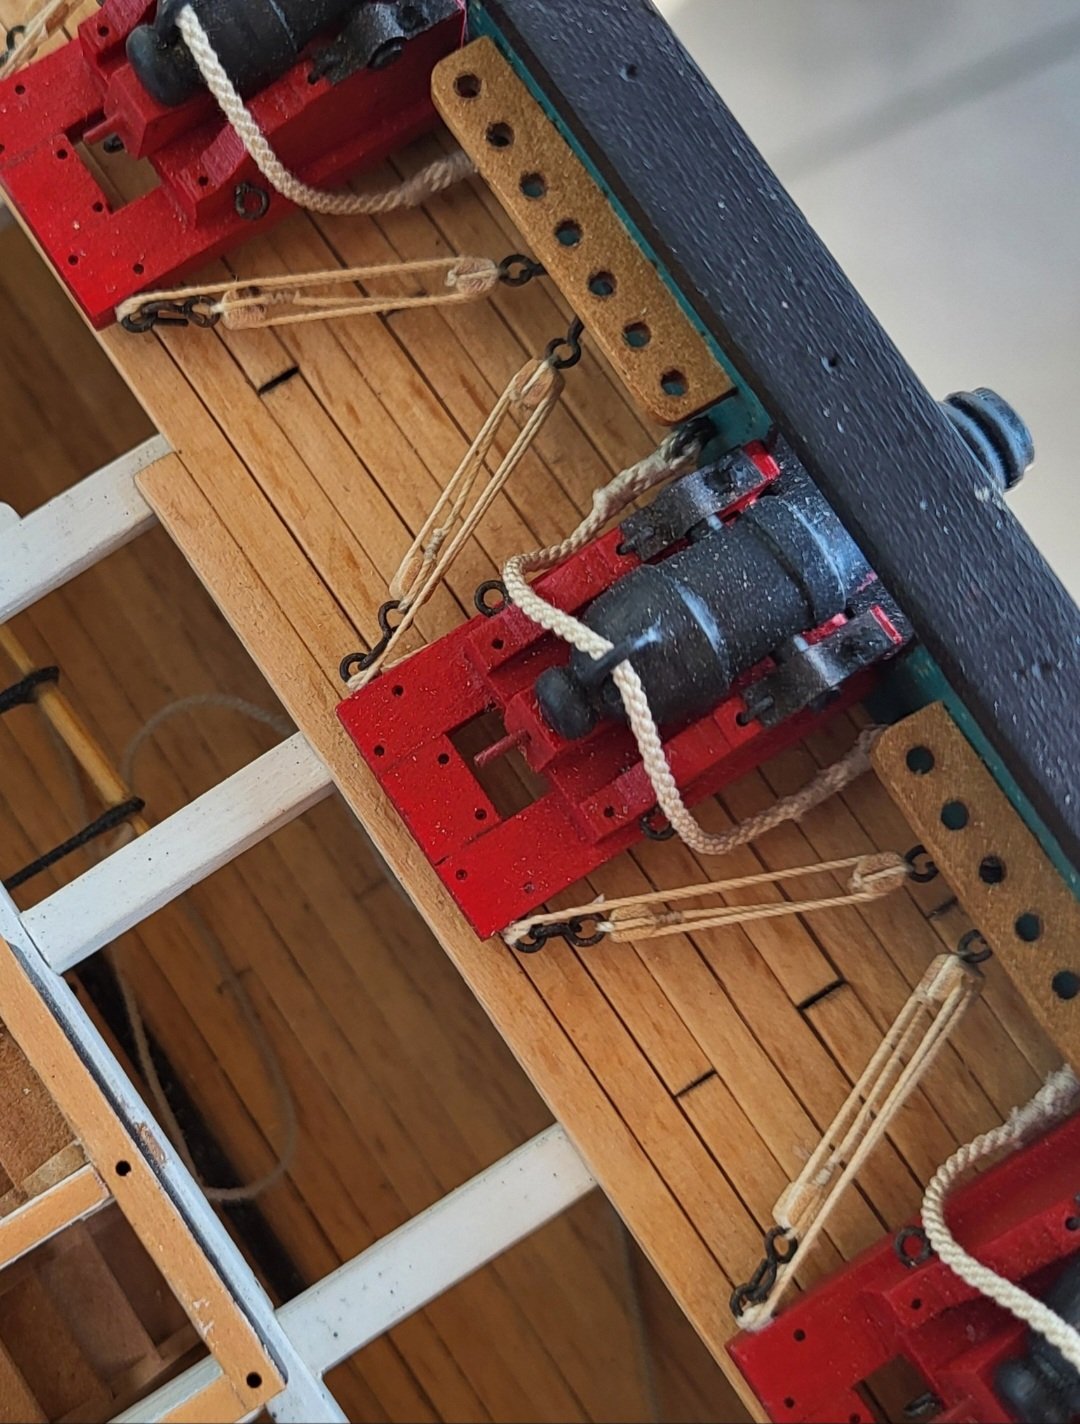
I did say it would be easier to do this your way.. 😁 I've had some time to think about this and confess that I'm not really enthused about adding the second tackles. So, when the time comes, I'll either do all three, or follow your lead. Were I a betting man, I'd wager on the latter.😉
-
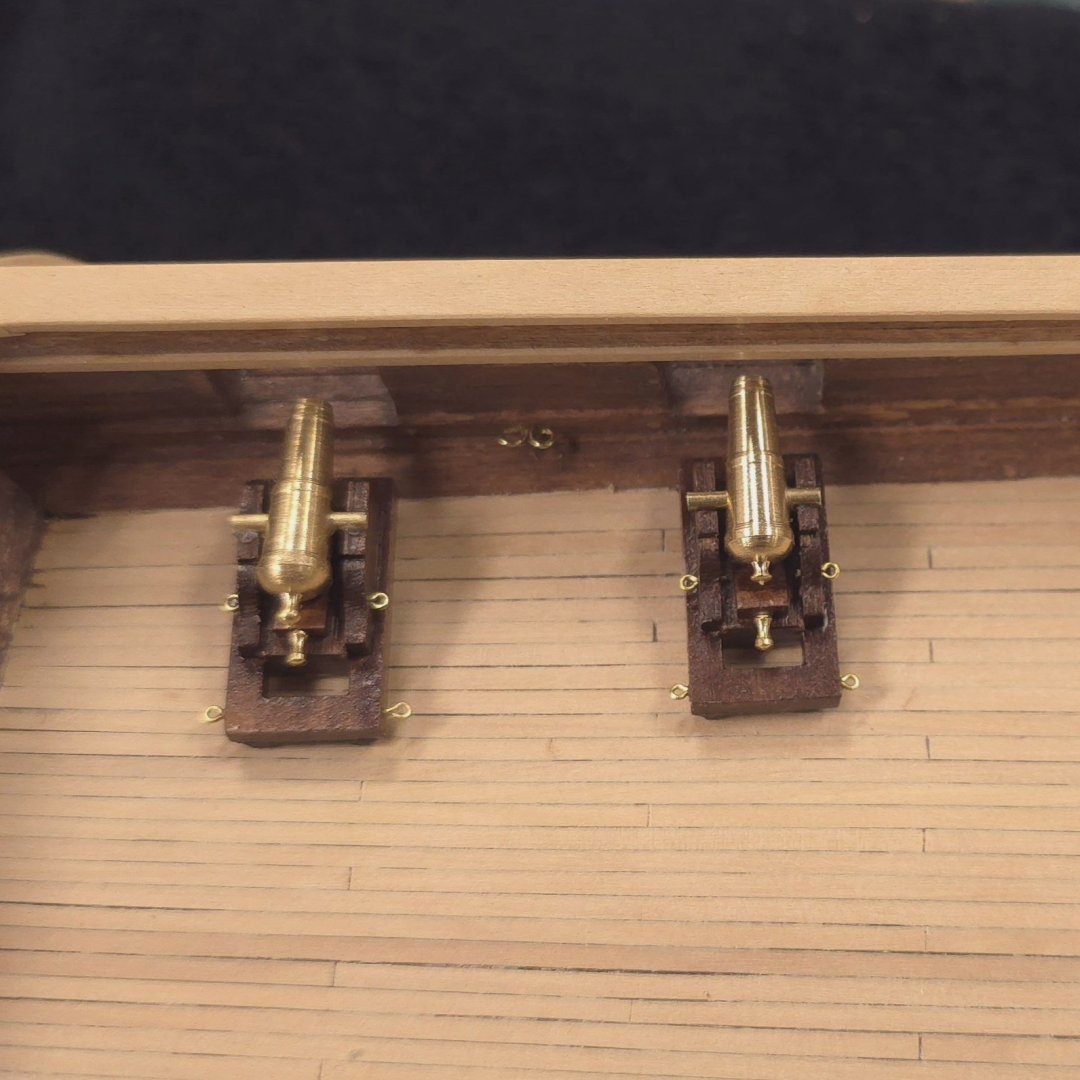
To elaborate slightly on the previous post, below is the photo from the Hunt practicum - Chapter 11. 8, the Carronades. And here is Mustafa's implementation. While it would be easier to follow in Mustafa's wake, I think I'll probably eliminate the rope that passes through the ring in the carronade itself and actually make use of the 2nd pair of eyebolts. We'll see. I probably won't tackle that until I finished the work on the rails and the hall.


-
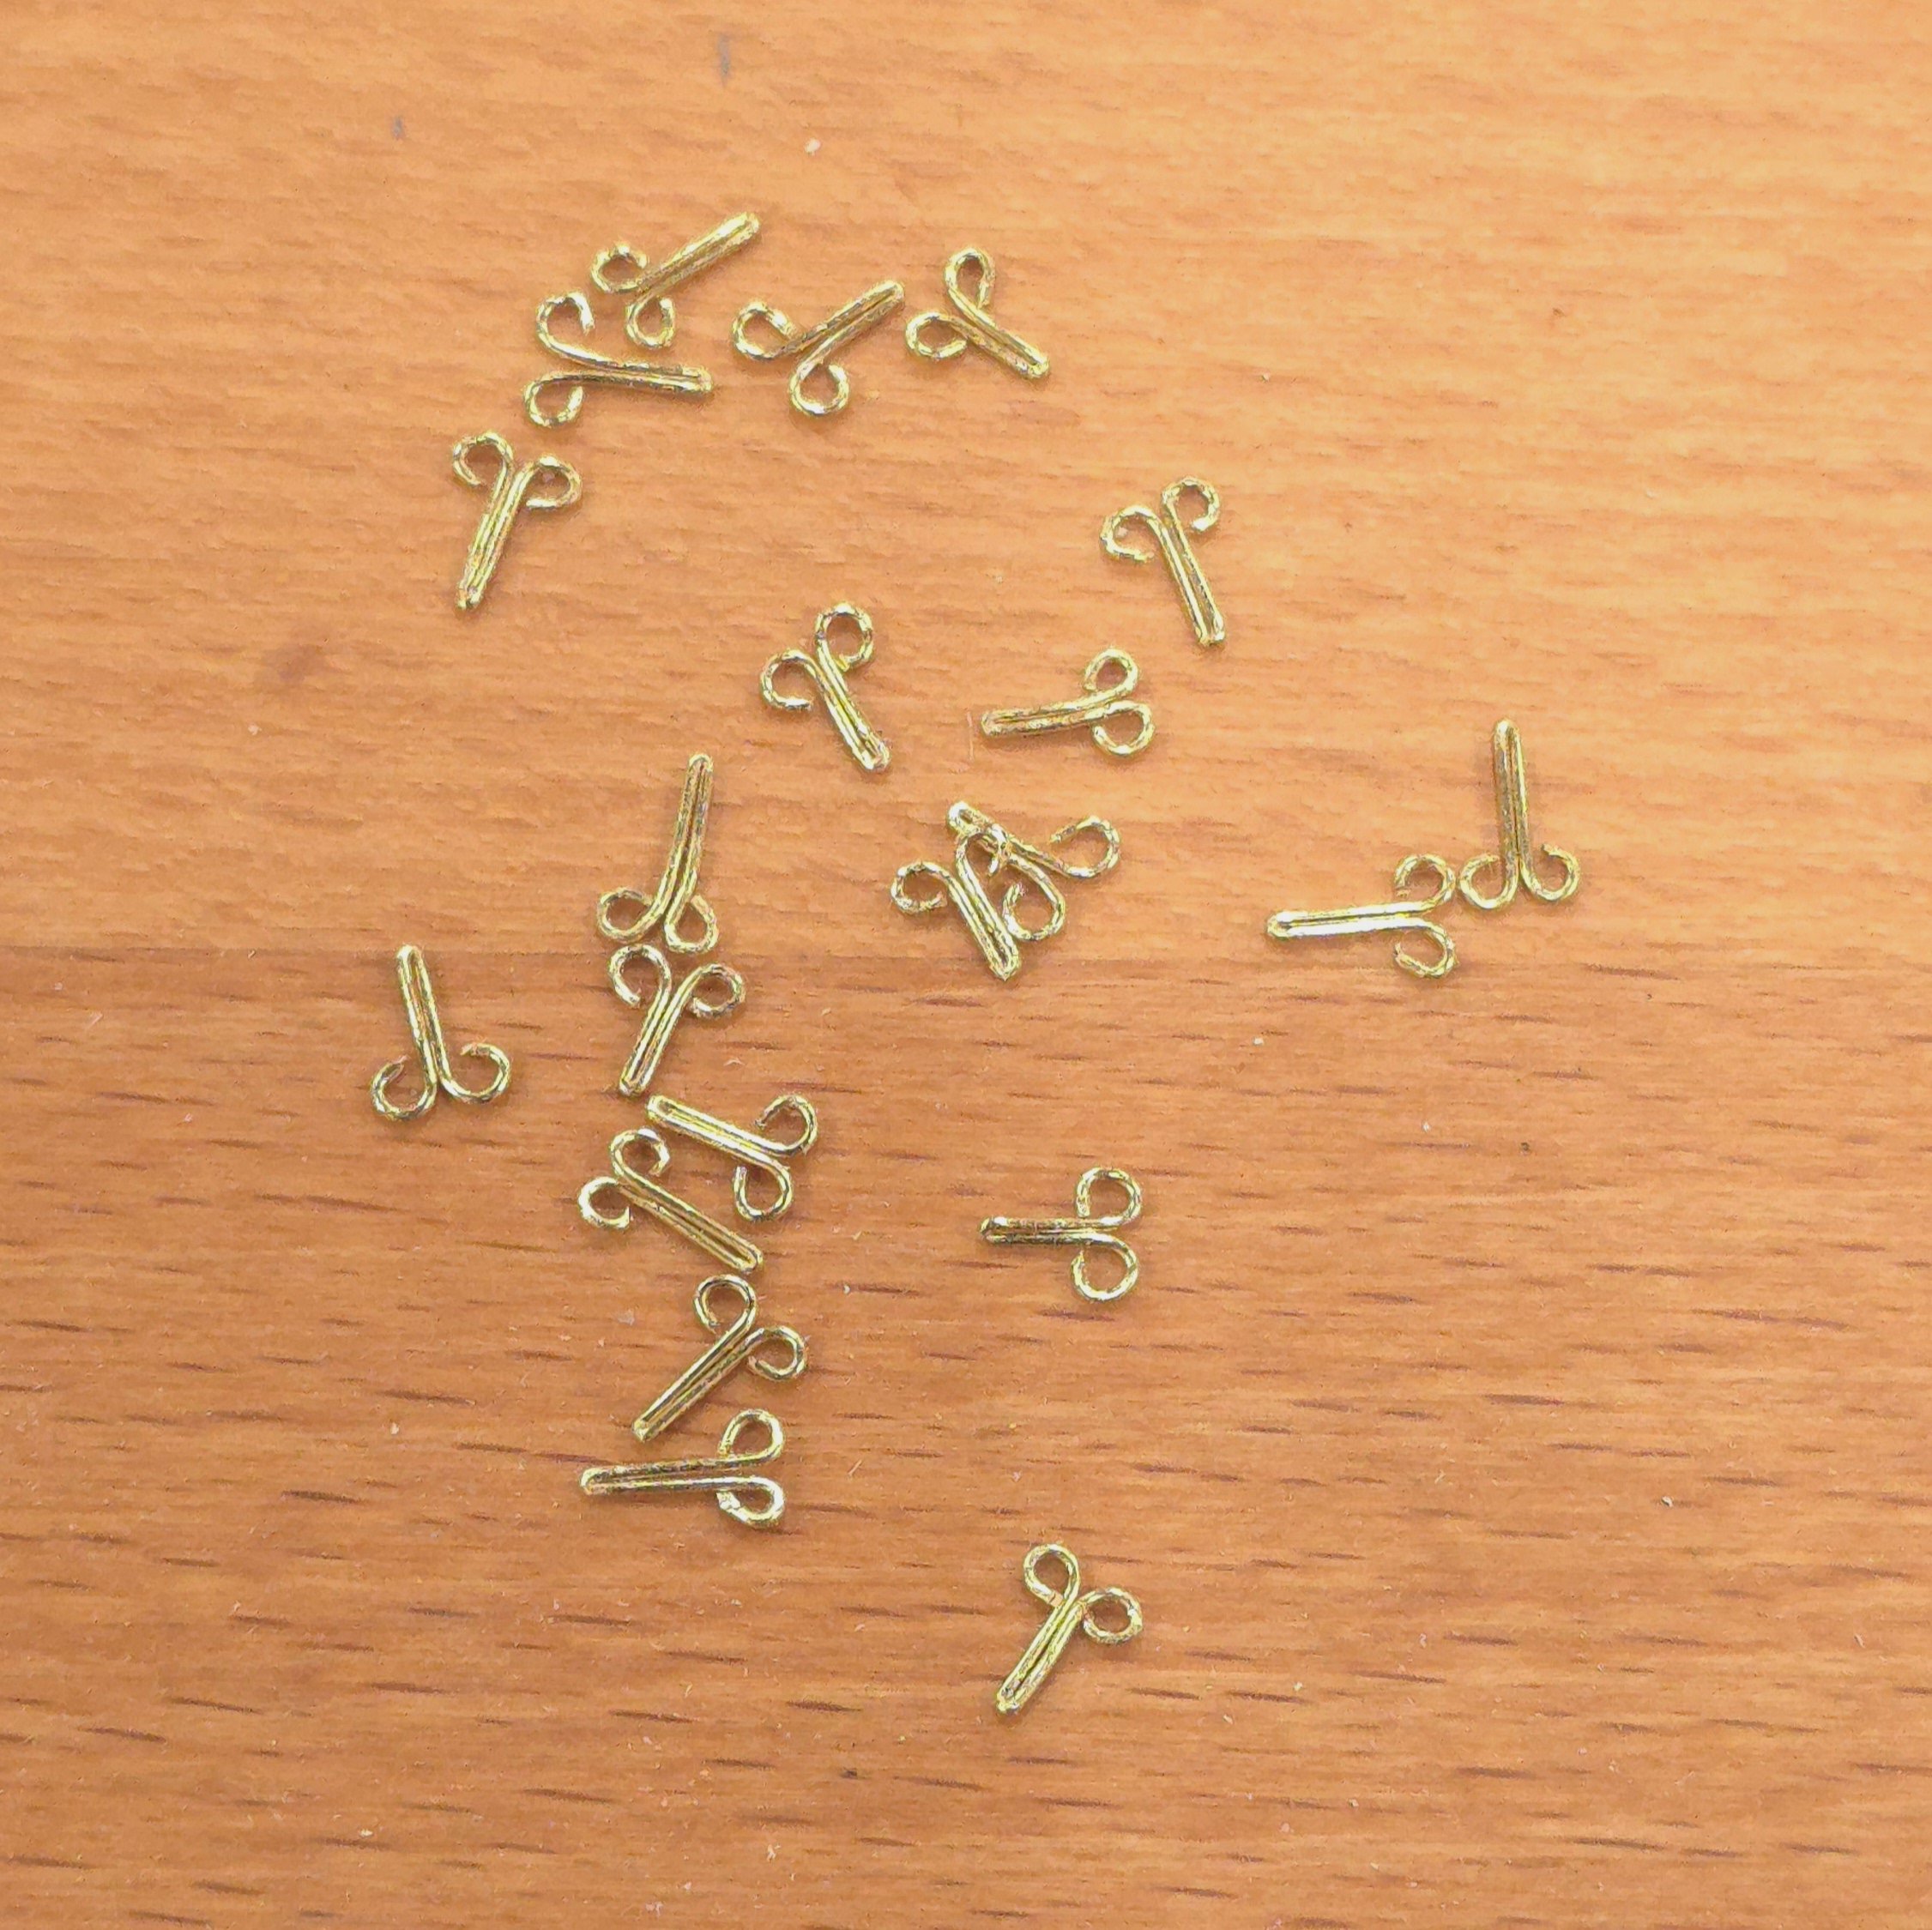
Well, here I thought that was ready to return my attention to the hull again, but then I realized I had not put a finish on the bulwarks or on the spar deck. Not only that, I realized I had forgotten to insert the single eye bolts. Well I spent the better part of the day finishing up that. Not much by way of photos, but I will post one below. Oh, by the way. I realize now that I will have to make those brass hooks after all. There aren't enough eyebolts left in the bag that came with the kit for me to modify. And, as mentioned before it's pointless to order more from model shipways, at least in my experience. Jon, too late for me to worry about scale, but, I'll see what I can find at the sources you recommended - in case I run out later in the build. I nothing else, I'd rather modify an eye bolt into a hook, then fabricate the number of hooks I anticipate needing from wire. Thanks for the leads. Gregg, I made use of that pin vice again today to increase the diameter of the holes so I could more easily insert the single eyebolts. Here's that pic.. P.S. I realized also that I could have saved myself 40 eyebolts, if I'd known earlier I wasn't going to add all the tackle that Hunt did in the practicum.
-
Bravo! Beautifully done.
-
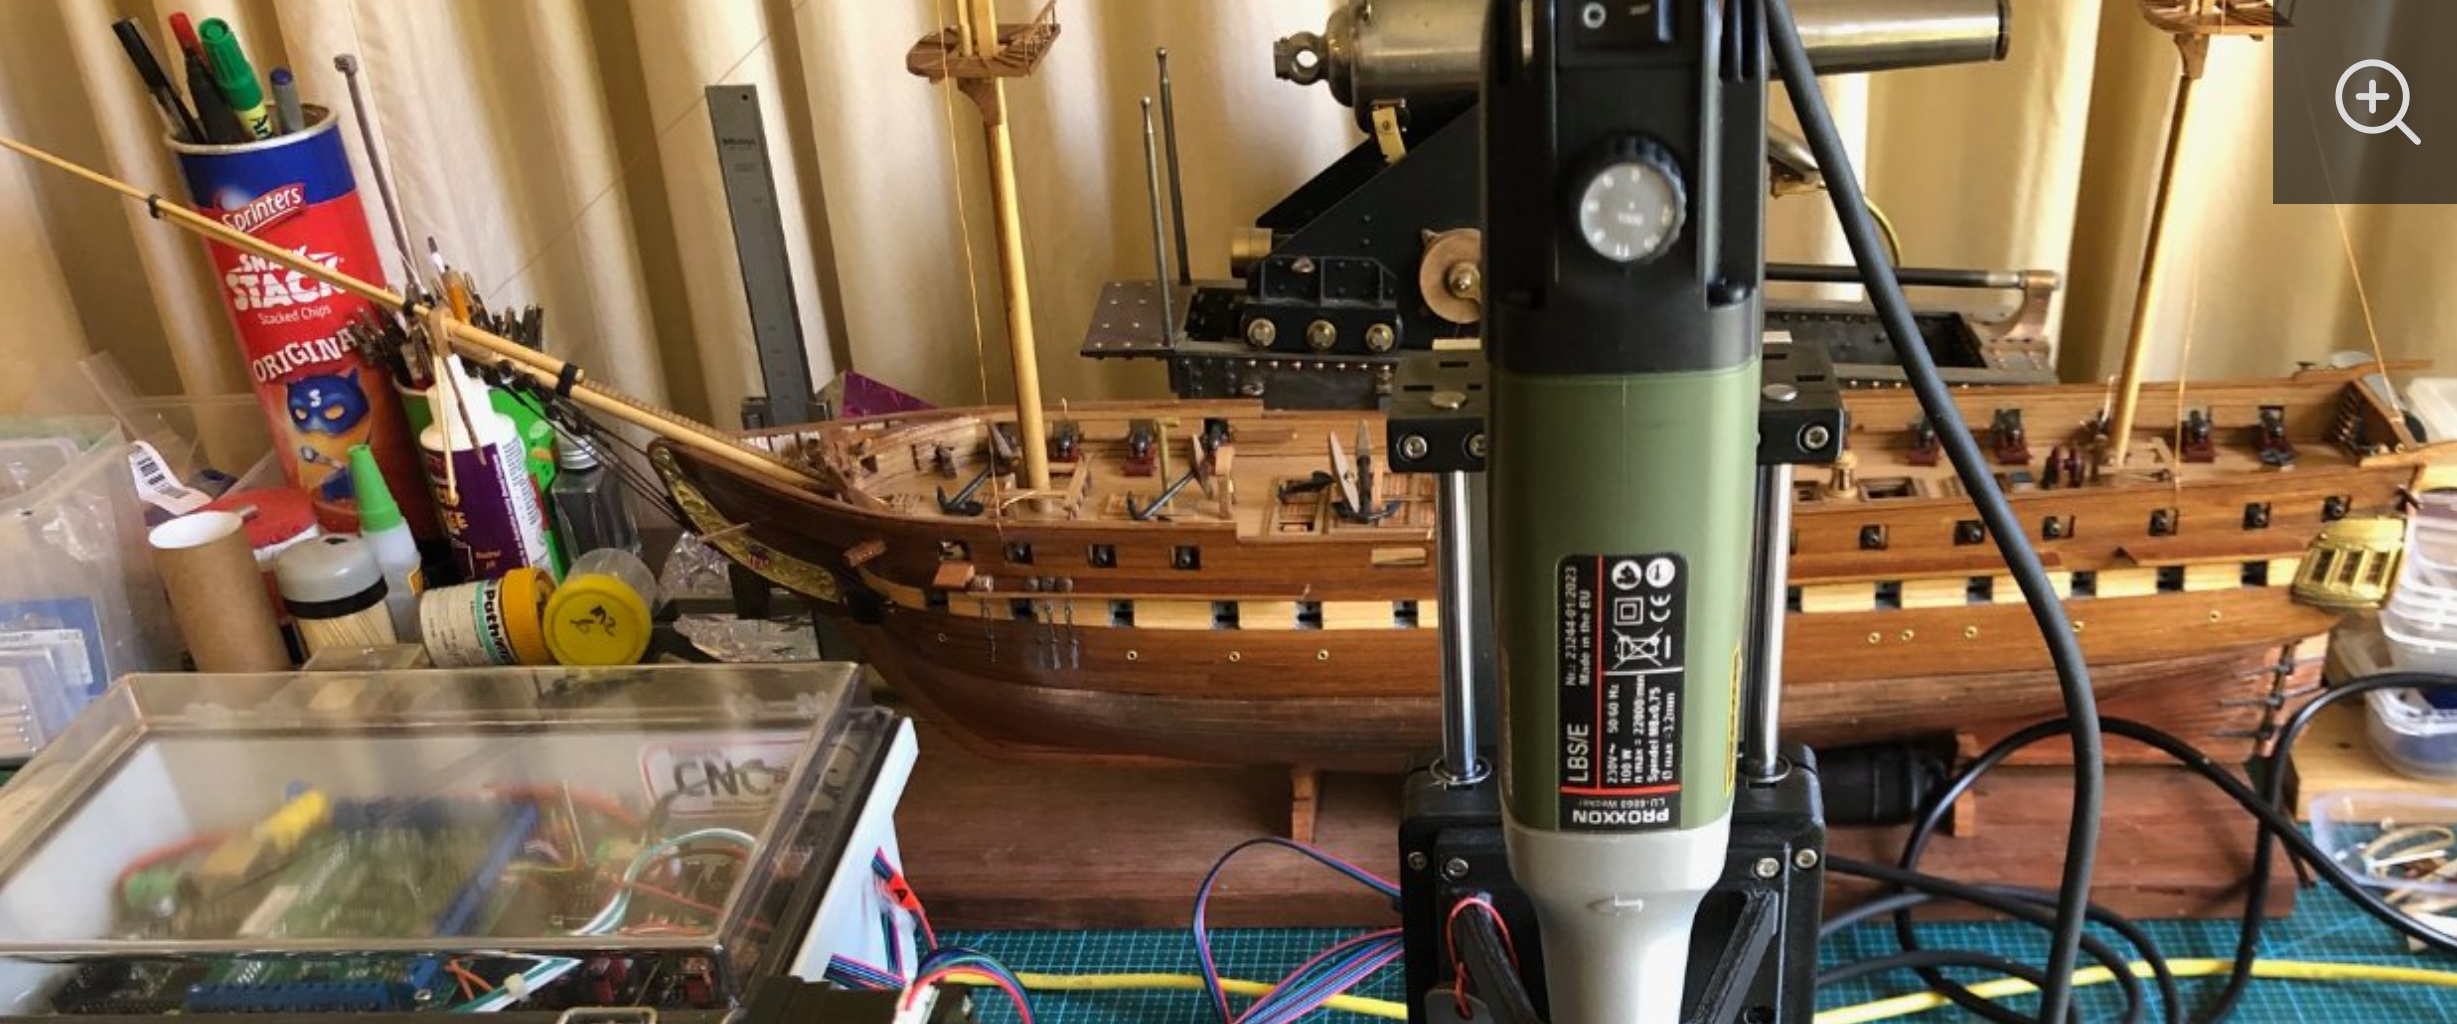
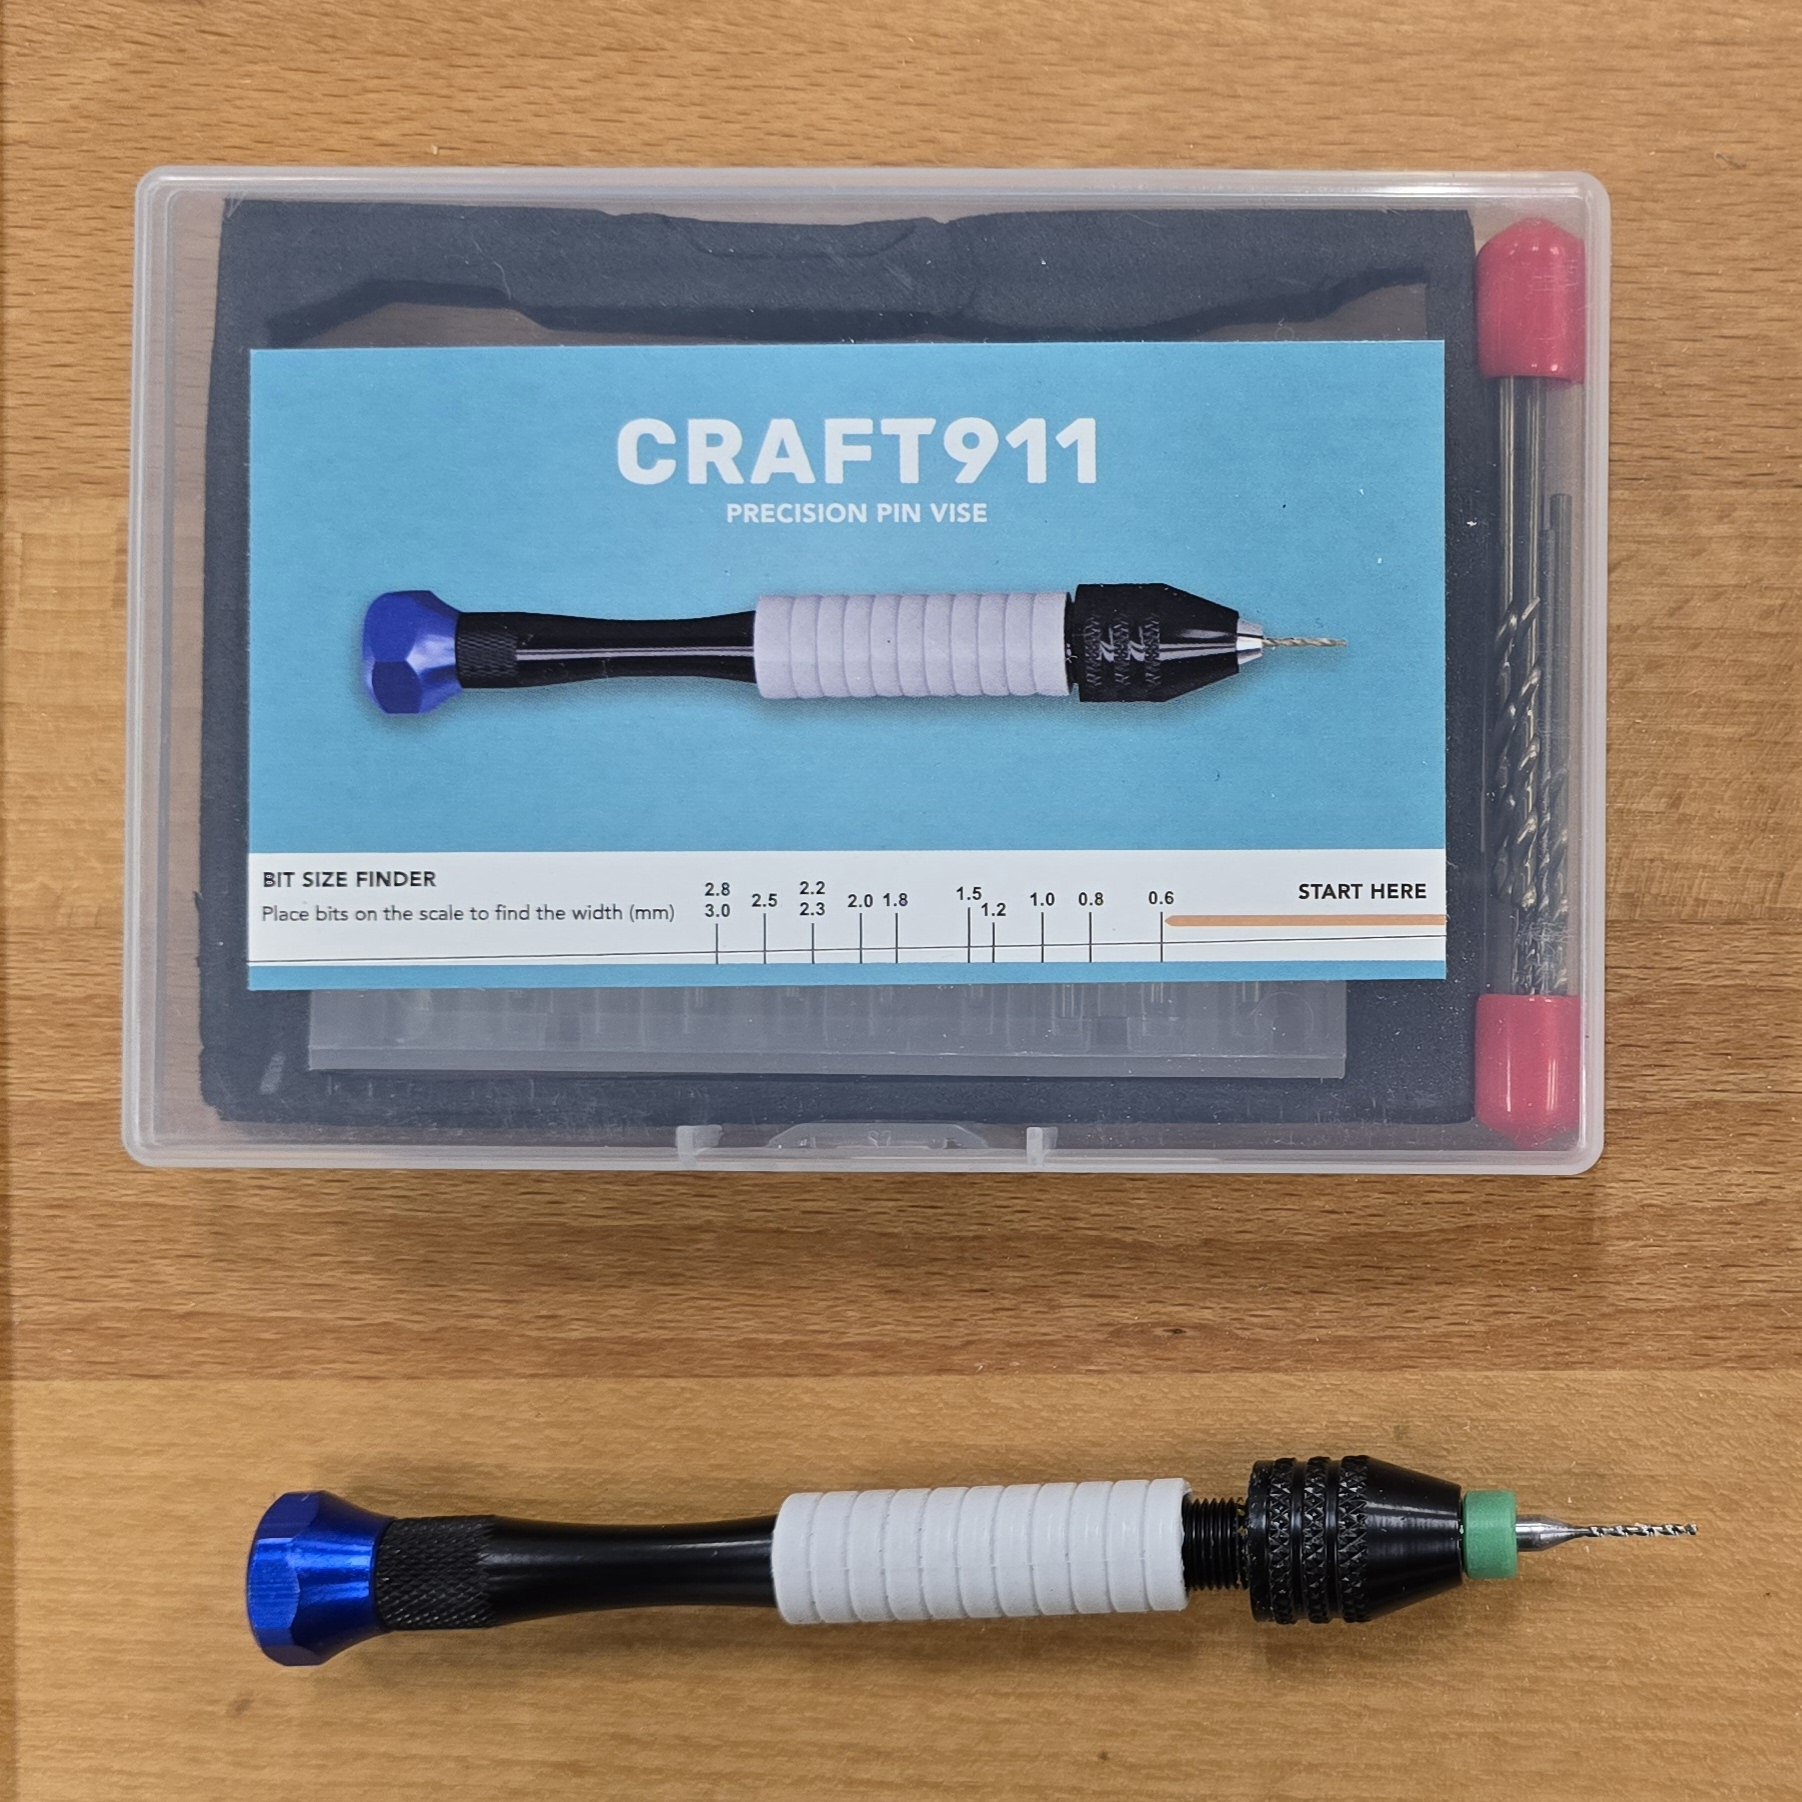
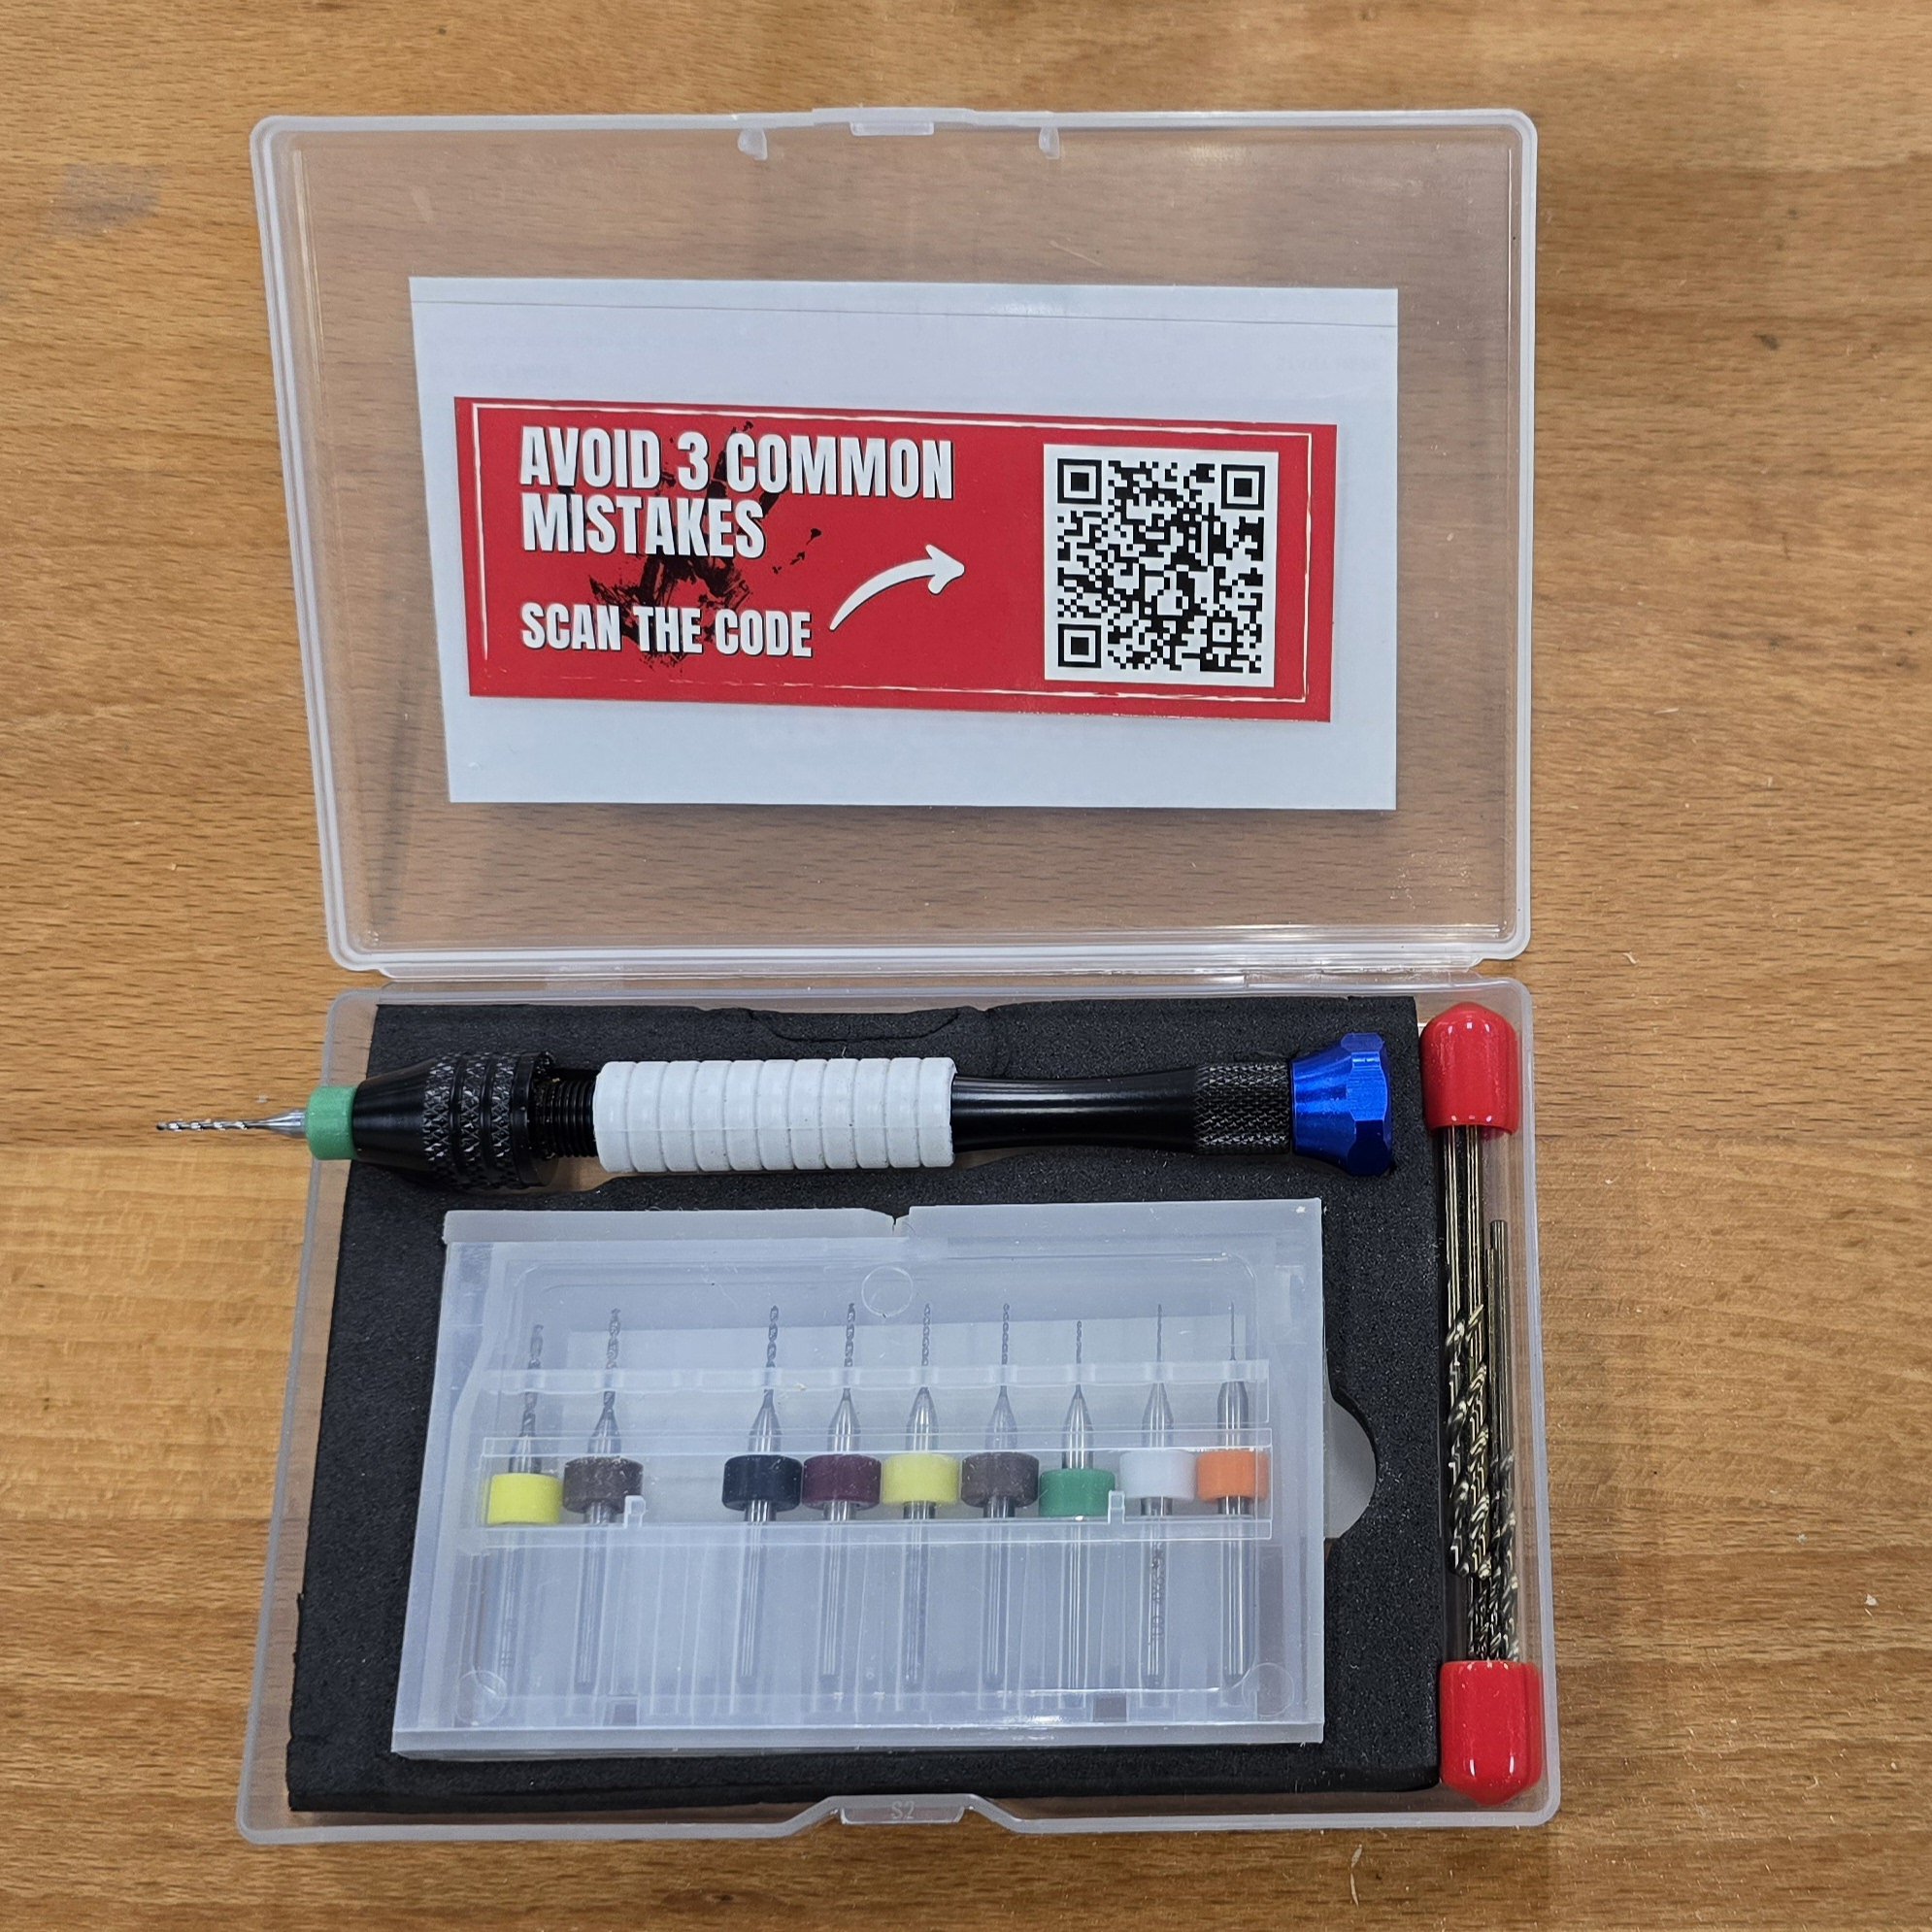
Not much to show by way of progress. But here's the latest round of photos. The double eyebolts are finished and installed. To drill the holes in the plank sheer for the eyebolts, I upgraded to a much more ergonomic pin vise/drill. The one I had worked, but I didn't have drills in the sizes I needed to drill the slightly larger than 1mm (I actually needed 1.2 mm) holes I needed for the eyebolts. This Craft911 kit included a very nice assortment of drills, and for the smaller diameters, these had larger shanks that made it easy to clamp down on the bits. Furthermore, these bits were nice and sharp, and the light grey area on the shaft was a soft slip resistant comfortable grip, making use of the pin vice a pleasure. Highly recommended!


-
Geoff, Since you're past all but the rigging, you're the best person to ask this. How many of the kit supplied eyebolts did you have left over after construction? I'm asking because I want to make those hooks used in the carronade tackle out of those eyebolts. Since I have yet to hear from Model Shipways on a year old request for parts (with one follow up email in the interim), I'm not holding out hope to get additional eyebolts from them. Bob hunt made it sound like there are way more eyebolts in the kit than one will need. I'll need to make what, 40 plus hooks for that rigging? No rush, since I'm done with the carronades and double eyebolt installation until I'm finished with the hull. I'll get back to that on Monday.
-
USS Constitution by mtbediz - 1:76
Der Alte Rentner replied to mtbediz's topic in - Build logs for subjects built 1751 - 1800
Tech support to the rescue. In Windows, press and holds these three keys to get to a utility that let's you select as much or as little of what you want in a screen shot: Then use your mouse to surround the part of the screen you want to capture. That puts the image into the clipboard. Merely paste it into your post - like I just did. Google Screen Shot using Windows, Shift and S keys to get at Youtube videos that explain how to use this awesome feature.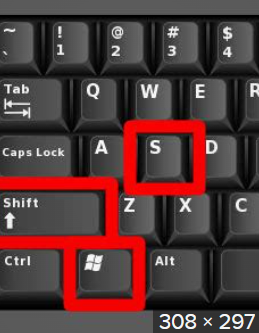
-
USS Constitution by mtbediz - 1:76
Der Alte Rentner replied to mtbediz's topic in - Build logs for subjects built 1751 - 1800
Jon, I just purchased that accessory for the Proxxon mill. It's the Dividing Attachment for MICRO Mill MF 70 and MICRO Compound Table KT 70. I wish that I'd had that earlier in the build, but once I see a tool I think I'll use (and I saw this before in Mustafa's build log), I must have it. Mine arrived last week, and I can't wait to use it. In the box of cool tools I got from Quentin, there was a drawplate. Next time I'm in the shipyard, I'll see if I can't produce some really thin dowel with it. I'm dubious, but if Mustafa thinks it can work, I'm game. He can do anything! And Mustafa, You never cease to amaze. -
USS Constitution by mtbediz - 1:76
Der Alte Rentner replied to mtbediz's topic in - Build logs for subjects built 1751 - 1800
Oooh! I have to get me one of those. P.S. Does anyone know what exactly triggers a new page here at MSW? -
Ich freue mich darauf, die Segel gerichtet zu sehen. Viel Erfolg!
- 210 replies
-
- 1
-

-
- San Martin
- OcCre
- (and 1 more)