Greg Davis
-
Posts
361 -
Joined
-
Last visited
Content Type
Profiles
Forums
Gallery
Events
Everything posted by Greg Davis
-
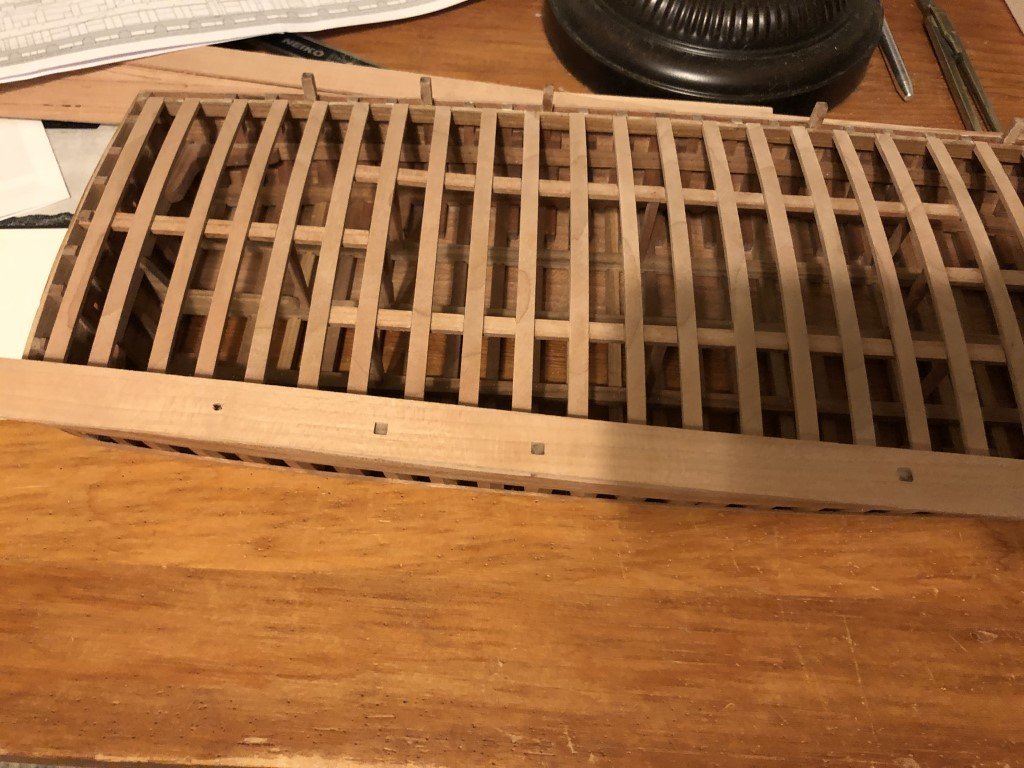
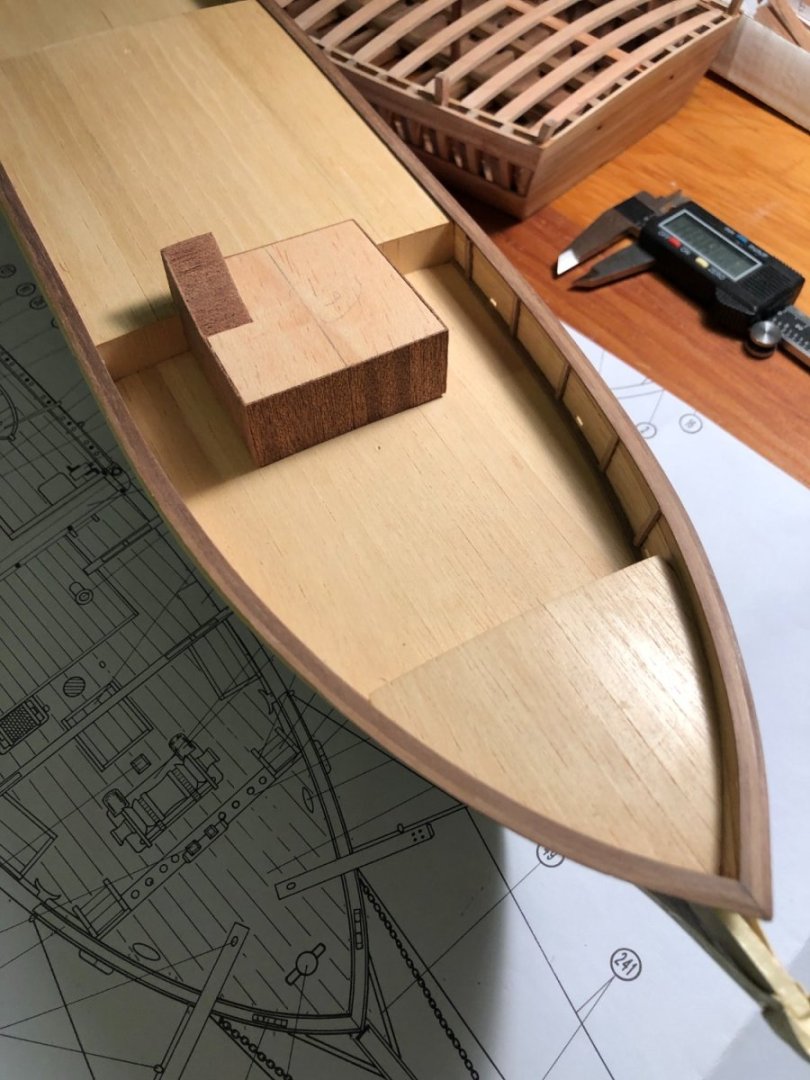
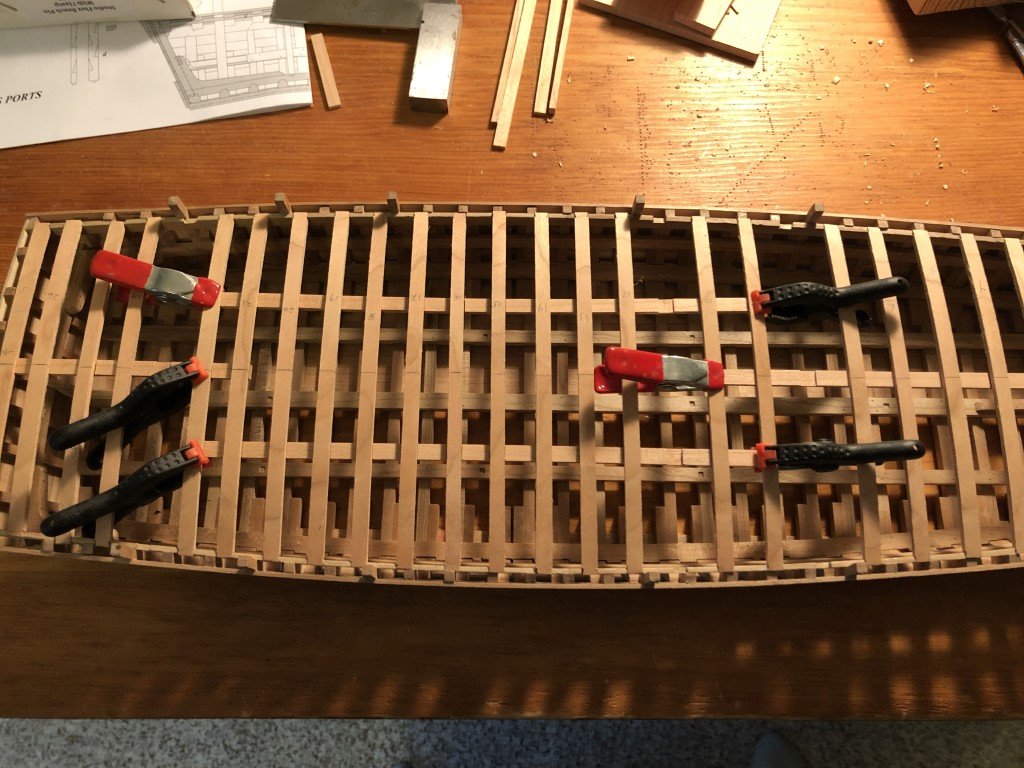
OK - I got up the nerve to start the outermost deck strakes and the first (of 4) is now fitted. I chose not to make a template for this piece, instead here's how I got this far. First I took a piece of stock large enough to cover this part of the strake and marked where a bollard would go thru the strake. A hole was drilled and then filed to the shape of the bollard. With the stake positioned on the top of this bollard, the position of the next bollard was marked, drilled, and shaped. As I made it to the last bollard, the piece of wood was looking like this: After the last recess was made, a little more filing allowed the blank slide to the deck beams. I then marked the intersection with the hull planks and cut off the exterior excess. A bit of sanding evened the deck plank edge to the hull planking. Next I marked the inner edge to create the desired width of the plank. After cutting the interior excess and sanding it was done (for now). Currently the piece is .5mm to wide and this will be shored up after it is scarfed to the second part of this strake. So three more pieces and two scarf joints to go here! Also, I will need to pierce these strakes for the superstructure pillars. I plan on doing that work after the strakes have been attached to the vessel.
-
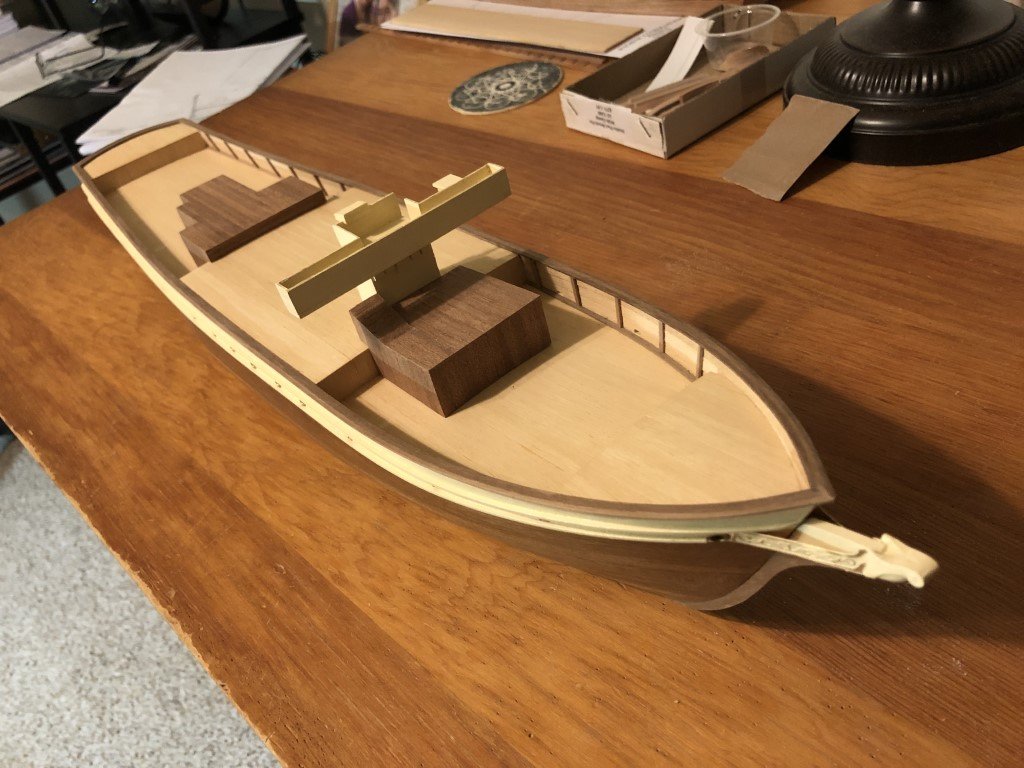
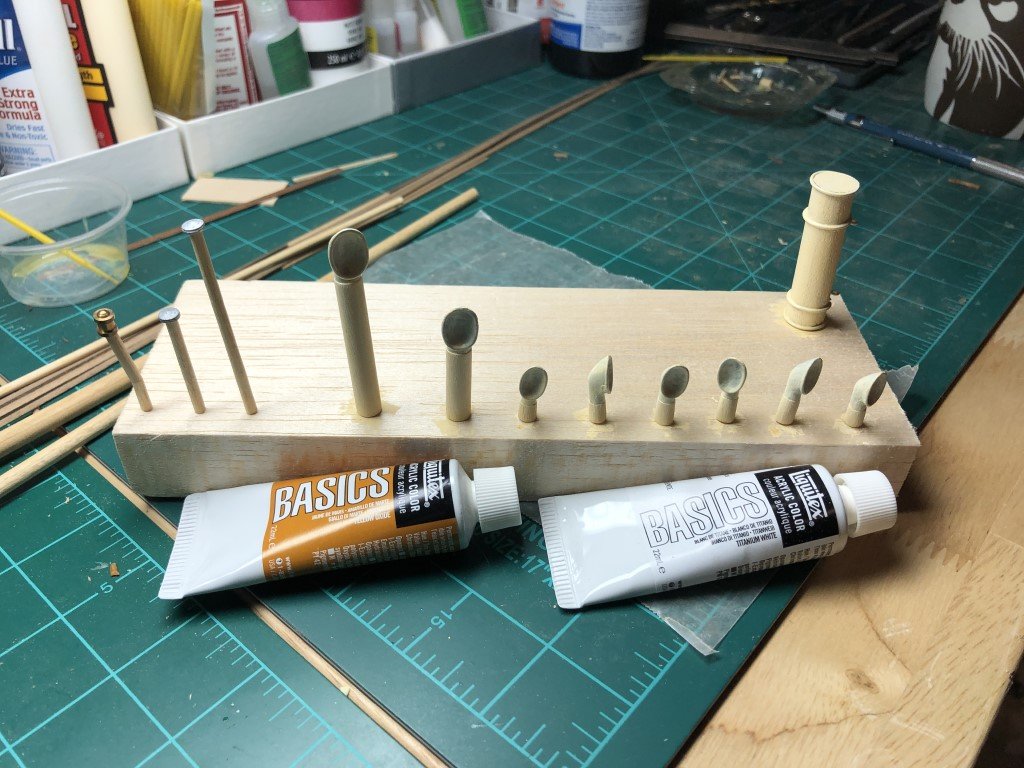
More progress is being made on the deck structures and it can be seen that they take up a lot of the deck space. The three largest now have their basic form. The front one (kitchen cabin) needs a few doors, smoke stacks, and a ventilator; the middle one (observation structure) needs doors, ladders, windows, and bell; the last one (above the engine) needs doors, ventilator, and smoke stack. The ventilators and stacks are assembled. The paint is starting to be applied. The vents and smoke stack are being painted an off-white / beige - the same color as the hull upperworks. The color is 8 parts titanium white to 1 part yellow oxide. I like this softer color much more than the bright white shown on the kit's box top. The acrylic paint that I am using builds up slowly, thus a large number of coats are needed - especially on the metal casting. The three stacks on the left will be black when done, as will the upper part of the smokestack.
-
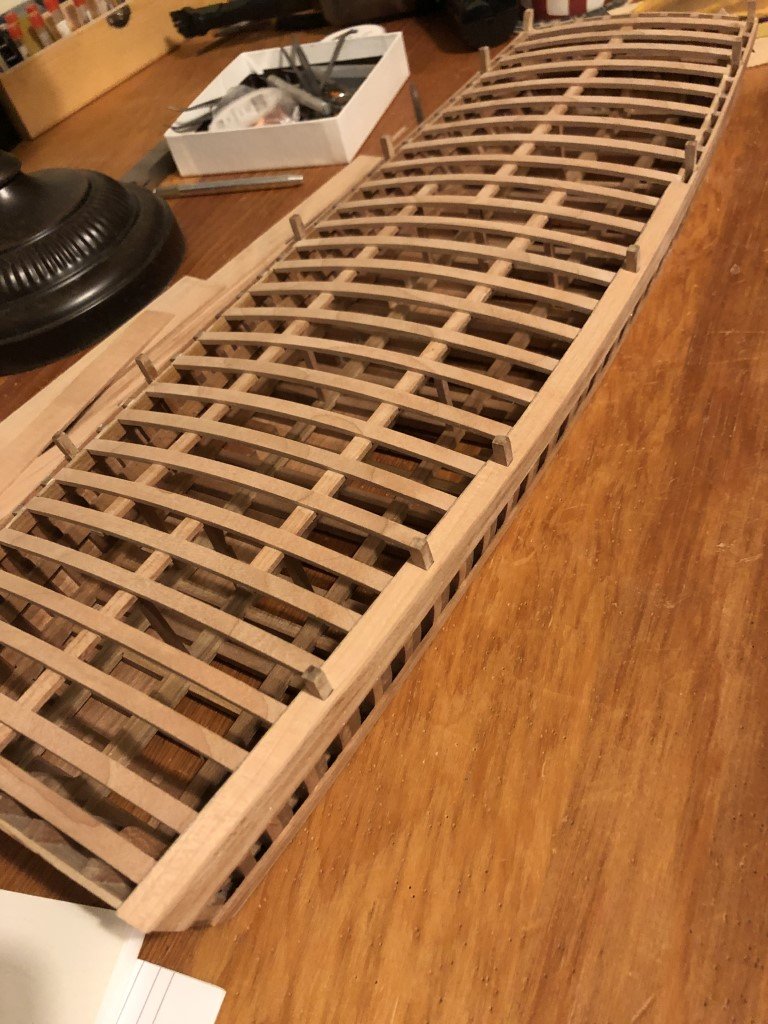
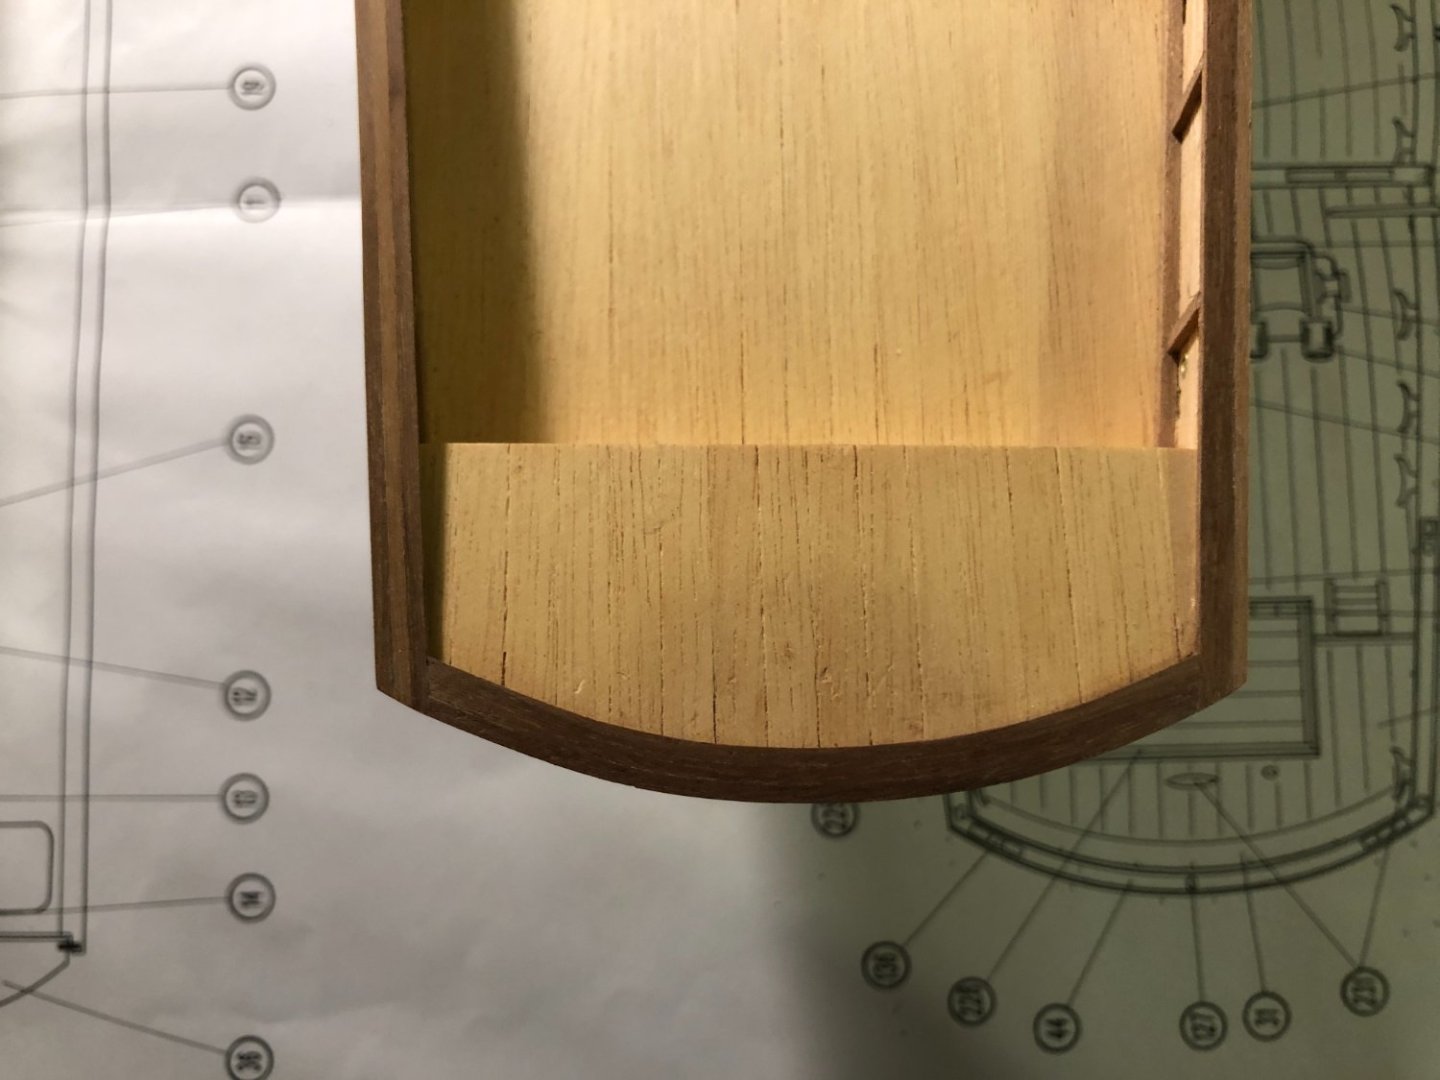
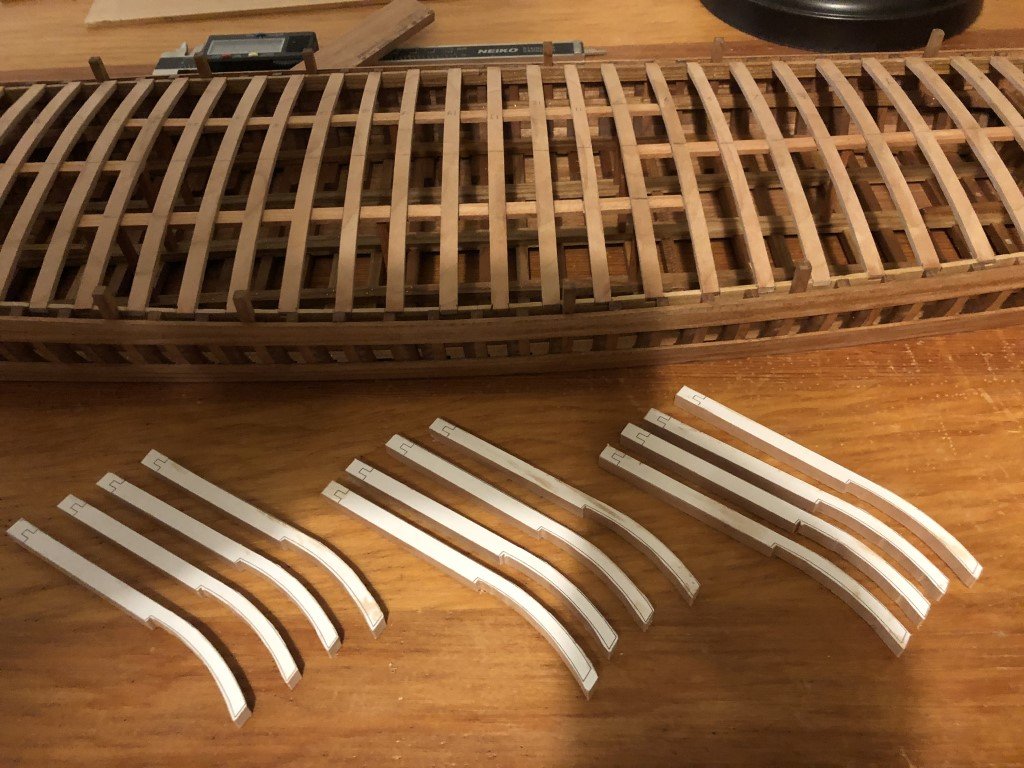
The top of the deck beams, ledges, top timbers, an planking now all blend together nicely. Even though everything was in pretty good order, it took awhile because I used 220 grit sandpaper for the whole process. I didn't want to create any indentations that were not supposed to be. Now I need to take another look at the 14 timber extensions that will form the bollards. They need to be of the correct cross-sectional dimension and shape before the outermost strake of the deck is fitted. I believe that these strakes will be 'testing' to make as they are formed from two pieces of wood scarfed together and will each have 13 piercings to accommodate the bollards and superstructure pillars.
-
The laminated rails are being classified as a success and have been installed. I am starting to work on the deck structures as a break from the main hull structure (which needs some more rails, ...). The first structure is where the kitchen was situated. Going back to the rails for a moment - I am glad I went with the laminations, especially for the rail over the stern. Even here the bend is severe enough that I needed to soak each of the three pieces in water to achieve the necessary bend. So that piece took a couple of days to make. Again, I don't see how anyone could be expected to edge bend these rails successfully. I was telling my wife today that if I had tried to build this kit when I first got it (about 10 years ago), that there would have been a very high chance that it would have become kindling long before I had gotten this far!
-
Well, the staining of the rails made in basswood did not go well at all, as I ended up with a motley mess! Fortunately, another kit was willing to donate some wood that matched Le Pouquioi - pas? kit's top rail. I trimmed it down, and am laminating it together. A little smoothing will follow, and I am fairly certain that an acceptable set of rails will be had. The difference in quality is easy to see:

-
Thank you!
-
I decided to try laminating three strips of basswood together to form the rail. After attaching the plans to my drafting table (with some waxed paper atop) I used some pins to keep the inner strip to the correct contour. The three strips were glued together thru most of the major curved section near the bow and then a second row of pins secured then in place. Once the initial part of the lamination was dry the rest was glued and pinned in place. The rail will need to be stained, but it looks like this may work well - and there could be an added benefit of using the laminations to center the rail on the ship.

-
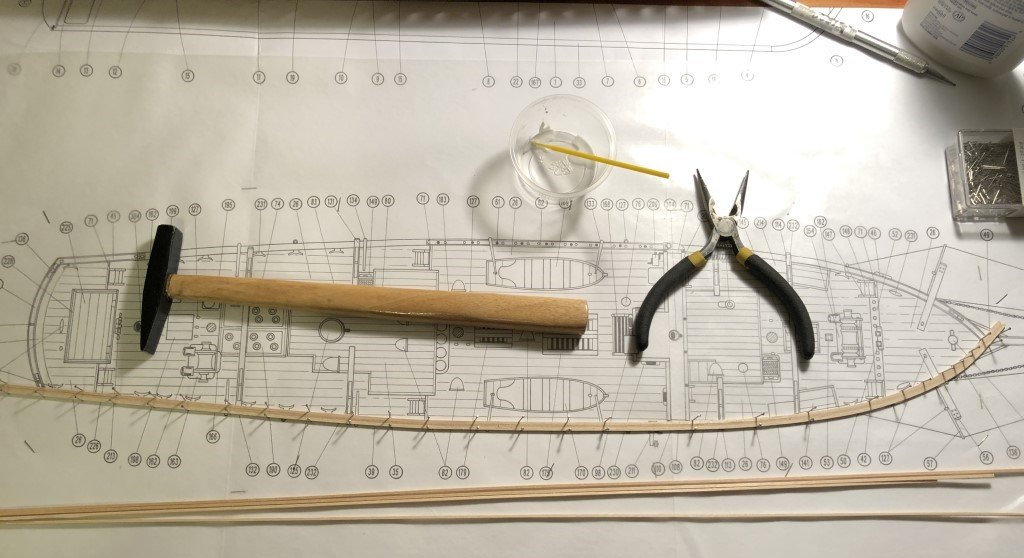
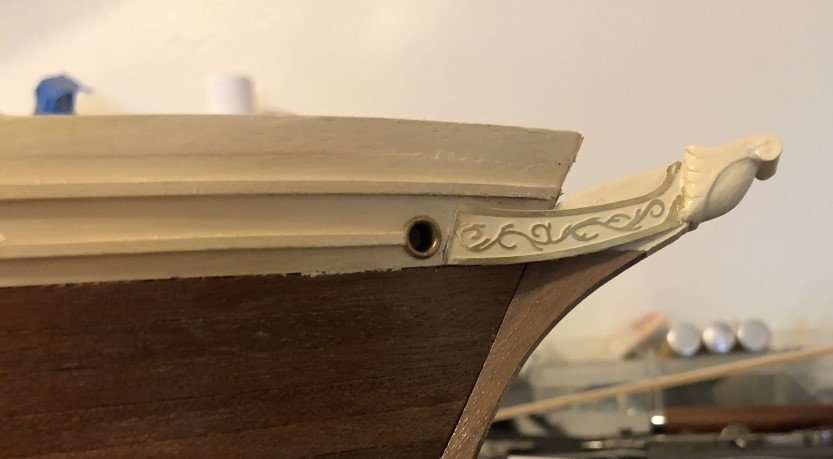
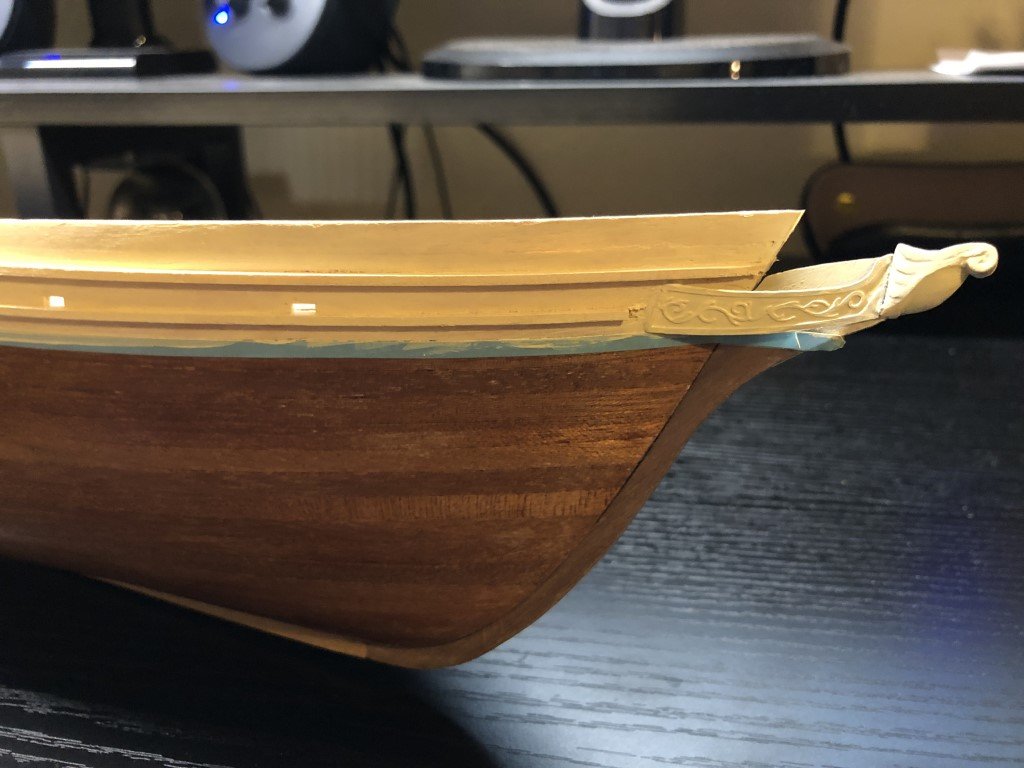
The port holes have been added As has the hawse holes. Also, some of the paint on the trailboards has been sanded/scraped off to highlight the scrollwork. The kit instructions claim that the top rail can be bent from a 1.5 x 4mm strip of wood. I have doubts that this can be done as it would require a good deal of edge bending. However, I did give it a good go - but this is as far as I can get after a couple of days: I calling this a top rail fail and will work out the rail in an alternative manner. I haven't decided on what method that I will try next but have a couple in mind, including using shorter pieces jointed together and laminating thinner more bendable pieces [three 1.5mm (1/16") square strips would easily do the job here]. Soon the multitude of deck furniture can be started!
-
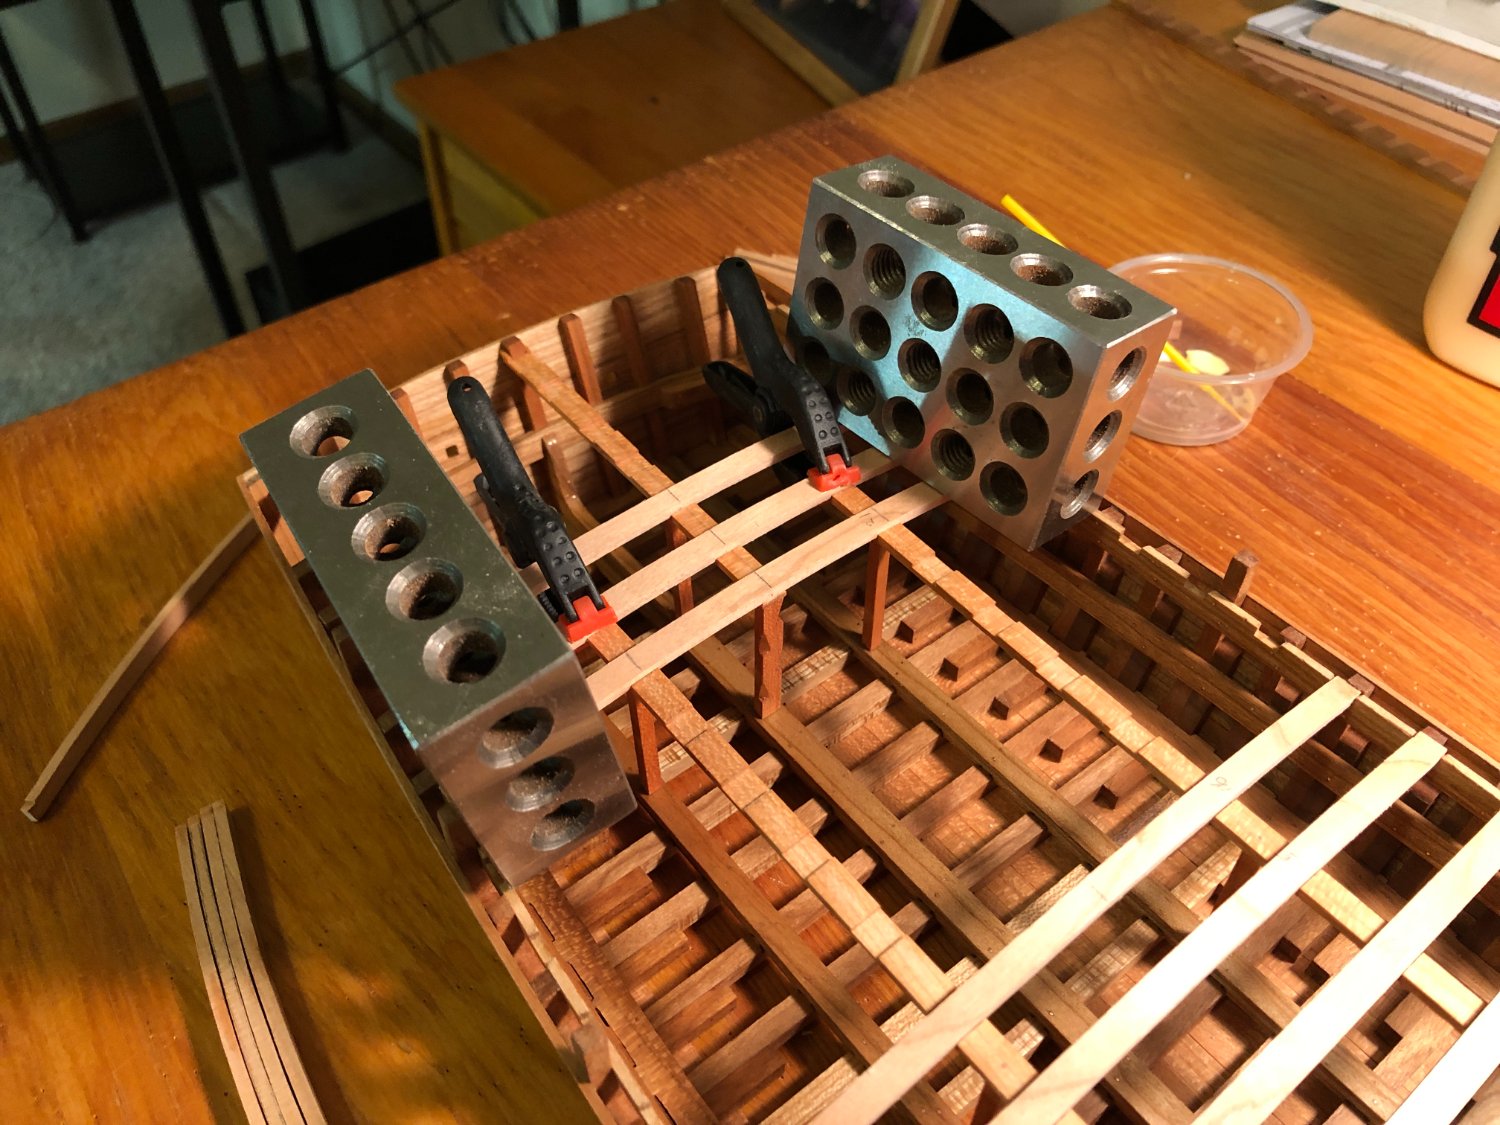
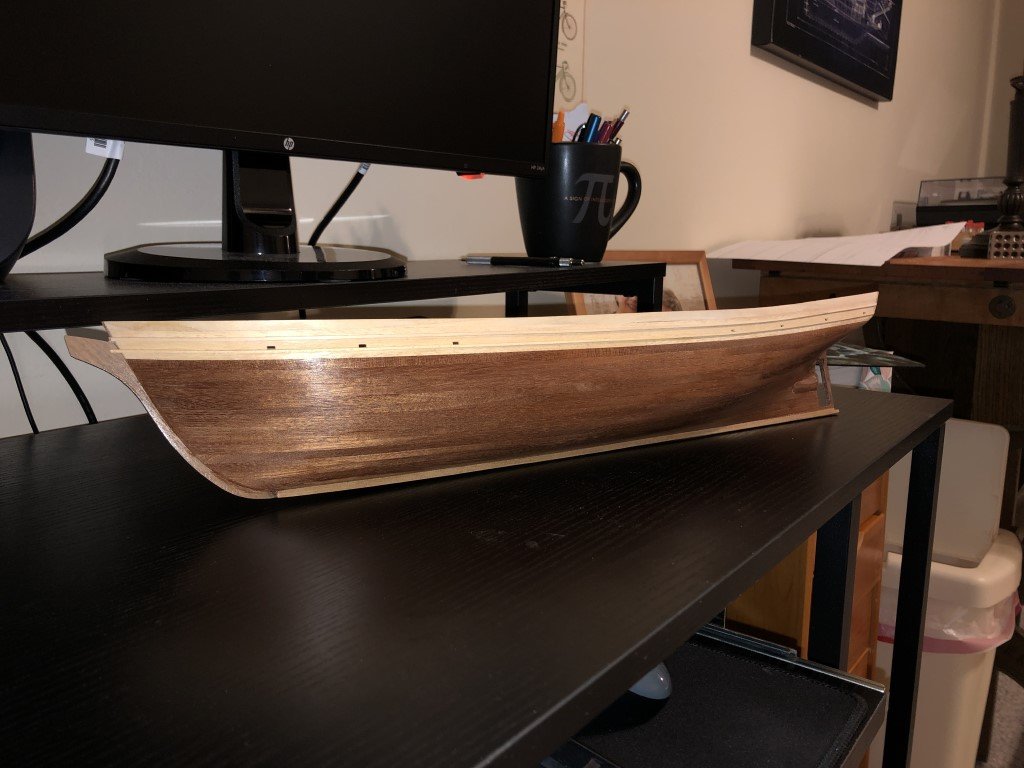
The lower portions of the uprights for the superstructure have been beveled and shortened to near their final length. The upper portion of the uprights are getting close to their final vertical orientation. I don't think that anymore can be done with them at this point. The outermost deck planks will need to be installed before going further with these pieces. The oil has cured to a point that I feel comfortable to working toward the final deck beam curvatures. I think that tomorrow some sanding is going to be the call of order.
- 199 replies
-
- 10
-

-
Everyone - thank you for the positive comments and reassurance that the project is going in the right direction! Greg
-
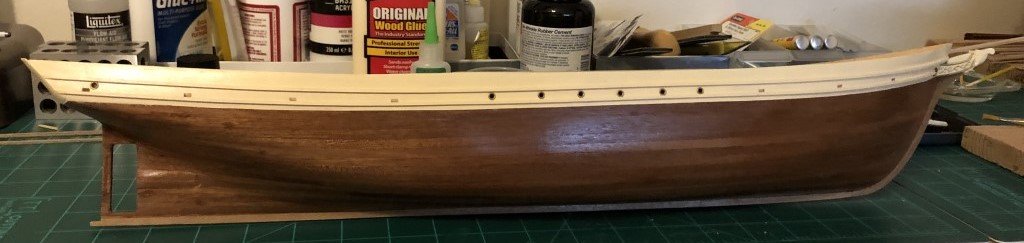
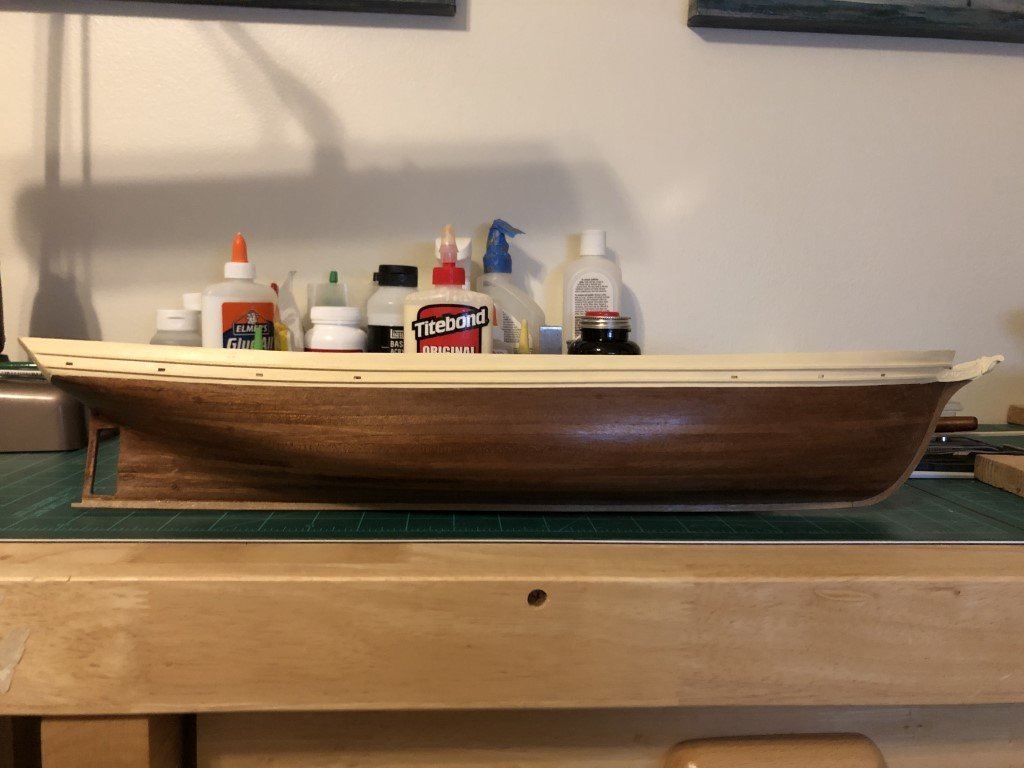
Several more coats of paint applied (6 in total) and the masking tape removed leaving a pretty nice color transition. After the port holes and hawse holes are added the whole hull will get another coat or two of varnish for protection.
-
Today Le Pourquoi-Pas? received its billet and trailboards. I mixed up some paint and started painting the upper-works. Three coats on so far; a good start, but not sure how many more it will take before I will be ready to move on from this task
-
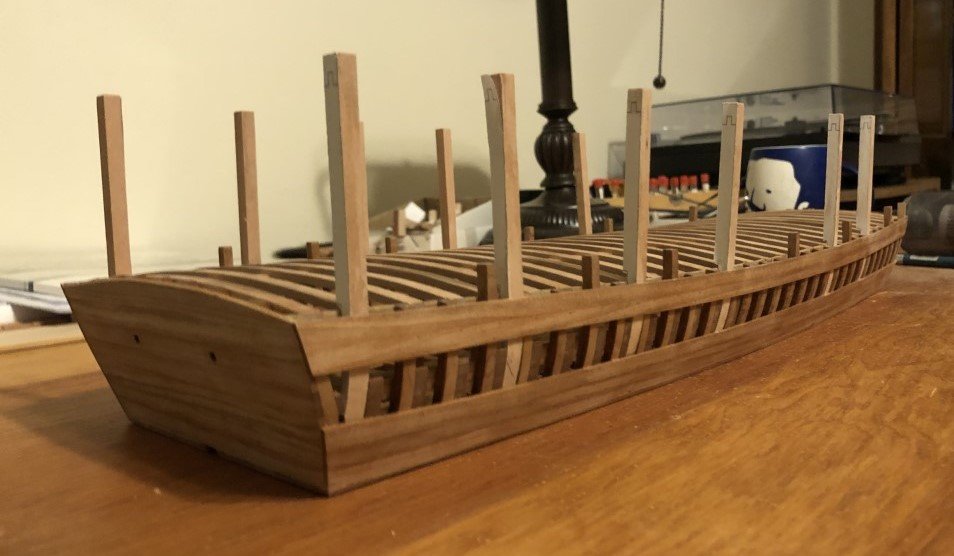
While I continue to wait for the linseed oil to cure before contouring the deck, I have started to fabricate the 12 uprights that will serve as the main supports for the superstructure. Over the next couple of days I hope to clean up the uprights and start work on the carlings that they will support. These carlings do not maintain a constant distance from the deck (due to the sheer), nor are they parallel to the vessels bottom - but instead slope slightly downward from stern to bow. Because of these facts, each of the six pairs of uprights have their own unique height above the deck, also the segment the goes below the deck is modified from pair to pair. Thus the final dimensioning of the uprights will be done in concert with the carlings once the outermost deck strake has been put in place - which won't be done until the deck beams are given their final contour. The linseed oil now is very dry to the touch. I just want to make sure that there is little or no chance of dust from sanding adhering to the innards. Since there are many other ways to make progress at this point I think it is best to leave the hull structure alone and go to work on other pieces of the vessel.
- 199 replies
-
- 12
-
-
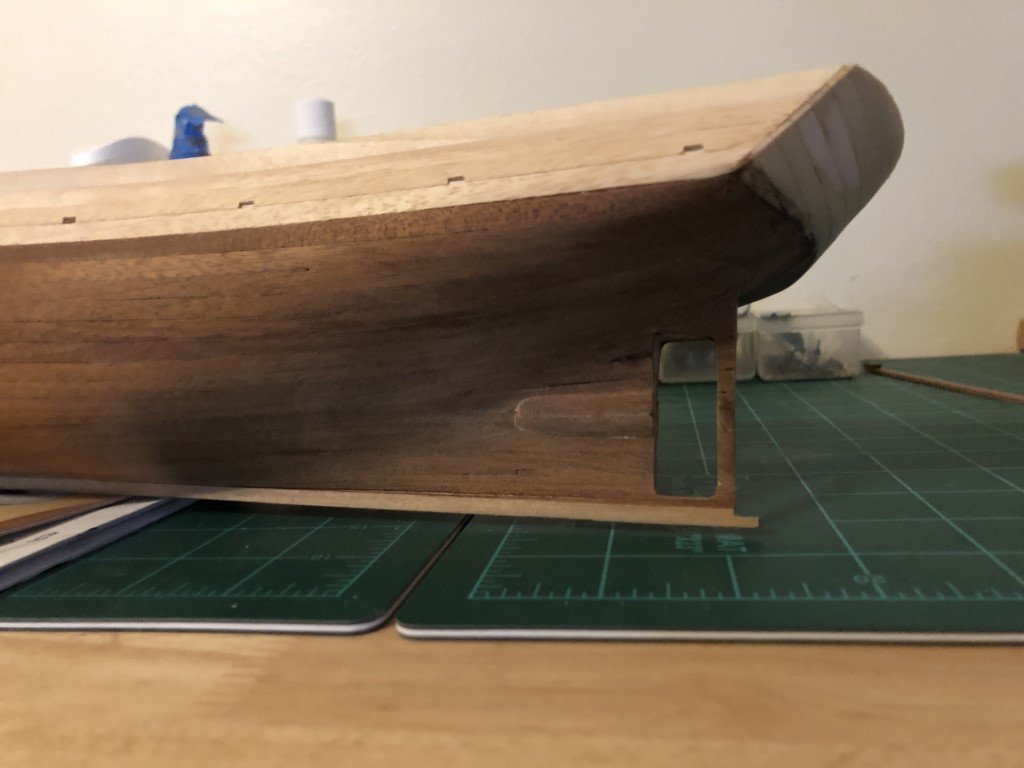
I decided (and the Magic 8-Ball affirmed) that the lower portion of the hull would be left in a varnished state. After 2 coats of matte varnish, this is what she is looking like: Soon I should be able to mask off and paint the upper section of the hull.
-
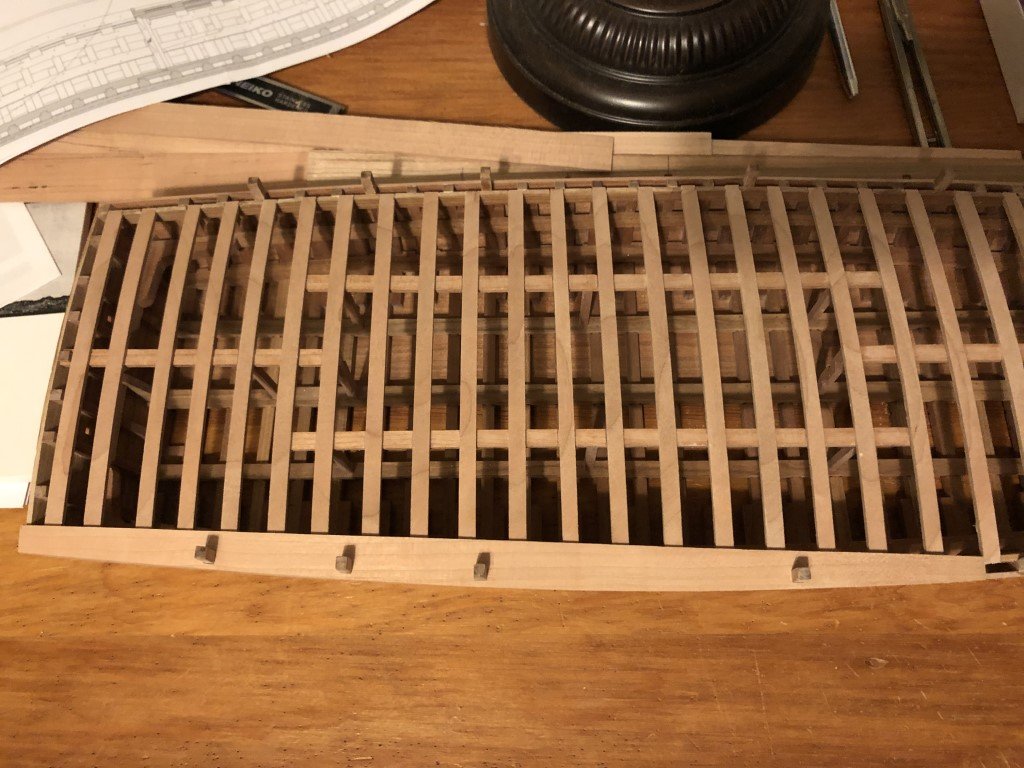
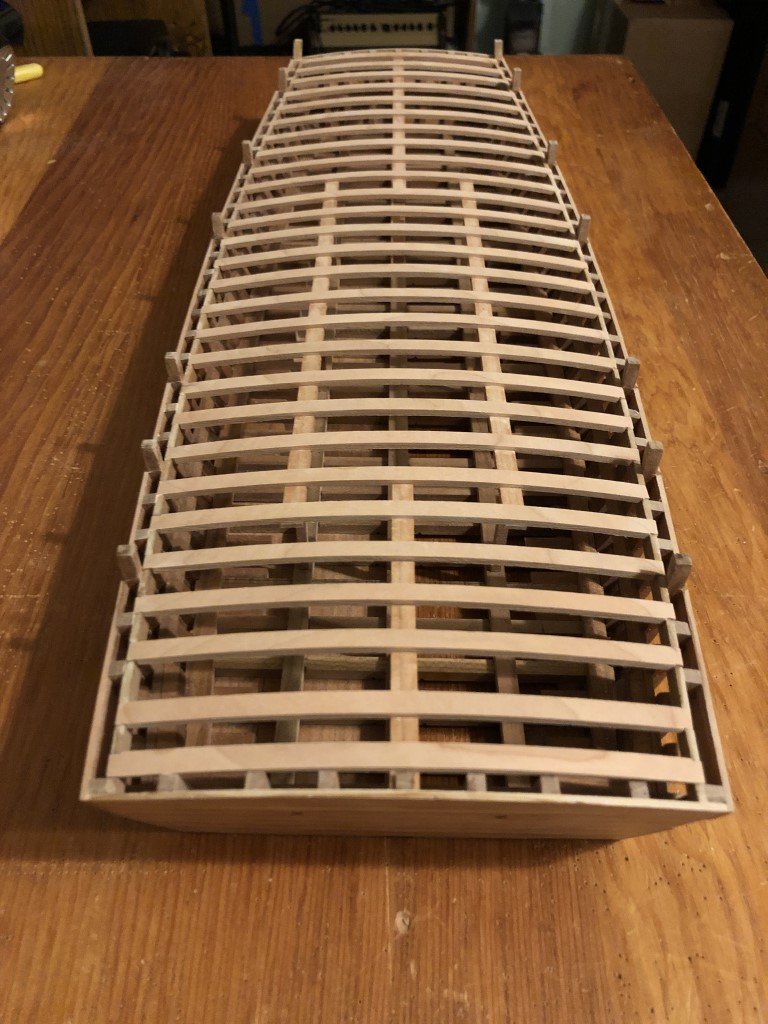
Today's pleasant progress saw the deck beams permentantly attached. Here's a picture taken partway thru the process: Next I will be able to provide the top of the beams with their final contour. It doesn't appear that much actually needs to be done at this stage - I'm taking this as an indication that the fabrication of parts has been done reasonably well so far. Still I will be taking this next step rather slowly as it will have a great impact on the final shape of the deck.

- 199 replies
-
- 12
-
-
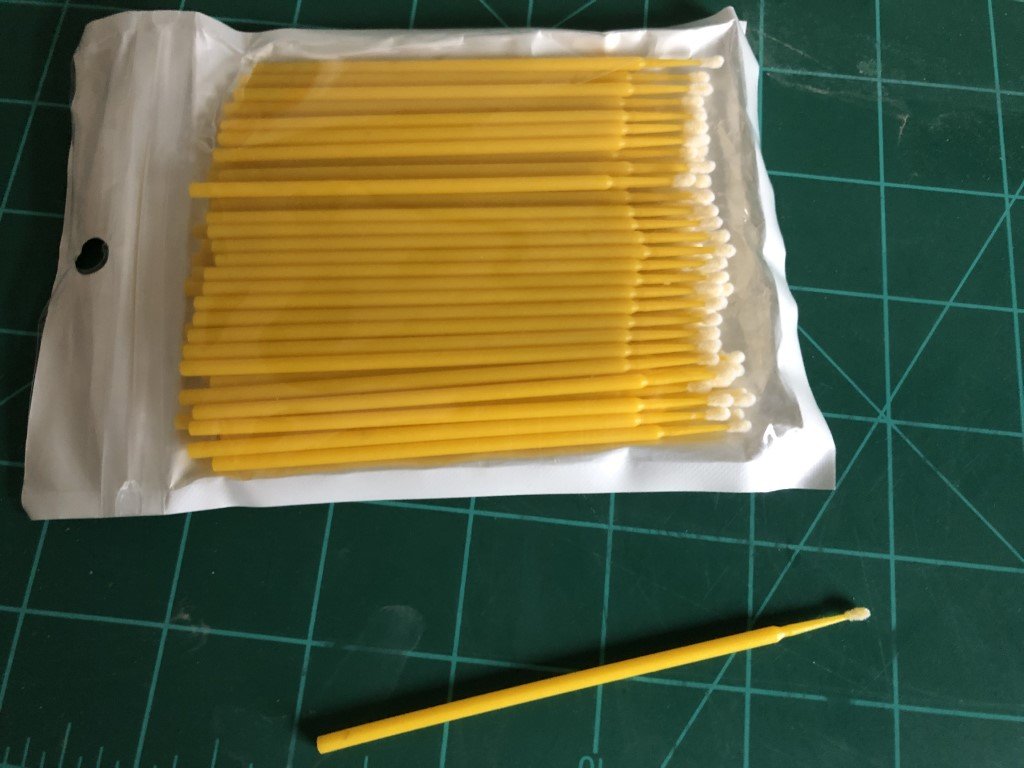
Kurt - I purchased the applicators on Amazon - here is the link https://www.amazon.com/gp/product/B09YHJK6N4/ref=ppx_yo_dt_b_search_asin_title?ie=UTF8&psc=1 . Thank you for the kind words on the progress made so far. If all goes well, I hope to be able to bring it to Manitowoc in the spring. Greg
-
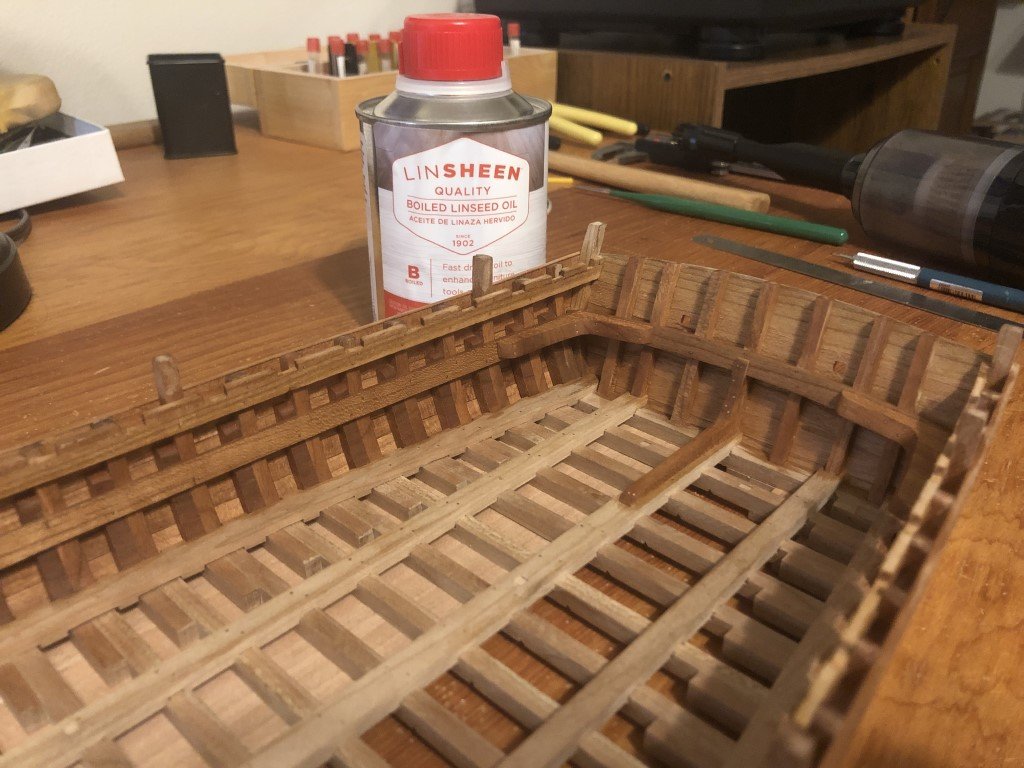
Jim - Emma C. Berry was first stained with Minwax Golden Oak and then was given a coat of matte varnish. I find that Minwax stain-sticks are easier to use than getting out a can of stain in many cases. Of course, it does take more time to do a larger area this way. On the up side, I find the stain-sticks to be easier for smaller / precise applications and they are easy to keep at hand. Also, I have experienced good color consistency from stick to stick. On the down side, the stain-stick color labeling is small compared to that on the can (which also shows a color picture). I must admit that I did need to re-carve one of the scrolls on Emma because I grabbed the wrong color stain-stick and all of a sudden had a red mahogany carving. At first I wasn't sure how I was going to get the linseed oil everywhere it needed to be on the dredger, yet not over-apply the oil. Here I used several adhesive applicators to apply the oil and had no problem getting to all the nicks and crannies. It was not a fast process and it is amazing how little oil is needed to coat the surface. By the way the whole interior has been oiled now. I used to get applicators under the Testors label at hobby shops and these would cost about 10 cents an applicator - not a lot; but I found that I could buy applicators online an order of magnitude lower. In fact, the ones I am using now cost $5.99 for 500 applicators. Greg
-
Yesterday, I was able to take care of the remaining interior bolts and the stern windows. Today I have begun oiling the interior of the hull. I chose boiled linseed oil for the finish. The four inside sides are done, the bottom comes next. I can then set in the deck carlings and finish those along with the main carlings. Obviously, there is no going back at this point so it is good that I like the look of the oiled wood - to me, it looks very fitting for a working vessel.
-
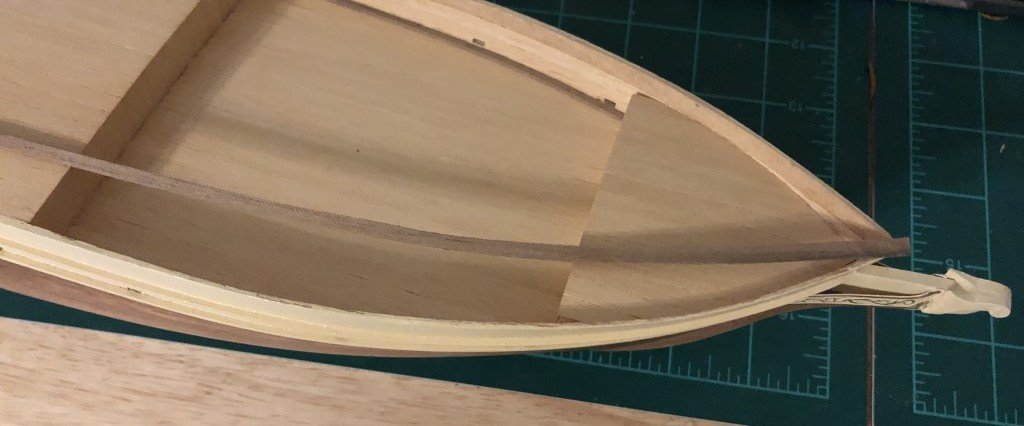
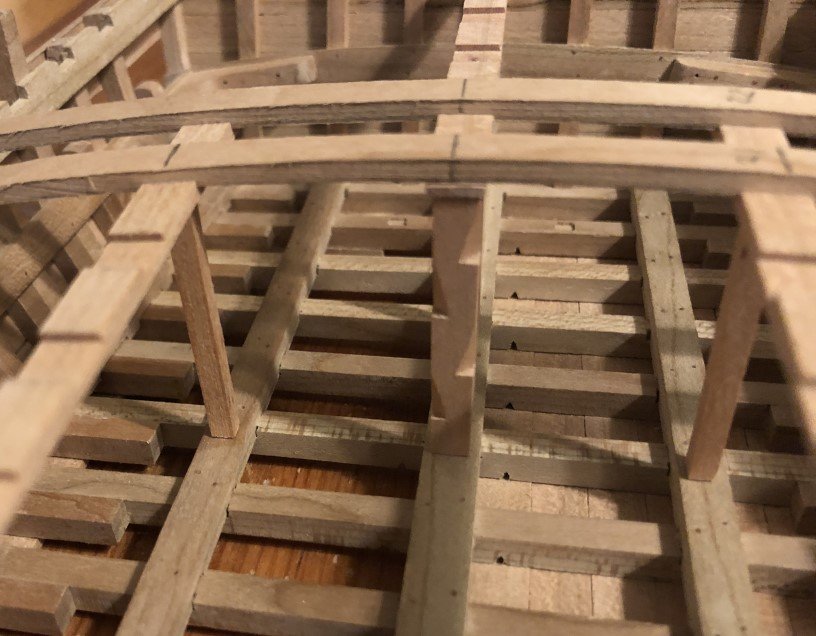
All the pillars are fitted - actually, there are ten (not eight as a said earlier), two of which are also climbing posts. I have glued and pinned the pillars to the deck carlings, but have not made any permanent attachments to the main carlings. I can still remove all of the deck beams as well as the deck carling / pillar structures in order to work inside the hull. Tomorrow I plan to clean up a few details inside the hull - for example, I still need to bolt the deck ledges to the frames and there are the two windows in the stern that need to be opened. Past that, I believe that everything is complete inside.
-
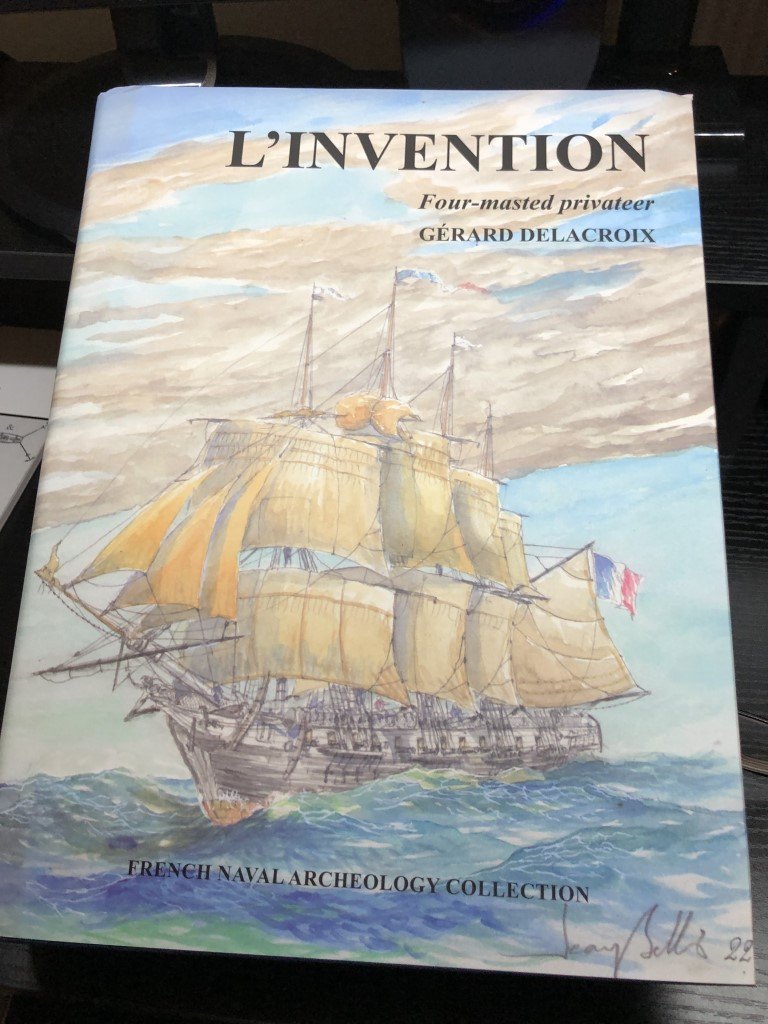
An excellent Holiday read made it to me last evening: Hopefully, someday I will have accumulated the skill to take a stab at modeling this extremely interesting ship!
-
The under-deck carlings are done. Next the eight posts that hold them up. My upcoming plans are: Make the posts and put the carlings in place for good (after a last check that everything else is in order below deck) Make and fit the small supports / knees that further secure the center carlings with the bow and stern Once that is all done, I'll apply an interior finish Fix the deck beams in place Prepare the upper deck beam surfaces for deck planks ...
-
I hope you, and your family, recover quickly and well. Greg
-
I'm considering that as well. It might look as nice or nicer that way. If it is plated below the water line, then there will be just a narrow band of natural wood between the plating and white painted topsides. I may need to consult the Magic 8 Ball for a final decision on this topic! Keith, sorry about the delay in response here - I have spent the better part of the last two weeks dealing with a bout of COVID. Testing negative now, but still feeling some residual effects. Just a small bit of progress on the vessel over the past couple of days. I opened the space for the screw and constructed the nacelles that precede the screw.
-
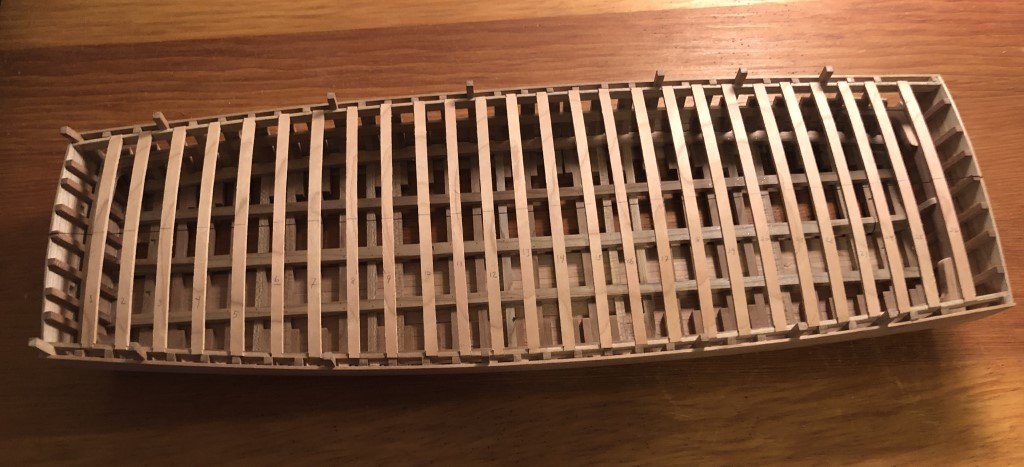
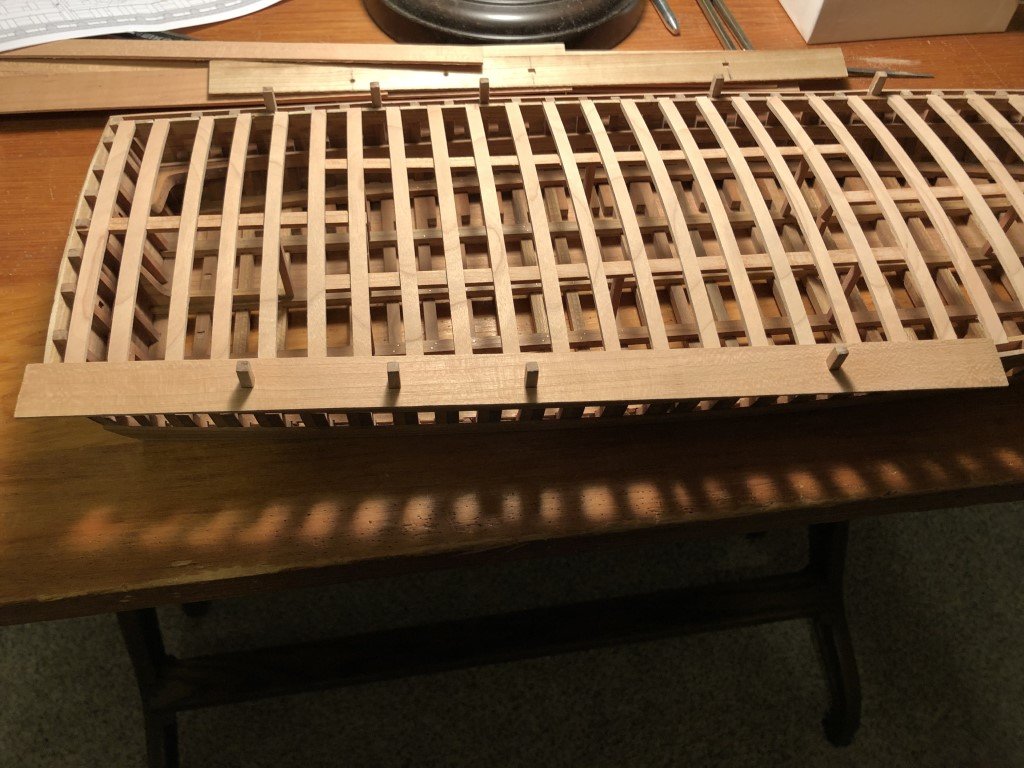
The deck beams (less the two that butt against the bow and stern structures) have been let into the shear clamps. Just a bit of fine tuning to do and I will start to fit in the four underdeck carlings and their supporting pillars. I don't want to finish the top of the beams until they are supported by the carlings as these thin beams do flex a little.