Greg Davis
-
Posts
807 -
Joined
-
Last visited
Content Type
Profiles
Forums
Gallery
Events
Everything posted by Greg Davis
-
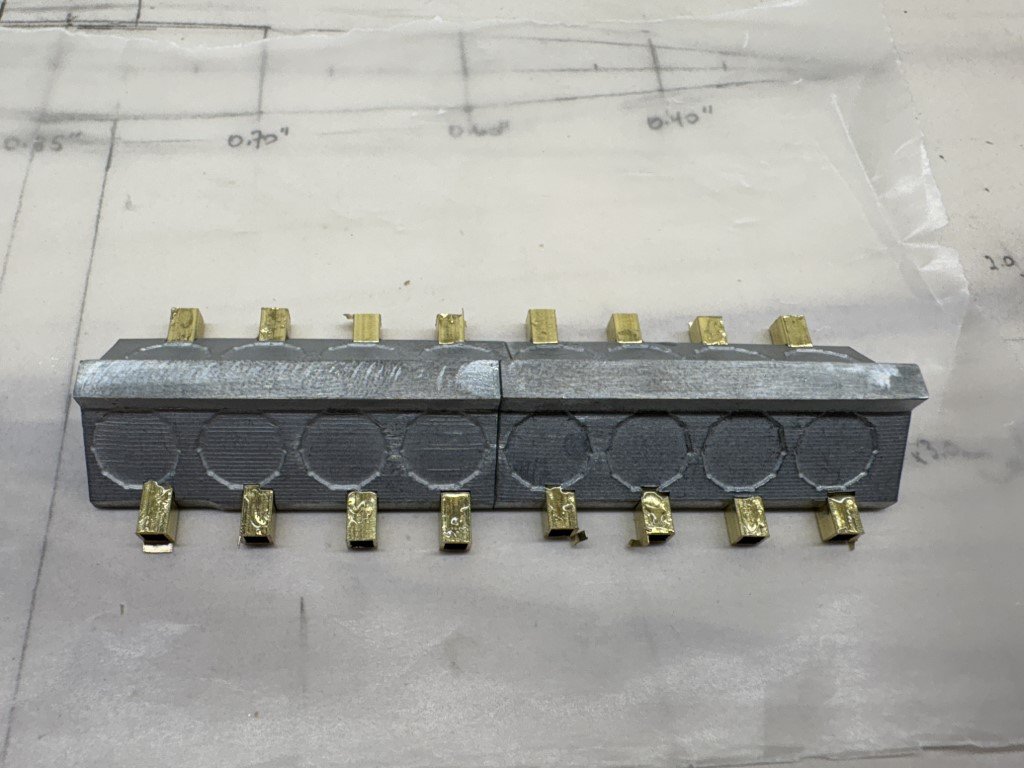
 Here is what the brackets look like after a bit of filing:
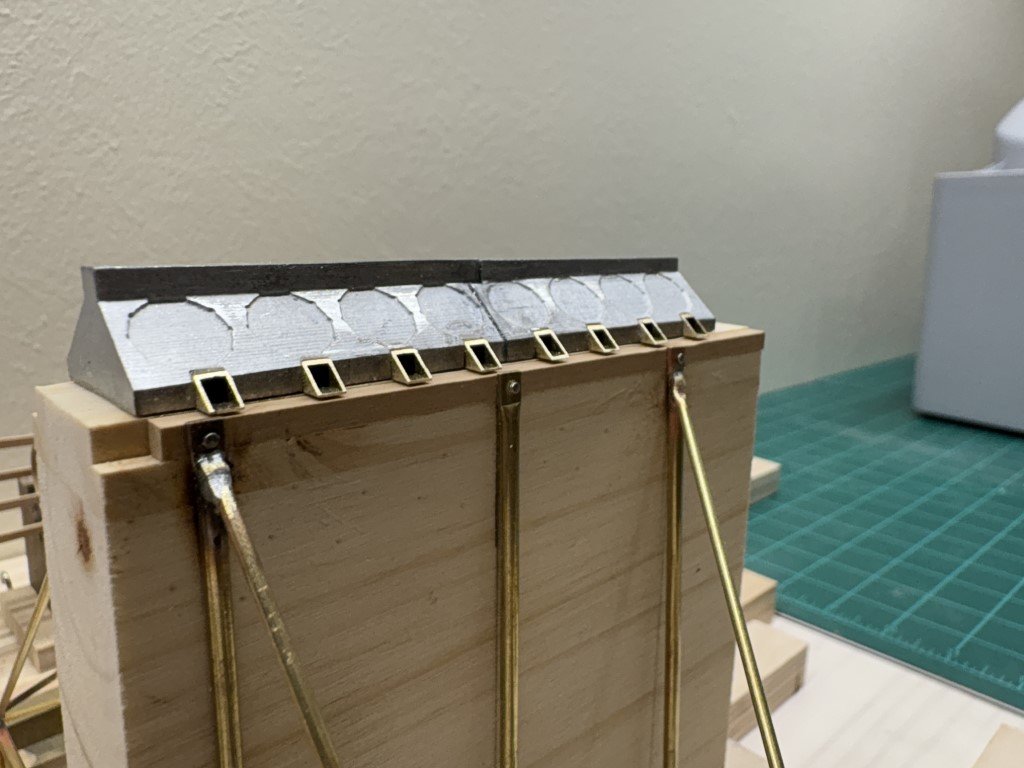
- 288 replies
-
- 8
-

-
- Santos Dumont No. 18
- hydroplane
- (and 1 more)
-
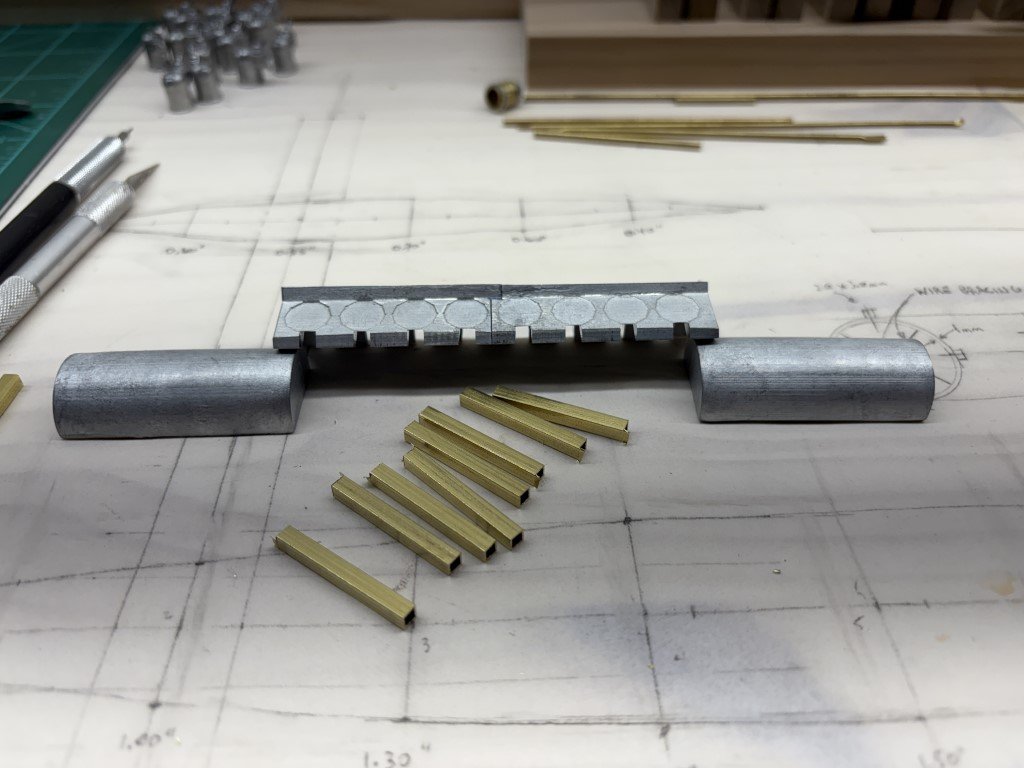
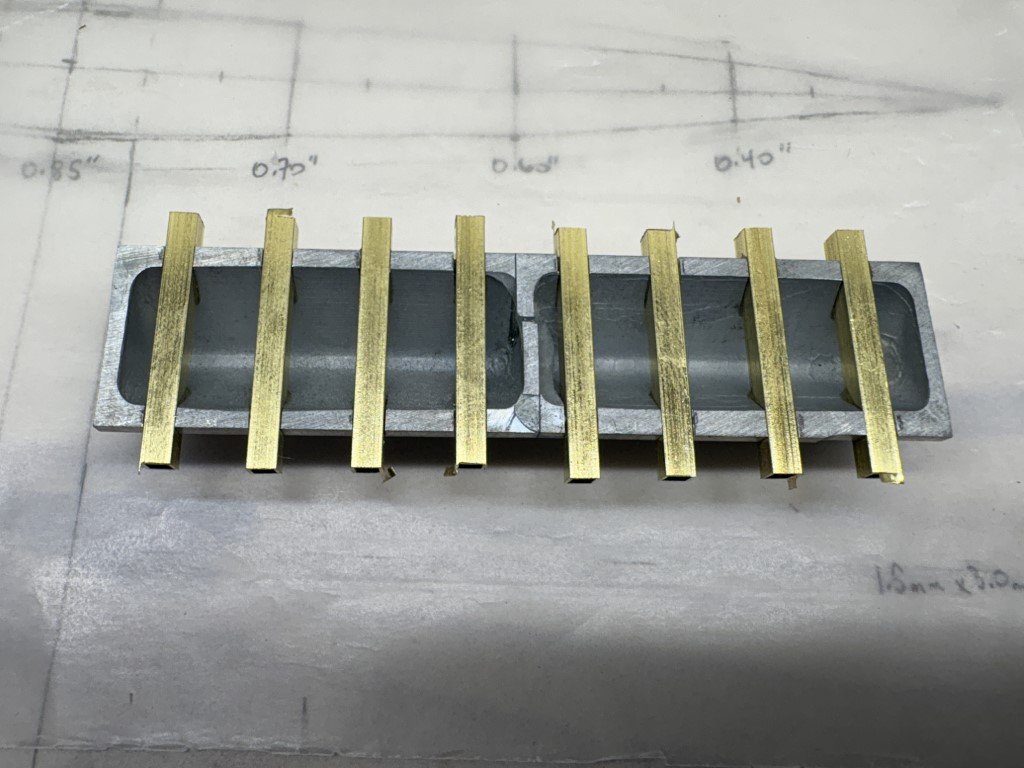
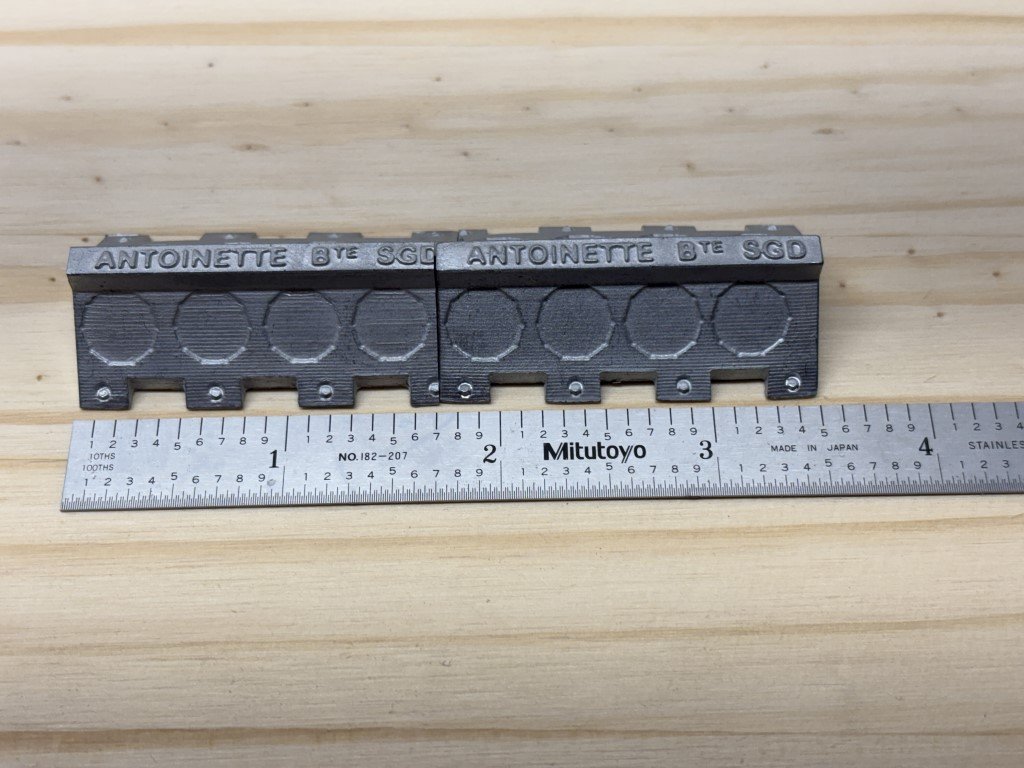
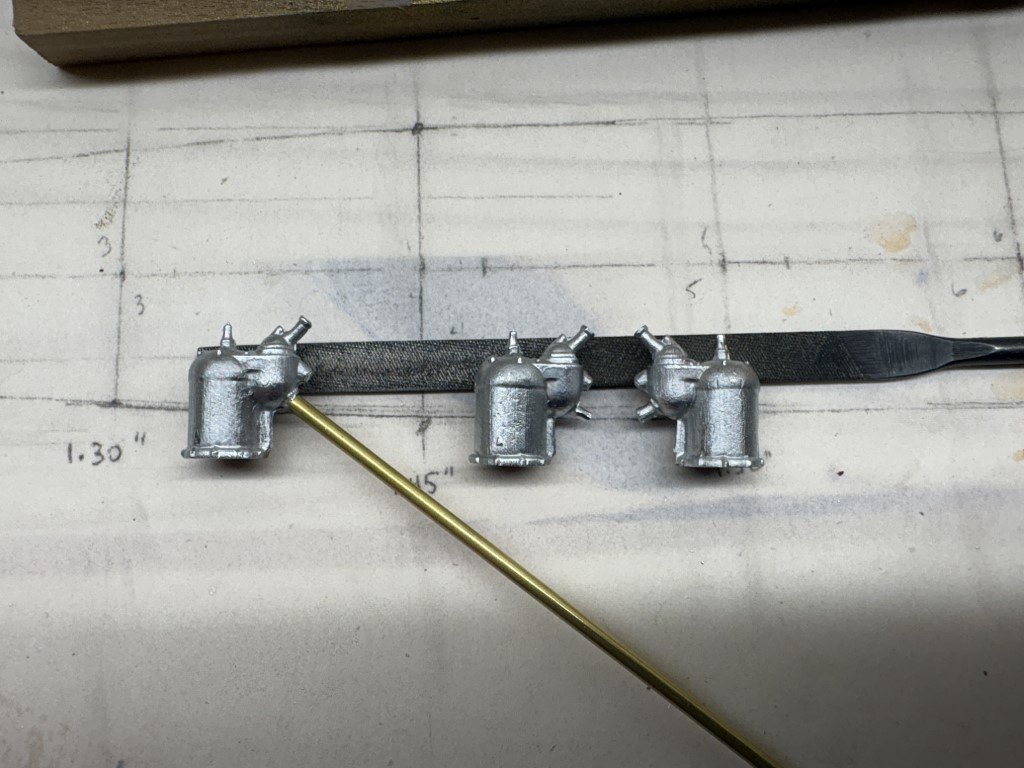
Sort of jumping around on this project! I milled slots into the top portion of the engine casting to accept 1/8" square tubing: The brass tubing has been epoxied in place. Once it has cured, the ends will be cut off matching the slope of the engine casting leaving behind the three-sided engine mounting brackets. Hopefully better looking, and closer to the correct placement, than the ones that had been part of the castings.
- 288 replies
-
- 9
-
-

-
- Santos Dumont No. 18
- hydroplane
- (and 1 more)
-
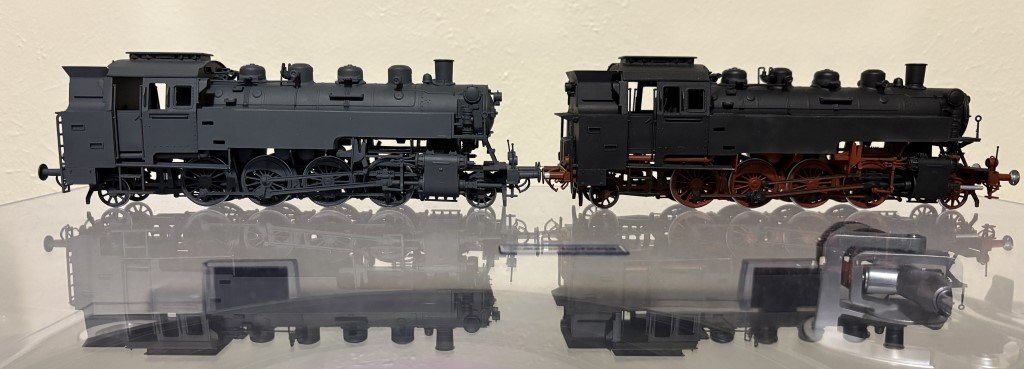
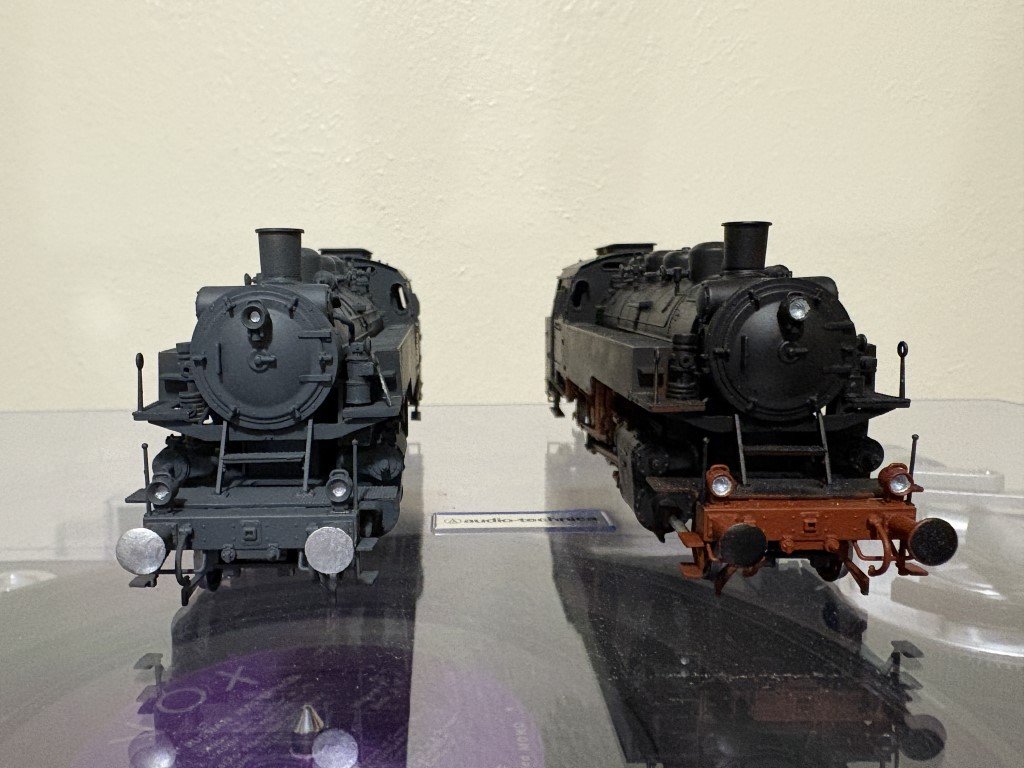
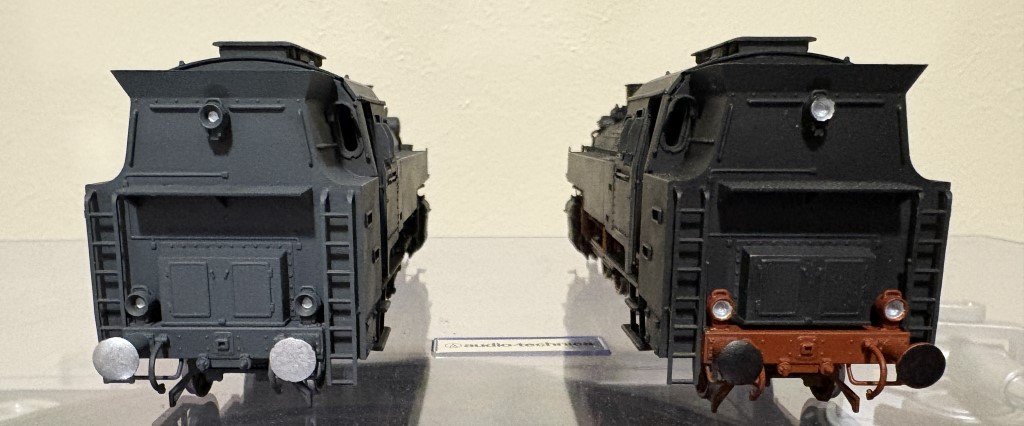
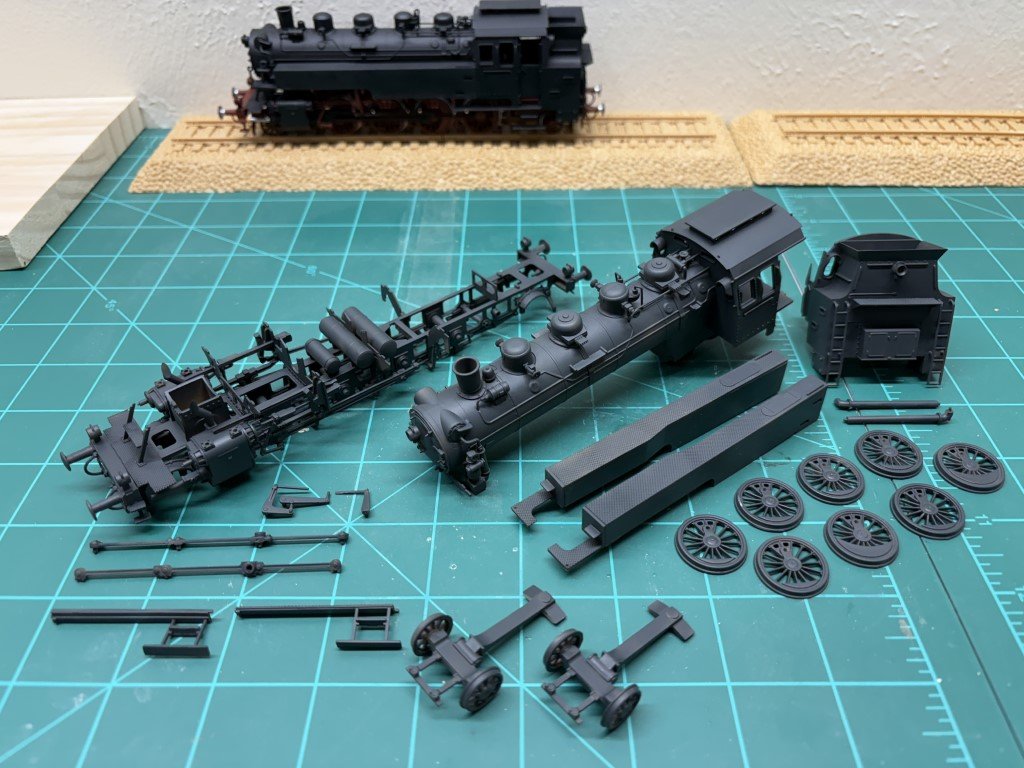
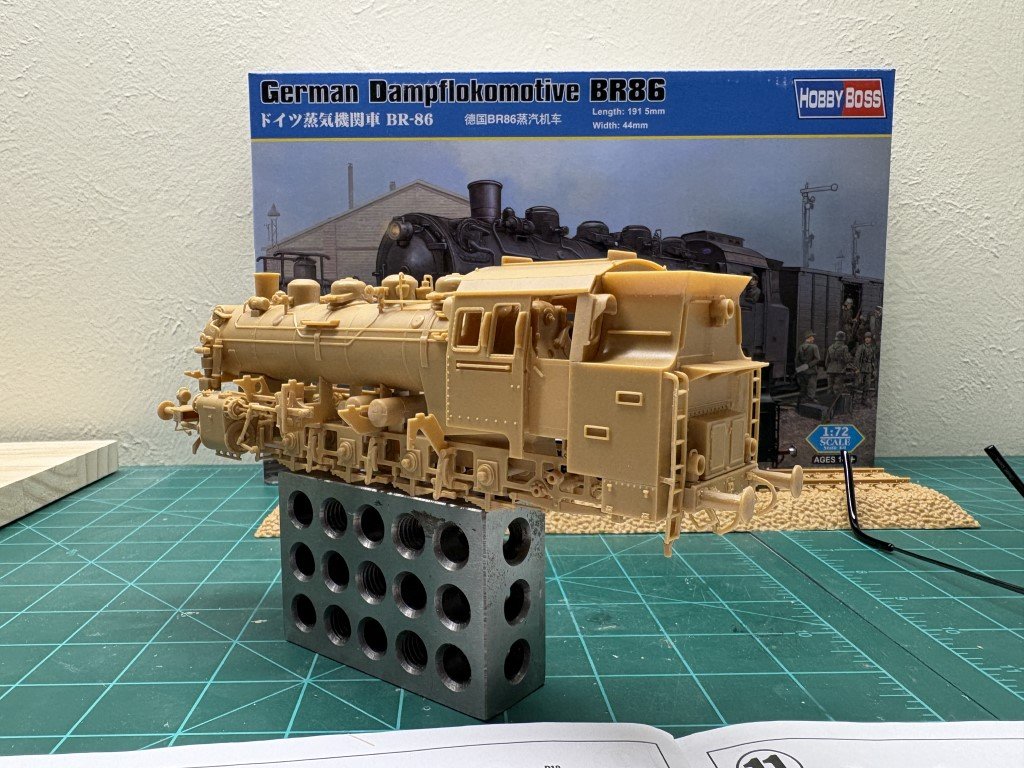
Here are the two BR86 locomotives together: They will both get their clear coat, decals, and any weathering around the time that I build and finish the Dora railway gun. Not sure when I will get to that as I want to get back to some wooden ship model work, I need to get my 1:48 Phantom and my 1:16 Hydroplane models completed. As those make progress, I really want to dive back in to the 1:48 L'Invention scratch build I started quite a while ago. But there may also be some time for a plastic side project as well - the D51 Slag could happen in the not too distant future!
- 45 replies
-
- 16
-
-
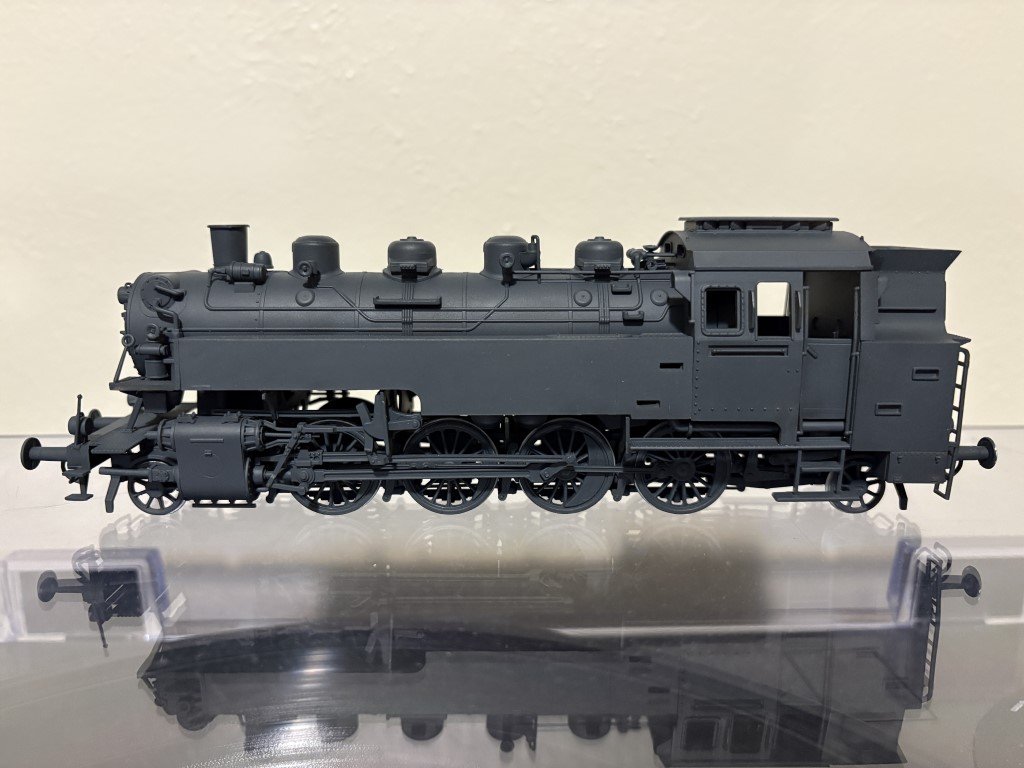
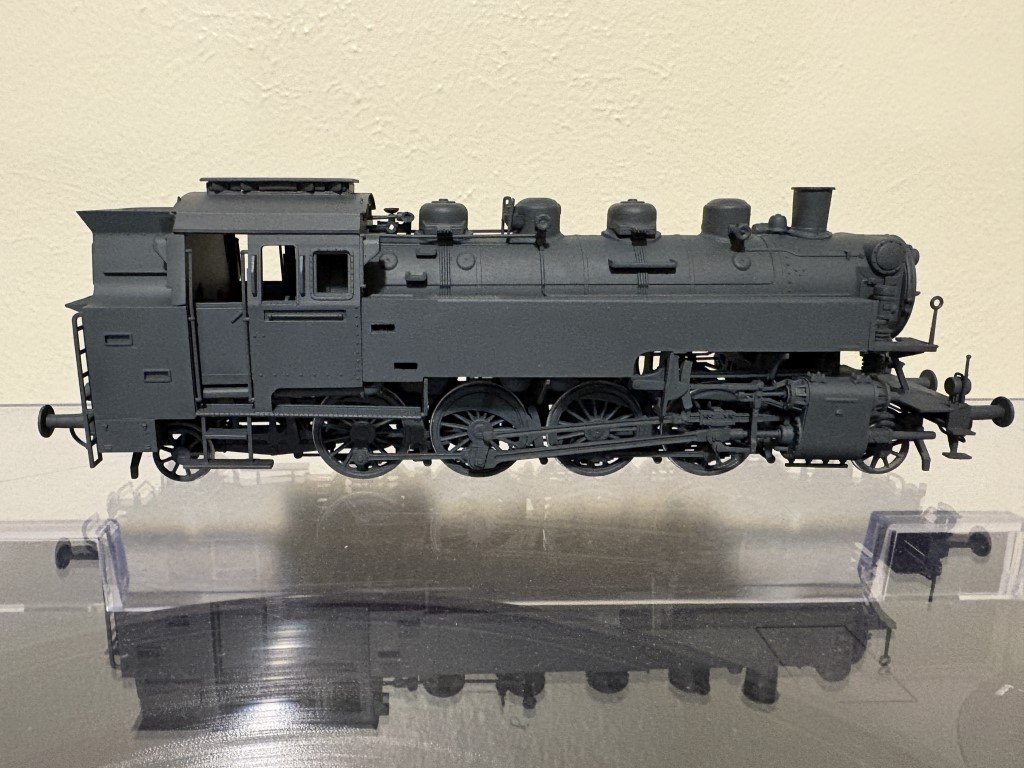
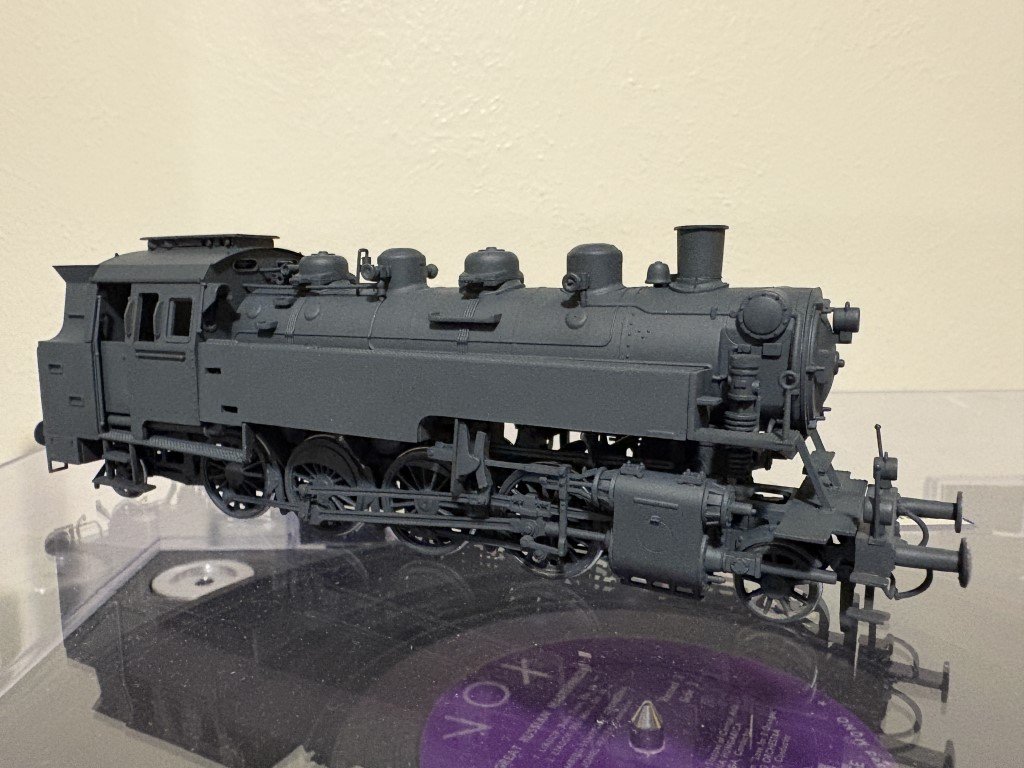
Today I put the BR86 together after painting the 'steel' brake pads and tires. Here is the mostly finished product: It will get a clear coat, decals, and windows later. The amount of weathering will also be determined later. But for now - done!
- 45 replies
-
- 11
-
-
-
I’m not a specialist in anything anymore - a couple of times I was as a mathematician, but it was related to some rather obscure material! Now I just try to learn what I can, when I can. Putting my work on MSW and getting thoughtful comments and suggestions from people like you makes my days quite nice. greg
-
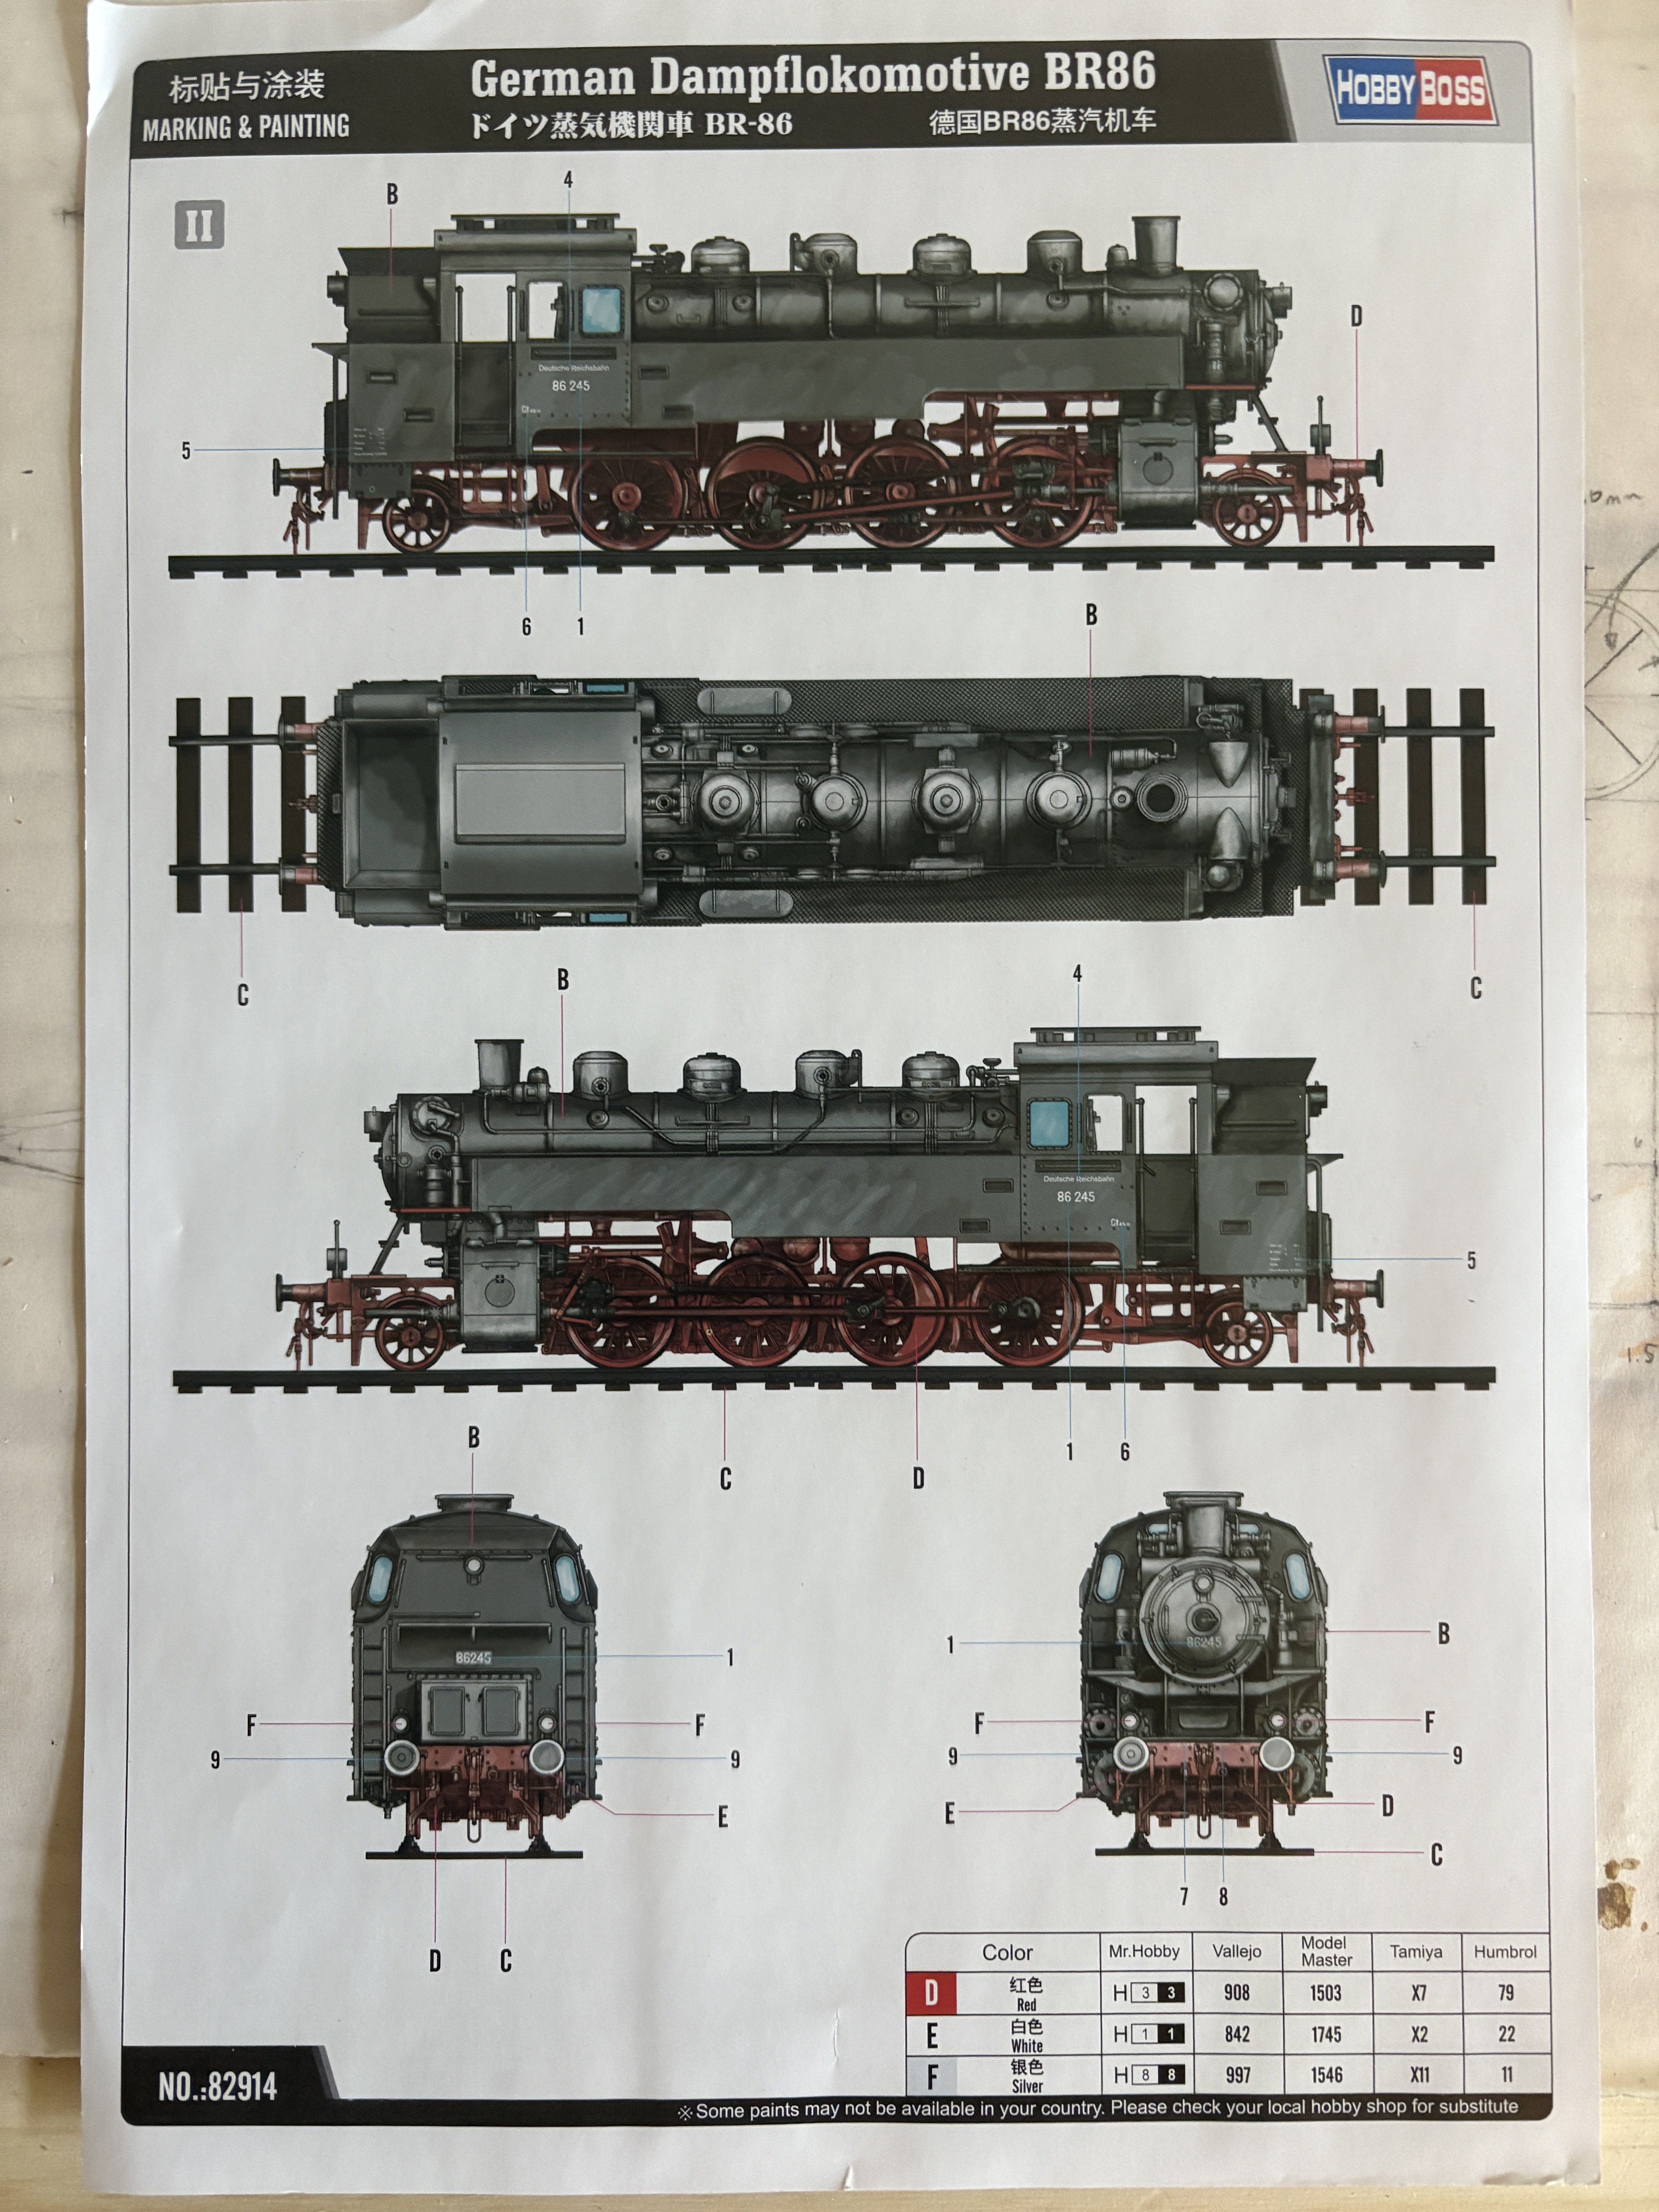
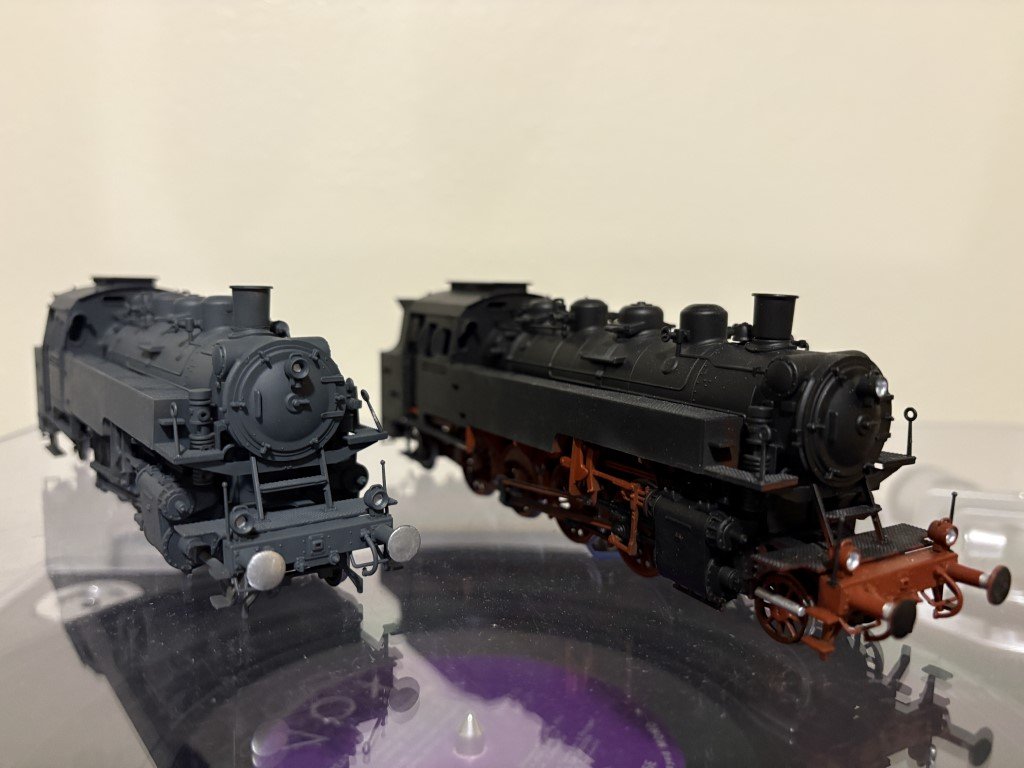
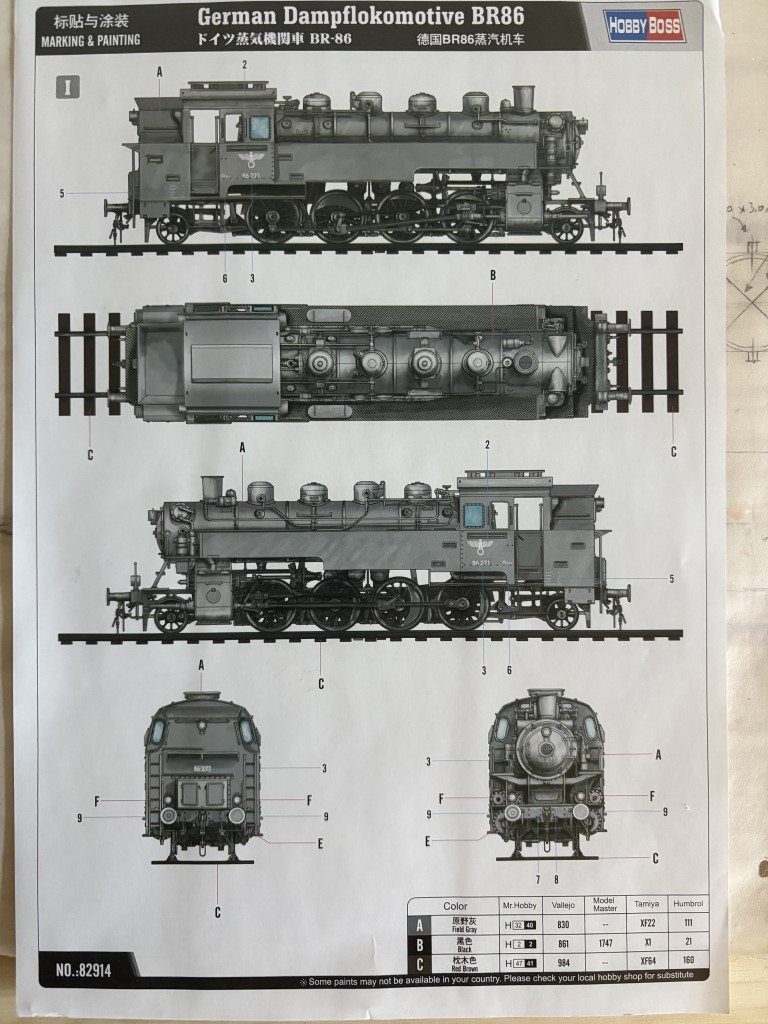
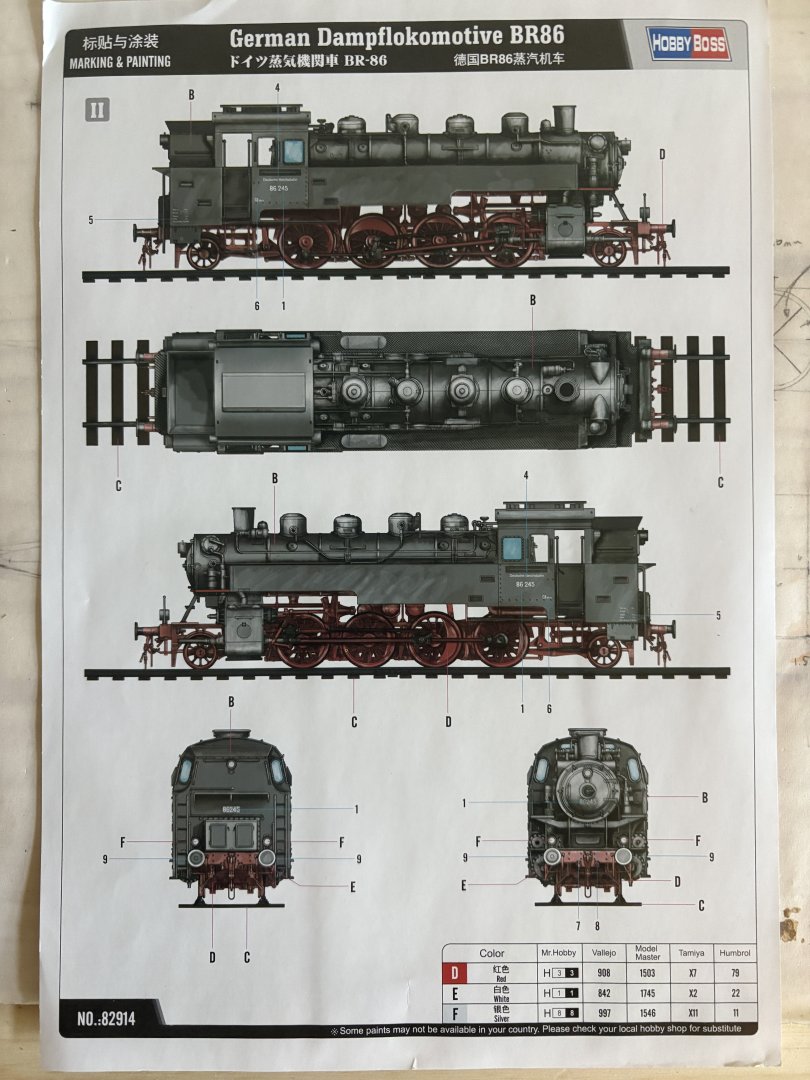
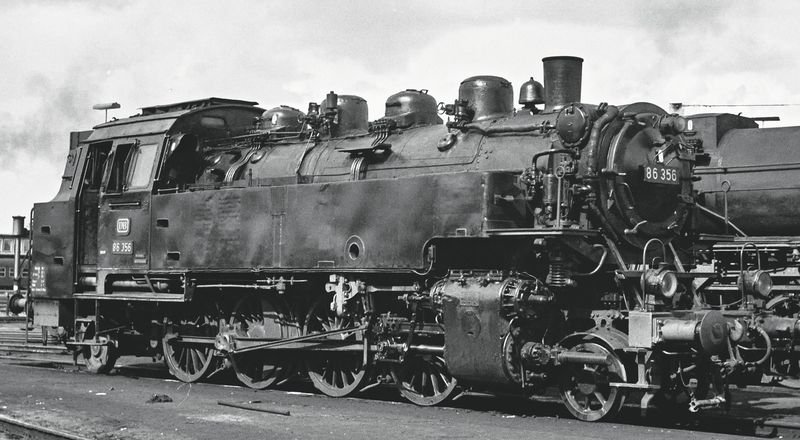
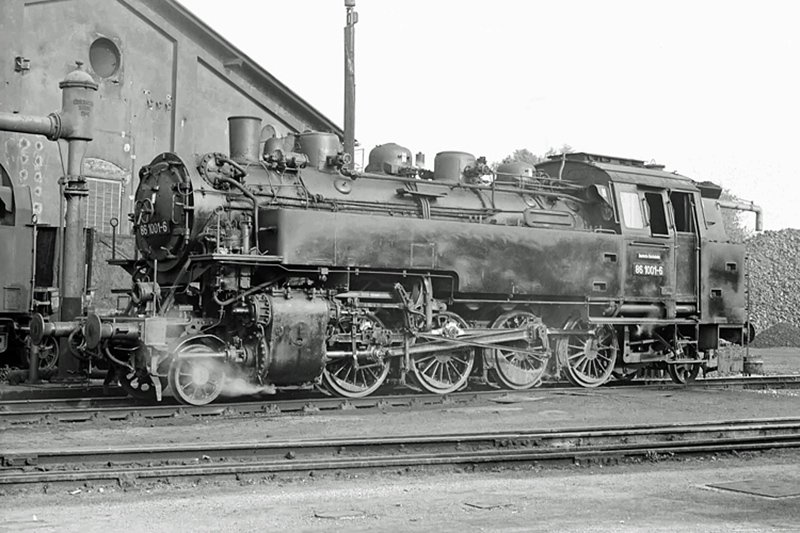
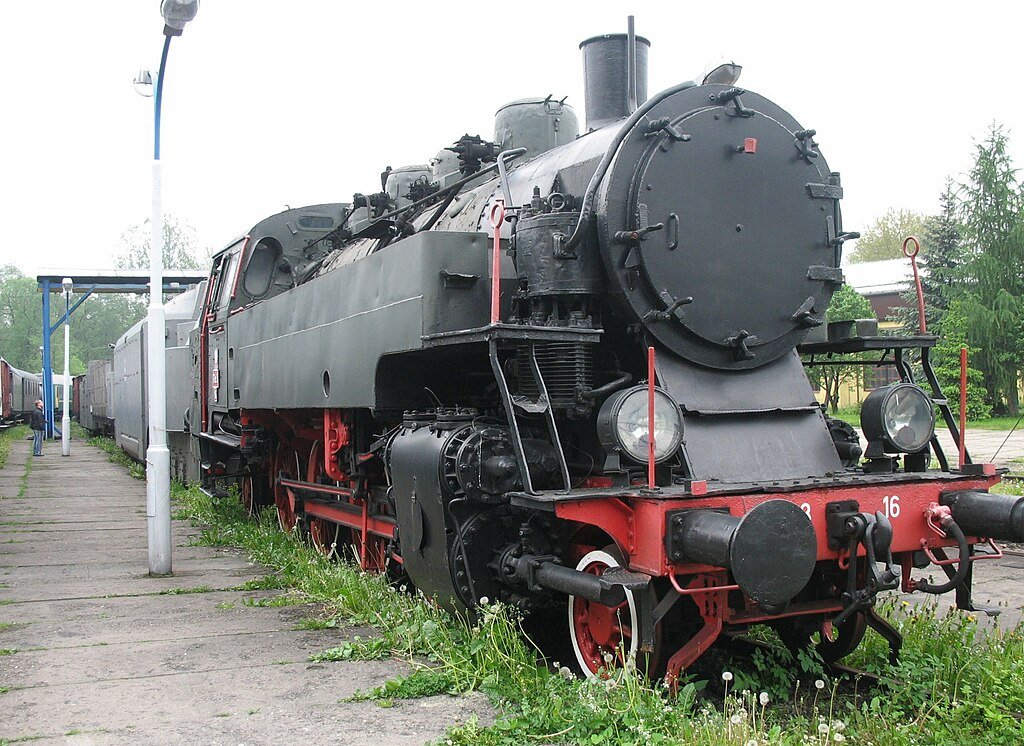
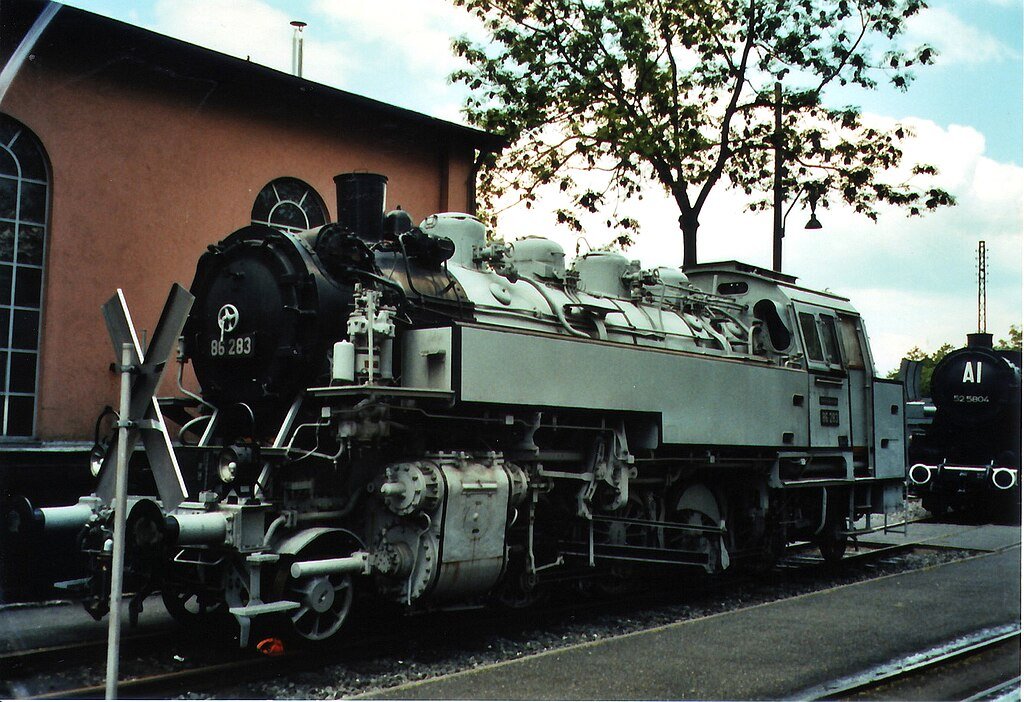
I just like priming with the darker color because it seams to have a residual darkening effect on the lighter grey. As far as the color scheme, I had been more or less following the painting guide provided with the kit. There are two schemes shown, this one is more on the grey side (apparently WWII era): I had followed the alternative scheme, containing more black and red, on the first BR86 model I made: Apparently 775 locomotives of this class were built between 1928 and 1943 and there was some variation of paint (or is this just wear and tear?). Several of the engines remain in museums today and offer a different look: Ultimately, I'd like to set the two engines behind the Hobby Boss Dora in a pseudo-diorama type presentation representing the railgun being completed. I was thinking that the engines would look relatively 'fresh and clean' because they would be associated with an 'important' project and would help give understanding to the enormous size of Dora. But eventually, I'll put a small amount of weathering on to the two engines. At the same time, I didn't want them to be a focal point of the presentation so I didn't plan on going all out for details here. In fact, placing the BR86's by Dora is conjectural - if there were kits of the electric locomotives that positioned the railgun in use, I would have built them instead. When I get to my Trumpeter 1:35 BR86 model, I should look more into the actual paint schemes! In the meantime a big thank you to you, Doreltomin, and Canute for comments and information related to the paint scheme! Greg
-
Mark - Please do! Greg
-
Here's everything painted with Vallejo Black Grey RLM66 from the Model Air line of paints: Next some brush painting - tires, brake pads, etc.; then it will be put together for good!
-
Will do when I can!
-
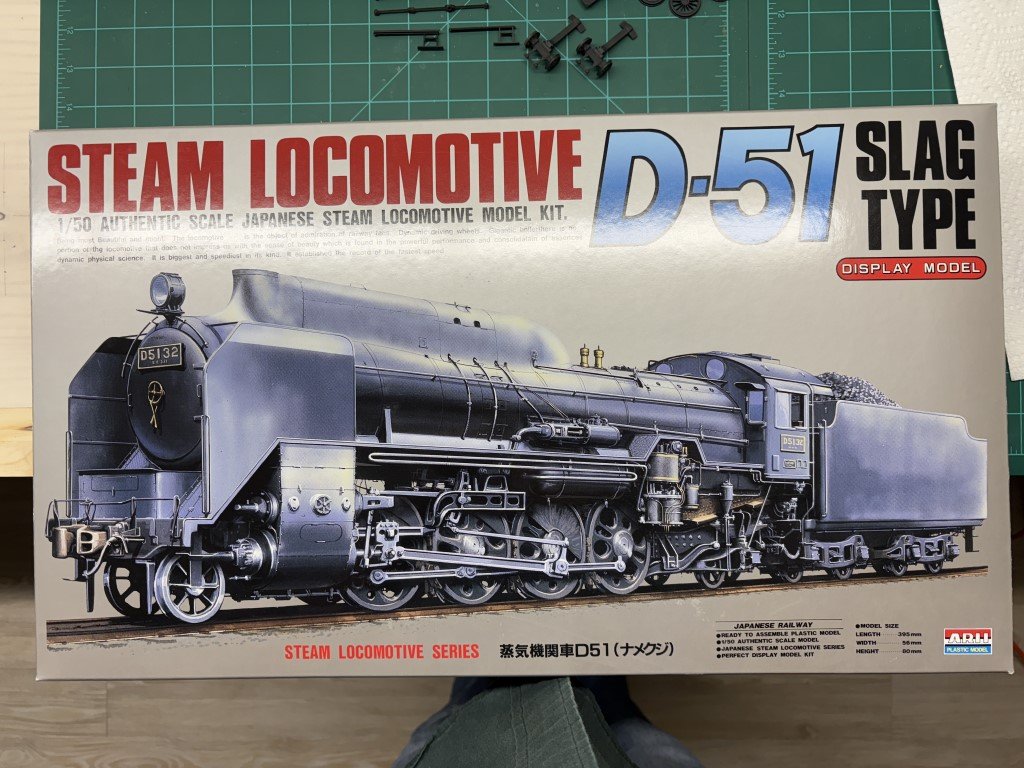
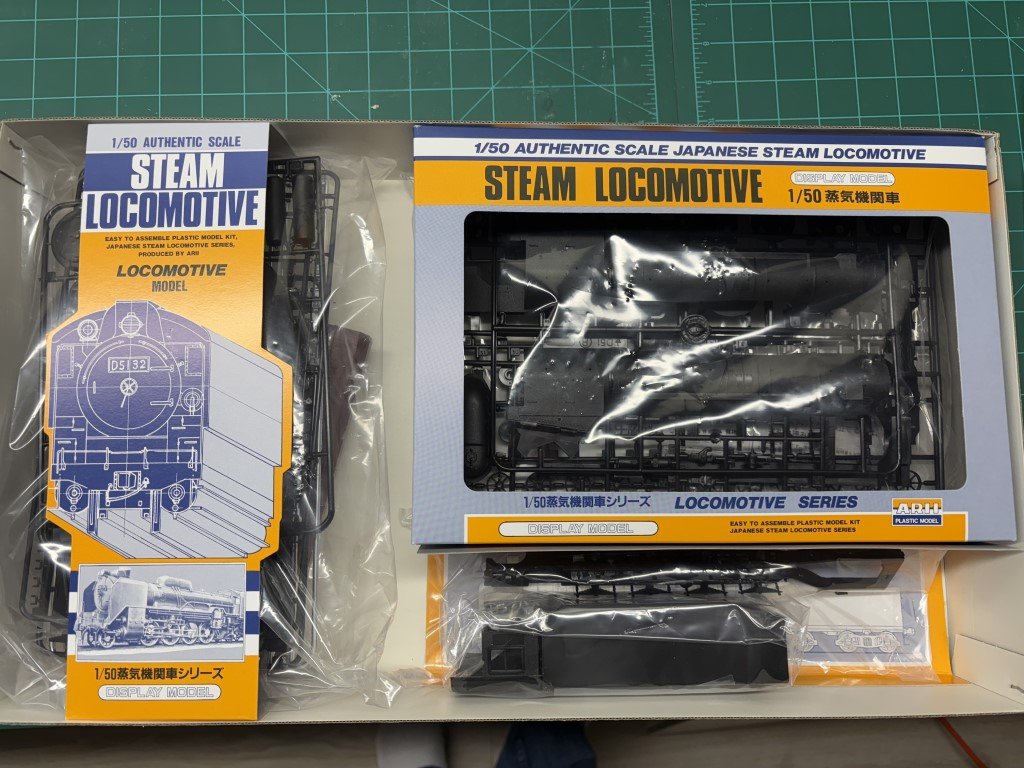
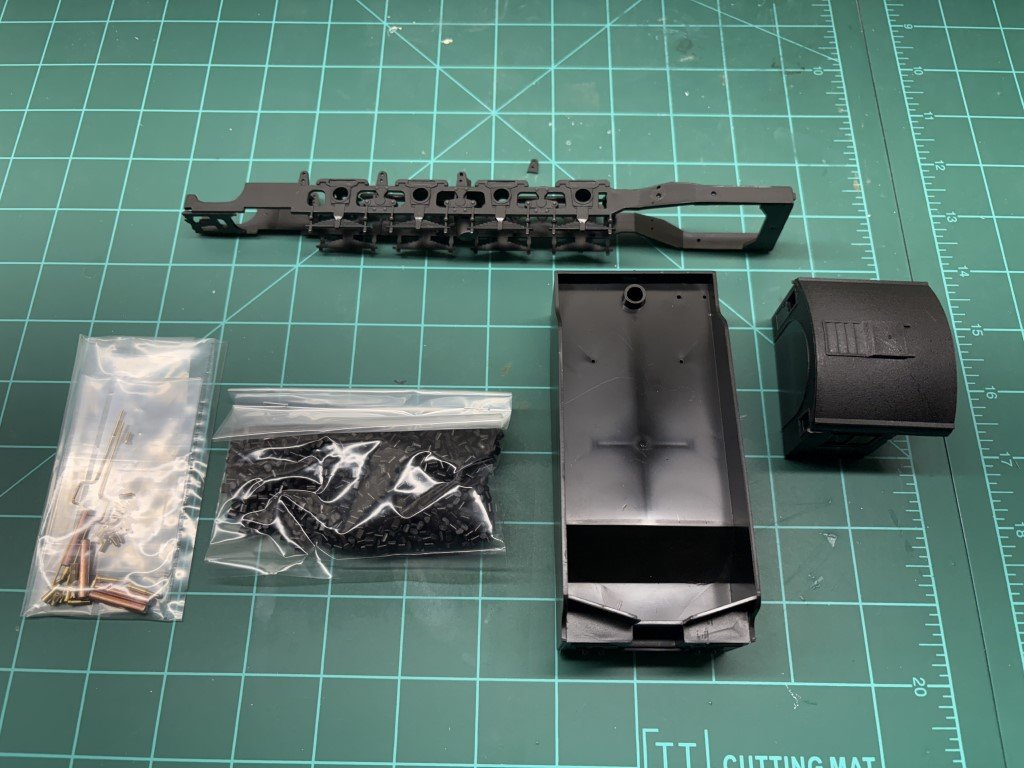
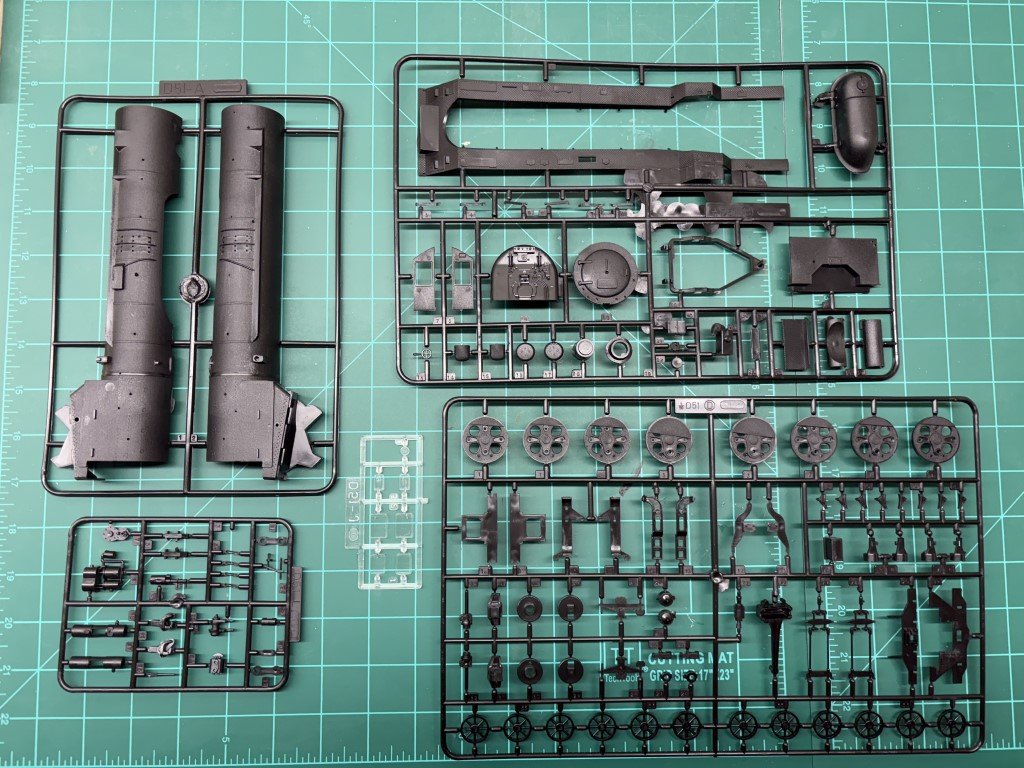
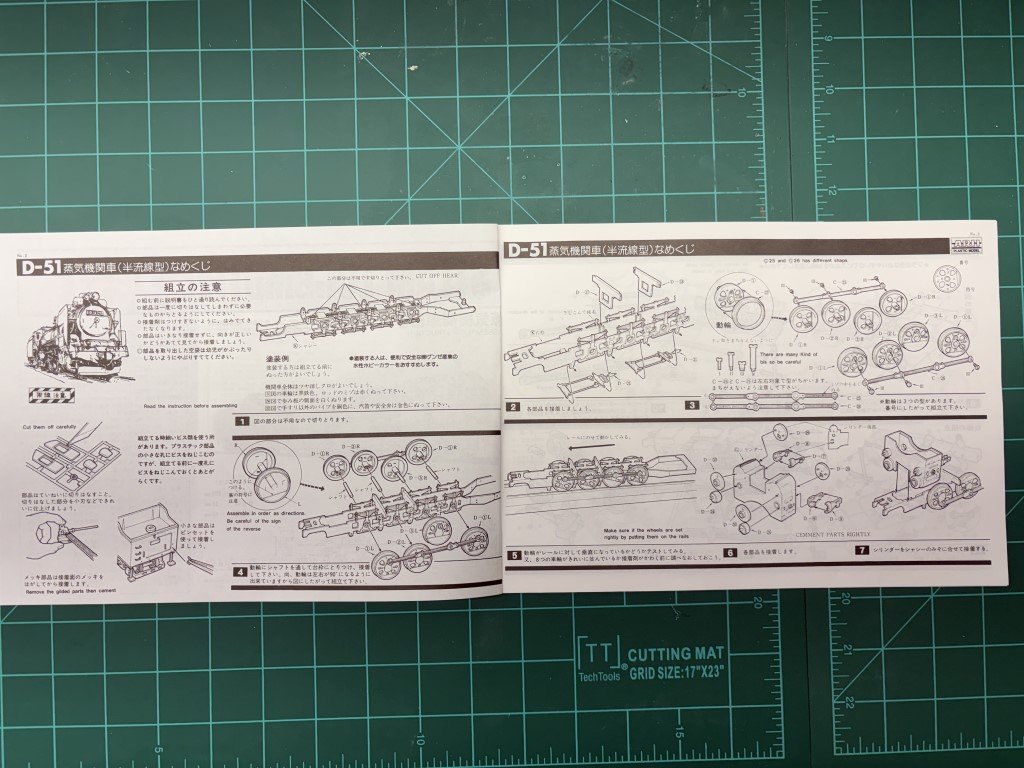
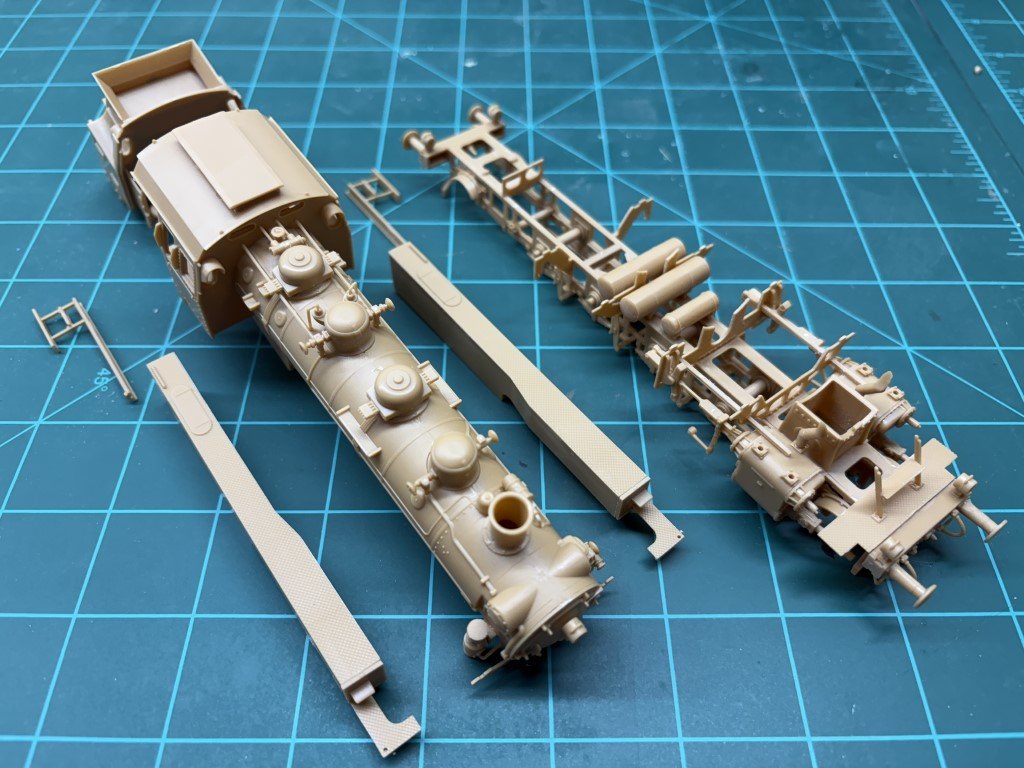
I received the 1:50 scale Micro Ace / Arii D-51 Slag Type locomotive kit today. As there is little information about this kit online (even Scalemates has just a box top picture) I wanted to post a few pictures of the kits contents: For the most part, the kit survived the journey from Japan - only a small piece broken off the chassis (4th pic top), and I've reattached it so that it will not get lost. Just a few observations from my initial look at the kit: The molds don't seem to be quite as refined as the Hobby Boss BR86 The tires (chrome) are separate from the wheels There are metal parts - including screws that hold most of the drive linkages together There are no decals - locomotive number is molded for cab, front, and back There doesn't appear to be painting information (at least in English) short of the box cover art The completed locomotive with tender will be 15.5" in length It should be interesting when completed and sitting with models of the C53 and C62 (yes, I didn't wait to see this before ordering another two kits)!


-
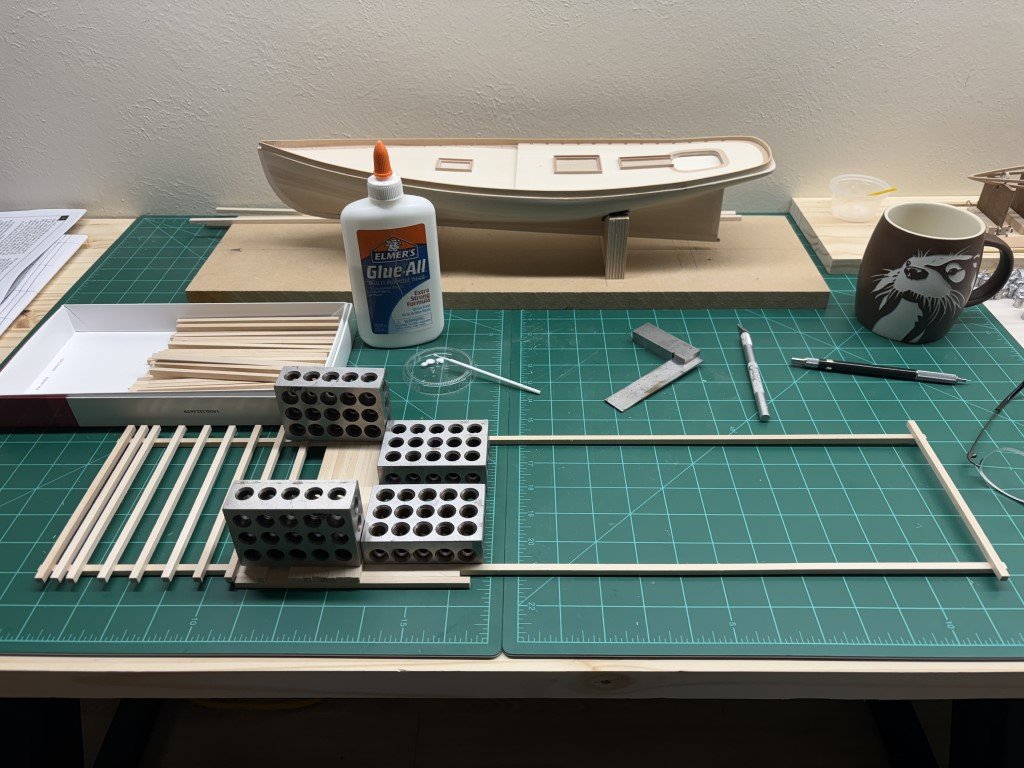
I've done all of the finish sanding on the hull. I was about to start painting when I thought it would be a good idea to pick a mounting method. I'm not the biggest fan of slipways preferring cradle type mounts in most cases. However, I did want the 1:48 Phantom to be compared with the 1:96 version I made years ago - which is on a slipway. So, at least initially, this model will be set on a slipway. I have started building one using the kit supplied basswood. It will be 24" long on the slant. The wood for this part of the build is of very good quality and should make a good looking mount for the ship. Lots of pieces to keep squared up!
-
It got up above freezing today and my basement painting area was warm enough to prime the BR86. I used Vallejo German Panzer Grey as the primer.
- 45 replies
-
- 10
-
-
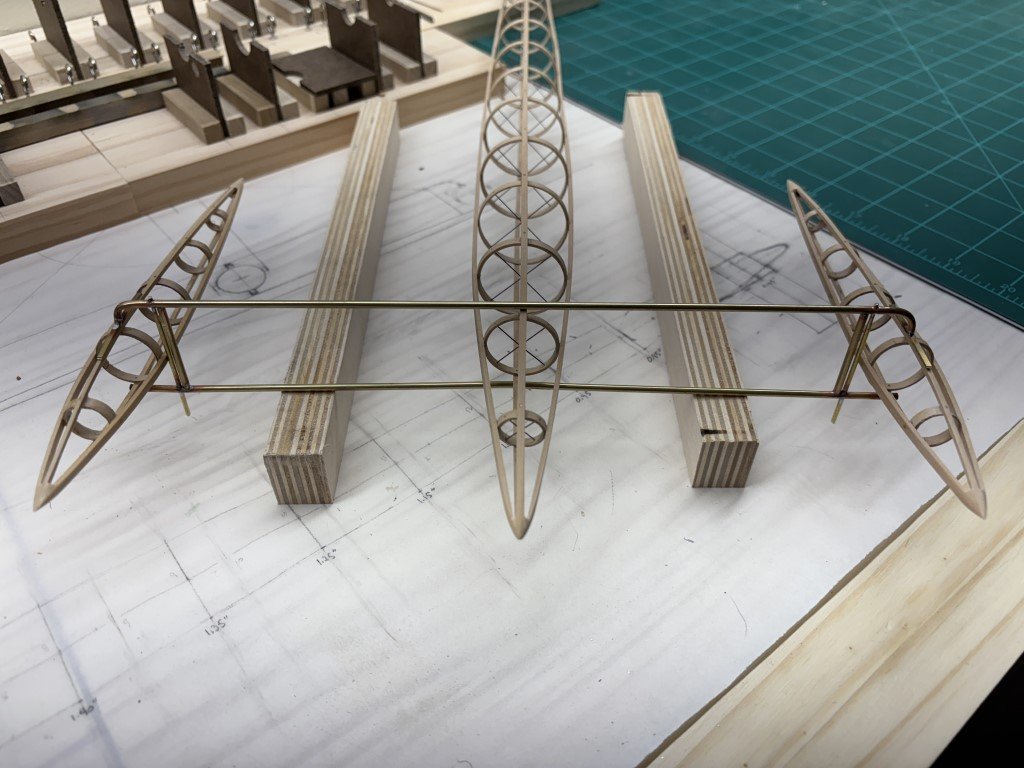
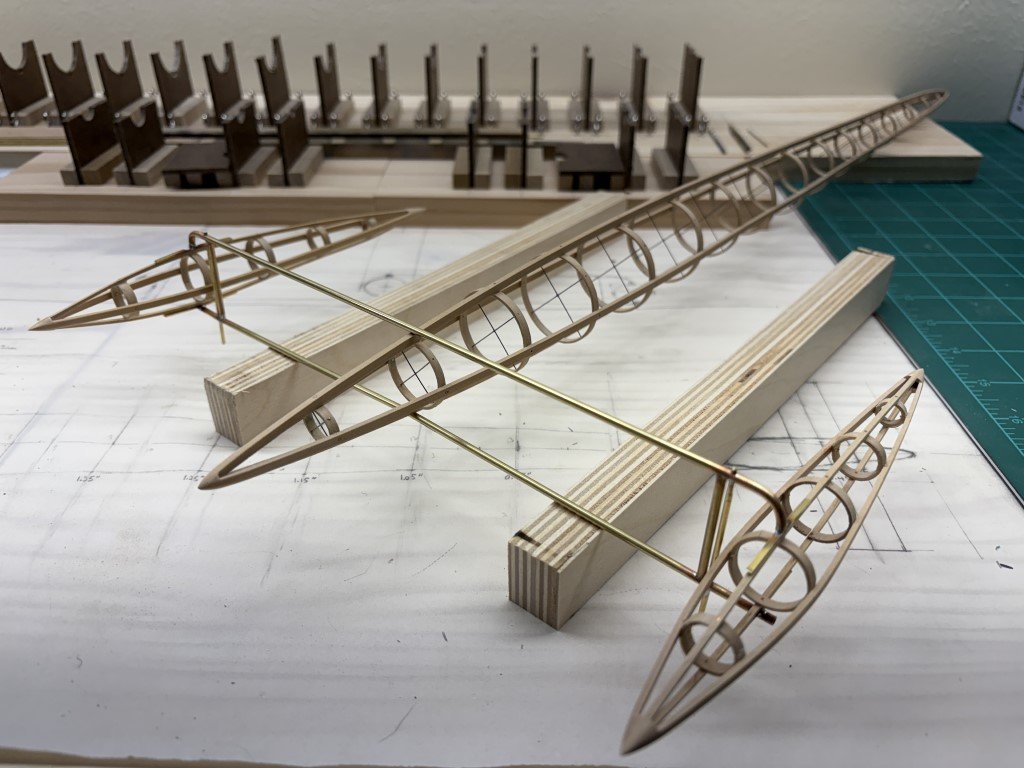
It's been to cold to paint. I usually do that in my basement and its not very warm down there right now - the typical winter cold snap here! Built a jig so that I could start to assemble the superstructure: I'm not sure how much more work can be done on this part before taking it off the jig. Looking forward to seeing the pontoon, nacelles, and hydrofoil connected to this structure. Also, it seems pretty stout but still I am really hoping that it supports the engine as all of the castings add up to something quite heavy!
- 288 replies
-
- 10
-
-
- Santos Dumont No. 18
- hydroplane
- (and 1 more)
-
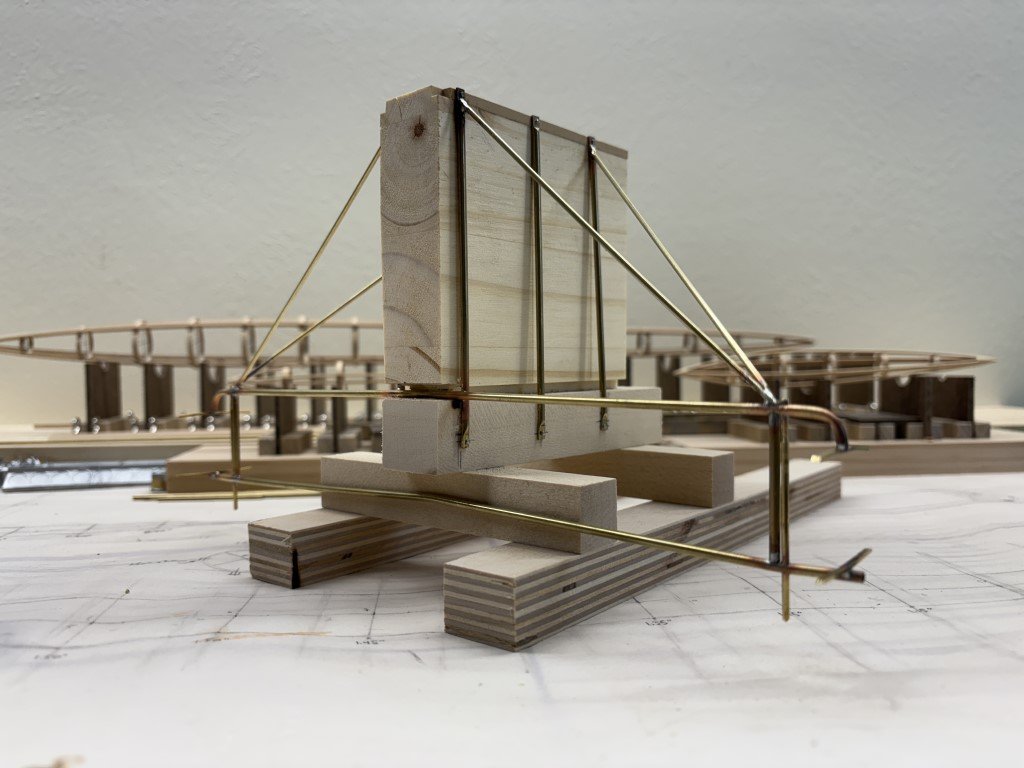
A lot more work on the cylinder castings has been done over the past few days. I hope to paint soon - but in the meantime I decided to start work on the harness(?) that connects the pontoon and nacelles. It is all made from brass and was soldered together with a resistance soldering unit. This structure will meld with the engine support structure.
- 288 replies
-
- 12
-
-
-
- Santos Dumont No. 18
- hydroplane
- (and 1 more)
-
Logging locomotives are awesome - Shay's, Heisler's, Climax's ... !
-
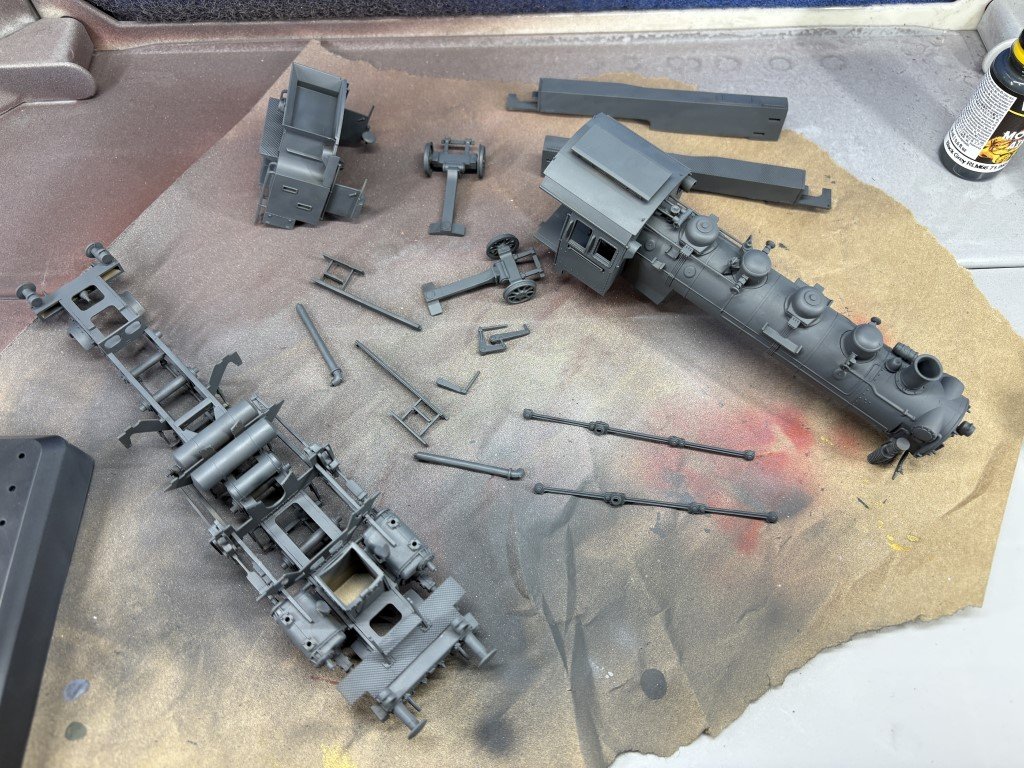
All the subassemblies are now done. There are a number of parts that I will be detaching from the spru's and cleaning up - wheels, running gear, etc. and then it will be time to paint.
- 45 replies
-
- 12
-
-
-
That Stirling Single is pretty interesting - reminds me of a paddle boat steamer! I had seen the Dapol kits, but I would like a bit more detail than their kits seem to offer. Thanks for pointing these out to me! Greg
-
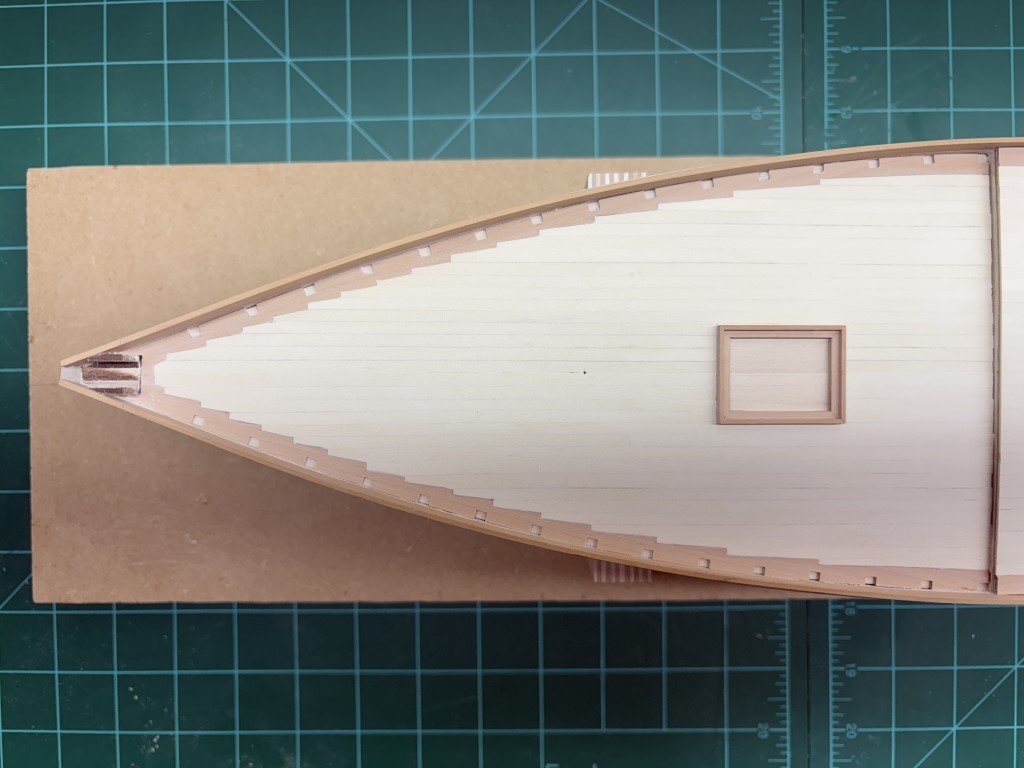
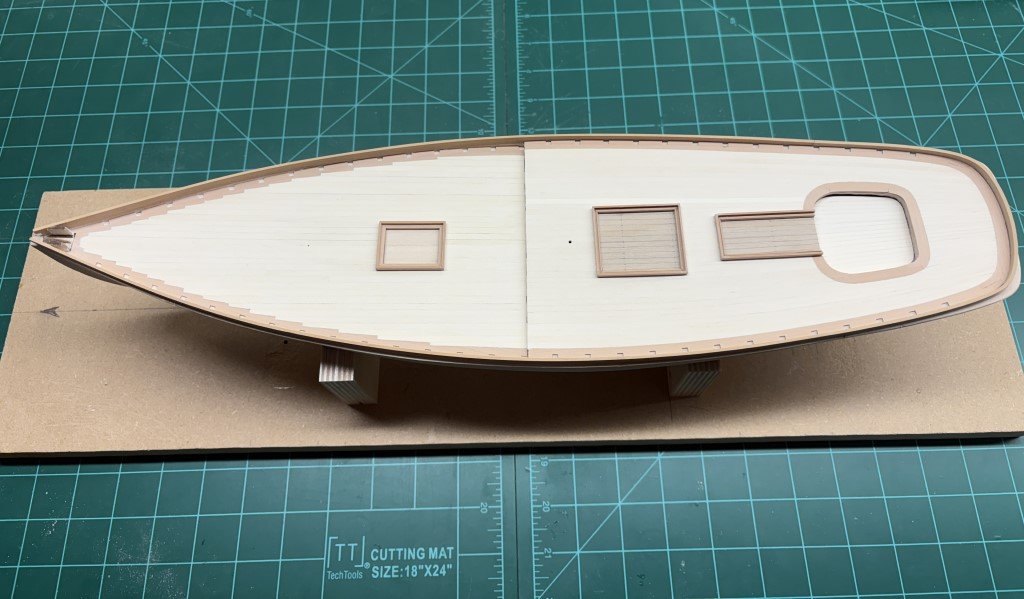
Finished planking the foredeck today: Here's the completely planked decks: Some finish sanding / smoothing still is needed; however, I do like the look of the holly planks against the pear. I think the next big task will be the hull exterior. Final finishing / smoothing of the planking; some painting; a good deal of copper plating! After that it can get mounted and then the deck work can be done followed by masting / rigging.
-
Thanks again - I like that 0-8-0 switcher!
-
Today the coal bunker subassembly was taken care of - Steps 9 and 10 in the instructions. No surprises here. But remembering from the first model, I took a little different tact when adding the door to the bunker subassembly. The instructions have you simply glue them to the bunker, but I found it better to dry fit the doors to the bunker and then dry fit the assembly to the cab. Once that is done, the alignment of the door can be done nicely and it can be glued to the coal bunker easily. Just don't want to glue the doors to the cab presently, as the bunker needs to be pulled off prior to painting. One more page of subassemblies to go. The side water tanks and some steps need to be put together in Step 11.
- 45 replies
-
- 10
-
-
Love it!
-
Ron - Thanks for passing this info along! I was not aware of the 1/75th C62 - do you have a link for the kit? I do know of the Micro Ace (Arii) 1/50th kits of several Japanese locomotives; C53, C57, D51, C62, C11, and C10. I have a D51 kit, Slag version, on order to see what they are like. If I like it, I may get another; the C53 is interesting in the sense it was a 3 cylinder engine. I've seen some of the Revell 1/87th kits; they look nice, but I like the slightly larger scales better (at least for my dexterity). I got a Occre S3/6 BR-18 at a good price when Model Expo stopped carrying Occre products. I had been looking at that kit for a long time, well before exploring plastic kits. Now that I've seen some of the plastic kits, I am so impressed with the extra detail they have compared to the BR-18 kit. Nevertheless I do look forward to building the model as the construction techniques lie somewhere between plastic and wooden ships! Greg
-
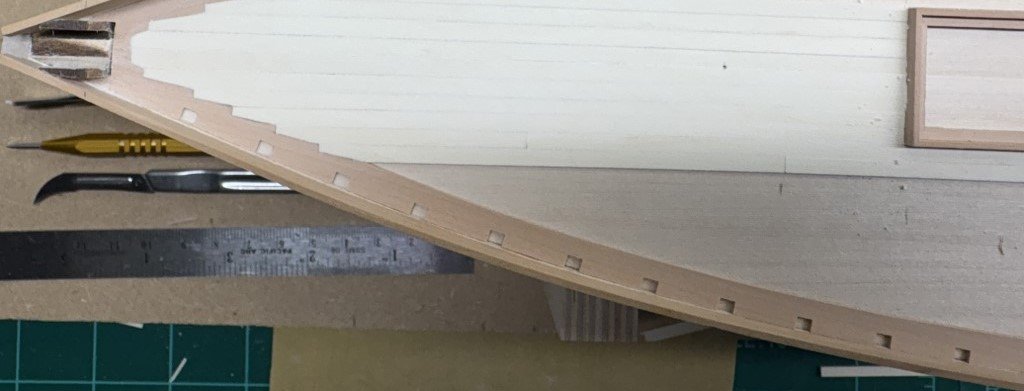
Bill - Yes, that is what I am doing. I'm making the tip about half the width of the plank and then where the plank intersects the waterway defines the angle. I've been cutting the plank first and then marking what needs to be removed from the waterway. Greg
-
A few planks at a time now. Outside of the hatch the planks will have a four butt shift for a few stakes.
-
The liquid mask was an experimental failure. It was probably doomed from the start as the mask instructions said not to leave it on too long, while I've read that primer (on metal castings) should dry for quite a long time - say 48 hours before the color coat. A bit of an incompatibility perhaps - when I carefully pulled off the mask, it also puled paint / primer that I needed to stay; more than touch up painting would cure! So that also made me sonder about my original surface prep. I've 'unpainted' all the castings for the time being. So I'm using this to my advantage by reducing the exhaust pipe nubs on the castings so that brass tubing that will be used for the new exhaust pipes fit / have a nice attachment aid. Once all the nubs have been reduced I'll go back to the painting. Before the second painting, I'm going to give vinegar etching a try.
- 288 replies
-
- 6
-
-
- Santos Dumont No. 18
- hydroplane
- (and 1 more)