cdrusn89
-
Posts
1,918 -
Joined
-
Last visited
Content Type
Profiles
Forums
Gallery
Events
Everything posted by cdrusn89
-
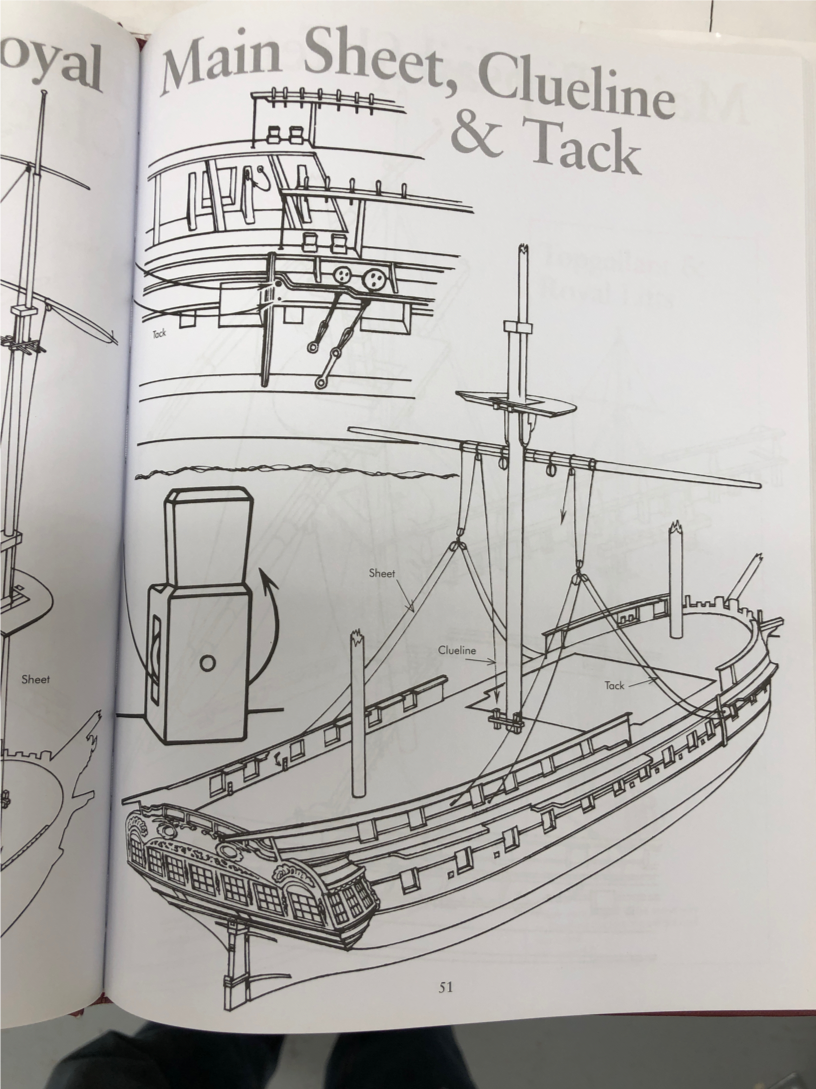
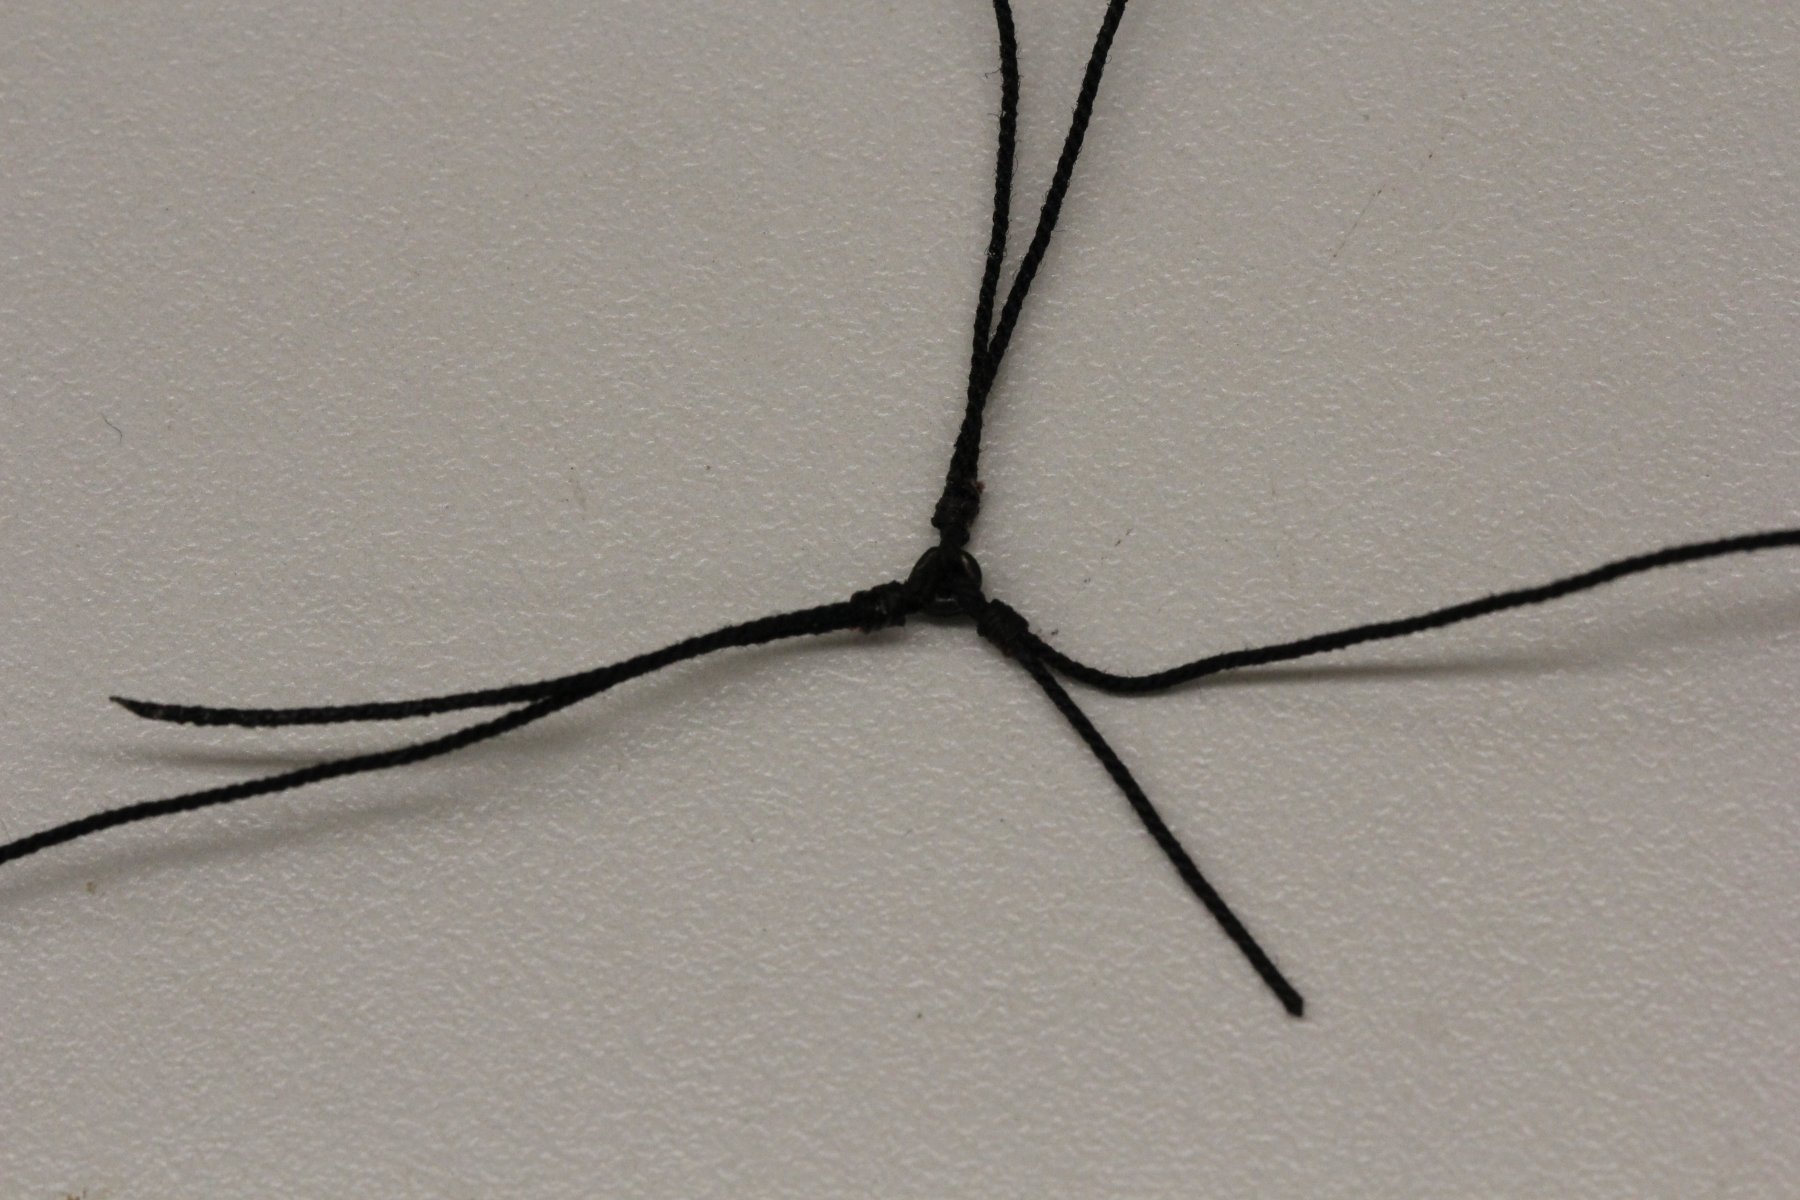
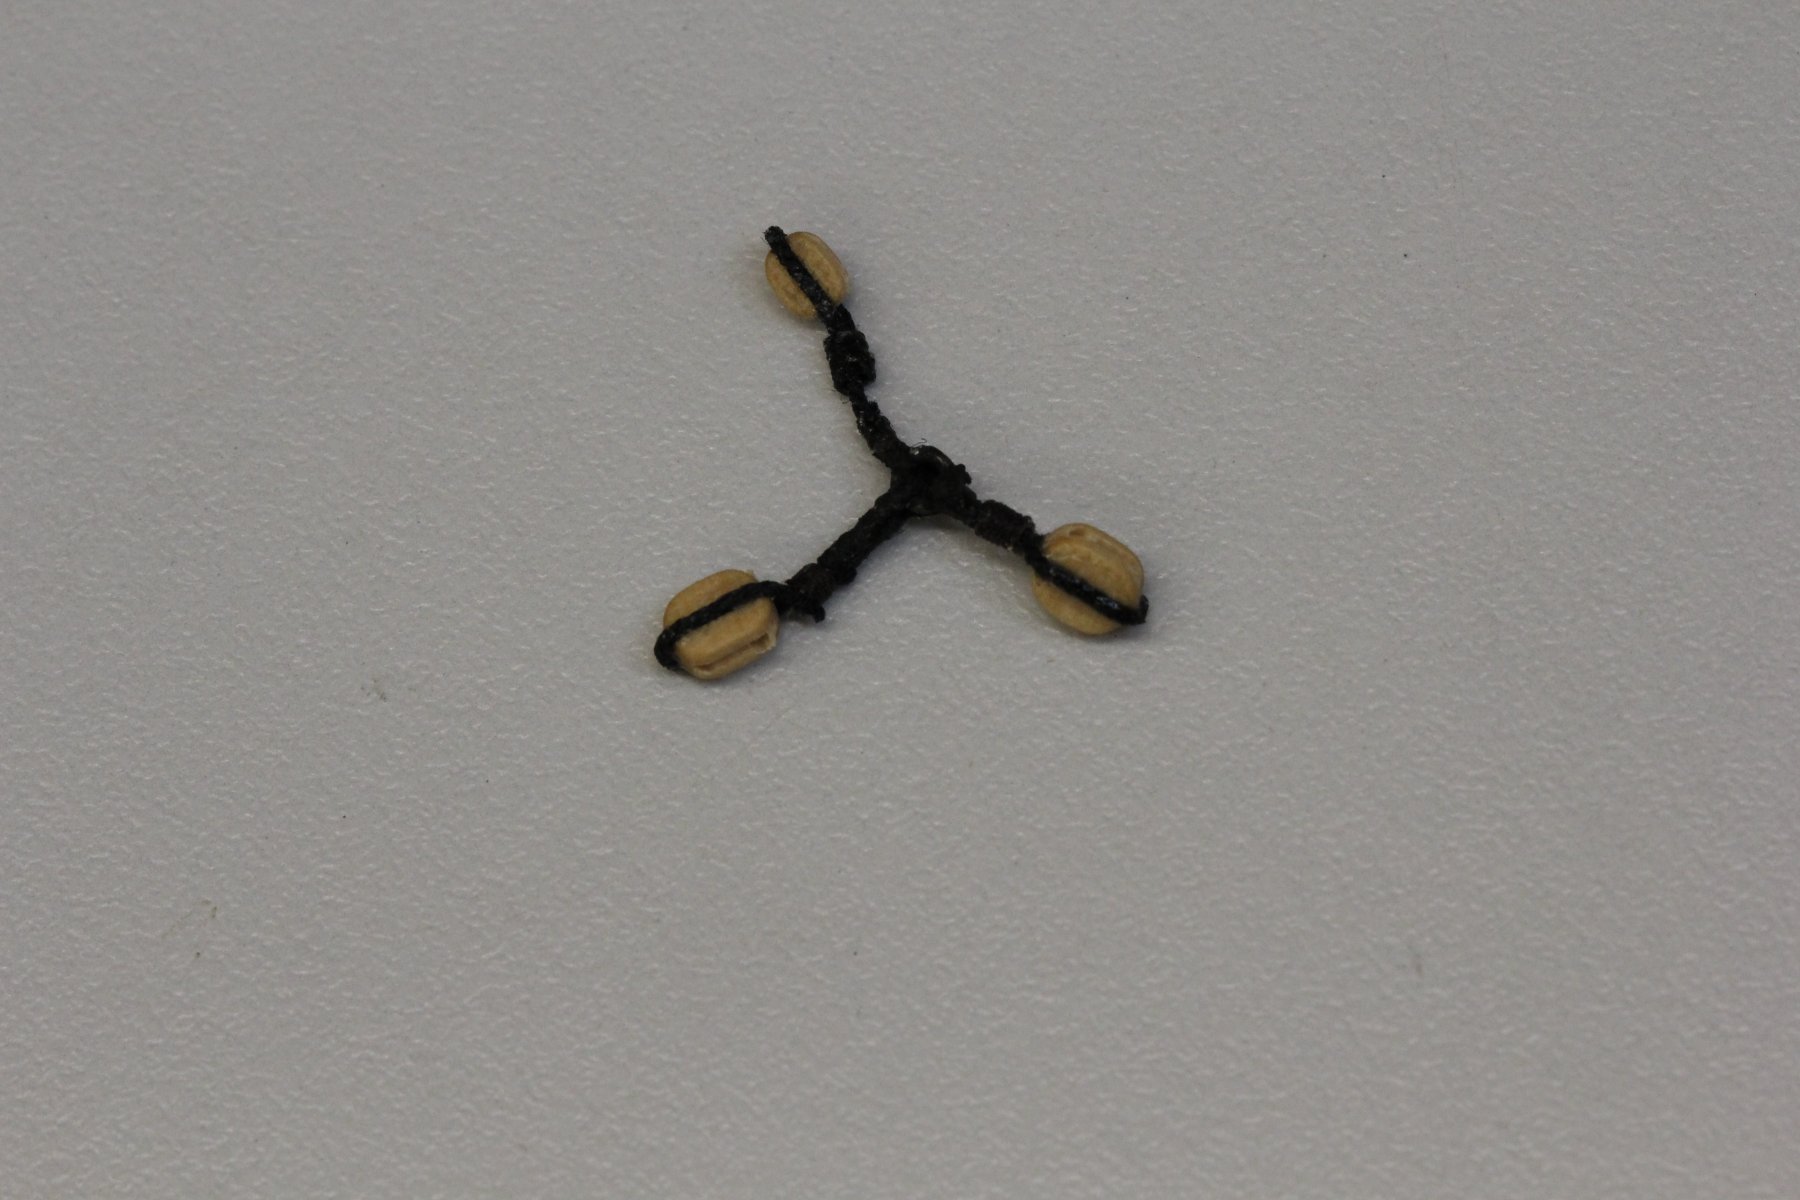
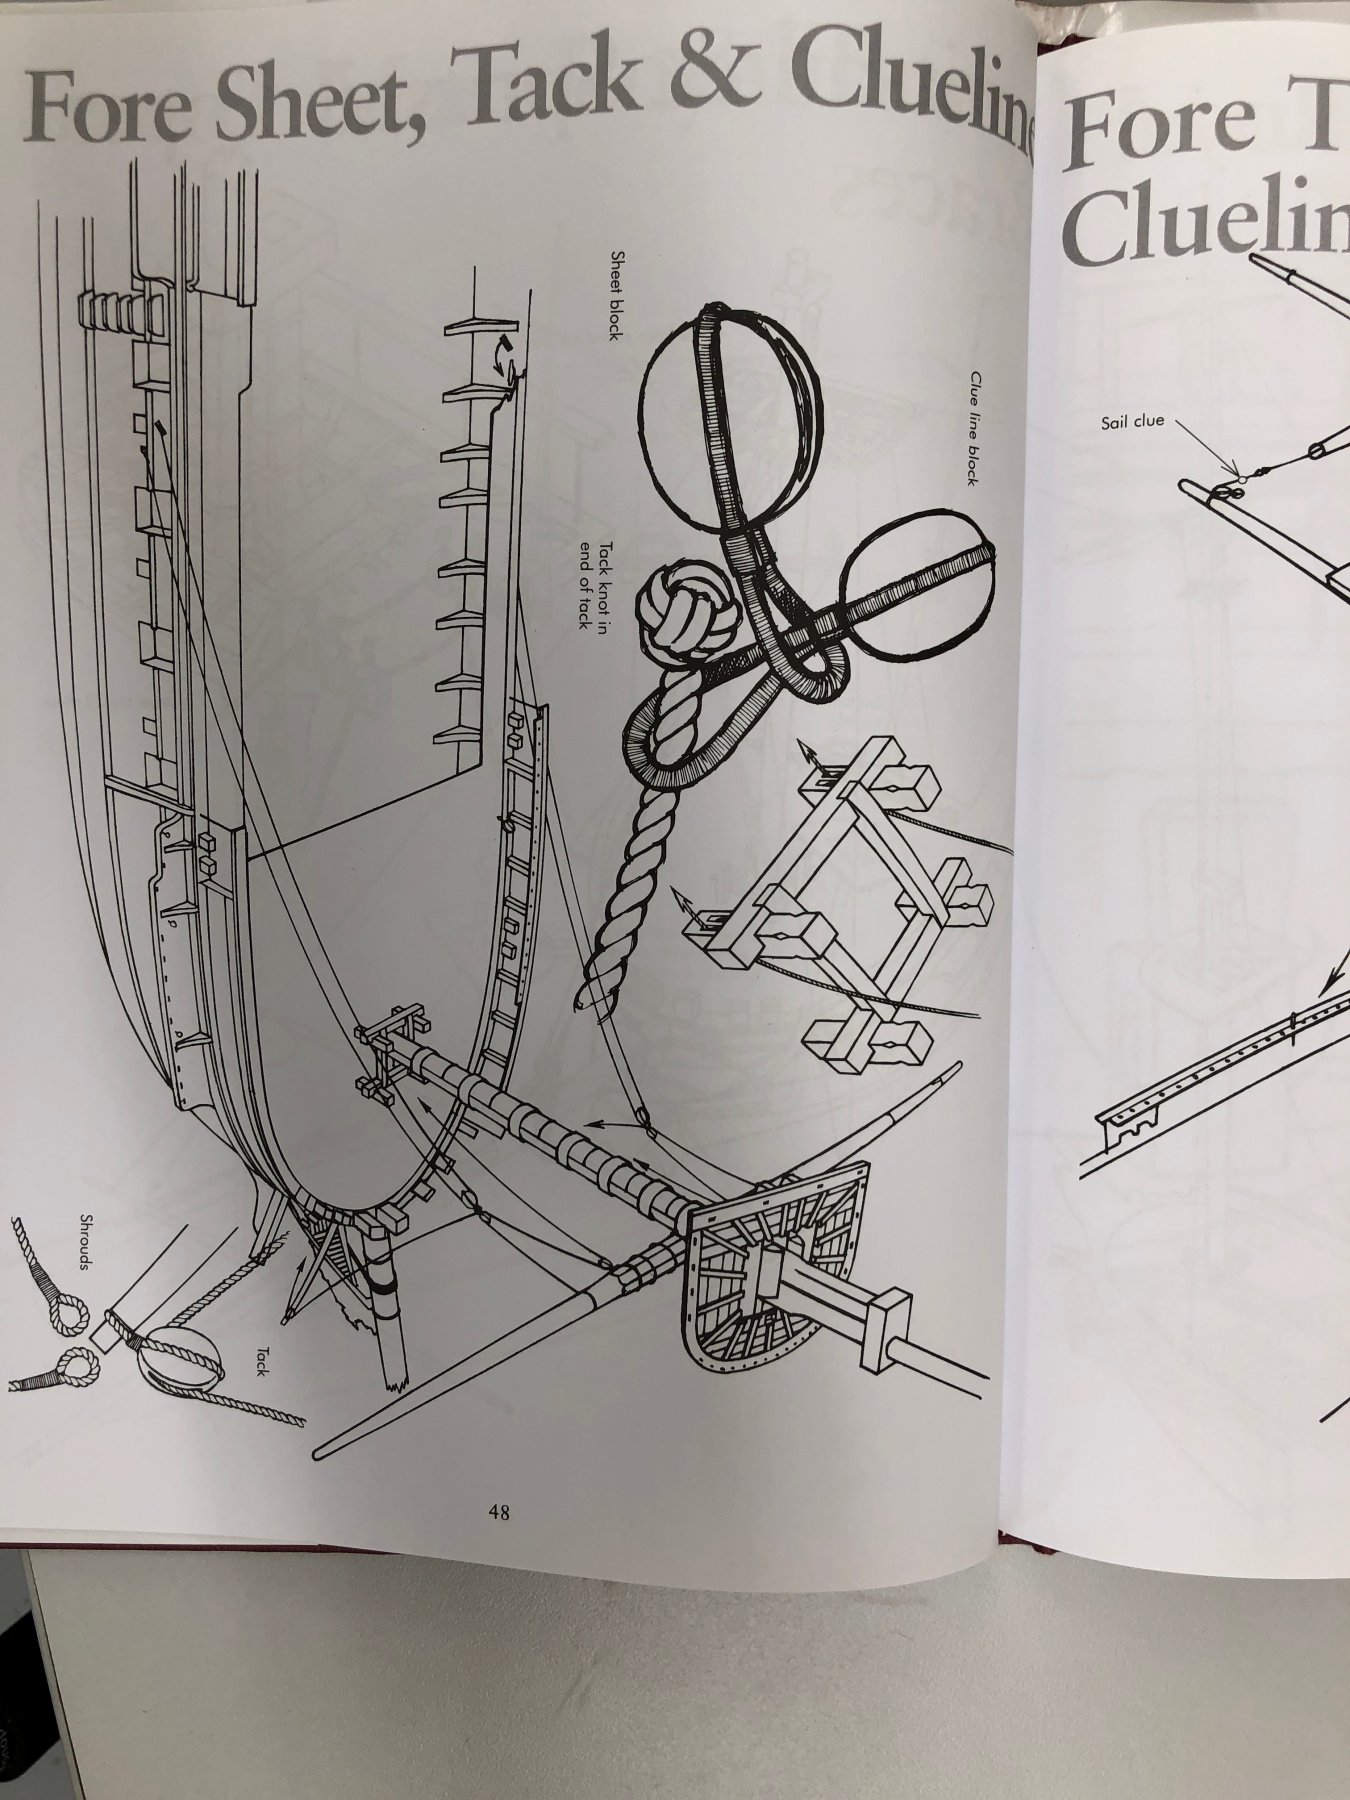
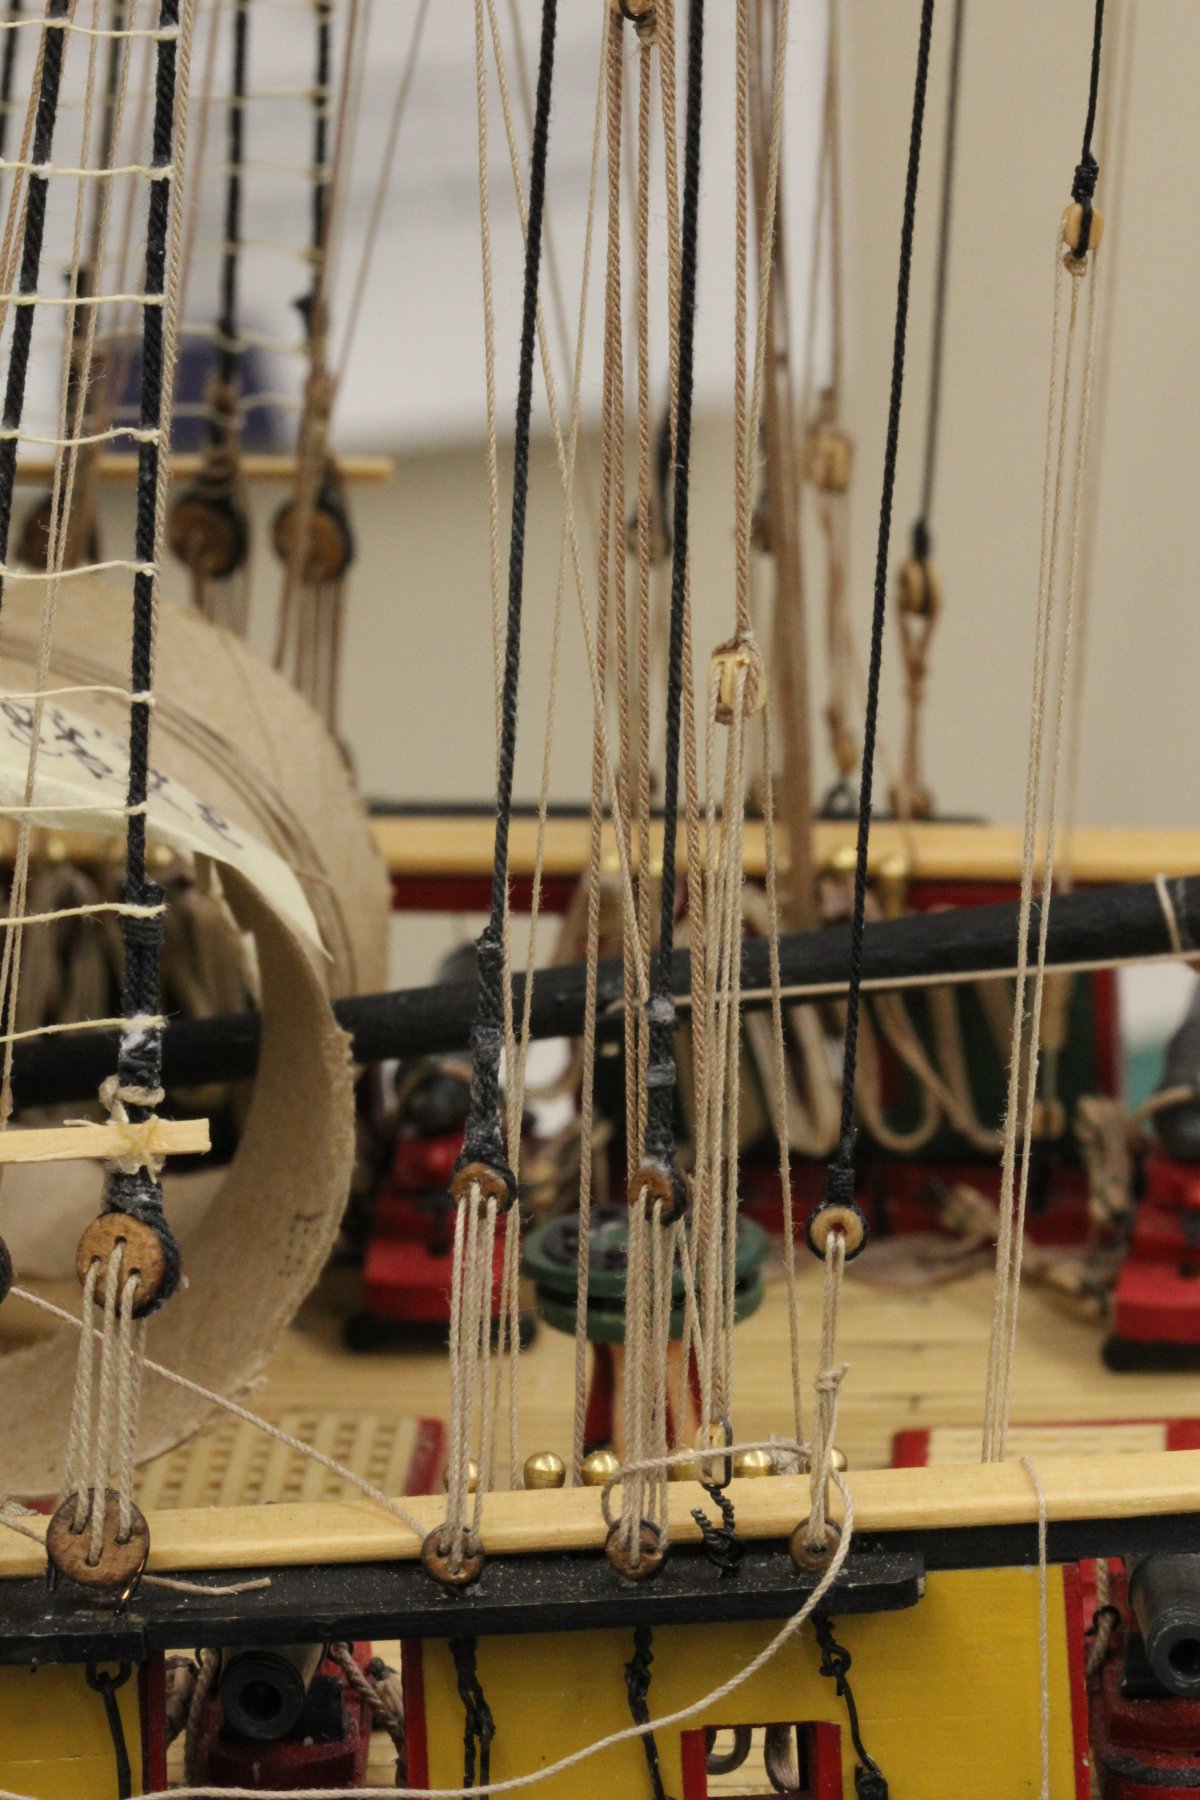
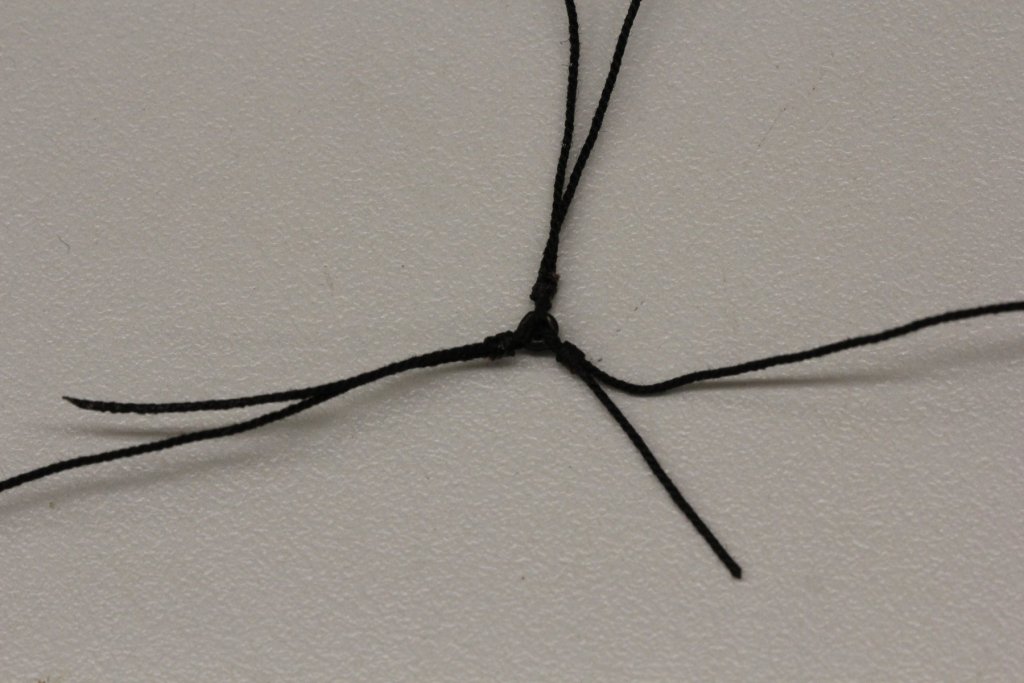
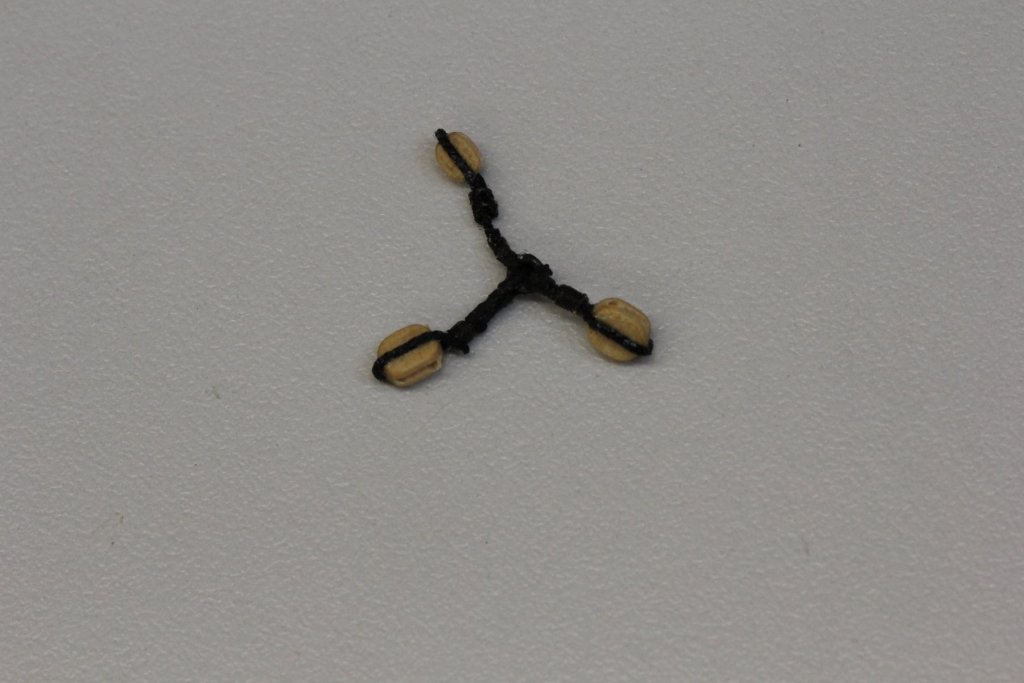
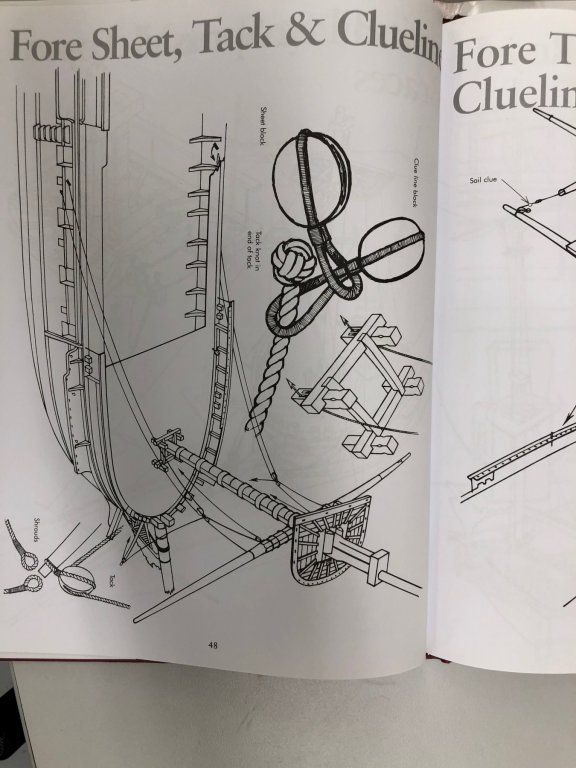
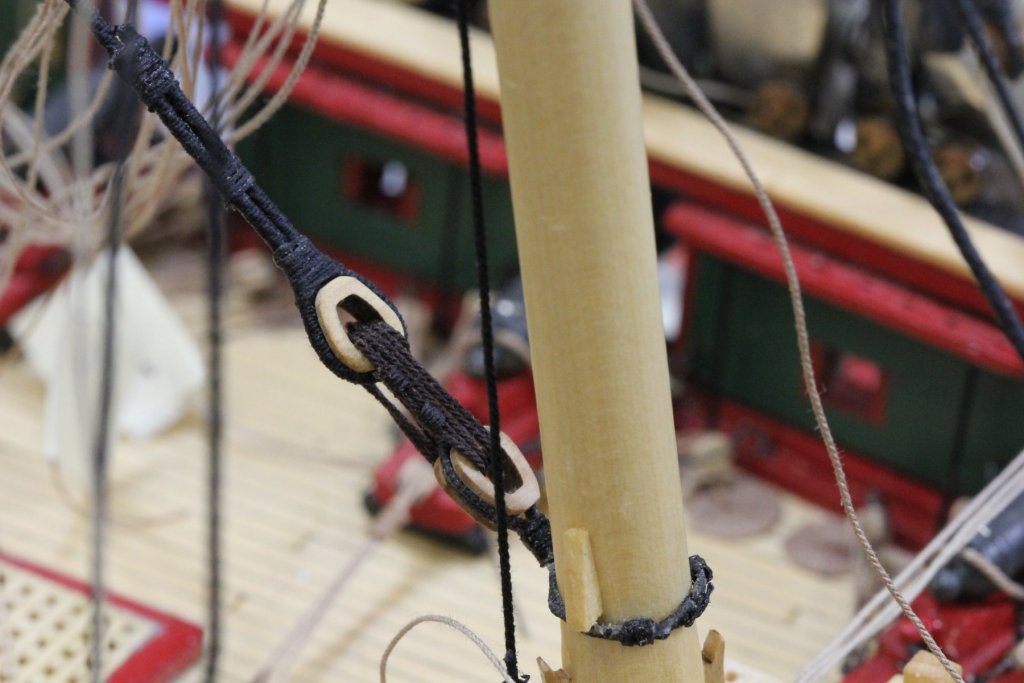
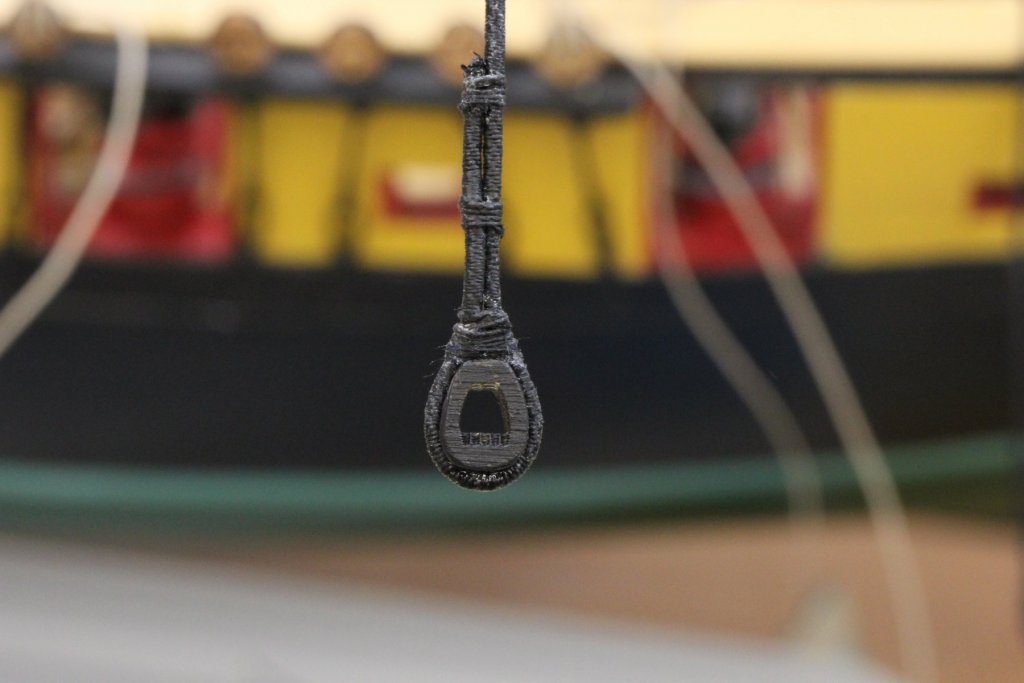
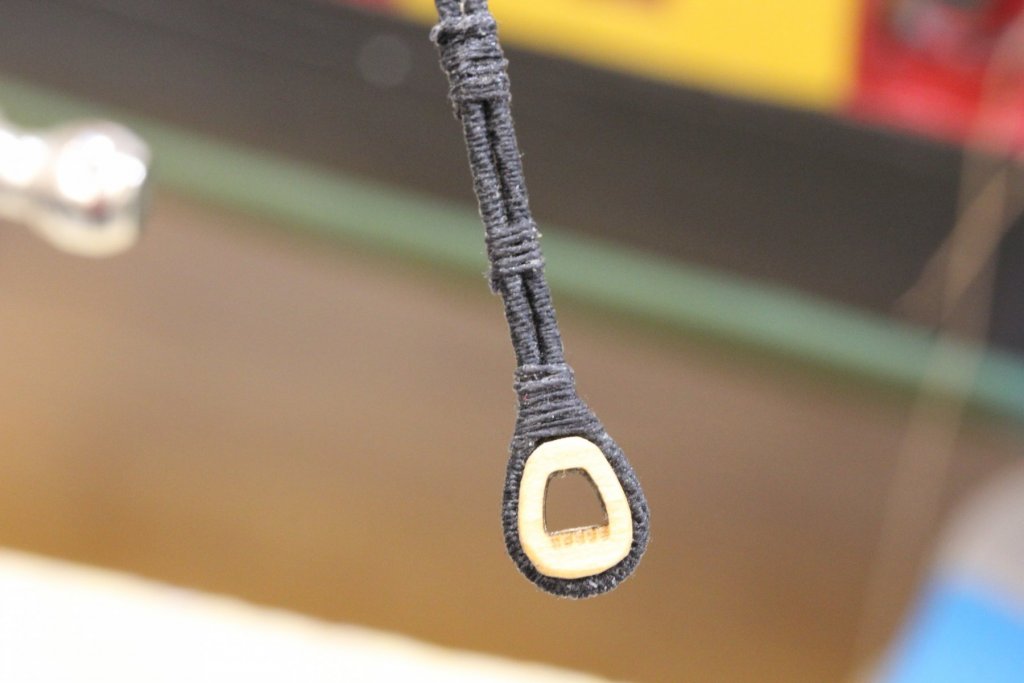
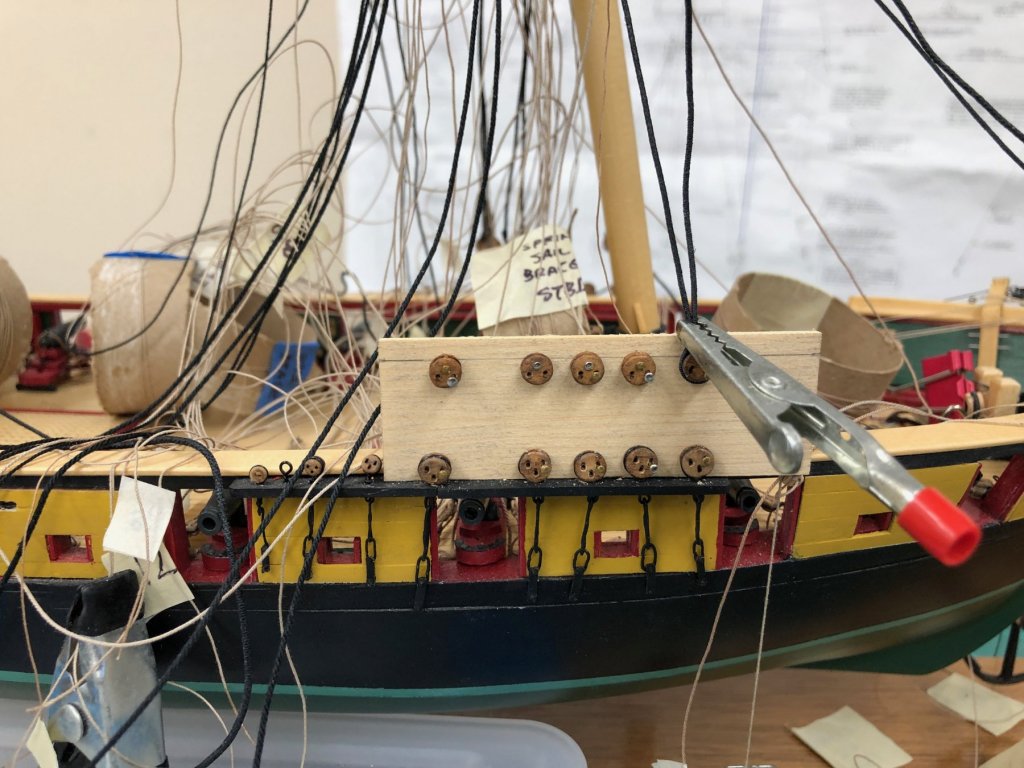
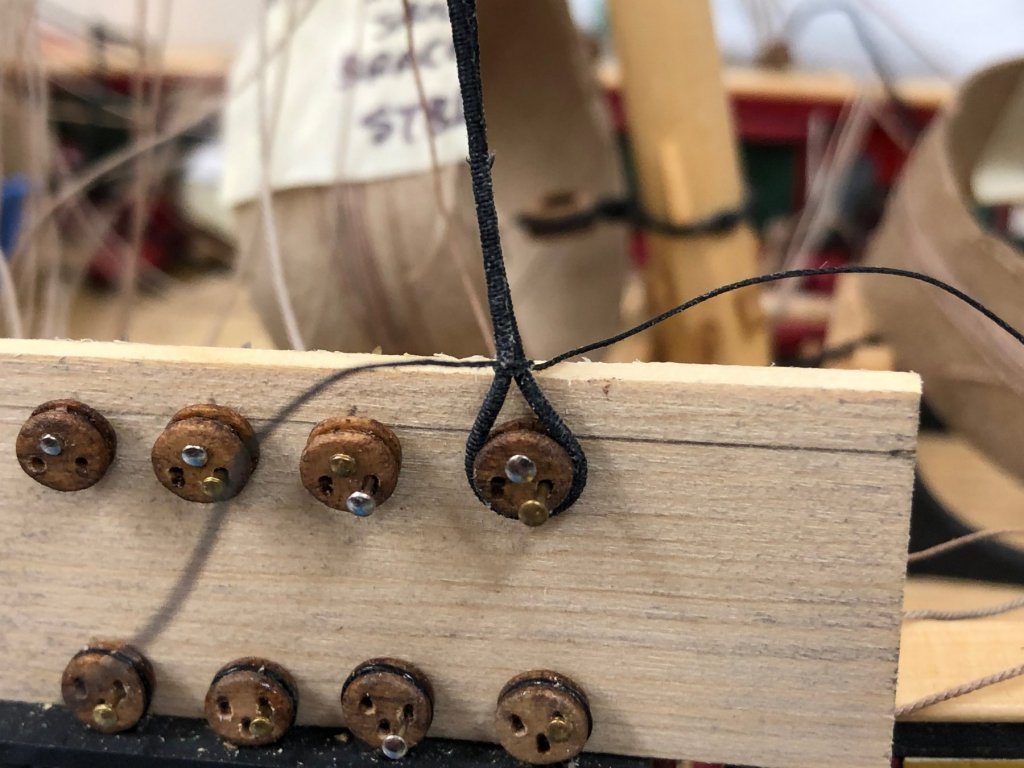
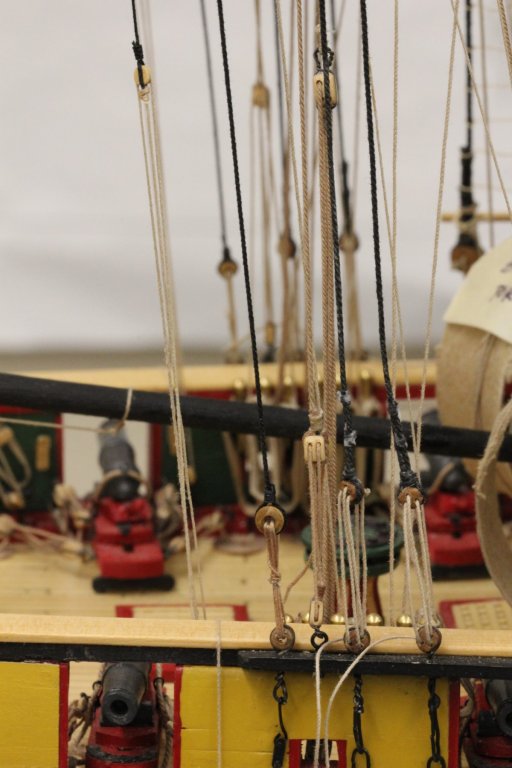
 I thought I had the photo order correct but I guess not - I corrected the photo numbers below to correspond with how the came out - sorry. While waiting around for glue to dry and looking back on the Main Mast rigging I saw the note on the sail plan about the Fore Tack and Sheet and that the Main Tack was seldom used. I know I had included the sheaves just forward of gunport 10 for the Main Sheet so thought I might as well use them. I looked in Petersson's "Rigging Period Ship Models" (photo 4) and it shows a version from a somewhat earlier period (1780s). So to rig the Main Sheet and Tack I need a "triple header" tackle with two 5/32 S and one 1/8 S blocks (sheet, tack and clew in that order). I saw how this was done on Darrel's (60hiocav) build log but thought I would try something I thought would be easier (if probably less "authentic"). I started with a 1/16" Britannia metal plain (i.e. no "teeth") bullseye from Bluejackets. I then attached three "strouping lines to the bullseye (photo 3). I also painted the bullseye flat black. Now I added the three blocks (order does not matter) to the strouping lines and you have the "triple header" block set for the Main Sheet, Tack and Clew (photo 2). How the Clew is rigged is different in Petersson than on the plans. On the plans the bitter end of the Clew is attached to the base of the clew block on the yard. In Petersson it is attached further out on the yard. I think I Petersson is probably correct as this would seem to give a better direction of effort when using the clew to furl the Main Course. Fore the Fore Course Petersson is quite different from the plans (photo 1). The tack goes to a "bumpkin" (the pole fwd of the cathead) which is no where on the Niagara plans but does exist on the replica ship in Eire. Darrel (6Ohiocav) added the bumpkin to his Niagara - I am thinking of doing the same but have not committed to that course yet. In any event I need to fabricate two additional block combinations for the Fore Sheet/Tack/Clew as well although these only have two blocks (sheet and clew) and a "hole" for the tack line. The tack block goes on the bumpkin or on a "bridle seized in a hole in forward chock rail. Belay to rod in cathead" according to the plans. I will build the block combos and think about the tack.
- 367 replies
-
- 3
-

-
- model shipways
- niagara
- (and 1 more)
-
Very nice Tom. Much cleaner than mine at the moment. There seems to be no end to the debris that finds it was onto the deck. And the closer you to finishing the harder it gets to "clean house".
-
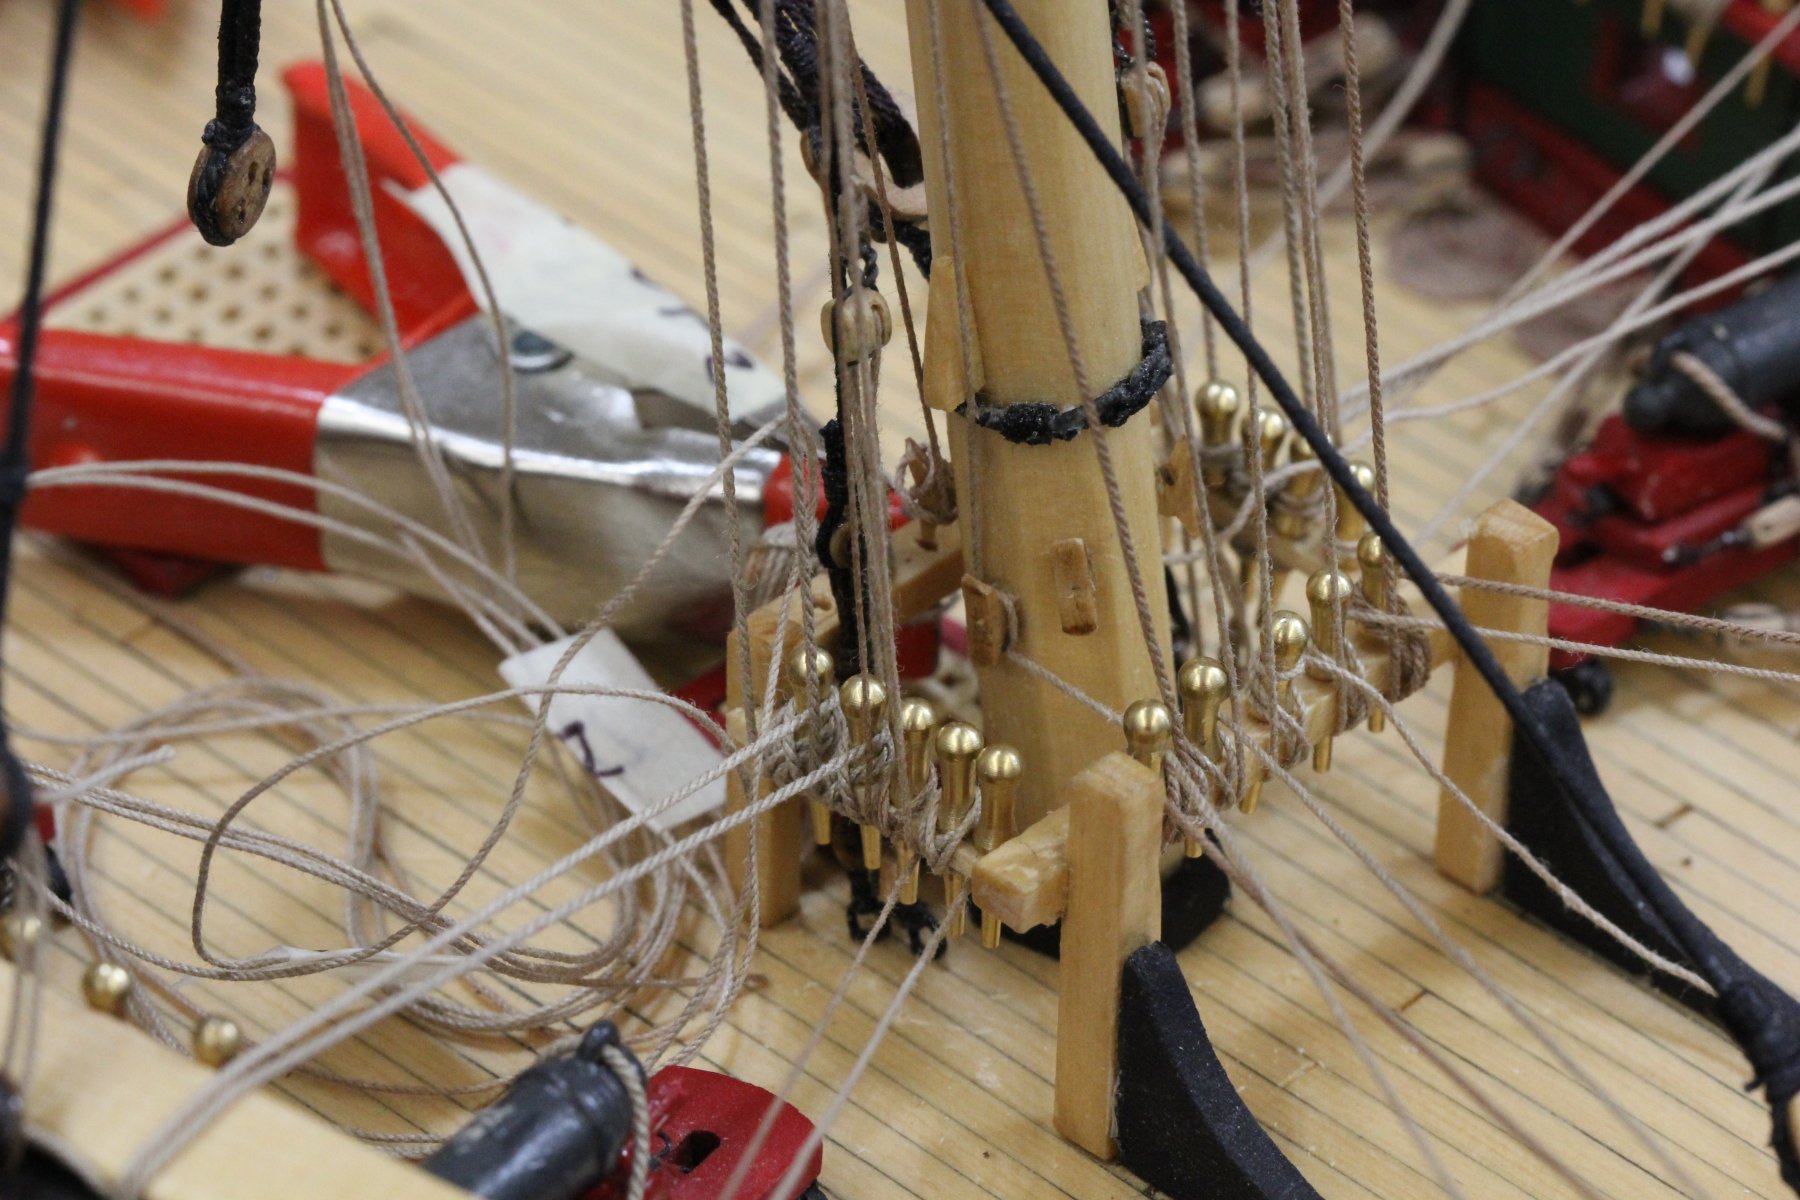
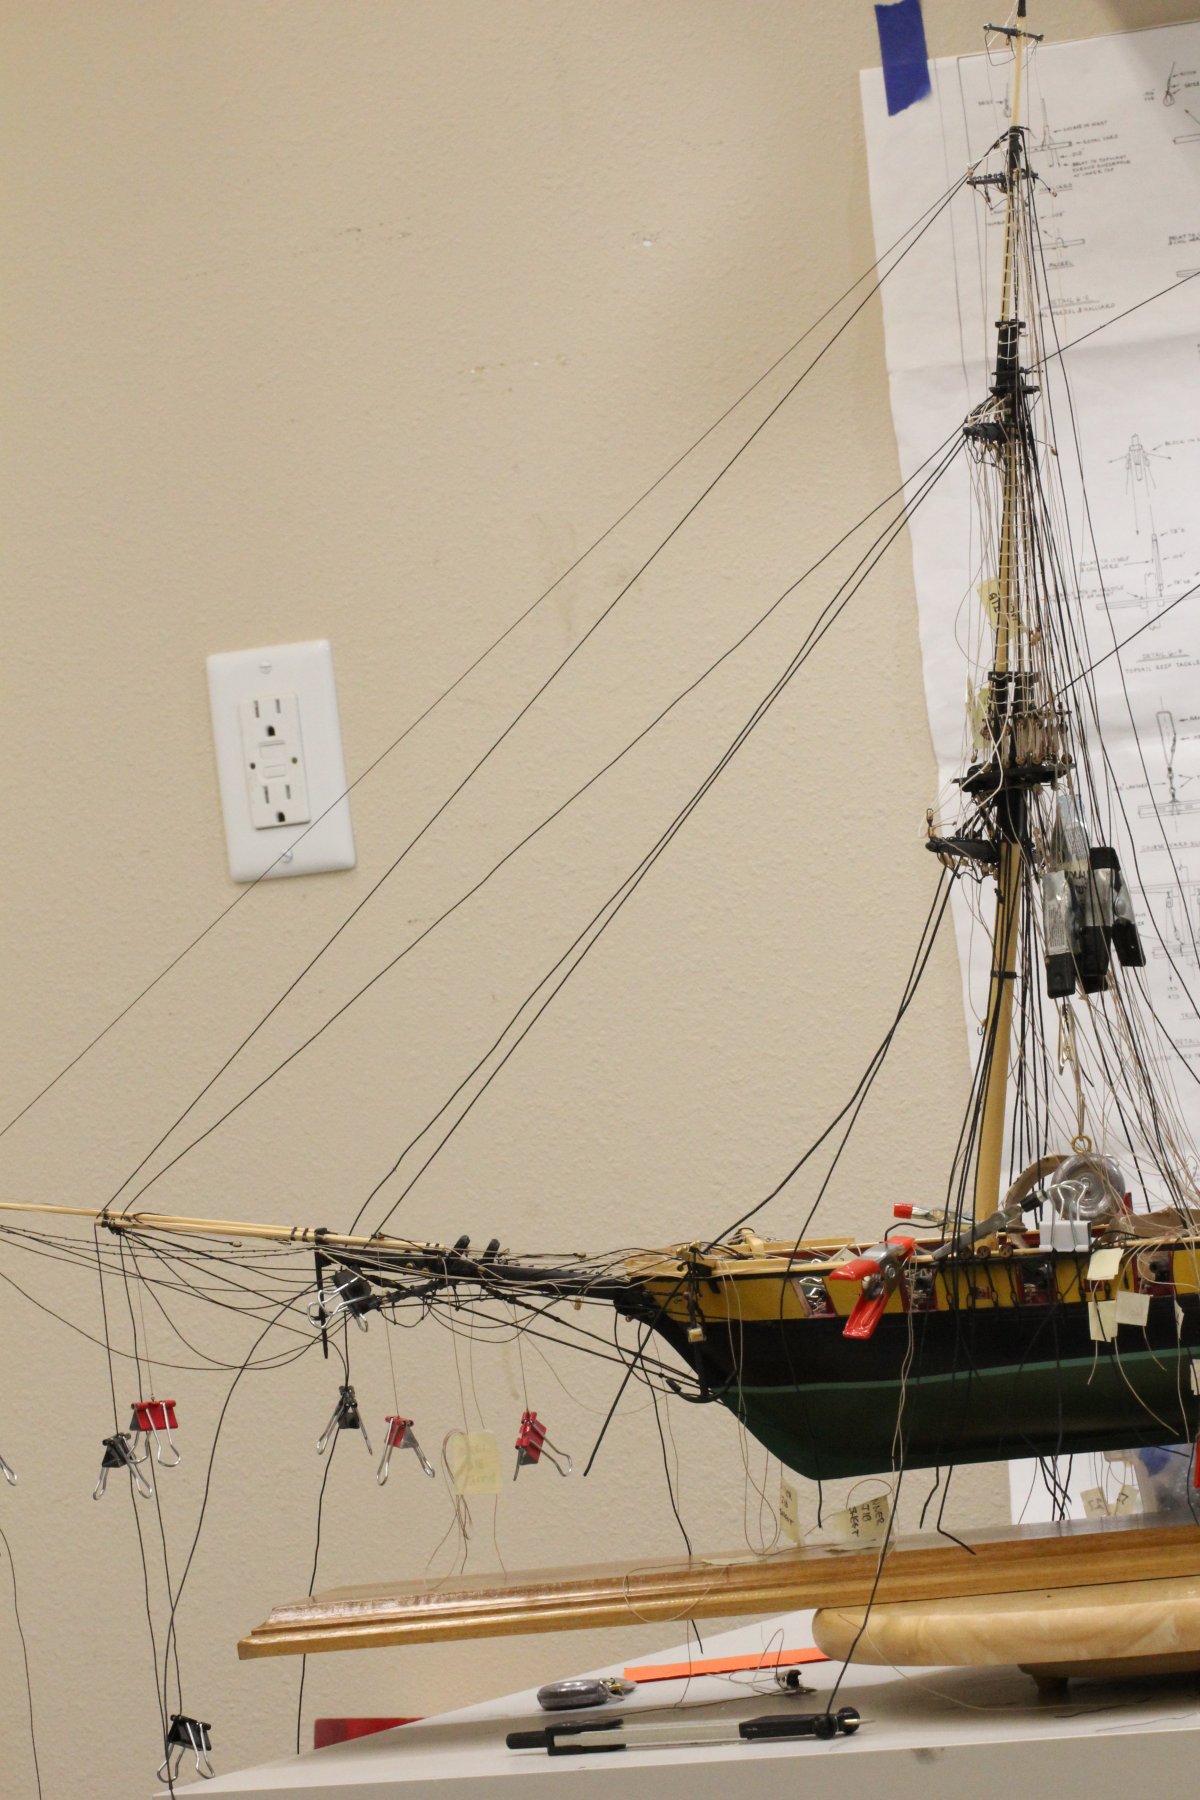
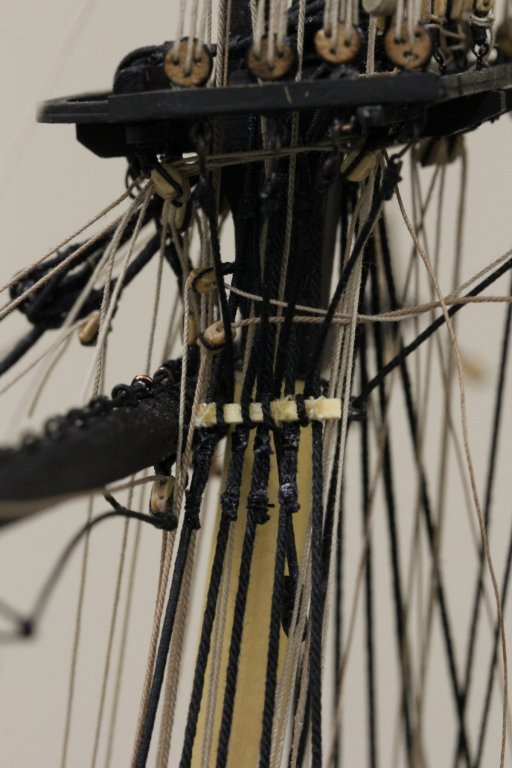
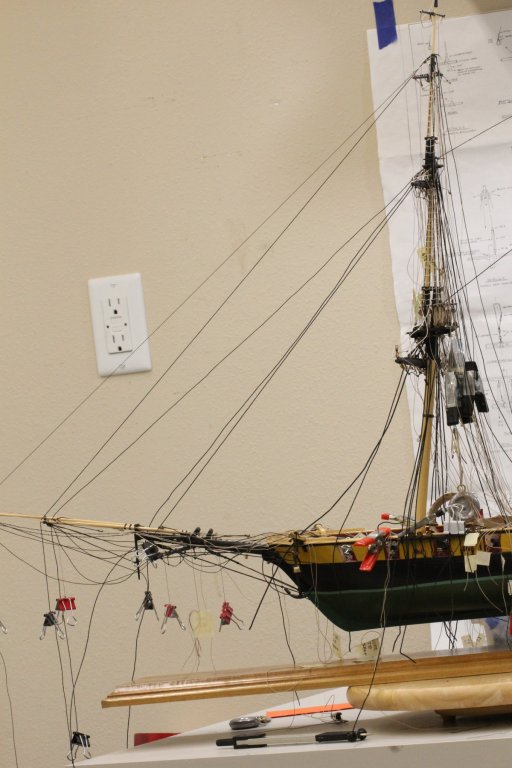
With mast now stabilized fore and aft I went ahead and installed the lanyards on the rest of the Fore Mast shrouds. I added the sheer poles (not really poles but...). I cheated and used slightly larger stock than the plans call for - 1/32 X 1/16 for both upper and lower sheer poles. With the upper sheer pole installed I added the futtock shrouds on that side. I think this looks better than the aft set and this time I actually looked at the plans for the futtock shrouds are lashed to the forward four of the lower shrouds as they should be. On the Main Mast I used the aft four shrouds for some reason I can't remember. I think I started aft and worked forward - maybe it was just happenstance. Anyway the futtocks are done on one side. I looked at the plans (again those damn plans) and decide to rig the Main Mast braces to their belaying pins now and adjust to the required length on the "other end". The toilet paper tubes on the Fore Mast hold the remaining line for the Main Mast braces (at least the three upper yard arms - the course yard tubes are on deck). I now have all the braces (Fore and Main Masts) accounted for. These will be the last lines to be rigged. I have most of the other running rigged belayed and will finish what I have rigged tomorrow. Then I will make a final check for blocks that need stropping, lines that are missing (I know at least the Fore Course sheet lines have yet to be rigged, I am sure there are others) and other odds and ends (like the anchor tackle). I want to make a final push to completion next week before we depart on a three week road trip up and down the east coast.

- 367 replies
-
- 4
-
-
- model shipways
- niagara
- (and 1 more)
-
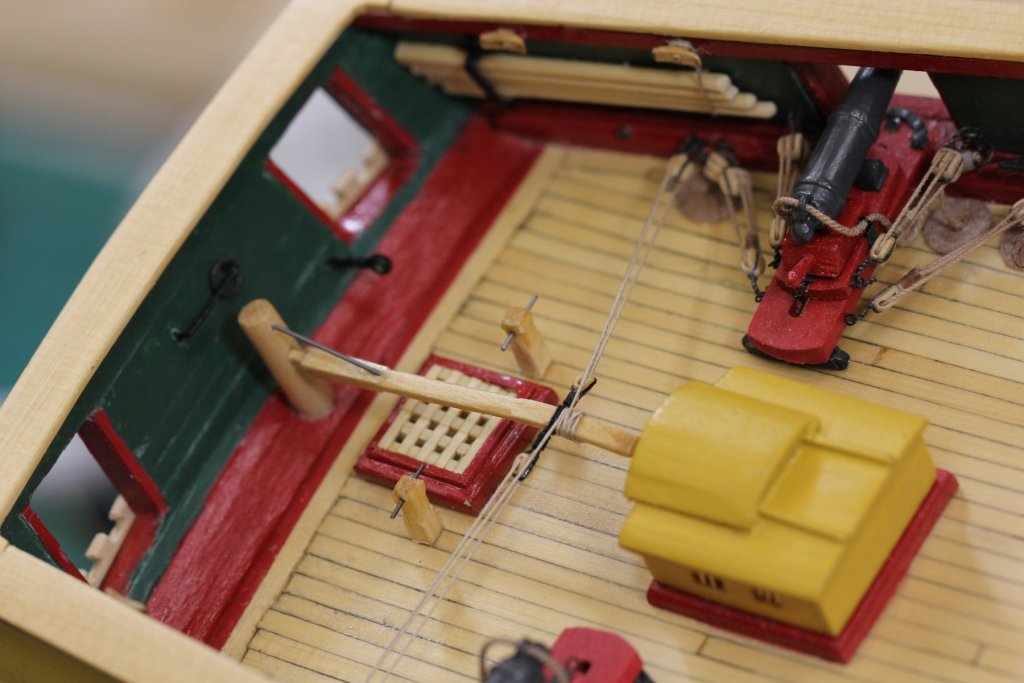
Will, Your eyes have it correct. The pumps discharge aft (according to the plans - see sheet 3, detail 3N). I suspect the water washed around the hatch coaming (it was designed to keep water that was shipped on deck out of the hold (within limits of course)). The alternative would be to discharge the pump towards where the main mast passes through the deck. I am not an expert but my understanding is that this was almost always a source of leaks as the mast worked against the wedges that hold it in place. Typically in the time frame a canvas (sometimes tarred canvas) cover was used to help keep the leaks to something the pumps could handle but there was no way to make it "waterproof". I actually thought about this awhile as I was placing the pump - then looked at the plans.
-
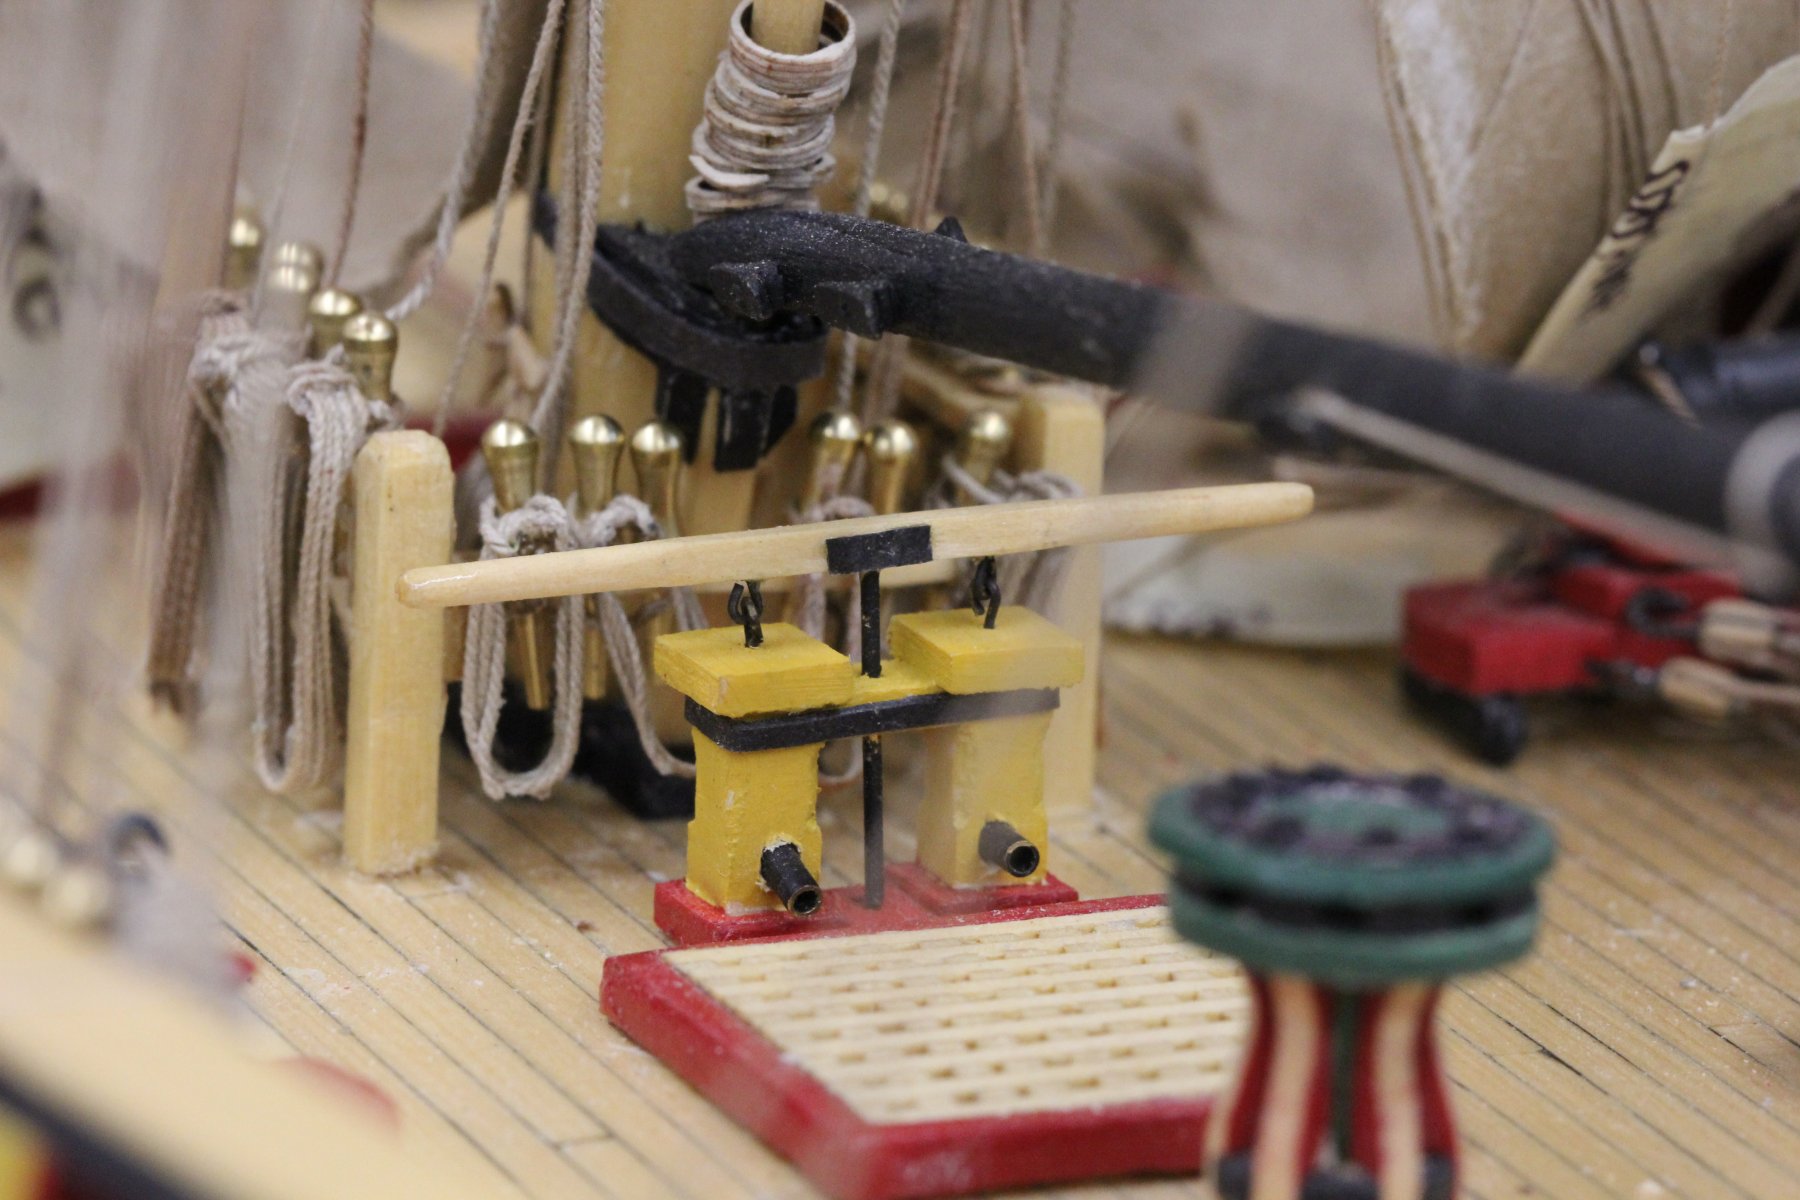
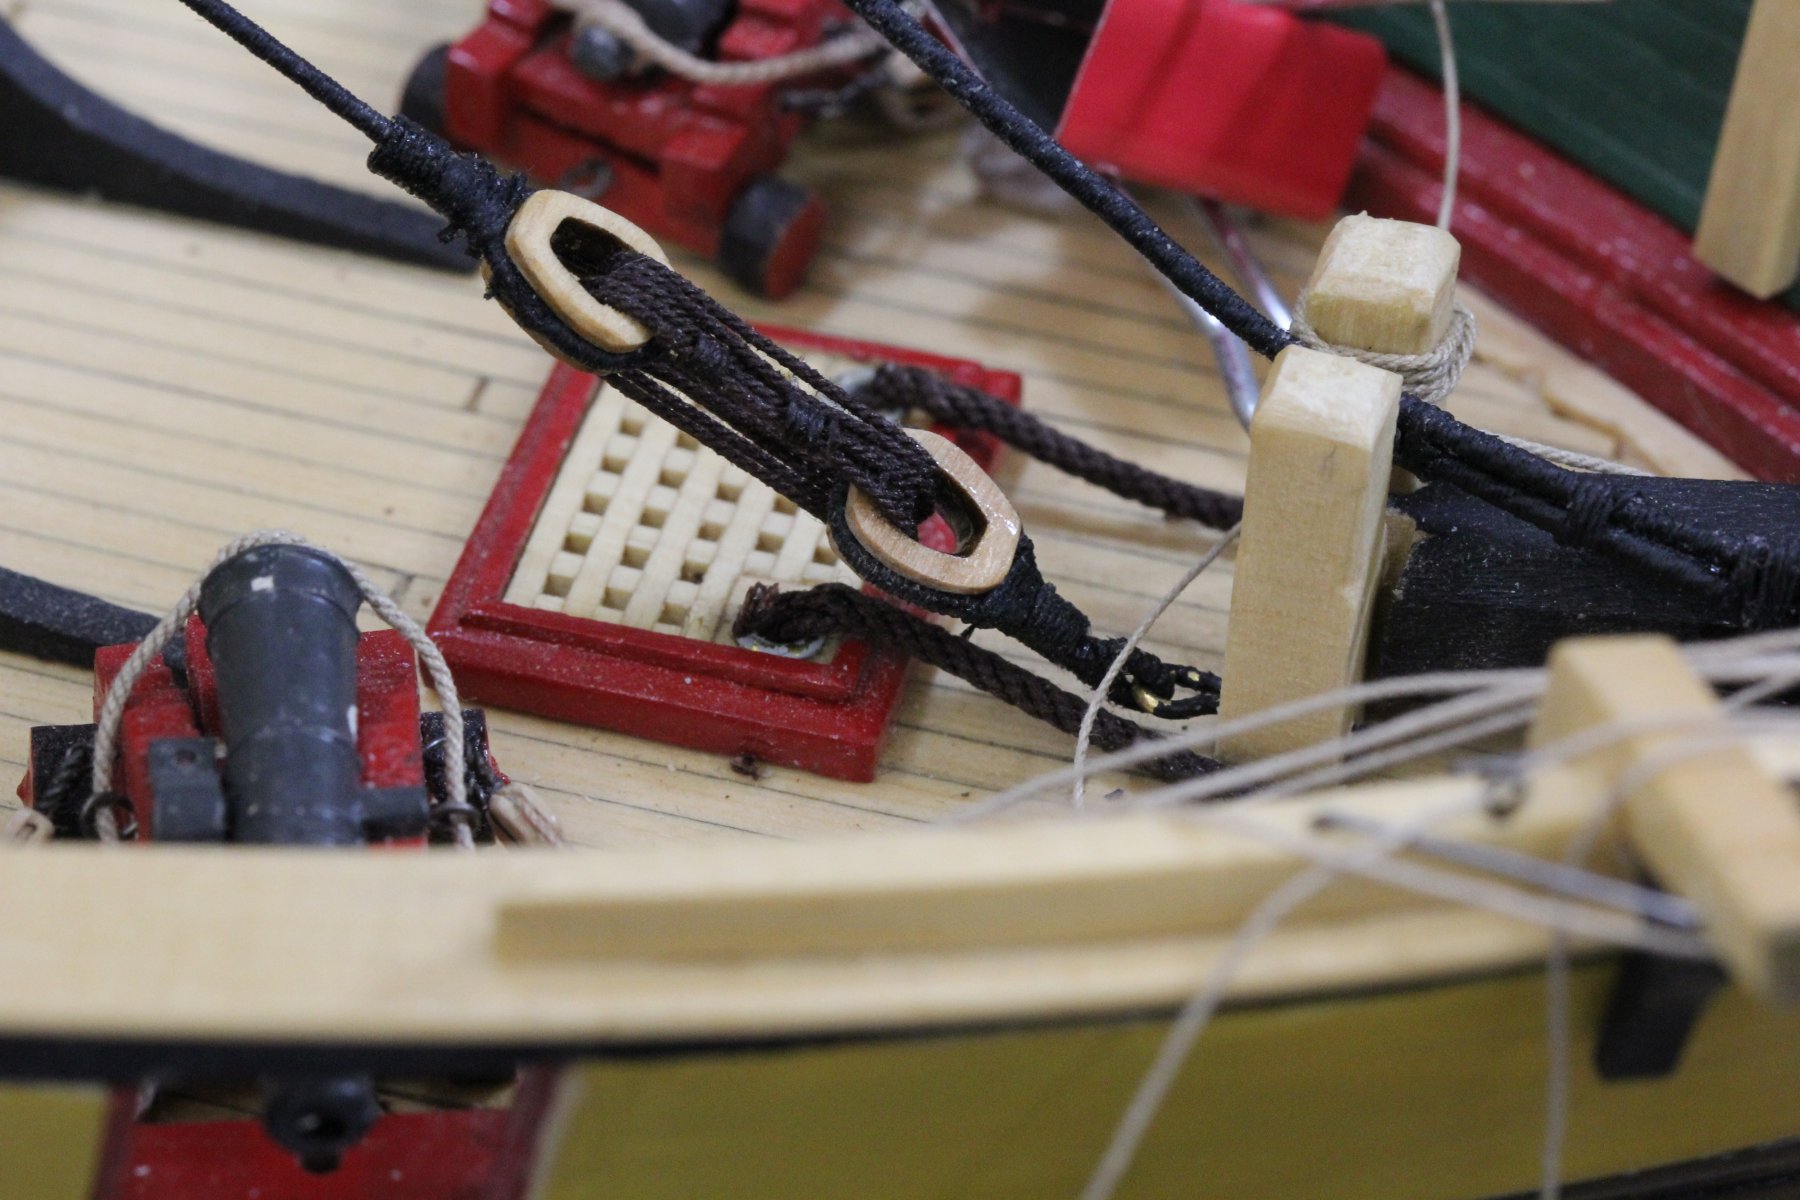
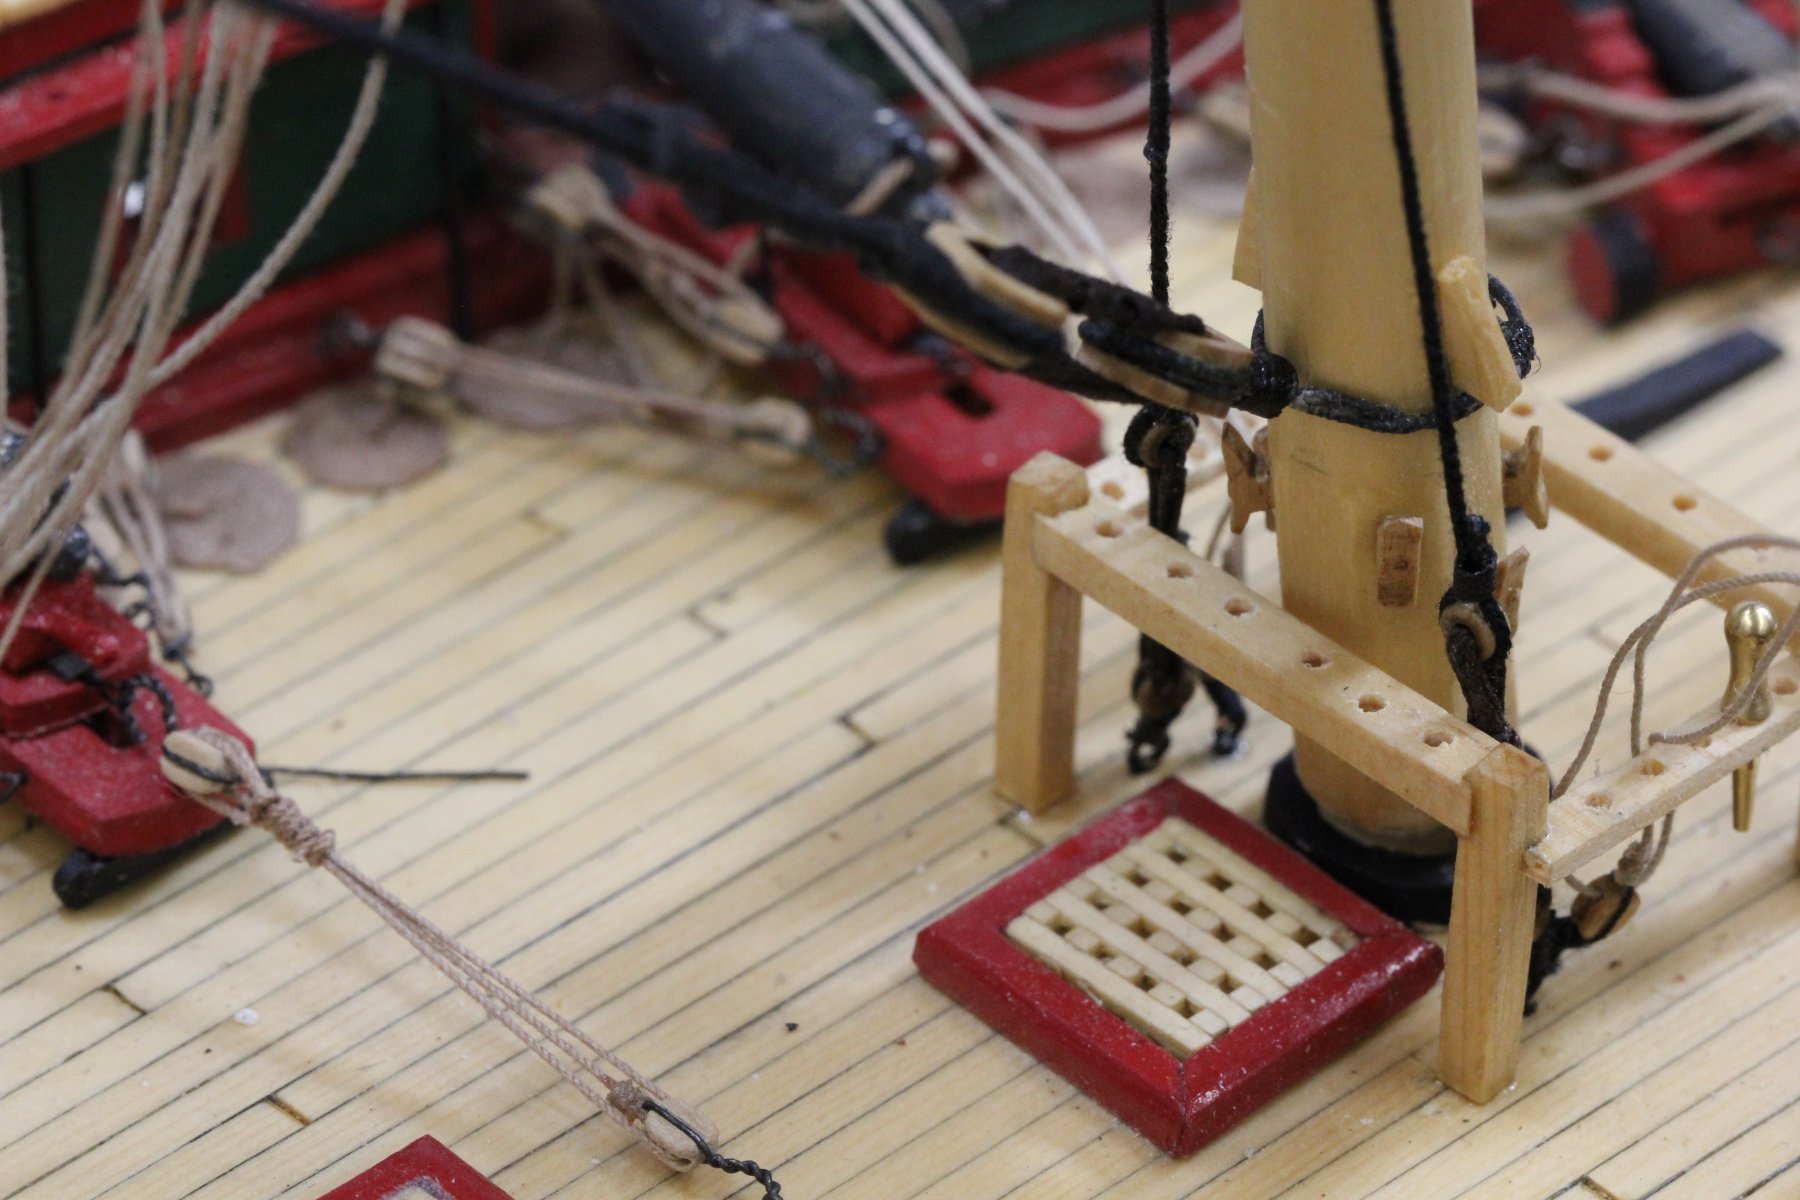
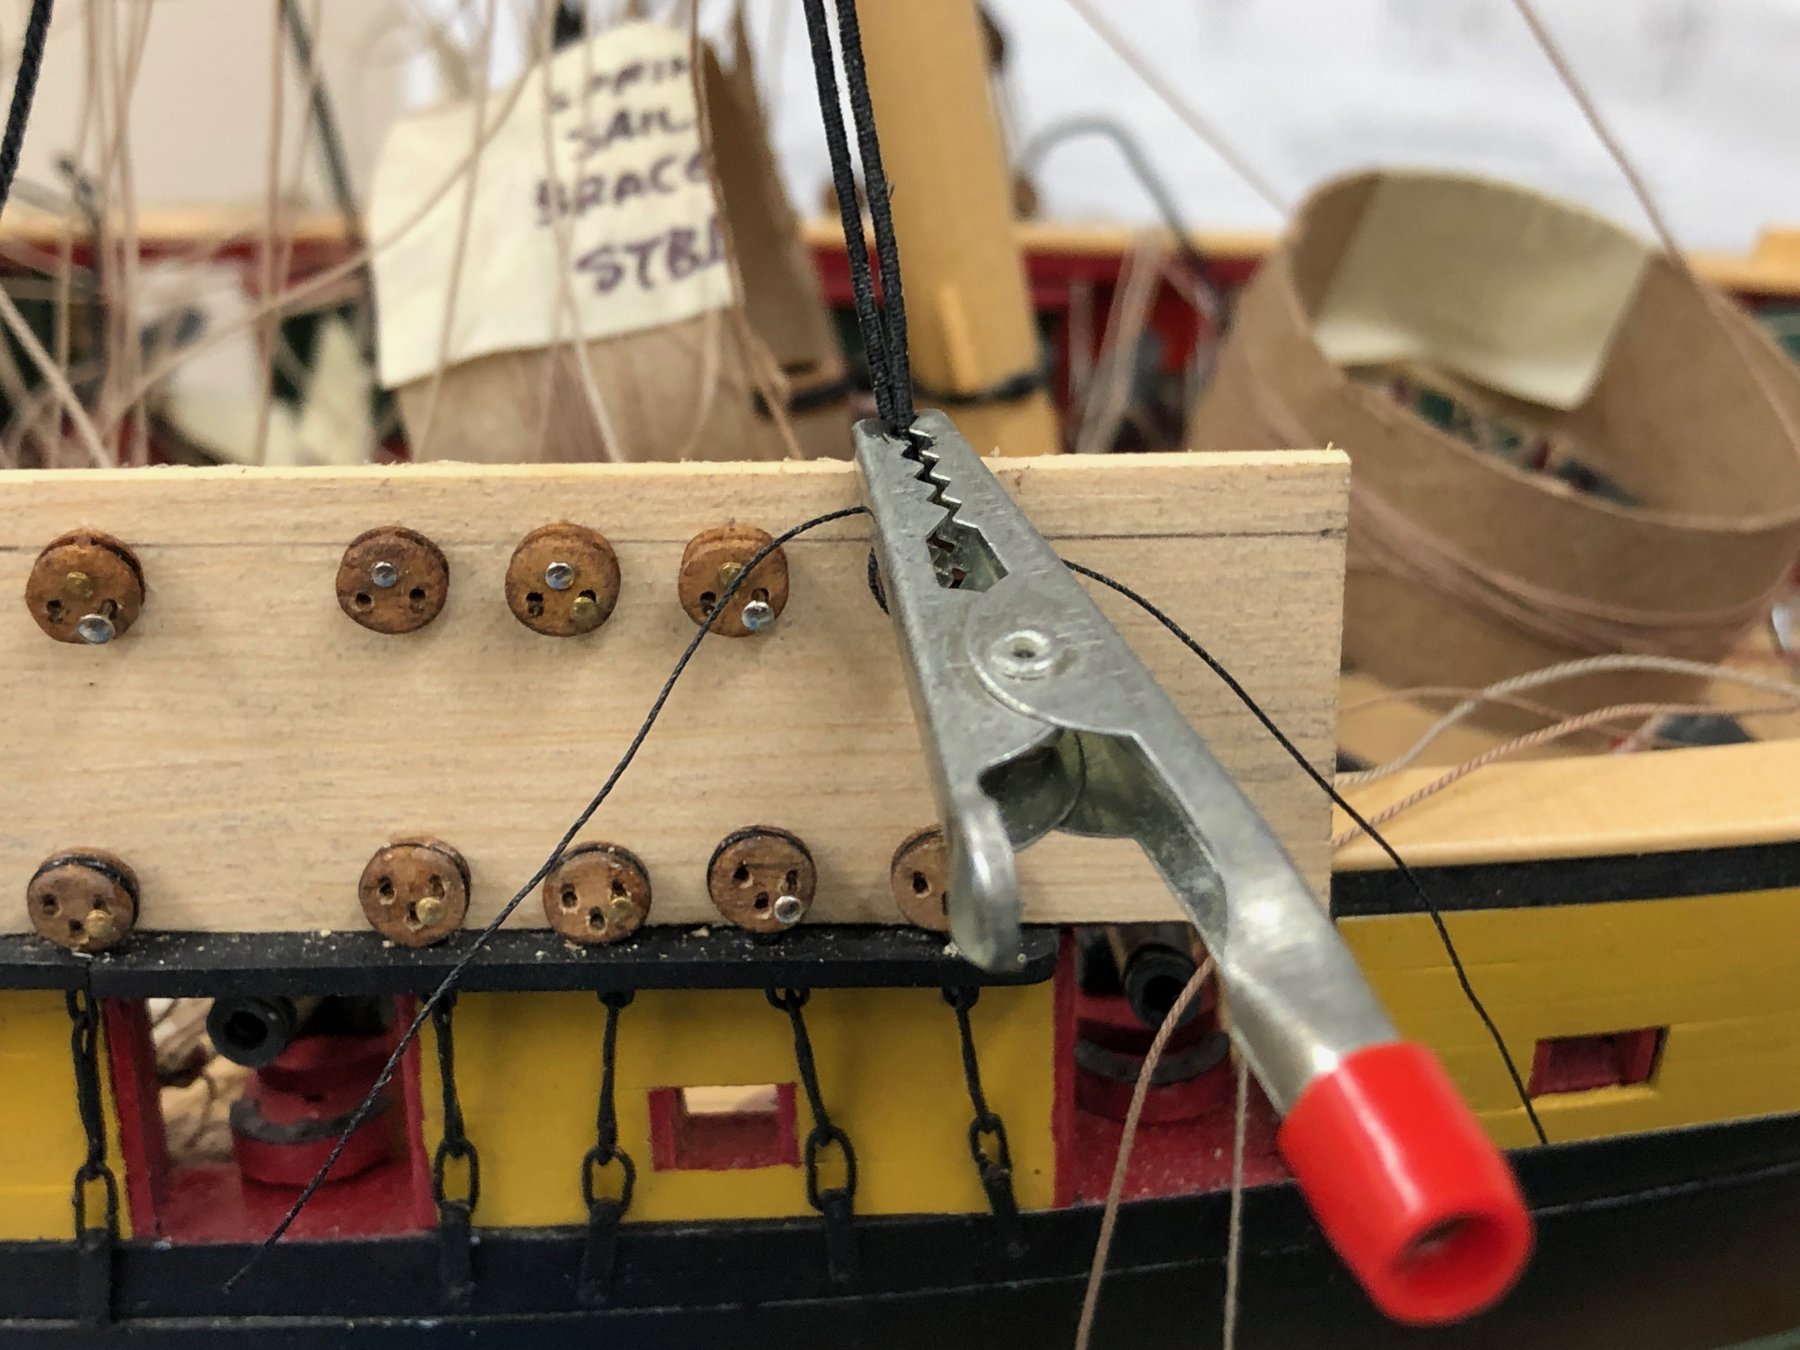
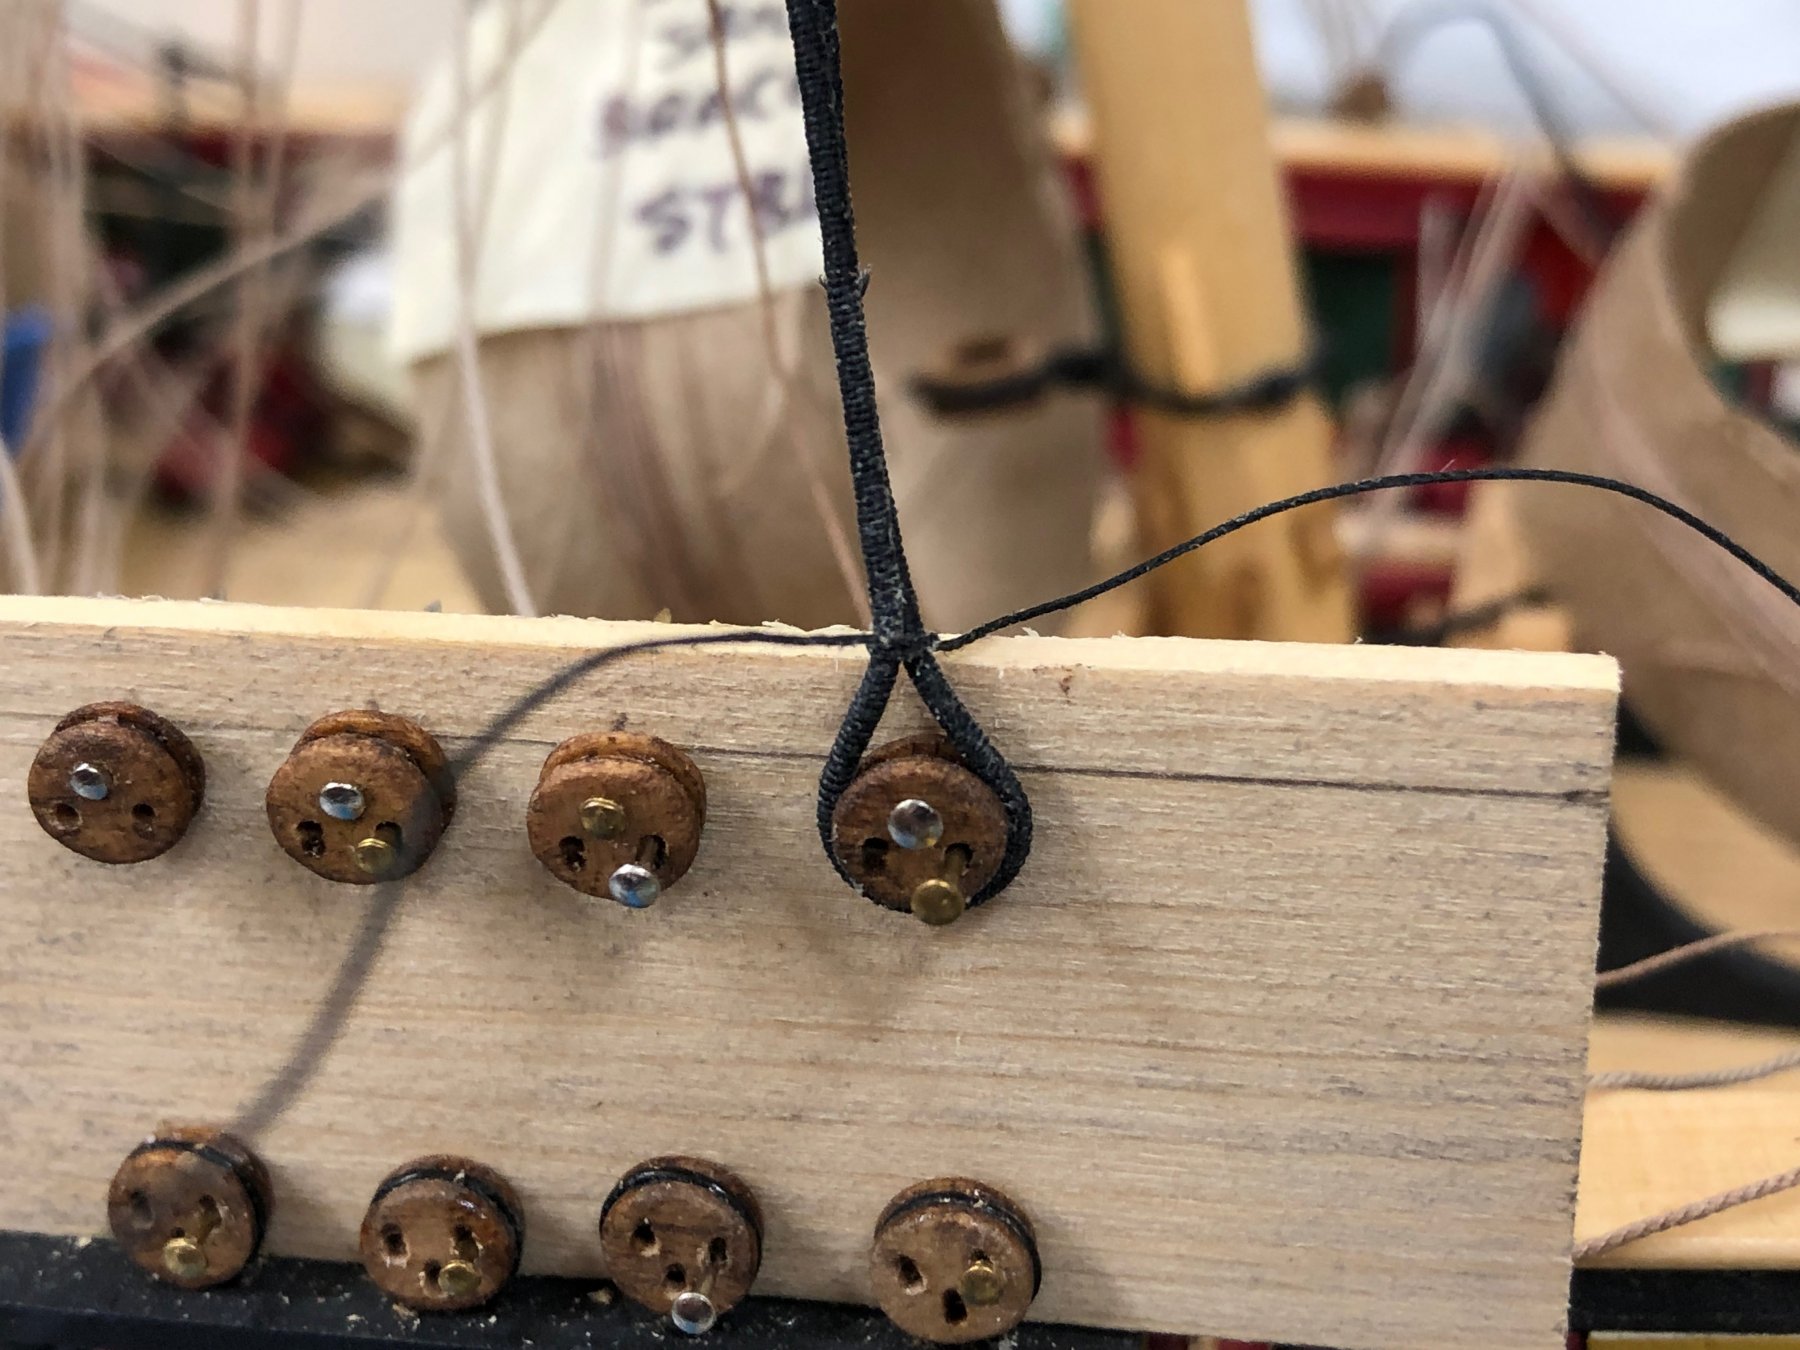
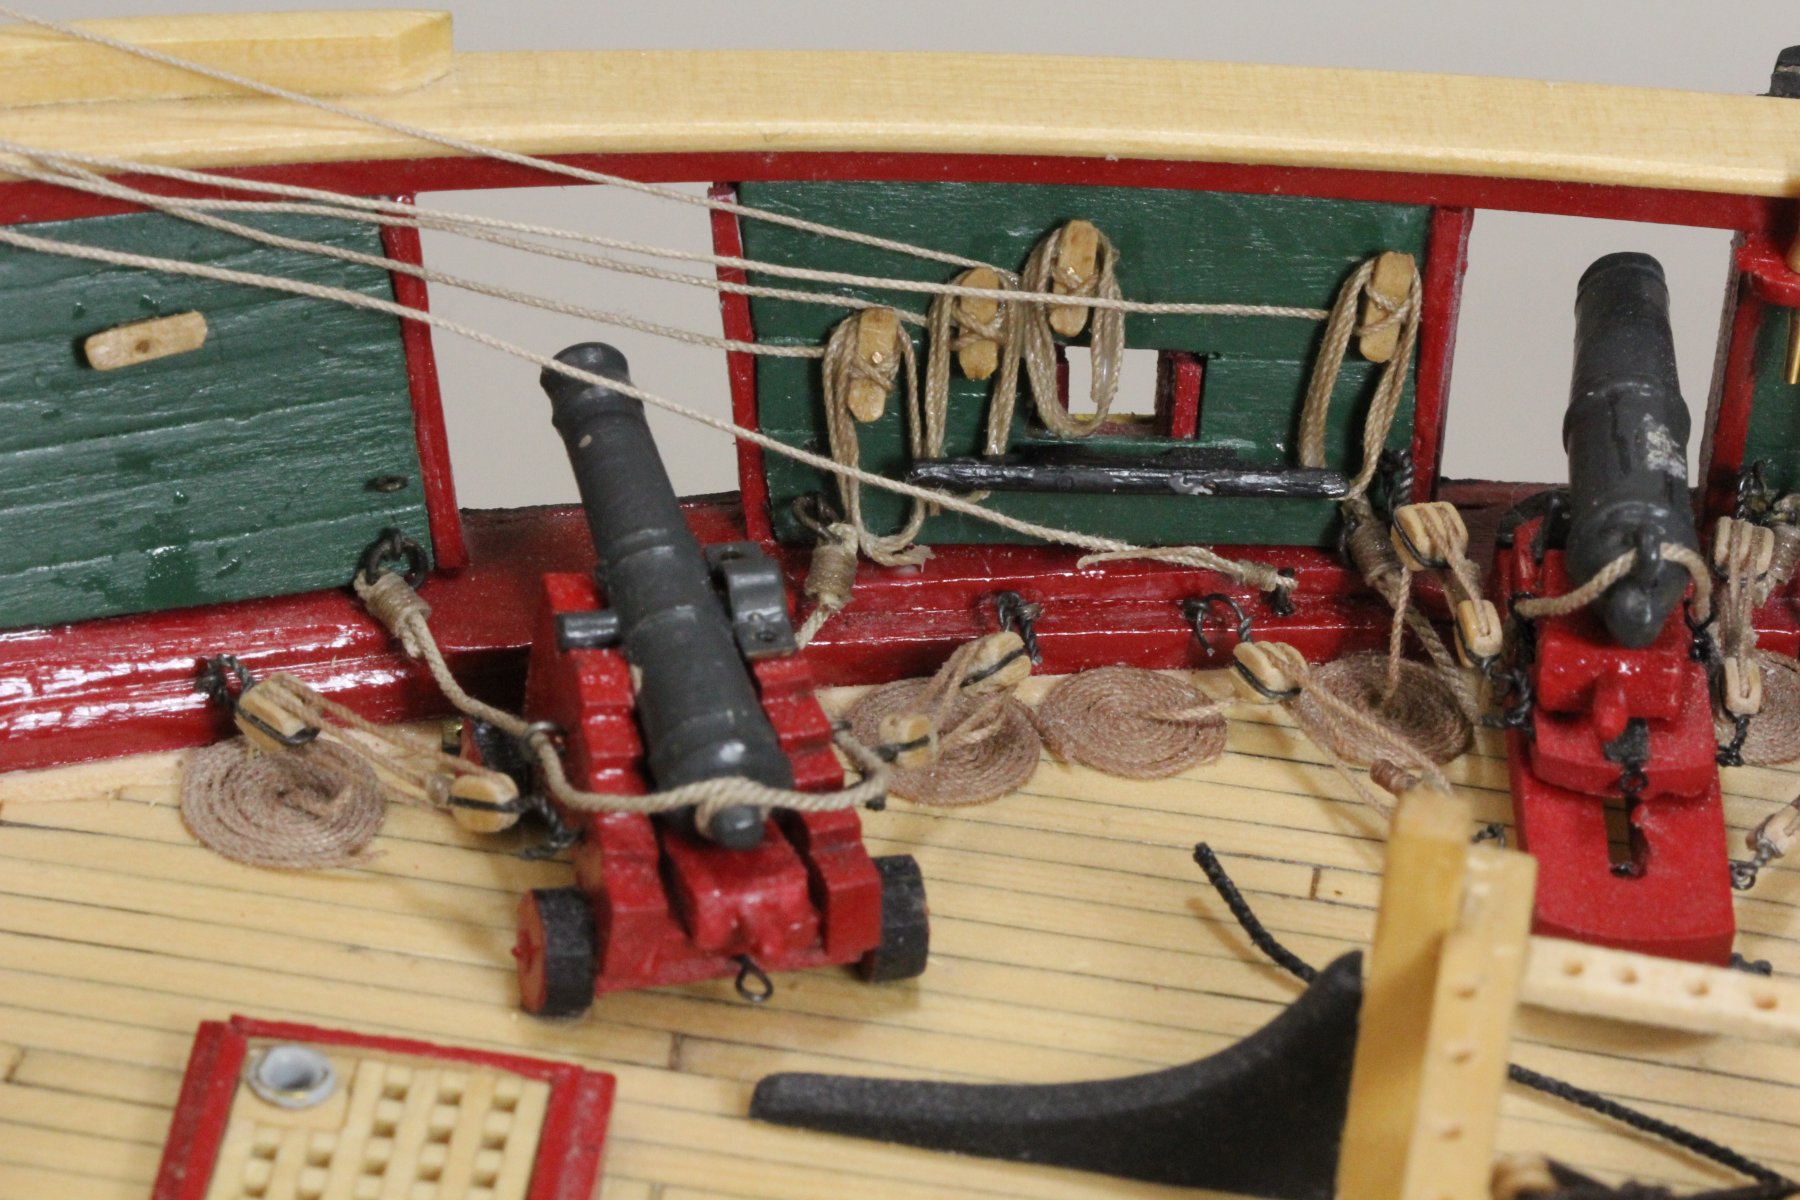
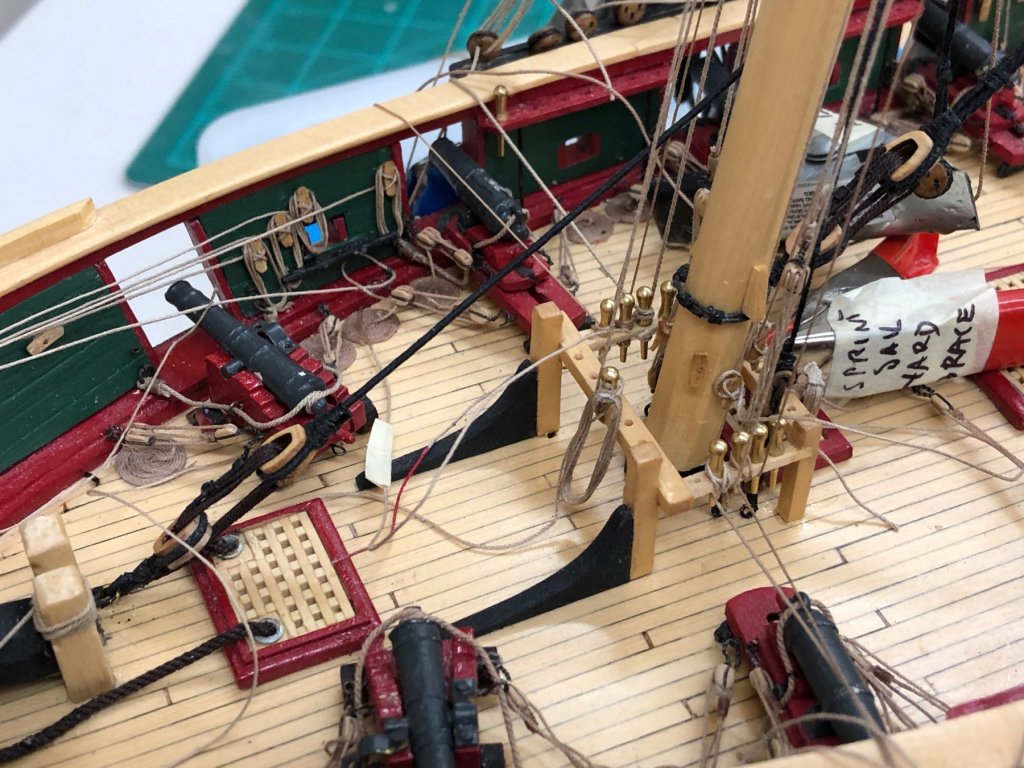
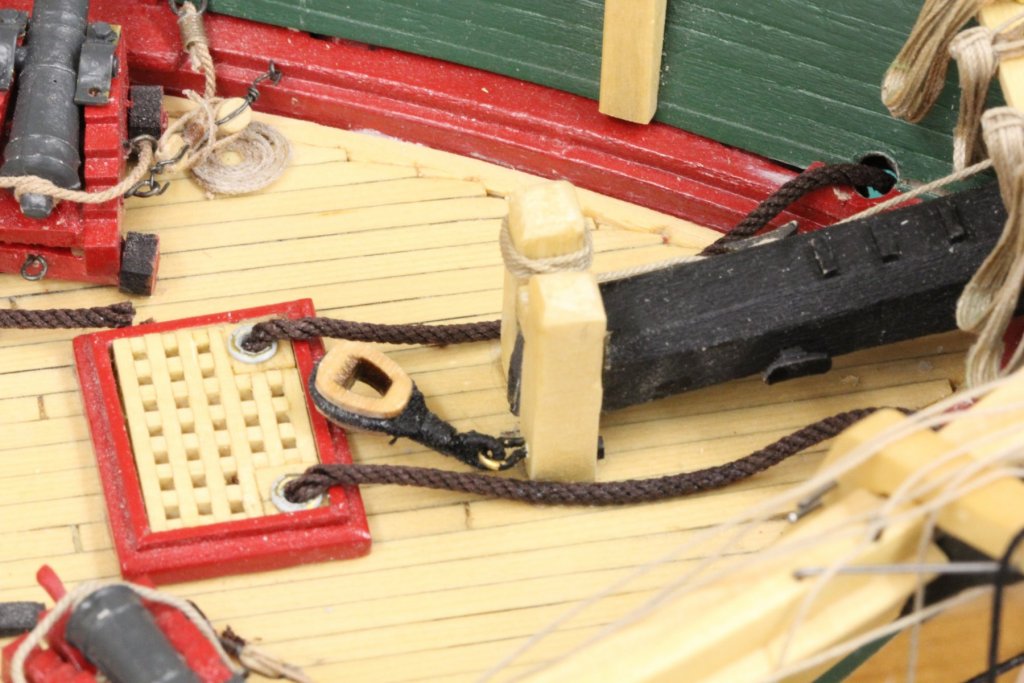
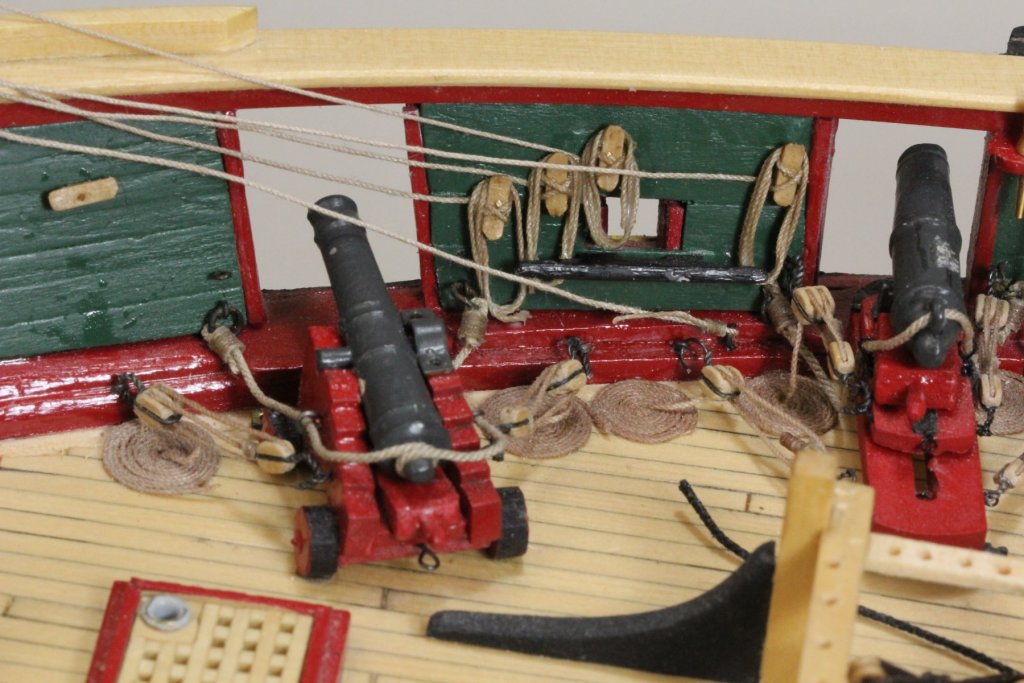
Thanks Kevin. I reworked my plan for getting the braces installed so I could belay the Fore Course Yard Braces (pin 53 for those following along) now rather than later. This would complete my plans for the aft portion of the Mail Fife Rail (pins 15 and 52 are for Spencer brails which I am not modeling). With that done I can finally install the bilge pump which has been quieting sitting in the "to be installed" box for months (along with the galley stove pipe and the belfry). Access to the aft portion of the Main Fife rail with the pump in place would be a real challenge and the pump handles are pretty fragile. One sneeze while holder tweezers in both hands could led to more work than I had planned. Anyway, the pump is in place and I moved on to continuing to unsnarl the "rats' nest". Here is the pump in place and the Fore Fife Rail with all (I think) the lines that belong there.


- 367 replies
-
- 3
-
-
- model shipways
- niagara
- (and 1 more)
-
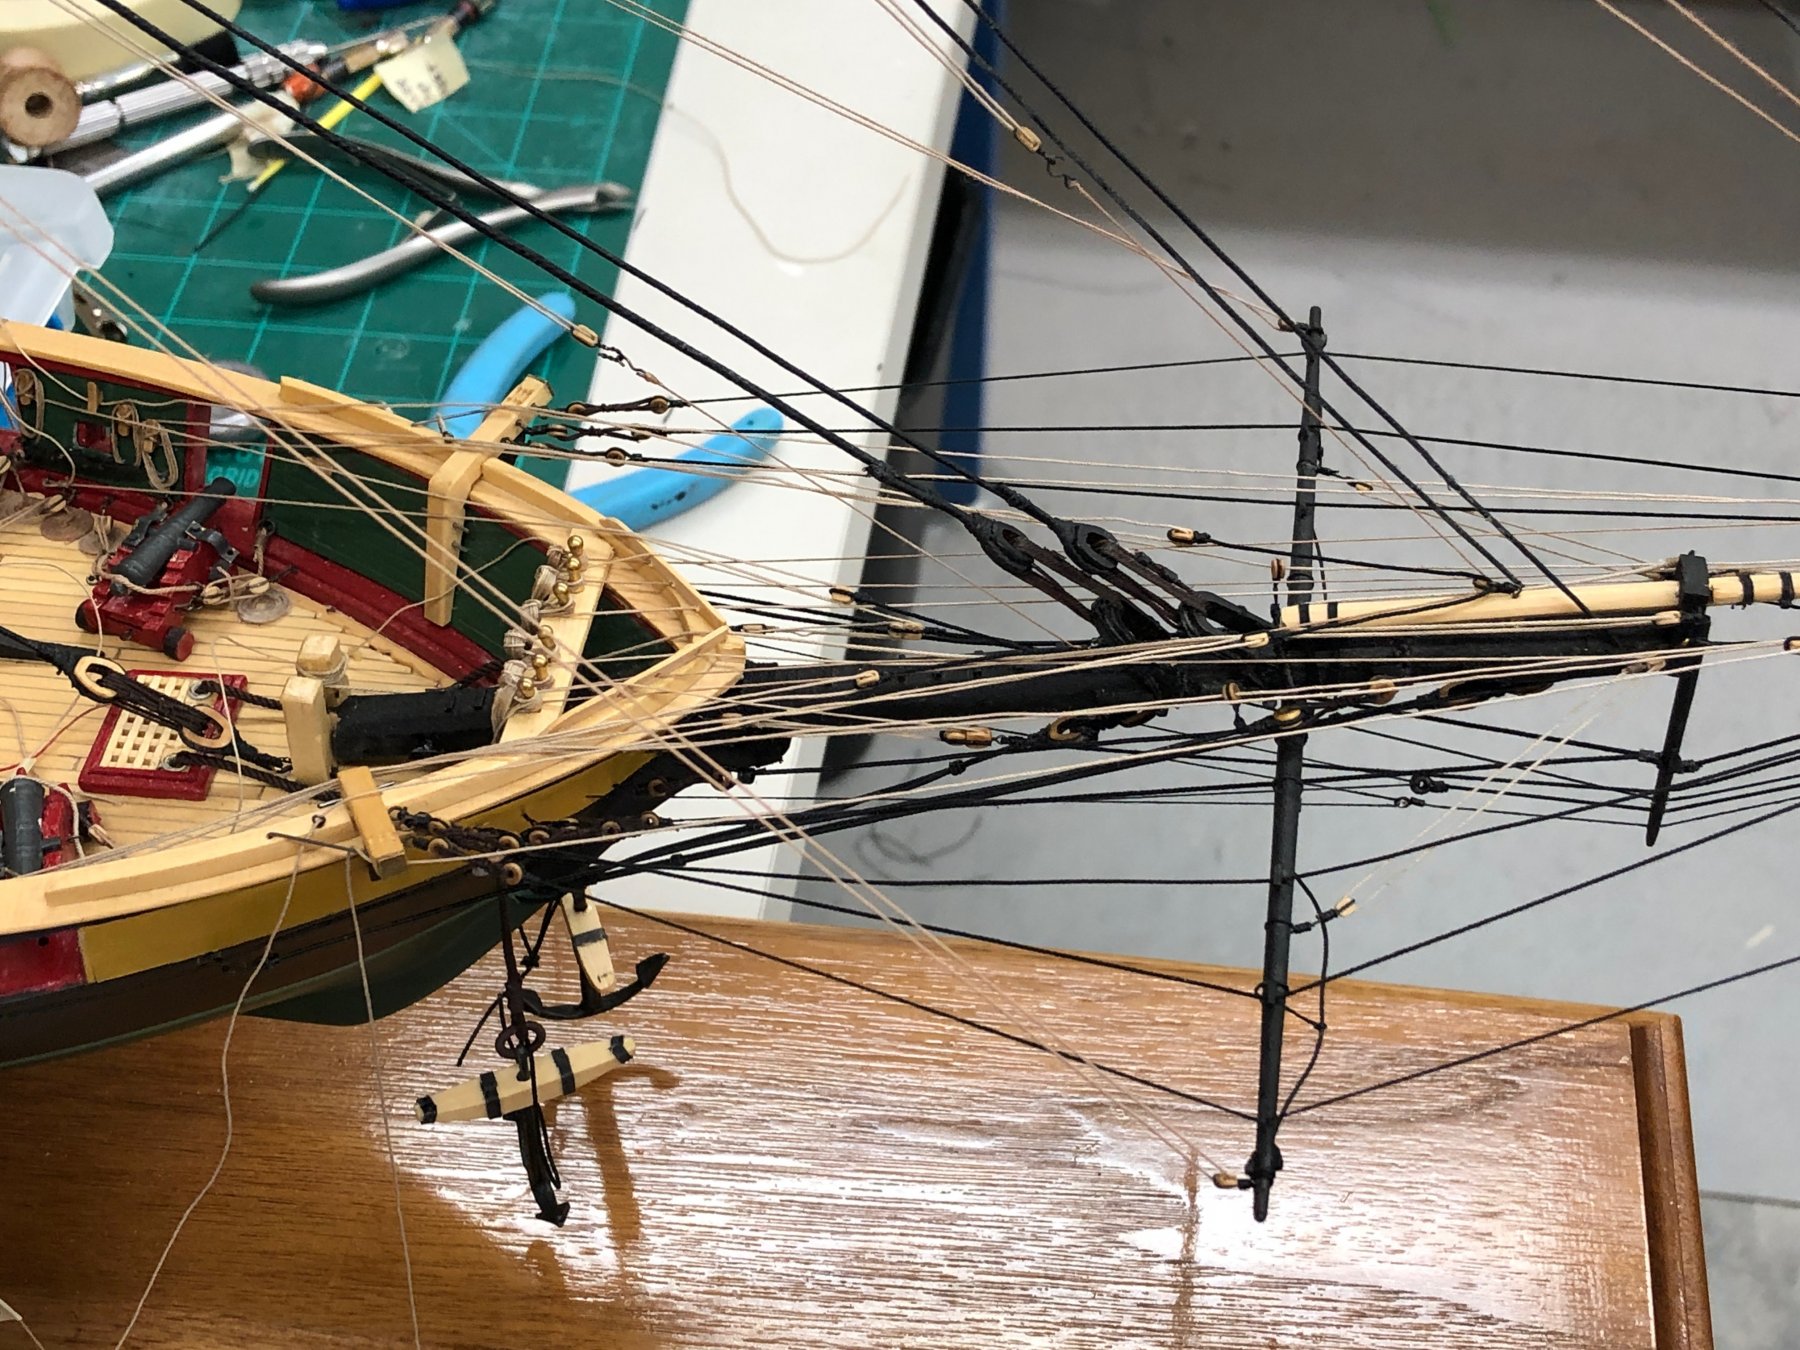
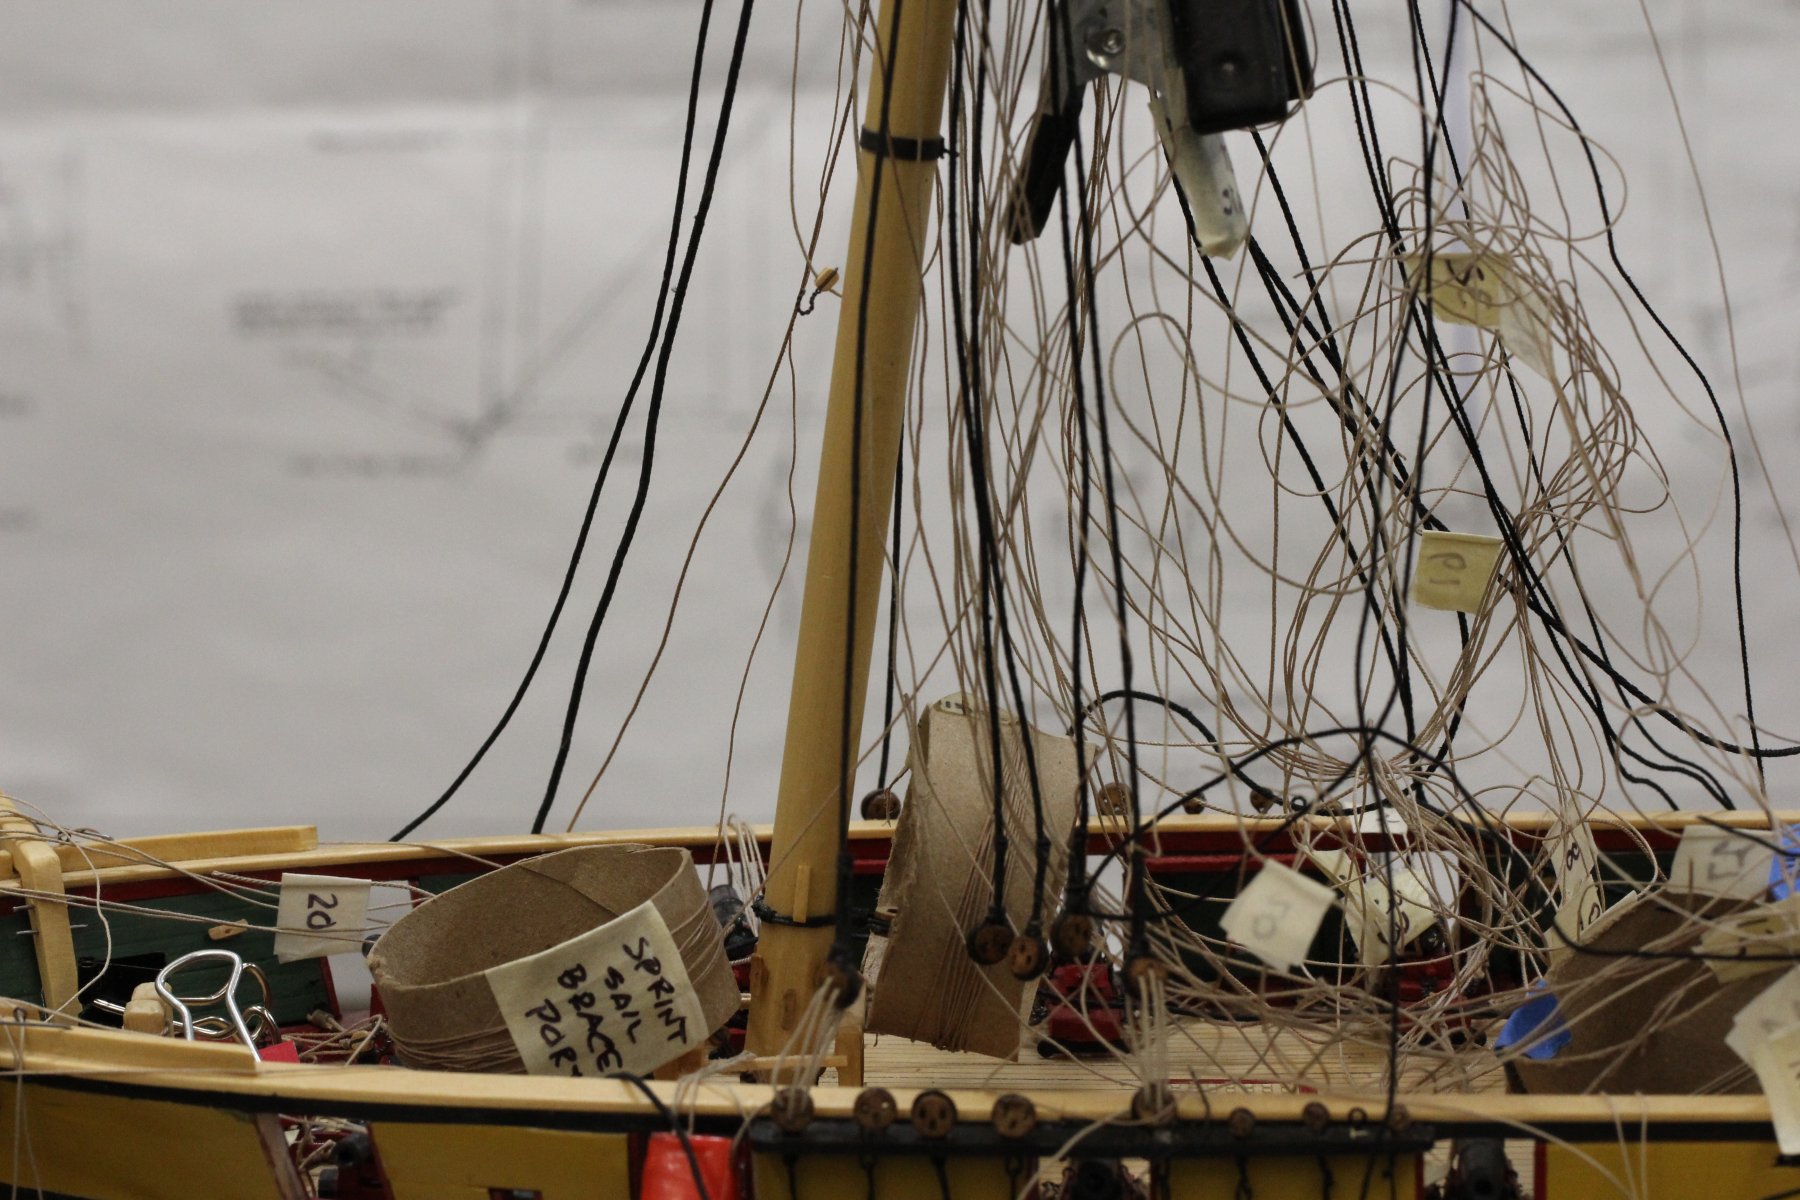
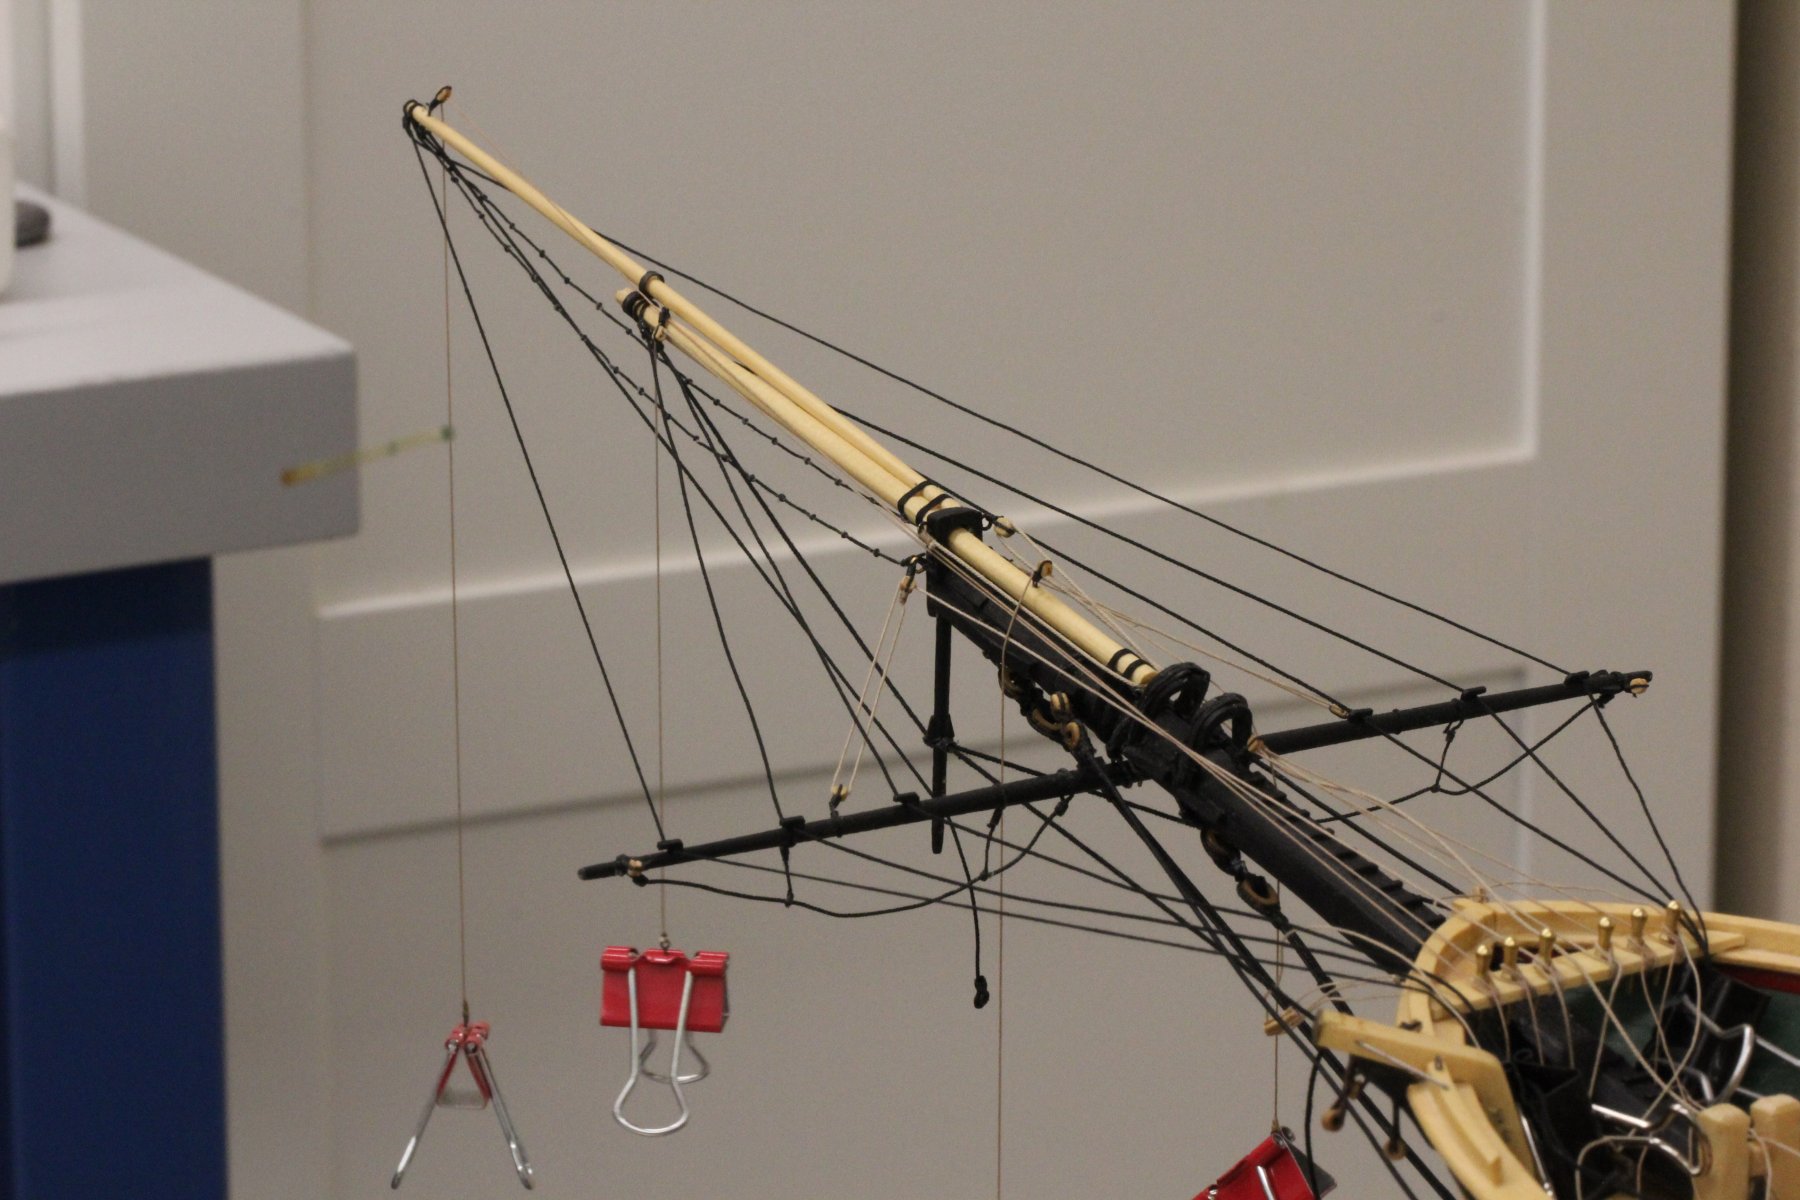
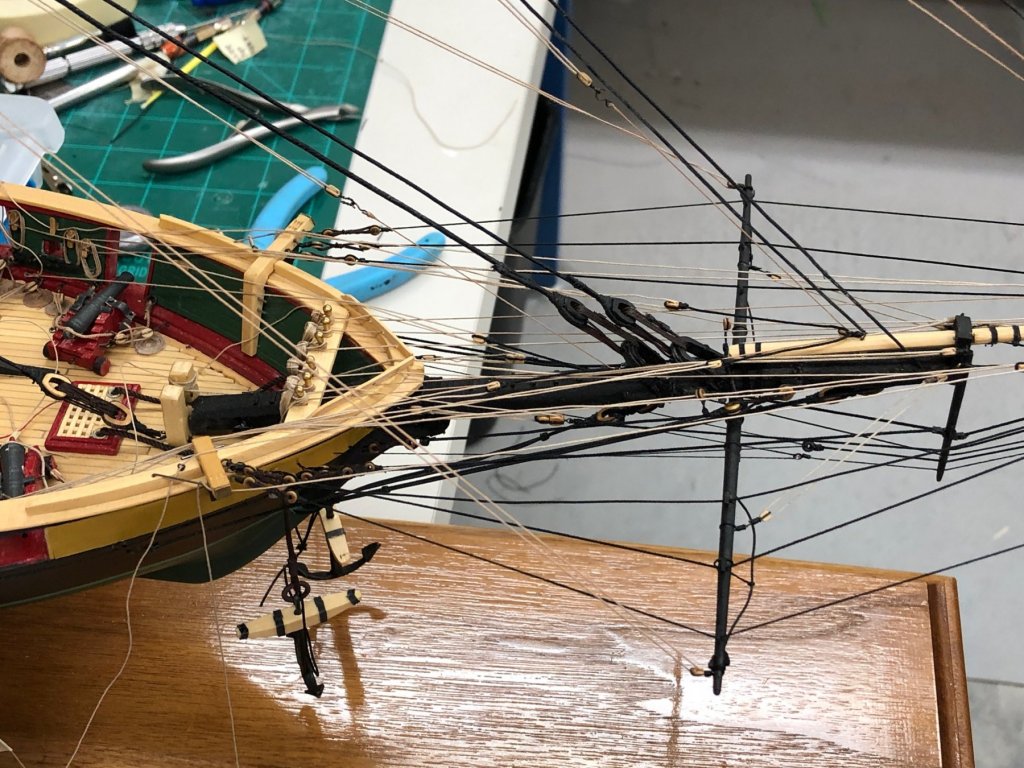
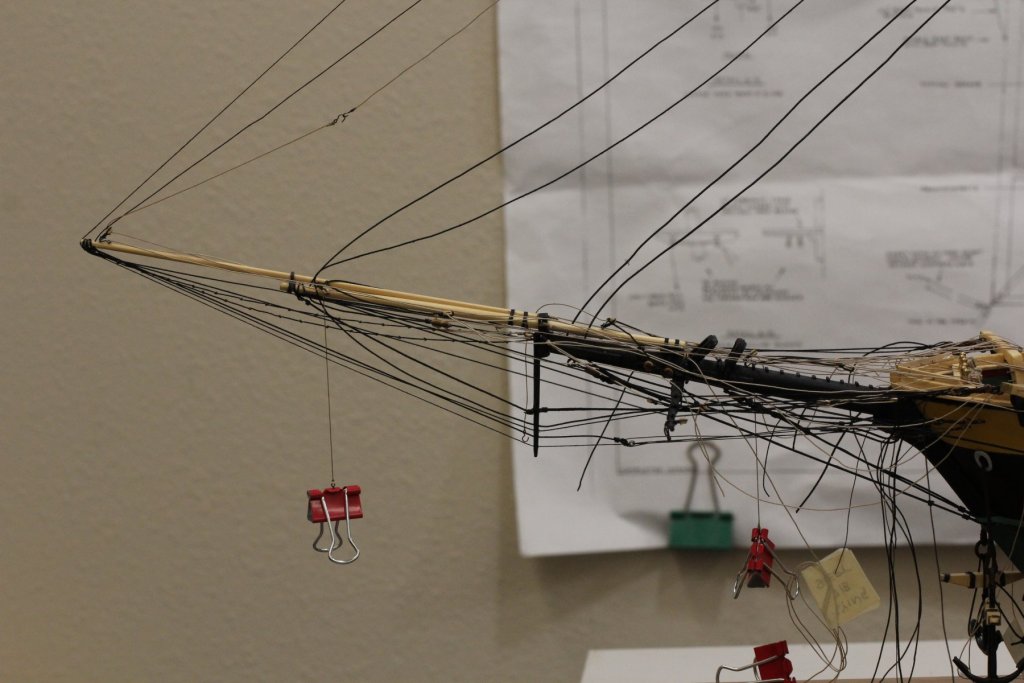
I am declaring the Bowsprit completed (except for tensioning the head sail sheets lines and halyards). I got all the guys and stays adjusted, tightened and then glued to keep them that way. I hooked the head sail halyards to the downhauls although they are kind of hard to msee unless you look closely. I also included the headsail sheet lines, three of which have a pendant with a block on each end. I considered hooking the sheet lines to the downhaul/halyard intersection but it puts a load that causes the downhaul/halyard to sag well away from the stay that would hold their sail. For now the sheets are just sitting on top of the bowsprit guys with the center (more or less0 of the pendant hooked to the eyebolt that holds the downhaul block. i may revisit this later but that is how I am doing it now. I have started to unscramble the rat's nest of sheet, clew, bunt and leech lines and have gotten about ten of them terminated. I am concentrating on those at the base of the mast and on the fife rail. The ones on the pin racks come next. Here are a few pictures of the completed (almost) Bowsprit and a shot of the base of the mast showing the lines that are belayed. If anyone wants pictures of a specific rigging item let me know. I am itching to get more use out of my macro lens.

- 367 replies
-
- 2
-
-
- model shipways
- niagara
- (and 1 more)
-
Dave, Javlin - thanks. Being retired makes working on this easier than if I was still working but there are "other things" that seem to get in the way even now.
-
Mike, I agree that a binnacle was probably somewhere but no one really knows since when raised in 1912/13 there wasn't much left of her above the deck. And a very nice binnacle you have there. I see you did not follow the kit deck furniture layout either. I have no idea how they would have used the capstan with the deck furniture as shown in the plans. I did something similar on my Niagara - put only gratings fore and aft of the capstan. I used the plans companionway structure but mounted it just forward of the tiller.
-
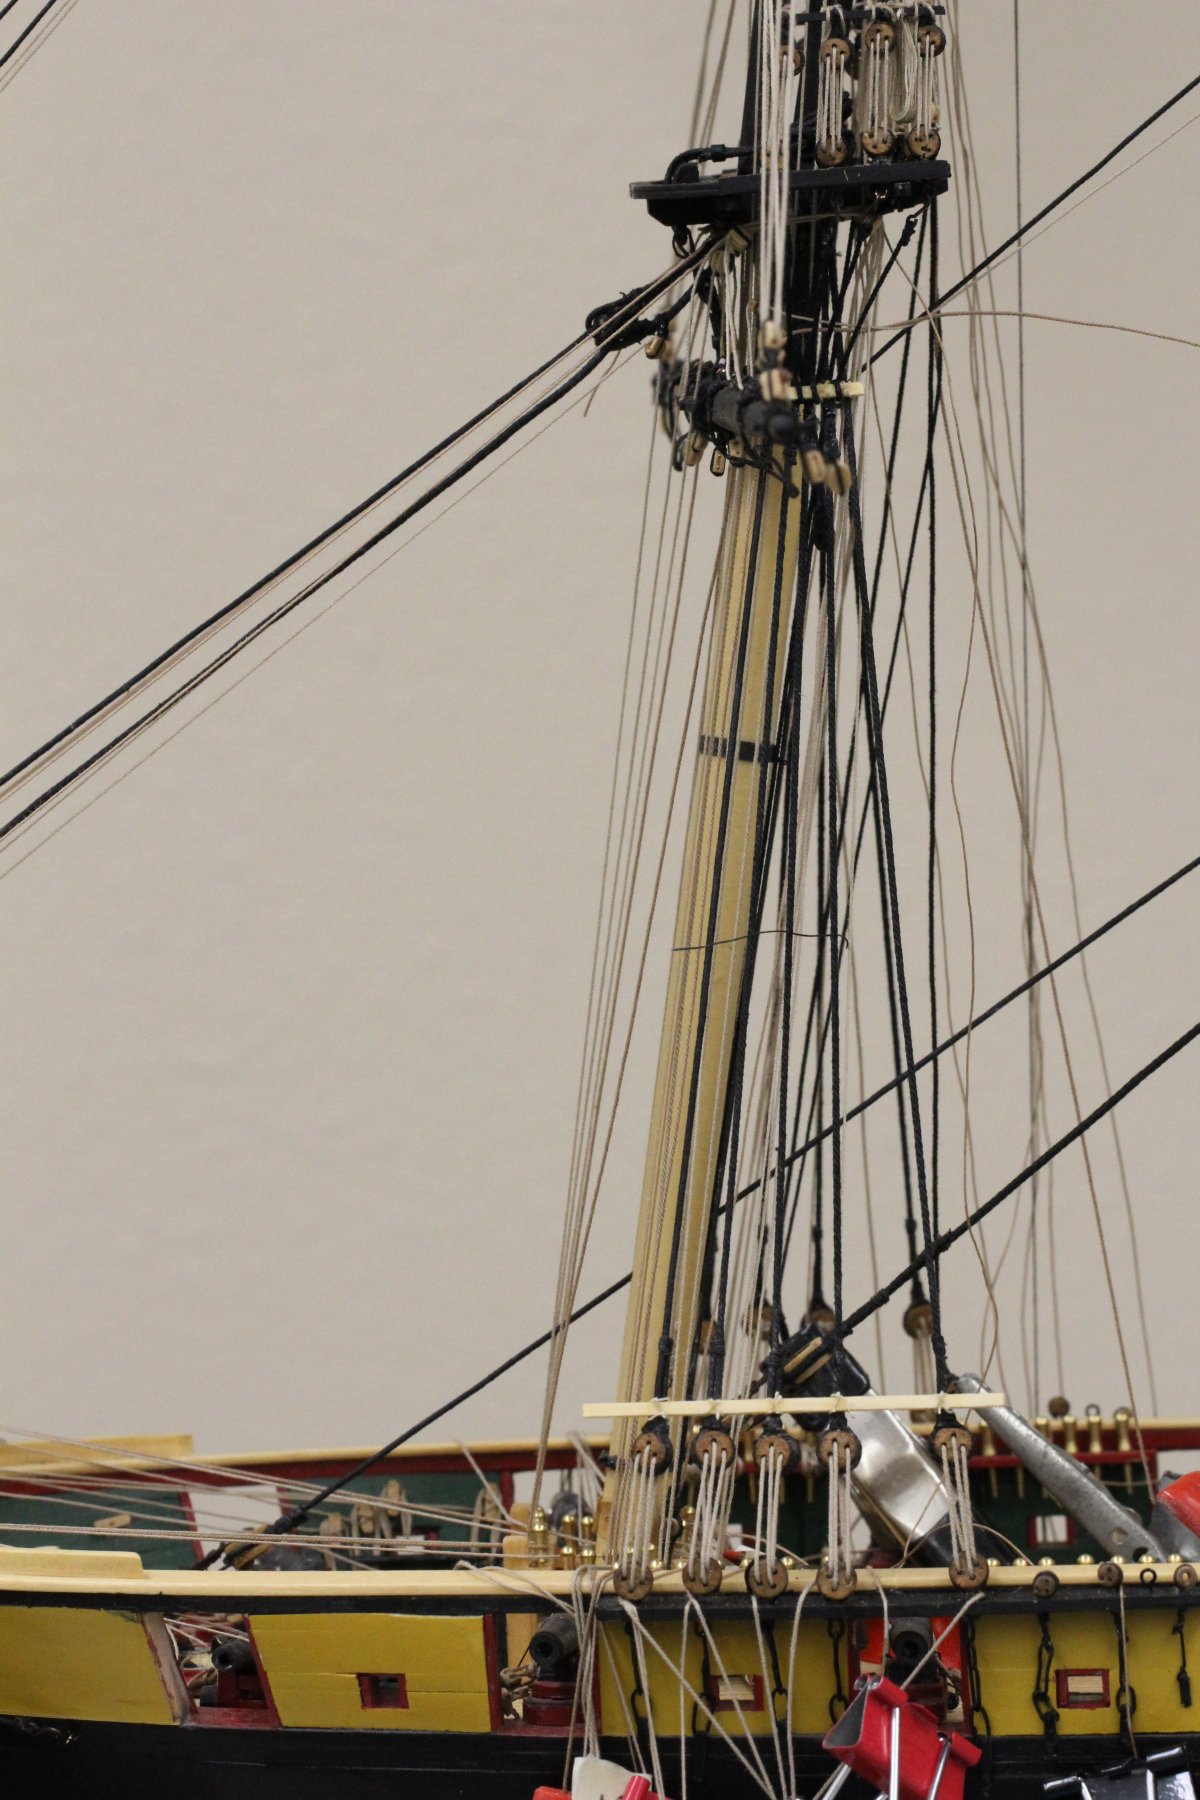
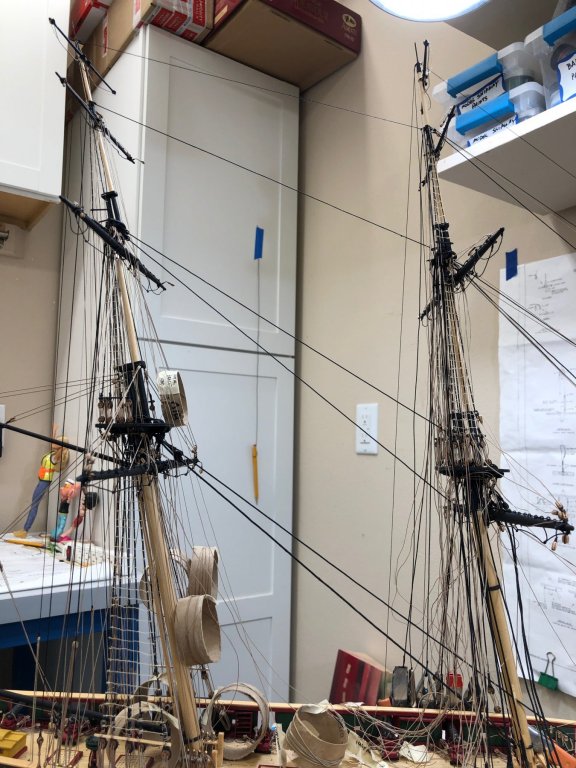
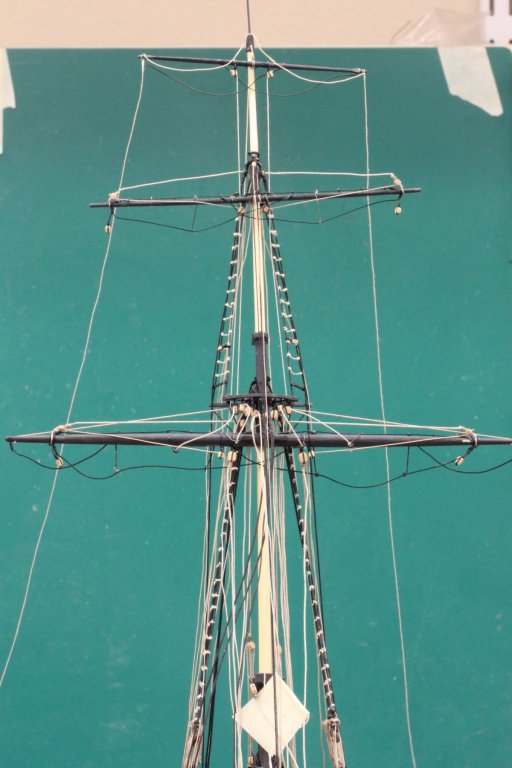
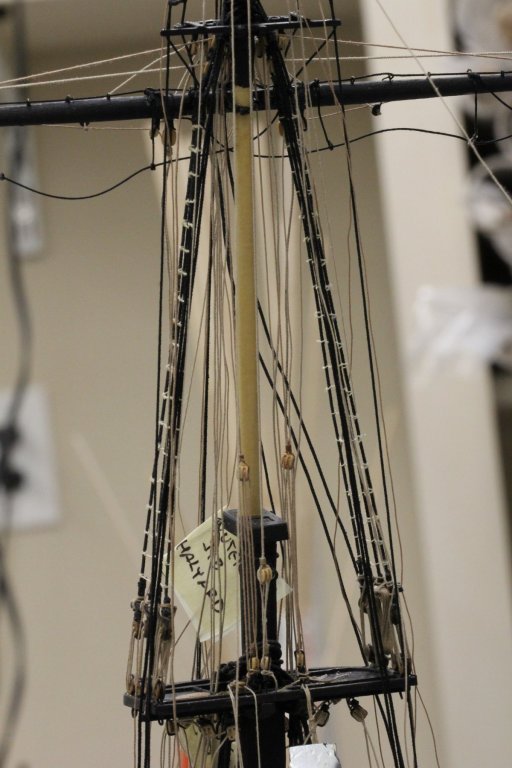
With the Fore Mast stabilized athwart ships I worked on the Main mast stays to get the Fore Mast stabilized fore and aft (having already rigged the Fore Mast stays (except the Fore Stay and Preventer). I had put the tackle for the Royal, top Gallant, Spring and top Mast stays in place so it was a matter of routing the stay through the (hopefully) correctly positioned fair-leads and connecting them to the tackles. It went pretty well except that getting the served stays to move through the fair-leads did not go as smoothly as I had hoped. The combination of the serving thread and the glue/water mix makes them much stiffer than the unserved line (and bigger in diameter too) which made some of the fair-leads both too small (drilled them out with handy pin vice - I used Britannia metal bullseyes of various sizes for the fair-leads) and not really in the correct place to get the stay through without 'hanging up". Luckily I had not done a very good job of securing the fair-leads so I was able to move them enough to get everything where it needed to be. Once the upper stays were in place I rigged the Main and Main Preventer Stays using the previously installed hearts. I used Syren .018 Dark Brown line for the lanyards. Chuck is no longer making black line and I was out of black .018 so I switched to the dark brown. It is not too easy to tell, either in the pictures or on the model. You have to look closely to notice the difference. Here is a picture with all the main stays in place and shots of the Main and Main Preventer stays, the Top Mast and Spring Stay tackle at the base of the mast and the Royal and Top gallant tackles on the Fore Top. We will be untangling the "rats nest" soon!


- 367 replies
-
- 4
-
-
- model shipways
- niagara
- (and 1 more)
-
Having gotten all the deadeyes (including the smaller ones for the Top Gallant Backstays) completed I moved on to the hearts for the Main and Fore Stays. I used a very similar technique on these as on the deadeyes. Really not too difficult. I used Syren 7mm closed hearts instead of the ones supplied in the kit - they look better. I also painted the ones for Fore stay and Fore Preventer stay black as I had previously painted the collars on the Bowsprit black. I left the Main and Main Preventer hearts the natural color of the wood which I believe is Alaskan Yellow Cedar which the what I have used for the masts, main rail and deck.
- 367 replies
-
- 1
-
-
- model shipways
- niagara
- (and 1 more)
-
Thanks Will - getting the deadeyes "right" (aka the same or nearly the same length) has always been a struggle for me.
-
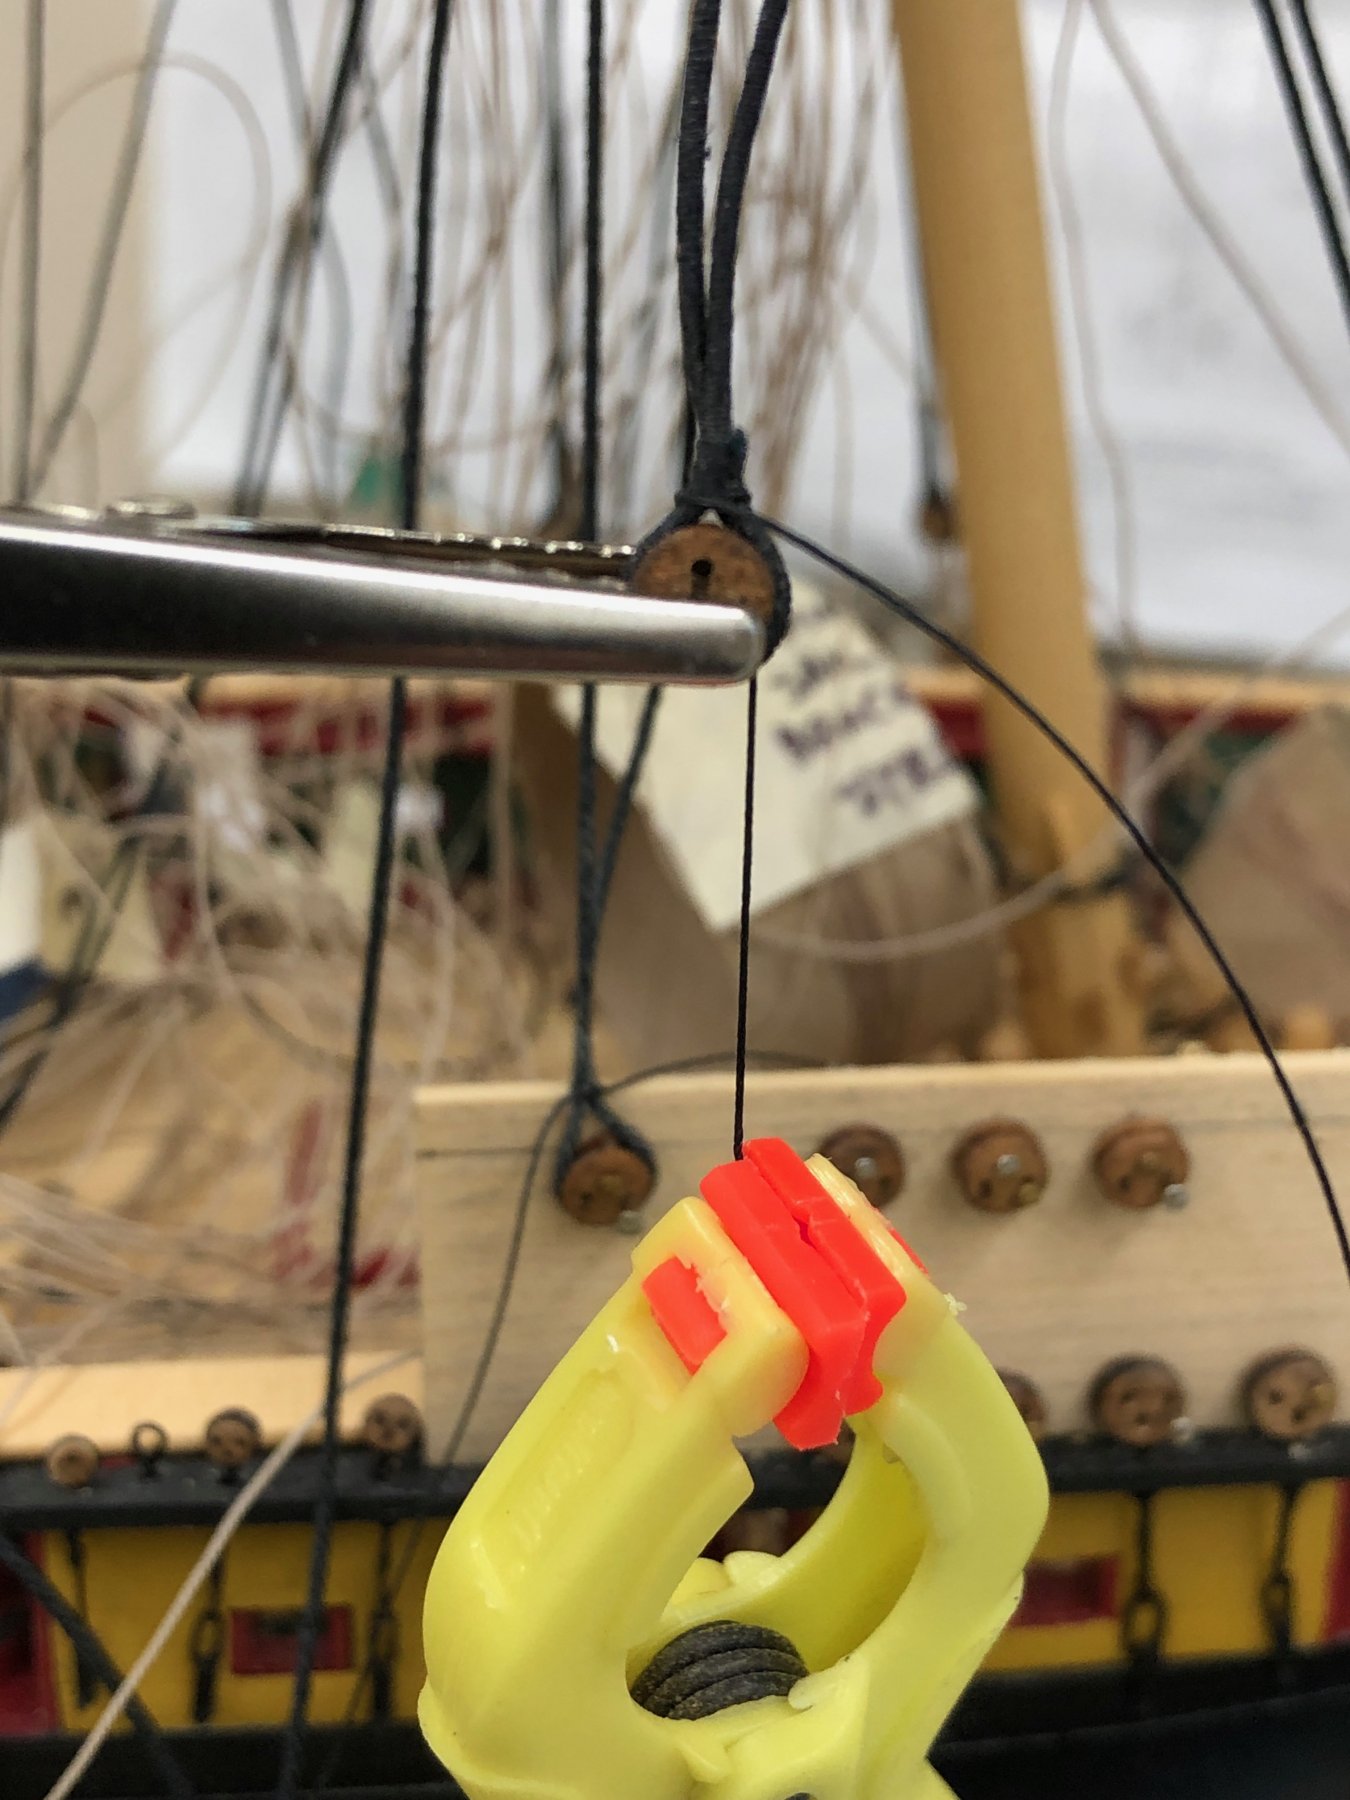
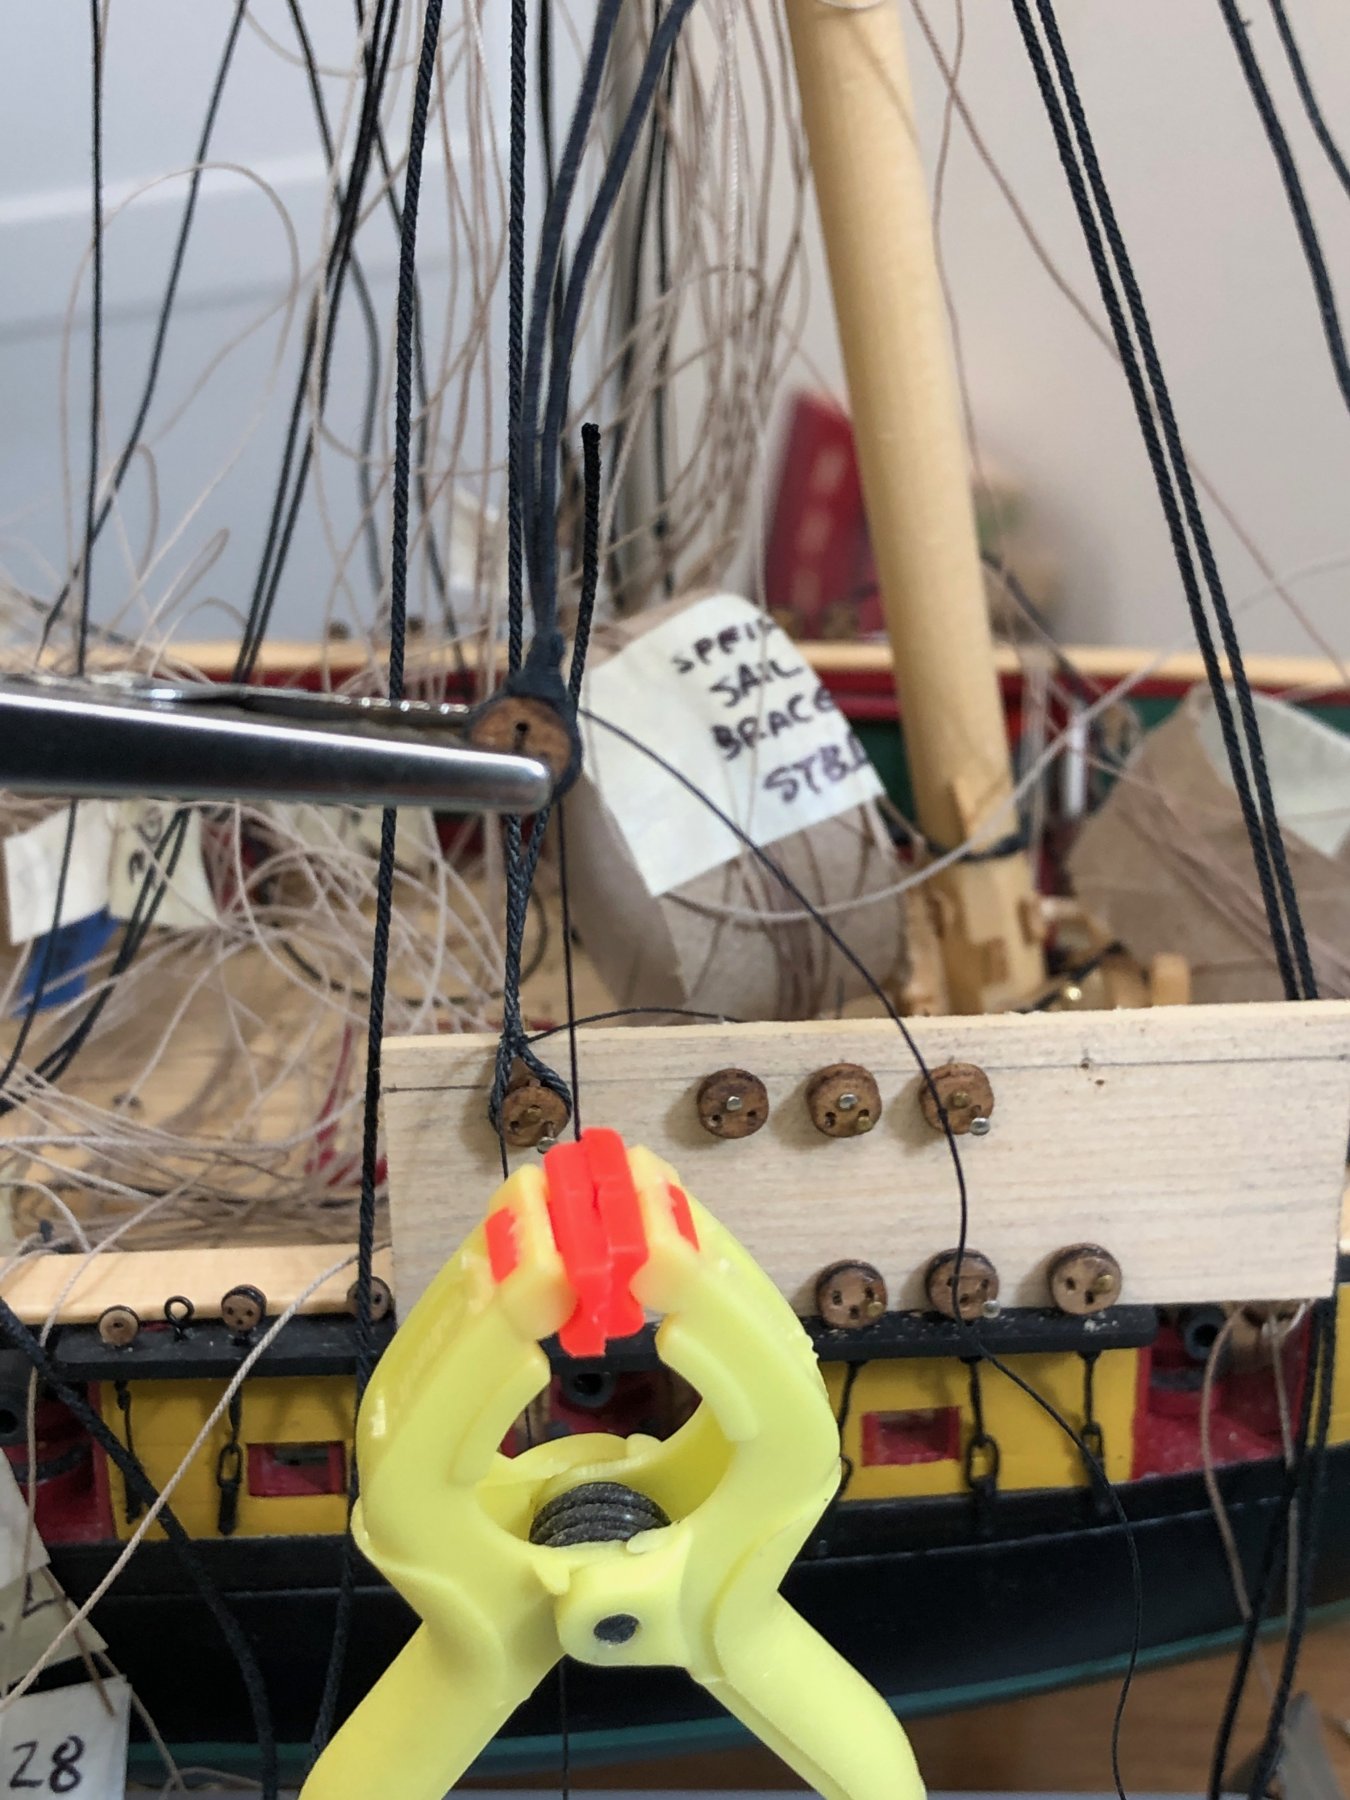
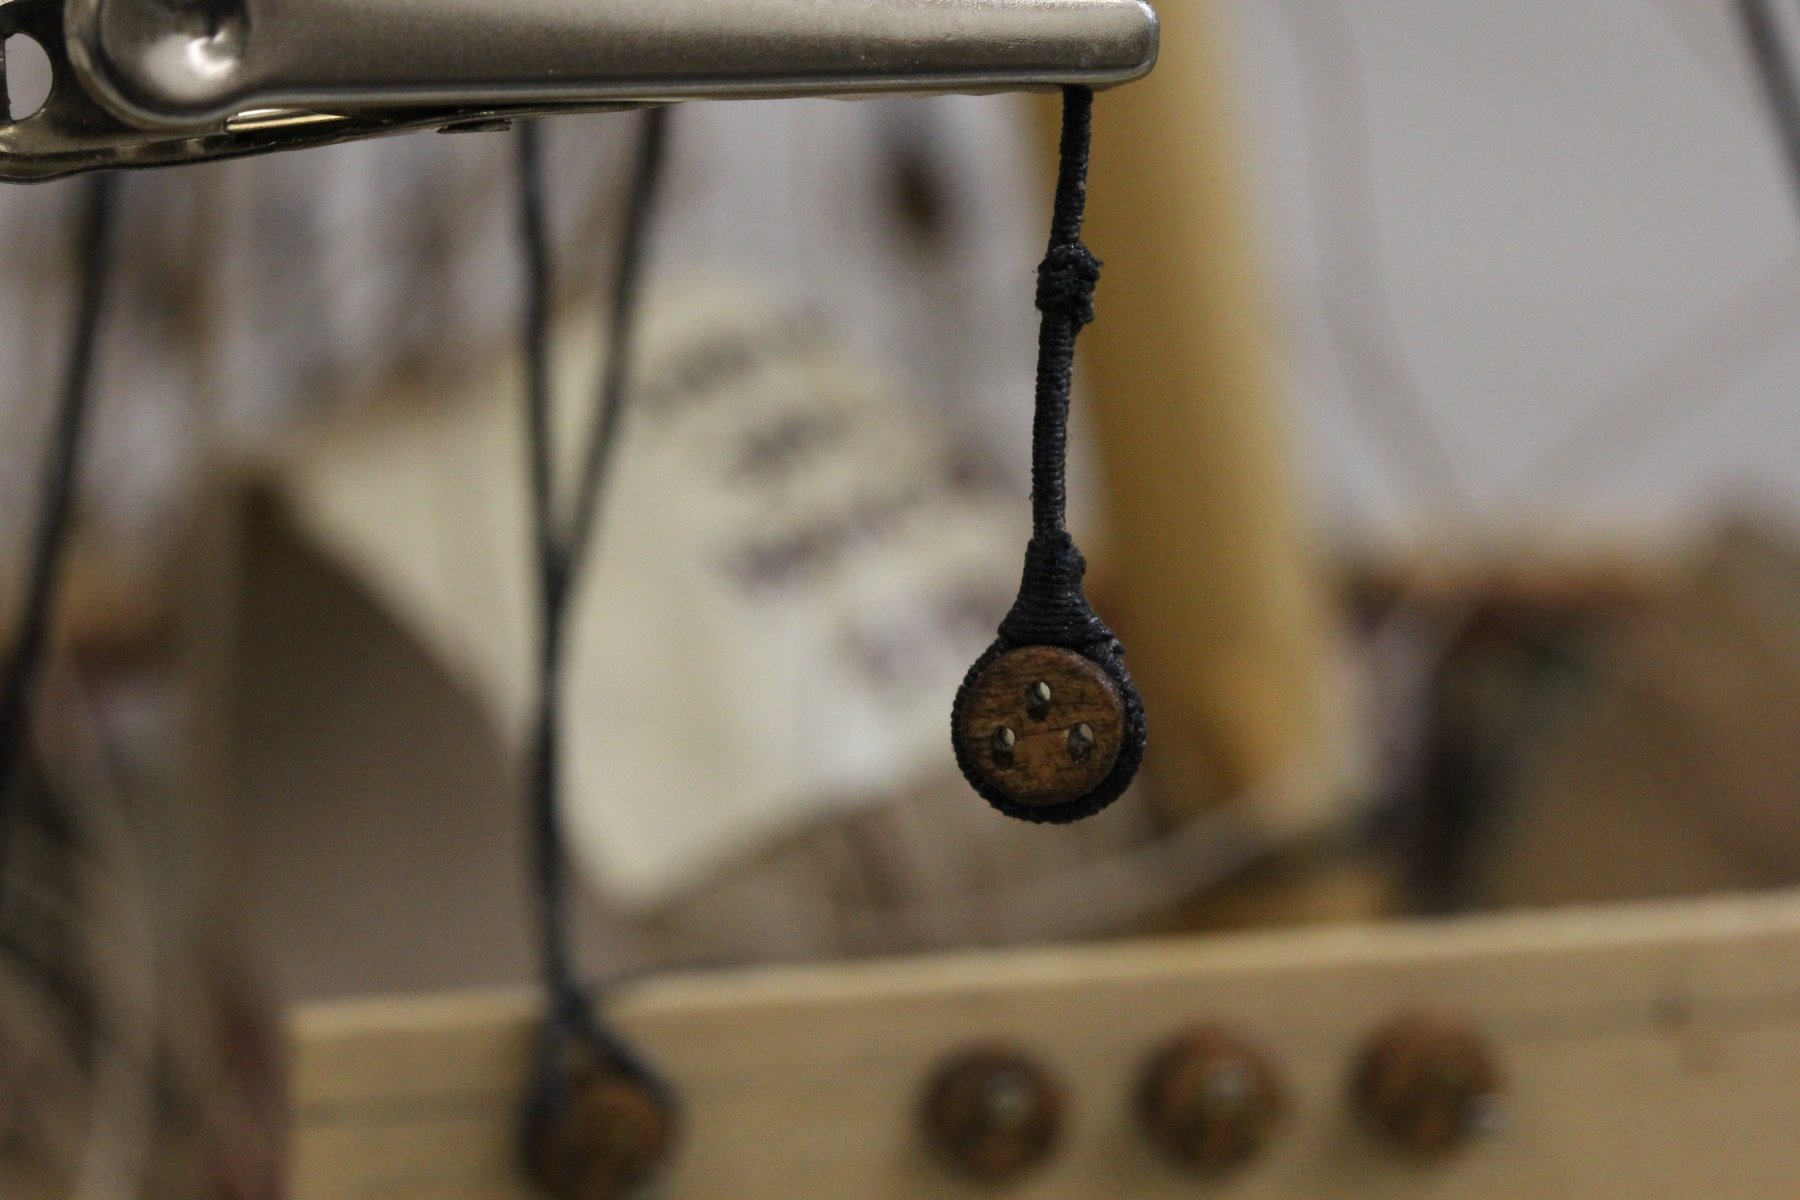
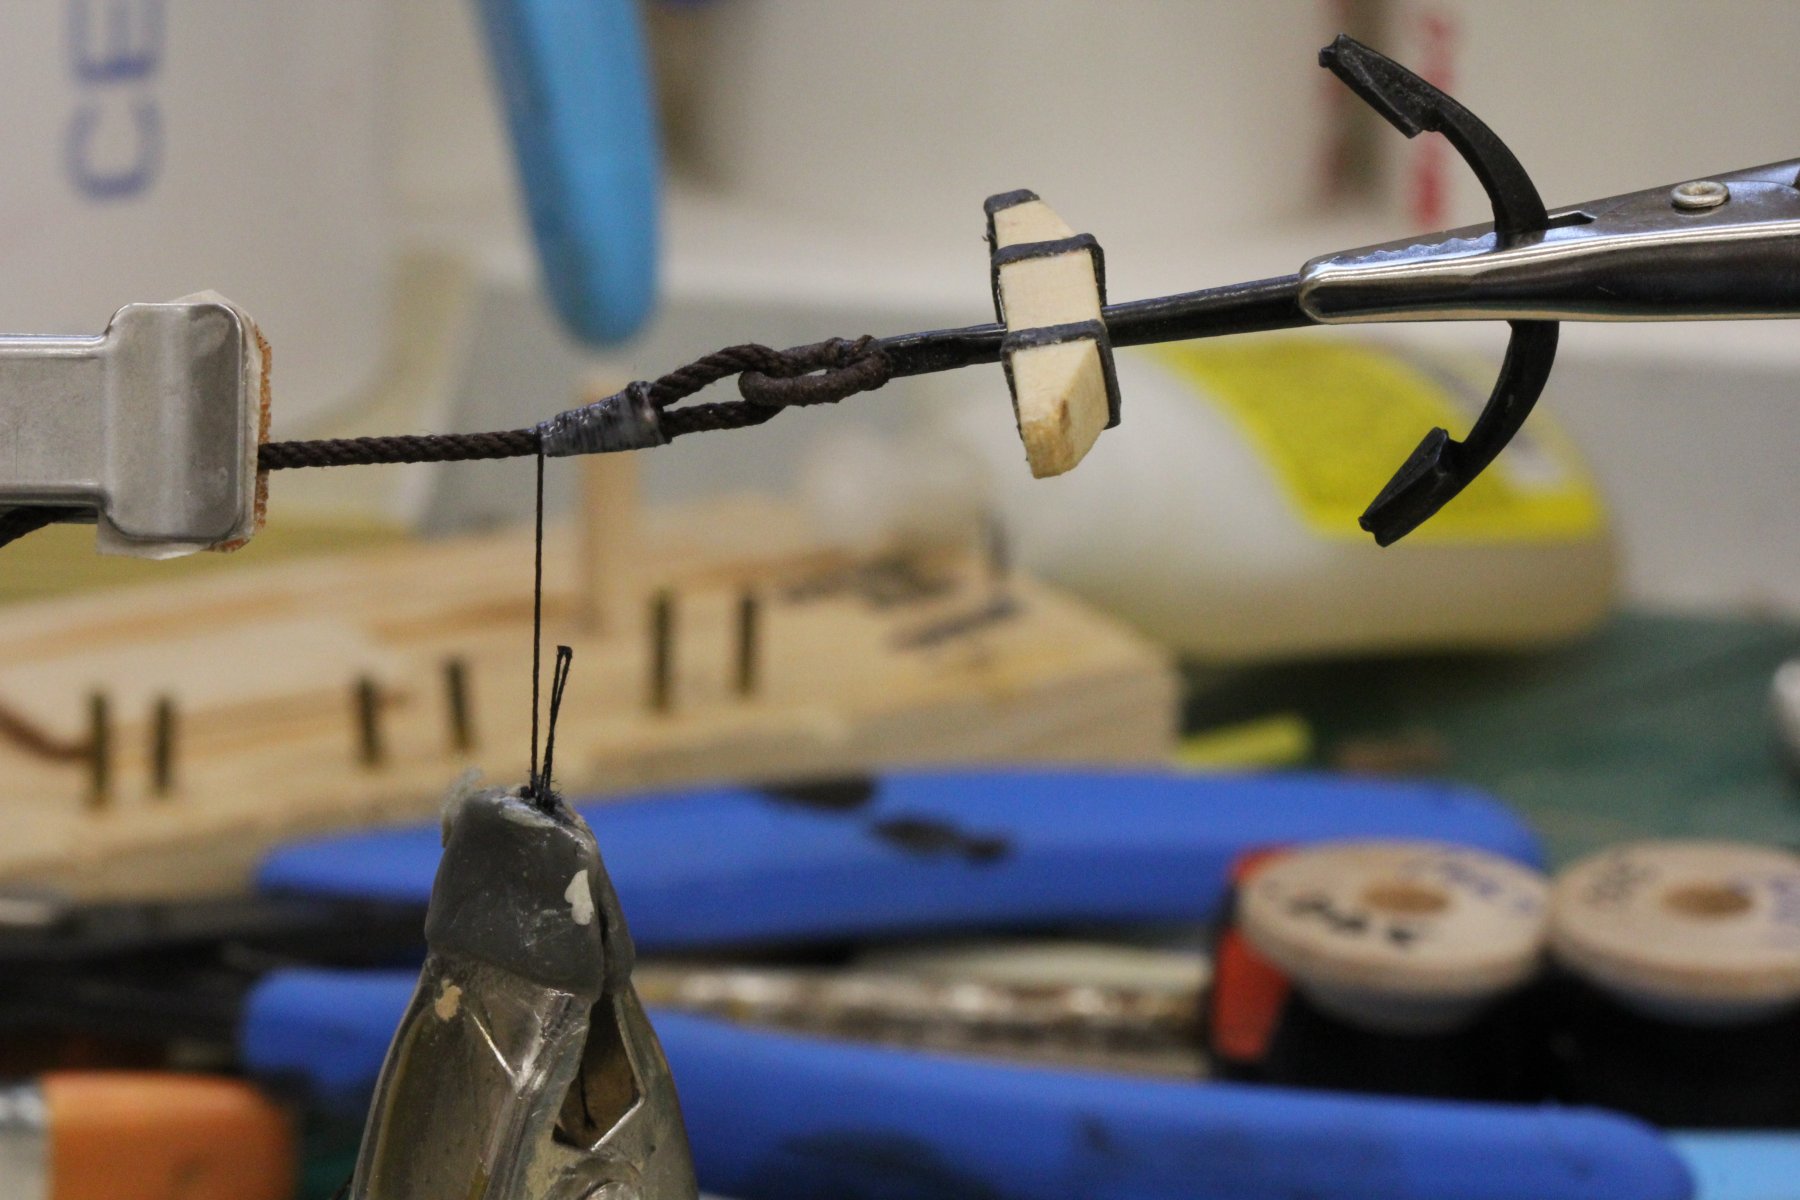
While installing the stbd side deadeyes I thought I might provide some details on how I do it. I am not saying this is the "right" way just my way developed over the five ship models I have built plus many hours looking at other build logs and tutorials. The starting point is a wooden jig attached to the lower deadeyes with a line where the top opening (upper deadeyes have the center opening at the top) in the upper deadeye should be located. It is important to make sure this is in contact with the channel at both ends and that the line is parallel with channel surface. The jig is attached to the lower deadeyes using pins through one of the upper openings. Once the jig is in place each shroud is brought to its lower deadeye and where the shroud crosses the upper deadeye line is marked. I drill holes (#72) through the jig at these locations and pin a deadeye in each place. For Niagara there are no significant angles that the shrouds must follow but if there were a line would be drawn on the jig from the upper deadeye center to the center of the lower deadeye to assist in getting the next step. Once the upper deadeyes are pined to the jig, they are aligned with the aforementioned alignment line (or "eyeballed to the correct orientation) and a second pin through one of the other holes is used to hold it in place. (Photo 1) I start at the front (but I do not think starting point is important) and wrap shroud #1 around the deadeye and use an alligator clip to hold the shroud together just above the deadeye. For Niagara the plans say that the shroud end goes behind the shroud so I go to some trouble to make sure the end is behind the shroud (although that is not obvious in picture #2). Using a piece of well waxed line (I am using Syren .008 Black but anything about this size or smaller will do) I tie an overhand knot around the shroud and under the alligator clip (Photo #3) Remove the alligator clip and adjust the knot to both get the shroud end behind the shroud (moving the knot to the side and pulling it athwart ship seems to help in this) and to get the knot location close to the deadeye - you should get something like Photo #4. The wax helps to thread to adhere to itself and not loosen badly. A touch of thick CA on the knot and let it set up. Remove the deadeye from the jig and use a "second hand" to hold the deadeye/shroud and a small clip to hold one end of the waxed line down. Wrap the other end of the waxed line around the line keeping the wraps as close together as possible. The wax helps keep the wraps from unraveling. (Photo #5) Wrap the waxed line down until you reach the top of the deadeye (Photo #6) Tie an overhand knot with the two ends of the waxed line which are now at the top of the deadeye and add a touch of thick CA. (Photo #7) Use a similar technique to add a second wrapping above the deadeye and trim the ends of the waxed line and the shroud end. I use cuticle shears to cut the line. They can get really close and seem to stay sharp. A completed deadeye (for Niagara) is shown in Photo #8. I return the completed deadeye to the jig and move to the next shroud. I believe it is important to keep all the deadeyes in place during this process. It is easier to see the tension in the completed ones as you clamp off the next shroud. It is possible to over tension a shroud and make some or all of those already completed too loose. Don't ask me how I know this.


- 367 replies
-
- 6
-
-
- model shipways
- niagara
- (and 1 more)
-
Thanks Tom. I decided to try and get all the stays (except the Fore Stay and Preventer - I don't want to do them until the fore mast is stabilized at the correct rack by the stays from the Main Mast.) from the Fore Mast to the Bowsprit located and prepared for tensioning but not close to their final position yet. I think I got them all but discovered I had not installed the tackle for the Outer Jib Stay - that tackle is out on the end of the Bowsprit (all the others are at or near the bow). Turns out I had the tackle made up and ready to install I just never got that far down in the "tackle to be installed" box. It is empty now. I got the lower deadeyes installed on the shrouds on the port side and will get the starboard side done tomorrow before I install the lanyards on the forward and rearward most shrouds on both sides as I did on the Main Mast. Once the Fore Mast is stable to port and starboard I will tackle the stays between the masts to stabilize the Fore at the proper rack. So here is how she looks at the bow now. Also a shot of the rats nest of lines coming off the Fore Mast that have to be sorted, routed and belayed - after the stays and shrouds are done.

- 367 replies
-
- 1
-
-
- model shipways
- niagara
- (and 1 more)
-
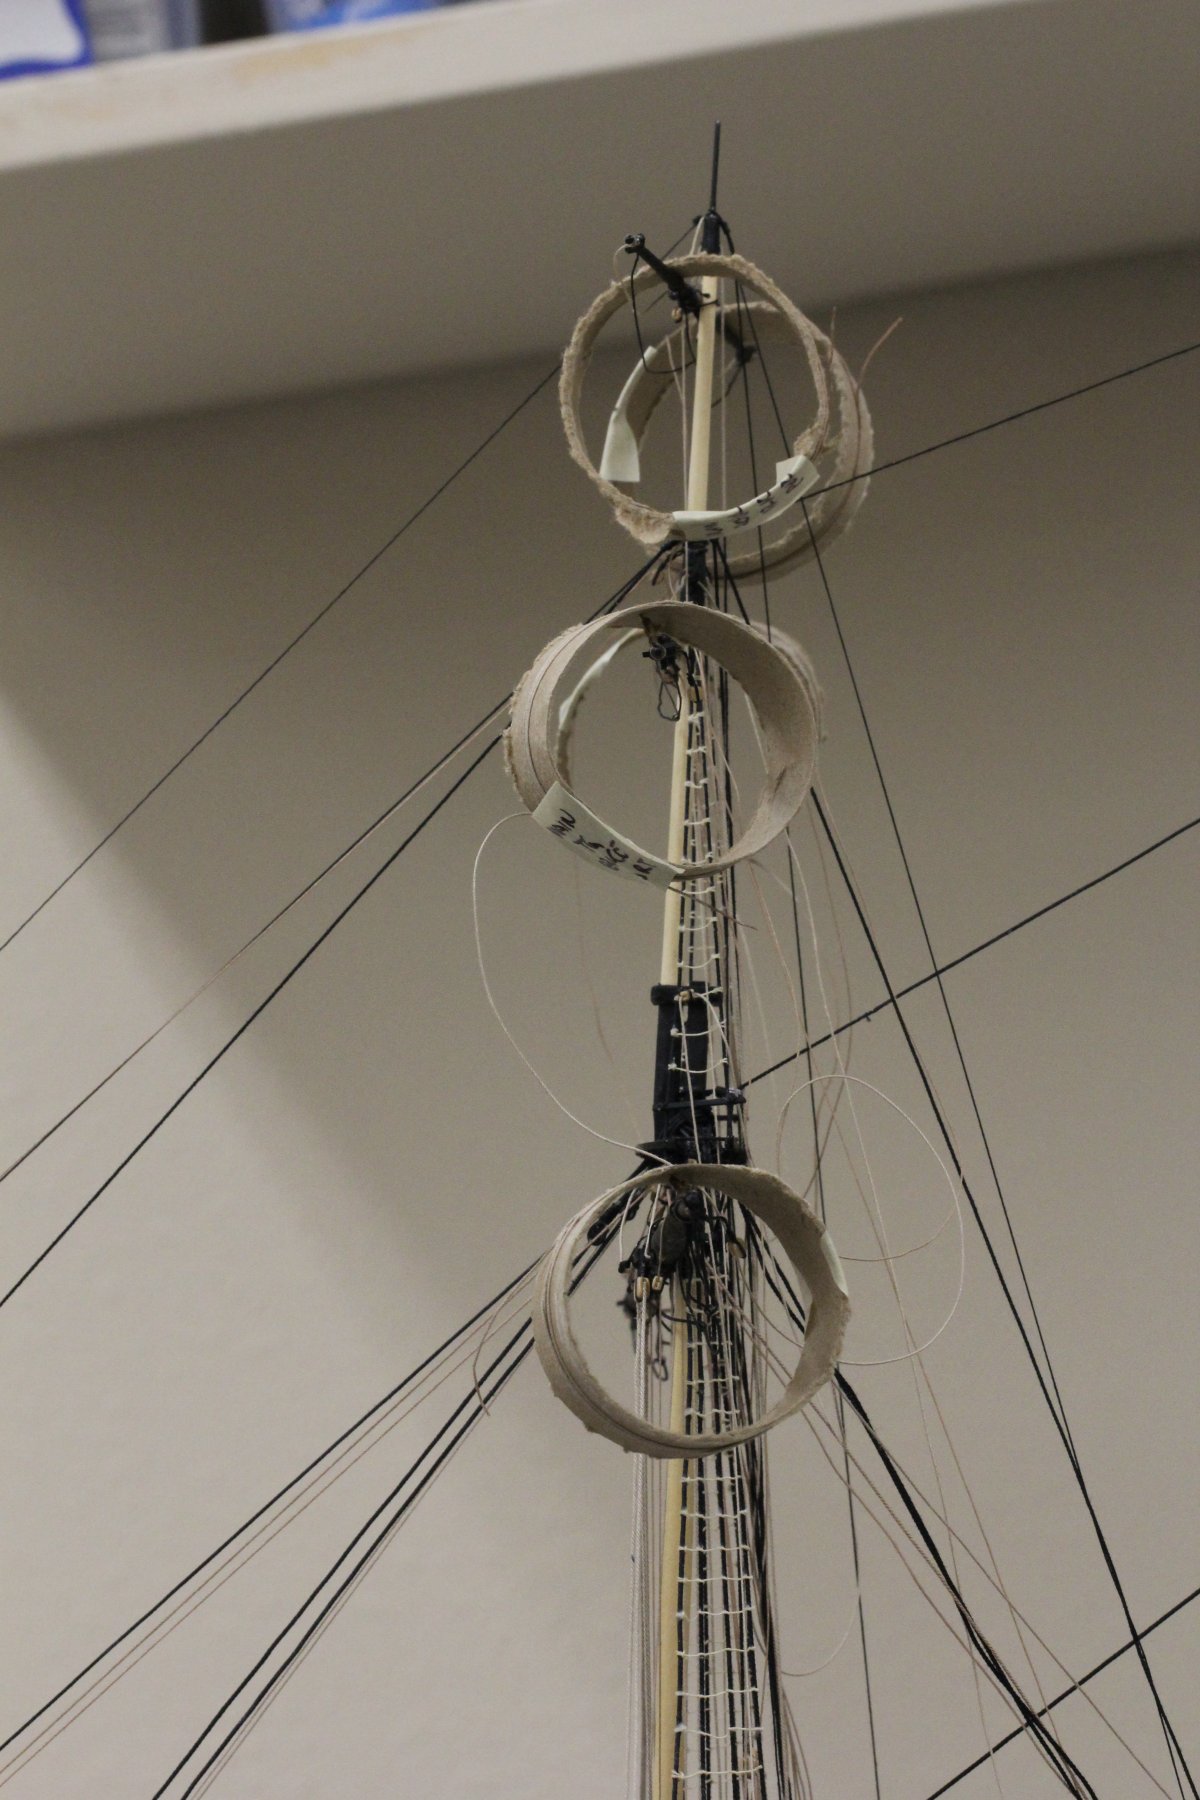
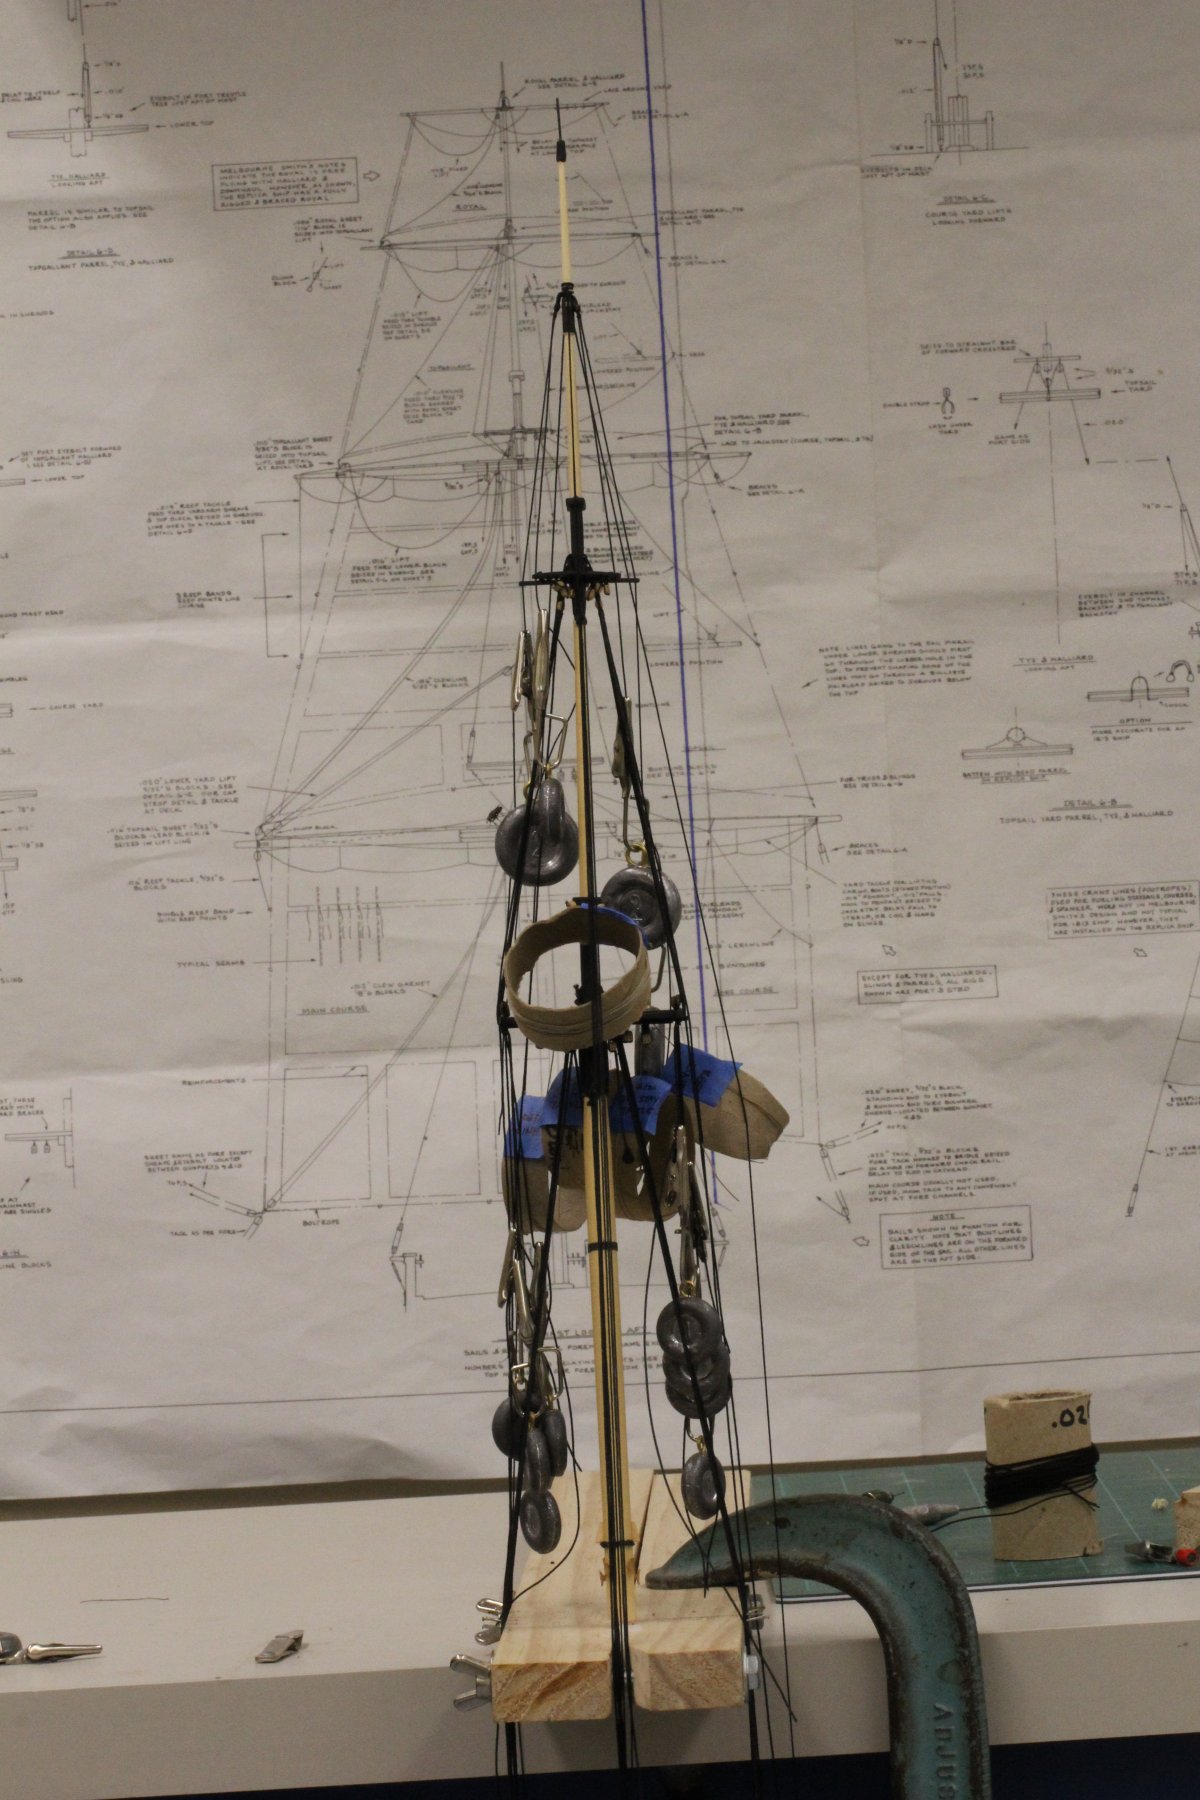
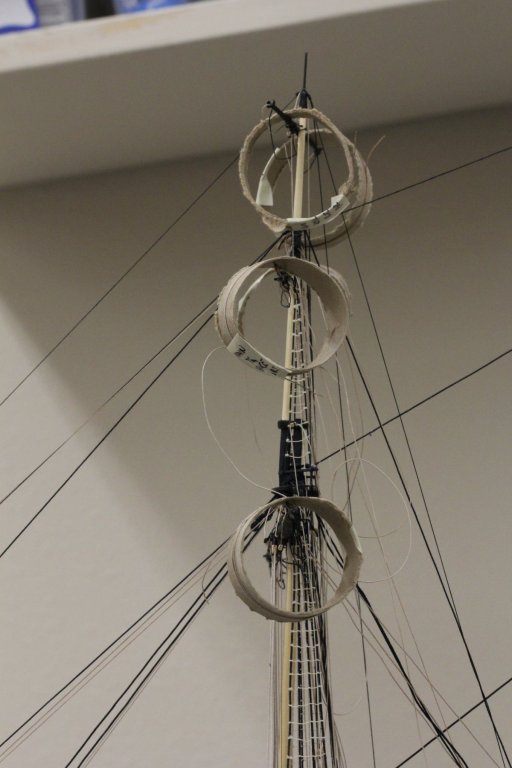
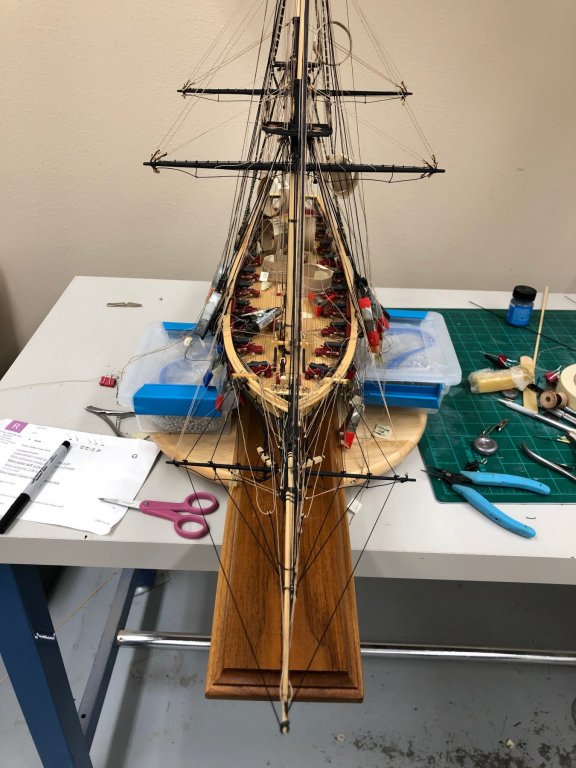
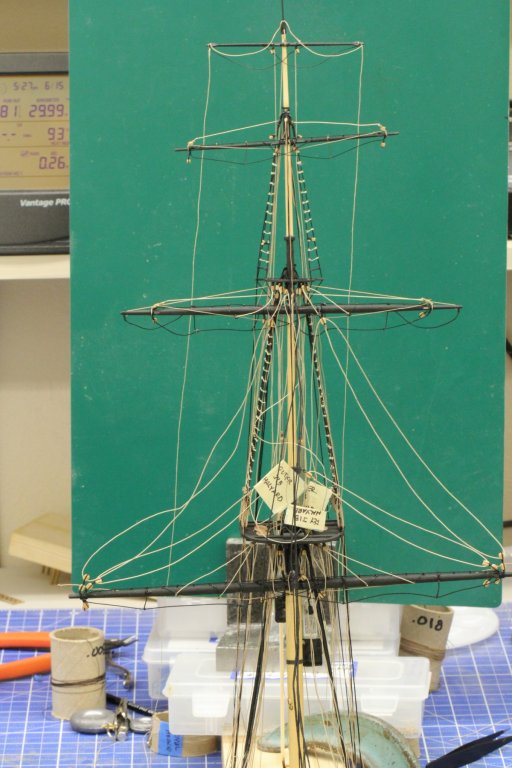
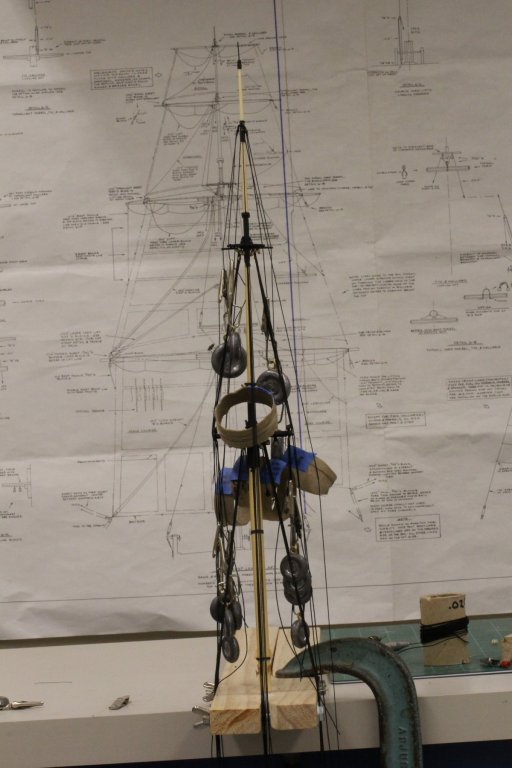
A milestone day - the Fore Mast has all it yards and as much of its rigging as it is going to have prior to installation and then, and then the Fore Mast is in place onboard the hull. Quite the rats nest that needs to be straightened out of the comes days and weeks. I have an internal deadline to finish by the middle of August - we are leaving on a road trip to see the Tall Ships at Eire, PA and then a "side trip" to Bluejackets in Maine to pick up the case they are building for it. I have built cases using Model Expo "kits" but I wanted to get this "done" without further effort on my part (other than driving 600 miles out of my way and back to pick it up). I used to spend a good deal of time in Maine on business but have not been there in 15 in years or so. Will be good to see what has changed.

- 367 replies
-
- 5
-
-
- model shipways
- niagara
- (and 1 more)
-
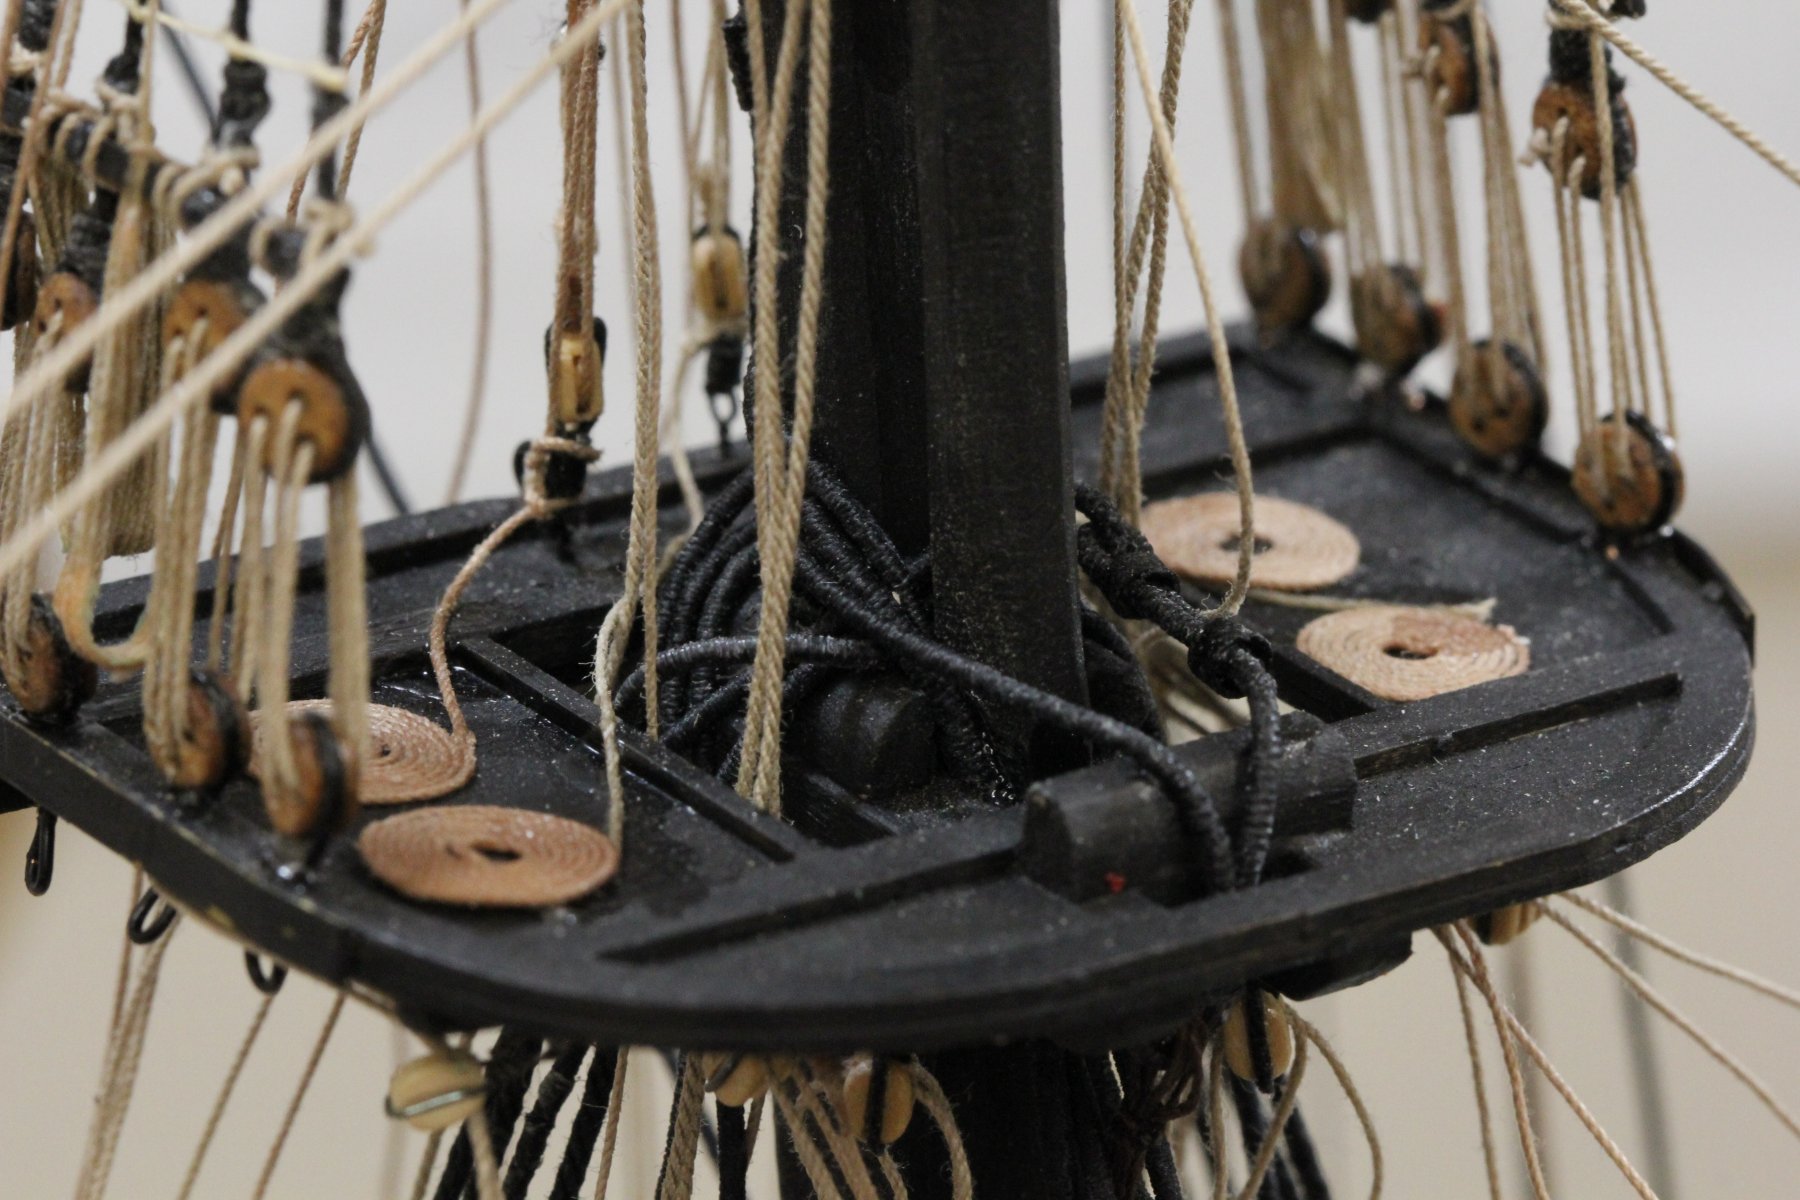
While preping the anchor rode for installation on the fore deck I found where the plans call for .047 line for the rode. I don't have that size and .054 is "close enough" for this build. So I ran the rode through the hawse holes and used 50/50 glue water tom get it to lie flat on the deck, then ran them to the holes in the forward hatch where they (presumably in real life) go into what would be called the "chain locker" but in this case the "rode locker" somewhere below deck and forward. Given that the capstan is back aft they must have lugged the rode up from storage and back to the capstan when they were going to raise the anchor(s). Doesn't sound like much fun as 10" line is pretty heavy, even heavier when wet. Anyway here is what the anchor rode looks like on the fore deck. The anchors are hanging from the cat head with temporary lines to keep them out of the way for now. Continued to install yard arms, I believe I have the top three complete. Here is a shot of the Fore Mast with the upper three yards (and most of their rigging) in place. Also a shot of the Fore top showing the Top Sail reef (a port and starboard set) and Top Gallant halyard tackles. There are two more items that terminate on this platform, the Main Royal Stay and the Main Top Gallant Stay. The tackles for these are "ready and waiting" as it was easier to rig them now and just attach the stay to the tackle than do that and then try to rig the tackle after the Fore Mast is in place. The Main Royal Tackle is clamp you can see at the bottom right of the picture.
- 367 replies
-
- 4
-
-
- model shipways
- niagara
- (and 1 more)
-
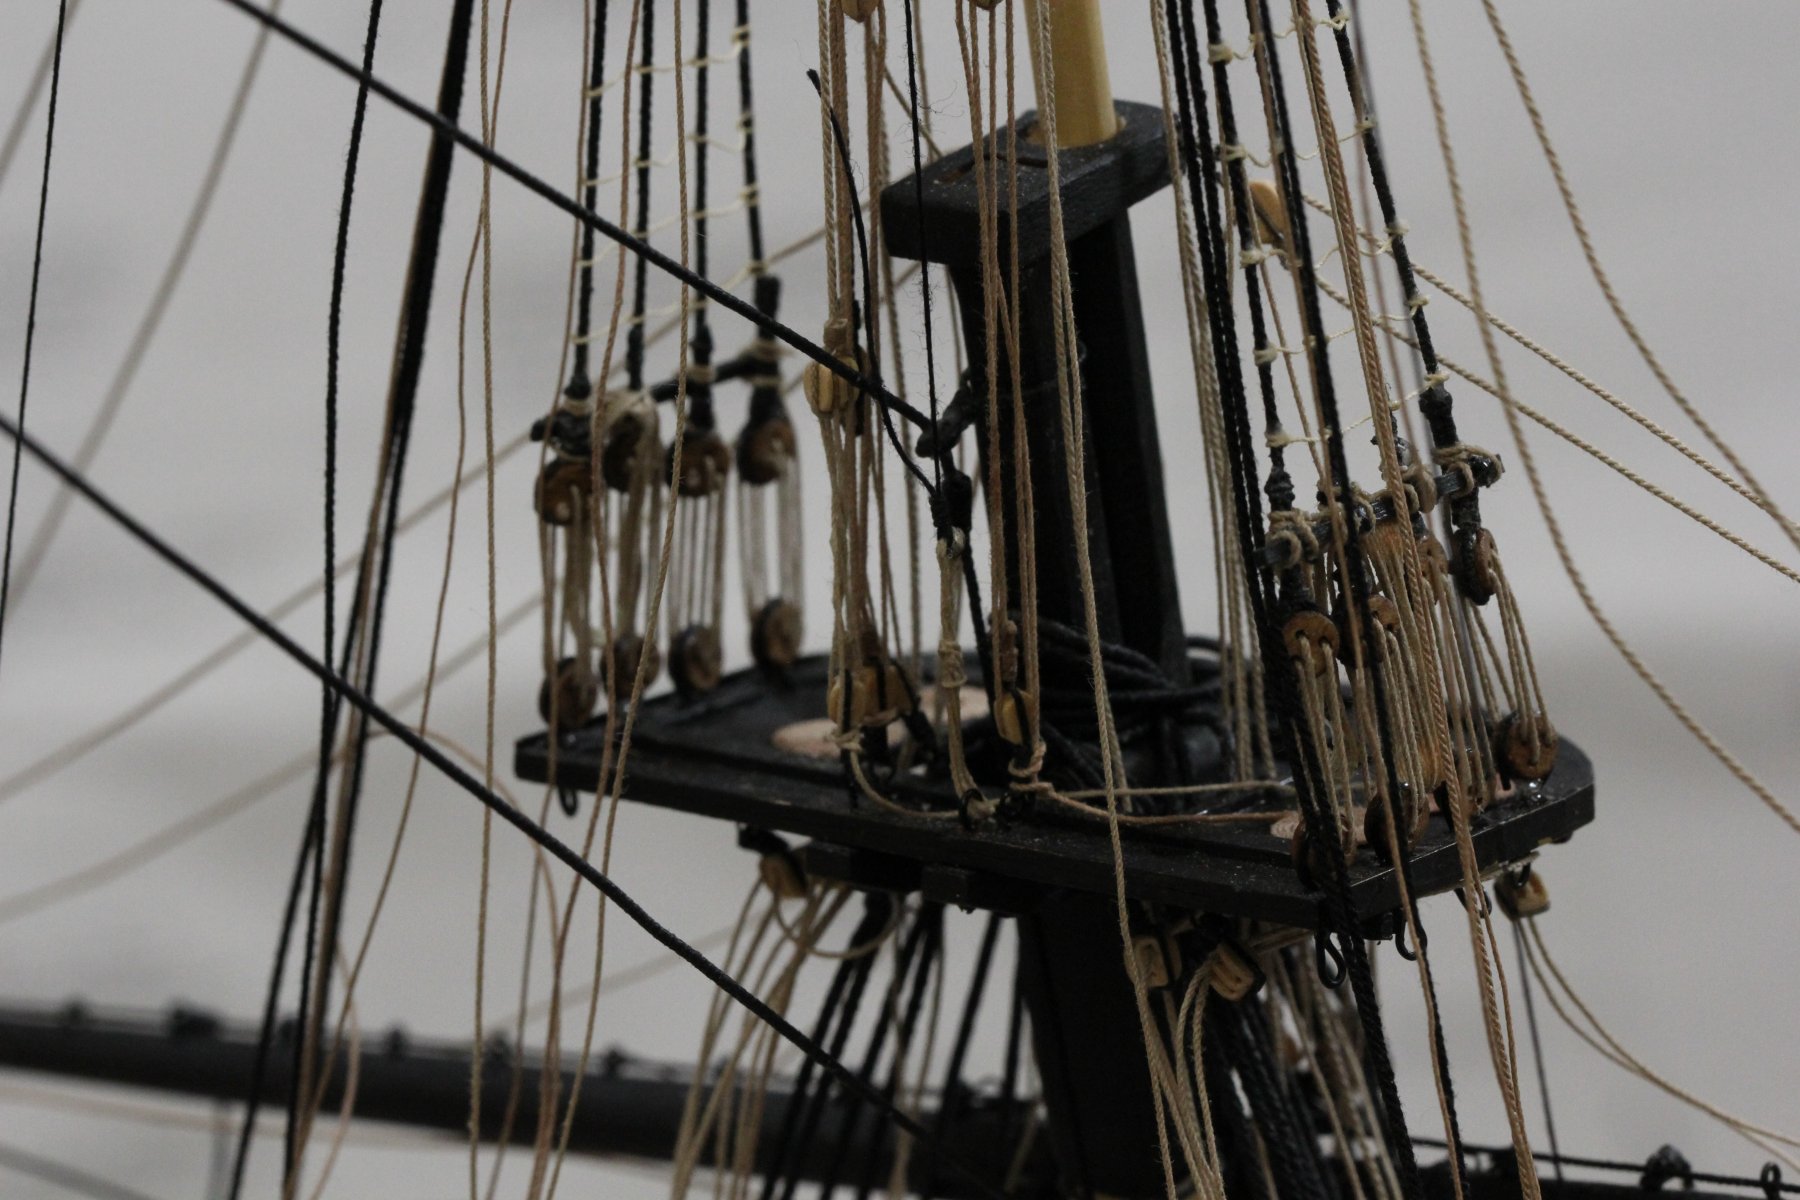
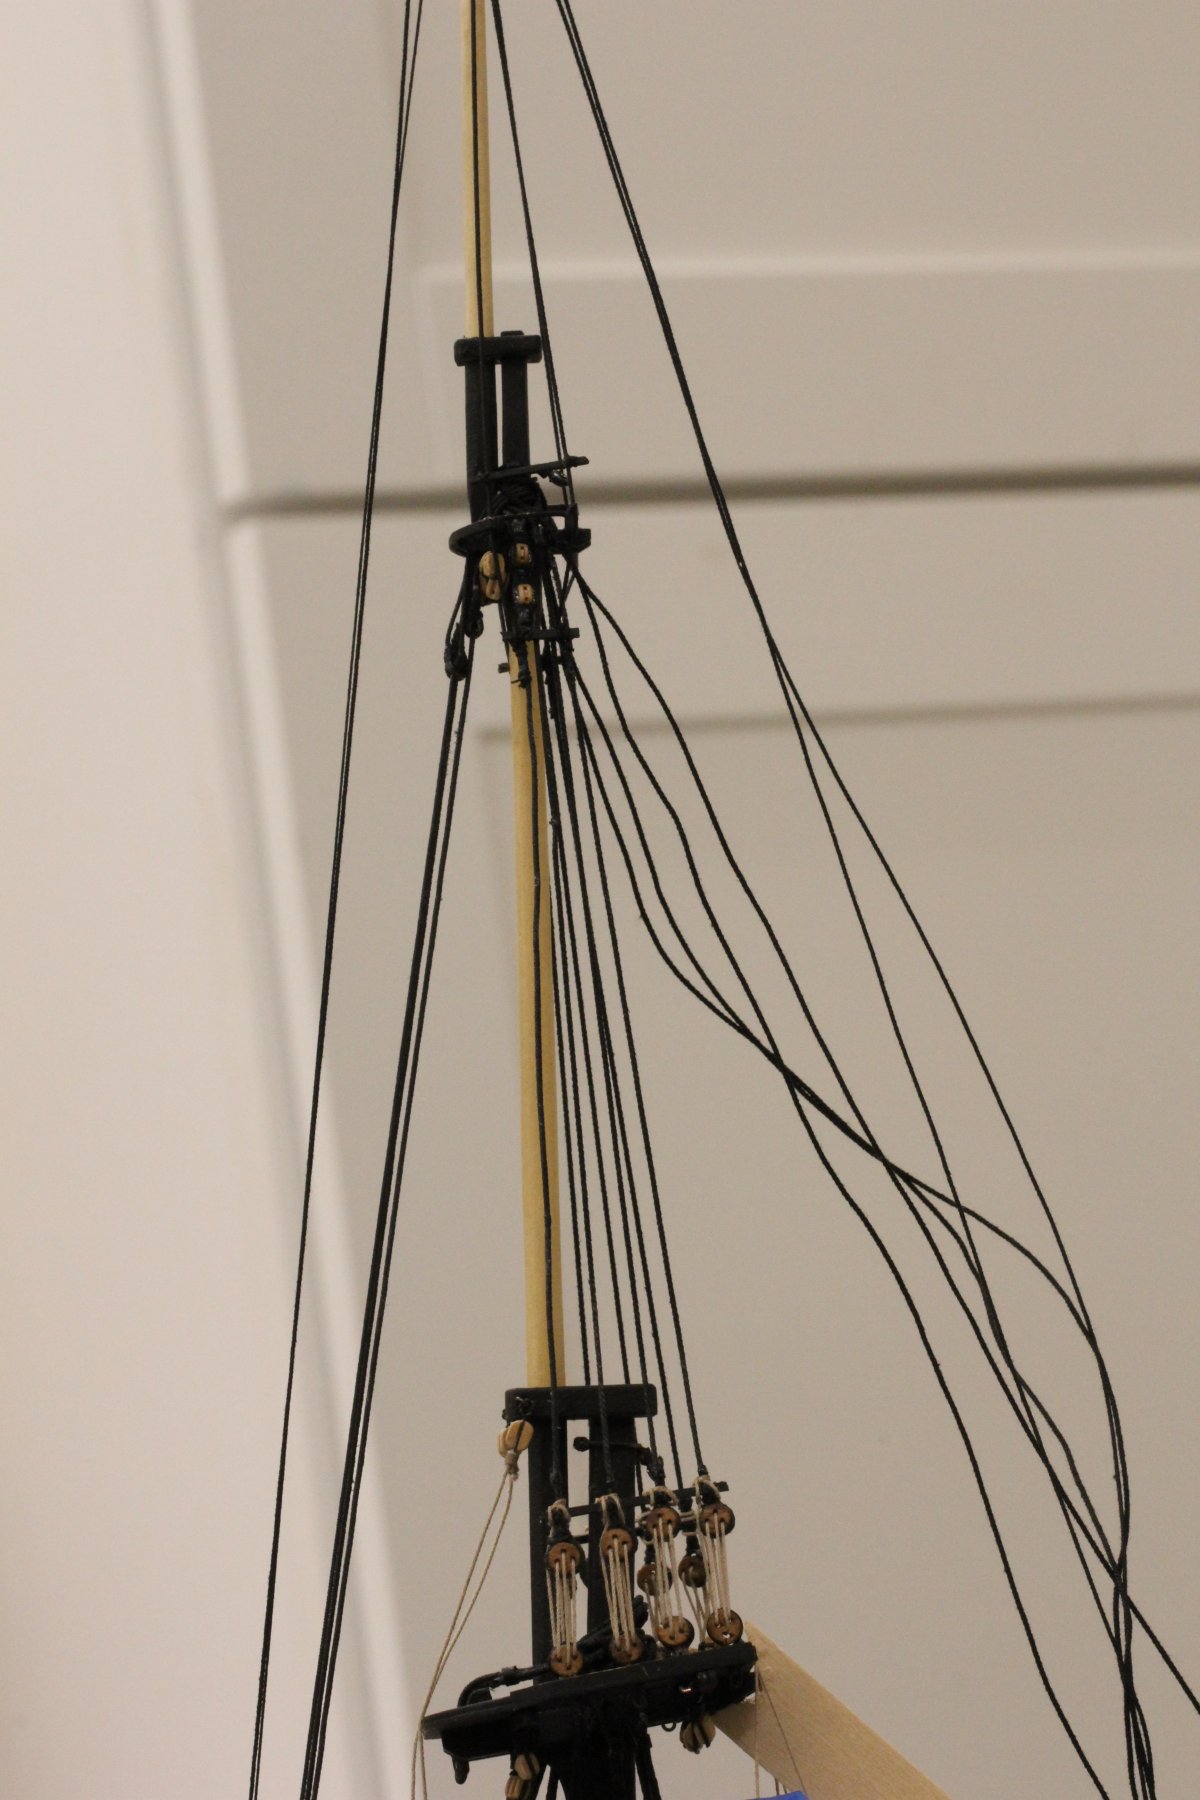
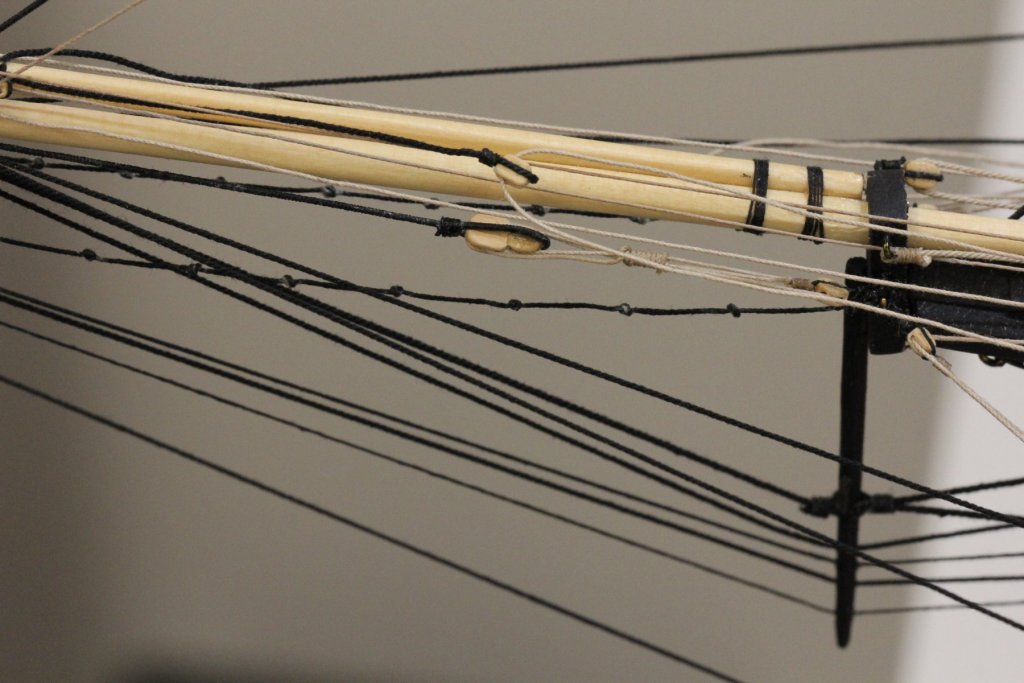
I finally got around to finishing the Main shrouds (those not involved in ratlines). I did not belay the bitter ends as they may need a final adjustment when the forward pulling stays are attached when the Fore Main is installed. Here are the port and stbd sides showing the Main Top Mast, Top Gallant and Royal backstays. Having experienced the fun of accessing the eyebolts where the Royal backstay tackles attach with all the rigging in place I decided to install the 3/32 S block, with the lanyard already in place (it will be attached to the "becket" of the 3/32 S at the end of the Royal backstay) for the Fore mast now. I also added the course yard lift tackle (which attaches inside the fwd Fife rail) now and the bullseyes and lanyards for the Main Top Mast and Spring Stays terminations which are also inside the Fwd fife rail. Hopefully this will make getting these attached easier once the Fore mast is in place.

- 367 replies
-
- 4
-
-
- model shipways
- niagara
- (and 1 more)
-
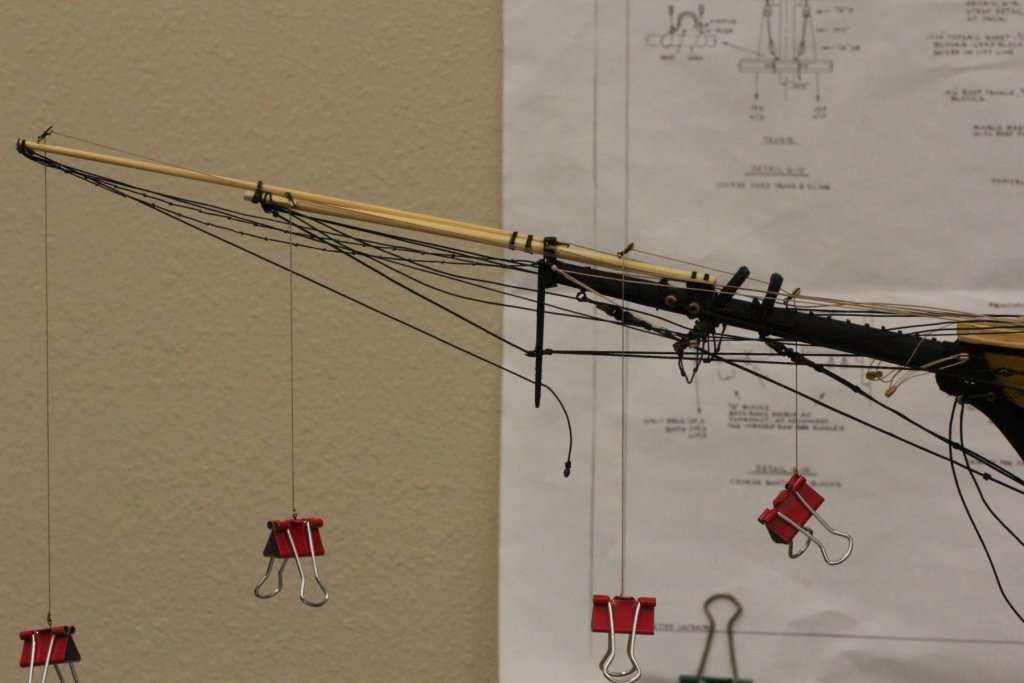
Continuing my search for things to do before the Fore Mast is installed lead me to the head sail sheet lines. All but the Flying Jib have a pendant with a block on each end and the standing end is attached to some part of the structure (eyebolts or the support rod of the cat heads). That being the case the end that terminates at the bulkhead cleats can be done now and any adjustment (as long as the line gets shorter of course) can be done later at a more accessible location. So here are the stbd side head sail sheets belayed to their respective cleats. The port side is similar but the Flying Jib on that side can't be done until later. I am going to make up some of the tackles that will be required later and then it will be time to mount the yard arms on the Fore mast at get to rigging them.
- 367 replies
-
- 3
-
-
- model shipways
- niagara
- (and 1 more)
-
Tom, Nice to see you finally got back to what is important. Down here in Florida we stay inside as much as possible in the summer. Winter is the time for barbecues, fishing and other outdoor activities. But anytime in the shipyard is a good time. I wish my bowsprit looked that good.
-
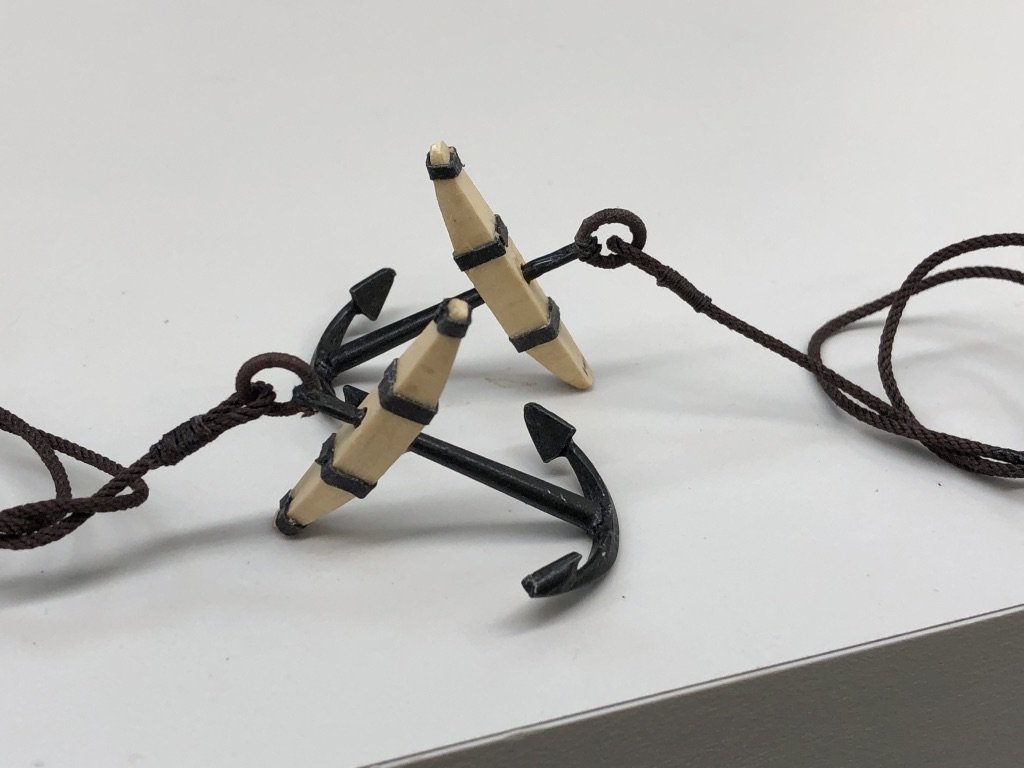
Messing around with a few odds and ends (trying to avoid working on the Fore mast for some reason). Decided to get the anchors ready for installation. It will probably be easier without the Fore mast in place. I previously wrapped the anchor rings with .008 Syren dark Brown rope so will use Syren Dark Brown for the anchor rode too. I had both .065 and .054 sizes available (and the smaller ones too but the anchor rode should be the largest line on the ship). I tried the .065 but it is too big to get through my improvised anchor rode "fair leads" so I will use the .054 (that is ~3.5" in diameter at scale or almost 11" circumference which is pretty heavy line). Here are the anchors in the jig for serving the eye "splice" and ready for installation (a bit of touch up required).

- 367 replies
-
- 4
-
-
- model shipways
- niagara
- (and 1 more)
-
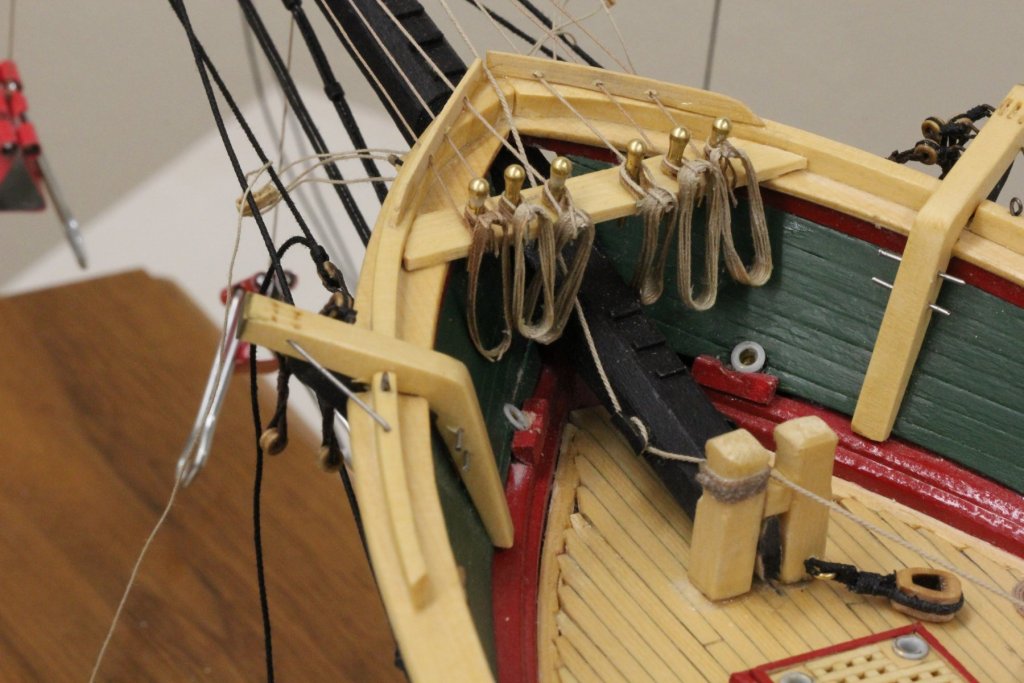
Before beginning the fore yard arms I "took a break" and ran the head sail downhauls (the bitter end will hook to the respective halyards) to the fwd pin rail along with the sprint sail yard lifts. When I started this effort I noticed that I had put the fwd pin rail on top of the main rail instead of under or at the same level (the plans are not clear on exactly where ism should go - except not on top). At this point I decided to leave well enough alone and added an additional 1/32" X 3/32 strip on top of the existing splash shield/fairlead to serve as the fairlead for these lines. Clearly I could have done a better job by cleaning up the inside where the holes are drilled but you live and learn. In addition to the downhauls and lifts there is the jib boom out haul tackle which is shown on the plans but not on the belaying plan. I took that line through the opening between the two pieces of new splash shield and to the stbd side cleat on the side of the bowsprit and then to the fwd bitts. Seemed like the only real alternative - the port side cleat is used for the Royal Stay tackle. So here is what it looks like with the lines secured and rope coils added.
- 367 replies
-
- 5
-
-
- model shipways
- niagara
- (and 1 more)
-
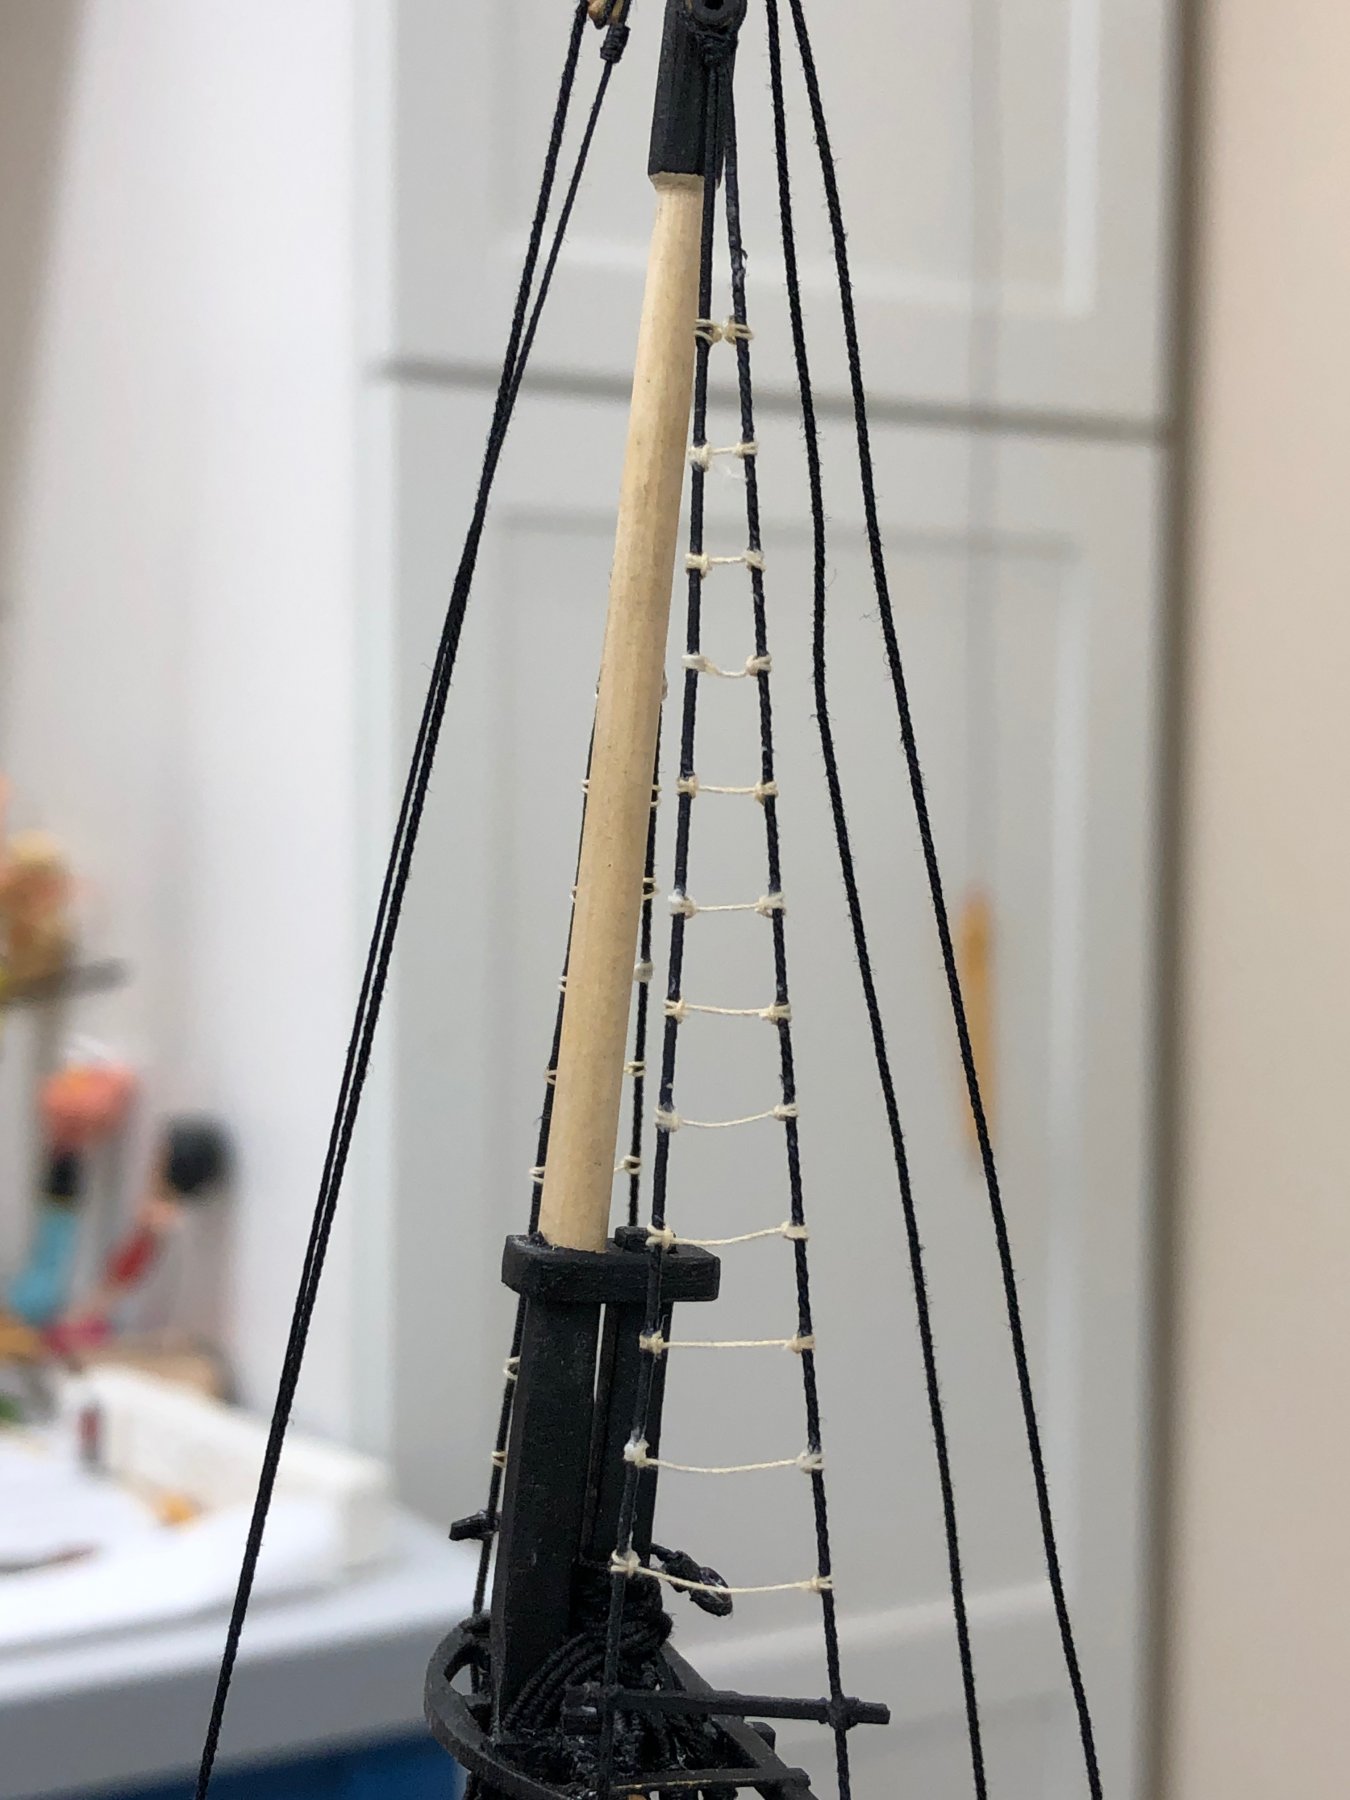
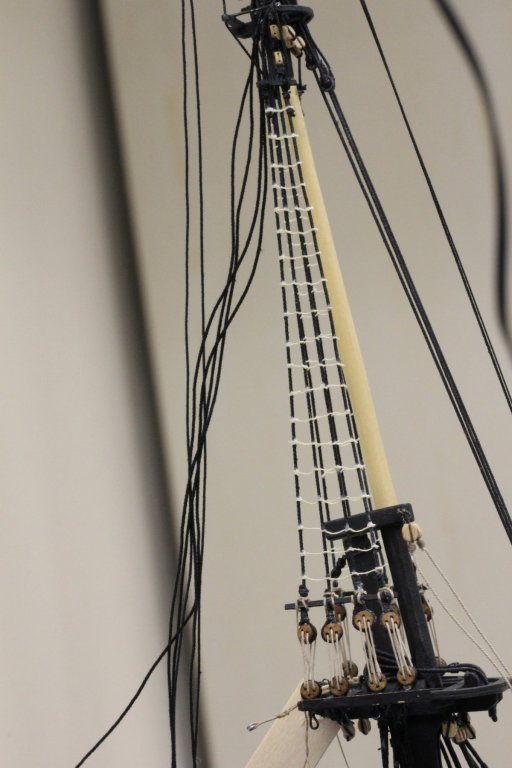
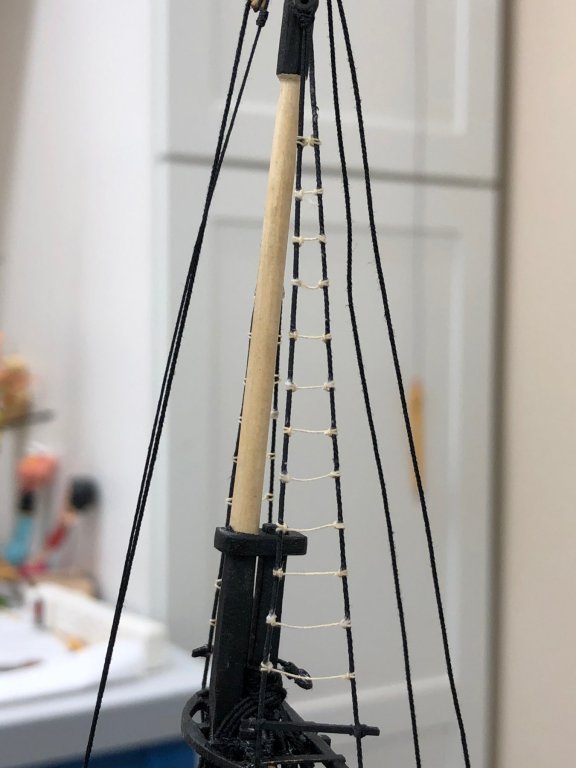
Fore Top Mast Ratlines done - on to the yard arms after I stroup a few more blocks for the braces and some that I think are missing on the fore yard arms.
- 367 replies
-
- 3
-
-
- model shipways
- niagara
- (and 1 more)
-
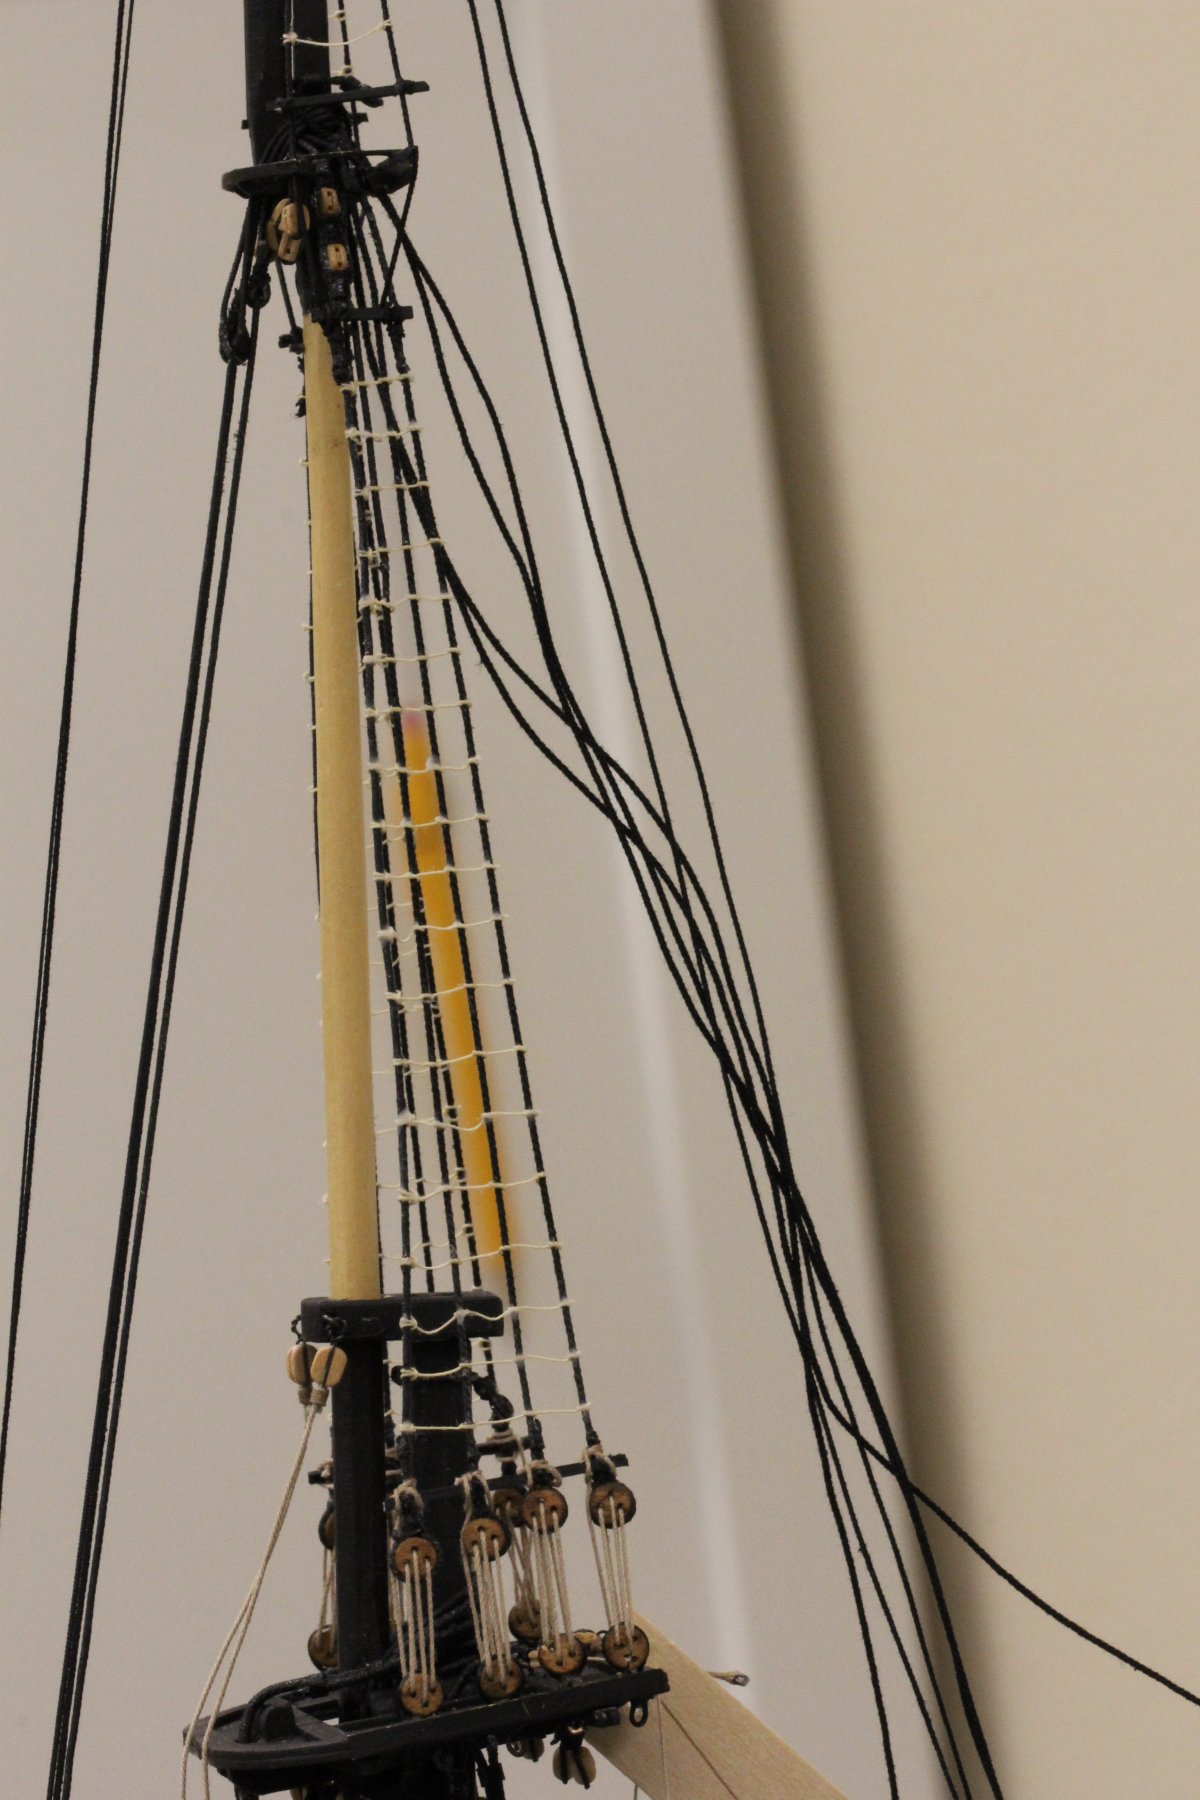
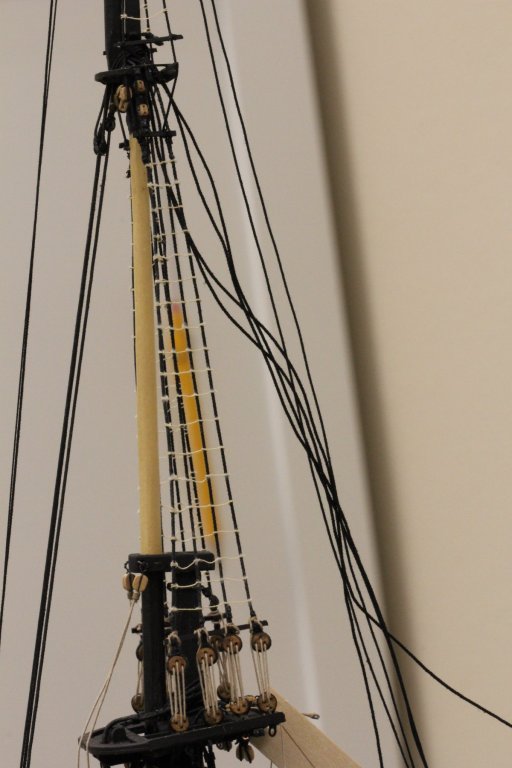
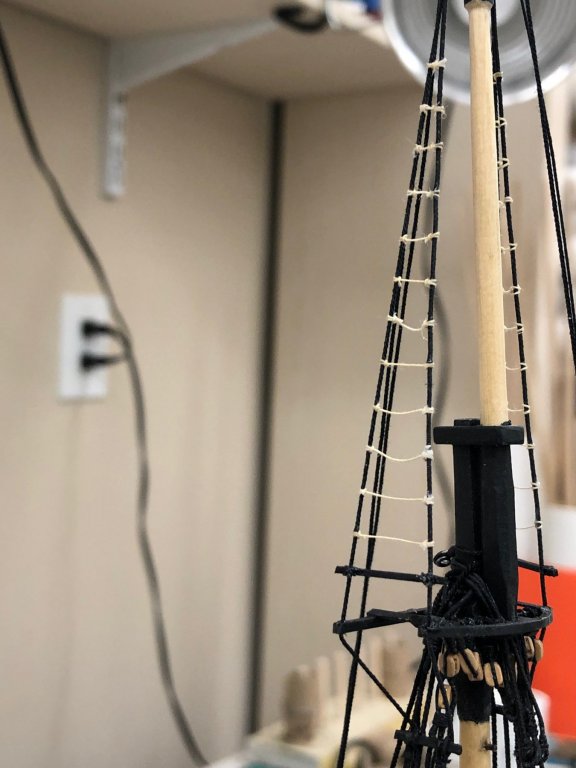
Fore Top Gallant mast ratlines (the easy ones) complete. I believe those are "calf hitches" on both ends.
- 367 replies
-
- 2
-
-
- model shipways
- niagara
- (and 1 more)
-
Upper Fore mast now ready for ratlines. Sheer poles installed and Top Gallant shrouds terminated per the plans. Having done the Main it was easier to get these completed. Hopefully the ratlines will be easier also.

- 367 replies
-
- 4
-
-
- model shipways
- niagara
- (and 1 more)
-
BJ, I built the Model Shipways Bluenose but it was back in 2012 or so. I do not remember much about the build except that I finished it and the completed model (in a Bluejacket's case) is hanging on the wall in my living room. It was my second kit (Bluejacket's Smuggler was first) and first plank on bulkhead (Smuggler is a solid hull). I believe you are correct that it is not a difficult hull to plank since I don't remember any significant issues. I remember buying a plank bender (the modified soldering iron type) but never used it. I would sand the wood and then soak. Sanding wet wood is pretty messy and difficult to control. Sandpaper (like 80 grit) glued to tongue depressors make really effective sanding sticks where you need to take off lots of wood - like shaping filler blocks. Also consider substituting balsa wood (I get mine at the local Michael's) for whatever the kits supply. It sands quite easily compared to bass wood or whatever they are putting in the kits these days. Your methodology for transferring the breading line to the keel sounds fine. I recommend using rubber cement to attach the plans to the keel. It makes it easier to get off when you are done. Looking forward to following your build. GLH
- 3 replies
-
- 1
-
-
- bluenose
- model shipways
- (and 1 more)
-
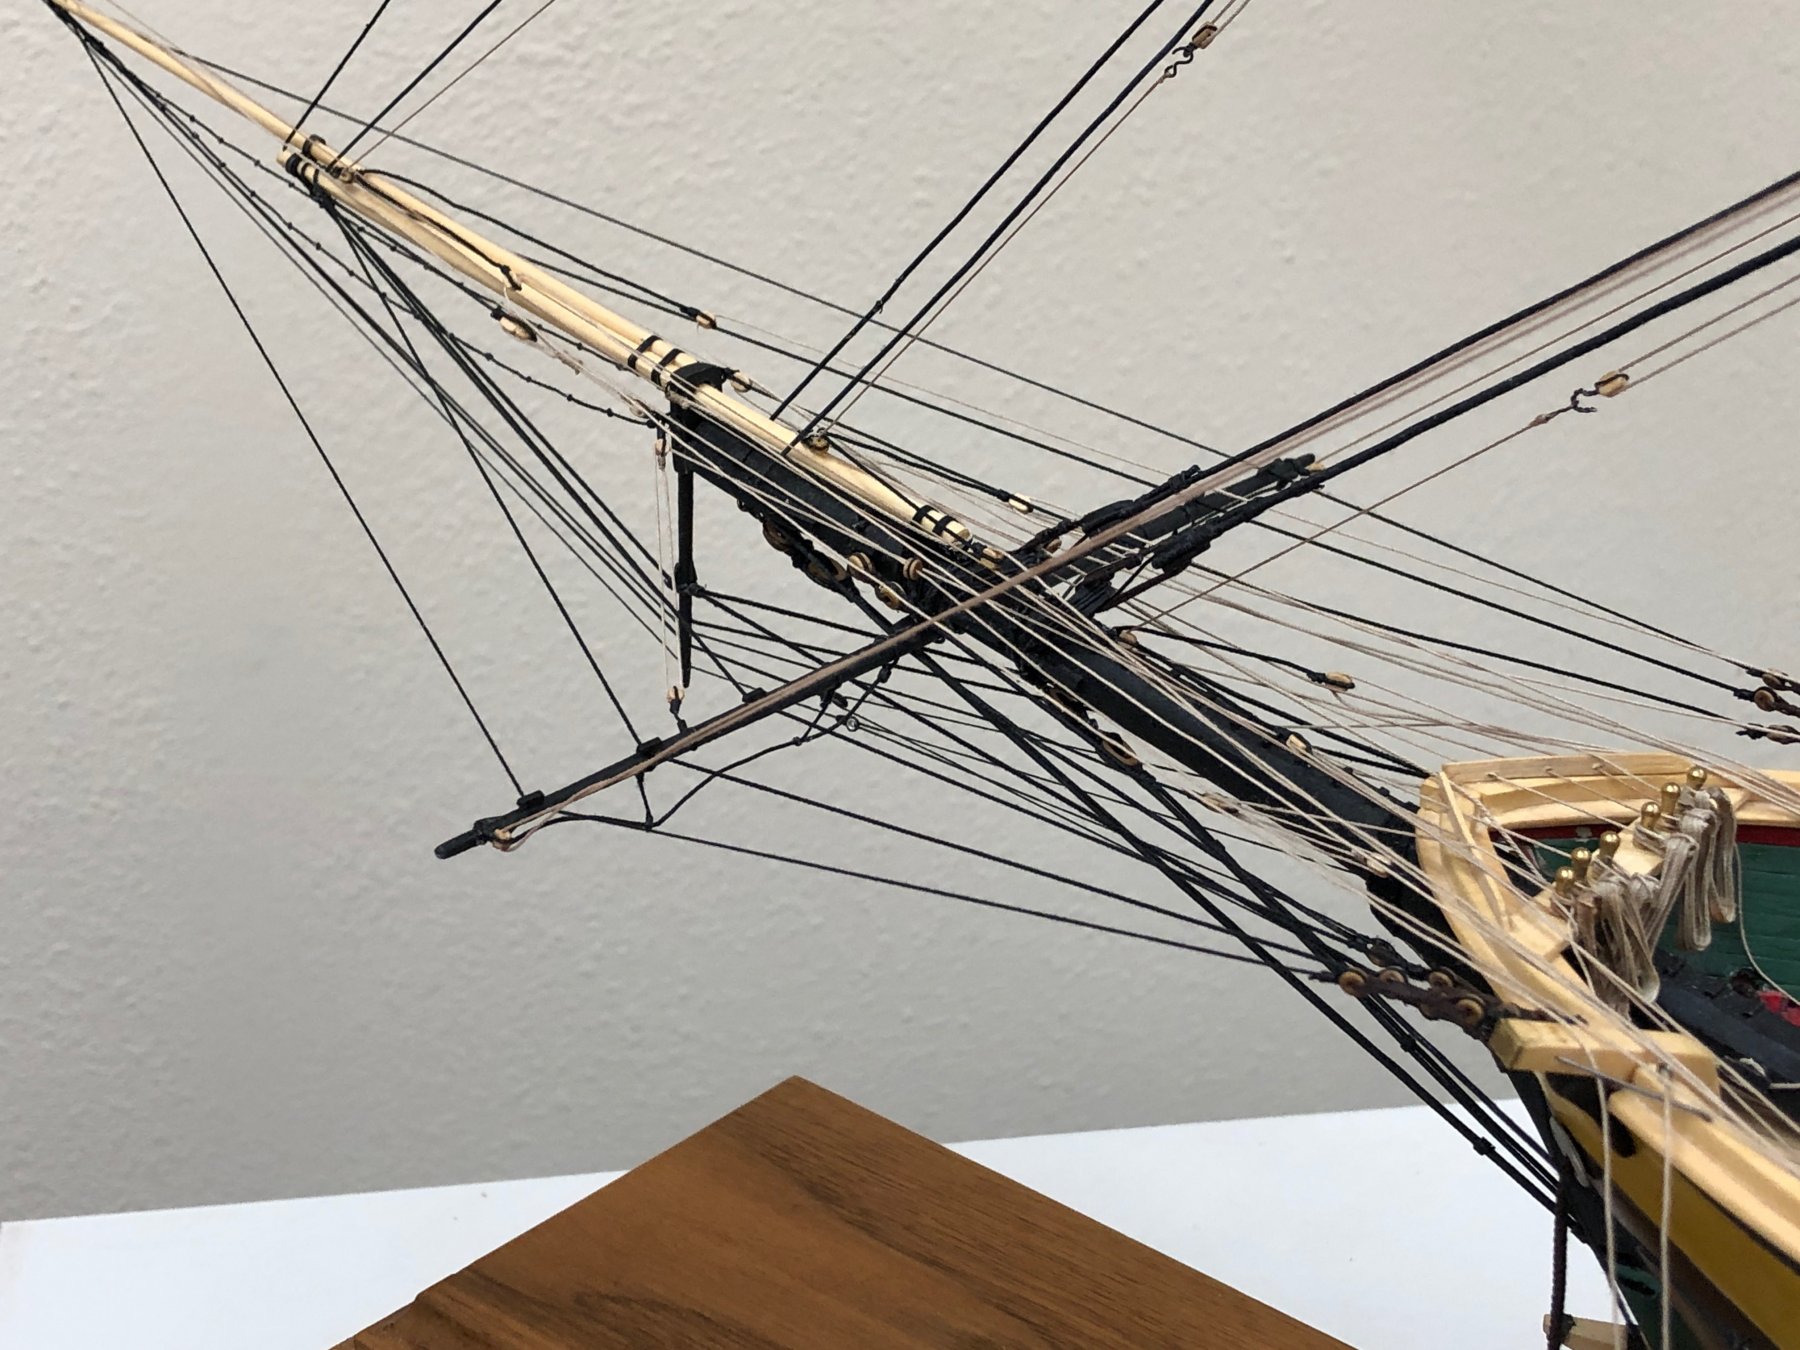
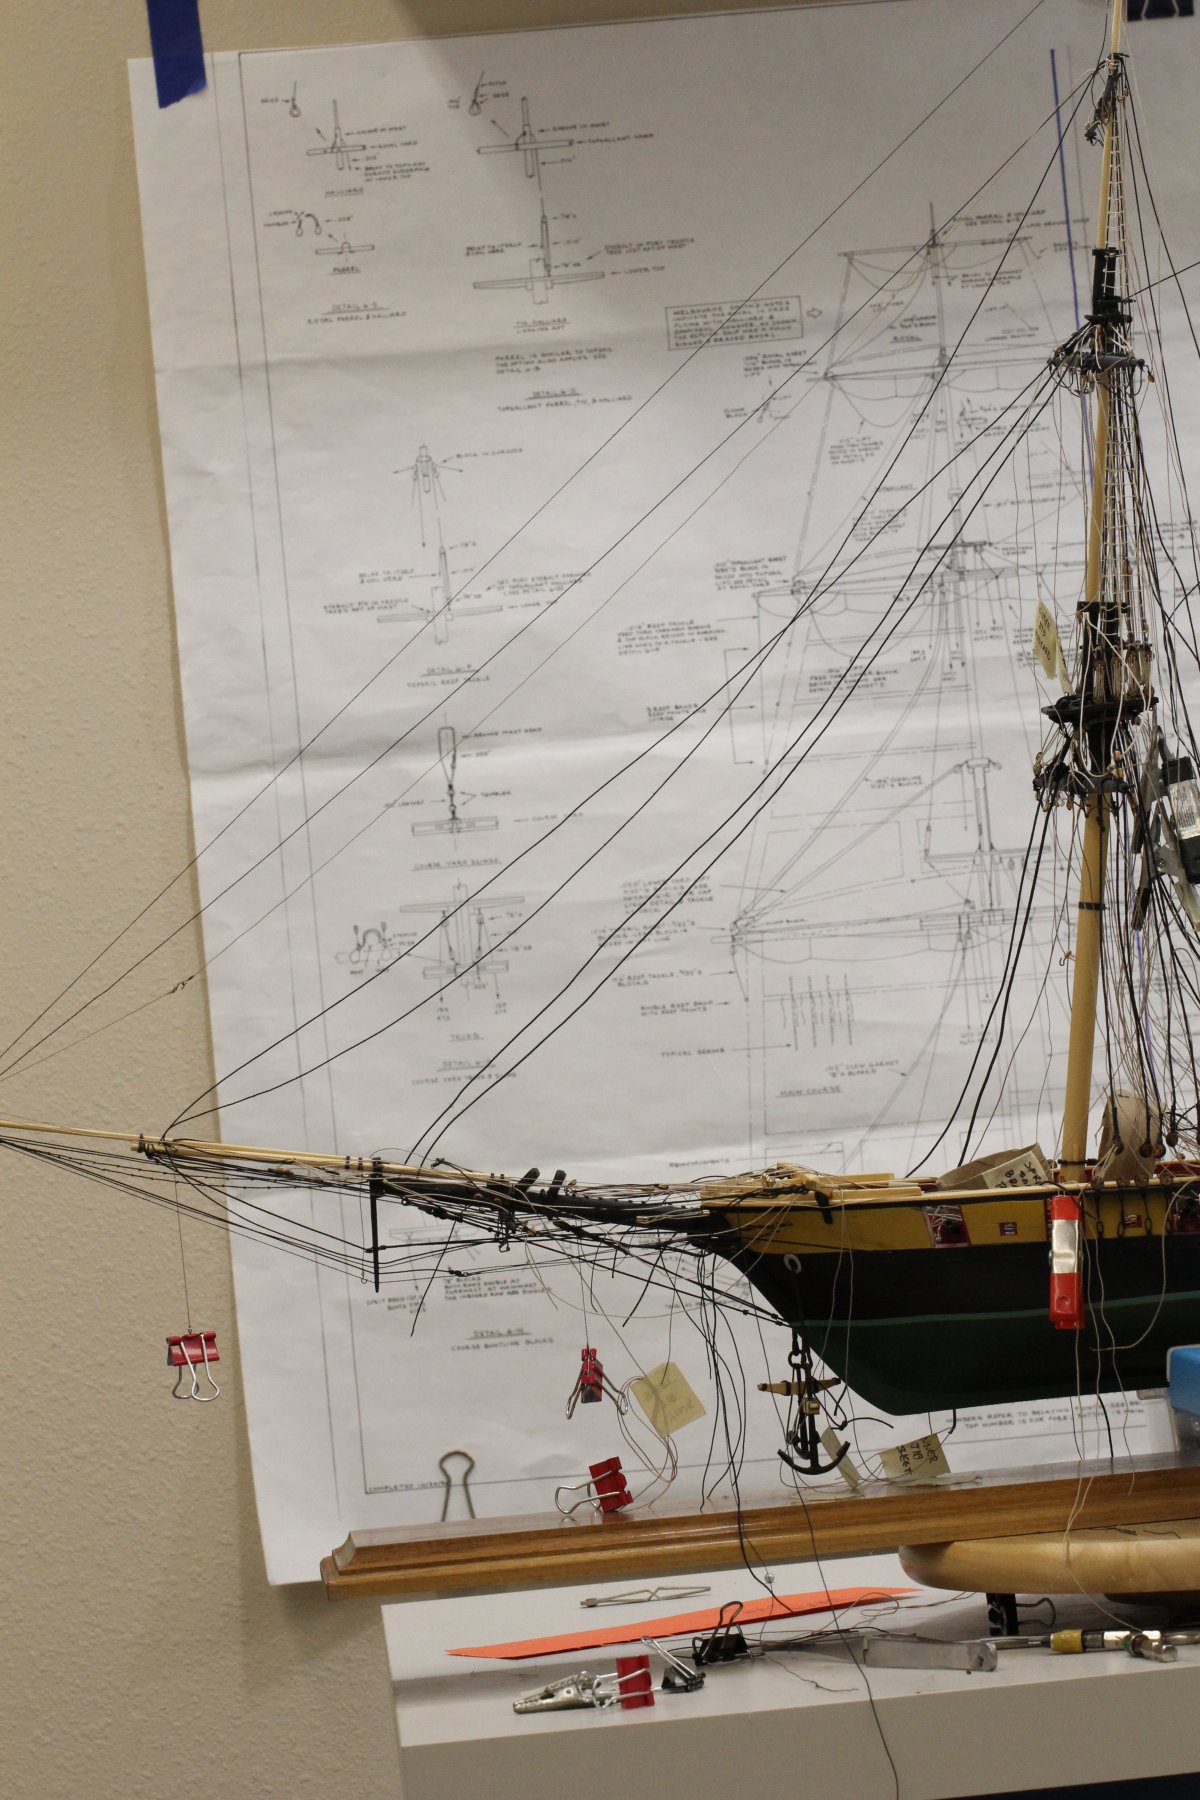
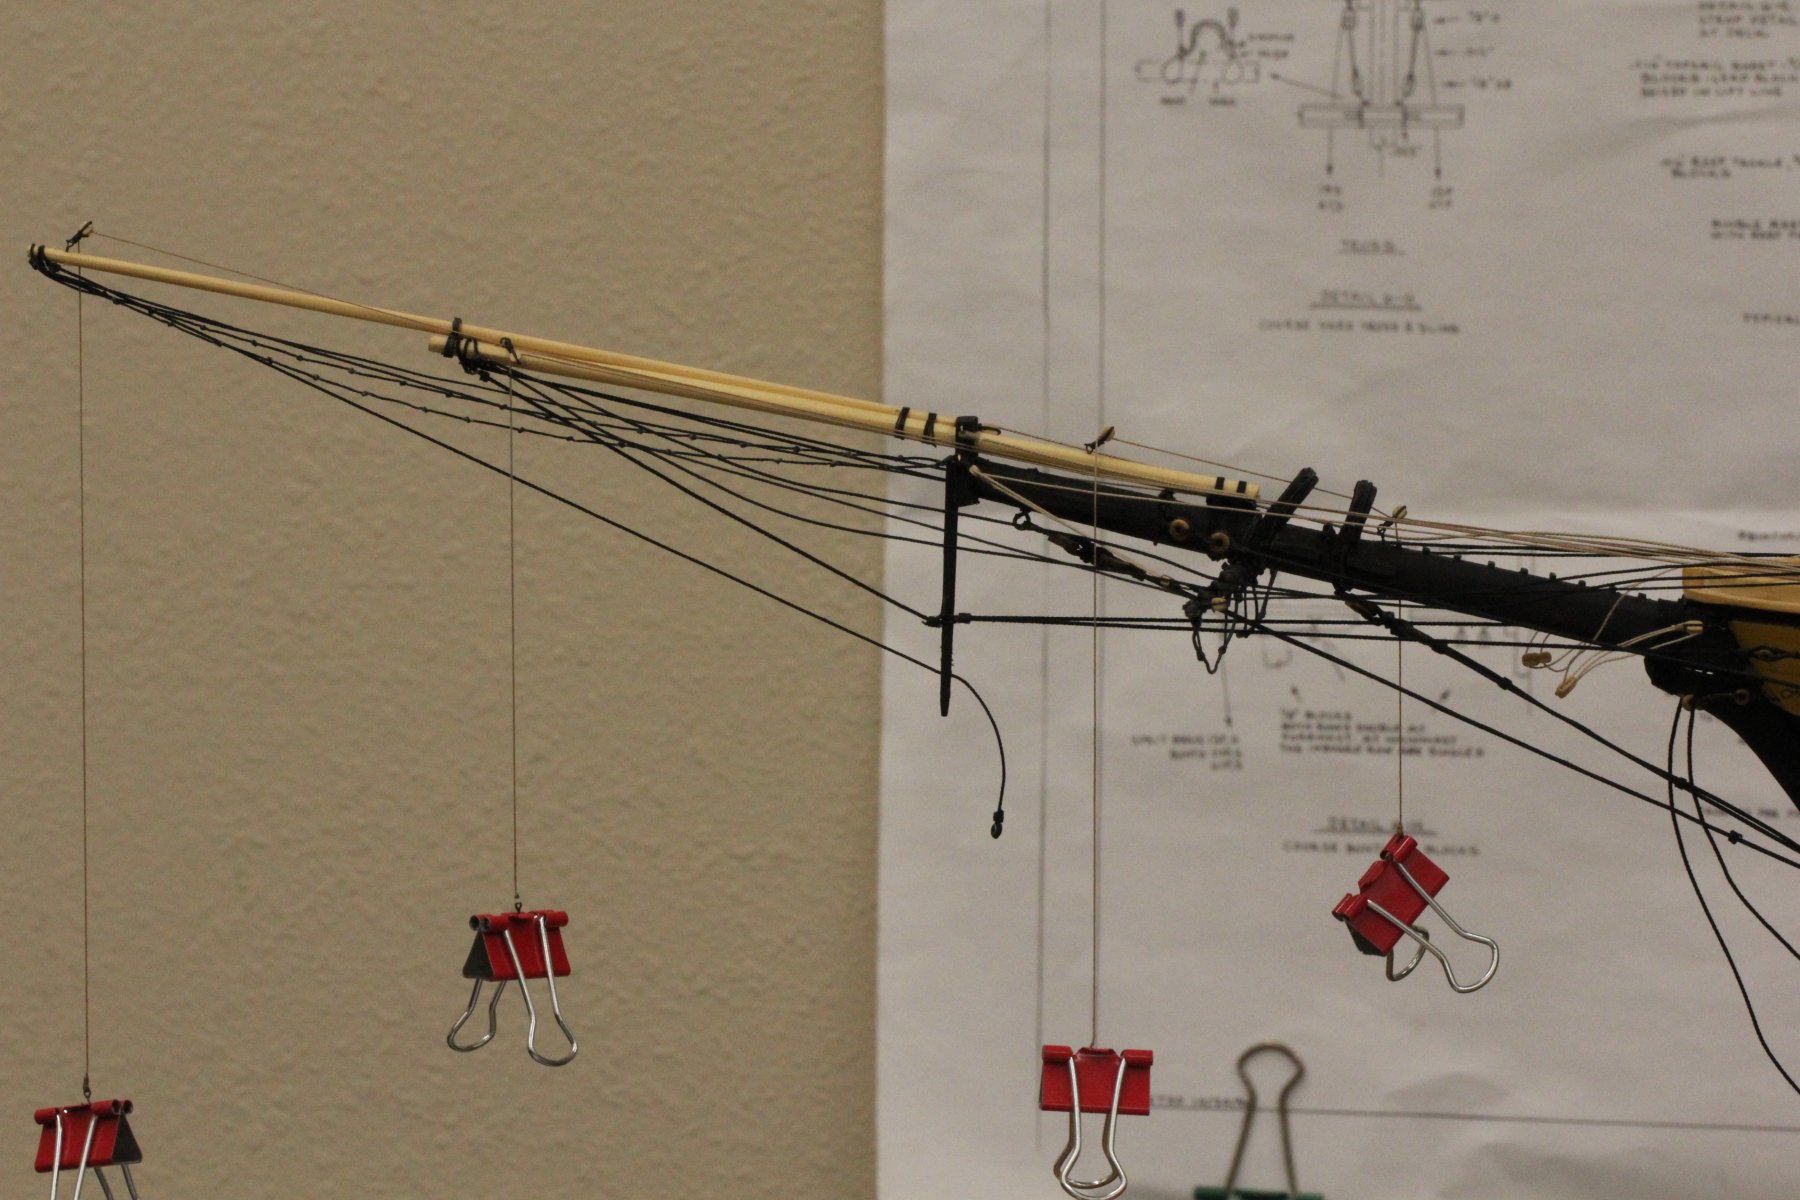
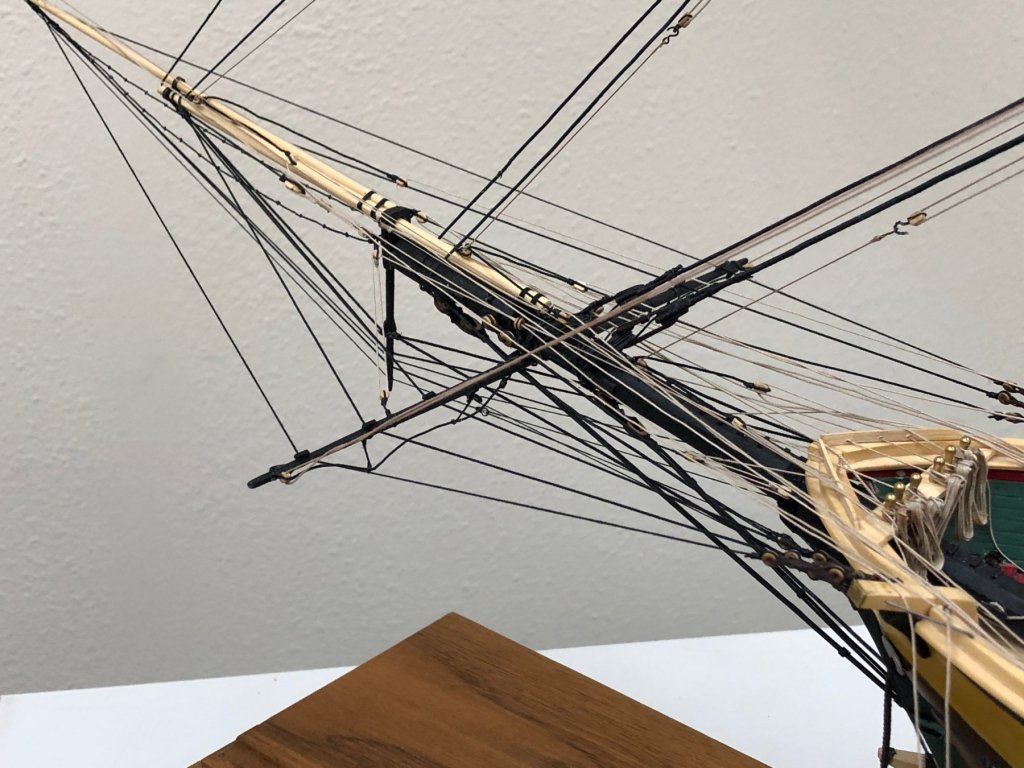
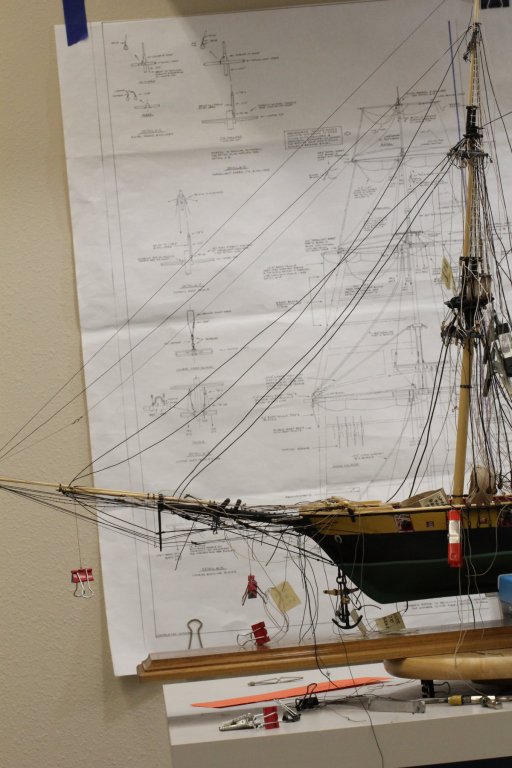
Completed assembly of the Fore Mast with all the stays and shrouds (and the two fair leads for the main royal and top gallant stays). Now on to the Top Gallant and Top Mast deadeyes, sheer poles and ratlines. Also have gotten the Bowsprit as far as I care to go before the Fore mast in onboard. There are four lines that pass through the dolphin striker, the top one is the Jib Boom Martingale, but the next two are the Top Gallant and Flying Jib stays. I want to rig these in the order from top to bottom to reduce the interference while rigging. Also the Flying Jib Boom and Jib Boom guys will not be rigged until the stays below have been rigged also to reduce interference. The red clips are holding the downhaul lines for the four head sails. These will connect to the respective halyards when the final running rigging is set up following installation of the Fore Mast. Here is a shot of the complete Fore Mast and two of the Bowsprit assembly.

- 367 replies
-
- 4
-
-
- model shipways
- niagara
- (and 1 more)