HOLIDAY DONATION DRIVE - SUPPORT MSW - DO YOUR PART TO KEEP THIS GREAT FORUM GOING! (83 donations so far out of 49,000 members - C'mon guys!)
×


FifeModels
-
Posts
528 -
Joined
-
Last visited
Content Type
Profiles
Forums
Gallery
Events
Everything posted by FifeModels
-
 Hi Dolly. It all depends on the kit, the materials being used, the level of curveature etc. I do a lot of dry testing first though. If I think that glue alone isn't going to be enough then I would fit the false deck pieces before planking, to obviously ensure the pins aren't visible. If I feel that glue alone will be enough, my personal experiences tells me about 75% of the time it is, then I would plank off-ship and then glue/clamp. There is no right or wrong answer here, it's down to as I said the kit and the wood and so on...and your own intuition. One example when I was building my aborted DeAg Victory (basically a canibalized AL kit), I found that pinning the decks down was required.
 -
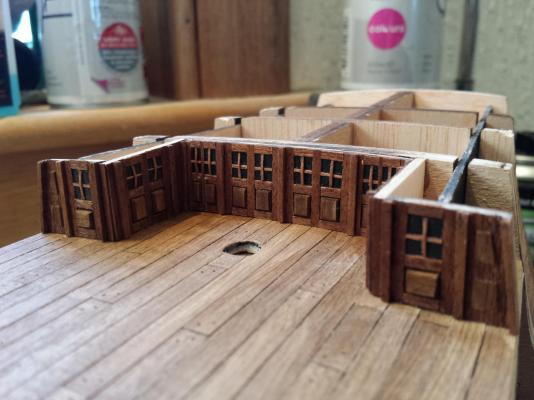
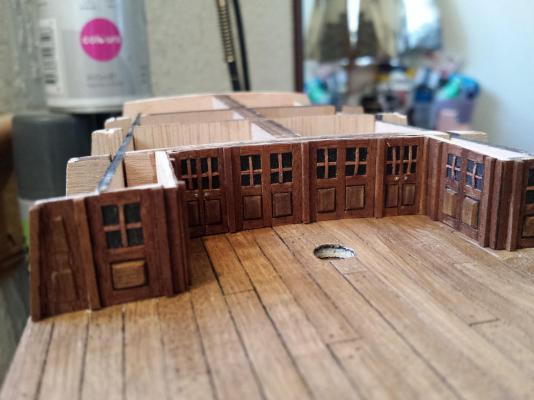
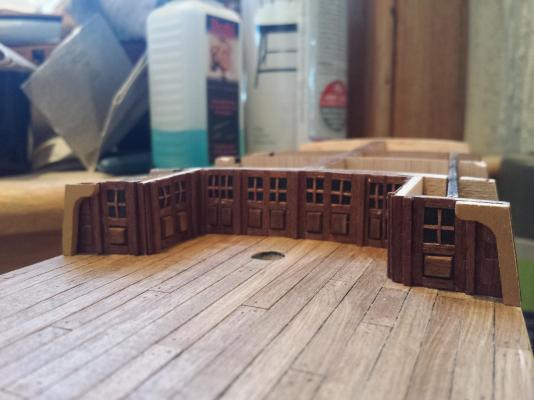
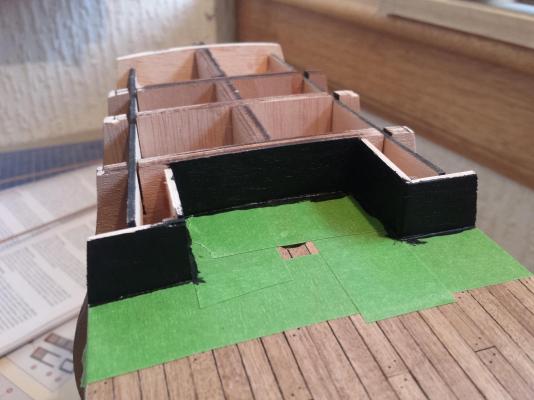
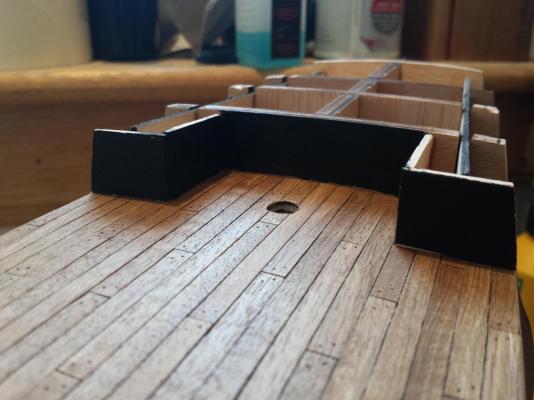
Good Afternoon. I've been busy the last few days, remaking the cabin walls and have finally finished them I wont go into detail on the process, although have taken step by step photos so you can see the general process I took. They aren't perfect by any stretch but they are a damn sight better than the standard kit. The last photo shows them installed on deck with my own scratch made knees for that bit of extra detail.


-
OK small update: The cabin walls/doors I was working on about...I did complete that back wall, and wasn't happy so I've just spent the last hour ripping it all out, as much as I could, and frabricating new false panels to replace the ones damaged as a result, on the plus side they are fitted to my build, not the plans, so take into account subtle differences and so on. Plus, I can work on the cabin walls off-ship which will make it much easier
-
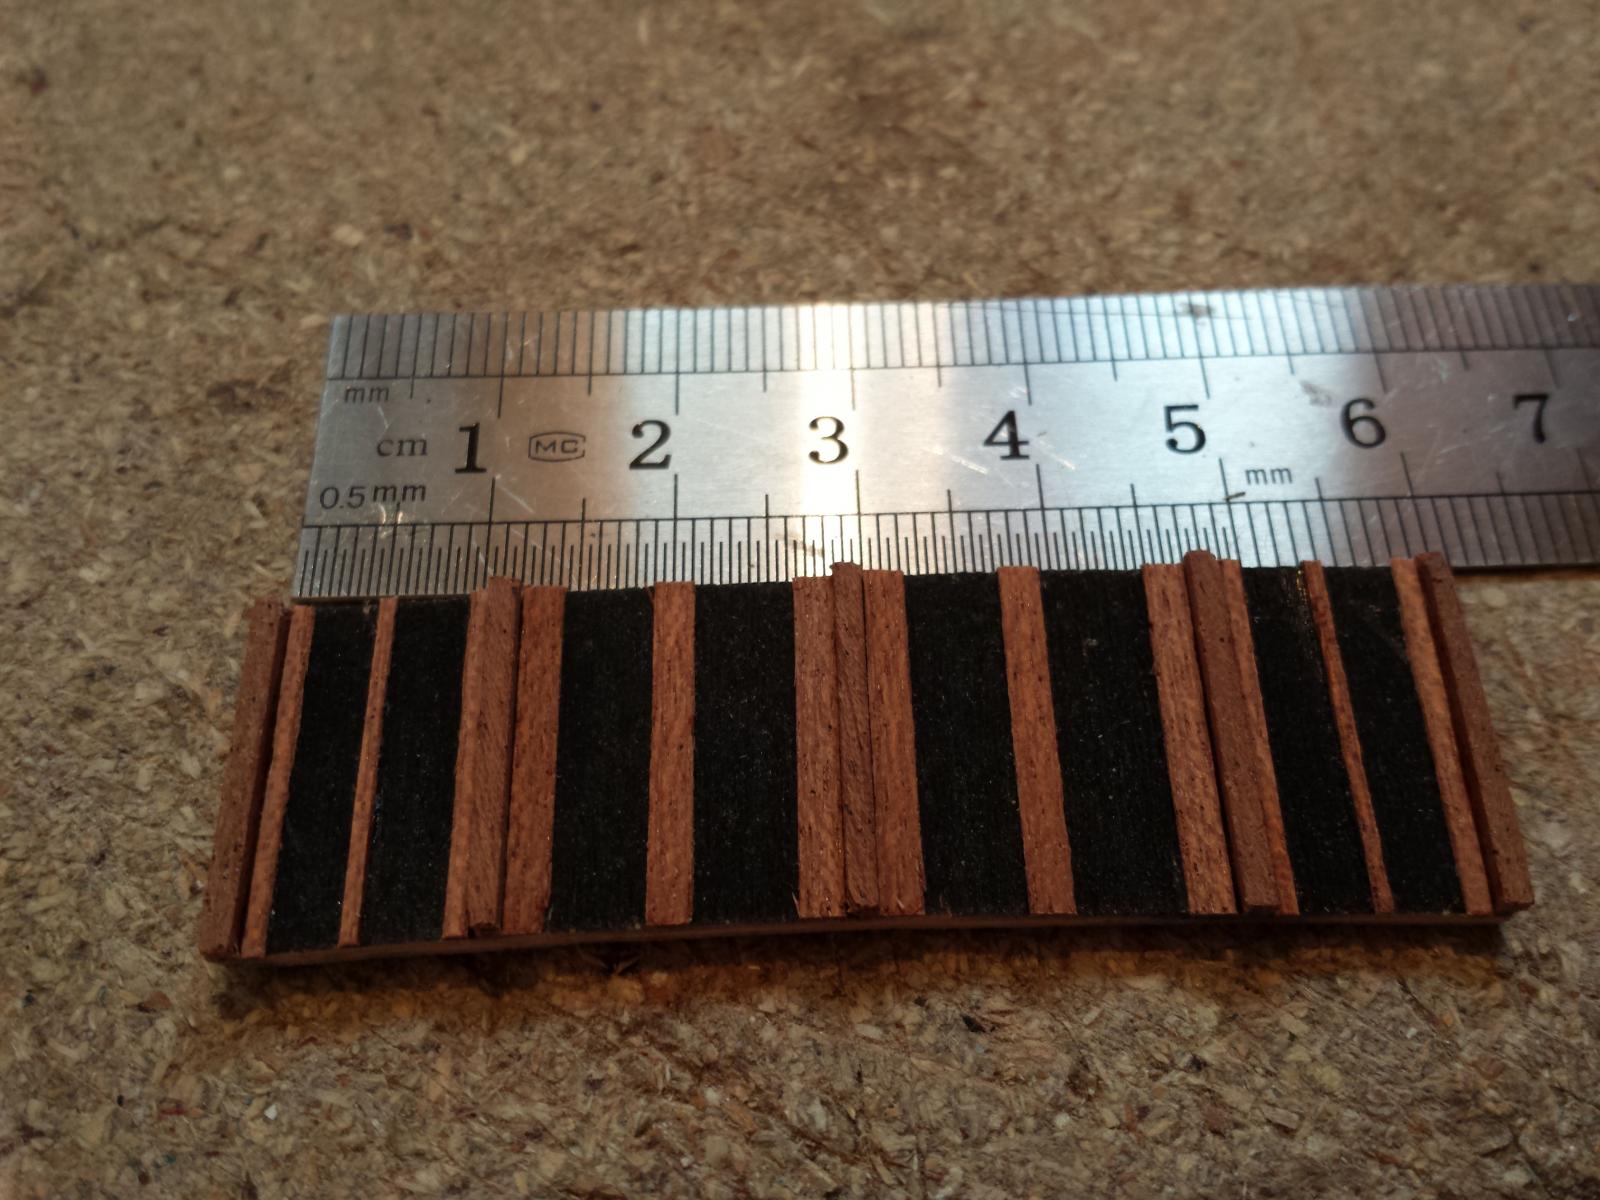
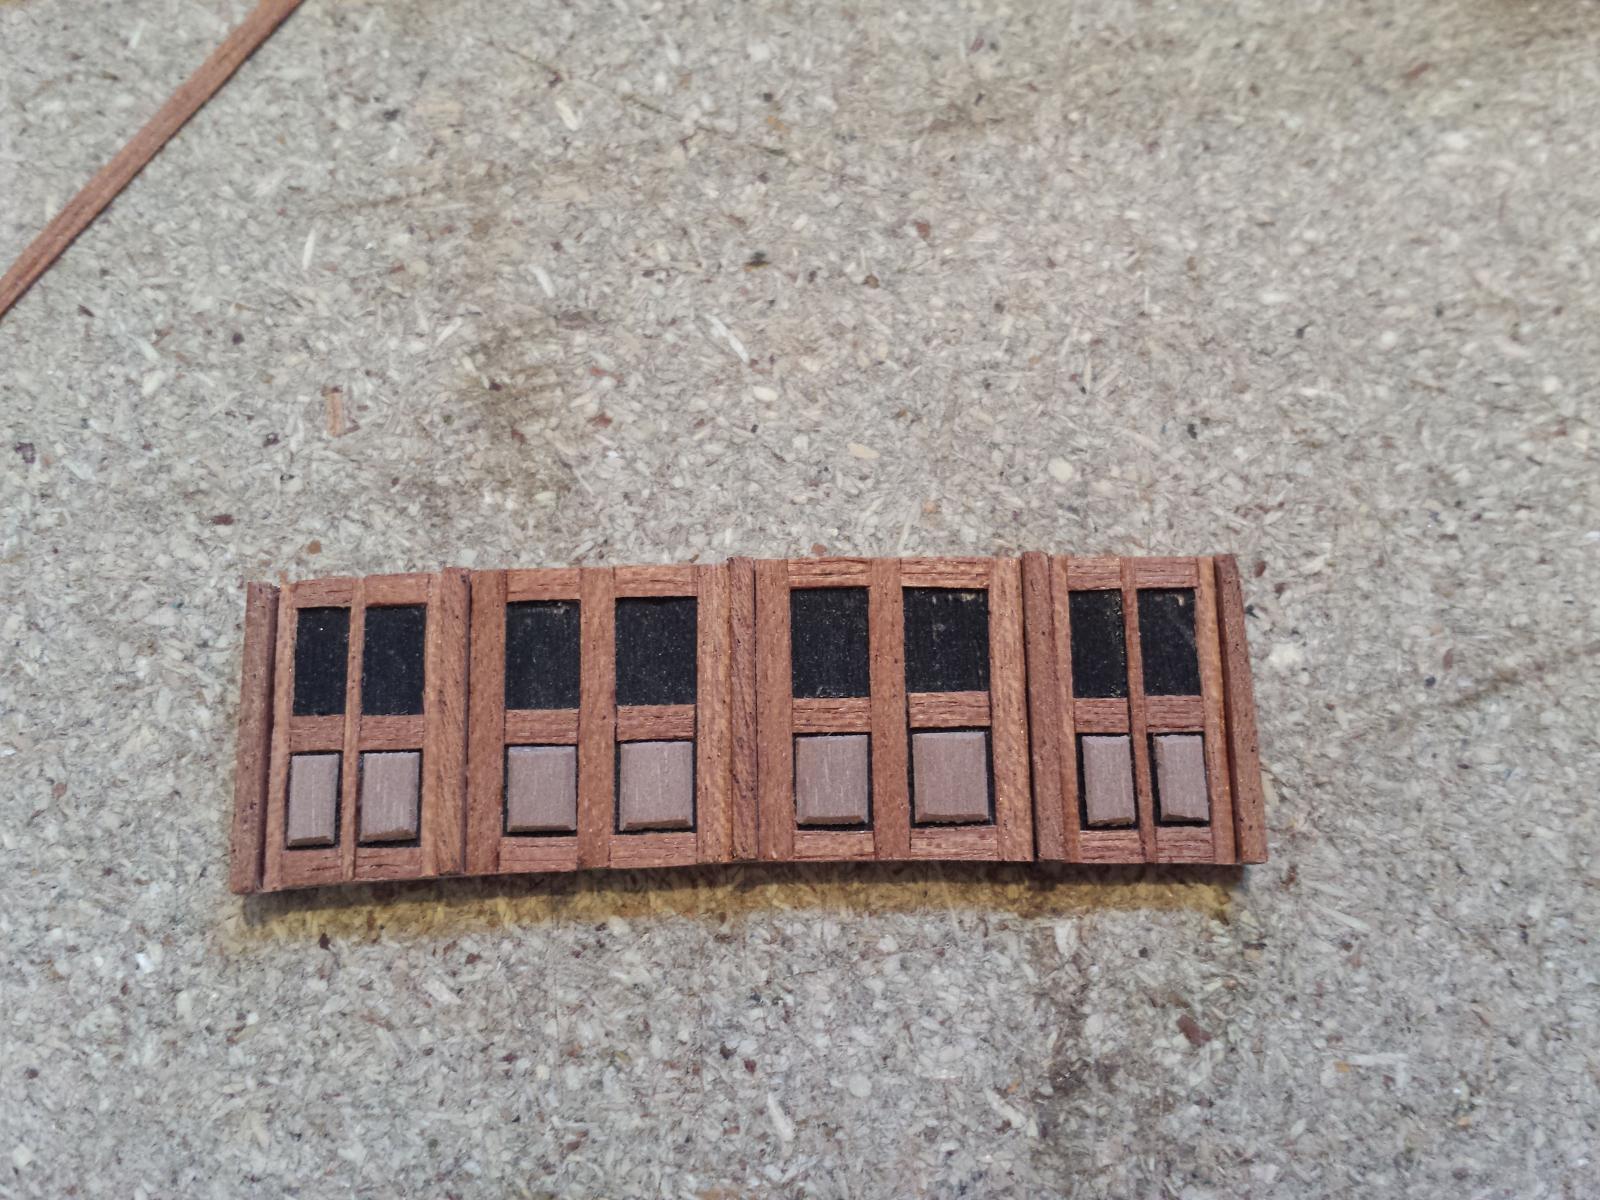
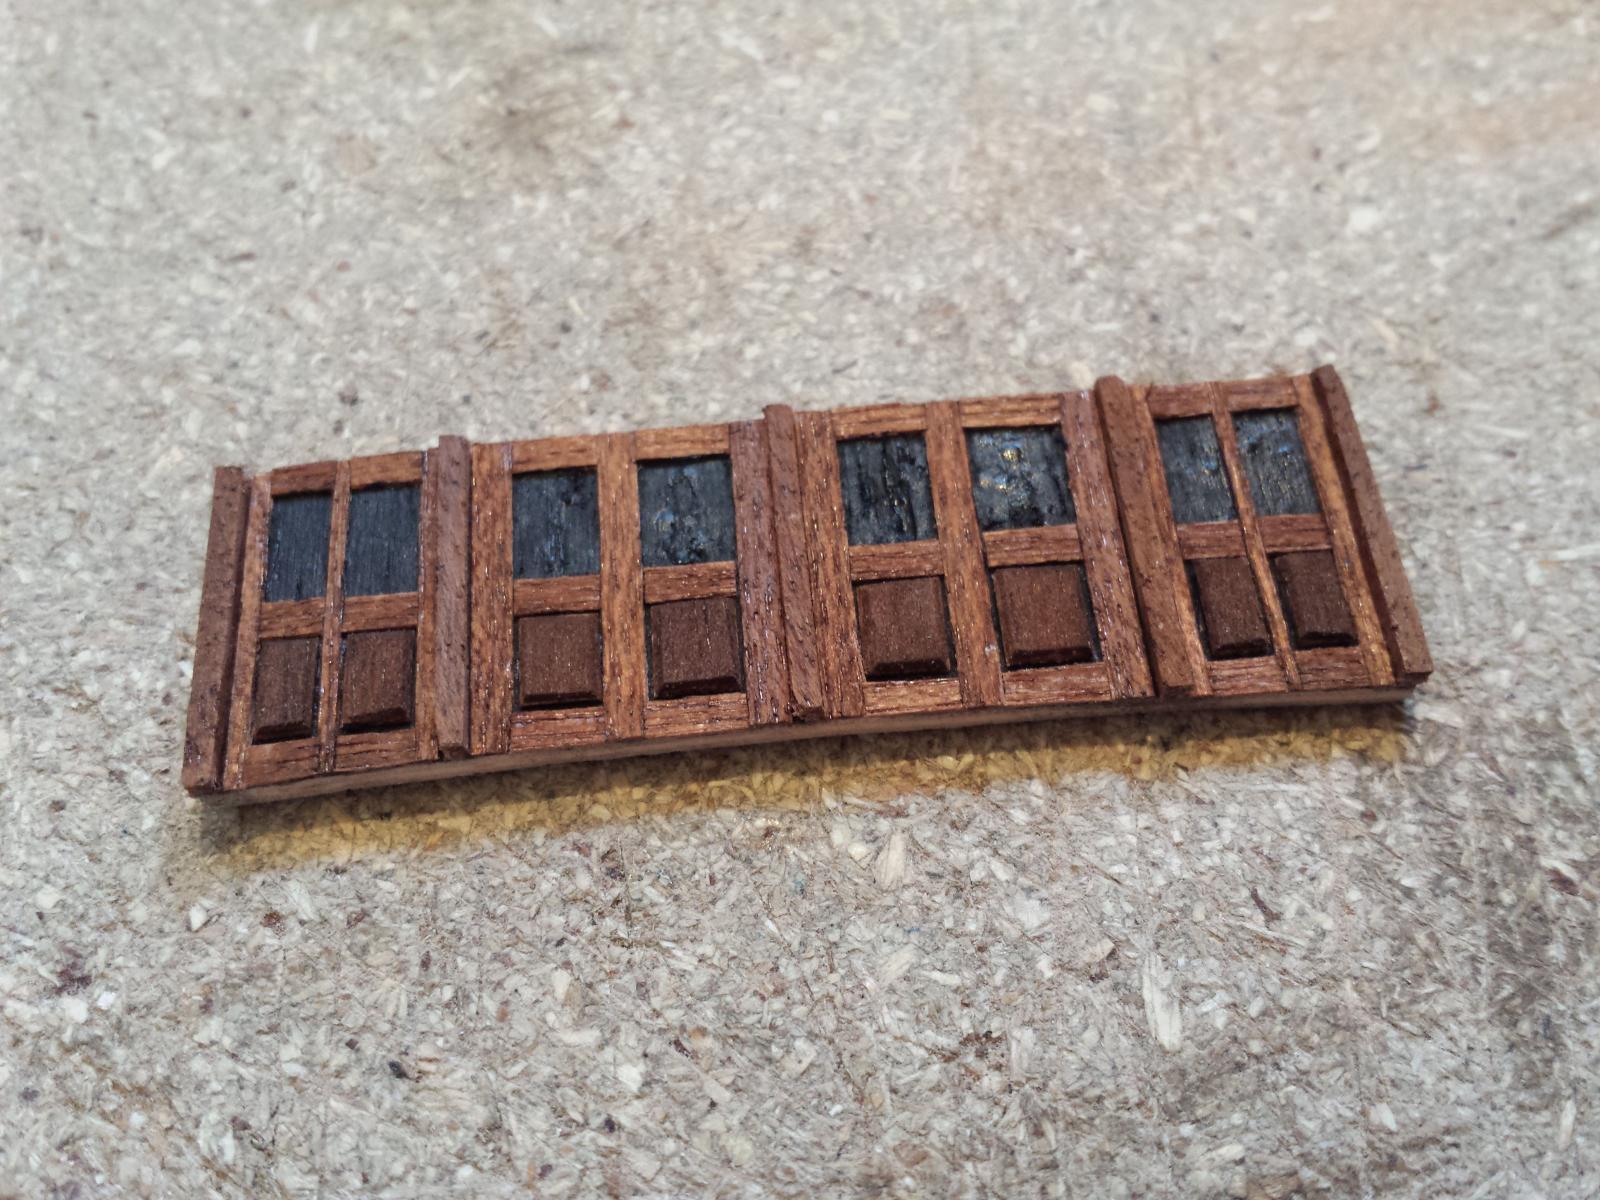
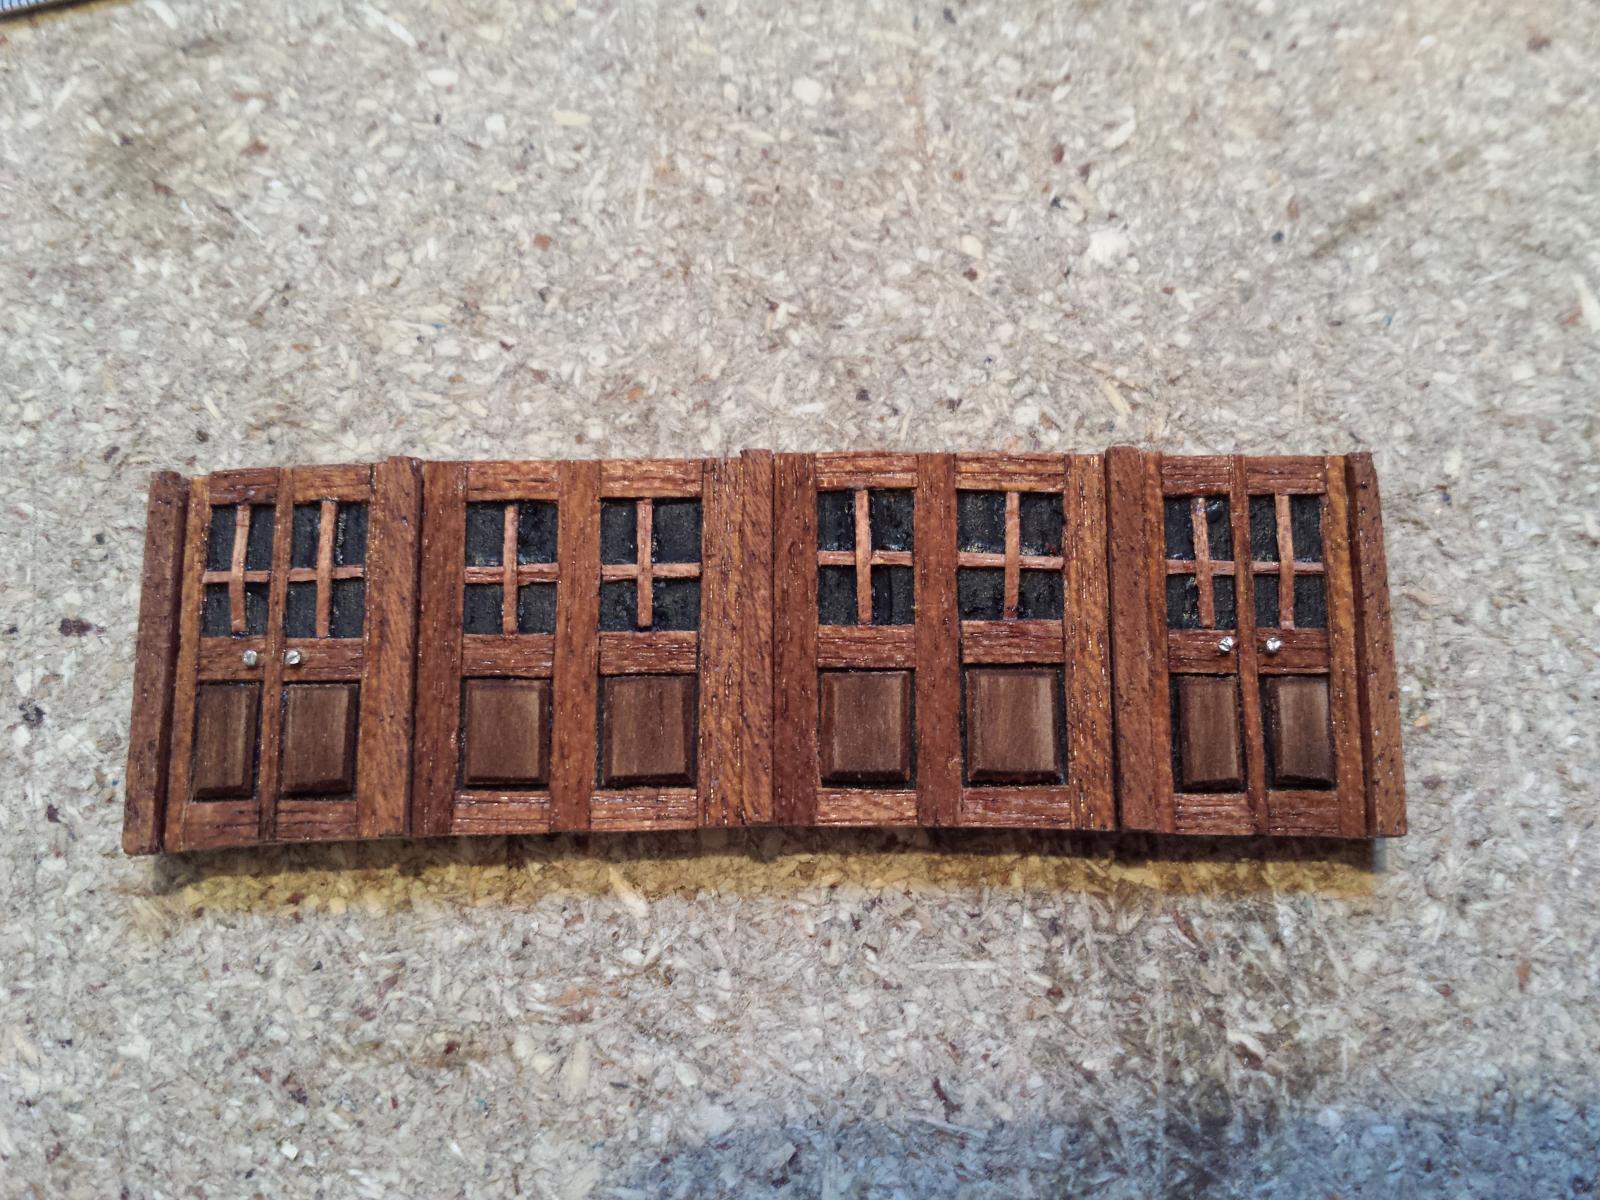
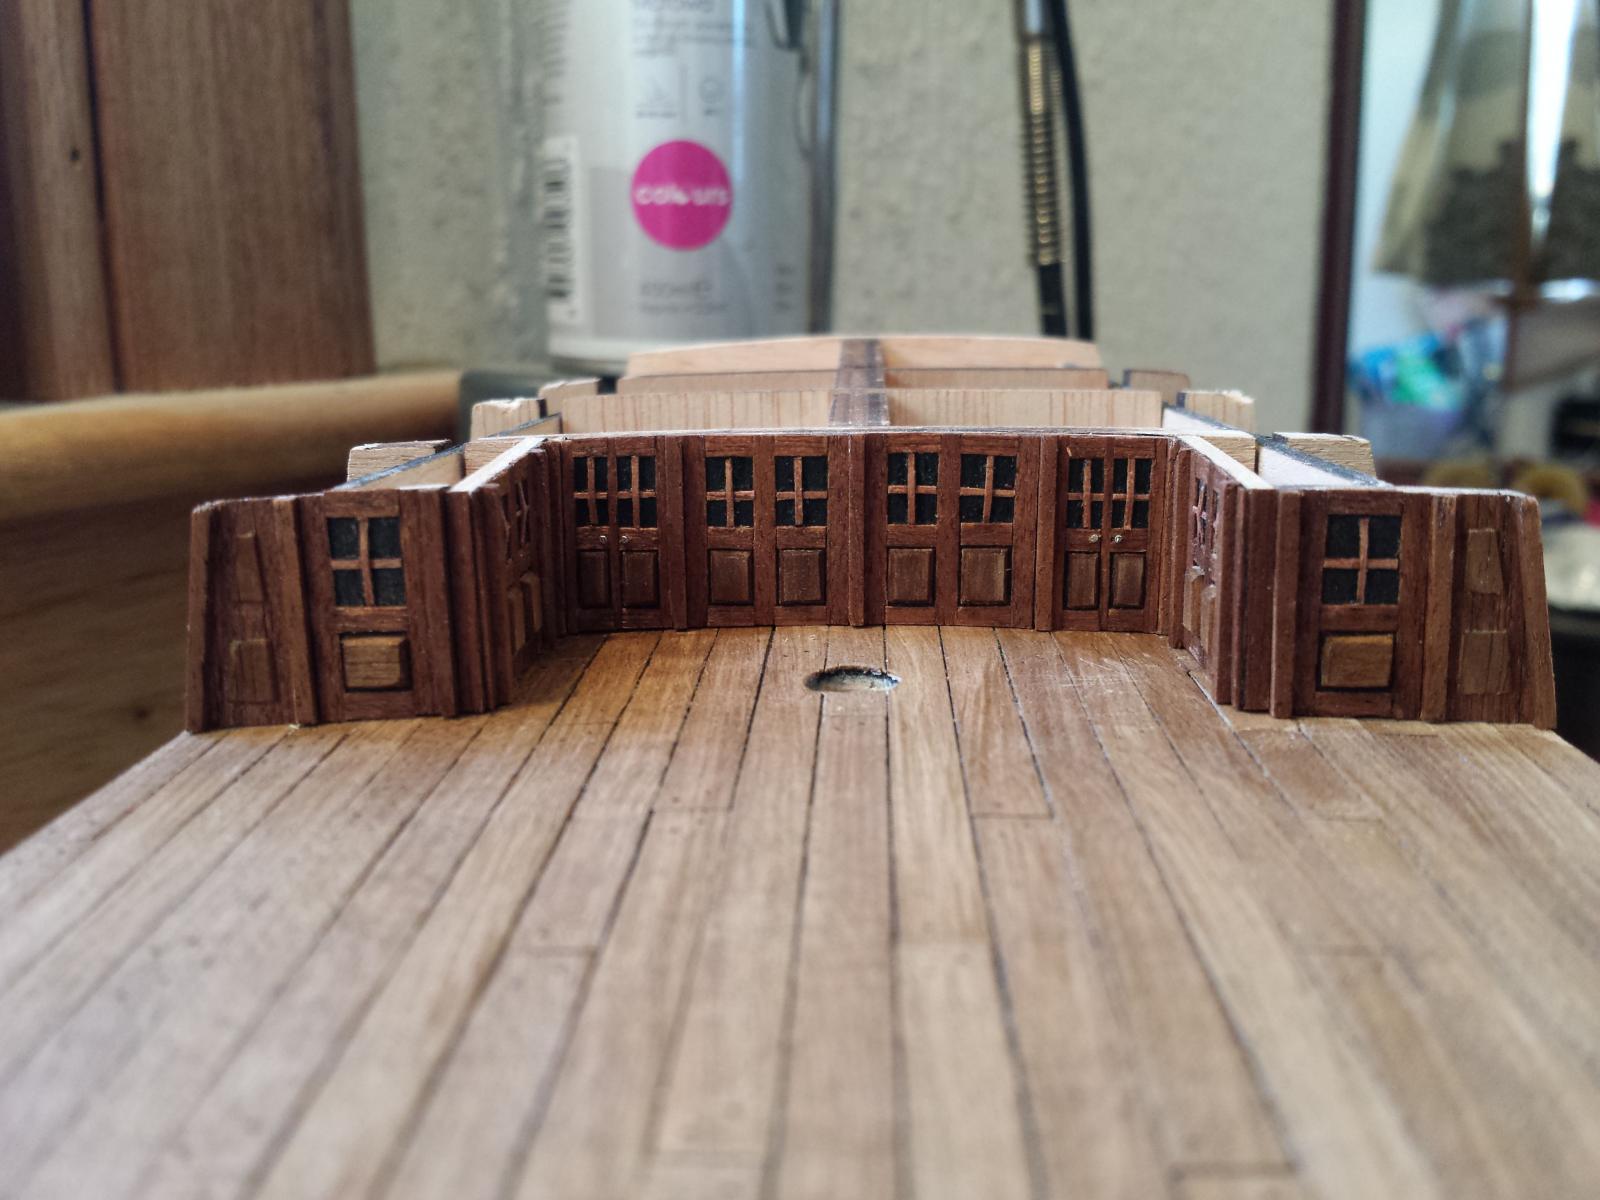
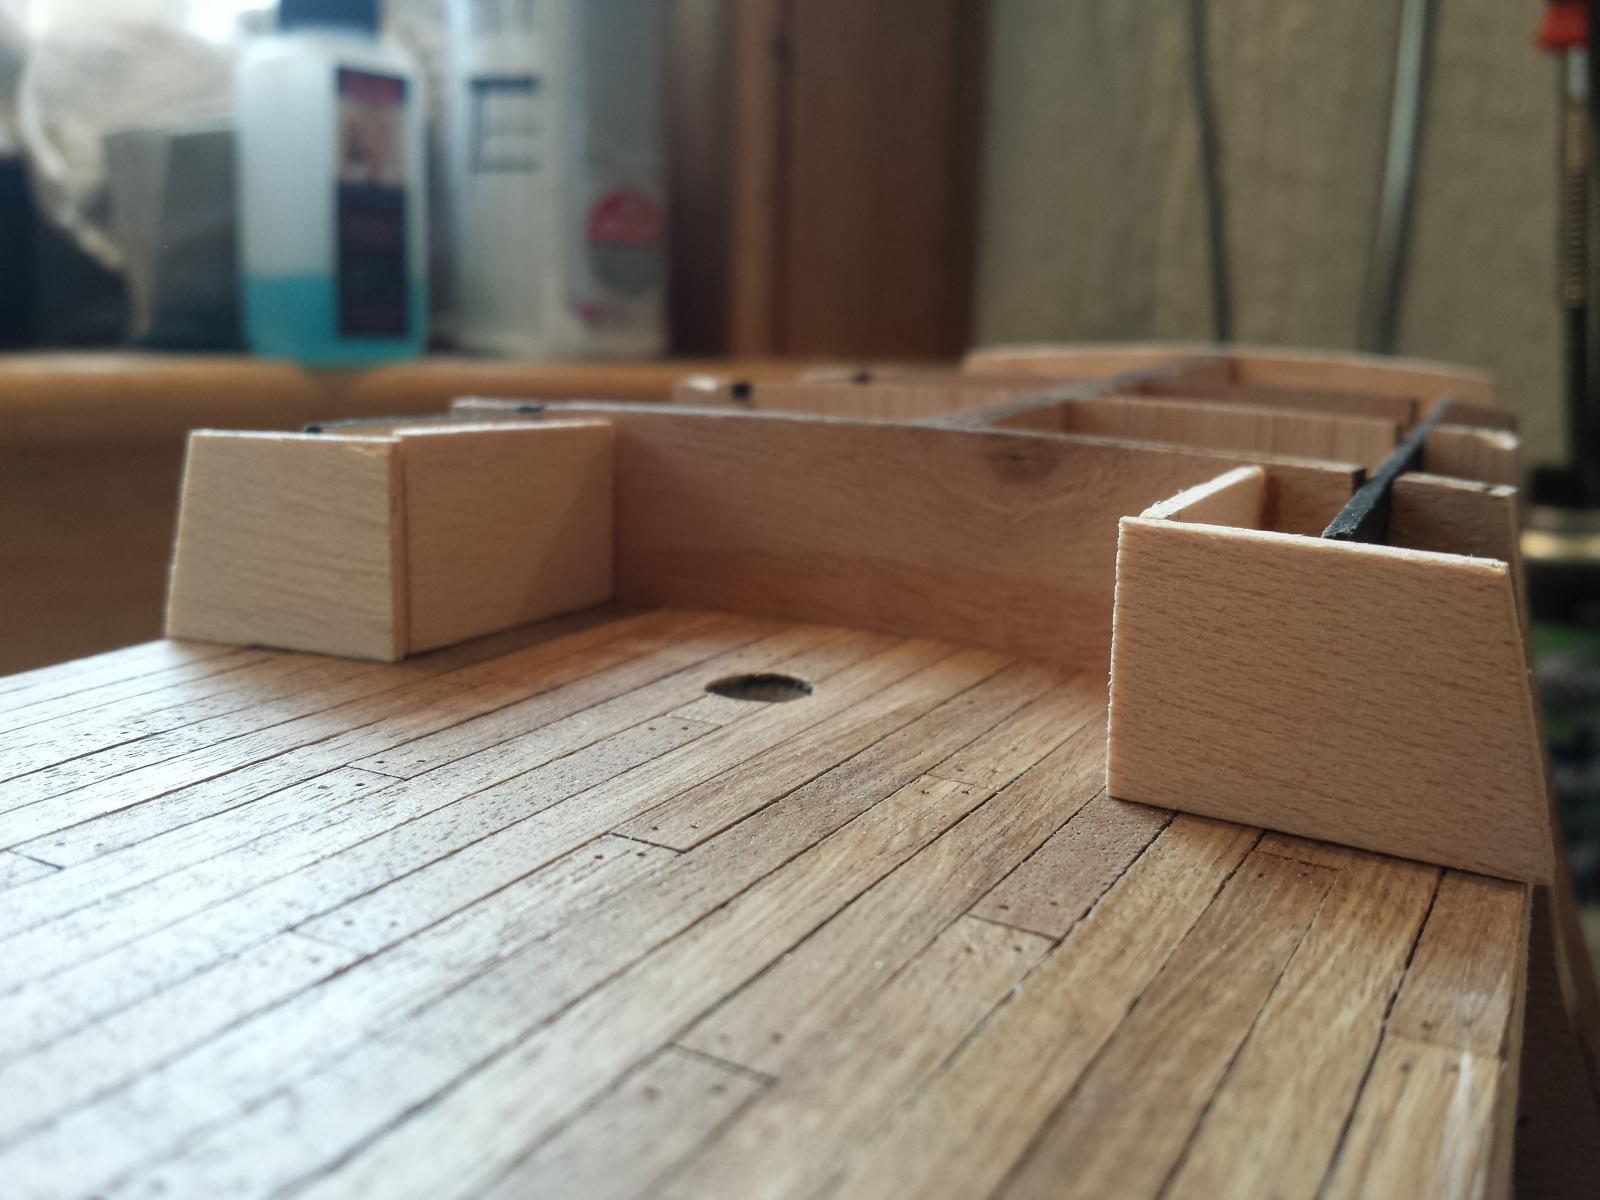
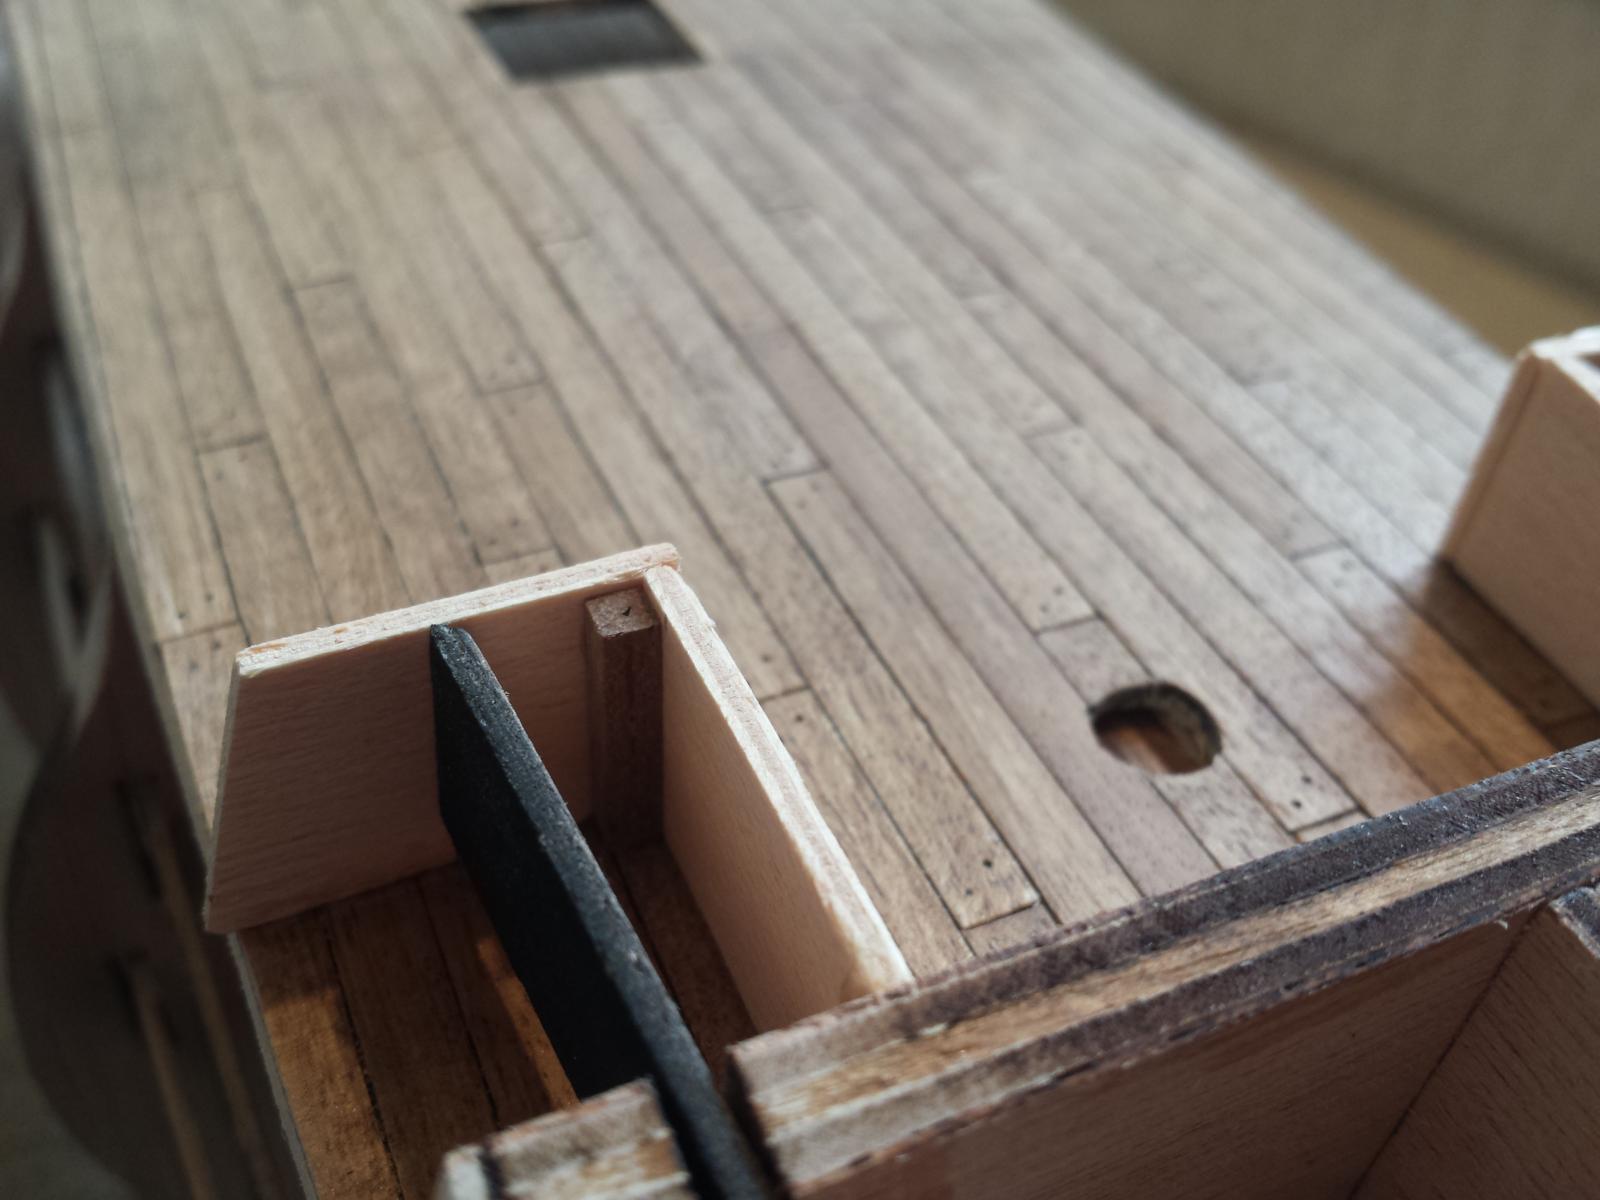
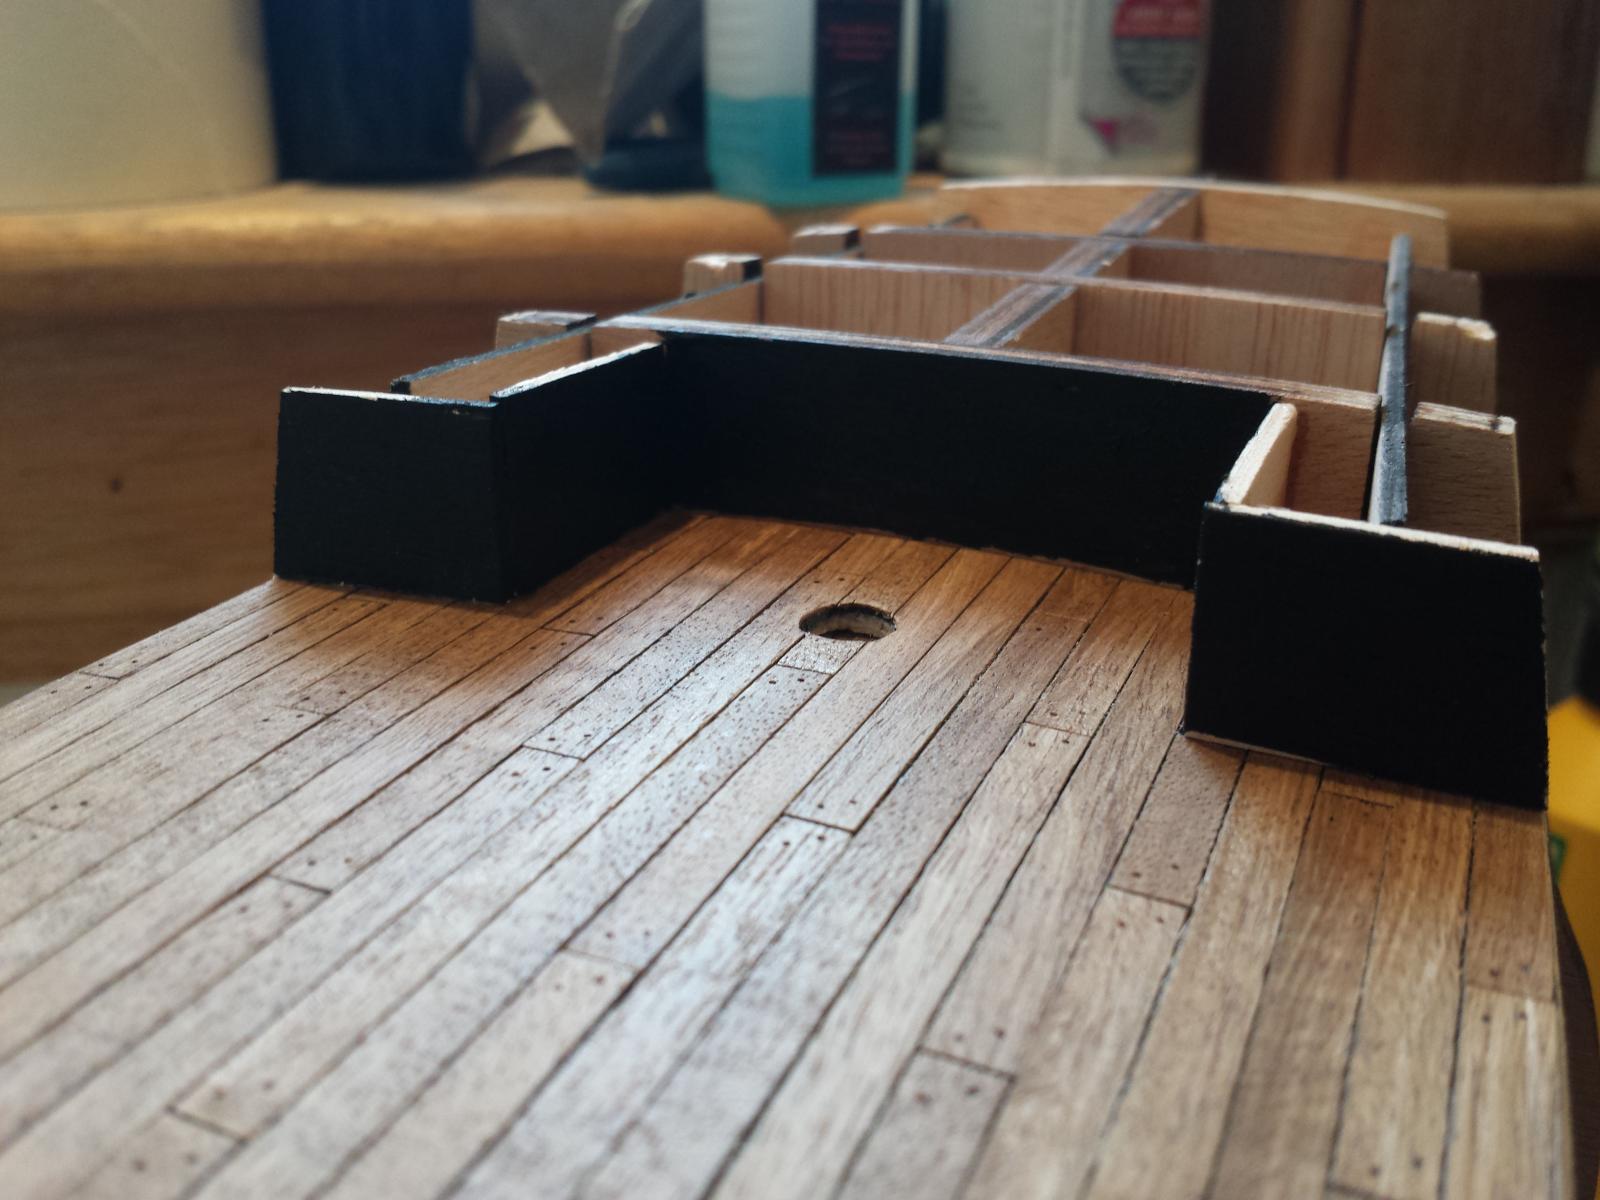
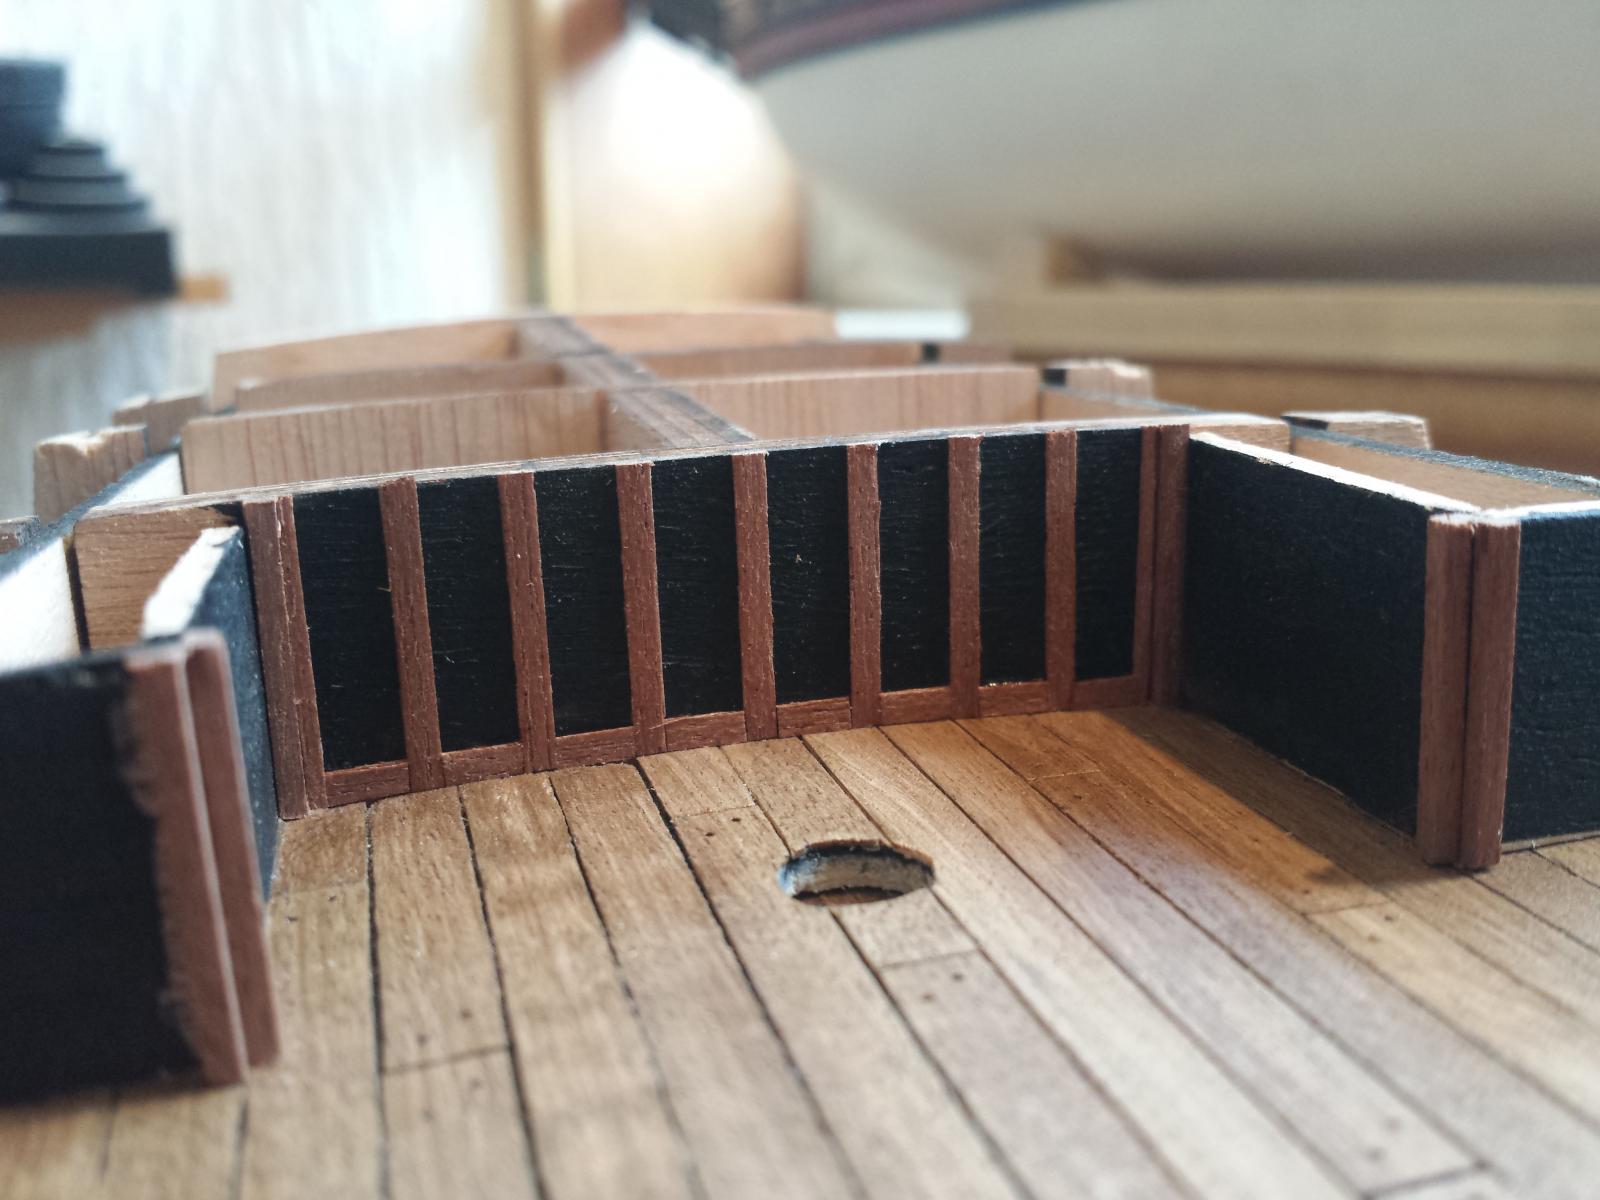
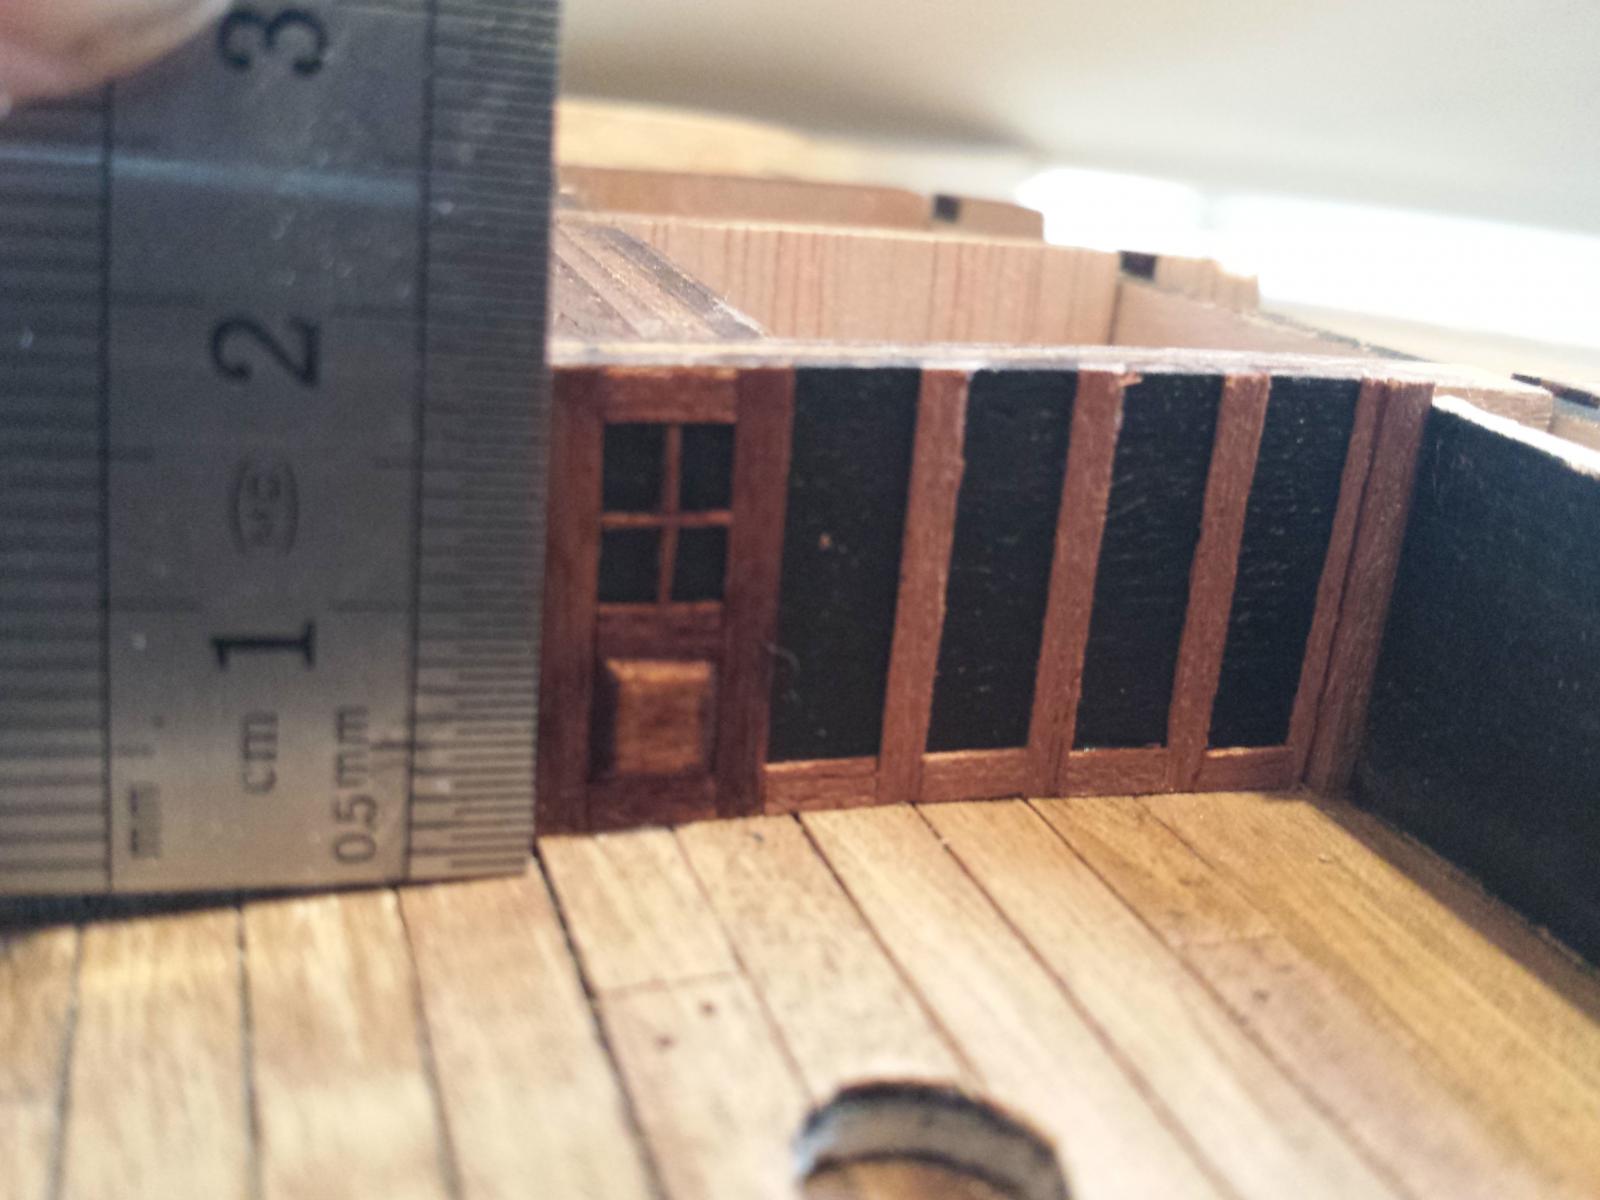
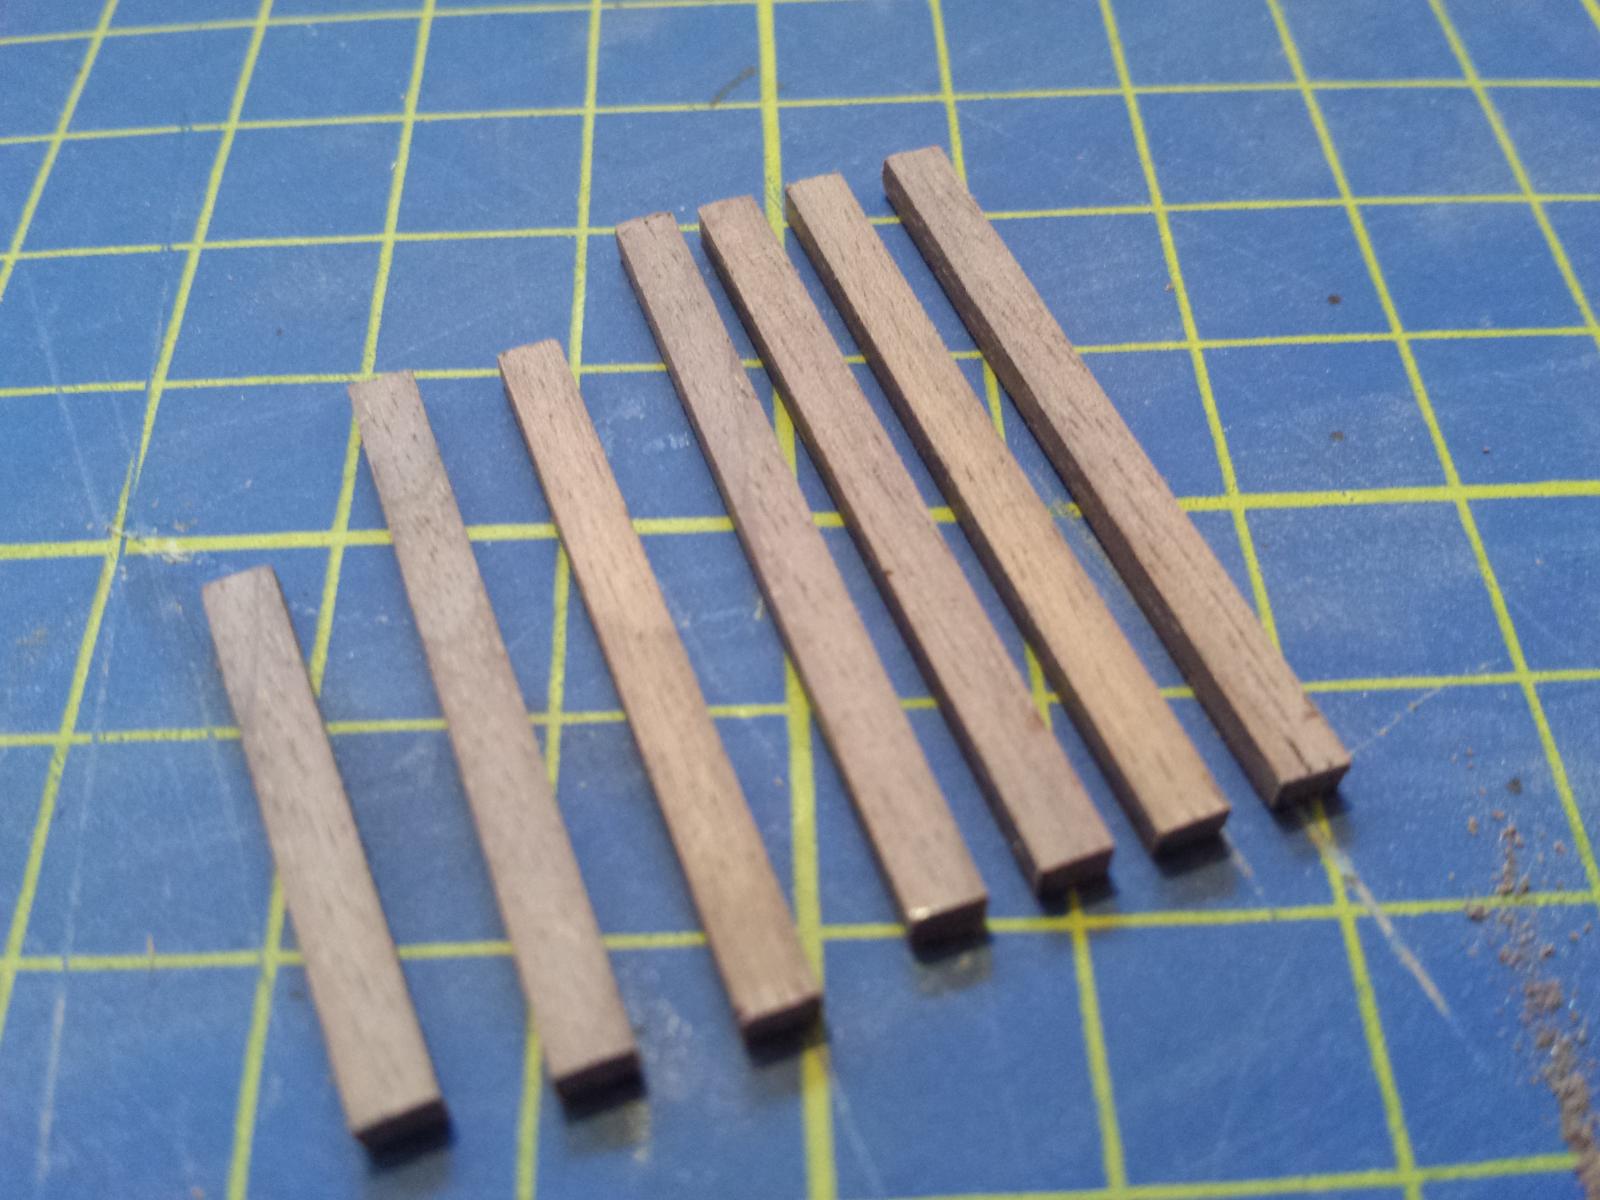
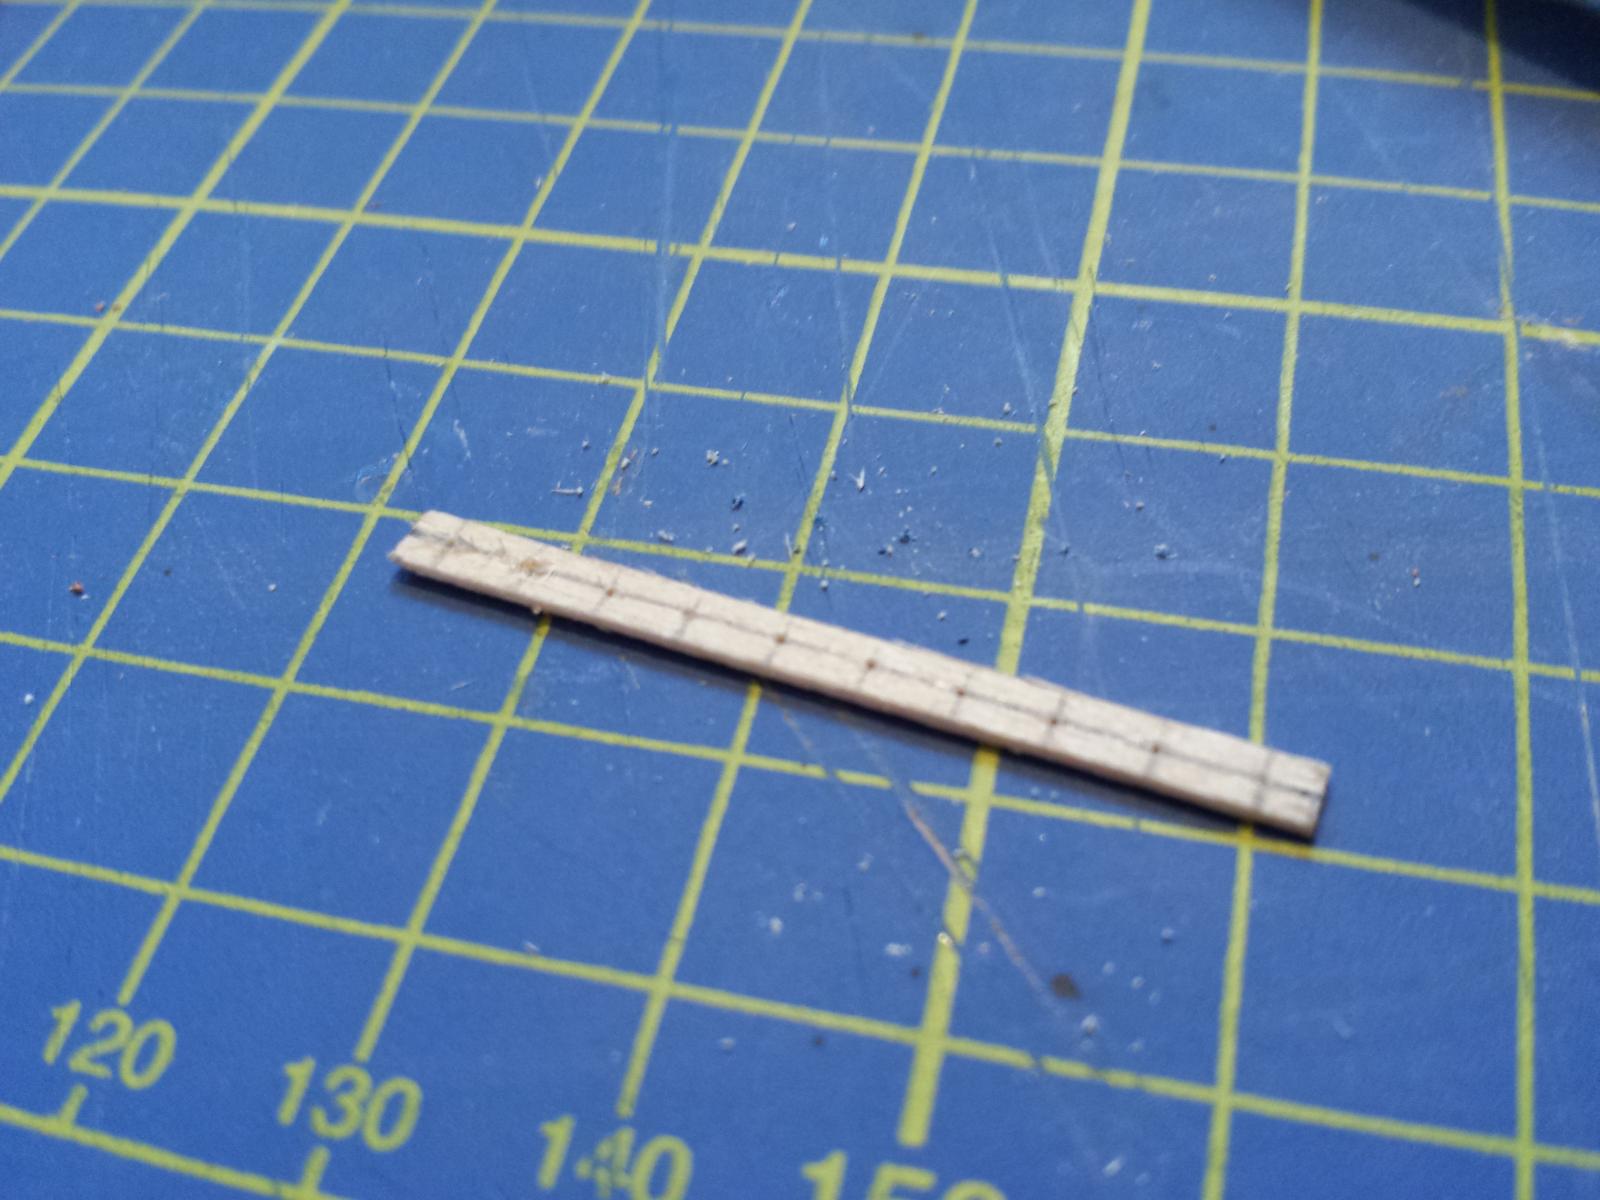
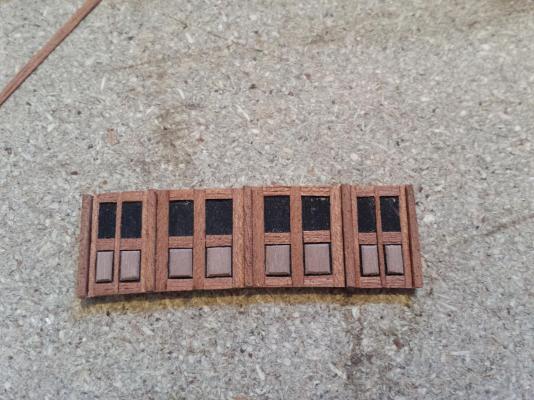
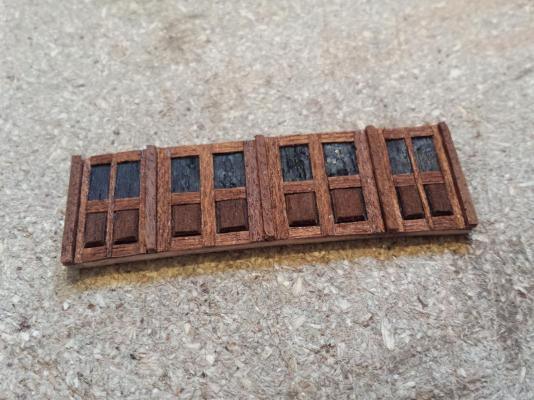
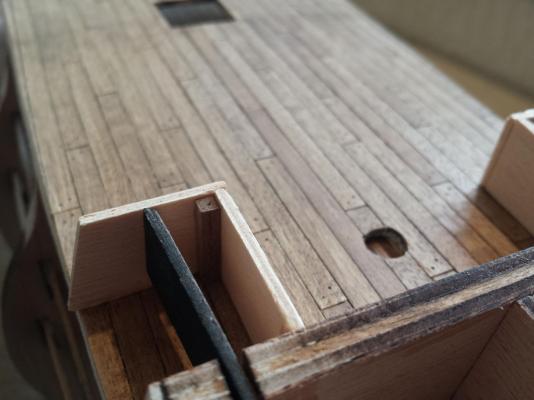
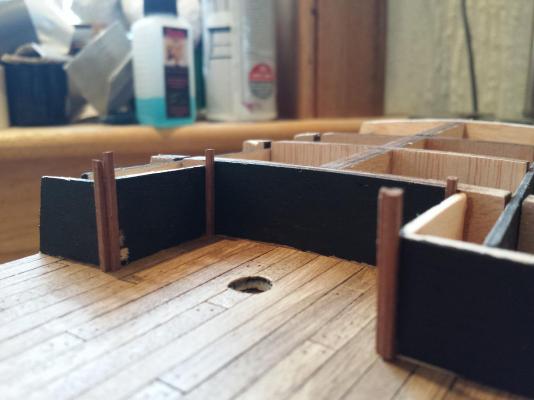
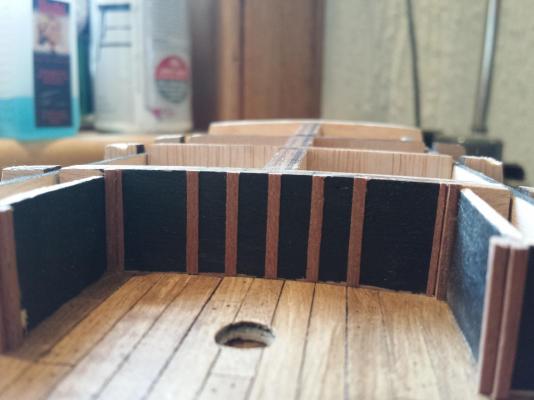
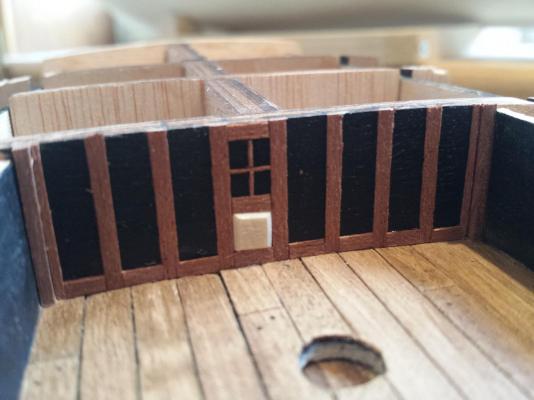
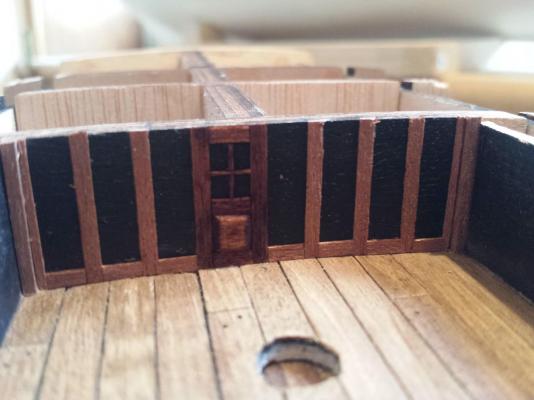
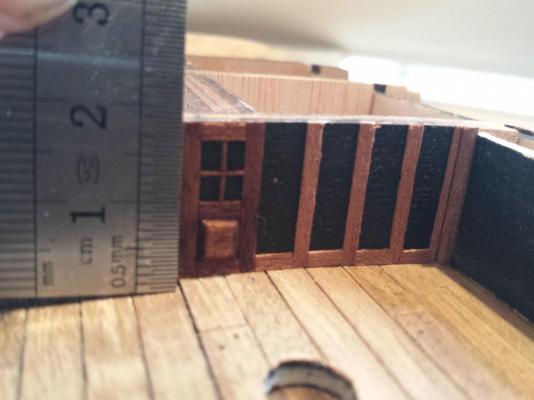
Hello. With the main deck in place, next task was to plank the grand cabin walls. Like Paul did on his build, I decided to detail this. I am surprised the kit doesn't provide for detailing this section, I have seen Vic kits at far smaller scales/qaulity/price have this detailing, however crude or innacurate. To start with, I placed the false walls and added some supports for the outer corners behind them. After expermimenting with various wood I had in stock, I started adding the frame work, starting with 6 larger "columns" for the internal/external corners. My detailing wont be strictly accurate but will be as close as I can get at my skill level. Once they were in place I started on the rearmost wall, with the vertical uprights between panels/doors. Then the lowest horizontal beams. I used a thicker wood for the beveled, panels, adding the bevel as best I could. Would have preferred wood the same tone as the rest but as I would be staining it didn't matter a great deal. I've kept to working on one central panel so I could finish one to give me a baseline reference for the rest. I added the centre and upper horizontal beams, and finally the window frame itself. These were literally slivers trimmed delicately off the wood I was using for the frames. Finally, a coat of Admiralty Oak stain. Pics below:


-
Well, I always use a flat or satin stain rather than a stain/gloss combination, firstly because one coat is rarely enough to give a decent gloss shine, meaning more coats of the stain is needed increasing the effect of the stain. IE making it darker for example where you may not want it darker. Also using a flat or satin leaves you with the option of adding a gloss topcoat for the shine IF you want it. Where I can, I use a flat or satin stain brushed on and then a clear gloss varnish spray, also from B&Q. If I can't use the spray then just the clear gloss from the same range as the stain. As a rule I would only use these stains on the decks or outer hulls. For smaller detailing I tend to stick with the Admiralty stains and a decent flat brush.
-
Dolly I did yes in the end. I was planning on using a different stain for the external decks, to show that they would be weathered more than the internal decks, but realised I had already done the small deck at the bow (not sure of the name), Oak Satin as well so had to stick with it.
-
Thanks I've been planking the main deck the last few days, not posted anything as it's only stuff I've already covered for this build. However the deck is now in place clamped whilst the glue dries. Once that is done I will fix the main cabin walls and see about detailing them as the kit doesn't provide for this.

-
Wow got off to a great start there, looking good I noticed you have the building slipway, I've been looking at that myself. Is it any good? Was wondering as well, whats the max length of keel it can take?
-
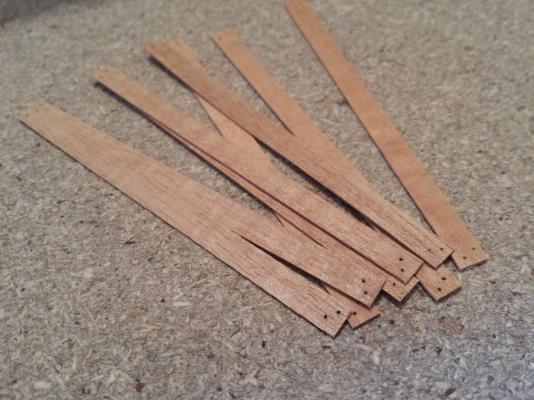
Thanks And of course not, that's why I share them. And also I know my methods are unorthodox, I think outside the box a little. (Mainly cos I can't fit in the box haha). I have cut and drilled 70 planks so far, (280 holes), another 70 planks and another 280 holes to go......
-
Not really much to report yet, with the previous deck finished I've begun work on the main external deck, sprayed black as before. Now I am just prepping planks. I've worked out I will need app 136 planks, which means 544 holes to drill
-
Thanks. I did consider that, but from looking at photo's from the Vic in Portsmouth the shot were quite inset, yes as you say at this scale it wouldn't have been noticeable...but I would know. It's one of those things, ya know, like when I used to make model cars, I used to paint and detail all of the engines even though in most of them it was under a closed bonnet (hood) so would never been seen, but I would know.
-
It's amost like a mini Titanic stern. I've been back a few days : http://modelshipworld.com/index.php/topic/9532-hms-victory-by-dominic-constructo-196/
- 44 replies
-
- 1
-

-
- robert e lee
- constructo
- (and 1 more)
-
That hull is pretty impressive Mike. And to think not so long ago you spent quite some time putting off starting on the planking of Bounty. Nice job
- 44 replies
-
- 1
-
-
- robert e lee
- constructo
- (and 1 more)
-
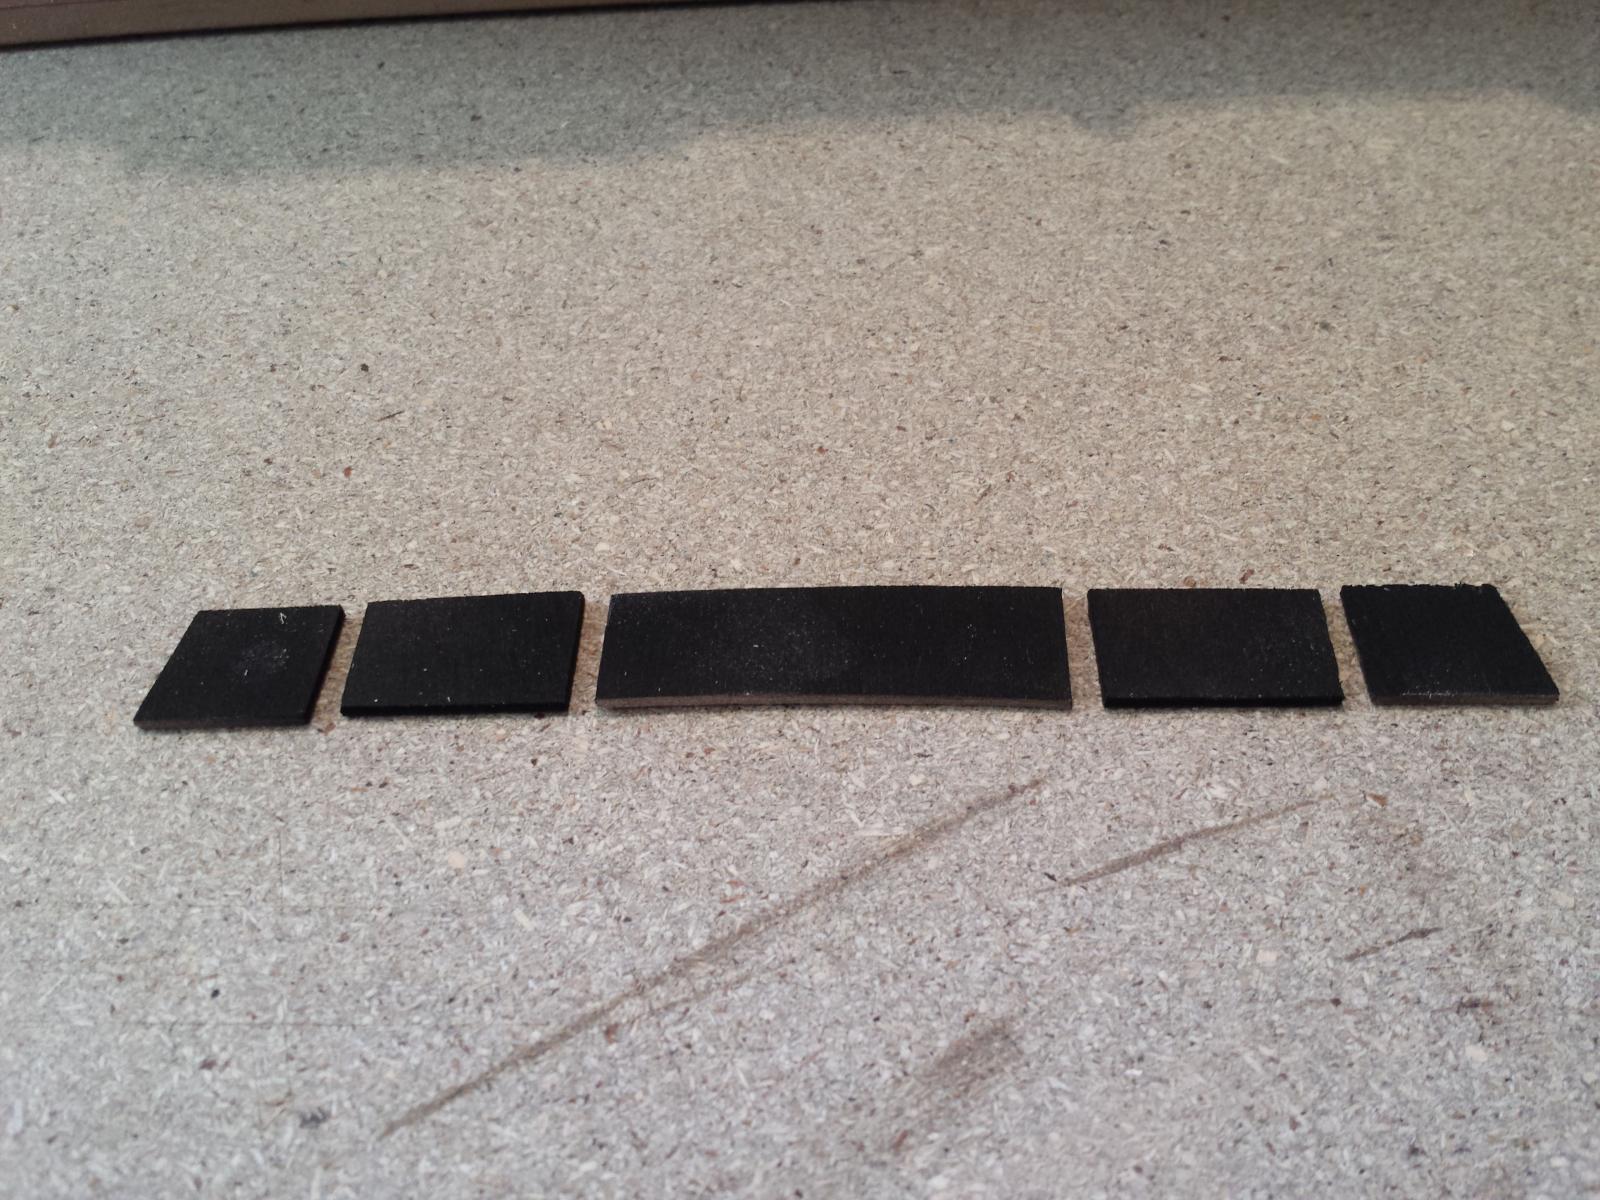
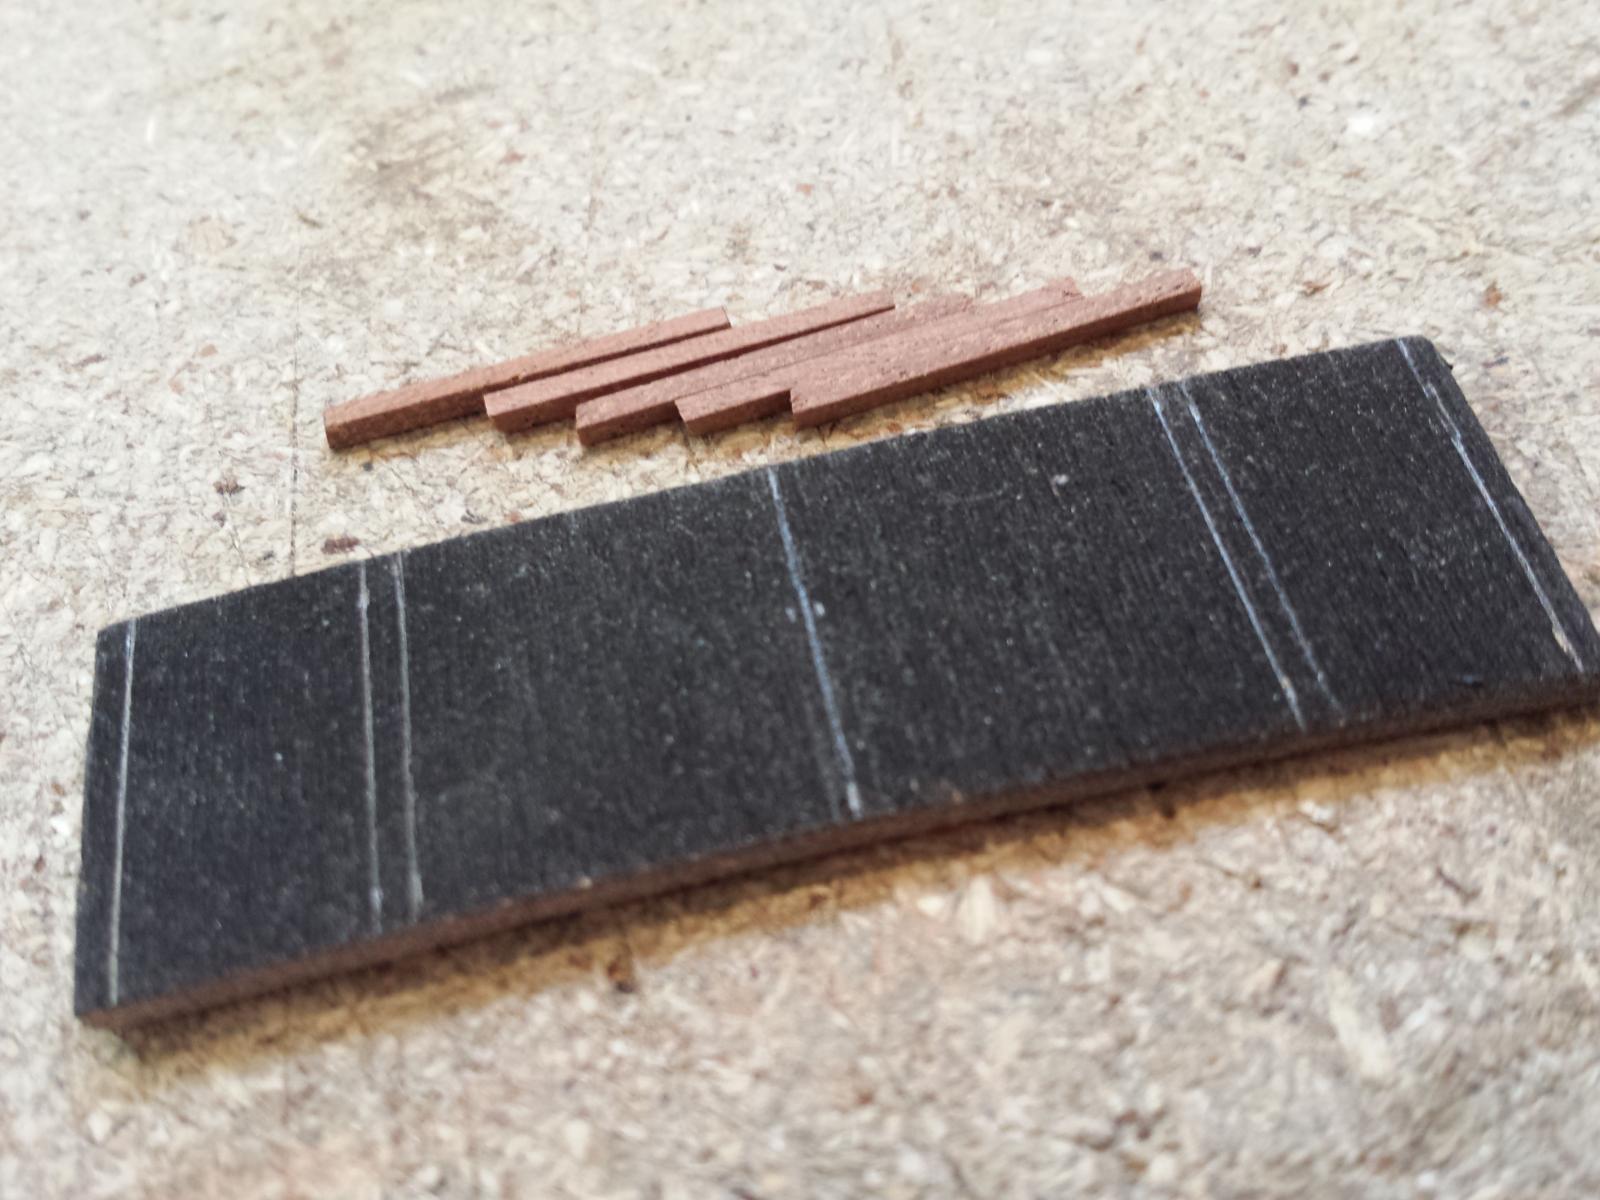
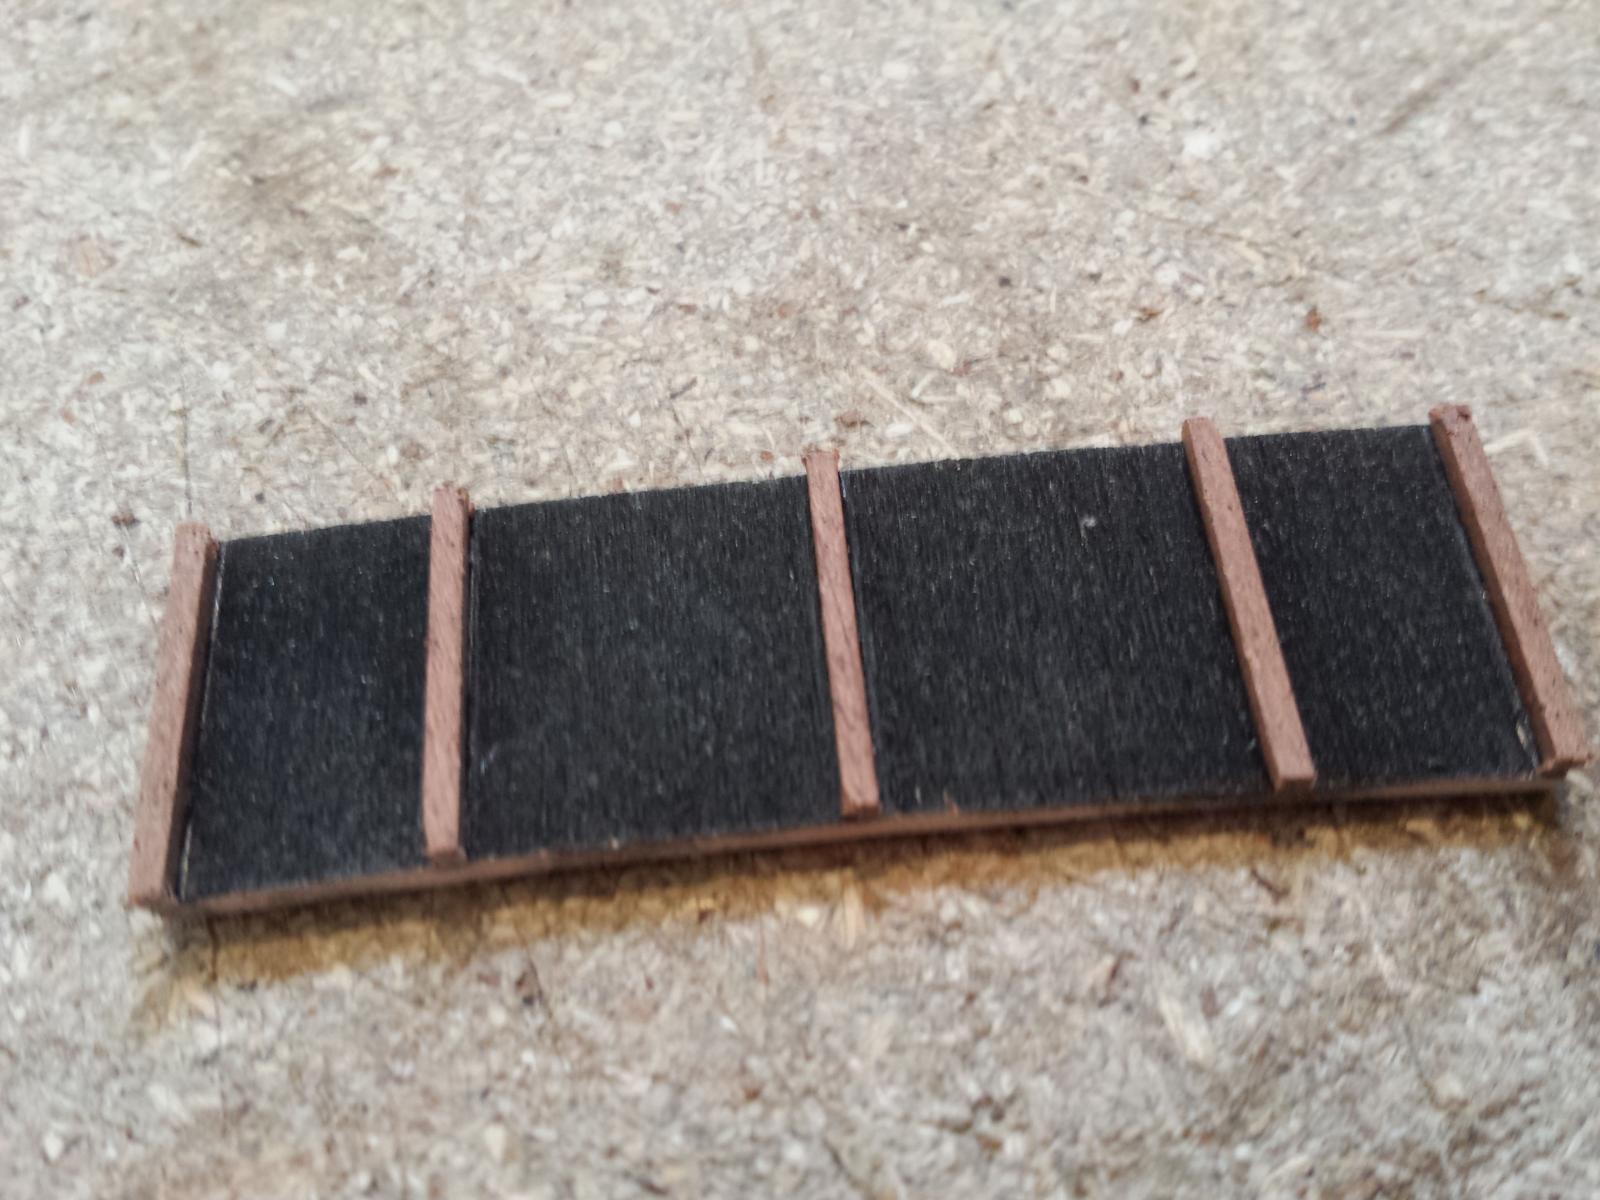
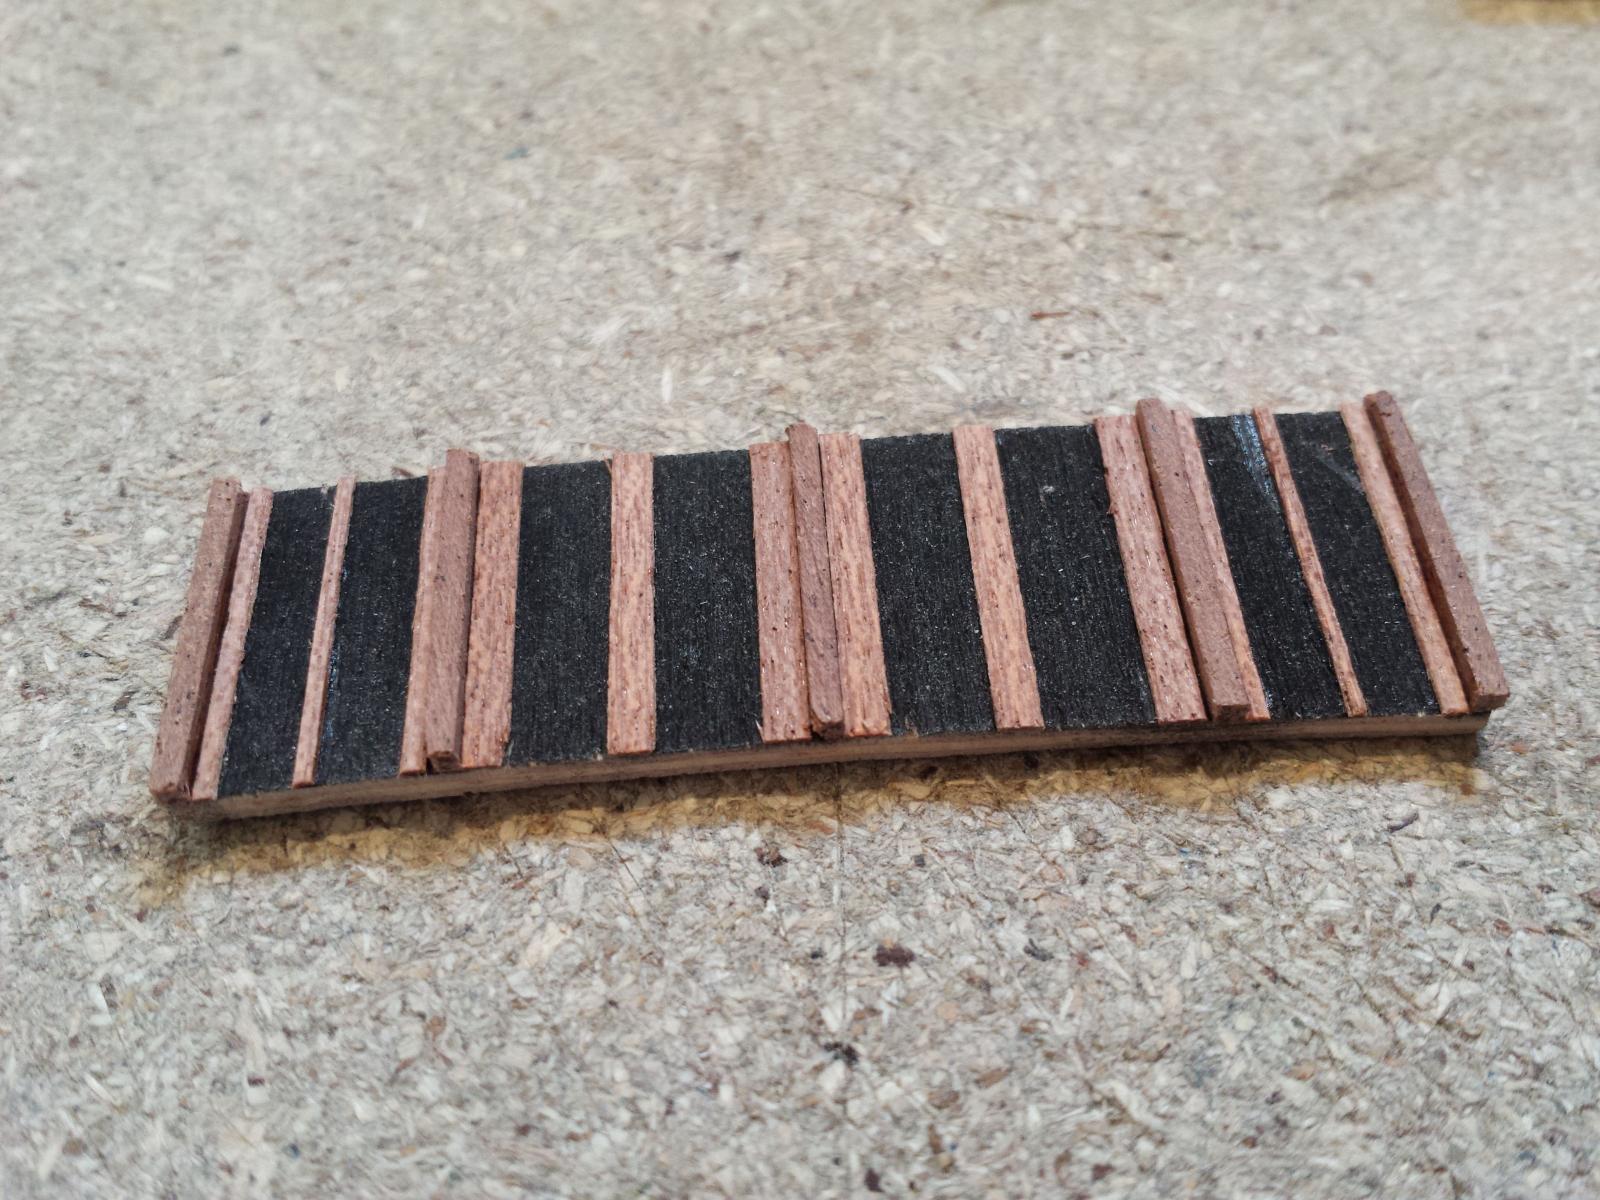
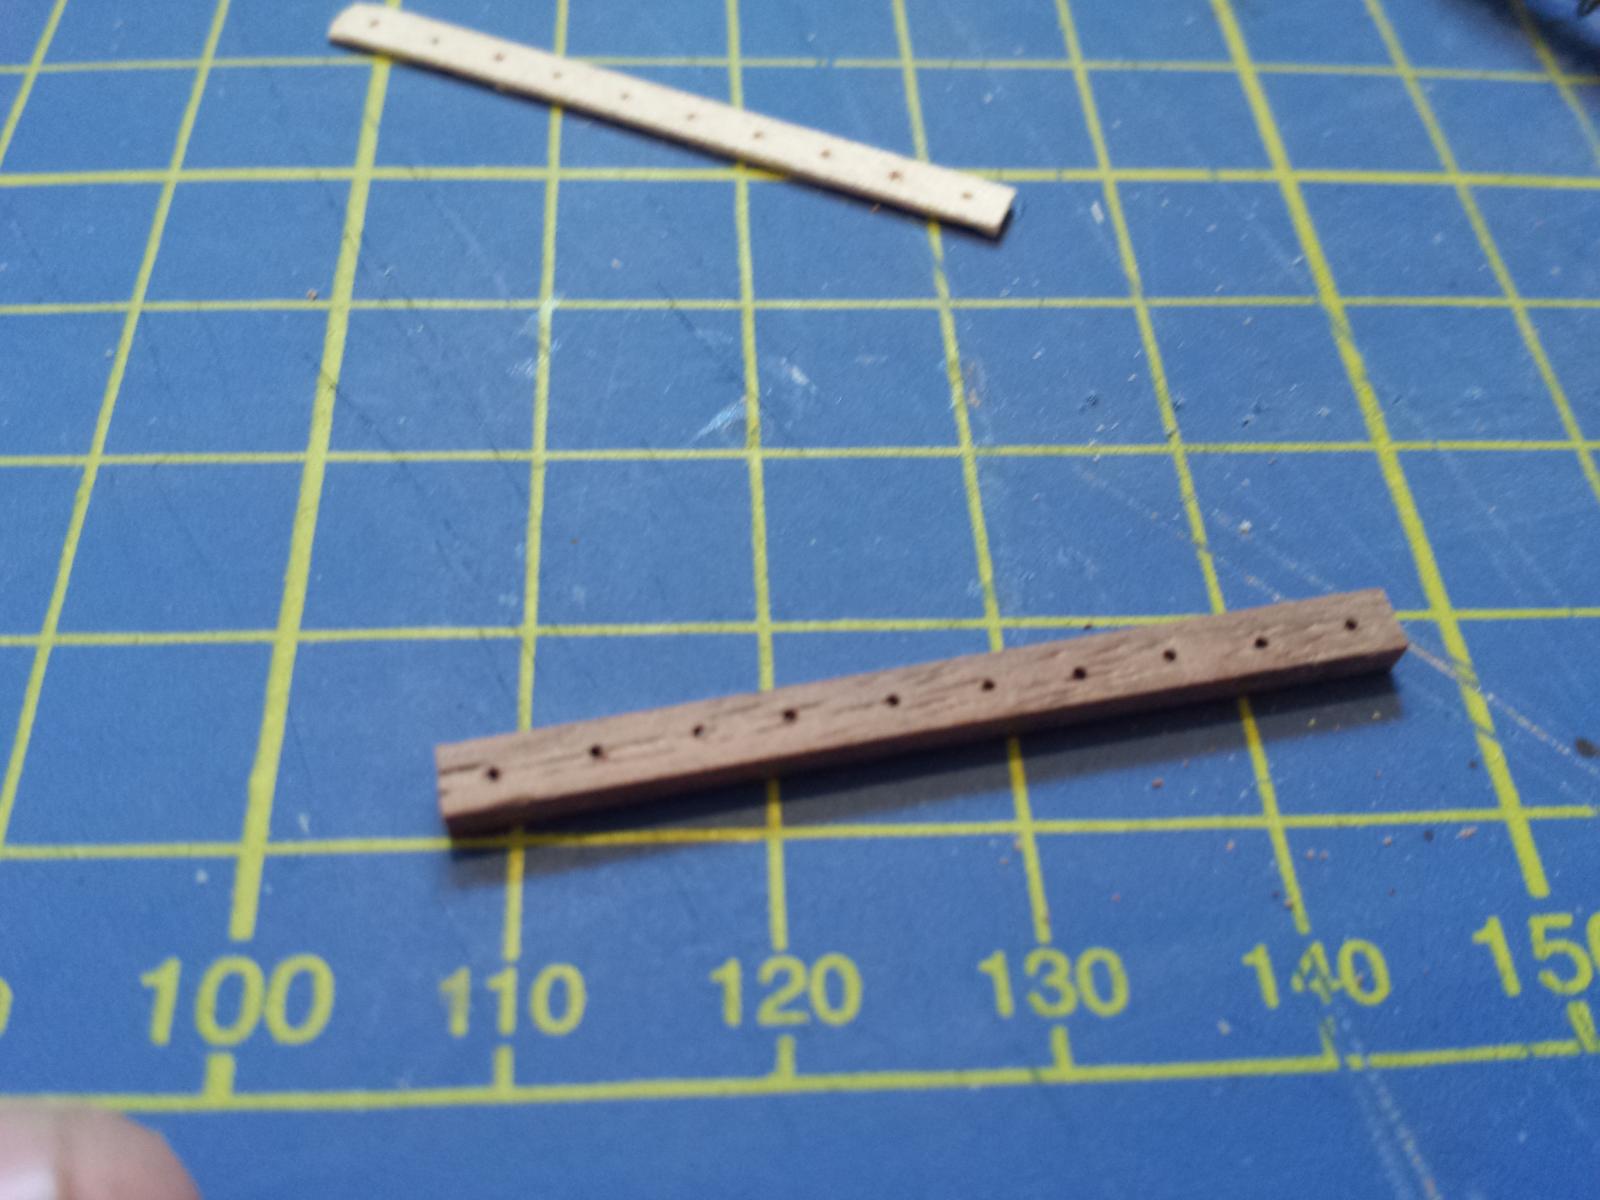
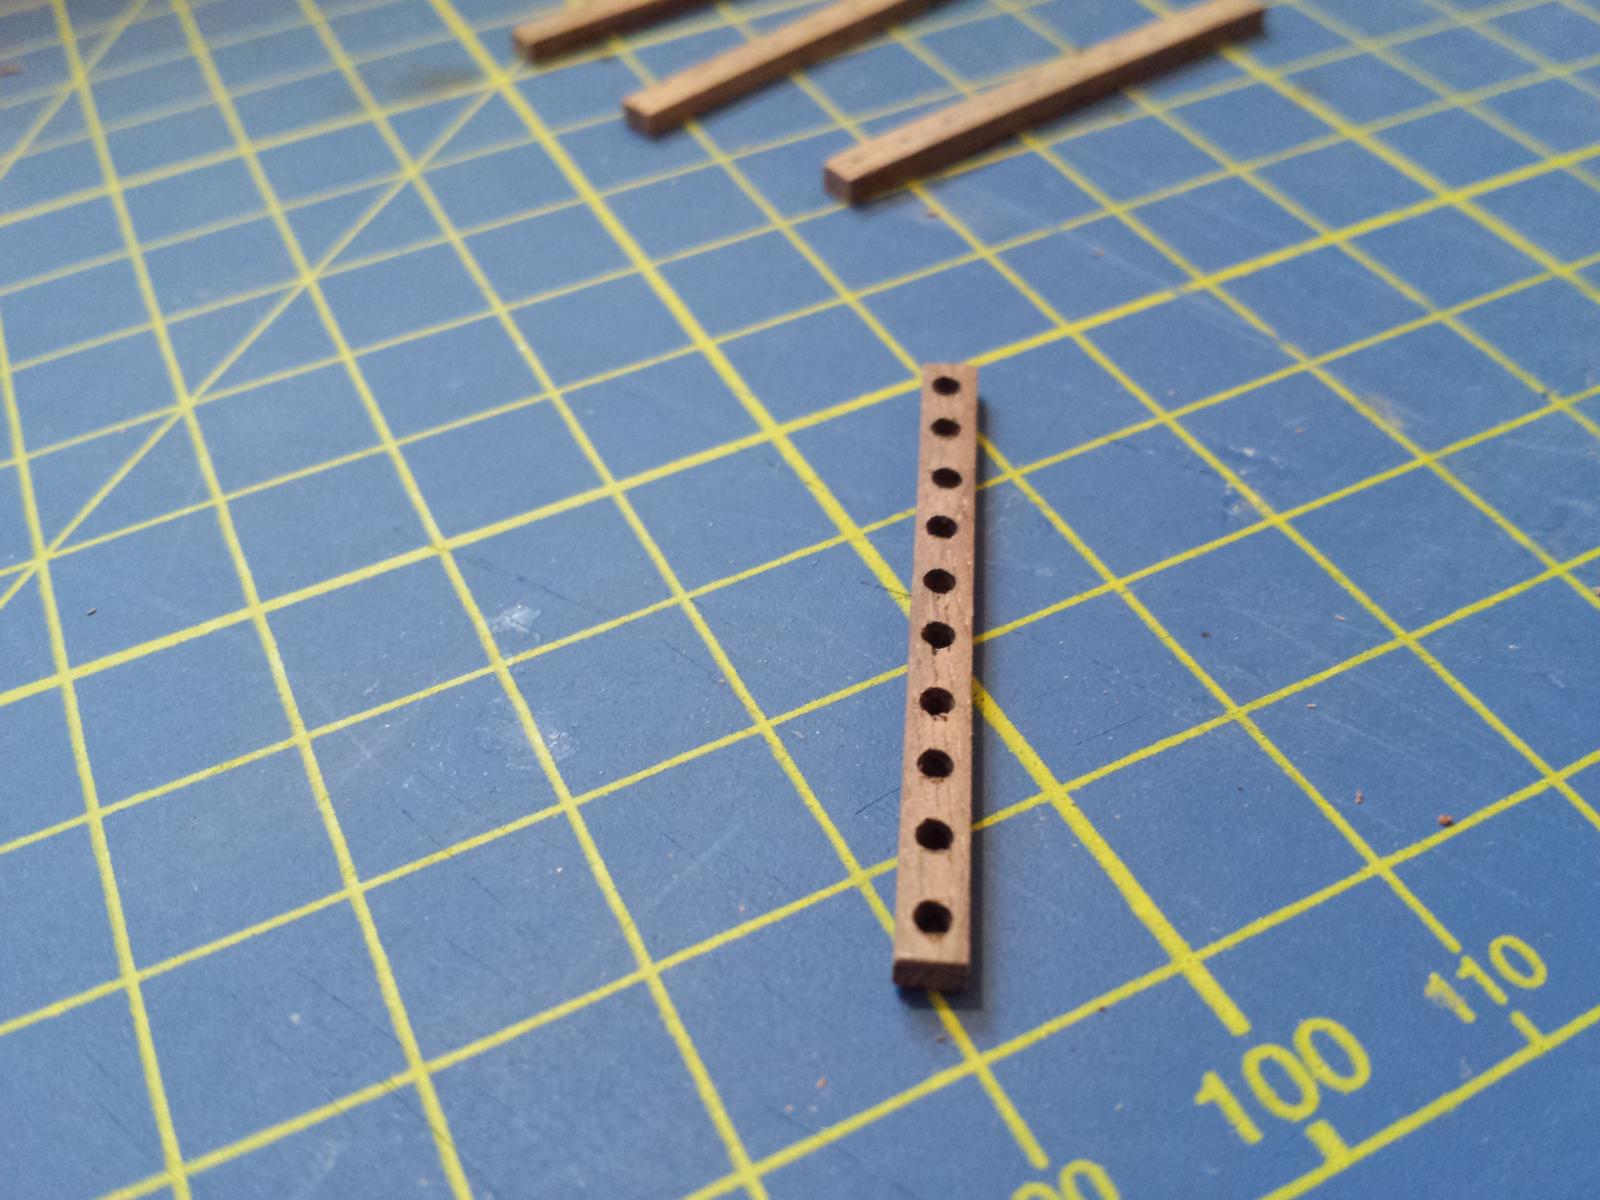
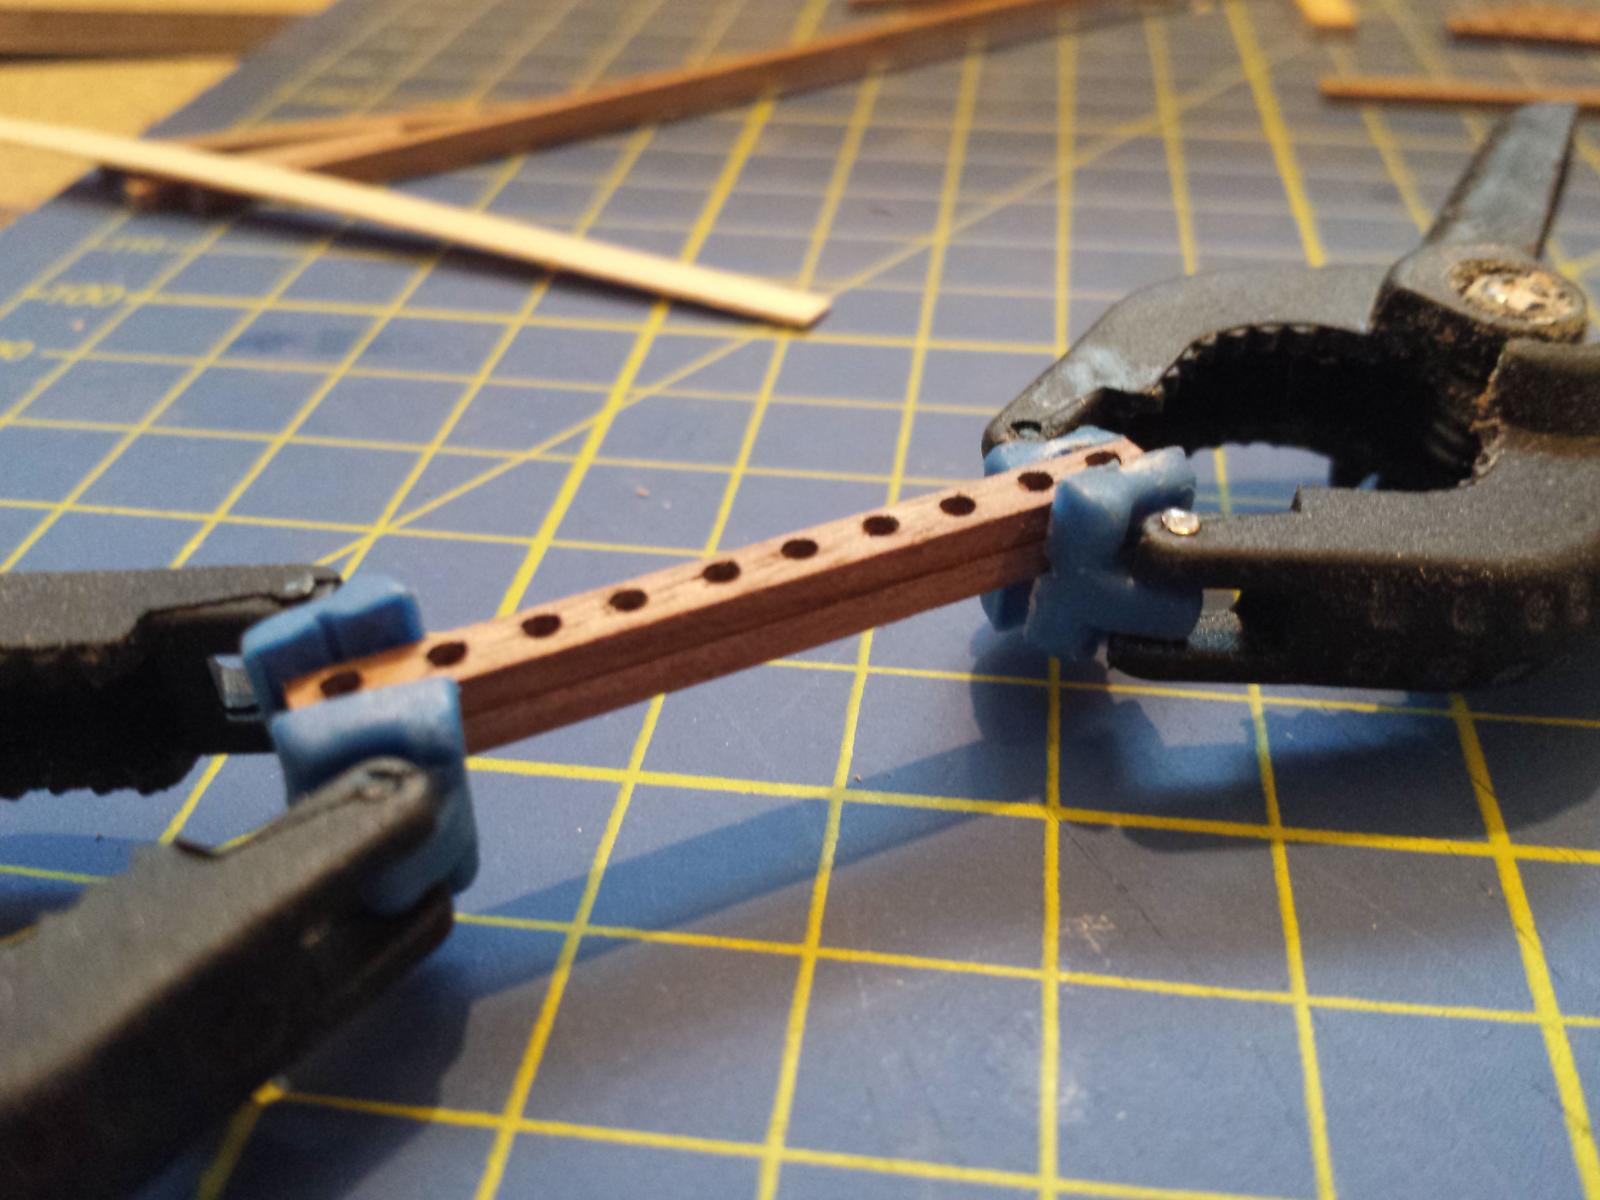
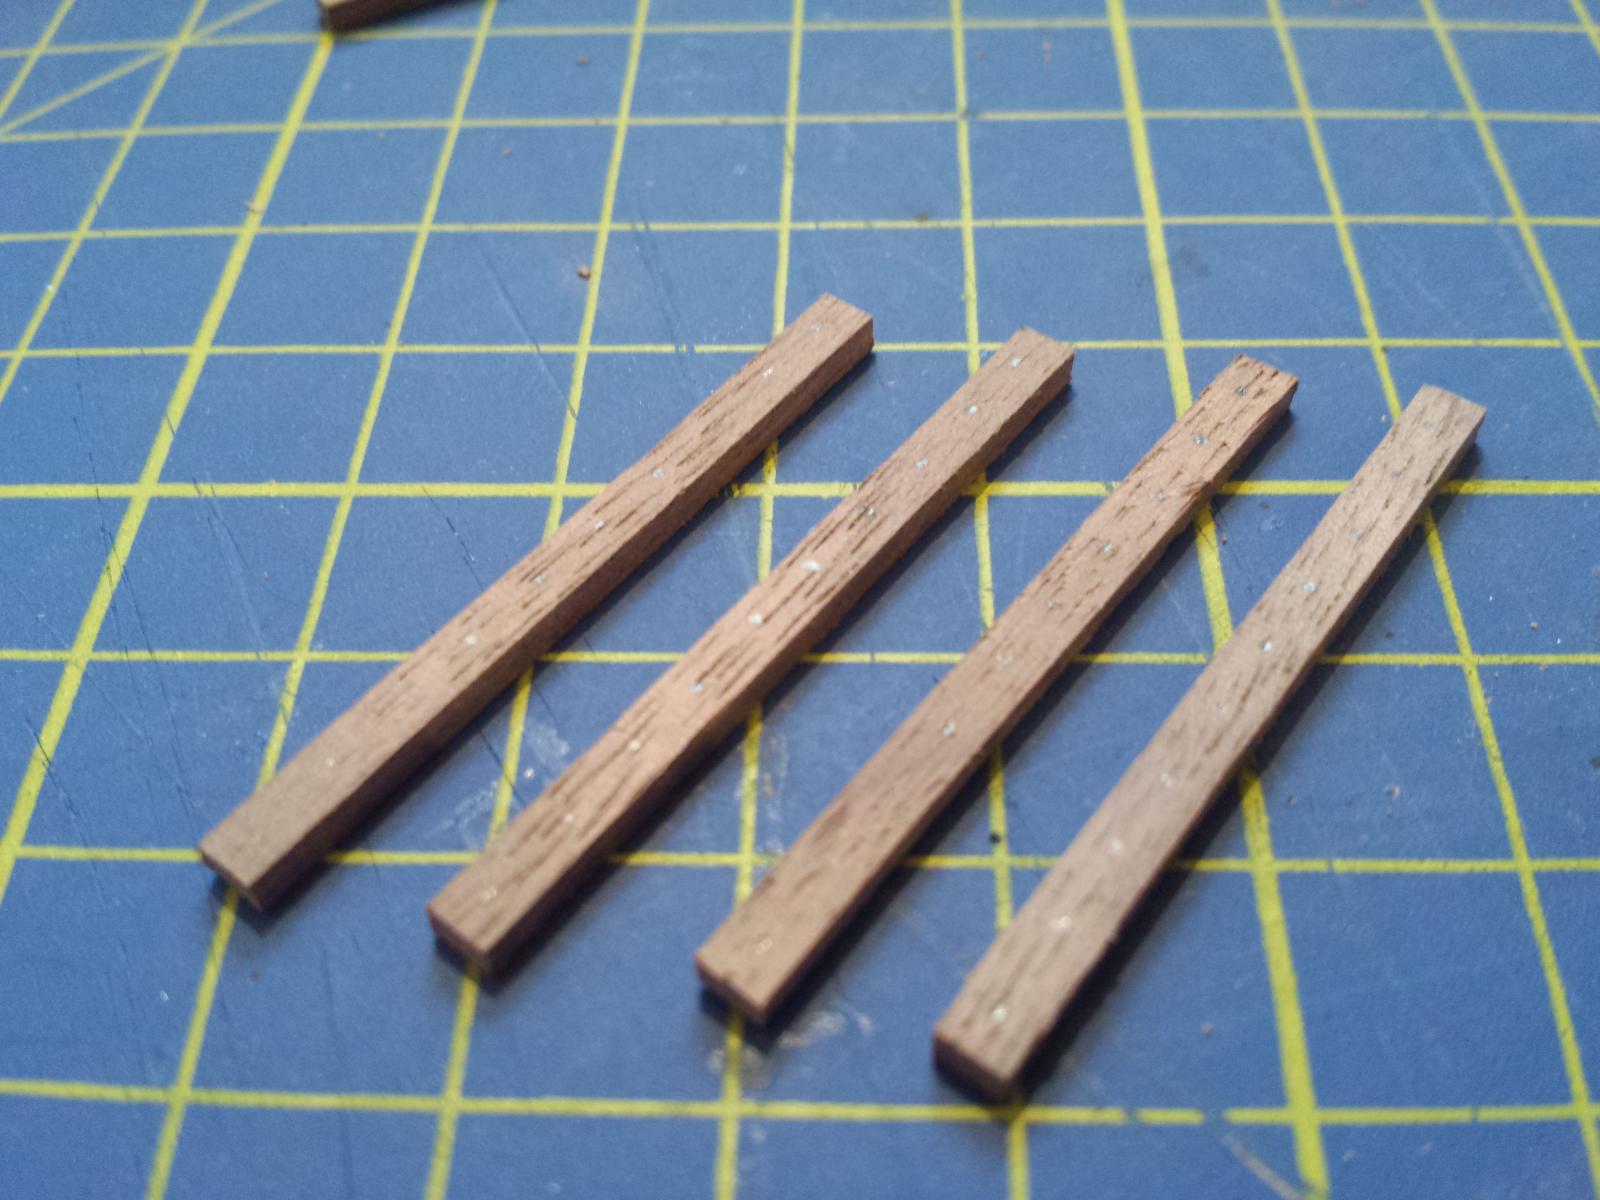
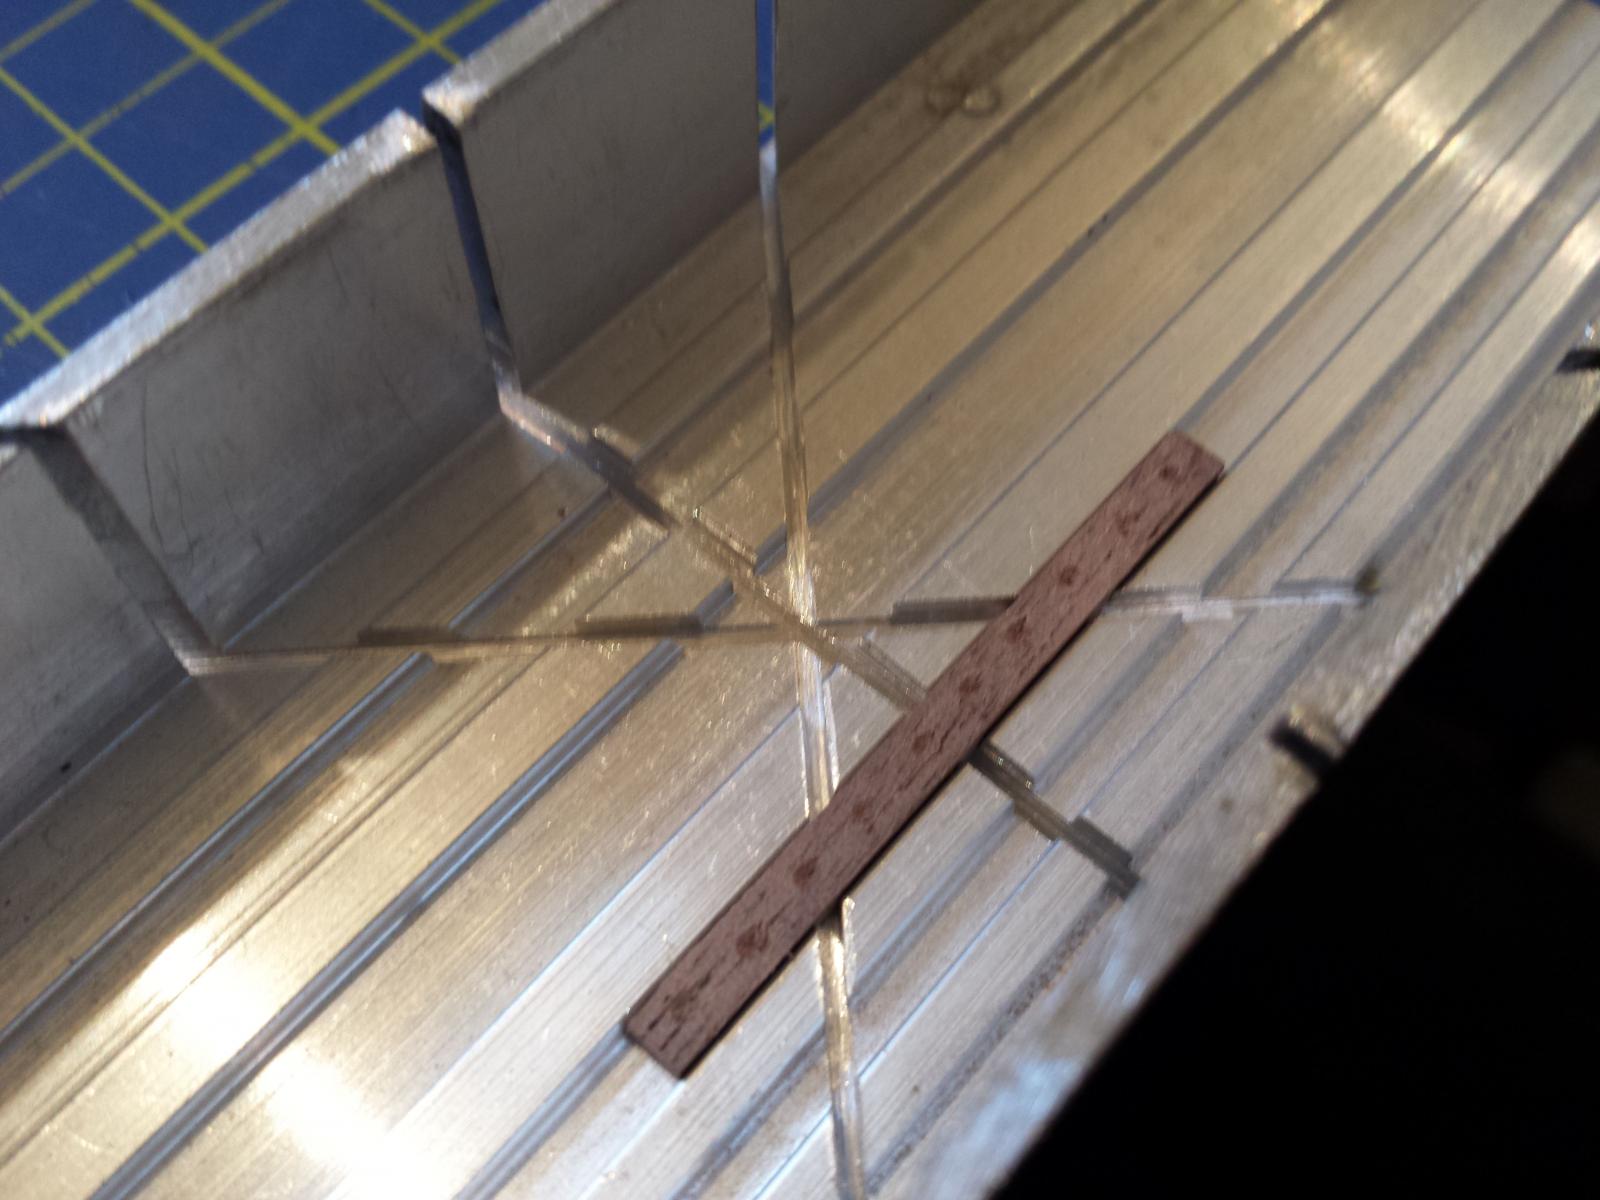
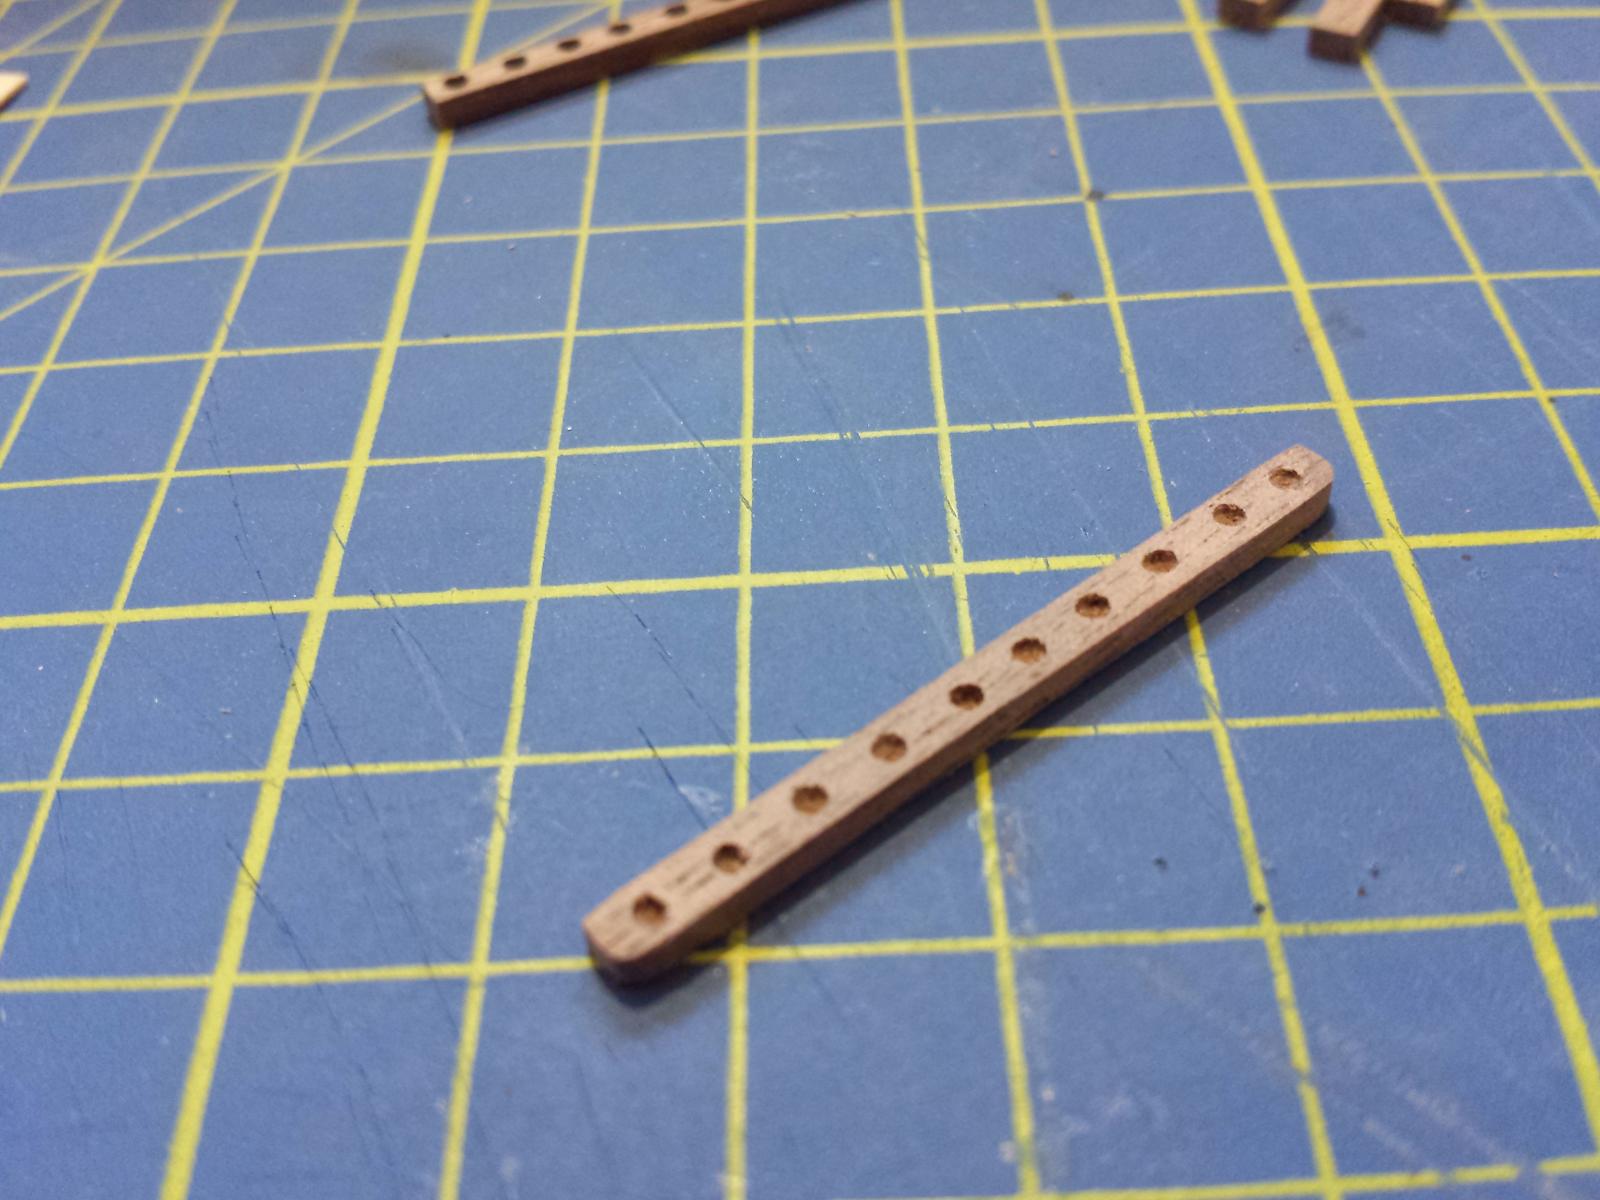
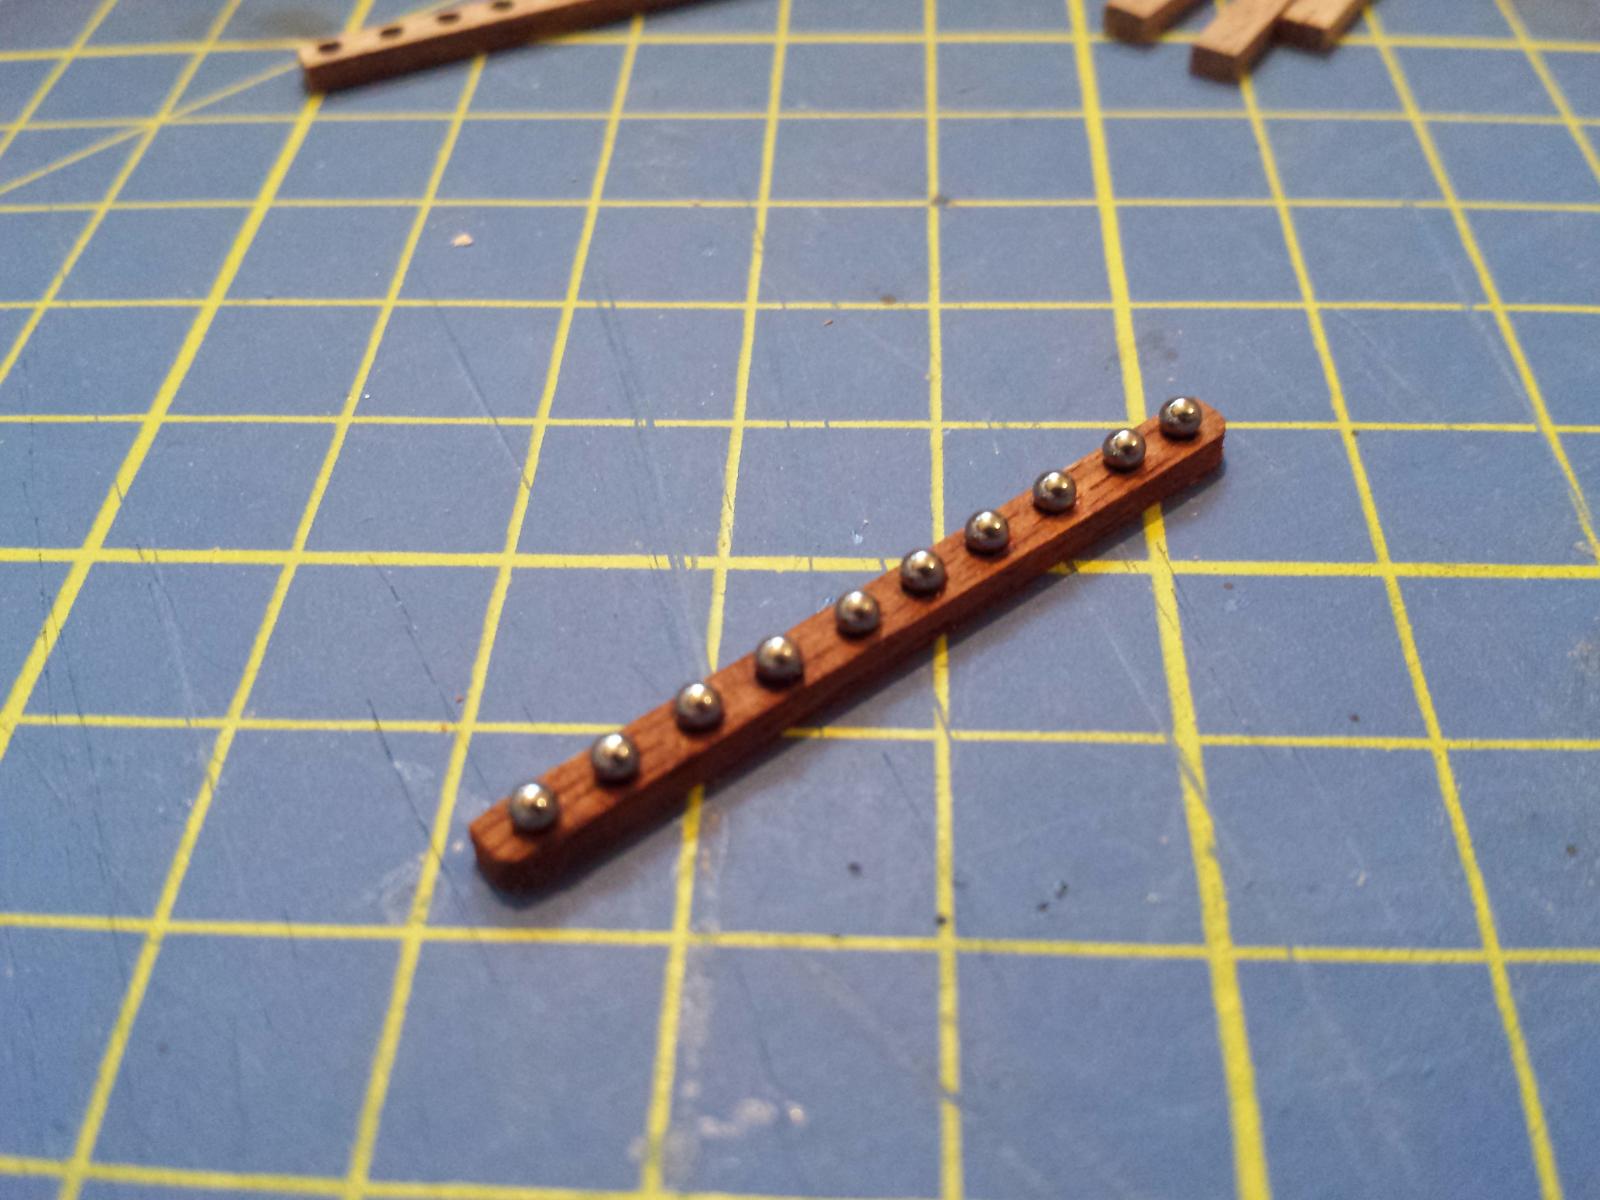
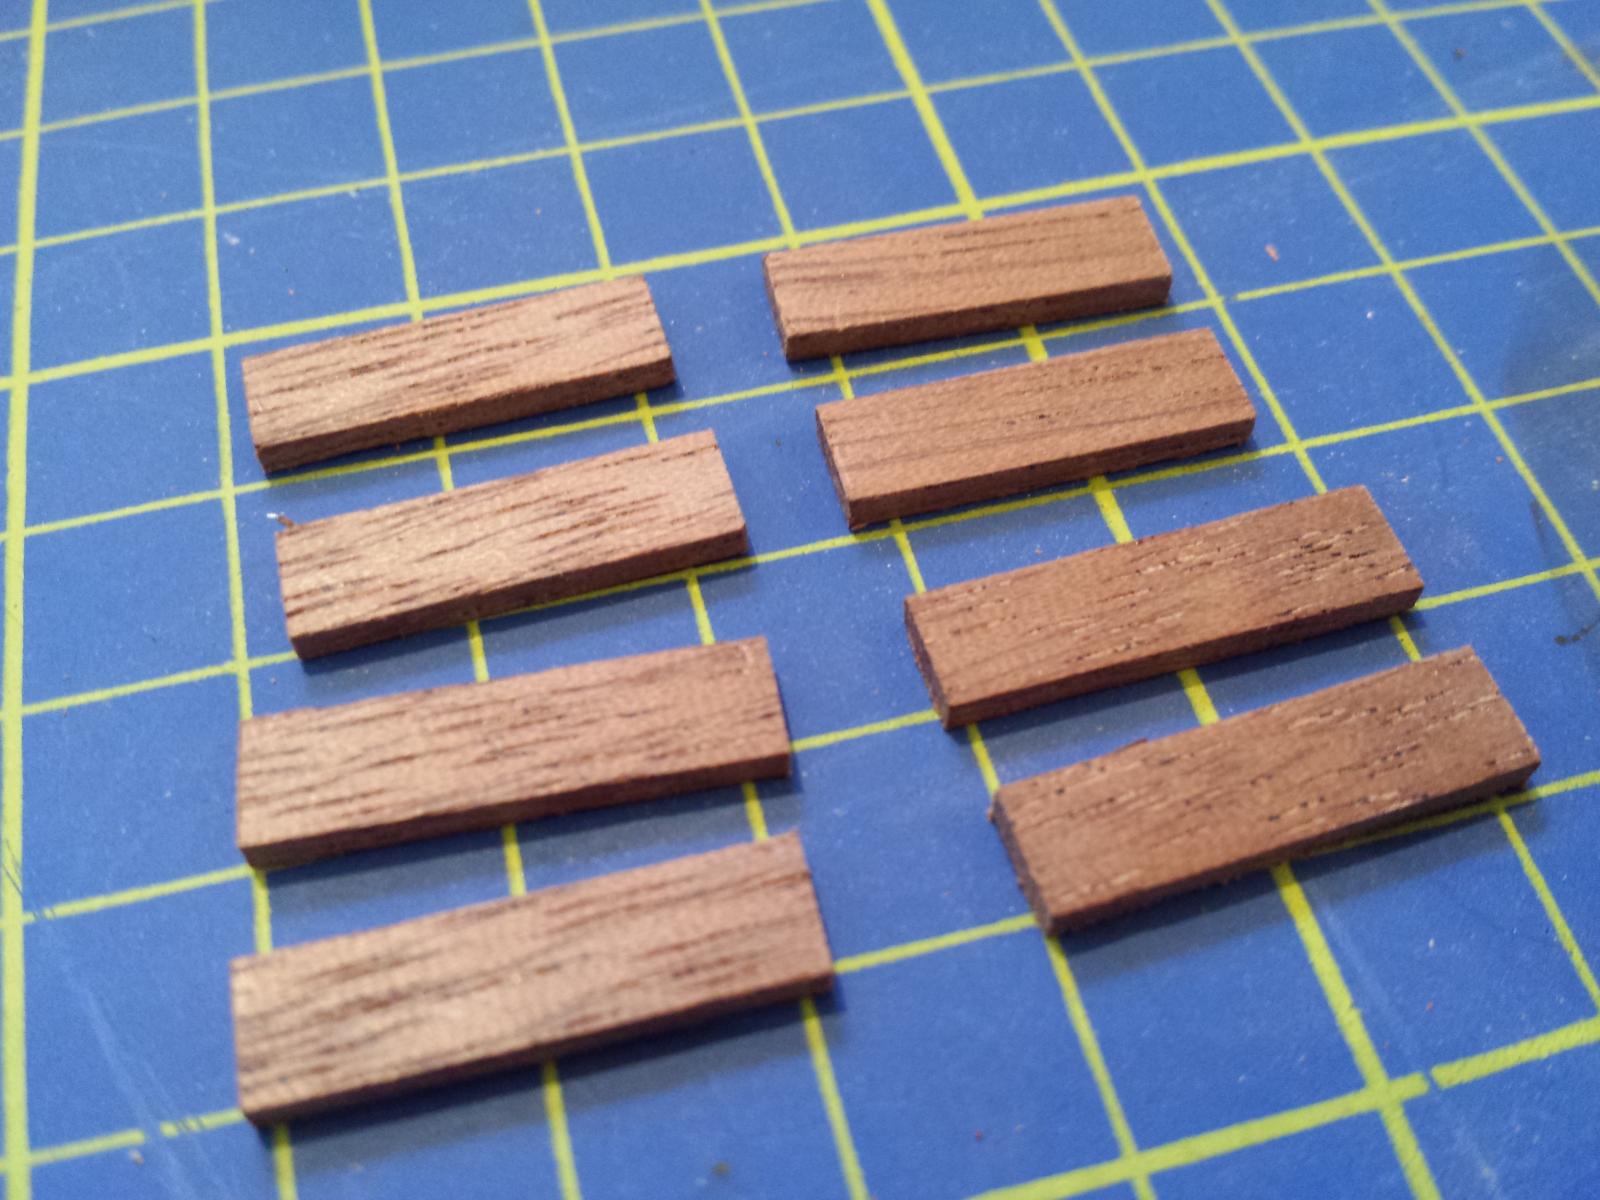
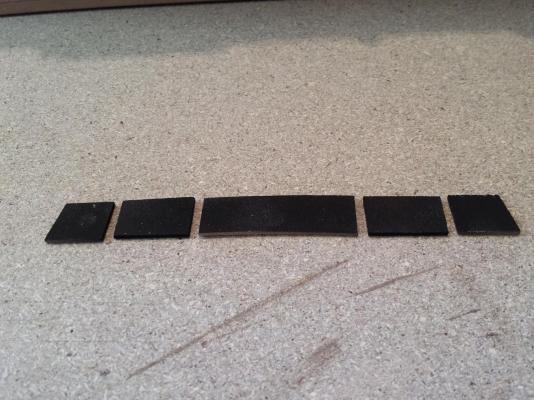
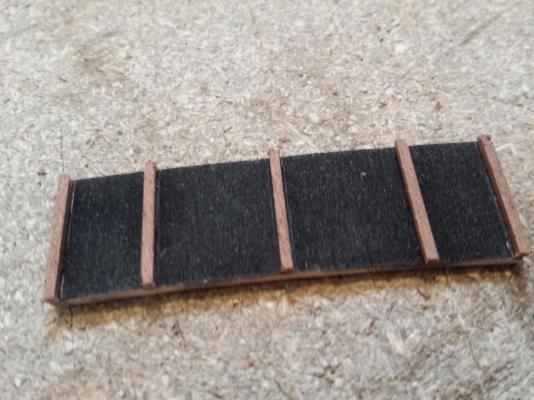
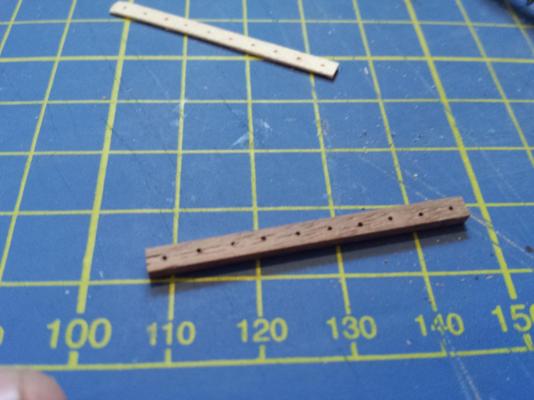
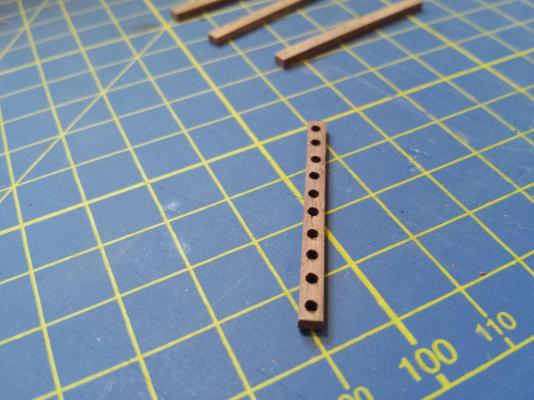
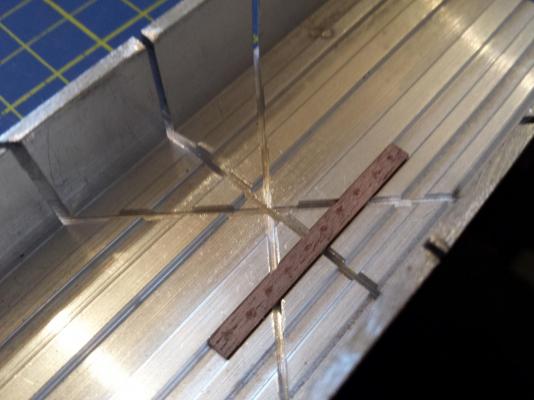
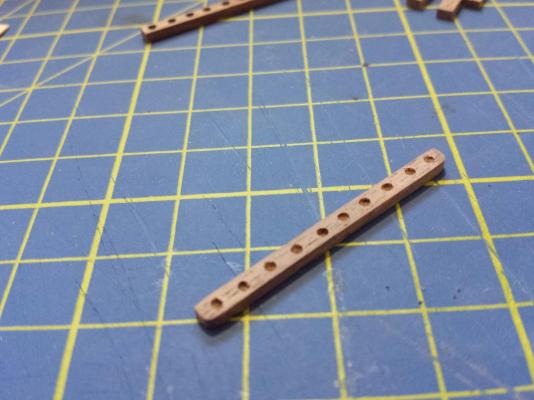
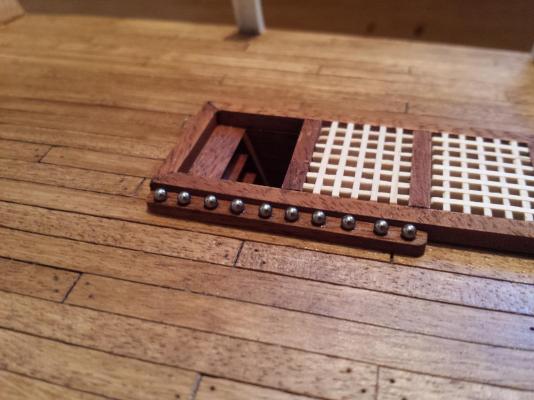
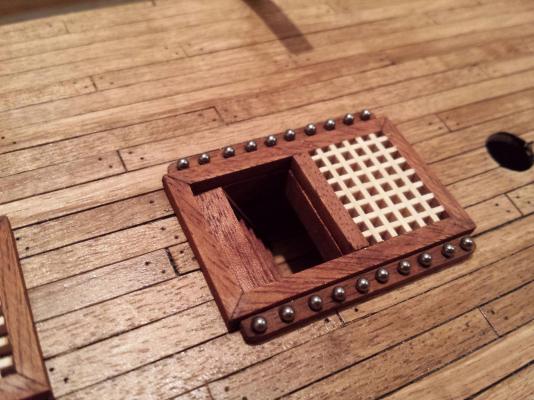
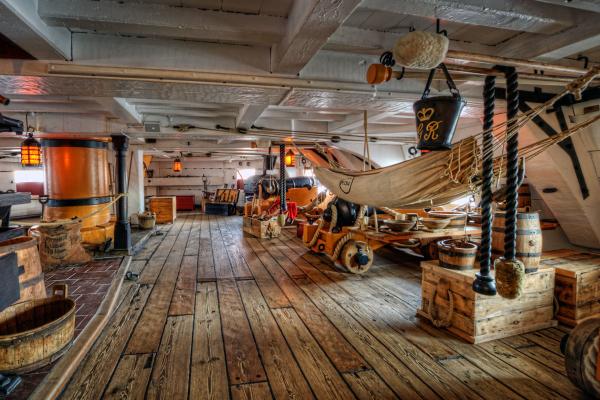
Evening. Making these ammunition racks was more tricky than I first though. I had several, well 8 to be exact, failed attempts at making them. Eventually I managed to make by the following method: Firstly I got the lengths of 2x3mm I needed ready, simple enough: Next, using some spare veneer I made myself a template, with small holes drilled through at 4mm intervals. Should have been 3mm really but I felt the earlier test results looked too cluttered. Using this, I created a further template with larger holes, using the same 1.5mm bit I would be using on the final racks: Using that, I clamped it to each piece in turn and used a pencil to mark the position of the cavities: Using my mitre box as a makeshift vice I drilled in about 1mm on the holes I had marked: And after some sanding and tidying up, curved the two ends and stained with Oak, and fixed the shot in place. There didn't appear to be any included with the kit so I used some spares: Repeated this process for the remainder and finally fixed in place on the deck. Thats this deck pretty much complete except for the cross beam:


-
Make sure everything is dry, check it is dry, check it again, leave it overnight, check again. Sand lightly, blow, sand lightly, blow, and repeat...if you're wife or otherwise good partner has one of those big soft blusher brushes, swipe it, they are excellent for removing dust and the like.
-
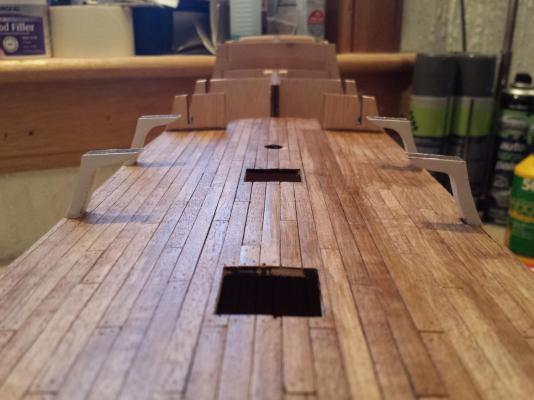
Hi Dolly. Welcome back to the hobby Feel free to chime in whenever you like, if I can help I would be happy to. You should also check out Paul's log of the same kit, he is much further along than I am and is doing a natural finish, to say nothing of his skill being far better than mine: http://modelshipworld.com/index.php/topic/6684-hms-victory-by-paul-bell-constructo-scale-1-94-first-wooden-ship-build/ Monkeyman, depends on how you define caulking on models, technically none of them are actual caulking...well not unless someone uses actual tar between the planks lol. Yes there are gaps, but the resolution of my camera and the contrasting colours exaggerate them. In reality we're talking around 0.2mm gap. (Although there are some area's where the planks wandered a little wider, but even then no more than 0.4 or 0.5mm). When veiwed with the naked eye it's not noticeable that there is actually a gap. It takes practice to perfect, and this is only my second attempt, a few more decks under my belt and I should be able to get the gaps to an absolute minimum Visualy, it looks very similar to the real thing, which did have gaps, of course for the tar to sit:
-
Thanks. You mean the simulated caulking? I sort of cheated. I've tried various methods, 2b pencil, sharpie (which I did get away with on one model as the wood wasn't blotting the ink), strips of card, black thread. In the end I went for the simple but effective solution. I prepped my planks as normal, cut to length, pre-drilled the treenail holes in bulk, sanded the edges etc...and simply sprayed the false decks black before hand. Then I just carefully laid the planks with a slight gap. The pale colour of the wood and the contrast of the black beneath makes this actually quite easy to do as they contrast against each other, and the result is, well you have seen the result It's not perfect...but then niether are the real things Link to my original post: scroll down past the first set of photo's: http://modelshipworld.com/index.php/topic/9532-hms-victory-by-dominic-constructo-196/?p=282109 Oh and this one expands a little more: http://modelshipworld.com/index.php/topic/9532-hms-victory-by-dominic-constructo-196/?p=282644
-
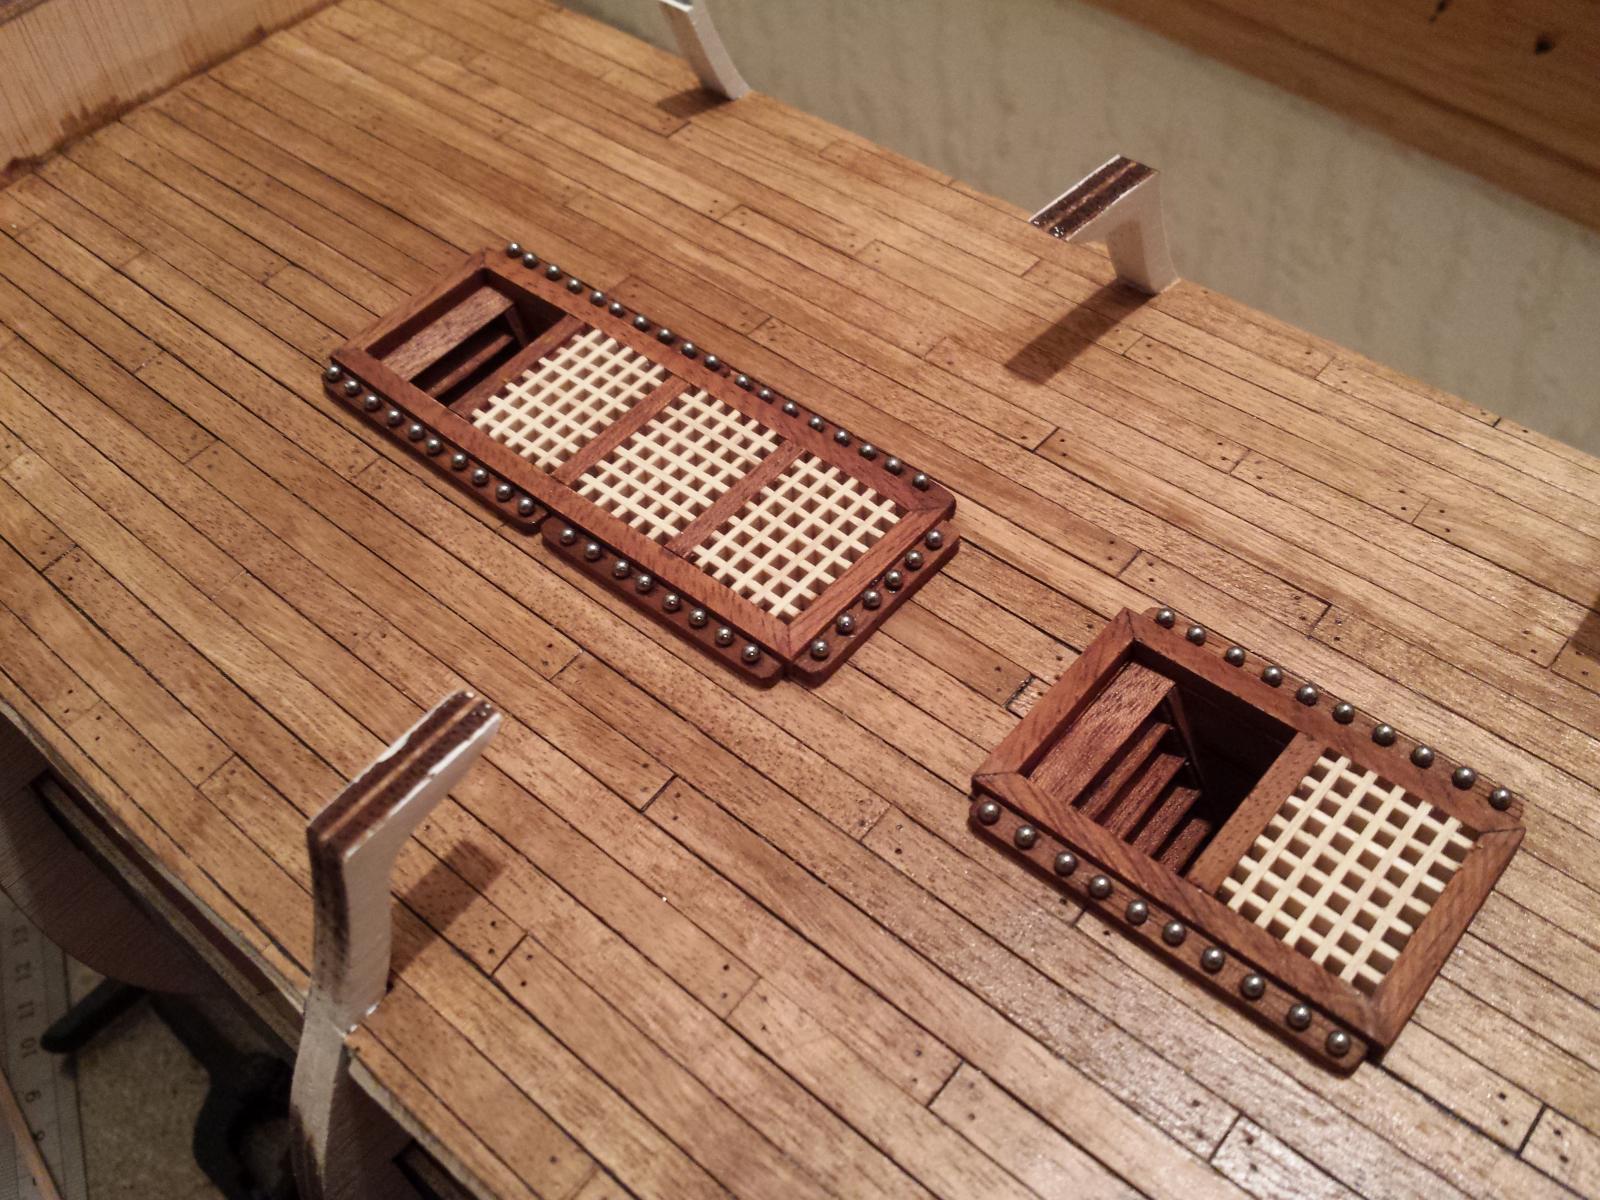
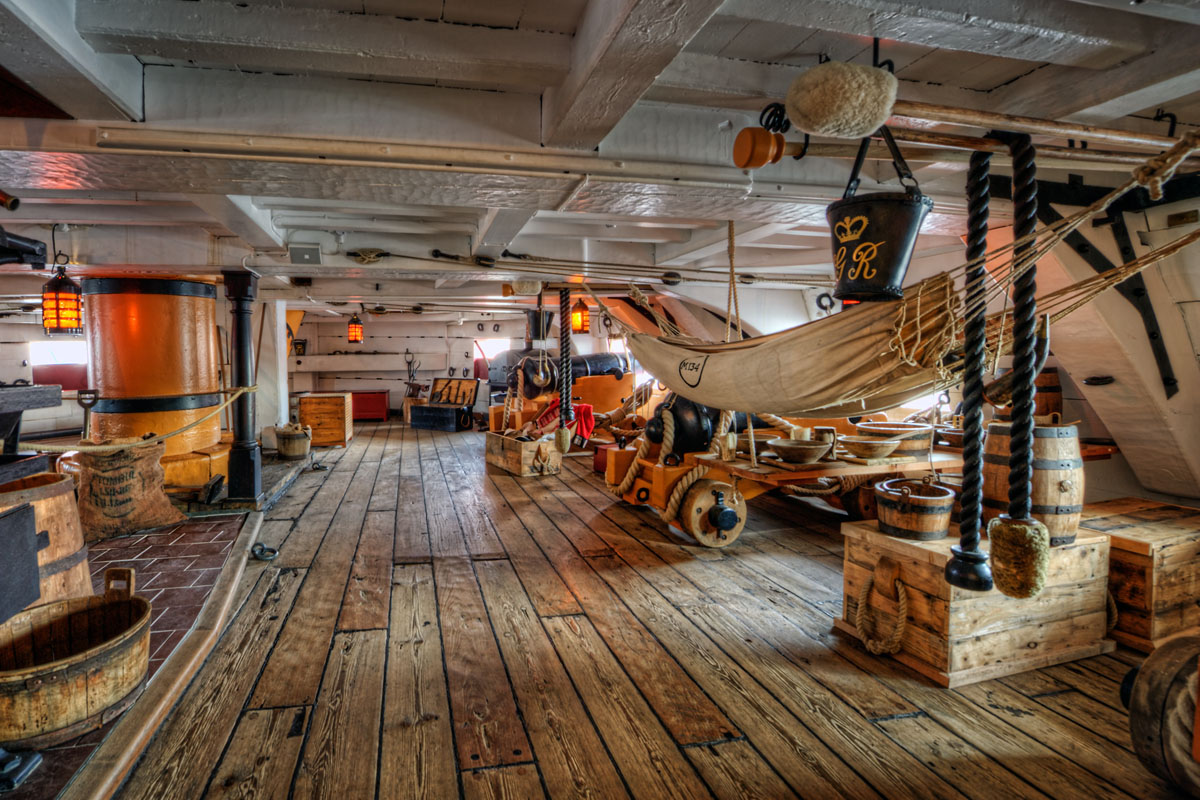
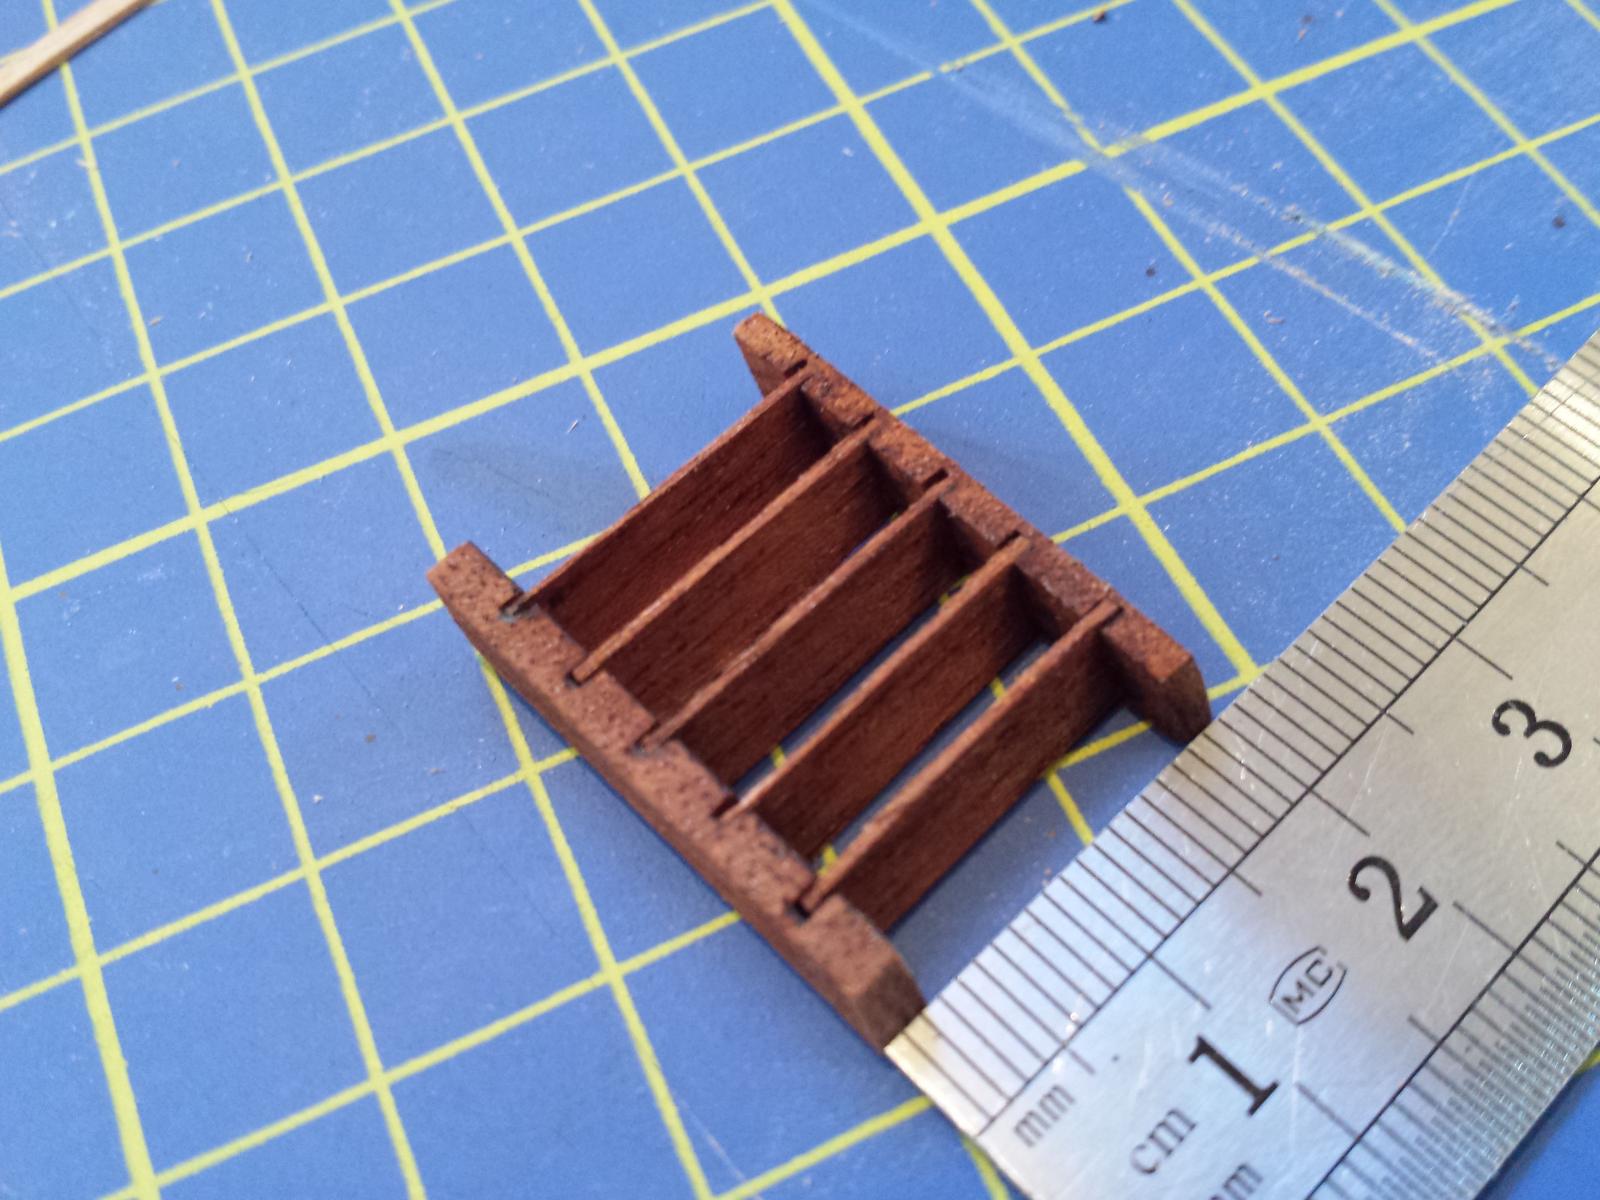
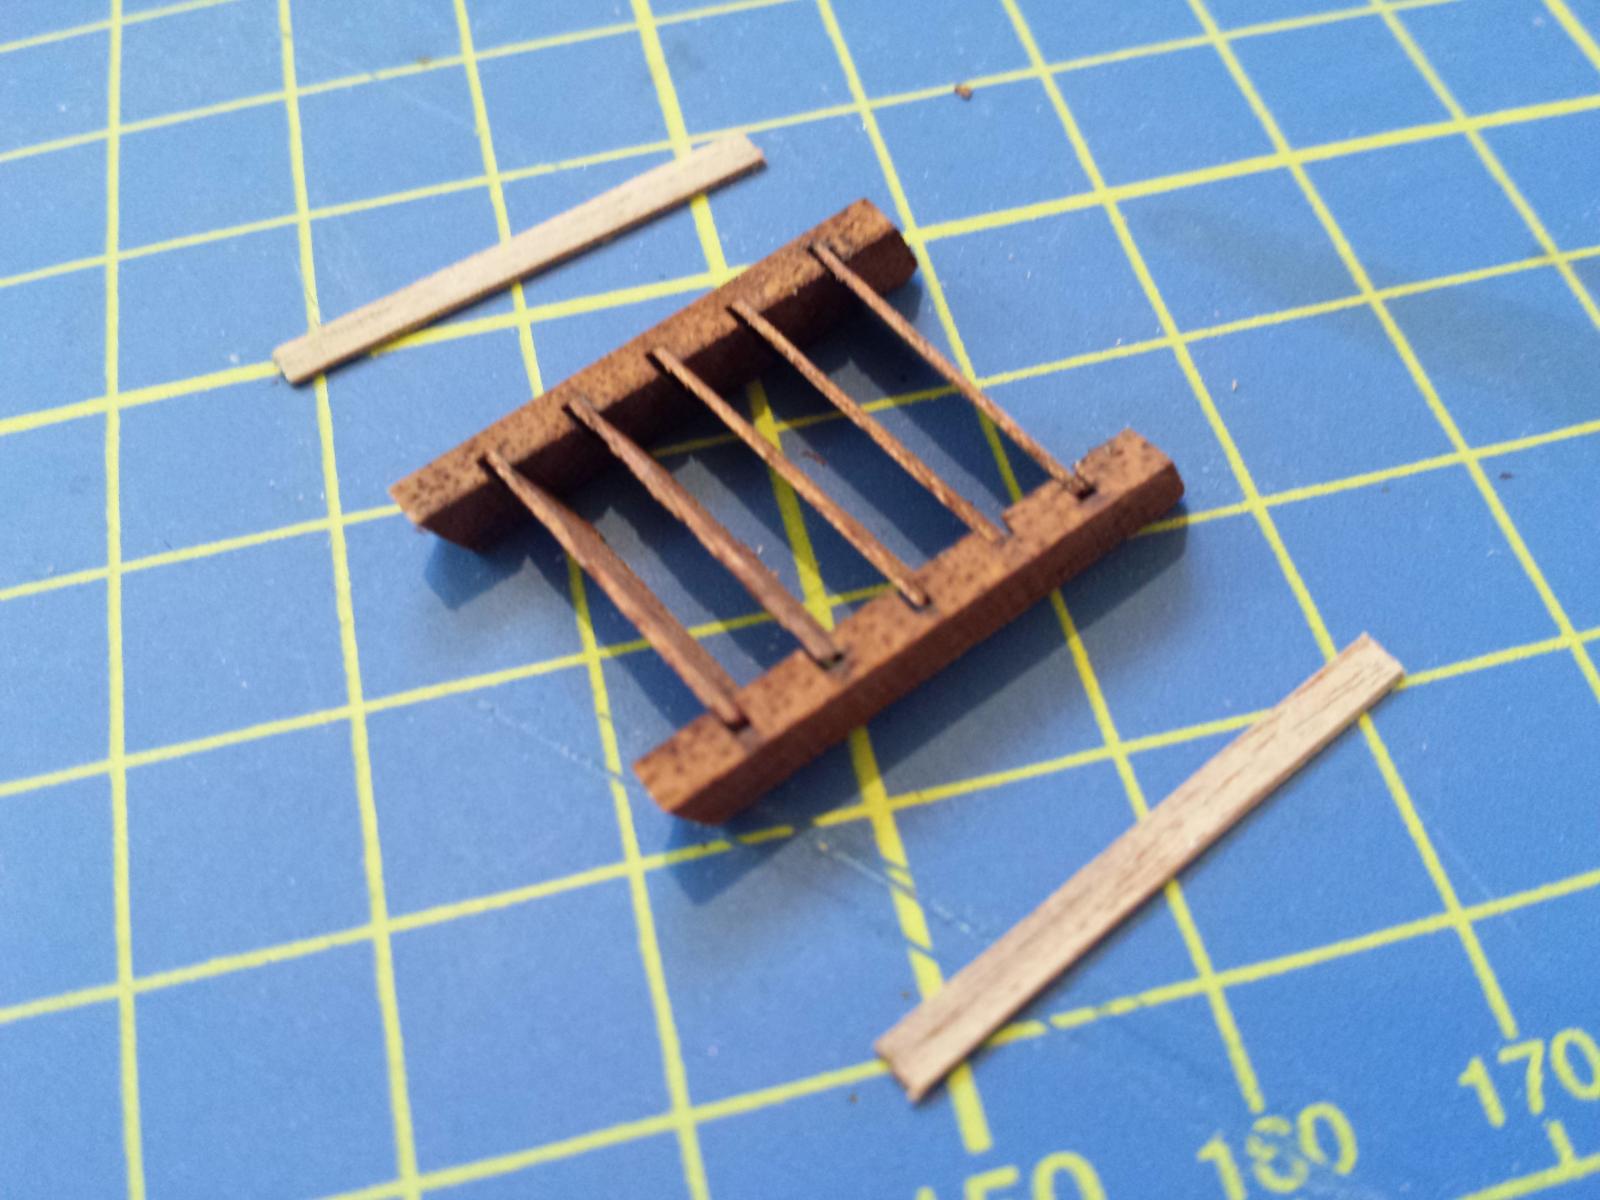
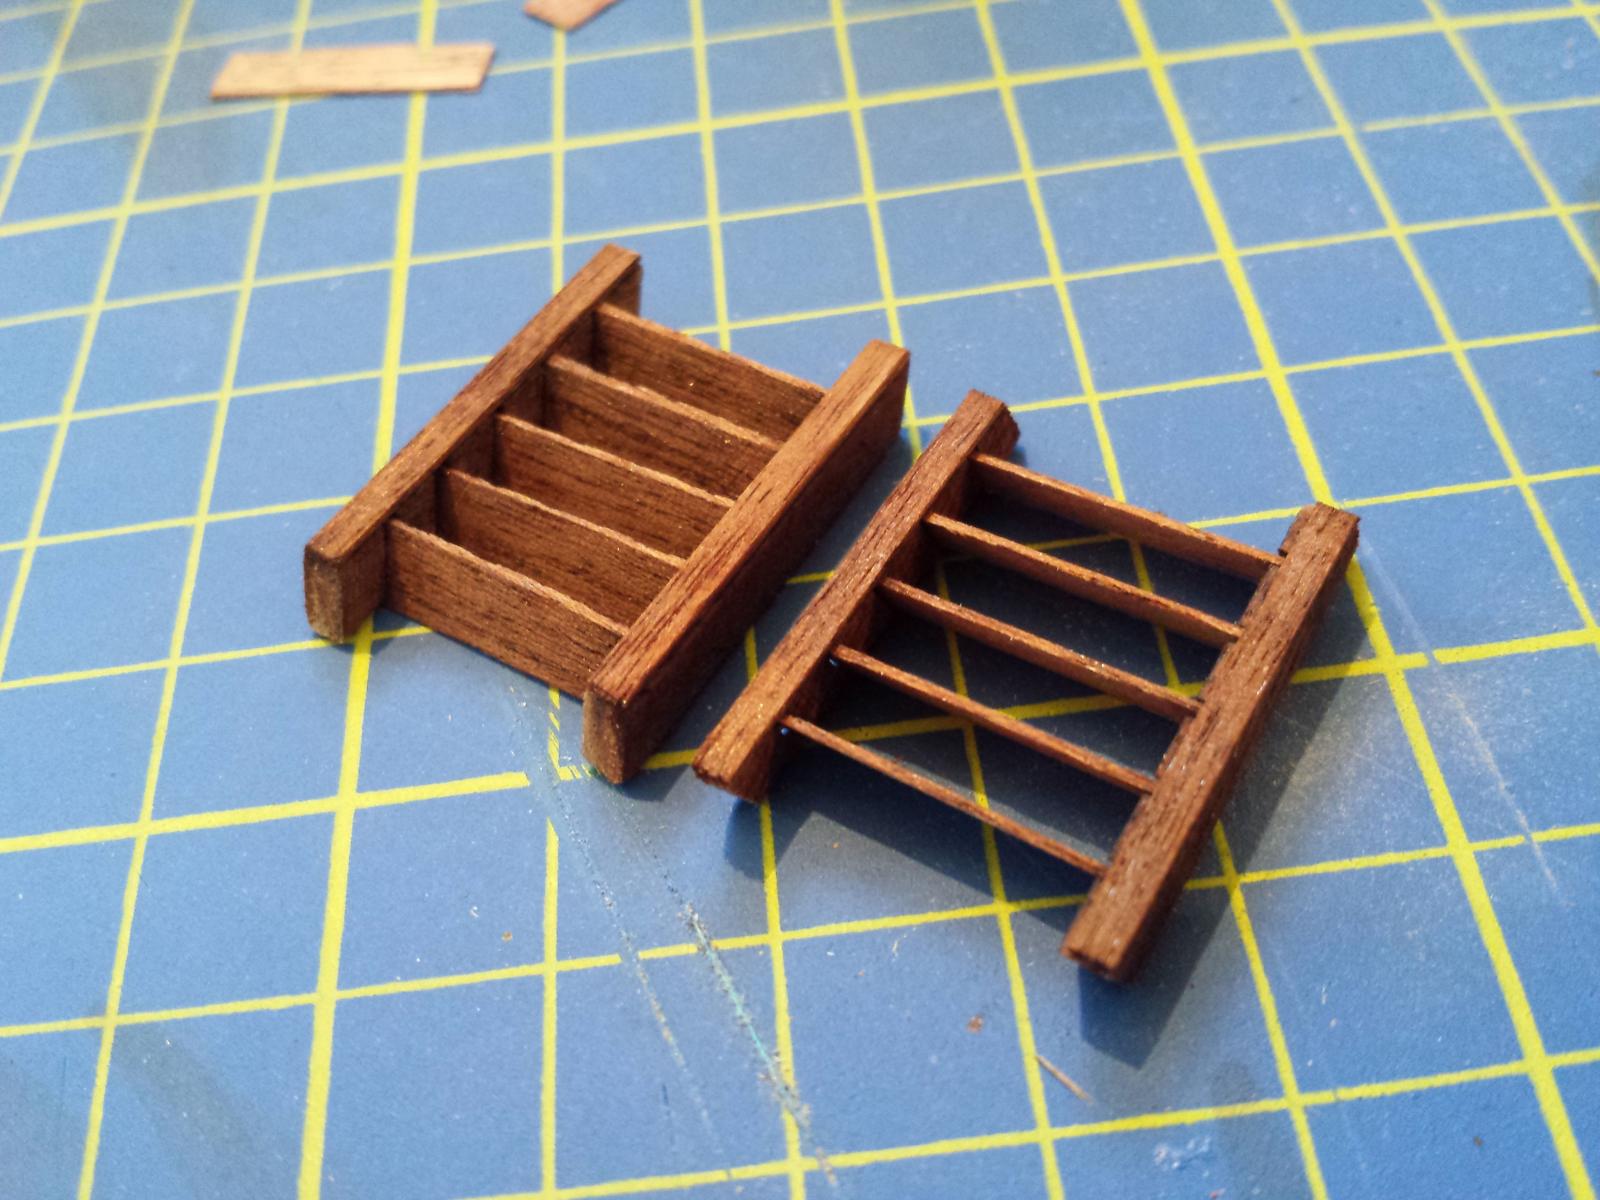
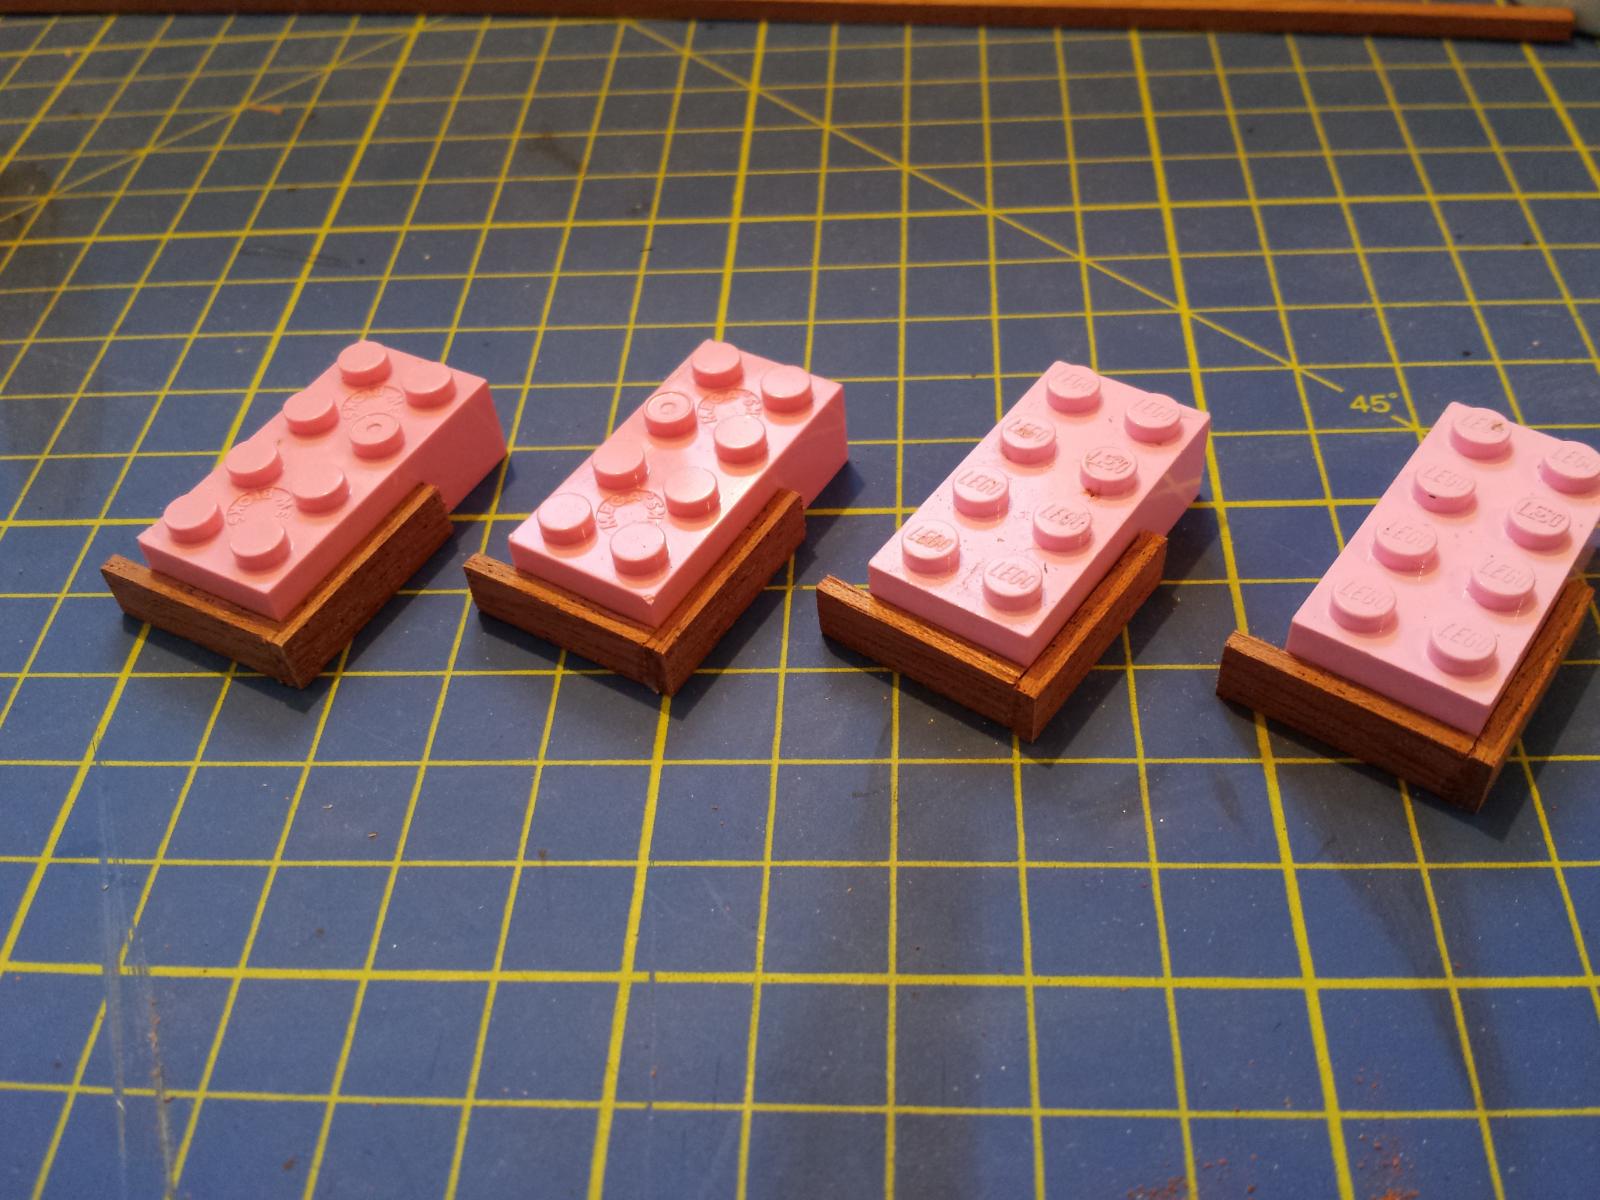
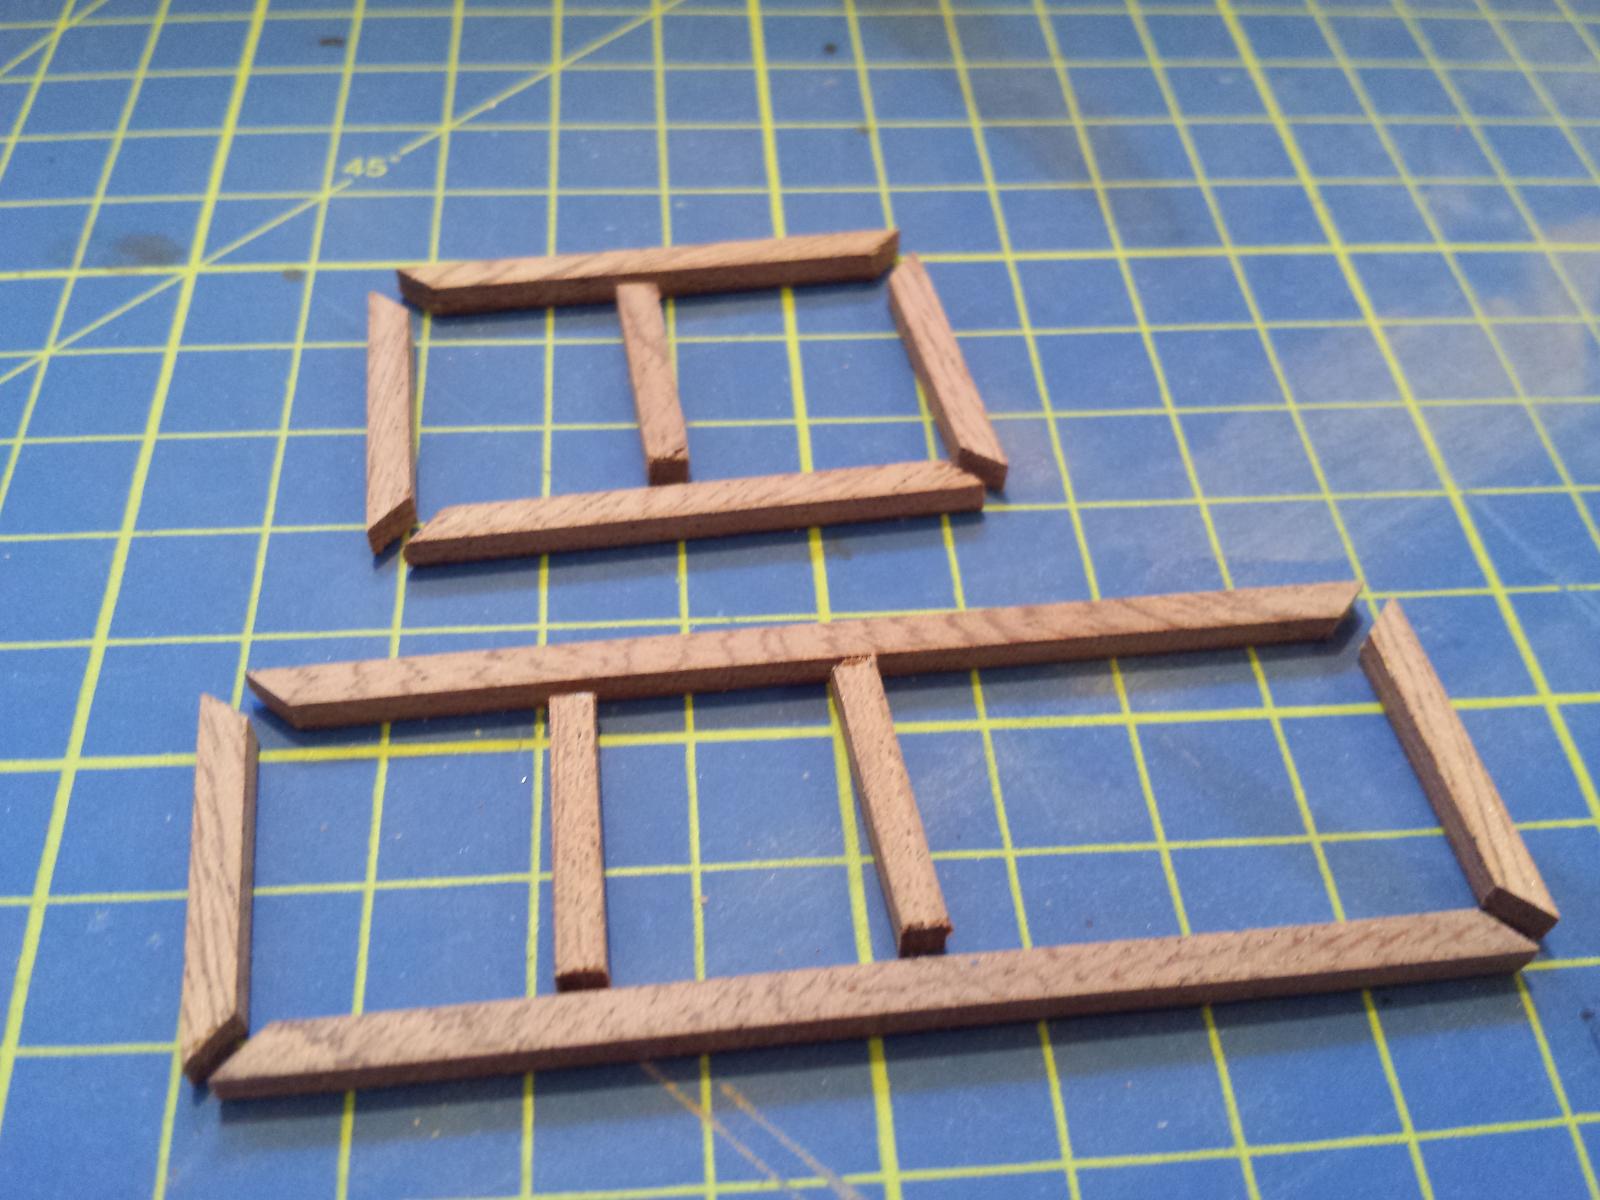
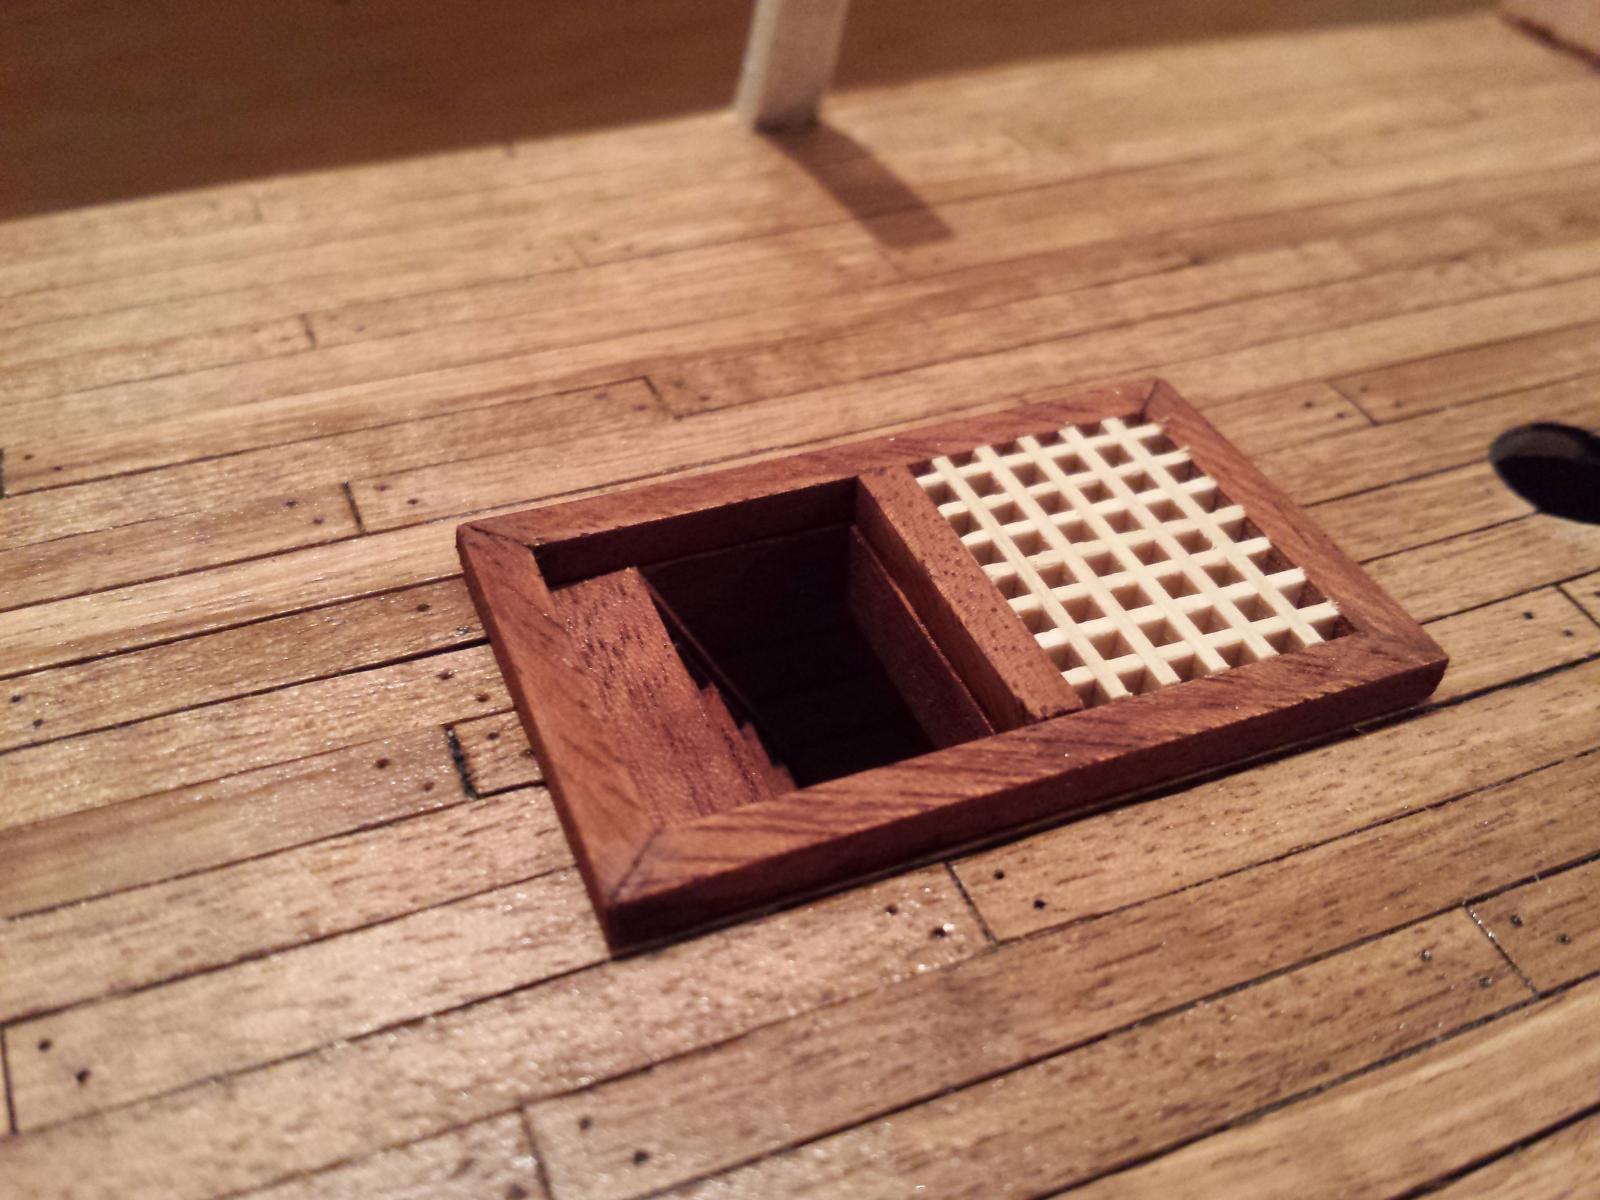
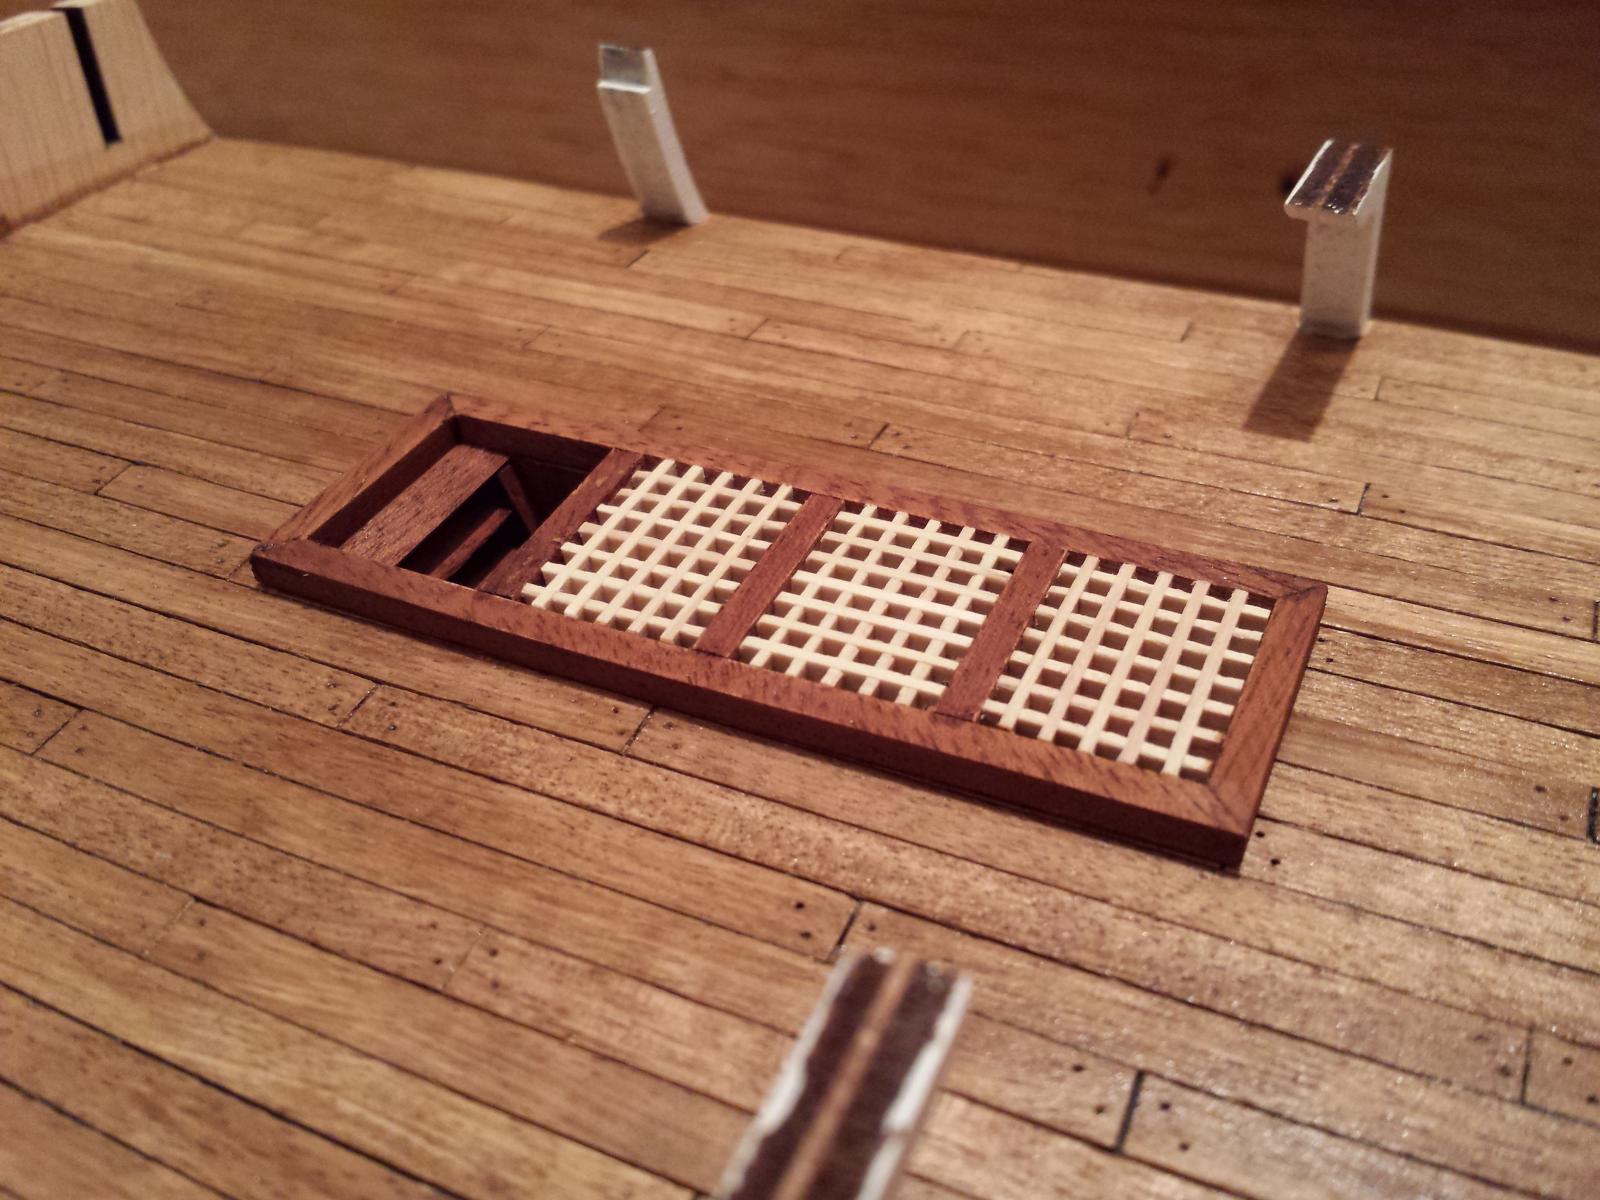
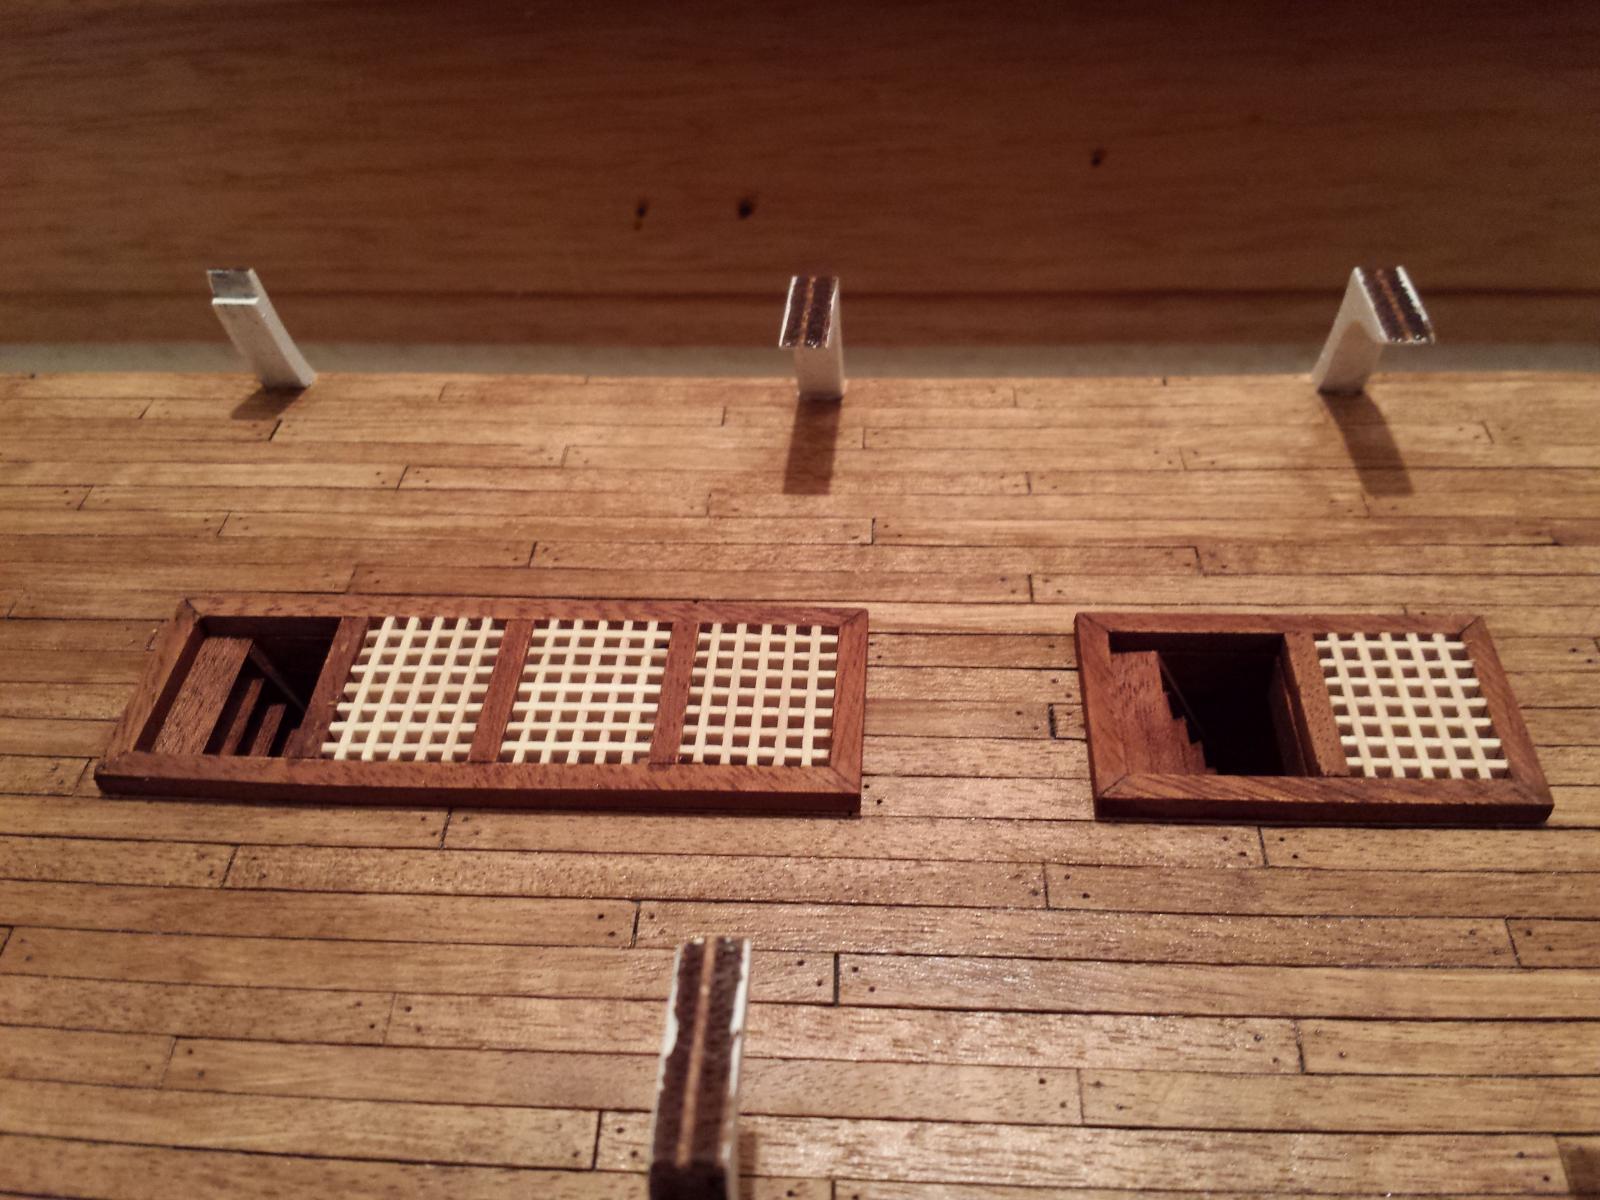
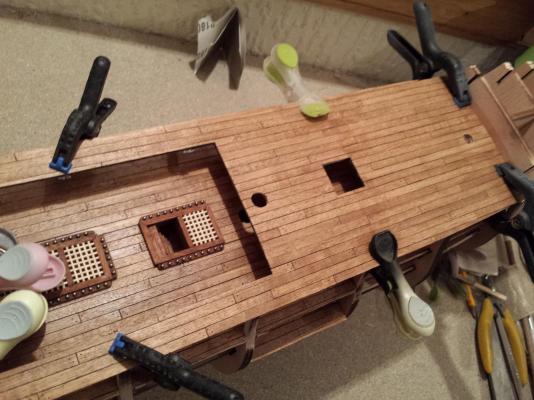
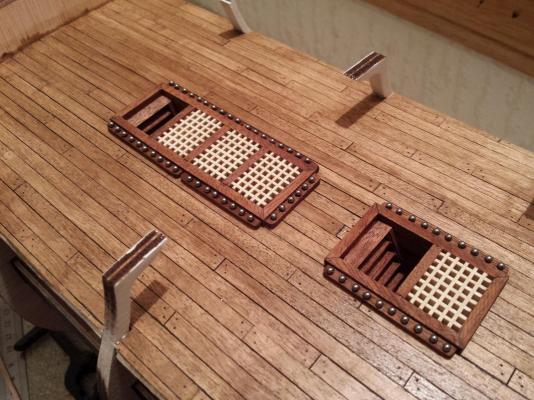
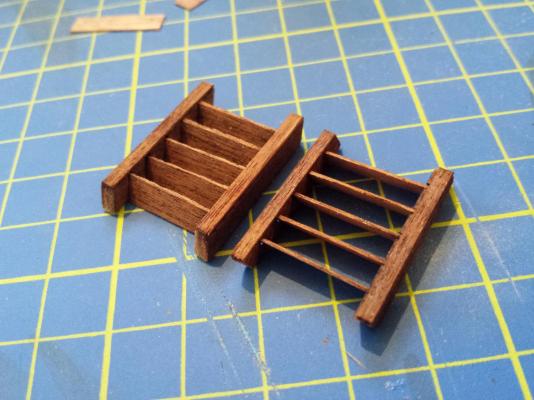
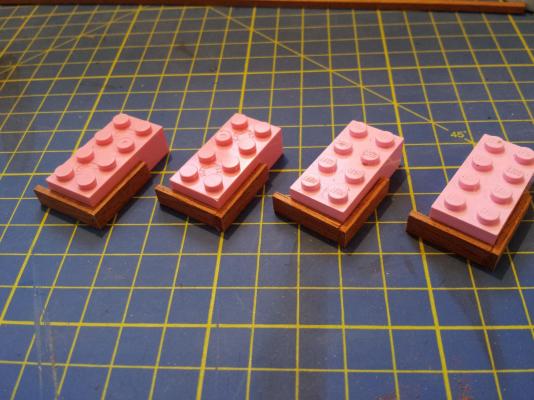
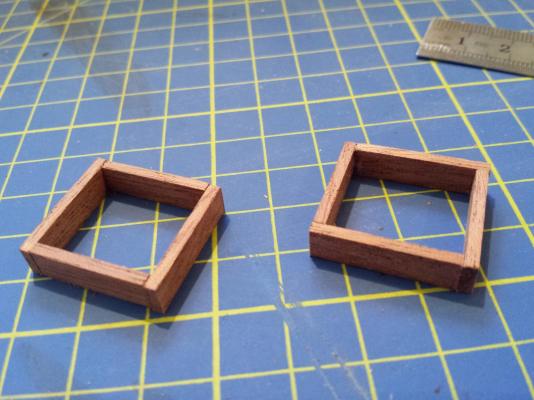
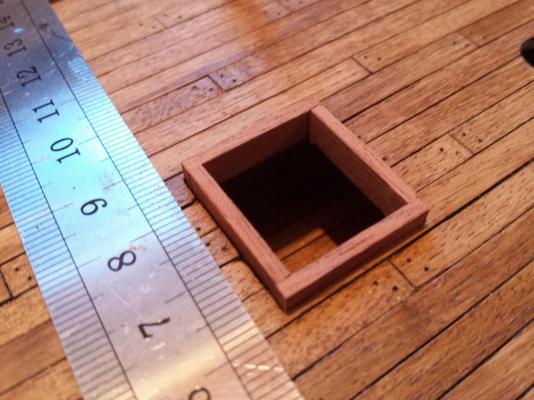
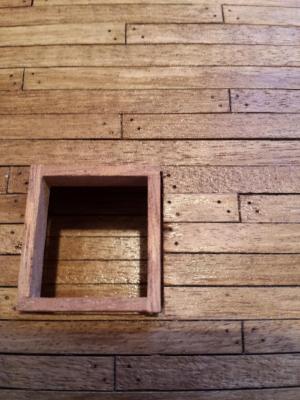
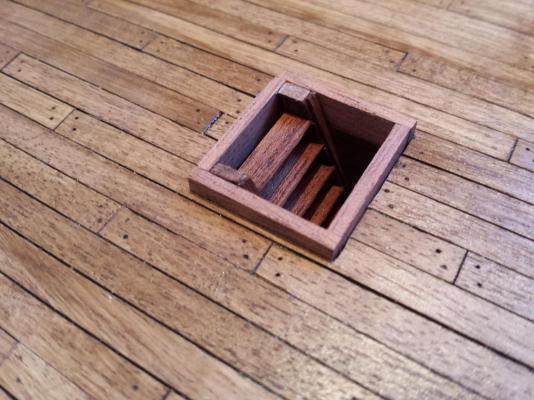
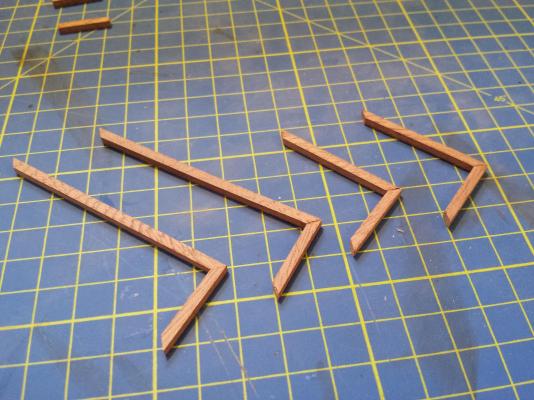
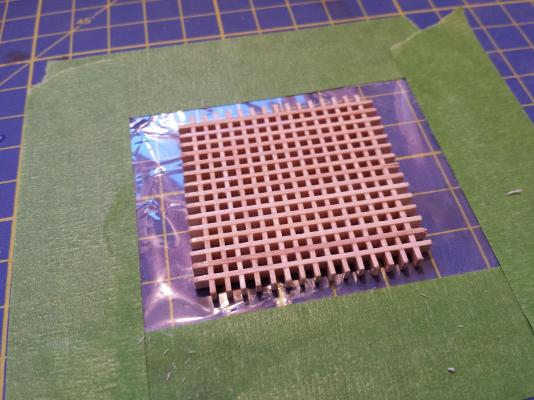
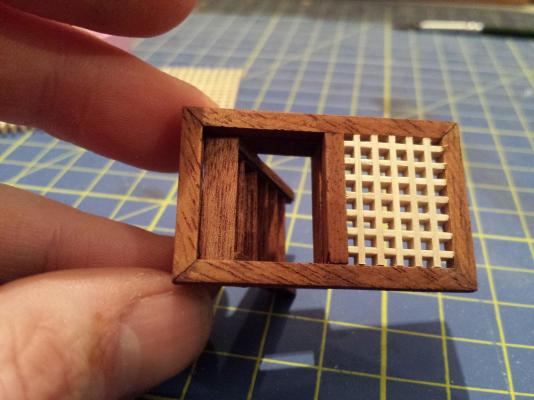
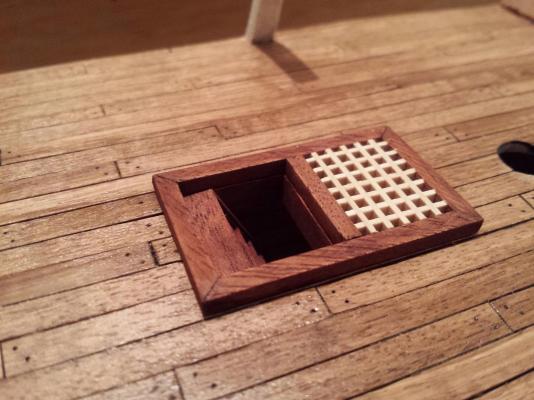
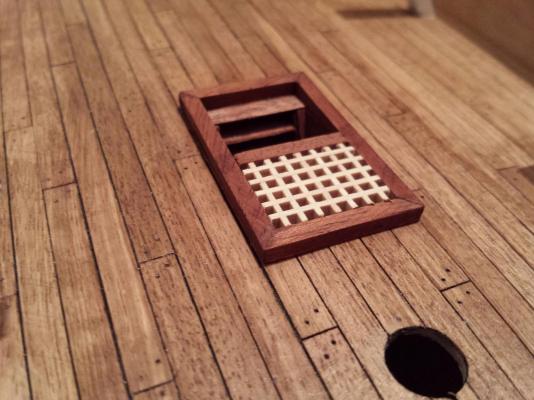
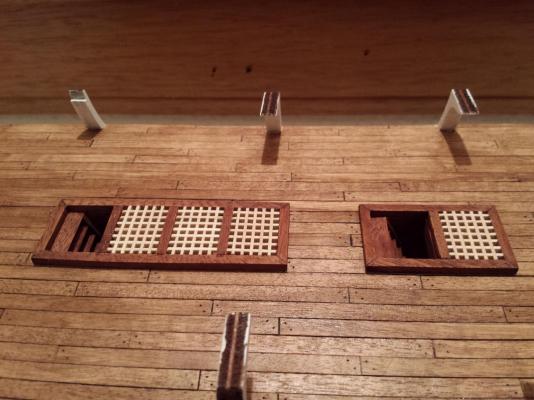
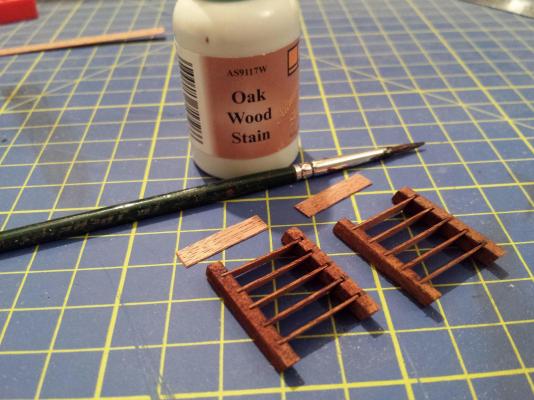
Had a productive day today. I've been able to completely finish the two stairwell frames, along with the gratings and frames, stain them and fit them to the deck. Just remains the shot lockers. Before I started on the frames though I wasn't happy with the front edge of the stairs. Those gaps in the stair frames were annoying me. I decided to use some spare veneer to cap them, and after sanding and staining in, they look a lot better. Then I started prepping the parts for the lower section of the frame, the stair well of sorts. They should have been mitred really but I haven't had much luck with mitre joints in the past, so stuck to the manual and cut them square and fixed them together. Excuse the pink bricks, I have two girls lol. I checked them in their respective places on the deck and adjusted the gaps as needed. Got a little happy with one of the gaps, but not a major worry as this won't be visible in the end. Once that was done next I started on the main frames. I decided to give mitre'ing the joints a go, and for once, they didn't turn out too bad, was quite happy with them in the end. Whilst they were drying, I assembled a set of combs. I'd worked out I could get all 4 grates from a single 15x15 set. Not much else to say on this really. This is where I got a little enthused and forget to take photo's, so these are the finished frames in place on the deck, after assembly and some adjustments to the length of the steps.


-
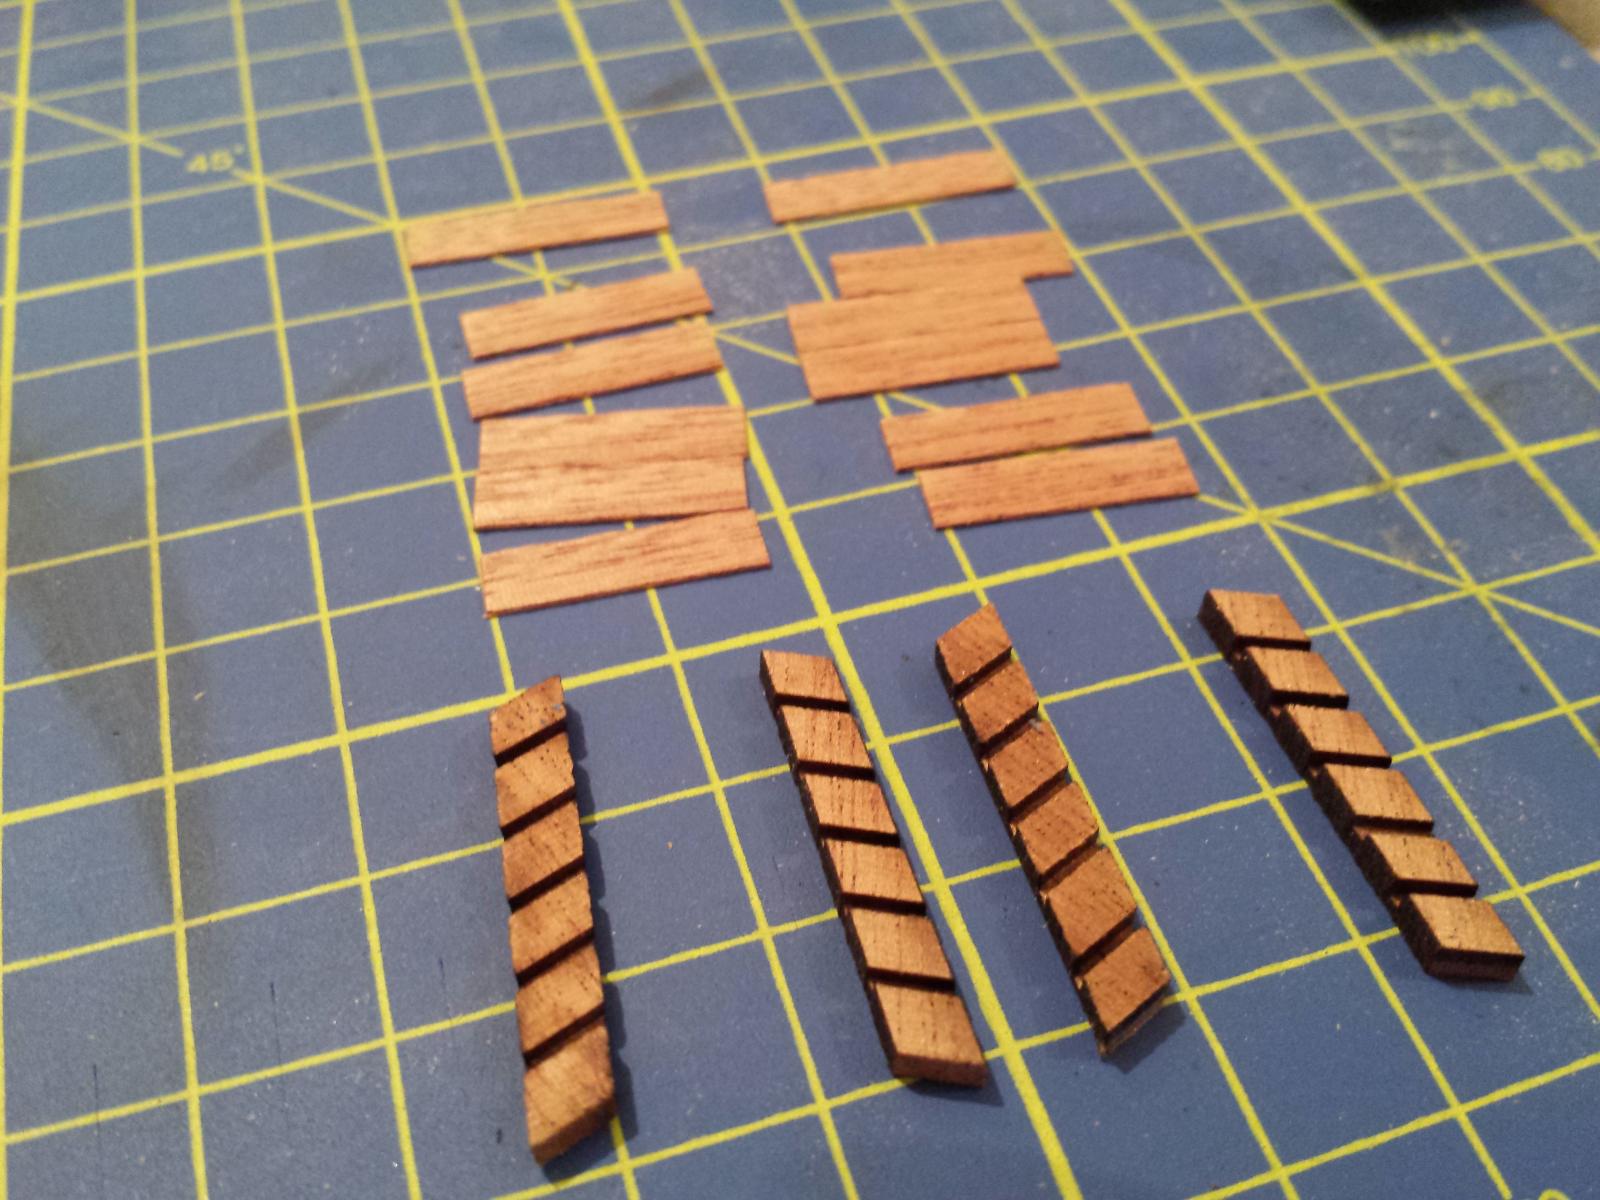
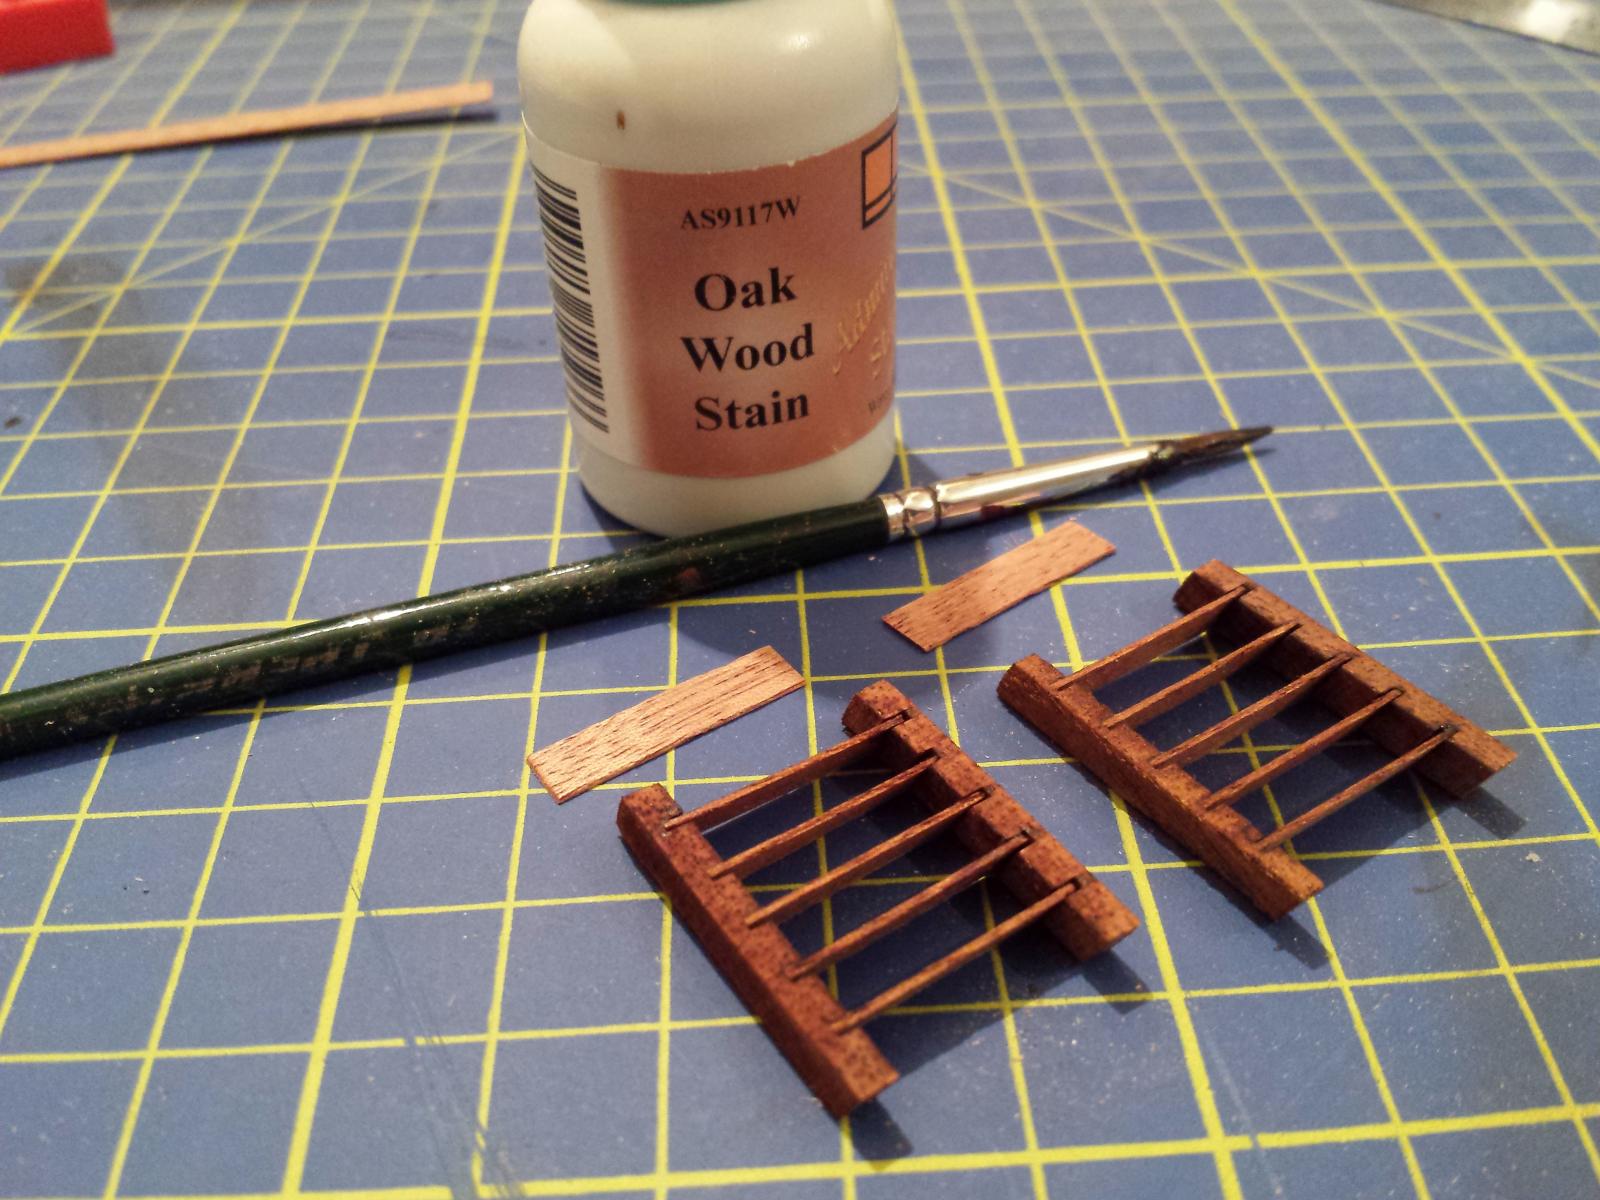
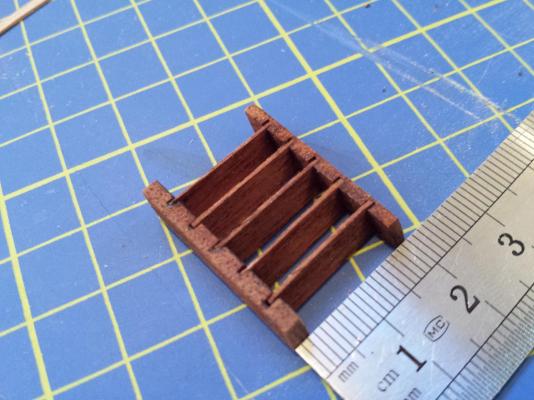
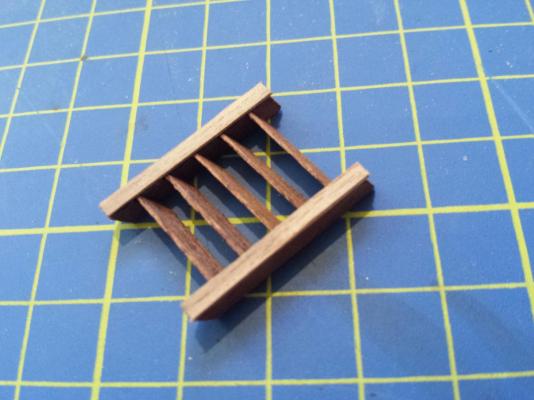
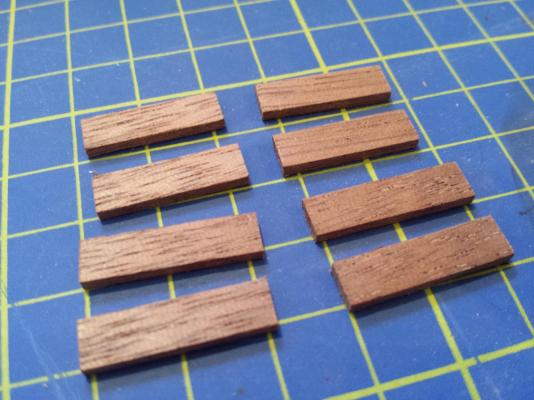
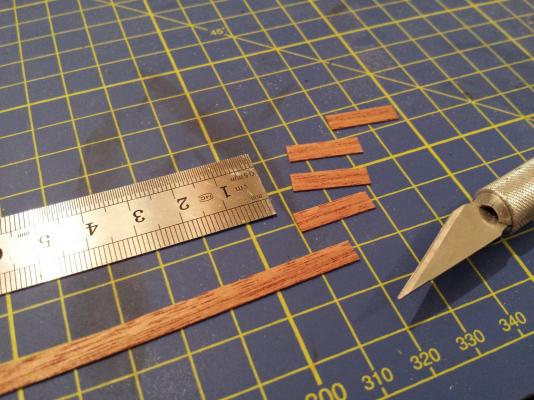
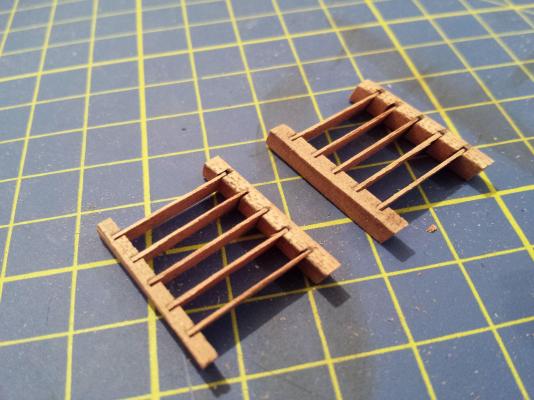
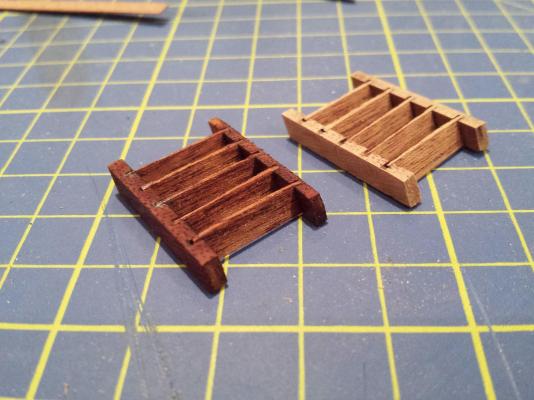
I made a start on the first two sets of internal stairways last night. Does anyone know for definate if they had any hand rails? The few shots I can find on Google of the internal stairwells some of them show handrails but they look "new" and I'm not convinced they were part of the original design... If they are though I would like to be able to add some before I get much further in. A few pics of the process I followed, which is basically after gathering the parts I need, pre-cutting the steps themselves, which are annoyingly made from 0.5mm to go into a 1.0mm slot. Still could have been worse, could have been 1.0mm into an 0.5mm slot. Following that I prepped the sidewalls and gave everything a light sand. Fixed everything together except the very top steps, which are wider, as I will fix these when I attach them to the hatch frames. I ended up having to take a shim off one of the stairs as it ended up 21mm wide instead of 20mm, trying to do this on a very delicate structure wasn't easy especially as the side rails were an especially strong wood, which is nice, most kits they are usually quite cheap and bendy. Once finished I gave it a coat of Oak stain.

-
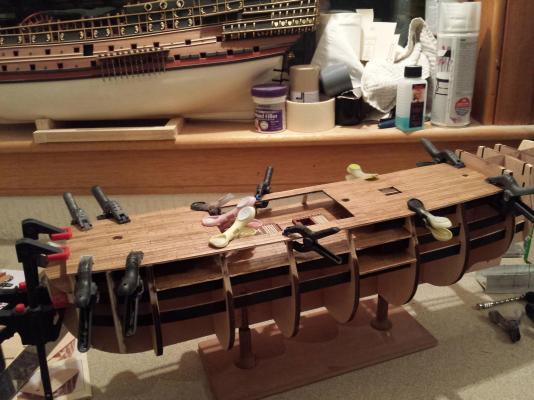
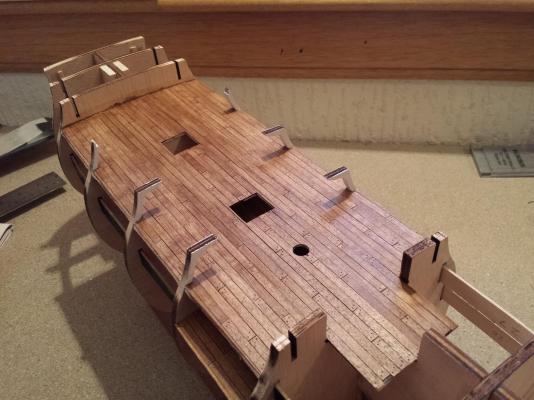
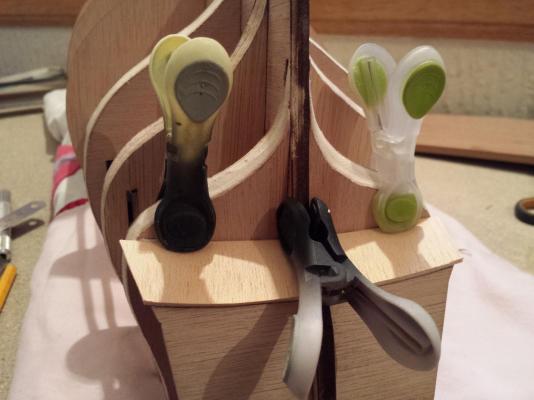
Thanks, will have a look for it. (Although Dremel tends to carry a high price tag in the UK) The middeck planking is finished, and after trimming and sanding smooth, has been given a coat of Satin Oak to match the lower decks. Edges have been trimmed back to allow smooth run of the planks and the knees have been touched in again with matt white. I've also this afternoon clamped in the transom peice, after having a little mystery with it. I dry fitted it and marked the excess with a pencil, but when I turned it over to cut the marked area off, I noticed it was curved as it should be, but at a slight angle and not square. My first thought was I had a skewed frame, which would have annoyed me as I checked double checked triple checked when this was fitted to ensure it was square. It turned out it was. So my second thought was that the pre-cut transom piece was wrong...measured at various locations and nope, that was almost perfect;y mirrored as well. They can't both be right and wrong? I must have spent about 30 or 40 minutes checking and checking and checking and nope, both were fine. In the end I had no choice, so I just trimmed the marked area and glued in place.

-
Ahh it THAT what the difference is? Always did wonder thanks. In that case yeh I have built one or two single planked hulls, usually ones that are to be coppered/painted.
-
lol sorry...I didn't mean carvel...Im still half asleep. Just standard planking...IE smooth hulled. My knowledge of terminology sucks! (Along with my spelling sometimes) Edit: No I was right, carvel is smooth hulled. Note to self, drink more coffee!
-
Been having a read through this, your planking came out great, nice work. And credit to you, I've not been brave enough to try a clinker hull...have hard enough time with caravel planking lol
-
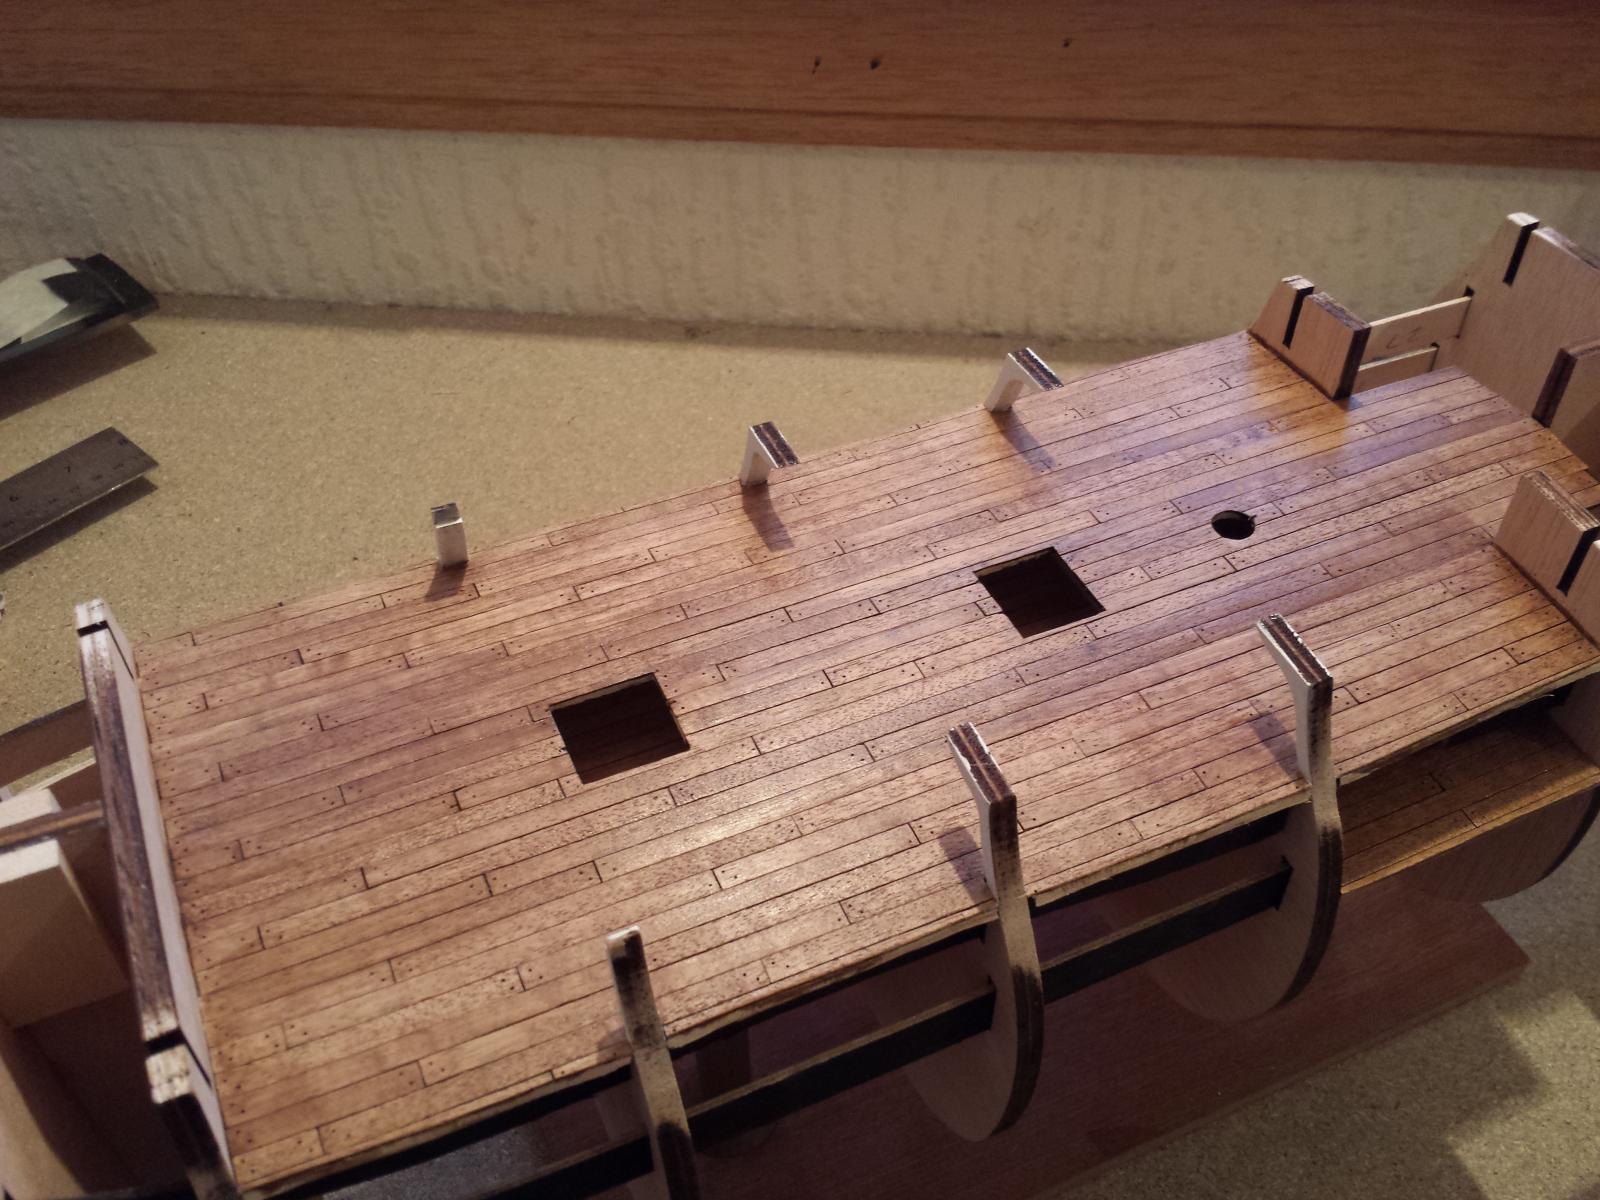
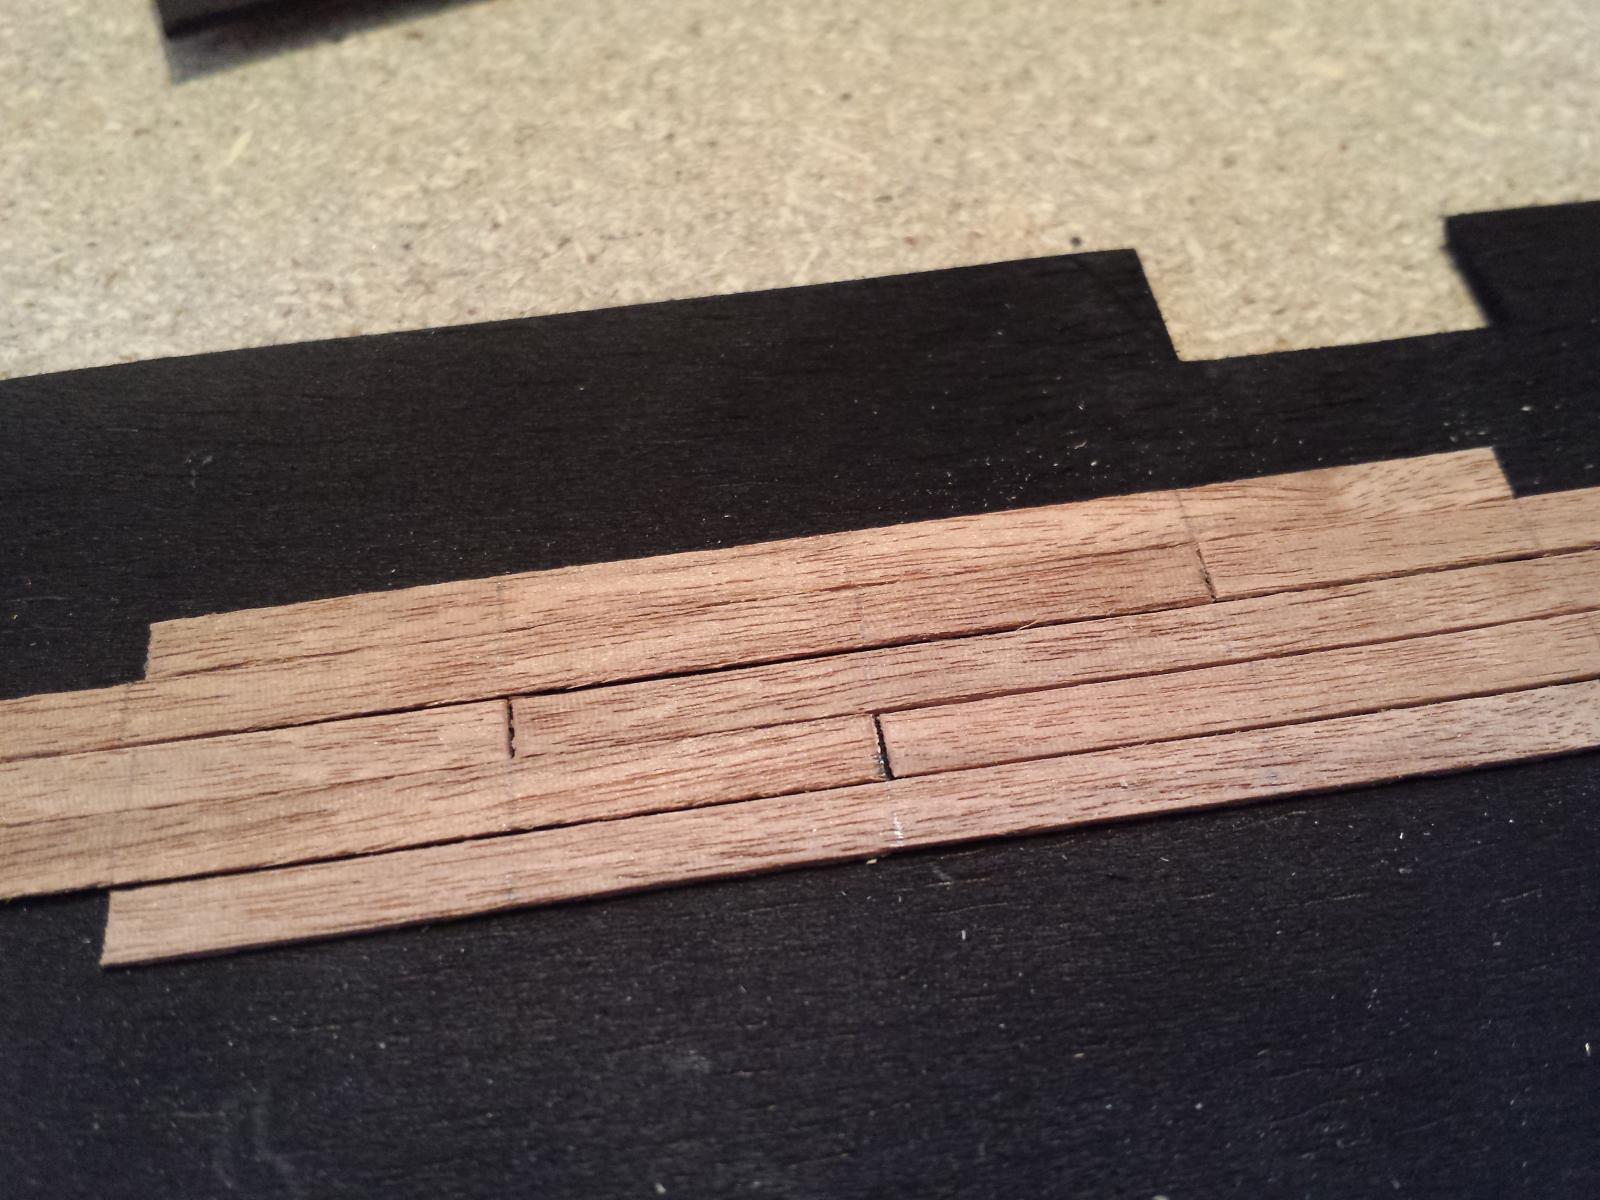
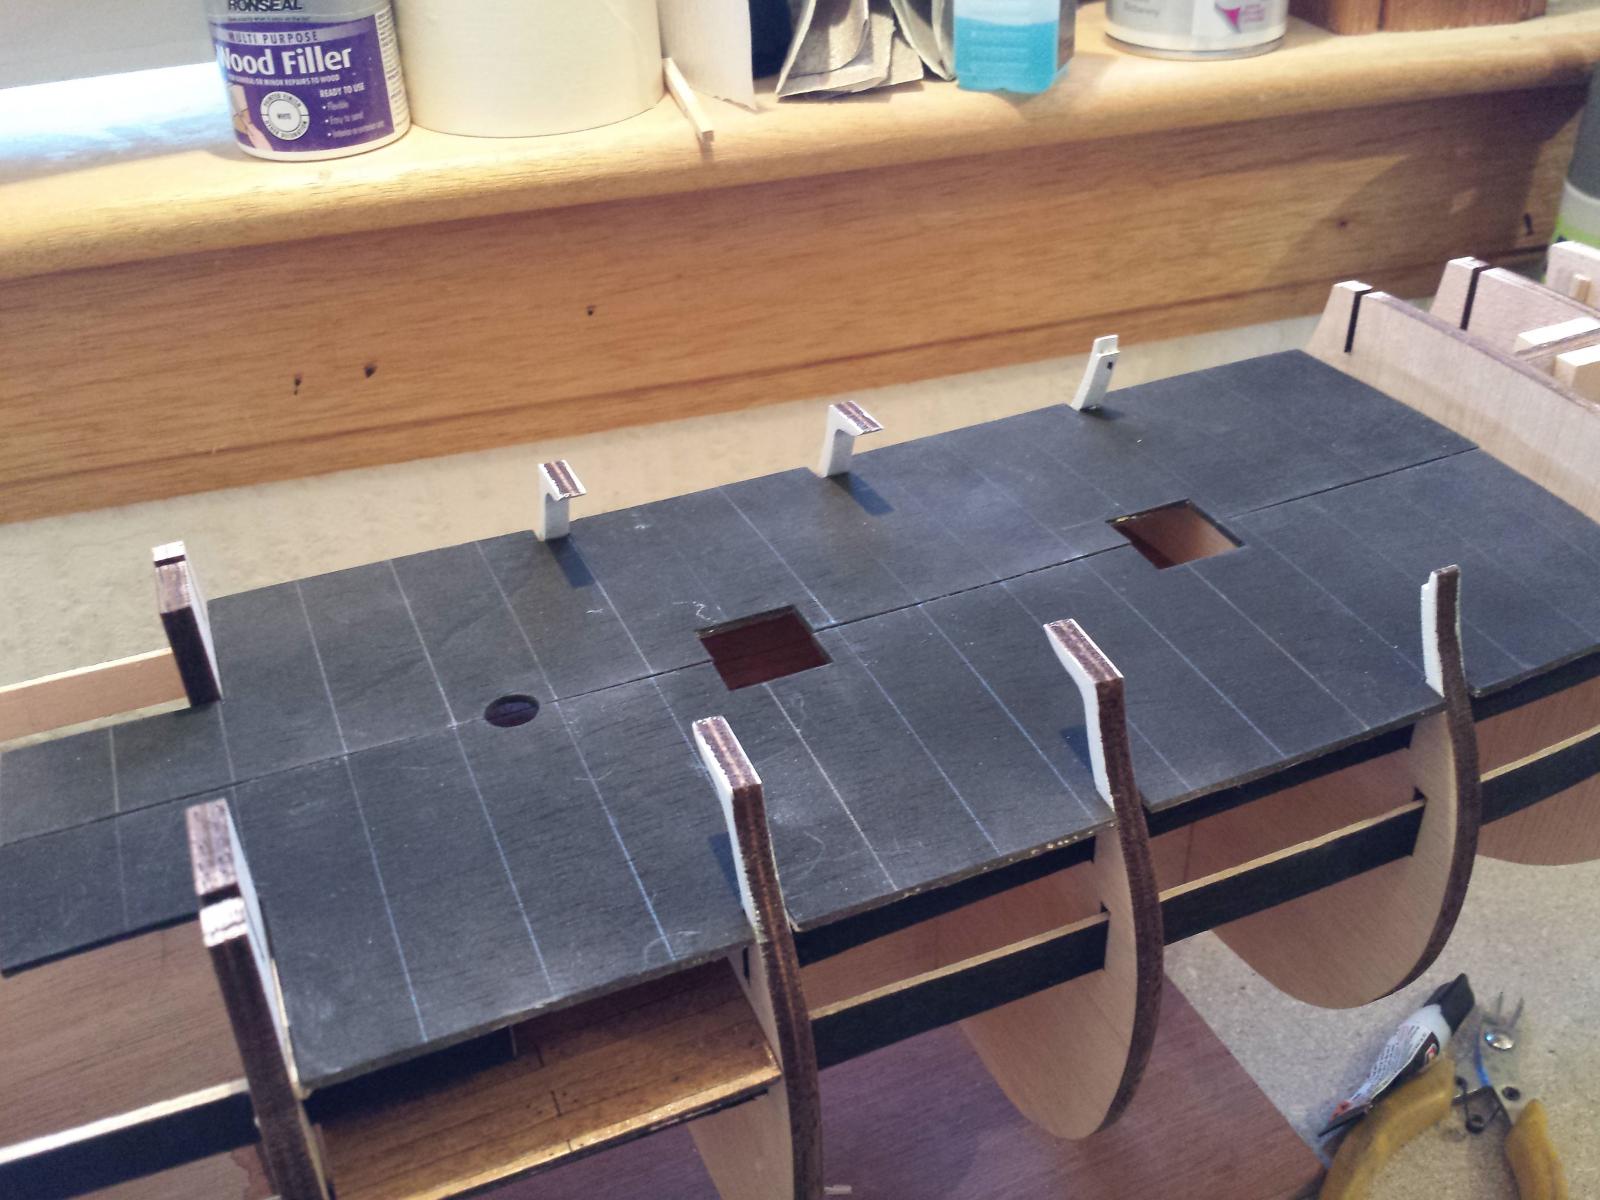
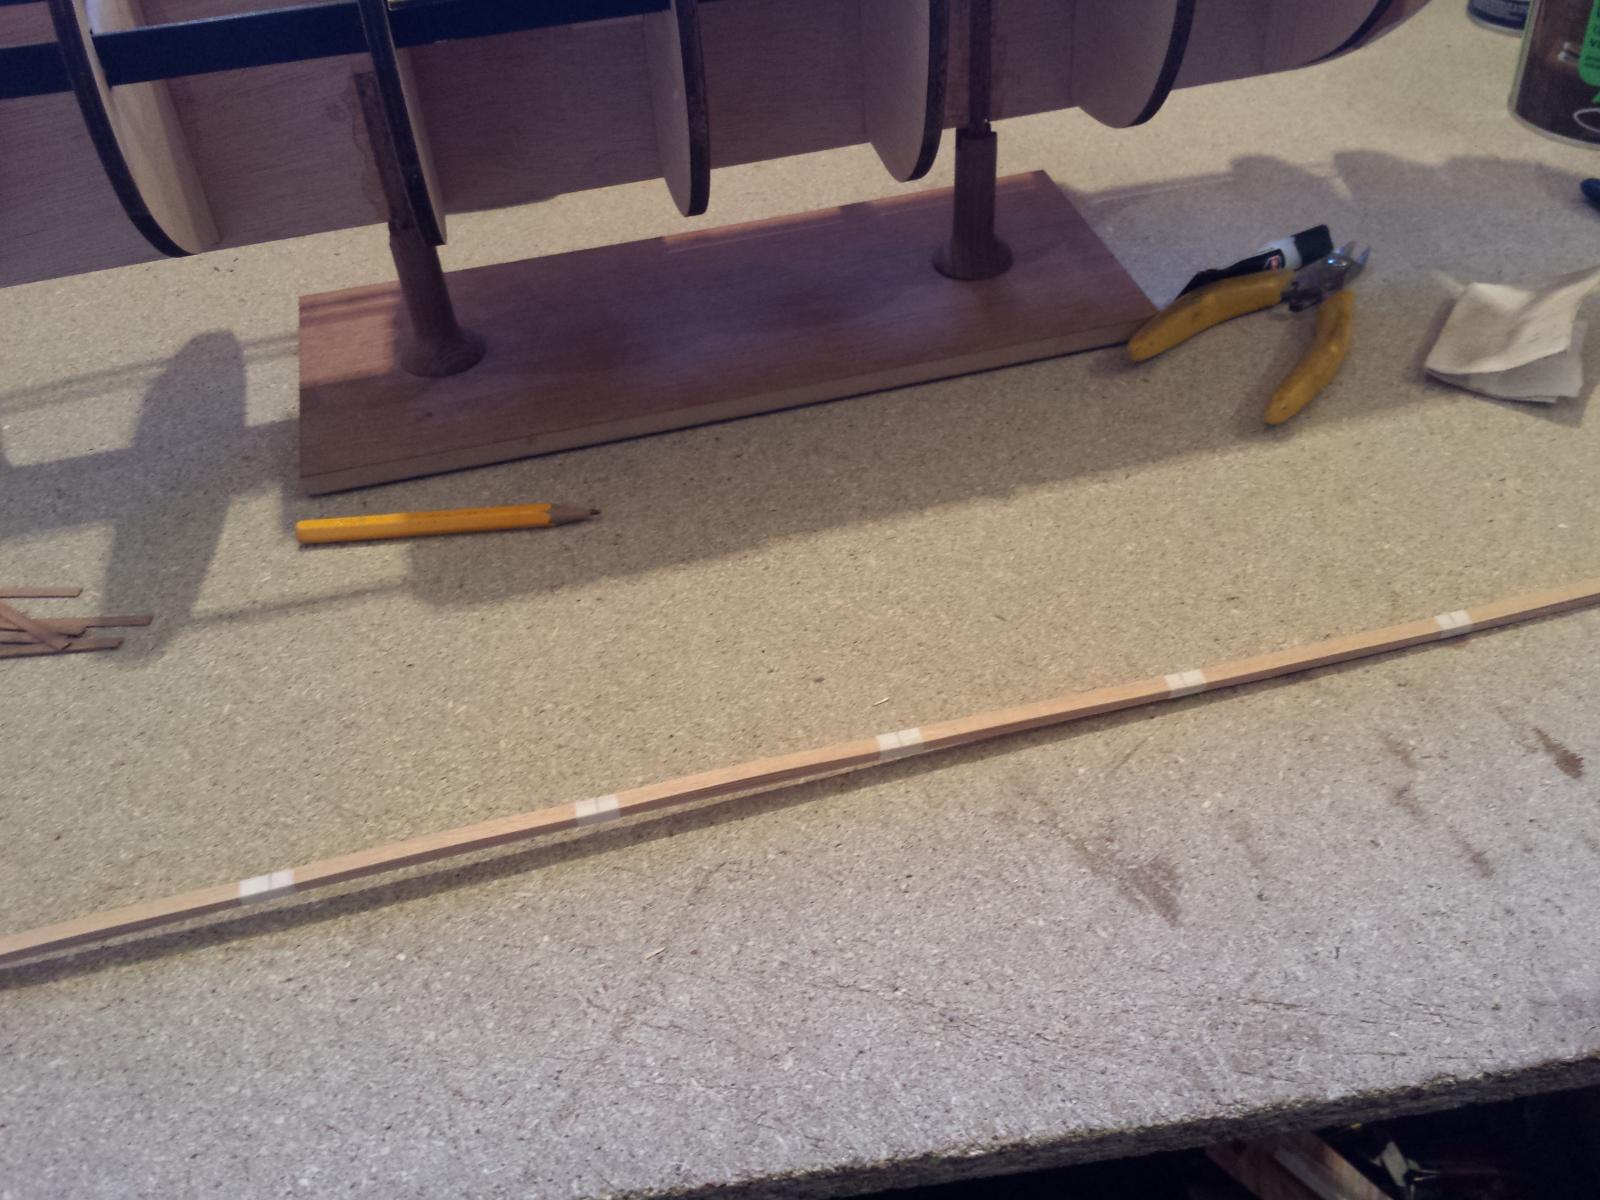
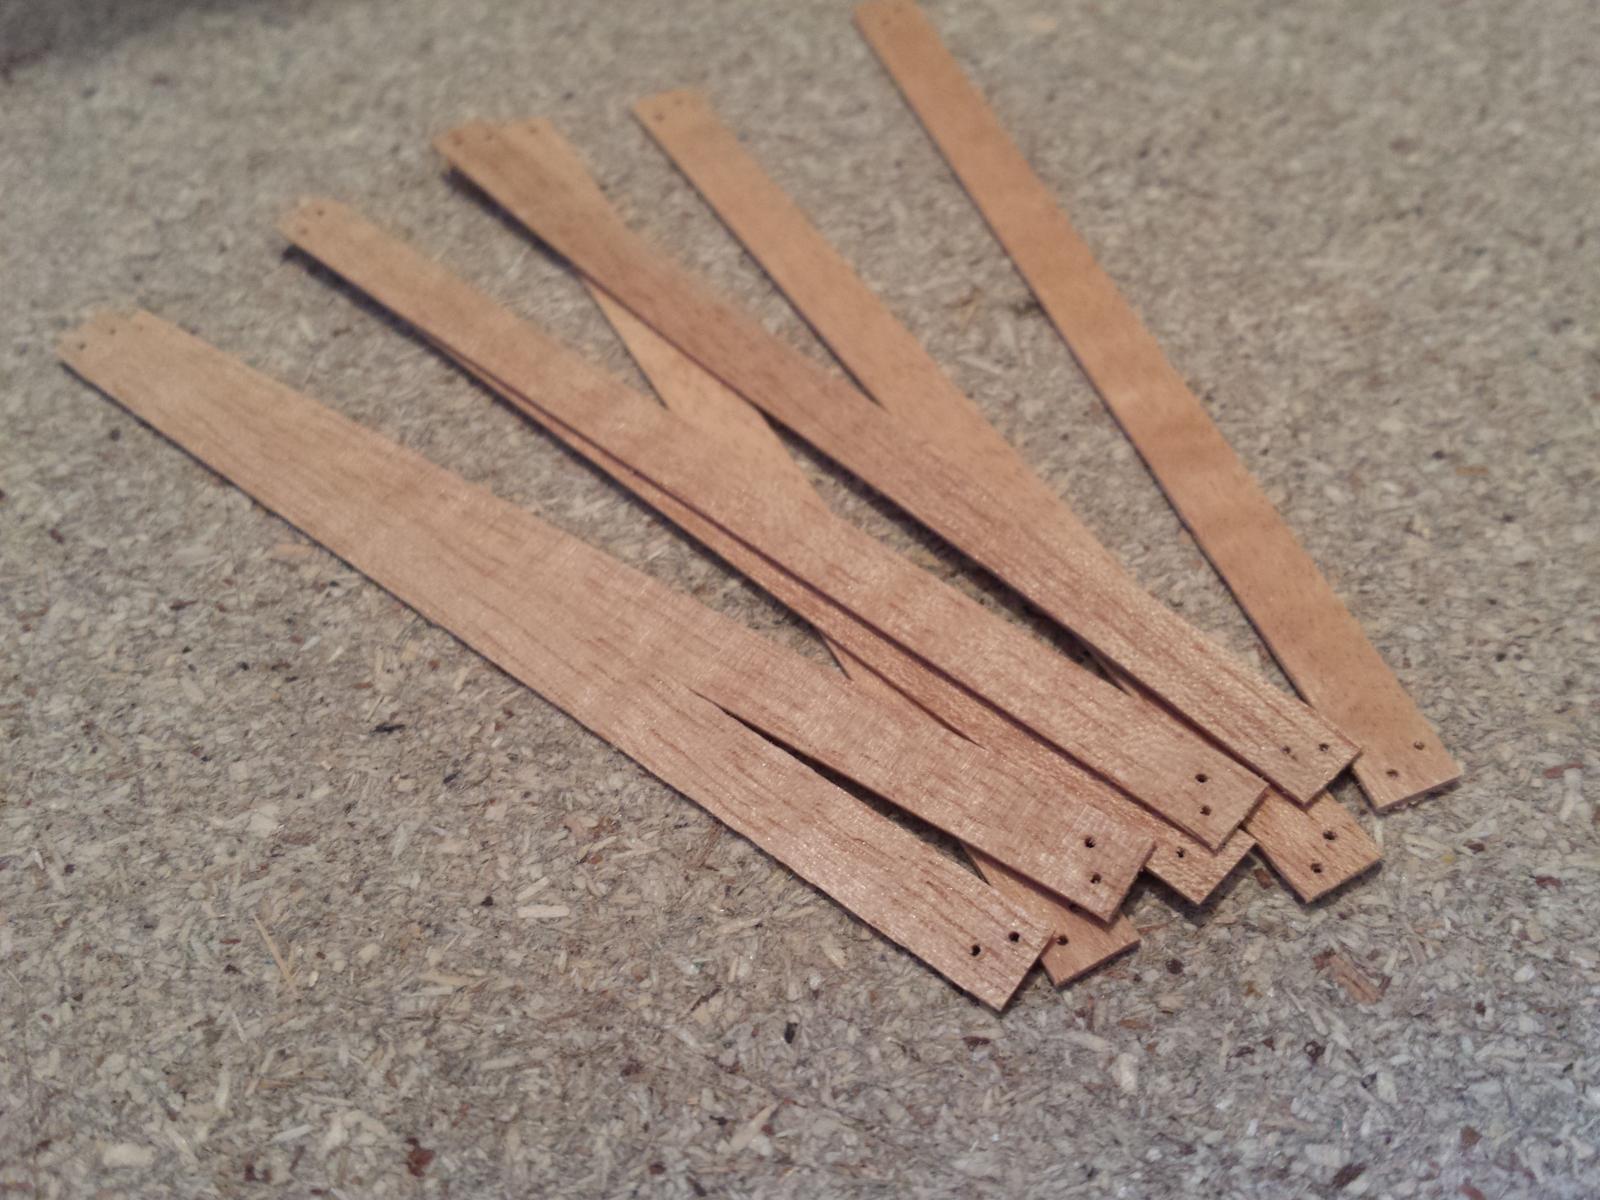
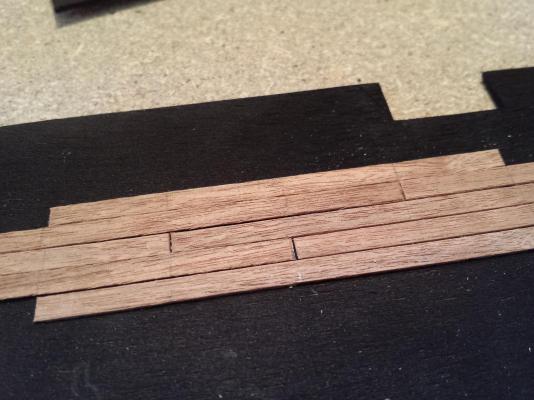
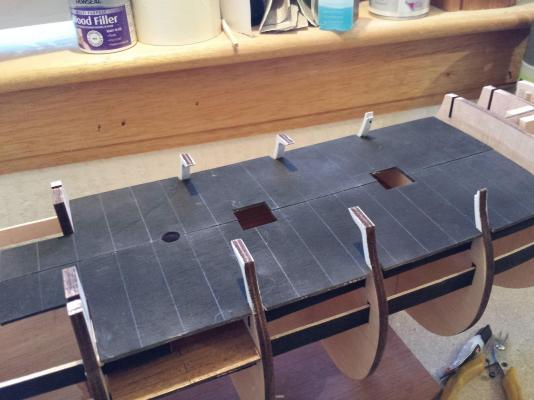
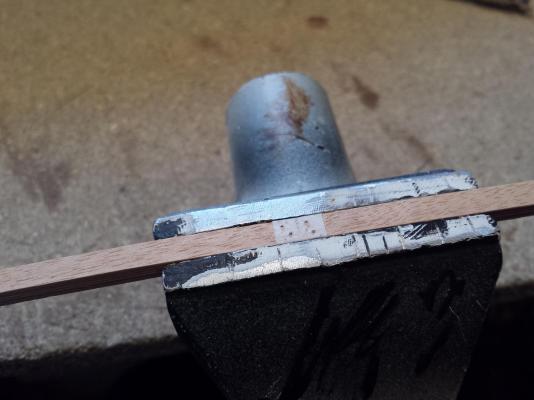
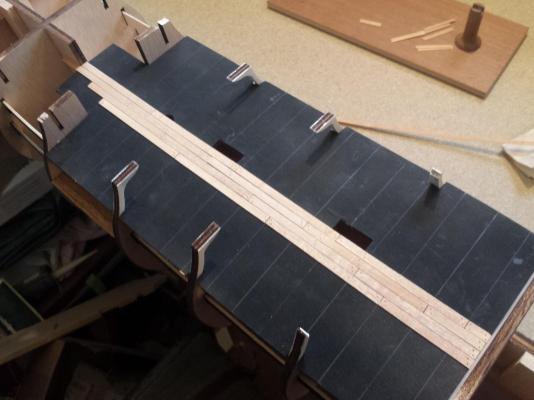
Alas I am not Scottish, I am English, I just live here...but thanks for the sentiment Anyway, the pics update I promised earlier. For planking the upper decks, I went with a 3 butt shift system, seemed to be the most commonly used method on ships, certainly the models anyway, and combined with my afore mentioned method of caulking. I tried a test with some spare planks, cut to 80mm lengths with the shift every 20mm/alternate planks: The false deck pieces trimed, marked, shaped and fitted to the bulkheads: I prepared my planks by getting a single length of the planking wood, marking out at 80mm intervals. I gathered this marker plank together with several more and using strips of masking tape I taped the bundle together, applying the tape at the marks. Clamping gently in a vice, I then drilled the treenails though the tape, which prevented the wood from splitting and also allowed me to create planks in bulk, as well as keeping things as similar as possible. And finally, beginning along the centre line, I began applying the planks... There isn't really much else to say or see at the moment. I'll post some more photos once this stage is finished

-
Thanks. Condolences on your loss I've been lucky so far, touch wood, never had any major breakage. Kudos to the guy who took her on and finished her...I think that would end any insentive I had to build myself.