

Jolly Jo
-
Posts
84 -
Joined
-
Last visited
Recent Profile Visitors
886 profile views


-
 Keith Black reacted to a post in a topic:
Prince de Neufchatel by Coyote_6 – Constructo – 1/58 scale - American privateer
Keith Black reacted to a post in a topic:
Prince de Neufchatel by Coyote_6 – Constructo – 1/58 scale - American privateer
-
 Coyote_6 reacted to a post in a topic:
Prince de Neufchatel by Coyote_6 – Constructo – 1/58 scale - American privateer
Coyote_6 reacted to a post in a topic:
Prince de Neufchatel by Coyote_6 – Constructo – 1/58 scale - American privateer
-
Jolly Jo reacted to a post in a topic:
Lynx 1812 by SaltyScot - Manuta-Panart - 1:62 - building as Mosquidobit
-
 Très bien, monsieur! I really have to get me some figures too...
 -
Jolly Jo reacted to a post in a topic:
Prince de Neufchatel by Coyote_6 – Constructo – 1/58 scale - American privateer
-
 Jolly Jo reacted to a post in a topic:
Prince de Neufchatel by Coyote_6 – Constructo – 1/58 scale - American privateer
Jolly Jo reacted to a post in a topic:
Prince de Neufchatel by Coyote_6 – Constructo – 1/58 scale - American privateer
-
Jolly Jo reacted to a post in a topic:
HMS Beagle by Maid of the Mist - FINISHED - OcCre - 1:60
-
Jolly Jo reacted to a post in a topic:
HMS Erebus by clearway - OcCre - 1/75 scale - bashed
-
Jolly Jo reacted to a post in a topic:
Astrolabe 1812 by Knocklouder - Mantua - 1:50
-
Jolly Jo reacted to a post in a topic:
US Brig Syren by Argaen Lok (aka Scott Larkins) - Model Shipways - Scale 1:64
-
Jolly Jo reacted to a post in a topic:
HMS Terror by Greg Davis - OcCre - 1:75 scale
-
Jolly Jo reacted to a post in a topic:
HMS Terror by Greg Davis - OcCre - 1:75 scale
-
Jolly Jo reacted to a post in a topic:
HMS Terror by Greg Davis - OcCre - 1:75 scale
-
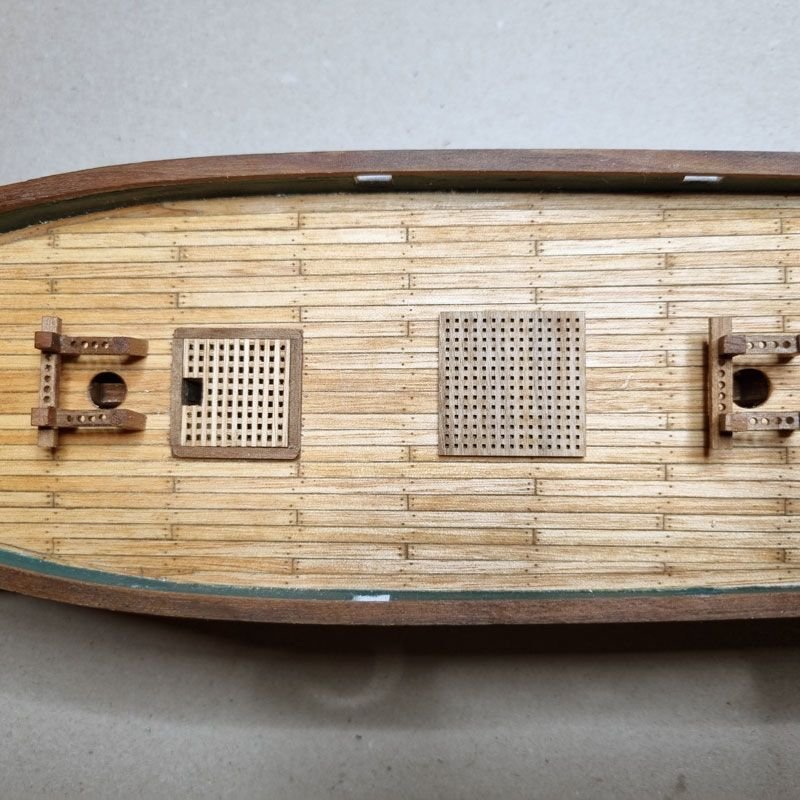
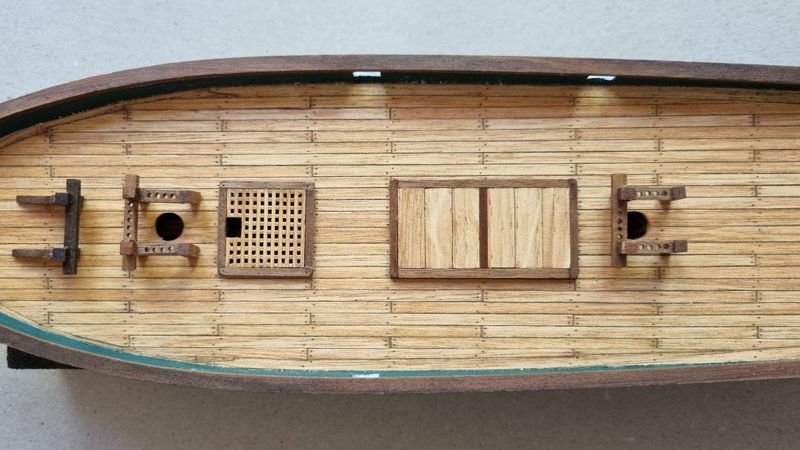
Ahoy everyone, I built the loading hatch from scratch. Below you can see the one provided with the kit and where it should have been placed according to plan. It was to large to fit between the deck beams and I didn't want gratings anyway as a smuggler essentially is a merchant vessel. A hatch as the fore one was out of the question for being to small. Making it small but wide I was afraid it would compromise the stability of the ship so I opted for a long version of the same width as the fore hatch. The space between the hatch and the fife rails is quite narrow but after all that's the most plausible solution I could come up with. Of course there will be rings on the cover boars but these will be made at a later stage.

-
Your Prince really is coming along beautifully! The way you are building your ship the natural wood of the top-o'-the top looks just right, better than all black.
-
So best of luck for being done in time. Deadlines sometimes help...
-
Thanks for the advice, Phil! I don't even want to dust off the model and planning on making an display case for it 🙂
-
I love that vintage Dazor desk lamp!
-
Thanks, Steve!
-
Finished the fore hatch today. I didn't want to just glue the piece to the deck, so, to add more realism, I butchered an opening into the deck, drilled away a good portion of the "false keel" and bulwark, painted these parts black, stained the edges and glued on the coamings. These were the first part of deck furniture to actually get glued on as their position, centered between the deck beams, leaves no room for moving them around anyway. Oops, forgot to the mark the nails... As the gratings fit tightly they are not glued fast and the hatch is an actual hatch. Will be helpful when adding the funnel and I like pieces which are functional, even if they don't have to be on a model.


-
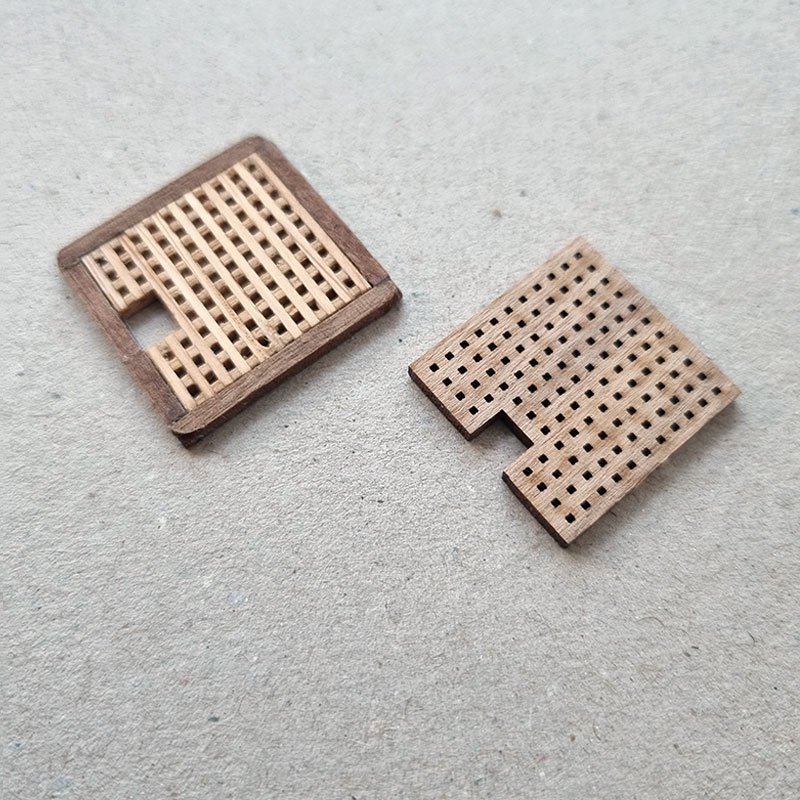
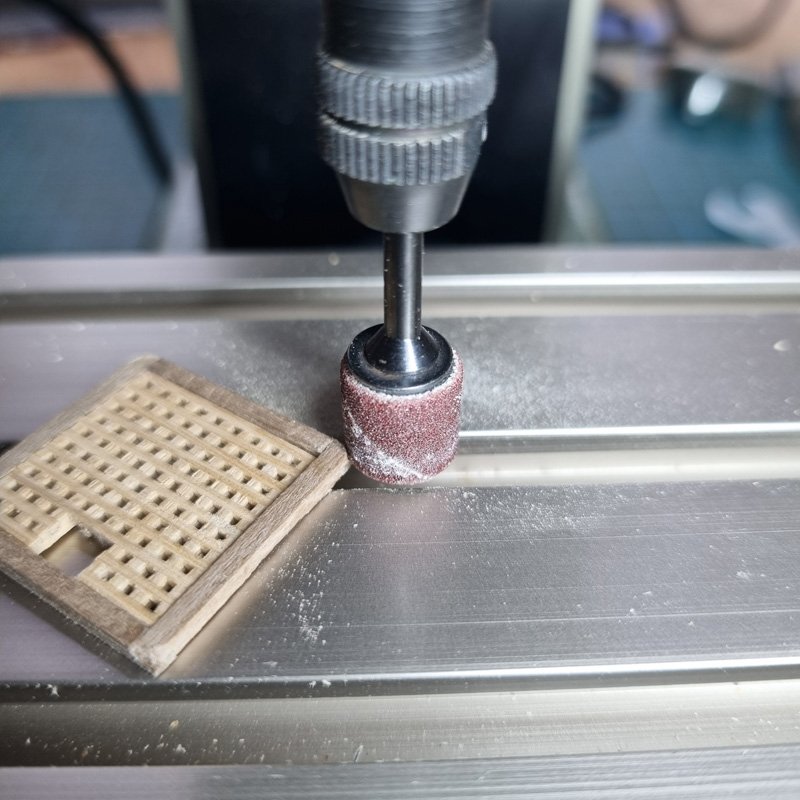
Hello Everyone, I was working on the deck furniture but without much to show. I had an idea how to do the venting piece on the binnacle but decided get to that at a later stage of the build. Instead I went on with the fore hatch. The grating I preferred to scratch build rather than using the kit supplied piece. After some trial and error I made one out of walnut. It was nice and a proof of concept but ledgers and battens were obviously out of scale. Furthermore the milling setup was less than ideal. In consequence I bought a real mill that was a quite game changer. I went for smaller 1 mm stripes for ledgers an battens and oak instead of walnut. For the coamings I stayed with walnut. My scratch-hatch versus the kit supplied grating on the right For rounding the edges of the coamings I uses a sanding bit 0.5 mm above the table so the bottom edges stayed square.
-
Impressive progress, Steve, I love it! Listing your sources will be very helpful for my build in the future, thanks for that.
-
Your build quality and speed is amazing and your fleet is quite impressive. Well done!
- 52 replies
-
- 1
-
-
- Grecian
- Vanguard Models
- (and 1 more)
-
Thank you very much, Steve! I haven't even thought about the lead in terms of long lasting effects (besides taken care not to breath in any material while drilling). I first thought of a funnel on top but in Marquardt's "The Global Schooner" there's this spherical cap instead. I think I'll stick to it in terms of shape but throw out the lead and also go for something smaller.
-
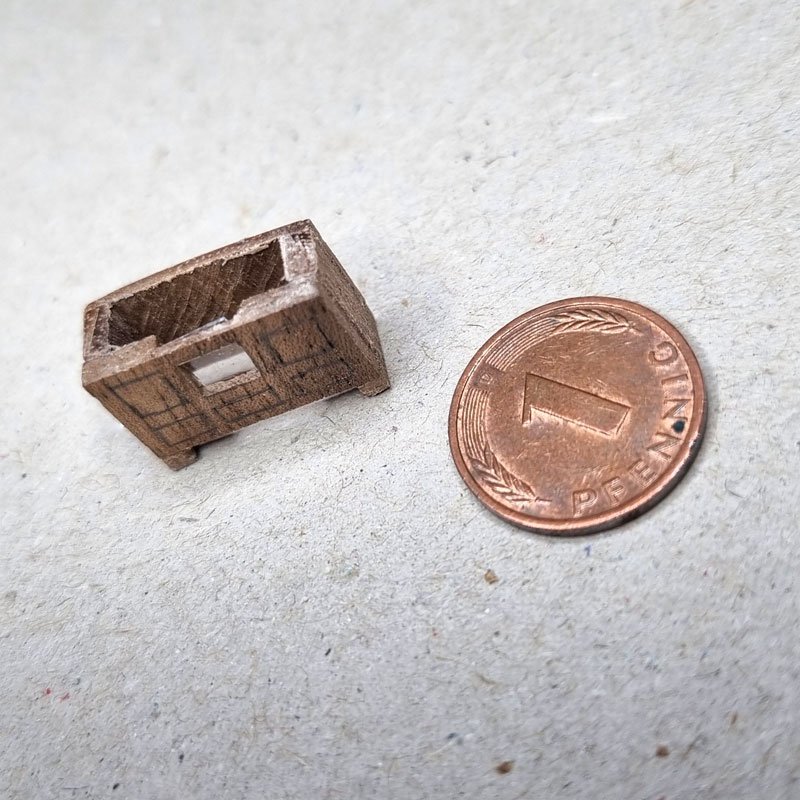
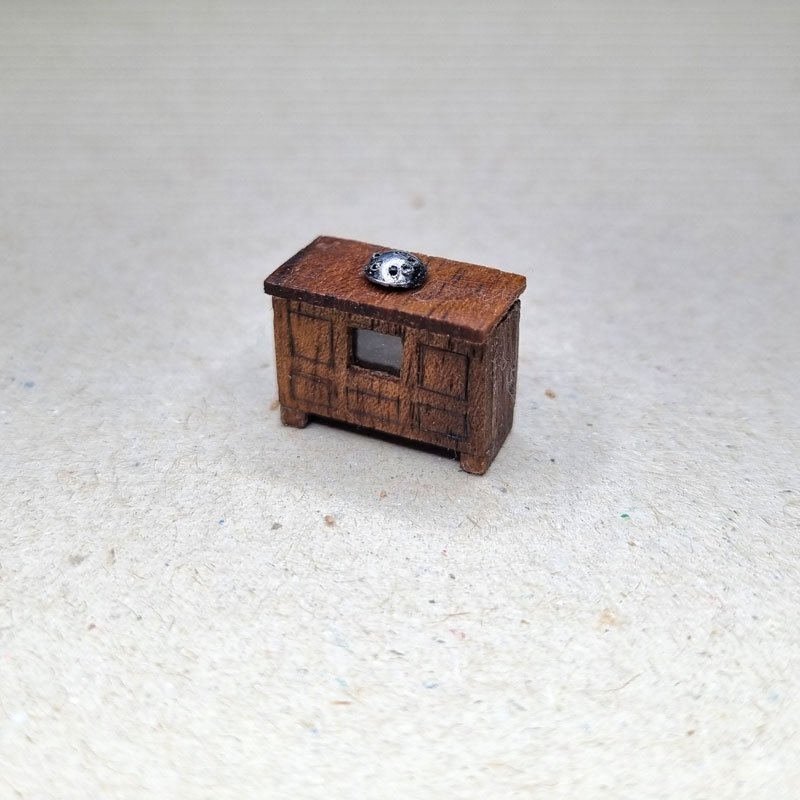
Next piece to tackle was the binnacle. The kit supplied a solid piece of wood (looks like oak) to glue stripes to as to simulate doors etc. I wanted it to be walnut like the rest of the deck furniture and to add a "real" window so I preferred to scratch build. (oops, there was a dated coin in my wallet...) The "glass" is cut from the clear plastic of the model's cover box, the drawers and doors are simulated by carving the outlines and tracing the grooves with a 0.3mm pencil. Before adding the lid I painted the rear wall white as I thought would have made sense to augment the light from the lanterns and I didn't cut a window into the back for stealth as the ship is a smuggler. The venting hood is made from a pellet head which I drilled 0,5 mm holes into. It is not fixed yet as I'm not sure about the size. What do you guys think?
-
Your pintles and gudgeons turned out really nicely, well done!
