HOLIDAY DONATION DRIVE - SUPPORT MSW - DO YOUR PART TO KEEP THIS GREAT FORUM GOING! (83 donations so far out of 49,000 members - C'mon guys!)
×


FokkerD7
-
Posts
11 -
Joined
-
Last visited
Recent Profile Visitors
321 profile views


-
 Wawona59 reacted to a post in a topic:
Santos-Dumont 14 BIS build by FokkerD7 - Model Airways
Wawona59 reacted to a post in a topic:
Santos-Dumont 14 BIS build by FokkerD7 - Model Airways
-
 Greg Davis reacted to a post in a topic:
Santos Dumont 14 bis (1906) by Greg Davis - FINISHED - Model Airways - 1:16 scale
Greg Davis reacted to a post in a topic:
Santos Dumont 14 bis (1906) by Greg Davis - FINISHED - Model Airways - 1:16 scale
-
Papa reacted to a post in a topic:
Santos Dumont 14 bis (1906) by Greg Davis - FINISHED - Model Airways - 1:16 scale
-
Old Collingwood reacted to a post in a topic:
Santos Dumont 14 bis (1906) by Greg Davis - FINISHED - Model Airways - 1:16 scale
-
Canute reacted to a post in a topic:
Santos Dumont 14 bis (1906) by Greg Davis - FINISHED - Model Airways - 1:16 scale
-
Jack12477 reacted to a post in a topic:
Santos Dumont 14 bis (1906) by Greg Davis - FINISHED - Model Airways - 1:16 scale
-
This is an excellent build. My own work on this kit is seriously lacking. I am hoping for some help. Everything I have been looking at, including your posts, are not showing how the wing was rigged. I have been studying the instruction manual until I have a headache. I am still not seeing the pattern the support wires are supposed to have. I think I see the hardware/location you used but I would be guessing for most of it. Thank you again for posting your excellent work.
-
Landlubber Mike reacted to a post in a topic:
Santos-Dumont 14 BIS build by FokkerD7 - Model Airways
-
mtaylor reacted to a post in a topic:
Santos-Dumont 14 BIS build by FokkerD7 - Model Airways
-
mtaylor reacted to a post in a topic:
Santos-Dumont 14 BIS build by FokkerD7 - Model Airways
-
mtaylor reacted to a post in a topic:
Santos-Dumont 14 BIS build by FokkerD7 - Model Airways
-
Santos-Dumont 14 BIS build by FokkerD7 - Model Airways
FokkerD7 replied to FokkerD7's topic in Non-ship/categorised builds
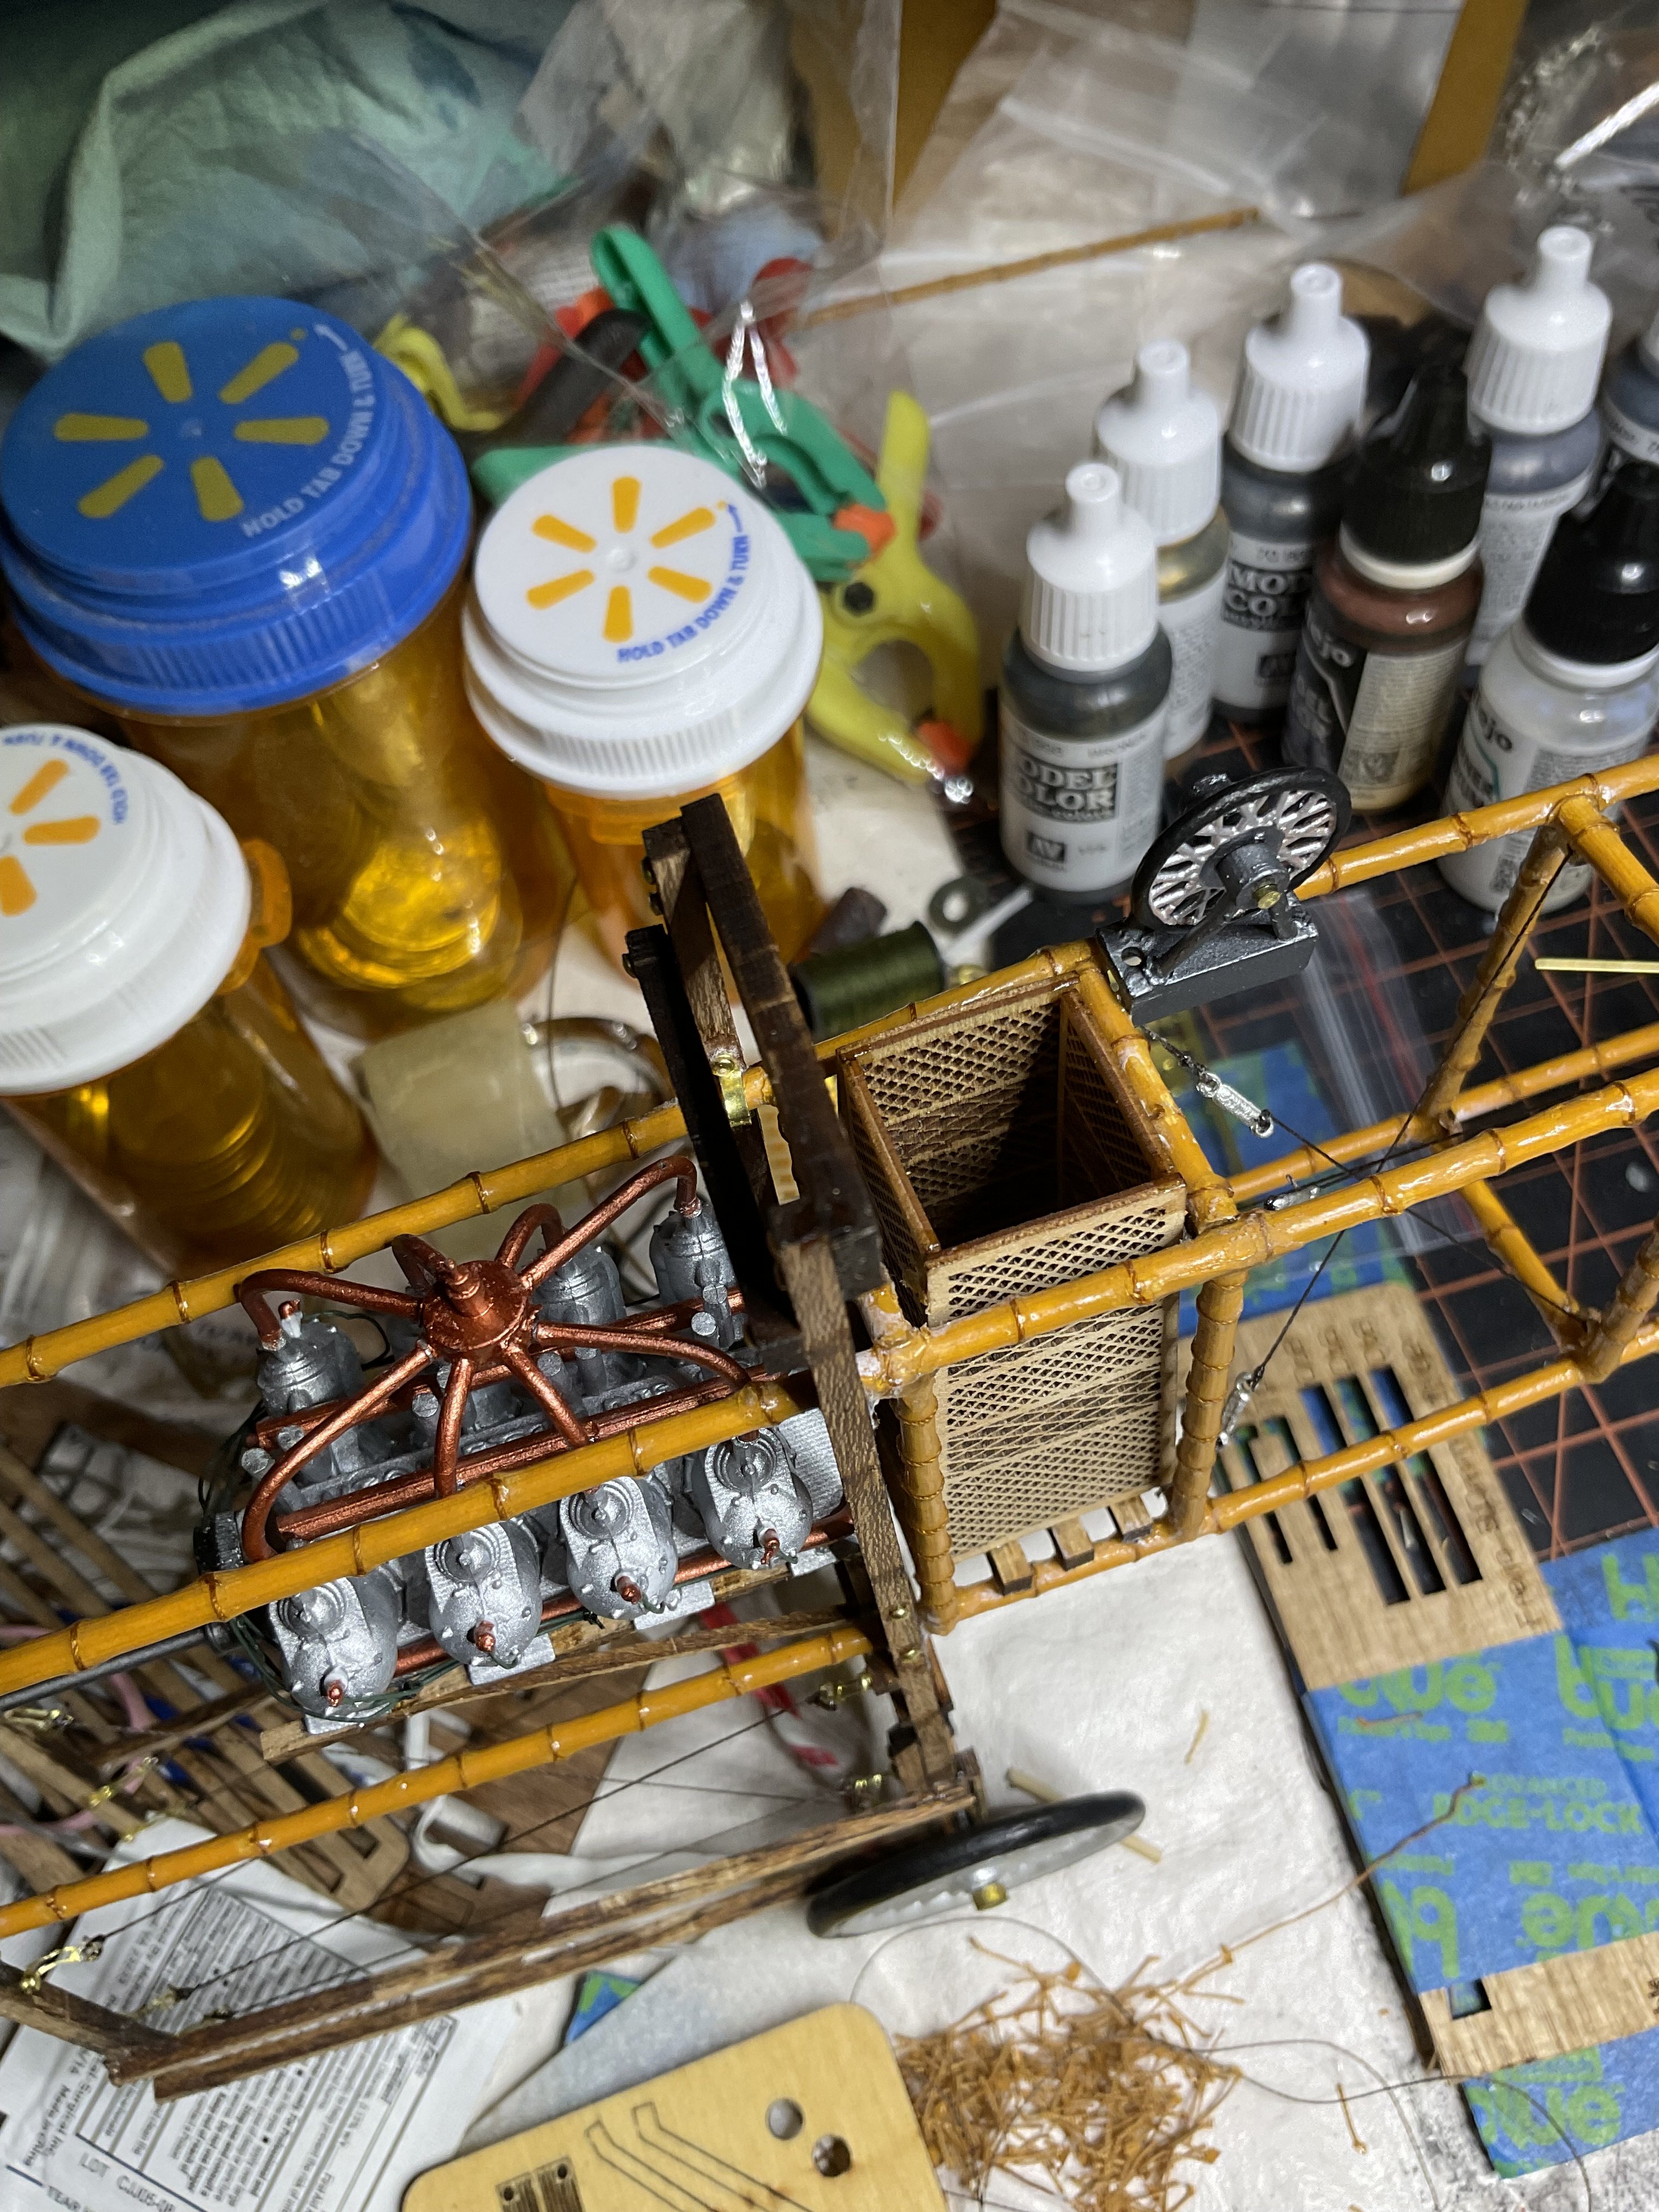
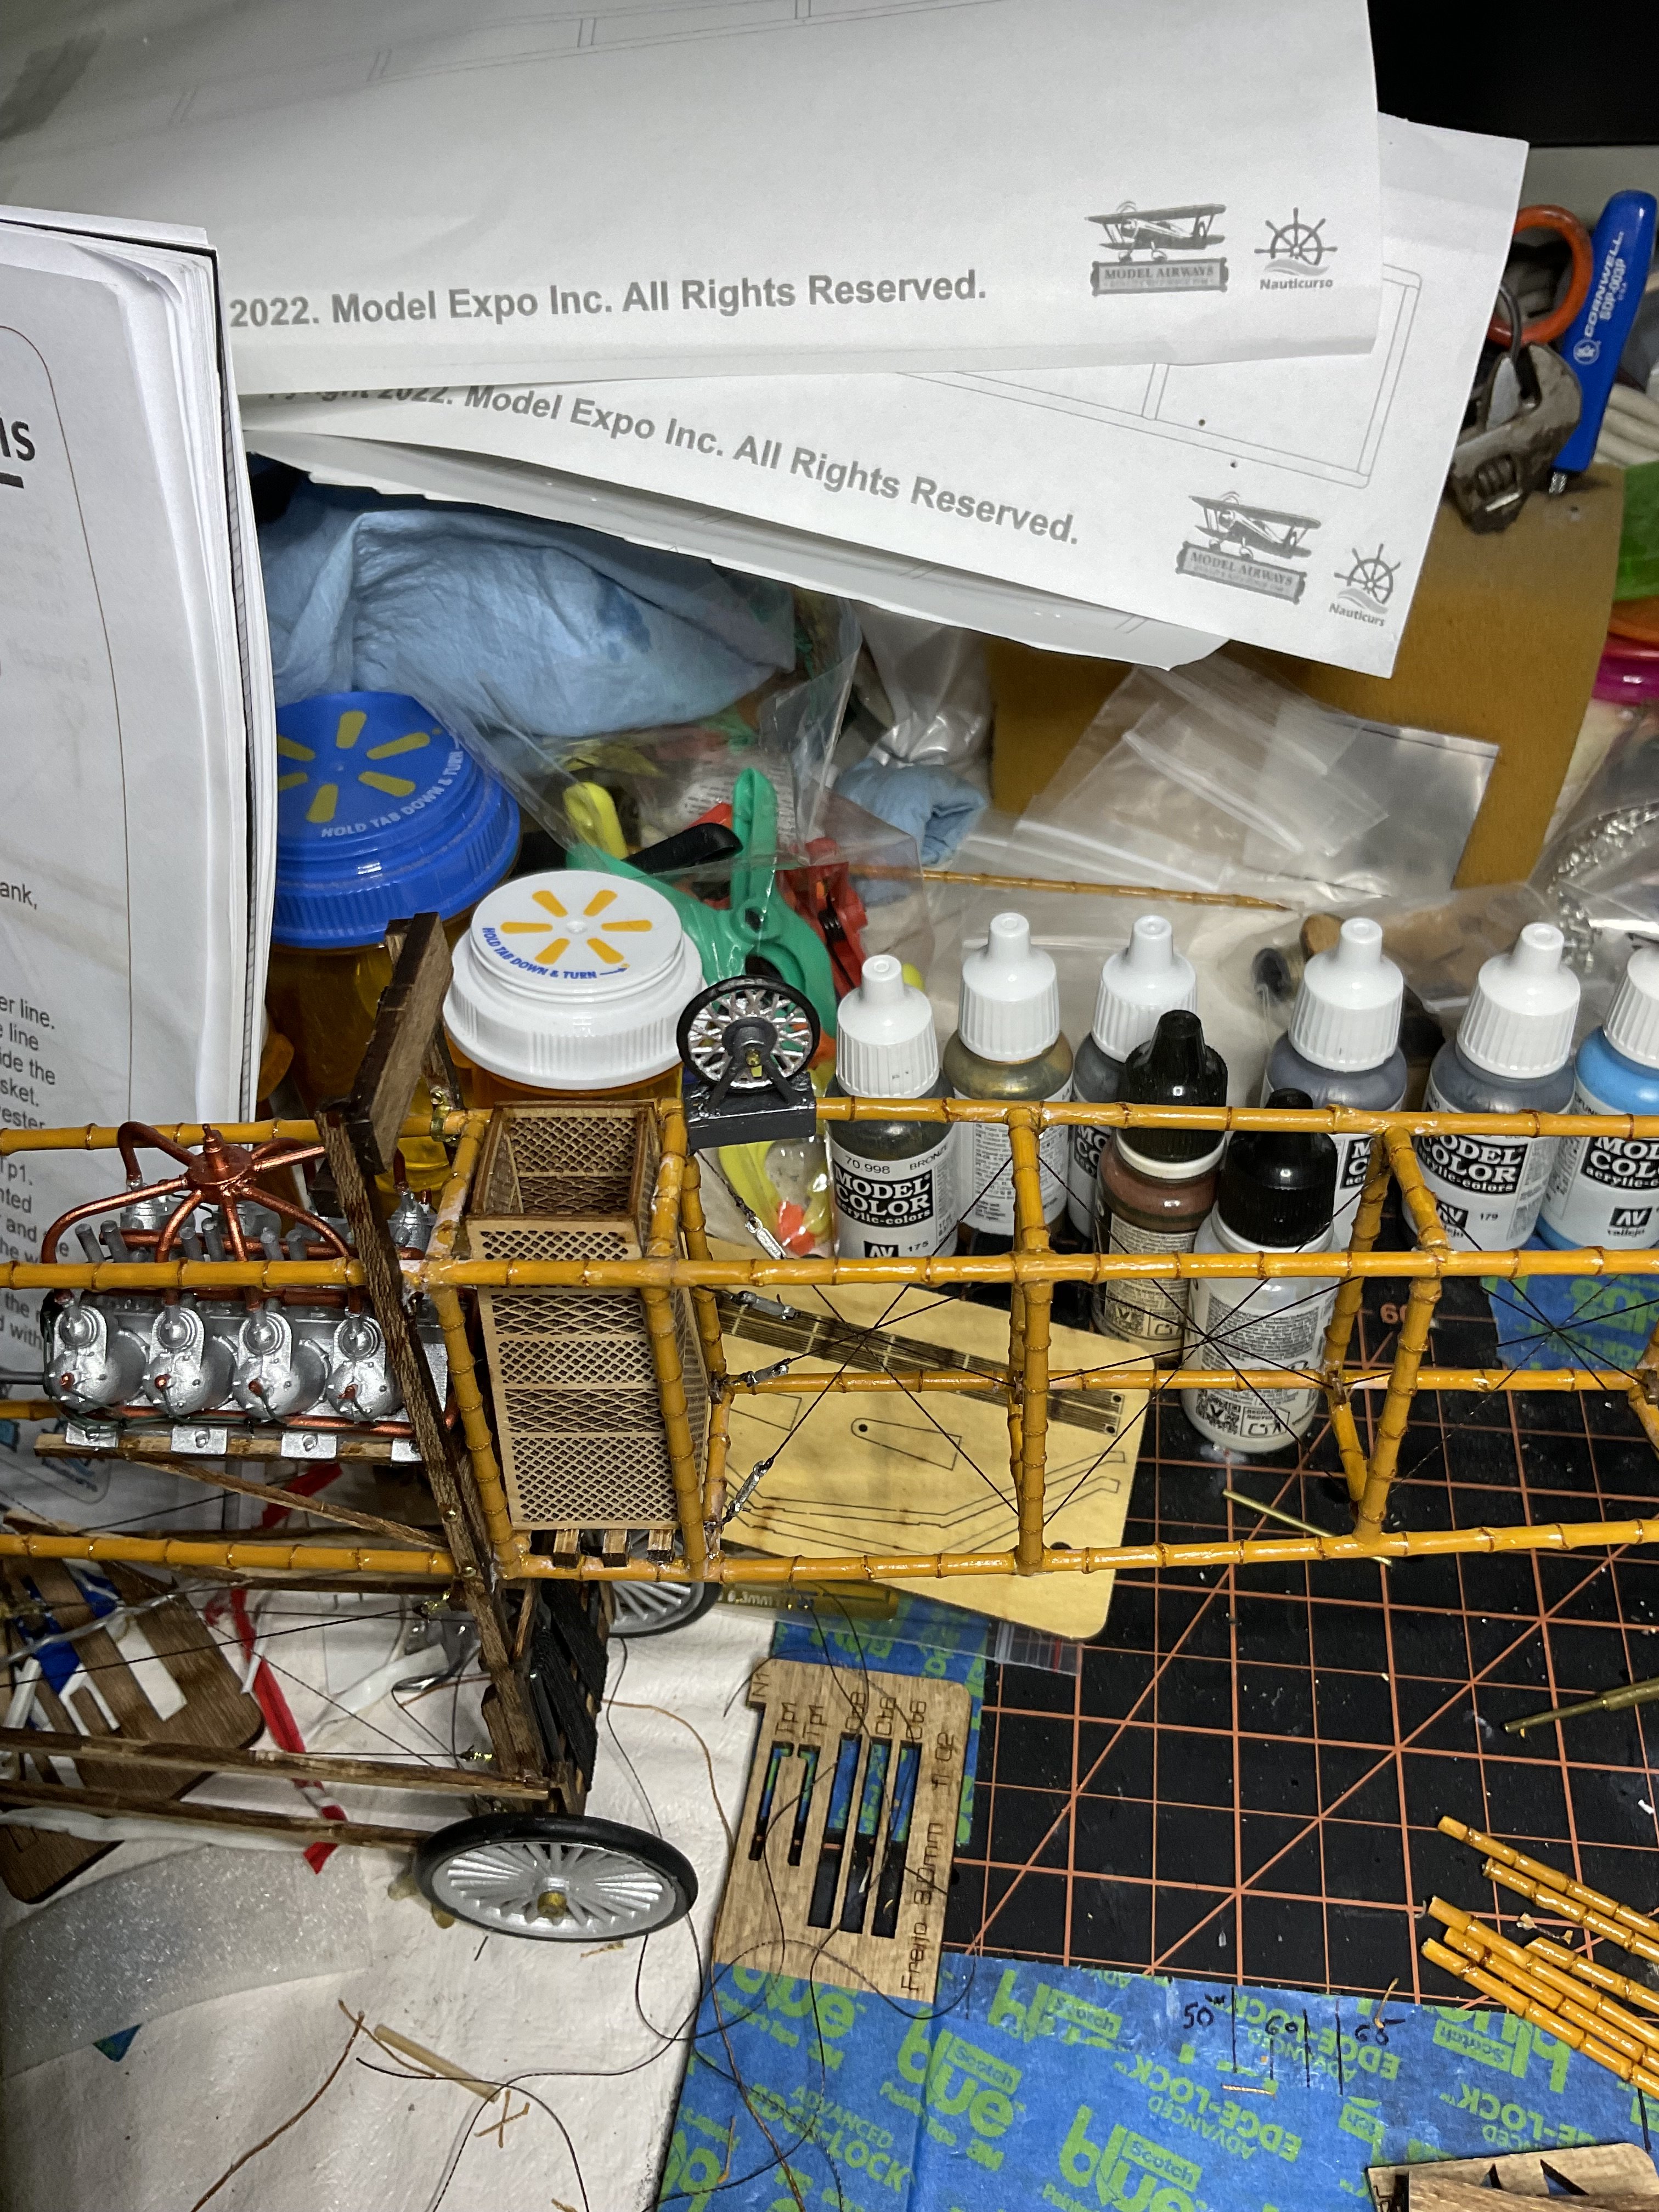
First, I need to figure out how to remove a duplicated post. I am sorry for my mess of a log. Second, I have finished the fuselage and canard. Third, problems I can see… 1) lots (and I mean LOTS) of “smoke”. White CA glue residue. Some of that issue is the glue, some brands are worse than others. 2) I am rethinking the color of the segments of the bamboo, I thing I should have gone to a much lighter color. Also I need to touch up the end cuts that look almost white. 3) The thread / rope work. When I was doing it I thought I was careful to make the wraps consistent and tight before I put CA on them. Ooops. And I should have put more time on the rigging some of it is twisted. Anyway… on to the wings…. I am running out of room to finish the assembly…As noted in other blogs, Greg Davis, the bamboo that is supplied is straitening (sp) out. This is adding a lot more warp to the wings. Also the struts look like they are too long as they come in the kit. I need to finish adding the final ribs and rigging to the wing and then try to install them. I am saving the propeller and drive shaft for last as they are as delicate as anything else with this kit and I do not want to have to work around them.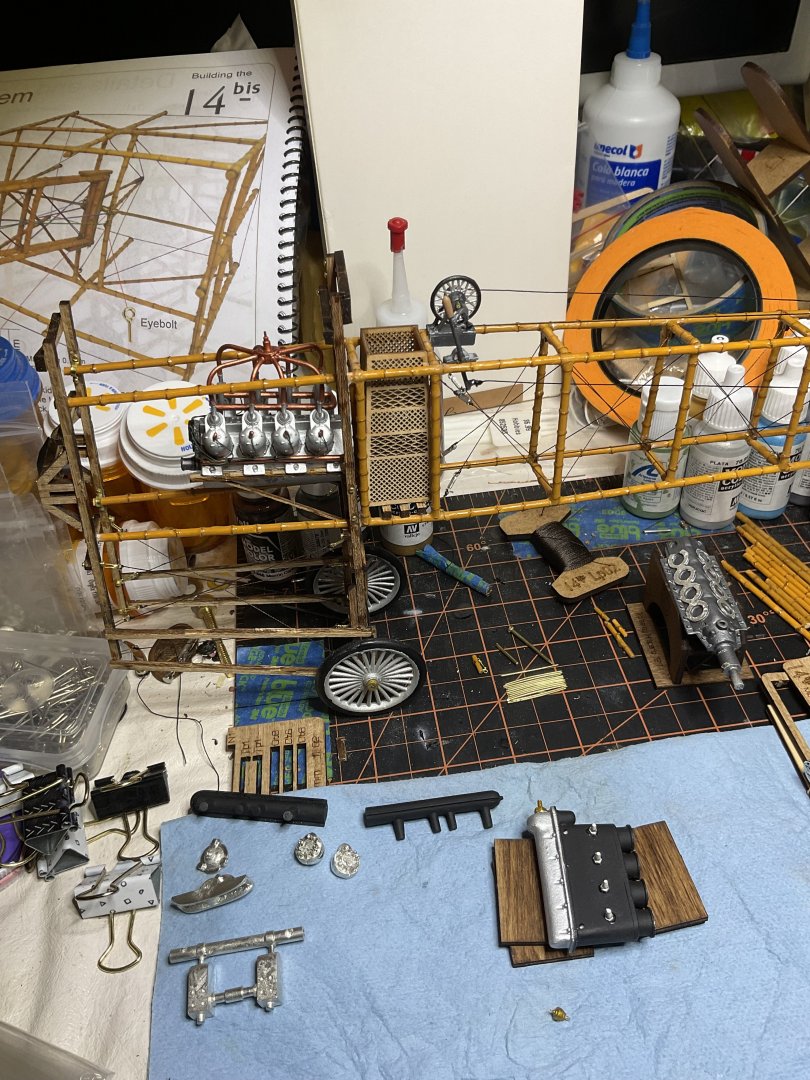
-
Santos-Dumont 14 BIS build by FokkerD7 - Model Airways
FokkerD7 replied to FokkerD7's topic in Non-ship/categorised builds
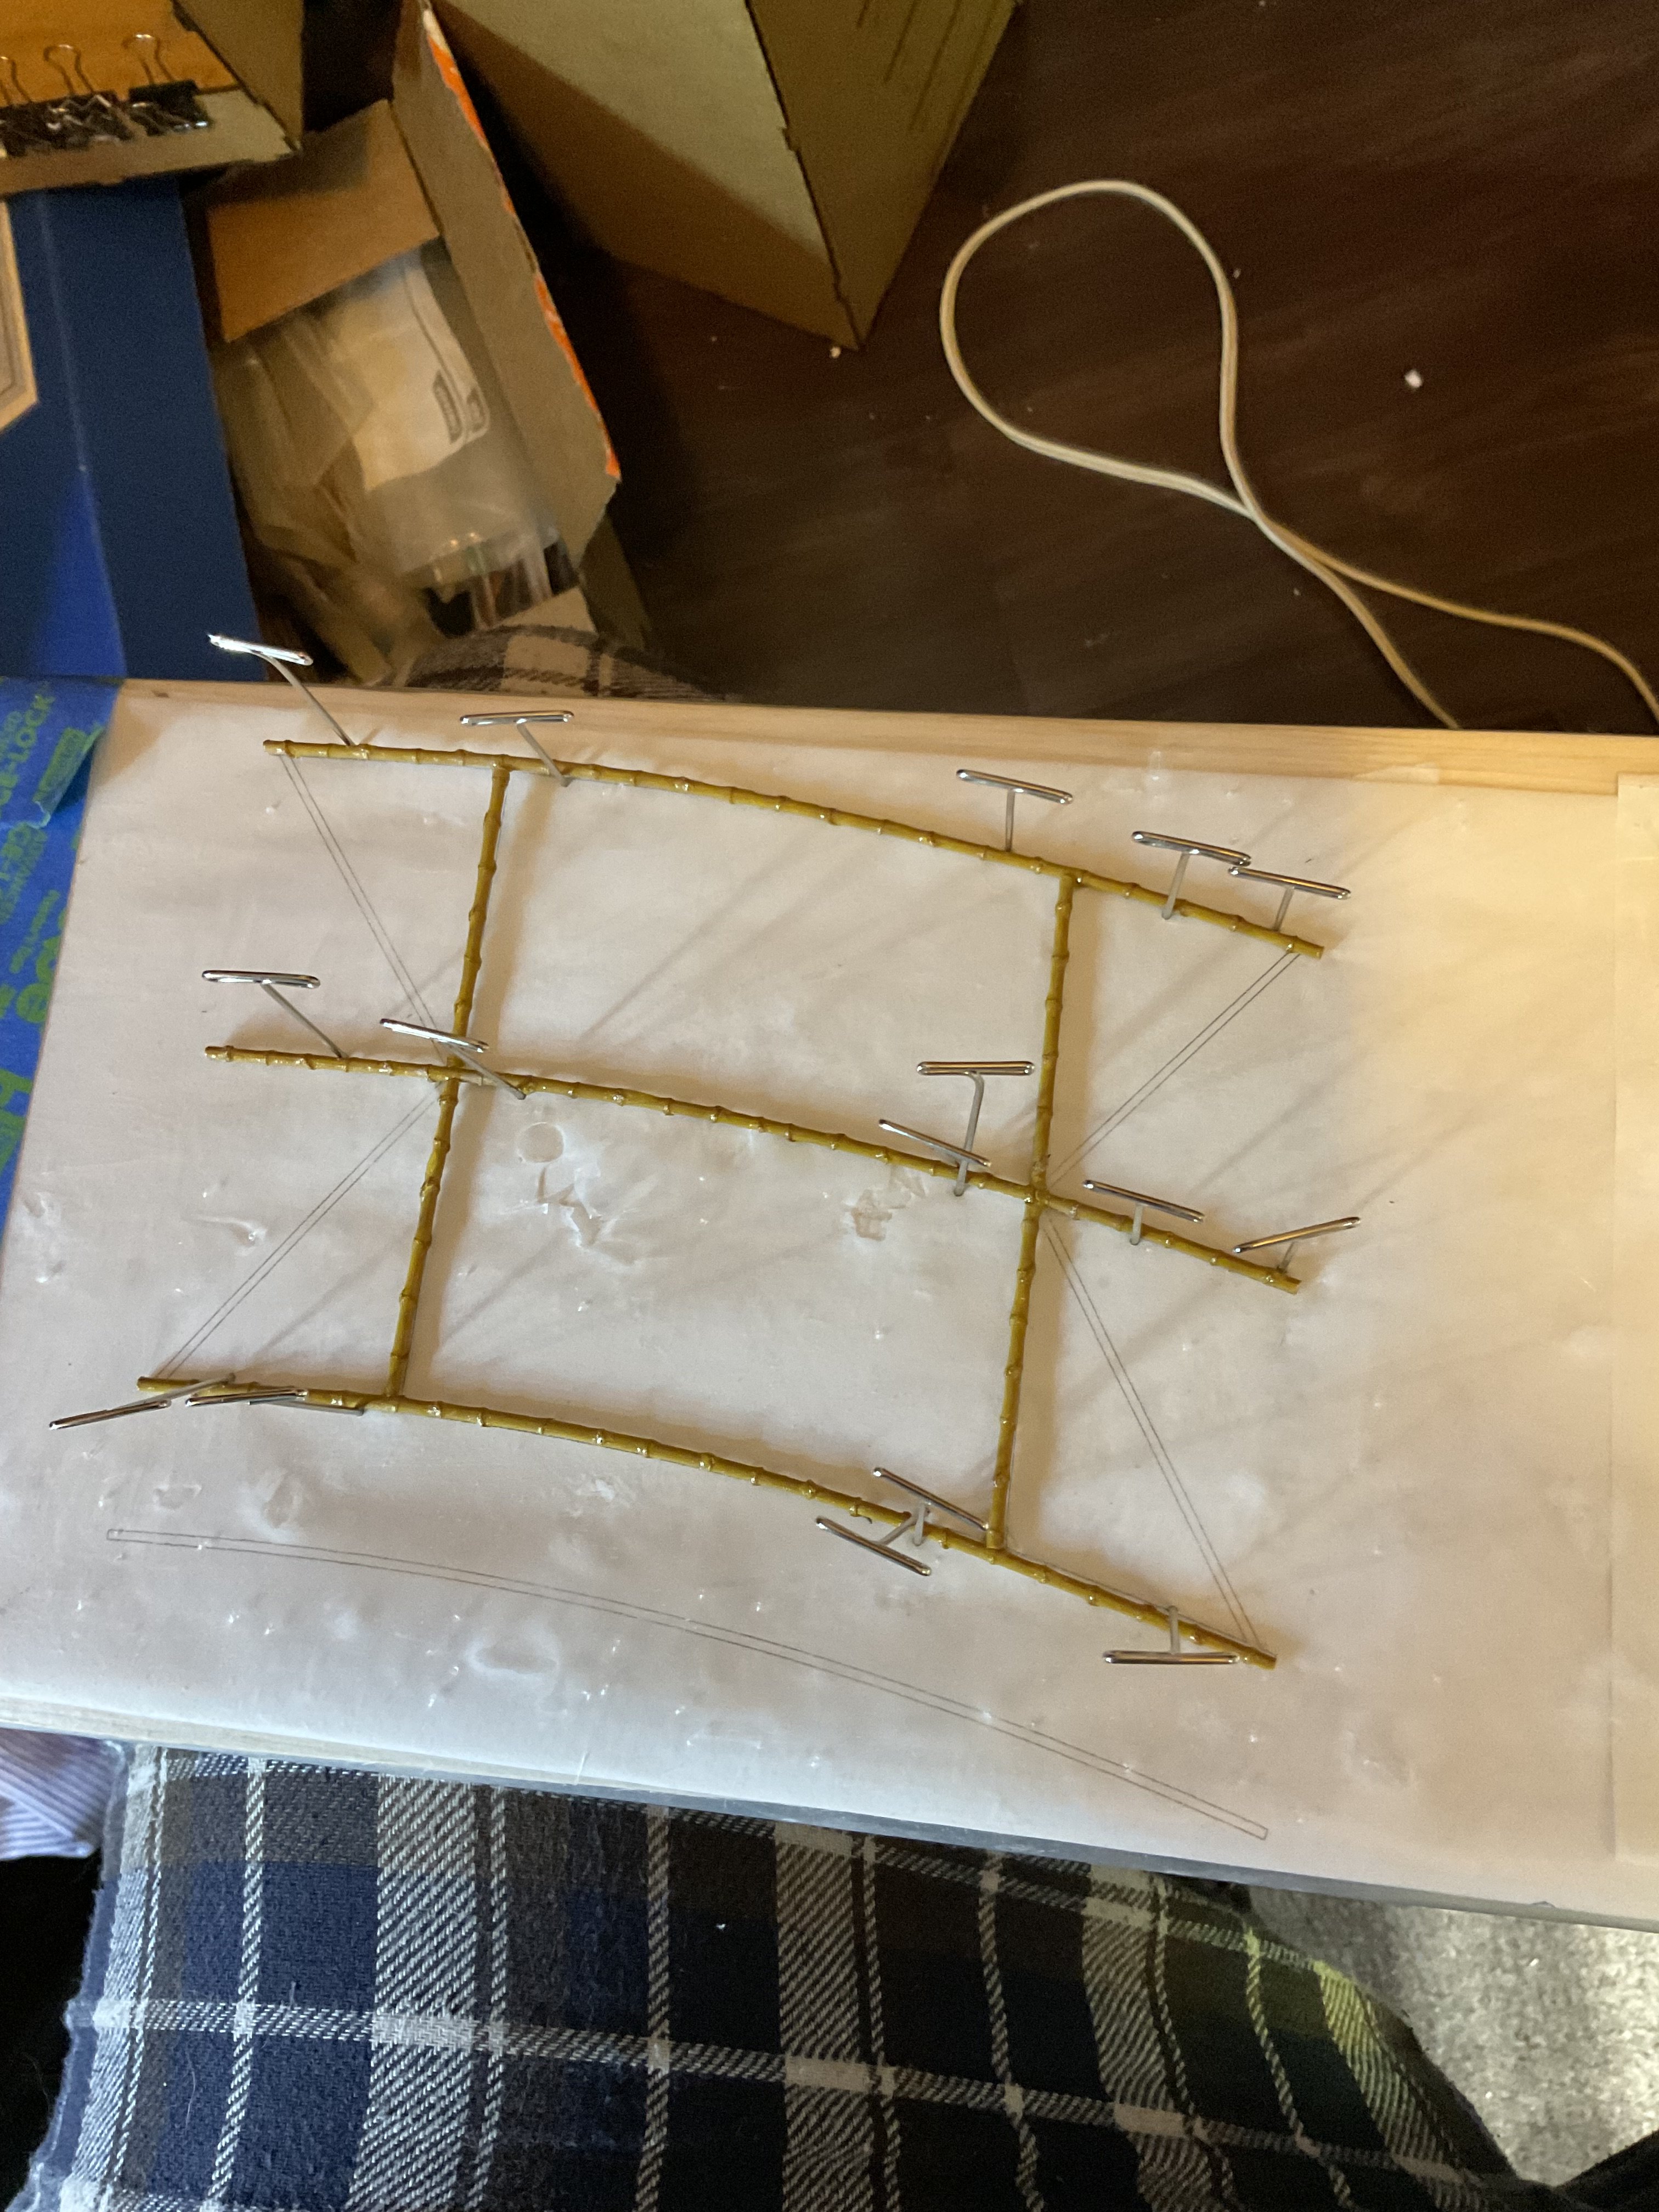
Aaaaaaaaaaah…….ok….. I’m a little better….. it was after I started assembling the left wing that i noticed that the instructions for the wing assembly or my interpretation of them is incorrect. Ref to photos 1, 2 and 3. The instructions show (and I did it to my first wing :p) to install the wing “struts“ Freijo sticks mounted on top of the wing. I cannot believe this to be correct. All the photos I have seen show a smooth, even curve at the upper surface of the wing the wing. I am certain that the Freijo sticks should go INSIDE the wing ribs. The upper and lower wing struts should mount the same way, Inside. Also, I am trying to dry fit the wing to the fuselage and the spacing of the struts and the wing spacing is to wide with the struts installed forward and aft of the wing rib vertical supports. I am continuing with the build while I try to see if I can make this work… -
Santos-Dumont 14 BIS build by FokkerD7 - Model Airways
FokkerD7 replied to FokkerD7's topic in Non-ship/categorised builds
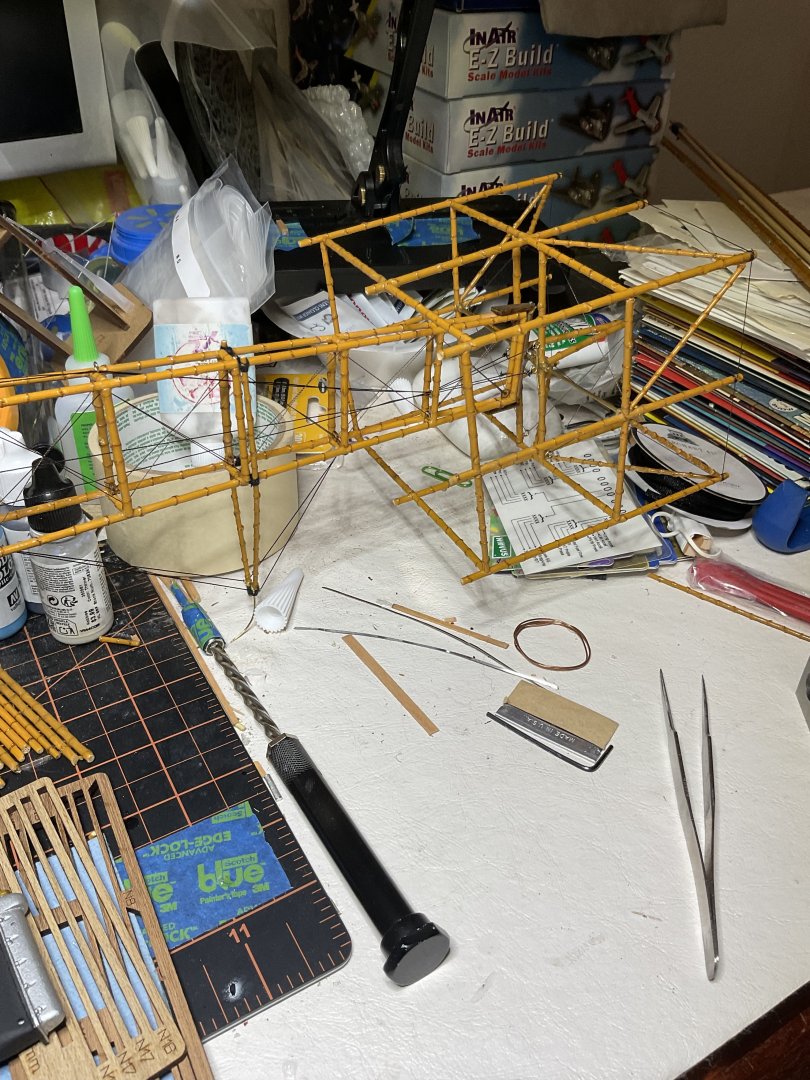
Ok…After a short break I have made a command decision…I found that I had accidentally glued the aileron in place, it should have moved freely. While I was attempting to correct the aileron issue most of the rest of the wing came apart. So…I started to continue taking apart the wing pieces and re-assemble the wing. Please note in this photo, that I have place the upper wing strut correctly. The photo shows the last part of the upper wing part incorrectly installed. Under the struts instead of over the struts. This will be corrected before gluing. I adjusted the spacing of the struts to keep them at the same spacing as the forward and aft upper mounts on the fuselage. Also please note the angle / placement of the clamps. Originally they were placed inboard of the struts. However, when I moved the struts it changed the stress the clamps placed on the wing ribs causing them to flatten out. Placing them outboard helps to keep the arc the ribs are supposed to have.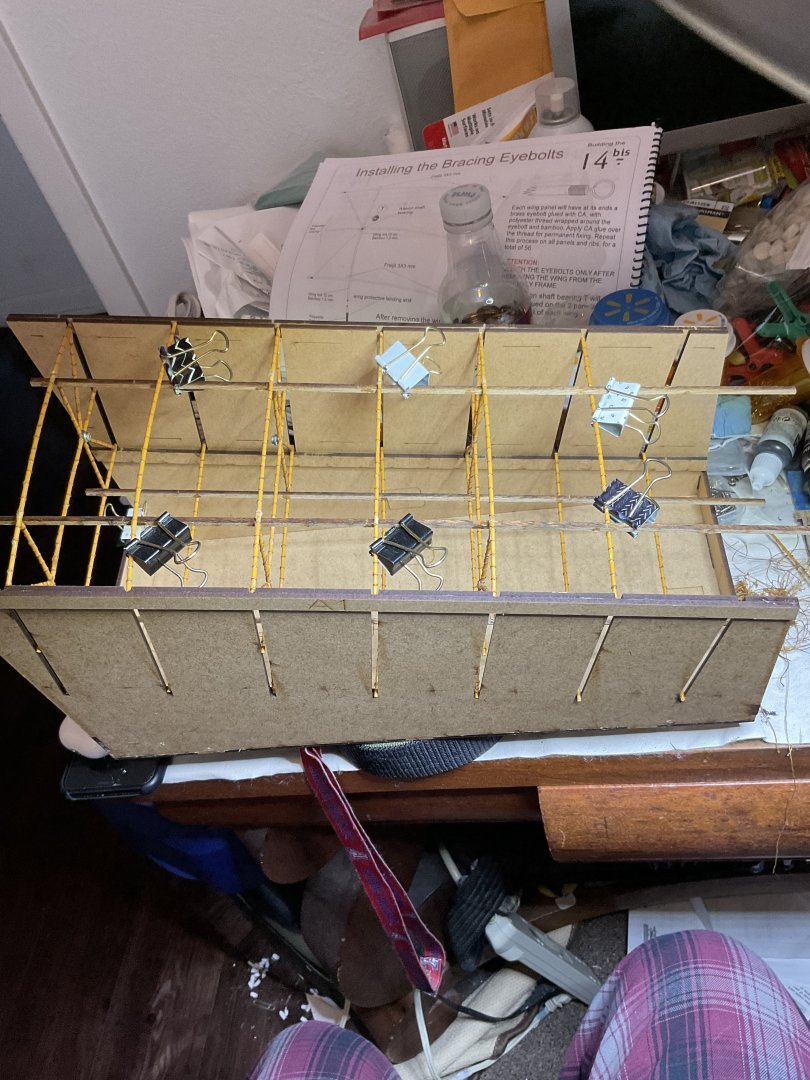
-
Santos-Dumont 14 BIS build by FokkerD7 - Model Airways
FokkerD7 replied to FokkerD7's topic in Non-ship/categorised builds
Aaaaaaaaaaah…….ok….. I’m a little better….. it was after I started assembling the left wing that i noticed that the instructions for the wing assembly or my interpretation of them is incorrect. Ref to photos 1, 2 and 3. The instructions show (and I did it to my first wing :p) to install the wing “struts“ Freijo sticks mounted on top of the wing. I cannot believe this to be correct. All the photos I have seen show a smooth, even curve at the upper surface of the wing the wing. I am certain that the Freijo sticks should go INSIDE the wing ribs. The upper and lower wing struts should mount the same way, Inside. Also, I am trying to dry fit the wing to the fuselage and the spacing of the struts and the wing spacing is to wide with the struts installed forward and aft of the wing rib vertical supports. I am continuing with the build while I try to see if I can make this work… -
Santos-Dumont 14 BIS build by FokkerD7 - Model Airways
FokkerD7 replied to FokkerD7's topic in Non-ship/categorised builds
I have had to take a short pause. I have most of the right hand (Starboard) wing completed photo1 (note aileron installed) and am starting the left (Port) wing photo 2.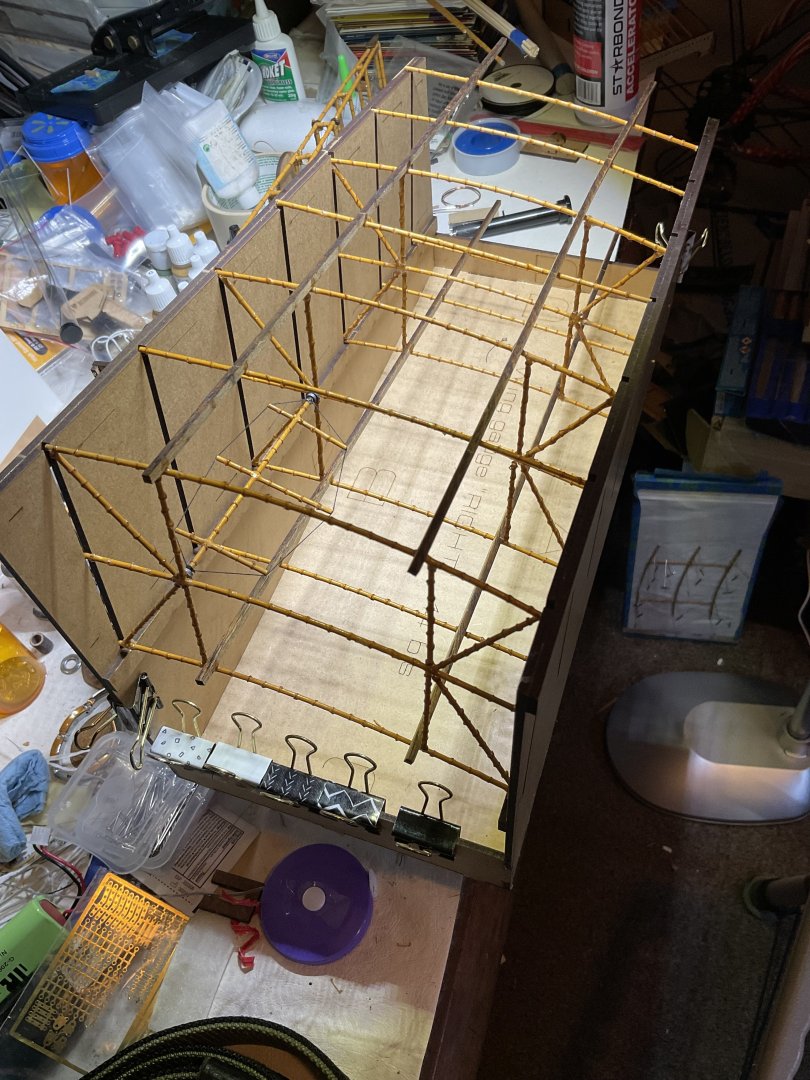

- 9 replies
-
- 12
-
-
Santos-Dumont 14 BIS build by FokkerD7 - Model Airways
FokkerD7 replied to FokkerD7's topic in Non-ship/categorised builds
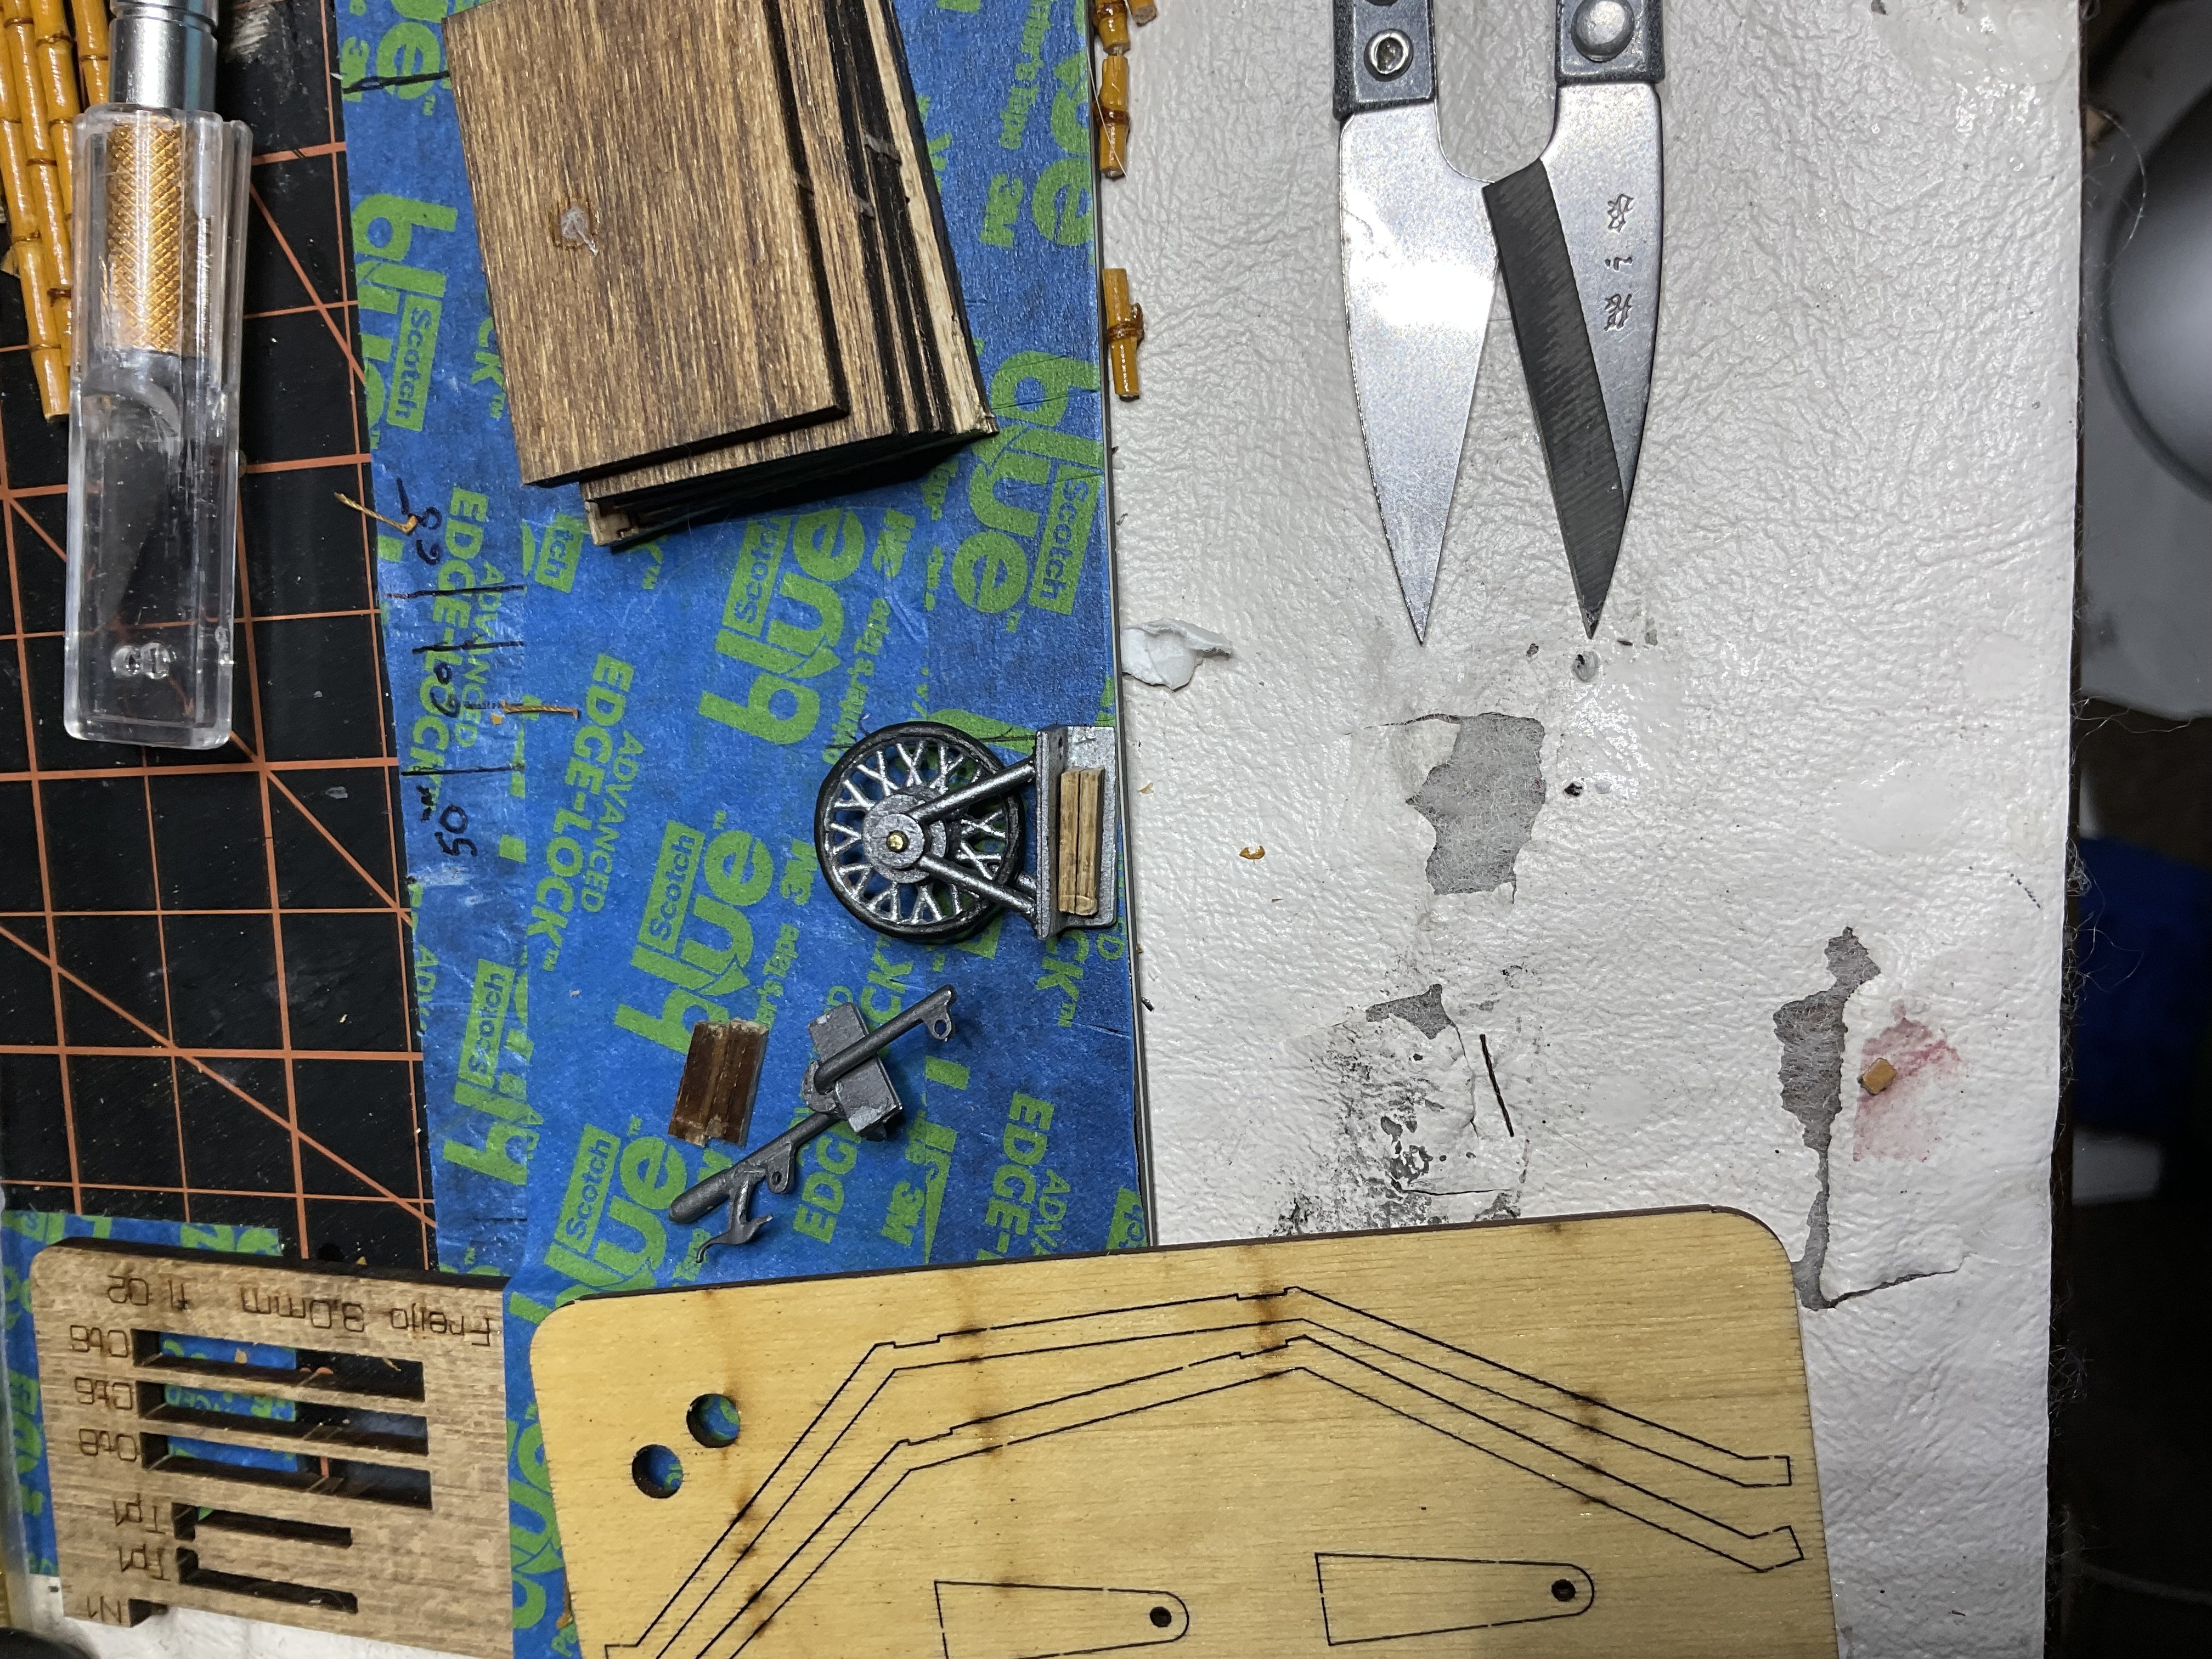
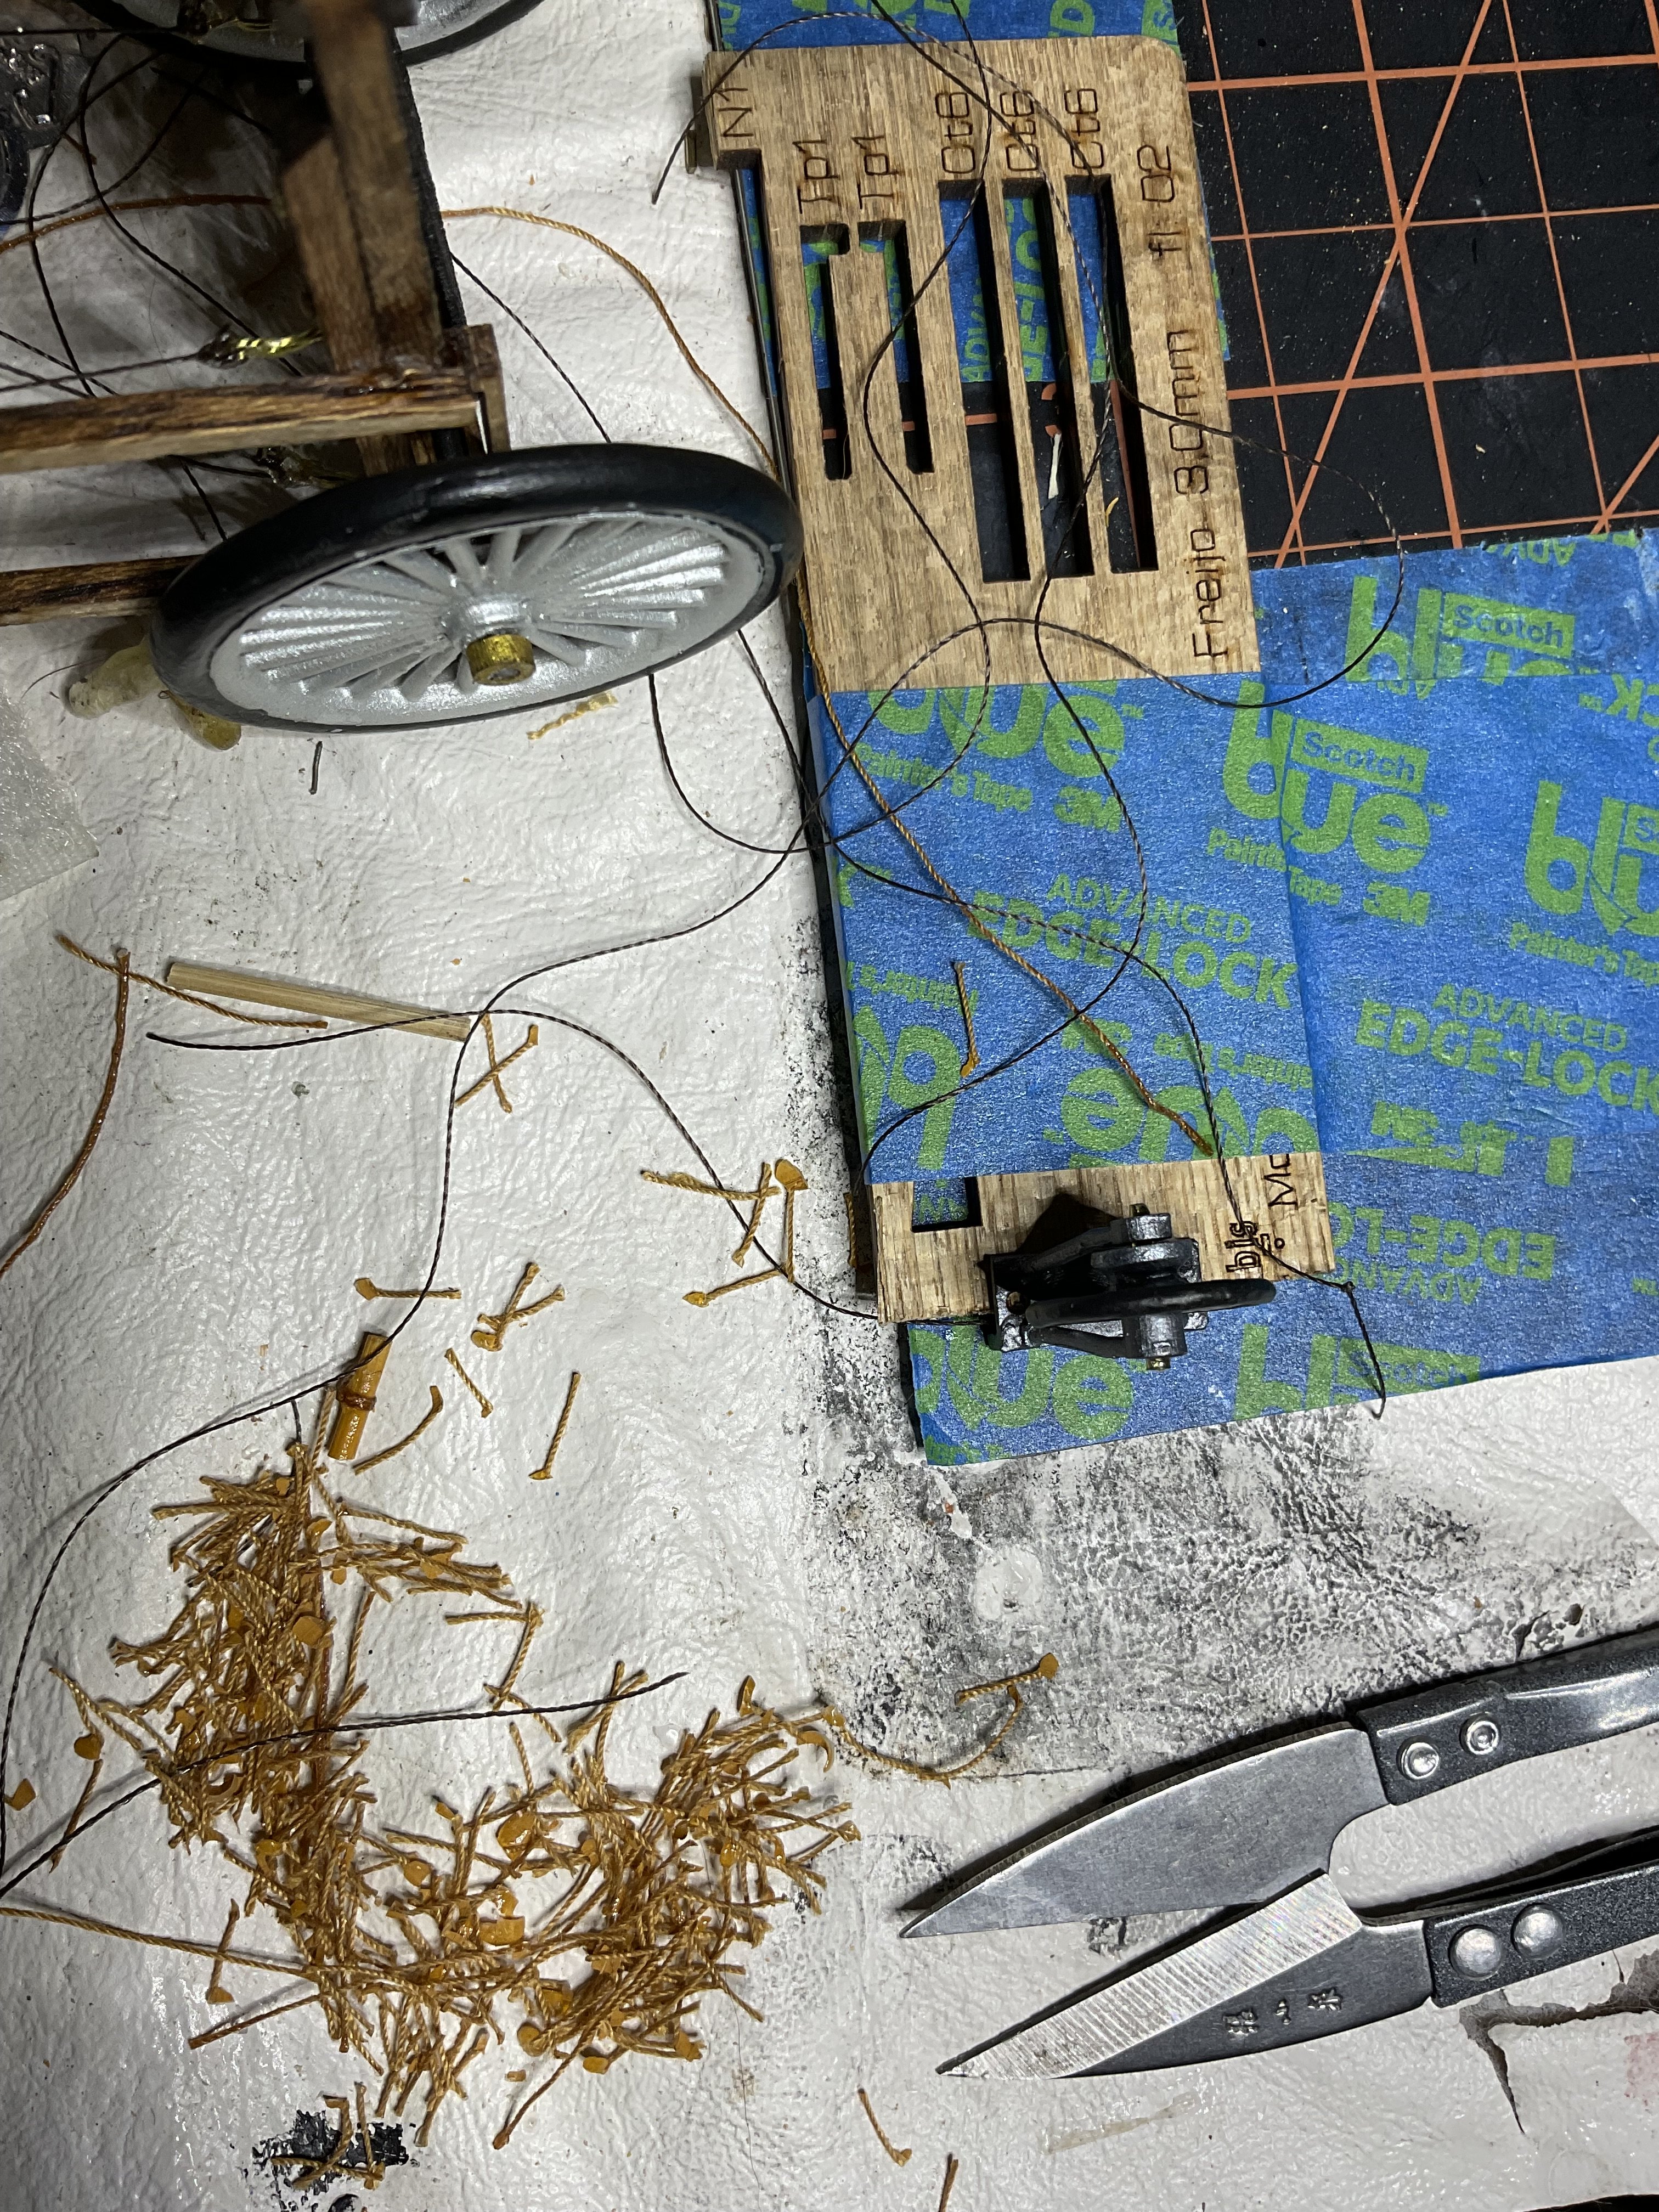
Sorry for taking so long to respond. Thank you! These photos are perfect. I am looking at the cross bar that helps stabilize the wheel. The model design has the bend on the inside and the way I assembled the wheel will not allow me to turn it around. If I were to redo this model I would follow these pictures closer. This is why I am on this site. Your help is invaluable. -
Santos-Dumont 14 BIS build by FokkerD7 - Model Airways
FokkerD7 replied to FokkerD7's topic in Non-ship/categorised builds
Thank you very much. I had read over his build and missed that detail. I am jealous of his build :). There is one other photo angle that shows its position as well. You have to look through the wing to see it. I have added wood spacer’s to mine so it pushes the assembly/hole over enough to clear the frame and still have good contact to glue to.

-
Howdy and welcome. How about a community build? Not a competition really, but a way for everyone to complete something and share different ideas about a common build? FokkerD7
-
Hello and Welcome! I to am new. This is such a large site it can be tricky to find your place, however, it is worth the effort. My personal suggestion is that you be your own critic. I know I need a lot of work, but I work on one thing at a time. I am trying an airbrush now. I also find the act of building a model quite cathartic. A time to turn off “outside problems” and take pride in being successful at one thing you can have complete control over. I look forward to seeing your work, and your technique, and hope you have an enjoyable time modeling. FokkerD7
-
Hello, I have found this site late. I am an amateur builder. I had not built anything since the late 60’s (1960 in case you don’t recognize the abbreviated date) I was building plastic kits and trying to understand glue control and painting before a long pause. My CG insisted I do something with my time. She is now regretting getting me started as I am fast running out of room. This is the fourth 1/16 scale aircraft I am working on. I am doing a poor job of recreating the bamboo look. That aside I am trying to understand the installation of the control wheel attached to the port side of the cockpit (?) there is a hole in the control wheel base and the instructions show the control line passing through the hole.But if I glue the piece in place then I would have to drill through a fuselage rod which doesn’t make sense. Am I installing this wrong? Thank you for any assistance.


- 9 replies
-
- 11
-