

Padeen
-
Posts
181 -
Joined
-
Last visited
Reputation Activity
-
 Padeen reacted to chris watton in Newsworthy updates from Chris Watton
Hi Mike,
No problem - here you go:
And this is the model in her crate, almost ready to be shipped - Victory would be too large (500mm longer and much wider) which is why we have to hire a van and drive...
-
Padeen reacted to vths in HMS Fly by vths - Victory Models - Scale 1:64 - Second wooden kit build
Cheers guys, I'll do just one layer, that should be just enough. I don't see how I would be able to make a layer on the inside.
I think that the crude hull turned out quite good for my first attempt. Now it is time to sand it, cover the pin holes and finish the fittings
-
Padeen reacted to EdT in Patrick O'Brian's Aubry/Maturin Series
There is a simple cure for unhapiness at finishing the Aubrey/Maturin saga. Start over.
Ed
-
Padeen reacted to realworkingsailor in HMS Pegasus by realworkingsailor - Amati/Victory Models - 1/64
Well... this will probably be the last little bit of "fun in the sun" until next spring. I expect to leave Thursday morning, so the shipyard will have to be tidied up before then, and I don't plan on any more building until I get home in December... and by then it's too snowy for outdoor pics. As it is I had to wait until just before noon for enough sun to filter into the backyard... Another sign the days are getting shorter and cold weather is coming.
Hopefully this will satisfy a few of the photo-addicts that lurk around here..... (you know who you are.... Sjors.... ).
Incidentally... based on the number of questions I've received from people... I may have to consider writing my own rigging manual.... and for some reason that strikes me as rather odd.... since I'm far from an expert on the subject.... I dunno.... Something to ponder over then next few months anyway.....
Andy
-
Padeen reacted to Sjors in Le Mirage by Sjors - FINISHED - Corel - Wood - 1:75
@ Mick,
@ Sam,
Thanks.
@ John,
What else can I do with all the time that I have at the moment.
I'm working only 4 hours a day ( last week and then to the 75 % ,6 hours ) for two weeks .
And going into the city because there is a festival ? no thanks…to many people !!!!!
We have a spare bedroom that we are using.
Still a lot of space left.
Maybe next year we will renovated the whole room into a decent workshop.
Now we have to tables where we are working on.
@ Adeline,
I'm still not a master of the ratlines….
I have to learn not to tight them to hard….
It can be some looser ( those ropes )
And yes , you read it well, at the main mast and mizzen mast there is another part with ratlines…..
And no worries about the hight of the seiling.
The room is almost 3 meters high...
Plenty of space left !
-
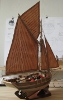
Padeen reacted to ofencer29350 in la "recouvrance" by ofencer29350 - Finished
after one month here is some news from my recouvrance
i realised the new roof and the cup board with the compas
Agrandir cette imageRéduire cette image Cliquez ici pour la voir à sa taille originale.
Agrandir cette imageRéduire cette image Cliquez ici pour la voir à sa taille originale.
Agrandir cette imageRéduire cette image Cliquez ici pour la voir à sa taille originale.
-
Padeen reacted to vths in HMS Fly by vths - Victory Models - Scale 1:64 - Second wooden kit build
Finished inner planking, gun ports and the rest of the gun deck planking. I also tried to create the stove, but that did not work out so well (yes, it is the black spot on the deck), so I'm not gonna show the detail of it just yet.
-
Padeen reacted to chris watton in Newsworthy updates from Chris Watton
Thank you, Mike. I have written before that I was not looking forward to designing yet another Victory. I have built many Airfix versions, the Panart version and had completed designs for the 72nd scale version 12 years ago. I realise that things have moved on a lot since then, and I most certainly wasn't prepared to re-tread old ground - boring for me, and a let down for the modeller who chooses to buy one.
It was probably the Airfix Victory that got me fascinated with ships from the age of about 8. I have recently bought some Tamiya plastic models, a Spitfire, Mustang and the Airfix 24th scale Mosquito. I know that there are many super-detailing kits to improve the already great level of detail. Some may quite rightly argue that most of the detail cannot be seen when made, but it's there nonetheless and this is where plastic modelling is going, so why not try it with predominantly wooden model kits, rather than simple 'block-models' - in which each new model is nothing more than an 'identi-kit' design of the previous models we build? I didn't want to give the illusion of full gun decks, I wanted the decks to actually be there, and when looking through the stern windows, I wanted to see the decks, not a wall of plywood, so the little boy in me could look through any opening and see detail - if the detail is there in a top of the range £100 Tamiya Spitfire kit, I feel it should also be there for a top of the range £800+ wooden kit - anything less is now unacceptable to me, as a modeller and designer.
With this in mind, Victory designs began, after learning lessons from the Bellona prototype - if it's really no different to the sea of other Victory offerings, then what would be the point - people would justifiably state that they could do just as good a job on a £200 kit, rather than splashing out 3-4 times as much - this is the problem with 'block' models, there's only so far you can go.
I will still leave out very minor details, like flags for the flag lockers and deck furniture. I believe that most like to add their own stamp of personality to the model and get enjoyment from this aspect, to truly make it their own, so deliberately omitting minor detail is intentional - I am stone cold sure that there will be many interesting and more detailed models made from this kit than my 'bare' prototype - I just hope I have eliminated as much as possible the more boring aspects of building the model..
Cheers, I have considered the Warrior, but concluded that it wouldn't be a great seller. Wrong period. While there will always be a few that want this model, the bottom line is that not enough would ever sell to justify development time and money. The only good sellers for this period are the elegant clipper ships - for military though, anything post Napoleonic seems to garner little interest. (I'm not saying there's no interest, but not enough to justify developing a kit)
Wish I did have a half year pause, I have another 6 months on Victory, but it's all PC based....
Am hoping I can either do Prince or the Leda class frigate next.
..or something small and Dutch...
-
 Padeen got a reaction from realworkingsailor in HMS Pegasus by realworkingsailor - Amati/Victory Models - 1/64
A bit late on the praise-party, Andy, but let me join the chorus! She is just lovely!
-
Padeen reacted to realworkingsailor in HMS Pegasus by realworkingsailor - Amati/Victory Models - 1/64
There you go, Sjors, you didn't have to wait too long
Of course, super close up does nobody any favours....
Anyway, the open heart for the forestay collar was made by cutting down an oversized heart. I'll use a smaller one for the preventer stay collar, but overall I like the appearance. The bobstay also looks much better now that it's served all over. Of course I can't much help having another gratuitous figrehead shot.... just to bug Augie
That could be a new meme around here.... the gratuitous figurehead photo.... hmm....
A small pause for the weekend, a few more chores to take care of up north. Back monday-ish.
Andy
-
Padeen reacted to Dan Vadas in HMS Vulture 1776 by Dan Vadas - FINISHED - 1:48 scale - 16-gun Swan-class sloop from TFFM plans
Breast Beams
The aftermost beam on the Forecastle and foremost beam on the Quarterdeck are known as Breast Beams. These are shaped differently to the other beams in that they have a rabbet to accept the ends of the deck planking and a molded spurnwater on the top edge. There is also a decorative molding beneath the outer edge:
The beam was originally made from heavier stock in one piece to add strength to the edges of the decks. I chose to make them from three pieces - a "normal" beam, the rabbeted top and the molding. When all glued together there is no difference apparent as the joints are hidden.
To cut the molding I filed a scraper from a square ended Xacto blade :
To attach the moldings I used a High Strength PVA glue named Rapi-Bond which I found recently. This stuff sets almost as fast as thick CA, and has a lot more bond strength than the Fullers Maxbond I've used to date :
Some pics of the moldings being fitted :
Danny
the fore
-
Padeen reacted to tlevine in HMS Atalanta 1775 by tlevine - FINISHED - 1:48 scale - from TFFM plans
Ben and Tom thanks.
I have installed the bed platforms (three aft and one fore). These are simple structures with a higher edge medially to help prevent rolling out of bed in rough weather. Once everything was glued in place I applied a single coat of Watco's. As I may have mentioned before, it appears their formula may have changed because it is causing a significant yellowing of the wood. With the Costello box it is not an unpleasant yellowing...almost an aging look. Compare these pictures with the bare wood pictures on the preceding page. But I am not sure it works well for the holly. Well, I have several months to work that out.
-
Padeen reacted to uss frolick in Patrick O'Brian's Aubry/Maturin Series
Anyone remember the scene in "The Far Side of the World" where JA and SM fall overboard through Surprise's cabin windows undetected one night, and just when they think that things could not get worse, they are rescued by militant, lesbian, native women escaping their home island, who decorated their raft with dried severed male members tacked to the sides? I don't think that happened to Lord Cochrane. Anyway, this is evidence that Mr. O'Brien occasionally smoked wacky-weed.
-
Padeen reacted to Sjors in Le Mirage by Sjors - FINISHED - Corel - Wood - 1:75
Yes it is update time !
I have finished the starboard side of ratlines…...
Now I have to go to the mizzen mast but I don't want to do it today.
Maybe I'll make a start at wednesday.
First I have to make the lanyards for the 3rd time
Pictures !!!!!!!
-
Padeen reacted to Stockholm tar in Sherbourne by Stockholm tar - Caldercraft - 1/64
With the mastcoat in place the mast provided made for a reasonably good fit, but to aid in its location I cut a slot in its heel, which secured it over the keel piece. I then tapered the mast from about half-way up its length using a small modelling plane, being careful to take just a thin sliver off with each stroke, and finishing off with a fine-grade sandpaper. (Btw, it is important to always have a sharp blade in the plane which, I find, also tends to reduce ’catching’.) This procedure took a little while, but I didn’t want to give the mast too much of a taper – and I think it resulted in a nice-looking spar. The kit’s topgallant mast was also, to my mind, a little on the thin side and I wanted to both beef it up and lengthen it. I therefore substituted my own from a suitable piece of dowel. Both the topgallant and the lower mast were made of similar dimensions to those given for the Alert, in the AOTS book.
Because of the above changes I was unable to use the ’cross trees’ and mast cap from the kit but I had decided to replace these in any case as, from my point of view, they were too small. Both parts are in fact the same, with similar-sized holes drilled for the lower mast and topgallant mast. Initially I attempted to adapt them but, when endeavouring to drill out one of the holes to enlarge it to take the head of the lower mast, it split in half – so that was that, I had to scratch them! The replacements turned out reasonably well, with separate ’trestle trees’ and ’cross trees’, into which the lower and topgallant masts fitted snugly, the lower ’cross tree’ structure resting on a pair of bibbs either side of the mast. I refer to them as ’cross trees’ and ’tressle trees’, but this is really a misnomer as they do not seem to have been fitted on cutters at this date. The structure I made more resembled an oblong-shaped ’box’, open at the top and bottom, with an off-center division passing between the two masts reflecting their differing circumferences.
Cutter lower masts and topmasts were in one piece at this date, hence the separate upper mast is referred to as the topgallant. The topgallant mast was also fidded abaft, or behind, the lower mast which meant that backstays were not normally required and could therefore dispensed with. Standing and running backstays were only fitted to the lower mast. As a further historical note, Sherbourne was very likely one of the last of her type to have this masting arrangement. From around 1780, cutter masts followed the practice on larger ships, with which we are perhaps more familiar, and were rigged with a lower mast and longer topmast, complete with proper crosstrees, trestle trees, bolsters, and backstays. There are also some differences with the shrouds. On Sherbourne these terminate just above the position of the gaff (fitting over a shoulder or stop) rather than going as far as the doubling, but with the later rig the shrouds passed around the lower masthead. The number of yards and their hoisting arrangements also differ from later practice, but more about these later, except to say that pins were inserted into the masts to take the yards when fitted.
The after side of the lower mast head was fitted with eyebolts to take the blocks for the throat and peak halliards and the boom topping lift, and stops were fitted in various positions for some of the rigging, such as the forestays when they they are fitted. At the base of the lower mast, I fitted a saddle around the aft side of the mast on which the boom jaws rest, whilst below them five cleats were equally spaced around the mast, to take the falls of the running rigging which might be belayed there. I’m not quite sure yet what all of these lines will be but, as I mentioned before, there is an overall lack of belaying points – so I think providing a few more will be an advantage. The cleats were painted black, as were the crosstrees, caps and masthead, whilst the mast itself was stained a reddish brown.
The topgallant mast, as mentioned, was a replacement. As with the lower mast, this was carefully tapered at its upper end, and given a snug fit at the heel to fit the crosstrees and mastcap. Not immediately obvious to the eye is the fid, made made fom a small cut-off nail, which passes through a hole drilled through the heel of the mast, and which rests on the upper edges of the ’trestle trees’. As mentioned it is not that noticeable, especially as the whole assembly is painted black – but at least I know it’s there! Just below this is the sheave hole for the toprope, the rope itself being made fast to an eyebolt on the port side of the mastcap. There is a corresponding eyebolt on the starboard side, for the toprope block.
At the upper end of the mast there are again stops for the rigging, and at the very top I fitted a truck. This was not provided for in the kit, but I think any mast looks unfinished without one! This was easy to make, being merely a suitably sized piece of dowel rod, with rounded edges and a small capping on the top. Four small holes, two on each side were then drilled, which will take the flag halliards when they are rigged. The topgallant mast was finished off similarly to the lower mast, with the lower end and masthead being painted black, and the spar itself being stained a reddish-brown colour. The masts were then lightly treated with beeswax.
I decided to glue the topgallant mast to the lower mast before stepping them as one unit – and in the process completely forgot about how I was going to fit the mast hoops, since they would not now of course, fit over my nicely-made crosstrees! This actually didn’t prove to be such a disaster, when I gave it a little more thought, and the problem was satisfactorily resolved as I will mention later.
I opted to glue the mast in place, with a smear of glue around the partners at deck level, and with a spot on the heel where it fits over the keel piece. The actual stepping of the mast went quite smoothly, and it made a close fit. To locate the cut out in the heel onto the keel piece, I had made a small pencil marks on the mast at deck level, which showed the fore and aft position. By slightly twisting the mast this way and that, as I pushed it home, I felt the heel ’lock’ in place. The mast was pretty much vertical in the athwartships plane, according to my homemade plumbob gauge, although to be sure I put some gentle pressure against the top end of the mast whilst the glue dried. The rake fore and aft was, of course, fixed by the kit design.
We now come to the boom. The dimensions, from the AOTS bible, called for a spar of 62’ in length, which works out to a model length of 27.62 cm. This was not much longer than the length given in the kit instructions, but again I opted to make my own spar, it being a little thicker at 9.2 cm at it’s maximum girth. Both ends are tapered from this point, approximately a third of the length of the boom from the mast. The sides of the boom at the mast end are then chamferred, to fit the jaws. Since the kit supplied jaws would, of course, no longer fit the thicker boom (but which I otherwise considered suitable) I first split them in half, shaped the tail end to fit, and then glued them to the spar on either side. Finally, I drilled a hole in each side at the tail end of the jaws, to take a couple of belaying pins for the mainsail brails. With the boom thus shaped I painted both ends black, including the jaws, and gave it a beeswax finish.
Fittings include: a preventer tackle beneath the boom, consisting of two double blocks fixed to two widely-spaced eyebolts, the fall of the line rove between them coming off of the after block, and being belayed to a small cleat on the side of the boom; two stops on top of the spar at its after end, between which the upper double sheet block strop is fastened; a sheave hole for the mainsail clew outhaul, which also belays to a small cleat on the boom; an eyebolt on top of the spar at the aft end, for the topping lift; another eyebolt, near the jaws, for the tack of the mainsail; there is also a small cleat for the ensign halliards.
Having finished all these fittings, it was then time to fit the boom to the mast. The mast end would rest, and be glued to, the boom saddle and I would further secure it (as with the yards) by a pin positioned in the mast. The aft end, however, could still move if not fixed so I decided, since the sails would be furled, to make a boom crutch. I had no reference for this (other than more modern ones I have seen) so I made it out of two simple, substantial-looking cross pieces, with a pin through them where they cross. I have it in mind that they fold when not in use, and can be stowed away. It is simply glued to the deck, behind the two lockers, but it made for a stable support for the aft end of the boom.
Two jobs remained to be done. The first was to fit the parrels, connecting the jaws to the mast, and here I opted to use the black parrel beads supplied with the kit. Then it was simply a case of tying a length of black rigging thread to one end of the jaws, through the hole already drilled, threading on the requisite number of beads required for it to pass comfortably around the mast (being careful not to make it too tight) and fastening the other end of the thread to the opposite jaws. A small touch of glue on the knot would prevent it from untying.
There was one other small job to do before the boom was finished. I thought a small footrope at the after end, overhanging the taffrail, might look the part. This was made from a length of black rigging thread, with simple overhand knots tied at intervals, and fastened to the spar. I fitted another stop to anchor the inboard end, the outer being fastened by a simple loop over the boom.
Next time: Some items of rigging, the gaff, and the mainsail.
-
Padeen reacted to Dan Vadas in HMS Vulture 1776 by Dan Vadas - FINISHED - 1:48 scale - 16-gun Swan-class sloop from TFFM plans
Steam Grating
I've made my first (and maybe ONLY) Grating - this goes over the stove. I'm a bit reluctant to make too many more (maybe some on the quarterdeck) as they hide too much detail beneath.
The grating stock is 0.79mm thick English Box, a fraction oversize (they should be 0.75mm) but I decided to make them the size of a 0.030" kerfed saw blade on the Byrnes saw using the Micrometer Stop.
My first job was to make a list of the spacings (i.e. the Micrometer stops) using a spreadsheet. This made it a lot easier to work out accurately than trying to remember and then calculate each one (especially if I'm interrupted ) :
Then I set up a piece of 2mm thick stock and started cutting 18 slots halfway through using the micrometer to set up each one (I made a couple of spares "just in case" - I needed them too ):
Then I cut each strip off against the fence, again using the micrometer stop. The measurements are identical to the previous cuts :
Assembly is the same as using kit gratings (fiddly, but at least they were cut more accurately than most kit ones). I dipped the grating into diluted PVA and let it dry :
After sanding the grating to size and gluing it into place I sanded the roundup in. I've also fitted the Cowl Base :
Danny
-
 Padeen got a reaction from Fritsl in Le Camaret by Padeen - FINISHED - Constructo - WOOD - 1:35 (first model)
25/01/2011 O.K.! So, after 4 months... I finally got the scuppers done! My double planking on the bulwarks is done. After all, I did not need to scrap them: a big file did the rough work easily and sand paper did the rest... The scuppers were a bit tricky to do and I'm not so pleased with the result. The booklet suggested the use of a 2 mm drill to open each scupper and then finish with a knife. If I had to do it again, I would use the knife only. First because I managed to break my 2 mm drill ("Et M...e !") and second because my drilling is not so clean as gently cutting: I find it harder to control. Well, it is done however. Maybe I can fix that a bit later when I get an idea... I am now in the process of gluing all those little pinewood bits (the stanchions?) outside and inside the bulwarks.That's easy! It is so pleasing to work with pine wood! The only tricky thing maybe is that clamps leave marks on it. Next step? The rail and the chains hopefully... 30/01/2011 After a very helpful suggestion from Elia (thank you!!!), I tried and fix my scuppers. I first cut out more of the wood from the deck and the plywood sheets that were still rough in the openings of the scuppers. I then used six planks from the remains of the deck planking material to cover the bottom of each scupper. I now have neat openings and a better looking deck. (The pics make them look a bit worse than with bare eyes... they enhance quite a lot the defects! ) I also finished placing the stanchions.
-
Padeen reacted to JerseyCity Frankie in Everyone's paint preference
I too want to put in a word for "artist" acrylic paint. In tubes or in small jars, manufactured by Golden, Liquitex or whatever. All of them are water based and can be mixed with other brands. Full strength or thinned to nearly nothing at all, acrylic can be anything from a stain to an thick opaque coating. Water is all you need to thin or clean up. The paint dries as fast as water dries and when its dry its no longer water soluble and will stand up to U.V. light, changing humidity and who knows what else? Acrylic artists paint is available in nearly any size, from a very small tube the size of your pinkie on up to gallons, and in every color. Its possible to find "student grade" acrylic colors and these will have a "hamburger helper" dumbed down pigment content but the artist grade paint will contain the best sorts of pigments available anywhere and the pigment content is listed on the container- something I suspect other hobby paints won't do for you. Note that the use of the finest pigments includes poisonous ones like cobalt and cadmium which should NEVER be used with a sprayer. Sometimes the "student grade" colors are better for what you have in mind and they cost about 1/3 less than the Artist Grade ones. You can't use Acrylic over unprimed metal though, nor any sort of smooth ceramic like surface. But it will stick fairly well to plastic. The shelf life of the paint is pretty good. If you leave a tube of acrylic paint sealed it will still be fine a year later.
-
Padeen reacted to vths in HMS Fly by vths - Victory Models - Scale 1:64 - Second wooden kit build
Second planking roughly done, well, the most difficult part of it. Now it is time to finish it, add a few stealers (fortunately not many) and sand and sand and then sand some more.
-
 Padeen got a reaction from Dan Vadas in HMS Fly by Padeen - Victory Models - 1:64 - second model
Hi ofencer,
thank you for the comments and the link.
24/08/2013 Hello MSW, At last something new to add to my log: I've had a chance to make some progress on Fly during the holidays! The first planking is now complete and I've added the stern counter pattern. The hull has been sanded and is rather smooth, though it still needs some wood filler corrections before I can start the second planking. And... that's not going to happen before Christmas...
-
 Padeen got a reaction from Sjors in HMS Fly by Padeen - Victory Models - 1:64 - second model
Thanks for the kind comments Andy, Kester, Sjors and Mark.
Fortunately there is MSW to help me bare with the long non-modelling periods called working abroad...
-
 Padeen got a reaction from DCIronfist in San Ildefonso by Sjors - FINISHED - OcCre - 1:70
Hi Sjors,
I'm glad to hear that you are feeling better but don't overdo: Anja is right. We want you fully recovered before we ask for more pics!
-
Padeen got a reaction from Sjors in San Ildefonso by Sjors - FINISHED - OcCre - 1:70
Hi Sjors,
I'm glad to hear that you are feeling better but don't overdo: Anja is right. We want you fully recovered before we ask for more pics!
-
Padeen reacted to Jim Lad in Stag by Jim Lad - FINISHED - Scale 1:96 - English Revenue Cutter of 1827
A proper update at last. I got some good progress today, which was very satisfying. The main halliards are now rigged together with quite a few other bits and pieces, and I have been able to make a start on the lower square yard. It won't be too long now before she's finished.
Here a few photos showing as she is at the moment - she's starting to look like the lady she is.
And in this one you can just see the square yard horse - the lower square yard isn't attached to the mast, but rather travels on a vertical horse up the fore side of the mast via a thimble on the after side of the yard. Then horse is the black line you can see running vertically between the yard and the mast.
John
-
Padeen reacted to Jim Lad in Stag by Jim Lad - FINISHED - Scale 1:96 - English Revenue Cutter of 1827
Thanks for the support, folks!
Mark - it can sometimes be a bit intimidating working in front of an audience, especially when you're trying to figure out something you're not sure about - after all, we're supposed to be the experts!
My best exchange to date was with a small boy of about seven or eight. It went something like:-
Small boy - I make models too you know.
Me - Oh, do you; that's good
Small boy - My models don't look like yours, though.
Me - Don't they?
Small boy - No; are you sure you're doing it right?
(Small boy's mum collapses laughing)
John