HOLIDAY DONATION DRIVE - SUPPORT MSW - DO YOUR PART TO KEEP THIS GREAT FORUM GOING!
×


Jerry
-
Posts
1,753 -
Joined
-
Last visited
Content Type
Profiles
Forums
Gallery
Events
Everything posted by Jerry
-
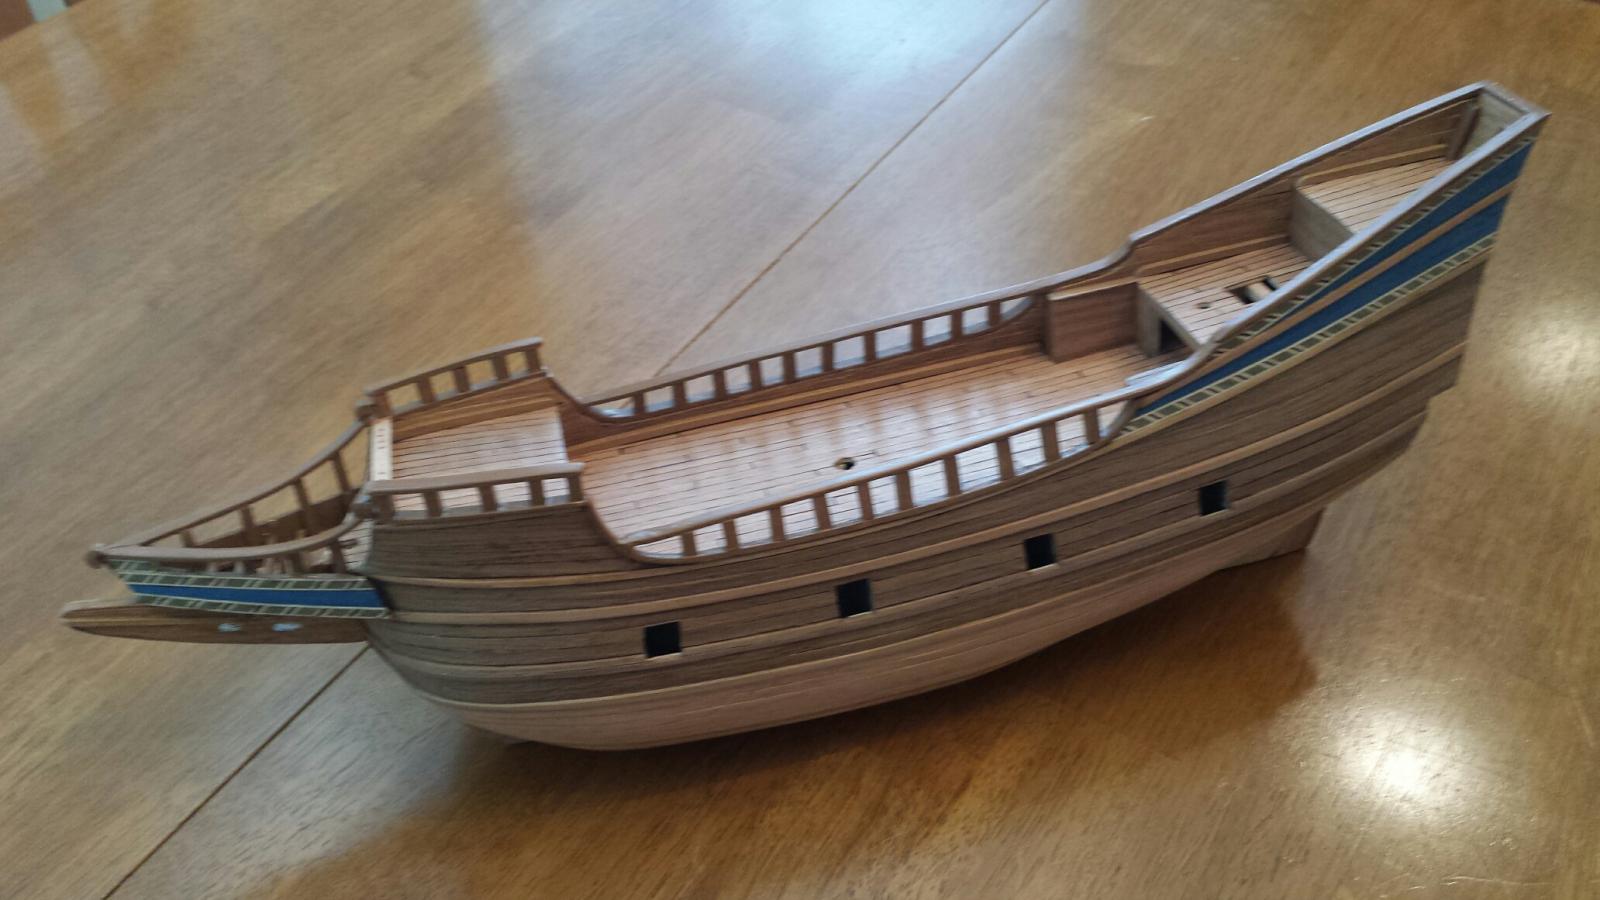
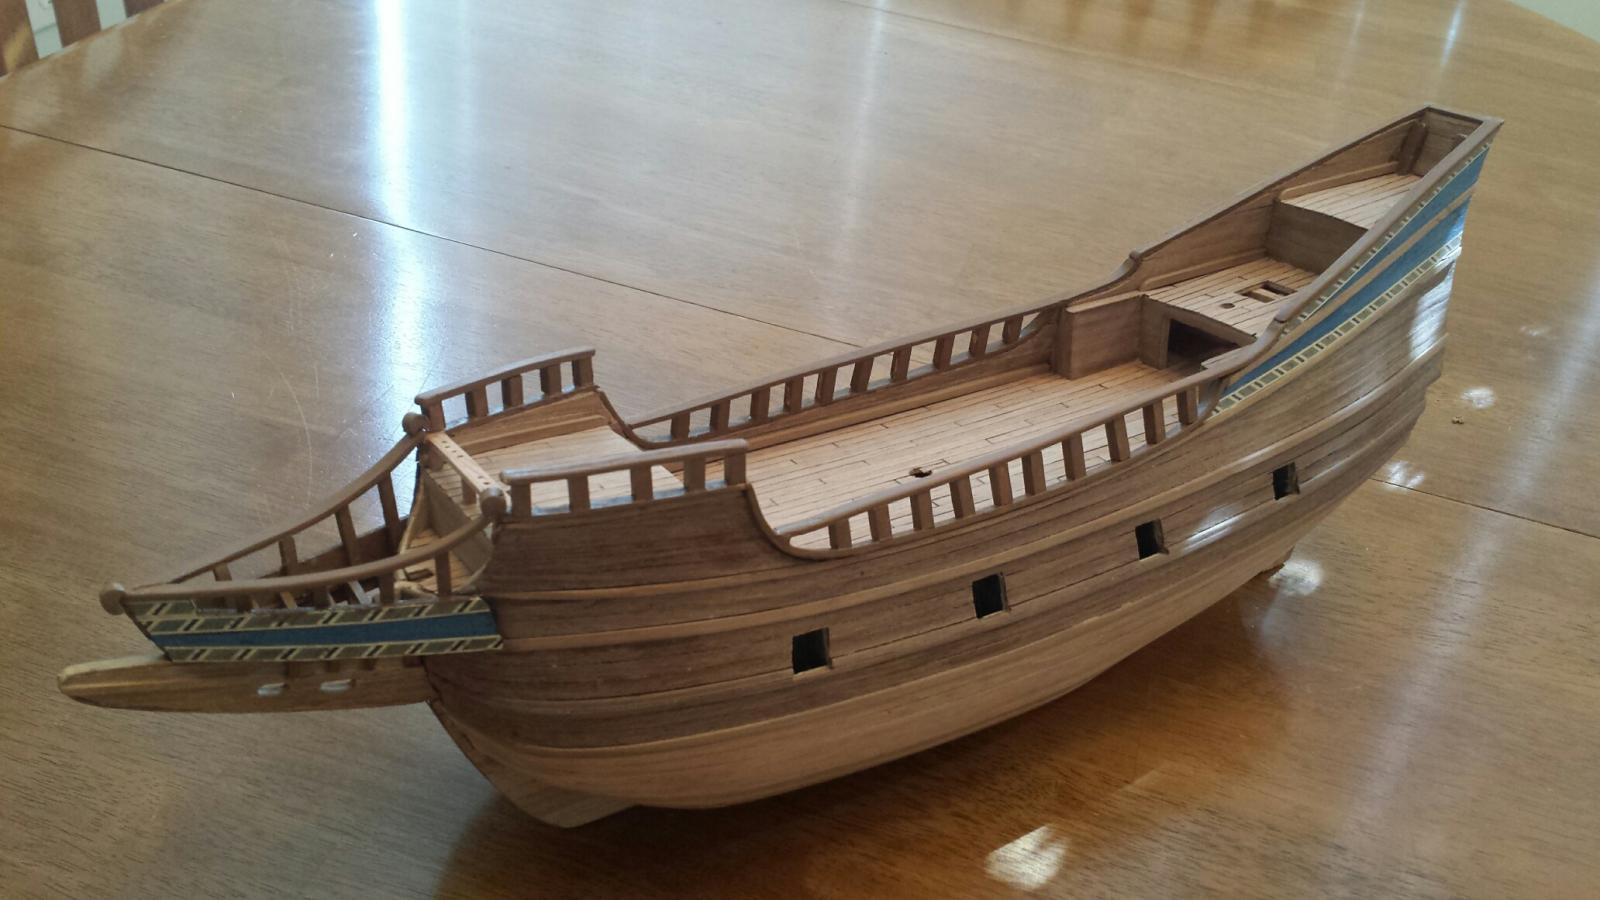
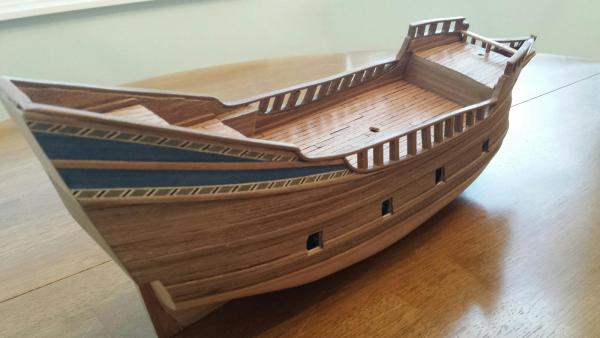
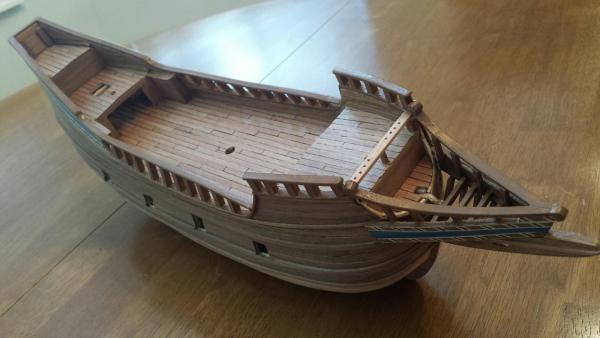
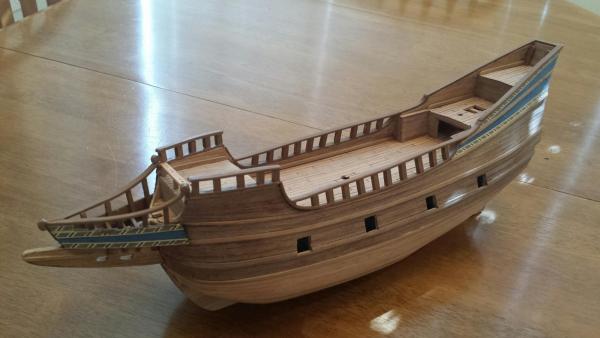
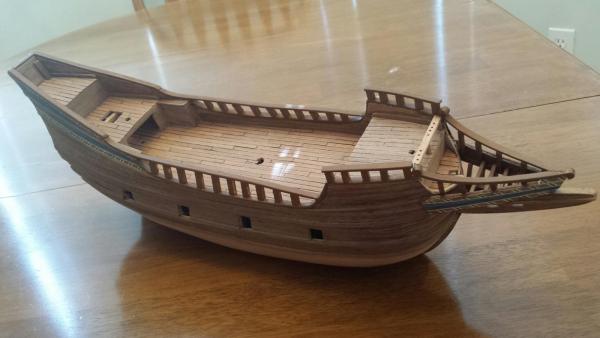
Hell again, And here are some photos of the Half Moon with the hull varnished. Best, Jerry

-
Good morning, Lawrence. I appreciate your comments regarding the deck varnishing and I thank you very much for your visit. Here's a couple of pictures of the hull with the deck varnished and the railings painted. In any event, you may be right; the build is going rather quickly so I may be serving rum to the little guys sooner than I think. Have a great day and best, Jerry
-
Hello Gil.. There are probably no accolades left to describe your fantastic rendition of HMS Victory. I'm so happy that we live a few thousand miles apart because there is little likelihood that your Victory and mine will ever appear side by side. I'm sure I've thanked you before for tutoring me and the many other Victory builders but I feel I need one last time to express my appreciation. I sincerely look forward to your next modelling endeavor. Best to you, Jerry
- 755 replies
-
- 2
-

-
- finished
- caldercraft
- (and 1 more)
-
Hello David.. Very nice work with respect to the decks...They look like you gave them much tender care. FYI I used a satin water based Varnish on the Victory decks and now, with Half Moon, I'm toying with the idea of varnishing the dntire hull, decks and all. I'm still torn between three finishes, Urethane, Varnish or Frombey's Lemon oil. That's my next step so I need to make up my mind. I'm also painting some of the wood a walnut color that I got from Cornwall for Victory. Talk to you soon. Best, Jerry
-
Hello Brian.. I wish you were criticicising my work; maybe I could learn something good from it. Please never hesitate to do so. Other than pure decoration, I agree, there's no other reason for the trim. Thanks again for taking the time to write me....Best, Jerry
-
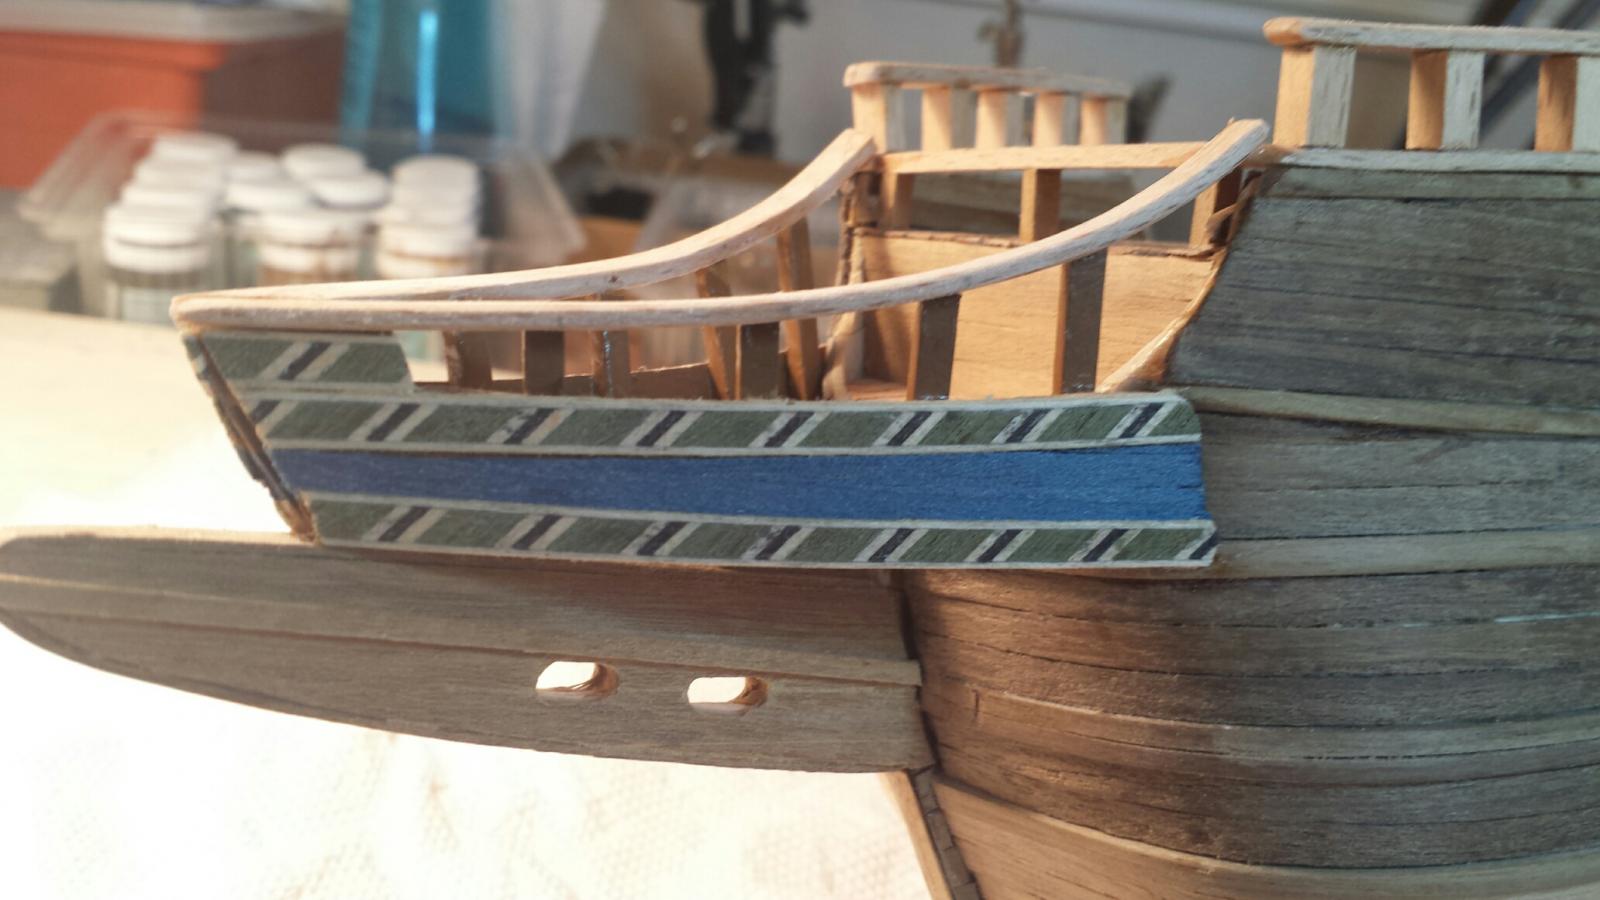
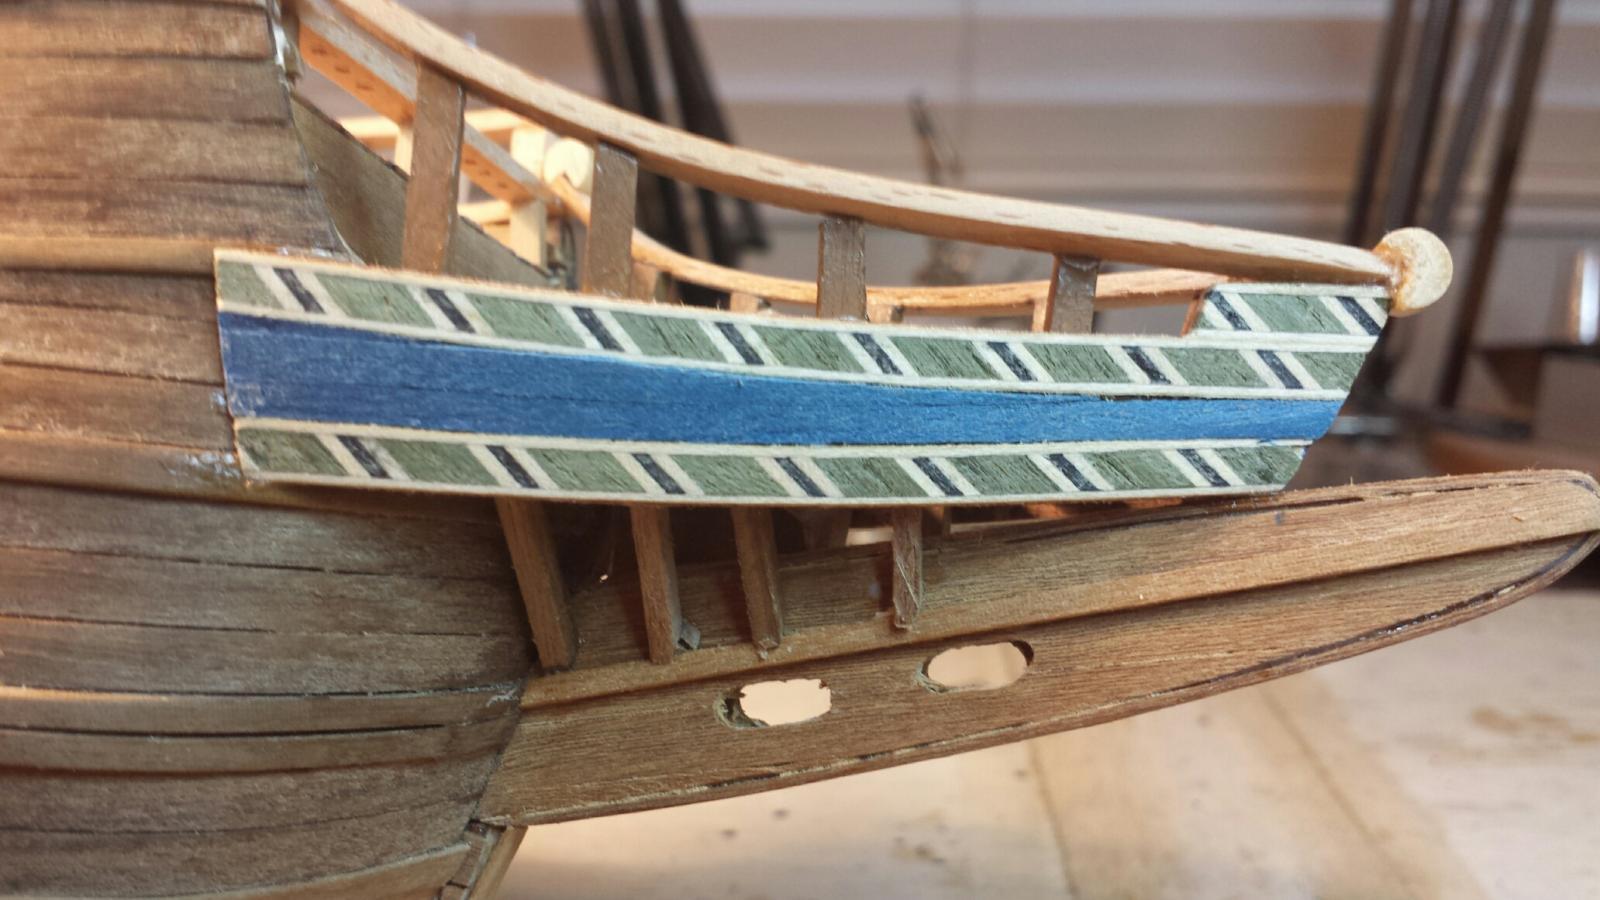
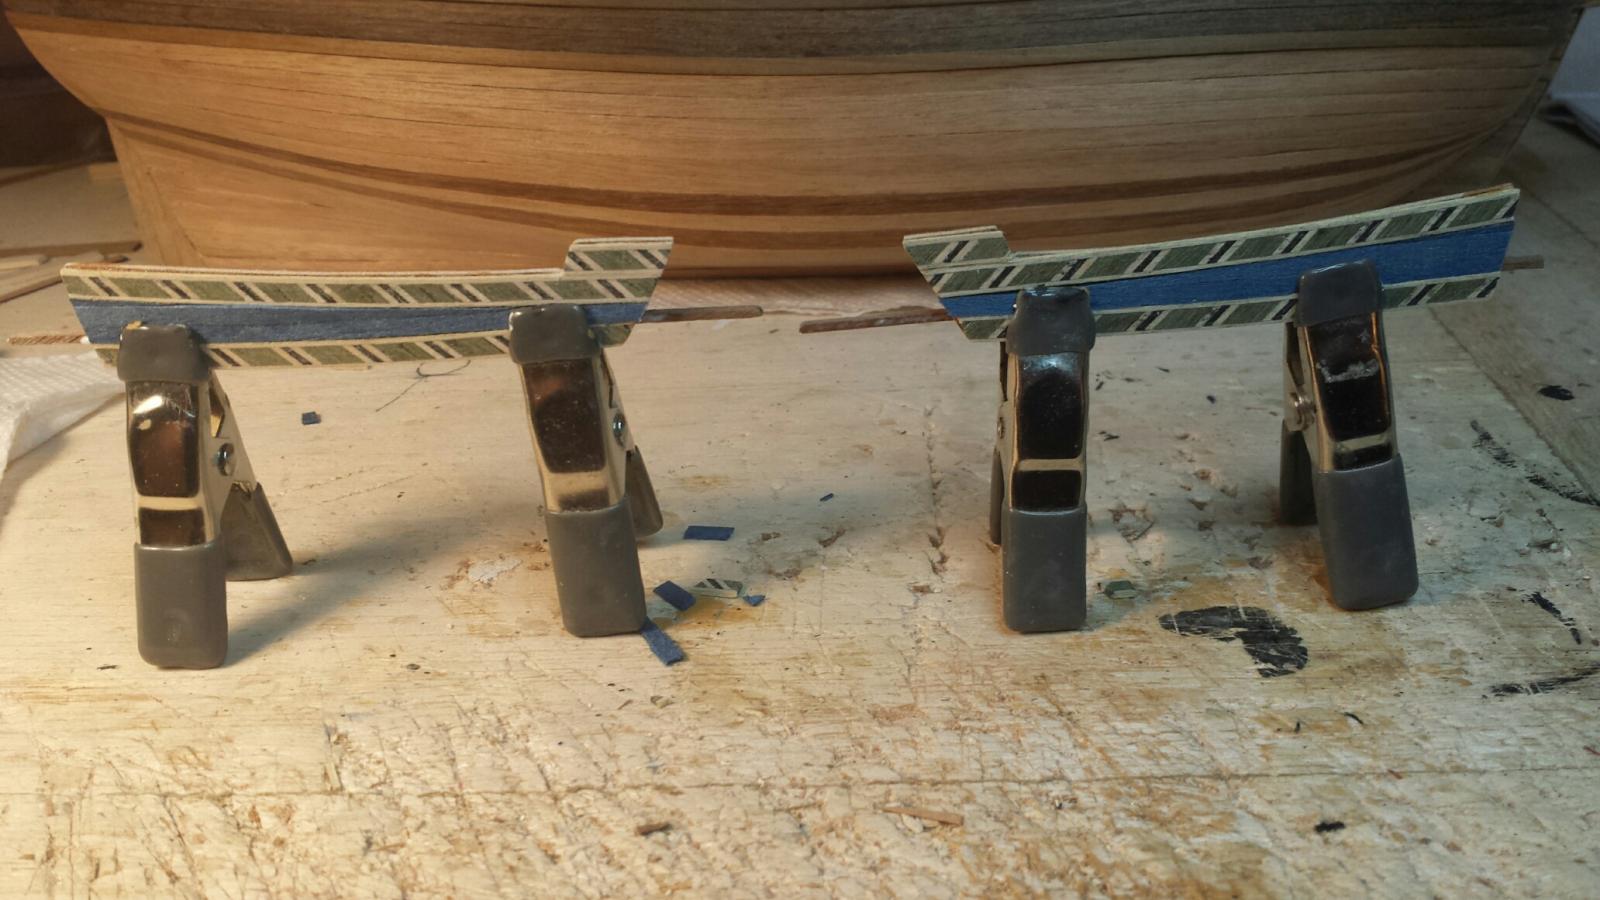
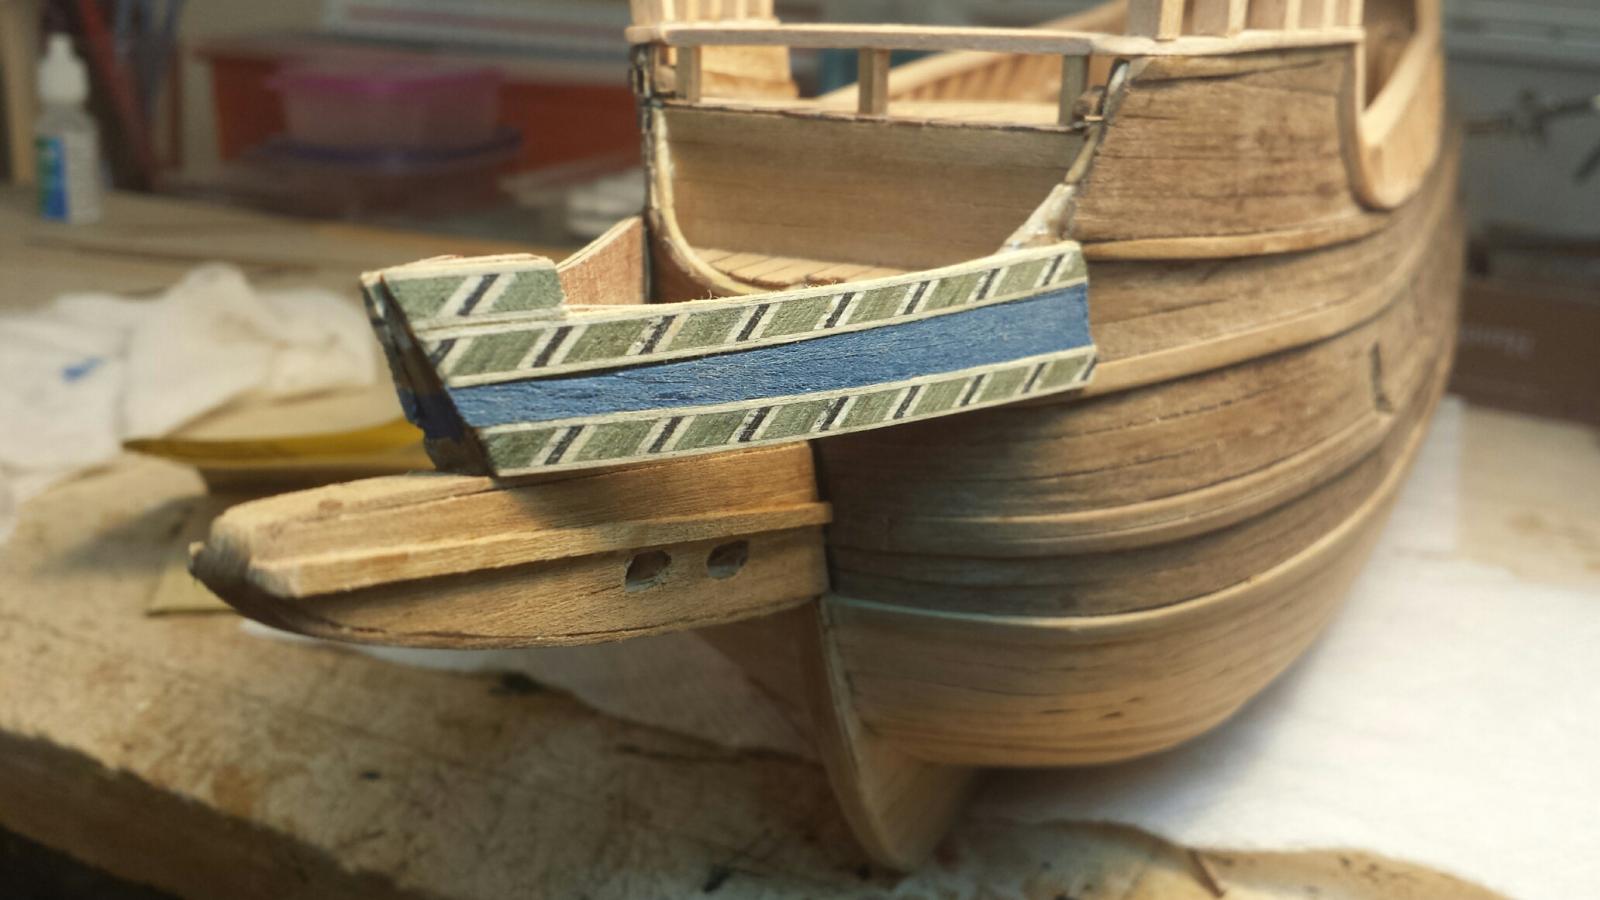
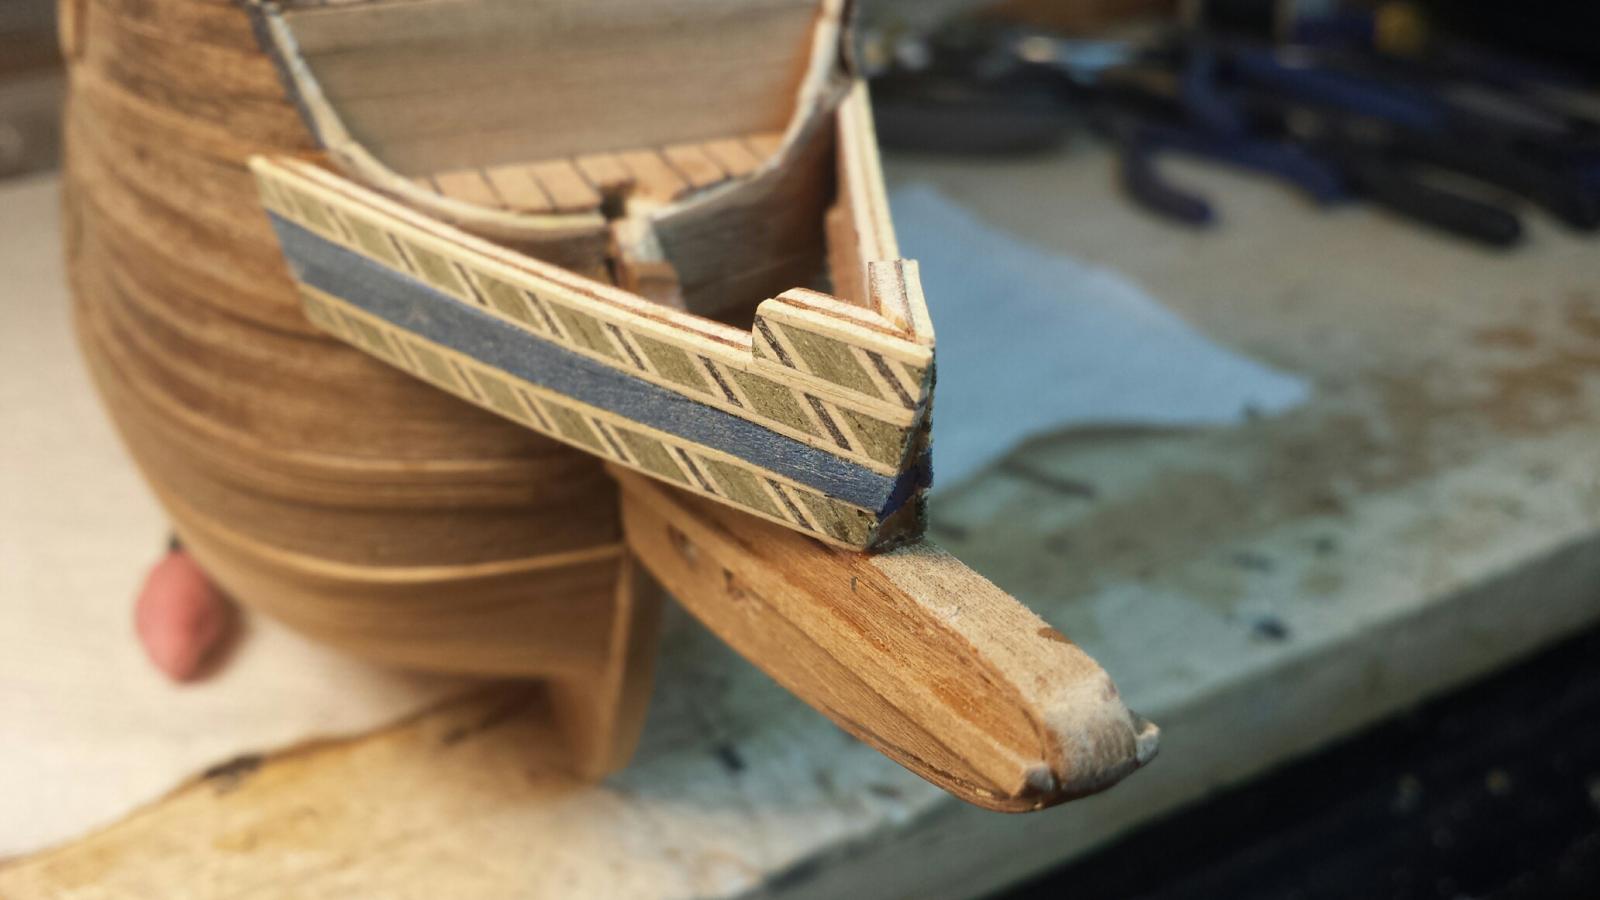
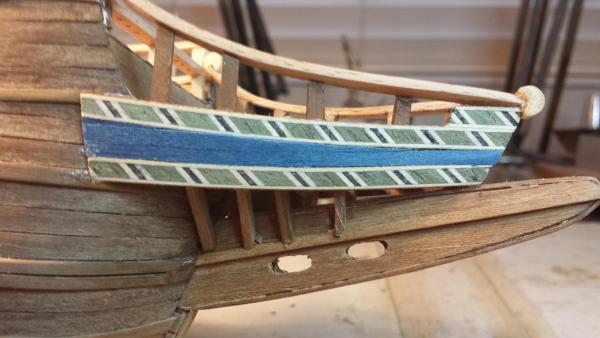
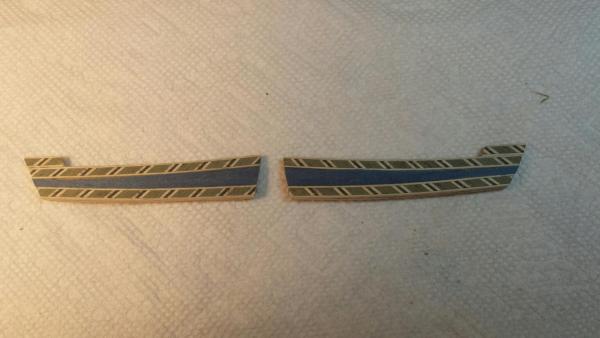
Hello Brian, Thanks for your comments and for your thoughts. I sincerely appreciate what you have to say and hope you will always let me know when you have a point to make; I hope you have checked your own log lately as i made an entry with respect to the work you are currently doing. Now, with regard to your question. I made ethe stems exactly as shown in the instructions. The decorative strips sandwich the blue field as the kit asks one to do. From pictures I have seen of the real Half Moon, this trim exists. I hope you get a chance to see other logs of this model as they too have made siimilar trim. Have a great night and Best, Jerry
-
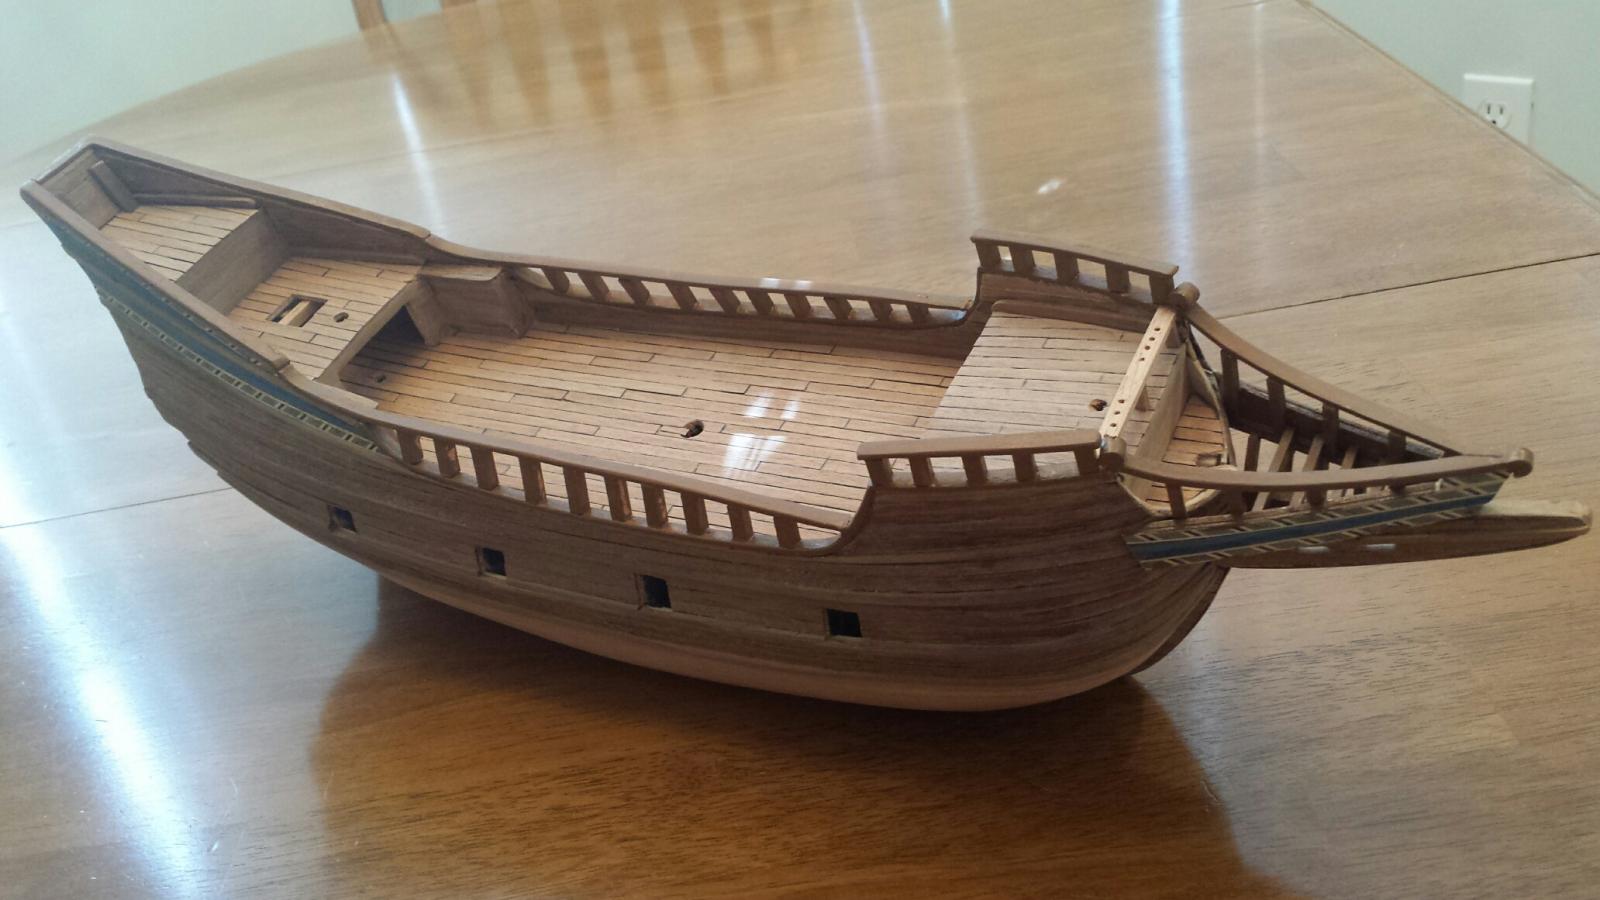
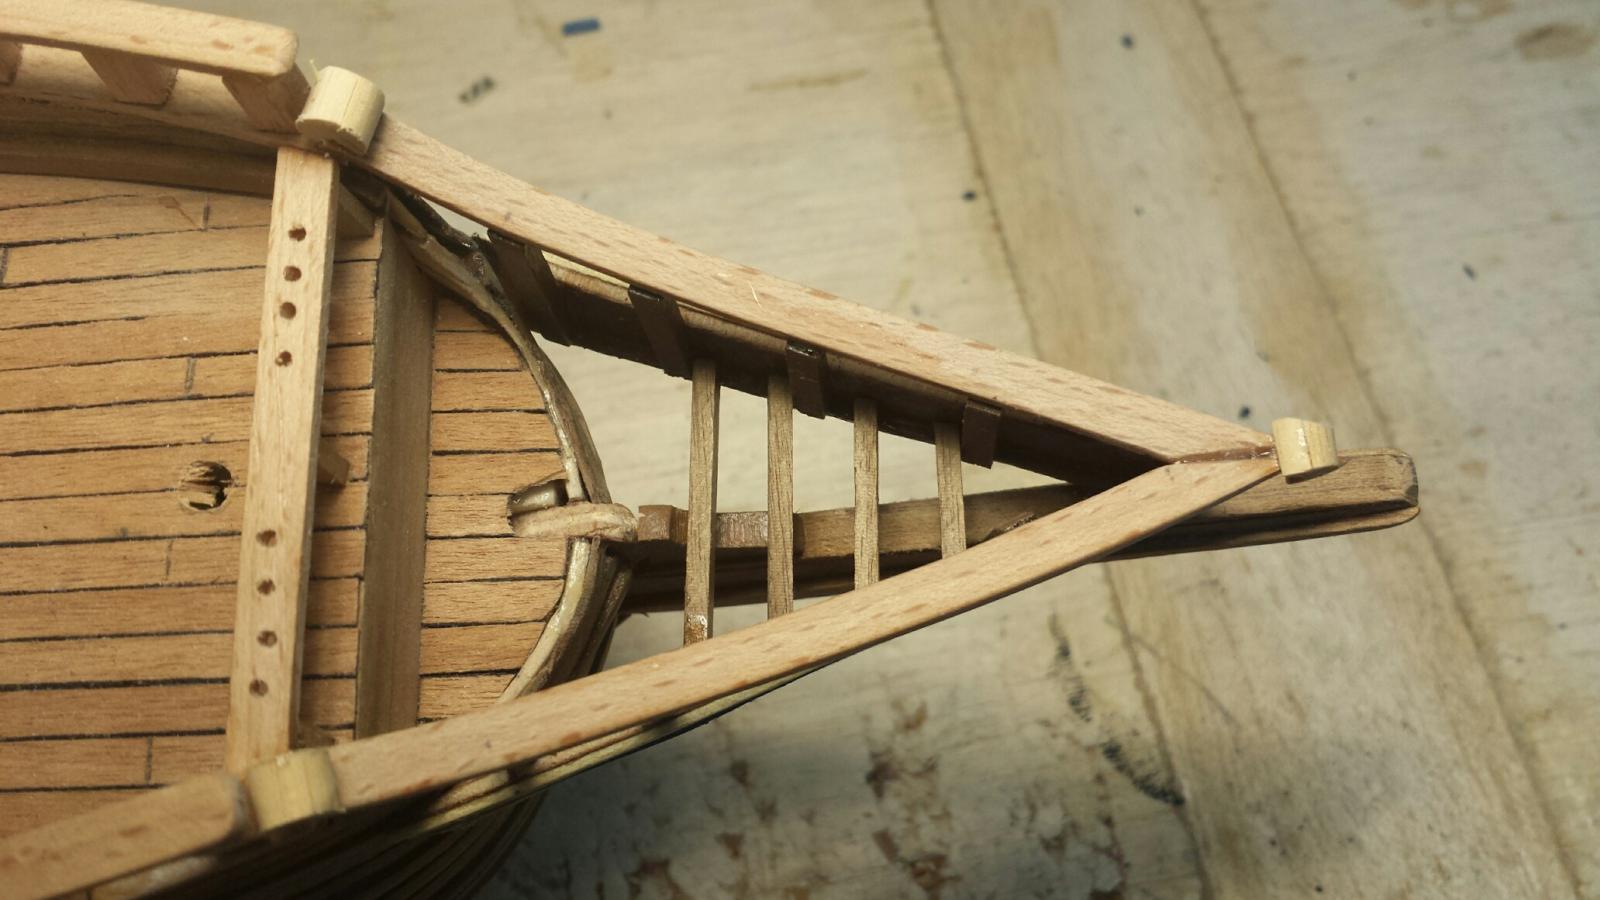
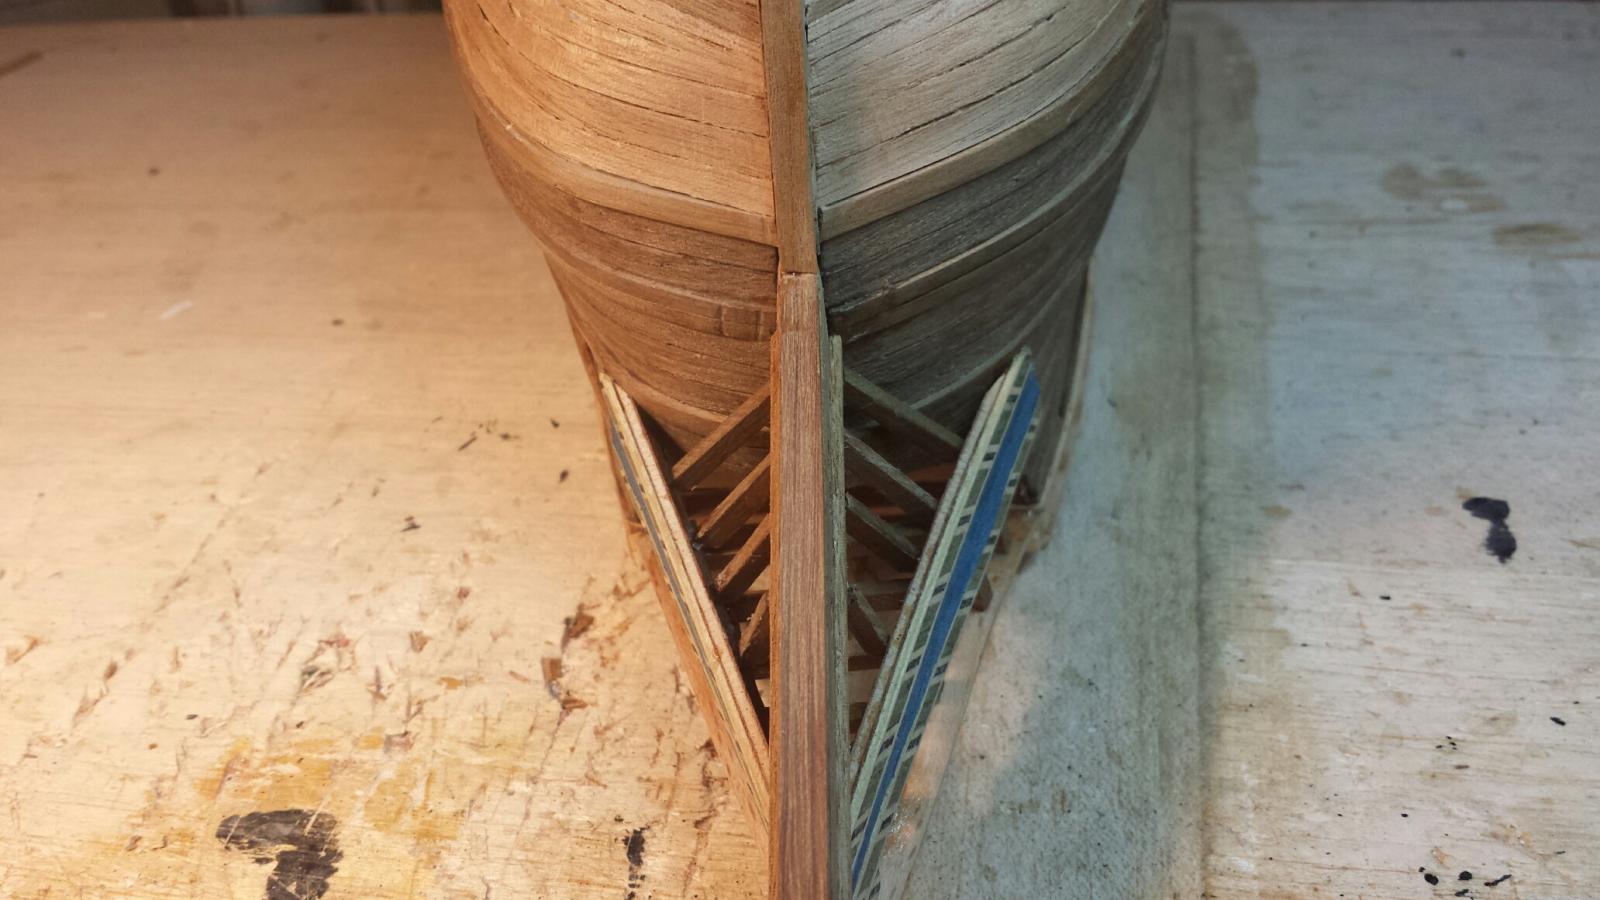
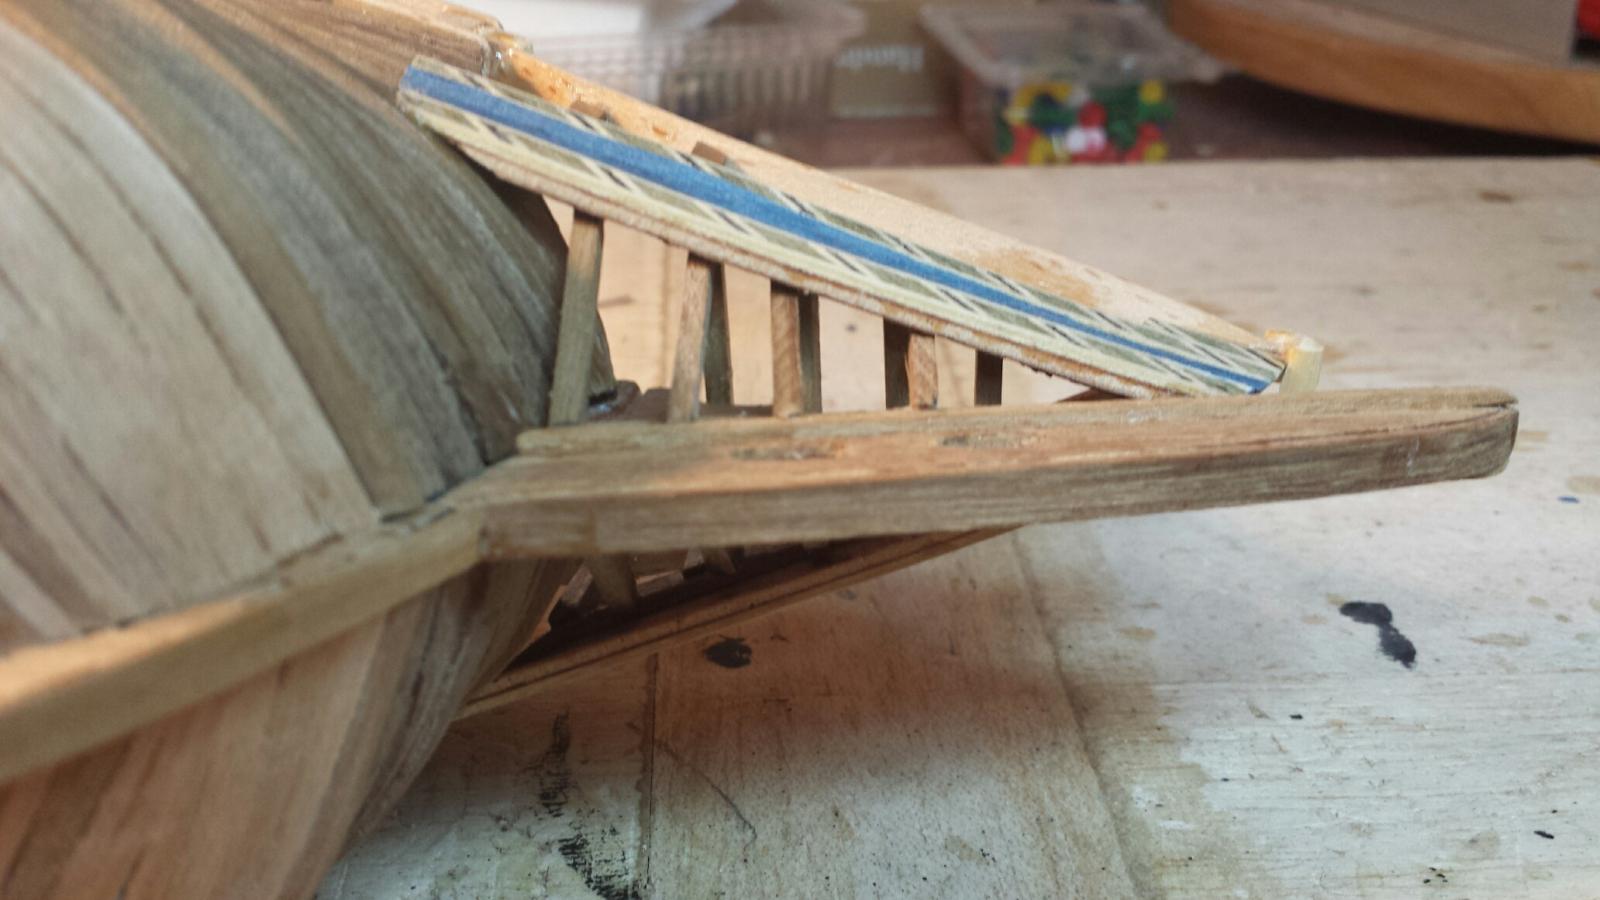
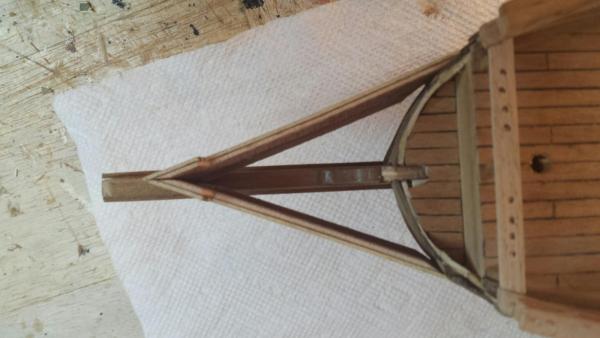
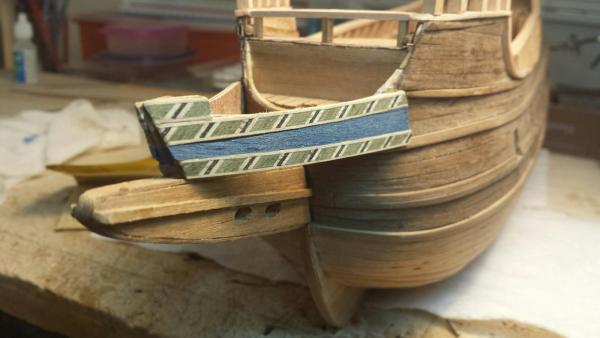
Hello Everybody.. Before I post a few photos of today's work I would like to say that what you see is not my finished work. There is plenty to do yet to remove any glue stains and also to sand several surfaces. In any event I decided to bash the kit for the first time and changed the way I built the bow structure. I repositioned some of the beams and will also have to make more room for the gammoning ropes when they pass from the bowsprit to the Ram holes. The basic design reamins but the thickness and as mentioned above, the position of some of the beams has changed. Since I freely gave advice to others to the tune that the build they were making was theirs to be unique, I finally have strayed a little myself. Here are some pictures of today's activities. Best, Jerry


-
Hi Lawrence// Thanks for the visit and warm words. Don't worry, you know I'll be careful[ i have a lot of experience in this area. LOL Best, Jerry
-
Hello Glenn. So right you are! Sometimes one gets humg up in a procedure that never figured to take so much time. The bow is fun though and I look forward to installing the railing supports tomorrow, Hopefully. Have a good night, Glenn and Best, Jerry
-
Hey J.. You are so right. What I thought would be a simple task turned out to a couple of hours of frustration. What helped was sanding the ends to lay flat against the hull and the rest was my pair of ancient eyes. Have a nice evening and.. Best, Jerry
-
Believe me, David...I'm watching the front end carefully. There's still a more pointy piece to stick in but in the meantime, I have you and the front end in mind. Many thanks for stopping by. Best, Jerry
-
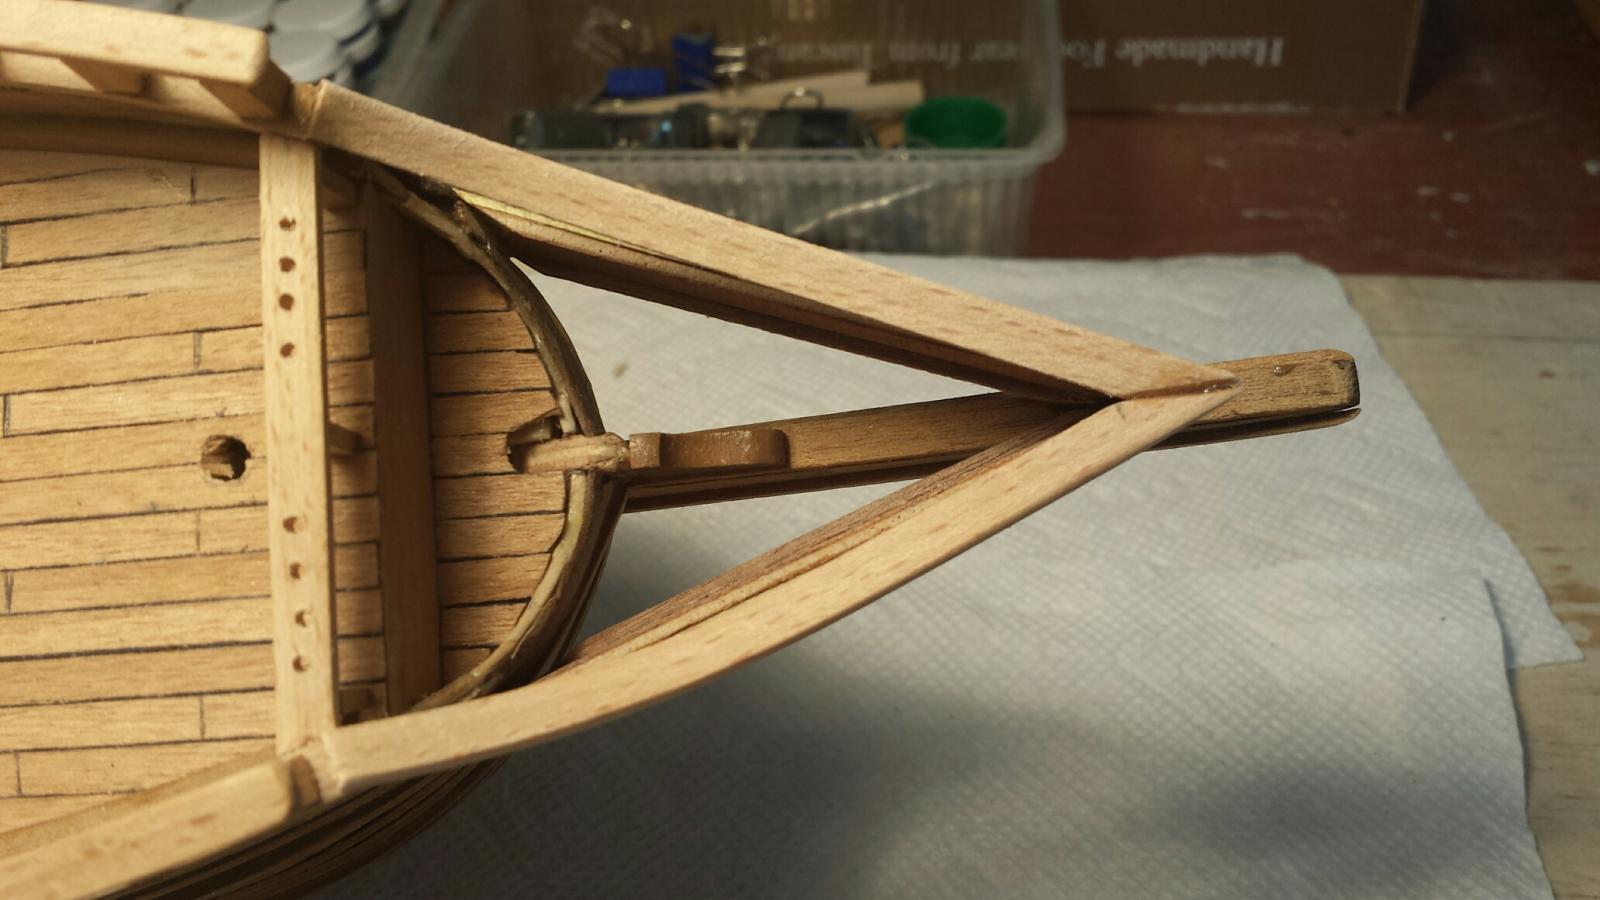
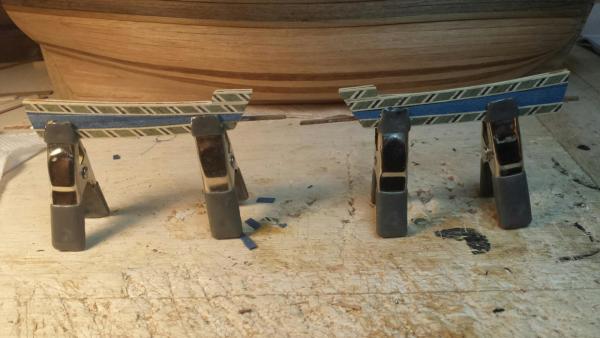
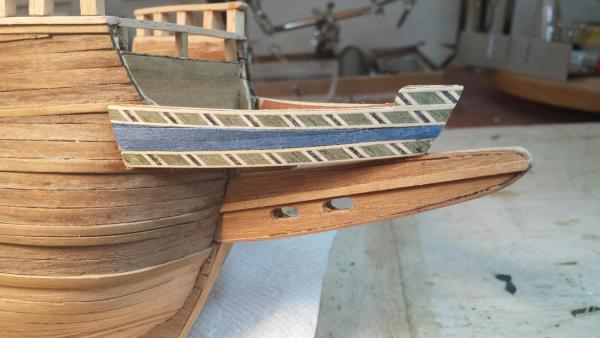
Hello Everyone.. I thought I'd enter an update in my log as I Have made a little progress since the last entry. I have been working in the bow area of the boat for the past several days and today I decided to take a break as the old eyes are acting up. I have completed the tops of the bow railing but I have yetr to install the railing supports. I have several photos to post and I may exceed the photo limit for one post; if so, I'll enter a second post so that all the pictures can be available. I'm probably rambling a bit here but like I said my eyes (and my brain) are getting tired. I did n't have any trouble with the posted work until I actually got to the bow railings. It was difficult to figure out the cut angle at the end of the stems since the railings were in compouind curves. I glued the end of the railing at the stem first and when dry I bent the top end of the railing into positioni at the belaying pin rack and glued it. It seem to have worked except for the slight twist in the railing. I will soak the wood and twist it into a better angle when gluing in the supports. Here's what I have so far: Best, Jerry


-
Nice talking with you today, Glenn. Skype is a terrific bit of technology, isn't it? Nice job on the coils, by the way. Hope to see you again soon. Best, Jerry
-
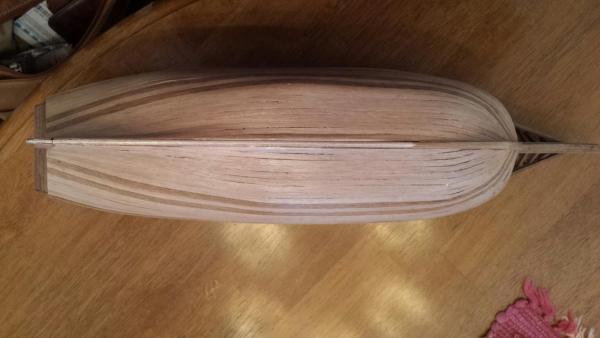
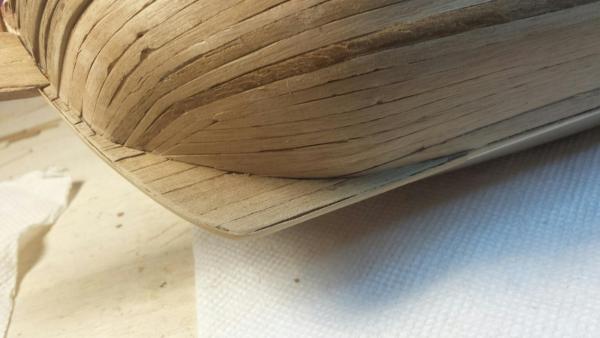
Good morning, Lawrence. You got that right. I attached the Ram to the hull so I need to be very careful from now on. Still have some more planking to do. The keel needs to be veneered. Hope you are having a decent weekend and not freezing your (you know what) off. Best, Jerry
-
Good morning, Glenn, I promise to do evrything it takes to keep the pointy thing intact. Have a good Sunday. Best, Jerry
-
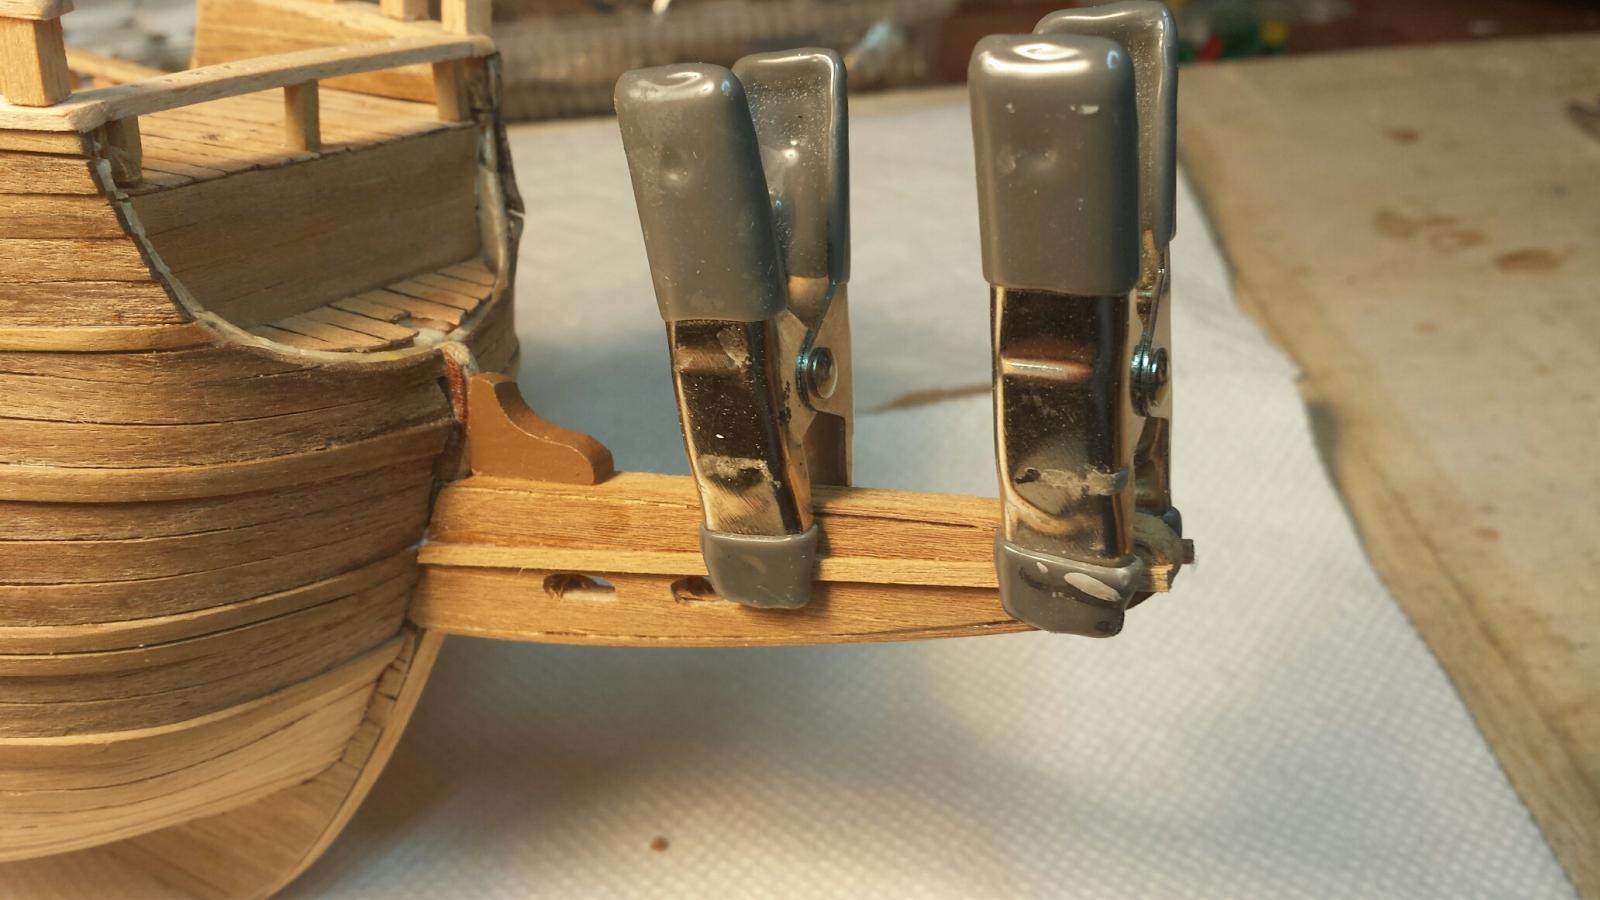
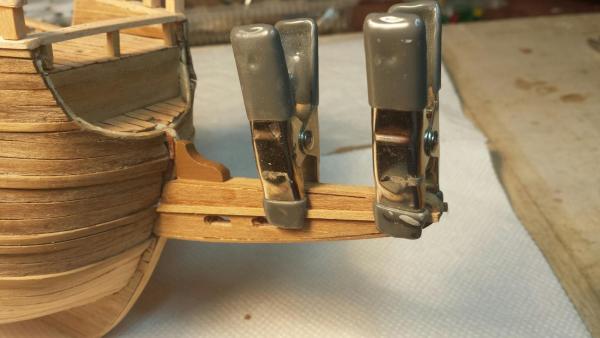
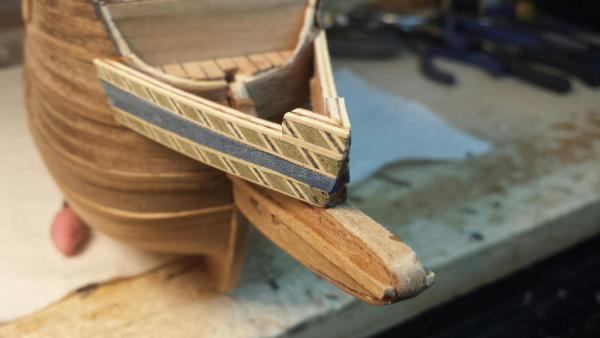
Hello Brian.. Hope I'll be able to make your life easier when you build your Half Moon. Many thanks for your thoughts about the "tutorial." I have glued the Ram into the hull and now I have a new pointy thing to break off as I usually do with every build. Enjoy the rest of the weekend. Best, Jerry
-
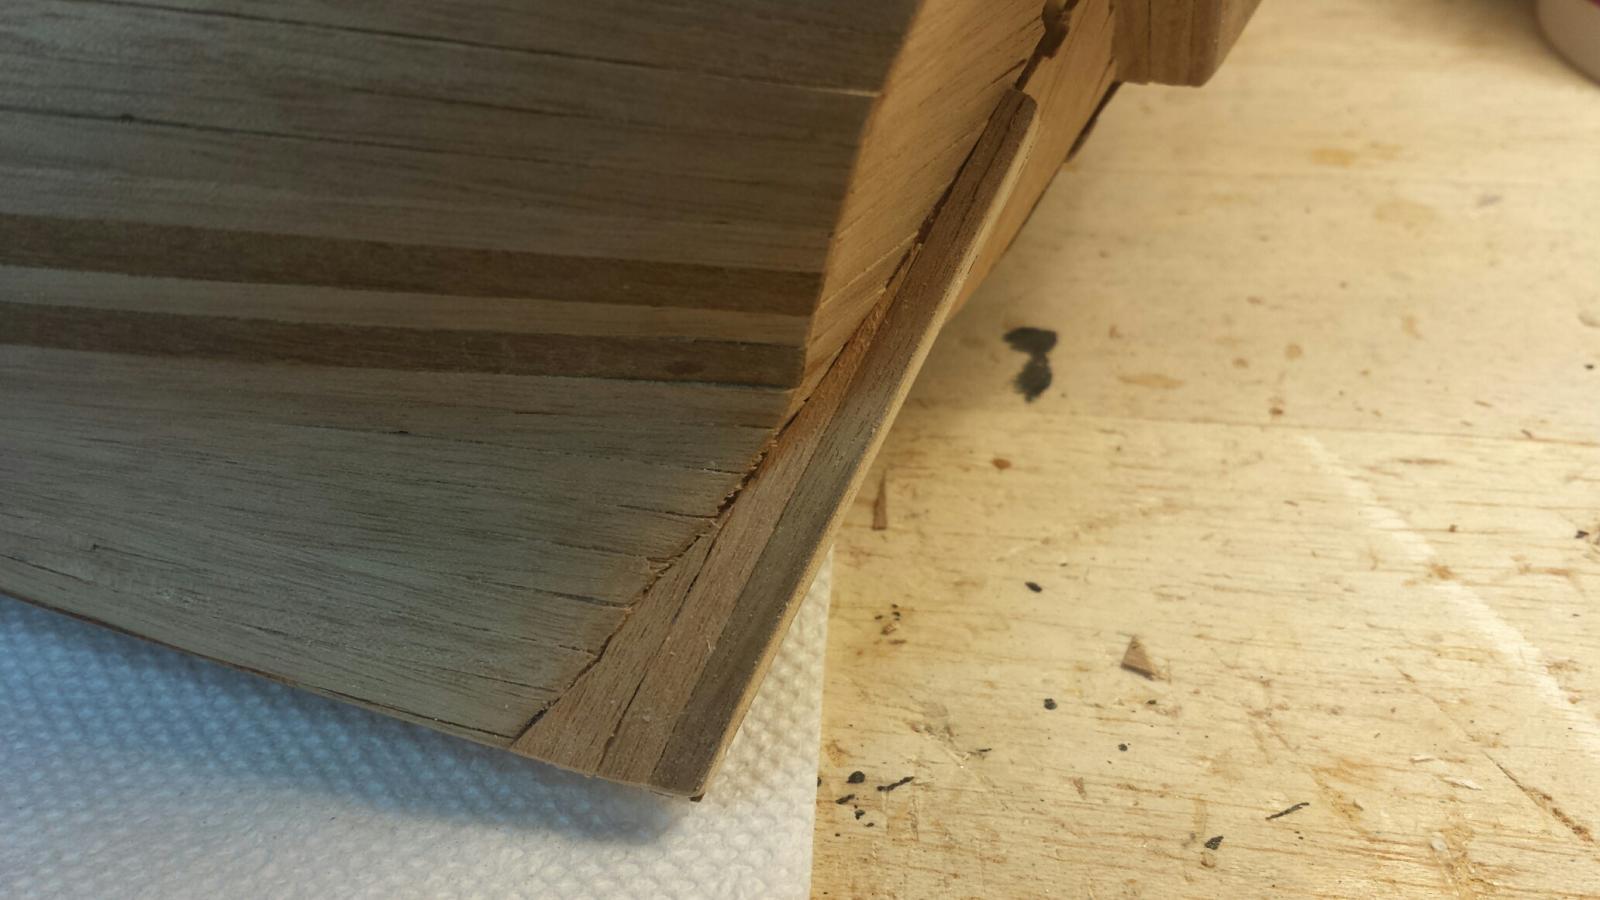
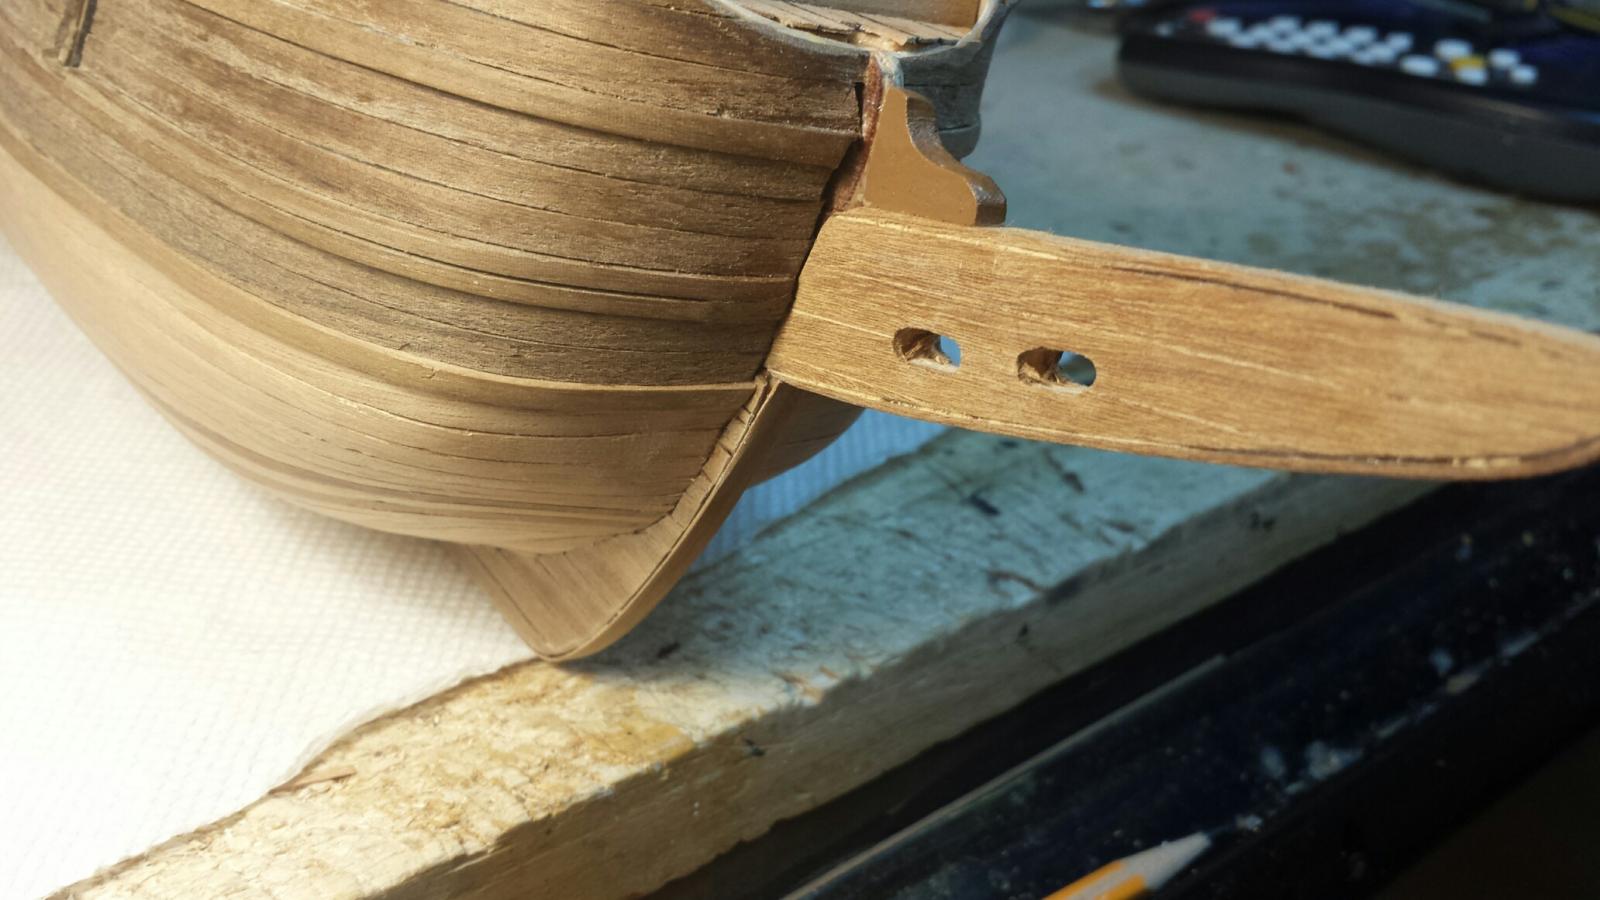
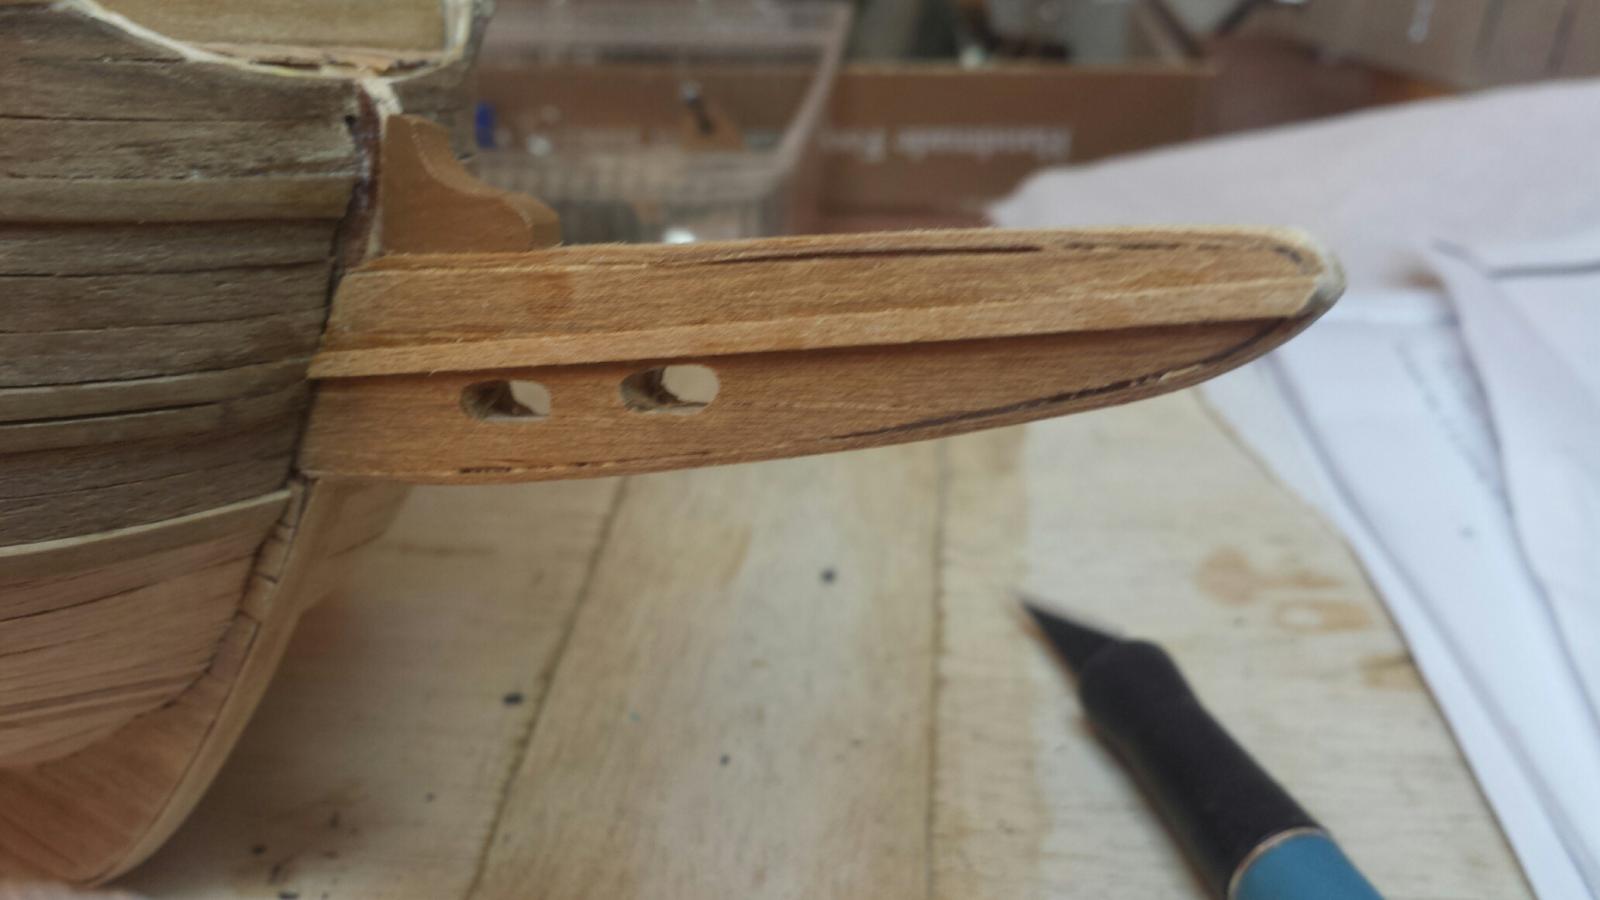
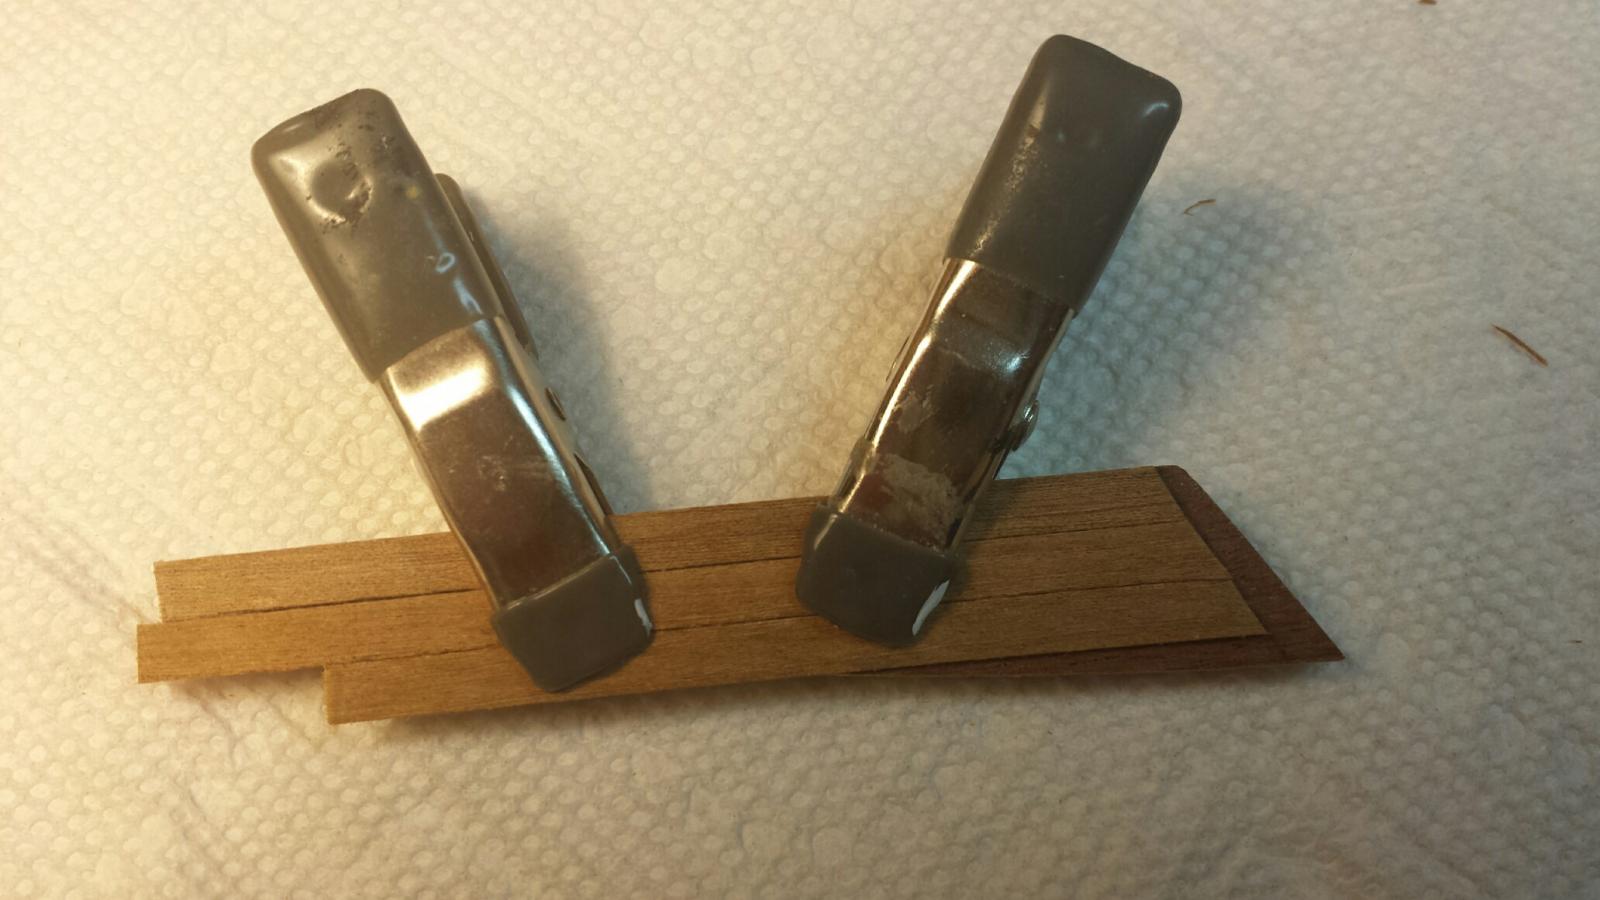
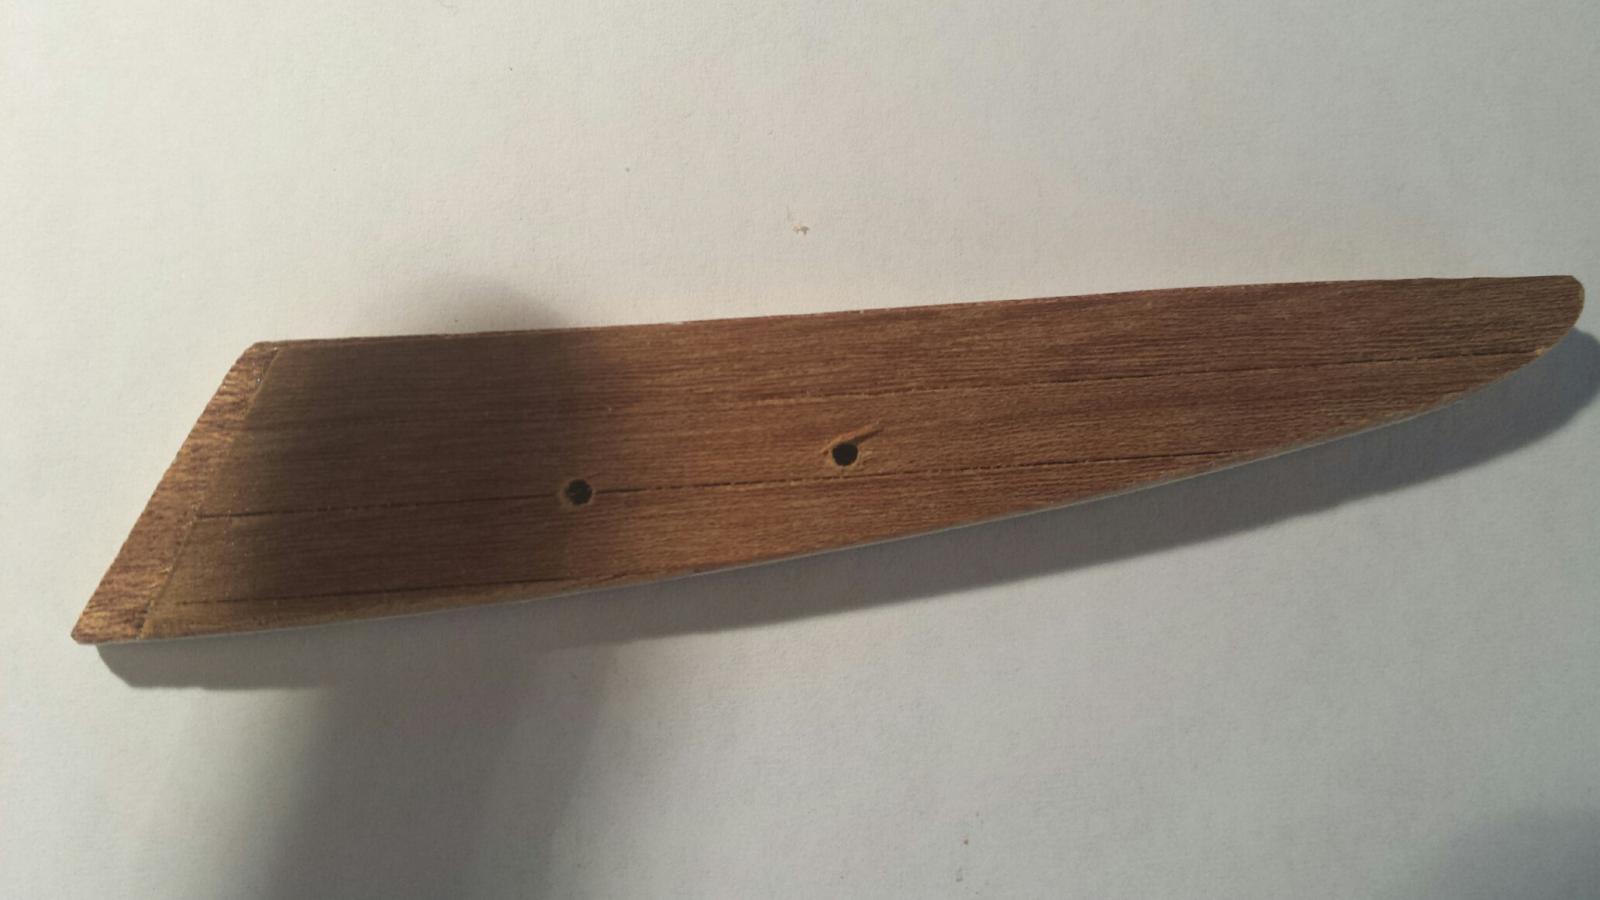
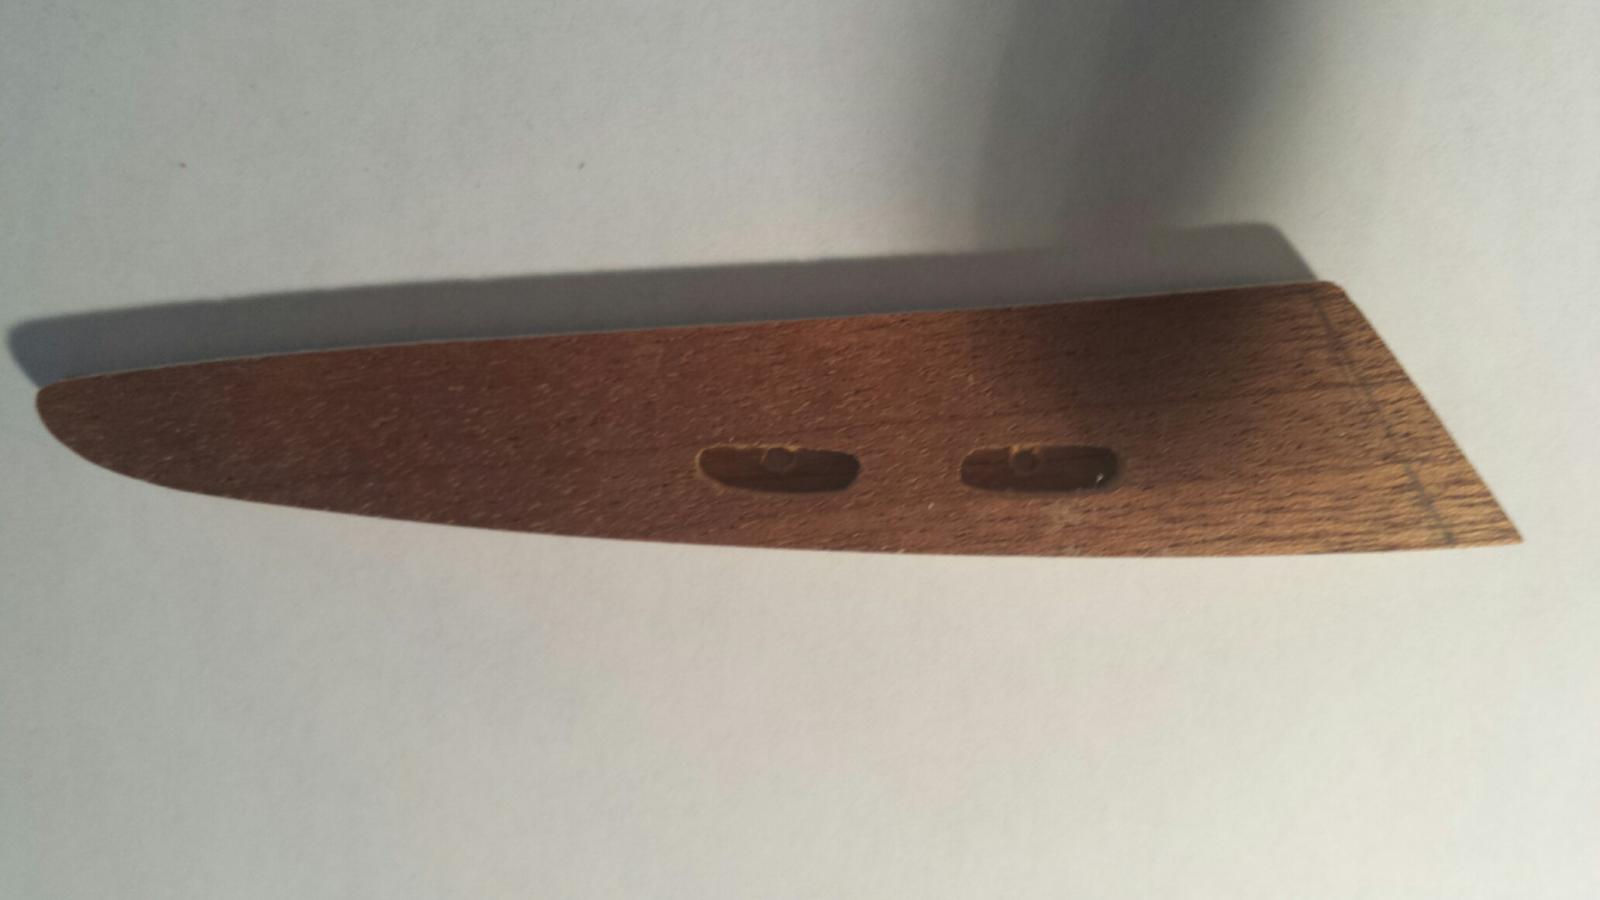
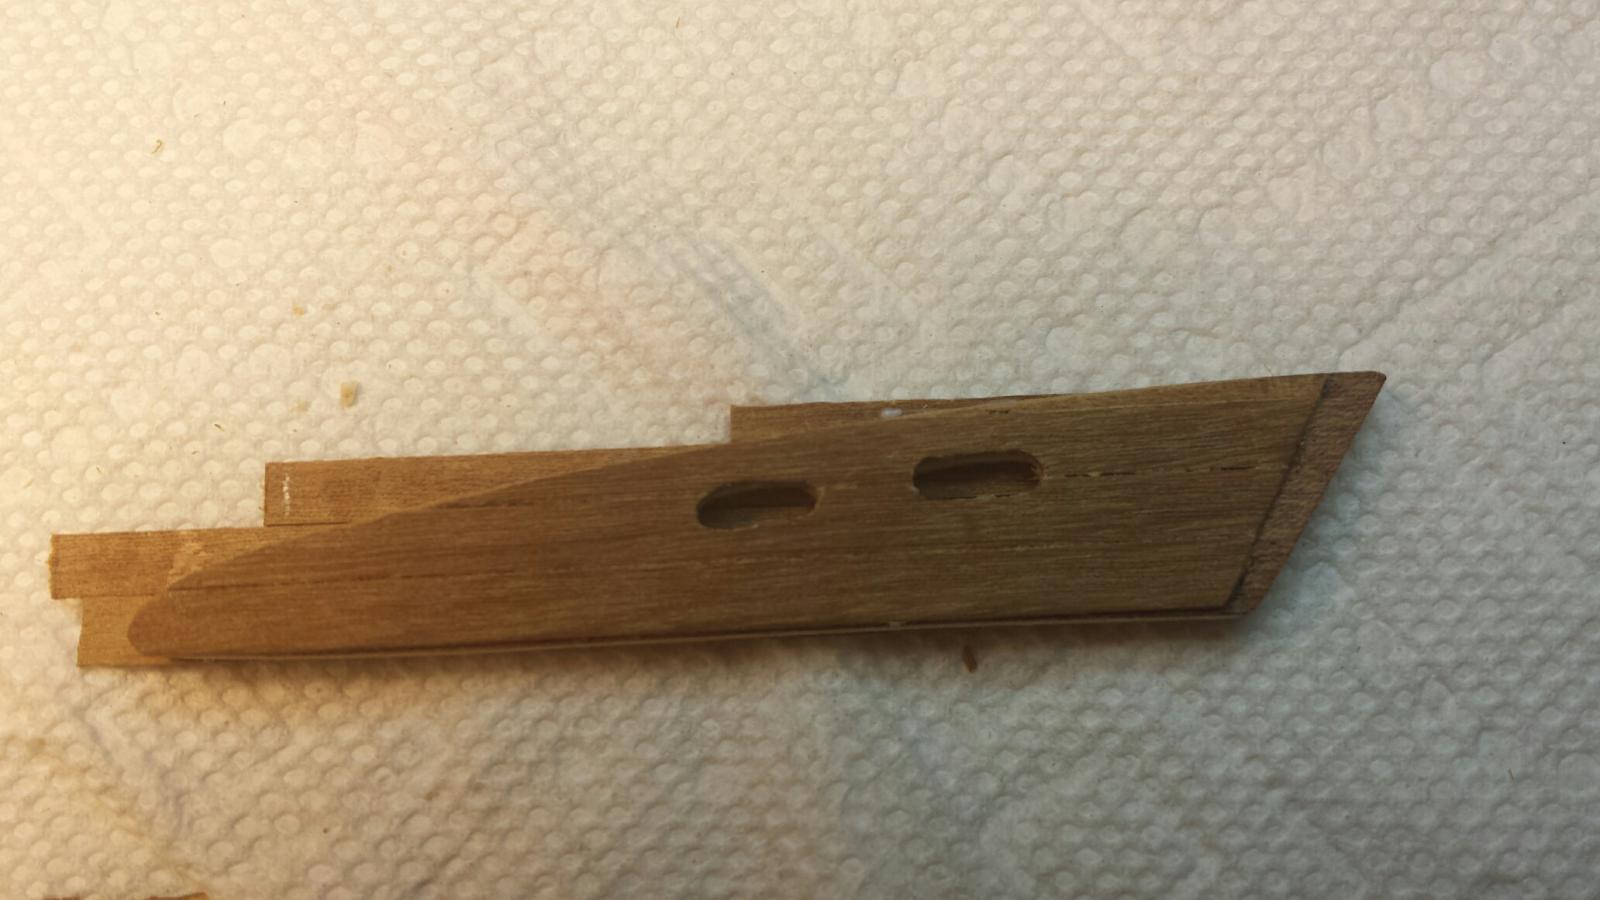
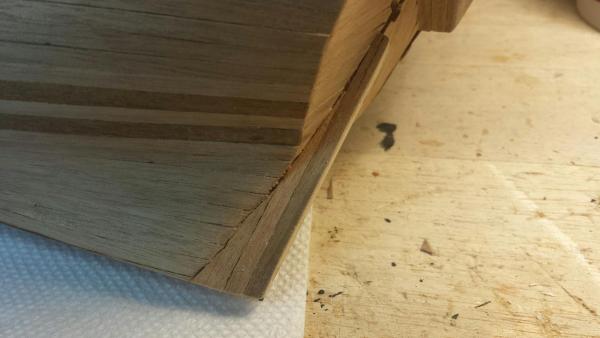
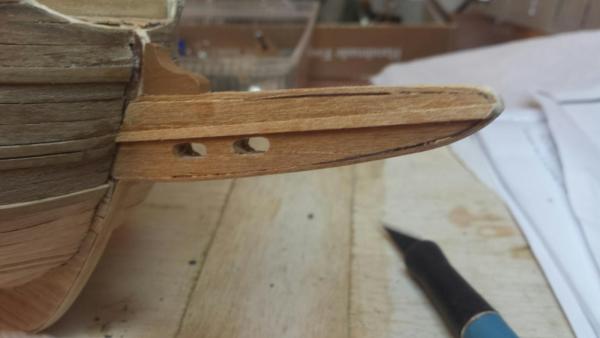
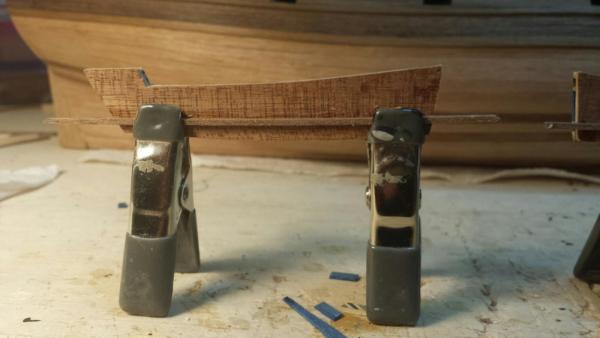
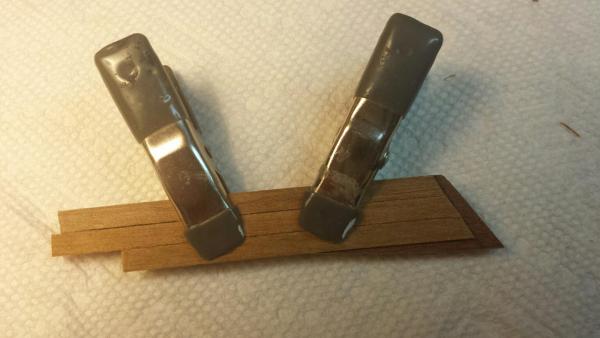
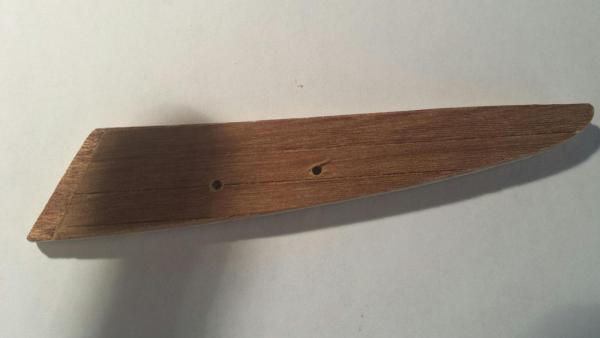
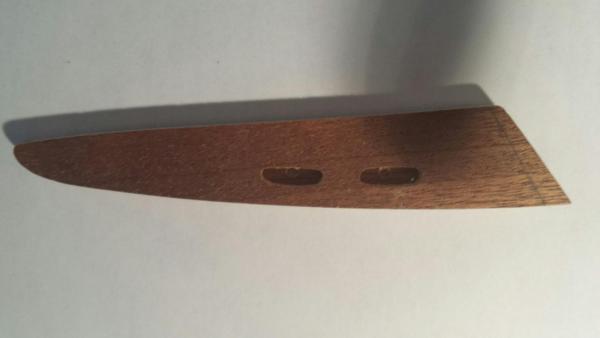
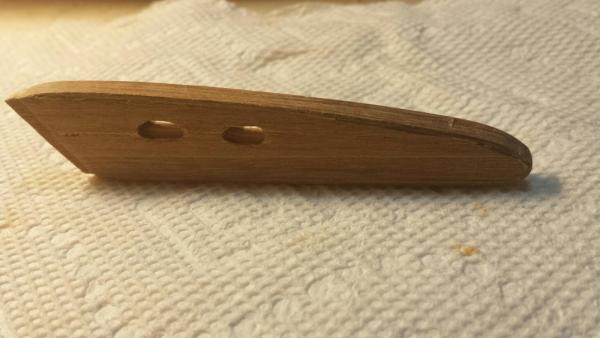
Hello Everyboy. Today was a strange day for me since what I accomplished took more time than I thought it would. But when I think back I remember that there was glue drying time as I had to wait for one side of the part dry before I could work on the reverse side and edges. I covered the Ram with walnut stripping which was 0.4 mm thicker than what the kit provided. I didn't have enough of the thinner wood left so I decided I would use that for the keel area and use some thicker walnut (1mm.) I had from my previous build. I covered one side of the Ram and waited for it to dry since I used white glue. After it was dry I drilled a pin hole in the center of each of the oblong slots to give me a starting point to file out the rest of the material. After completing the filing, I covered the reverse side of the Ram and went through the same procedure to clean the material out of the oblong gammoning slots. I soaked another piece of walnut which I used to bend around the egde of the Ram using CA cement to secure it. After sanding the piece the joint that was formed at the front tip of the Ram blended in nicely. I expect to glue a strip of wood on each side of the Ram which will be used as a support for the beams that will later help form the Beak. Here are some pictures of my work on the Ram which took the best part of today.


-
OK J, I'm happy to hear that you're thinking about the case as I'm anxious to see what you come up with.. May have to copy you on that also. Have a great weekend, Jerry
-
Hello Brian... Rounders, I believe, is played with some kind of bat and a ball. The game were the players wear huge shoulder pads is American football and the game that J and I are bantering is one where they wear a lot of pads all over the body. LOL And I'm sure you know we're talking about hockey. After all, they play hockey in Wales too, don't they? Hope you're having a decent weekend, Jerry
-
Like I said, There's plenty of season left. Good luck. Jerry
-
Well, J, a 2 point lead is better than being behind by 2 points, I guess but there's plenty of season left to go. Have you decided on another ship model yet? Jerry
-
Good to see you, J. but you must have a short memory. LOL Jerry
-
Hello Jim.. Many thanks for stopping by my Half Moon log. I appreciate your nice words and hope to see you again real soon. However, I must adnit at I have to differ with you on one subject... I'm a NY Ranger fan. LOL Jerry
-
Good to hear from you, Lawrence. I appreciate that you could take time from the work in your shipyard and come over to see what's going on in this drydock. It may appear that the little guys are working at a feverish pace but the truth is I had to lay off several of them a couple of days ago for the reason you mentioned. It seems that the one in charge of planking had some trouble at home and thought he could forget about his troubles if he drank them away. This particular fellow migrated to the United States several years ago from Newfoundland and apparently smuggled a case of Newfoundland Screech over the border. He proceeded to bring 2 bottles of the rum into drydock aand a binge ensued. The foreman, a rather large and broad bloke, walked into the planking area and discovered several of the little guys sprawled on a pile of planks. He had no choice but to set an example and sack the lot. But it didn't take long to find replacements as you well know, jobs are still hard to come by. All in all, things are back to normal and the bow division of my drydock has taken over the construction and is preparing to install the Ram and other parts to produce a beak of beauty. P.S. The drunkard and his better half have come to terms; he is now house cleaning while she has found employment in a competing shipyard.