HOLIDAY DONATION DRIVE - SUPPORT MSW - DO YOUR PART TO KEEP THIS GREAT FORUM GOING! (Only 13 donations so far - C'mon guys!)
×


Jerry
-
Posts
1,753 -
Joined
-
Last visited
Content Type
Profiles
Forums
Gallery
Events
Everything posted by Jerry
-
Thanks, J...Enjoy the day. Jerry
-
Hello Glenn... I've been lucky so far; I've been able to keep working while waiting for the material. At this point I have very little more I can do so I'll probably enjoy a break for awhile. Happy to hear that MU did okay.They're known the world over and you're lucky you can get to see them. Jerry
-
Hello Brian, Thank you for the visit; I always appreciate hearing from you. I do not own a lathe. I have just about every other power tool but I never owned a lathe. I'll remember what you said however as I can always visit a friend who has one if needed. I'm looking forward to getting that circle cutter as I want to make new bases for the crow's nests. I hope to receive the rest of the material I need in the the next few days so I can move on and get ready for rigging. Take care, Brian and come visit again. Best, Jerry
-
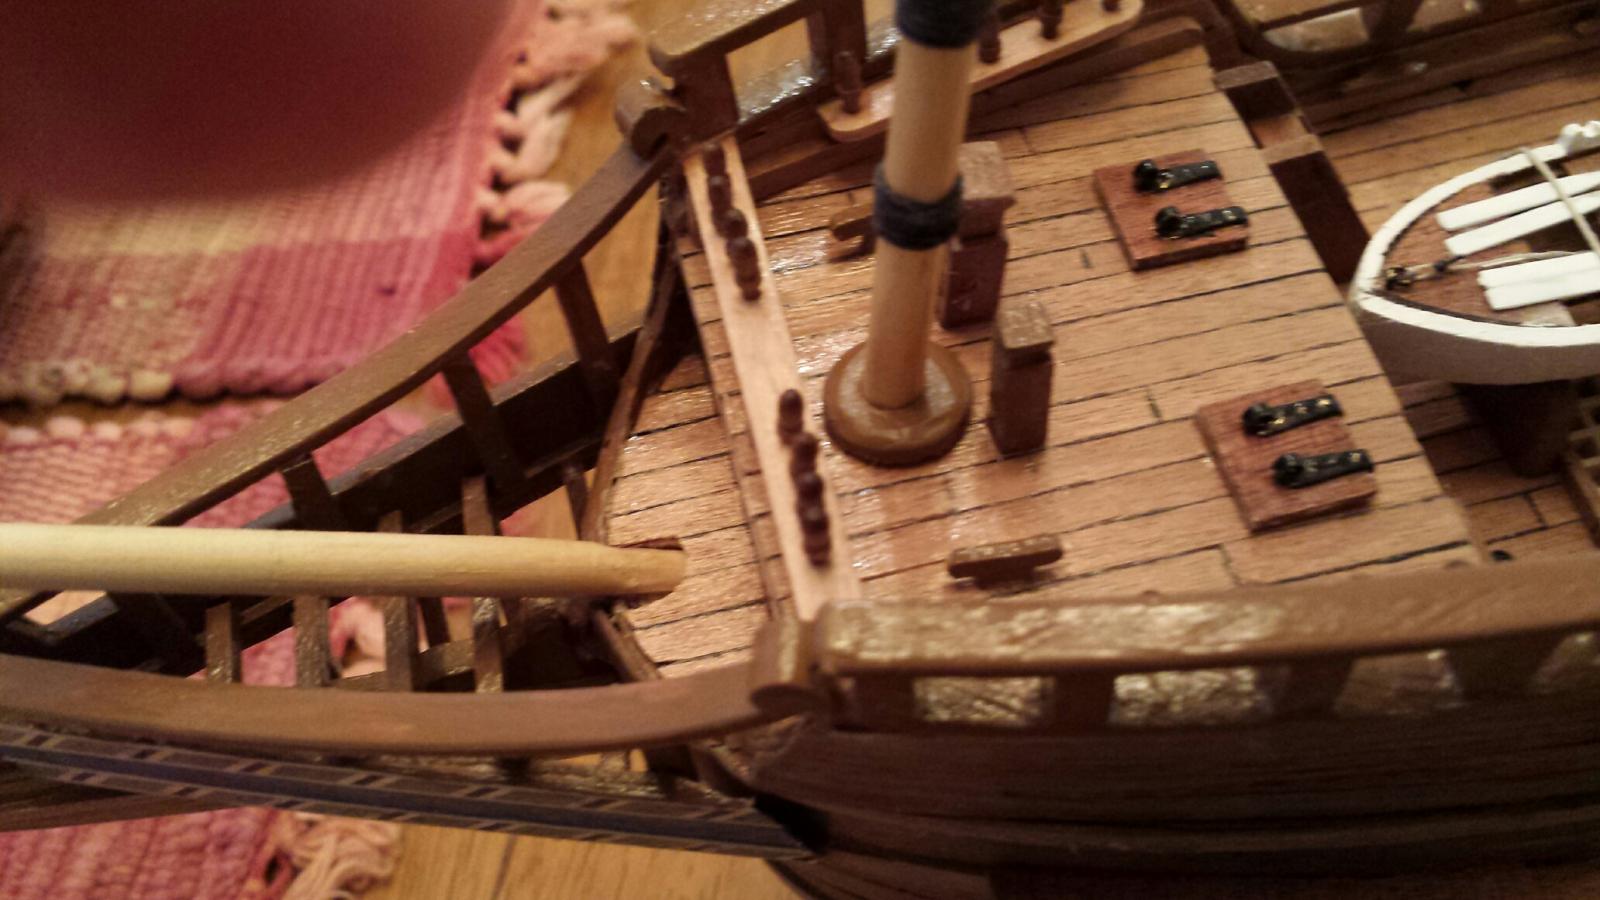
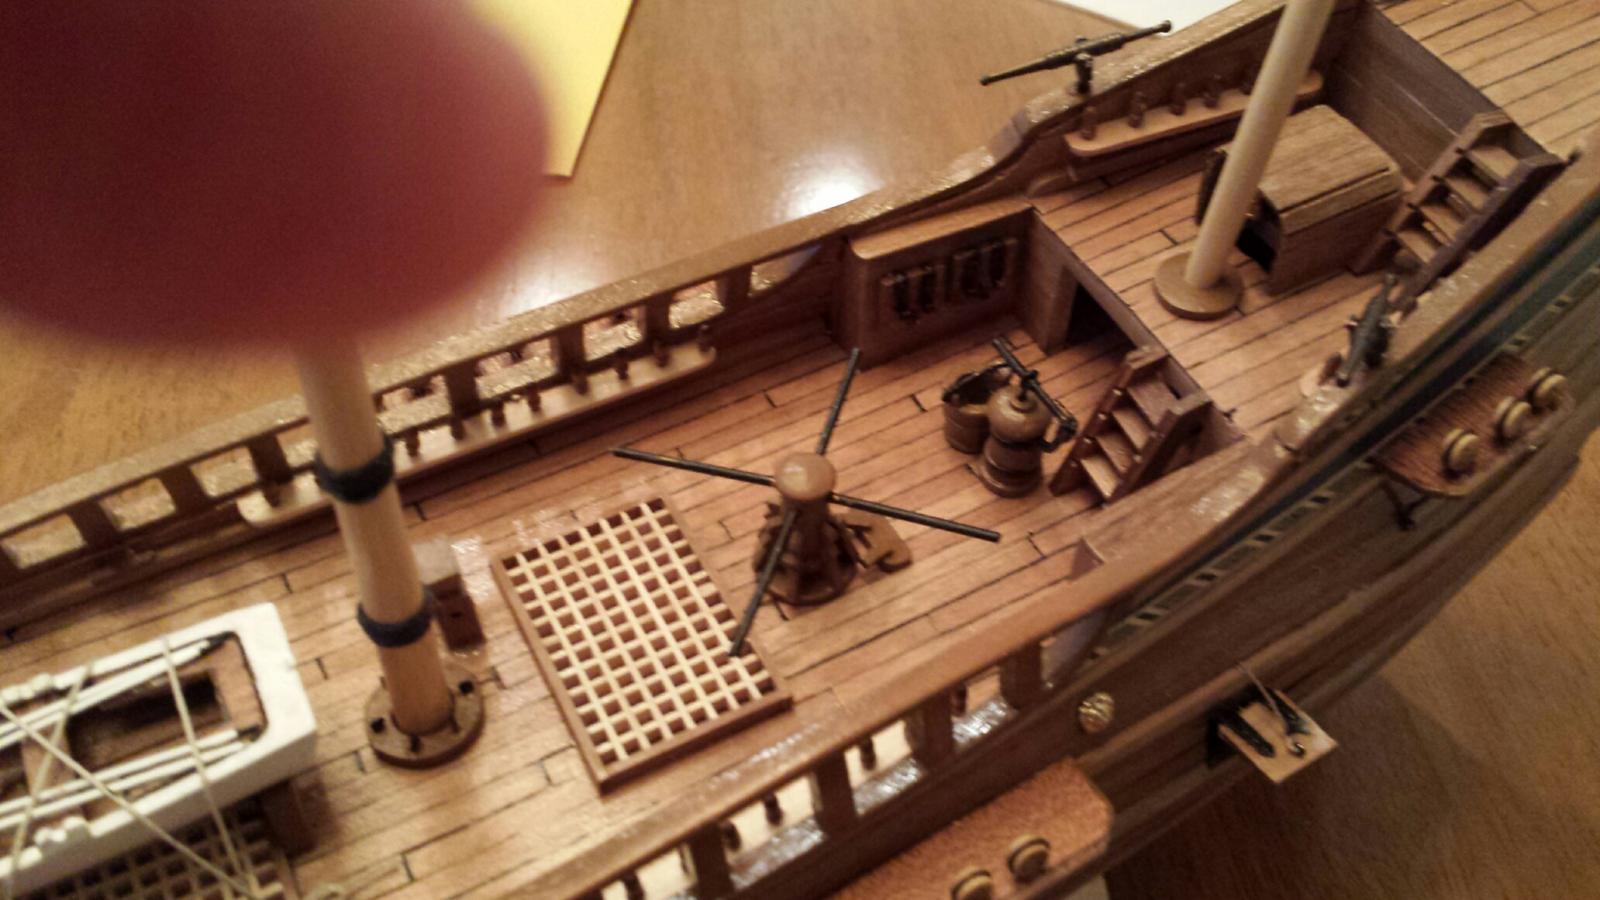
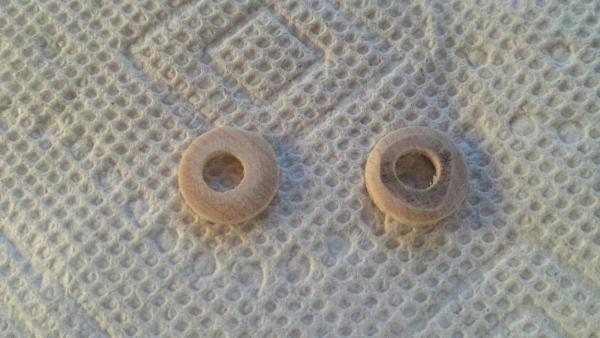
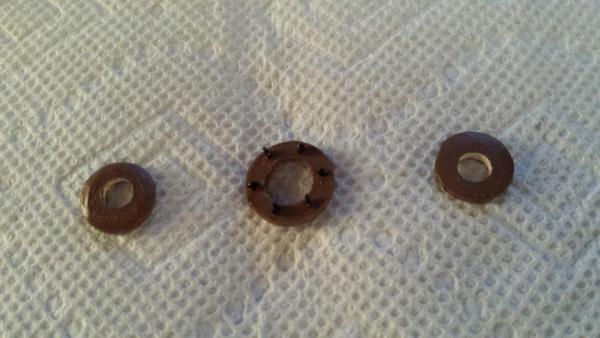
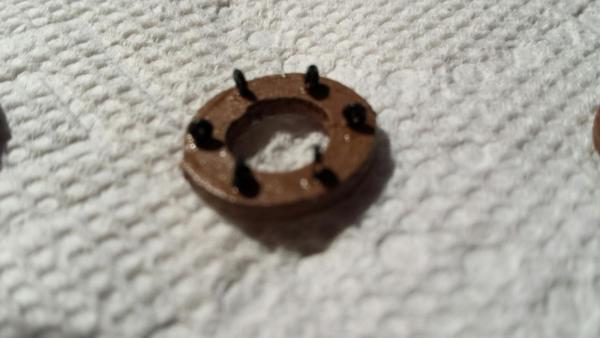
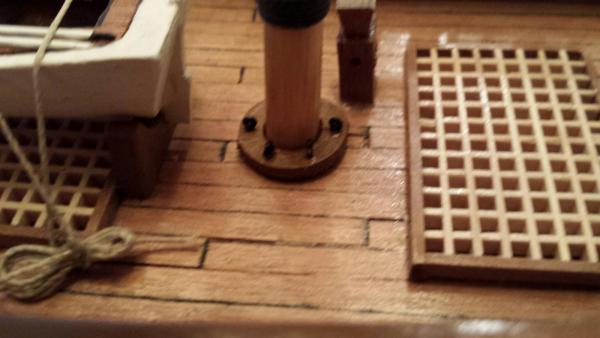
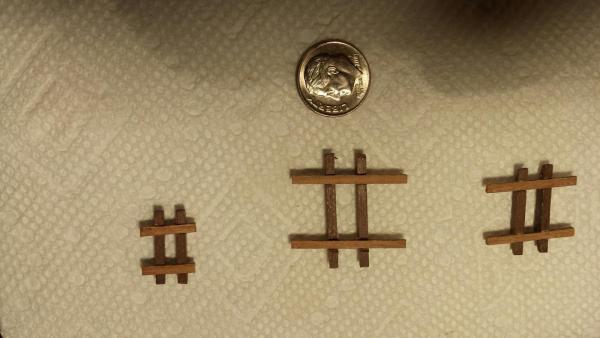
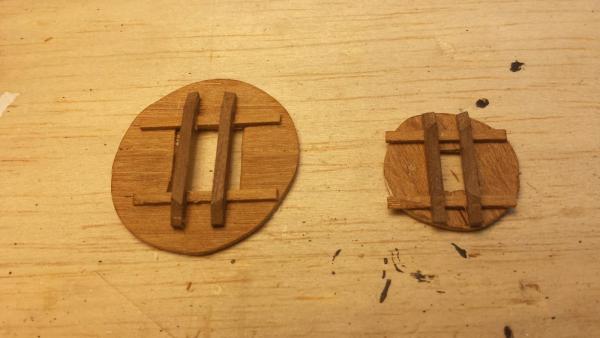
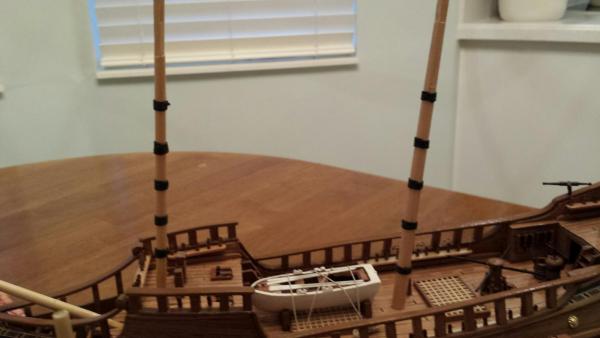
Hello Everybody. I found something else to keep me busy while waiting for the strip wood delivery from the U.K. I noticed that some people completed the stepping of their masts by placing mast sleeves at the junction of the mast and the deck and other did not. The Corel kit makes no mention of these sleeves and therefore doesn't provide any parts or material to make them. I like the look that the sleeves give to the finish of the mast stepping so I decided to make my own, I had no trouble slicing a piece of dowel and drilling a hole in the slice's center as long as I did the drilling in a few steps. However, I had a terrible time trying to drill the main mast sleeve because of the larger size of the hole. I must have shattered four or five sleeves while trying to drill the center hole so I scratched my head and started to think of some other way to do this. I rummaged through the left overs from my Victory kit and, lo and behold, there was a sleeve still in its plywood sheet that I never used. And the best part was that it was exactly the right size. It even had the holes for the eyepins which will come in very handy when tying off some of the rigging later. I've attached some photos of these scratch built sleeves and how they look on the ship. I hope everyone is having a great weekend. Best, Jerry


-
Hello J, Hope you are well. Well I remember how it bent when I tried bending the small piece that I had left over from ther kit. I ordered 1.5 x 3mm pieces which I believe will allow me to mount the deadeyes for the top mast rat lines on the railing. I think that will give me a lot more room to run lines than mounting the deadeyes on the floor of the crow's nest. Thanks for the visit j, it's always great to hear from my mentor.... Best, Jerry
-
Hi Lawrence, Thanks for the visit. And before I say anything else i want to sincerely thank you for your patience with the skype repair episode yesterday. It seems to be okay now but I'll know for sure when next I skype you. I'm anxious to proceed with stepping the masts, crow's nests, mast caps, etc. so I'm really looking forward to what the mail brings these days. All in all, there's a lot of time to pass before the rigging begins. Hope to see you soon, Best, Jerry
-
Hello Popeye. Good to hear from you once more. I'm really excited about the circle cutting tool as I believe you told me about a good way to go. I bought a piece of birch plywood, 1/16th of an inch which is about 1.6mm. I'm sure this will work and give me for once and for all a decent circle for the crow's nest base(s). Thank you for your very nice thoughts about my progress with Half Moon as I sincerely appreciate it. The directions that came with this Corel kit leave a lot to be desired as I'm sure J must have mentioned. It's a good thing that I just completed Victory because that experience has enabled me to move along without much explanation. I'm preparing the top caps to give me something to do as I await the various mail deliveries which will bring me, I hope, the materials I need to move beyond what I'm presently doing. best to you, Jerry
-
Hell David... Slow but steady..Looks good so far. You need to keep posting because we need to see your good work for our own inspiration. As for my quick progress, forget about it. I'm just dilly dallying as I wait for material to come from your country so serious progress will be hard to come by fo a little while. I really like how nice the gunports look[ you really did a nice job on them. Hope to see more from you soon. Best regards, Jerry
-
Go M.U.
-
Hello Glenn, Just took a look at your progress and happy to see you are coming along vey nicely. Steady for sure. I imagine Pegisus is slowing you down with Victory but you'll end up with two for the price of one. (well not exactly). But you know what I mean. Best, Jerry
-
Hello David... What's going on? Haven't heard from you on your build for quite some time. I hope all is well. Best, Jerry
-
For your sake, Glenn, I hope the team straightens out. Jerry
-
Hello Dimitris... Ευχαριστώ Δημήτρη, εκτιμώ την επίσκεψή σας. Ελπίζω ότι όλα είναι καλά.
-
Hello Glenn and thanks for the look see. I hope your team is still winning. Best, Jerry
-
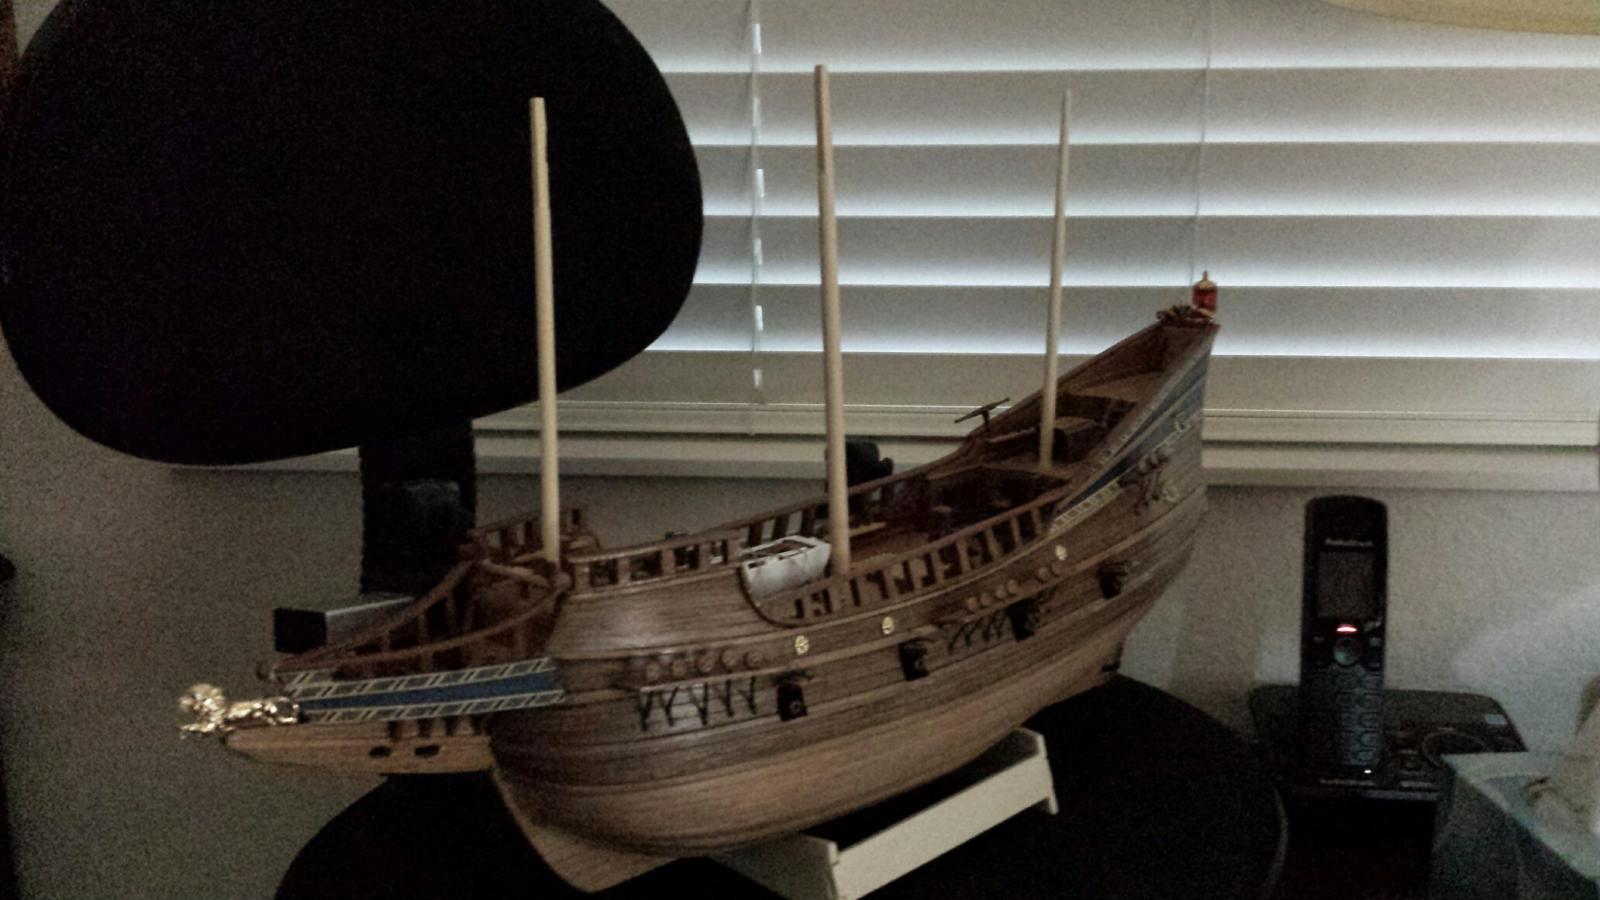
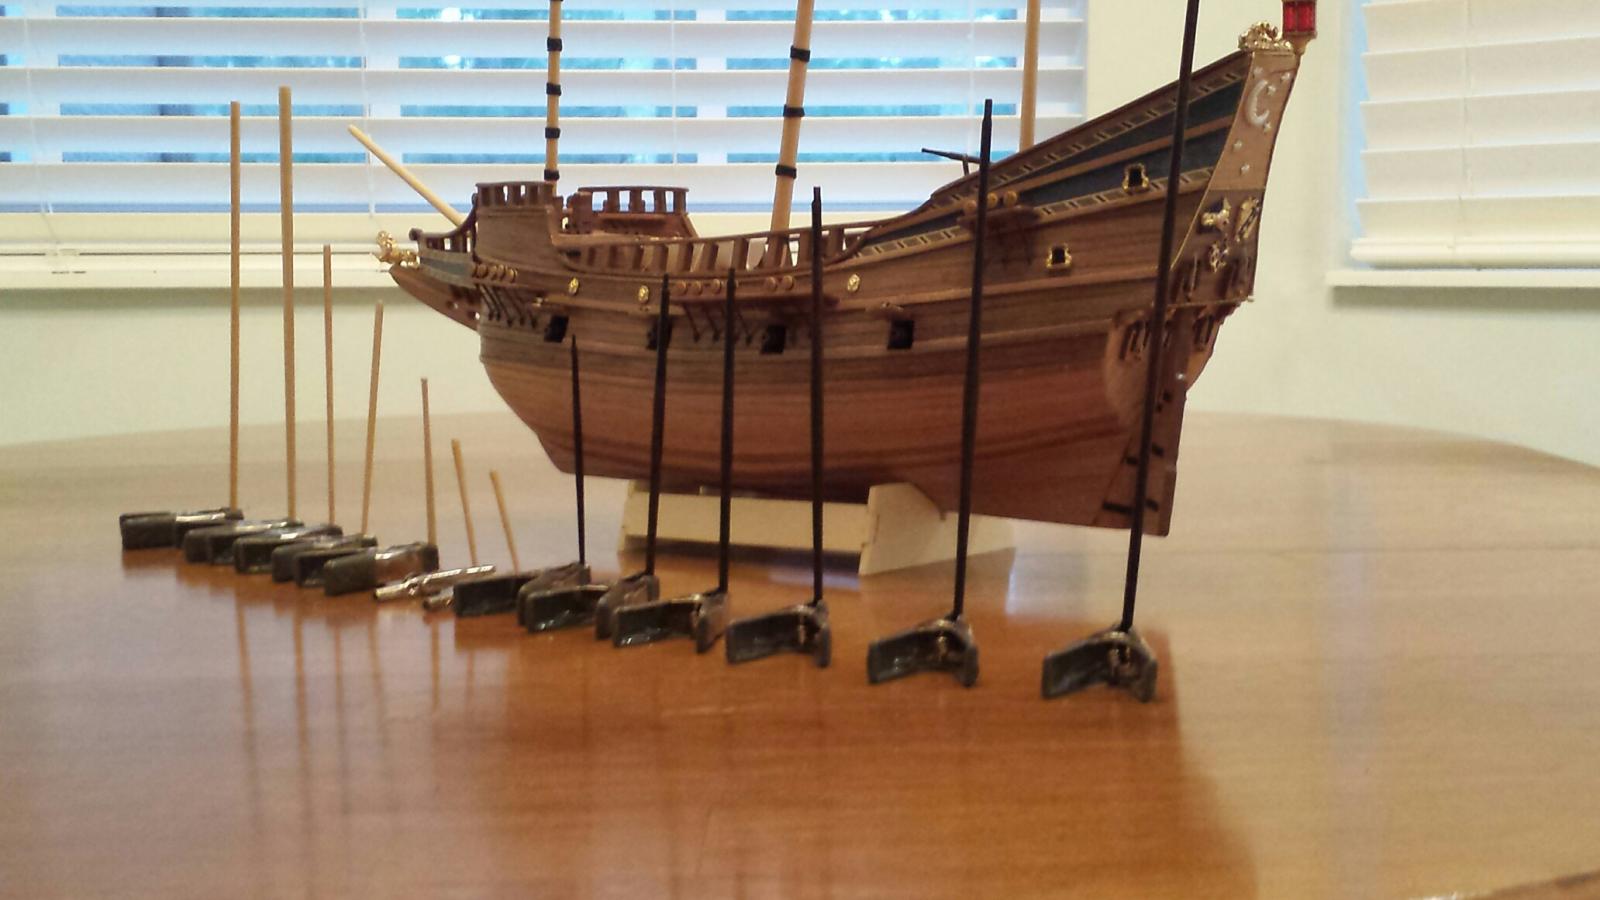
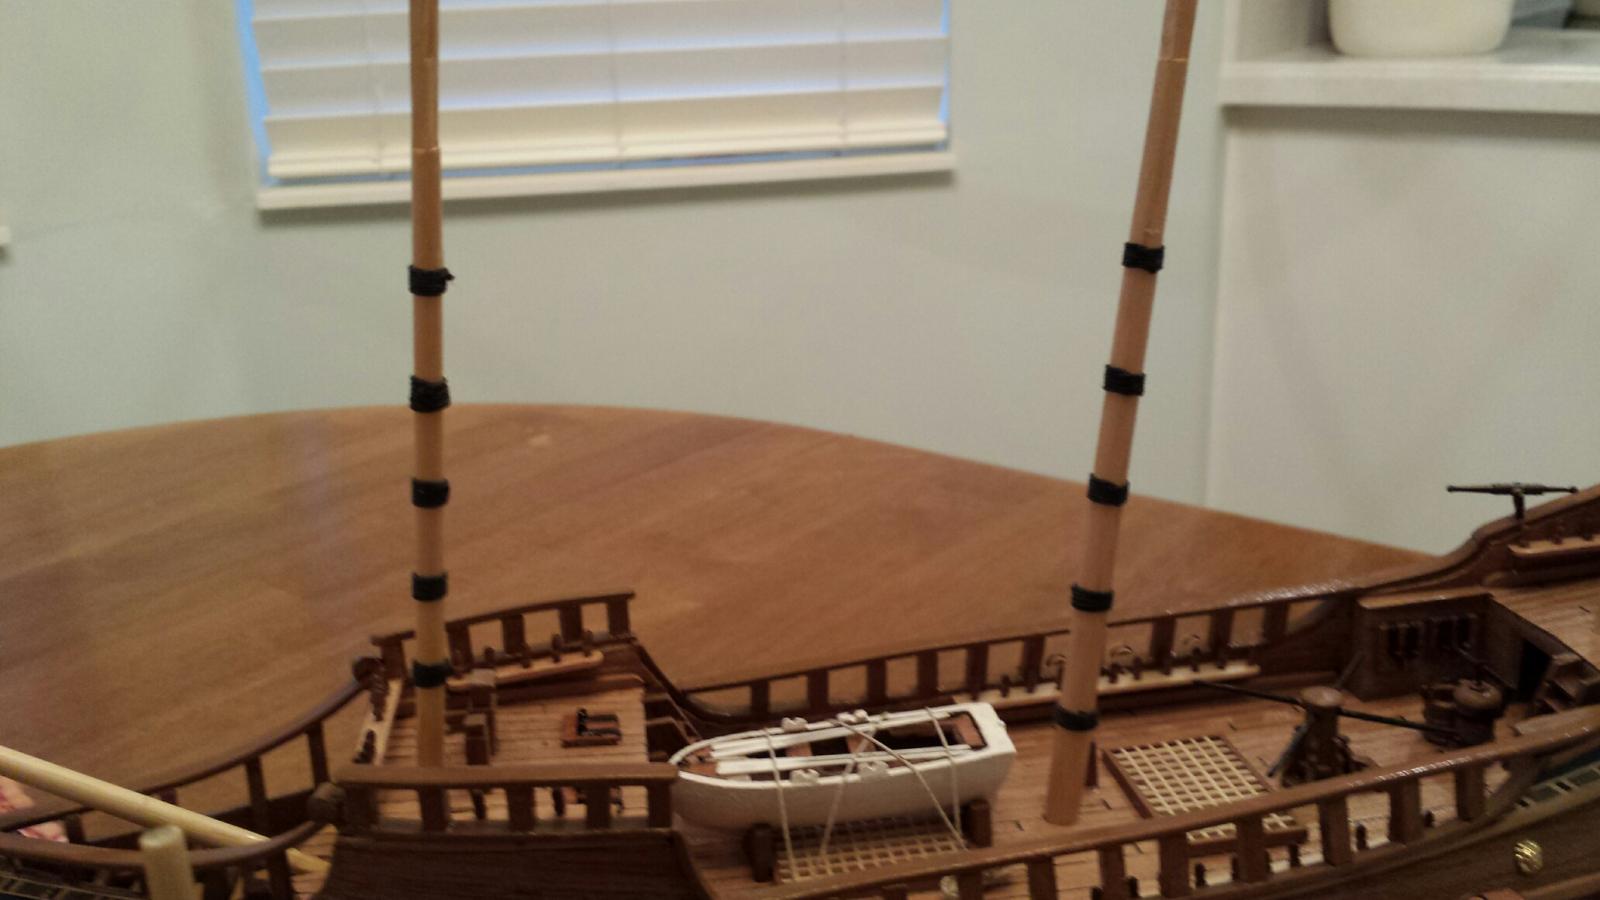
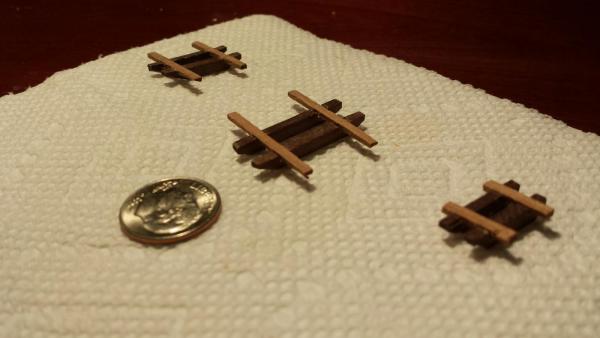
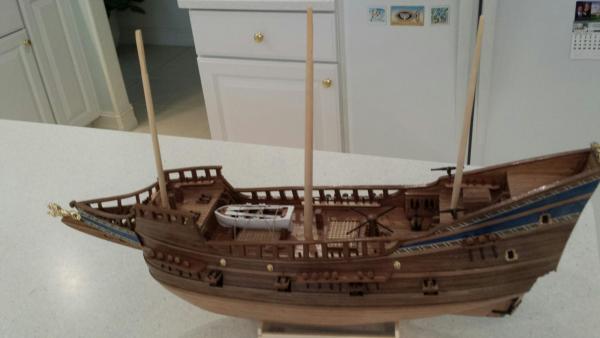
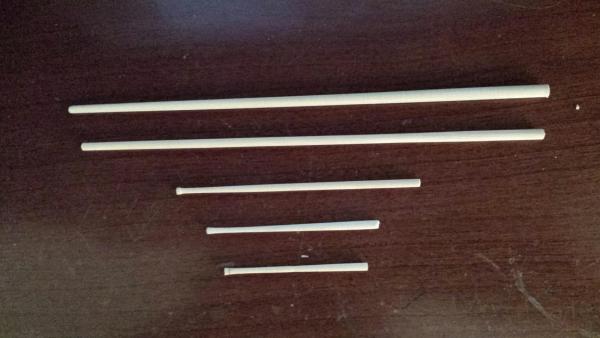
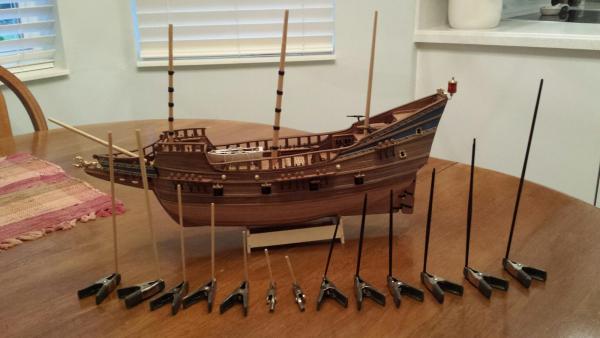
Hello Everyone.. As I mentioned earlier I'm at the stage in this build where I planned to scratch build the two crow's nests for the fore and main mast. Unfortunately I did not have enough material to accomplish this. I like what J did at this stage of his build and plan to come close to copying his design. In order to do this I need some flexible Birch wood strips. These are now on order and hopefully I'll receive them in a week or so. In the meantime I have built the crosstrees, the bottoms, the rest of the masts, yards and flag staffs. I had on hand some dark walnut stain which I applied to all the yards as called for in the directions. I was also able to wind the gammoning on the fore and main masts. I have attached some photos to show this. There really isn't much more I can do until the wood strips arrive from the u.k. A litle note to Popeye....Many thanks for the tip on the circle cutter. I ordered one yesterday from Billings since I'm not happy with the previus circles for the mast tops that I made. Best to one and all. Jerry


-
Hello Popeye... and many thaks for bringing this intriguing tool to my attention. I found it listed in Billings catalogue for $8.99. The listing mentions some suggested materials that it can be used to cut circles that includes paper, vinyl, leather but no wood. it may work cutting very thin plywood lets say up to 2mm. I just don't know. I appreciate knowing about it though, Best, Jerry
-
Hey Lawrence.. Hope you're ok. Thanks very much for your kind words regarding Half Moon, they're really appreciated. The strip wood was mailed yesterday so I don't expect to see it for at least another week. But I've been keeping busy by making the masts and yards which are almost finished. It looks like I'm about 2 or 3 weeks away from rigging. Take care Lawrennce; see you soon on Skype; Jerry
-
Hello Brian. It seems like you have a very nice idea to try some time. The problem is I don't have any 0.6mm planking strips left over and what I do have is very hard walnut, at least 1mm thick and some 1mm Tanganika. . However, as you may have read above, I have just ordered some 1.5mm x 3mm flexible Beech strips from Model Drydock in Cornwall for the exact purpose of making the rings. I also mentioned that when I experimented with a piece of this wood I had no trouble making a very nice ring. I checked your Enterprise log, page 12 and liked the way your lamination looks. I will also have to make stantions for the two rings and will make them from the same Beech by soaking, etc. Brian, it is very good of you to take the time to explain your method and if my attempt to make the rings as outlined fails, I will certainly give your idea a go. Please stay in touch, Jerry
-
To David... No way the "chap" with the Half Moon comes in second............
-
Hello Glenn, Nice work.. First time I've seen box joints used for the coaming. It's a good idea with guaranteed strength. Yoyu're moving nicely on two fronts...Victory and Pegasus...If you ive away your Victory for a charitable reason, the benefactors should raise somee real money. Good luck to you. Jerry
-
Hello Glenn. Two for the price of one...You're on your way for sure. I have all I can do to read directions and try and understand them. Oh well, it must be great to be so young. All kidding aside, you're going to end up with two display cases with two trophys in them. Nice work. Best, Jerry
-
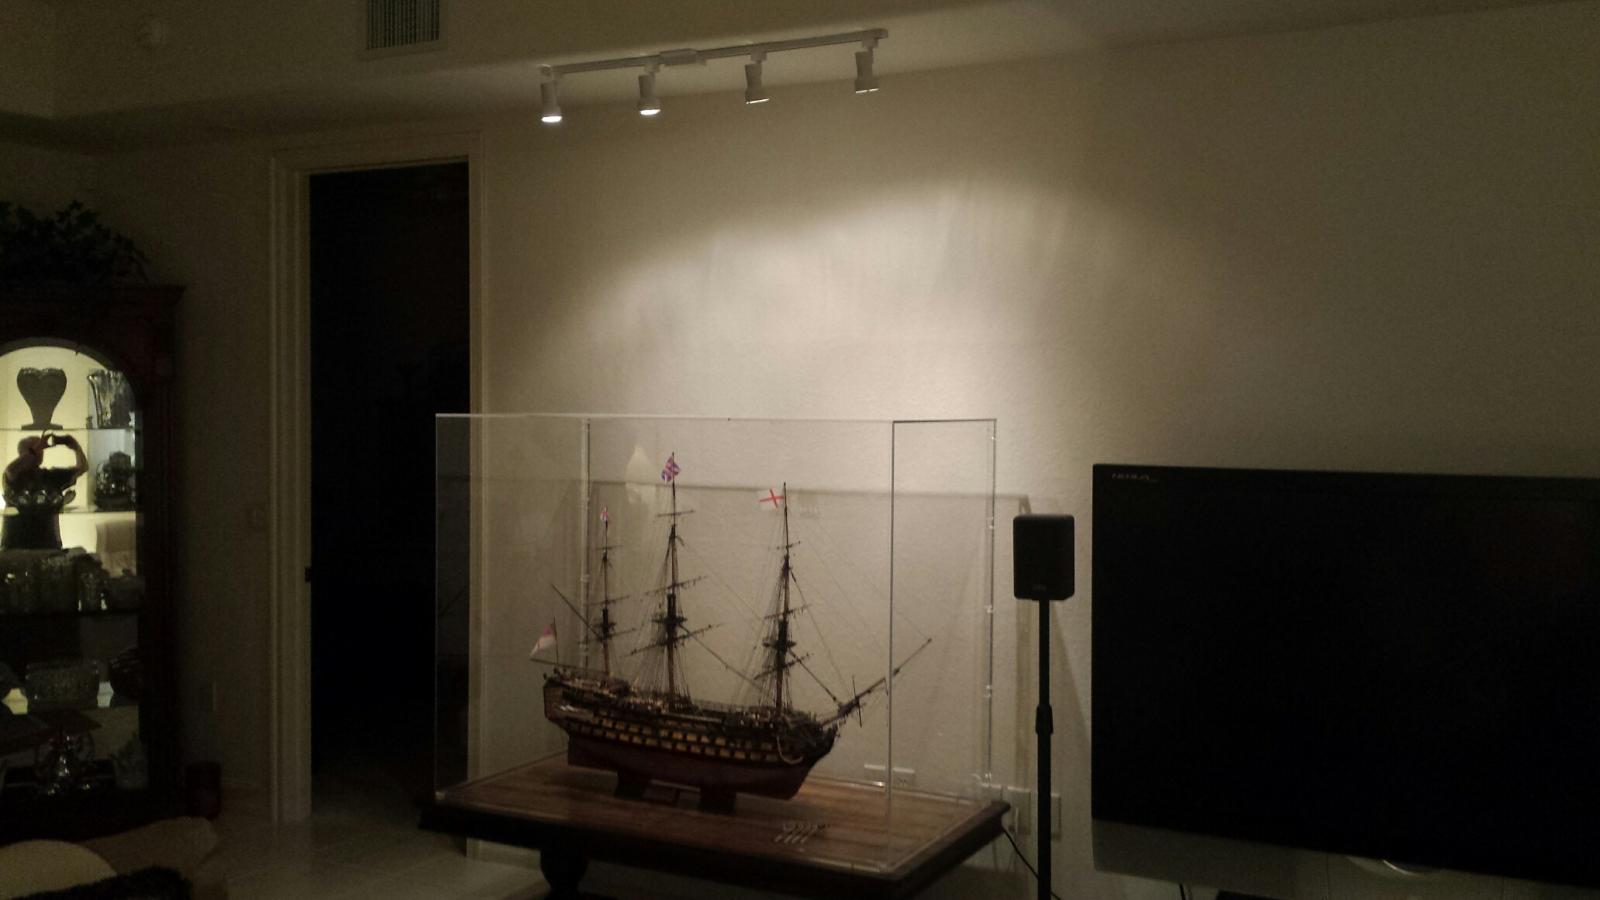
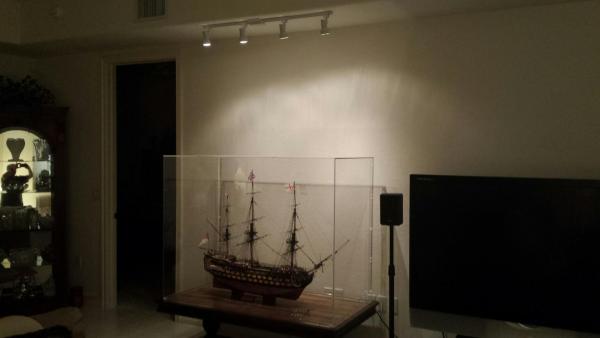
Hello Gary and many thanks for your visit and the nice things you said about my build. The case is 1/4" acylic, 56" wide, 43" high and 28" deep. The back is removable (it attaches with screws) so putting the model into the case is relatively simple. One, however, must be very careful to clear the case as it very easy to damage the "pointy thing" in the front end of the ship. I should know....LOL... The table is a dark finished (very dark brown walnut) which was purchased from Wayfair furniture on-line. As you can tell from the pictures in my log, there is a 3/4" square frame that is screwed into the table onto which the case fits over. This frame keeps the case from moving in any direction once in place. The sides and front is actually one piece formed by bending the sides to their 90 degree angles. I installed a 4 LED lamp light strip above the case with a dimmer wall switch which gives the display a nice dramatic effect. At least I think so. I hope this helps you and if you'd like any more information or photos (which I'll be happy to take) please let me know. I have attached a picture showing the lighting. The best of luck to you with your build. Jerry
- 900 replies
-
- 6
-

-
- victory
- caldercraft
- (and 1 more)
-
Hello Popeye...Good to hear from you. Well, I made a couple of "circles" out of plywood and frankly they look terrible. They're much too bulky and way out of scale so I decided to go the route you and Jay did. Funny, I believe we have the same scroll saw. I just bought mine last week at Sears also. It's the basic 10" throat scroll saw and I figured I'd need it some day. The admiral is planning to start a build this summer so I believe it'll be a good thing to have around in case she needs it. I called the UK this morning and spoke to someone at the Model Dockyard and ordered a few pieces of Flexible beech strip wood 1.5 x 3mm. I will go the way you and Jay did. I don't know what wood you used to bend the crow's nest's railings but the kit supplied some beech for railings and I had a little left over but not enough to finish the job. I soaked the piece I had and bent it into a circle and it came out fine. I think the 1.5x3mm will be perfect but I'll probably not see it for at least 10 days. However, there are other things to do in the meantime. Keep in touch and best to you, Jerry
-
Hello Robert.. I had no idea that you have started to build Victory and happily i came across your log this morning. I see that my friends Glenn and David have been paying regular visits to your site and have been watching your progress. You have two excellent tutors communicating with you but I thought you'd like to also hear from someone on the other side of the pond. From what I see you are doing a very good job so far and I know you will end up with a beautiful model aas David did and Glenn will. I'm happy to see that David advised you to drill the two pedestal holes for that is something I didn't do so as you may see from my build log, I ended up standing my Victory on a small cradle. There are other aspects to your build that I really like including painting the framework black. This was an afterthought for me and of course was more difficult when I did it later in the build. Please include me on your list of followers and feel free to contact me any time I may be of help. Good luck and best to you, Jerry http://modelshipworld.com/index.php/topic/1951-hms-victory-by-jerry-jotika-scale-172-1805-version-wood/?hl=%2Bhms+%2Bvictory+%2Bjerry