Mayohoo
-
Posts
189 -
Joined
-
Last visited
Content Type
Profiles
Forums
Gallery
Events
Everything posted by Mayohoo
-
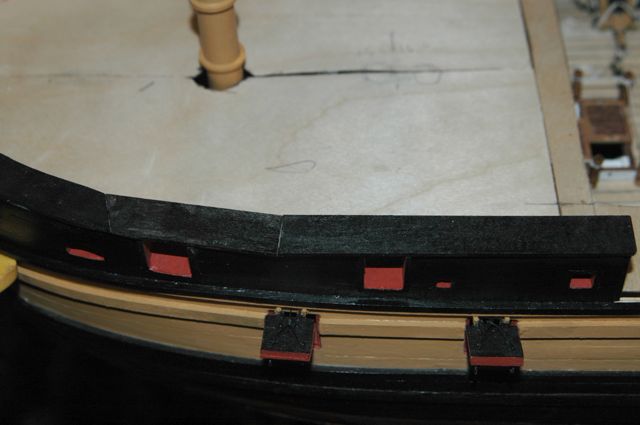
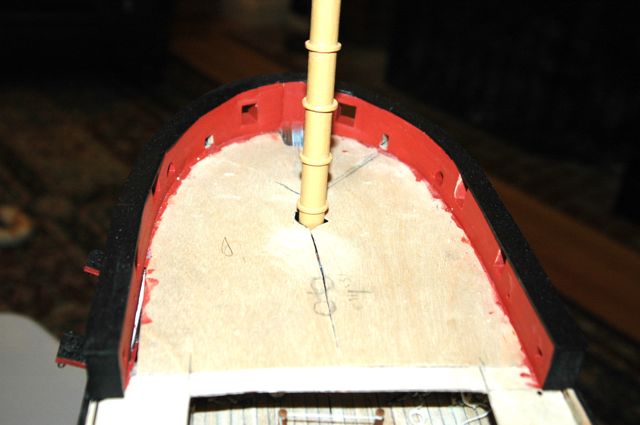
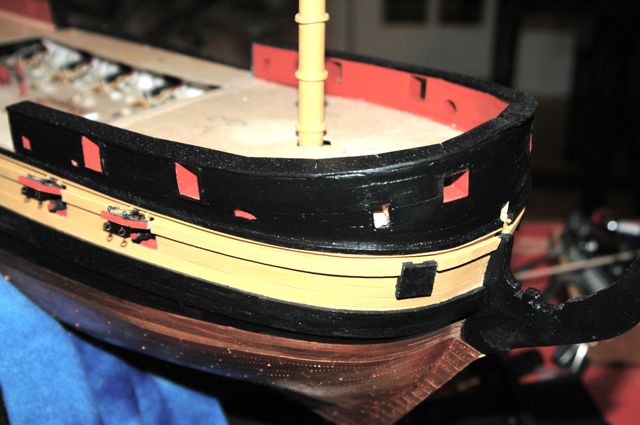
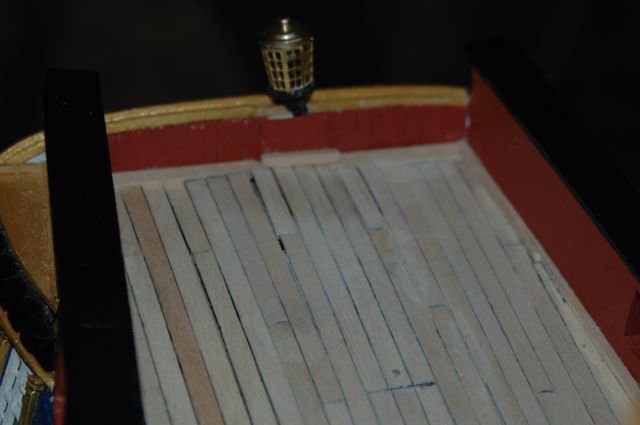
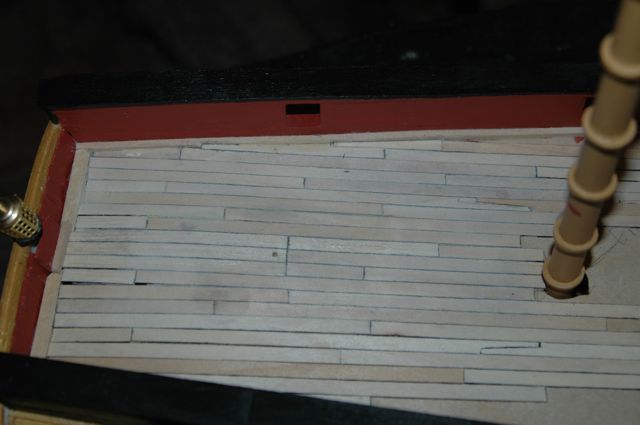
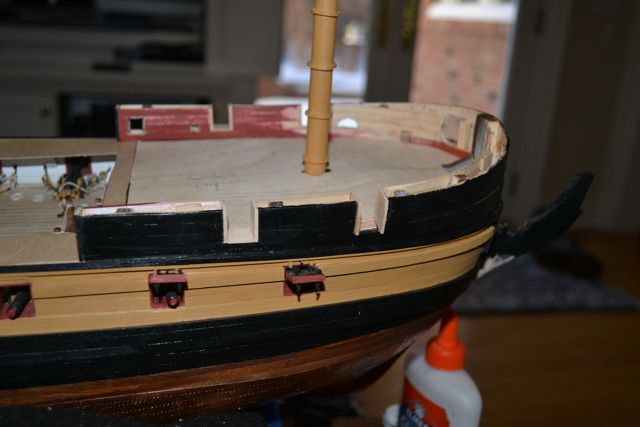
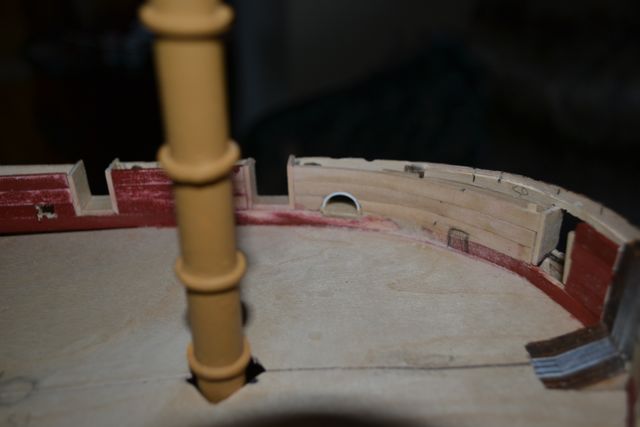
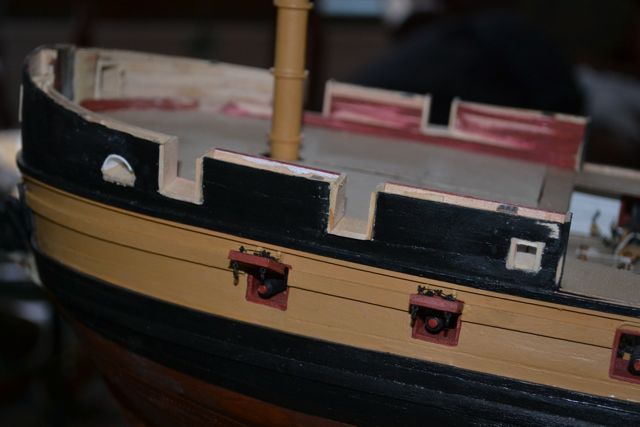
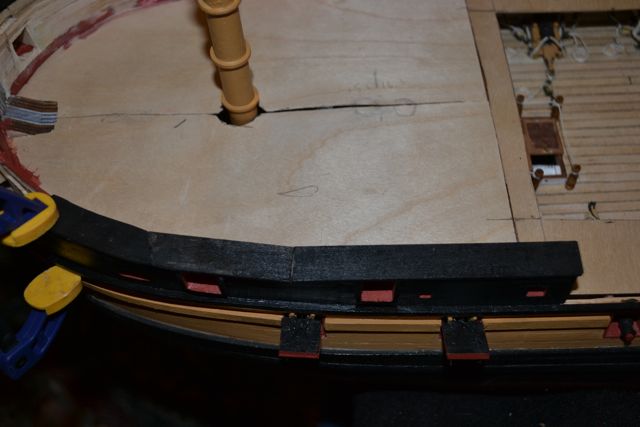
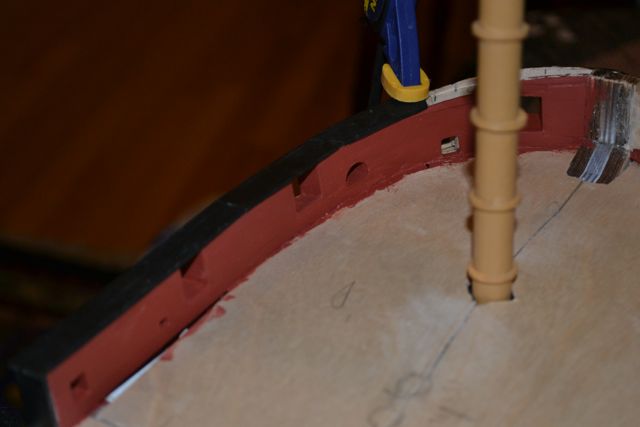
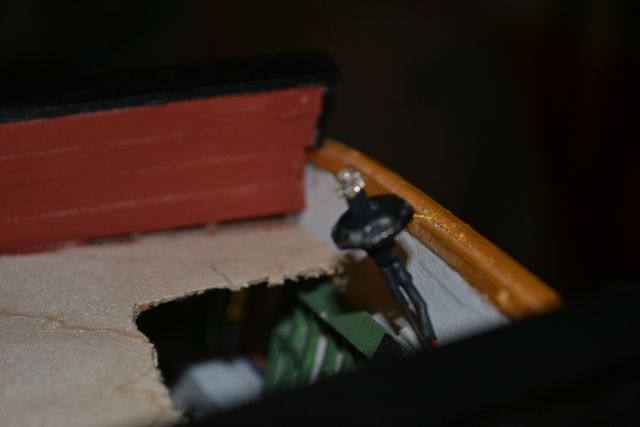
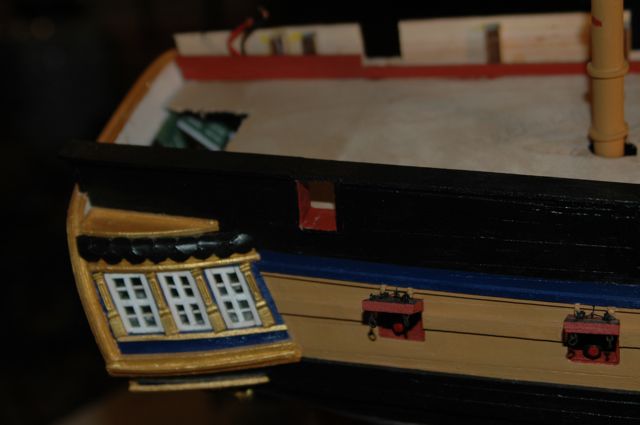
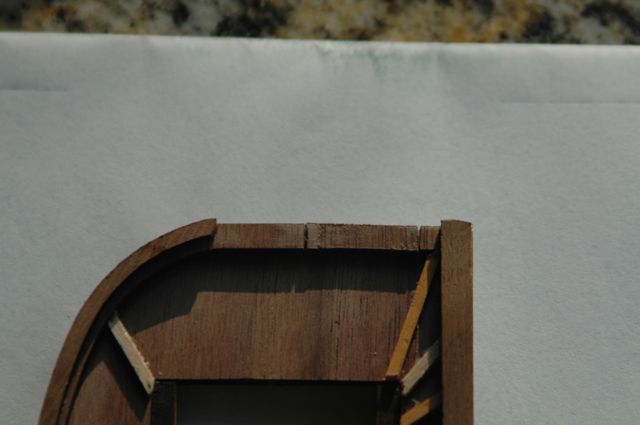
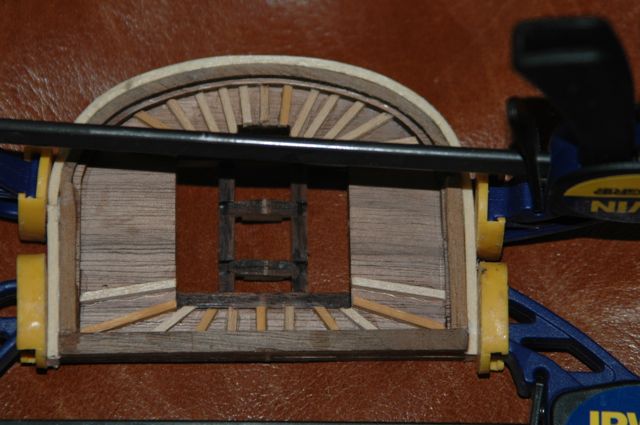
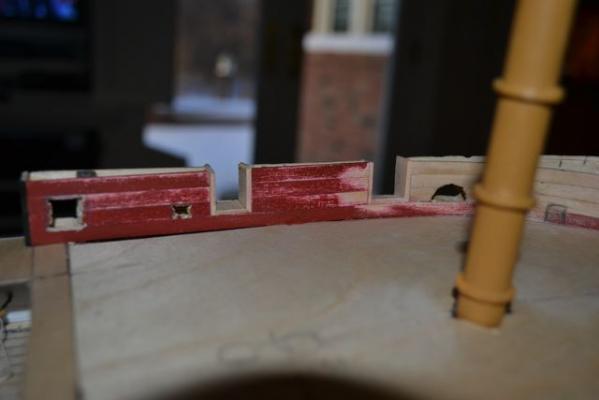
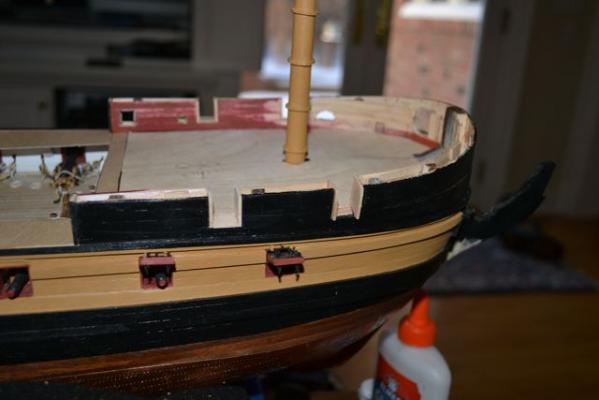
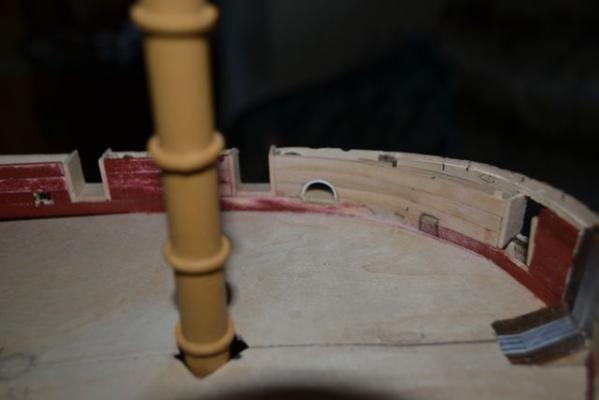
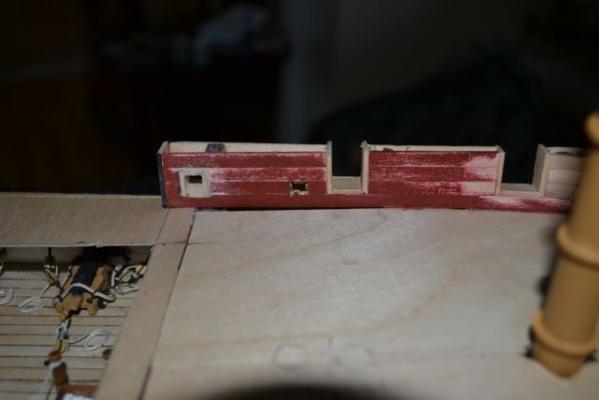
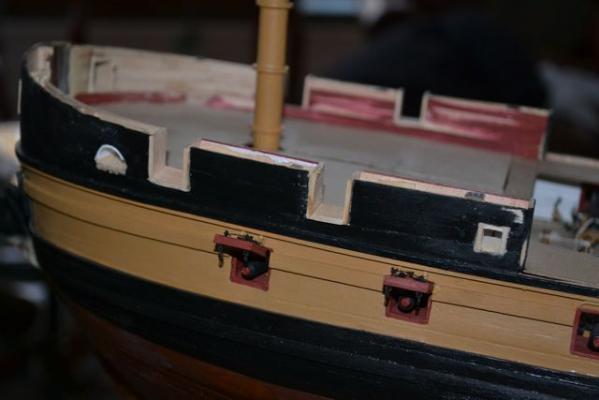
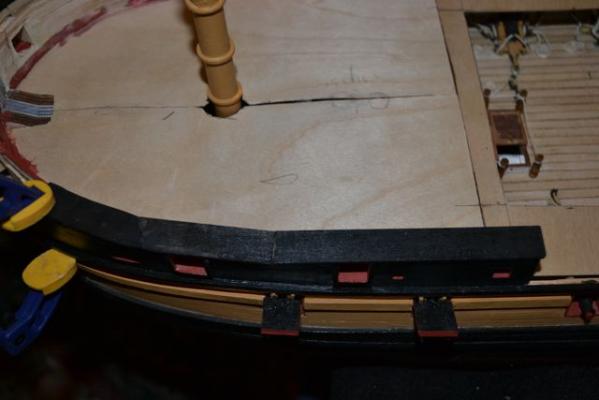
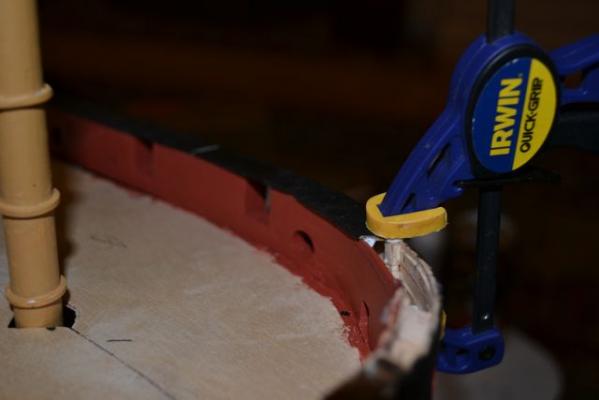
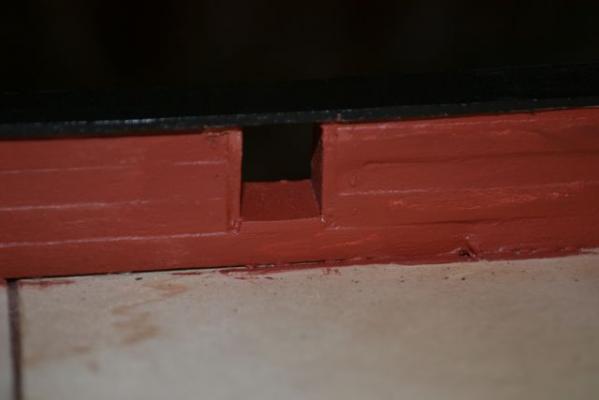
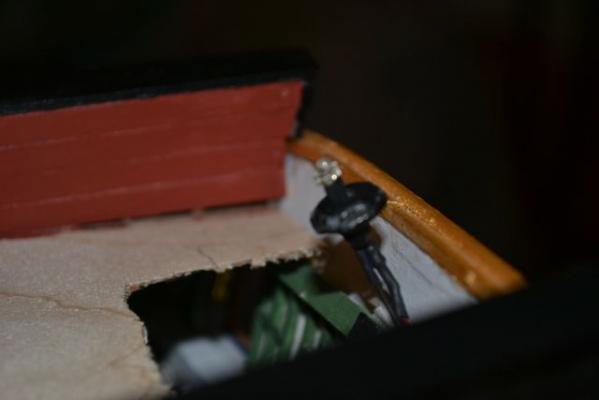
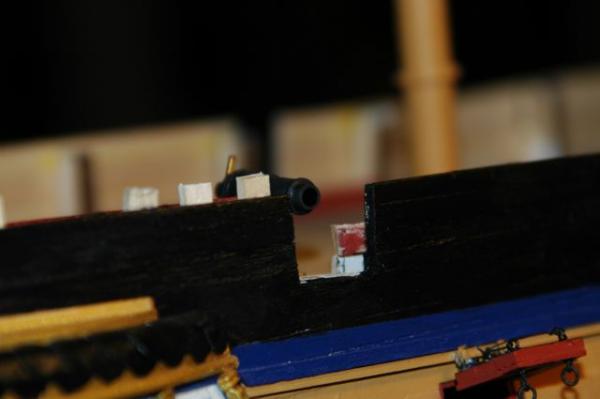
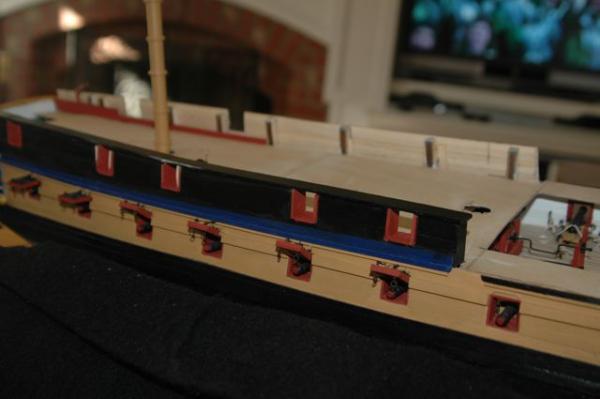
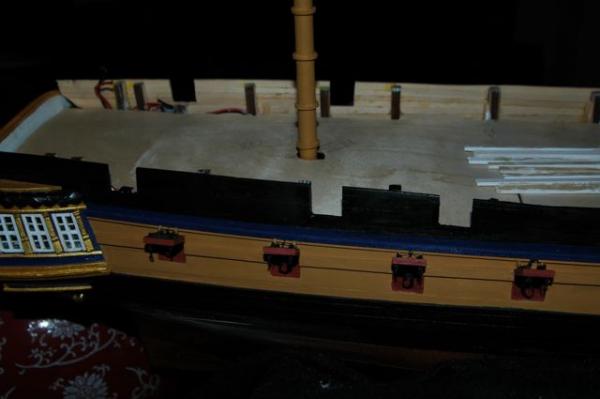
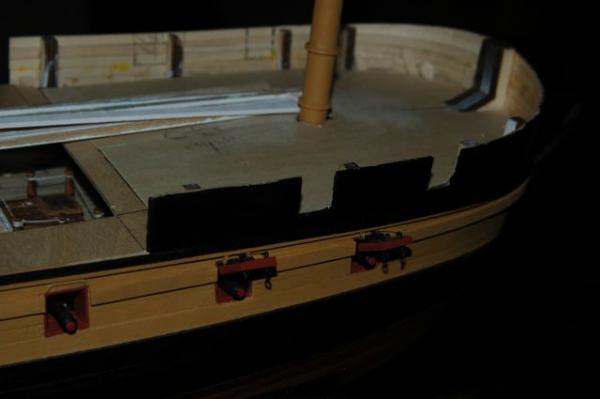
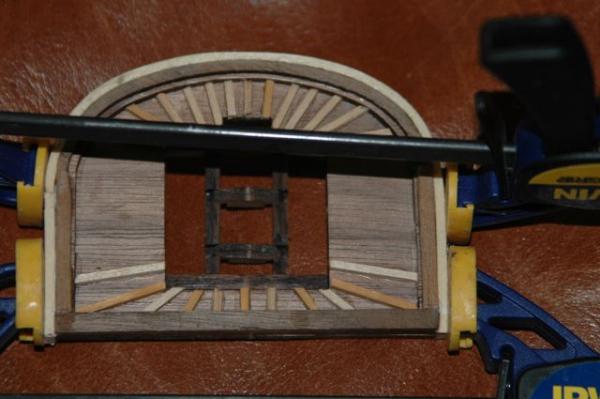
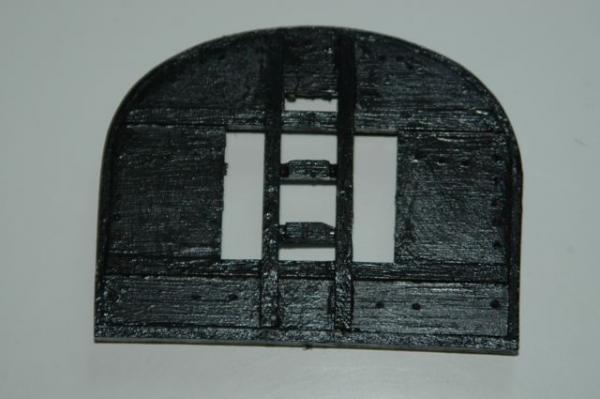
 Hrs 721-733 Done with the Bow deck area (finally). Used styrene to create half circle area in wall. I couldn't get the top rail perfectly smooth, but it is the best I could do with the gentle rise and the curve of the wood at the same time. Began work on the stern and put up the main stern lantern with light. Will add smaller lanterns later Also beginning the deck planking in a modified 4 butt shift with cut into the sides (joggling?). I made the edge a little more narrow because the carronades won't come to the gun port otherwise. Am working on having a detachable segment of deck to be removed by lifting off the wheel or binnacle and removing a single nail. It's the one in the middle of the deck. Hope to be able to look into the cabin through the stern windows (which open) and through the small piece of removable deck. (That's the theory of course...)
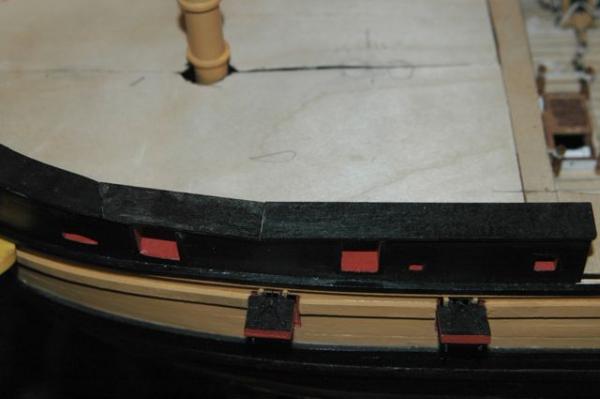


- 188 replies
-
- 2
-

-
- surprise
- artesania latina
- (and 1 more)
-
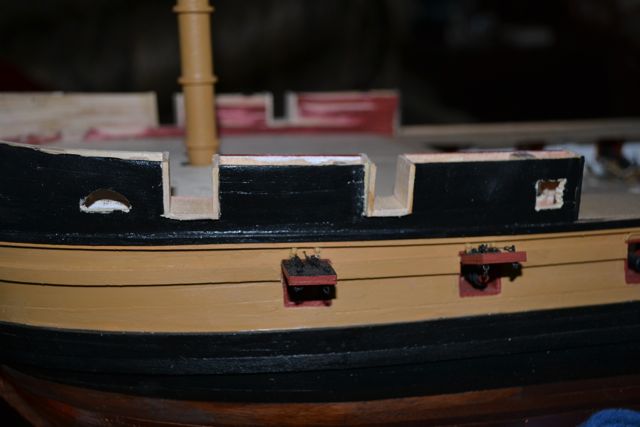
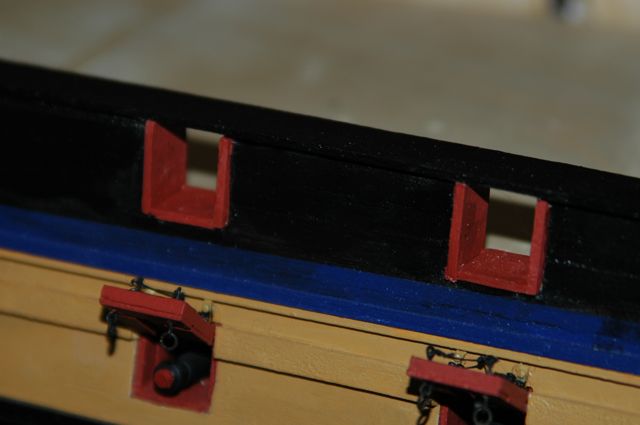
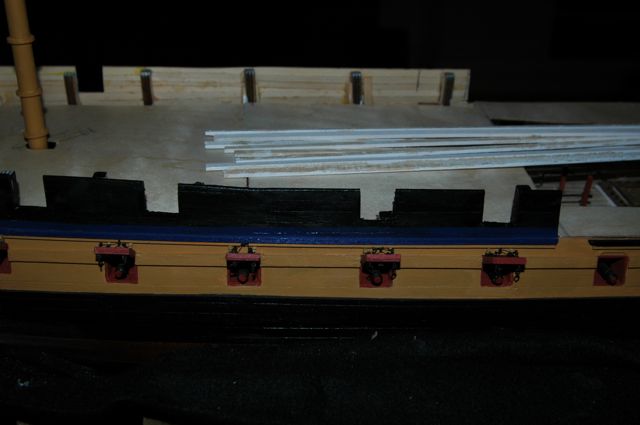
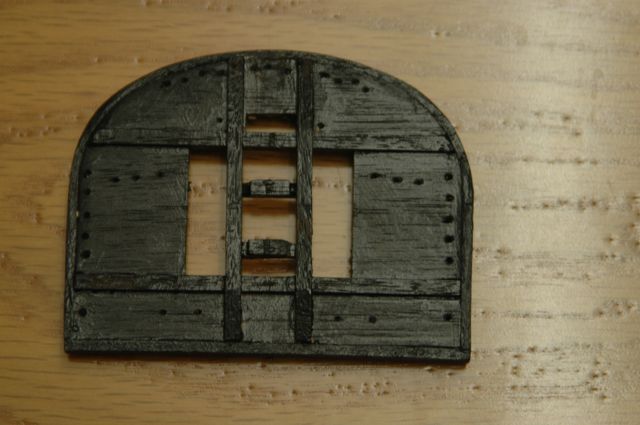
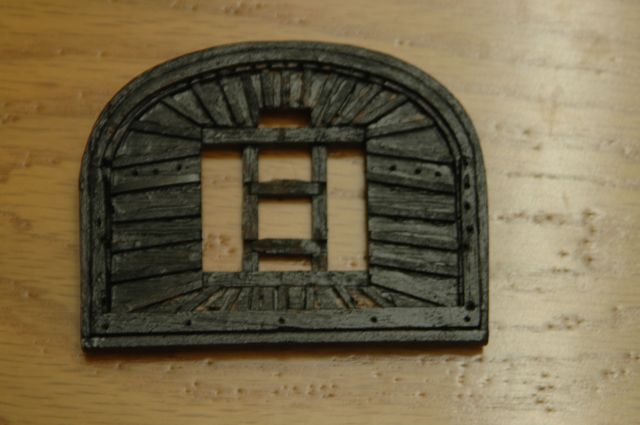
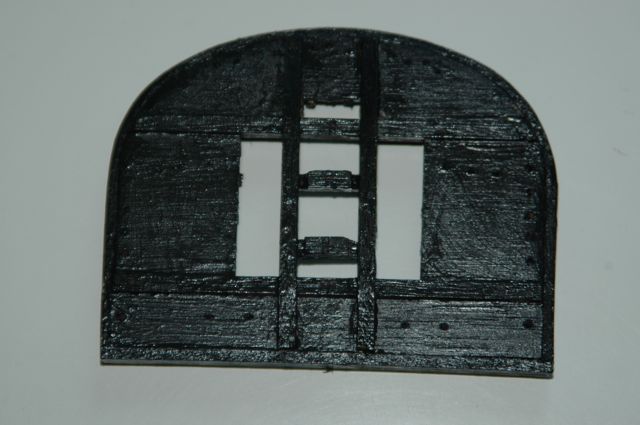
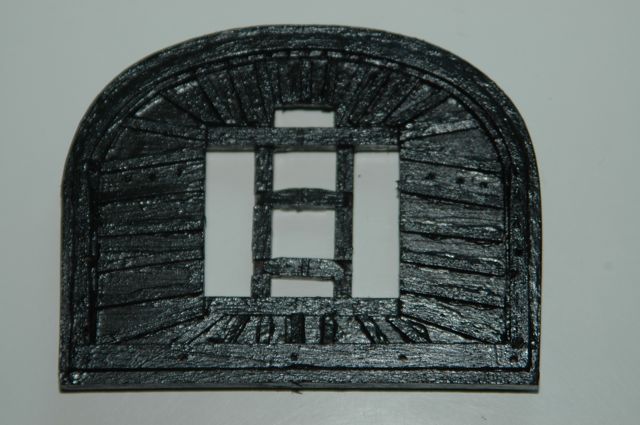
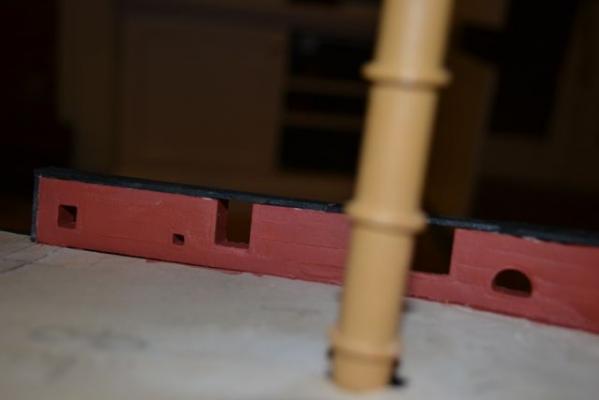
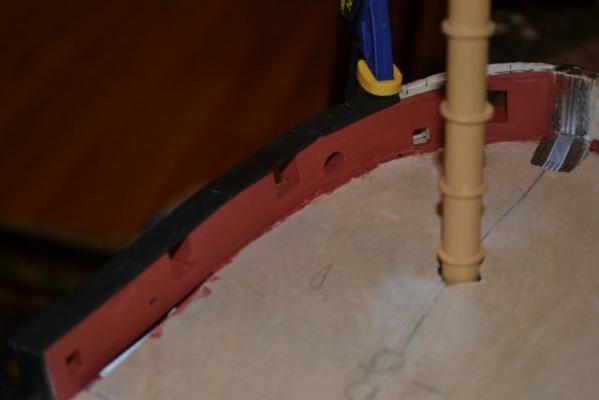
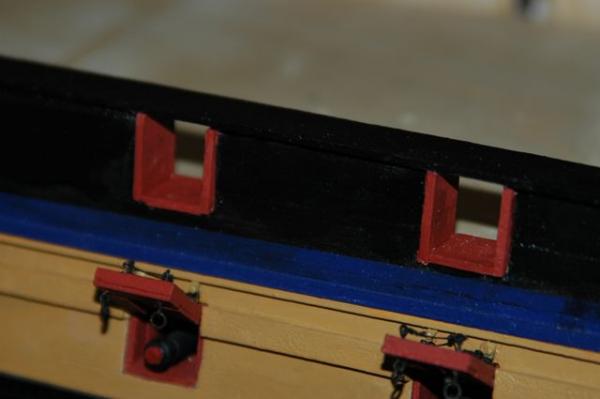
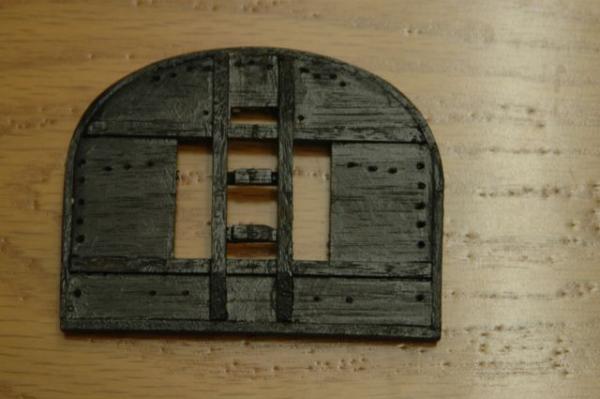
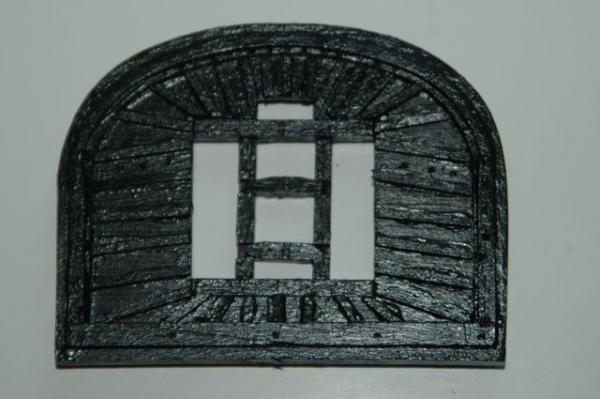
Hrs 706-720 Working on forward bulwark details including the openings for the bow chasers and the catheads. Also the half circle, large square and small square on the Jotika model (not exactly sure what they are for, but what the heck). Unfortunately, one of the AL braces is right in the middle of one so I sized it down a bit. So cut outs of the gun ports for carronades and the other openings, all of which are lined. Painted and covered with the railing. Slow and steady wins the race...

- 188 replies
-
- 2
-
-
- surprise
- artesania latina
- (and 1 more)
-
Will follow with interest! Am kit building but would like to learn scratch building some day ;0)
-
Thank you for coming back and reposting! I am plodding along in your wake (so to speak) with my HMS Surprise. It's amazing how long it takes when you do this for the first time
-
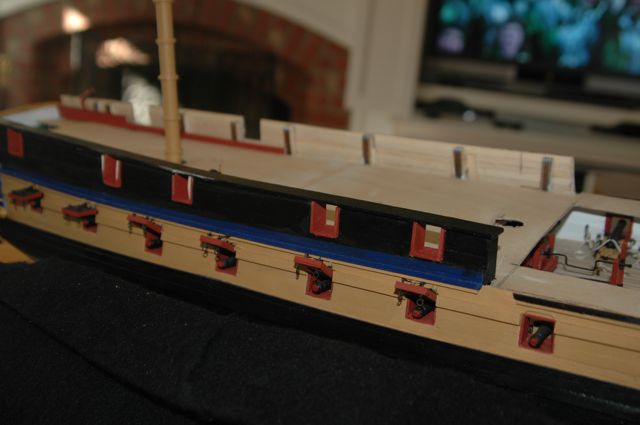
Hrs 701-705 Some. Went on vacation to Spain and so has been slow. Was not happy with quality of bulwarks so did a lot of reworking. Also added trenails to make more realistic. Hard to see but they are around gun port frames and on end of stern bulwarks. Also hooked up one light for the stern lantern. Still need to touch up paint job. Went to a museum in Barcelona and they had a replica of a galley gunboat on display. Pretty cool. Big too. May add a pic if they come out on my iPhone

- 188 replies
-
- 2
-
-
- surprise
- artesania latina
- (and 1 more)
-
I did actually. I was not sure if it was the entire mainmast or just the lower mainmast, which would be a thicker diameter lower mainmast. In any event I added a small amount of length to it. According to the resources the formulas were not precisely exact and the distance overall length between a 28 and 36 gun frigate was (to scale) only 1-2 inches different. In addition, there was a suggested range for the masts and the formulas were sort of an average. I plan to make up the difference up by not pushing the length of the lower mainmast as deep into the hull using a screw extension off the base. (I haven't put the main mast in yet). The fore and mizzen are in already. But thanks!
-
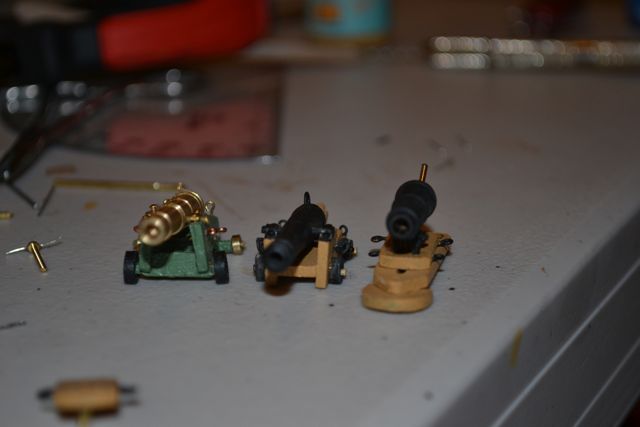
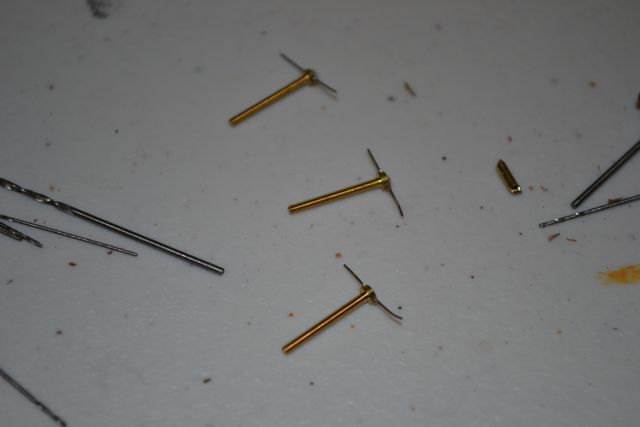
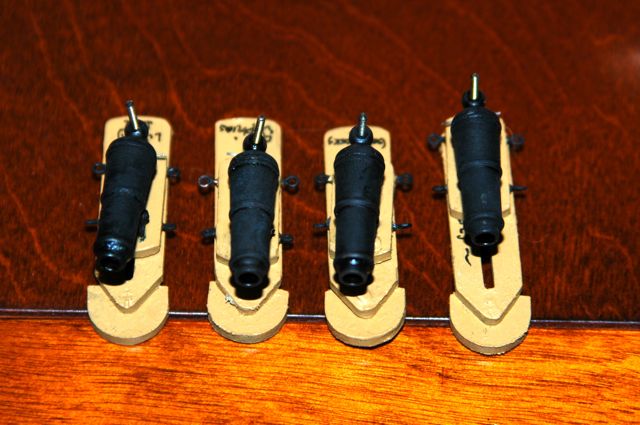
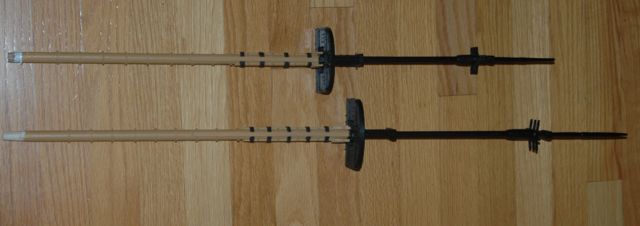
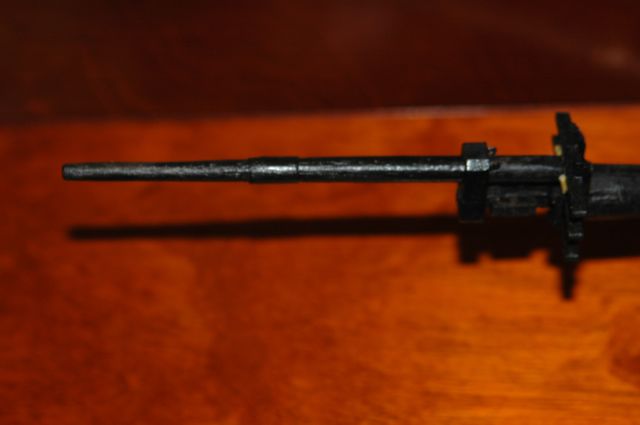
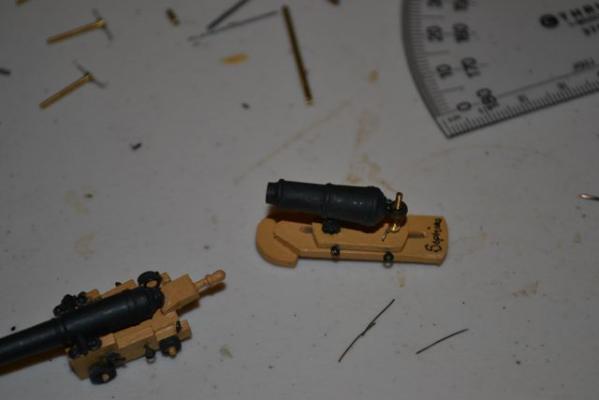
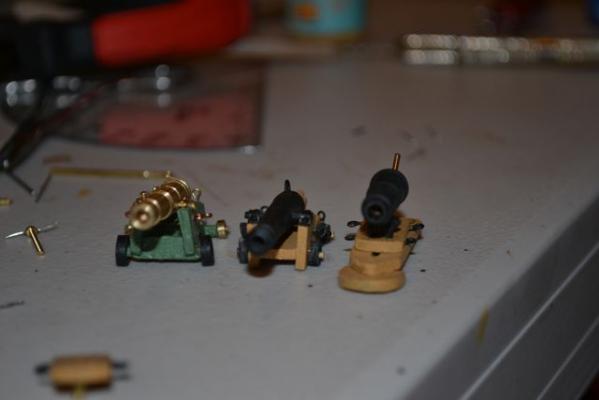
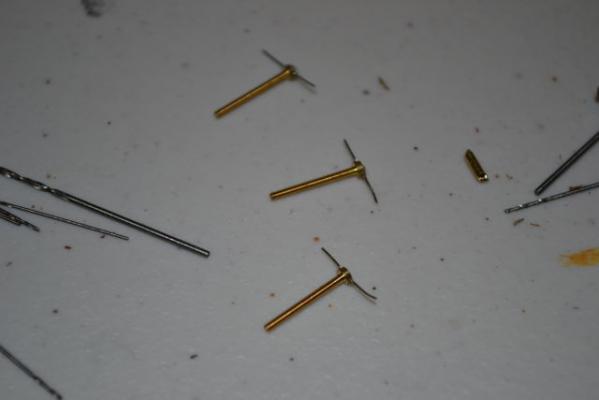
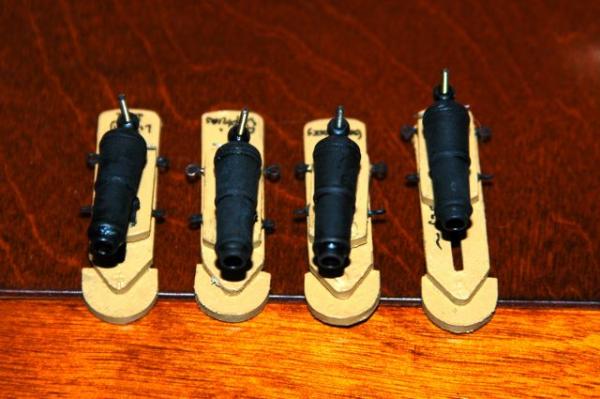
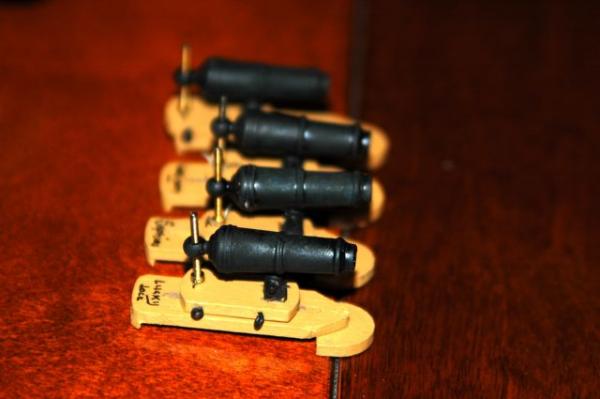
Hrs 691-700 Got the last carronades from Jotika and am working on them. Nice detail with screw elevation on back and the slide. Also made 2 brass "Long Nines" for bow chasers which were Jack's favorites. Made the gun carriages green and did not blacken the barrels. I will call them "Catherine's Claw" and "Henry's Hammer" after the kids. Here's a view compared to the regular cannons on the gun deck and the carrondes. Note height differences of the bow chaser, regular cannon, and carronade.


- 188 replies
-
- 2
-
-
- surprise
- artesania latina
- (and 1 more)
-
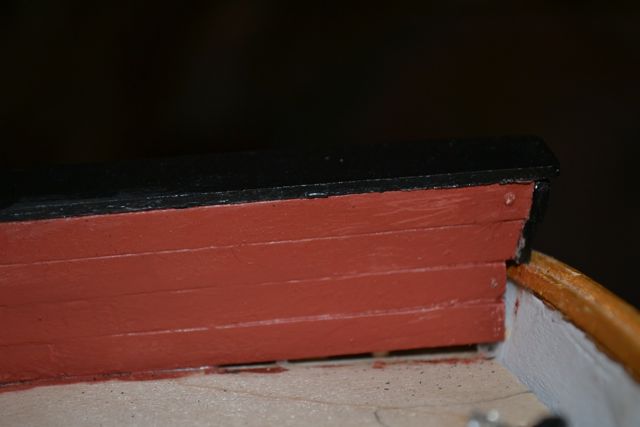
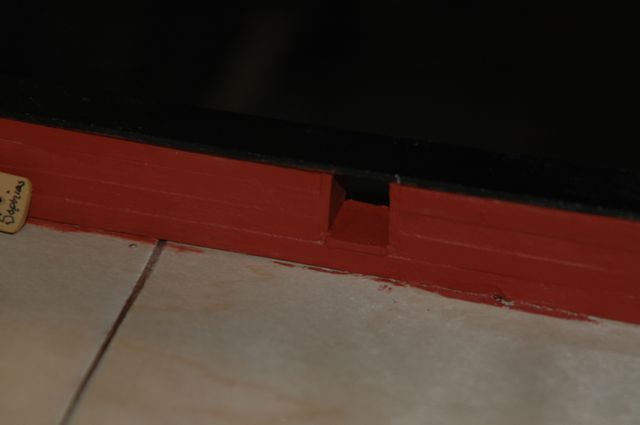
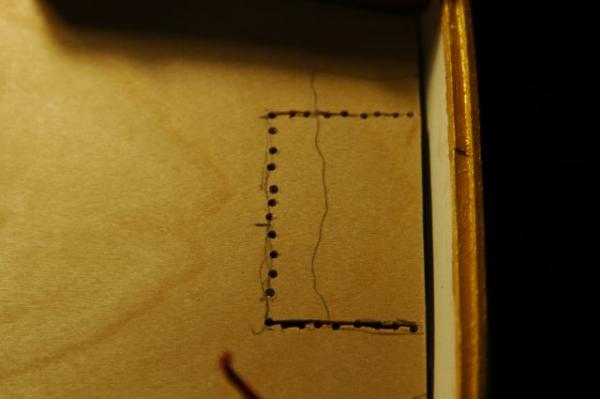
Hrs 683-690 To temporize I made a trap door, just have to figure out how to conceal it. The bulwarks are a little bit of a challenge. The carronades are significantly taller than the included cannons from AL although they should be 24 pounders by scale. So I have to increase the size of the upper bulwarks. Also, after looking at the painting, the gunports are not red on the upper deck on the outside, so I had to repaint them. And the inner bulwarks Off to take a little vacation and sit in the sun playing golf with college buddy in Palm Springs... 81 degrees vs 8...some choice!


- 188 replies
-
- 4
-
-
- surprise
- artesania latina
- (and 1 more)
-
Greater Weevil Lesser Weevil (naturally) Spotted Dog Lobscouse Six more... Nelson's Salt/Honor/Duty Death to Boney Spanish Flea Blaster Bollocks Marine Mauler I'll keep thinking...
-
Any name suggestions from the blogosphere? (For the cannons, not my singing)
-
I like the music Jerome! Course if I played it while Iworked, the dogs would howl... I wish youtube was a little higher resolution, but it is nice to see the Surprise come to life. Thanks for the find.
-
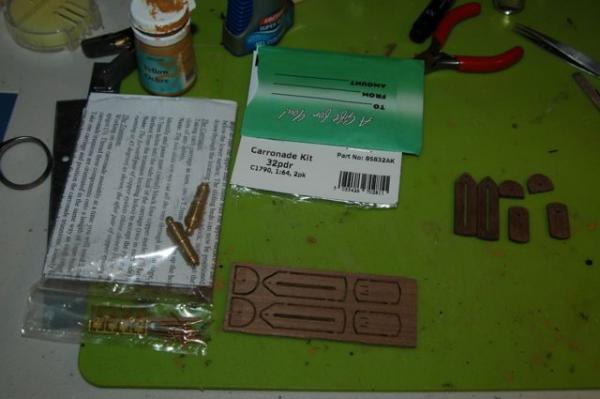
Hrs 676-682 Doing carronades using the very nice kit. Did not show the company as I am not sure about rules on that here. A bit pricey, but heck, I am in for so much now whats a little more... Have decided to name them: Goldilocks Lucky Jack Sophies Polychrests Now I need another 10 names...
- 188 replies
-
- 7
-
-
- surprise
- artesania latina
- (and 1 more)
-
Thanks Jason. Looks like I'm going to have to figure out hour to put two stern chaser ports in. Hmmmm. Hate to disturb the transom ast it is handsome (rhymes too). Will have to think on it
-
Thank you Scott! I try, it's a learning experience every step of the way. I'm thinking of putting a trap door in on the deck to be able to show off the captains cabin. Mulling it over in the ol' noggin...
-
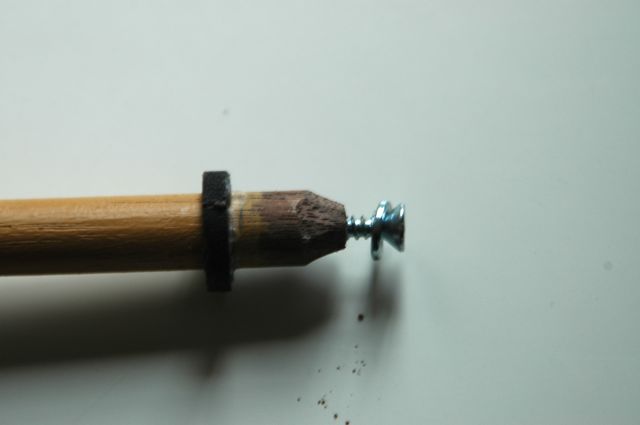
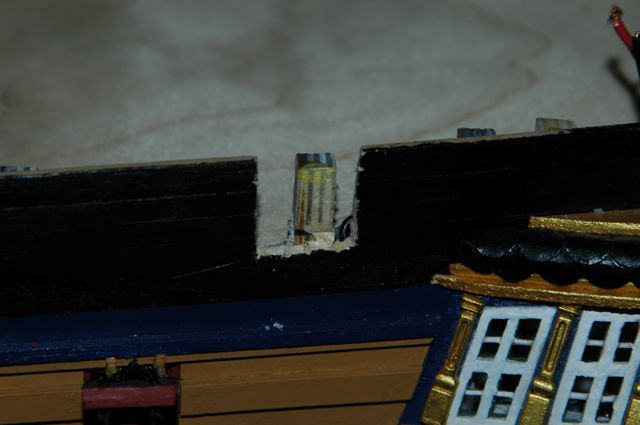
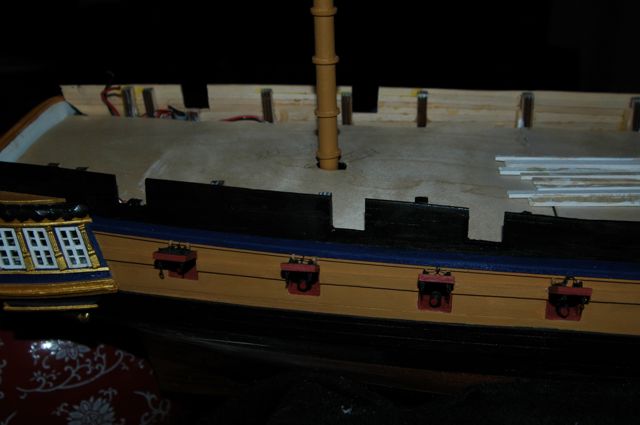
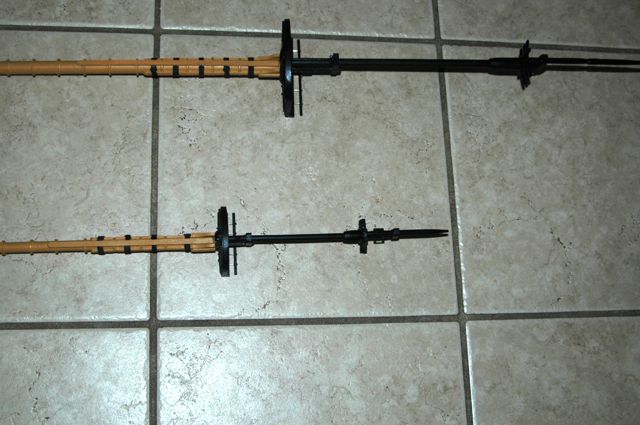
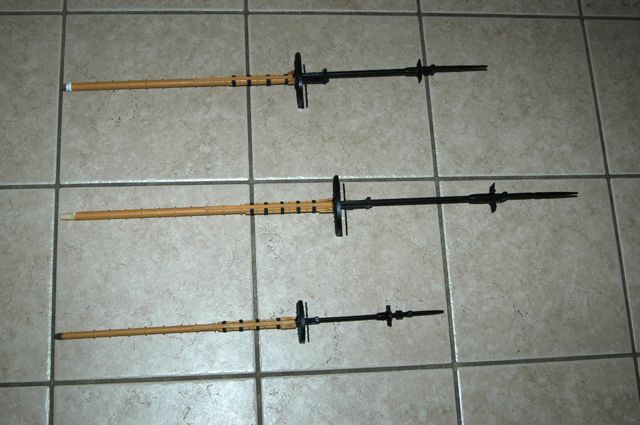
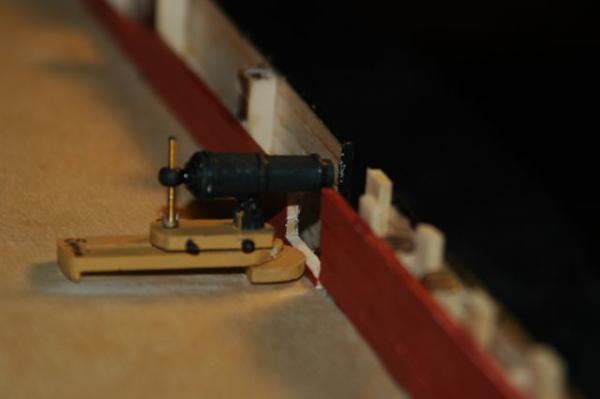
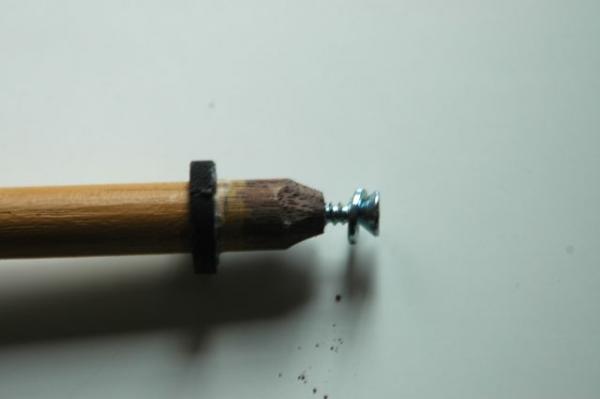
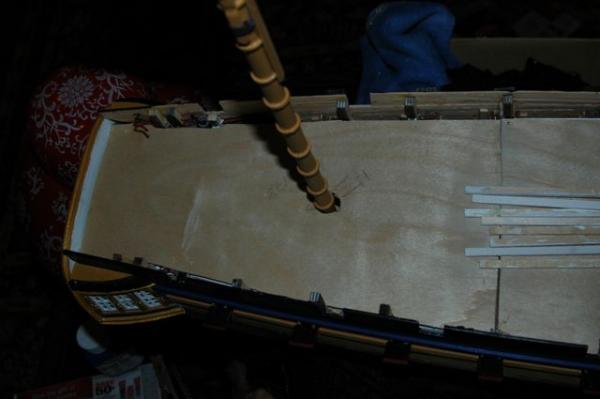
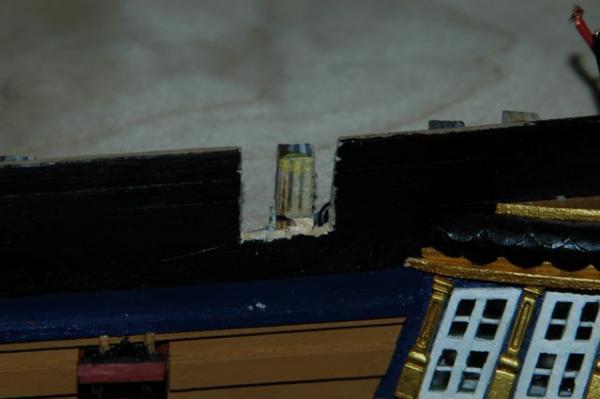
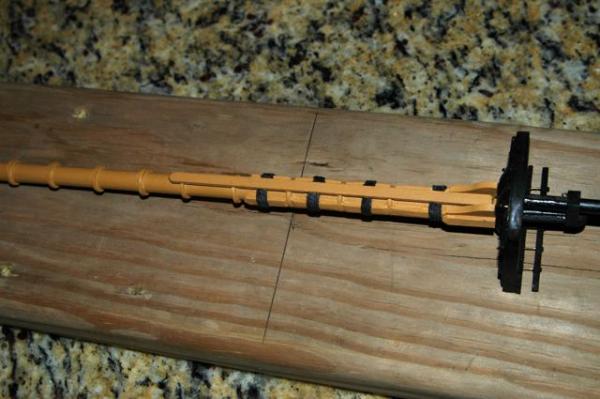
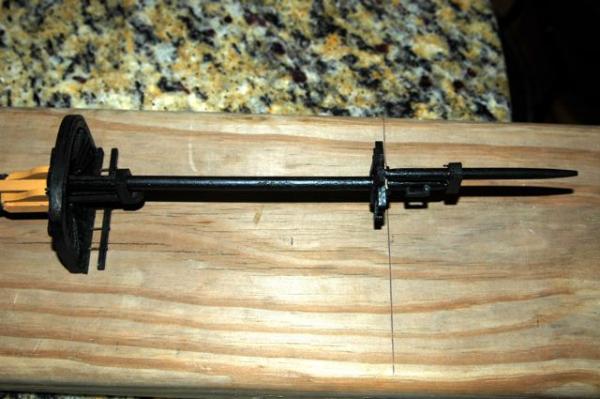
Hrs 671-675 First a pic showing the washer screw I added on the end of the foremast and mizzen. Seems to work. Added the plywood underlayment with camber. Cut out the 7 carronade positions on the starboard (right?) side. Of course the AL kit has the uprights exactly where they are on the Lavery plans... grrr. Am building a carronade from the Caldercraft kit to see what the size is compared to the ports. Am going with yellow as I did the same for the other guns. I think I might name them too... Question for gurus: for sternchasers, did they have permanent ports cut out? Or did they chop them open as needed? Or did they simply put the guns at elevation and shoot over the rear bulwarks?

- 188 replies
-
- 3
-
-
- surprise
- artesania latina
- (and 1 more)
-
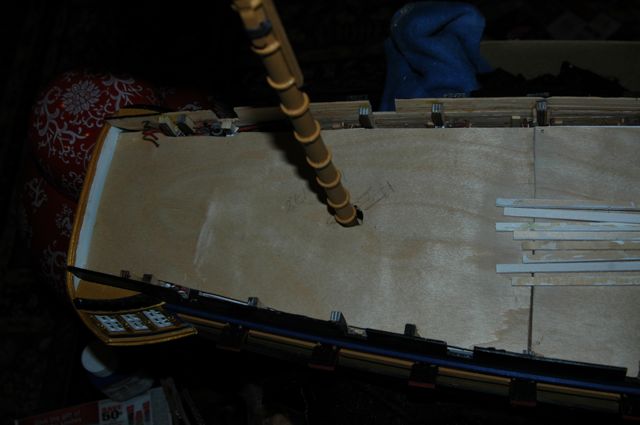
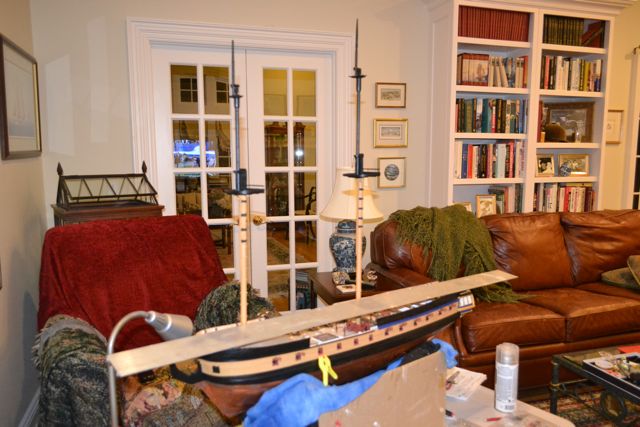
Good idea. I sort of extended it by adding a screw into the end with a washer then loaded glue in and on top so it has more to grab on to. The holes I drilled into the new mast placement areas are not perfectly squared down so its more v like. Worked so far on the forward mast. Am adding the plywood underlayment with camber in the middle of around 4 inches to scale. The other thing...this thing is BIG. The picture is 55 cms (22 inches long) in frame and the ship dwarfs it even without the bowsprit. I may have to build a room for it...


- 188 replies
-
- 2
-
-
- surprise
- artesania latina
- (and 1 more)
-
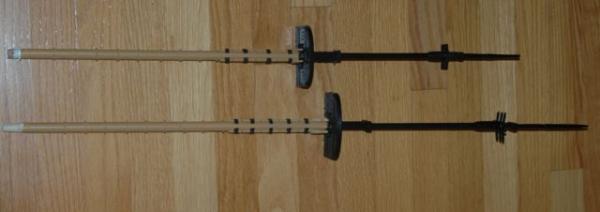
Hrs 662-670 Finished the masts! Of course I made a mistake and had to take down some stuff and redo it, but a least I am done. I think I will place the masts and do the quarterdeck...I am in need of something different. Plus the yard and rigging look hard to do... Been thinking of placing the masts and I think I need to add a screw or something solidly in the base as the bottom ends are a little short. Then epoxy in place and allow to solidify for 24 hours.
- 188 replies
-
- 6
-
-
- surprise
- artesania latina
- (and 1 more)
-
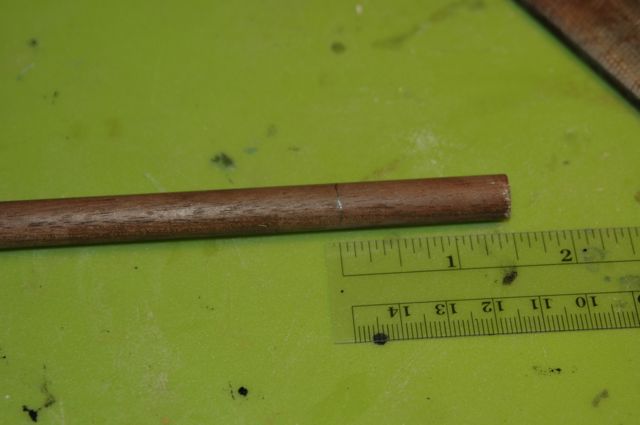
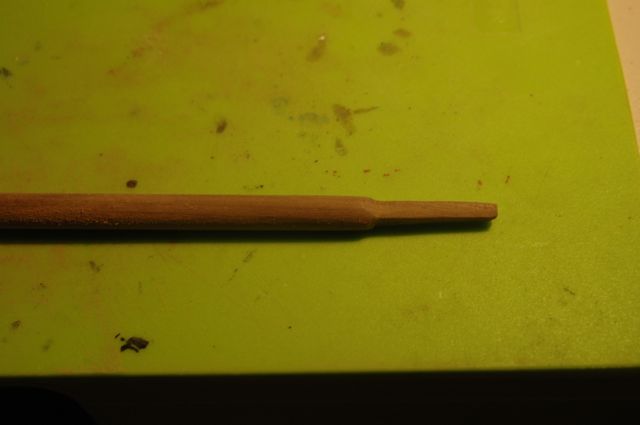
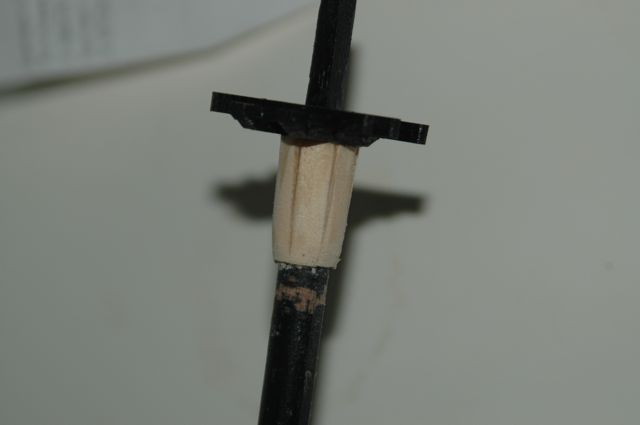
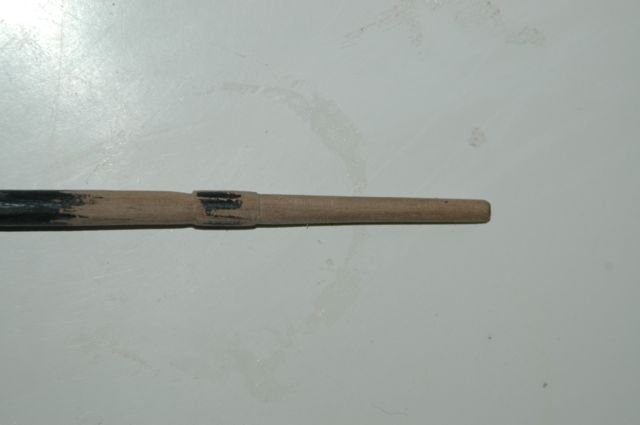
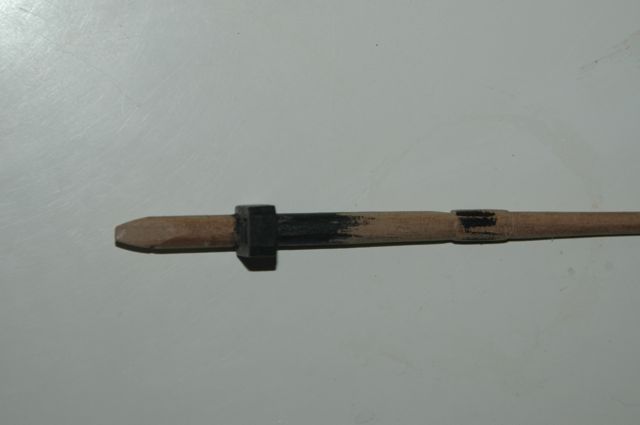
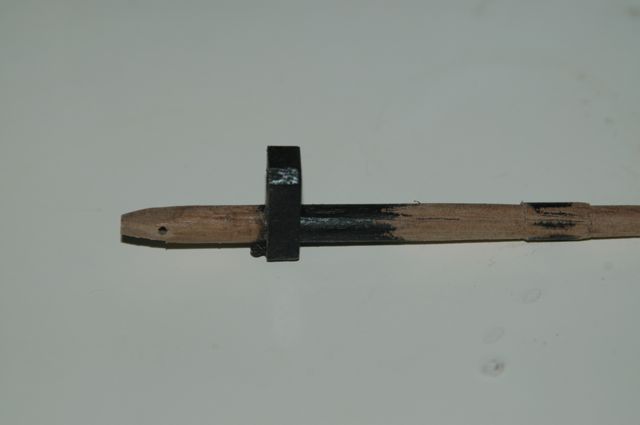
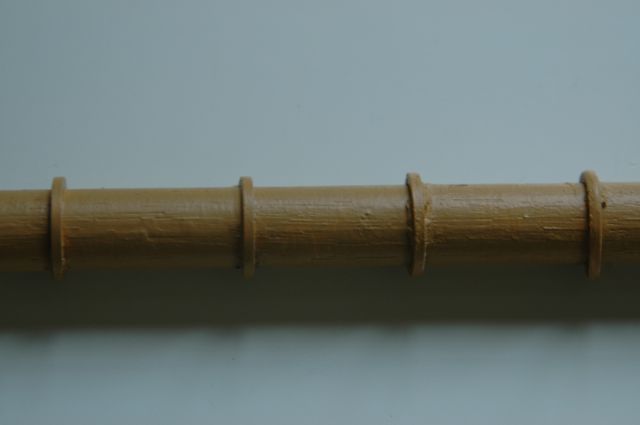
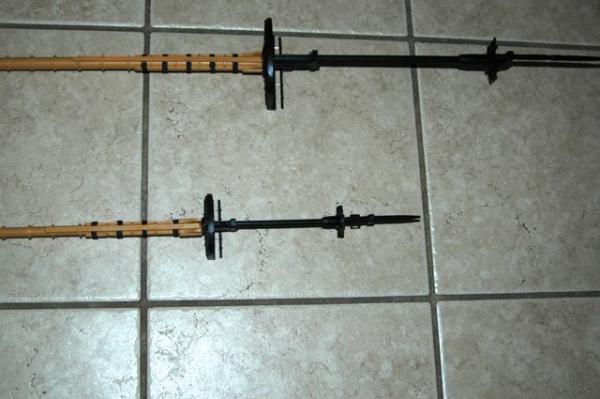
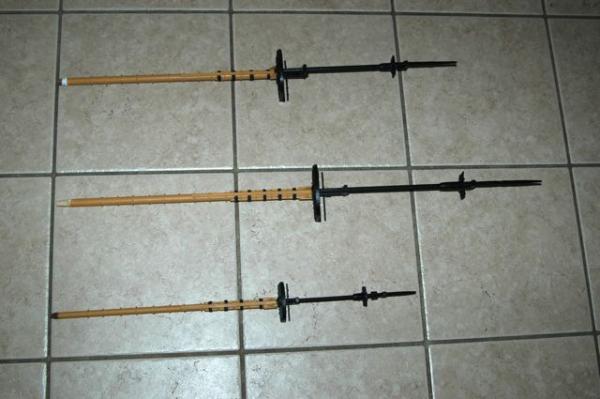
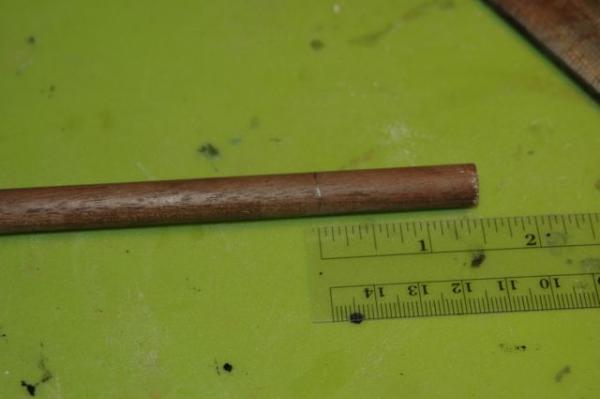
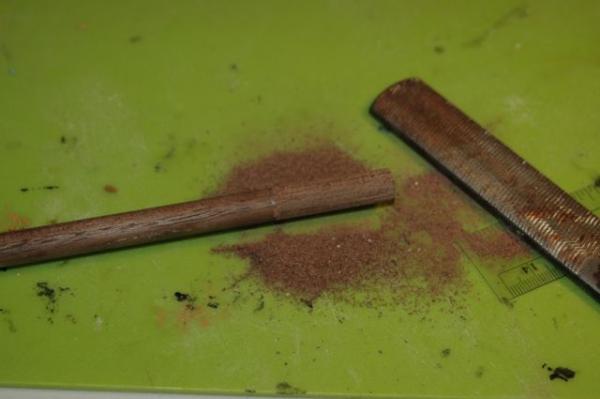
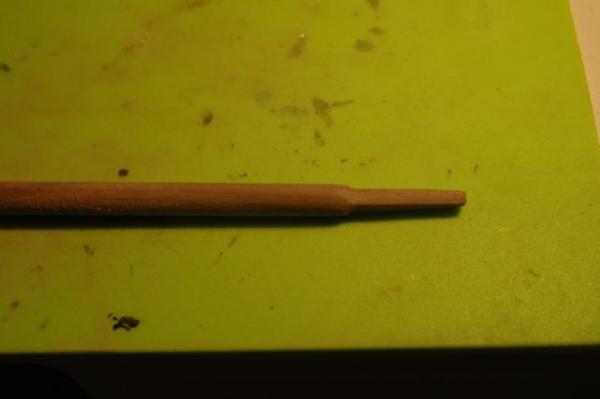
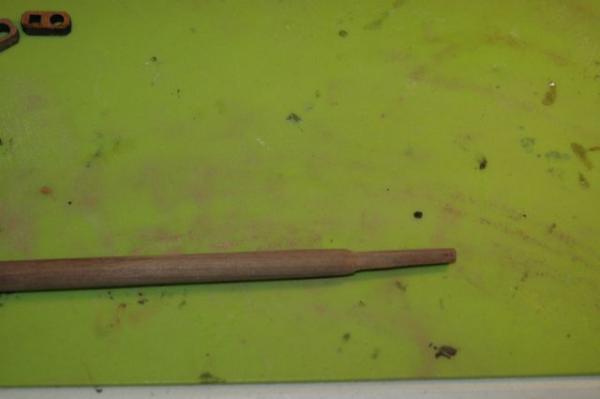
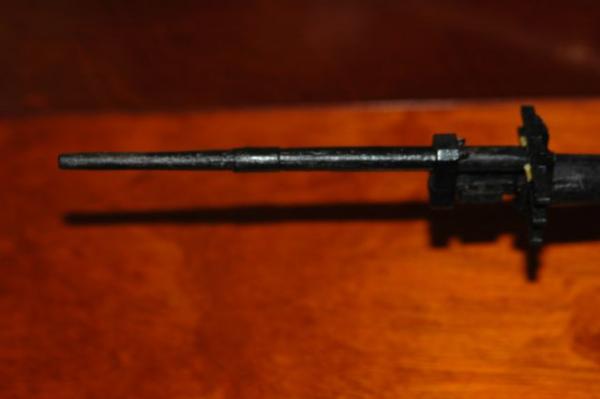
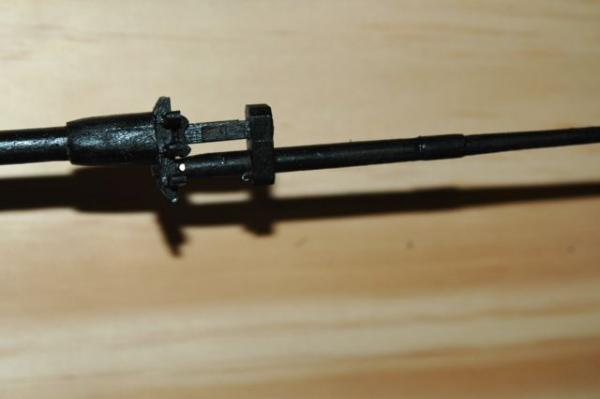
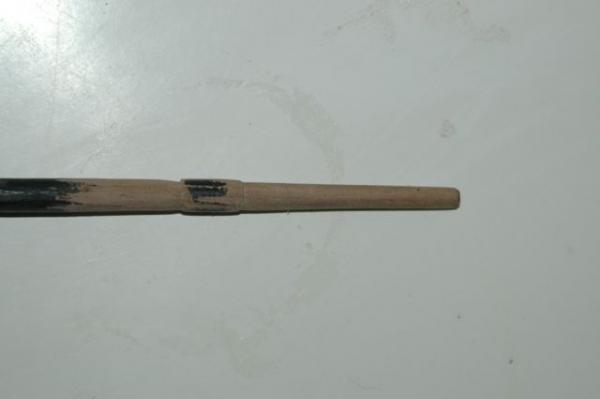
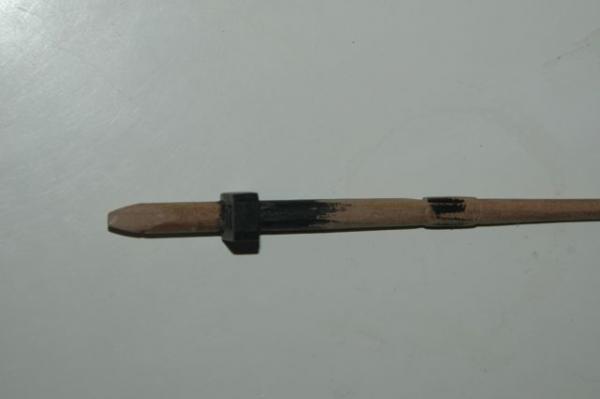
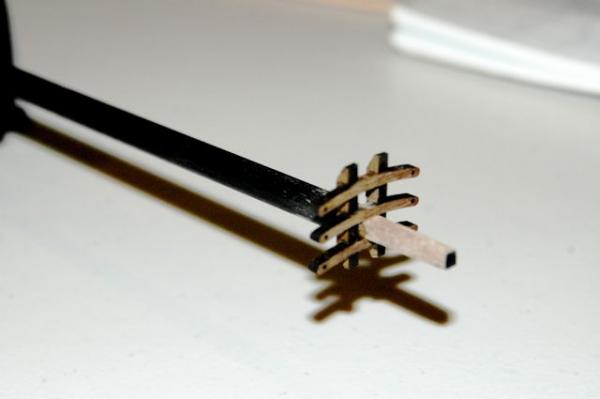
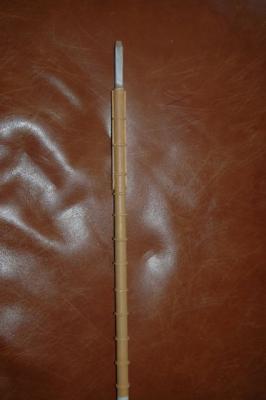
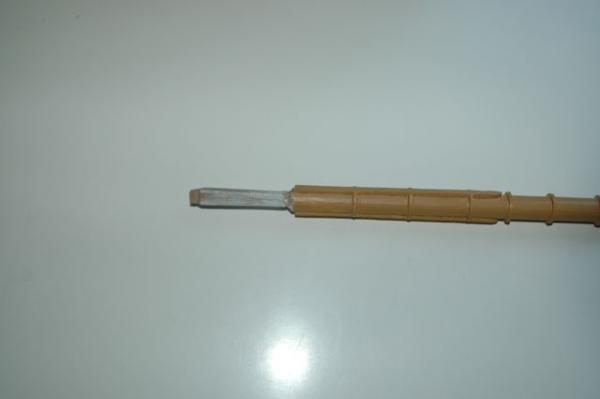
Hrs 651-661 I'm getting faster on the second mast. Mainmast done in similar fashion. Now working on Mizzenmast. Diameter is 0.37 inches or 3/8 of an inch with a little sanding. Doubling area is 1.1 inches, squared down to fit cap. Thought I'd show how I do it with a my Dad's plain old file and some sanding. Also, marked the front and flattened the sides slightly
- 188 replies
-
- 3
-
-
- surprise
- artesania latina
- (and 1 more)
-
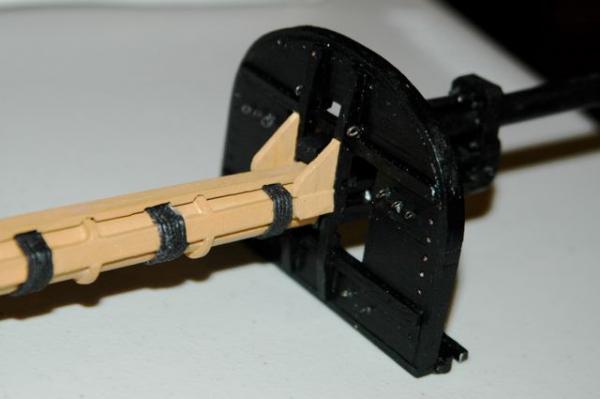
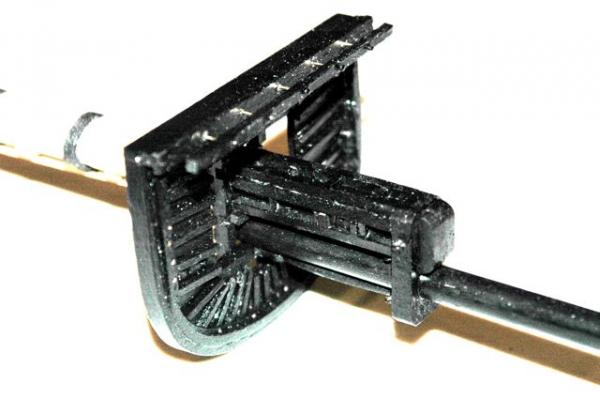
And a couple more showing the work on the topgallant foremast area.

- 188 replies
-
- 2
-
-
- surprise
- artesania latina
- (and 1 more)
-
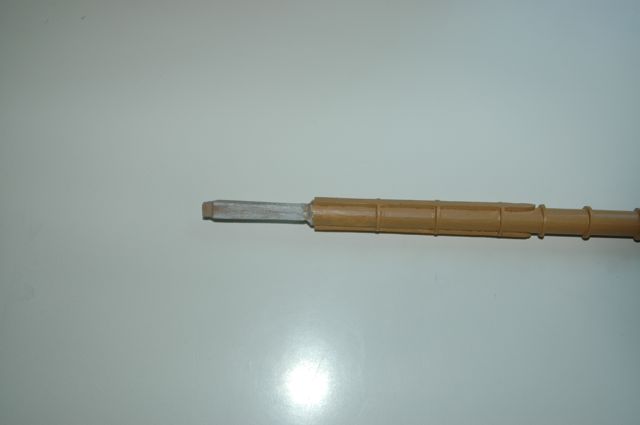
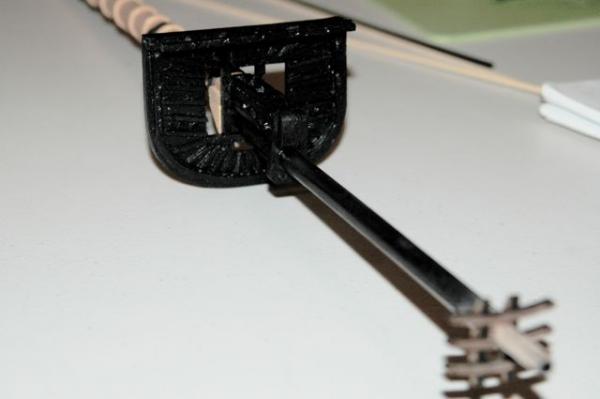
Hrs 638-650 Finished the foremast. Everything is looking ok so far. Even figured out what a fid is! I am now ready for Scrabble Tapered area below topgallant area Topgallant measured out correctly from calculations Cap added to doubling area and the Fid!

- 188 replies
-
- 2
-
-
- surprise
- artesania latina
- (and 1 more)
-
After consulting the gurus, I have decided to try one mast seated now and one mast completed with yards seated later. Both Mtaylor and Gil Middleton said they have done it both ways and had success. Since this is an opening ship build for me and I don't know better, I'll try both techniques.
-
Have finished foremast (pics to follow). Question: Is it better to place the yards now or put into ship and add yards later? Beginning mainmast...
-
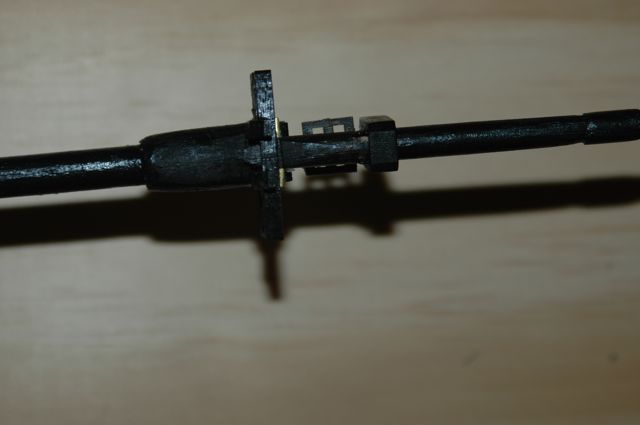
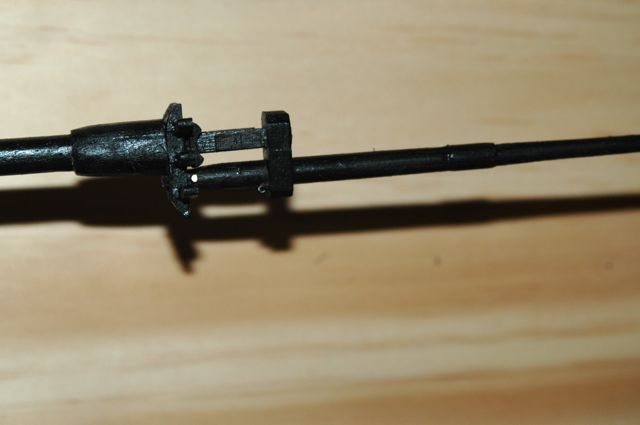
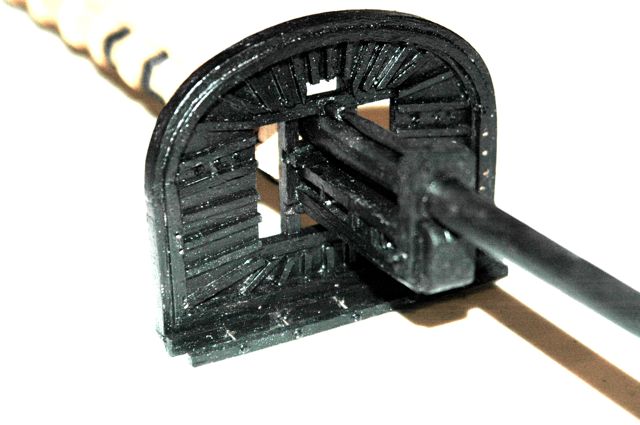
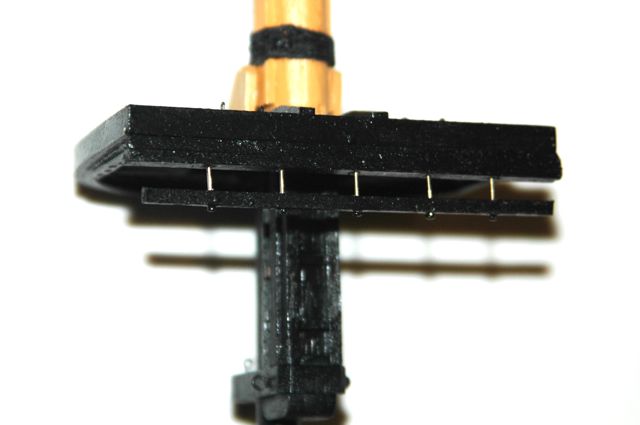
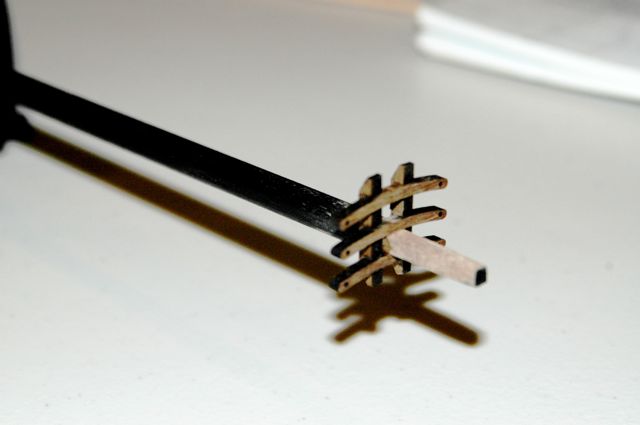
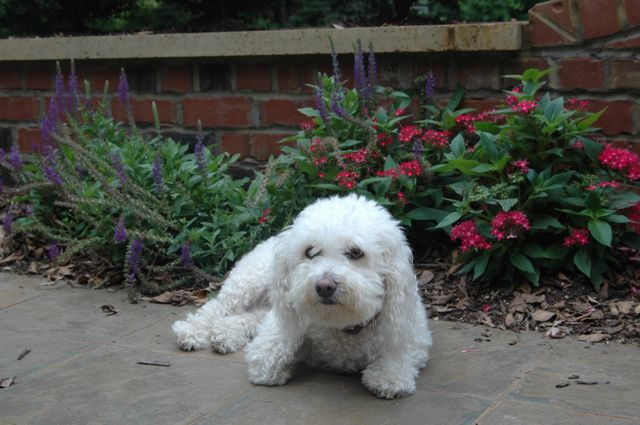
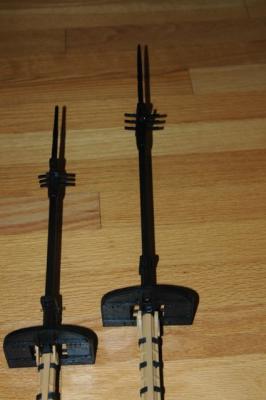
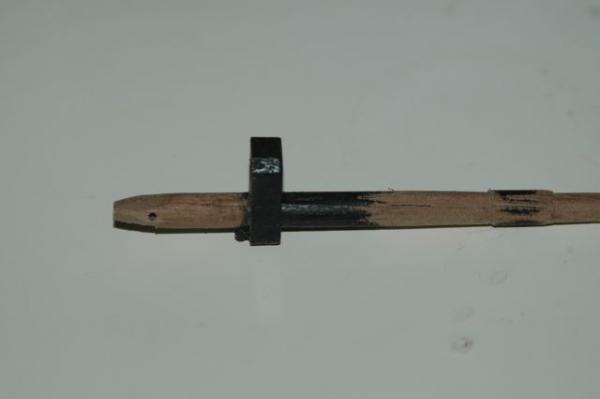
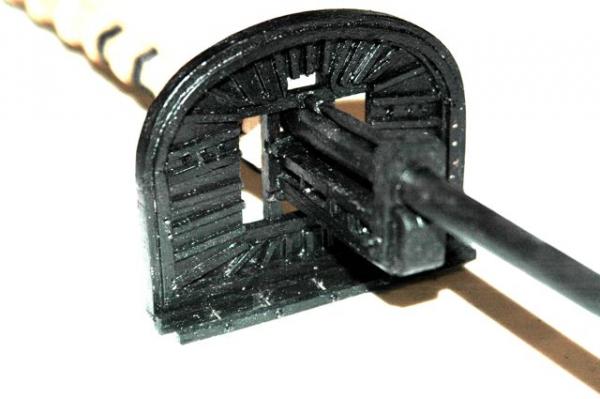
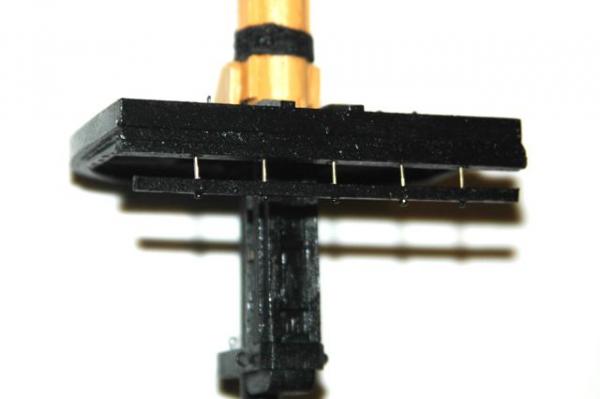
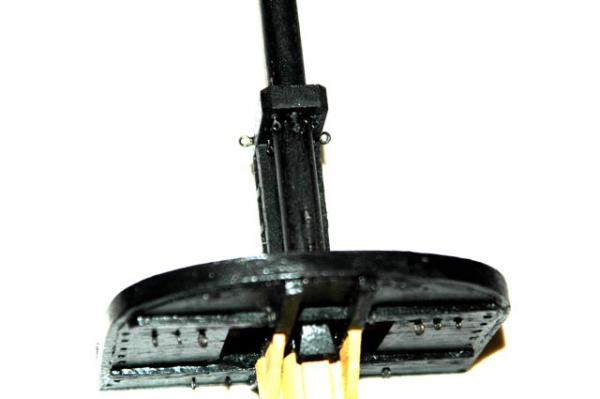
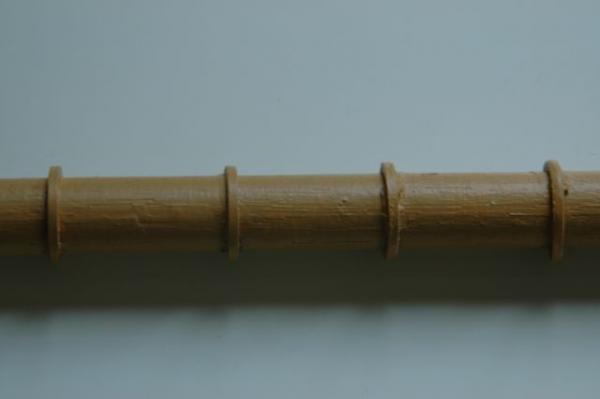
Hrs 625-637 Masts are not just sticks poking out of the hull... Foremast Working my way through the instructions and using a couple generic sources for hints. Applied styrene rings to mimic iron reinforcements as mentioned above. Then applied wooldings using thread at 3 inch scale using bamboo flute knots to bury knots. Not perfect, but the first tries... Bottom view of platform showing cheeks, woolding Top view of platform showing eyebolts. Unfortunately the black is so dark I had to remedy with a lot of exposure so background is very white. And the doubling area with fore topmast and cap A couple are upside down... Then the topgallant platform is under construction The vocabulary is pretty arcane and the directions are sparse so am using the modeling books for help. It all starts to make sense after awhile thankfully. The Queen approves... And the young lad is rowing at the Pac-12 Championships. The team took 3rd, his boat took 5th. Another way to move across the water
- 188 replies
-
- 3
-
-
- surprise
- artesania latina
- (and 1 more)
-
Hrs 611-625 Revamped the lower foremast and have put on the metal hoop reinforcements using styrene. Have had difficulty getting them to stick together using cya glue. Tried Plastic model glue with no better success. Eventually got them in place but it was slow going. Put the side reinforcements on above (cheeks?) and square cut the coupling area and test fitted the cap on top after cutting to the right length. Then started building the platform and discovered the sapele/mahogany is brittle and cracks easily. After repairing and covering got it together pretty well. Drilling the holes for the ropes to go through and the ironwork is not easy as the exact precise vertical angle is really hard to maintain so some of the holes are not exactly even. I am hoping the rope work will cover the minor errors. Second layer of paint and done!


- 188 replies
-
- 2
-
-
- surprise
- artesania latina
- (and 1 more)
-
After working on the foremast I have come to realize the mast is going to be disproportionately too large. So after thinking about it, I measured the greatest beam of the model itself which is 7.75 inches. Using that, I will recalculate all the masts. Lower Mainmast is then 2.28 x 7.75 inches long or 17.67 inches long Lower Doubling is then 0.13 of this or 2.3 inches long Topmast is 0.58 or 10.25 inches Upper Doubling is 0.06 or 1.1 inches Topgallant is 0.31 or 5.5 inches Total is 17.67 -2.3 + 10.25 - 1.1 + 5.5 = 30.02 inches Lower Foremast is then 17.67 x 0.9 or 15.9 inches Lower Doubling is the 15.9 x 0.13 or 2.1 inches Topmast is 15.9 x 0.57 or 9.1 inches Topmast doubling is 15.9 x 0.06 0.95 inches Topgallant is 15.9 x 0.29 or 4.6 inches Total is 15.9 -2.1 + 9.1 - 0.95 + 4.6 = 26.55 inches Lower Mizzenmast is 17.67 x 0.84 = 14.84 inches Lower Doubling is 14.84 x .095 or 1.41 inches Topmast is 14.84 x .43 or 6.82 inches Topmast doubling is 14.84 x .095 or 1.41 inches Topgallant mast is 14.84 x 0.22 or 3.26 inches Total is 14.84 -1.41 + 6.82 -1.41 + 3.26 = 22.1 inches Will try with dummy masts to see if it looks right.
- 188 replies
-
- 2
-
-
- surprise
- artesania latina
- (and 1 more)