

42rocker
-
Posts
504 -
Joined
-
Last visited
Reputation Activity
-

 42rocker reacted to dewalt57 in H.M.S. Triton (Cross Section) 1:18 Scale, started by AL
Thanks guys!! Here's the finished cut before I slice off the ends. I made a video, waiting for U-tube to digest it.... LOL
The wood is Poplar, took 45 mins to do the finish cut with a 1/8" Ball Nose bit, 5% step over, 70 IPM.
AL
-
42rocker reacted to jaerschen in HMS Triton 1773, 1/48, POF by Juergen
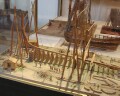
If I fit the transoms I had a big trouble. The reason was a wrong angle at the top-view plan.
On the following photo you can see the correct angle and the discrepancy.
If I know that it was possible to fit transoms.
-
42rocker reacted to Karleop in Vasa by Karleop - FINISHED – Billing Boats – reviving a poorly built model
Hola a todos;
I just finished the stern lantern. As I already mention, the plastic piece that simulates glass did not fit, I need to make a new one and also added and upper and lower piece to accommodate vertical “ribs”.
Here you can see the finished lantern in position.
Saludos
-
42rocker reacted to Karleop in Vasa by Karleop - FINISHED – Billing Boats – reviving a poorly built model
Update Feb 15:
Hola a todos:
After finishing the hull planking I began to paint and bend the upper strips of the hull. For this operation I use my wife’s steam iron.
Then I begin making the galleries and domes. This was a tricky operation because they need cuts in 3 different angles. To facilitate the cuts I glue first a square piece of plywood at the base of the cylindrical pieces.
To make the model more real I decided to include the roof shingles, which cost me much work at first, until I decided to glue one over the other and then cut all together in a triangular way in order to fit over the roof.
Finally I place galleries and domes in their place.
-
42rocker reacted to Karleop in Vasa by Karleop - FINISHED – Billing Boats – reviving a poorly built model
Hi everybody.
After removing almost all the parts that were misplaced or wrong I begun with the hull plancking. For that it was necessary to make some adjustments in the bow adding a little piece in order to fit the plancks.
The next step was to correct and rebuilt the stern.
After making the stern and the bow adjustments I proceed with the hull plancking.There were few problems placing the first plancks, but below the water line it was a little tricky because the hull made a sharp curve and the plancks at the stern, and mainly in the bow area, must be cutted and bevelled.
-
42rocker reacted to Karleop in Vasa by Karleop - FINISHED – Billing Boats – reviving a poorly built model
Hi everybody!!
First of all forgive my poor English, hope you can understand what I want to tell.
The story of my VASA started about 10 years ago, when the son of a friend visited the museum in Sweden and bought the model thinking that he could do with her dad, who has some experience in woodworking. Shortly after, they gave up trying to do it, and stay abandoned for about 8 years.
One time I visit him and seeing the model he told me the sad story and asked me if I wanted to try doing it, which I promptly accepted. After reviewing the boat I noticed several errors and that it will be difficult to assemble. Here in Mexico we say that It is always easier to start something than to repair it!
This boat represents three challenges:
1) Undo many of the laid parts, redo some parts, either already broken or broken when I tried to take them off.
2) It is a boat complicated to assemble, rated for experts and additionaly with many plastic figures that must be painted with much detail. Also with poor instructions and drawings (but fortunately with much information in forums like this).
3) Many of the pieces were loose and detached from its original panels, so it was like a puzzle to find parts.
Therefore, at that time I decided not to start it, partly because I was doing the Endeavour ship, so stay on hold just over two years.
Finally, about 6 months ago I decided to build it. Initially without much hope because it had some irremediable things that were complicated to repair (like alignment of lateral panels or deck). So I thought to build it more for practice, that a model to show. However, over time I change my mind and now it’s getting pretty good.
-
42rocker reacted to md1400cs in Wasa by md1400cs - FINISHED - Corel - 1:75
Nigel,
Yes I did misunderstand. Thanks for the input input Well, for the four most rearward cannons, so be it. It seems as though, however, that I may not be the only Vasa kit builder with this dilemma irrespective of manufacturer.
So this issue is still to be resolved, and is a work in mental progress. I may opt for those smaller guns, and build small carriages. At this point I remain irritated, and may move on to an other area.
Also, when I look at photos of the 1/10th, that has some very long weather deck guns, It would seem to be a problem for them as well? As always thanks for your sage input.
Speaking of guns I finally received those four stern swivel guns that I had ordered. I may segue and install those in the interim. A nice part of this hobby; One can meander all over the place, exclusive of when it comes the time to rig. That needs to be specifically ordered.
Cheers,
Michael
-
42rocker reacted to md1400cs in Wasa by md1400cs - FINISHED - Corel - 1:75
Dennis,
Thanks for your comments, very nice of you. You can buy all of these nails here;
http://www.micromark.com/small-spikes-pkg-of-1000,8607.html
One note- they are right angled, as they are intended as railroad tie cleats. In that regard make sure that you line-up the angles all along your hull. I have also noted that occasionally they will slip downwards. I decided to sort-of push them into the wood a bit to limit the slipping. Glue, of course would preclude that. However the micro ones are sooo small, that it is very hard to not have the glue be invisible.
Also I recommend that you pre-drill all holes and then slip/push them in. One "sideways" entry (without the pre-drilled hole) and oops a scar is left in the wood Mmmm...
I purchased all the medium and micro sizes. and sorta mixed them up. Good luck (:-)
MJD
-
42rocker reacted to md1400cs in Wasa by md1400cs - FINISHED - Corel - 1:75
I have been working on the stern windows, the stern gilded figures (I decided to try painting them). I took a side trip and installed the stern canon doors. Here are some pics.
The photos are self-explanatory. However FYI the nails and the bending tool were acquired through Micromark.com
You may also note that that the port side door (the pic in which I drilled the rope inlet, well that door was sprung too low. Darn thing would not close, so I will re-do that sucker...Nonetheless it gives you the idea.
I will post pics of the revised and re-designed stern windows next.
Regards
PS: I learned about watering down the glue to secure the rope wrappings on MSW Such a treasure chest of great ideas. Thanks to all of you, my sages.
MJD
-
42rocker reacted to md1400cs in Wasa by md1400cs - FINISHED - Corel - 1:75
My opinions of Corel’s SM13 Wasa are as
follows;
I purchased this kit many
years ago after having visited the museum. I did not do any research. The Corel
was the first one that I noticed and purchased it from Model Expo (a
consistently excellent supplier). As I proceeded with the build,
I decided that I wanted to add more details that were available from the kit
right out of the box. I also wanted to take my time and really improve my
skills as I went along. I was having a lot of fun.
I looked at, and filed many
photos of the original and started noticing several shortcomings, in terms of
accuracy, with Corel's example. There were several areas that were totally
wrong. Mmmmm, but I had progressed to a point where it was too late to adjust
the build in some areas.
First noted errors;
The five deck entry doors are
poorly shaped.
The bow entry doors are way
too thick.
The bow step-down side stairs
are incorrect.
The bow front railing is
incorrect (especially those dolphin gilded pieces)
The stern is too thin and
doesn't allow for the required gilded soldiers. In fact the entire stern is
wrong. I tore mine out and re-did it.
I'm only realizing these "issues" because I have researched so many photos. I also acquired a
set of plans from the museum.
OK. Some positive thoughts;
All framing is pre-cut. The gilded pieces are very well plated and well cast.
The instructions are adequate. Lumber is well cut, as are other wood pieces.
If one has no idea of what the real ship really looks like these criticisms would be vacuous, and benign.
The ship "out of the box" is none the less impressive, and is obviously the Vasa.
The one kit that is super accurate to the real Vasa is the Billings example. This kit is excellent to a
fault. However, I do believe that much of the wood parts are only inked onto
boards and then need to be cut. Also all of the very accurate gilding are made
of plastic. The completed kits that I have seen online looks so excellent. Nice
work on Billings part.
http://www.naturecoast.com/hobby/bil490.htm
If anyone has any specific
questions I will be happy to respond. And please any constructive criticism of
my project will be very appreciated, as this is only my second build, and I'm
new to your wonderful forum. Gee some of you have awesome projects.
MJD
-
42rocker reacted to dewalt57 in H.M.S. Triton (Cross Section) 1:18 Scale, started by AL
Thanks Tim!! If enough people were interested then I could post some info over in the "Modeling tools and Workshop Equipment" section!
Spent all night doing the fine tuning and got all the configurations in Mach3 set so it would all work correctly together and......Drum roll here......the first test Cannon in almost done with its rough cut!!!! Well....shiver me timbers!!.... its done with the rough cut!! Now to do a tool change and get the finish cut done! Here's what it looks like so far, the tail end is modified somewhat so as to have some meat for the 3-jaw chuck to hold on to, I'll cut and add the tailpiece later.
Took 1 hour to do the roughing cut, 1/4" Ball nose bit, 10% step over, 70 IPM. More coming so stay tuned in!!
AL
-
42rocker reacted to jre8655 in Harbor Freight Workbench
Mike,
I purchased the Harbor Frieght Workbench about three months ago. I love it!
It's as sturdy as any workbench I've either owned or used. Assembly was very easy and I was able to do it unassisted.
I waited until it went on sale for $129.95. I contemplated going to our local Harbor Frieght, but opted to have it shipped to my house because shipping was only $6.99. Yeah! $6.99 and it came from California.
-
42rocker reacted to dewalt57 in H.M.S. Triton (Cross Section) 1:18 Scale, started by AL
Thanks Tim!! Got the Tailstock mounted, just a bit of fine tuning and power hookup and she'll be ready to test on some wood!! That completes all the mechanical work on the rotary 4th axis, next will be the re-learning of the software again, been awhile since I've played with Aspires Wrapper software, which is what I'll be using to make the cannons gcode.
AL
-
 42rocker got a reaction from jaerschen in HMS Triton 1773, 1/48, POF by Juergen
Looks like you are off to a Great start. Enjoy and Good Luck.
Later Tim
-
42rocker reacted to Jeronimo in LE BONHOMME RICHARD by Jeronimo - FINISHED
Hi Thomas.
Thanks for the note.
Correction was rendered.
Otherwise, see my homepage:
https://fotos.web.de/ui/gallery/karl.weinmann
-
42rocker reacted to mtaylor in Licorne 1755 by mtaylor - 3/16" scale - French Frigate - from Hahn plans - Version 2.0 - TERMINATED
Thanks for the support and the likes...
Minor milestone... took the big pieces of wood and made about 850 small pieces of wood. Oh... and sawdust.
I've closed the sawpits for now and the pieces have been sent to the yard for gluing up into frame blanks and then cutting into frames.
Here's pics... and for those who wanted it.. a picture of (naturally) the sawdust from cutting the pieces.
Hopefully, I didn't mis-count but I still have some "big" pieces left just in case.
Now where did I stash that really large bottle of glue??
-
42rocker reacted to usedtosail in USS Constitution by usedtosail - FINISHED - Model Shipways - scale 1/76
Thanks Patrick. I am happy with that solution, since they will be painted anyway. If I ever try to build a model in all natural wood someday, i will be in real trouble.
I am going to add the vertical and diagonal knees to the gun deck walls. I am not sure if these were in the 1812 version, but here is what they look like on the current ship. There is a vertical knee under each beam and the diagonal knees meet between the beams, probably at a carling (if that is the right term). Since I won't have any carlings, I will just have them end under the spar deck planking.
I made one from some 1/8" basswood sheet to use as a template for the rest:
I made this template a little thinner than the knee I wanted, because I have found in the past that once I trace it, it gets fatter in the end, so by starting smaller, it should come out close to the right size. I used the template to trace the shape onto some basswood sheet that I cut close to the correct height.
I traced these so the curved edge was always on the short side of the blank, so I could use the blank as a handle when sanding it. I cut off the excess with a razor knife, which left a nice triangular piece that I put aside to use to make the quoins for the gun deck cannons.
I then used a Dremel sanding disk in the drill press to sand in the curves:
I cleaned up the knee with small files and some sand paper.
Then cut it away from the blank with the razor knife:
I got into a good rhythm and was able to crank each one out about every couple of minutes, so it took less time than I thought it would. And here is how it will look as a vertical knee:
The trick is getting them all to look similar, so here are the first 10 or so and I think they do look similar:
And here are 33 of them, which is getting closer to the number I need, but not there yet. And the triangular waste pieces too.
Tonight I will figure out exactly how many I need and finish making them, then start attaching them.
-
42rocker reacted to Ulises Victoria in HMS Bounty views please
I built the 1/48 starboard side open kit by Artesanía Latina. Good kit in my opinion, with very good instructions.
-
 42rocker got a reaction from mij in Xebec by mij - FINISHED - 1:60 scale
You have done a lot on Nice Work on this. Can't wait to see more pics. Thanks for sharing.
Later Tim
-
42rocker reacted to mij in Xebec by mij - FINISHED - 1:60 scale
Milling the sides of the gun carriages
Drilling the holes for the 4mm blocks for the carriages
Turning a step suport
New carving of a rabbit
Model so far
-
42rocker reacted to mij in Xebec by mij - FINISHED - 1:60 scale
I was not happy with the carving of the first eagle, so I carved another one from Boxwood.
I cut out the shape of the eagle first, then started the carving.
I took Antony`s advice in putting a light stain on the carving to bring out the detail.
I used French polish and linseed oil.
Carving with the stain on.
Eagle fitted to the stern of the ship.
-
42rocker reacted to mij in Xebec by mij - FINISHED - 1:60 scale
Port and Starboard Dolphins fitted.
Eagle fitted to stern.
I`m not certain if the carving of the Eagle is good enough.
I might take this one off, and re-carve another one.
mij
-
42rocker reacted to mij in Xebec by mij - FINISHED - 1:60 scale
Cutting brass tube for rudder hinge.
Soldering tube to brass shim
Rudder hinge complete.
Blanks cut from Boxwood of Eagle and Dolphins.
Carvings of Eagle and Dolphins.
-
42rocker reacted to mij in Xebec by mij - FINISHED - 1:60 scale
Planking from Cerry
Port and Starboard Serpents carved from Boxwood
mij
-
42rocker reacted to mij in Xebec by mij - FINISHED - 1:60 scale
The rudder is cut from Cherry, all other items are cut from Box.
All items fitted to the decks.