


olopa67
-
Posts
33 -
Joined
-
Last visited
Content Type
Profiles
Forums
Gallery
Events
Posts posted by olopa67
-
-
-
-
OK first of all thanks everyone for the precious information, put the expanding foam idea on the side. I will fill the bulkheads with wood leaving 1mm gap on one side and glued it only on 1 side of the frame, I hope this will minimized the problem that can be caused by expanding wood due to humidity (this was something I was totally unaware, so thanks again for the tip) I will try to find some basswood although I have already purchased and installed some balsa wood, could not find much on line here in Australia so the choices are to buy overseas, don't know if I can wait for the delivery so I might proceed with what I have. I m still undecided if fill the entire side or only stern and bow.
and then going for my first planking ever. wish me good for that
Thanks again
- thibaultron, Canute, CaptainSteve and 1 other
-
 4
4
-
thanks Clark. bugger the 3 gaps i filled i did it with balsa. can you please tell me what problem balsa can give me, hope nothing major
- Canute, mtaylor and thibaultron
-
3
-
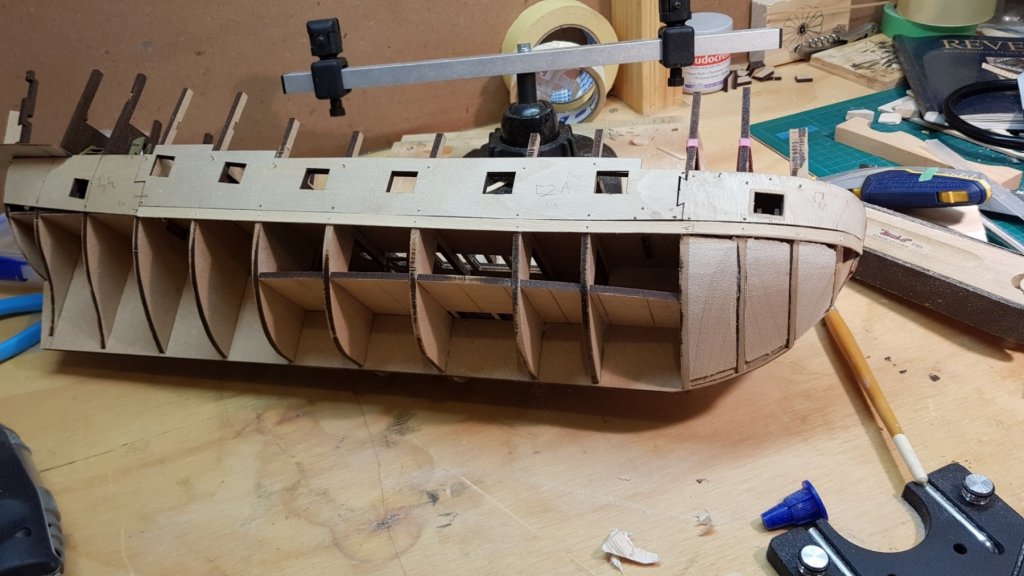
Good day to All,
a quick, probably silly question.
it is worth to install the filler block in between all the bulkheads ? or it`s enough just at the stern and bow.
did anyone attempted to use expanding foam? and if so with what result? any others way to fill the gaps? any tips to share
thank you for your time and have a great day/night
Paolo
HIC SUNT LEONES
- CaptainSteve and thibaultron
-
2
-
7 minutes ago, vossiewulf said:
Well I'm probably one of the least knowledgeable people here, but as far as I know we don't know very much about the details of how cannon were mounted and rigged this early. As I recall, the Spanish were still mostly using land-type carriages, and they and the English both carried about 9 different types of guns on board so it's at least a complicated question. Maybe someone else who knows more can step up.
thank you vossiewulf,
I had found few pictures of the cannon and how they have been rigged, so many different ways, probably due to my inexperience I should take the easiest way and start studying how to actually perform the rigging (kinds of knots, wrapping and coil and how to make them).
any resources on this topic are also welcome 🙂
I know I choose a difficult kit for a beginner, I challenging my self hardly and perhaps I should have taken a more humble model. I m not giving up tough and I love this site full of people of knowledge and very keen to help.
thank you for time
-
G`day everybody,
I have to start building my first ever cannon ( I m making the Revenge Kit from Amati) does anyone have any links to video and/or instruction on how to make them?
the actually assembly of the cannon itself seems pretty straightforward my biggest concern is the rigging part (I never rigged anything before so this will be my first attempt ) I need all the possible visual information on how to do the rigging.
if anybody can help me out I will be very grateful.
thank you for your time
Paolo
-
-
-
another rear deck planked
thanks for the support.
-
12 hours ago, vulcanbomber said:
As long as the mast holes are in line, you should be ok. It does not seem to matter to much about the size of the gap. But it is your ship and if you want it to look more like the instructions, then move the stairwell over, but personally, like xodar461, I would leave it as it is.
thank you vulcanbomber, as i previously mentioned to xodar i have no experience and may be i relay too much to the instruction and panicking a bit too easily if i see discrepancies with the manual. i really appreciated your support and advice.
-
19 hours ago, xodar461 said:
I would not worry too much if the model does not exactly match the pictures. And I would not move the opening for the ladder. It will just be extra work that is not needed. This area on my model has a 4 mm strip running across the deck aft of the hatch combing.
jeff
thanks Jeff my concerns come from mine unexperience, i tried only once before to make a model and i completly stuffed it up. but was a good learning experience....on not what to do. :-). love your help really appreciated. i saw the way you planked the edge of the decks and i will definitely start to use it from now, much cleaner finish.
thanks again
-
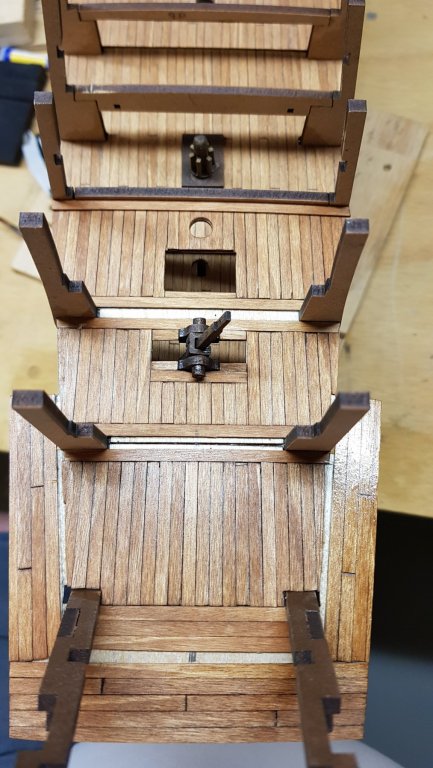
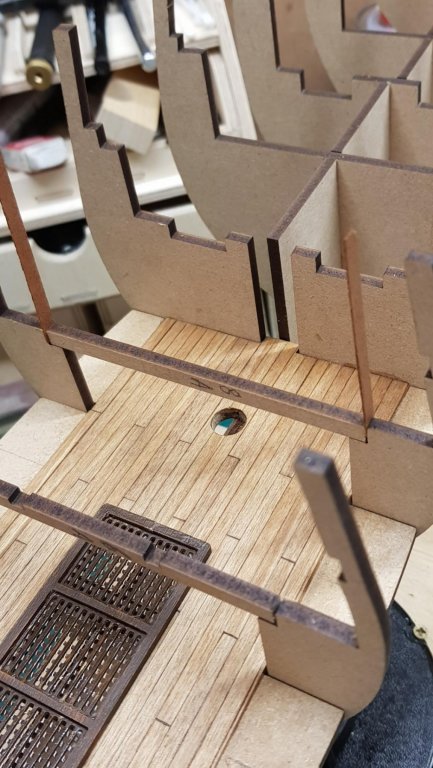
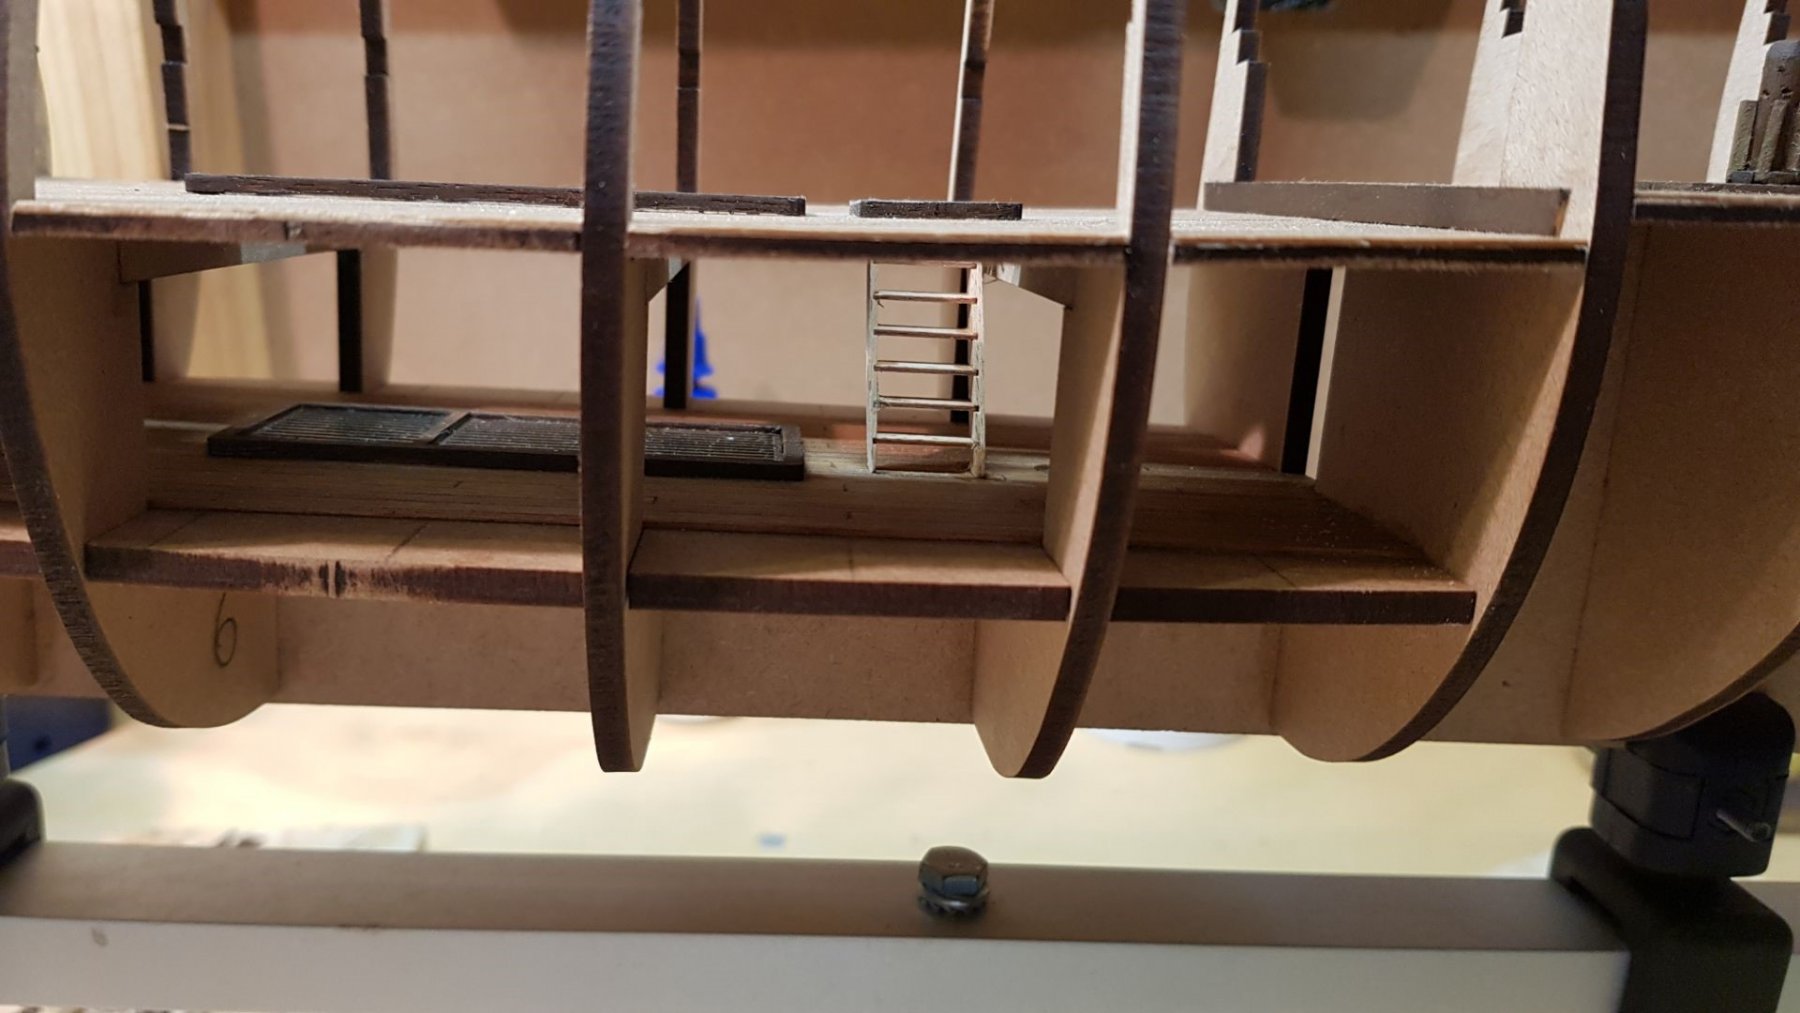
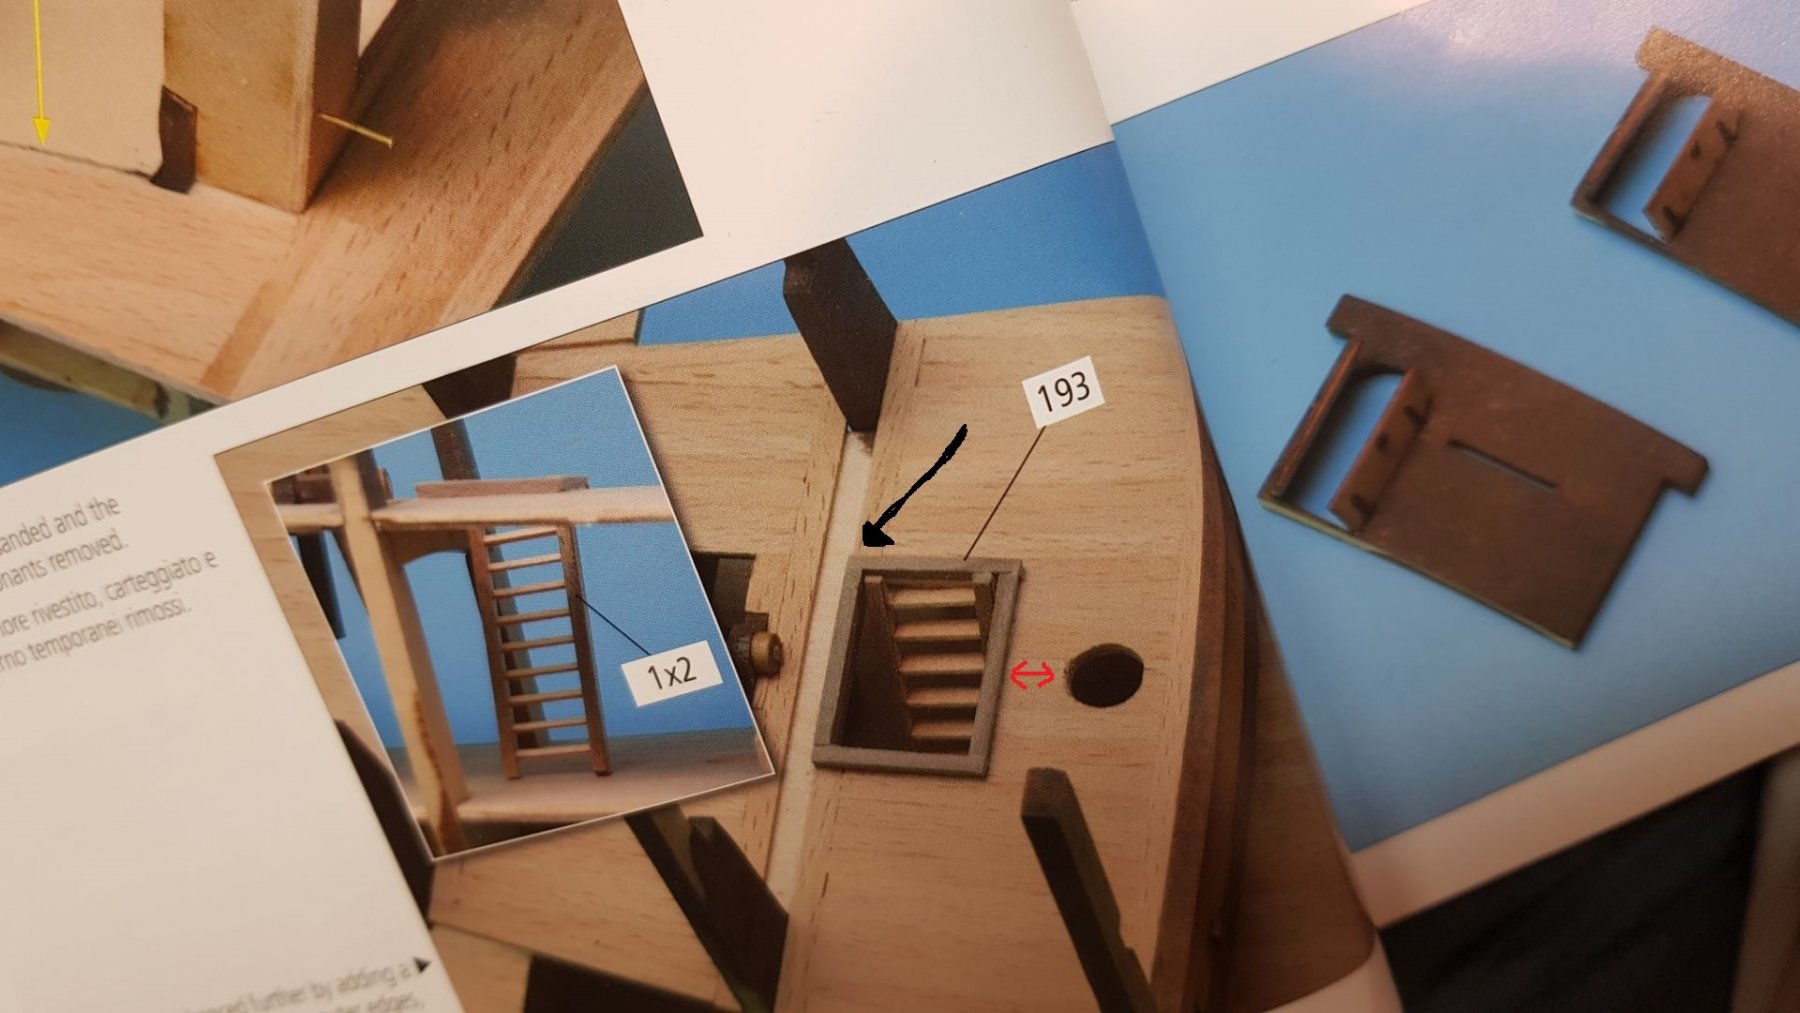
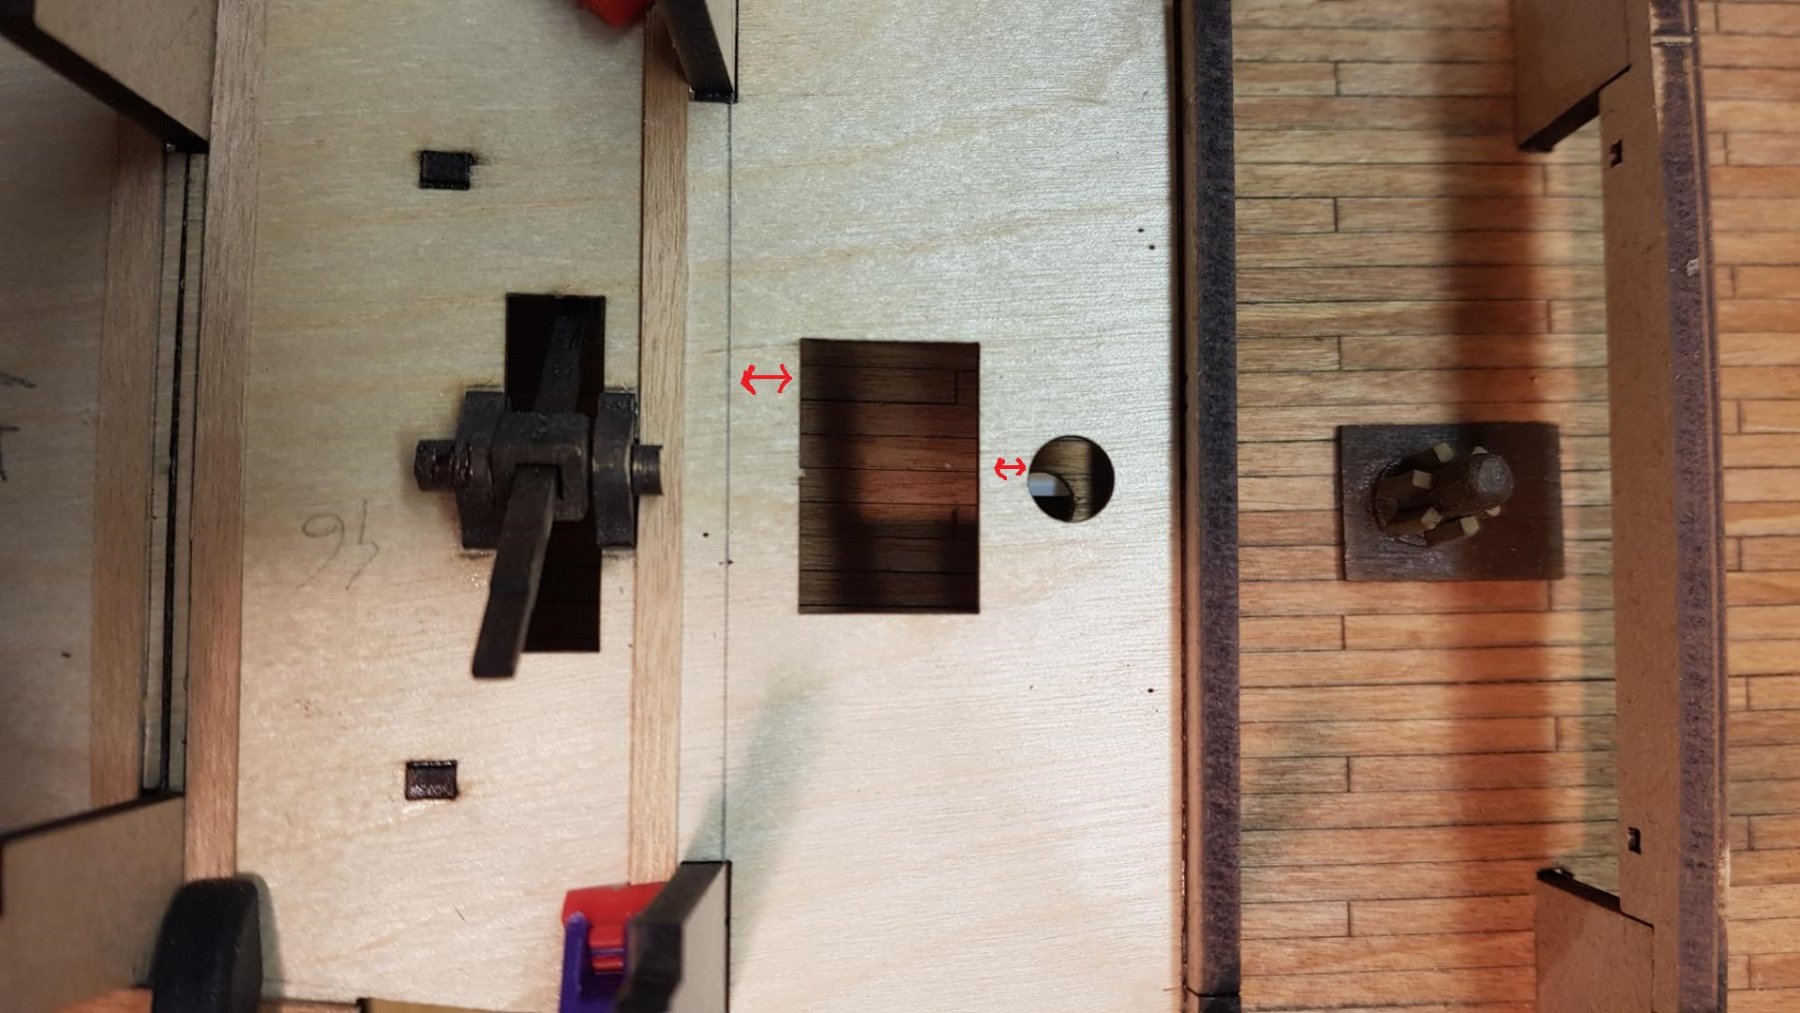
First ladder installed, once again measurements from Amati instruction are wrong, far to wide to fit,

Now with the upper back deck.
what is shown in the manual is a bit different of what you ll find in the kit.

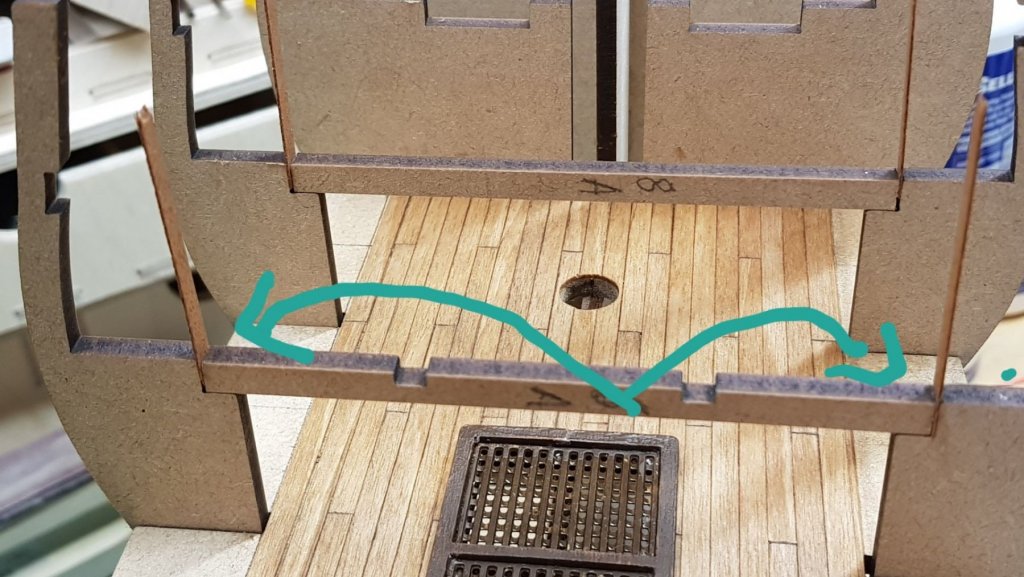
the frame for the access to the bottom deck appear to be aligned with the beginning of the planks but I had a dry plank on and there will be space for an extra plank, same for the mast hole, the space in between the hole and the lower deck access is far less in reality than what is shown in the manual, I m hopping this will not create major issues later on

- CaptainSteve, JeffT, Baker and 1 other
-
4
-
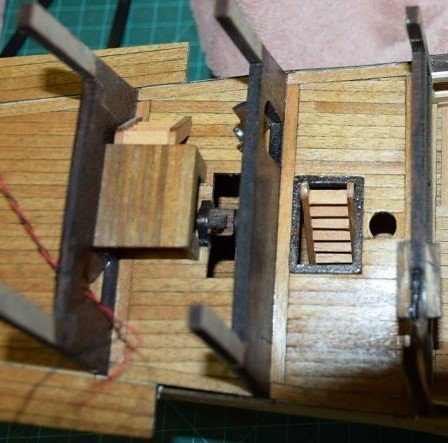
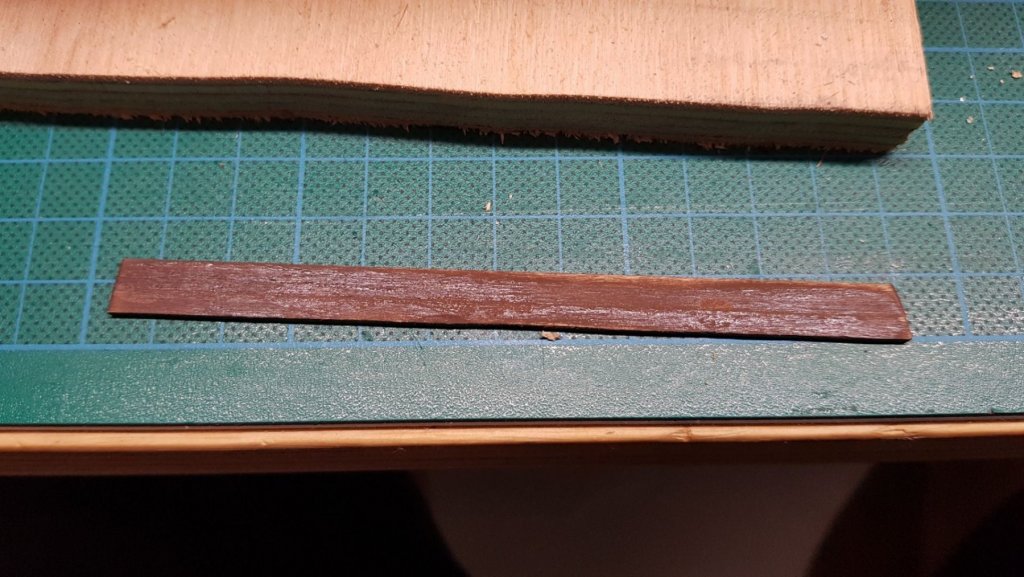
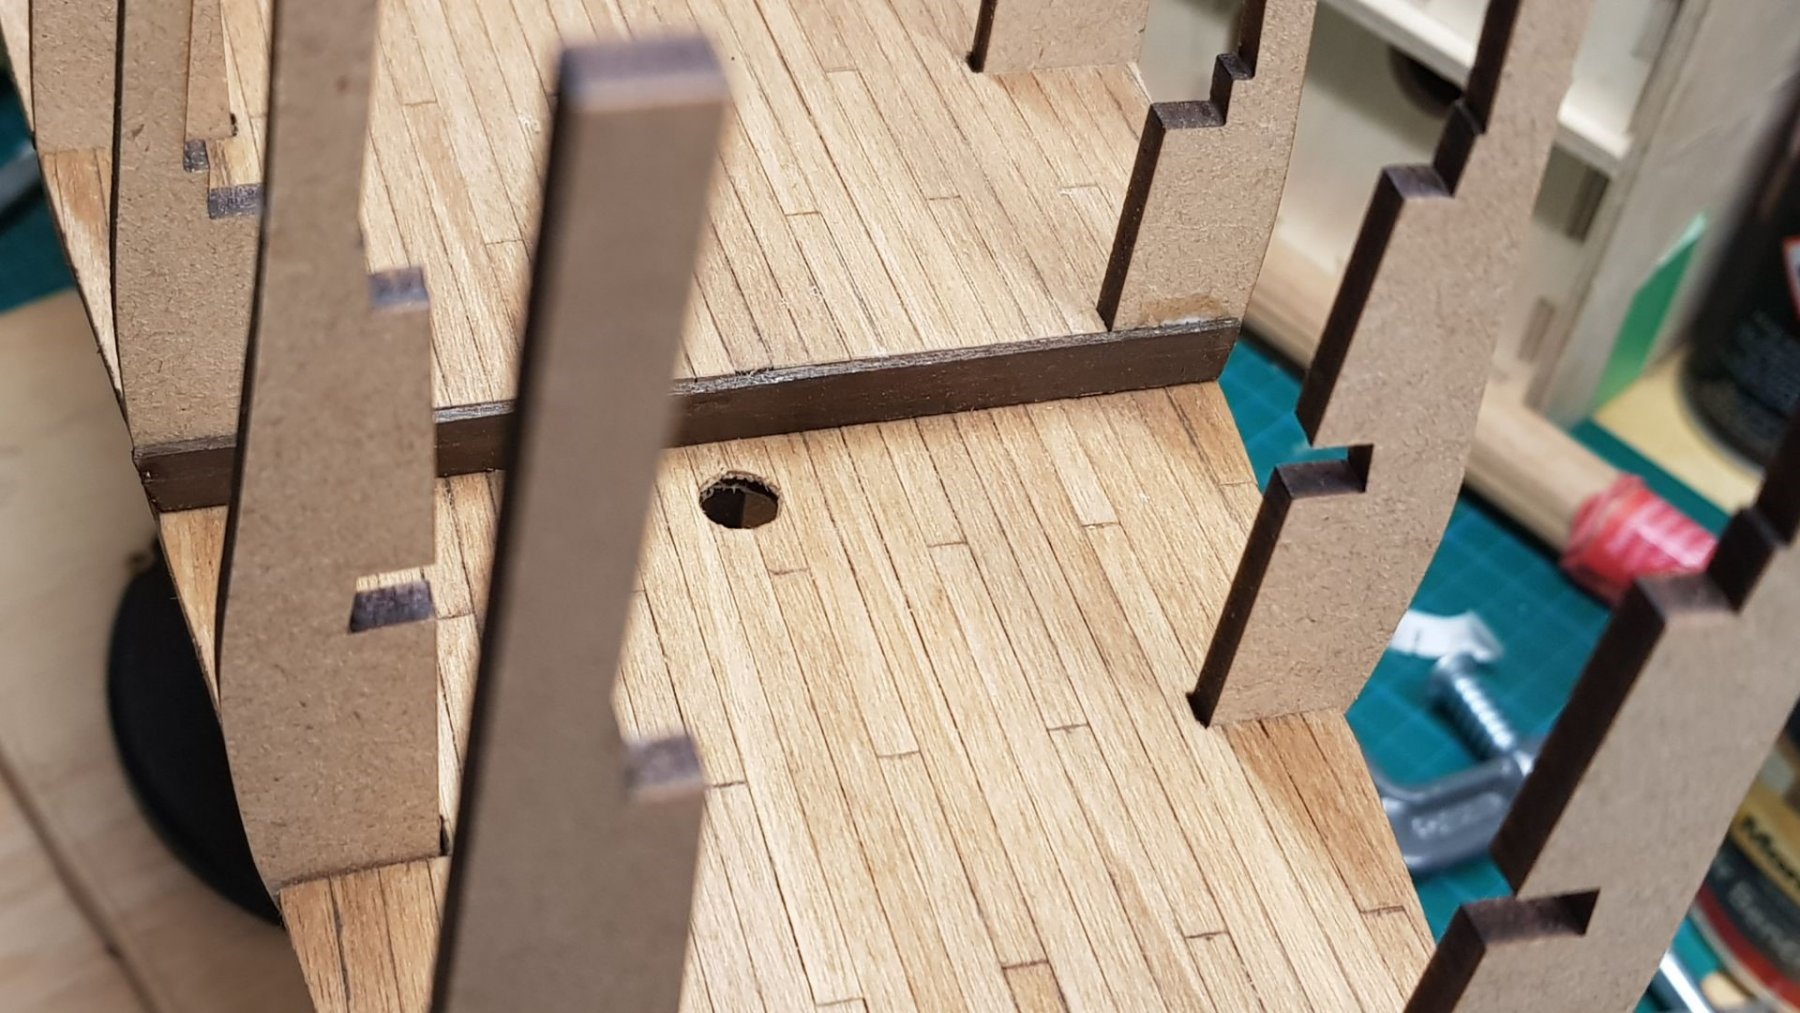
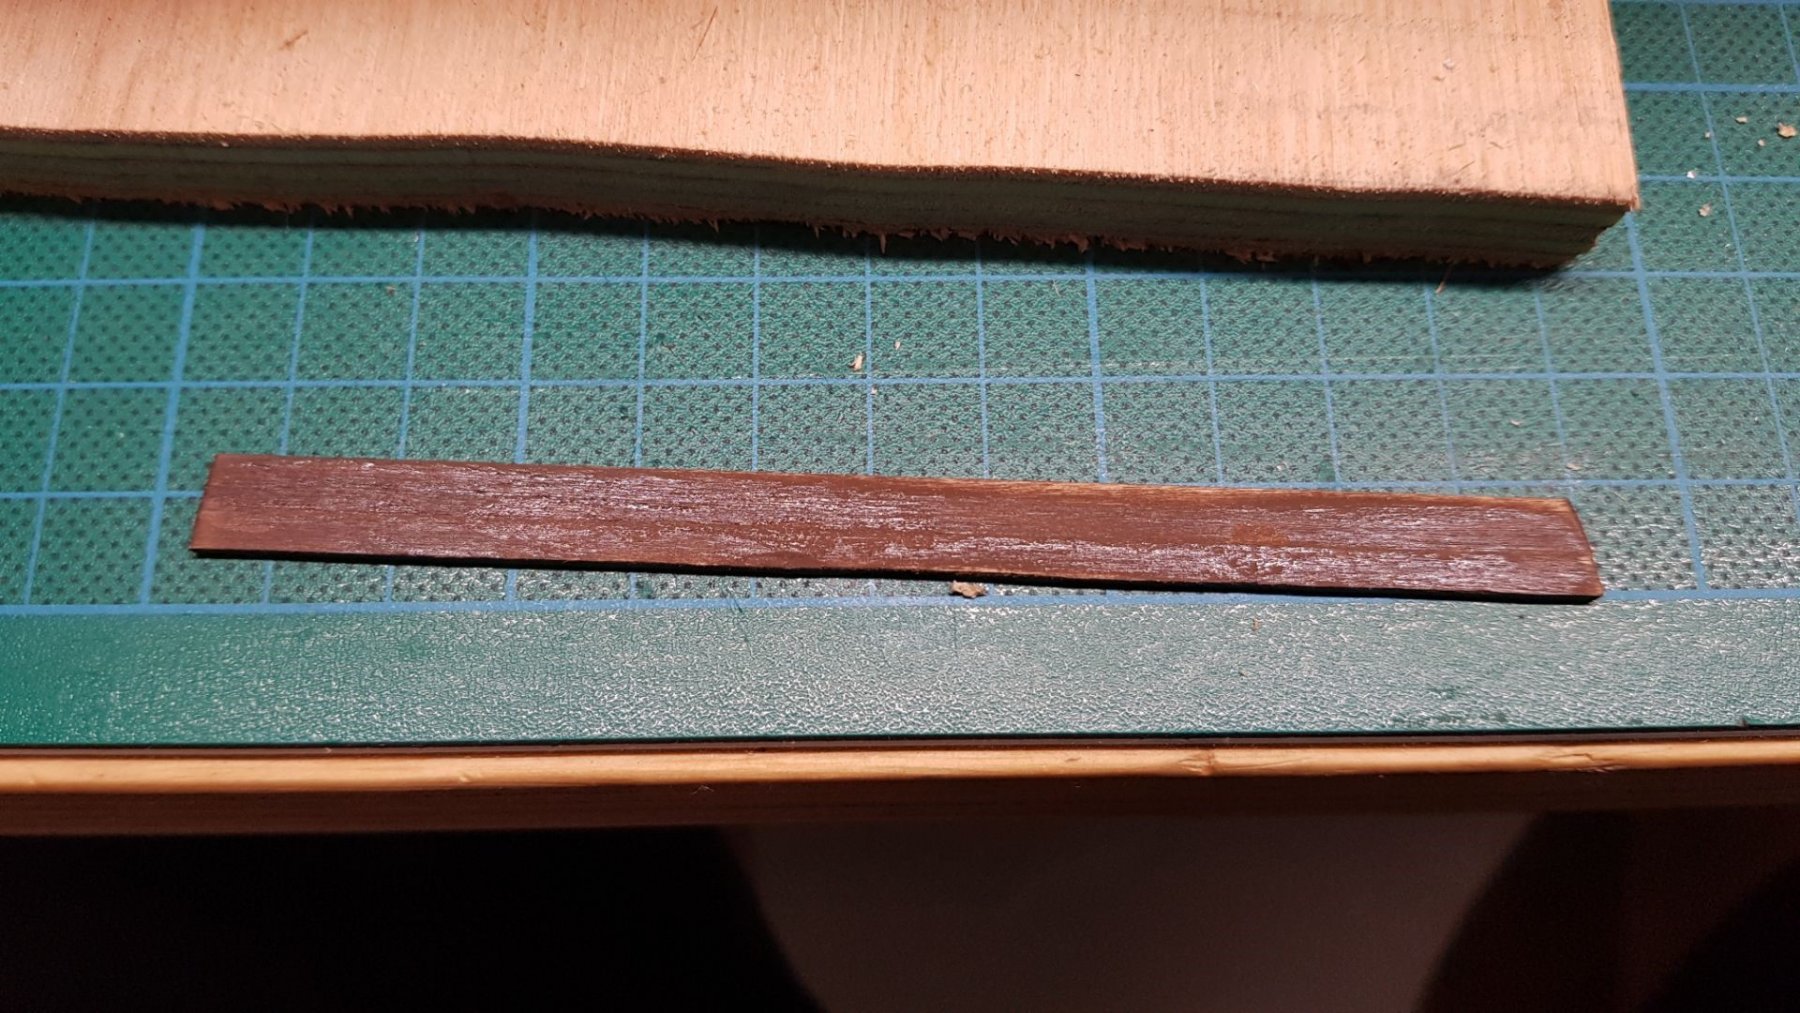
Another deck up. This deck makes two steps that need to be planked, one with 0.5mm x 5mm and one with a 1.5mm x 8mm plank, there is no plank with the measurement requested so I had to make them.

I had also found that the length suggested by the manual appear to be incorrect (too short) so I used the part 9A as a guide which also gave me the right angle for the cut

The bow deck is also planked,
a bit hard to put it in place, you need to carefully bend it, and it is a bit scary, i was just waiting to hear the snap sound :-) ...did not happened.
Amati want you to fix the support beams temporally with nails to give the structure some rigidity, i opted to use two elastic rubbers, less invasive and if really needed i can always put the nails later on.
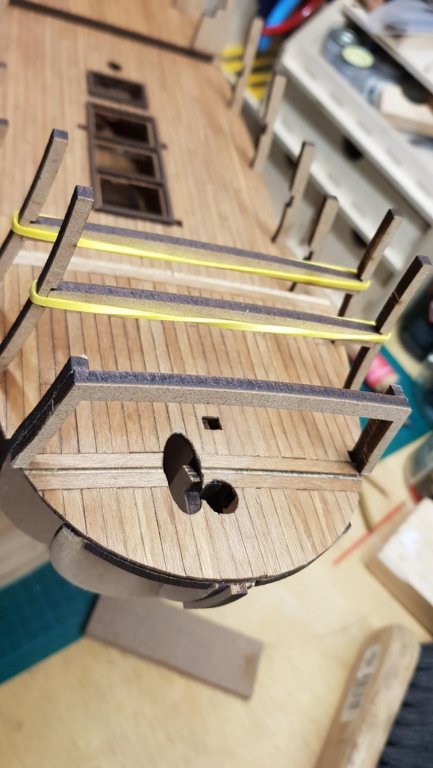
I can sense problems to fit the bowsprit later on, i hope to be wrong.
So this is where i m now


- GrandpaPhil, Baker, nikbud and 1 other
-
4
-
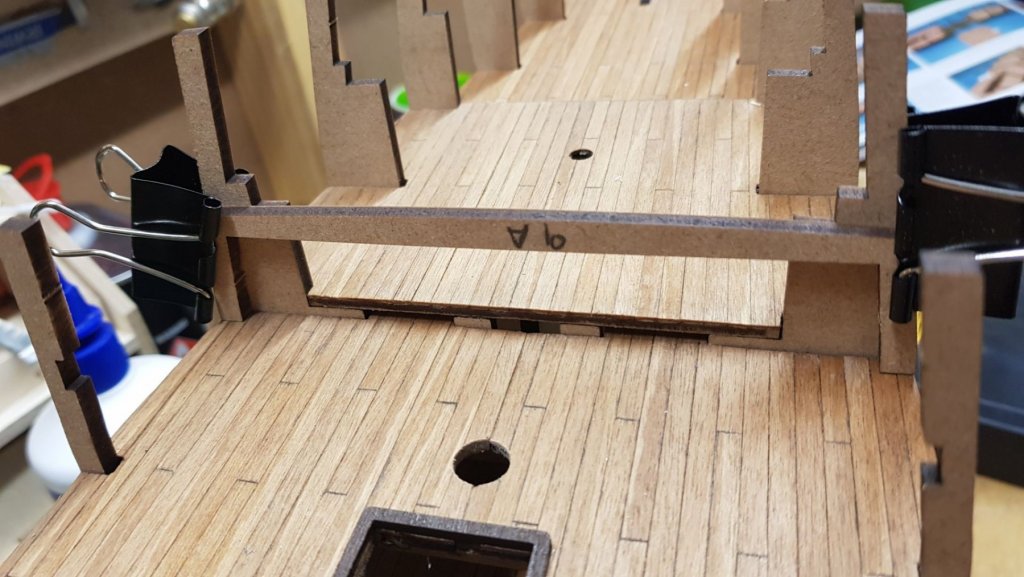
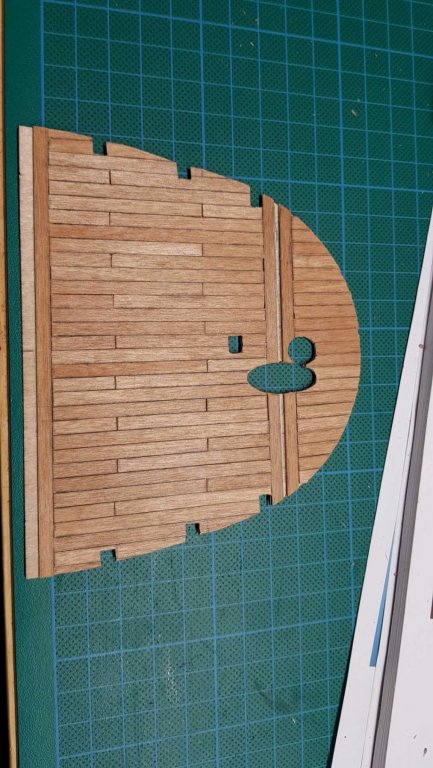
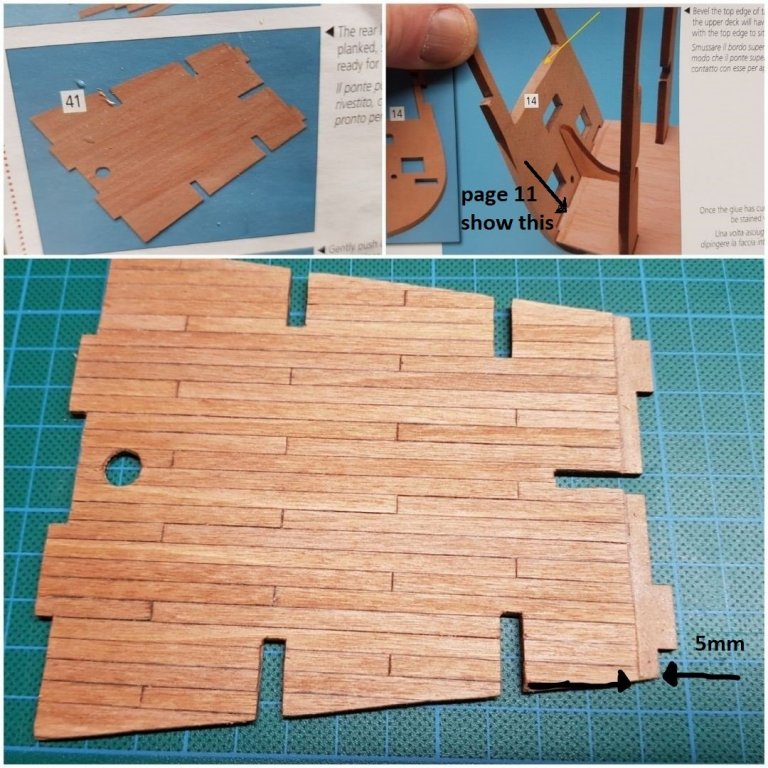
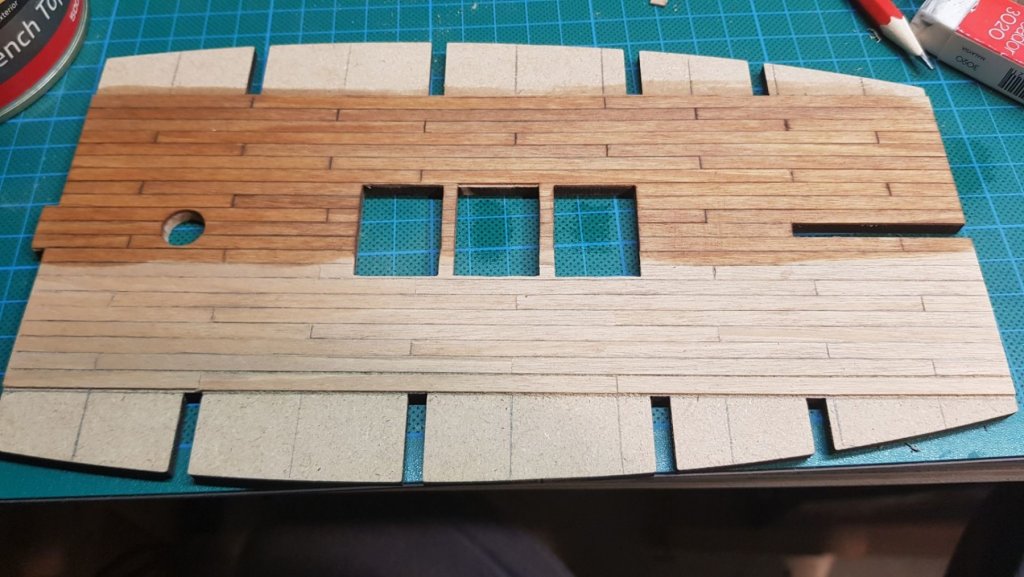
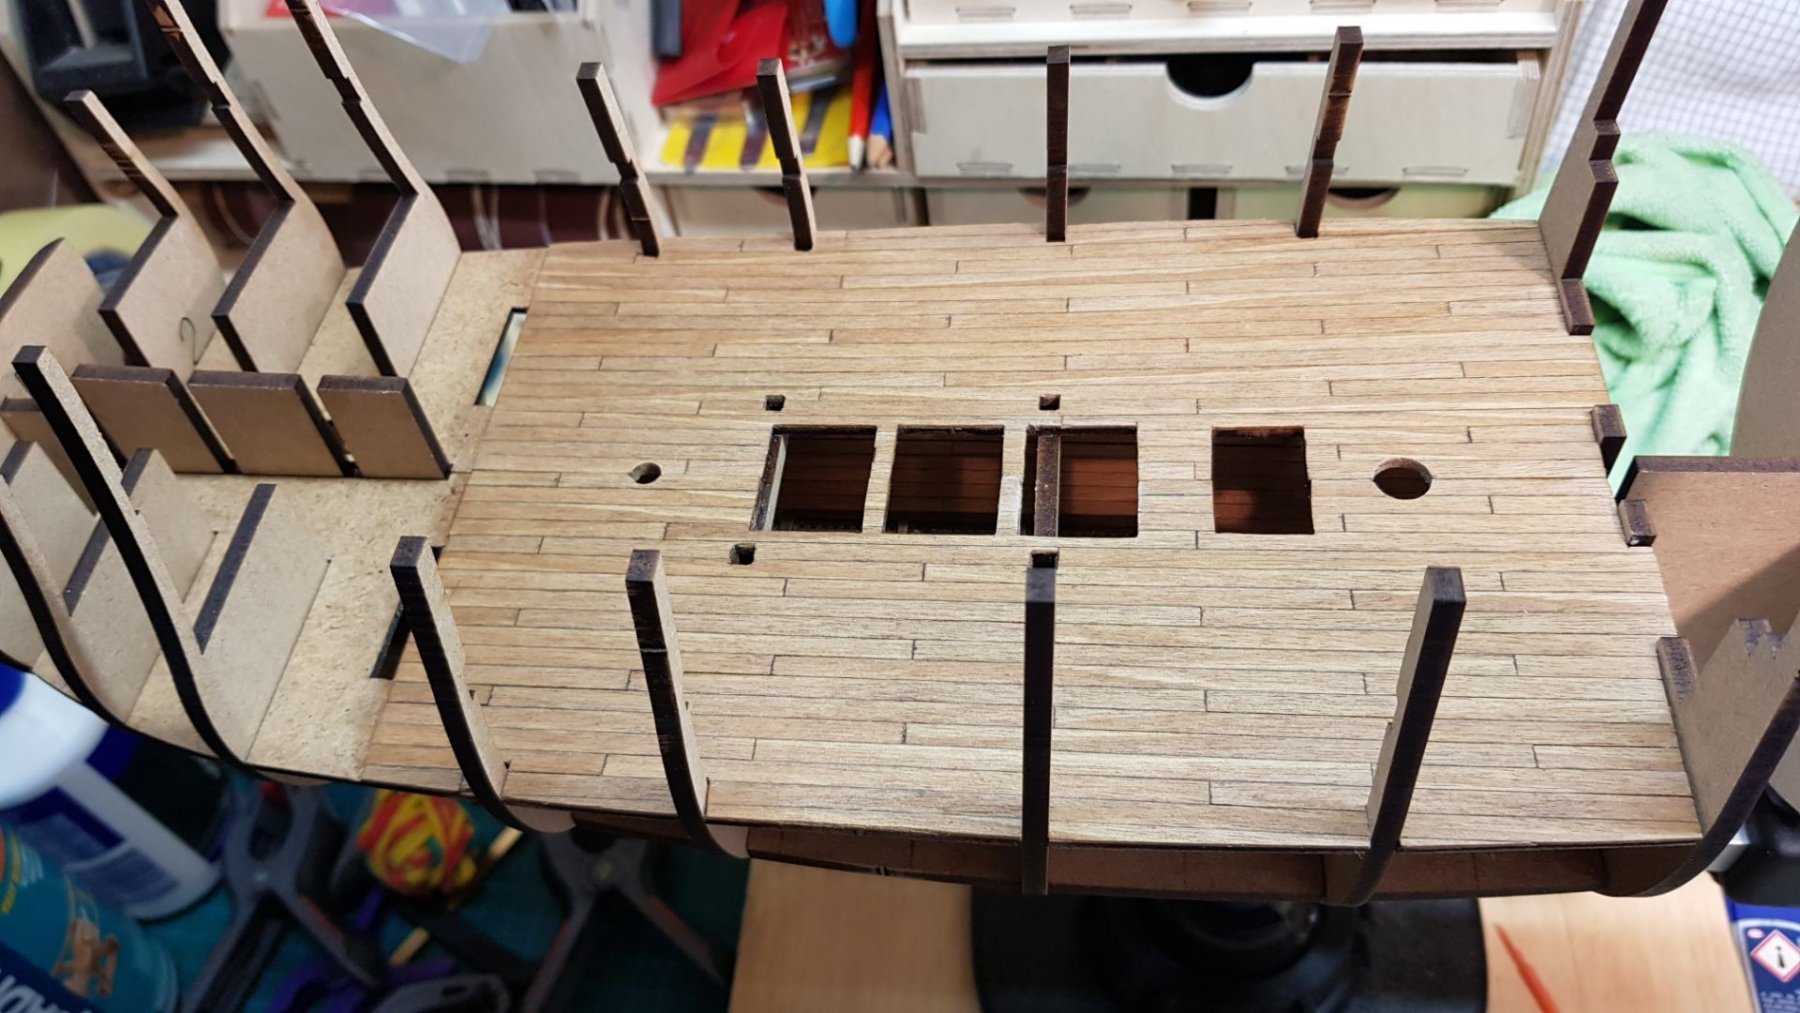
the Back deck present 1 little issue with the manual provided which make hard to understand if you should plank the deck all the way to the back or leave some clear space. Go on page 11 and you can see that they want us to leave some space un planked. They did not mention this previously and they did not say how big should be the gap. I personally left a space of 5mm, hopping for the best.
"The pessimist complains about the wind; the optimist expects it to change; the realist adjusts the sails."
— William Arthur Ward, Writer
- nikbud, JpR62, CaptainSteve and 1 other
-
4
-
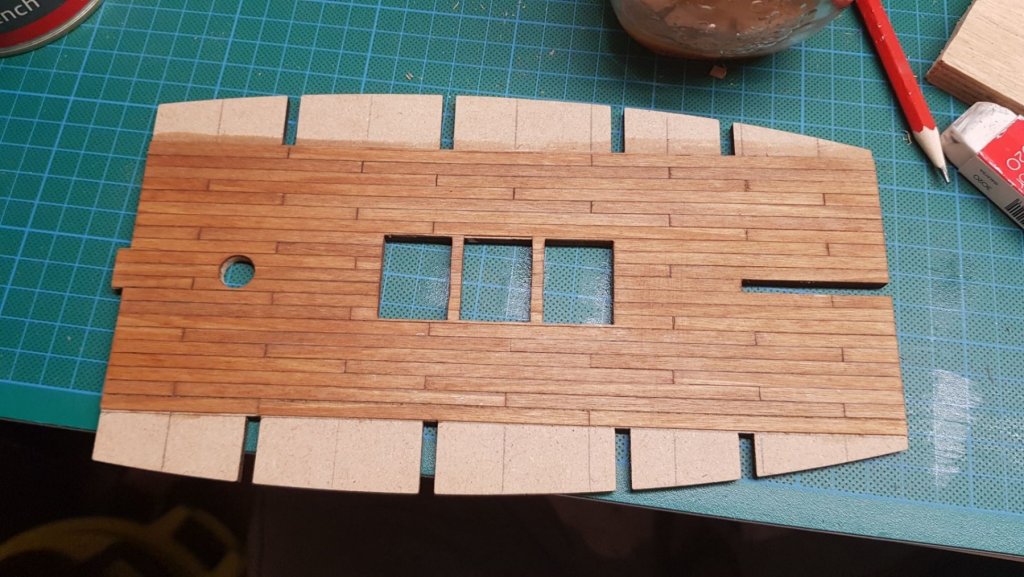
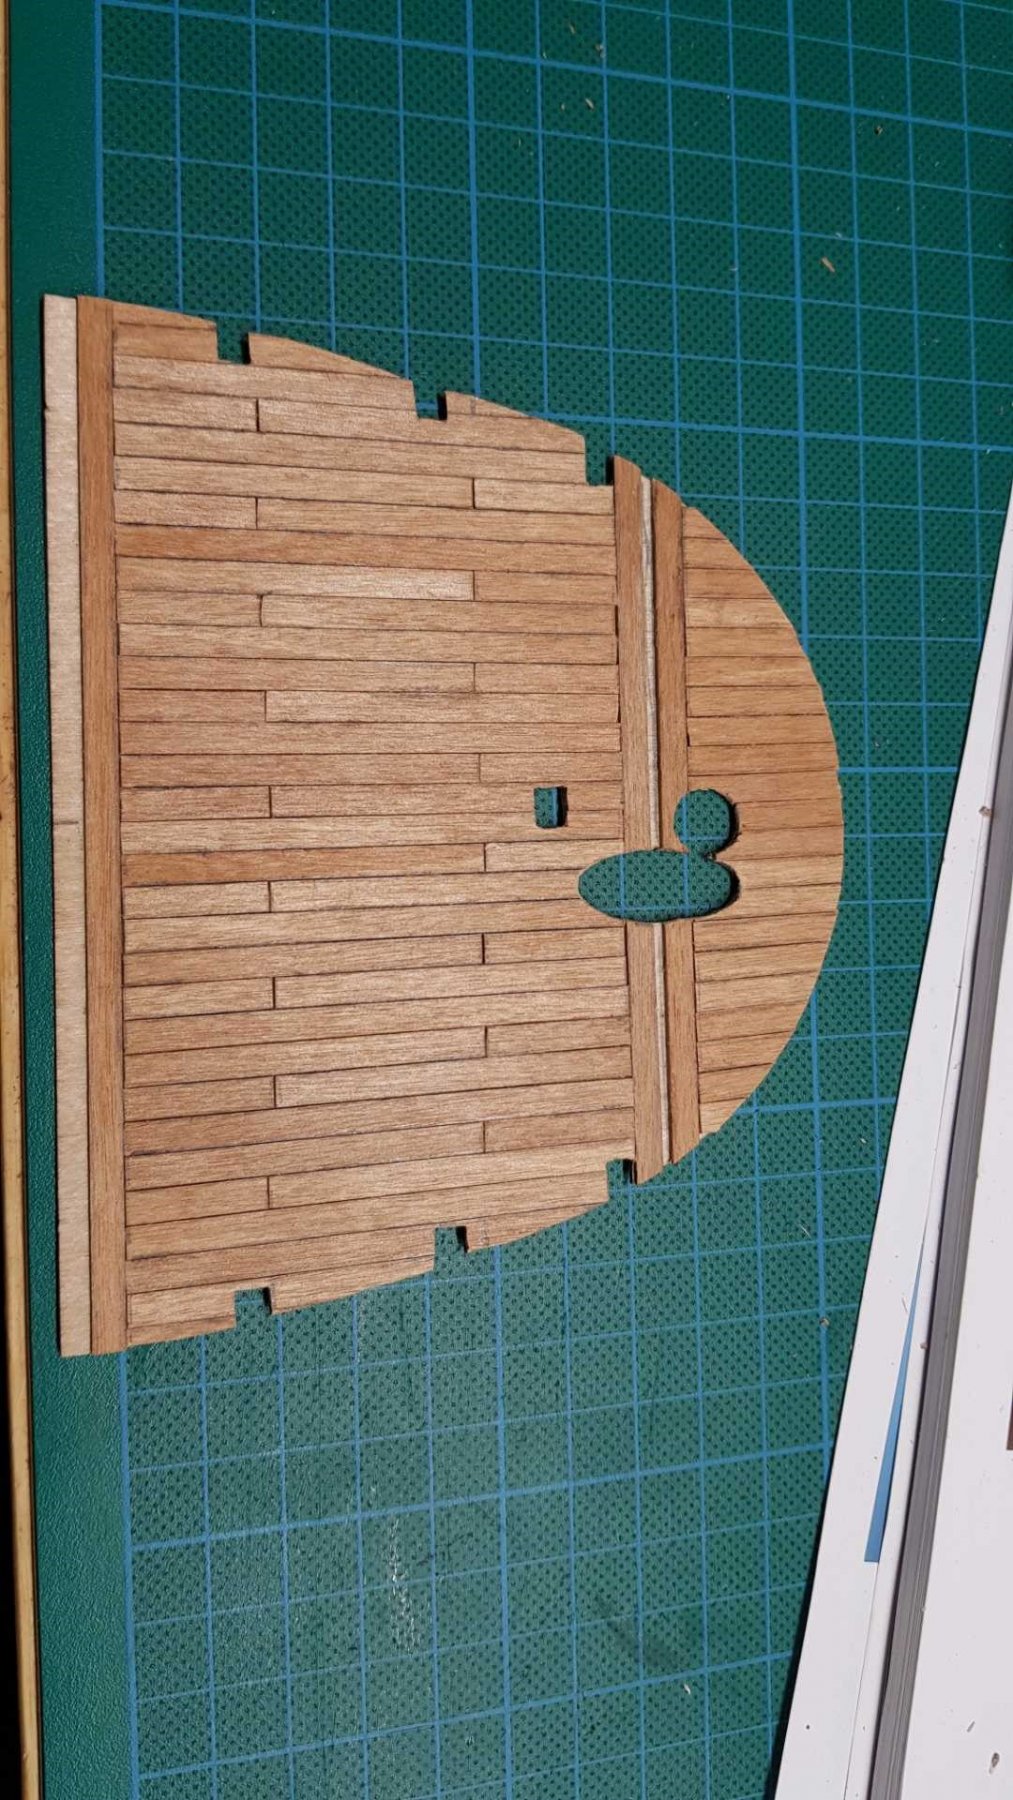
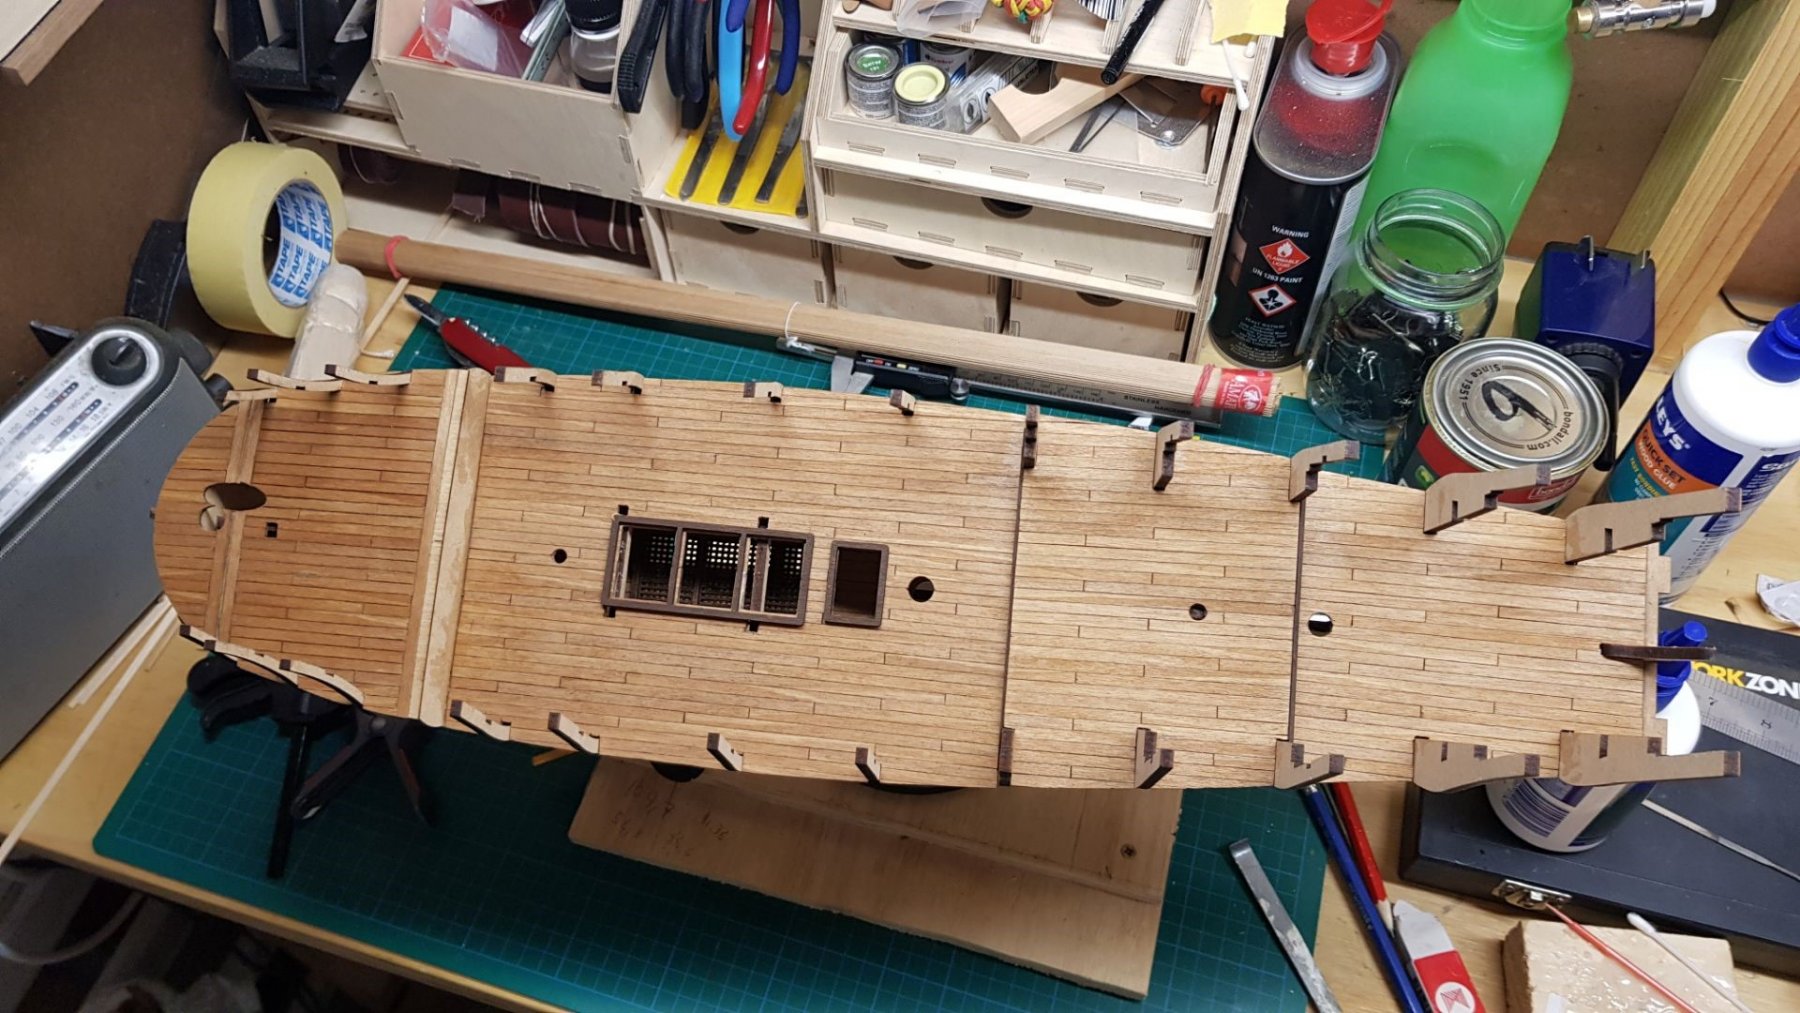
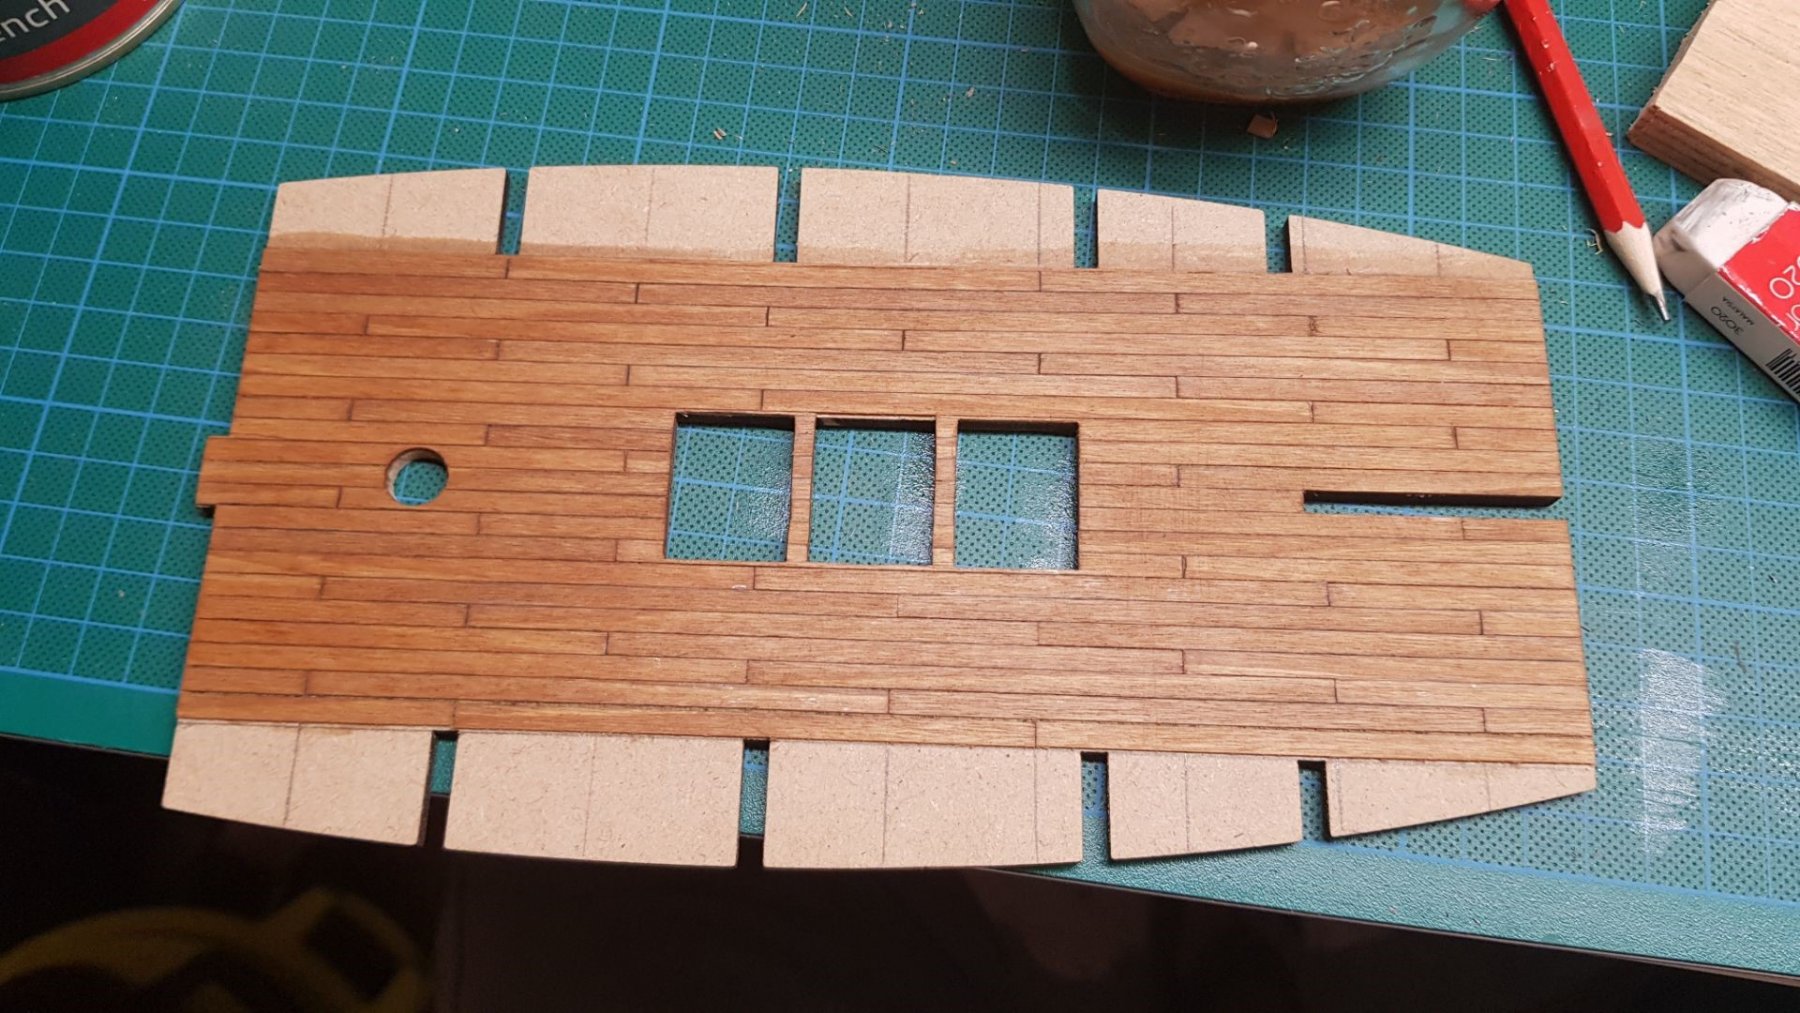
Here we go!
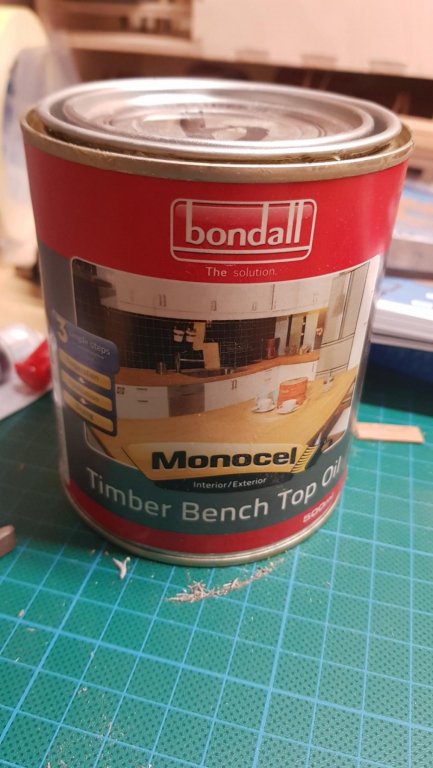
the main guns deck is been planked and put on place. the finish was sending, 1 coat of bench oil, 1 coat of wipe on poly,1 coat of matt varnish and sanded again, I know I probably exaggerated a bit with 3 coats but I m not in rush and did a bit of experiments, I would probably not apply the first coat of oil bench in the future. I had a bit of problem of shaping the two holes, I guess because the deck is split in two halves and when I join them the two half hole was not symmetrically finished. thanks @xodar461 for your advice I managed to correct the shape by rolling a bit of sand paper end run it trough the holes, much easier than using a curved filer. the access to the lower deck is not the best but I didn't give too much attention it will cover anyway by the grate support and if still visible I will file it later.
once again any advice is more the welcome and thanks again to Jeff for answering my question, especially the silliest ones. 🙂

- GrandpaPhil, JpR62 and CaptainSteve
-
3
-
On 1/17/2019 at 1:43 AM, nikbud said:
I like the look of this ship, so i'll pull up a chair and follow your progress, good stuff so far
you are welcome, not sure if it will be an enjoyable watching. 😂😂. i m not very experienced and know that there is someone around make me feel more comfortable. lots of question will be asked.
-
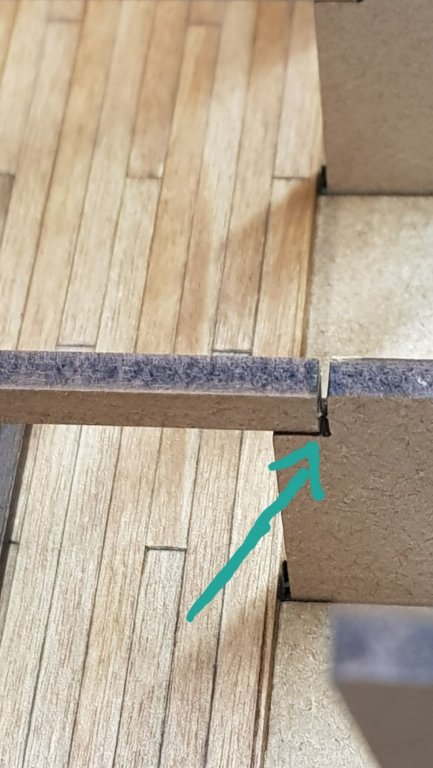
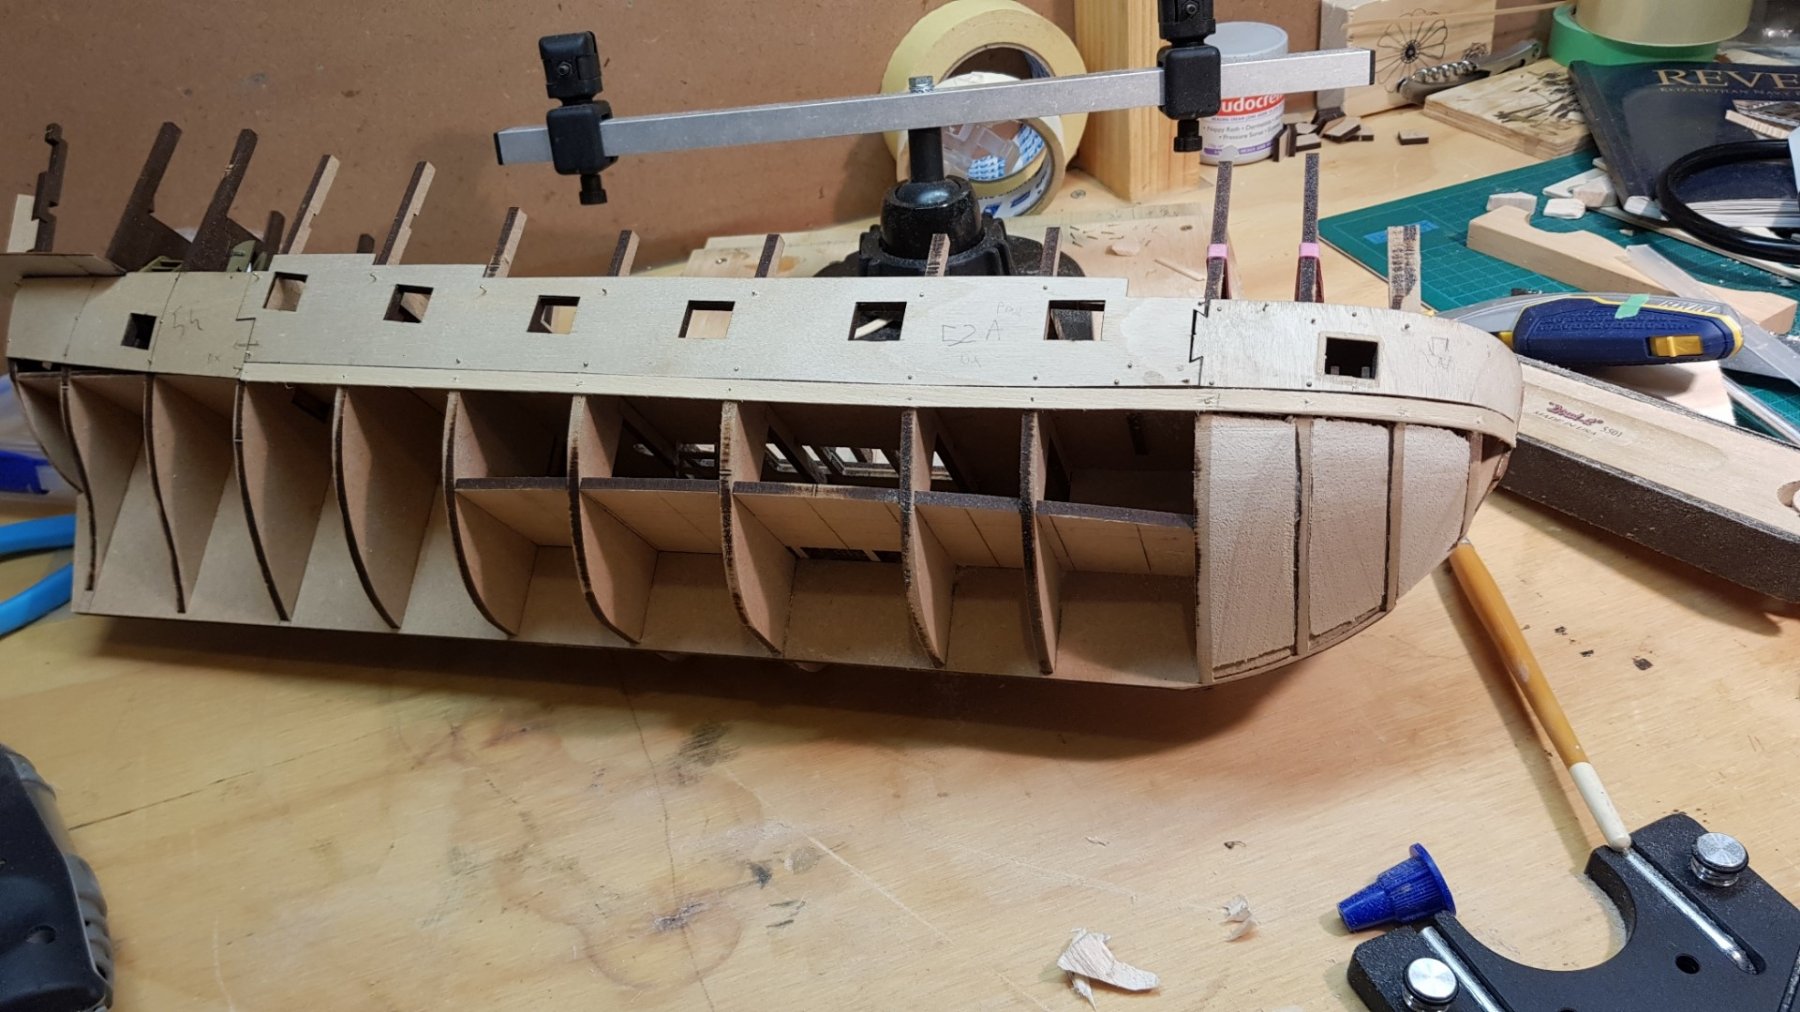
Lower deck glued with no issues.
The support for the gun deck which have to be glued after the lower deck shows a gap (see picture) of about 1mm, so I have place a bit of wood (planks from a previous model with 0.5mm thickness) on both the ends. Don’t want any surprise later with alignments, two of the supports have some kind of slots and I try to have them aligned the best I can, just in case. Of course I have had trimmed the excess of the inserts
- Baker, JpR62, GrandpaPhil and 4 others
-
7
-
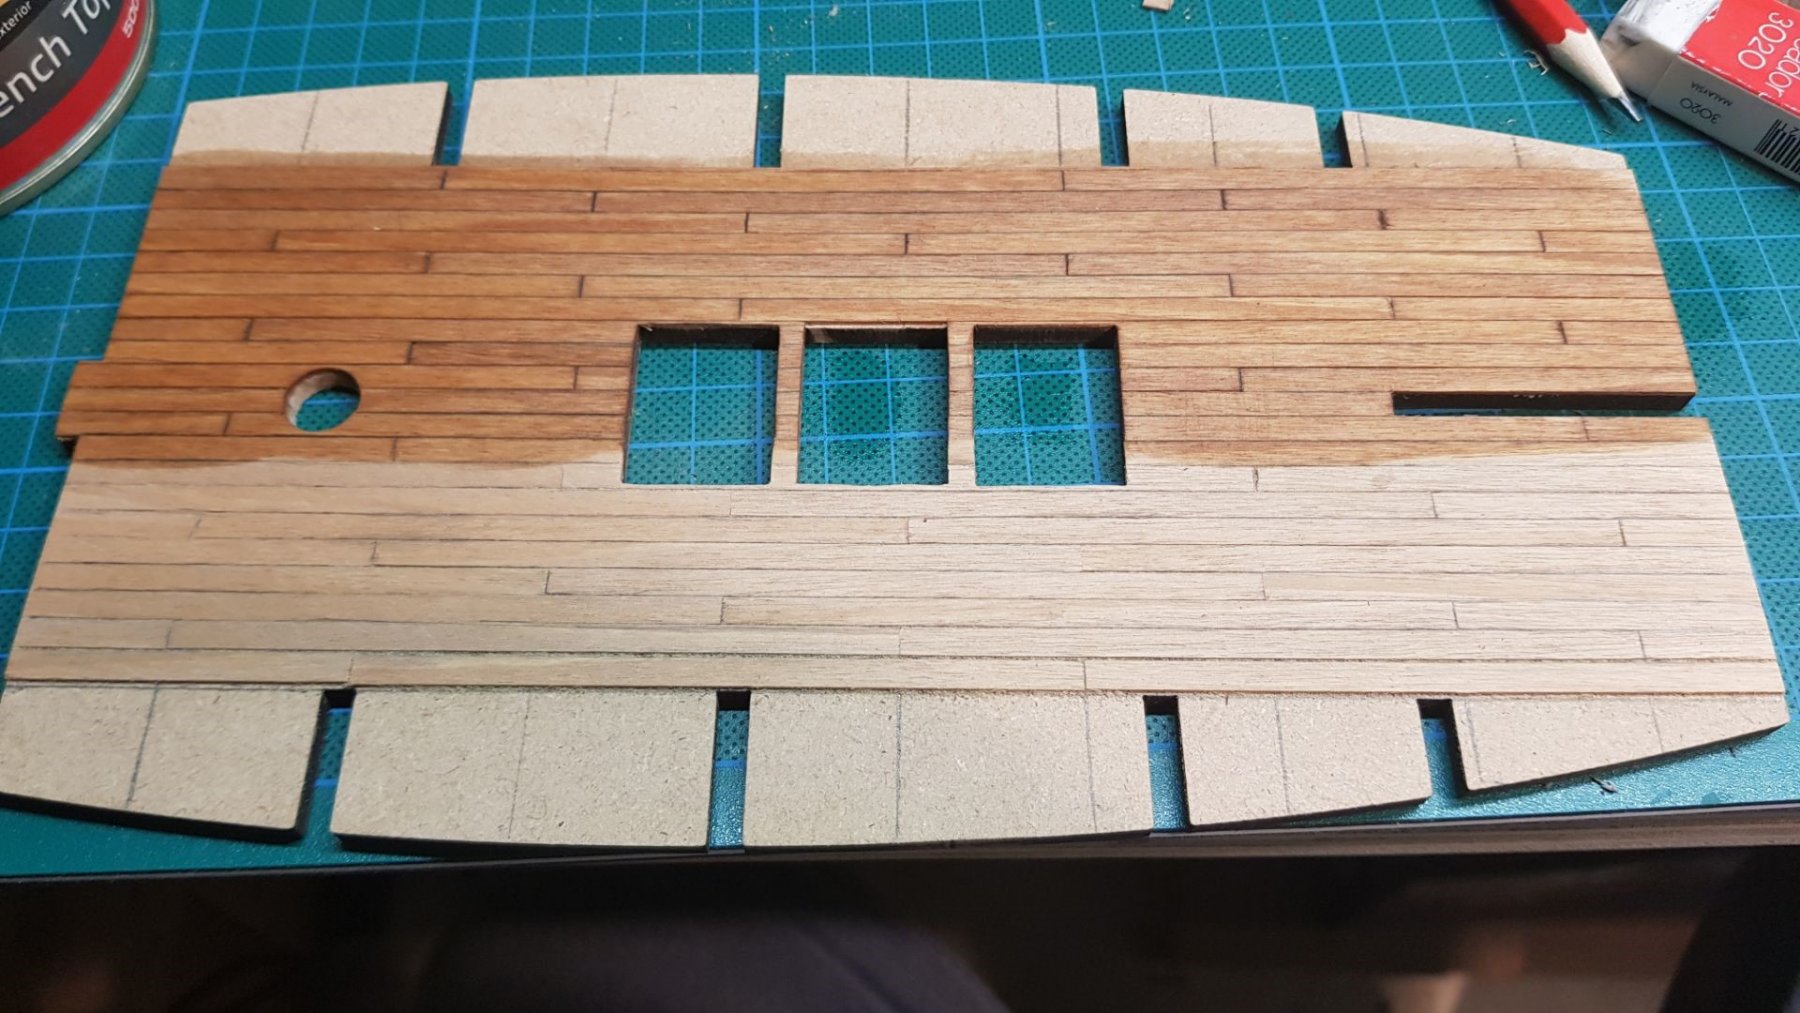
Lower deck planked with no major issues, the instruction shows the deck in one single piece but it come actually split in two, not a problem just glued the two halves. After getting few advice from more expert members I decided for 10cm planks with a slide up of 2.5cm and a pattern of 4 repetitions.
I took the risk to buff the deck with some clear bench oil (was in the lower deck anyway ) you can see the difference with the oil on end without it. Pretty happy with the result.
Should I apply varnish? Open for any advice.
For the more expert that will read this if they can spot any mistake or have any improvement or tips to give, I m very happy to receive them before the other decks start.
- GrandpaPhil and CaptainSteve
-
2
-
-
-
15 hours ago, xodar461 said:
Hi Paolo
Thanks for following my log. I am not a very speedy builder as you can see from where I am in this build. Re: the deck plank lengths, I started with a full sized length of 24 FT which is ~ 4.5 inches at a scale of 1:64. I think I decided on 4 inch planks for the model. To make it easy, I would recommend a plank length of 10 cm. This would also make it easy to shift the planks 2.5 cm with each successive plank so joints on the same "beam" would be separated by 3 planks. Feel free to ask any questions along the way.
hope this helps
Jeff
it help a lot Jeff thank you so much. i will start the planking to night australia time.
-
41 minutes ago, pontiachedmark said:
Gidday olopa.
My two cents worth.
Based on the above comments and advice.
As long as you find the end result aesthetically pleasing you have found your answer.
I hope I haven't confused the issue.
All the best with your build.
Mark.
thank Mark
more or less this is my view as well but i donnt
want to end up with a build that i like but looks ridiculously out of contest or proportion.
and i dont have enough experience, yet, to know what the boundaries are.
- pontiachedmark and mtaylor
-
2
-
1 hour ago, xodar461 said:
Hi.
I am one year into this model so please feel free to send a message should you have any questions
Jeff
thank you Jeff i will definitely take your offer 😀.
your job looks great and your building log already gave me few useful tips.


Filler Blocks
in Building, Framing, Planking and plating a ships hull and deck
Posted
here is my solution about filler blocks expanding problem due to humidity. not sure if it will work and if i wasting my time but i ll give it a go.
the idea come after i saw concreter cutting the cement slab to avoid cracking. so i cut with a small saw blade the filler blocks after i had installed to create a small gap so that the wood have a bit of freedom if it need to expand.
i ll let you know in 10 years if it worked or not 😁😁😁