olopa67
-
Posts
33 -
Joined
-
Last visited
Recent Profile Visitors
549 profile views


-
 Knocklouder reacted to a post in a topic:
Filler Blocks
Knocklouder reacted to a post in a topic:
Filler Blocks
-
Bill Morrison reacted to a post in a topic:
Revenge 1577 by xodar461 - FINISHED - Amati - Scale 1:64
-
GrandpaPhil reacted to a post in a topic:
Revenge 1577 by olopa67 -Amati/Victory Models - scale 1:64
-
Canute reacted to a post in a topic:
Filler Blocks
-
thibaultron reacted to a post in a topic:
Filler Blocks
-
mtaylor reacted to a post in a topic:
Filler Blocks
-

Filler Blocks
olopa67 replied to olopa67's topic in Building, Framing, Planking and plating a ships hull and deck
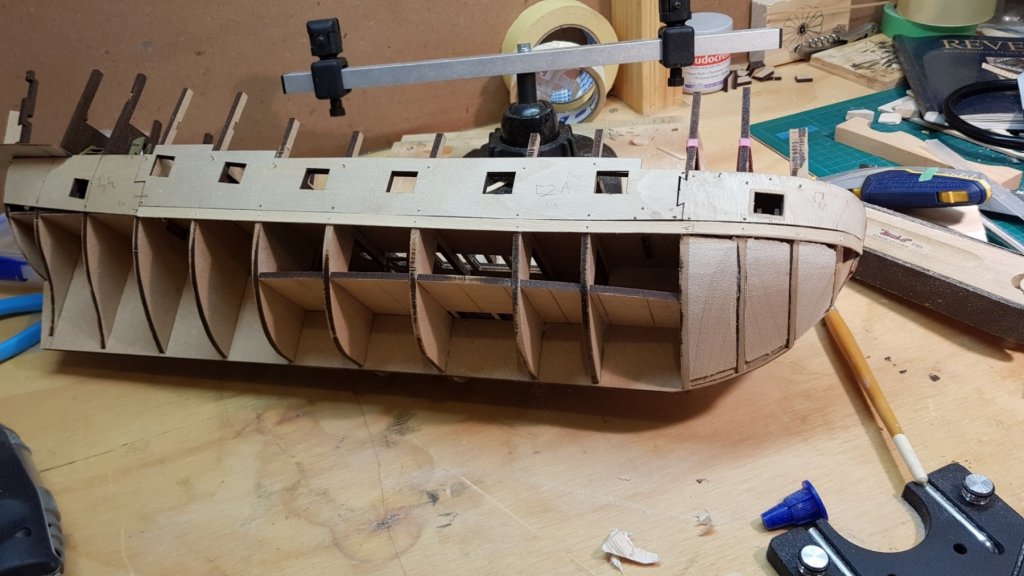
here is my solution about filler blocks expanding problem due to humidity. not sure if it will work and if i wasting my time but i ll give it a go. the idea come after i saw concreter cutting the cement slab to avoid cracking. so i cut with a small saw blade the filler blocks after i had installed to create a small gap so that the wood have a bit of freedom if it need to expand. i ll let you know in 10 years if it worked or not 😁😁😁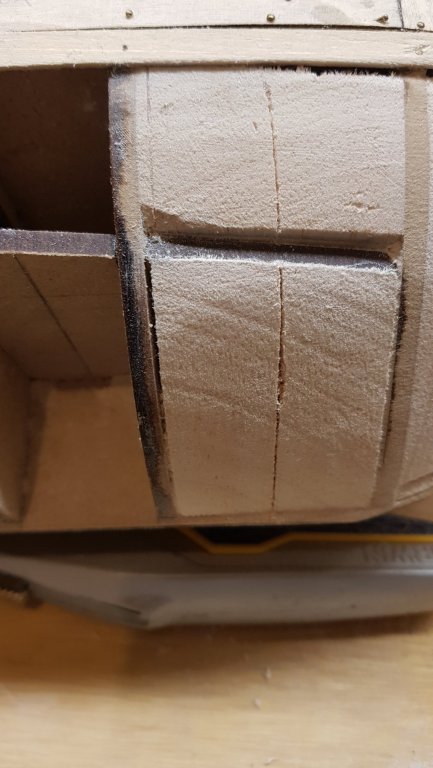
-
mtaylor reacted to a post in a topic:
Building and rigging Cannon Help
-
olopa67 reacted to a post in a topic:
Building and rigging Cannon Help
-
olopa67 reacted to a post in a topic:
Building and rigging Cannon Help
-
olopa67 reacted to a post in a topic:
Building and rigging Cannon Help
-
Thank you Clark very useful info added to my resources
-
Canute reacted to a post in a topic:
Filler Blocks
-
Canute reacted to a post in a topic:
Filler Blocks
-
mtaylor reacted to a post in a topic:
Filler Blocks
-
thanks Clark, no i dont access to the book and i m not very familiar with german, just english and italian 😁
-
Filler Blocks
olopa67 replied to olopa67's topic in Building, Framing, Planking and plating a ships hull and deck
OK first of all thanks everyone for the precious information, put the expanding foam idea on the side. I will fill the bulkheads with wood leaving 1mm gap on one side and glued it only on 1 side of the frame, I hope this will minimized the problem that can be caused by expanding wood due to humidity (this was something I was totally unaware, so thanks again for the tip) I will try to find some basswood although I have already purchased and installed some balsa wood, could not find much on line here in Australia so the choices are to buy overseas, don't know if I can wait for the delivery so I might proceed with what I have. I m still undecided if fill the entire side or only stern and bow. and then going for my first planking ever. wish me good for that Thanks again -
olopa67 reacted to a post in a topic:
Filler Blocks
-
olopa67 reacted to a post in a topic:
Filler Blocks
-
olopa67 reacted to a post in a topic:
Filler Blocks
-
olopa67 reacted to a post in a topic:
Filler Blocks
-
olopa67 reacted to a post in a topic:
Filler Blocks
-
olopa67 reacted to a post in a topic:
Filler Blocks
-
olopa67 reacted to a post in a topic:
Filler Blocks
-
Filler Blocks
olopa67 replied to olopa67's topic in Building, Framing, Planking and plating a ships hull and deck
thanks Clark. bugger the 3 gaps i filled i did it with balsa. can you please tell me what problem balsa can give me, hope nothing major -
Good day to All, a quick, probably silly question. it is worth to install the filler block in between all the bulkheads ? or it`s enough just at the stern and bow. did anyone attempted to use expanding foam? and if so with what result? any others way to fill the gaps? any tips to share thank you for your time and have a great day/night Paolo HIC SUNT LEONES
-
thank you vossiewulf, I had found few pictures of the cannon and how they have been rigged, so many different ways, probably due to my inexperience I should take the easiest way and start studying how to actually perform the rigging (kinds of knots, wrapping and coil and how to make them). any resources on this topic are also welcome 🙂 I know I choose a difficult kit for a beginner, I challenging my self hardly and perhaps I should have taken a more humble model. I m not giving up tough and I love this site full of people of knowledge and very keen to help. thank you for time
-
G`day everybody, I have to start building my first ever cannon ( I m making the Revenge Kit from Amati) does anyone have any links to video and/or instruction on how to make them? the actually assembly of the cannon itself seems pretty straightforward my biggest concern is the rigging part (I never rigged anything before so this will be my first attempt ) I need all the possible visual information on how to do the rigging. if anybody can help me out I will be very grateful. thank you for your time Paolo
-
it's look awesome Jeff, so many advices. i use more your Blog than amati manual. im very glad i met you here.
-
thank you vulcanbomber, as i previously mentioned to xodar i have no experience and may be i relay too much to the instruction and panicking a bit too easily if i see discrepancies with the manual. i really appreciated your support and advice.
-
thanks Jeff my concerns come from mine unexperience, i tried only once before to make a model and i completly stuffed it up. but was a good learning experience....on not what to do. :-). love your help really appreciated. i saw the way you planked the edge of the decks and i will definitely start to use it from now, much cleaner finish. thanks again
-
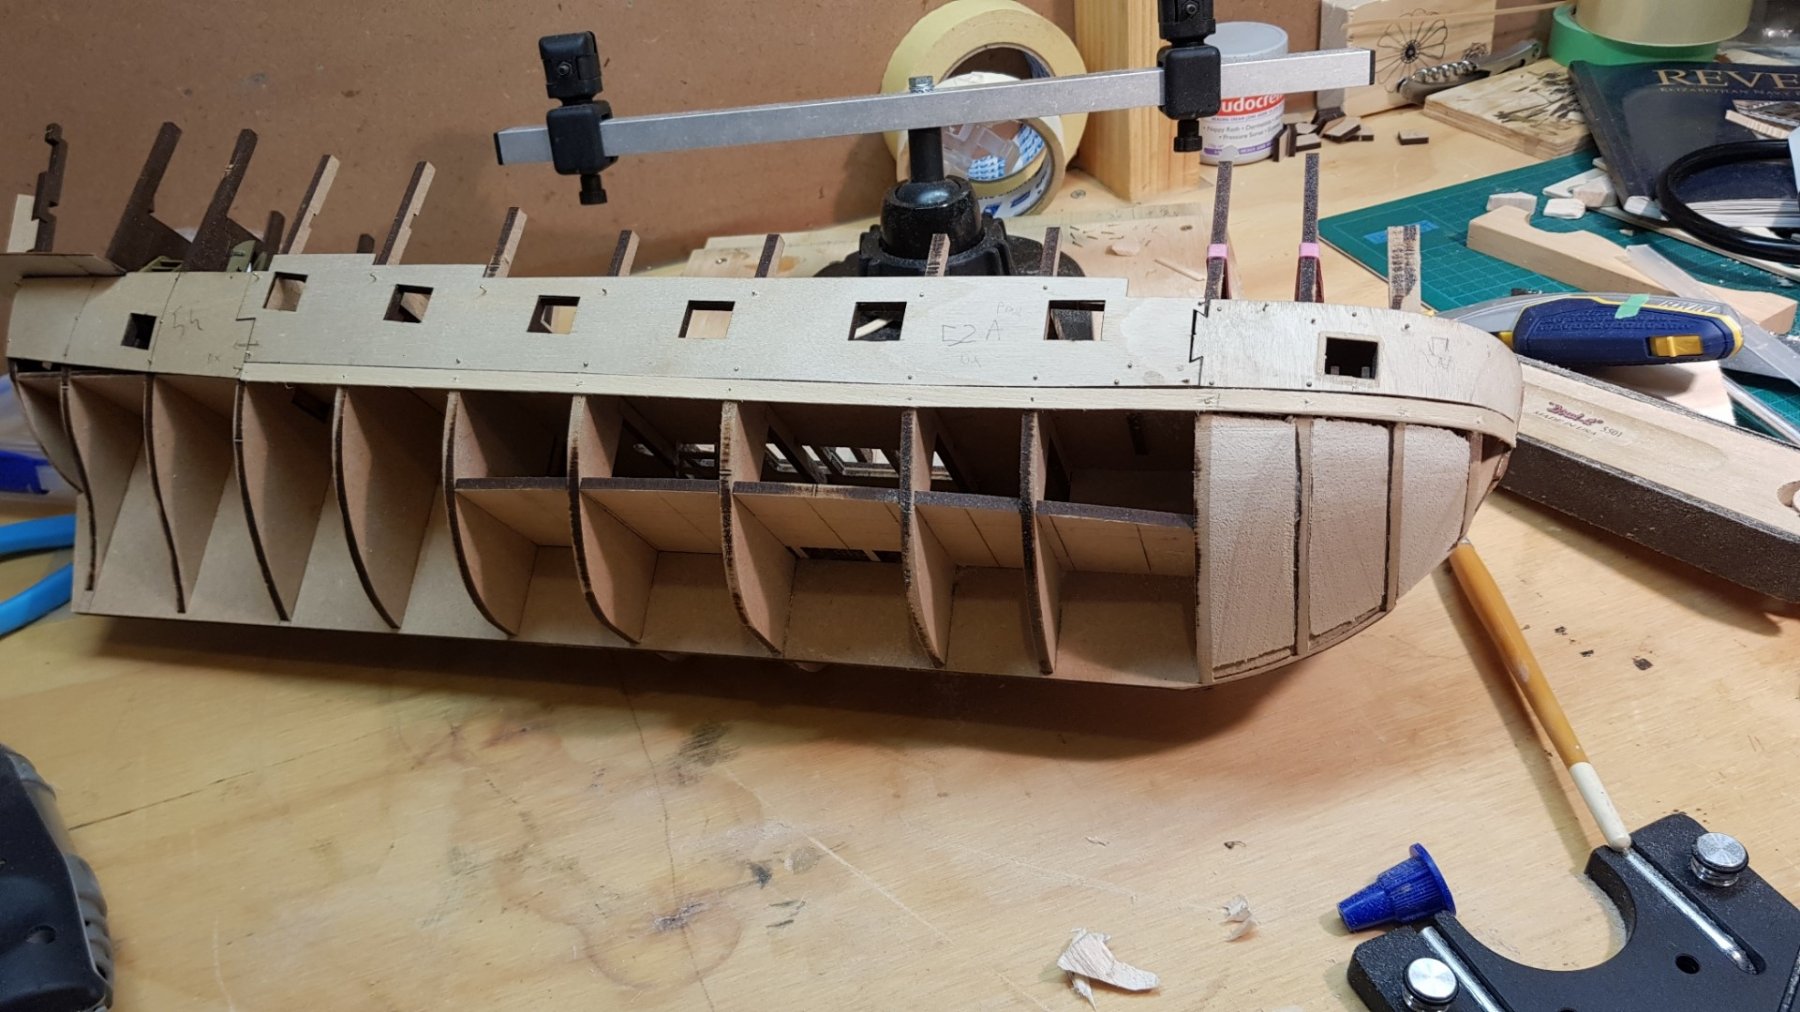
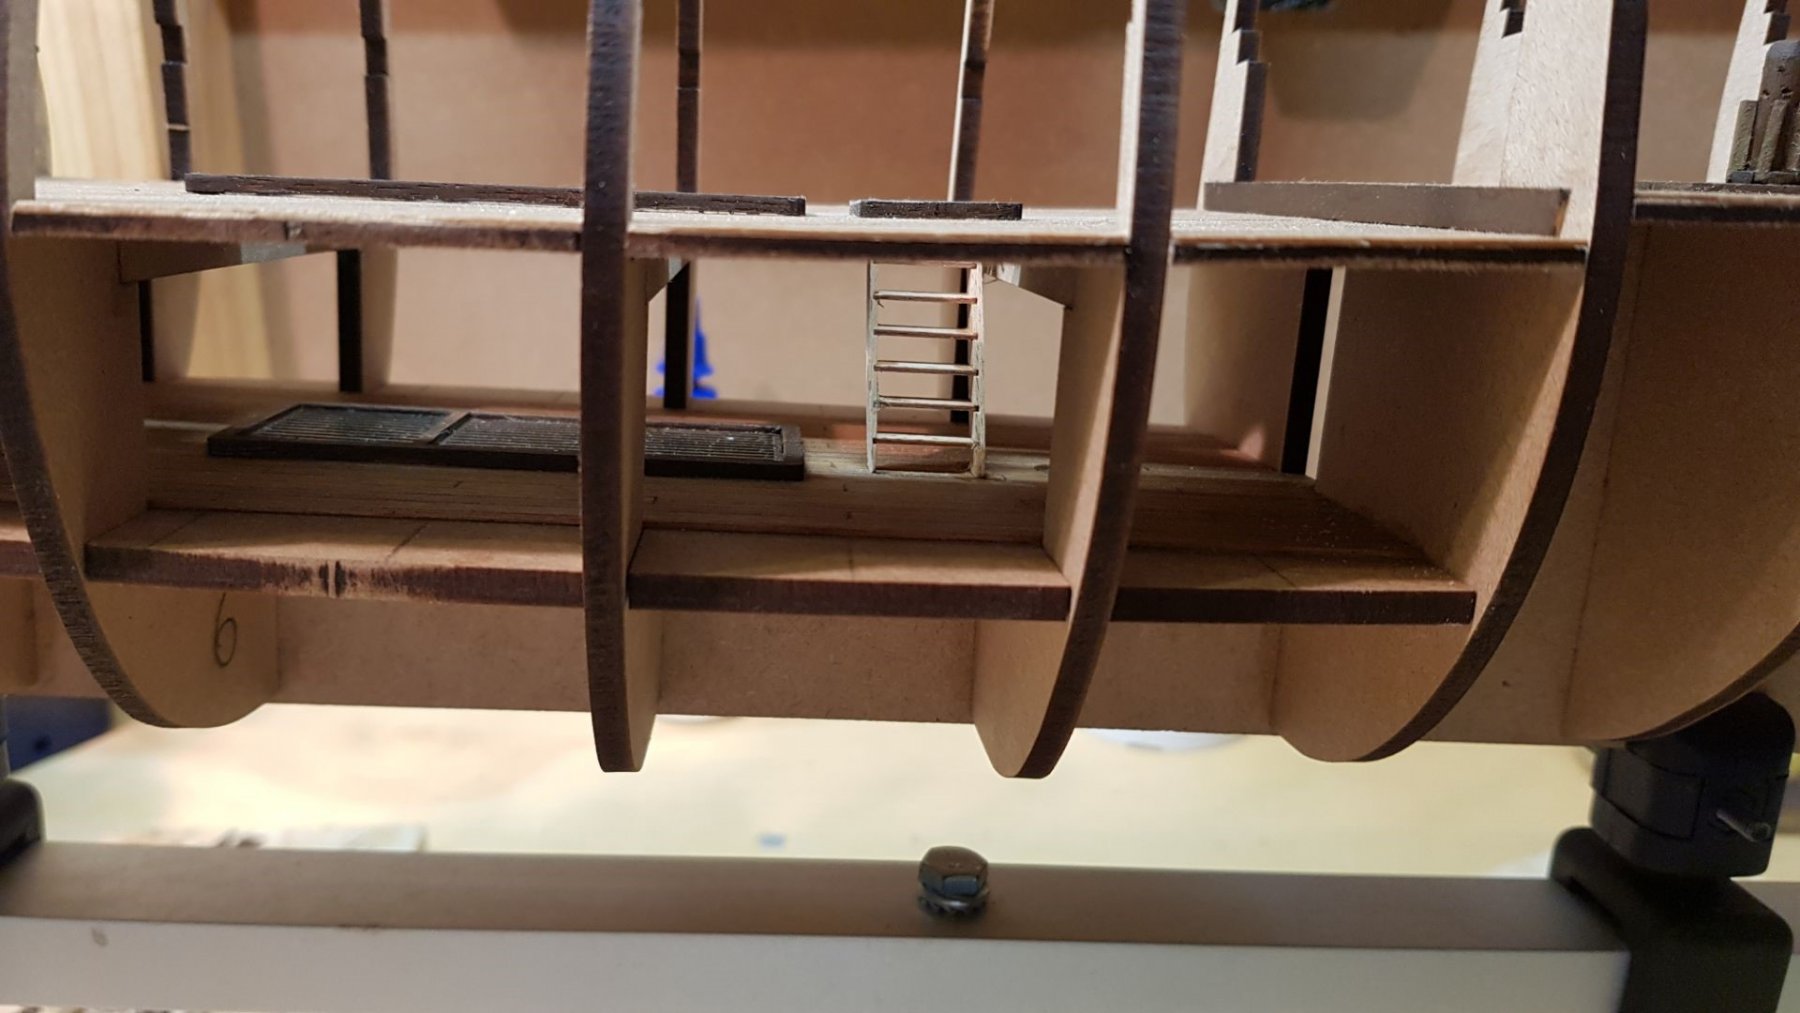
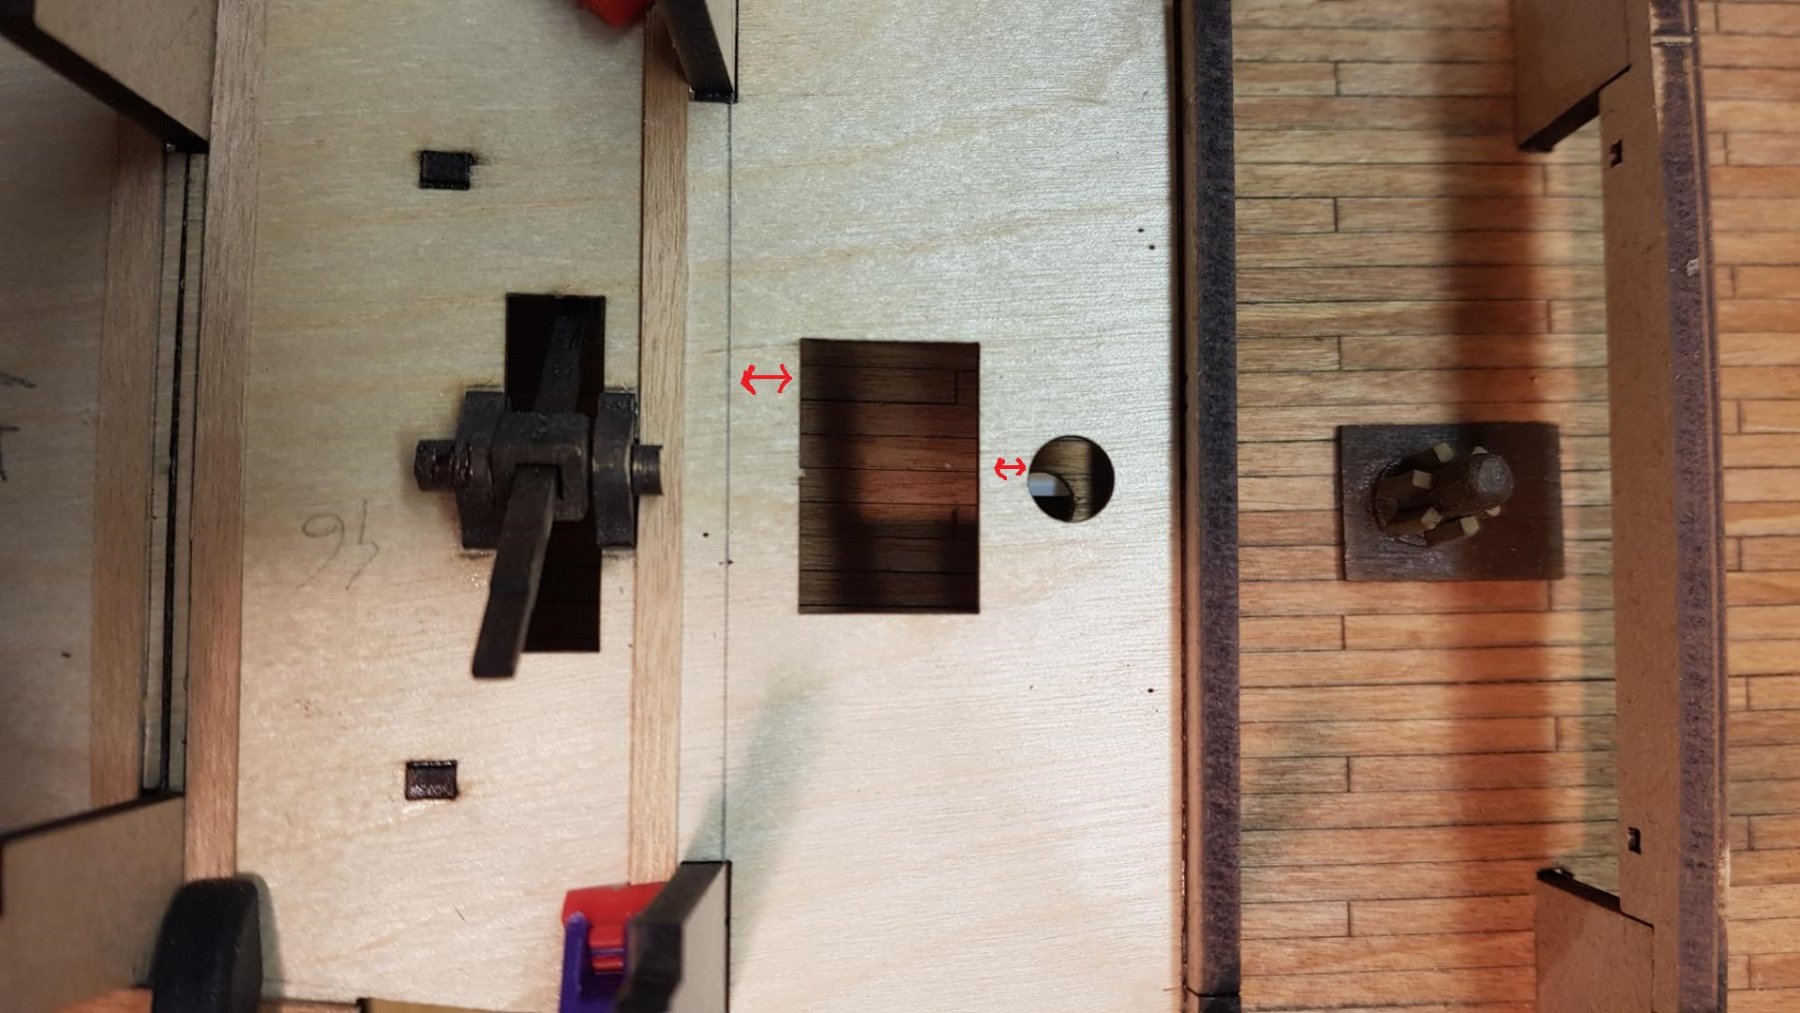
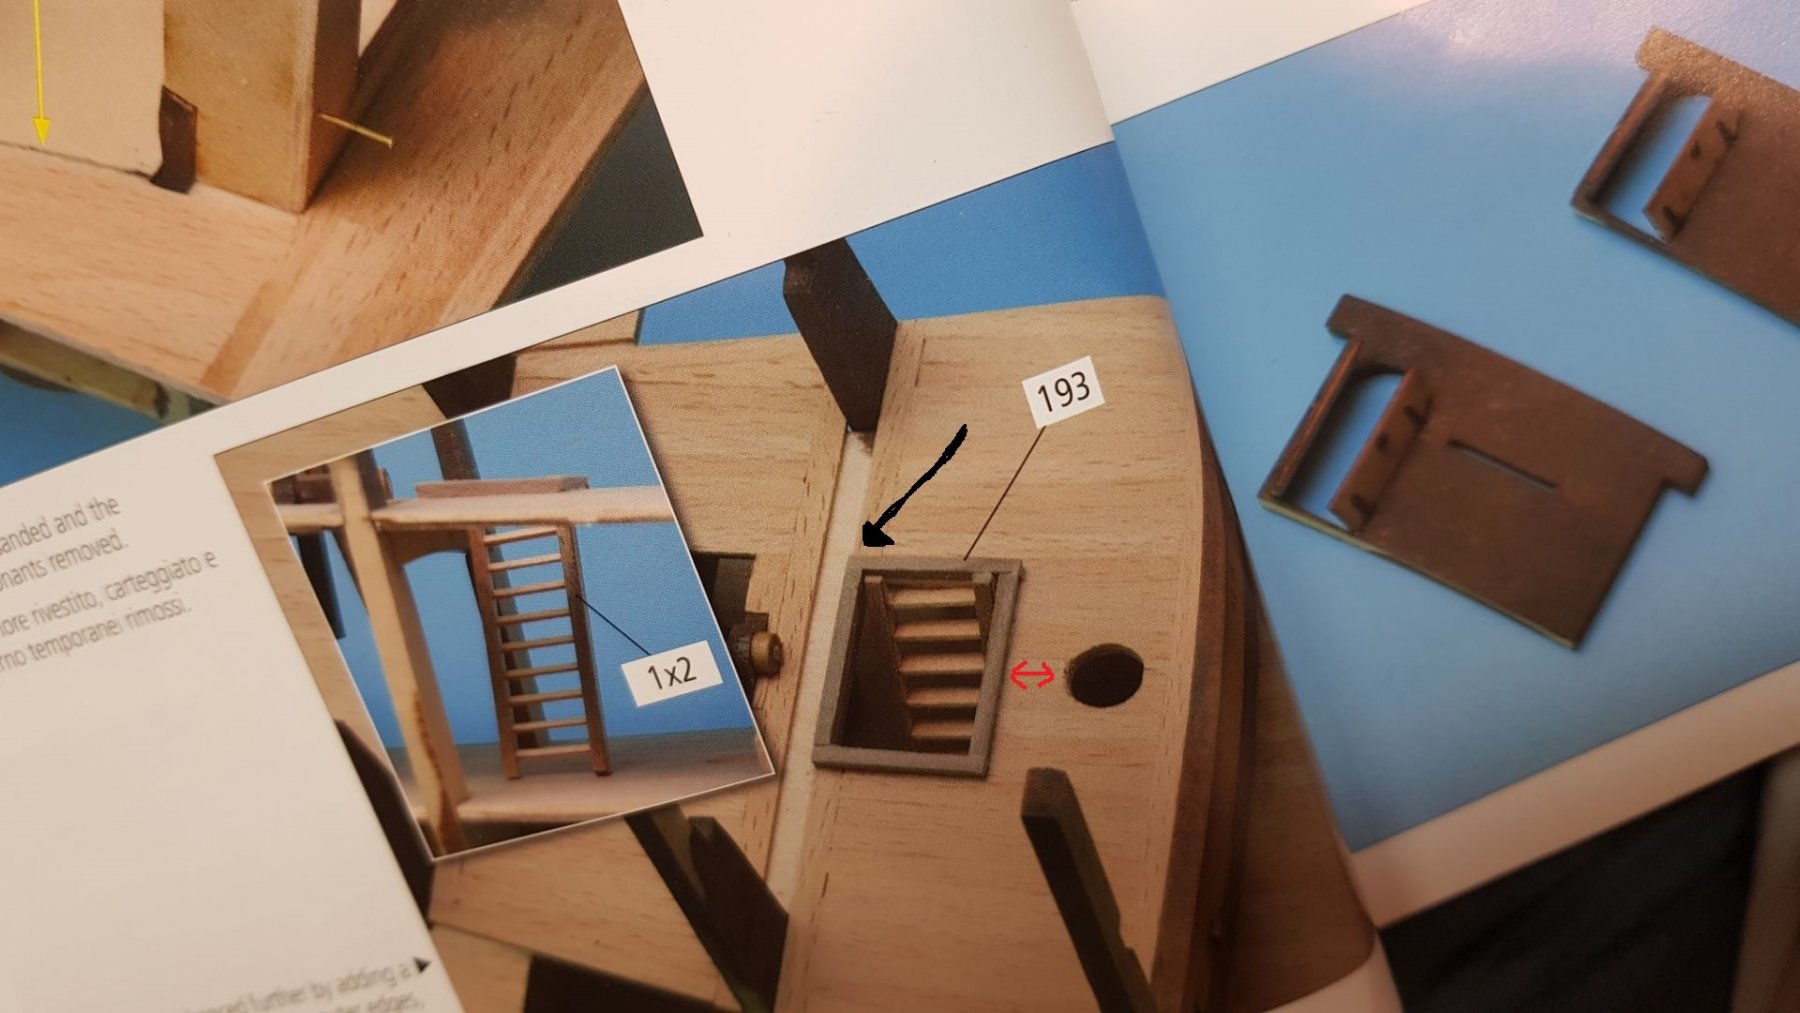
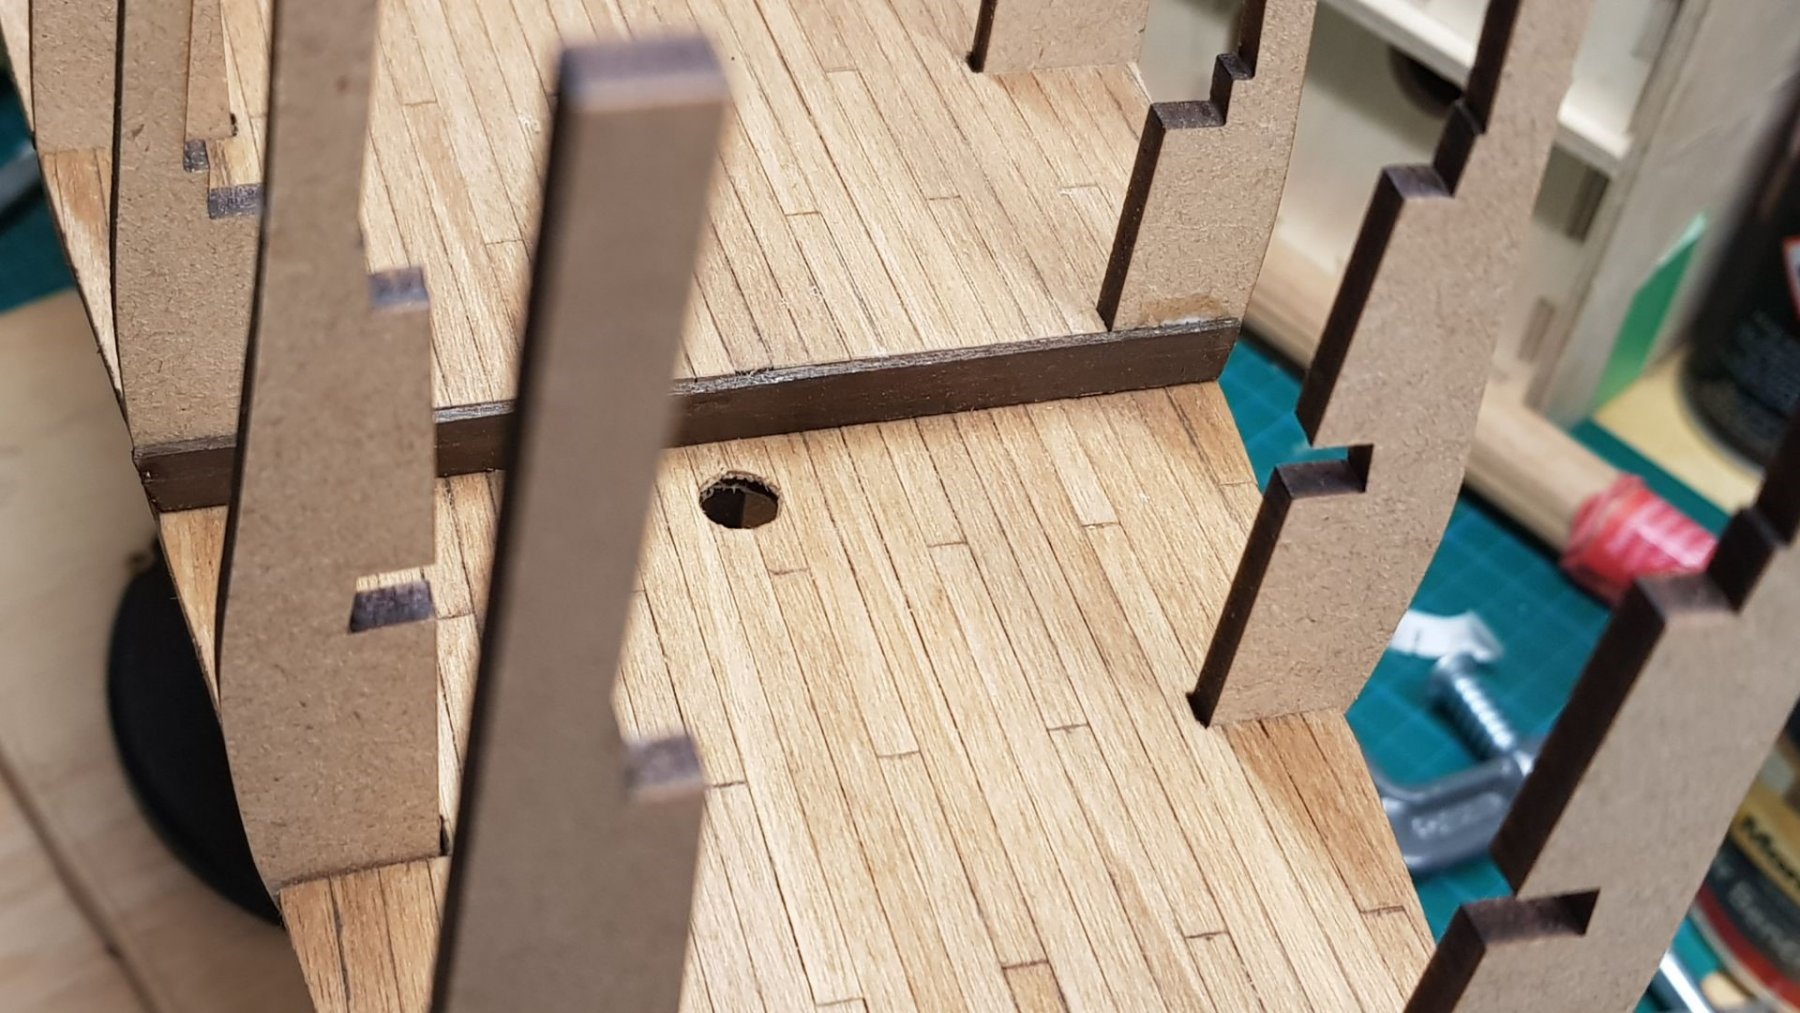
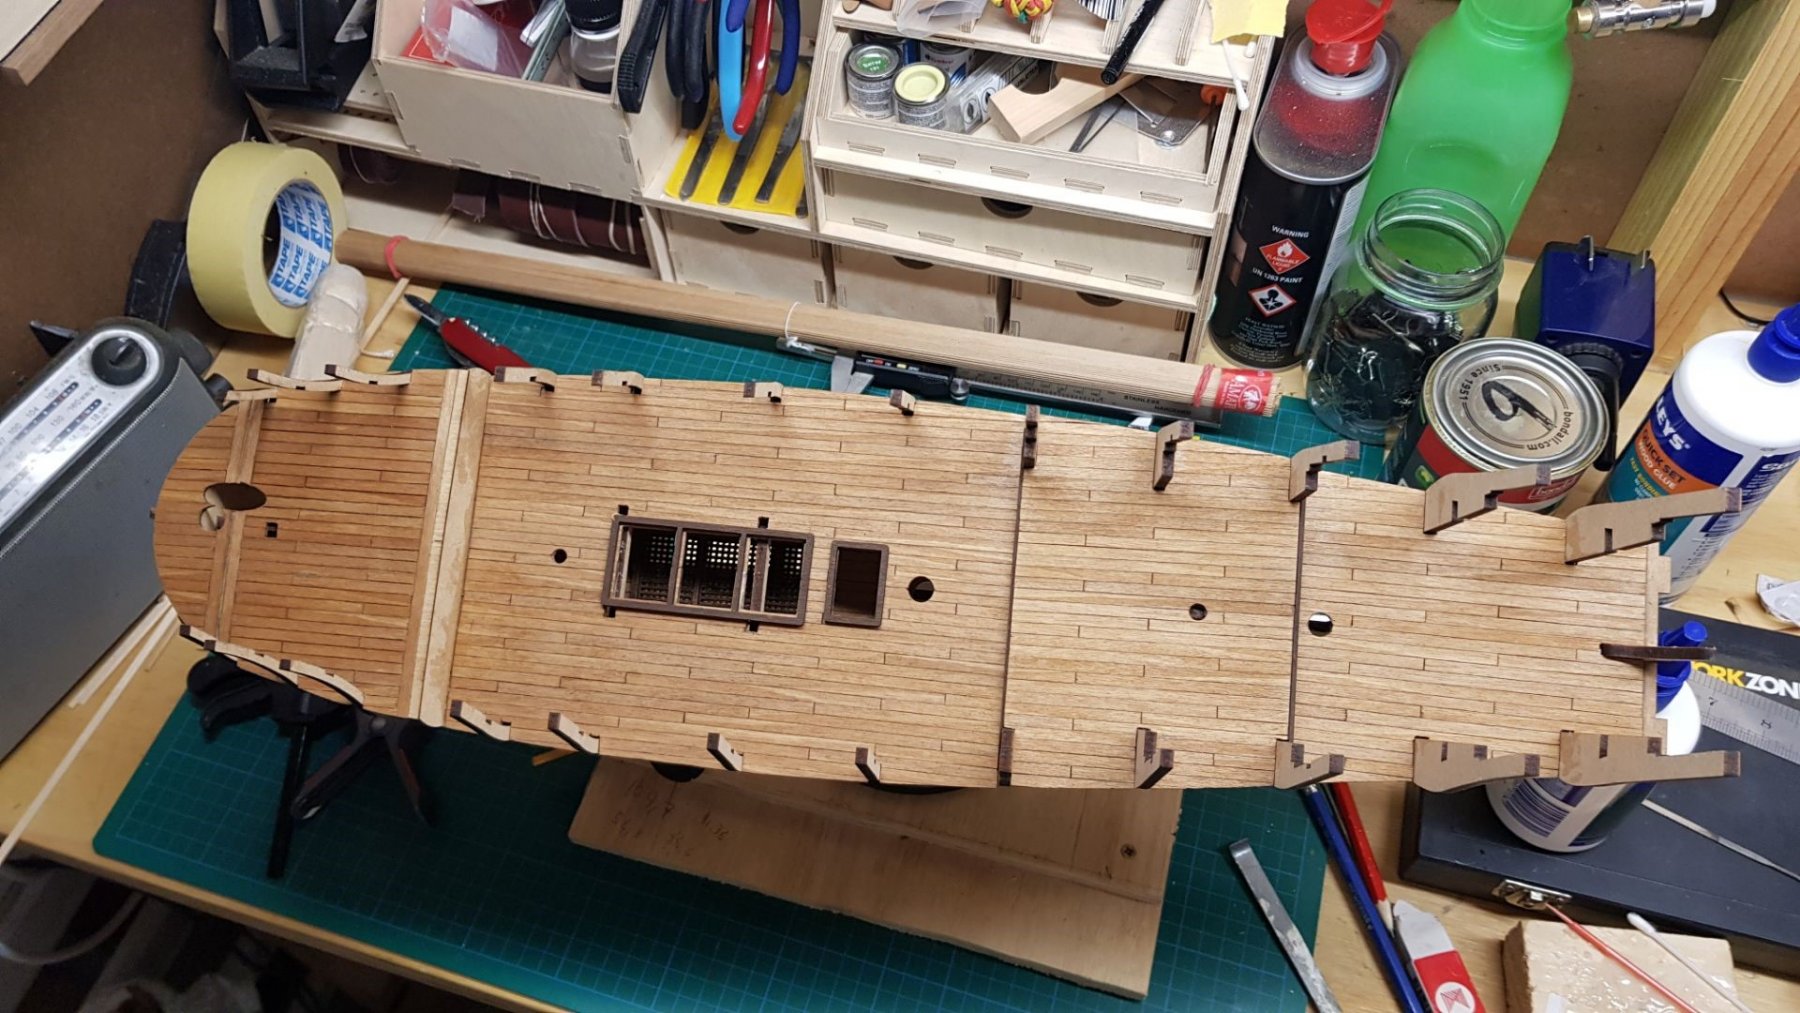
First ladder installed, once again measurements from Amati instruction are wrong, far to wide to fit, Now with the upper back deck. what is shown in the manual is a bit different of what you ll find in the kit. the frame for the access to the bottom deck appear to be aligned with the beginning of the planks but I had a dry plank on and there will be space for an extra plank, same for the mast hole, the space in between the hole and the lower deck access is far less in reality than what is shown in the manual, I m hopping this will not create major issues later on


-
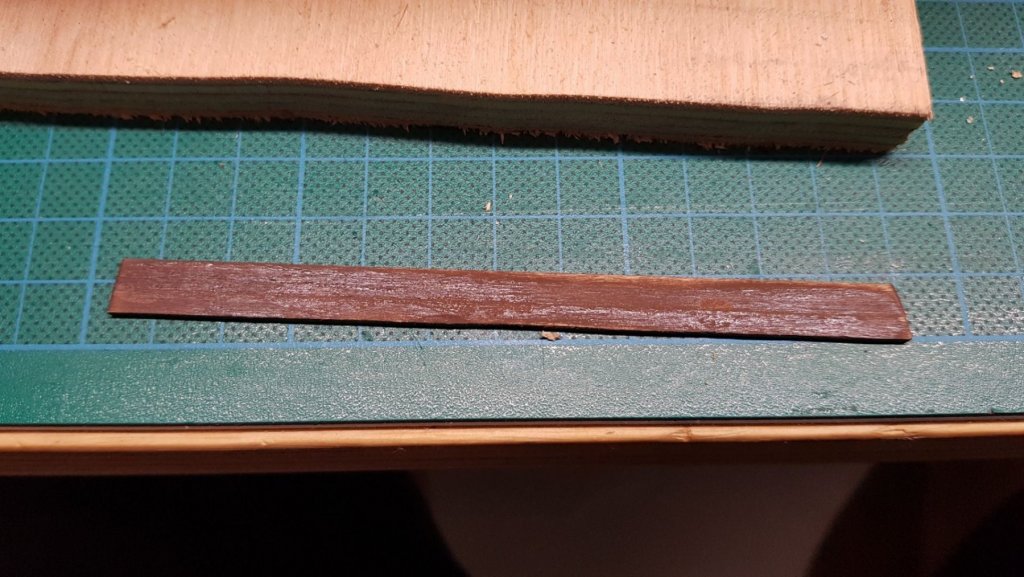
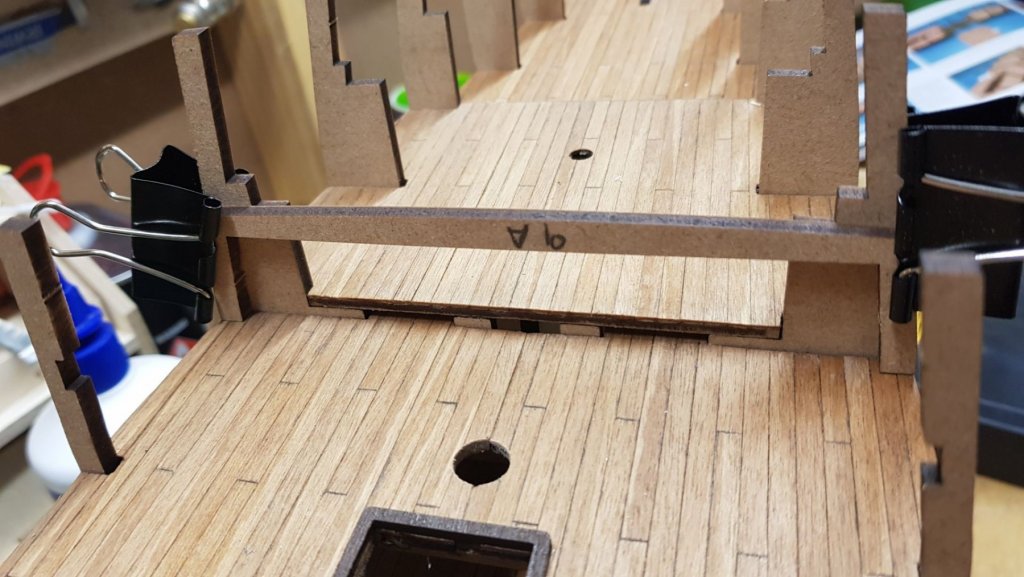
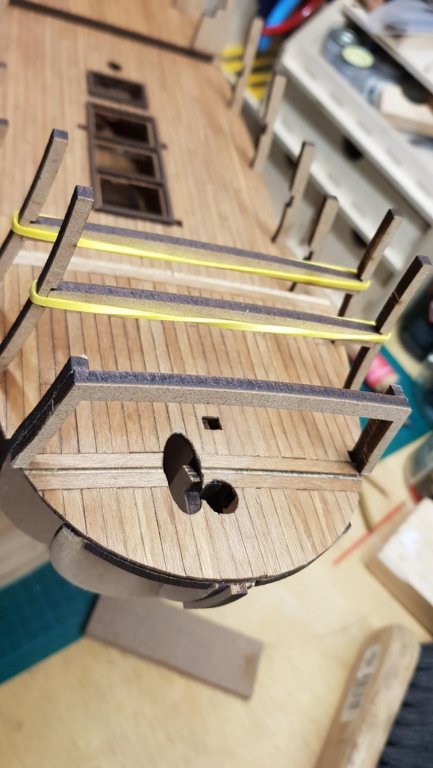
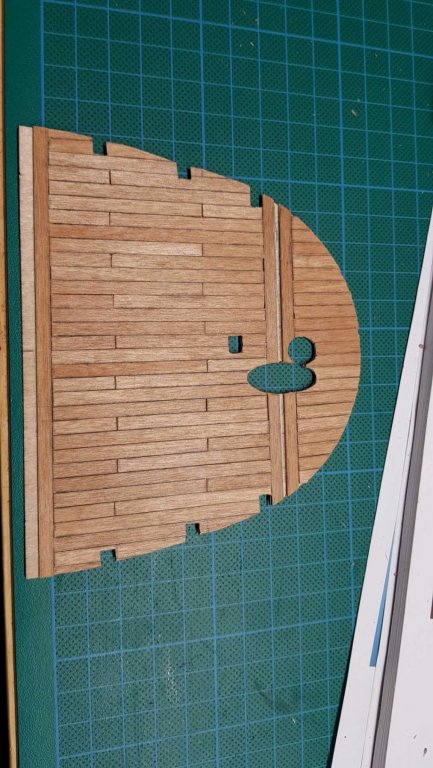
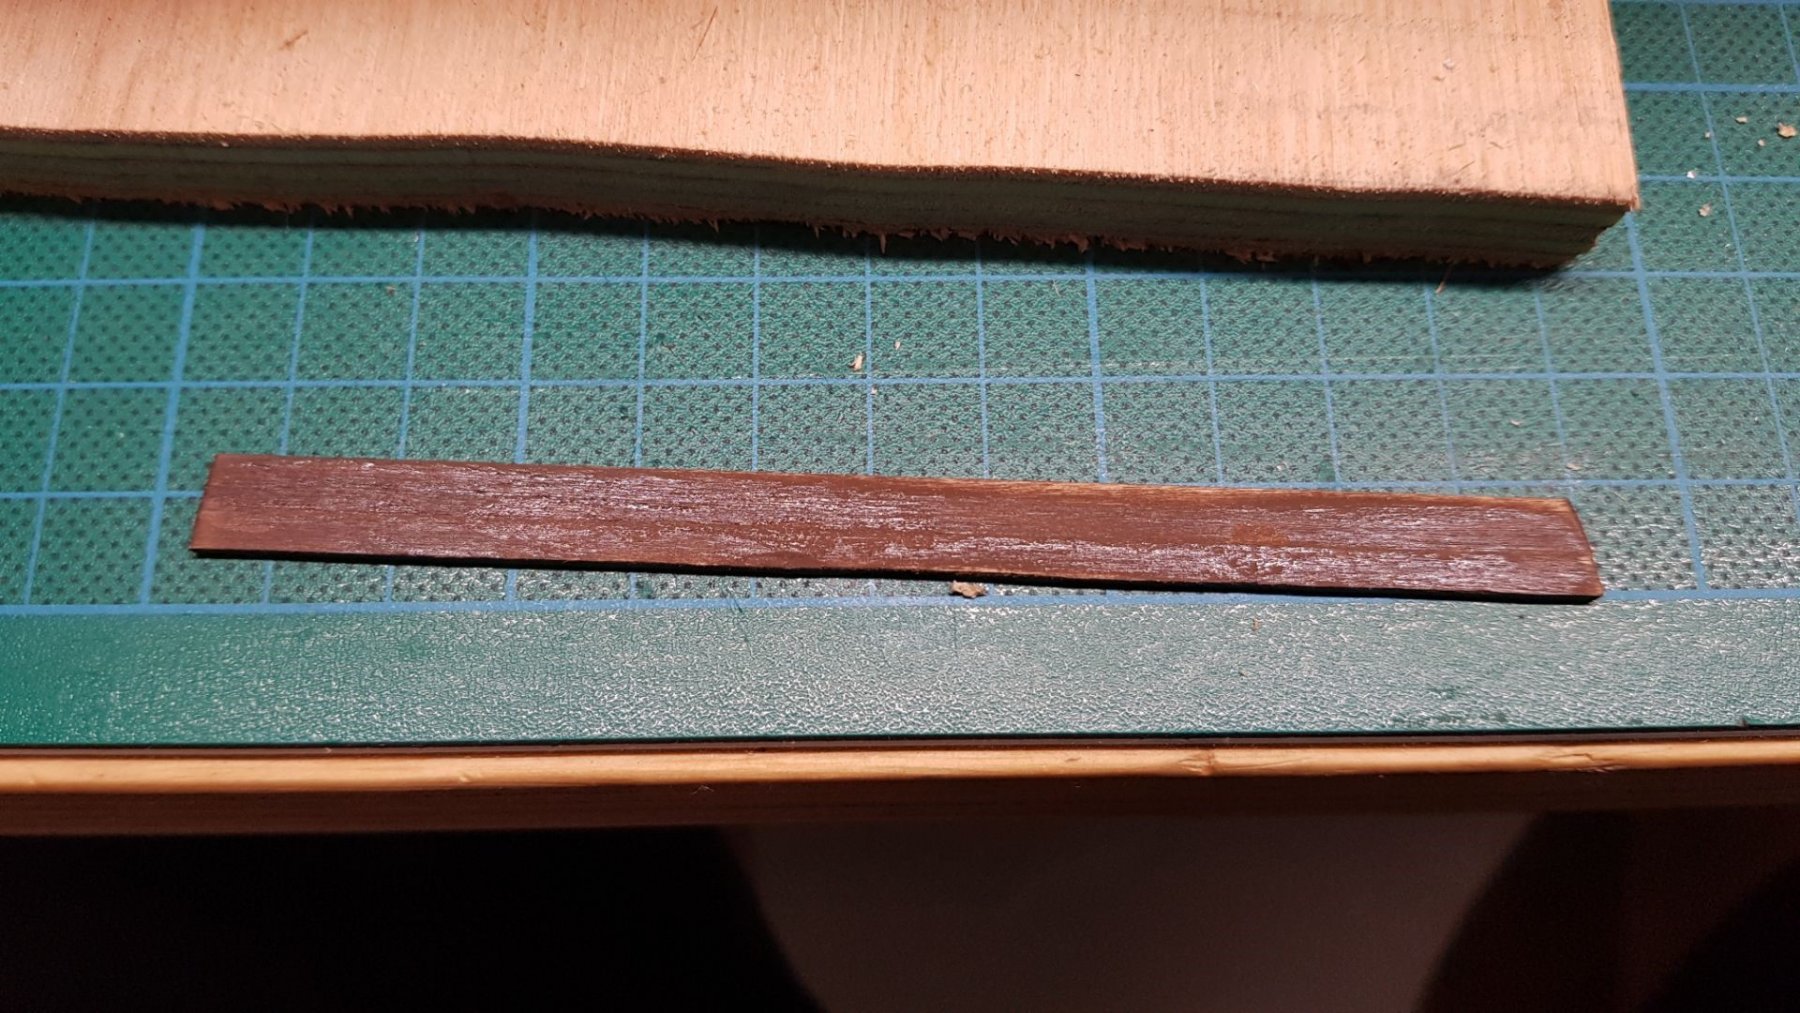
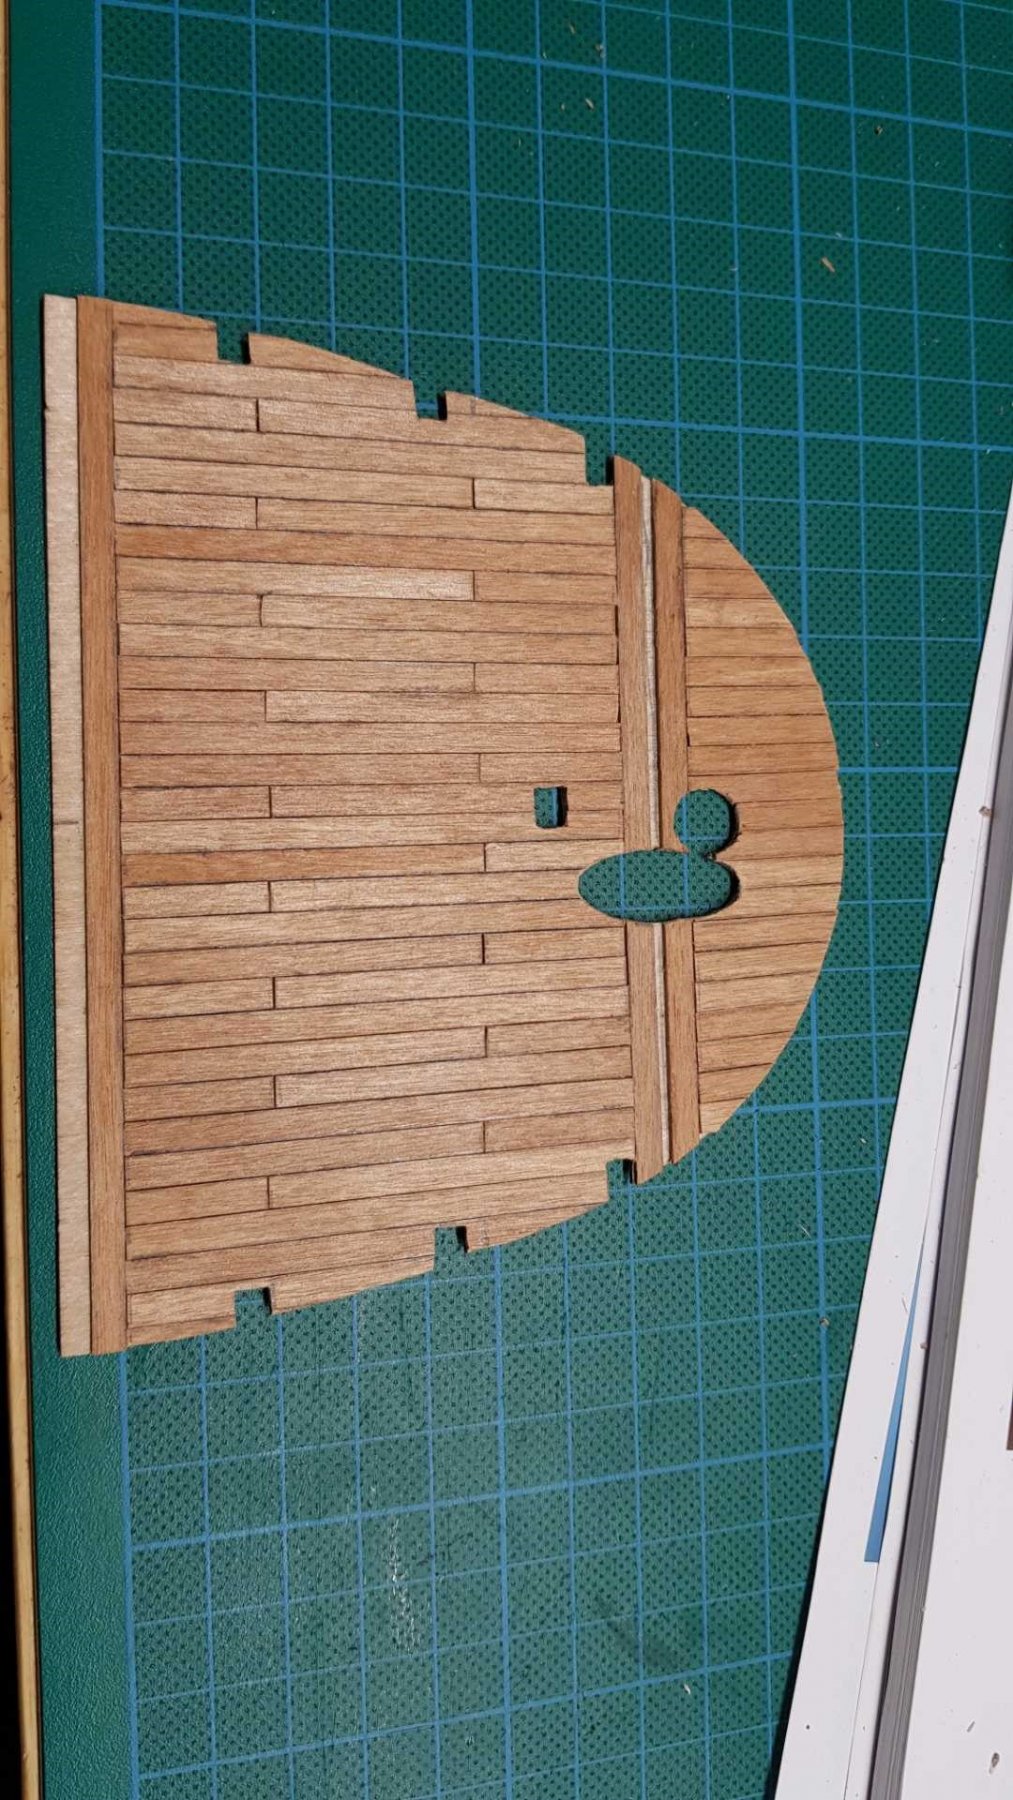
Another deck up. This deck makes two steps that need to be planked, one with 0.5mm x 5mm and one with a 1.5mm x 8mm plank, there is no plank with the measurement requested so I had to make them. I had also found that the length suggested by the manual appear to be incorrect (too short) so I used the part 9A as a guide which also gave me the right angle for the cut The bow deck is also planked, a bit hard to put it in place, you need to carefully bend it, and it is a bit scary, i was just waiting to hear the snap sound :-) ...did not happened. Amati want you to fix the support beams temporally with nails to give the structure some rigidity, i opted to use two elastic rubbers, less invasive and if really needed i can always put the nails later on. I can sense problems to fit the bowsprit later on, i hope to be wrong. So this is where i m now