


DannyVM
-
Posts
41 -
Joined
-
Last visited
Content Type
Profiles
Forums
Gallery
Events
Posts posted by DannyVM
-
-
10 hours ago, cog said:
Nicely done the AA in PE. I know what's it like, the tripple AA's on Musashi have about the same nr of parts. It turns your eyes
 and if you're lucky you do not get a splitting headache
Thank's Carl.👍
I only did one, just to try iff i could do this without many problems. It turned out fairly nice, but indeed, the amount of work that you need to put into this little gem is enormous.
- mtaylor, Old Collingwood, Canute and 2 others
-
 5
5
-
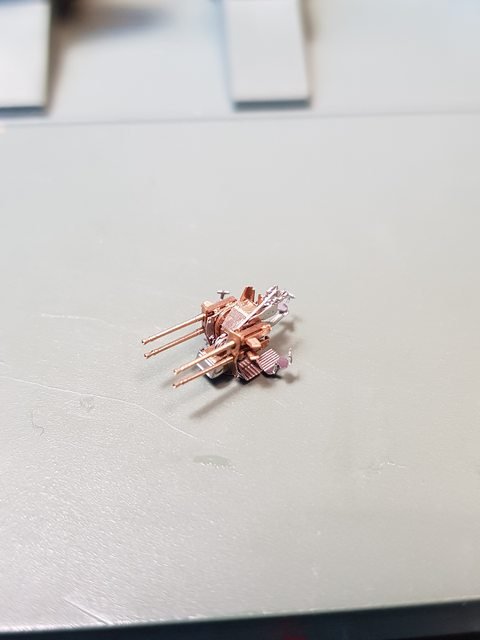
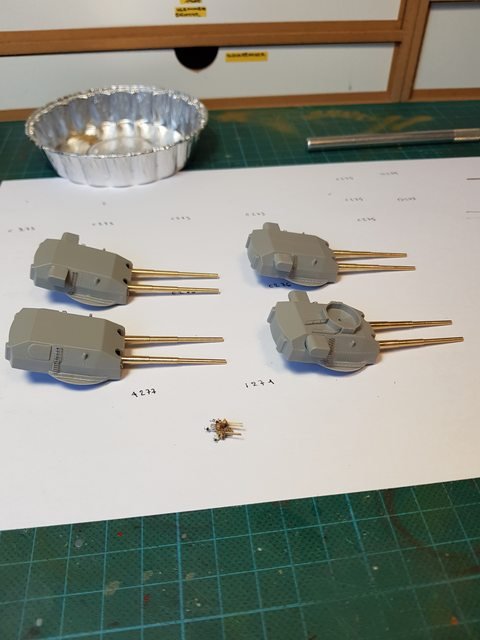
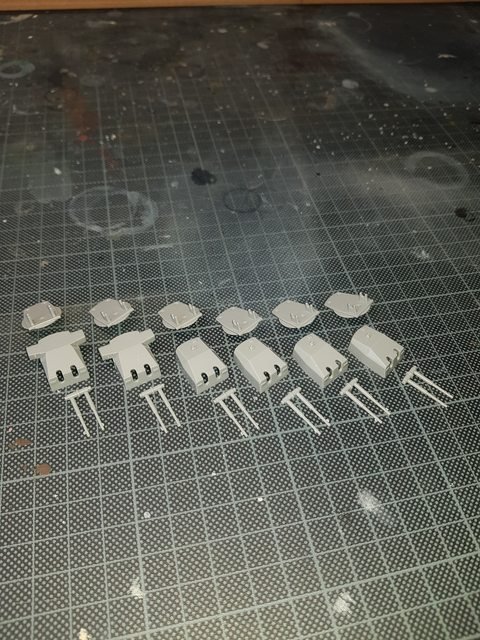
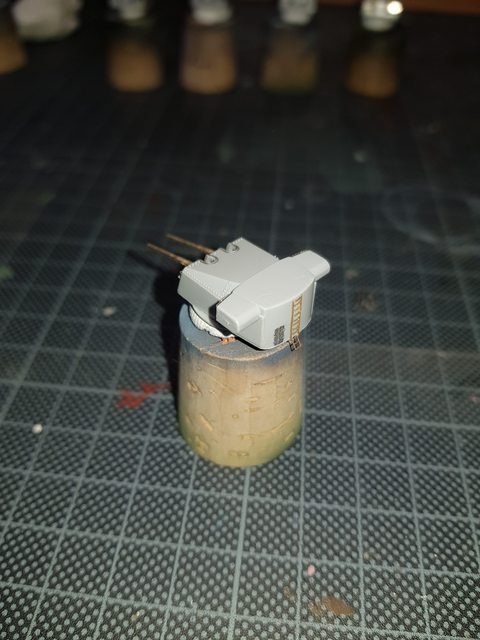
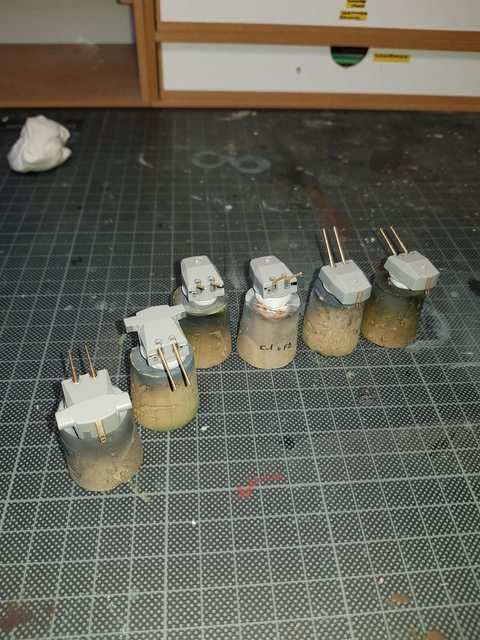
Just finished work on the four 380 m/m guns of the Tirpitz. I also made one 20 m/m AA gun to place it on one of the 380 m/m gun turrets. You wouldn't believe it, but this 20 m/m AA gun exists of 25 PE part's which are folded and glued together.
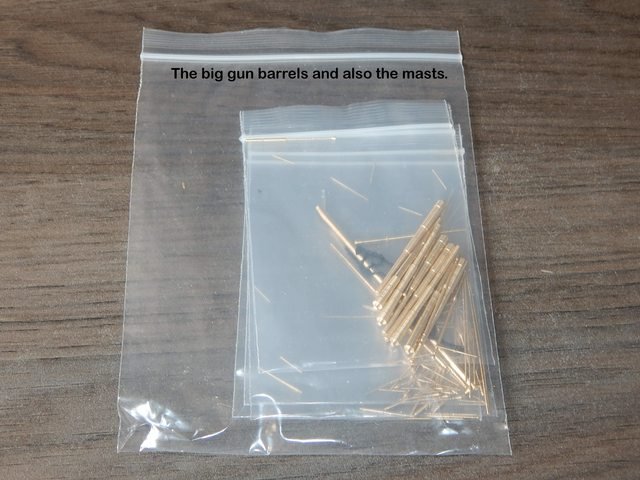
The basic ingredients for the four 380 m/m guns.
Some turrets showed some scratches on their surface. Nothing serious, just a little bit filling and the job is done.

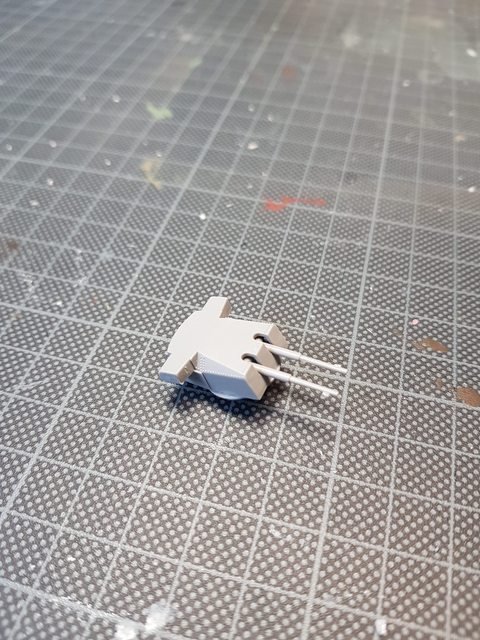
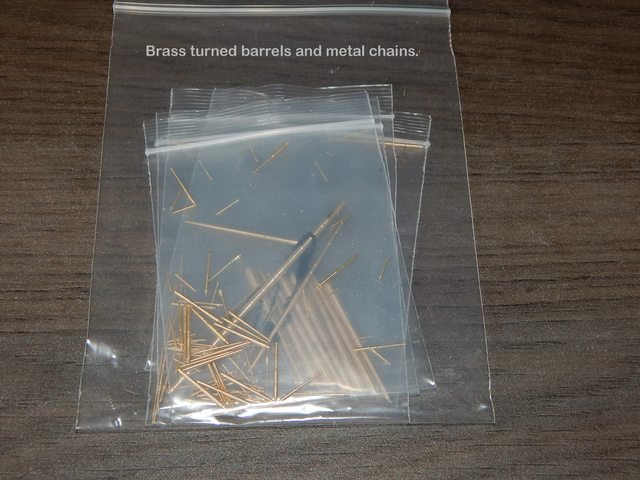
Next, replace the plastic gun barrels with new brass ones.


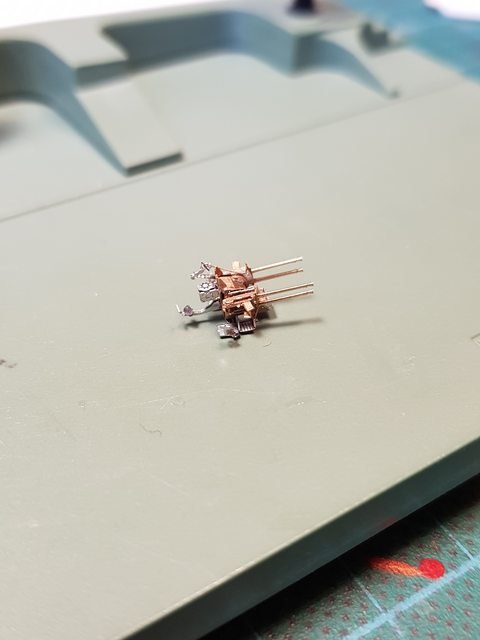
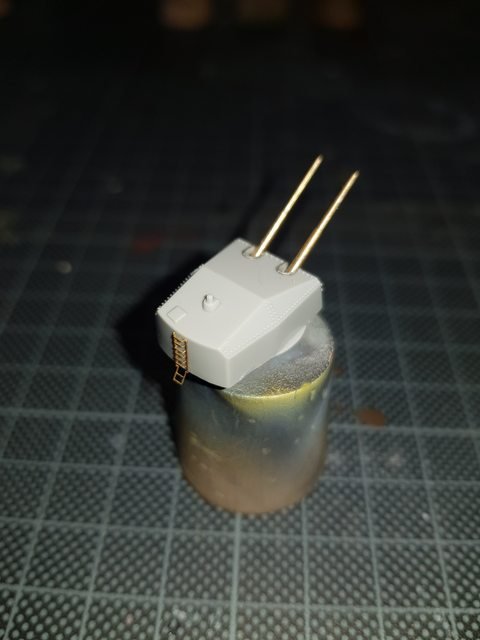
On top of one of the turrets comes a 20 m/m AA Gun. Two choices, plastic or .......pe..........which exist out of 25 pieces.....

I decided to take the plunge, this is the result.
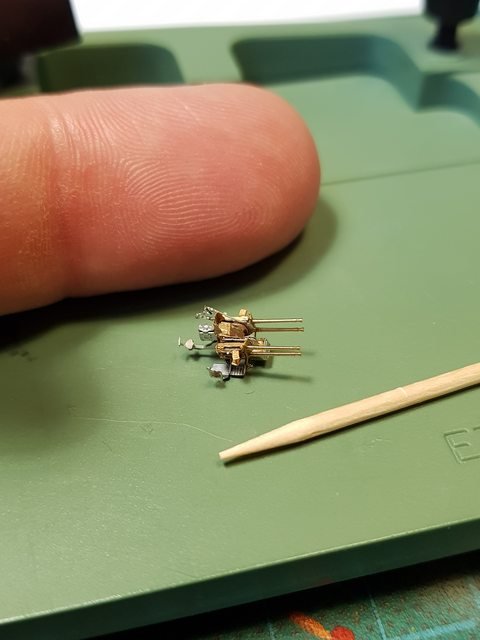
For comparison, a toothpick and my finger, just to show how small these suckers are...
And the whole bunch together.
Regards
Danny
-
-
2 hours ago, Richmond said:
You would want to hope your site doesn't morph into another photobucket.
I use this site for about 3 years now, and it's still runs like in the beginning, so at the moment no worries yet. That said, there's always a possibility that thing's go wrong on such site's, but for now, i'm happy with it.
- Canute, mtaylor and popeye the sailor
-
3
-
15 hours ago, popeye the sailor said:
I love your stand..........where did you get it?!?!?!?!? very nice work! the thing to remember about the color schemes.......these were at different points in her career. is this one of her just starting out? what flotilla was she in at the time? to pinpoint an exact scheme, this is some of the info that will help you make the decision. I like it too.......I think you made a good choice.........but I would find out when that was though. there is similar controversy with the Arizona........I think it's a combination of cheap azz paint and water reflection.....you there are folks more knowledgeable than I, going all Sherlock Holmes over it. the deck work is wonderful.....so glad you visited and gave an update. don't make a stranger of yourself....this is an awesome project
")
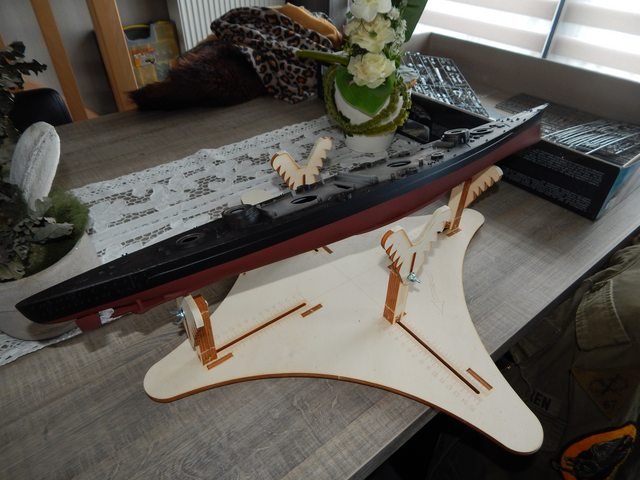
In fact it's a 1/32 airplane model stand from JHModels. I found out it was suitable for ship models to with a flat bottom.
This is the link where i bought it from, they are situated in Amsterdam, the Netherlands.
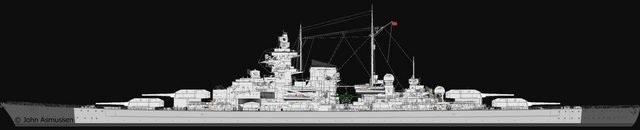
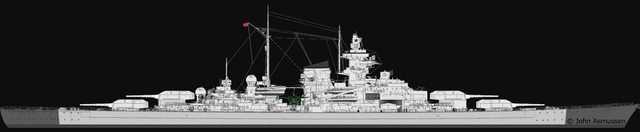
About the color scheme : and when i look at my previous post i notice that i didn't copy the link which is the reference i use for my build.
http://www.bismarck-class.dk/tirpitz/tirpitz_menu.html
You're right when you say that every color scheme has a time frame to it, on this site you can easily see the color scheme's that are linked to a time frame. What i couldn't find, or overseen it, was the flottille where the Tirpitz was assigned to. The color scheme i use, was worn between February 1942 and March 1942. It's also interesting that from March on they seem to use tarp's over de main gun turrets and barrels.
11 hours ago, Richmond said:I think you are underselling yourself, you have done a great job with the paint.
May I ask, is there any reason why you post your photographs through another host and not directly to the site?
Thank's allot for the nice compliment.👍
I'm using a photo sharing host because i'm active in other forums also regarding my airplane builds. So it's easy to use it to over here, just because i am familiar to it. But maybe i should try it, it's alway's good to learn other way's to place photo's on a forum.
Regards
Danny
- popeye the sailor, mtaylor and Canute
-
3
-
4 hours ago, Backer said:
We once visited the Tirpitz muzeum in Alta norway.
On the site of this museum there is an interesting film with a Tirpitz in grey color and various other color schemes
Thank's Patrick for the nice link you gave me.😃
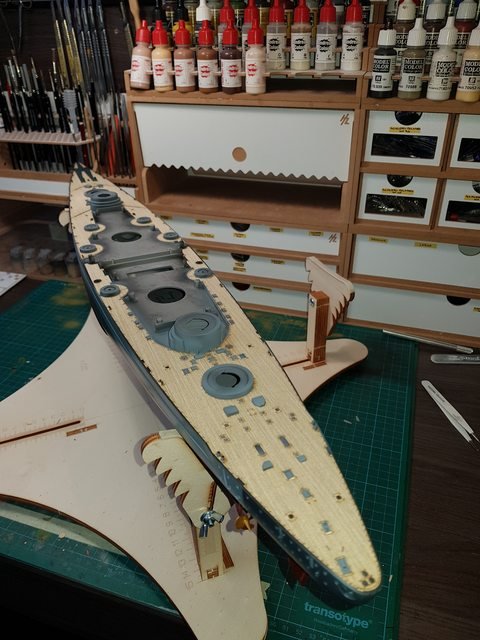
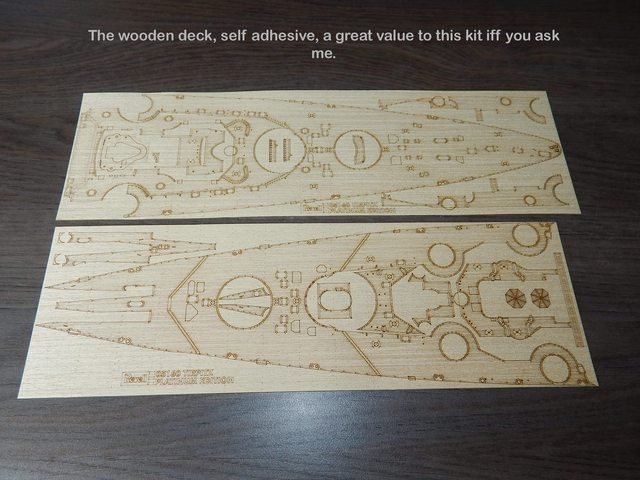
Yesterday and today i did some work on the Tirpitz. The hull was painted completely, and the deck received the wooden deck it deserved.
So now onto the painting of the hull. Revell instructions gave two choices to paint the model, but something tells me that it is not very accurate, don't ask me why, but when i look at this link, i don't find any color variation like the ones depicted into the Revell instructions.
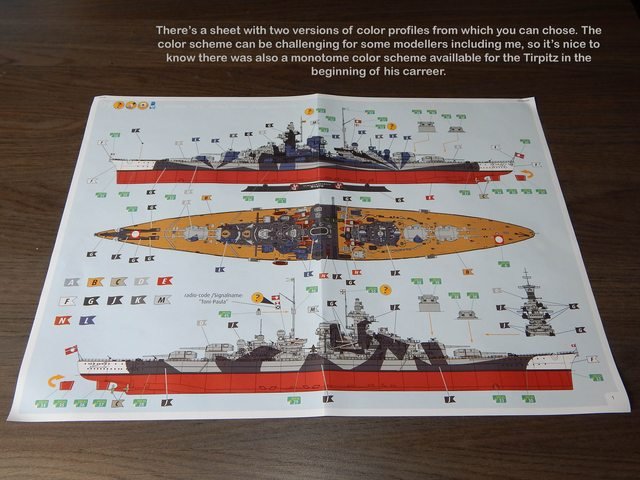
So, to be honest, this is my first ship build, the camo pattern like shown above is just to complicated to paint it for a novice, so i decided to go a little easier. I did some research and i came up with this color scheme :

It's a fairly simple color scheme, but still, i like it, so, this is the one i will use.
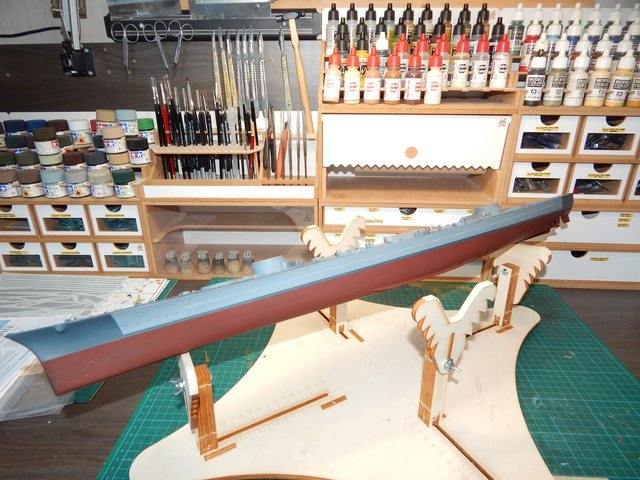
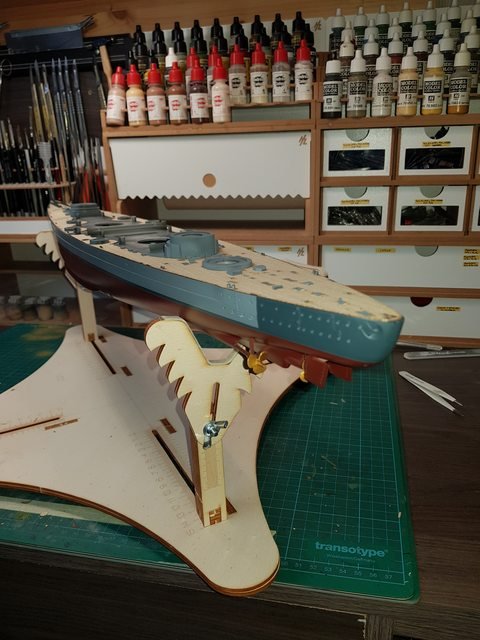
I started with the primer coat, i use black.
Some taping to do and next color is the bottom of the hul, the red-brown color.
So i build up the colors, side of the hull, the dark and light grey colors.
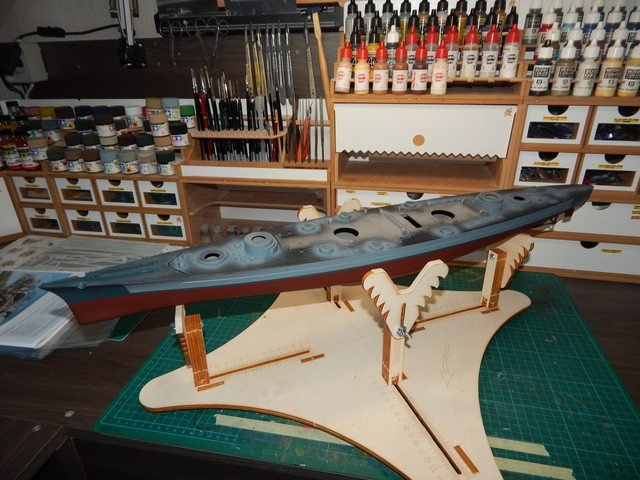
After that, i airbrushed a gloss clear coat onto the model and afterwards it was time to tackle the wooden deck, something is wasn't really thrilled about to do.
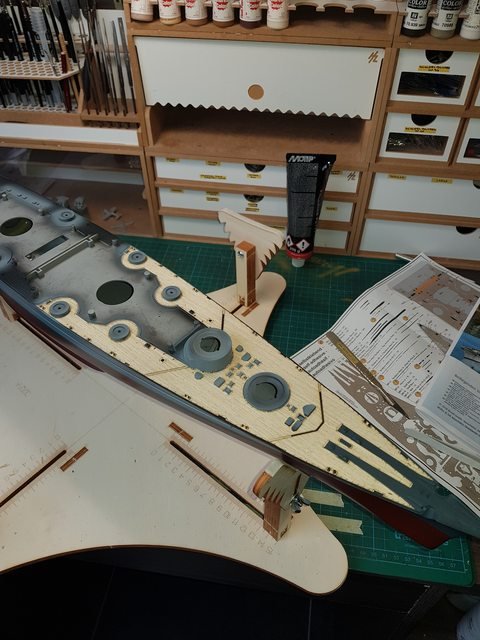
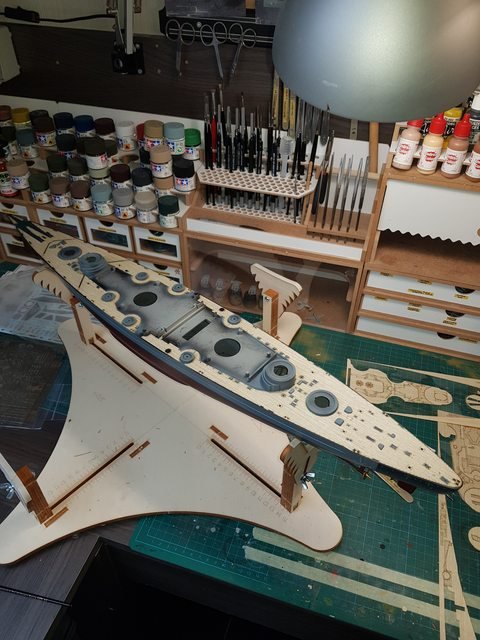
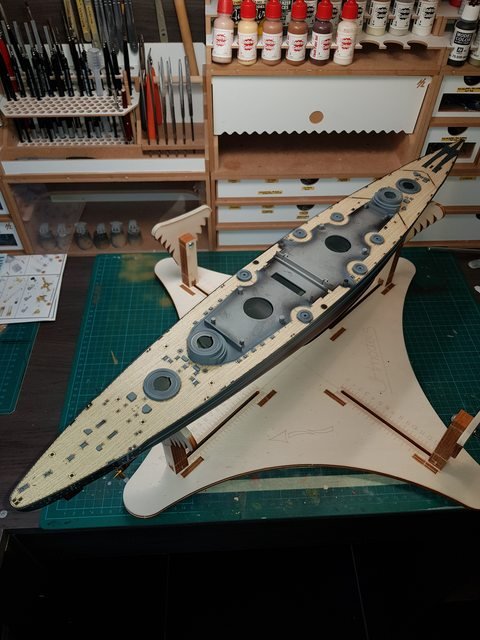
To be honest, this is just easy work, the wooden deck was added withing about an half an hour and it was done.
Regards
Danny
-
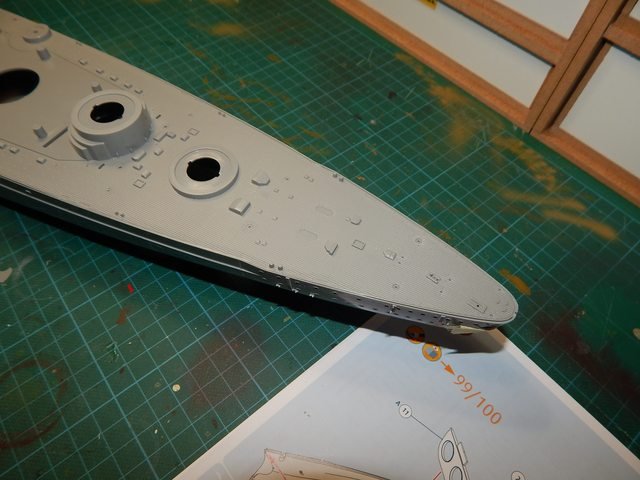
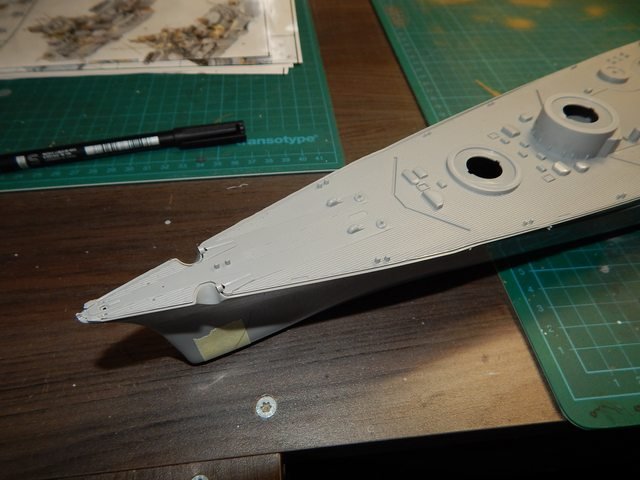
Hi Folk's, again it's a long time since i posted something about the Tirpitz progress. So time to give some updates about the progress.
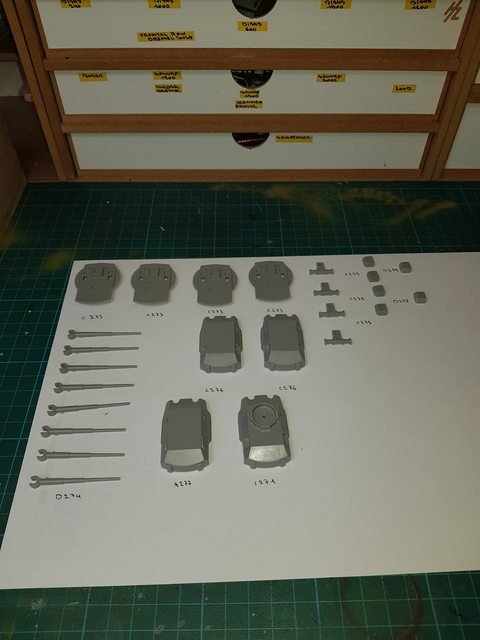
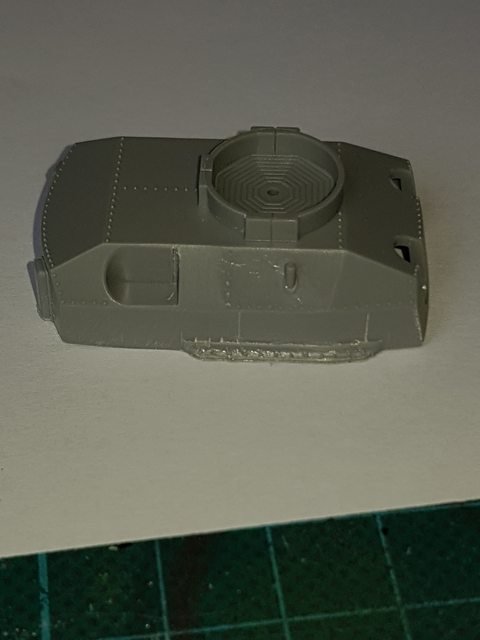
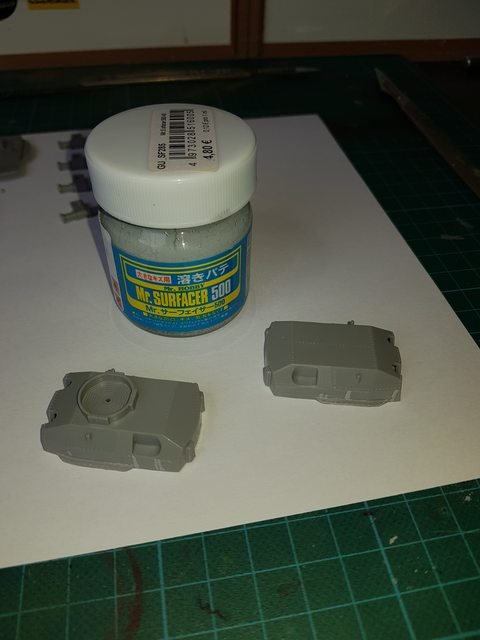
Hull of the Tirpitz was glued together, resulting in some unequal seams, so they need to get some putty. While drying, i tackled the 150 m/m gun towers.
Without PE they look like this....
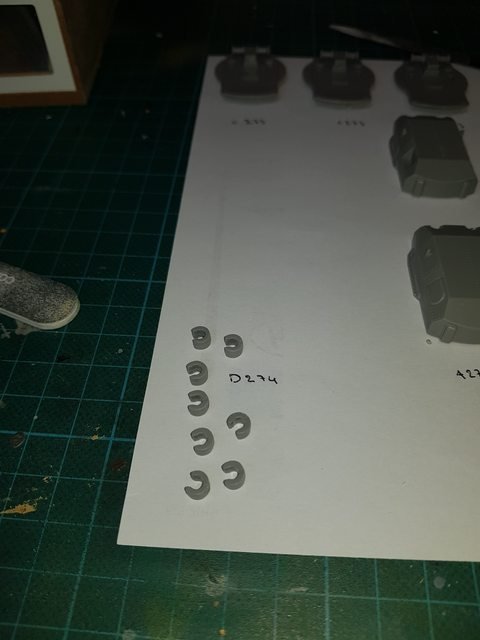
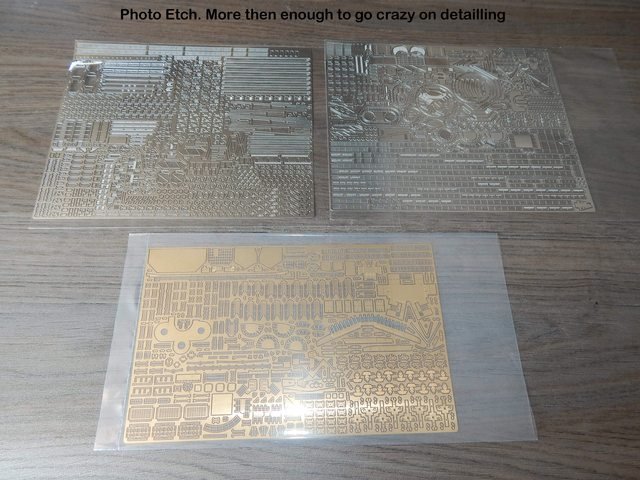
But this kit got a load of PE and brass barrels onboard, so let the fun begins.


Ok folk's, so far the progress, for now i have a question?
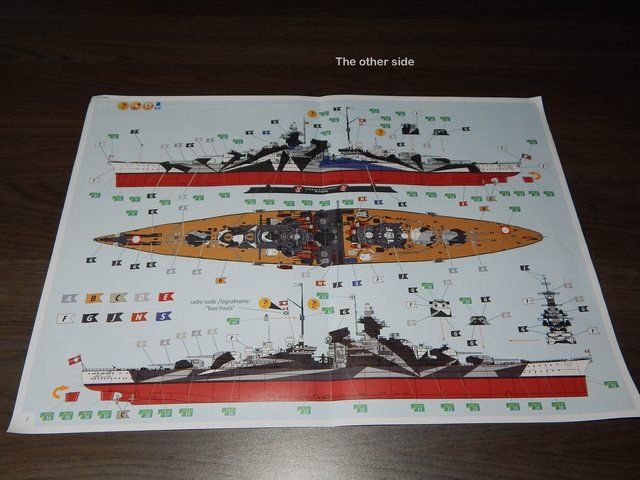
Revell give's the modeller a choice between two color scheme's. On both they depict two color scheme's with the use of blue, but i can find any info about the use of these sort of color scheme's. For this i used the following reference site :
http://www.bismarck-class.dk/tirpitz/tirpitz_menu.html
These are the Revell color profiles included in the kit :
My question to the expert's ; are these color scheme's accurate?? Or is it just a rendition of what could be???
Regards
Danny
-
40 minutes ago, cog said:
Show us!!!
If it's okay for showing it over here, no problem for going for a second off topic.

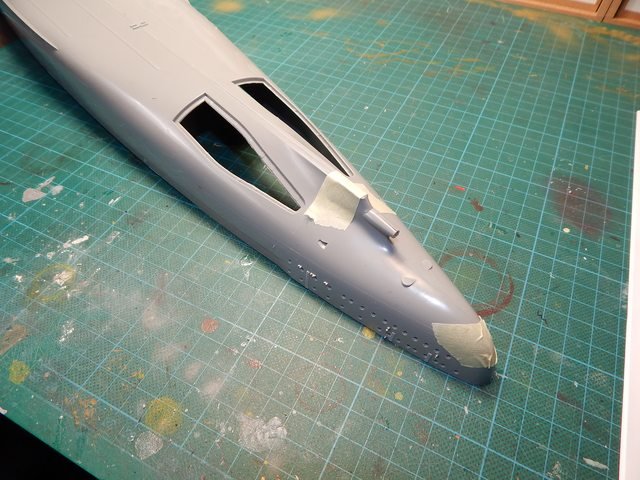
Mig kit's nose was to pointed
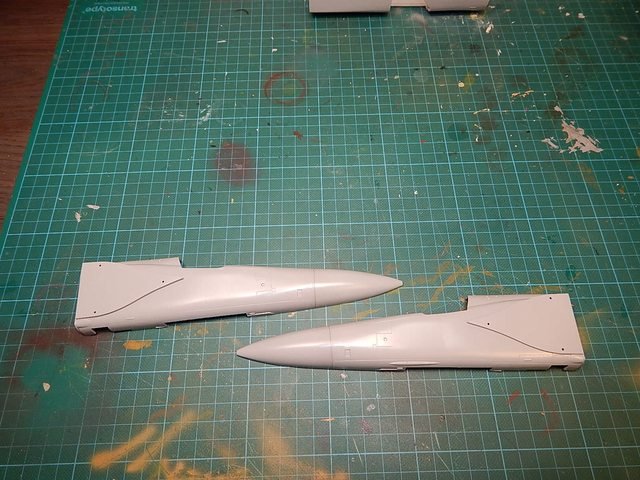
So i decided to make a more accurate nose from a MIG 29 nose.
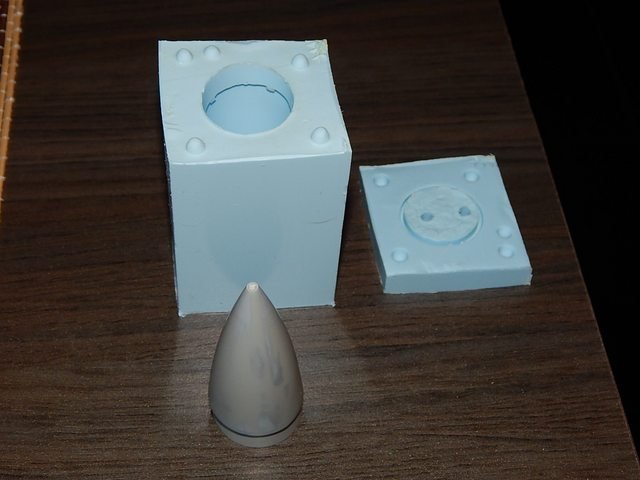
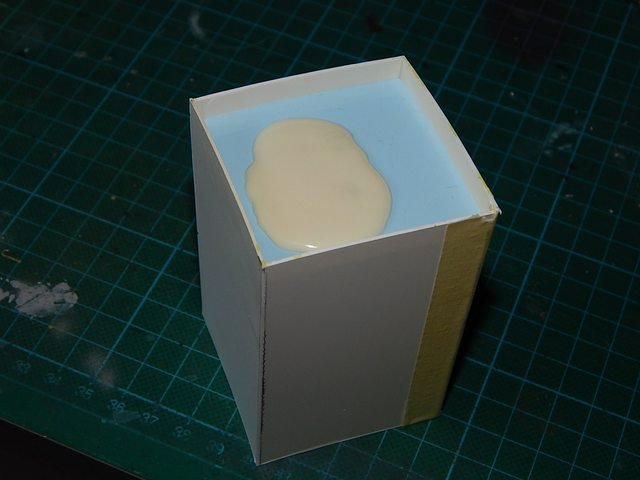
Made a rubber mal, and poured some resin to get a new nose-cone.
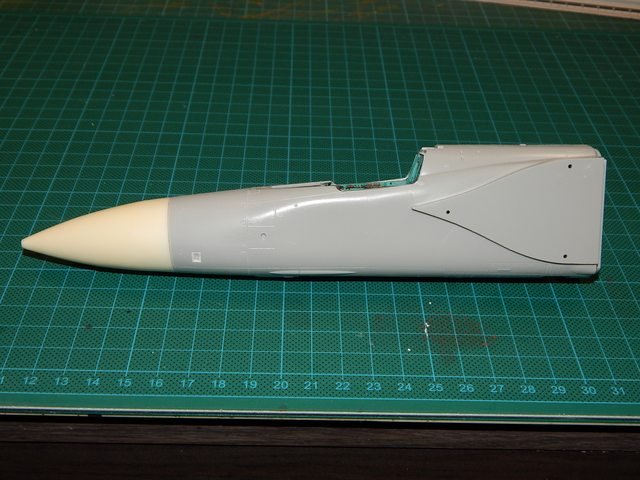
Dry-fit
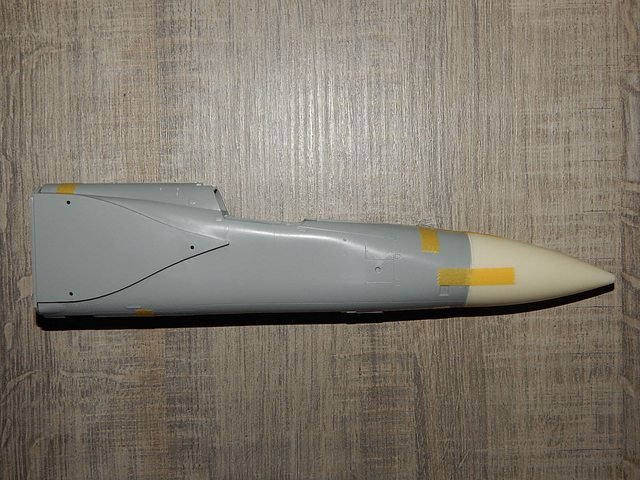
and after trimming the resin nose and glueing onto the fuselage.
Regards
Danny
- popeye the sailor, Canute, BenF89 and 4 others
-
7
-
On 24-5-2018 at 4:20 PM, RGL said:
Sigh, you’ll never have enough PE now you’ve started.
You hit the nail Greg, i'm afraid i will go crazy on this one, but for now i'm sticking to the pe in the box
 On 24-5-2018 at 8:14 PM, cog said:
As RGL wrote ... you haven't got enough!!! You'll be buying more ... and more ... and more ... because you want her to look better, nicer details ... crispy ... might as well have bought Yamato with both Pontos and Flyhawk detailup sets ... lovely build by the way I'm on Musashi (old tool) for at least two years now. The old tool has a wee bit more PE, but whats a ton more or less in brass
Well if i look at my airplane build's, there's never enough. I like to work with pe, but i always have in mind that there is a limit............nah......at the end, there isn't

I think on a ship model pe has a much more important factor due to the tiny details, so i'm afraid that i always will find something that will have a better look with the using of pe.
On 24-5-2018 at 11:19 PM, cog said:You've been building airplanes ... without PE/resin?
All my 1/32 airplane kit's have their own pe/resin detail set's inside. Some of them even have more pe/resin then kit parts. If something isn't there yet regarding replacing the kit part with resin, i will make it myself. That's what i have previously done with the MIG 23 nose cone.
Regards
Danny
- Canute, cog and popeye the sailor
-
3
-
15 hours ago, cog said:
You go crazy on three sheets of PE ... then I strongly advise against Yamato/Musashi from Tamiya as a future build!
Nice detail up set included. Normally you would have to buy a set which is as, sometimes even more expensive than the kit itself.
Crazy is the right word Carl, i think really crazy
 , but on the other hand, it will give the kit a nice extra dimension if you ask me.
Yamato was also on my wanted list, but with the kit about 260€ and more then a equal on the AM it was a little on the expensive side.
14 hours ago, popeye the sailor said:WOW....Revell has really stepped up to the plate on their kits....then again, platinum edition kits must be rather new. I've not heard of them. ok then......I'll just sit back and watch
They are, still almost two years i think when they released their first Platinum kit, the Bismark. There's also technik kits that are released now, i think the Snowberry is one of them. They come with light set, which are fabricated and delivered from belgium.
Regards
Danny
-
33 minutes ago, popeye the sailor said:
Carl beat me to it.......nice looking kit.........very nice detail on the deck. is there a wood deck upgrade out there for this model?
you can have a look here.......I do notice that they sell their products through Amazon and E-bay
No need for aftermarket for this kit, this kit comes with a full load of different media.
Regards
Danny
- lmagna, Baker, popeye the sailor and 6 others
-
9
-
43 minutes ago, cog said:
I like their products, but 1200/1300 ... I'll stick to 1:350 with an eye on 1:700 for a change once in a while
That's really tiny, not for my old eyes Carl. Respect for you guy's who tackle these kit's.
41 minutes ago, cog said:Normally one would say bulkheads, but in this case ... these are reinforcements
Yep right on target, i couldn't quit give them a name, thank's allot.
-
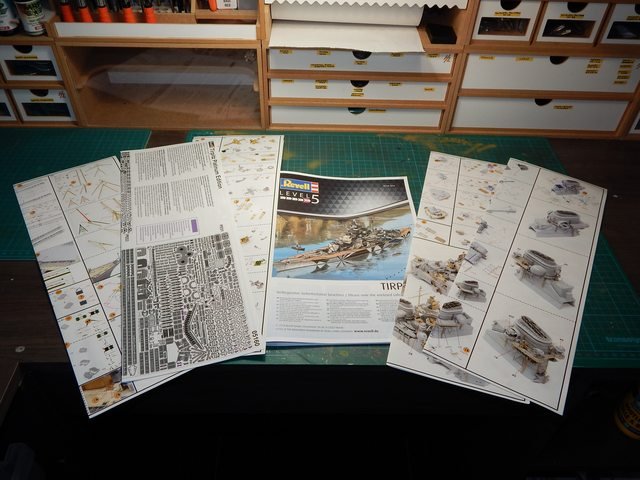
Time to put some photo's over here. I made a careful start on this beast. Like i said before, i'm used to build bigger scale, 1/32 airplane models, so this will be my first ship building in plastic medium, i hope everything will turn the way i like it.
")
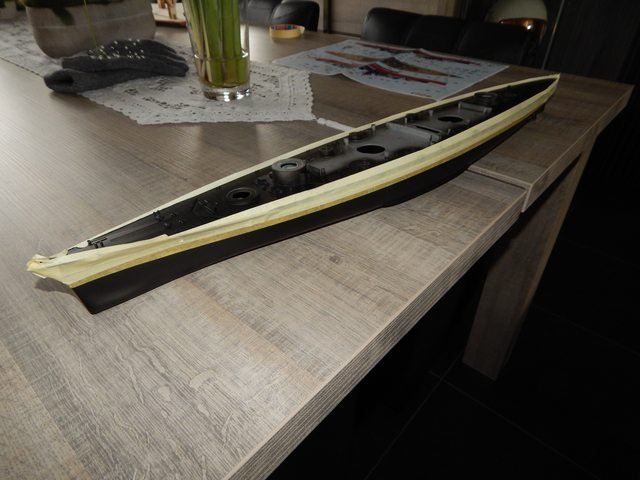
There's enough instructions to get lost on this one.
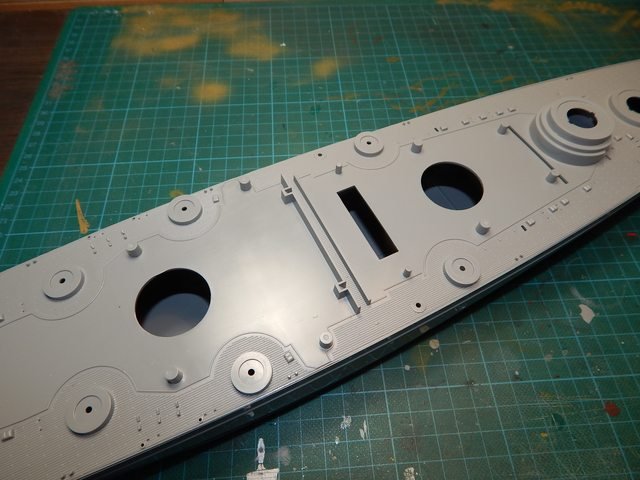
The hull is separated into two half's, which both are nicely moulded, some seam lines need to be removed, but it's no difficult job to do.. The fit of the two half's is fairly good.
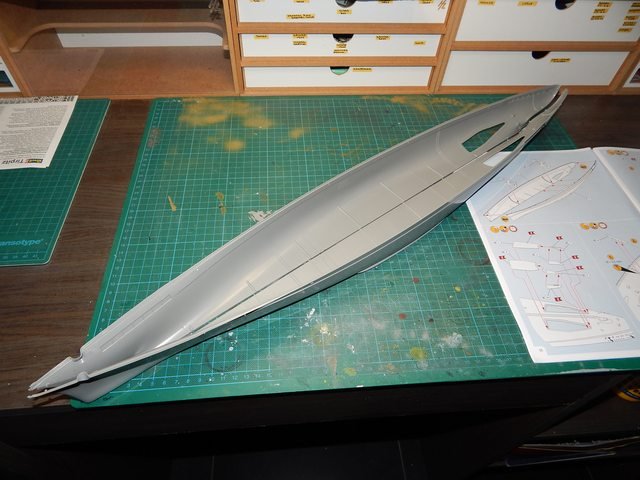
I just wanted to know for sure how this kit would fit, so i did a dry-fit of both half's and the upper deck.
Also the two inner (i don't know how to call them ) walls gave a very good fit into the hull.
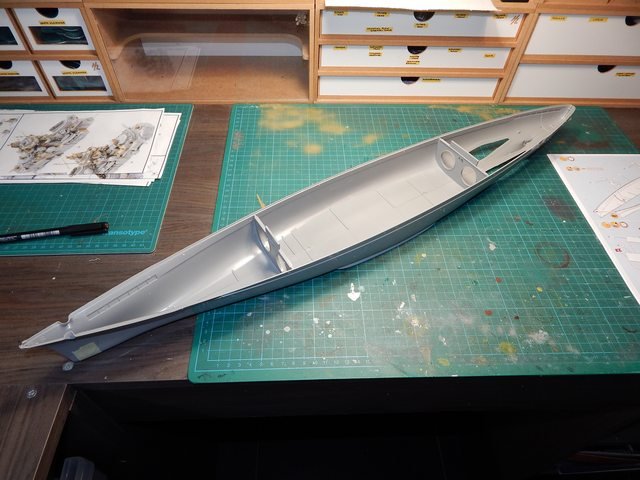
Dry-fit of the upper deck gave a good alignment, so for this i was happy.
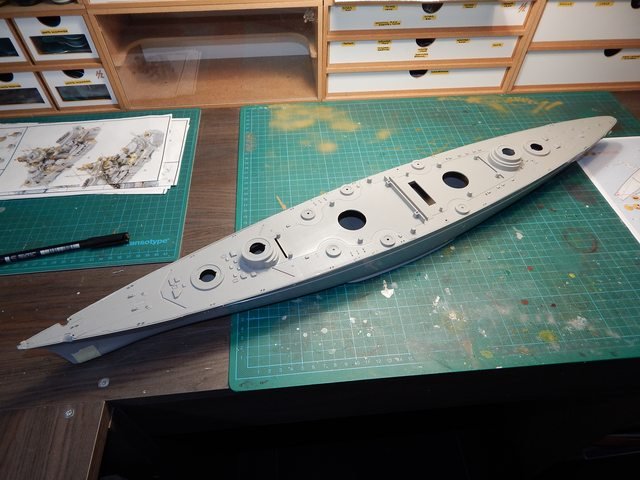
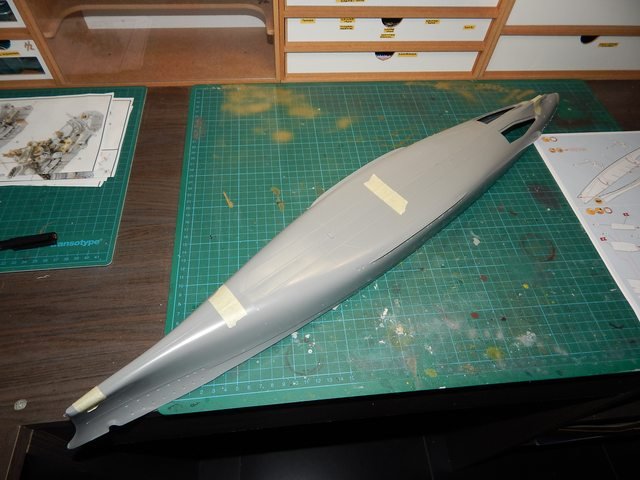
Time to glue the two half's together.
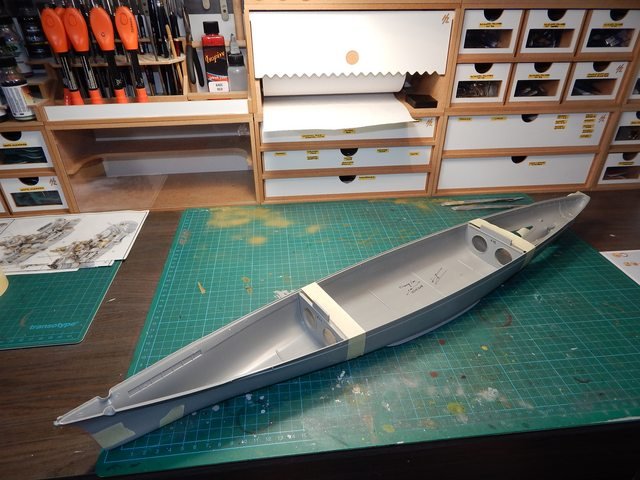
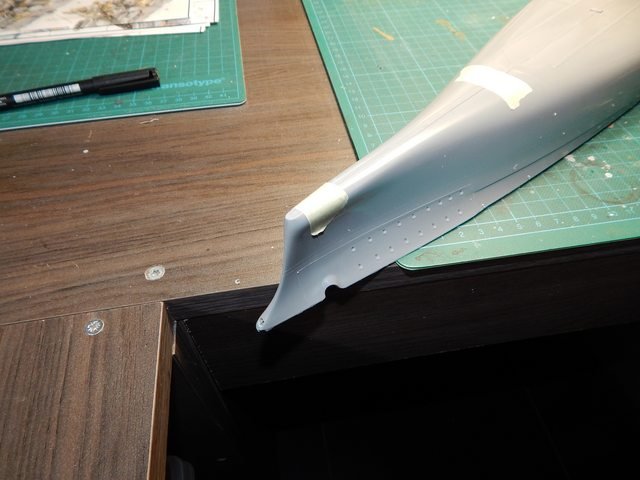
When the gued is dry, i will glue two nuts into the hull, for later connection on a base plate. Also i will use epoxy glue into the separation seam for a secure connection.
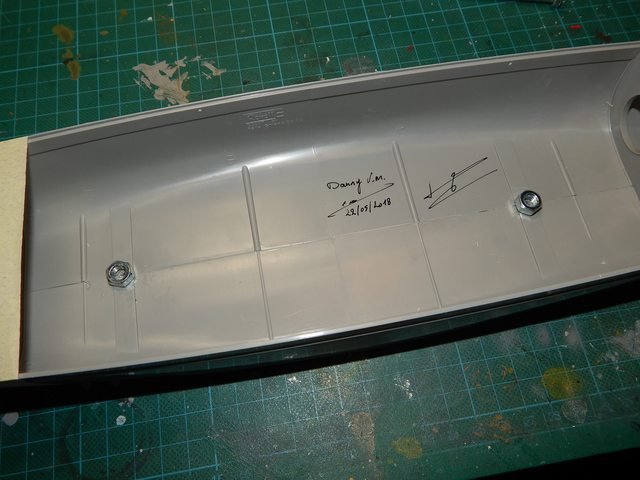
Indeed, yes, i put in all my models my signature and starting date of the project, let's say it's for good luck...........

Ok guy's so far so good, it's not much, but it's a start.
Regards
Danny
- popeye the sailor, cog, el cid and 7 others
-
10
-
Quote
MaybeIMaybe you will find an answer with Marijn.
Check this post. There are beautiful little figures on his ships
Oohh yes Patrick, i did see this fabolous build by Marijn in real person at a convention, really really great build. So your answer explains allot, thank's allot.
29 minutes ago, RGL said:North Star have fabulous stuff, remember the figures are tiny and you will need a lot for a battleship
Hi Greg, thank you for your answer. I know, they are really tiny, and i know also i will pushing myself to the limits.
2800 to be exactly, yes that's allot, but i will depict the ship when the most of them are asleep in their bunk's
I know, it's not fair.
Ok, guy's i made a start, expect photo's real soon. See ya
Regards
Danny
- popeye the sailor, Baker, Canute and 4 others
-
7
-
Thank's guy's for the interest.
Anybody of you guy's know this manufacturer??
https://northstarmodels.com/2012/12/sailor-set-1200-1300-scale/
Anybody has ordered there before??
- popeye the sailor, Canute and Baker
-
3
-
48 minutes ago, cog said:
Danny,
Have a look at RGL's builds too. You ask the questions we'll try to answer or steer you in the right direction ...
Cheers
Will do that Carl, thank's.
Regards
- popeye the sailor, mtaylor, Canute and 1 other
-
4
-
2 hours ago, cog said:
I've looked plenty, video as well as build logs ... to me there is but one way: Do it. My only concern was whether it would stick (the PE) I find the larger area's to be the hardest. Those tiny parts ... you need to stick em on right since you do not have a lot of time to correct it, but it's fun once you get the hang of it
Yes indeed Carl, just do it, that's the best way, totally agree on that. PE isn't the problem, i've done enough on that during my build's on airplanes, but again, it's another subject in which i have knowledge. On ship's i have almost none, so i hope you guy's can give me allot's of feedback during my build process.
1 hour ago, Old Collingwood said:Yeah! I have about 100 hammocks, wonder if danny has enough room for us all snoring away waiting for the show.
Well, let's put it this way OC, on the www. there's lot's of space available, in my apartment, i'm afraid not

Regards
Danny
- popeye the sailor, lmagna, Canute and 2 others
-
5
-
Quote
Danny, I'll try to keep me eyes open. What happened to the research, or is that the cleanin of the workbench ... my clening could be considered thus (oeps)
Sure do Carl

Research regarding, way to work true the numborous step's of adding pe, and the wooden deck. Ship's are rather new to me, but i like them allot, still, i'm not familiar to the way of steps taken for painting etc. so i did some research on Youtube regarding WIP's of people who worked there way true various of ship build's. Last evening and this morning i looked at some video's so now it's clear to me, and i know (i hope
) what to do.
First i need to glue one wing onto my F-104 fuselage and let it dry, then it's Tirpitz time.

Regards
Danny
-
4 hours ago, cog said:
Hmmm, what a bummer, first show the goodies, and then take them away ... OC d'you have a spare hammock, might as well catch some zzzzzzz's
No worry's Carl, i will soon start this one, probably this evening, but first i have to clean some stuff from my workbench.
Regards
Danny
- mtaylor, Old Collingwood, Canute and 1 other
-
4
-
Thank's Guy's, i will start very soon on this one. First i need some research to get started, so stay tuned.
Regards
Danny
-
Thank's OC, for the interest.
Regards
Danny
-
Hi Guy's, long time i posted something here, but that's gonna change.
Today i just bought myself a long time wanna have gift.
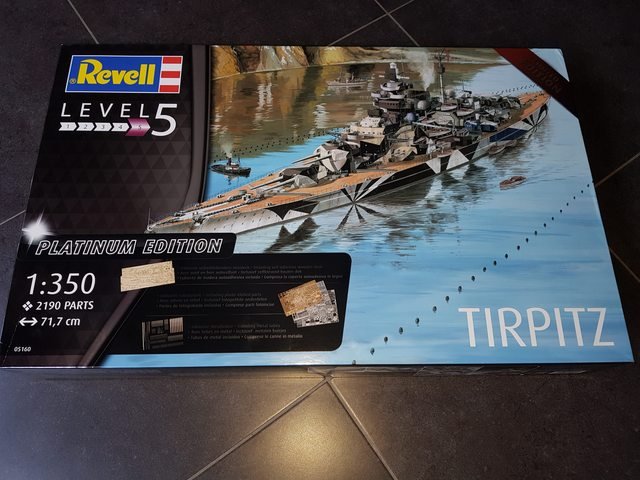
I will start soon on this one, just for now, are there any tip's to build this kit.
Regards
Danny
- xken, hexnut, Old Collingwood and 7 others
-
10
Tirpitz by DannyVM - Revell Platinum Edition - 1/350 - PLASTIC
in - Kit build logs for subjects built from 1901 - Present Day
Posted
I second that Carl. It take some effort but afterwards the reward is so big.