


Adrieke
-
Posts
1,625 -
Joined
-
Last visited
Content Type
Profiles
Forums
Gallery
Events
Posts posted by Adrieke
-
-
not the Isabel Browne or Edinburgh
another clue : Duncan Mclean
-
nope Danny
-
hi Greg
I will be using the wood that came with the kit and hoping I get a good result from it.
after counting and calculating from pictures and the 360 degree views from the museum website I have concluded the follow
the planks they used for the deck are about 285 mm in width (the board plank my model is sitting on is that exact width what a coincidence)
at 1/80 that would mean my planks need to be about 3.5 mm in width. the kit comes with 5 mm strips of wood
so major first decision to make. not sure if I even can consistently reduce them in width (it will have to be all by hand)and if I still would have enough of them to cover the deck
-
nope not Annesly
she was built in 1885 in Glasgow
-
another small update
fitted the first two curved railings . they where a bit awkward as the head posts have different angles there but I think I got them pretty ok. will se when the glue dries
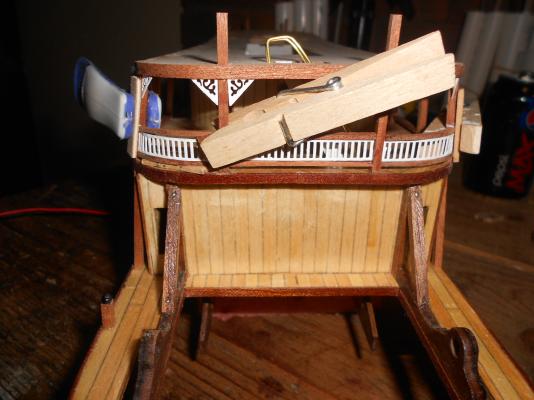
with this done I can now fit the paddlewheel in permanently

tomorrow I will also buy the necessary parts to fit the 3rd deck and the connector to be build into the display bottom for the powerpack. I need to do that now before fixing anything on the 3rd deck (same goes for the triangle ornaments
i feel like i am in the same stage as when i started the rigging of the Virginia . still a lot to do but seeing the end of it
then i can concentrate more on the endeavour . maybe even start the Gorch Fock before Sjors has made his first ratline

have another beer sjors

-
nope David
-
not the carleton either
-
i am with you trying to make her look like the replica if possible
she is a challenge , especilay to get her hul nicely shaped and planked which yuo already doen beautifuly
have a good weekend too
-
thanks for looking in Rowand
yup so far it seems i ll i have done is sanding lol
i have some website wher you can upload pictures and by pointing at a color it wil give you a chart with colors close to the one in the picture. This should get me in the rigth direction together with photos of the replica and of the other build logs here
i am going to try and adjust as close to the replica as my skill level alowes and paint her exactly the same except most likely for the bottom (white) as i want to be able to see the nice planking (i hope
 )
) -
good instructions (which would include the basics on how to plank, rig and finish the model) will make any kit do able (meaning the builder wil end up with an end product) but it depends on how much commitment he wants to put in. the skill level on a kit should explain what is required of the builder to complete it.
-
not the silverstream David
-
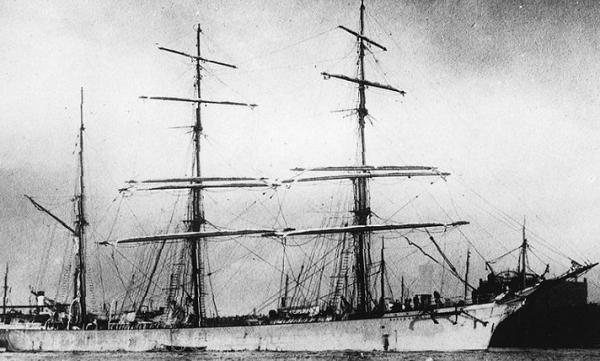
found it through a picture of the herzogin cecile which is a "windjammer" like the balclutha
next one from me :
-
funny littl econversation my wife and me had yesterday :
once in awhile i show her the forum and the beautiful builds on her. she noticed the title captain above my picture and she said was that so i explained to her about the number of posts .
anyway last night in the car when out shopping we where bantering a bit about who is in charge and i said wel i am because i am drivign and she goes
wel you may be the captain but i am the admiral. i look at her half shocked half laughing my wife knows nothing about ranks or the honorary title on here .; ofcourse i had to explain to her and she laughed
its just in them isnt it
-
the balclutha also named star of alaska and pacific queen
-
ouch David. nasty break but fixable ( i had some of those on my curved walls onthe kom)
if you go for making a new part in plywood make sure to feel which way it bends best that was the last mistake i made.
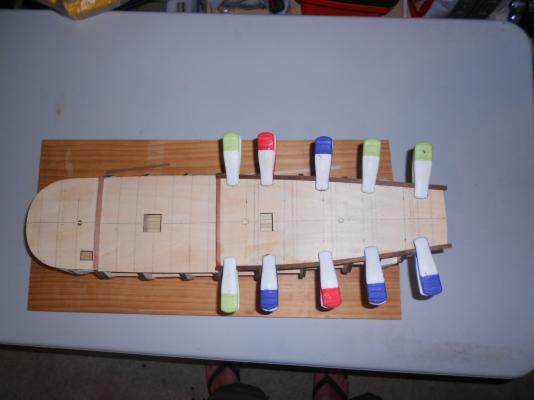
for holding things when there is no hold like the bow what i do is use rubber bands. ofcourse they d slip off but not if you just clamp some pegs on top and let the band rest against it
-
-
thank Sjors . i had read that tutorial before. when i saw some pictures of the replica i noticed that the planking is not uniform which makes sense. if you got a smal part to plank and acording to the pattern you would need 2 planks joining you d put a full plank in. my idea is to plank the model the same way as the replica. same goes for the trenailing. so far i only put trenails on the end of the planks but ofcourse each plank was nailed into each of the beams (or whatever they are called) they sit on
thanks John dont think i kave these pics so they will certainly help
-
correct DF
your turn -
i was lucky finding that one so quick
next :

-
hello pmangos
while I am figuring out how to plank (by finding any image I can find of the decks of the endeavour replica) I decided to prepare the gunwales.
cut 2 of them to approximate size soaked them and clamped them dry
-
i agree with that
not much update today . prepared a few of the curved railings (bend then repaint) and got a few more of the triangle decorations on (trick was to turn th eship upside down when installing them duhh)
-
oh darn from next moday on it says

-
cool
maybe i ll see you there then as i want to get some pics of the endeavour for my build -
haha David honestly no i havent heard that alot . there is an anothere reference that i do got sick of hearing but yuo need to be dutch to know it.
sjors (the clown) will probably know it
i didnt know about happiest but i am happy i moved here (even with all the nasty poisonois beasties )


Name the Ship Game
in Nautical/Naval History
Posted · Edited by Adrieke
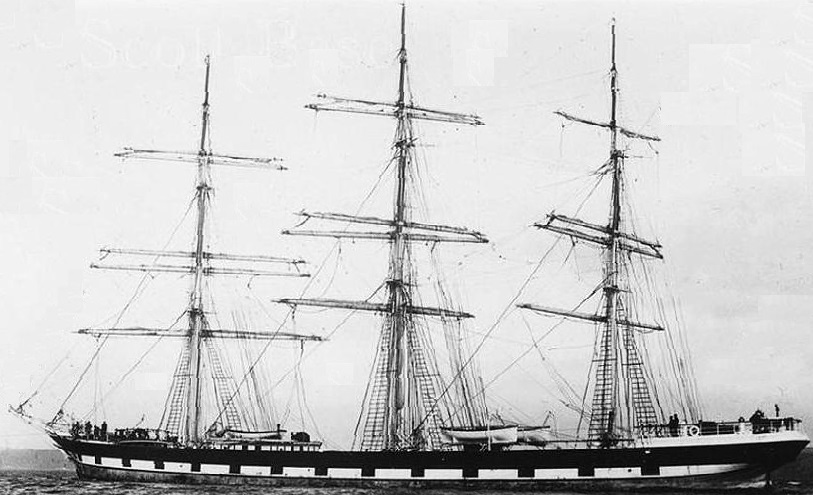
you got it Danny
here a better picture of her :
http://www.flickr.com/photos/uon/3323649515/lightbox/