


Adrieke
-
Posts
1,625 -
Joined
-
Last visited
Reputation Activity
-

 Adrieke got a reaction from popeye the sailor in Gorch Fock by Adrieke - OcCre - 1:95
soon I ll be starting on finishing painting the hull
for now I am first catching up on another build.
a few months ago I signed up for the build the black pearl magazine, as an incentive for me to slowly get back in to model building.
the idea was to do one magazine each week but some other activities (I got too many things on again) got in the way.
I should be back on track this weekend and then I can put my main focus back on the GF
here a picture of the Black Pearl so far
-
 Adrieke got a reaction from Script in Gorch Fock by Adrieke - OcCre - 1:95
soon I ll be starting on finishing painting the hull
for now I am first catching up on another build.
a few months ago I signed up for the build the black pearl magazine, as an incentive for me to slowly get back in to model building.
the idea was to do one magazine each week but some other activities (I got too many things on again) got in the way.
I should be back on track this weekend and then I can put my main focus back on the GF
here a picture of the Black Pearl so far
-
 Adrieke got a reaction from mobbsie in HMS Agamemnon by mobbsie - FINISHED - Caldercraft / Jotika - 1/64
I am catching up with all the builds and they are all looking so fantastic
-
 Adrieke got a reaction from Piet in Hr. Ms. O 19 1938 by Piet - FINISHED - scale 1:50 - submarine of the Royal Navy Netherlands in service 1939 - 1945
wow Piet
absolutely stunning
-
 Adrieke got a reaction from Sjors in HMB Endeavour 1768 by Adrieke - Artesania Latina - scale 1:60 - made to look like the replica at the ANMM
thanks Sjors and Augie
-
 Adrieke got a reaction from trippwj in HMB Endeavour 1768 by Adrieke - Artesania Latina - scale 1:60 - made to look like the replica at the ANMM
hello pete
sorry I haven't been on the forum for a very long time
I am still at the start of the build , so I probably wouldn't been able to help you
hope you r build is going well
-
Adrieke got a reaction from trippwj in HMB Endeavour 1768 by Adrieke - Artesania Latina - scale 1:60 - made to look like the replica at the ANMM
thanks Sjors and Augie
-
 Adrieke reacted to mobbsie in HMS Agamemnon by mobbsie - FINISHED - Caldercraft / Jotika - 1/64
Hi Guys
I cant believe my last post was on the 26th June, jeez time flies.
I have been working on rigging the Mizzen Gaff and Boom, making, fitting and rigging the Mizzen Mast. I have gone as far as I can at the moment so now am starting on the Main Mast Yards and rigging.
My one gripe is the quality of my 0.75mm Natural Rope supplied with the kit, it's not just hairy but it has bits sticking out of it's entire length, applying wax does the trick for a short time then when the rope is passed through a block it's back to normal. The only thing I can do now is replace it, I'll do that whilst making the Main Yards.
Before I go any further I will apologize for not posting progress pics earlier but I sort of got carried away, one moment it seems not enough to post and the next it's done.
OK enough yak, here are some progress pics.
The Mizzen Gaff and Boom.
The Mizzen Mast Yards and Rigging
The Braces are still to be rigged but that's for later.
So there we have it guys, your right up to date, apologies for the quality of the pictures but in my defence I will say that I'm working with old equipment and old eyes.
Be Good
mobbsie
-
Adrieke reacted to mobbsie in HMS Agamemnon by mobbsie - FINISHED - Caldercraft / Jotika - 1/64
Hi Guys,
Just a quick update to let you know that I haven't fallen of the planet.
Rigging continues, all the main yards are made painted and fitted, the rigging is now completed on the main as far as I want to go at least at this moment in time.
I thought I would be clever and just put pegs on the ropes before tying off, so with all the yards rigged and a multitude of pegs hanging came the first headache.
I ended up almost making lace, the pegs got spun around each other and so the lace making had begun, the second headache was once all the lines were untangled where the hell do they go, they are all now tied of and trimmed so lessen learned, tie of as you go and avoid a whole lot of headache pills. It still isn't getting any easier tying around the belaying pins, even with the approved tools and a few homemade efforts.
Next job is to make the fore and sprit yards, this will be done over the next day or so.
I have a few pics to show and as usual please give your honest thoughts and opinions, all are welcome.
These are the main yards prior to painting
Lace making
As I have said all these lines are now fixed and trimmed but no pics yet.
Be Good
mobbsie
-
Adrieke reacted to mobbsie in HMS Agamemnon by mobbsie - FINISHED - Caldercraft / Jotika - 1/64
Morning Guys,
An update on progress so far, all four remaining yards are now complete and waiting to be fitted to the foremast and bowsprit, that will started this afternoon.
I have a series of pics showing various stages and the finished yards, I just hope I don't bore you guys with them, all you guys can run rings around me so I'm not trying to teach anybody to suck eggs.
These yards have been turned on my lathe but there is still work to be done trimming up.
The Octagonal is being worked on using a fine tooth file.
Completed Octagon
Starting to dress the yard, here I'm using black paper to form some strapping
Stirrups and cleats fitted
Stunsail brackets and more cleats fitted prior to painting
Painted and waiting for the blocks, also the main sling is also ready.
Guess who made these blocks
I use my hands free to hold the yards, but the jaws are too strong so I clamp using the top of the clamp
The finished yards with all the blocks attached
Once these yards are attached the end is in sight, so its a matter of weeks all of a sudden, a display case still needs to be made and I want to pay some attention to a different stand, not yet designed but I have a few ideas.
That's it guys. Any and all remarks and comments are more than welcome.
Be Good
mobbsie
-
Adrieke reacted to augie in USF Confederacy by Augie & Moonbug - FINISHED - Model Shipways - 1:64
Never let it be said that I kept Popeye waiting------
The installation of the gun deck has been completed
Just to review (since it's taken so long), the deck is Swiss Pear supplied by Jeff at HobbyMill. Fantastically uniform material -- BIG thanks to him.
The planks are all scale length of about 25 feet. The meeting of the deck planks to the margin planks was carried out using hooked scarph joints. I received some queries on these:
As I came to discover, Swiss Pear is pretty tough stuff but it holds an edge very well. After going through several Social Security checks worth of Exacto blades, I came up with the following procedure:
A card stock template was carefully fitted into the spot to be filled and, using double-sided tape, attached to the plank. The outline was then cut using a fine belt on a belt sander. Takes a steady hand. Given my aversion to power tools, I was surprised how well it worked.
So here are a series of photos showing the deck from different perspectives:
The treenailing was created using the 'drill and fill' method using #75 pin vise drills. There are about 1200 holes (but who's counting). The fill material is Hobbylite that I dyed with some acrylic paint to get just a tiny bit of contrast with the deck itself. The entire deck was finished using the sequence of Minwax Pre-Stain followed by Natural stain, 2 coats of WOP and 2 coats of Testor's Clear Flat Acrylic:
A lot of this deck will be obscured by the partial upper decks and deck beams.
I need to do some touching up here and there on the ship and install some ladders in the hatchways. At that point the shop will be closed for about a month as the Admiral and I are off to do some globetrotting After that it will be on to the cannons.
Thanks to all for stopping by. Enjoy the upcoming change of the Seasons !
-
Adrieke reacted to Sjors in HMS Agamemnon by Sjors - FINISHED - Caldercraft/Jotika - 1:64
I promise you an update today and here it come.......
Not the update that you are expecting but it is one !
Caldercraft give me a cradle with nothing..
I know that some is painting them or giving it a layer of stain.
I didn't do that.
Because I love planking, I have planked the whole thing !
When that was done I give it two layers of mat varnish.
I think it looks good.
But, see for your self.
I also place the nameplate that I've got from Mobbsie.
But, I don't want you to think that I'm doing nothing, the last picture is an update from the starboard side.
So you see that I'm still at the copperplates !
Sjors
-
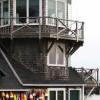
Adrieke reacted to DCIronfist in Corsair by DCIronfist - FINISHED - OcCre - 1:80 scale (First wooden ship build)
I've been putting some pieces on the ship.
The rudder gave me a heck of a time but am ok with it now
Here is some of the rear detailing
The rear with Windows
A view down the ship
And an overview
Thanks for looking :)
-
Adrieke reacted to Piet in Hr. Ms. O 19 1938 by Piet - FINISHED - scale 1:50 - submarine of the Royal Navy Netherlands in service 1939 - 1945
Hello friends,
I have been quietly and slowly working on the O19. I finished the starboard railing, which worked out better then the port side. At least I didn't have to go back and redo two stanchions All of them are as close to being correct as possible, at least I'm happy with the results.
Then it was off to installing the sense antenna. This one is laced to a steel cable that runs from the port side of the con to the bow and back to the starboard side.
I used 0.2 mm brass wire for the support cable and stretched it to make it harder and stiff. I had already made the bow attaching hook a few months ago but now I had to put both ends of the support cable into the hook assembly and solder them. I also cut a bunch of 1 mm brass tubing into 0.5 mm pieces to act as simulated tension devices. (sorry Amateur Jan, just simulated ) The antenna cable tensioners I used when I was running an aircraft repair facility were some ver nifty gizmos. The were internally spring loaded and the cable is attached at one end and the other end to the airframe.
These were all soldered to the support cable at their appropriate locations per the drawings I have. I took the finest black sewing thread for the actual antenna cable and laced that to the support cable at set intervals. The lacing cords I made up from splitting the sewing thread and used the two nylon filaments inside the tread. This is thinner then fly-tying thread and strong too.
I used clear nail polish to secure the lacing to the support cable with the antenna cable and tried to leave a few sagging like loops. In real life the weight of the antenna cable will sag naturally between the lacings.
Well, it looks like that most of the hard work is done except for painting the railing and general paint touch-up, the replacement of the ship's numbers, the boarding ladder and the dingy.
Remco was able to obtain new white numbers with black outlines that are printed on clear decal paper. I am mighty obliged to him for his help. He was not happy himself with the color mismatch and now I can just put these new decals right over the paint, awesome
That'll be my next project before painting. I don't know how much damage I may occur by removing the decals. I did already spray them with a sealer so soaking with water may not work. But then again, touching up paint is not a big problem for me. After I'm done no one will ever notice
Okay, here are a few pics of my efforts of the last few days.
This shows the antenna installation and the starboard railing. Emphasis is on the antenna. The details I mentioned above may be visible when you enlarge the picture. We can now find our way by using radio beacons or low frequency broadcast stations. On the last picture you'll see the DF antenna.
I made a close-up for a more detailed look at where the support cable is attached to the torpedo loading boom bridge. Those two and three little humps are the tensioners.
This is a detail pic of the con side antenna hoop-up. You can see where the antenna cable is routed through a conduit down to the radio / navigation room. That round black thingy is the Direction Finder antenna or DF for short. It works real well after you get used to it, "flying the nul" as we called it. When I learned to fly I learned how to operate it and of course the VOR. Things have evolved to Satellite Navigation and now to GPS. But when my father sailed on this boat this was the best available with "shooting the sun or the stars."
If anyone sees anything that needs attention or fixing please tell me now or forever hold your peace
Cheers,
-
 Adrieke got a reaction from mtaylor in HMB Endeavour 1768 by Adrieke - Artesania Latina - scale 1:60 - made to look like the replica at the ANMM
hello pete
sorry I haven't been on the forum for a very long time
I am still at the start of the build , so I probably wouldn't been able to help you
hope you r build is going well
-
 Adrieke got a reaction from Kevin in Gorch Fock by Adrieke - OcCre - 1:95
thank you for the comments
sorry I haven't been posting for awhile but I have taking a bit of a break from the online world
I have been slowly but steadily working on this build though
second planking is finished
I have applied a first layer of filler, mainly to seal most of the gaps between the planks and have sanded most of it smooth
after that I have added the last keel part and used some more filler to seal the gaps between that part and the hull
I will now finish the sanding and then check for bumps and such and apply more filler
this will then finally allow me to start the painting of the hull
-
Adrieke got a reaction from Kevin in Gorch Fock by Adrieke - OcCre - 1:95
its been awhile but I am finally have got an update
second planking is almost done , just a few more planks near the keel
during the sanding of the first layer I didn't notice that I sanded down the keel to a point at the front and back
I decided to cut off these parts and replace with 2 new bits
here they are glued on and some filler applied to cover up the gaps :
I have also soaked the stern part and bended into the right shape using the form the keel came from
I intend to start the tedious work of sanding and filling the second layer next weekend
-
 Adrieke got a reaction from TerriM in King of the Mississippi by robert1965 - FINISHED - Artesania Latina - Scale 1:80
verry good start Robert
next make sure to check the placement of the 2 rooms as you will notice one of them doest fit in the slots of the deck. whatever way you go (extend the room or remove the part that fits in the slot) you need to check when you add the next deck because it wil not line up properly
-
 Adrieke got a reaction from tasmanian in Gorch Fock by Adrieke - OcCre - 1:95
thank you all for the comments
after a second session of filling and sanding this is how she looked :
then I spray painted a few layers :
this is now showing up a fair bit of errors so after the paint is completely dry I will start on fixing those up
I see a fair bit of work ahead of me before I am done with the hull
-
Adrieke got a reaction from tasmanian in Gorch Fock by Adrieke - OcCre - 1:95
finished more of the gratings tonight
i am still practicing the spray painting. i was going to show some parts but the photo turned out blurry. i cheated with this part as instead of removing the previous paint i just turned it over (the back wont be seen once the model is finished)
-
Adrieke got a reaction from tasmanian in Gorch Fock by Adrieke - OcCre - 1:95
I am not afraid of the cotton ball armada :P
things are going well but soon I need to put my attention back to the King . I feel like I am ready to tackle the last few problems so I have smooth sailing till the finish
today I raced to the hobby store before it closed to get my paints :
undercoat spray can, dark green and white spray can, dark green and white for the smaller work and light brown dark brown and brass. there are a few other colors needed but I should have those in my rack of revel colors
most of the day spend on making gratings
finished one. used mitre cut corners to make it look nicer
-
Adrieke got a reaction from tasmanian in Gorch Fock by Adrieke - OcCre - 1:95
I actually thought of an aquarium for the Virginia and asked at the fish shop . because it wouldn't be a standard size it would come down to around $200 he said . and that's for the smallest ship I have and without the wooden base.
yesterday I finished planking the aft deck
today I worked on the little structure. it has a small ridge on top made by 2x2 dowels.
-
Adrieke got a reaction from popeye the sailor in Gorch Fock by Adrieke - OcCre - 1:95
thank you all for the comments
after a second session of filling and sanding this is how she looked :
then I spray painted a few layers :
this is now showing up a fair bit of errors so after the paint is completely dry I will start on fixing those up
I see a fair bit of work ahead of me before I am done with the hull
-
 Adrieke got a reaction from augie in HMS Agamemnon by Sjors - FINISHED - Caldercraft/Jotika - 1:64
pfffffffffff
well I caught up with your build log now and you seem to be going great (as I knew it would)
soon you l be on the sanding and filling stage like me , lots of joy (but I am needing a shoulder replacement )
-
Adrieke got a reaction from Script in Gorch Fock by Adrieke - OcCre - 1:95
thank you all for the comments
after a second session of filling and sanding this is how she looked :
then I spray painted a few layers :
this is now showing up a fair bit of errors so after the paint is completely dry I will start on fixing those up
I see a fair bit of work ahead of me before I am done with the hull