SaturnV
-
Posts
170 -
Joined
-
Last visited


-
 Shotlocker reacted to a post in a topic:
Conestoga Wagon by SaturnV - Model Trailways - 1/12 scale
Shotlocker reacted to a post in a topic:
Conestoga Wagon by SaturnV - Model Trailways - 1/12 scale
-
 GrandpaPhil reacted to a post in a topic:
Triton by SaturnV - 1:48 - Full Framed
GrandpaPhil reacted to a post in a topic:
Triton by SaturnV - 1:48 - Full Framed
-
GrandpaPhil reacted to a post in a topic:
Triton by SaturnV - 1:48 - Full Framed
-
mtaylor reacted to a post in a topic:
Hello ftom Colorado
-
Keith Black reacted to a post in a topic:
Hello ftom Colorado
-
k-slak reacted to a post in a topic:
Hello ftom Colorado
-
Welcome from a fellow Coloradan, If you join the NRG you can view a very good video on making sails, both furled and set. See here: https://thenrg.org/events/workshops Richard
-
mtaylor reacted to a post in a topic:
Inlay Wood
-
mtaylor reacted to a post in a topic:
Inlay Wood
-
CiscoH reacted to a post in a topic:
Inlay Wood
-
CiscoH reacted to a post in a topic:
Inlay Wood
-
 Hi Kieth and thank you very much for the input. I got the same response from my wife on my last model. I always run this sort of thing passed her to keep me from straying too far into the absurd when trying new things for my models. I think it looks good but in the end I'm usually the only one who feels that way. 🙂 And BTW, my latest use of an inlay strip is on an early 16th Century dutch ship. Perhaps I got that one right. The wife will let me know..... SaturnV
 -
I have used store-bought inlay wood strips on a couple of models and think that it does add something to the look in a positive way. Not all of us (including myself) can actually carve decorations for our ship models and this may be an alternative to that. I just substitute a planking strip with one of the inlays. They are usually the same thickness and bend fairly well to the contour of the ship. They also stain well. Am I cheating? Are they too gaudy? Your thoughts? SaturnV
-
Doing it my way:

-
- 10
-
-
-
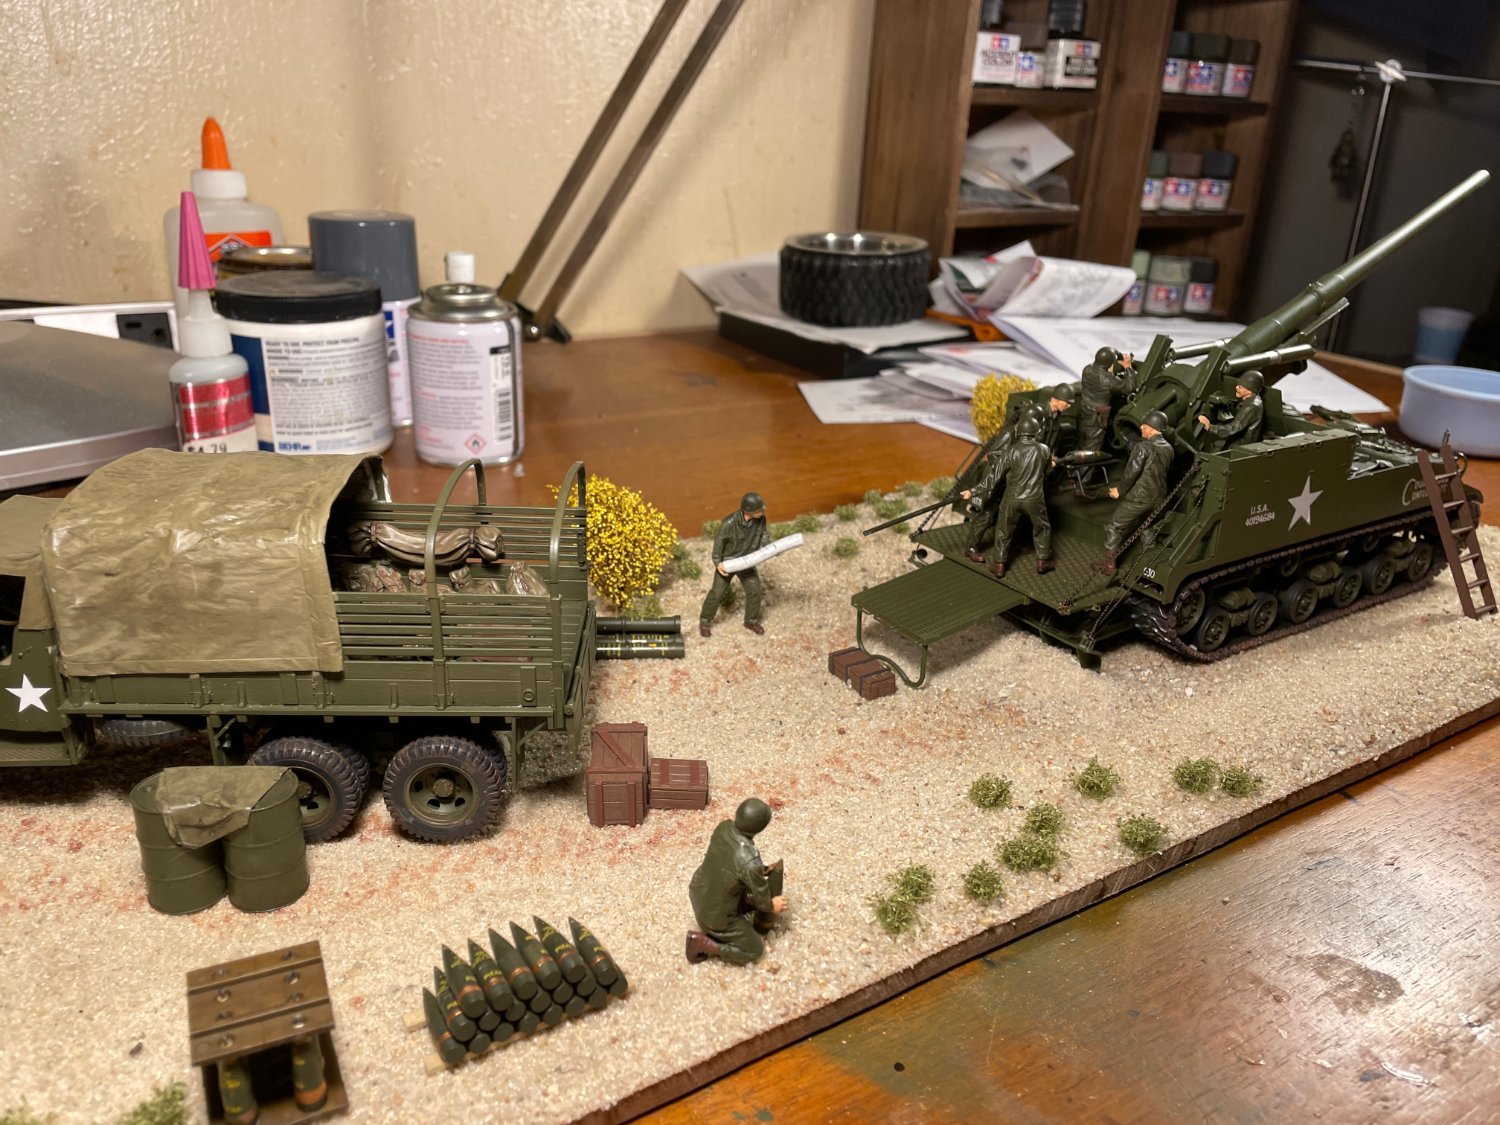
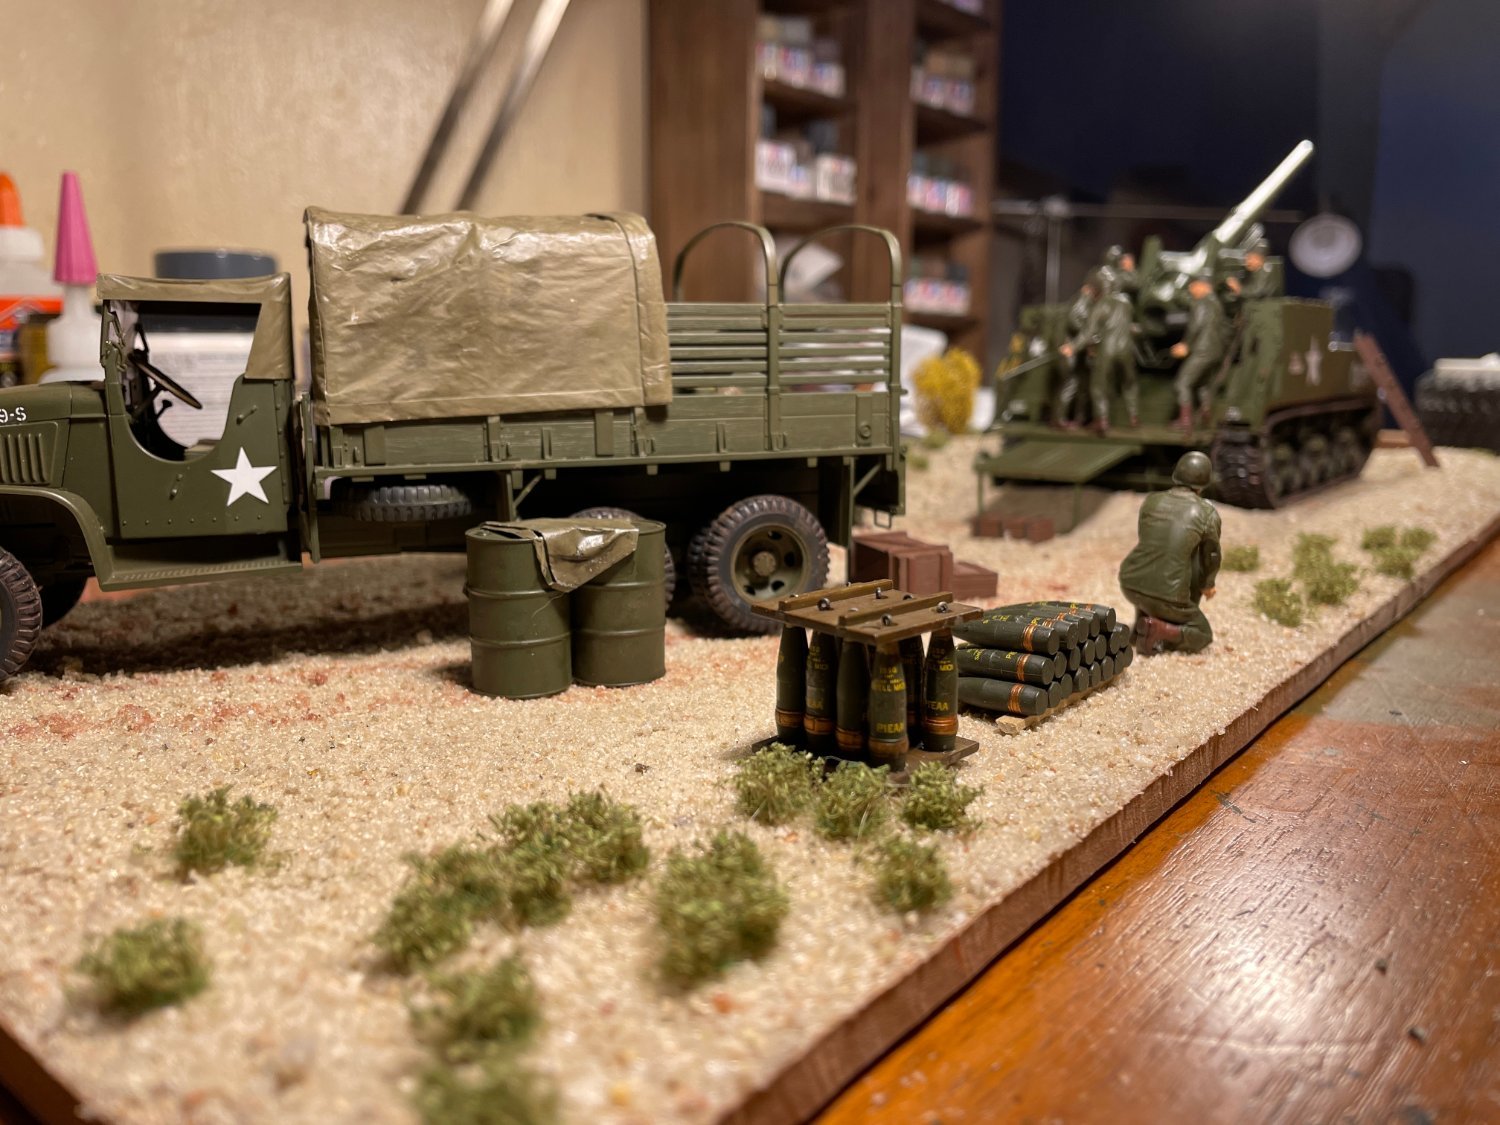
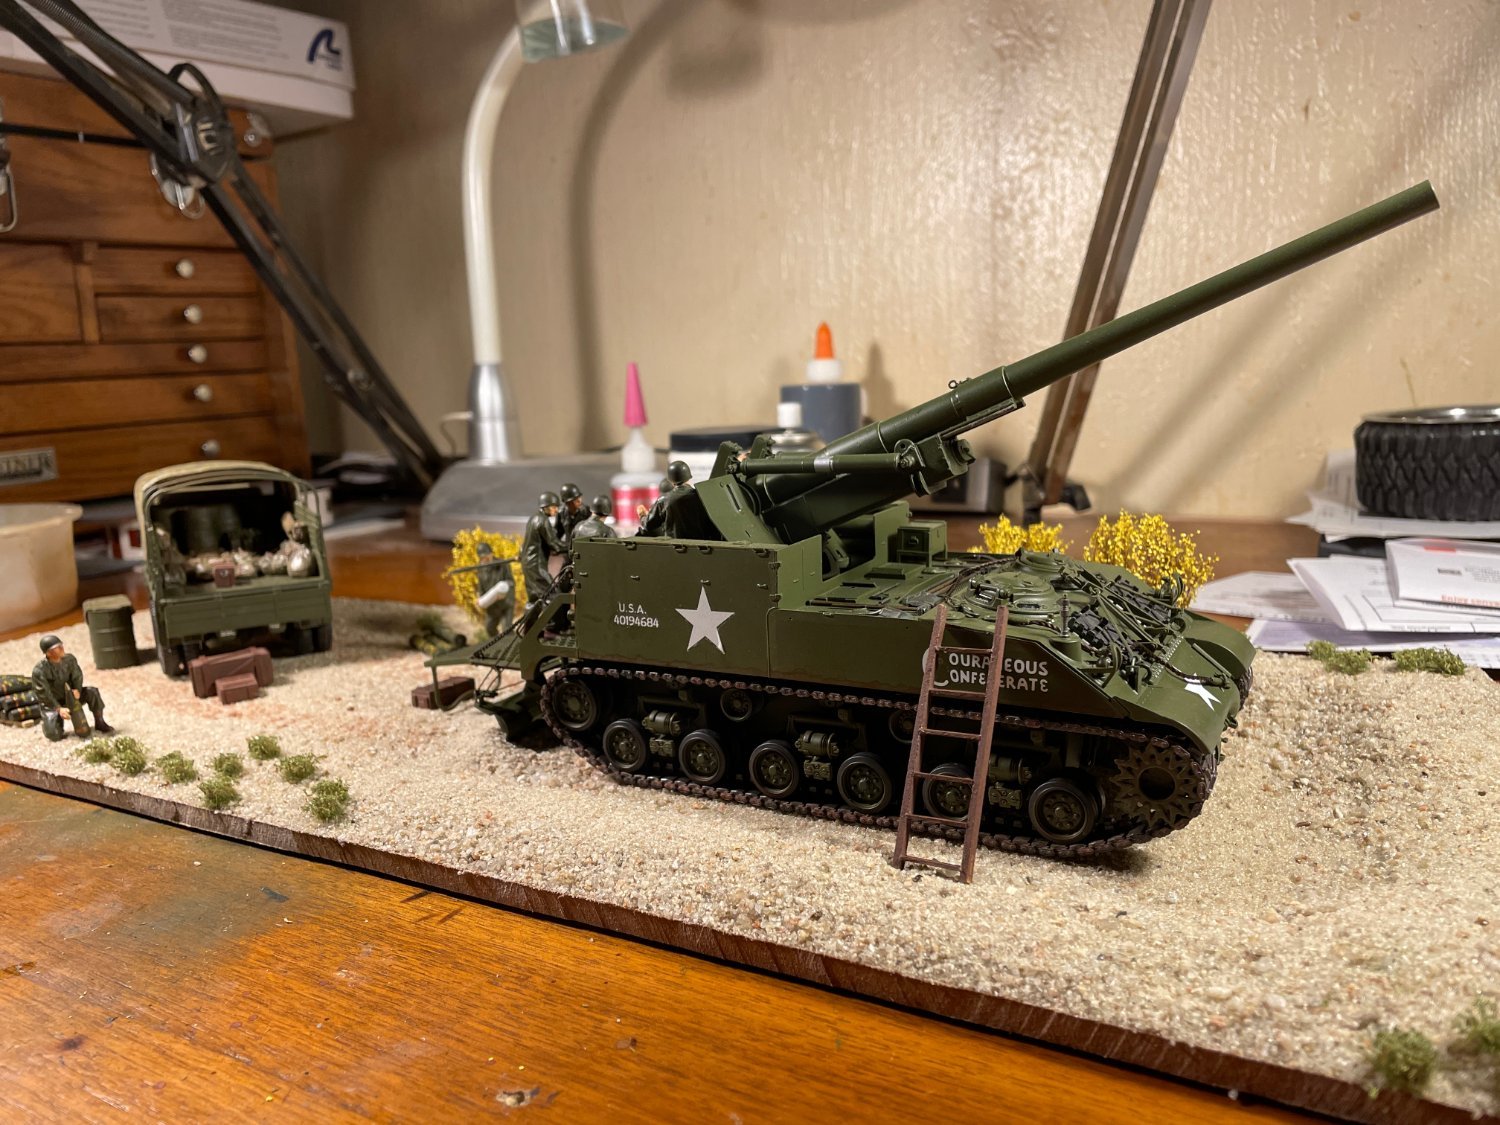
Hi folks! I did not know until today that I could post pics of other types of kits than ship models. I have built plastic models of just about everything over the years and this is my first diorama that I built almost two years ago. For me, wooden ship model building requires me to have a certain frame of mind - it takes concentration and problem solving that don't come easy for me. So, I have to do plastic model bashing to get to the point where I feel confident about working on wooden ships. This is one of those projects that got me back to wooden ships (namely the paddle wheel ship The Reti V.). This is two Tamiya kits that I put together and placed on a wood fiber board base that I covered with play sand, spray glue and some store bought bushes and shrubs. The M40 was made with an after market barrel and the ladder is just scrap wood. The CCKW truck is stock with a balsa wood airplane tissue scratch built tarp and additional bags and boxes from a Tamiya extras kit. I purchased additional ammo shells to get a complete set that would be carried for this type of motor carriage gun. The figures came with the M40 kit and were my first attempt at modeling scale people. The diorama was based on a photo I found on the internet:


-
- 9
-
-

-
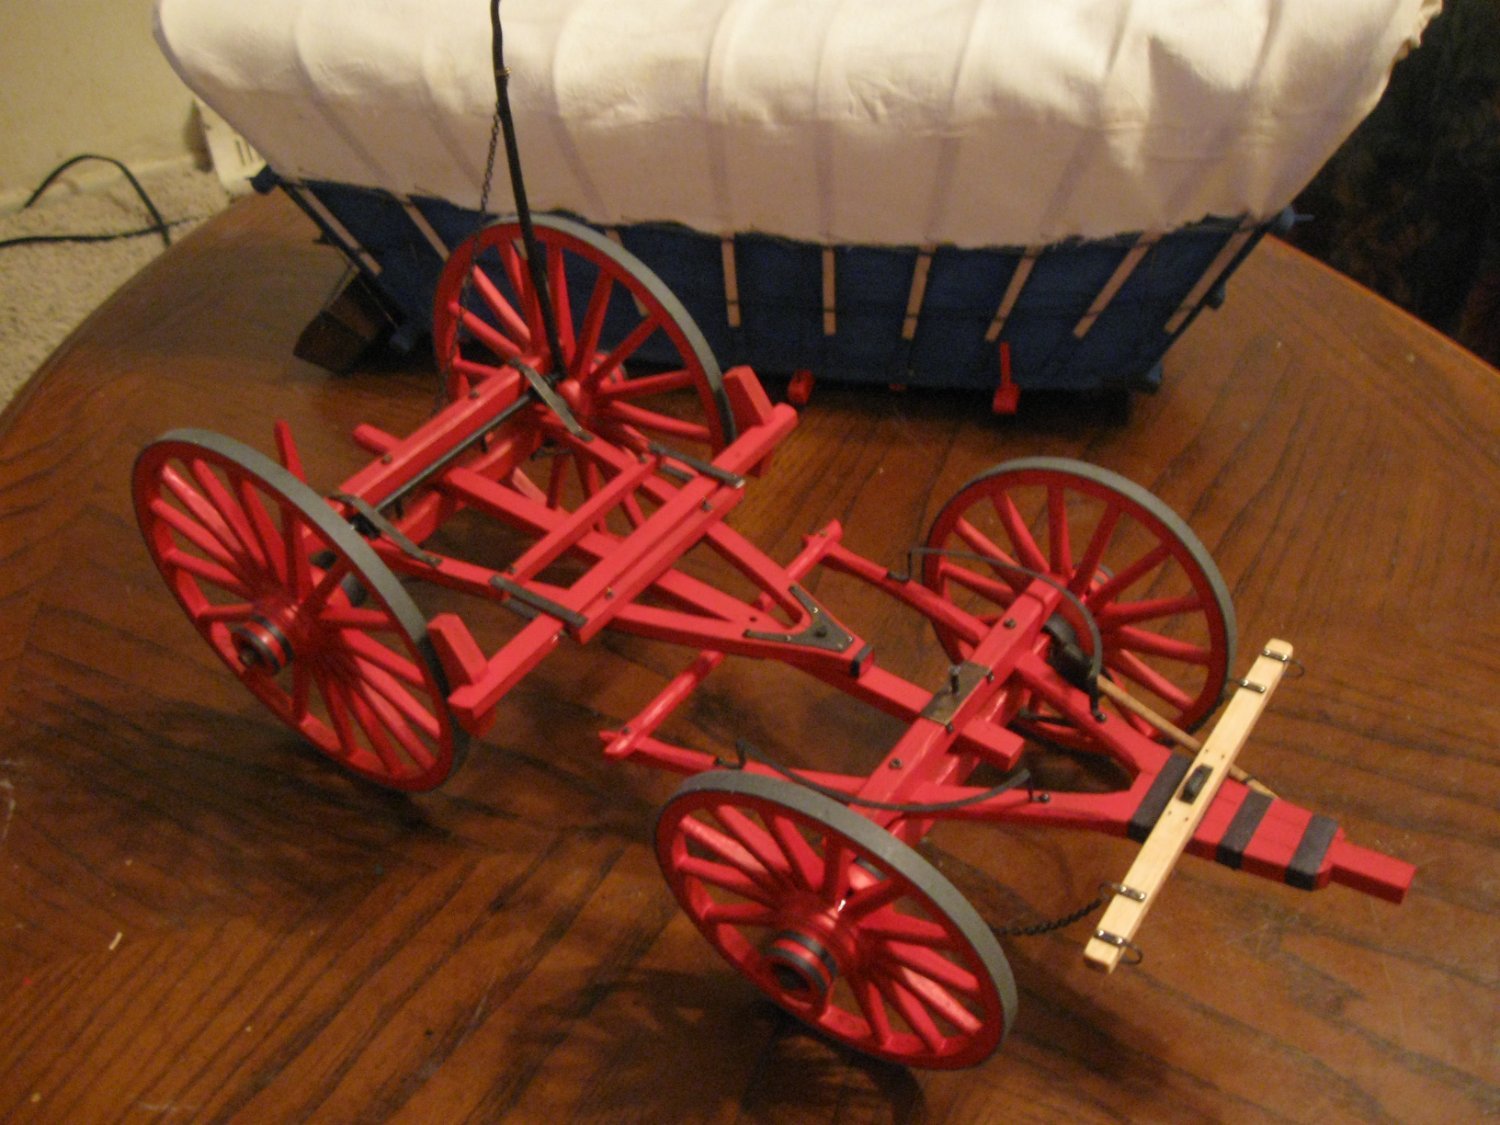
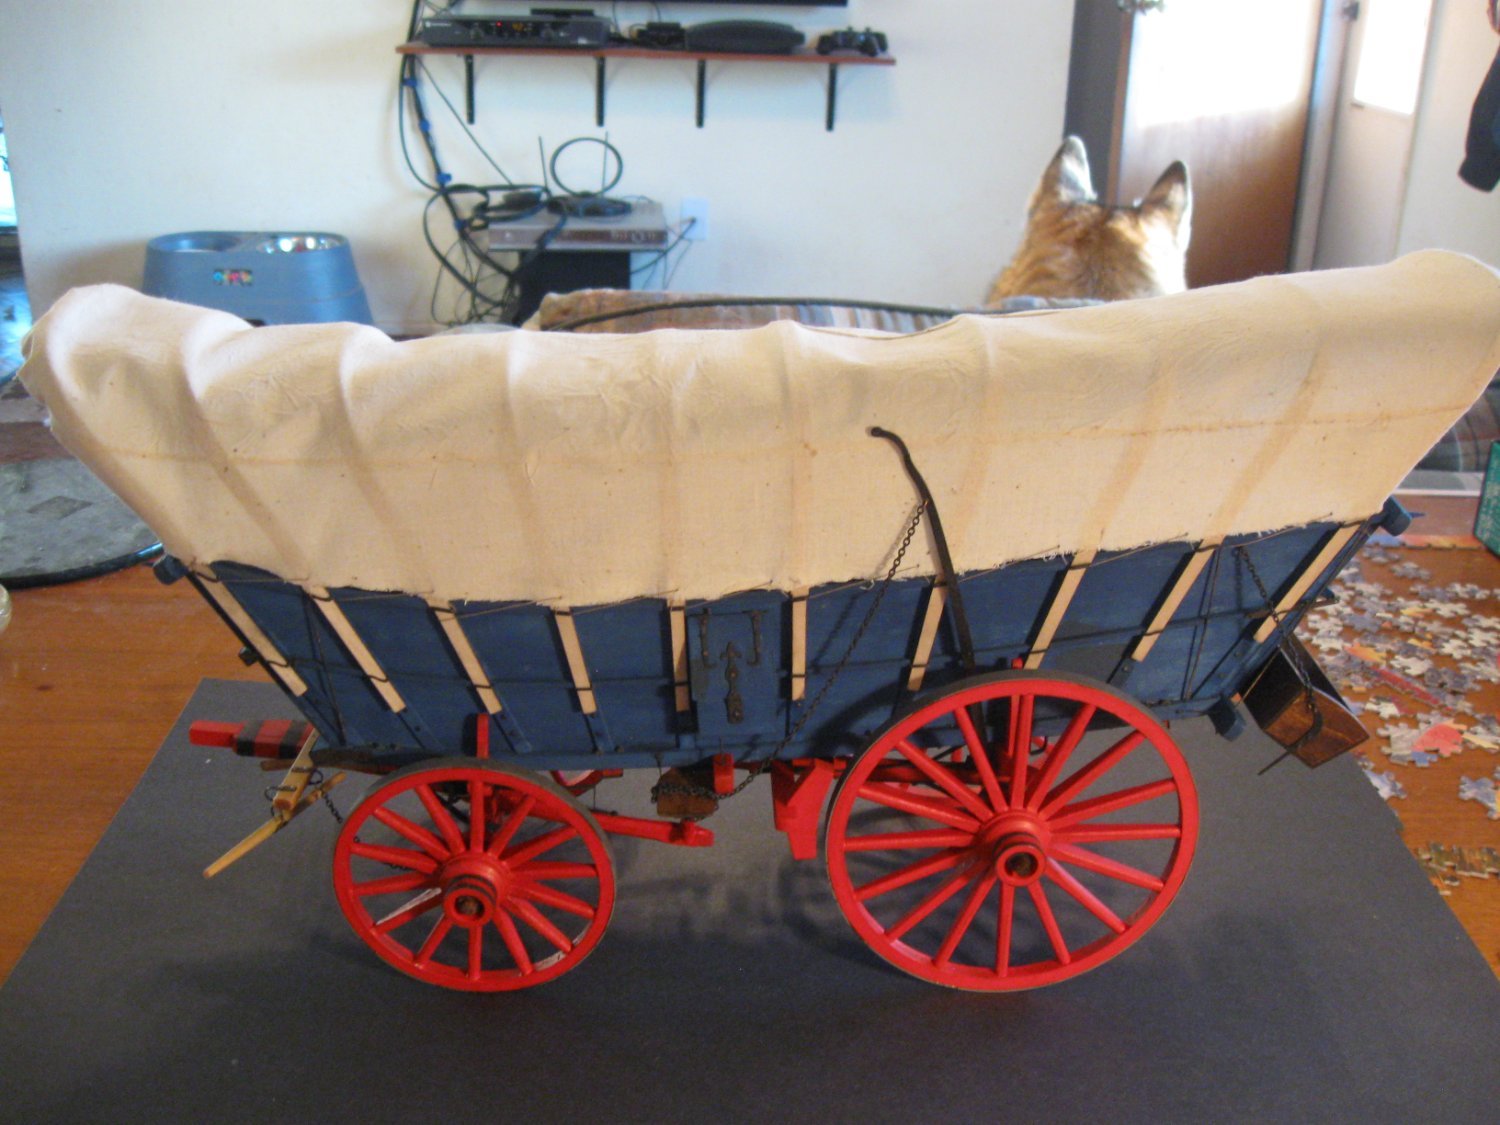
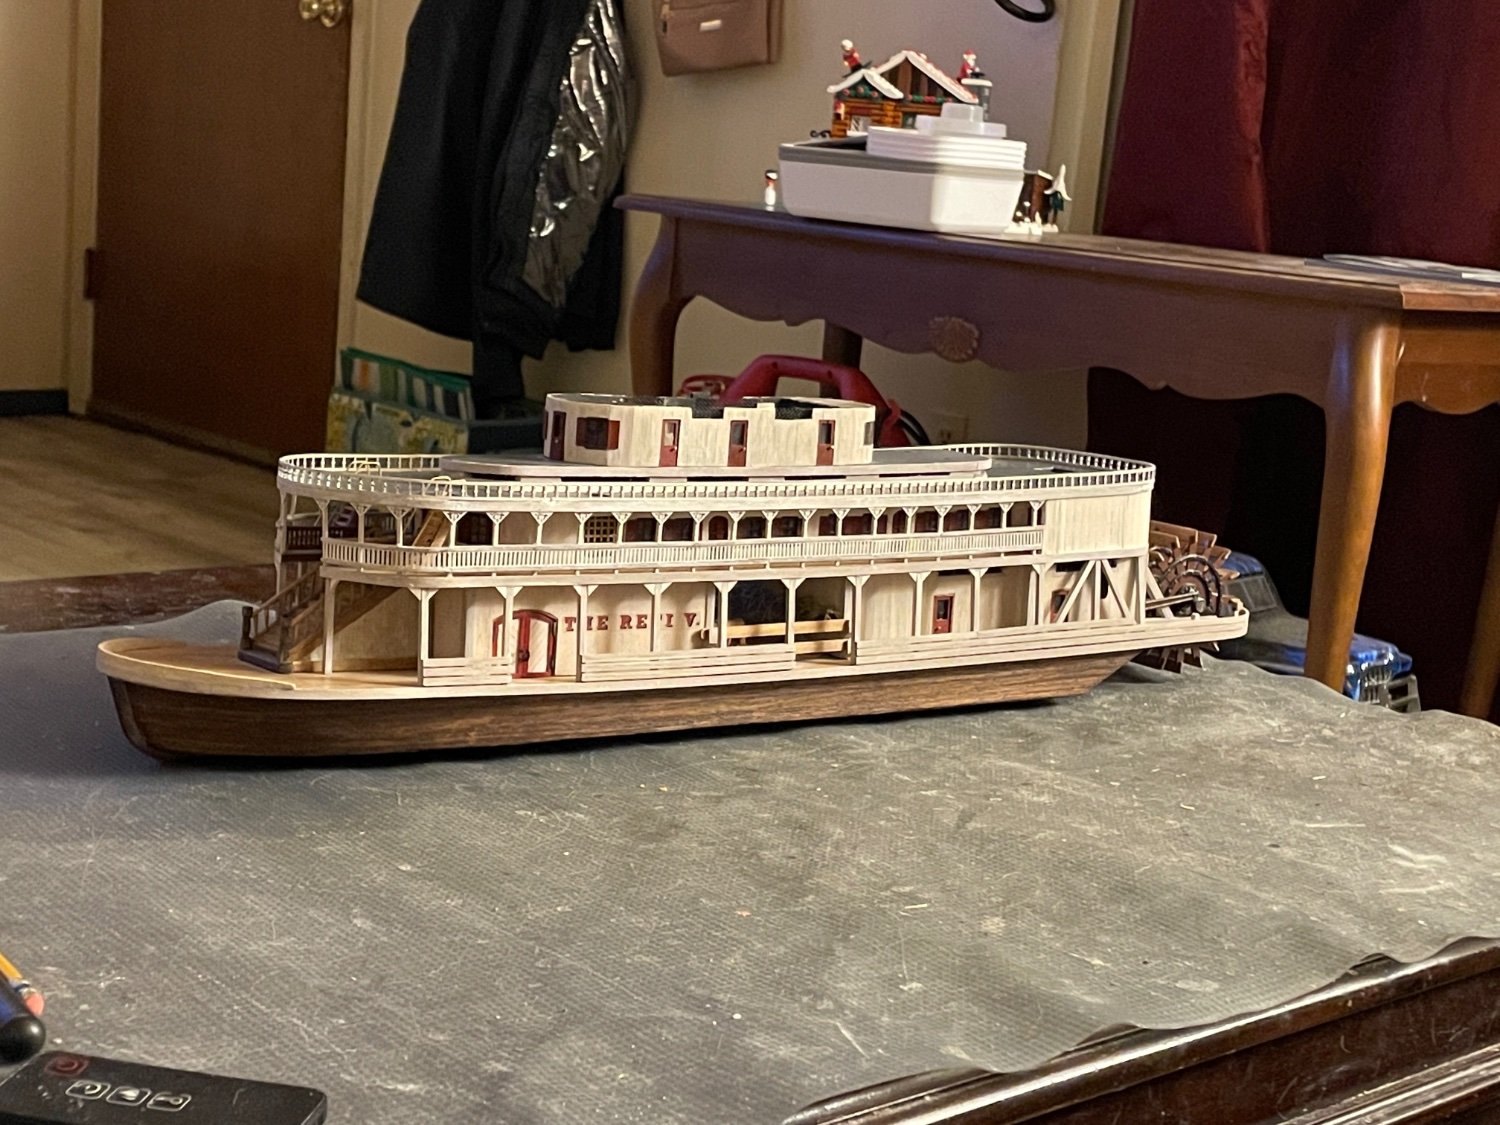
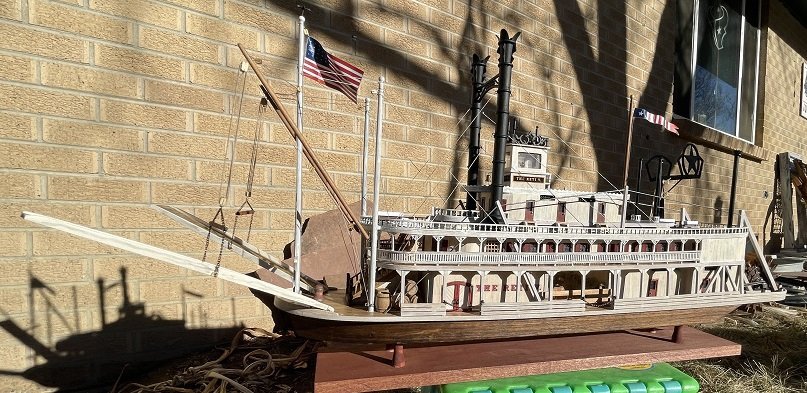
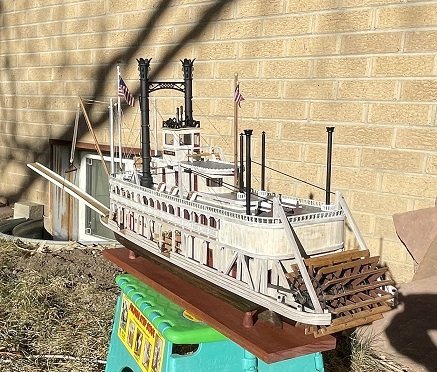
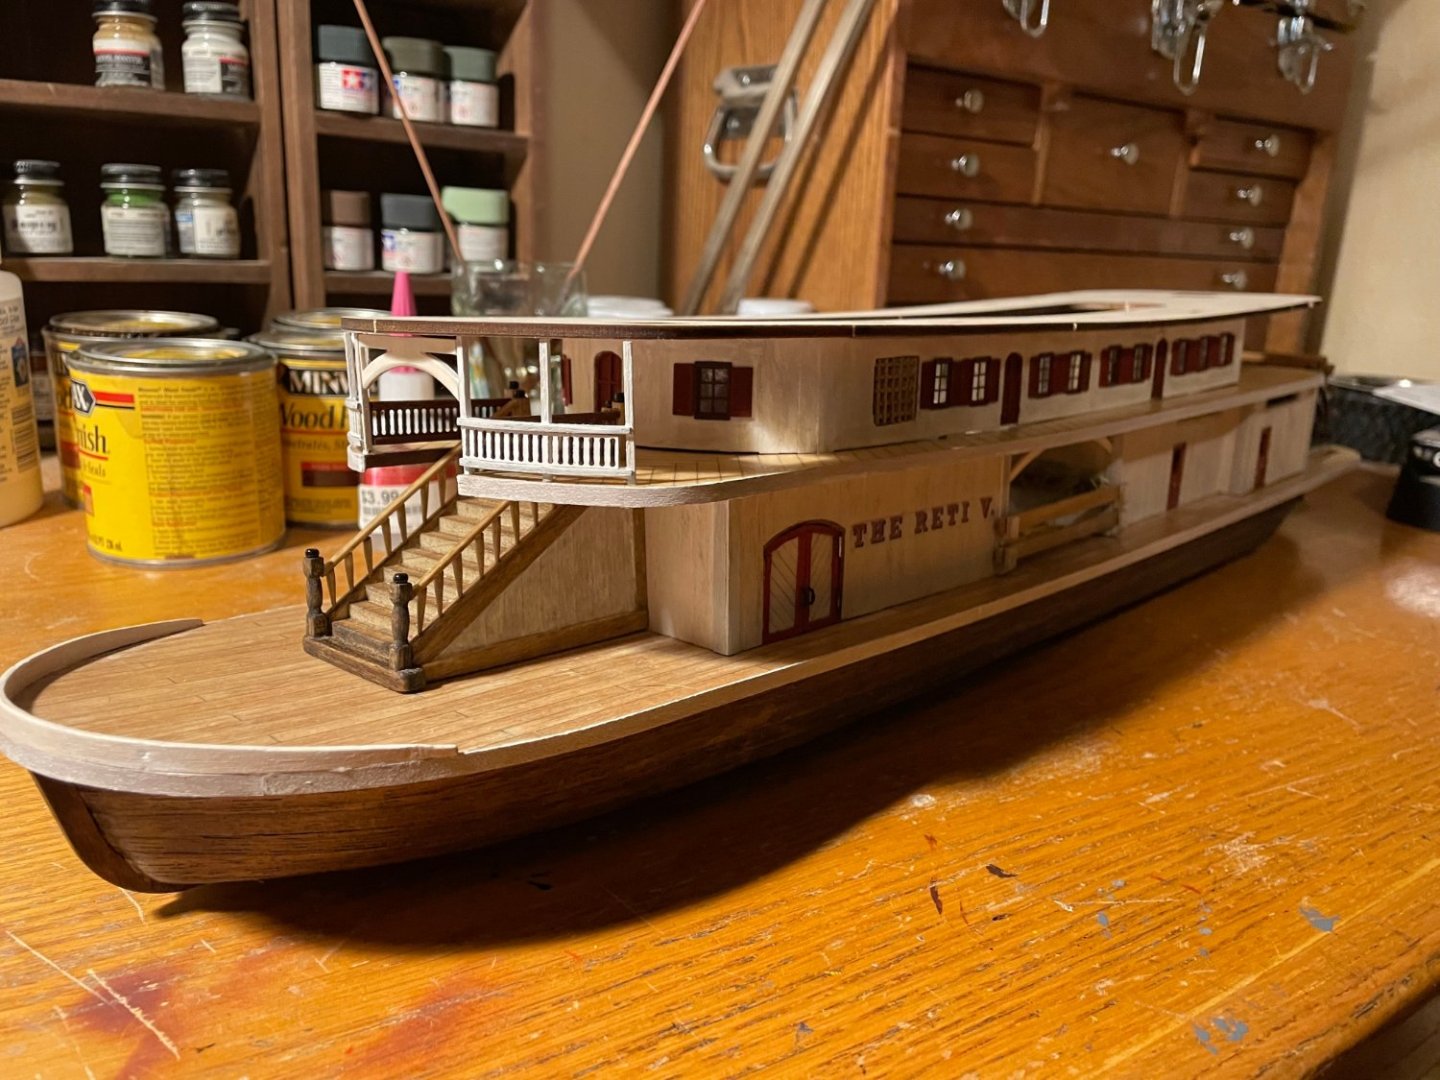
Completed. Below are some pics. The kit was good. If made like the manufacturer intended, it is a nice decorative piece to display. I always want my models to look like the real thing as much as my skills will allow and buying two of the kits provided adequate material to do so. For those who have made this kit before you will notice parts meant for other areas being used for adding detail such as the flag pole base at the bow and the arch over the stairs. My only regret is that I did not realize until too late that the deck floors need to be widened by probably 1-1/2" (3/4" on each side) to make it more realistic. In doing that I would have probably added a 5th wheel to the paddle as well. I hope my model inspires others to work towards realism by building beyond what the kit instructions call out. Scratch building is not as hard as it sounds and you don't have to be perfect to make a good looking model. Mine is certainly not perfect but I accomplished what I set out to build. Happy sailing, SaturnV
-
Hi folks, I have this model almost completed and will post pics soon. Because I purchased two kits of this model I have a lot of cast metal items, eyebolts, nails, and some laser cut items left over. I will say I don't have any of the curved sections at the ends of each deck because mine broke just like everyone else's did. 🙂 If in the future someone breaks a part or did not get something in the kit it may be faster to PM me and I will send you replacements if I have what you need, rather than trying to get them from Art Lat. SaturnV
-
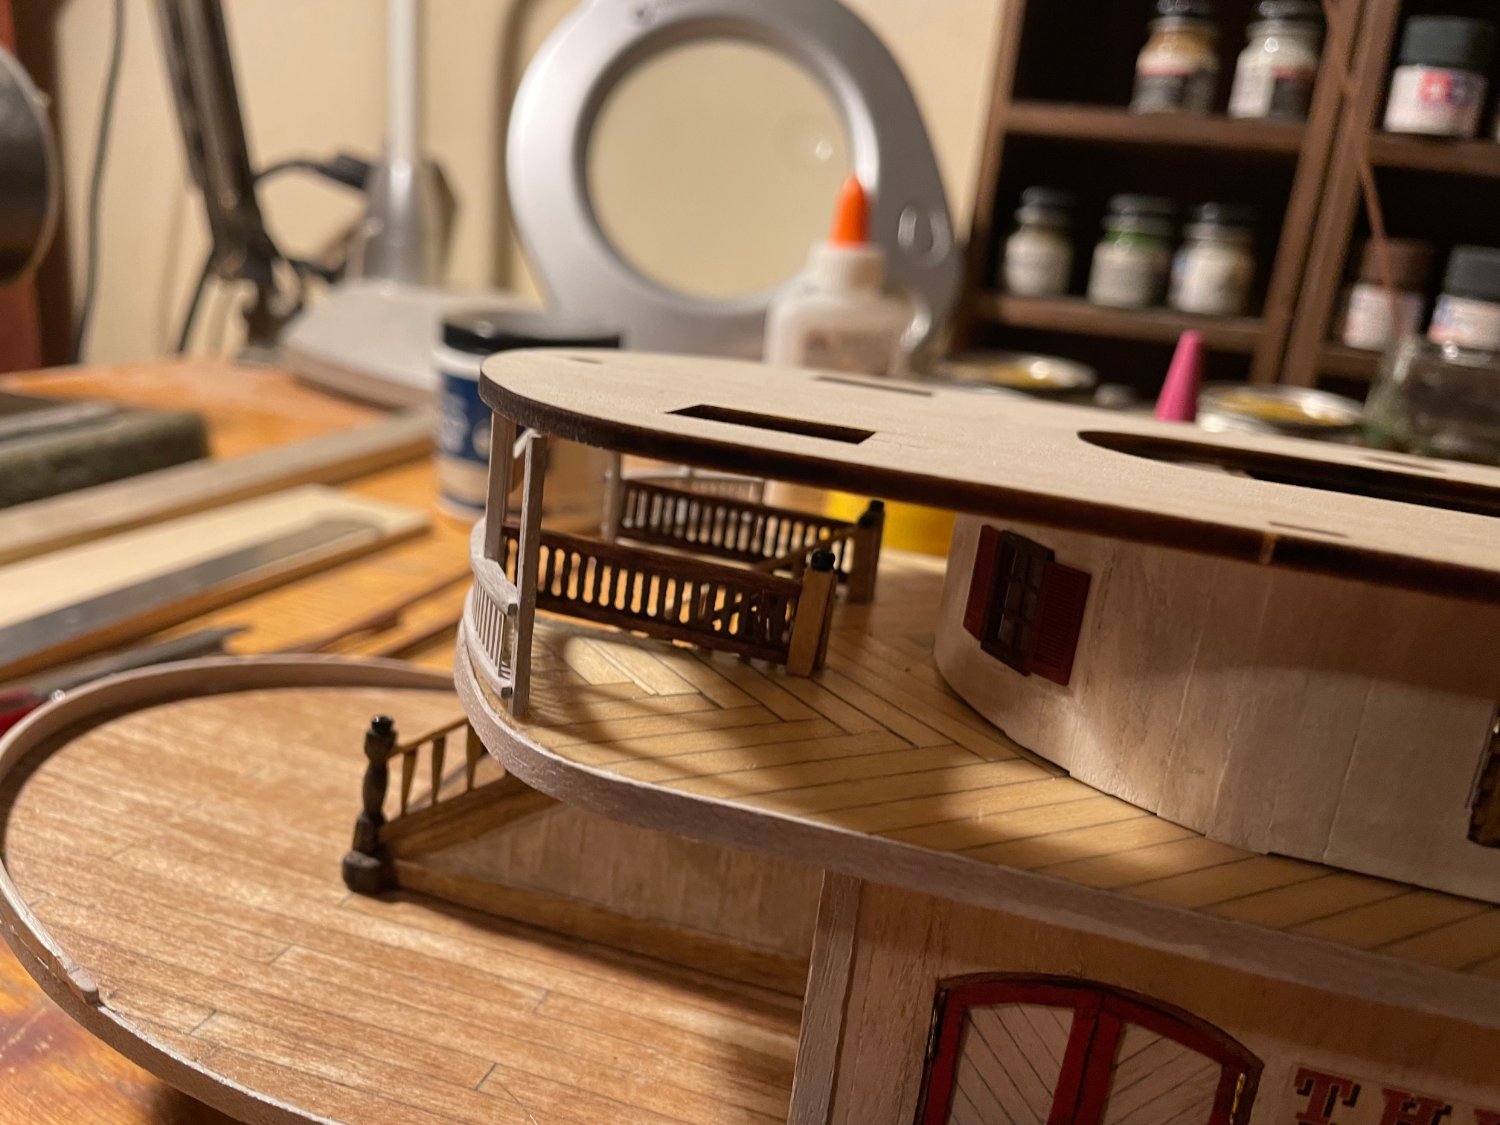
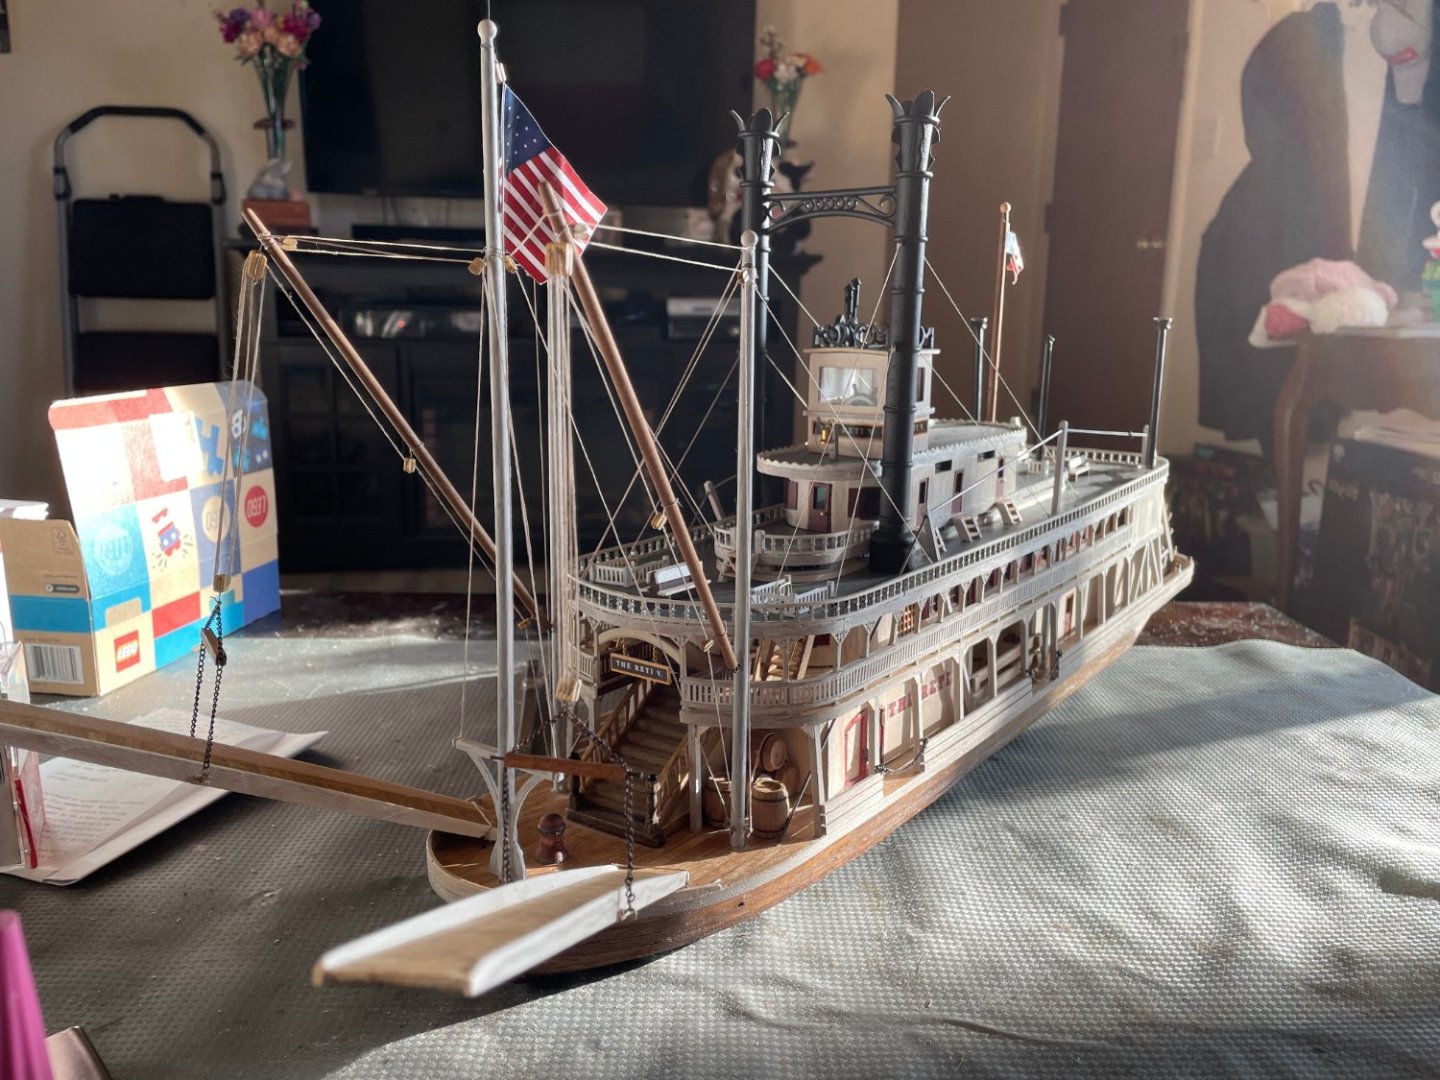
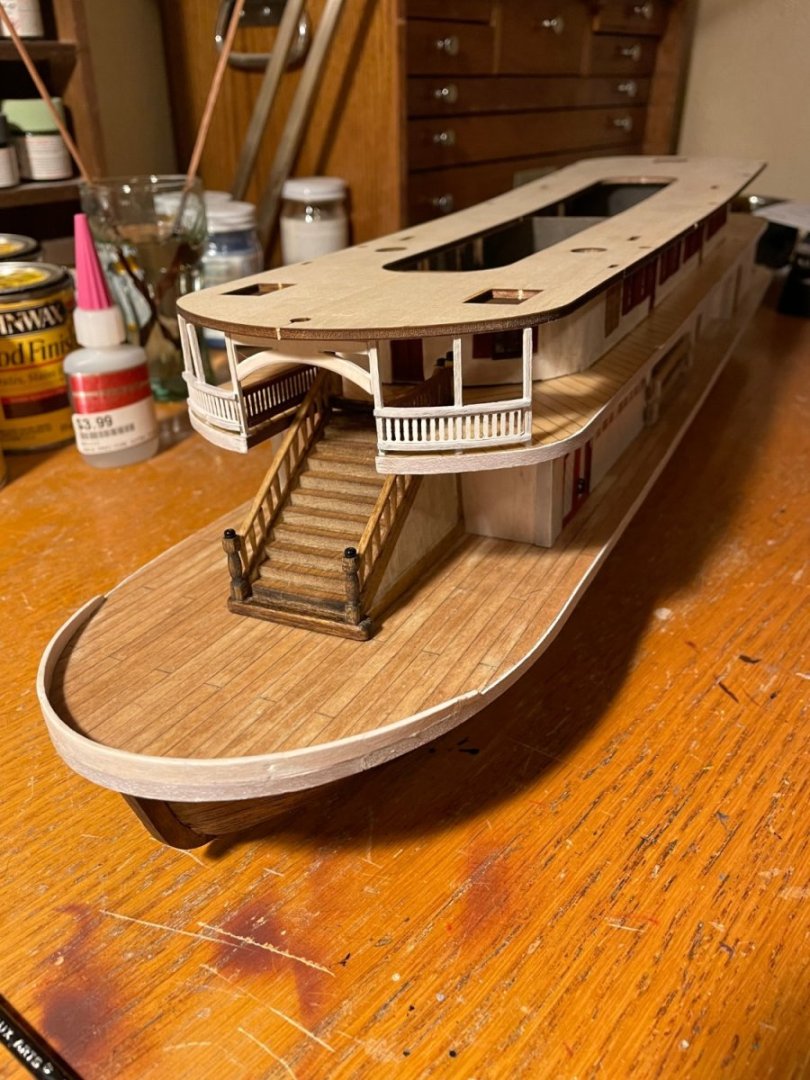
Got the second deck built. Sanding and touch up painting to come. I used xtra wood from the second kit to build the railings and the bulkheads at the stern. I think it looks more accurate than the kit plans now. To get the railings to be vertical instead of tilted inwards, like kit plans show, I had to add material to the width of the third deck. Third deck rail is doll house trim off of eBay. SaturnV

-
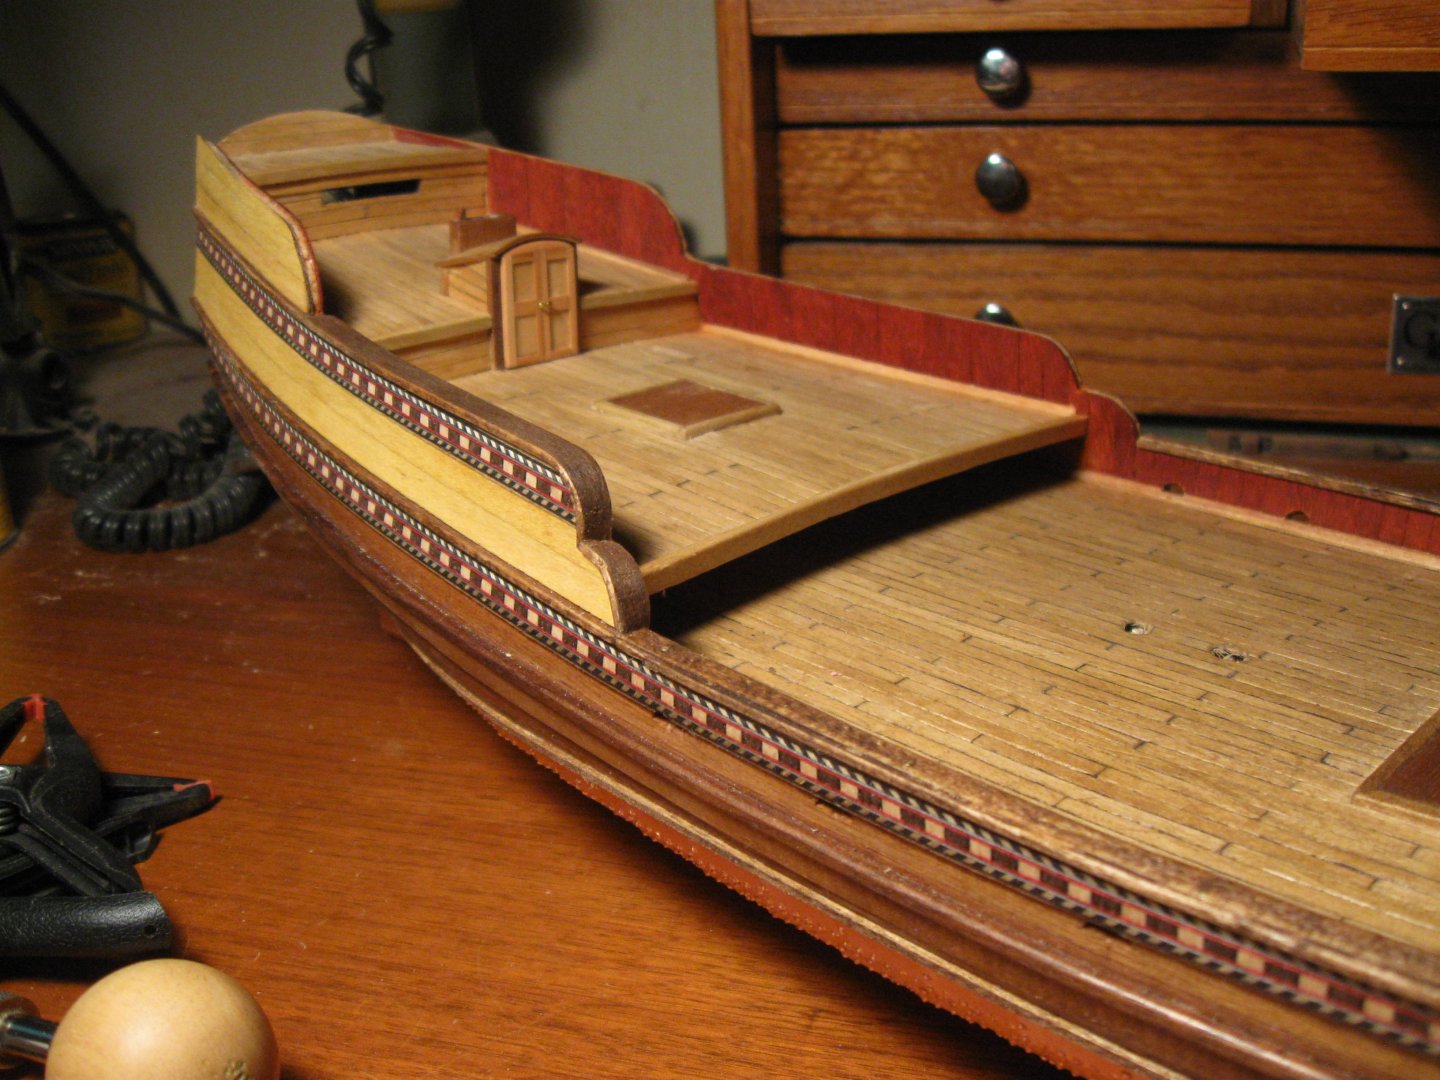
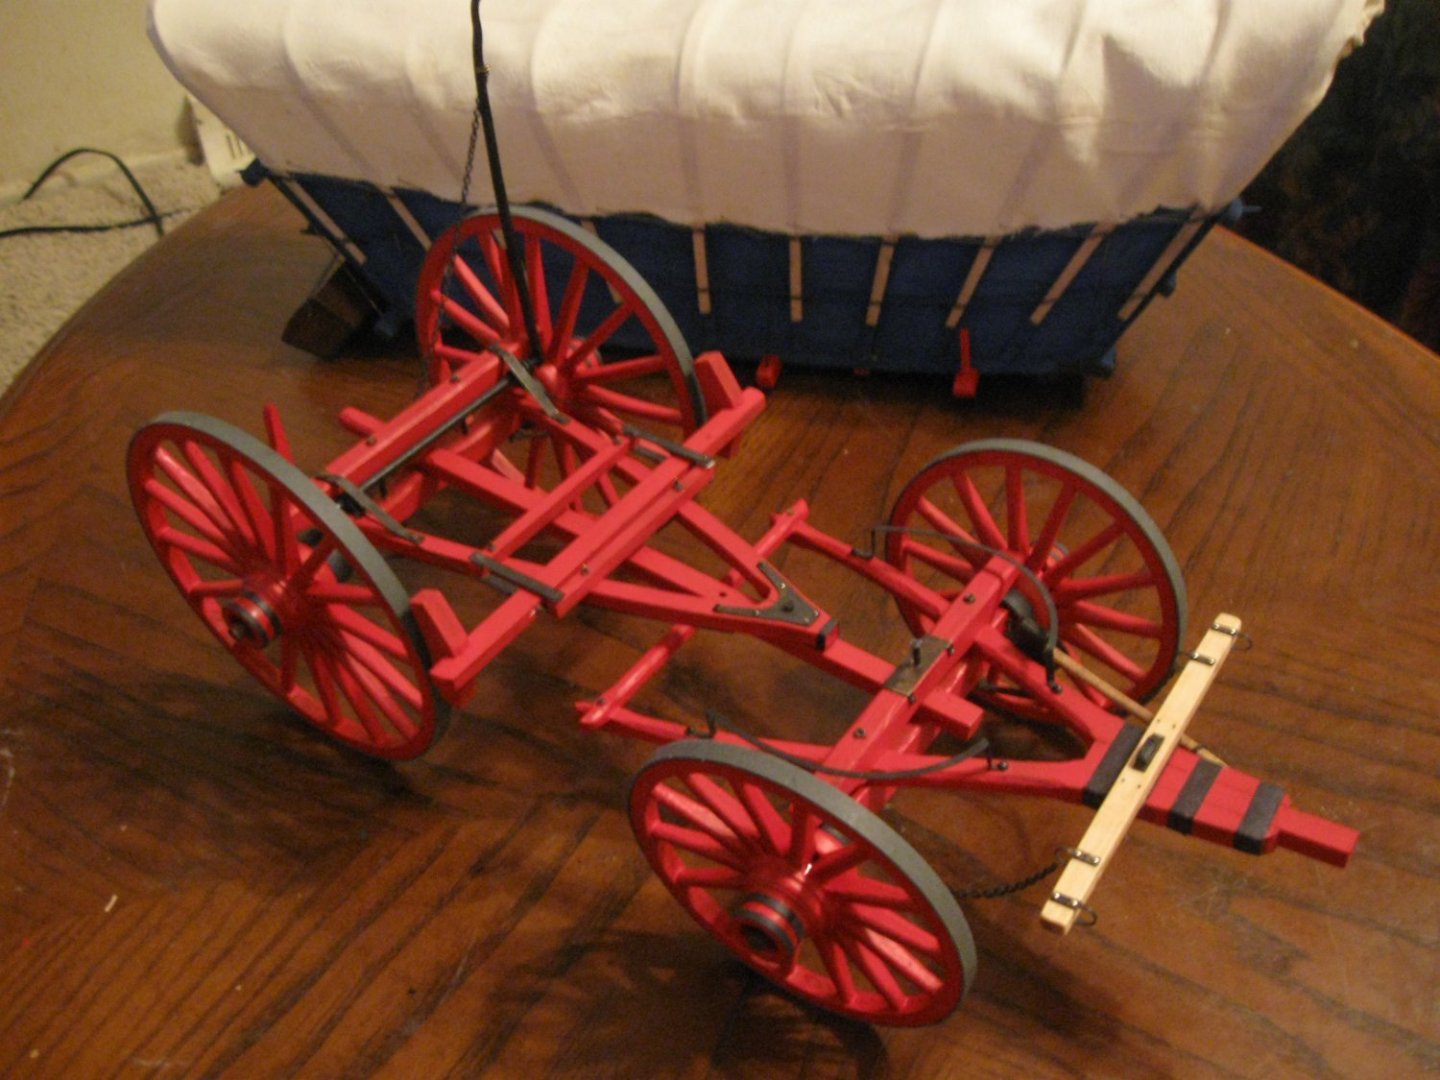
At the beginning of the Pandemic it looked as though Art Lat might go out of business. Most of their models available in the US were sold out and the ones left were disappearing quickly. Having wanted to build this model for a long time I decided to buy one before they all disappeared. For Art Lat though, there are always missing parts, insufficient quantities of parts, or poorly cast parts. So, to combat this I bought two kits. It turned out to be a smart move. To this end, below are some pictures of the progress. There are many inaccuracies in this kit, things that are not scale, or just would not work when you try to fix the problems. So I am scratch building items as I go along. Additionally I did not like the spiral stairs so I changed them out to a more traditional staircase. Its worth noting that I built the stairs three different times to get them right. That alone took 2-1/2 weeks to get where I am now. The top deck, its roof, and the upper white railings are not glued in place yet but were placed there for pictures. Lots of sanding to do still. BTW, I purchased new windows and doors for the upper deck as the cast ones are not well done in my opinion. The white color I feel is more accurate. I used a white wash pickling stain from the hardware store to get the effect. It takes at least 7 coats on each piece you make to get this depth of color. I kept the red and brown colors for the doors and windows. I know that is inaccurate but it needed some color to match the lettering of the name. All in all it is a fun model to build and worth the effort. Oh, and the name of the ship is my wife's name "The Reti V." (pronounced Reetee) She was all flattered by it when I showed her what I had done. SaturnV

- 4 replies
-
- 3
-
-
- Reti V
- Artesania Latina
- (and 1 more)
-
Thank you LH and Mark. Your words do mean a lot to me. Richard
-
Well, I have been gone from the forum for 5 years now as I tended to Capt' Buddy's medical problems and every other problem that found me along the way. Sorry to say that the Capt' is 13 years old now and has reached the end of his voyage. We will miss him very much and building ships will not be the same without him by my side. Once I get over this I hope to return to the Triton. It stills sits waiting for me, just like I left it, albeit a little dusty. Richard
-
How would you improve your Byrnes tools?
SaturnV replied to Keith_W's topic in Modeling tools and Workshop Equipment
I heard back from Jim - thank you for the e-mail address Keith. He's still out there. Ropewalk not really available anymore though. Richard -
How would you improve your Byrnes tools?
SaturnV replied to Keith_W's topic in Modeling tools and Workshop Equipment
I don't have that one but will try it out. Maybe they are on vacation or something..... thanks, Richard -
How would you improve your Byrnes tools?
SaturnV replied to Keith_W's topic in Modeling tools and Workshop Equipment
Anyone been in contact with Byrnes Model Machines? I have been unable to get through with calls, e-mails, the website, or PM's from this website. I finally saved up enough for the ropewalk but it now says call for availability. Maybe the ropewalk is no longer available.... Richard -
Let me add to the above description: If you heat it or outright burn it, it stinks worse than a skunk. You want to aggravate a bothersome neighbor? Throw some ro in your fireplace! It has two different colors in the younger pieces - a yellowish white outer layer and the chocolate brown inner layer. The ro around my area has thorns. The ro in my area has shaggy peeling bark. I will agree that it has distinctive tree rings but the rings are wide. For the small pieces we use in models an entire part can be cut from a single ring so that you only have one shade that shows. Richard