

catopower
-
Posts
1,900 -
Joined
-
Last visited
Content Type
Profiles
Forums
Gallery
Events
Everything posted by catopower
-

Anyone out there working on a card model?
catopower replied to gagliano1770's topic in Card and Paper Models
Another card model publisher which has been reviewed here on MSW is Seahorse. I wanted to learn more about this company and their products, so I went ahead and purchased their Armed Virginia Sloop kit. At 1/100 scale, the hull is pretty tiny at just about 7-1/2" long. I ordered some of the optional accessories, including the laser-cut gun carriage set, sails set, and laser-cut parts. The whole order cost me less than $25 shipped from Poland(!). In a matter of about three weeks time, this is where it stands... I'm still learning a lot about paper modeling, but this kit has so far been a very fast lesson. I'd only gotten it to try it out. But, it's small enough that I'm going to have to see it through to completion. Only thing is that it's been fairly easy up to this point, relatively speaking. Now, come all the tiny parts! I found that there are a few other optional accessory sets that I didn't see when I got the kit, so I went ahead and ordered those. They include the dowels set (in beech), resin cannon barrels set, and laser-cut blocks set. So, add another $20 to my project costs. I'm really hoping to see some of these Seahorse builds here on MSW...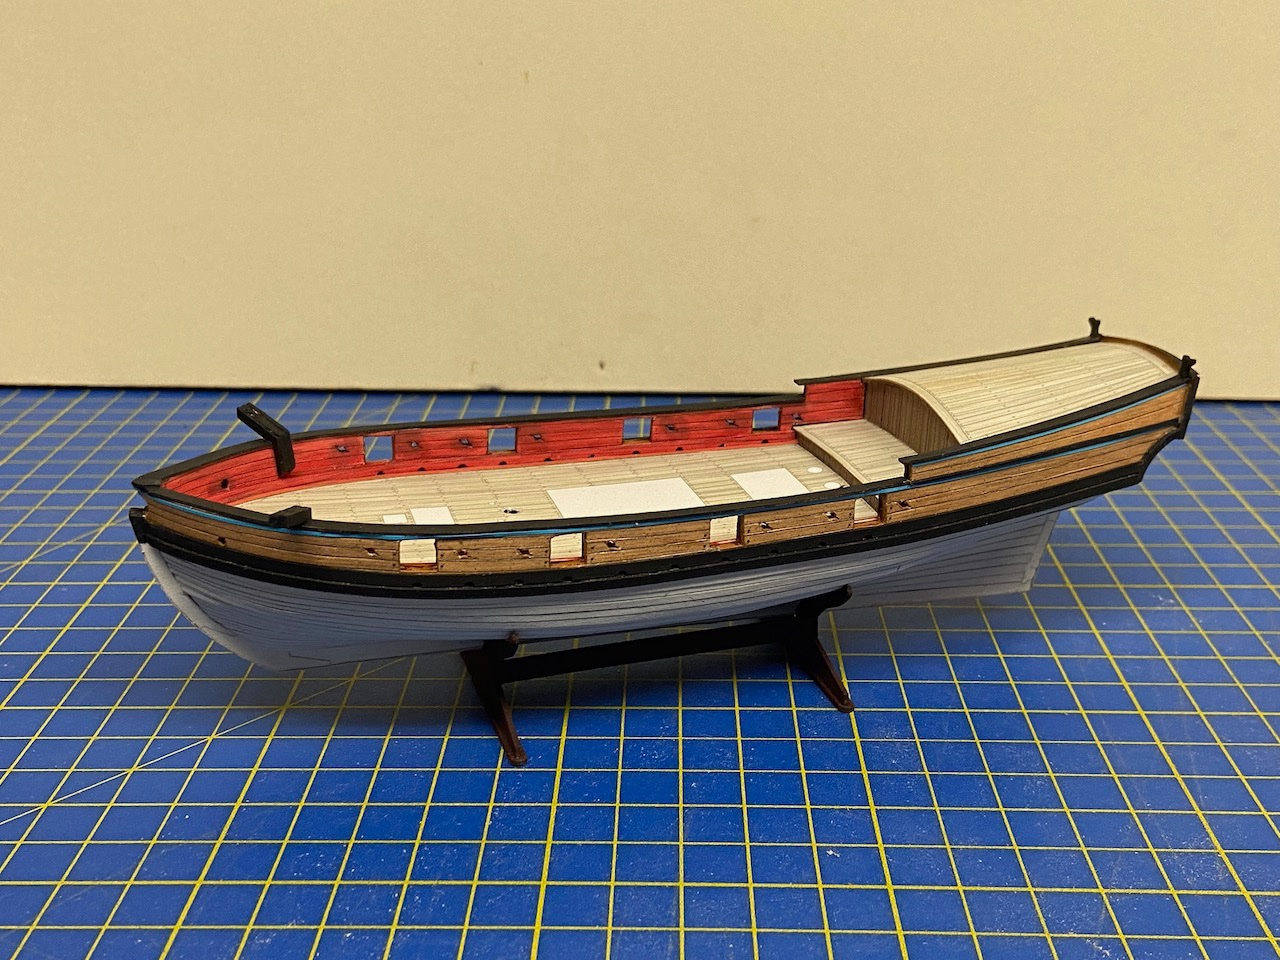
- 57 replies
-
- 11
-

-

-
I love the fact that because of the way they're designed, many of the kits feature some of the internal spaces, like the great cabin, and the space under the forecastle. Though it just means more stuff you have to detail at 1/96 scale(!).
-
Hey Chris, your "cheap" is showing! 😀 In the world of ship modeling, $130 for all the accessories, detail sets, blocks sets is nothing. You made similar comments when I was sharing photos of my HMS Wolf kit. Anyway, how often do we spend money to buy kits or accessories to simplify construction, etc? (Don't actually count me, as I spend way too much on ship modeling! 😊 GrandpaPhil, I'm watching and learning!
-
Hi Allen, I agree with Mark's explanation. Many kit manufacturers have some way of getting around the need for cutting the rabbet for the garboard planks, which is probably why you've never really had to worry about it in your prior builds. I too have seldom found it necessary to cut a rabbet for the garboard strake for a kit model.
-
Hi Mark, Interesting question. I think Allan has it right. During battle, there's not much you can do. Everyone is busy in the fight, which is why I suppose they went to Battle Sail, reducing sail by brailing up the lower sails and such, which also reduces the amount of damage that the sails might take from cannon fire. I think it's only after battle that there's time to splice parted lines. And if there's one thing those sailors knew how to do, it was to splice ropes. Of course it's the Flying Dutchman. So, it doesn't actually need the sails to travel on the seas and send his victims to Davey Jones' Locker. Looking forward to seeing what you come up with!
-
You know, their navy has always been somewhat western-oriented. Not only were many (most?) early ships purchased from western shipyards, in the 1850s, the earliest navy learned their commands in Dutch. I'd actually be curious to find out how the instrumentation was labeled on ships built in England, etc.
-
Hello Bill, I say, if you like the kit, buy it, build it, make your neighbor jealous that he didn't build it when he sees your completed model! My first kits were Artesania Latina. The same is true for many others here. Kits all have their issues, none are perfect, but that doesn't have to keep you from having a great time building it. I find that Artesania Latina kits actually go together quite well, though I have no information on that particular one. If you have any questions as you're building it, you can always ask for advice on this forum. Good luck with whatever you decide!
-
I bought some UV cure glue off of Amazon, which included a little UV flashlight to cure the glue. Not expensive for the set, less than $20. Though I didn't end up using the UV cure glue for anything yet, the flashlight showed the Titebond residue on a model very well. All in all, a VERY useful tip – enough to where I really need to pass this along!
-
Sounds like it's worth trying out. Thanks for the tip!
-
Hi GrandpaPhil, I had trouble keeping the next layer nice and smooth on my last paper model. I don't have any advice for you, but there are definitely some ideas out there on the subject. Hope you have better luck than me!
-
Hi GrandpaPhil, congratulations on starting on HMS Mercury. I never finished mine, but it's still on the shelf, waiting for me to get back to it. I just have way too many projects, and I'm trying to clear them out finally, one by one. Isn't it cool how well these laser cut parts go together? I'll be checking in on your build. Good luck and hope you have lots of fun with it!
-
help with Corel Mystique running rigging
catopower replied to edite's topic in Masting, rigging and sails
Well, not that this will help Edite any, as he was only online here for about 2 weeks. But, I managed to find my instruction booklet, and it does in fact have a basic description of belaying points. Takes a little understanding of basic nautical terms as there are no diagrams, just text. So, for what it's worth, there ya go... -
Khufu's Solar Boat from Woody Joe
catopower replied to Snug Harbor Johnny's topic in Wood ship model kits
Hey Snug Harbor Johnny, nice purchase! If I make another major Woody Joe kit purchase, this is kit I've been thinking I'd get. I've seen a couple builds, and it looks like a very interesting project. Only problem for me is that I actually have a huge stack of Woody Joe kits in my closet. I only just managed to finish a small one. Unfortunately, this only served to slow the rate of growth of the stack, not actually reduce the size of the stack. Looking forward to reading about your progress whenever you end up getting started! Clare -
Hi Trevor, I just saw your model on your other topic regarding the Misticque. Again, a beautiful looking model! Pretty well all of the standing rigging is set up with deadeyes or some kind of tackle. I find that it's often best to set up the tackles, but to not secure them until later in the build, to give the rigging line time to stretch, as Chris mentioned – to relax, as it were. Sounds like it's done just that, and it may be necessary to re-rig those tackles. But, that can be done without having to re-do the shrouds and stays themselves, though it may mess with the evenness of your ratlines.
-
help with Corel Mystique running rigging
catopower replied to edite's topic in Masting, rigging and sails
Hello Edite, First off, beautifully done model! Corel's Misticque has always been a favorite of mine, in terms of appearance. I haven't built it, but your build is pretty inspiring. It is a subject that's on my ever-expanding to-do list. I do have the plans set for the model, and I see nothing in the plans at all that indicate the belaying points of any of the lines. So, this is a bit of a mystery, and your call for help is completely understandable. Some lines appear to be numbered, but there's nothing in the plans that show where they specifically tie off. Alan's suggestion for a book on xebec rigging might be one possibility, though I've never personally seen a book specifically on xebec rigging. Also, since the Misticque is not a pure xebec, but rather a pollaca xebec, that complicates thing further. However, many people have built this kit, and they managed with the rigging somehow. So, I'd suggest checking for build logs here, and maybe contacting them directly with this question. Last note. I lost my instruction booklet, so I can't check that. But, is there a possibility that there is some small diagram in it, possibly at the back, that shows some kind of belaying plan? -
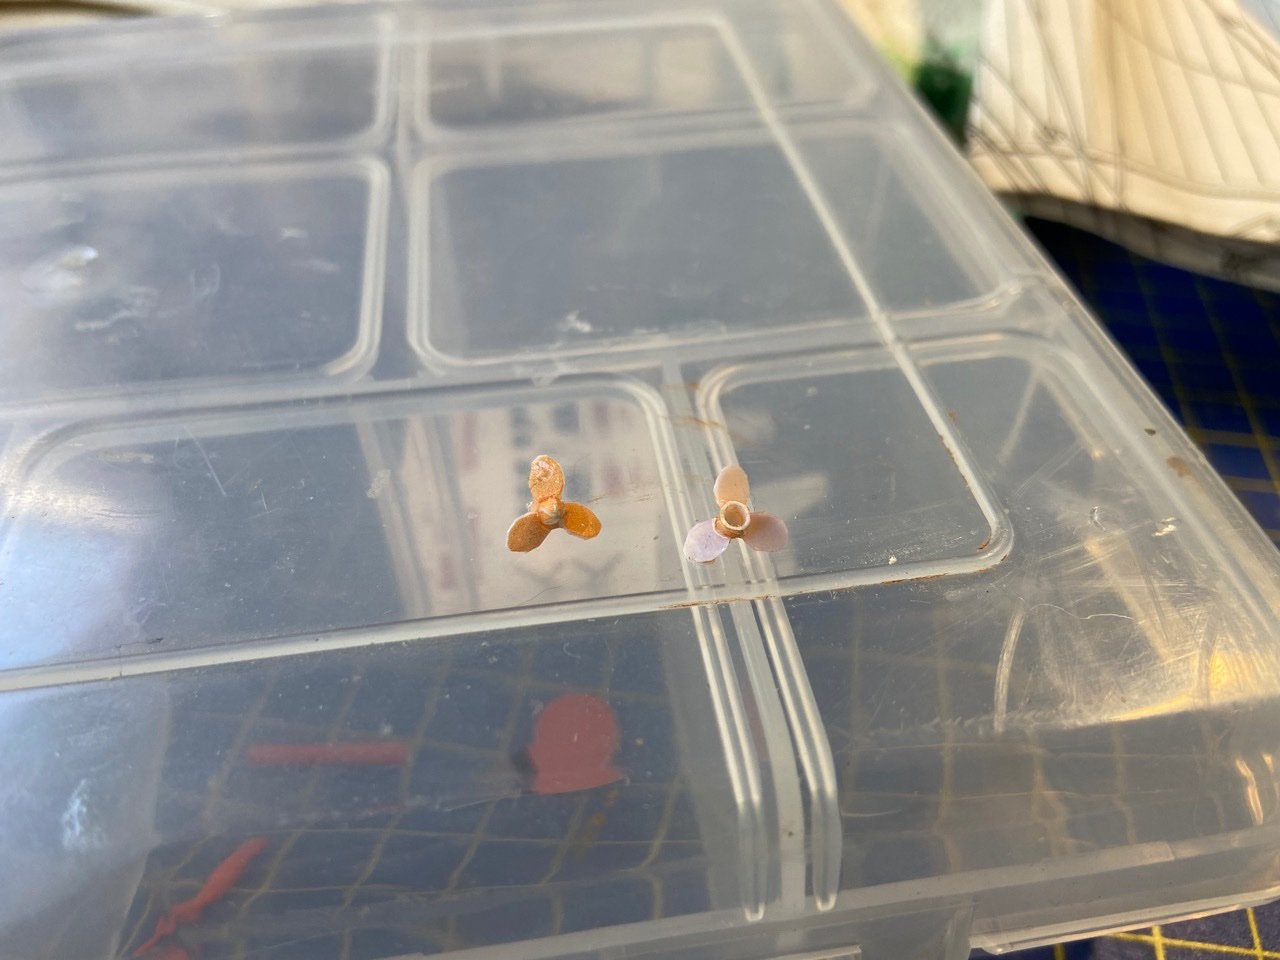
Thanks Tim. Very kind of you! I'm thinking it's actually going to be very simple, as it's slated for a pretty small case. So, just a boat on the canal, maneuvering up to a landing along a stone wall. Something like that. Gives me a chance to add some basic diorama elements. Now, as for the V108, I started painting the screws bronze. But, before I mount these, I need to add the struts and stuff for the propeller shafts. Also, aren't propeller shafts unfinished steel? I have brass rod in the right diameter, but I decided to hunt for some stainless steel rod in the right size. I found some pretty easily on Ebay. I think they're used for axels on RC vehicles. They weren't expensive, as long as I was buying short ones – less than $14, with tax, for a set of 10, and free shipping from within the US. Should have them by the end of next week. While I'm waiting for those, I'll use the brass rod I have for place-holders to get the alignment of all the other parts straight.
- 106 replies
-
- 7
-
-
- digital navy
- v108
- (and 3 more)
-
Hi Jan, Tim is just teasing me about building something other than a Japanese subject. But, thanks for the comments on the kit. I'll be lucky if people notice the kit design issues instead of my construction issues! Tim, yeah, I guess I'm taking a vacation break. 😁 But, last night I did spend some time planning out details for a little Edo canal diorama that I want to do for one of my Japanese boat models. Guess I can't really stay away from them!
- 106 replies
-
- 6
-
-
- digital navy
- v108
- (and 3 more)
-
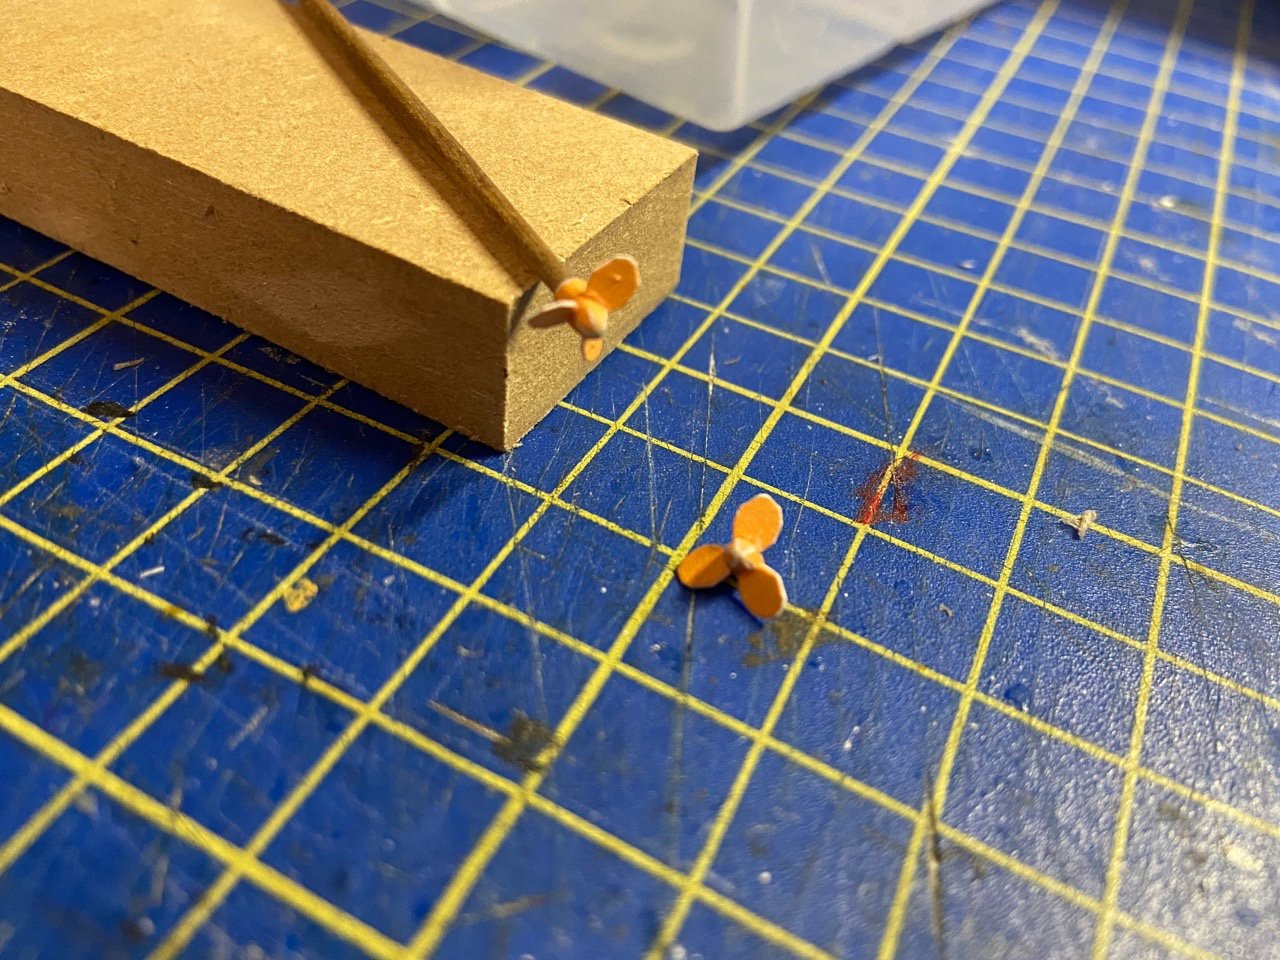
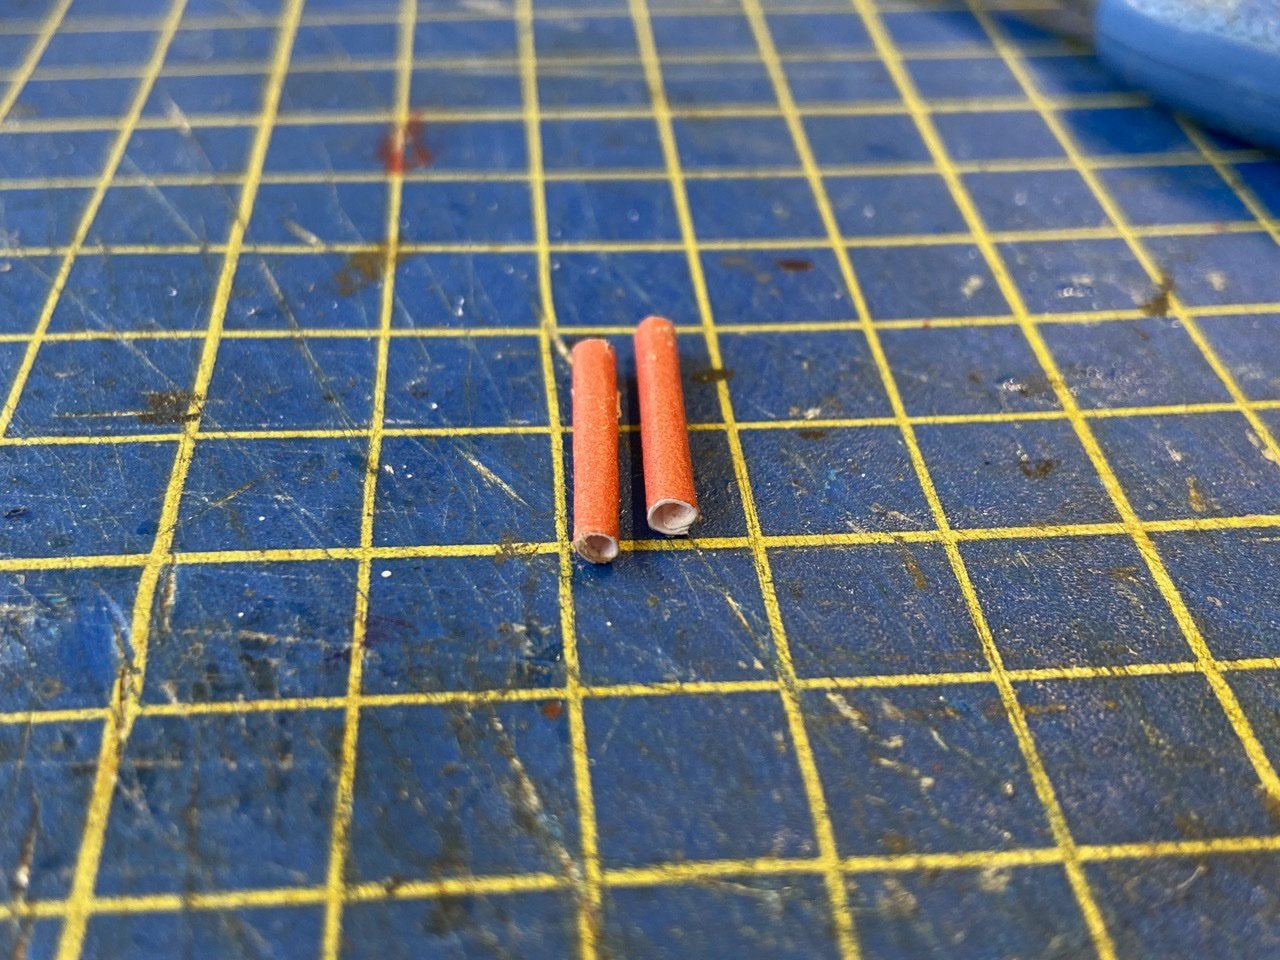
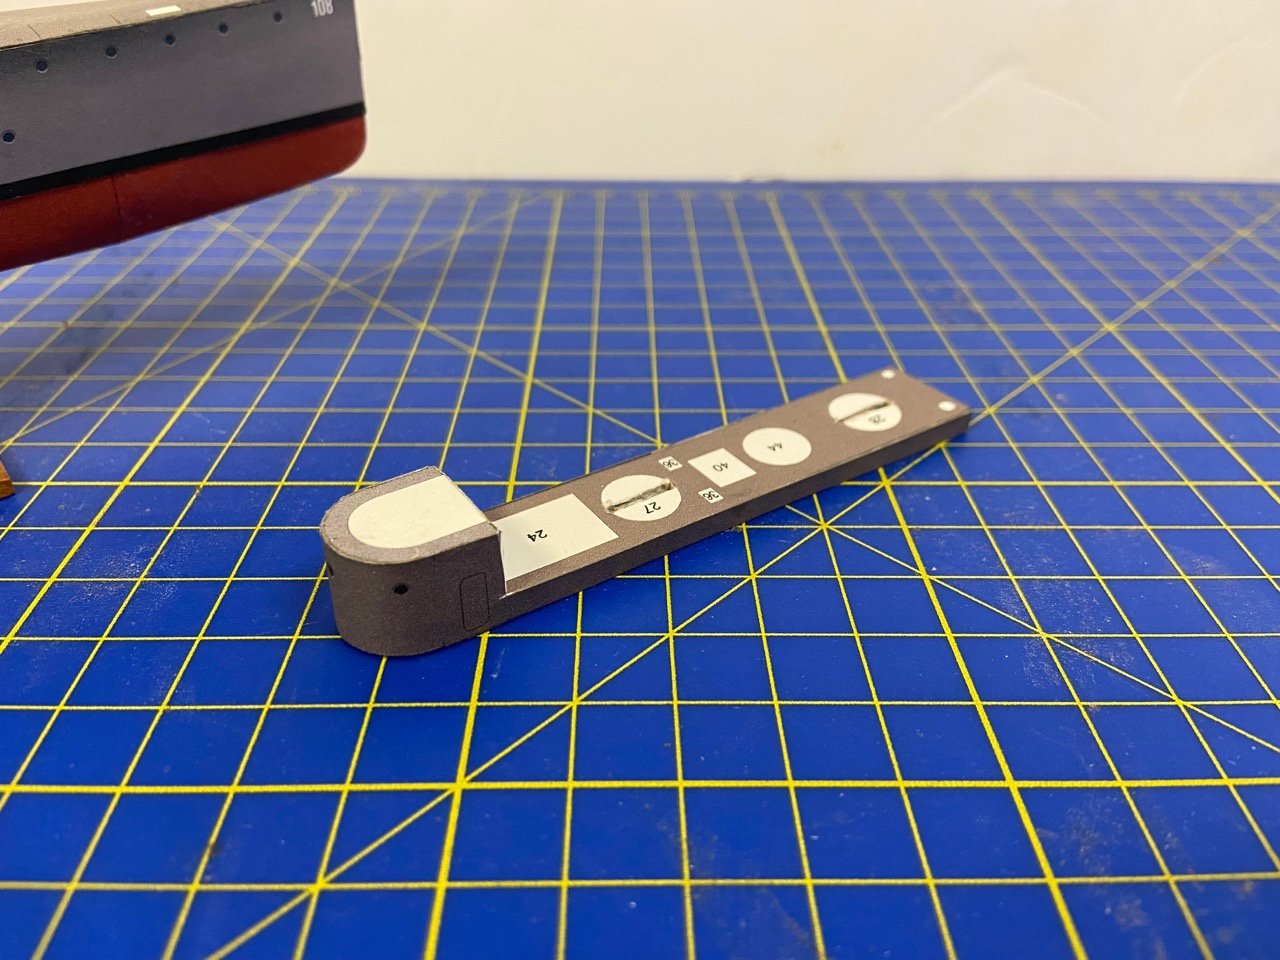
I've been trying to get some work done on another project, and then I recalled the problem with paper models... Building paper models is like eating potato chips: Once you get started, it's hard to stop! As I recall, that's the main reason I set this project aside. I'll still have to do that from time to time, but this is not that difficult a project, and it really shouldn't take very long to complete, so I'm motivated to see it through to completion. I decided it was time to deal with the ship's propulsion. Looks like I'll just use brass rod for the shafts. That's actually indicated in the instructions. But, first, I needed to make the extensions that come out of the hull and partly house the shafts. I don't know what the correct term is for these. I tried to roll the printed paper, but had a very difficult time getting not only a tight roll, but also a difficult time getting the pair to match. That is, they were slightly different diameters. It has to do with the difficultly of rolling the paper. I decided to reprint the parts on thinner stock paper. To save on ink, I copied the parts sheet pdf, and managed to crop the parts sheet down to just the area on the sheet that I needed. This printed out fine on the thinner paper, in my case, 28lb, instead of the 65lb card stock I used for the main parts. I rolled the tubes with the help of a piece of thin brass rod, and the pair seemed to come out just fine. Here they are with some of the parts I started pre-assembling... But, looking back, I noticed that printing on the thinner paper was actually what the instructions said to do. In the future, I might just make several of them, then pick out the best looking pair. Finally, I decided to tackle what I considered to be the most intimidating assembly of ship of this type, the screws. This entails rolling a piece with petals, then gluing together the petals to form the hub of the propeller, then gluing on each of the propeller blades at an angle. But, the process ended up being far easier than I had anticipated. I formed the rolled hub on the end of a small dowel. When dry, I put glue on the petals and then carefully rolled the end against the cutting mat. The end results were actually pretty good, and I ended up with the ends nicely rounded. Gluing the blades turned out to be pretty much a non-issue. I made sure to angle them differently for each of the screws, as they would be counter-rotating on the real ship. Then, I touch each blade with a tiny amount of thin CA. This made the screws very sturdy. As the printing on the blades are only on one side, the screws are going to have to get painted. Now, do I go with matching the color of printed paper? I do I break out some bronze paint and do the whole thing?
.jpg.fe59d954cc2fca41147fb1435d5ea2b4.jpg)
- 106 replies
-
- 9
-
-

-
- digital navy
- v108
- (and 3 more)
-
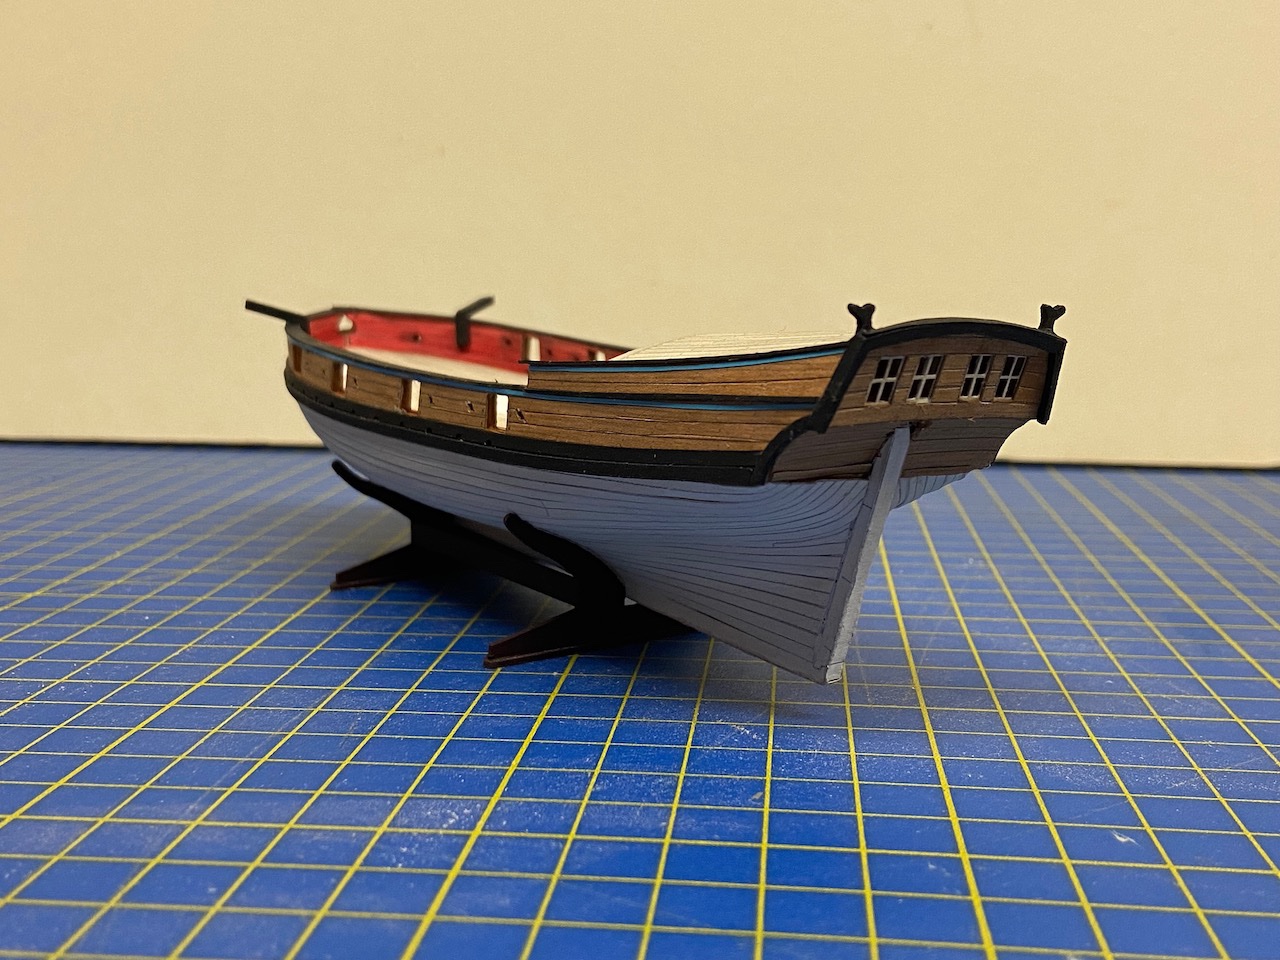
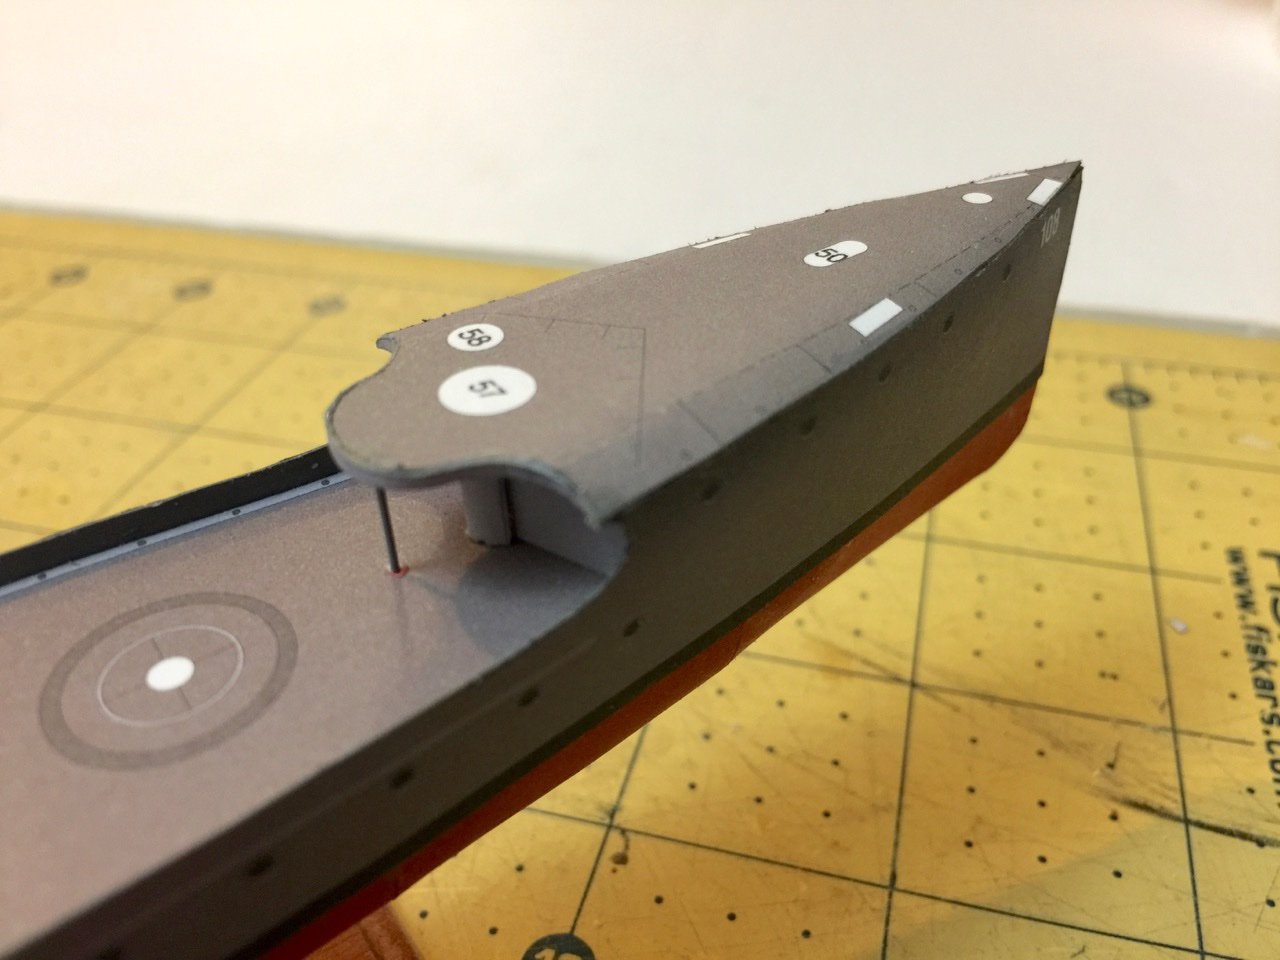
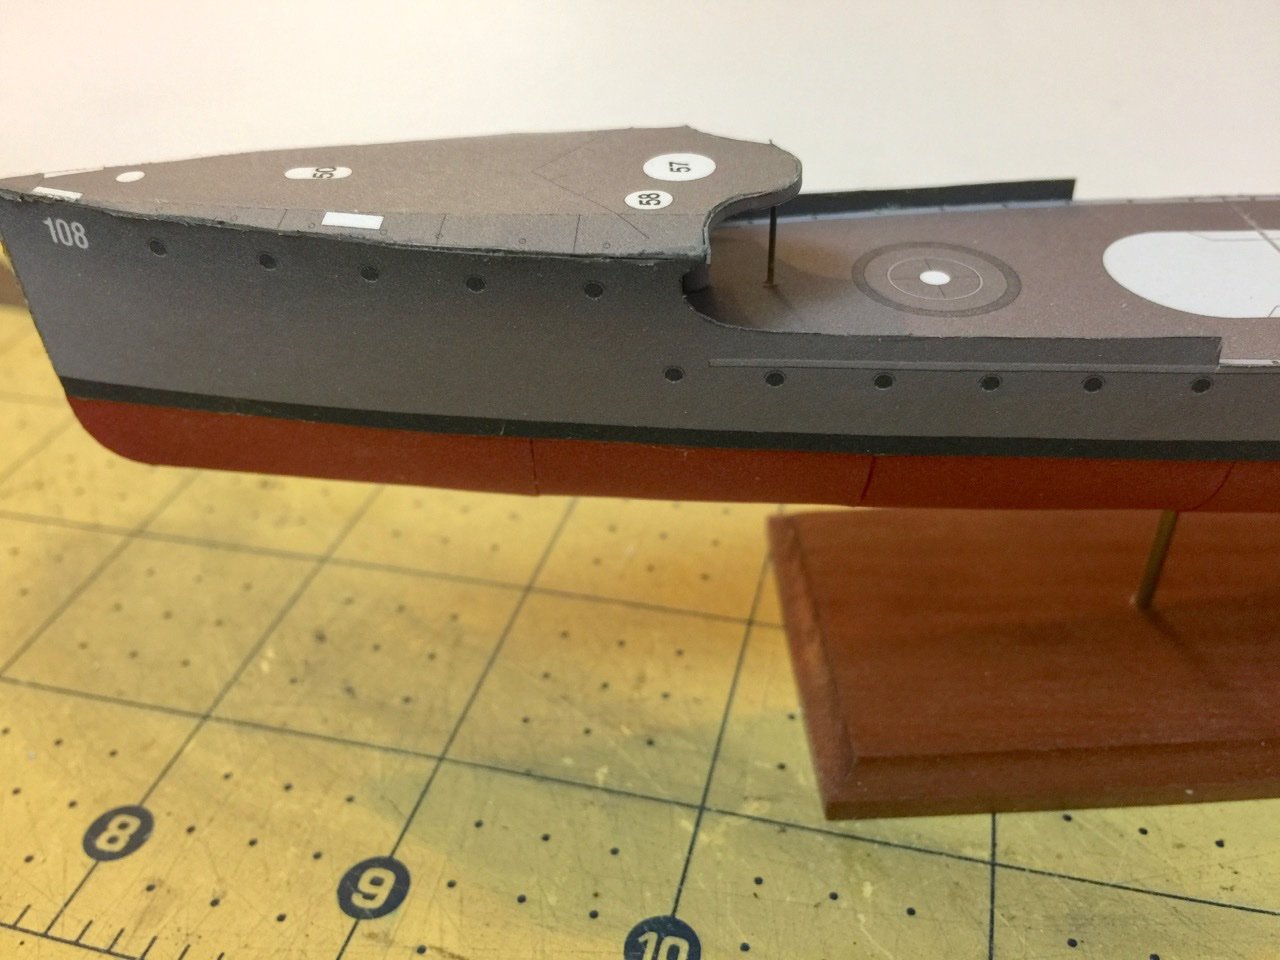
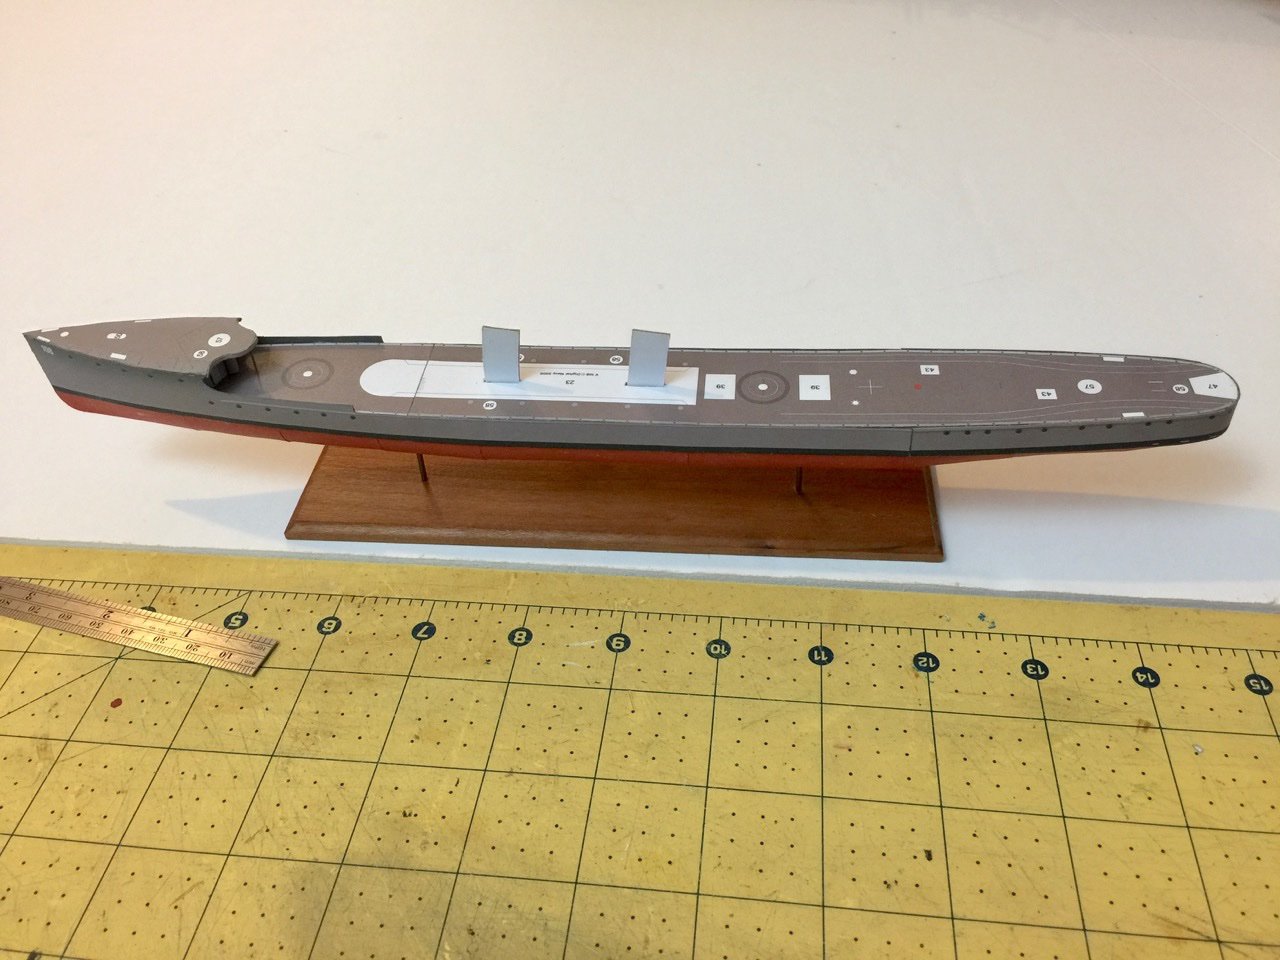
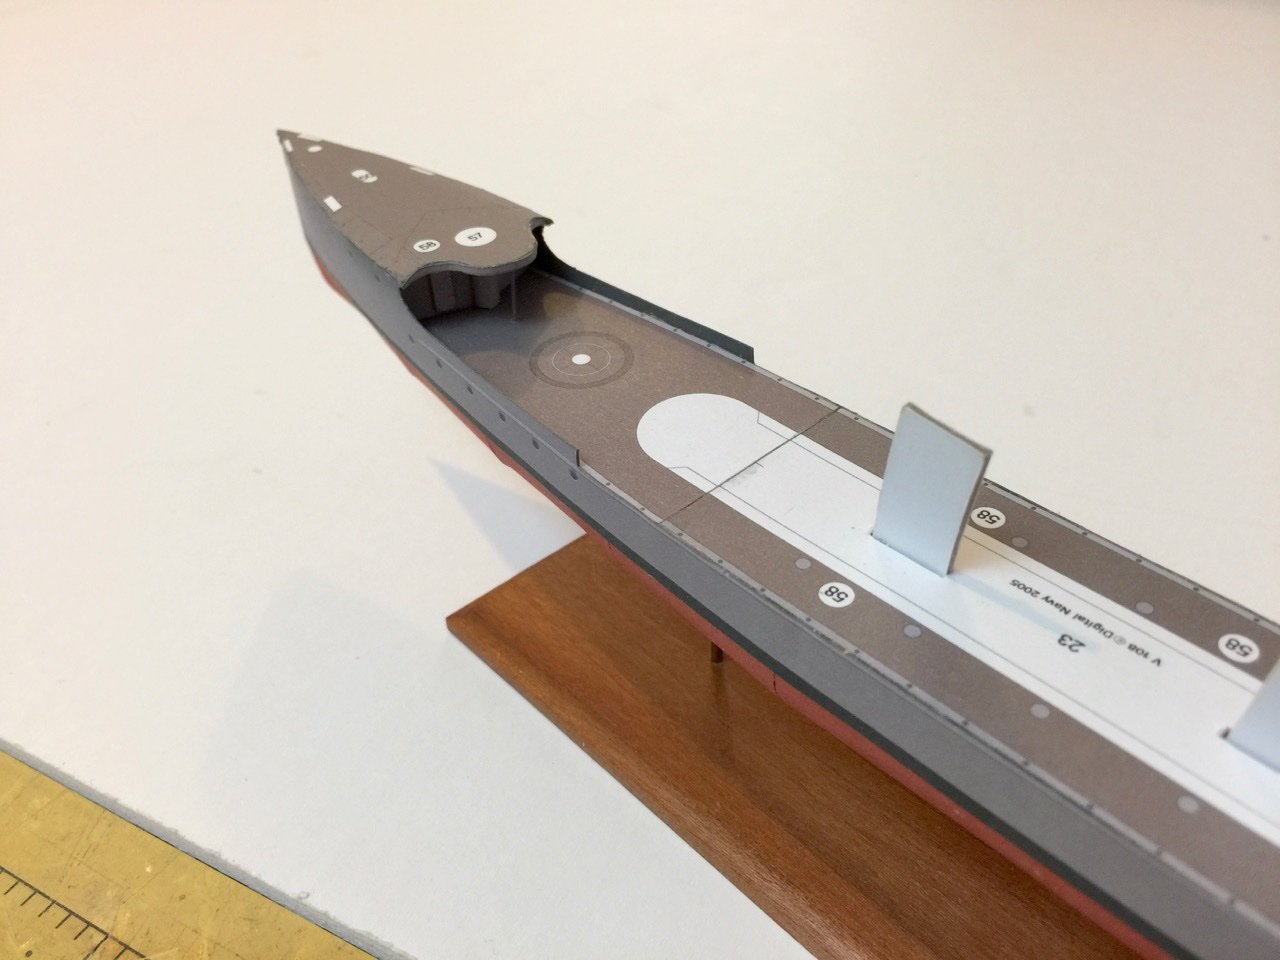
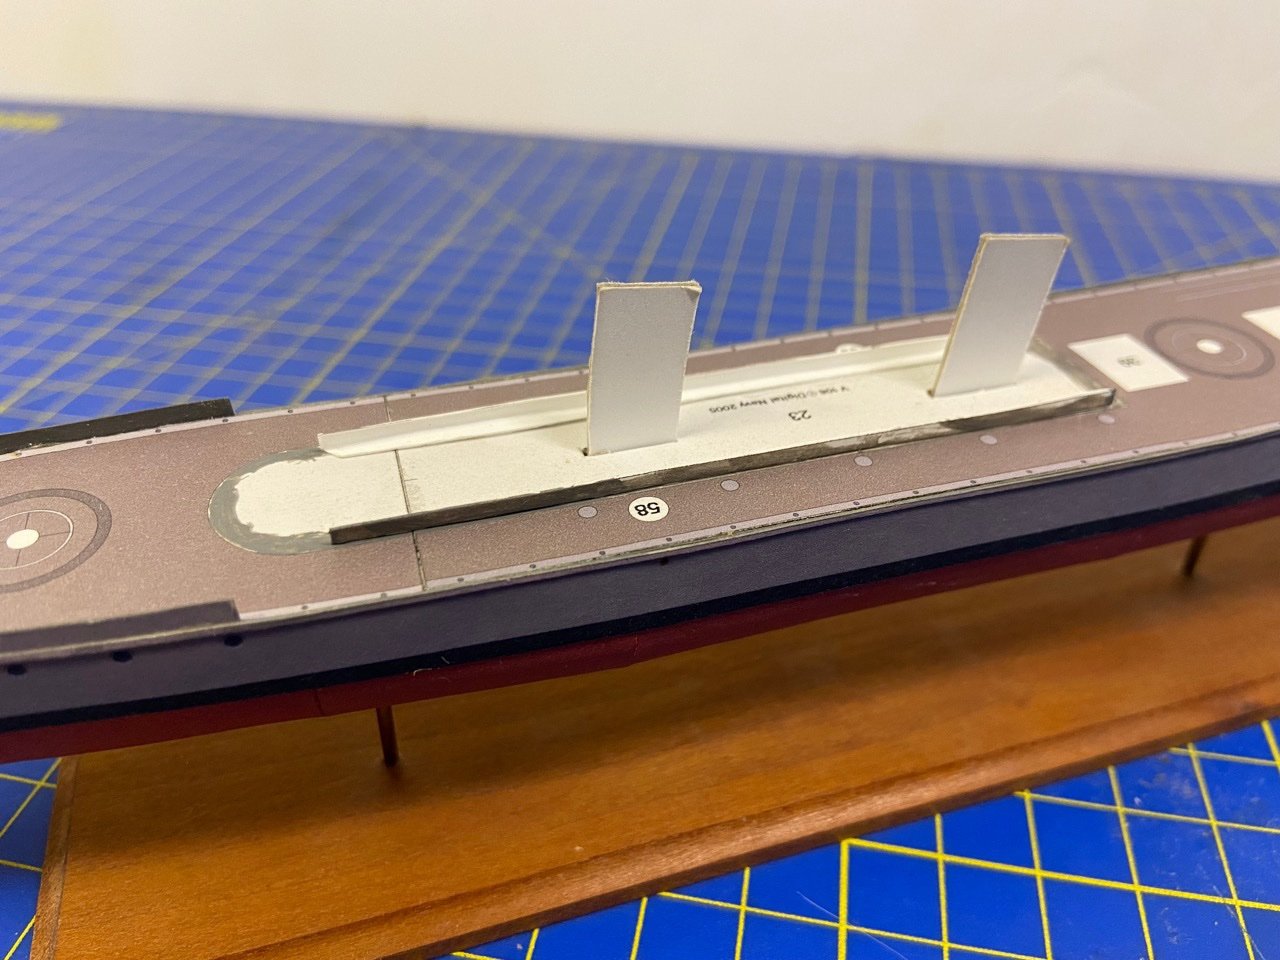
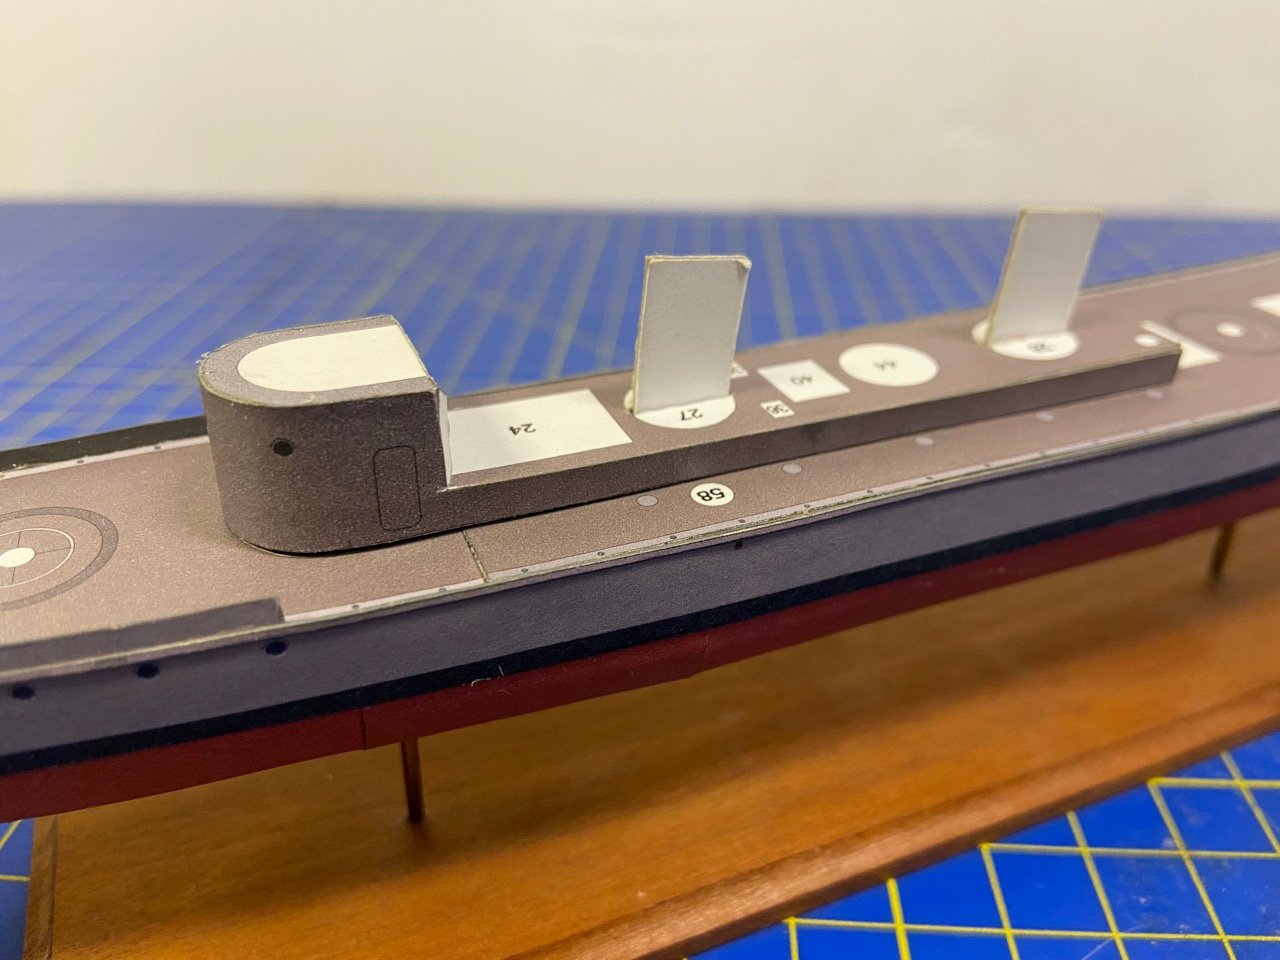
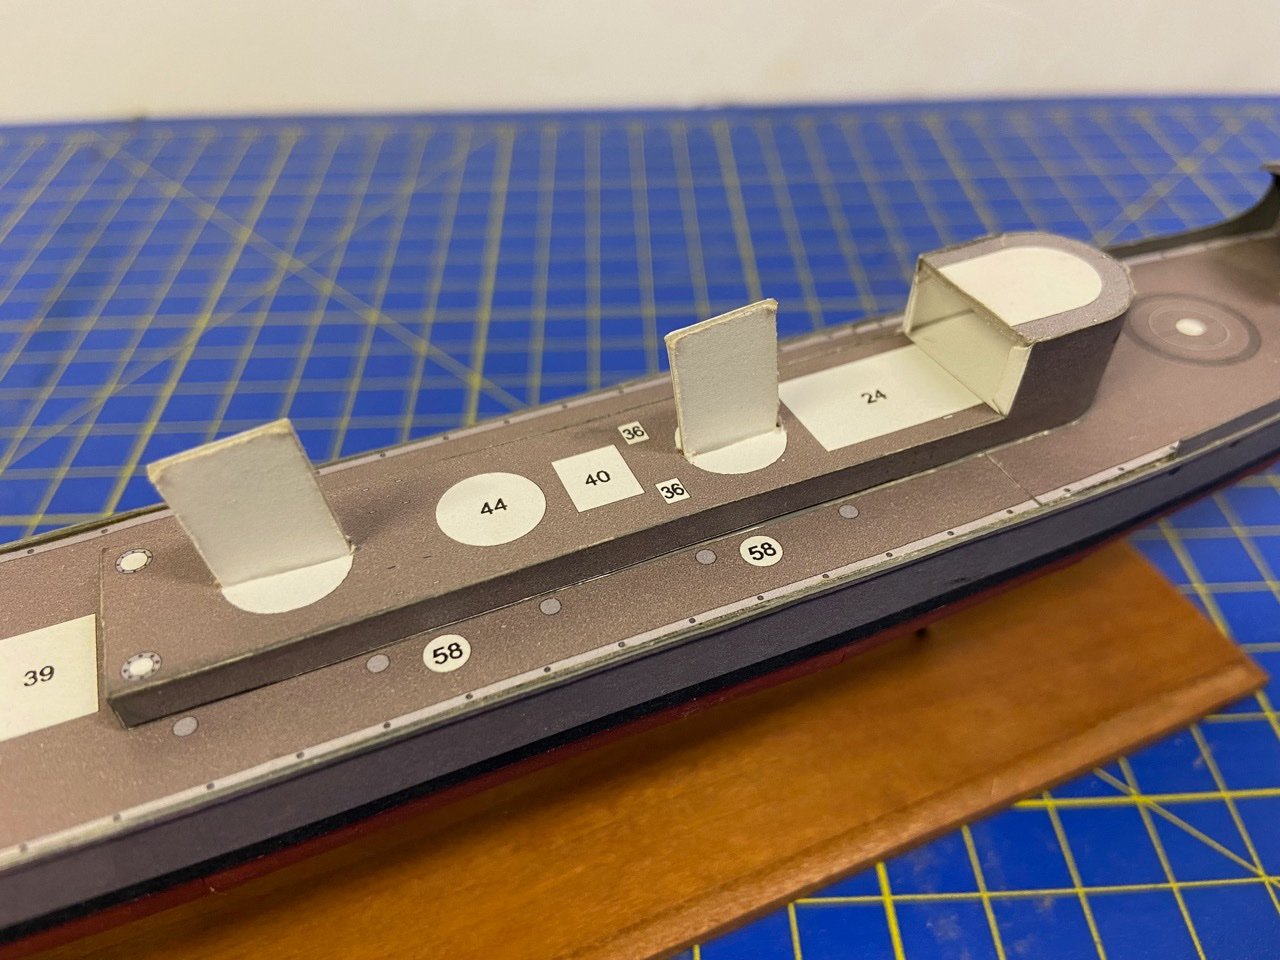
I love and hate maintaining build logs... It's great to be able to share, but I work on projects off and on, and I often disappear from the build log for YEARS. Like this V108 Torpedo Boat, I started this build nearly 5 years ago. People follow along, and then I have other things to deal with and end up setting the project aside. I kind of lost interest for a while, as I'm still primarily a wooden-ship modeler, and also not much into steel-hulled ships. But, recently, a couple fellow ship modelers have been working on steel-hulled ship projects, and I've been discussing issues with them. So, it got me back to thinking about things like the V108 project and even seeing what kind of a job I could do with a detailed plastic kit with lots of PE and possibly resin after-market items. Yesterday, I pulled out my V108 model from storage(!), and decided I needed to do a little paper modeling in between other projects. Part of the reason for this, is that the other work I'm doing right now, requires me to be out in the garage workshop, and it was just too hot in there this week. A paper model, I can just work on in the living room. First, here are some photos that I took after my last post, which was...uh... close to 5 years ago... Then, yesterday, I pulled the model out of storage, dusted it off, but couldn't find what I did with the part sheets and instructions. Fortunately, this is a downloaded kit, so I found the files on my computer, and just reprinted them all. I was a little concerned about variation in color, after all, I don't even recall if I had the same printer at that time. But, I think I did, as the colors look spot on. So, I spent a little time re-familiarizing myself with the model, and what needs to be done next. The obvious step was to do a little work on the superstructure, so I went ahead, just to make some progress... The basic superstructure was a nice re-intro to this model, as it's a major part, with no fiddly small parts to worry about, though I think I'll go ahead and mount the hatch that's outlined in the forward part of the superstructure below. Then, I forgot what you call these little connecting tabs that help to hold assemblies together. I glued them down to the deck first, as this should keep the part from causing the superstructure to creep up from paper "bendi-ness". Test fitting showed that some of the white of the deck piece shows a little, so I ended up painting areas where the white seemed to show. Managed to paint part of those tabs as well, but that shouldn't be too much of a problem. Finally, the superstructure is shown in test-fit. That's why it's not entirely flush with the deck yet. But, it will be, once I glue it into place. On the other side, you can see some of the white still visible. I'll touch this up before the superstructure gets glued into place. Now, I'm probably going to build in a slightly different order than Chris does in his tutorial. I want to get some of the little, flat pieces, like those #58 parts, which I think must be hatches for coal bunkers here(?), done, as I think I'll have more room to get them on properly without other stuff on the model. Also, as this is not a waterline model, I figured I'd better work on the underwater details, as I'll need to hold the model inverted as I do. That won't work too well with lots of stuff on the deck. Since the model is on a stand already, this should keep the screws, and all those related parts, mostly safe from harm.
- 106 replies
-
- 8
-
-
- digital navy
- v108
- (and 3 more)
-
Beautiful job on this model Dan! Or should I say "neighbor"? I live just up the road from you in Pleasant Hill. I look forward to seeing more of your work.
- 90 replies
-
- 1
-
-
- Model Shipways
- muscongus bay lobster smack
- (and 1 more)
-
Patent Model Ship (F19083)
catopower replied to Howard_And_Olivia's topic in New member Introductions
I'm curious about the use of the word "patent". Could the word just be used to show that the actual lifeboat was of a patented design, which might suggest that some serious thought was put into its design? I've seen the term used for in reference to a particular type of windlass. It seemed that it was kind of a selling point of the item. -
Patent Model Ship (F19083)
catopower replied to Howard_And_Olivia's topic in New member Introductions
Hi Howard and Ollivia, Sorry, I wouldn't know how to tell from the age of the wood. I would just be guessing. As far as museum accession numbers, each museum would have it's own set of numbers, and you'd probably have to check with each museum individually about the availability of a searchable database. If it is a former museum model, I have no idea how you would determine which museum it might have come from. -
Patent Model Ship (F19083)
catopower replied to Howard_And_Olivia's topic in New member Introductions
A double-ender like that looks to me like a lifeboat. I tend to agree with John (Jim Lad) that the number looks like a museum catalog number, and I think this would be the most likely possibility. I agree it's a very nice model. Interior? Over the ages things like that have habit of disappearing. Perhaps someone thought they would repair it, but it never happened (can't say that's never happened to me...).
