catopower
-
Posts
1,900 -
Joined
-
Last visited
Content Type
Profiles
Forums
Gallery
Events
Everything posted by catopower
-
Returning to this old topic, I'd add that the Mysticque was an actual French ship. Her particular type is called a Polacca Xebec. The ship appears in the 1880's publication, Le Souvenirs de Marine, by Admiral Paris. I don't know the type well enough, but I believe it's a European modification of the Xebec type. I think a true Xebec would be more likely used by the Barbary pirates, but that's just my opinion. I have nothing to back that up. However, I do recall there is another option for a Xebec, which is one made by Mantua.
-
 Hi Melissa, I'm enjoying watching your Statenjacht build. So much so, that I've been eyeing the Kolderstok kits that are on the shelf in Ages of Sail's warehouse for the past couple weeks. I'm trying NOT to spend any more money, or to add another kit to the stack in my closet. But, your work looks so good, it's making it difficult.
- 84 replies
-
- 4
-

-
- Statenjacht
- Kolderstok
- (and 1 more)
-
I love early American pilot boats, and that is an EXCELLENT book. I look forward to seeing what you come up with.
-
Hi rudybob, First, I agree with Allan that since this is a computer controlled laser-cutting process, replacement parts aren't going to be any better than what you got in the kit. Then, I went and looked at the kit I have in my closet, did a photocopy of the wood sheet, cut out the stem and overlaid it on the inner keel piece. To me, it basically looks like what you have, with the slight gap in the parts. That said, I don't really see a problem with the build. The gap isn't ideal, but it's going to be hidden by the planking. The stem piece is design to sit in a certain way so that the scarf joint in the keel lines up with it. So, I'd just make sure that whatever you end up doing, that you don't rotate the stem out of position any, as you'll then have to modify the scarf joint a little. As for ME customer service, though I do some work for Ages of Sail and ME is a direct competitor, I've always found their parts department to be very good. In my personal experience, they've just been poor at communicating. But, as pointed out earlier, they did just relocate again, so maybe that's created a bit of a work backlog.
-
Hello Floyd-Rw, congratulations on a great start to your build. I've grown rather interested in the Spanish warships of this period. I have a build of the Spanish 74-gun ship Montañés that I've been tinkering with. Also an OcCre kit, or based on it anyway. Looks like good progress!
-
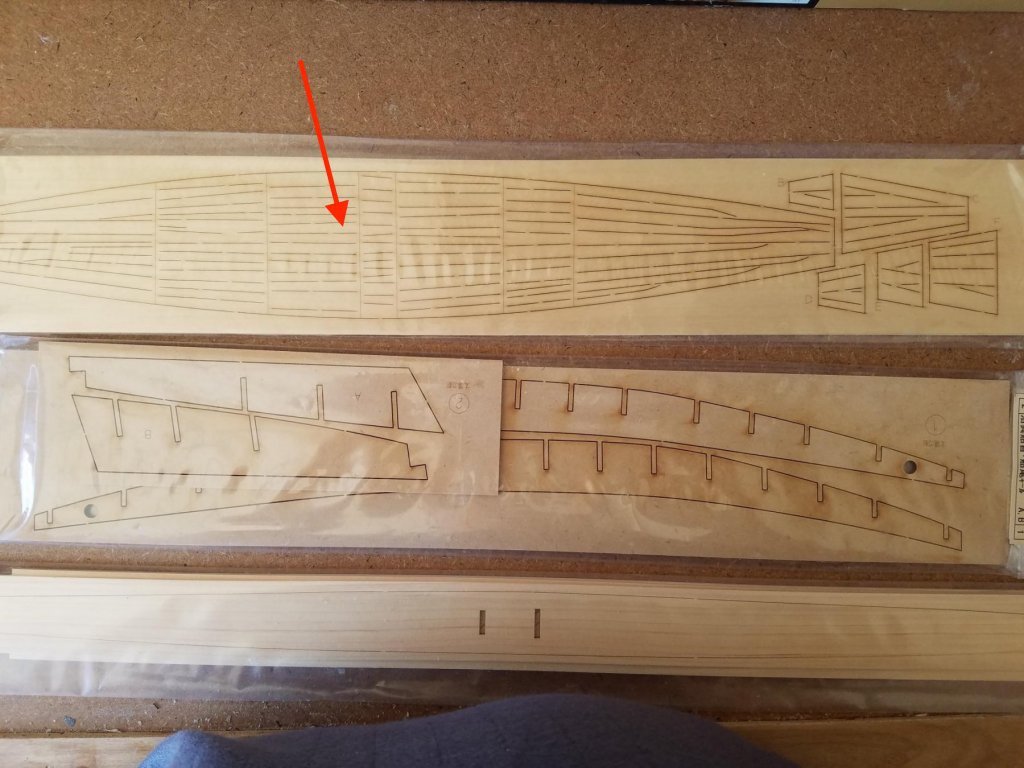
An old topic, but not forgotten. And, not a dumb question at all. I've never built this kit before, but I'm familiar with their instructions and laser-cut parts. From what markjay posted, I can see that the hull planking is laser-cut. In fact, it looks like three or four laser-cut sheets that have the planks cut into it. Hope this is okay to do. These are markjay's photos, posted above. I downloaded them so I could repost them here: The red arrows point to what appears to be the laser-cut hull sheets. On some wester-style ships, Woody Joe provides strips for planking the hull. But, for these more unusual types, including the Japanese vessels, they're pretty consistent with providing laser-cut sheets. But, I say this, not having built this model. And, I don't own the kit either – I know, it's a shock... 😉
- 18 replies
-
- 3
-

-
-
- woody joe
- museum models
- (and 2 more)
-
Looking for a card model of the Arizona
catopower replied to Dion Dunn's topic in Card and Paper Models
I've ordered from GPM many times successfully. Then, a fellow modeler from my ship model club tried it, based on my recommendation, and had all sorts of trouble. It appears they have switched to newer payment system, and it's much harder for us in the U.S. to navigate it successfully 🤨 -
I have used both single ply sheet wood as well as plywood to scratch build the hull. If you have bulkhead extensions, i.e. timberheads, then I'd stick with plywood, you'll have fewer problems with breakage. Otherwise, single ply sheet wood should be fine.
-
kit review 1:65 HMS Endeavour - Artesania Latina
catopower replied to James H's topic in REVIEWS: Model kits
Nice kit review James. I'm glad to see AL back at it under the new ownership. I know that some people are concerned about instructions on DVD. I don't have a DVD drive on my main computers either, but downloading the 500-page pdf shouldn't take very long for most of us. My download was just about one minute. Viewing it doesn't require top hardware either. My computer is 9 years old, has 16GB of RAM, and it flies through the pages without a hitch. However, DVD drives are very slow, and accessing the pdf on it could be a lot less enjoyable unless you copy the file to your hard drive and view it from there. Viewing the file where your doing your building might be more of an issue for some. -
This is an old topic, but I would just add a word of caution. Make sure that when microwaving wood that the towel wrapping is wet and that you monitor the process very closely if you're not familiar with it. I know of a guy in a ship model club I belong to tried this method, kept at it, because the wood wasn't flexible. He let the towel dry out, the wood dried out, the microwave oven caught fire and was destroyed in the process. Cost him a few hundred dollars. Now, this is clearly user error and nothing really to do with heating the wood really. But, just something to be aware of.
-
Welcome Tim. This is the Panart/Mantua kit. It's 1/78 scale. I recognize it from the details, particularly the base. It's this kit: https://www.agesofsail.com/ecommerce/mantua/panart/ma738-panart-victory-wooden-ship-kit.html But, as Mark said, it basically needs to be rigged, and just about any Victory rigging plans should work.
-
BikerMart, I think you'll generally find that Billing Boats kits, if not blessed with great instructions, seem to have very accurate shape. And, while it's no Caldercraft Victory kit, I was just recently looking over the instructions for the Billing Boats HMS Victory kit, and compared to other kits, it looks like it's pretty buildable, and should result in a very nice model. But, good luck whichever way you choose to go. I'm sure you'll get lots of great support here!
-
I think kit instructions are difficult to write, and time consuming to develop, which is why most kits have terrible instructions. Particularly in older kits, I think, where you were expected to figure out a lot of things yourself. Looks like you've got a good attitude and a good handle on it though. I didn't even notice that you had mentioned that you have the full Corel HMS Victory kit too. Well, that will certainly be a challenge. But, it looks like you have all the right references for it!
-
Hi Steve, I love your approach to this build. You're really doing a great job and giving me a whole new respect for how well a kit like this can be done. It's interesting that yours is a 40 year old kit, I think I read in one of your earlier posts. I think if you opened one of these kits today, it would look exactly the same. Your build is really coming along, and I'm enjoying following the work.
-
The plywood in the OcCre kits is definitely fragile when dry, so definitely make sure to dampen the bulwarks piece. The problem is that you don't want to soak it too long or the layers will start to separate. I'd test soak a piece of the plywood scrap in the kit to see how much you can bend it after just a few minutes of soaking, as well as how long you can safely soak it before the plywood layer separate. As Jeff pointed out, it's mostly the bow stern section that needs the dampening/soaking. You can probably just do that in the sink, or wrap the piece with a wet cloth. First, make sure you bevel the frames a little more than you show in the photo. Also, the instructions indicate that bow needs to be filed down to a width of 2mm as well as the skeg – aft end of the keel.
-
Hi Anthony, I'm curious what you used for the HMS Blandford, as you say it was your first scratch project. A number of suggestions have already been made here. But, one comment I have is that Jeff Staudt's HMS Granado cross-section plans would be an interesting change from the other cross-sections, as the Granado was a bomb vessel. Also, I've noted that he incorporates some simplification, which should then be an easier build than some of the others mentioned here, if that's an issue.
-
Yeah, I've seen too many questionable kits, both in paper and in wood on ebay. These days, the only things I'll use ebay for is if I feel like getting materials or tools when I can't find them elsewhere. Well, that and used computers. Pretty hard to pirate that stuff! But, thanks for the original posting Chris. I'd actually looked at a couple kits I was familiar with and considered buying off of ebay. This is a good reminder not to do that. The particular ones are easy enough to get from gpm.pl where I've purchased many things before. Plus, when you go to legit seller's websites, you often discover so much other cool stuff you just gotta buy, including kits as well as after-market accessories, etc.
- 27 replies
-
- 5
-
-
- eBay
- kit piracy
- (and 1 more)
-
I'm just speculating. What do I know???
-
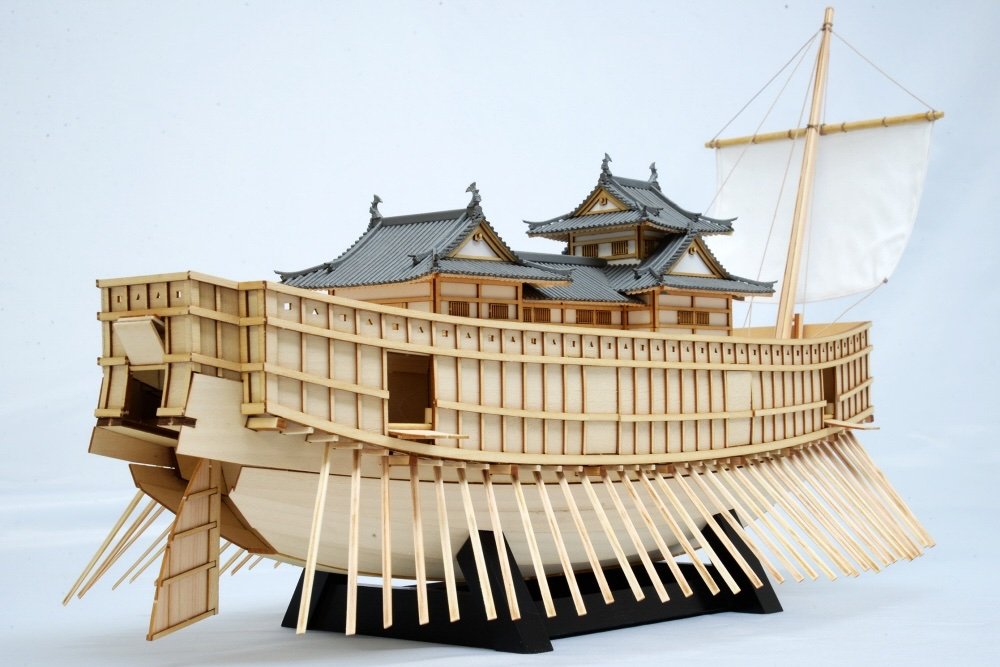
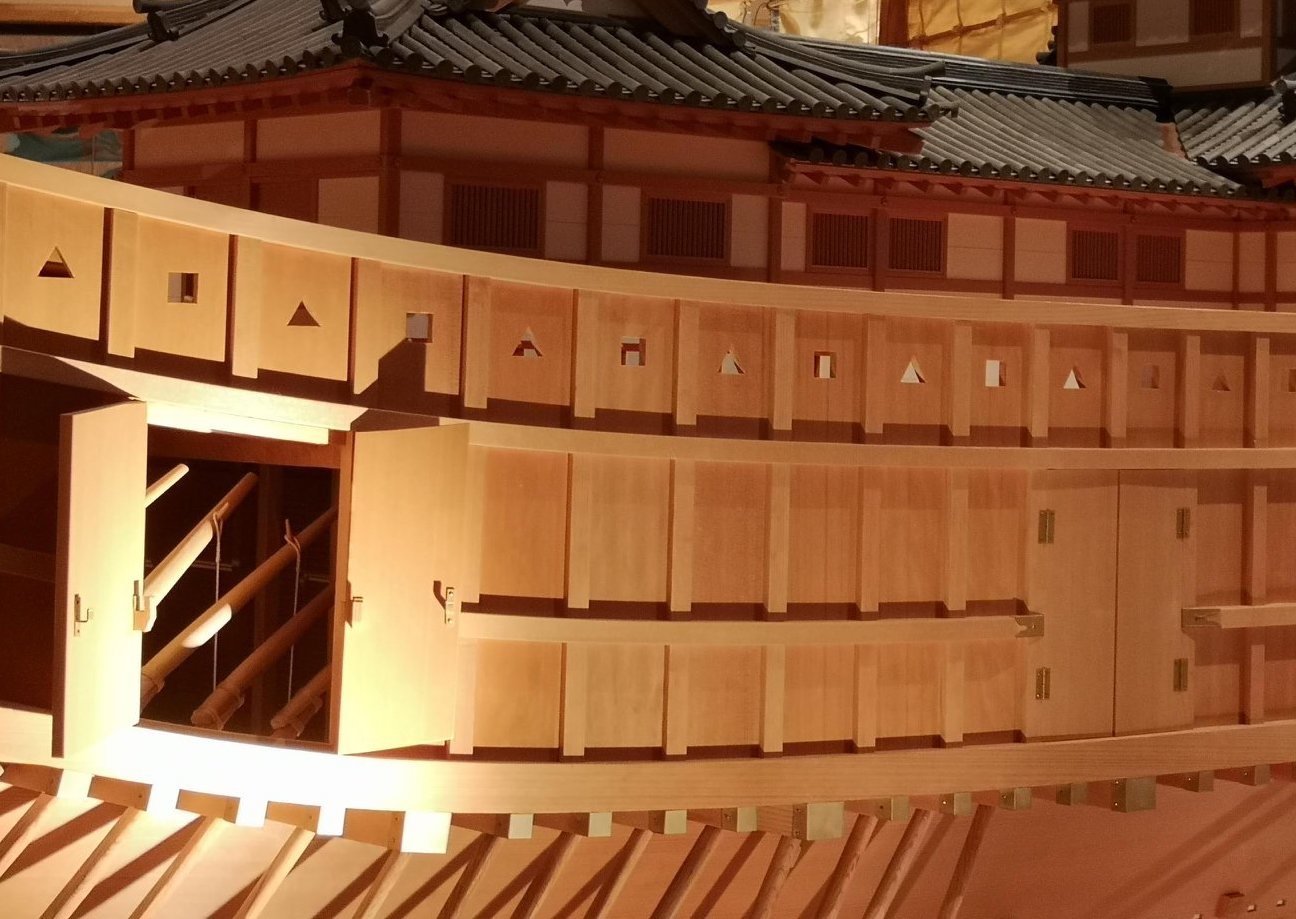
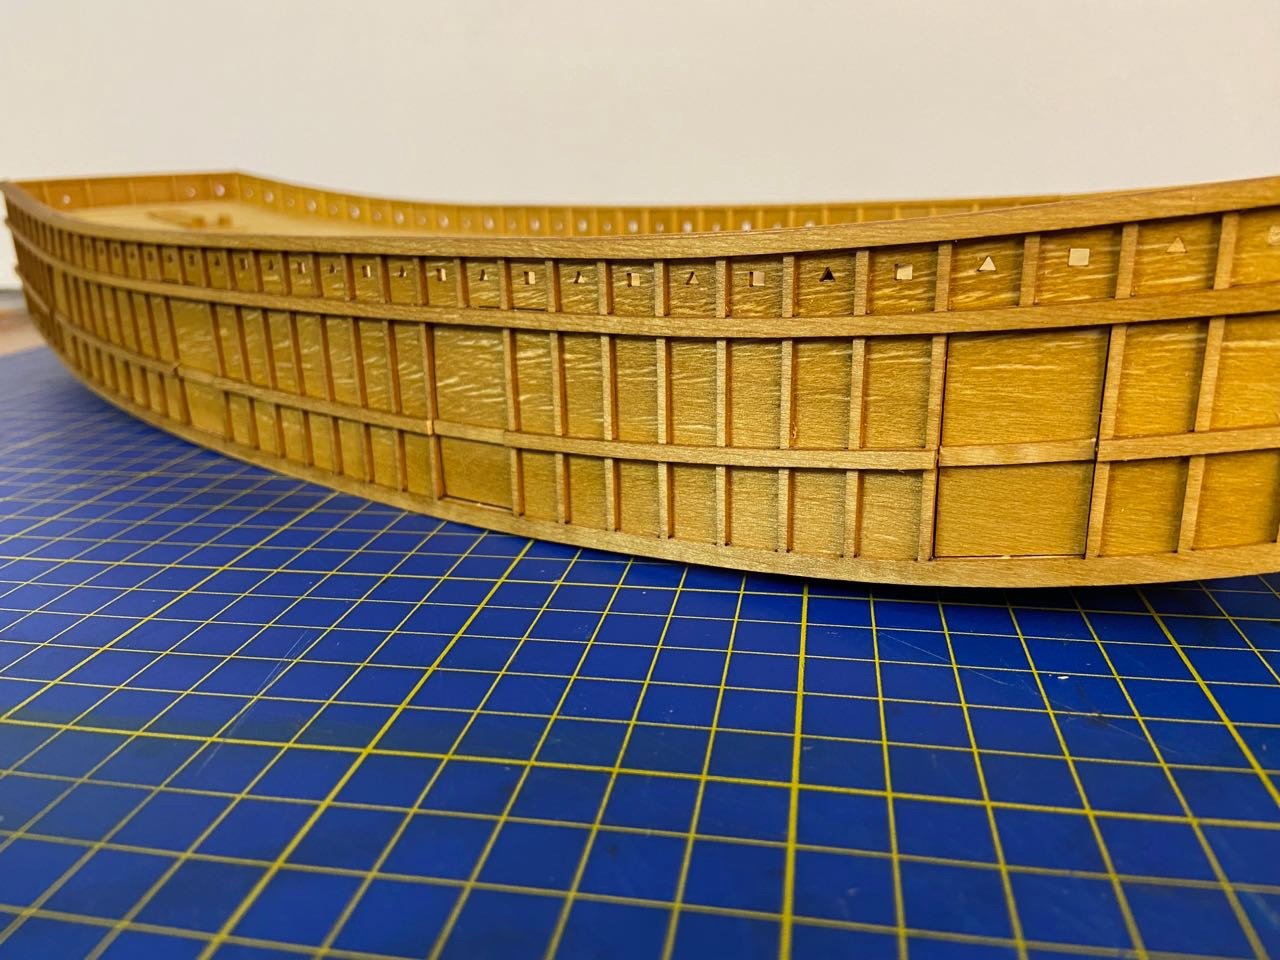
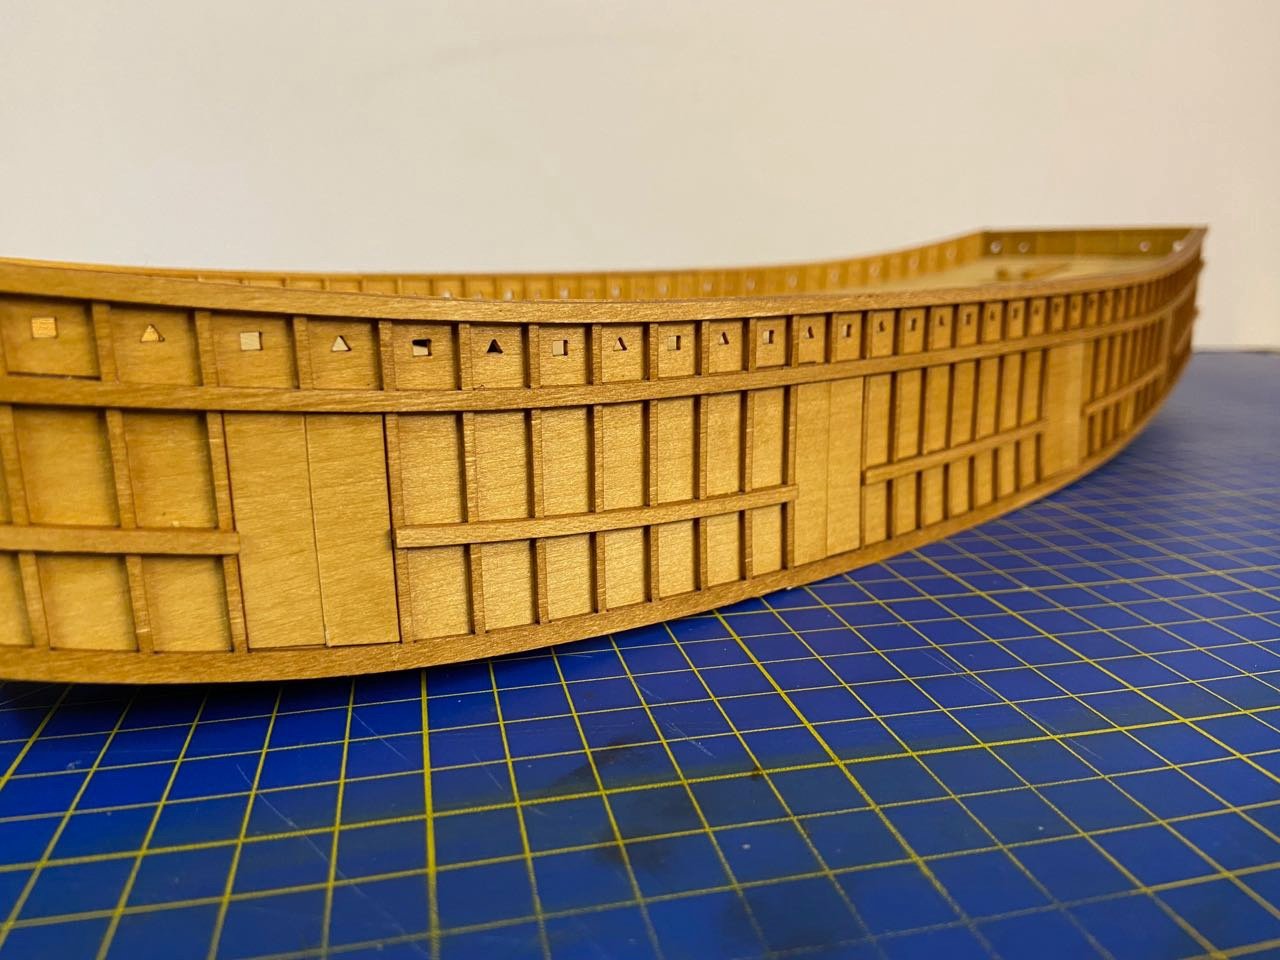
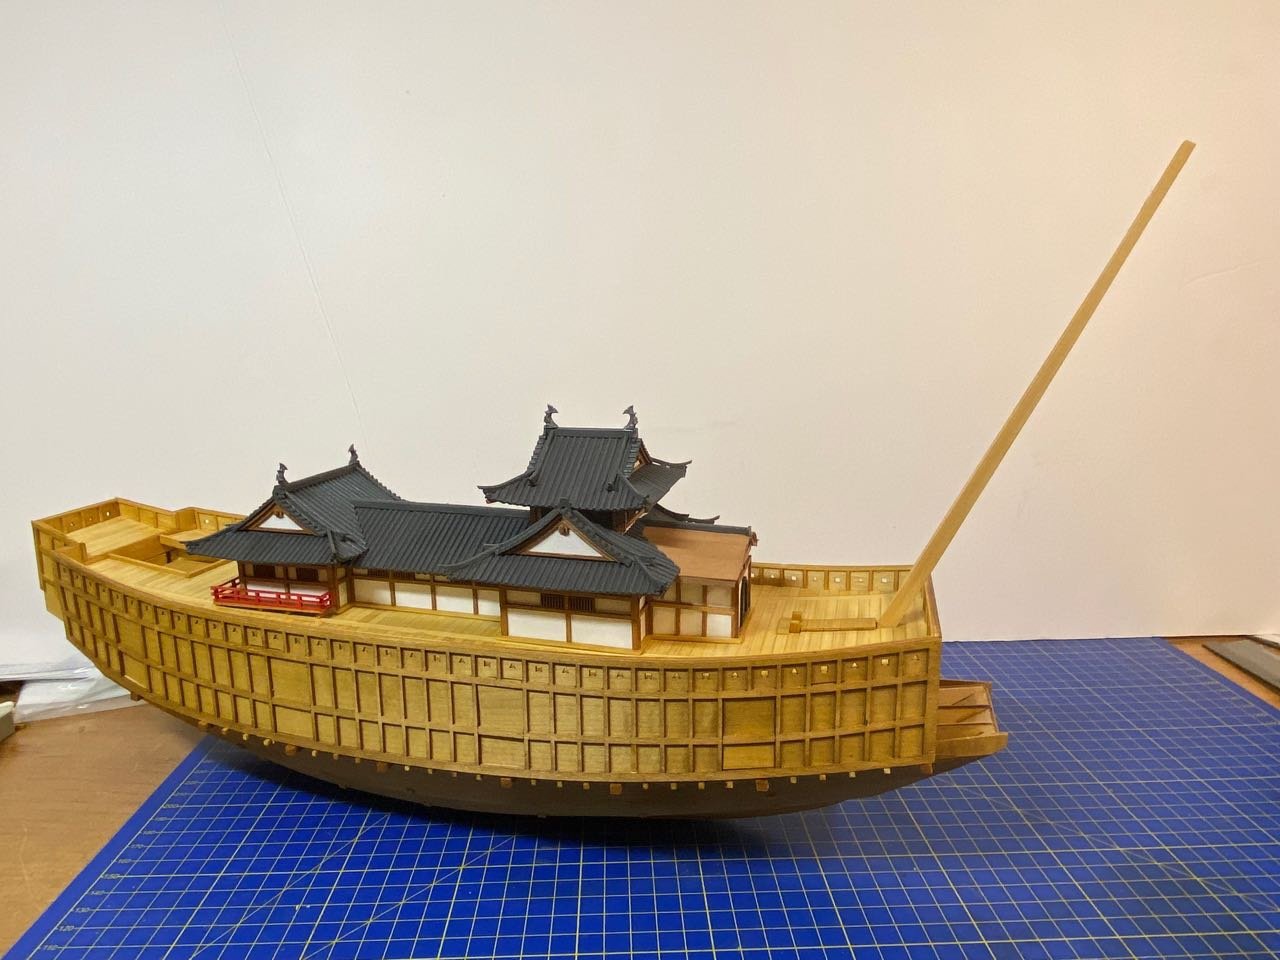
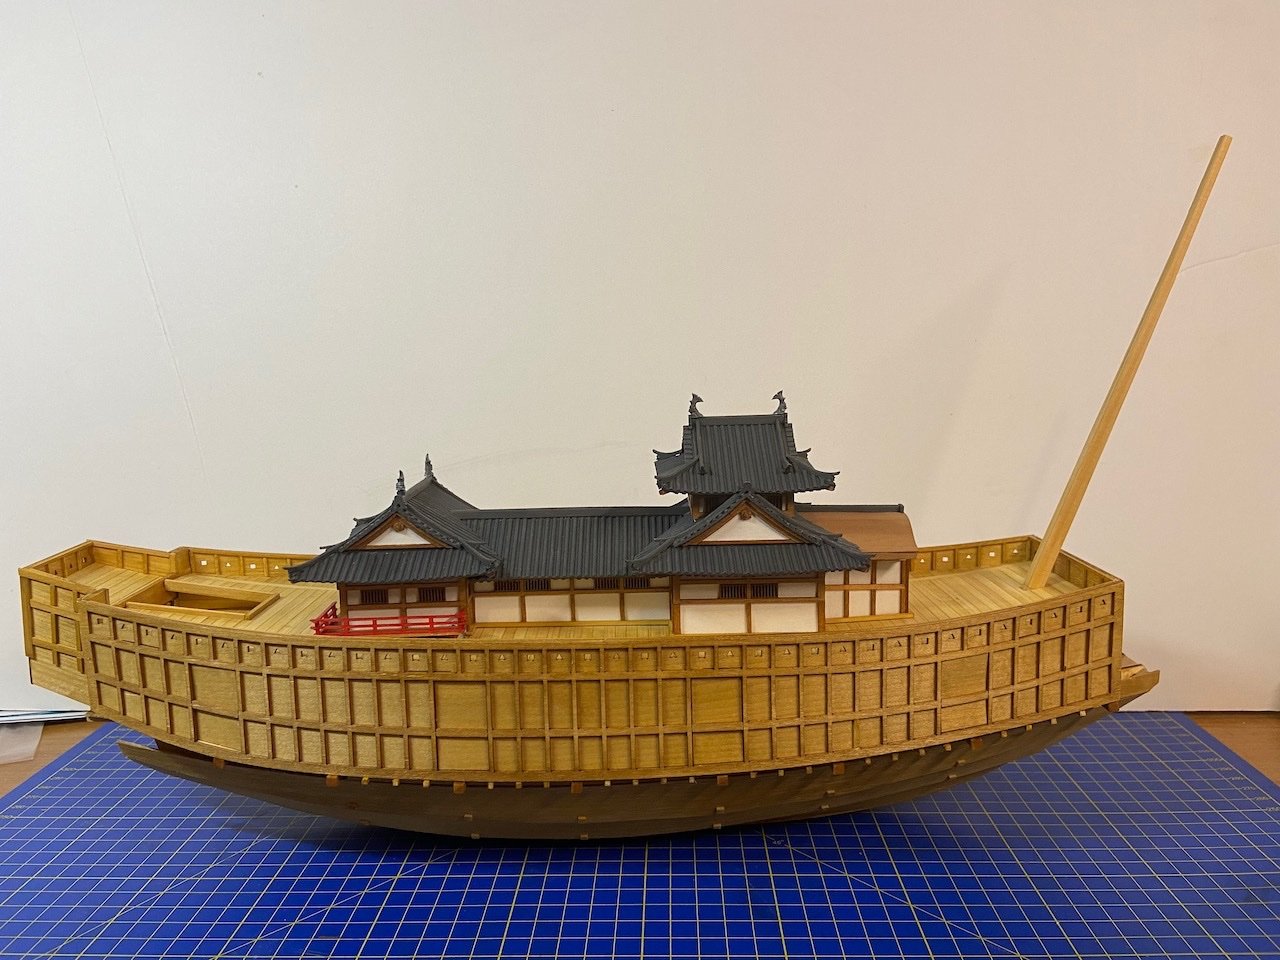
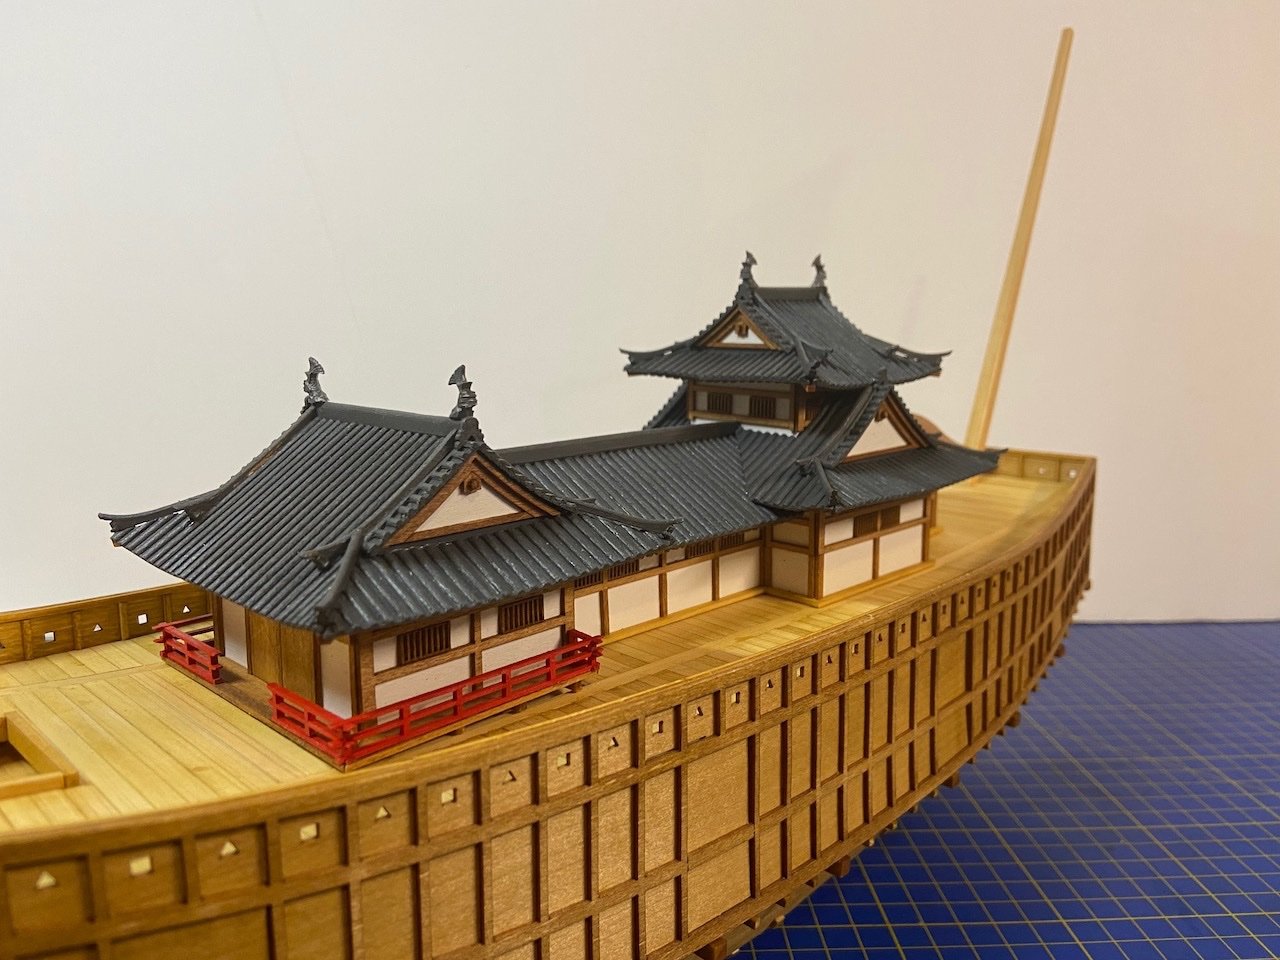
Small update for anyone interested! You might have noticed that the kit doors are made so that they work as boarding ramps. While I've seen doors on other atakebune models and painting like this, it's not the way the museum model's doors work. On that model, and in the original artwork, they are outward-opening double doors, with a metal bracket on the inside for barring the doors shut. For boarding, I believe there would be ramps dropped down from inside. The one good thing about this arrangement is that a counter attack might be prevented from boarding the atakebune by shoving the ramps all the way out or cutting them loose. If the ramps and the doors are one in the same, you have to re-raise the ramps to close up these openings. Assuming these actually have ropes for lowering/raising the ramps, if there ropes are cut, there's no way to close up the big hole in the side. And, yes, in any case, the sculling oars in front of the doors have to be taken in before I can do anything. If you look at my earlier model photos, you can see how the doors looked before I did any work to them. Below is an update photo I took before modifying the doors. But, note that I've added most of the remaining horizontal trim on the yagura, or box structure. The very bottom rail has to be left off for now, as I have a modification to make to it at the stern. But, the upper 3 rails were added, giving the model is little more detail in depth, like the museum model. I started modifying the doors on one side. But, I can't fix them into place yet, until I decide if I should leave any of these open. The problem is that the interior does not at all look correct. To begin with, the sculling oars are not full oars, they're only the lower portion that sticks out. I could make a few of them full-sized, but then I'd have to come up with a way to properly rig them with ropes, called hayao. By the way, these doors aren't fixed into place. I just have them taped into place from the back side. I'll eventually need to add something to represent hinges. And, I'll think about leaving one open door. More later.
-
At that period, I think most likely color is black for the mast tops, doublings, bowsprit.
-
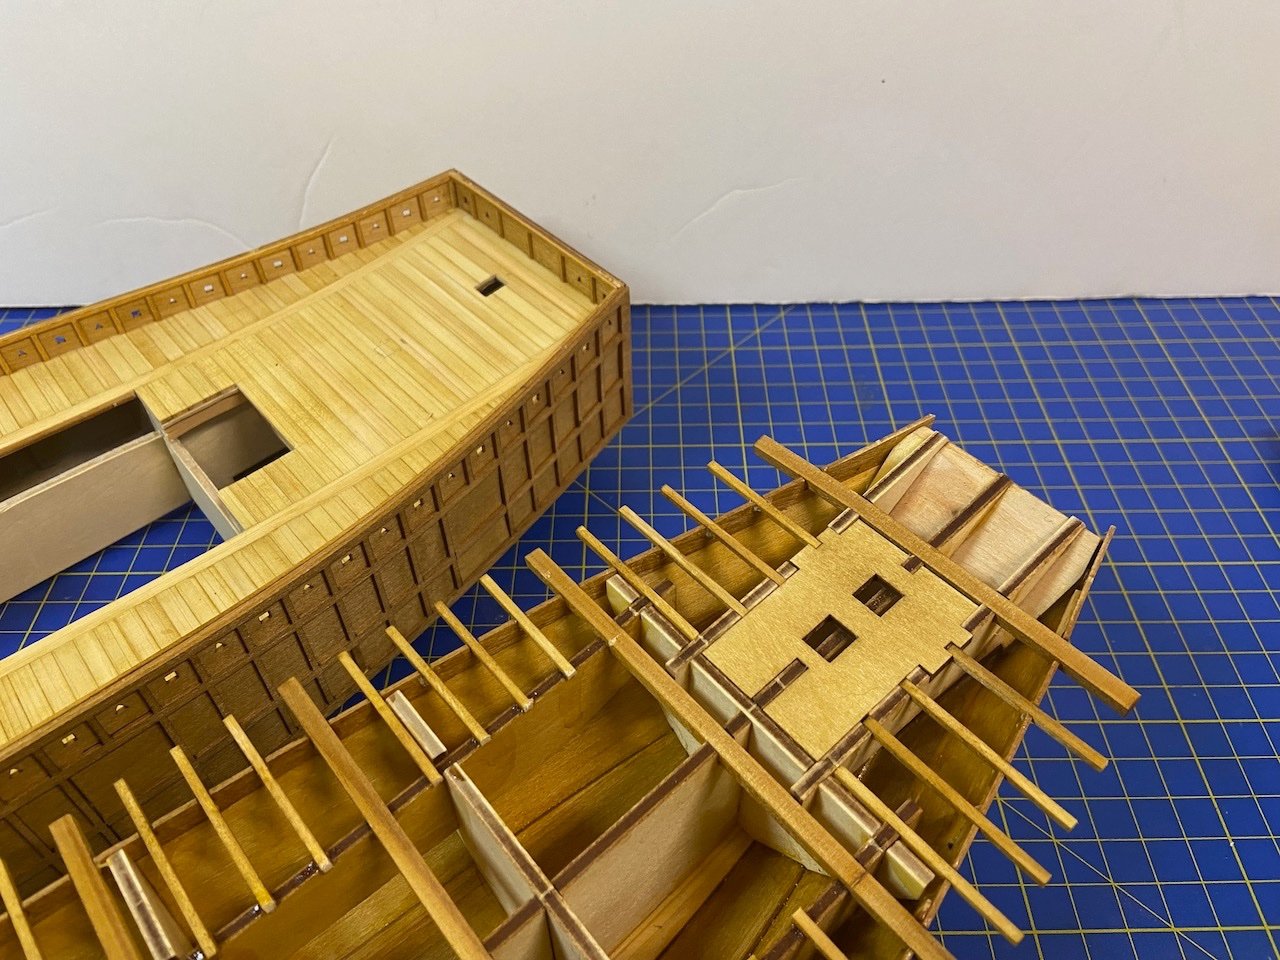
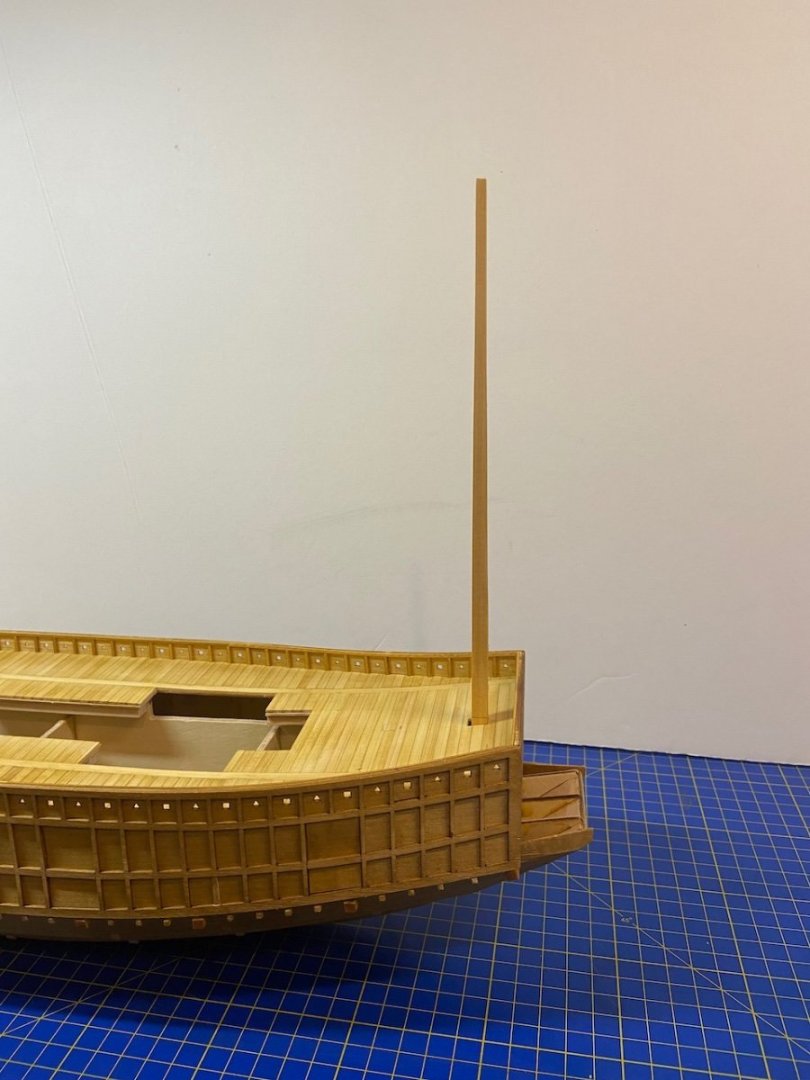
Here are the results of my latest minor modification. Below, you can see how the deck looks just aft of the mast. I cut open a slot and made a cover for it, which fits nicely into place. You can also see a pair of mast supports behind that, and there's deck reinforcement plate behind that. The reinforcement place is probably just a thicker section of the deck in reality. It is through this thick plate that a pair of halliards lead out from the deck and up to the tip of the mast. The photo below is actually an earlier photo where I was using a temporary assembly to figure out the positioning and workability of the mast support on the left. Also, you'll notice that the thick plate I just mentioned is not in place yet. Leaving the mast free and the deck covers removable allows me to illustrate how the mast might appear if it is in a raised position. Again, this is only speculation, based on what little I could see of the deck of the Saga Nagoya Castle Museum model. But, I think this makes sense, and this shows it as workable. More work on the yagura, or box structure, to come next.


-
Welcome John, and good luck with your Terror build. It's a very interesting ship and I'll look forward to seeing your build progress.
-
Thank you, Druxey. It's a good question, to which no one will ever know the answer. It's all speculation. I figure that either, A, it gives the occupants of the castle structure a better view without having the mast so close to the structure, or, B, it's an intermediate step in tucking the whole mast down below deck where it would lower the center of gravity of the ship. On most ships, the mast is lowered across the top of the ship, and the simple, single structure on top of most Atakebune had a hole in the front and back ends for the mast to pass through. But, with such an elaborate structure on the deck, that just wouldn't be possible here. And we don't actually know what the inside of the yagura or box structure looks like, so it could easily have a kind of space down the middle for storing not only the mast, but the yard as well. But, it's just my guess. I'm going to try to pass this by some knowledgeable folks in Japan to see what they think about the idea. Most likely, the best answer I'll get is that no one really knows for sure.
-
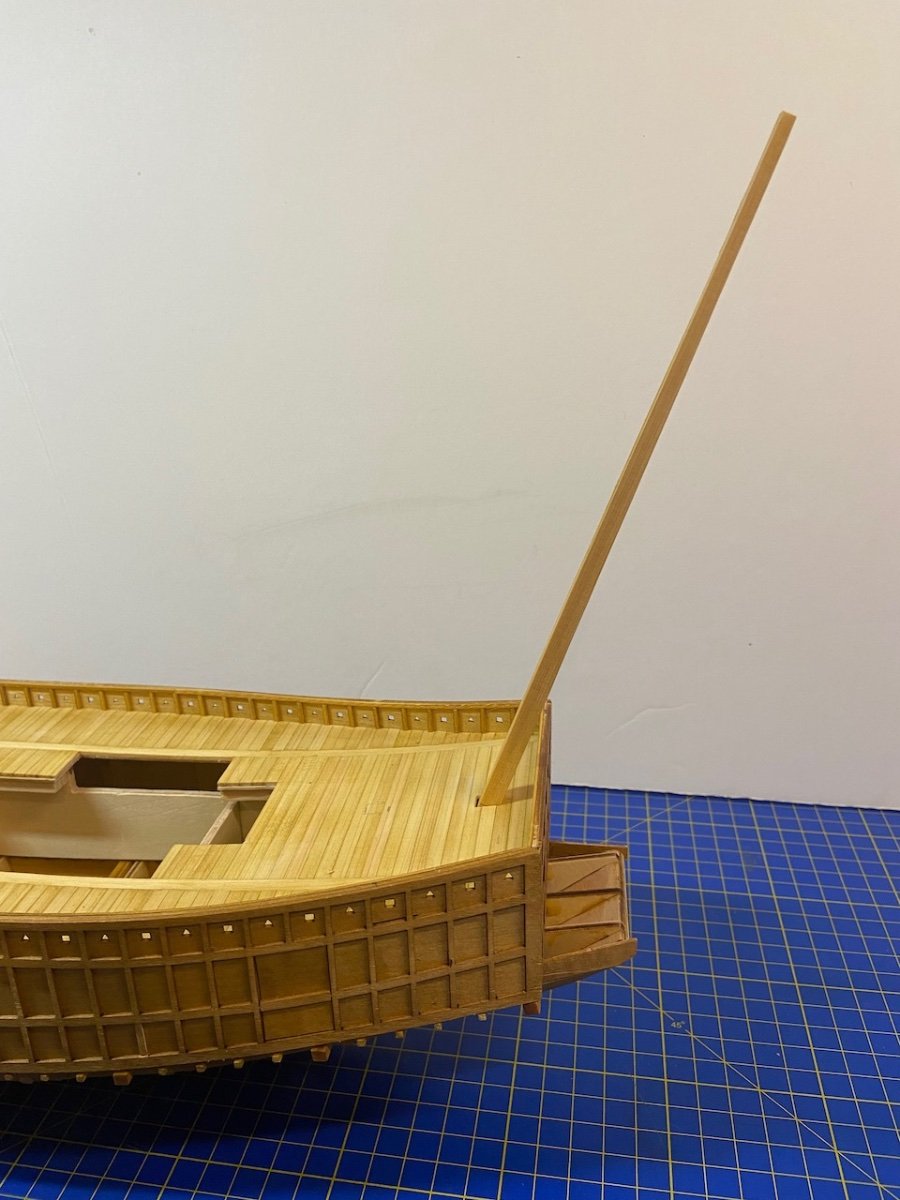
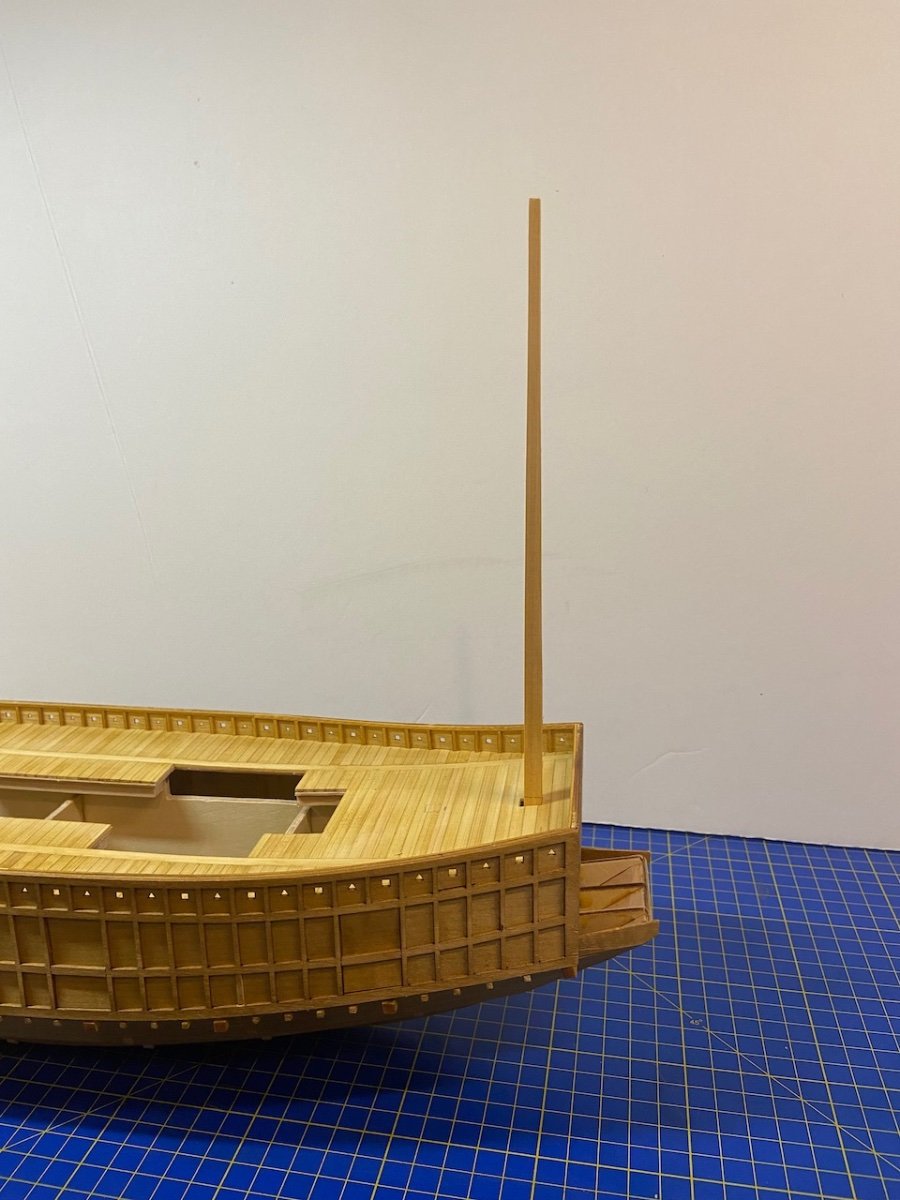
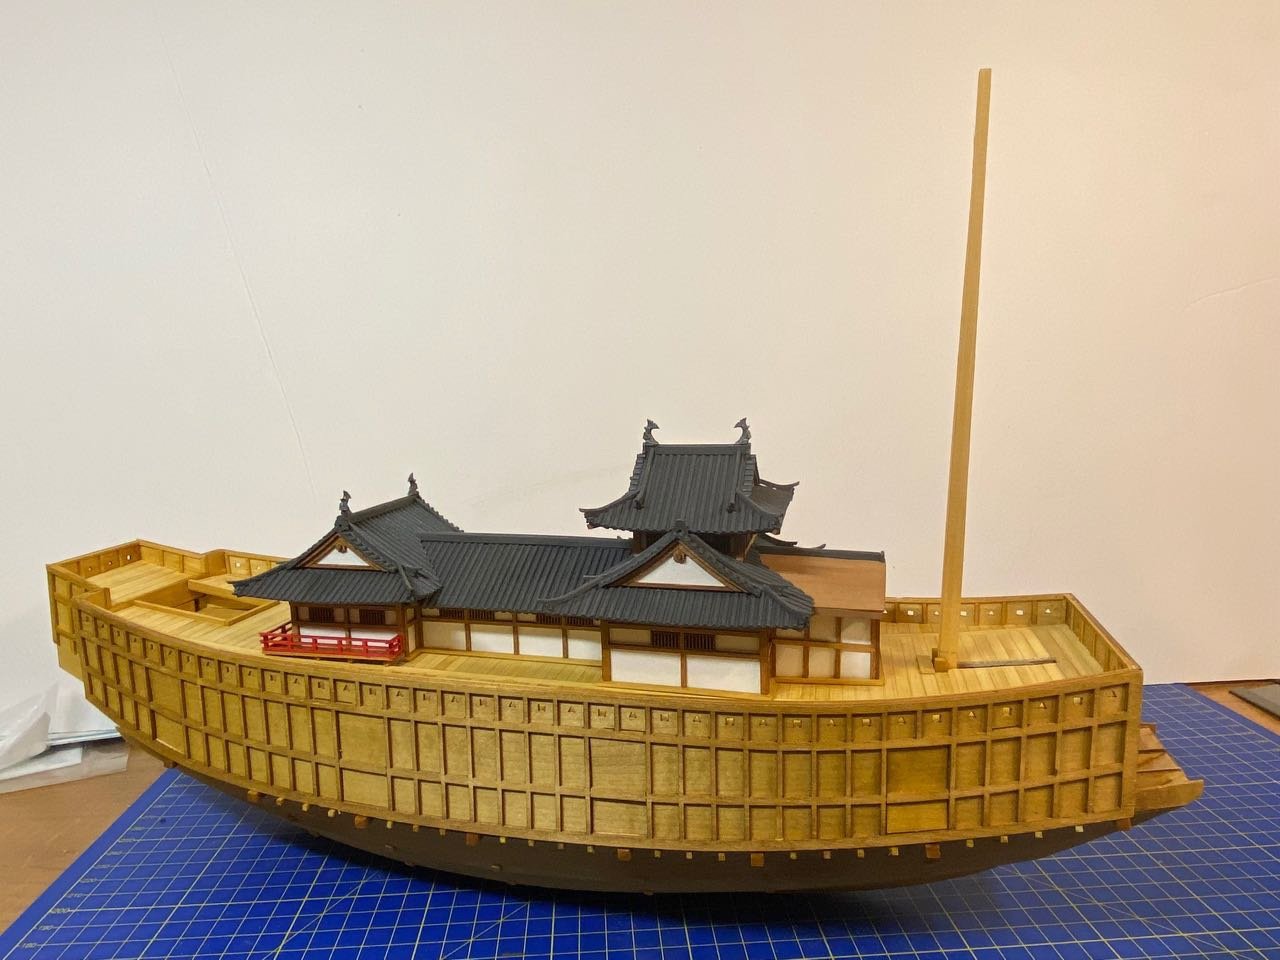
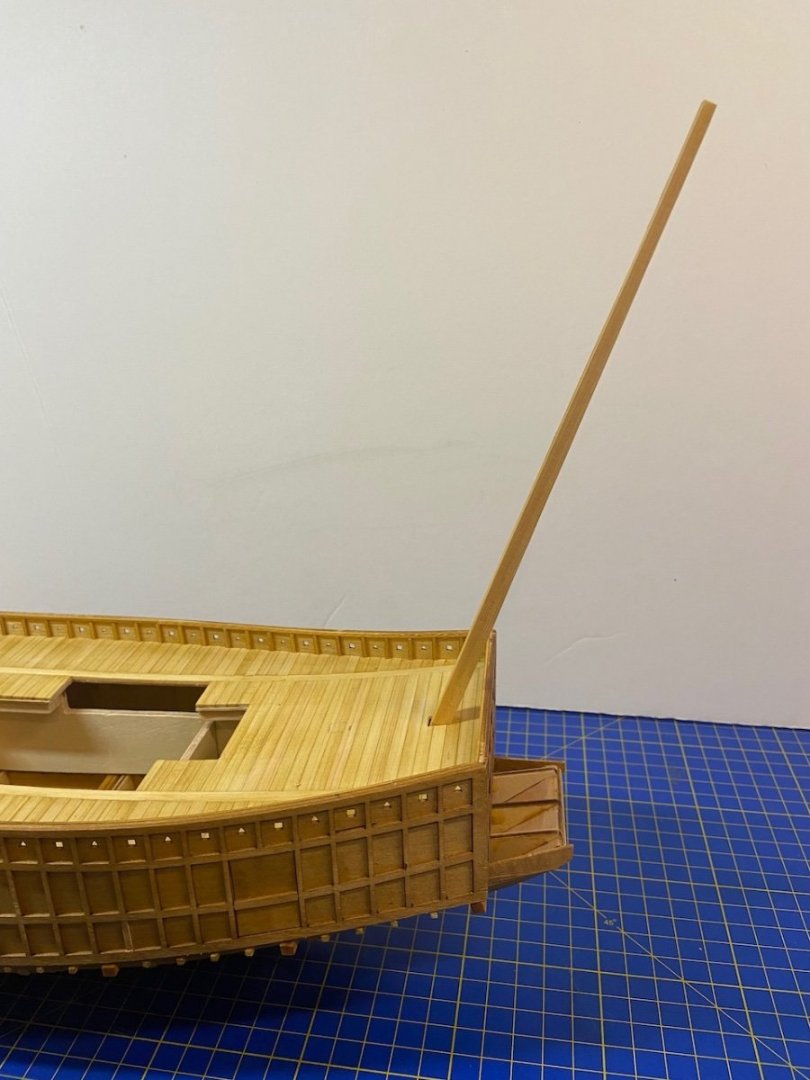
For those following my Atakebune build, my apologies for the progress delay! I could try to make an excuse that sanding down all those sculling oars got boring and slowed me down. But, that wouldn't be entirely true. I did finally finish sanding those oars. I guess the model only needs 66 of them, but I'm sure I counted 72 in the kit. Maybe there are spares. Also, I made the mast. It has a square cross-section and is tapered, but was actually quite easy make, as the parts are all laser-cut and simply need gluing together and then staining or dying of the wood. Also cut the hole in the deck planking. That was easy too, as the thin plywood sub-deck has the hole already cut, so the planking just needed to be cut through. As I mentioned before, the forward rake of the mast is quite unusual, and it doesn't appear on any other Japanese watercraft I've ever seen or read about. But, I'm more convinced about my speculation that the mast would have been raised to a vertical position when carrying the large squaresail. One thing I found interesting that is unexplained about the kit, is that there is a hole cut down below to hold the foot of the angled mast in place. However, there is a second hole just in front of the first. If you place the foot of the mast there, the mast sits vertically... Below, you can see the lower structure with the two supporting holes for stepping the foot of the mast. My guess is that the designers at Woody Joe agreed that the mast would be raised to a vertical position when carrying a sail, but had it stay in its position at the very front of the hull. My belief is that the foot of the mast remained in the same location, and that the mast was hauled into a vertical position, which really moves the body of the mast very close to the front of the castle structure. In any case, I don't plan to raise the sail, so I'll leave the mast in its forward leaning configuration. Now, I'm going to place the panels that would cover the slot for raising the mast. I'm considering actually cutting open the deck now, so I can illustrate how this process would work, and how the mast would look in it's raised sailing position. Hmmm... Okay. I'm off to it.
-
Welcome Artesania Latina! You made two of the very first wooden ship models I ever built!