catopower
-
Posts
1,914 -
Joined
-
Last visited
Content Type
Profiles
Forums
Gallery
Events
Everything posted by catopower
-
 Now I ASKED you not to ask me that Druxey... 😉 Thanks for the advice on the rubbing alcohol. The water did warp some of the thin wood, but it all straightened out again when dry. So, maybe I just got lucky. In any case, those should be the only glue joints I needed to undo. Onward!
 -
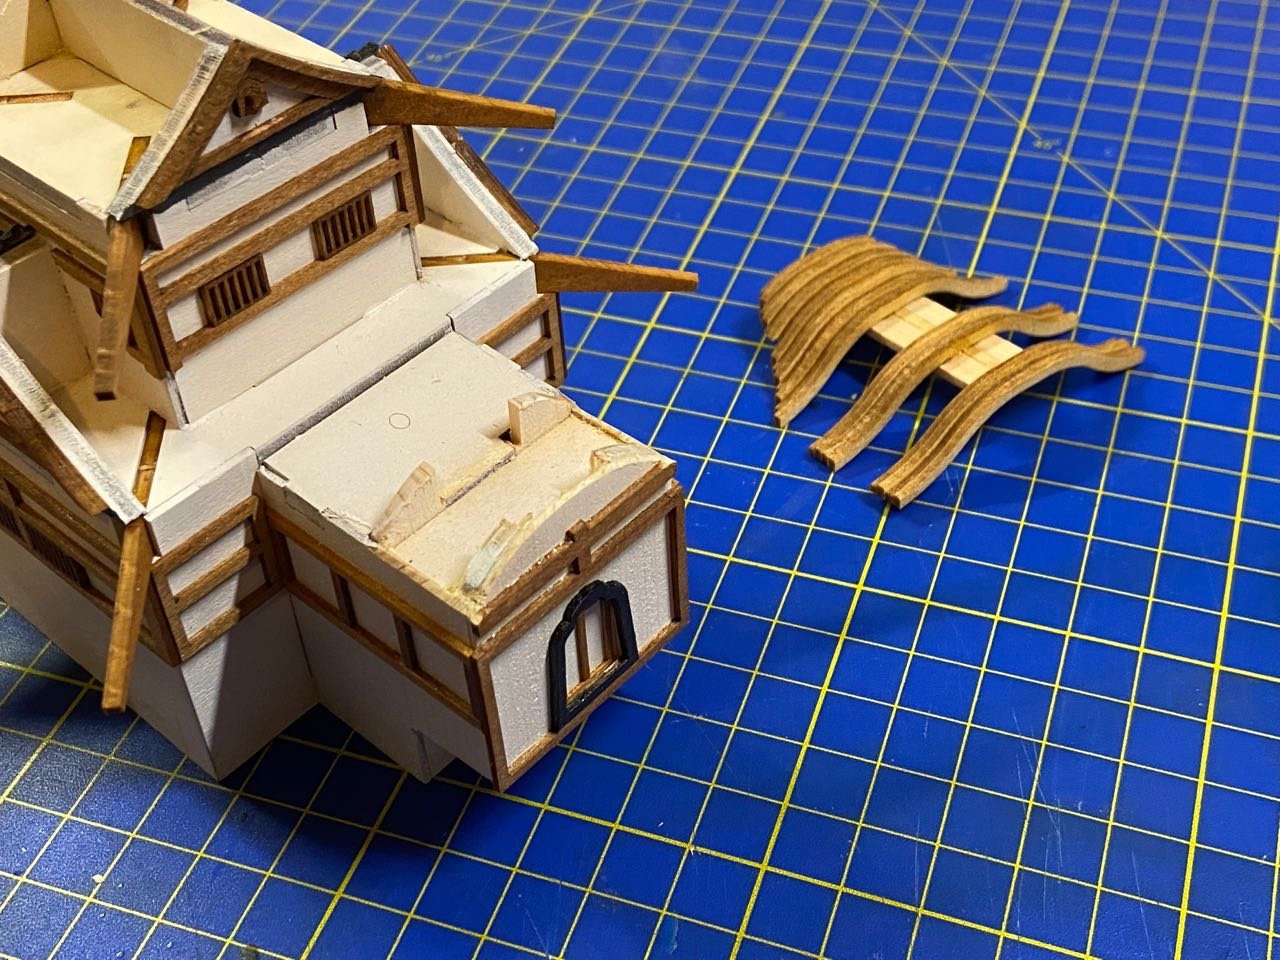
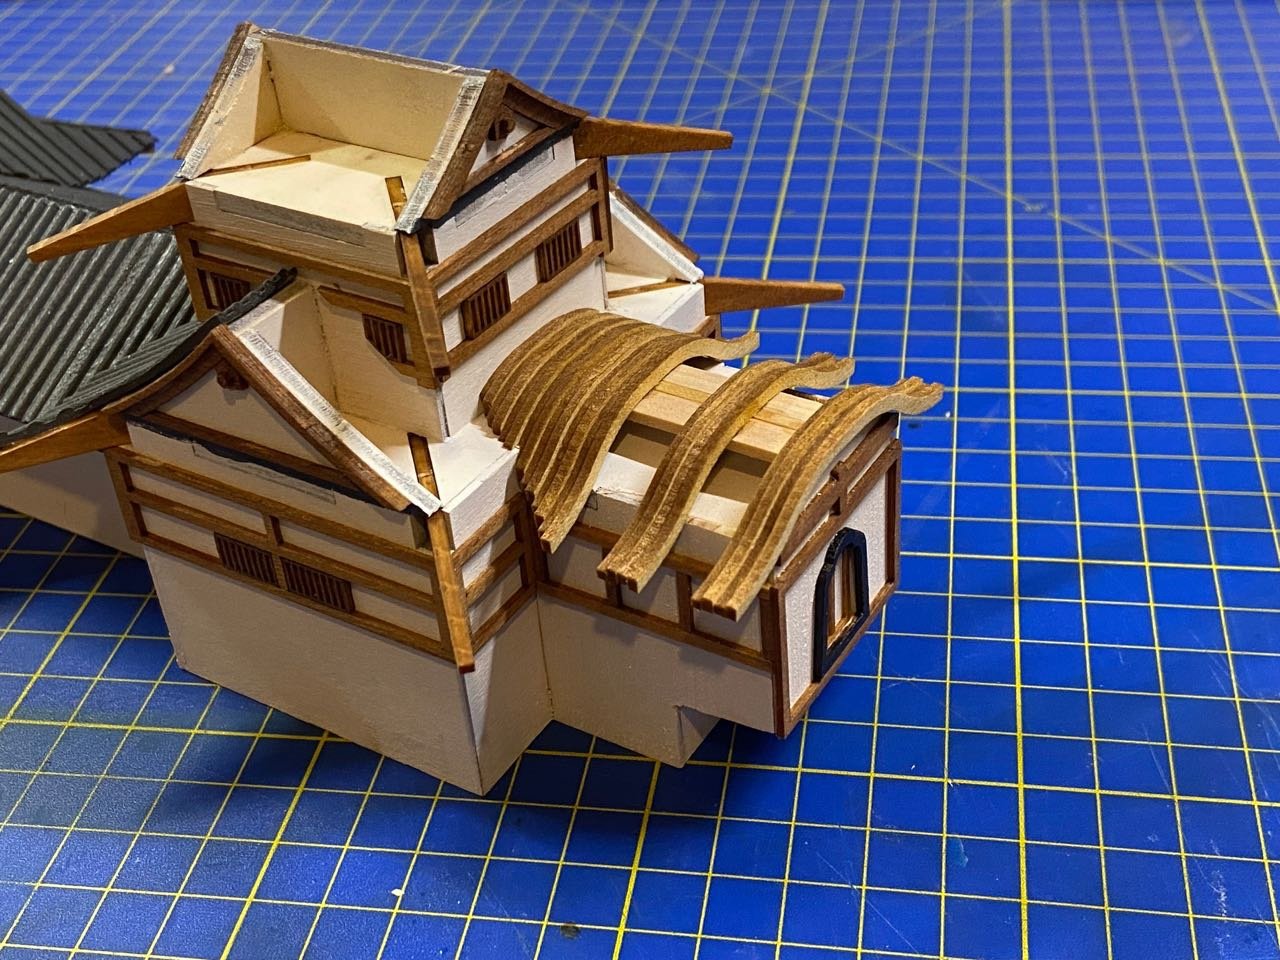
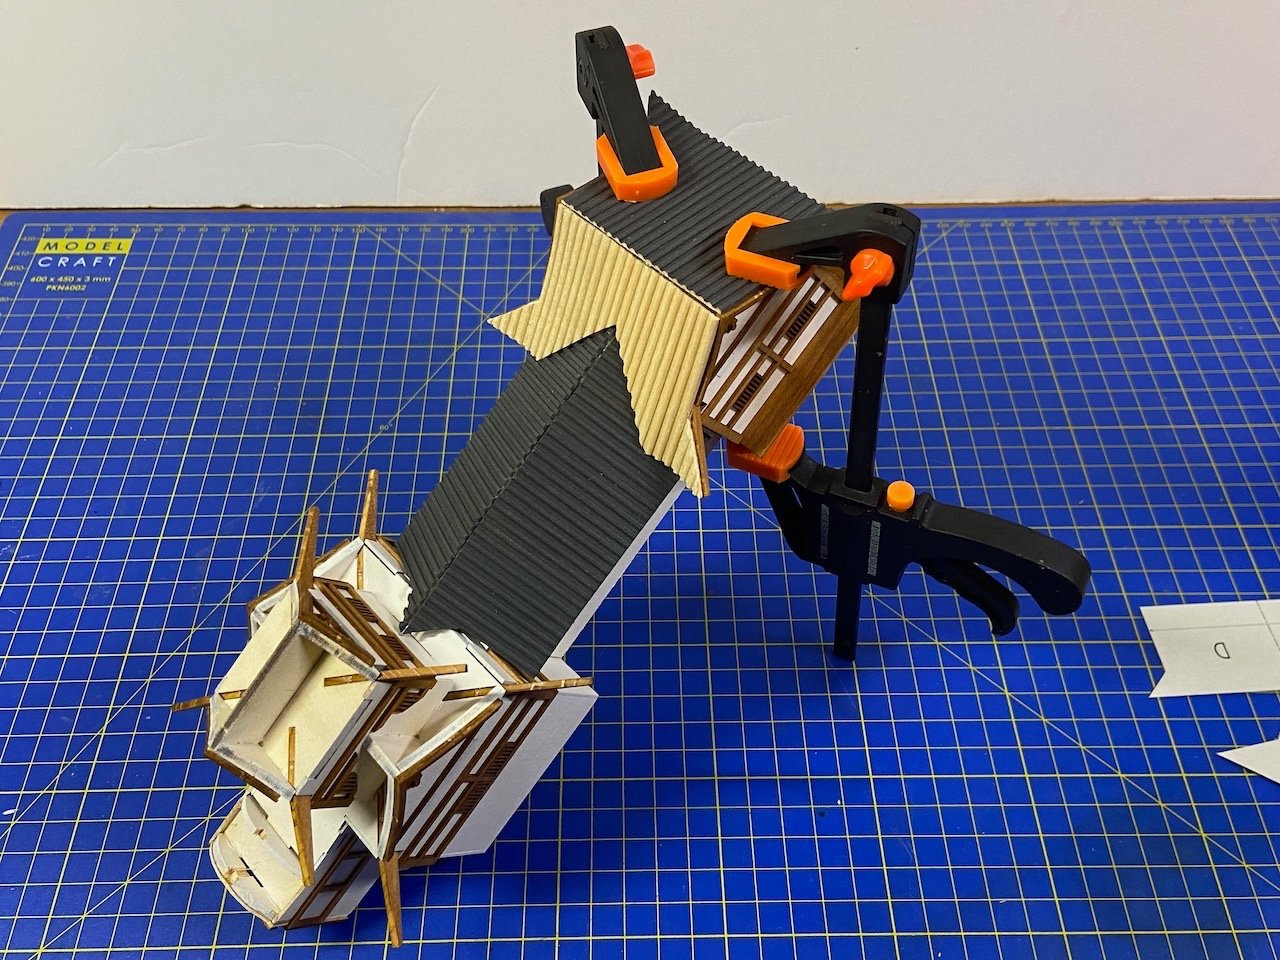
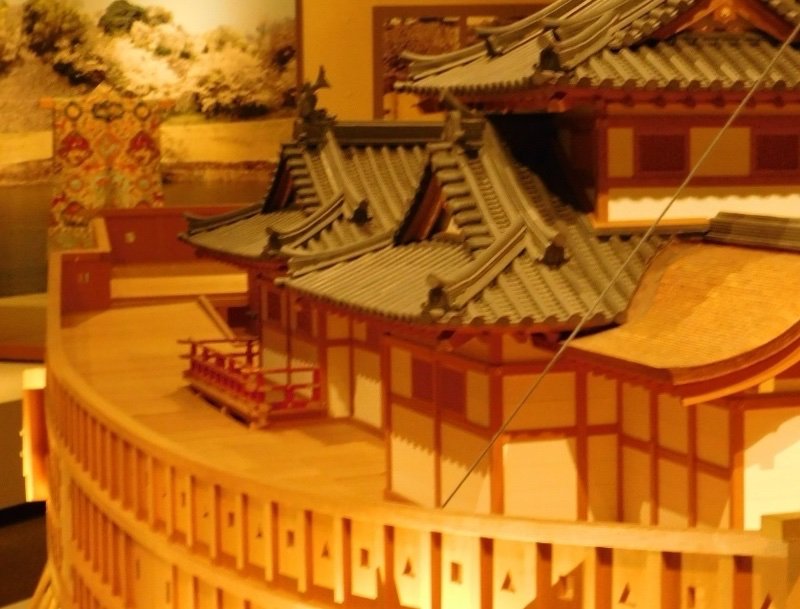
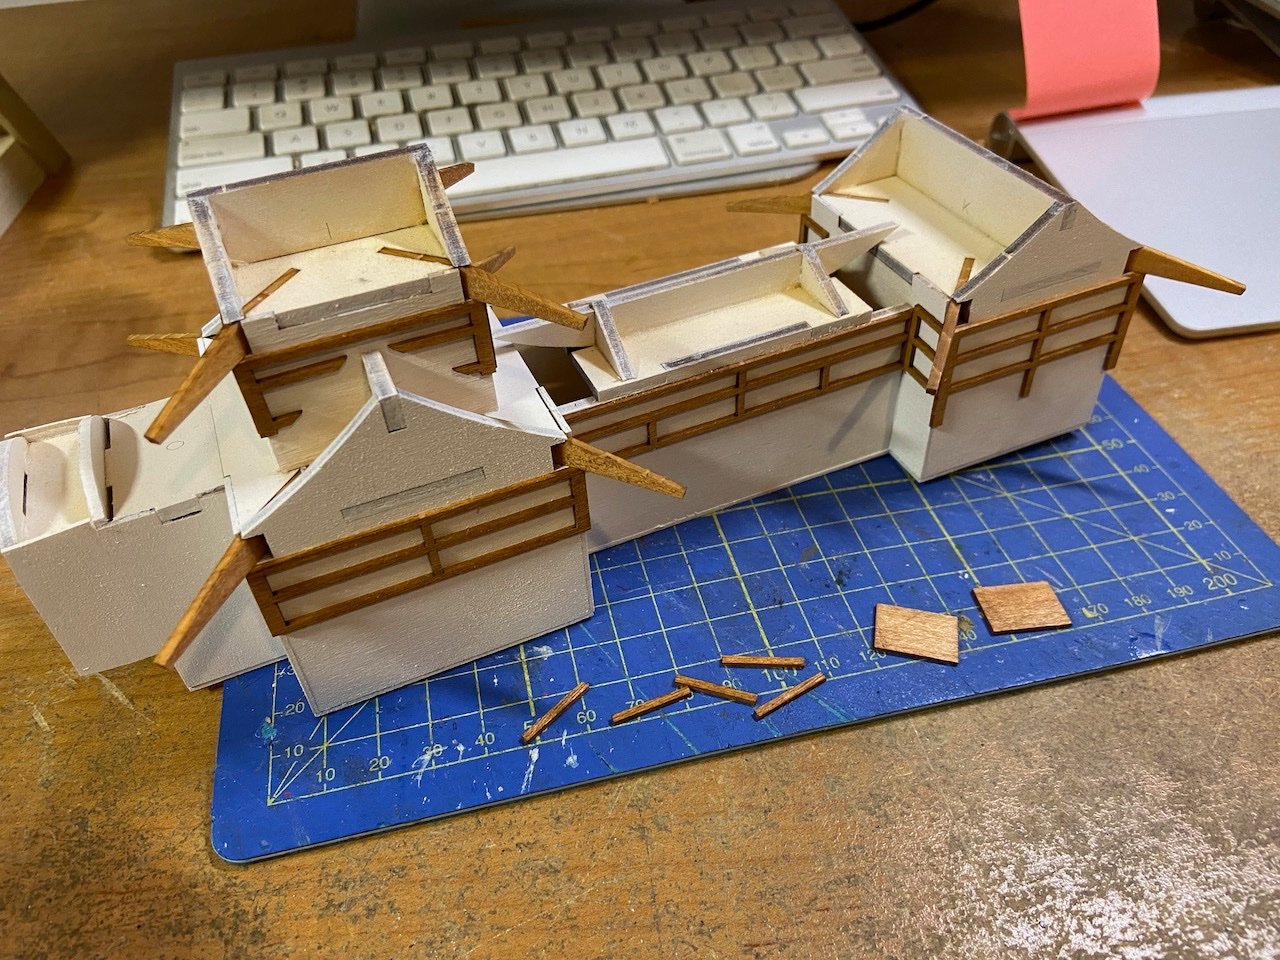
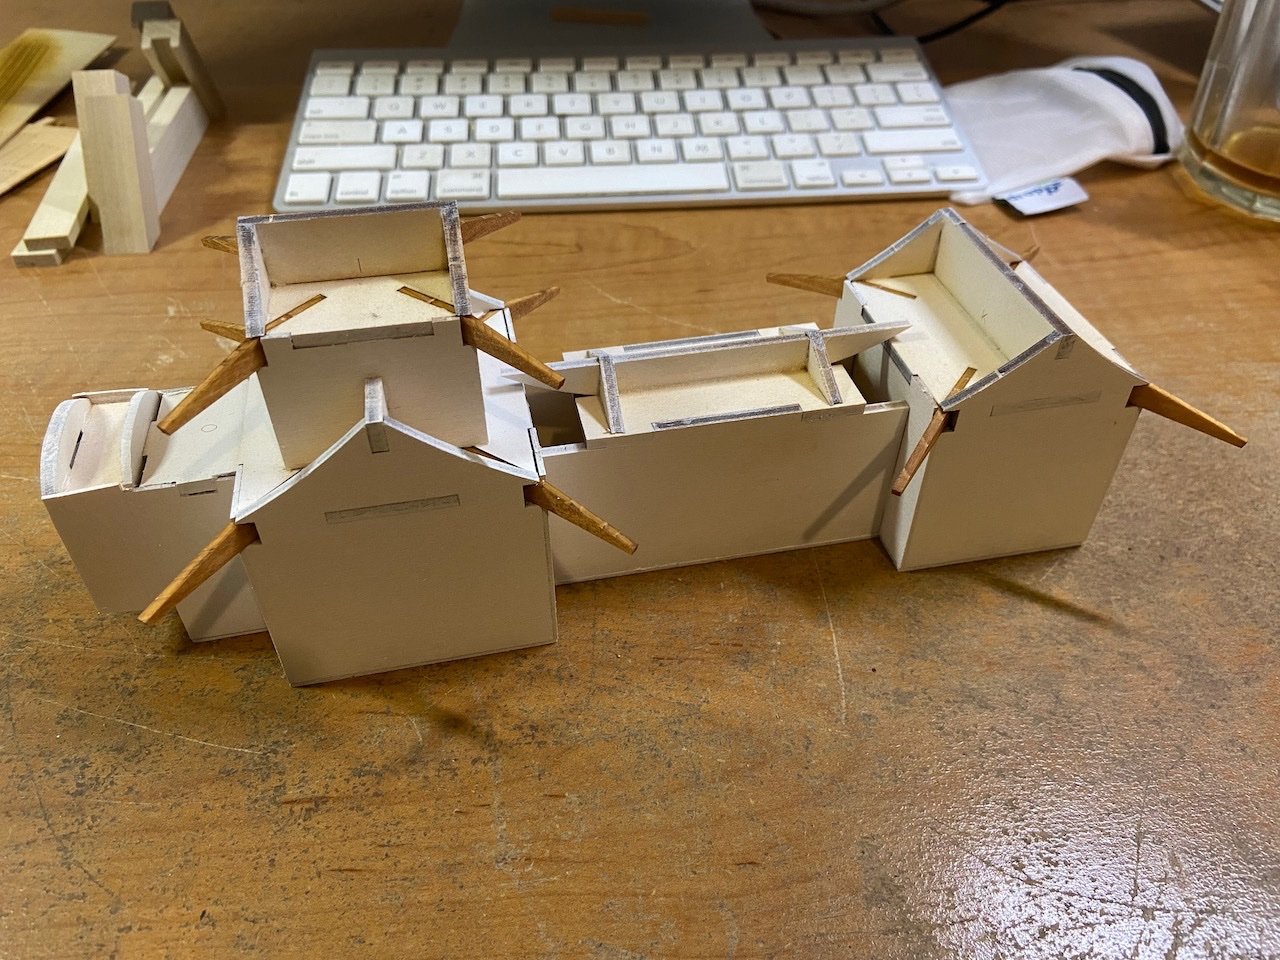
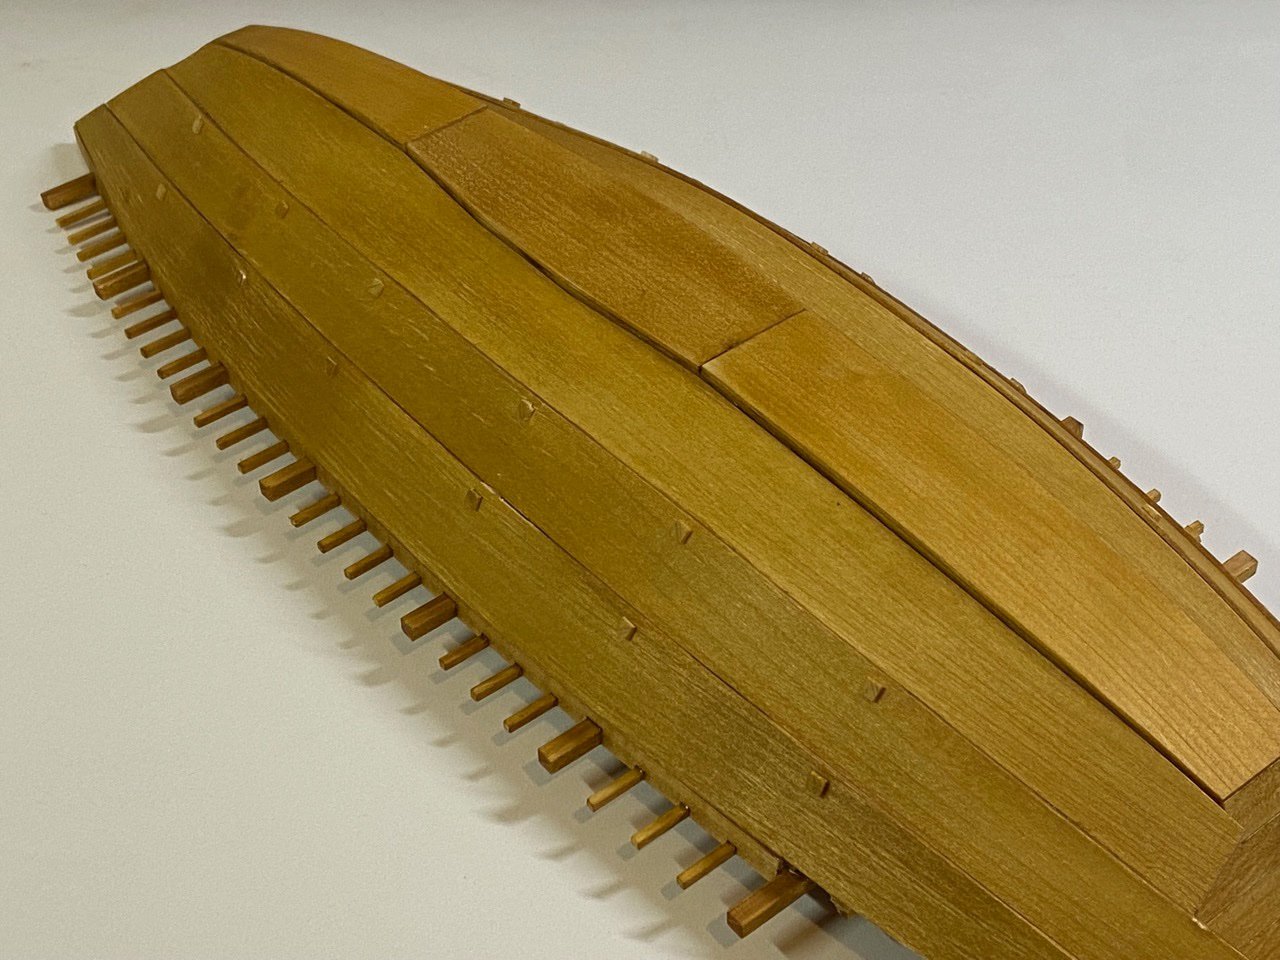
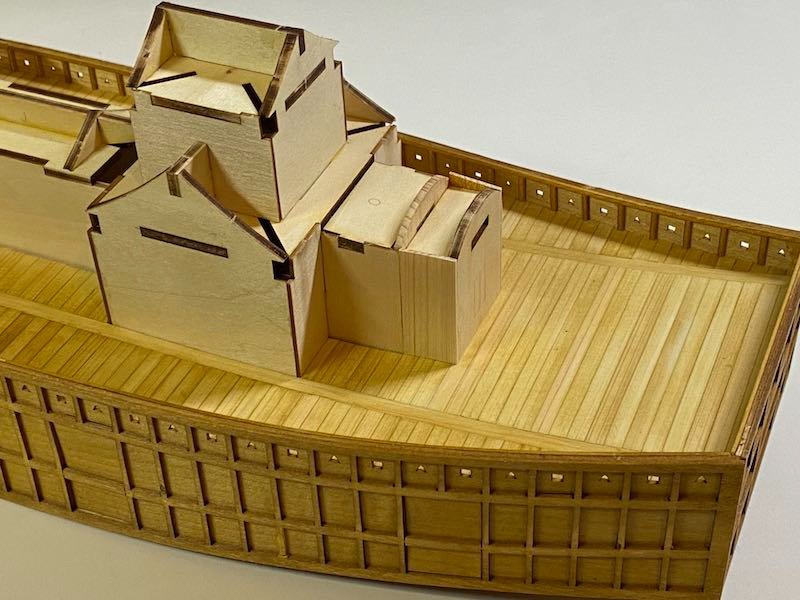
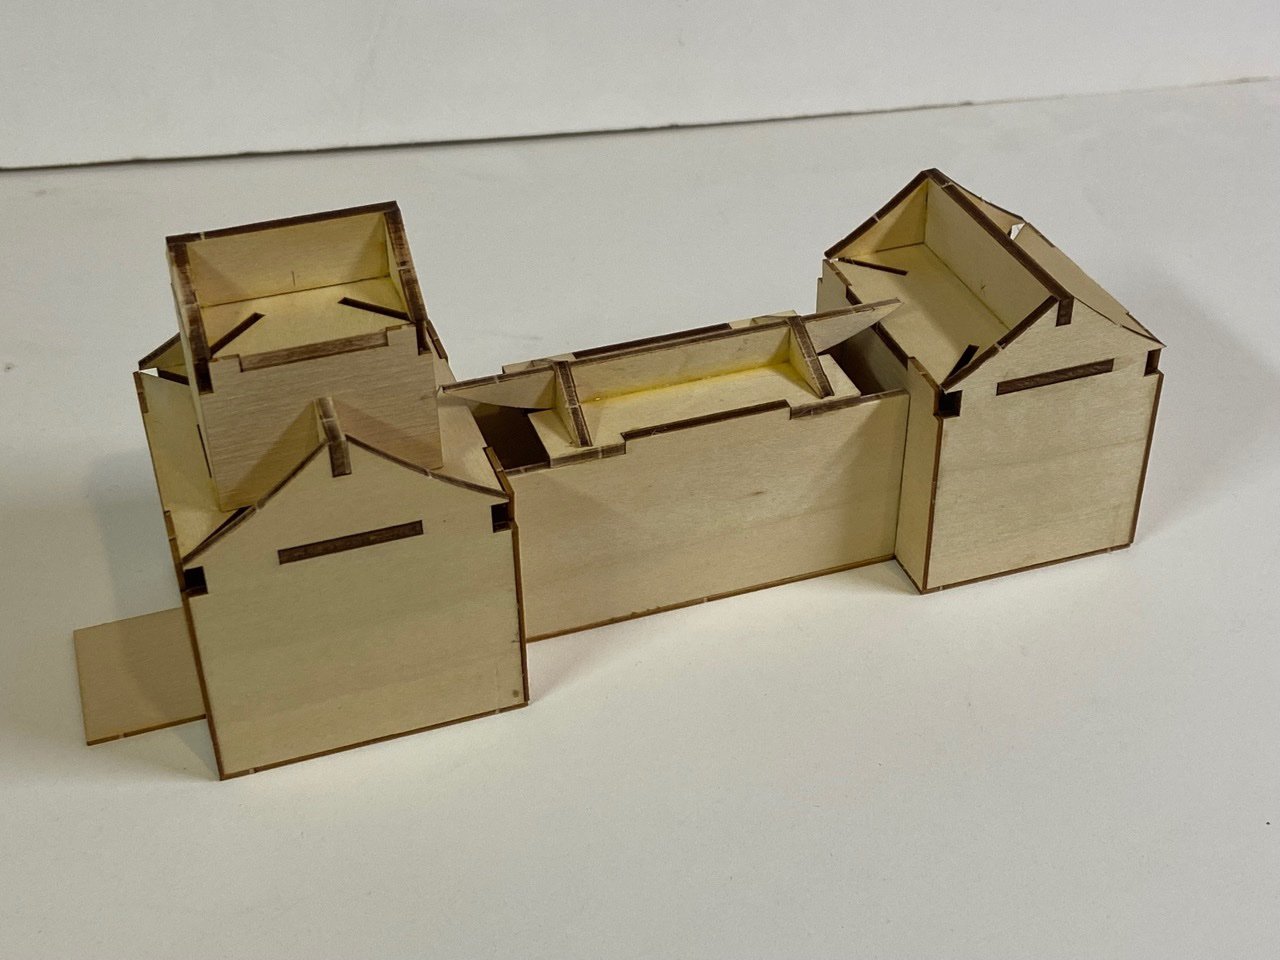
Yesterday, I burned a bridge... I removed the back end of the box structure, which will be replaced by a longer aft structure. As you can see, the parts are pretty well all intact, thanks to the use of Original Titebond, which softens nicely when wet, allowing me to cut apart the pieces relatively easily. Basically, I will use the existing back piece with some internal bracing to extend the existing bracing by about 15mm. Then, I just need to replace the side panels and deck. Should actually be relatively easy. 🤞 Meanwhile, the castle structure roofing continues. It currently looks like this... The biggest challenge here is that I extended the forward structure (left end in the photo above), so the kit provided roof no longer covers it. So, I am using the pieces of the provided roof as beams and I plan on covering this with a sheet of pear wood veneer. This roof will be left a natural wood color. Don't ask me why it wasn't tiled like the rest of the roof.

-
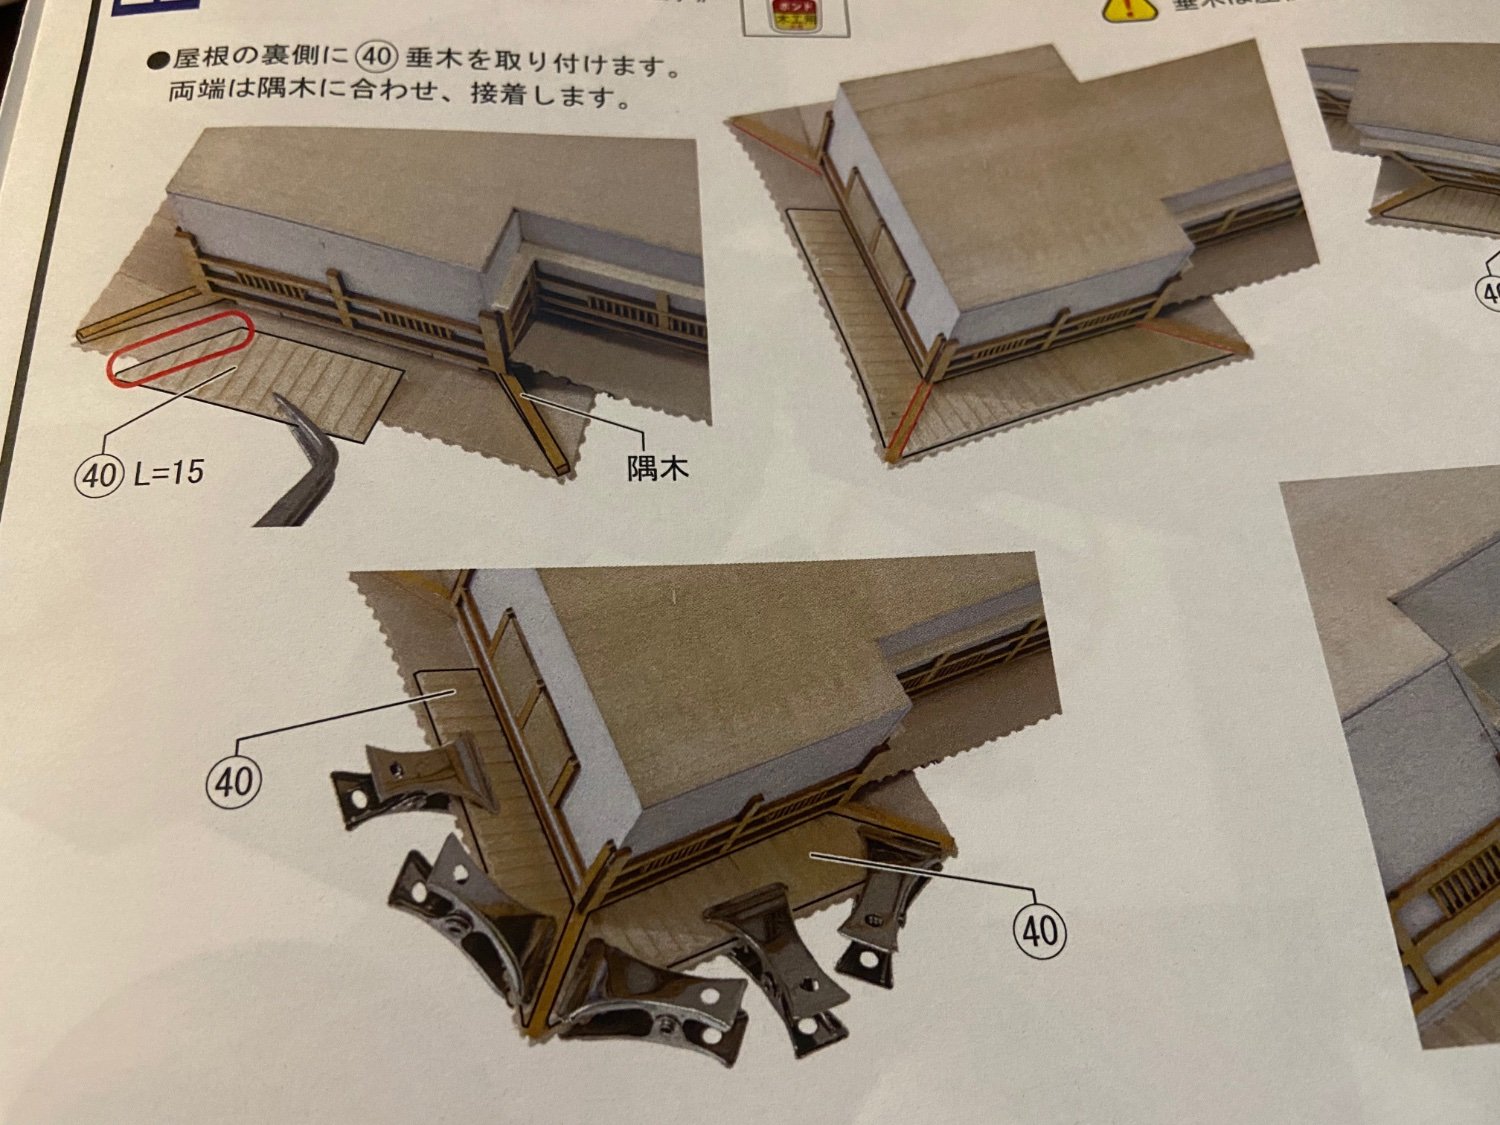
Thanks, as always Druxey, for your support! Hi Popeye, on the real castle and temple structures, there are lots of beams. On this small kit, these are just simulated with milled pieces that fit underneath later. Here's a glimpse of the instructions for the upcoming steps showing the parts labeled 40 that I'm talking about...

-
And after a little more work... Still, plenty more to do here.


-
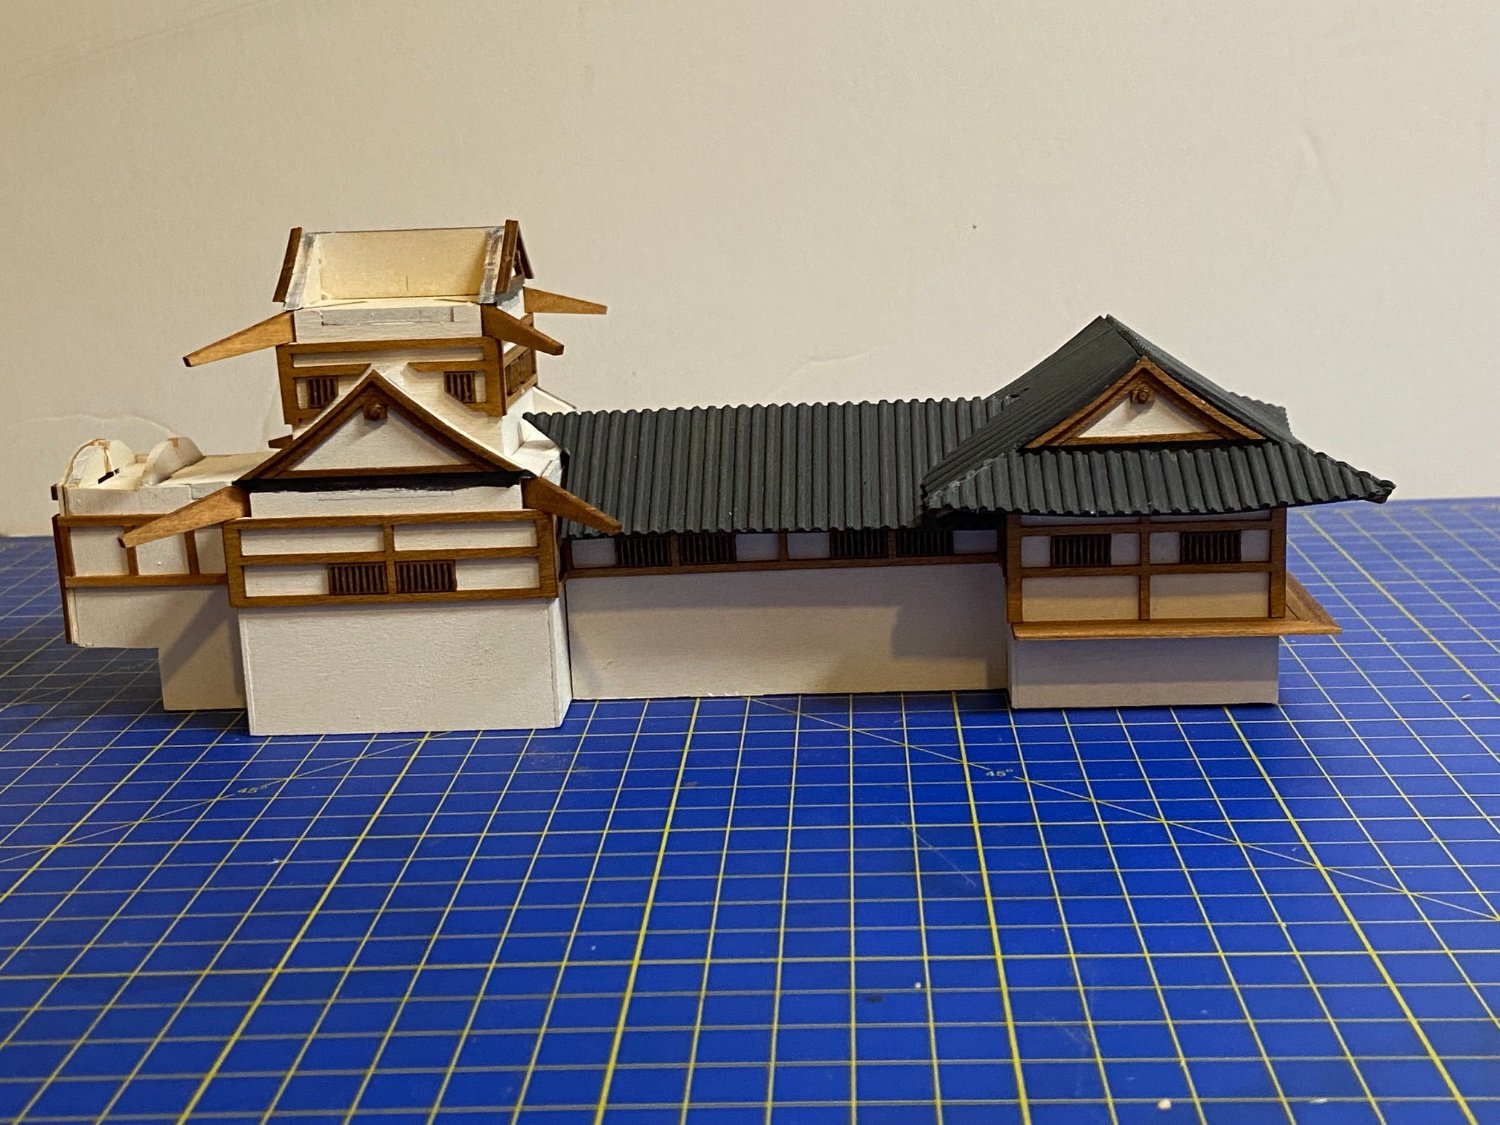
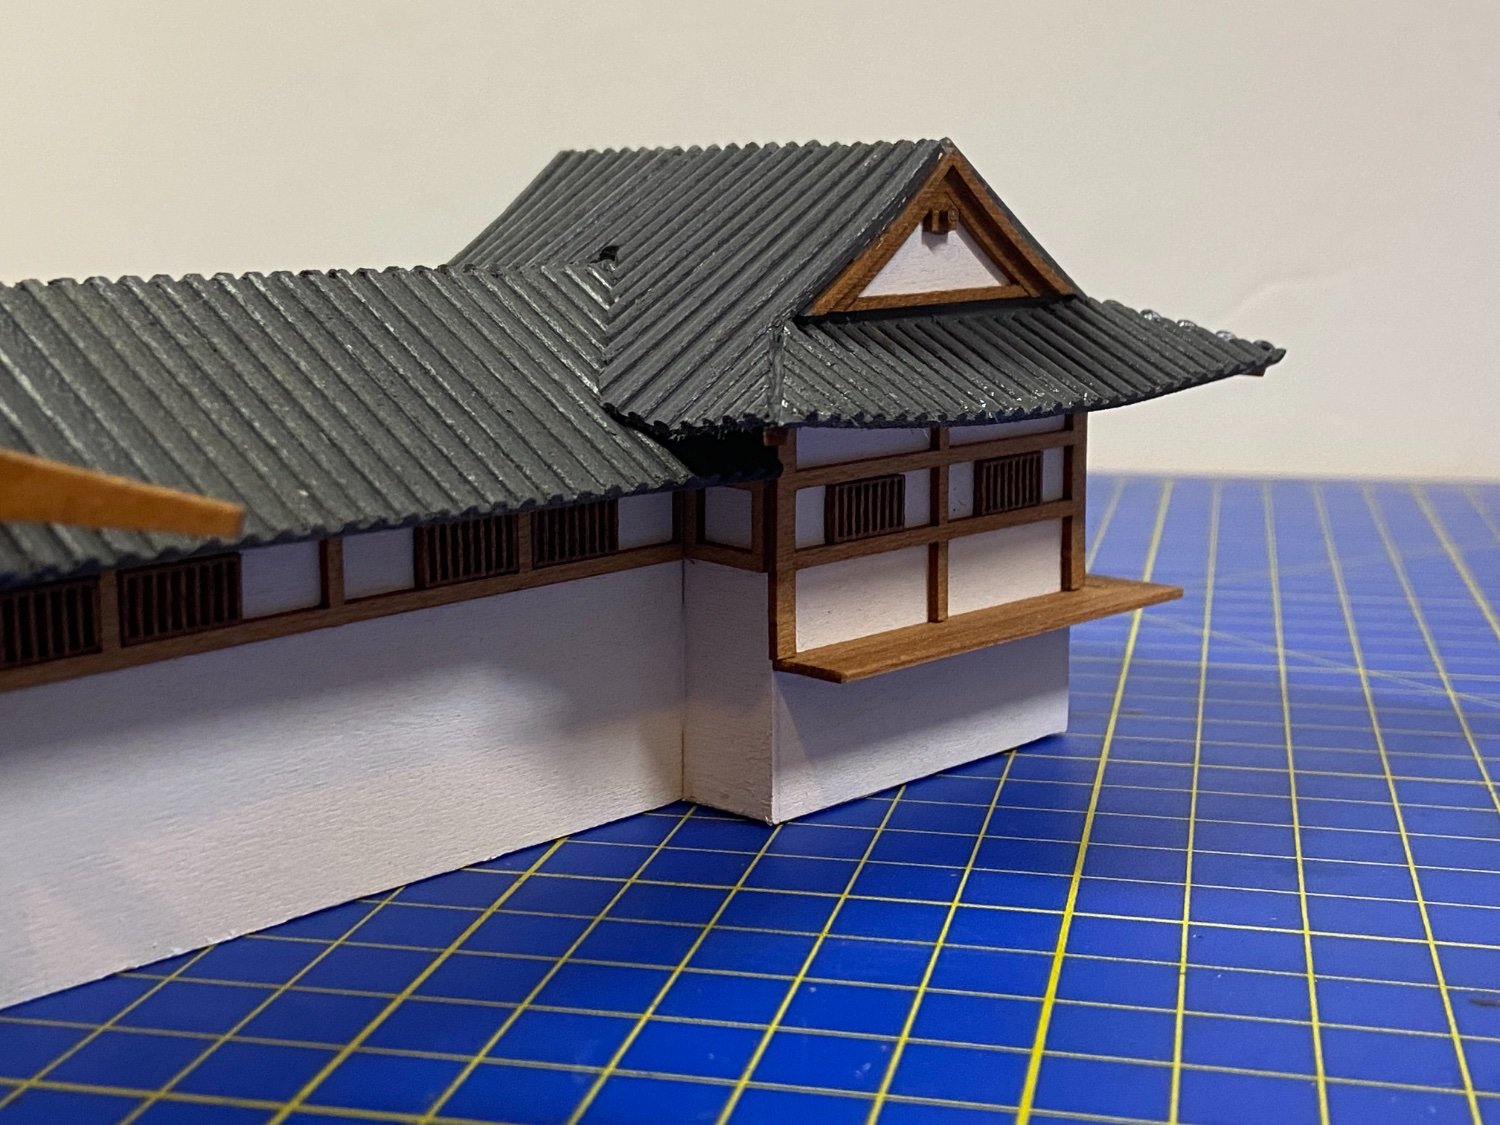
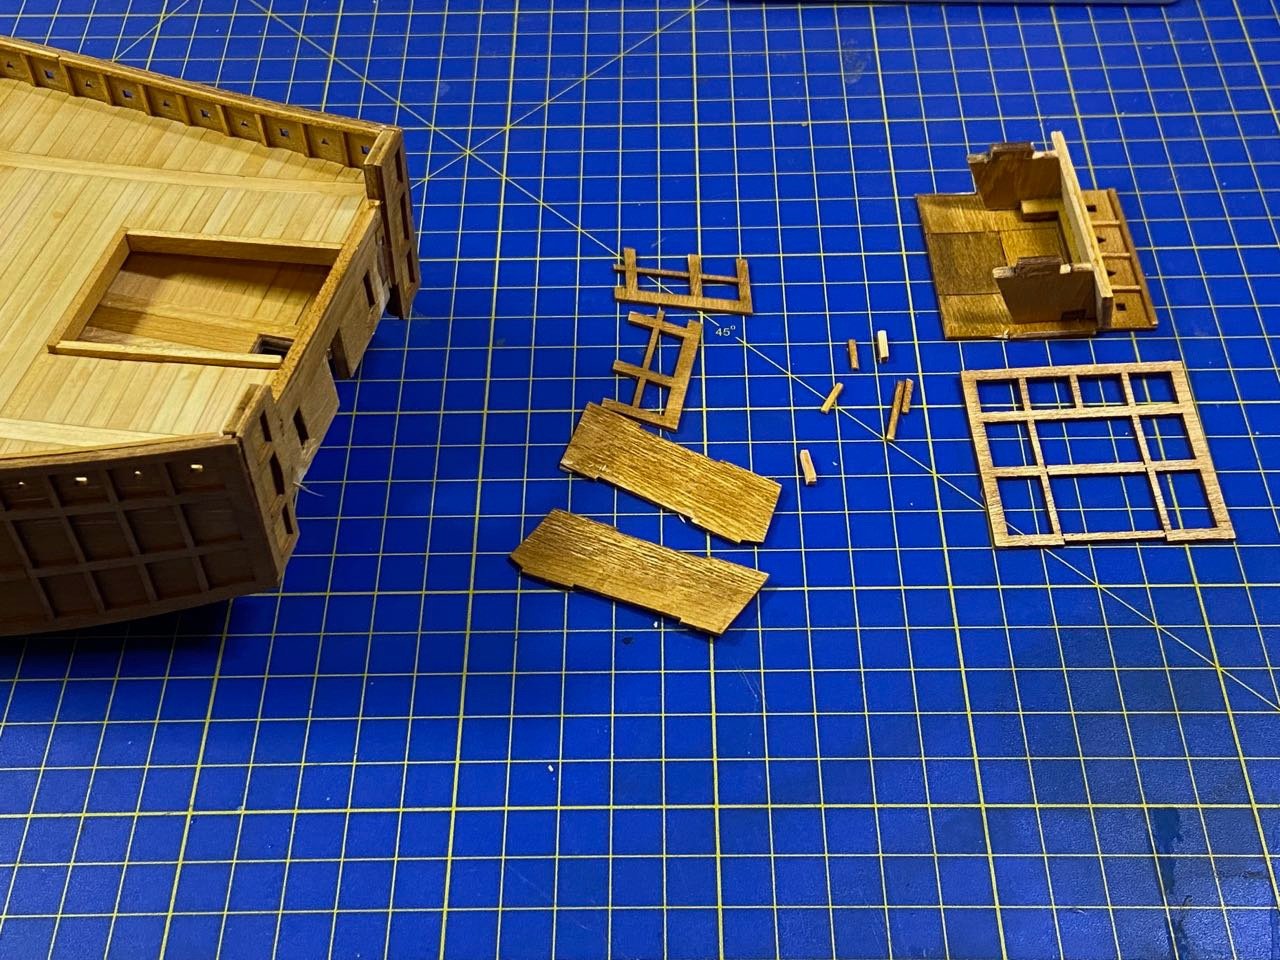
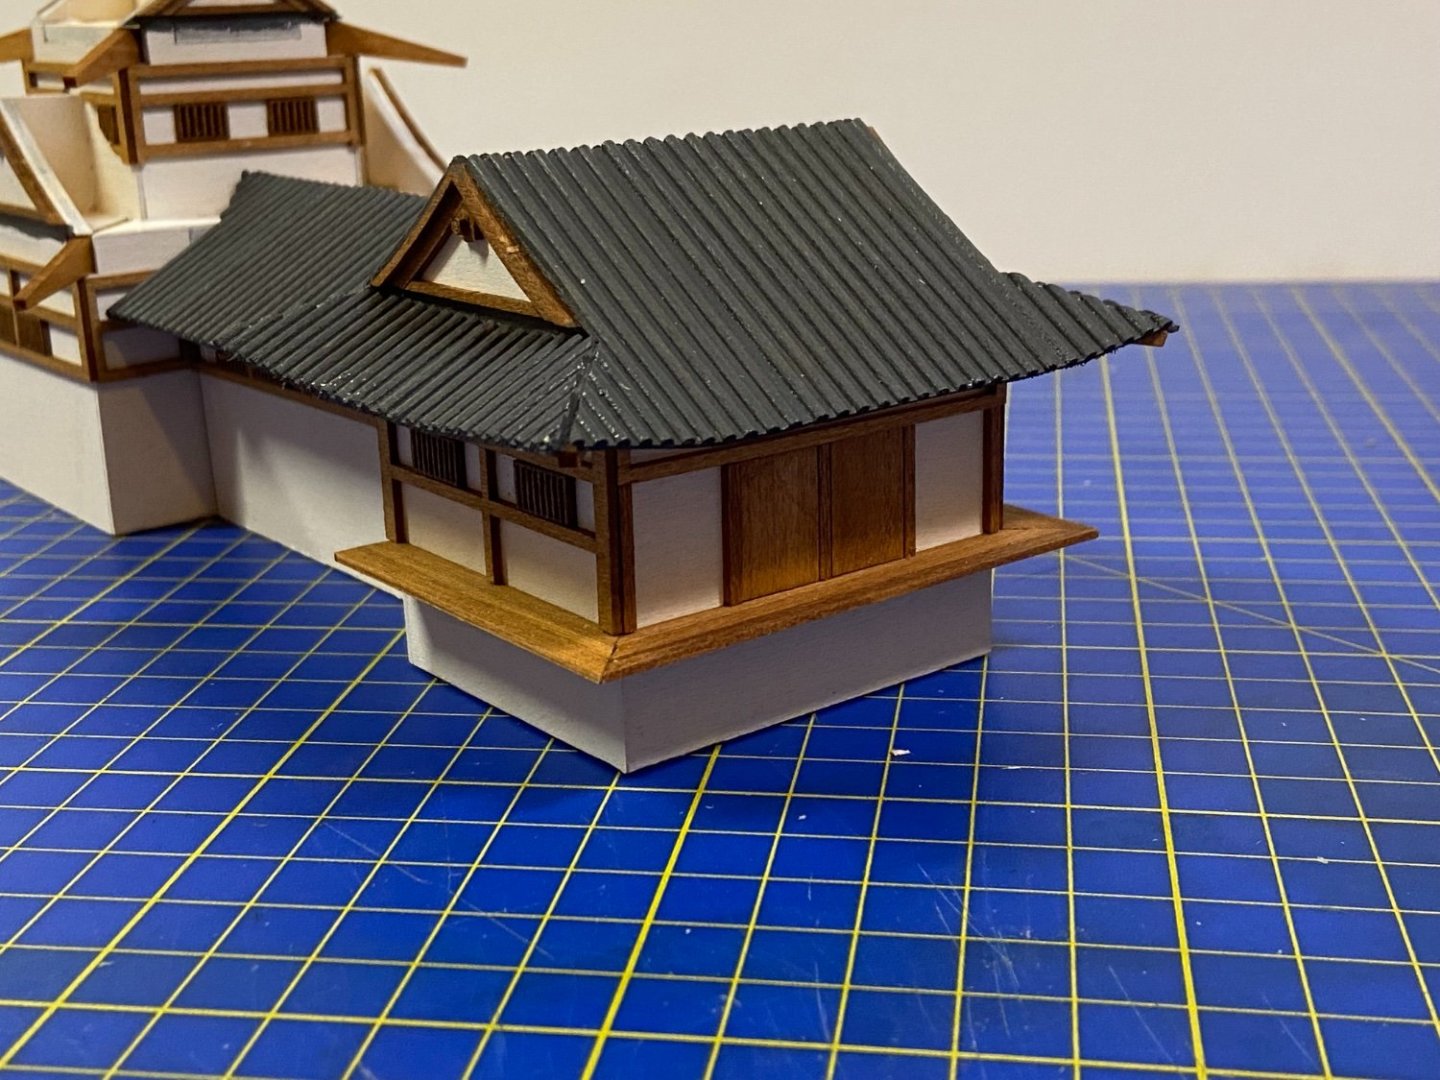
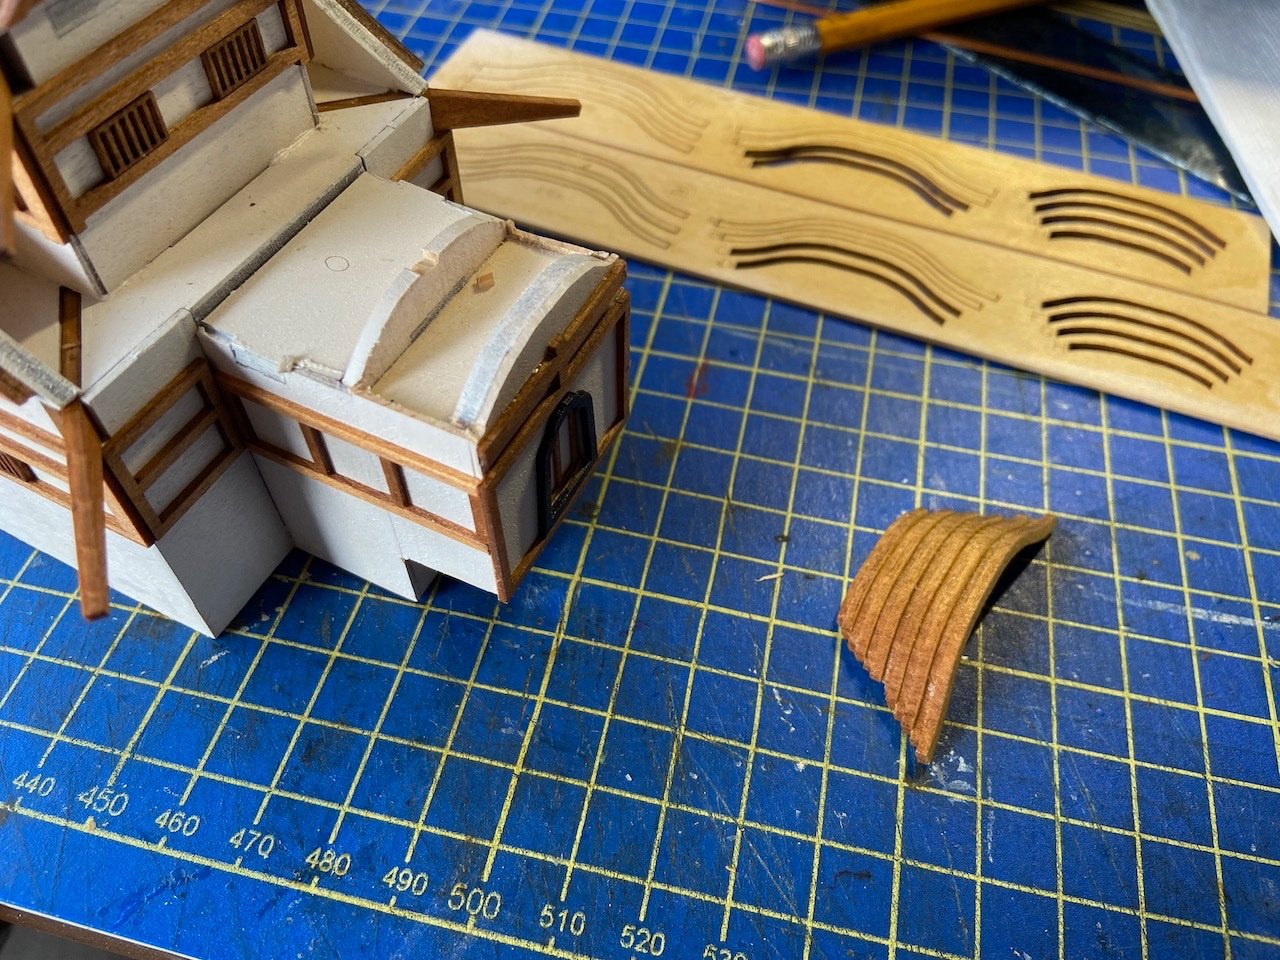
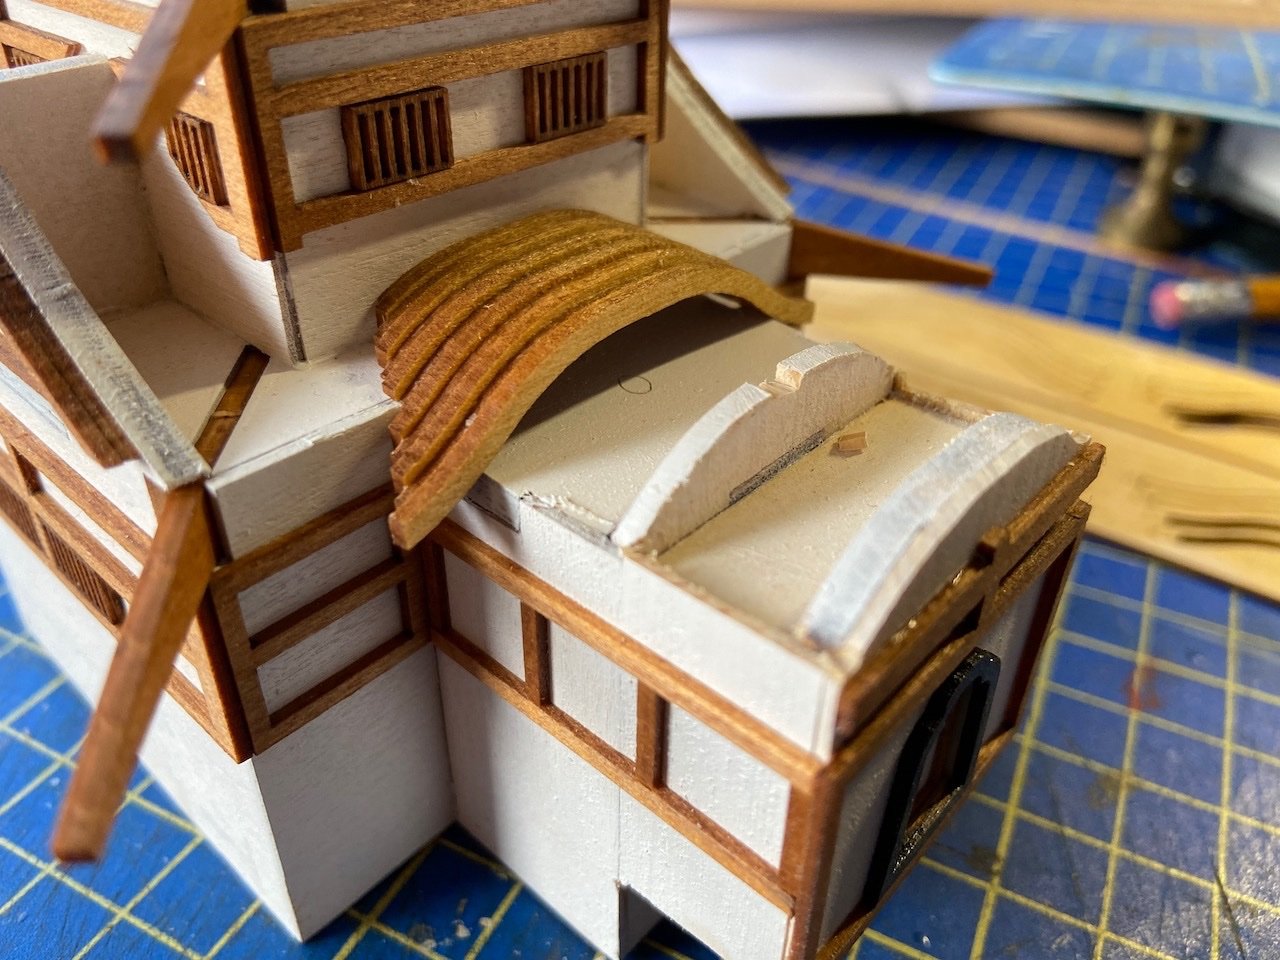
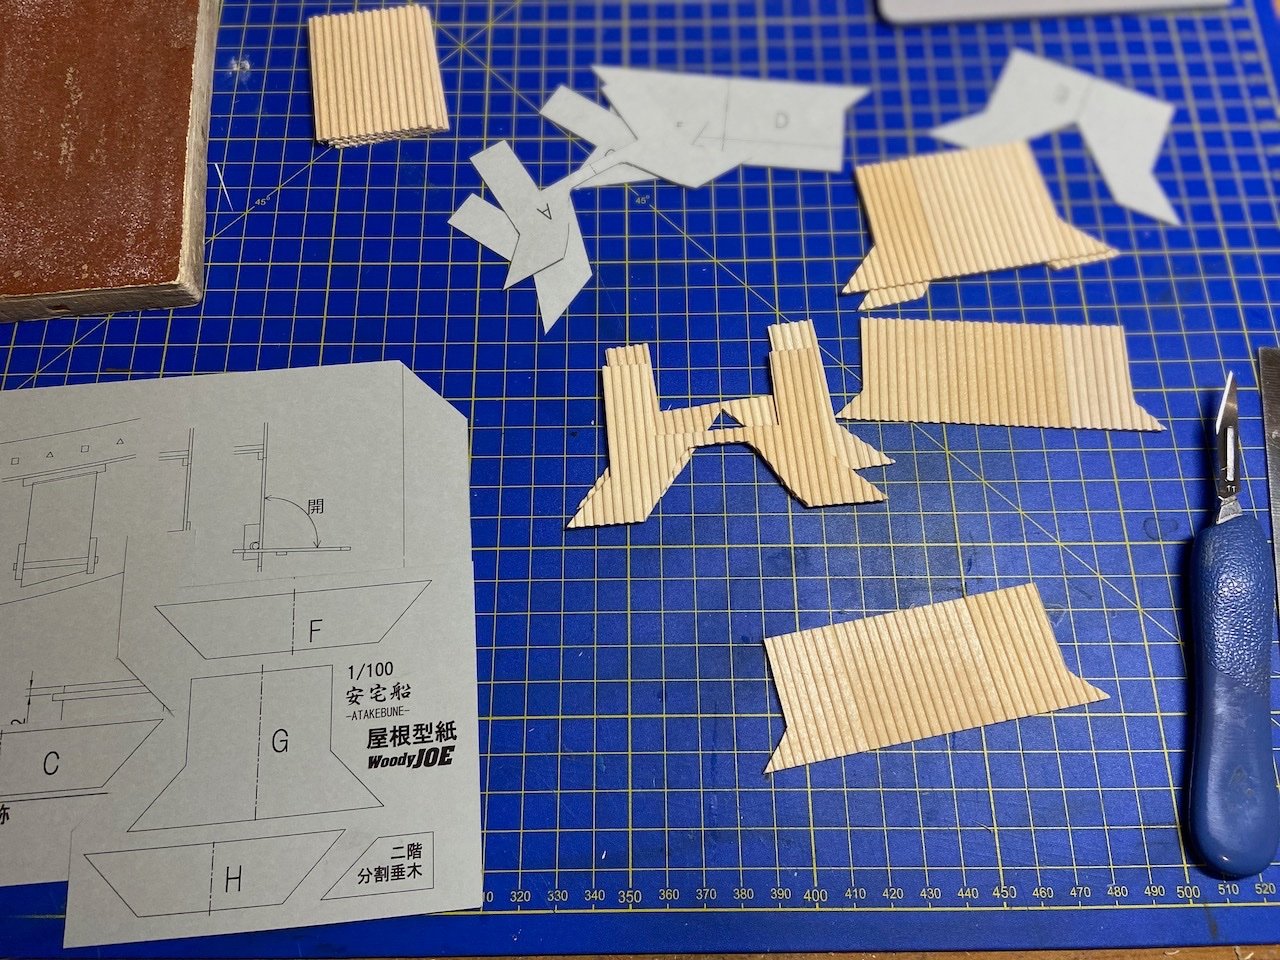
I started on the roof of the castle structure this week. Not much to tell, except that the rounded roof at the front of the castle structure is going to take the most planning. The reason is that I've extended the length of that part of the structure, and the roof was originally designed for a shorter structure. That roof was designed to be made up of a series of arches, laminated together. Now, I'm figuring those arches will form the basis of a simple wooden roof made from thin sheet wood, maybe veneer. The main roof material is made up of pre-milled wood. Woody Joe actually provides it in several sizes, minimizing the amount of cutting needed. I built a castle model a few years ago, and it included larger milled wood sheets that made for a lot more work. So, this is really a kit design improvement, probably indicative of the contents of their other newer castle kits. There's still plenty of cutting needed, starting with the cutting out of paper patterns. I fully pre-painted the roof pieces prior to installation using a mix of Liquitex acrylic paints black and soft white. The instructions mention using neutral gray. But, I think it looks better to use a darker color, which I will then highlight with a lighter color shade later. The construction of the roof is actually quite enjoyable, as it's interesting how it all comes together. Plenty more to do!

-
Beautiful model, Eric. Congratulations! Your work reminds me that I have a couple paper model subjects waiting for me to get back to them. You're inspiring me to do just that.
-
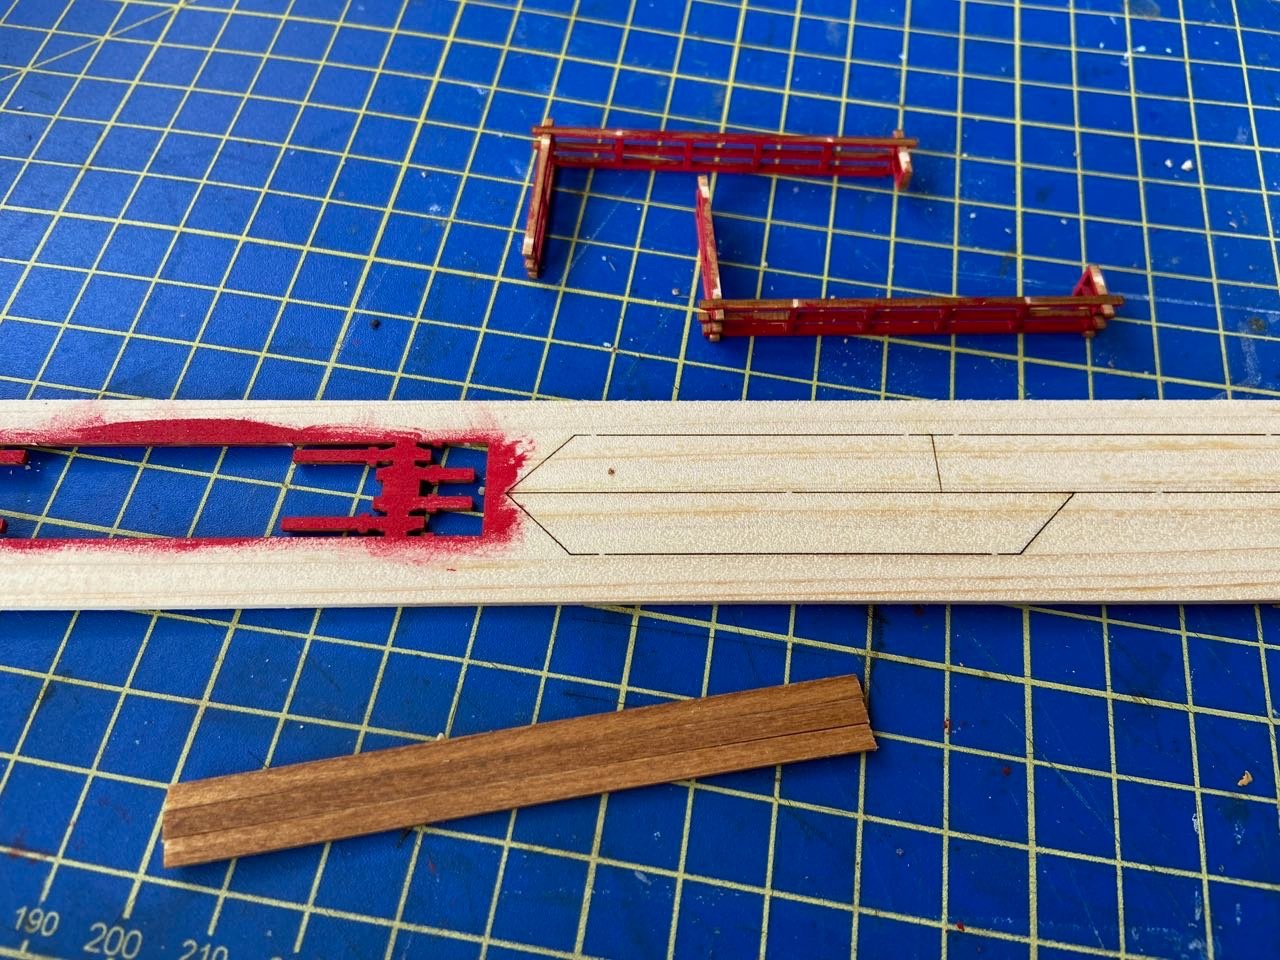
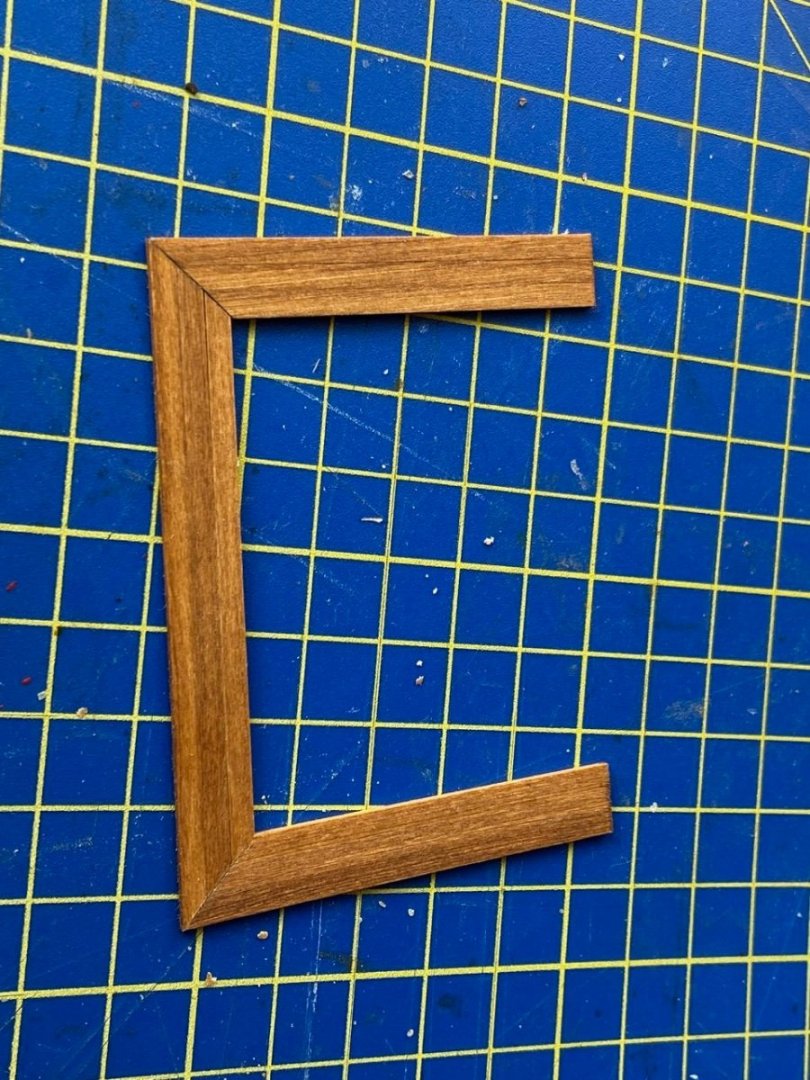
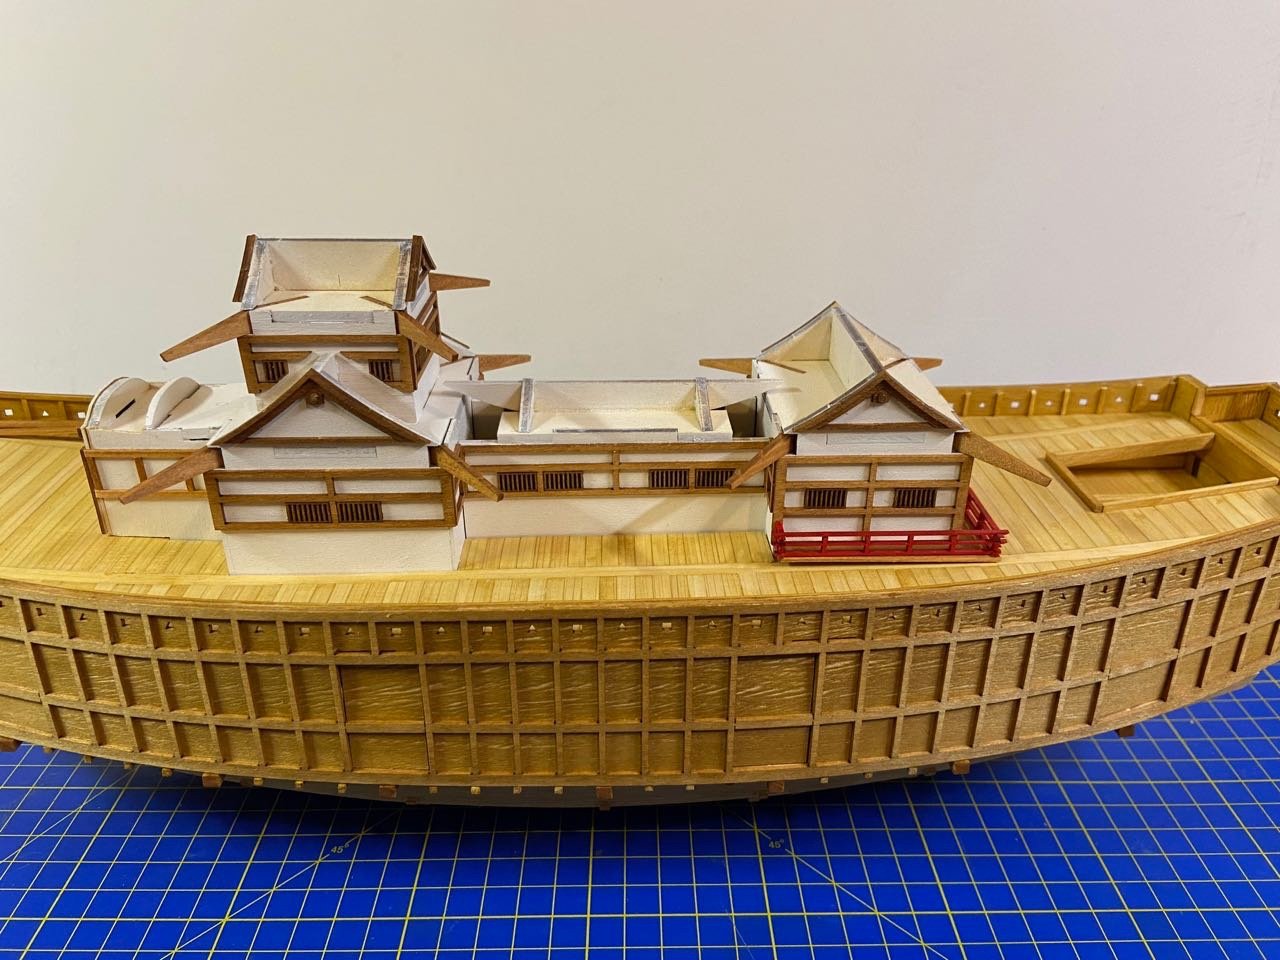
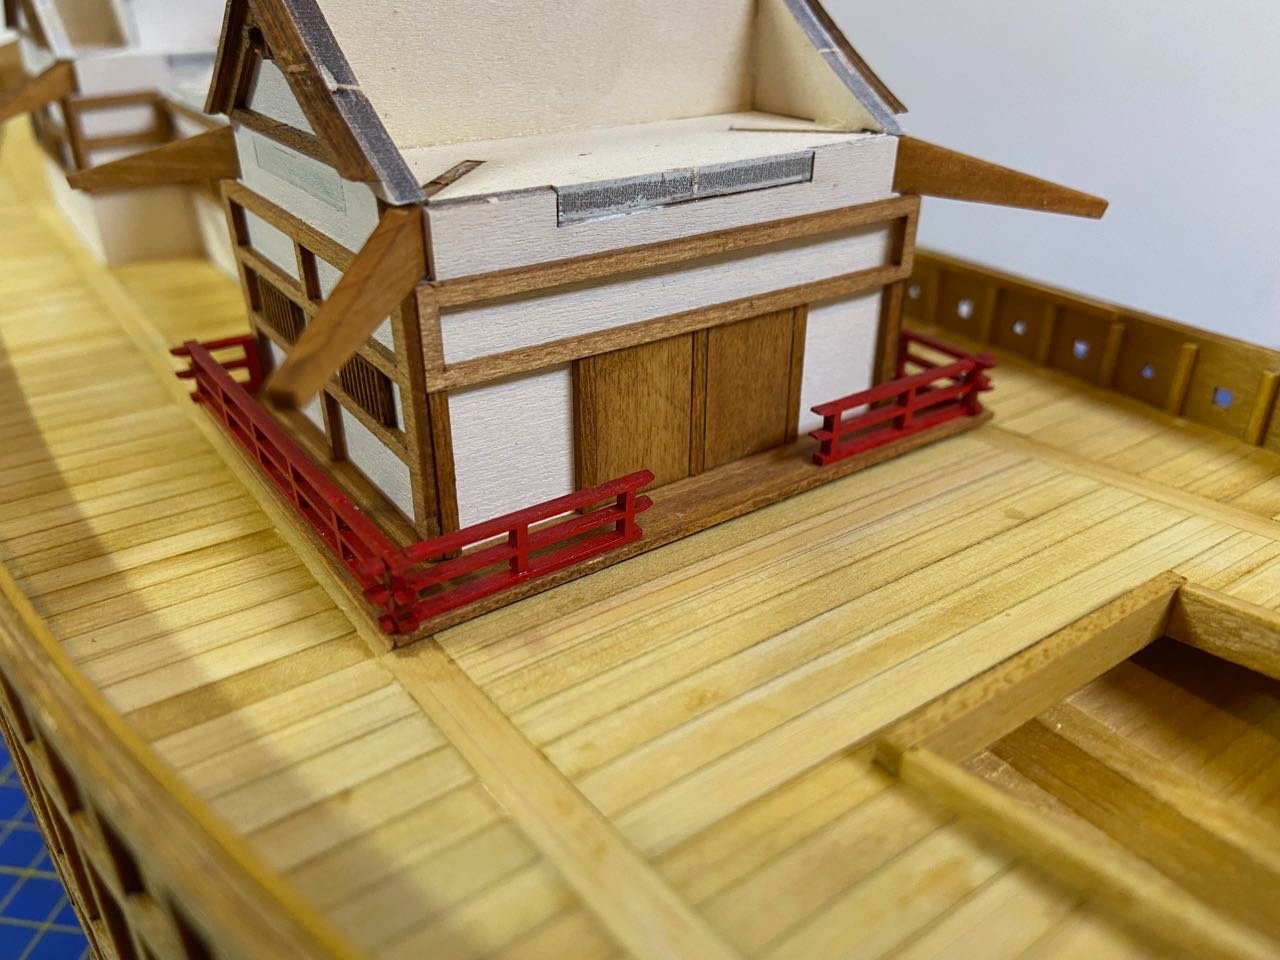
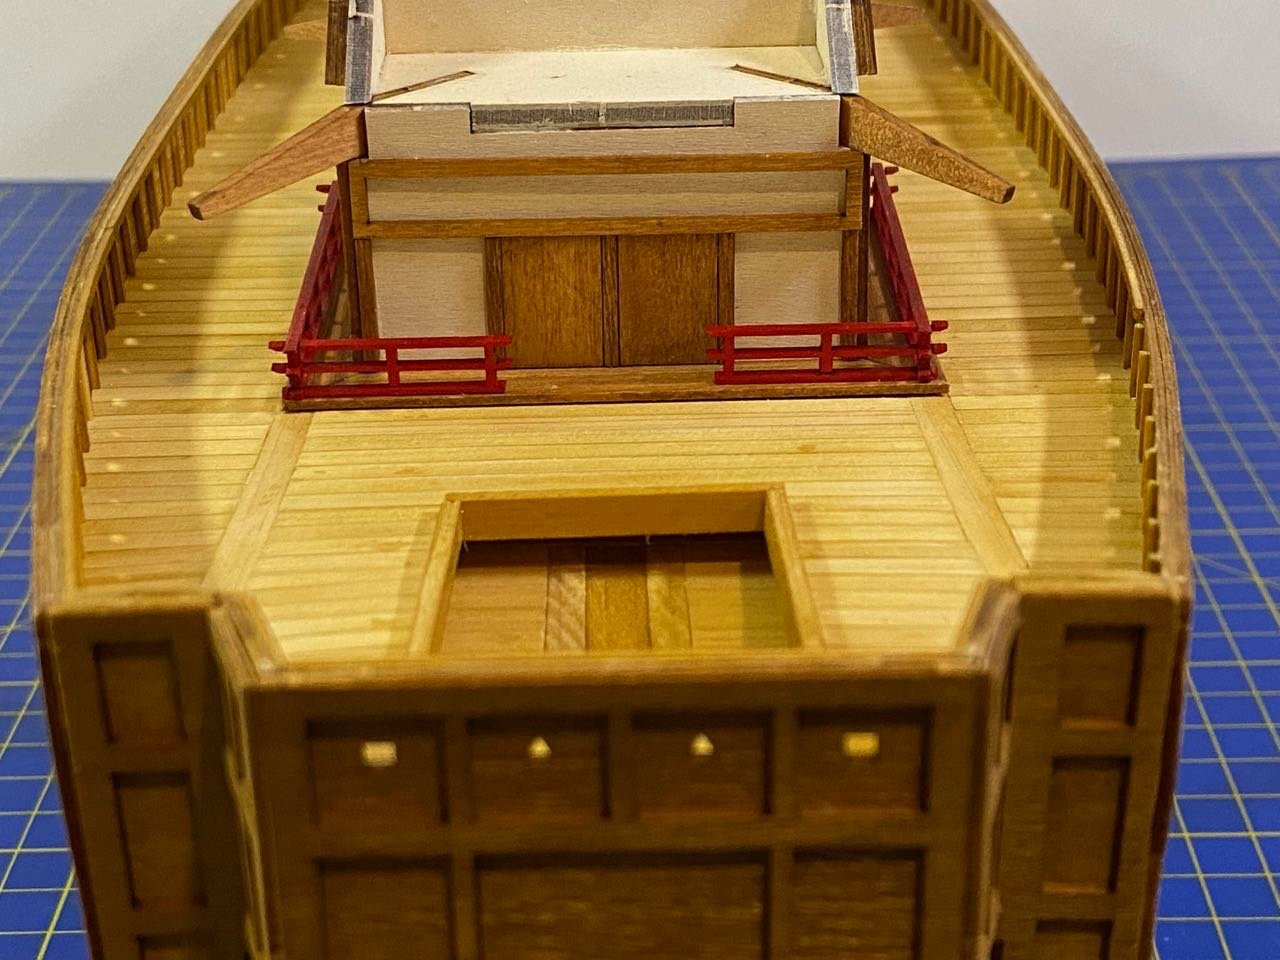
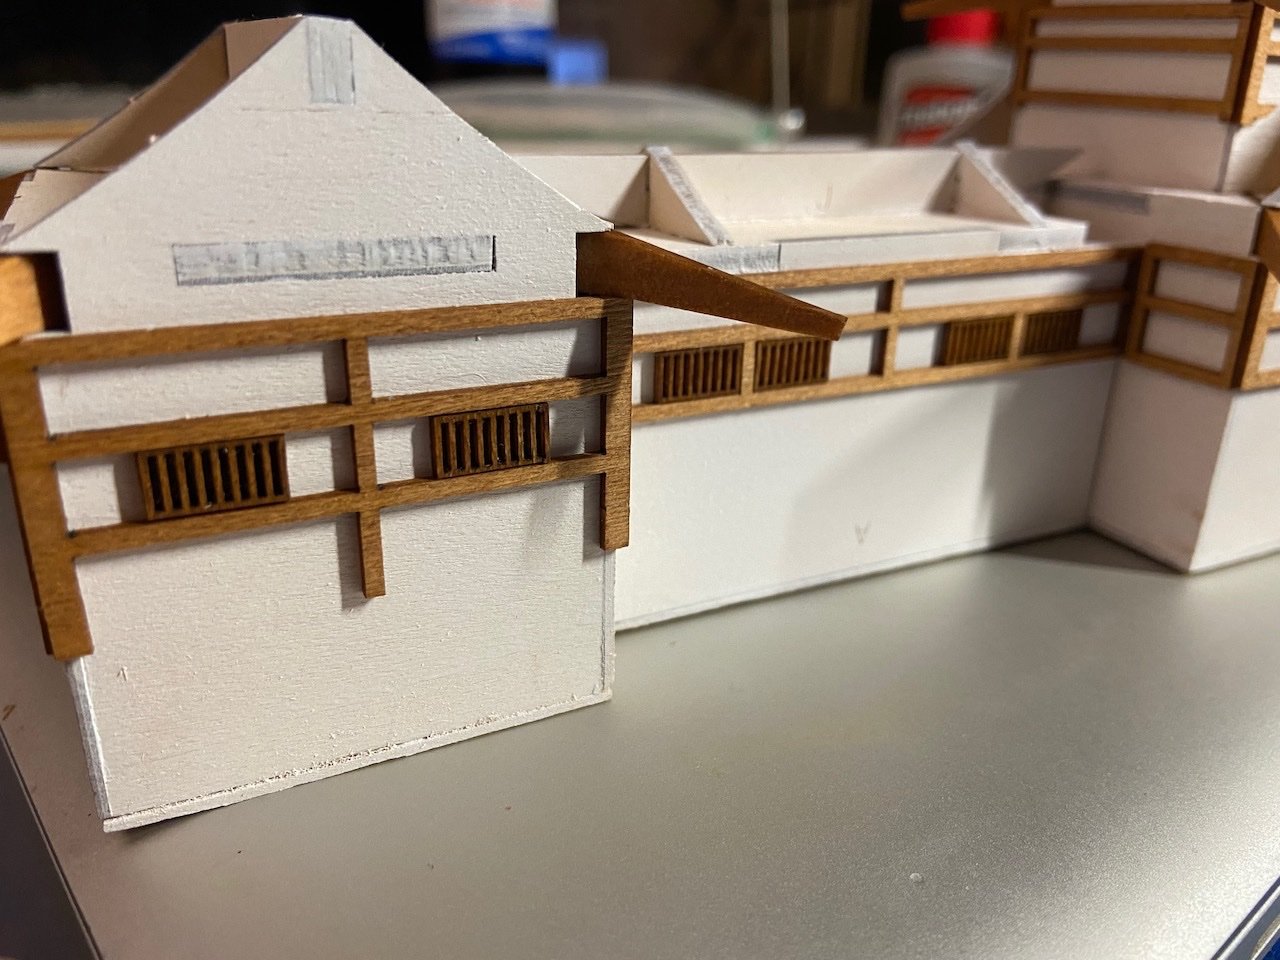
Thanks for the interest baskerbosse. It does seem like something out of a Japanese anime adventure. This month, I'm definitely back to more ship modeling, and there are a couple other things I'm trying to do some work on. As a result most of my posts here are small updates. This one is no exception... As I mentioned before, the forward part of the castle structure has been lengthened in the same fashion as Mr. Kazunori Morikawa's model. He and I have shared some ideas, and the other major idea I'm considering is removing the little stern section of the "box" and lengthening it by about 15mm. Morikawa-san did this, and it makes the ship look more balanced. It's also more like the museum model. But, it's a bit structural modification – true kit bashing. So, I've put off thinking about it for a while. You can see the latest photo of his model here, where he's extended the stern and added some detail inside the stern as I've been doing. https://www.facebook.com/JapanOnlineHobbyStoreZootoyz/photos/pcb.1739880429535493/1739867882870081/ Anyway, I built the temple-style railing for the back end of the castle structure, so I could see how much I could lower the whole structure. I prepainted the railing as much as possible using liquitex acrylic paint. The wooden parts remaining on the sheet below are supposed to be for the walkway. Instead of using these, I just built them up from strips I cut on my table saw. Using the provided parts as patterns, I cut these assemblies to shape. They still needed a little tweaking to get them to fit squarely, but they worked pretty well. While these are supposed to be added later in the castle structure assembly, I needed them in place at this stage. Since the railing is a fragile assembly, and harder to replace, I only glued the walkway into place and just set the railing on it to show how it will all look later. This is the only splash of color the model will get, though I'm considering adding flags at the corners of the box structure and possibly a curtain hanging down from the top edge of the wall. These would be printed with the crest of the clan the ship belongs to. It's not something that would have been added in battle. Still, just thinking... The walkway gave me the information I needed, and I decided to remove the bottom base of the castle, which is just a 1mm thick piece of hinoki. It's not necessary once the structure is glue together. I was then able to modify the bottom of the extended structure at the front, to make for a better fit. Next, there will be a kind of coaming around the sides of the castle structure. Now that the castle sits a little bit lower, it's safe to add them. That step is forthcoming. With those in place, I'll be able to finish the wood trim of the castle. One last thing I'm considering here is to add a 1mm shim under the stern end of the castle structure, which would allow me to add a step under the walkway. Yes, after lowering everything by 1mm, it would raise the back end up again. But, the main reason for the lowering of the structure, was the get the addition at the front end to sit a little lower, which is a better fit. It would give the whole structure just a little forward tilt, which would be unnoticeable. I any case, part of the newly added walkway sits up off the deck. I will probably add some kind of beams/blocks underneath, just to add the visual detail.
-
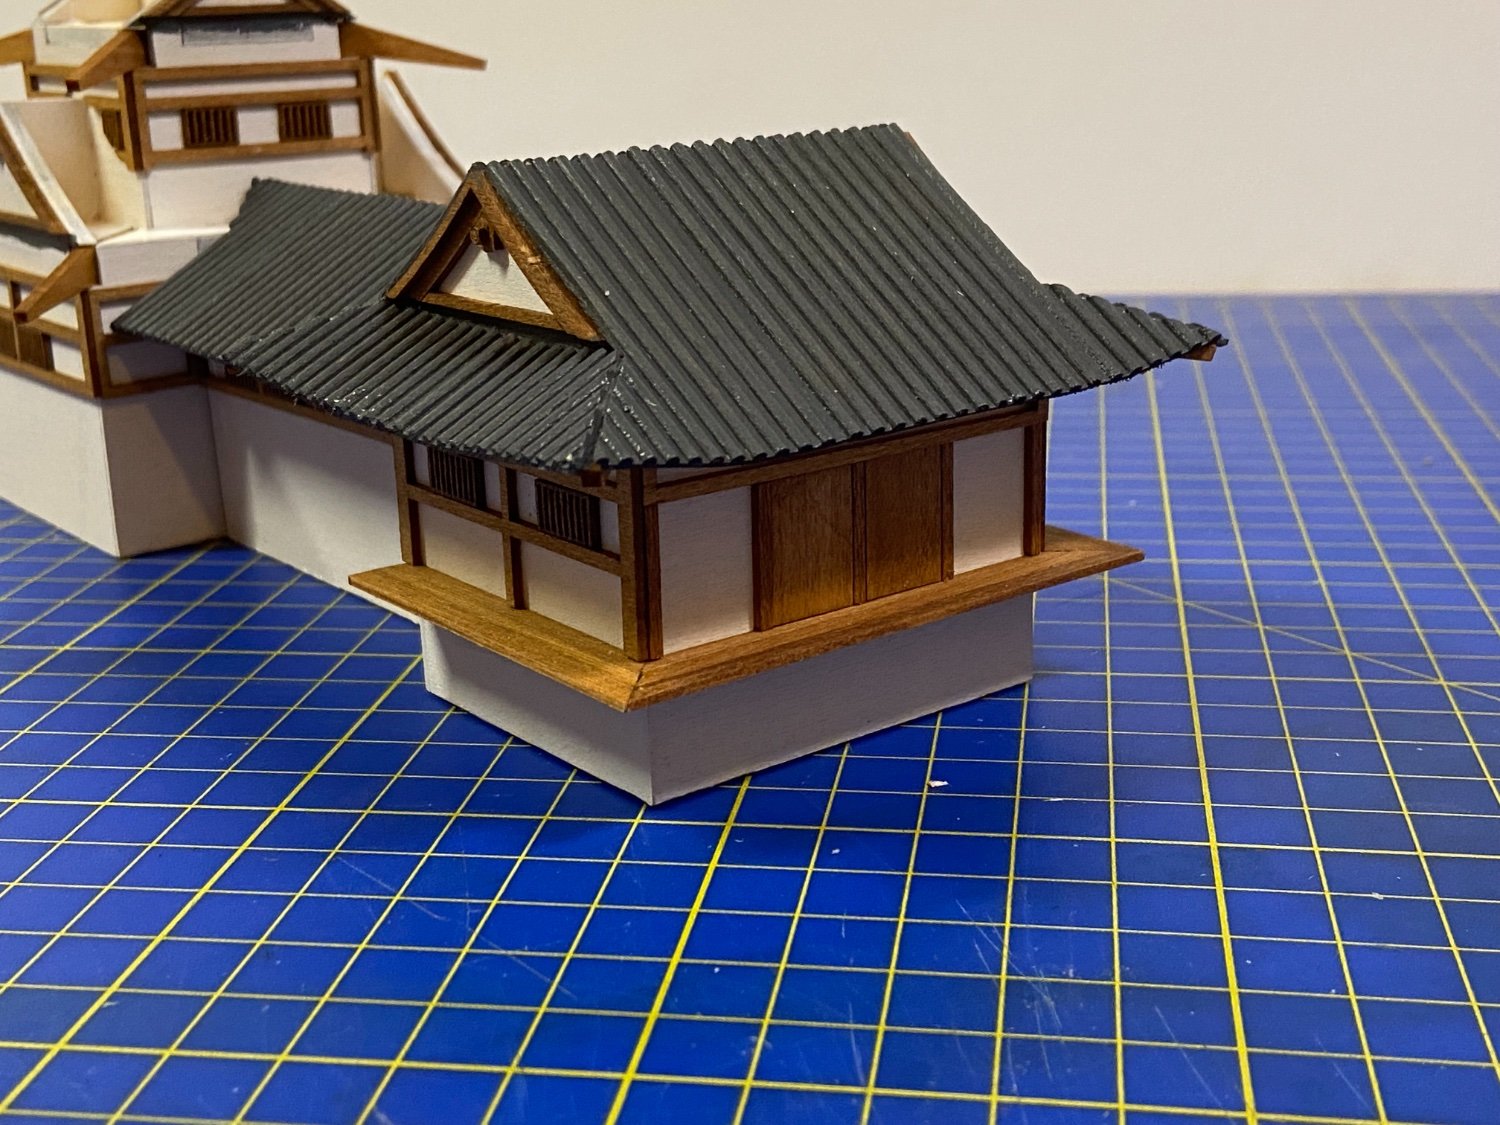
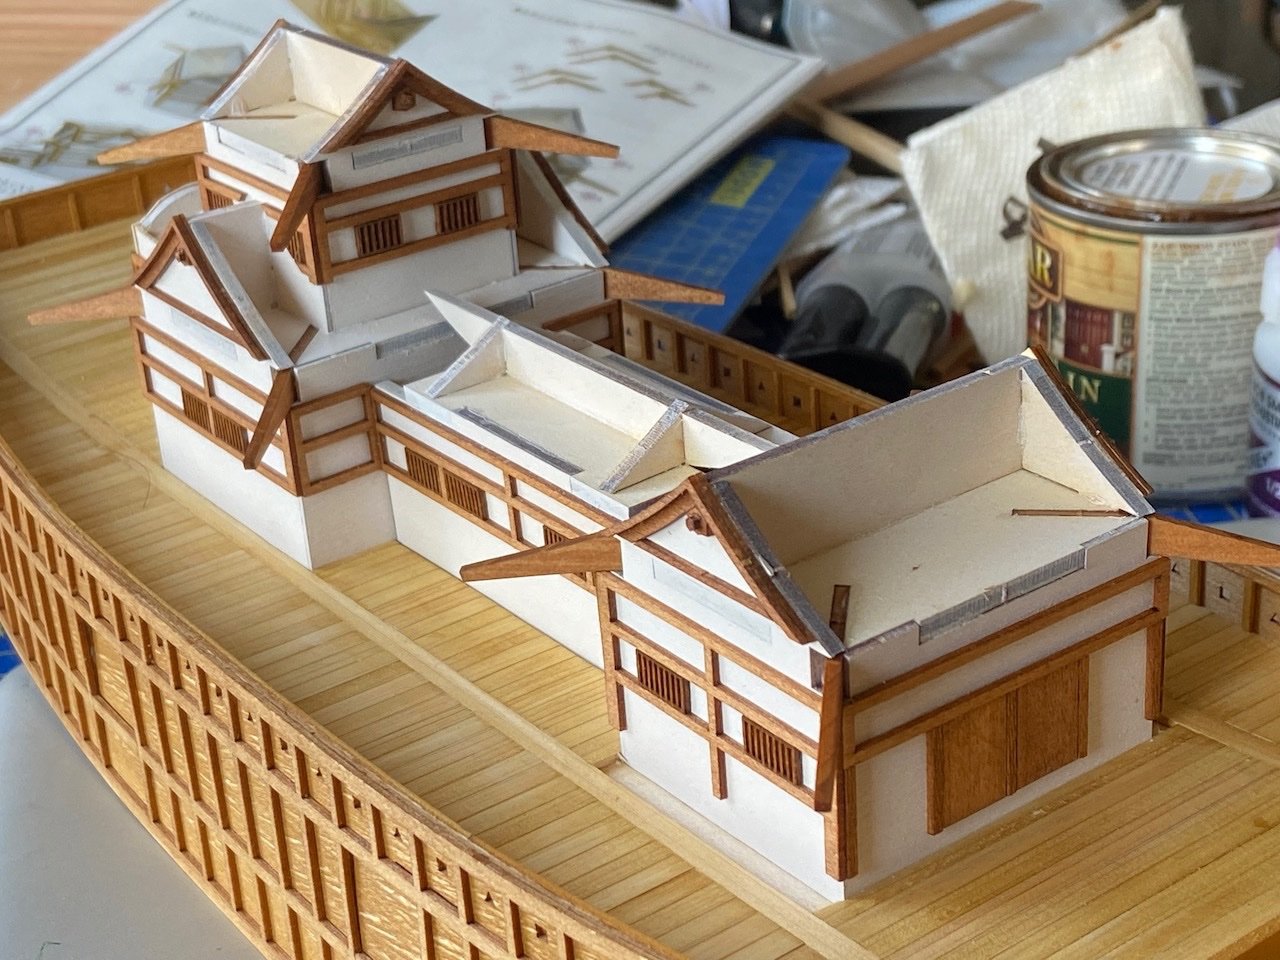
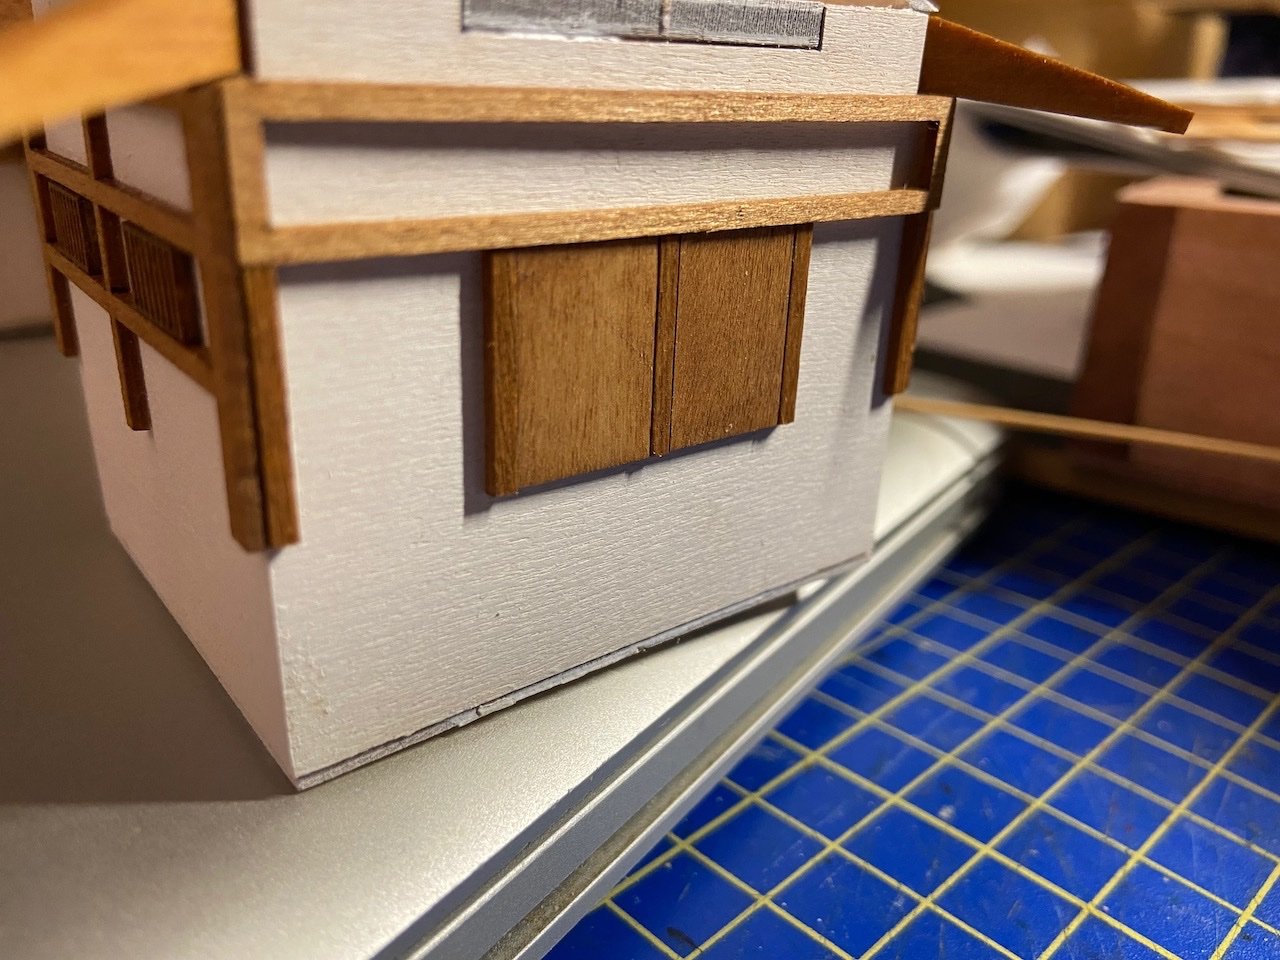
Here's a little more... I finished the basic trim on the castle structure. All the windows are now in place, as well as the trim detail at each of the roof peaks. At the forward end, I took some scrap wood and built the extended trim along the sides of that forward most room. If you're wondering about all those visible plywood tabs, they get covered up by the roofing. The next step here is some trim that runs down to the deck. Since I modified this build a bit, and lowered the deck and the foundation for the castle, I want to make sure I lowered the foundation enough. Might be okay to drop it down by another millimeter or so. The real limiting factor in the height of the structure is a fenced walkway at the rear of the structure. I don't have any good photos of that part of the museum model, but you can see the feature in the following photo. Once this is worked out, I can add the lower part of the castle trim and get started on the roofs. I mentioned before that I actually have a second kit. On this model, I'm aiming for replicated the museum model as much as I can. But, on a second model, I will probably try to build it not with a tiled roof, but a wooden style roof.
-
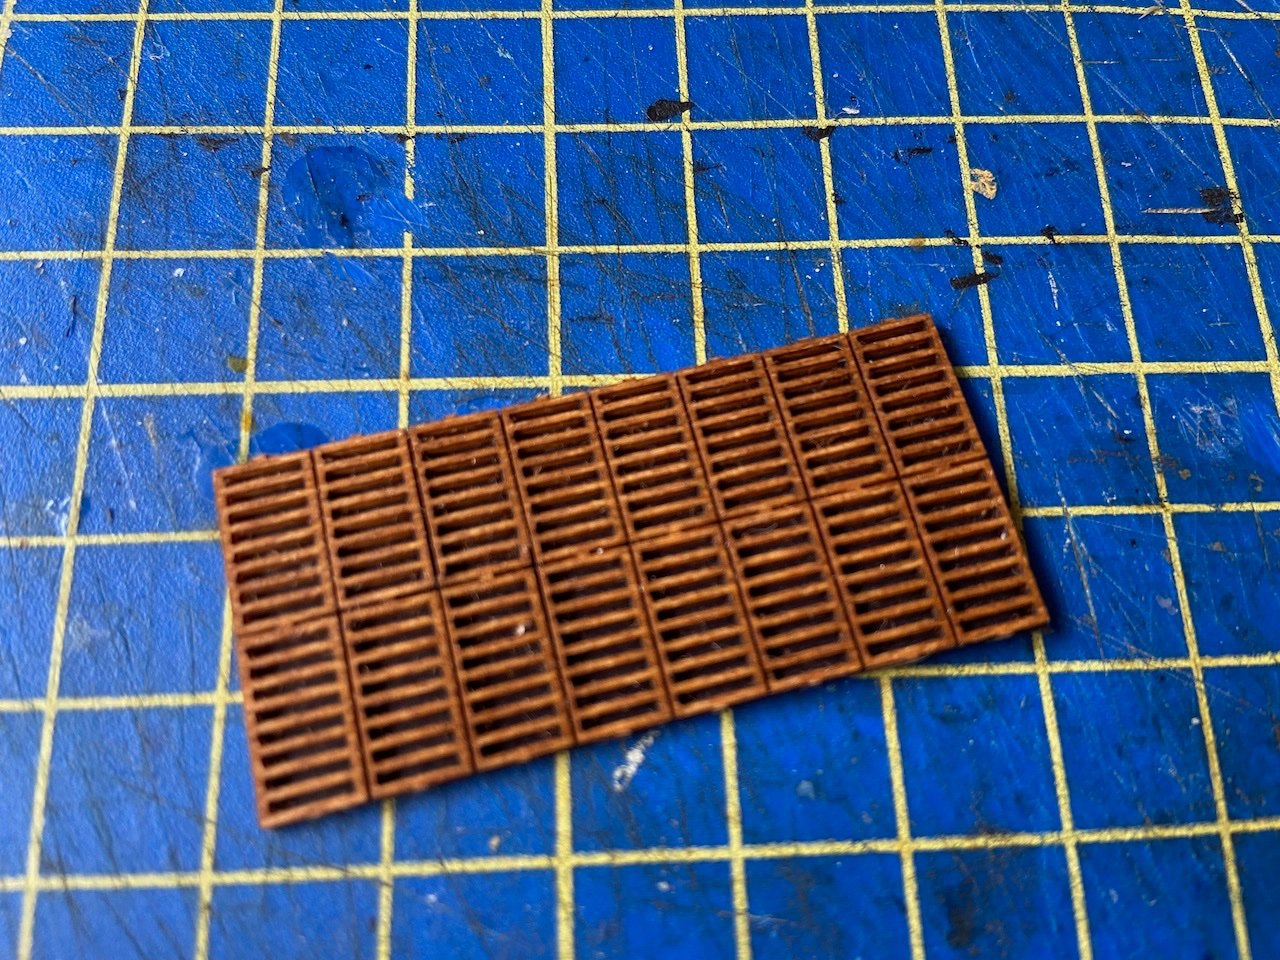
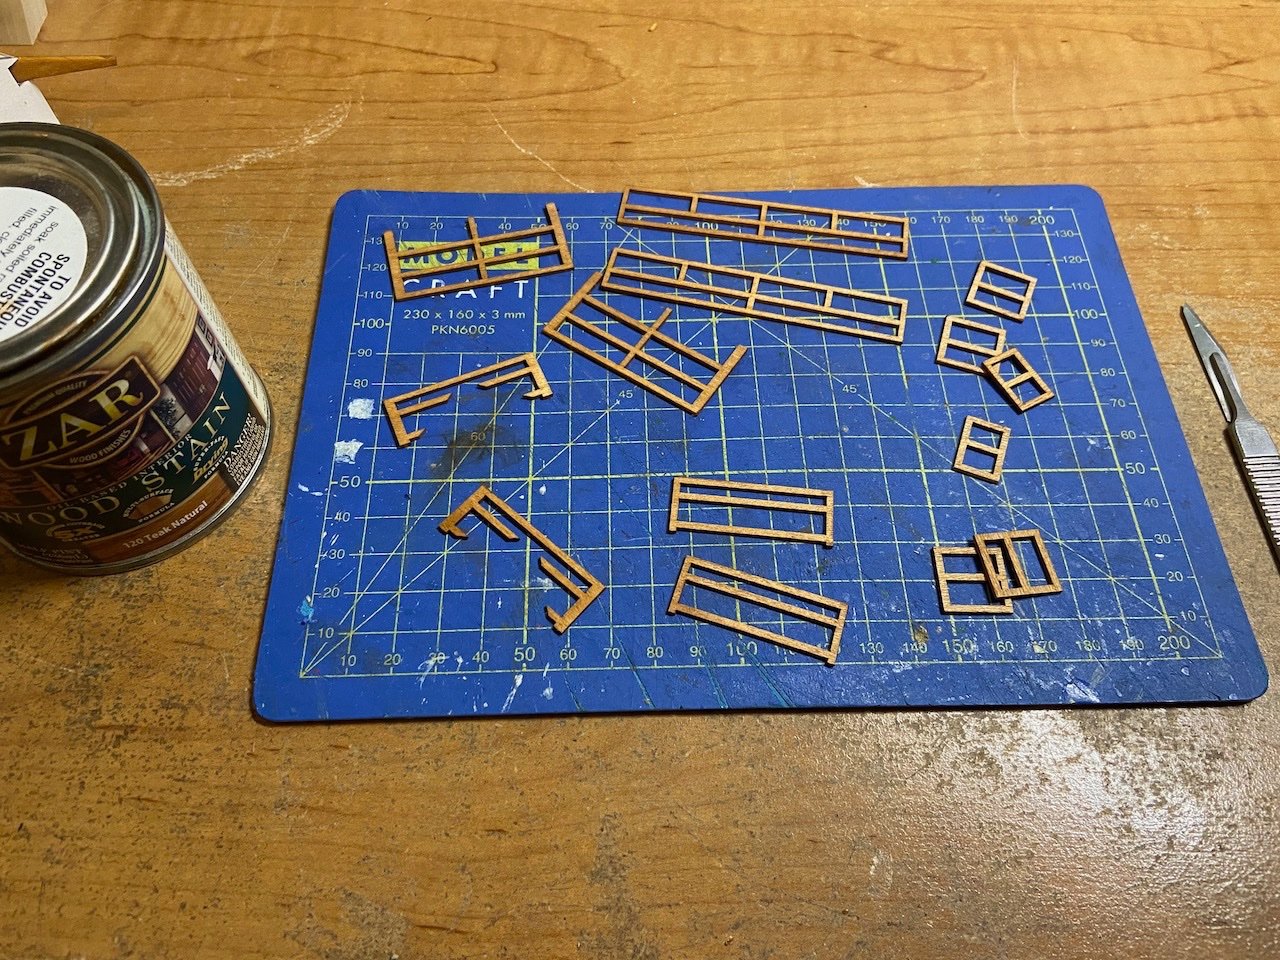
LOL, to me when I'm working on models, I think the term is FAT fingers! 😁 The Japanese temple and castle kits that Woody Joe makes are particularly full of milled wood like this. Before laser-cutting, all the parts were milled wood, cast metal, or stamped metal sheet. Their ship models are mostly laser-cut wood now, but I guess there's no good replacement for the milled parts use in many of the other kits. In this kit, the other main milled wood pieces are for the eaves underneath the ends of the roofs. There, the pieces are more like slatted wood. So, instead of a sine-wave cross-section, it's a square-wave cross-section. John, you must have been gone for a while! Hoping to make more progress now, so come back sooner! 🙂
-
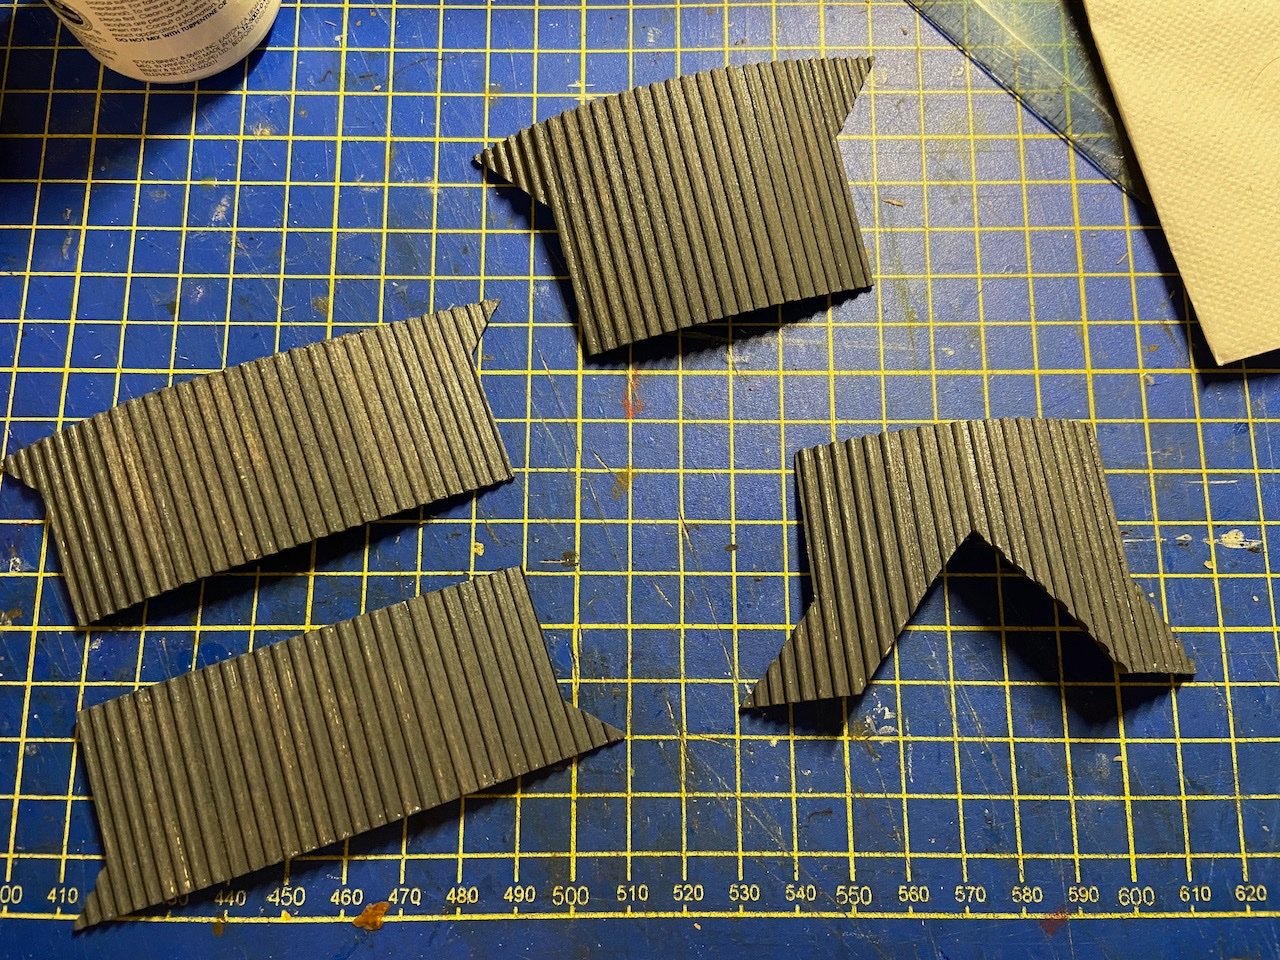
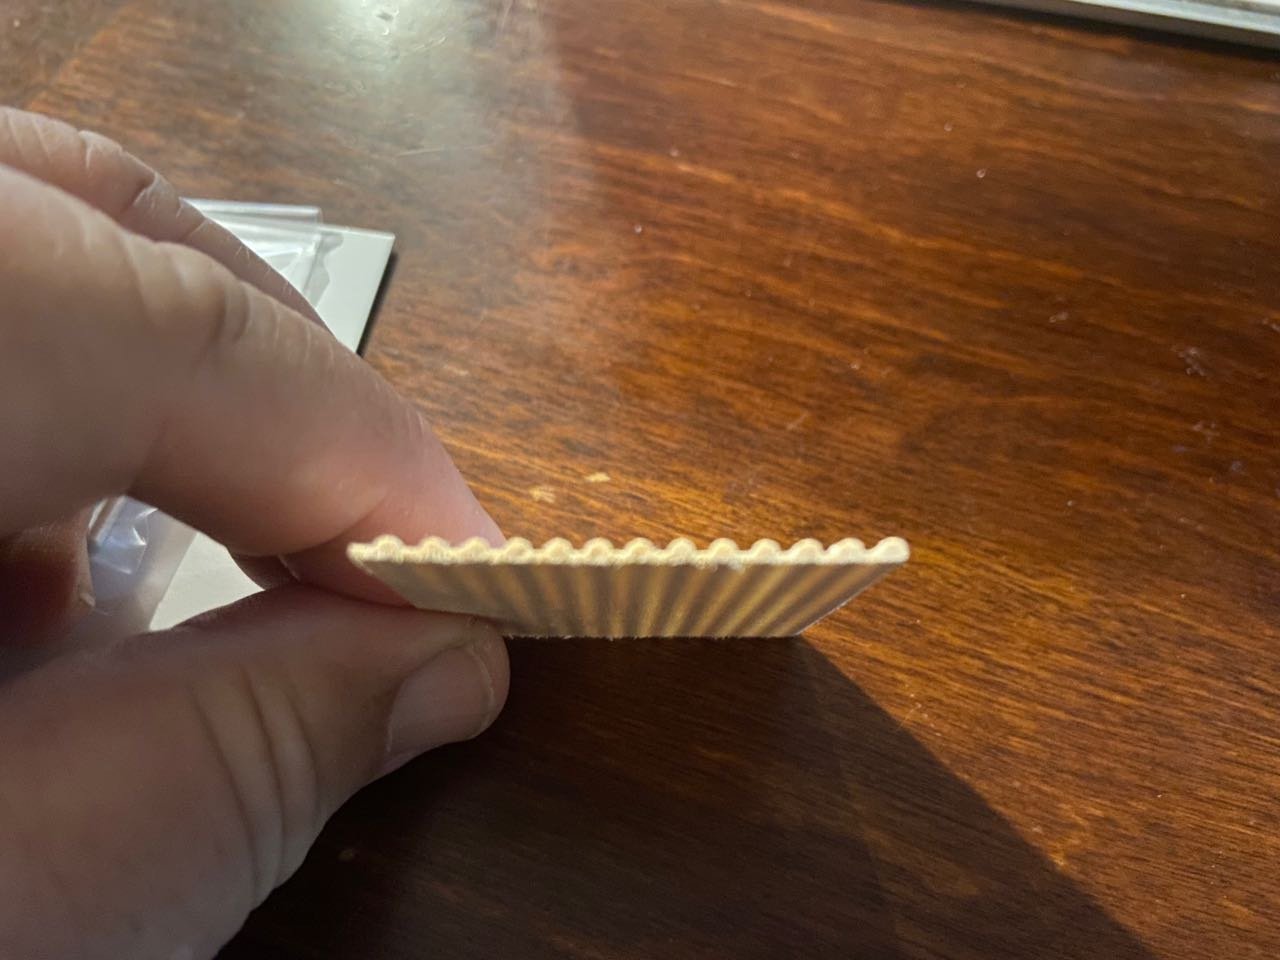
Peter, I forgot to answer your question about the roof. While a tiled roof may not be correct, this kit is based on the museum model, which has a tiled roof over most of the castle structure. Woody Joe has a history of providing kits containing milled wood shapes. So, in this kit, they provide sheet wood that has a wave pattern on one side. Kind of like Ruffles potato chips. Sorry, it's a little blurrier than I thought it would be. But, should give you the idea. These pieces work very well for Woody Joe's castle kits, so they should work well here.
-
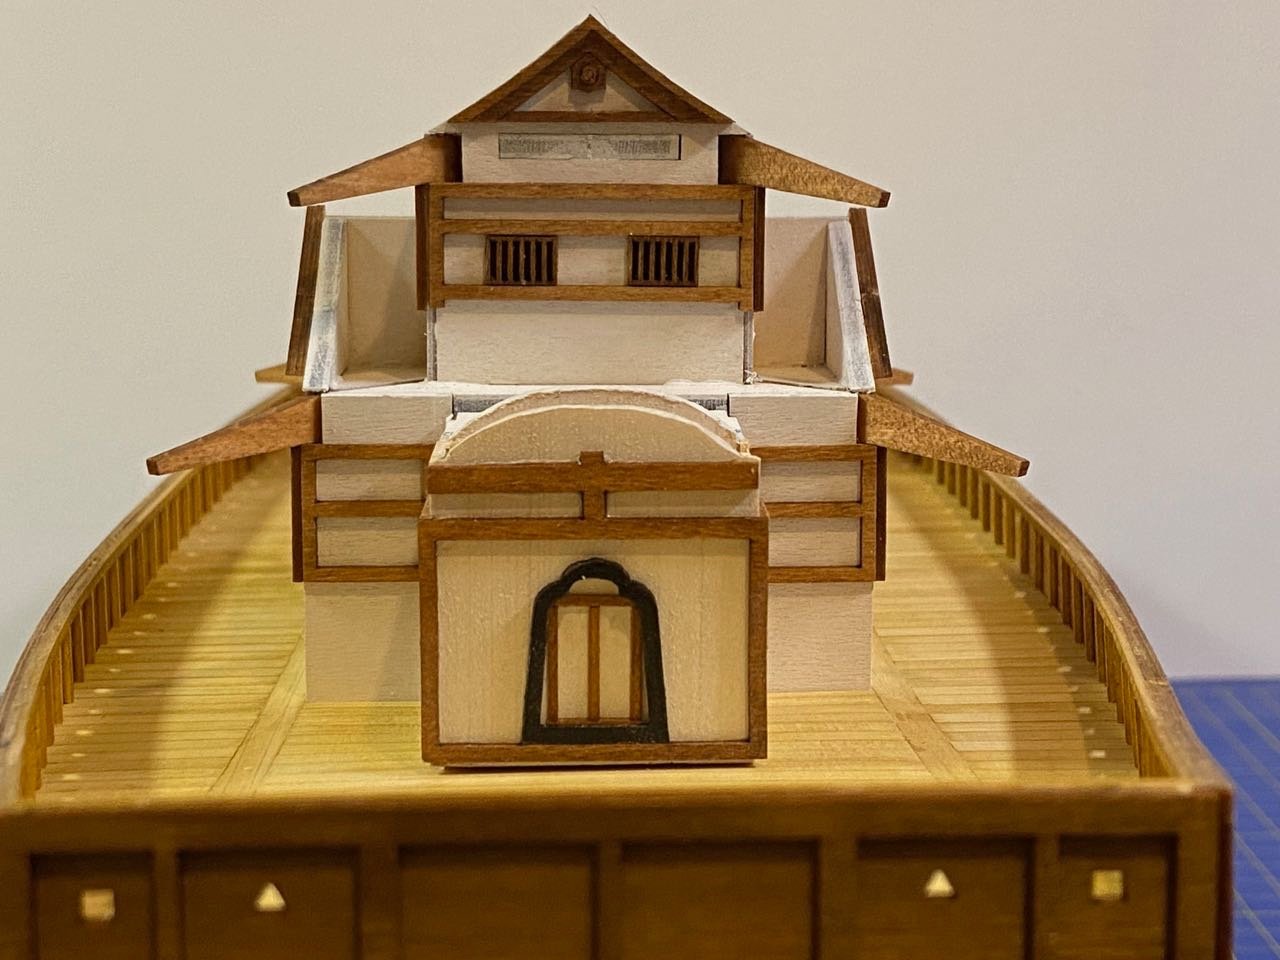
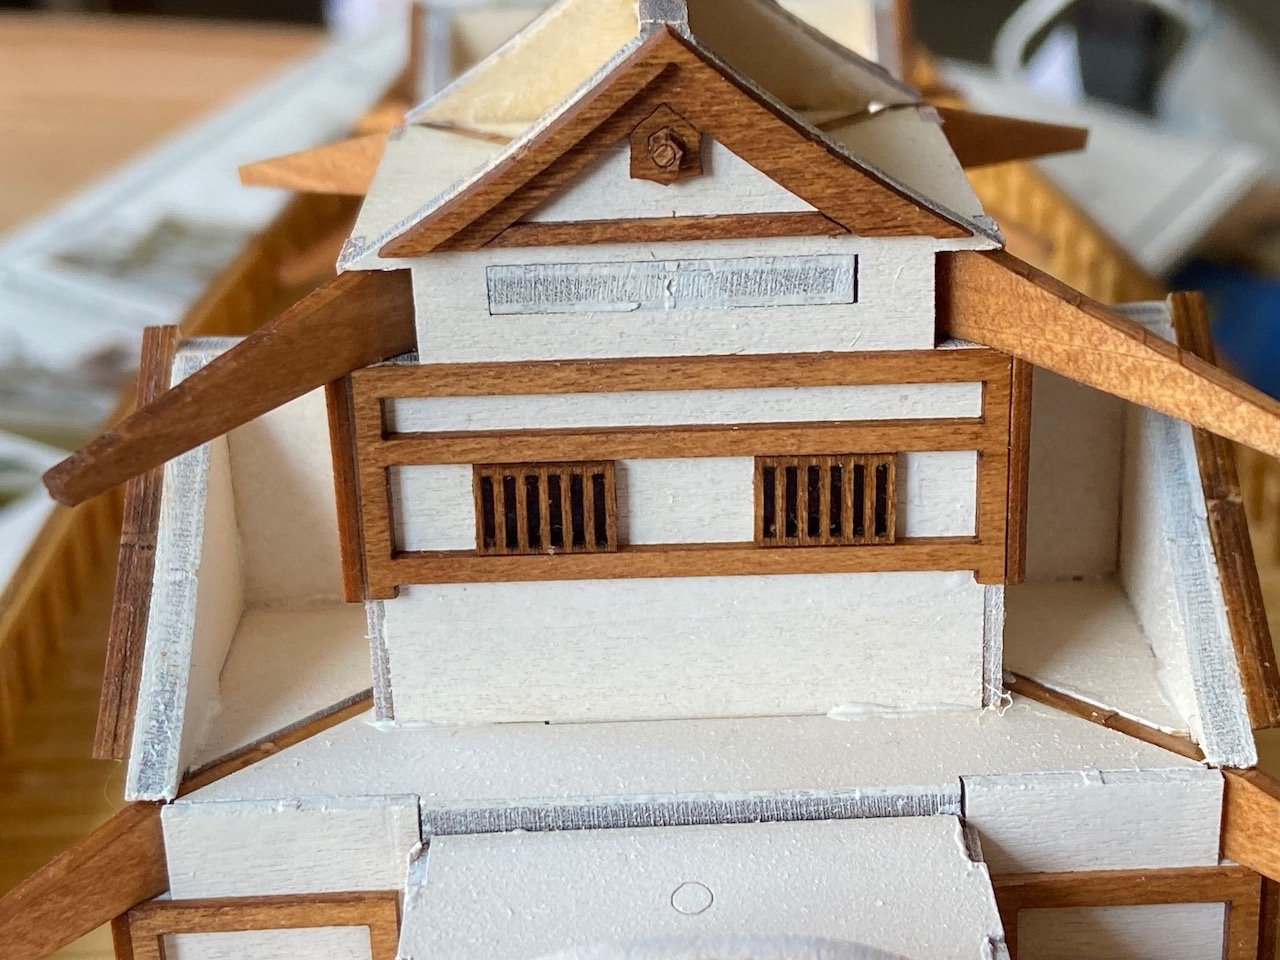
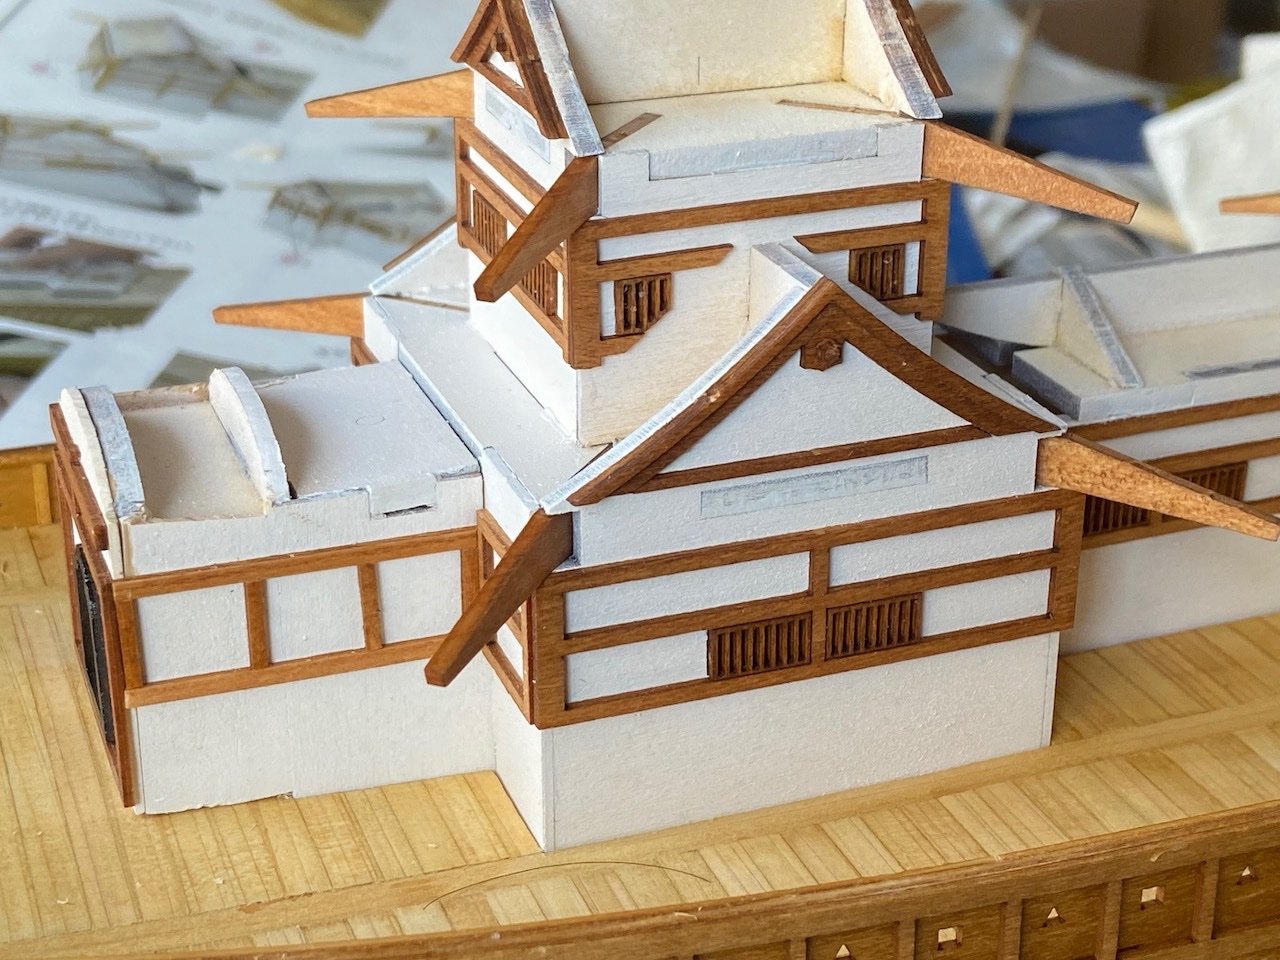
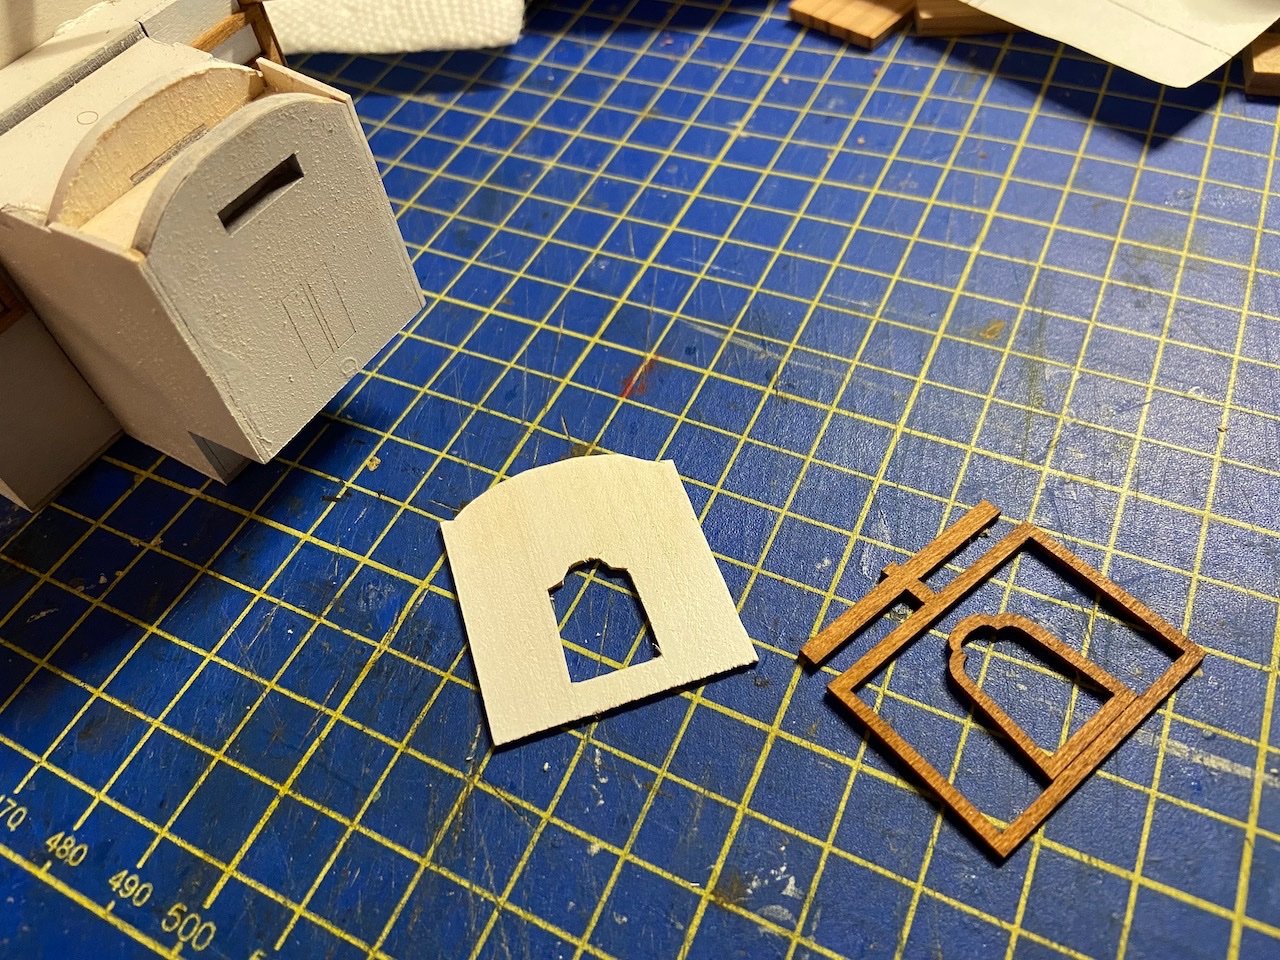
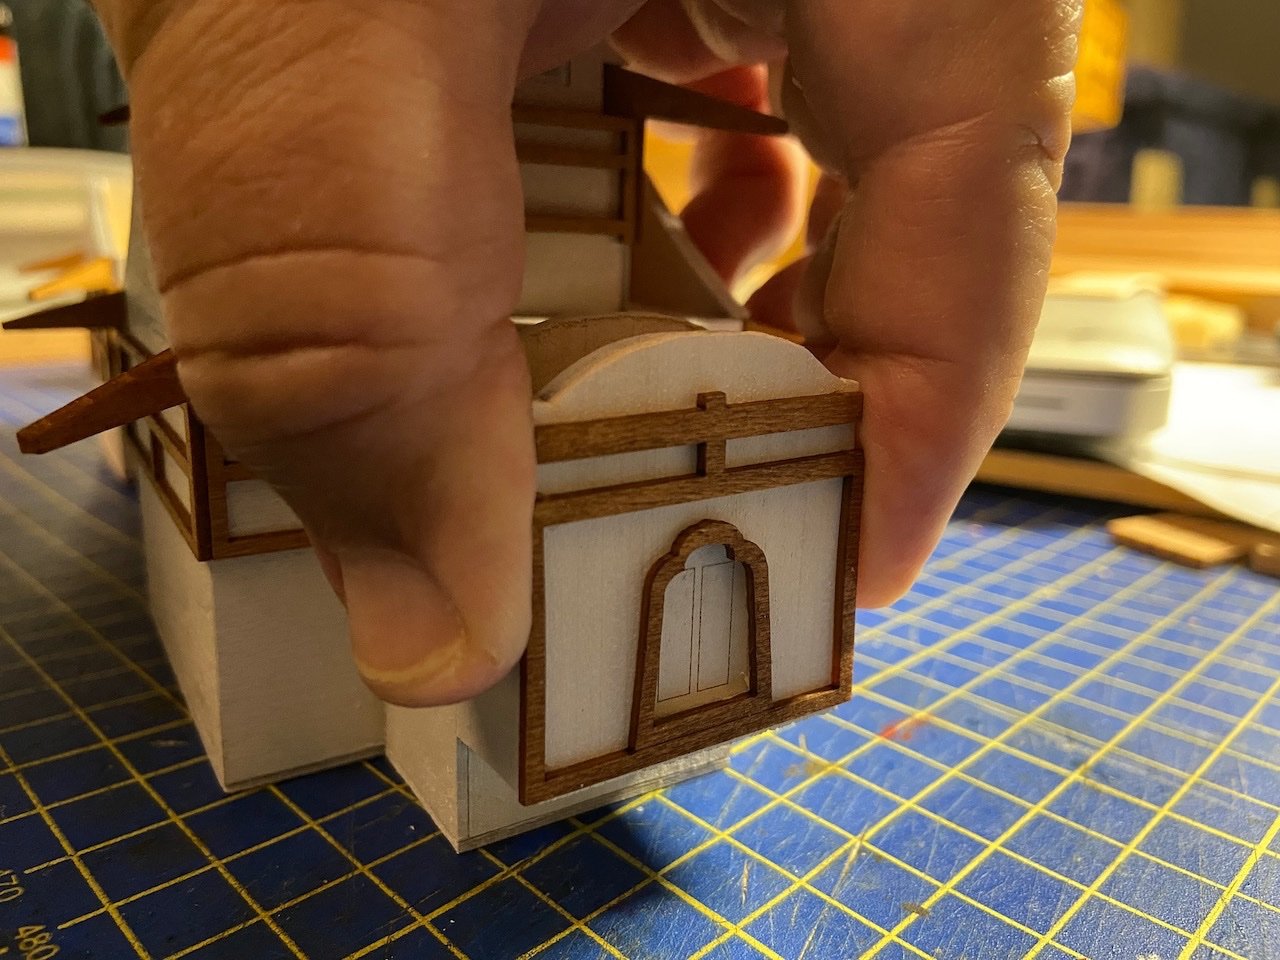
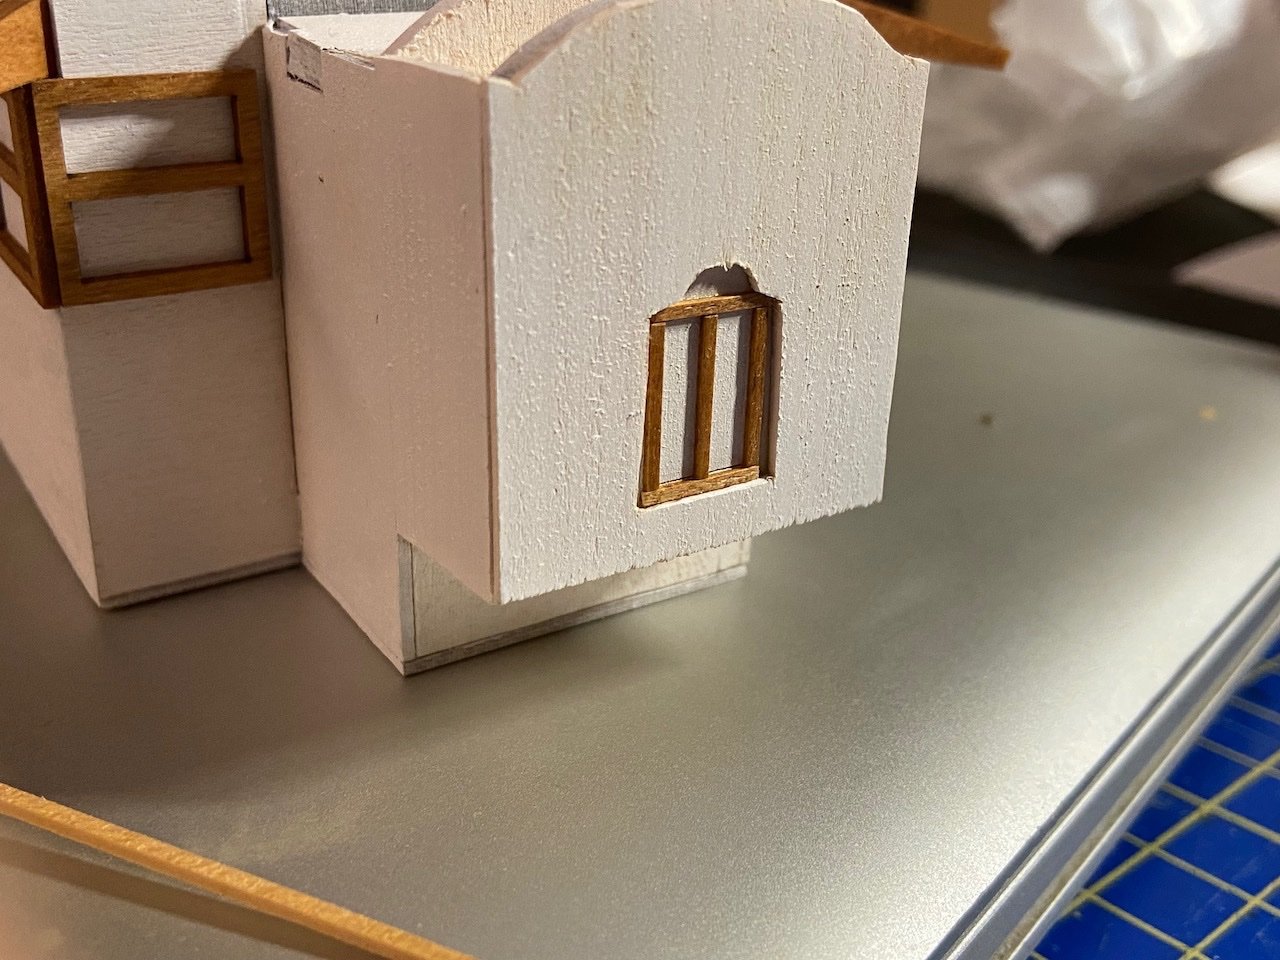
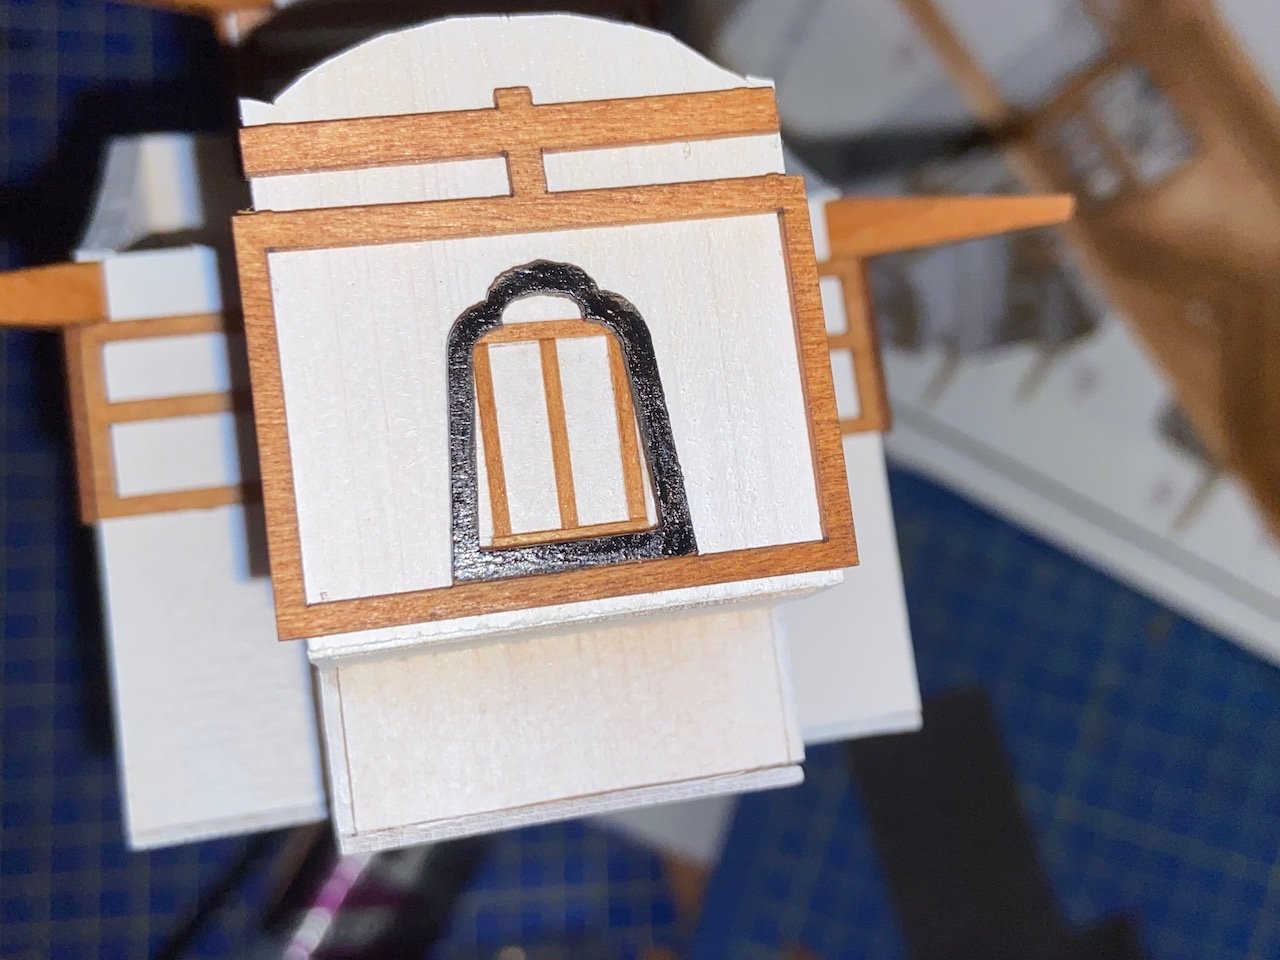
Hello Peter, don't think I hadn't considered that! But, they'd be too small to be recognizable for this model... Thanks for the castle comments. Here are a couple more photos after adding some of the trim details. There are some barred windows that are added as well. I decided to try gluing a piece of black tissue paper to the back of these before gluing them into place. You can see the difference is makes below. And, finally, when they were all glued into place... And, finally, I've been working on modifying the forward most building of the castle, from the simple laser-engraved outlines of a door, to something a bit more 3D, with wood trim. That middle piece with the cutout is my own addition, so that the door is inset from the facing woodwork. As it still seemed to need some detail, I built a framework around the door panels and then painted the archway around the opening. It may not look all straight and centered, as it hasn't been glued together yet. I just wanted to set them all up for the photo here.
-
Hello Modeller_Masa, thanks for your posts. I have a Cameo 3 myself, which I've used to resolve certain masking and template problems, as well as providing a means to create flat decorations to models. Your posts are giving me some interest in taking another look at trying some creative solutions to work with copper foil with it.
-
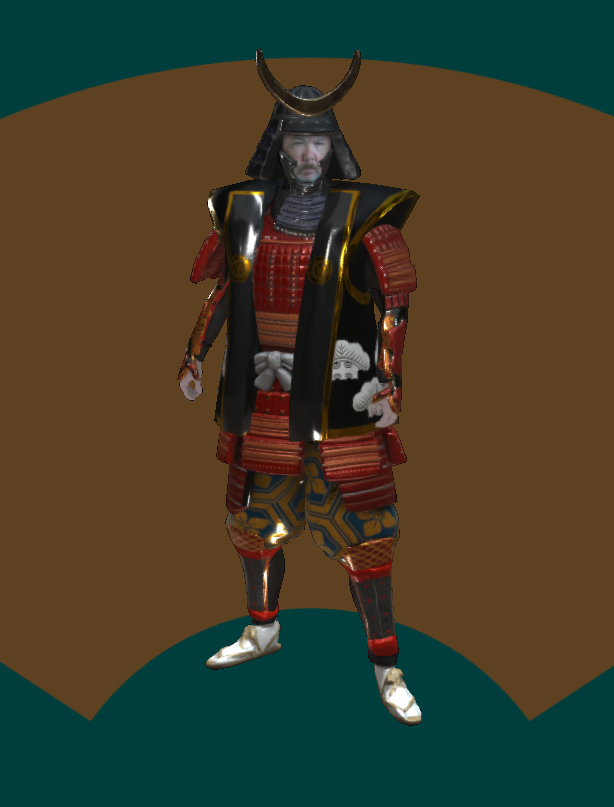
By the way, I did manage to find the time to fool around with a website someone posted on Facebook which puts you into your own customized samurai armor. You can even download yourself in 3D CAD files that you should then be able to send to a 3D printer. In case you don't want to visit the site, you can just gaze upon my samurai awesomeness here... That's a screen shot from the website. You can make your own awesome samurai self here: https://www.ana-cooljapan.com/contents/craftsmanship/samuraiavatar/?detail=5355d664-2612-4a59-b9dd-33762b266023 If I 3D print this, probably should be at least 1/32 scale to appreciate – I'm going to need a much bigger ship!
-
Just starting to get back to the atakebune build after the holidays. Not much progress, but some. I decided to continue working on the castle structure for a bit, so I gave the whole thing a base coat of white paint. For the wood trim, I decided to go with a different shade of wood, as this it very likely be of a different type of wood here. I wanted a warmer looking medium brown, and settled on some ZAR wood stain #120 "Teak Natural". Here, you can see that the roof supports have been stained and added. These roof beams will be pretty well hidden, but they give you an idea of the extent of the roof that will be installed later. I then cut out the trim parts that will go on the walls of the structure. I stained these parts in their wood sheets, but had to do a little sanding and touchup after I cut the parts free. These are thin and delicate parts, but only one piece broke and had to be glued back together. This happens a lot where the wood grain runs across the narrow dimensions of the wood. After I get a little ways along with this structure, I'll go back to finishing up the lower hull.
-
Hi Michael, Mark, Harvey. Domo aritago gozaimasu. Glad you like them. Michael, I'd love to see any photos you have of traditional Japanese watercraft. Harvey, I hope you do build one of the boats that Douglas Brooks studied in Japan. Funny thing I realized recently, is that I haven't really built anything that was described in his book, except the bekabune. That was an early build, and I think I need to try it again to do a better job on the mortise detailing and on the nailing on the inside of the boat. But, one that I really want to do soon is the water taxi, or chokibune, that he built with the late Mr. Fujiwara. Sadly, his first three teachers are gone now. But, that's the very reason he's recording these builder's techniques.
-
Thanks for the comments Ian. You're probably right. If I don't want it too bulky looking, I could try thinning down those strips. They're laser cut, so that might be a bit tricky. Then again, I can probably use my own stripwood, as there is another modification I've been planning on where using my own stripwood will probably be easiest. Appreciate the suggestion!
-
By the way, over the holidays, I created two Youtube video slide shows. These are two scratch builds, the Hozugawa Ayubune and the Himi Tenmasen. Both small boats in 1/10 scale. These are based on projects by boatbuilder Douglas Brooks, and in many ways, they are tributes to him and his teachers. The Hozugawa Ayubune is a small river fishing boat used on the Hozu river, northwest of Kyoto. The Himi Tenmasen is a general purpose coastal workboat from Toyama prefecture on the Japan Sea coast. Hozugawa Ayubune: https://youtu.be/N16kF7O_VIY Himi Tenmasen: https://youtu.be/bCLl2Xb-V0o If you enjoy them, please give them a like! In the meantime, I also was asked about putting together all the wasen models, or traditional Japanese boat models, that I've completed. A couple that you may be aware of aren't on here yet, as they aren't technically complete. But, if you want to see everying in one shot, you can find them here: https://wasenmodeler.com/wasen-mokei/
-
Hi Michael, glad your here. I haven't done much study of samurai ships, so this is kind of making do more study of the subject. Of course, this is basically a ship on the large end most ships of this type didn't have the elaborate castle structure. So, was your dad at the Marine Corps Air Station there by any chance? Well, I've had to take some time away from model building to deal with family matters, but I'm starting up again this week, so stay tuned.
-
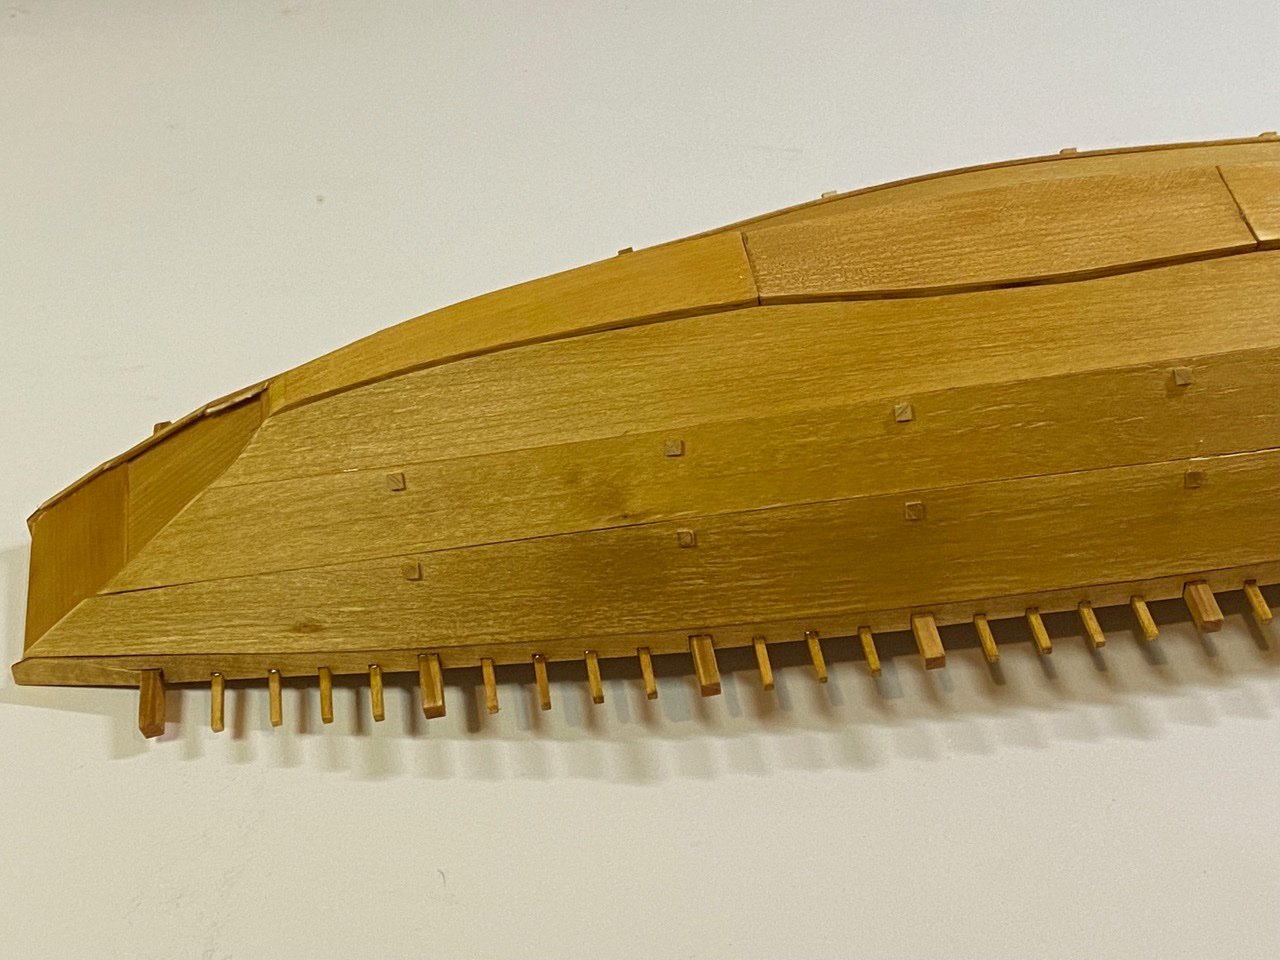
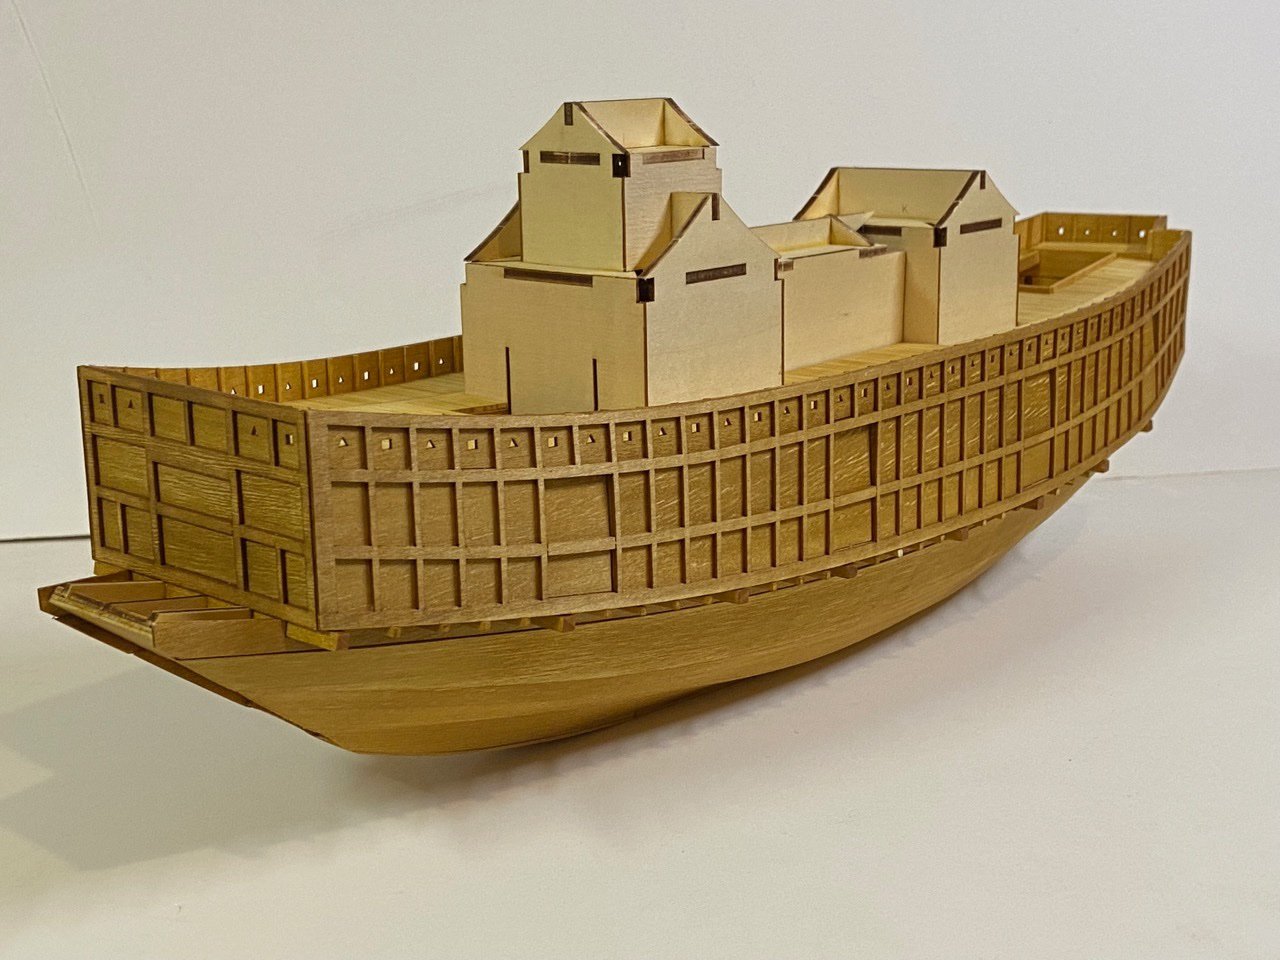
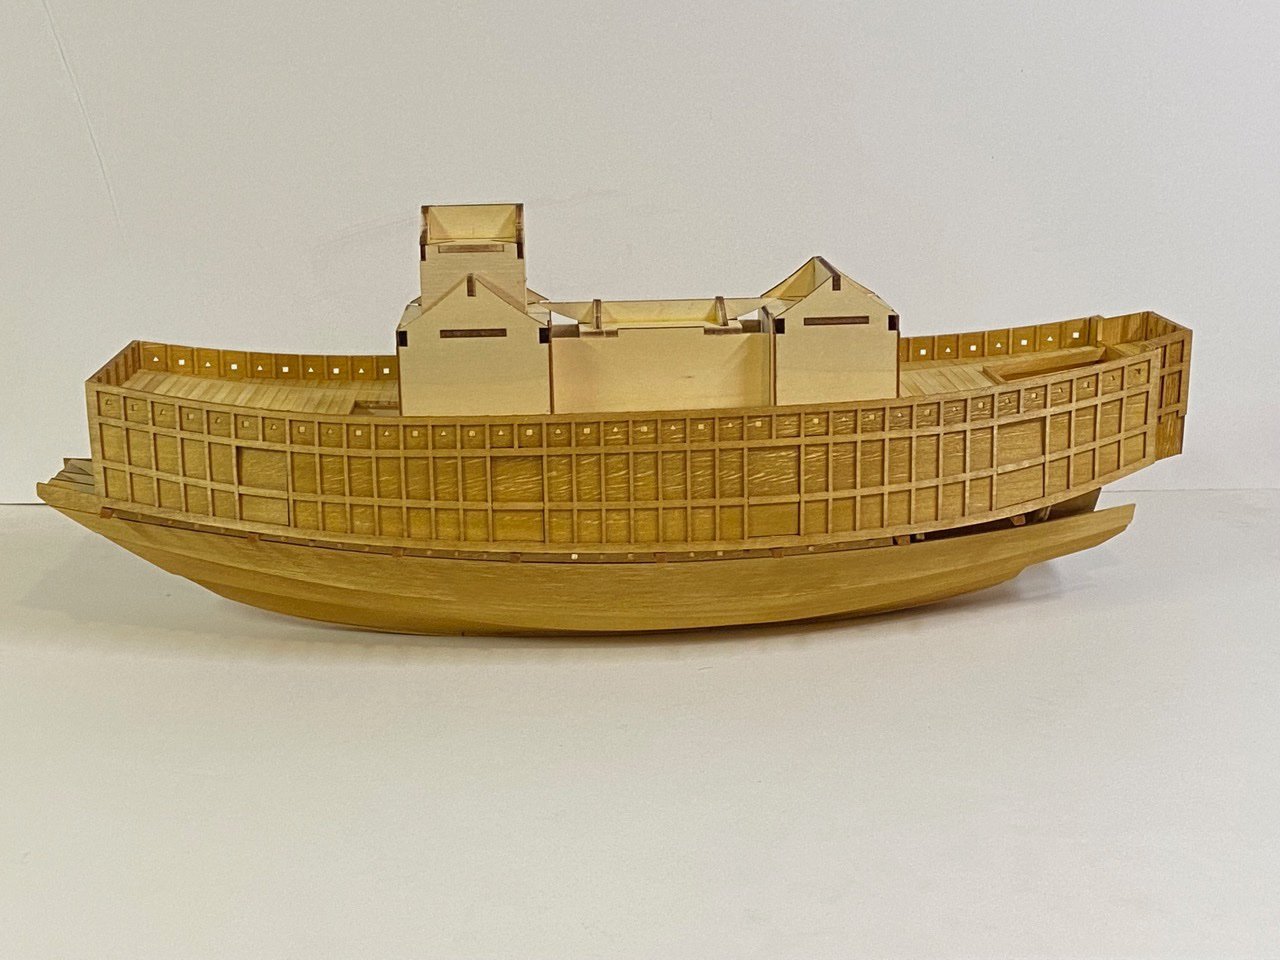
For the holiday weekend that's coming, here's a bit of an update on my Atakebune build. First off, I have to say that Mr. Kazunori Morikawa has been really going to town, making all sorts of major modifications to his build. Now, I don't agree with what he's been doing with the mast and yard details, but everything else I've seen are major improvements to the model. Here's a link to one of the more recent photos on his Facebook page: https://www.facebook.com/JapanOnlineHobbyStoreZootoyz/photos/pcb.1724615267728676/1724590987731104 As for my own model, I've finished cutting the "stanchions" on the inner side of the box structure walls. I then added an upper rail to mostly match the rail on the outside of the structure. In addition, I cut some thin cross sections of some 3mm square stock wood, dyed them, and glued them to the hull to represent the beam ends coming through the hull planking. At some point, I'll need to add the simulated mortise covers, which were made of copper. On my most recent models, I simply used brown adhesive-backed vinyl that I cut using a Silhouette Cameo 3 machine. I could do the same thing here, but I'm considering alternatives, to give copper parts are more natural patina finish, rather than the tarnished copper look. I've got some ideas I want to experiment with. More on that later. The last addition, is an extension of the front of the castle structure. This idea is based on a similar modification that Morikawa-san made on his model. He ran into a few issues regarding the construction of the roof, which for this part of the structure, is very different from the rest. But, the idea is to make the build closer to the museum model's appearance. One thing to note is that there is generally some controversy among those who follow the design and history of Japanese traditional boat construction regarding the accuracy of this design. This kit is based on a museum model, which is an interpretation of a ship depicted in a very old folding-screen painting. If you think the ship looks very top heavy, there are those that agree. But, the main issue that I've seen brought up recently is the presence of a tile roof. Now, the painting shows a traditional castle-type roof. It is dark gray in color, just like the tile roofs that appear on castles. But, there's the suggestion that this is wrong. I suppose one possibility might be that the roofs were simple wooden roofs. Perhaps they were painted gray to look like actual castles? No one knows. But, it's worth noting. Perhaps on another build, I'll use a bit more conjecture.
.jpg.77ce3dd5eacf44f3ed05f93f6196fb40.jpg)
-
Druxey, you're Dad's words are very appropriate... and perhaps explain a lot! 😁
-
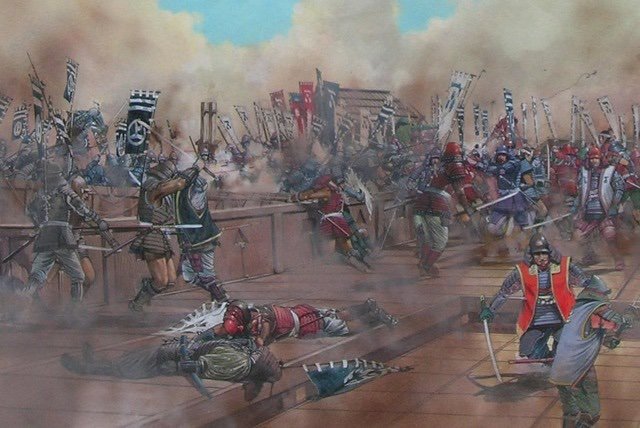
Thanks Mike, Druxey, I'm glad you like it. Here's a little bit more. There was one simple kit modification I've wanted to make. The inside of the bulwarks, for lack of better term, is smooth on the model. That's simply a copy of the way the museum model is constructed, which always kind of bothered me. There's a great illustration of samurai fighting on the deck of an Atakebune that I found on a Japanese blog site dedicate to the late Mr. Kenjo Tanii, who worked with and did illustrations for the late Professor Kenji Ishii, who is well known for his work on the history of Japanese boats. There's some great illustrations of Atakebune on the page I got this from. There's also a lot of great historical information, but it's all in Japanese. However, you can get a lot out of it by running it through Google Translate. In fact, here's a link through Google Translate. Scroll down past the aircraft carrier information to find the entry on Atakebune: https://navy-ap-teacup-com.translate.goog/applet/kanzo/archive?b=30&_x_tr_sl=ja&_x_tr_tl=en&_x_tr_hl=en-US In any case, I went ahead and added this feature to my model... Now that I'm well along on two of the three main components of this kit, I figured I might as well start off on the third component, which is the castle structure. So, I glued up the parts that form the basis of the structure. Construction was pretty easy and straightforward, but it took a bit of trimming of the deck opening to get it to fit nicely. Here's what the whole thing looks like when it's all together at this stage. In the bottom image, you can see where it's missing my customized parts, which I have yet to replace due to breakage. I've been thinking about making those pieces from thicker wood, say 1.5 or 2mm vs. the original 1mm sheet wood. I guess I should try it, since I've made one set of hull pieces already and need to make another. Why not, slightly thicker wood?

-
It's kind of easy to make a box look neat! 😁
-
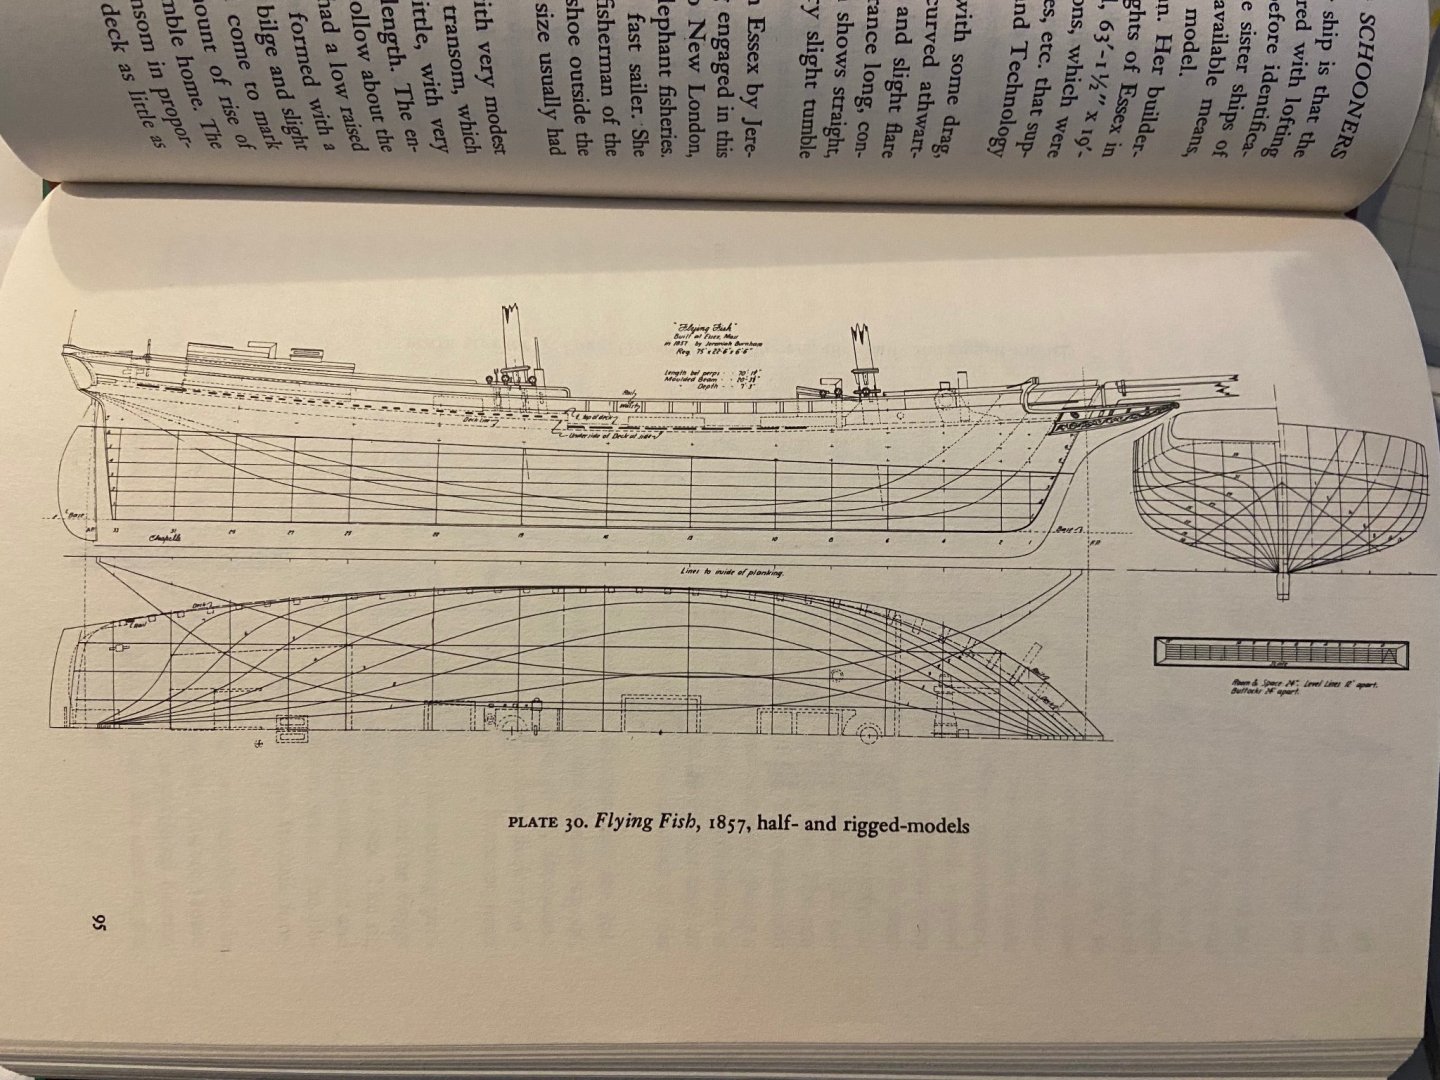
Well, I called my client because the information she sent me precluded the need for me to come out and help her out today. Wish she had sent it to me earlier in the week, as I now have a gap in my schedule. But, what the hey... So, here's that photo, if it's any use to you. Again, this is from the Gloucester Clipper Fishing Schooners book. You can also see how Corel apparently misinterpreted what is called the "fish" in the drawings as a break in the deck, which is why they gave it a raised forecastle. The book also shows that the chainplates are most probably internal to the bulwarks planking, so you wouldn't see any metalwork, and the deadeyes are mounted directly to the rail at timber heads. Also, while not in this photo, the plans shown in the book do show the stack on the aft cabin roof directly forward of the skylight. Oh, and just to allay your fears as to what you are building. I'm pretty sure it's actually the Flying Fish. Here are the plans published by Chapelle... When dealing with companies, particularly the older European manufacturers, just bear in mind that these kits are produced primarily as an enjoyable pastime, resulting in a model that represents the original ship, and looks beautiful on a shelf in your home. Scale and historical accuracy are taken into account, but only so far as their standardized components are able. There are also some liberties taken where the manufacturer's knowledge or capabilities may be lacking, etc.
-
Hi Jimmy, All, l Let me add that Ronnberg shows that the anchor chain is not run belowdecks at all. Rather, there is a chain box on deck next to the forward companionway hatch, on the opposite side of the galley stack. I was going to send a photo from the book, but I have to run out to a work appointment right now. I'll do so when I get back.
-
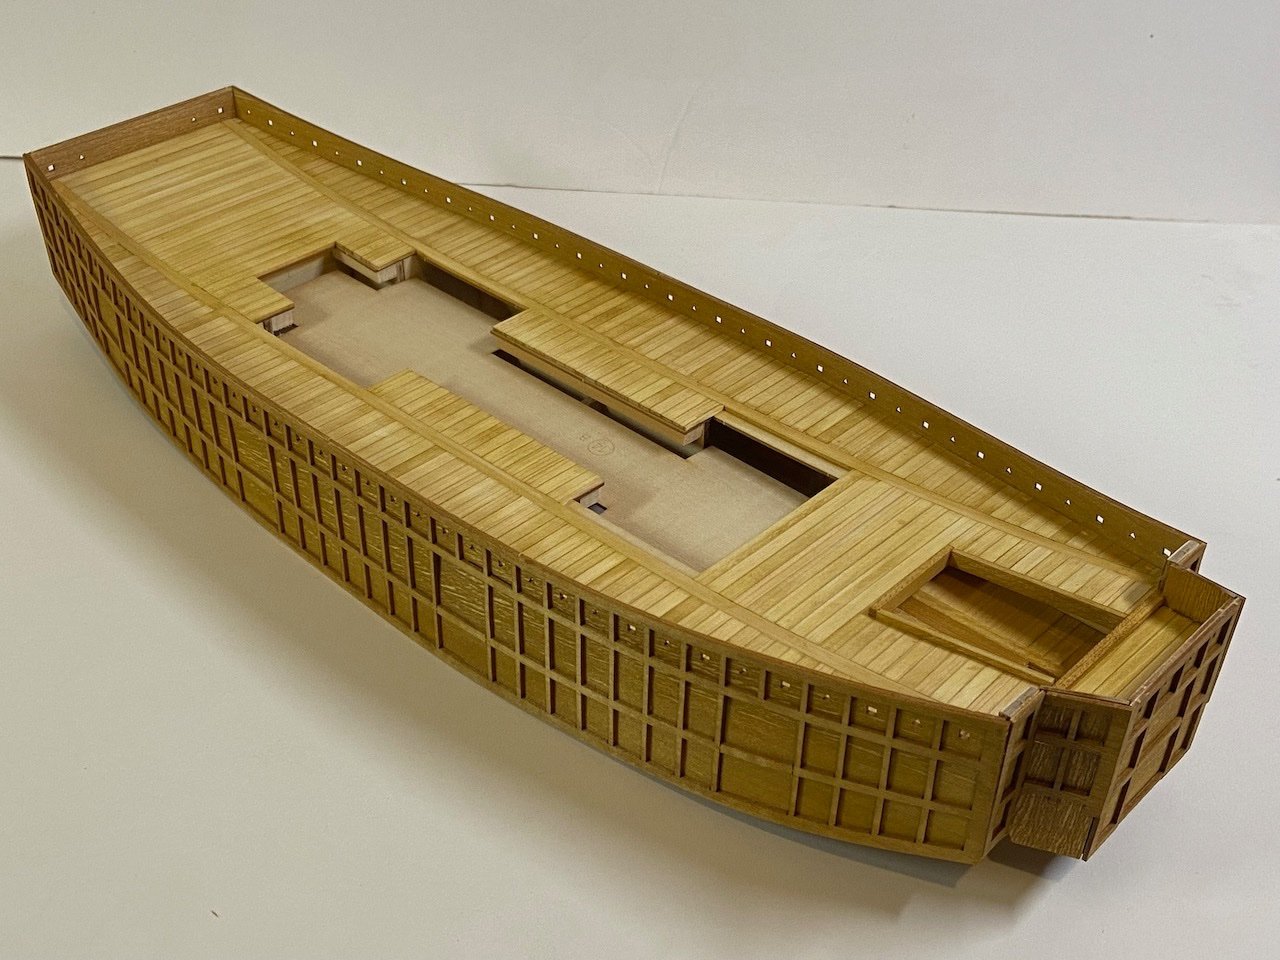
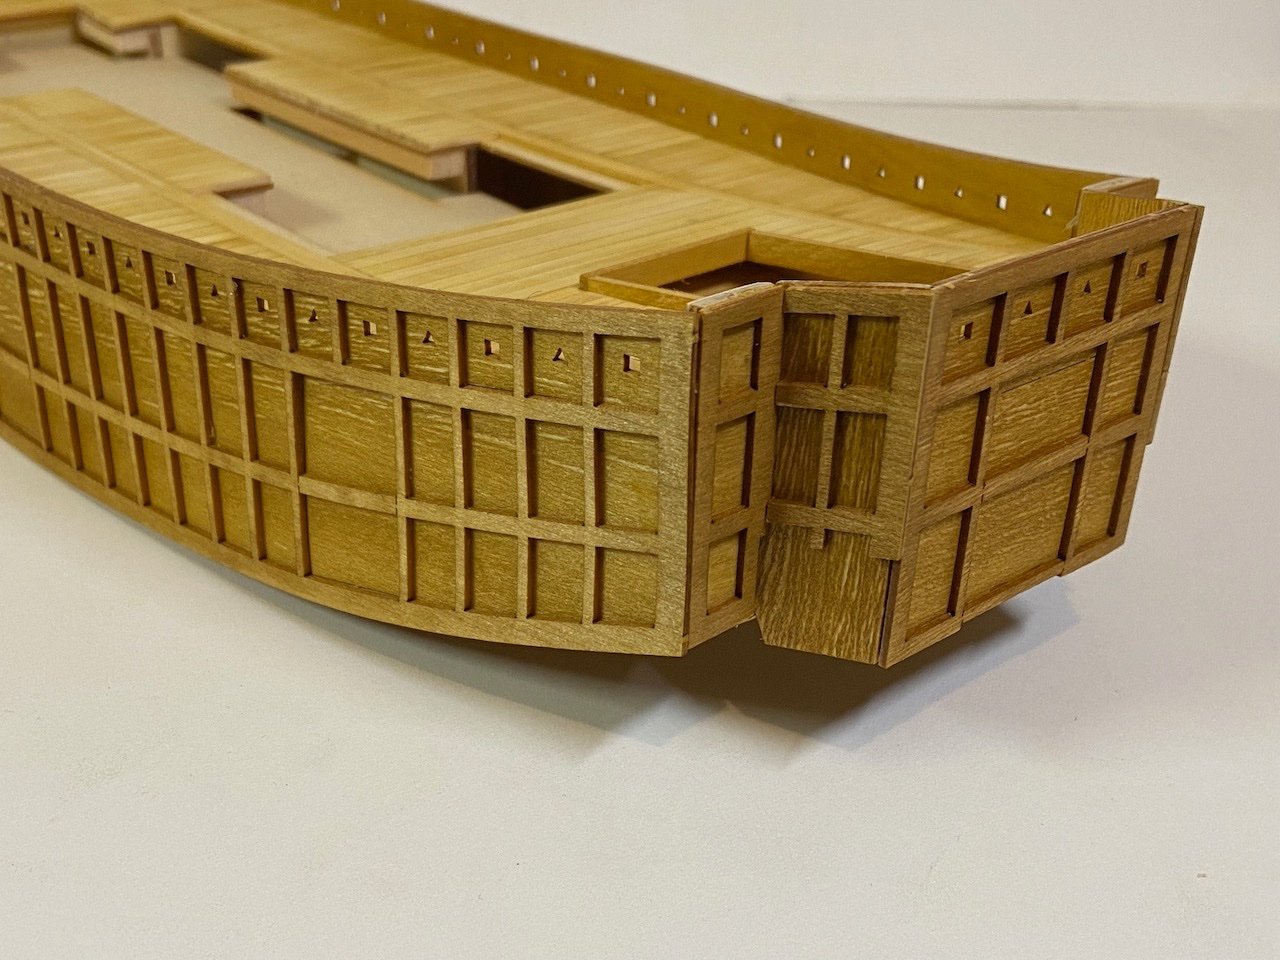
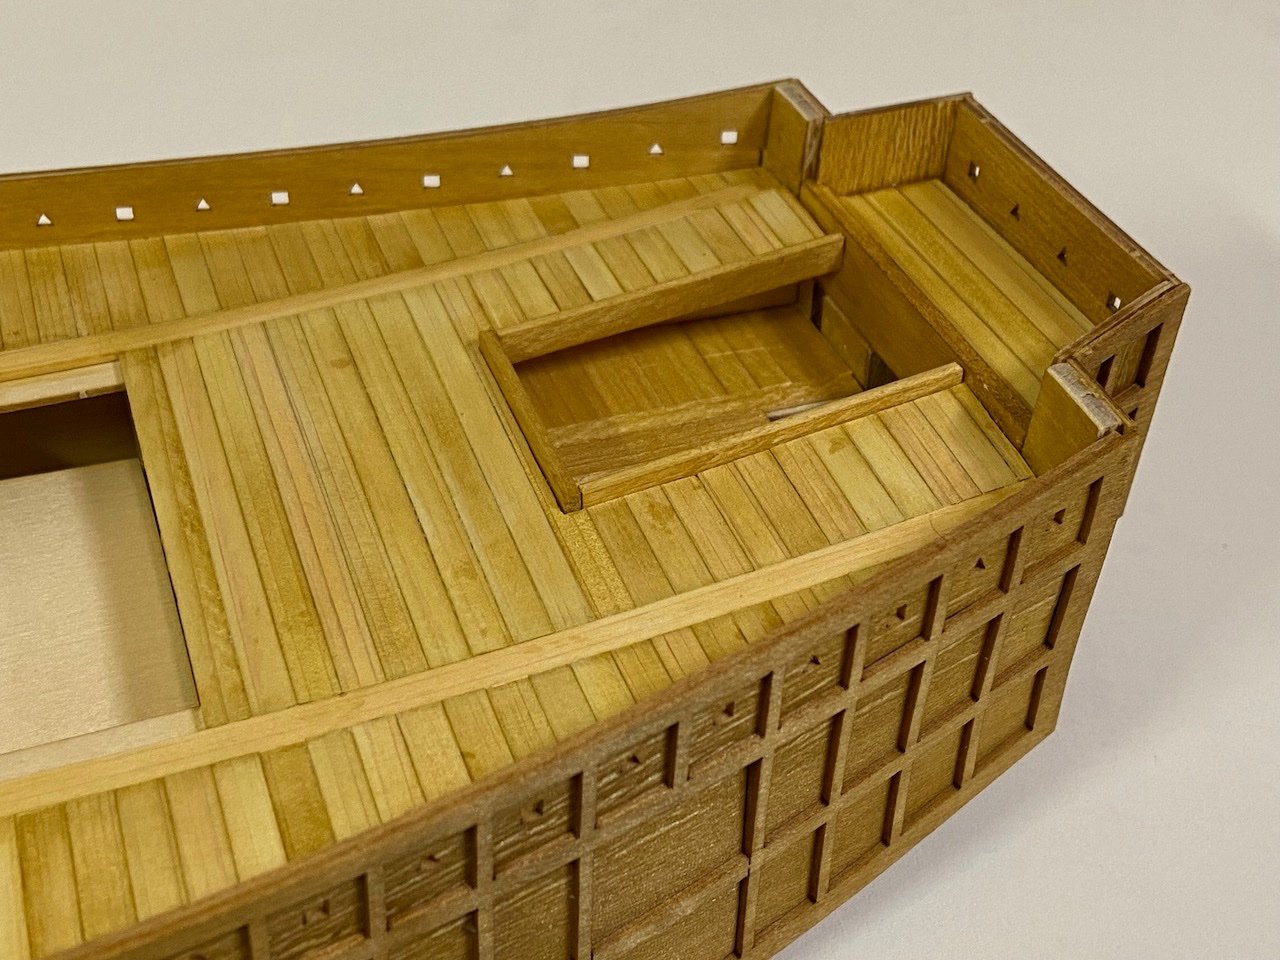
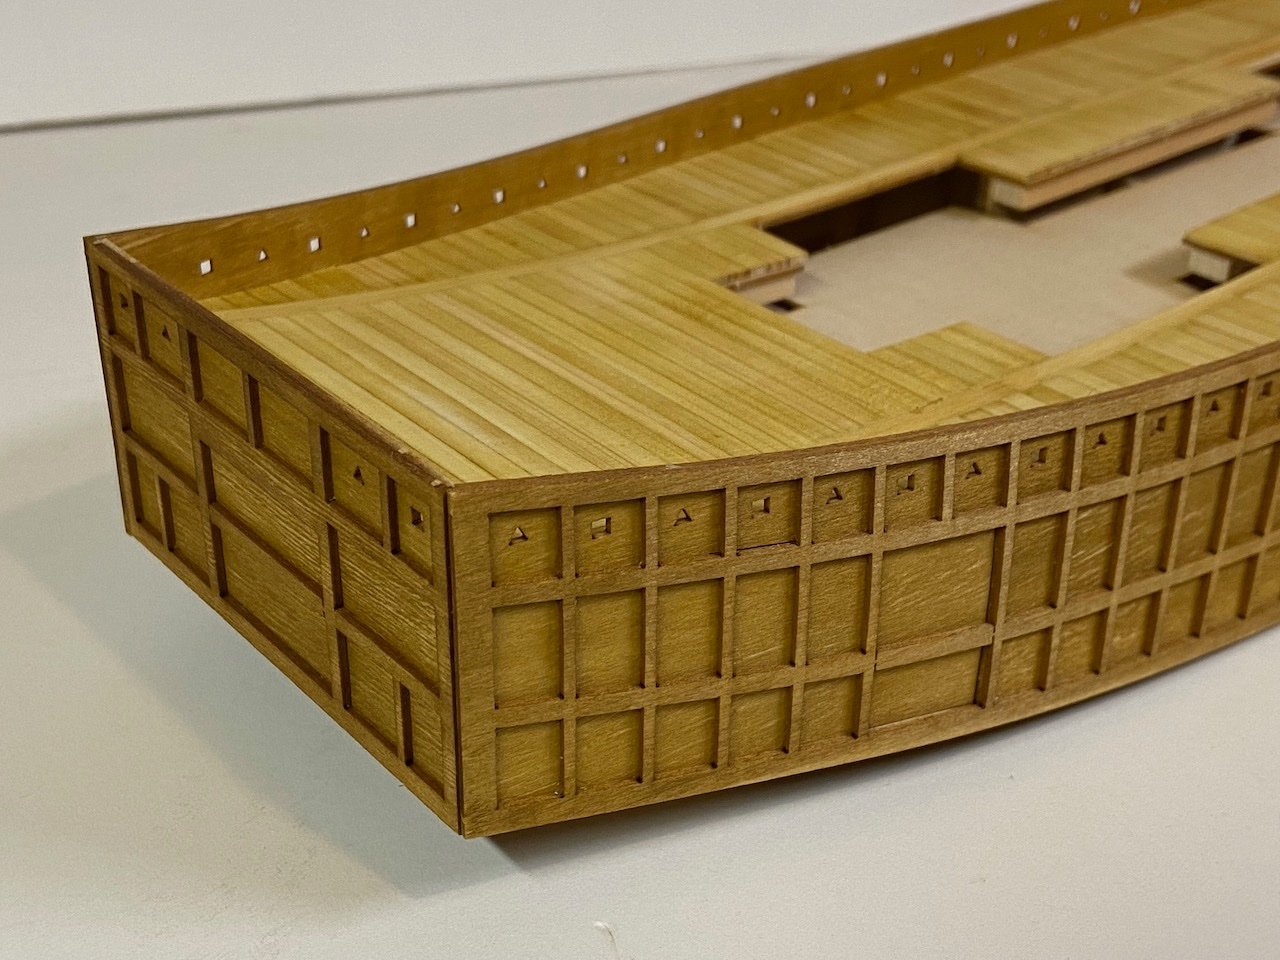
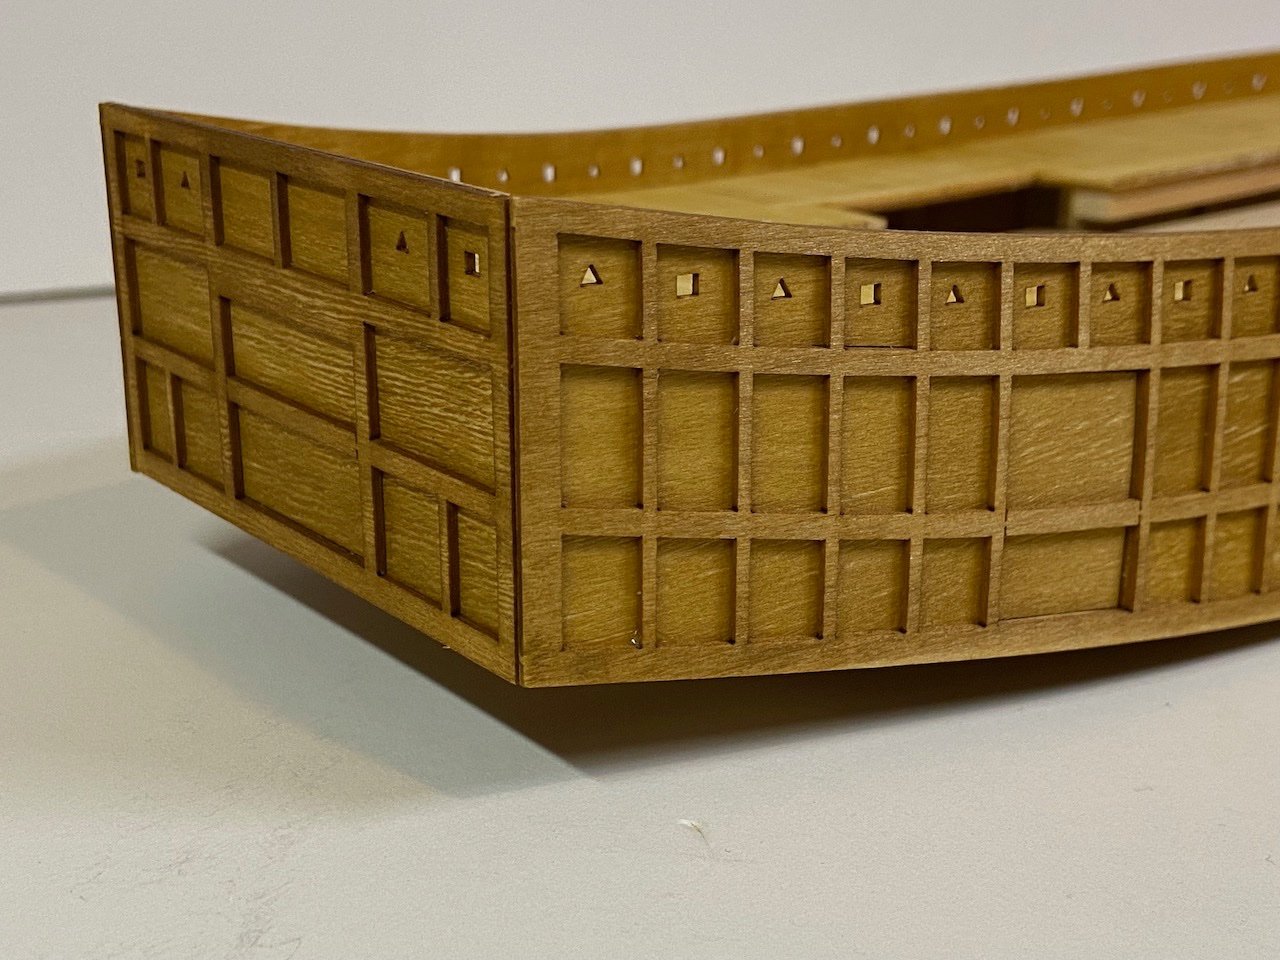
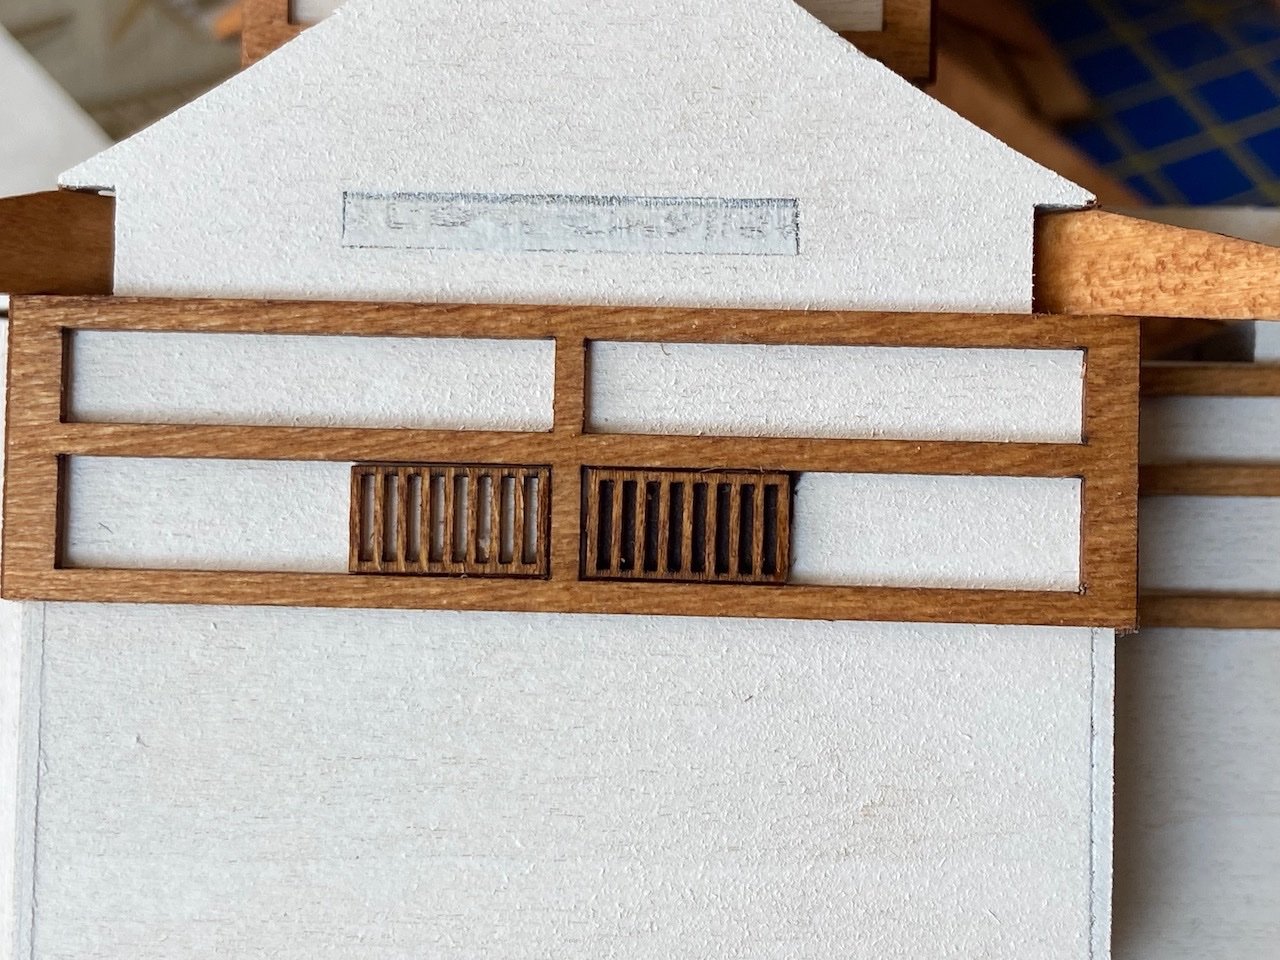
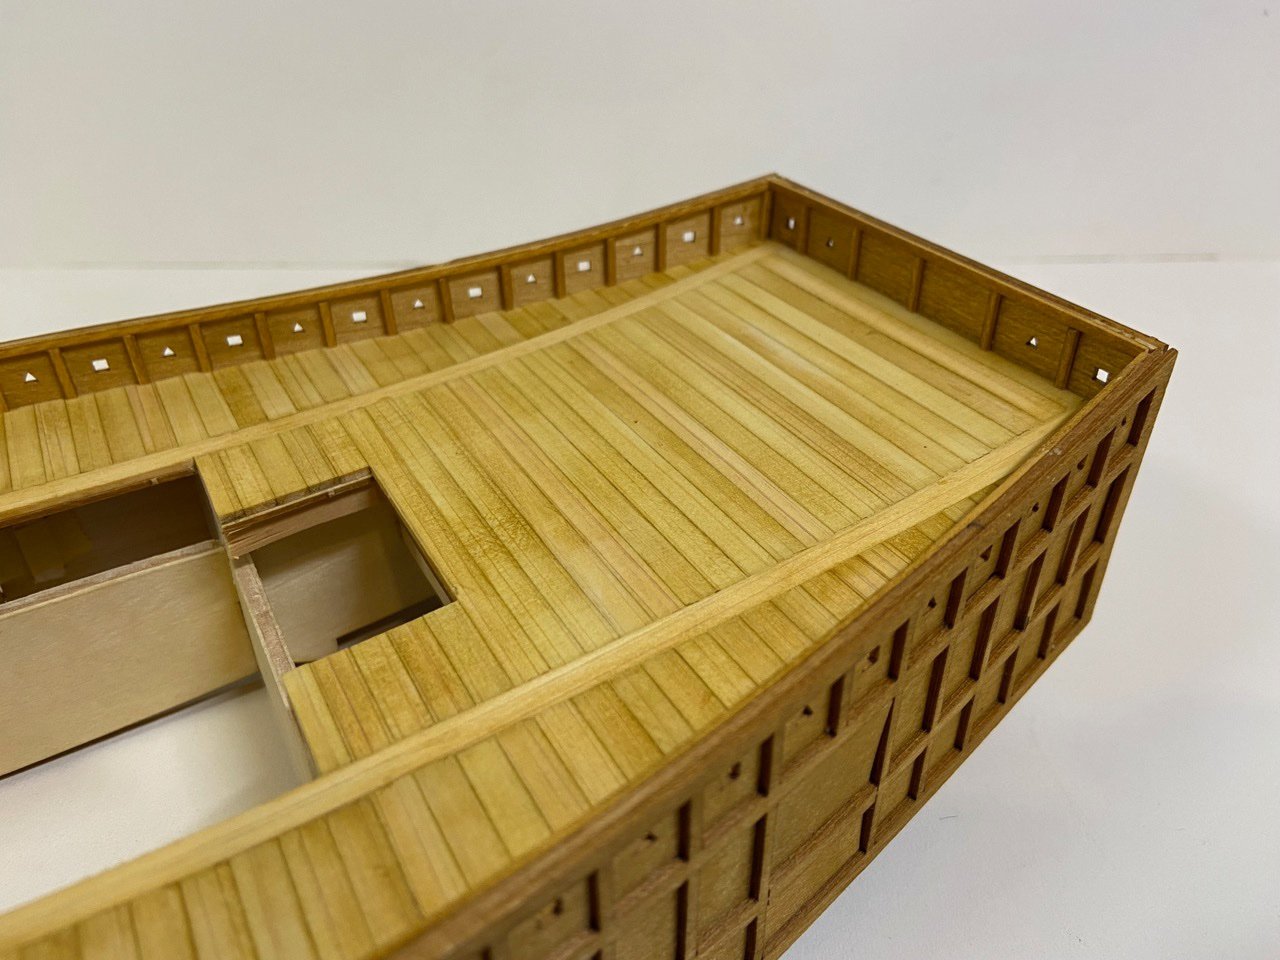
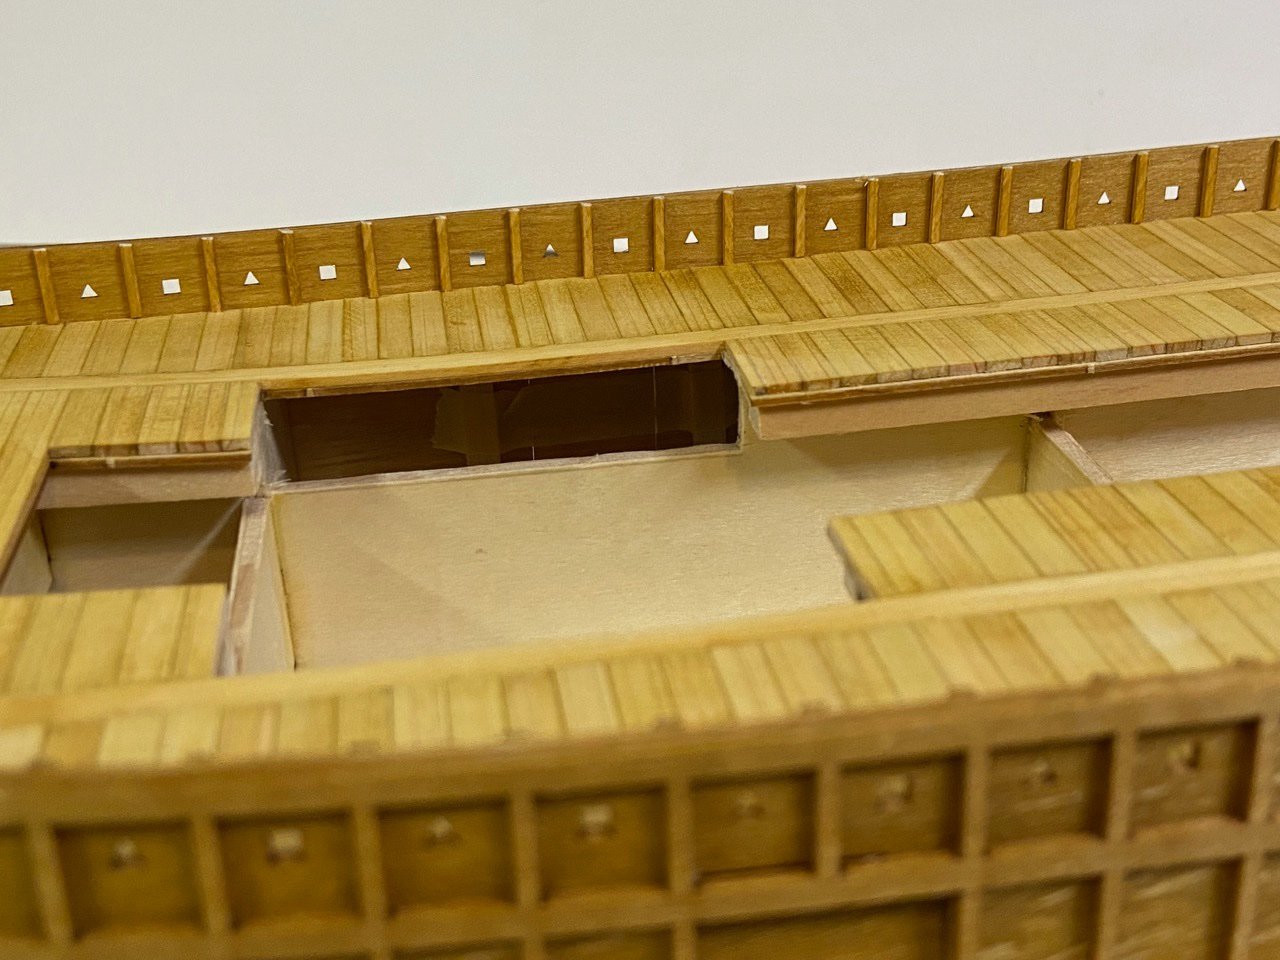
I got a little farther with the box structure and re-finished the deck planks. The laser-cut "framework," is in place on the box structure. The instructions call for the addition of strips for the horizontal portions of the framework, but I like the way this is looking now, and I'm a little concerned that the added horizontal strips kind of bulk-up the appearance. So, I'm going to think about this for a bit. In the meantime, I managed to damage some of the components of the new stern modifications. It's not surprising, giving how thin the wood is that I'm working with, and how much I've been changing back there. I don't see any issues though – I just have to remake some parts that I made in the first place. Also there are still a few additions I was thinking of making to the inner wall of the box structure. Plus, the castle structure is a completely independent assembly, so I can actually start on that too. Oh, I should mention that the coaming around the steering well is my own addition that I think better mimics the appearance of the museum model. Also, you may recall from my previous post that all the door panels fell out. They're shown in place here, but I just have them taped into place from the back sides.