catopower
-
Posts
1,900 -
Joined
-
Last visited
Content Type
Profiles
Forums
Gallery
Events
Everything posted by catopower
-
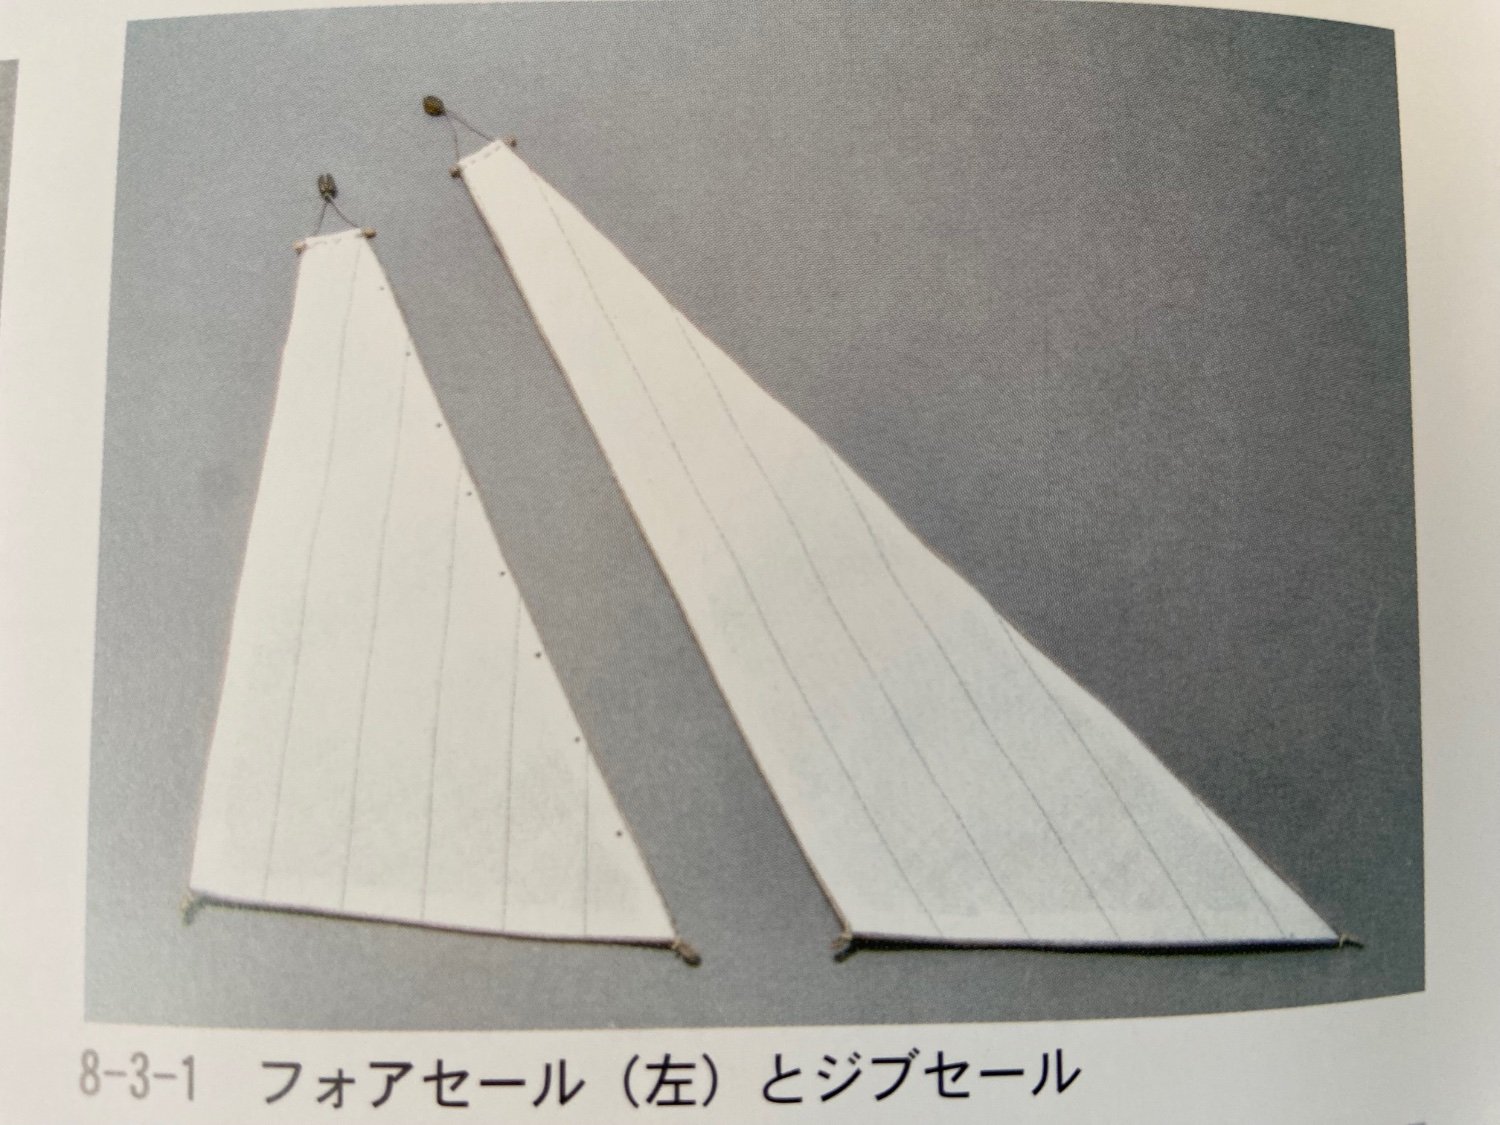
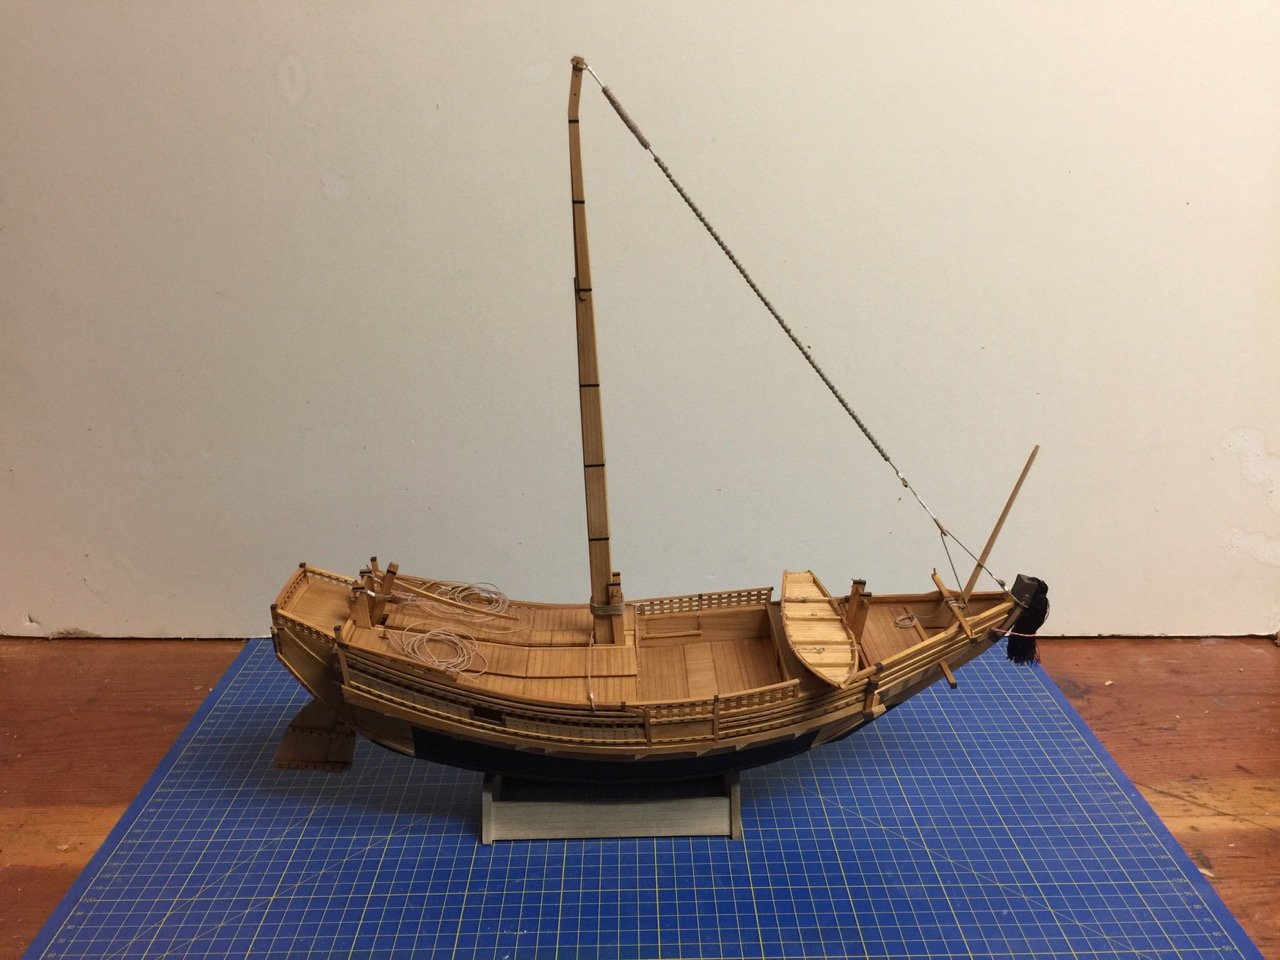
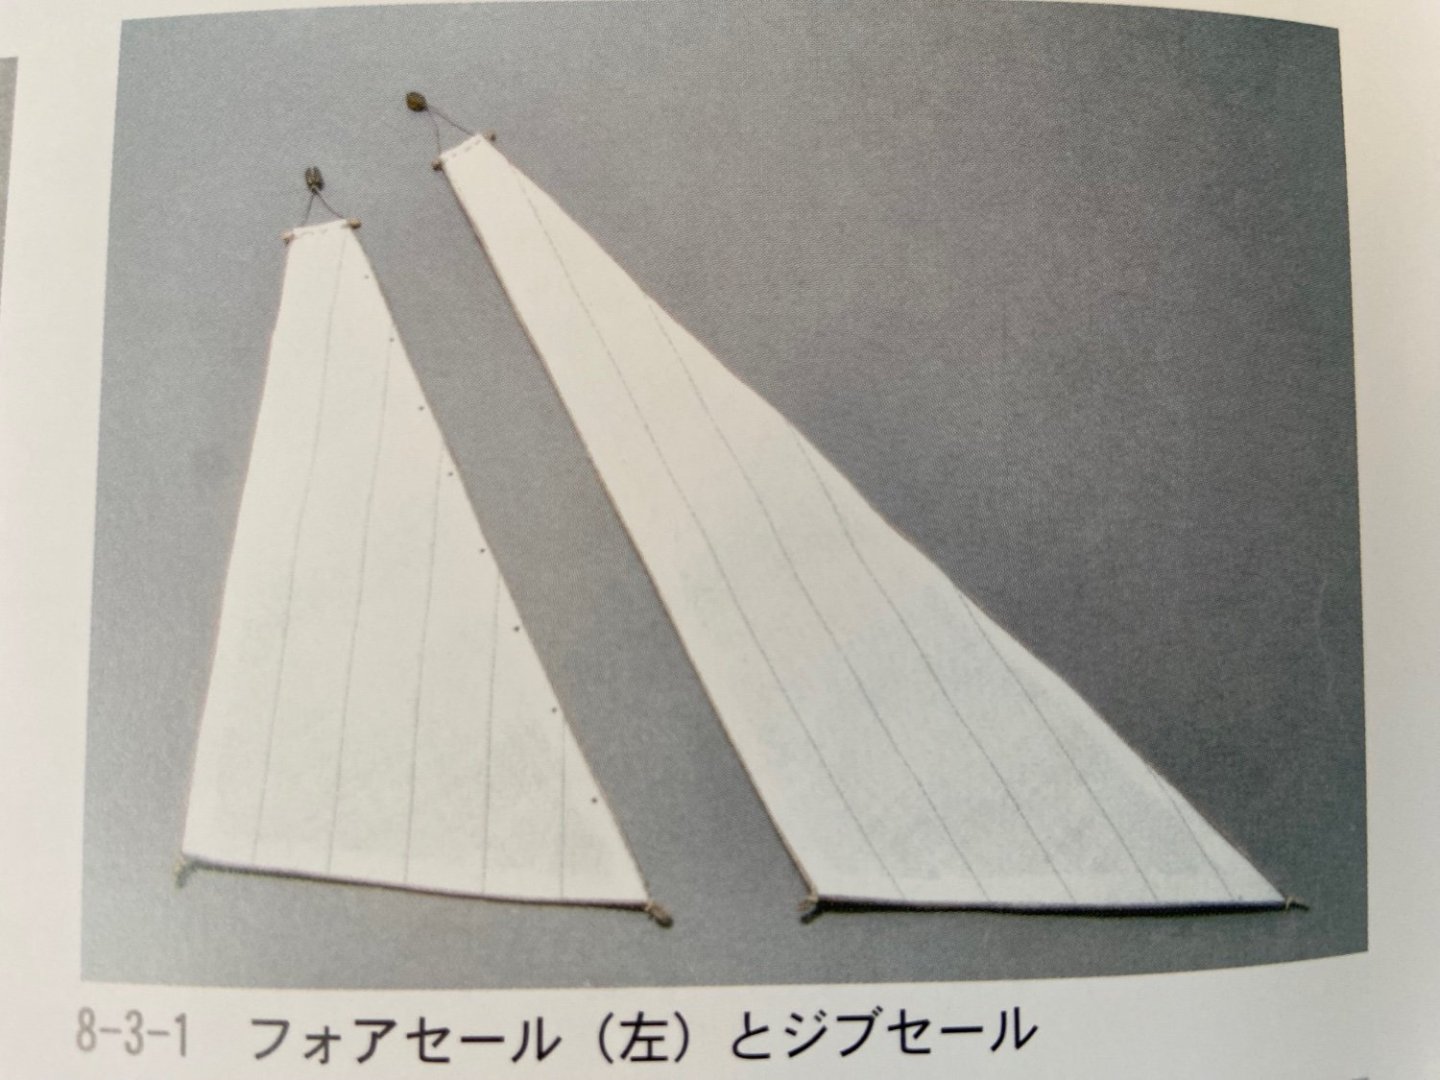
 For those who are wondering, I haven't given up on this. I needed to finish a model and diorama for a small museum in Monterey, CA, a 1/24-scale, scratch built Monterey salmon fishing boat, 1916. With that done, I also wanted to wrap up another model project that's been hanging over my head for some time, my 1/64-scale Woody Joe kit of a Charles royal yacht, 1674. Well, I just finished that up this past weekend as well, and I feel I really need to get more finished up. My Japanese coastal trade ship, called a Kitamaebune, is another Woody Joe model kit in 1/72 scale. Pretty much, it just needs sails and it's done. So, chances are good that I'll focus on that next. There are also a couple other projects that I'd like to make at least some progress on, including HMS Wolf. So, expect to see some activity again here, soon – I've not given up on anything...

- 108 replies
-
- 13
-

-
Kit review Belle Poule - Occre - 1/90 - review by kevin
catopower replied to Kevin's topic in REVIEWS: Model kits
Yes, except by average onlooker. I notice it every time I look at an OcCre kit. I think your idea of what constitutes a "complete" model is not universal. The sheathing is a sacrificial covering. Also, I know many people who don't like the look of the metal on a model, and would rather have natural wood that has the general color of copper plating instead. -
Chris, can you tell what blocks or belaying pins are required to complete the model?
- 146 replies
-
- 4
-
-
- Speeljacht
- Seahorse
- (and 2 more)
-
Interesting. At 1:50-scale, that makes it a direct rival of the Kolderstok Speeljaght wood kit... 🤔 Will be interesting to see how this compares. 1:50 is a big scale for paper ship model kits.
- 146 replies
-
- 6
-
-
- Speeljacht
- Seahorse
- (and 2 more)
-
New member and brand new (Paper) modeller!
catopower replied to Marcel1981's topic in New member Introductions
Marcel, Welcome! I've built a few Shipyard paper models, mostly the laser-cut kits. Temporarily on pause are Shipyards HMS Wolf laser-cut kit, and the Seahorse Armed Virginia Sloop kit. Hoping to get back to those very soon! LOL! Hey Chris, I don't think that may be a universally understood reference! 😁 -
Beautiful work Greg! I'm just catching up on this project now. Sorry to hear about your missing wreath and the thing about Ages of Sail and the cost of shipping. I do some work for them and apparently, they got tired of people ordering one or two parts and being told that the item that was mailed out in an envelope never arrived. So, they only use tracked shipping methods now. Sucks when you only want a 60 cent part, I know. I'll point out your comment to the staff, so they realize it's actually a problem. Anyway, very inspirational model!
-
Wonderful job on your Yakatabune model! I'm sorry I didn't see your question on my build log and didn't find this build log until just now, but I'm glad you put it up! I read what you wrote about how some of the construction tabs are visible on this model. I didn't worry about them on mine. You have to look closely to see them. But, were I to do it again, I'm sure I would basically just do what you did in covering them. Really glad to see another Woody Joe kit build and I'm very glad to see your comments about it. Nice job on the copper trim, it all looks perfect!
- 7 replies
-
- 2
-
-
- Japanese boat
- yakatabune
- (and 2 more)
-
Moonbus from 2001: A Space Odyssey by catopower
catopower replied to catopower's topic in Non-ship/categorised builds
Sorry, I didn't see this until today. The figures don't actually say 2001, but they are clearly the lunar astronauts from the film. You can find them here: https://www.shapeways.com/product/MWUZ2B6Y9/sf-lunar-set-1-48-1-55-1-72?optionId=314218691&li=ostatus Hope that helps! -
Tiny Spar on 17th Century English Yacht
catopower replied to catopower's topic in Masting, rigging and sails
Yes, unfortunately, while the photo I posted at the very beginning is of a contemporary model, the rigging was a modern addition, so not much help there. -
Tiny Spar on 17th Century English Yacht
catopower replied to catopower's topic in Masting, rigging and sails
Phil, Tony, my hats off to you both. That's exactly what I needed, thank you! Tony, I checked out your making and use of the head stick on your Sherbourne model. Wow, what a treat to see the work you did on that model. Outstanding! -
Hi David, welcome to MSW! Others have given some good advice here. I'll just add that I would at least start considering how you want to mount the model. If you wait too long, it will become difficult to drill holes into the bottom of the ship safely, if that's something your stand will require. I usually use mounting pins or screws and try to plan where they will go ahead of time. If your model has a solid hull, then screws or pins are no problem. If it is plank-on-bulkhead, you may want to reinforce the interior structure by gluing in some solid wood blocks, so screws or pins will have something to support them.
- 114 replies
-
- 3
-
-
- Cutty Sark
- plastic
- (and 4 more)
-
Hello from Seattle - looking to buy a built ship
catopower replied to wyapa's topic in New member Introductions
I don't know where some people are coming up with ridiculous ideas of the value of kit built ship models. If they're well done, then they have value. The idea that they're worth so little is total BS. It all depends on the modeler and their skill, and attention to detail, and scale. If that's not the case, then many of us shouldn't even be here, myself included... -
I noticed that your first post shows Shipyard's HMS Wolf kit. Are you working on that one? I've been working on it too, though I took a bit of a break to finish up some other stuff. I got as far as making the masts and starting on the other spars. Would love to see what you're doing on the Wolf!
-
Nice work on the color conversion. My only concern would be with opacity/transparency of the paints. As you discovered the Shipyard kits include a brand of paints called Renesans, a Polish brand. They can be found online, but you usually have to order from Europe, and it can be difficult to find a seller that can/will ship internationally. The Renesans acrylics have a slightly transparent quality to them, so you can see printed or laser-etched (burned) details through the paint. I like to use these paints for the Shipyard printed paper kits for this reason. Also, I've found that with lots of grinding and stirring, that I've been able to revive most of the dried Shipyard paint jars. But, it is a lot easier to just get new Renesans paints if you can find them.
-
Tiny Spar on 17th Century English Yacht
catopower replied to catopower's topic in Masting, rigging and sails
wefalck, I agree that the "pockets" idea seems odd for the time. The museum model I'm looking at certain shows the whole mini-spar, uncovered by sail cloth. Checking with Ab sounds like a good plan. Dr PR, I found the image you're referring to. I think that's just tiny gaffs, but they do very similar to these mini-spars on this jib and staysail. Kind of makes sense the it might be rigged similarly. druxey, you cost me a lot of money trying to keep up with your writing, but always well worth it. These titles in particular sound like something I'll be very interested in. I just wish I were better at the carving that's required to scratch build these kinds of ships. Not sorry I asked at all – Now I know what to start setting aside my money for! All, I just get my Internet fully restored today and I've had power back on now for 2 days. Such a relief, but I guess I need to get back to work now! Clare -
Tiny Spar on 17th Century English Yacht
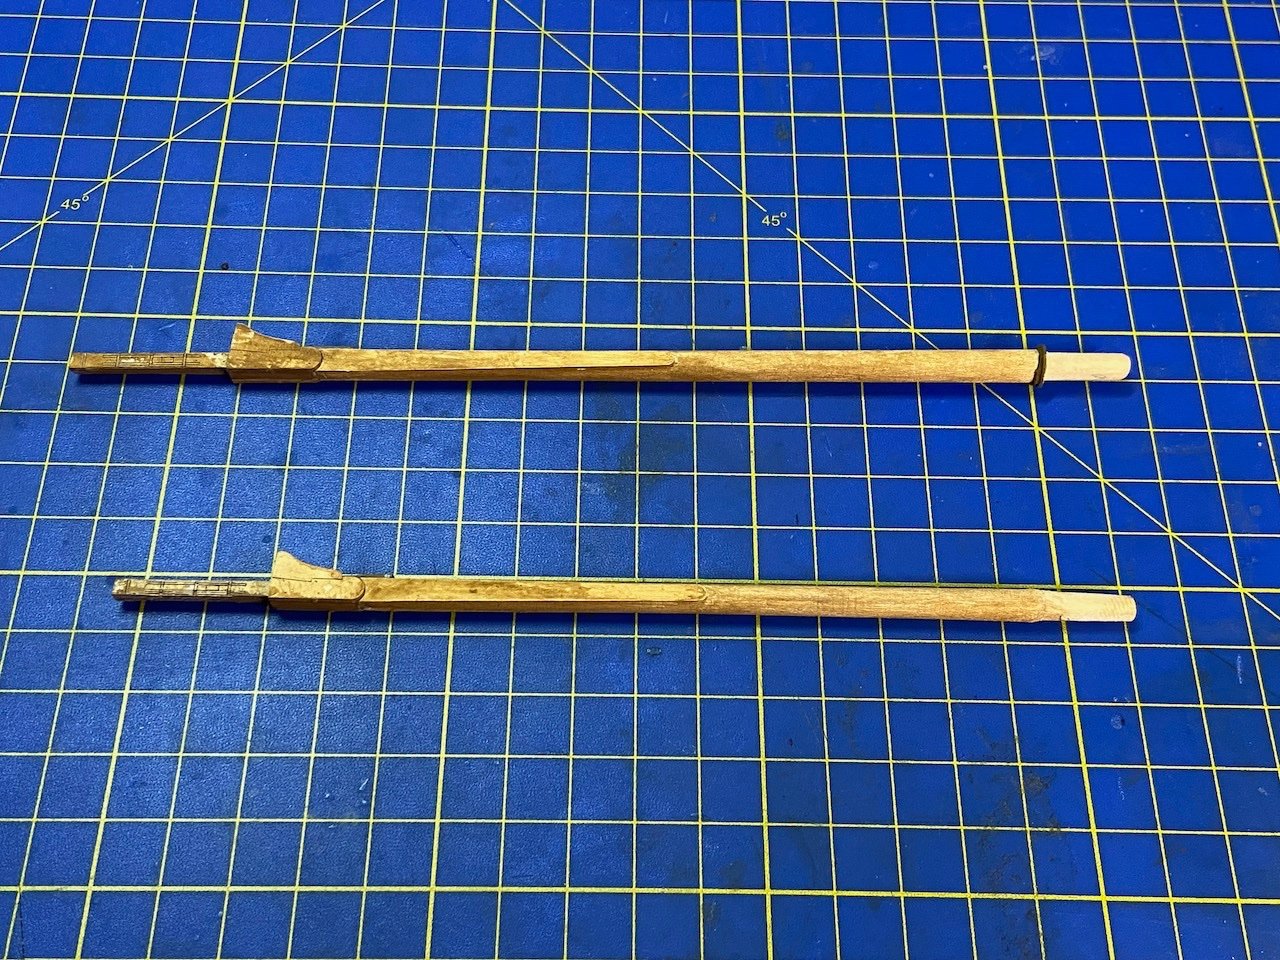
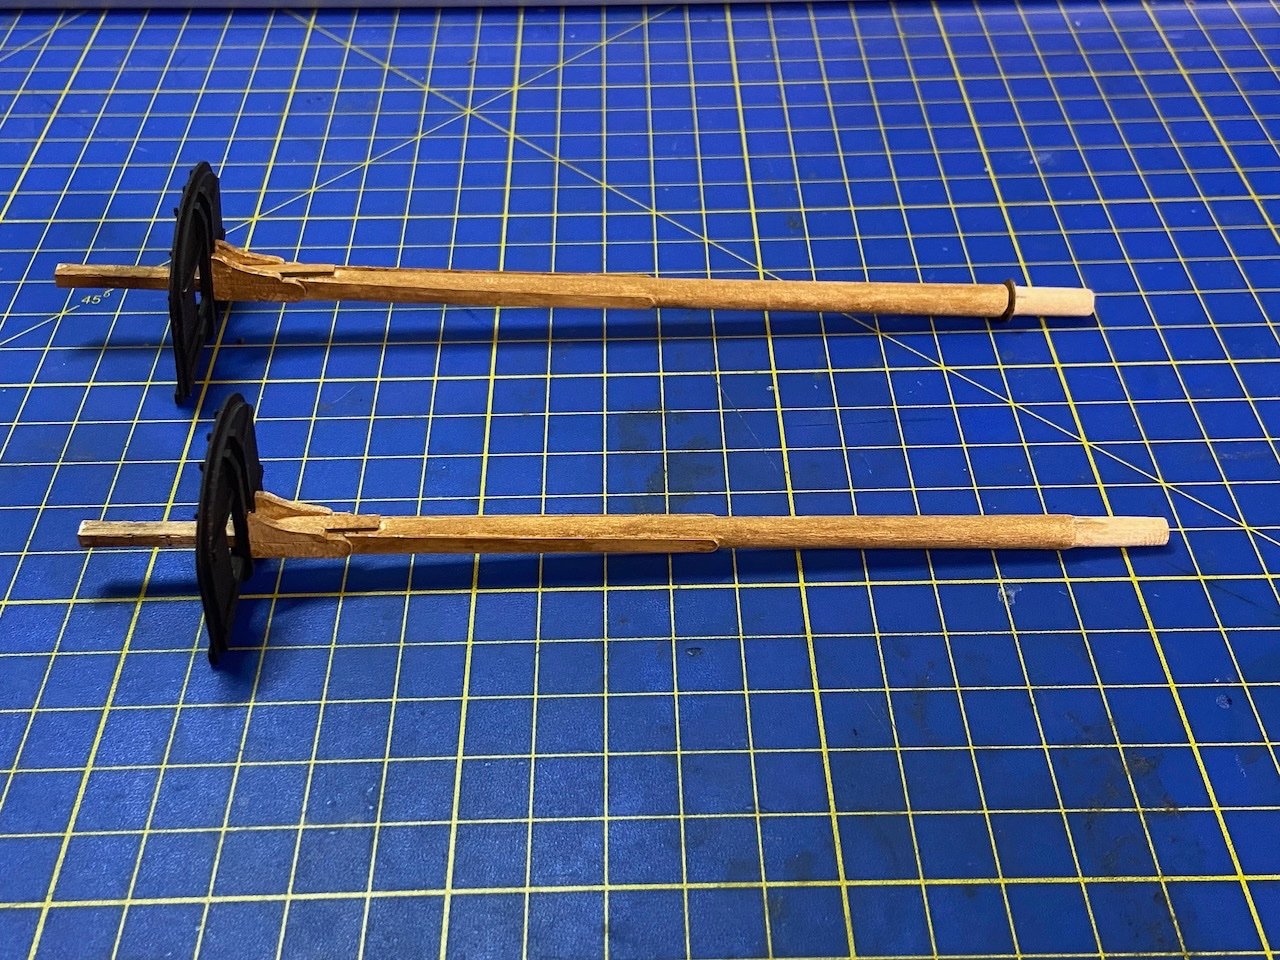
catopower replied to catopower's topic in Masting, rigging and sails
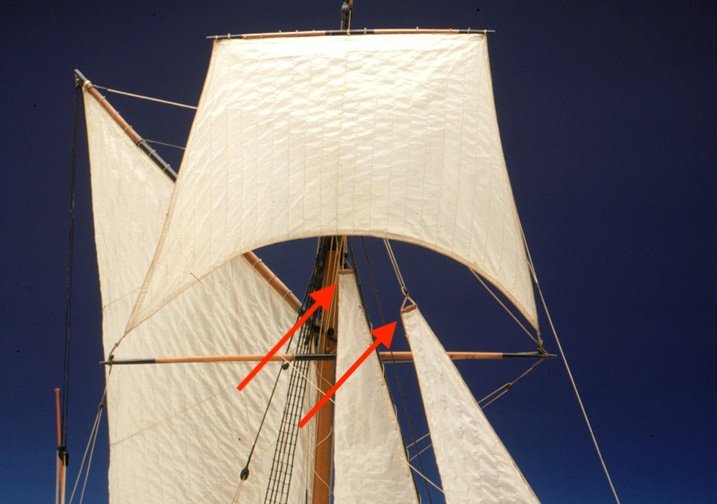
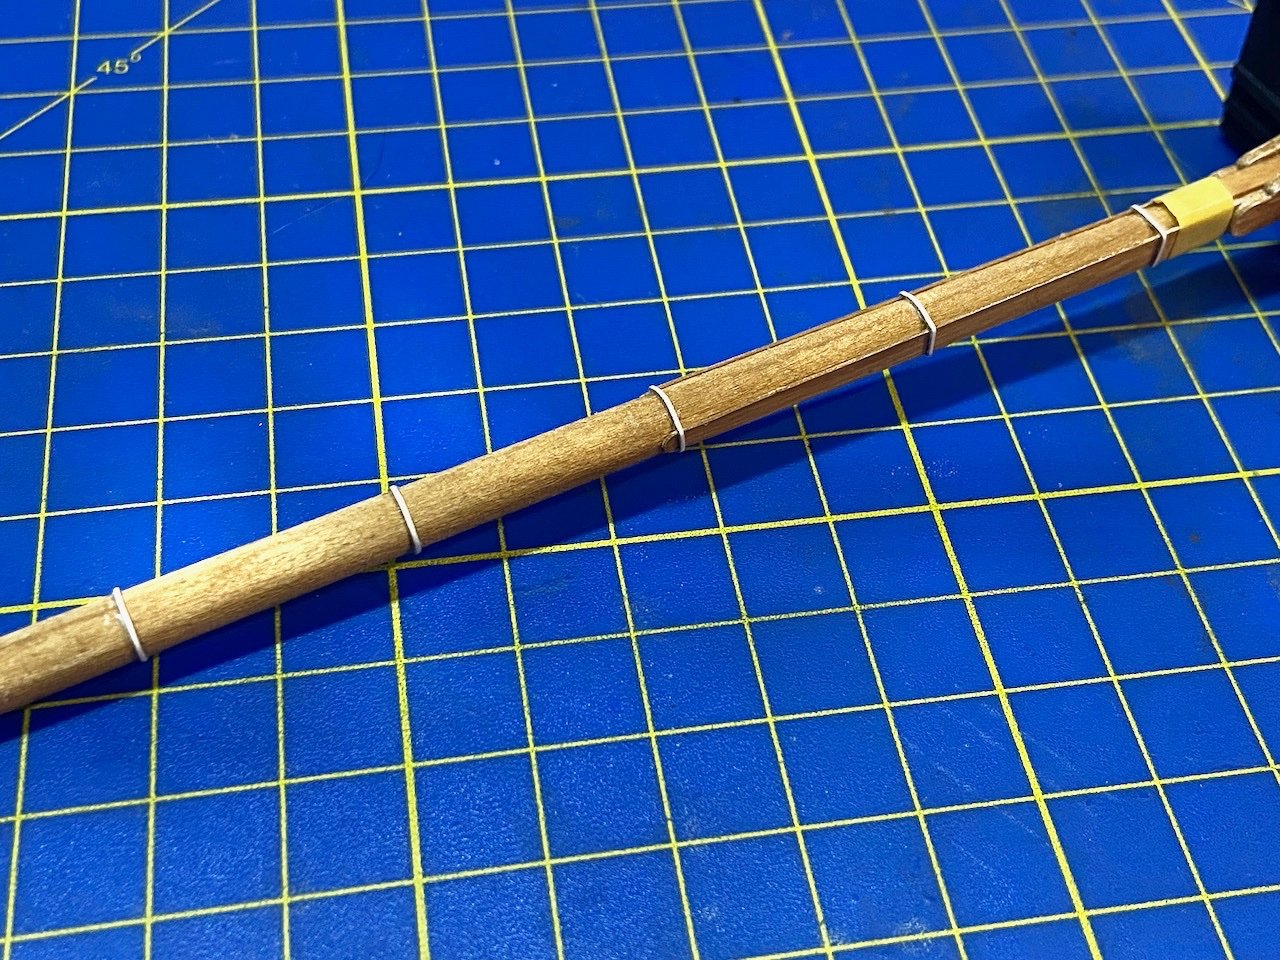
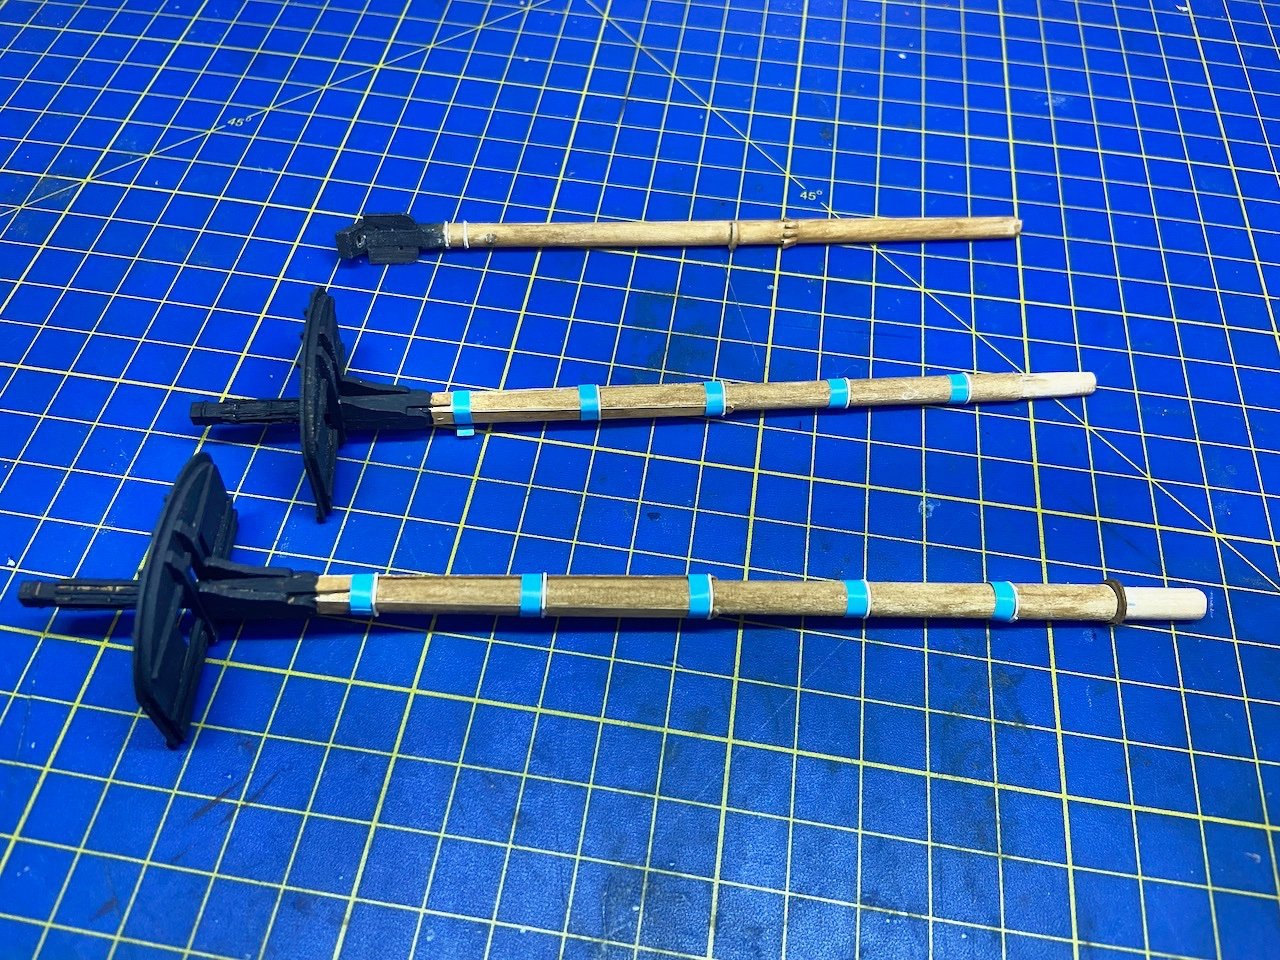
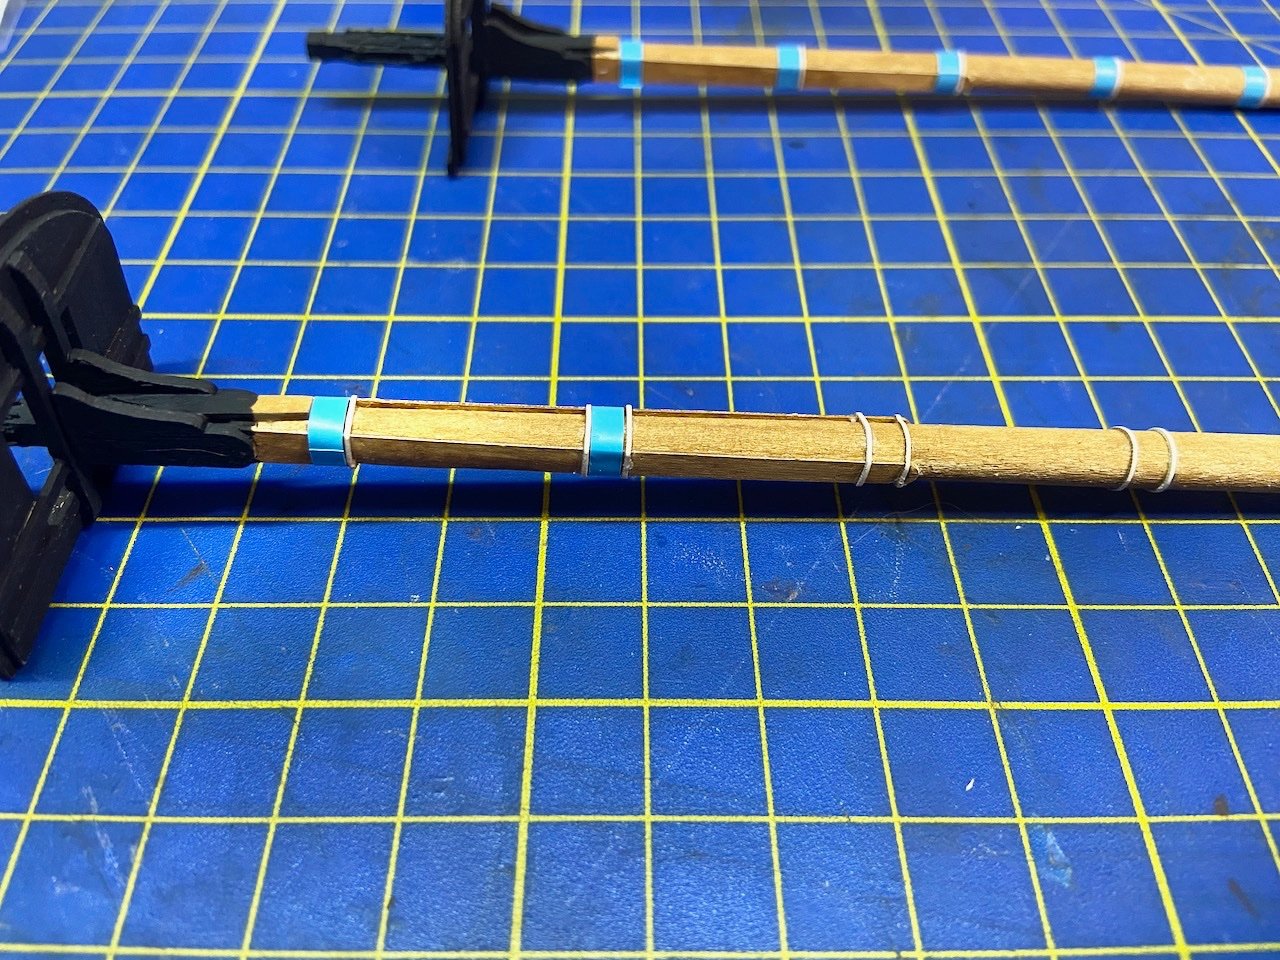
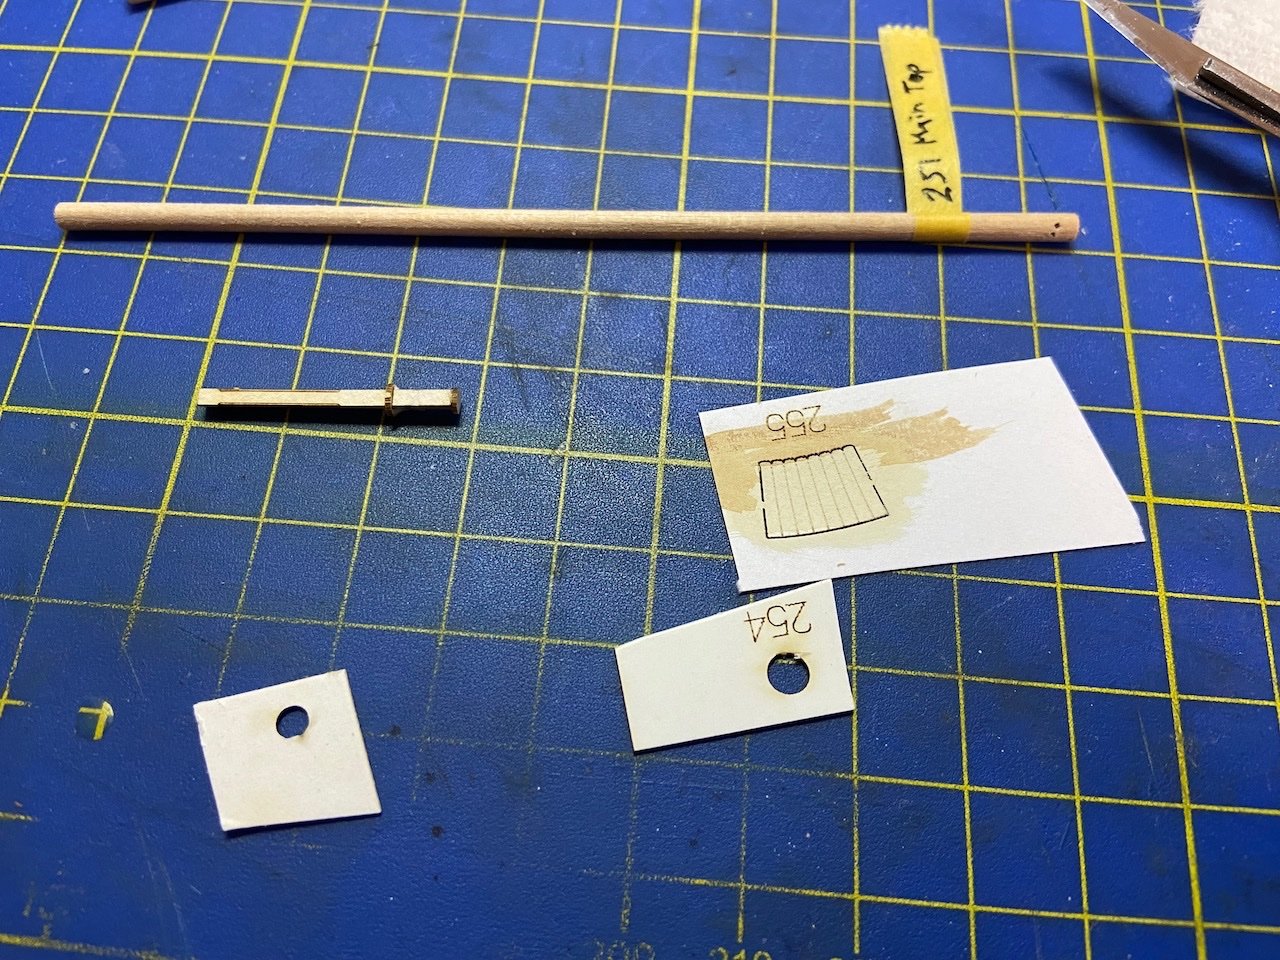
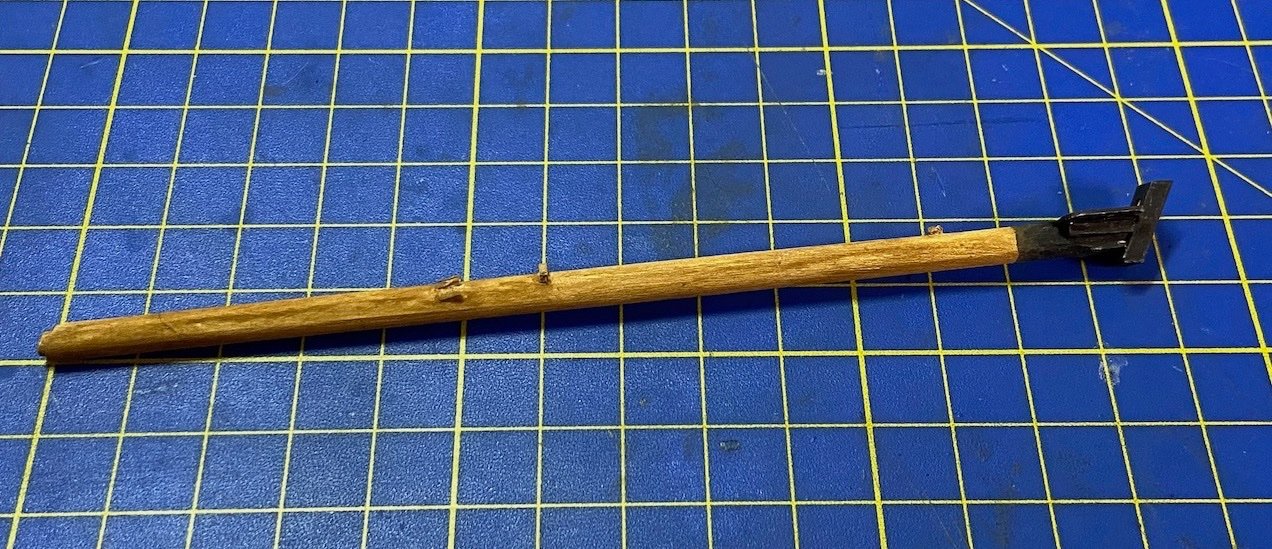
Allan, sorry, I should have made it clear that the photo was of a contemporary model. By the way, I don't think the rigging was removed, just the flags. Druxey, thanks for identifying the model and providing the link! How did you recognize and find it from the photo I uploaded??? Robert, druxey, wefalck, that's interesting about the unusual Dutch block. It's different from what I'm seeing on this model, but it does seem to serve the same purpose. The reason for my query is that I'm building Woody Joe's Charles royal yacht kit, which is apparently roughly based on this unidentified contemporary model that druxey provided the link to. The person who did the development work for this kit, the late Mr. Kazunobu Shirai, wrote a book about building the model. He wrapped the spar in the head edge of the sail. That's clearly not what I'm seeing on the museum model. I managed to translate a bit of the book's text where he mentions that this was a Dutch practice, as everyone here has pointed out. Dr. PR, I'm thinking the club is, as you say, is probably laced to the head of the sail. I looked for mention in Landström's book, but couldn't find anything. Do you have a page number? These are from Mr. Shirai's book... Clare
-
Tiny Spar on 17th Century English Yacht
catopower replied to catopower's topic in Masting, rigging and sails
Thanks friends for chiming in on this subject. I must apologize for not being more responsive, but I lost power in my house on Saturday morning when neighbor's yard people trimmed a tree and downed a power line, causing a power surge that knocked out service to several houses and burned up a lighting fixture in my house (Fire Department had located it). Just got power restored today, though possibly temporarily. I actually have no Internet still, except from some limited wifi I can piggy back onto (like right now). Again, power's back, at least for the time being, and more importantly, light, HEAT, cooking appliances, refrigerator, and did I mention HEAT??? I'll try to follow up on your comments about this strange little spar soon! Thanks again! Clare -
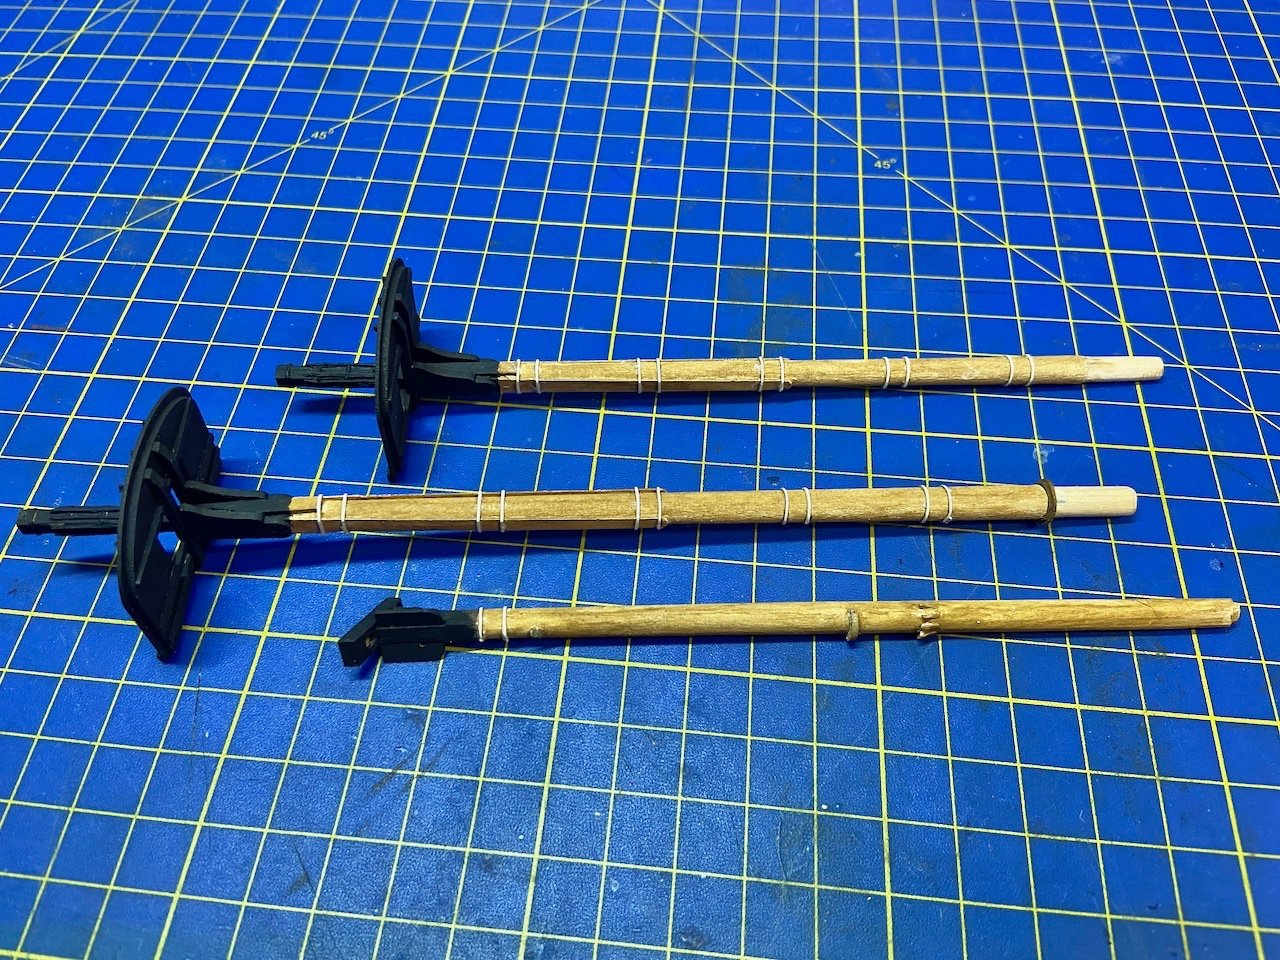
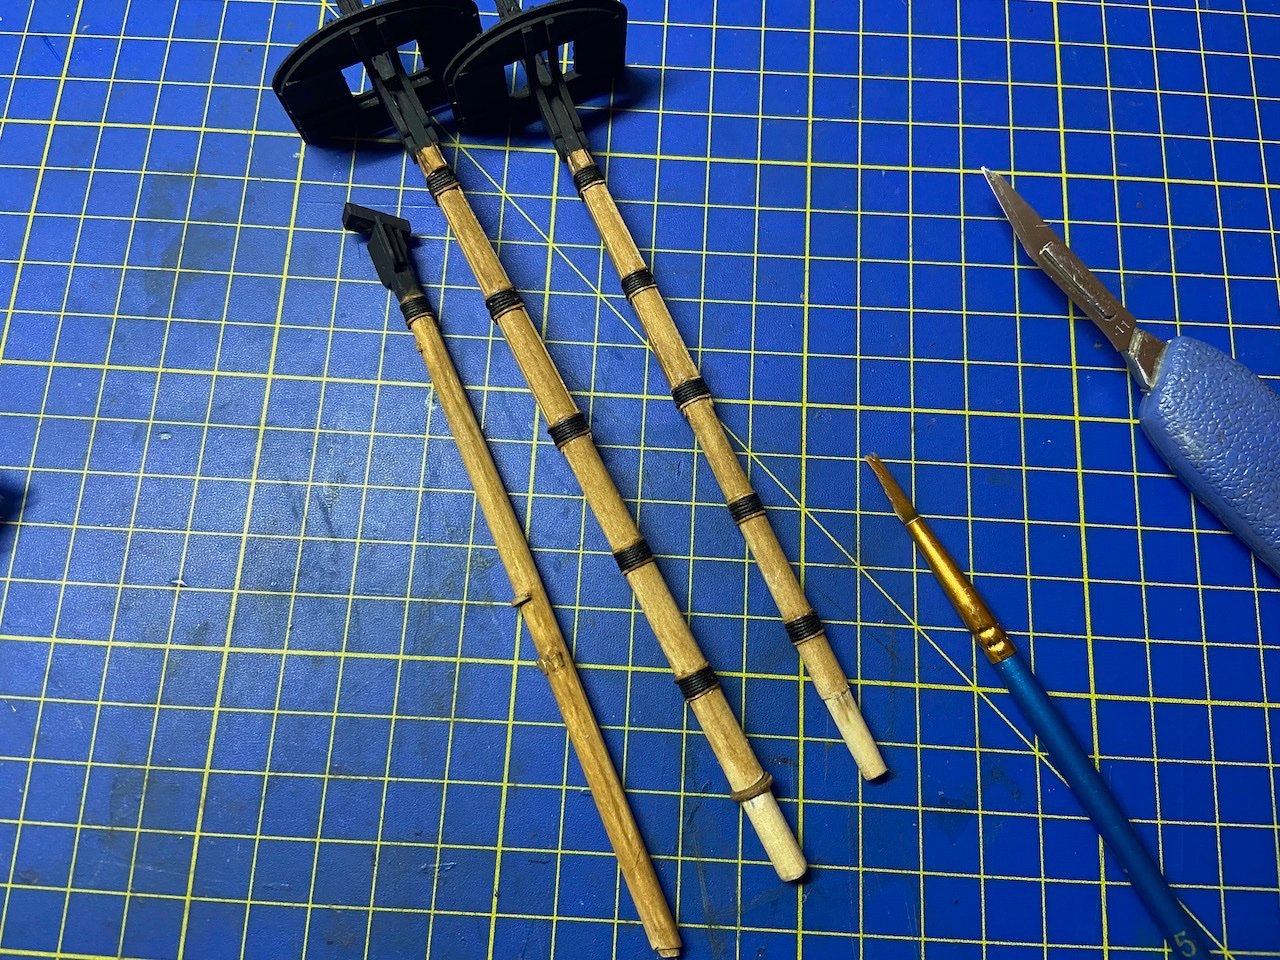
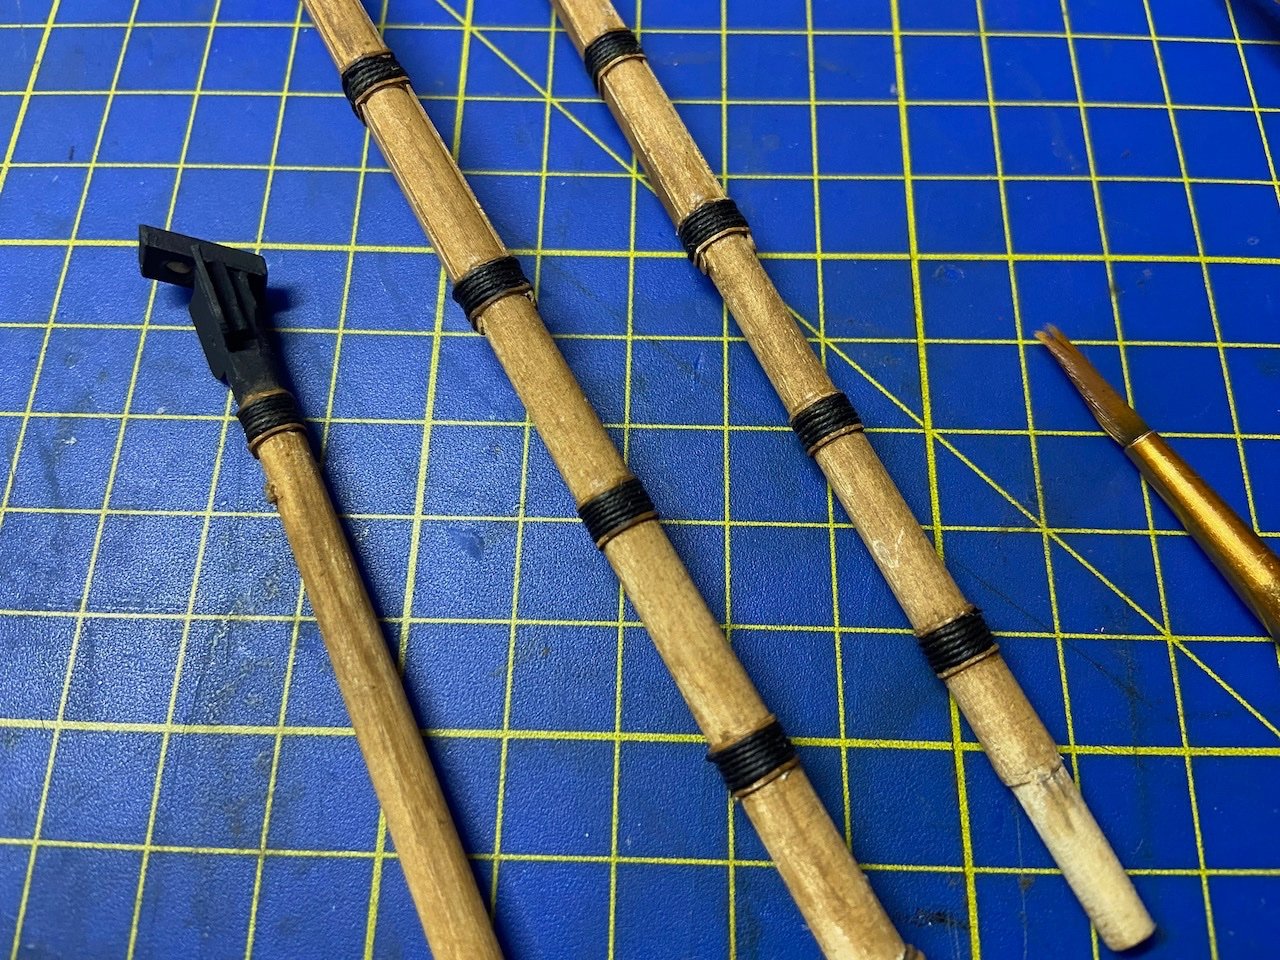
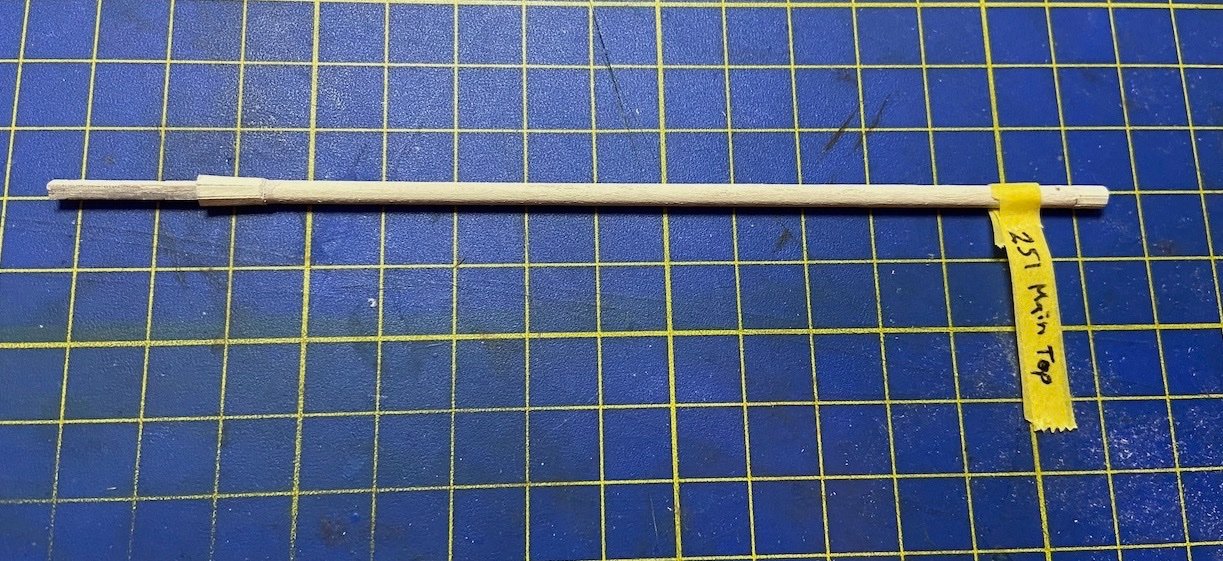
Can anyone tell me what the little spar is called that appears at the head of the jib and staysail on this English yacht? Also, does anyone know how it's attached to the sail and to the halliard? I can makes some guesses, but I'm hoping someone has something definitive. I've looked in various rigging references, but haven't been able to find any info. Thanks in advance! Clare
-
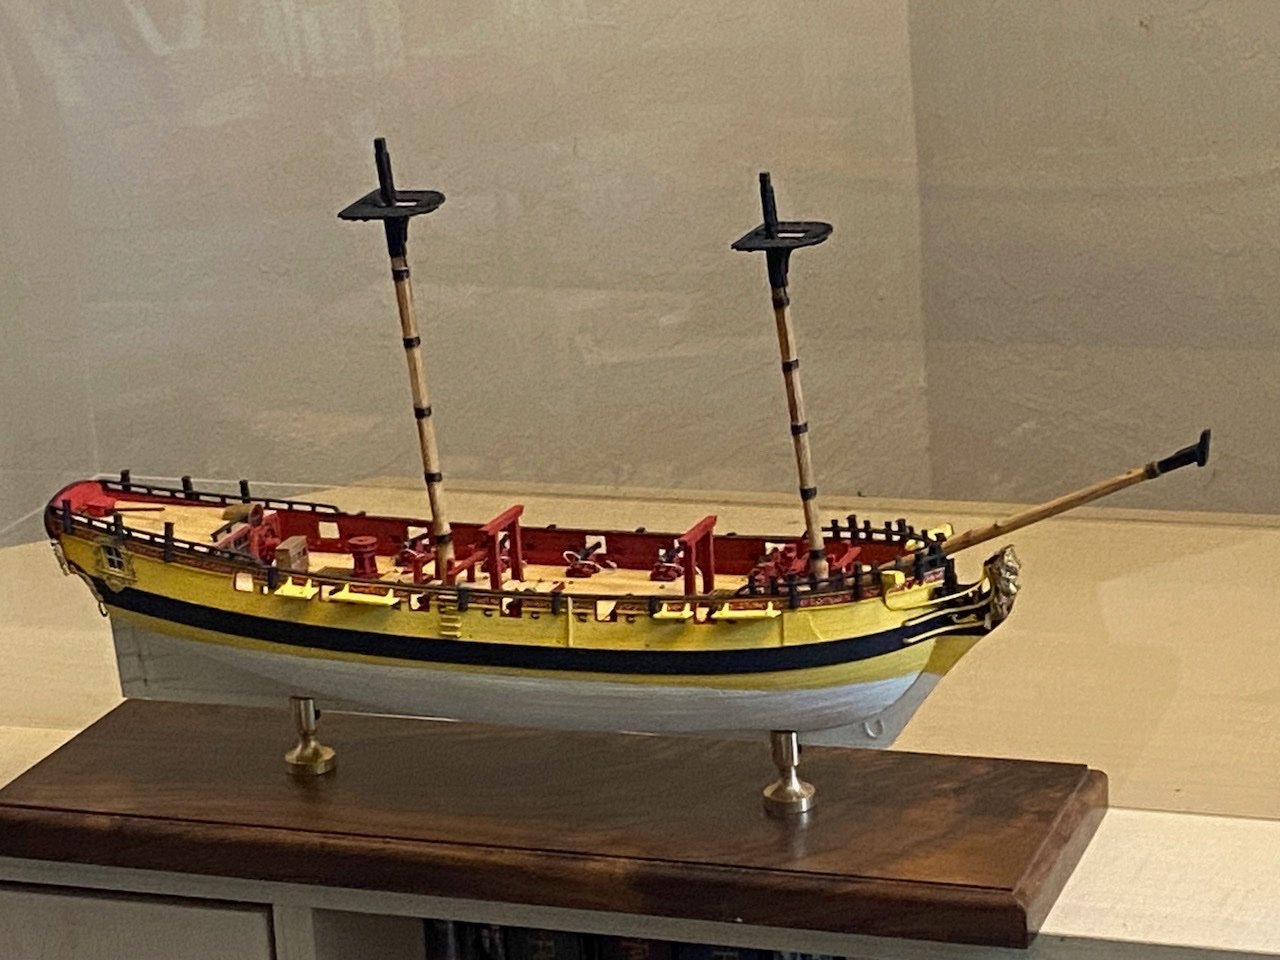
I completed the lower masts and the bowsprit, adding the mast hoops and the wooldings. In order to get the width of the wooldings consistent, I measured them out on the plans and then cut some adhesive backed vinyl as a guide. I cut the vinyl on my Silhouette Cameo 3 machine. It allows me to make consistent strips of precise widths without error. After I mounted the hoops, I painted them and then painted the space between them black. Just in case I don't do a good job with the wooldings, it won't be noticeable. I wrapped the wooldings with some black rigging line. To be honest, I don't even know what line I used. It was just laying around my work spaces in a bit of a tangle and was the right size, so I used it. There are a LOT of parts going into each of the lower masts. It was a bit of a challenge building them up, but it felt quite rewarding. Here's the ship with the masts and bowsprit test fit... I'm in the process of making all the yards (and gaff) now, but that's a lot more straight forward and easier than the masts. I do have to figure out what to do about the t'gallant masts still. The poles at the tops get might thin. Perhaps I'll use some brass rod. Meanwhile, I'm starting to give some thought as to what her sailing configuration will be. The kit includes a full set of sails. I will have some of the sails set, might try furling the main courses to pull them up out of the way. I'll do a bit of research before I have to start dealing with them. Next step is to finish rigging the cannons and adding the remaining cleats...
-
Being rather productive this holiday season, I decided to press forward by working on the bowsprit and masts of HMS Wolf. It's amazing how many laser-cut parts are provided for the detailing of these. There are some dozen little parts plus the wooden dowel, which requires shaping, and another seven or so, just for the bowsprit cap, not including the half dozen eyebolts that have to be made and added to it. My completed bowsprit. Still have to add eyebolts to the cap... The lower masts were next and this was the first time I'd encountered the built-up card for the mast tops. The cheeks and above are all laser cut card and I found the part of the mast that will make up the doublings to be too flex, and I was not confident they would survive my rigging work. So, I added a little strip of wood front and back at the cheeks – I figured they be painted black, like the whole area of the mast head, and be pretty well hidden. I also made sure to soak the thick card masthead with thin CA glue. This did stiffen them up and made the whole masthead feel a lot sturdier. The thin paint used on the wood beaded up at the CA soaked card parts, but this area will be later painted black, so should look much better. Test fitting the mast tops. Here, you can see the wood reinforcements at the cheeks... The assembling of the main topmast, showing the dowel and 5 of the 8 laser-cut parts that make it up... Complete main topmast after assembly and "primer" painting... I expect I'll continue preparing all the mast parts and start on the yards and gaff as well. By the time I'm done with these, I'll have decided on the rigging and blocks I'll be using. Then, the rigging can commence!
-
I've noticed that some manufacturers of models kits of wooden ships, and some modelers, tend to throw around the term "riveted", when in fact they're referring to things that were nailed or bolted. If it's any help, Matthew Betts in his book on HMS Terror, describes the iron plates as being "bolted" to the bow.
-
Moonbus from 2001: A Space Odyssey by catopower
catopower replied to catopower's topic in Non-ship/categorised builds
Hi Yves, it is a pretty neat model kit. I've always liked this car and it's interesting to see how well a 1960's concept "Car of the Future" holds up today. It did have electric motors, a hybrid engine, digital display, onboard computer, rear video camera, solar cells, etc. But it also was supposed to be built for high speed travel on specially designed highways using computer control, lift fans, turbine engines, and retractable wheels! I'm still waiting for these "future" developments in car travel... -
Moonbus from 2001: A Space Odyssey by catopower
catopower replied to catopower's topic in Non-ship/categorised builds
Hi Ziggy, I hope you do! It's a fun build.