catopower
-
Posts
1,900 -
Joined
-
Last visited
Content Type
Profiles
Forums
Gallery
Events
Everything posted by catopower
-
 I think it's kind of funny how this thread has gone from the OP asking about his pin vise, to recommendations of drill presses. Personally, like Chuck, I am very happy using a pin vise. My preferred variety is the swivel headed type. Quality varies with these things. My go to is one sold by ModelCraft Tools. I have a few of them, with each set up with a common drill bit size, so I can swap pin vises without having to change the drill bits all the time. In any case, I have no trouble using drill bits as small as #80. I have drill presses, and there is a place for the power tools, but nothing replaces the ease of use of a basic pin vise.
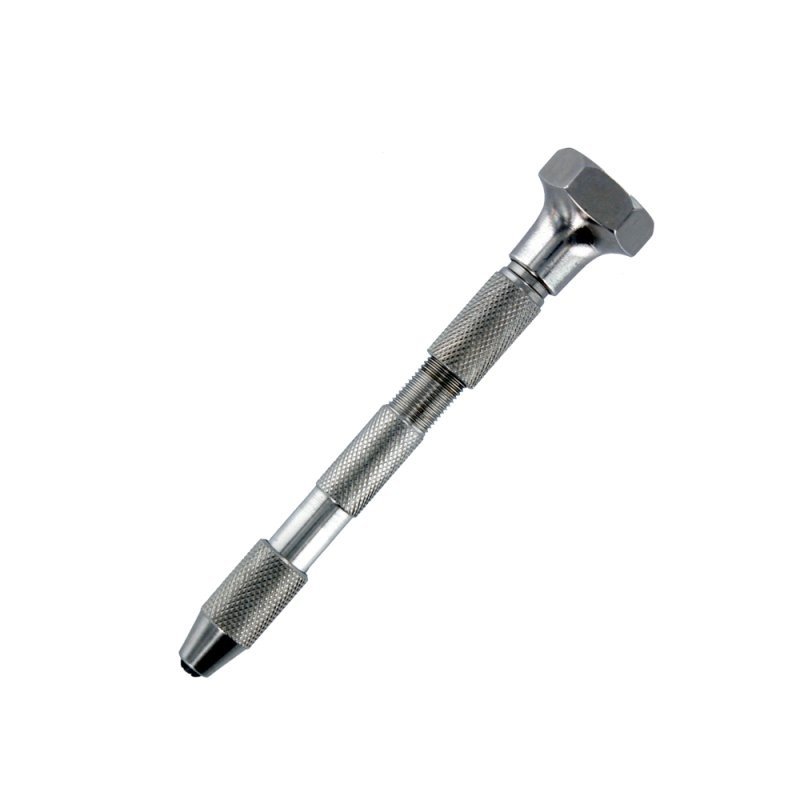
-
As I recall, the old AL instructions were pretty generic. All the build info is derived from the plan sheets.
-
@TJM I see there are two versions of QCAD available. Are you using the regular QCAD Professional or is the QCAD/CAM version?
-
Hello TJM, I'm enjoying reading your posts here. I recently splurged on an XTool S1 40watt myself and trying to learn what I can about doing laser-cutting with it. I'm very impressed by what you've accomplished so far. What's your source for the 3mm MDF?
-
Lovely work Chris! Question: What blocks are you using?
- 146 replies
-
- 4
-

-
- Speeljacht
- Seahorse
- (and 2 more)
-
Thanks for posting this, Tim. Having just gotten myself a new laser-cutter, I find your project very inspiring.
-
I think it's neither amateurish nor unrealistic if you are representing a specific reason for a ship doing that since, as John (Jim Lad) pointed out that it was done in reality. That said, it's such an unusual configuration that it will look really odd to most people, and you'll probably have to constantly explain your model to people. That might get annoying after a bit.
-
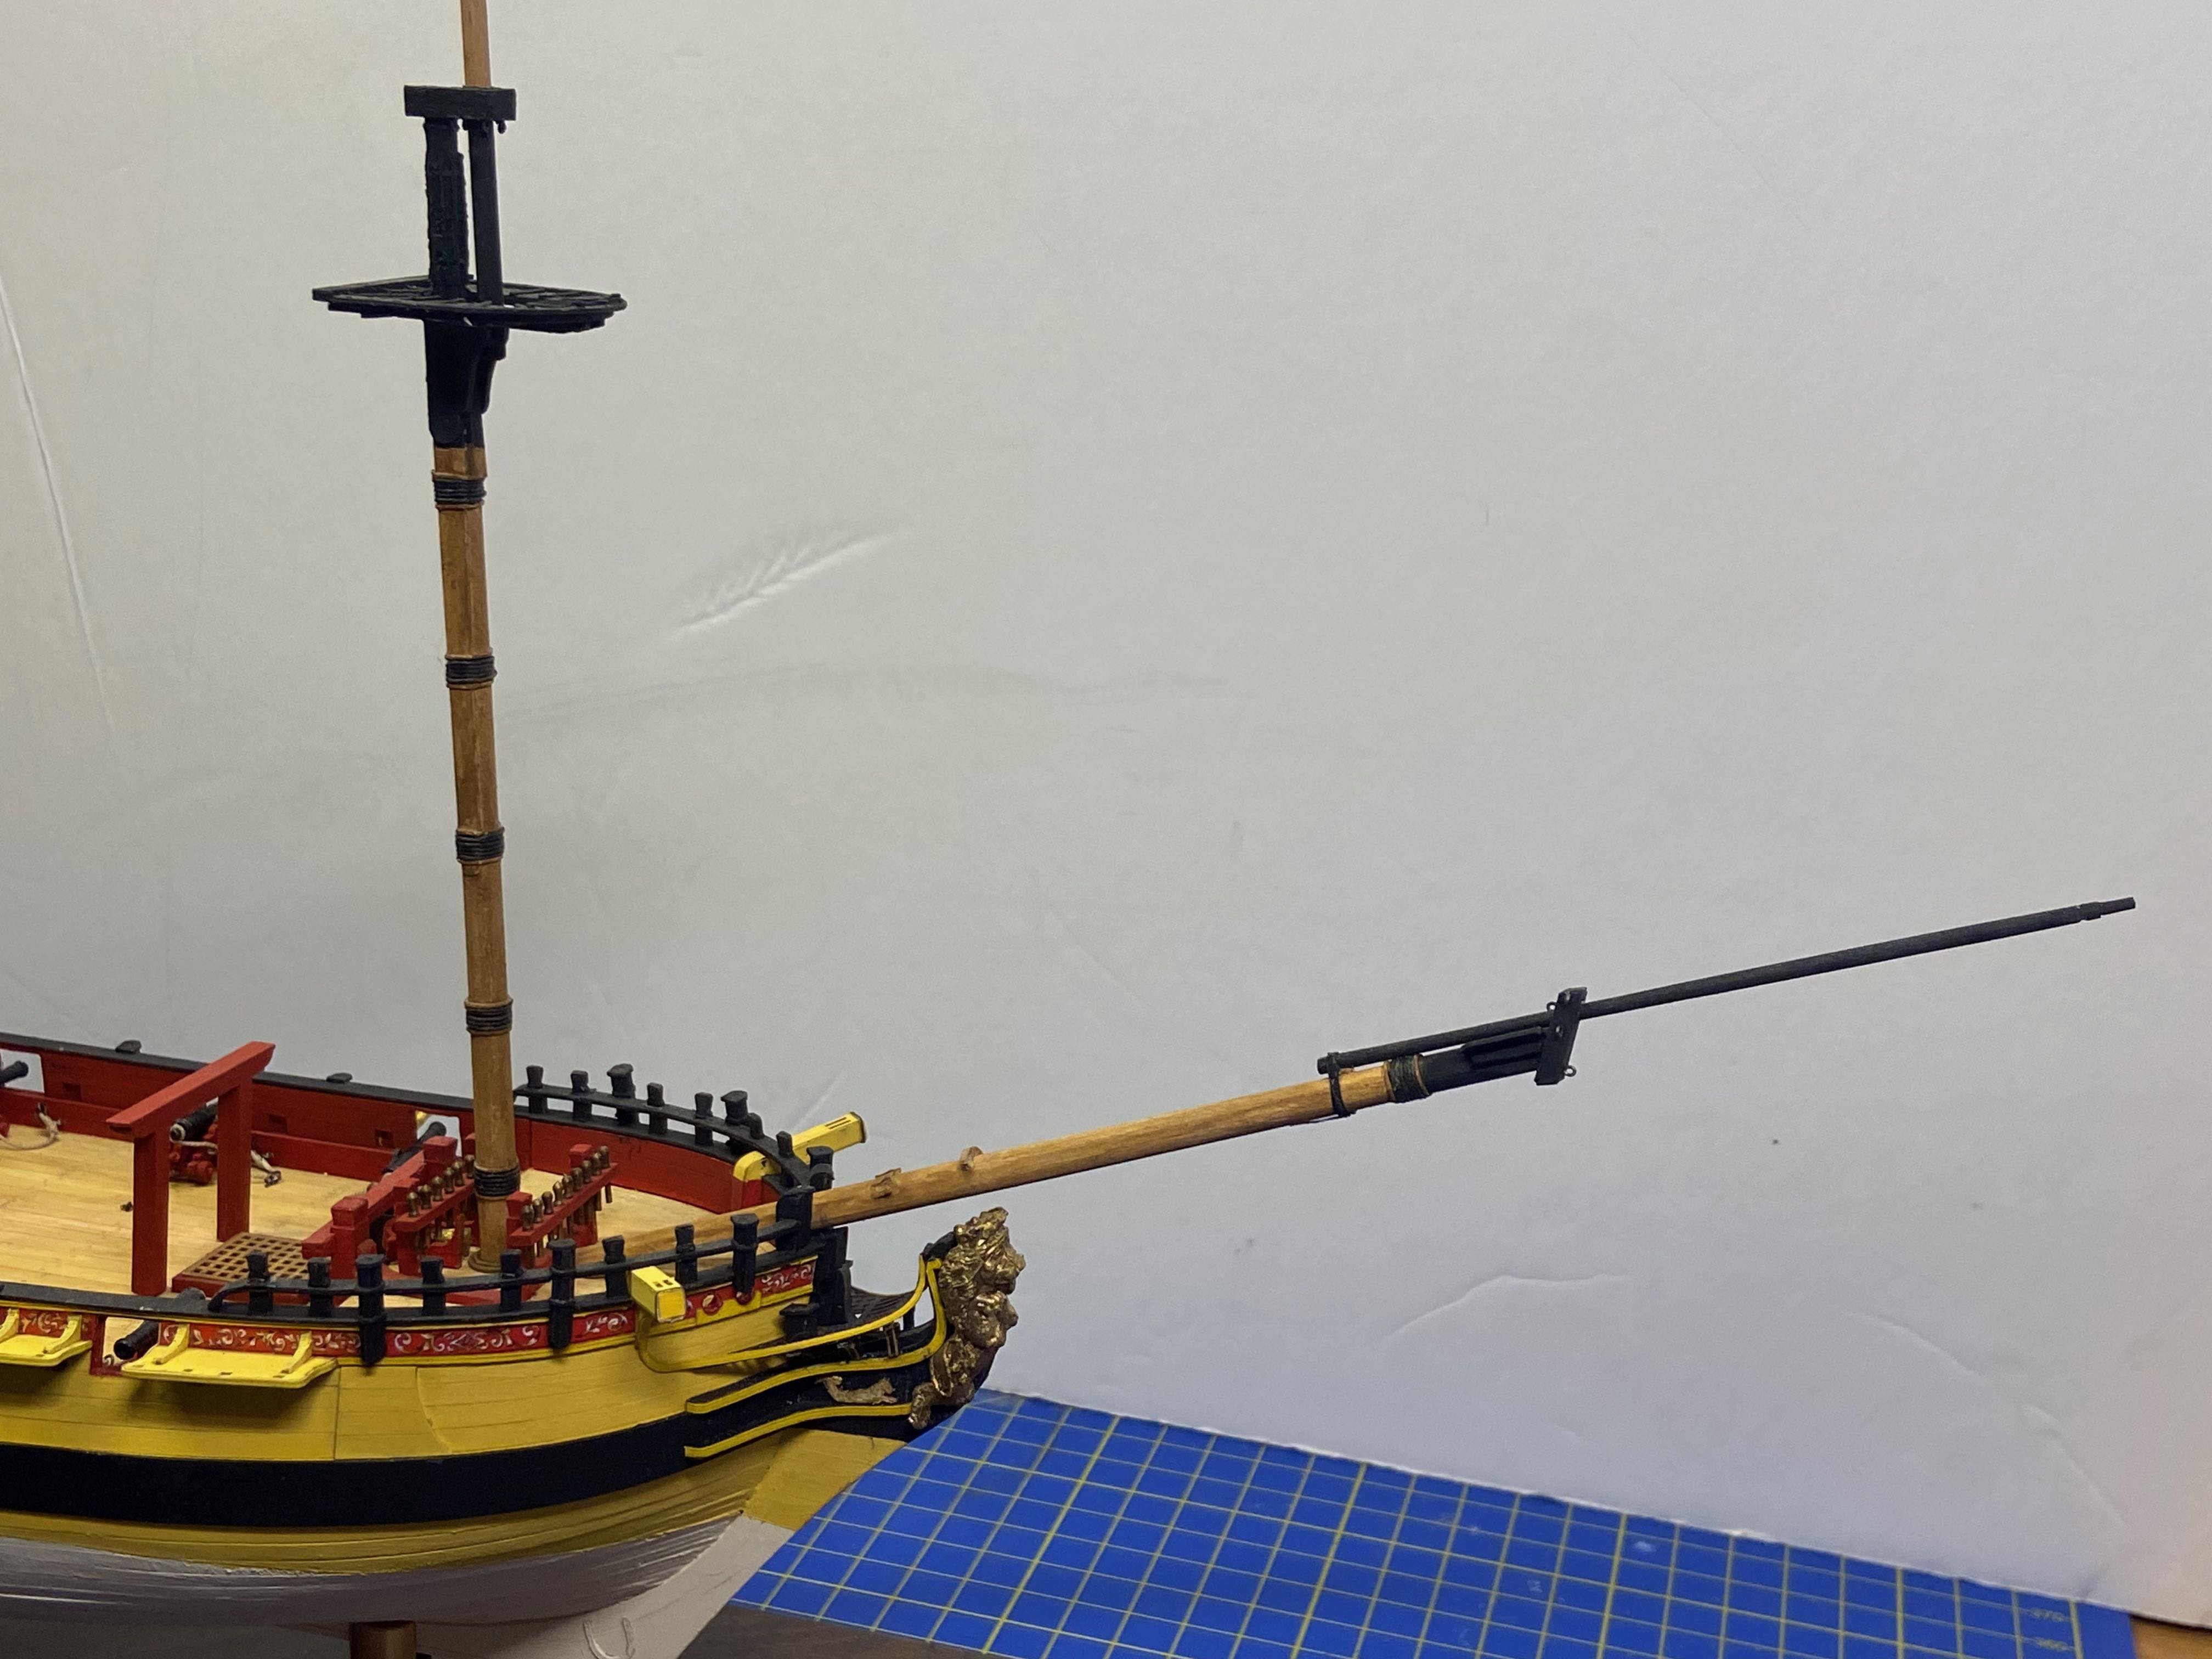
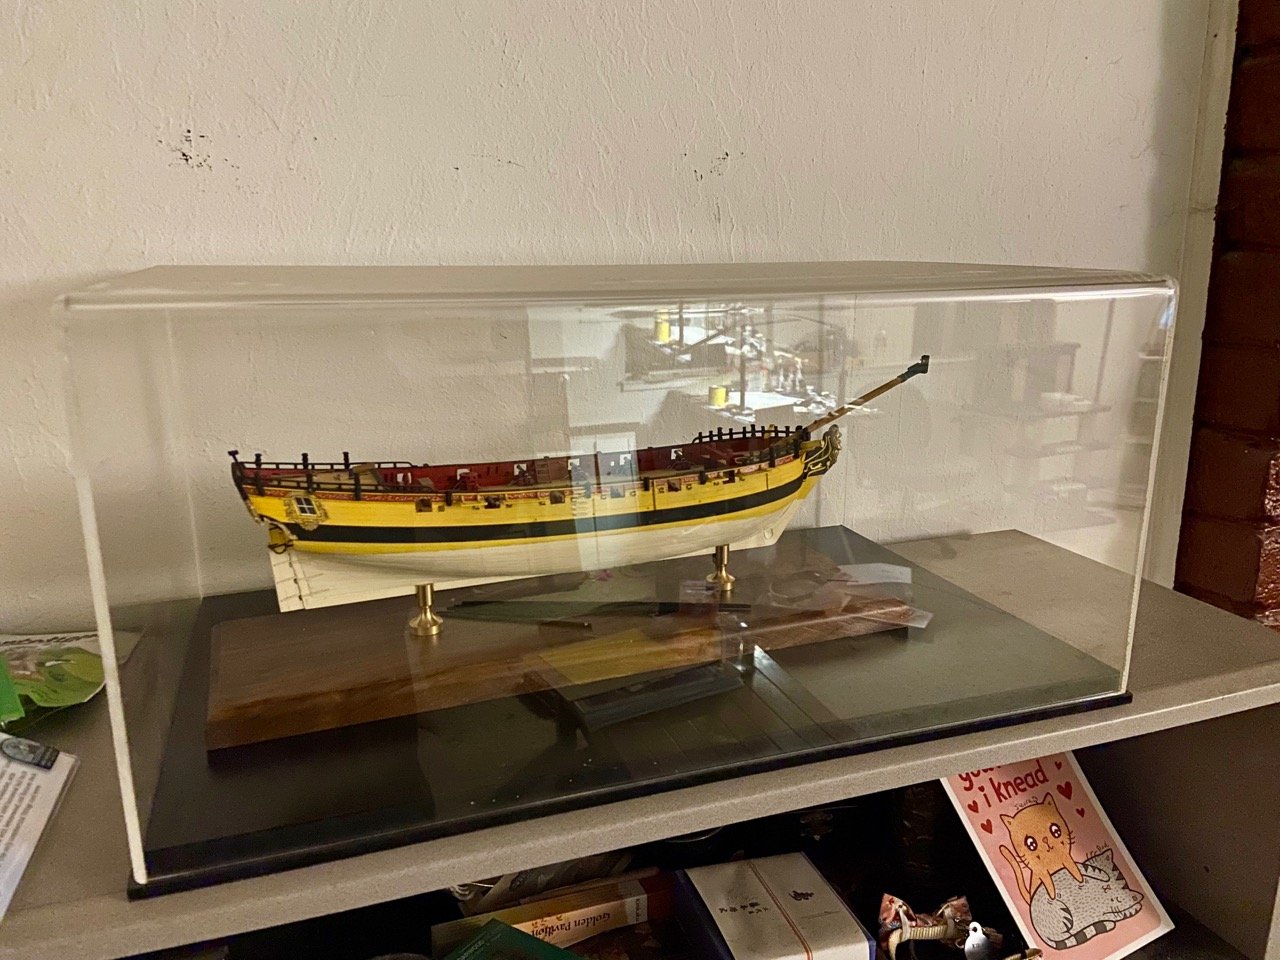
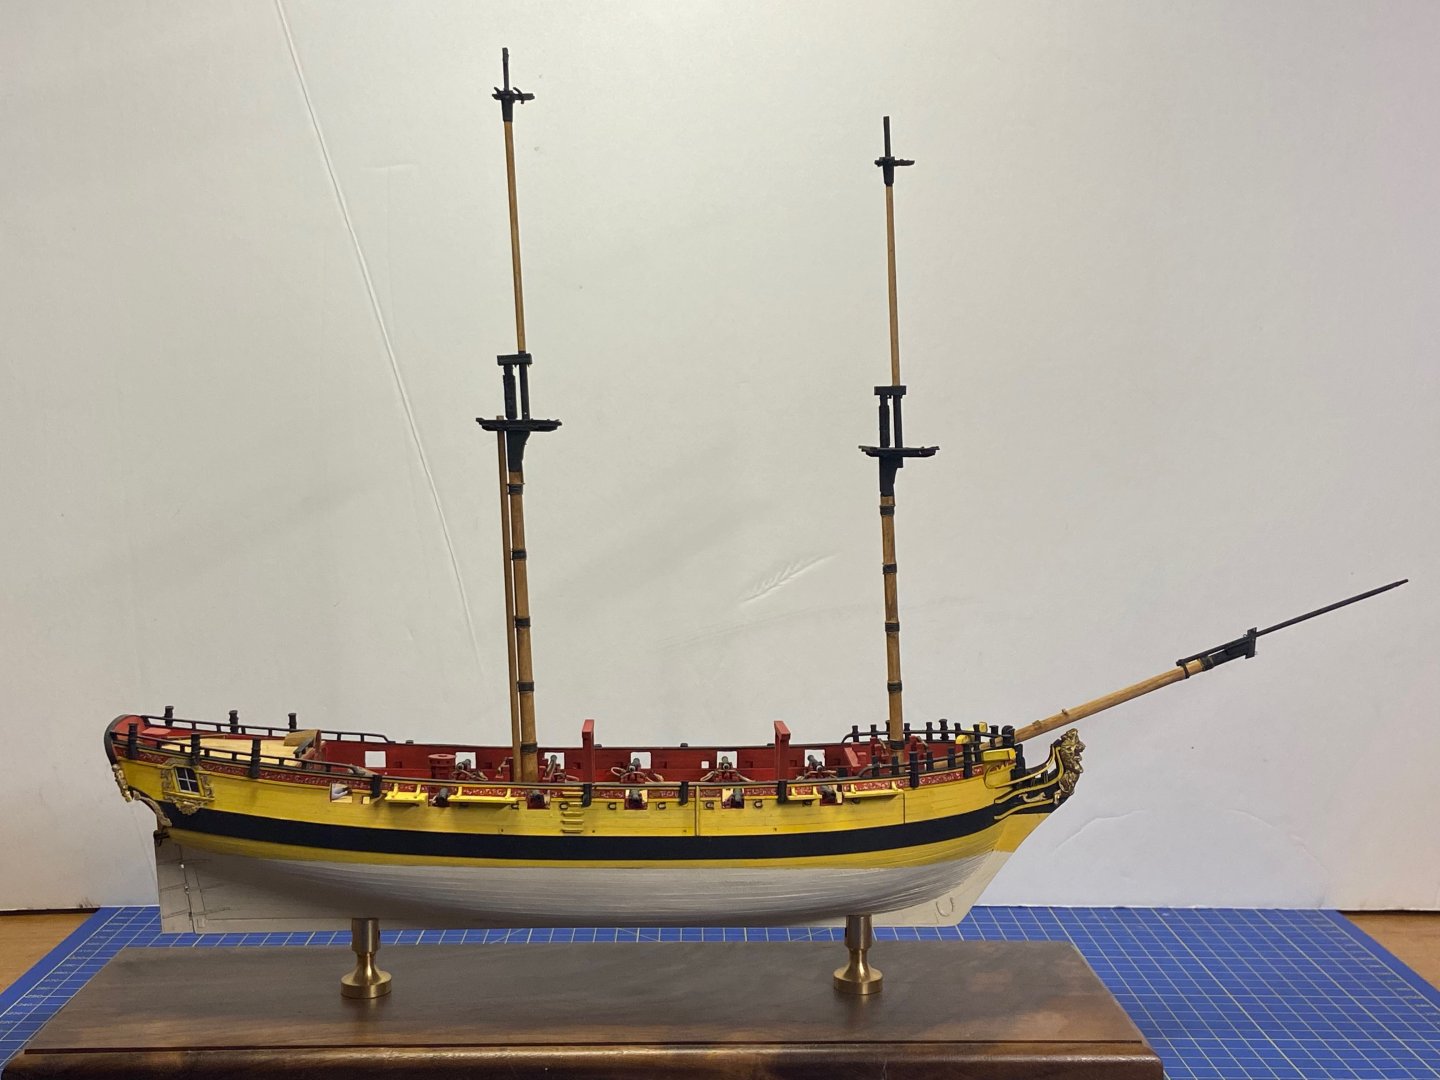
Nothing new to report, except that I removed the jib boom for now. This allows me to put the model under a nice dust cover. Kind of looks like a good way to display a hull model...

- 108 replies
-
- 11
-

-
-
Druxey, were I to build another HMS Wolf kit, and it's not entirely out of the realm of possibility, considering how much I've enjoyed this build, I would go with a modification of the tiller, deleting the existing ships wheel, or possibly relocating it on the quarter deck, as you'd suggested. Perhaps another intrepid ship modeler will take on this amazing build with such a modification? One can only hope.
-
Hi Tom, You're working to make a "natural" finish, which is more decorative in nature, so I think it's about your color choices and workability, rather than scale accuracy. Walnut has a darker tone that most people find pleasing. I've used cherry on ship models, but the color isn't stable, it will darken a lot over time and has a lot of red in it. I like how my cherry planked model looks, but I tend to like the look of walnut better. But, that's just me. Go with what you like or your client likes. If you do go with walnut, I'd suggest you consider using the kit wood first and cover it with thin strips of walnut. It'll be easier to work.
-
Thank you Druxey! Of course, I'm just going by the kit instructions and plans. Are they accurate? I don't know. Do you think they might have been more like Speedwell in being steered by a curved tiller? In many respects, the ship certainly resembles Speedwell. I think it would be easy enough to modify the kit to do away with the wheel, except for the rectangular outline on the deck marking the position of the platform.
-
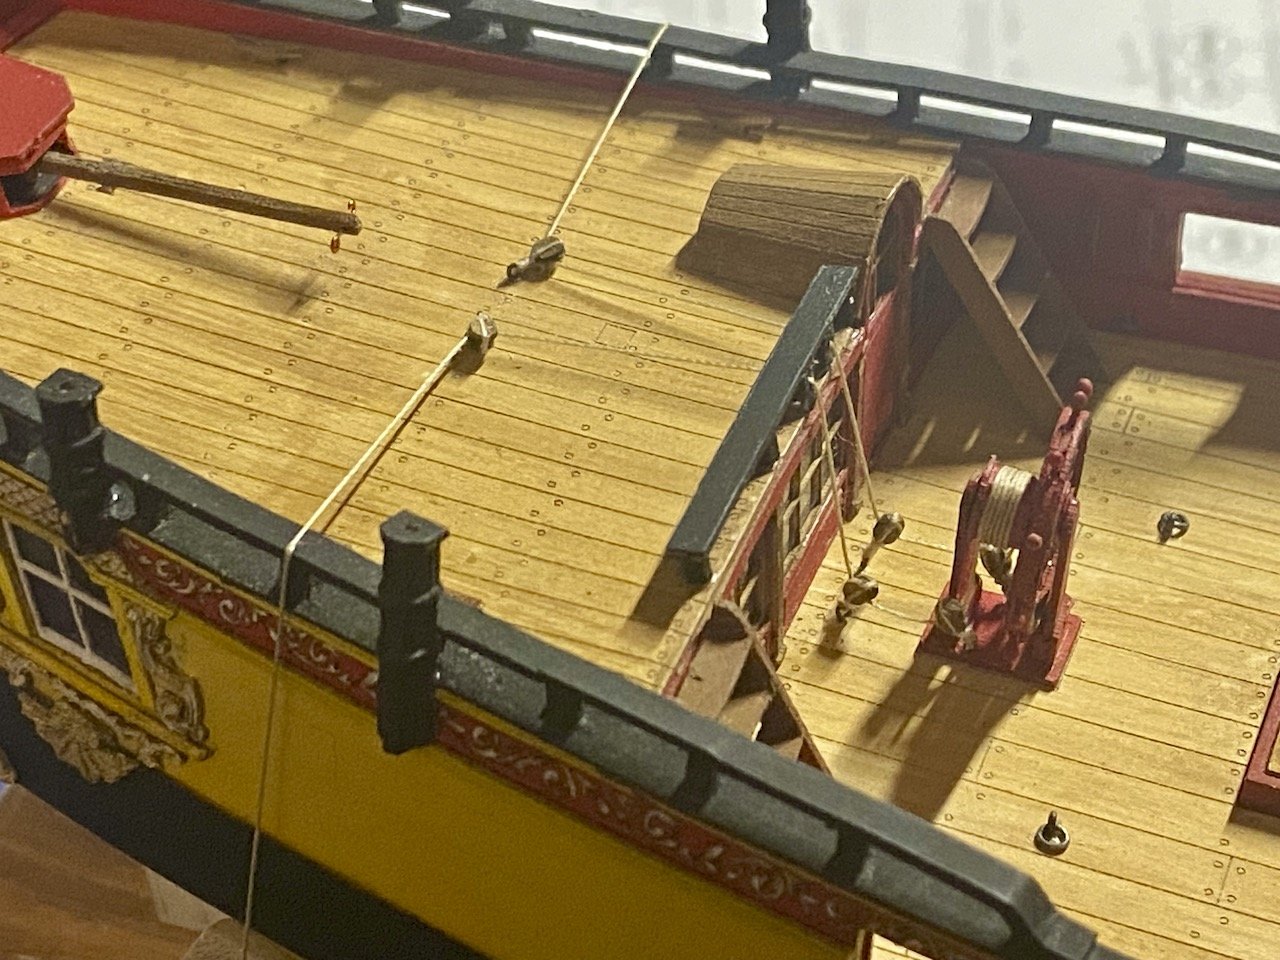
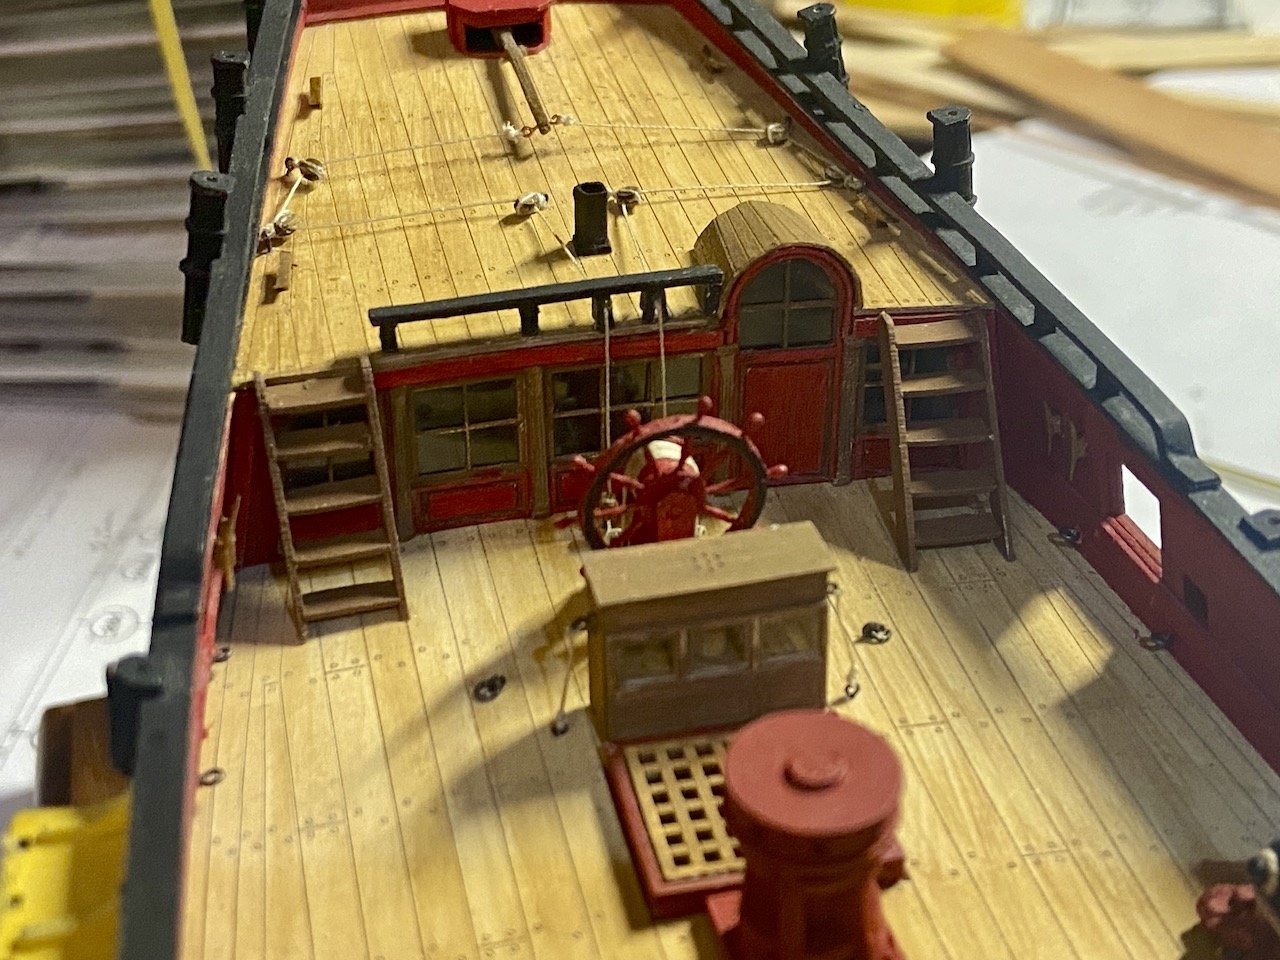
First use of the paper blocks are now in place on the model, and this also marks the first rigging to on as well. Just finished rigging the ship's wheel and tying down the binnacle box as well. It began with stropping a bunch of the smallest of the blocks provided in the kit: 2mm singles. I also had to make a bunch of eyebolts as small as I could. I pre-rigged the blocks to the eyebolts, and then mounted them into place. In the process, I kept finding items on the deck and on the hull that I'd knocked loose. So, I had to do a bunch of small repairs. Fortunately, it was nothing serious, and the rigging of the ship's wheel and tiller is now done and I can move on. This has been weighing on my mind for quite some time, so I'm very happy to have this step behind me. Afterwards, I went ahead and tied down the binnacle box, after doing a little paint touch up on that first.
-
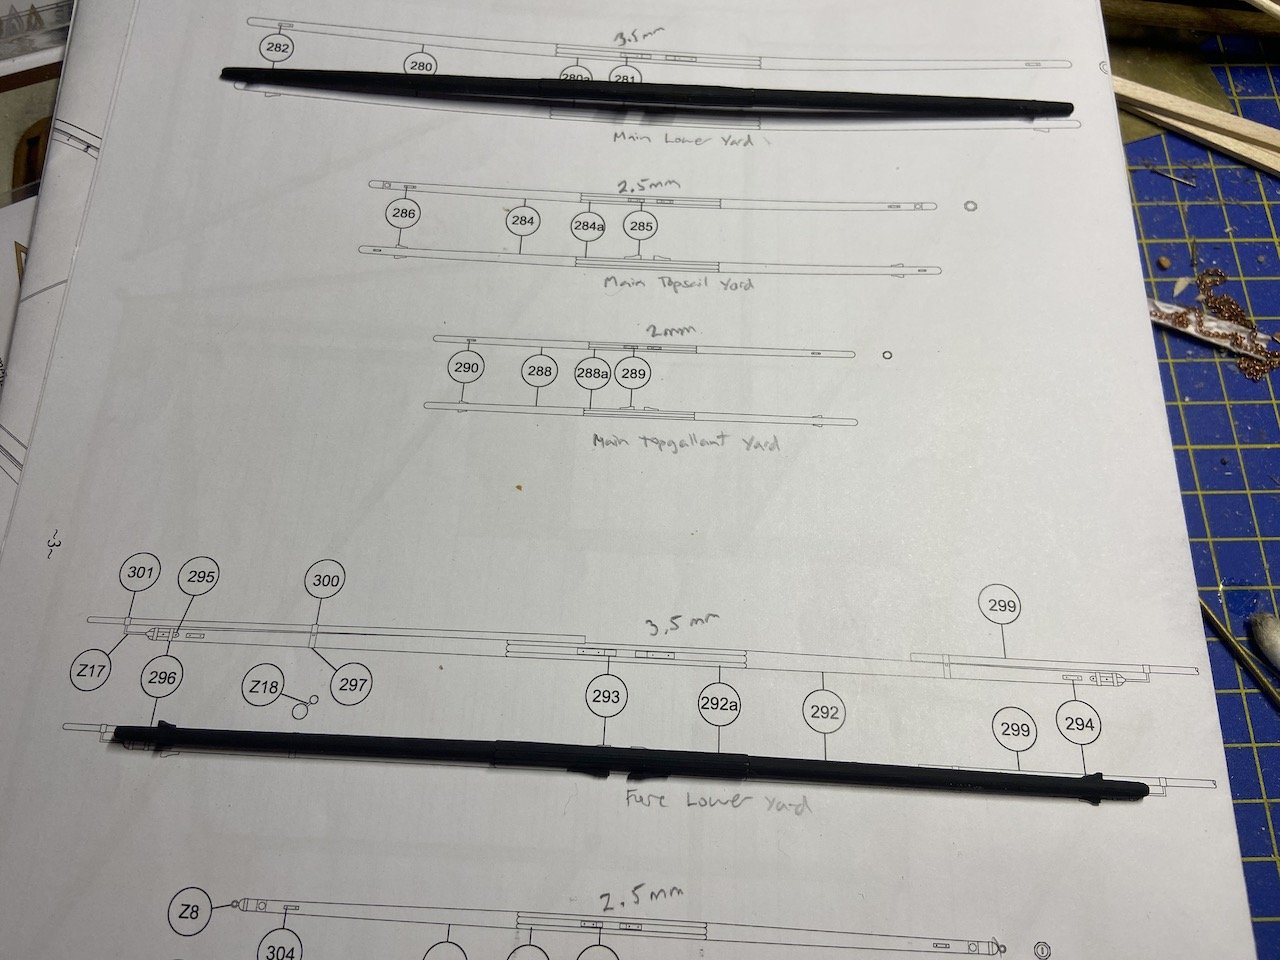
Didn't start rigging the ship's wheel yet, but I did decide to proceed with using the laser-cut cardboard blocks for this model. I've got a good start on making a supply of most of the necessary sizes for this model. By the way, I’ve found it a bit confusing that Shipyard gives each block type a special designation number in the kit, with 2mm single blocks called B1, 2mm double blocks called B6, etc. I find this particularly confusing, because when you buy blocks as accessories, they are only named by size and type. What’s more, a B1 block in one kit is not the same as a B1 block in another kit. I’ve had to buy some extra blocks to replace ones I completely messed up, and to do so, I had to ignore the kit’s block designation and to figure outthe actual sizes. The “translation” between the kit number (B1, B6, etc) and the block size/type is only shown on the kit’s block packaging and on a label on the small cardboard box that contains all the block packages. Don’t lose these labels. You may need to refer to them later on to figure out exactly which blocks you are working with. Glad I didn't toss out this small box! Anyway, in addition to the block making, I managed to finish two more yards: The main and the fore lower yards. These are the largest, of course, and that make them the easiest of the bunch. So, now I'm up to 4 completed yards (the lower yards and topgallant yards), though I still have to add stuns'l booms and irons on the fore lower yard. This means, 4 more yards to go. More by this weekend...
-
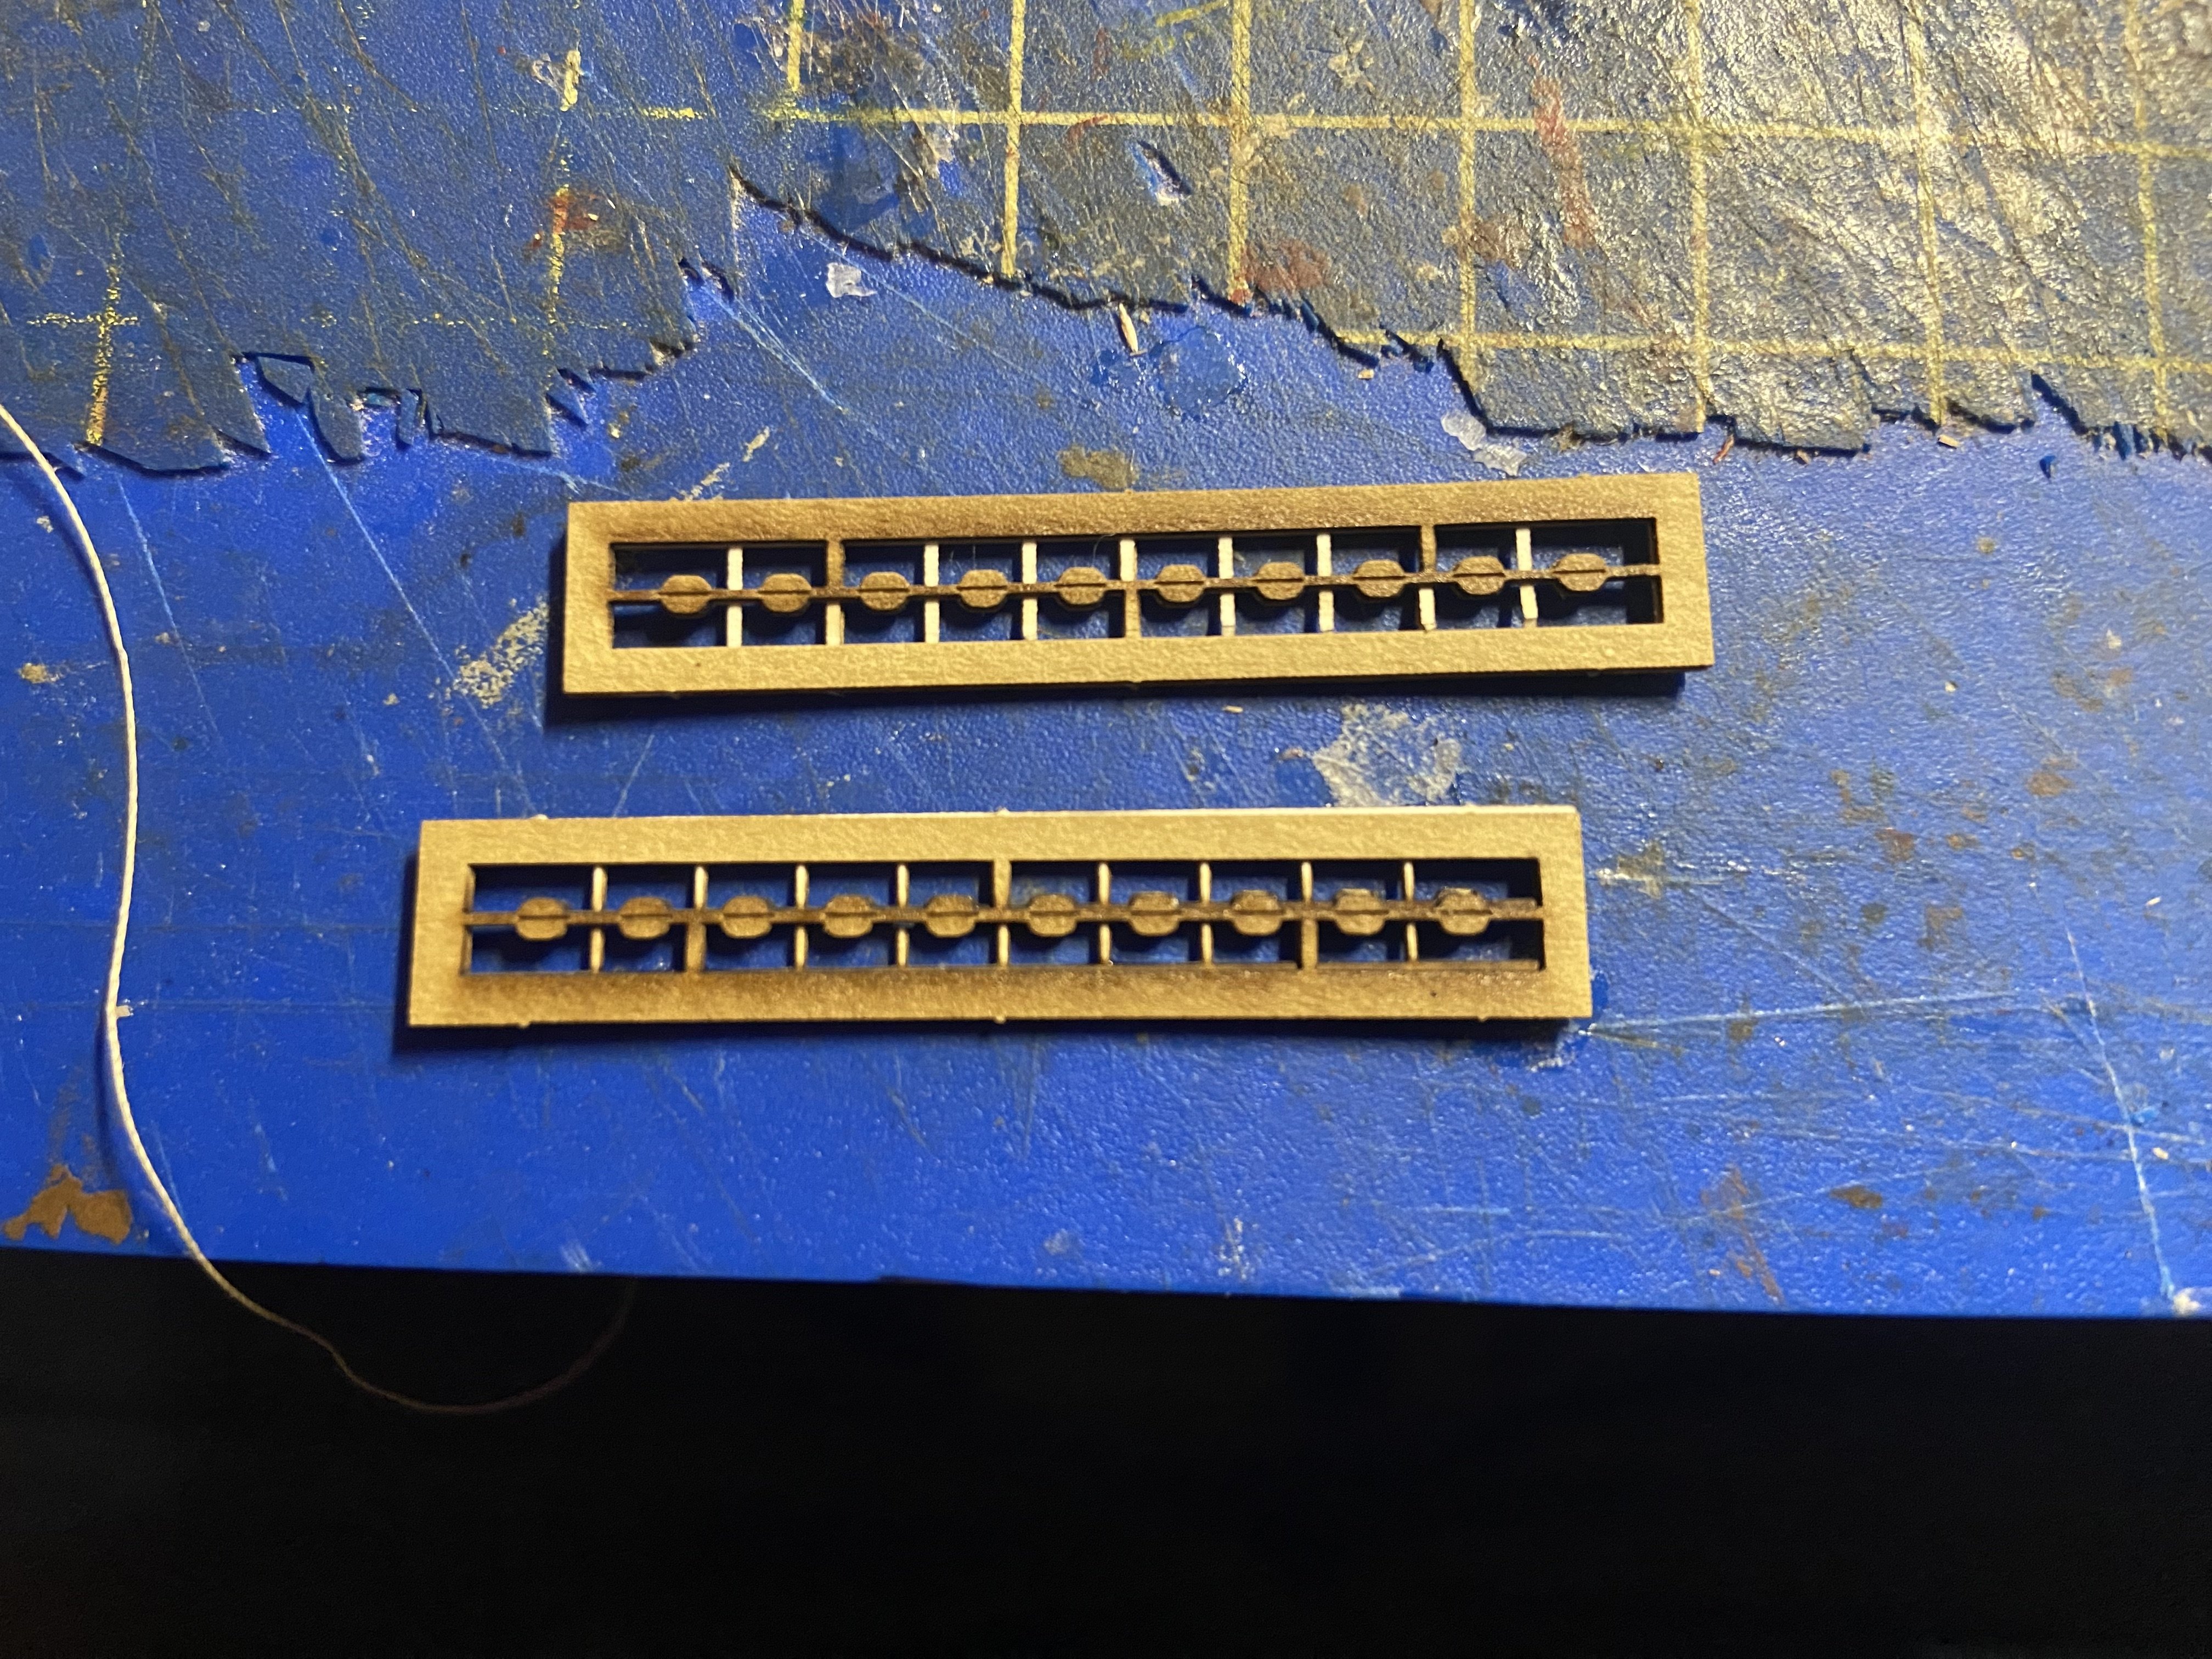
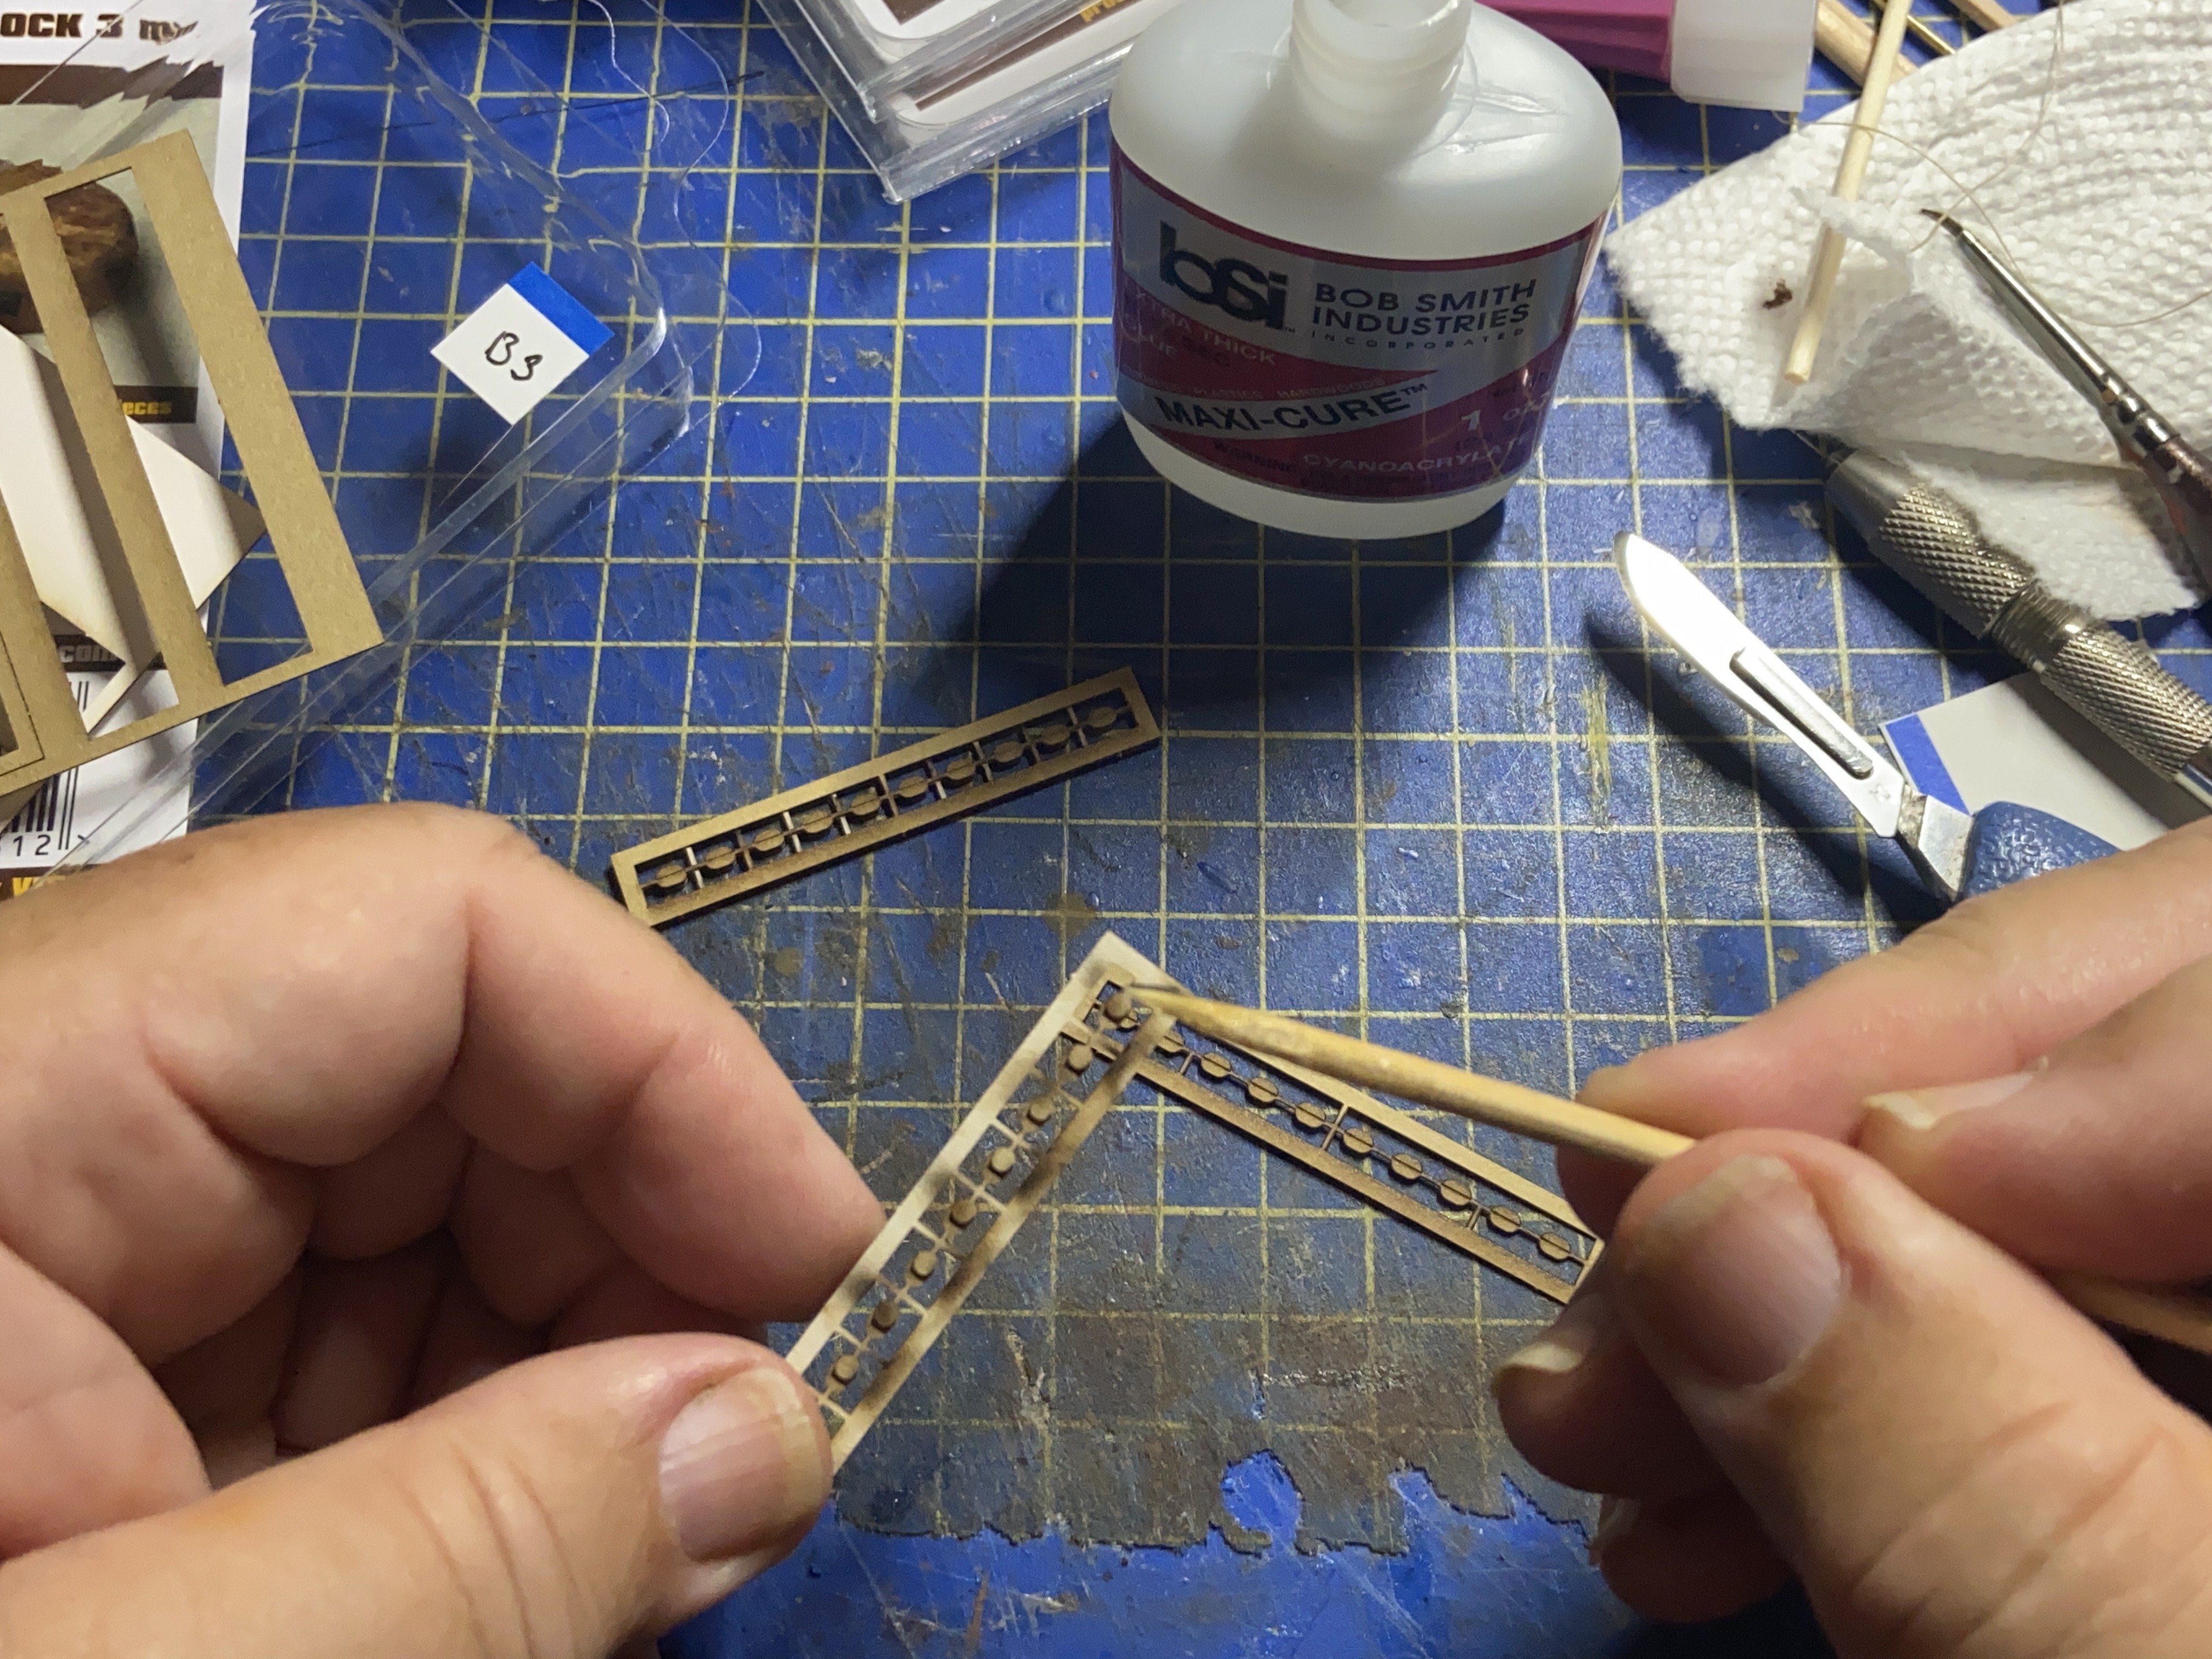
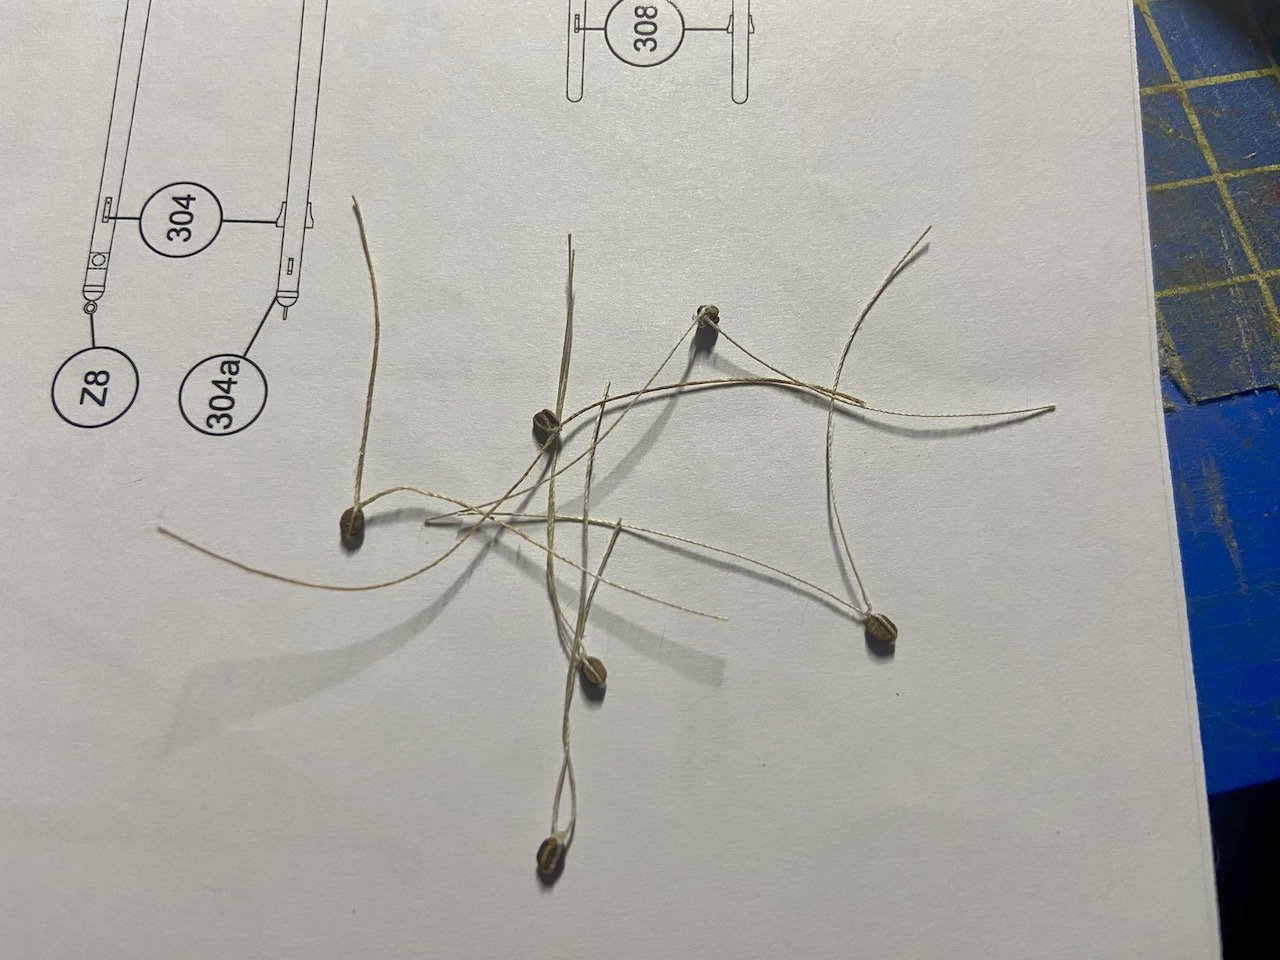
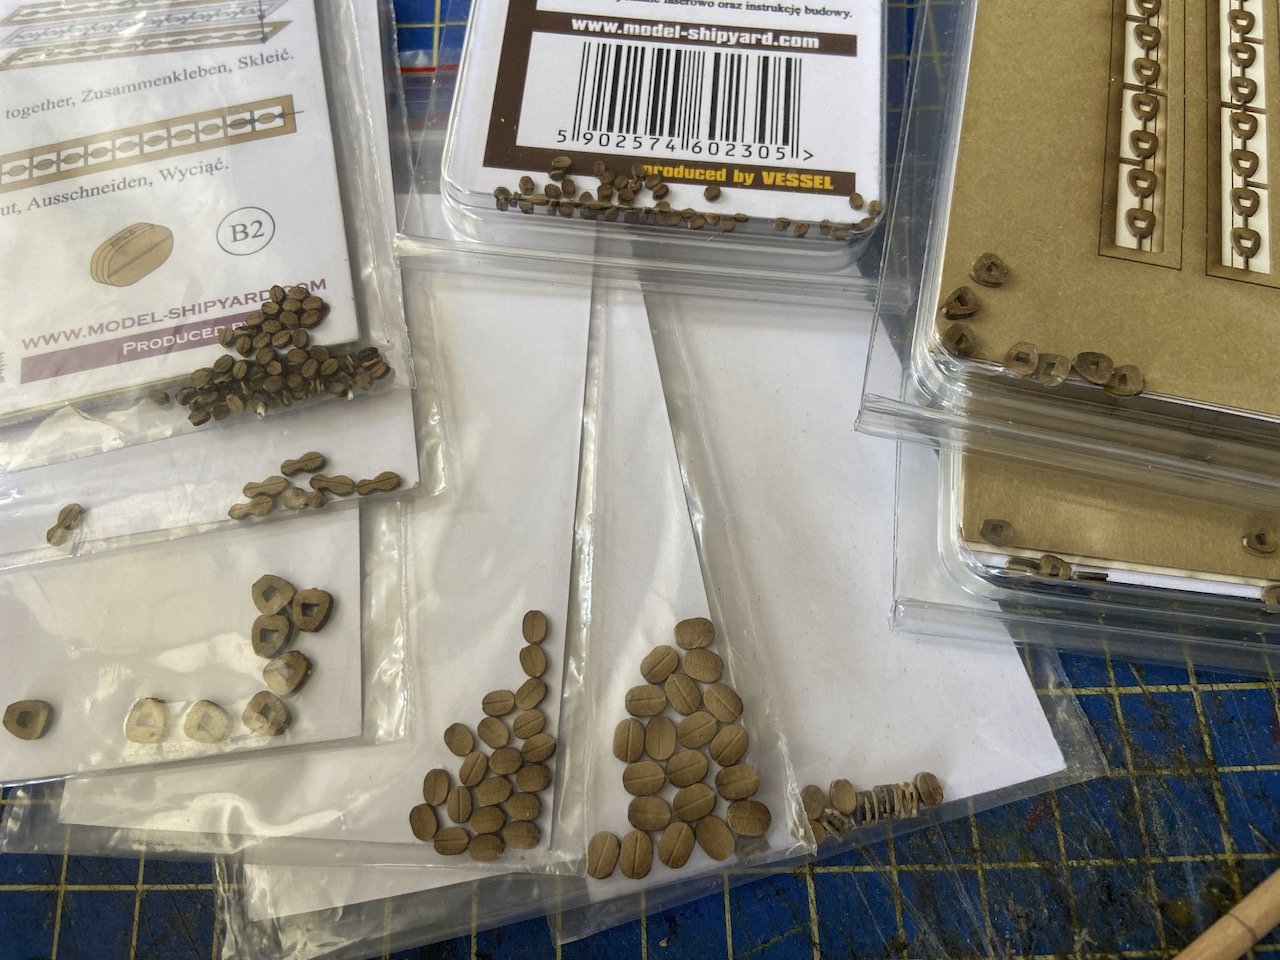
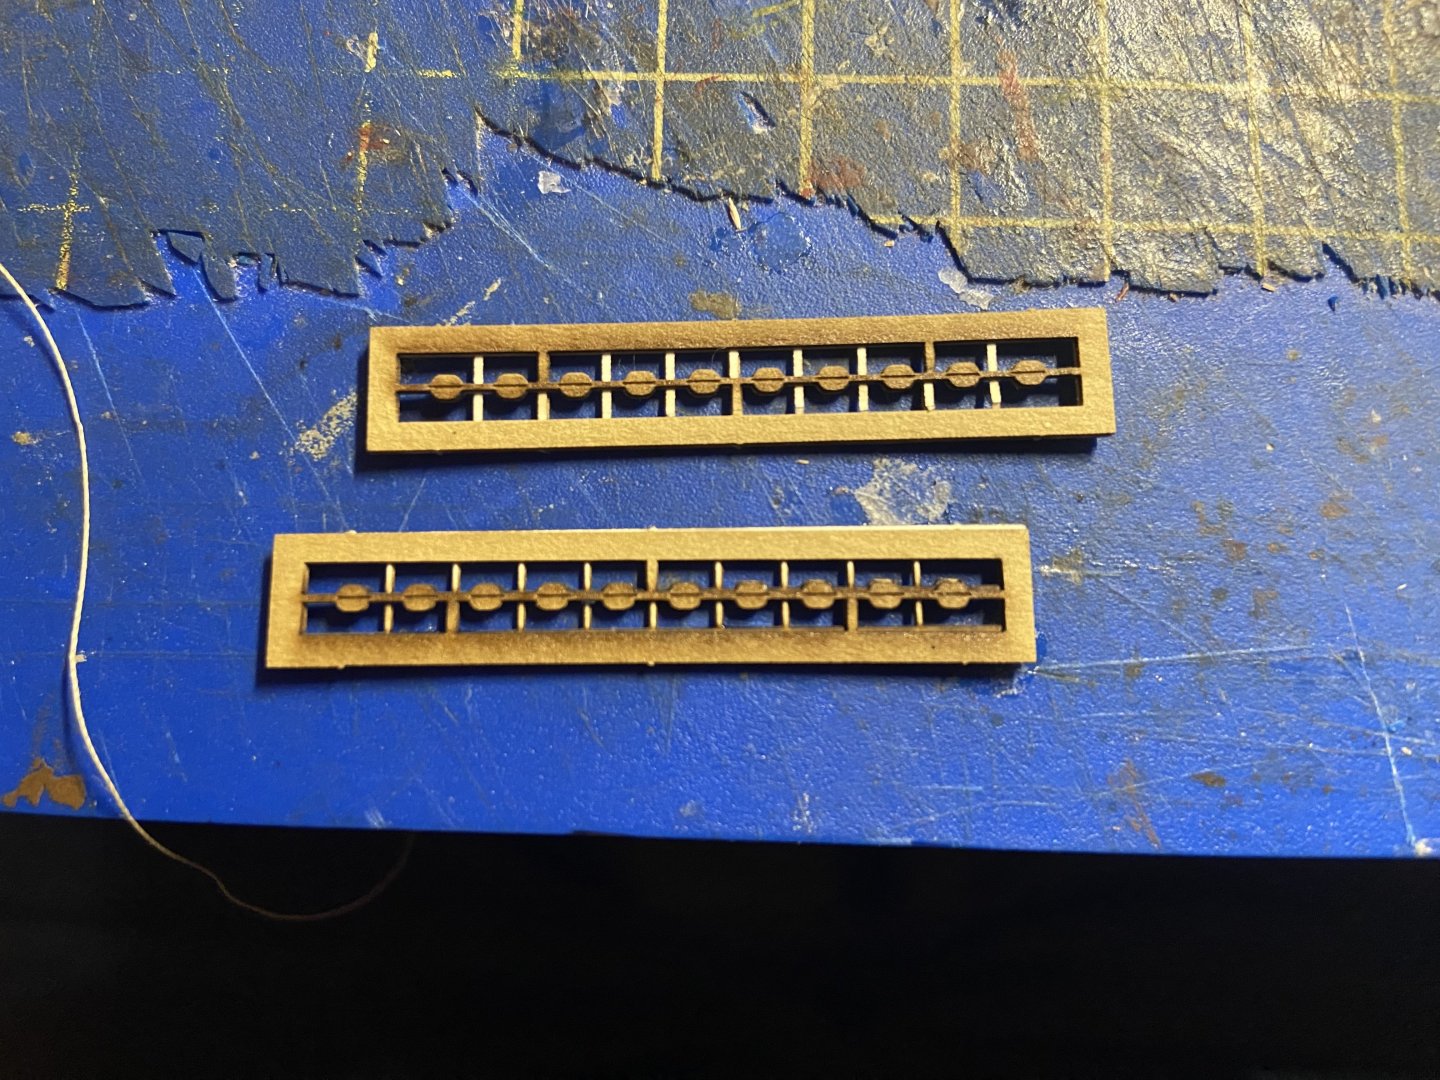
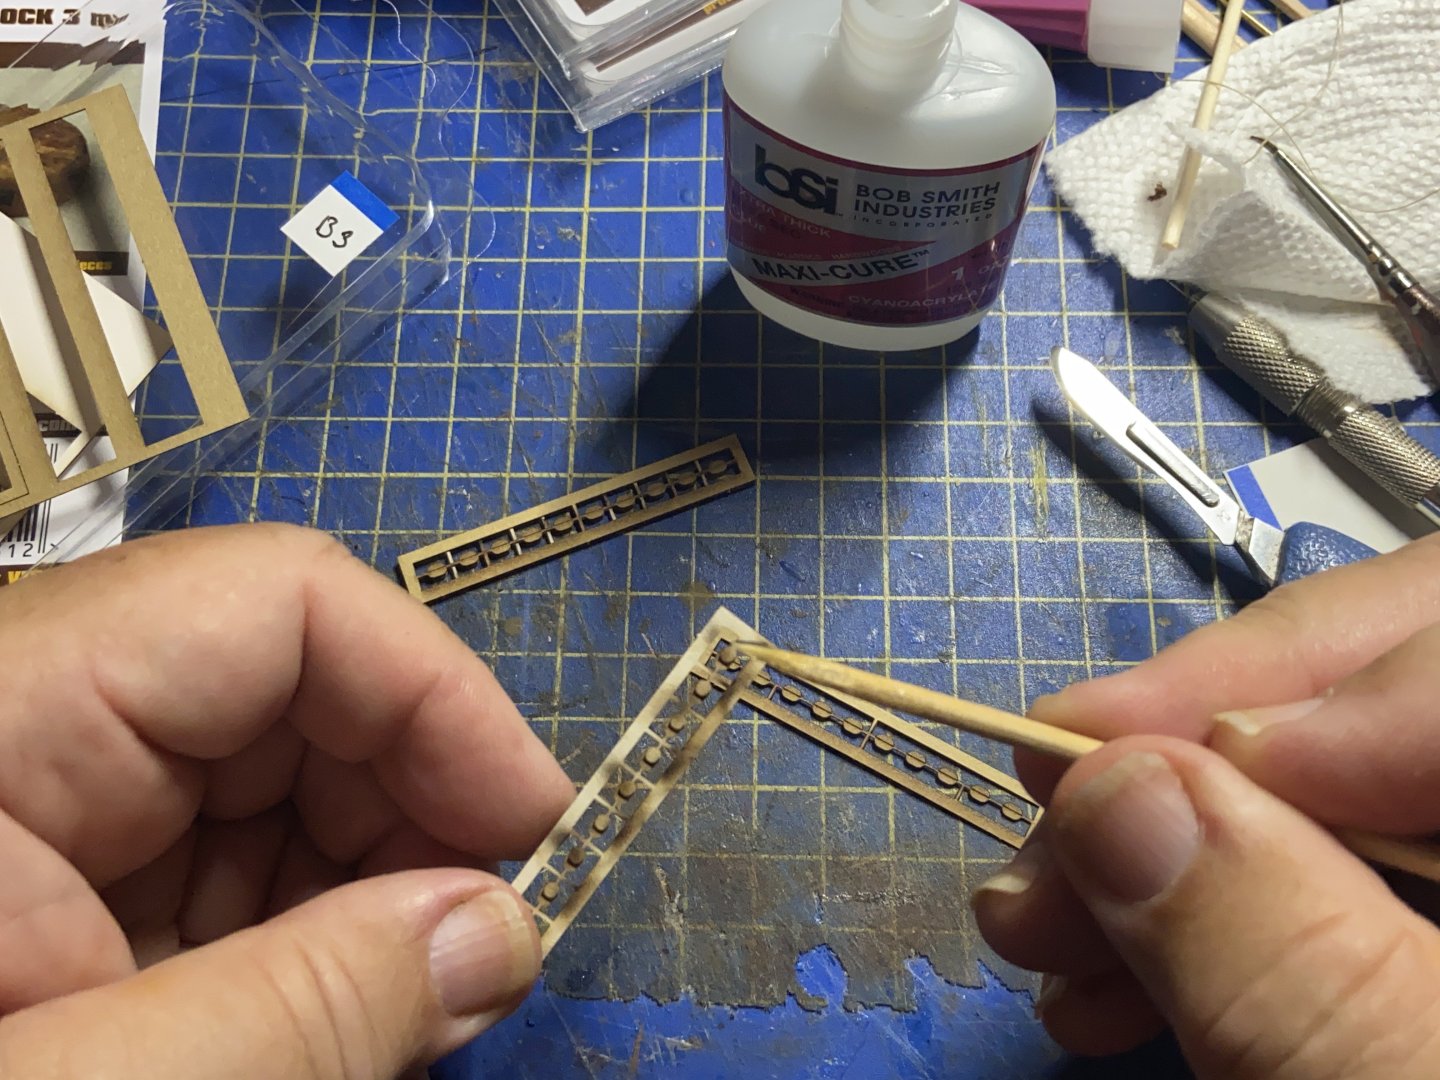
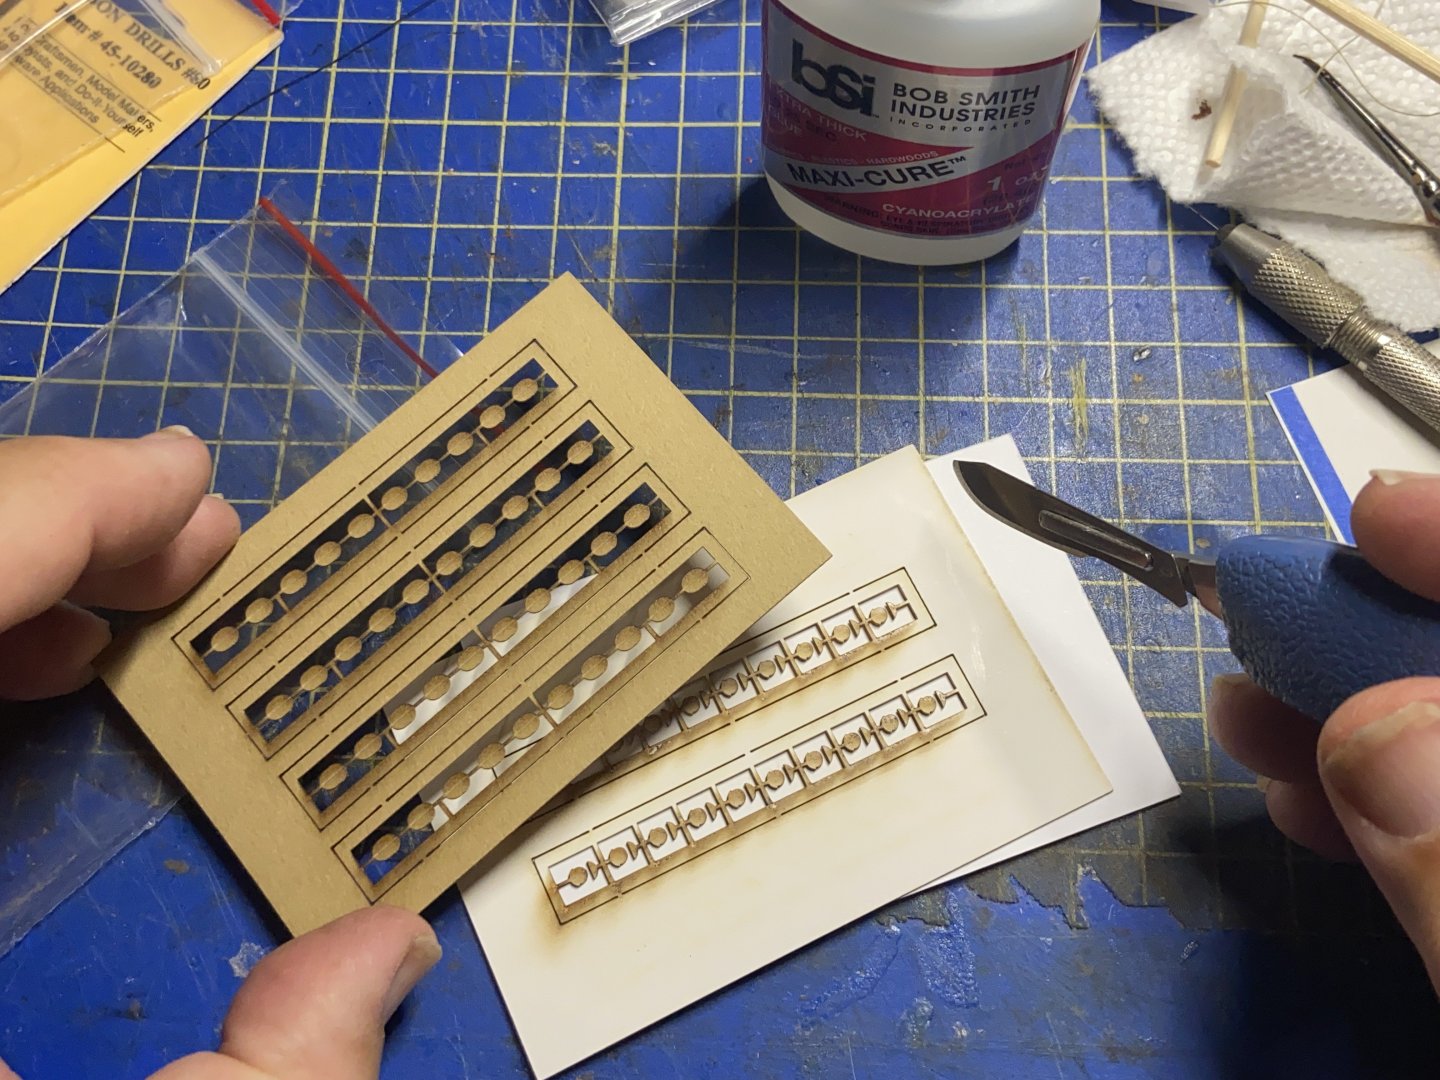
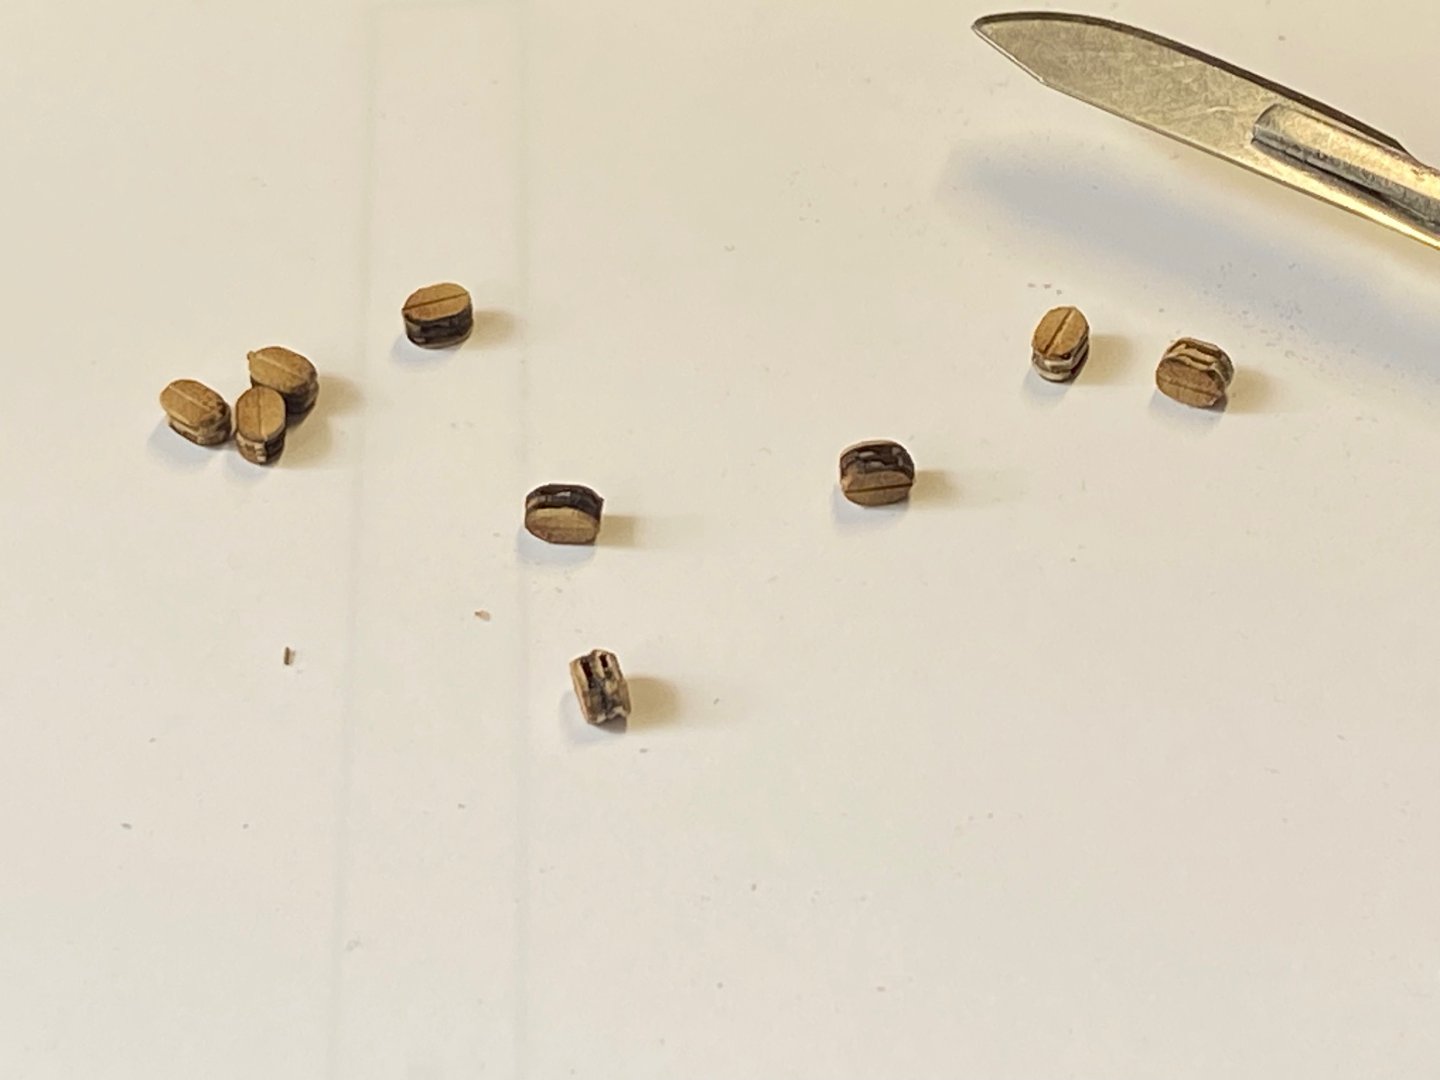
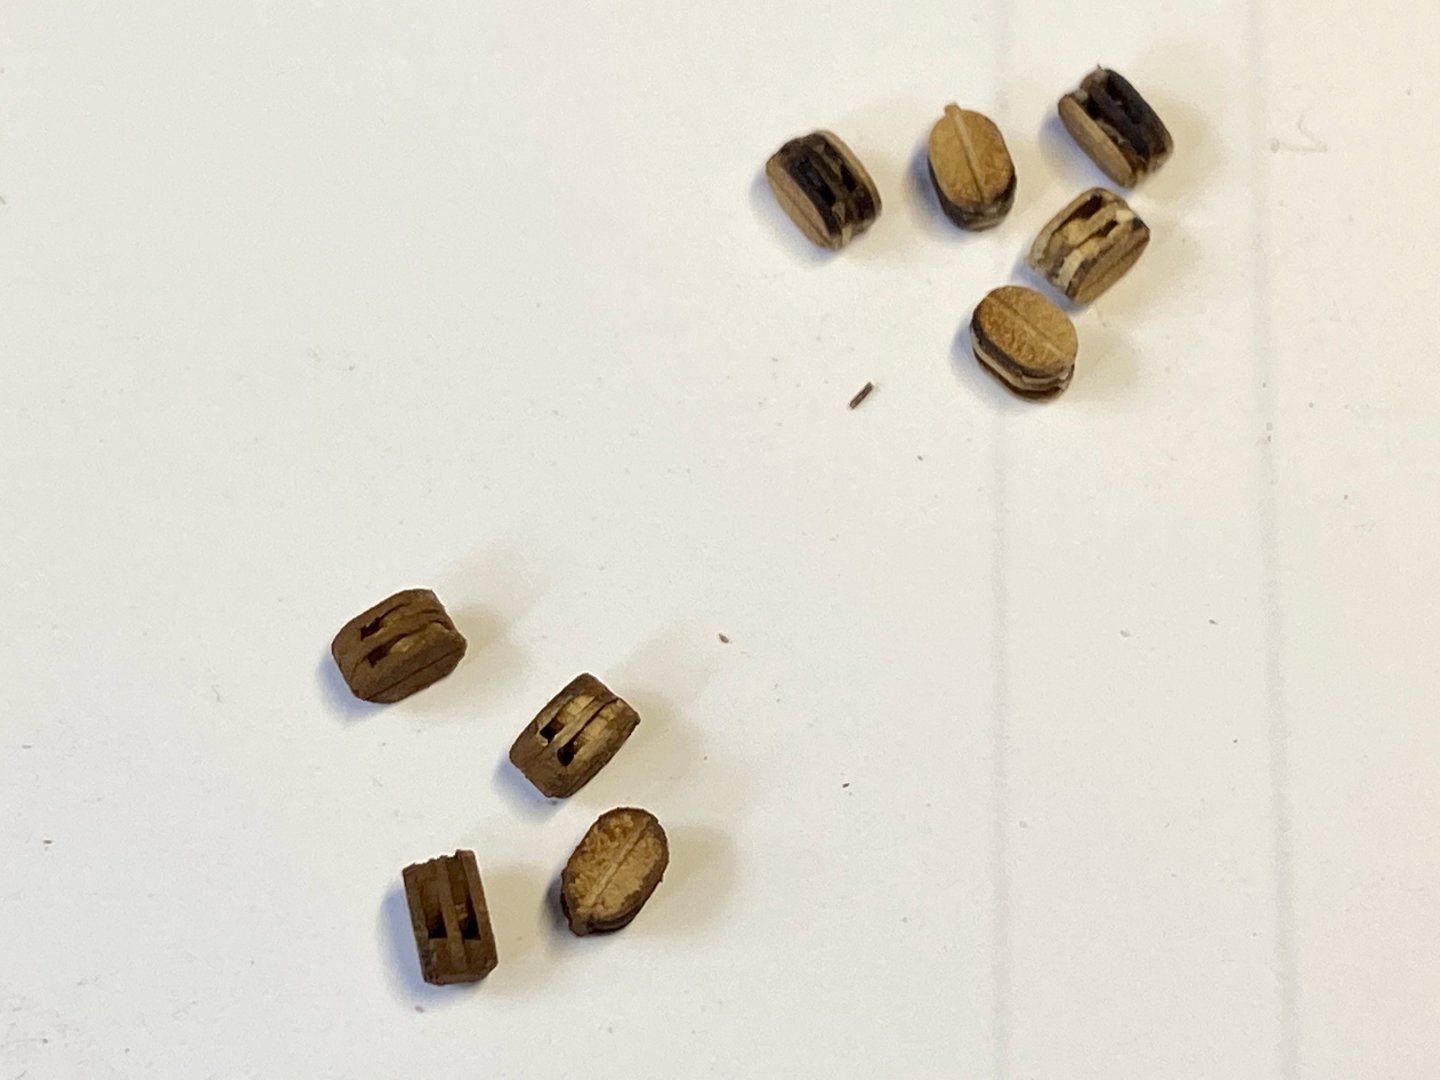
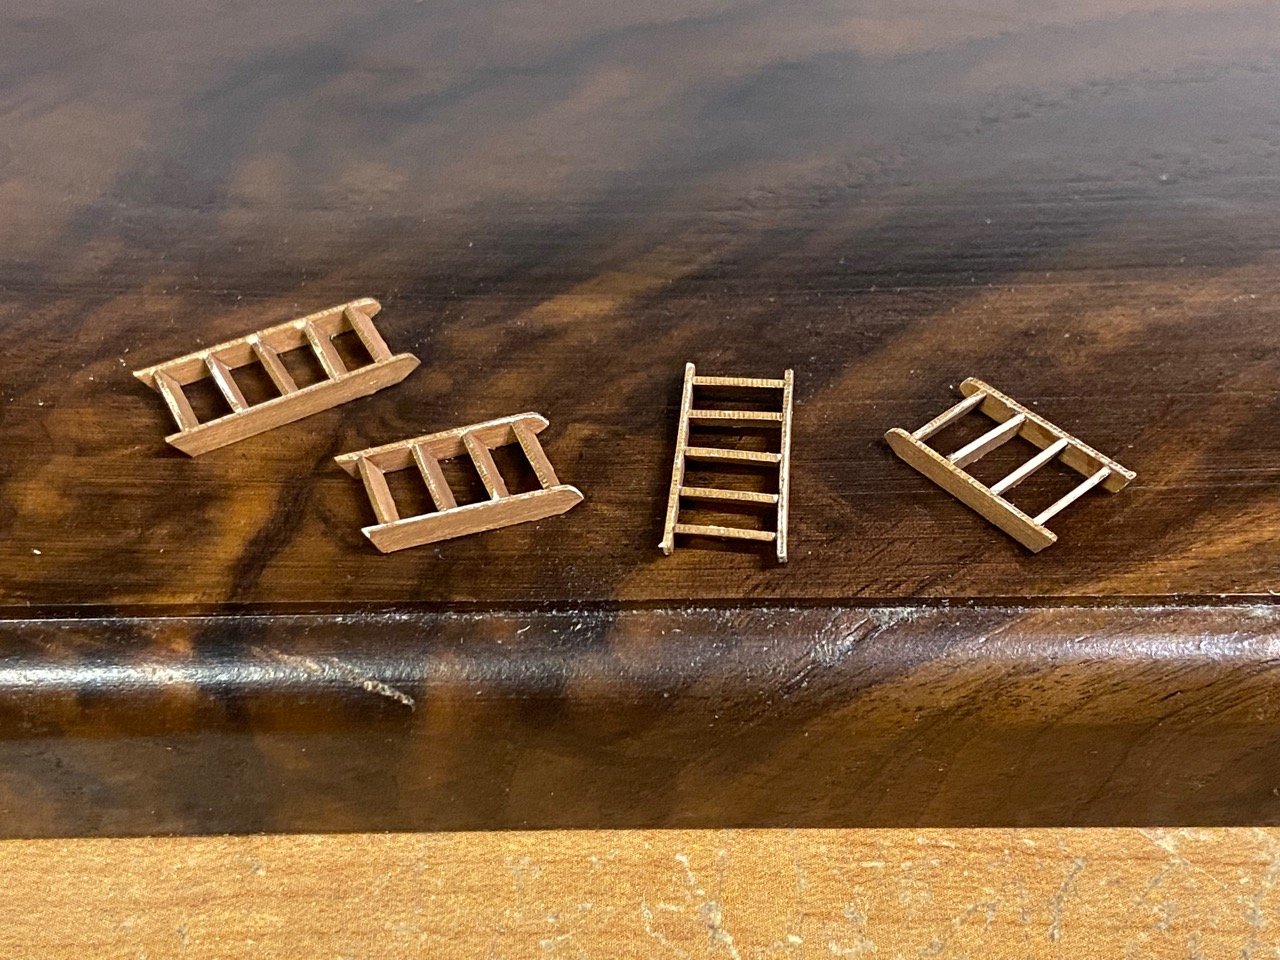
It's all little stuff now... Those ladders have been cleaned up and they are now permanently on the model. Next, I decided I have to get this block situation dealt with. I've been pretty successful at assembling the smaller blocks. I just broke down and thick, slow cure CA for the small blocks, and that seemed to work okay. It's slow going, though. The blocks are done in batches of about 8-10. Each batch of single blocks requires 3 parts: 2 cheeks and "the guts" with the sheave an such... I cut the strips out from the laser-cut sheets and then apply the glue to one side of the middle section, "the guts". Then, one of the cheek strips is put into place. Note that there is a "groove" in the outer face of the cheek pieces, so you have to make sure to put the flat side to the inside. Below are two strips glued up. CA, even the thick stuff, sets up quickly, but I leave the glued up strips for a few minutes, just to make sure. Then, I use a scalpel blade to trip apart the individual blocks. To keep from losing them, and to make sure that the sheave holes are clear enough to rig, I run a #78 drill bit through these smallest blocks. That's enough to make sure the 0.1mm line called for by the instructions will thread through easily enough. I then thread the block onto a piece of line to keep from losing the darned things, since there's more work to do on them. I dab each end of each block with a tiny amount of thick. This is because I've had too many blocks fall apart in the past, so I'm just being extra cautious now. After all the blocks are glued and dried, I then dab each end with a tiny amount of tan colored paint. It doesn't exactly match the color of the cardboard, which looks fine for "wooden" blocks, but it's mostly to get rid of the bright white spots at the ends. This is definitely a process, but it's not too bad. It is nice to be able to say the model AND the blocks are paper. But, I still do have wooden spars, metal cannons, etc. The part that makes me rethink using the cardboard blocks really comes from the double blocks, which are made up of 5 layers instead of three. The construction process is similar to the single blocks, but I initially had a terrible time with blocks falling apart. But, now that I've settled on using the thick CA, the process is not terrible, and the blocks seem to hold up. The main problem now is the appearance. The blocks look very... so so. The laser char is very bad on these blocks for some reason, and after assembly, the block layers are very clear. I've tried to clean up the char a little using a needle file, but it's very hard to work on these 3.5mm and 2.5mm blocks individually. I've taken to painting the cleaned up blocks to even out the color. I may not continue the painting, but just doing the filing. Anyway, I don't need that many double blocks on this model, so maybe it's okay. Below, you can see cleaned up and painted blocks in the lower left, and untouched blocks in the upper right. If I do paint, I think I need to use a lighter shade and maybe just do the faces of the blocks where necessary. With that, when these are stropped and rigged, they may look okay. I think the lighting makes the painted ones look a bit darker than they actually are, as I'm using a tan-colored paint. The next step is to rig the ship's wheel, which calls for a half-dozen 2mm single blocks, so I need to make the final call on wood or cardboard in the next couple days.

-
Enjoying following your build Chris! I was just looking over the Kolderstok Speeljaght kit, and then lo-and-behold, you're building this Seahorse kit of the same scale! Then, a fellow modeler in our local club just got the Kolderstok kit. Now, I have to see how your project goes, so I can figure out which version I should work on...
- 146 replies
-
- 4
-
-
- Speeljacht
- Seahorse
- (and 2 more)
-
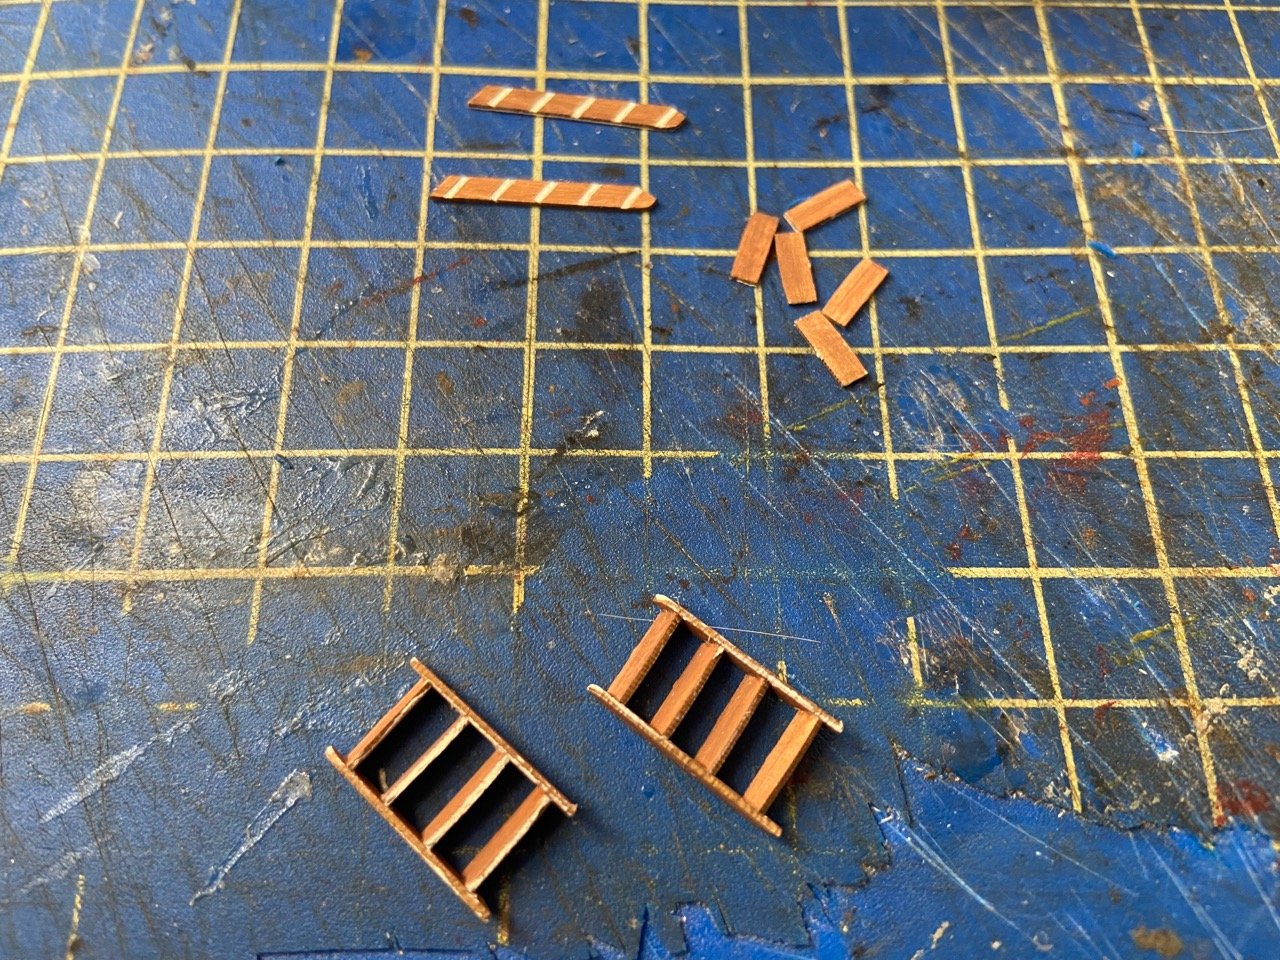
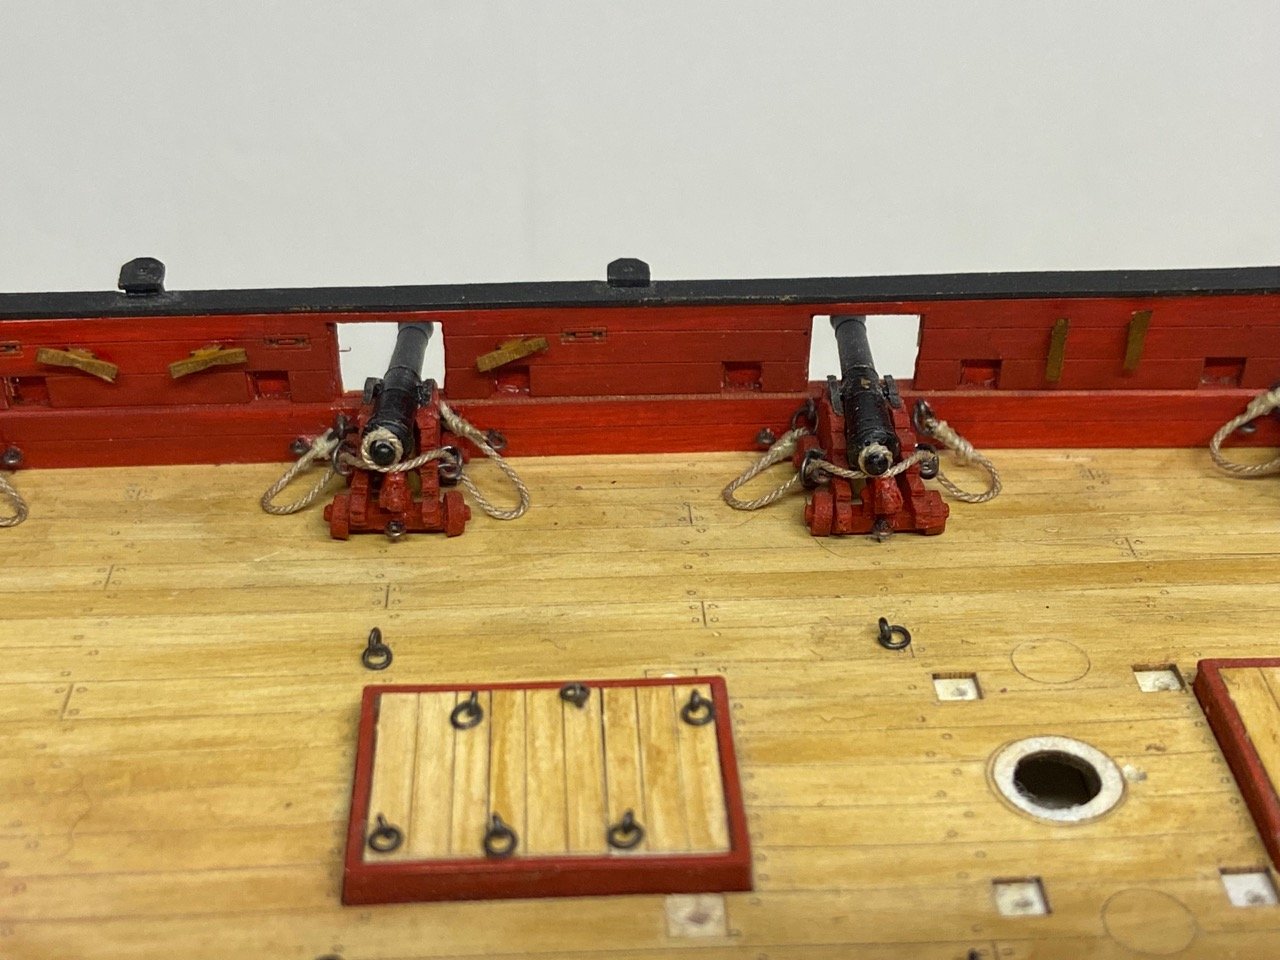
Two steps forward and... that's it! Managed to make some progress on HMS Wolf this past weekend. I installed 31 cleats, mostly on the bulwarks, but 9 tiny ones had to go onto the inboard side of the bowsprit. Also constructed the ladders that I'll need to mount on deck soon. Still have to touch up the painting of those, but it was nice to get some construction done. After I finished these, and with the guns permanently fixed in place, I started to feel much better about my progress on this model. Pretty soon, I'll start rigging the tiller ropes and adding the ship's wheel, and rigging the bowsprit.
- 108 replies
-
- 11
-
-
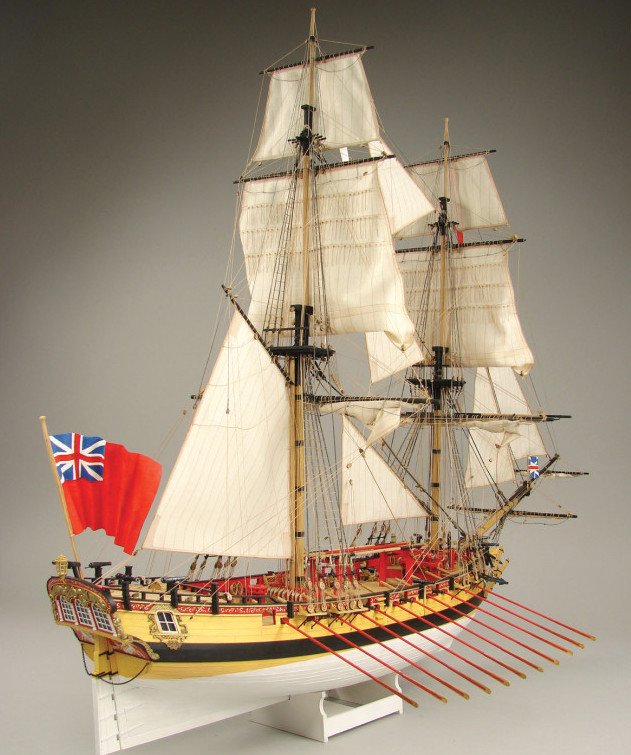
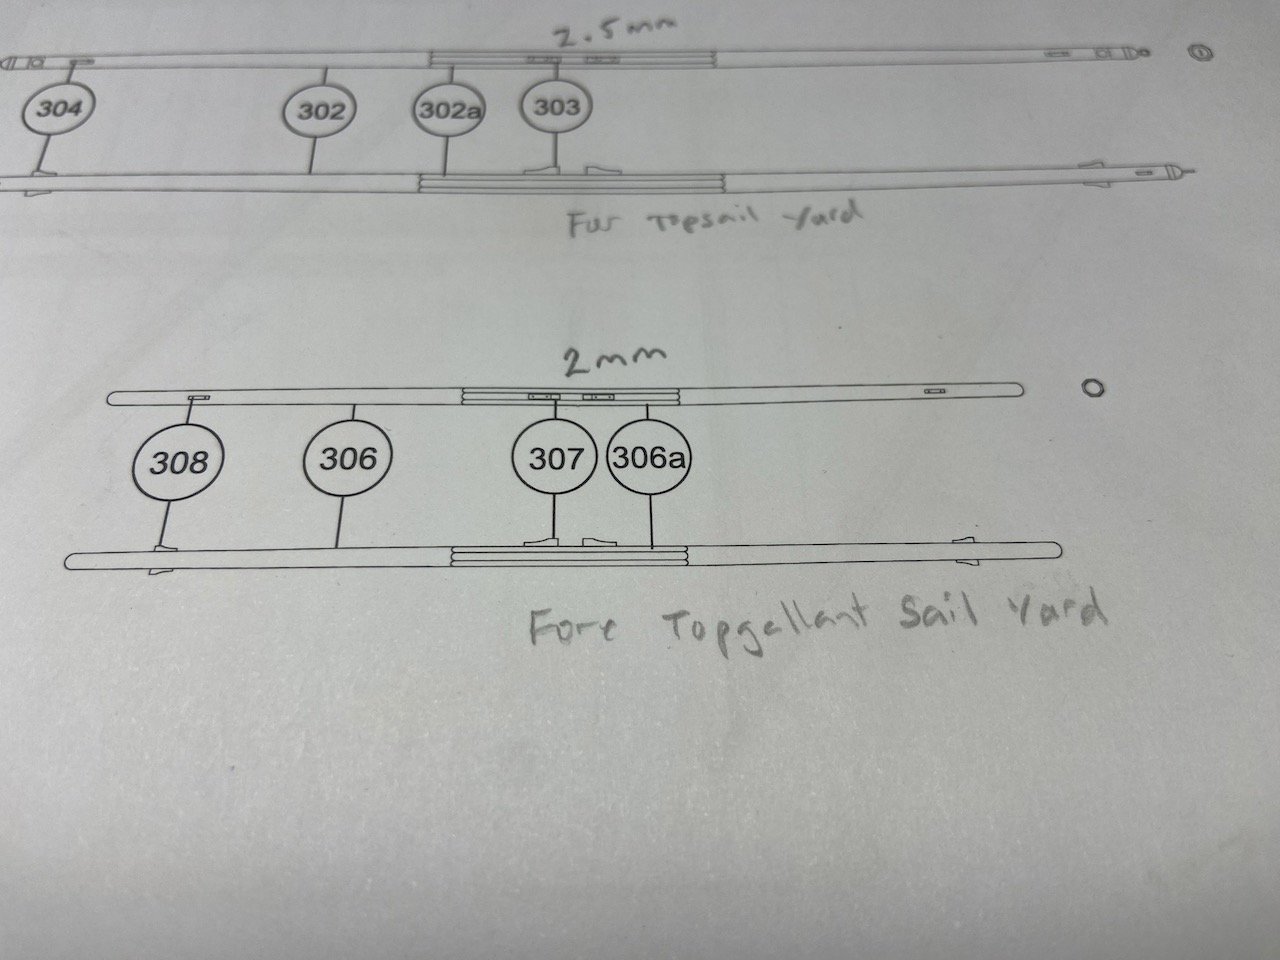
It seems that my ship modeling "prop" is cavitating, my sails are taken aback... it's two steps forward and TWO steps back... Made main t'gallant and topsail yards, but there are problems. The laser-cut part for the octagonals/battens takes a lot of care to fit, and as a result, I found the topsail yard too thin. Also, the t'gallant yard mid-section where the laser-cut part fits is also very thin and it seems the wood broke underneath the laser-cut part. I'll need to re-do the topsail yard, but not sure about the main t'gallant. I'm now considering the sail configuration of the model (so that's kind of a step forward!), as this might tell me if I can reinforce the main t'gallant yard with a piece of wire that might hide under/behind the sail material. Below is the kit photo. The kit includes all the sails shown here, but I think I'm going to try my hand at making some sails from silkspan, inspired by the recent workshop by Ron Neilson and Tom Ruggiero. Excelling workshop, by the way, and I'm very inspired to try it! I think I'm going to go with a simplified sail arrangement and try flying the topsails, jib, and spanker. The courses I'm thinking I may furl. Still not sure about the t'gallants. If I furl them, I can put the yards in lowered position. I could also leave the t'gallants off the yards. Given the tall nature of the rig, that might give it more of a nice balance look, especially if the courses are loosely furled. But, having the furled sails on their yards will allow me to hide repairs. Looking through Harland's Seamanship in the Age of Sail, as well as online images of brigs under sail. Beyond that, I did permanently fix the guns into position, so I won't be adding any of the additional tackle there. On the blocks, can any paper modelers out there suggest the best way to glue up the laser-cut card blocks? Mine tend to fall apart when I try to clean out the sheave holes. I'd still like to be able to use them, but I'm consolidating my wooden block supplies to be ready to go with those.
-
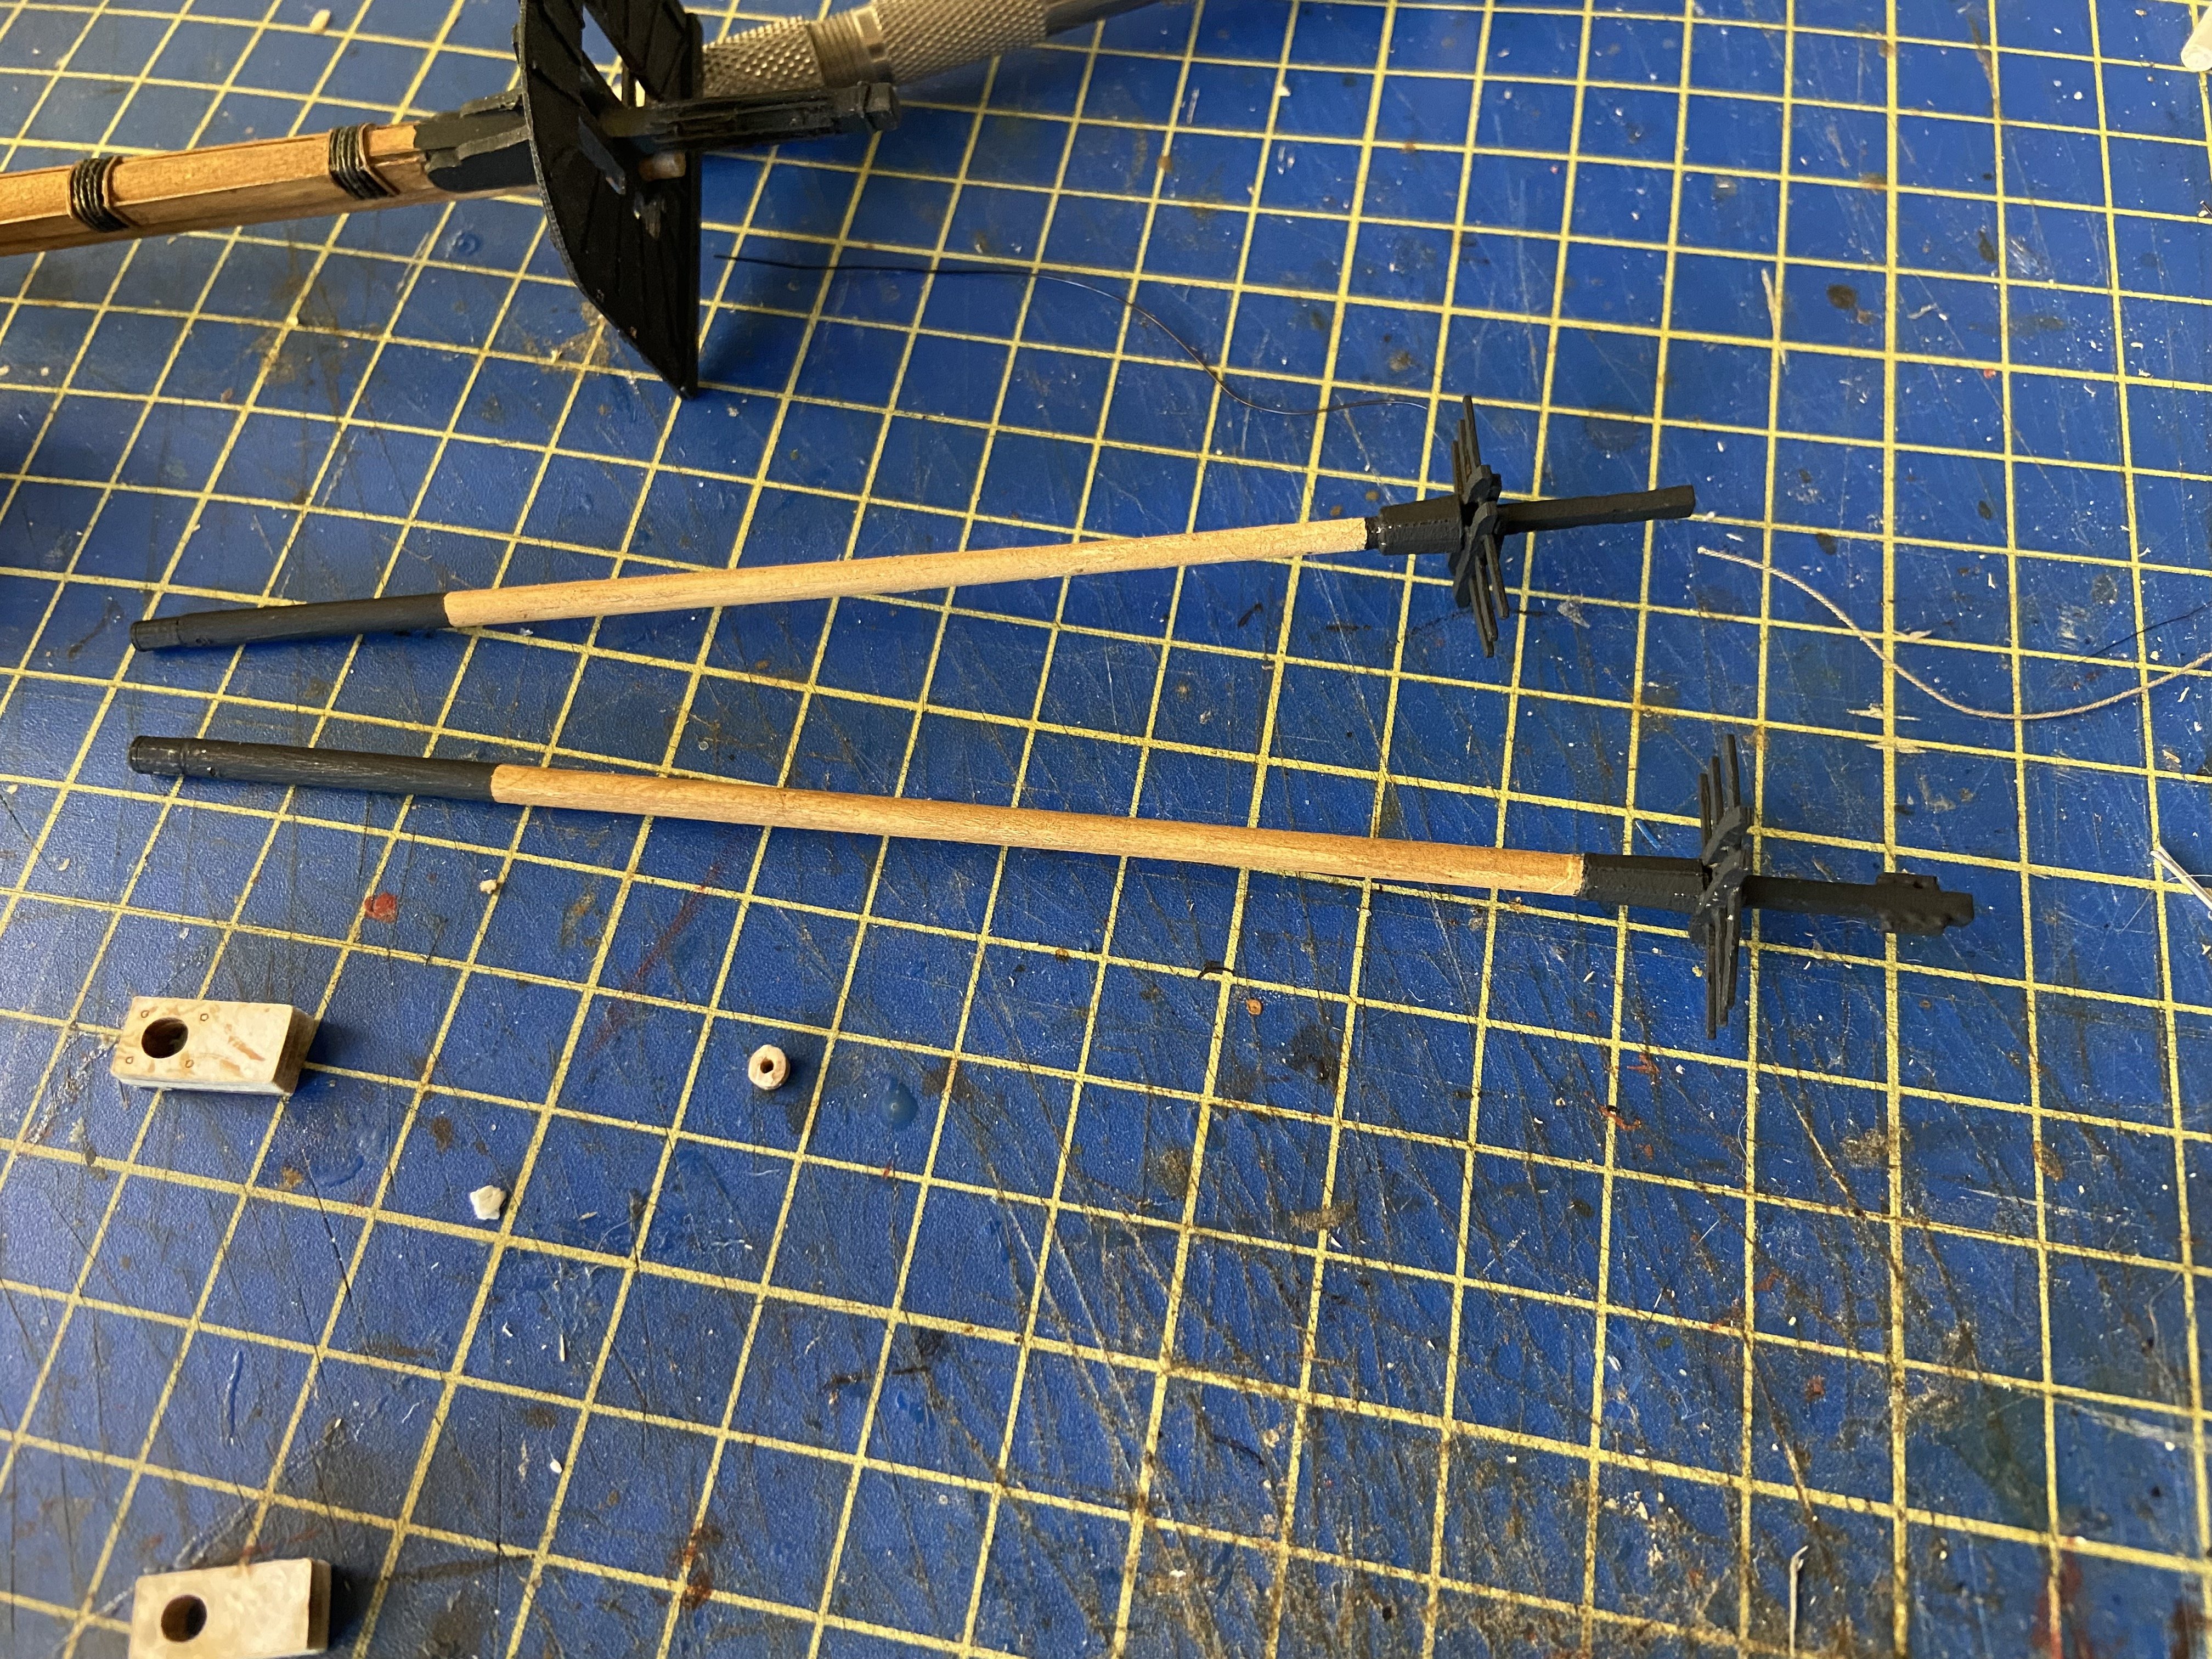
Vacillating on which blocks to use again! I went through my inventory of blocks, and I have two different lines of wooden blocks that include ones small enough for this model. I'd still LIKE to rig the gun tackles, and that calls for 2mm blocks, though it looks like I could get away with 2.5mm blocks. I have some old Warner Woods blocks, quite a few actually, and fair supply of Master Korabel blocks. Neither of these includes shoulder blocks or long tackle blocks, which the instructions call for, and which are readily available in cardboard form. So, I'm giving the cardboard blocks another chance, seeing if I can assemble ones that don't fall apart when I start to work with them. Meanwhile, I ended up making a couple spars today. Oh My God are these tiny, even at 1/72 scale. I started with the kit dowels, but I ended using some 1/16" diameter birch dowels I have a supply of, as they were smaller diameter to start with. I just used these to make the main gaff and the fore t'gallant yard. I tapered the dowel accordingly and sanded them down closer to 2.3mm in diameter. That was okay for the main gaff, but the t'gallant yard has a nice laser-etched piece that wraps around the middle to represent the octagonal section or battening. In order to get it to fit, I had to shave down the middle section of the dowel to 1.7mm, creating a slightly recessed section in the center of the yard. Even then, the battening piece doesn't quite wrap all the way around, but it's close enough. The seam will be located on the underside of the yard, and if I mount sails, they will completely cover it up as well. This was more of an effort than I was expecting. But, it's done – 1 yard down, 7 yards to go. Fortunately, this is one of the smallest. The others should all be larger and easier to deal with. At least, that's what I keep telling myself...
-
I agree with GrandpaPhil. Nice find! This is a very rare kit. You are right that Aeropiccola has been out of business for a LONG TIME, and the kit is from an era of older kits that are harder to build into an "accurate" model. But, some of us have an appreciation for these old classic kits. A friend of mine recently told me he is in possession of a USS Essex from Aeropiccola and wanted to know if I wanted to buy it. Unfortunately, I have more than enough kits to last the rest of my life. I need to get rid of some, I think! Are you going to build the kit?
-
Nice score Erik! I'm familiar with just about all of those kits, except for the BlueJacket Blue Gray half-hull. The Black Hawk half hull, If it's the kit I'm thinking of, is basically a framed half-hull that you can pretty much display on the wall as-is. It's really rare, and I've only ever seen one of these before. Anyway, it looks like your stockpile is now well seeded. Good luck with all those builds!
-
Wooden model ship parts ans supplies
catopower replied to JFMJr's topic in Masting, rigging and sails
For the best quality model rope, yes, go with those suggestions. For a general source of parts, I personally recommend one of our site sponsors, Ages of Sail. However, being that I do some work for them, I'm somewhat biased. They mostly carry Amati and Billing Boats parts, but also some Caldercraft parts as well. -
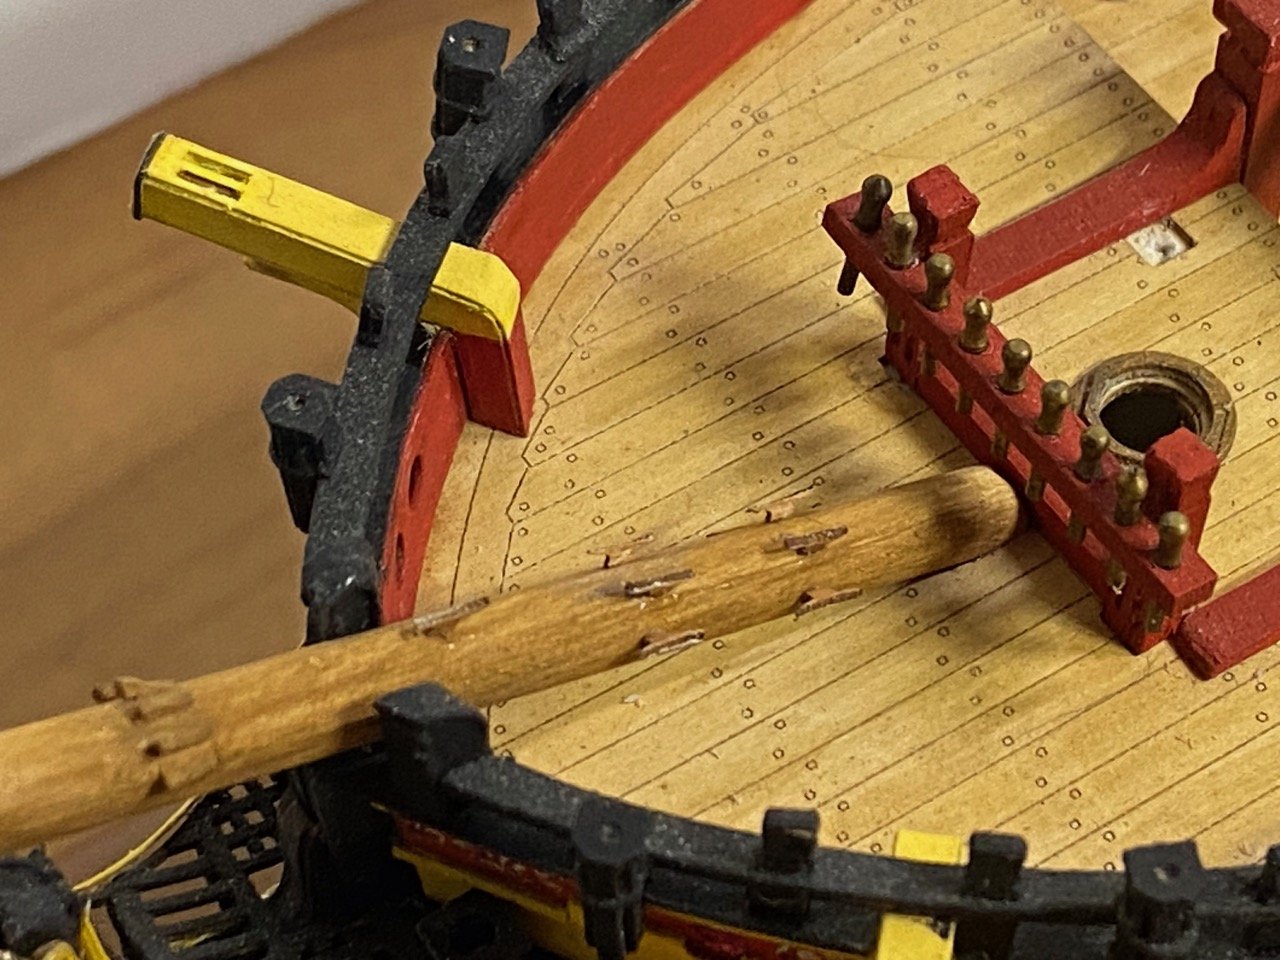
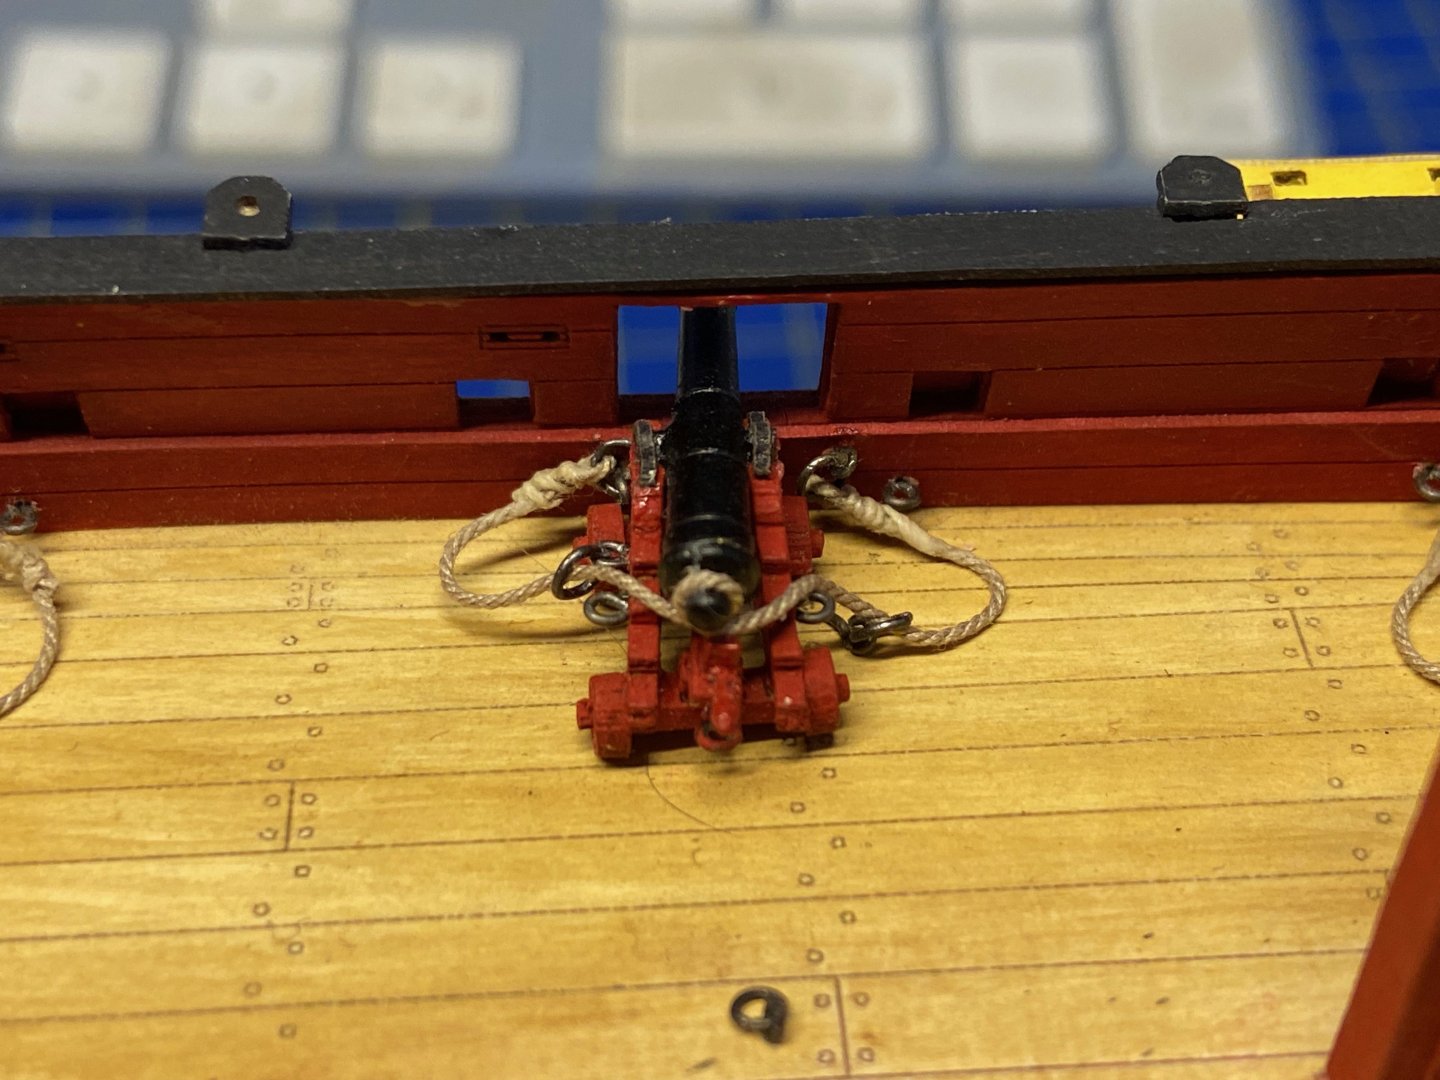
Those cardboard crosstrees turned out to be SUPER delicate, so I ended up having to reinforce them. Since the detail is so small, and will be mostly hidden by the topmast shrouds and t'gallant shrouds, I was able to just apply some 2-part epoxy to the undersides. Painted over, the results are hardly visible. In fact, I can't even get a good pic of the details of the small black-painted parts. I considered gluing some short pieces of thin, stiff wire to the undersides of the crosstrees, but it didn't seem necessary in the end. Meanwhile, I went ahead and added the jib boom to the bowsprit and added the belaying pins to the pin rails. However, I have yet to glue all the deck furniture into place yet. I want to make sure I have enough room to add the gun tackle, though I'm still not sure if I will do that. I also started adding the eyebolts to the mast caps and bowsprit cap. The kit provides thin copper wire for this purpose, but it's really soft stuff. I was trying to replace it with some black wire I bought recently, but it turns out to be copper wire with a black coating, so still pretty soft. Finally, I settled on using some annealed steel wire. It's a little shiny, but at this scale, they're barely visible anyway. I need to start adding a bunch of blocks onto the model, particular on the underside of the mast tops. This means I need to make a call on the which blocks I'm using. I was really trying to use the cardboard blocks included in the kit, but I'm just not great at assembling the multi-sheave blocks and had some problems with that. The cardboard blocks are very detailed and I think they look more like the actual blocks needed for the model than anything else commercially available and in the right sizes. But, I've decided I need to use wooden blocks at this point. It's hard to find ones in all the sizes necessary. Fortunately, I have a large collection of old blocks from Lloyd Warner, who used to be heavily involved in the NRG here. I have my own supply, and I recently inherited a friend's supply as well, so I'm pretty well set with that. Still have to decide on the rigging of the gun tackles though... I definitely don't put them on my 1/96 scale (1/8" = 1') models, but I though as a rule of thumb, that I'd add the gun tackles at 1/72 scale and larger. However, these are very small cannons, only 3 or 4 pdrs. So, I'm thinking I may have to skip them on this model. Anyway, I can still work on some masting details before I'm forced to make the final call on the gun tackles. I think I'd really like to add all the bowsprit rigging and those blocks under the mast tops next.


- 108 replies
-
- 12
-
-
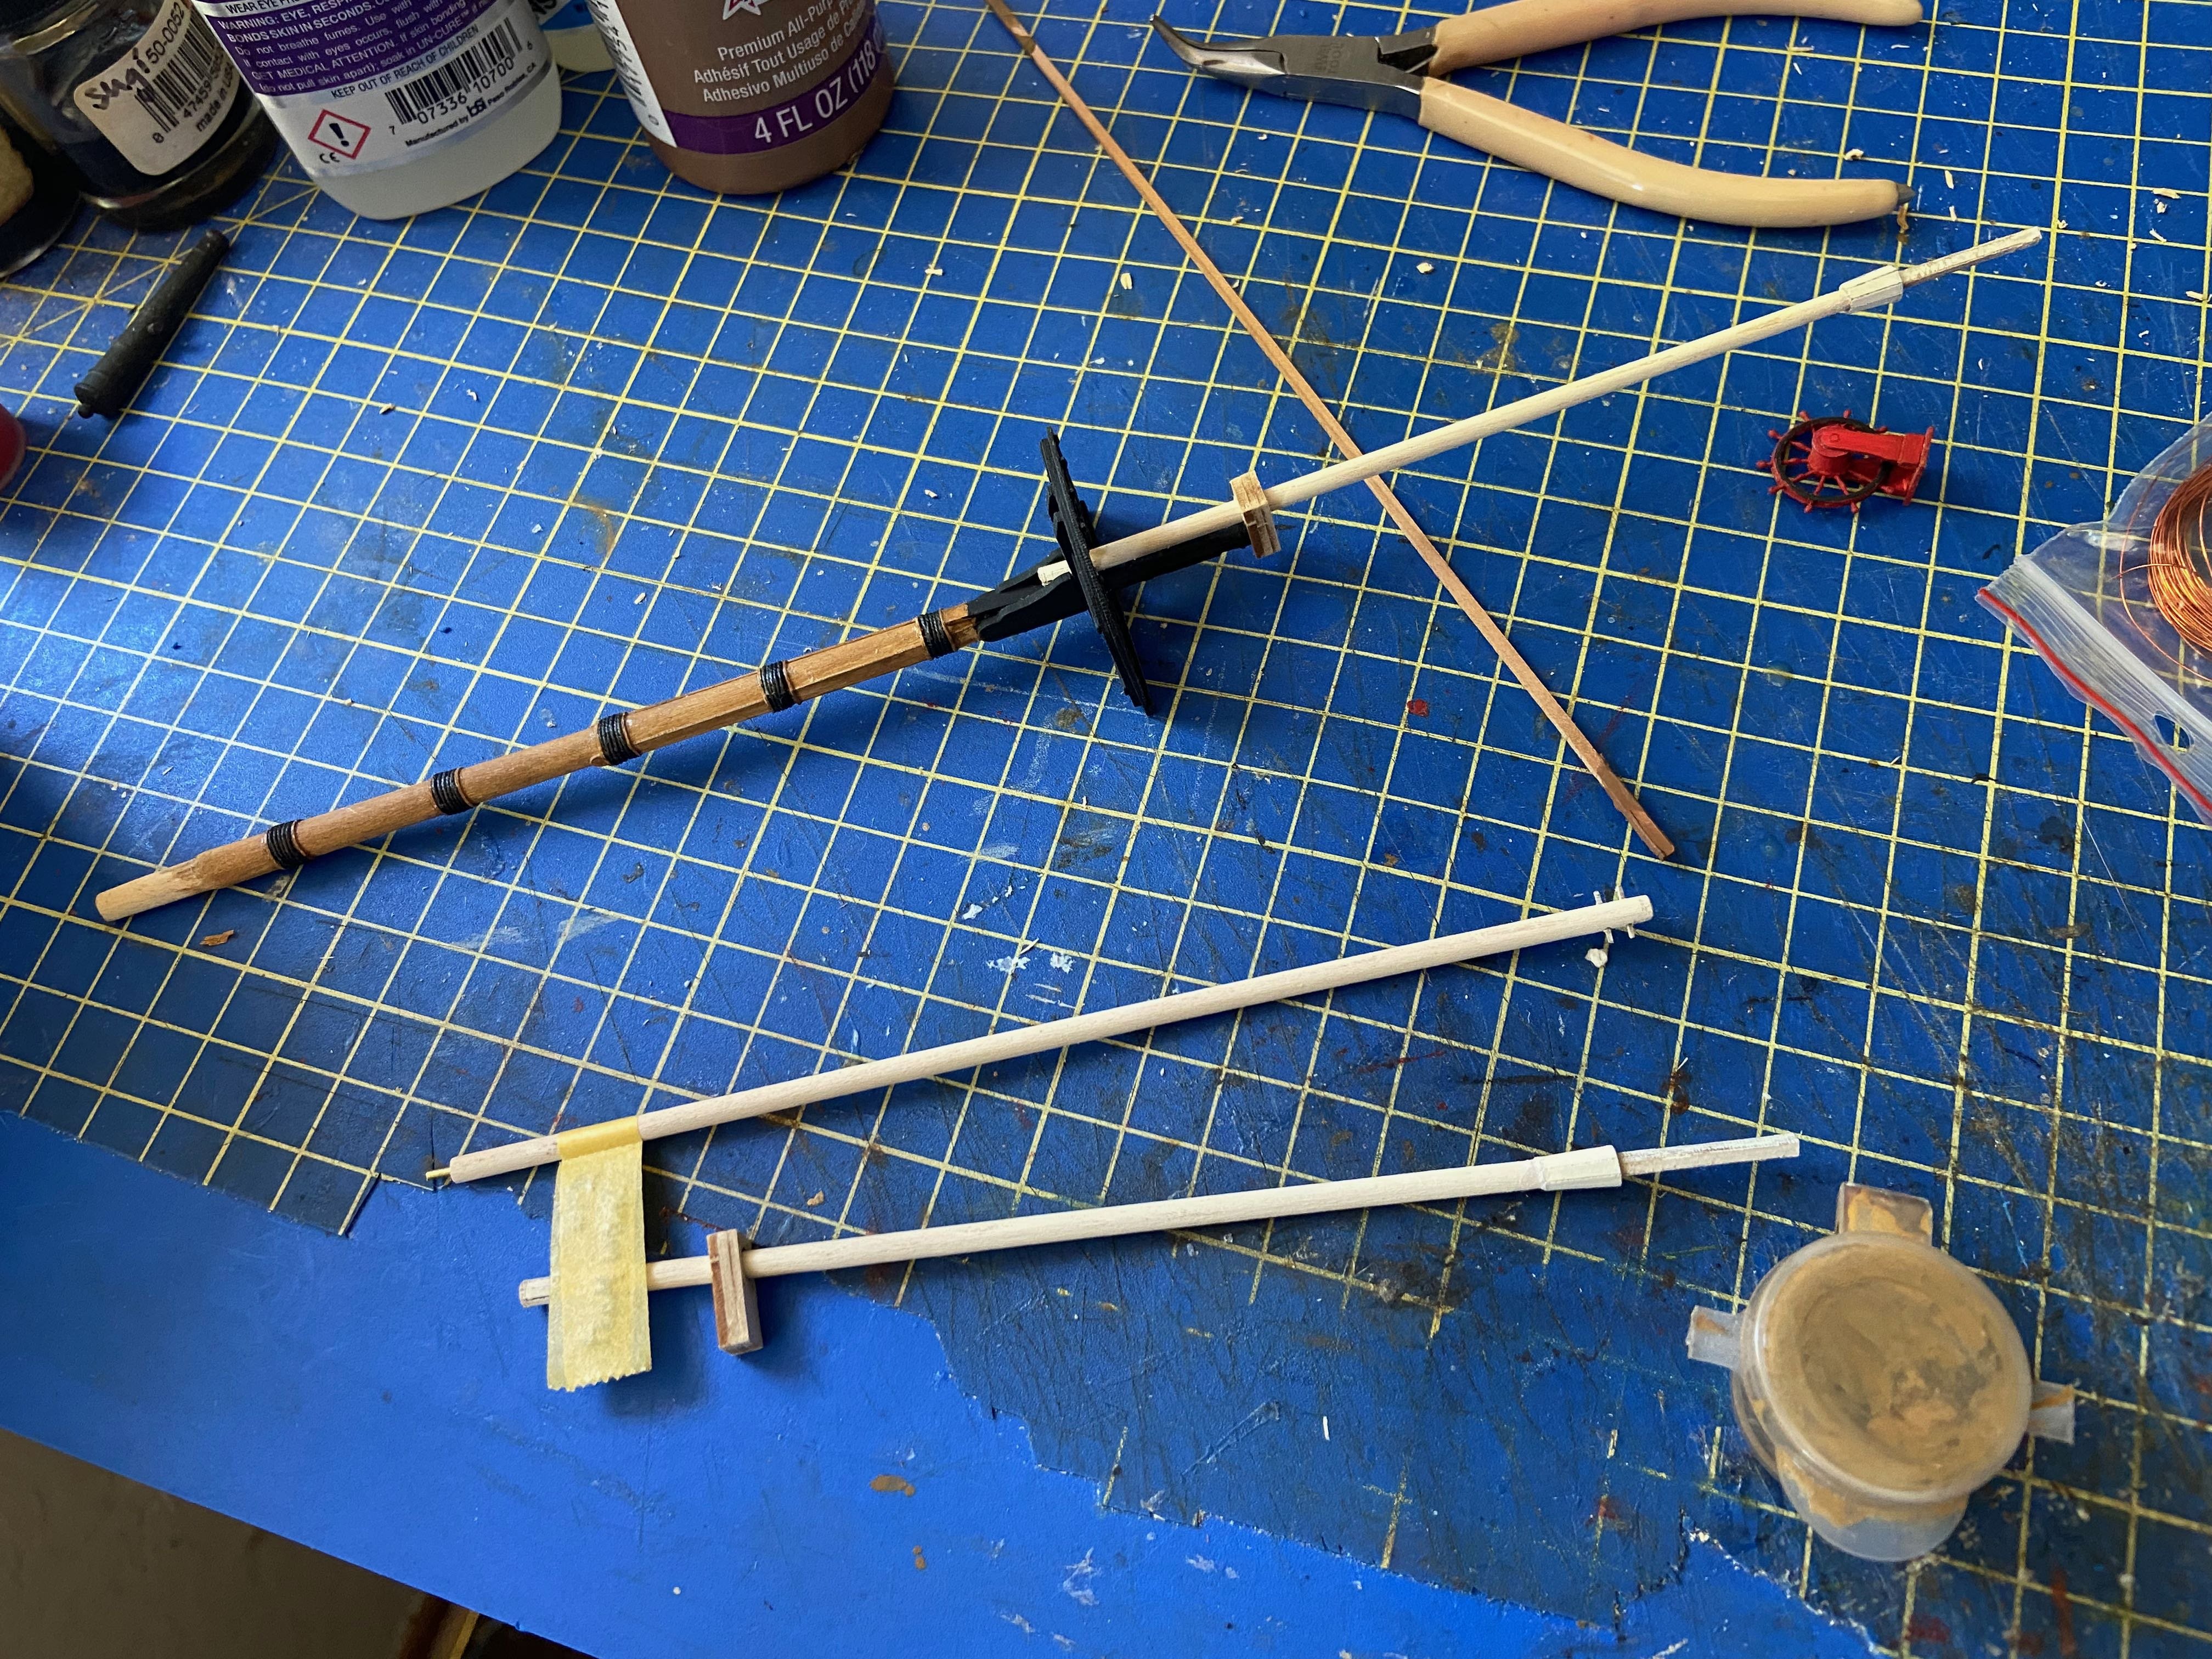
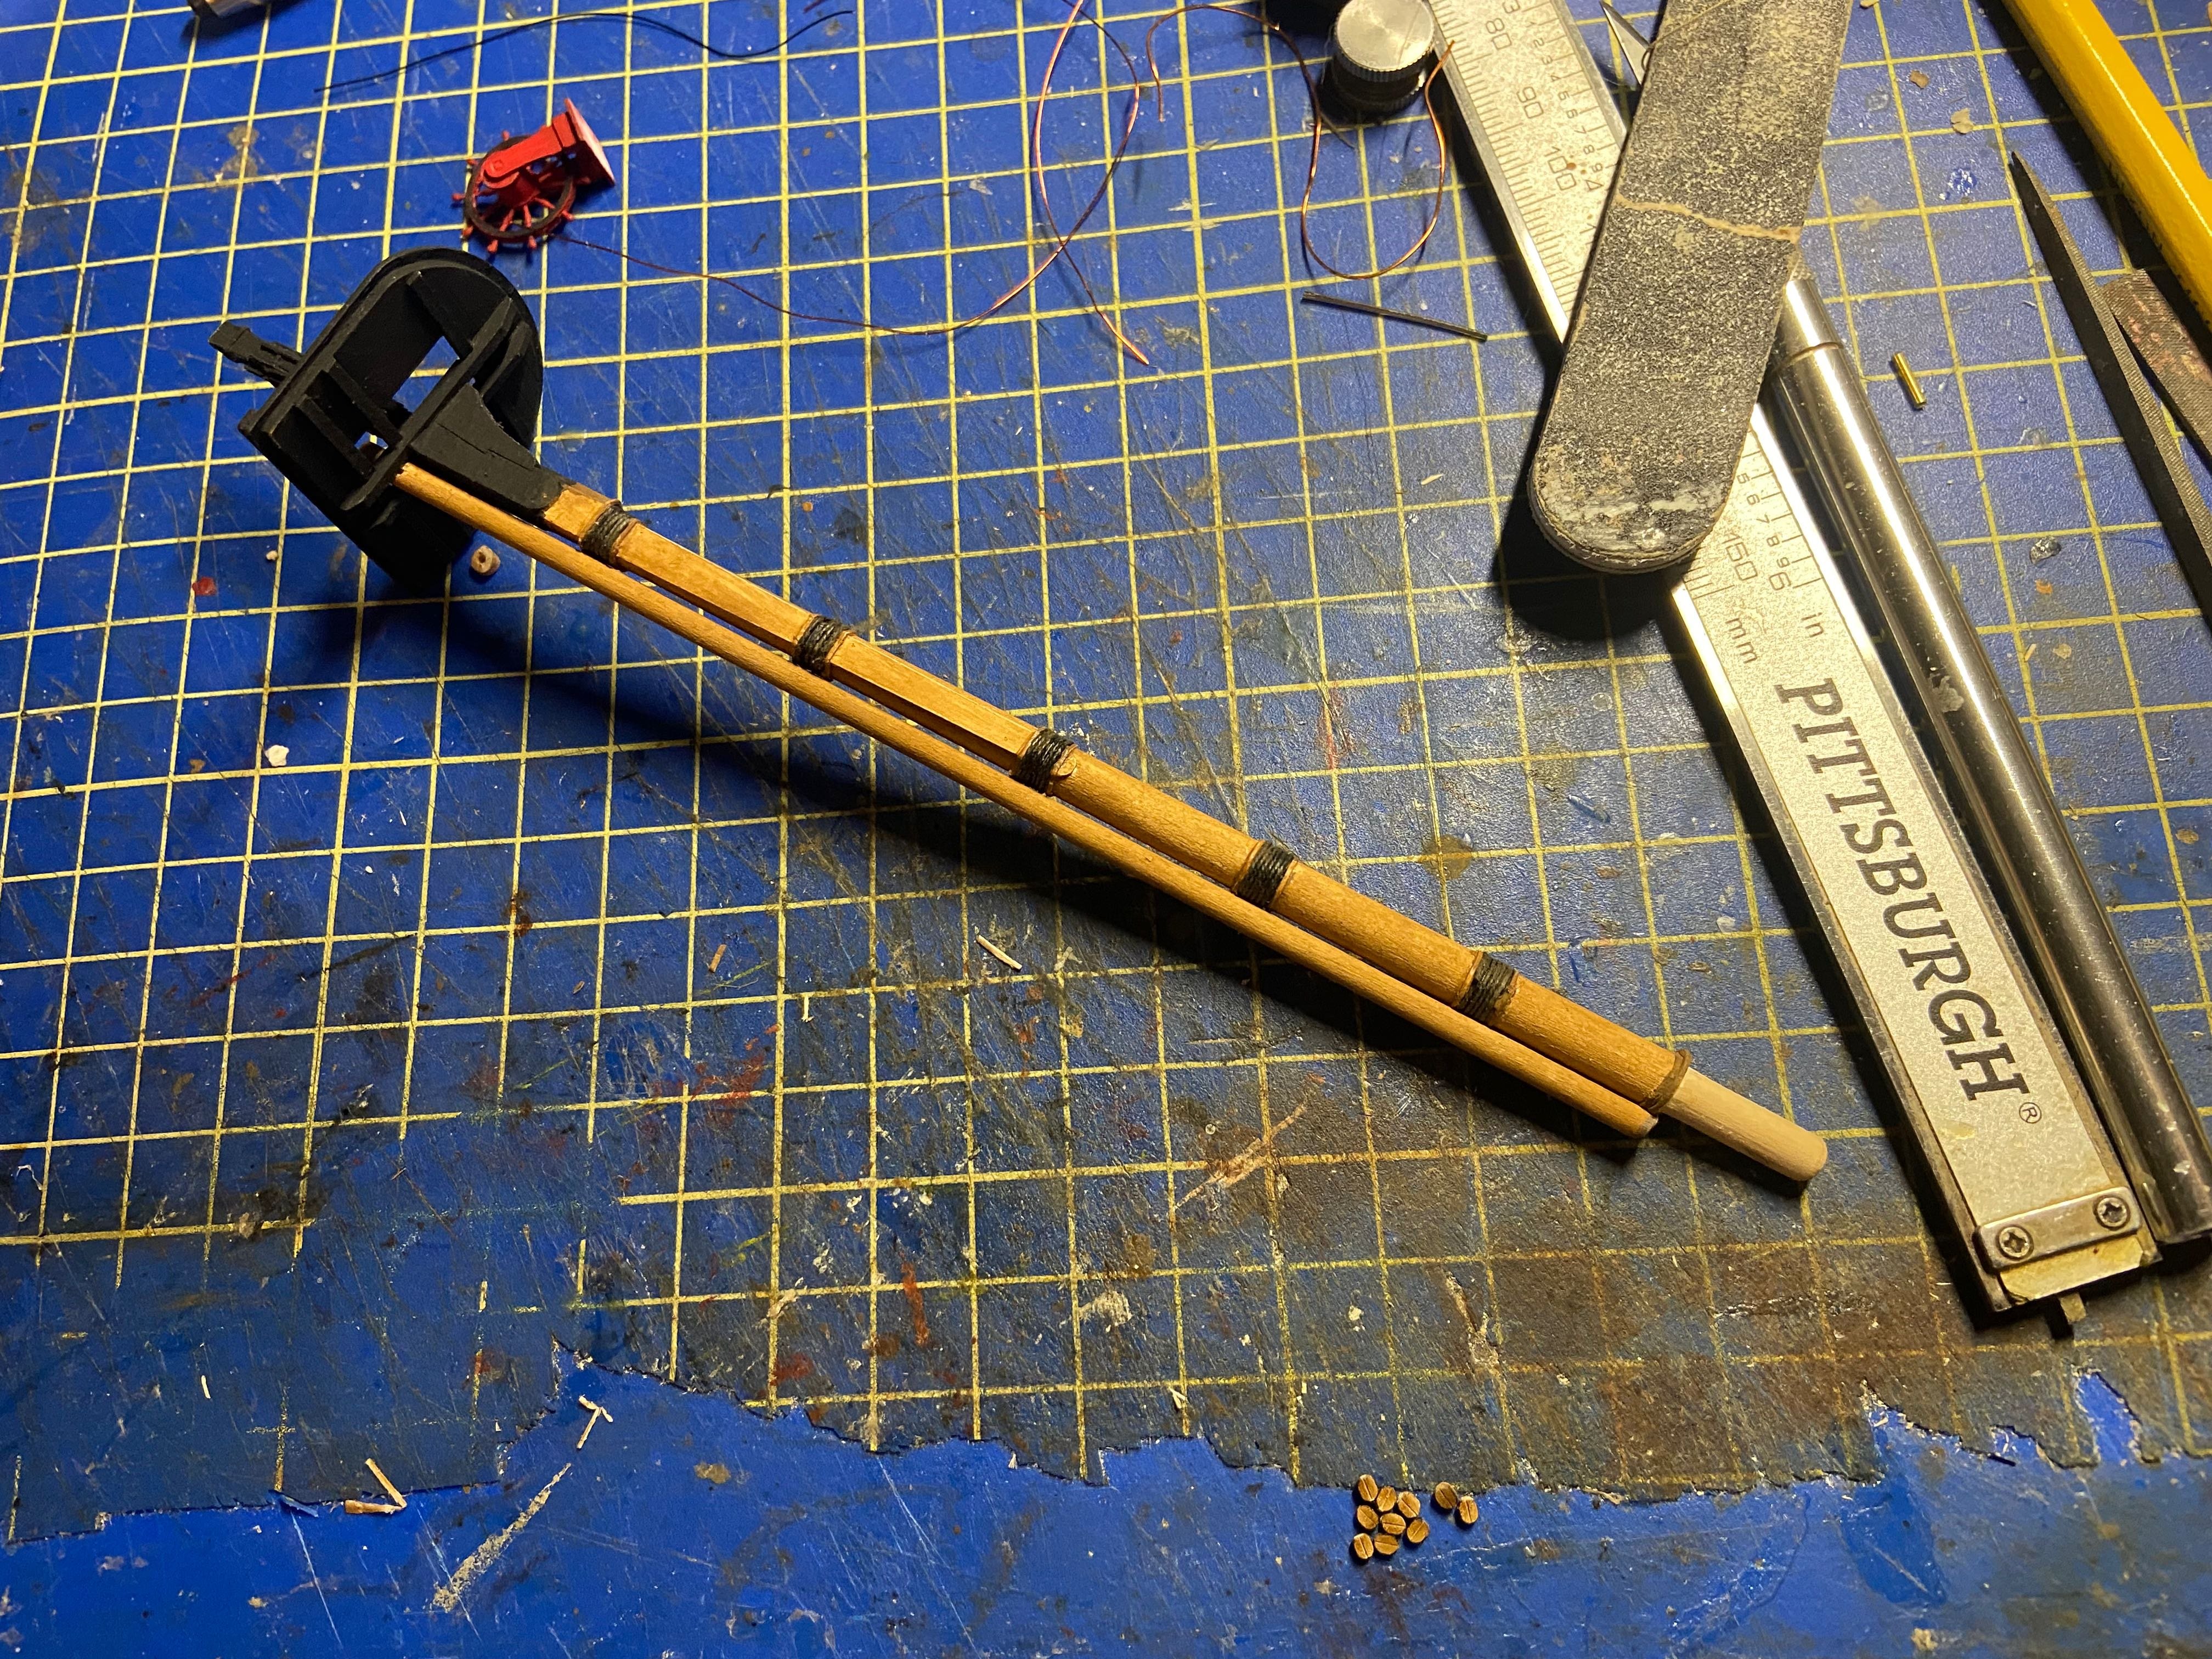
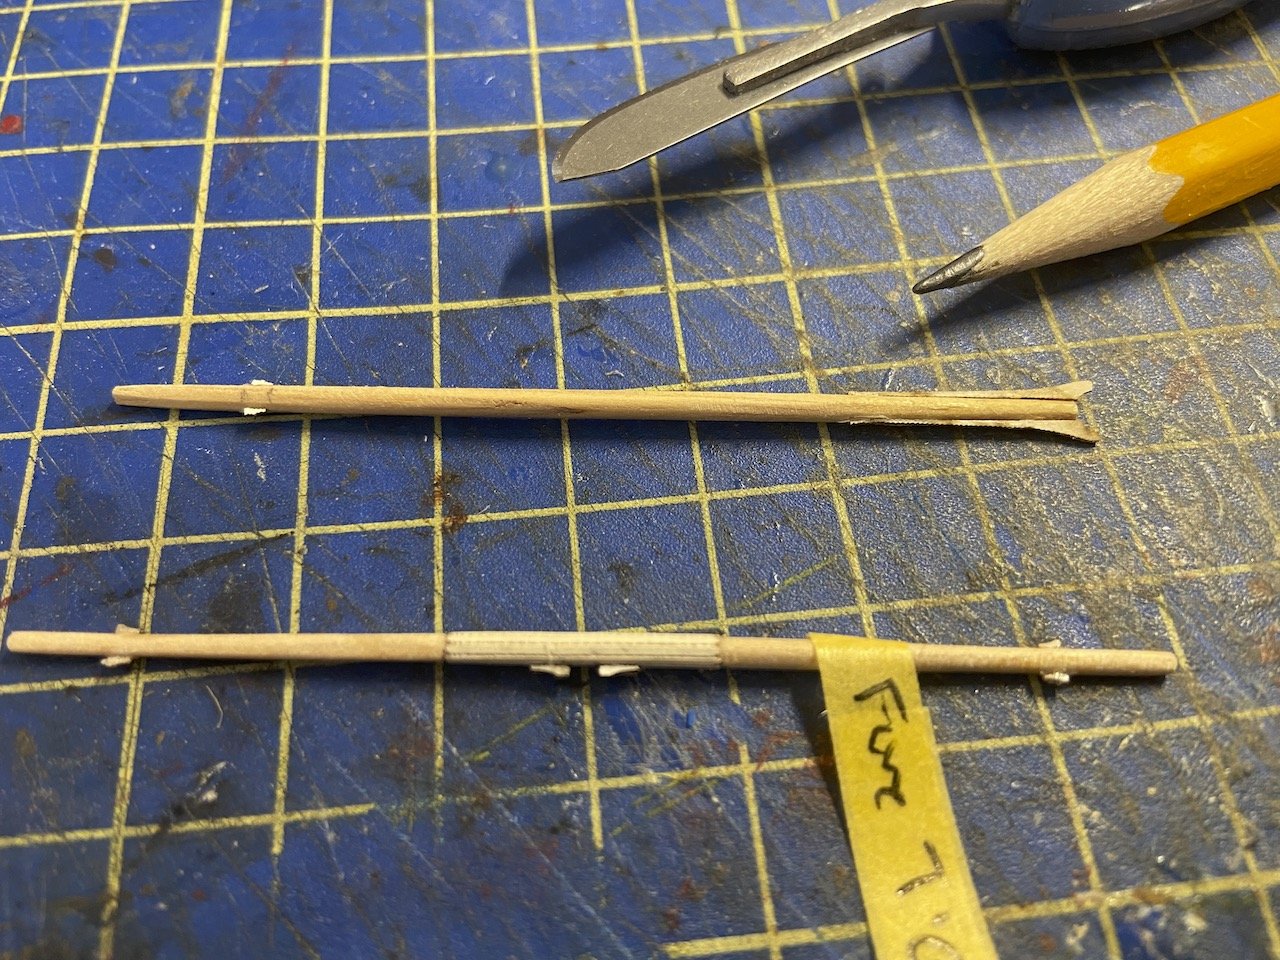
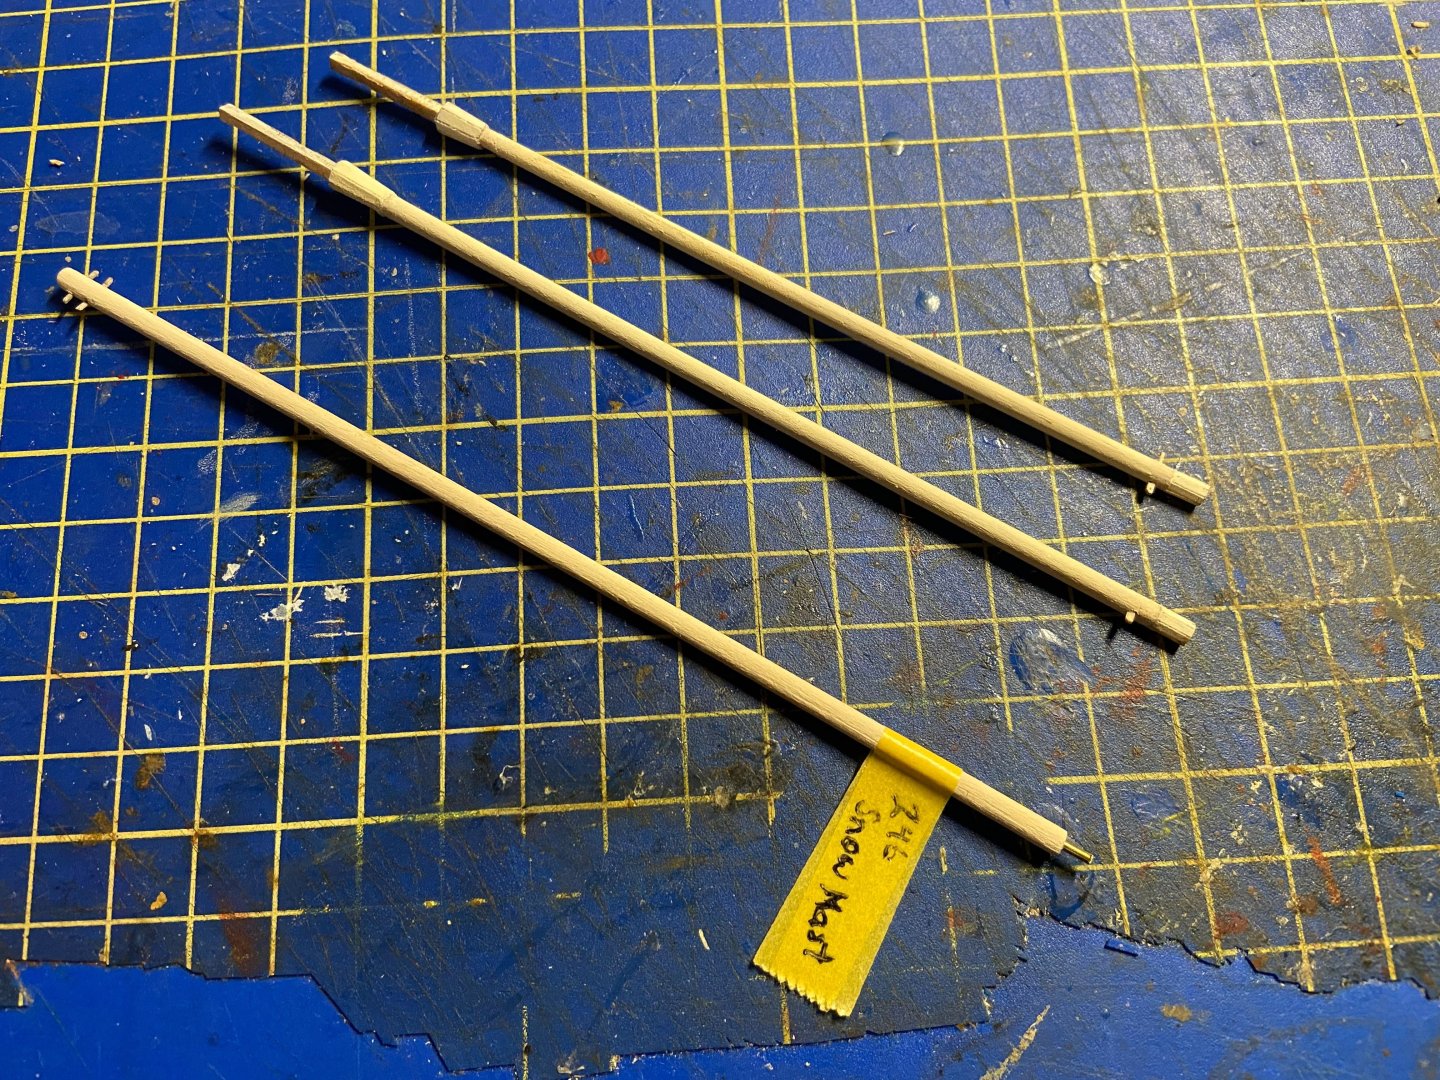
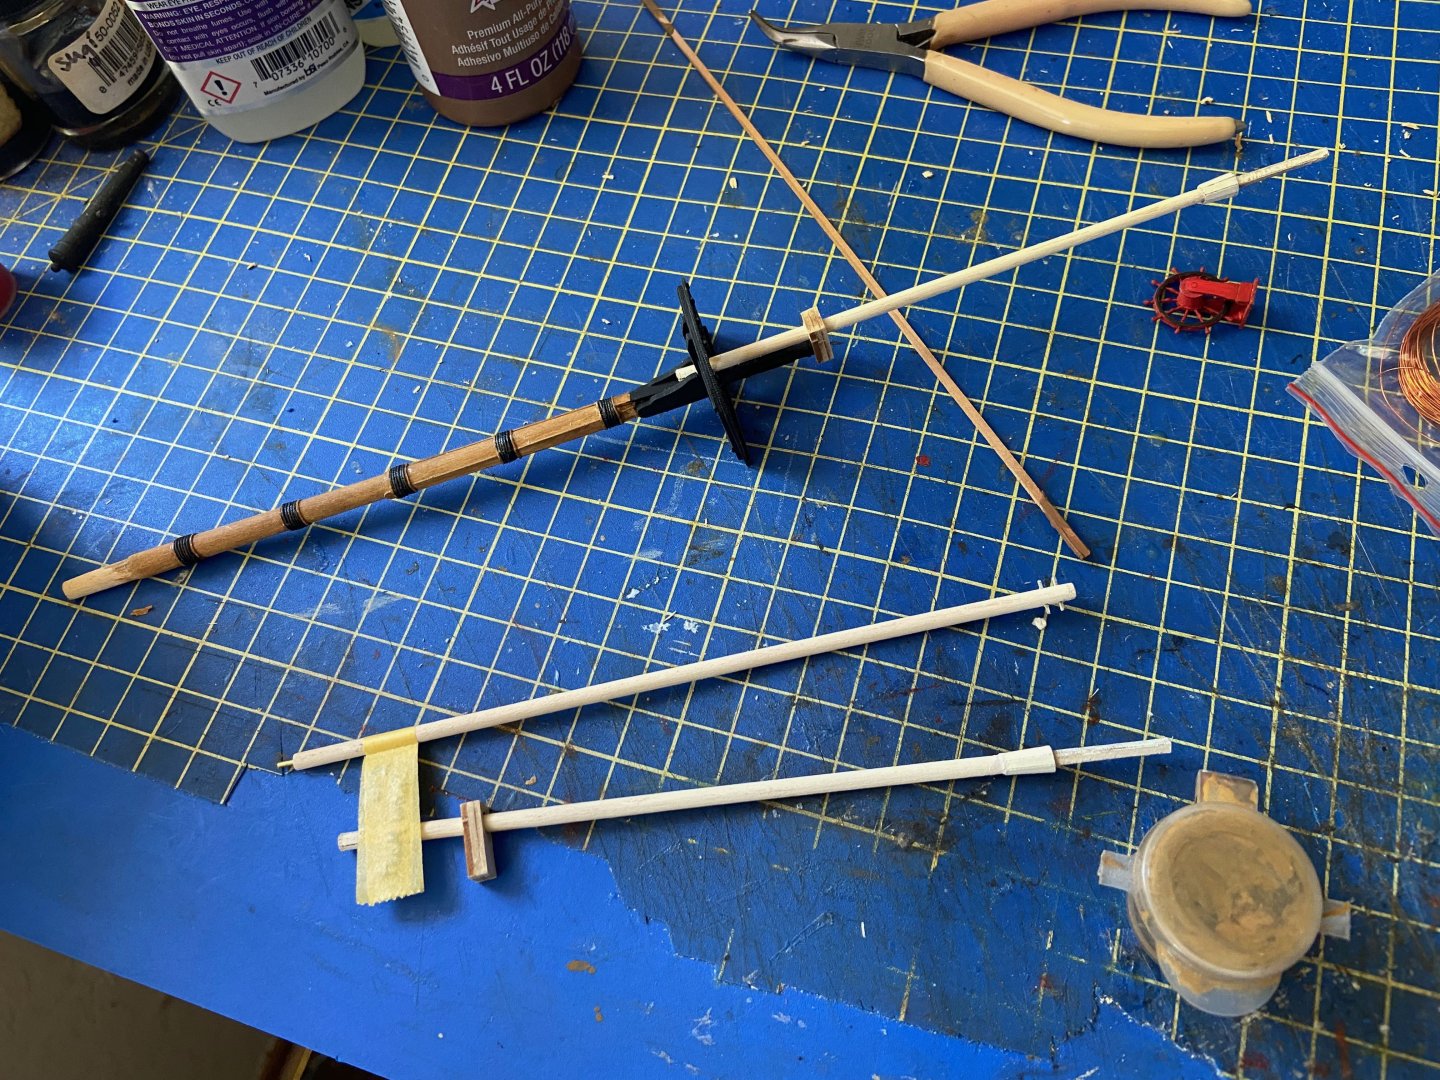
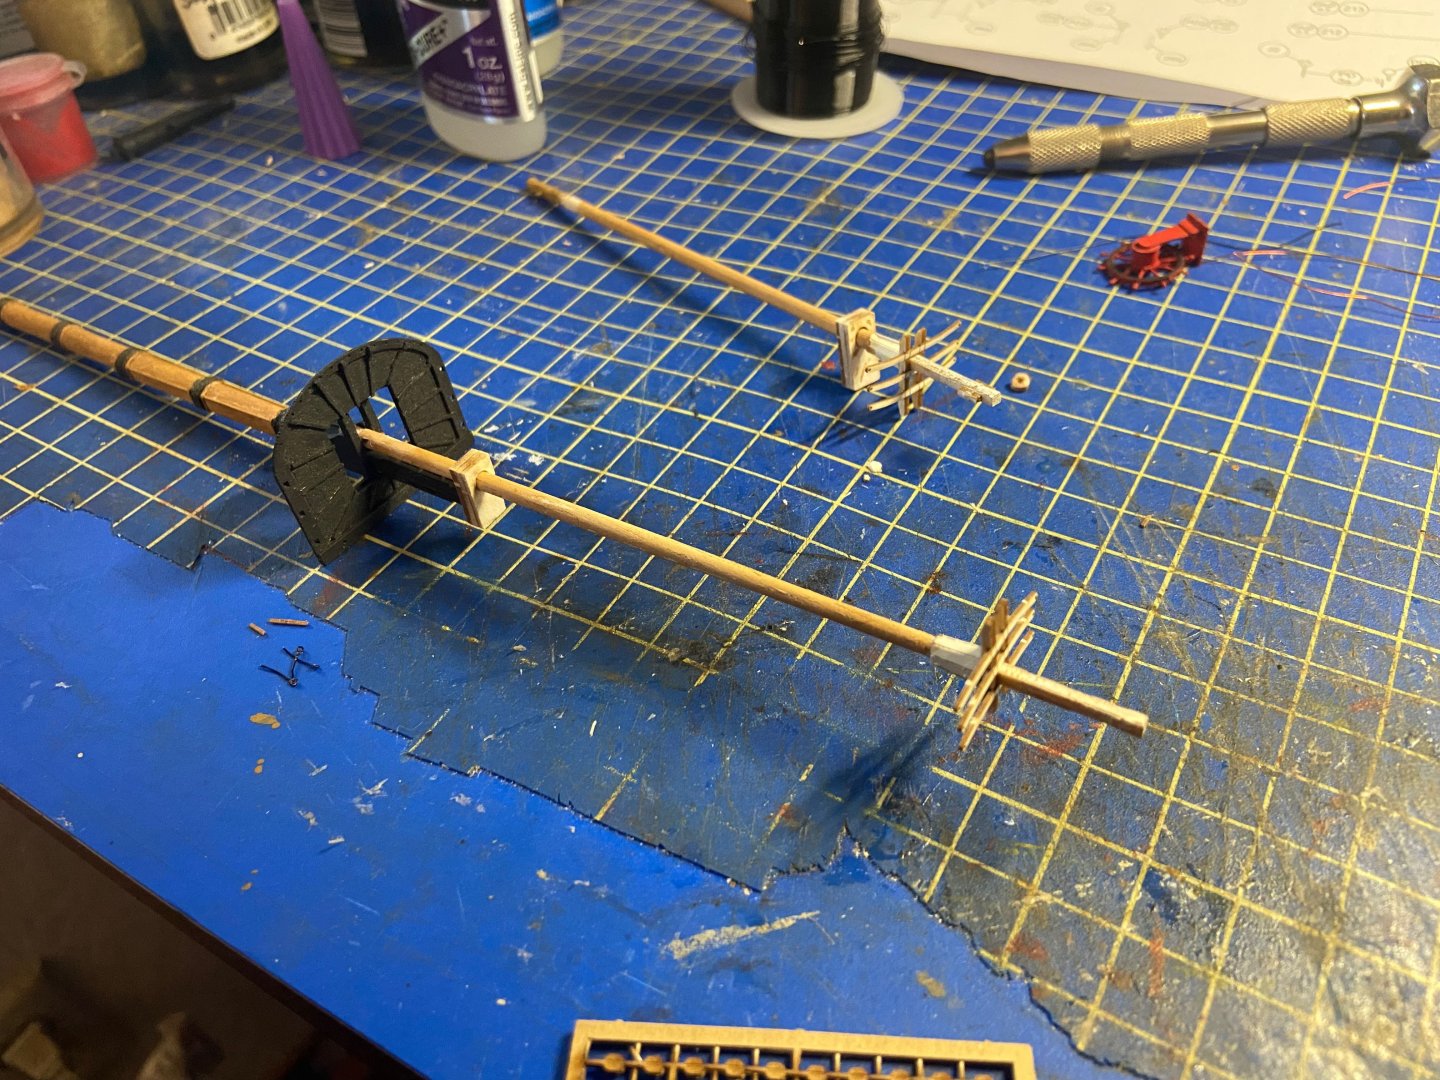
Working on card (paper) models can feel like really slow going at times. Possibly, it's just because the hull construction is so quick in comparison. So, I'm posting a little bit of progress I'm making, and it doesn't seem like much. But, it's progress nonetheless, and I just wanted to show that I've been giving this model some attention. There are three sub-projects I'm currently working on with this model. First, there are the masts and spars; second, there's the rigging of the cannons; third, there is the rigging of the ship's wheel. The spars are the easiest, I suppose. Below is the progress already made on the mast tops and the snow mast, or what the kit calls the trysail mast. The topmasts required the most work, as both ends are card assemblies, connected by a dowel. The snow mast is the simplest. It's just a dowel with holes drilled in it for the fids, or that's what I assume they are called. Below is another view of the same pieces, with the fore topmast test fit into place. It's actually not very clear how the snow mast is to attach to the mainmast. At the top end, it seats into the crosstrees and that's fine. But the bottom end doesn't have a hole in the deck to fit through on the model. I contacted Shipyard and they said is just sits on the deck. Doesn't seem very secure, so I went ahead and drilled a hole in the bottom of the snow mast and fit a short piece of brass rod in it. I've since removed the brass rod and trimmed the length of the snow mast so that is will sit on the deck, and simply glued it to the back edge of the mast coaming. However, I think I'll go back and put that piece of rod back in, just to make the assembly more secure. Finally, I finished the assembly of the topmast crosstrees. These are kind of delicate, so I made sure to treat them with thin CA, which stiffens up the parts pretty well. They're still a bit delicate, but not nearly as much as they were, untreated. You can see I have the ship's wheel out on the work bench too. I need to rig this and the tiller, but that requires running thin line through 8 teeny blocks, and then some... I think I'm moving forward with using the kit blocks, which have to be assembled. You can see some of the smallest ones at the bottom of the photo above. Assembly isn't a problem now, it's how to rig them that's an issue. 1/72-scale isn't the worst scale to work on (I practically swore-off 1/96 scale early on), but the level of detail and scale accuracy of these Shipyard kits (and I think Seahorse is the same way), results in dealing with very tiny parts. In the old days, I learned to "fake it" and to take various short cuts, understanding that this is a model, and that the "art" of model making is much an art of illusion, of making things look correct, even they really aren't. This is something I used to do better and I think I've forgotten that. It's something I need to remember on a model of this size and detail... At any rate, I'll try to keep at it a while on this model. It's nice to be making some progress on it again. One of the guys in the local ship model club has put me to shame, recently completing his model of Shipyard's 1/72-scale armed pinnace Papegojan, while my HMS Wolf is still in dry dock...

- 108 replies
-
- 11
-
-
Thanks Druxey, Chris. It's been nice getting some things done and "out the door" as it were. Fortunately, I'm finding fewer potential projects distracting me, so I don't really feel like starting anything new. Unfortunately, I have more than enough projects to juggle between, even after eliminating a few... Clare