HOLIDAY DONATION DRIVE - SUPPORT MSW - DO YOUR PART TO KEEP THIS GREAT FORUM GOING! (Only 13 donations so far - C'mon guys!)
×

molasses
-
Posts
455 -
Joined
-
Last visited
Content Type
Profiles
Forums
Gallery
Events
Everything posted by molasses
-
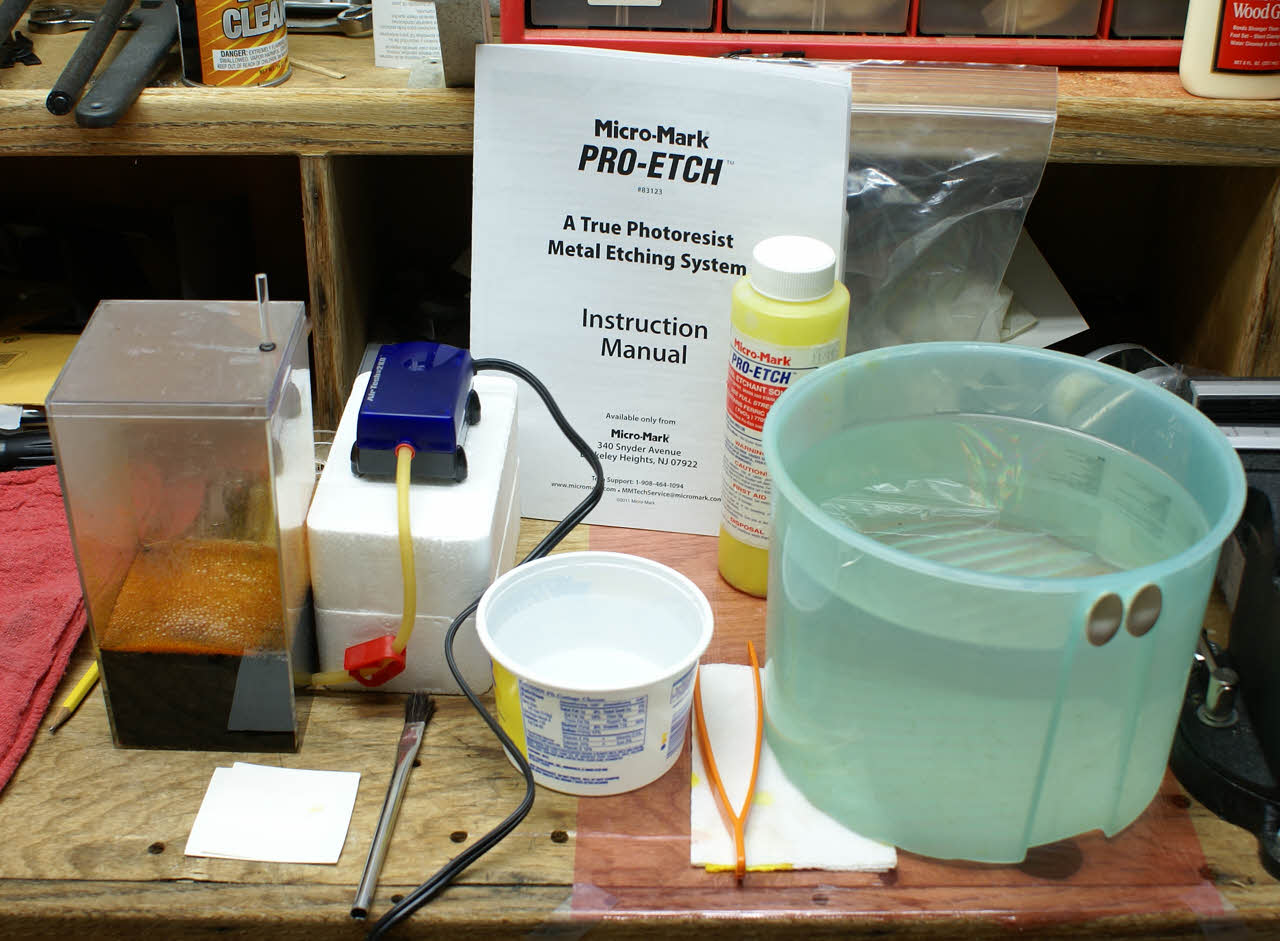
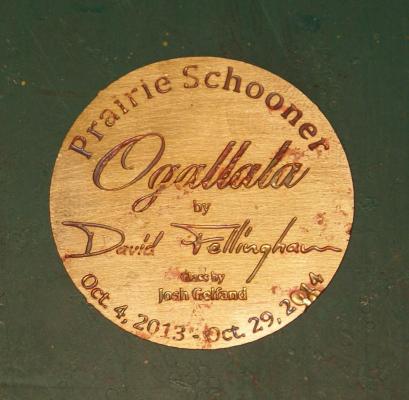
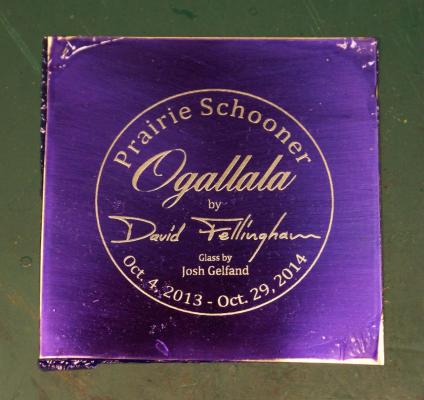
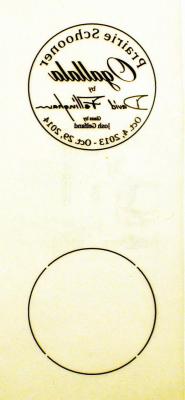
 I received the Micro-Mark Pro-Etch Kit and set out on the learning curve - which is rather steep to successfully make usable photo-etch parts on the first try. It took me three. After ordering and waiting for delivery, I set about drawing in my drawing program the etched letters I wanted on two brass discs - one as a seal for the bottle and one on the display base. Keeping it simple, I planned to remove lettering on one side of the discs that I would later fill with paint, black letters on the brass discs. When the kit arrived I read the instruction book multiple times and identified all the tools and materials in the kit. Following the instructions, I made the masks for both sides of a disc and printed them on the backside of the mask transparency film. Follow the instructions carefully. The black areas of the mask are the areas that need to be removed from the metal and this mask will be printed backwards (flipped horizontally) so that the print is on the backside of the film. After the ink is dry the two masks are perfectly aligned, print side to print side and taped together. The print side of the mask transparency. The face side of the disc with reversed lettering and the back side with interruptions in the circle so that the disc will stay partially attached to the square of base metal. The black is what will be removed, half-way through from both sides with most of the edge all the way through. With directions in hand I cut two 2.5 inch / 64 mm squares of .005 inch /0.13 mm thick brass sheet. Before I opened the package of photo-resist film I set up a darkened work area lit by a single yellow "bug" bulb, then opened it, removed the resist and cut two squares, put them in an envelope lined with black paper, and returned the photo-resist film to its package and sealed it shut. This film hardens in UV light. I prepared a brass square by wet sanding each side of the square with a provided 3200 grit sanding pad until very shiny and so that the water sheeted across the square. I pulled one piece of the resist from the envelope, peeled off the inside cover film and, like applying a decal, attempted to lay the resist film on the wetted square, get it aligned to the edges of the square and adhered to the square without bubbles of air or water between the film and the brass. This turned out to be rather difficult and I had problems with it. On my second through fourth tries I submerged the brass square in just enough water to cover and applied the resist film through the water. (An old school decal application trick.) I did the same to the back side. While doing this I had the Pro-Etch laminater plugged in and warmed up. I cut two squares of carrier sheet (card stock with one side treated so that it is glossy and smooth) slightly larger than the brass squares. I made a sandwich of the photo-resist covered brass square with the two squares of carrier, glossy side to the photo-resist and ran it through the laminater twice, flipped over and turned 90 degrees for the second pass and let it cool in a black envelope. Next the cooled, laminated brass square (carrier sheets set aside) is slipped between the two masks and centered, then placed in the center of one of the Plexiglas squares provided, the other Plexiglas square placed on top and clamps applied at the four sides. All of this has been done with minimal exposure to UV light, just the yellow "bug" bulb - a suggestion in the directions. Again per the instructions I exposed each side of this sandwich to full sun at local noon for 20 seconds. The UV light hardened and turned the photo-resist in the areas not masked a deep blue from its original light blue. I disassembled the sandwich and returned the brass square to a black envelope while I set up for the next step and put away what I wouldn't need right away. I prepared a solution of sodium hydroxide and water per the instructions, removed the outer protective layer of the photo-resist film from both sides and submerged the brass square in this solution. This chemical reacts with the masked and un-hardened photo-resist film, softening it so that it will brush away. This is the most important part of the process, if the film is not completely removed from the areas to be chemically etched it won't etch properly. This is where I messed up in my first two tries; for the third and fourth tries I used my 2.75X Opti-Visor and inspected and brushed with the solution and inspected and rinsed and brushed some more until I was certain that every bit of resist was removed from the areas that needed to be etched. I made use of a hand held magnifying glass with the Opti-Visor to make sure every bit of un-exposed resist film was gone. The second brass disc with blue photo-resist and bright brass showing through the areas that will be etched. I thought this was good enough but it was not. Many areas did not etch properly, especially from the backside, due to my lack of diligence. Paying close attention to the instructions, I set up the equipment for the actual photo-etching. I had to supply a rinse bucket and a smaller rinse bowl, both filled with water. I warmed the bottle of ferric chloride in hot water running from the tap before filling the etching tank. I plugged in the aerator (to circulate the etching solution) and submerged the brass square. I set a 5 minute timer. Etching in process. There's a clamp on the hose to prevent the etching solution from flowing back into the pump plus the pump is placed on two pieces of foam packaging to raise it above the solution level. After five minutes, I removed the brass square from the etching tank (turned off the aerator and pinched shut the hose clamp - the fumes must be assumed to be nasty) rinsed and re-rinsed to inspect the progress. Most of the double side etching at the edge of the disc was cut through, so I turned the brass square 180 degrees in the clamp, returned it to the solution (turned on the aerator and released the clamp) and waited three minutes. Upon inspection, it was done and I rinsed it in hot tap water before setting it aside and cleaning up. Now, to see the results. I poured out just enough of the sodium hydroxide (undiluted this time) into one of the trays provided to cover the brass square. Full strength this chemical removes the photo-resist from the brass with a little help with a brush. When cleaned of the resist the brass was rinsed in hot water from the tap and set aside. Here's my first try with some practice with black enamel to fill in the letters. There are several places where the photo-resist did not adhere and laminate properly as a result of my difficulty with getting the resist in place as directed and etching solution got into them from an edge exposed to etching solution. I had no more problem with this using the submerged technique of applying the photo-resist film. Many places in the lettering have incomplete depth because I didn't get all the masked film removed the way I should have. Micro-Mark was right when they said this was the most important step. Third and fourth tries, both appear perfect. The lettering has not been filled with enamel yet, just the result of better photographic technique learned since the photo of the first disc. I didn't even bother stripping the second attempt since I could see that I had not removed all the masked and un-hardened photo-resist film. The discs are 1.73 inch / 44 mm in diameter. I am very pleased with the Micro-Mark Pro-Etch Kit. It has everything needed except for a yellow "bug" bulb and the two rinse buckets I provided. I bought a better pair of rubber gloves than the single use, throw away gloves supplied in the kit for my second session when I made the last two discs. I also added a small in-line on/off switch to the aerator electric cord so I would not have to crawl under my work bench to unplug it when I needed to turn it off. The process does have a steep learning curve, a mistake made anywhere in the process will affect the results. READ AND STUDY THE INSTRUCTIONS and MAKE SURE YOU UNDERSTAND EACH STEP. I hope my experience helps others learn from my mistakes. Dave


-
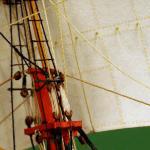
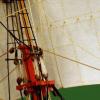
I am working on a display base, nearly complete, and have had the mast folded down and back up again, twice, as dry runs to identify and adjust for problems with the lines before putting the ship into the bottle. On one of those dry runs I passed the ship through a ring slightly smaller than my bottle's neck to verify that it will fit - a must do to prevent the disaster of getting the ship stuck in the neck. I've just about given up on making and installing coils of rope on the pinrails and cleats. I made a fixture for making some coils - which turned out okay - but I found them very difficult to install in many places. I should have made and installed them as I tied off each line instead of as a separate step. I may try again starting with the easy ones to get to instead of the hardest ones. I received the Micro-Mark Pro-Etch Kit and set out on the learning curve - which is rather steep to successfully make usable photo-etch parts on the first try. It took me three. After ordering I set about drawing in my drawing program the etched letters I wanted on two brass discs - one as a seal for the bottle and one on the display base. Keeping it simple, I planned to remove lettering on one side of the discs that I would later fill with paint, black letters on the brass discs. When the kit arrived I read the instruction book multiple times and identified all the tools and materials in the kit. Following the instructions, I made the masks for both sides of a disc and printed them on the backside of the mask transparency film. Follow the instructions carefully. The black areas of the mask are the areas that need to be removed from the metal and this mask will be printed backwards (flipped horizontally) so that the print is on the backside of the film. After the ink is dry the two masks are perfectly aligned, print side to print side and taped together. The print side of the mask transparency. The face side of the disc with reversed lettering and the back side with interruptions in the circle so that the disc will stay partially attached to the square of base metal. The black is what will be removed, half-way through from both sides with most of the edge all the way through. With directions in hand I cut two 2.5 inch / 64 mm squares of .005 inch /0.13 mm thick brass sheet. Before I opened the package of photo-resist film I set up a darkened work area lit by a single yellow "bug" bulb, then opened it, removed the resist and cut two squares, put them in an envelope lined with black paper, and returned the photo-resist film to its package and sealed it shut. This film hardens in UV light. I prepared a brass square by wet sanding each side of the square with a provided 3200 grit sanding pad until very shiny and so that the water sheeted across the square. I pulled one piece of the resist from the envelope, peeled off the inside cover film and, like applying a decal, attempted to lay the resist film on the wetted square, get it aligned to the edges of the square and adhered to the square without bubbles of air or water between the film and the brass. This turned out to be rather difficult and I had problems with it. On my second through fourth tries I submerged the brass square in just enough water to cover and applied the resist film through the water. (An old school decal application trick.) I did the same to the back side. While doing this I had the Pro-Etch laminater plugged in and warmed up. I cut two squares of carrier sheet (card stock with one side treated so that it is glossy and smooth) slightly larger than the brass squares. I made a sandwich of the photo-resist covered brass square with the two squares of carrier, glossy side to the photo-resist and ran it through the laminater twice, flipped over and turned 90 degrees for the second pass and let it cool in a black envelope. Next the cooled, laminated brass square (carrier sheets set aside) is slipped between the two masks and centered, then placed in the center of one of the Plexiglas squares provided, the other Plexiglas square placed on top and clamps applied at the four sides. All of this has been done with minimal exposure to UV light, just the yellow "bug" bulb - a suggestion in the directions. Again per the instructions I exposed each side of this sandwich to full sun at local noon for 20 seconds. The UV light hardened and turned the photo-resist in the areas not masked a deep blue from its original light blue. I disassembled the sandwich and returned the brass square to a black envelope while I set up for the next step and put away what I wouldn't need right away. I prepared a solution of sodium hydroxide and water per the instructions, removed the outer protective layer of the photo-resist film from both sides and submerged the brass square in this solution. This chemical reacts with the masked and un-hardened photo-resist film, softening it so that it will brush away. This is the most important part of the process, if the film is not completely removed from the areas to be chemically etched it won't etch properly. This is where I messed up in my first two tries; for the third and fourth tries I used my 2.75X Opti-Visor and inspected and brushed with the solution and inspected and rinsed and brushed some more until I was certain that every bit of resist was removed from the areas that needed to be etched. I made use of a hand held magnifying glass with the Opti-Visor to make sure every bit of un-exposed resist film was gone. The second brass disc with blue photo-resist and bright brass showing through the areas that will be etched. I thought this was good enough but it was not. Many areas did not etch properly, especially from the backside, due to my lack of diligence. Paying close attention to the instructions, I set up the equipment for the actual photo-etching. I had to supply a rinse bucket and a smaller rinse bowl, both filled with water. I warmed the bottle of ferric chloride in hot water running from the tap before filling the etching tank. I plugged in the aerator (to circulate the etching solution) and submerged the brass square. I set a 5 minute timer. Etching in process. There's a clamp on the hose to prevent the etching solution from flowing back into the pump plus the pump is placed on two pieces of foam packaging to raise it above the solution level. After five minutes, I removed the brass square from the etching tank (turned off the aerator and pinched shut the hose clamp - the fumes must be assumed to be nasty) rinsed and re-rinsed to inspect the progress. Most of the double side etching at the edge of the disc was cut through, so I turned the brass square 180 degrees in the clamp, returned it to the solution (turned on the aerator and released the clamp) and waited three minutes. Upon inspection, it was done and I rinsed it in hot tap water before setting it aside and cleaning up. Now, to see the results. I poured out just enough of the sodium hydroxide (undiluted this time) into one of the trays provided to cover the brass square. Full strength this chemical removes the photo-resist from the brass with a little help with a brush. When cleaned of the resist the brass was rinsed in hot water from the tap and set aside. Here's my first try with some practice with black enamel to fill in the letters. There are several places where the photo-resist did not adhere and laminate properly as a result of my difficulty with getting the resist in place as directed and etching solution got into them from an edge exposed to etching solution. I had no more problem with this using the submerged technique of applying the photo-resist film. Many places in the lettering have incomplete depth because I didn't get all the masked film removed the way I should have. Micro-Mark was right when they said this was the most important step. Third and fourth tries, both appear perfect. The lettering has not been filled with enamel yet, just the result of better photographic technique learned since the photo of the first disc. I didn't even bother stripping the second attempt since I could see that I had not removed all the masked and un-hardened photo-resist film. The discs are 1.73 inch / 44 mm in diameter. I am very pleased with the Micro-Mark Pro-Etch Kit. It has everything needed except for a yellow "bug" bulb and the two rinse buckets I provided. I bought a better pair of rubber gloves than the single use, throw away gloves supplied in the kit for my second session when I made the last two discs. I also added a small in-line on/off switch to the aerator electric cord so I would not have to crawl under my work bench to unplug it when I needed to turn it off. The process does have a steep learning curve, a mistake made anywhere in the process will affect the results. READ AND STUDY THE INSTRUCTIONS and MAKE SURE YOU UNDERSTAND EACH STEP. I hope my experience helps others learn from my mistakes. As you can see from my name plates I've set myself a dead line of the 29th of this month - one year from my first post for Ogallala. A year is long enough and I'm getting tired of looking at it. Dave


- 170 replies
-
- 6
-

-
- ogallala
- praire schooner
- (and 2 more)
-
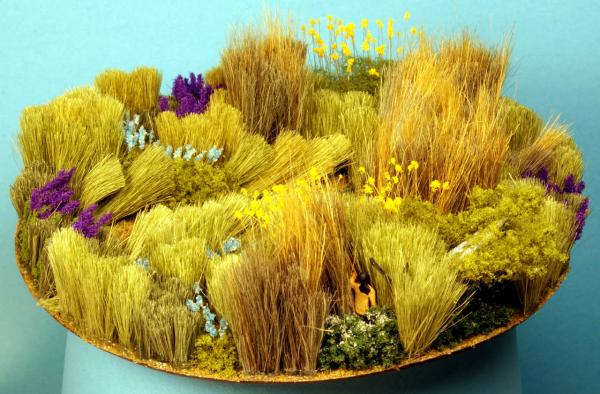
One more step and he will be out of the taller grasses. I considered putting the scout on a horse but decided against it - I didn't want to make a horse.
- 170 replies
-
- 2
-
-
- ogallala
- praire schooner
- (and 2 more)
-
More experimental photography trying to get all of my little piece of prairie in focus. Can you find the Oglala scout? Dave

- 170 replies
-
- 4
-
-
- ogallala
- praire schooner
- (and 2 more)
-
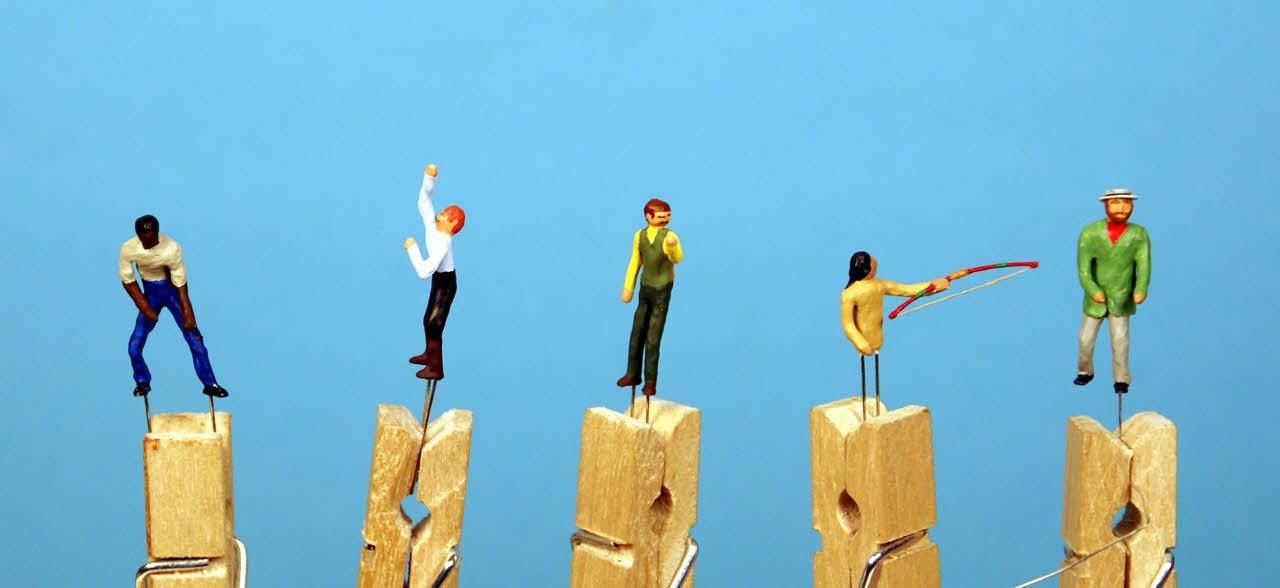
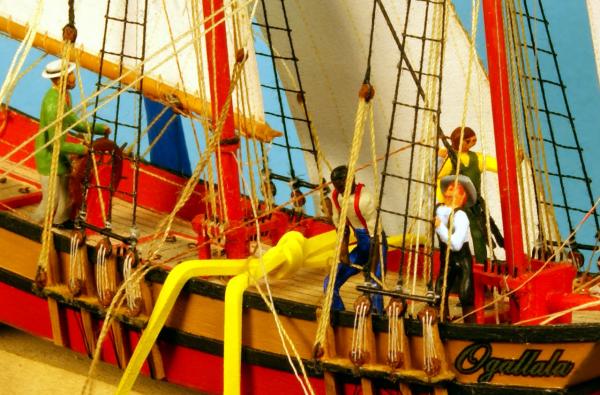
After I finished and placed my figures on Ogallala's deck I got to experimenting with my photography by taking it off "auto" and using aperture priority to improve my depth of field. Here's the best shot with my smallest aperture (f36) and a .60 second exposure using a time delayed shutter so I wouldn't move the camera when i pressed the shutter button. I gave the black man and the red head their suspenders, the red head a cowboy hat and the black man a rope to pull on. You may notice the name on the bow as well. Dave

- 170 replies
-
- 3
-
-
- ogallala
- praire schooner
- (and 2 more)
-
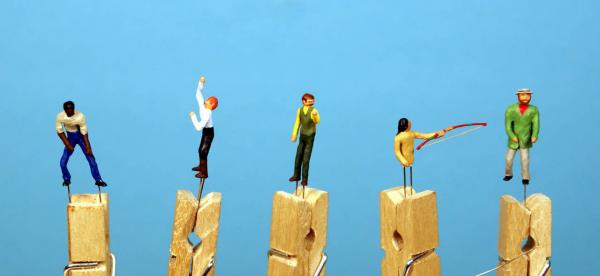
They average (not counting the legless Indian) about 16 mm (5/8 inch).
-
They were my first attempts and were fairly easy, see the pdf.
-
These figures attracted a lot of attention here and elsewhere so I put together a pdf for handy reference. Modeling Scale Figures for Ships in Bottles.pdf
- 170 replies
-
- 3
-
-
- ogallala
- praire schooner
- (and 2 more)
-
I don't know where else this should go but this seems to be the closest. I'm sure it will get moved if another forum is more appropriate. I mostly build small scale and miniature ship models at sea in bottles. They seemed naked without sailors at work on deck and aloft. So I set out to find an easy way to make them until I came across Lloyd McCaffery's technique in his book "Ships in Miniature". I used his materials and technique to make these five figures at 1/96 scale. They attracted some interest so I'm posting the information for others to use. Here's an article I put together from my build log for submission to the Database here and at ship bottling sites. Modeling Scale Figures for Ships in Bottles.pdf A little more information on the figures can be found in my Ogallala build log.
-
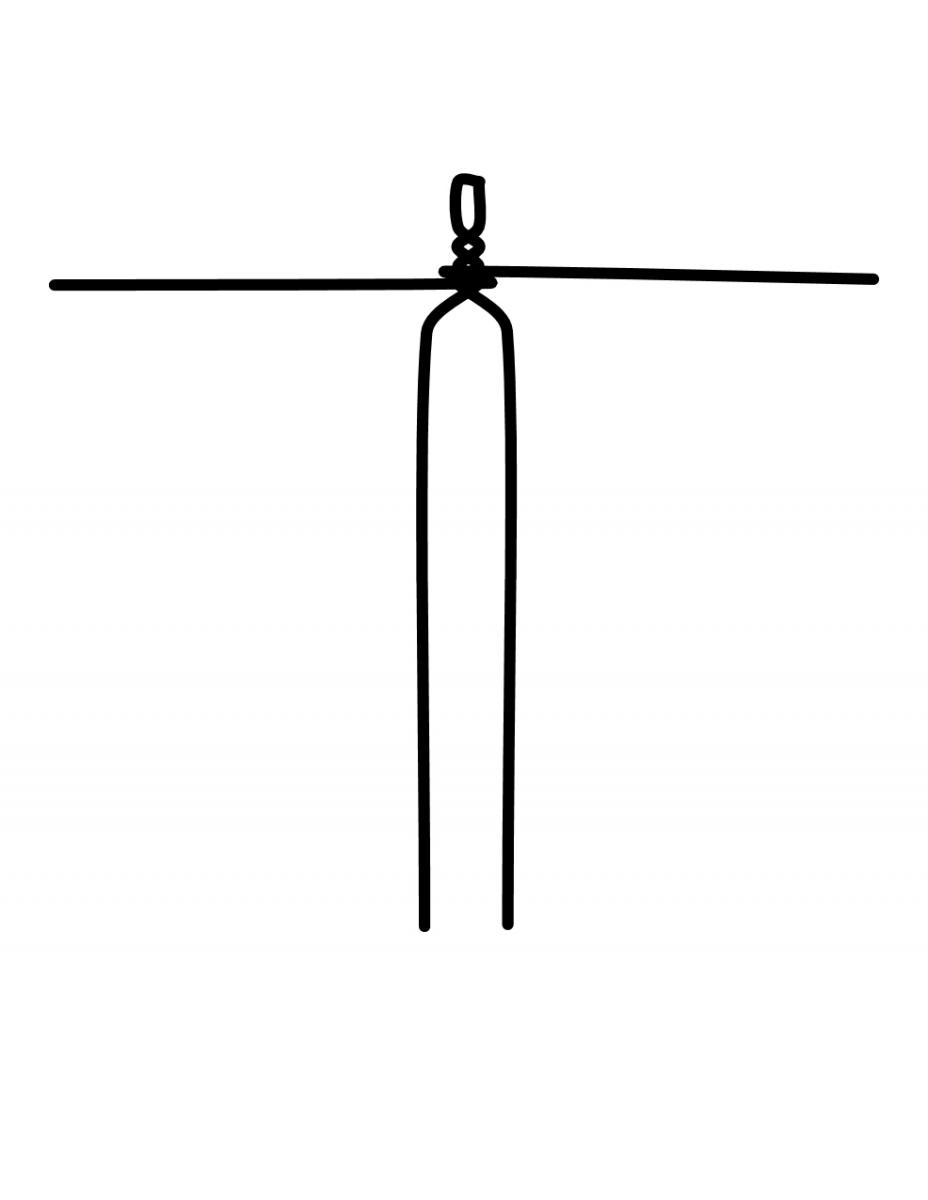
Okay, Omega and Bob. Rather than describe the entire process over again, I'll refer you back to post #60 on page 4 for the basic process and material. I posted lots of photos as I went through the first one and progress on subsequent pages. I used artist's proportion drawings to get the proportions right. I printed these out and kept them handy for reference, mostly the one on the right. Notice that the proportions are all based on the measuring unit of a 'head'. Reduce two copies of the right hand proportion image into your drawing program for maximum (tall man) and minimum (stocky man) heights to the scale required. These will give you a variety of heights and builds like in real life. Make armatures out of soft brass or copper wire (I used 28 gauge - use finer for smaller figures than the ones shown at 1/96). A simple armature used for the last four figures. Use ca to secure the arms wire wrapped around the neck and deliberately leave the arms and legs long. Make soles for the shoes (about 1 head long) and attach them where required. Use the reduced proportion drawings to locate the shoulder, elbow, knee and hip pivot points. Notice that the bones are shown at the hip joint and make sure your bend point is there. Remember that the armature needs to duplicate the skeleton and will be built up. Bend the arms to match the proportion drawing and trim to length. Now bend the armature to your desired pose. This is the critical point; if the armature isn't right the figure won't look right. Try to use active poses rather than static and take your time. I used myself as a model to work out the poses in a mirror taking note of where the pivot points and the center of balance are and duplicated those locations in my armatures. Remember that sailors work on a moving platform and that they usually stand with their feet wider apart than we do on land and with one or both knees partially bent. Don't forget you have pivot points at the ankles and wrists if you need them. If the figure will be on deck verify that the soles of the shoes are on the same plane. Leave the wires below the feet for handling and trim off as the last step with one or two to glue into a hole or holes in the deck. Now to apply the gesso, just paint it on in as many coats as needed. It will span across gaps like the two wires that form the torso. You might want to glue a piece of paper in this area (but not lower than those important hip pivots) to speed the build-up. The gesso will tend to fill in V's like the crotch, under the arms and at deeply bent elbows and knees; when it does use the back side of the point of a hobby knife to restore the V, it's easier to add later than take it off. The gesso sets up enough for additional coats in 30 - 45 minutes. I found it useful to work on several in rotation. When built up enough some details (like overlapping coat fronts, lapels, rolled up shirt sleeves, cuffs on shirts, coats and pants, even some of the natural folds and wrinkles of the clothing) can be added with the gesso and a finer brush. See how I did the coat tail on the helmsman with paper wrapped around his hips for a realistic detail and for how I did a hat. I did add suspenders to the black man and the red head made from very narrow strips of paper pre-painted and glued in place. I will give the red head a cowboy hat made from paper for the brim and build up the crown with gesso. The gesso dries kind of soft and rubbery and can be shaved with a sharp hobby knife to trim some excess but I don't recommend that you try to sculpt it. It doesn't work well with fine details like facial features smaller than chins and a suggestion of a nose. My impression is that this technique will work very well in small scales up to about 1/100 but may require a different material (like Sculpey) for heads and their necessary detail at larger scales. Remember, these are my first figures, ever, and I have a very limited base of experience, but I am very pleased with the material and technique at this scale.

- 170 replies
-
- 5
-
-
- ogallala
- praire schooner
- (and 2 more)
-
Welcome! I finished my figures. Let me introduce my crew, plus one. From left: the black man, the red head, the dandy, the scout and the previously completed Captain/helmsman. The scout will be standing in chest high grass (his legs won't be seen anyway) using his bow to move taller grass aside so he can see better the passing wonder. The black man and the red head will be hauling on a rope to adjust sail trim. The dandy is new and at the wrong rope. The Captain will be at the helm, speechless - he's run out of profanities to hurl at the dandy. The figures average about 5/8 inch/16 mm tall. Don't be deceived by the clothes pins. They're about 1/2 scale clothespins I found and are very useful for handling small parts like these. The four figures together took less time to make than the helmsman alone - a good example of a learning curve. I may add a detail or two like suspenders on black man and red head, and the very fair red head could use a hat - he's getting fried out in the sun all day. Dave


- 170 replies
-
- 5
-
-
- ogallala
- praire schooner
- (and 2 more)
-
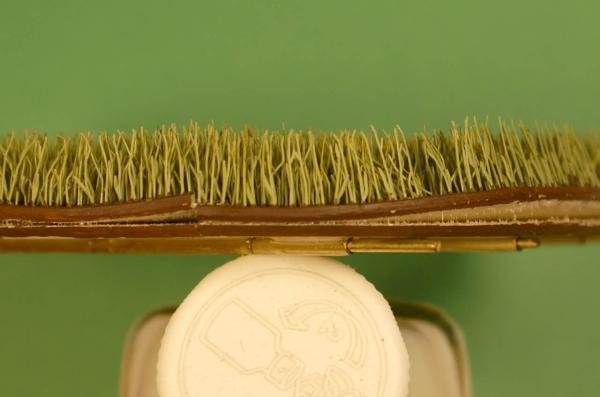
Keith, it's very gratifying - and humbling - to know that one's work is held in such high regard. Thank you. Yes, I'm going to use the 8 inch diameter glass sphere displayed with the opening down and hidden. This will give the viewer a 360 degree, from ground level up to directly overhead, un-obstructed and minimally distorted view. This presents some new challenges for me but I have seven more of the spheres and I'd better find the solution if I'm going to use them. I think I have but I won't know for sure until I bottle this project. It just isn't in me to sit back on my current skill set and, in a way, build the same thing over and over even if the details are different. That would be boring. I can't help but try for perfection even though I know I can never attain it. At least I know it's the best I can do at that particular moment. I understand about a build that grabs the viewer for any number of reasons. This one grabbed the builder and won't let go. It didn't start out this way, it started as a Fantasy Build to commemorate the First Annual National Ships in Bottles Day with a chance to try a couple techniques that had been bouncing around in my empty head and was intended to be a fairly quick build. It's now a year later and just a few days before the Second Annual National Ships in Bottles Day (October 5) and it isn't finished. As soon as I saw what was happening with this attempt to model a tallgrass prairie (when I stepped back from the work to photograph it) I knew it wasn't just an incremental improvement over the "fairway", it was an order of magnitude improvement if I continued the way I started. Although a very focused 4 1/2 inch disc diorama places different demands on the builder than a 4 foot by 8 foot, or larger, model train lay-out, I owe a lot of my success to the products from Woodland Scenics and their series of excellent instructional videos. Dave
- 170 replies
-
- 5
-
-
- ogallala
- praire schooner
- (and 2 more)
-
Thank you, Keith, and thank the Admiral for me, I'm very flattered. Jeff, I was never anything but pleased with the earlier version. It would have worked just fine - and showed off my wheels better - but as I re-thunk my options I realized I could do better.
- 170 replies
-
- 2
-
-
- ogallala
- praire schooner
- (and 2 more)
-
Yes, Piet, there are several prairie preserves scattered among the plains states including those that serve as bison preserves as well. Those are short grass prairies in the western plains states where the scant rainfall limits the grass growth to 3 feet / 1 meter or less in parts of Montana, Wyoming and Colorado and a little of Oklahoma, Texas and New Mexico where those three states meet. I chose the tallgrass prairie that extended through much of Illinois, Missouri, Iowa (my home state), Minnesota, the Dakotas and the eastern parts of Nebraska and Kansas where annual rainfall exceeds 20 inches per year, the prime farm land states. The prairie in the area between is called mixed grass. There are three National Tallgrass Prairie Preserves, all on land that has proven marginal for farming for one reason or another. The best they've been able to do so far is give a faint impression of the tallgrass prairies - they more closely resemble farms than a completely wild tallgrass prairie. The tallgrass prairies were comprised of about 50 species of grasses and 200 to 300 species of wildflowers. Their were numerous insects that evolved an almost symbiotic relationship with the plants they exploited for food and pollinated in the process and the plants evolved to exploit those insects - now both the insects and the plants are extinct. There were species of grass that sprouted within days of a prairie fire, grew very quickly and provided cover and erosion control while the other species recovered from the fire. They went to seed very quickly before being overwhelmed by the re-growth. The seeds would remain dormant in the soil until the heat from another prairie fire triggered them to sprout and repeat the cycle. The most amazing part of the tallgrass prairie ecosystem is that it evolved in only 10,000 years since the end of the last ice age. I enjoy doing research and learning from it - and I'm pretty good at it. I did a lot of research while re-thinking my approach and waiting for my raw materials to arrive. I also found the subject very fascinating which surprised me.
- 170 replies
-
- 4
-
-
- ogallala
- praire schooner
- (and 2 more)
-
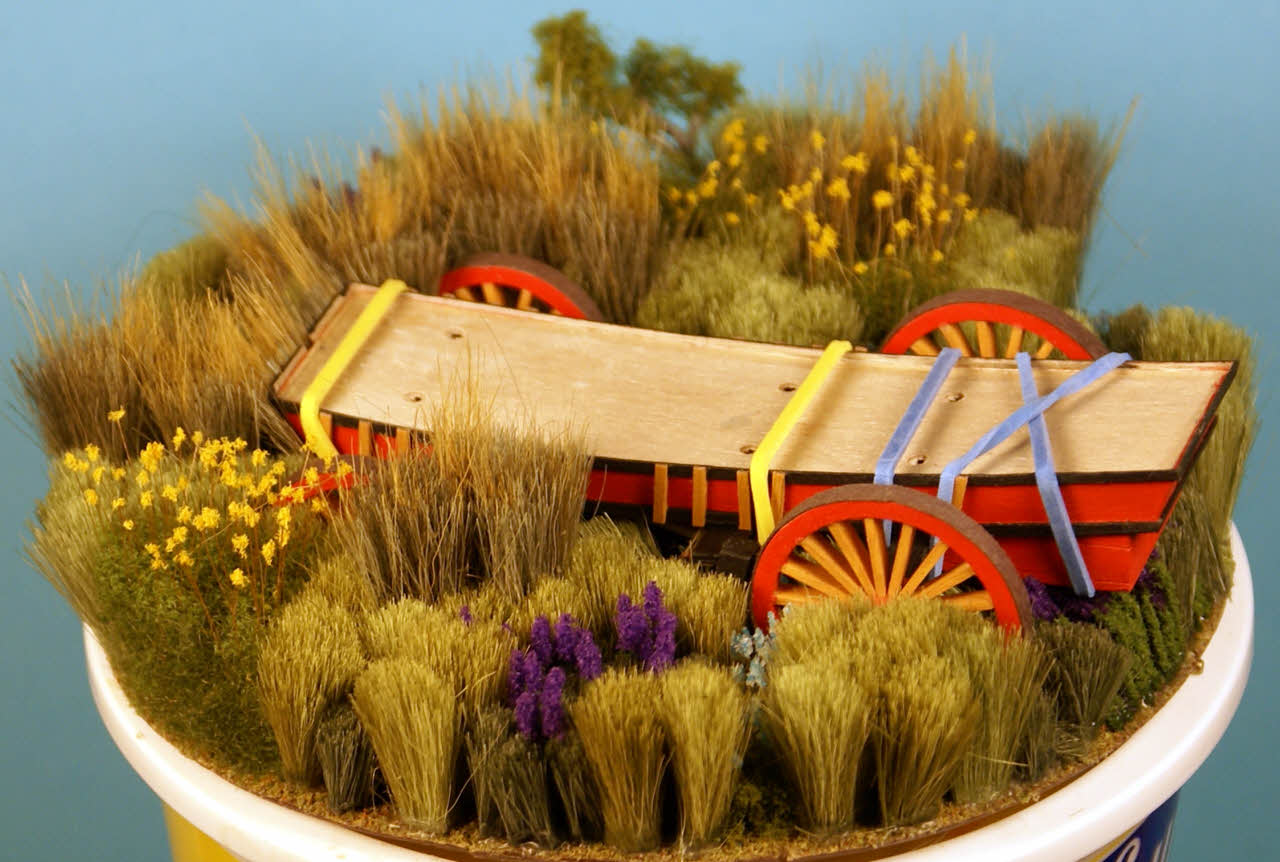
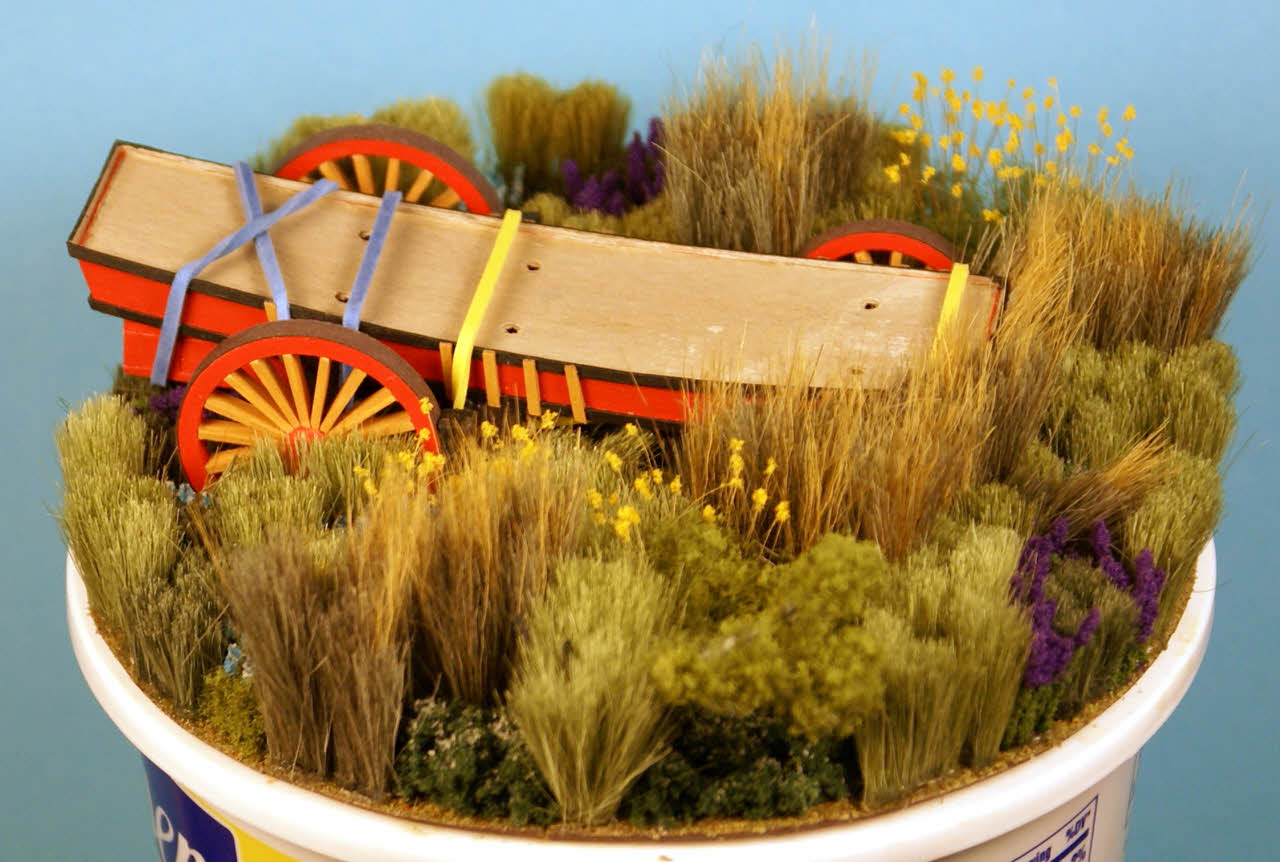
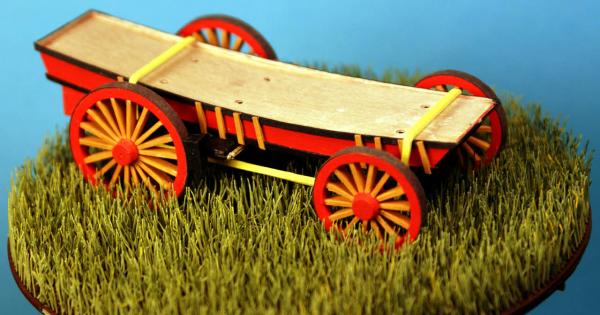
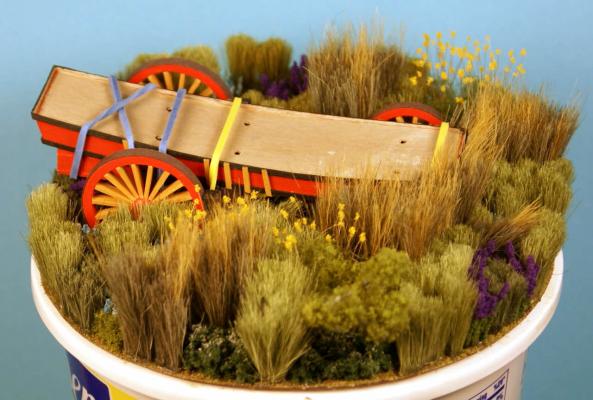
I thought the other looked pretty good and that it fit in with the idealistic, cartoon-inspired first concept, but while re-thinking the sea of grass I decided the highly detailed Ogallala would look better in an equally realistic setting. The earlier version does suffer very badly in a side by side comparison. I don't mind covering much of the wheels - at first glance from a bit of distance Ogallala will look like a vessel on a mostly greenish sea until details like the exposed portions of wheels and colorful wildflowers are noticed. I think it will be fun to watch as a viewer's initial impression changes radically as they get drawn in and see more. I even arranged the tallest grass in a sort of bow wave pattern, mostly by accident, which will reinforce that first impression. You're essentially correct about the tallgrass prairie ecosystem, most of the grasses had root systems that went at least as deep as the grasses were tall. The ecosystem depended heavily on the great migratory bison herds and frequent fires to recycle the over growth. The prairies were doomed as soon as the bison were killed off. Without their browsing the over growth was heavier and denser which allowed the prairie fires to burn longer and hotter killing the grasses. The plow only delivered the death blow. It saddens me that all of that is gone forever.
- 170 replies
-
- 3
-
-
- ogallala
- praire schooner
- (and 2 more)
-
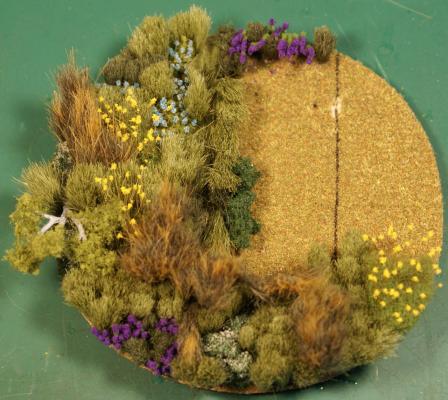
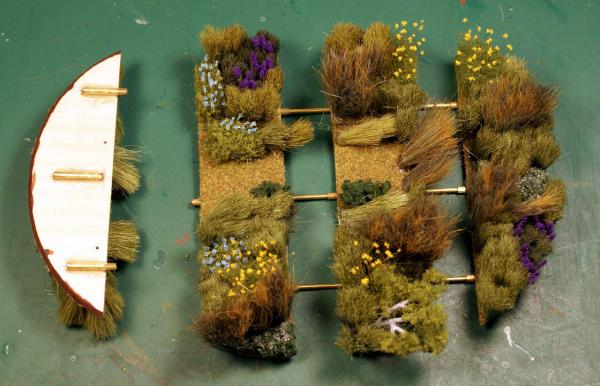
Welcome back! Fortunately, my fourth attempt at the Sea of Grass was a failure. I say "fortunately" because I had used up all the plastic grass and I was forced to re-think what I wanted. Some suggestions from a friend and his links to some wargamer sites and videos eventually led me to model railroader foliage techniques and products. Instead of the idealized uniform grass I initially had in mind, I went for realistic. I'll go back to the fortunate failure. The "potato chip" effect caused the plastic to curl and peel away from the plywood disc. I researched tallgrass prairie and ordered several Woodland Scenics products to model the most common grasses and wildflowers. All the products, except for one tree, were basic pre-colored materials. When the products arrived I set to work making exemplars and settled on three species of grasses and four species of wildflowers. The start of work with two grasses, two wildflowers and the surviving portion of a small burned tree. The bare rectangles locate Ogallala's wheels so the wheels will glue directly to wood. About three-fourths complete. I laid out the wheel tracks in black and the concealed area under the wagon where I wouldn't need to plant any grass. Two views of the lower hull and carriage in my new Sea of Grass. One species of grass grows to over 12 feet / 3.5 meters as does one wildflower. The rest are 3 to 8 feet / 1 to 2.5 meters. Three of the wildflowers were made one flower at a time. The fourth try re-posted for comparison. Now you see why I say its failure was fortunate. One last photo showing the segments of the Sea of Grass to go in the bottle and their method of assembly. As it turns out making this greatly improved version took considerably less time than the failed fourth try and was a lot less tedious and boring. In fact, this was fun! Clearly, I'm delighted with the results. Work progresses on the other four figures (I added one), finishing up some minor rigging details, and making a base to hold the sphere. I ordered the photo-etch kit from Micro-Mark to make name plates and to experiment with making small parts and figure armatures for other projects. I still need to make up a bunch of rope coils to hang on the belaying pins and cleats. Bottling this project isn't far off. Dave


- 170 replies
-
- 6
-
-
- ogallala
- praire schooner
- (and 2 more)
-
I like your methodical and carefully thought out approach. It's the way to avoid problems later. You might also look for the much smaller rare earth magnets I've seen in the craft section of Wal-Mart. I don't recall seeing the use of magnets for segmented components before this.
-
Welding a broken bandsaw blade. Bad idea?
molasses replied to qwerty2008's topic in Modeling tools and Workshop Equipment
All of the bandsaws, both vertical and horizontal, had roller guides as I recall. The great majority of the bandsaws were horizontal for use as simple cut-off saws. A few of the shops I worked in did a significant amount of fabrication in aluminum for which a vertical bandsaw was useful. These were the only bandsaws I saw that had blade welders. -
Welding a broken bandsaw blade. Bad idea?
molasses replied to qwerty2008's topic in Modeling tools and Workshop Equipment
Perhaps the bone to pick is with the blade manufacturer. I'd bet the blades all broke at the weld. This may be one of those items where the high dollar blade is actually the better value. You might try de-tensioning the blade one turn when finished cutting - and remember to re-tension when you go to use it again. Can't comment on the Tink . . . Tink . . . Tink . . . I never worked in a shop where I would have heard it. -
Welding a broken bandsaw blade. Bad idea?
molasses replied to qwerty2008's topic in Modeling tools and Workshop Equipment
Sorry, Dee Dee, but in spite of your background I don't believe you have more than minimal hands-on experience with a band saw. If you had ever used one enough to experience a blade break you would know that when a band saw blade breaks all that happens is that it stops moving, nothing else, at all, ever. I have used both vertical and horizontal band saws extensively my entire working life, have experienced uncounted hundreds of band saw breakages and have never seen nor heard of a broken band saw blade doing anything except just stop moving instantly. The entire blade except for the portion between the two sets of guide rollers where the cut is made is inside a closed box and blade guards. Using even a poorly rewelded band saw blade (as long as it's reasonably straight and properly ground) poses no more danger than using a new one. Removing the broken band saw blade from the machine is more dangerous than breaking the blade. But the most dangerous part of breaking a band saw blade is unpackaging the new replacement. They are turned back into themselves to make a smaller, triple coiled, package. Have you ever seen those little round sun screens (fabric stretched over a spring wire frame) for use in a parked car that pop open into a large circle or rounded rectangle and are almost impossible to turn back on themselves into the smaller unit until you learn the trick? Same thing. The only way I've found to open those band saw packages without shredding myself is to hold the blade firmly in one leather-gloved hand while cutting off the cardboard bands securing it then toss the blade across the room and take cover. Band saw blades do not fail in anything like the near explosive, shrapnel throwing way circular saw blades can. I'm in no way saying to ignore safety concerns, but I don't believe in exaggerating dangers out of ignorance. I believe that the truth serves best. I'm assuming that everyone wears safety glasses and/or a face shield using power tools. My own prescription glasses, which I need to wear all the time, have had safety lenses since I was in my 20s. Take no chances with your vision. After working for more than 40 years in a potentially very dangerous industry I have gotten into the habit of always asking myself "What if........?" before proceeding with a planned operation and changing it when needed to minimize potential dangers. I haven't stabbed or cut myself with an edged tool in many years. I learned my lessons from the safety mistakes I made on the job - and the resulting injuries and near misses - and apply those lessons to my hobbies. The best safety device is the one we have built in between our ears, but it needs education, training and consistent practice to work at its best. -
Poor Man's Photo Etch Parts
molasses replied to torpedochief's topic in Metal Work, Soldering and Metal Fittings
Alternatively, Micro-Mark has a small photo-etch kit that I have on my wish list. http://www.micromark.com/micro-mark-pro-etch-photo-etch-system,8346.html -
Welding a broken bandsaw blade. Bad idea?
molasses replied to qwerty2008's topic in Modeling tools and Workshop Equipment
I made my living for more than 40 years as a welder and used band saws with built in blade welders in several shops. Those welders use resistance welding where electric current passes through the blade ends until molten then presses them together in an automatic process. I've broken and welded a lot of band saw blades. Like the previous poster I was the only person in any of those shops who paid enough attention to the details to get it right. There is no danger from using your repaired blade; if it breaks again the blade just stops like it did when you broke it the first time. Unlike a circular saw blade, a band saw blade isn't moving fast enough to throw shards of the blade around the shop. Perhaps the best way to weld at home a broken band saw blade would be by using an oxy-acetylene torch with a very small torch tip. After cleaning and degreasing the ends, align and clamp the ends tightly together and run a fusion pass without filler metal (except perhaps a small touch at the end of the weld) on one side, let it cool, turn it over and run a fusion pass on the other side. Unfortunately, this takes a moderate amount of skill. On the plus side, there's no weld build-up to grind off and there's no need to anneal it afterwards because the torch will heat enough of the blade to allow it to cool slowly. Silver brazing won't be strong enough. And please heed the safety precautions in the previous post. I got complacent with a band saw once and split a finger lengthwise from the tip to the root of the fingernail in a split second. -
Here's a source for sets of re-sharpened solid carbide drills, all with 1/8" shanks. Most of the time I use the 1/8" collet from one of my pin vises as a handle. They're brittle and will break before they bend but they're tougher than tool steel drills. http://drillcity.stores.yahoo.net/info.html
-
I figured you had seen those photos - I know you're a solid researcher - I posted that link more for those not familiar with that spectacular model of Preussen. I think you're referring to the model by Robert Wilson, it's amazing especially when you consider that it's a miniature at 25 ft. to the inch (1:300 scale). I like your plan of showing her under shortened sail in heavy seas - very dramatic. Dave
-
I posted photos of the model of Preussen taken by Rob Mackie at the San Francisco Maritime Museum on one of the forums here on MSW. They might be useful. http://modelshipworld.com/index.php/topic/526-san-francisco-maritime-national-historical-park/?hl=preussen#entry6233 I agree with your assessment that many ship bottlers try details that come out as clumsy and/or grossly out of scale when they should choose to leave them off. Those decisions can be very difficult to make especially when the builder has to admit to himself that he can't do them well. Believe me, I know. Even the finest fly tying thread may be too large for some of the rigging. The finest I have at .002 in./.05 mm translates to 1.71 in./44 mm at 1:857 scale. You may want to "un-lay" the thread to get "rope" that is more to scale especially for the running rigging. You might want to consider a thinner paper for the sails. You may find the thickness objectionable as ordinary printer paper is .004 in./0.1 mm (almost 3.5 in./88 mm to scale) and better quality papers are usually thicker. Archival tissue and cigarette rolling paper are about .001 in./0.025 mm. Most cigarette papers are made with a very faint water mark; the cheap Topp and Bugler papers have parallel lines as water marks that may serve for sail seam and/or buntline details. This is a very ambitious SiB project. I see no less than 16 lines coming out the bottle for the forward stays alone, more if you decide to include the stays without staysails.