jre8655
-
Posts
154 -
Joined
-
Last visited
Content Type
Profiles
Forums
Gallery
Events
Everything posted by jre8655
-
In undertaking the building of a ship model I am “comfortable” working with wood, plastic, metal, and paints. Now I find myself having to learn a whole new skill; sewing. Throughout my life I’ve sewn buttons back on shirts and mended the odd tear in a pocket or hem. That’s nothing compared to making a sail! I thought I’d tap into a sewing knowledge base by visiting our community sewing and quilting club room. These ladies turn out some gorgeous pieces for the community arts and crafts sales so who better to seek instruction from? I wanted to learn some basic stitches to use for making the sails. I thought I could learn enough to hand sew a decent sail. After about two hours with these seamstresses I discovered there is no way I could hand sew these sails in my lifetime! Then several of the ladies suggested I purchase an inexpensive, light duty sewing machine. Now all I had to do was convince the Admiral that it was necessary for the model shop. Believe it or not, this blessed Admiral of mine said, “Well, let’s go look.” We now have a new Singer Talent sewing machine for the Sail Loft. And here I thought I had all the tools I needed to complete a ship model. Now let’s see if I can sew a straight seam!
-
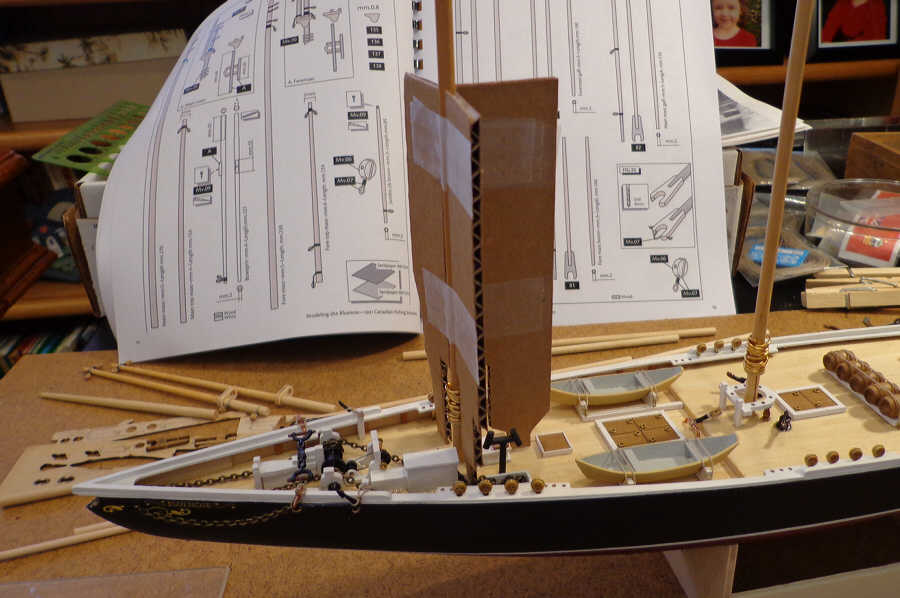
I can still remove the top masts because they're not glued in place yet. Since I can roll up the Shrouds and clip them to the mast heads there will be a lot or room to work around the masts. I think I can attach the sails without much difficulty. I can't remove the mast hoops, but using the cow hitch idea from Dave it should make attaching the main and fore sails fairly easy.
-
Thank you all for your quick replies to my question. I have not begun the tast of securing the Shrouds, much less the Ratlines, so I can stop rigging at this point and concentrate on making and installing the sails. Sail making is one aspect I have no experience with. I do have a copy of the "Making And Forming Sails For Your Model" that is posted in the archives. I'll print that out and start doing my research. Dave; I do remember reading your post on attaching the sails to the Mast Rings using a cow hitch. I actually down loaded it and have it stored in my build folder. Thank you. At least I can roll the Shrouds up and clip them to the Mast Head to get them out of the way. Bob; you pointed out that you attach the sails before stepping the masts. The photos I posted were with the top masts in place. These have not been glued in place yet and are easily removed. I shall do so and continue.
-
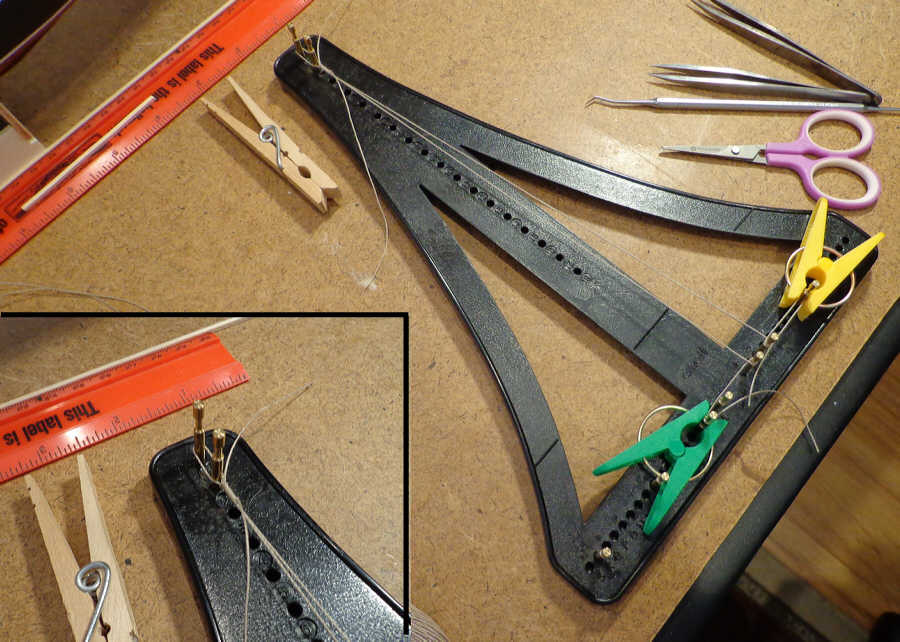
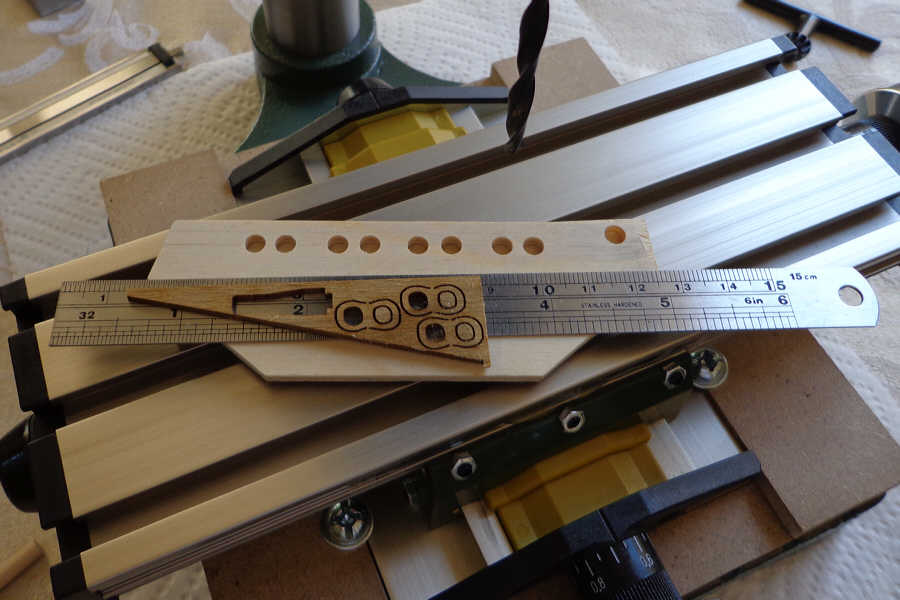
Progress has been very slow. I finally have all the Booms and Gaffs tapered, fitted with jaws, and rigged with their pulleys. Additionally I have the Shrouds seized at the mastheads and ready to be rigged with the Deadeyes. I acquired a Loom-a-line some time ago and have always scratched my head trying to figure out how to use the thing. None of the holes really corresponded to the actual measurements of the model. I did use it as a jig to hold my shrouds in place while seizing them for placement over the mastheads. It gave me some very consistent spacing and held everything nicely while winding the seizing. After completing the blocks, I noticed that on the plans the rigging for the Booms and Gaffs shows some of the pulleys in a “Gun Tackle” arrangement. The instructions do not mention this and all the blocks are only single hole. I selected some of the blocks that were originally drilled a little off center and drilled a second hole. These will go in the locations needed for the Gun Tackle rigging. I’m going to make a jig to hold the Deadeyes in place while securing the Shrouds. I want to make sure that all the Shrouds are of the same length with the Deadeyes in place so the Channels are as close to the same as possible. Once I have the Shrouds finished, I can start on the Ratlines. Now my question is, when should I consider making and installing the sails? I was thinking that once the Ratlines are in, the sails should be attached to the Booms and Gaffs then rig all of them in place. Any suggestions?


- 152 replies
-
- 1
-

-
- bluenose
- model shipways
- (and 1 more)
-
The book still appears to be available from Model Expo. Here is the URL: http://www.modelexpo-online.com/product.asp?ITEMNO=MSB113
-
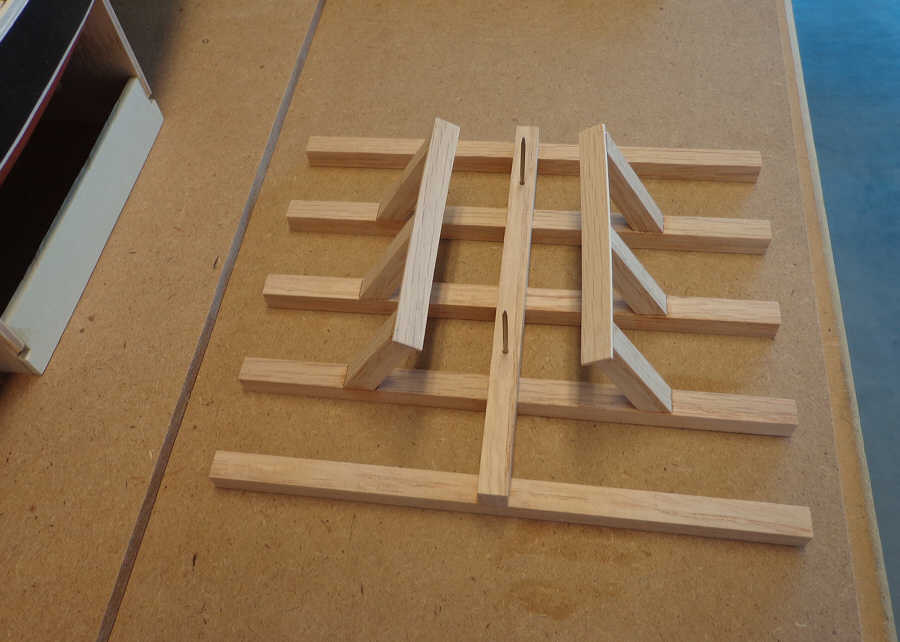
Finished the display stand this afternoon. It does have the desired look I wanted. When the Admiral saw it she remarked, “It looks like what we saw in San Diego where they’re building that ship.” She was referring to the San Salvador that the San Diego Maritime Museum is building. So even she thinks it looks like a dry dock. That’s praise enough for me. What I discovered in building this was that I managed to get both sides of the hull very close in contour. All the support pieces on the stand are identical Port and Starboard. That pleased me.

- 152 replies
-
- 5
-
-
- bluenose
- model shipways
- (and 1 more)
-
Elia, Thank you for the kind remarks. This is actually my first wood ship model build, but I've had some experience building wood model airplanes when I was a kid. I'm finding that a great deal of the woodworking techniques used for the airplanes translates very nicely with the wood model ship. One thing I caught onto very quickly is don't hurry. When you get tired, put it down, walk away, then come back later. Prime example; I had to suspend my build for a couple of weeks here because of some family health issues. All is much better now and I’m actually somewhat refreshed with the build. I found a scrap piece of oak one evening while at the community woodshop and decided that it would be good building material for a display stand for the Bluenose. Using a band saw I striped it into 5/16” square rods and came up with a base resembling a pseudo dry dock bed. The next step is to bend some strips to fit along the contour of the hull that will form a buttress for support beams. Now I have to get back to seizing blocks.

- 152 replies
-
- 1
-
-
- bluenose
- model shipways
- (and 1 more)
-
Jan, I've been using the Model Expo Paints and Primer. The primer coat was applied with a brush, sanded, and a second coat applied the same way. The color paint was applied to the hull with an airbrush. All the colors on the Deck Furniture was applied with a brush. After airbrushing the red color on the hull I used 3M Automotive Masking Tape to mask off the water line, then applied the black using an airbrush. The Model Expo Paint produced a very smooth surface and the masking tape created a beautiful, straight line. Once the colors were done I used the Automotive Masking Tape for the water line, which was applied with a brush.
-
Used one of those irons when I was building RC model airplanes. They actually have a fairly good temperature control. Here is an address for the ones carried by Tower Hobbies: http://www3.towerhobbies.com/cgi-bin/wti0095p?FVPROFIL=&FVSEARCH=%3Cb%3Ecovering%3C%2Fb%3E+%3Cb%3Eiron%3C%2Fb%3Es They range in price from about $20 to $50.
-
I just completed the bed extension last Saturday and haven't had a chance to try it out on anything loooooong as yet. All the shorter work is already in place on the models. Something I noticed on one of Hank's previous posts was a "collar" placed on the tailstock end of his turning. I hadn't thought of that little idea. Everything I've turned so far I just left some extra stock on the ends and was very careful not to put too much pressure on the piece with the tailstock point to split the wood. That "collar" looks like it will eliminate the splitting problem. Obviously my next project will be to turn some collars with various size holes to accept the different dowels. Thanks for the idea Hank!
-
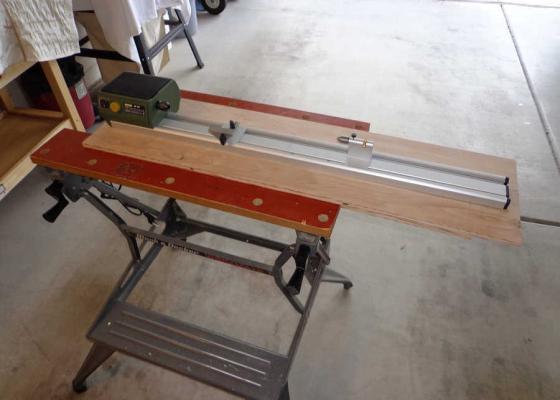
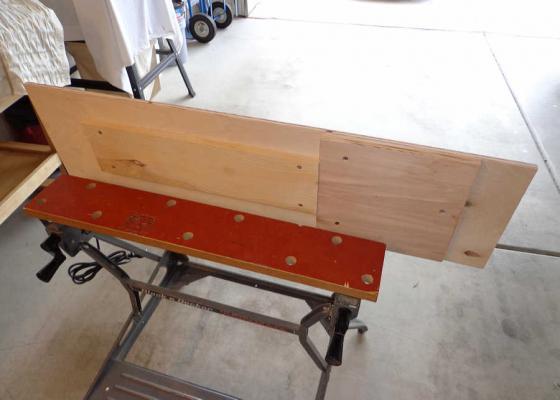
The support board is 38" x 10" x 1/2" plywood. To the underside I fastened a board 14" x 7" x 3/4" which is clamped into my WorkMate. The extra board on the underside to the right of the clamping board is there for additional support and keeps the entire unit from tipping if clamped to a workbench. When assembling the DB-250 and extension bed you have to make sure that the two beds align, otherwise the tailstock and tool support will not slide back and forth across the entire length. This was easy to accomplish using a metal straight edge along the side and top of the two beds and either sanding the bottom of the bed and/or adding a shim to the other end.
-
I've read through this topic and found it very interesting and informative. I purchased one of the Proxxon DB-250's a few months ago and ran into some of the same issues as have been adddressed here. One thing I found is that the bed wasn't long enough for some of the booms and masts I was working on. Somewhere within this topic I came across a comment about getting a bed to use as an extention. I checked the user manual for the lathe and found that you have to write to Proxxon to purchase replacement parts. I did so and received the bed within a few days. The fun part was aligning the two beds. I had to sand down one end and add a little shim to the other to get it flat across the seam between the two beds. Other than that I came out very nice and I can now turn some very long pieces. I decided to set up the board I have it mounted to for clamping in a ShopMate. This way I don't have the lathe permanently consuming a long section of my workbench and I can set it up just about anywhere I want for use. Thanks for all the useful information.
-
Larry, Thank you for your review of the Model Expo Plank Bender. I also purchased one a few months ago when it was on sale. One thing I found, and you may have already experienced this, is that the charring on the bending form may come off and embed in your planks. This was easily solved by sanding the form to remove the charred layer. You will also produce an even surface across the form via this sanding. As you gain experience you can make your own forms to achieve other bending processes. As you mentioned, the iron does get very hot and cannot be laid on any surface. A wire stand, bent from a coat hanger, will let you support the iron during use. Happy modeling!
-
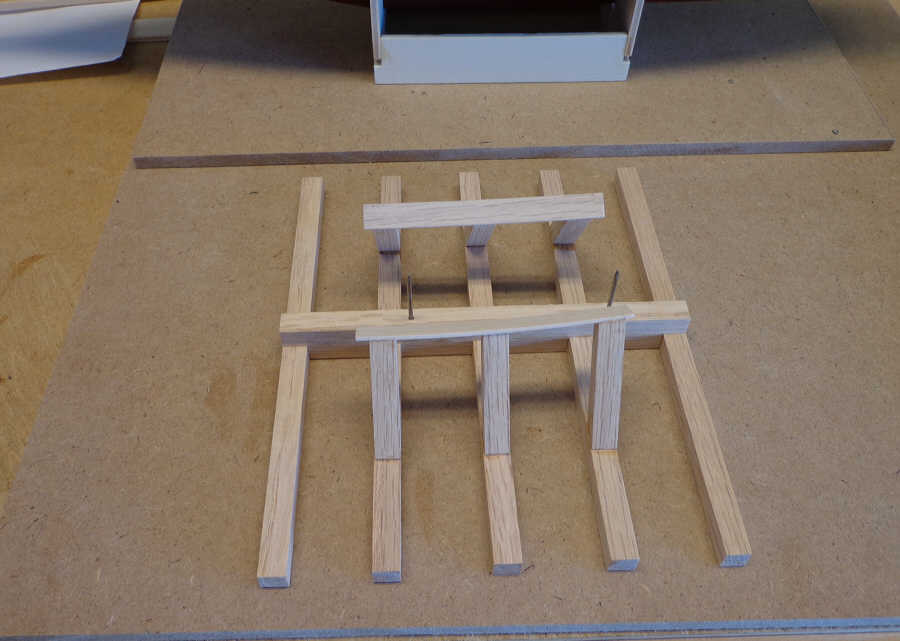
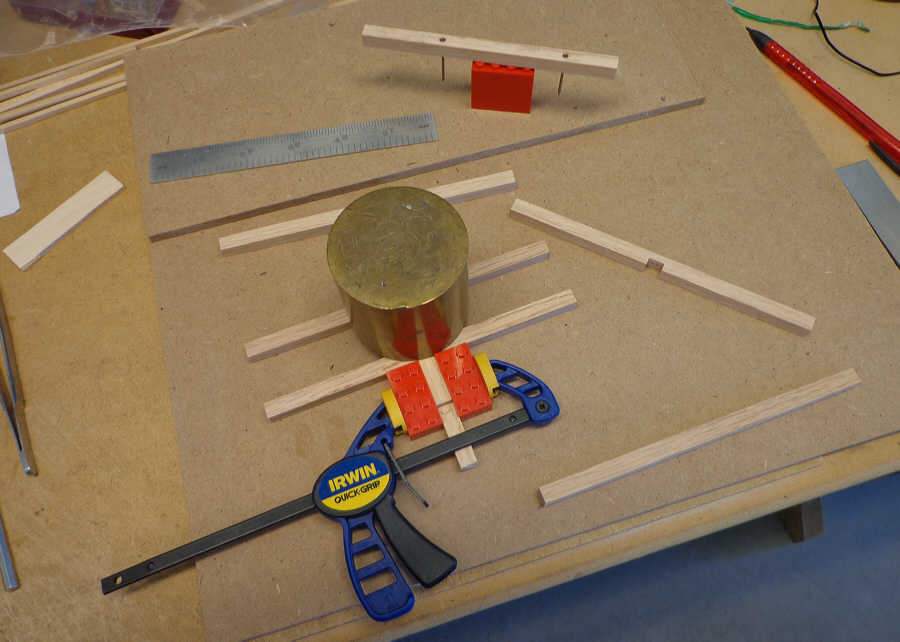
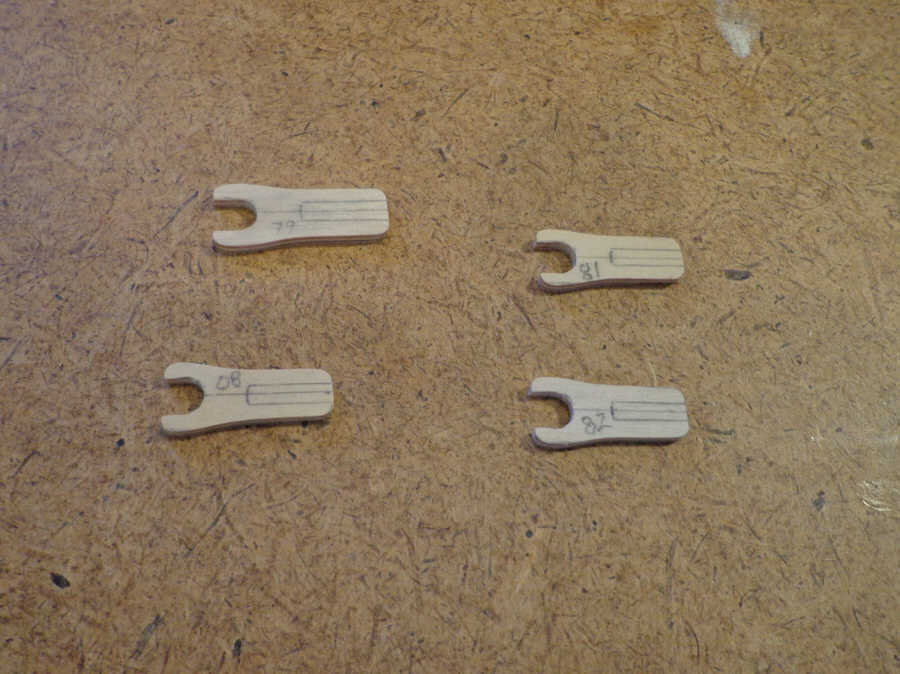
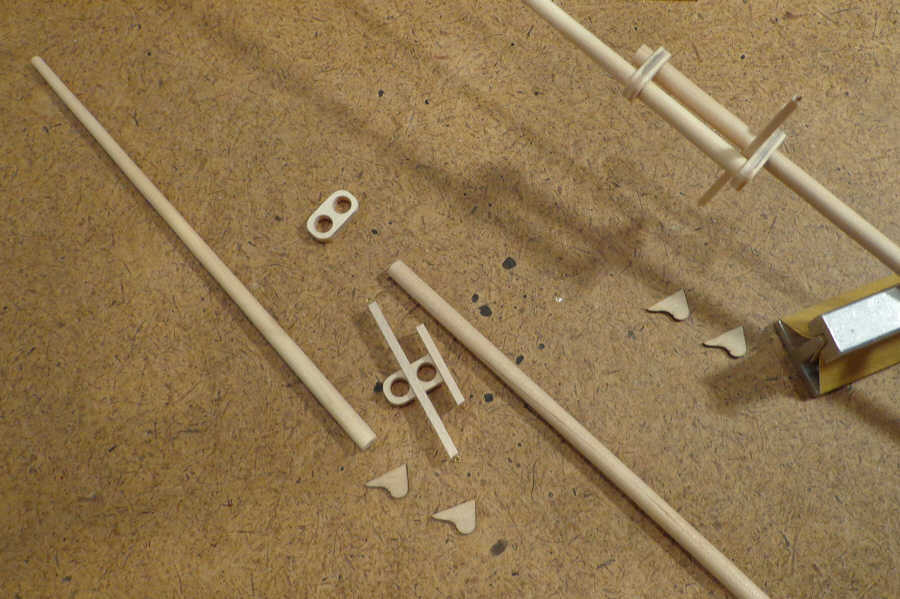
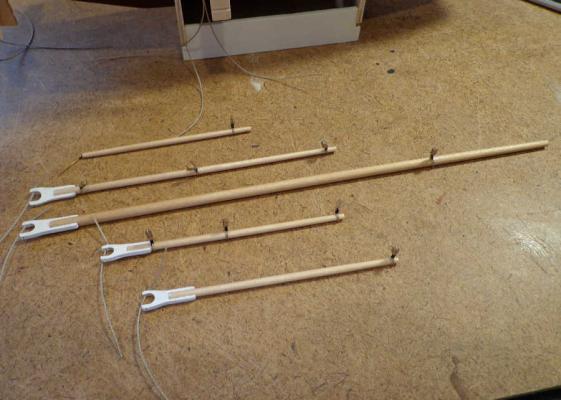
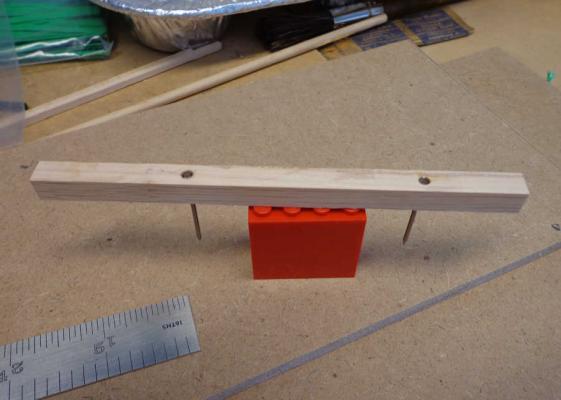
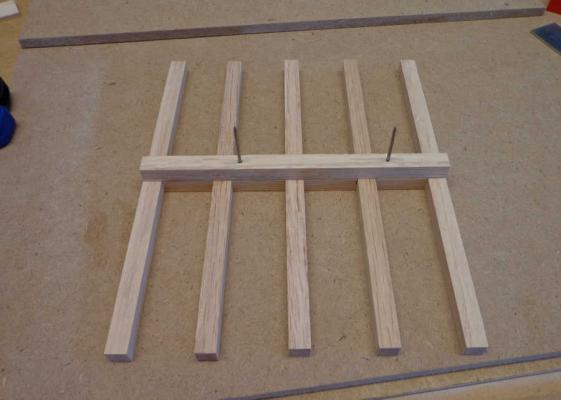
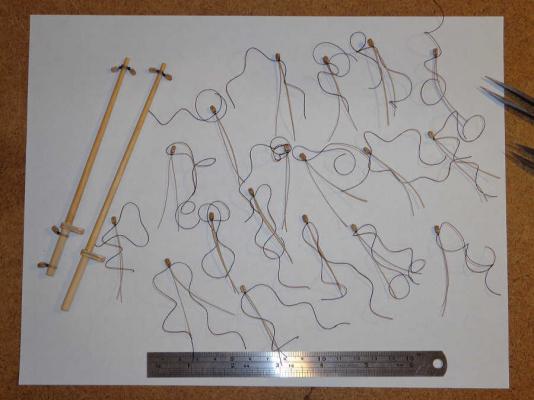
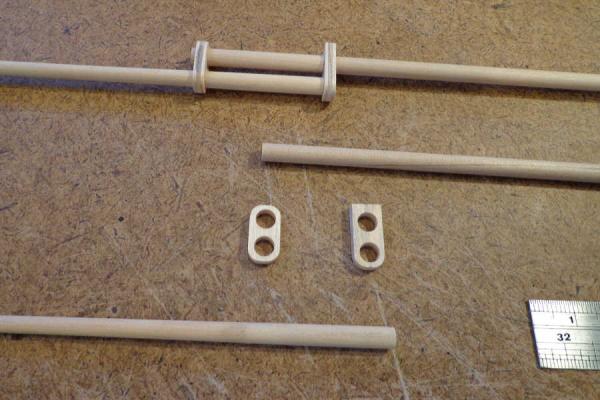
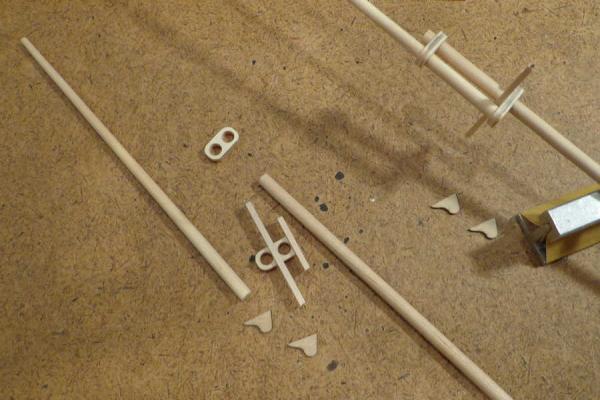
I was away from this build for a little while. I’m trying to plan ahead and thought that ultimately I would need to build a display case for the Bluenose. We have a fantastic woodshop in our community so I spent the last two weekends over there getting to know some of the woodshop members and familiarizing myself with all the machinery. They have everything you could want. Found one of the members builds what he calls “toys.” They are more like scale models rather than toys. I’ve already been told by some of the other members that I’m as crazy as he is because of the small work I’m doing. Guess I’m in good company. Onward with the build; the jaws will have to be made from scratch (as with the mast caps) because the originals are cut from the same Walnut as was the Fife Rail. In fact one of the jaws has already cracked when I removed it from the sheet. I used the scrap 1mm plywood for the jaws that I used for the mast caps. Each jaw is cut to make two identical parts that are then glued together. I now have a much better fit around each mast and can control the width and taper of the slots to better fit the boom or gaff it will go to. The other task at hand is tying all the blocks that will be secured to the Bowsprit, masts, booms, and gaffs. This is a tedious chore. This must be what a rat’s nest looks like. My mother always said that’s what my room looked like.
- 152 replies
-
- 2
-
-
- bluenose
- model shipways
- (and 1 more)
-
Thermopylae assembly instruction booklet
jre8655 replied to smarinid's topic in Wood ship model kits
Denscalle, I have the Sergal No 791 Thermopylae kit. I can photograph the plan sheets and e-mail them to you. Please send a private message to me with an e-mail address. -
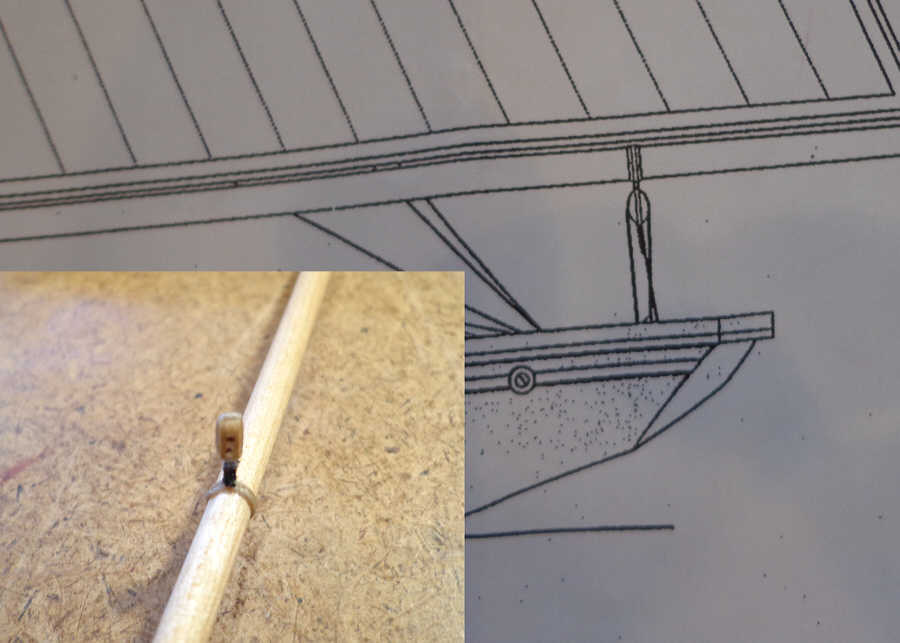
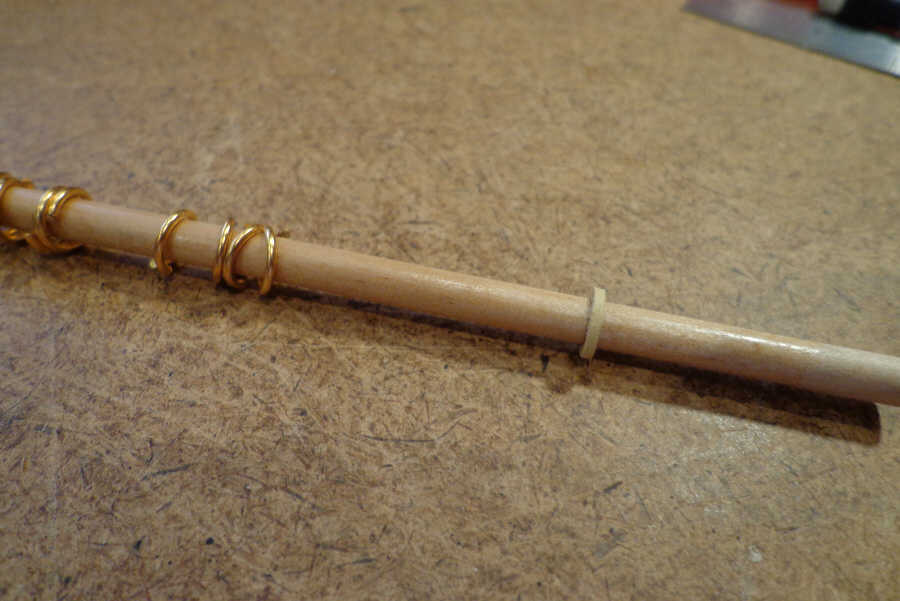
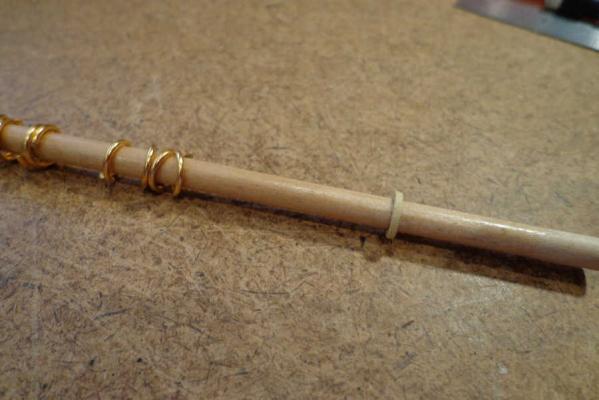
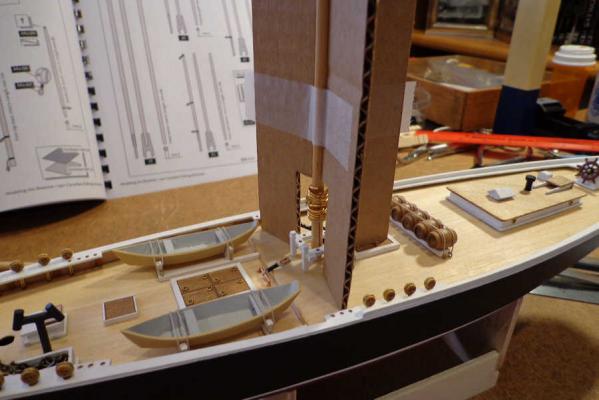
The masts are ready to be glued into the hull. In one photo I have of the Bluenose I found that there is a collar (Boom Jaws Rest) on each mast. The kit includes 20 brass rings (10 for each mast) to secure the Main and Fore Sails to their respective masts. These rings were placed on the masts then the Boom Jaws Rests glued in place. This really helped prevent the rings from dropping all the way to the deck and in the case of the Main Mast they would have rested inside the Fife Rail. With the masts in this configuration I set about epoxied them into the hull. On this model there is no rake to the masts so they are set perpendicular to the deck. I cut some cardboard braces to size and secured them to each mast to hold the mast at 90 degrees while the epoxy set. I believe I’m ready to move on to the booms, gaffs, and jaws.

- 152 replies
-
- 5
-
-
- bluenose
- model shipways
- (and 1 more)
-
Thanks for the information about the movies. I'll have to check that out. Over the past several days I've been assembling the masts. Seems like every time I get ready to add another bit I realize there is something else that will have to be put in place below it before gluing it in place. That includes the shrouds and stays. So I'm putting all the various parts in place then will disassemble the construction and do a final reassemble before securing the masts in the hull. Once I have the masts secured I can get on with the rigging.
-
Thus far, the only real problem I've encountered is with the Mahogany parts I've already mentioned. The dowels in this particular kit have a very good grain structure and are, for the most part, very straight. Two of the 5mm dowels had a slight curvature toward one end. I found that I was able to use them by keeping the curve toward the upper end of the piece I was making. In this way I eliminated the curve when I tapered the piece. Building from this point on is probably going to be slow. School is back in session here and we will be babysitting our two year old grandson while his mother (a teacher), father (a school administrator), and sister (starting Kindergarten) are all engaged. Trying to keep a two year old out of your build is a chore.
- 152 replies
-
- 1
-
-
- bluenose
- model shipways
- (and 1 more)
-
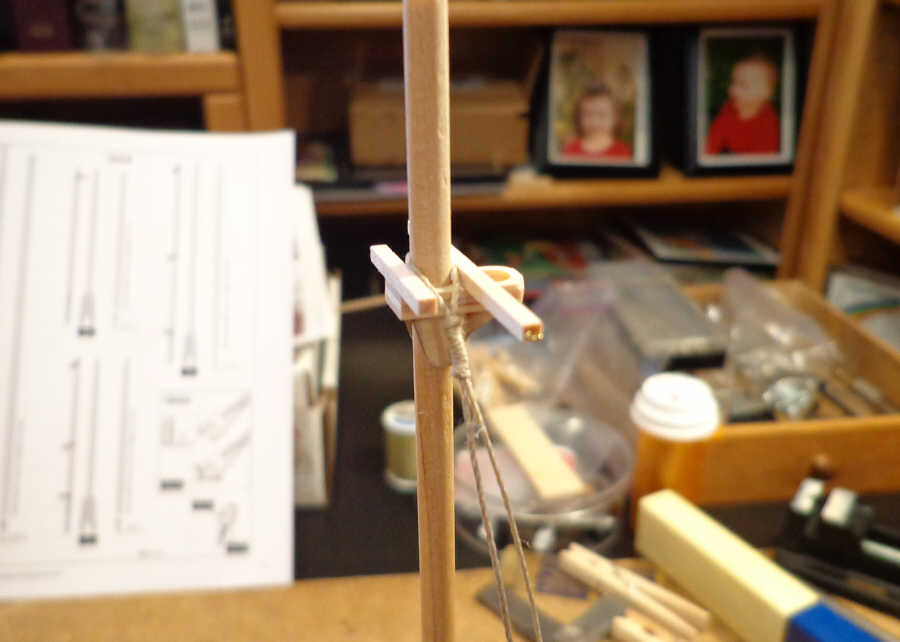
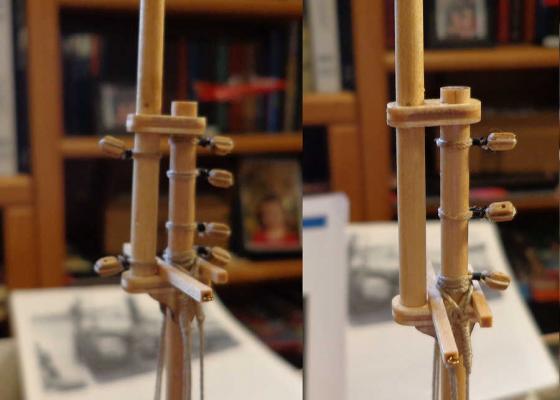
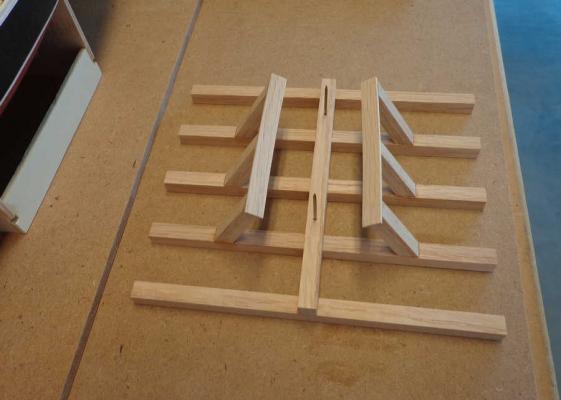
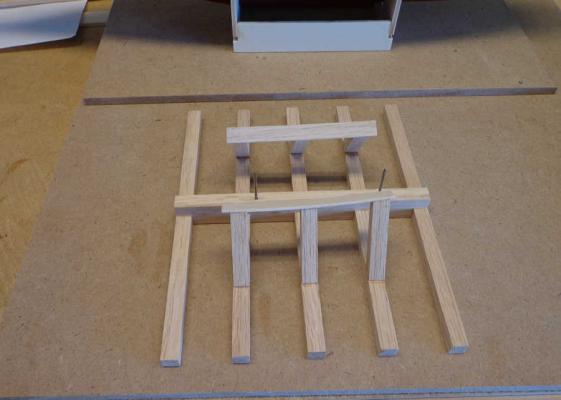
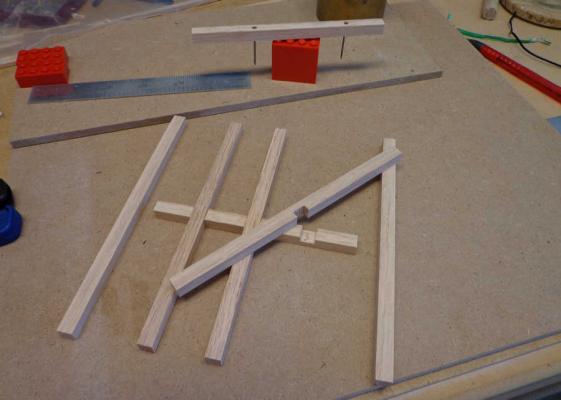
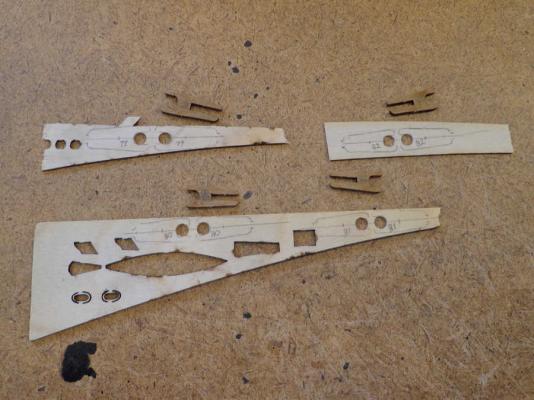
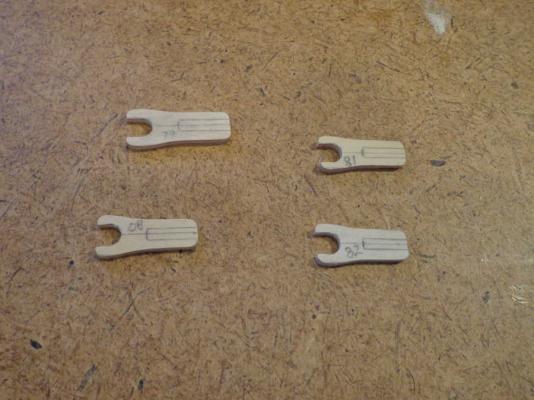
Hamilton; Thank you for the insight. I believe I will secure the Main and Fore Masts and then begin rigging the Shrouds and Stays before adding the top masts. The parts to form the mast heads were, as I expected, not to the task. The grain ran lengthwise through them and the holes were so misshapen that any attempt to drill or file them out would have resulted in a total failure of the part. I opted, again, to manufacture my own parts. I made them out of 2.5mm plywood. After tapering the masts I measured the diameters and selected the appropriate drill sizes for the holes. Once I had all the holes drilled for the four pieces I cut them to size and finished them. Each one is specific to the locations they go. Next I constructed the Trestletrees and added the cheek pieces. The plans call for holes to be drilled in the longer cross members of the Trestletrees to accept rigging. In this case I thought that drilling would weaken the piece so I installed eyebolts in the ends instead. Next step is to add the blocks to the masts.

- 152 replies
-
- 2
-
-
- bluenose
- model shipways
- (and 1 more)
-
Thank you all for the kind comments and encouragement. Now comes the part of the build that I have no experience with; the rigging. I am looking over the instructions and am at the point where I cut the fore mast, fore top mast, main mast, and main top mast. It appears that these parts need a great deal of work before even thinking about joining them together. There are several blocks that need to be tied to the masts and trestletrees and mast heads constructed. I can see where the trestletrees should be built onto the main and fore masts before the blocks are tied. I am scratching my head though as to the correct time to join the top masts to the construction. I'm thinking that the main and fore masts should be built up to the trestletrees and then glued into the hull. Am I correct in thinking that the shrouds should be rigged before adding the top masts? I still have to taper these parts before proceeding.
-
Having previously posted a question about a mysterious object on the aft deck, next to the steering box, I decided to go back over the photos of the original ship and see if there was anything I could do to improve the overall look of the model. The Admiral made a comment that the rigging line for the anchors look, “Phony,” in her opinion. She said it would look better if there was chain instead of, “Thread.” Since we needed to go to Michael’s for some needles, for her, I went along and took a look in the bead and jewelry making aisle. Found some chain that looked promising. Got the chain and a package of small Jump Rings to attach the chain to the anchors. I also noted on the original photos the placement of a Chain Box on the Foredeck, next to the Winch Motor Housing. If I was going to use chain then I would need a place to stow the extra. The Chain Box was made from some scrap wood that had laser cut parts. I think the overall affect looks pretty good considering the scale. In the photos I have of the original Bluenose, there is a rack of barrels on the aft deck just ahead of the main cabin. This kit does not supply, much less mention, any barrels on deck. Improvising, I found some barrels of the appropriate size and fabricated a barrel rack. Once it was completed and glued to the deck I fixed in some eye bolts and lashed the barrels down. So here is a series of photos of the original ship’s deck and my completed rendition. I hope it meets with your approval.


- 152 replies
-
- 5
-
-
- bluenose
- model shipways
- (and 1 more)
-
I managed to something done this weekend. It’s been very humid and HOT here in the Phoenix area. Lots of rain for the entire valley with some flooding in various areas. Seems only fitting that I should be working on the Dorys for the Bluenose. The hardest part of this bit of construction was bending the plywood parts. The first piece I tried to soak and bend broke in the middle and I had to cut a new piece. I eventually used a damp sponge to lay the pieces on then applied finger pressure to get the desired curve to the pieces. It took a little longer than I expected, but it worked out very well overall. The Dory Cradles were a bit tricky because there was very little area to glue together. I built them over a piece of paper and allowed a small amount of epoxy to stick the parts to the paper. After the epoxy cured I painted the cradles, drilled the eyebolt holes, epoxied the Dorys to the cradles. Once all the epoxy was cured I cut the constructions from the paper, glued in the eyebolts, finish sanded the bottom of the cradles, and added the tie-down ropes. Everything seems to fit where it should.


- 152 replies
-
- 2
-
-
- bluenose
- model shipways
- (and 1 more)
-
The scale on this model does not lend itself to much fine detail. I wanted to add a drive chain to the winch, but was unable to find anything that small. I opted (at the suggestion of my son) to wrap some thread around the sprockets to simulate a drive chain, or belt. At least it fills in that space between the parts. Once all the glue and paint was dry I mounted it on the Forecastle as indicated on the plans.


- 152 replies
-
- 3
-
-
- bluenose
- model shipways
- (and 1 more)
-
I’ve started the construction of the bow winch. This makes me feel like Queequeg tossing the bones. What a jumble of parts! Ultimately this will build into three sub-constructs placed on the Forecastle in such a way as to form one assembly. Wish I had a skyhook to hold some of these parts in midair while I glue them together.

- 152 replies
-
- 1
-
-
- bluenose
- model shipways
- (and 1 more)
-
This idea comes at just the right moment for me. I'm getting ready to start construction of the masts and booms on my Bluenose and will be rigging very soon. Thanks!