HOLIDAY DONATION DRIVE - SUPPORT MSW - DO YOUR PART TO KEEP THIS GREAT FORUM GOING! (89 donations so far out of 49,000 members - C'mon guys!)
×


Glenn-UK
-
Posts
3,164 -
Joined
-
Last visited
Content Type
Profiles
Forums
Gallery
Events
Everything posted by Glenn-UK
-
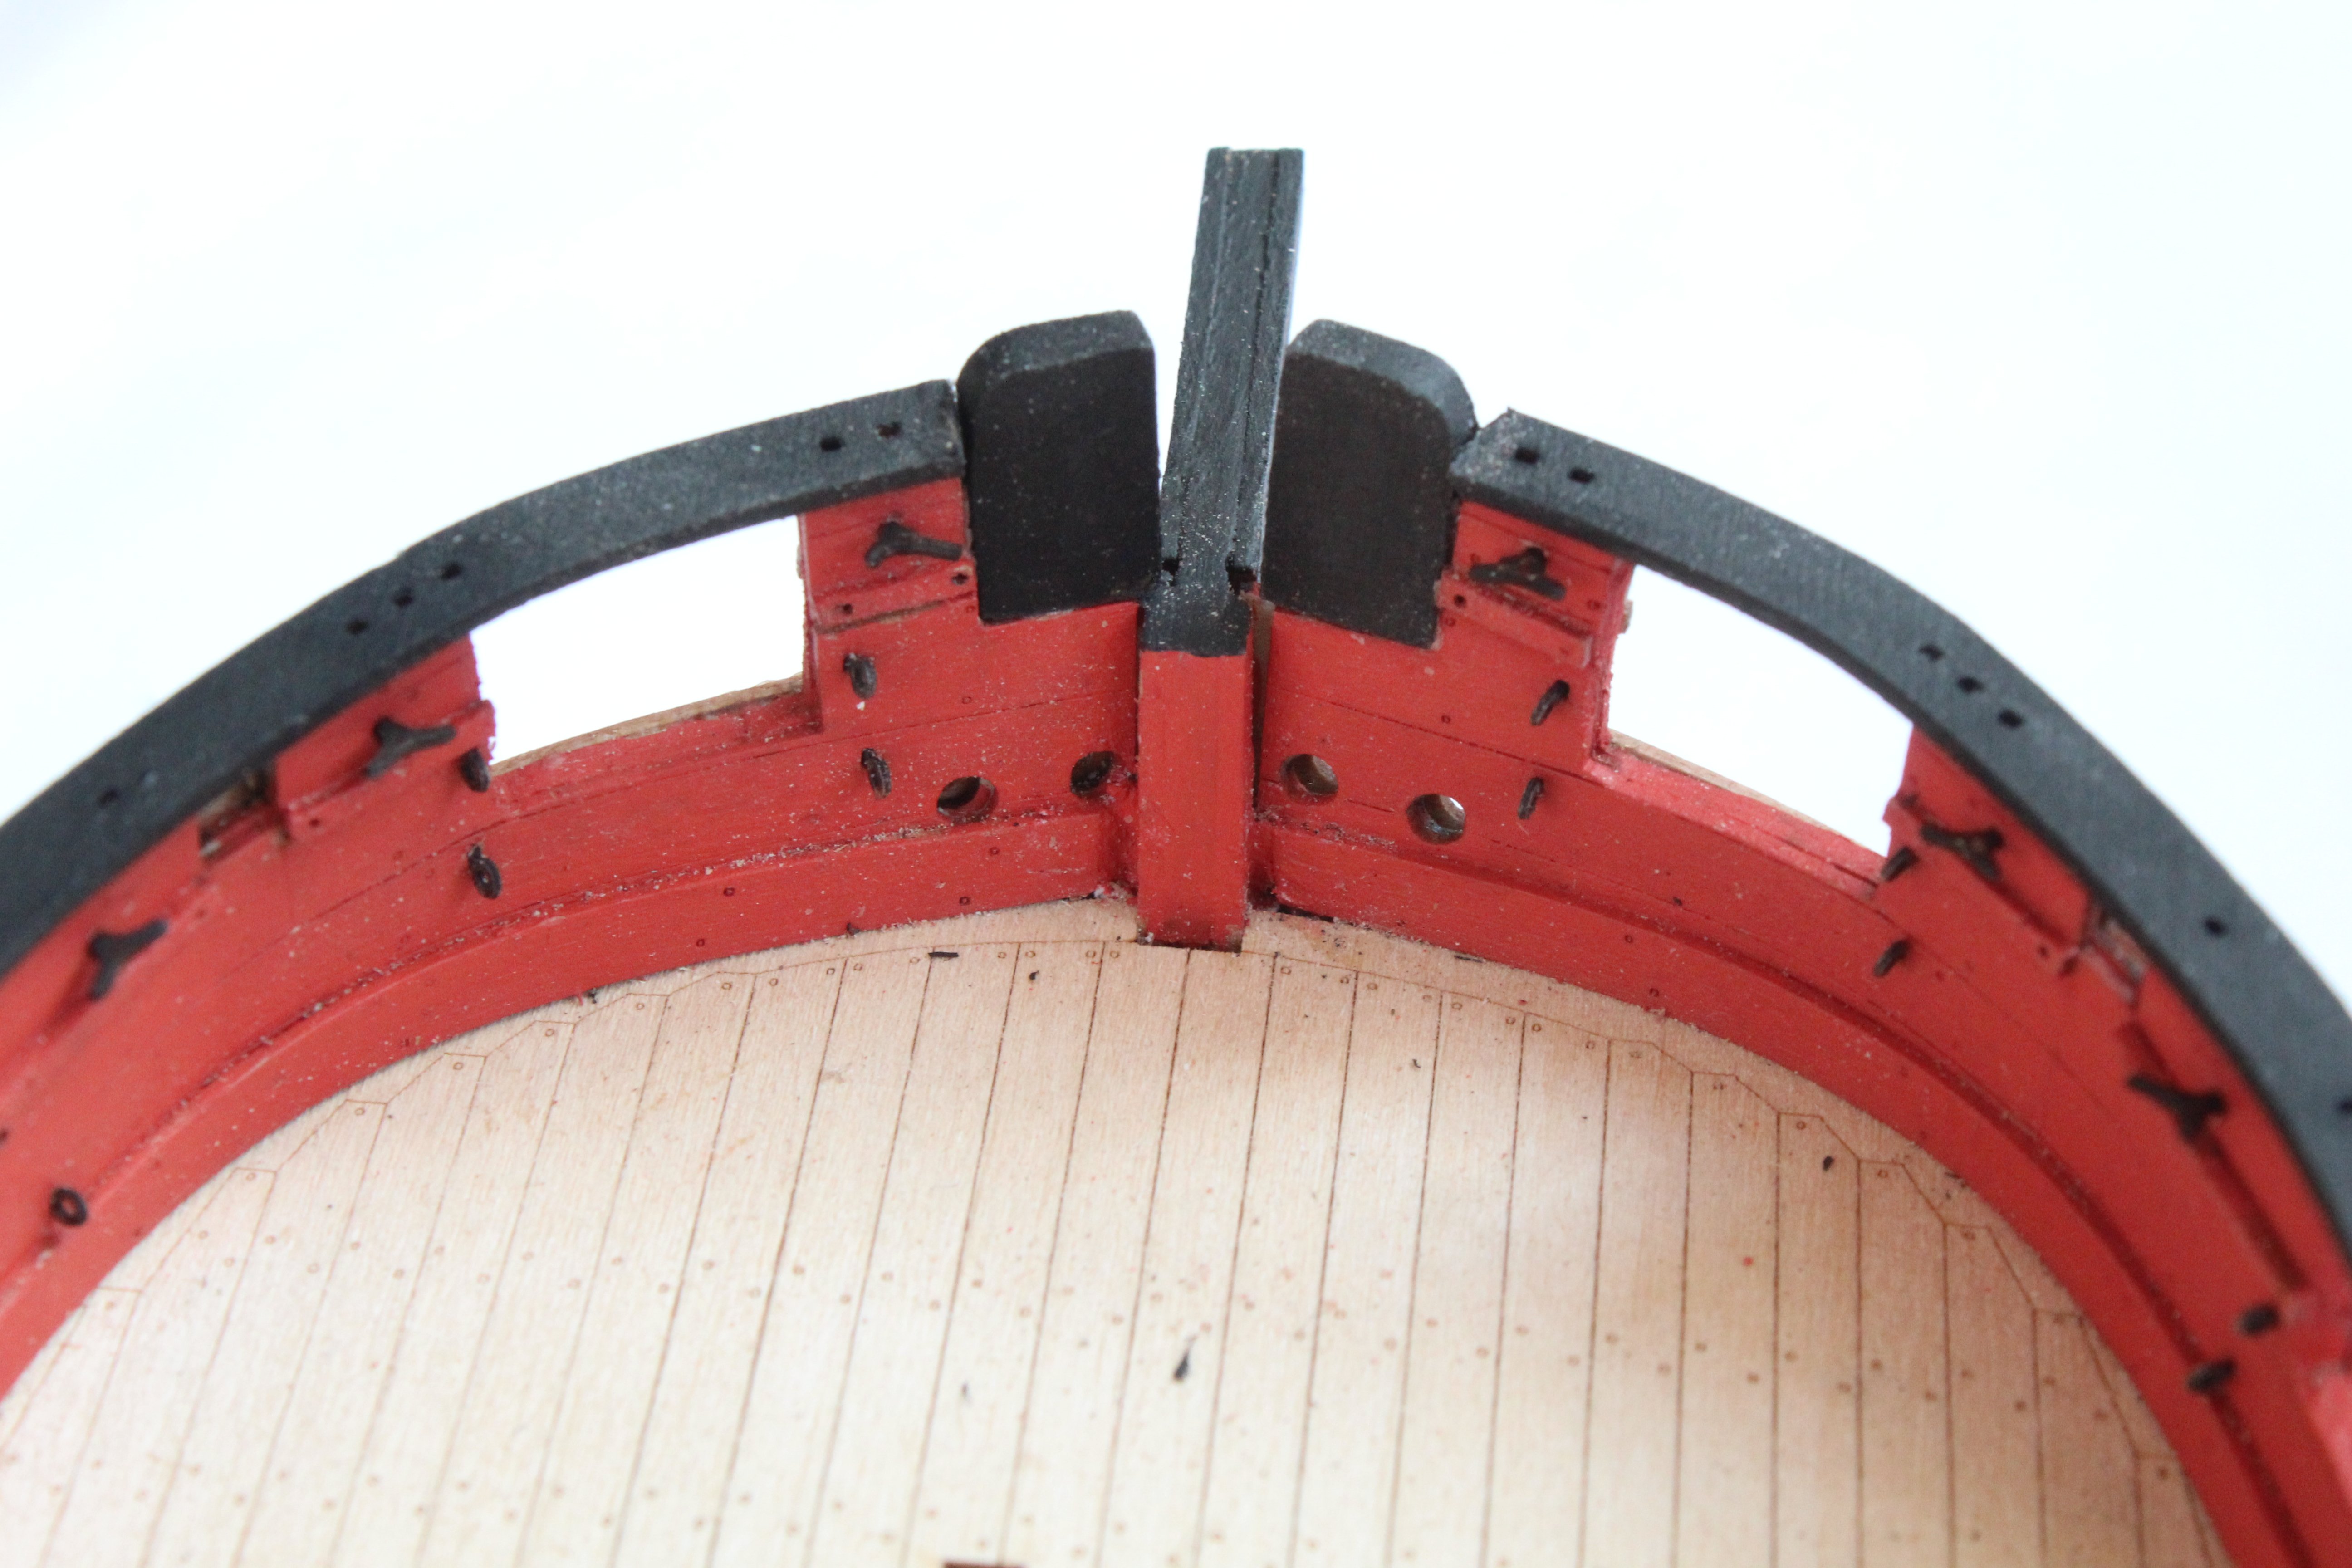
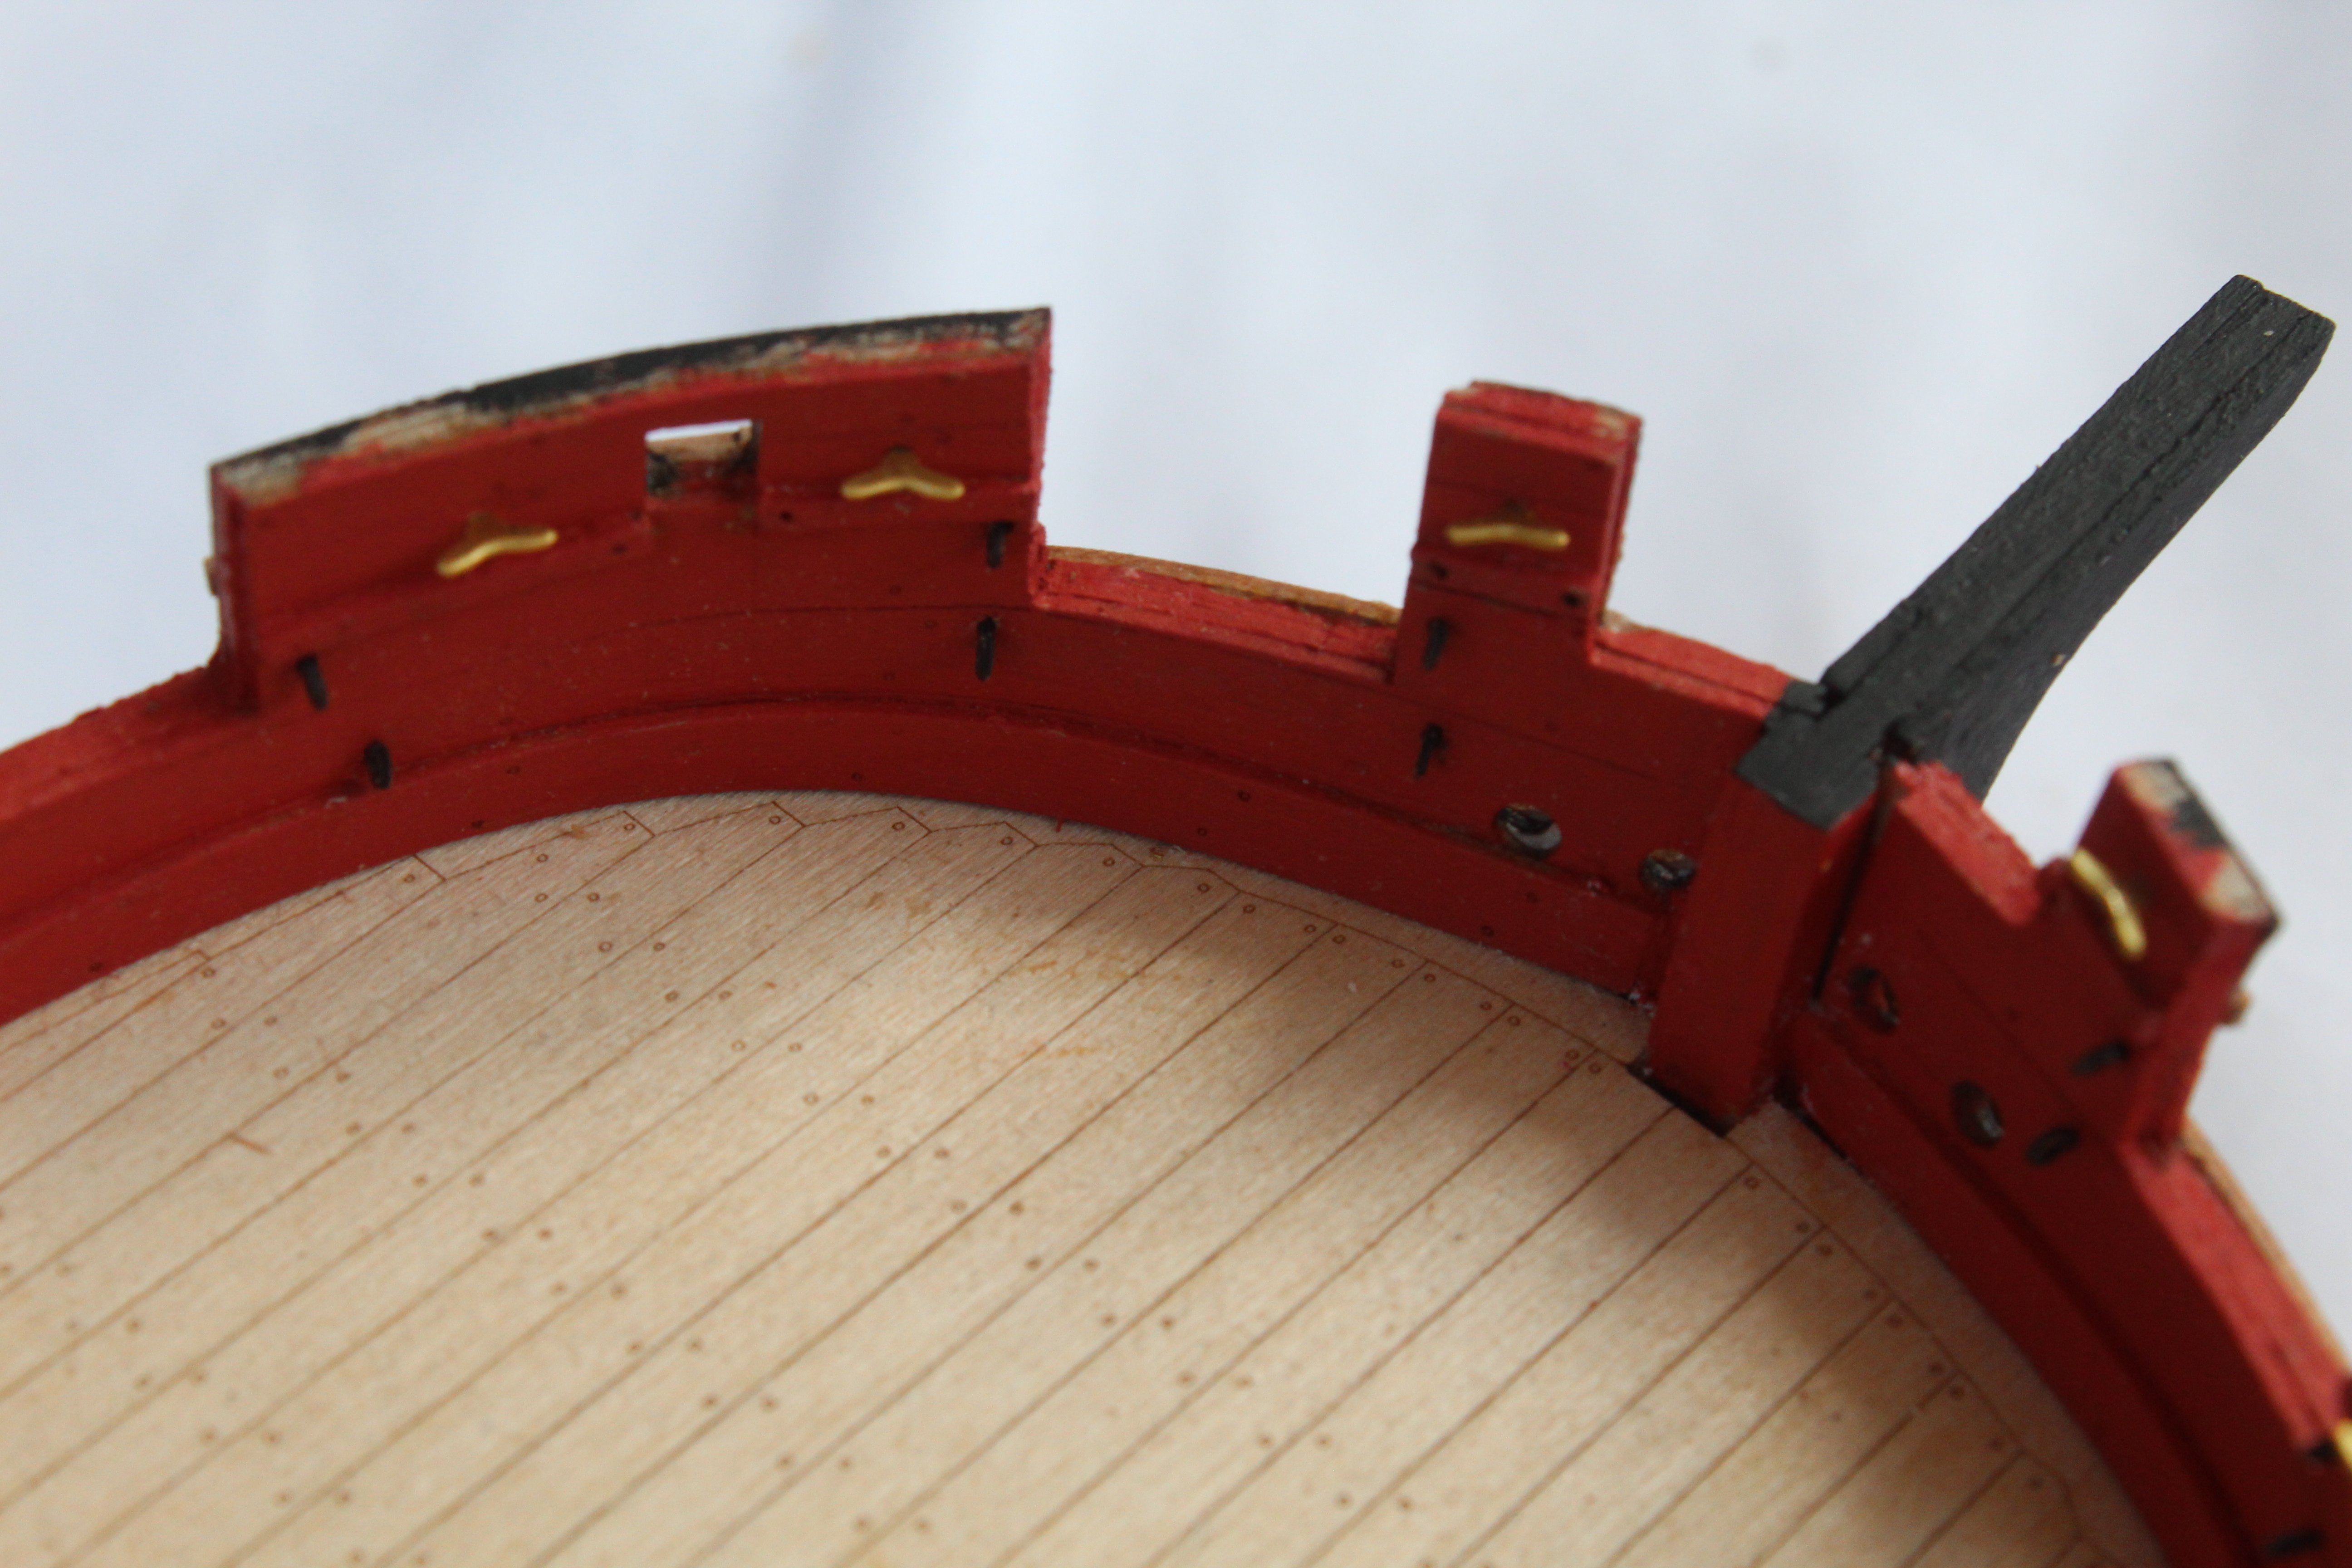
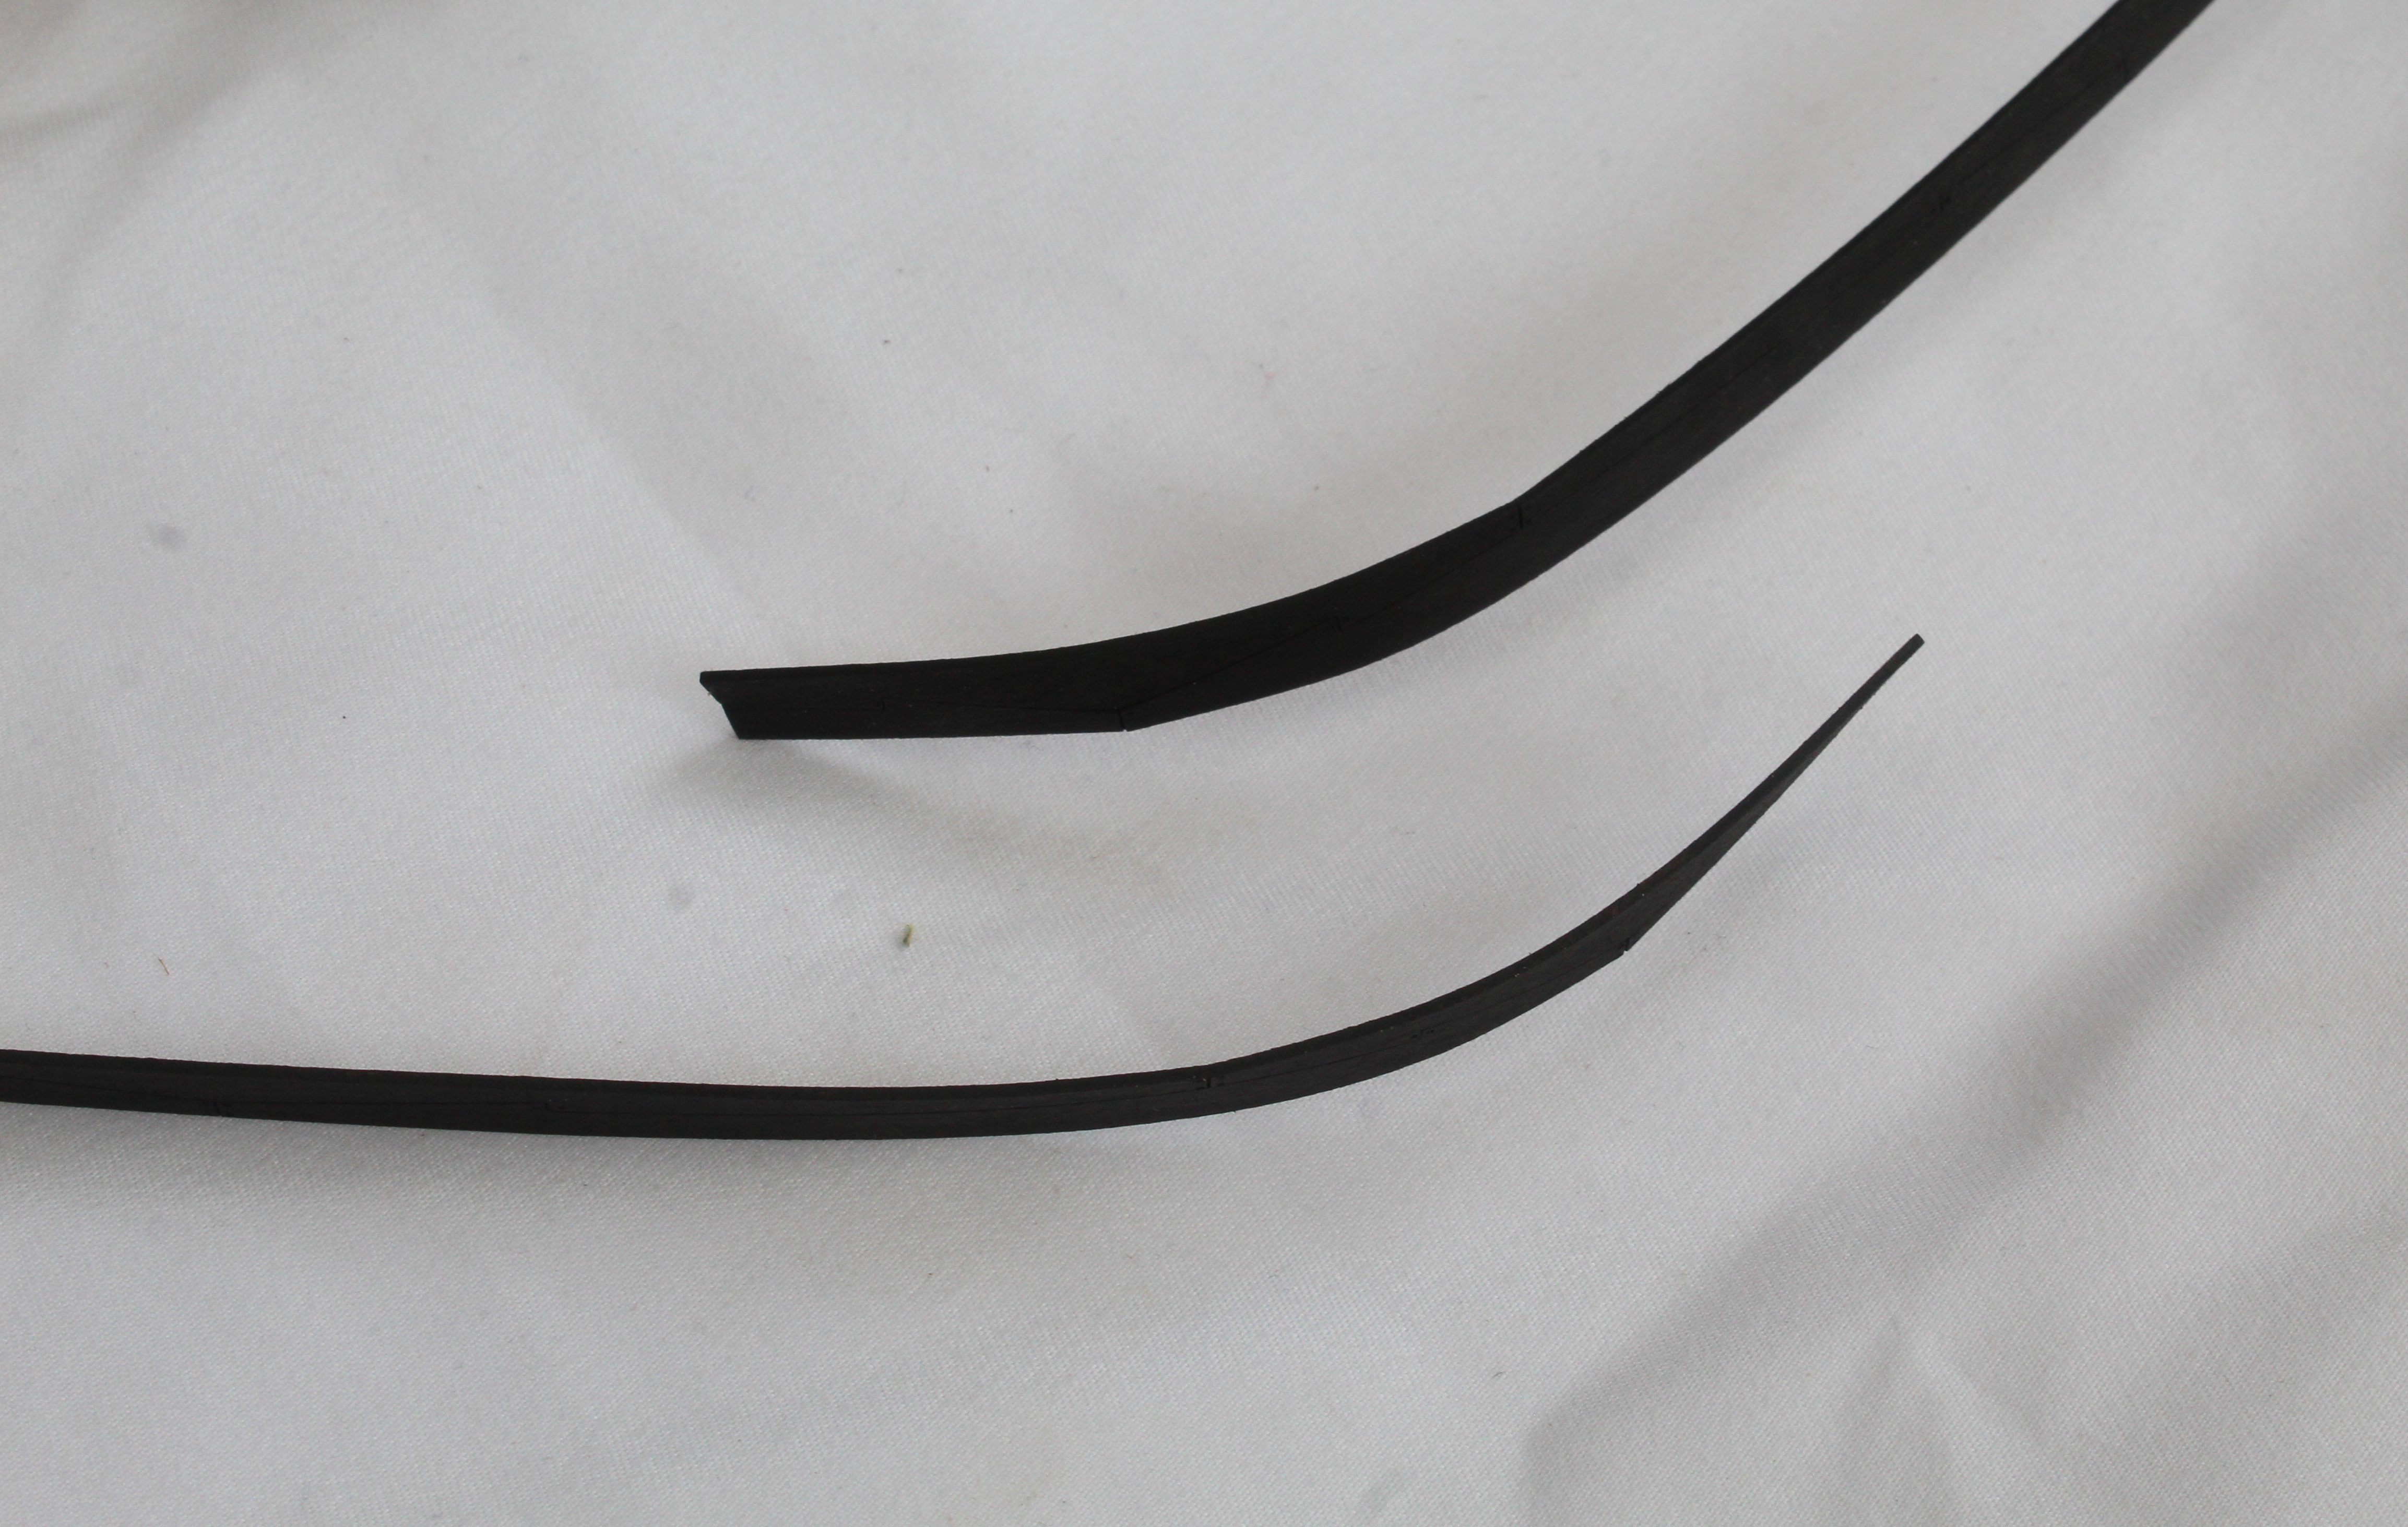
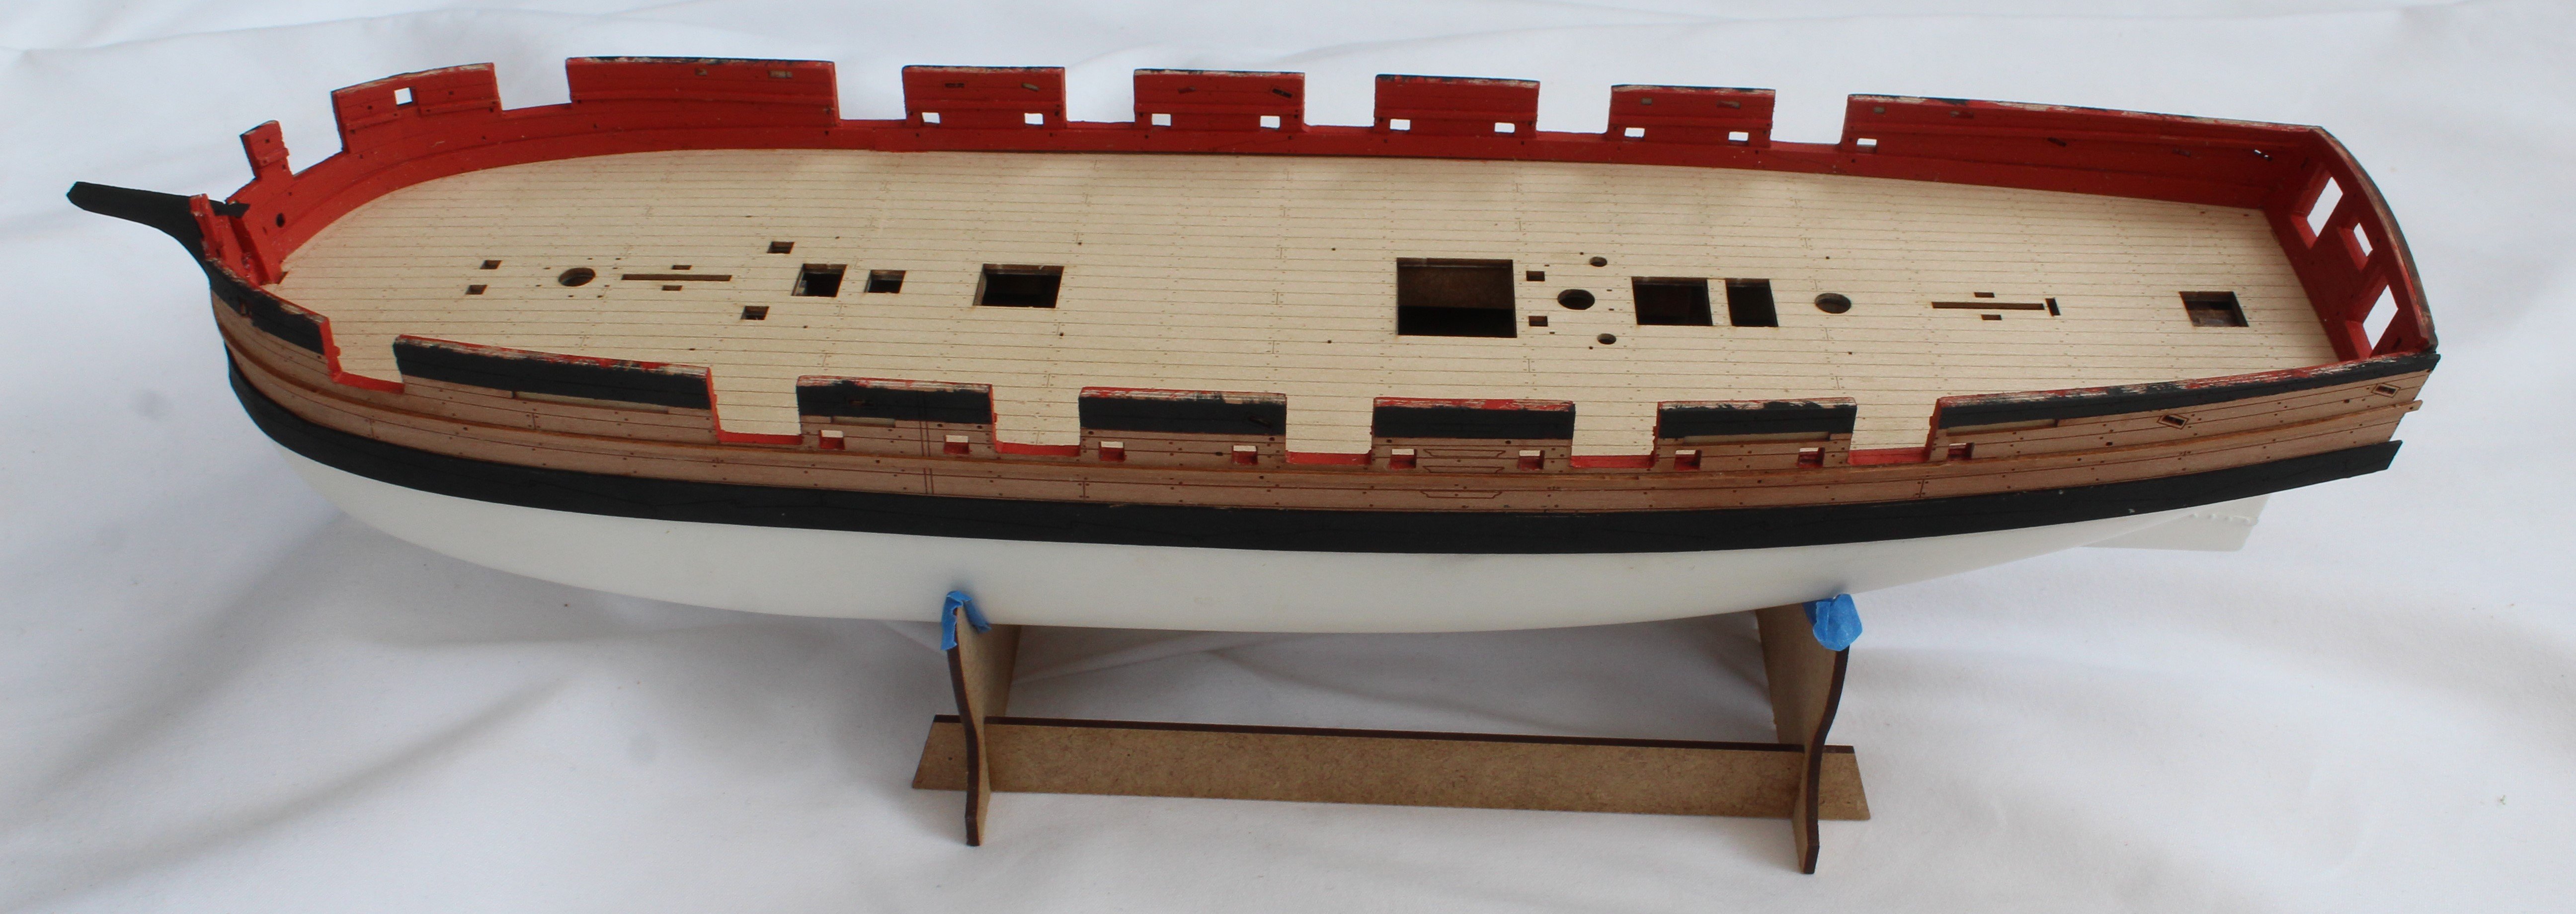
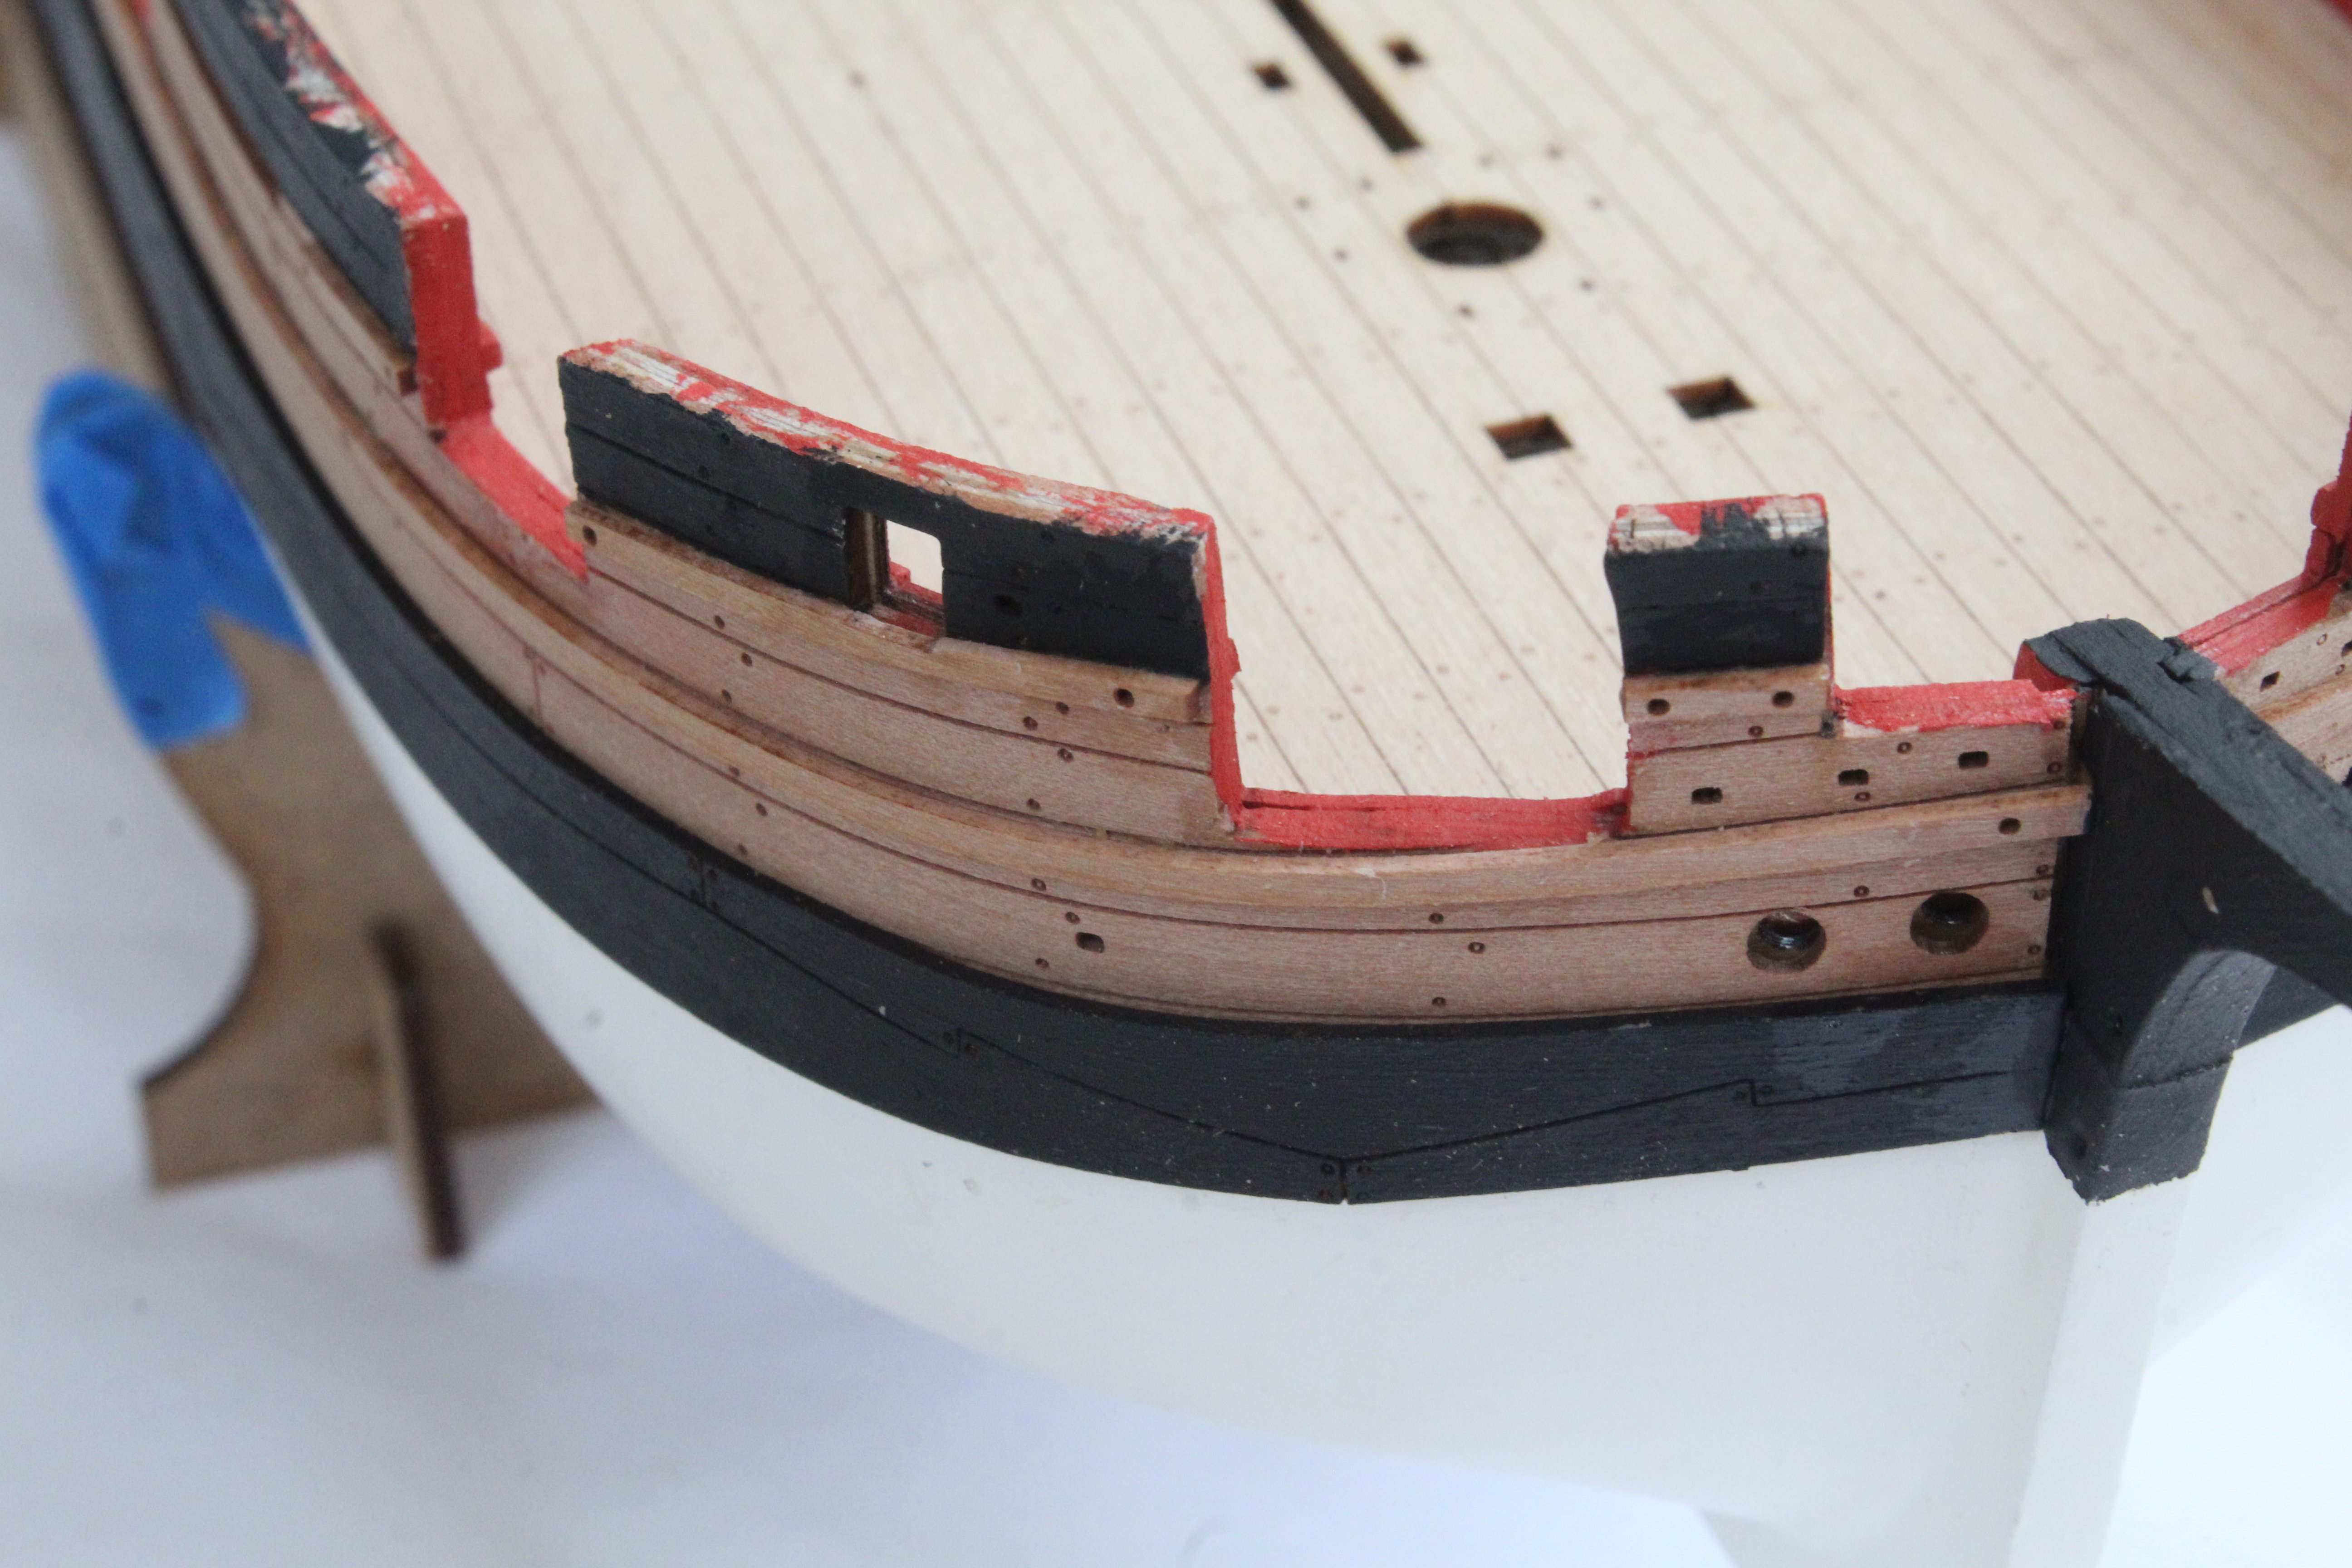
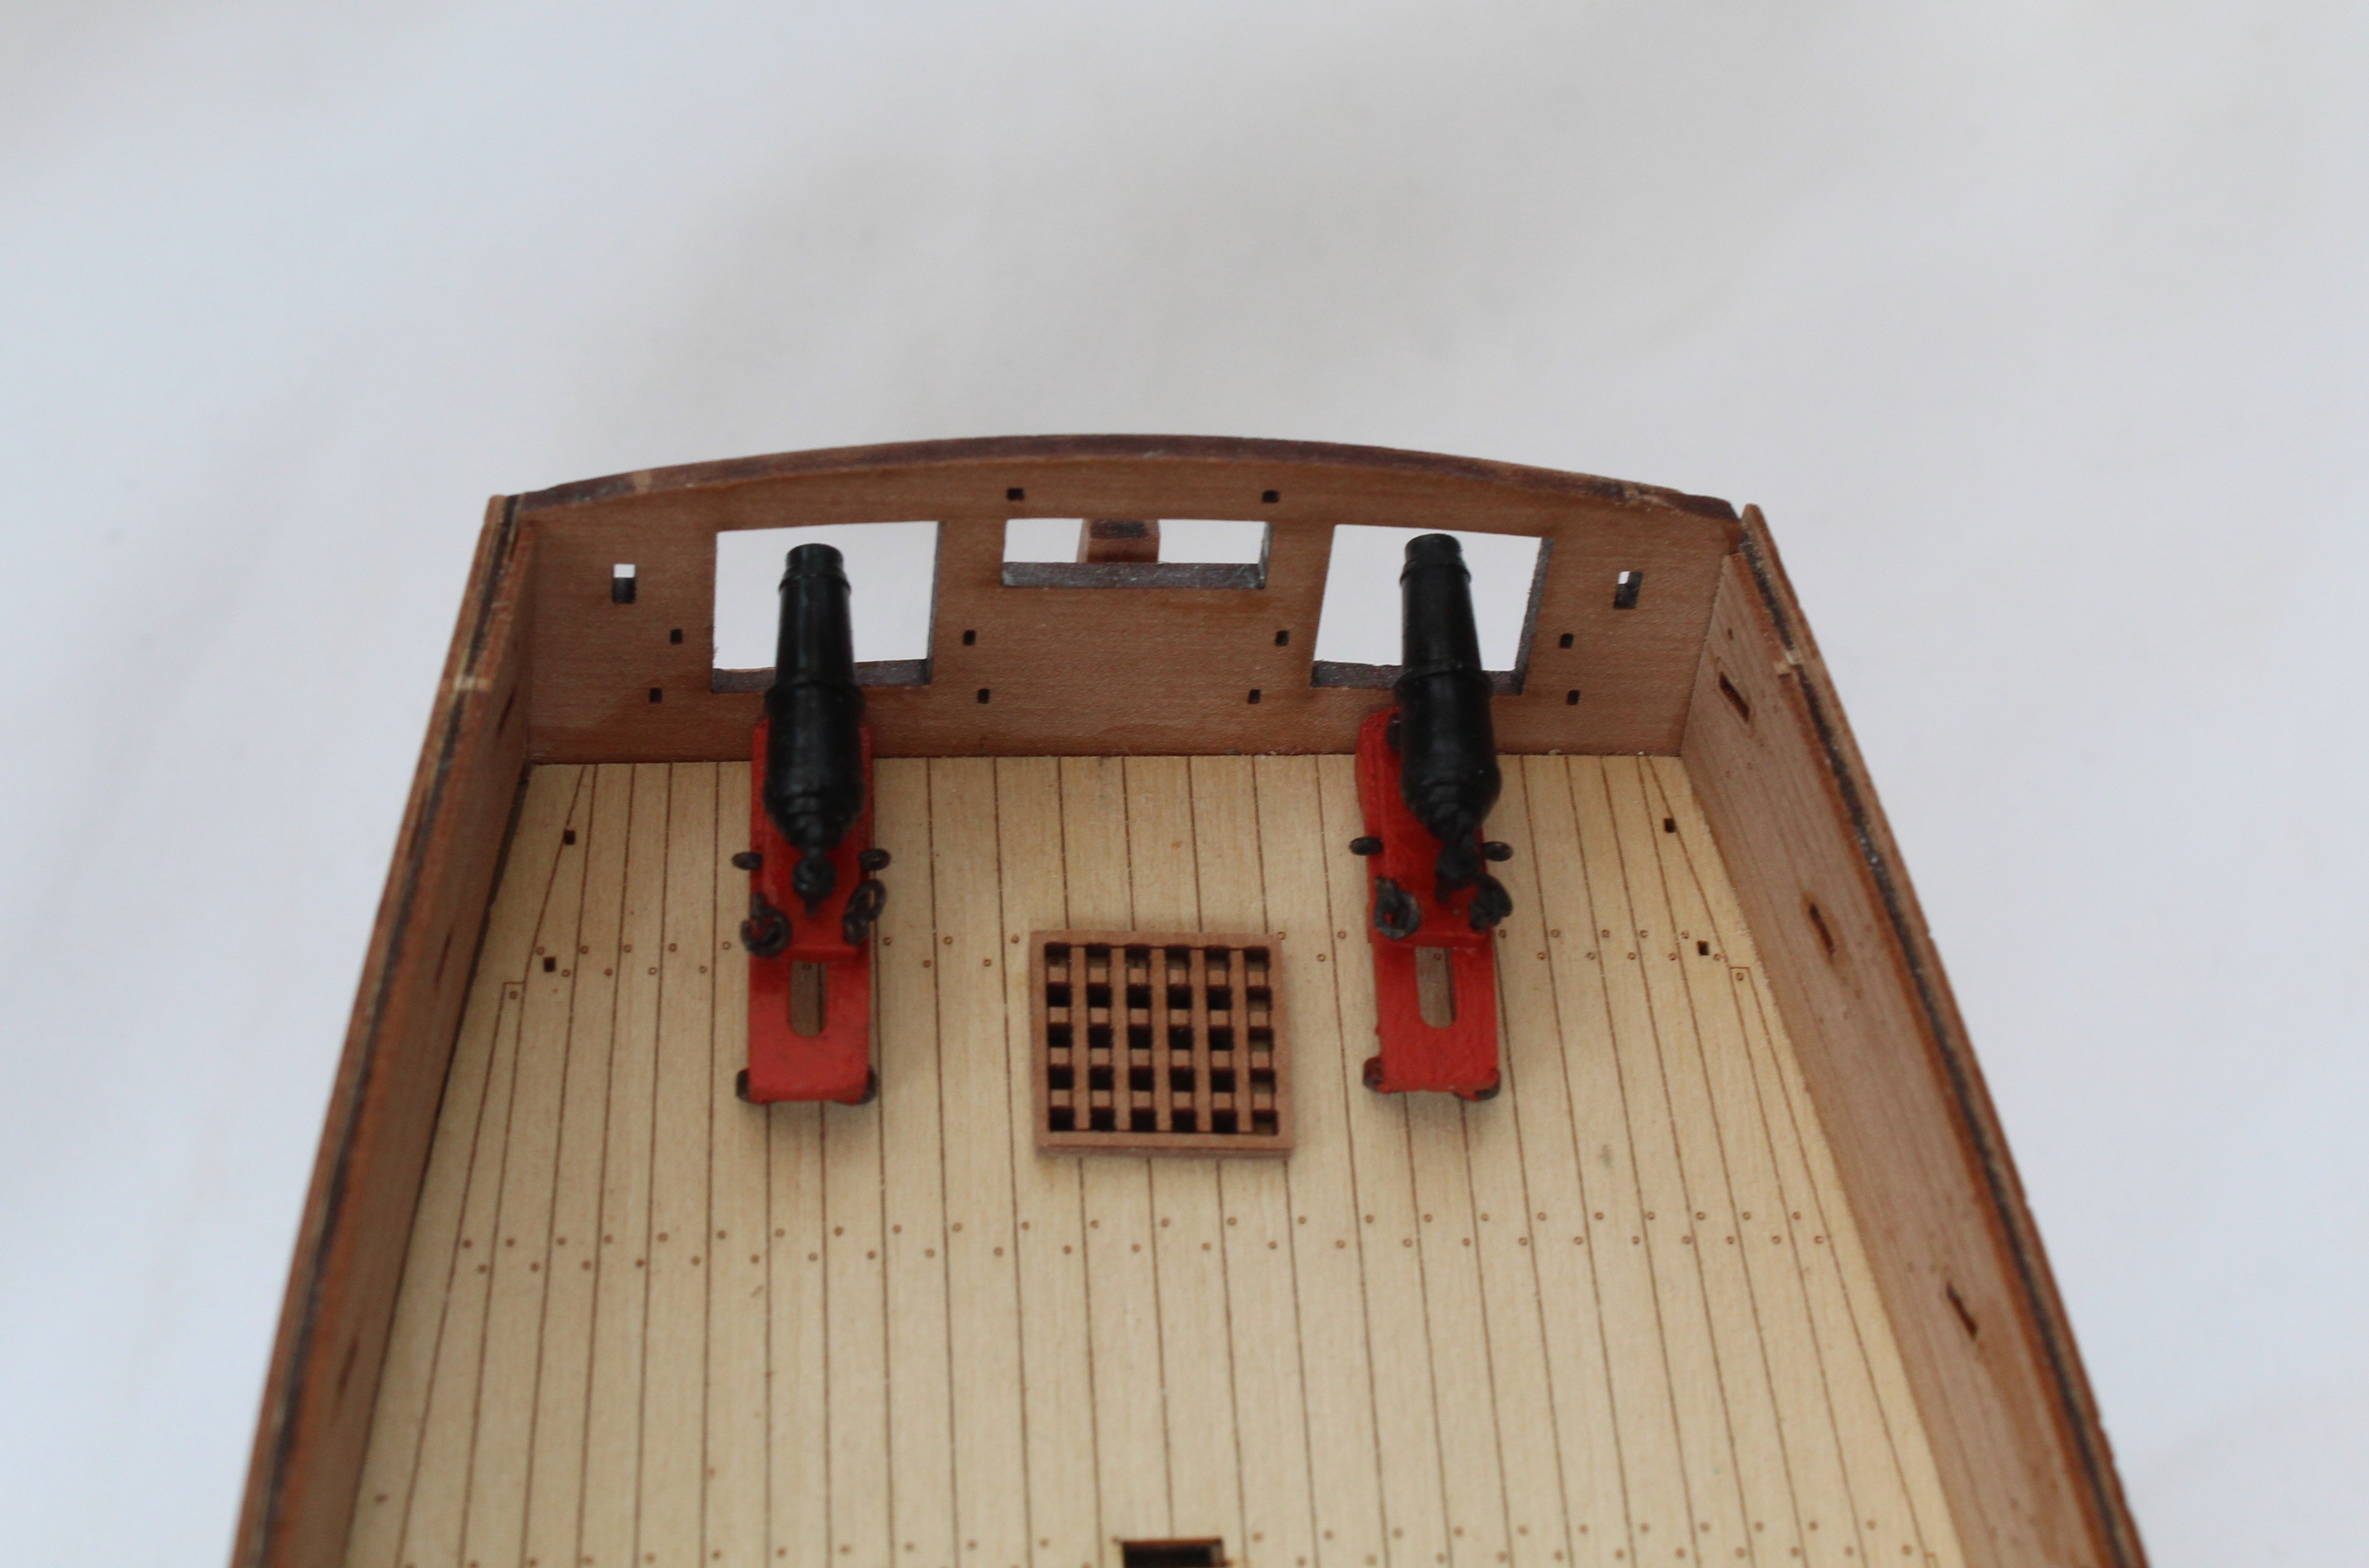
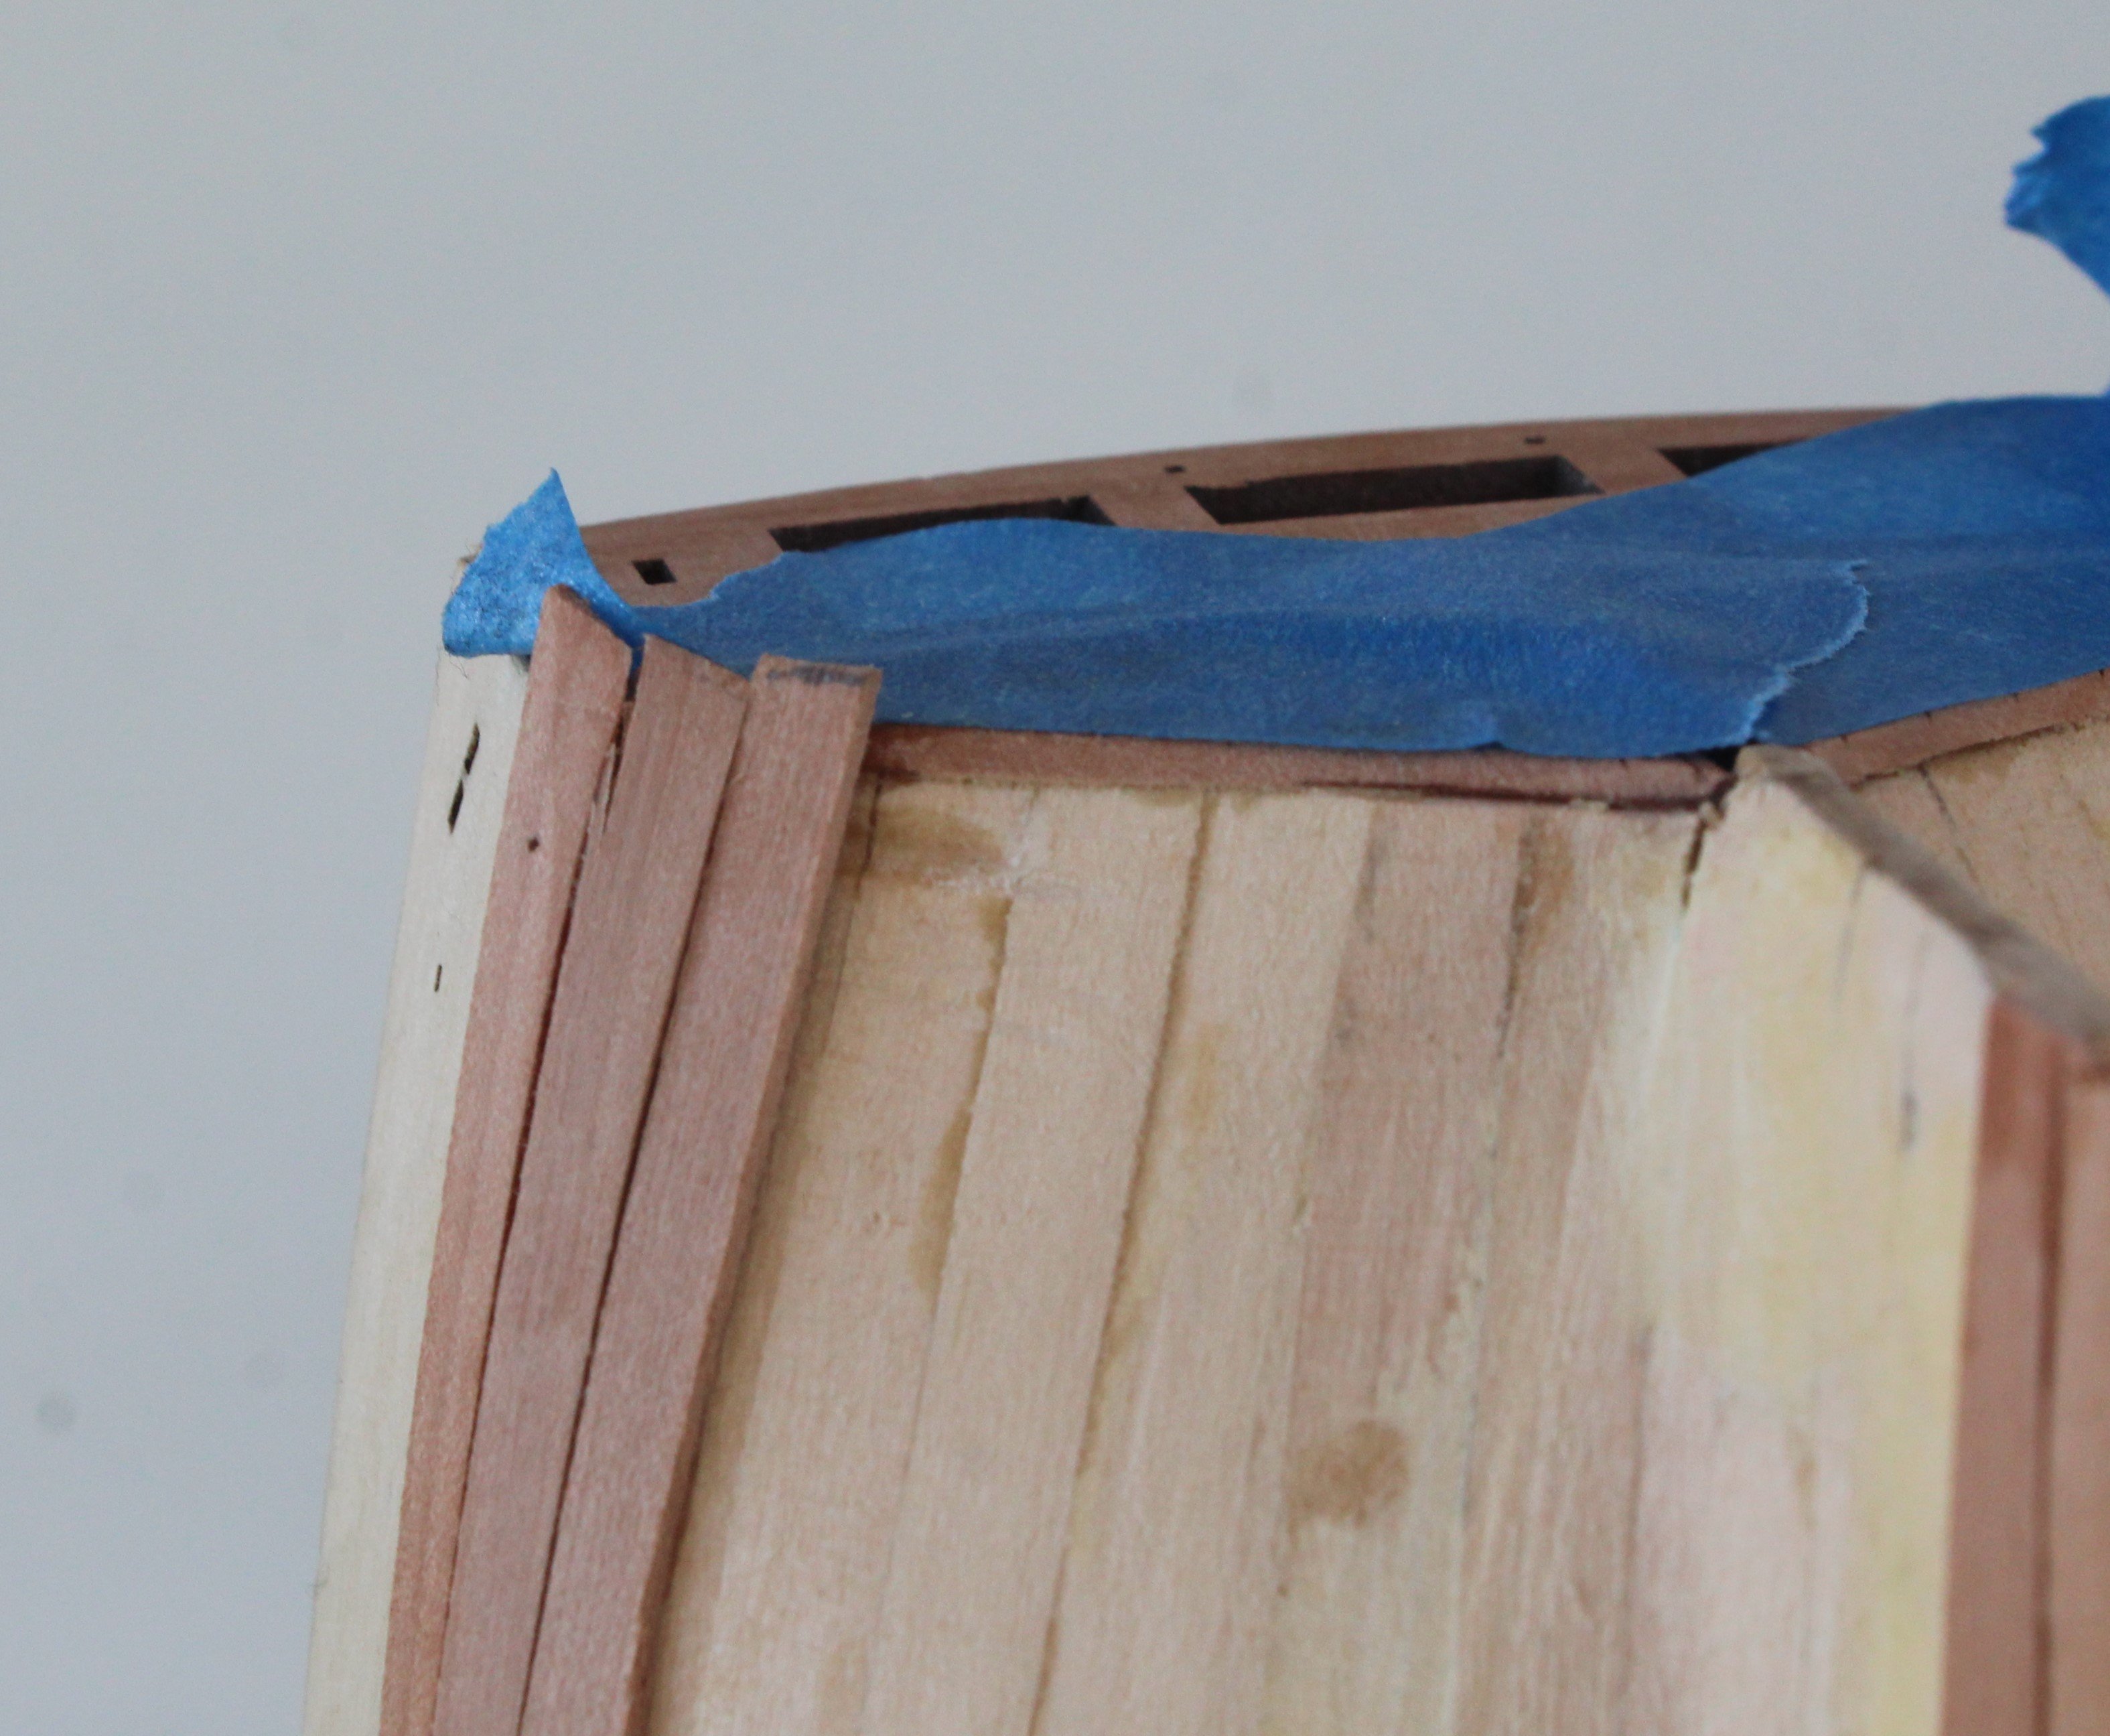
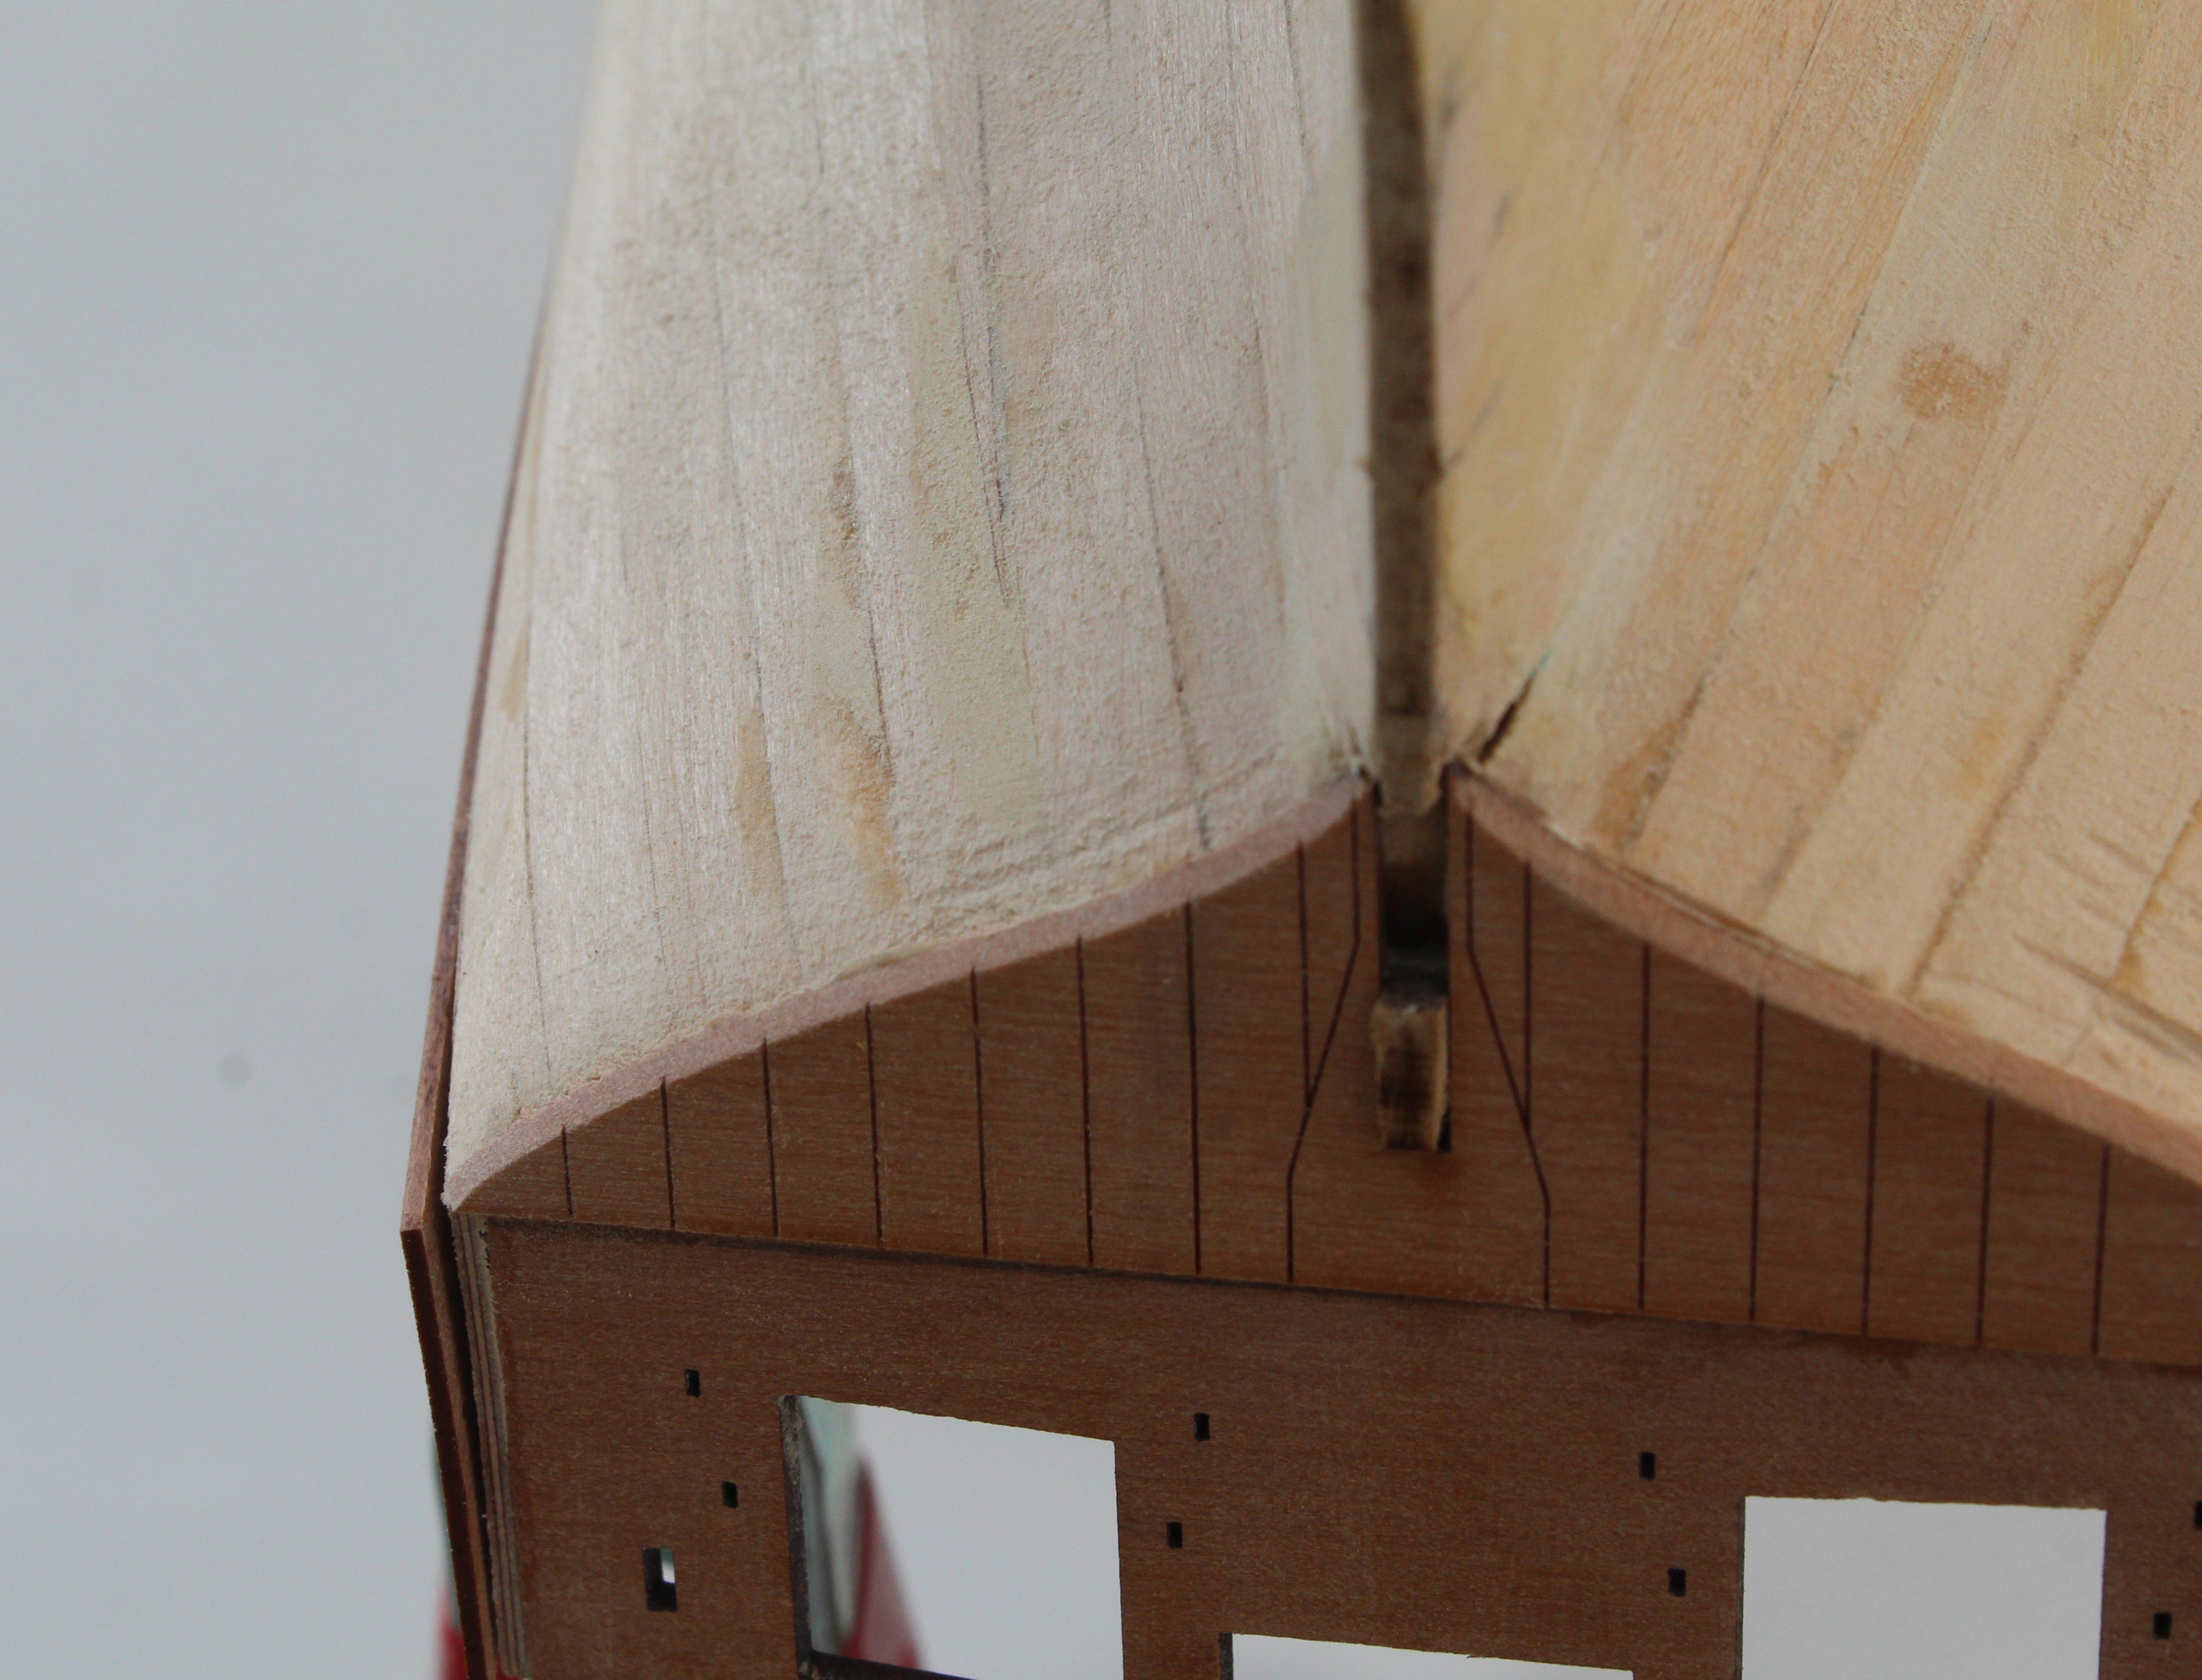
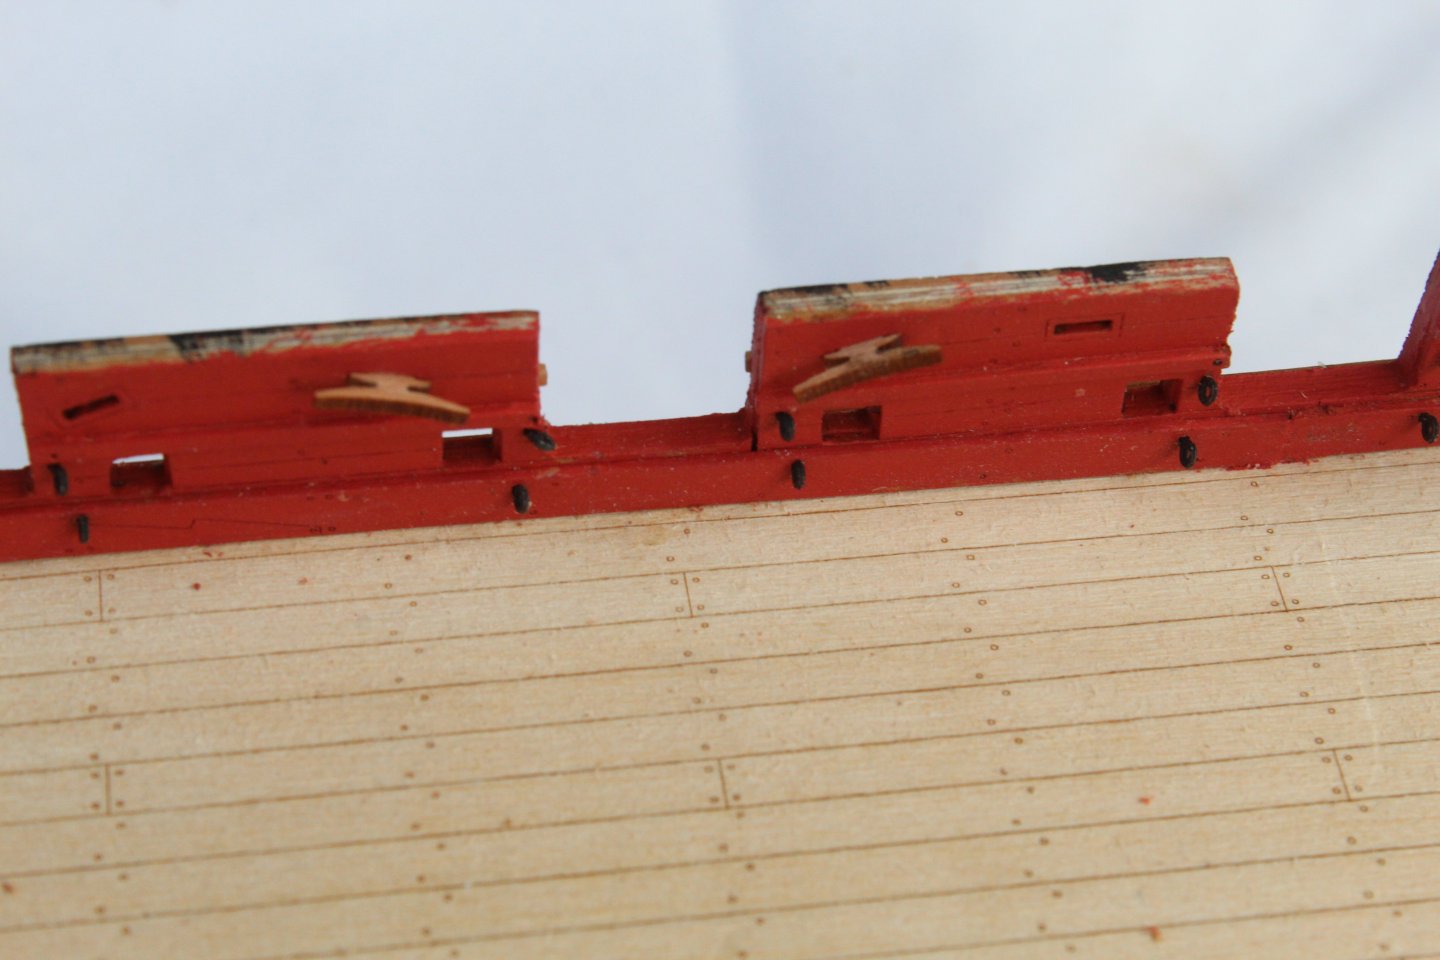
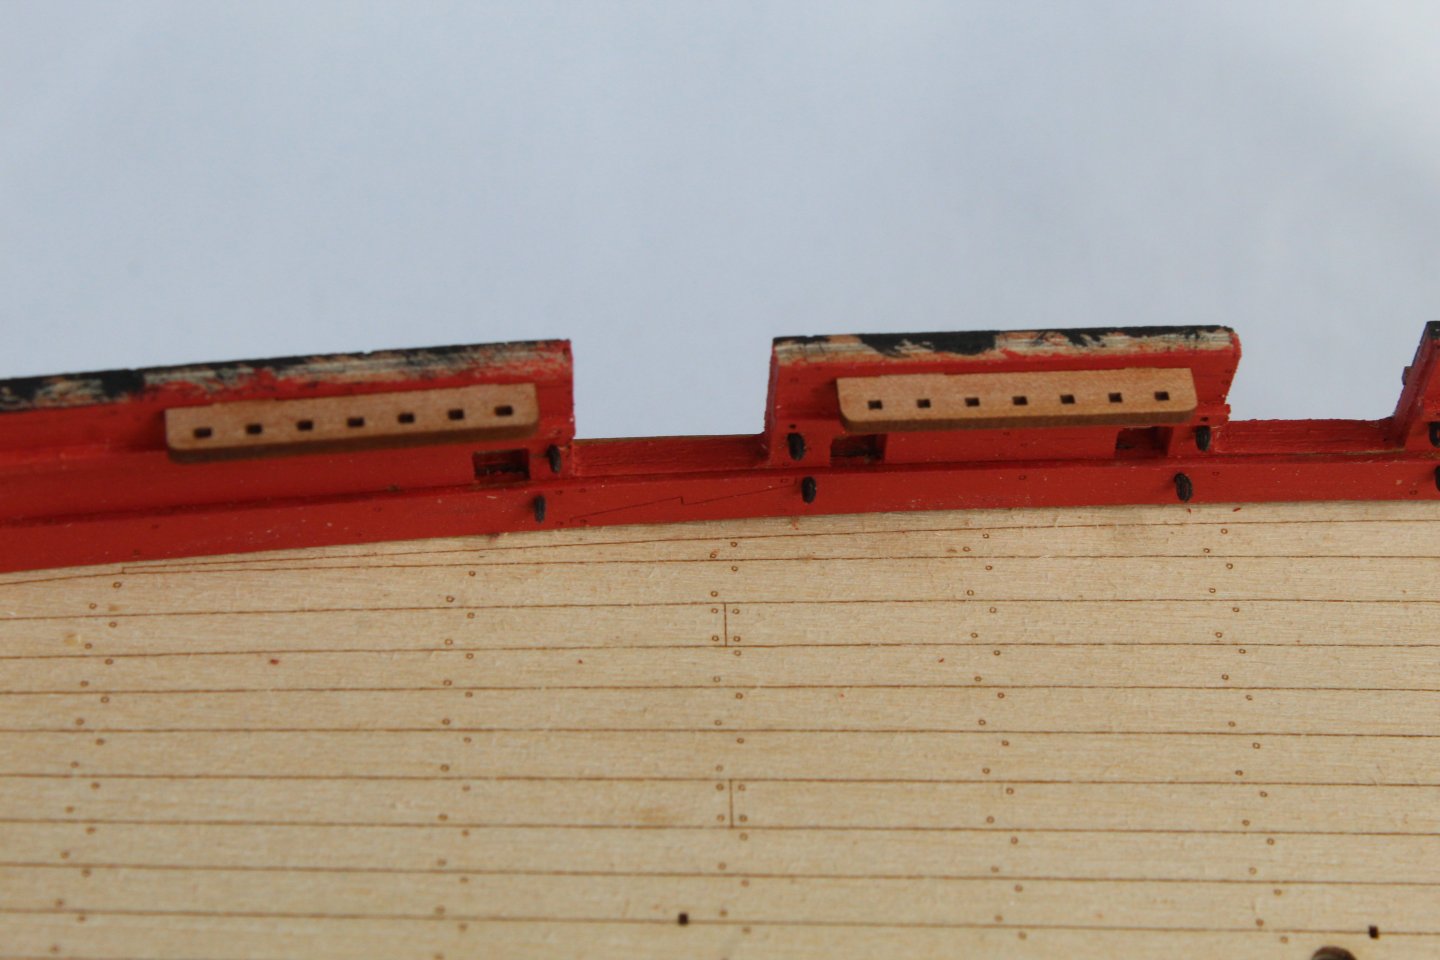
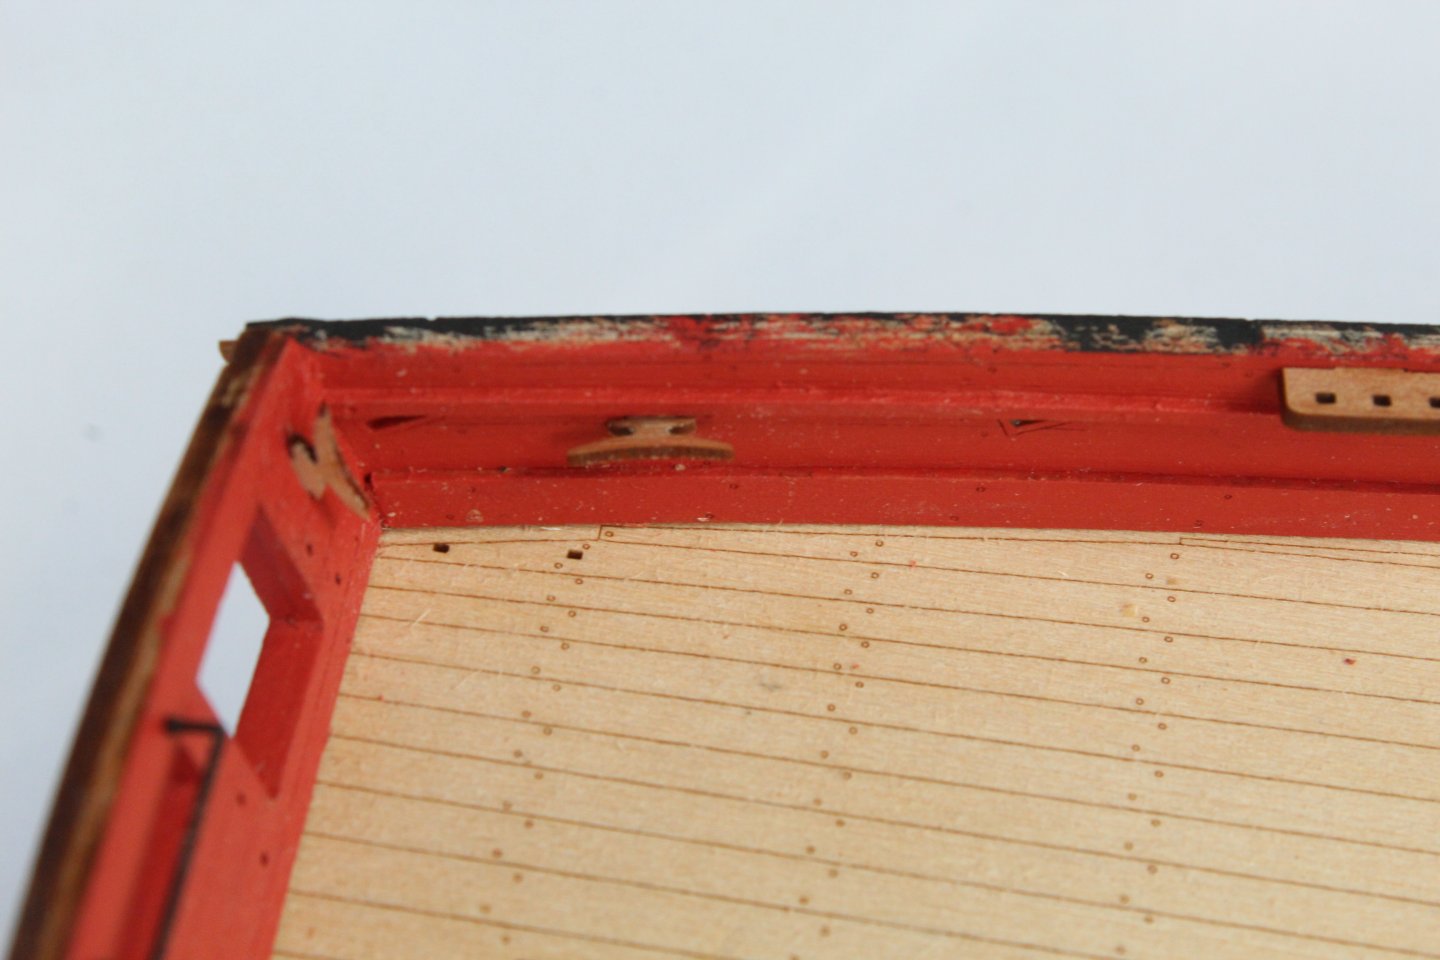
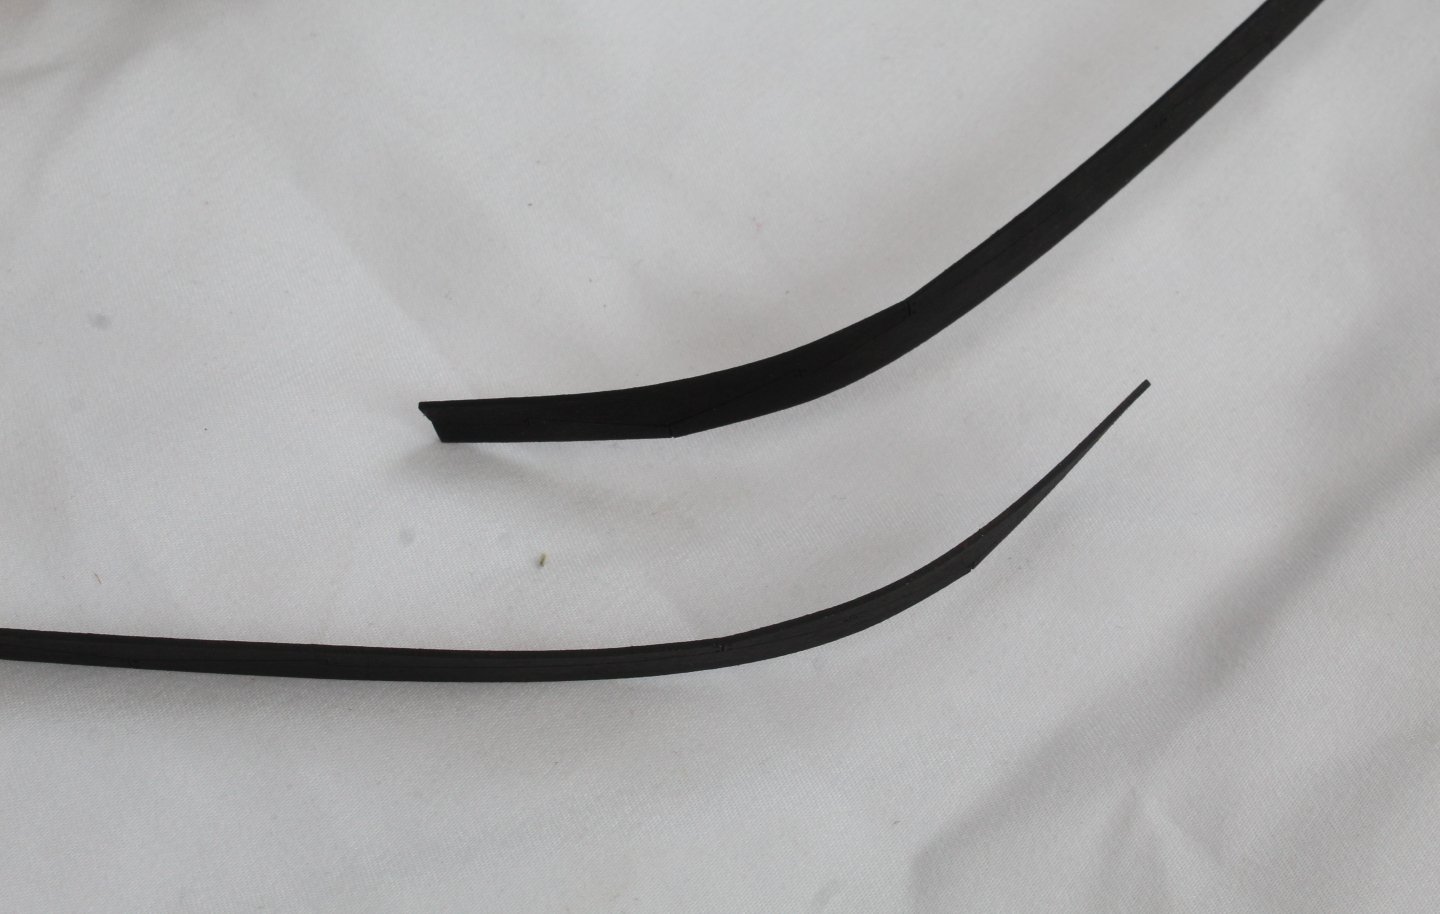
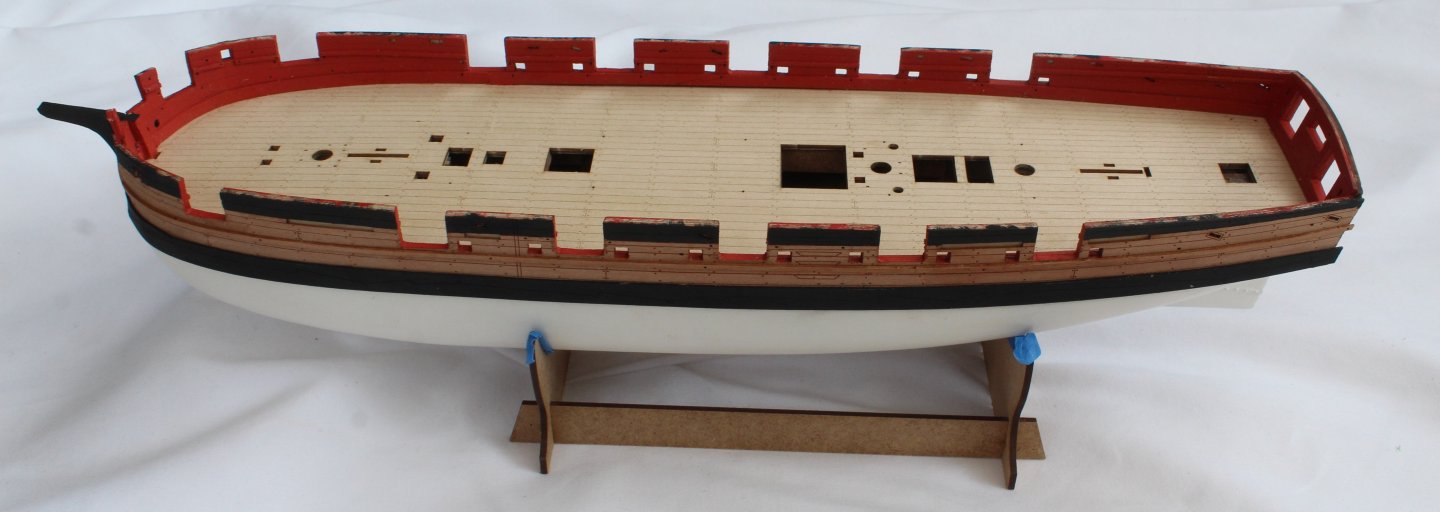
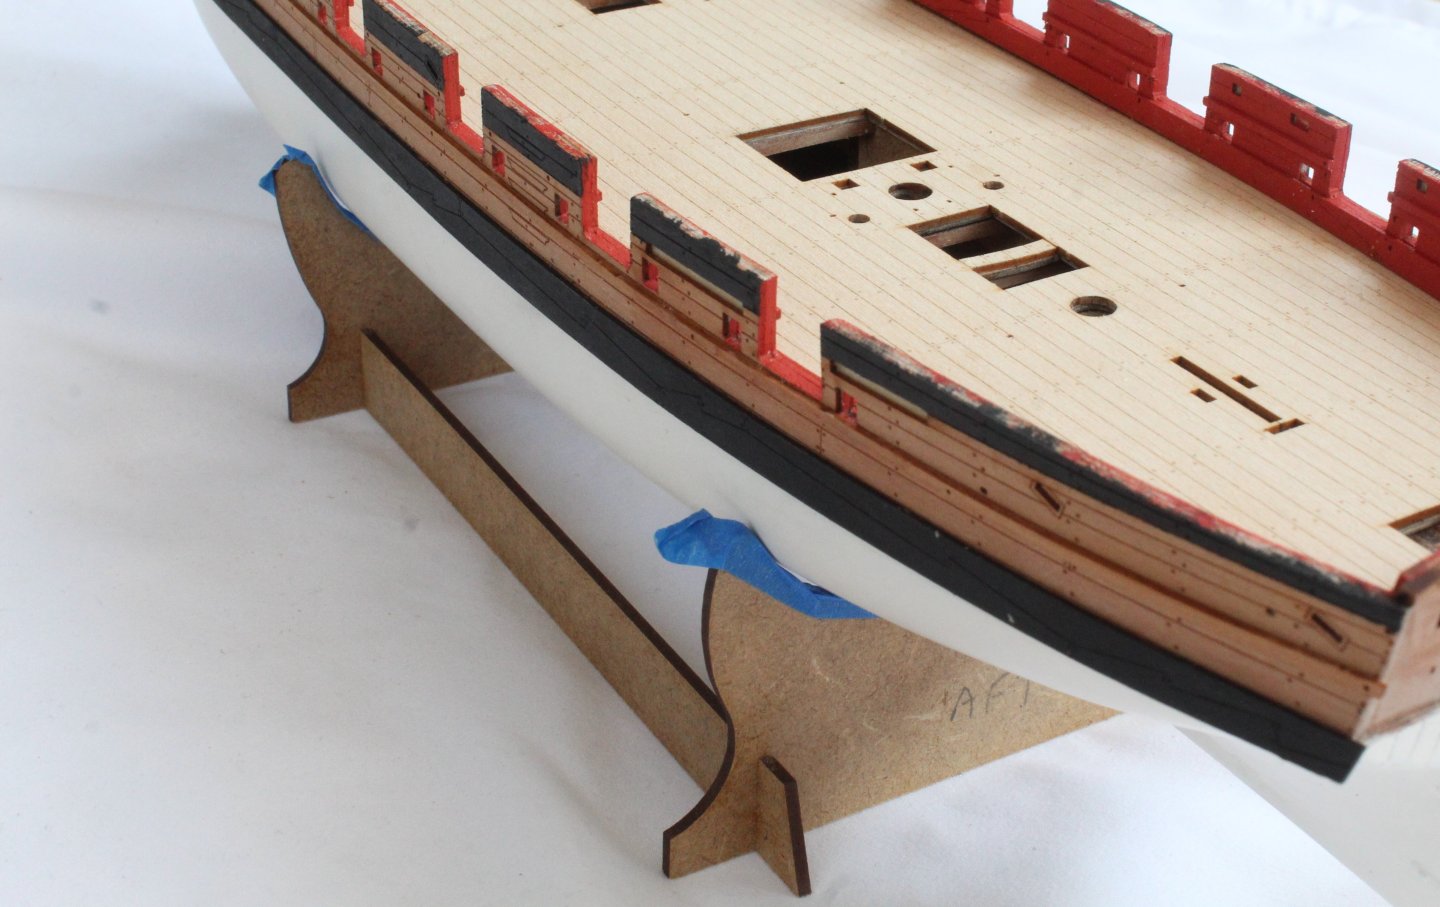
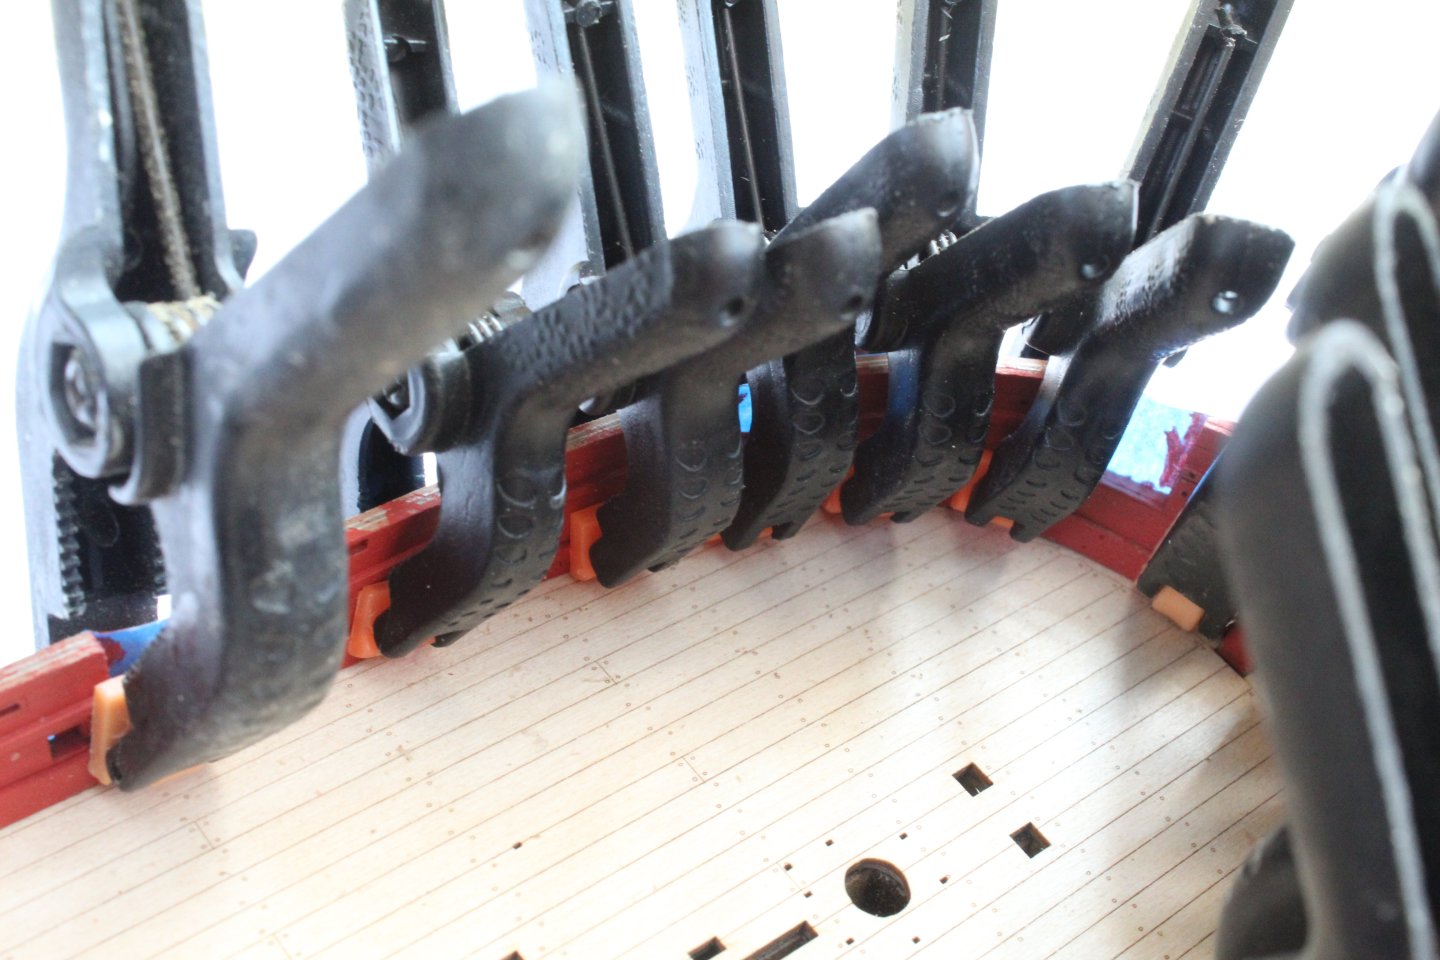
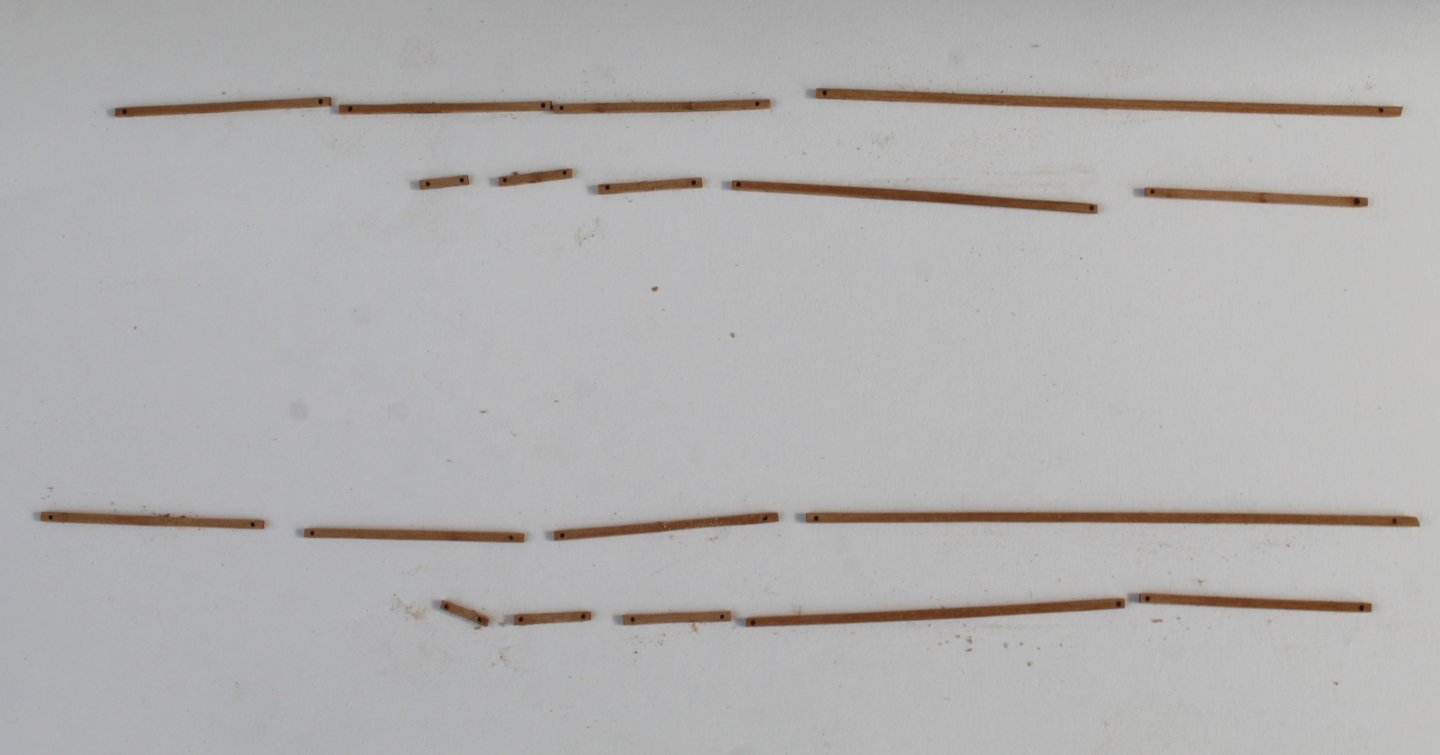
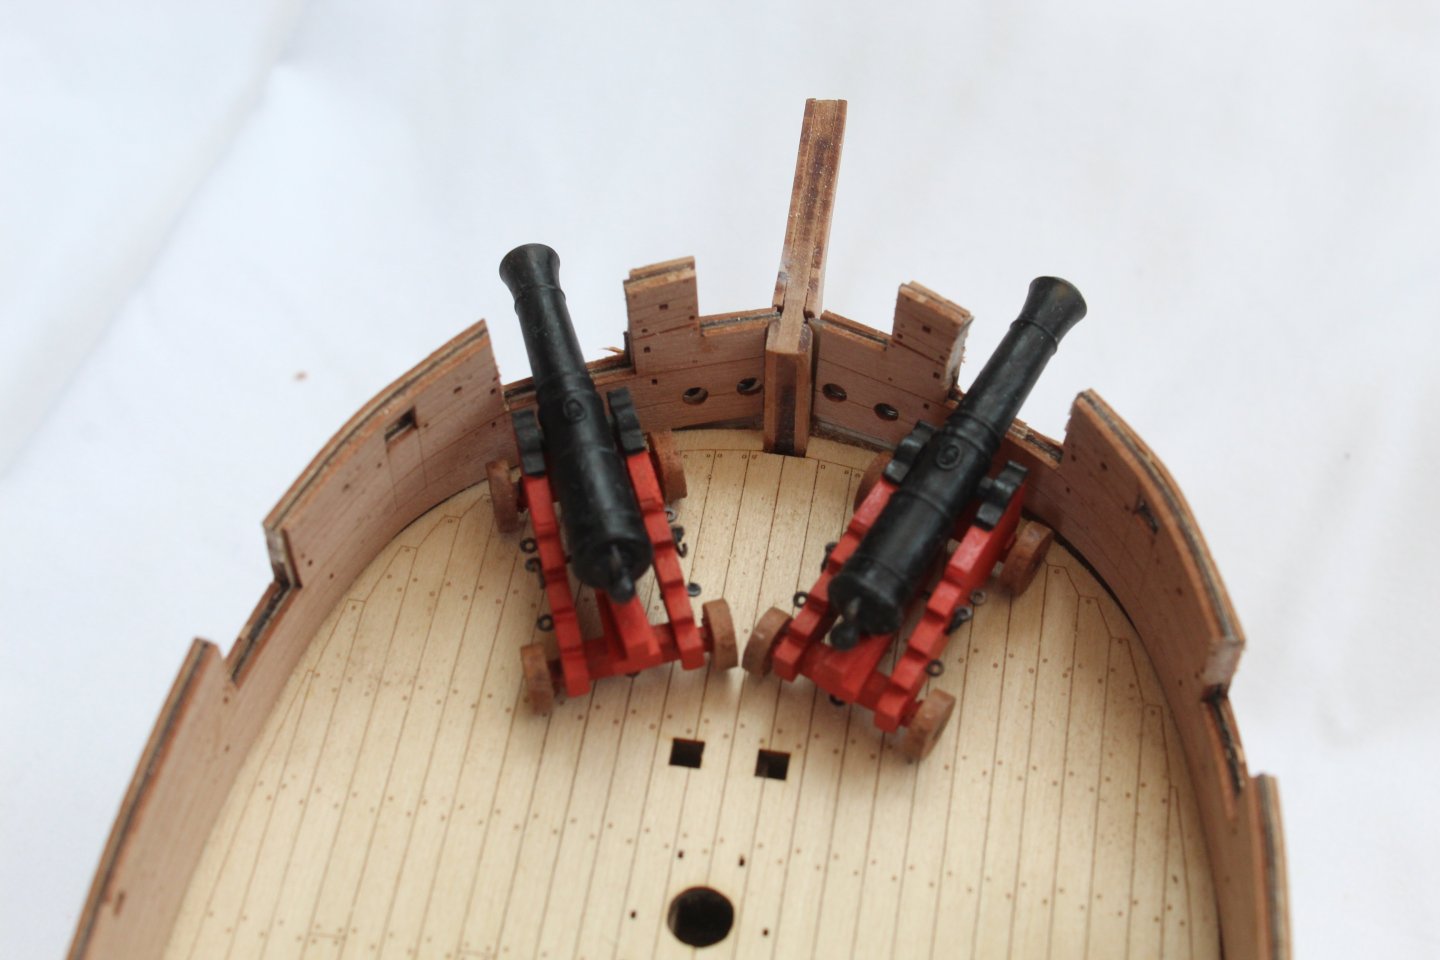
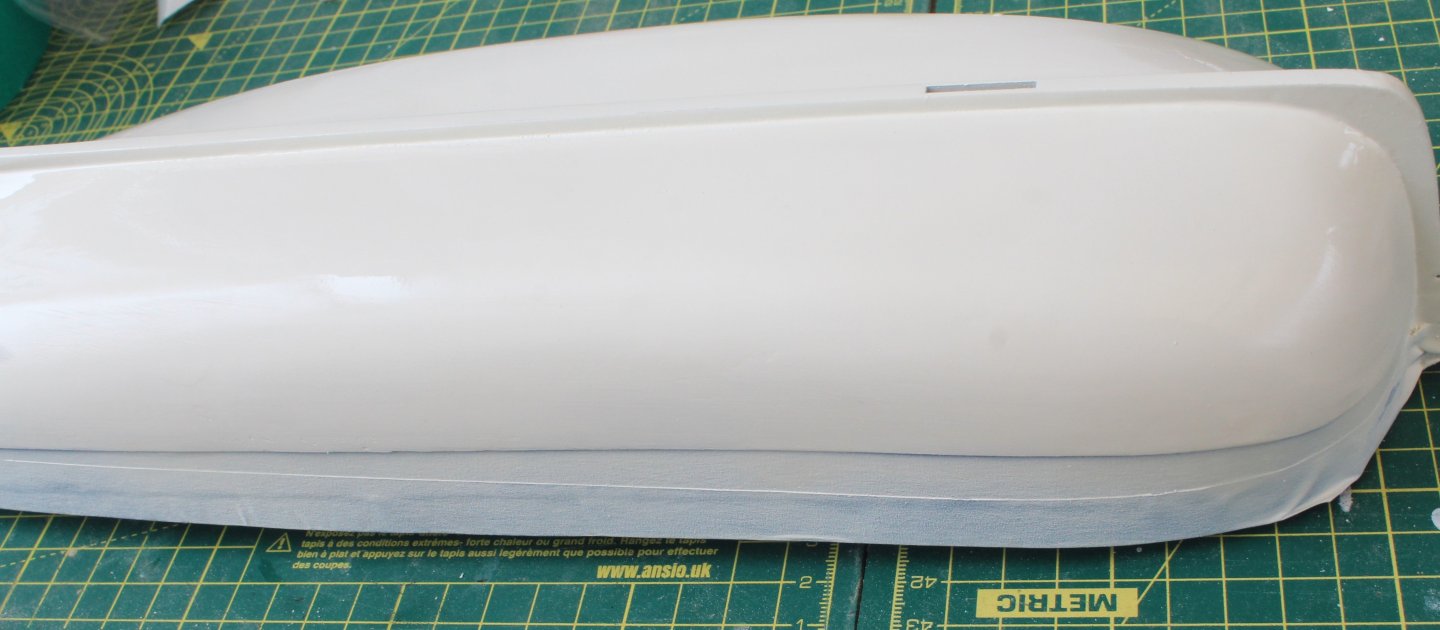
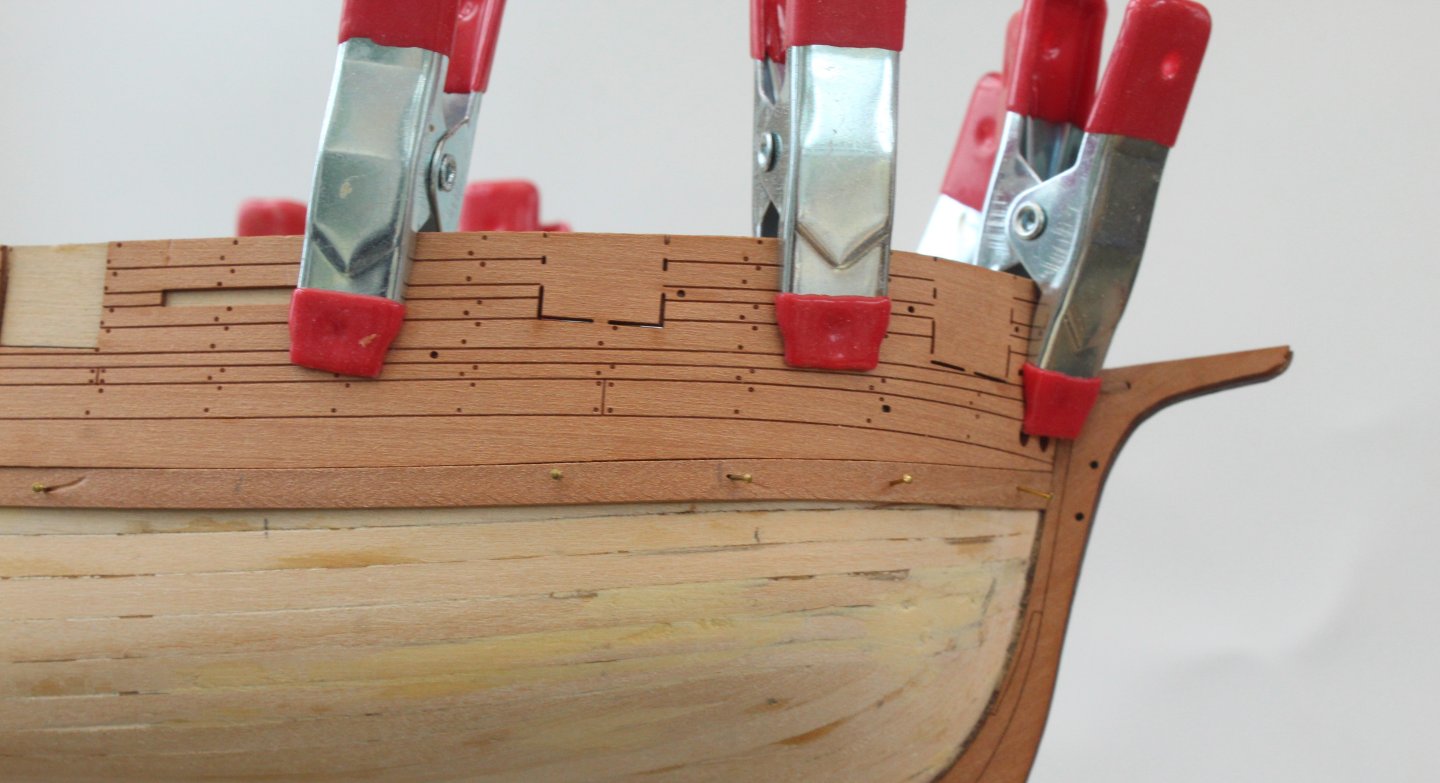
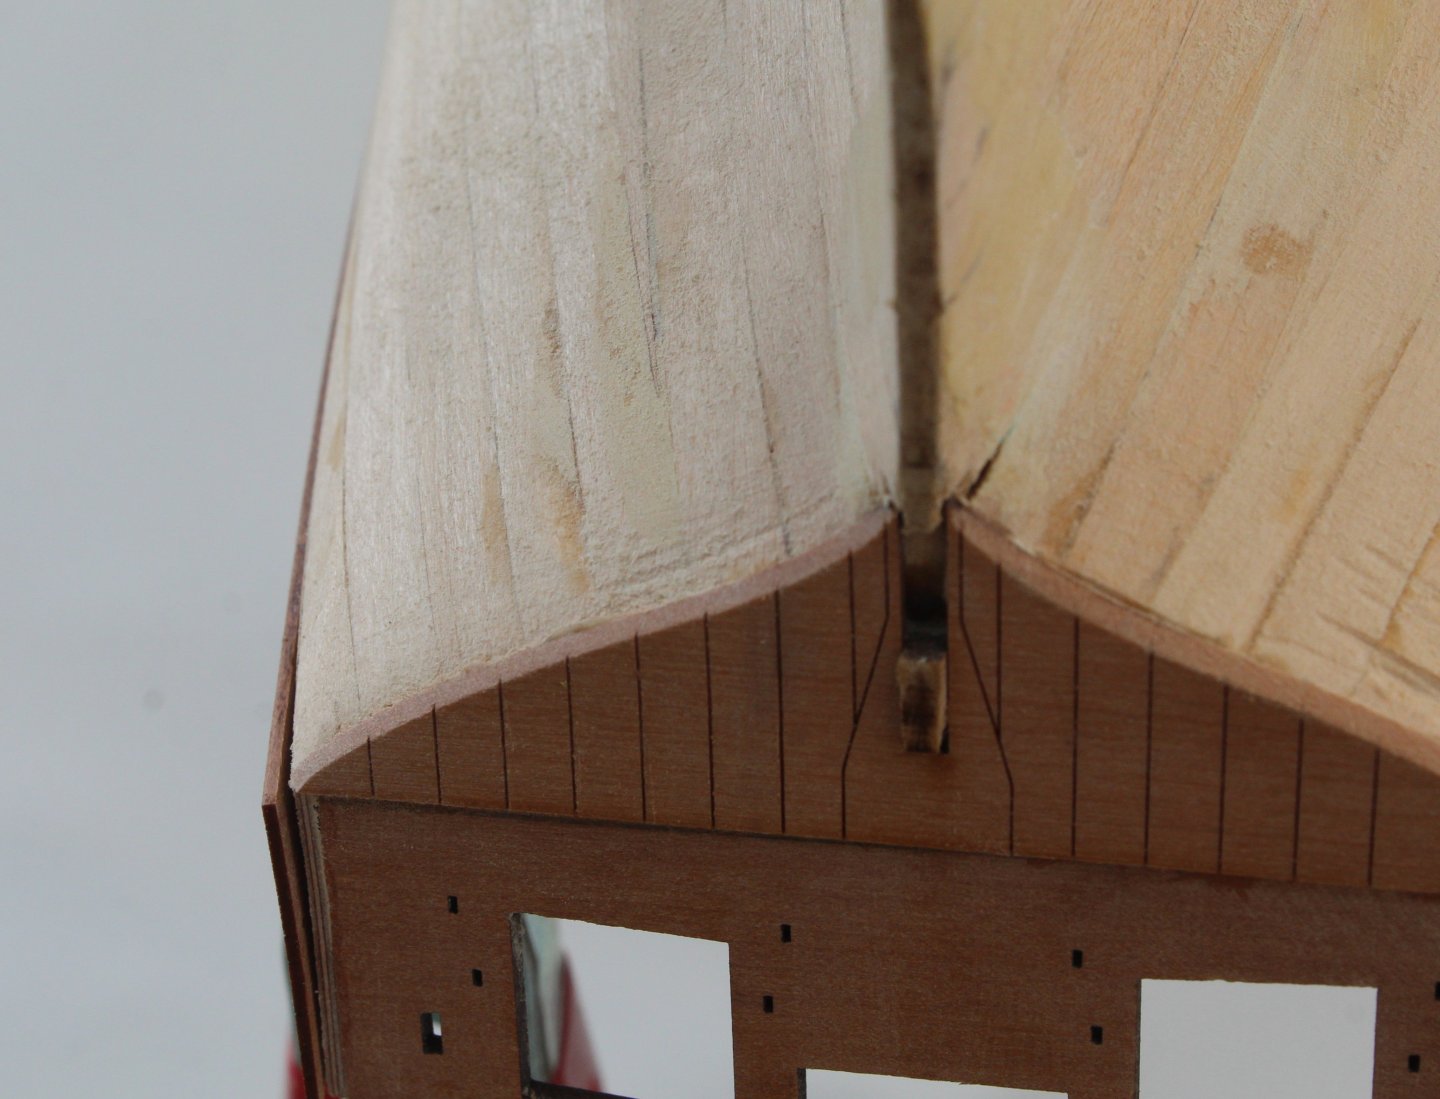
 Build Log Index Date: 24/08/2024 Time worked today: 2 hours. Total time spent on build: 48 hours. Gunwales and Bow Timbers After soaking the stern gunwale in hot water for a few minutes I was happy with the fit once the clamps were removed after they had been left to dry overnight. I decided to glue this part in place using wood glue. Once that was done the two gunwale patterns were painted black. I applied a coat of varnish followed by 2 coats of black paint. After a couple of trial fits the gunwale patters were trimmed and then glued in place. I opted to use ca glue for this. Next the two bow timbers were added to the hull after they had been painted black. The various cleats, after being painted black, were also added to the bulwarks. I am considering adding the breach rigging to the various carronades and cannons. I do have an idea how to simplify the production and installation of the breach rigging so I will do a bit of experimentation before making a final decision.


-
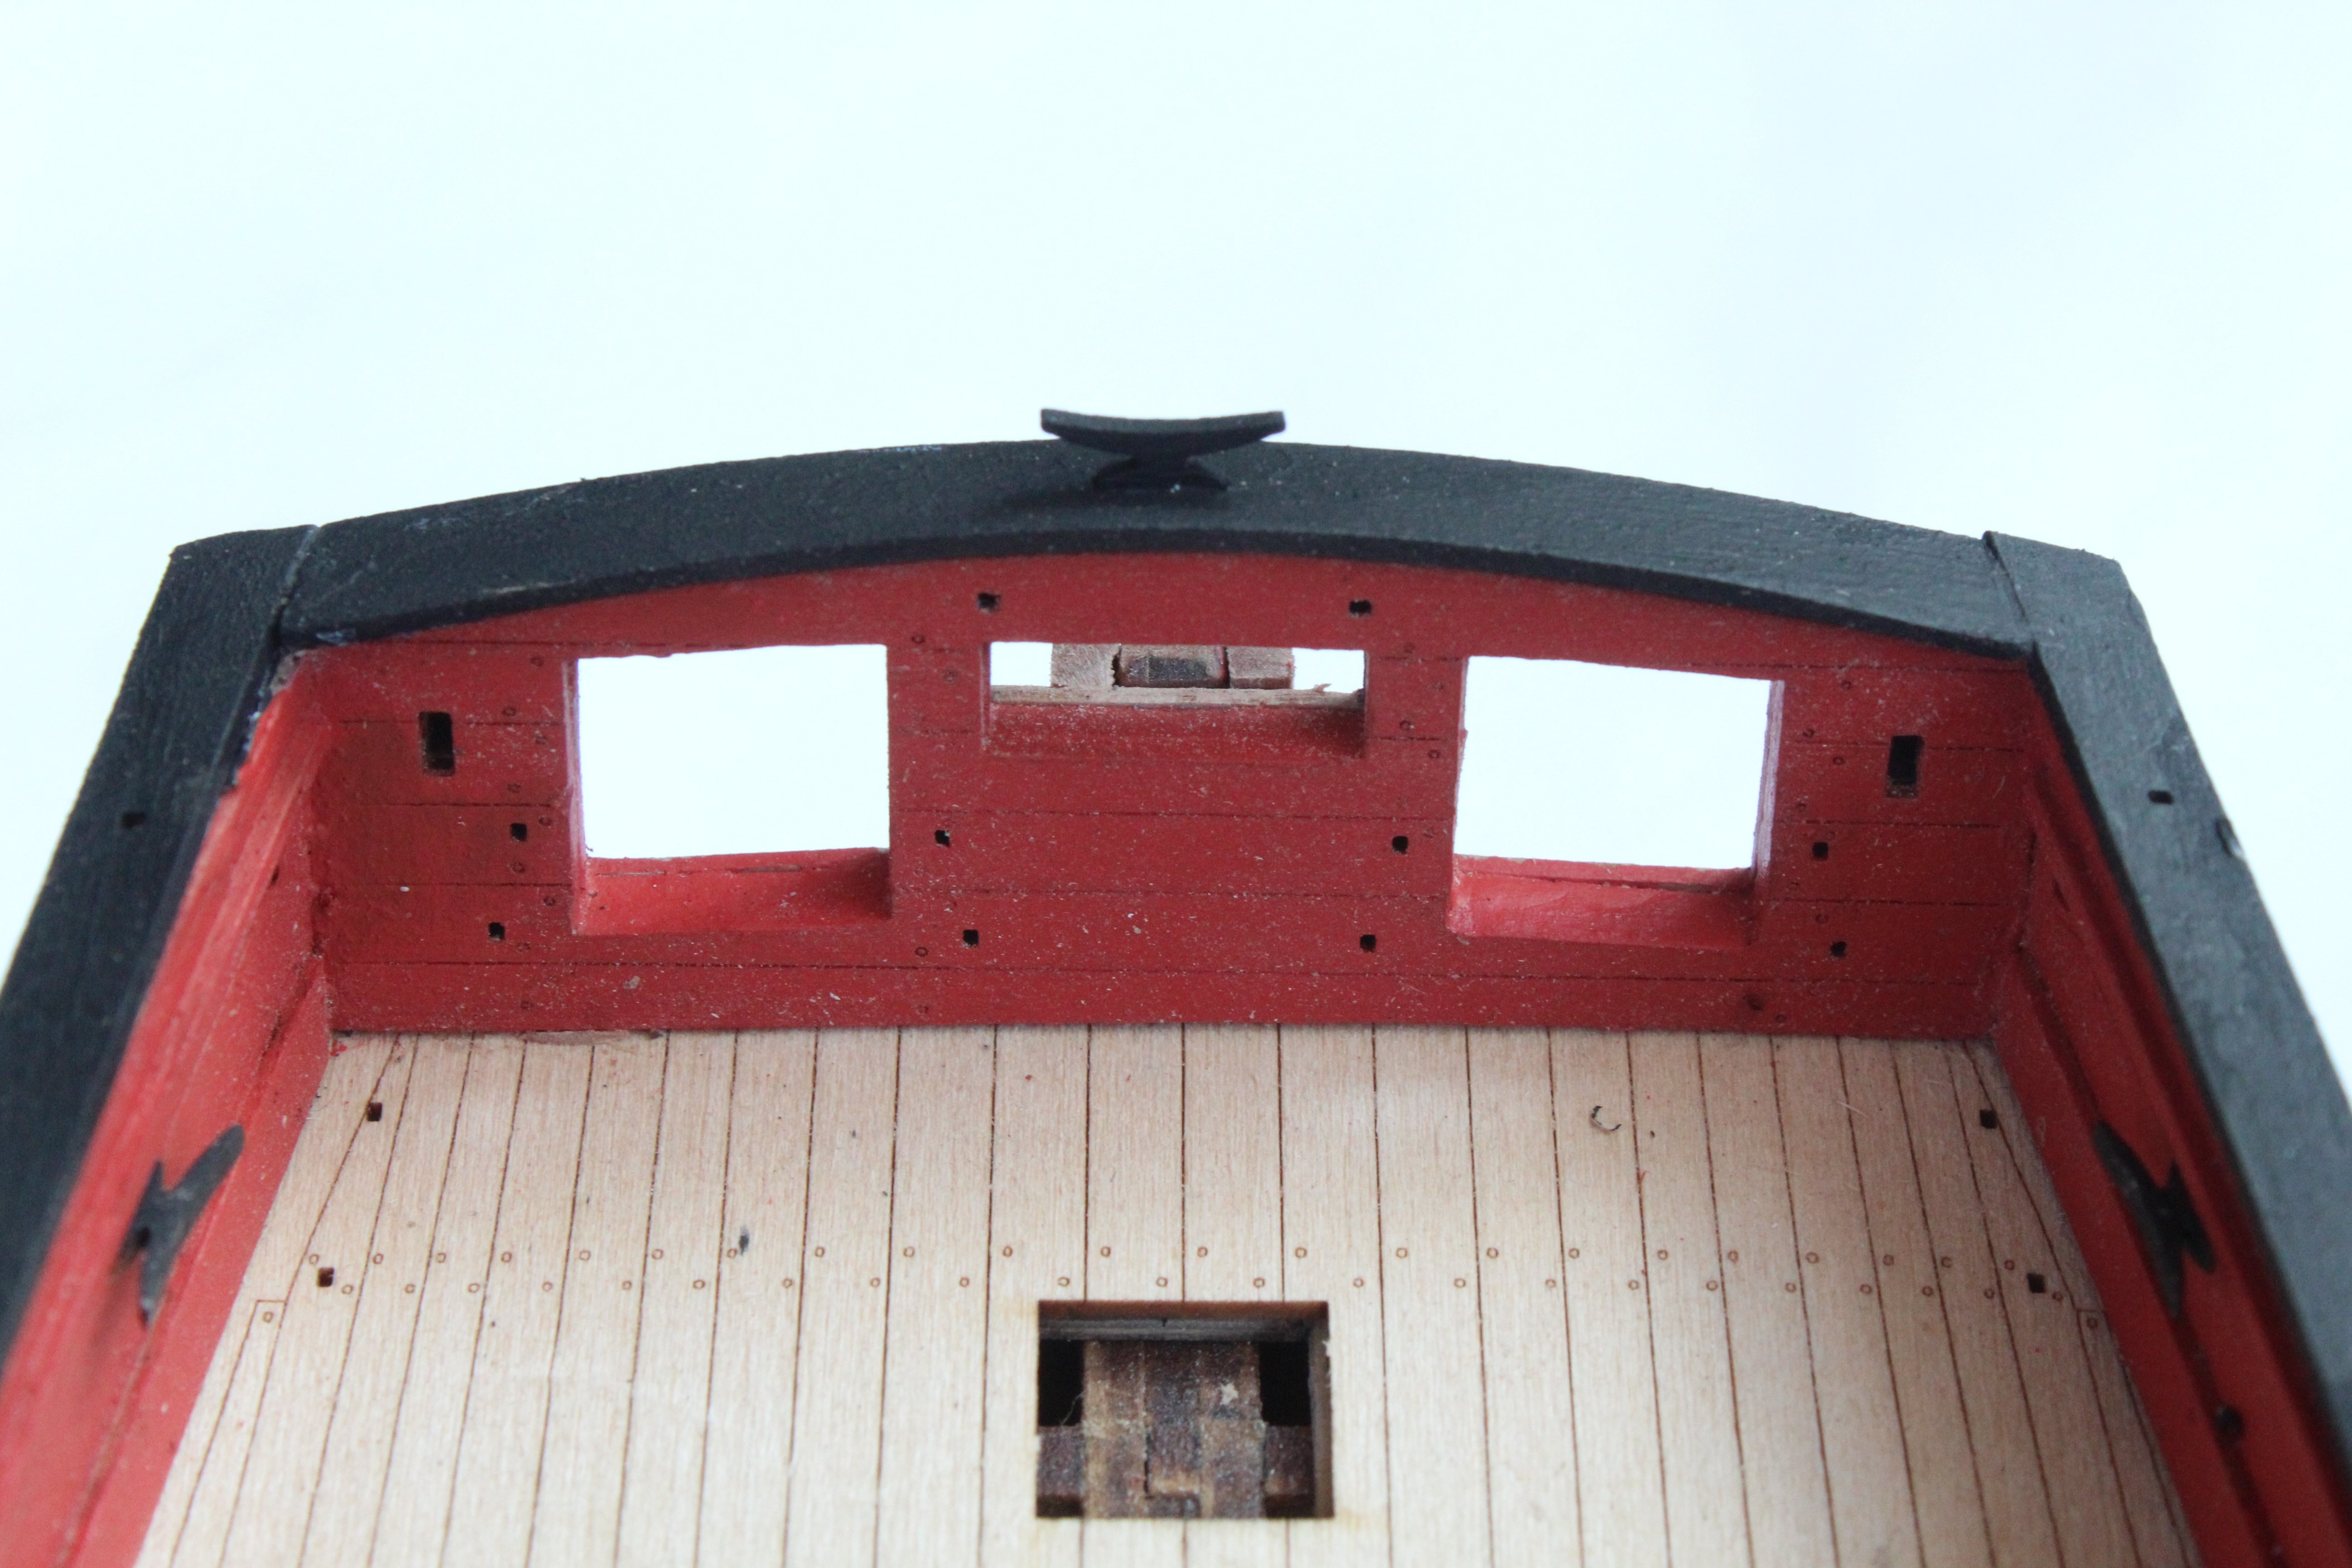
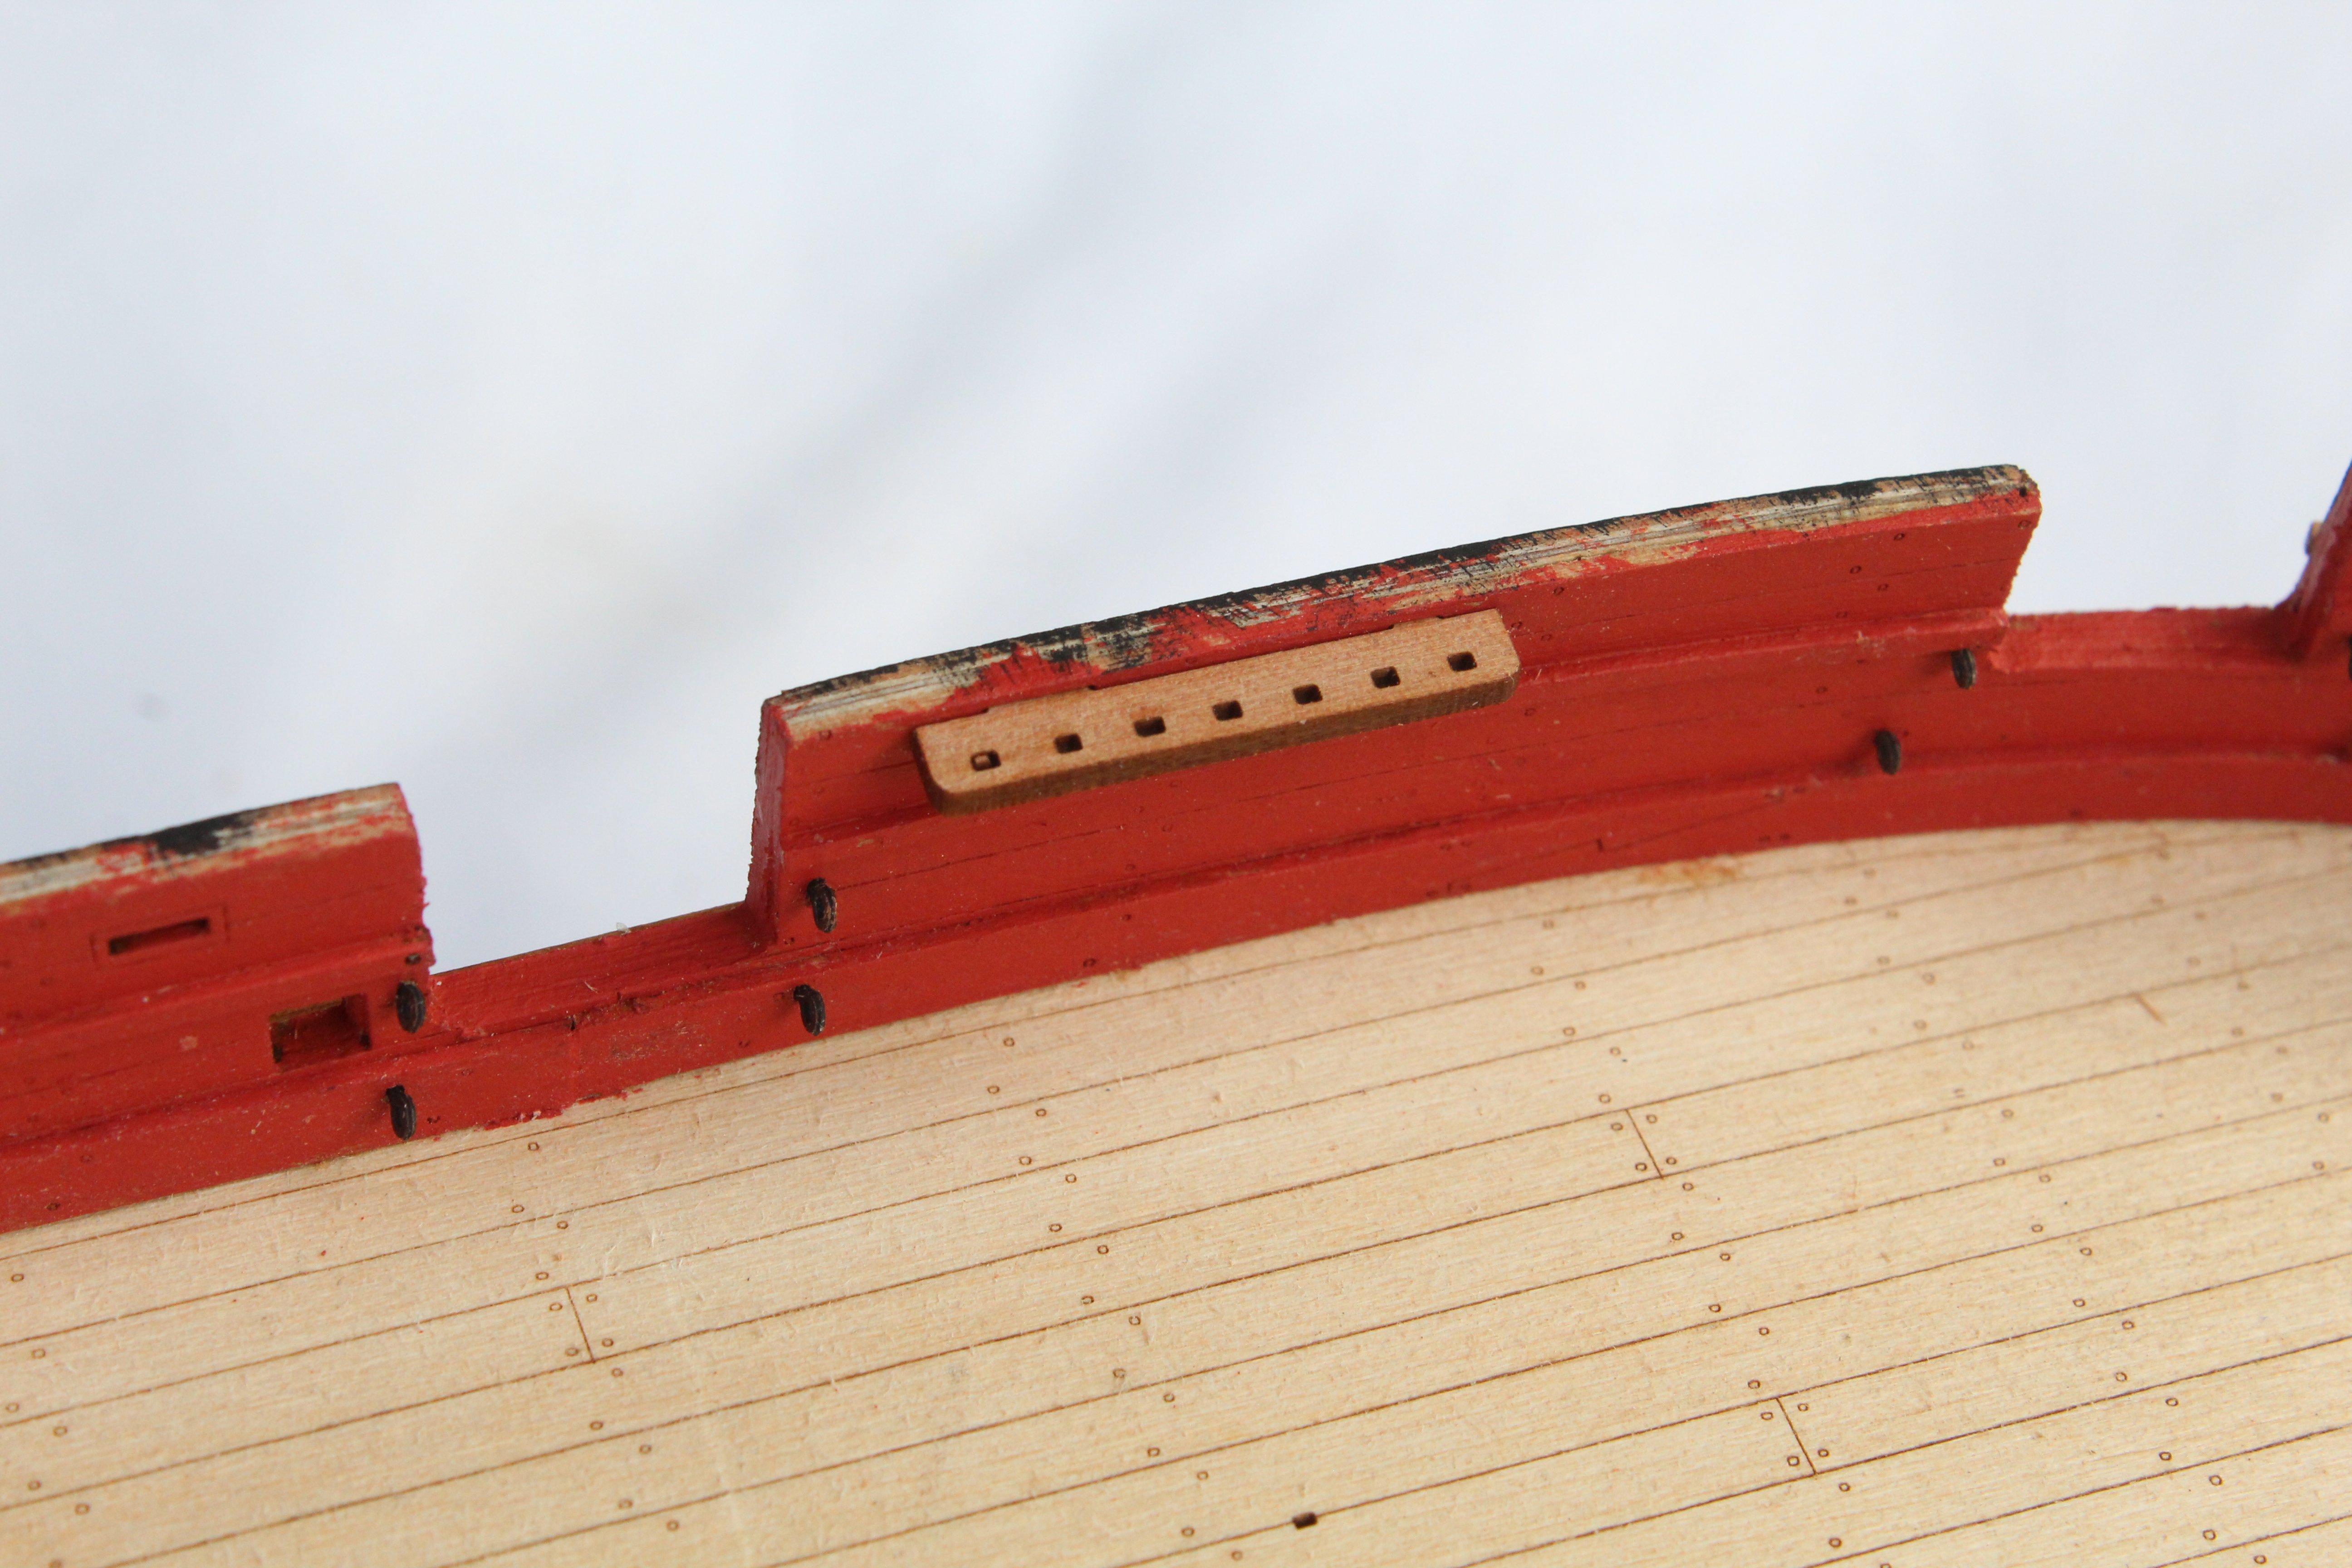
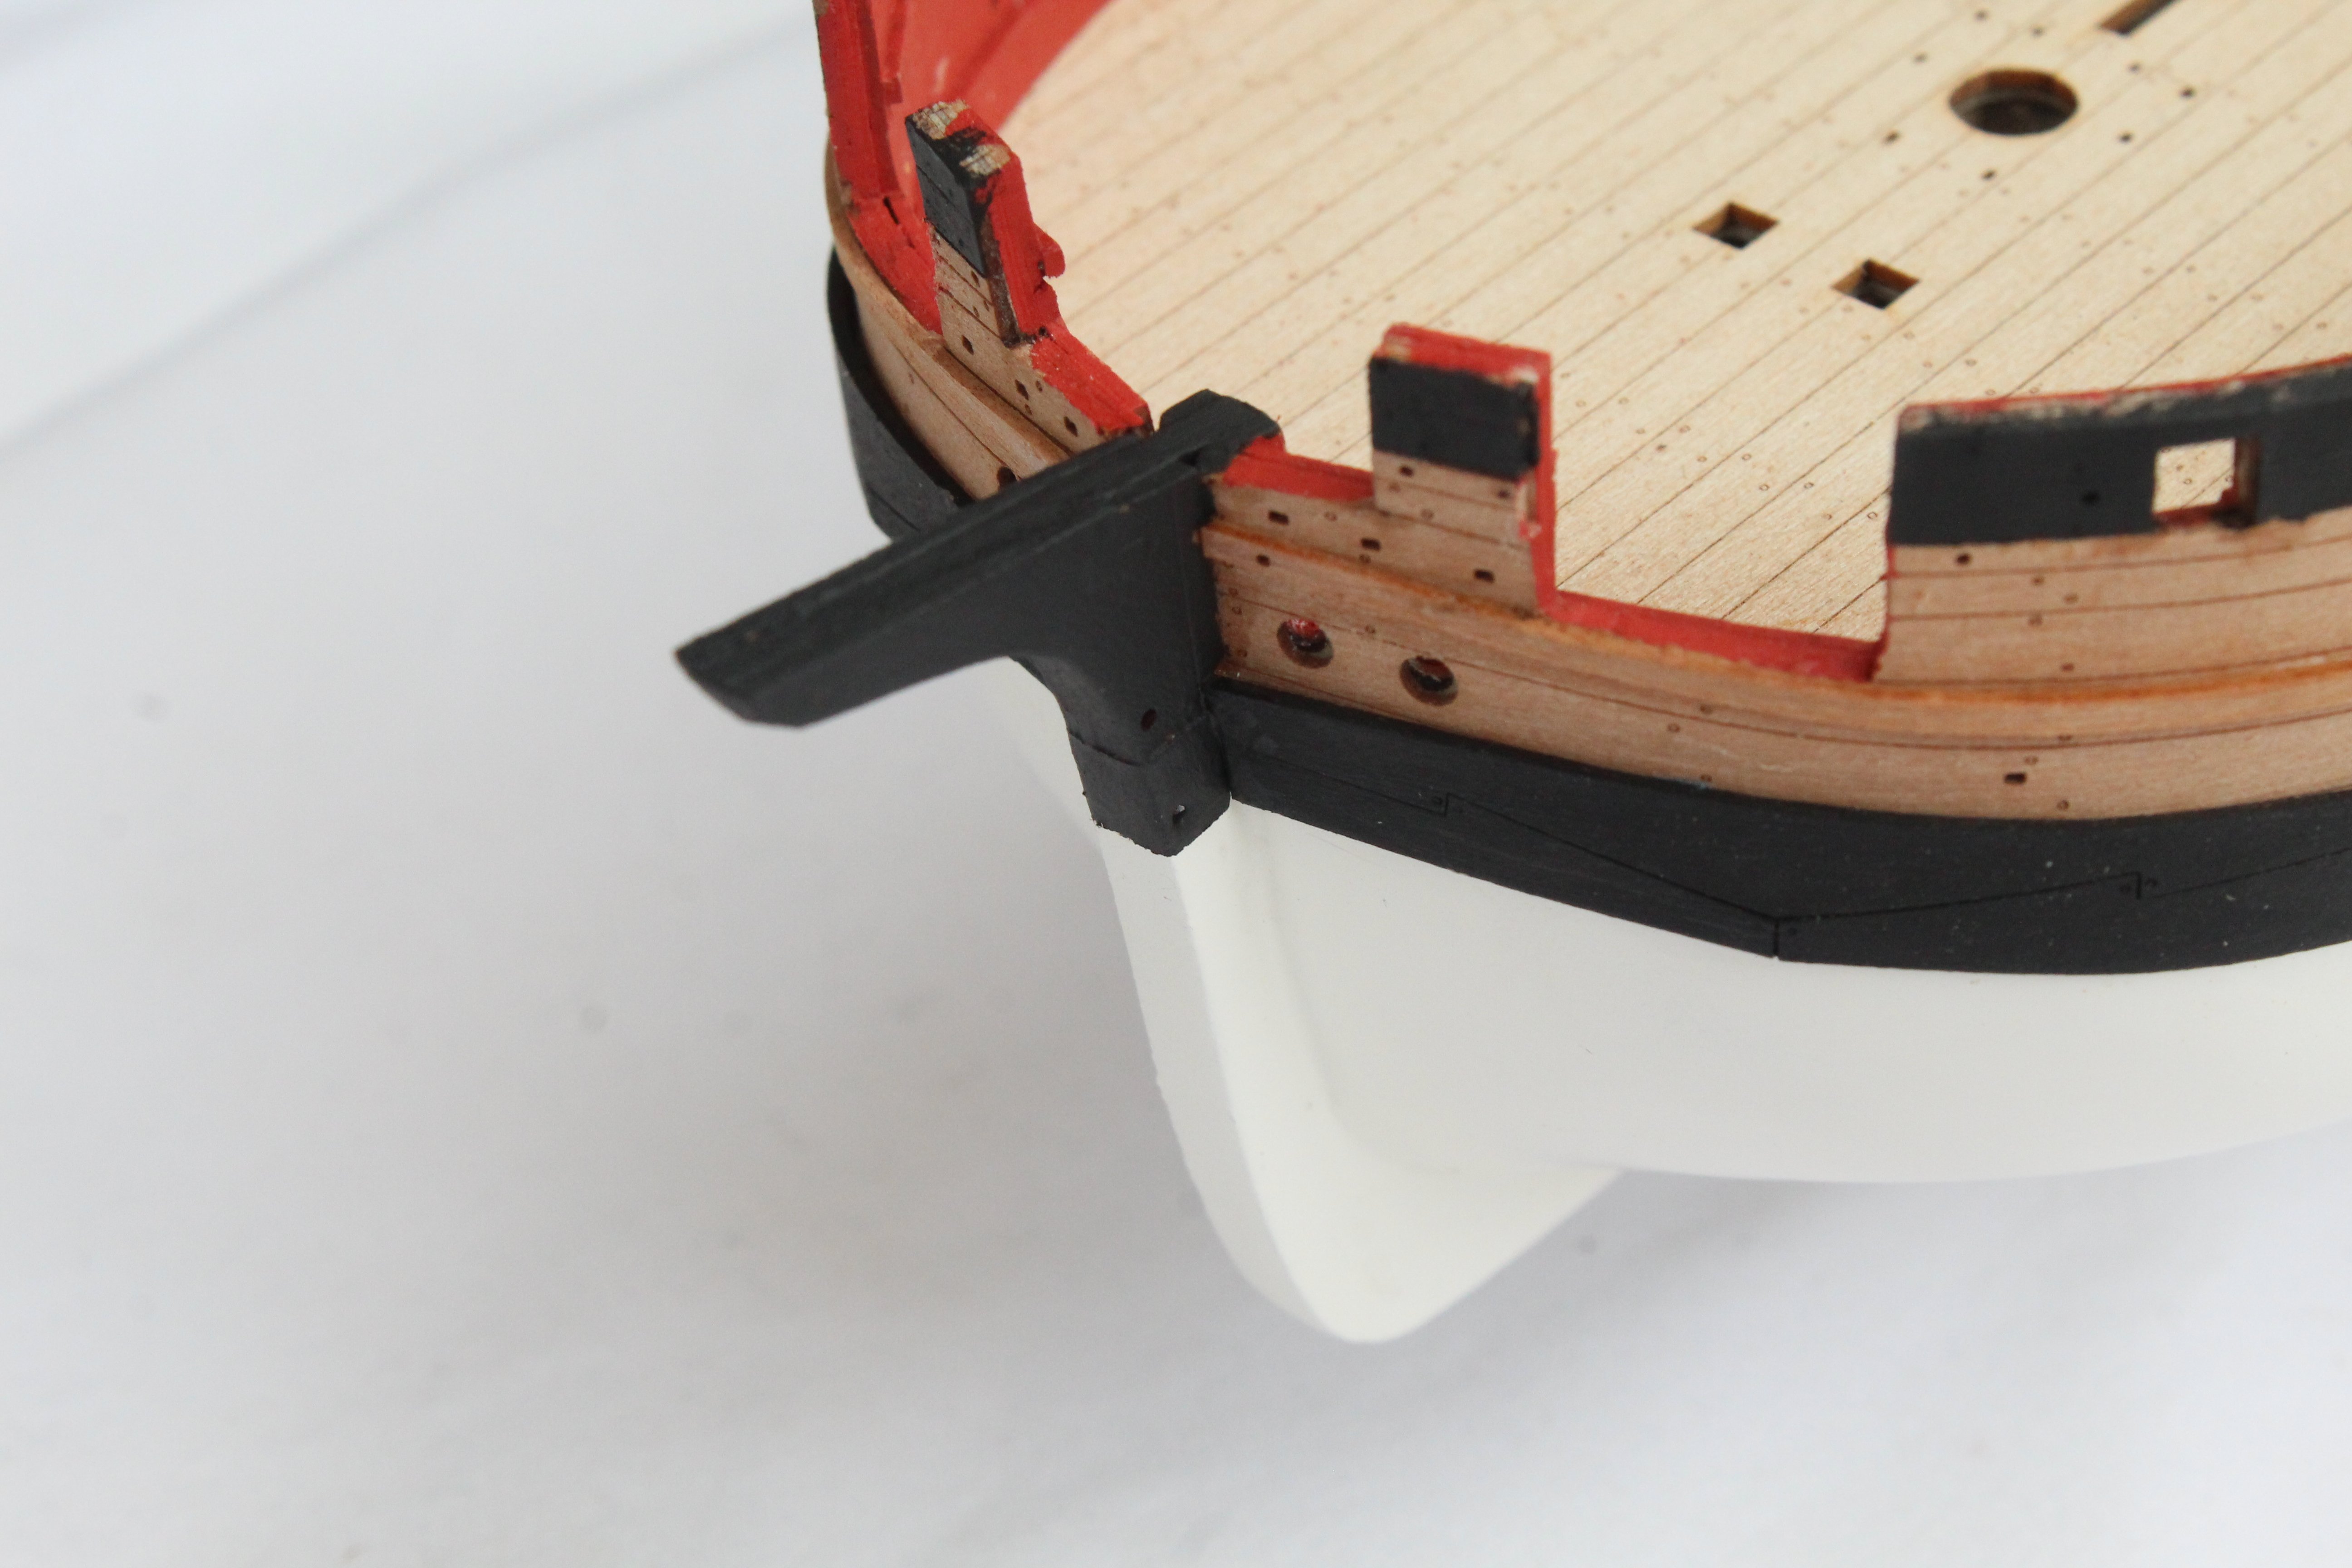
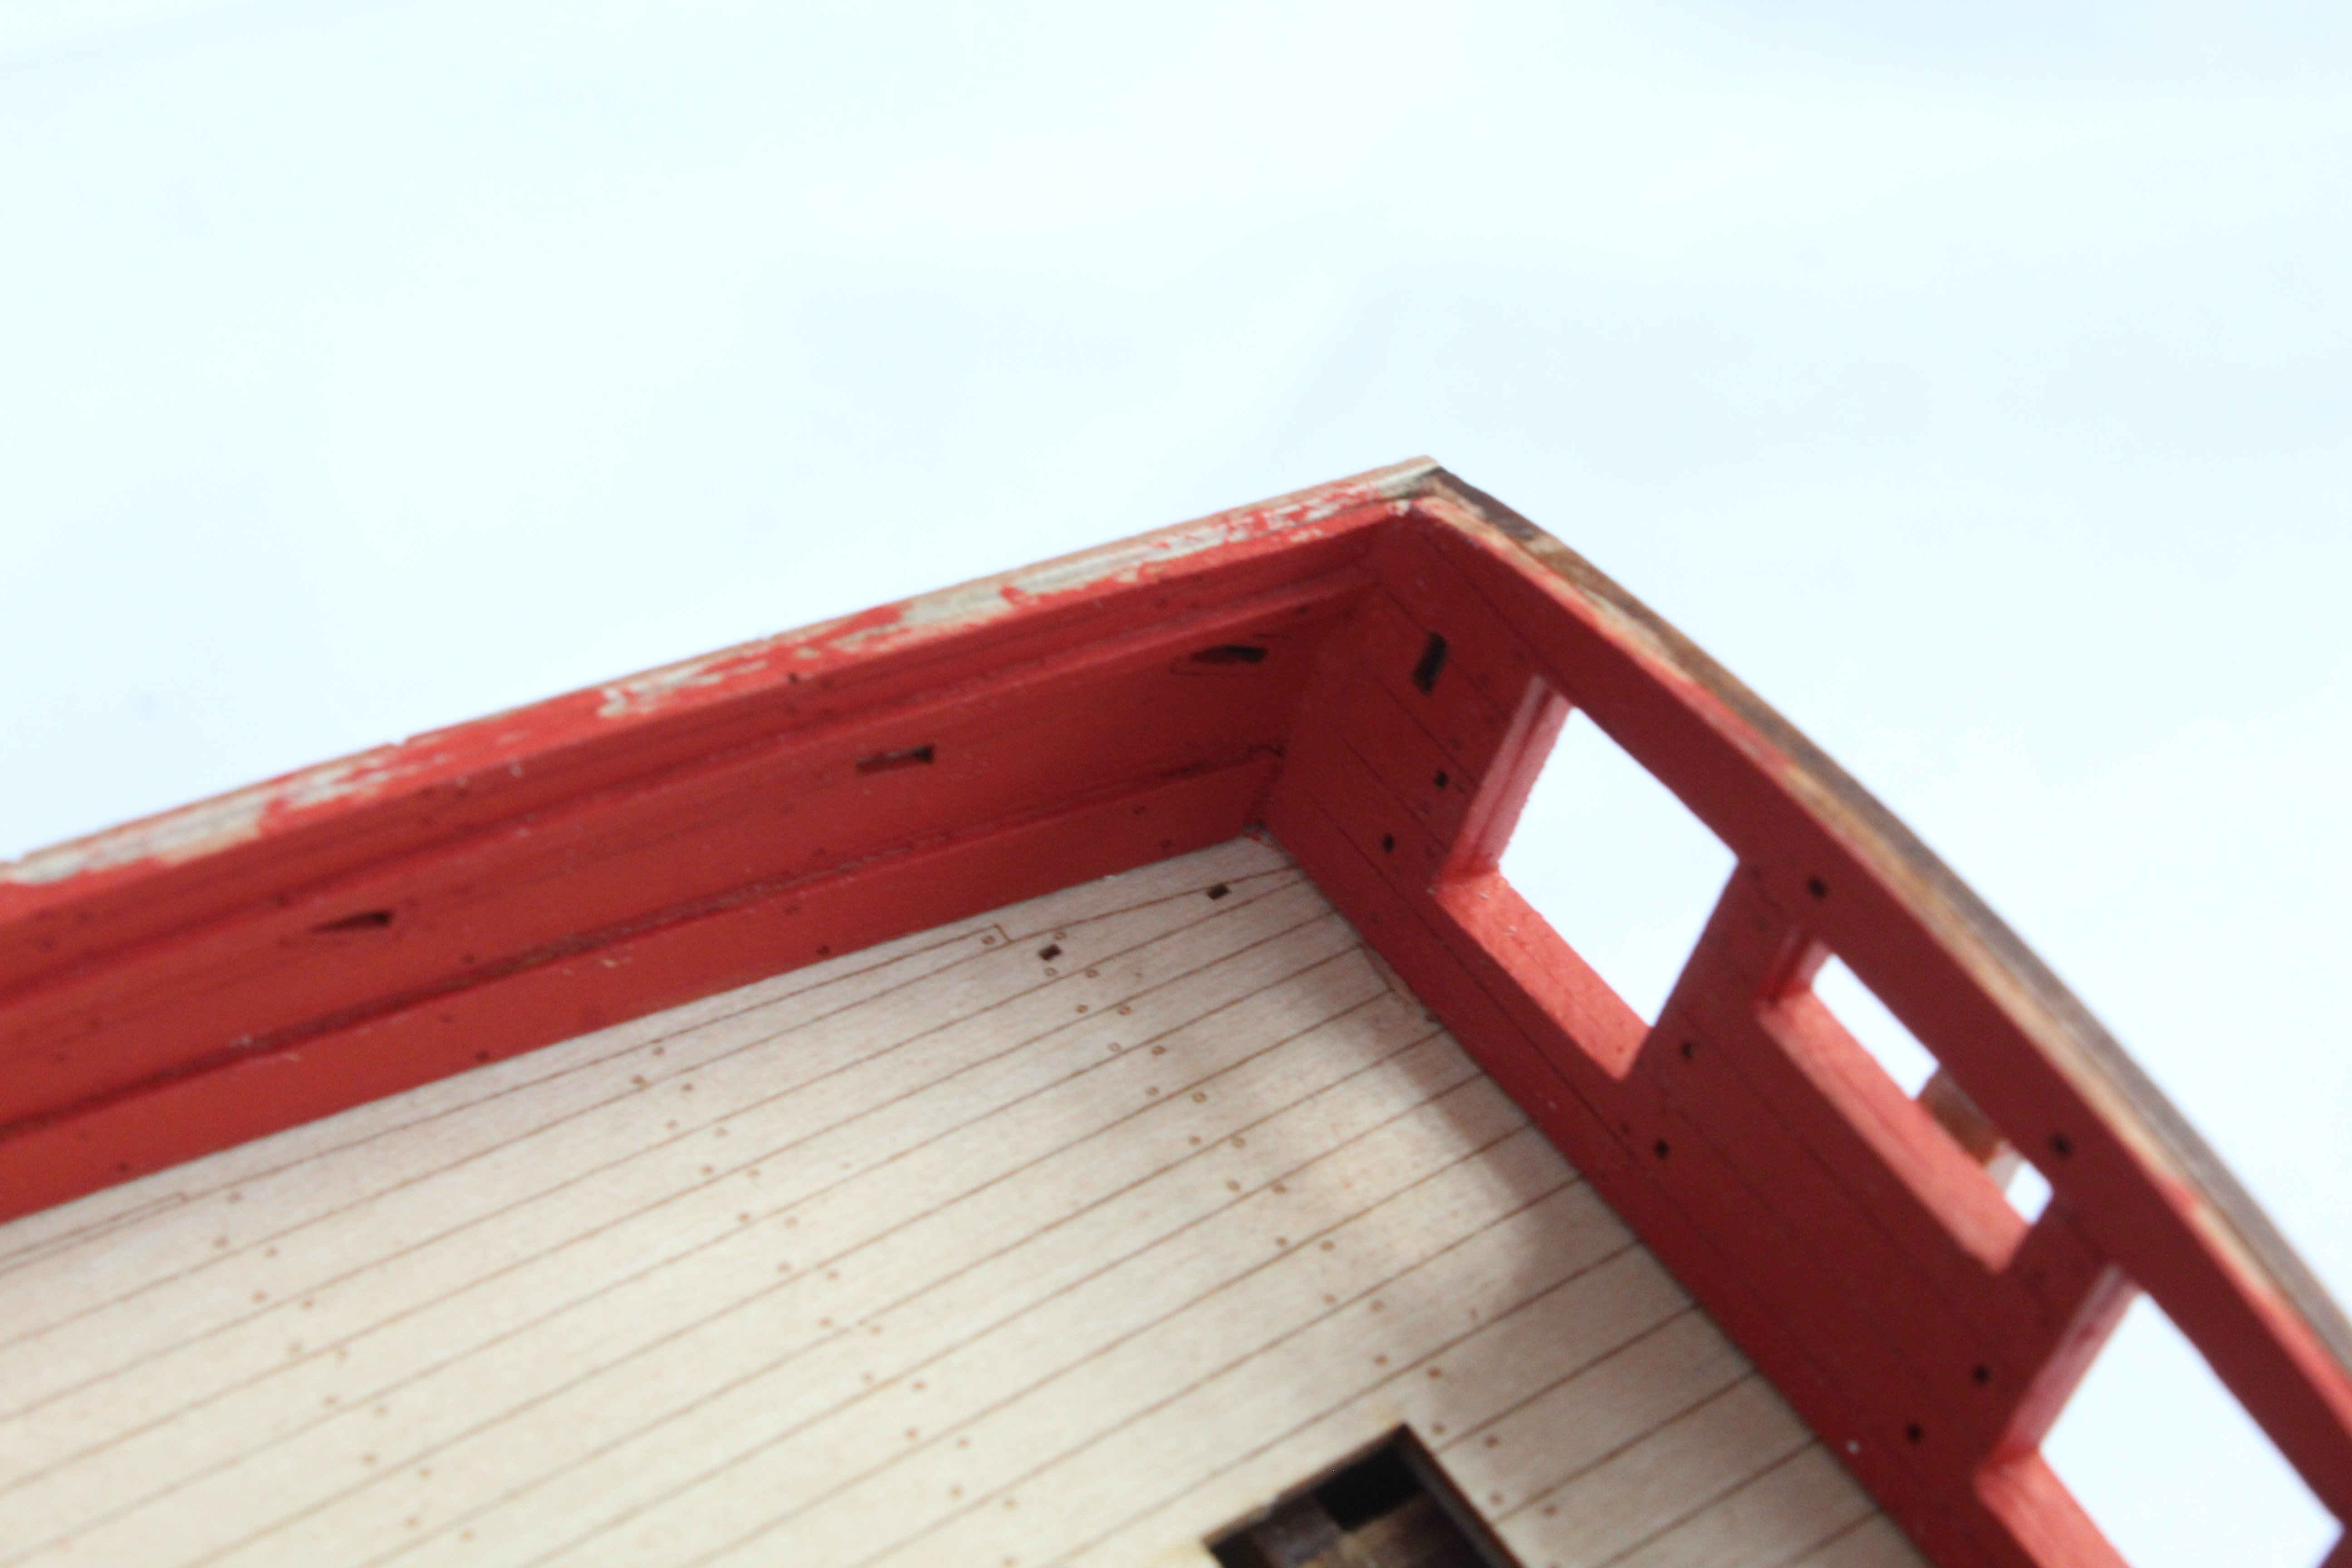
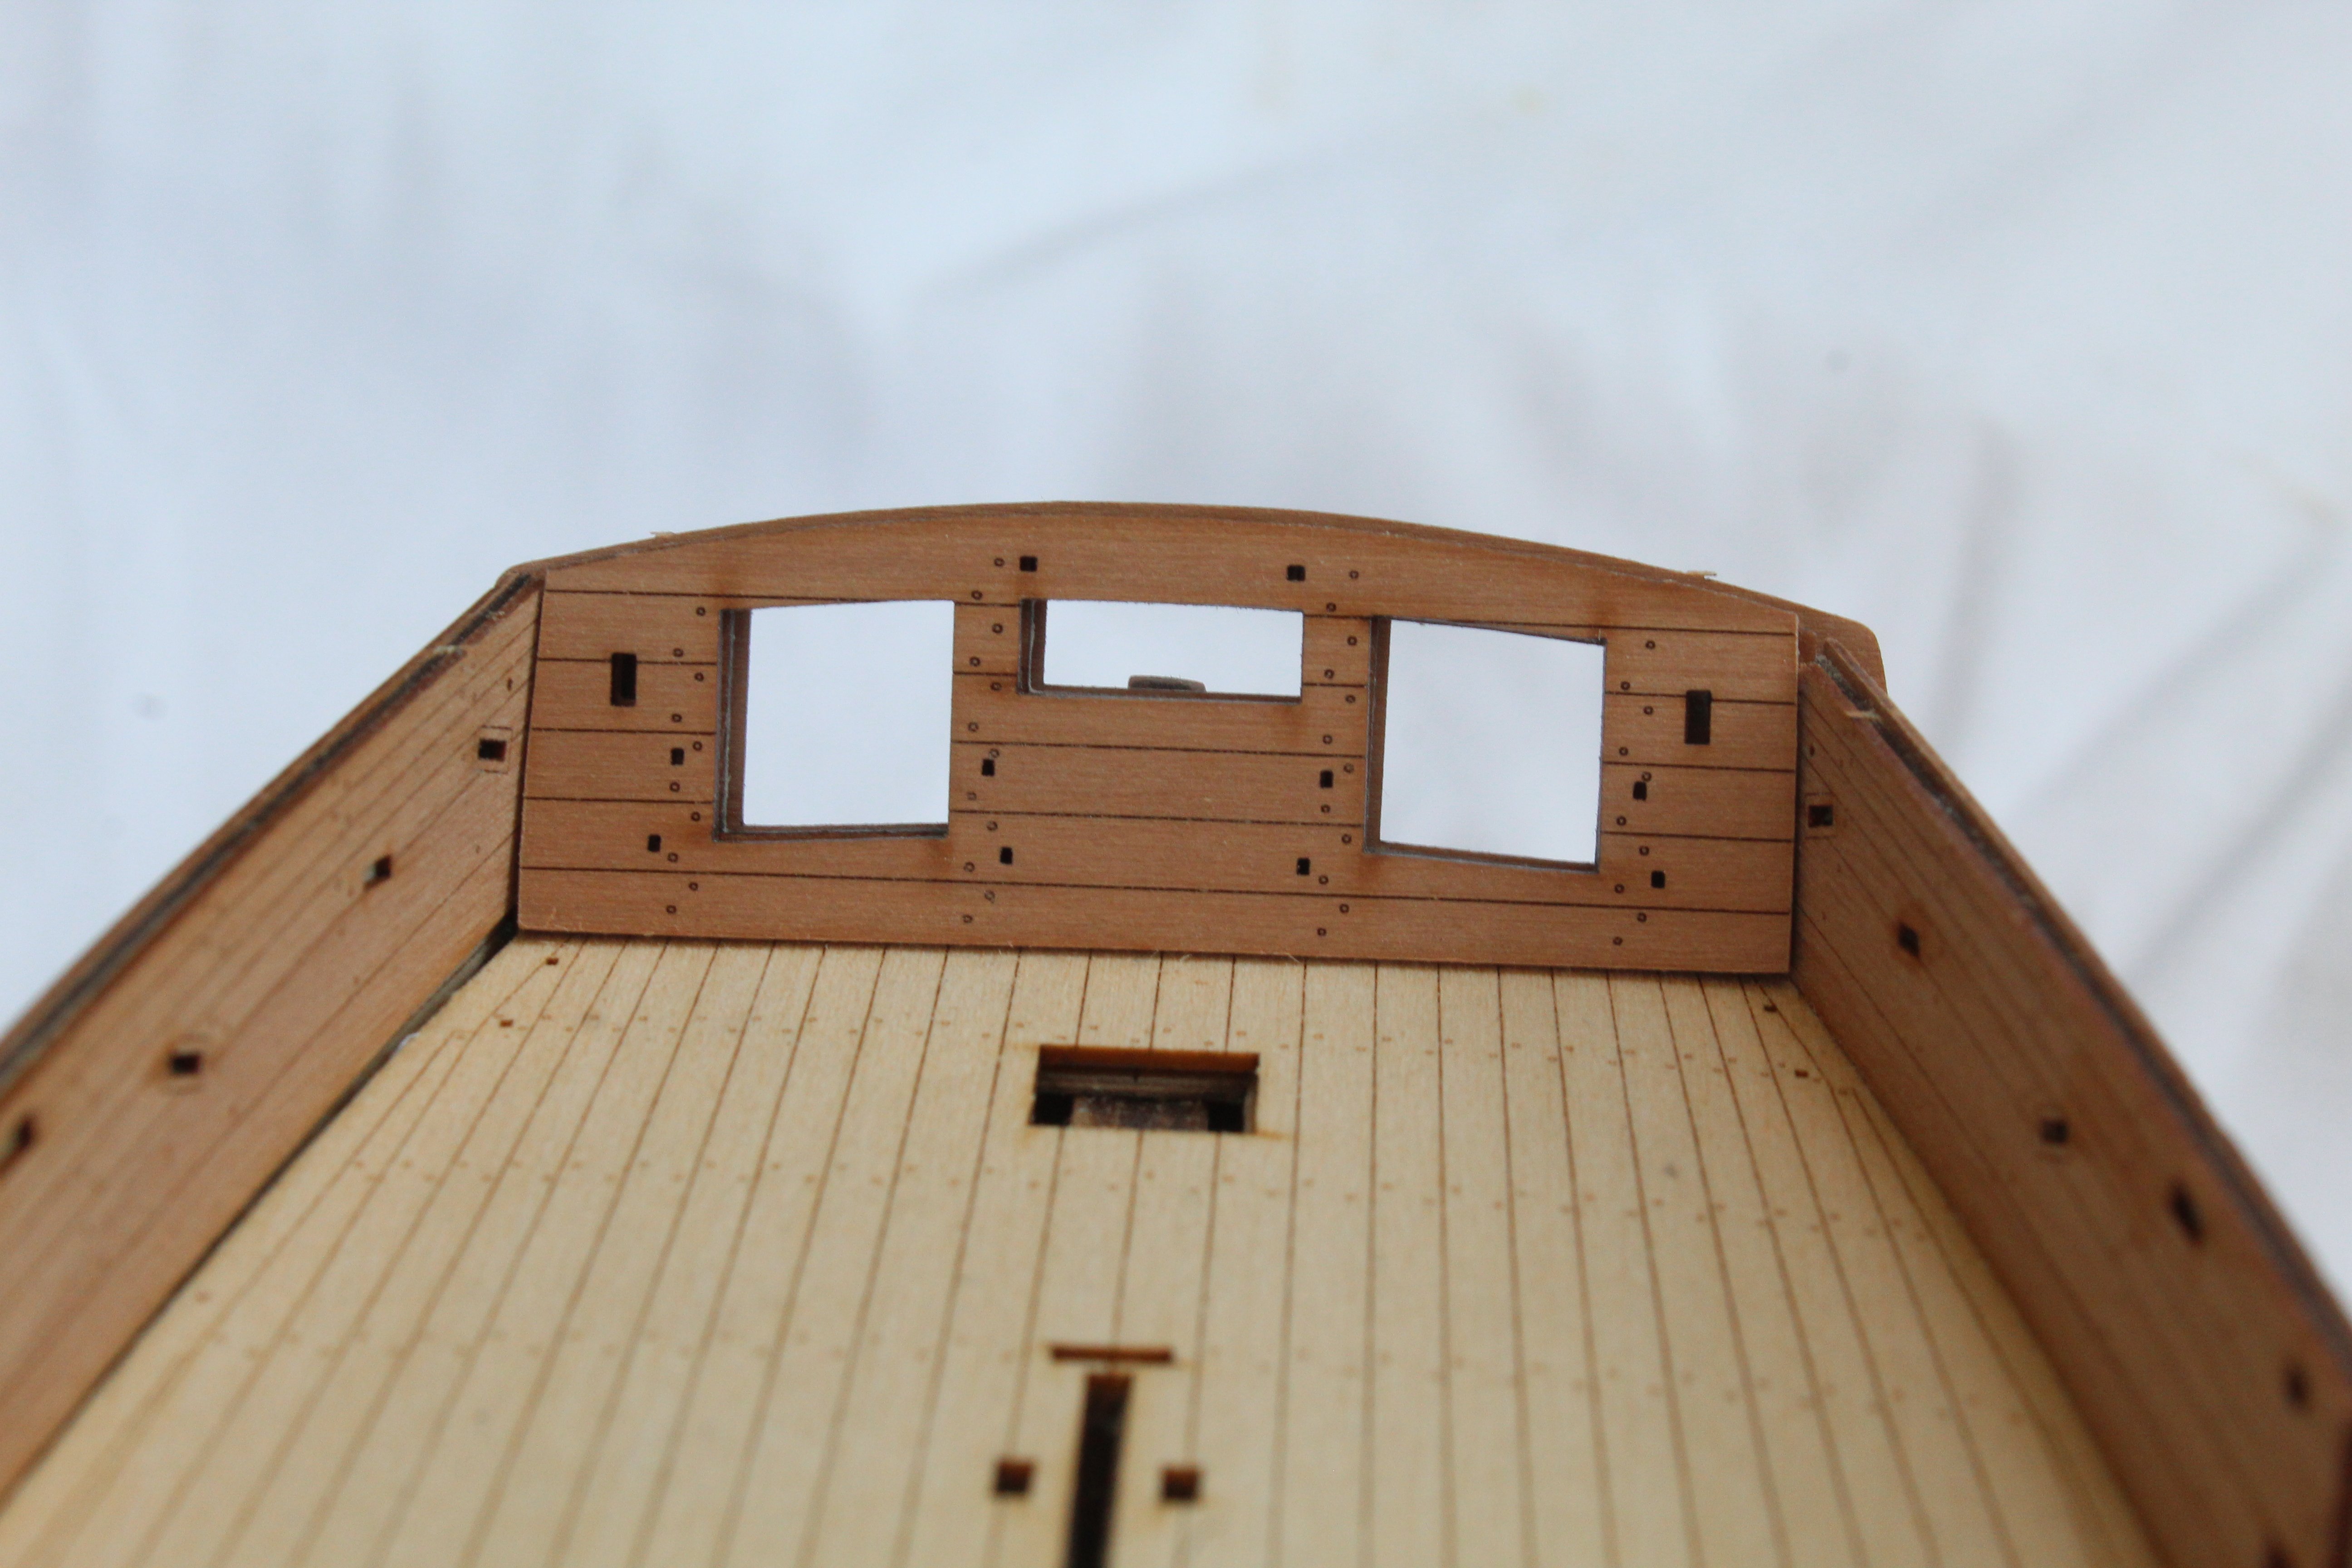
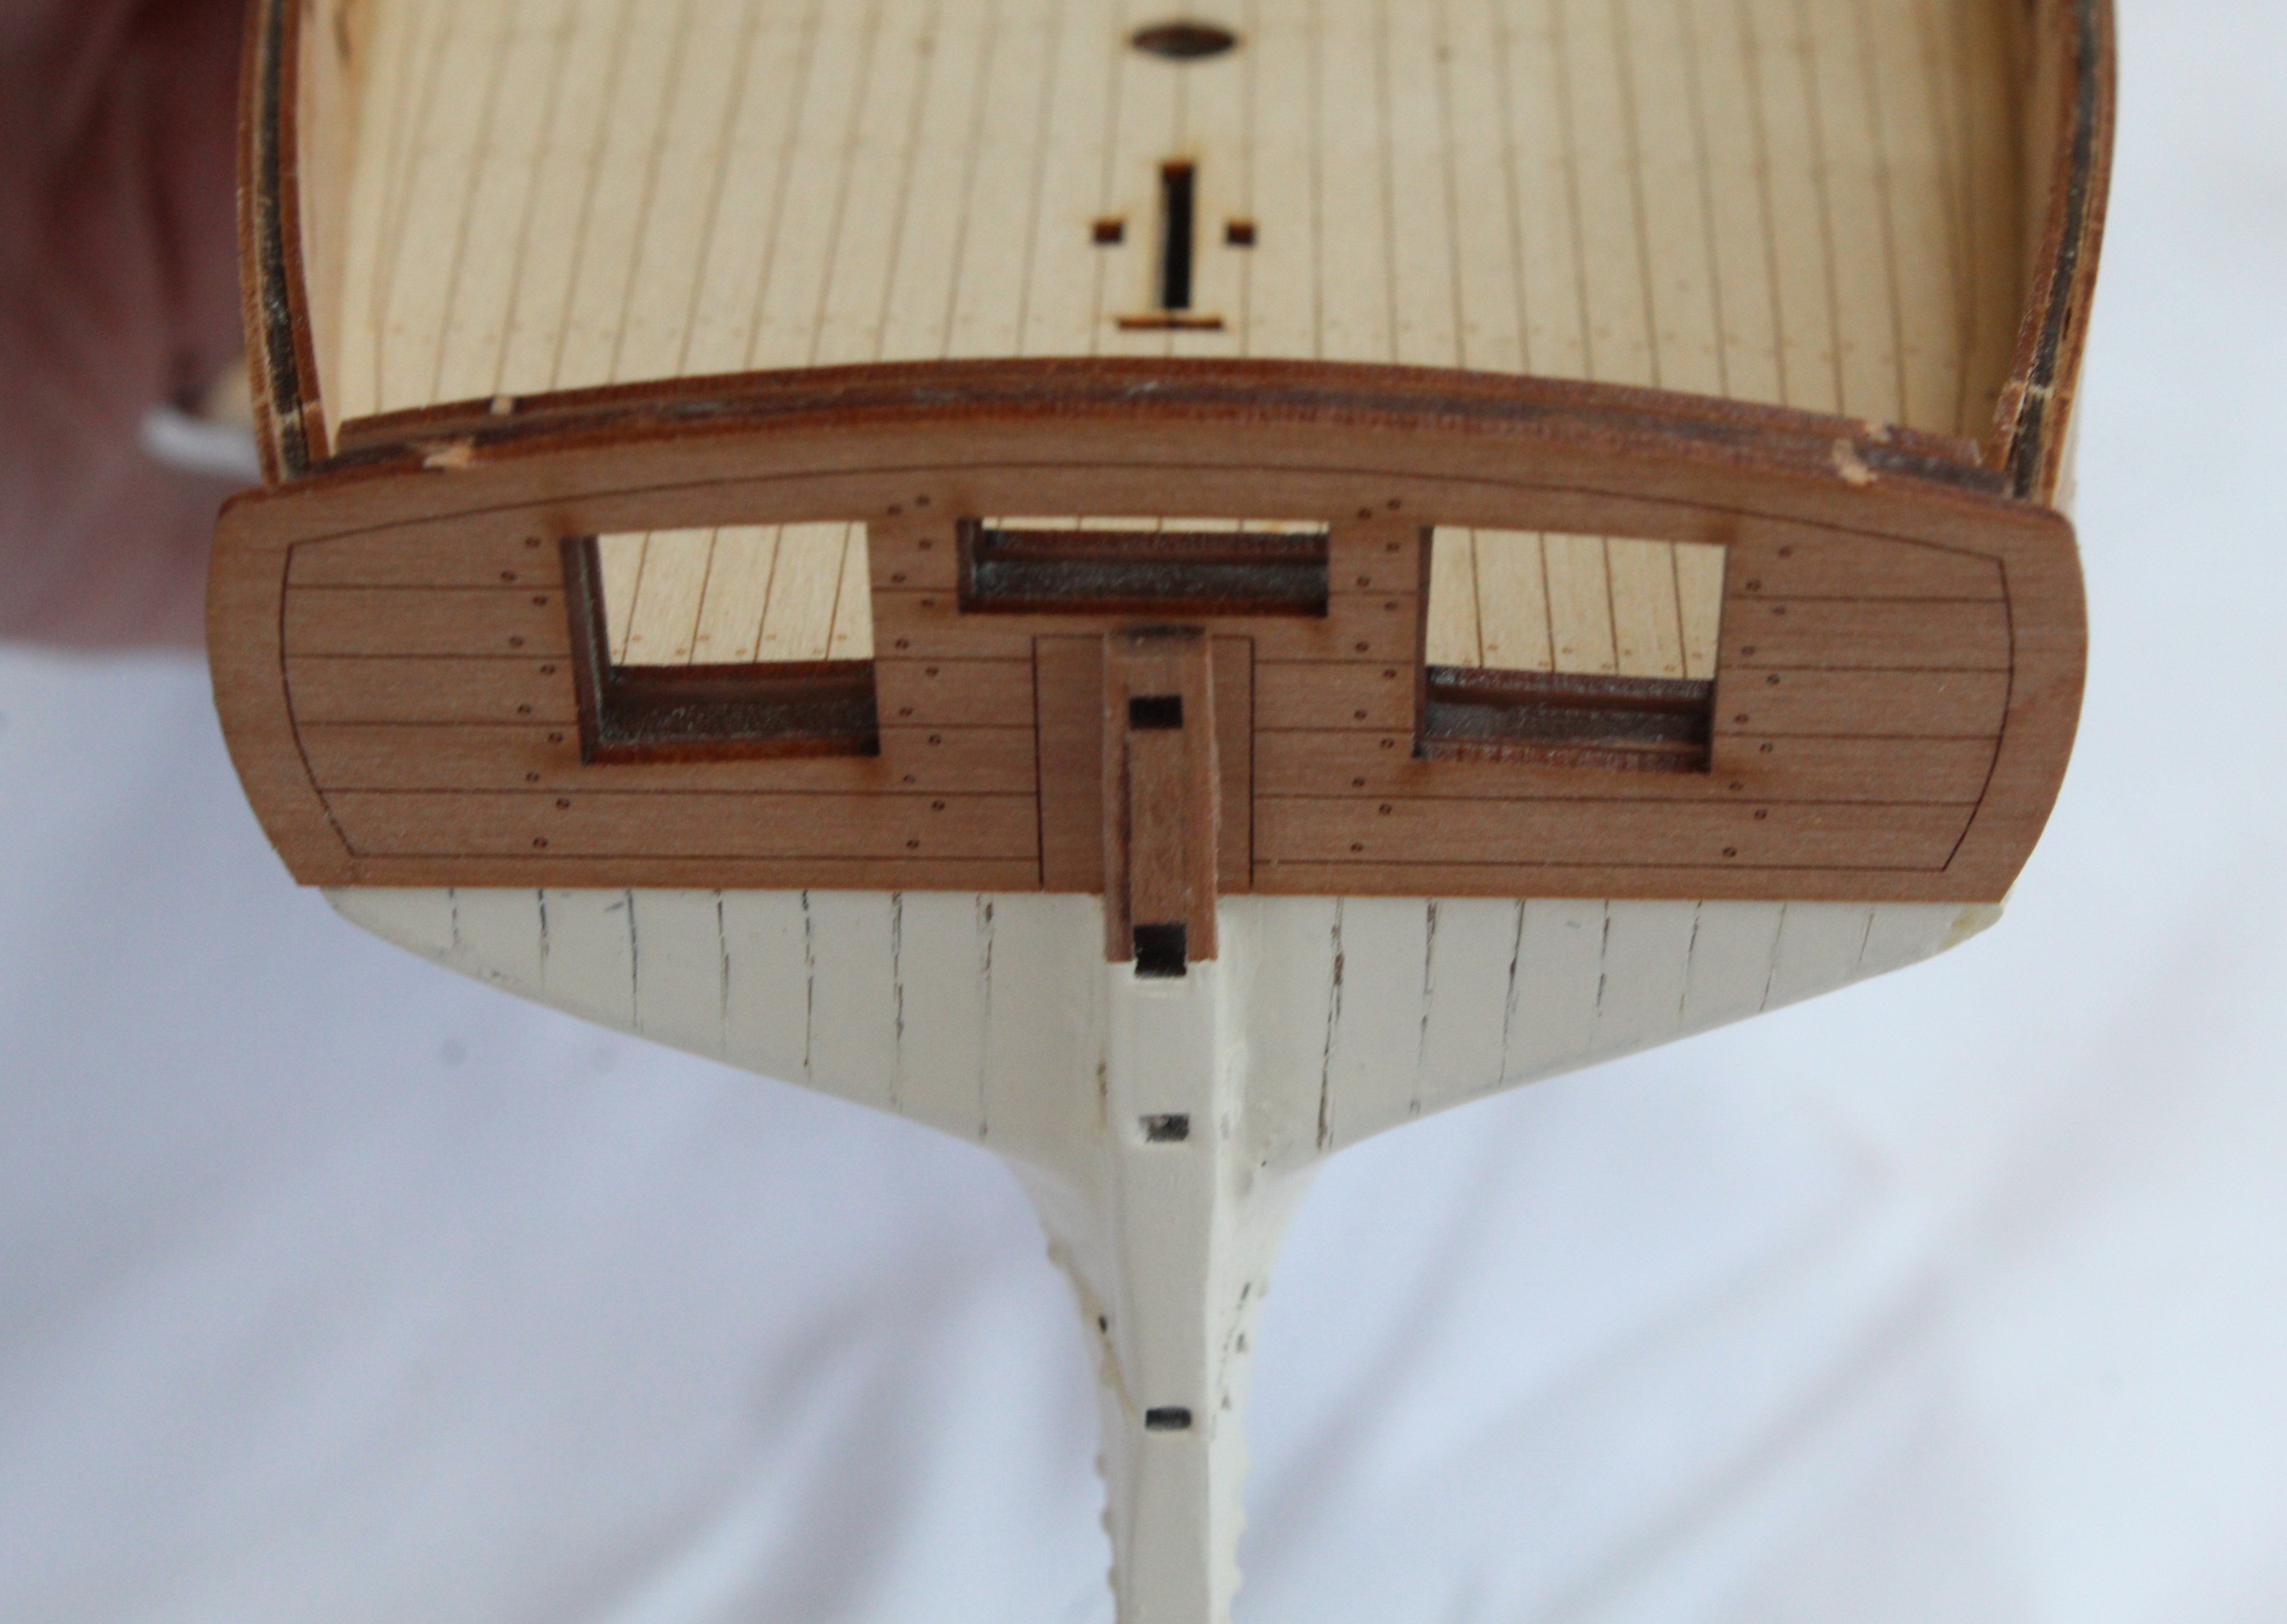
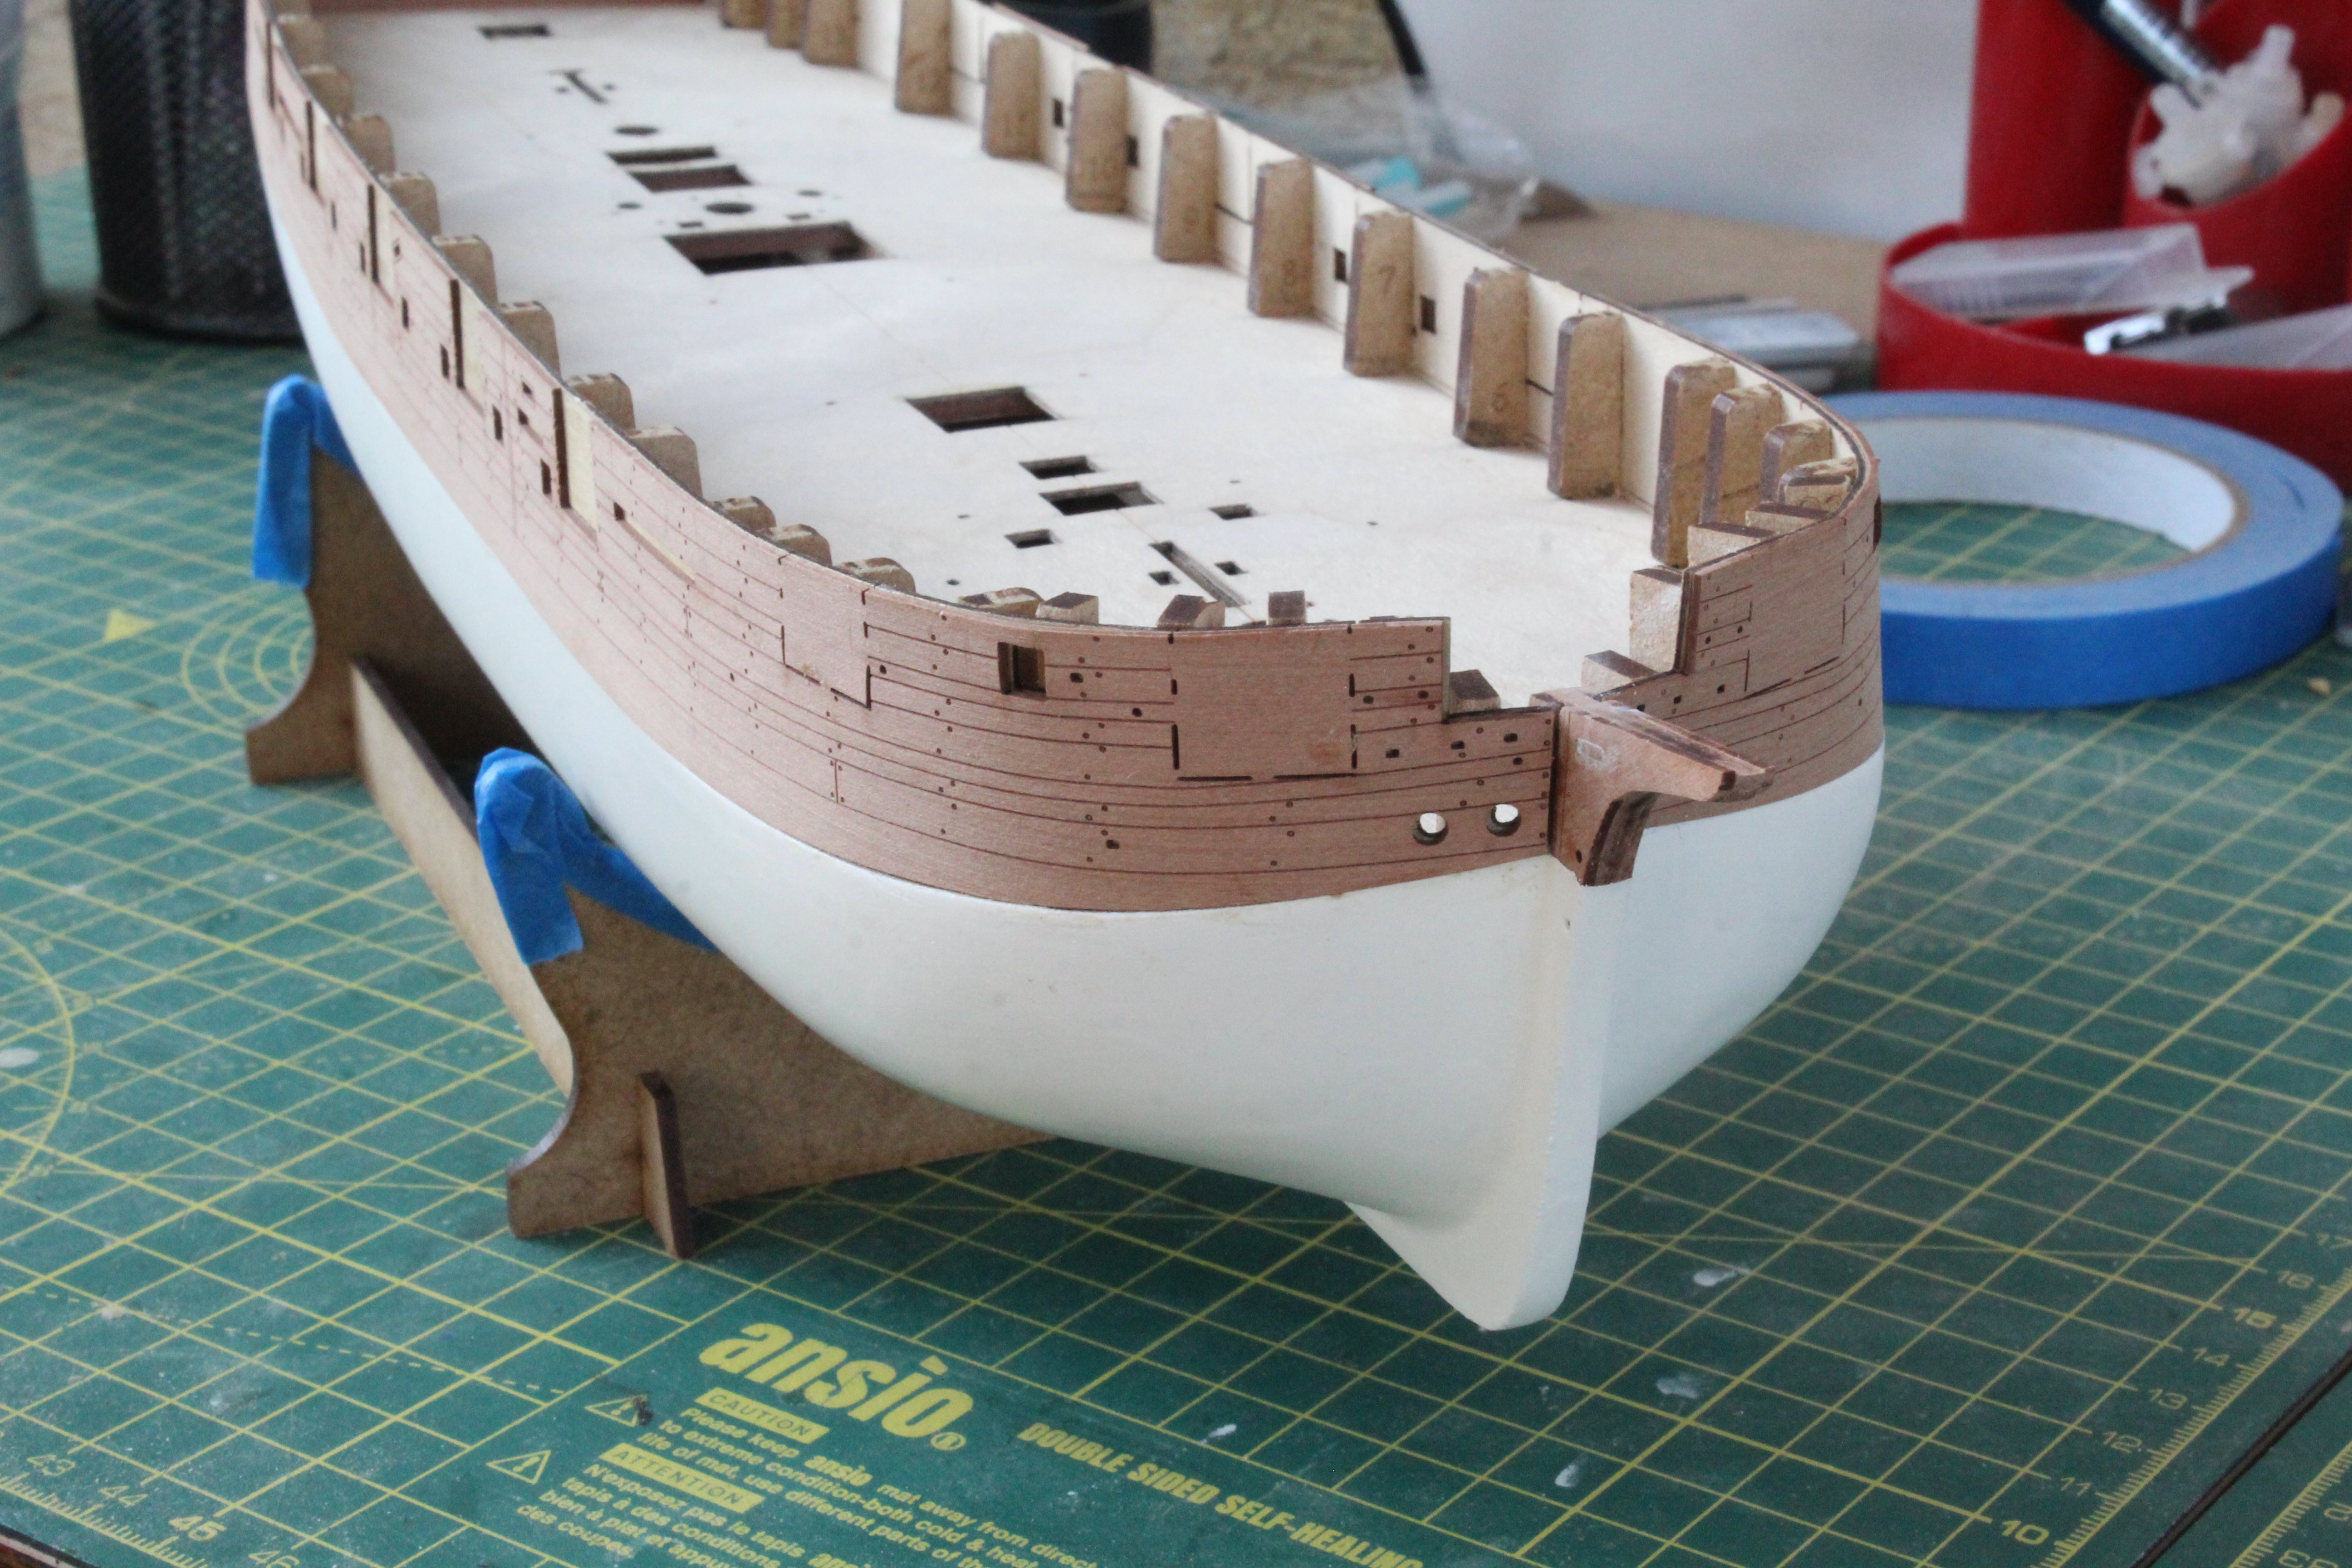
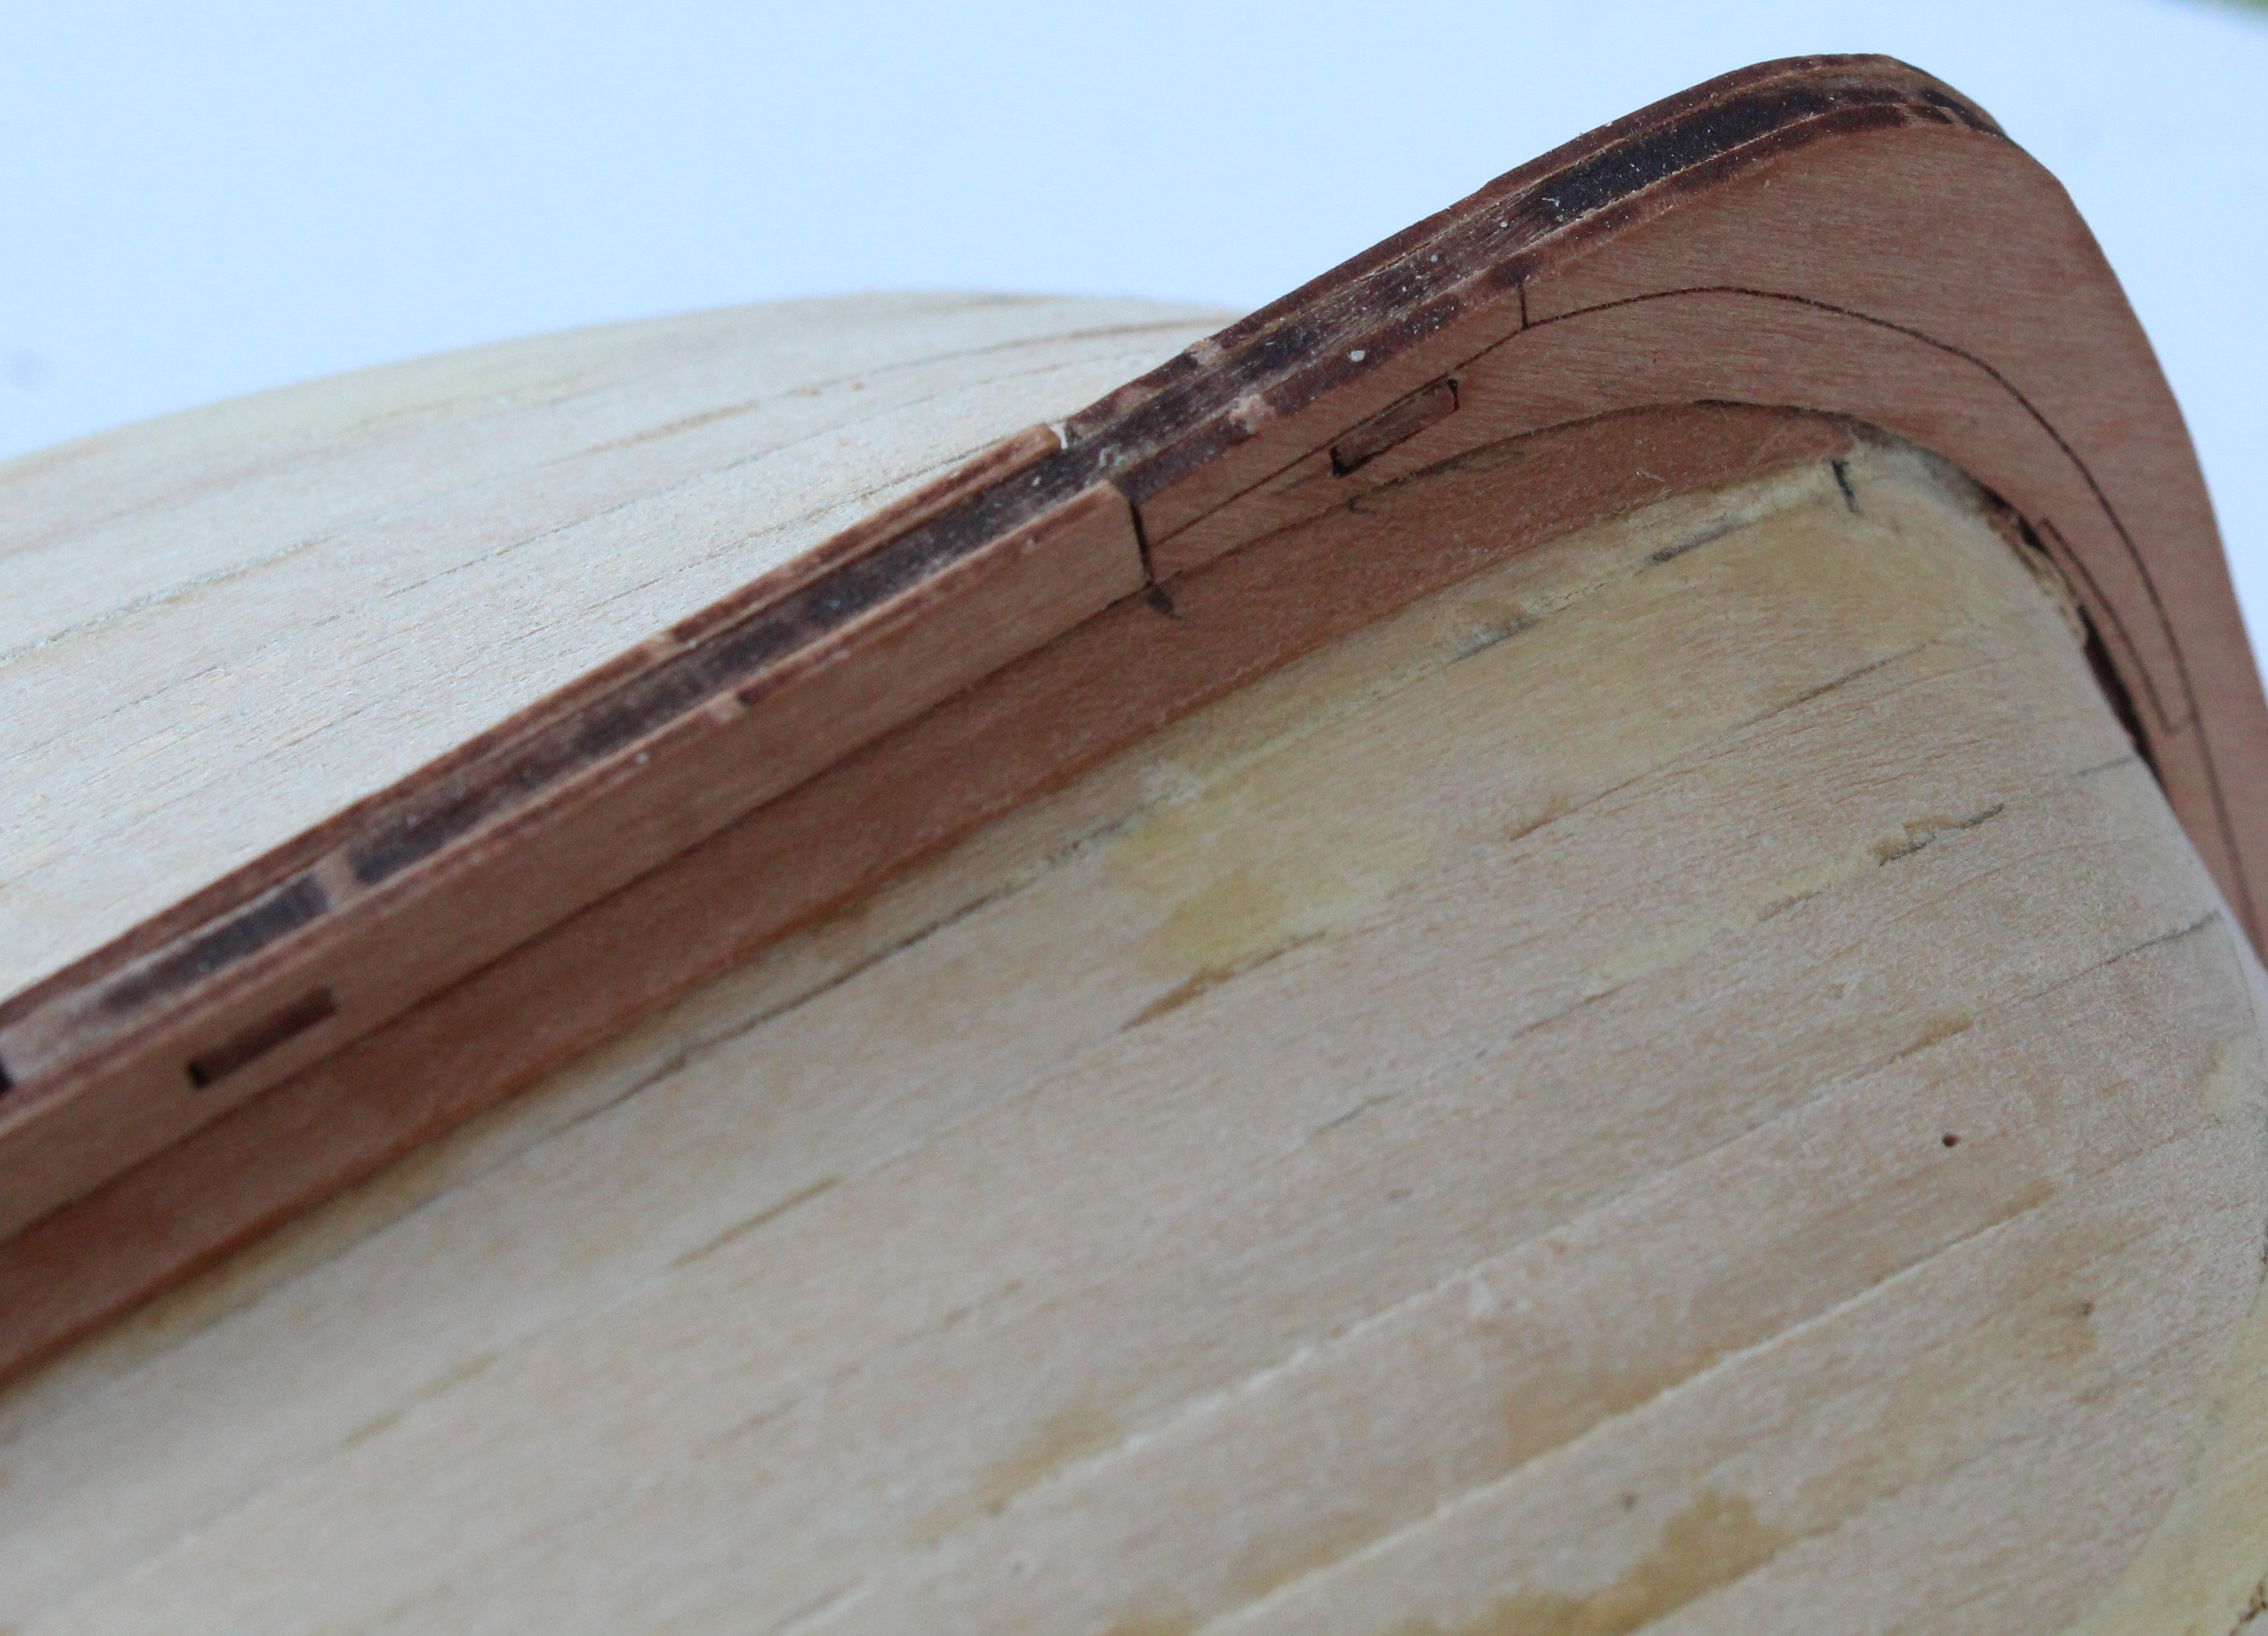
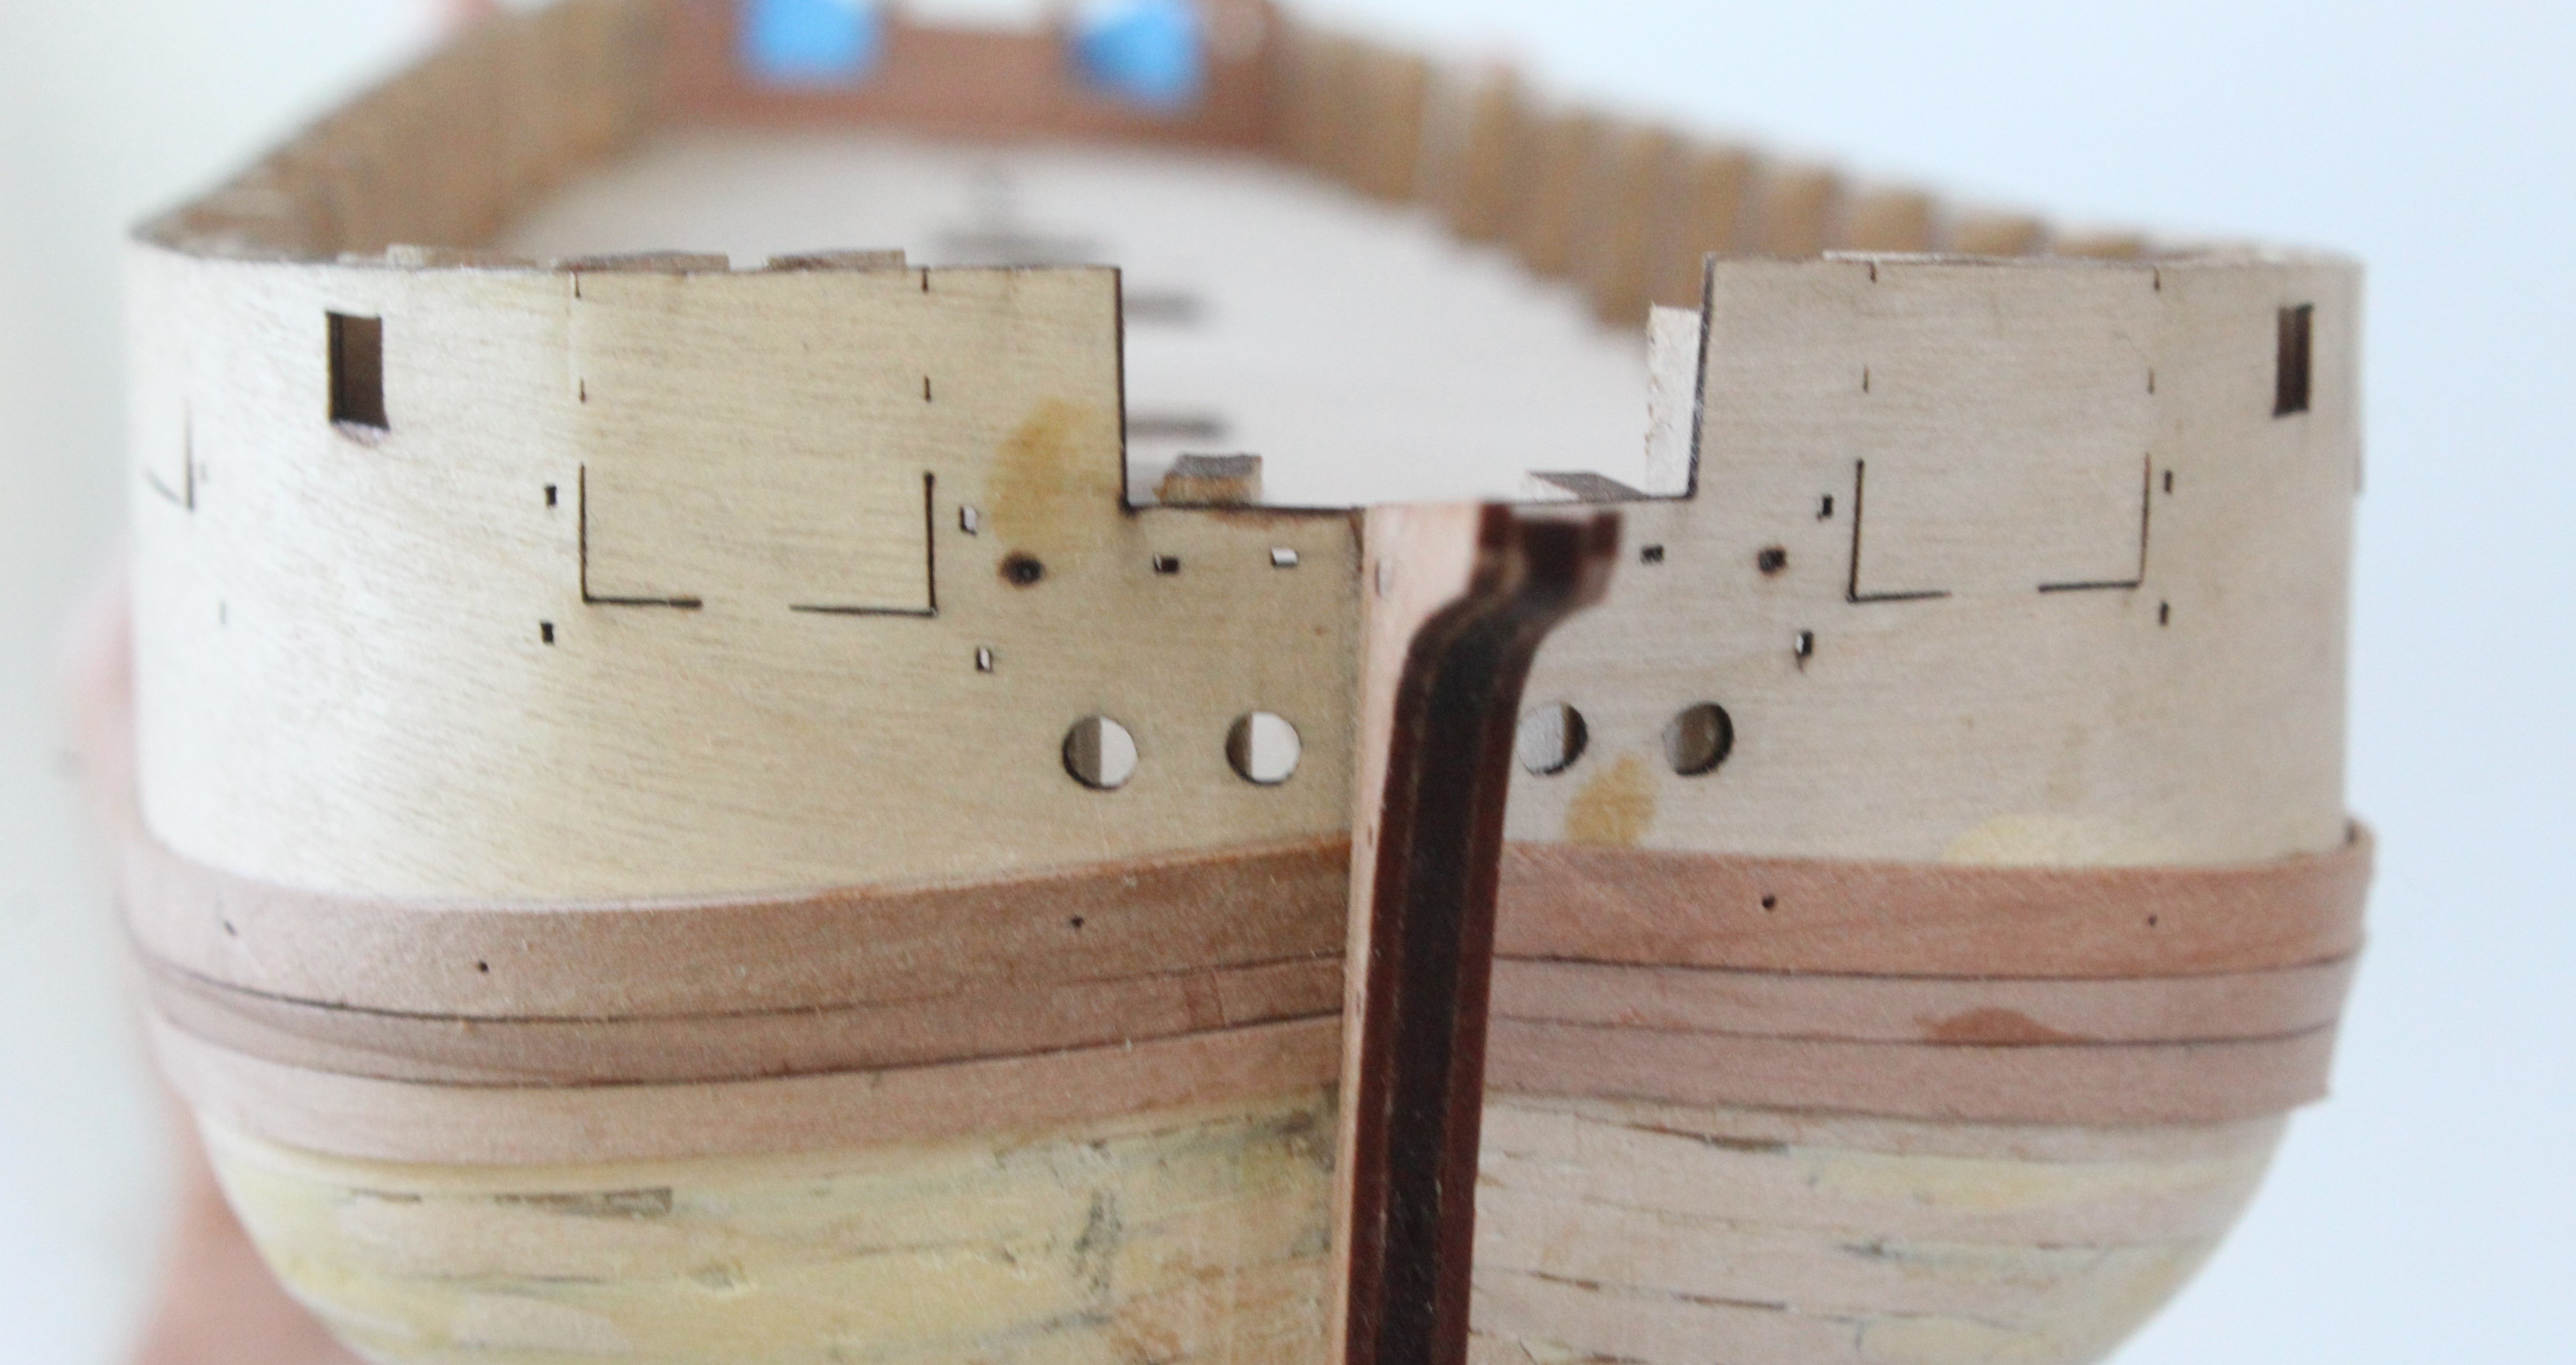
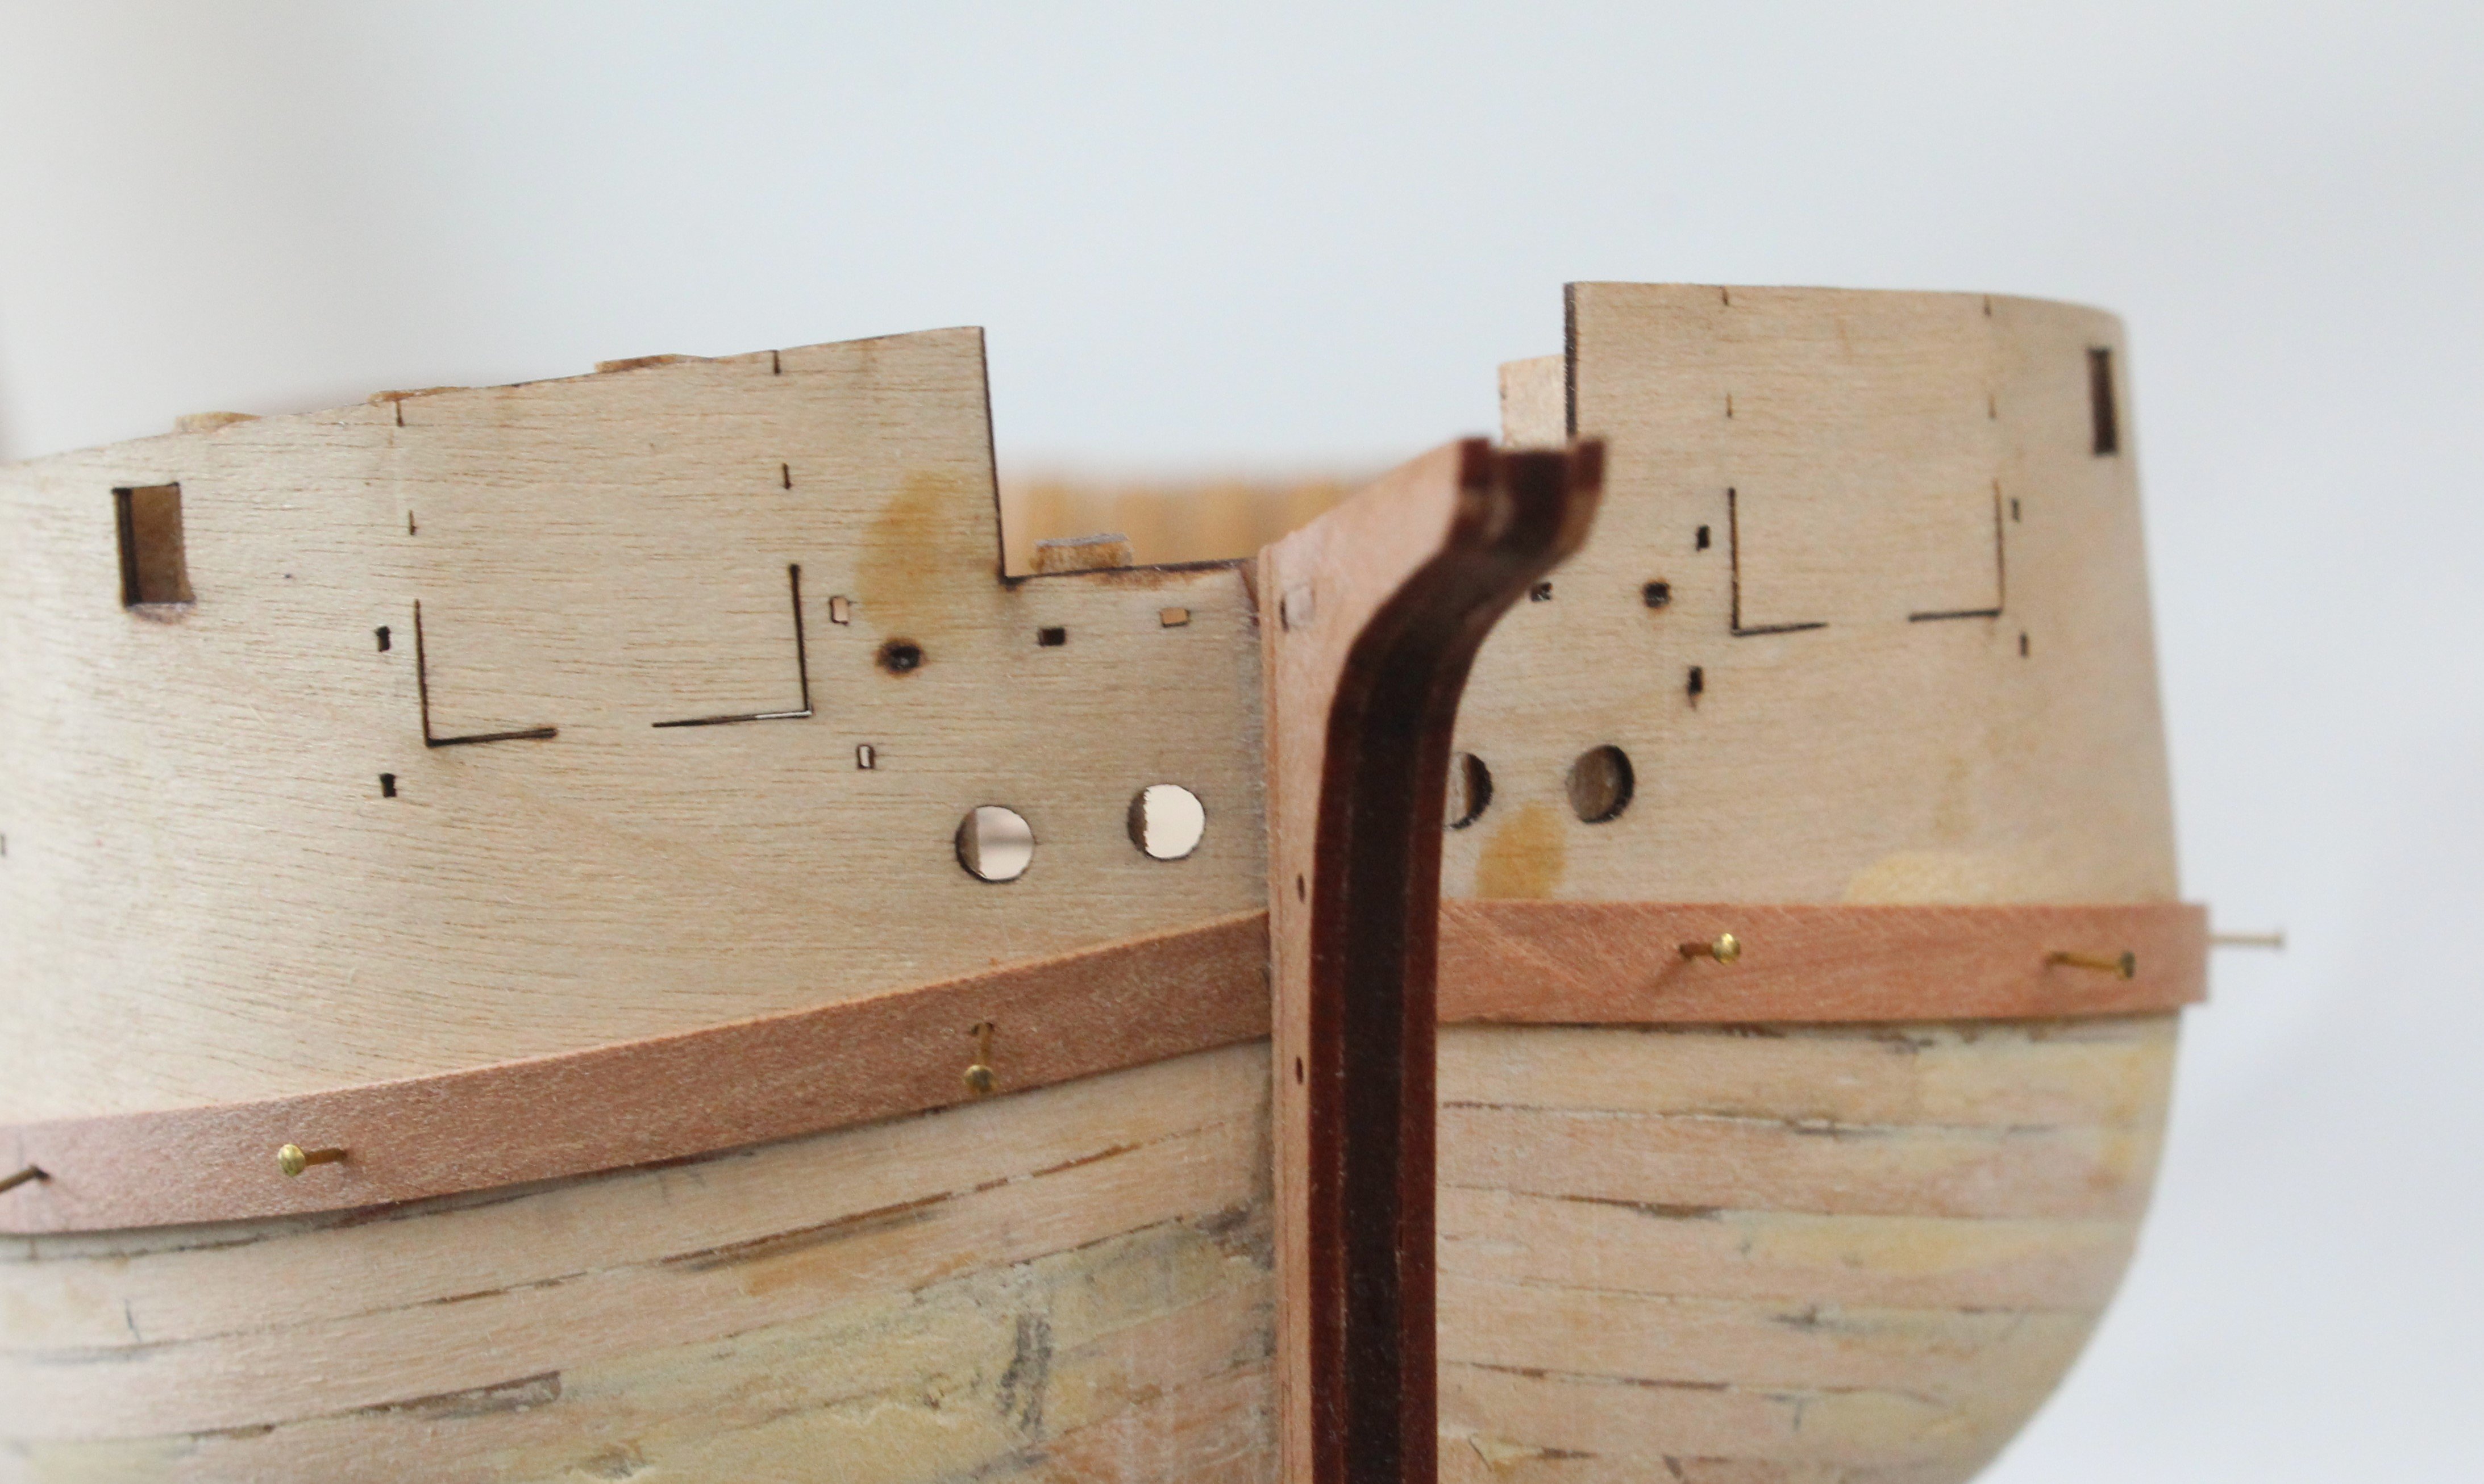
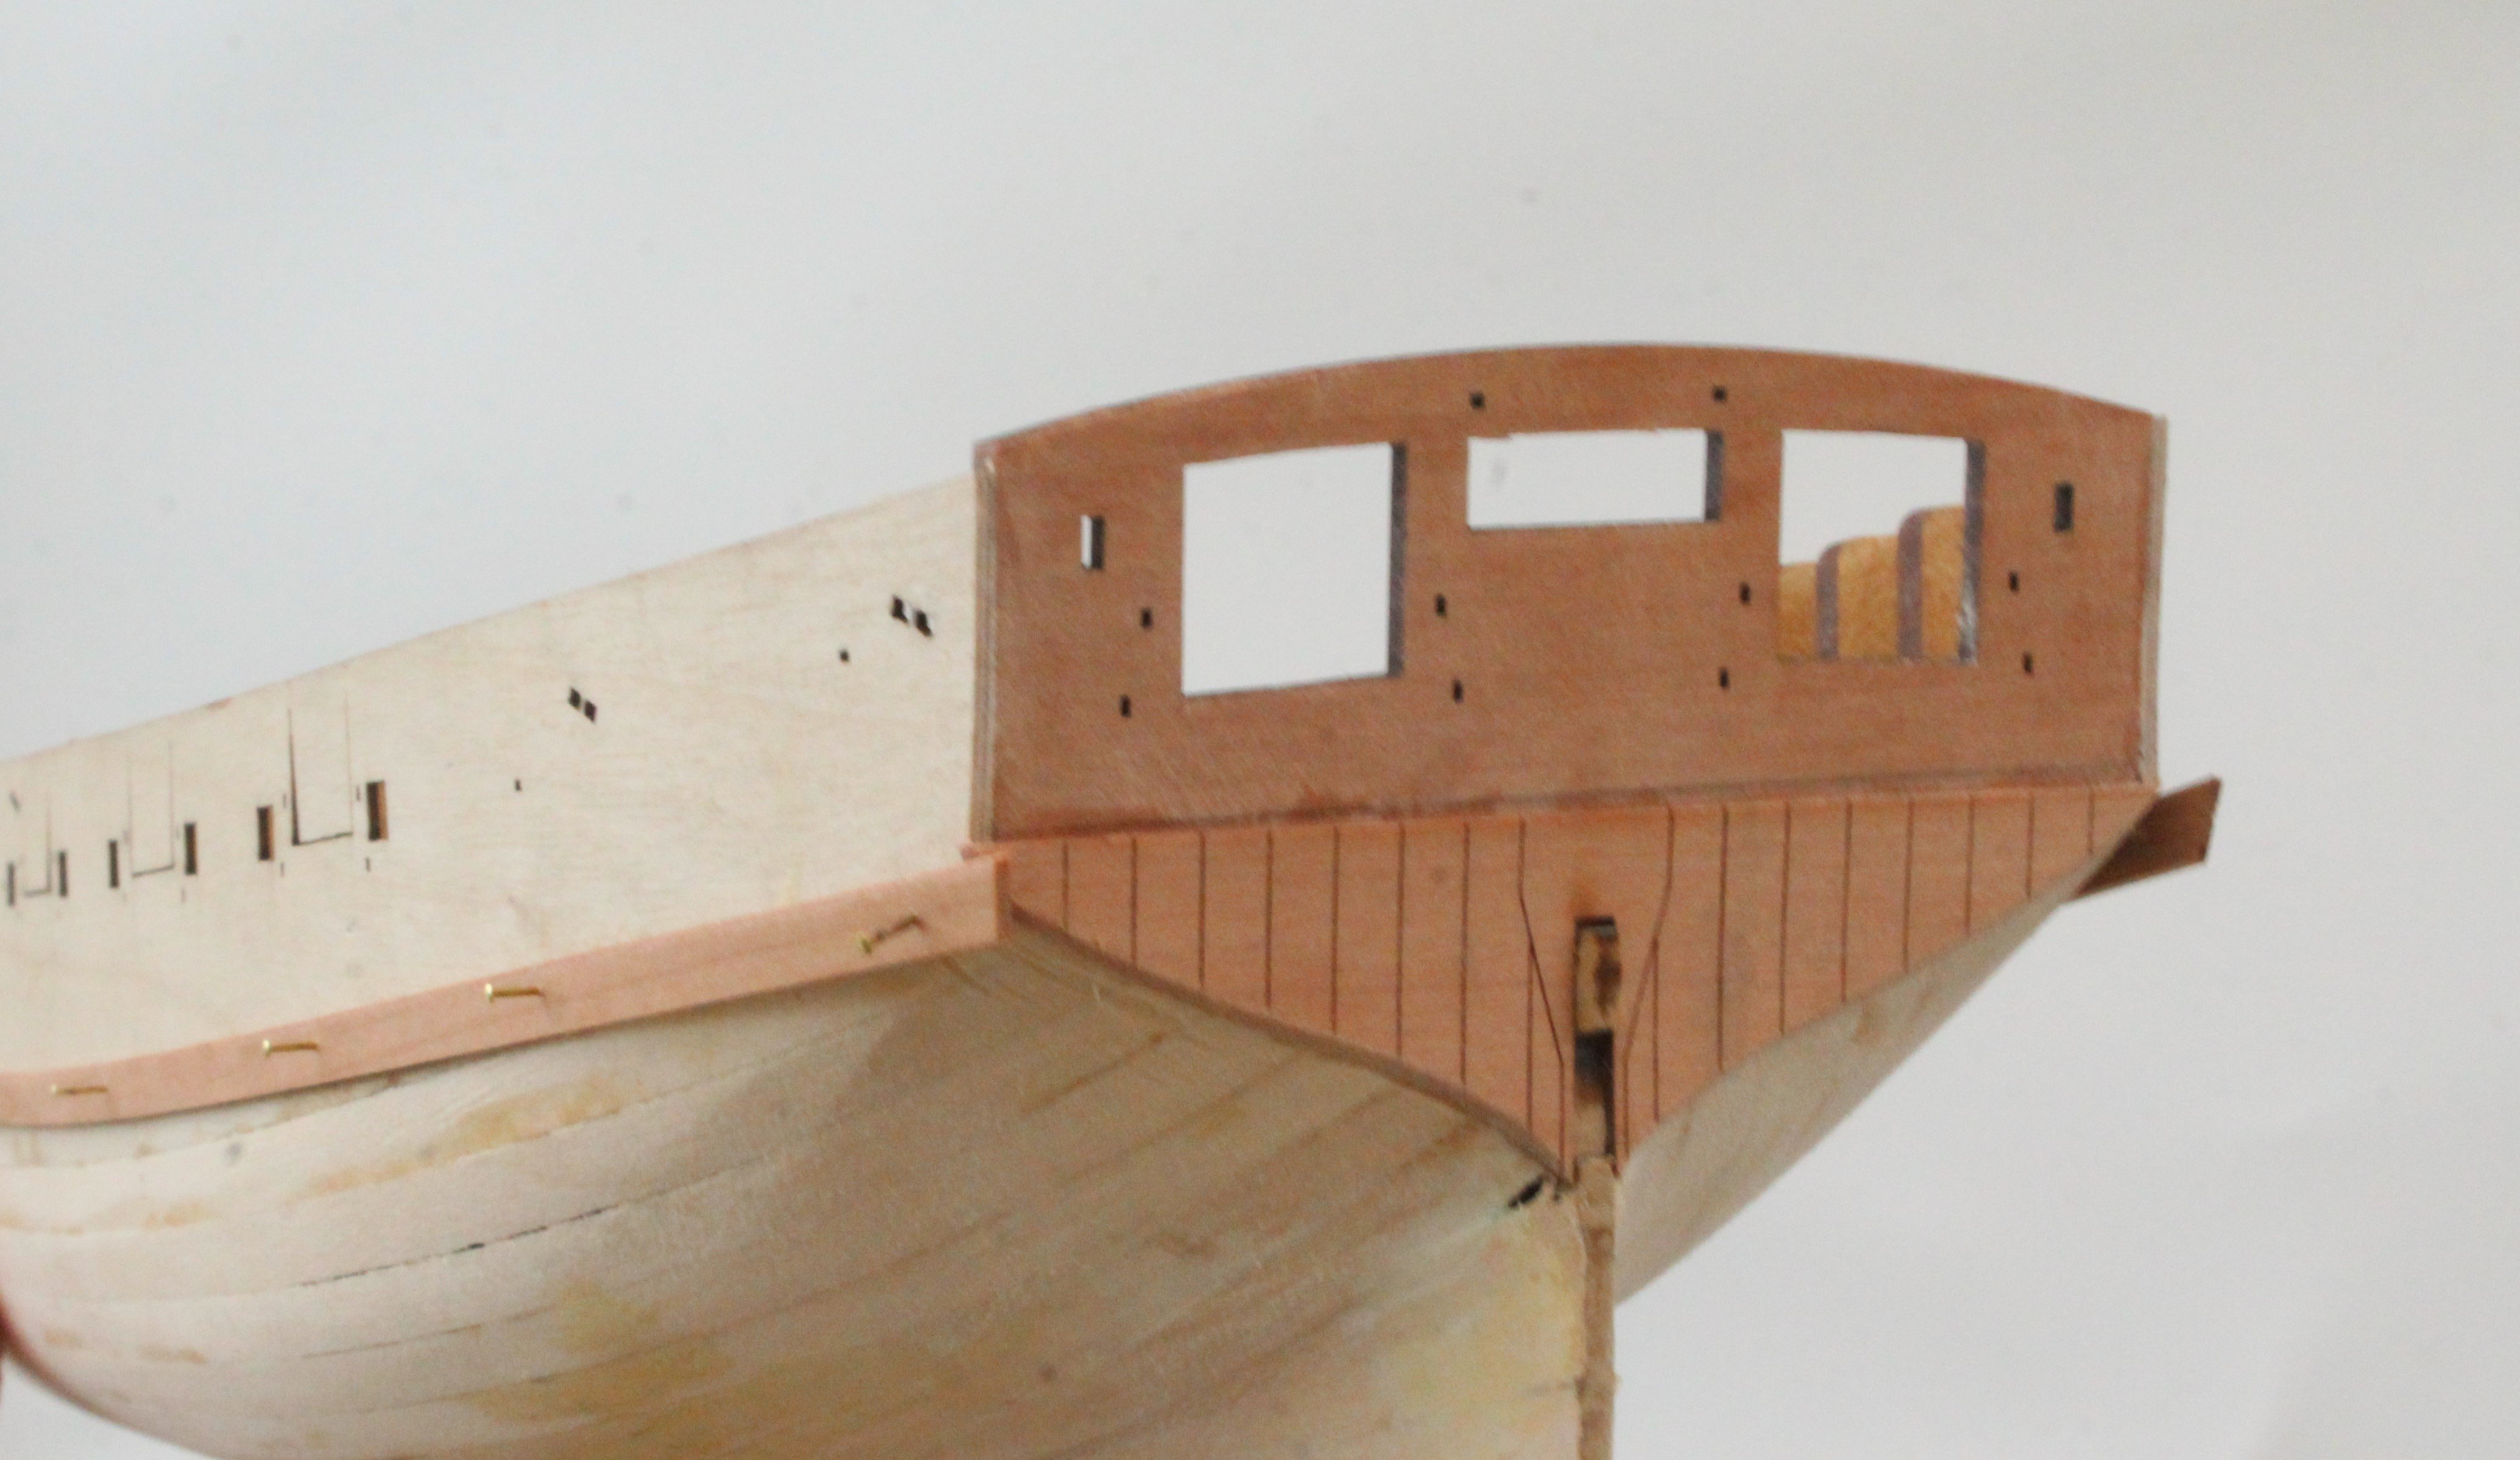
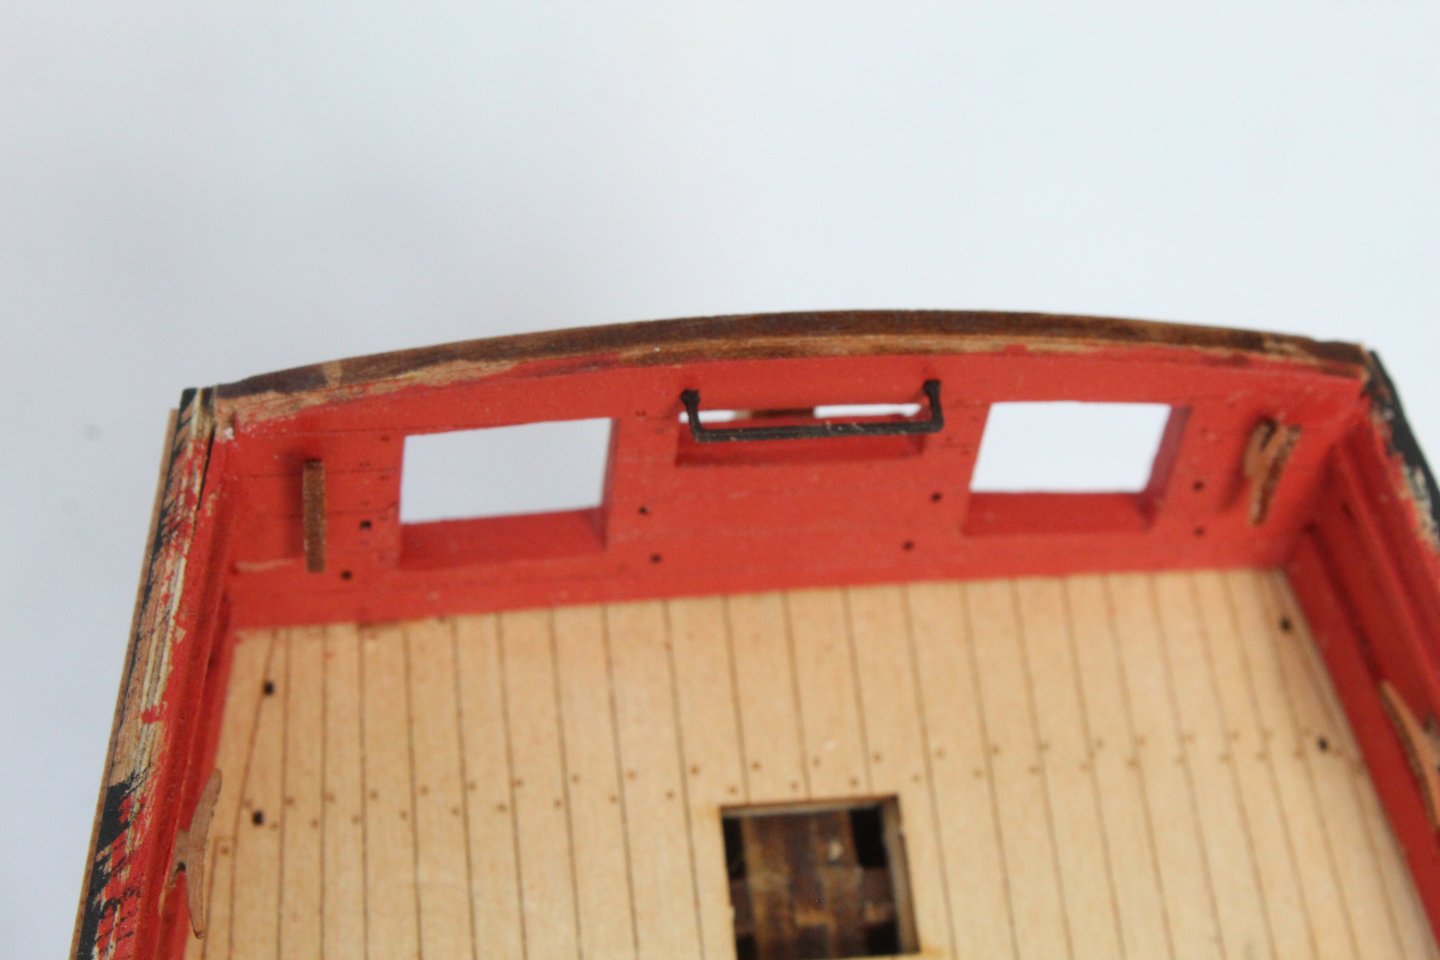
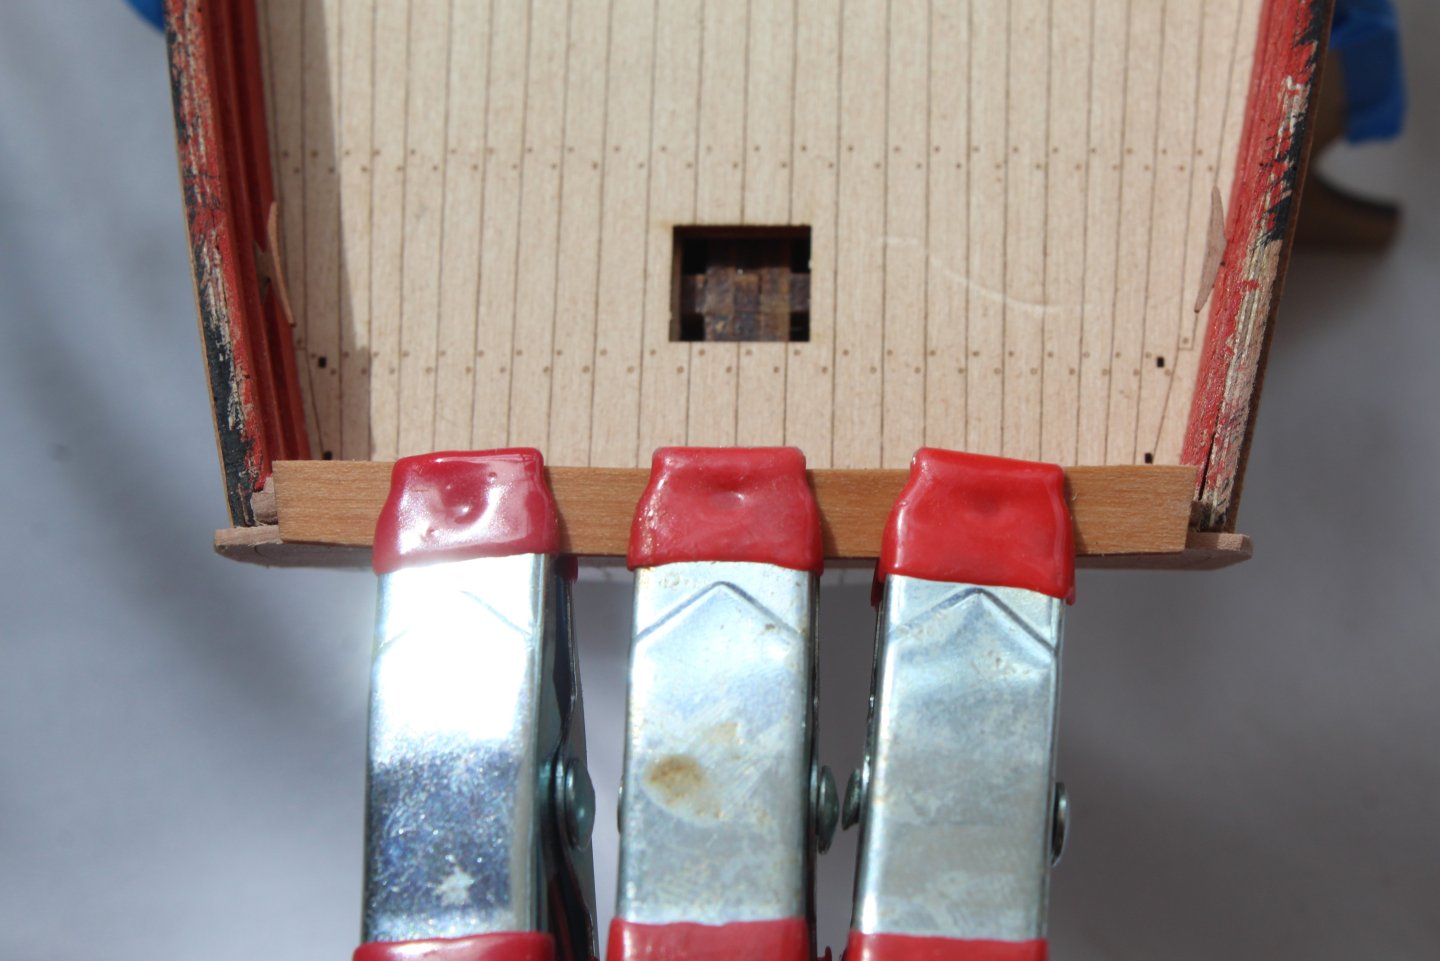
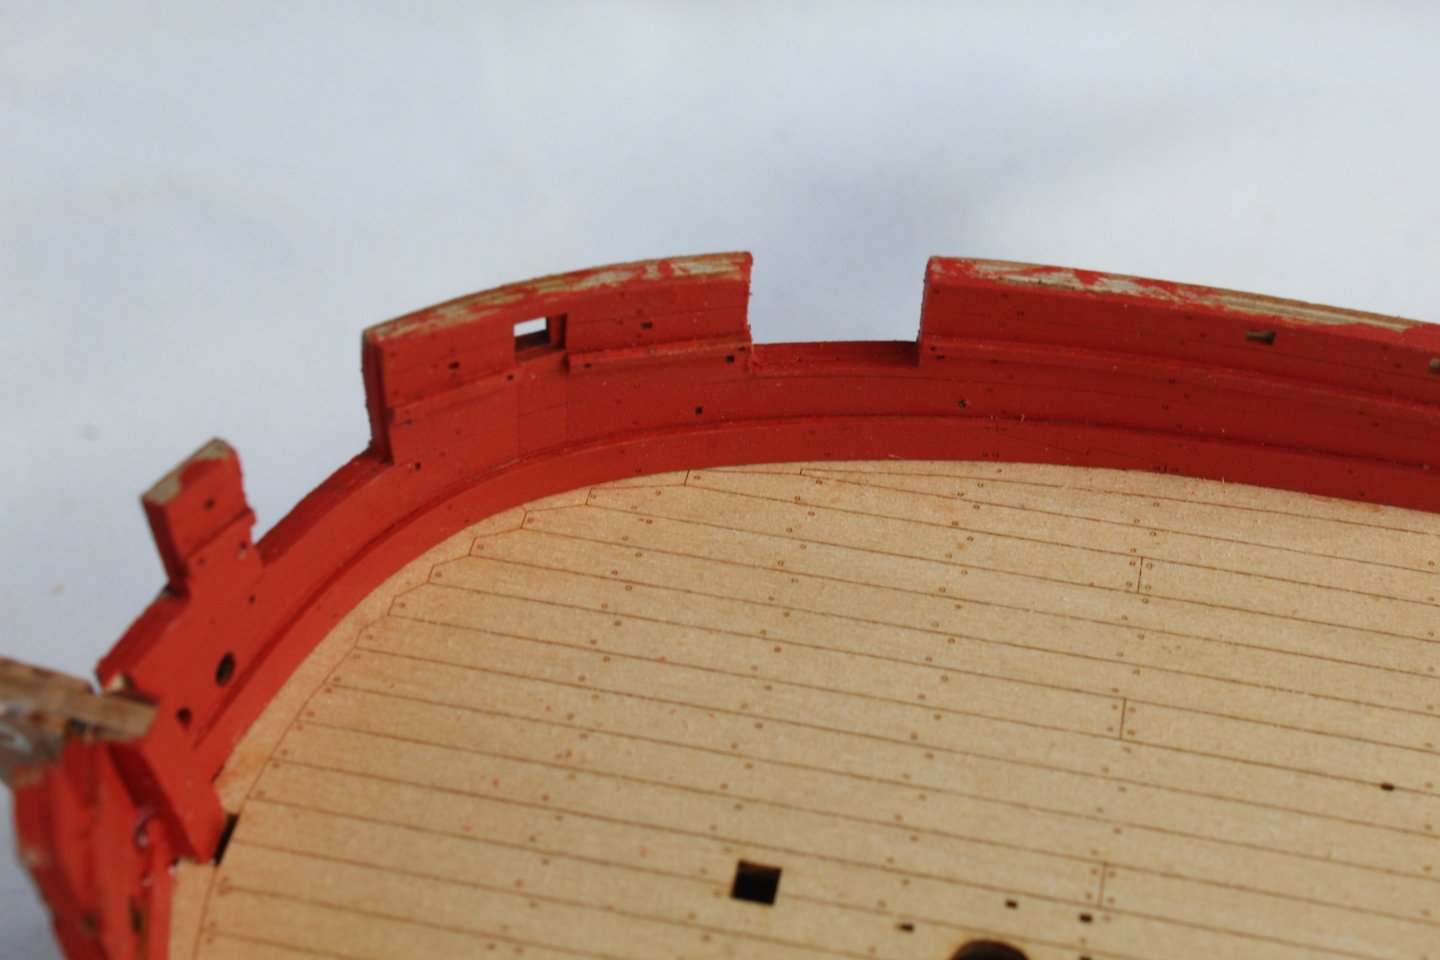
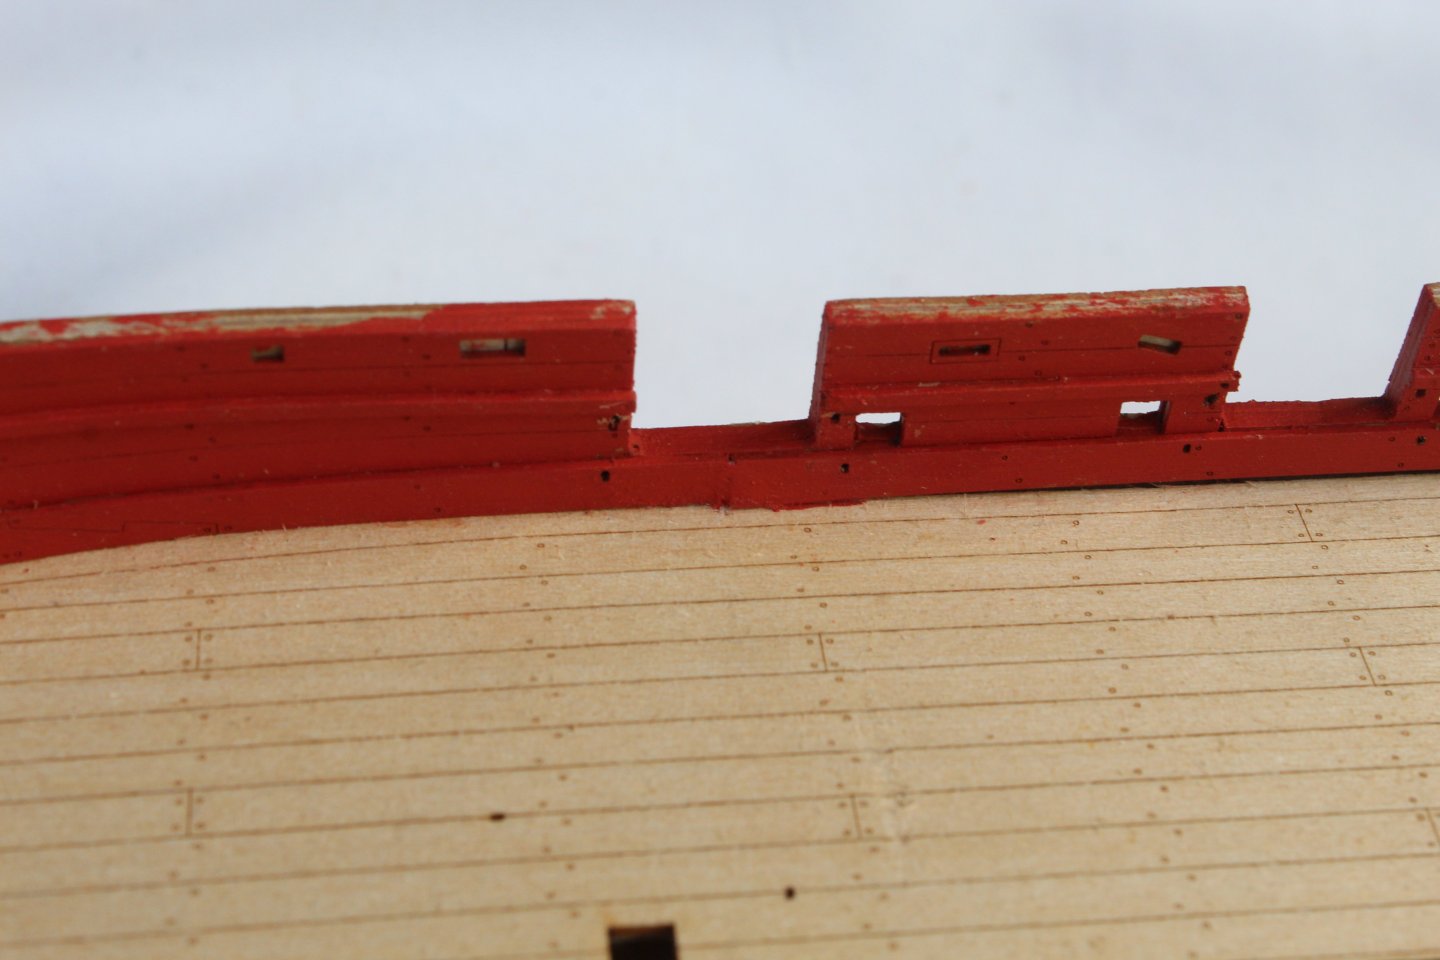
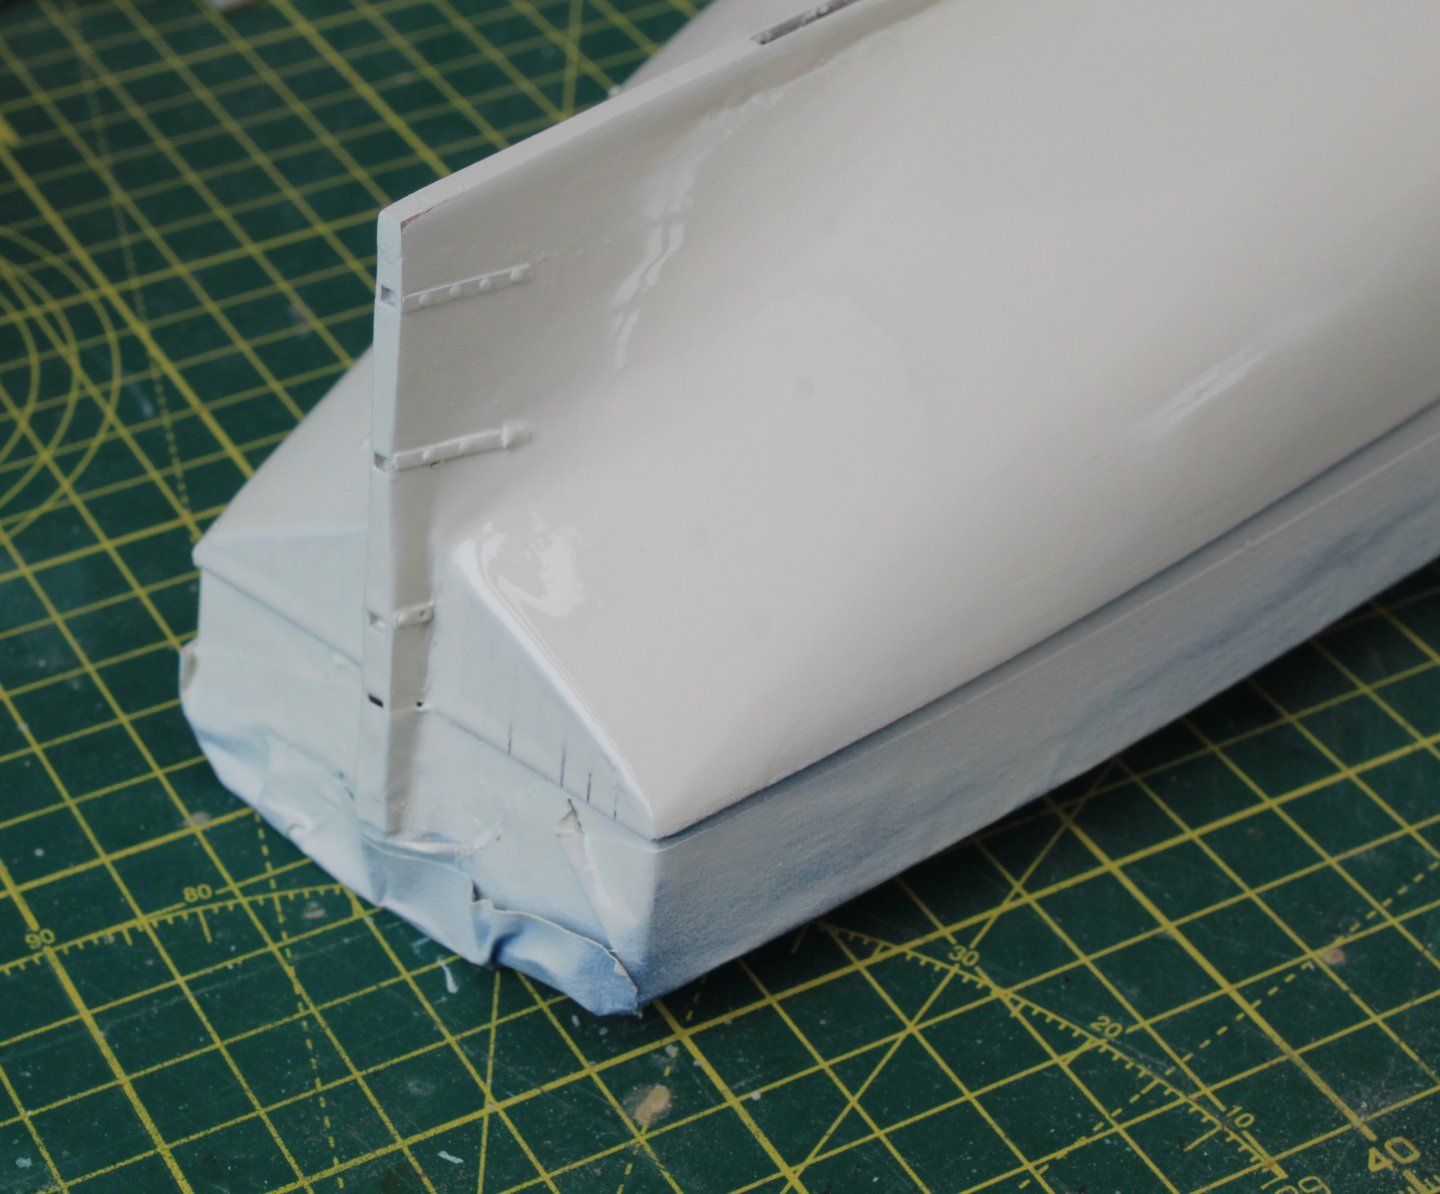
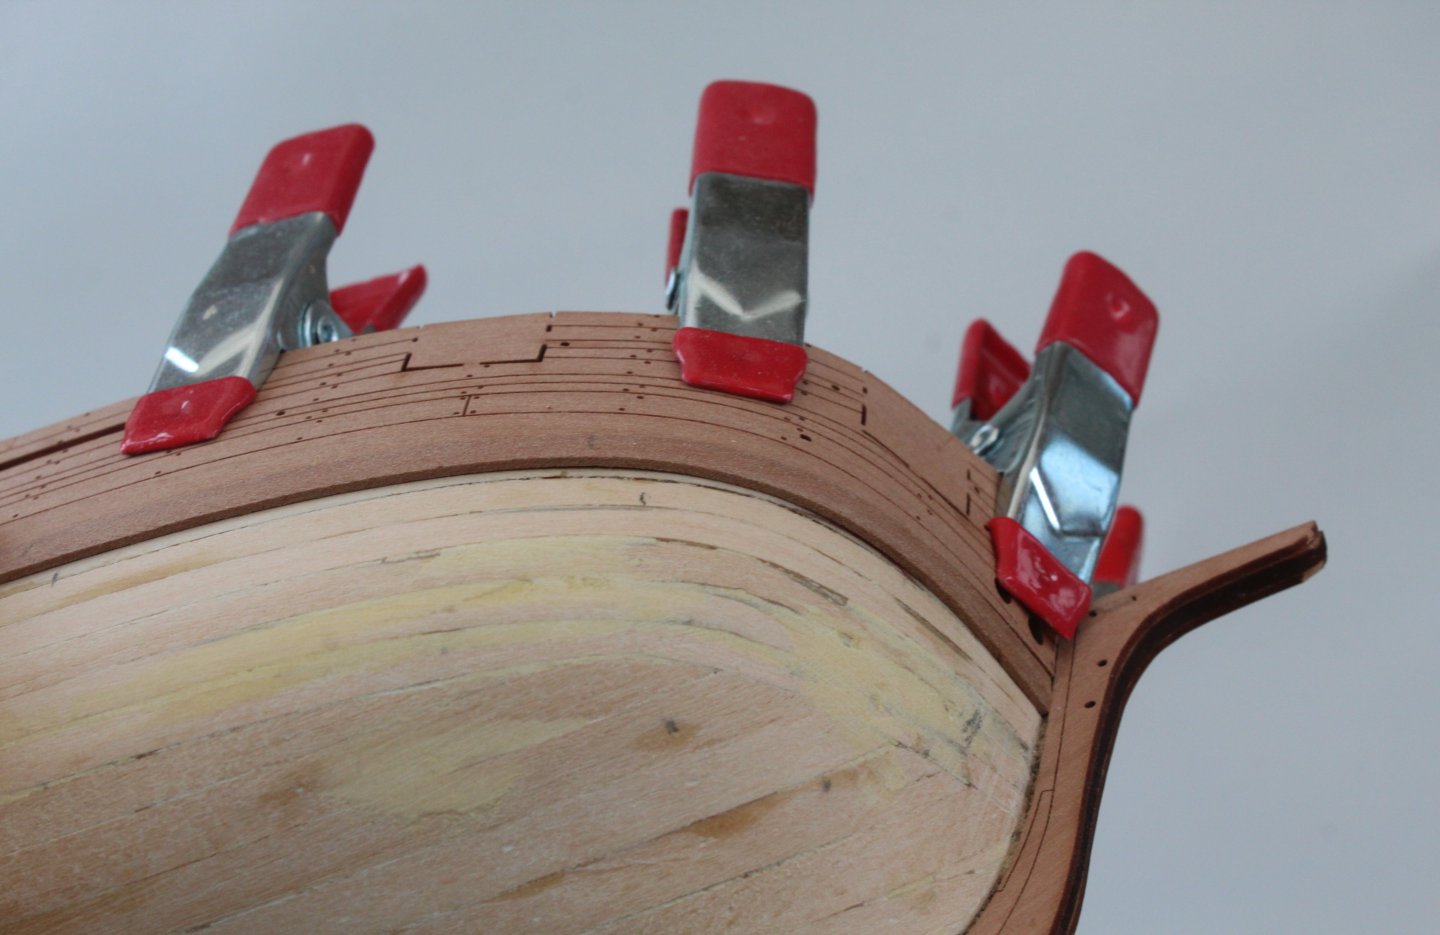
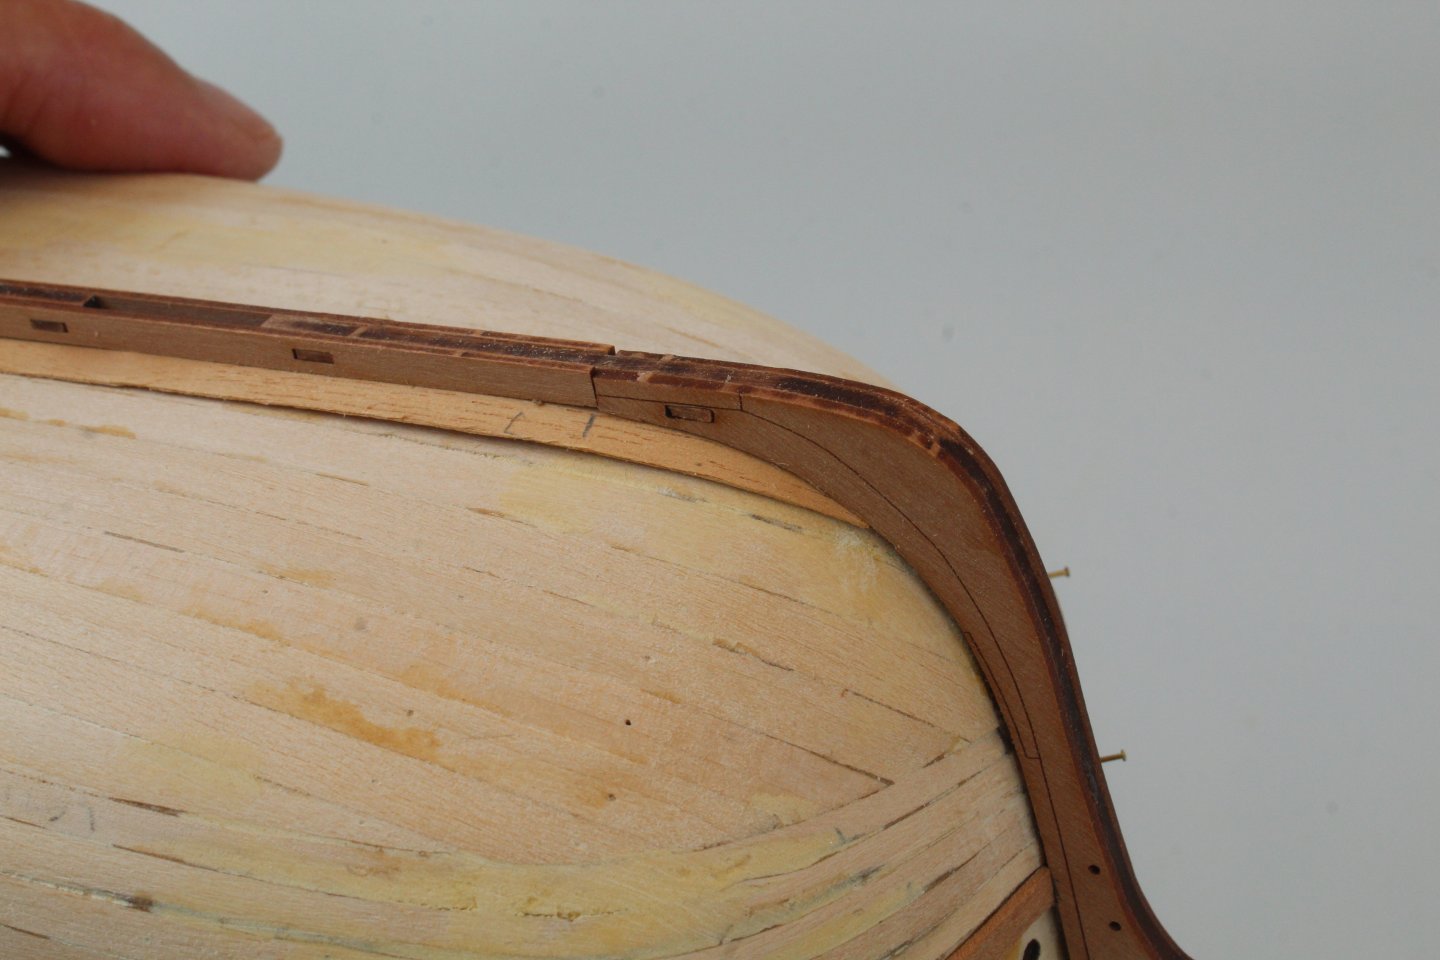
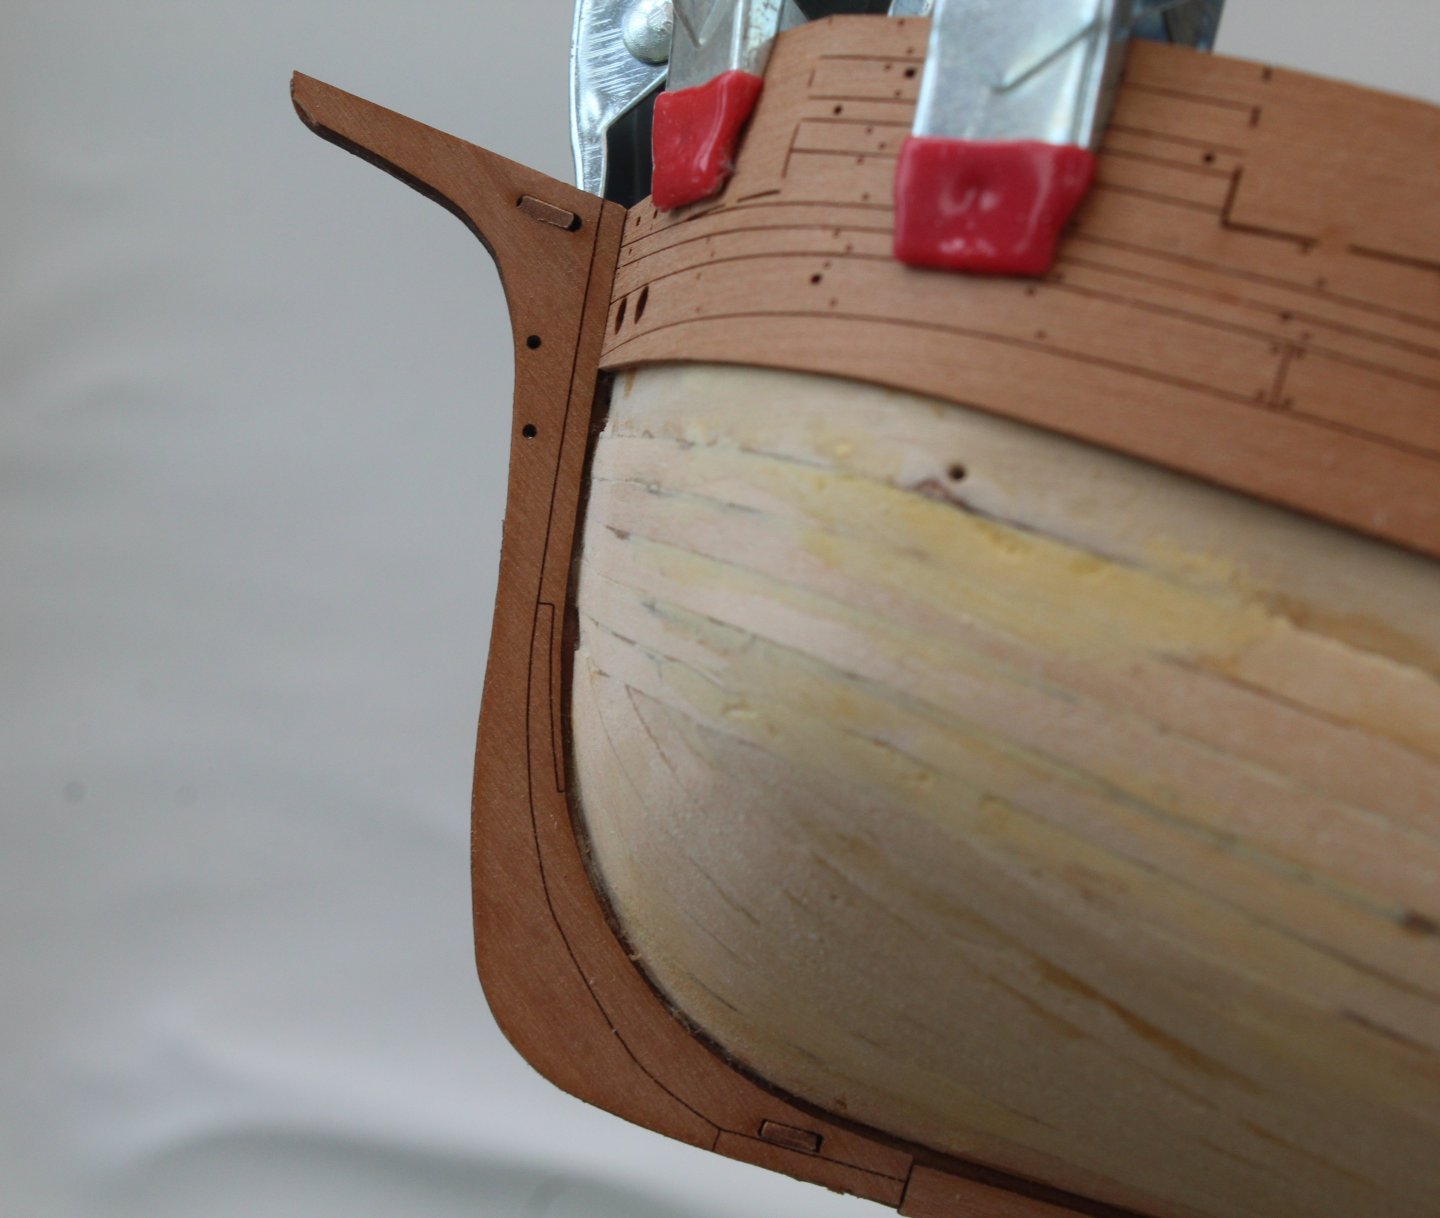
Build Log Index Date: 23/08/2024 Time worked today: 3 hours. Total time spent on build: 46 hours. Carronade Eyebolts and Outer Stern Board The eyebolts which are located on the inner bulwarks for the carronades were chemically blackened. The process I use for this works well and is as follows: a) Soak the PE parts in acetone and agitate the solution for a few minutes b) Transfer the PE parts to a soapy hot water solution. Agitate the solution for a few minutes c) Rinse the PE parts and repeat a) above. d) Rinse the PE parts in hot water and dry. e) Place the PE parts in the blackening solution f) Place the blackened PE parts on a paper towel and pat dry. After fitting all the eyebolts I decided to dry fitted the various internal cleats and belay pin racks. The next task was to fit the Outer Stern Board. Once that was done the two rudder post cheeks were then added. They did need to be trimmed to fit. The lower section of the rudder post cheeks were also painted white to match the hull. The stern gunwale pattern was soaked in hot water for a few minutes and then clamped to the stern board assembly. This will be left to fully dry out before moving on to add all the gunwale patterns.


-
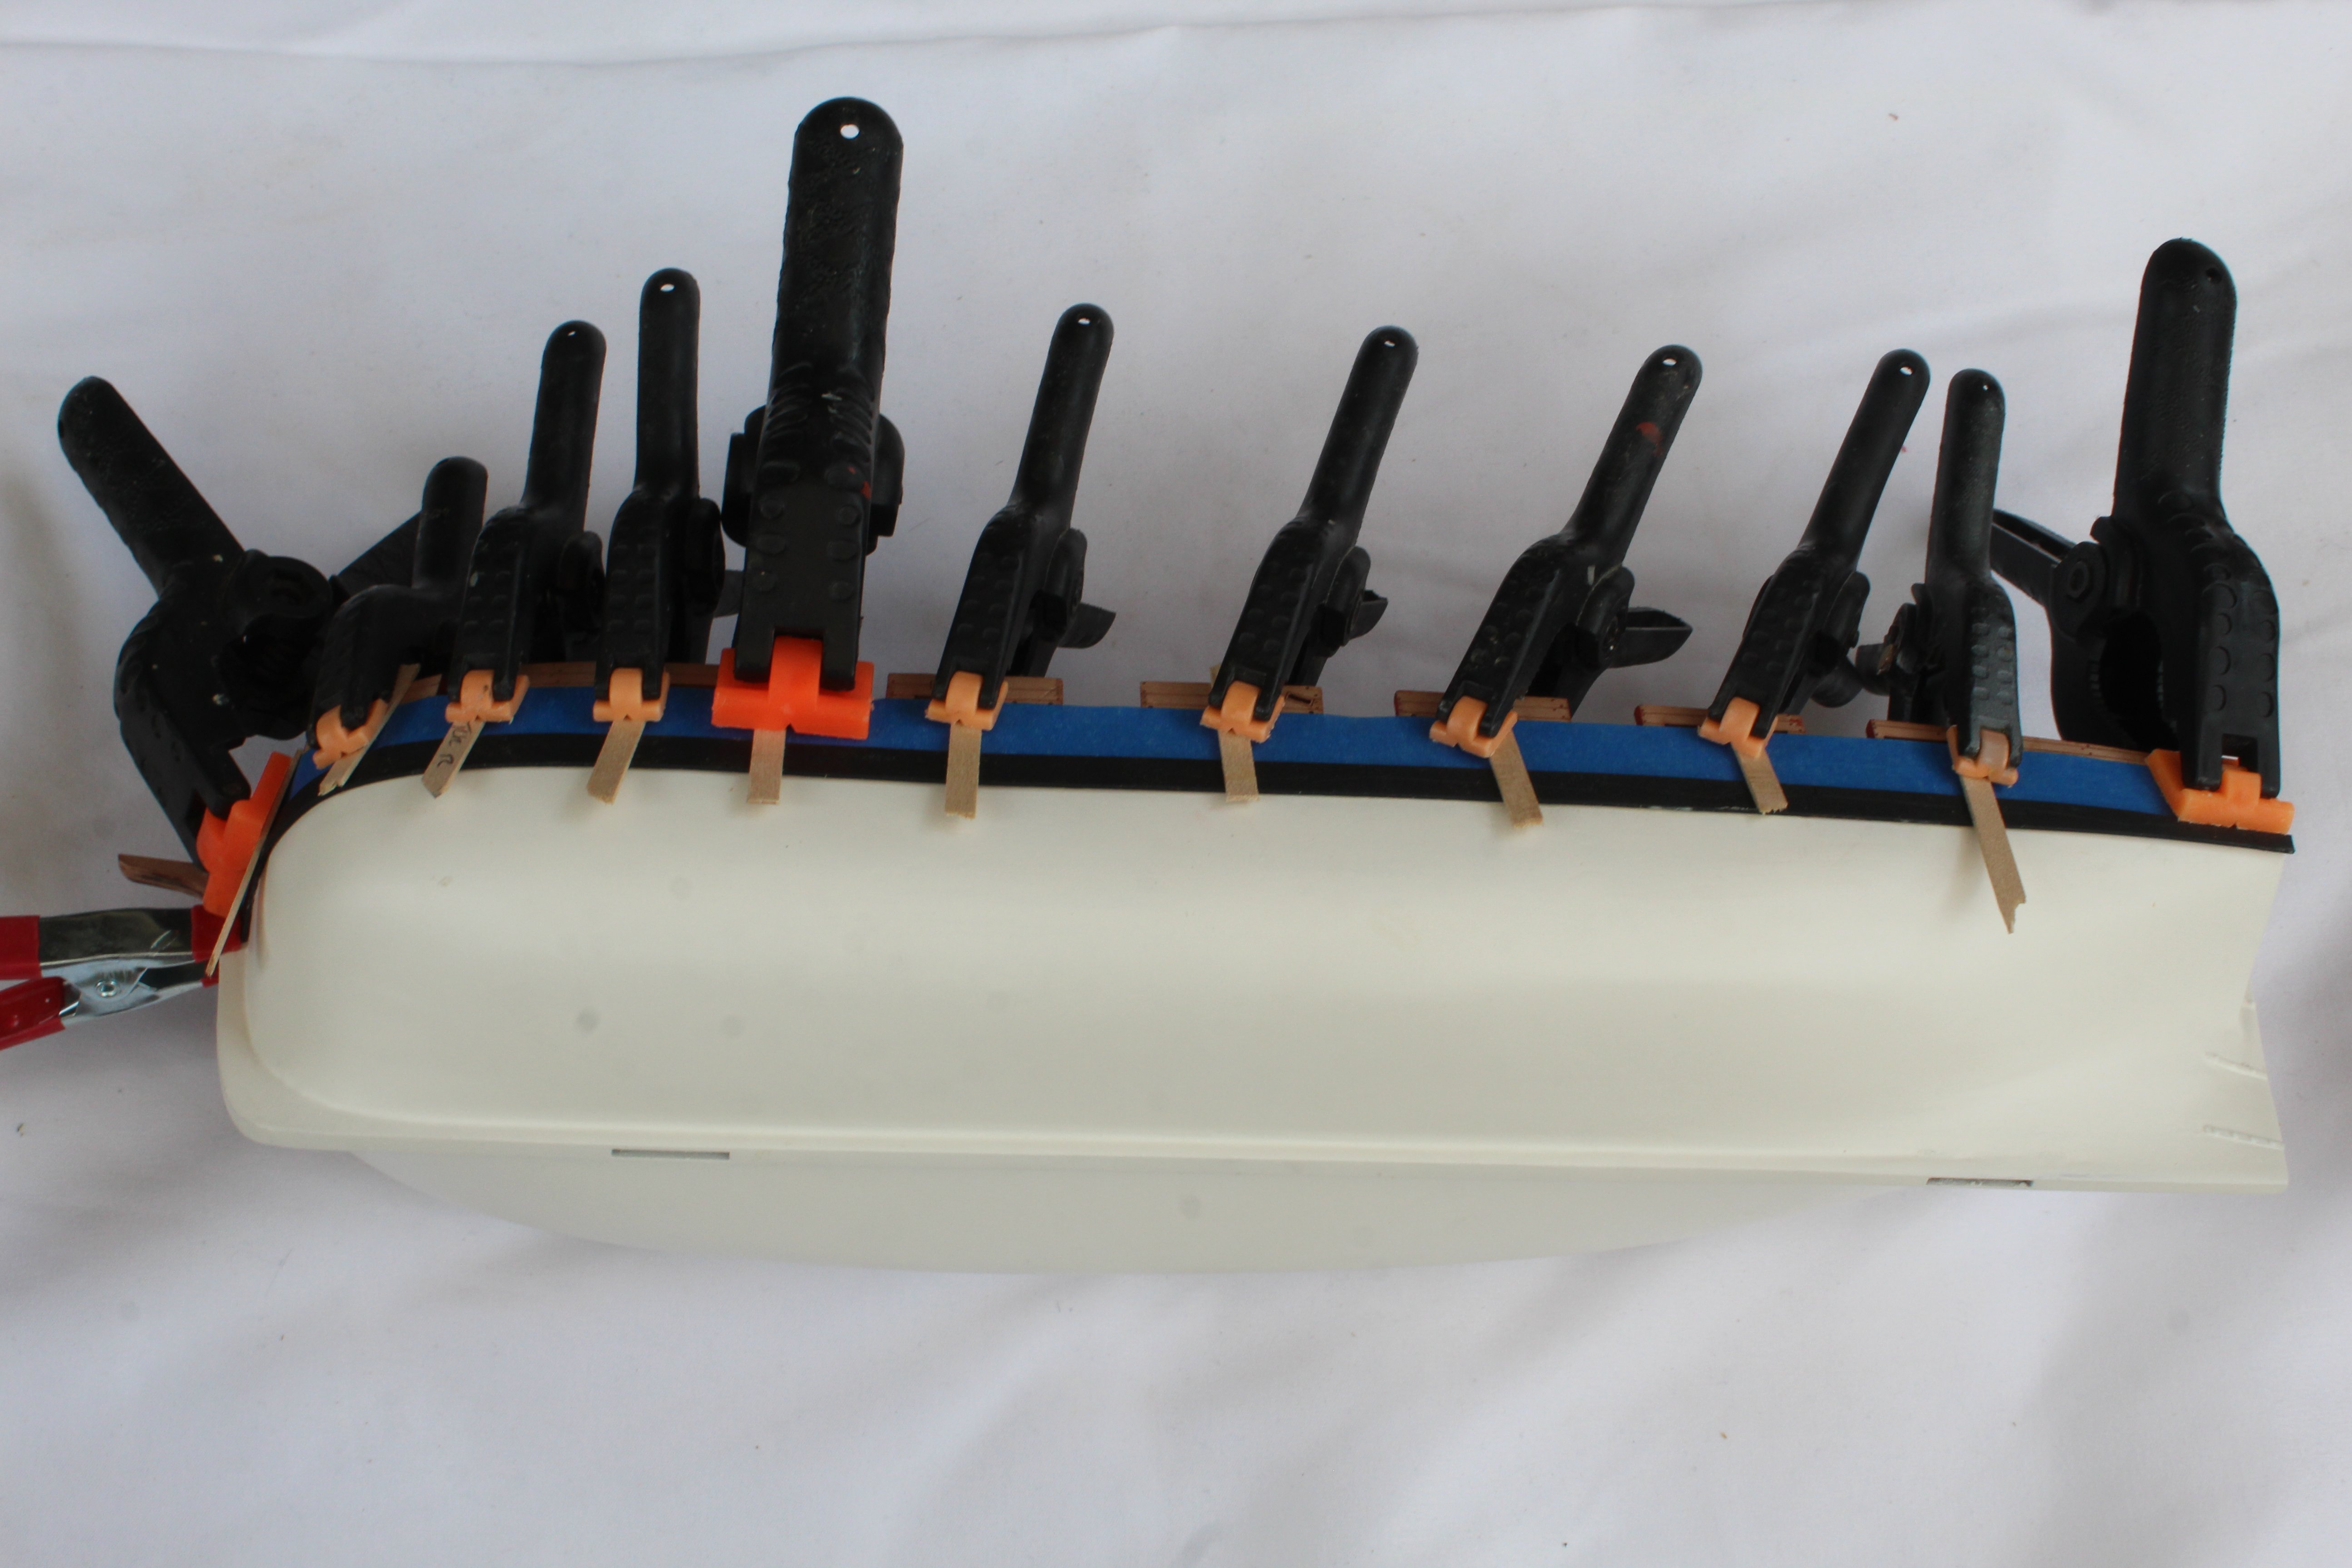
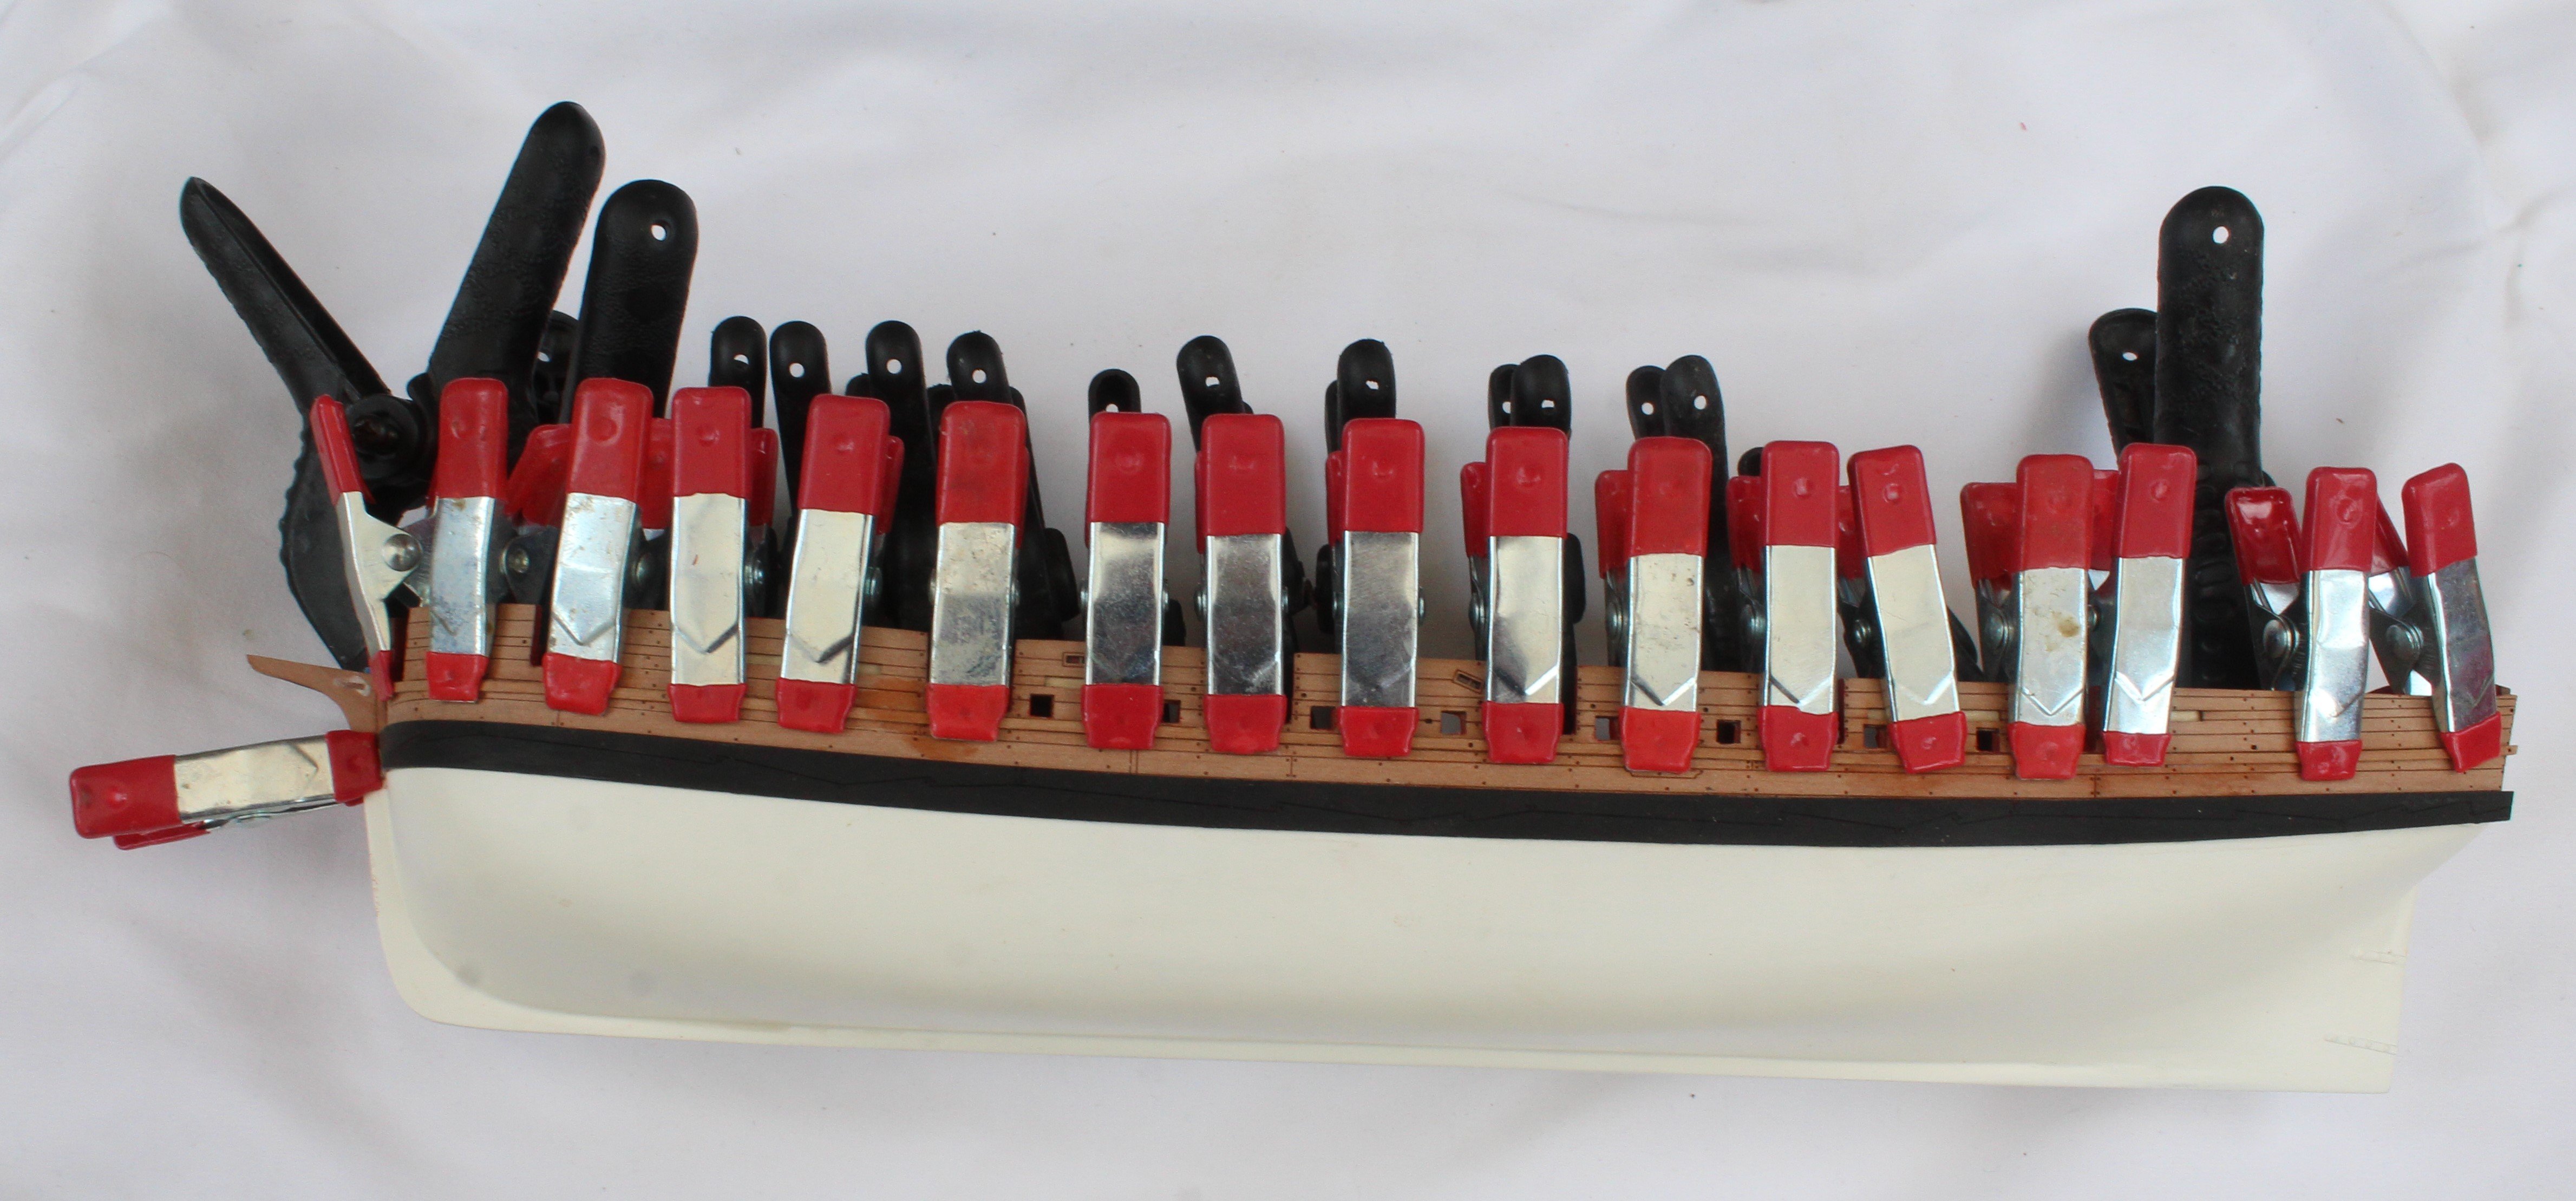
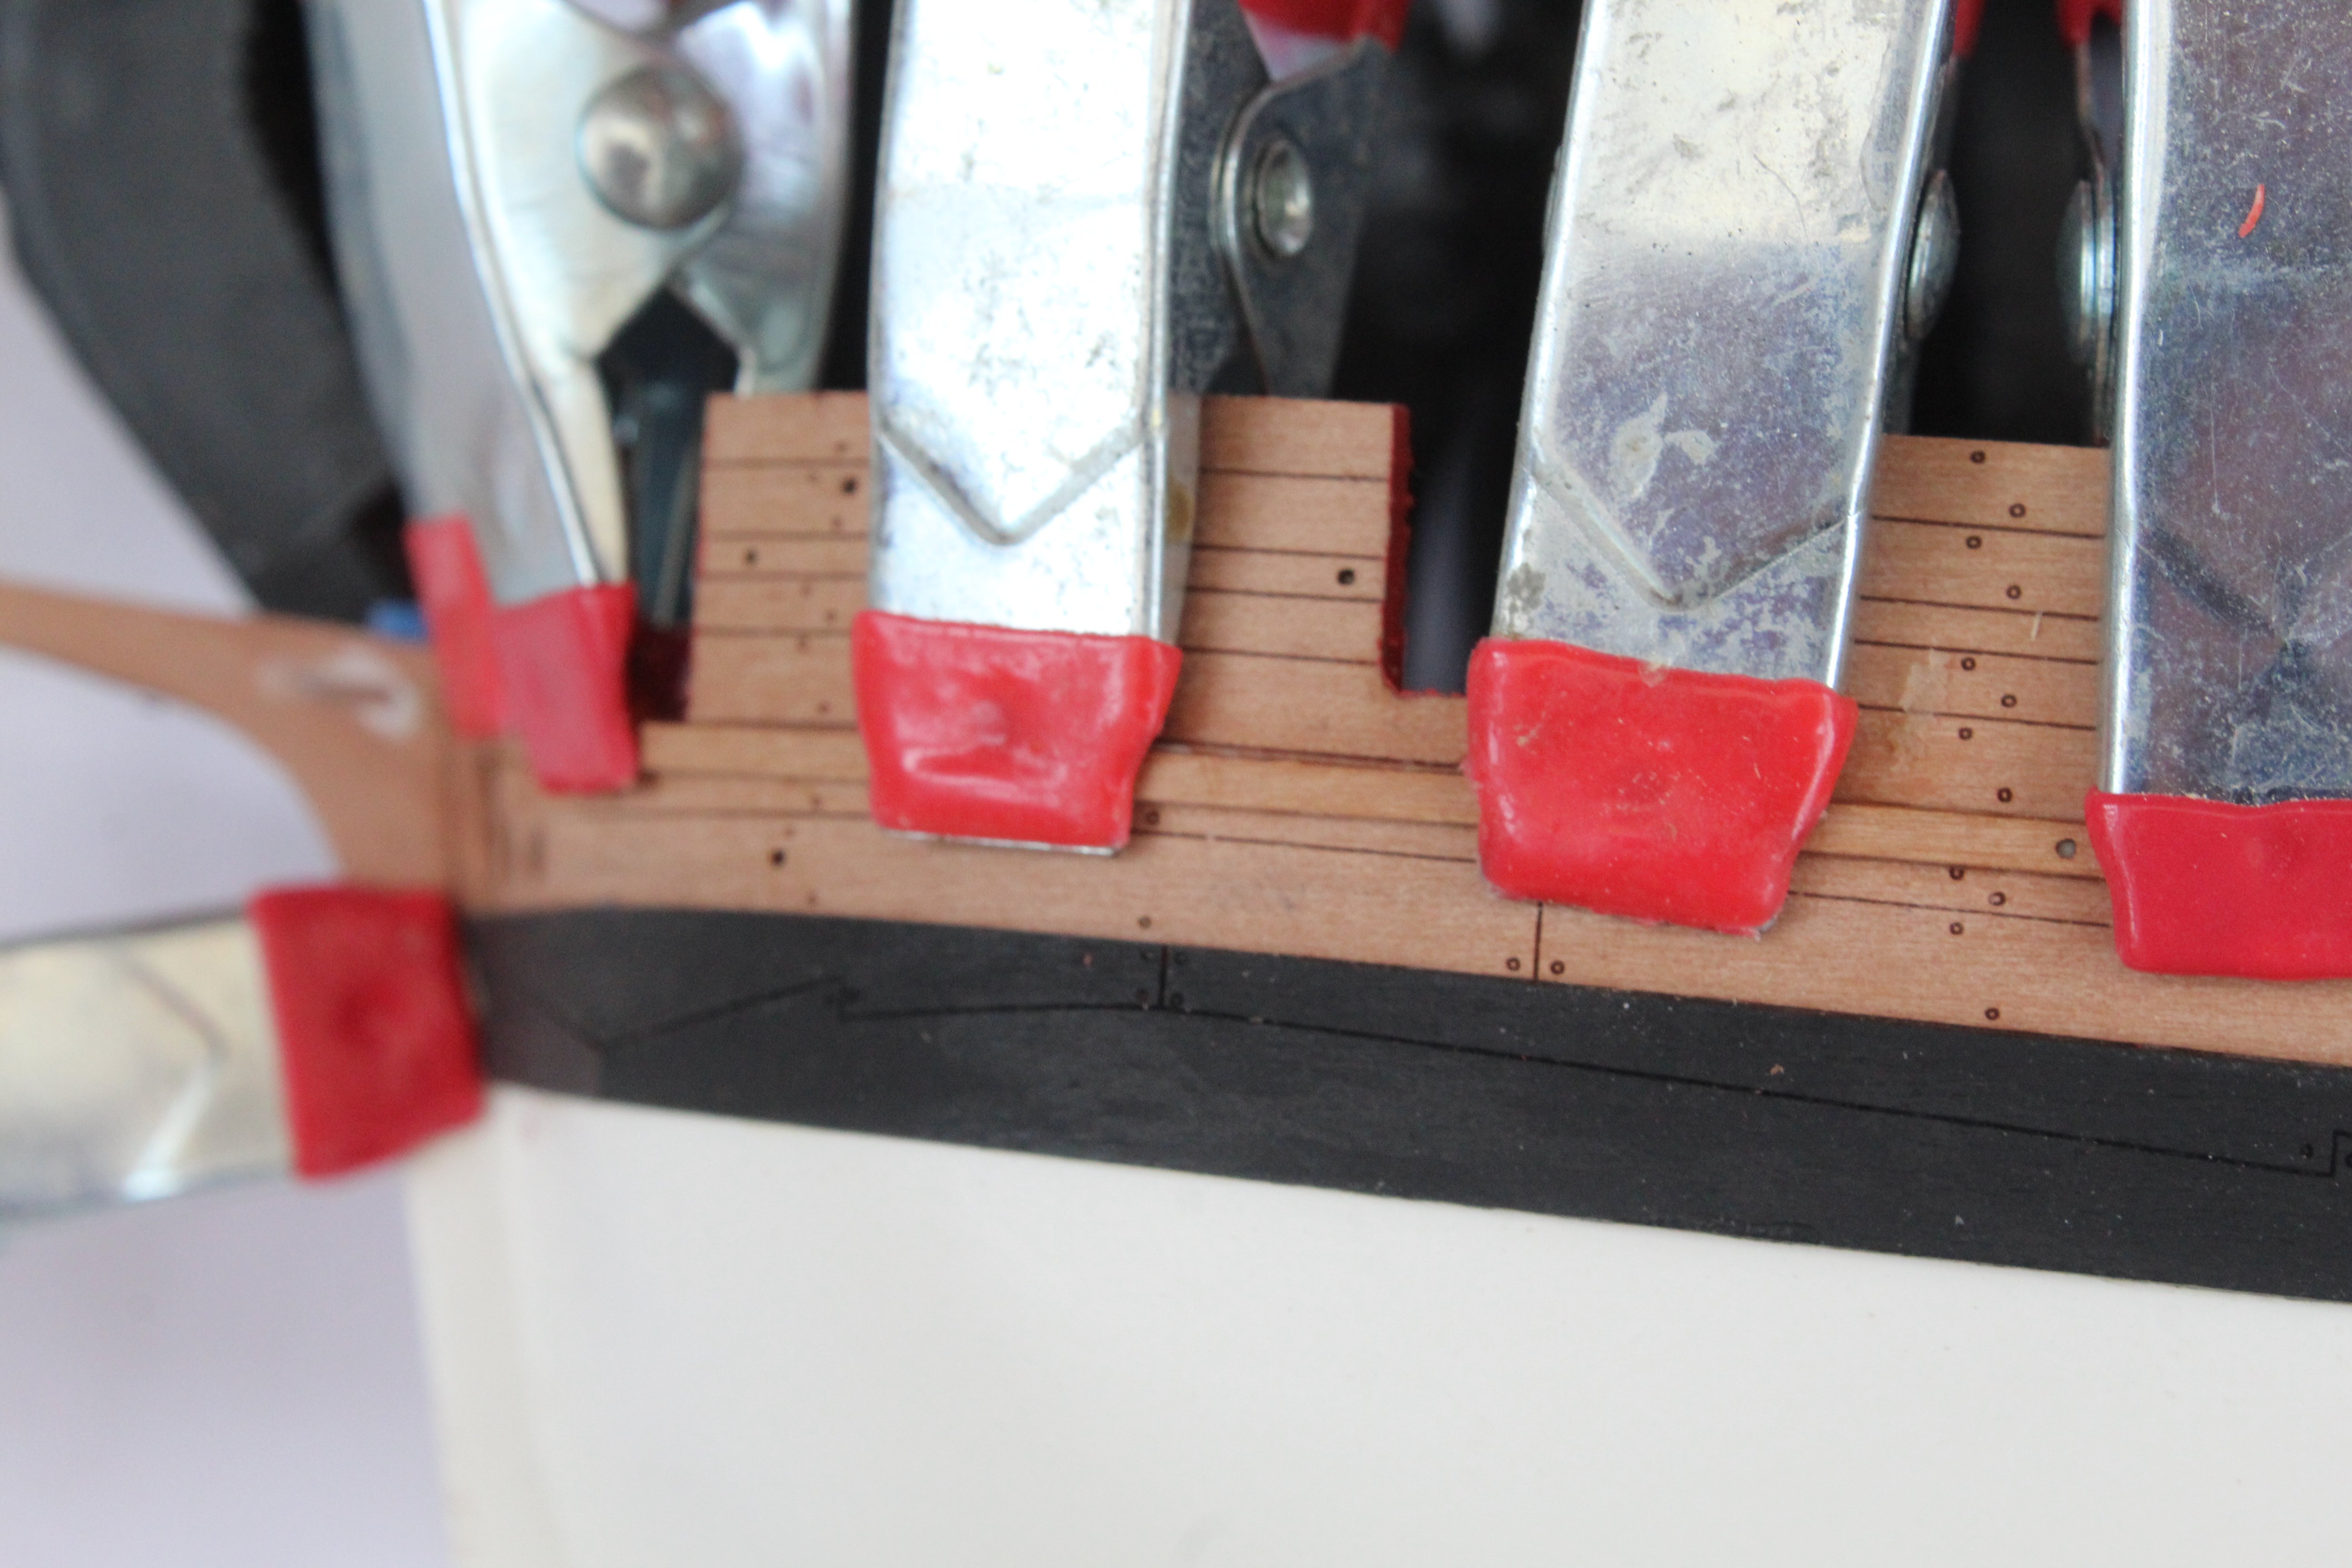
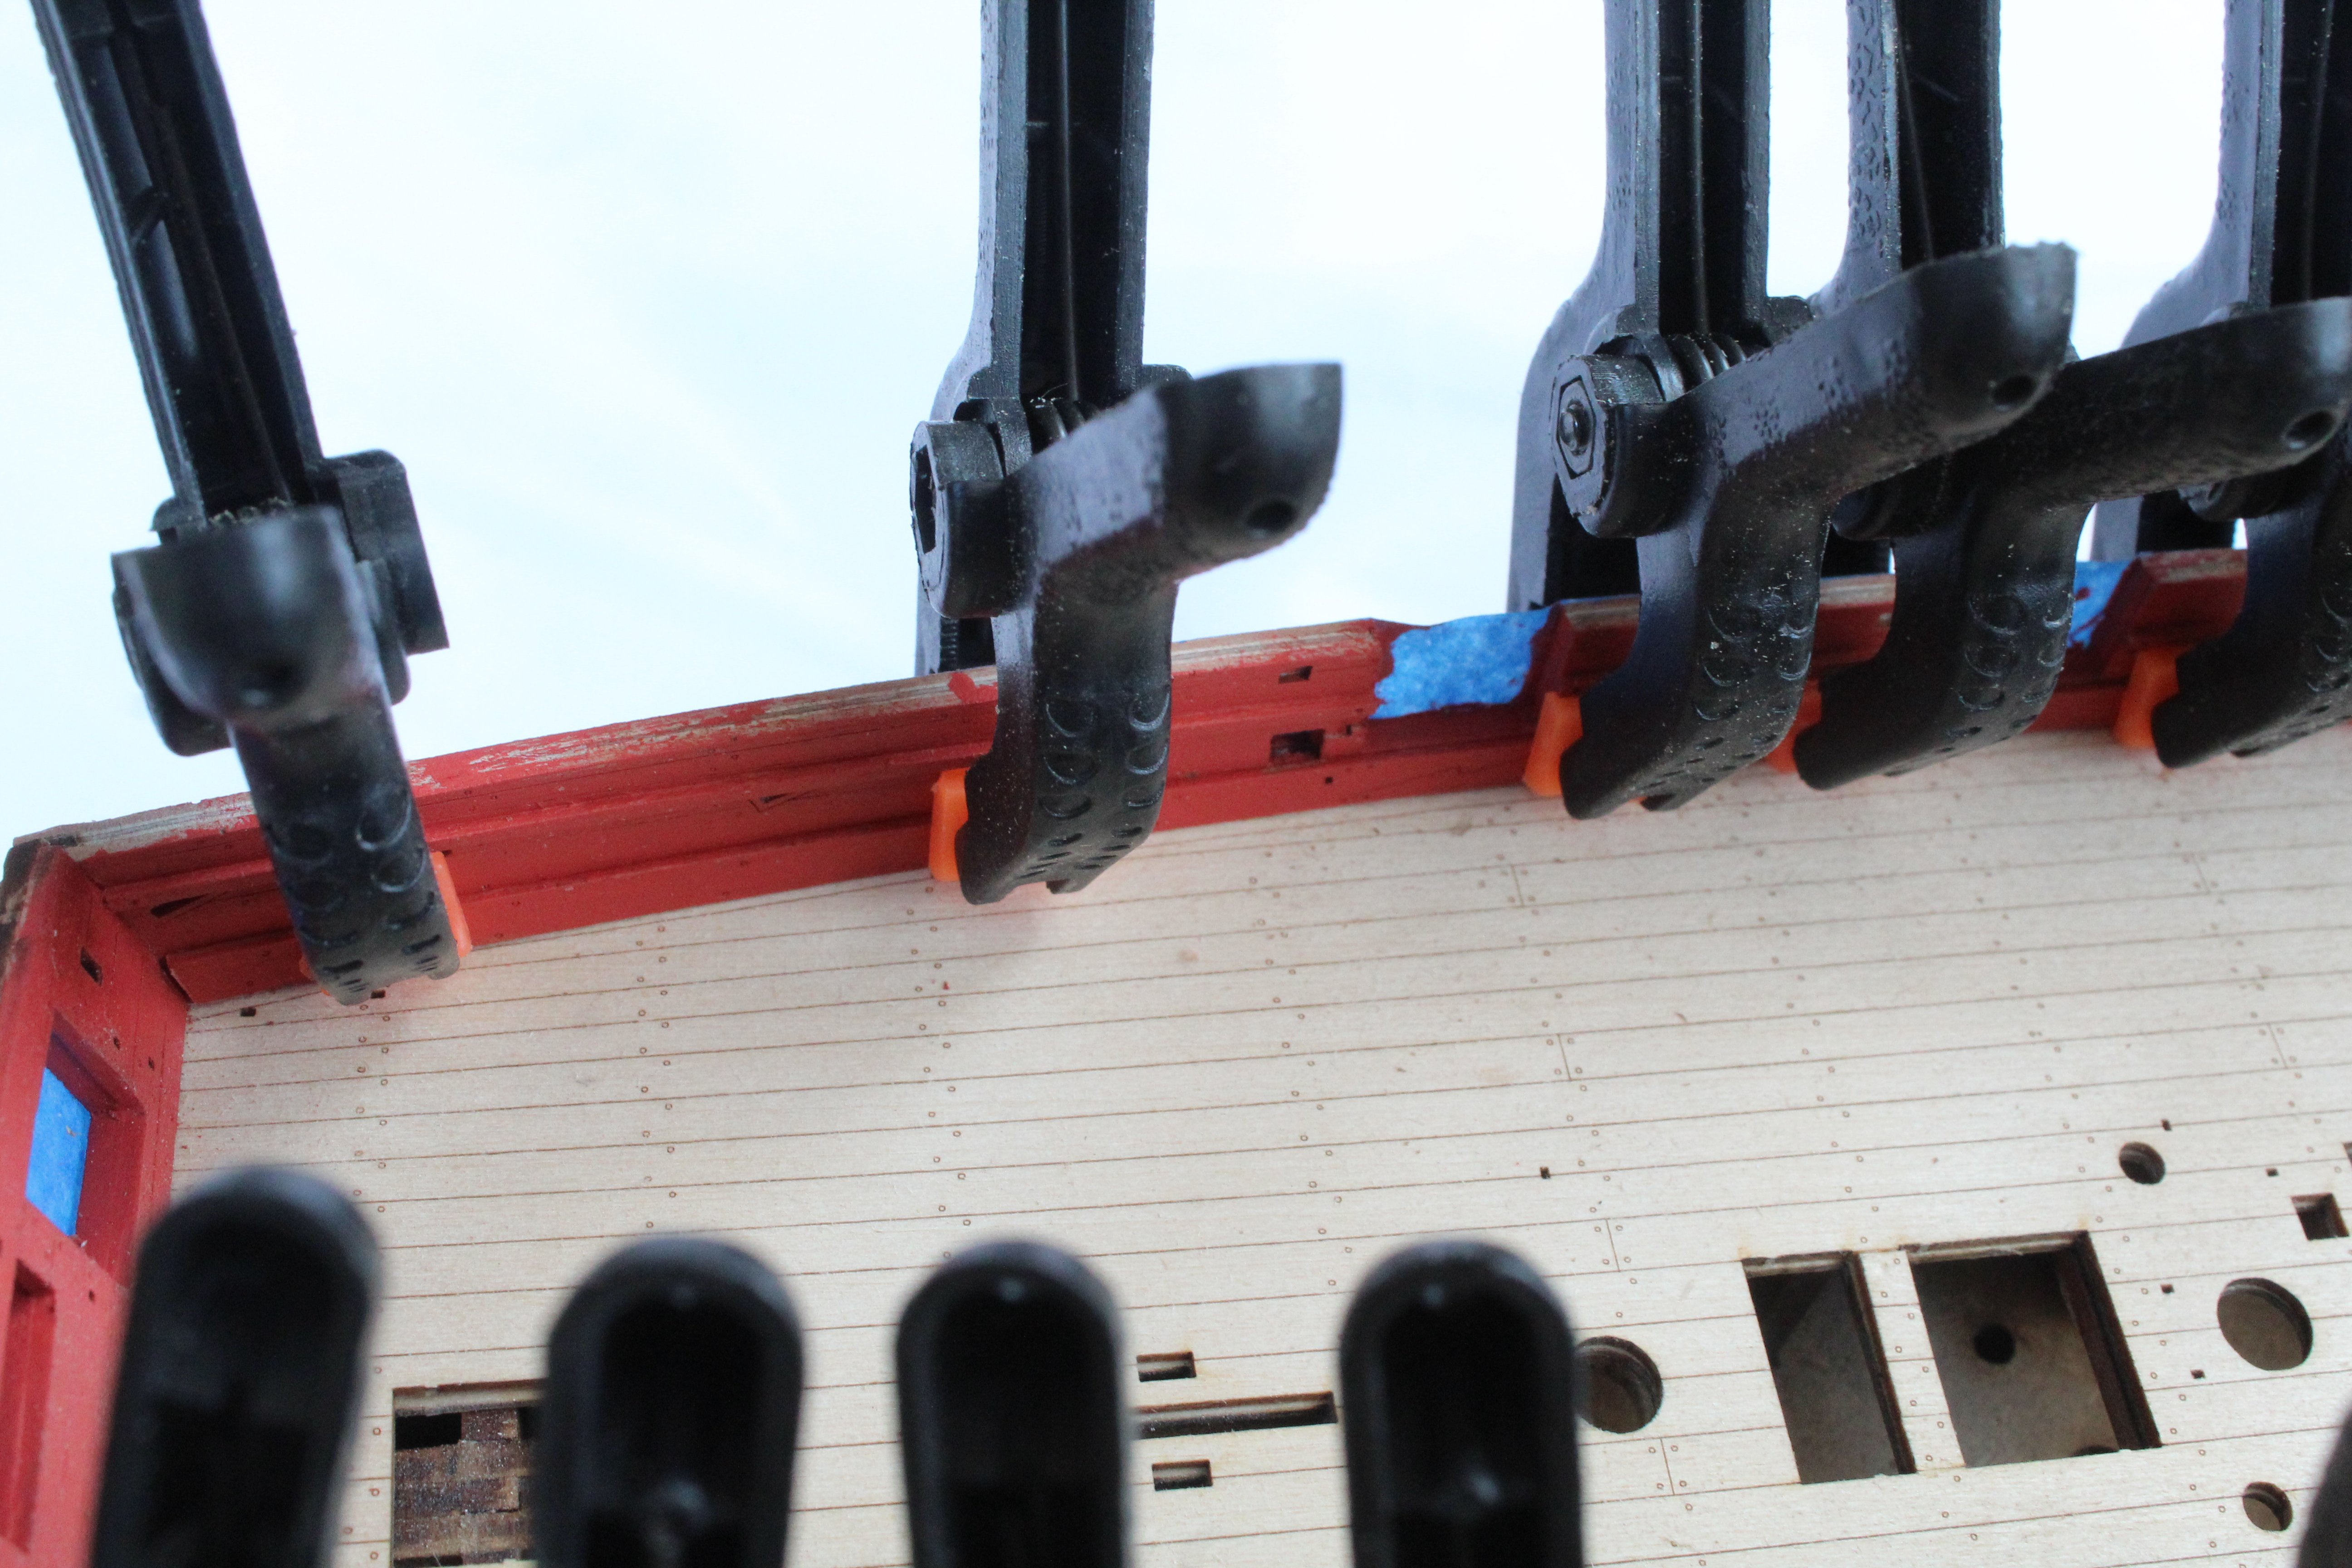
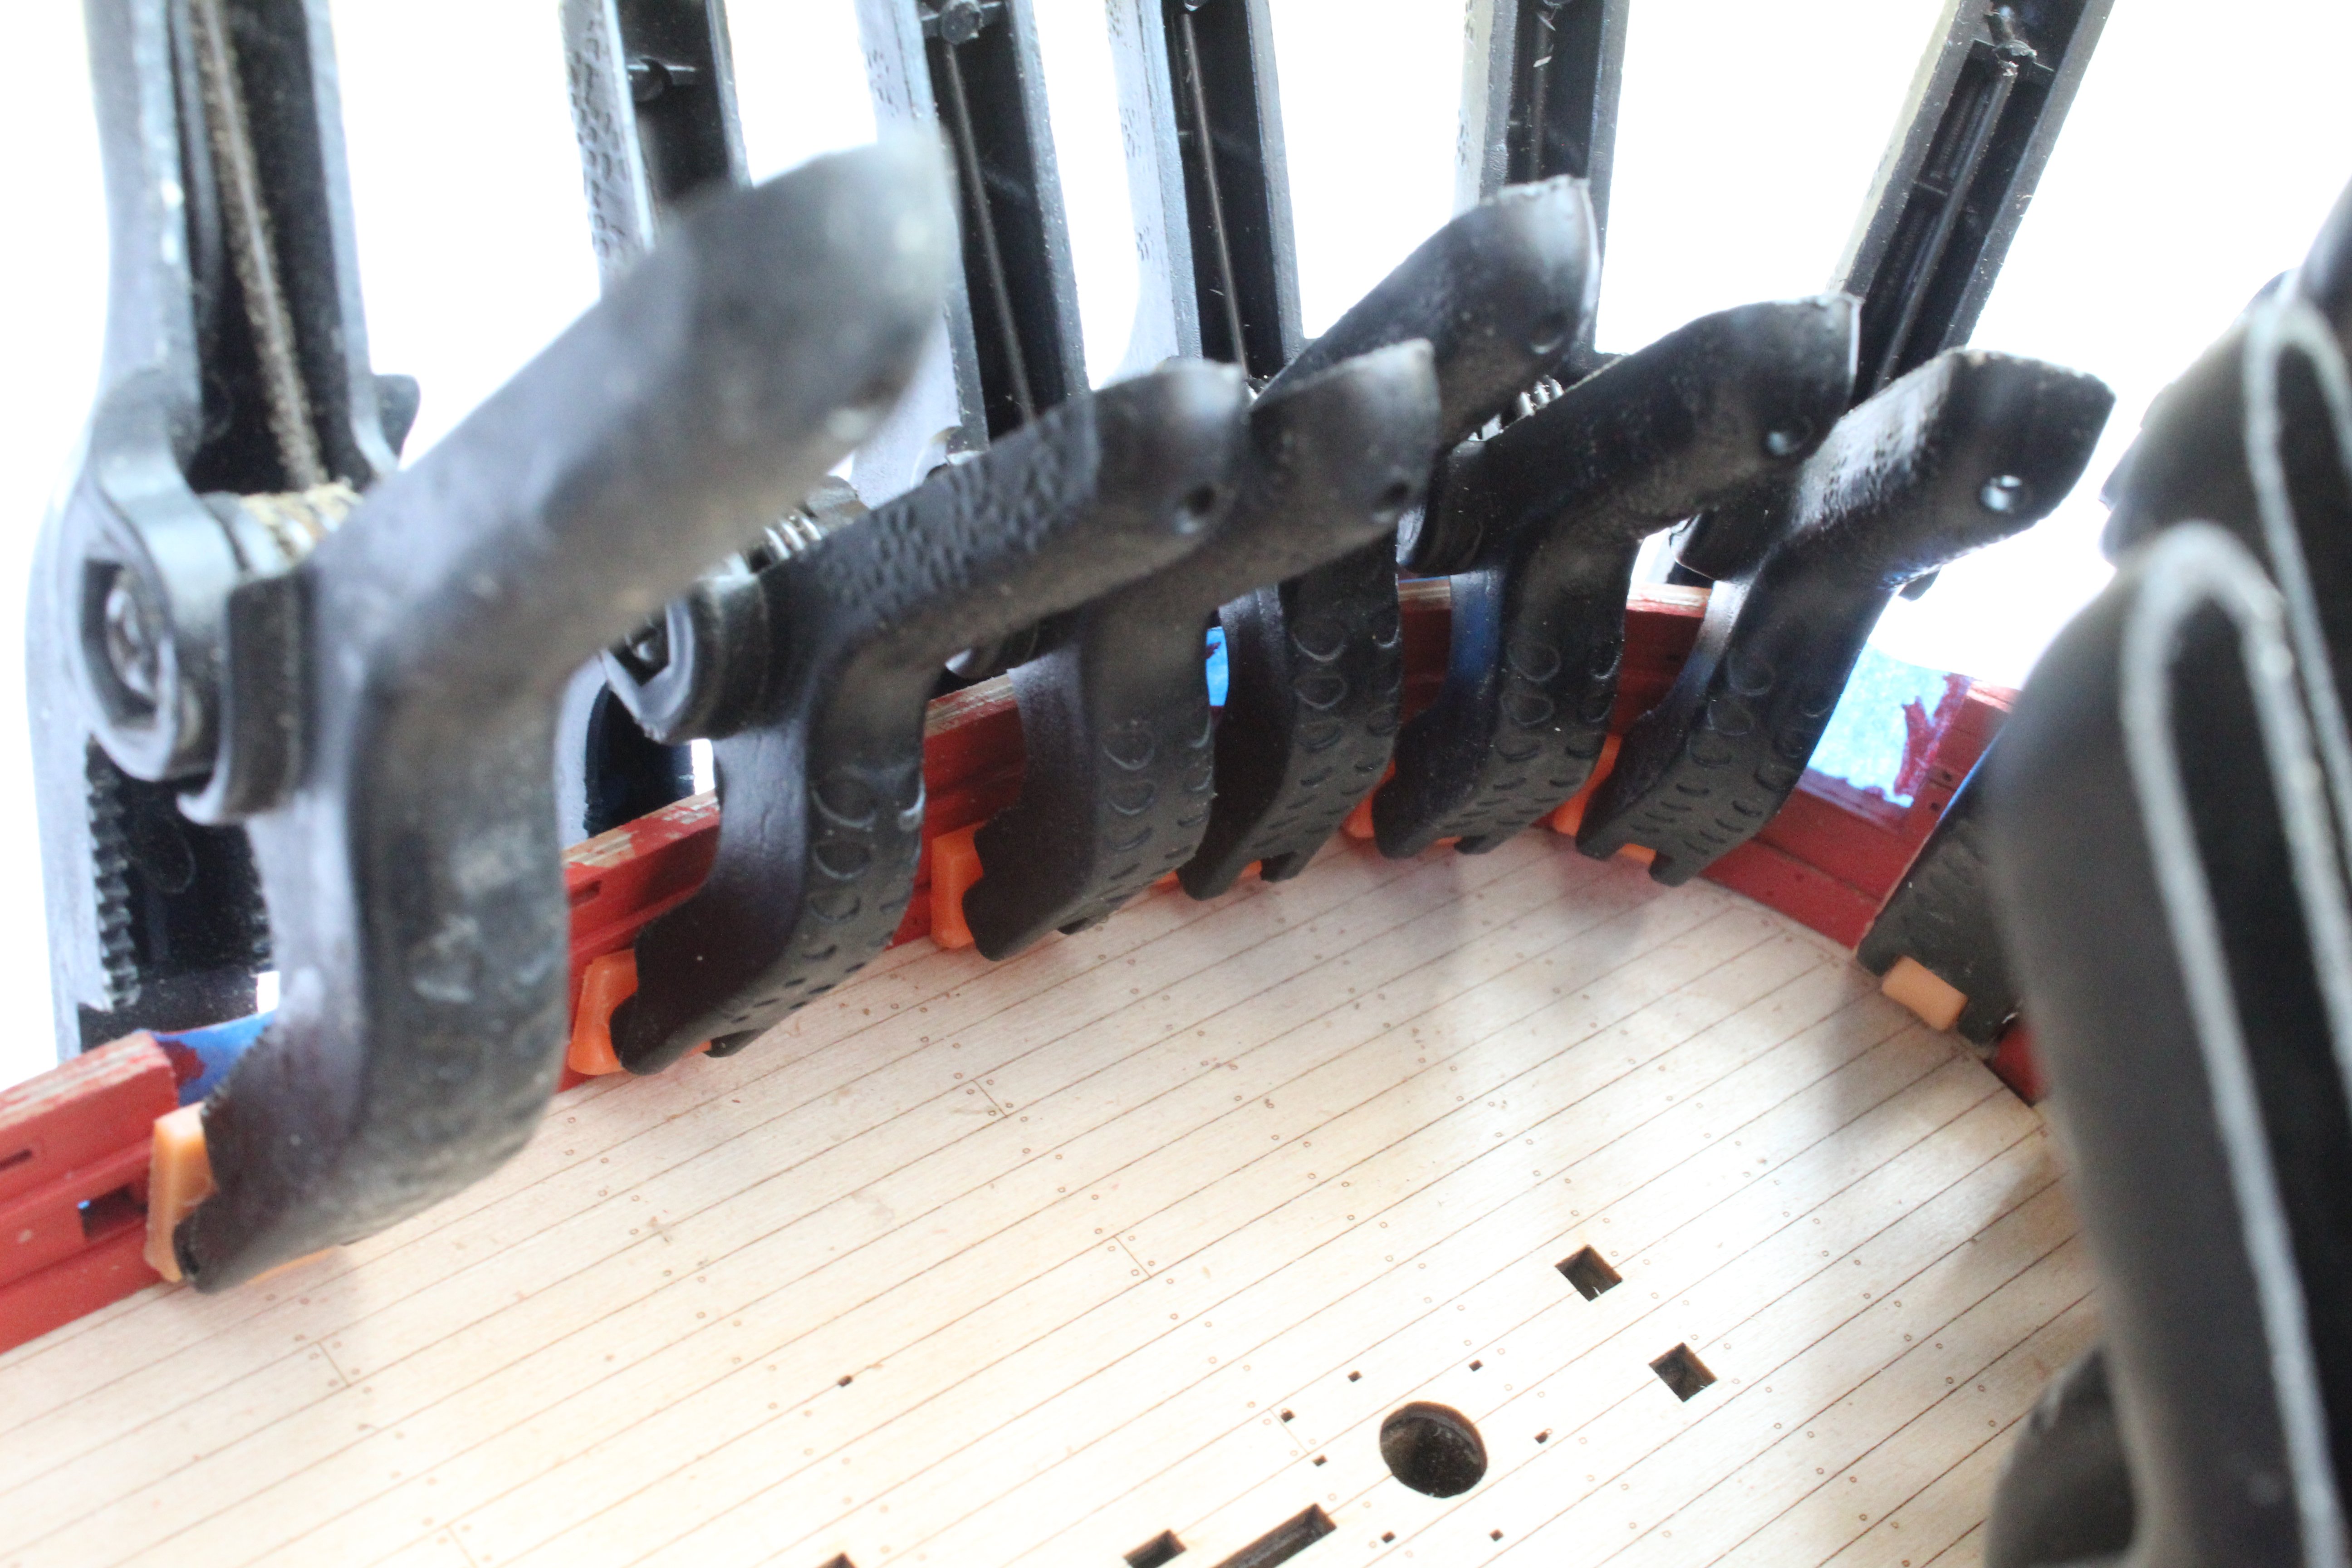
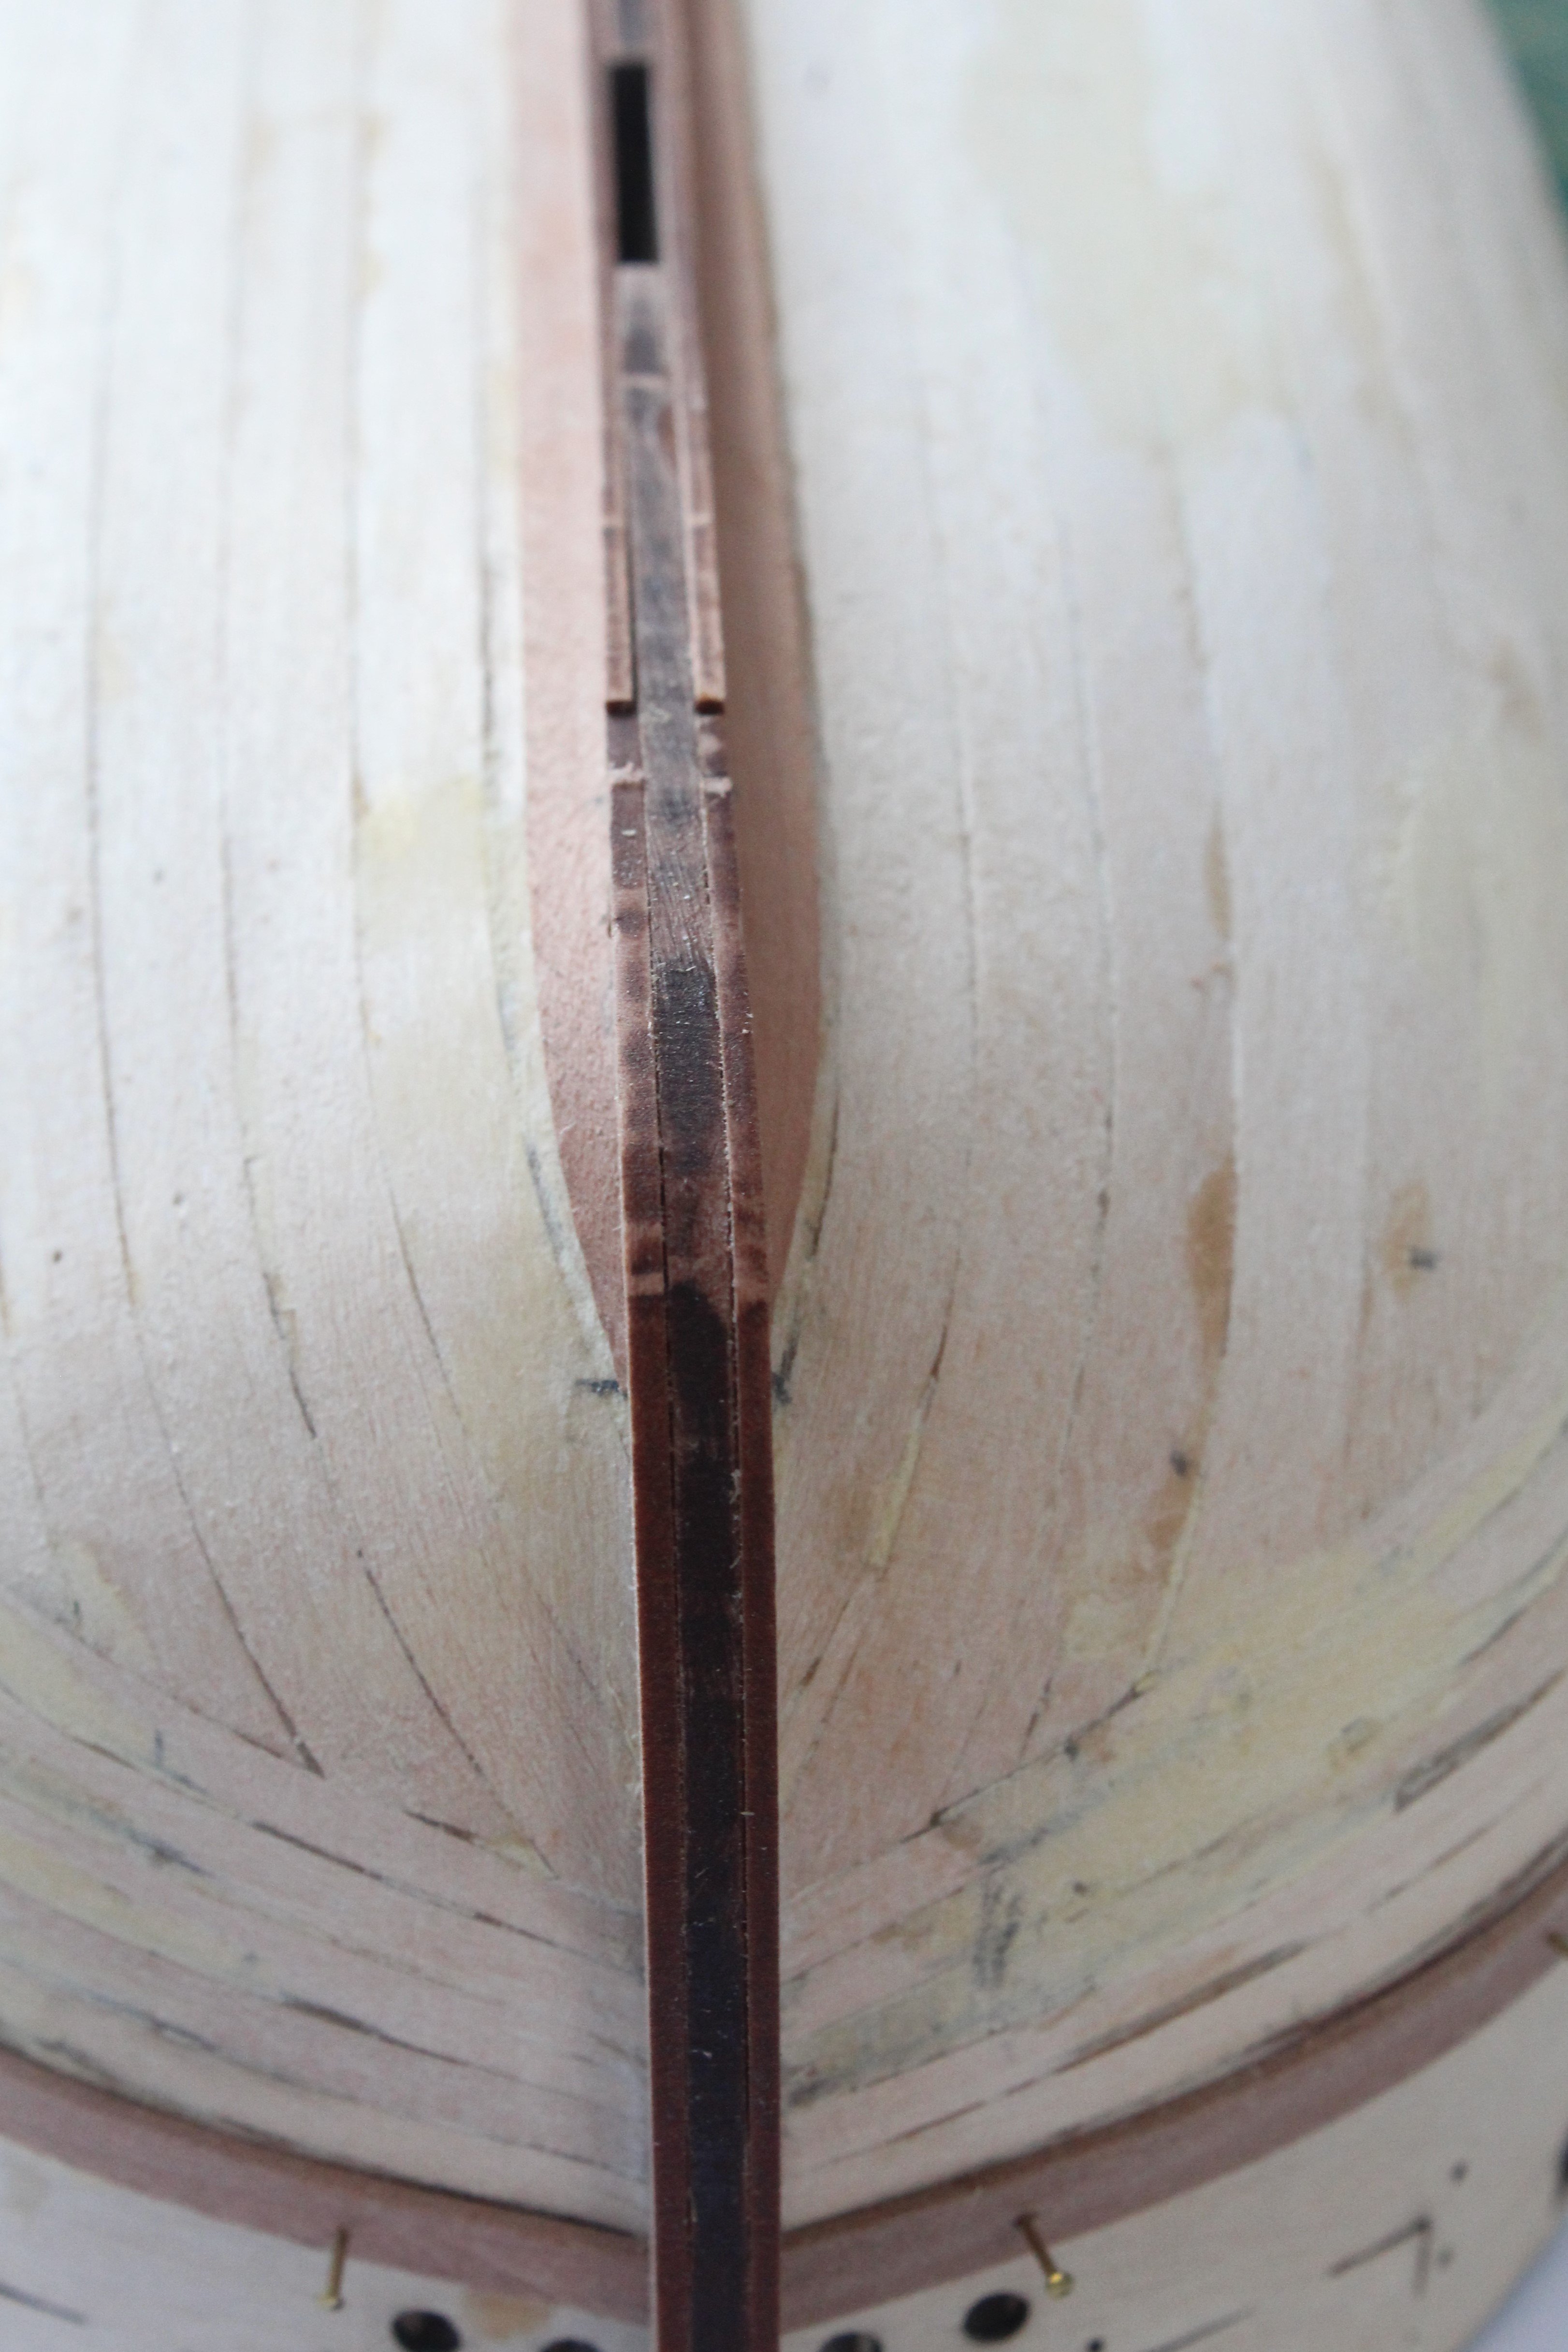
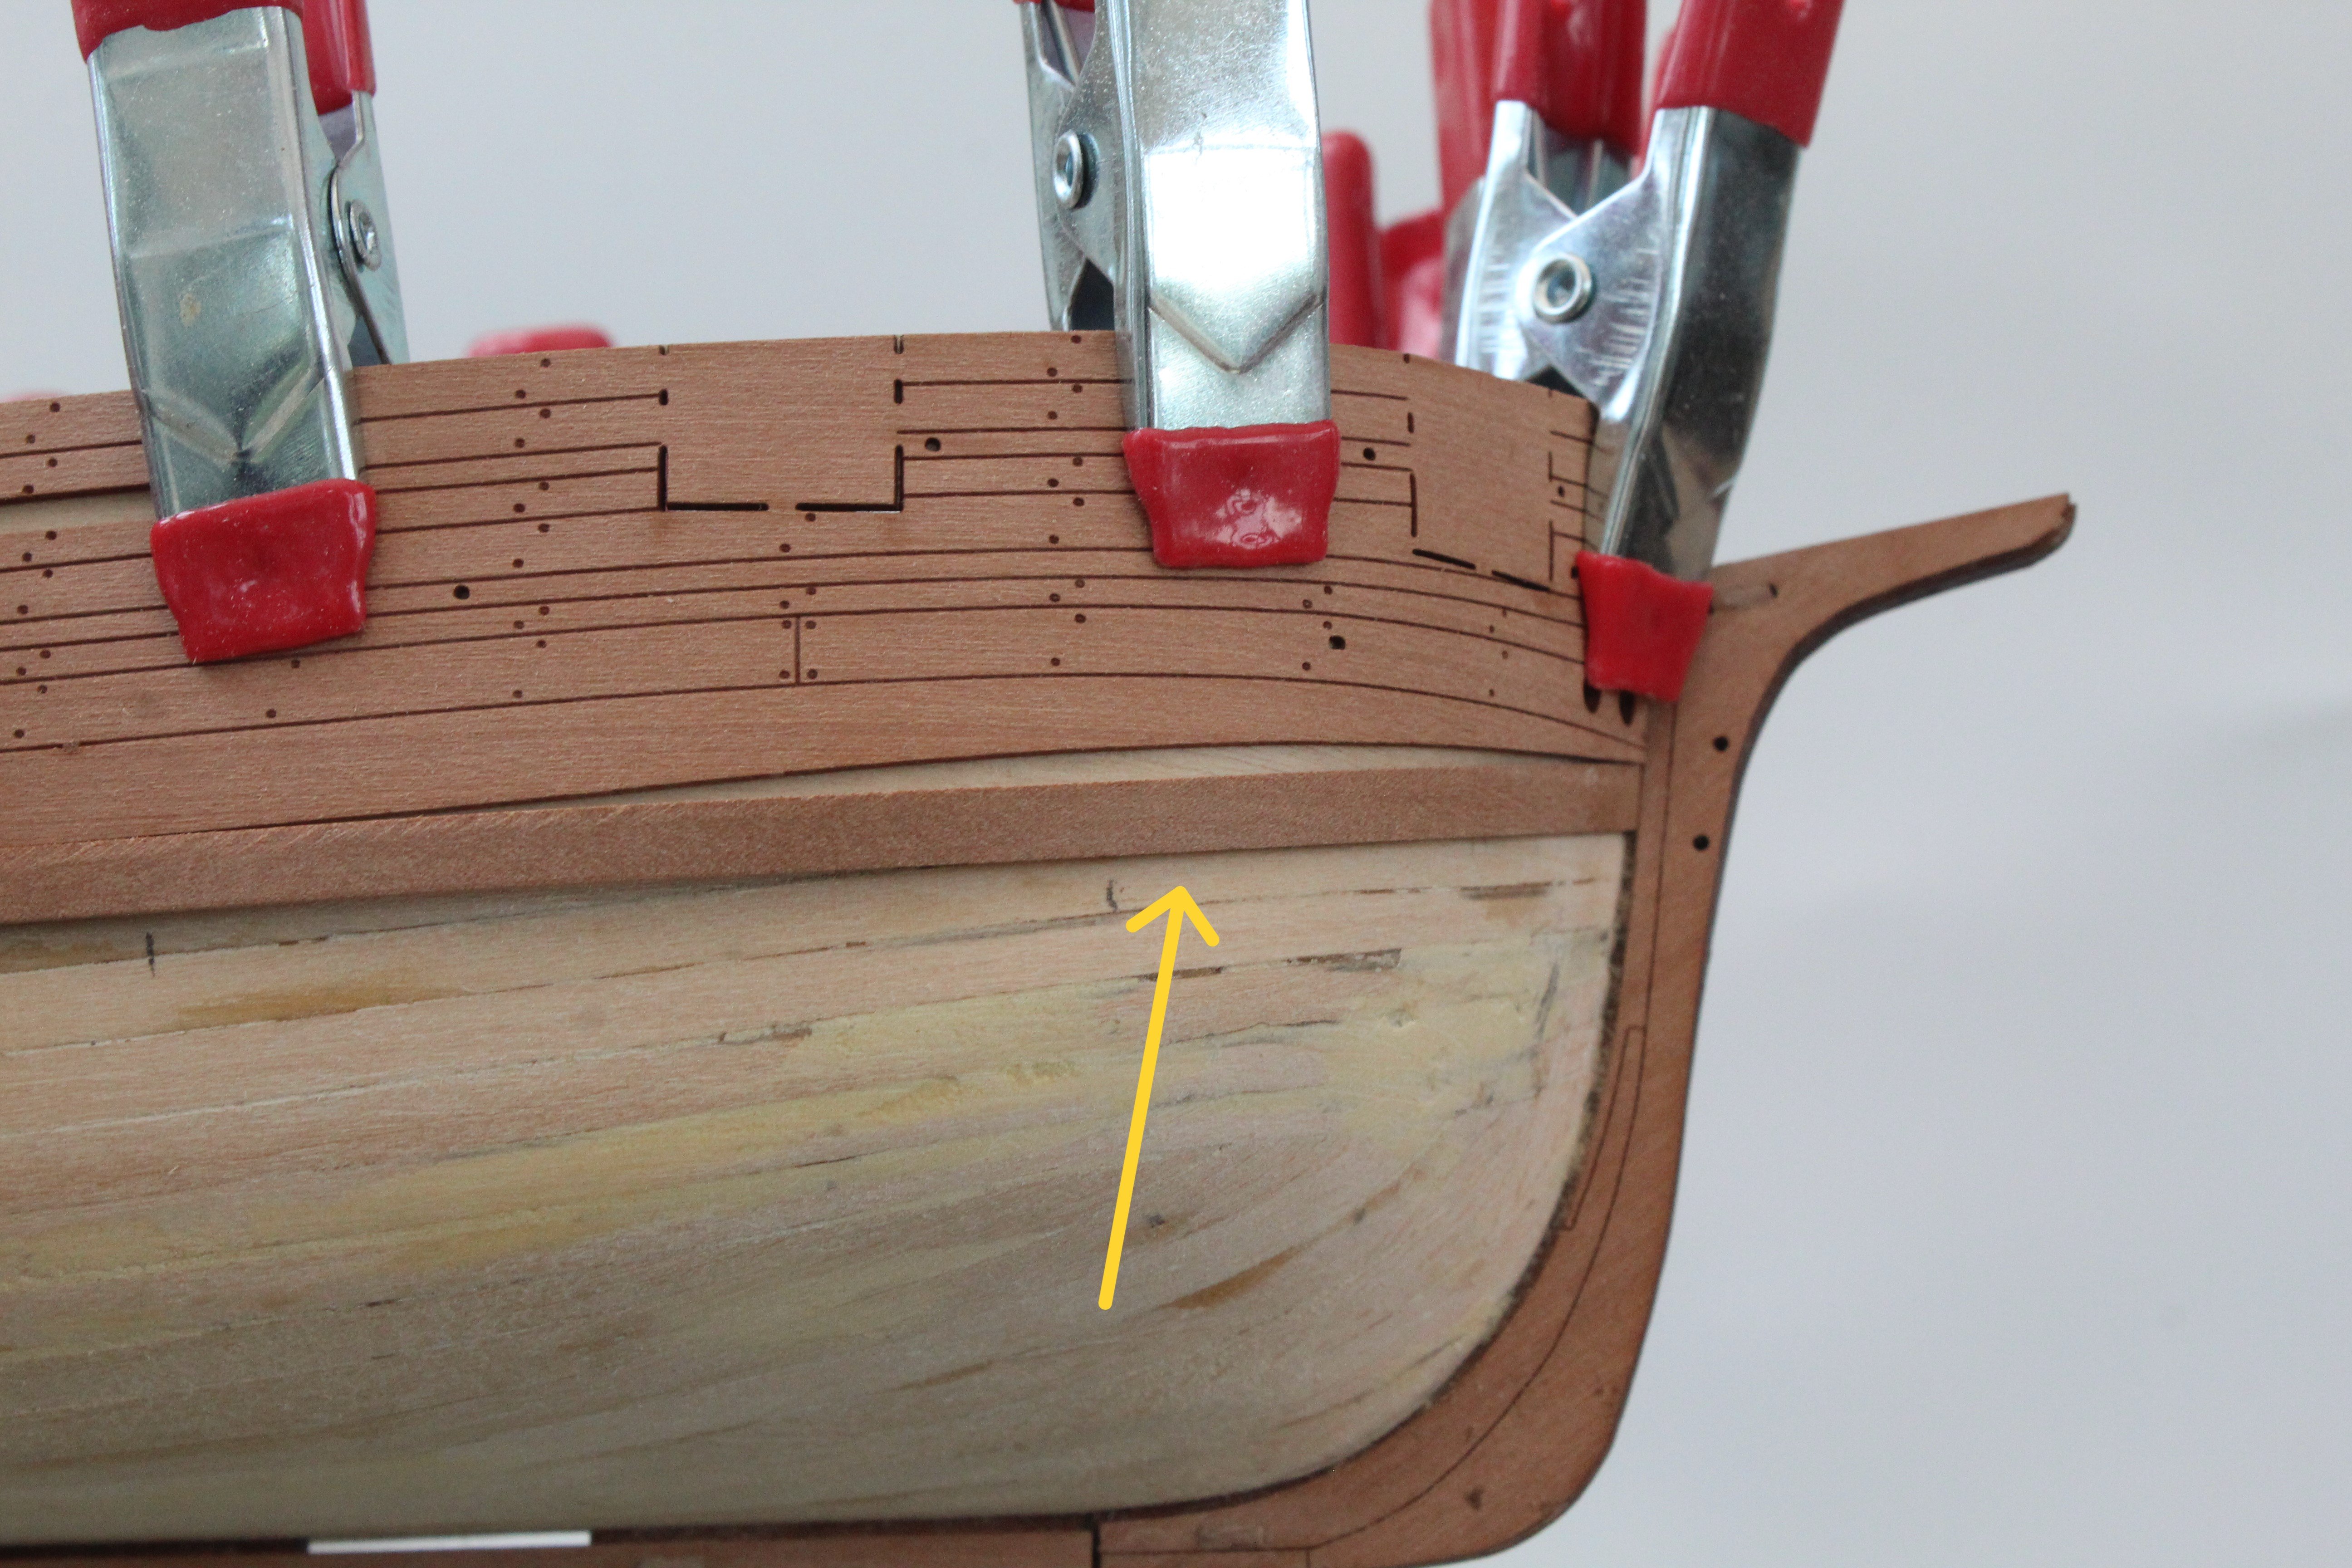
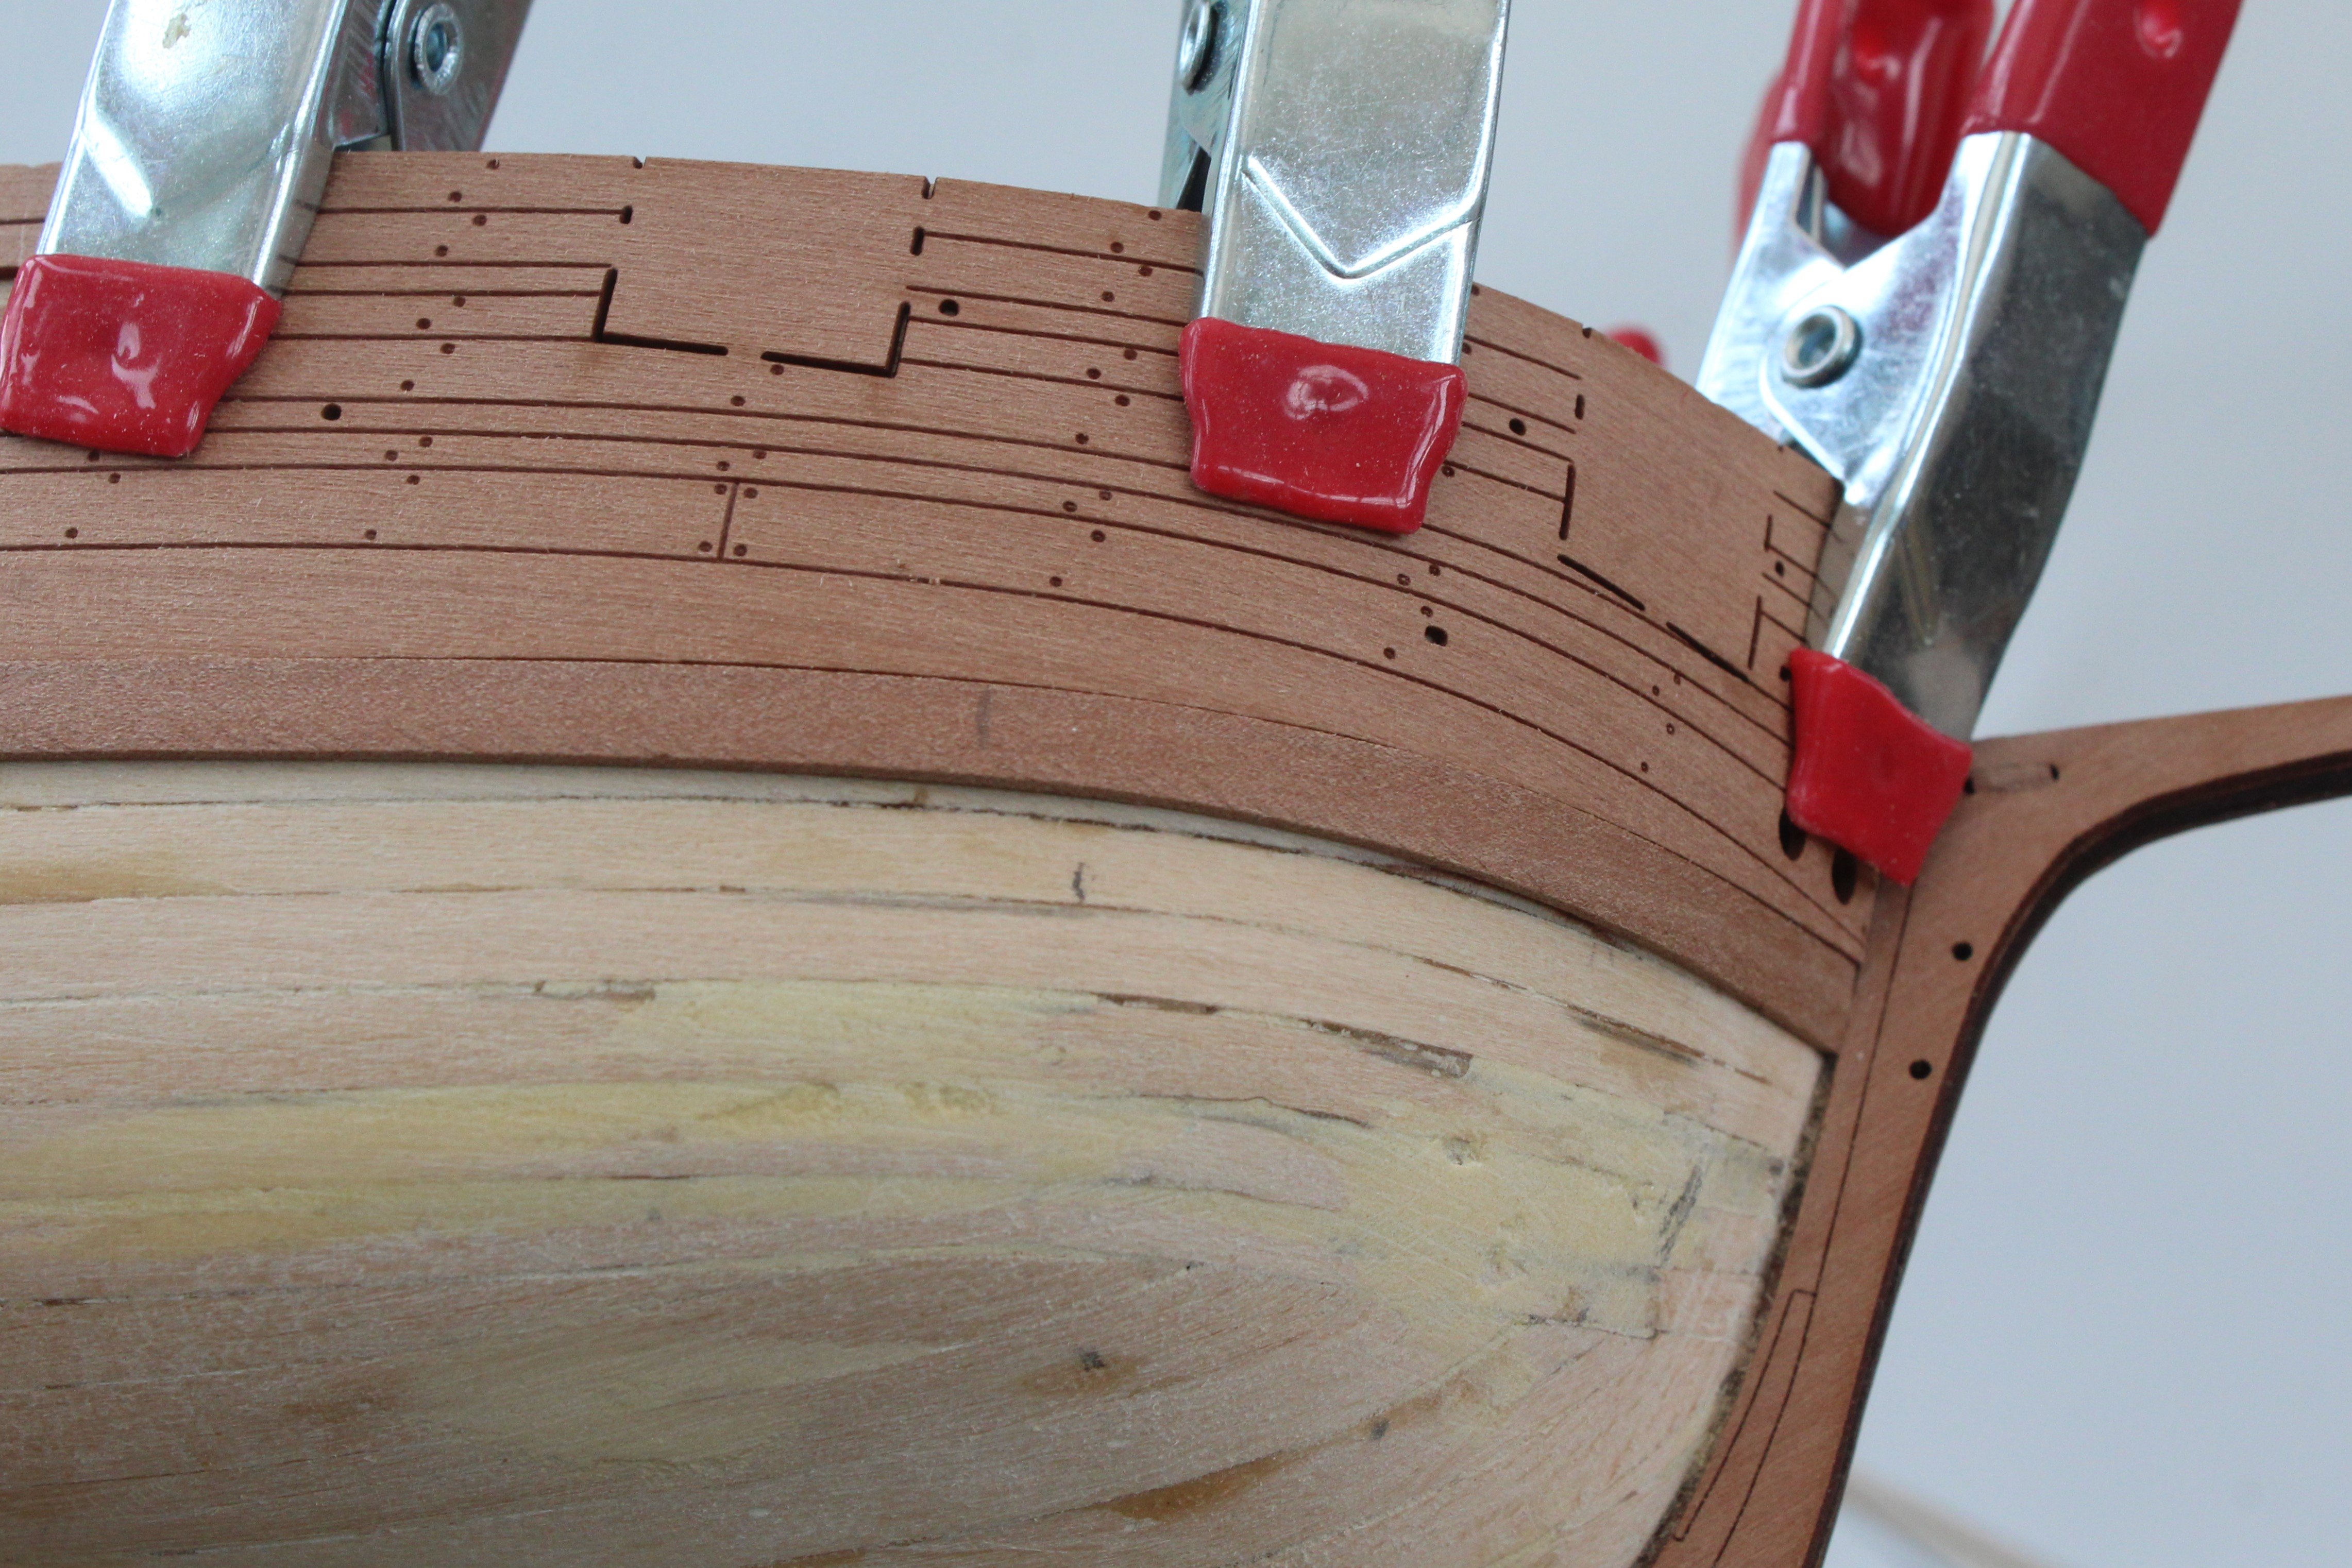
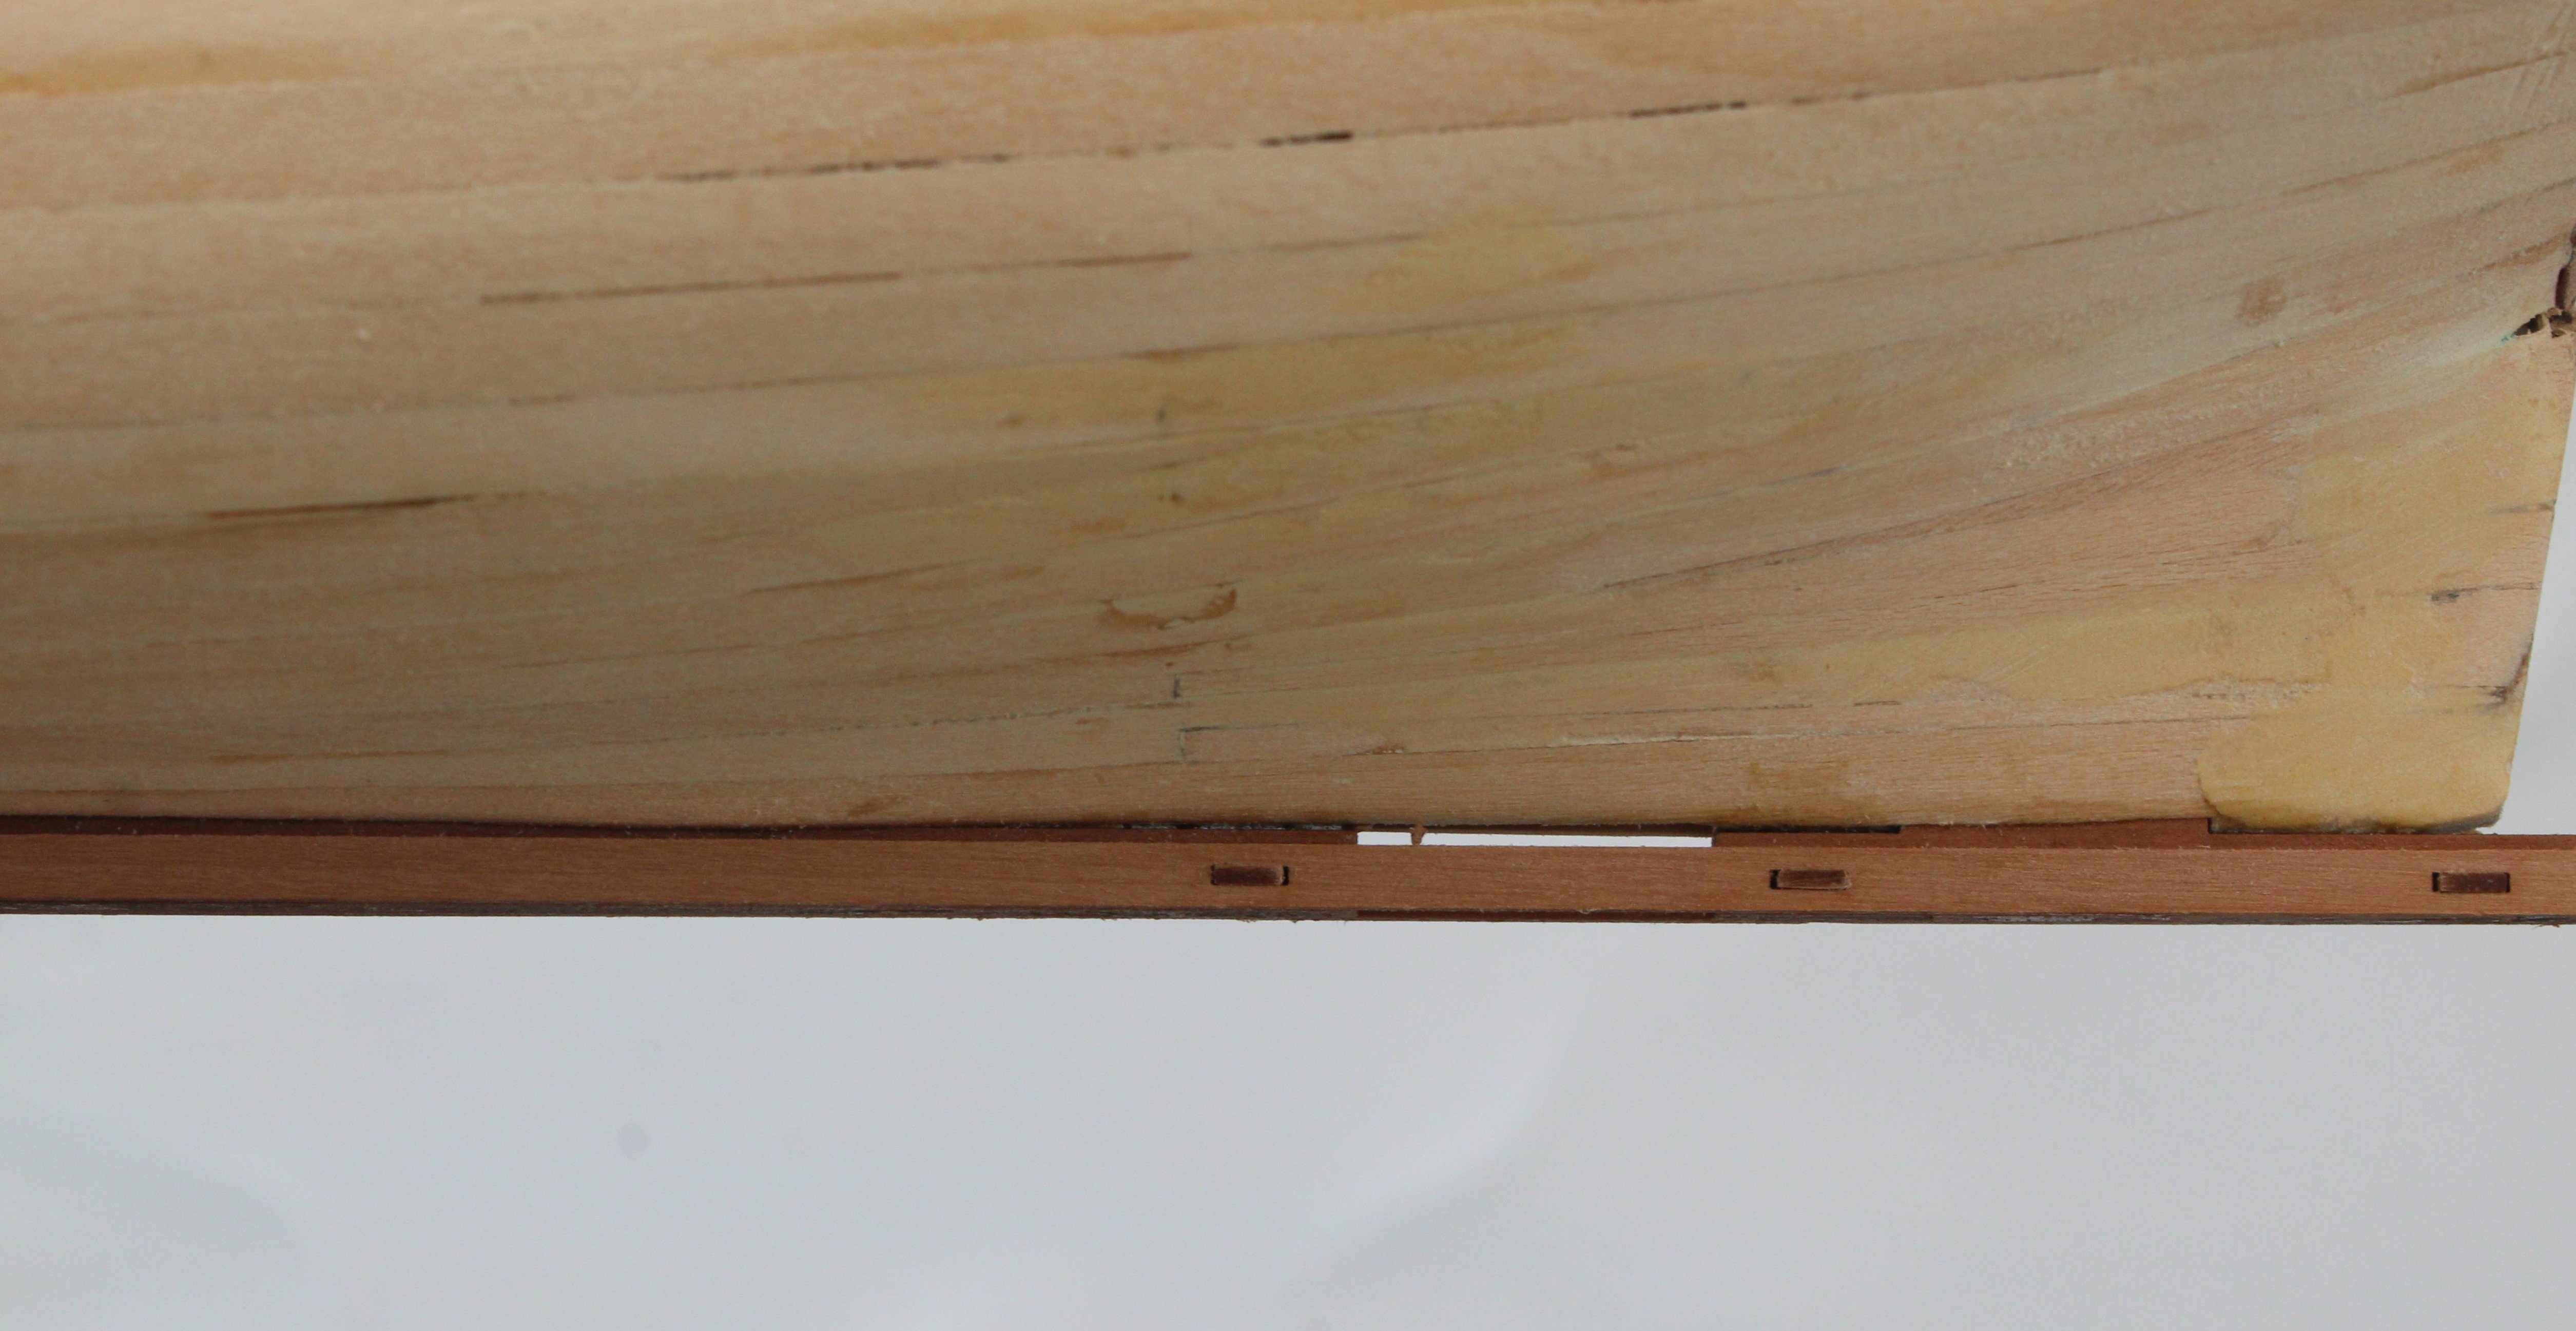
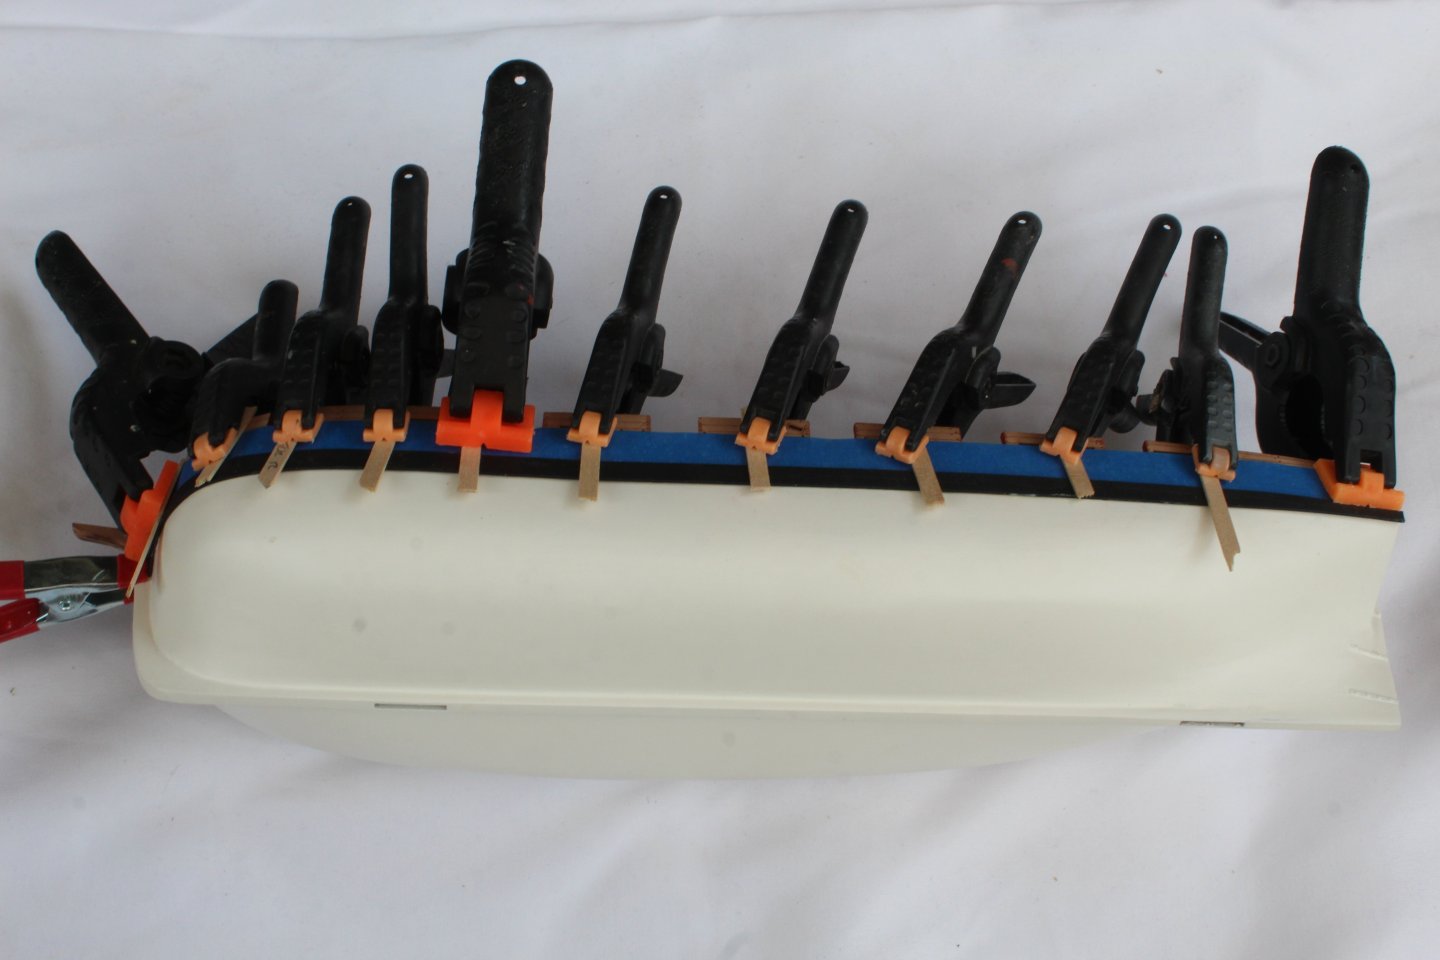
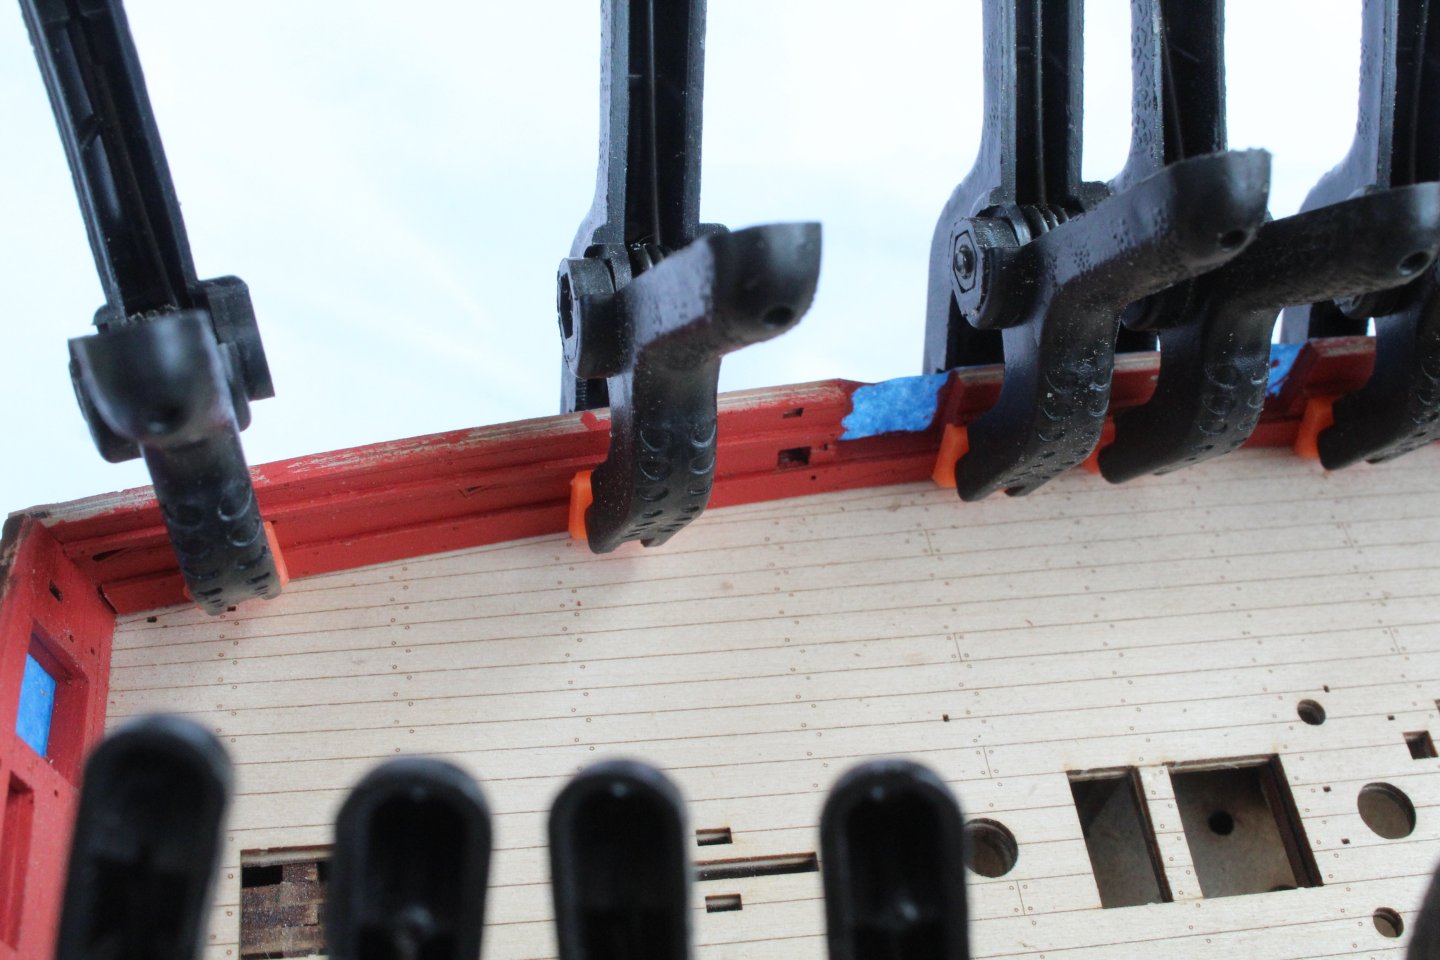
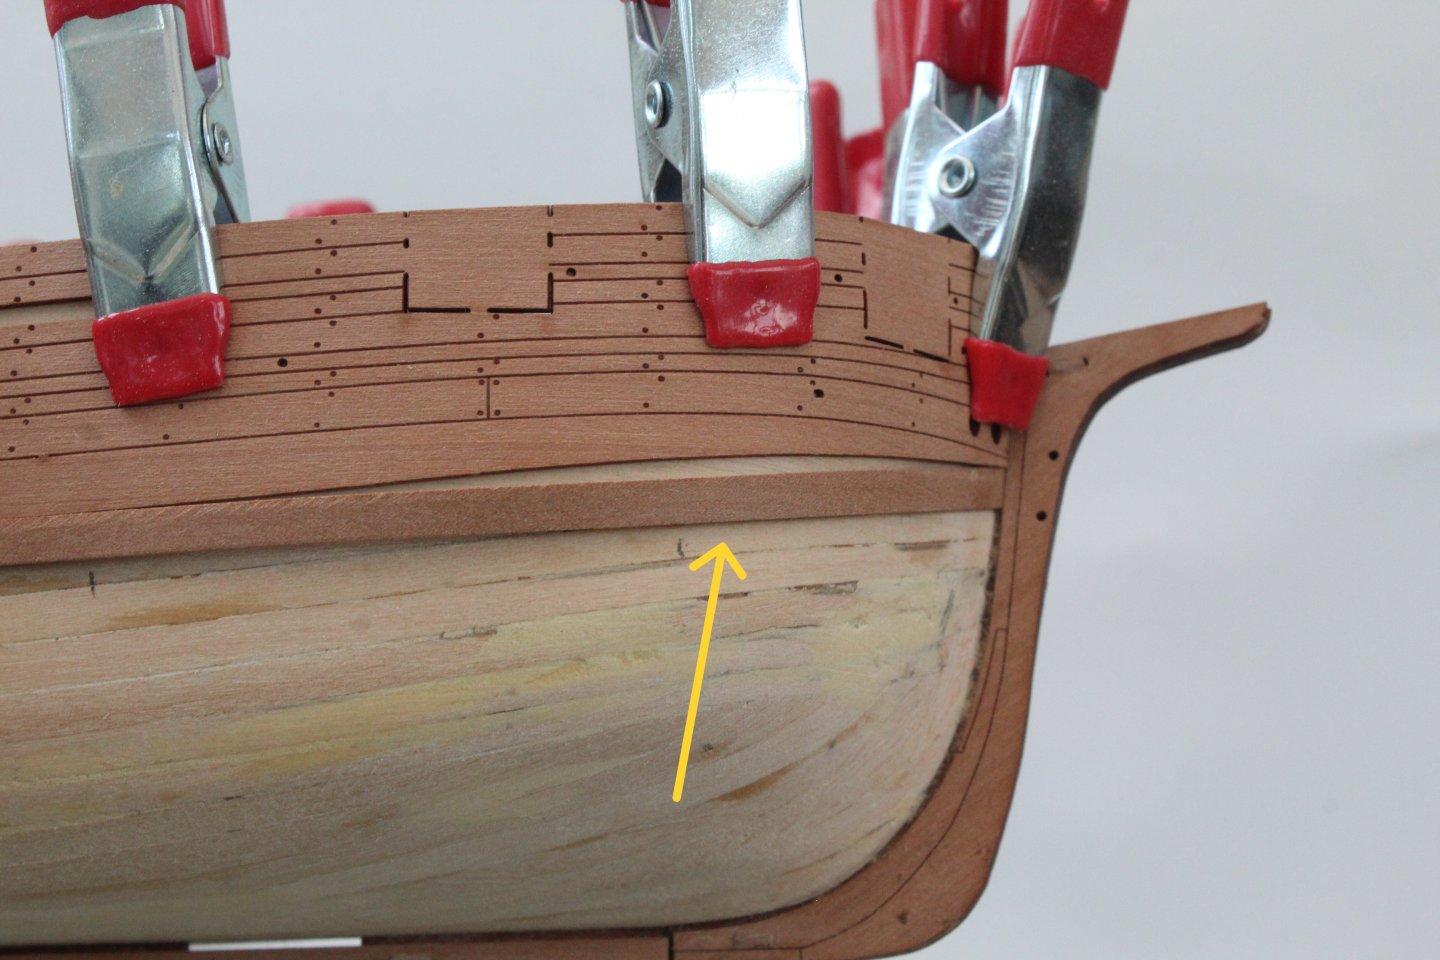
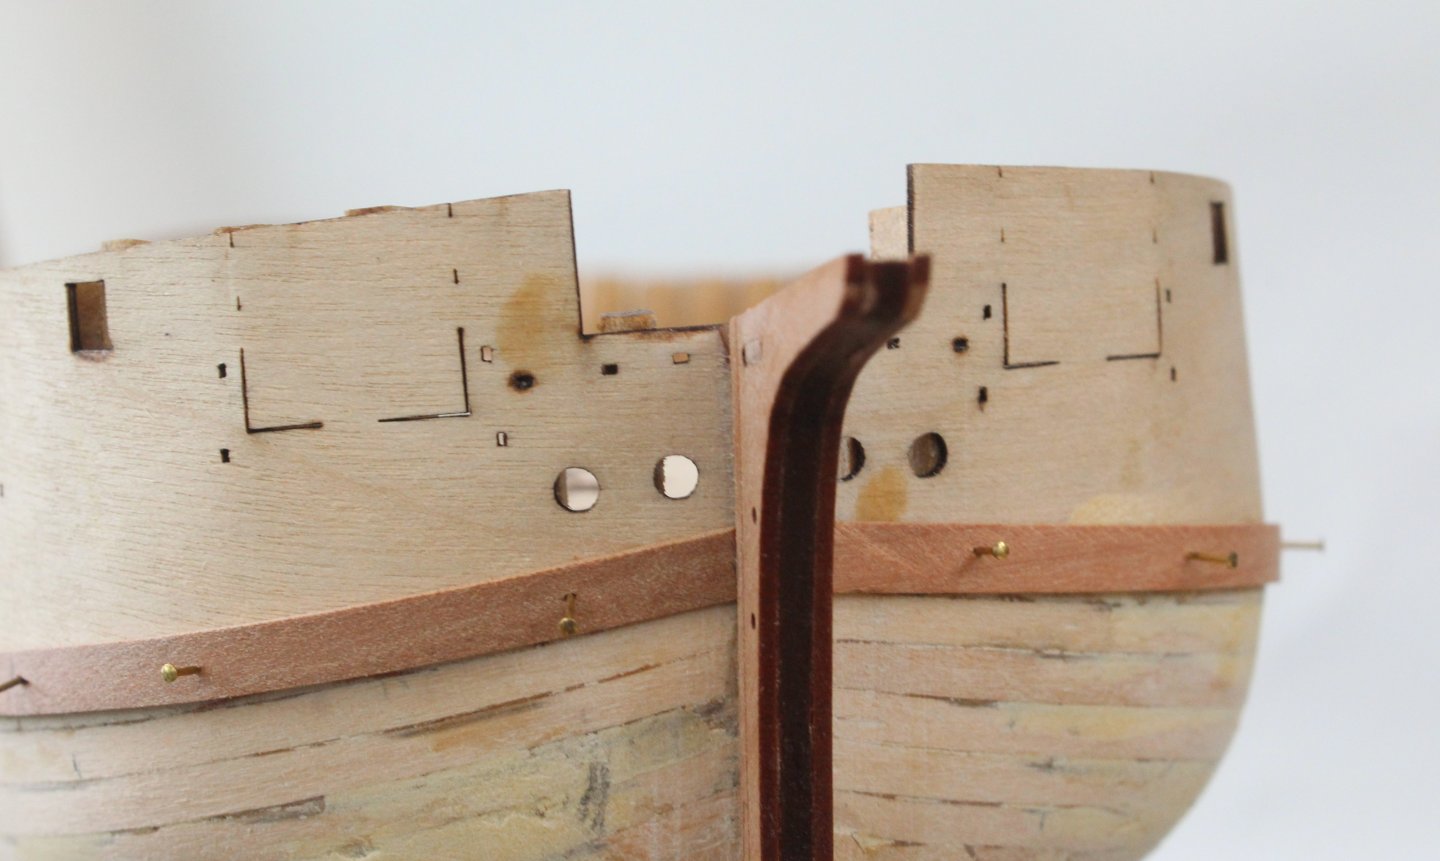
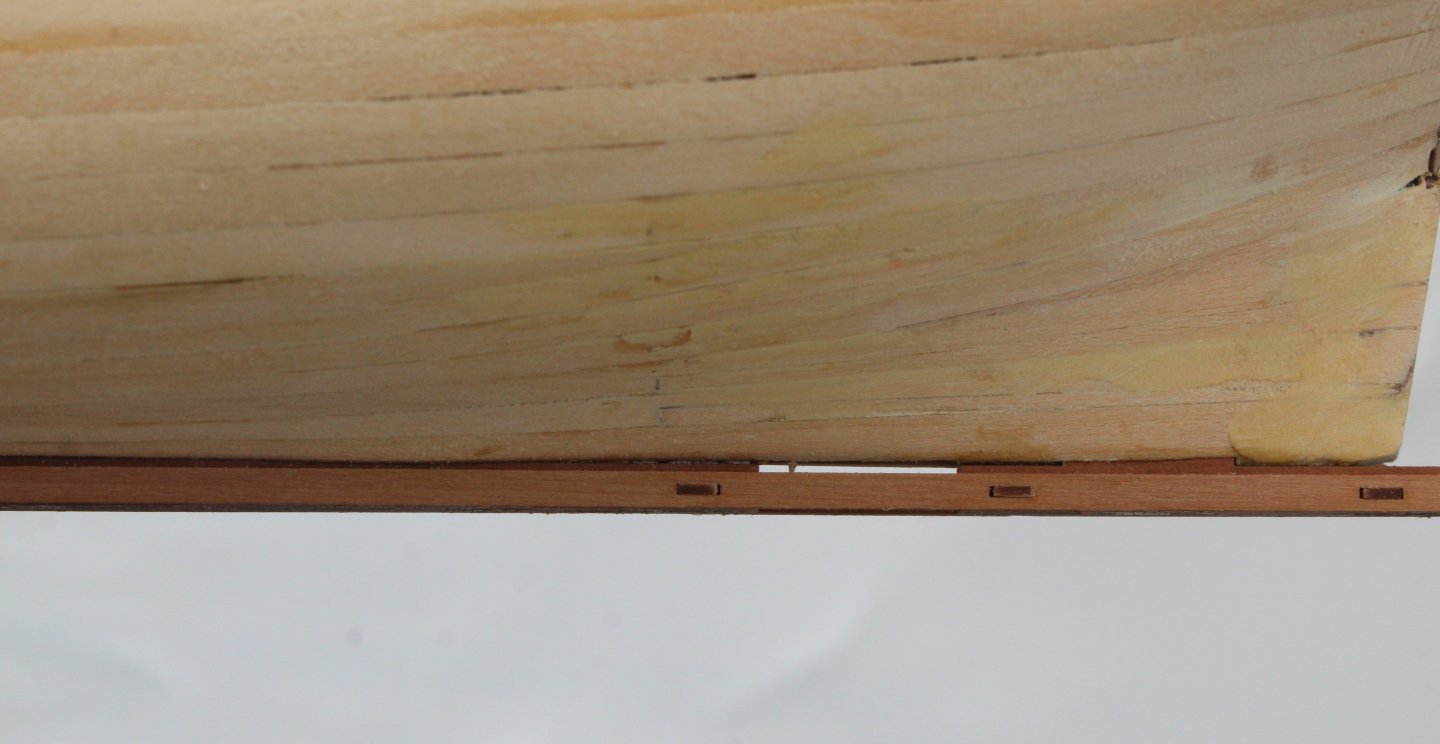
Build Log Index Date: 22/08/2024 Time worked today: 4 hours. Total time spent on build: 46 hours. Wales and External Rails As indicated in my last post the soaked wale patterns had been clamped to the hull. Once they were released a coat of varnish was brushed on followed by two coats of black paint. Before fitting the wales I did add some tape to protect the bulwark patterns from any excess glue. After applying the wales with wood glue they were added to the hull. I did use some clamps to hold them in place as the glue cured. The next job was to fit the lower rail patterns. After the laser char was removed they were giving a coat of wood glue and then clamped to the hull. After adding some tape to the bulwarks a coat of varnish was brushed on to the upper section followed by two coats of black paint. The final task was to add the upper rails.


-
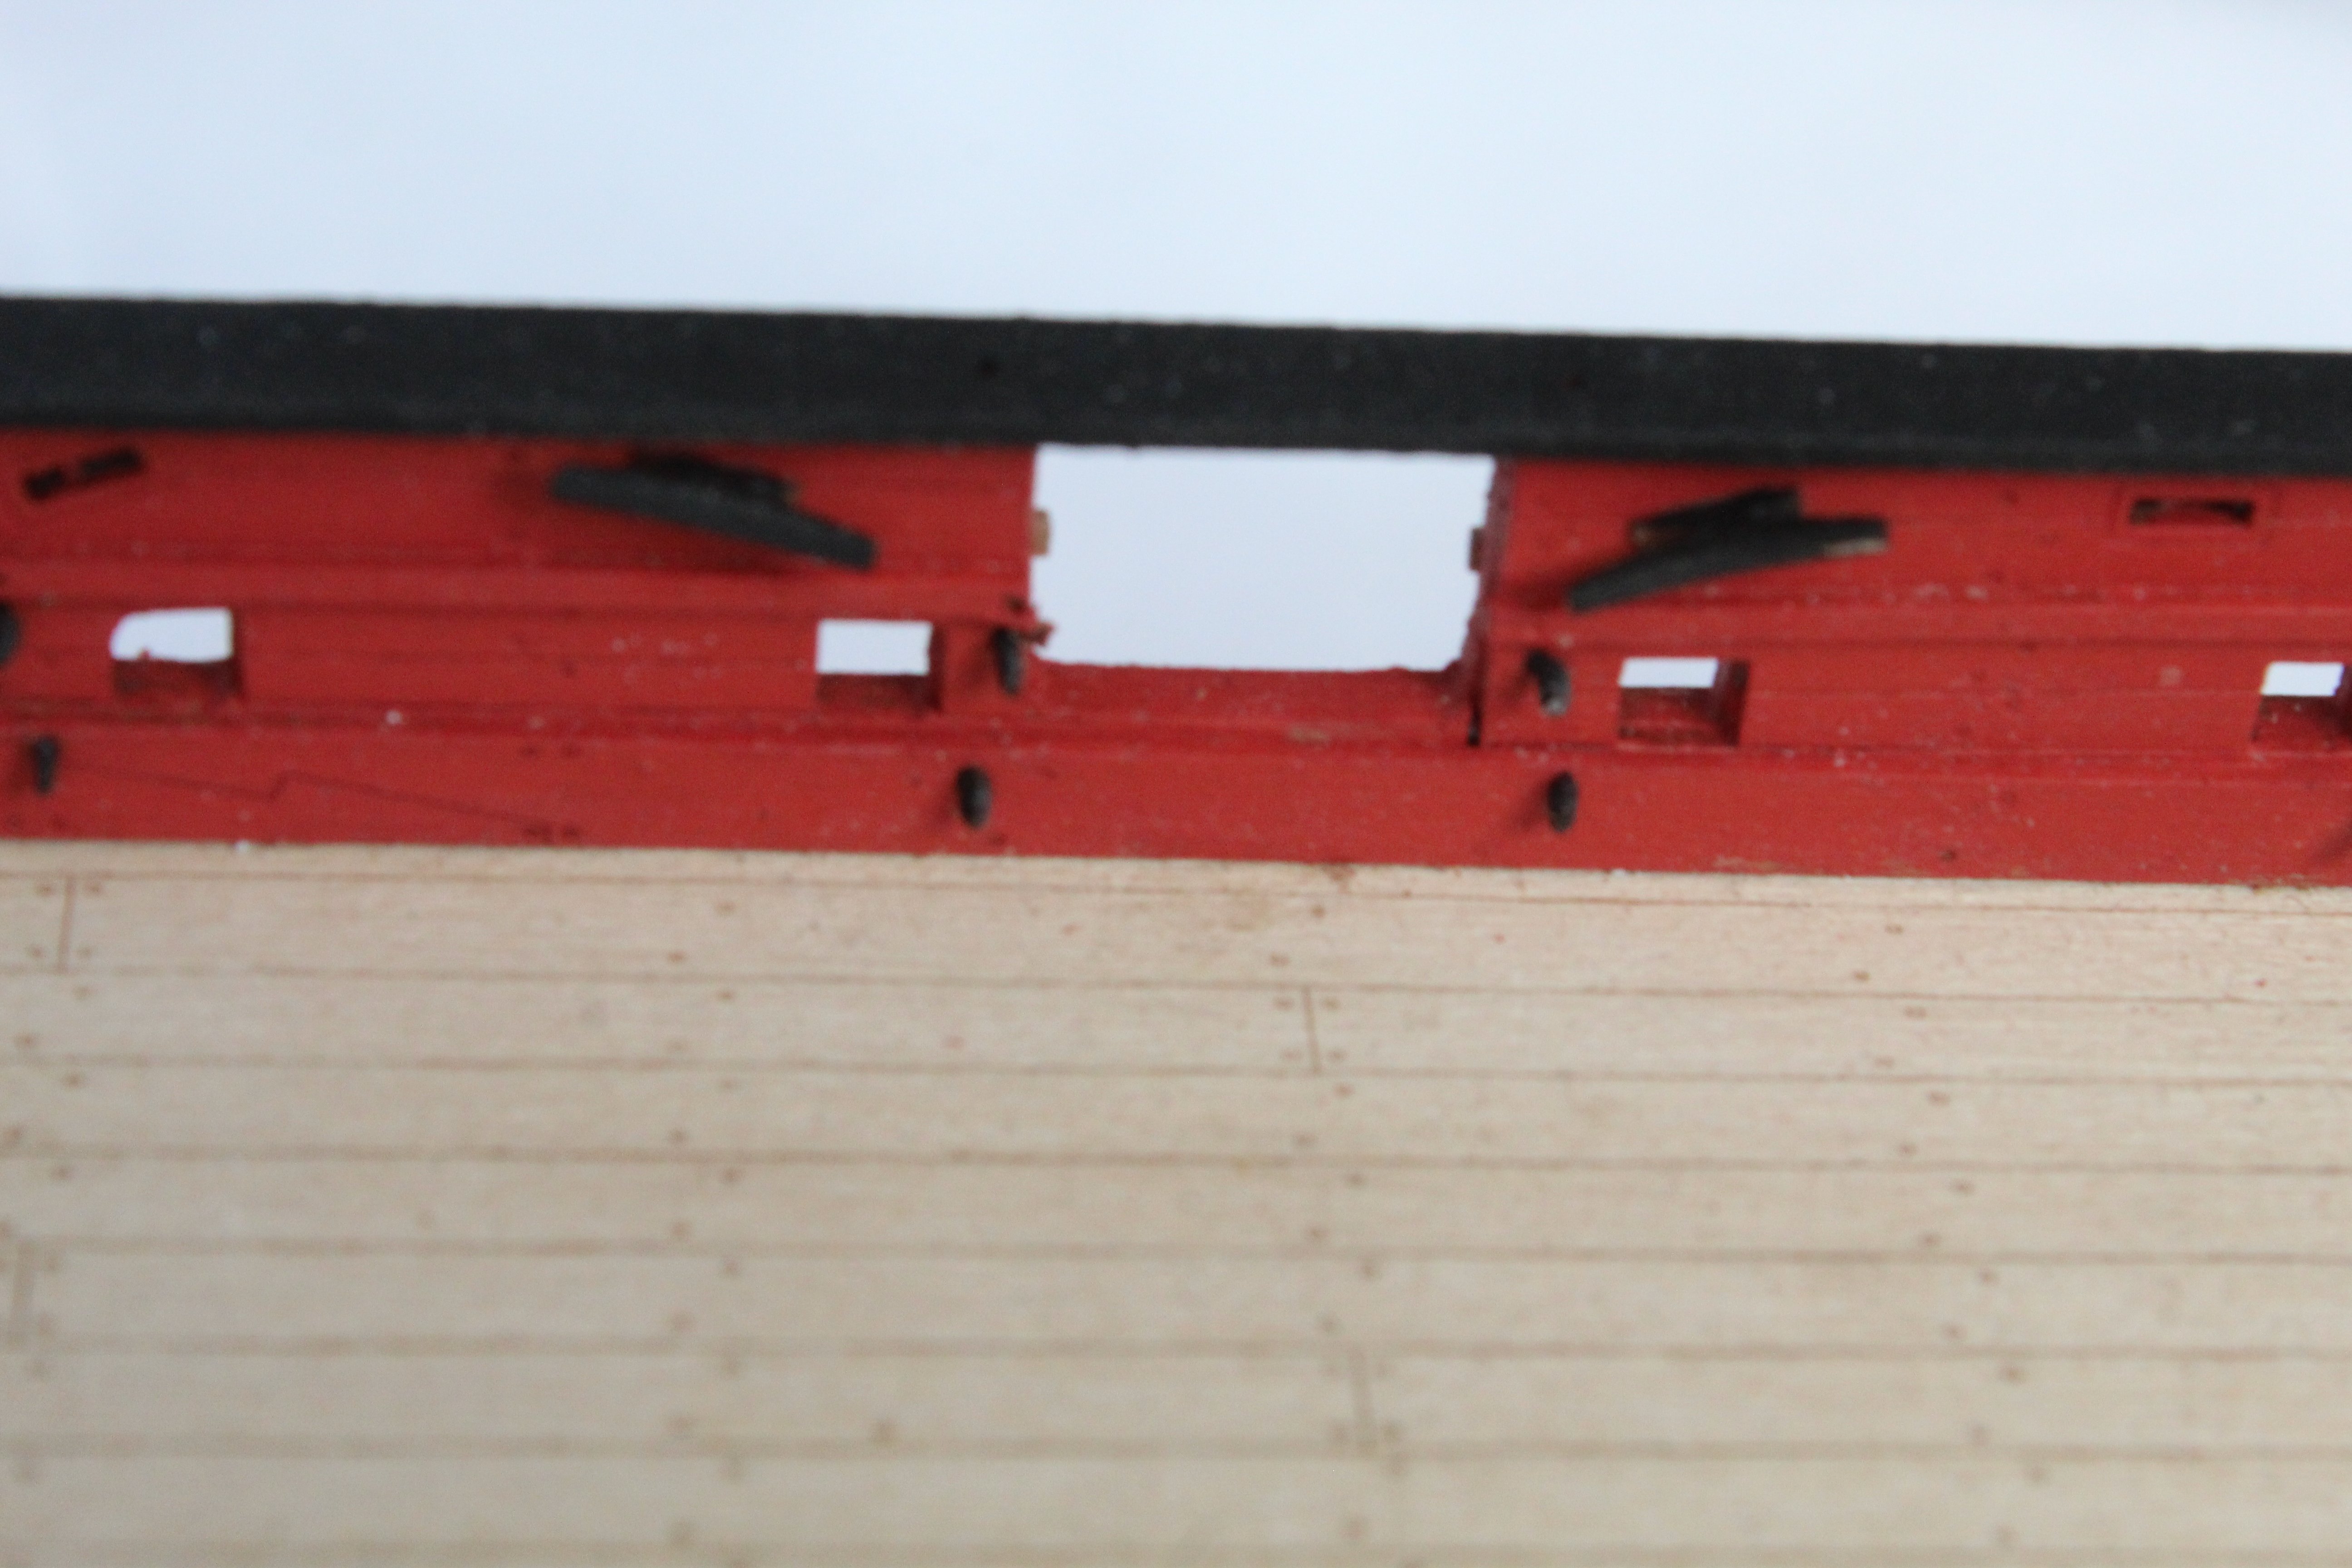
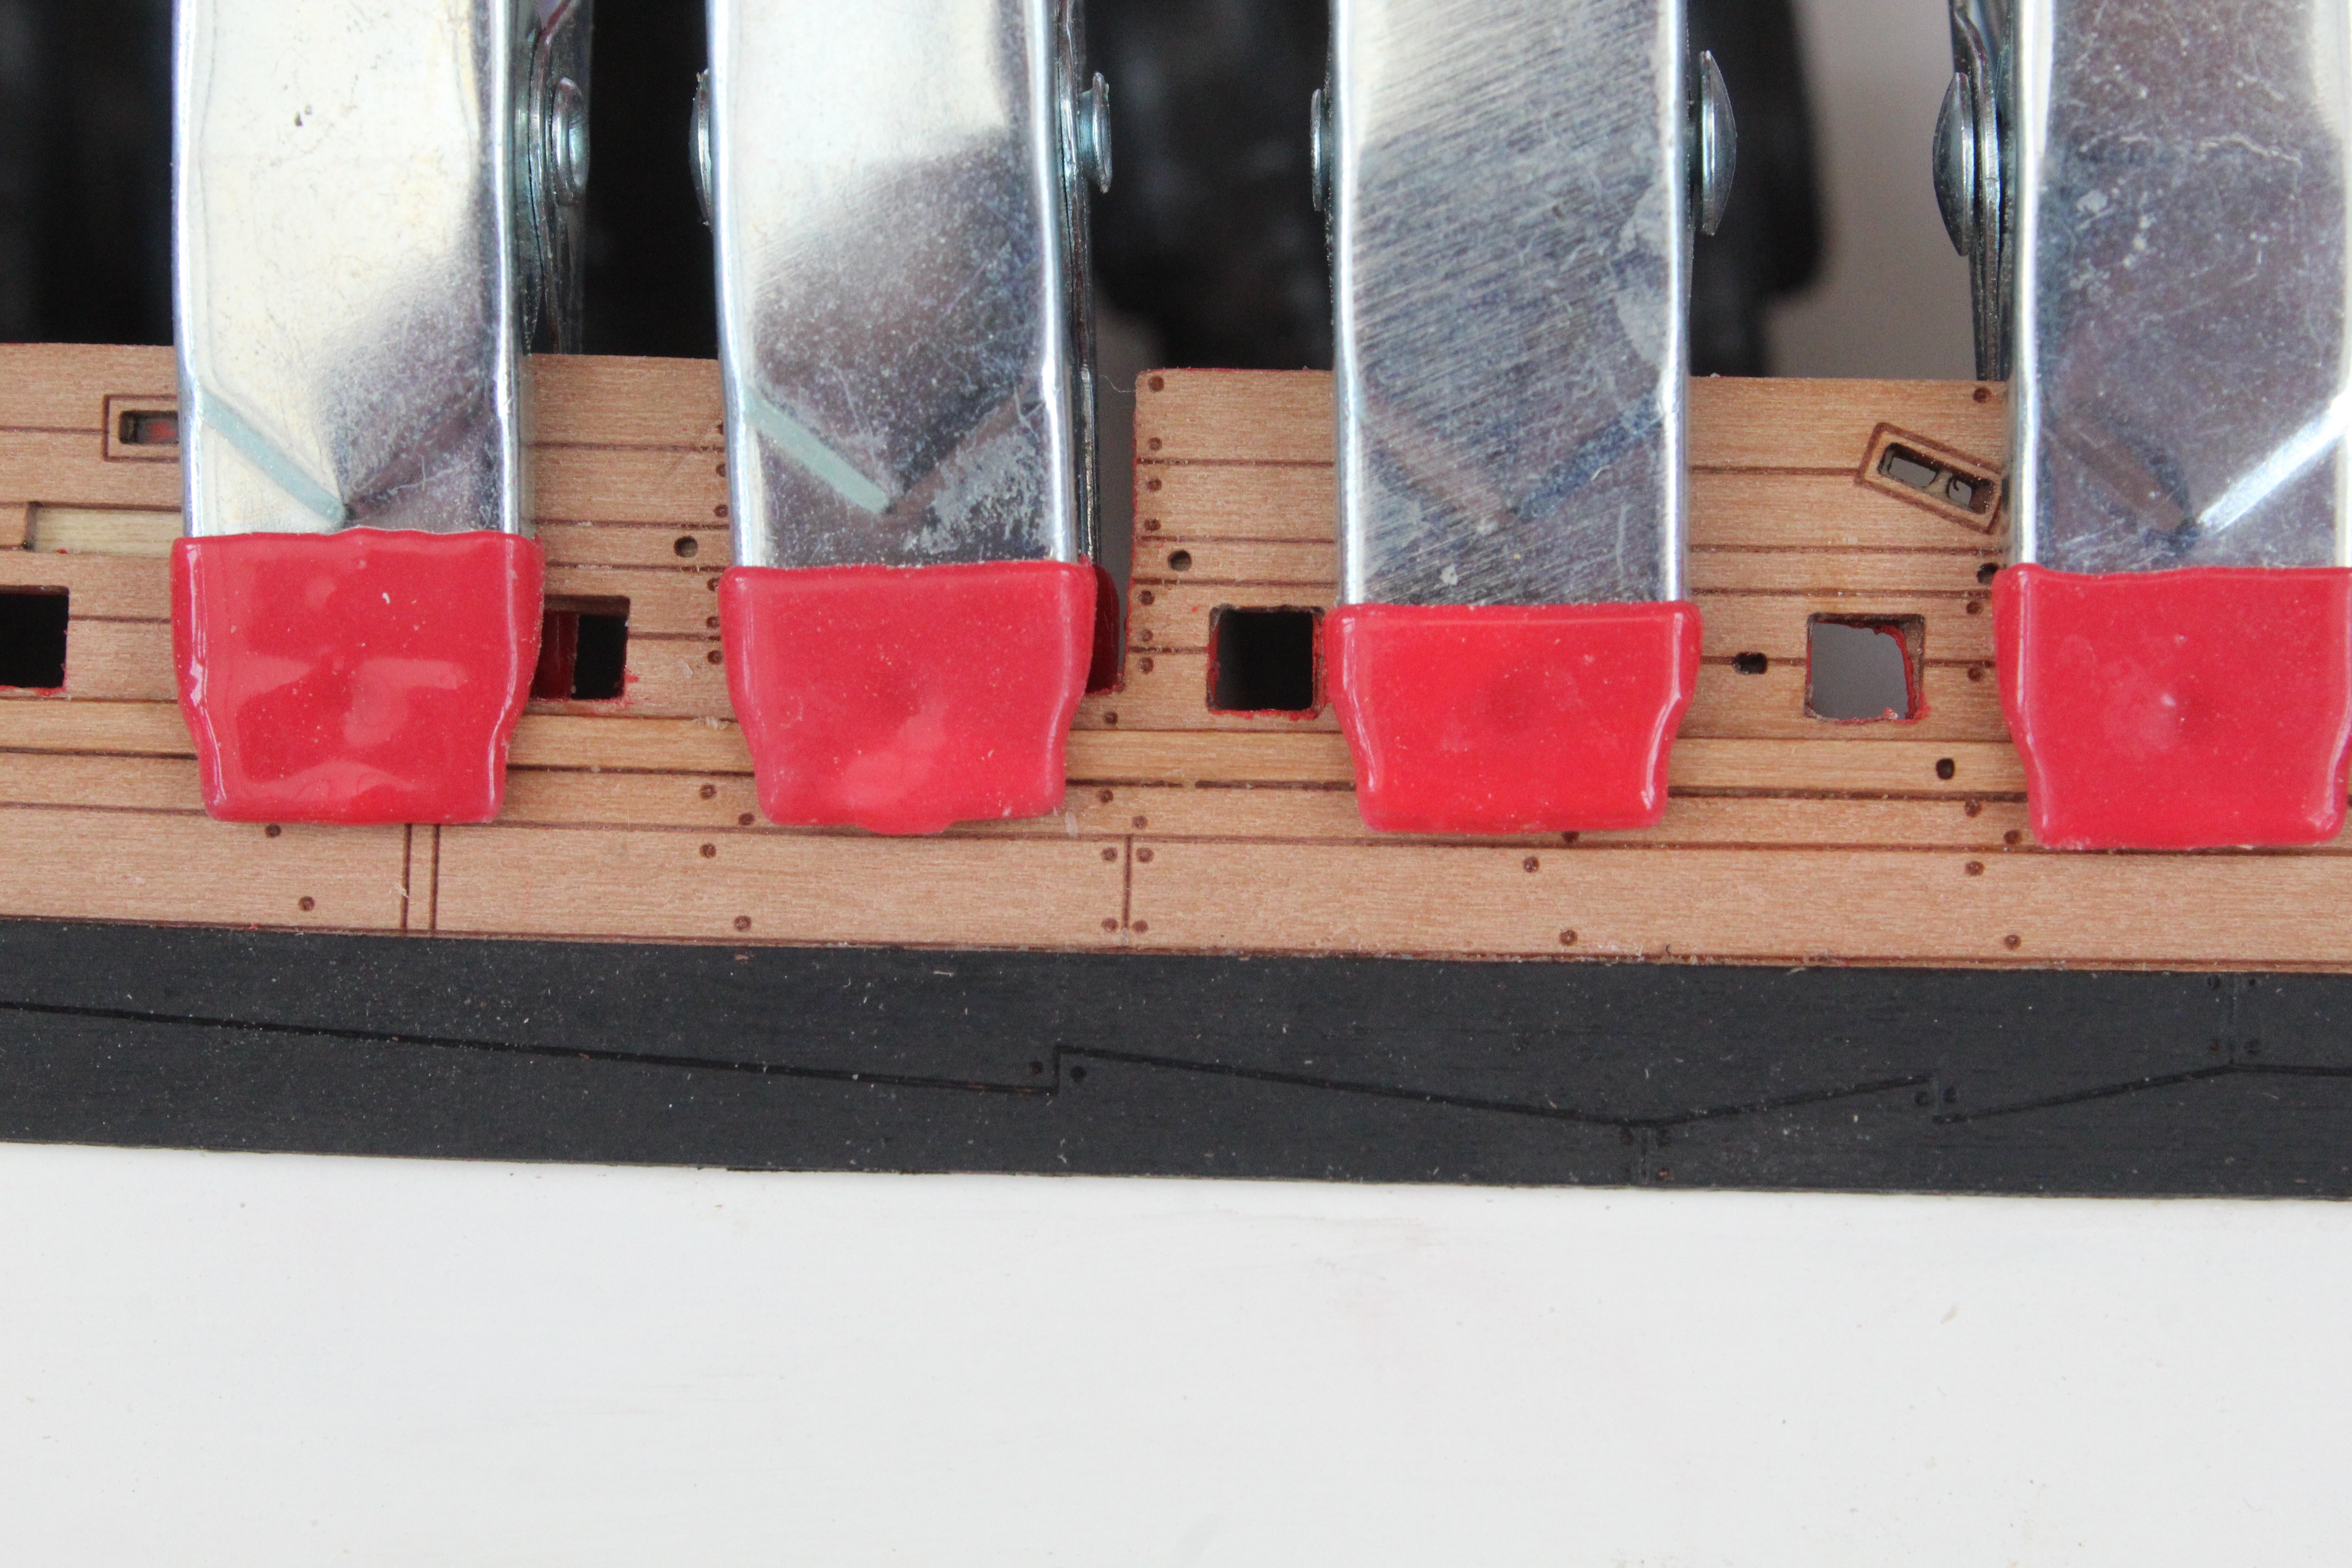
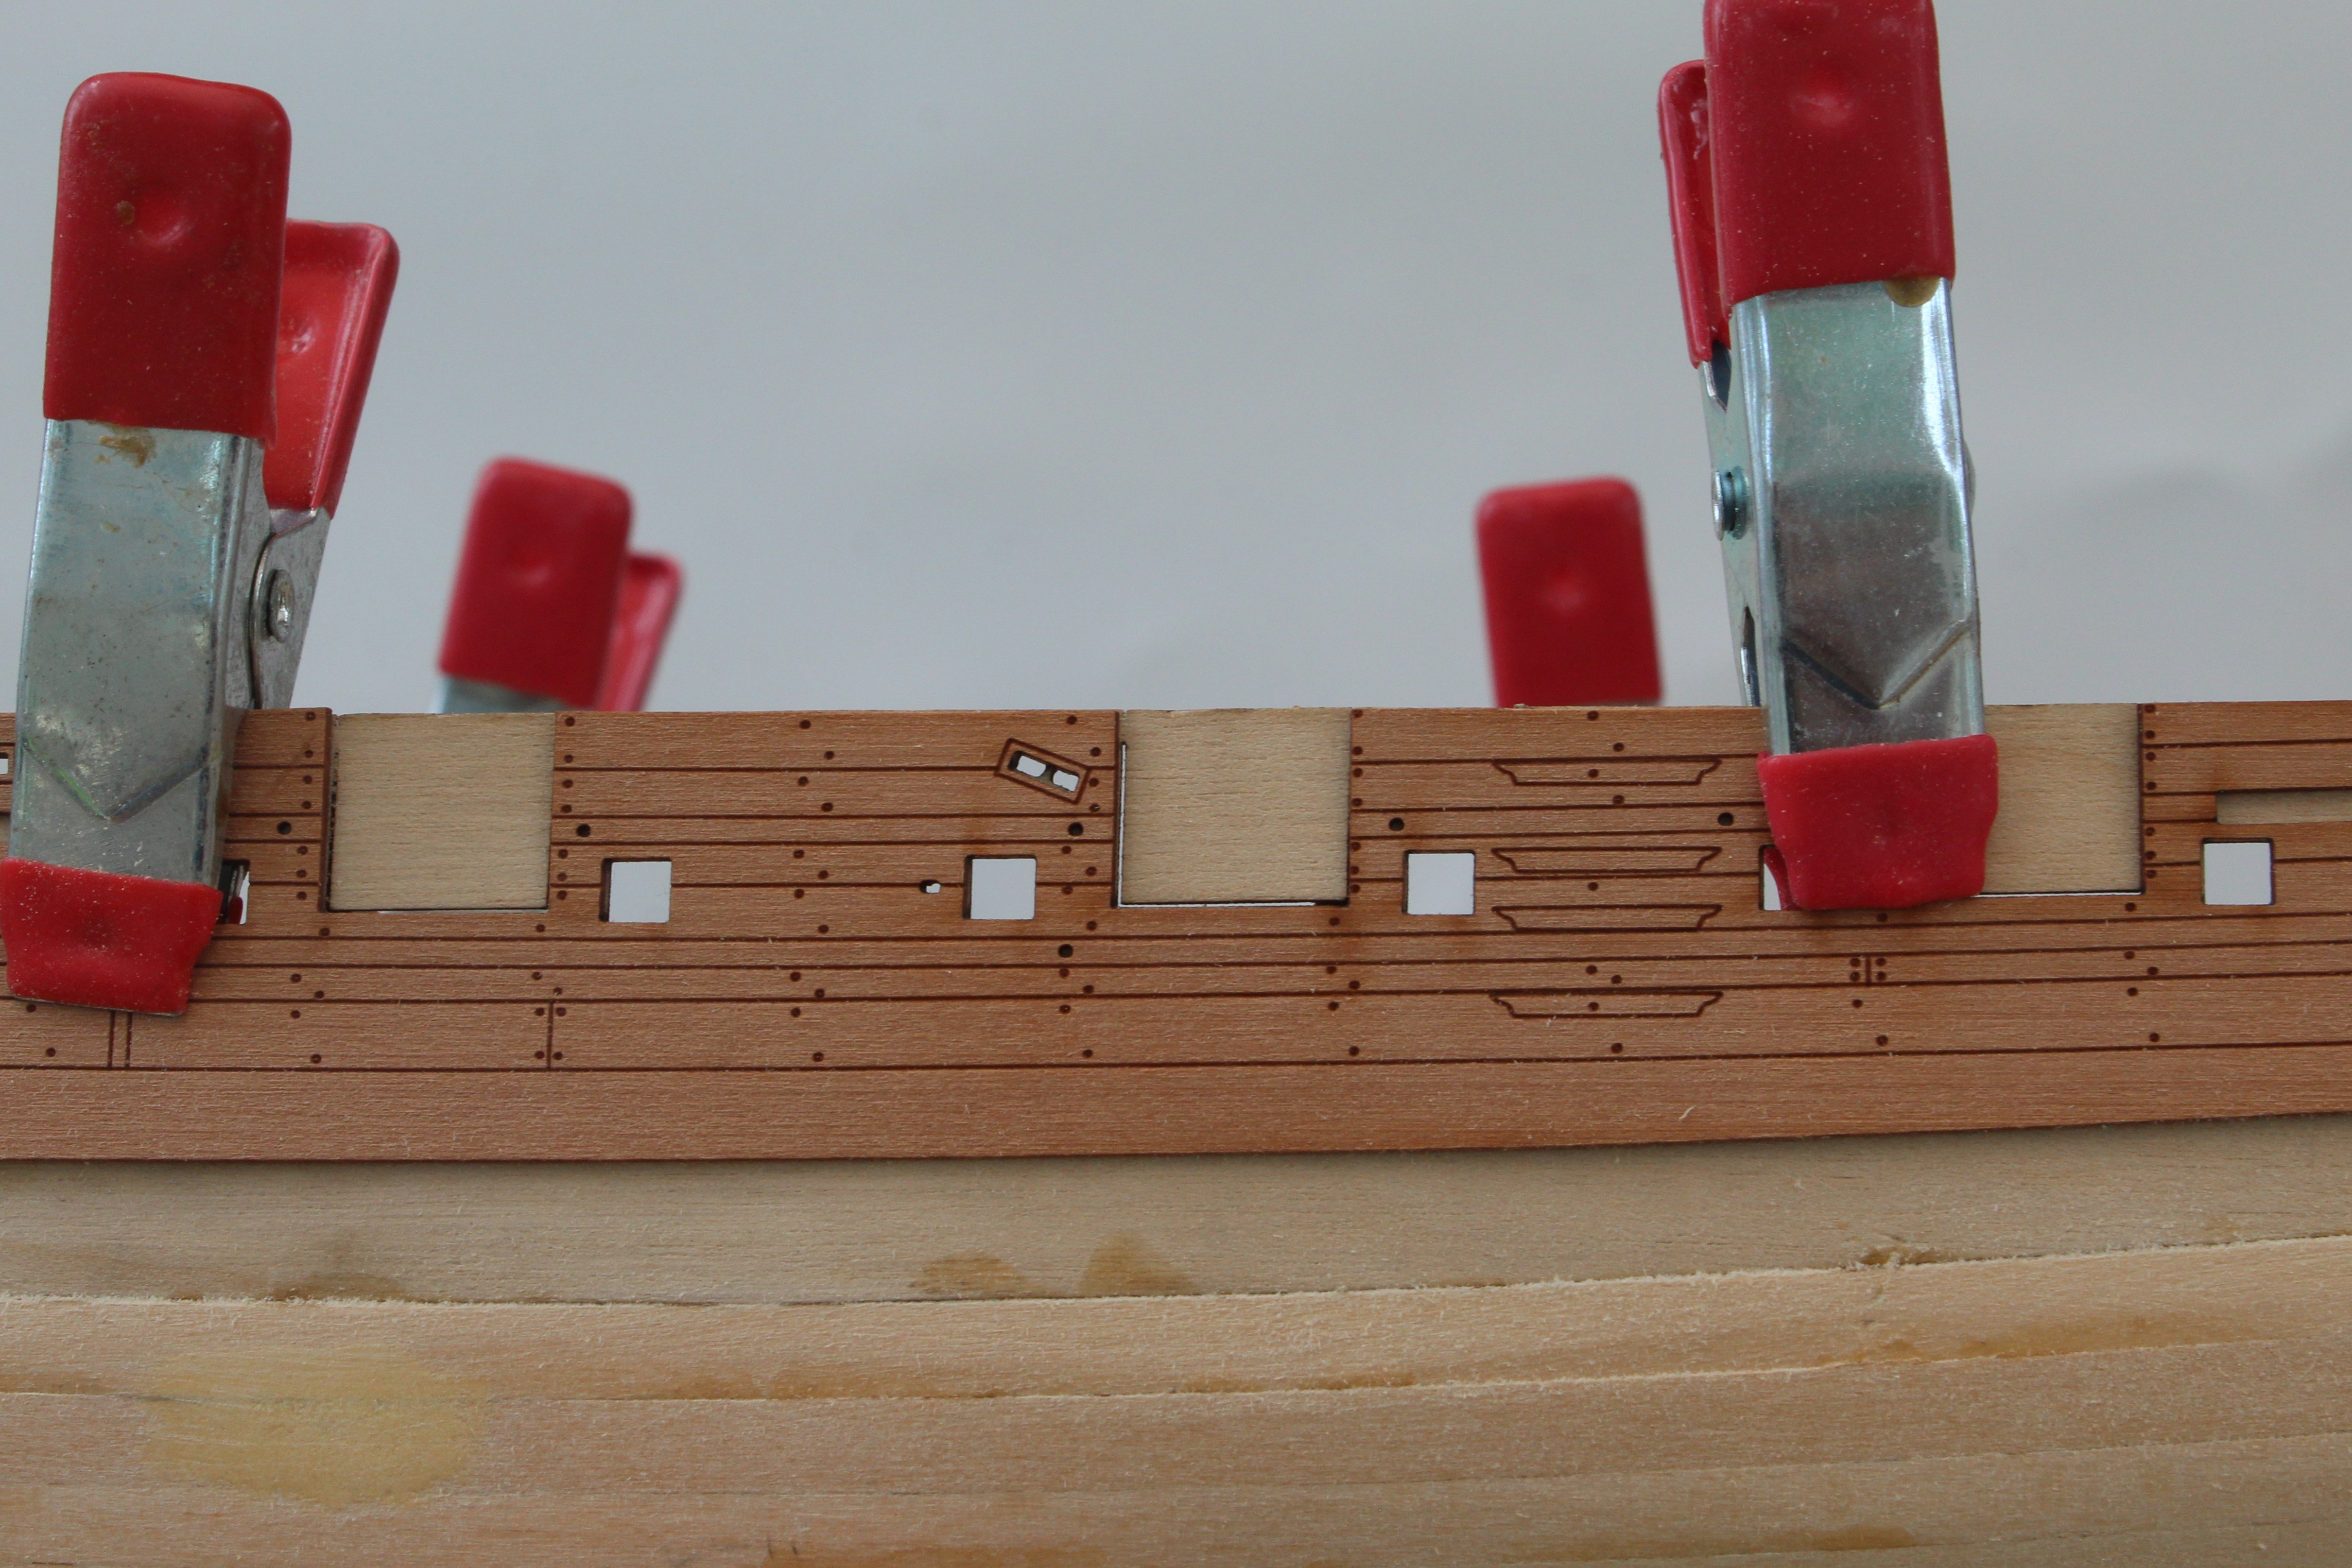
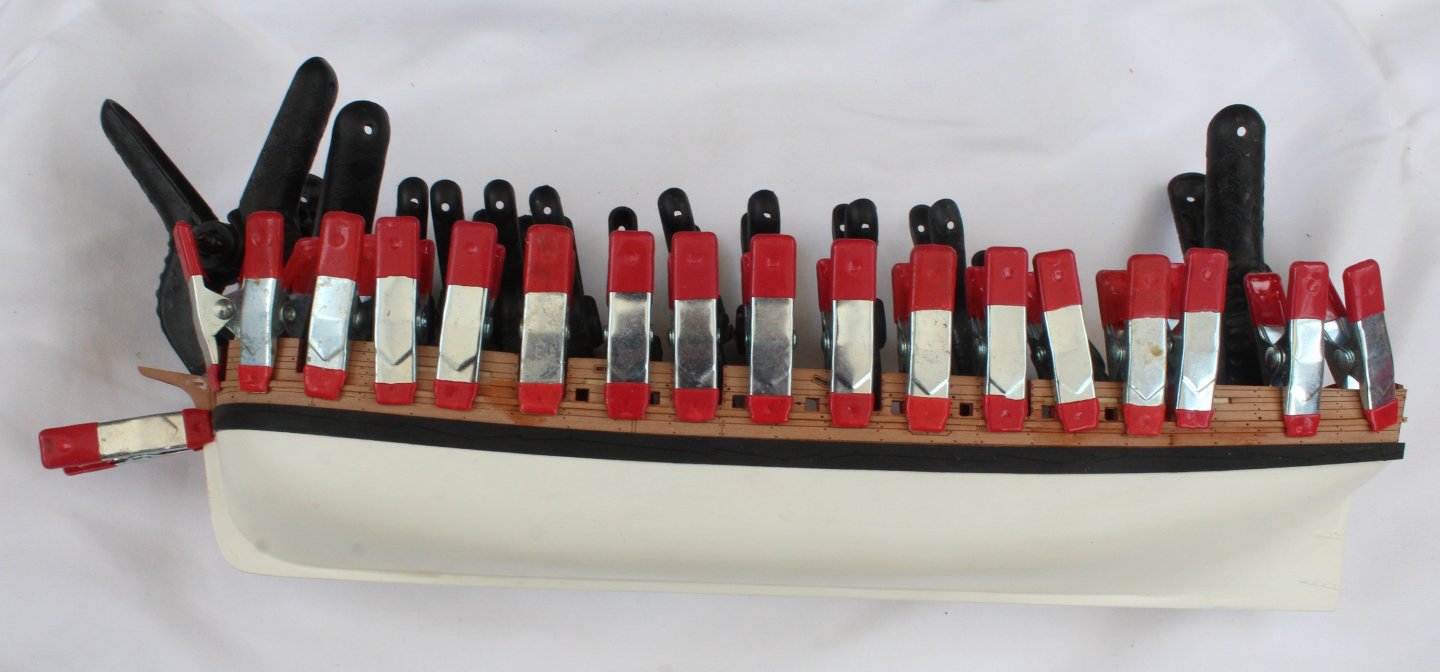
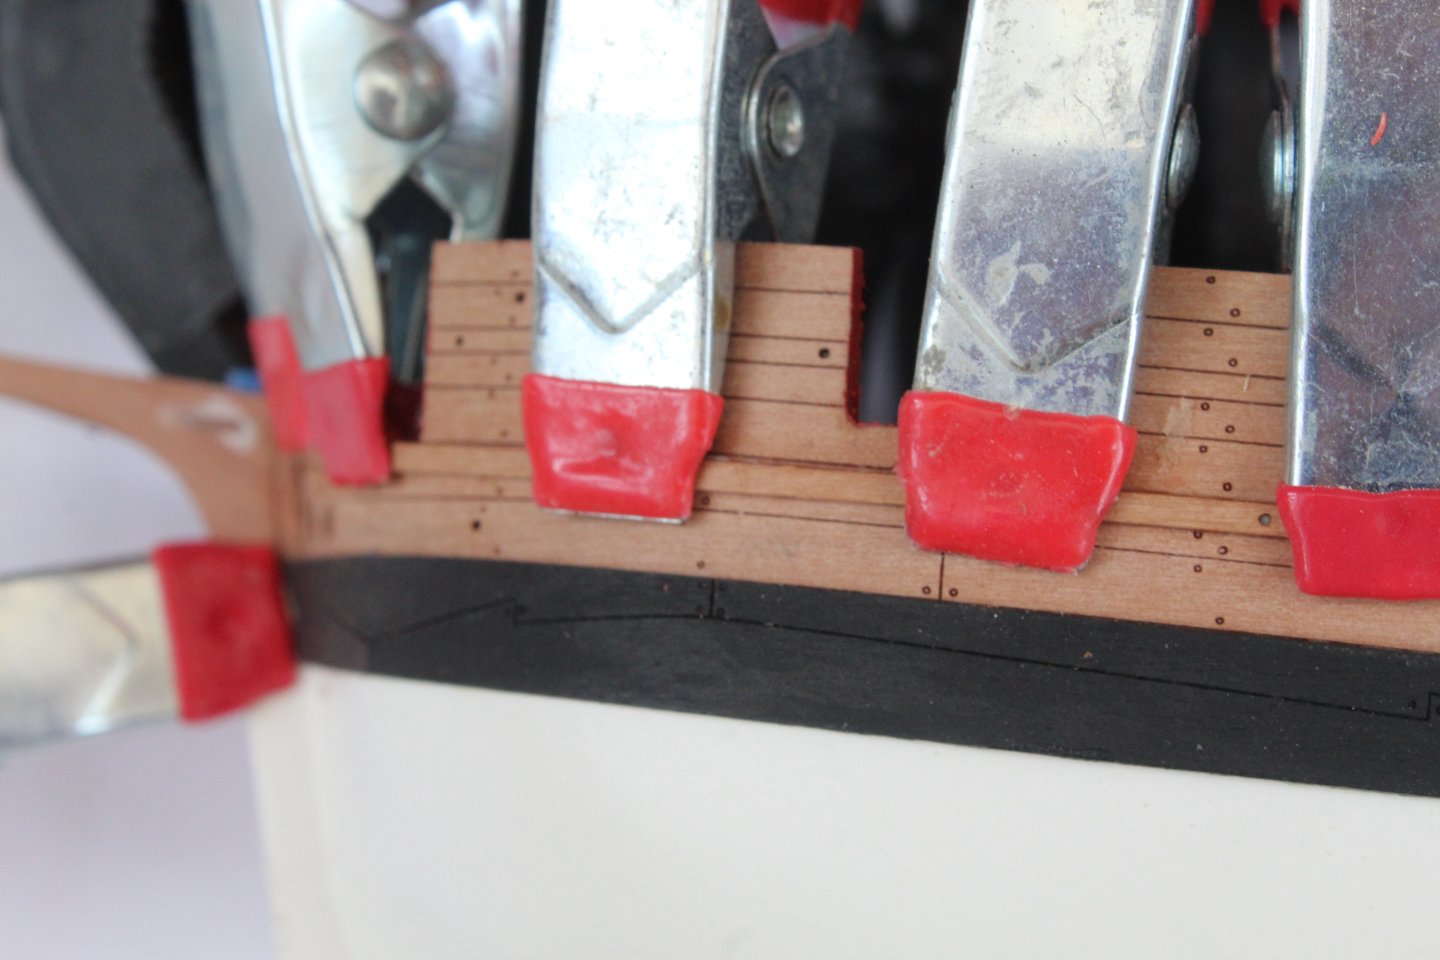
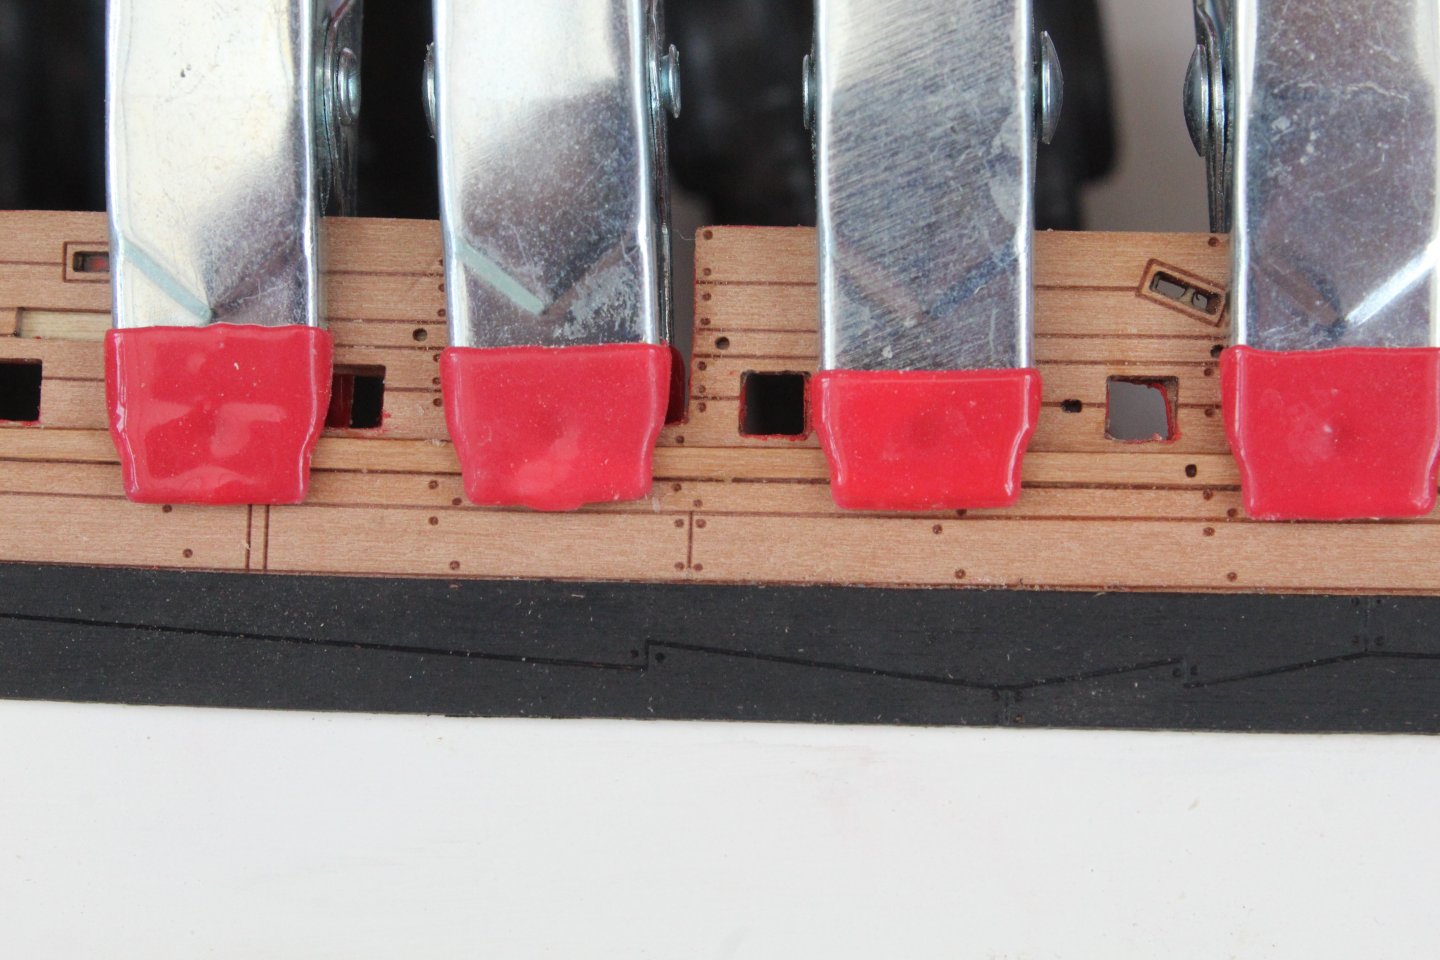
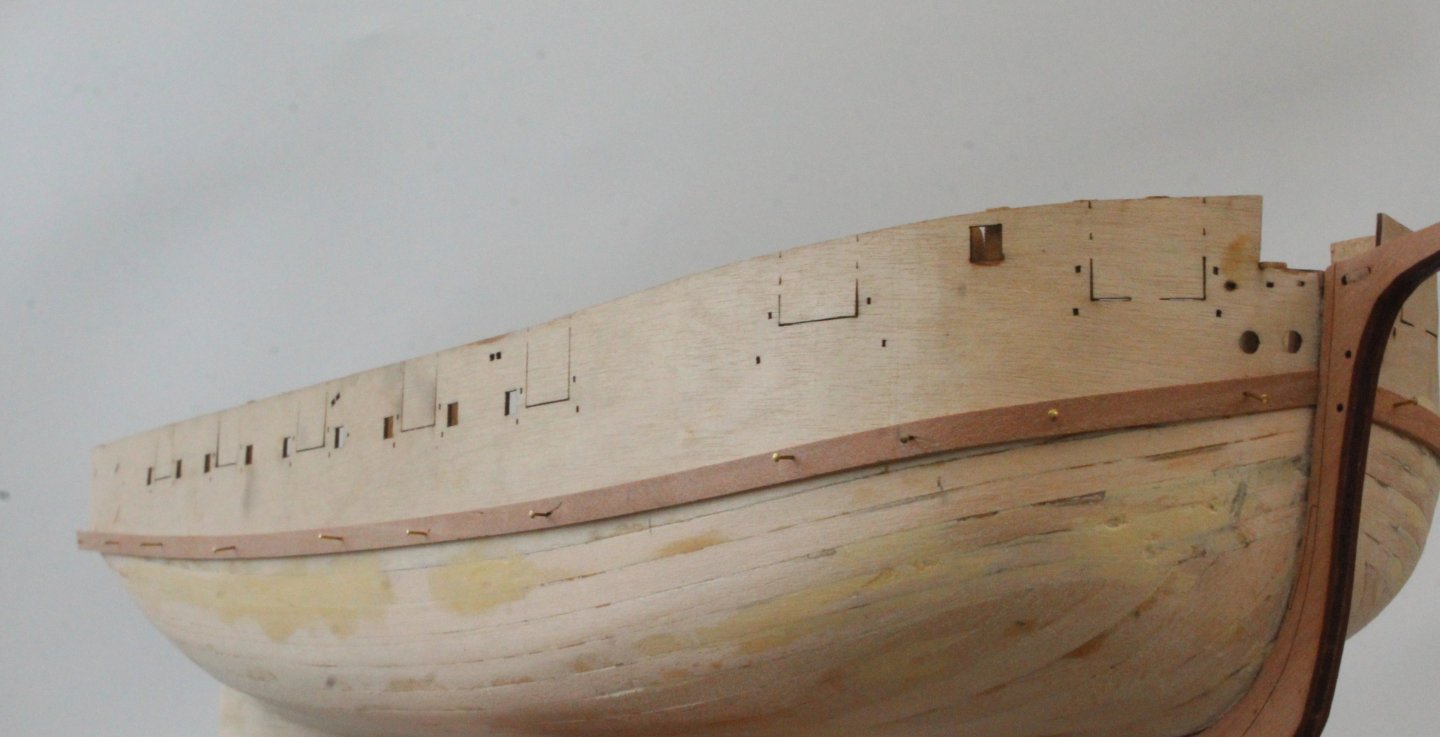
Build Log Index Date: 20/08/2024 Time worked today: 3 hours. Total time spent on build: 42 hours. Spirketting Before fitting the spirketting patterns a fine coat of vanish was brushed on the inner bulwarks which were then brush painted with two coats of flat red. I did tape the outer bulwarks to try to prevent unwanted paint leakage. I then checked the carronade eyebolts would fit in various bulwark holes. Where necessary a micro drill was used to ensure the eyebolts would fit. After trimming the spirketting patterns, a fine coat of vanish was brushed on them and then two coats of flat red paint were then brush on. The spirketting patterns were then glued in place and held in place using plenty of clamps. Once the glue had cured the clamps were removed. The wale patterns have been soaked in warm water and they are currently clamped to the hull and will be left to fully dry out over night.

-
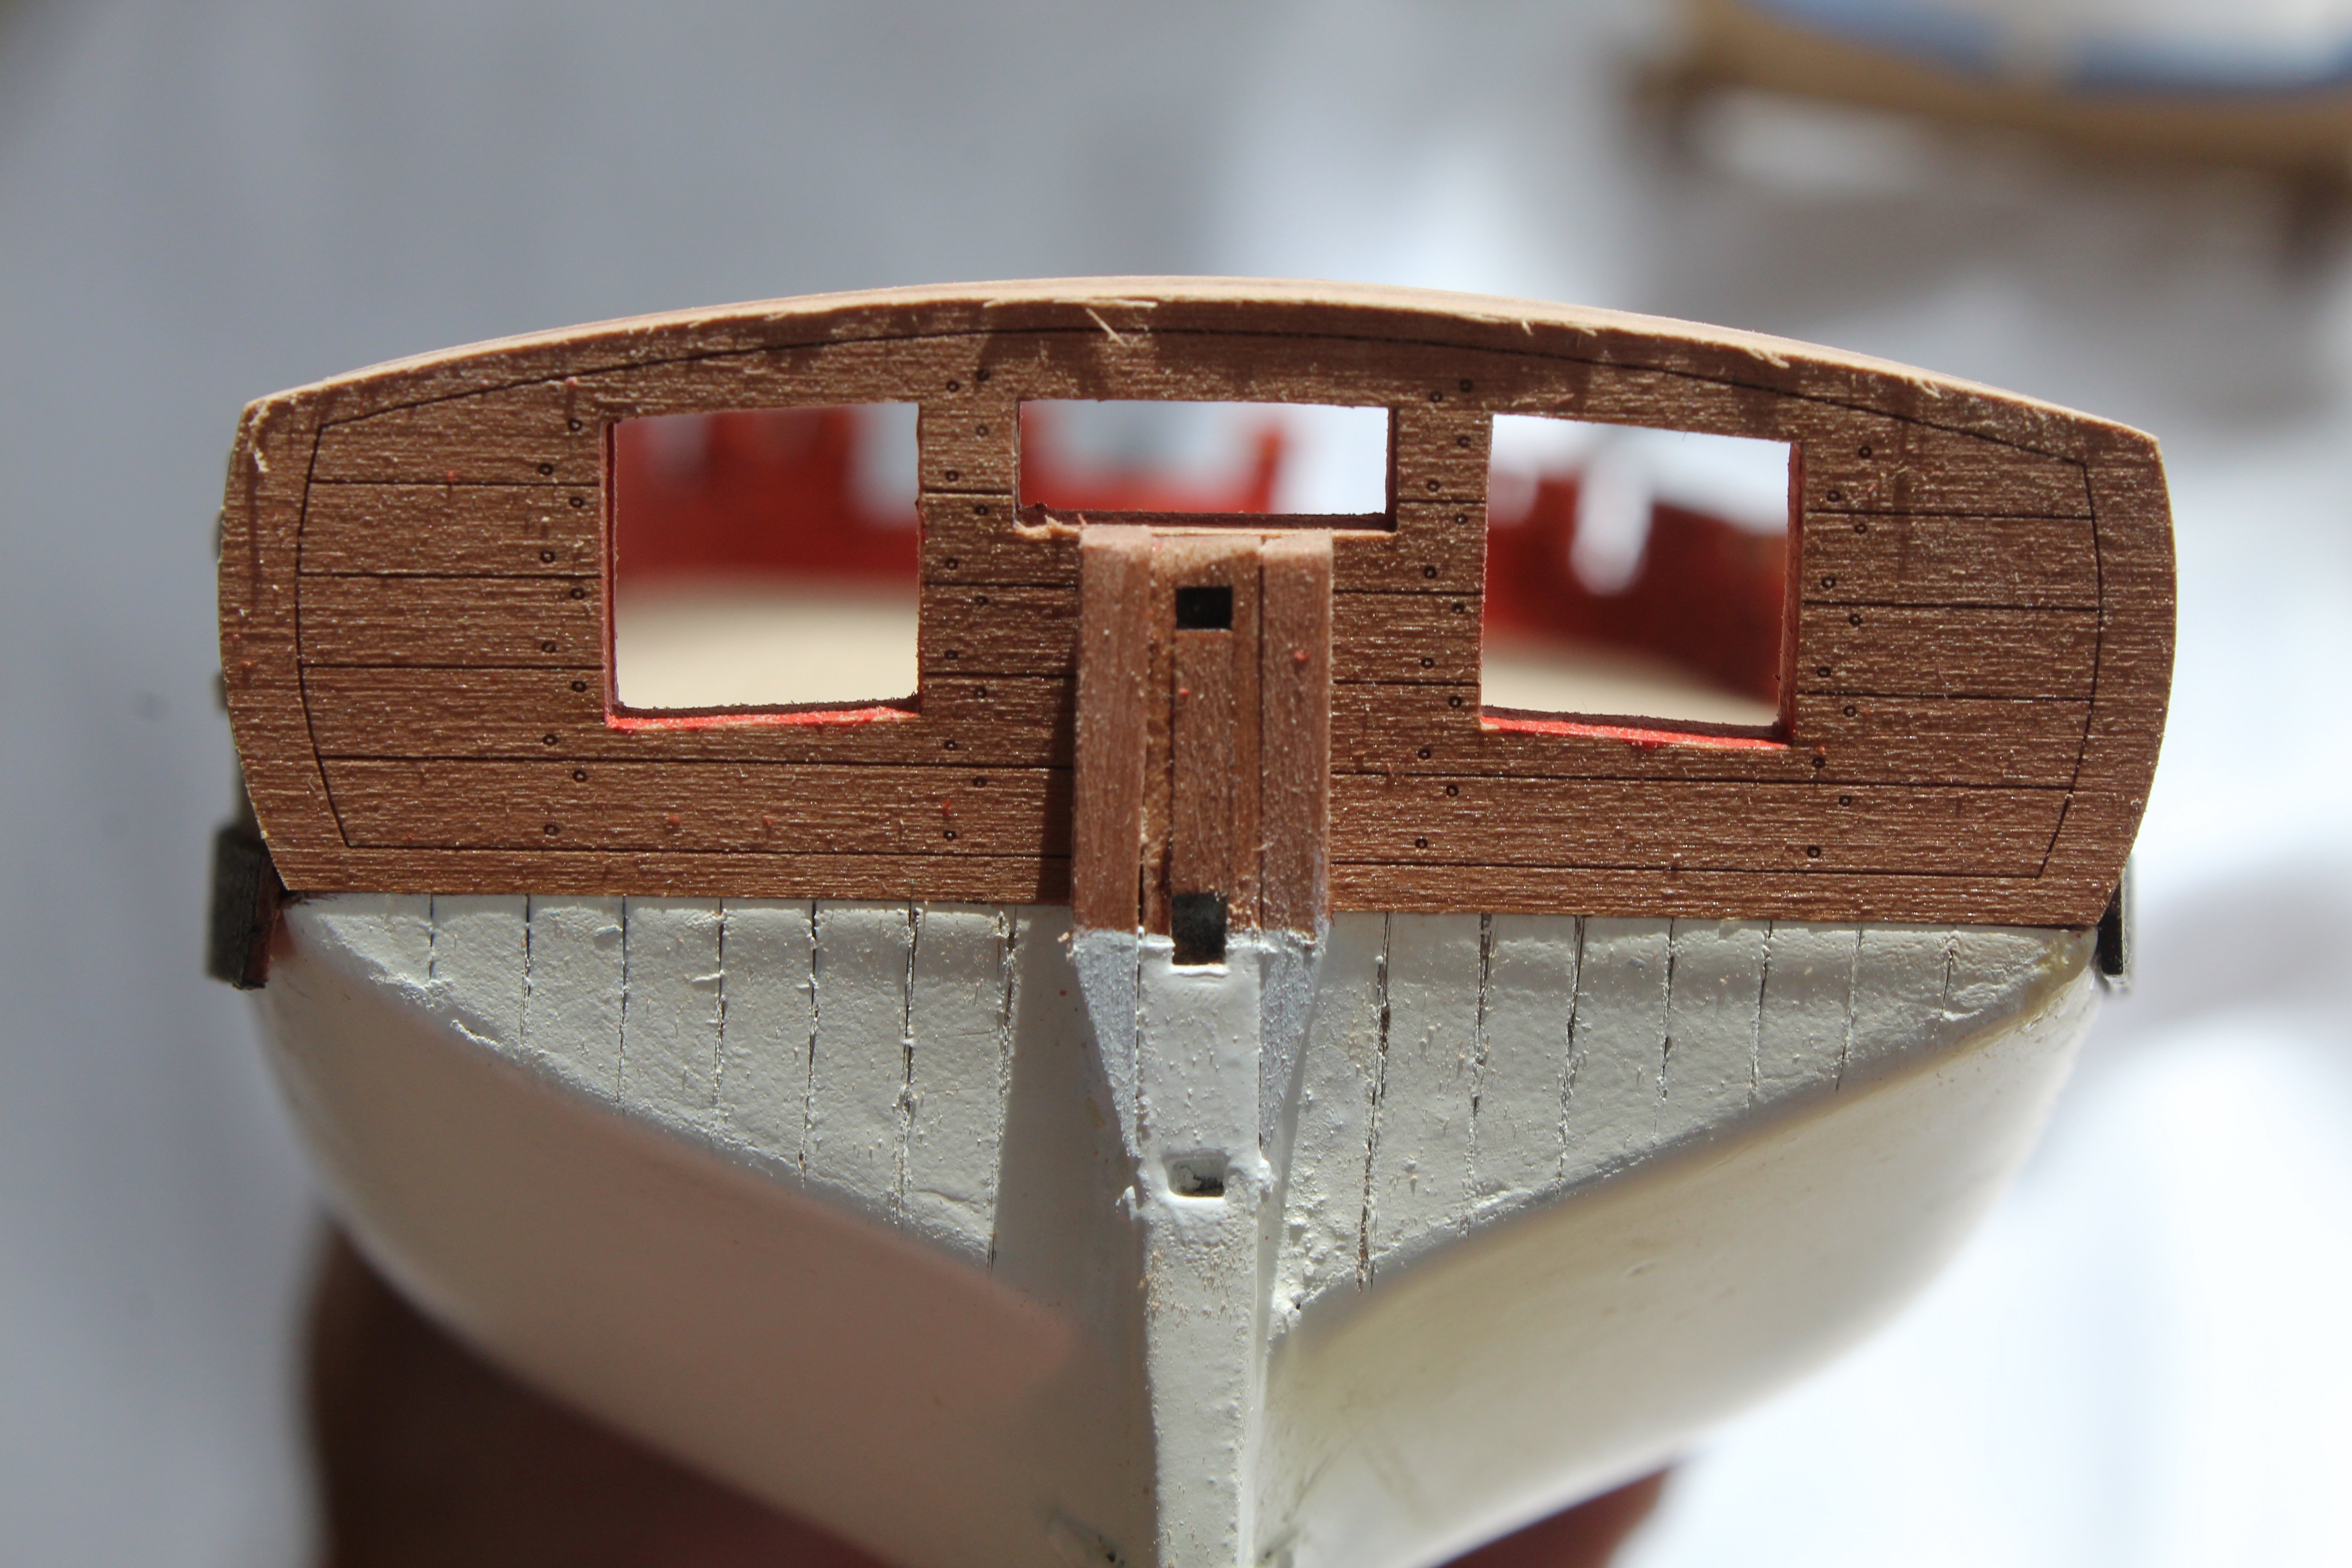
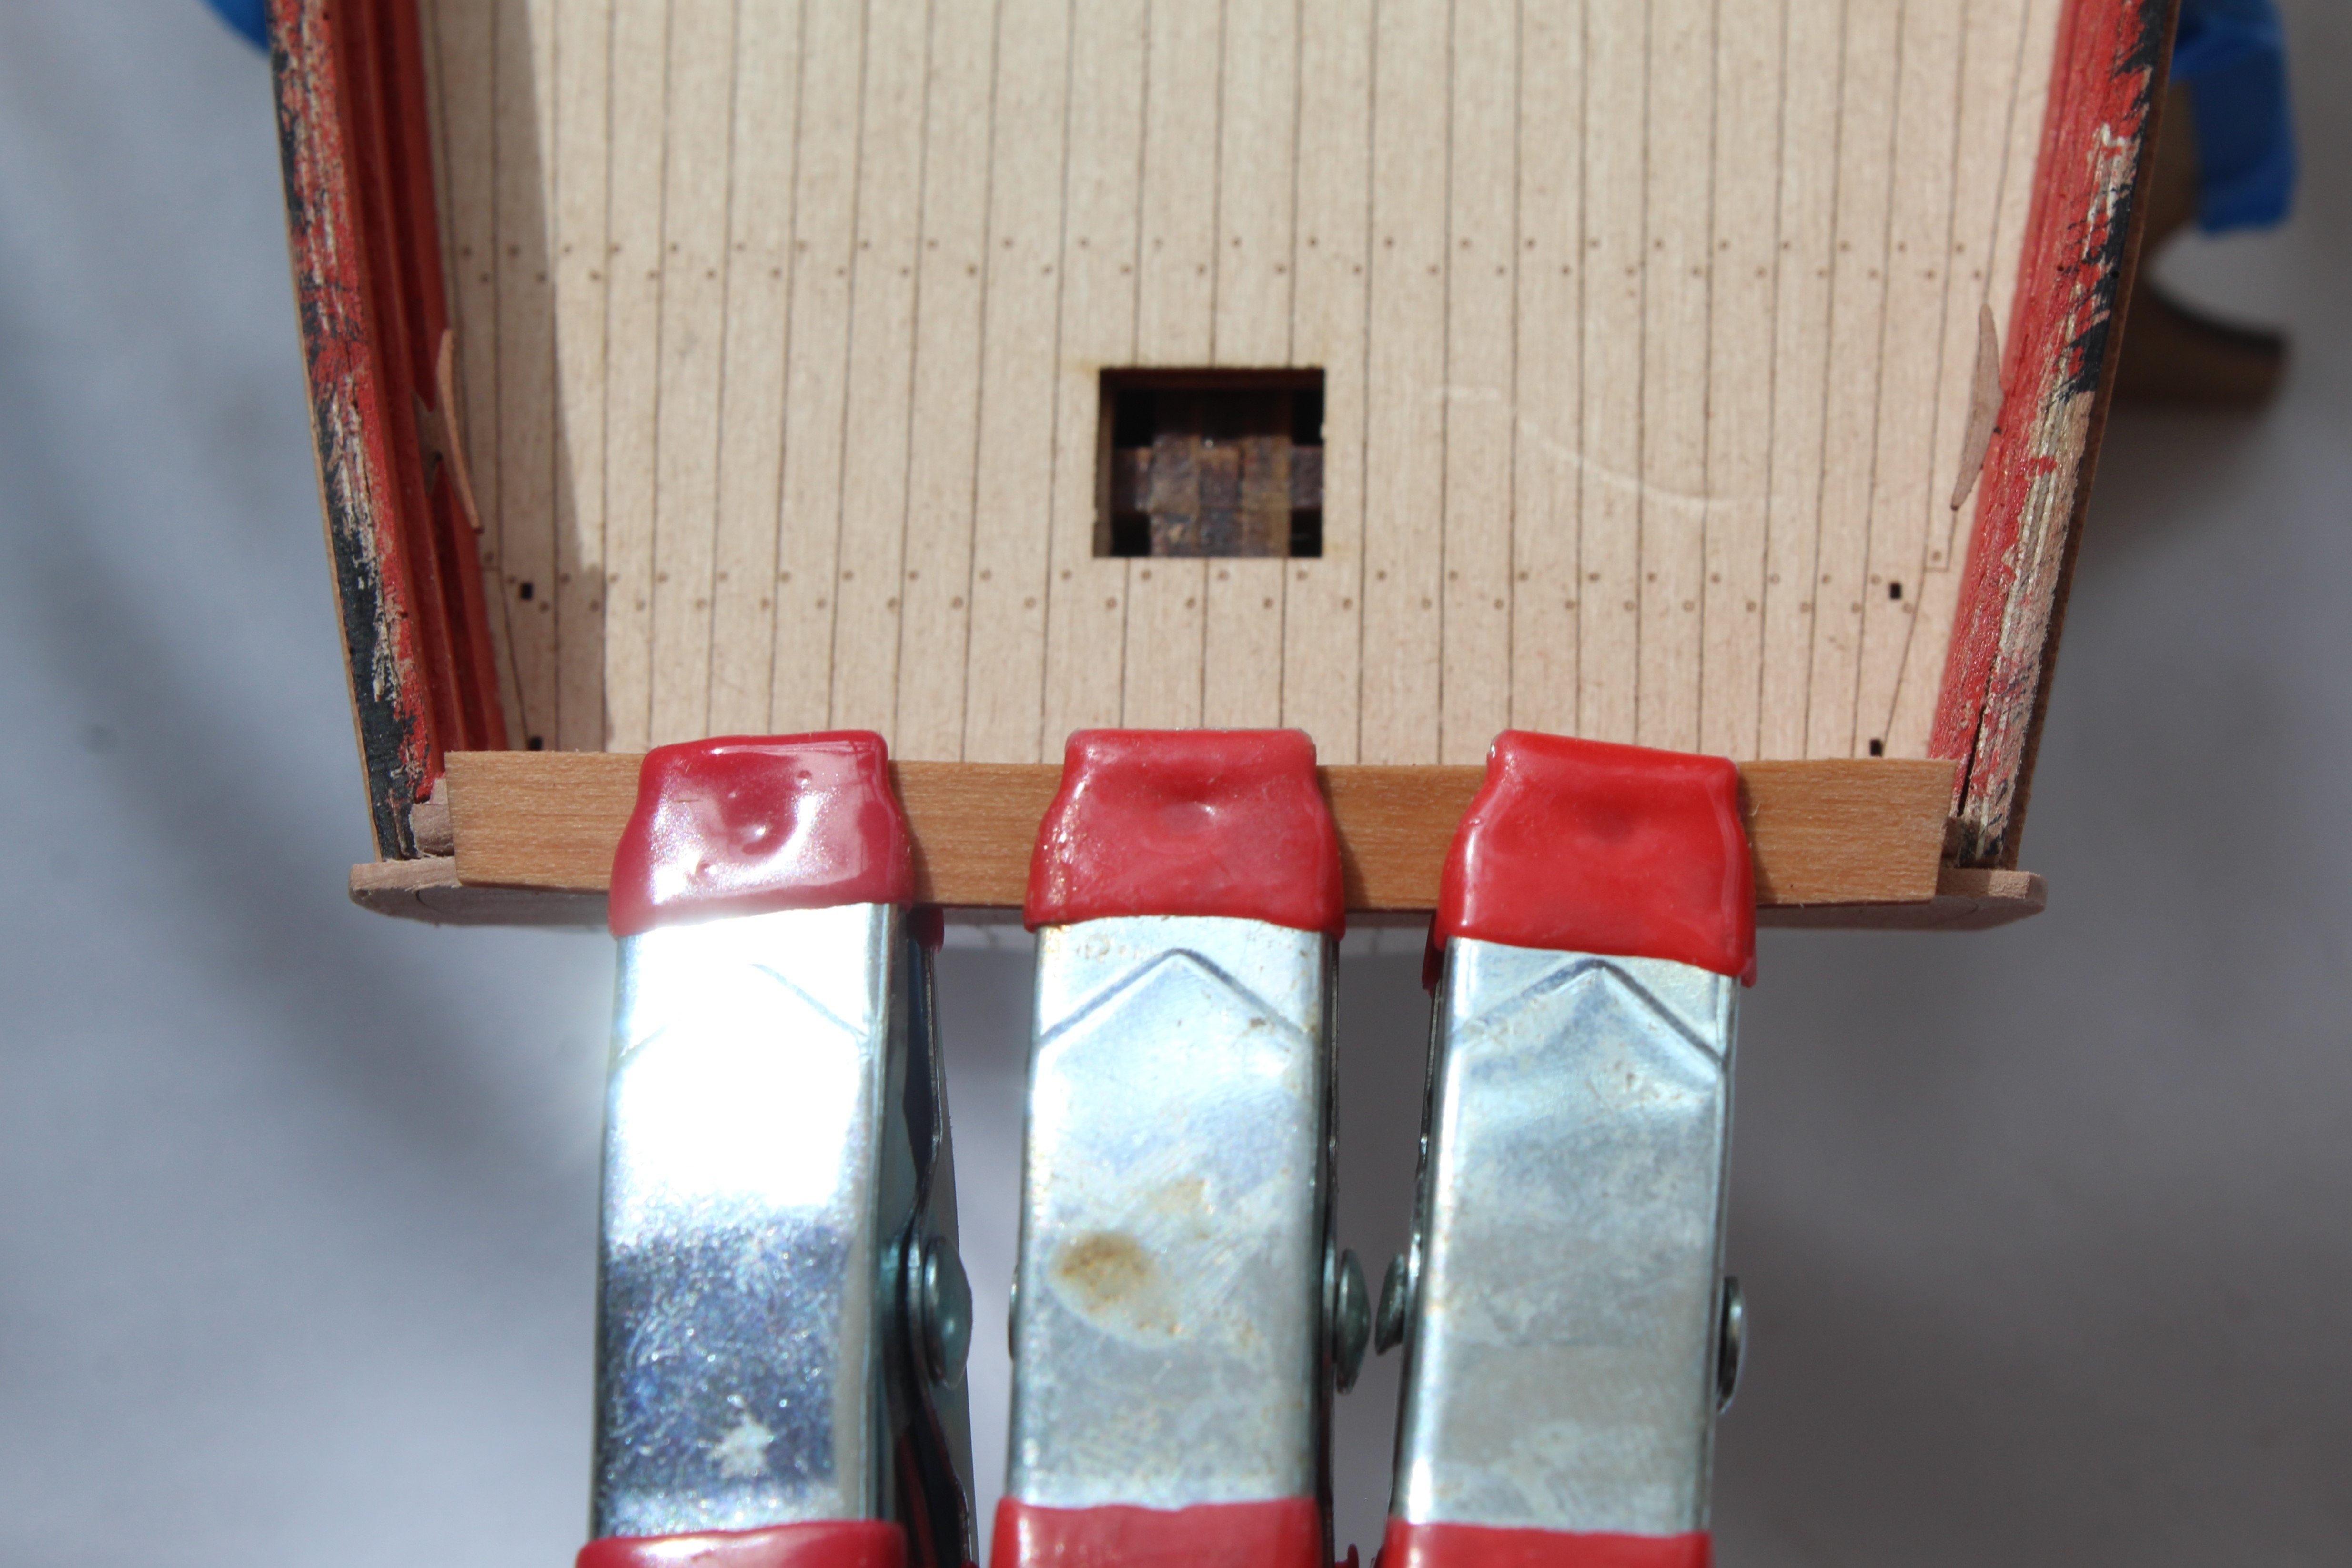
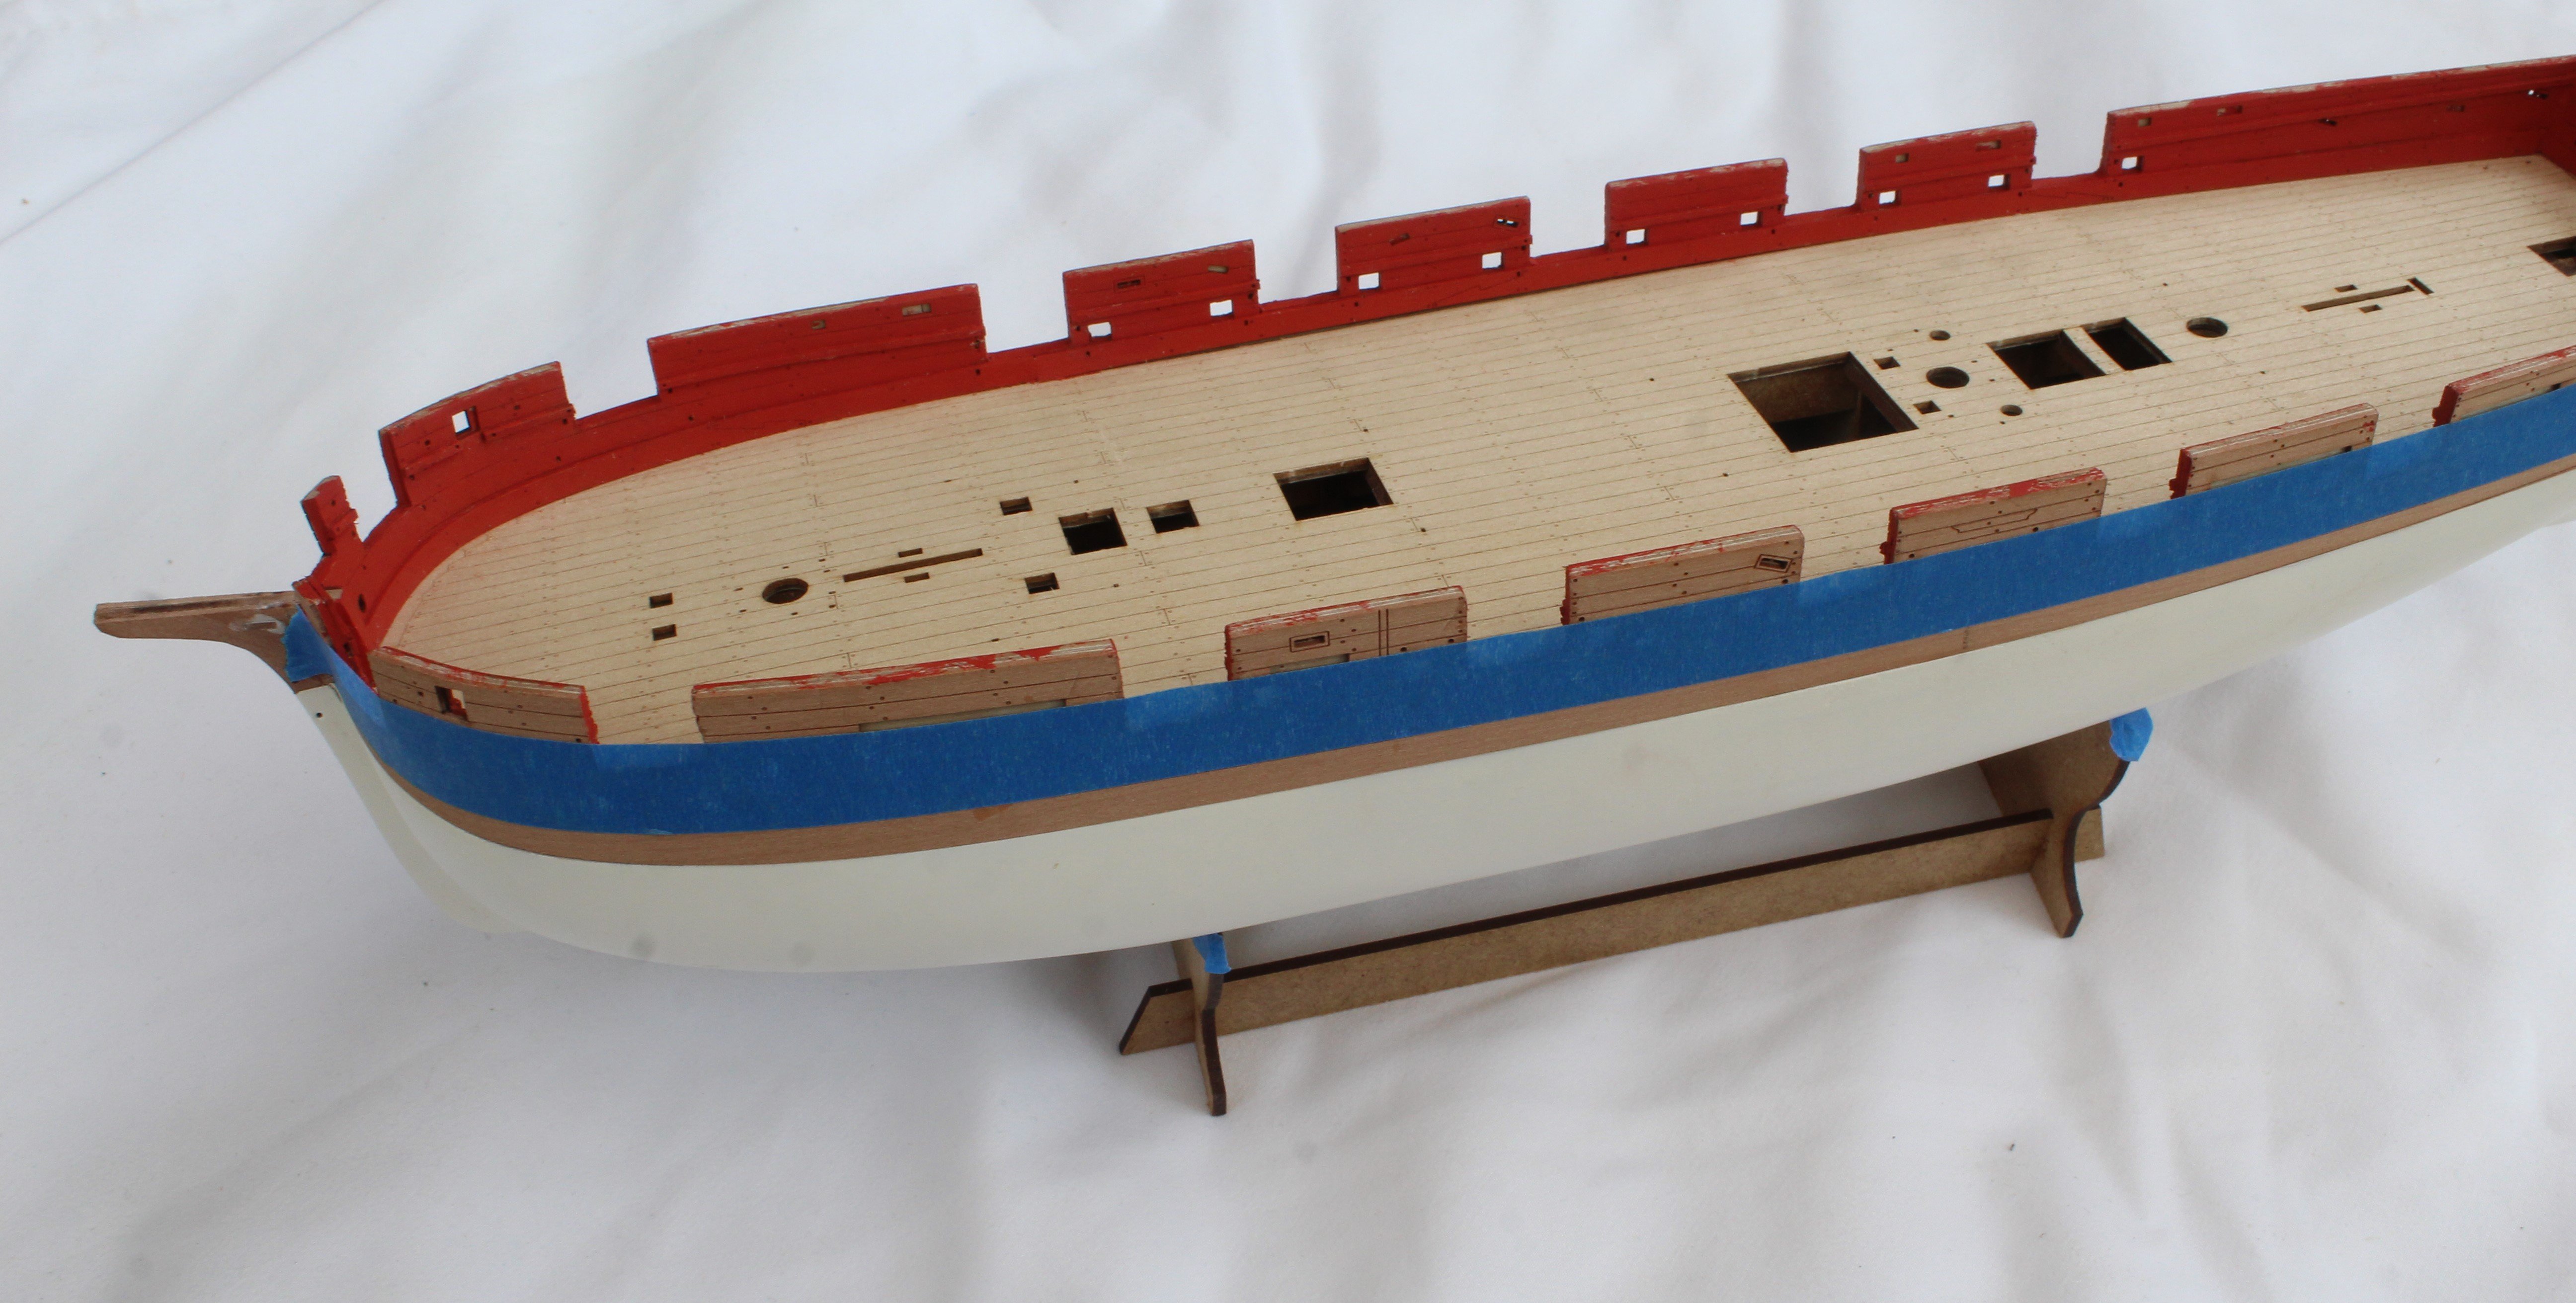
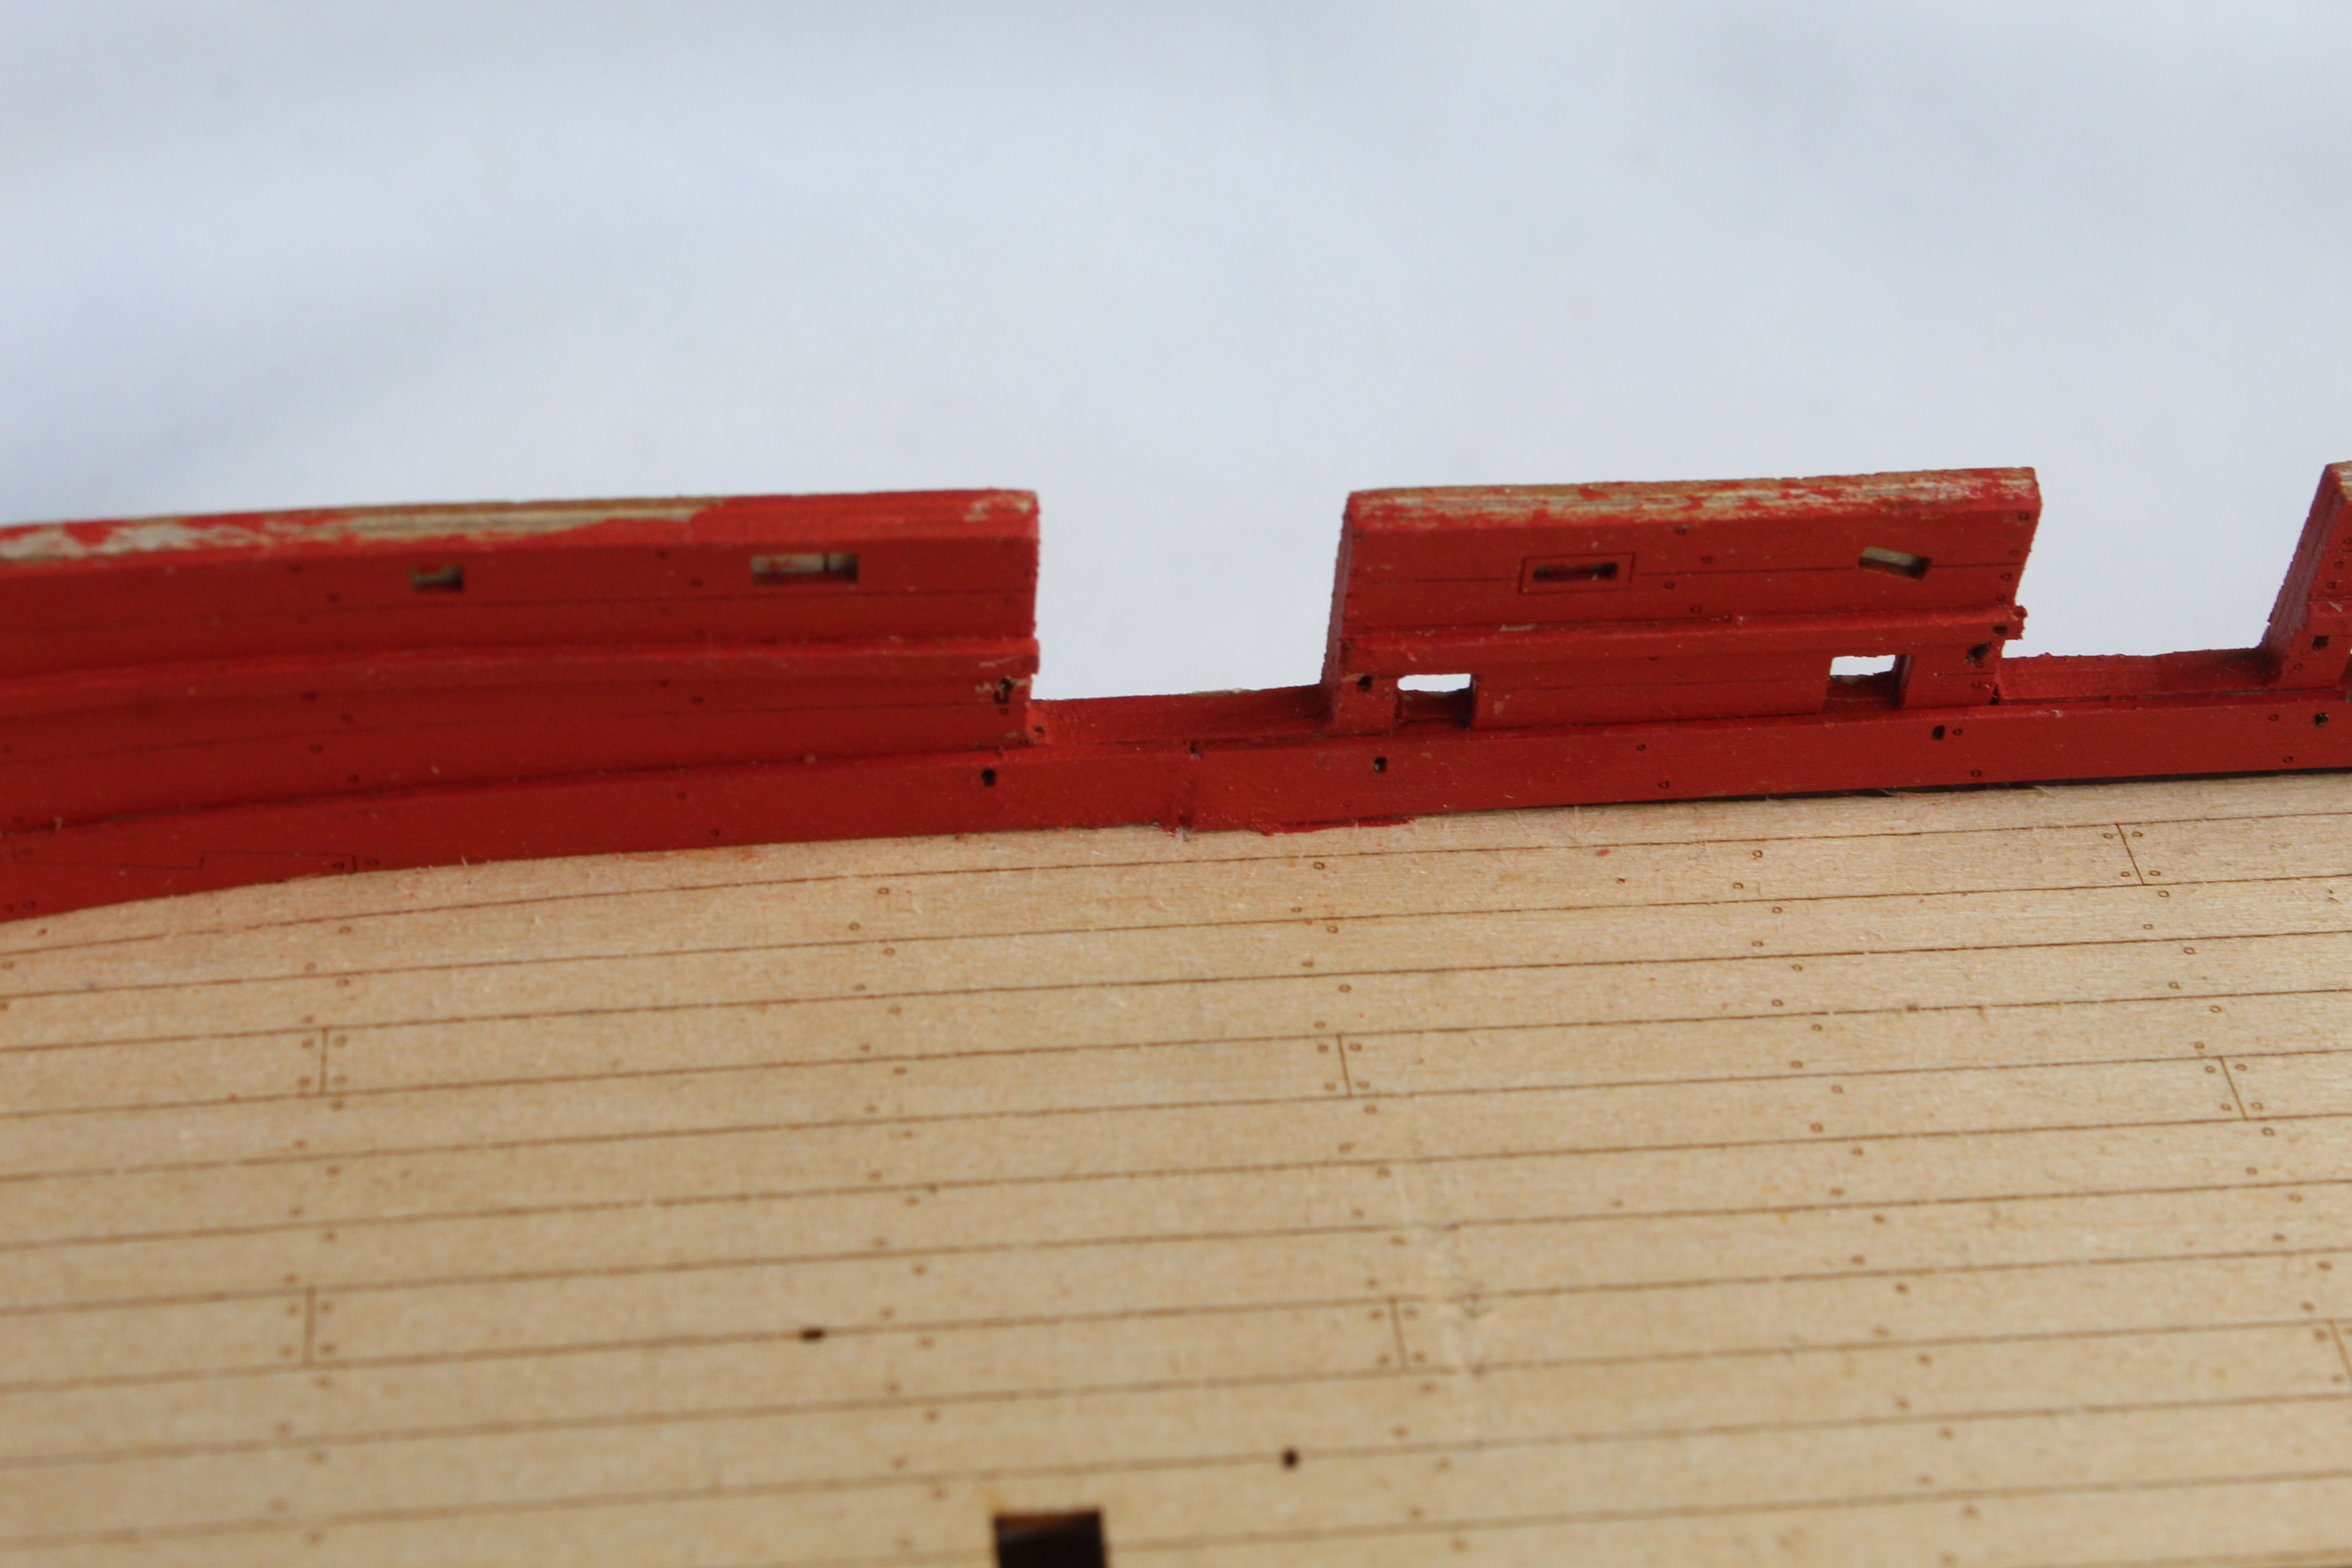
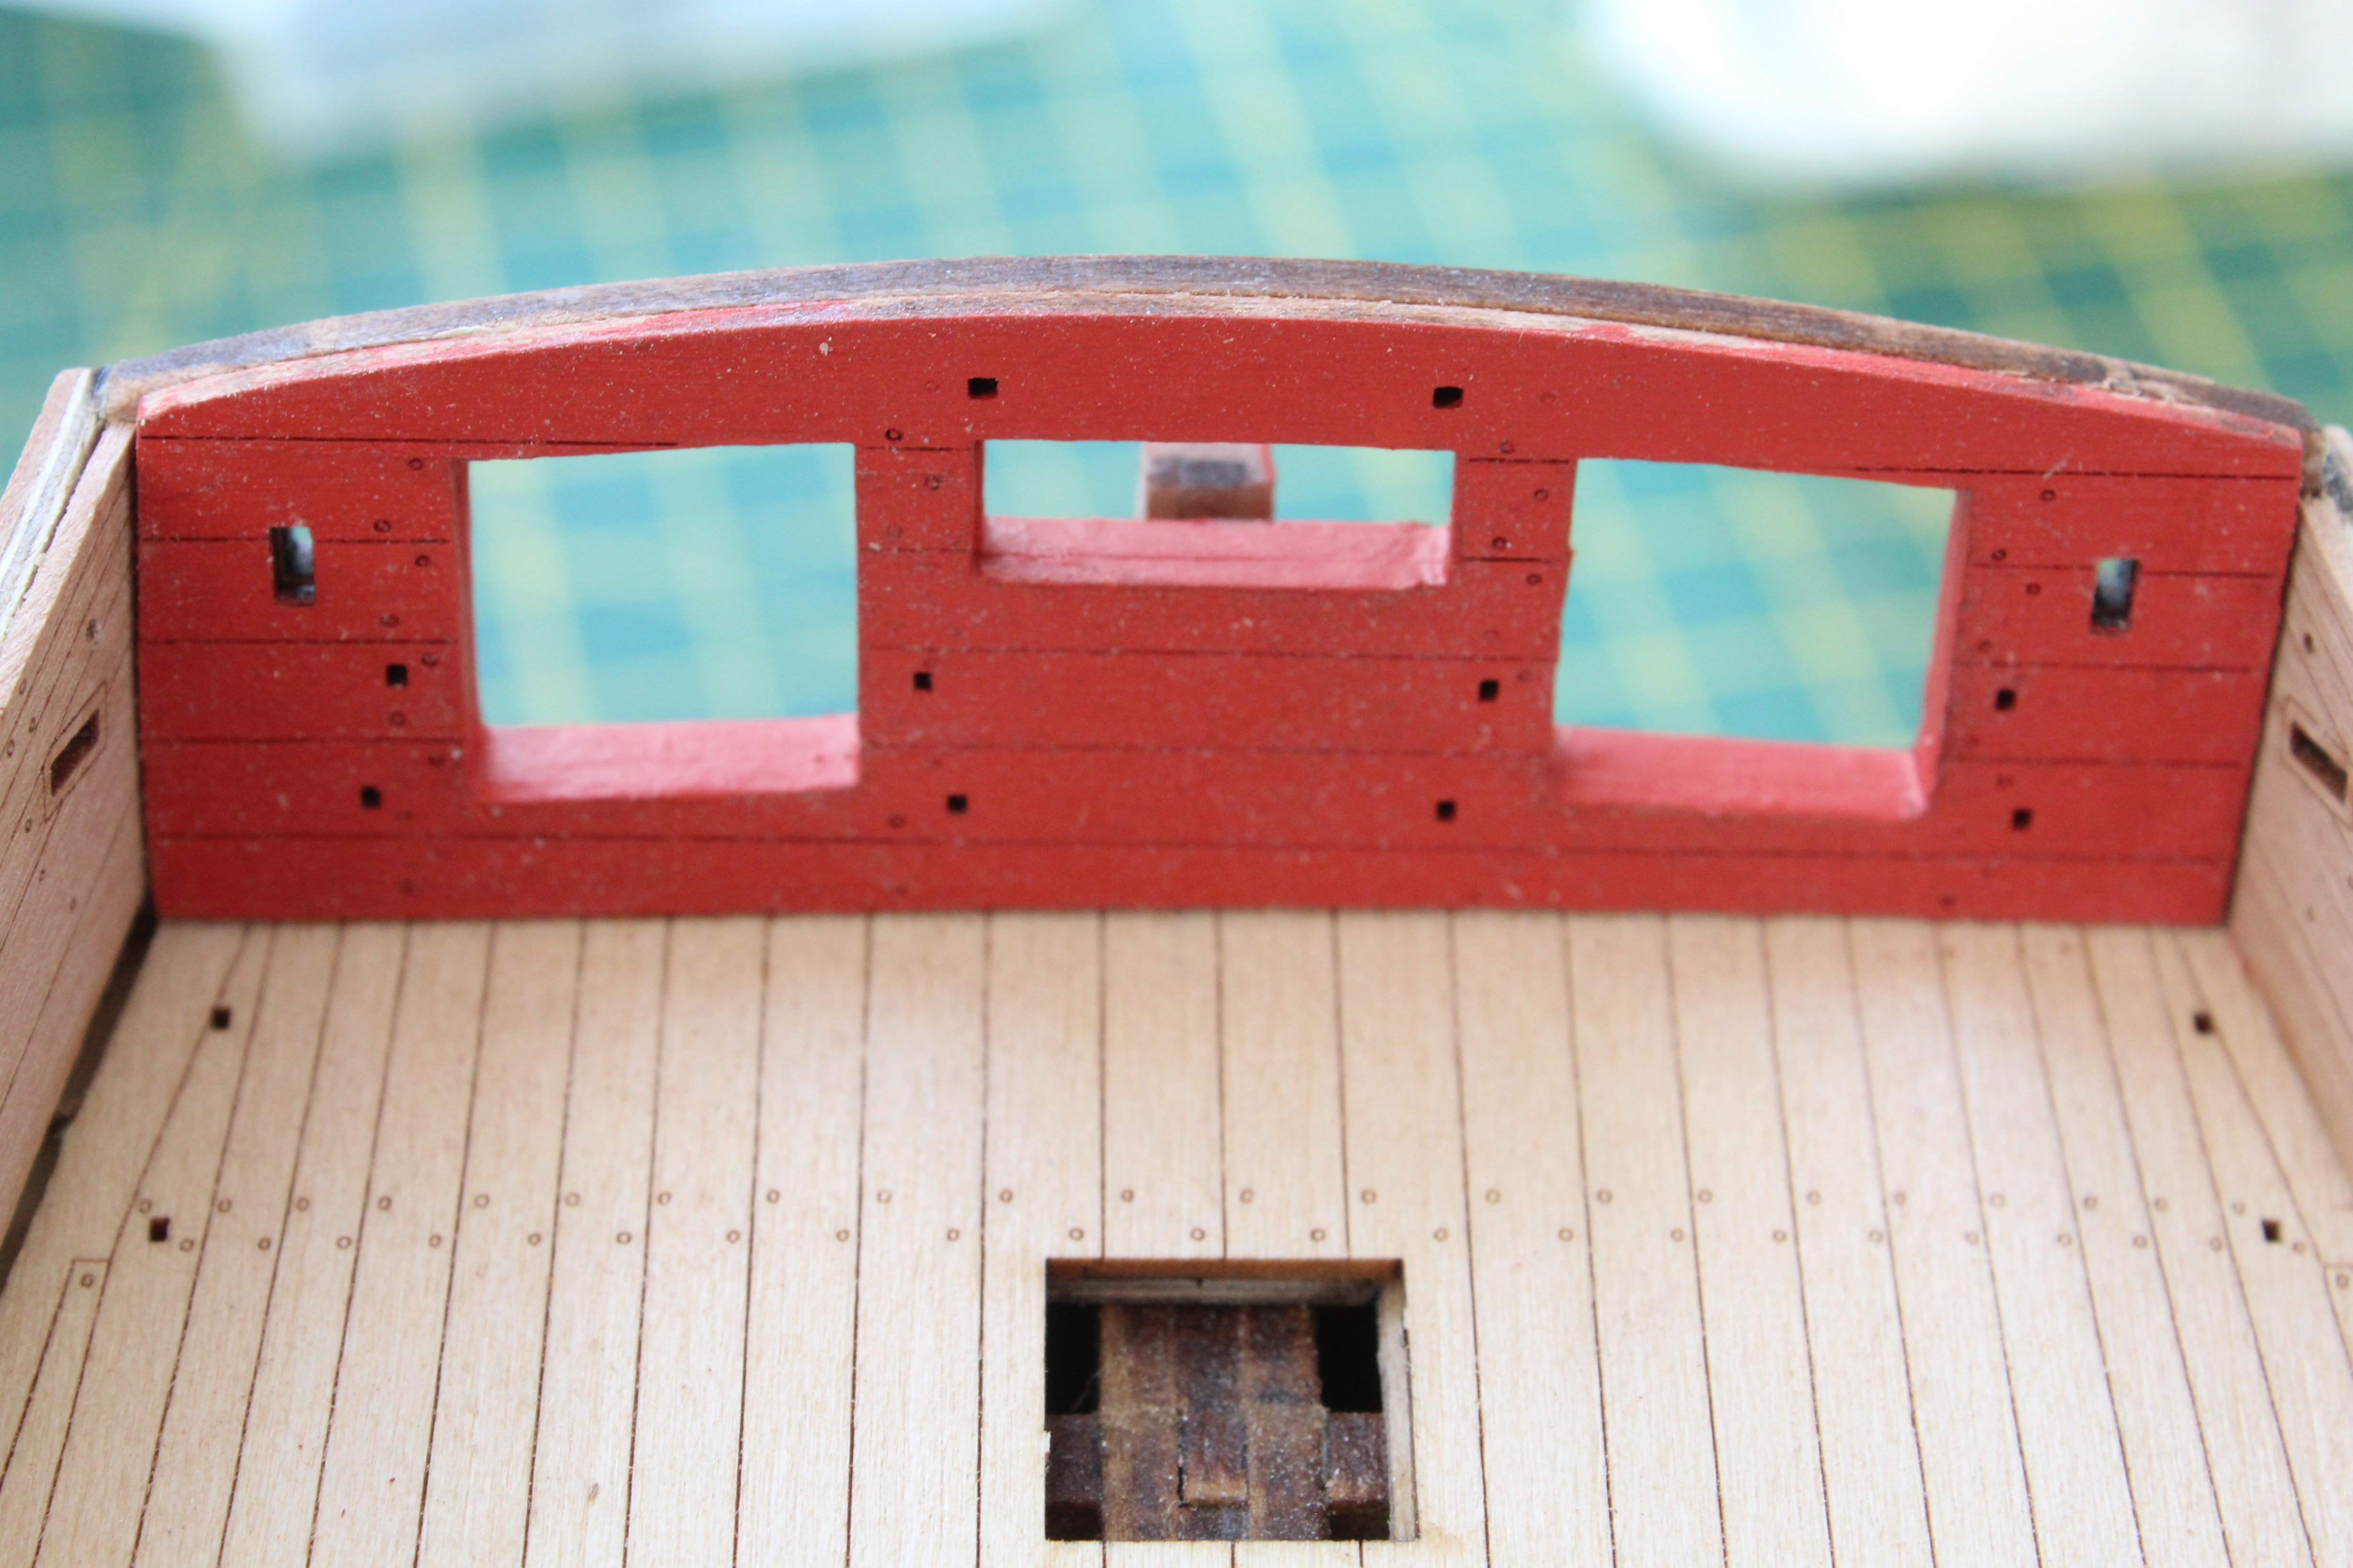
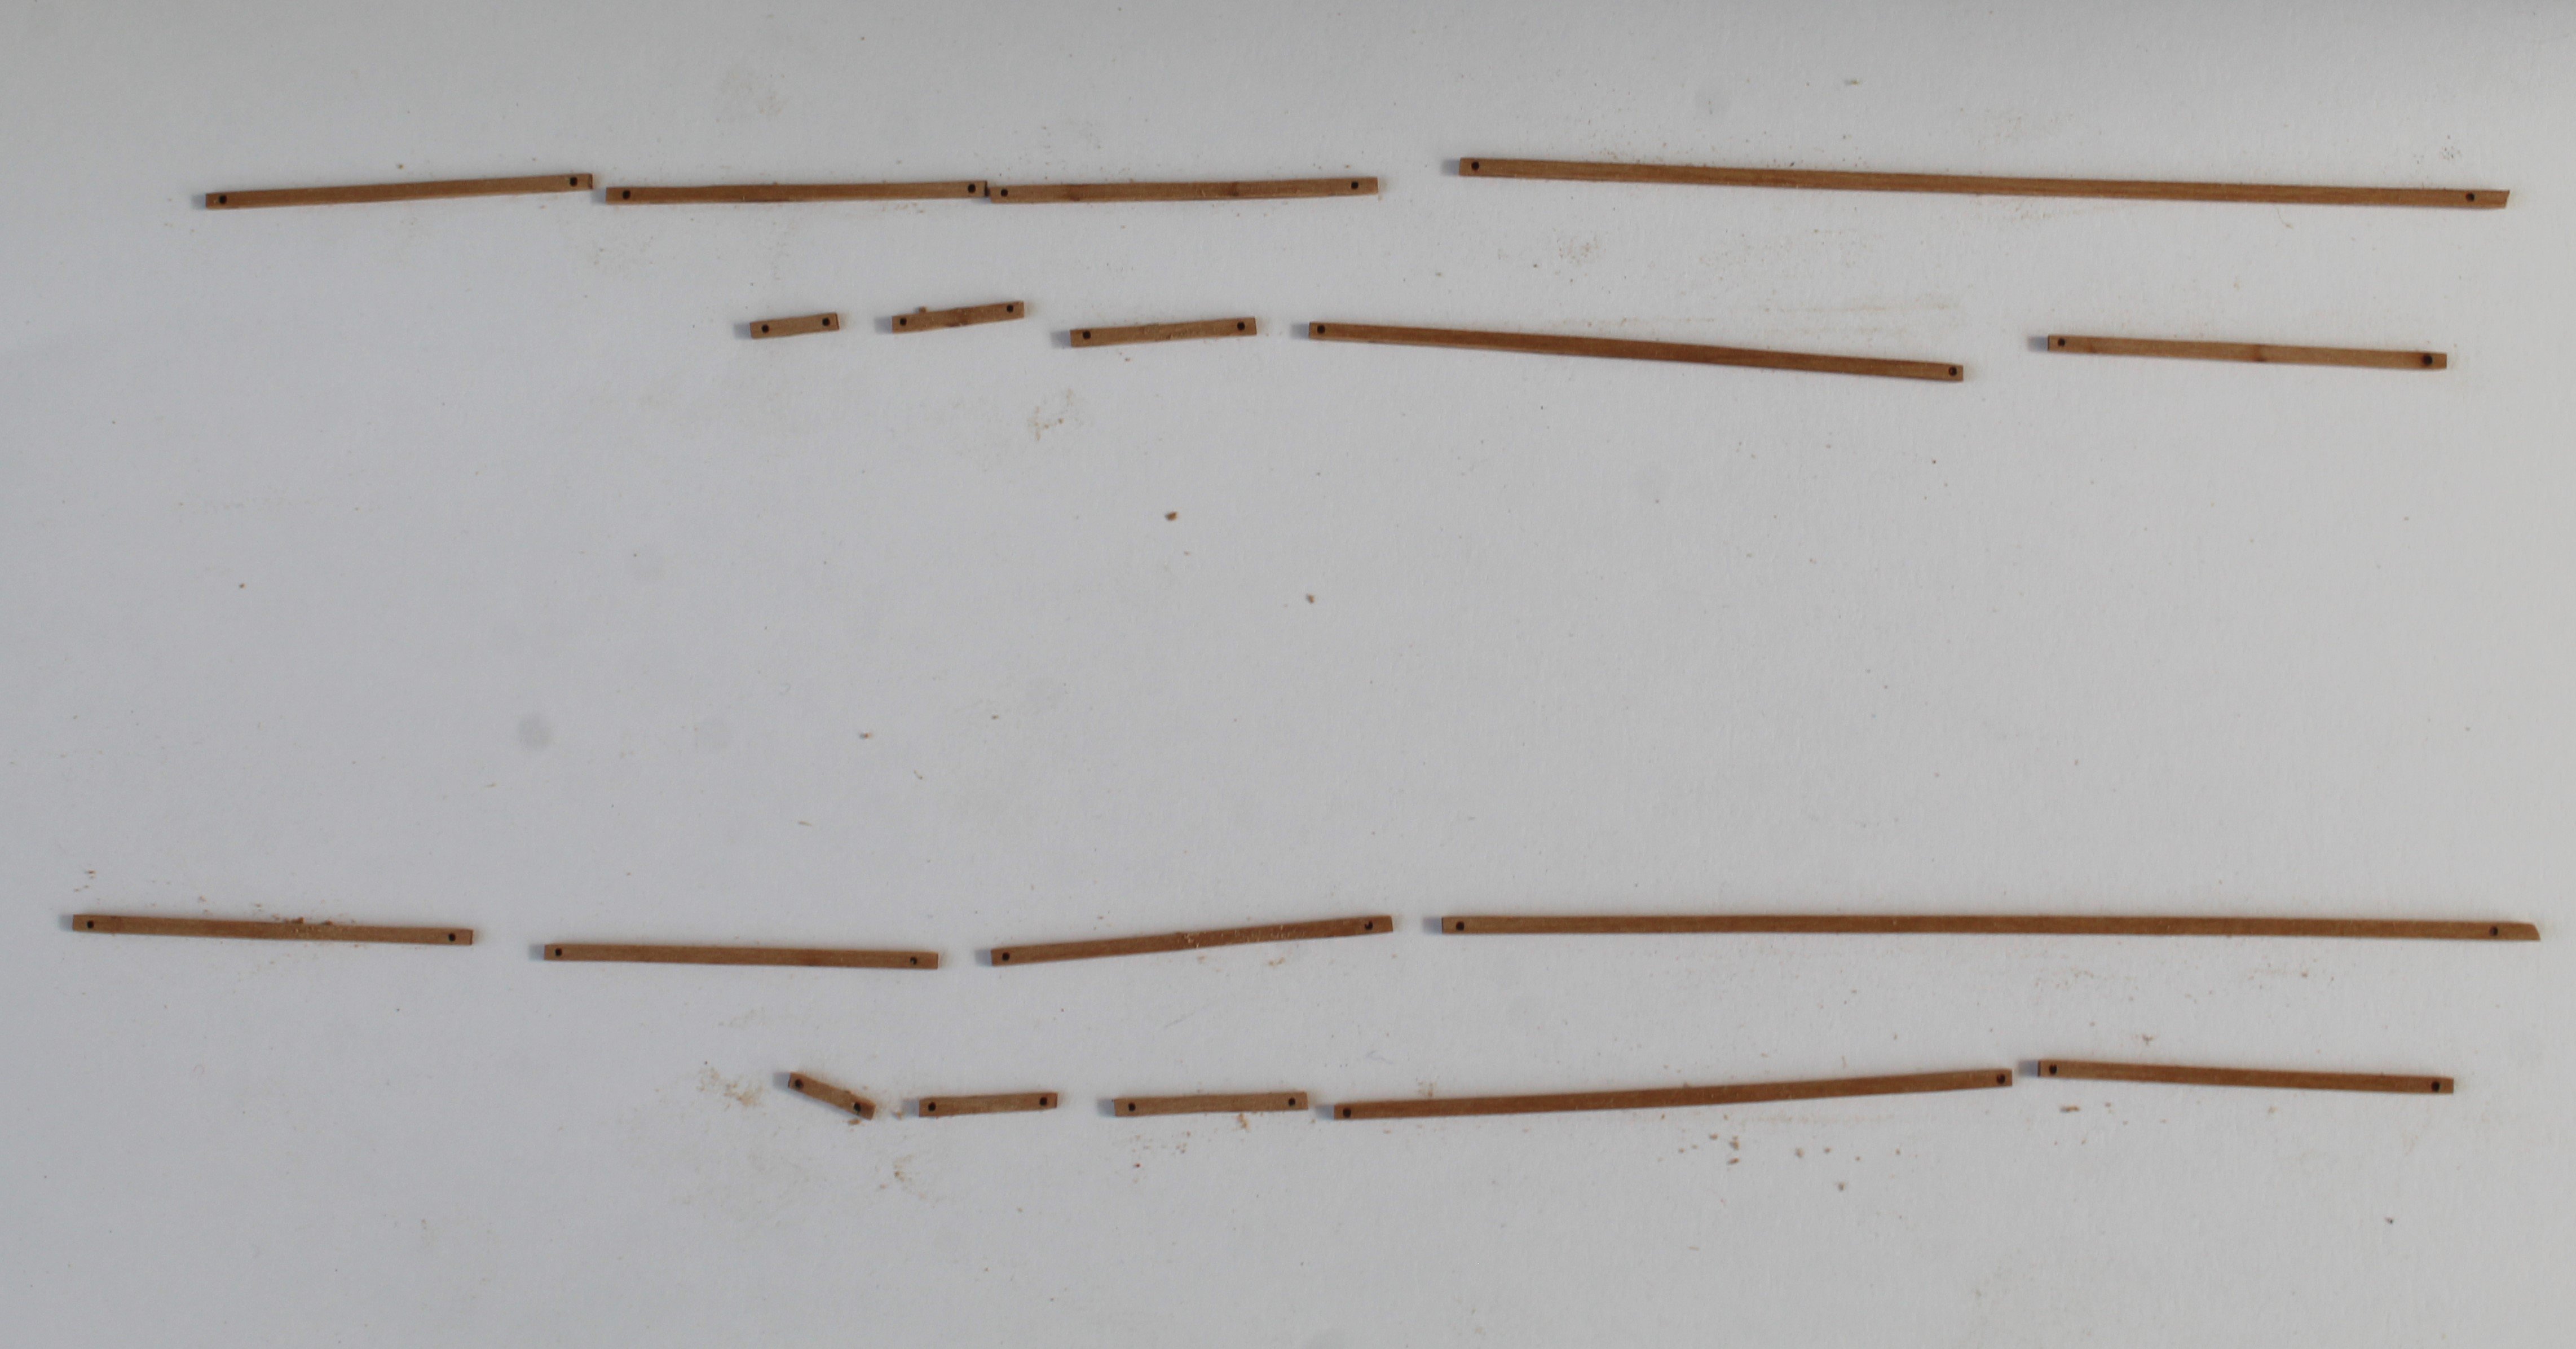
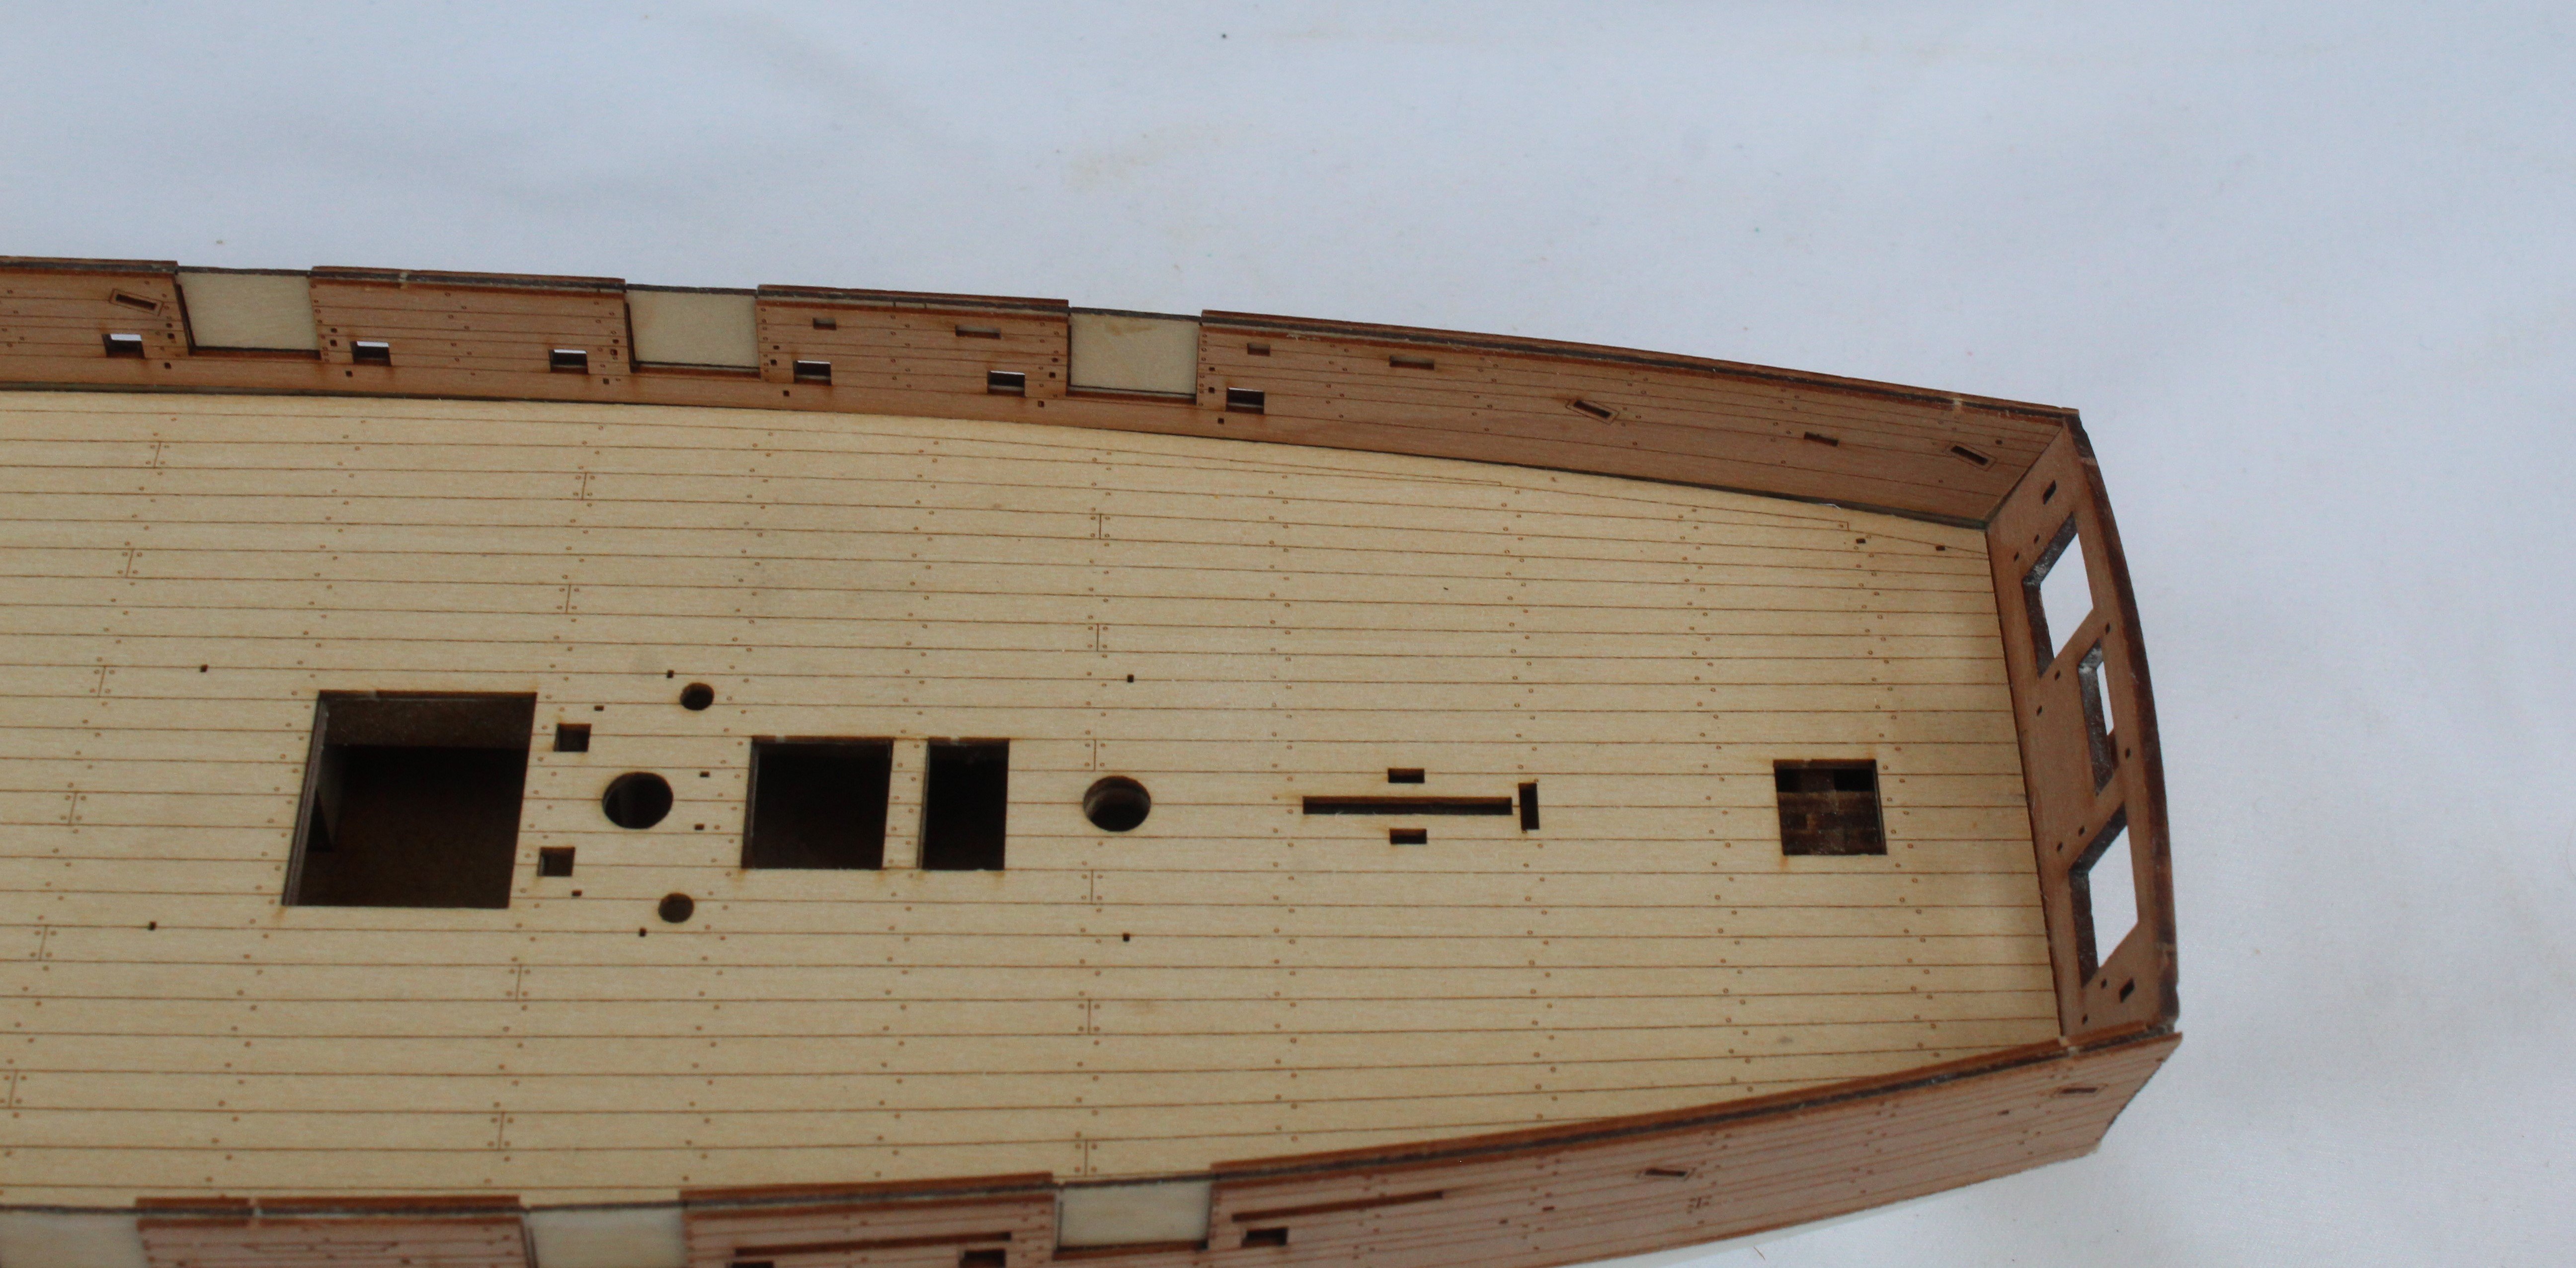
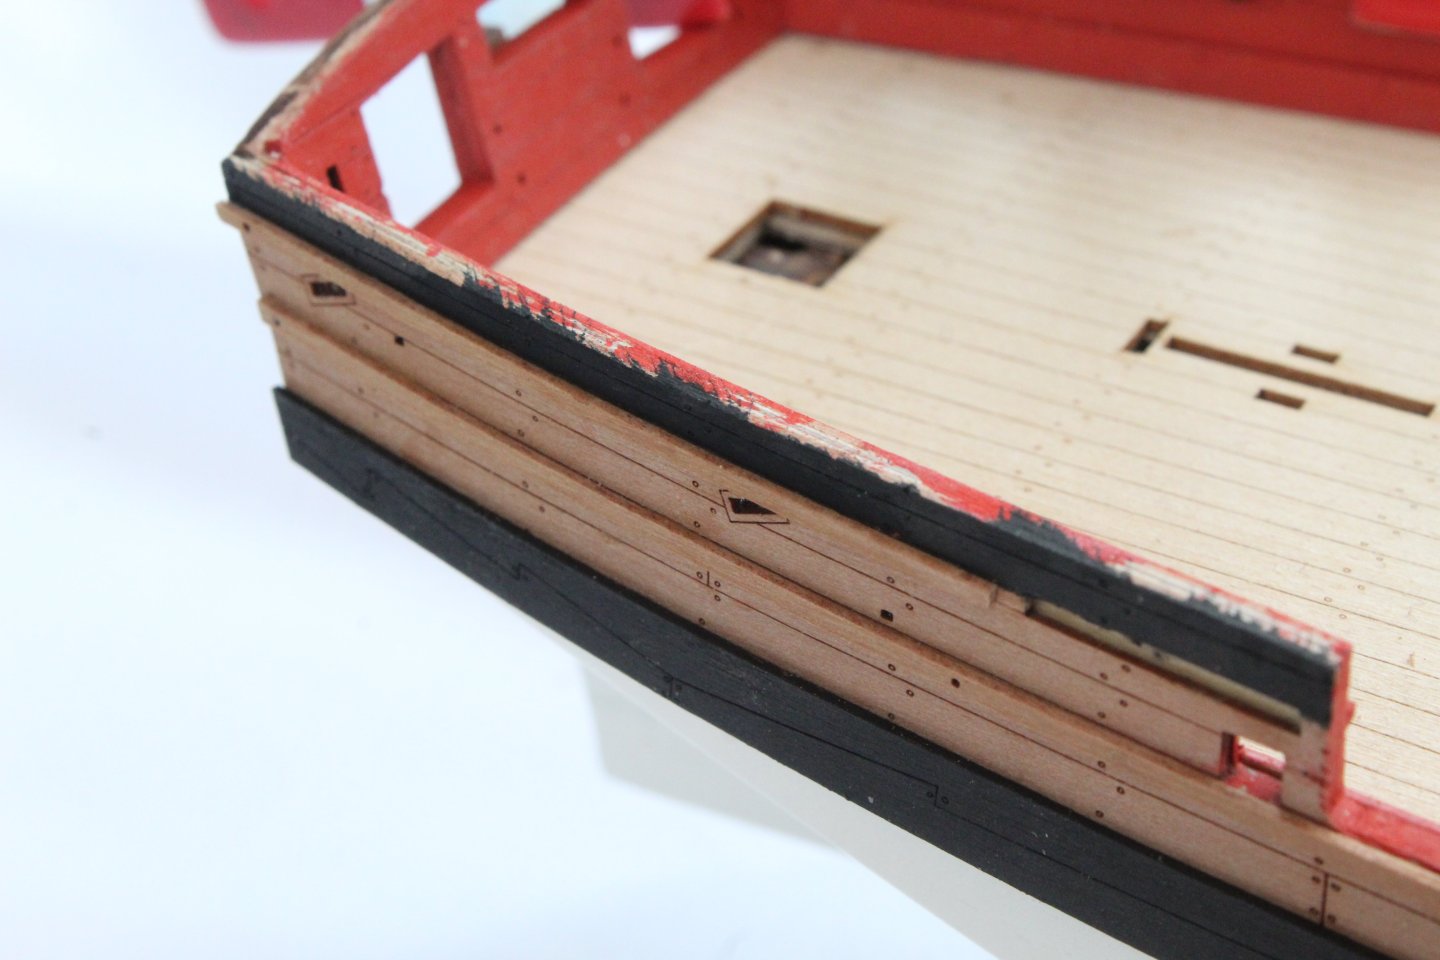
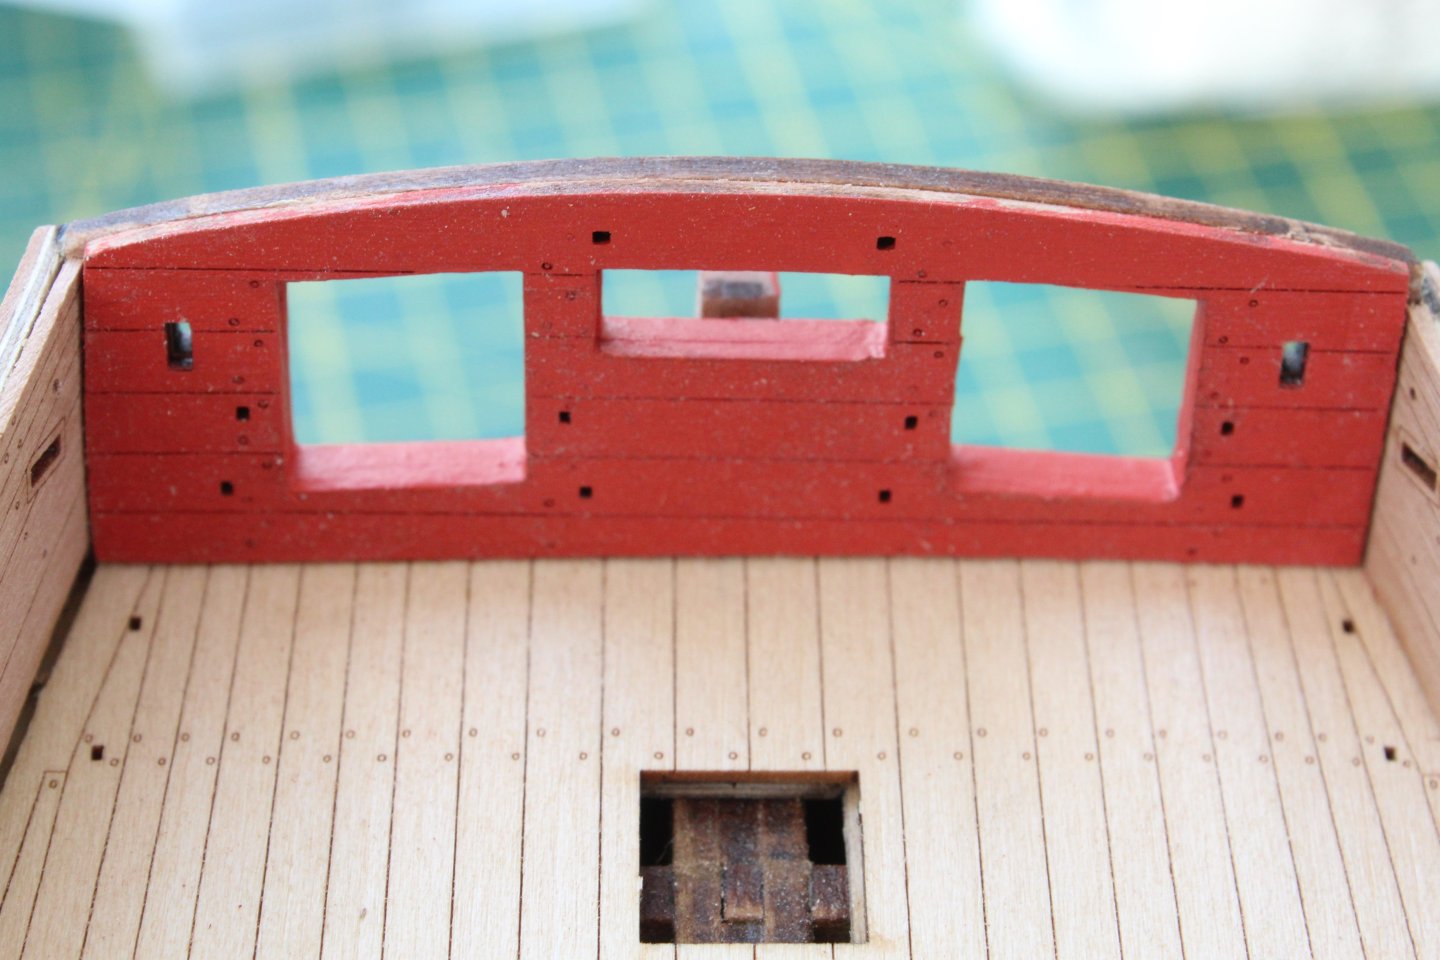
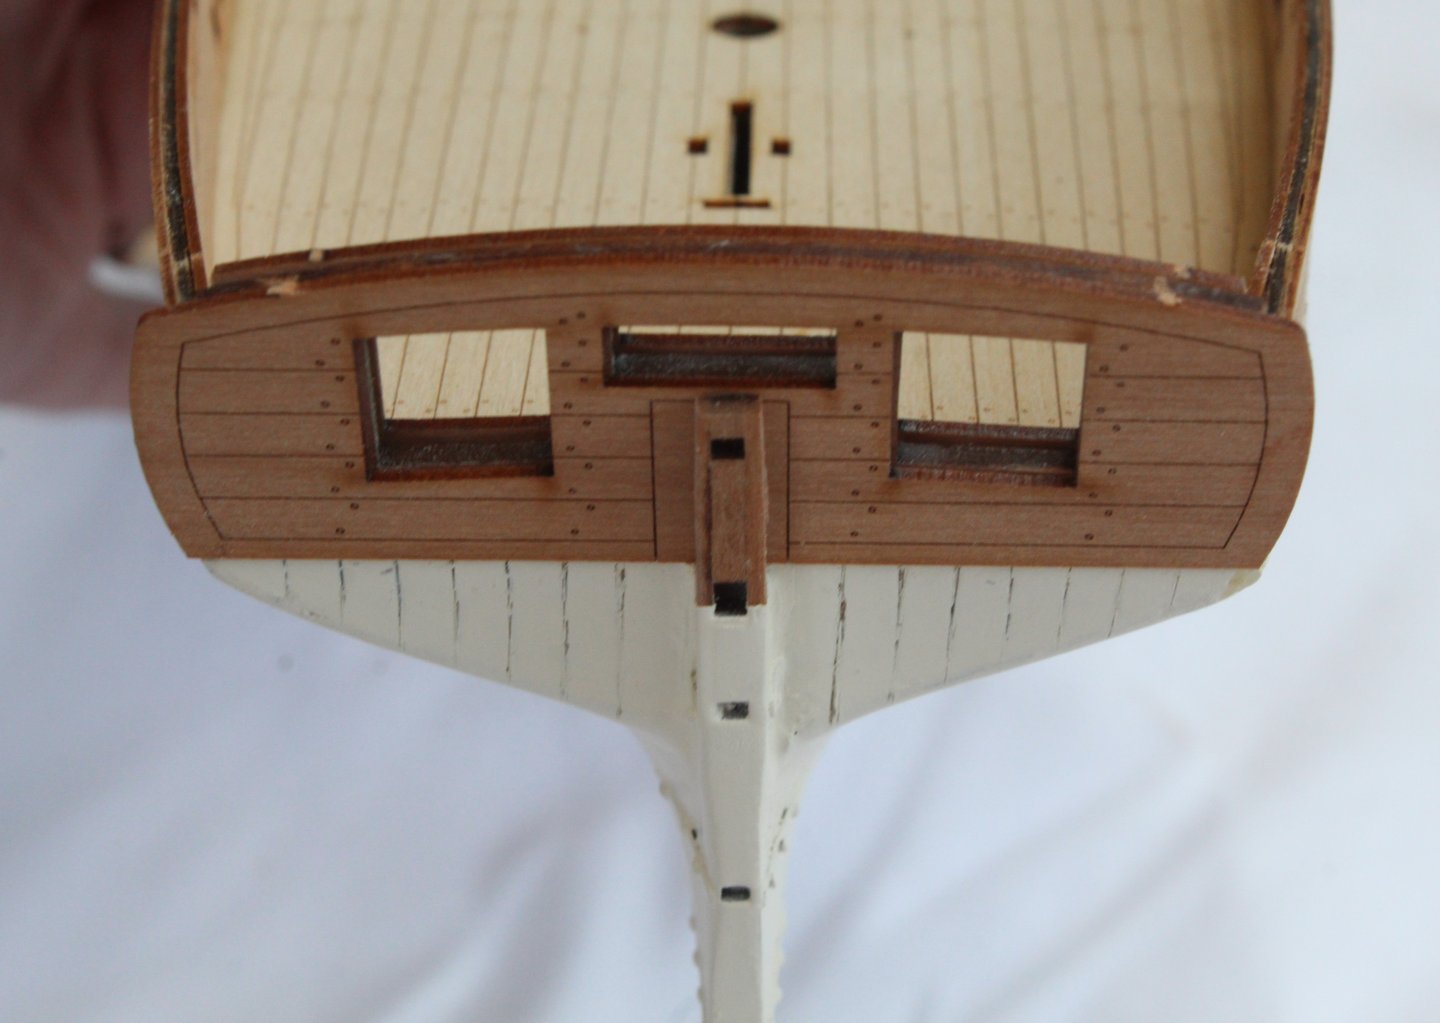
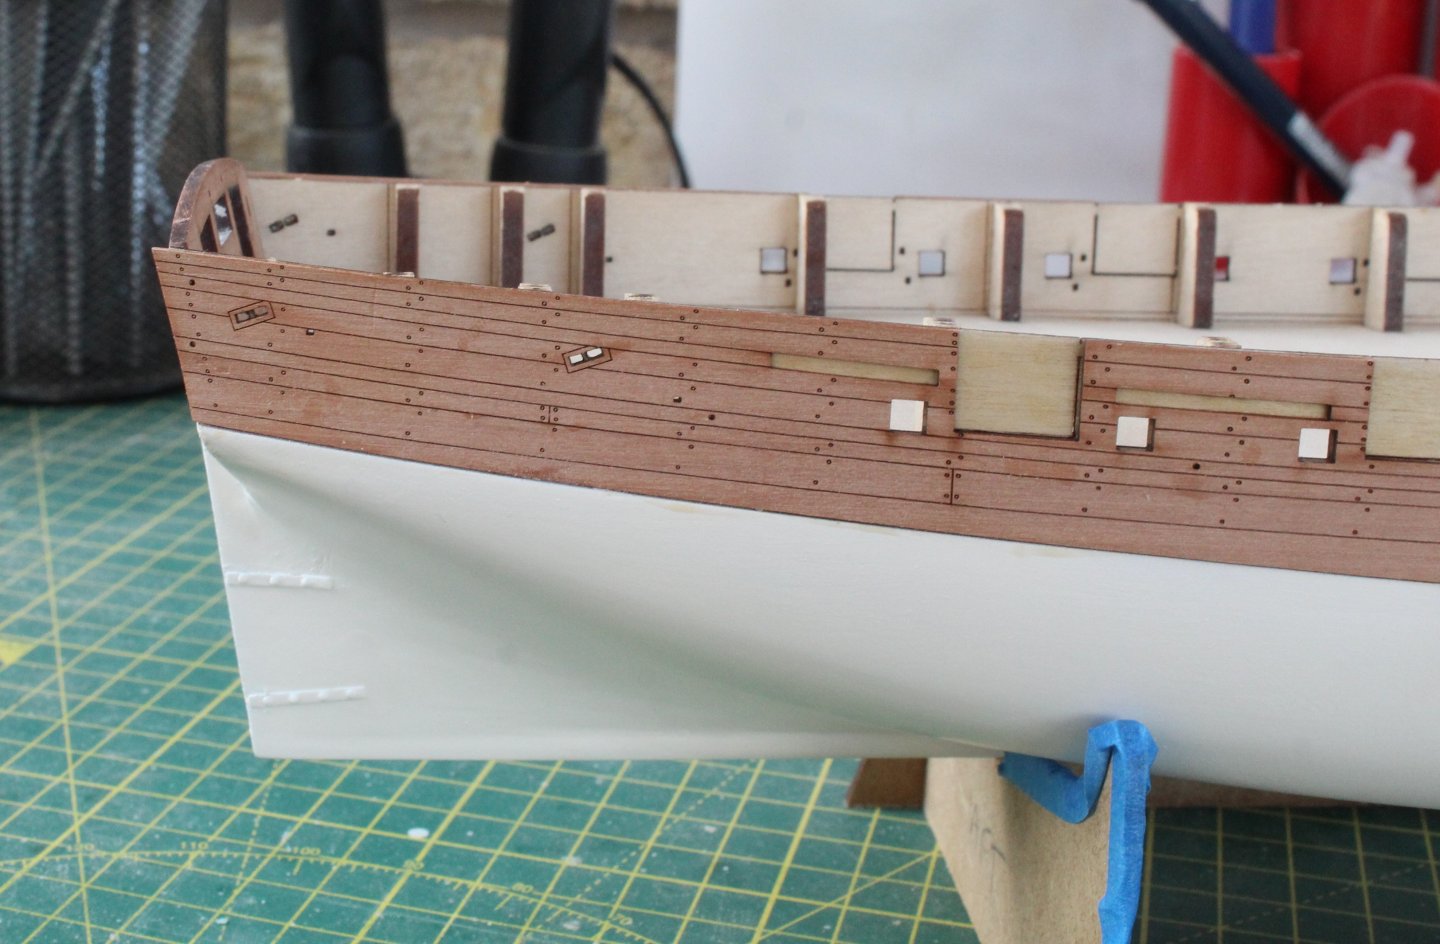
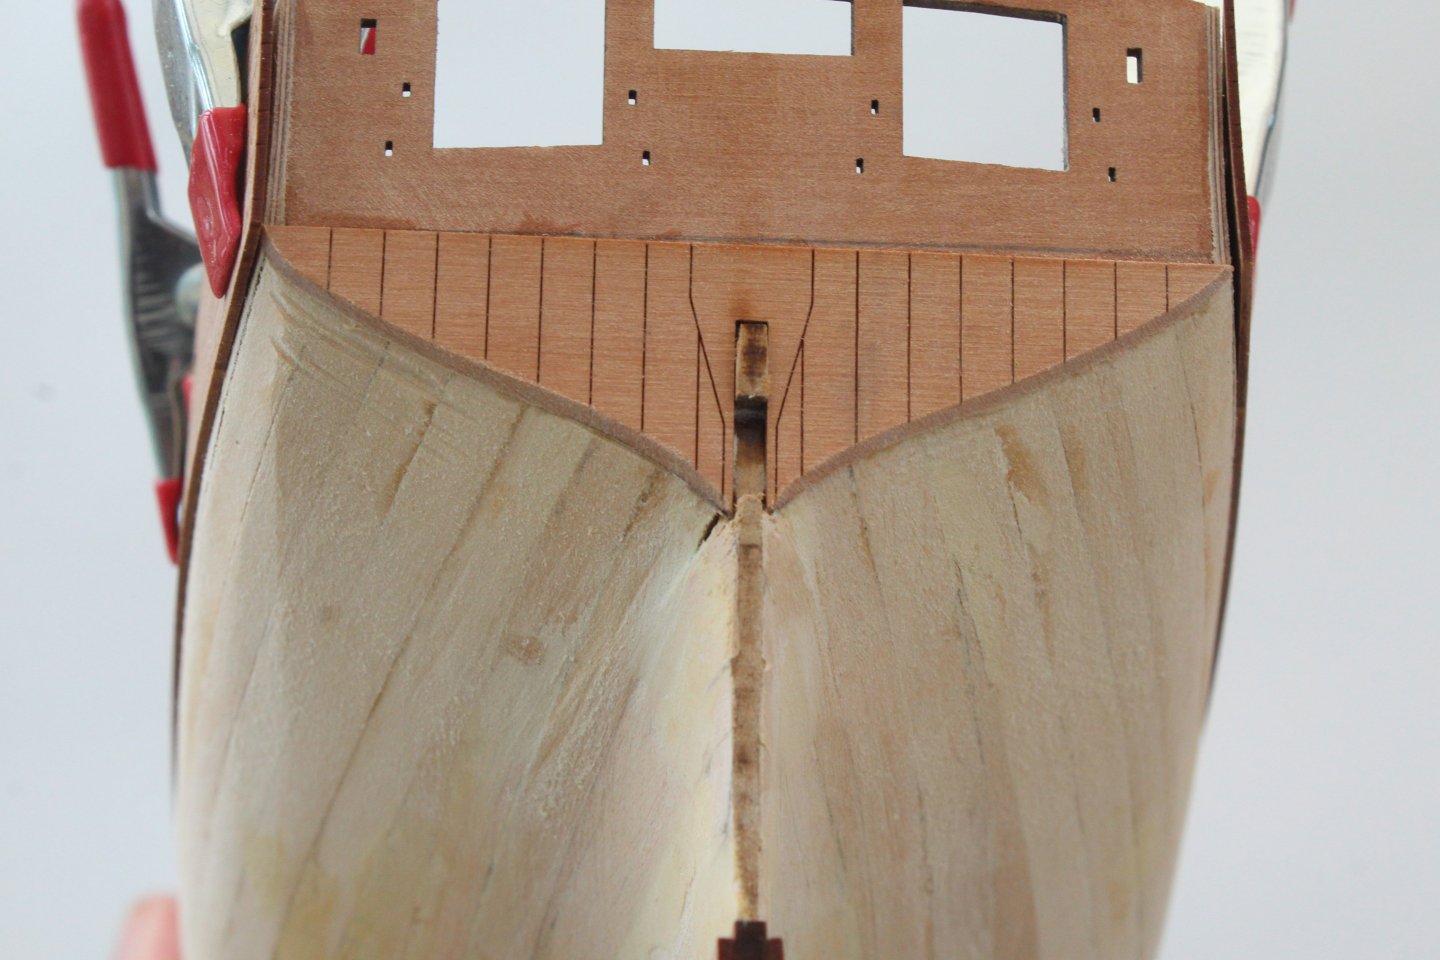
Build Log Index Date: 18/08/2024 Time worked today: 1 hour. Total time spent on build: 39 hours. Fitting Inner Stern Transom Pattern As indicated in a previous post the inner stern transom pattern had been trimmed during the dry fitting process. Today a light coat of varnish was brushed on the pattern. Once that had dried 2 coats of flat red paint were brushed on. Before gluing the pattern in place, a trial fit of the inner transom pattern cleats was done. This is much easier to check before the pattern is fixed in place. The pattern was then glued in place. I did apply of red paint to the openings once the glue had cured. Preparing Inner Bulwark Rails The various inner bulwark rail patterns were removed from the 0.8mm sheet and the laser char was carefully removed from the edges. There is still a bit of work required to fit these rails as they may need trimmed to ensure they are aligned with the edges of the various gun port openings. It will be slow and steady work to complete.
-
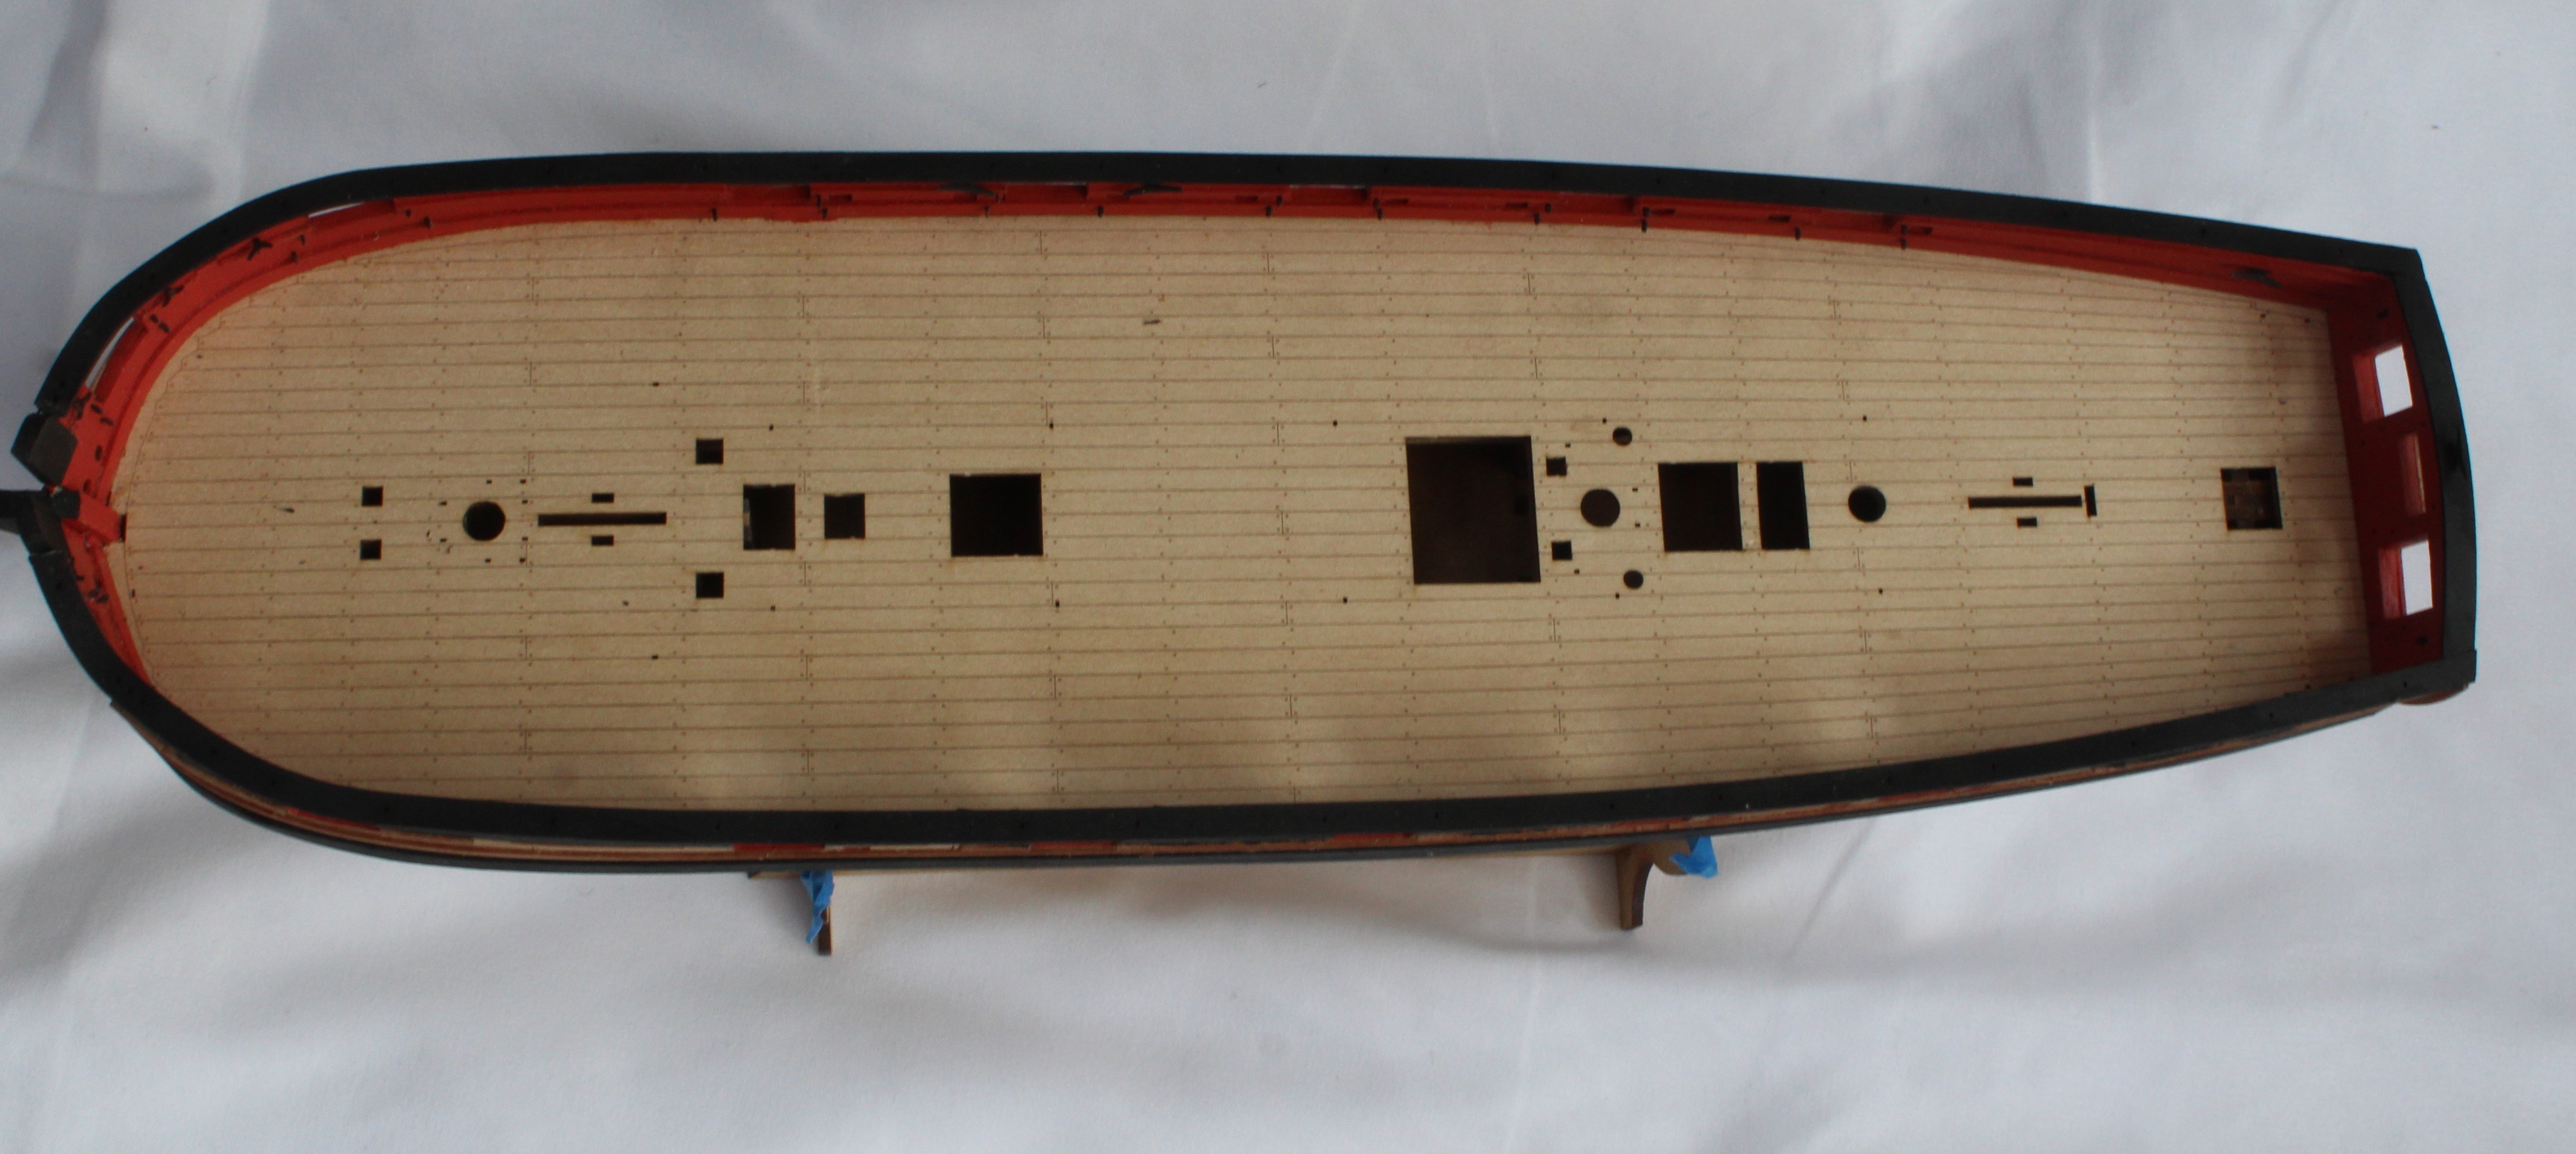
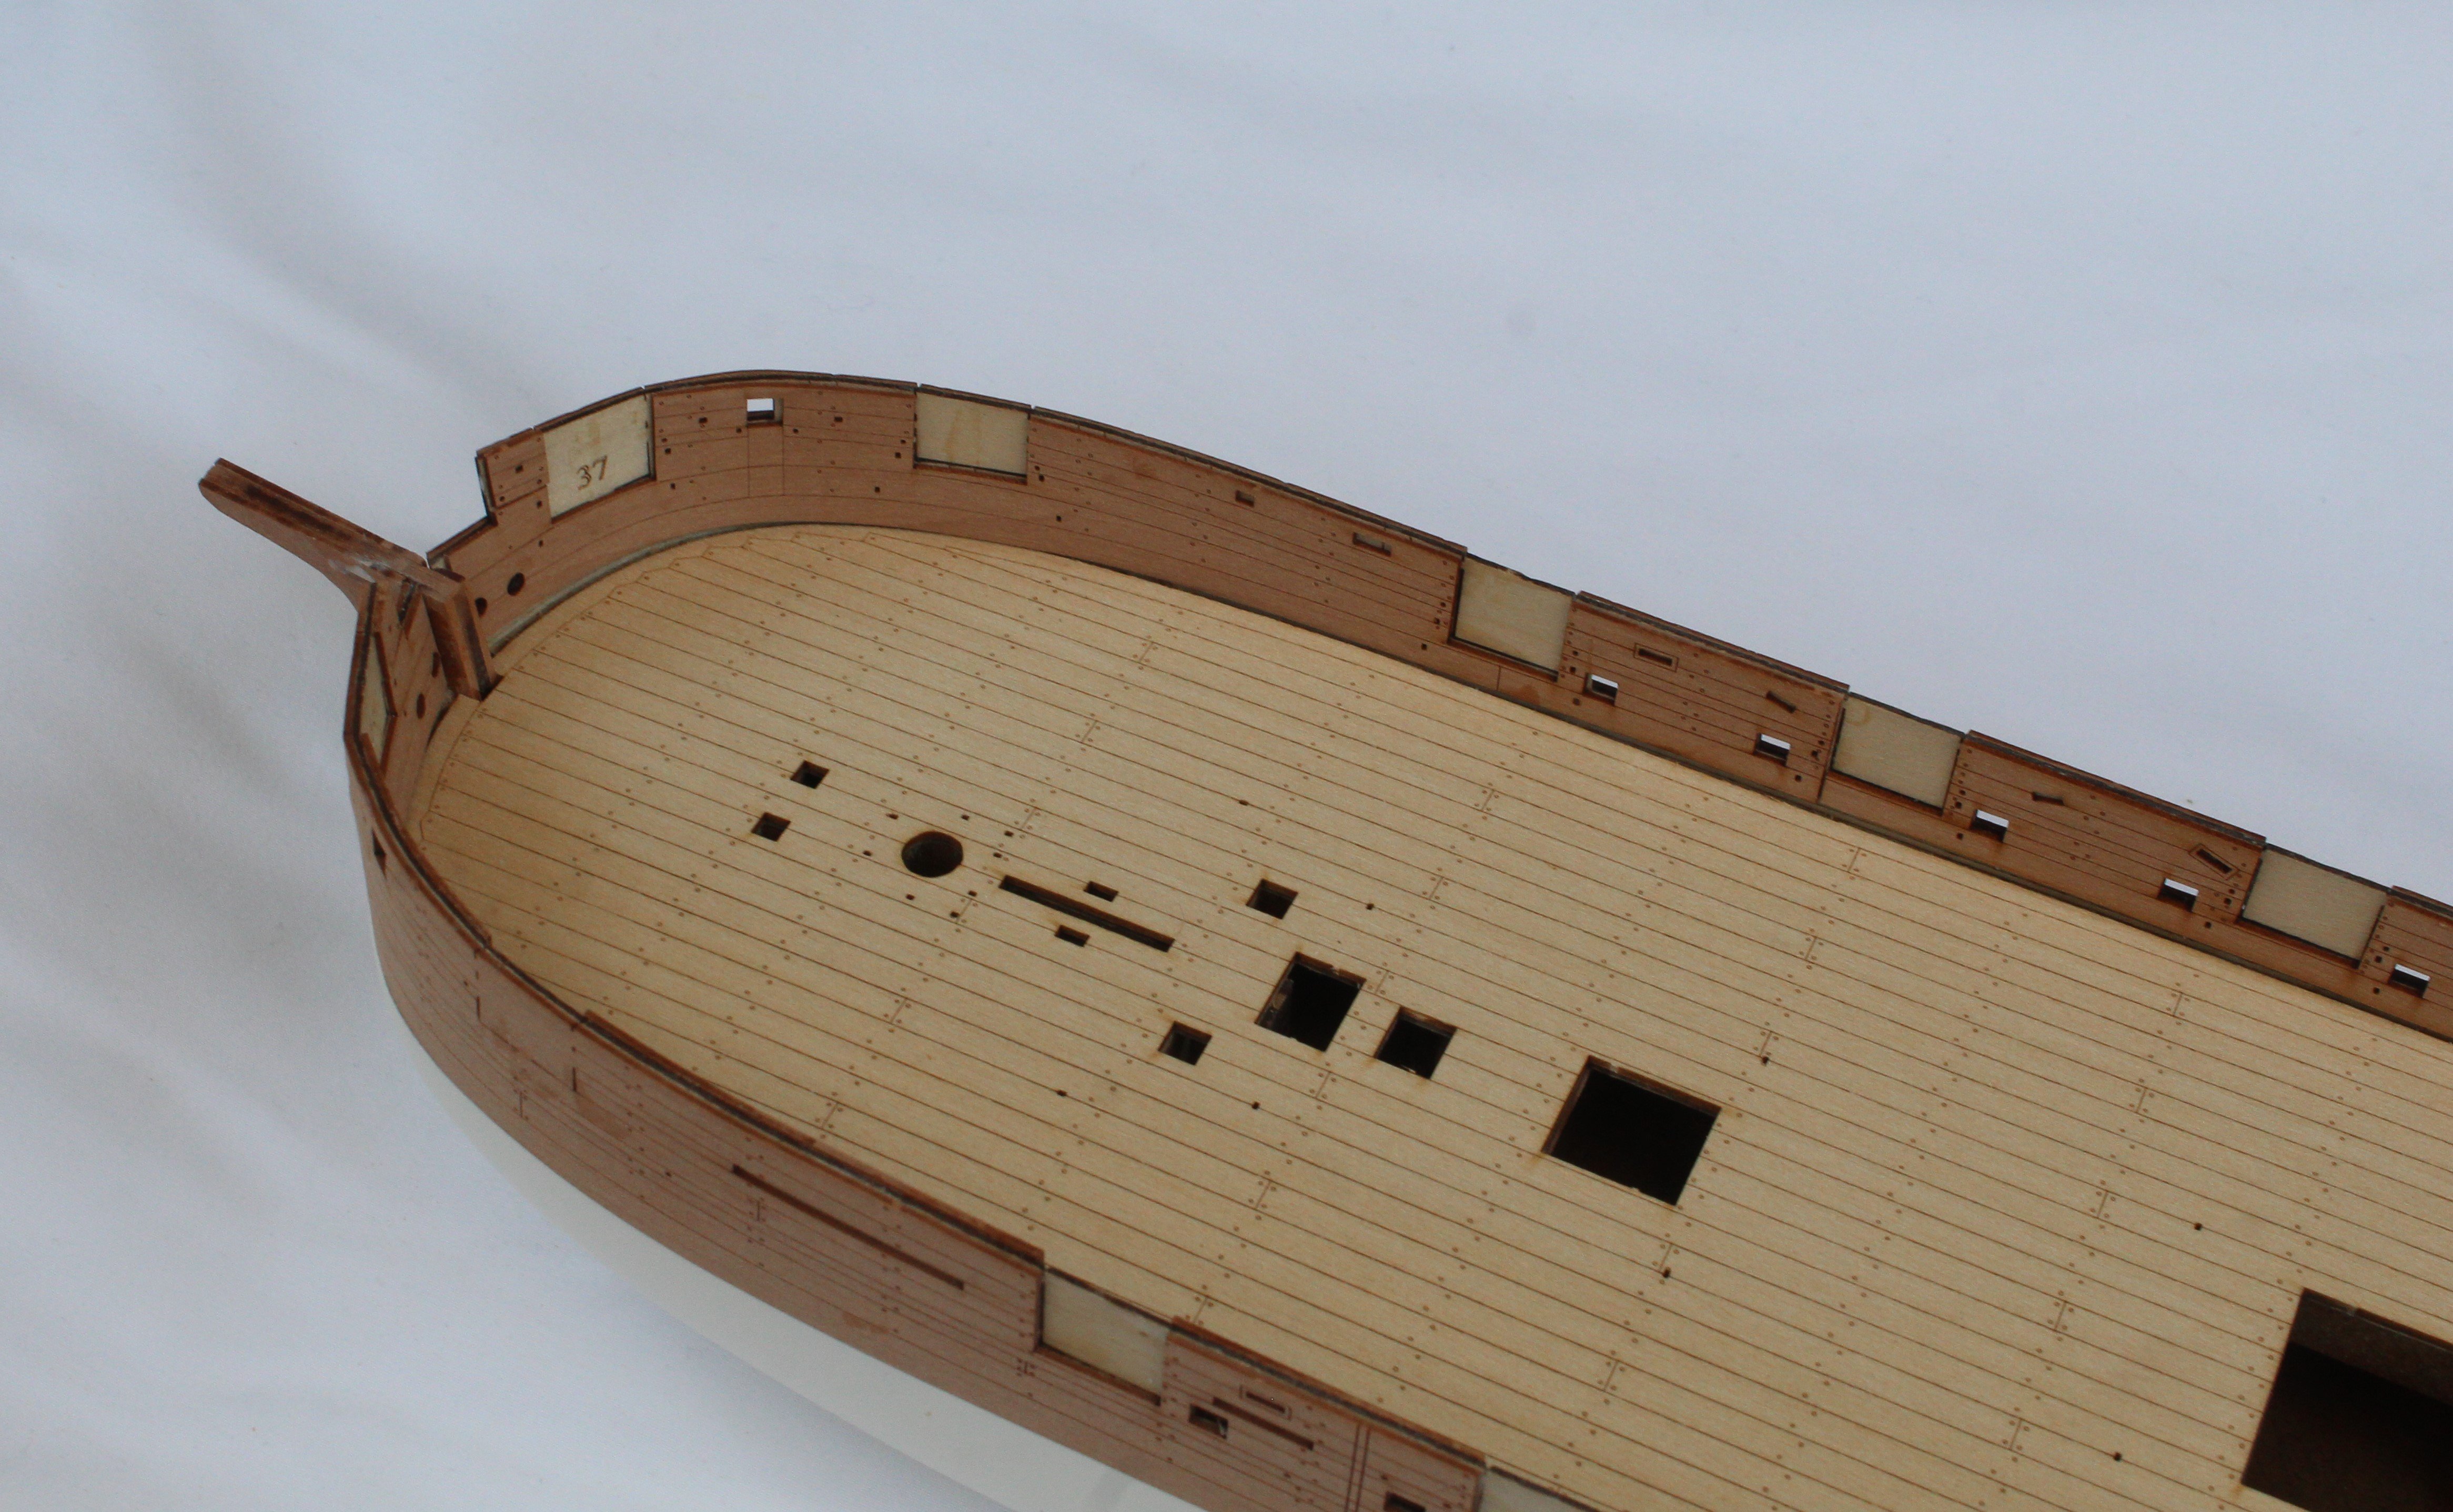
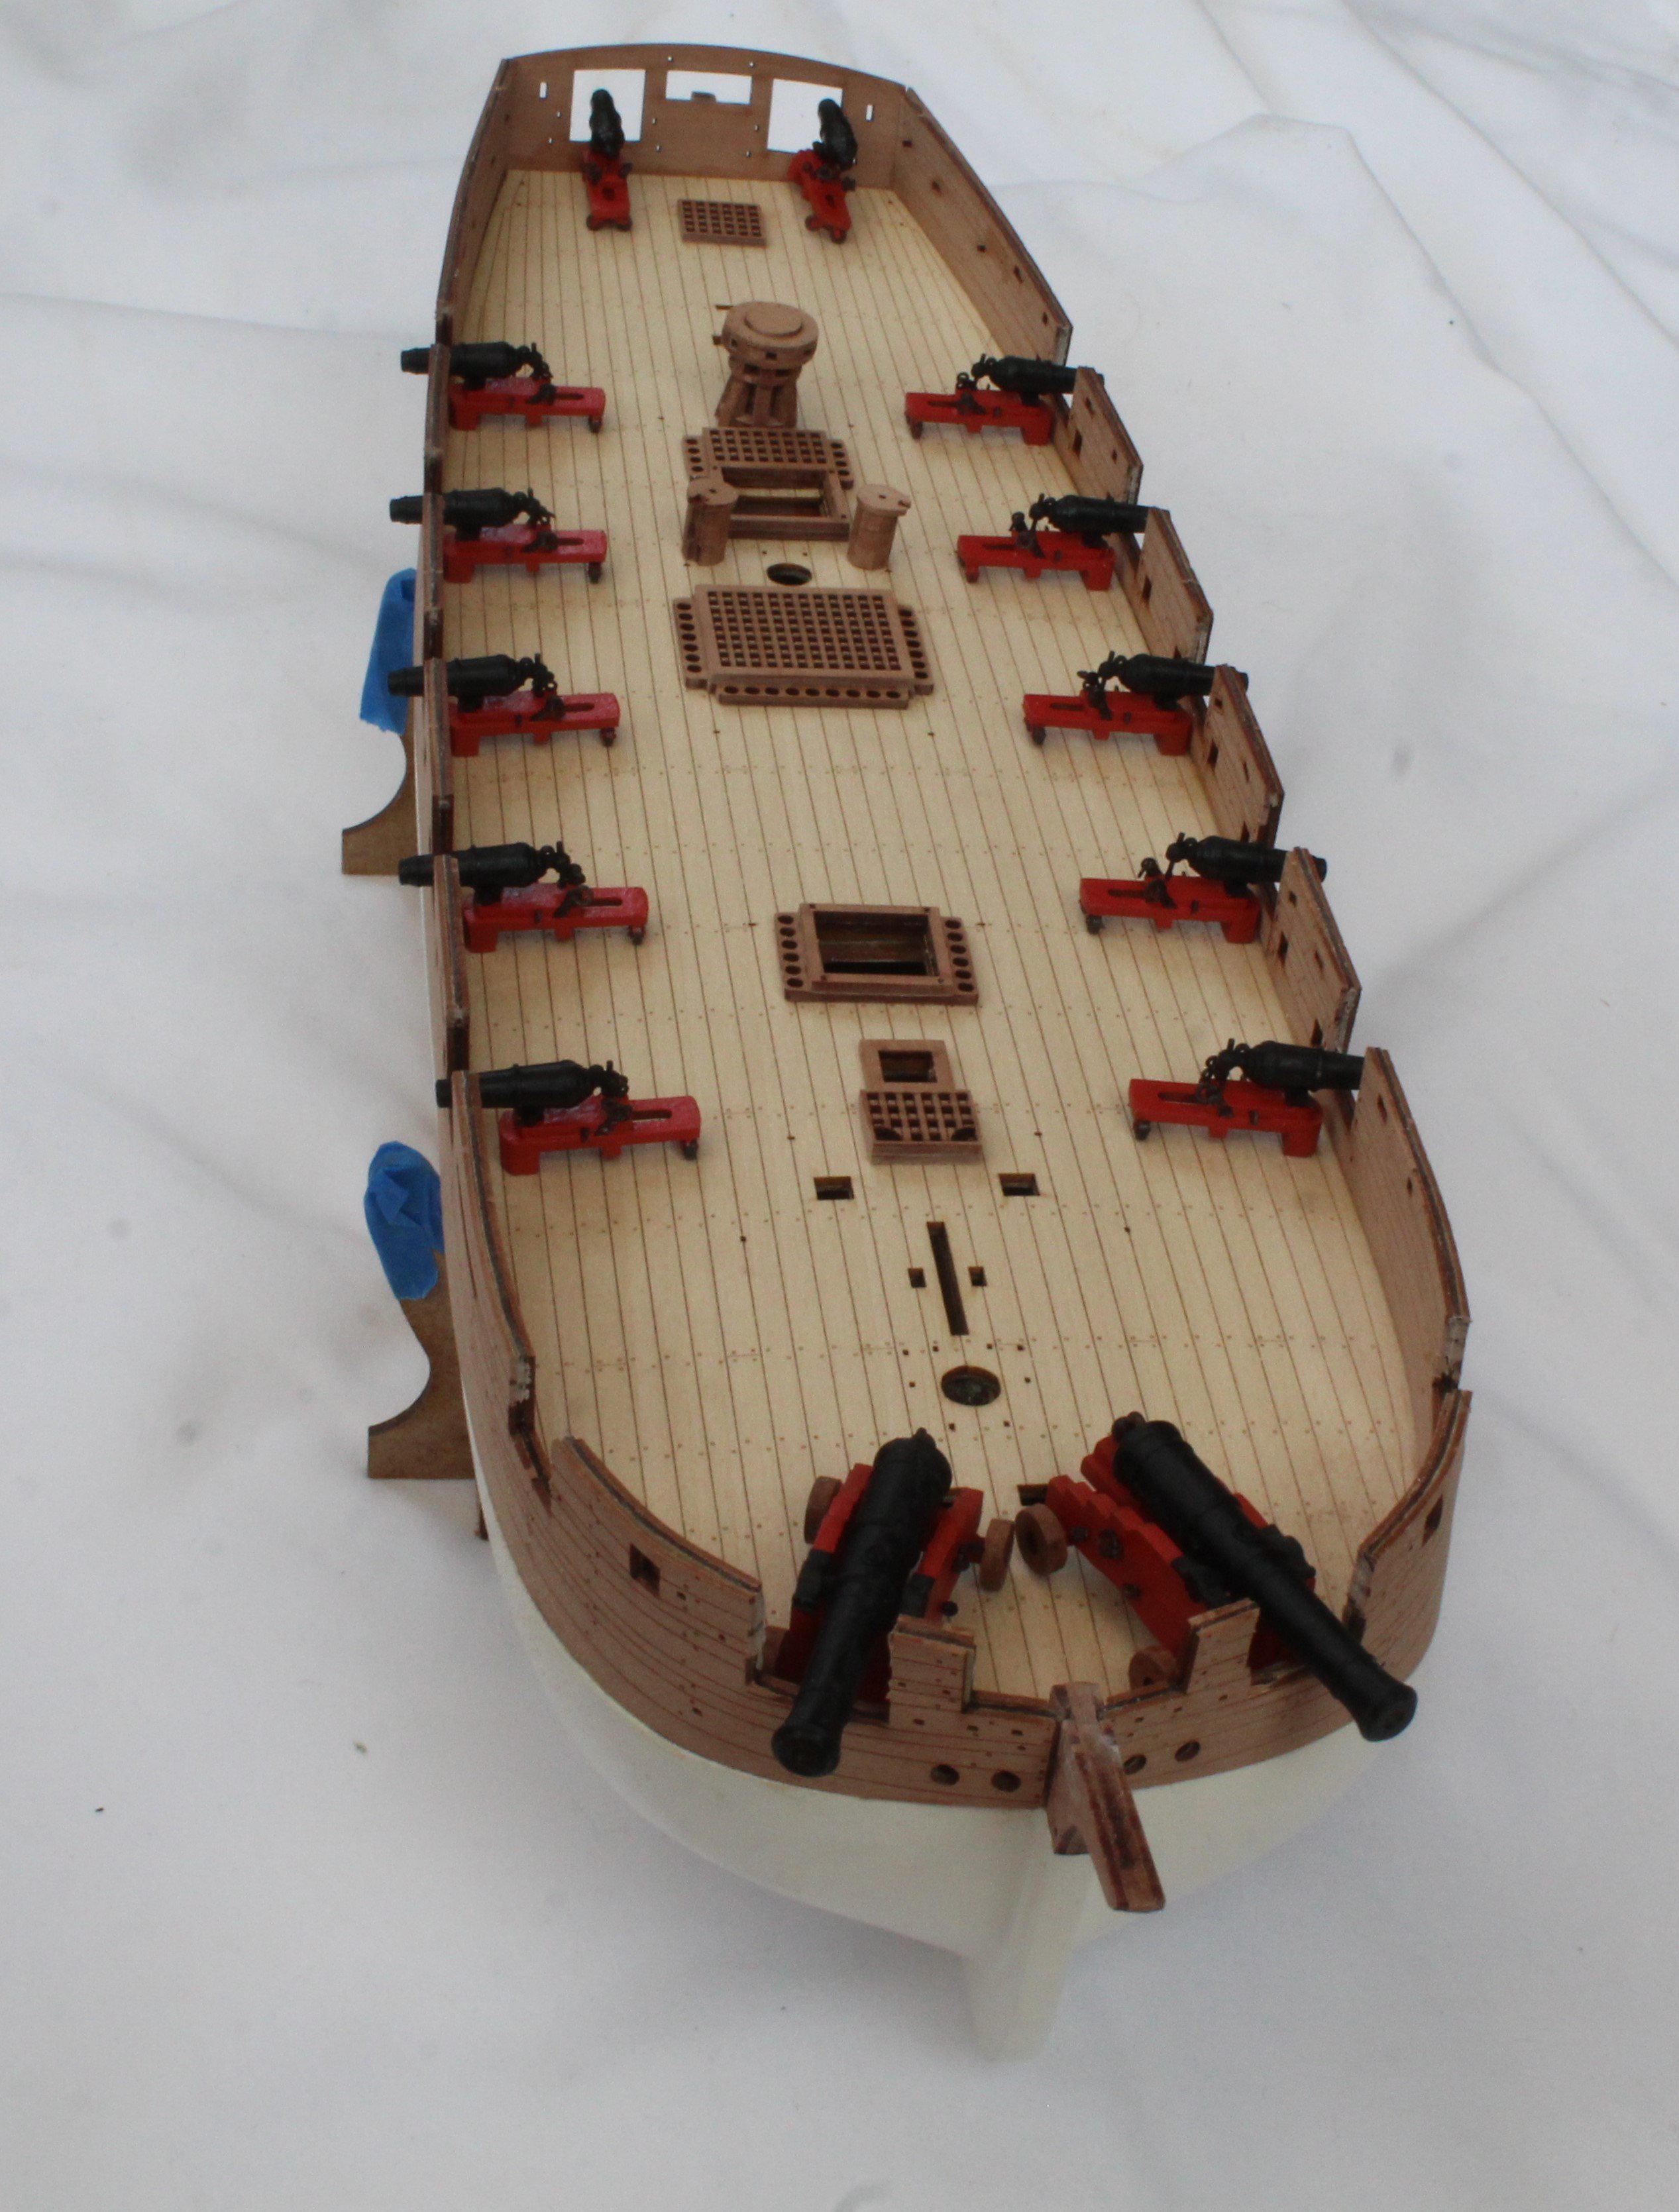
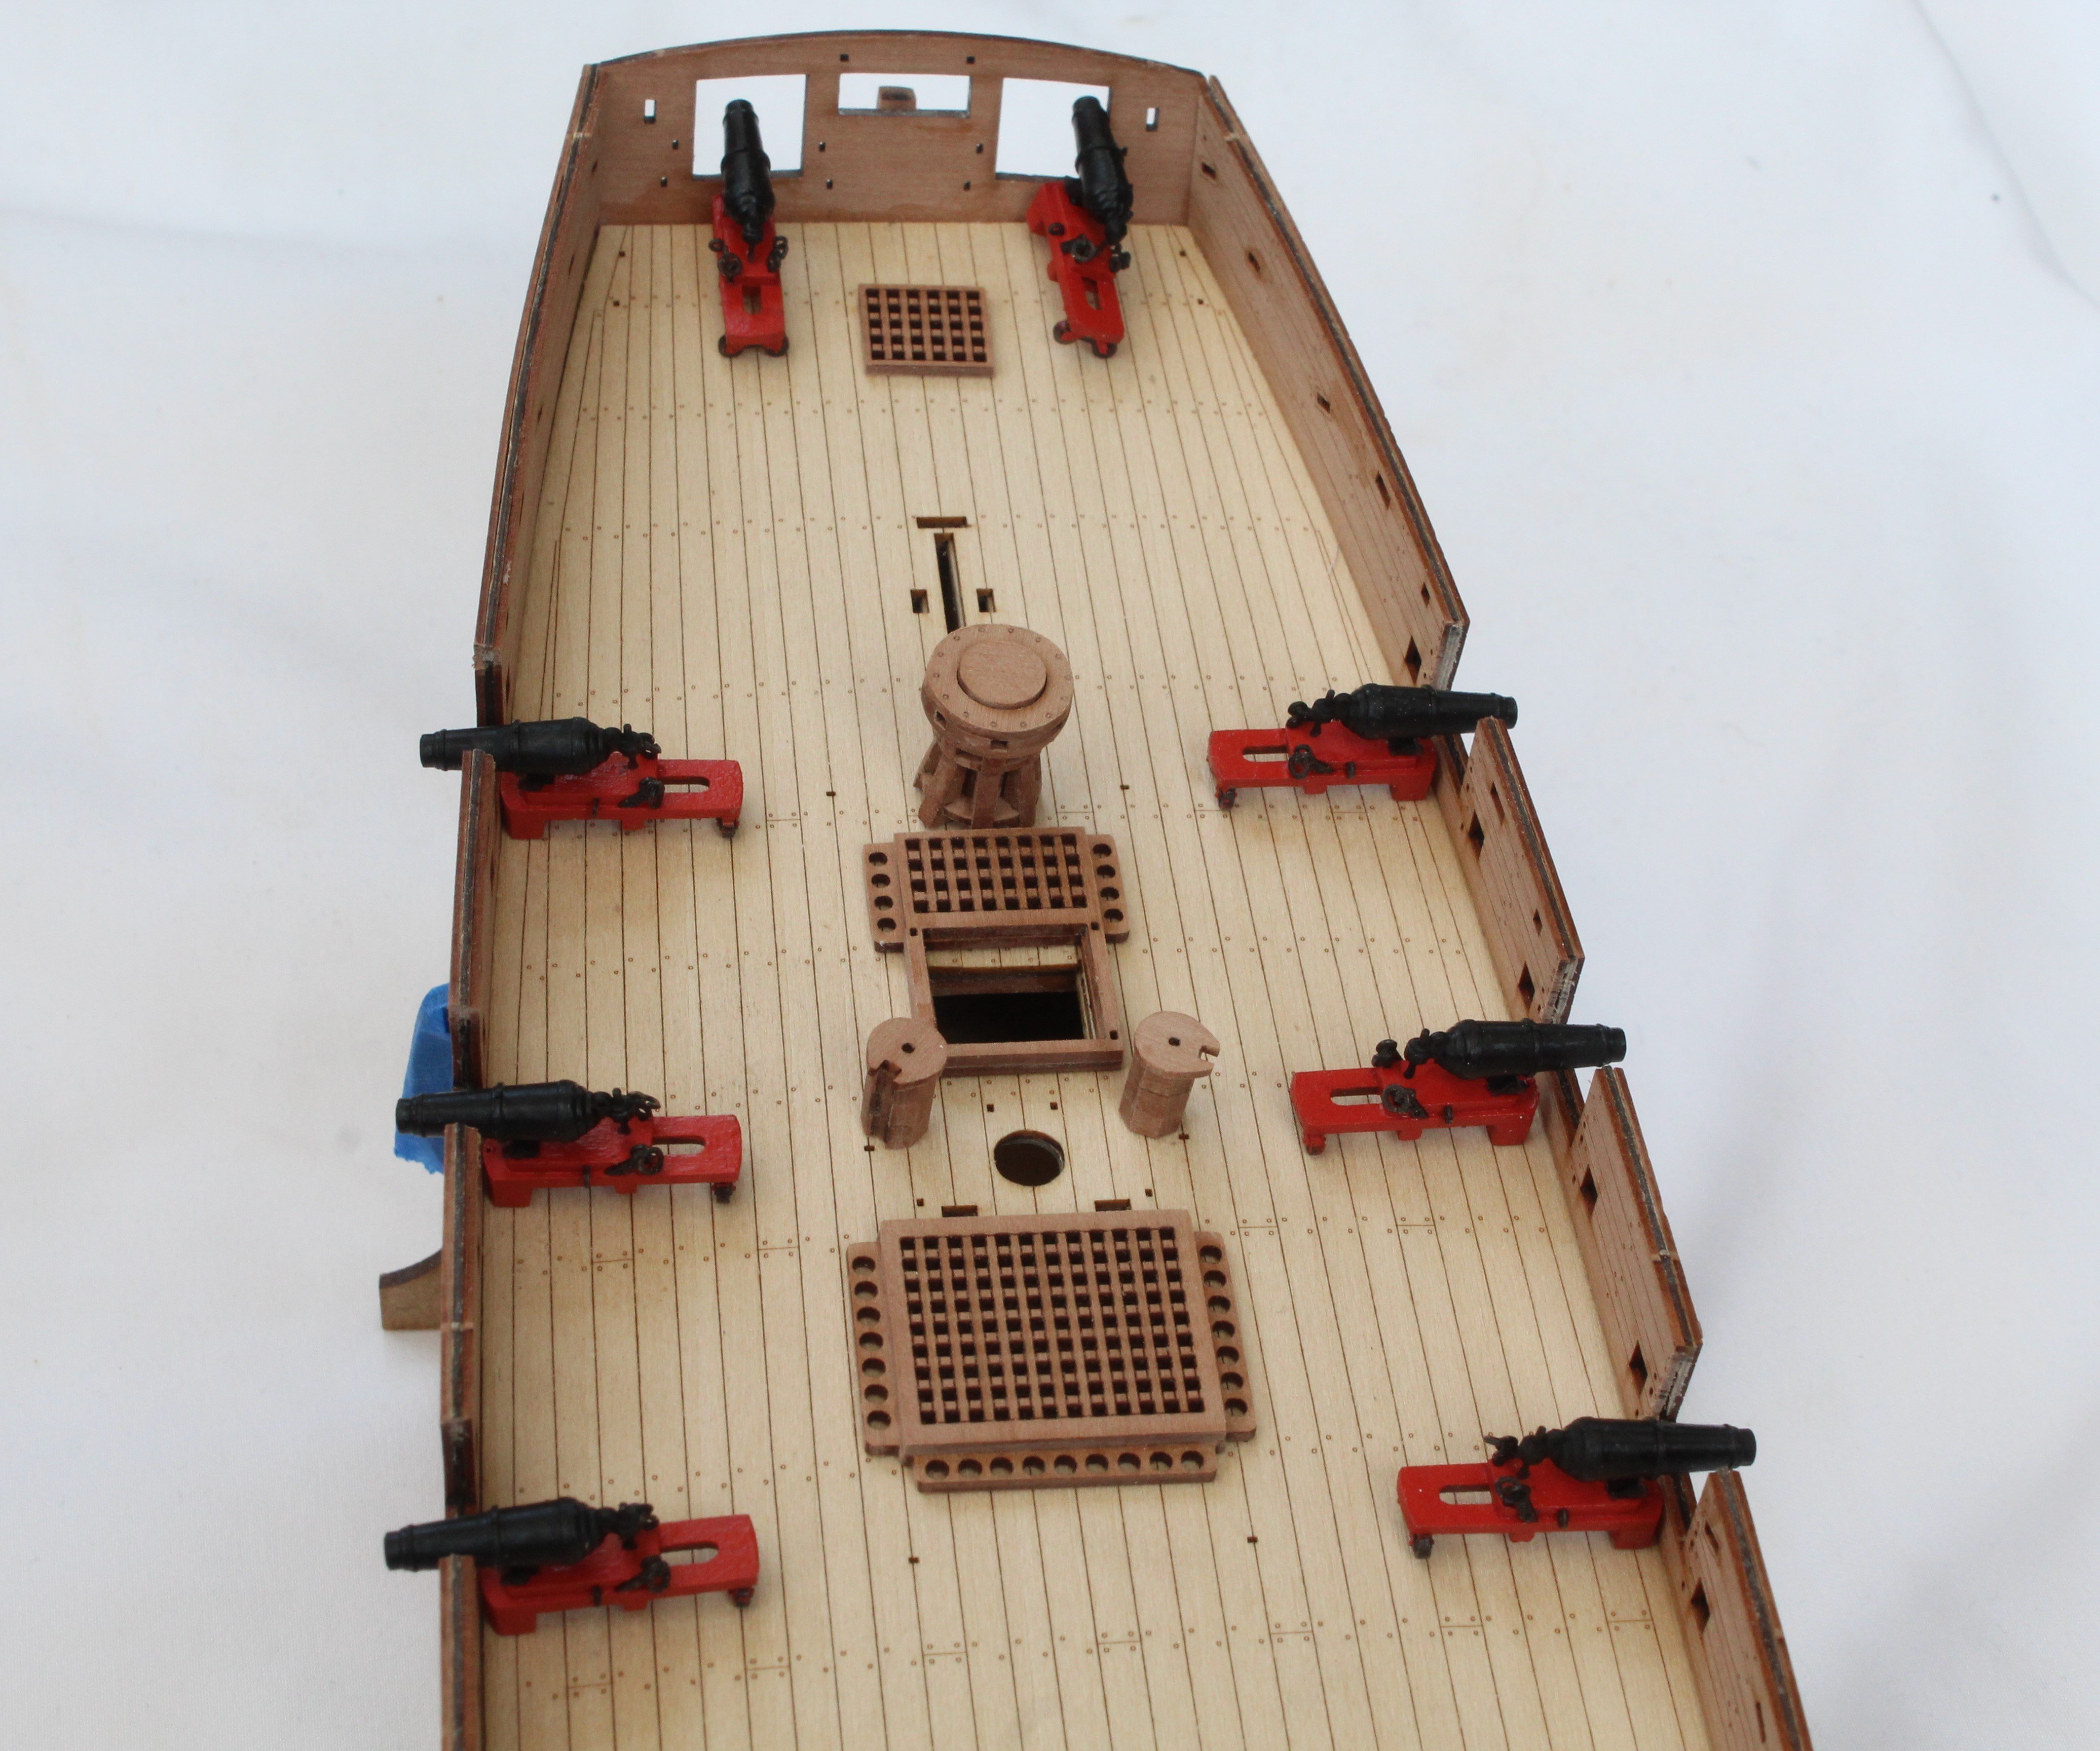
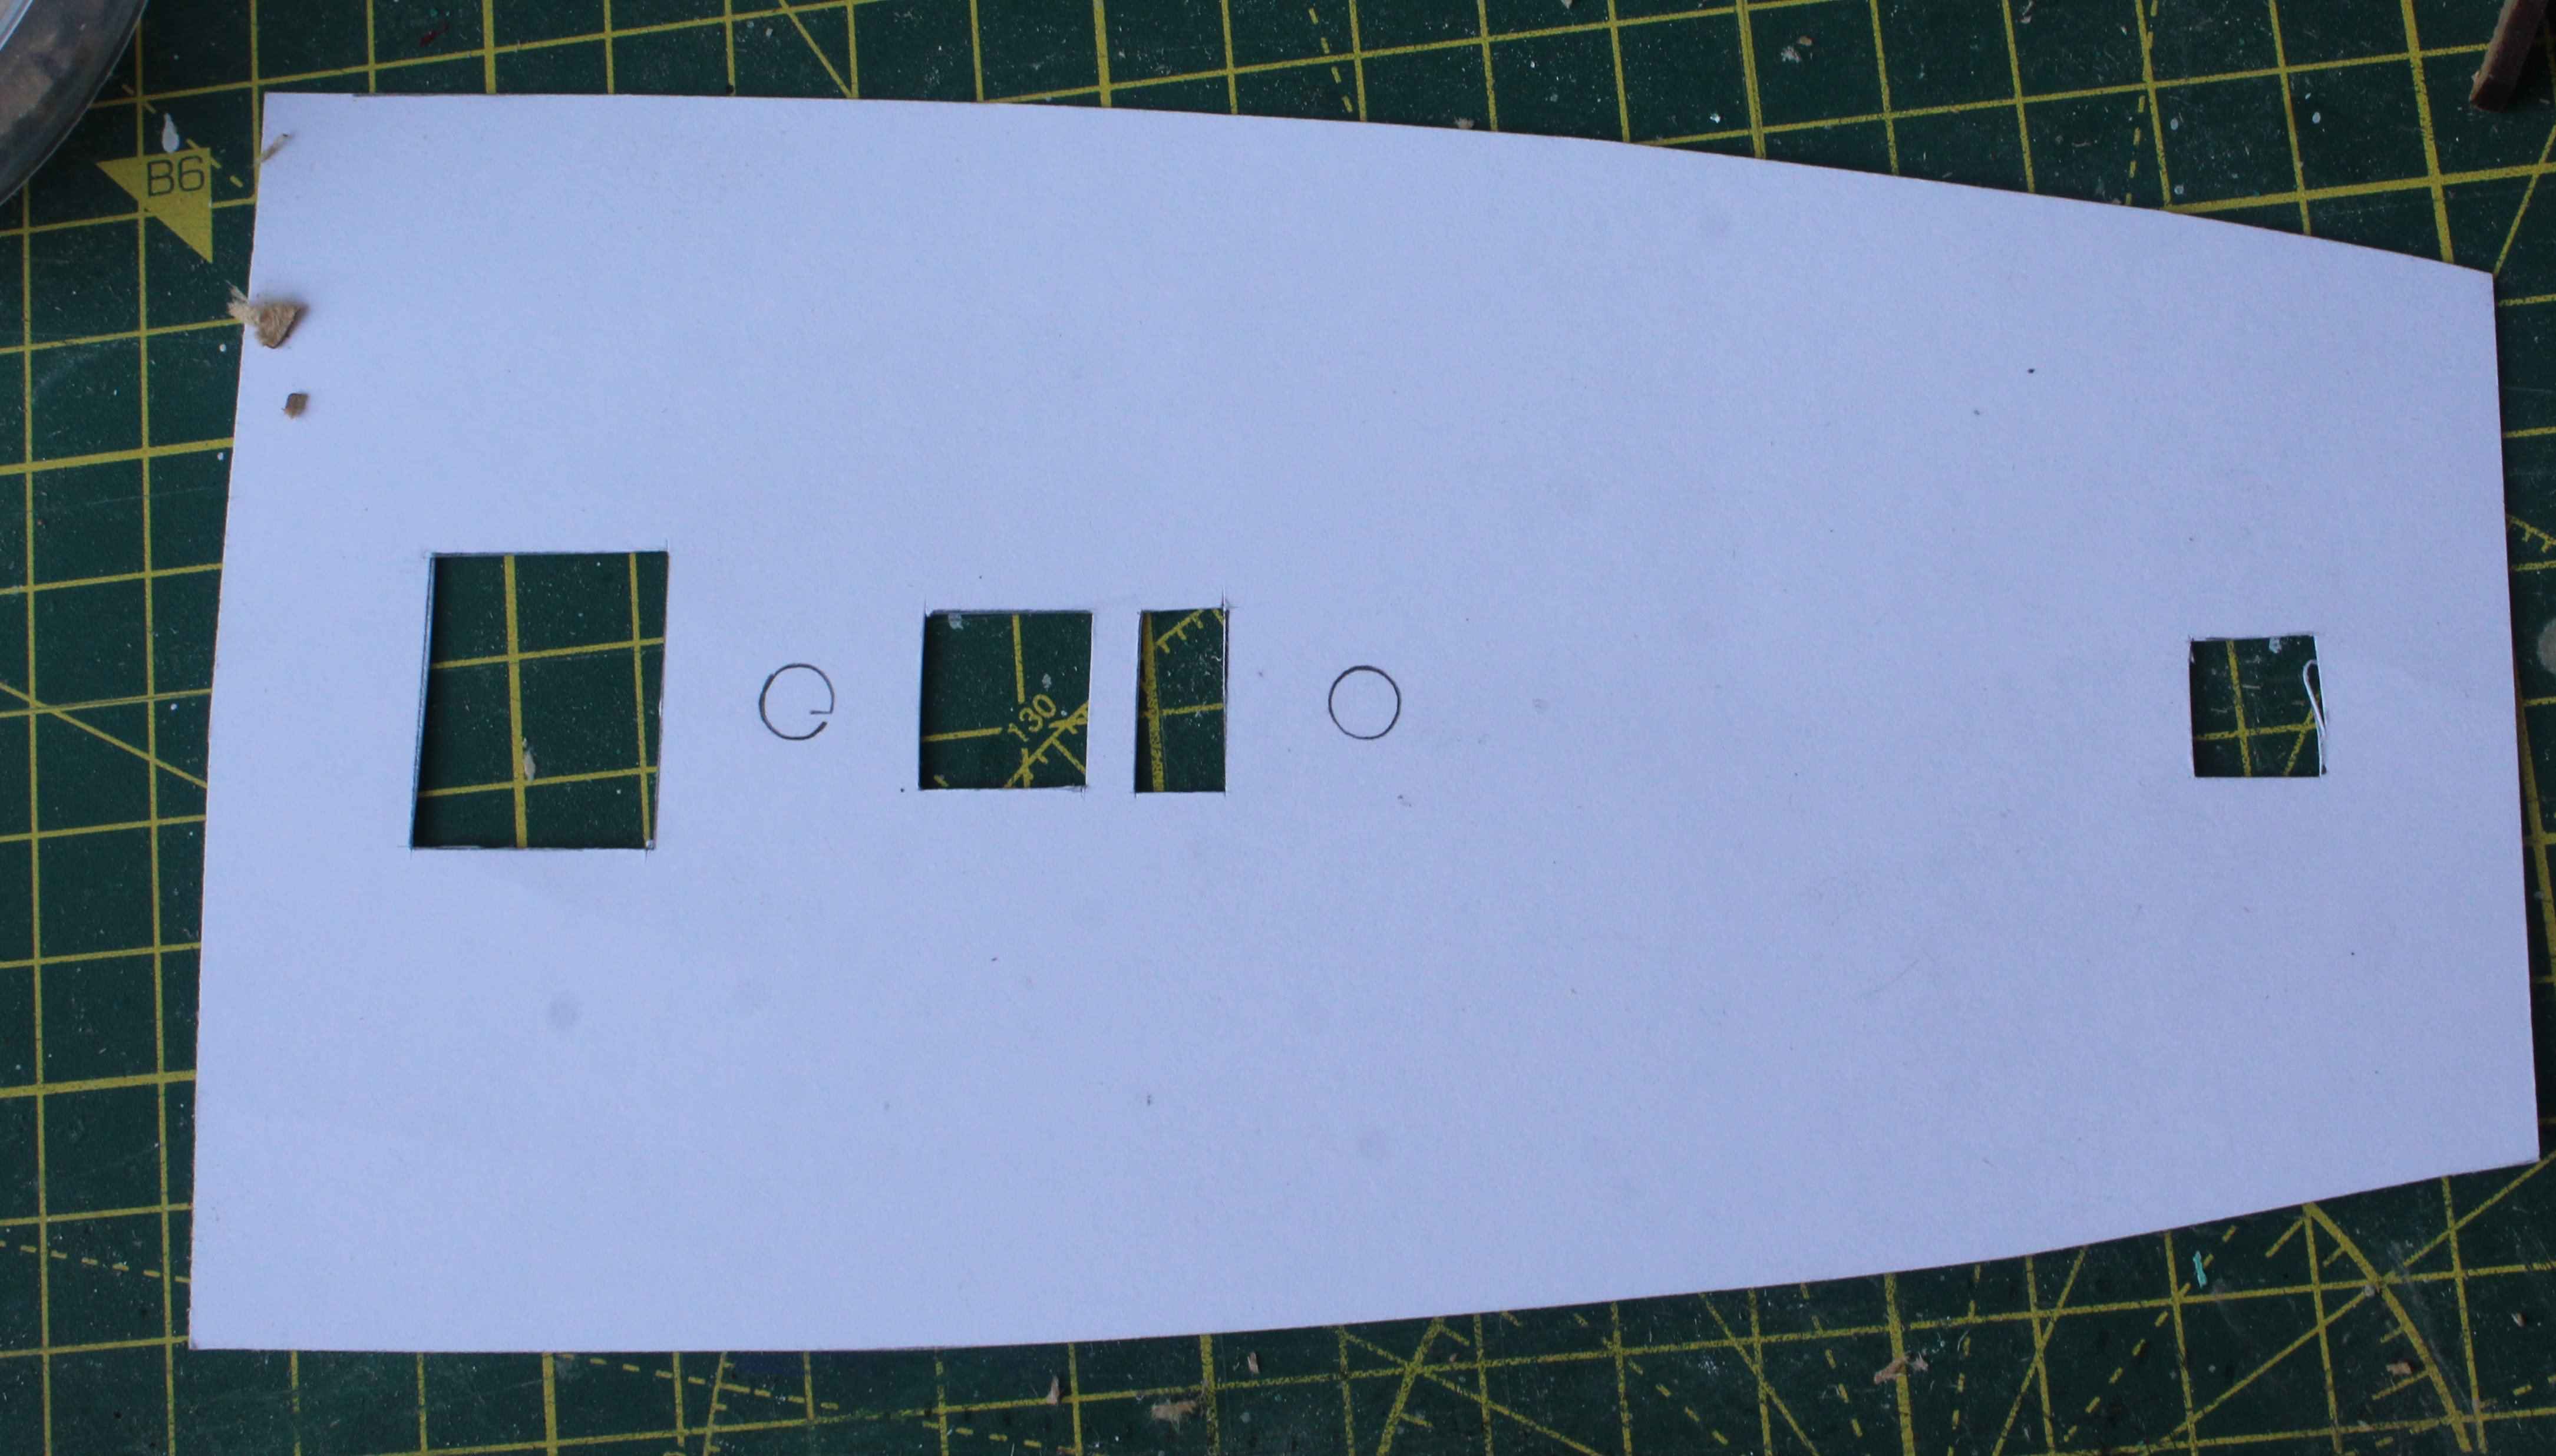
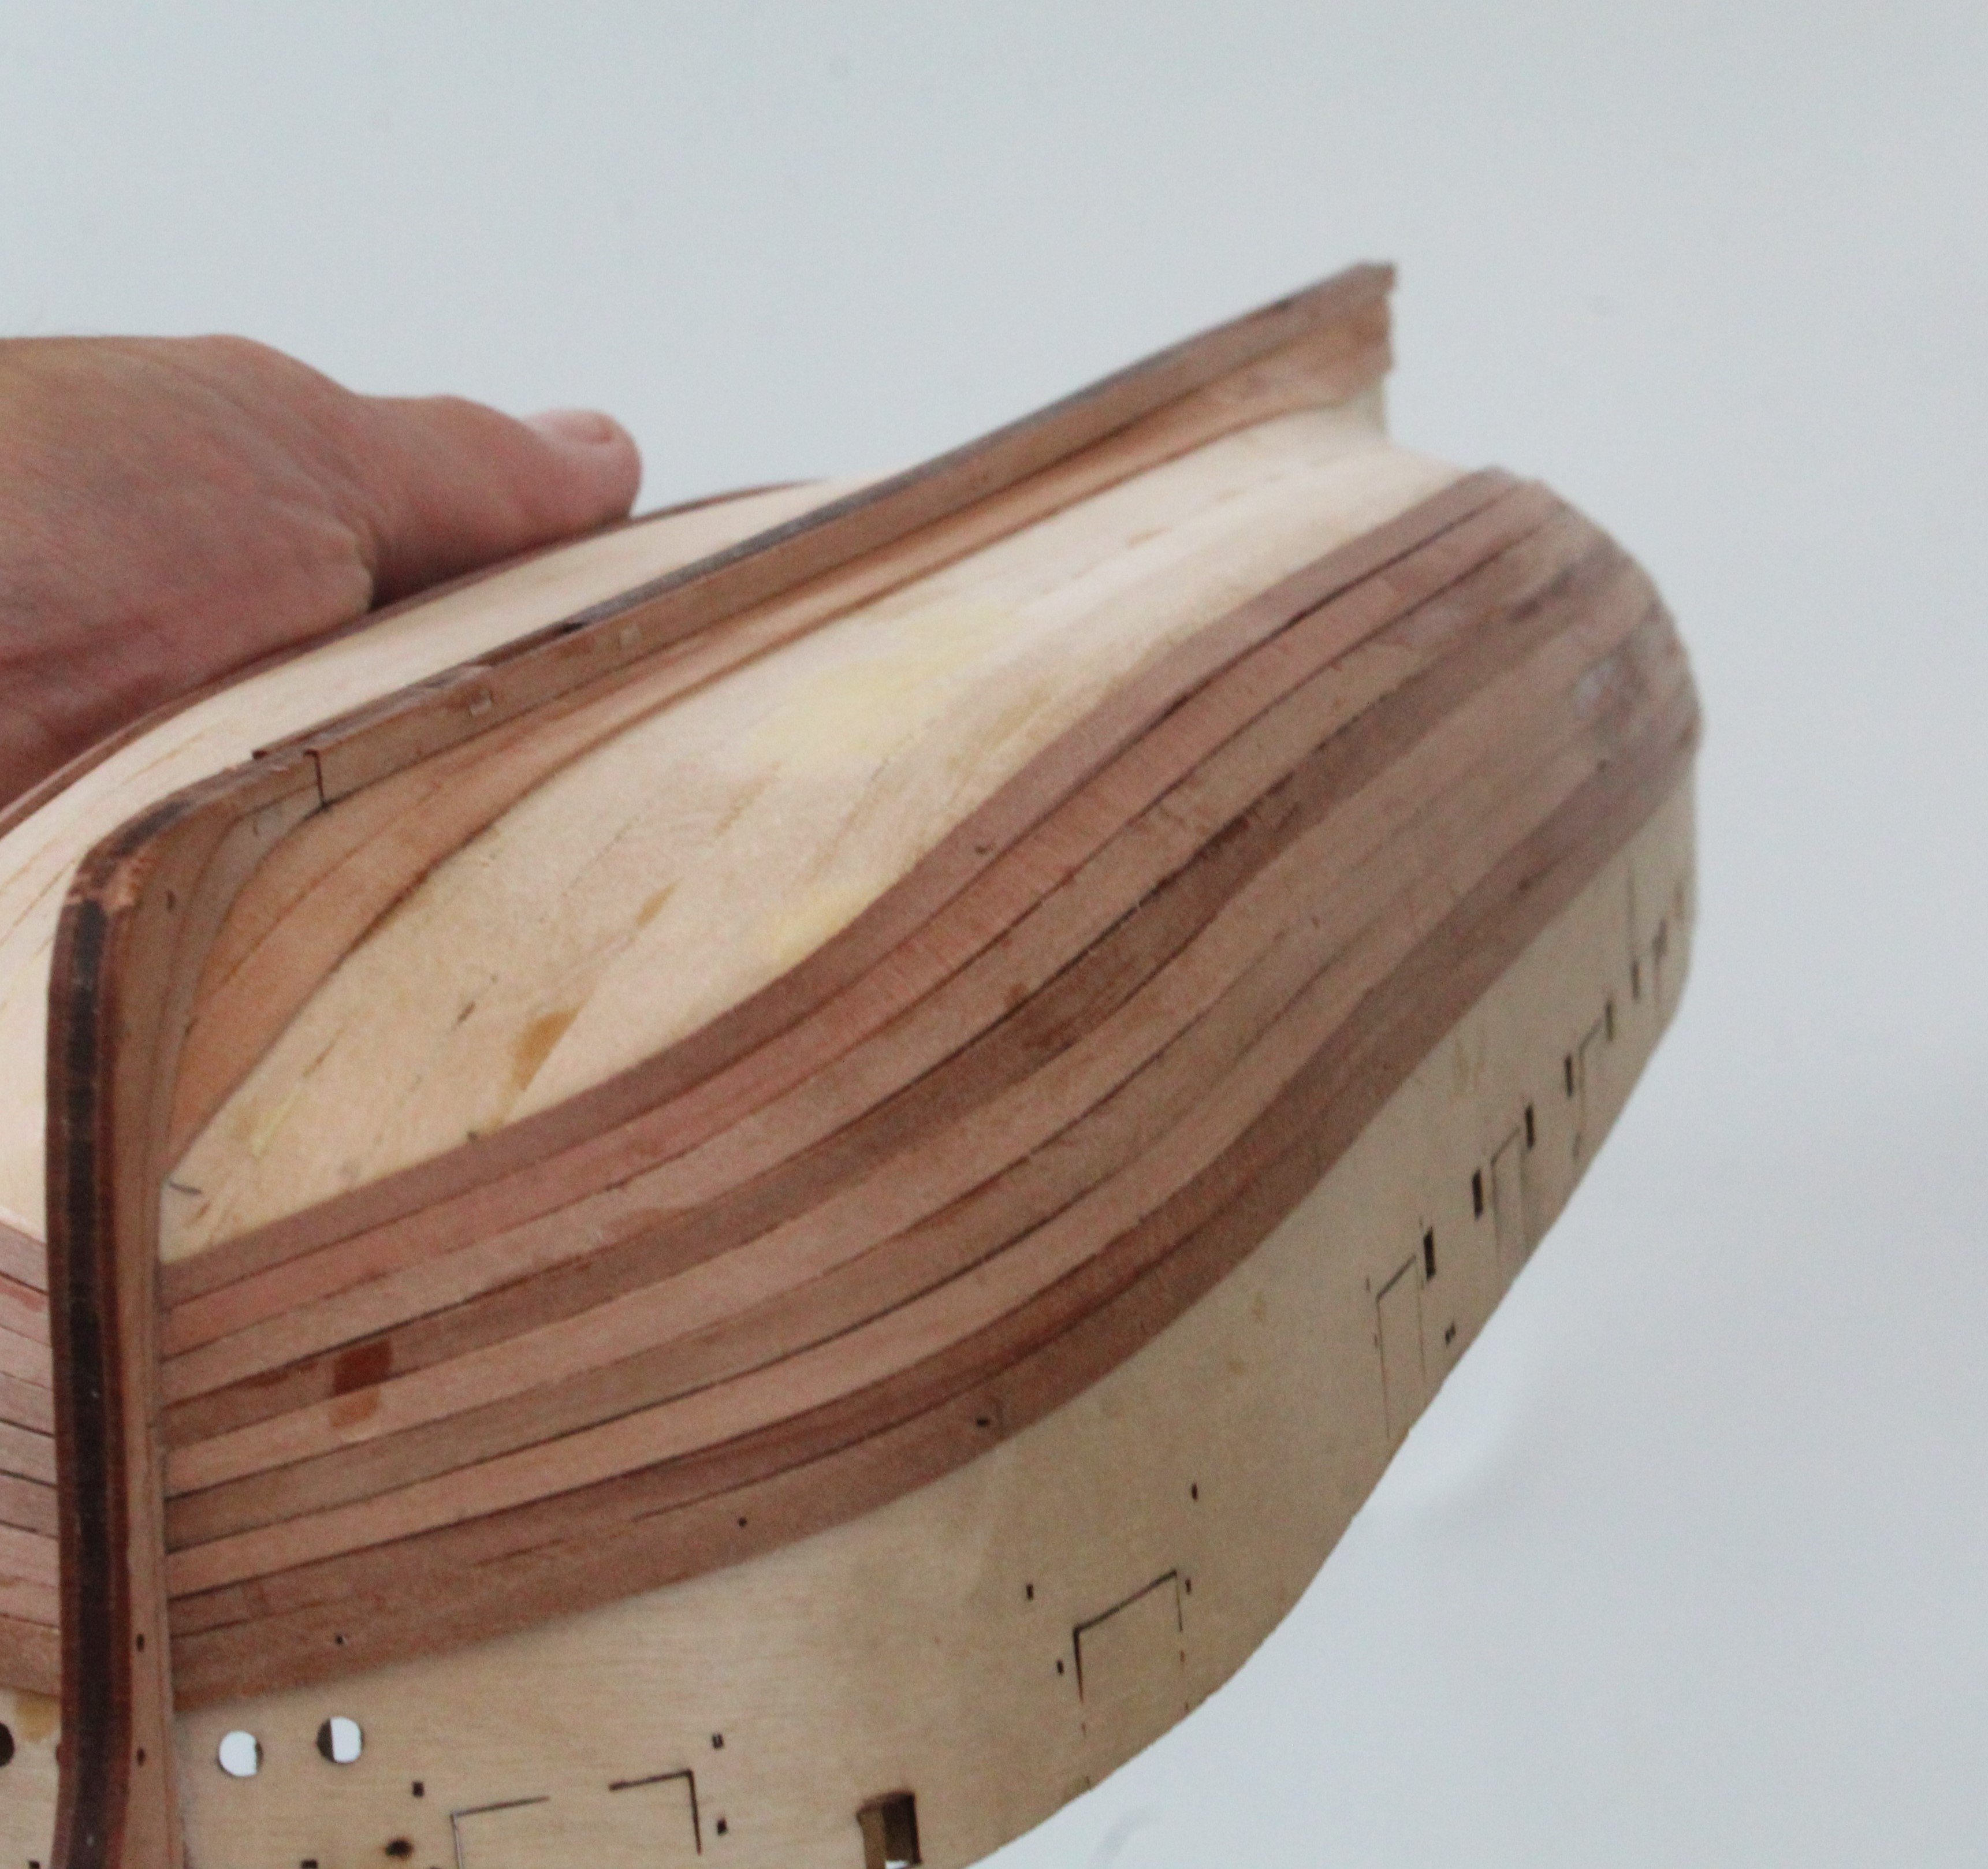
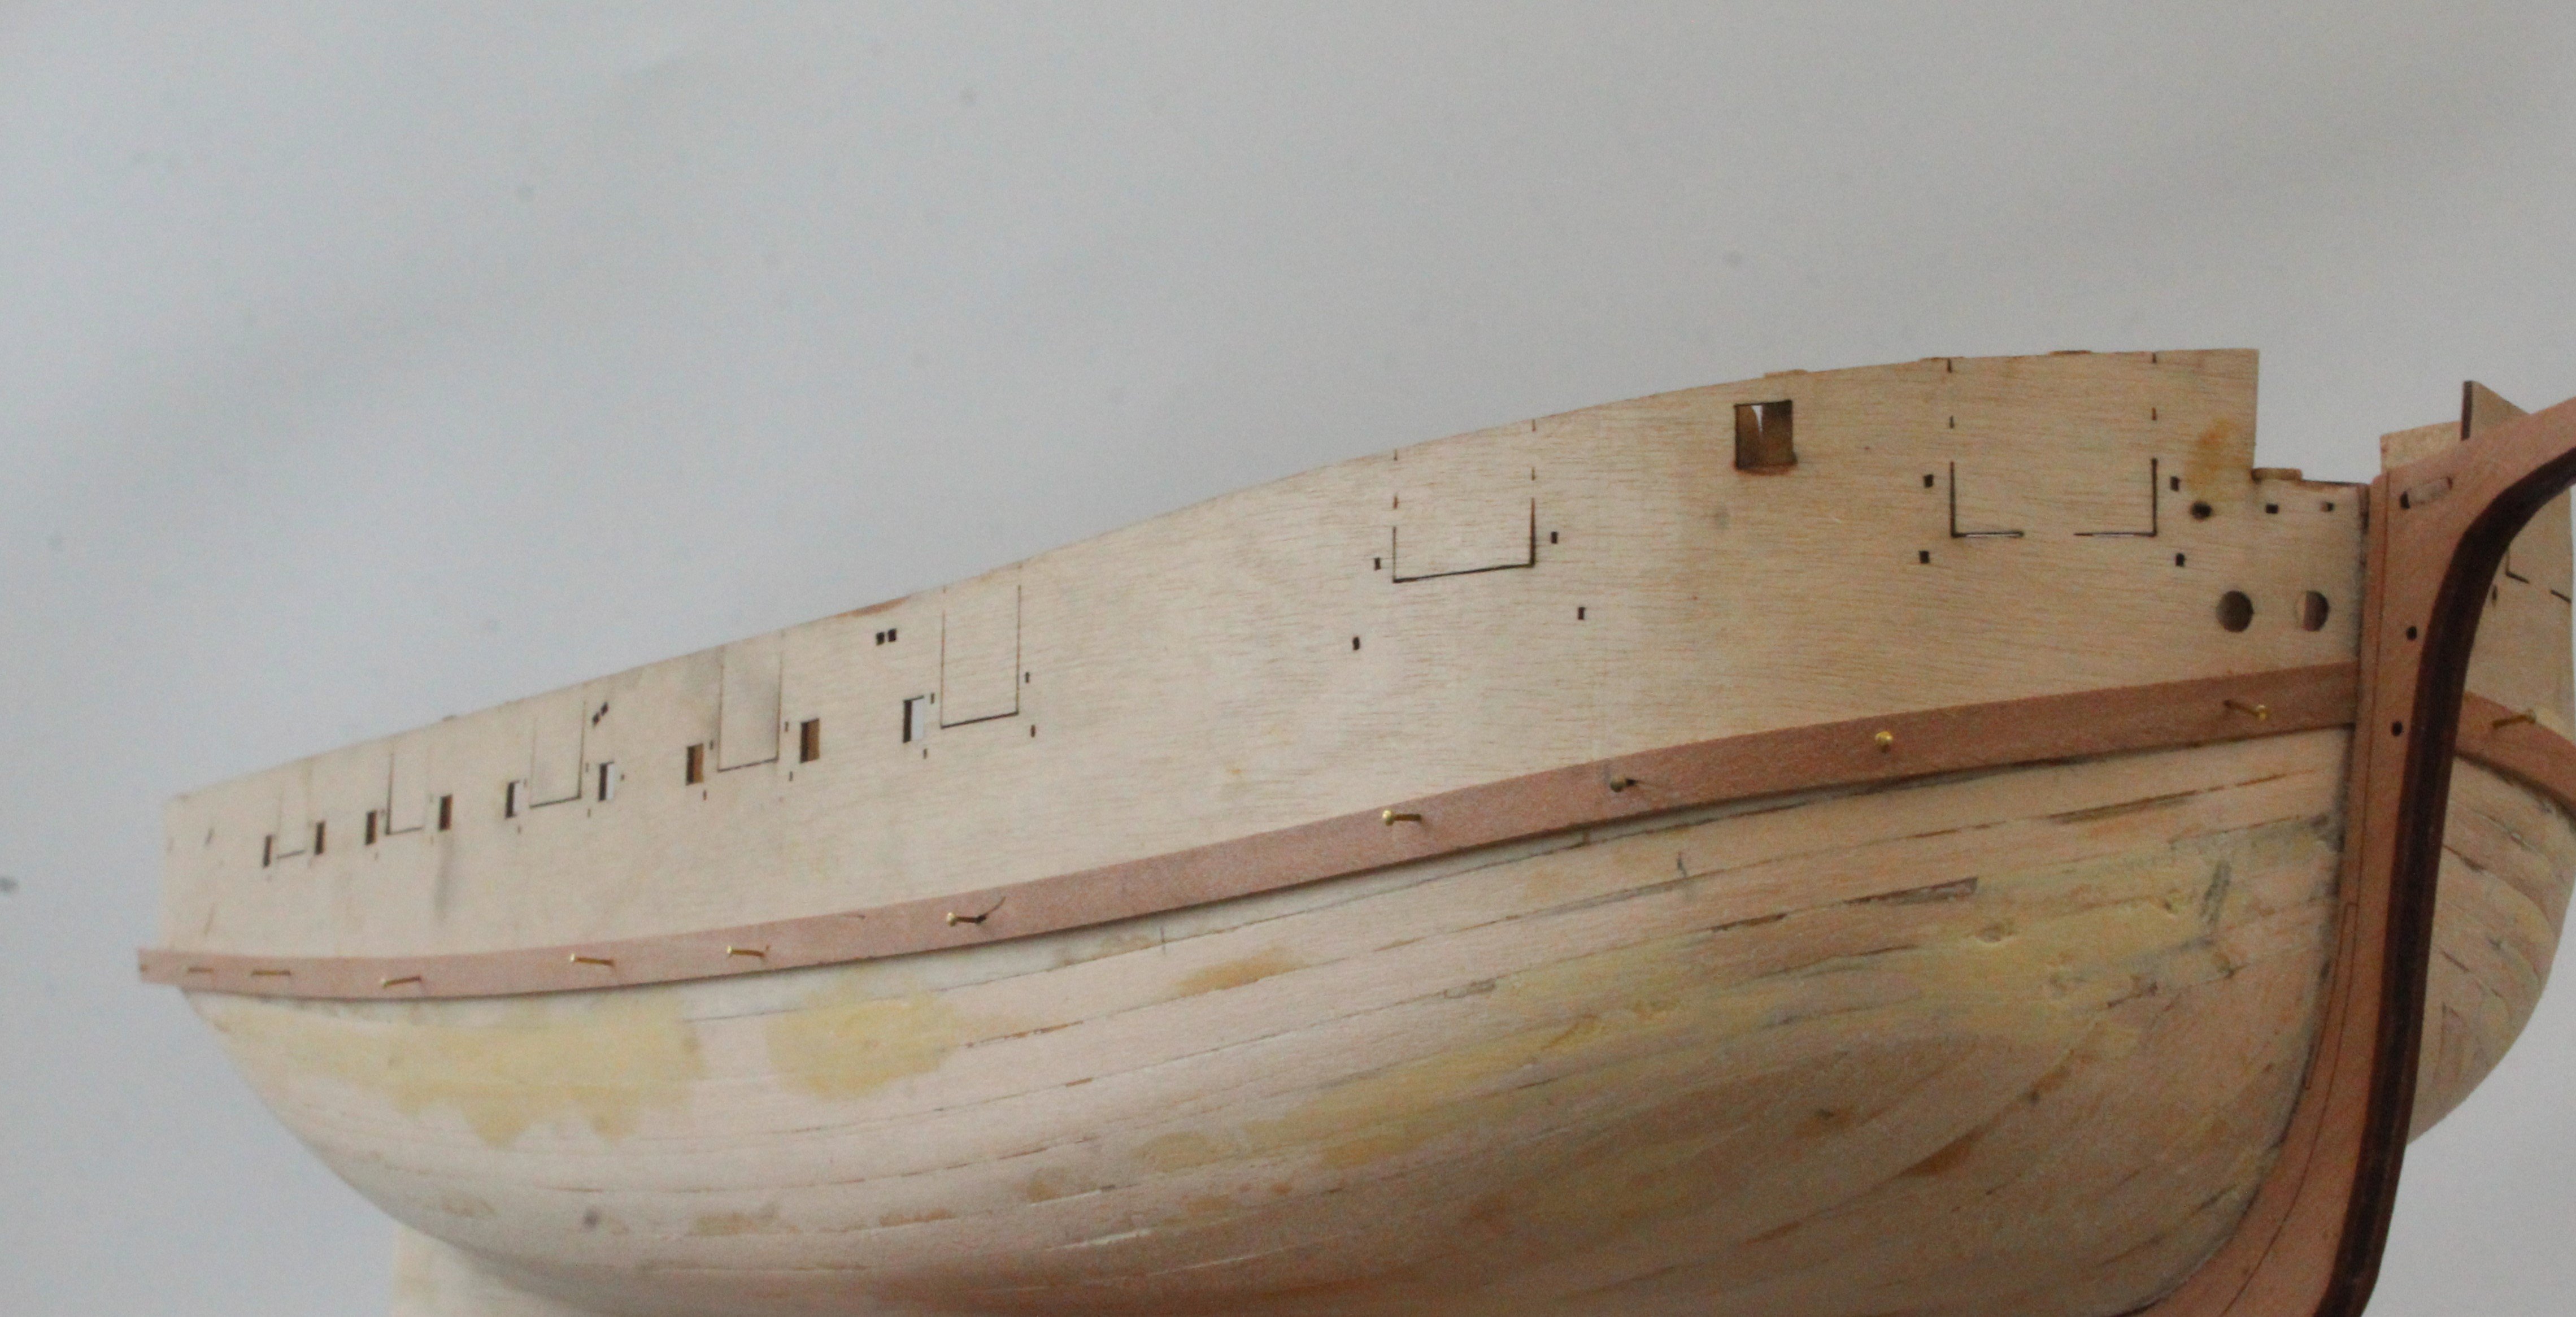
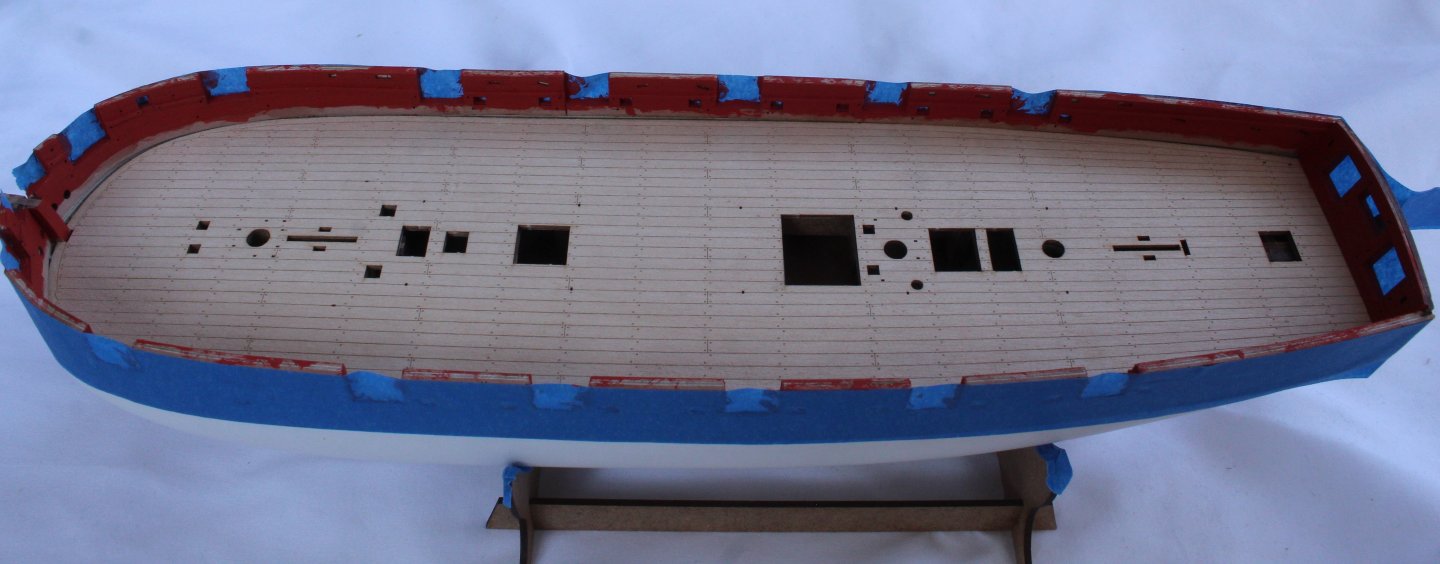
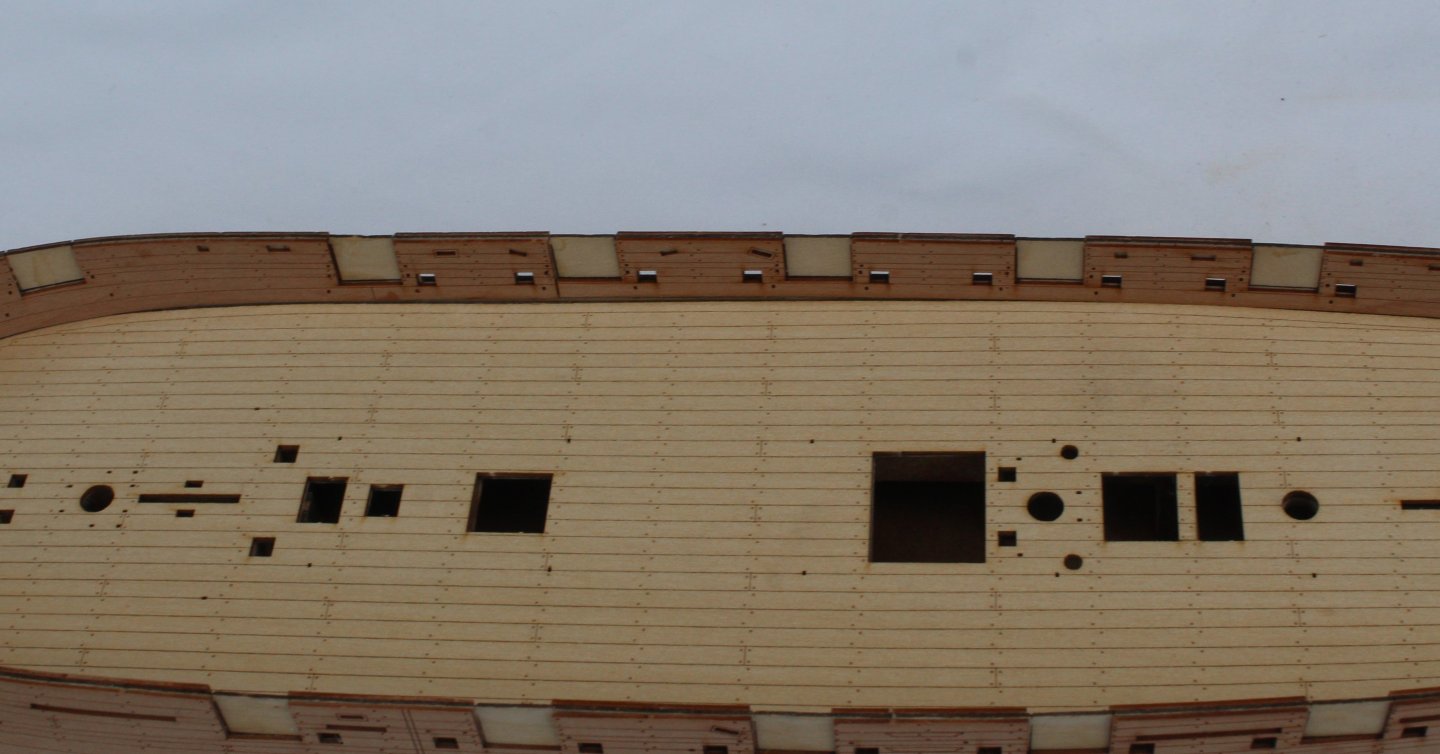
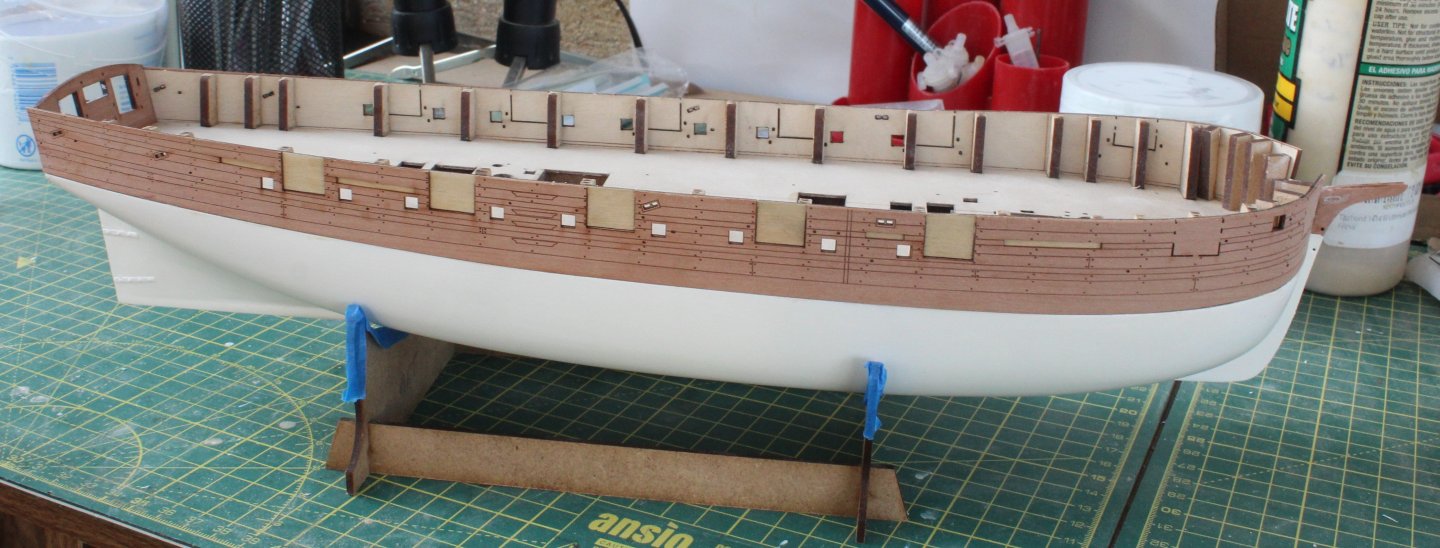
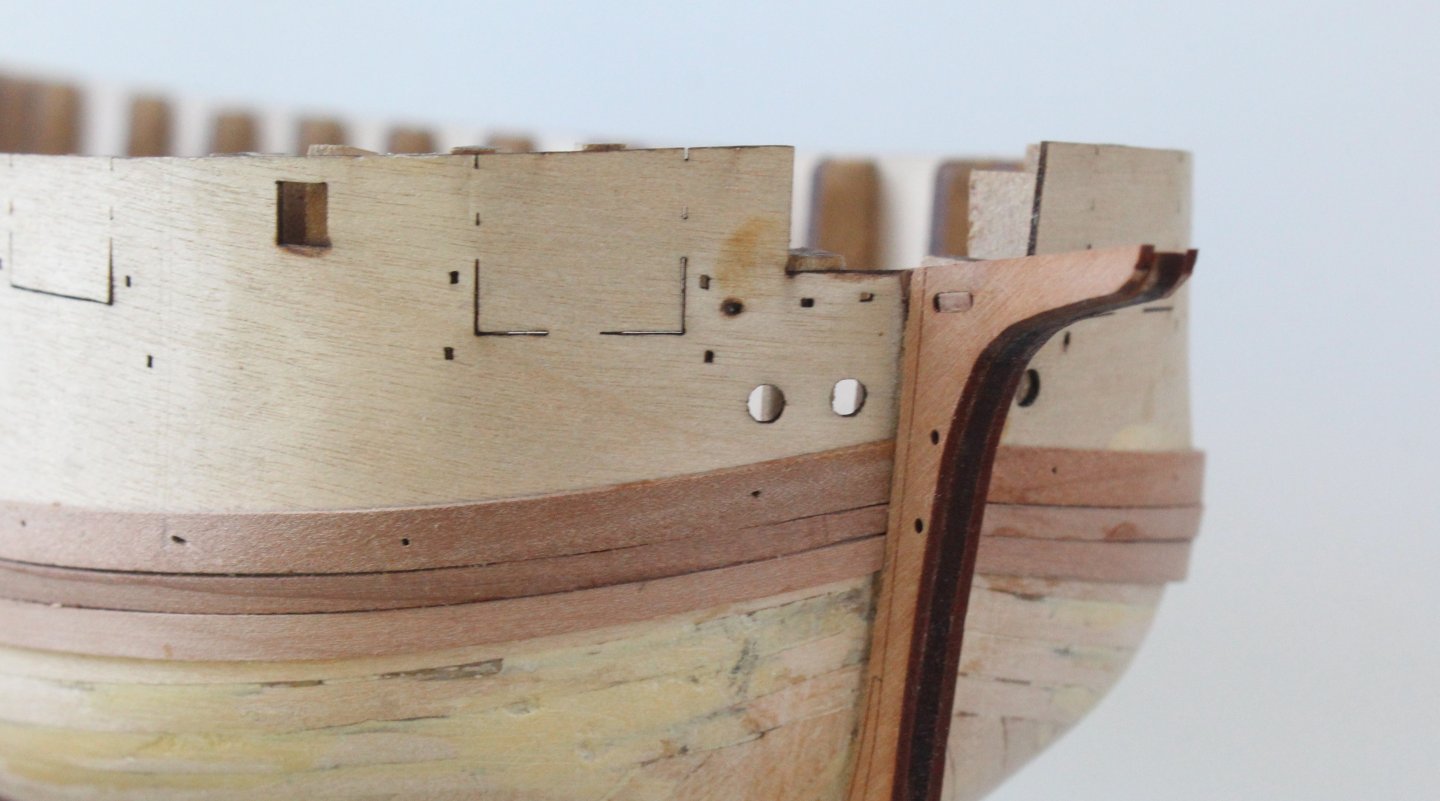
Build Log Index Date: 17/08/2024 Time worked today: 0.5 hours. Total time spent on build: 38 hours. Fitting Inner Bulwarks and Test Fit Deck Items The two bow inner bulwark patterns were soaked in hot water for a few minutes and then clamped in position. Once the parts had fully dried out they were glued in place along with the two aft inner bulwark patterns. Plenty of clamps were used to hold the patterns in place as the glue cured. Next was a dry fit of the inner transom pattern, which did require a little bit of sanding before it was aligned with the openings. The excess aft outer bulwark pattern material was trimmed and sanded smooth and the outer upper transom pattern was then test fitted, it was not quite in the right position in the photo below. It needed to be be moved slight to the right. Using a razor saw all the gun ports were opened. They will require filing and sanding before moving on to the next stage of fitting the inner rails. It was now a good time to test fit some of the deck items that I had previously constructed. There is still plenty of other work to complete before these deck items will be fitted.


-
Hello Andrew. They do look great.
-
Thanks Ronald
-
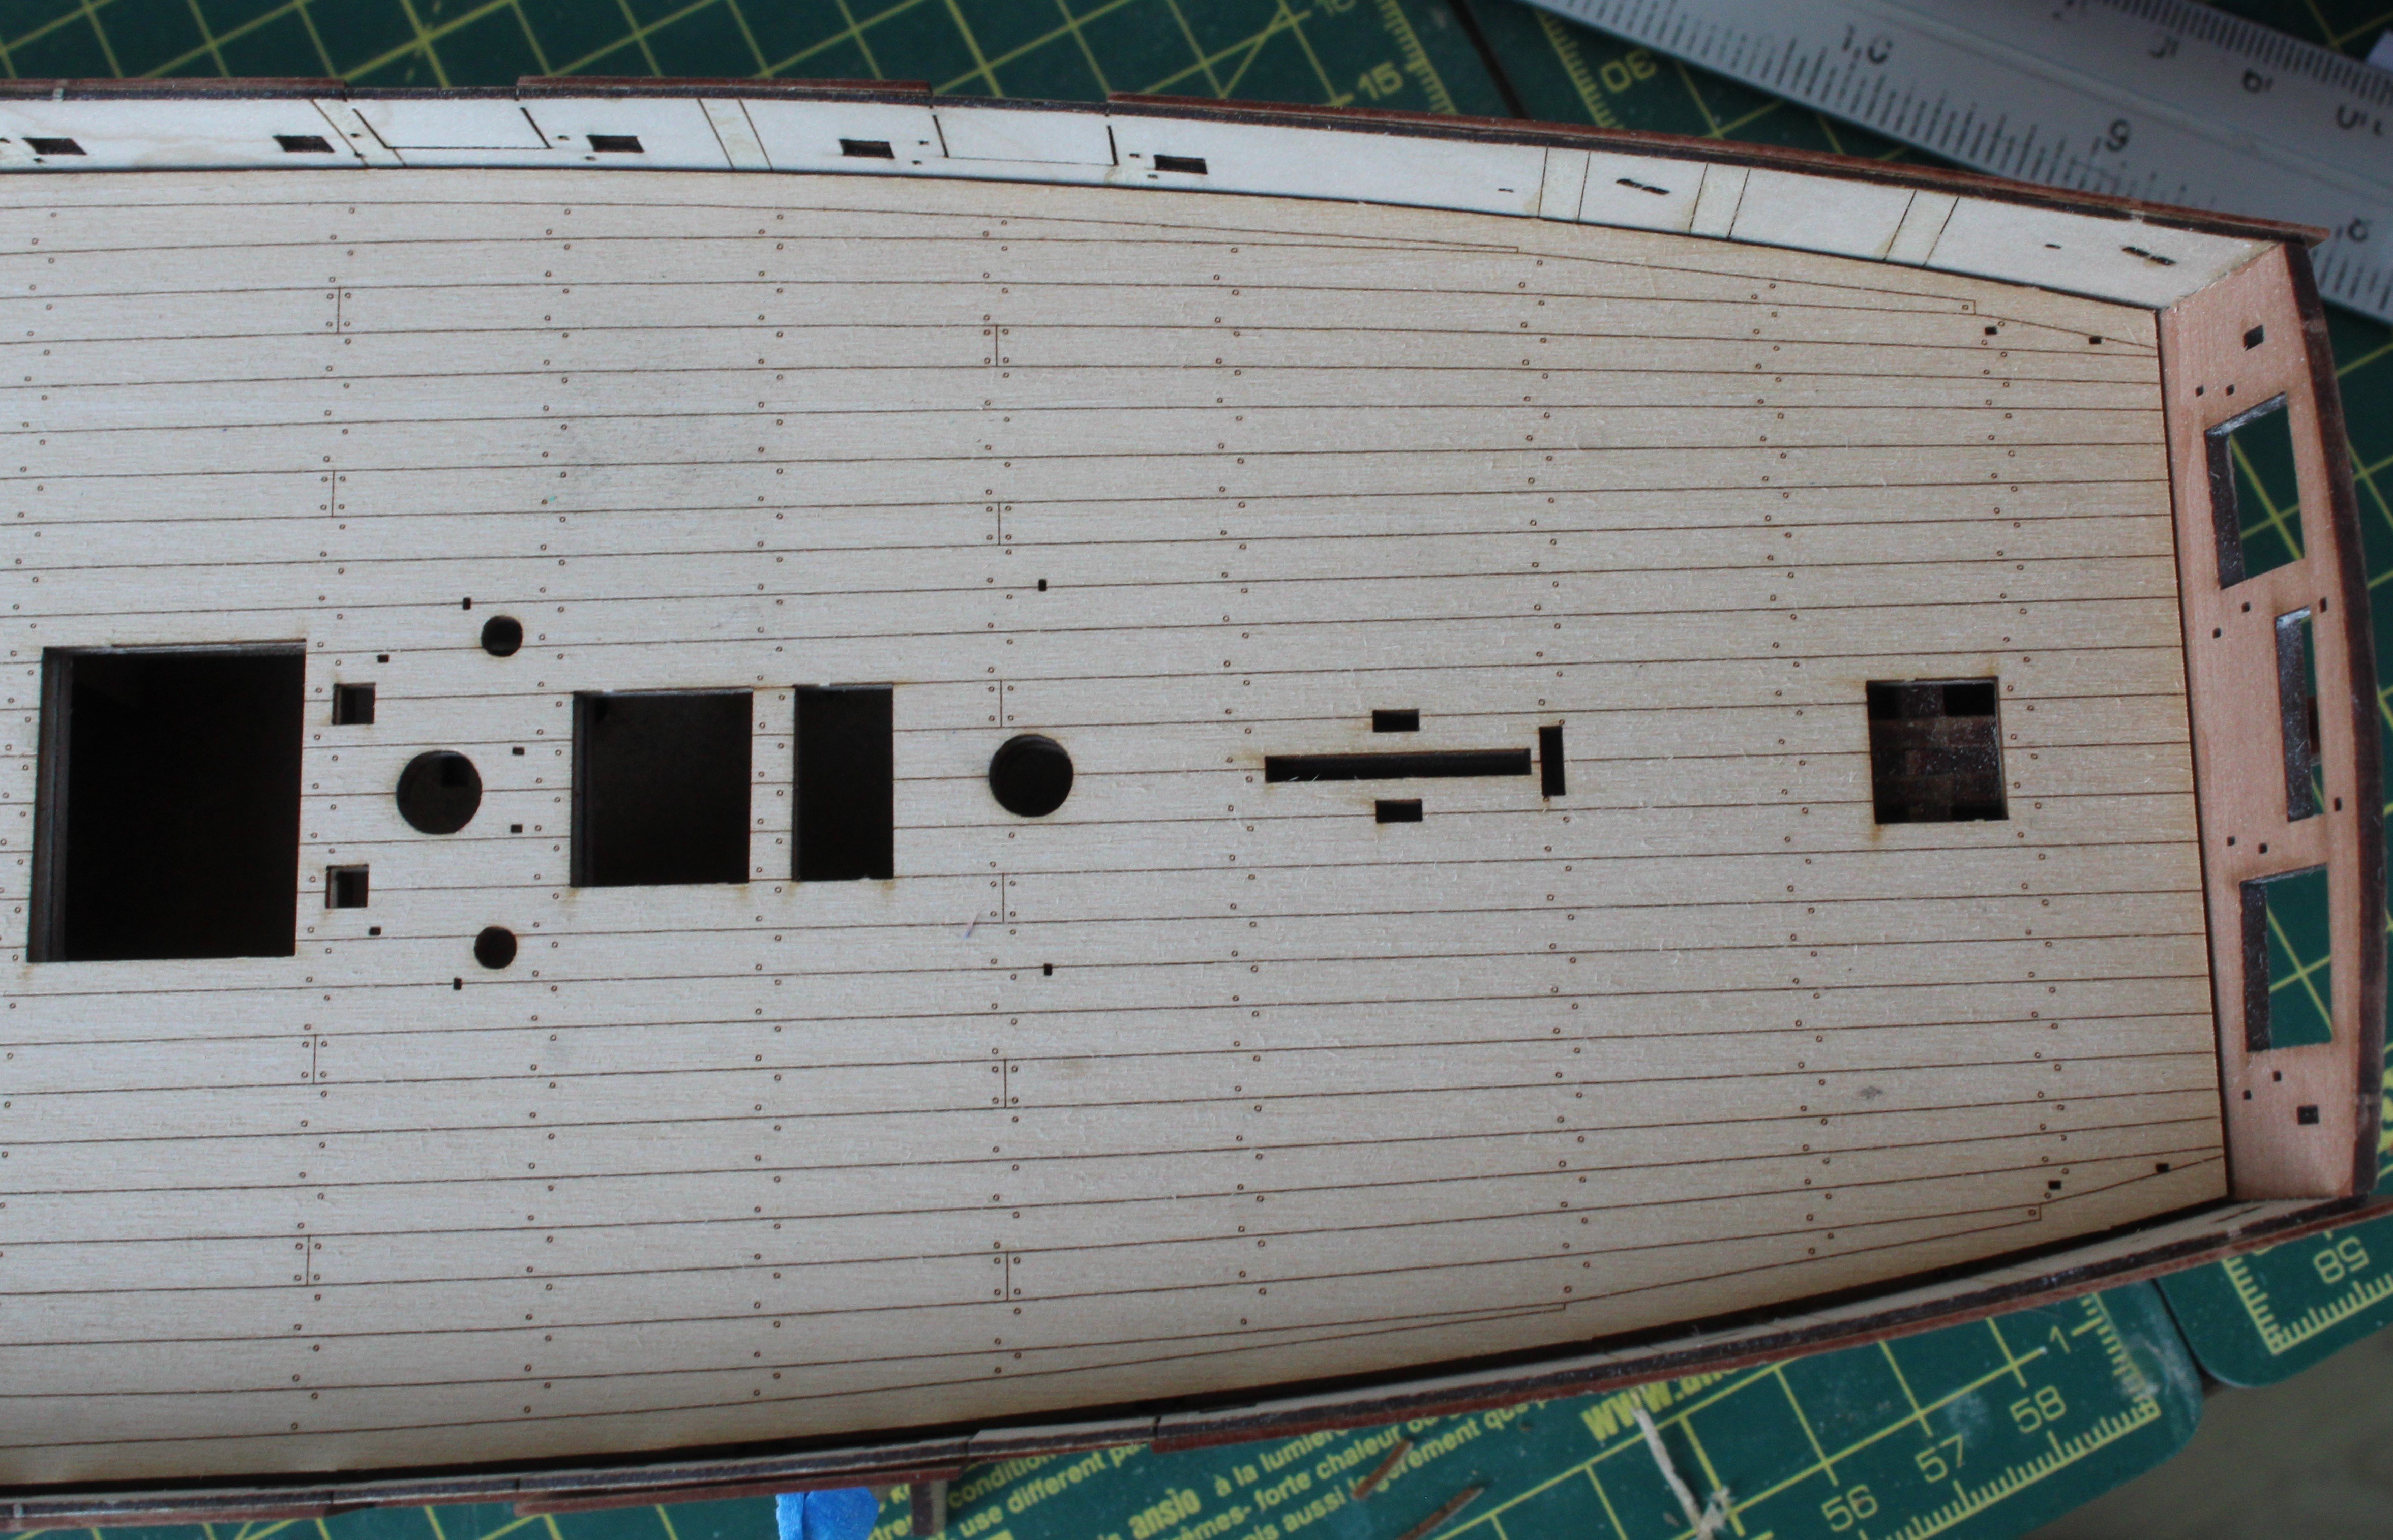
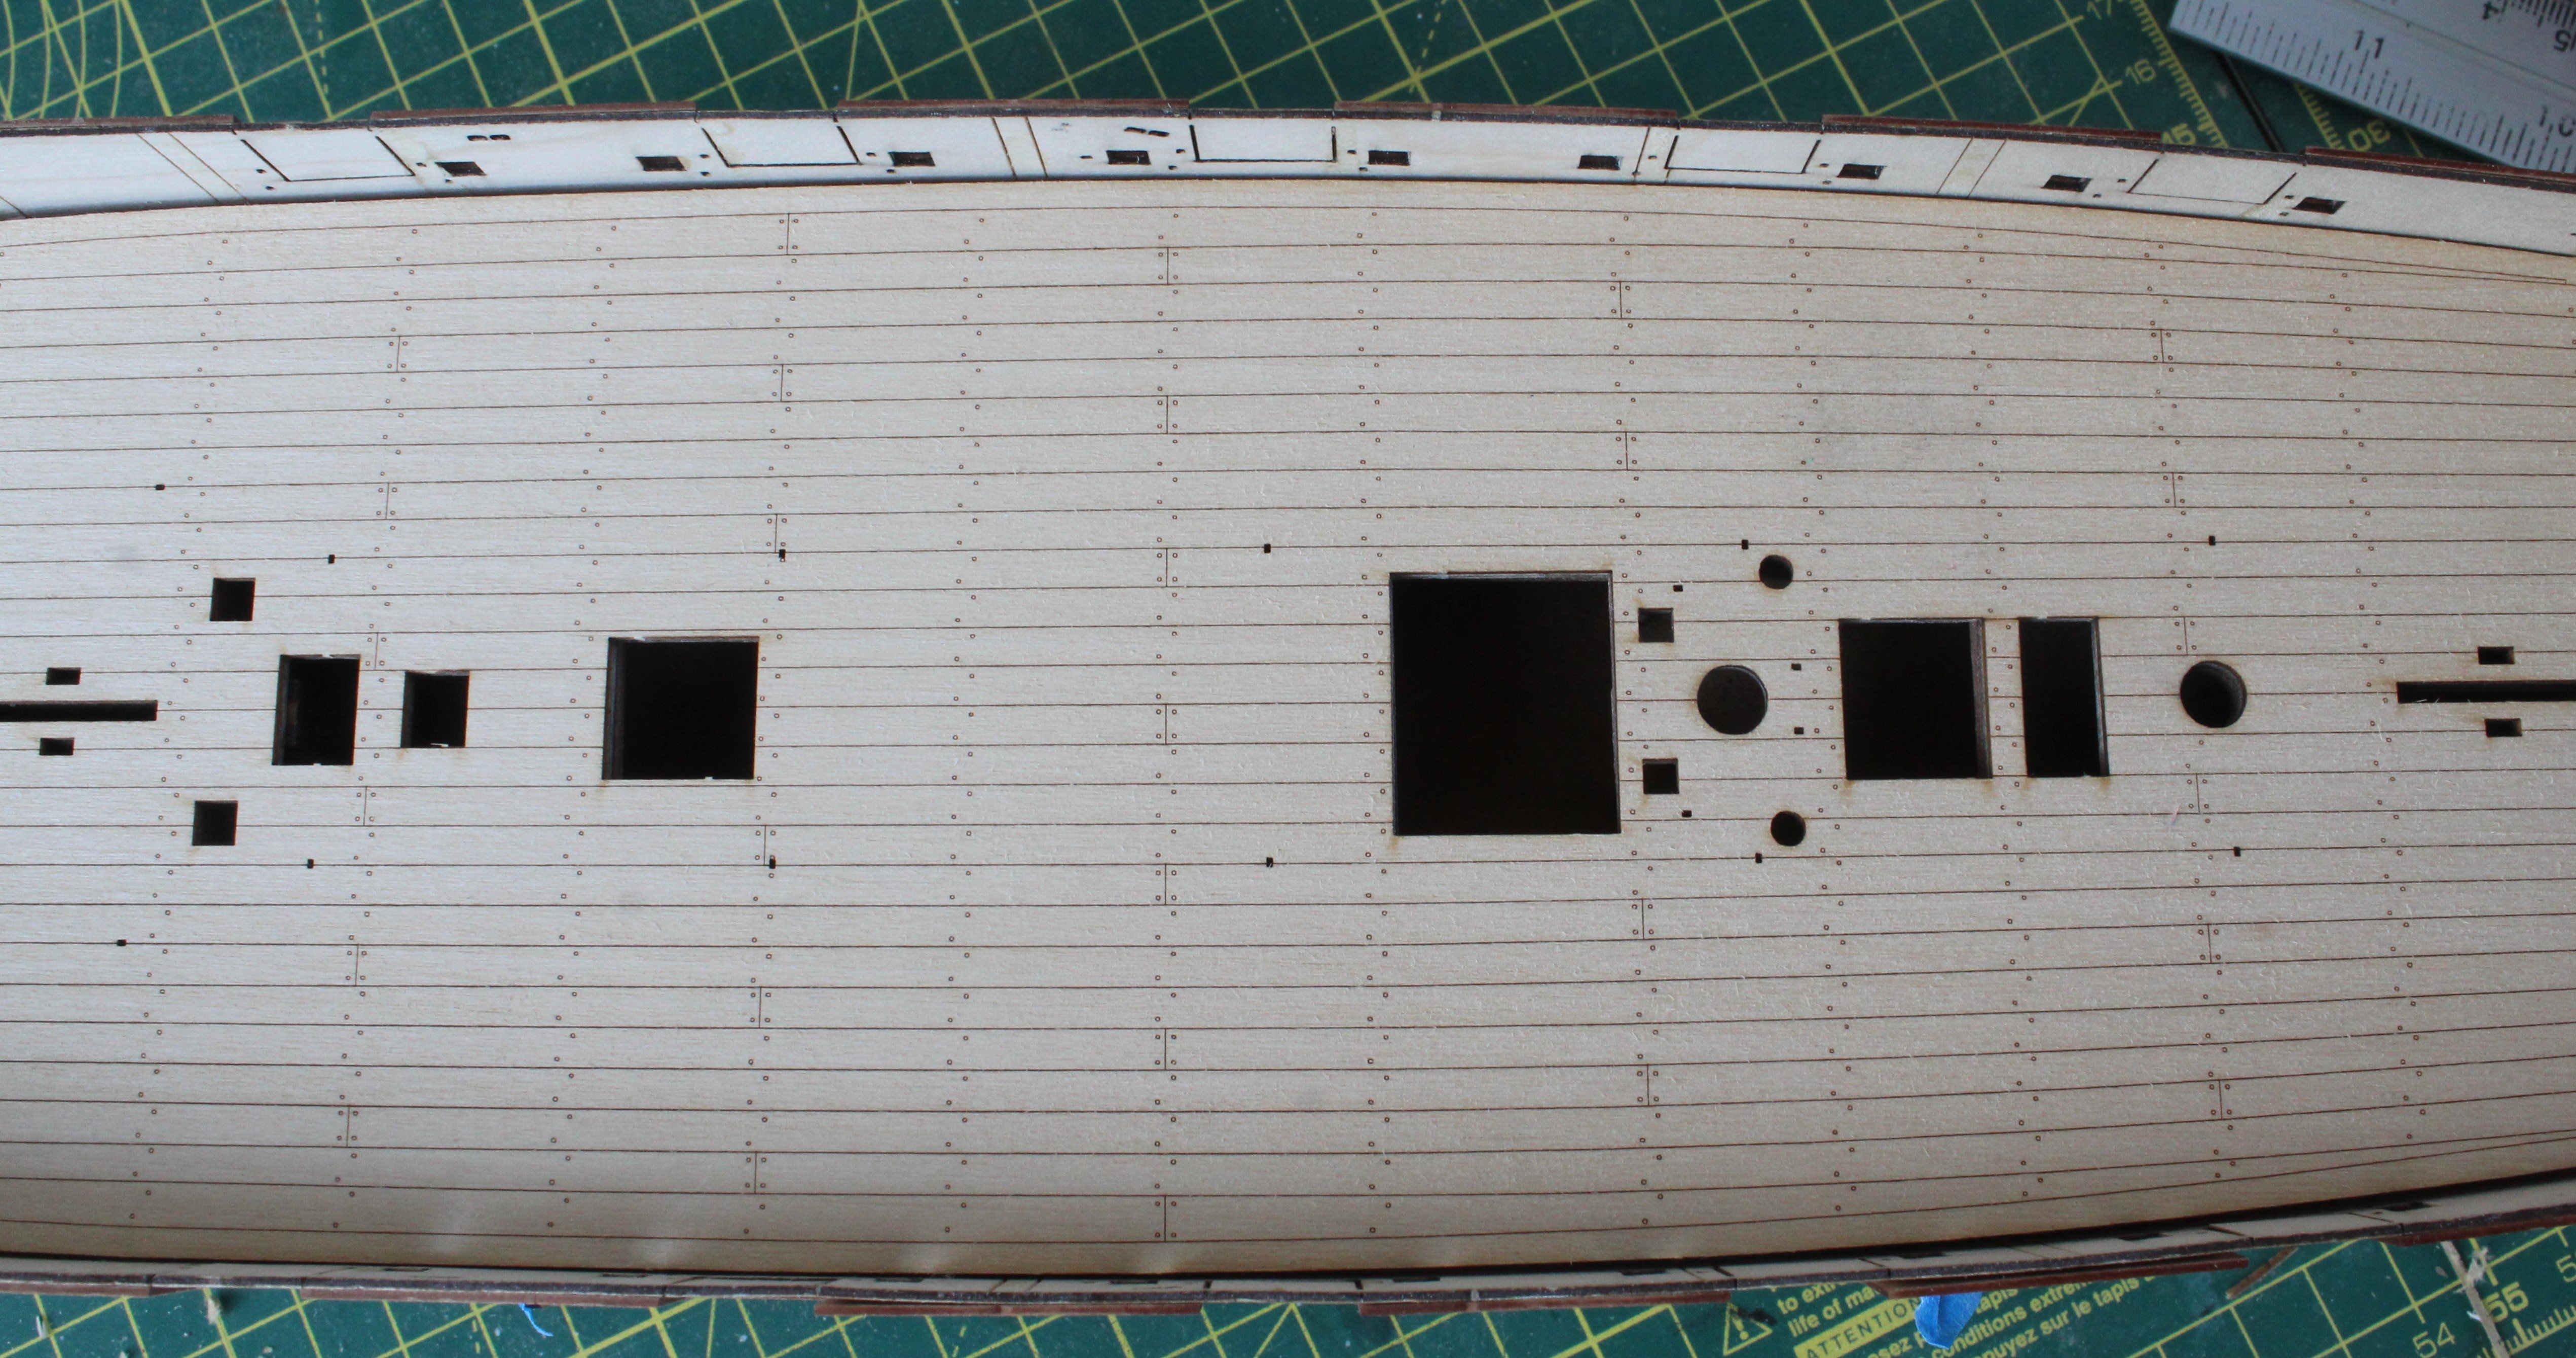
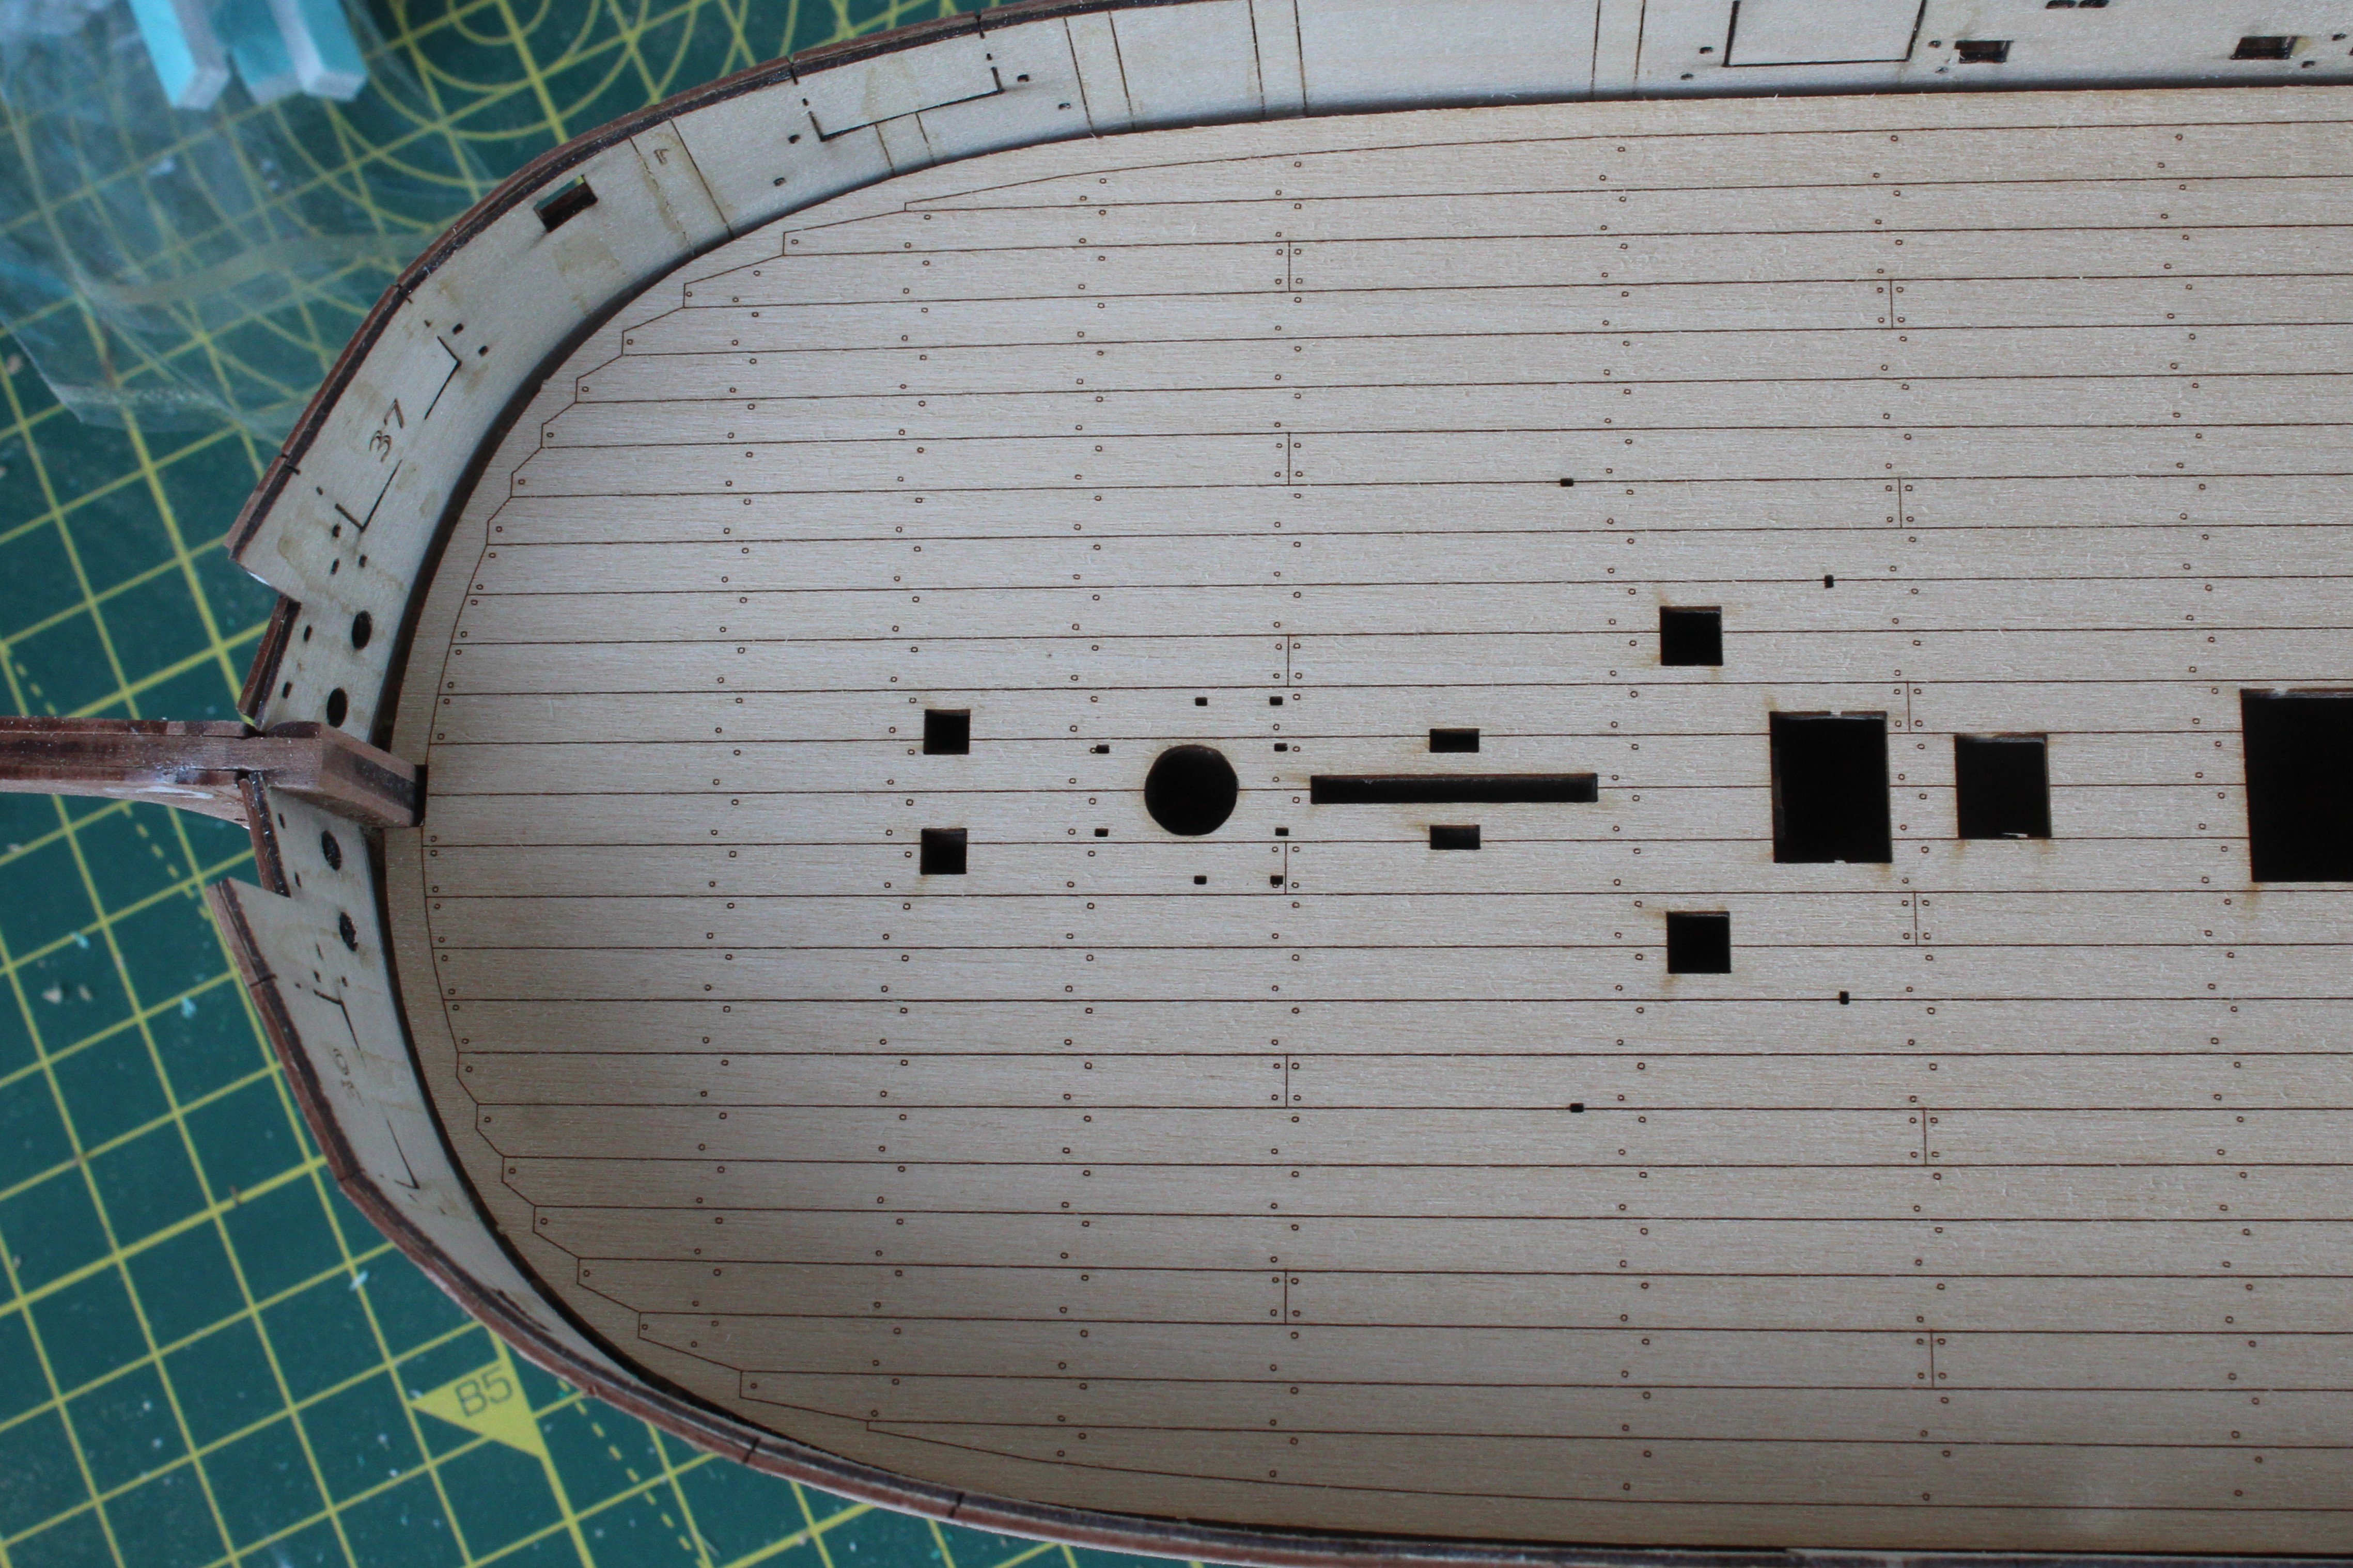
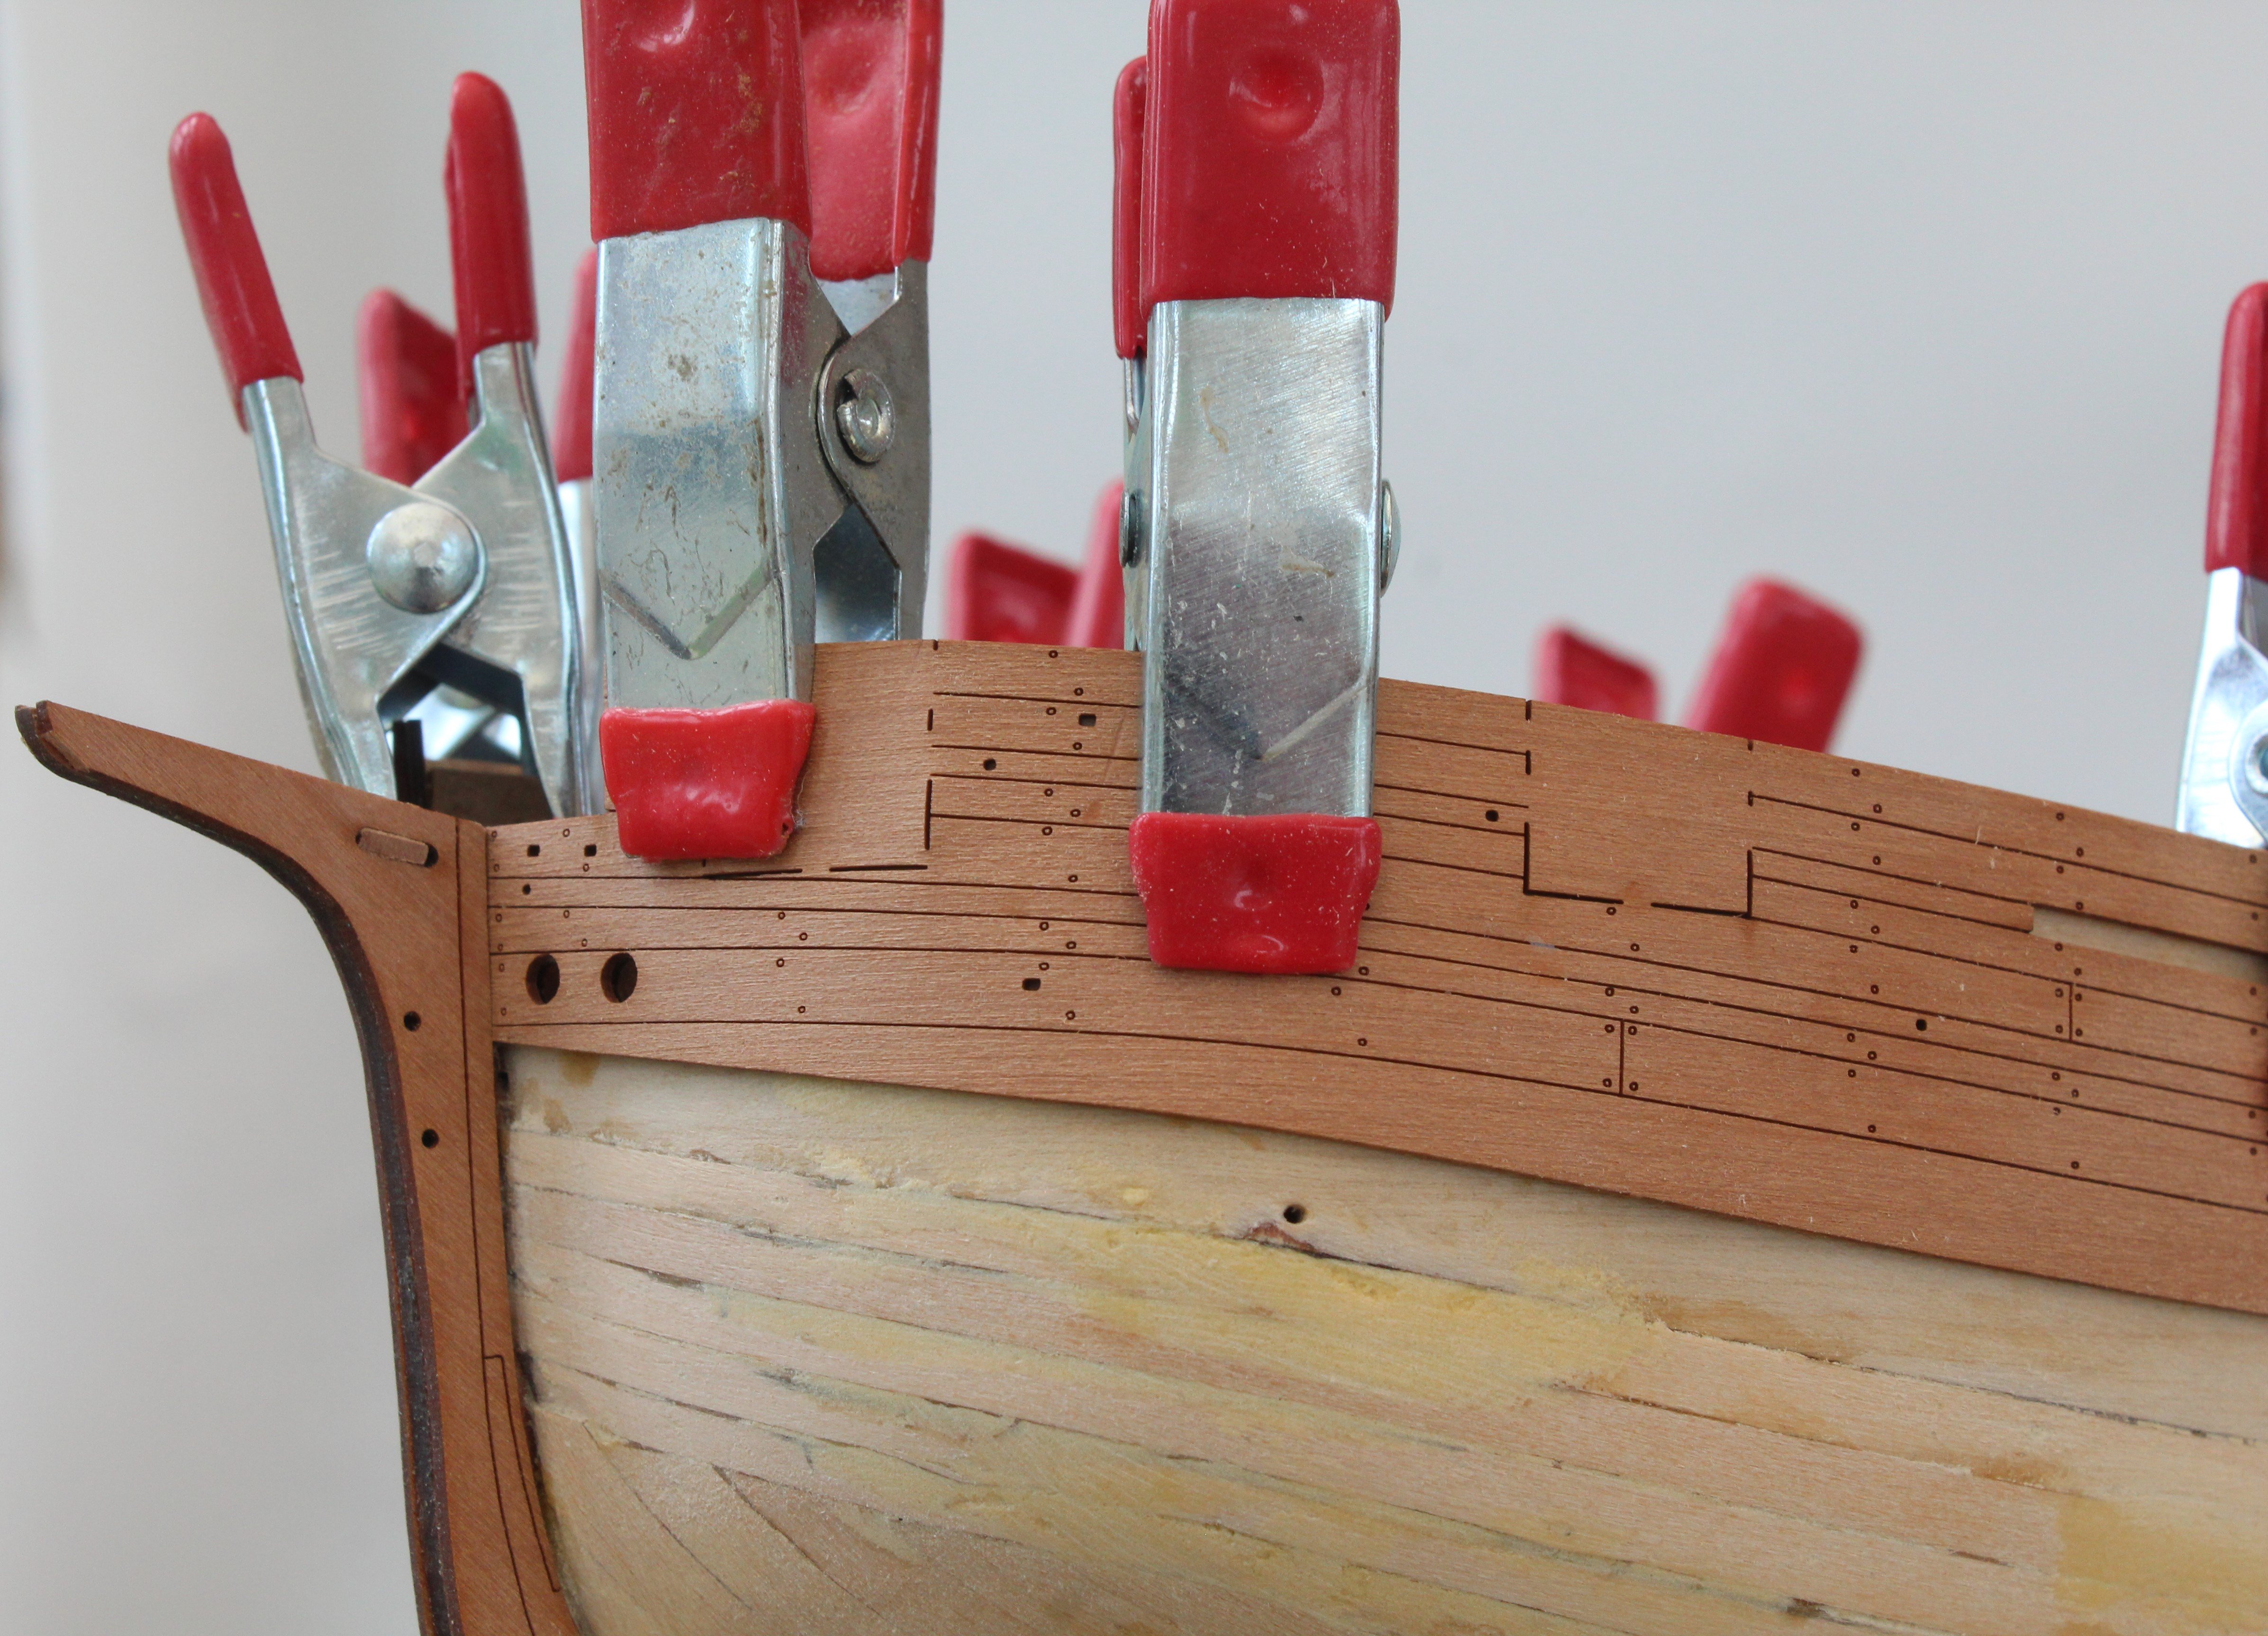
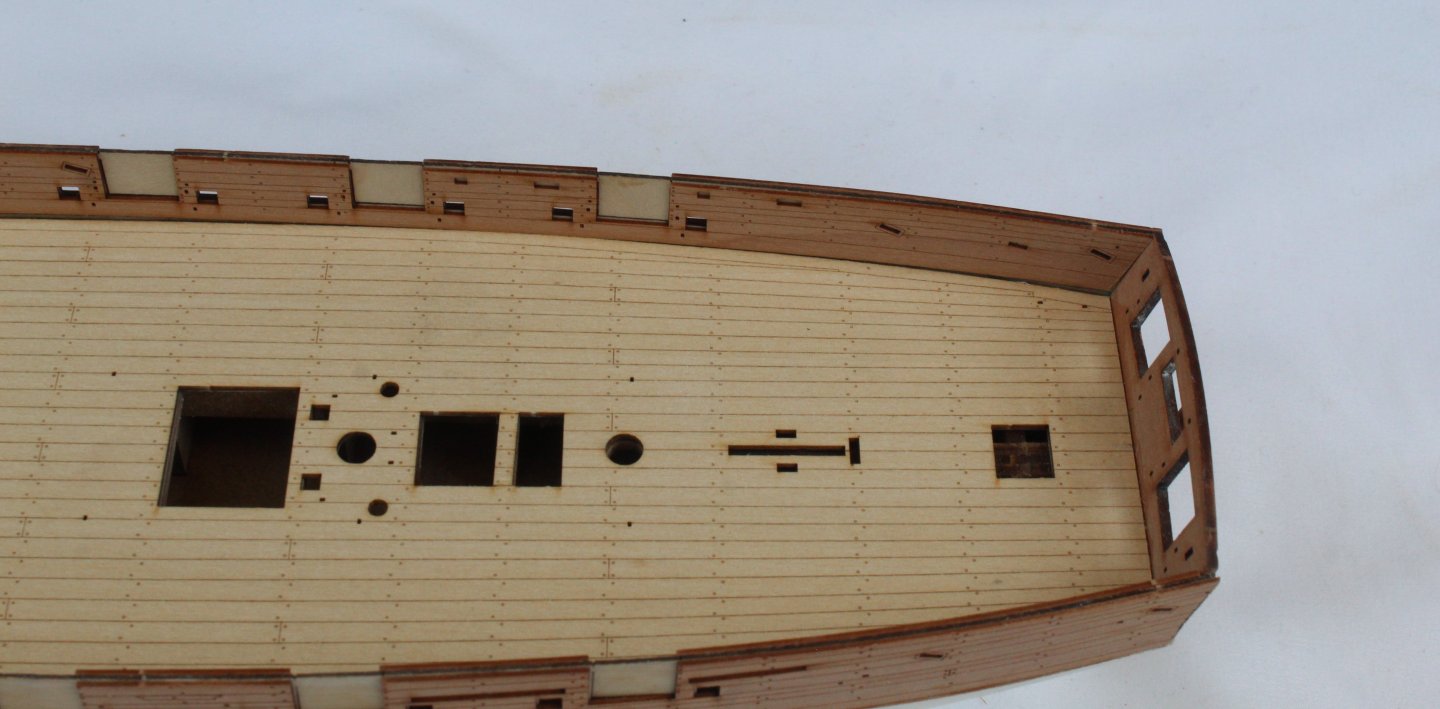
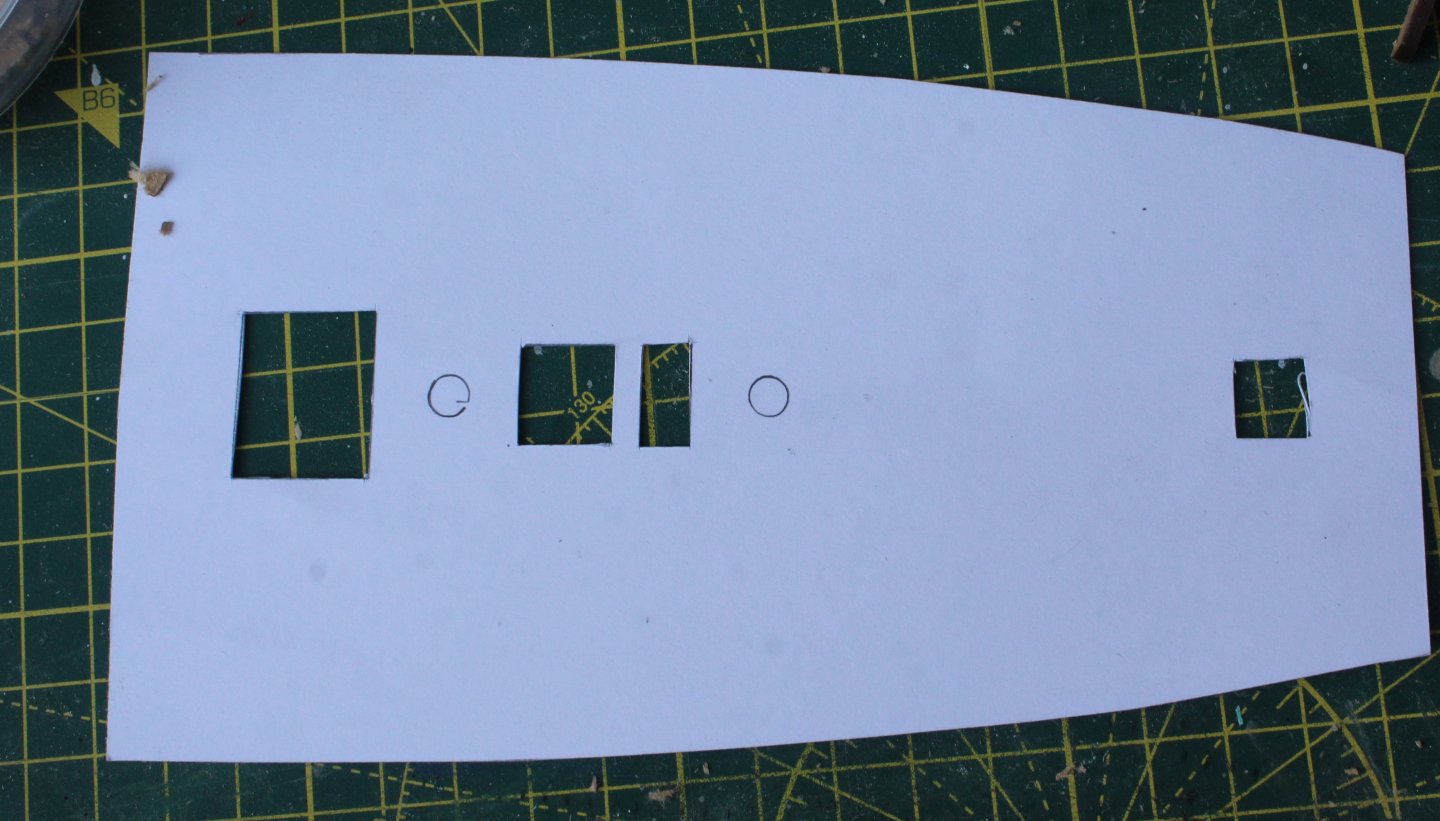
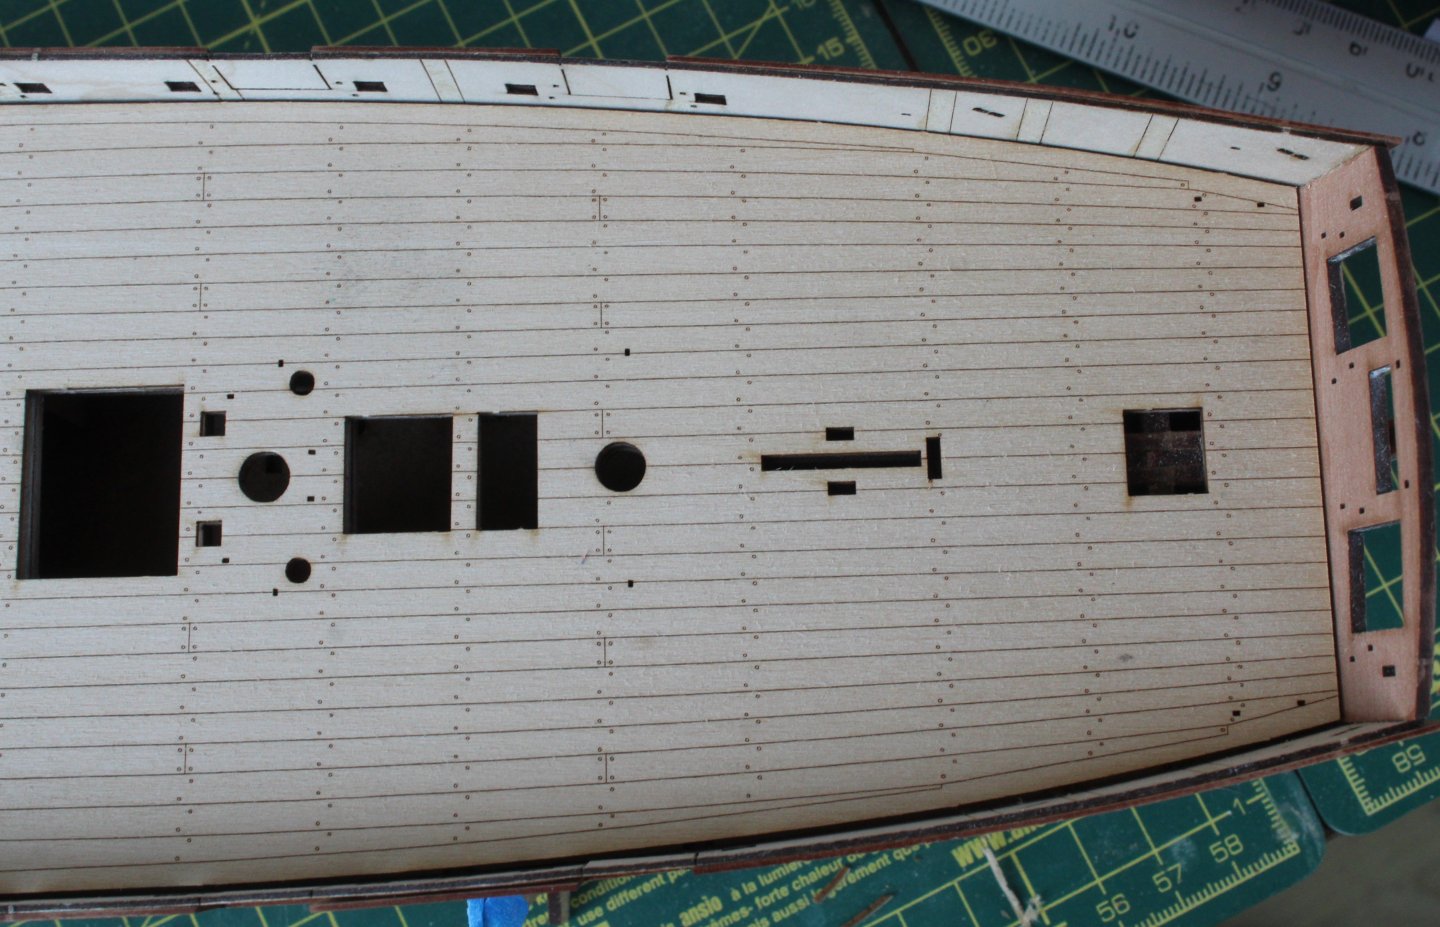
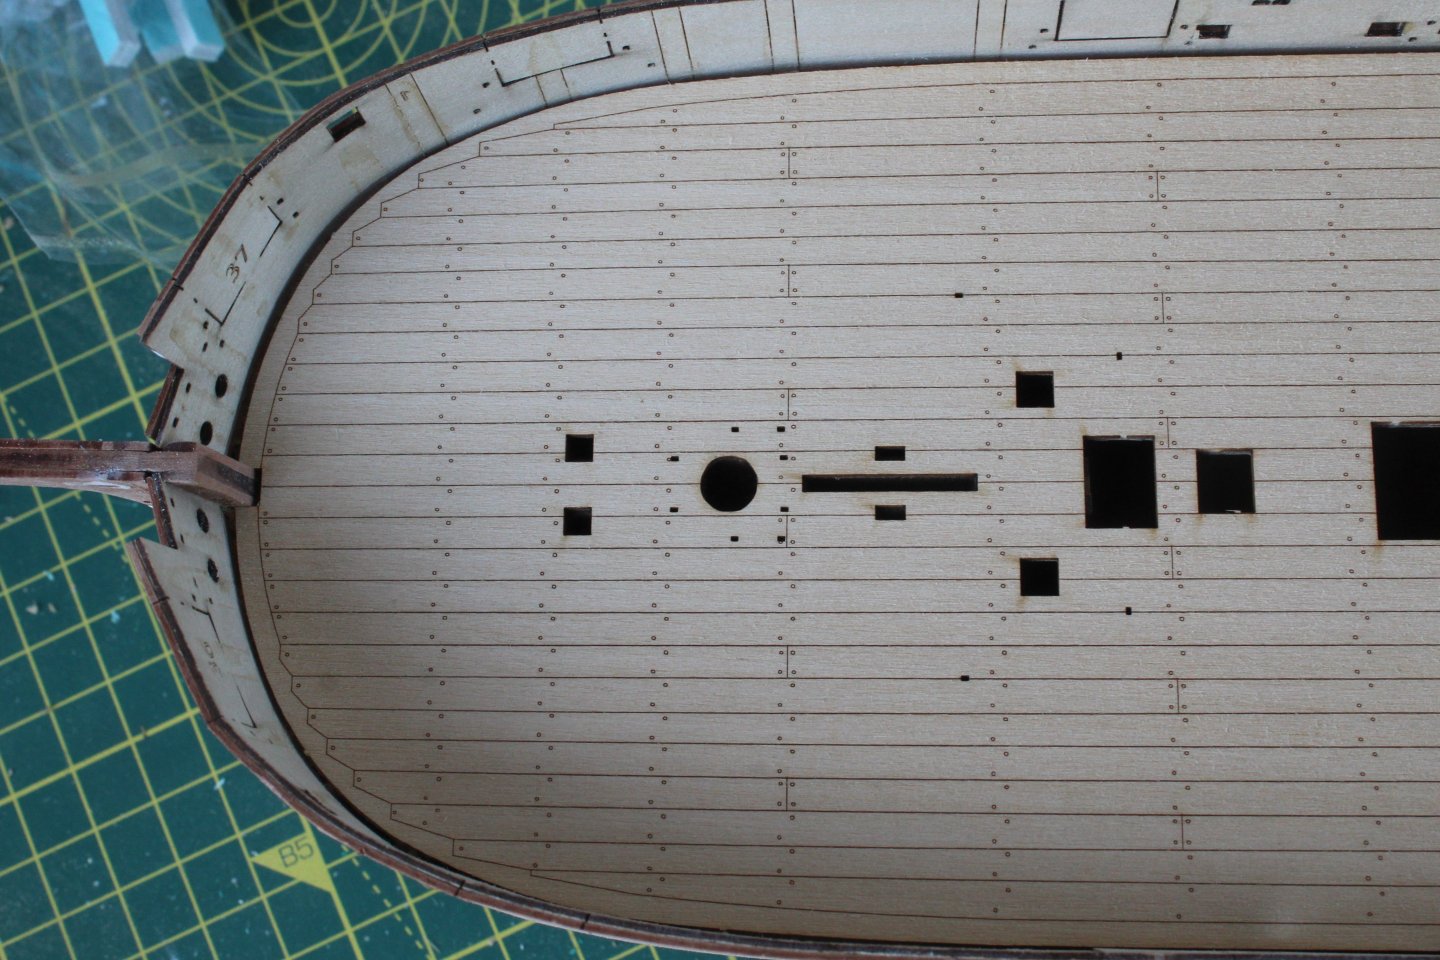
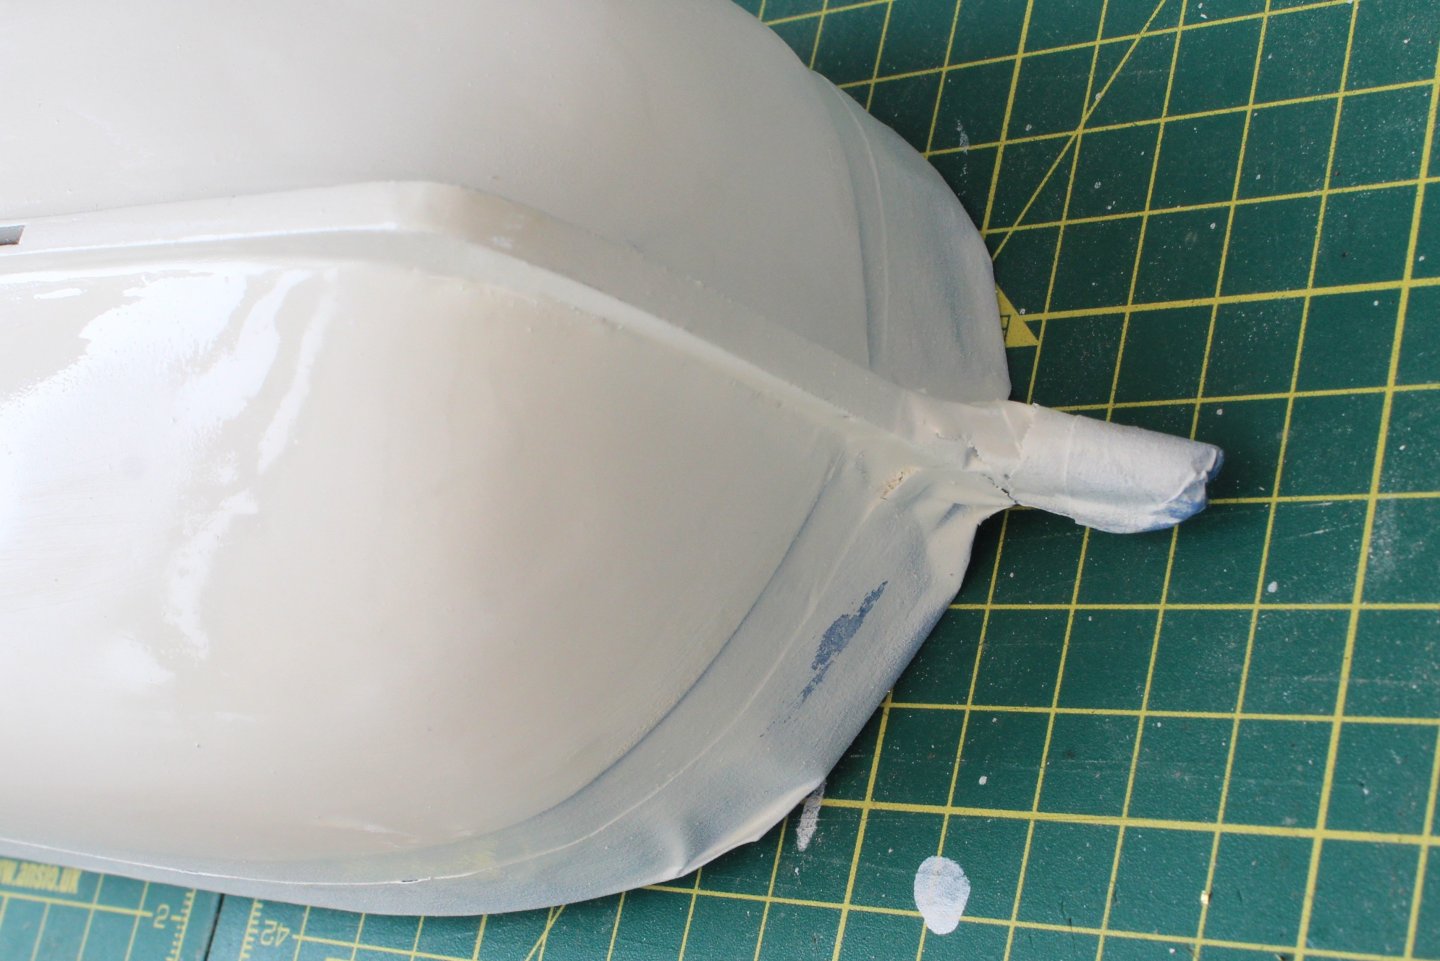
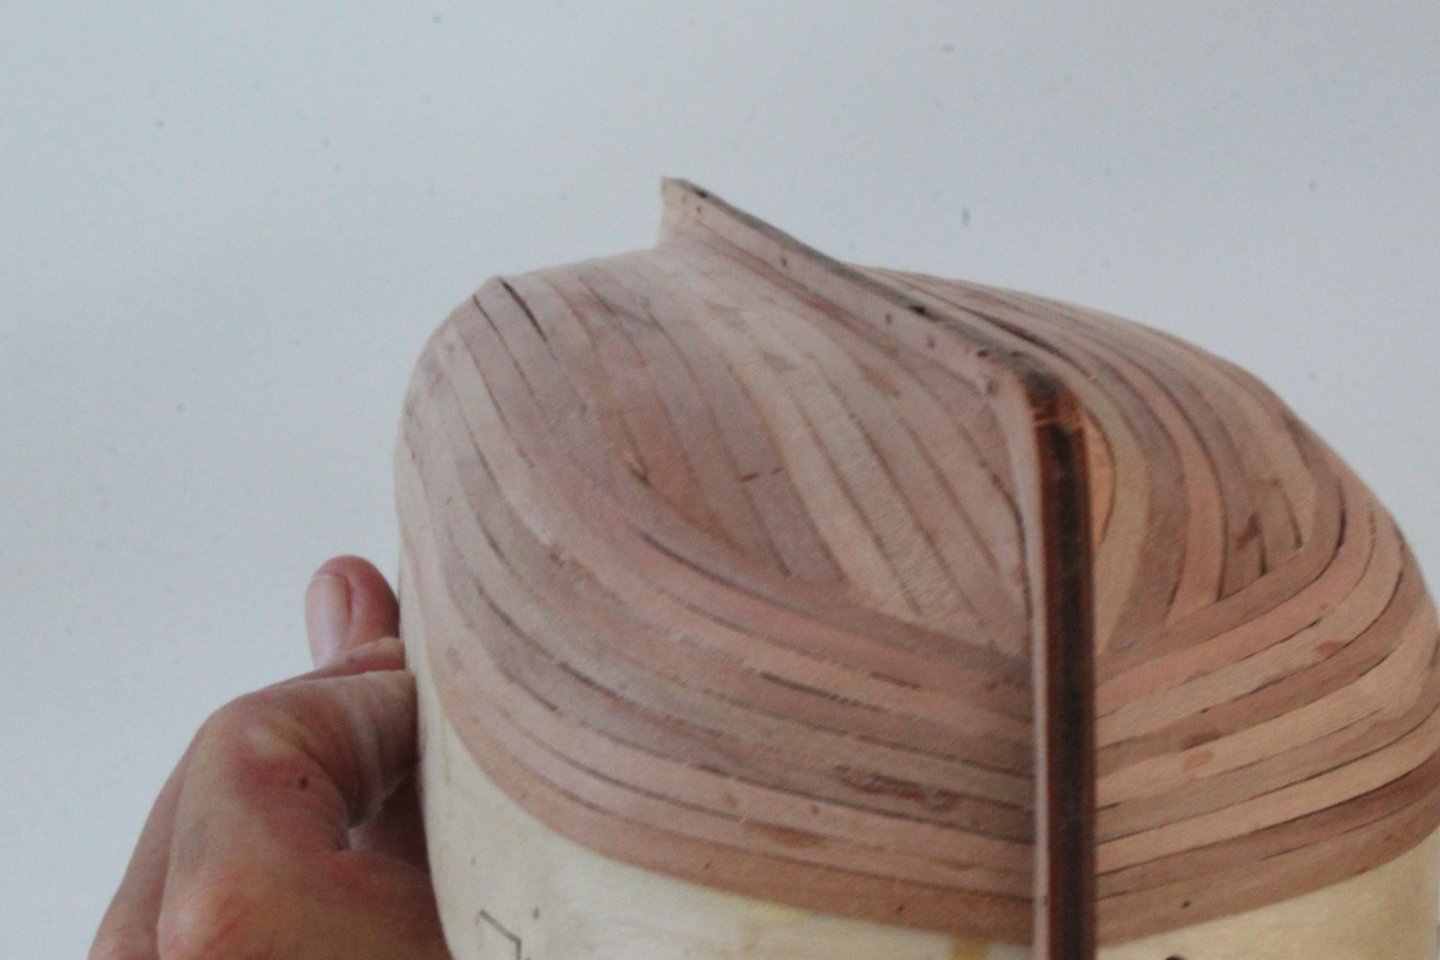
Build Log Index Date: 16/08/2024 Time worked today: 0.5 hours. Total time spent on build: 37.5 hours. Fitting Outer Bulwarks and Test Fit Deck The outer bulwark patterns were fitted without any issue. I brushed plenty of wood glue to the hull and then carefully aligned the outer patterns. A series of clamps were used to hold the patterns, and they were then left overnight to allow plenty of time for the glue to cure. The bulkhead tabs (above the deck level) were then removed using pliers to gently twist. It was then a case of removing any remaining stubs with a craft knife and sandpaper. The laser engraved deck pattern was then test fitted but I did note that the hatch and mast openings were not in complete alignment with the lower deck and that I would need to trim the rear edge. Using some stiff card, I made a template of the aft section of the laser engraved deck so I could trim as necessary. Once the template was perfectly aligned with the deck I was able to mark up and trim the laser etched deck. After trimming the aft section the laser deck was aligned with the lower deck openings and is now ready to be glued.


-
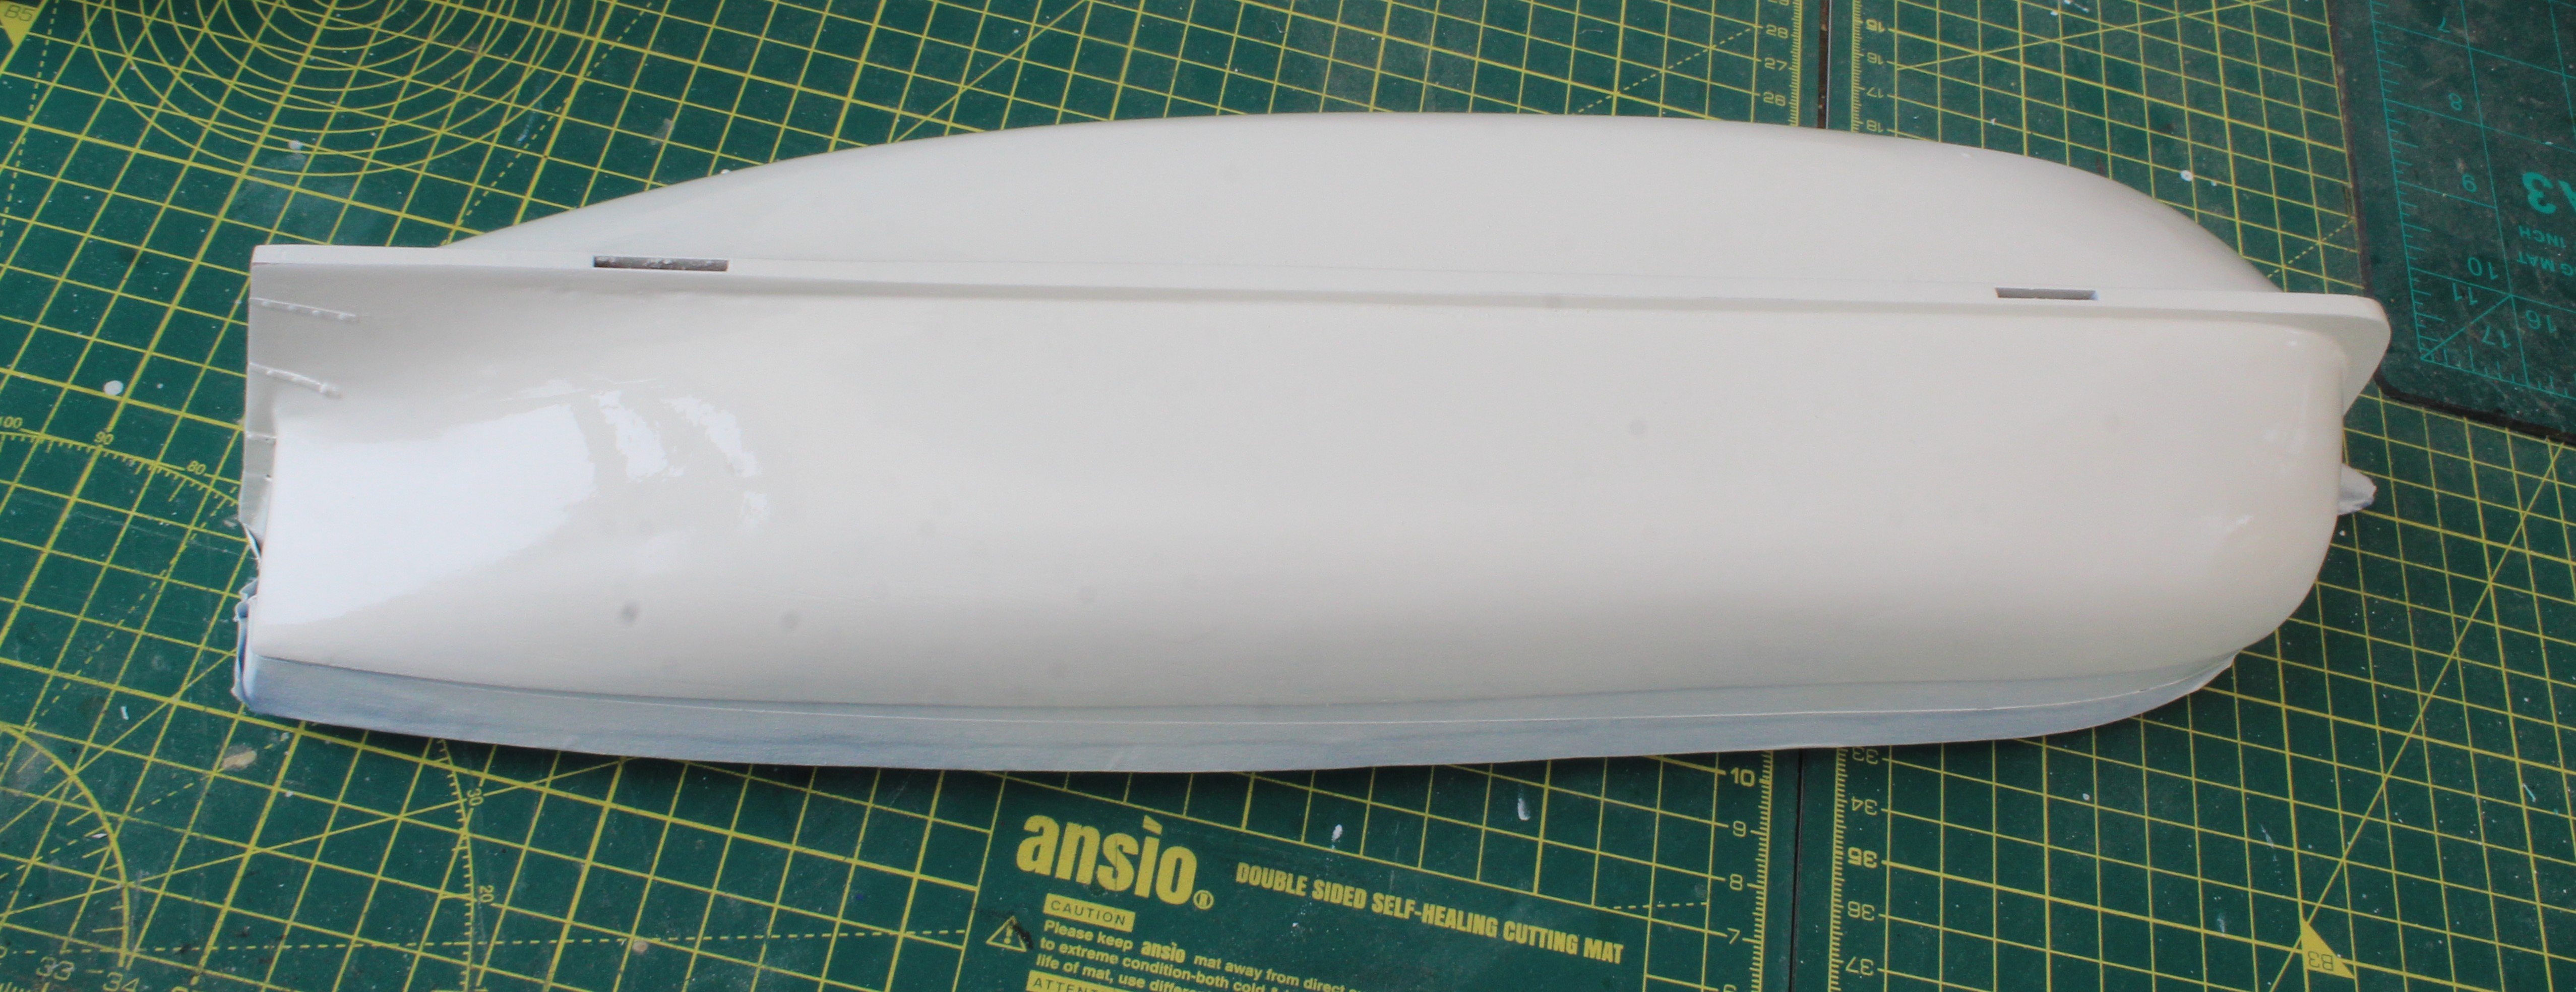
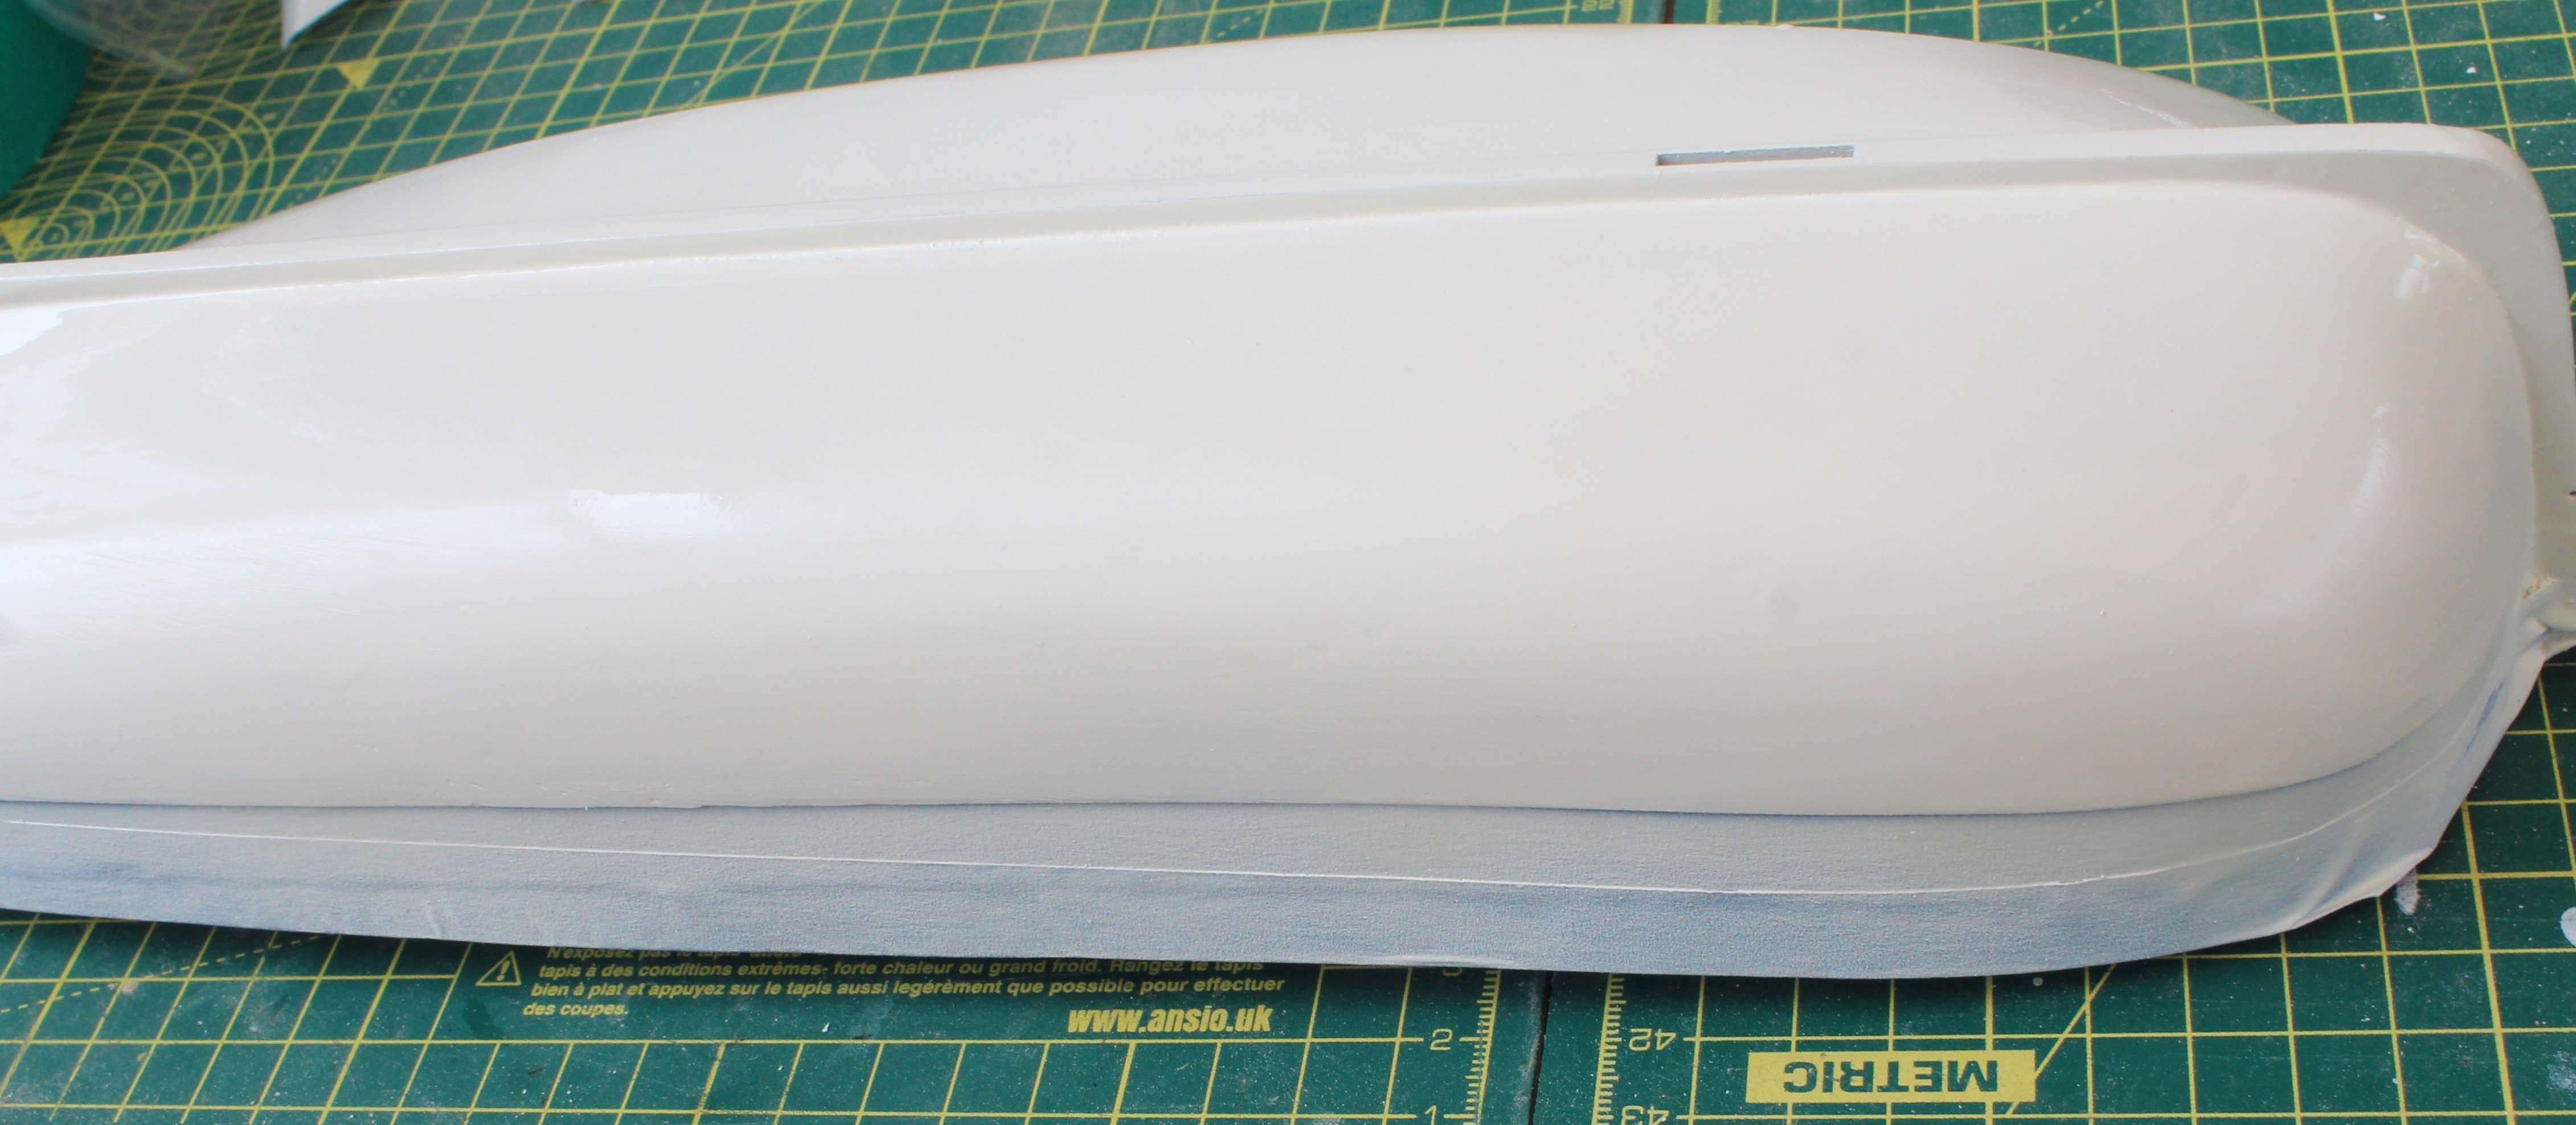
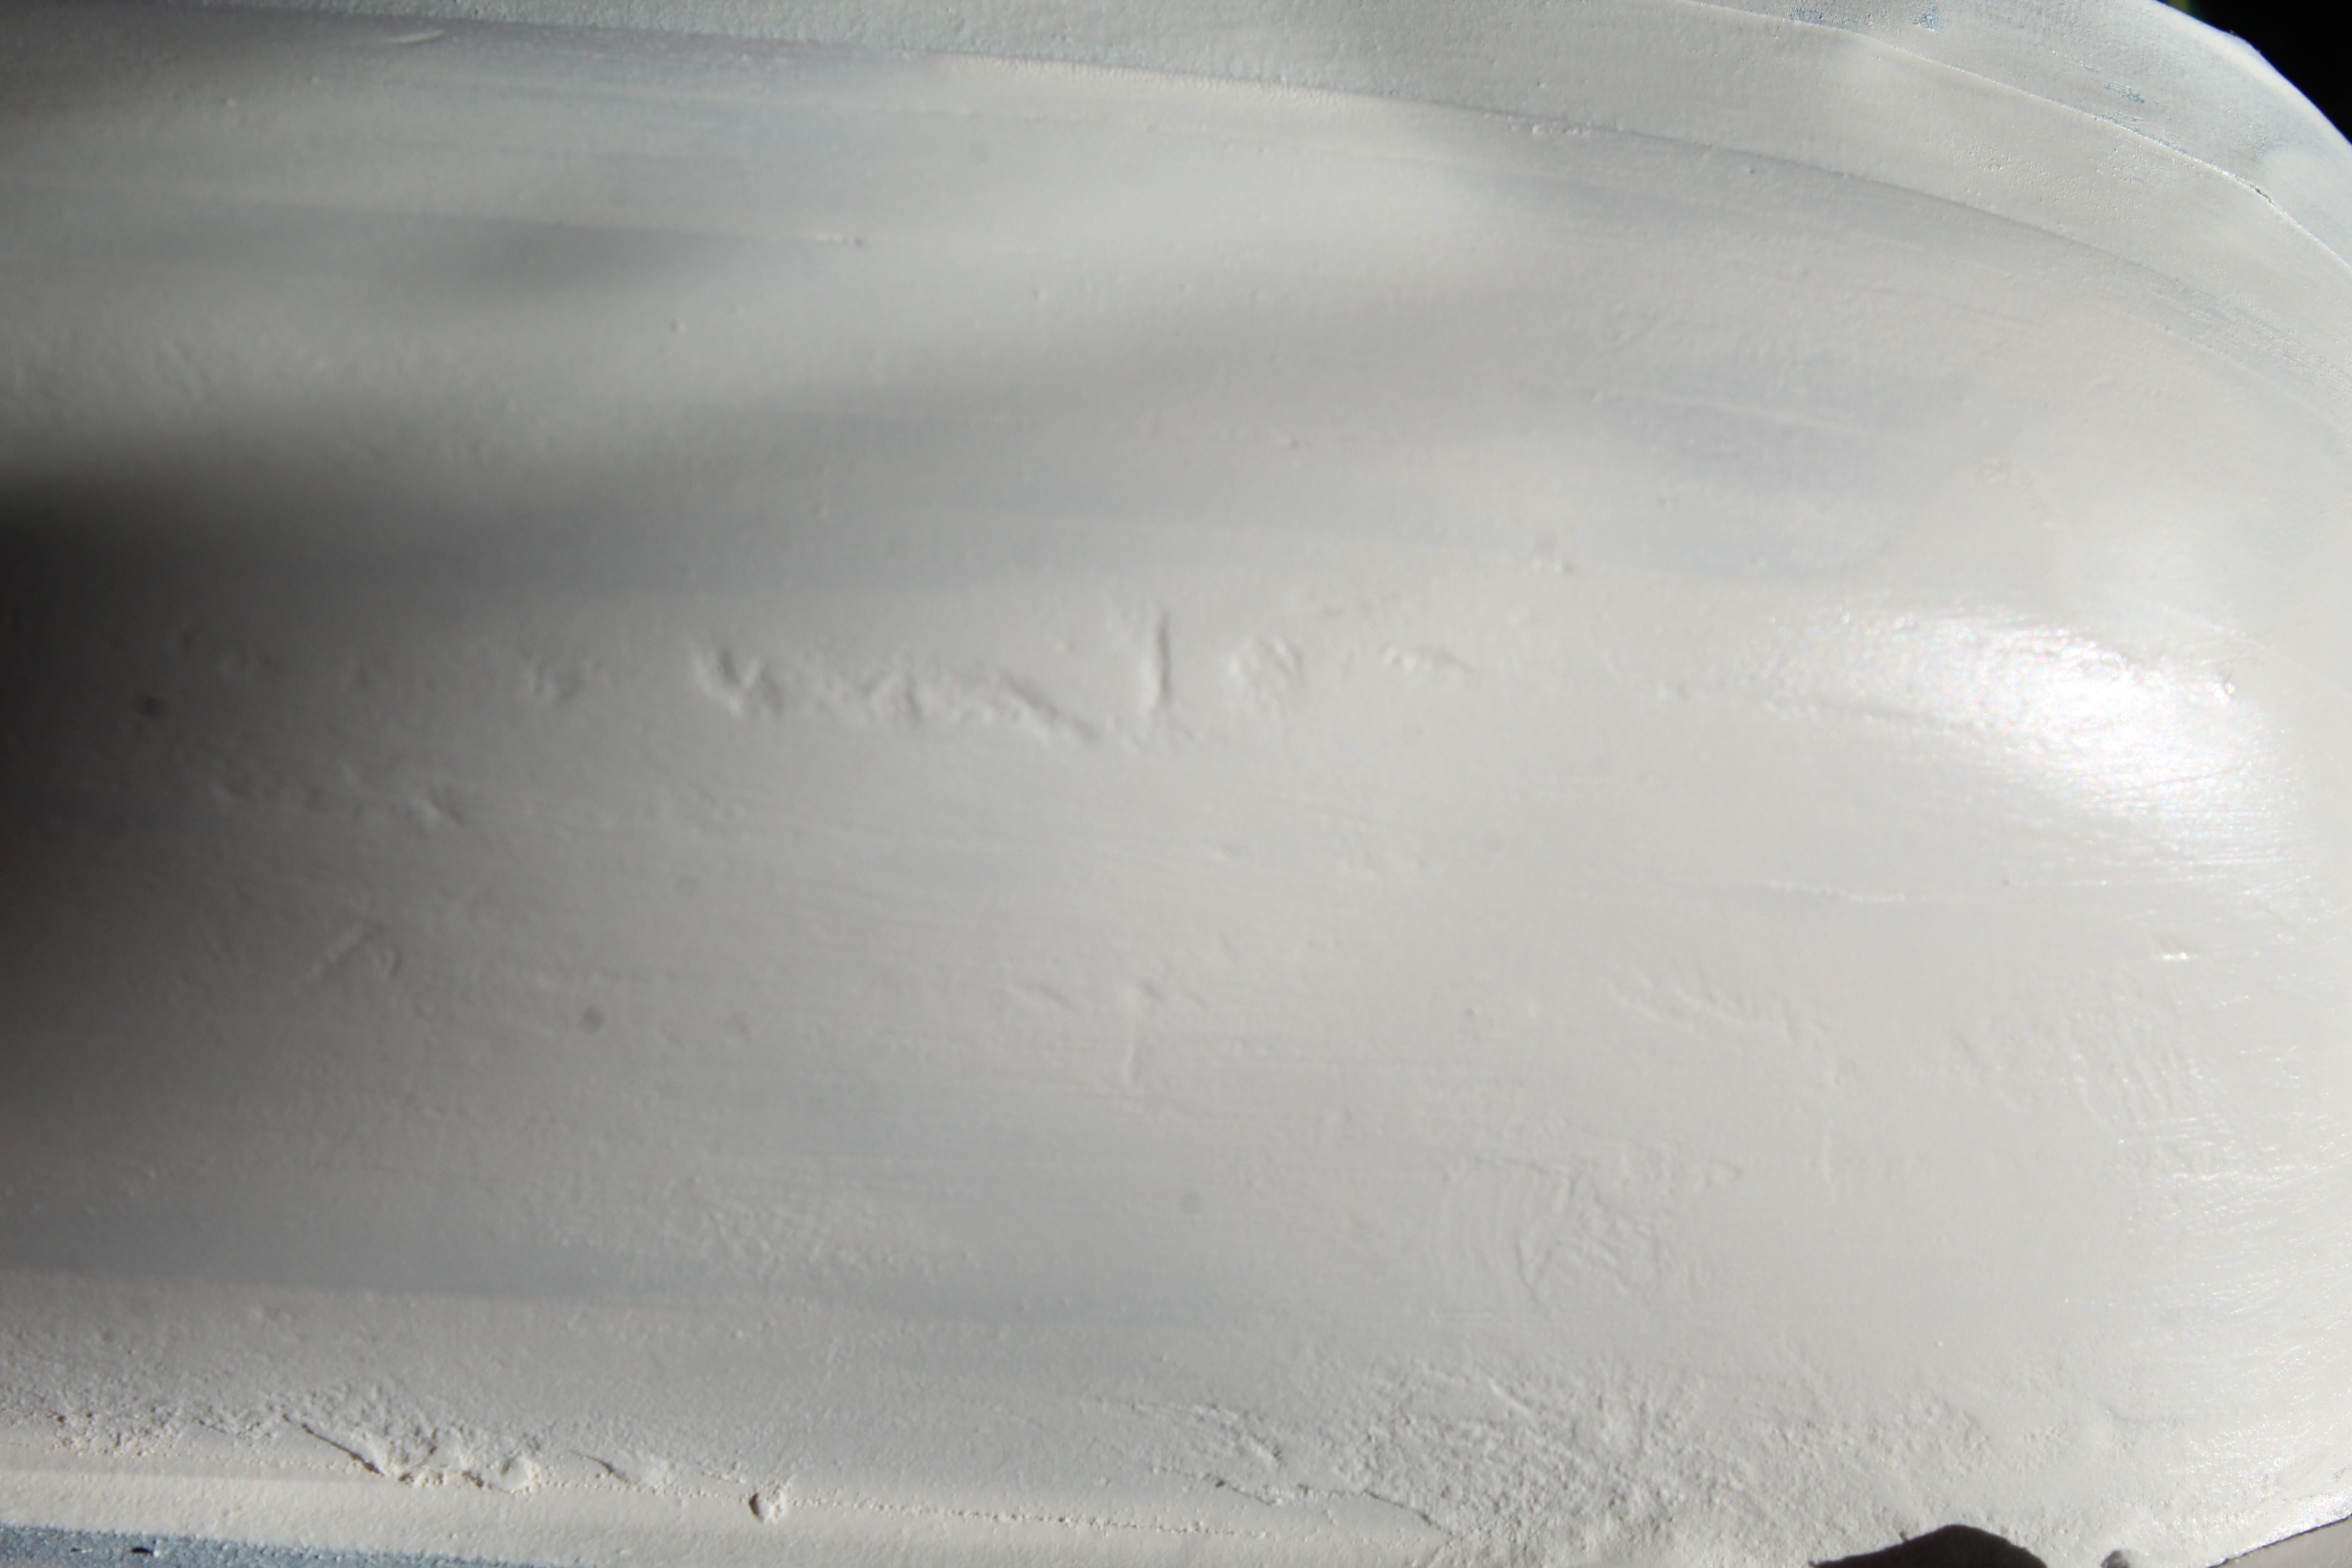
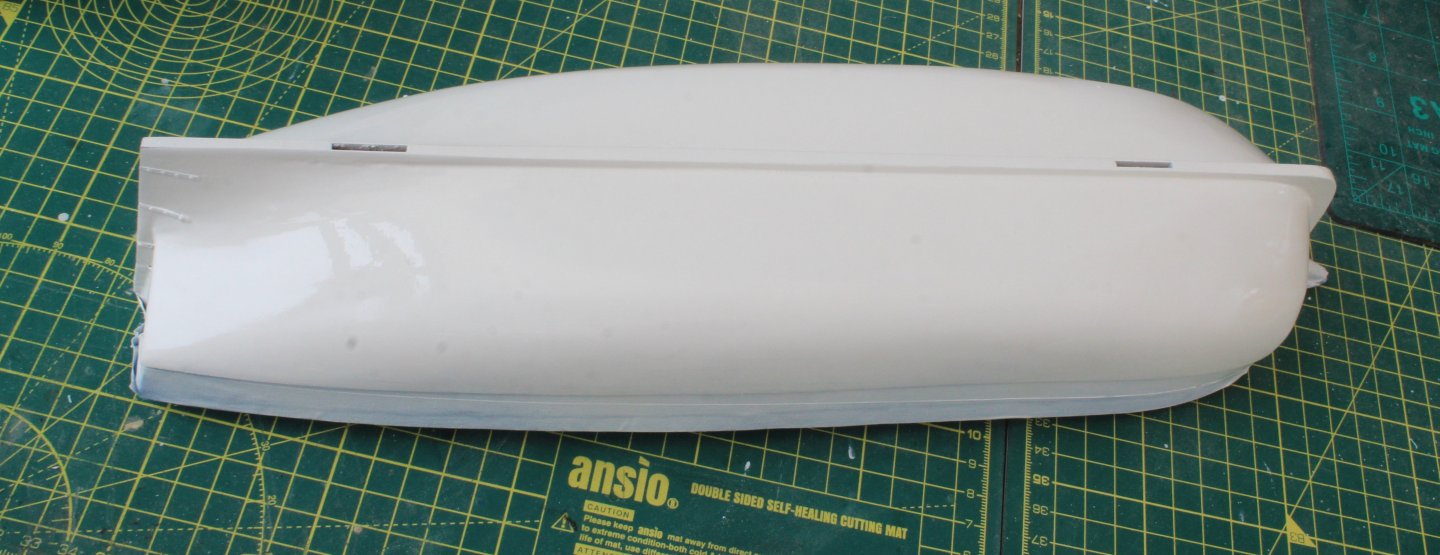
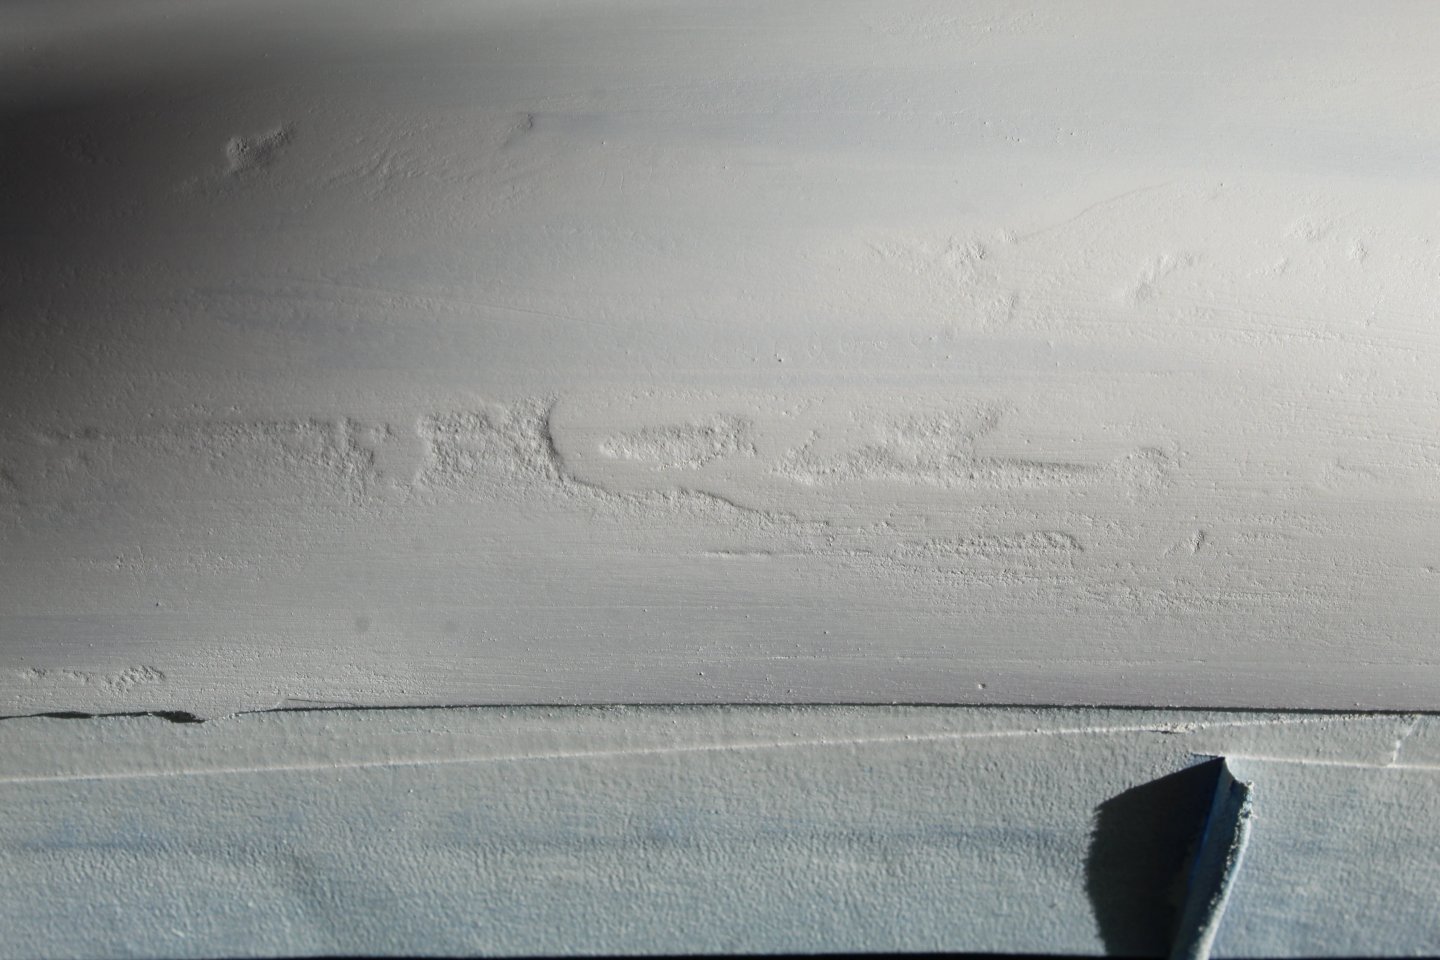
Build Log Index Date: 12/08/2024 - 15/08/2024 Time worked today: 2 hours. Total time spent on build: 37 hours. Painting The Hull Continues The hull has now had a few iterations of the painting process and as I indicated in my last post it is not a task that can be rushed. After each coat of paint had been applied, I continued sand and apply filler where necessary. Once I was reasonably happy with how the hull was looking the rudder strap PE parts were added. Cut down pins were then inserted in rudder strap holes. After a couple more sprays of paint the hull is now looking good. I am hoping that once the paint has dried there will be no more worked required. The paint is still wet in the attached photo’s hence the shiny nature and reflections.
-
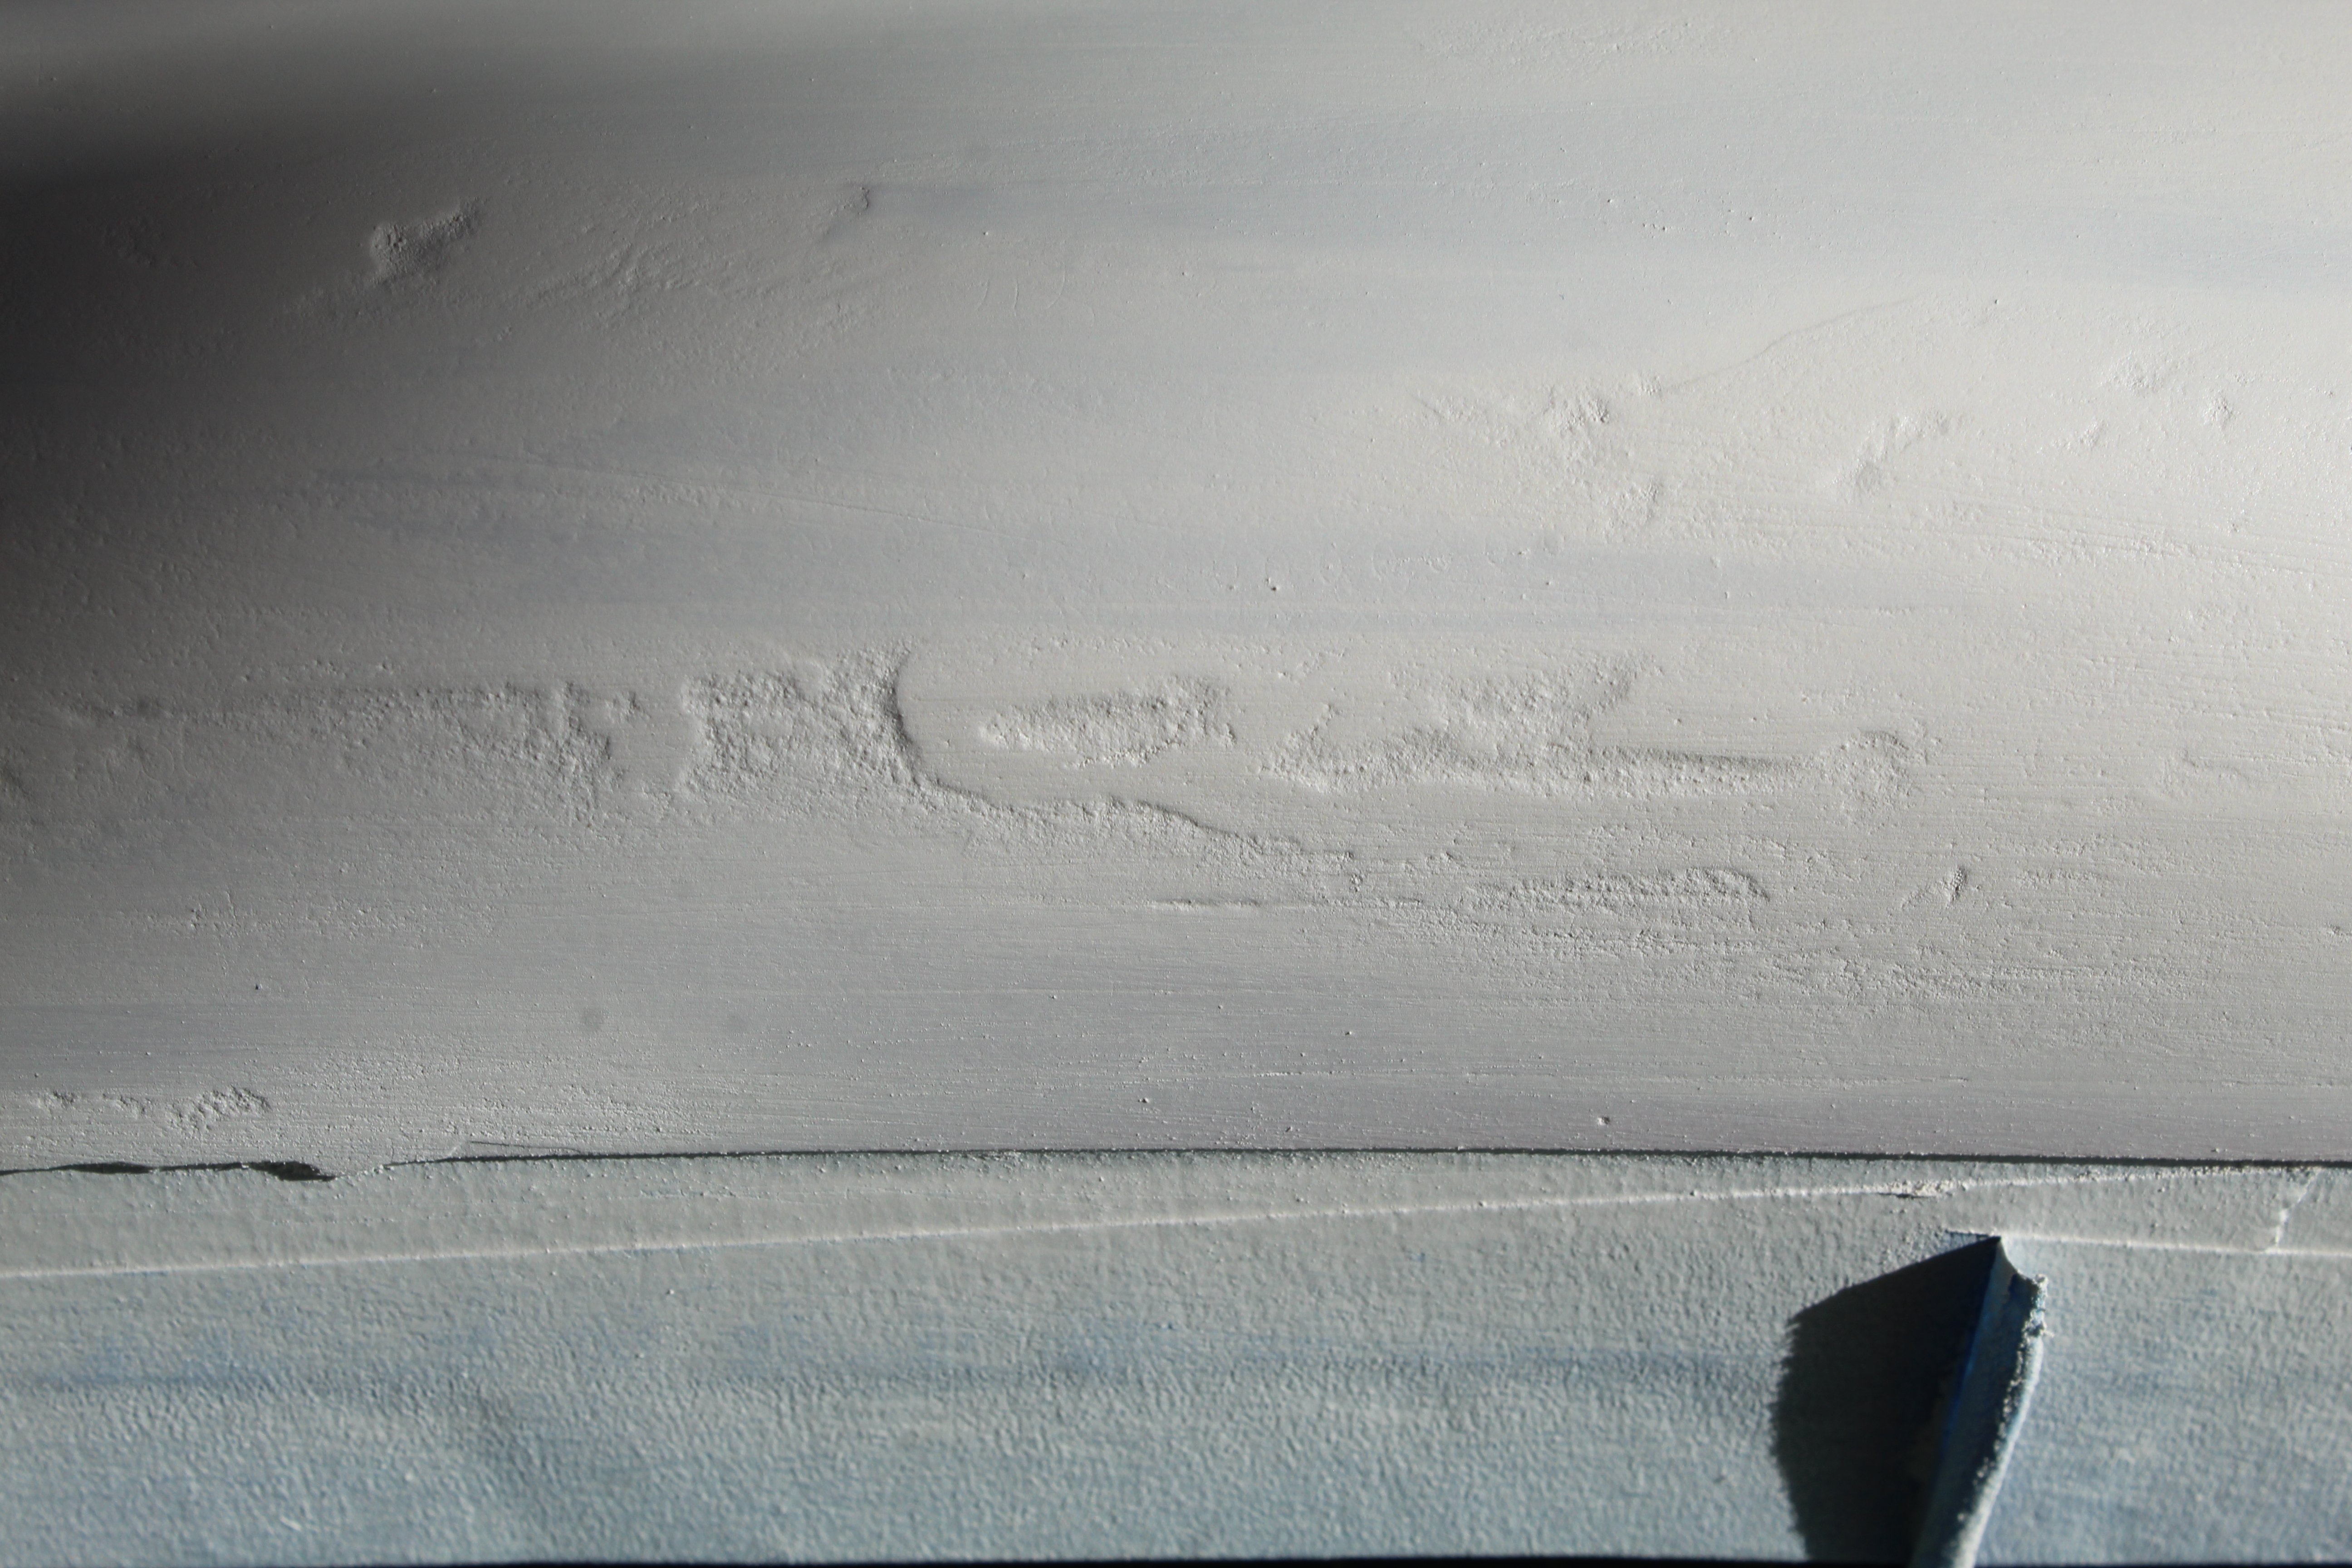
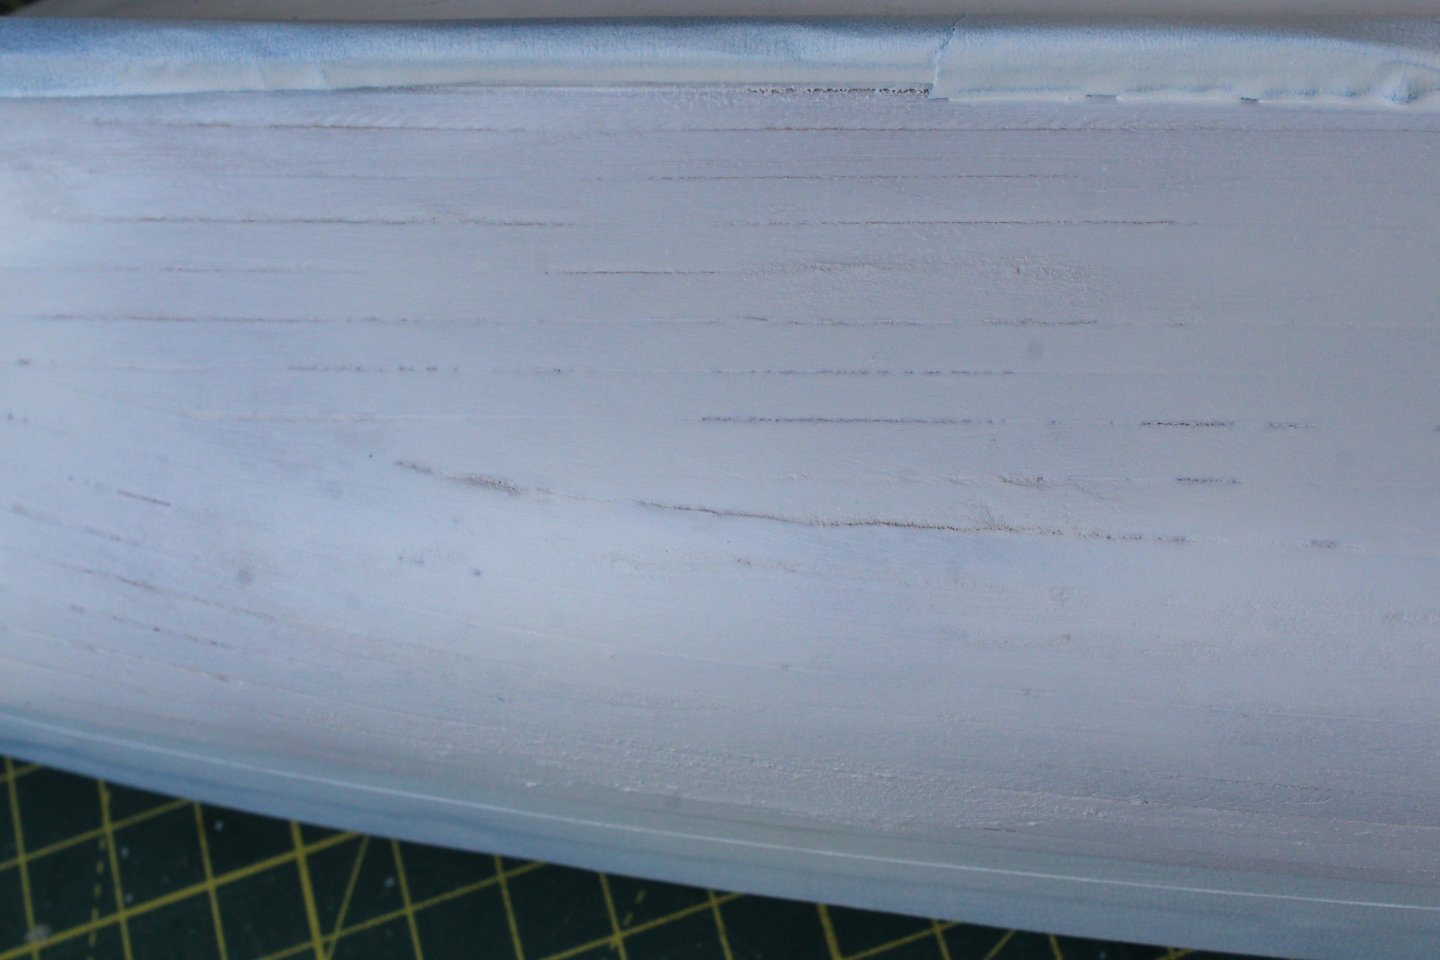
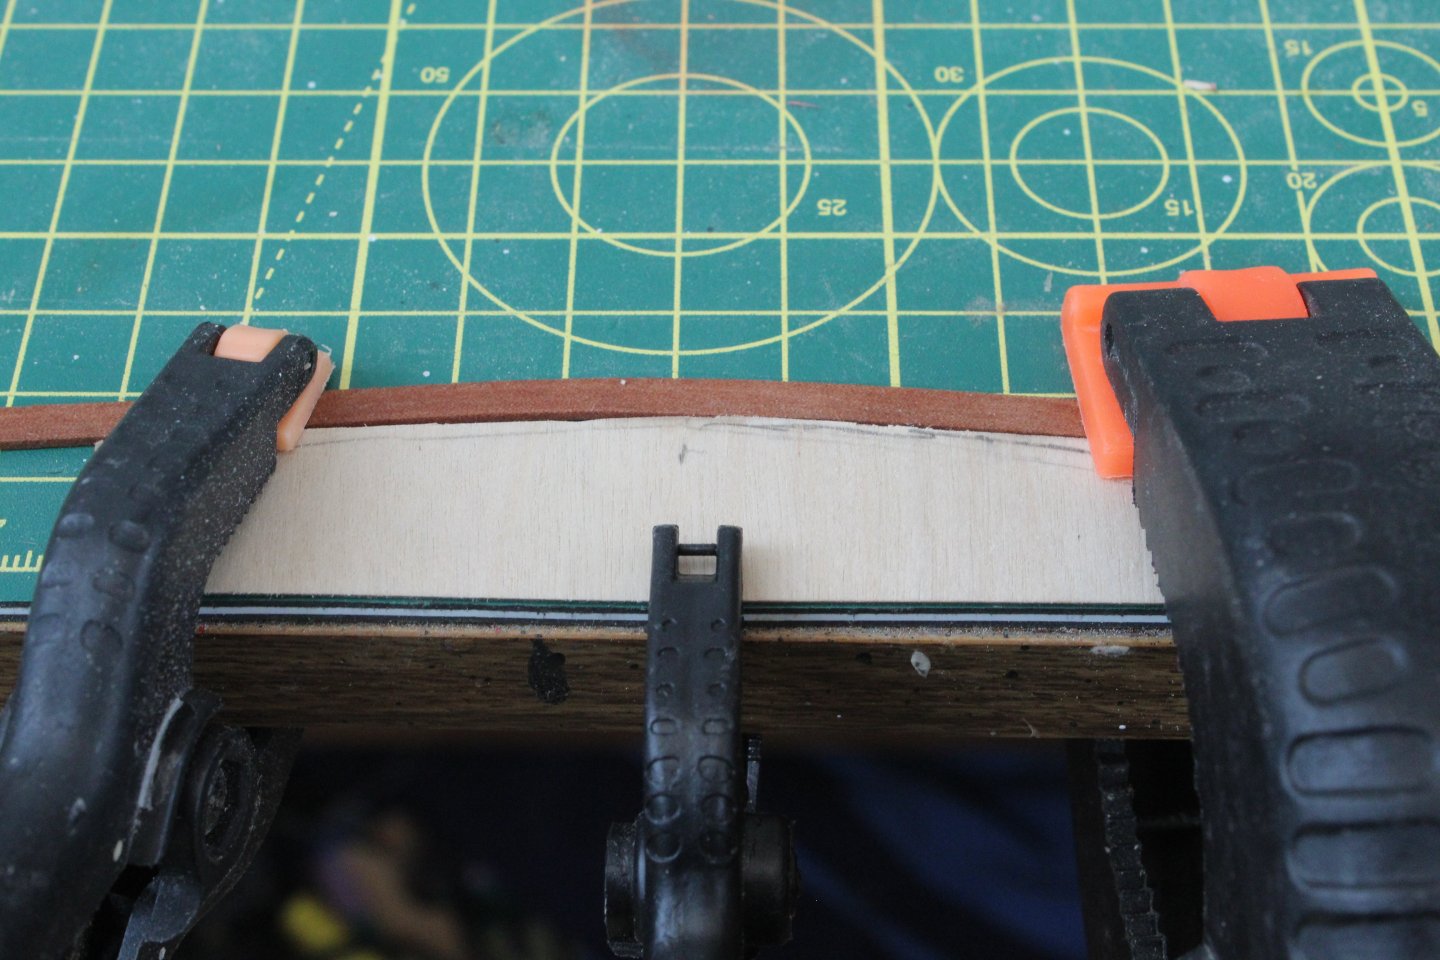
Build Log Index Date: 10/08/2024 & 11/08/2024 Time worked today: 2 hours. Total time spent on build: 35 hours. Sanding. Filling and Painting The Hull It takes time and patience to sand, fill and paint the hull, requiring a few iterations of the process. It is not a task that can be rushed. Prior to starting work I used tape to protect the patterns. I then brushed a diluted mixture of wood filler to the hull so that all the little gaps between planks were filled. I also added more filler to the visible depressions in the planking. Once the filler had hardened the hull was given a light sand with some 120-grit sandpaper to remove the excess filler. The hull was the giving a light spray of white paint. Using my palm sander fitted with 80-grit sandpaper and then 120-grit sandpaper the hull was sanded smooth again. The aim is to remove as much as the white paint as possible which indicates the hull smooth. As can be seen in the photos below there are still a few areas which will require some filler. After filling and sanding the hull once again another coat of white paint was sprayed on the hull. As can be seen in the next photo’s there is still a bit more filling work required but the hull is starting to look better. After filling the gaps with more diluted filler and then sanding smooth again another coat of white paint was sprayed on. The hull is now looking good but it will require another round of sanding and filling as there are still some imperfections. Once the hull has been sanded and filled I plan to add the stern post and the stern transom (upper outer) pattern to the hull before I start the formal painting process.


-
Many thanks Uwe.
-
Many thanks Bob.
-
Many thanks Ronald.
-
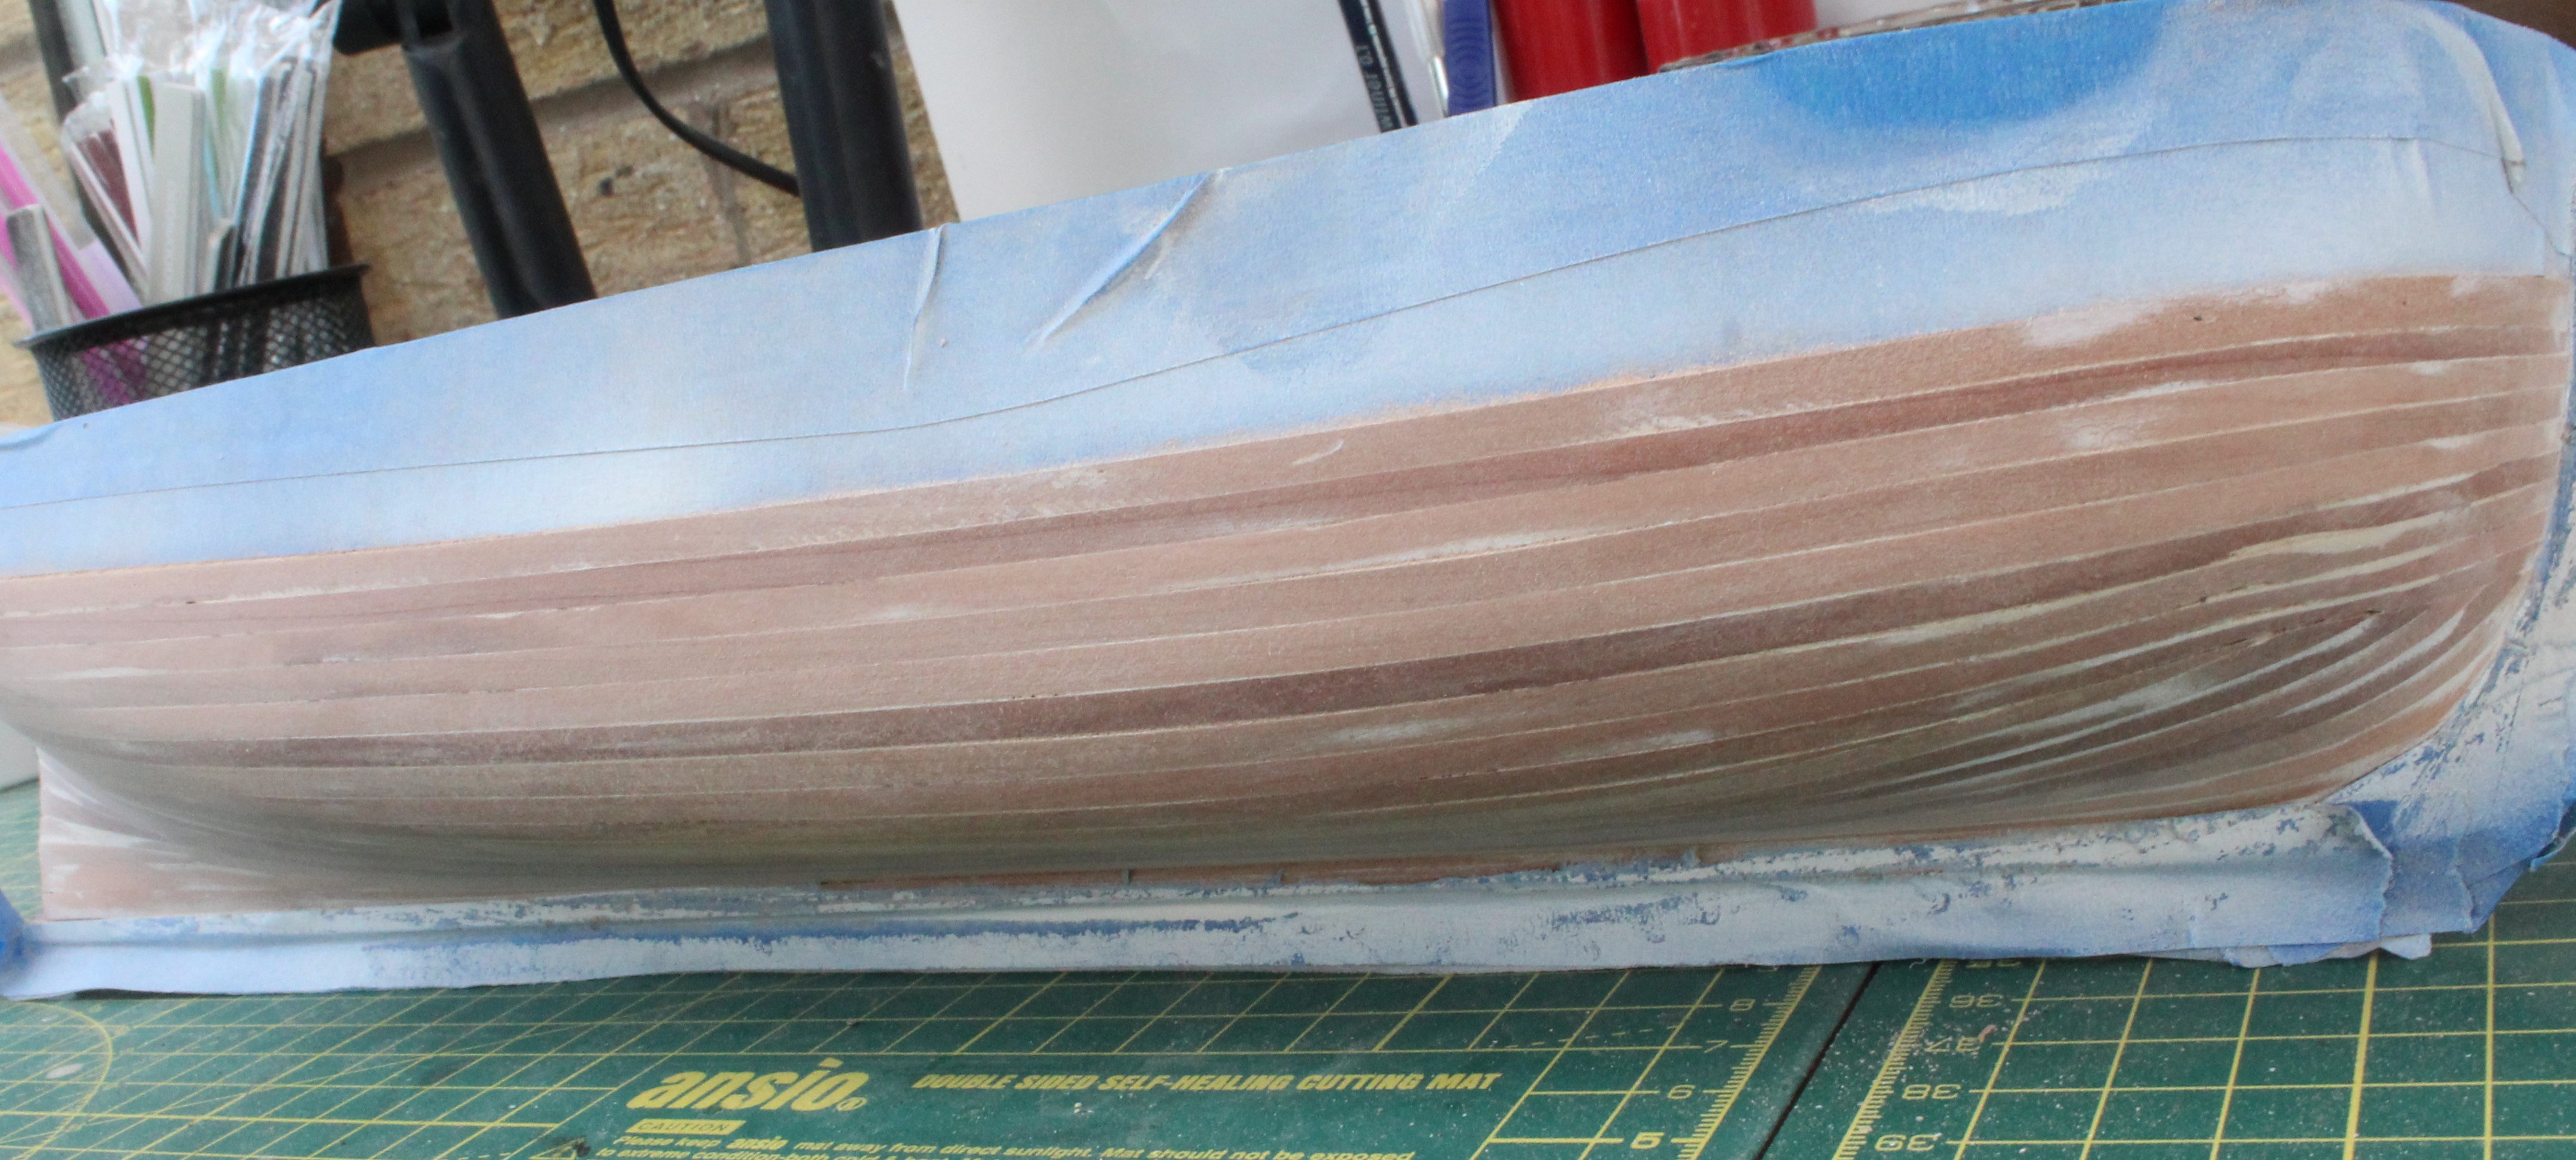
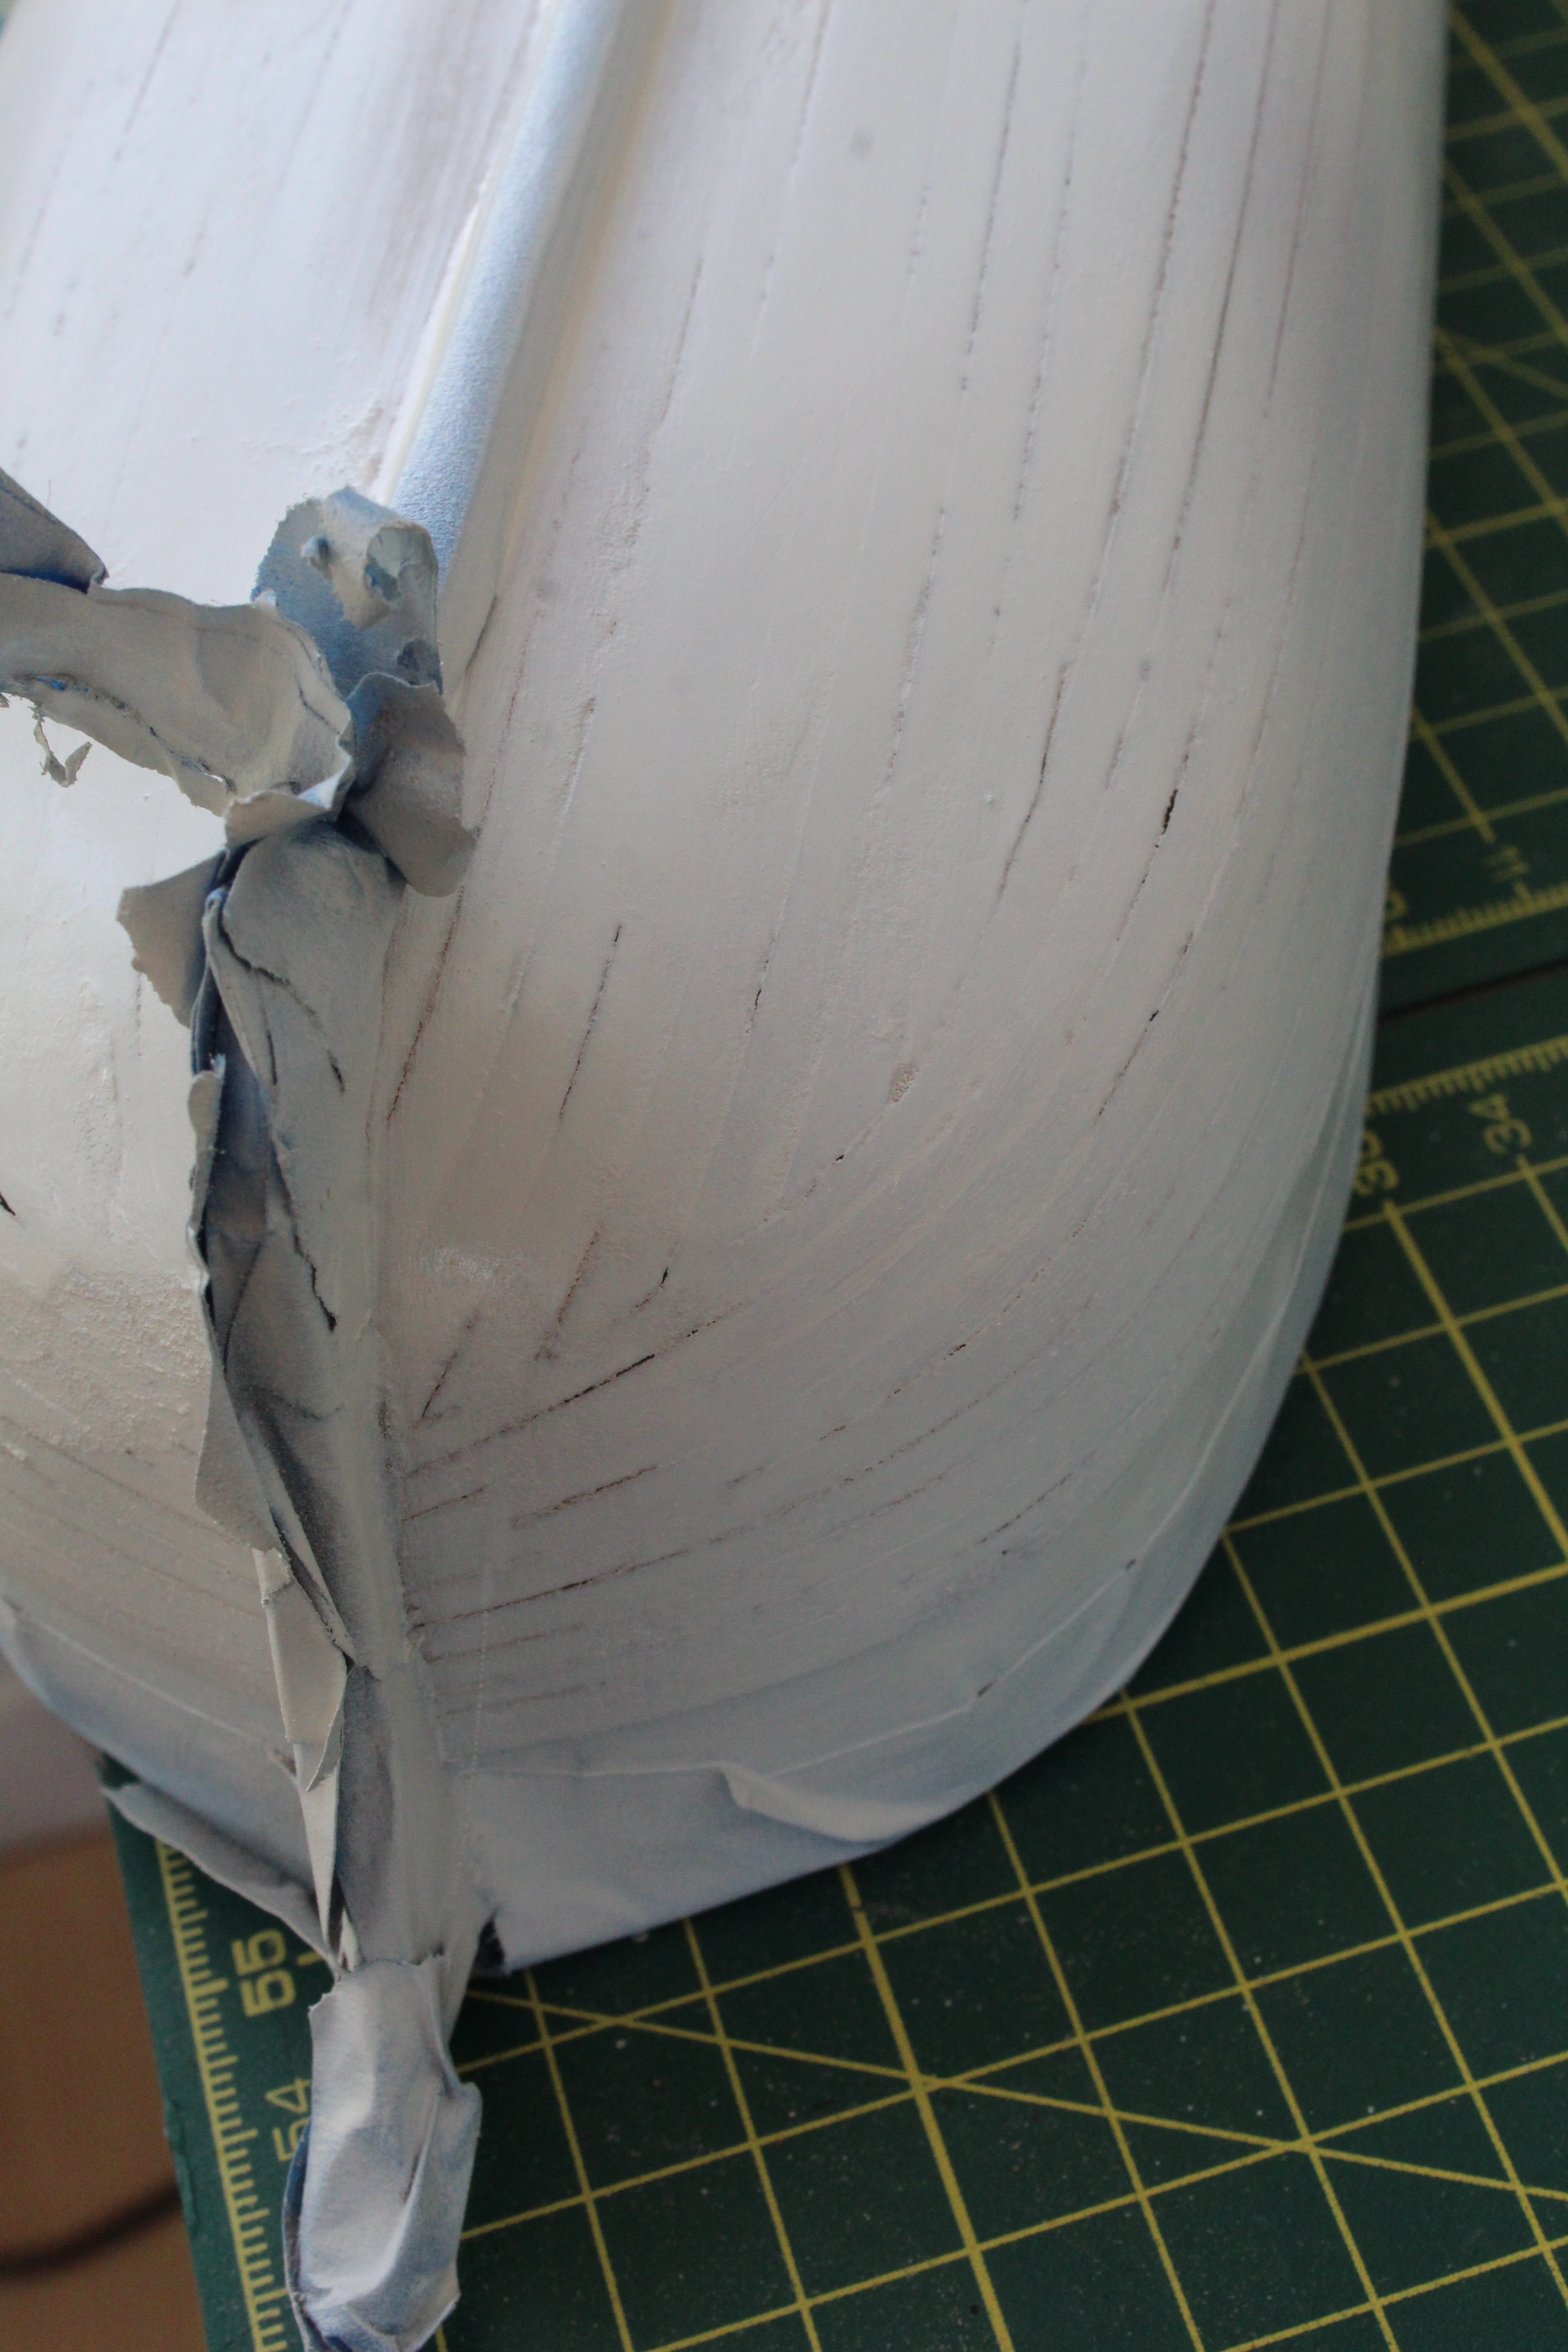
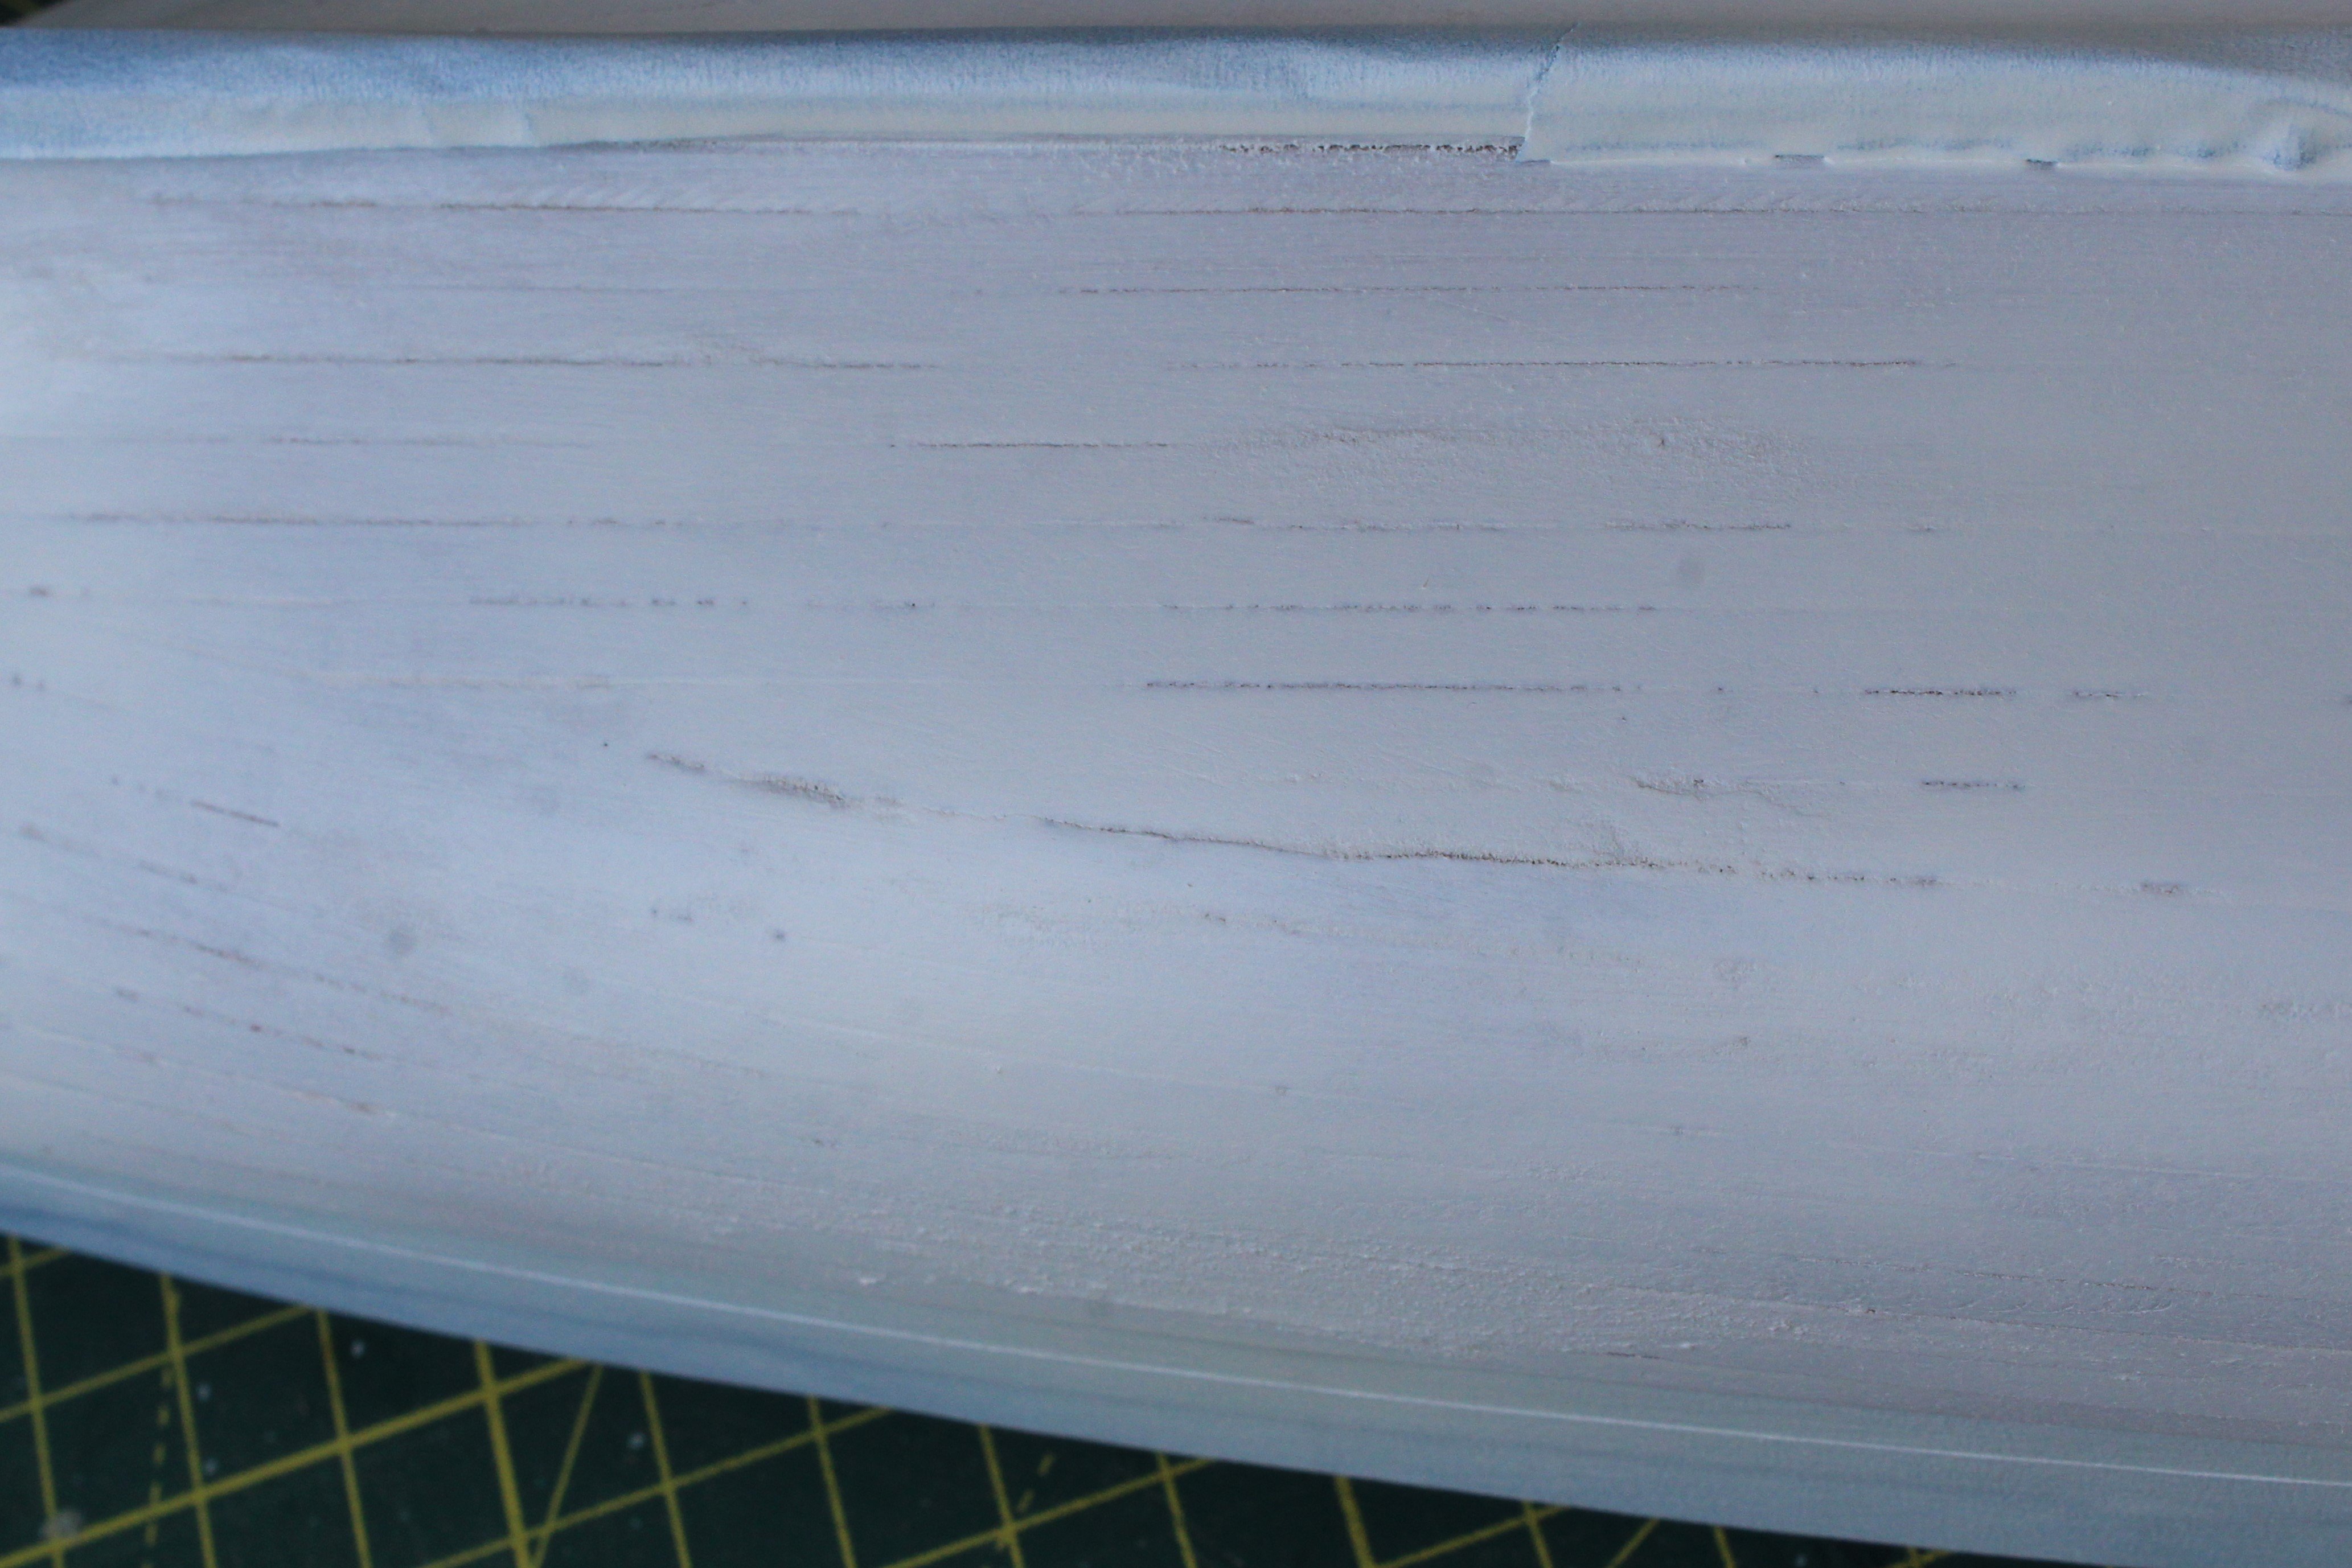
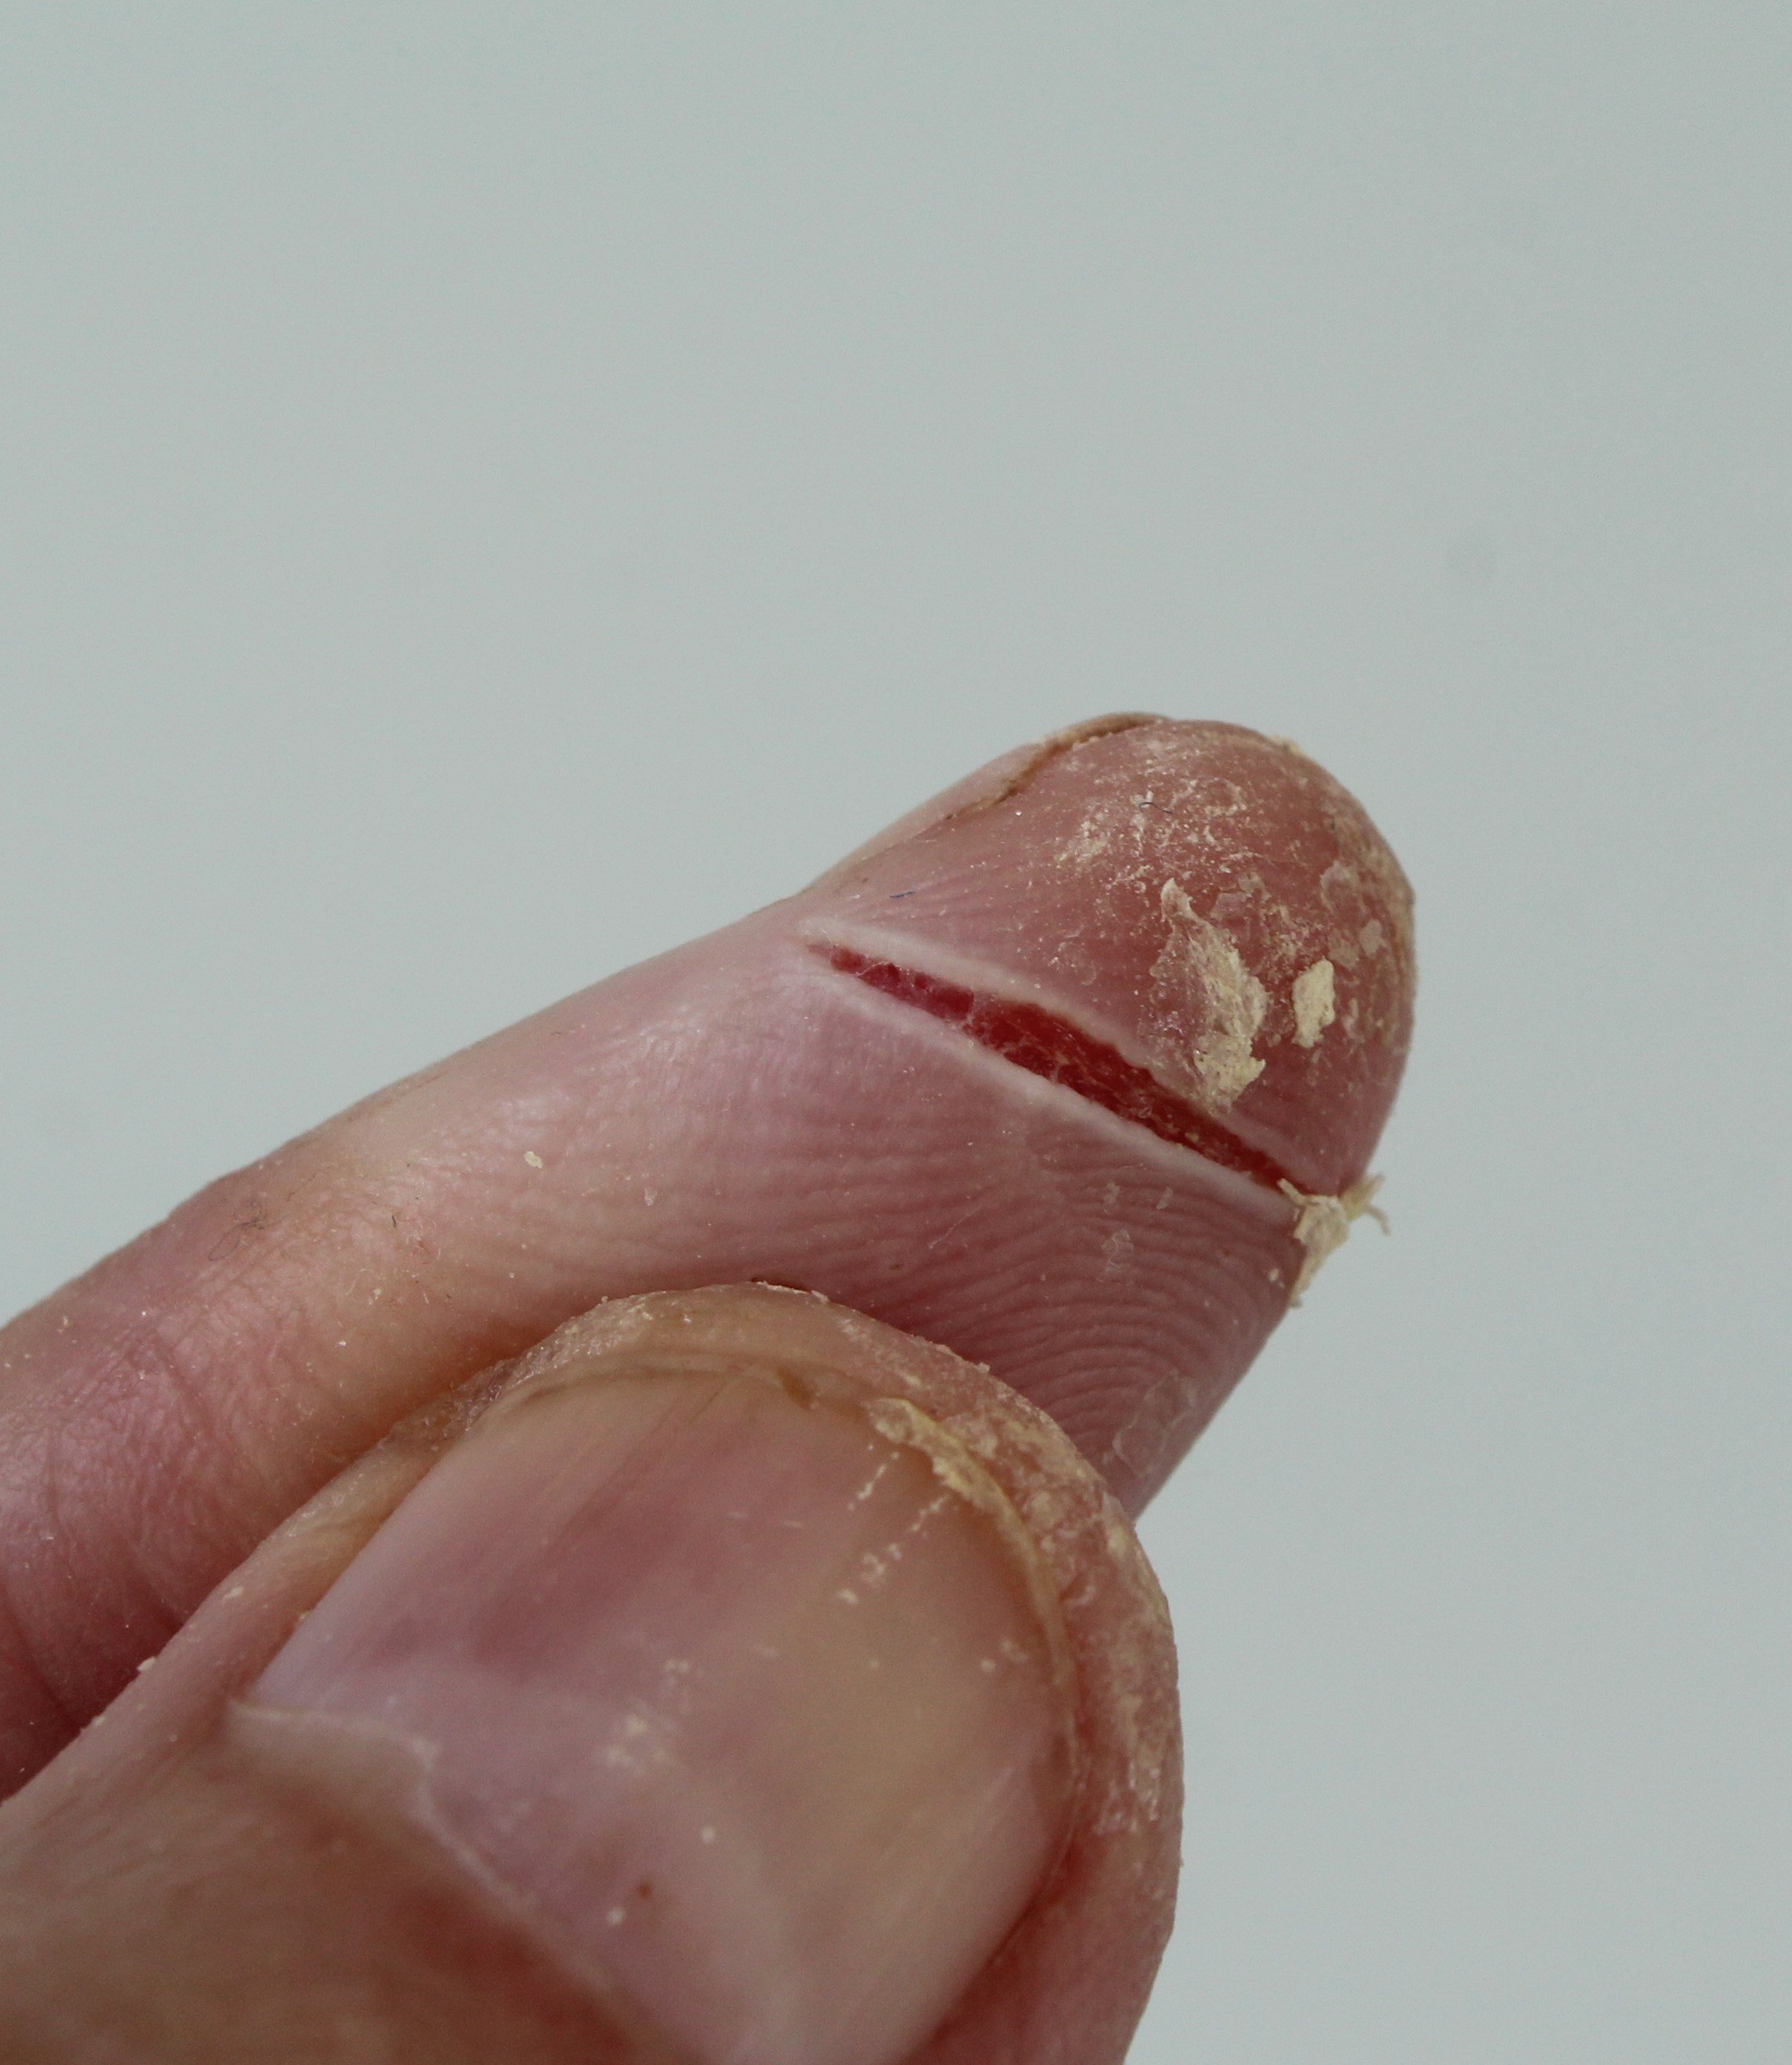
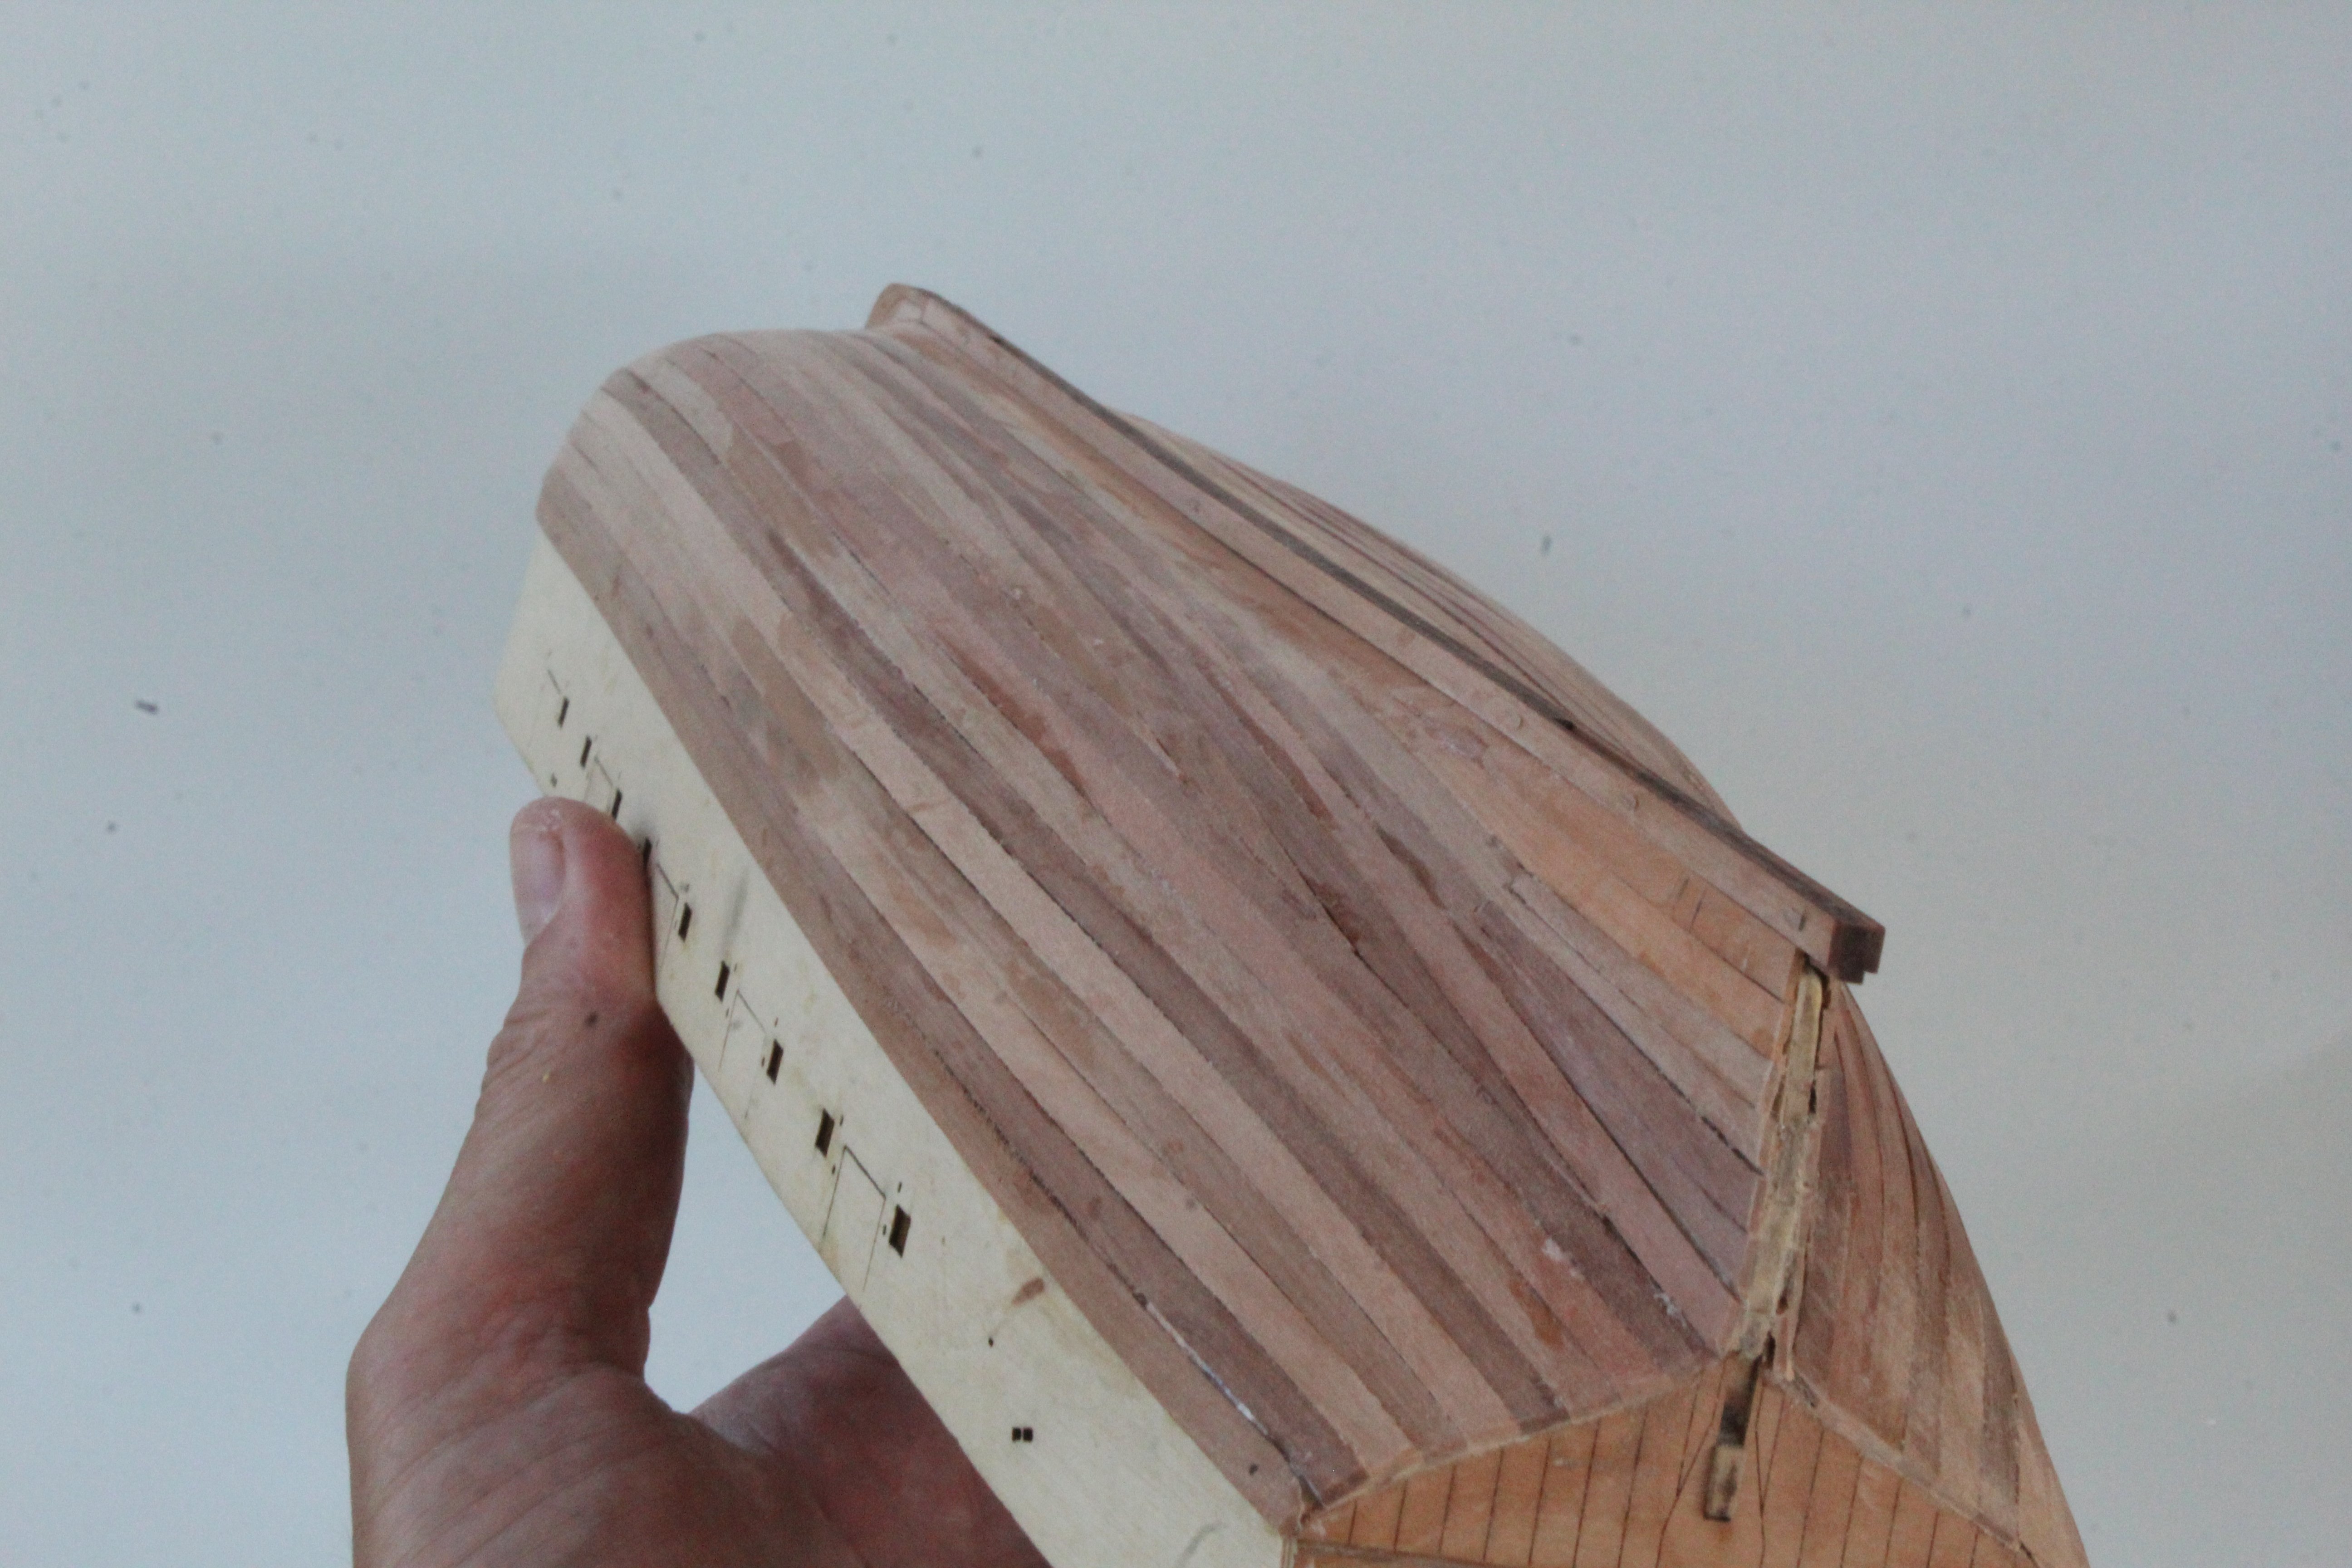
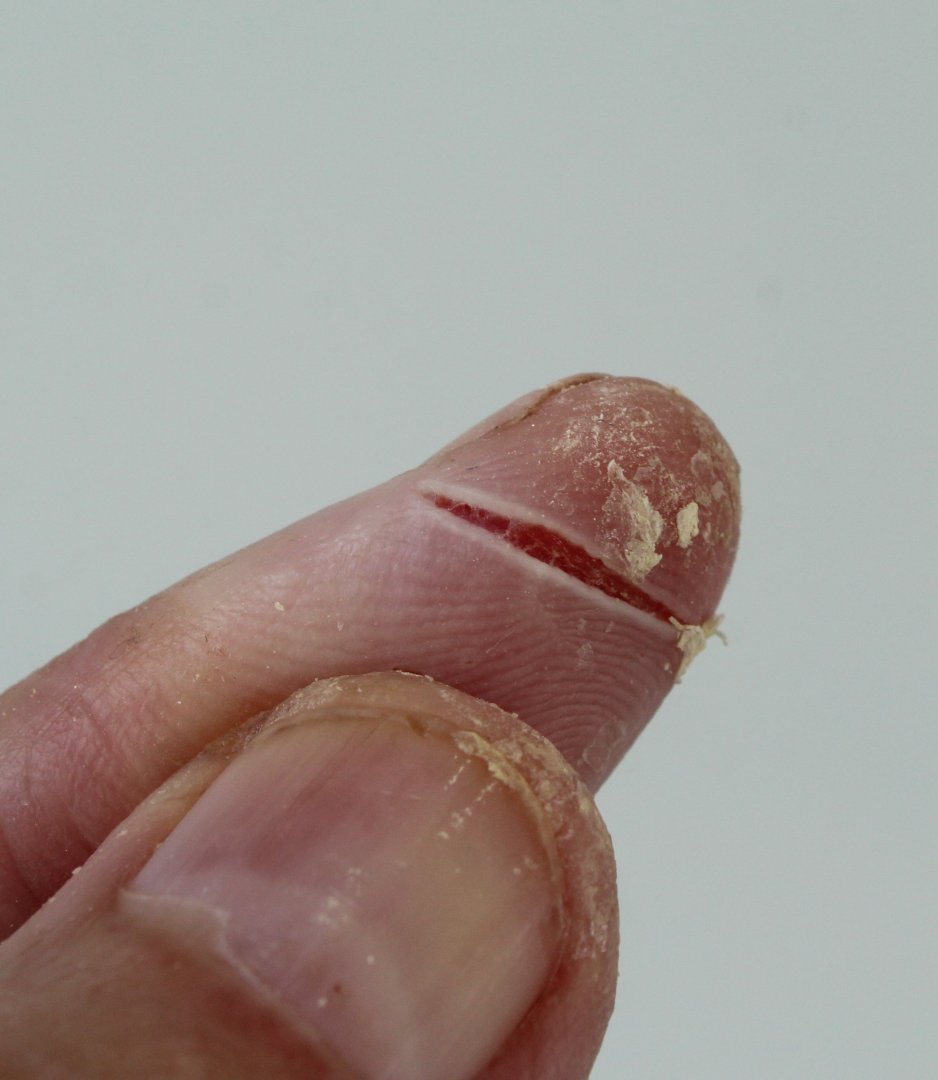
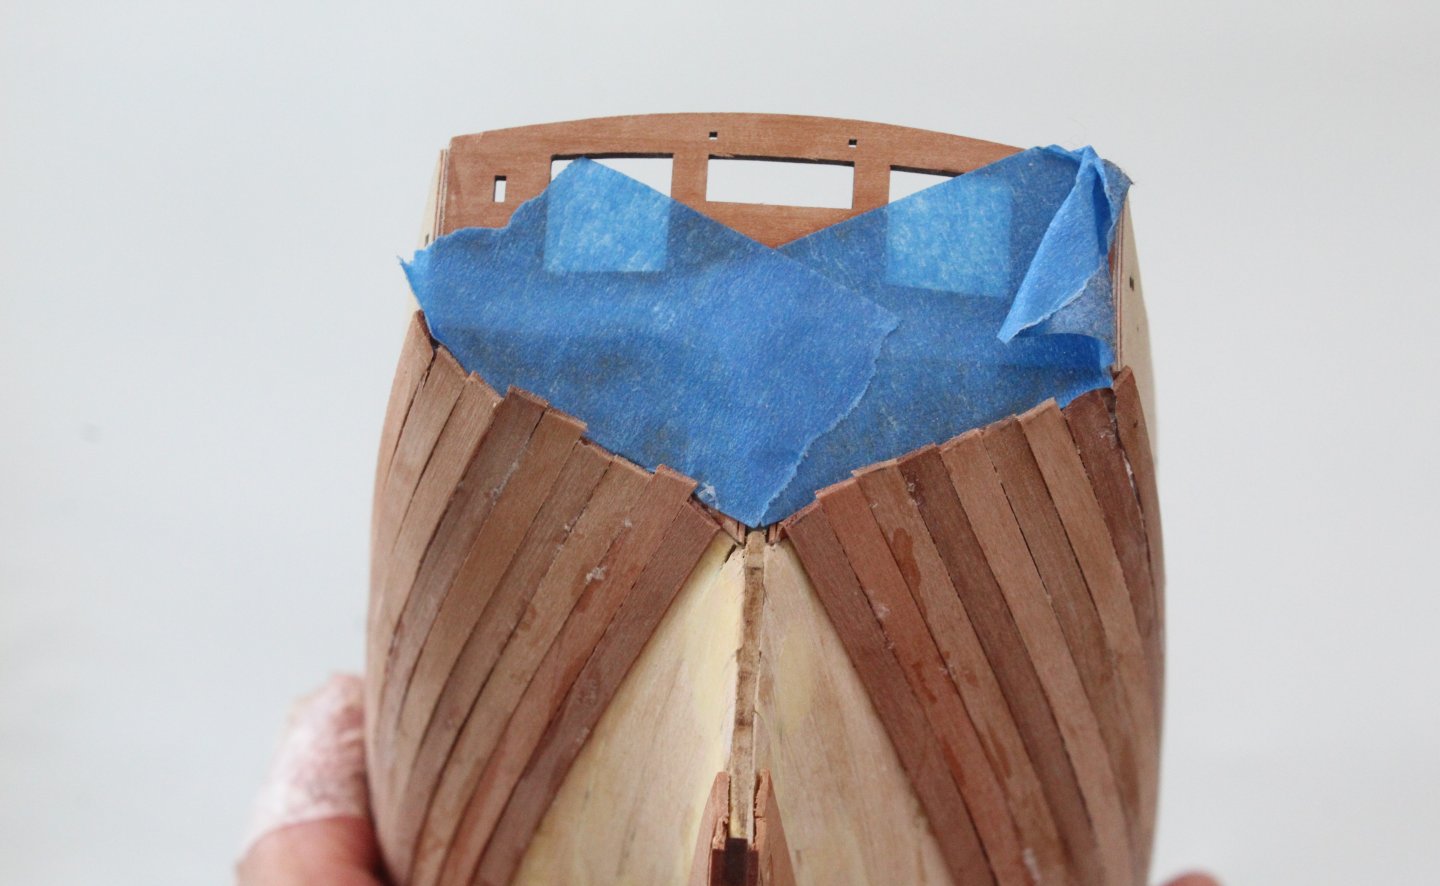
Build Log Index Date: 07/08/2024 & 08/08/2024 Time worked today: 3 hours. Total time spent on build: 33 hours. Second Planking Completed I managed to complete the second planking this morning. As this section of the hull is to be painted white I was not overly worried with the technique. The hull is now ready to be filled and sanded, as necessary prior to painting. If you have a nervous disposition, please do not look at the final photo which shows what can happen if you’re not careful when trimming planks.

-
Thanks Andrew. Probably should have gone to A&E to get it stitched. It is a bit sore and I seemed to have stopped leaking copious amounts of red fluid so it just needs time to heal.
-
Many thanks for you comments. Finger is a bit sore and will take a few day to heal. Hoping to resume in the morning.
-
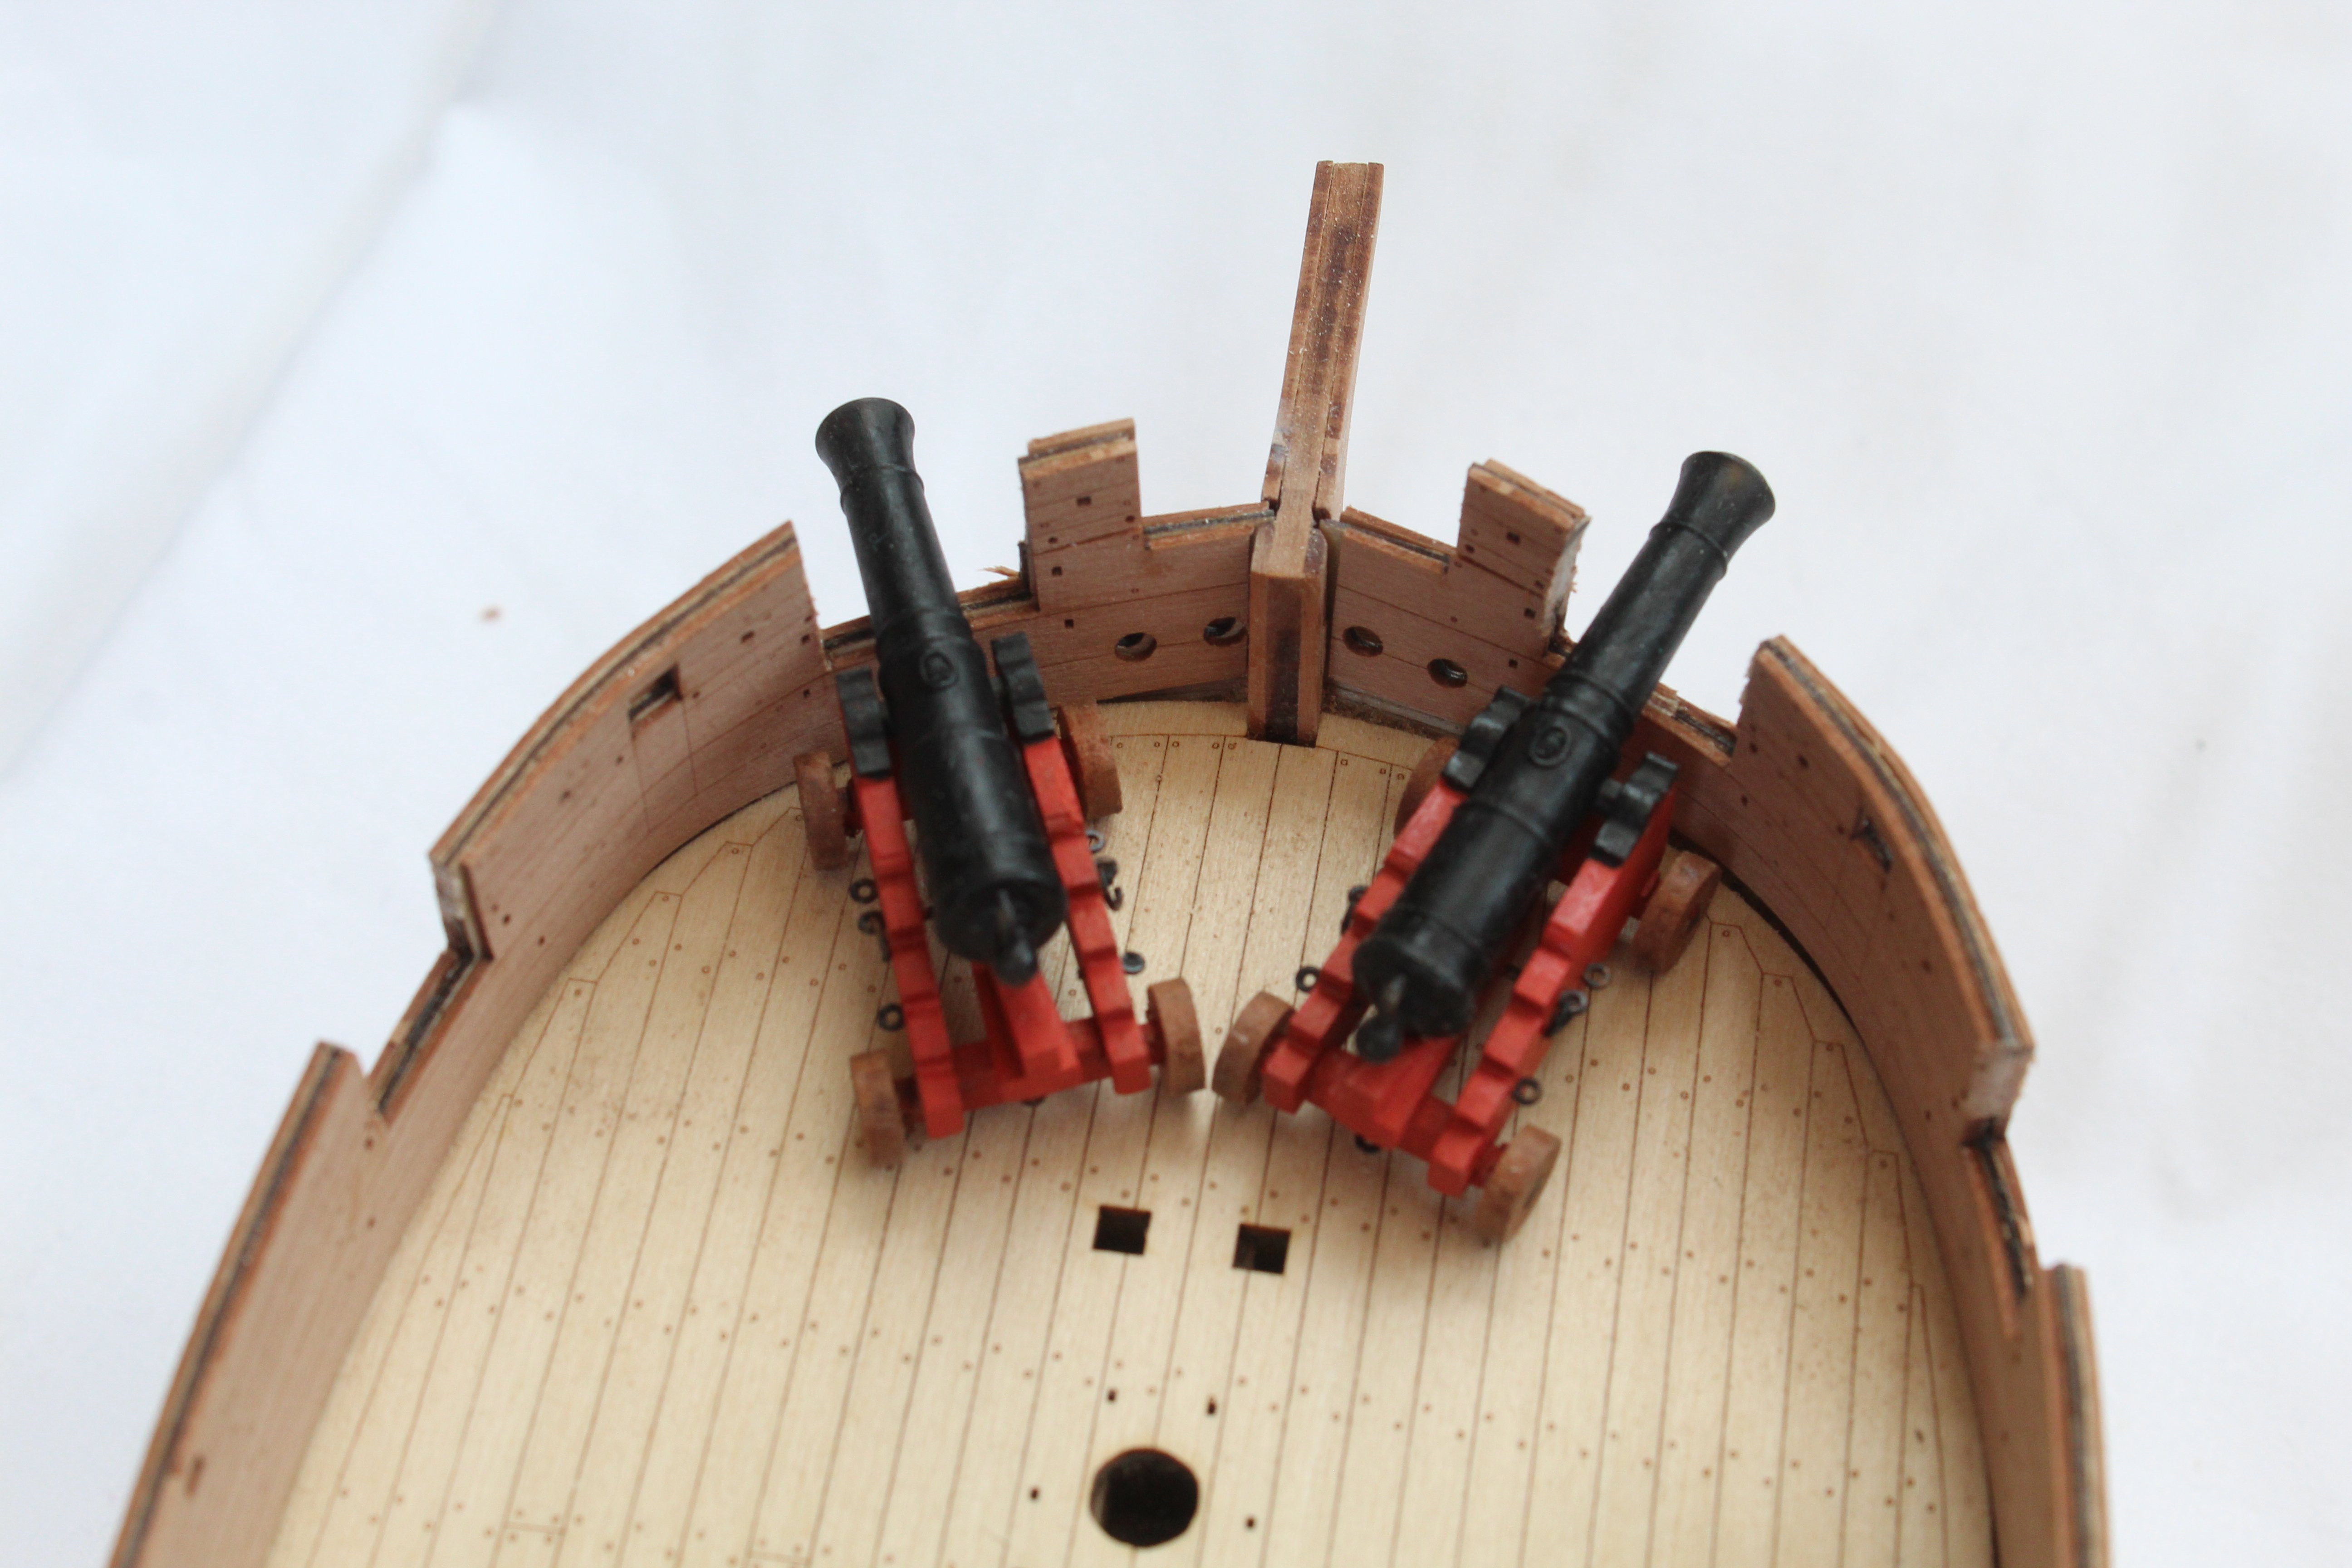
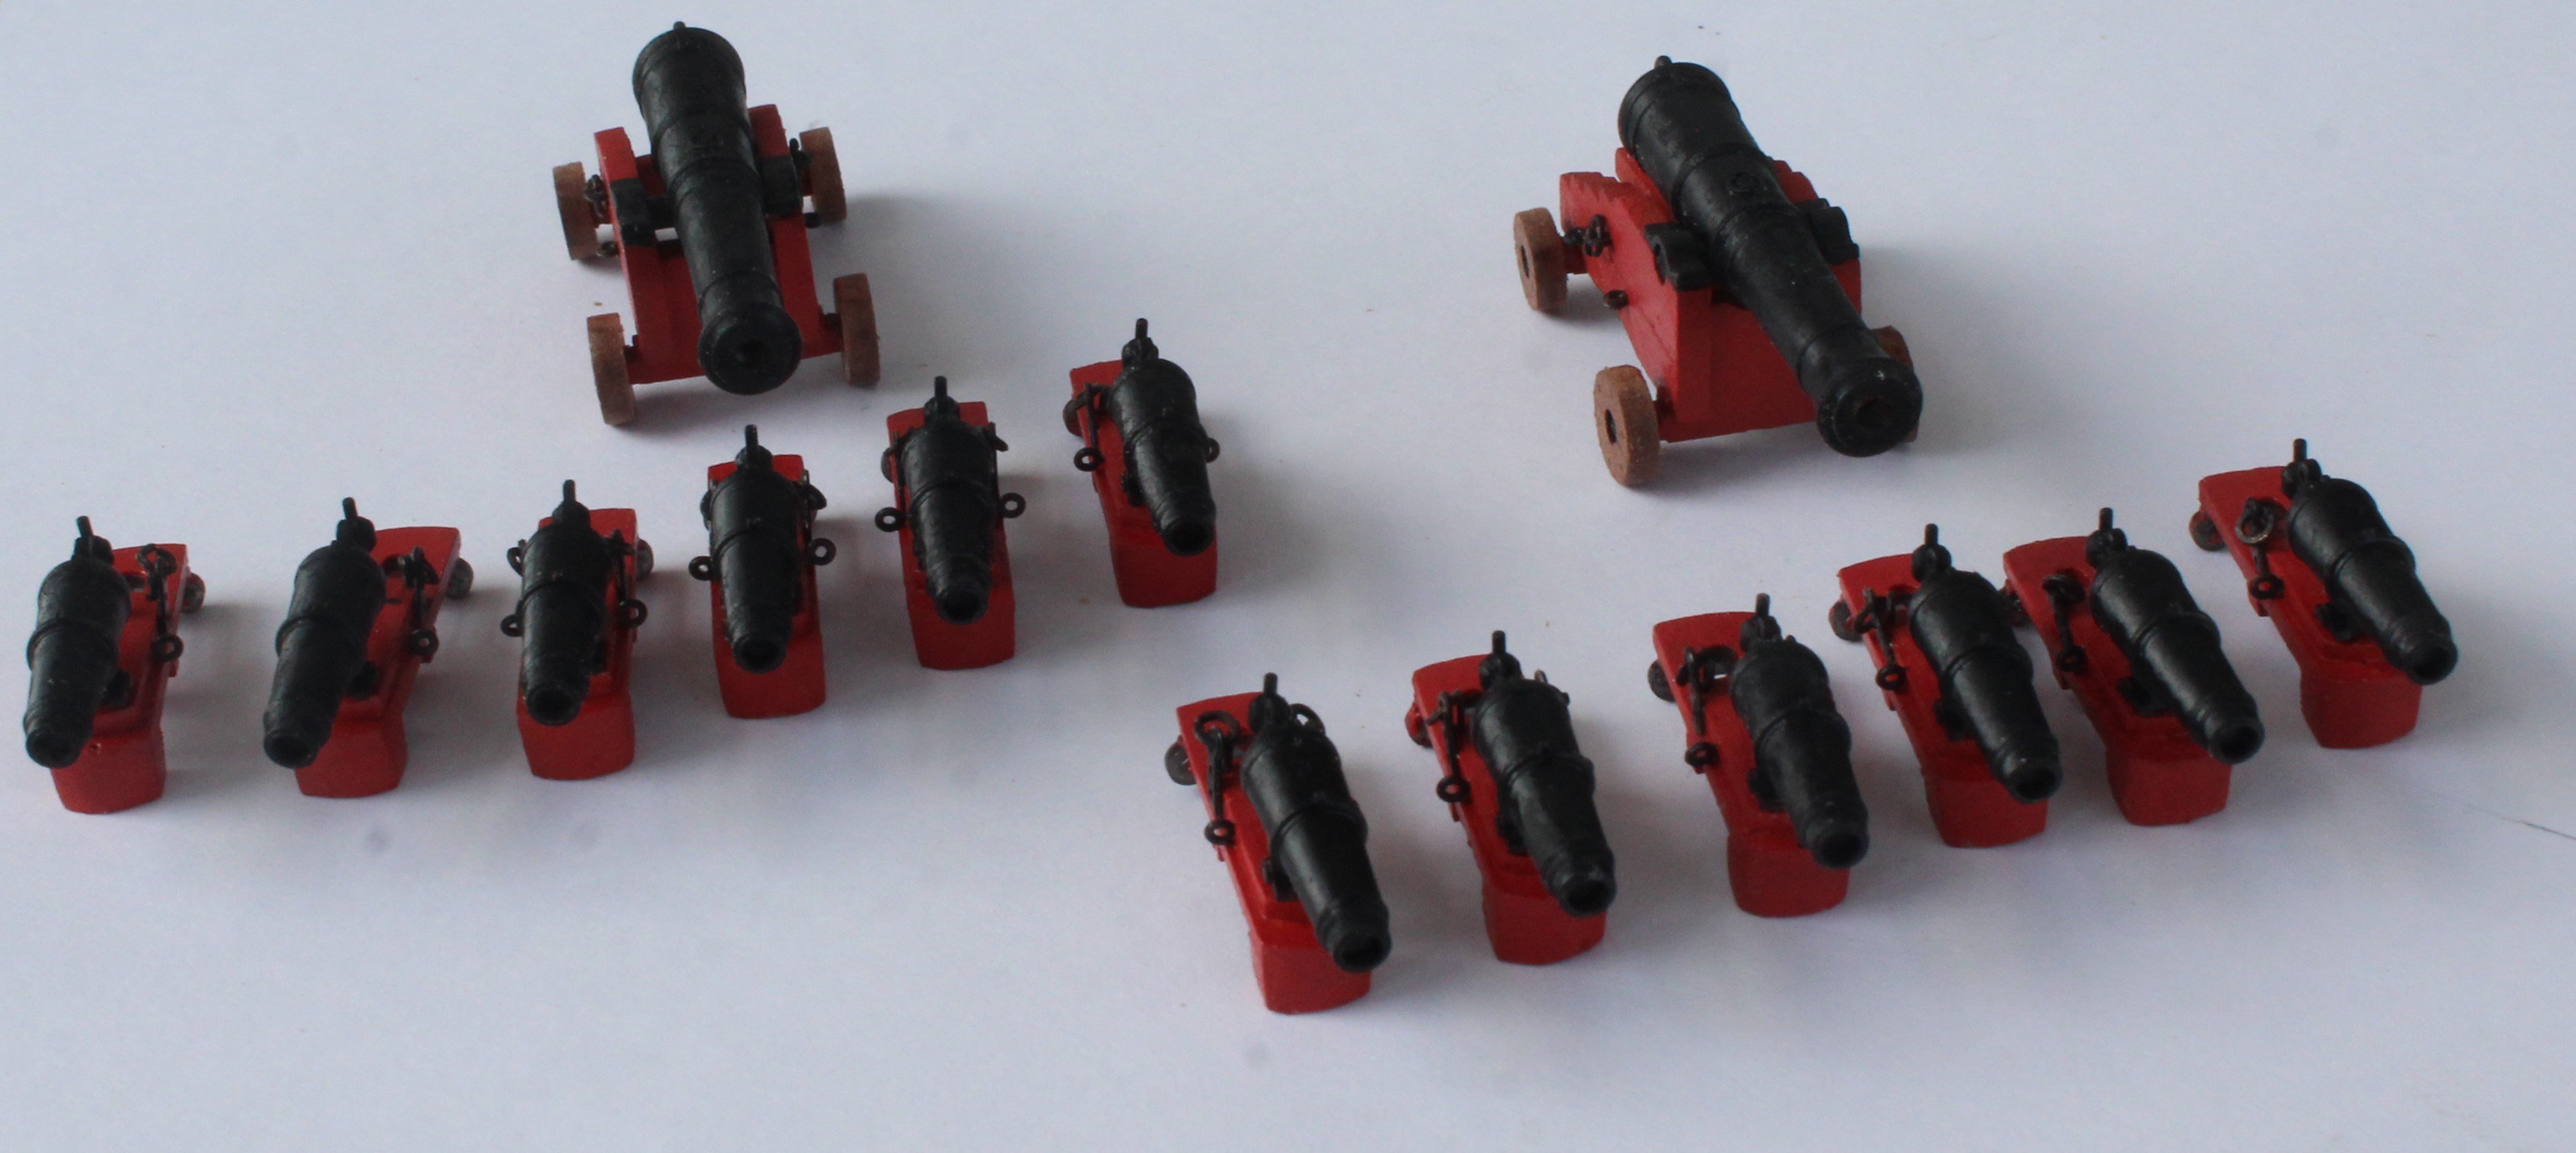
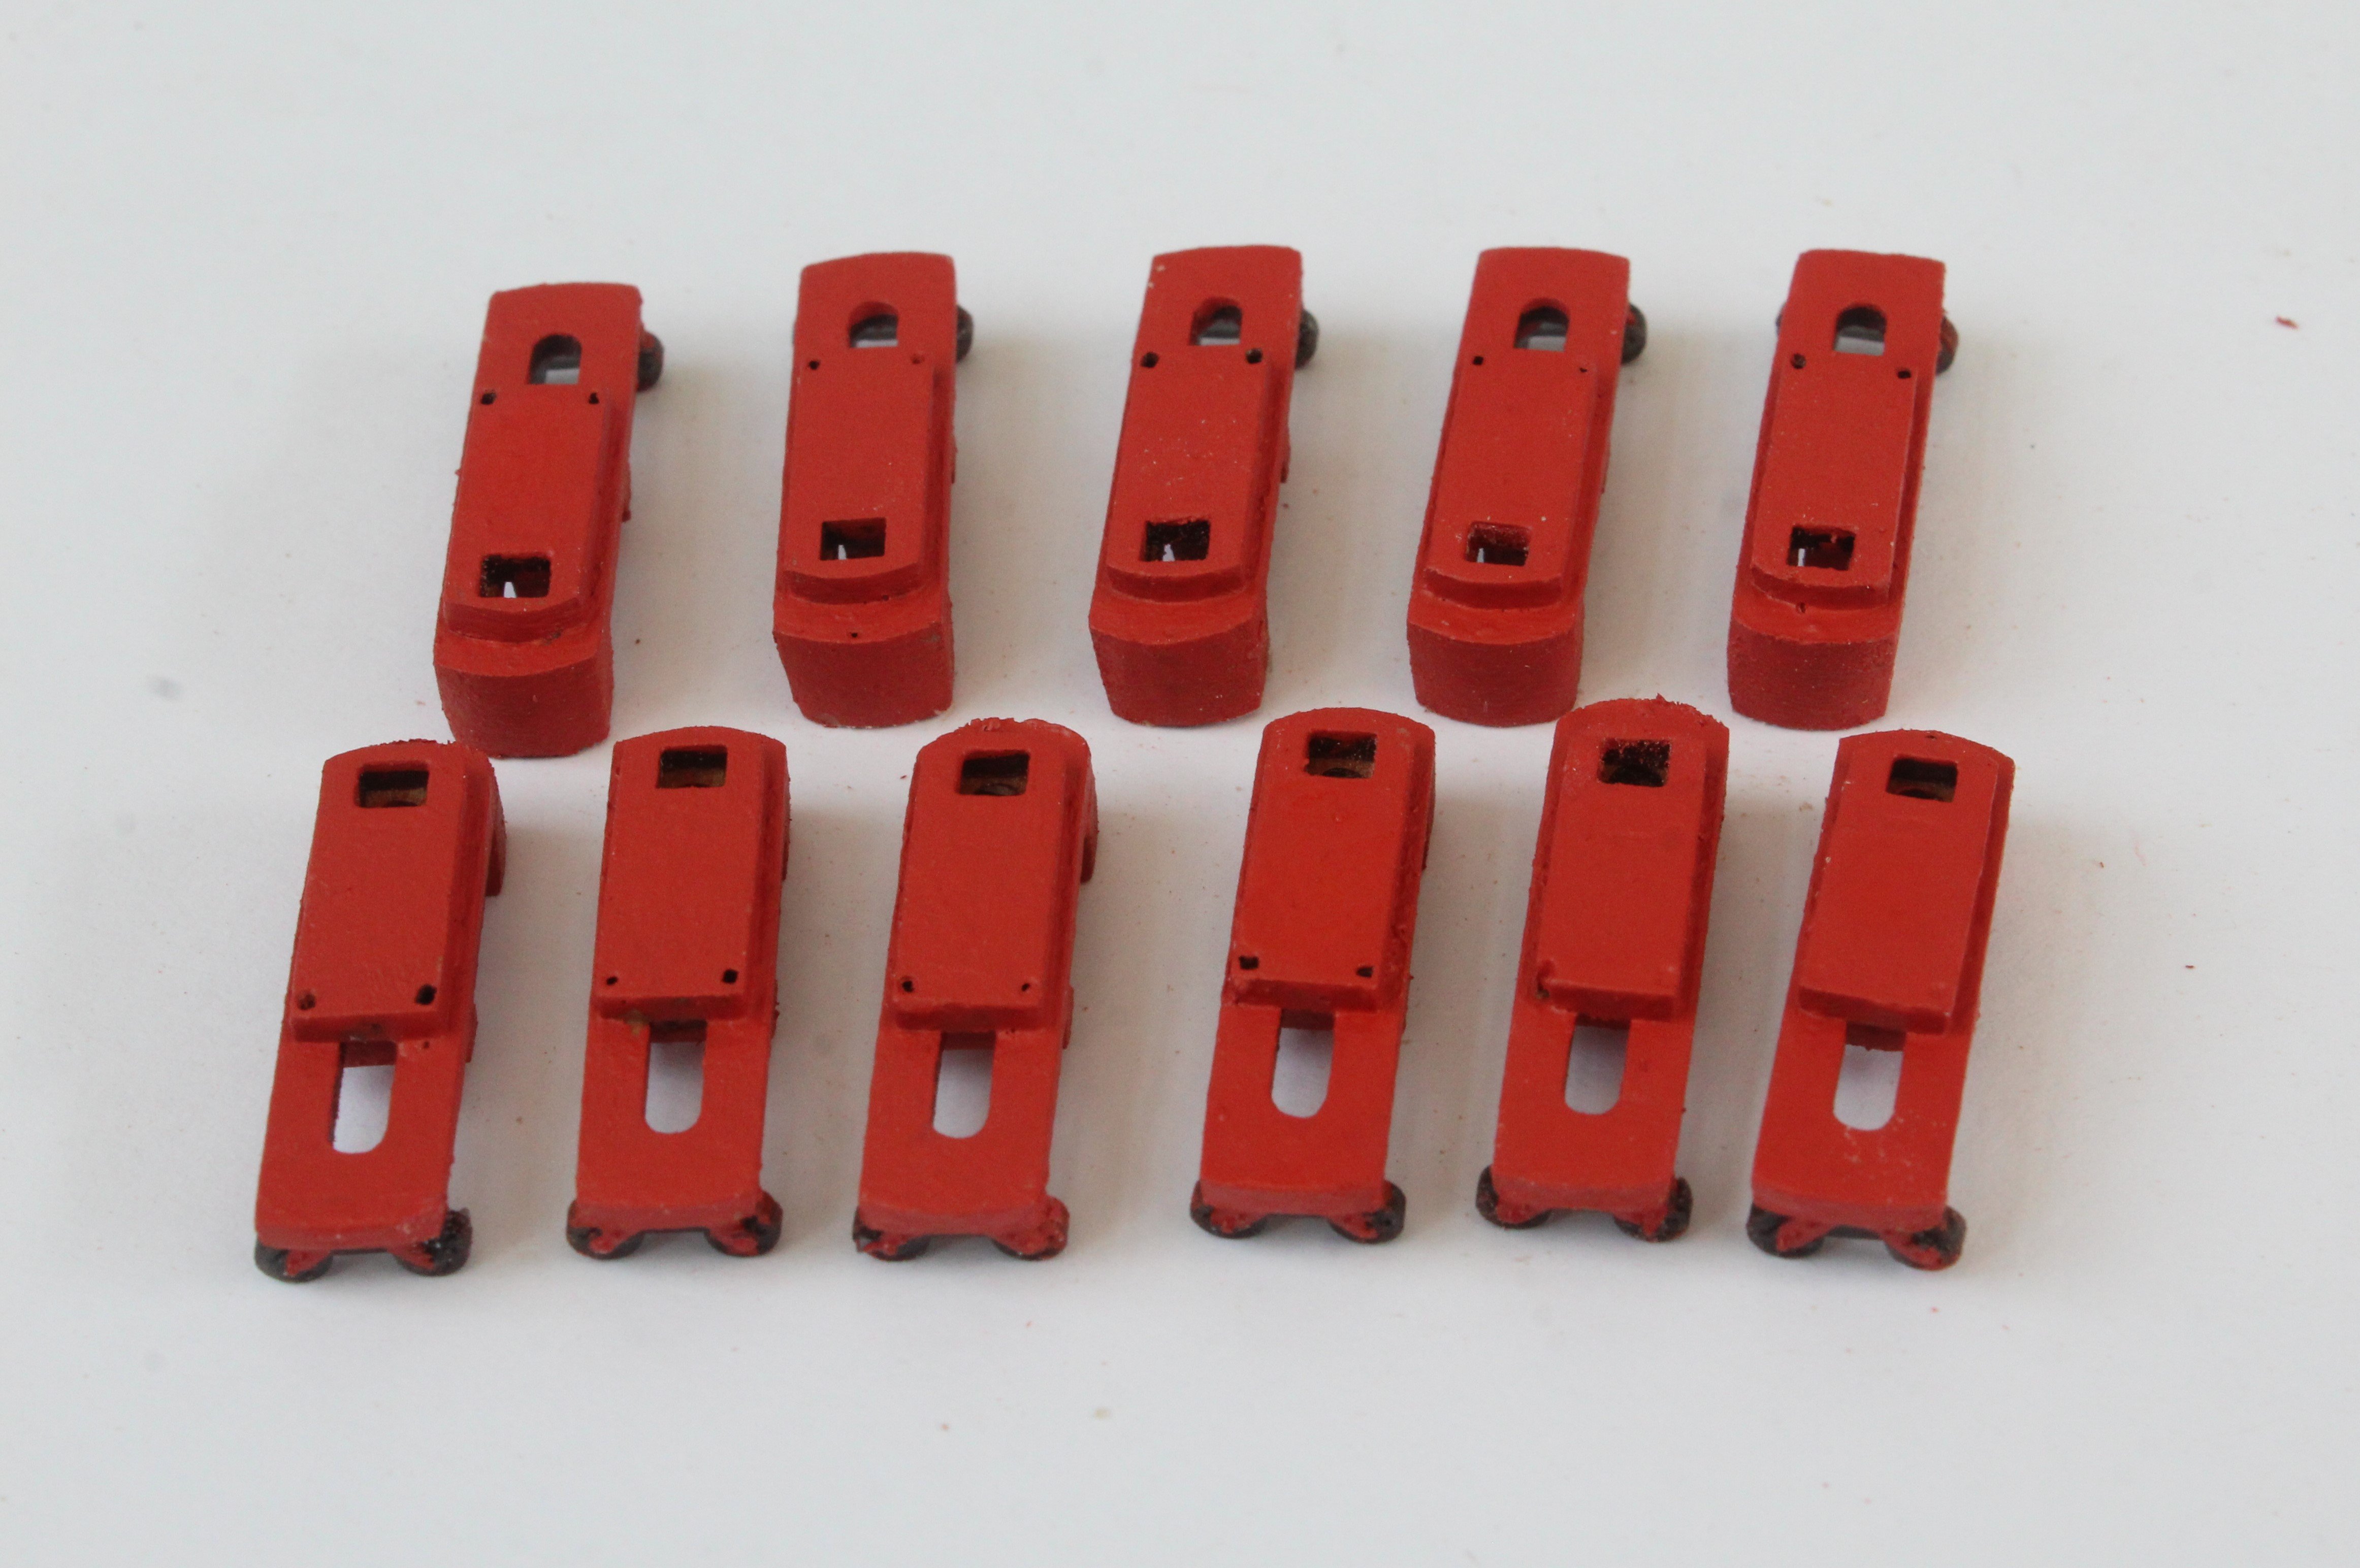
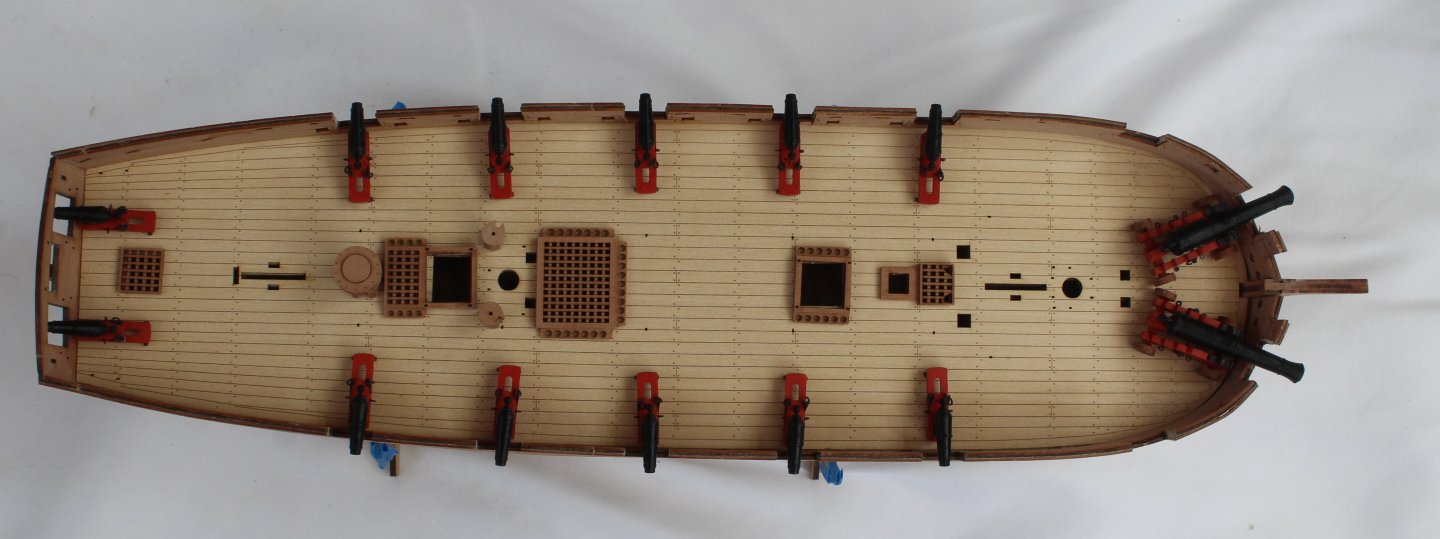
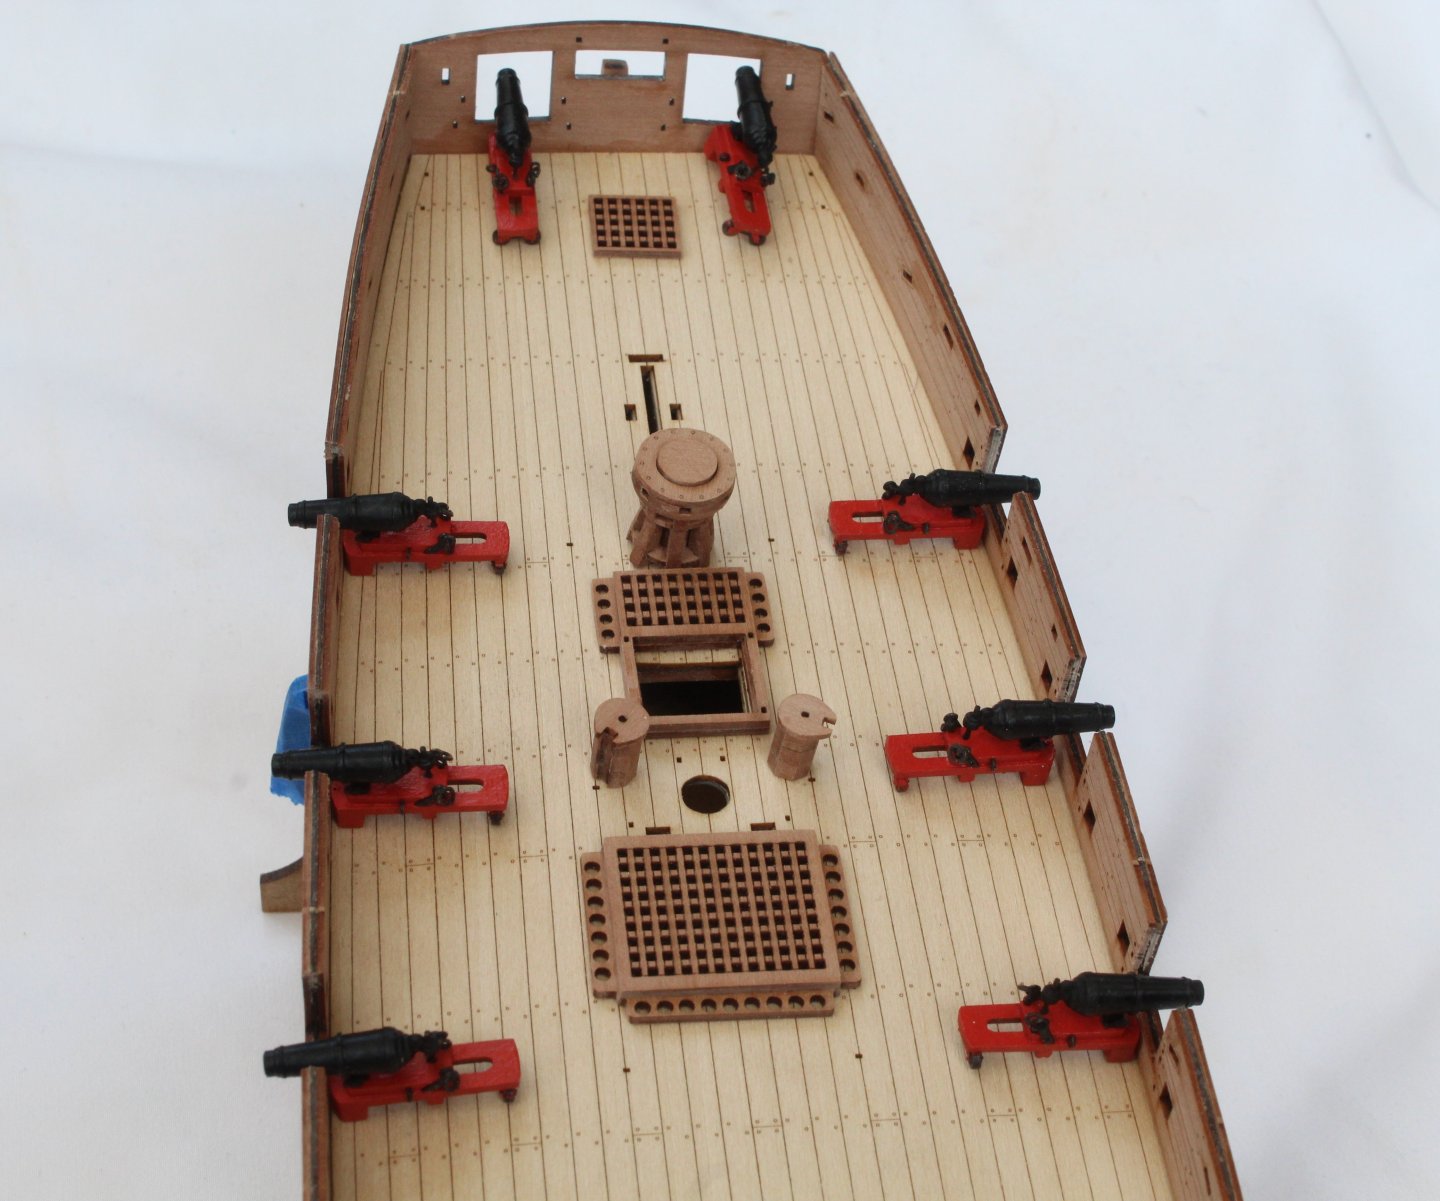
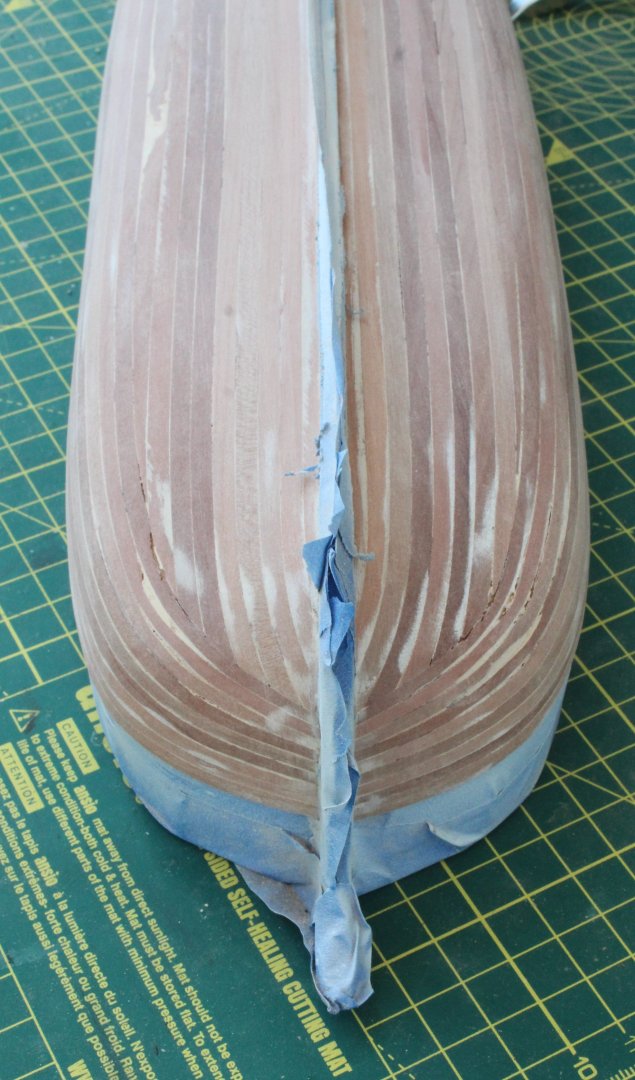
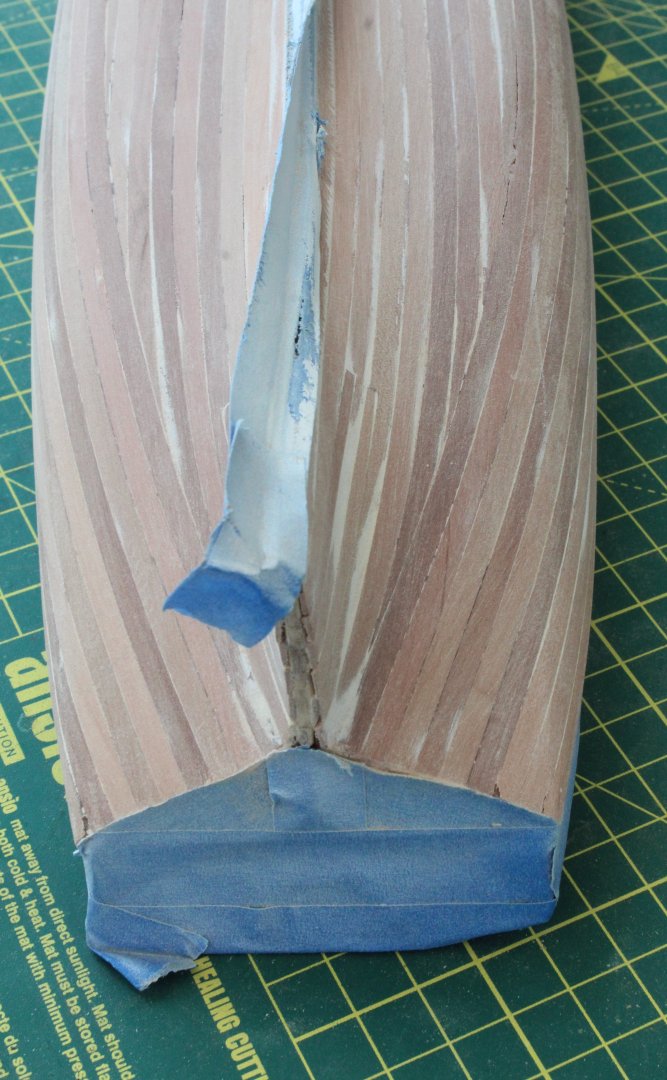
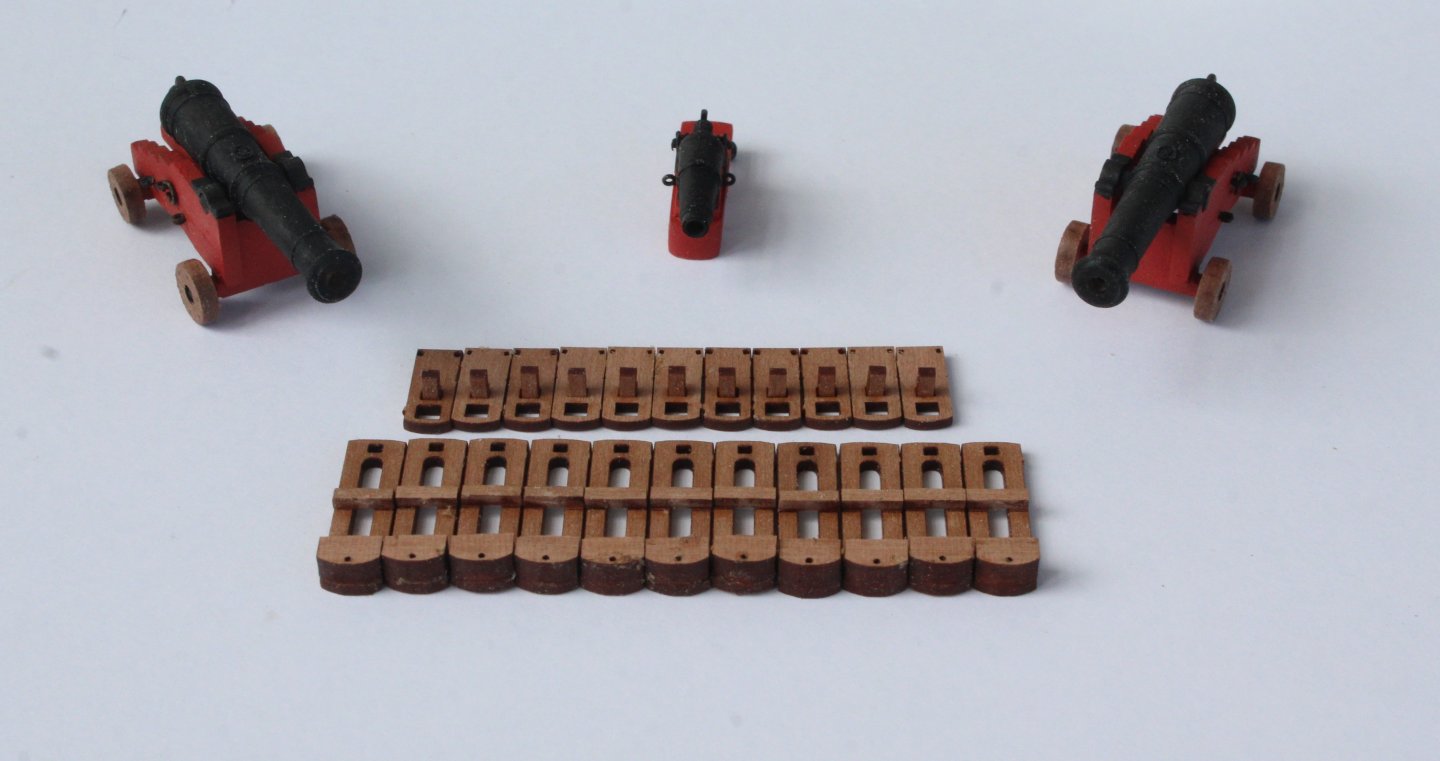
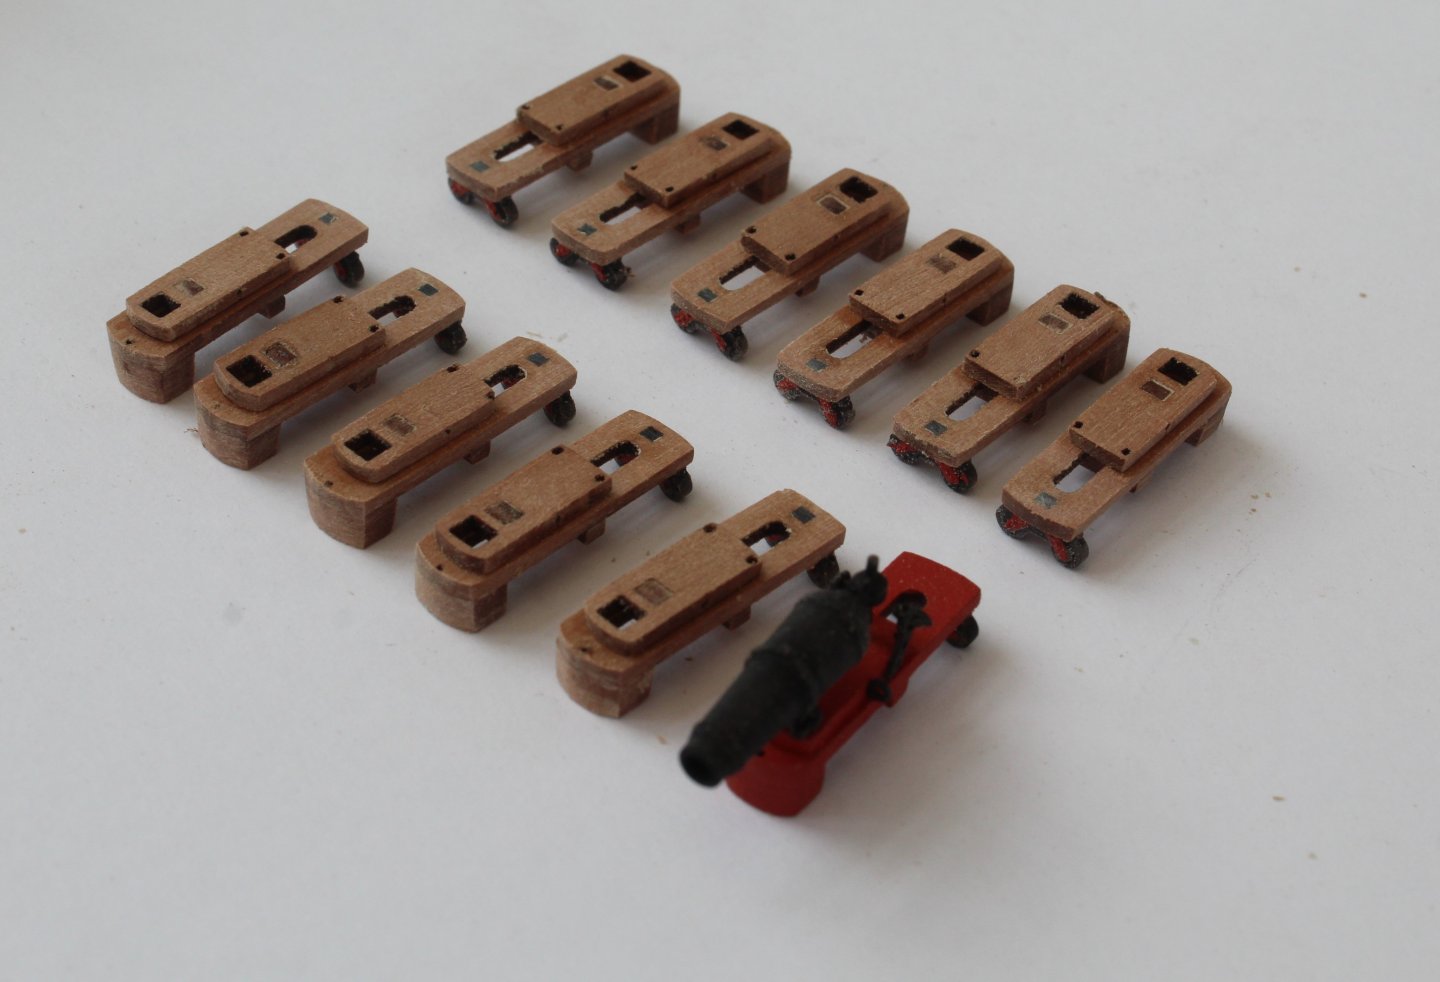
Build Log Index Date: 07/08/2023 & 08/08/2023 Time worked today: 6 hours. Total time spent on build: 30 hours. Completion of Carronade’s I have now added the various PE parts and barrels to the carronade carriages. I started by fitting the 4 off eyebolts to each assembly. Once that was done, I then added the ringbolt straps and breeching ringbolts to each assembly. The final task was to glue the barrels to their respective sliding beds. Garboard Plank As reported in my last post I was finding it very difficult to shape the bow end of the garboard plank and decided to take a break. It was a wise decision as I was quickly able to discover the problem and correct. These planks were then glued in place. Start Of Second Planking Working downward I started to add the planks. I tapered the planks down to 2mm at the bow. I did not add any taper to the stern end of each plank. I am adding a lateral plank bend to the bow section of each plank. I did tape the stern area to protect the lower pattern from any excess super glue spills. First three planks fitted. I am shaping by the left and right and planks at the same time before bending and fitting. Nine planks have now been fitted. I have also fitted a second plank next to the garboard plank. I am very pleased that by adding the planks in pairs they are looking nicely matched As I started to trim the next plank I managed to run the blade of my craft knife right across my left hand index finger resulting in a long deep cut close to the bone. I am hoping it will not hinder me too much and that I can return to the shipyard in the morning.


-
Build Log Index Date: 04/08/2024 & 05/08/2023 Time worked today: 4 hours. Total time spent on build: 25 hours. Second Planking Initial Work With the two outer bulwark side patterns clamped to the hull the first second plank was ready to be pinned in place. As can be seen in the photo below I am trying to work out the central point for the lateral plank bend. After soaking the plank in some hot water for about 1 or 2 minute it was clamped to my bending jig. I used a hair dryer for a minute or two to apply the required heat to enable the plank to retain the required bend when it was released from the jig. It was then a case of checking how the lateral bend plank fits. I am happy with how this plank looks when test fitted. A good close fit with the bulwark when it is pinned in place. I then repeated the lateral bend process for the first plank on the other side. There when then pinned to the hull and the two outer bulwark side patterns were then removed for the time being. As I am currently waiting for a delivery of super glue I am unable to start adding planks below the pinned plank. Therefore I decided to look the garboard plank. Using a spare piece of 0.6mm strip wood I made a template which seem to be a good fit. However, transferring the bow shaping from the template to a test piece of 0.8mm planking material I found it very difficult to get the bow shaping to fit in the rabbet. As I could not work out what the problem was I decided it was better to take a break and therefore decided to start making the remaining 11 off carronades. Carronade’s The various wooden parts were glued to their respective carriage and to the slide bed assemblies. After removing the laser char the slide bed assembly was glued to the carriage assembly. The carronade wheels were also added at this stage. Once the glue has dried the top of the side pin was sanded smooth with the slide bed. The top of the wheel assembly was also sanded smooth with the carriage base. A light coat of varnish was then brushed on each carronade assembly and once dried a couple coats of flat red paint was brushed on each assembly. The carronade’s just require the PE parts and barrel to be fitted.


-
Hello Andrew, many thanks
-
Many thanks. It is a sharp bend around the bow. I plan to experiment with some laterally bent planks as I think that make the second planking much easier to do.
-
Many thanks Bob, your comments are greatly appreciated.
-
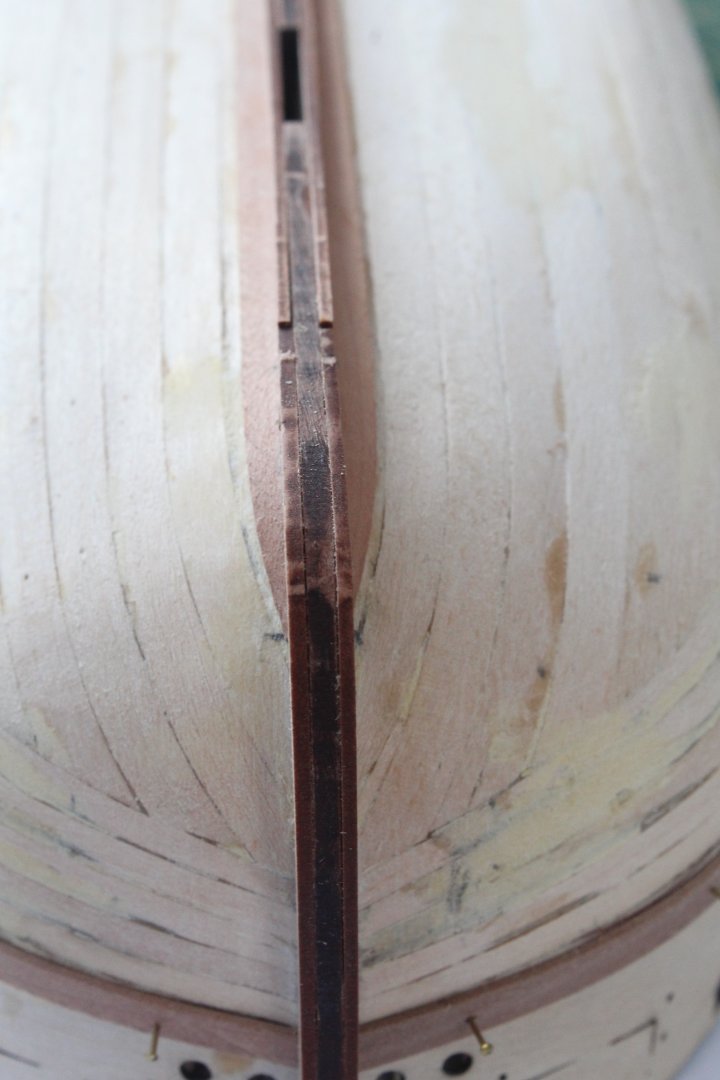
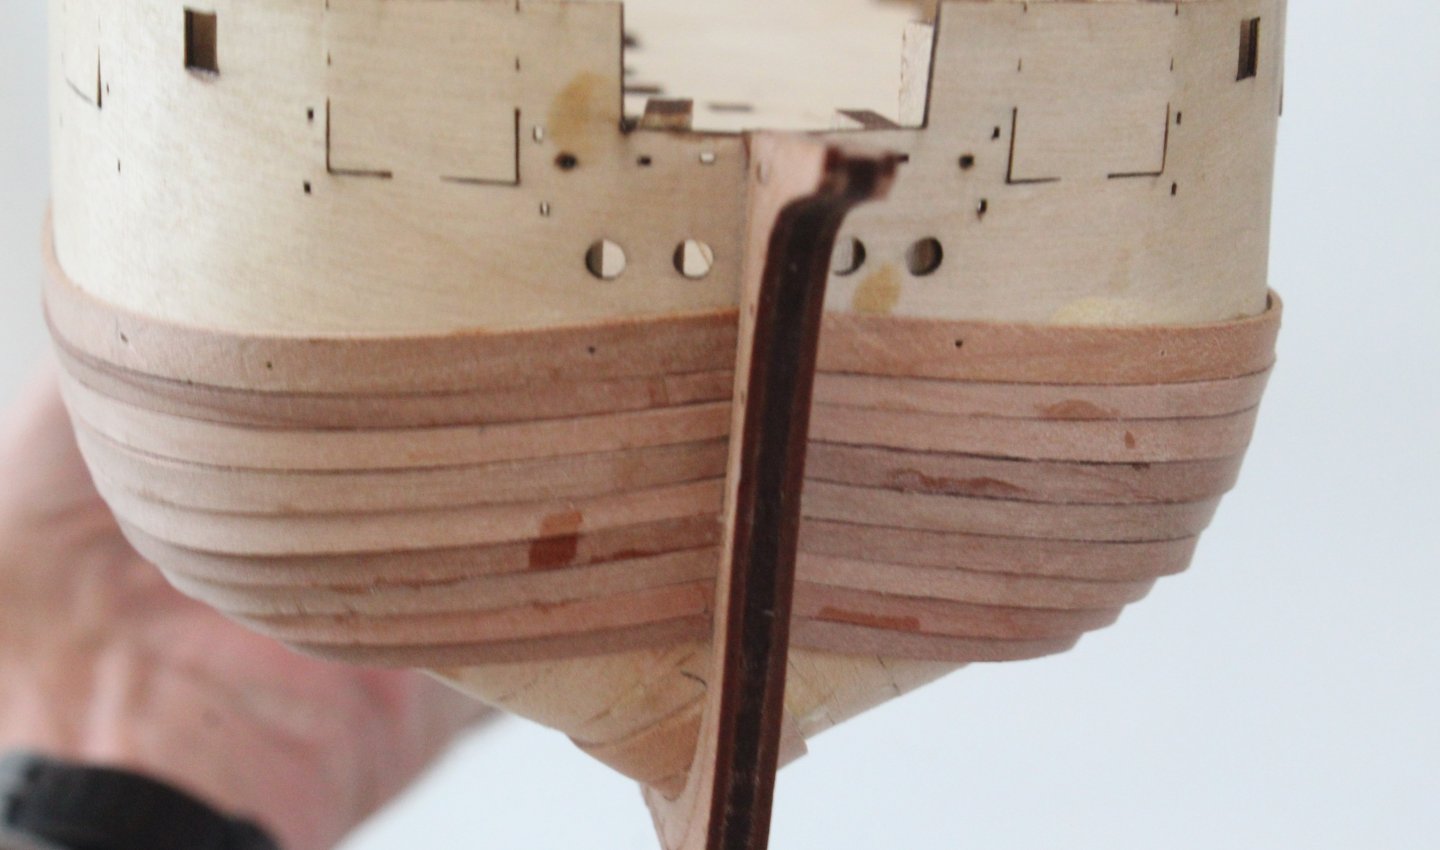
Build Log Index Date: 04/08/2024 Time worked today: 2 hours. Total time spent on build: 21 hours. Pre Second Planking Work After a fabulous 8 days cruising along the Blue Danube it is time to return to the shipyard. Before starting the 2nd planking there are a few tasks to complete. Stern Transom (Lower Outer) After brushing some wood glue to the hull the stern transom (lower outer) pattern was added. To ensure this pattern was correctly positioned I did clamp the stern transom (upper outer) to the hull (not shown in the attached photos). The bottom edges of the stern transom (lower outer) were then sanded so they followed the flow of the hull planking. Main Keel The two main keel parts were then added to the hull. Prow Patterns The two outer prow patterns were the next parts to be added to the hull, using the locating tabs provided with the kit to ensure they correctly aligned. The excess locating tab material was trimmed and sanded smooth. Lower Keel Patters The two outer keel patterns were the next parts to be added to the hull, using the locating tabs provided with the kit to ensure they correctly aligned. The excess locating tab material was trimmed and sanded smooth. Outer Bulwark Side Patterns The two outer bulwark side patterns were soaked in hot water and then clamped to the hull and were left overnight to fully dry out. They will not be glued to the hull for the time being but will be clamped in place to get the correct planking line for the first second planking strip. They will then be removed to protect the engraved lines. They will then be fitted after the hull has been painted.


-
Thanks Uwe