HOLIDAY DONATION DRIVE - SUPPORT MSW - DO YOUR PART TO KEEP THIS GREAT FORUM GOING! (89 donations so far out of 49,000 members - C'mon guys!)
×


Glenn-UK
-
Posts
3,164 -
Joined
-
Last visited
Content Type
Profiles
Forums
Gallery
Events
Everything posted by Glenn-UK
-
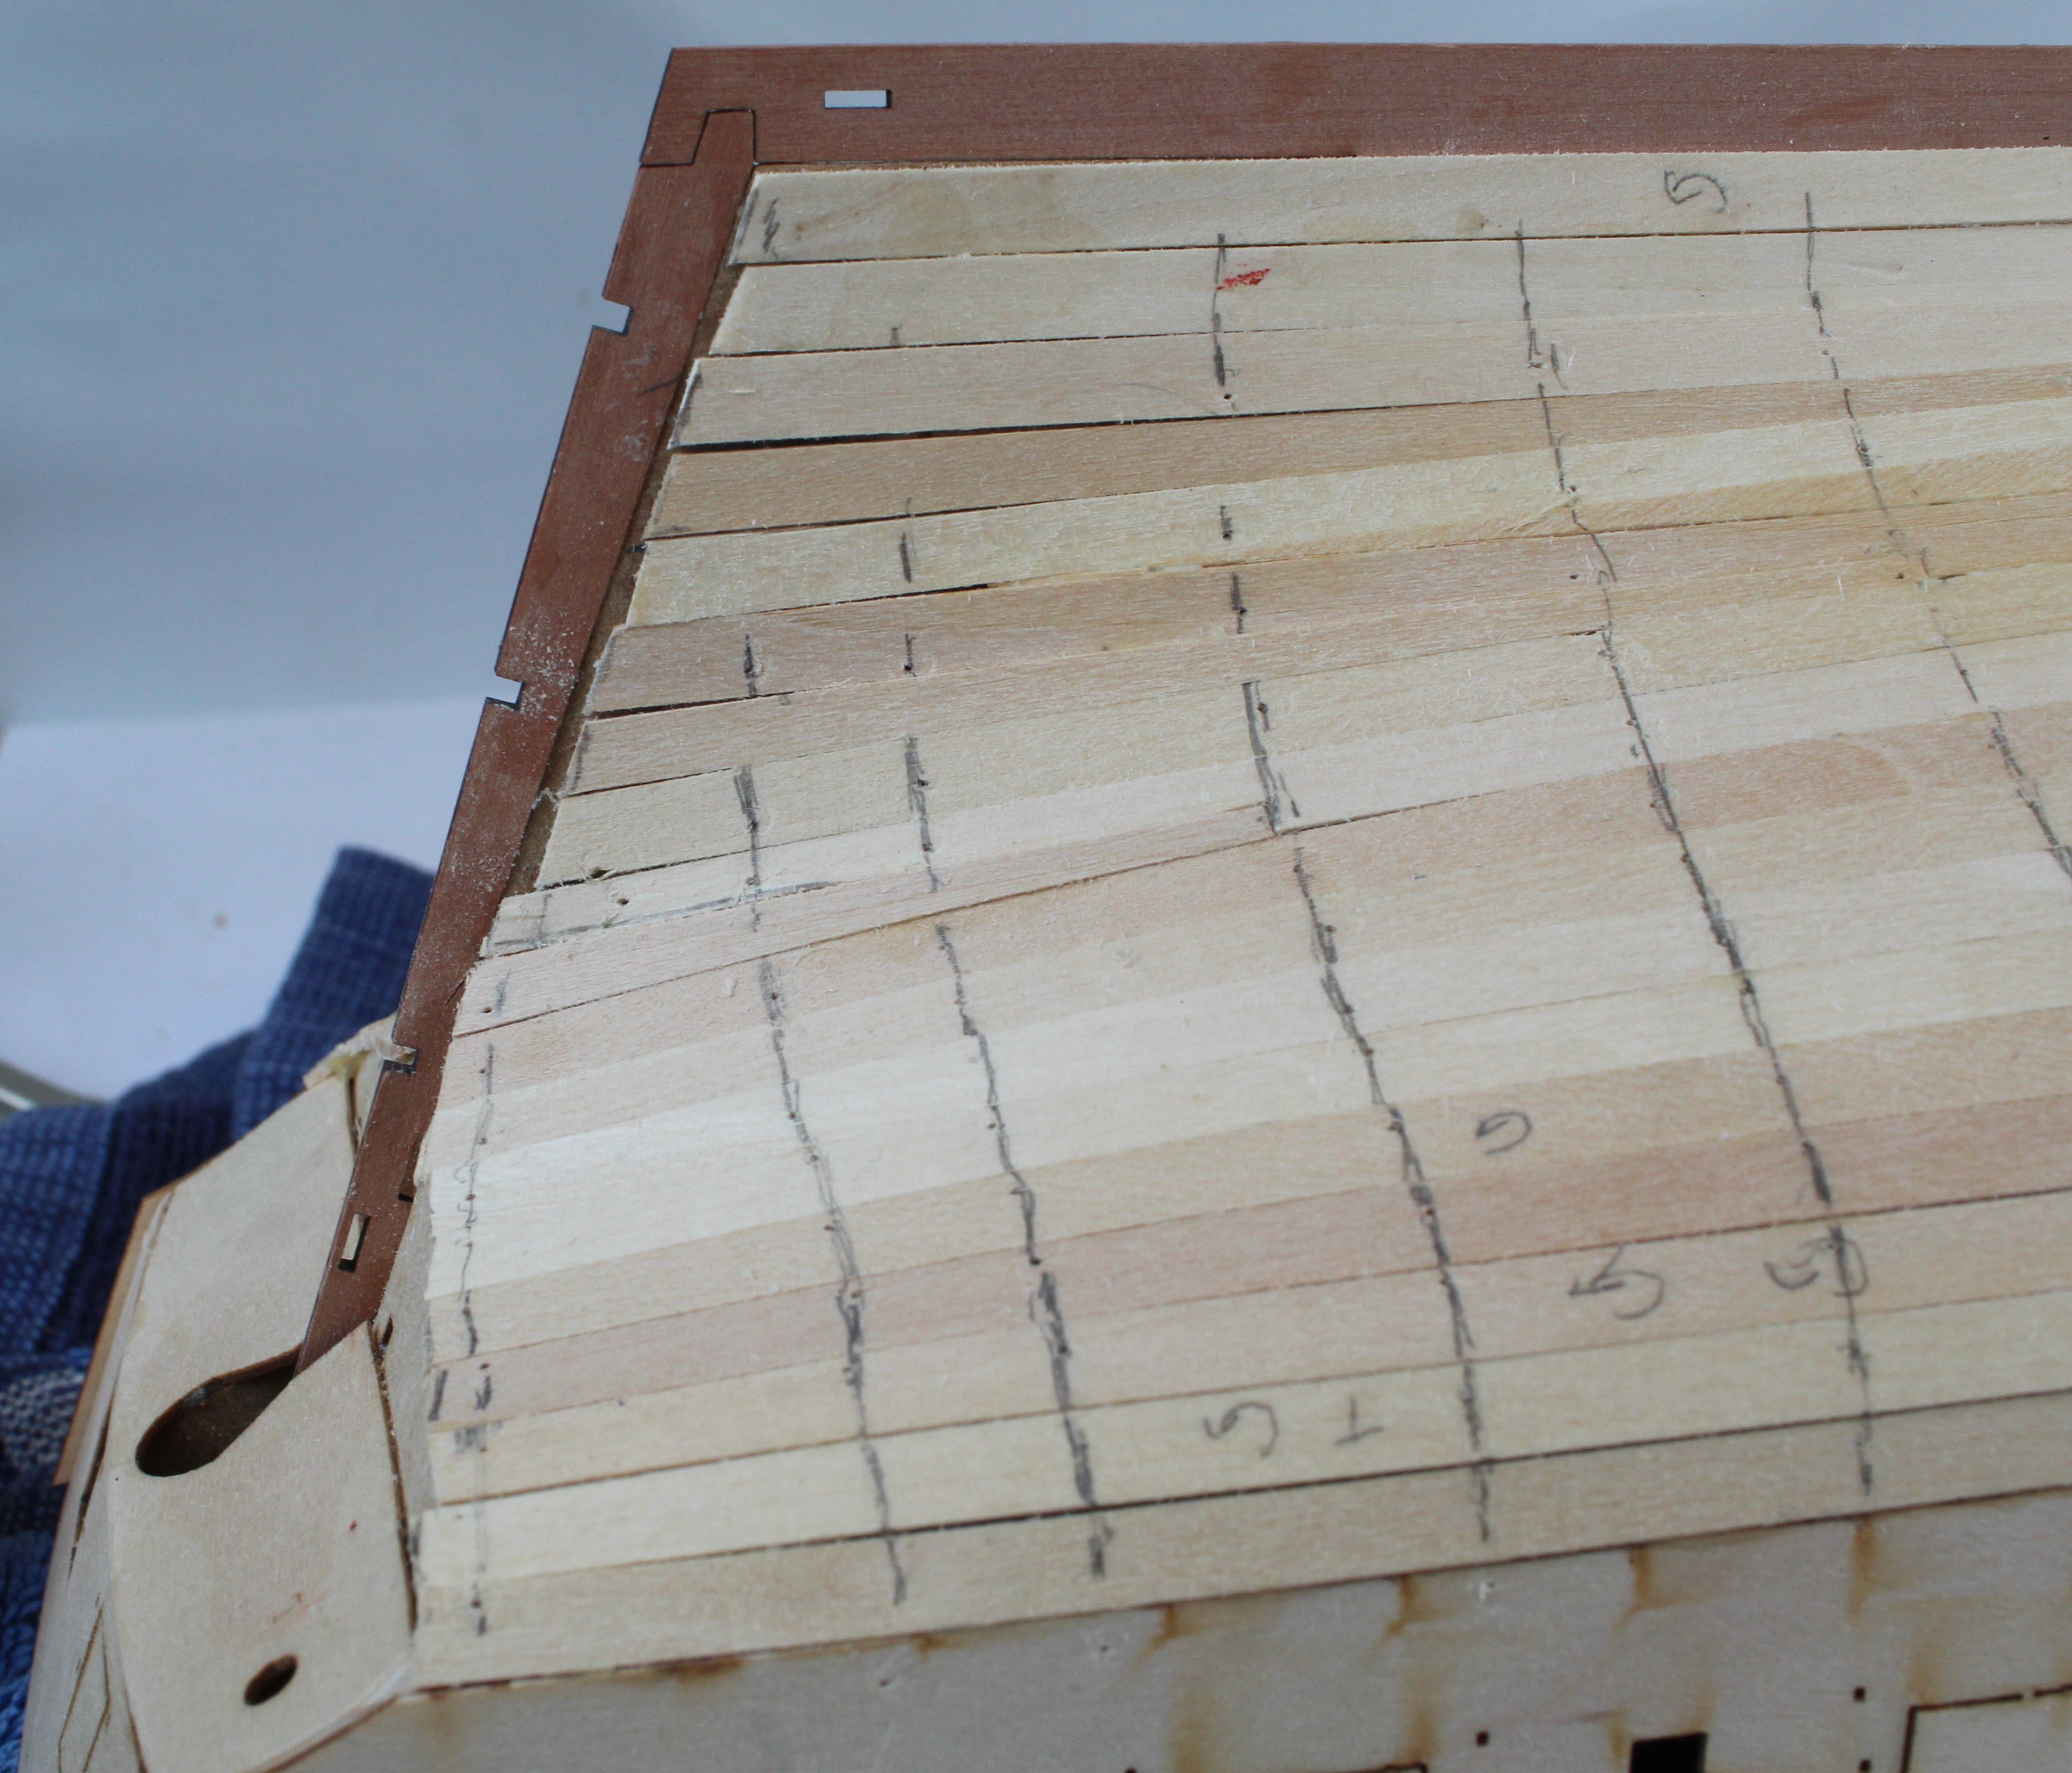
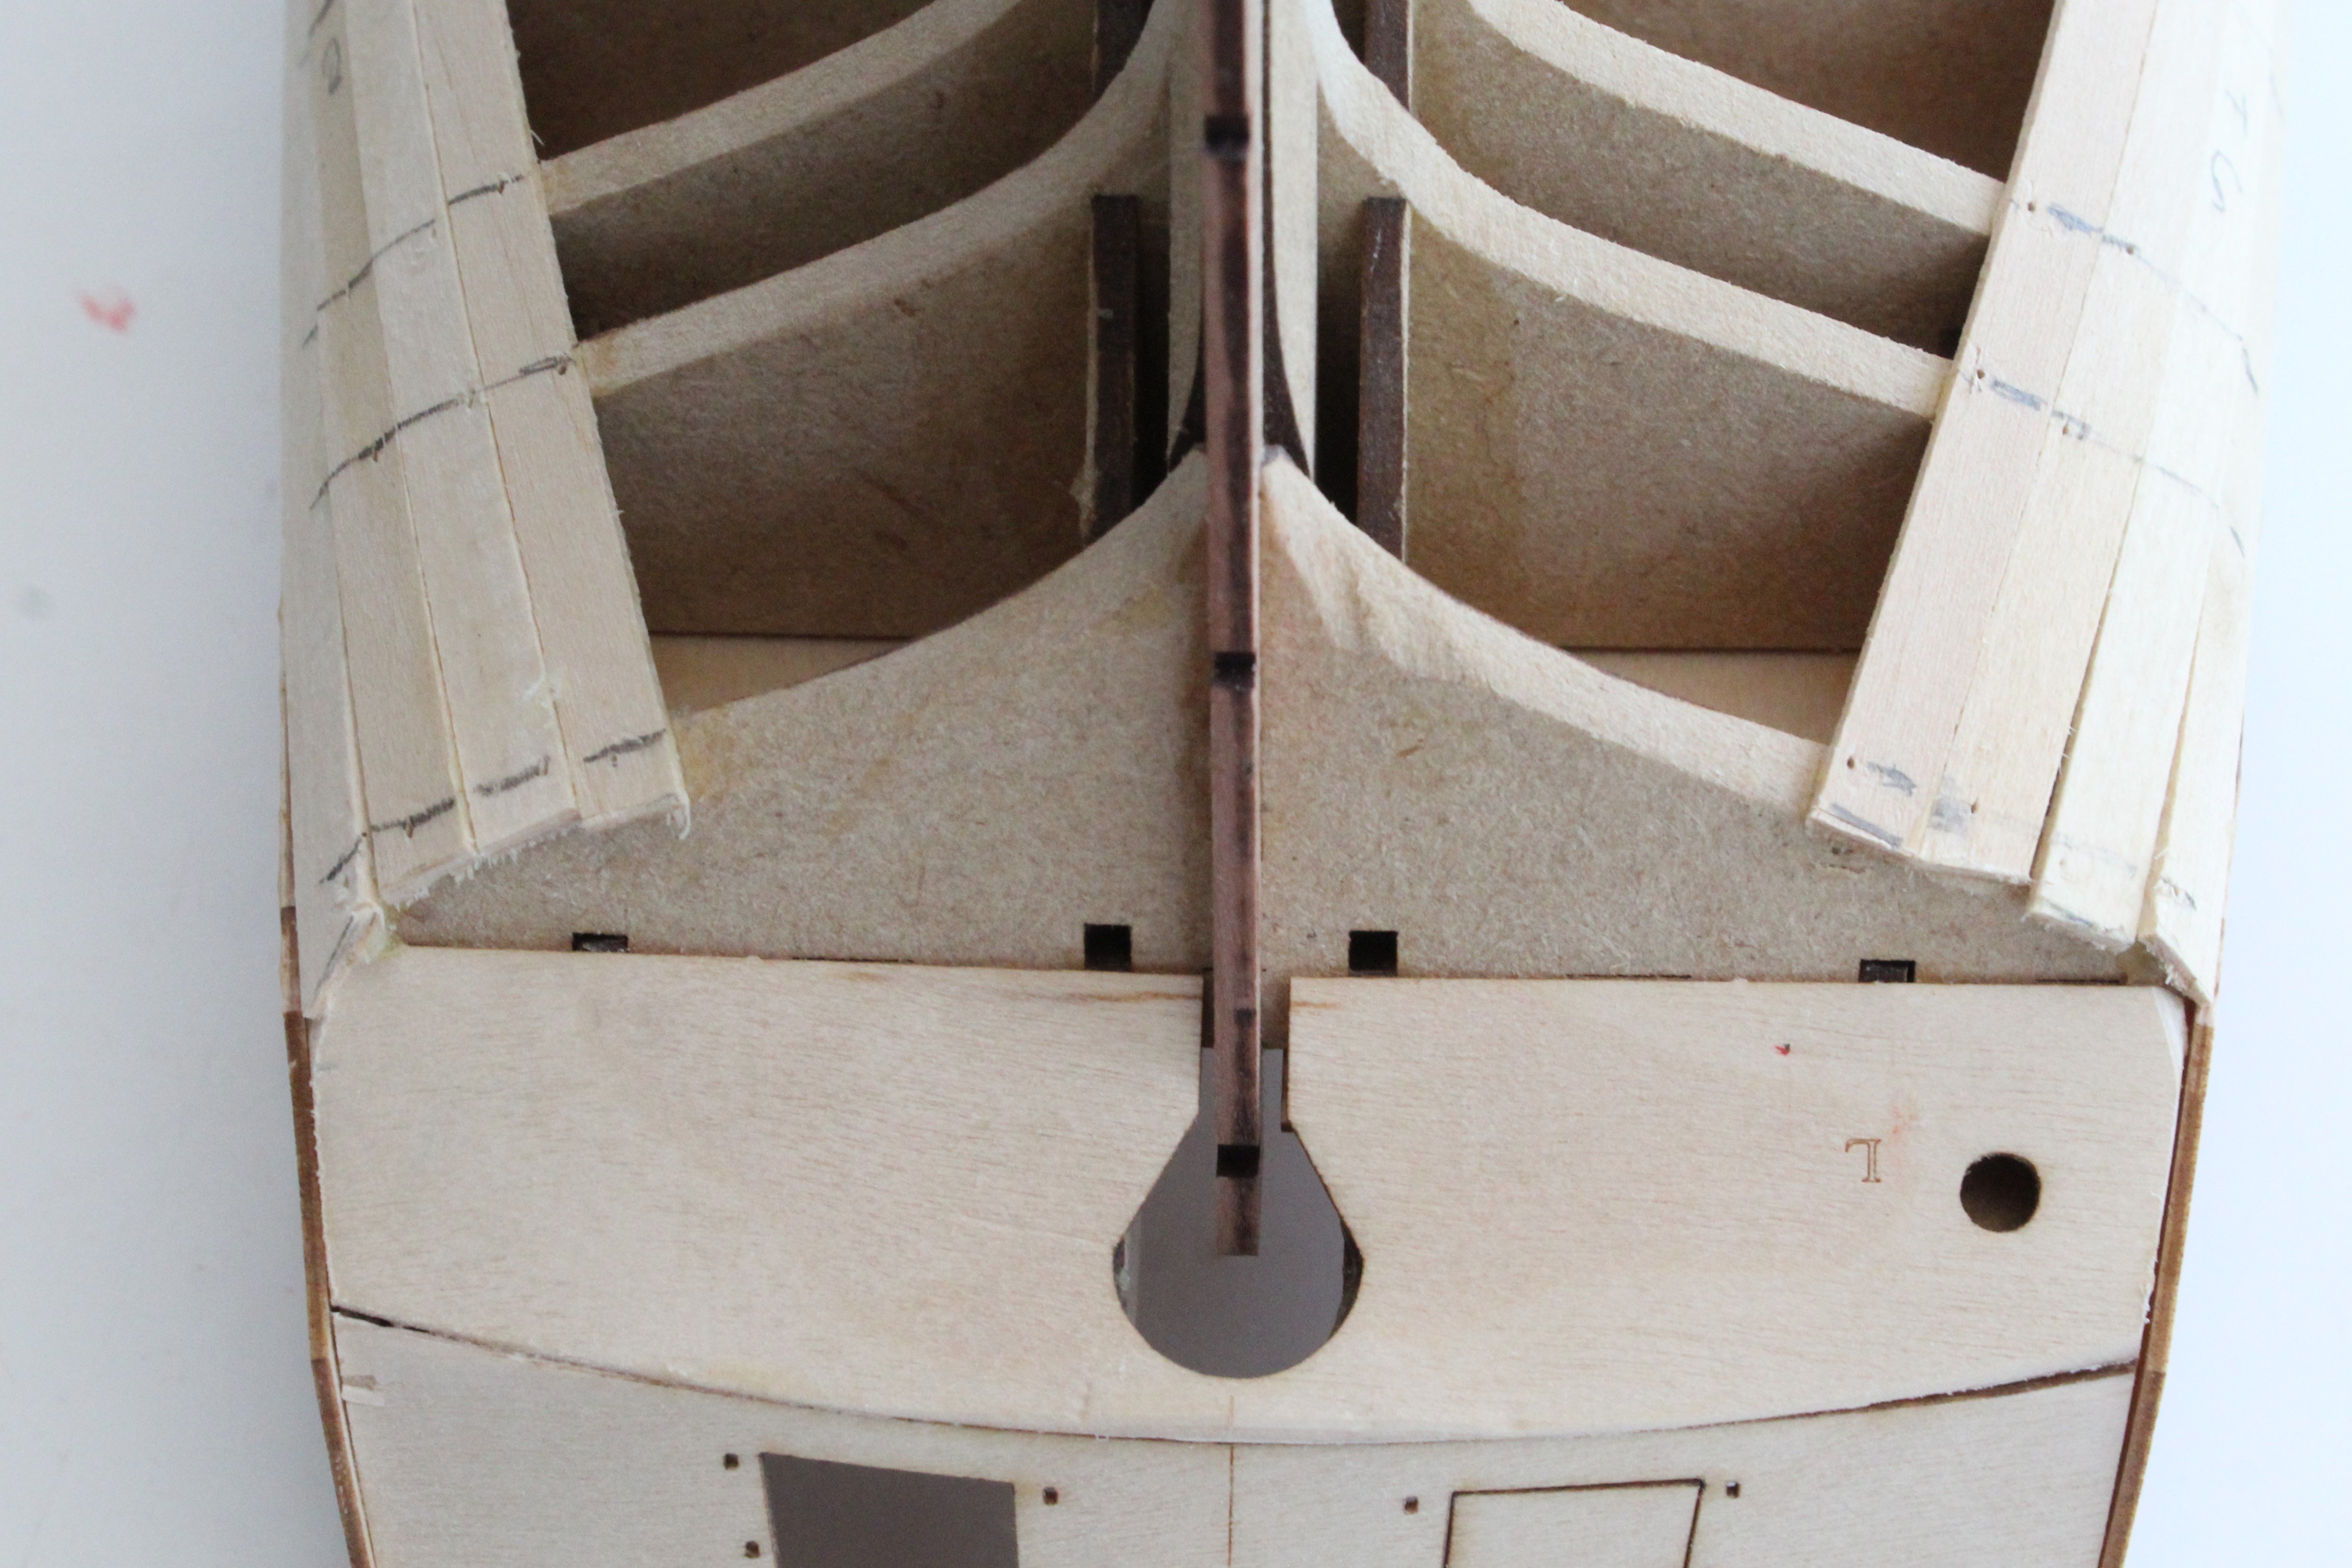
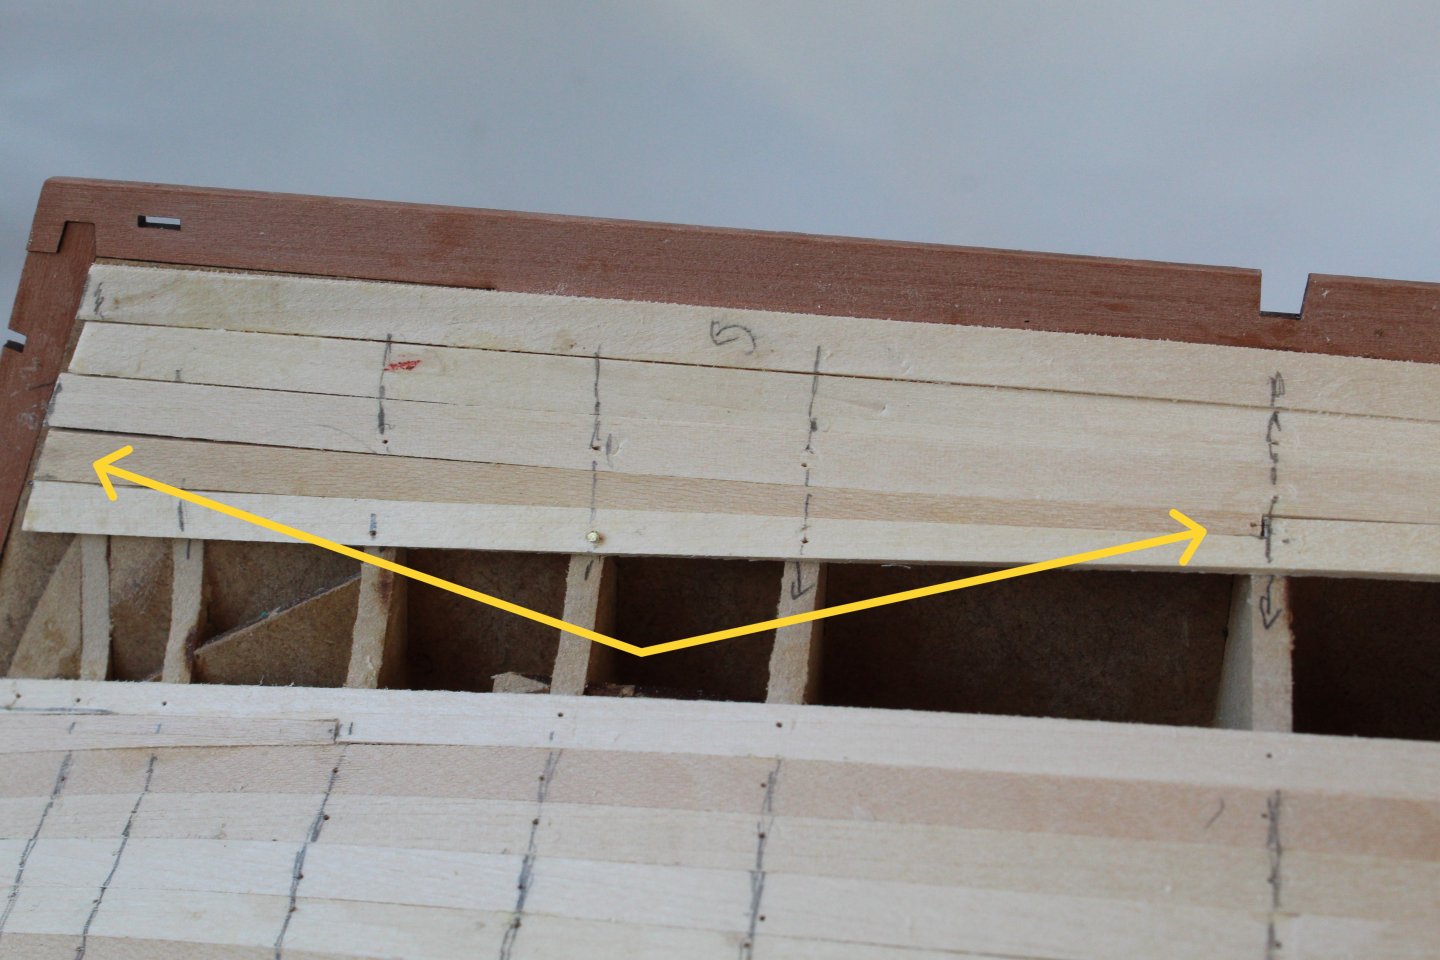
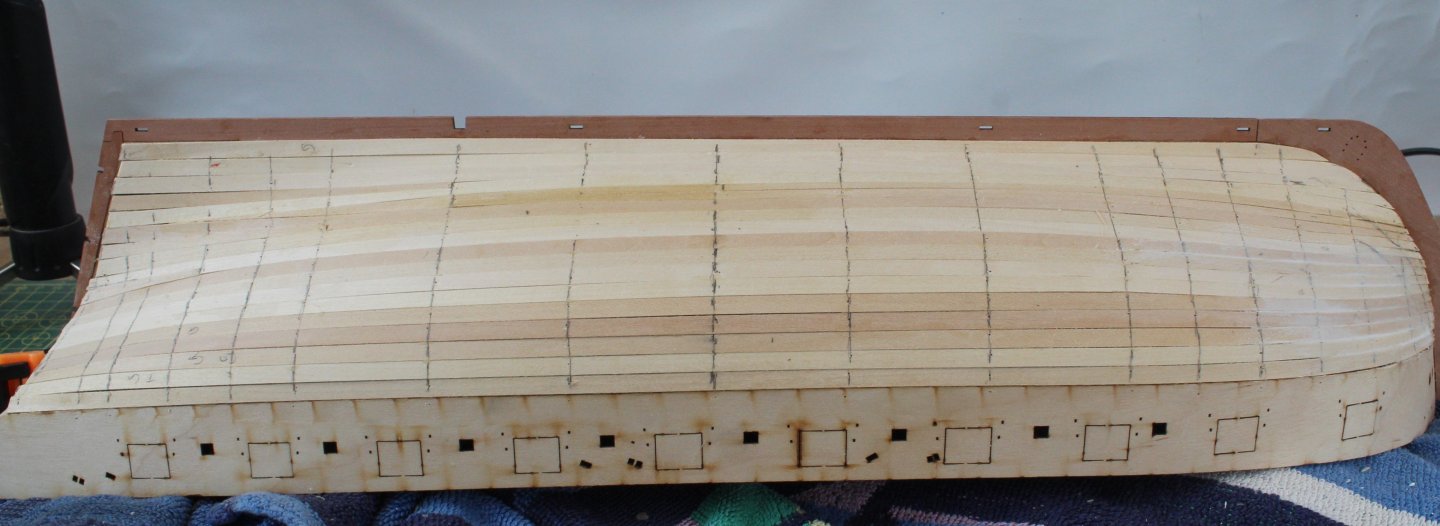
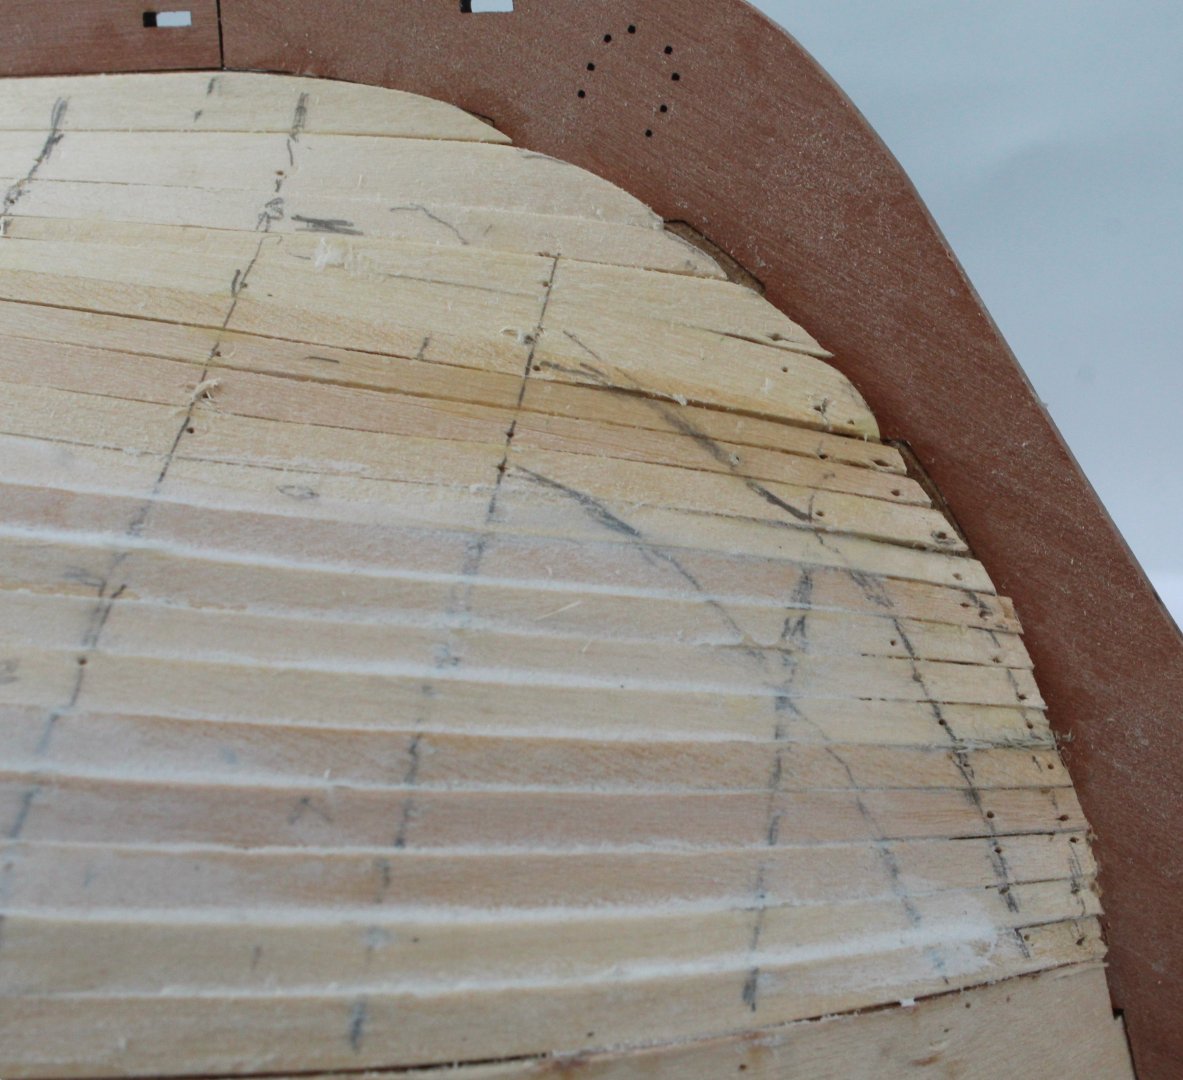
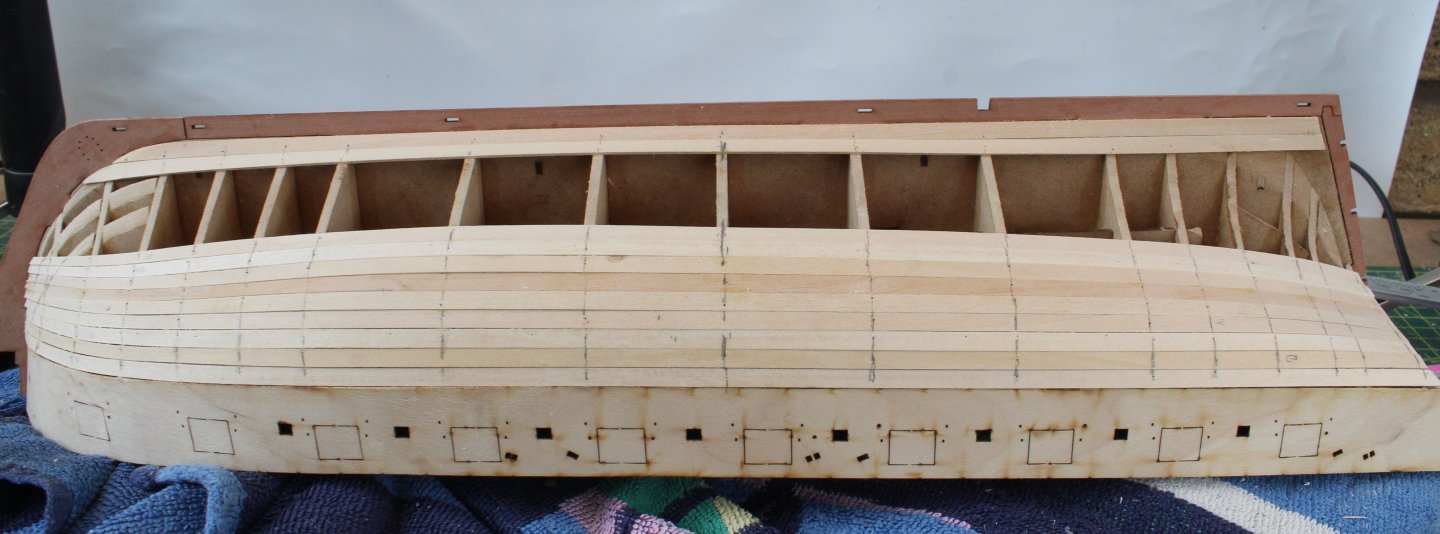
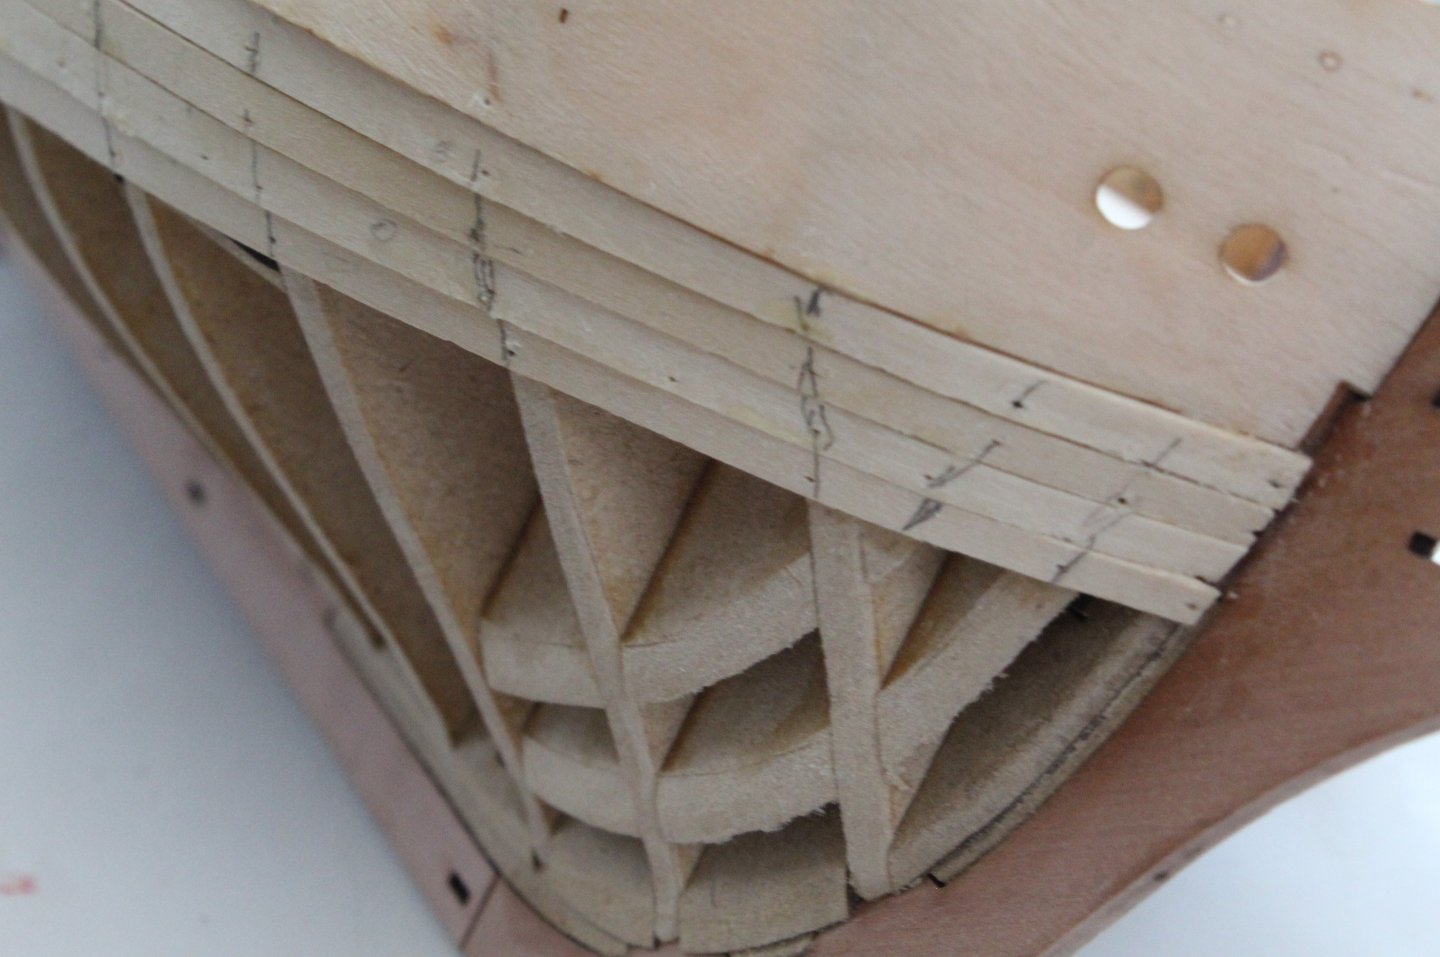
 The first planking of the Harpy continues but the end is near. I hope to have to completed later in the week, all being well. After adding the first 8 strakes to both sides I turned my attention to adding the garboard planks (to both sides). In the two photos below you will note that I have cut the stern end of these strakes a tad short of the stern post which is intentional as this will aid the sanding process to ensure the second planking (when added) sits flush with the stern post. I have found it necessary to add one dropper strake (bow) and three stealers strakes (stern). I have attached a couple of photos of these strakes. Dropper Strake Stealer Strake I have completed the first planking on the left-hand side, as can be seen below I am very pleased with how the stern area is looking, and if you look closely the three stealers can be seen. The bow area looks Ok, you may notice in the following photo I have brushed in some diluted wood filler in the gaps. As I worked on the bow area I got a better understanding of the nature of the lateral bend and why it is necessary, I also (eventually) realised when adding the last few stakes that, in most cases I needed to add a bigger lateral bend to get a better neater fit. The starboard side first planking is almost complete and should be completed in the next couple of days.
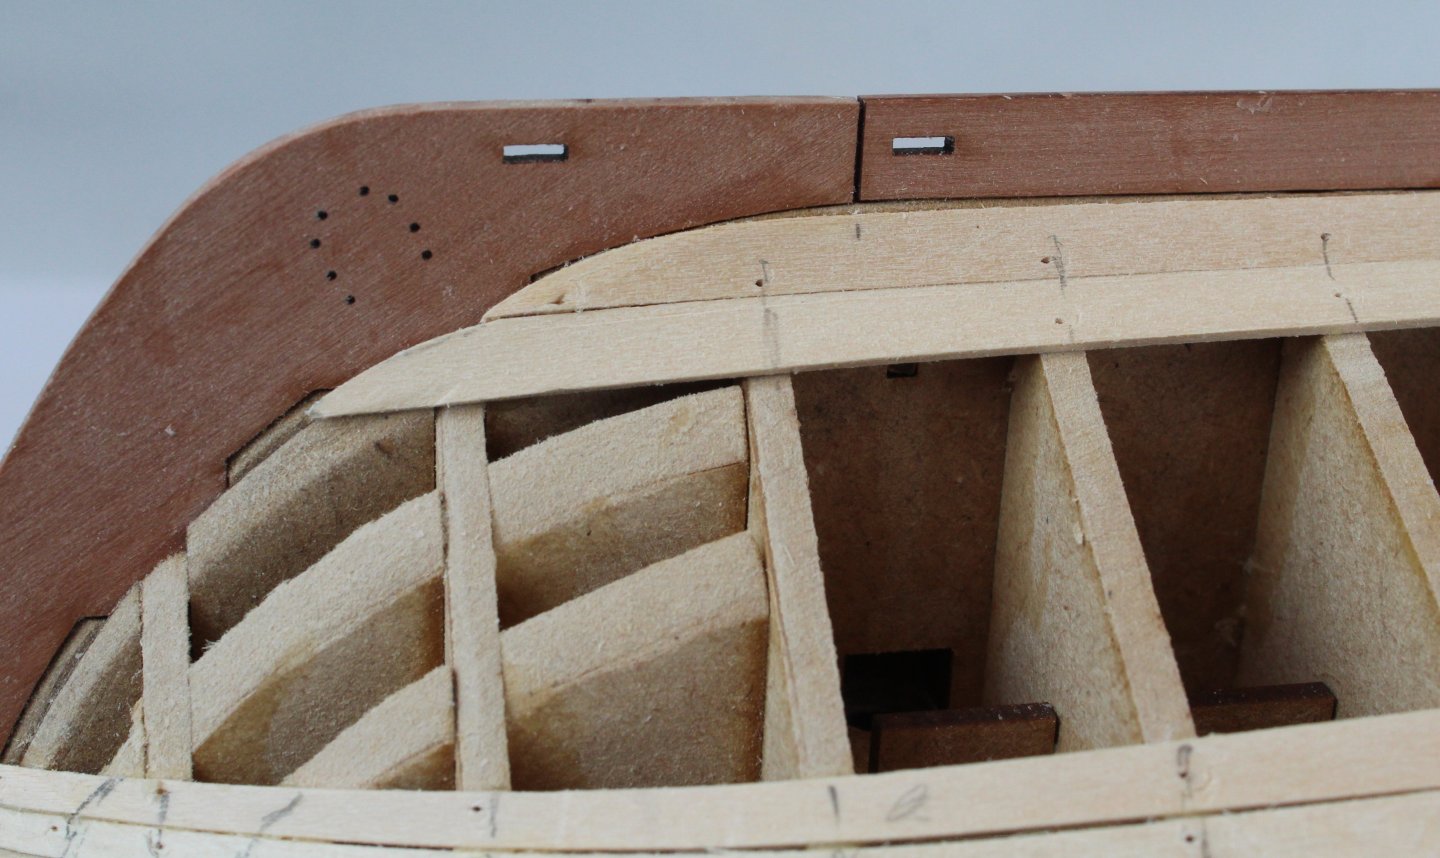


- 241 replies
-
- 13
-

-
- Vanguarrd Models
- Harpy
- (and 1 more)
-
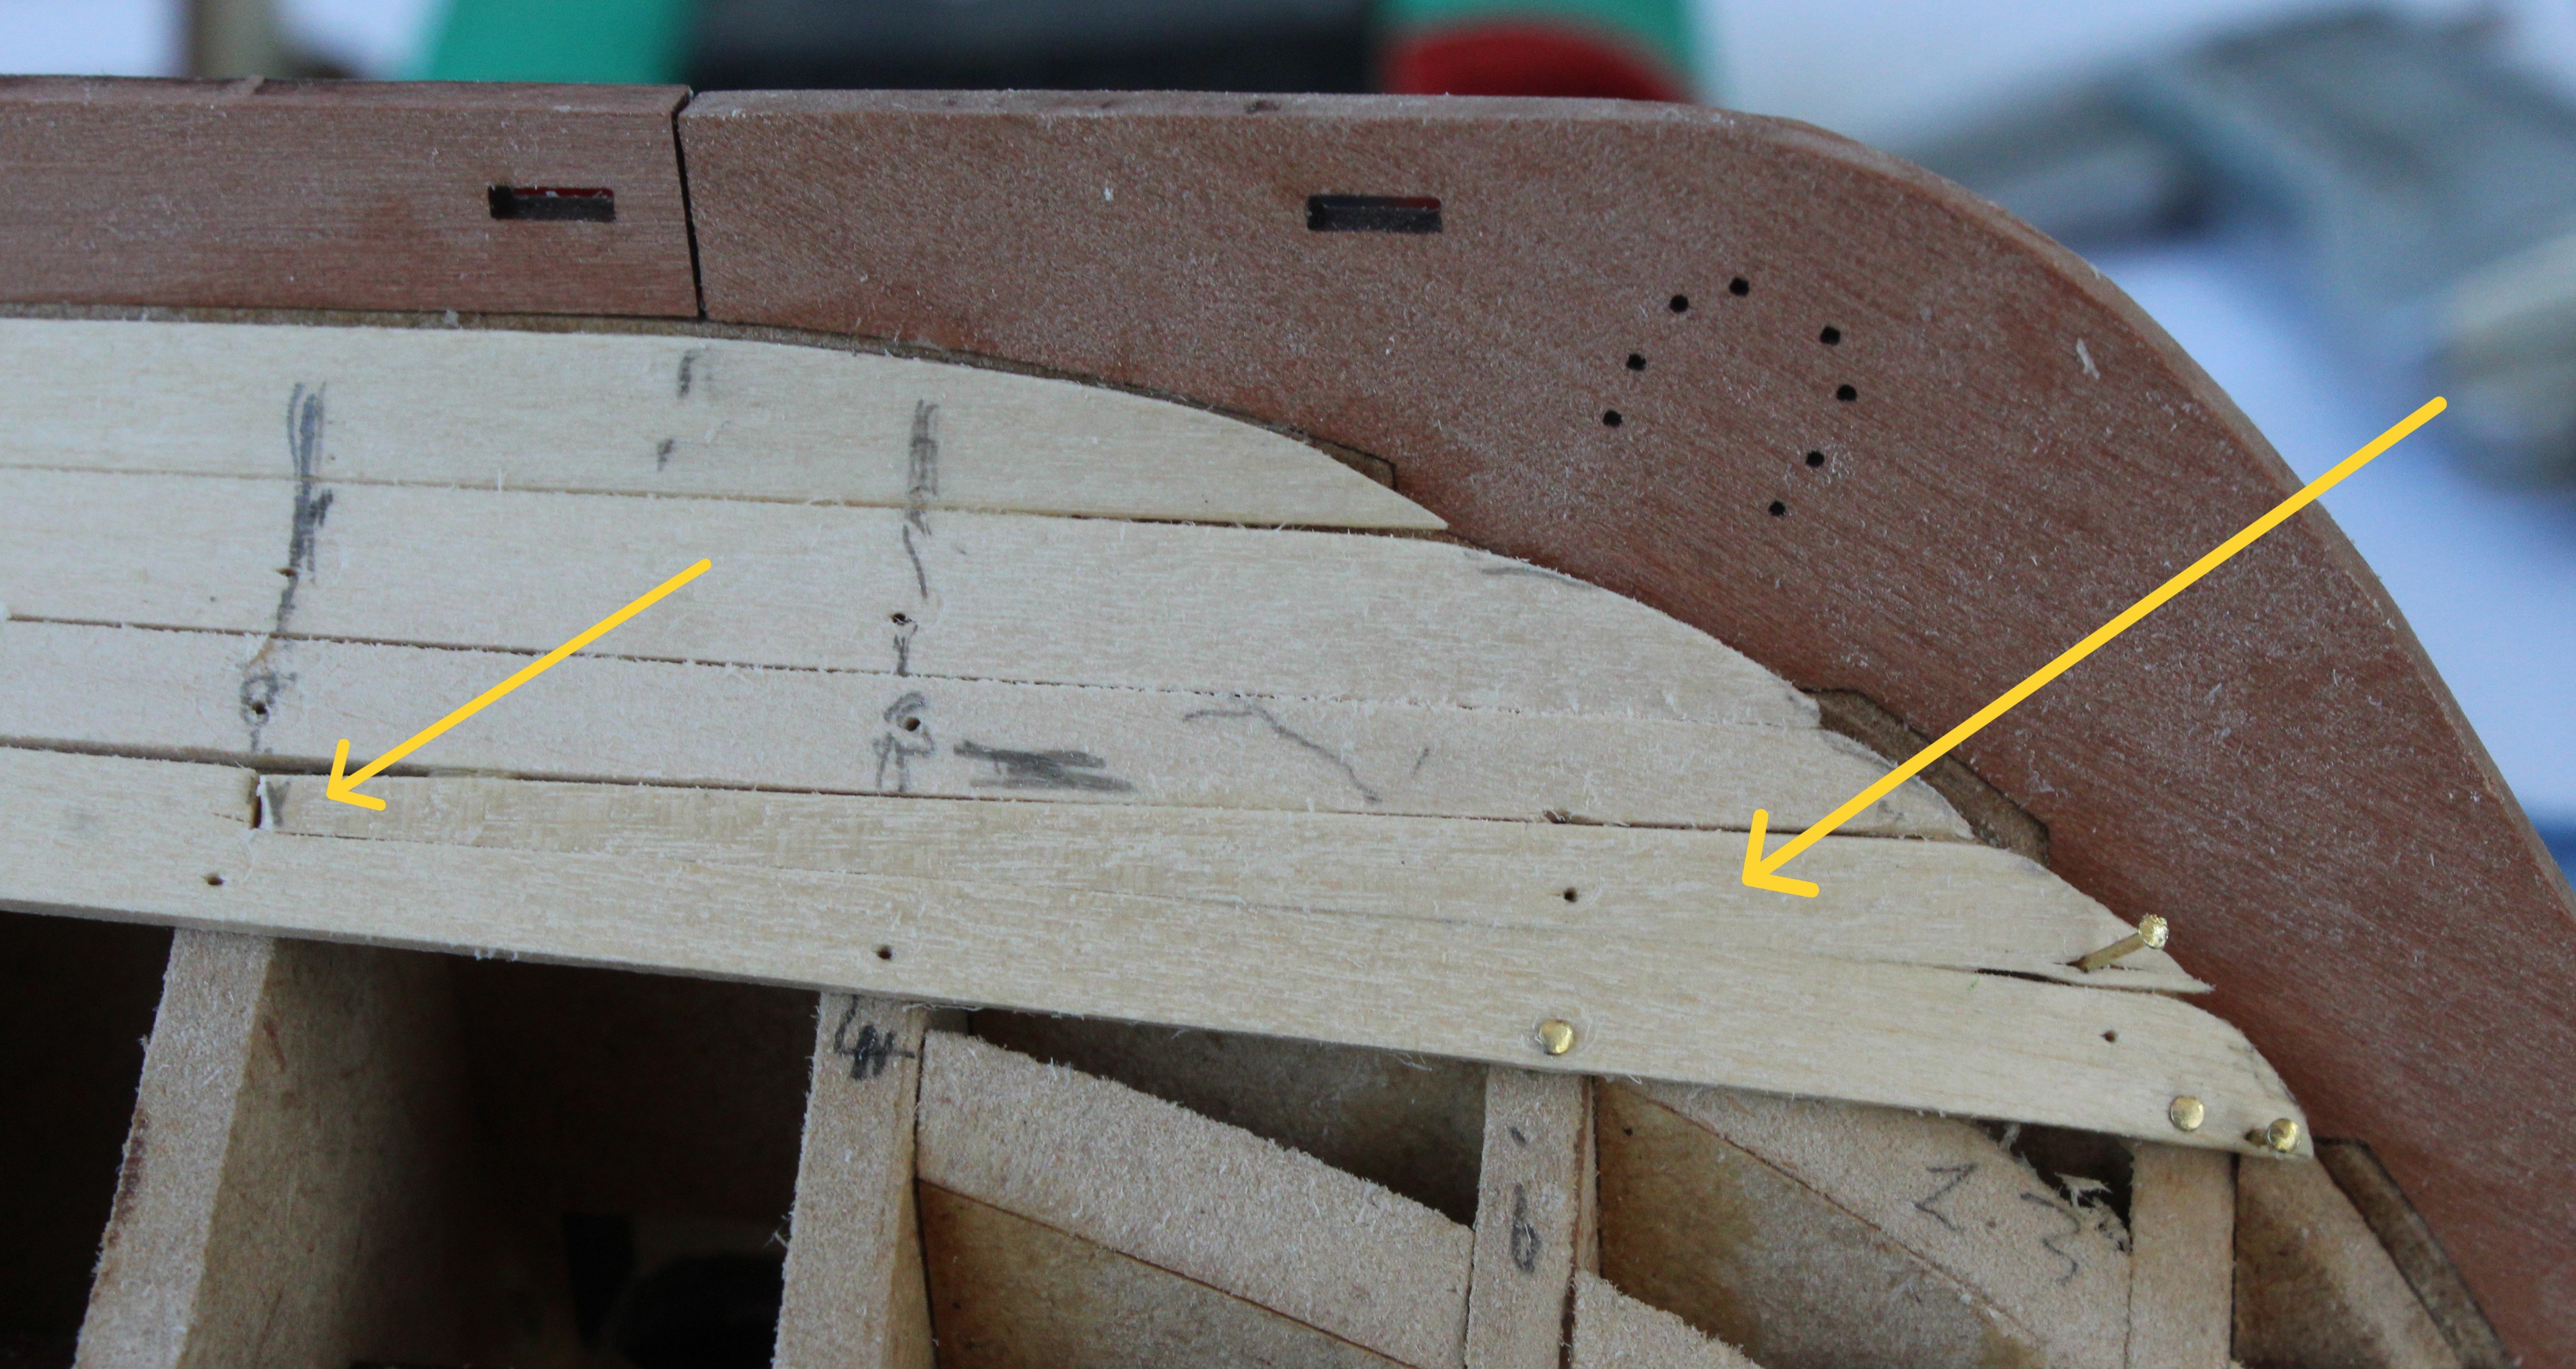
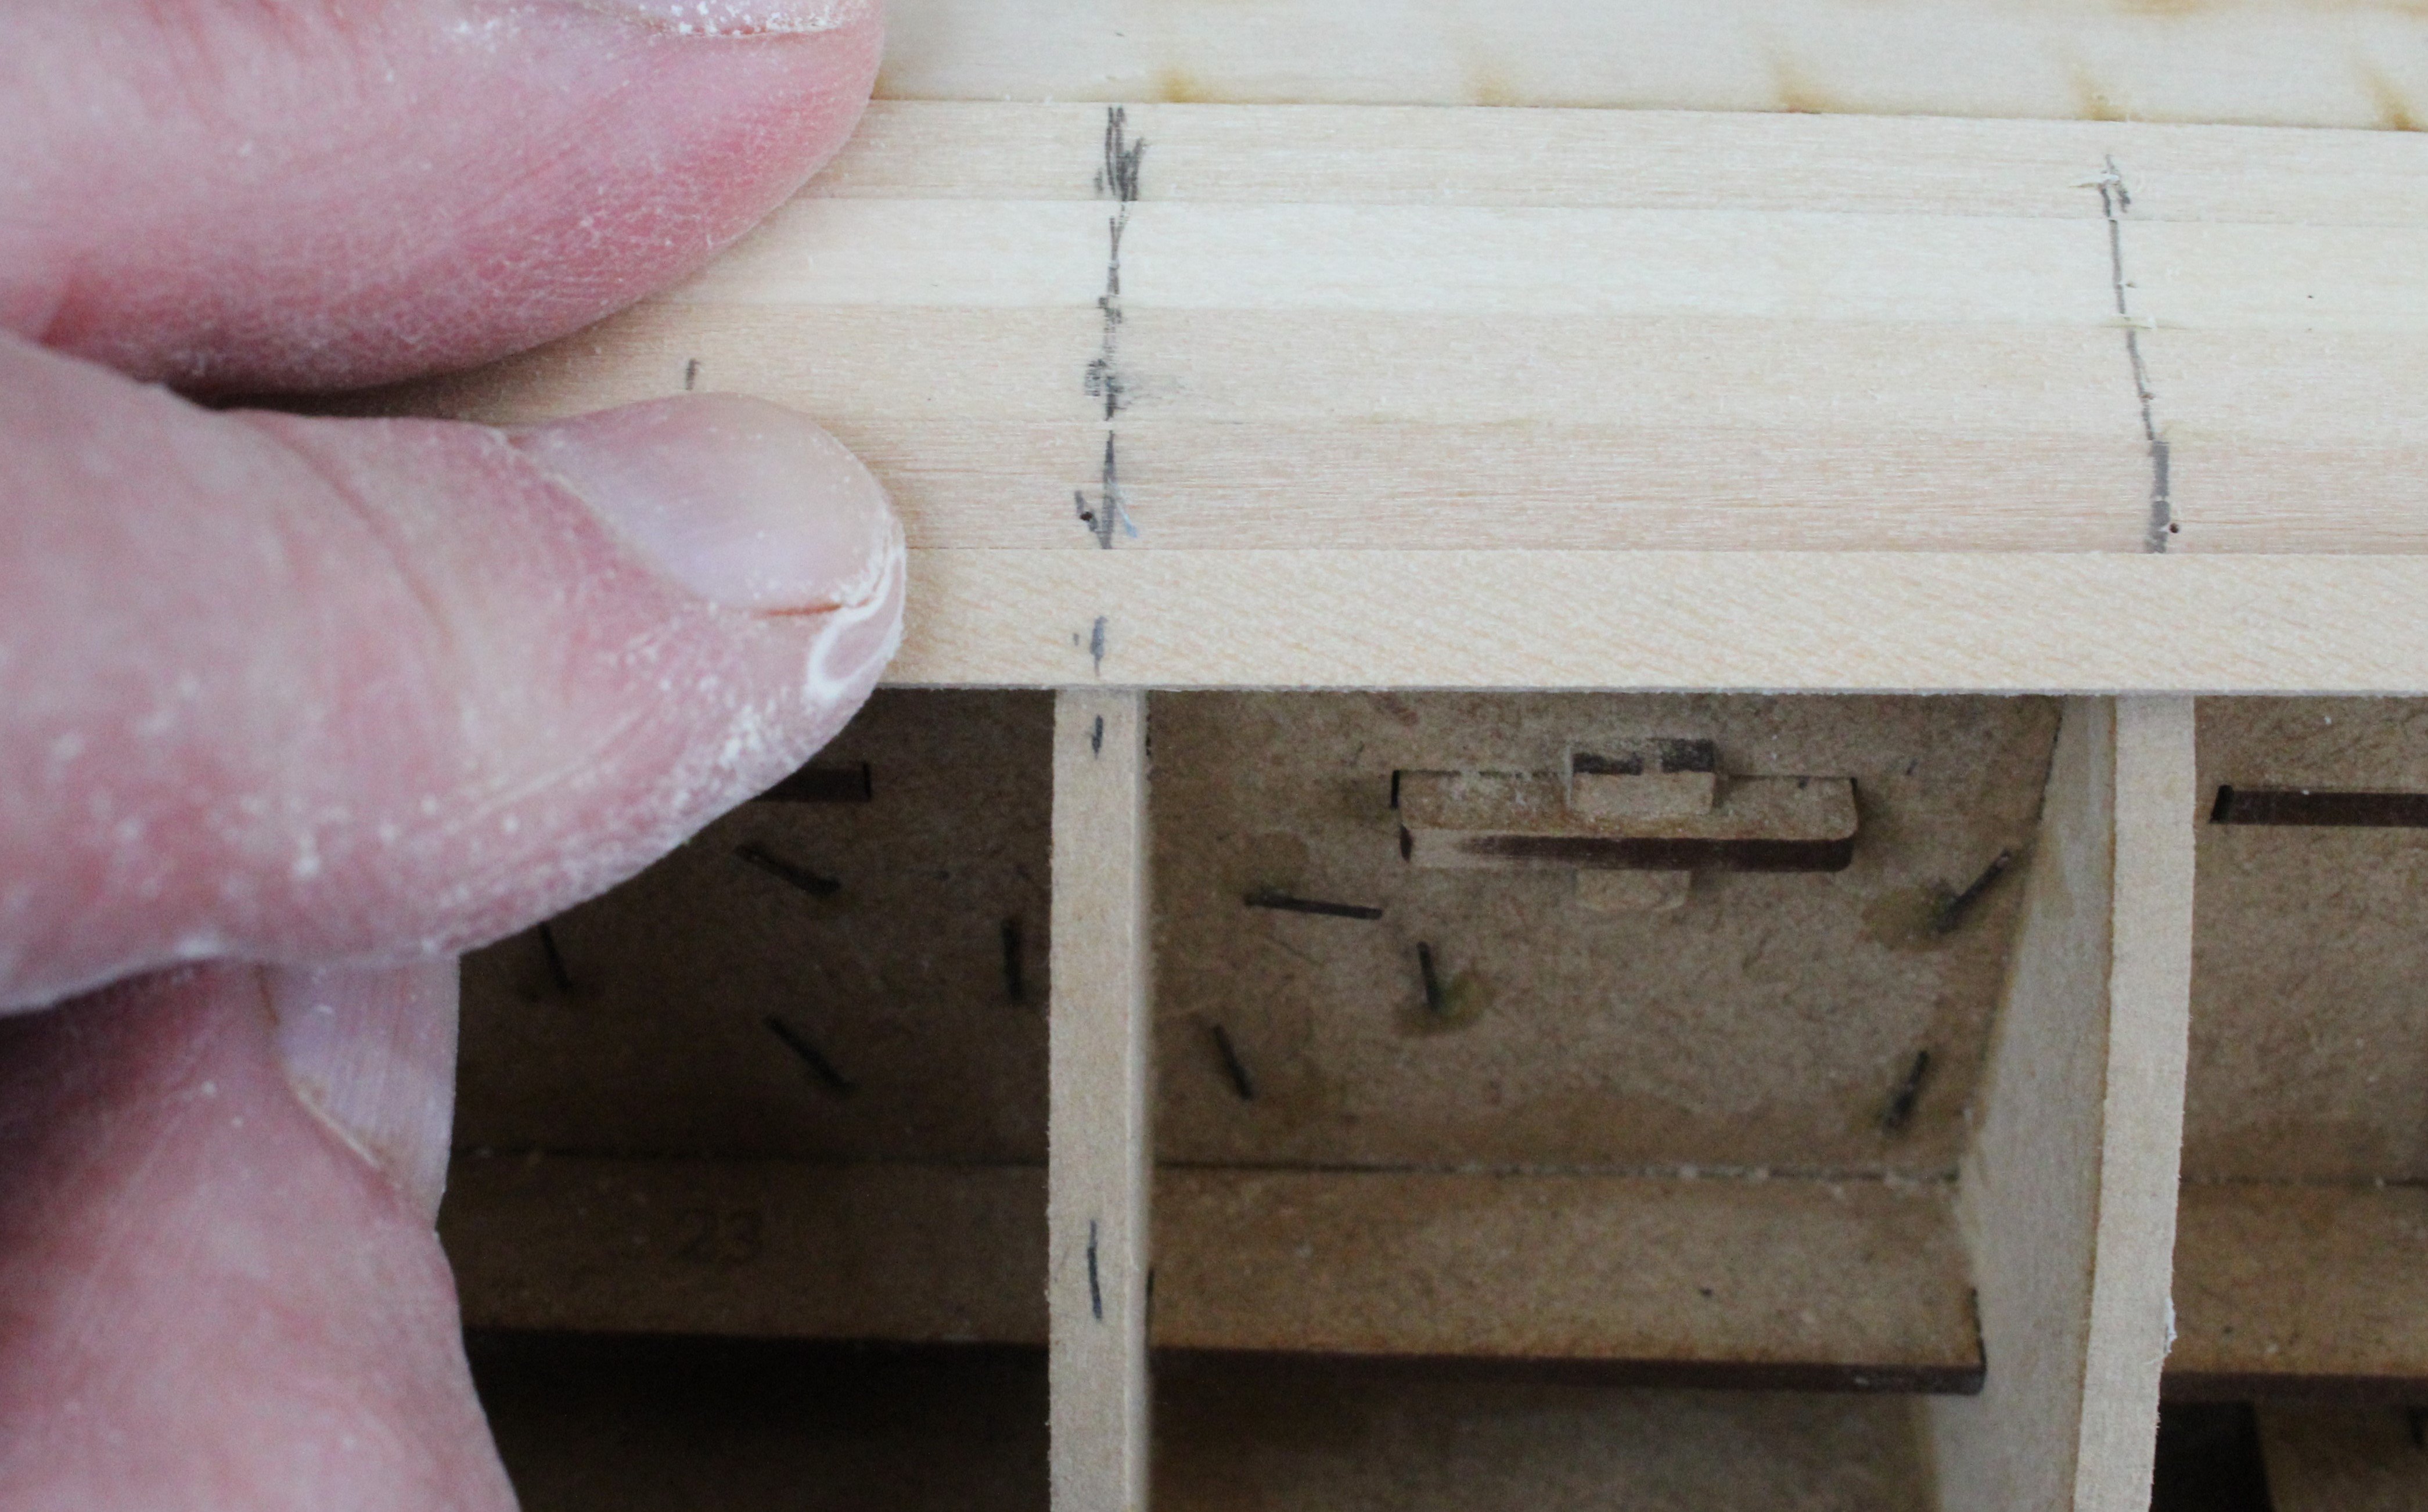
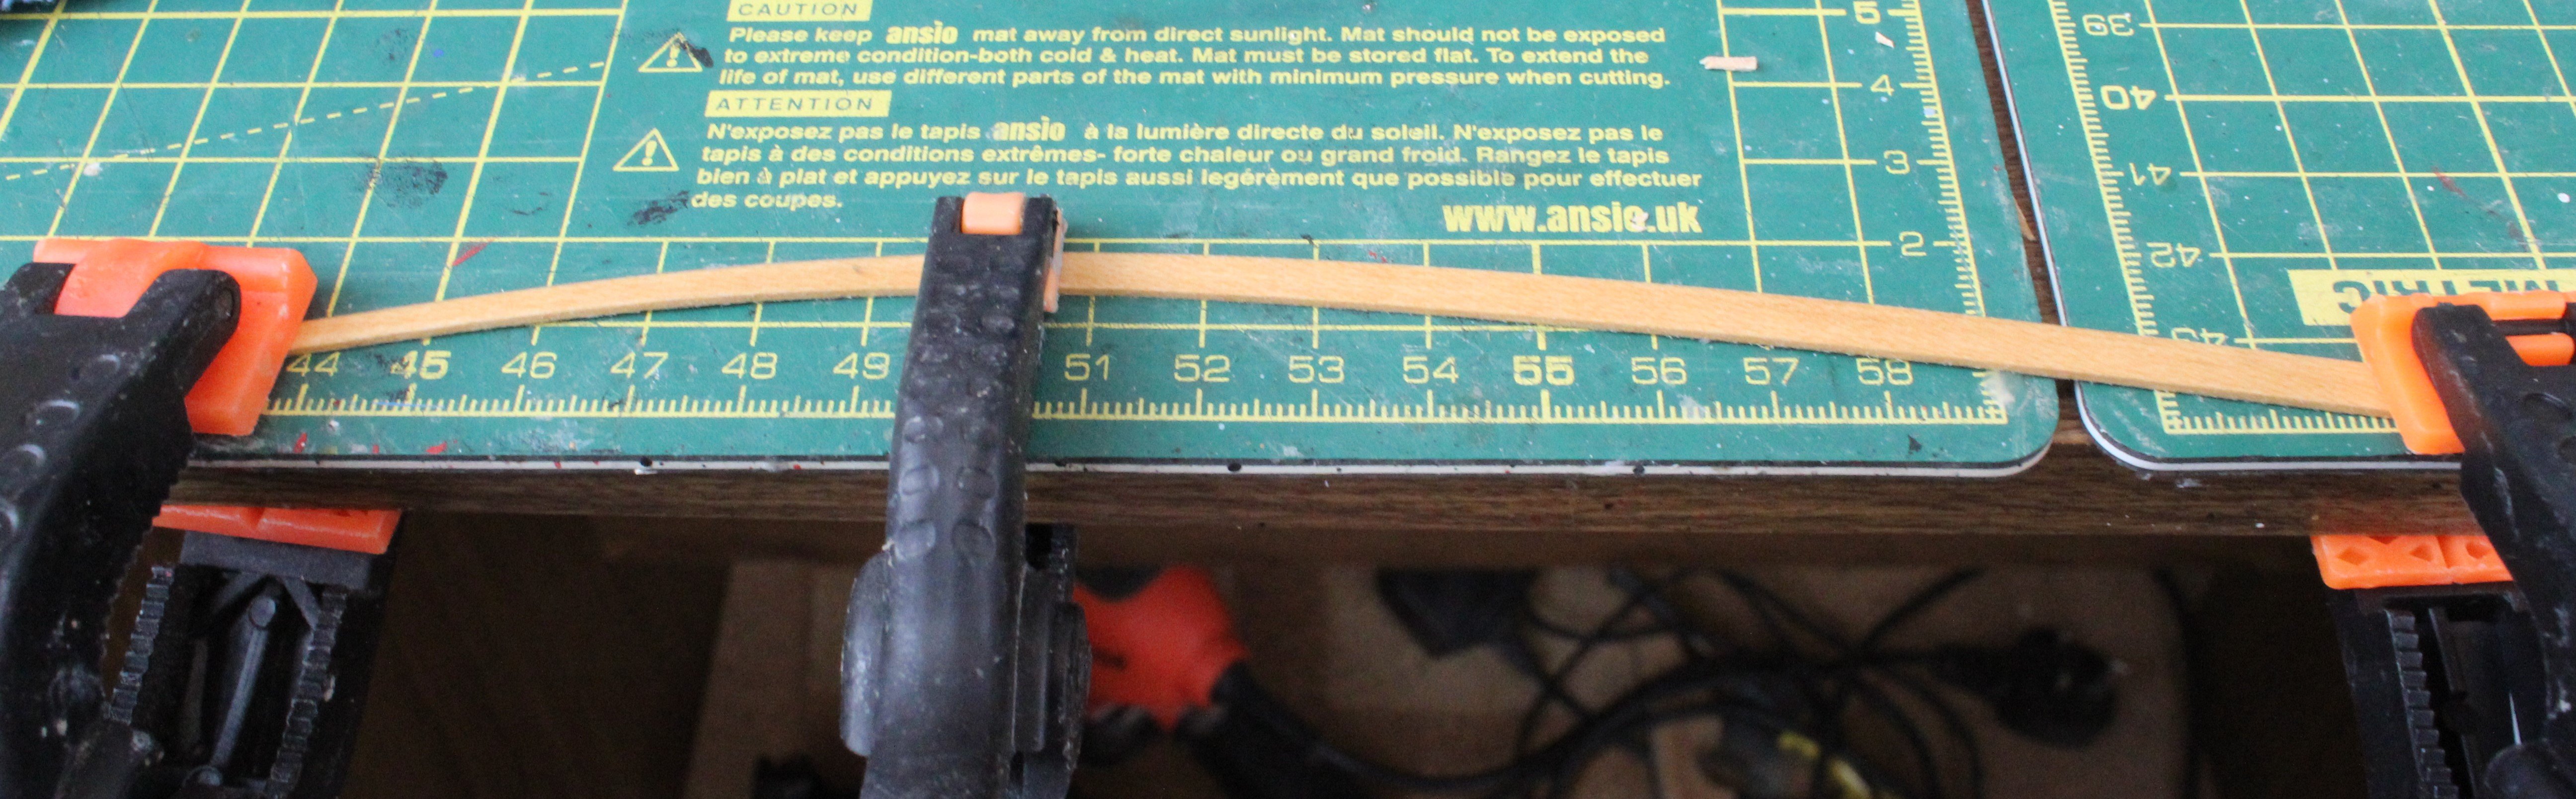
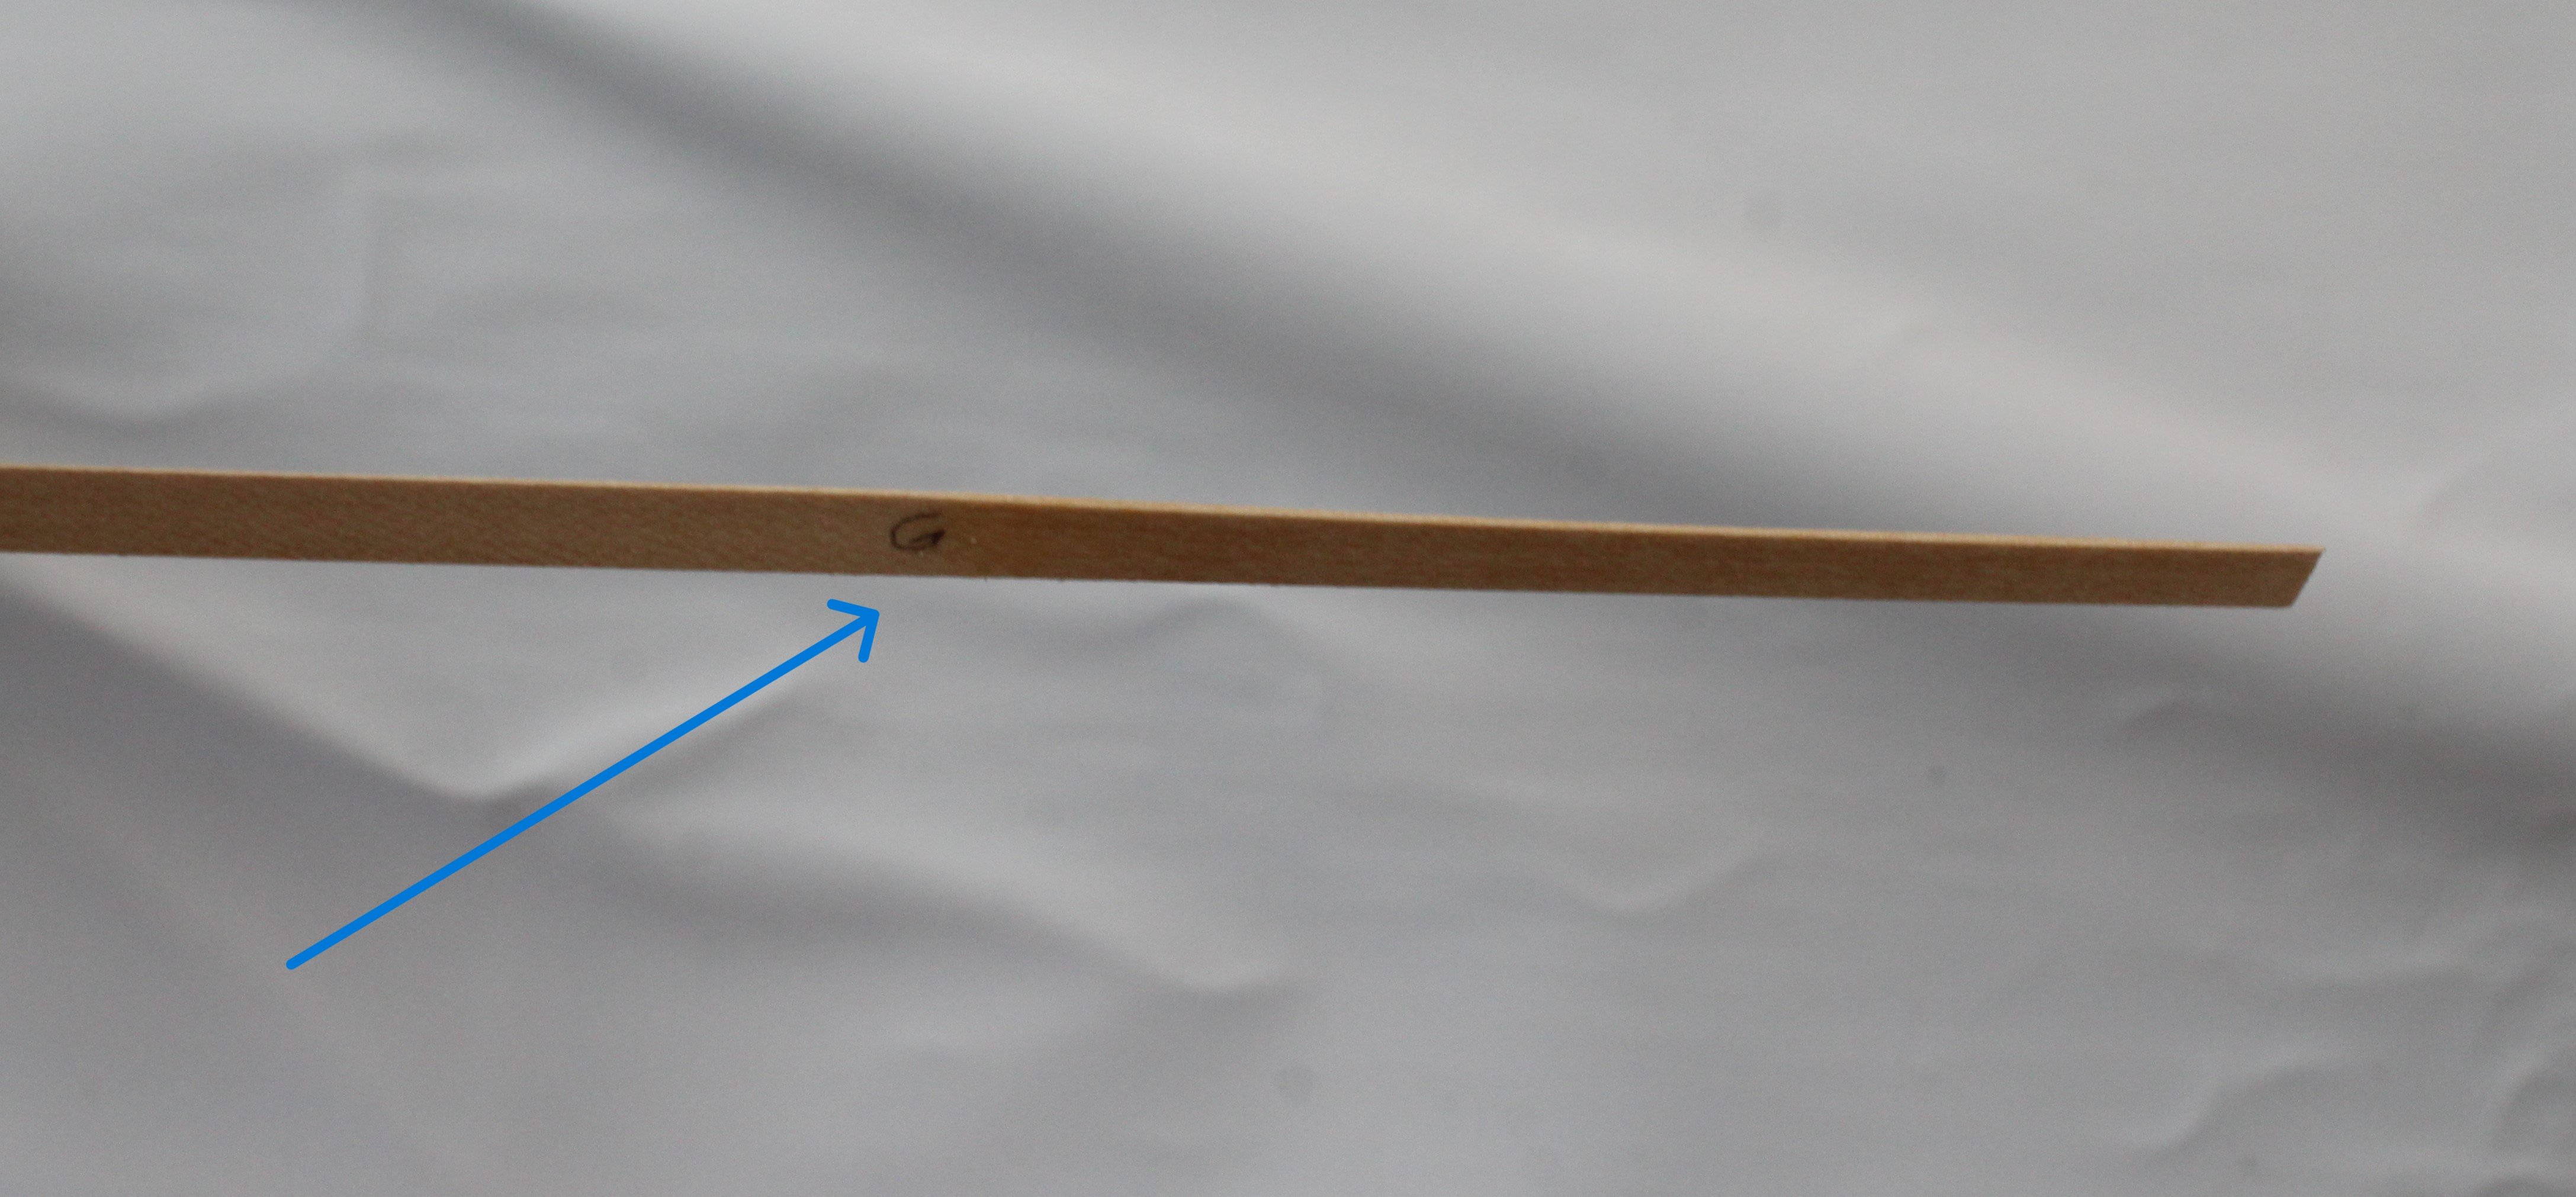
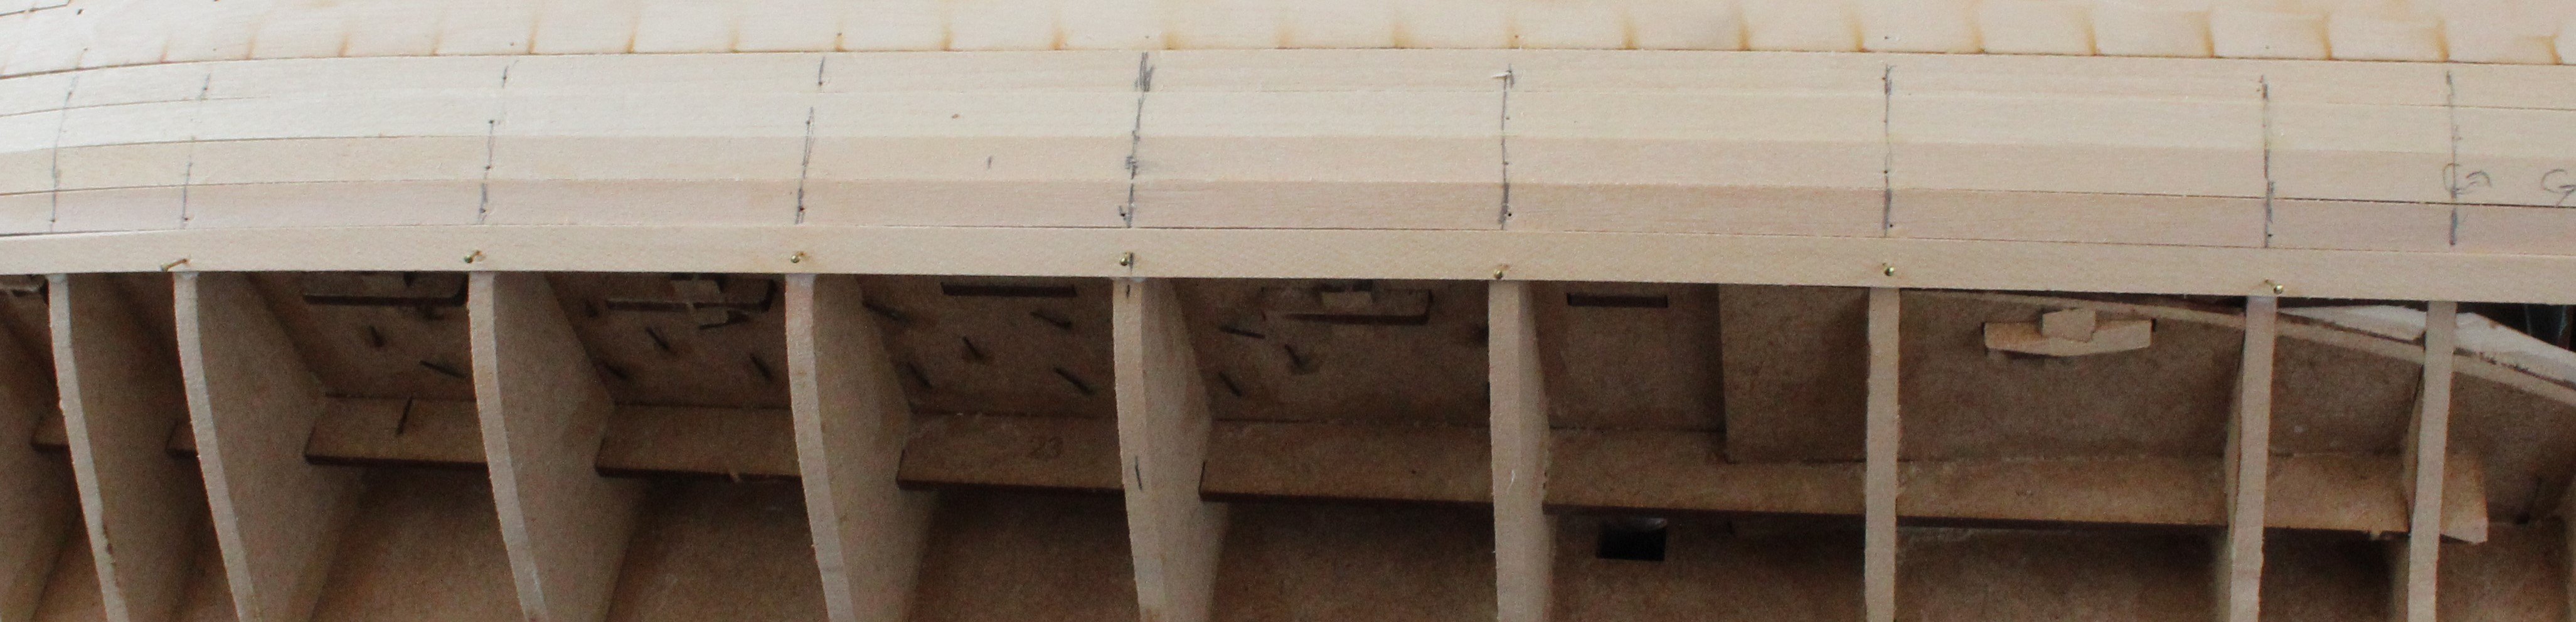
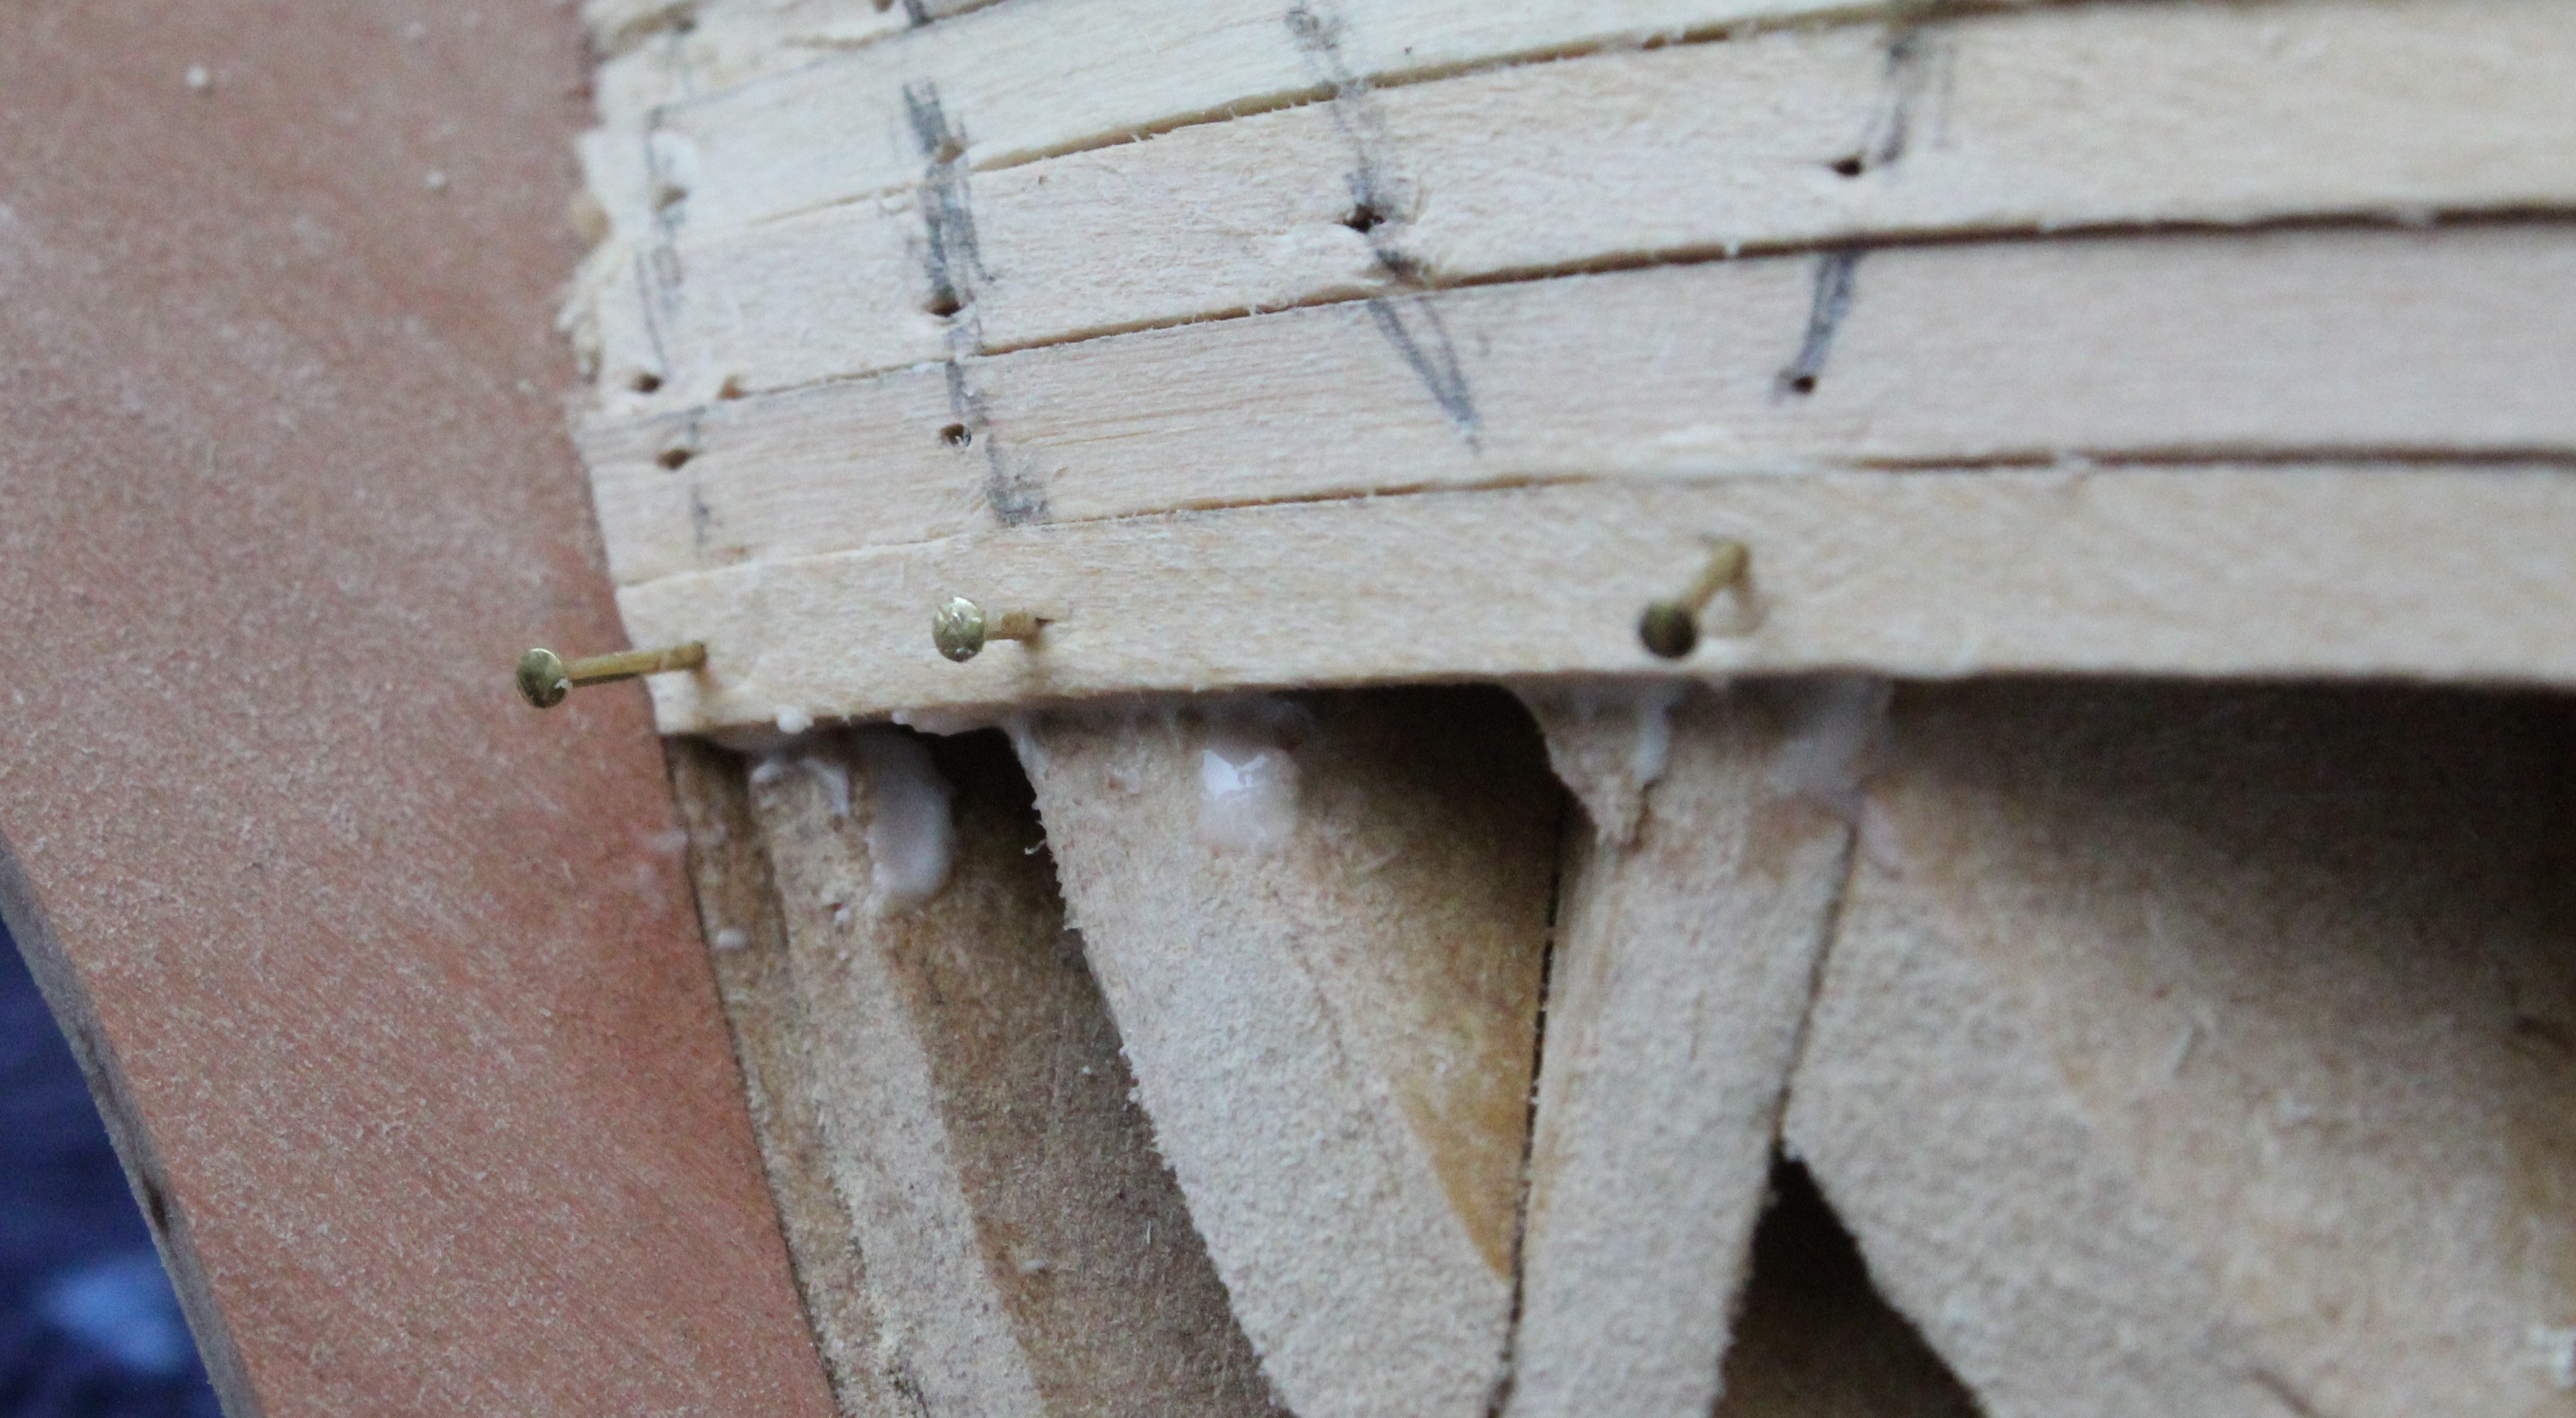
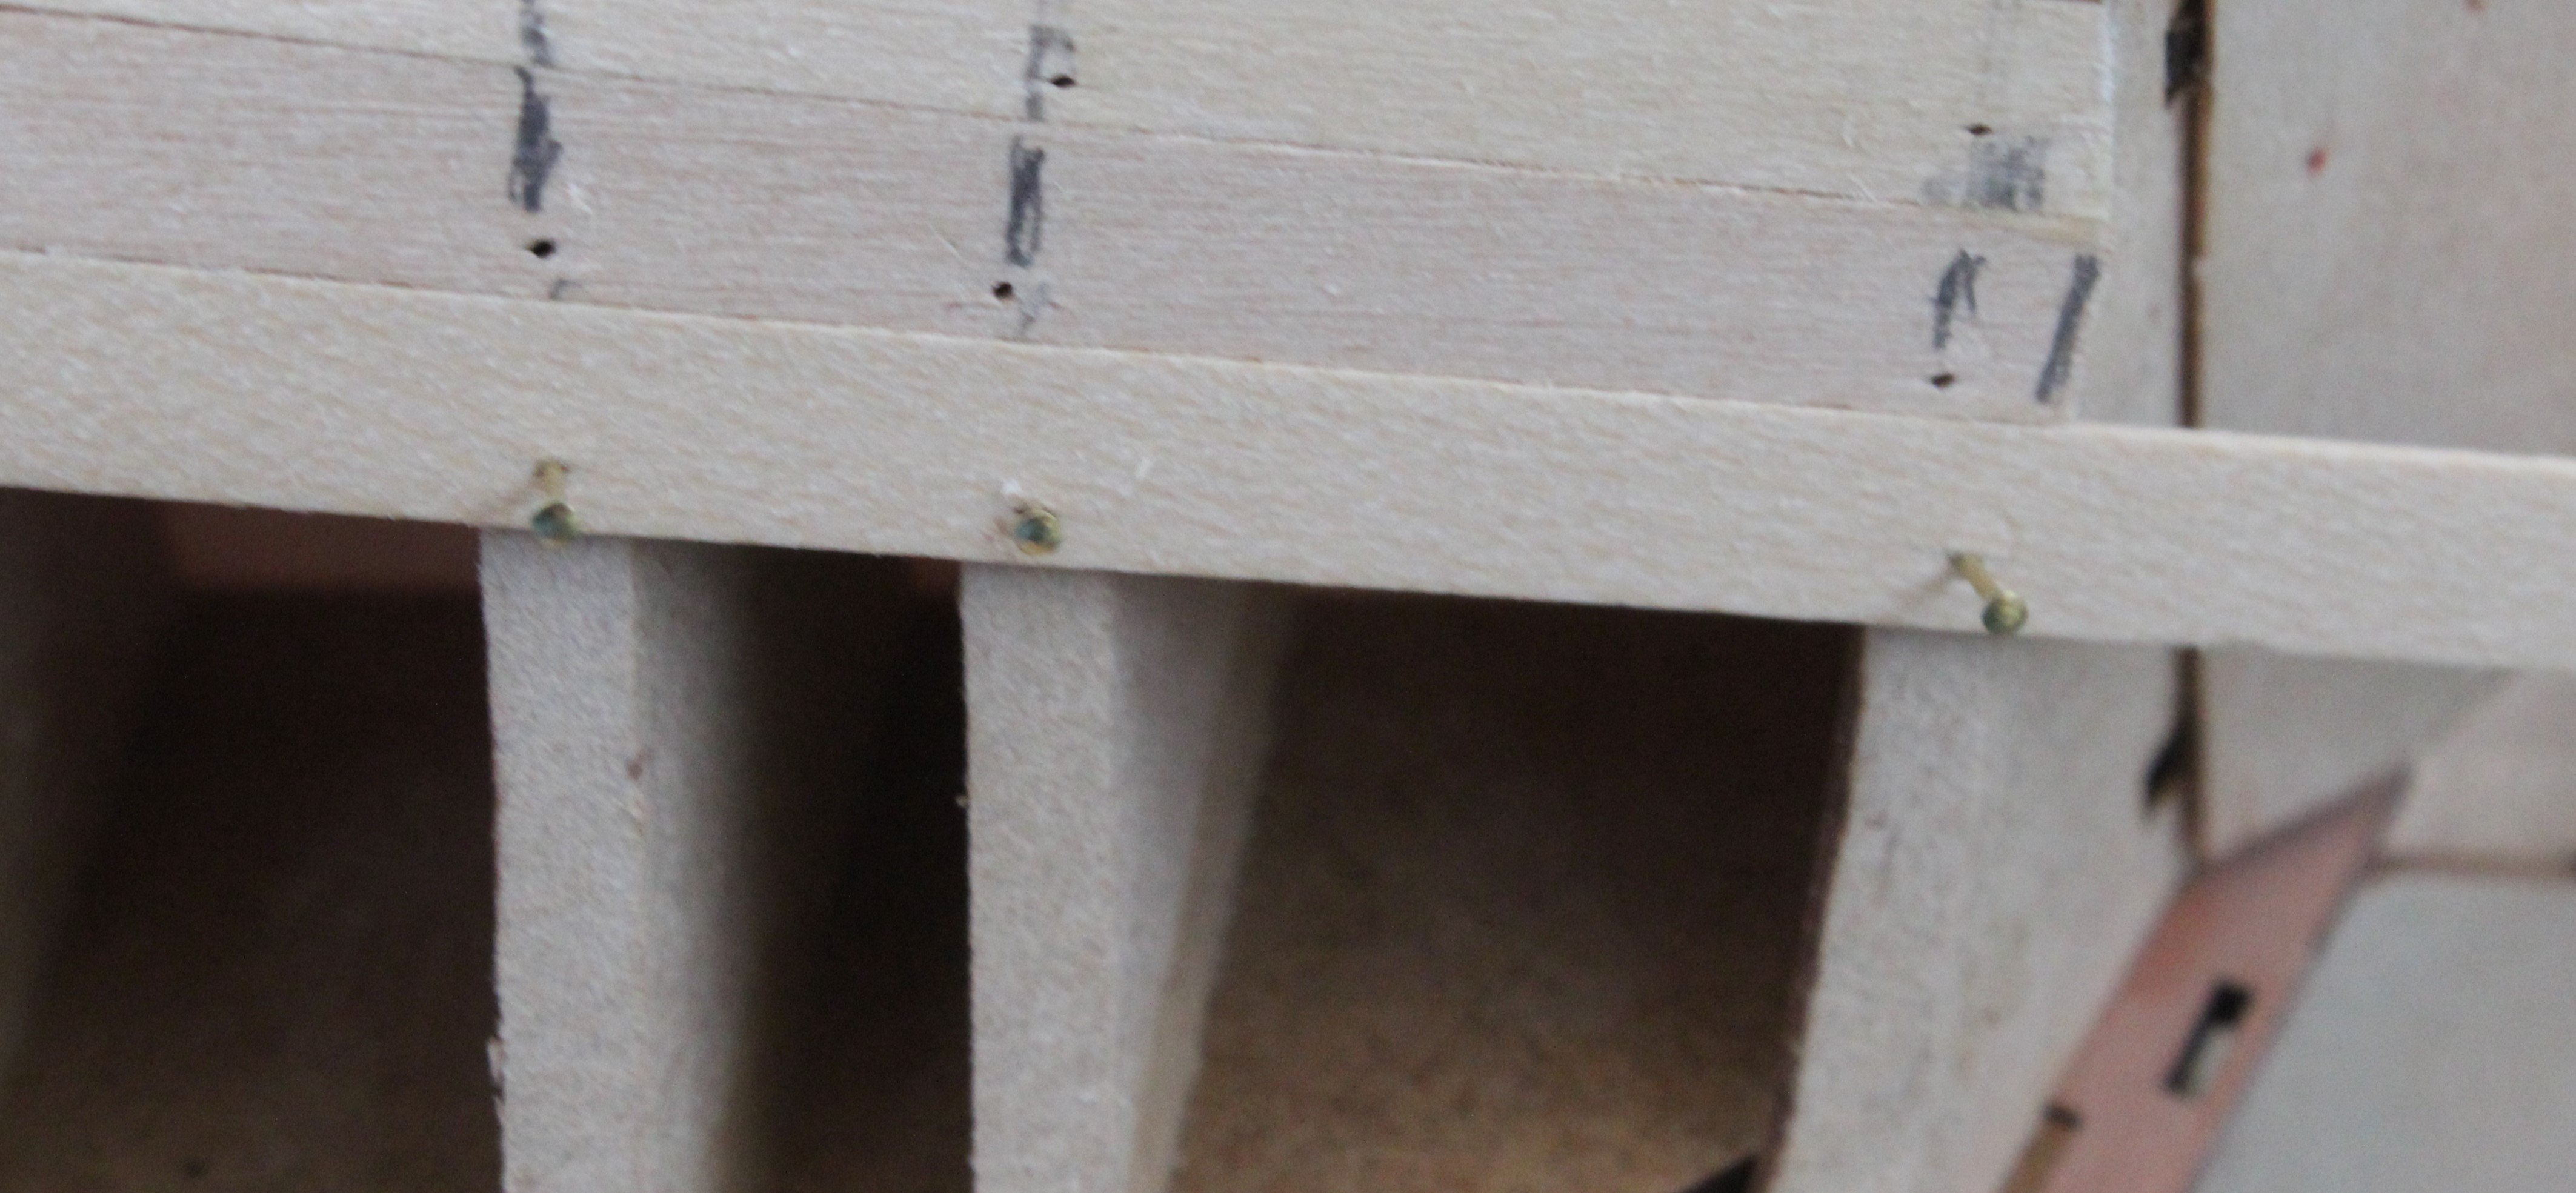
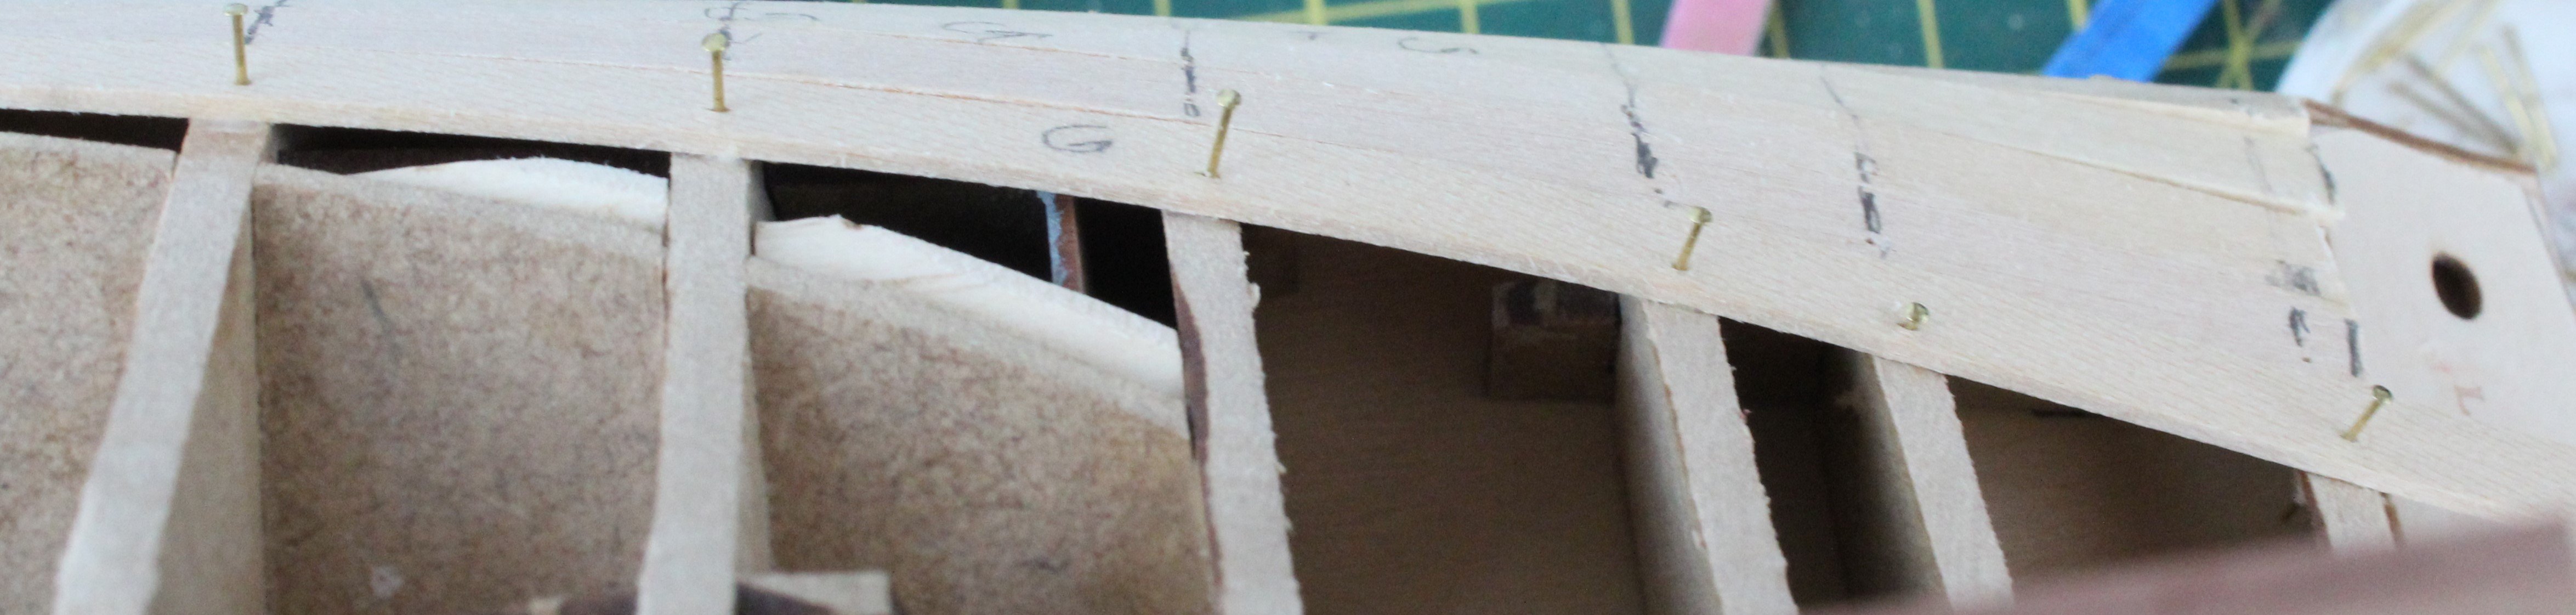
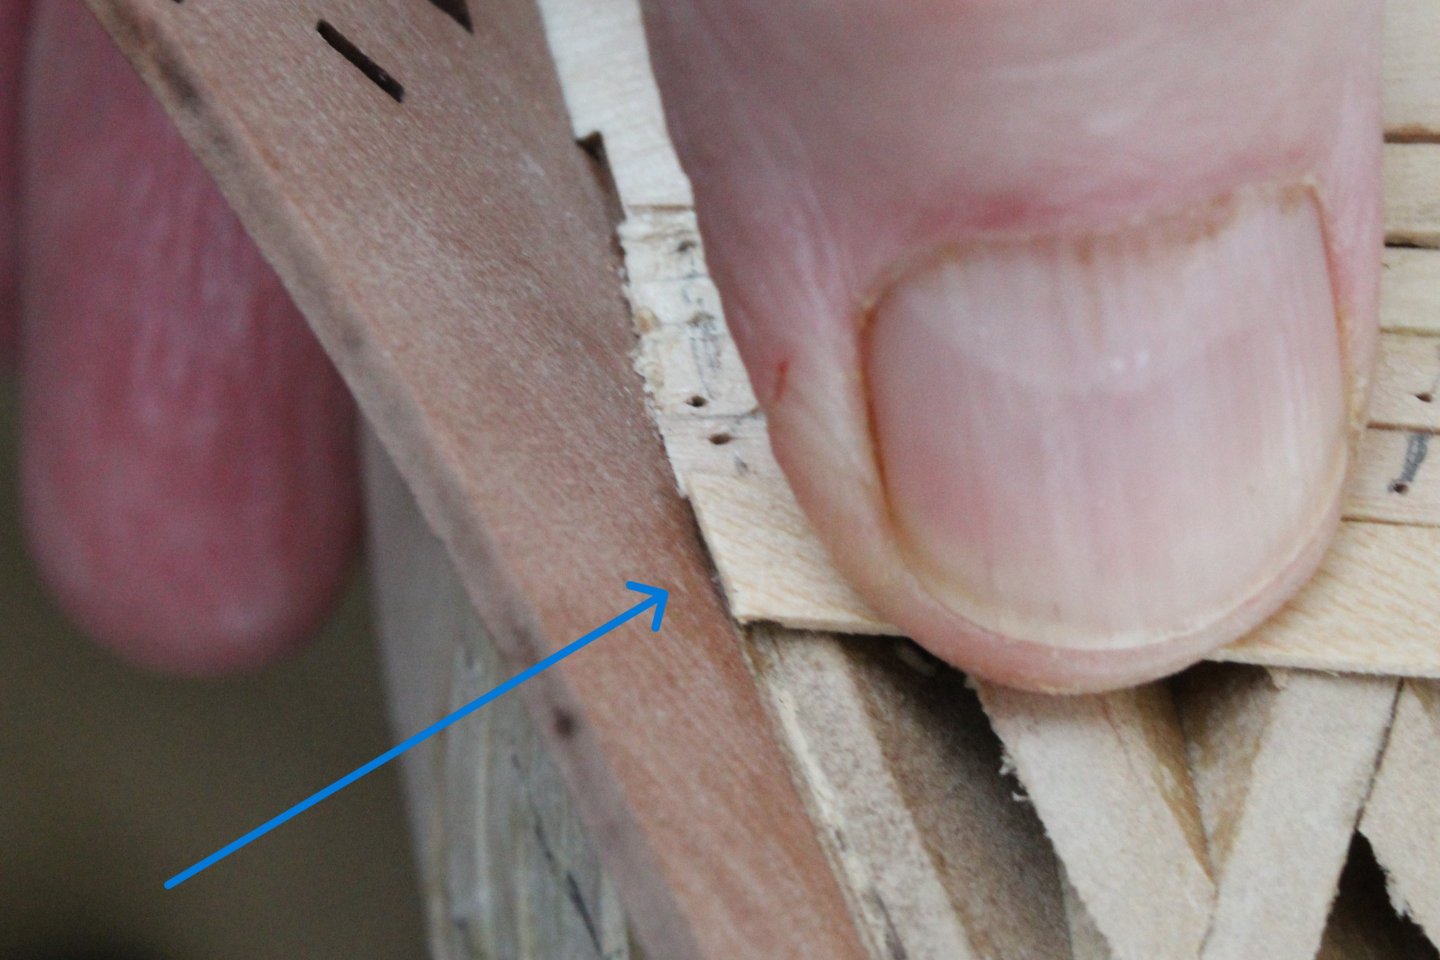
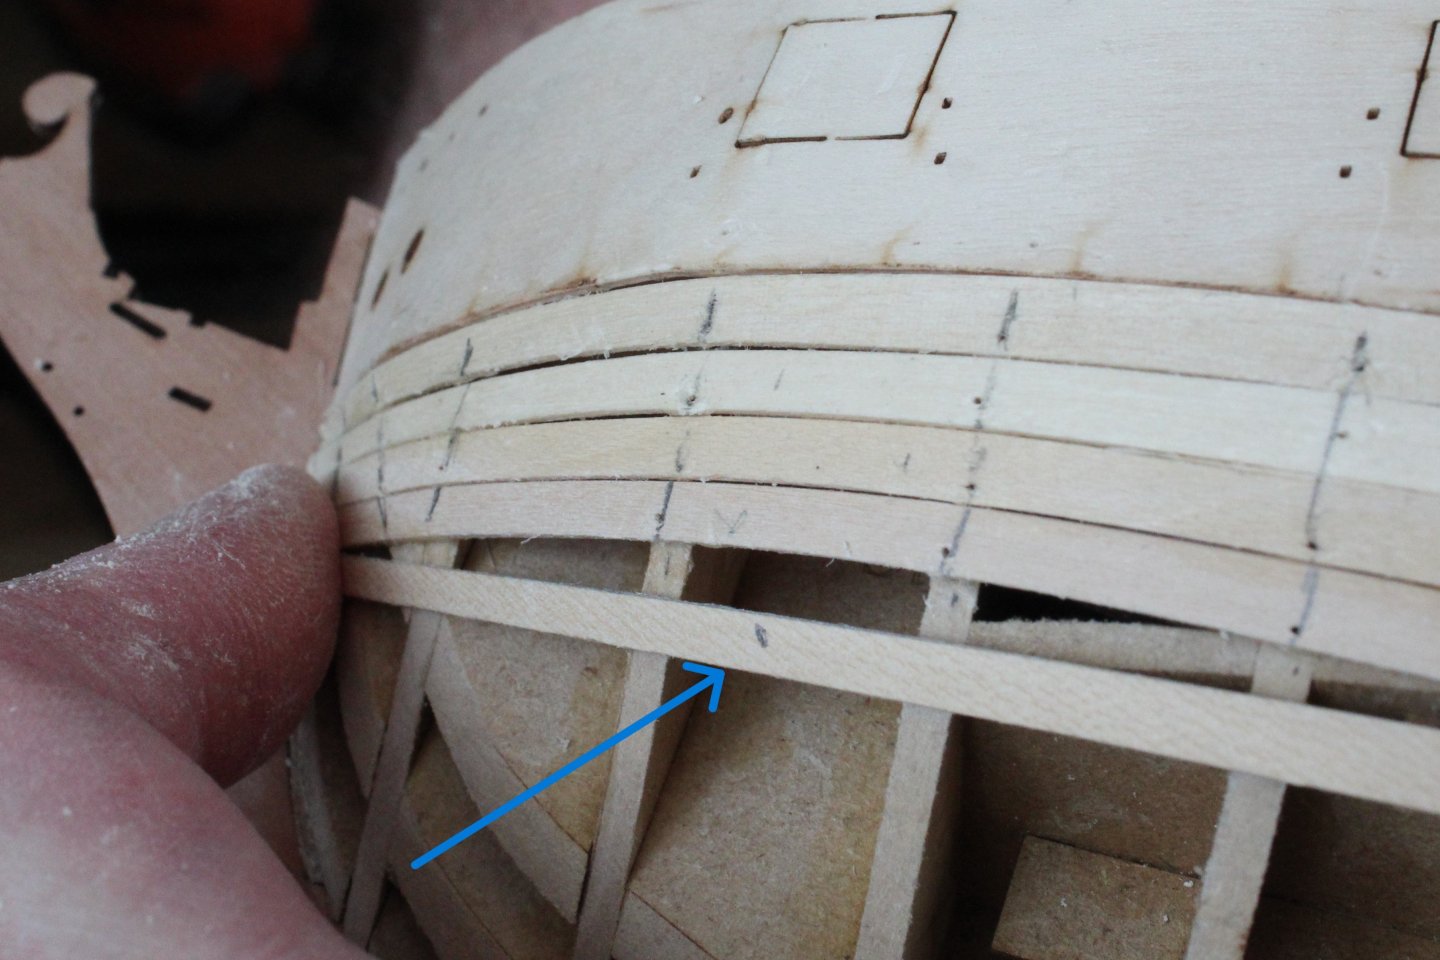
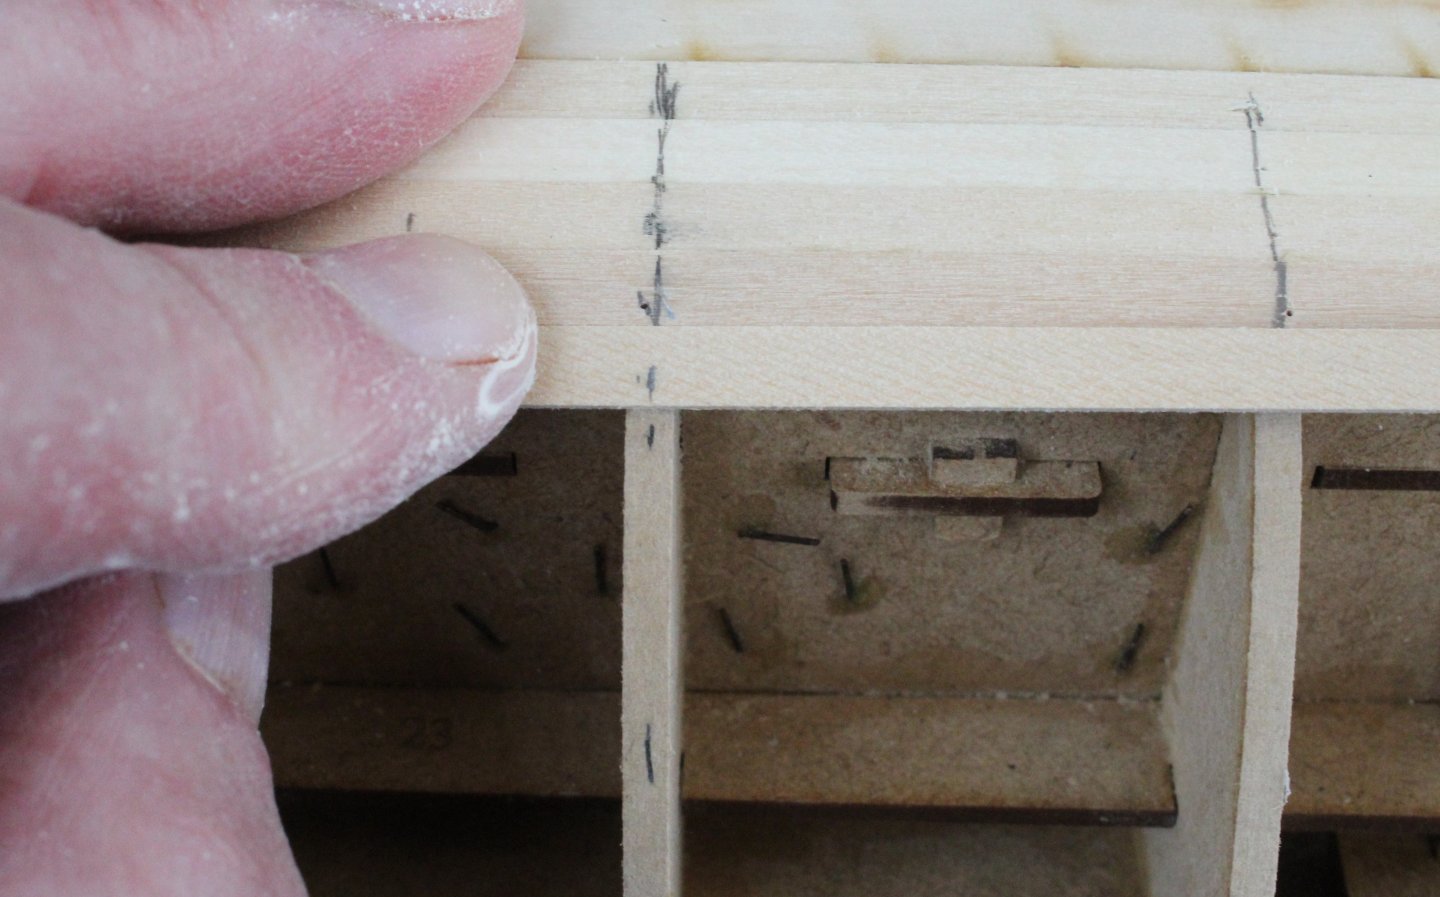
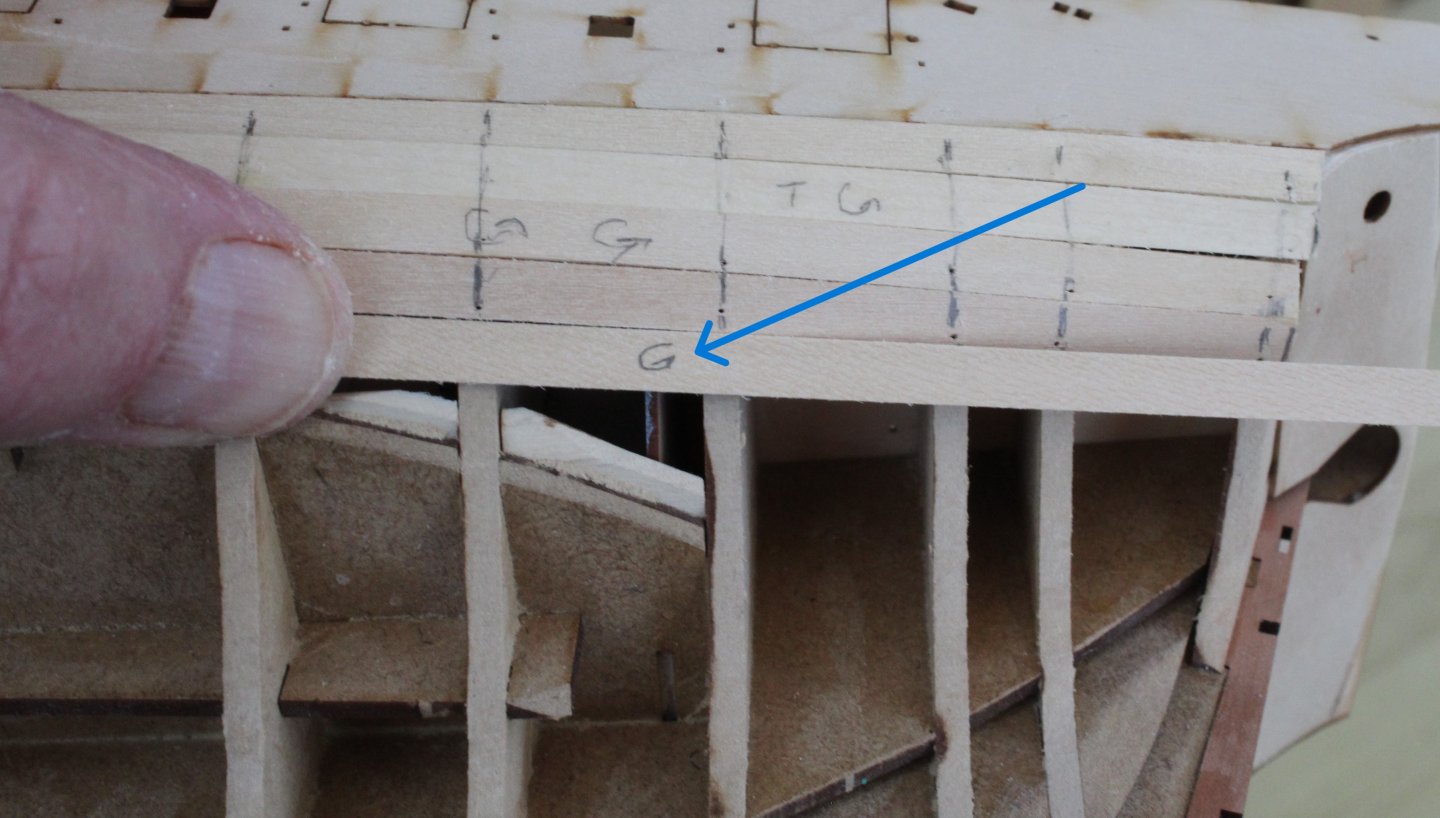
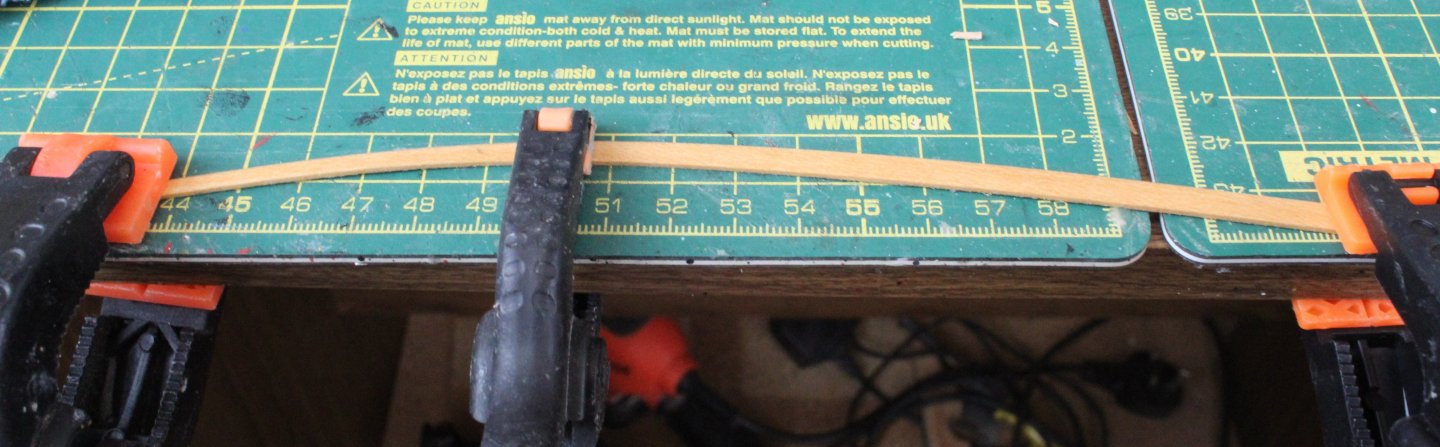
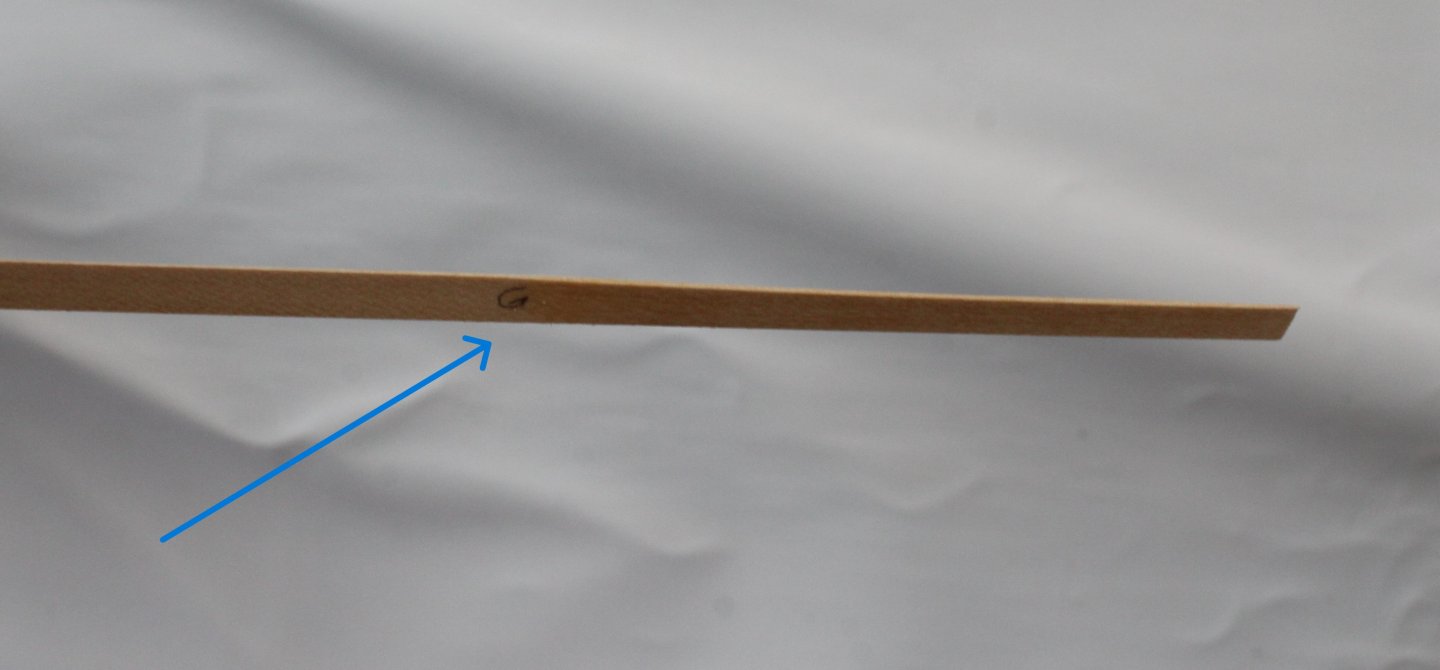
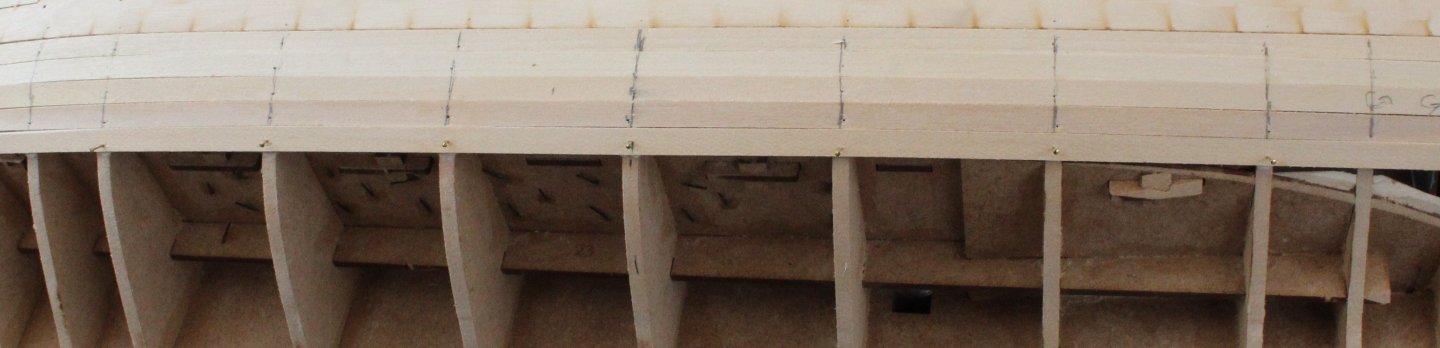
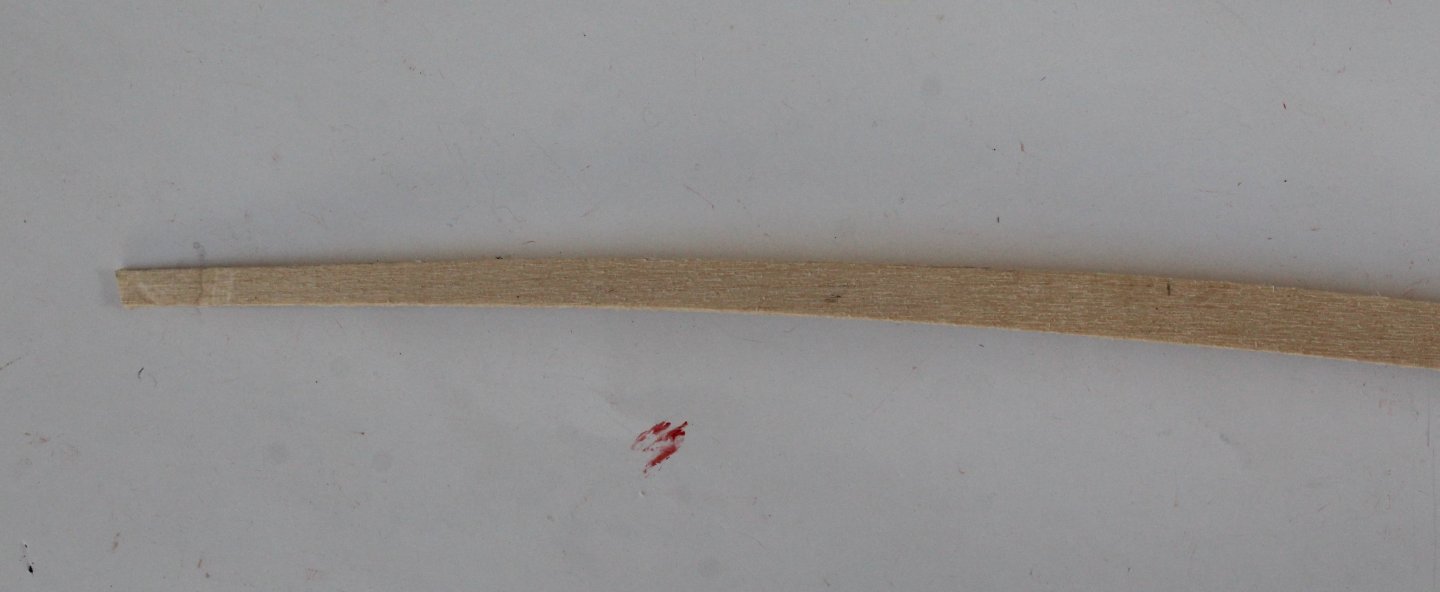
Progress is slow and steady with the first planking. I did take a couple of days off from the shipyard as I had 1000 piece jigsaw to do, as it was an XMAS present from my youngest son. In the first set of photos below I have added 4 strakes per side. I am also marking the position of the bulkheads on the strakes after the pins are removed. The next set of photos is a tutorial on how not to plank🤣. It works well for me however. I start the process by shaping the strake's bow edge. Next I mark the required taper for the bow section. After the taper has been cut the strake is test fitted and the central point for the lateral taper is marked. With the strake in the required position I add an alignment mark on the central bulkhead. When gluing the strake in place I like to work outwards from the centre. Next I look at how the strake looks at the stern and mark where I will add an anti-clockwise (for the left had side) twist to get a better fit. After holding the strake in some warm water for a minute or two it is clamped to the bench so the lateral bend can be set. I use a hairdryer on a hot air setting for a couple of minutes to dry the strake. The strake is then test fitted, and if necessary the bend is adjusted. With the stern section of the strake dampened the anti-clockwise twist is added. I do this by applying the twist manually with my hands. Wood glue is added to the various bulkheads and I also add some addition glue to the bow end of the strake. The plank is then positioned, using the central mark. Pins are then added moving outwards, equally from the central point. Any excess glue is wiped away as each pin is added. With the strake pinned in place a final check is made to check the contact with the bulkheads and to remove any remaining excess glue from the bulkheads beneath the strake.


- 241 replies
-
- 11
-
-
- Vanguarrd Models
- Harpy
- (and 1 more)
-
This is something I might add to mine as your Square Tuck looks great.
- 332 replies
-
- 3
-
-
- Harpy
- Vanguard Models
- (and 1 more)
-
You have a wonderful model which you must be very proud of. Great work.
- 207 replies
-
- 6
-
-

-
- vanguard models
- Duchess of Kingston
- (and 1 more)
-
Always nice to complete the first planking, yours look good. I have only fitted one plank per side so far on my Harpy.
-
I did chamfer the two stem post fillers which maybe added to the issue. When lined up with the bulkhead guide lines the front bulwark starboard pattern tab sat flush with the stem post slot rather than being pushed in and held in place which did not help.
- 241 replies
-
- 1
-
-
- Vanguarrd Models
- Harpy
- (and 1 more)
-
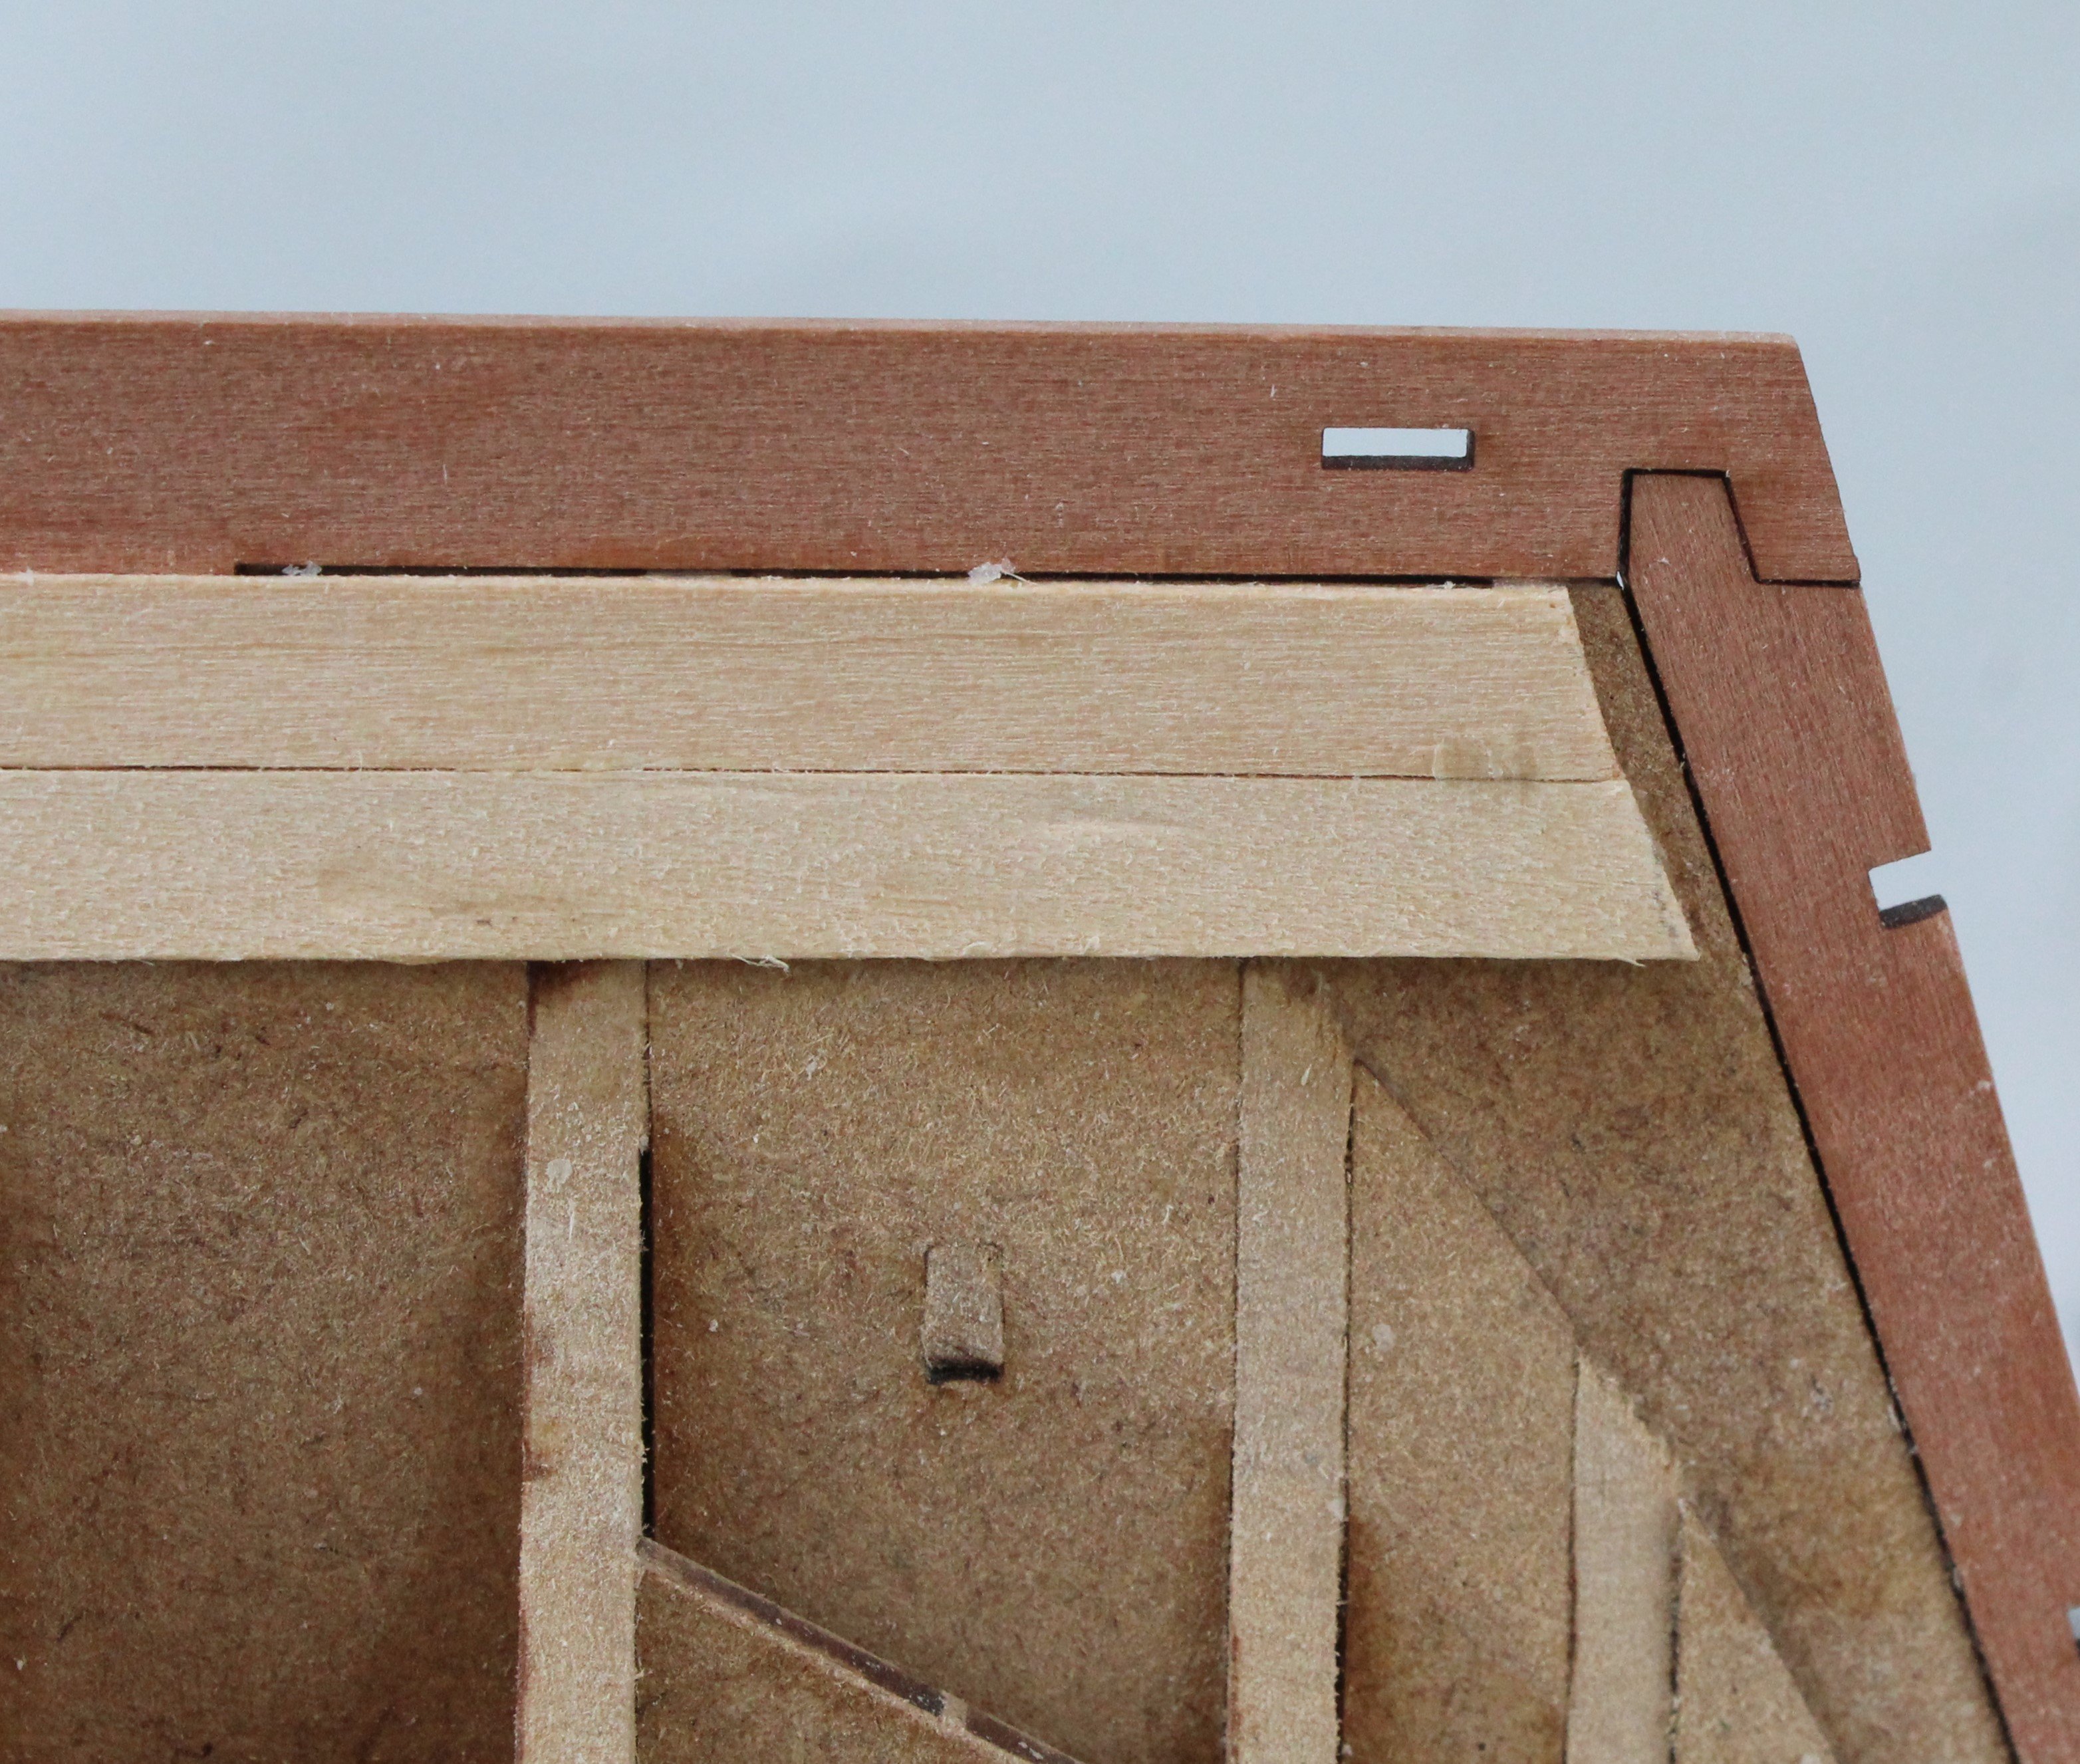
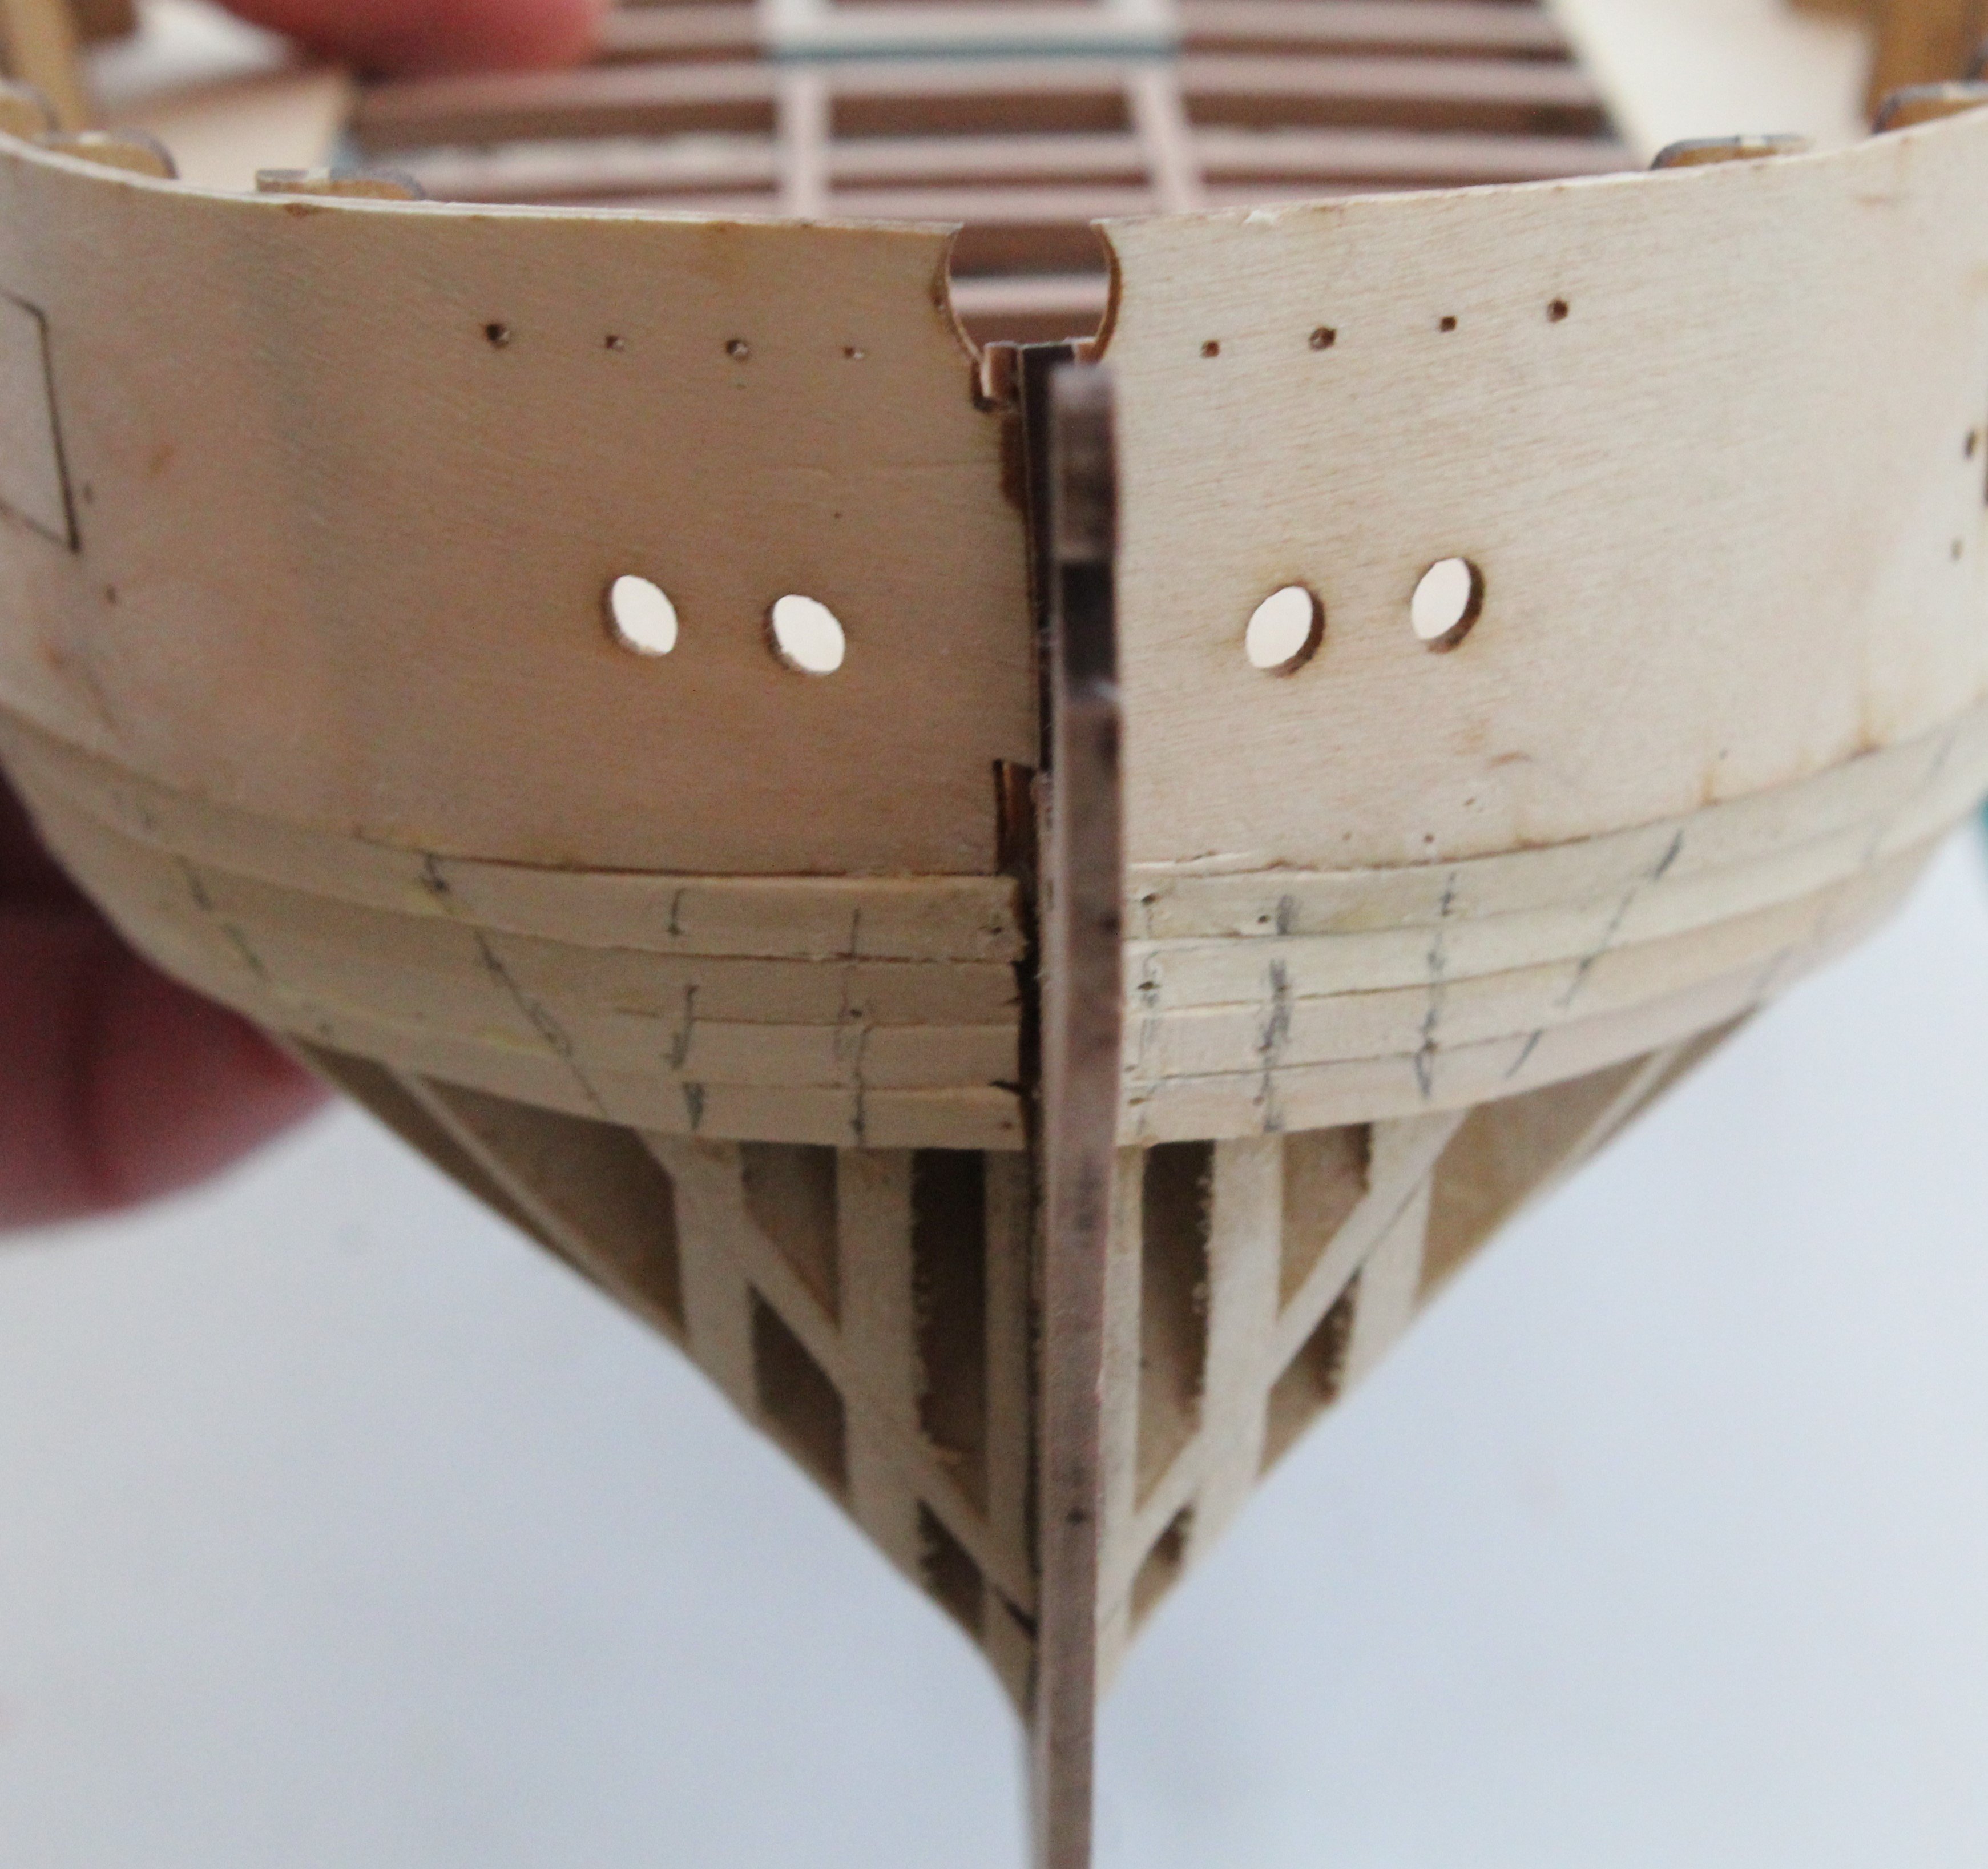
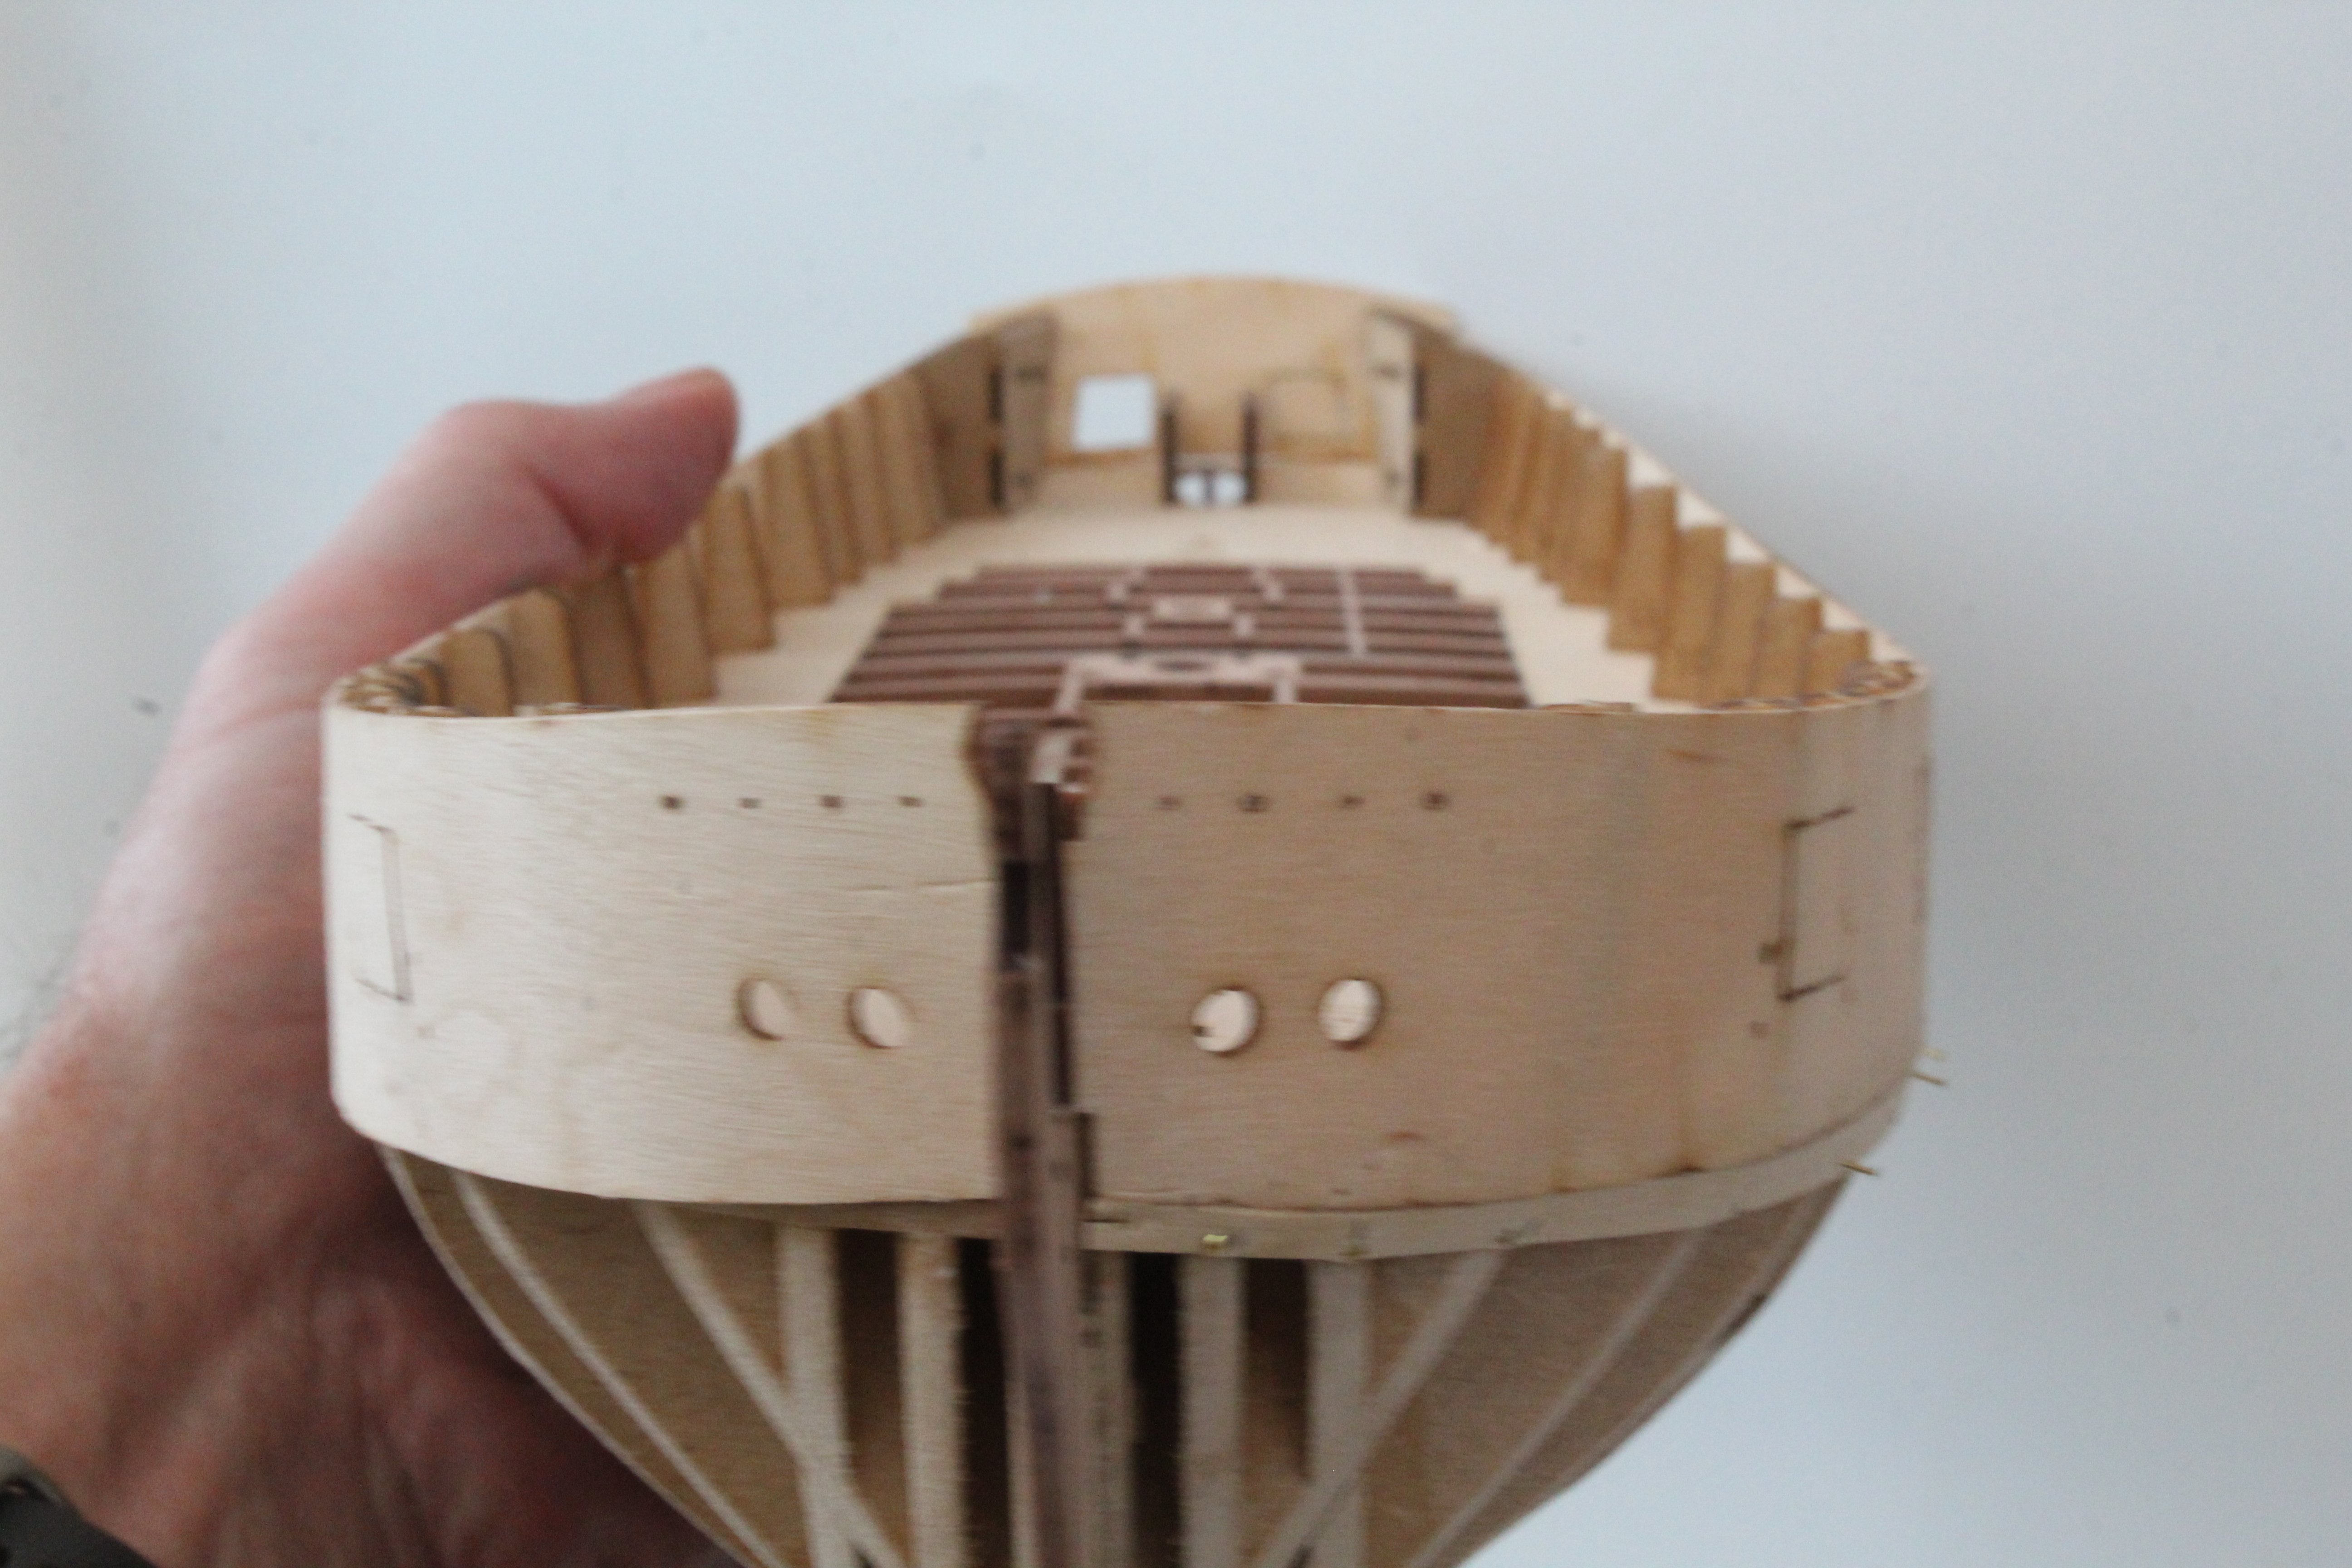
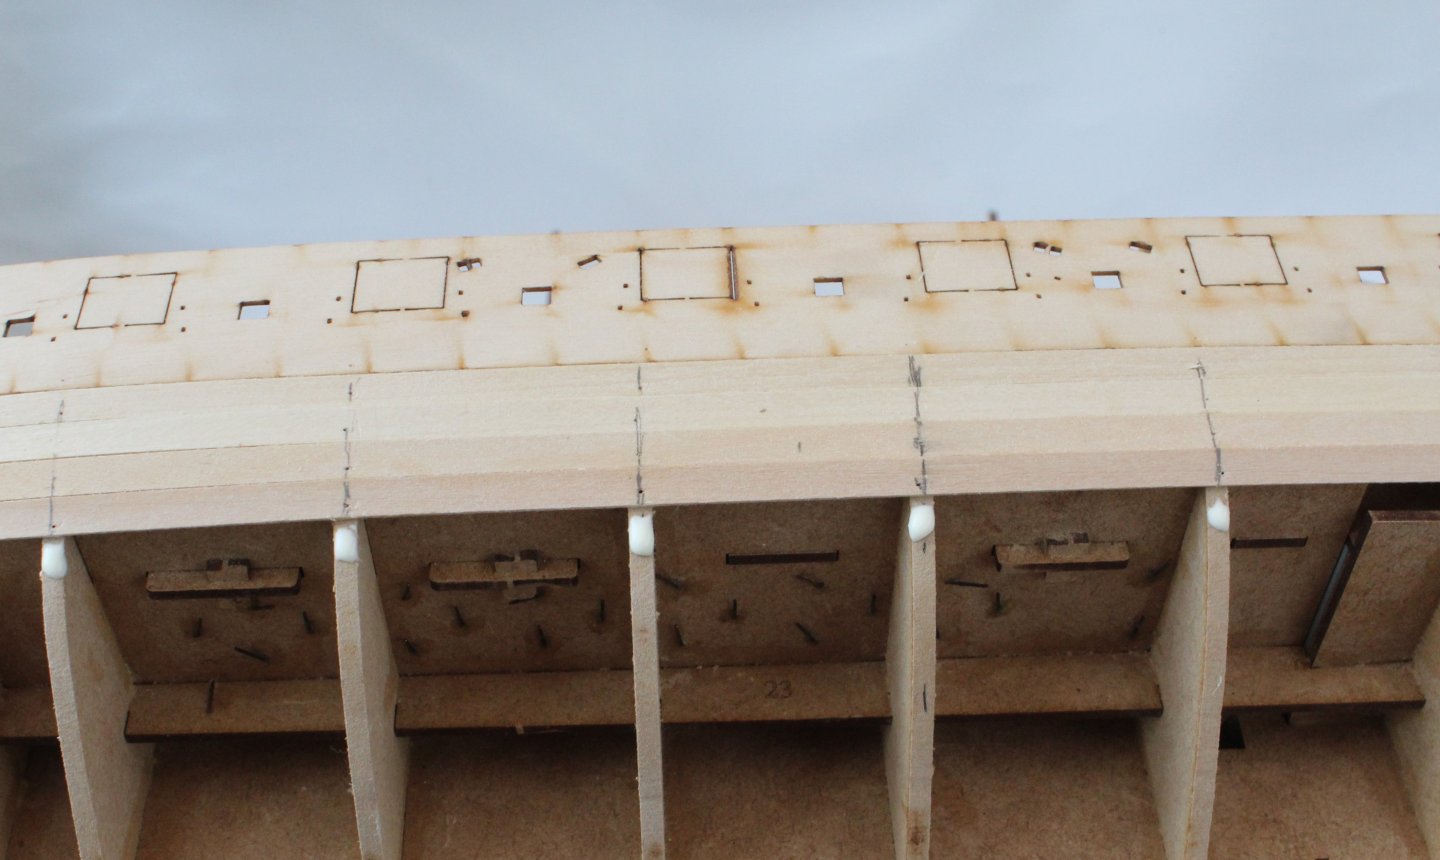
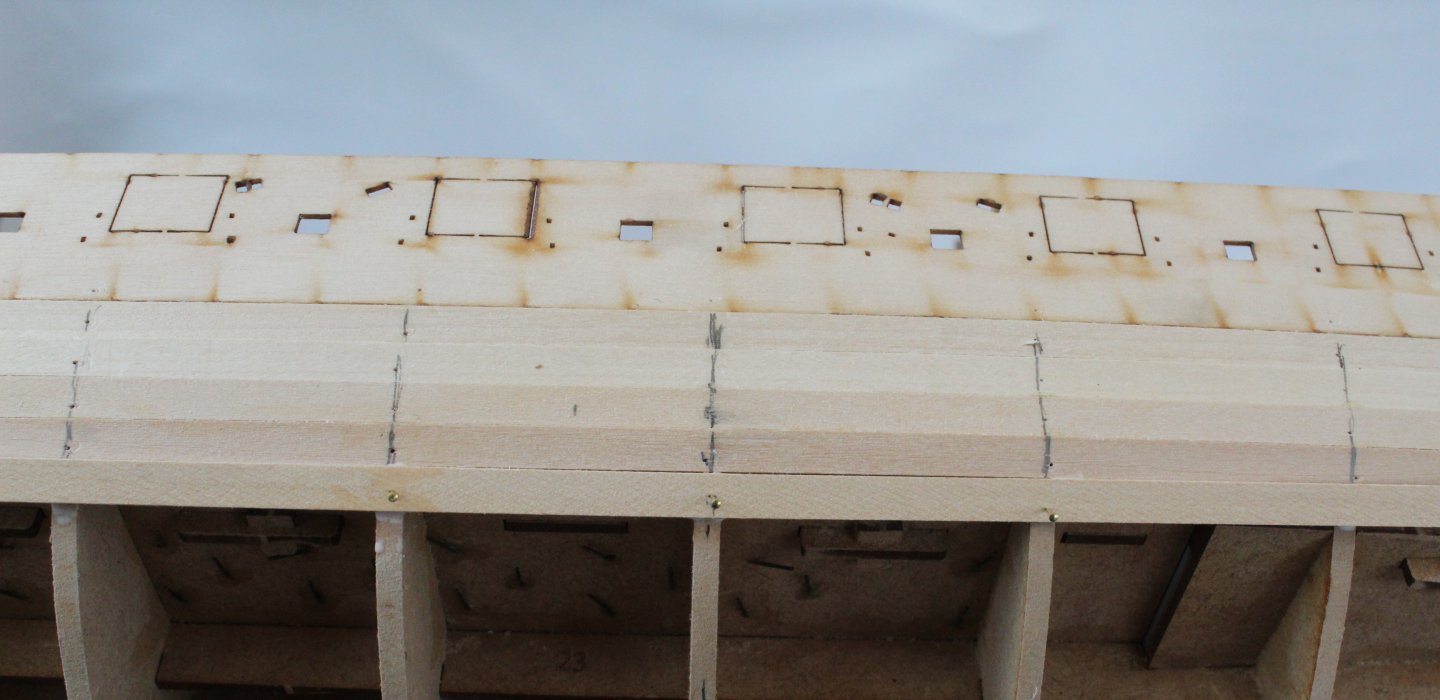
Not a great start to the day. When I went into the shipyard to add the first plank to the other side I noticed a problem with the alignment right-hand bulwark (left side when looking at the photo below) pattern. Although the pattern laser etched guide lines are perfectly aligned to the deck for the most part, it can be seen the bow section must have slipped during the clamping process, which I had not noticed. I think, after clamping the bow section, I was so focused on aligning the pattern using the laser etched guide lines, I did not recheck the bow section after all the clamps and pins had been added. When looking at the next photo it can be seen that the problem starts somewhere between the last two bulkheads. My initial reaction was leave it has fitted and trust that it would not be that noticeable as the build progresses. Then the newer version of my said "Stop! this is shoddy workmanship and is simply not acceptable". With a little bit of fear and trepidation I brushed plenty of warm water to the wood glue area. After a few minutes I started to ease the pattern away from the bow and two leading bulkheads. Thankfully I was able to do this without causing any significant damage. It was then a case of repositioning the pattern around the bow section. It took a few attempts before I was happy with the alignment. With clamps holding the pattern in place I left the shipyard. A couple of hours later I returned to the shipyard to remove the clamps and thankfully the bow pattern looks so much better, as can be seen by looking at the out of focus picture below. It is not 100% perfect but I have deemed it acceptable. The pattern laser etched lines are now aligned with the deck.


- 241 replies
-
- 16
-
-
- Vanguarrd Models
- Harpy
- (and 1 more)
-
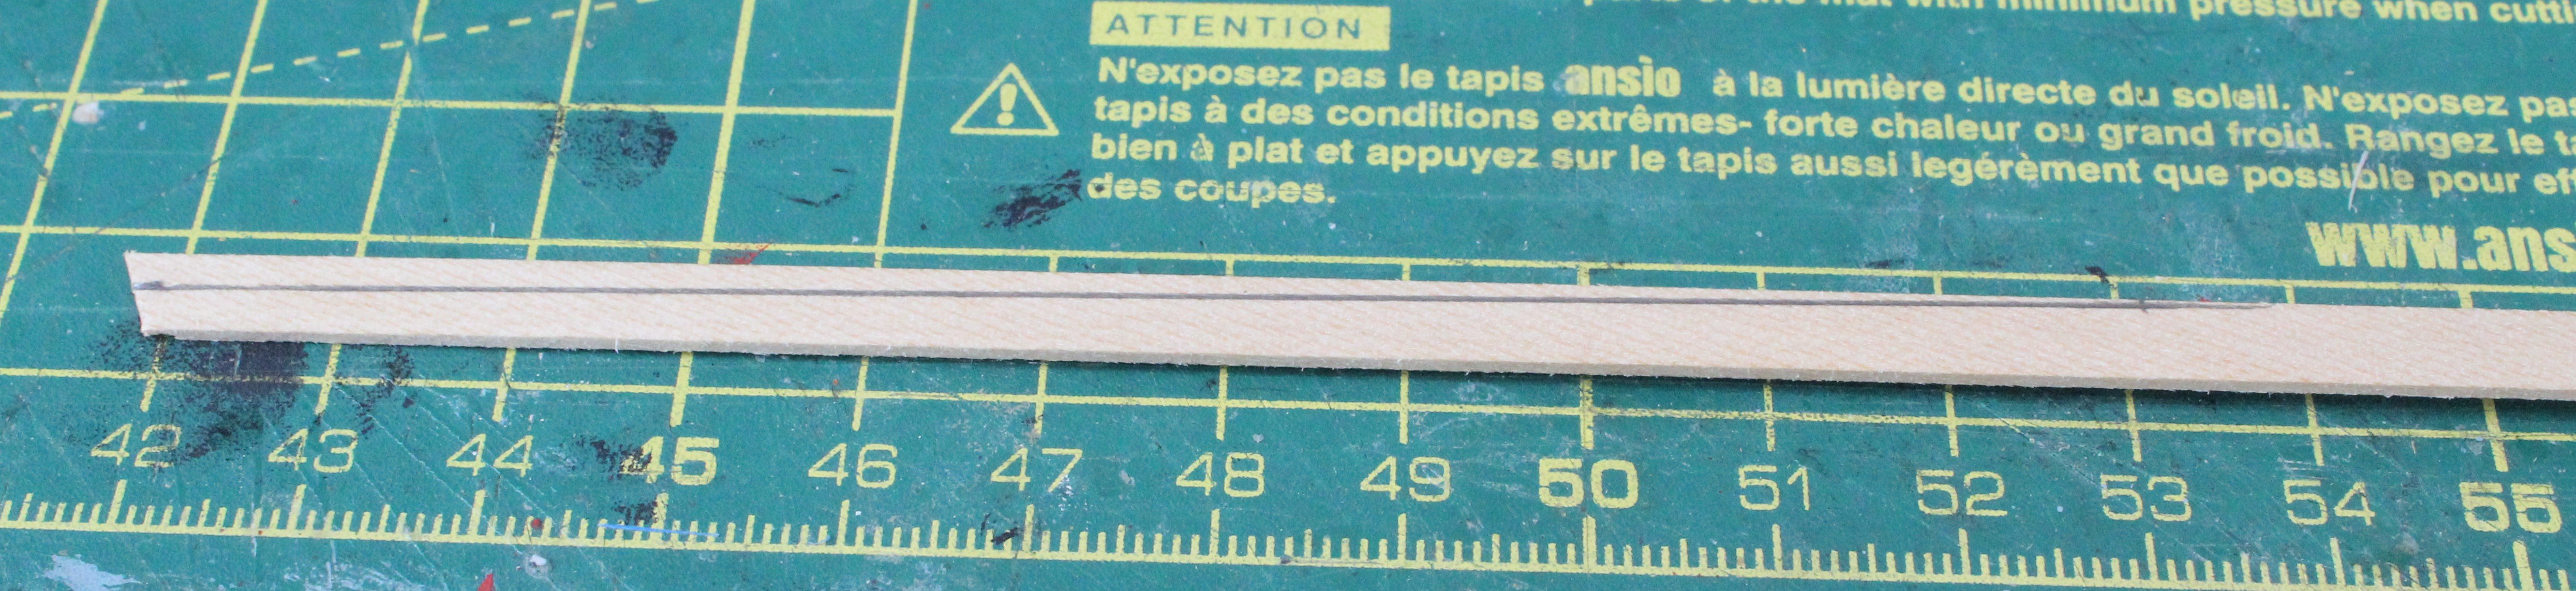
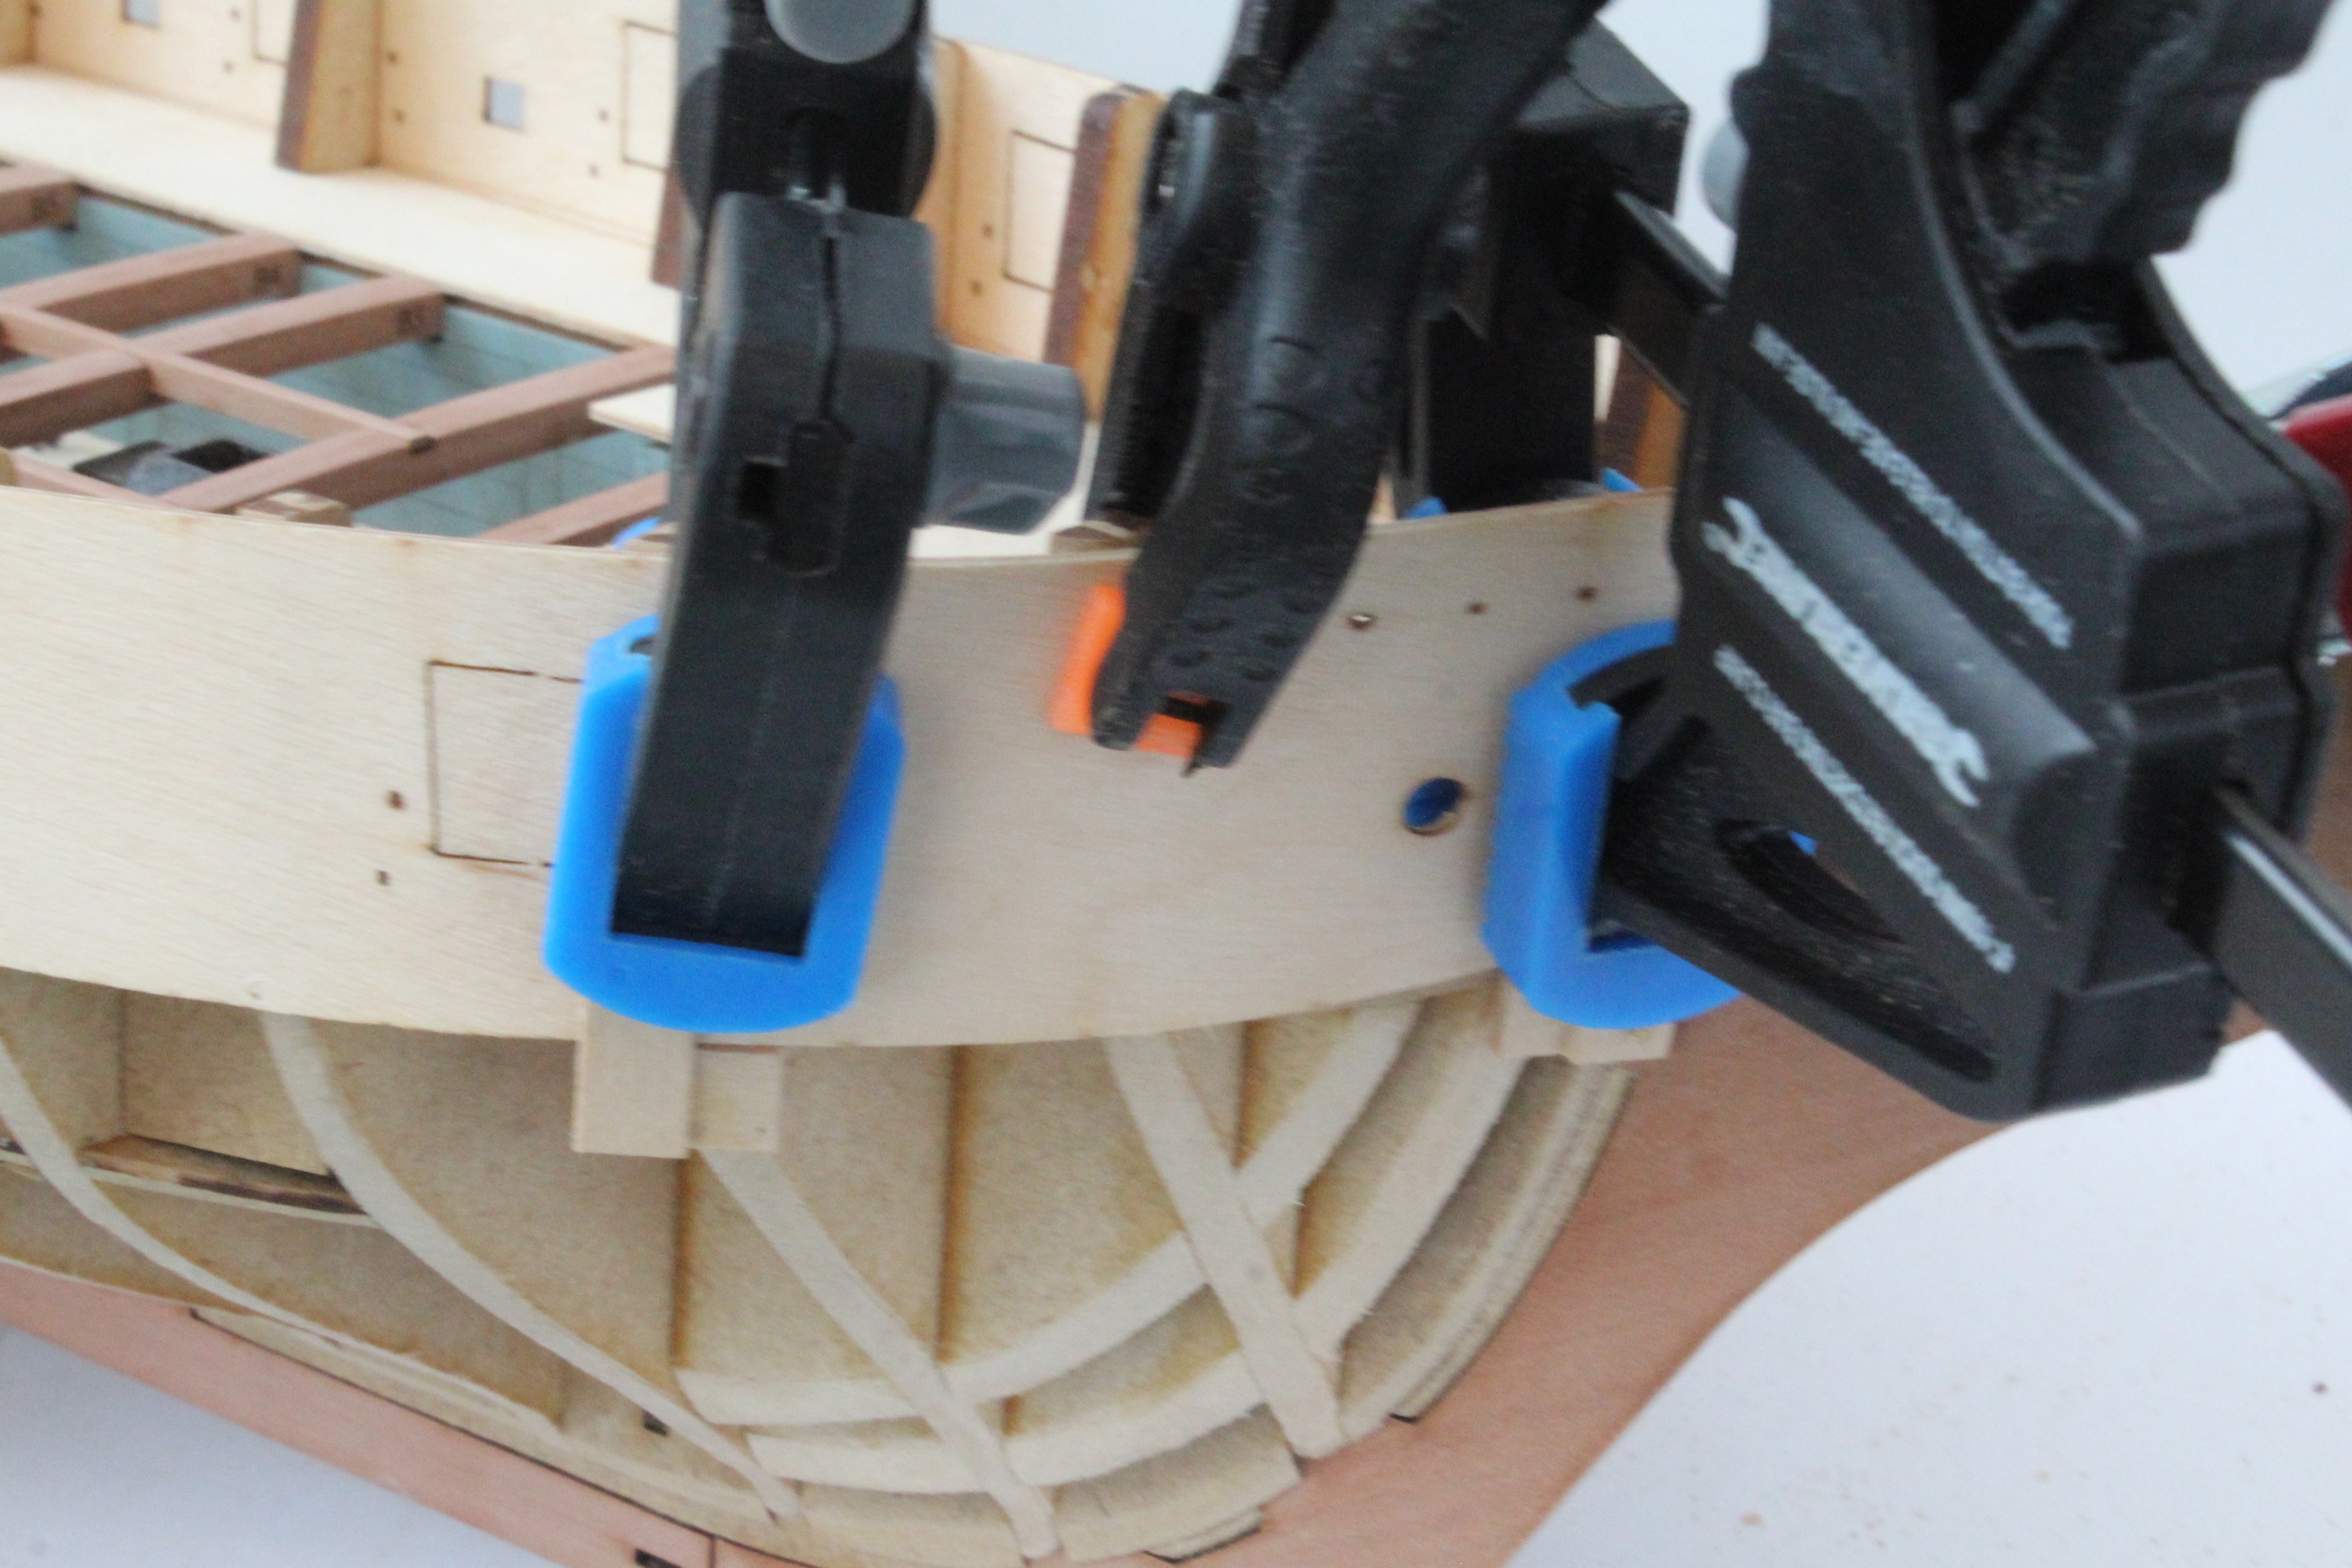
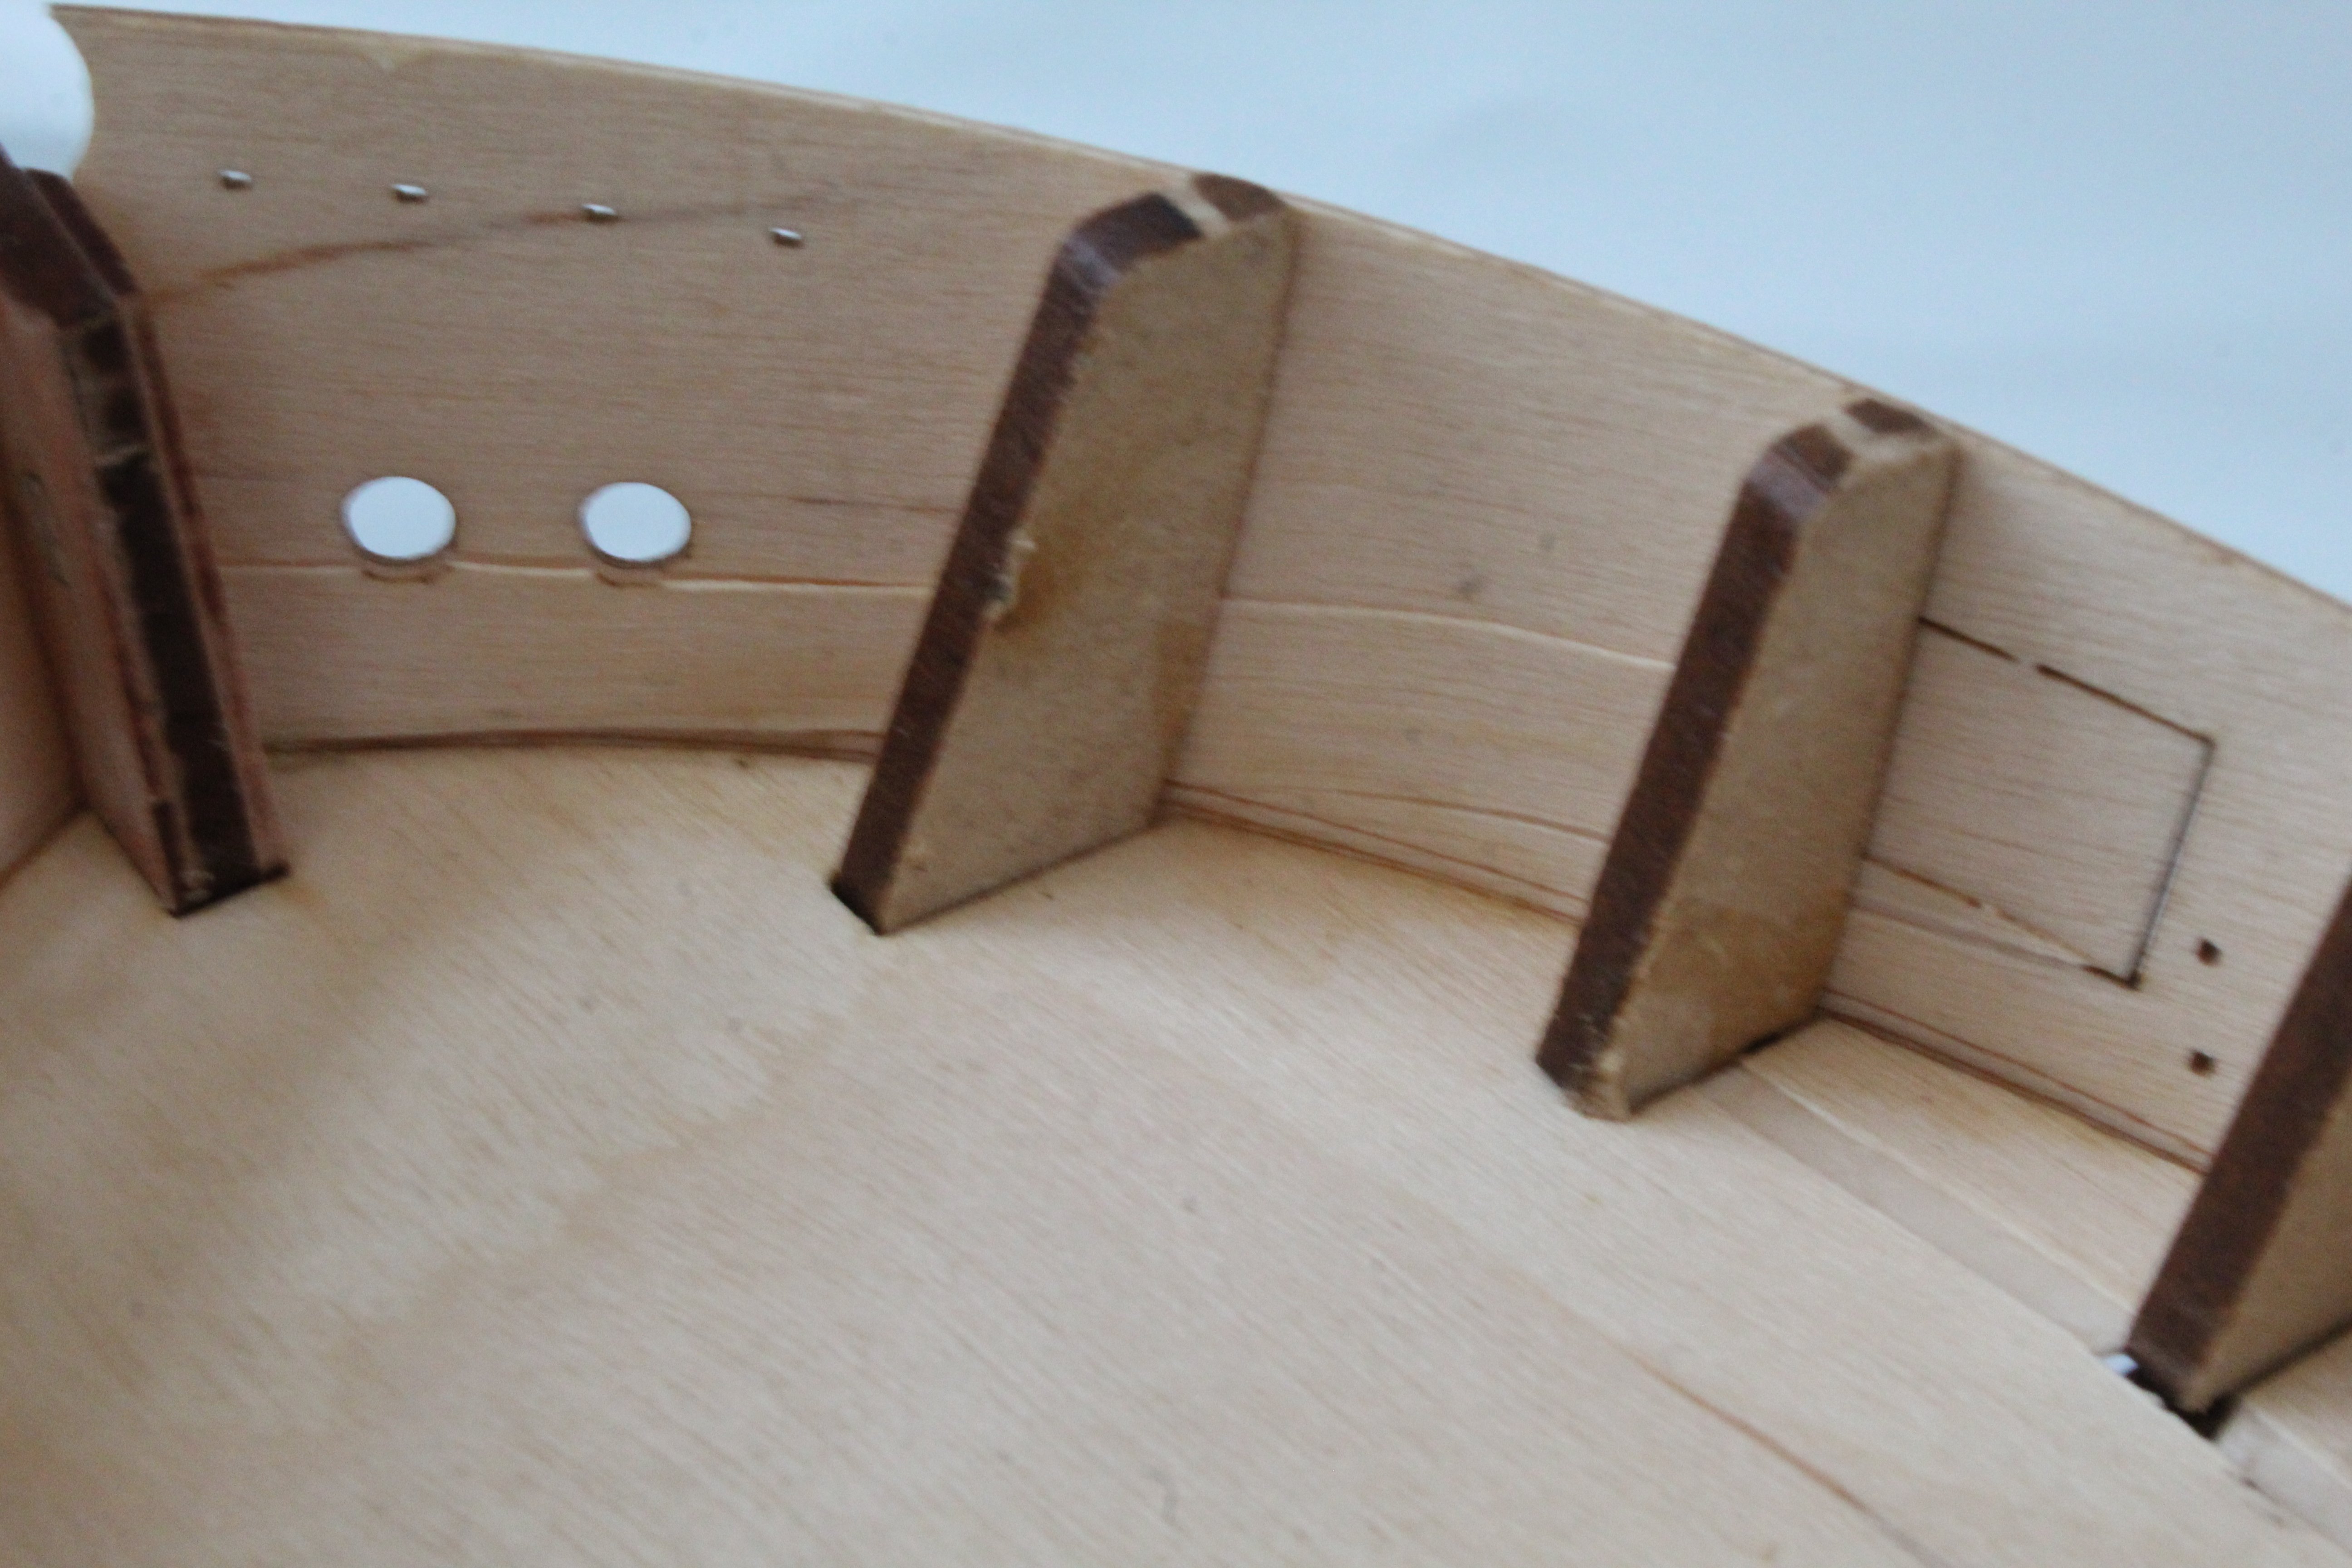
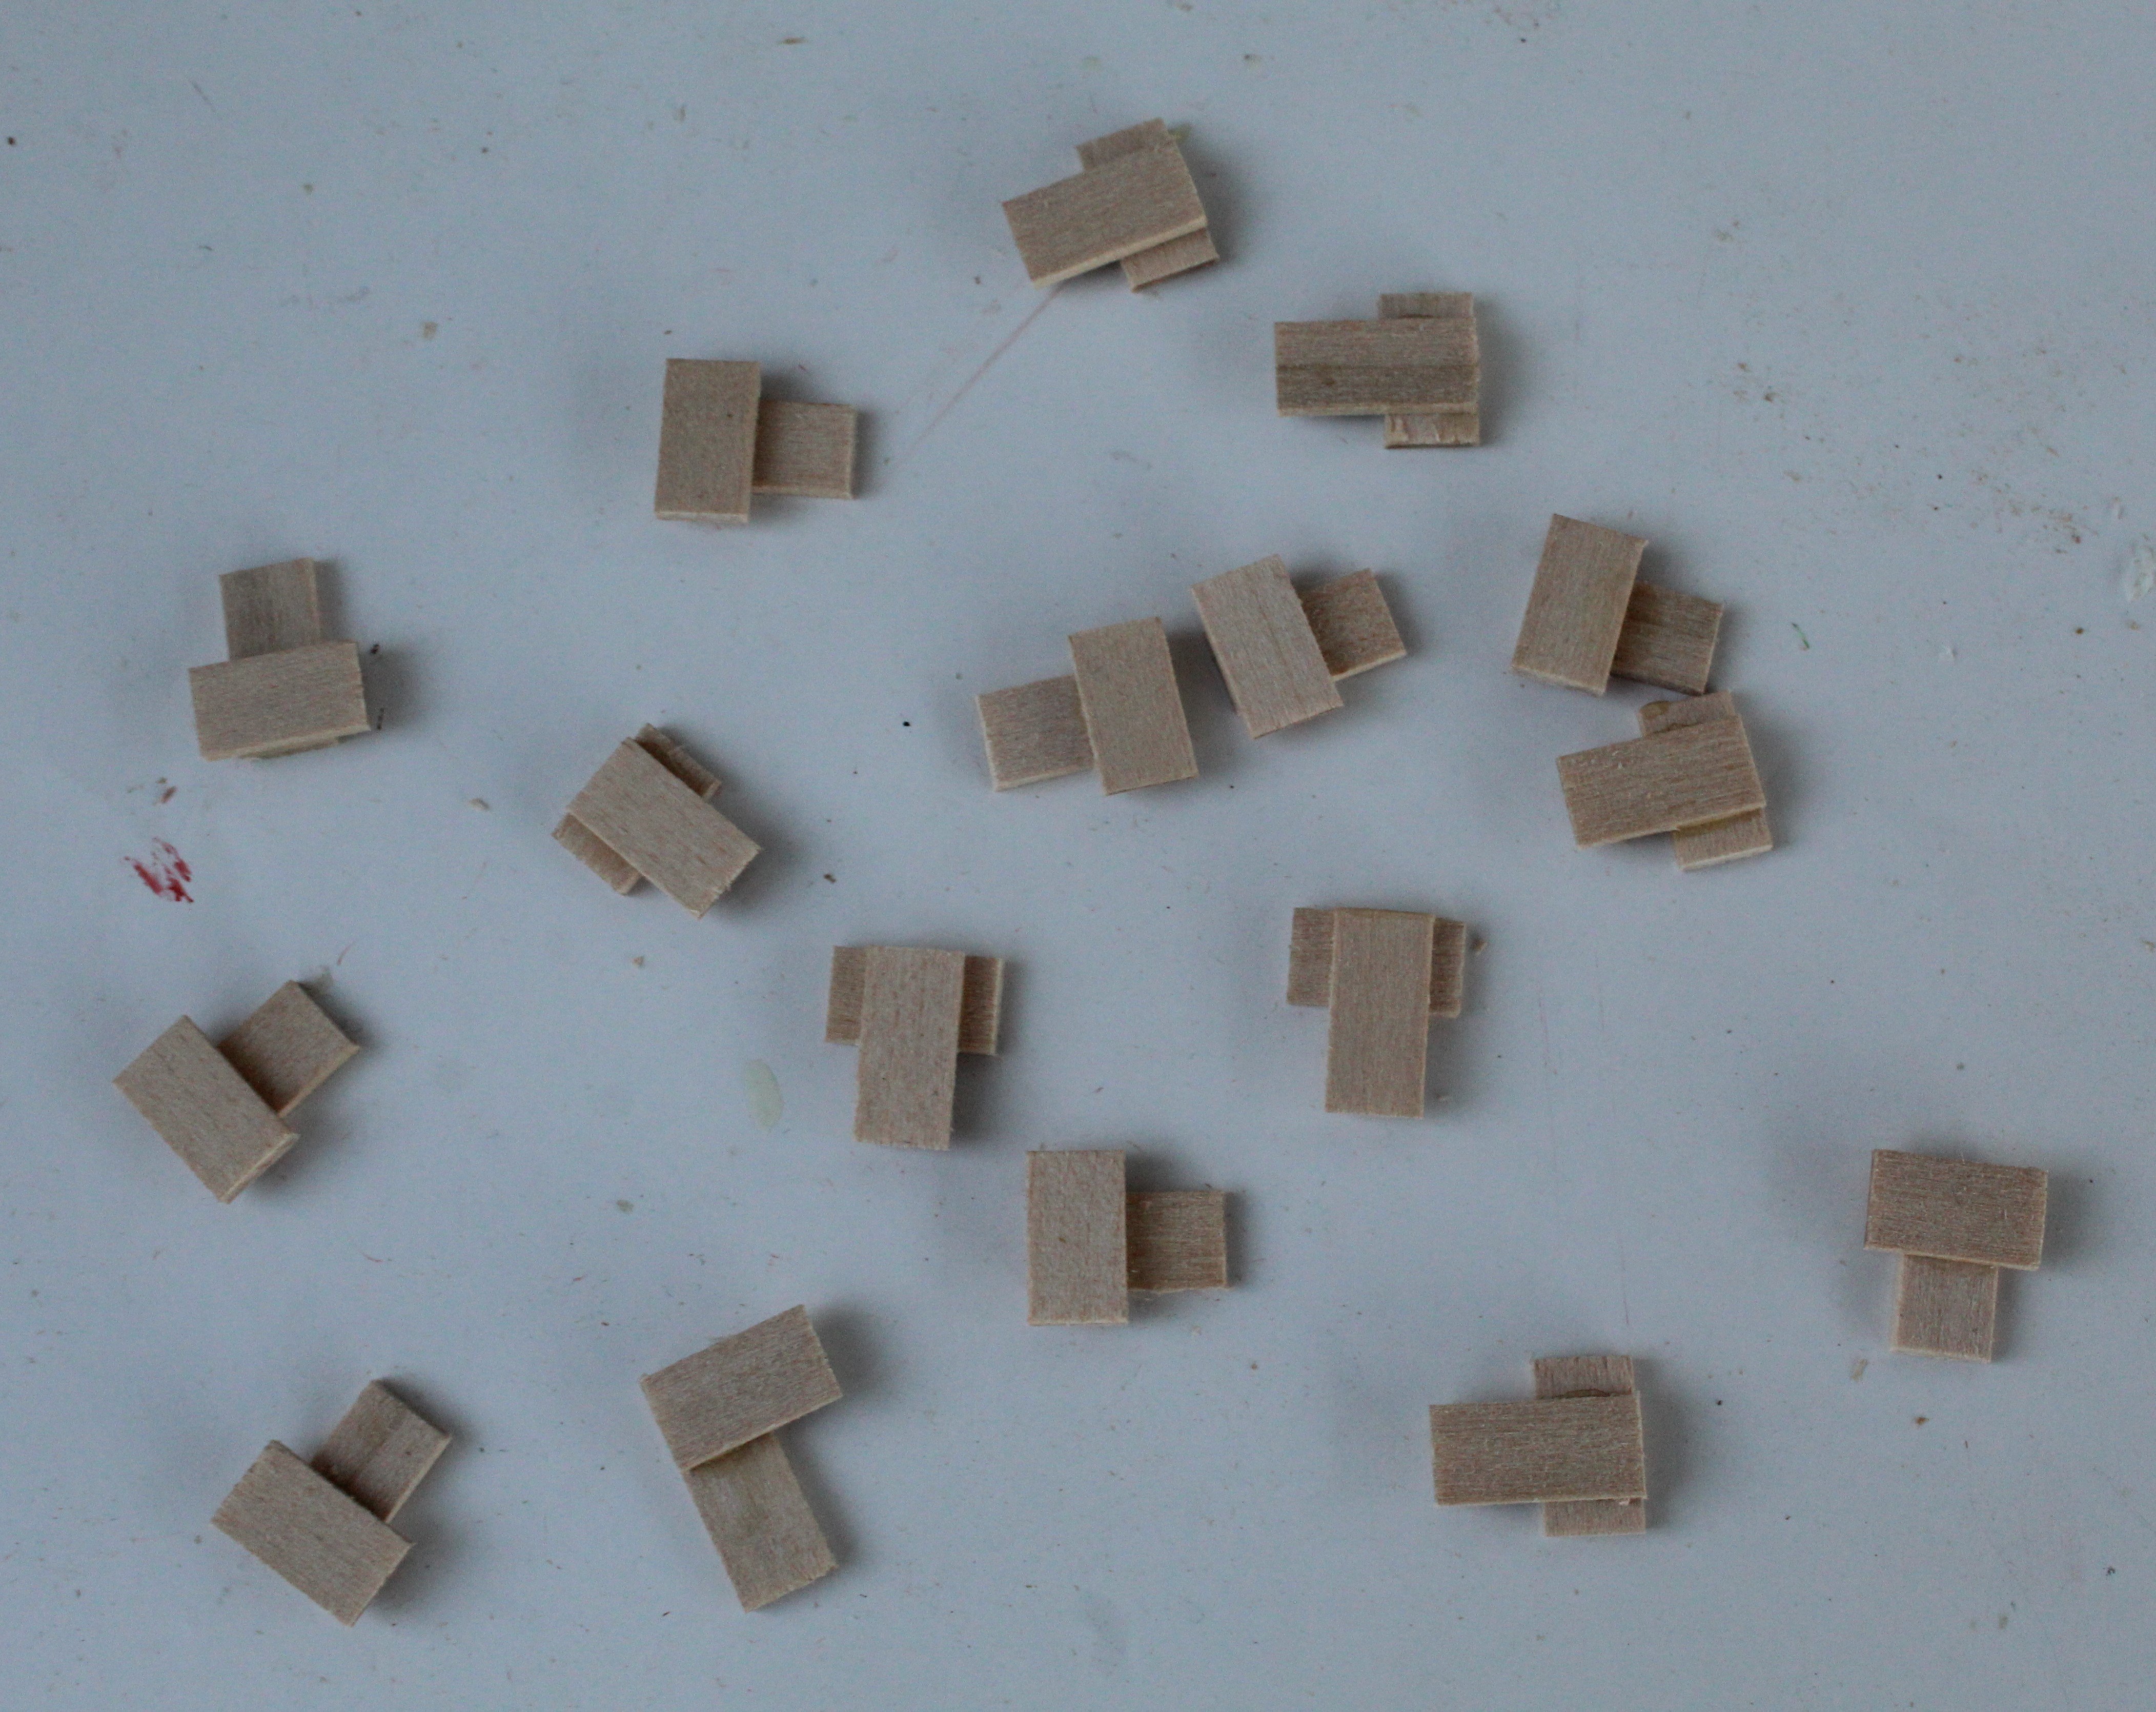
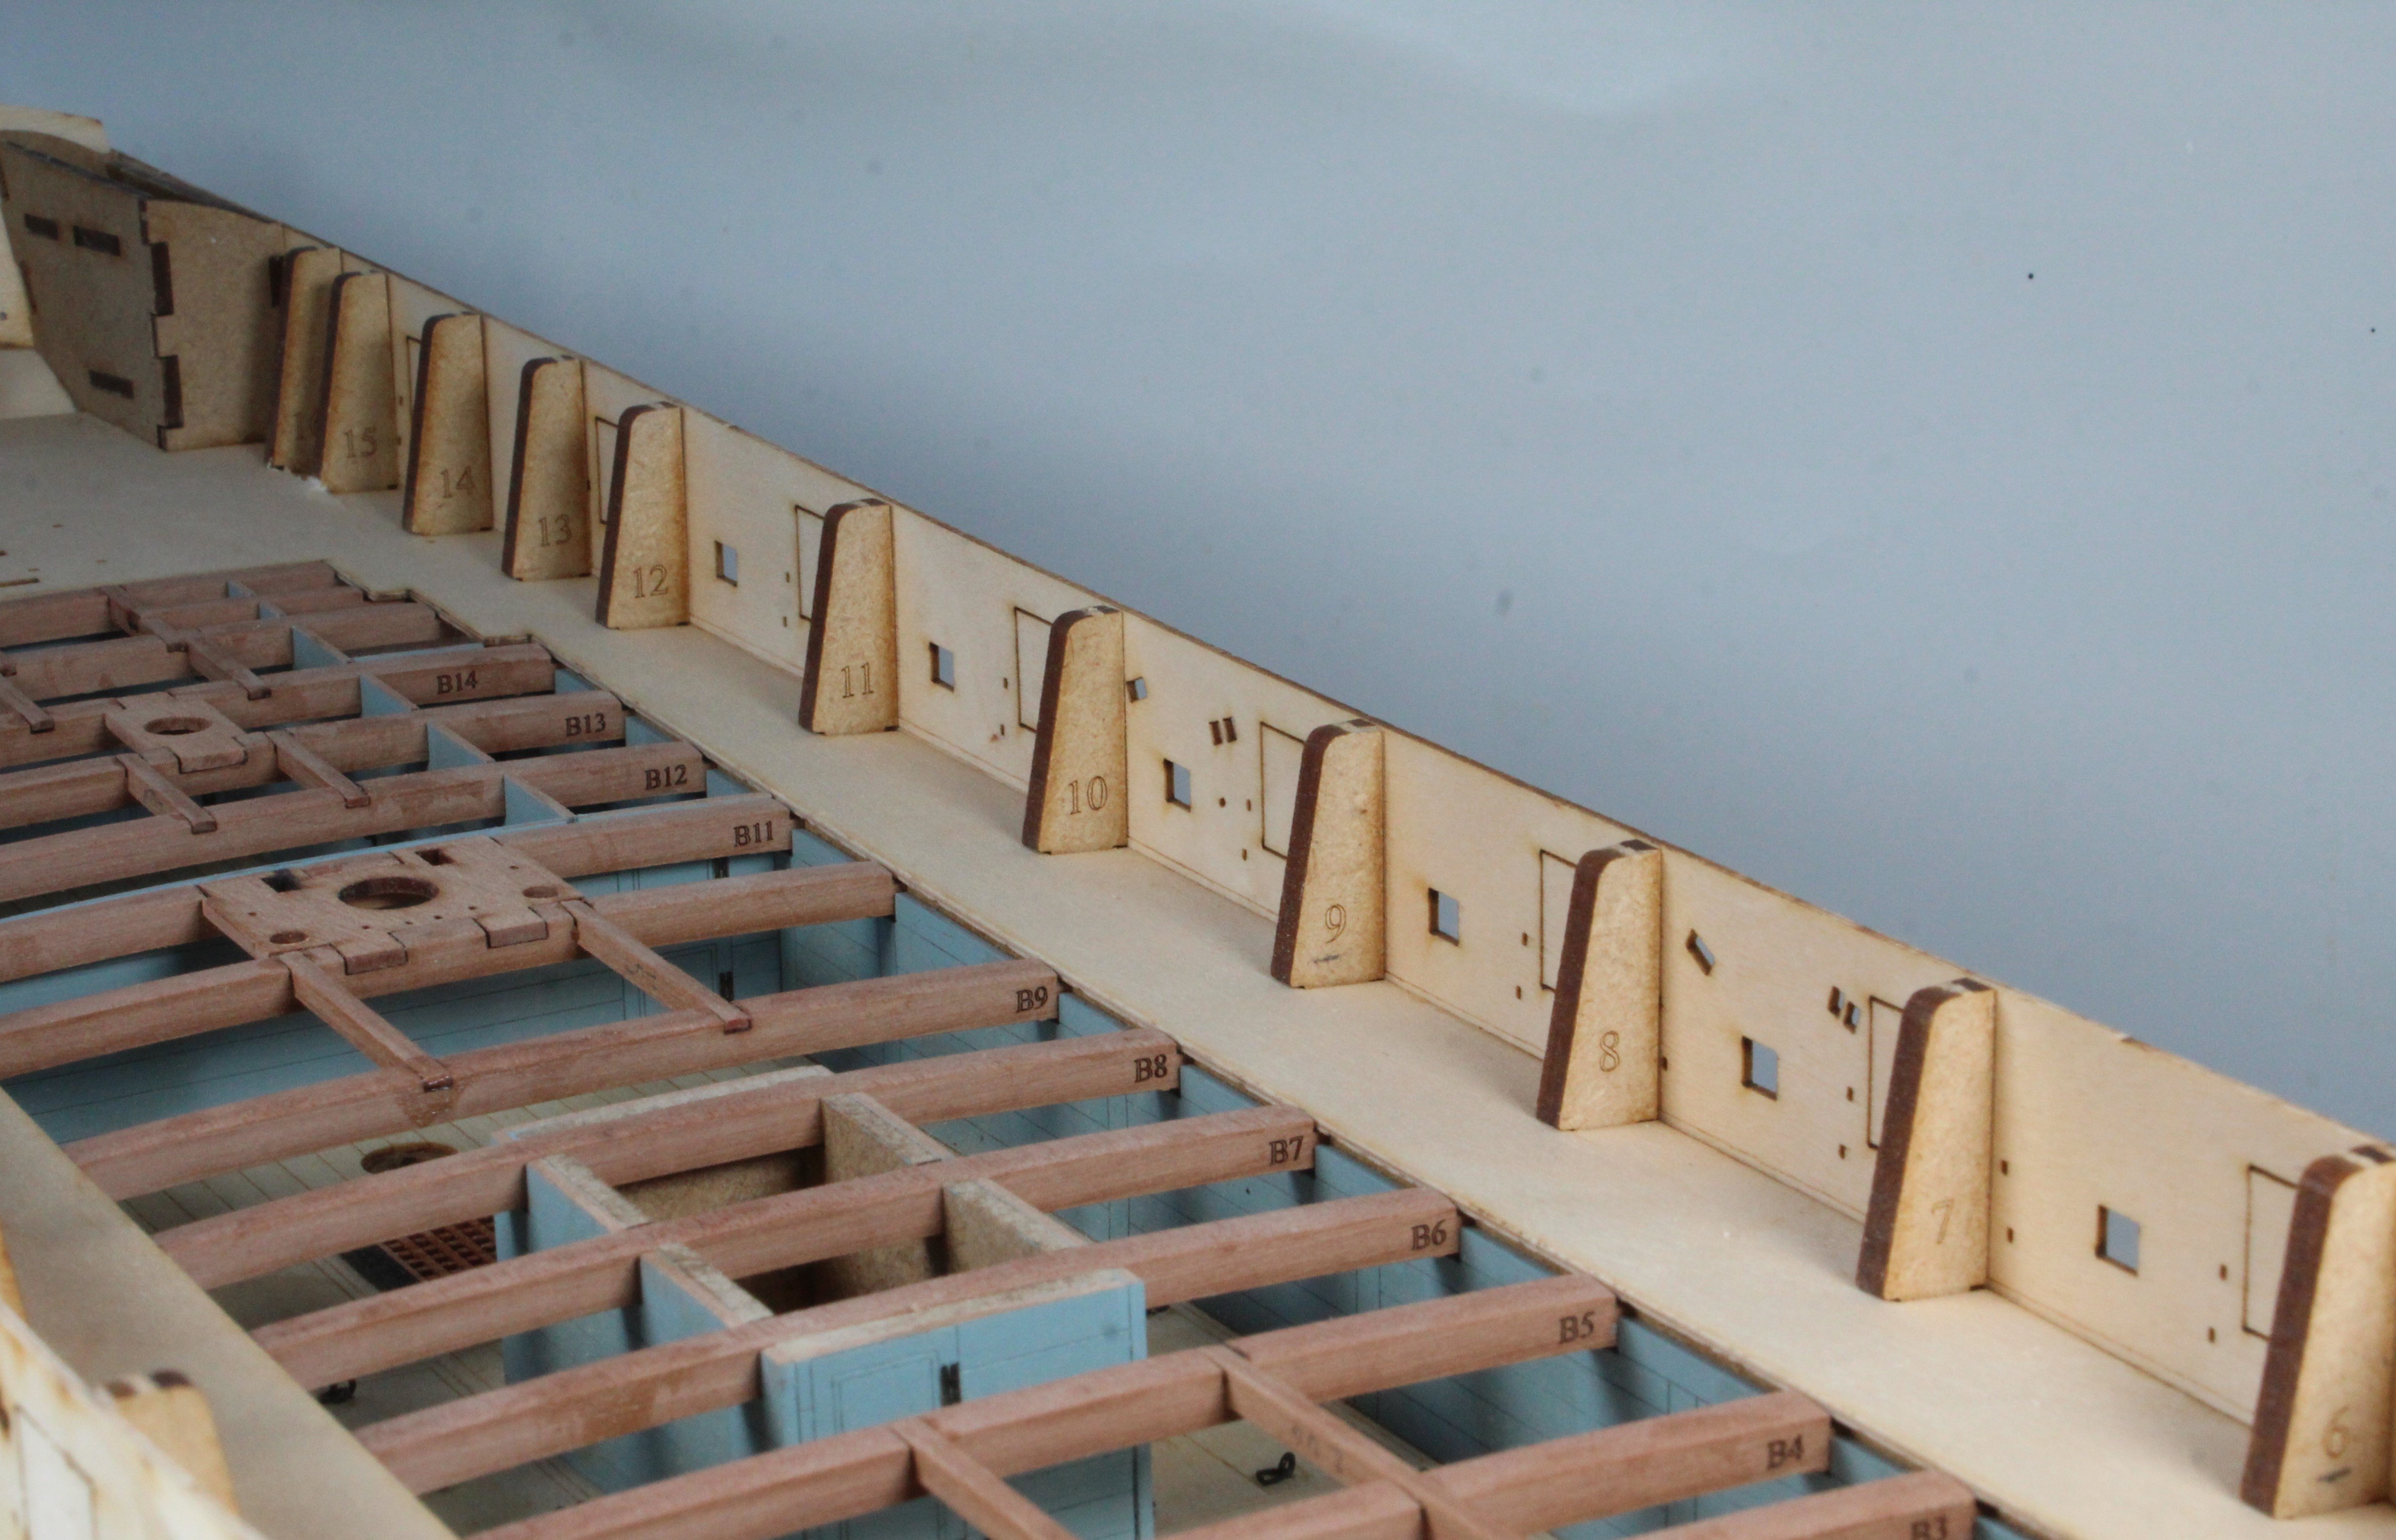
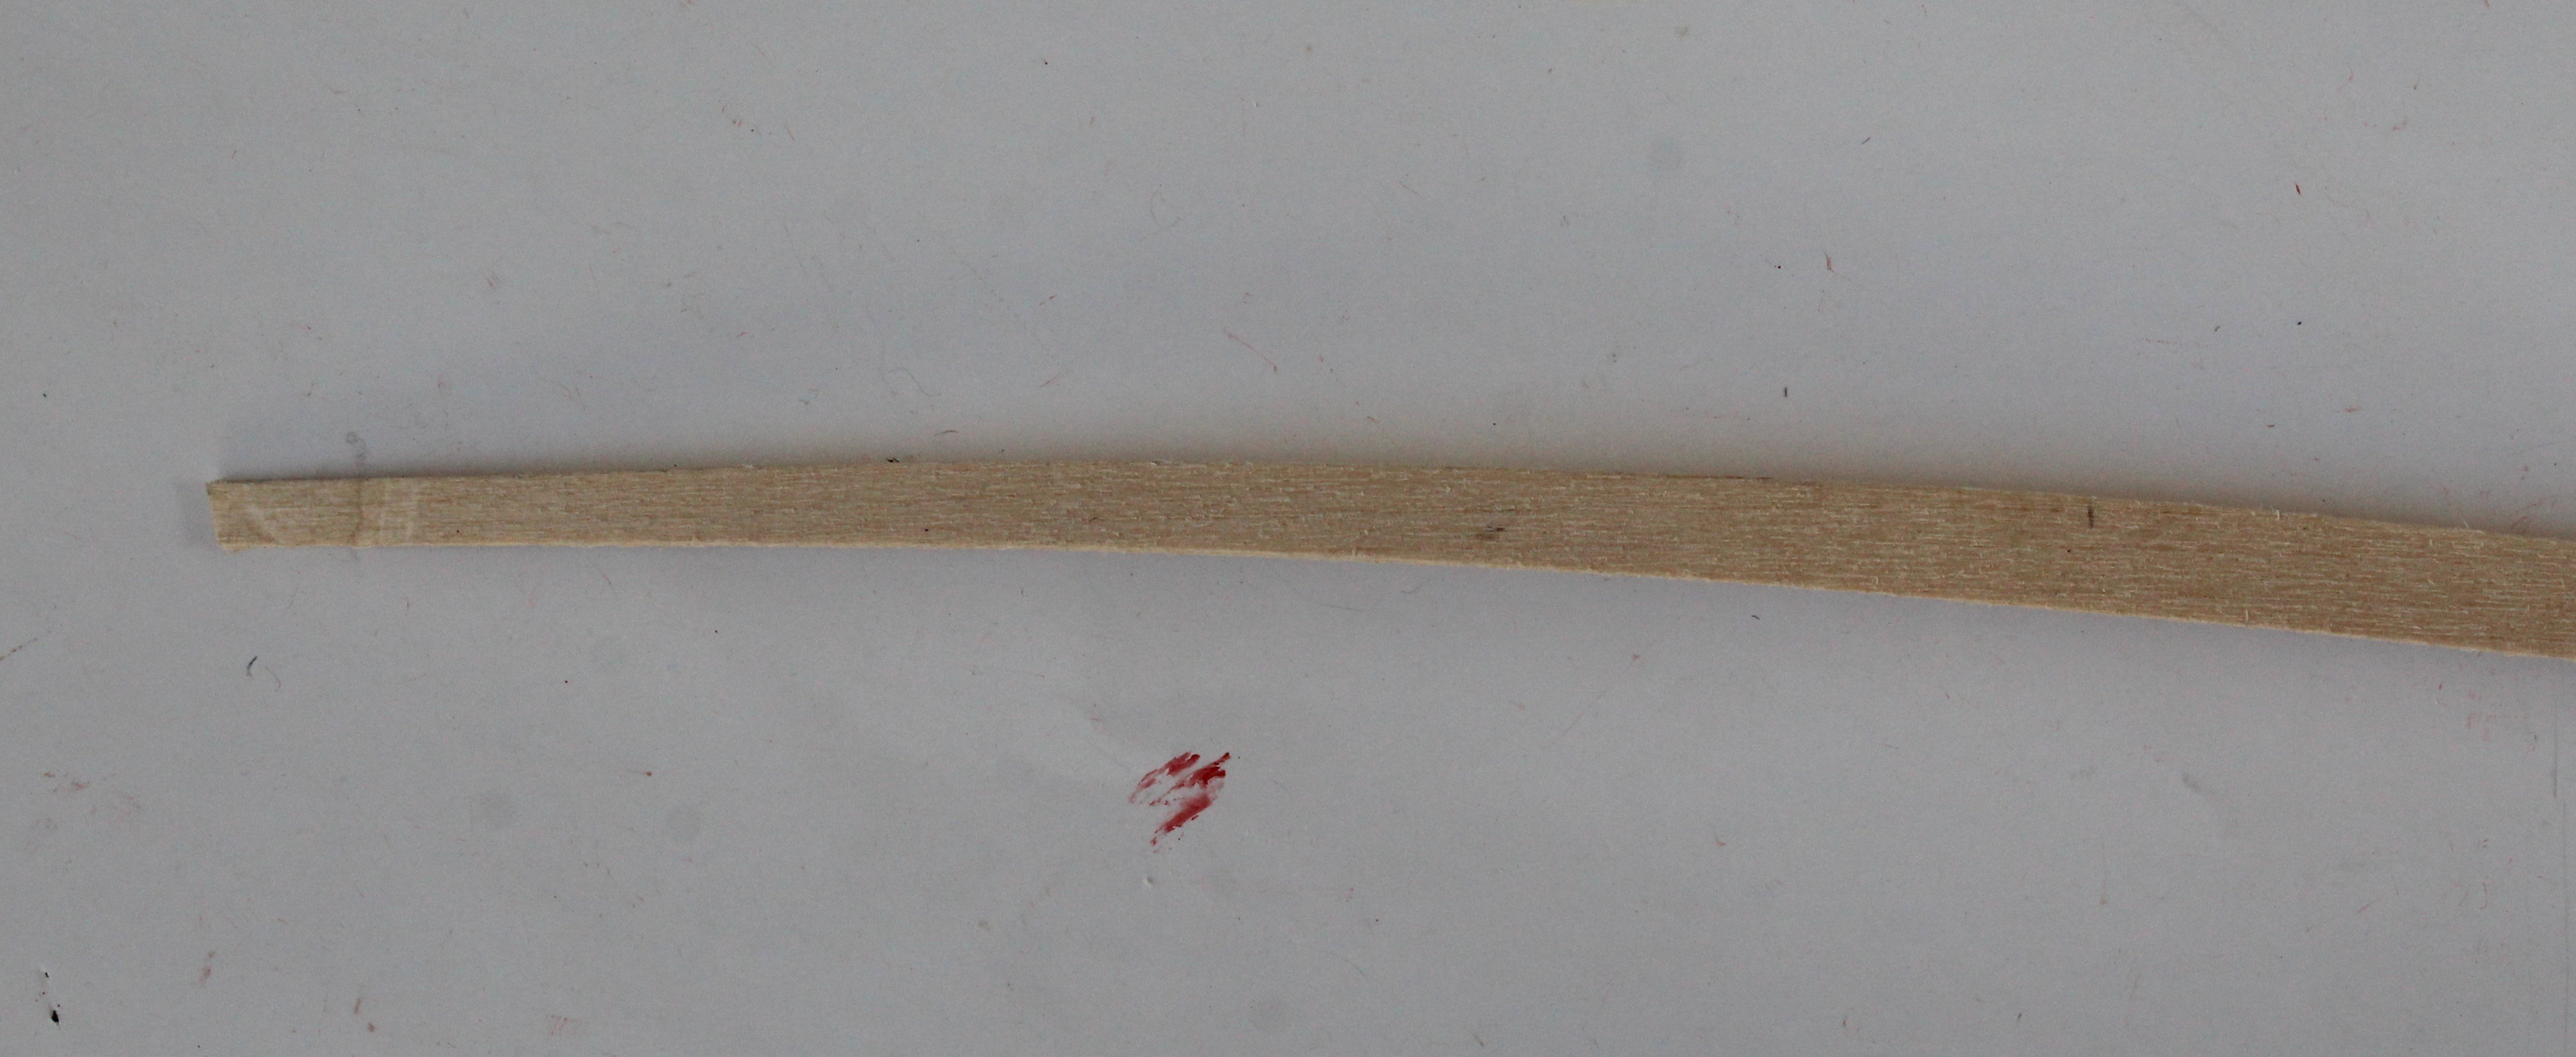
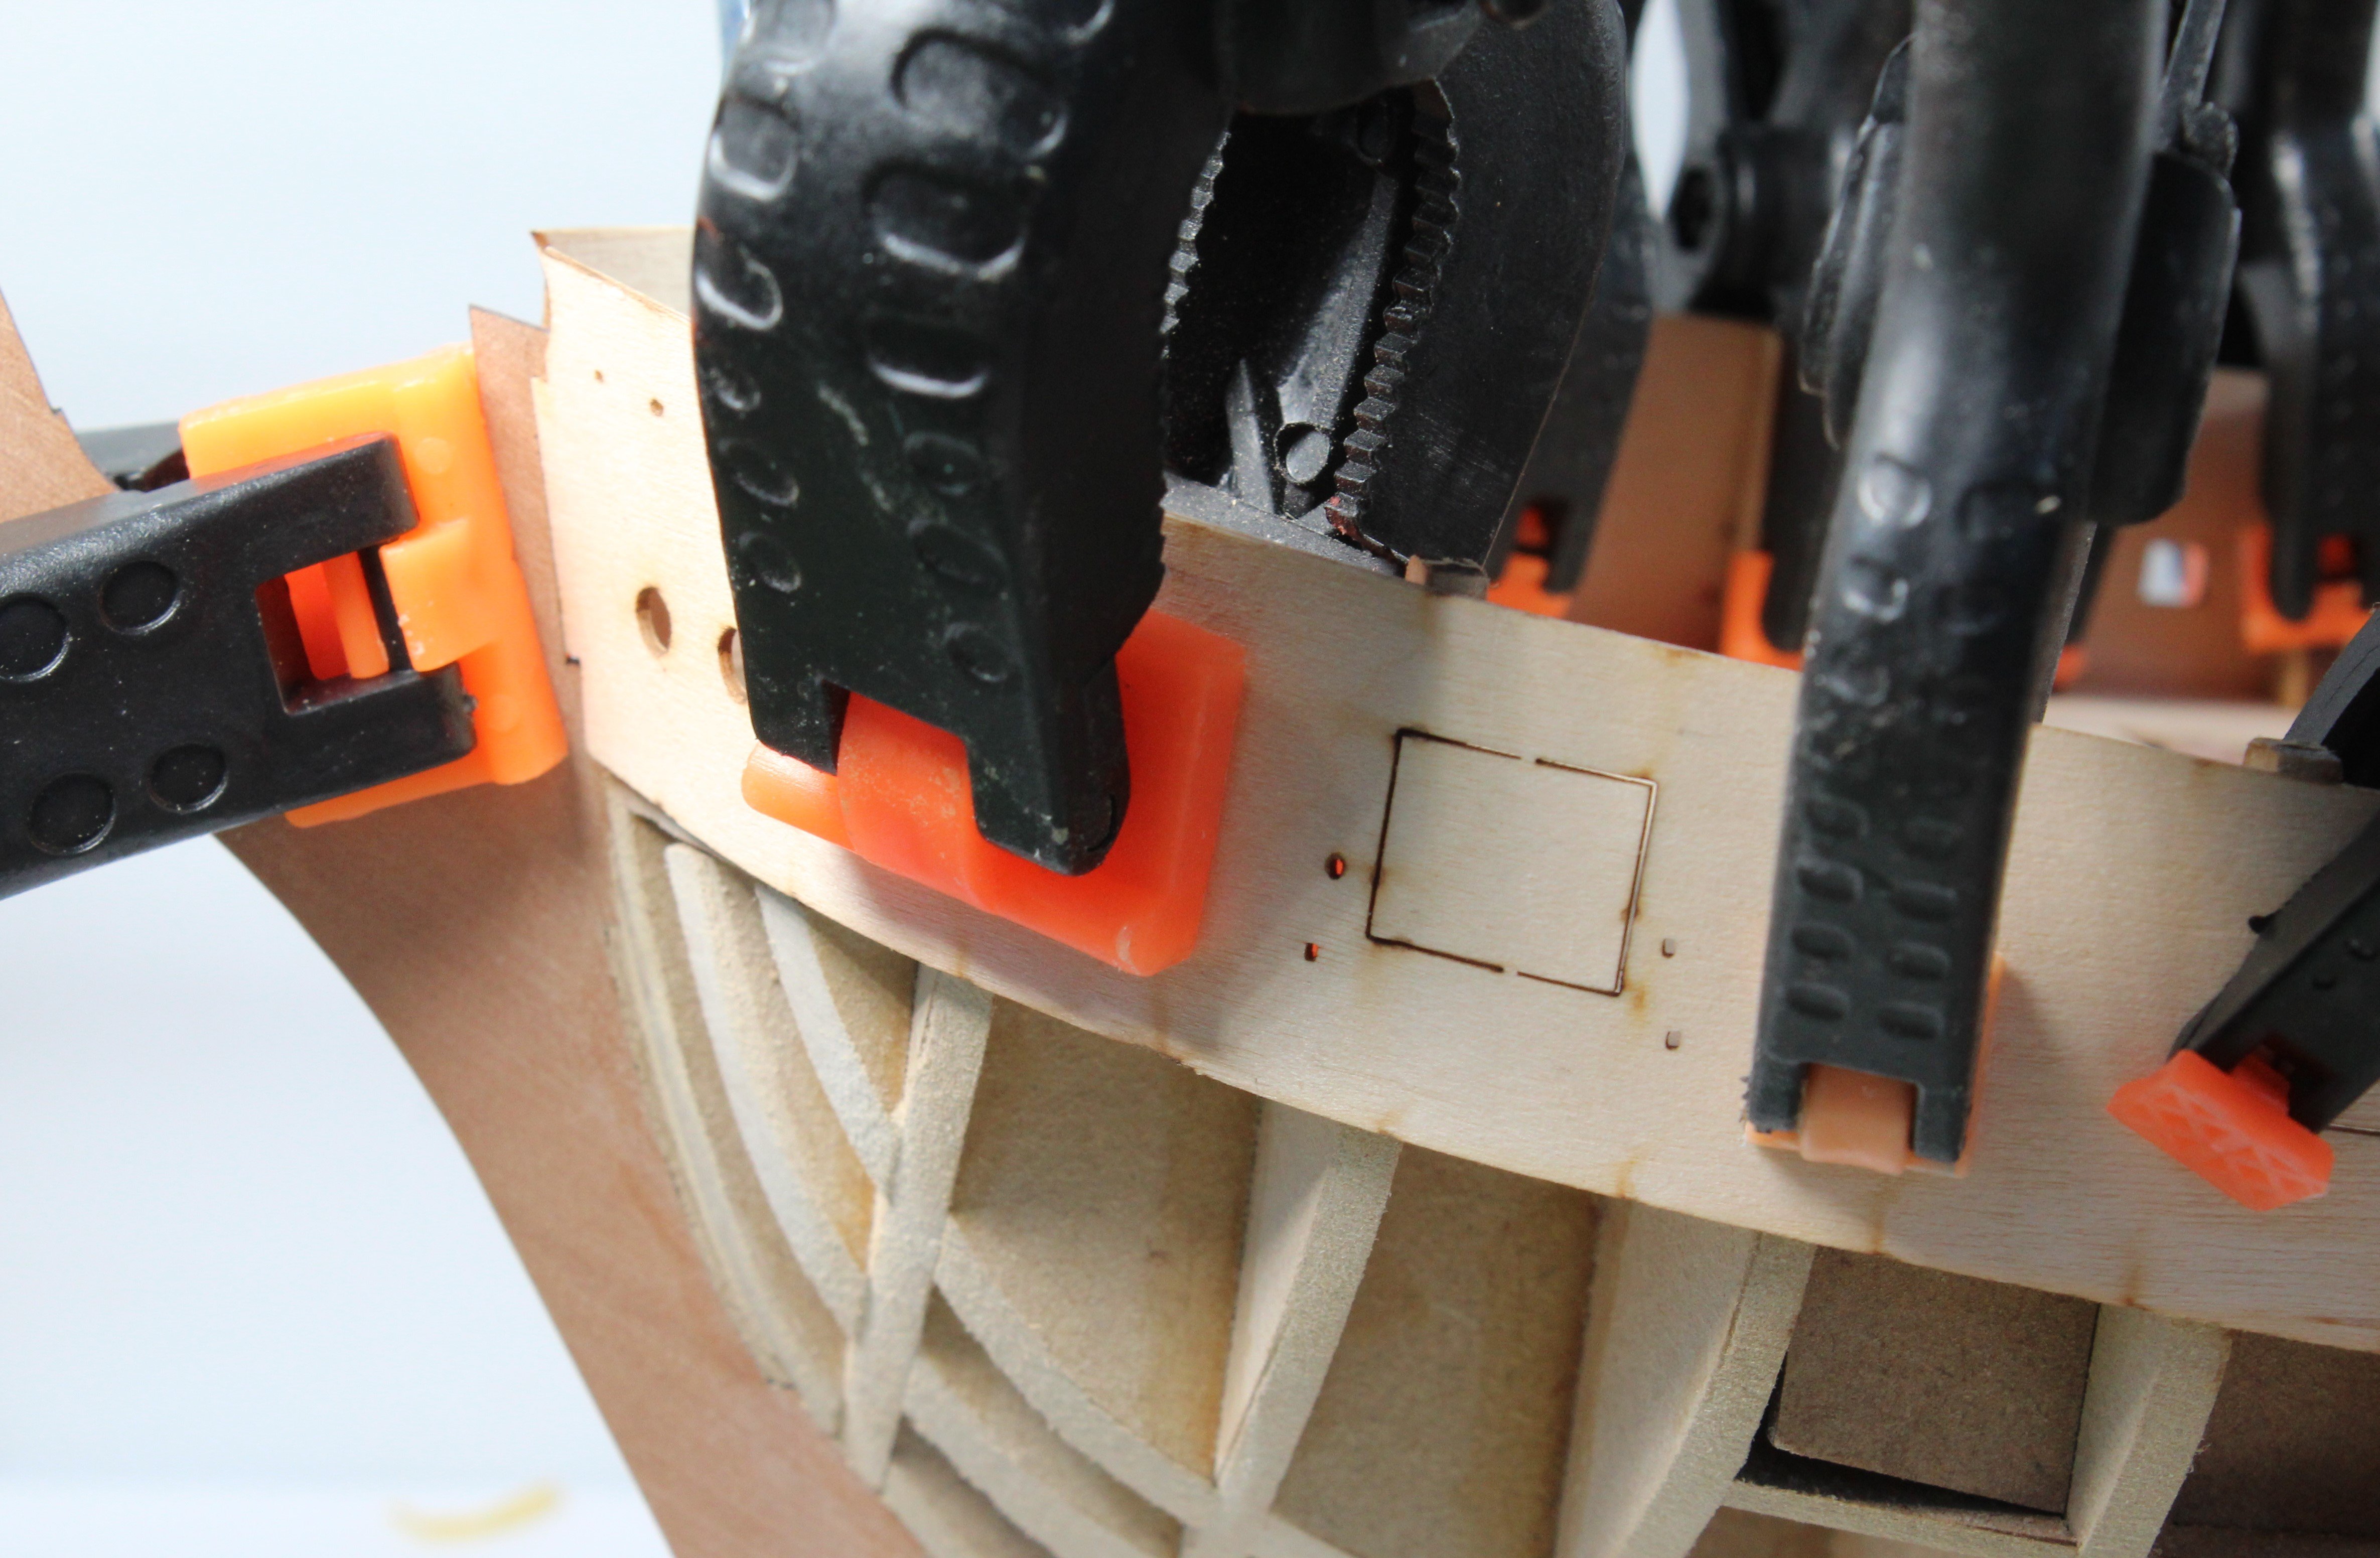
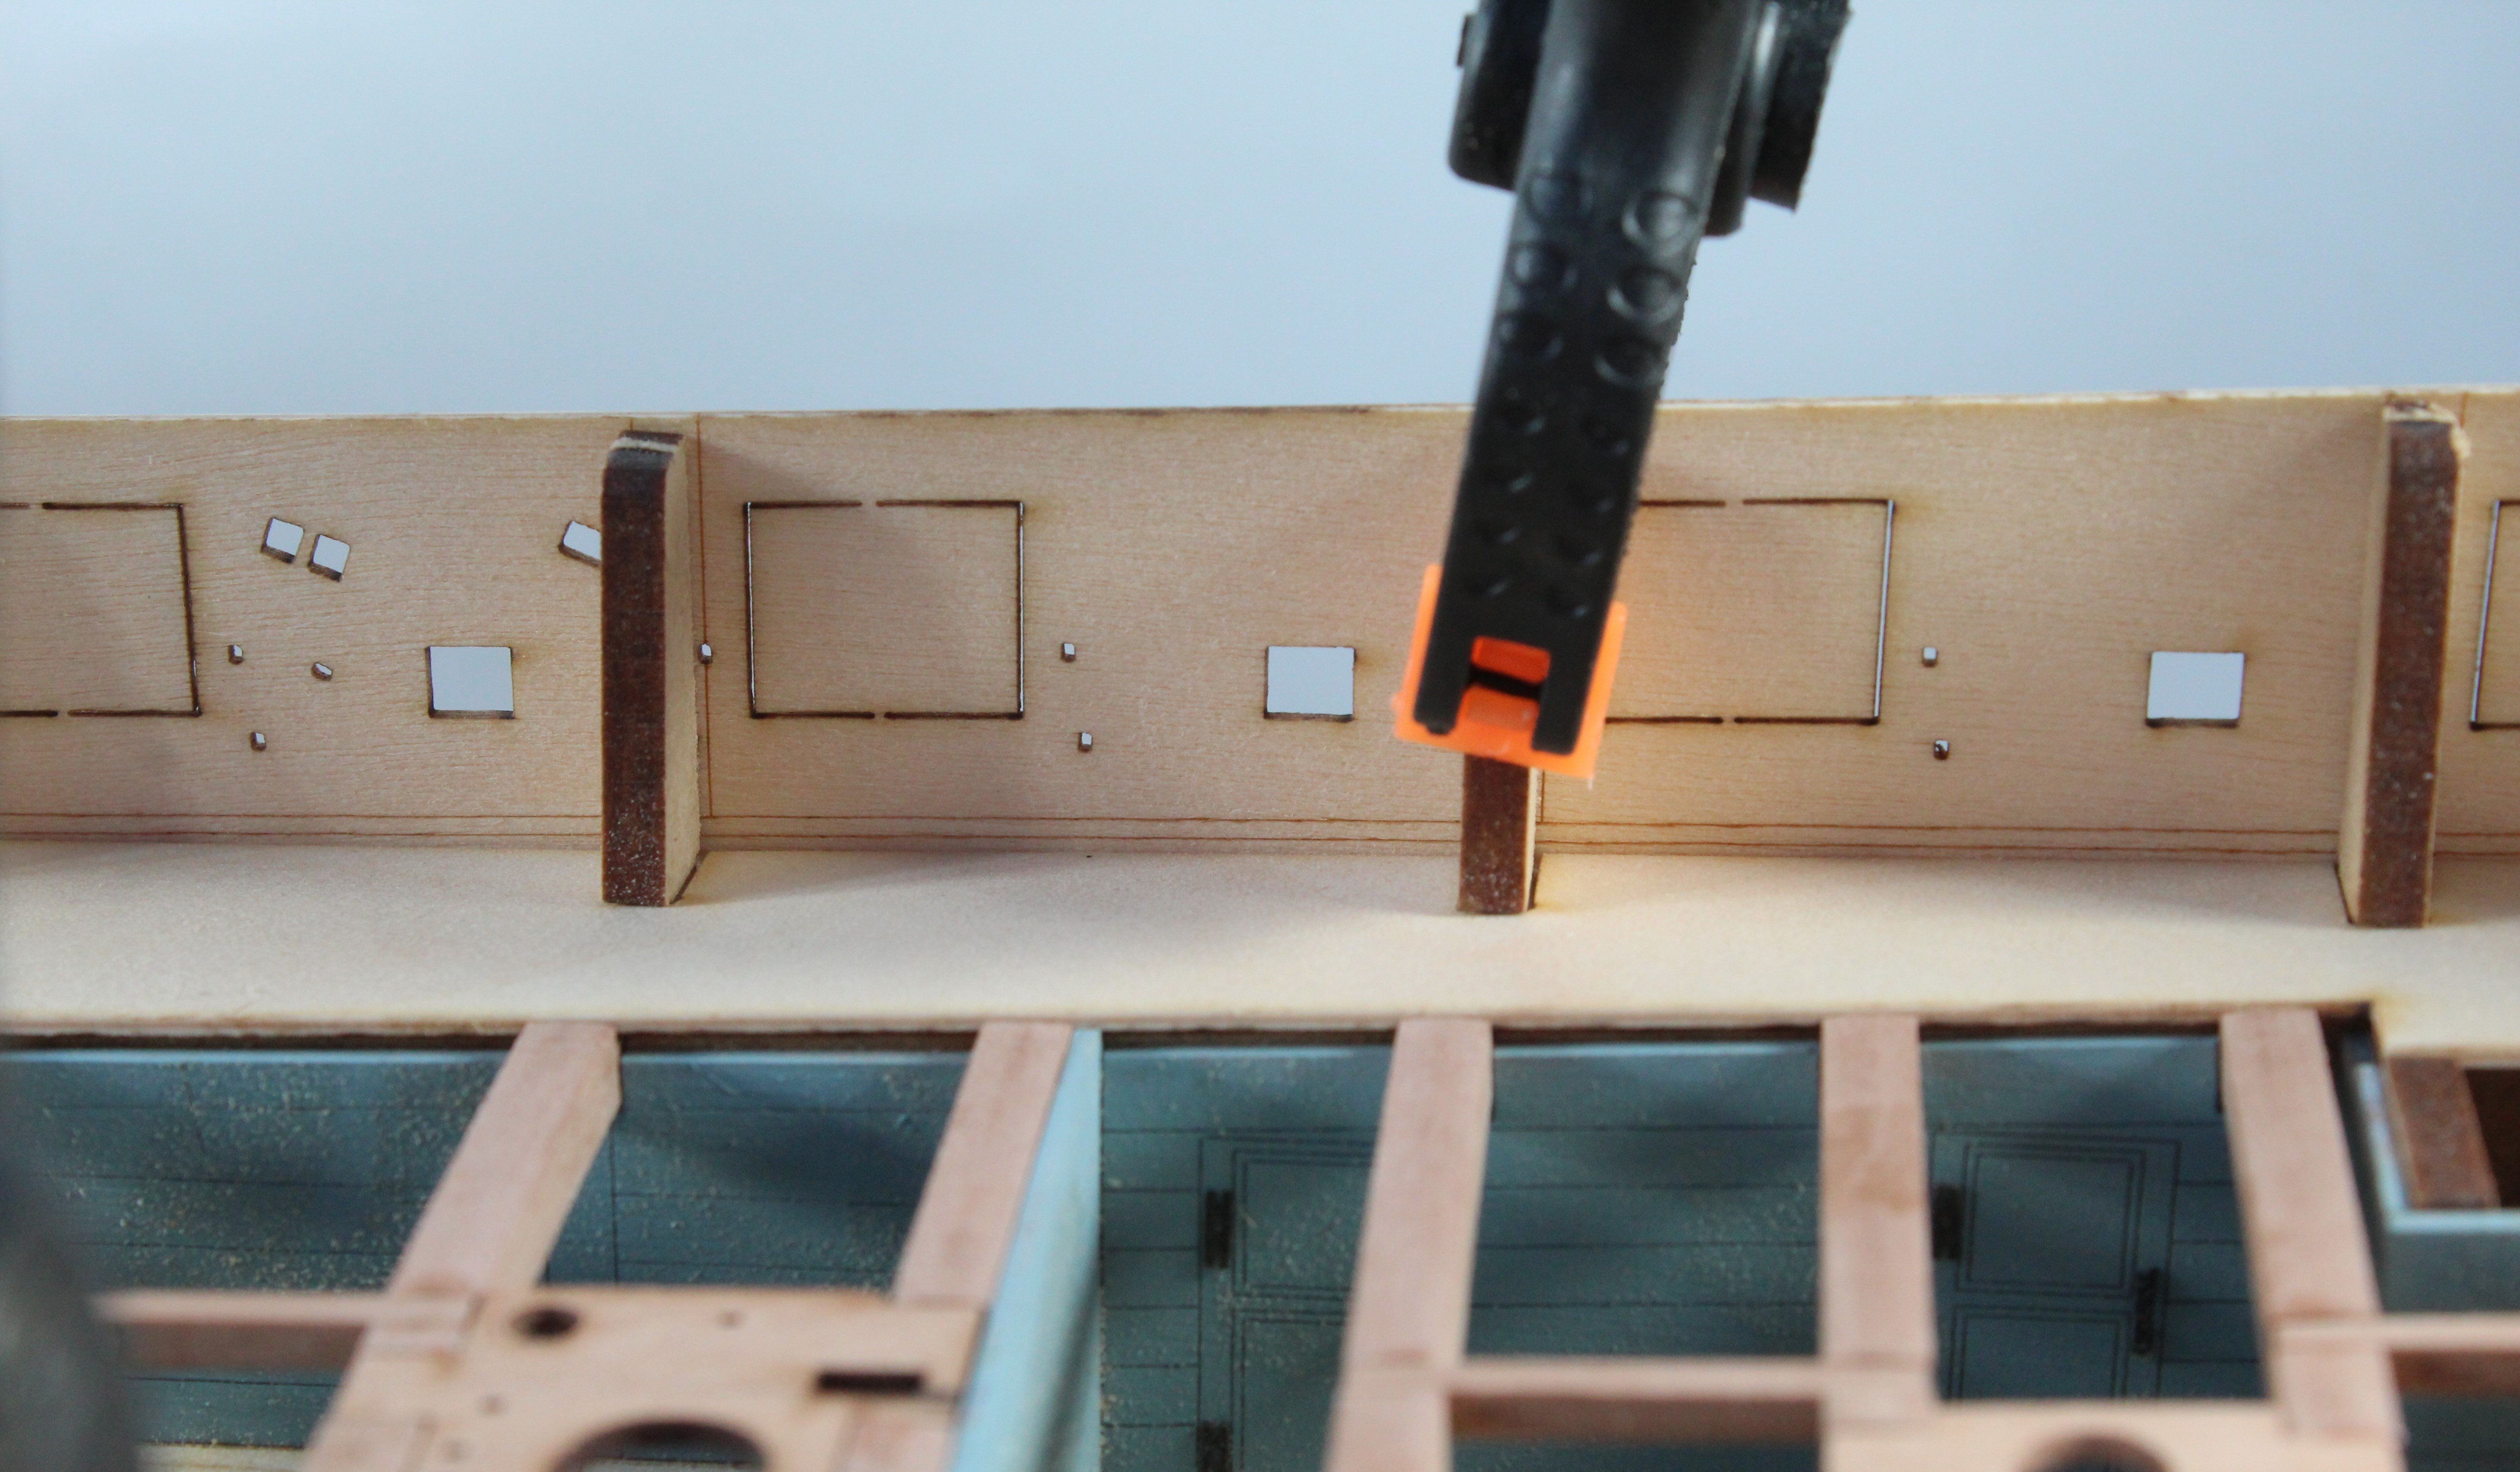
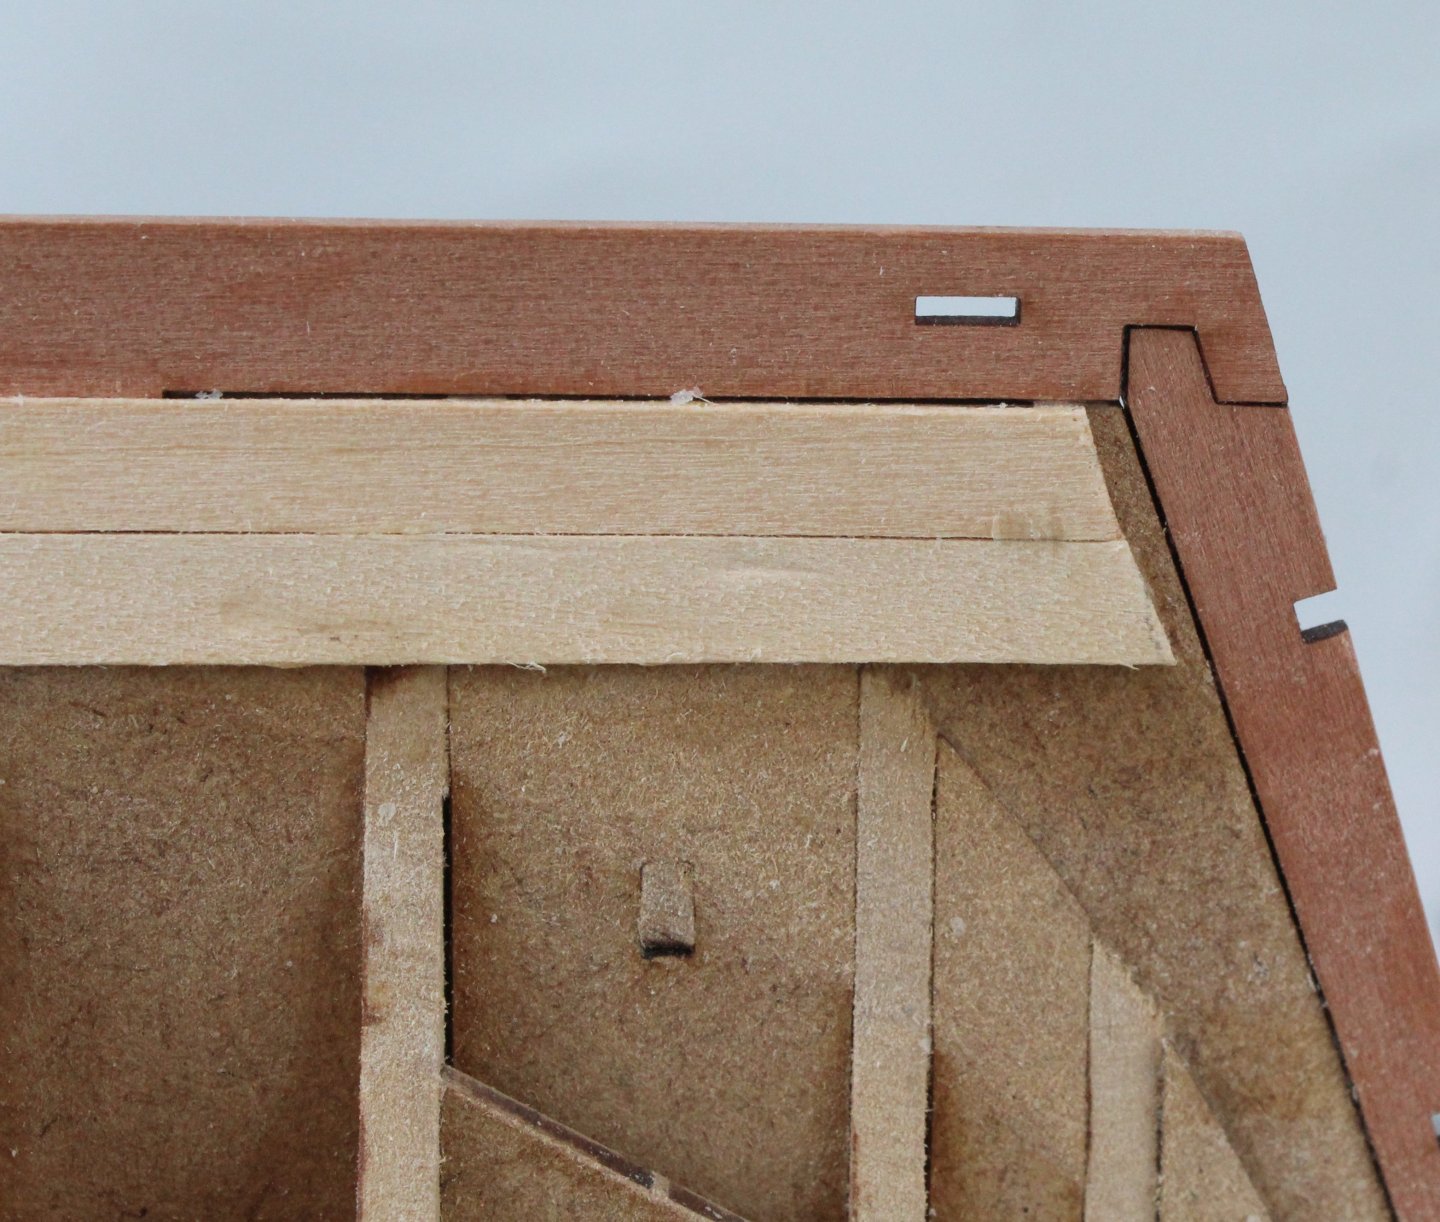
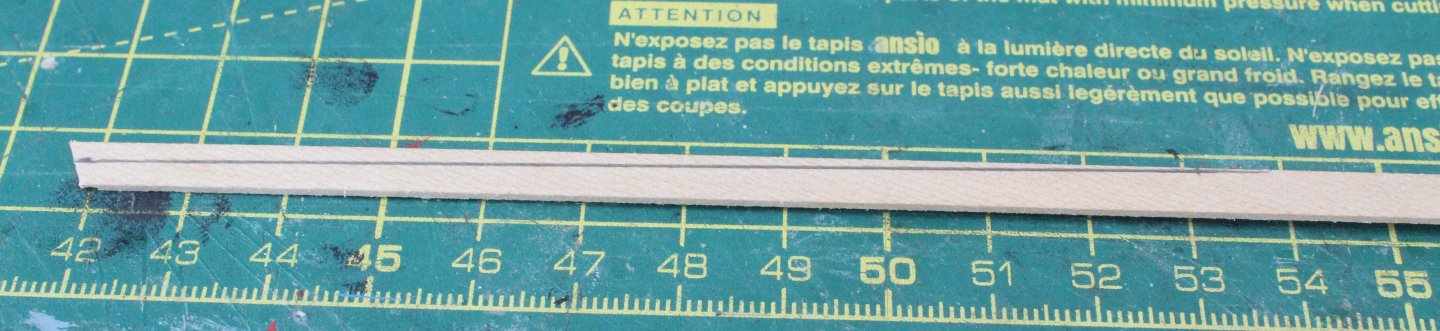
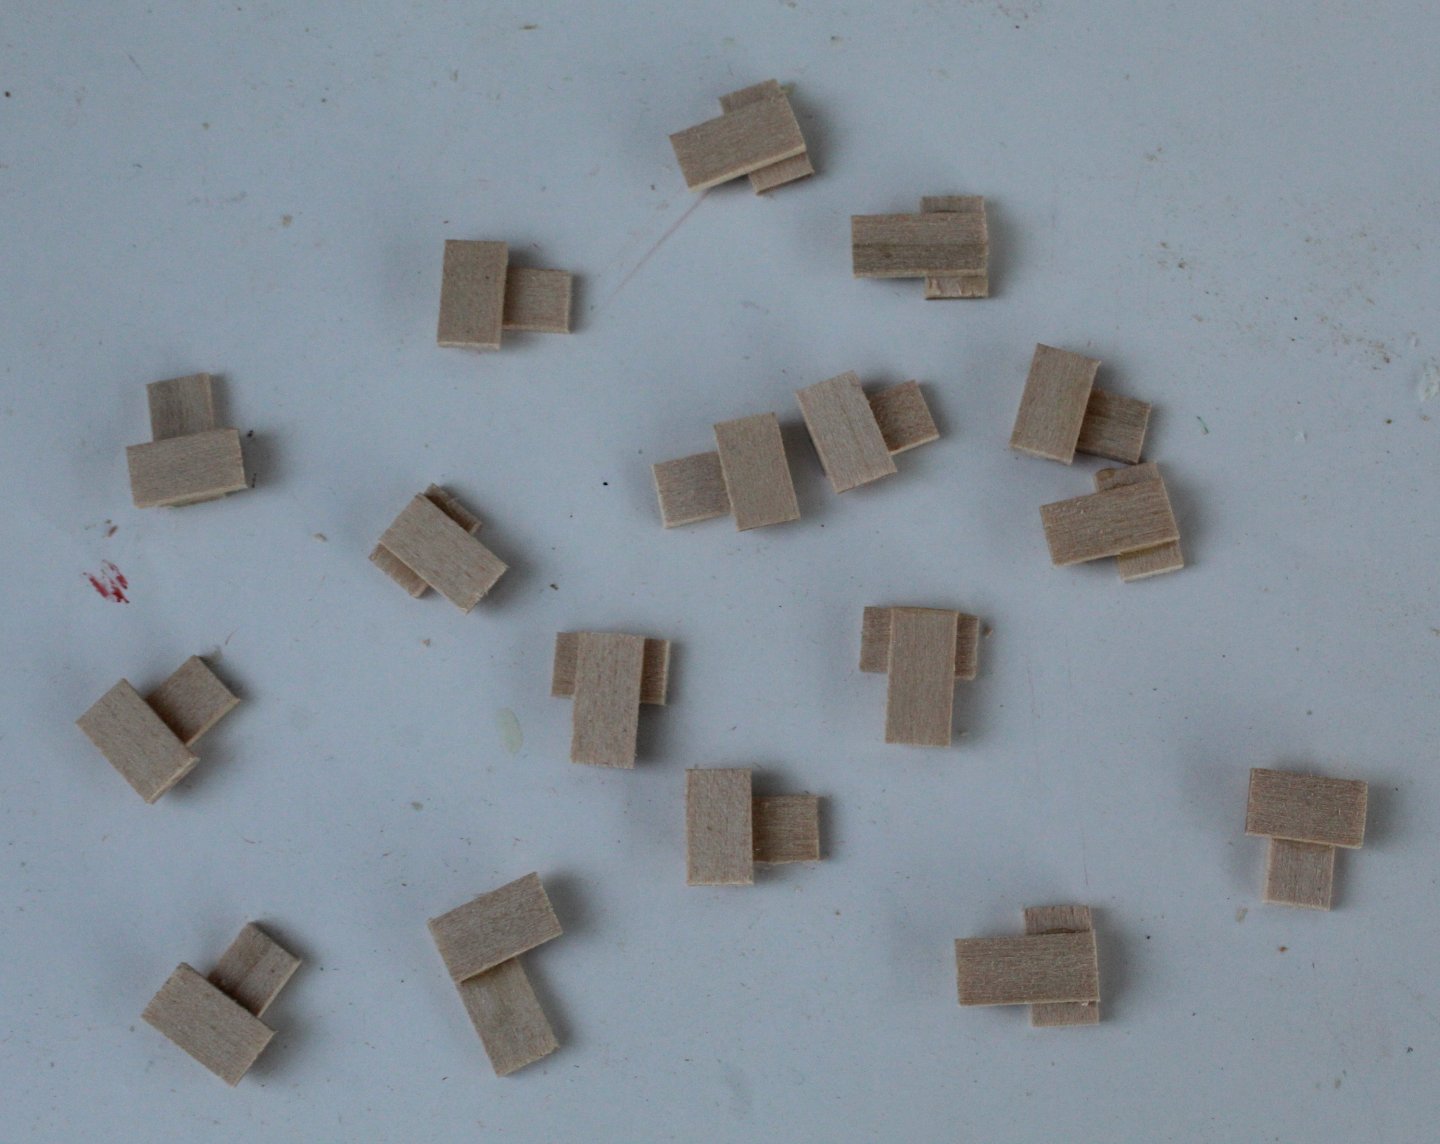
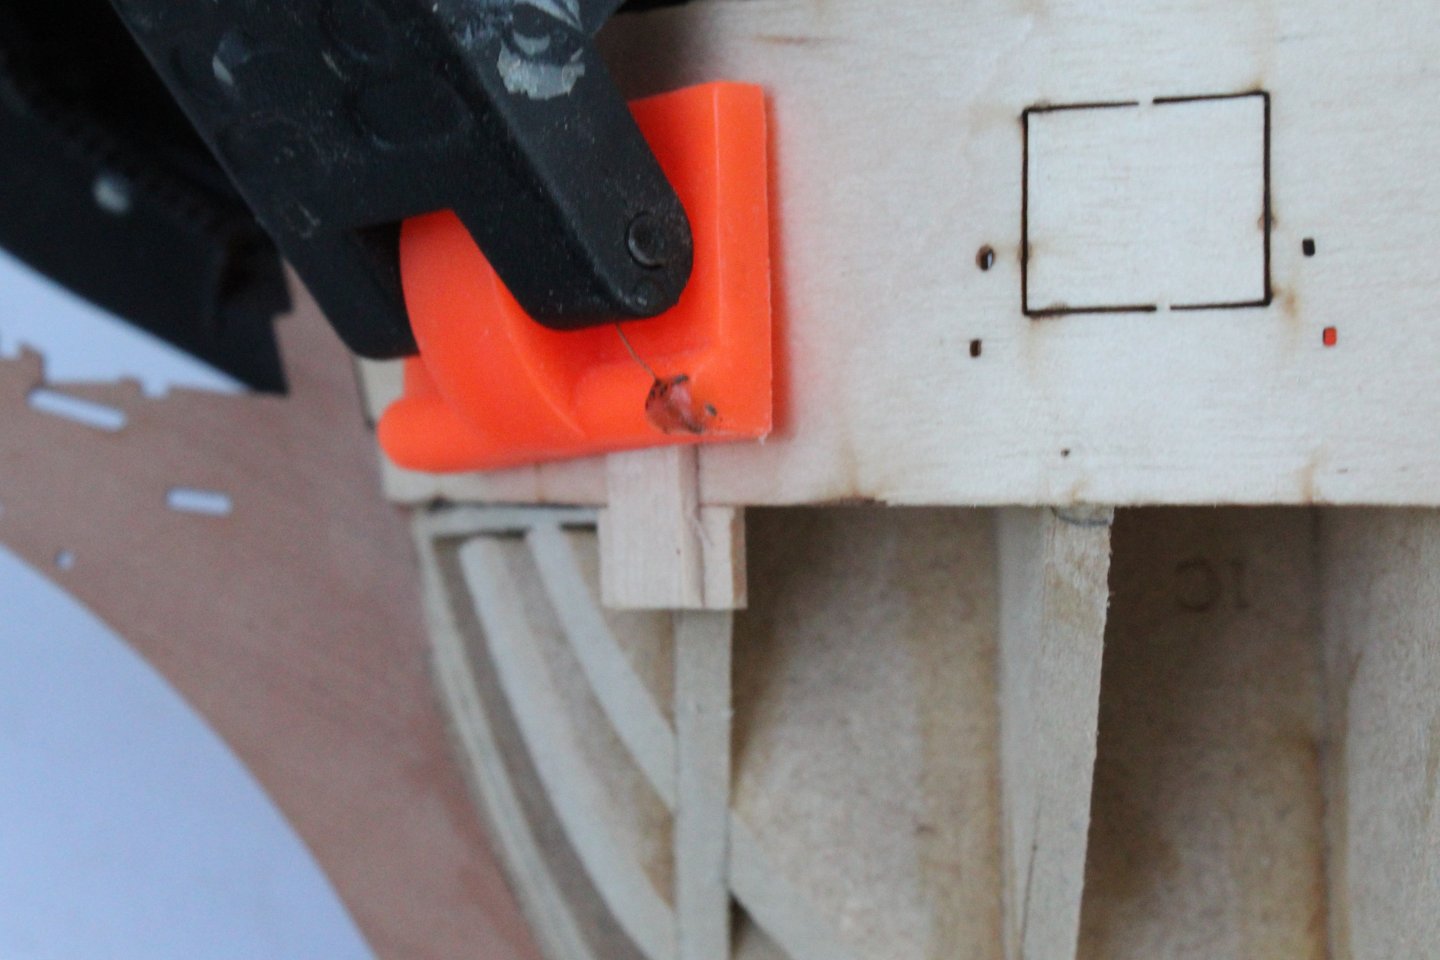
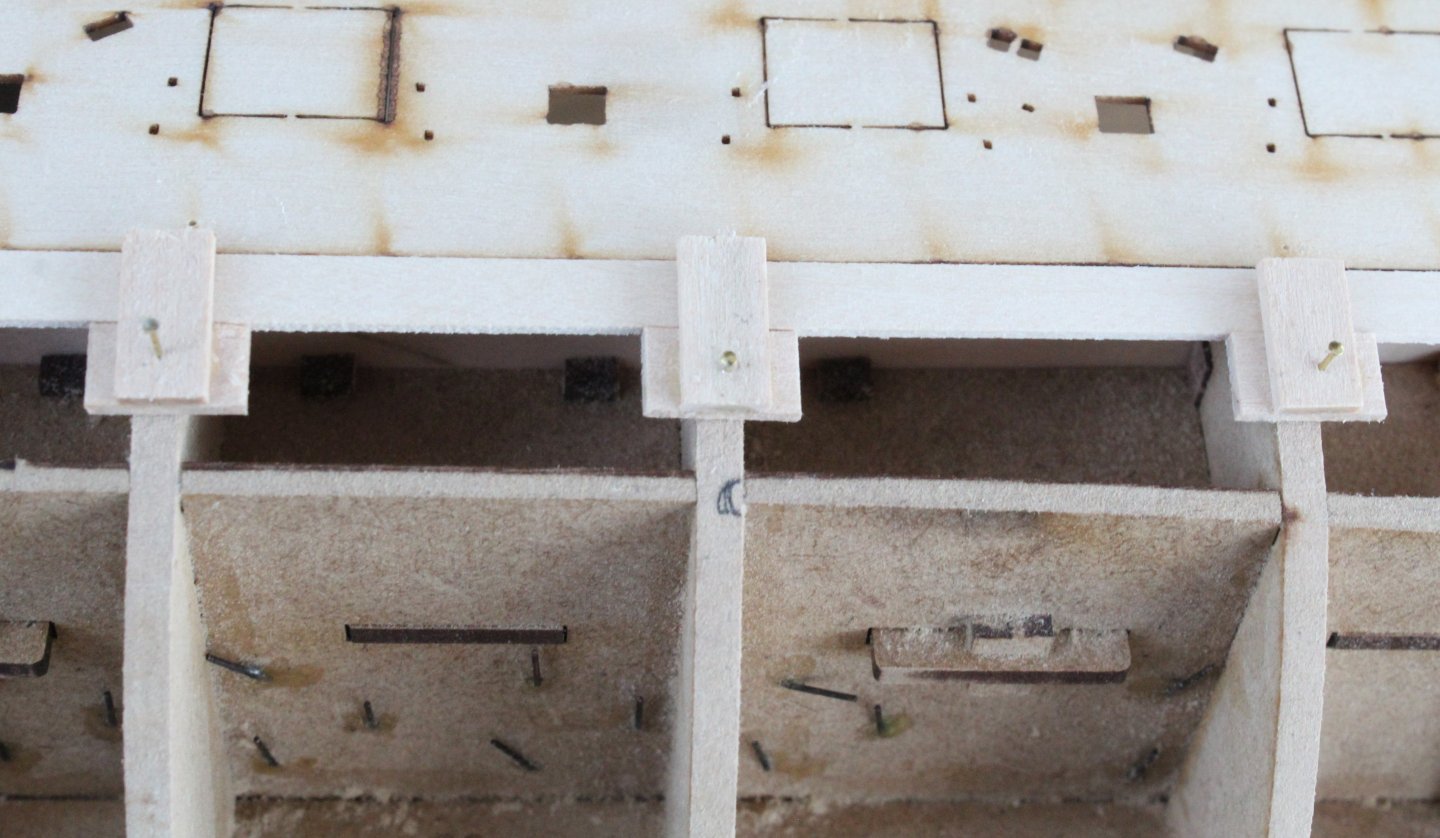
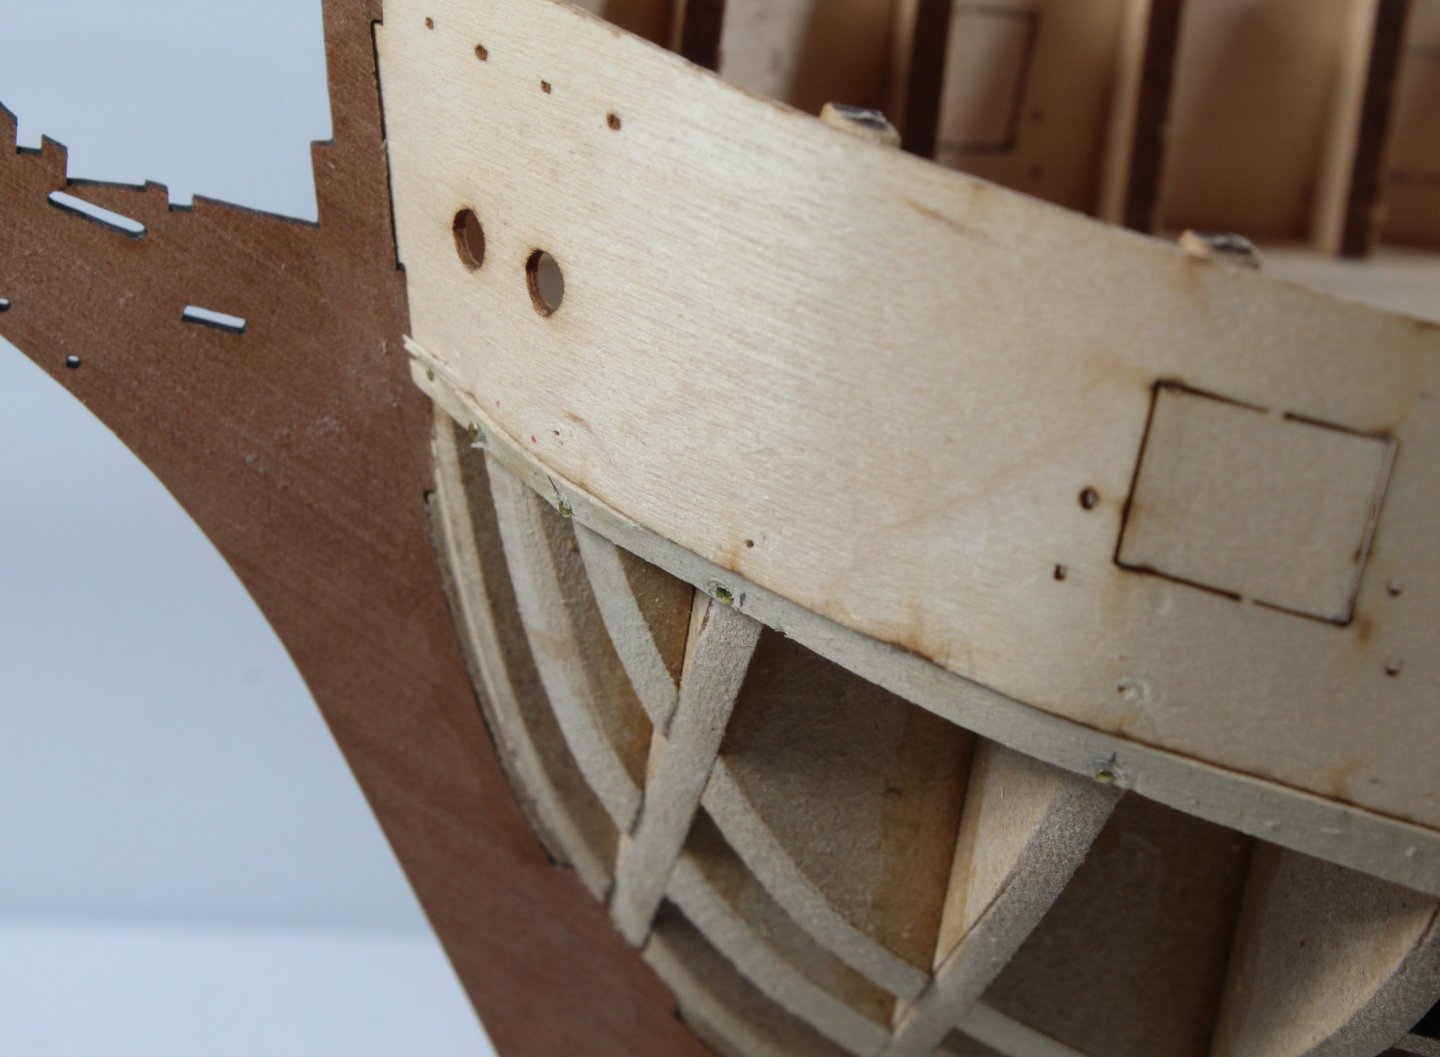
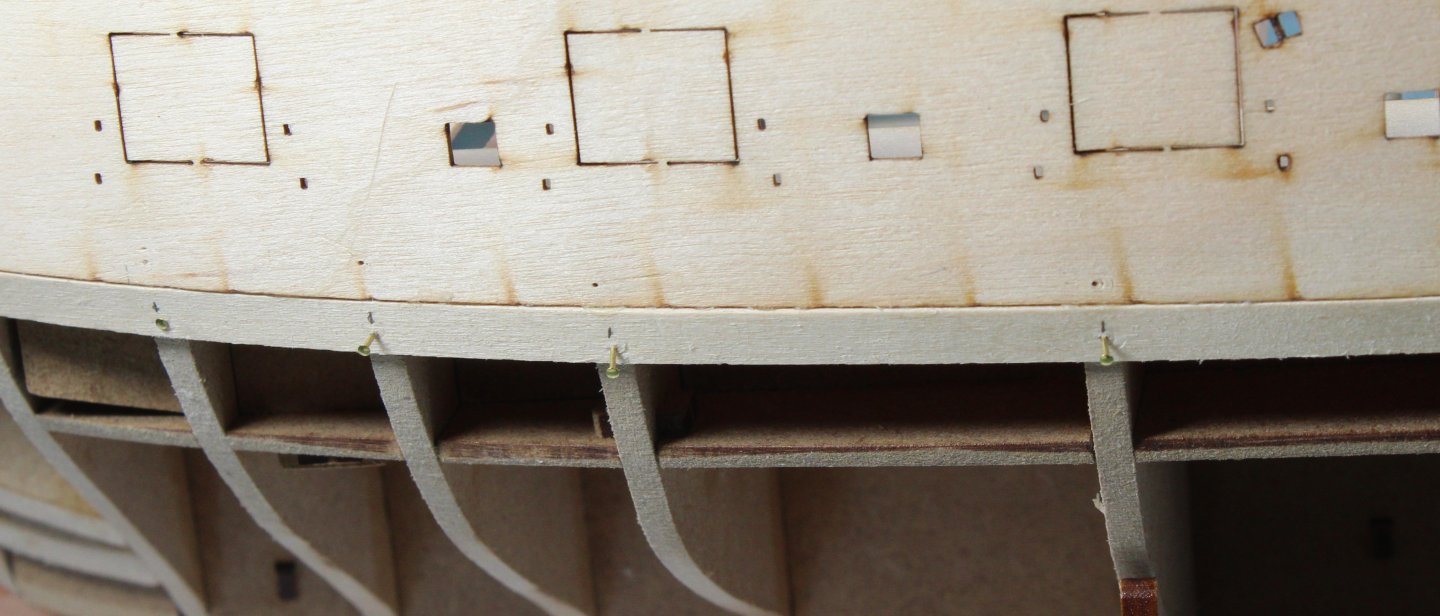
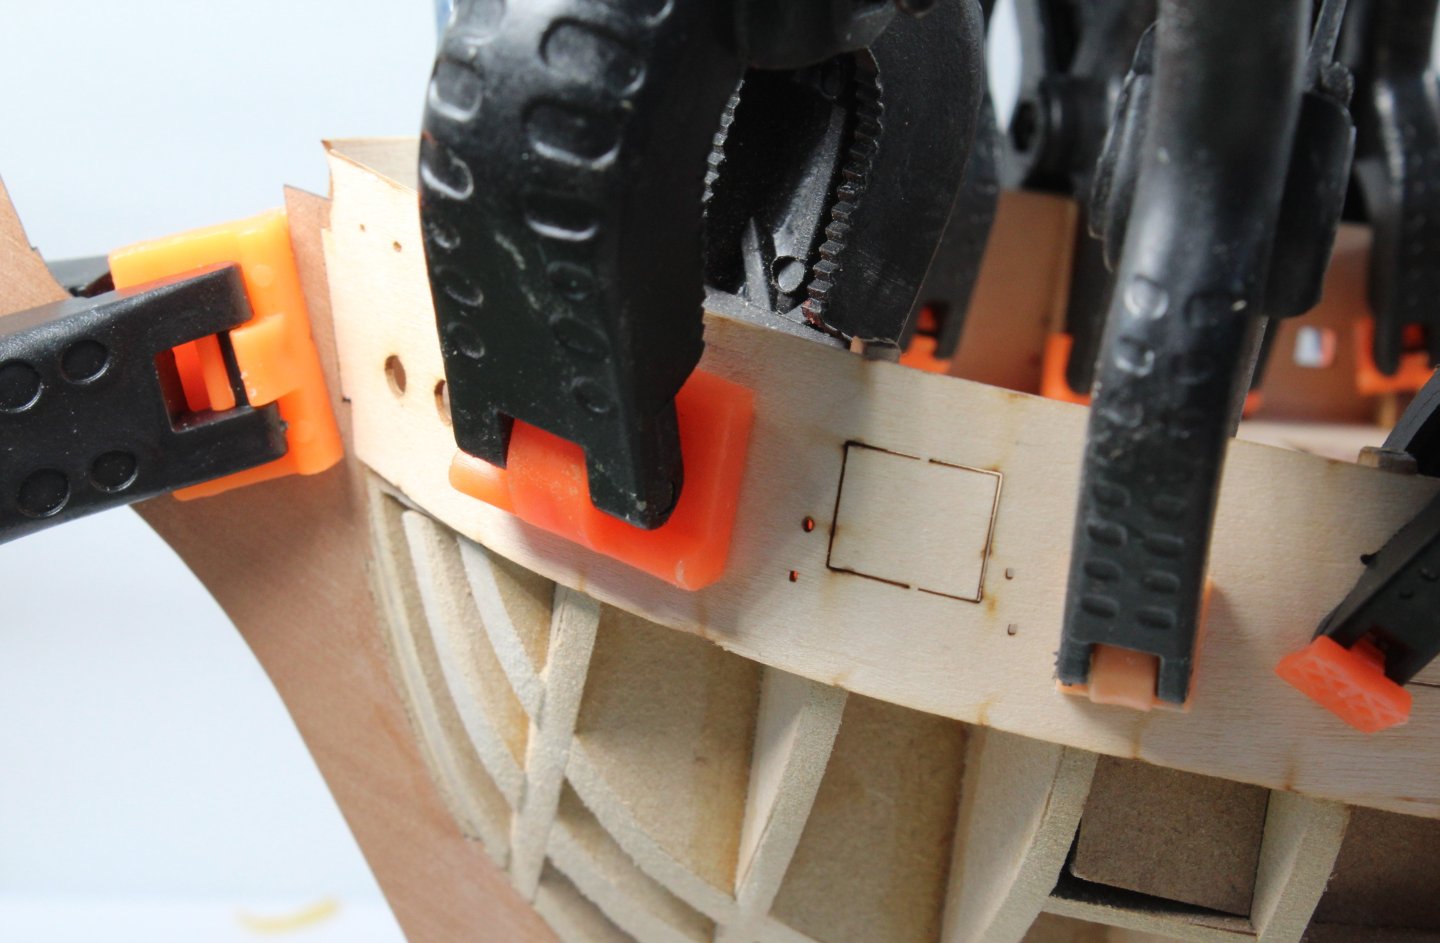
I decided to make some simple planking clamps. These were made using some 1 x 5mm planking material I have left over from previous model builds. In the next picture I am using one of my clamps to secure the bulwark pattern to the bulkheads. The following photo shows the hull complete with the bulwark patterns glued in place. In the next three photos the bulwark pattern laser etched guide line is nicely aligned with the deck pattern. And now some more photos of the bulwark patterns. It was now time to start adding the first planking. I start by positioning the plank and marking its position on the central bulkhead, as shown below. This is because, when gluing the plank, I like to work from the central bulkhead and to pin alternate sides as I work toward the bow and stern. Using three of my clamps the plank is held in position so I can determine where the plank starts to flow above the bulwark pattern. The plank is marked so it can be tapered. A lateral bend is then added to the plank. The plank was then glued and pinned in place. There will a total of 18 planks per side required at the midships.


- 241 replies
-
- 11
-
-
- Vanguarrd Models
- Harpy
- (and 1 more)
-
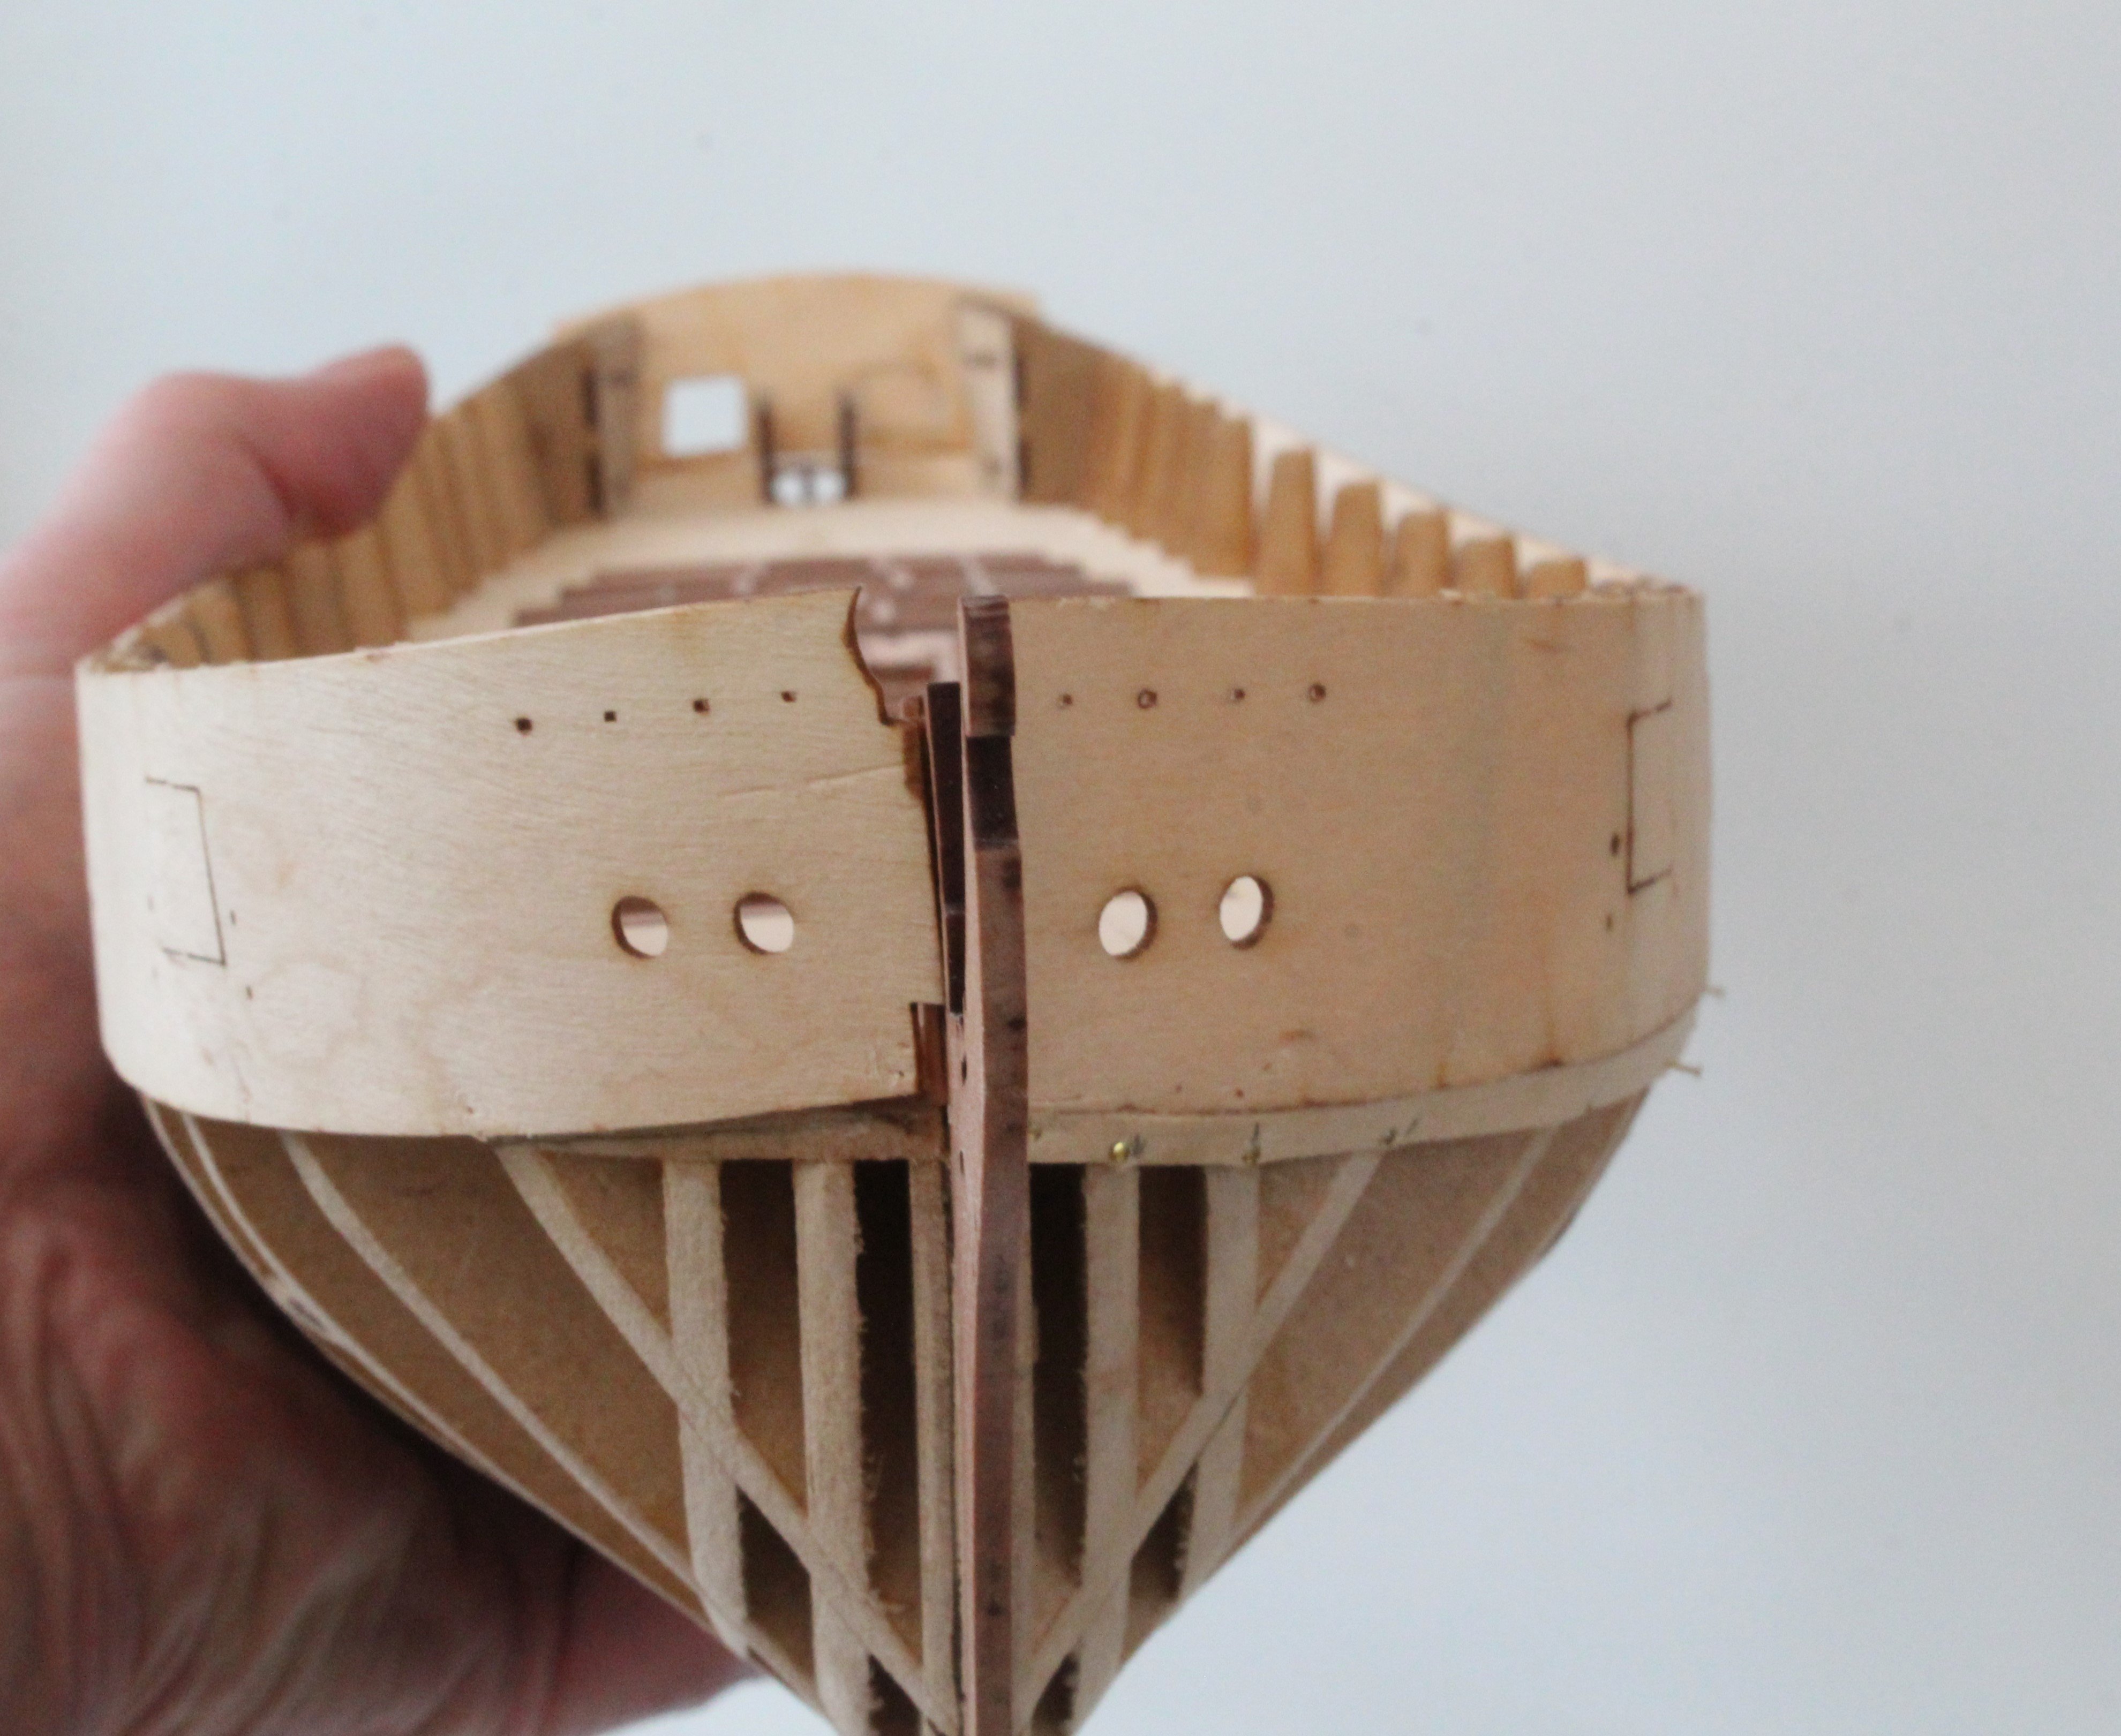
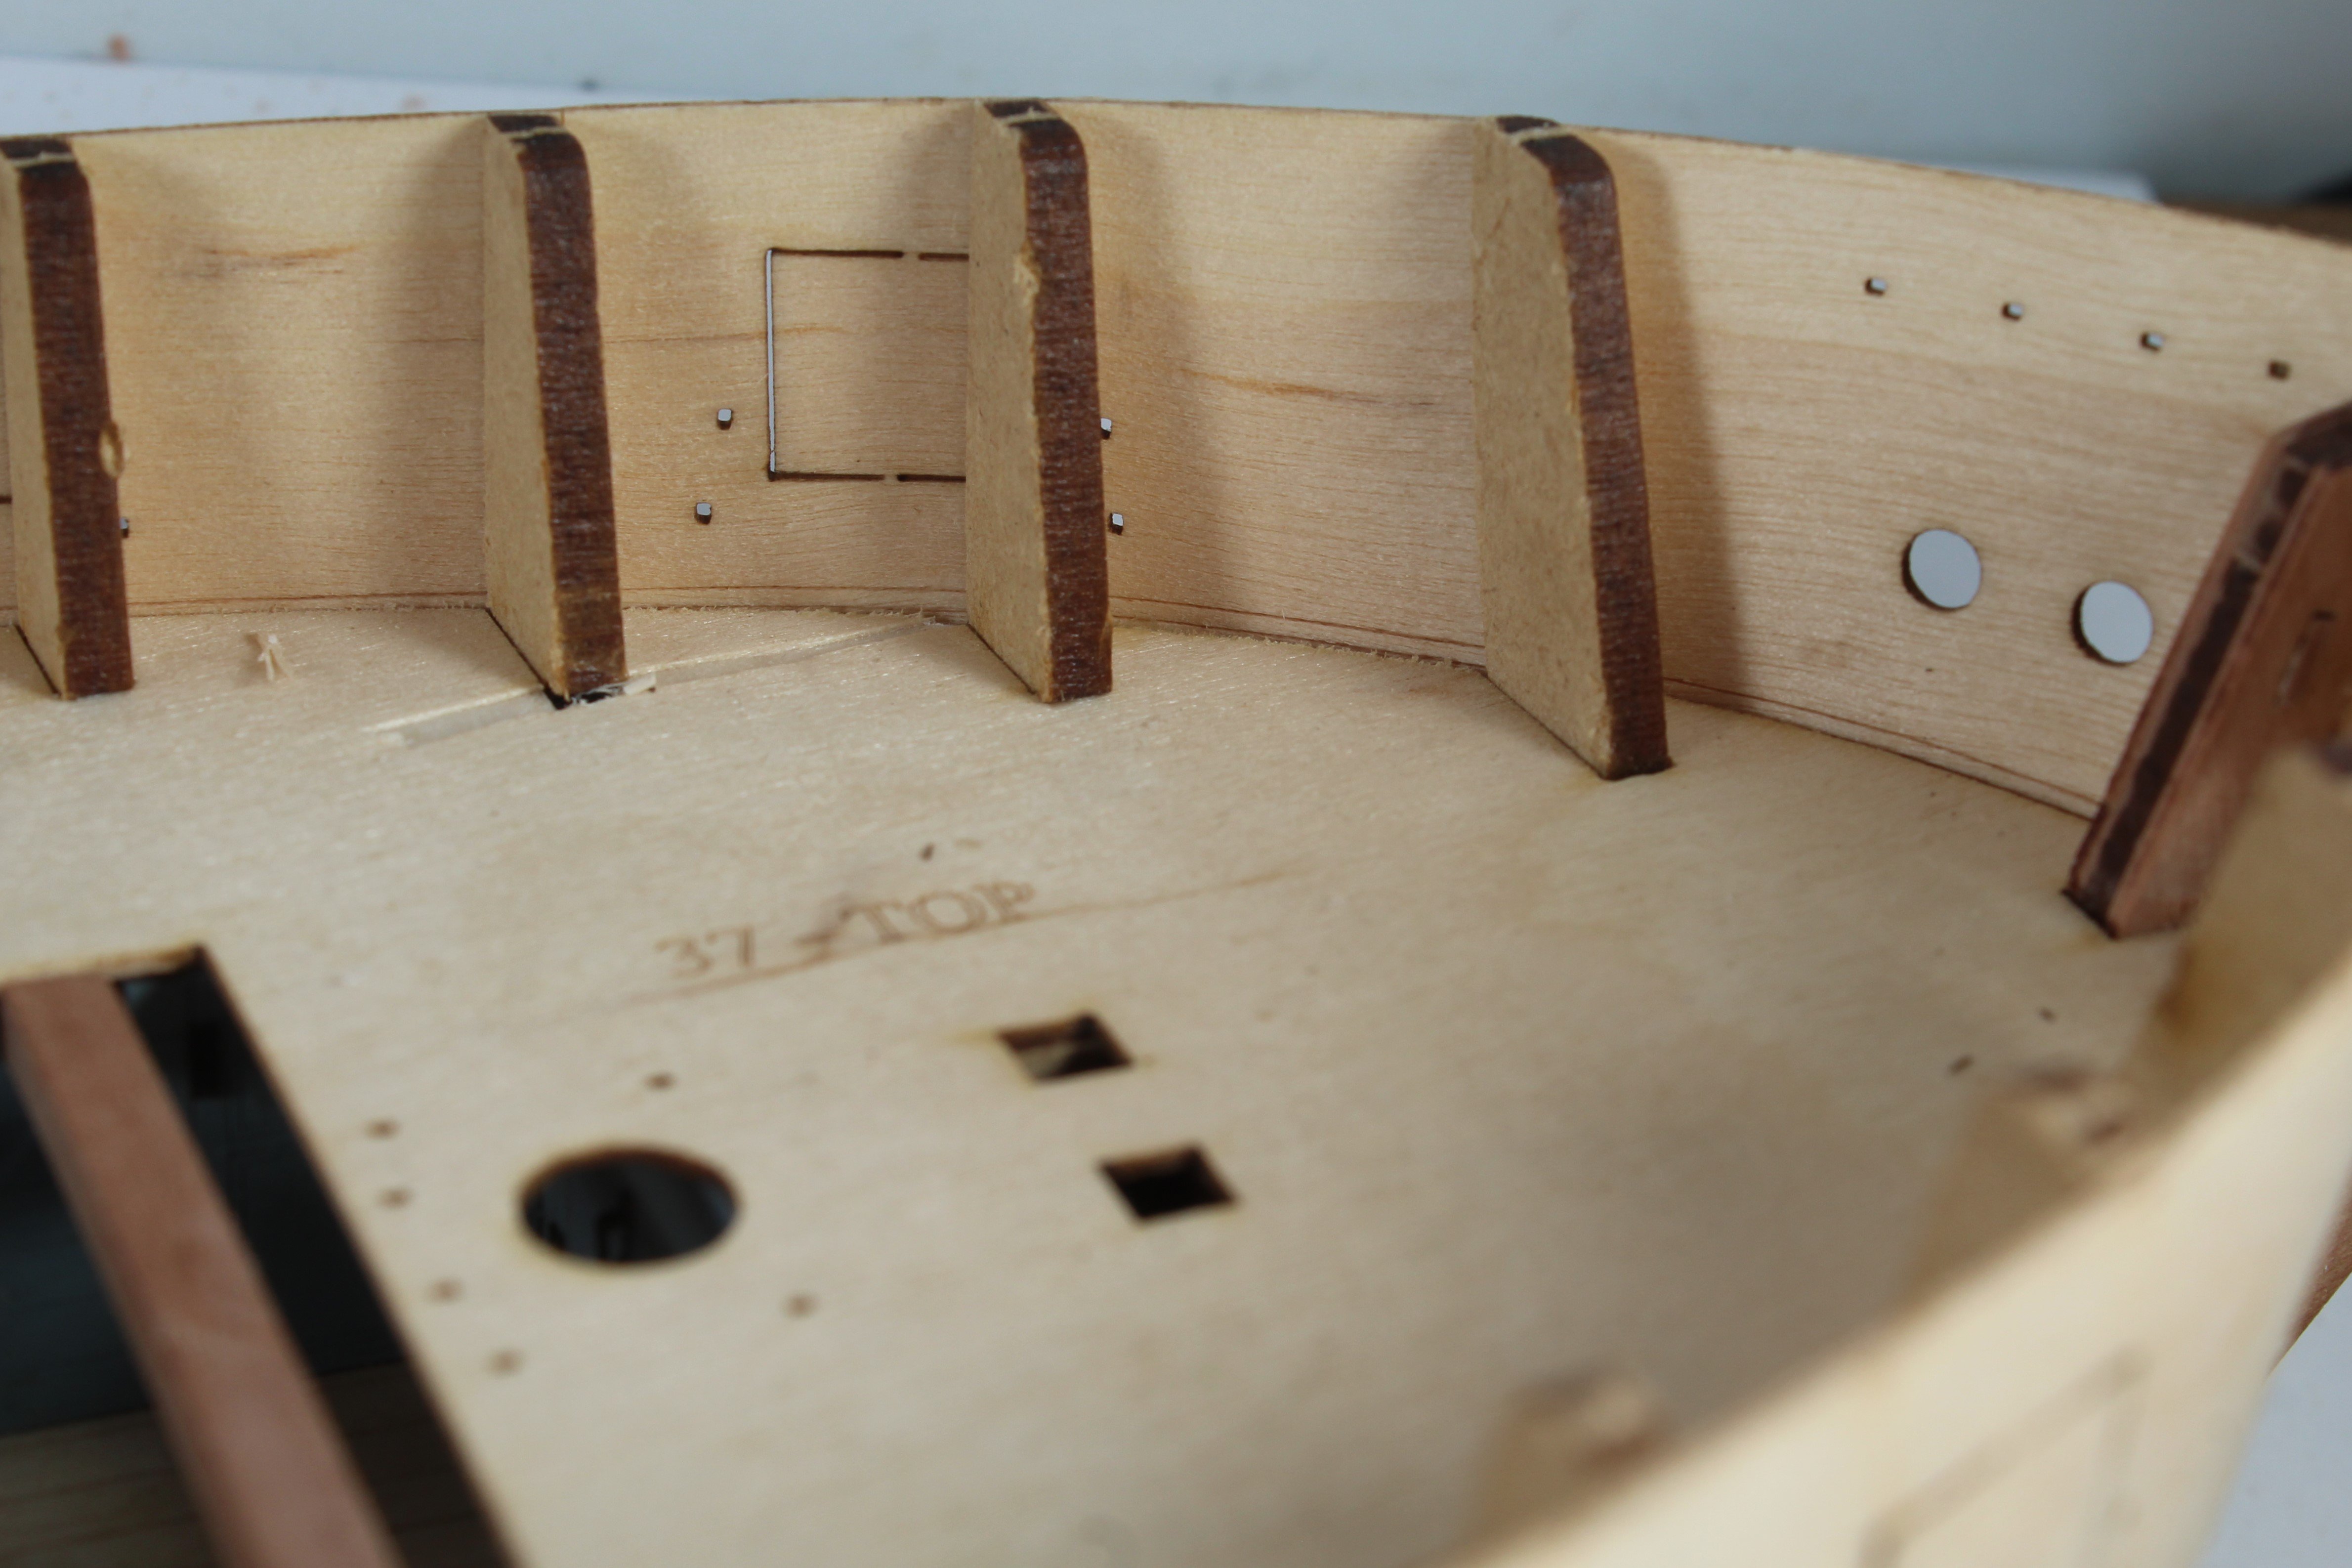
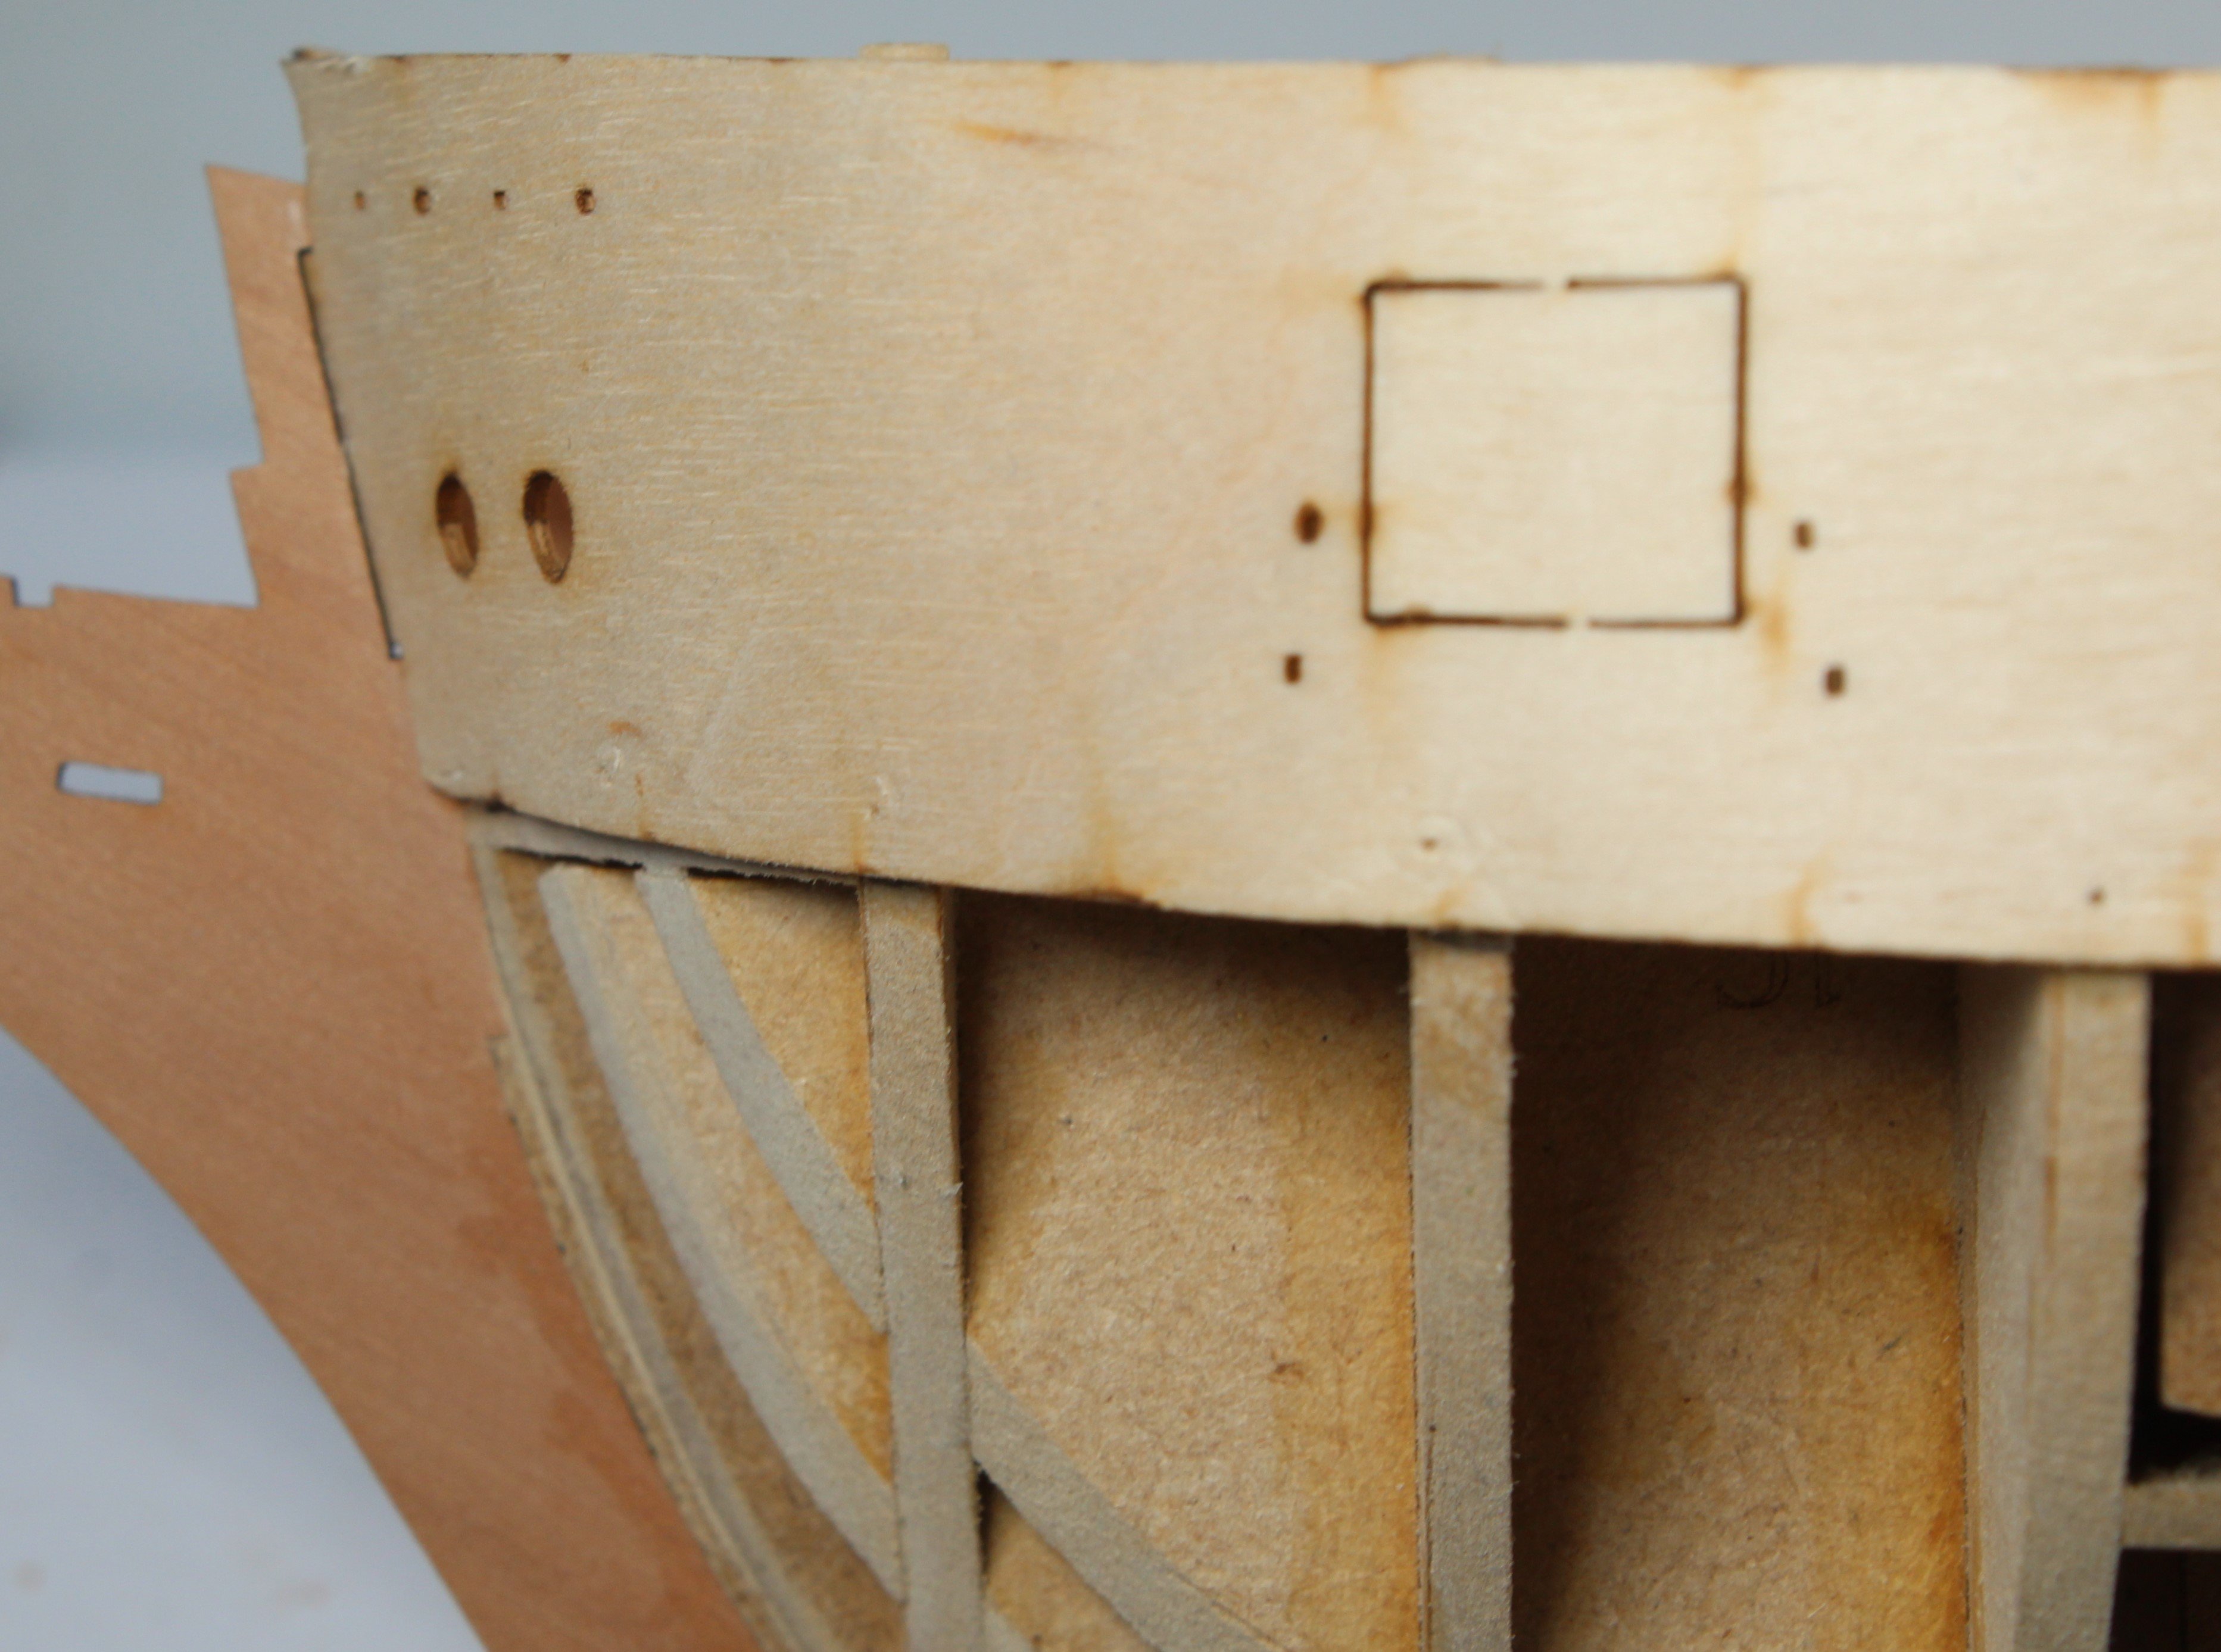
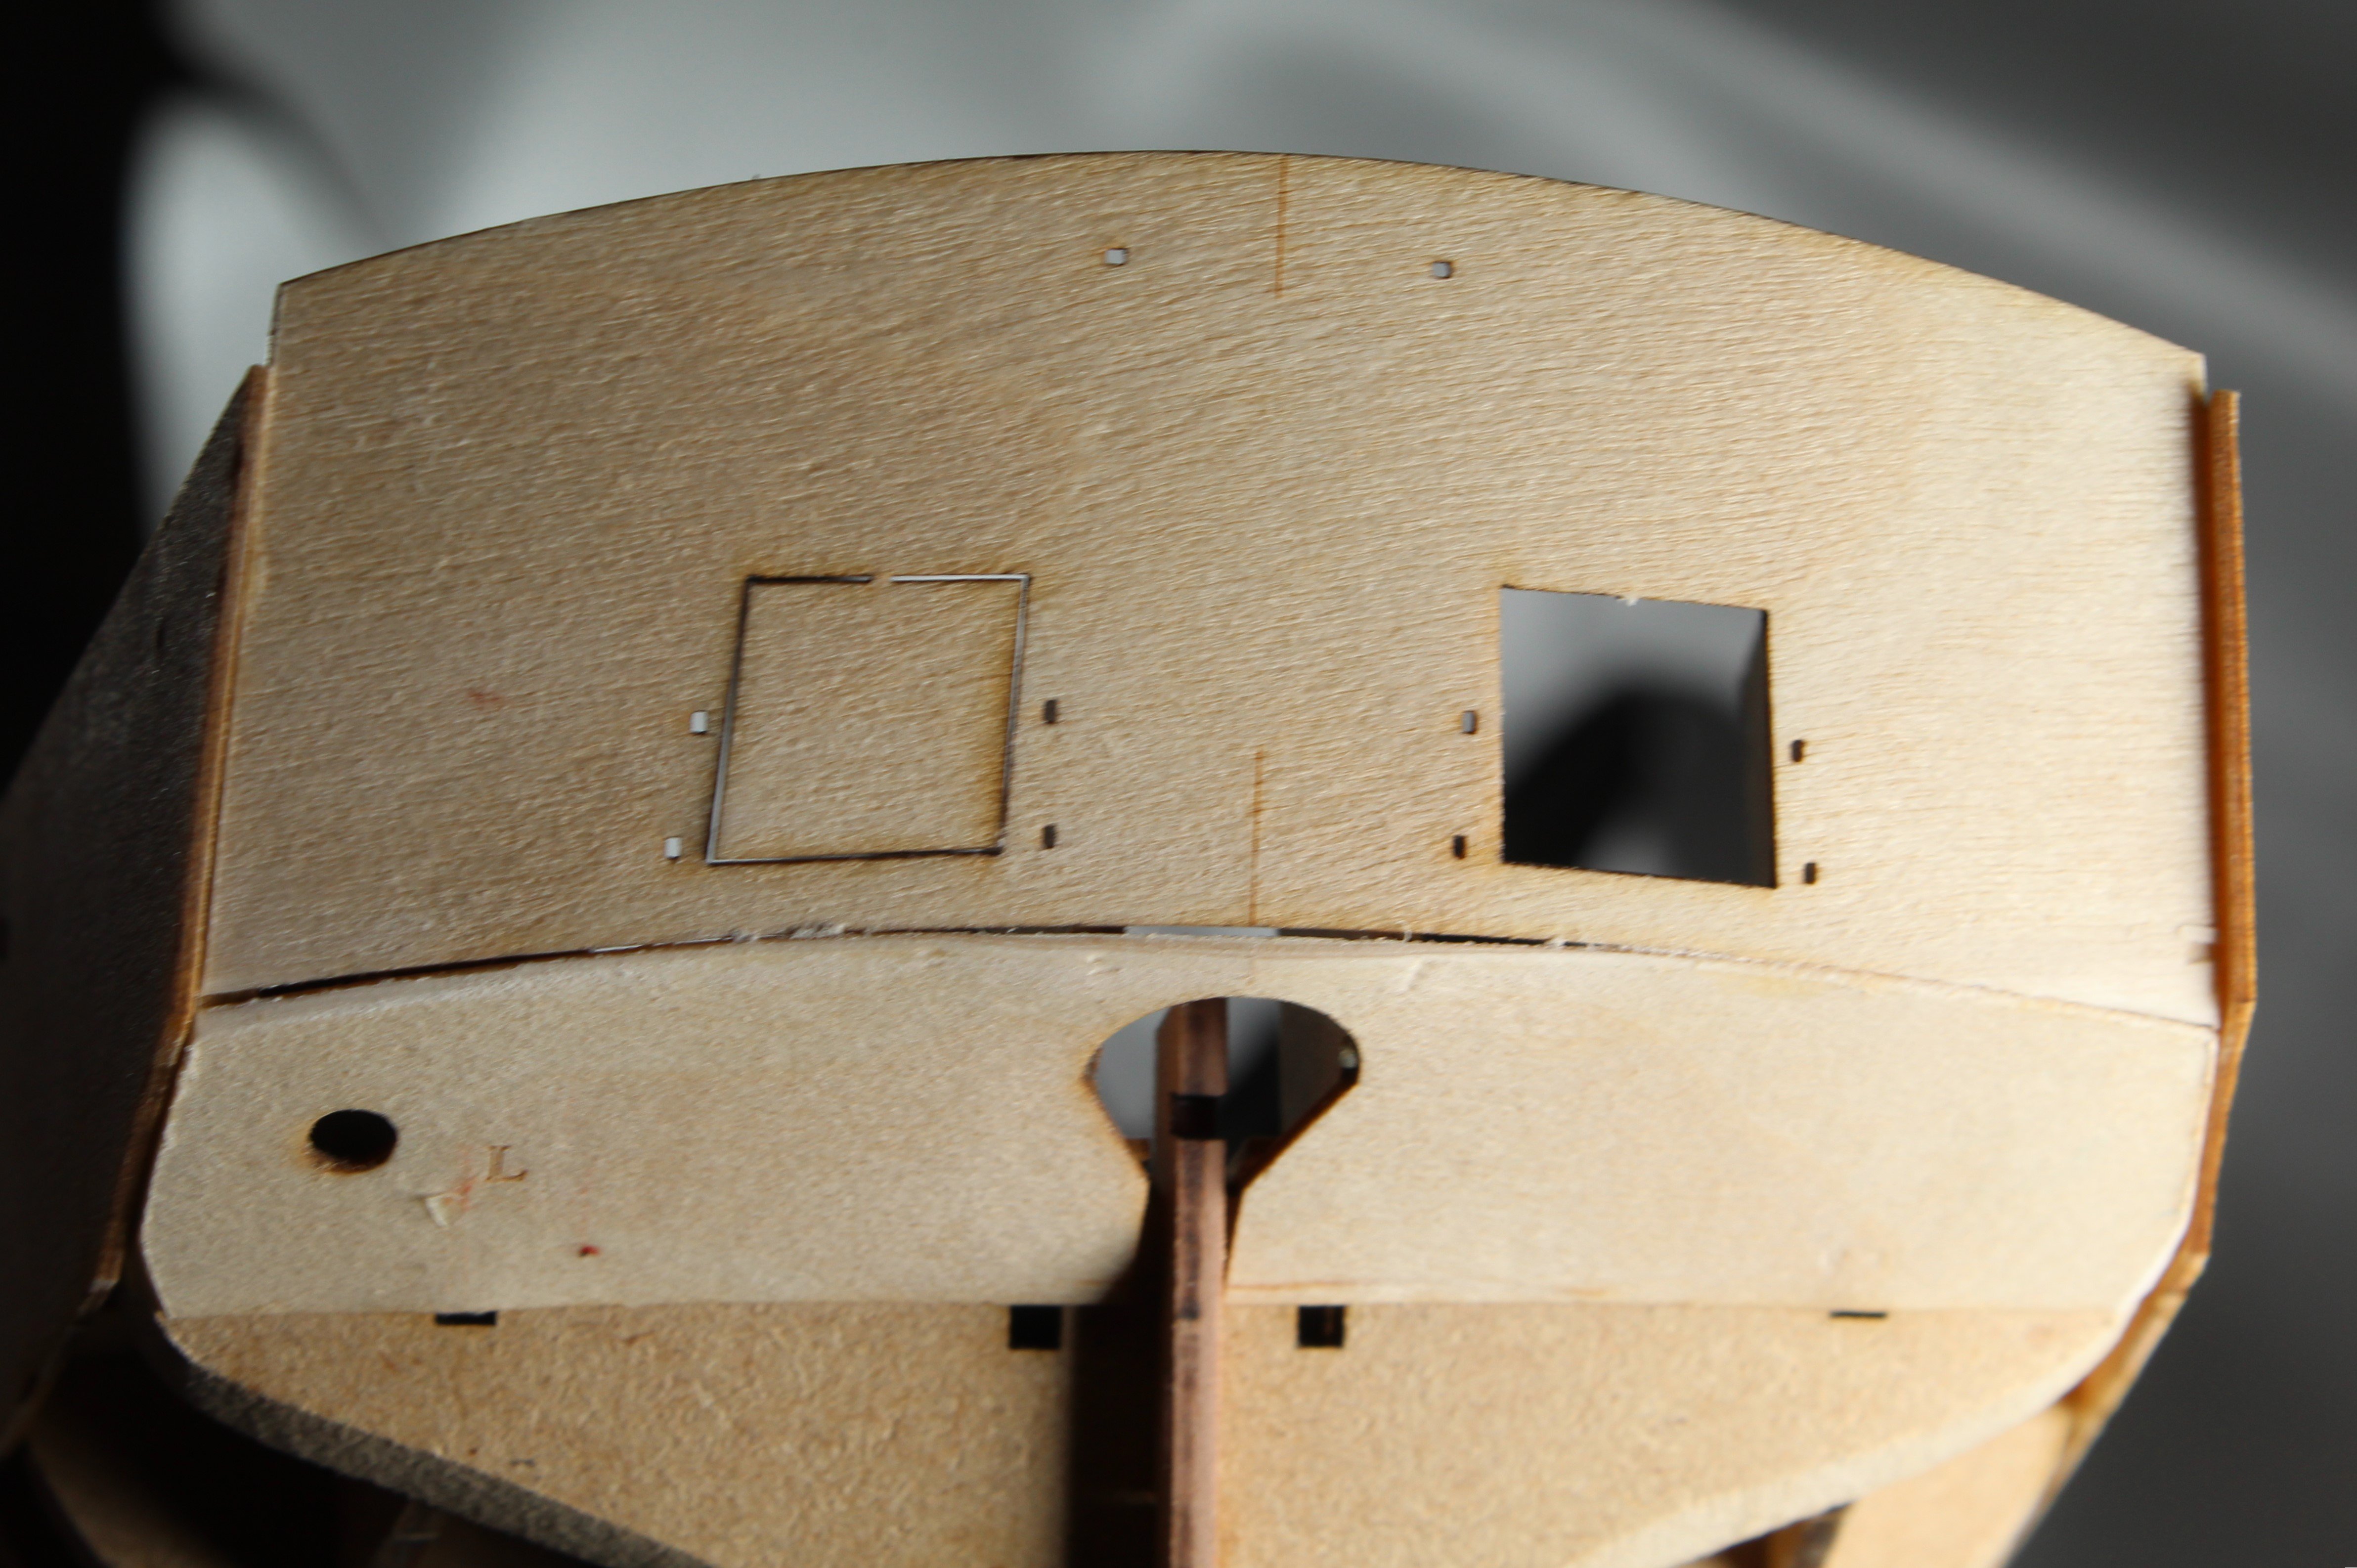
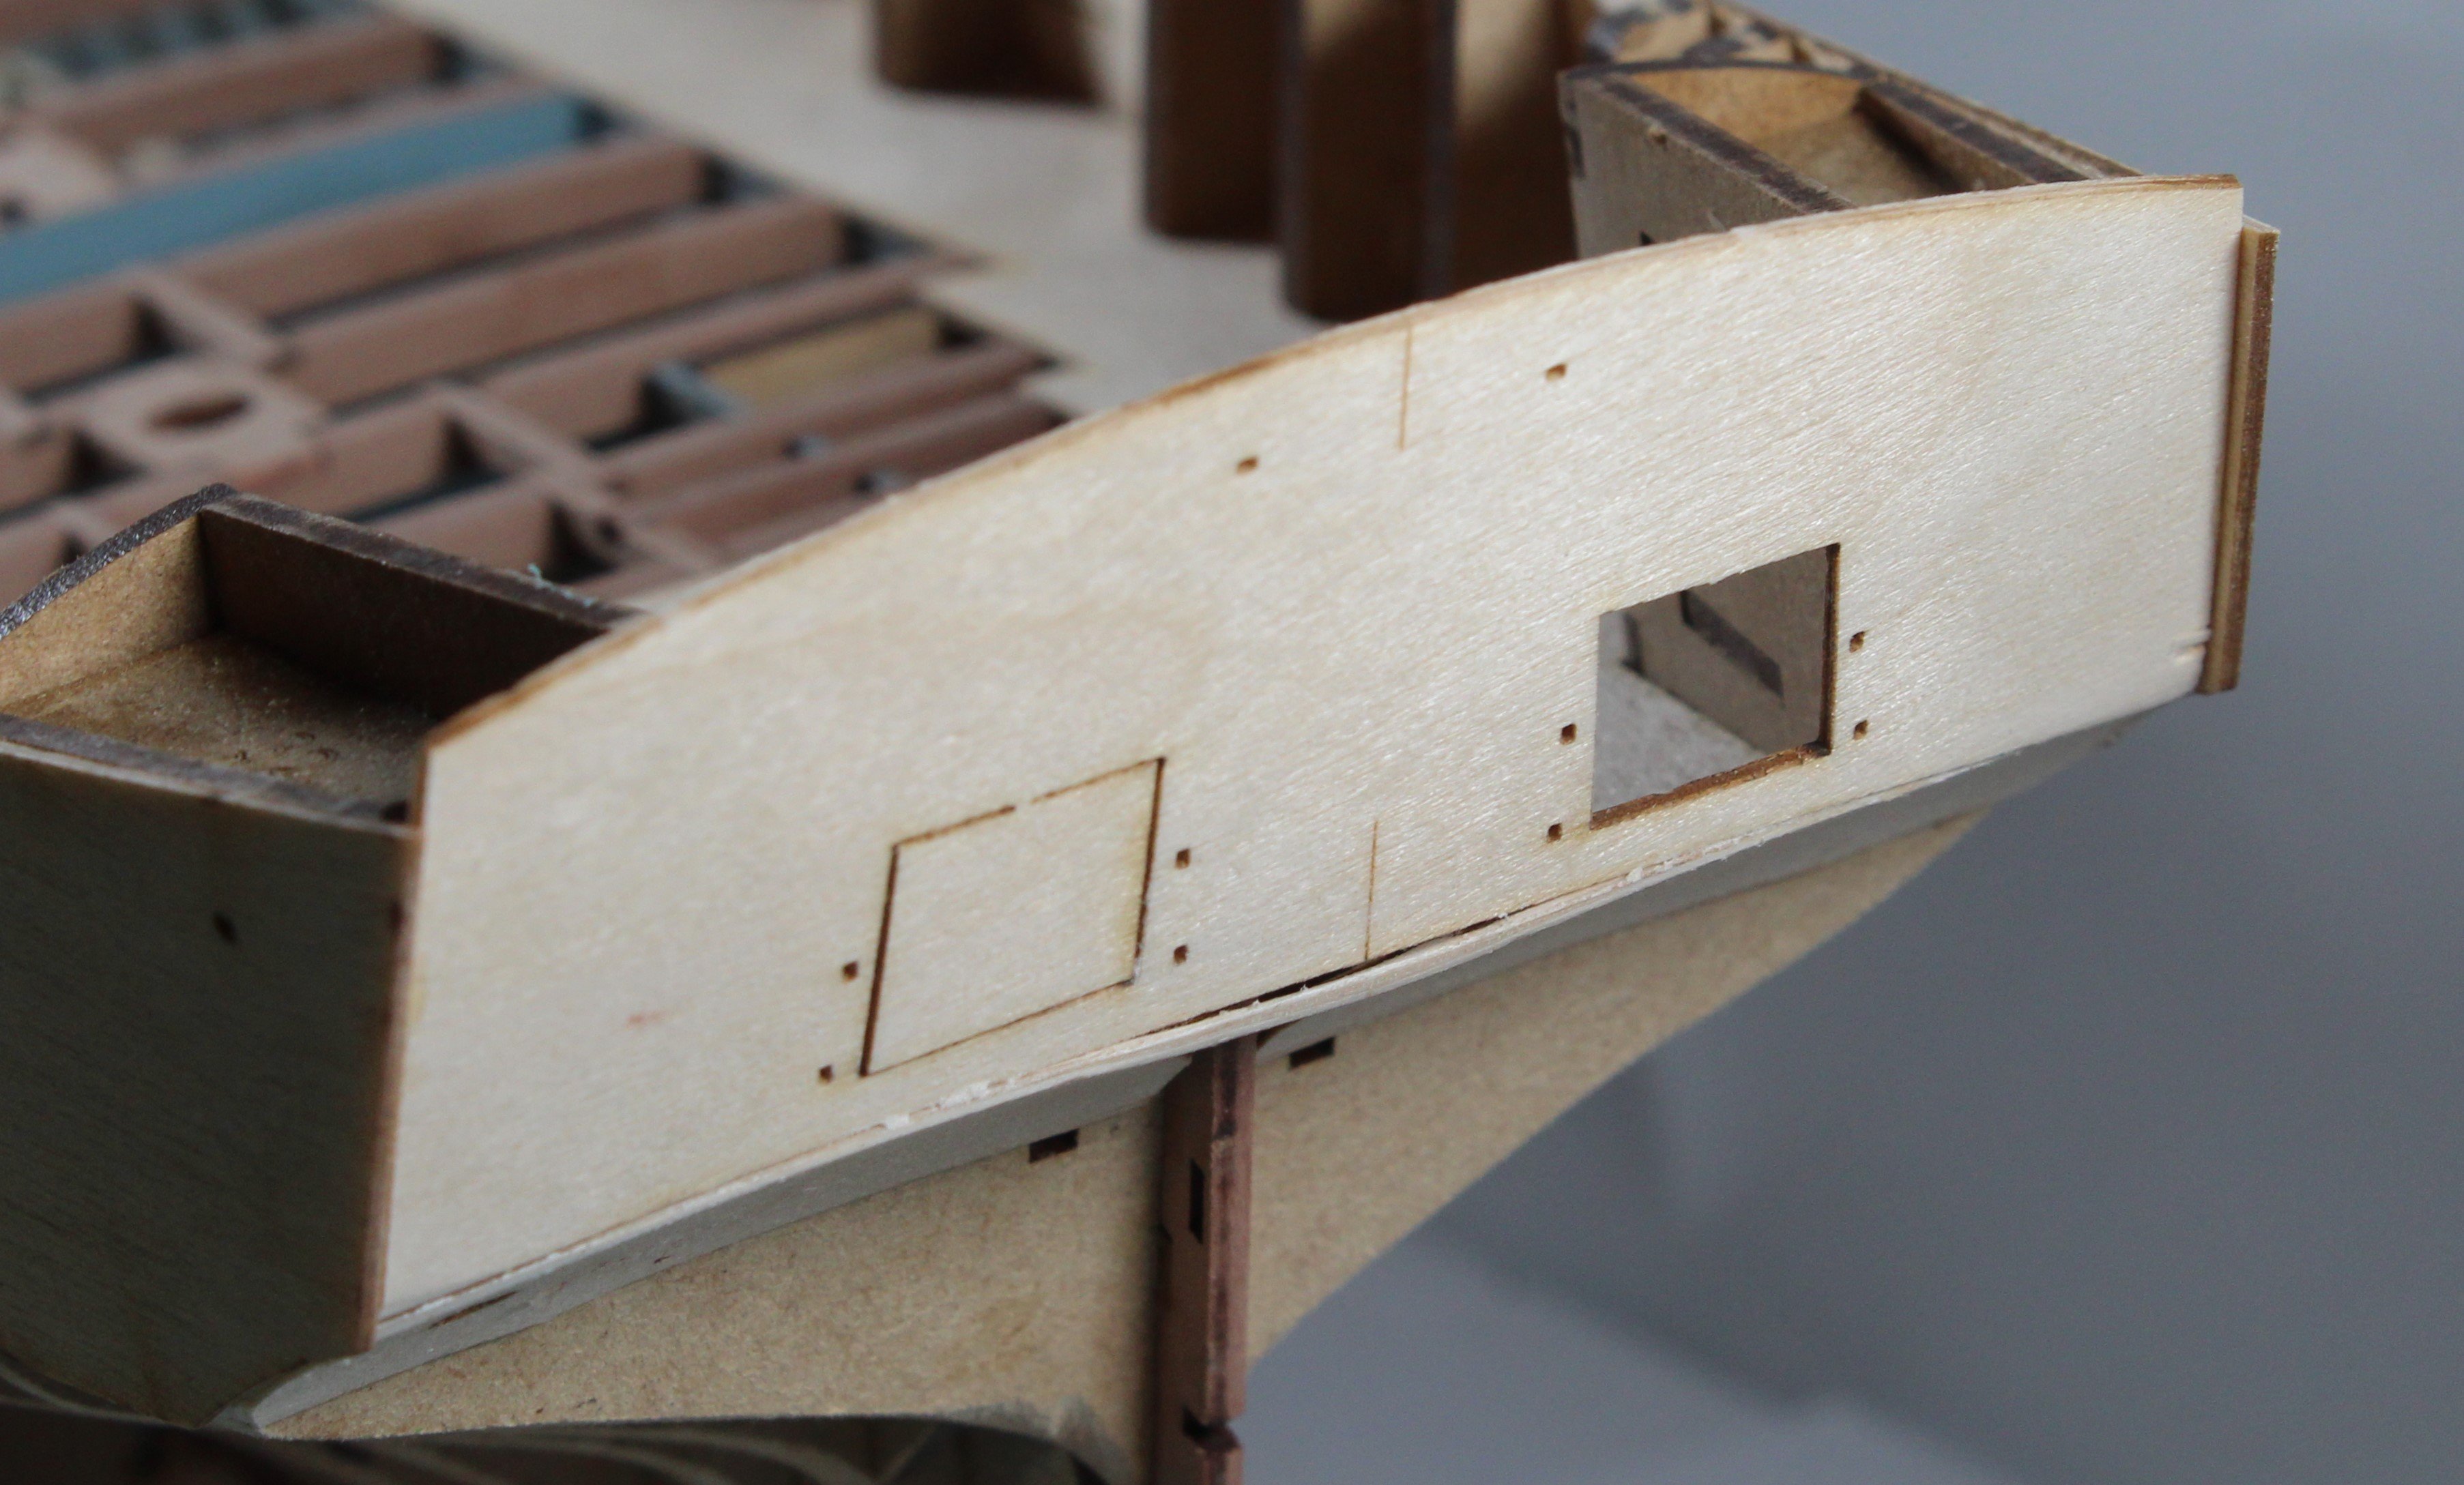
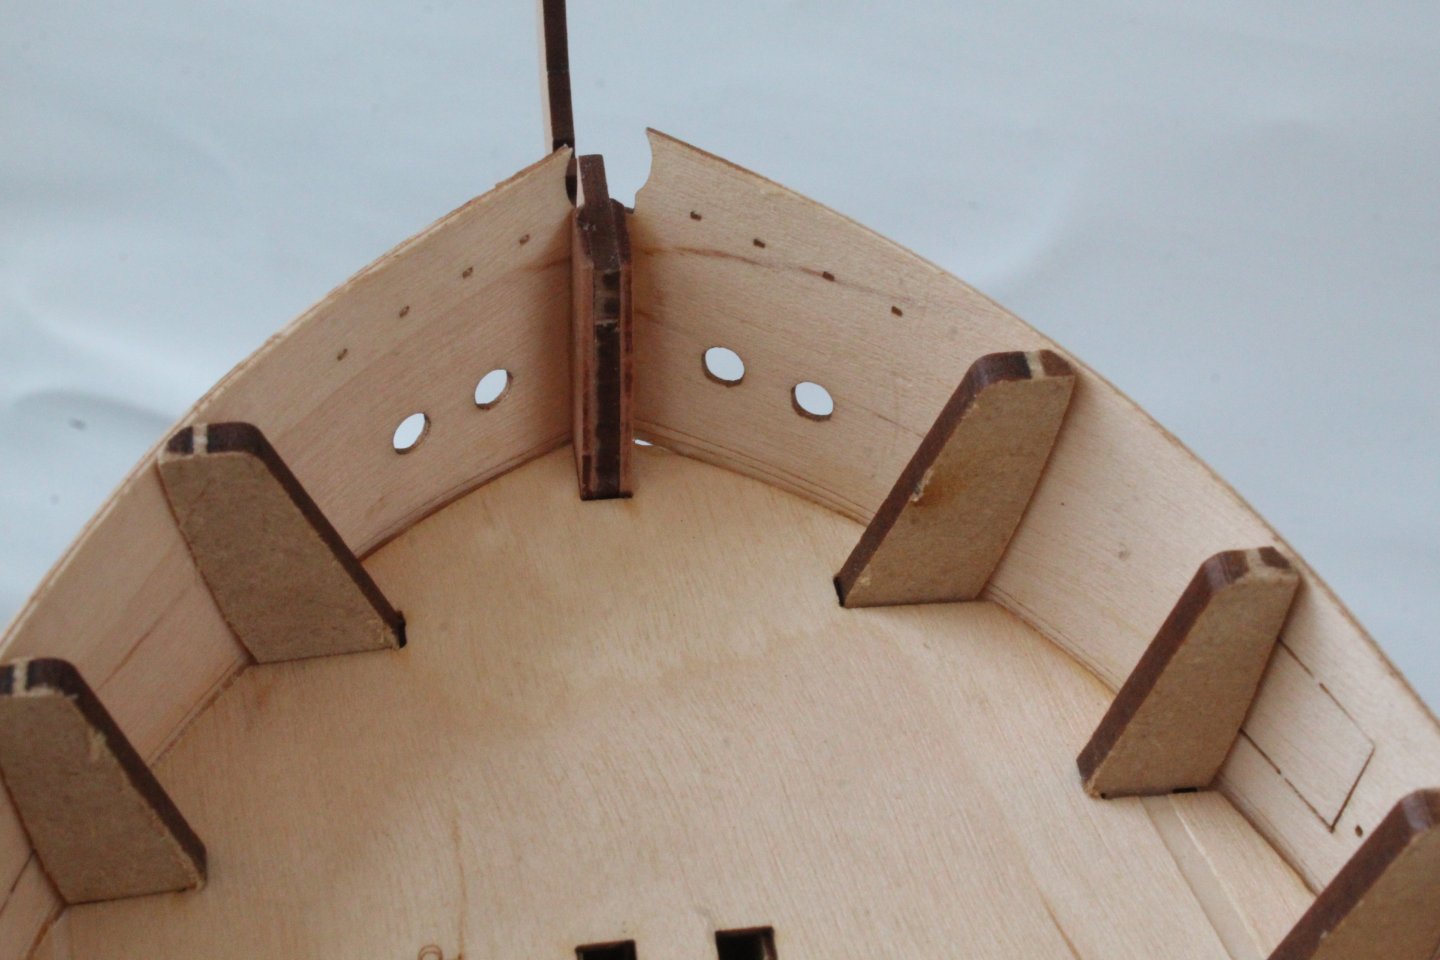
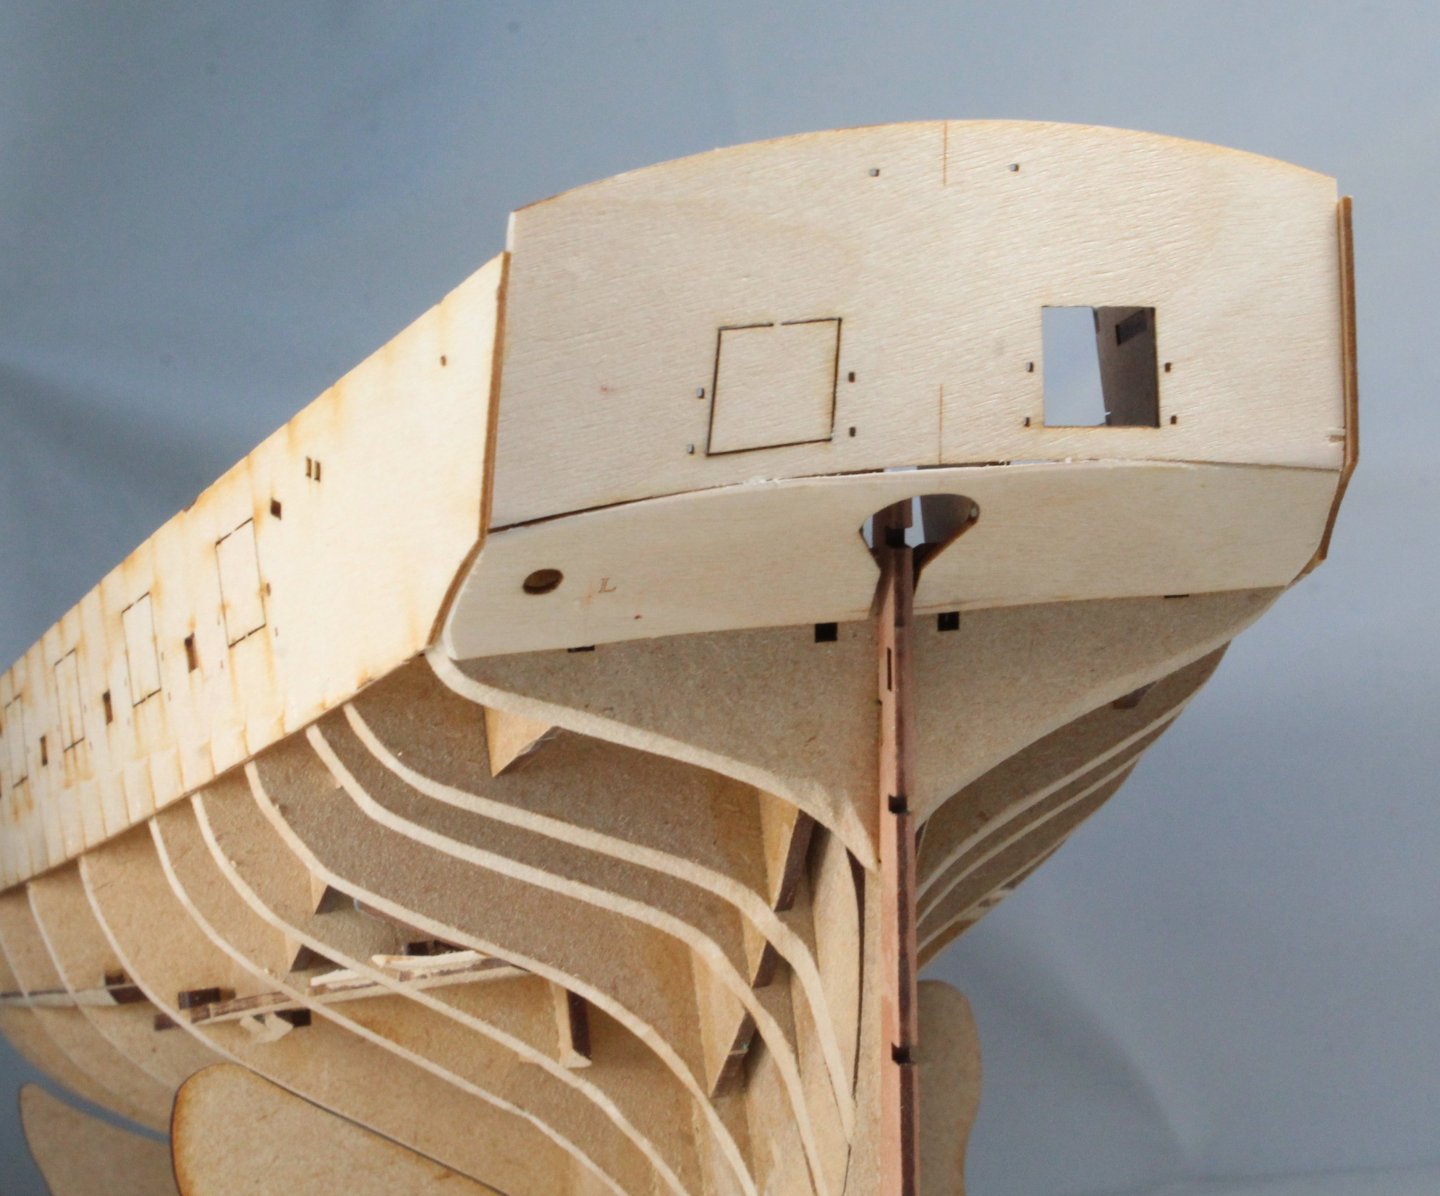
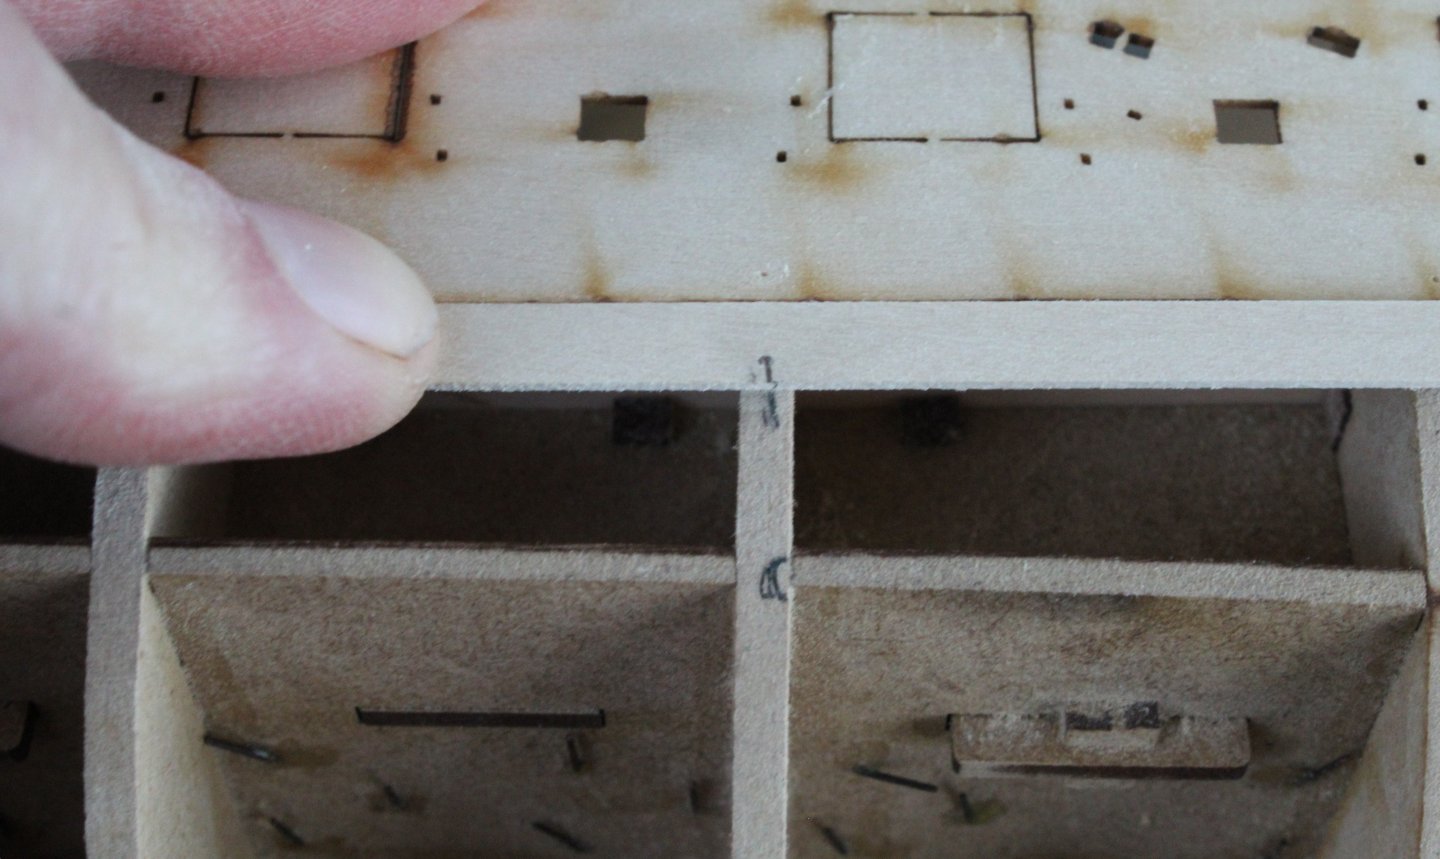
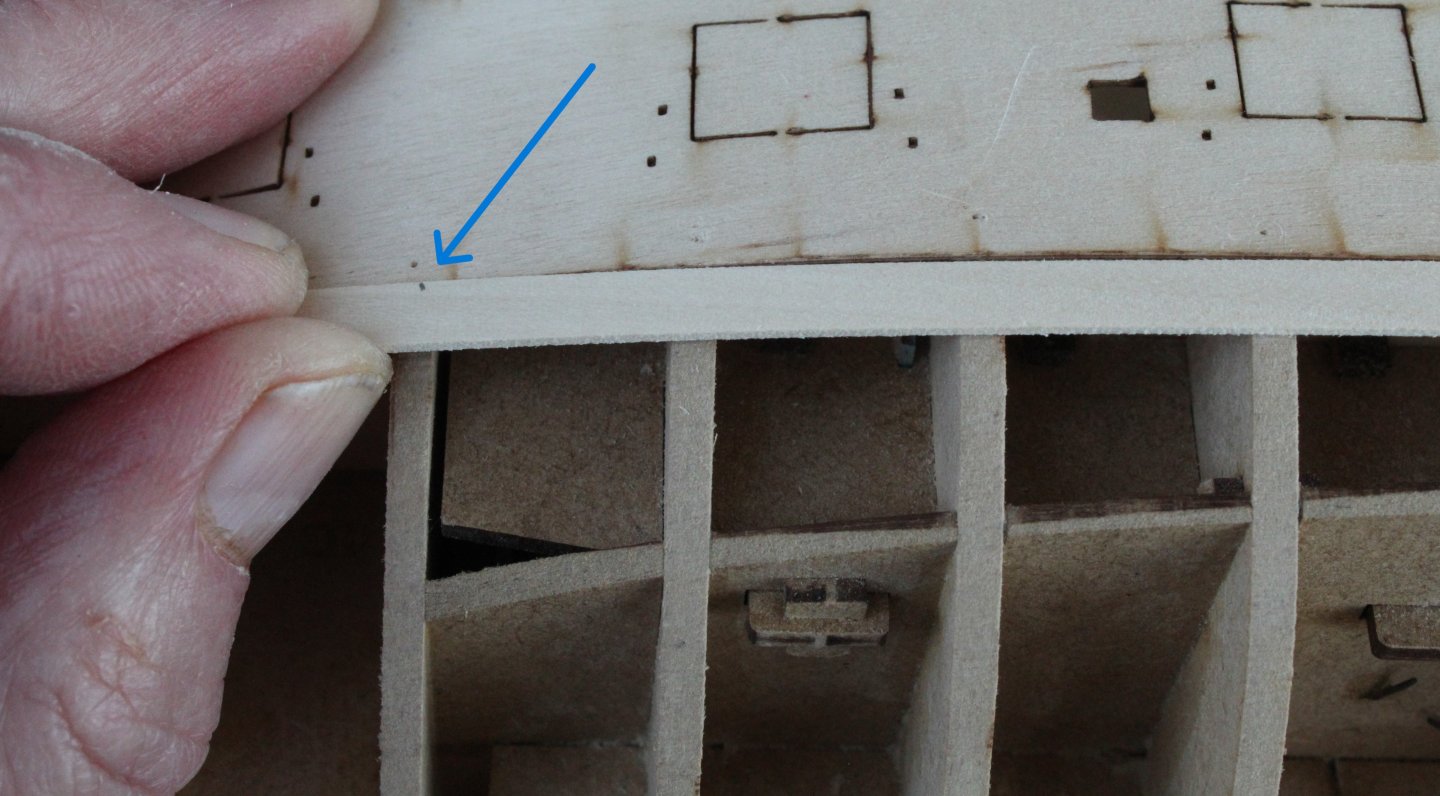
Not spent much time in the shipyard over the last few of days. The rear stern counter patterns have been glued in place and the excess material sanded smooth to the hull sides. The bow sections of the two outer bulwark patterns, after being soaked in hot water for a few minutes, were clamped to a plastic measuring jug and left to fully dry out out. I was was happy with how the patterns fitted around the bow, as can be seen in the next photo. When checking the position of the bulwarks there is a laser engraved line, the lower line needs to be aligned with deck base. In the photo below the test fitting of the pattern is a tad high. The patterns have now been glued in place. I will take some photo's once the glue has had sufficient time (overnight) to cure. I only applied glue to the area below the laser engraved deck lines on the bulwark patterns.


- 241 replies
-
- 9
-
-
- Vanguarrd Models
- Harpy
- (and 1 more)
-
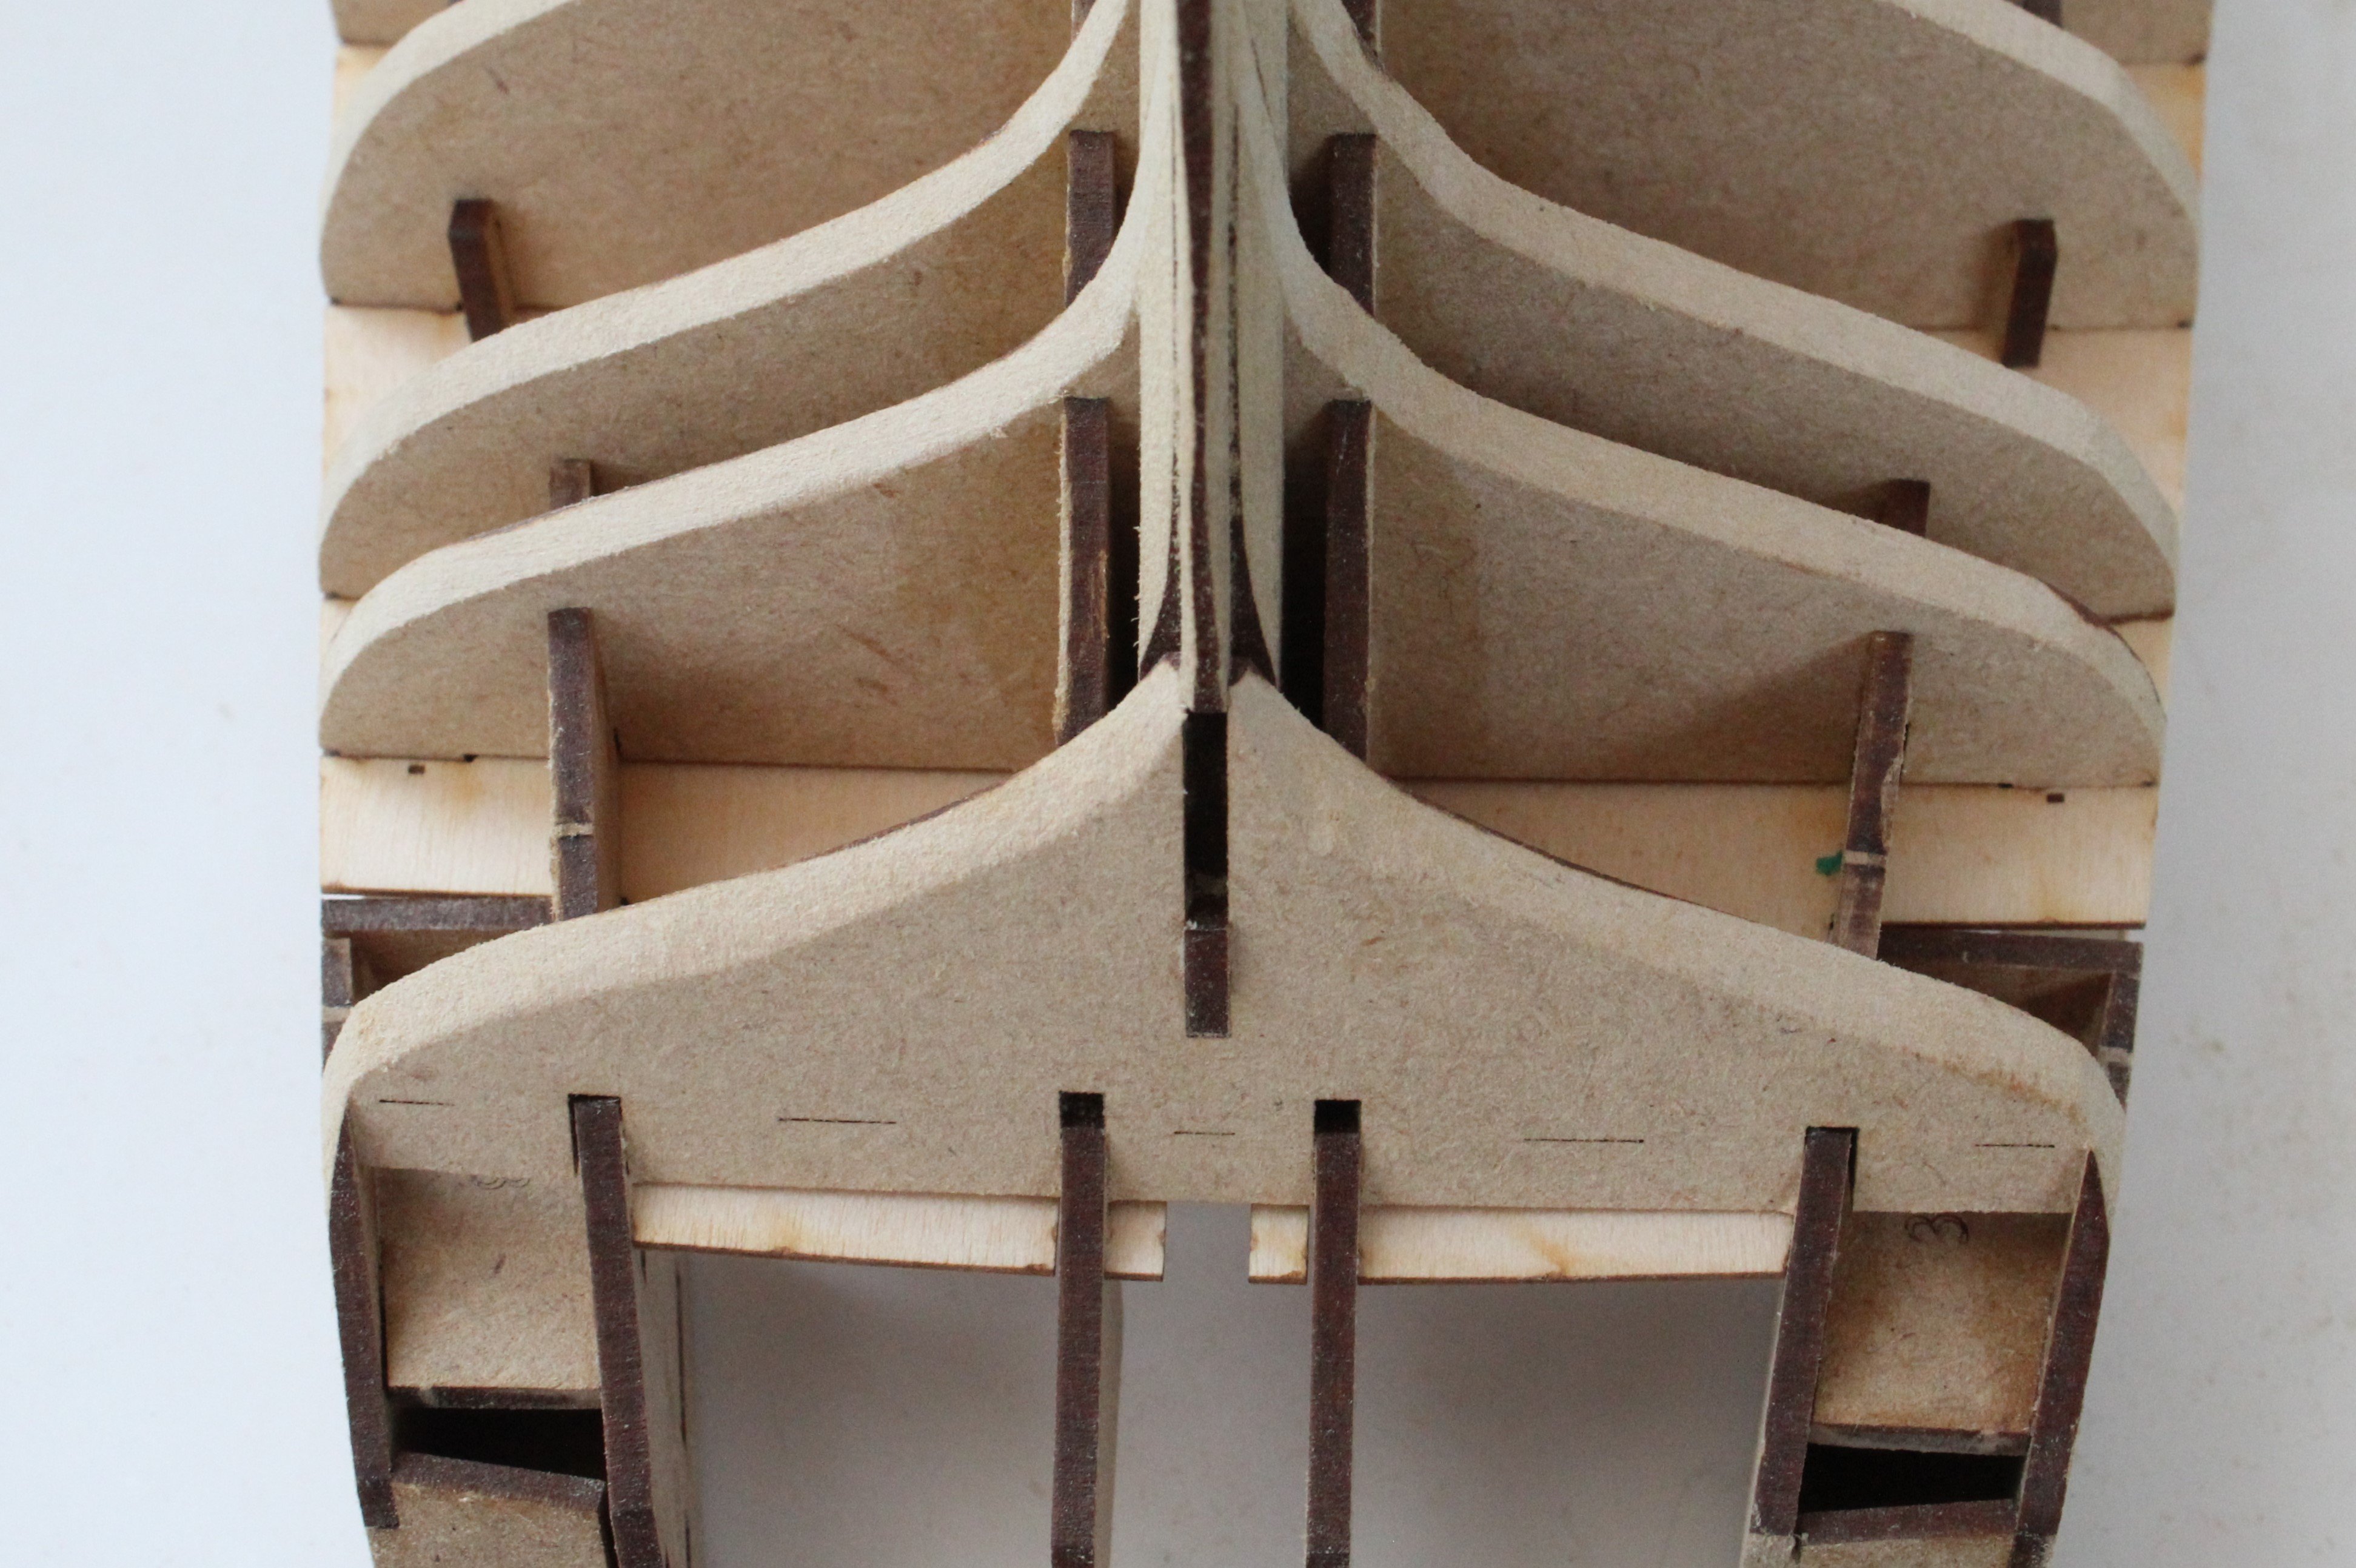
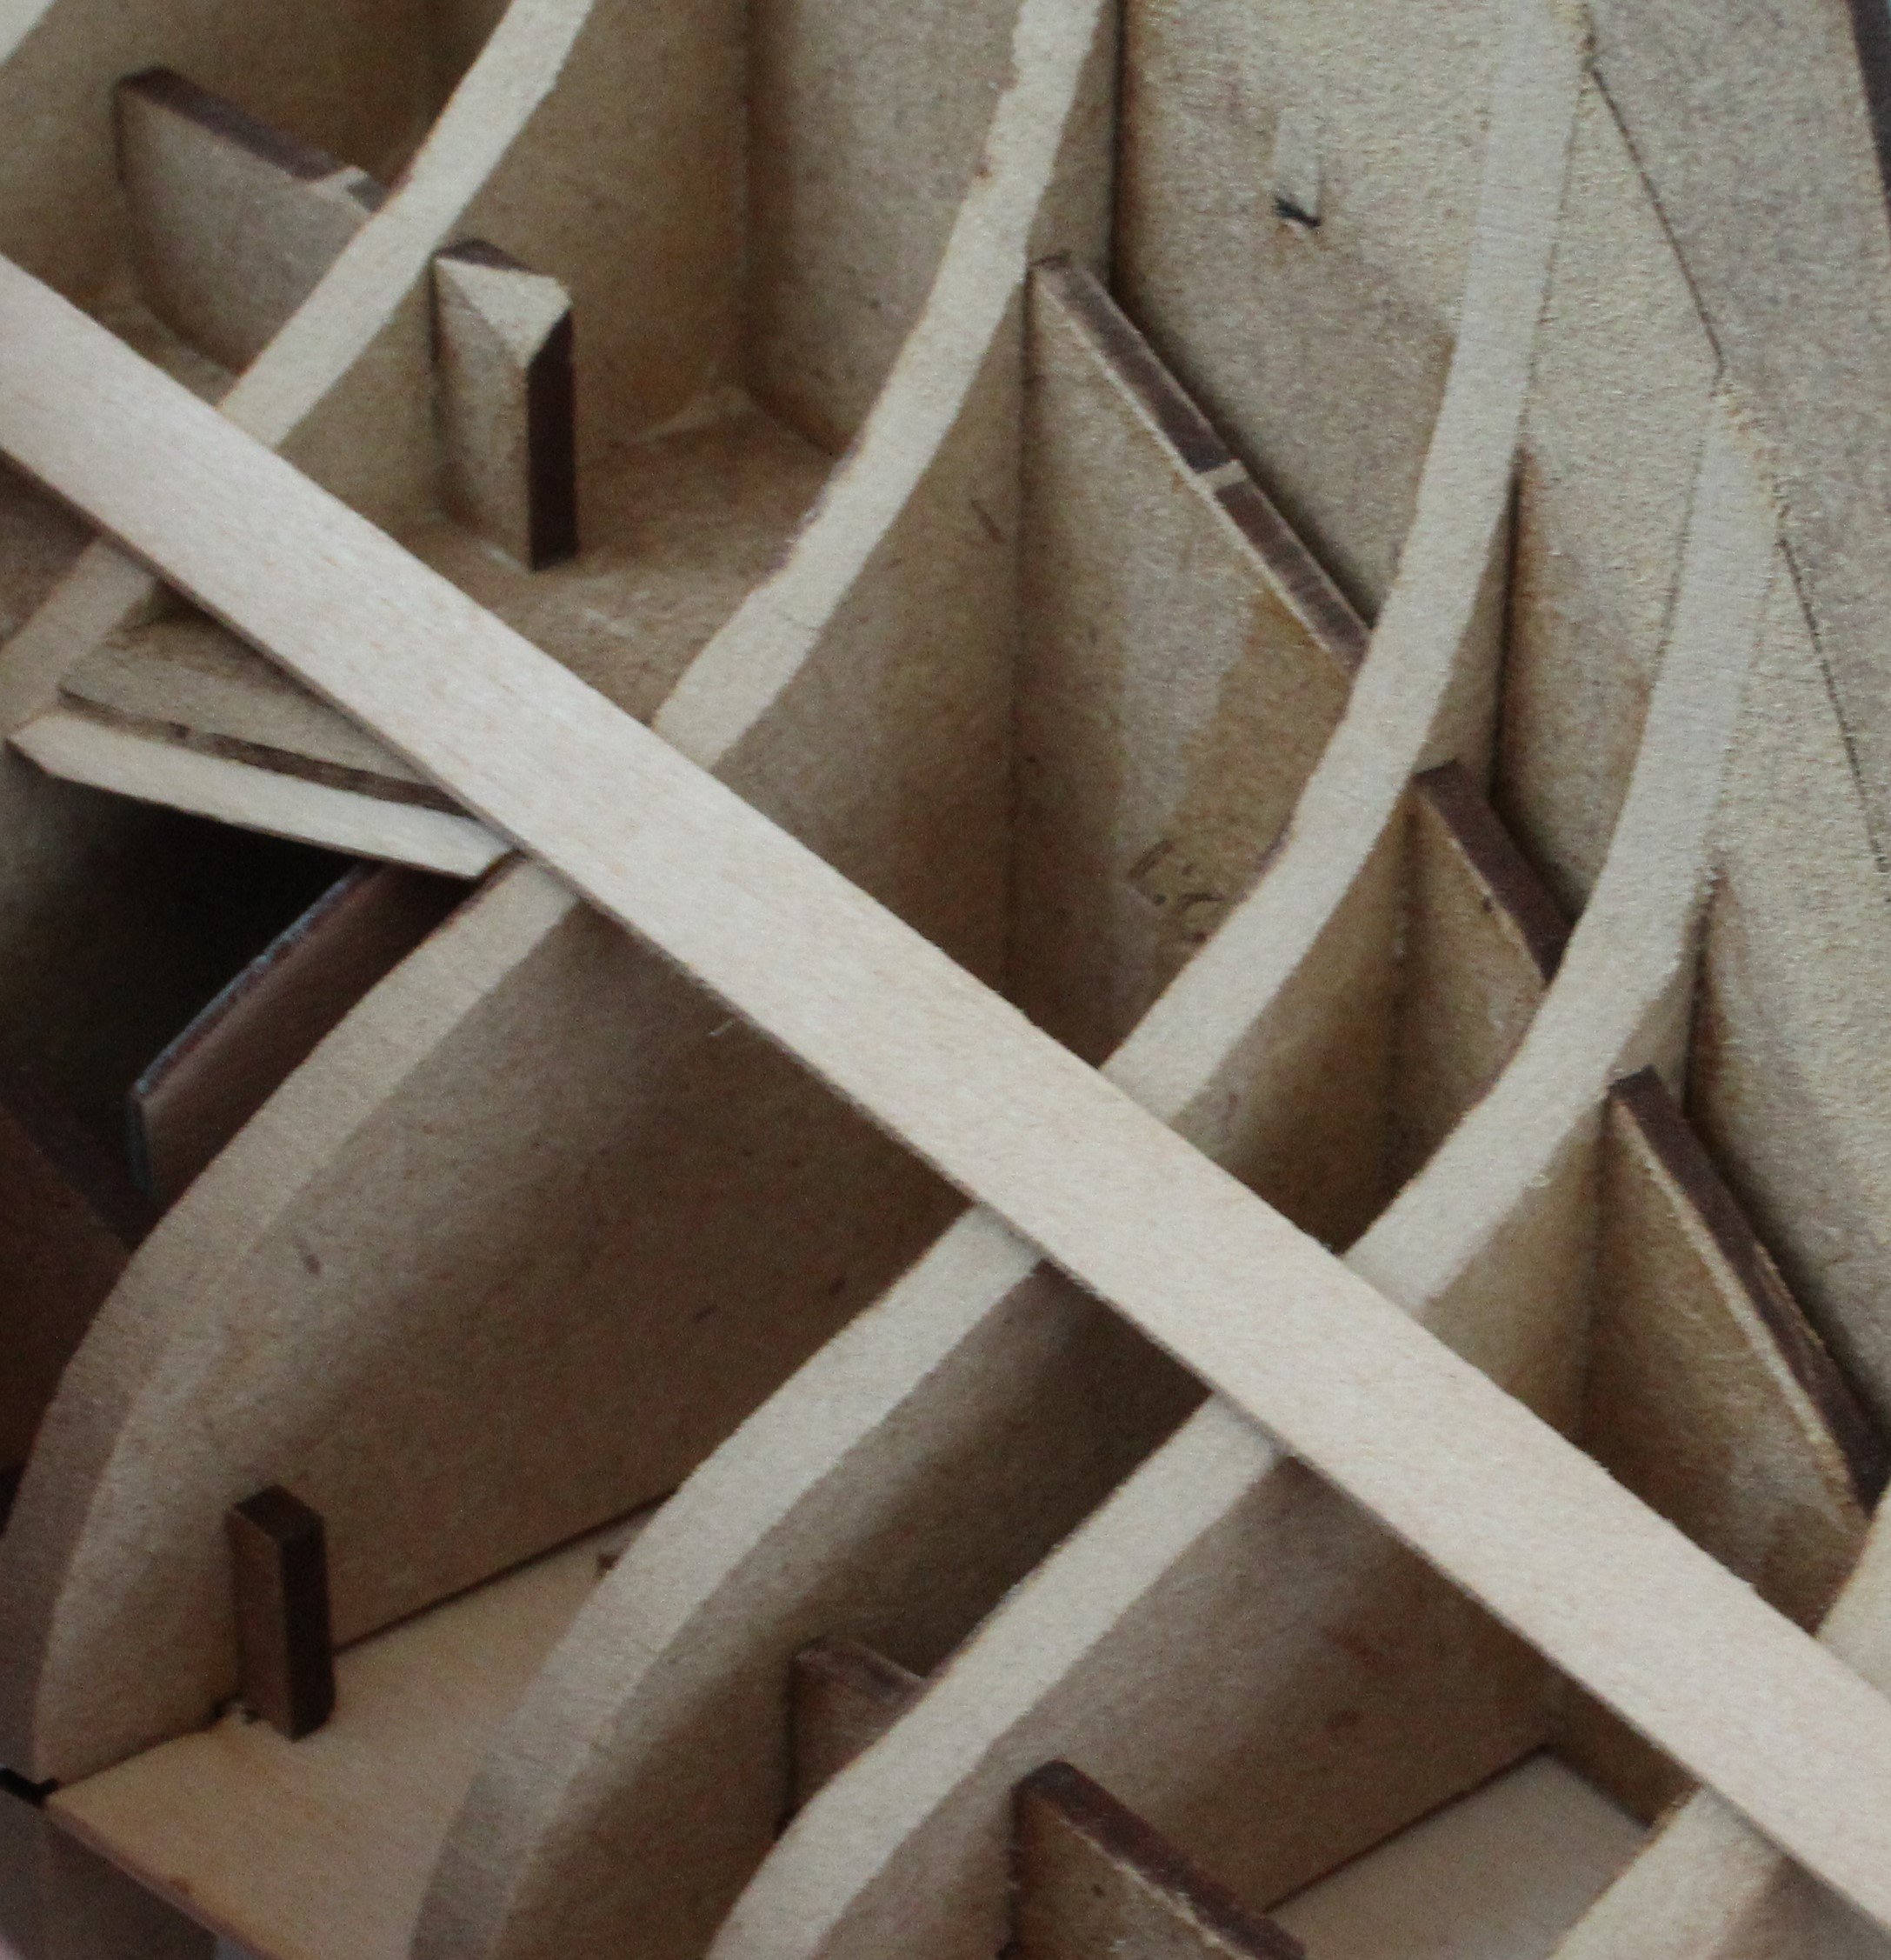
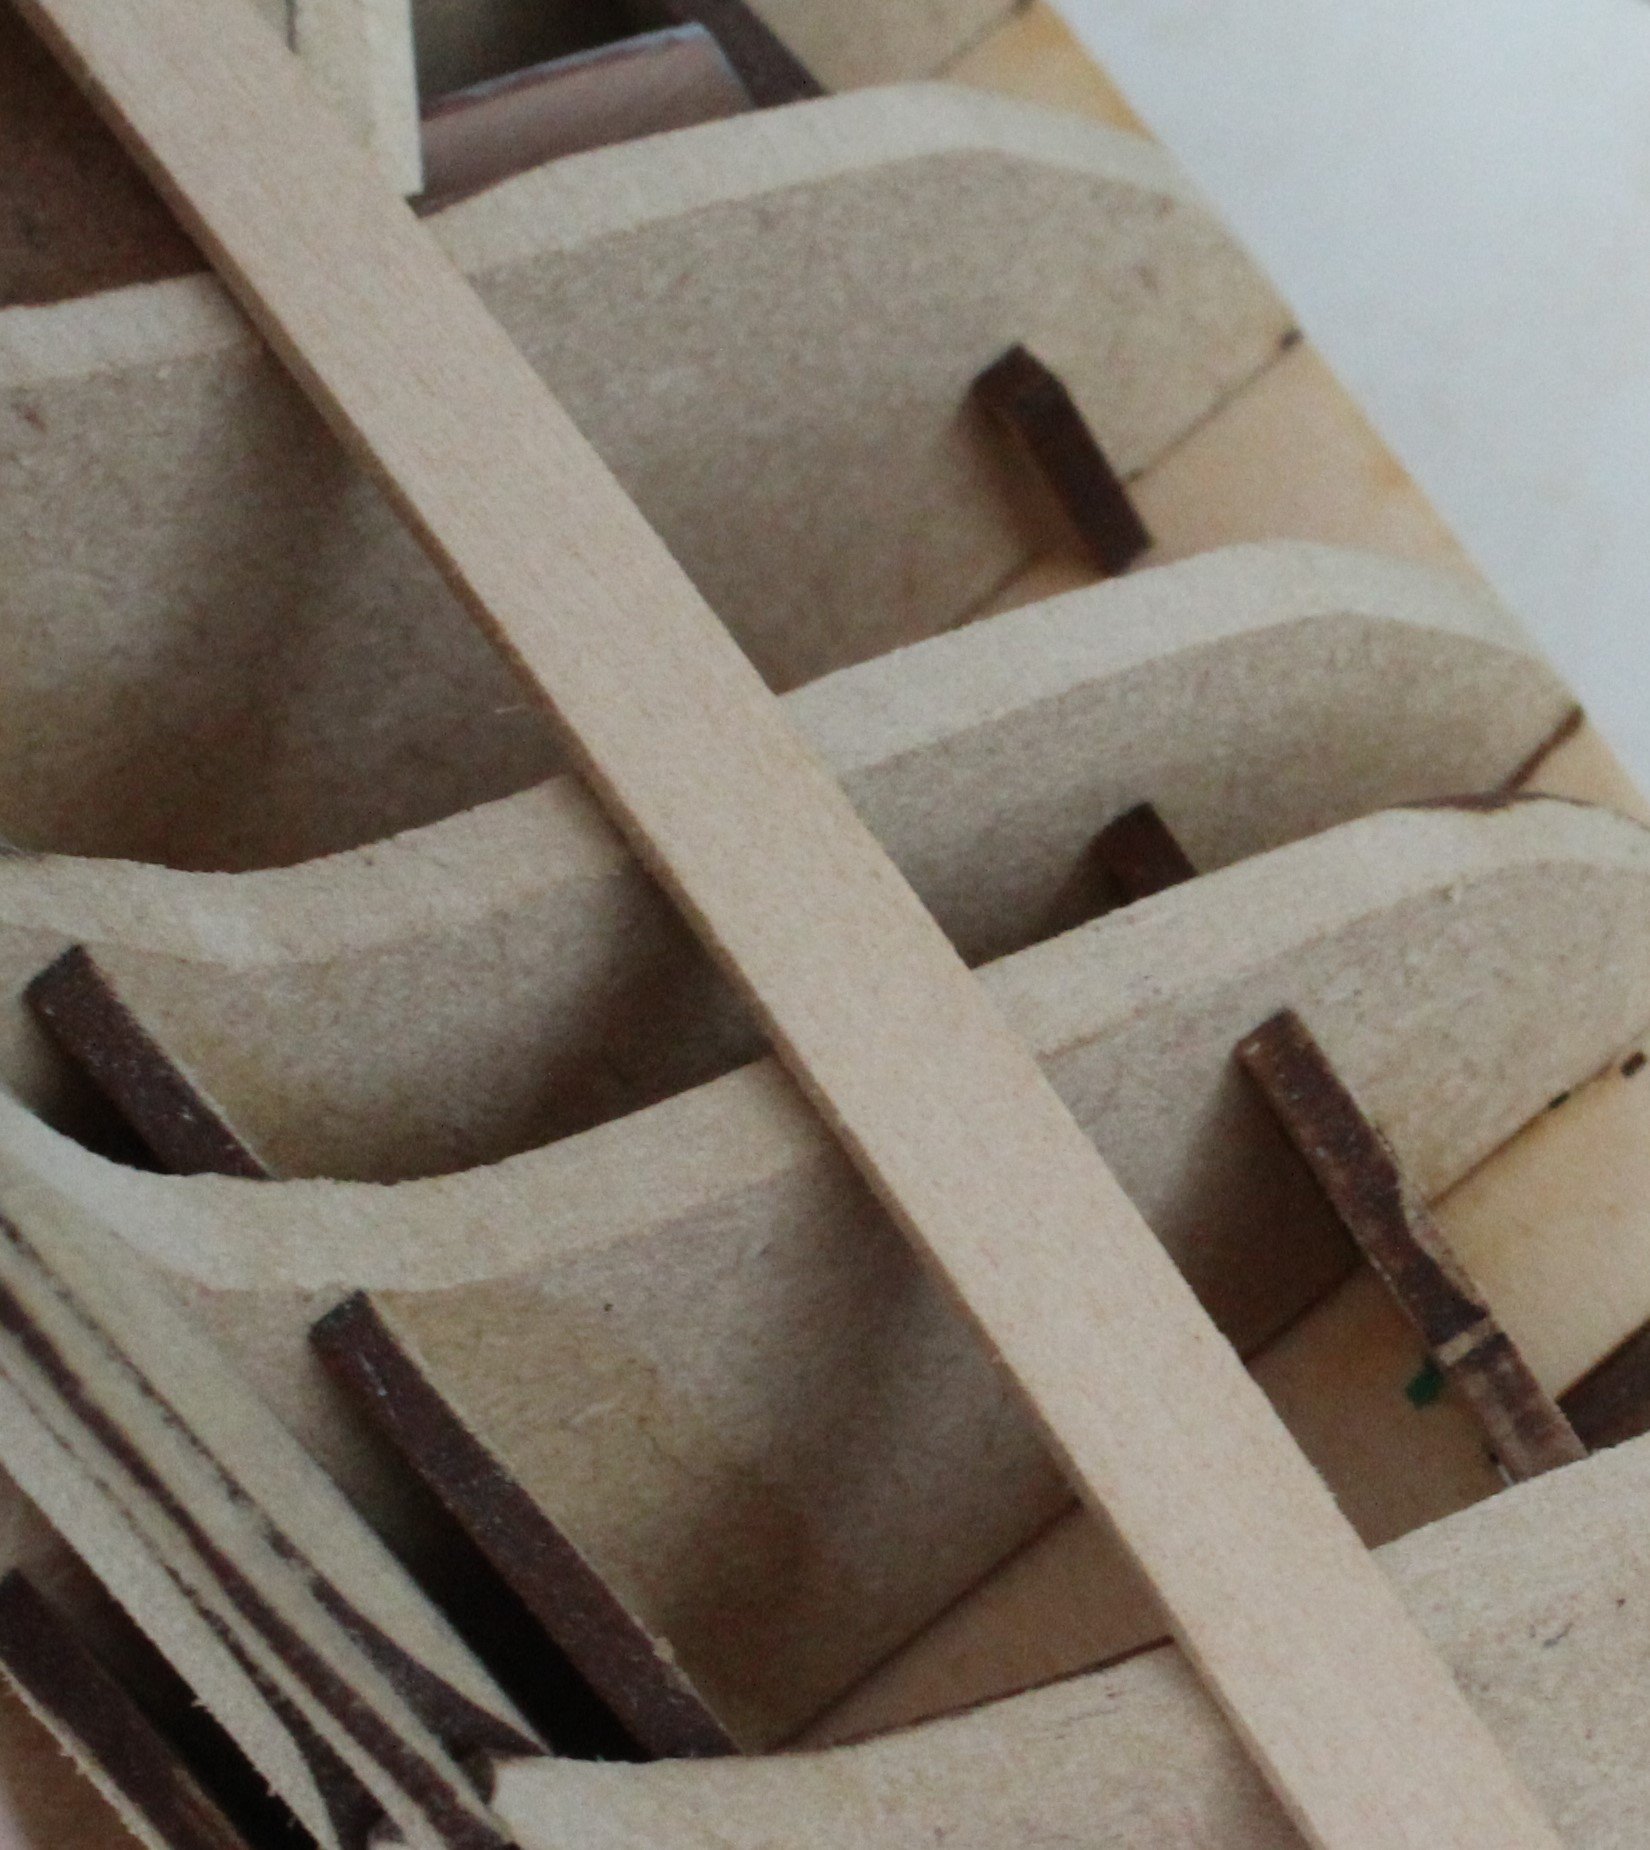
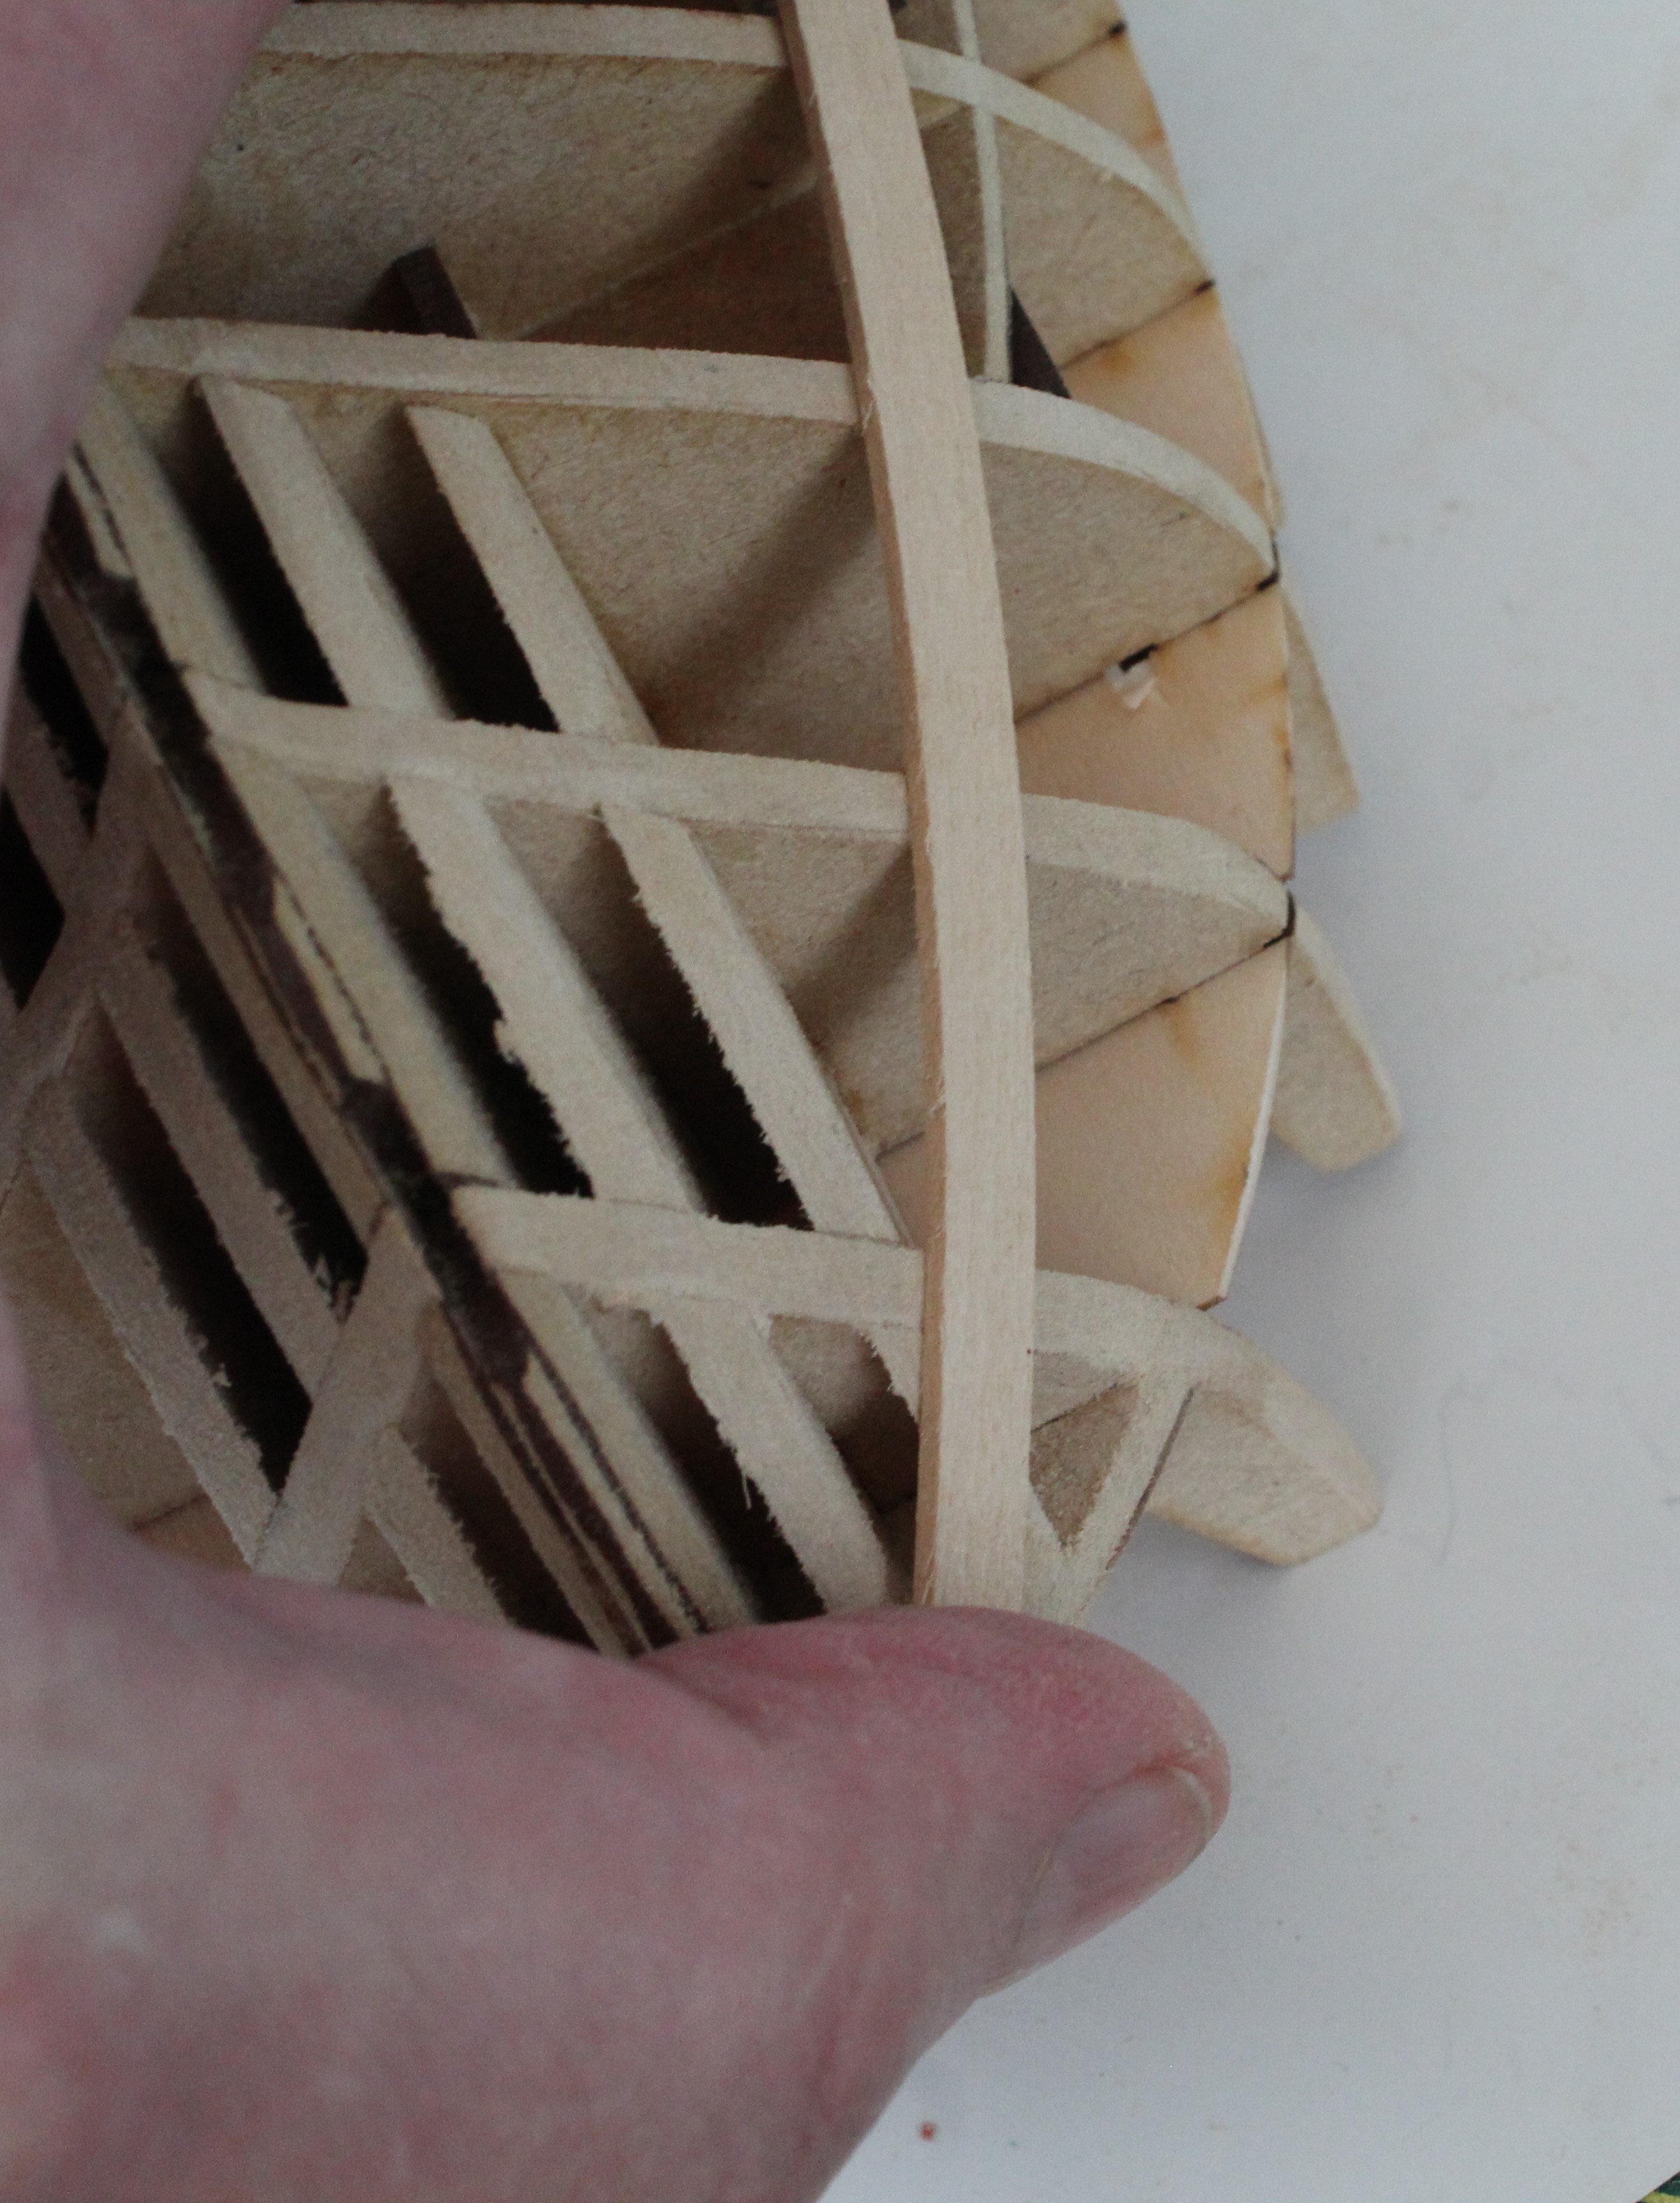
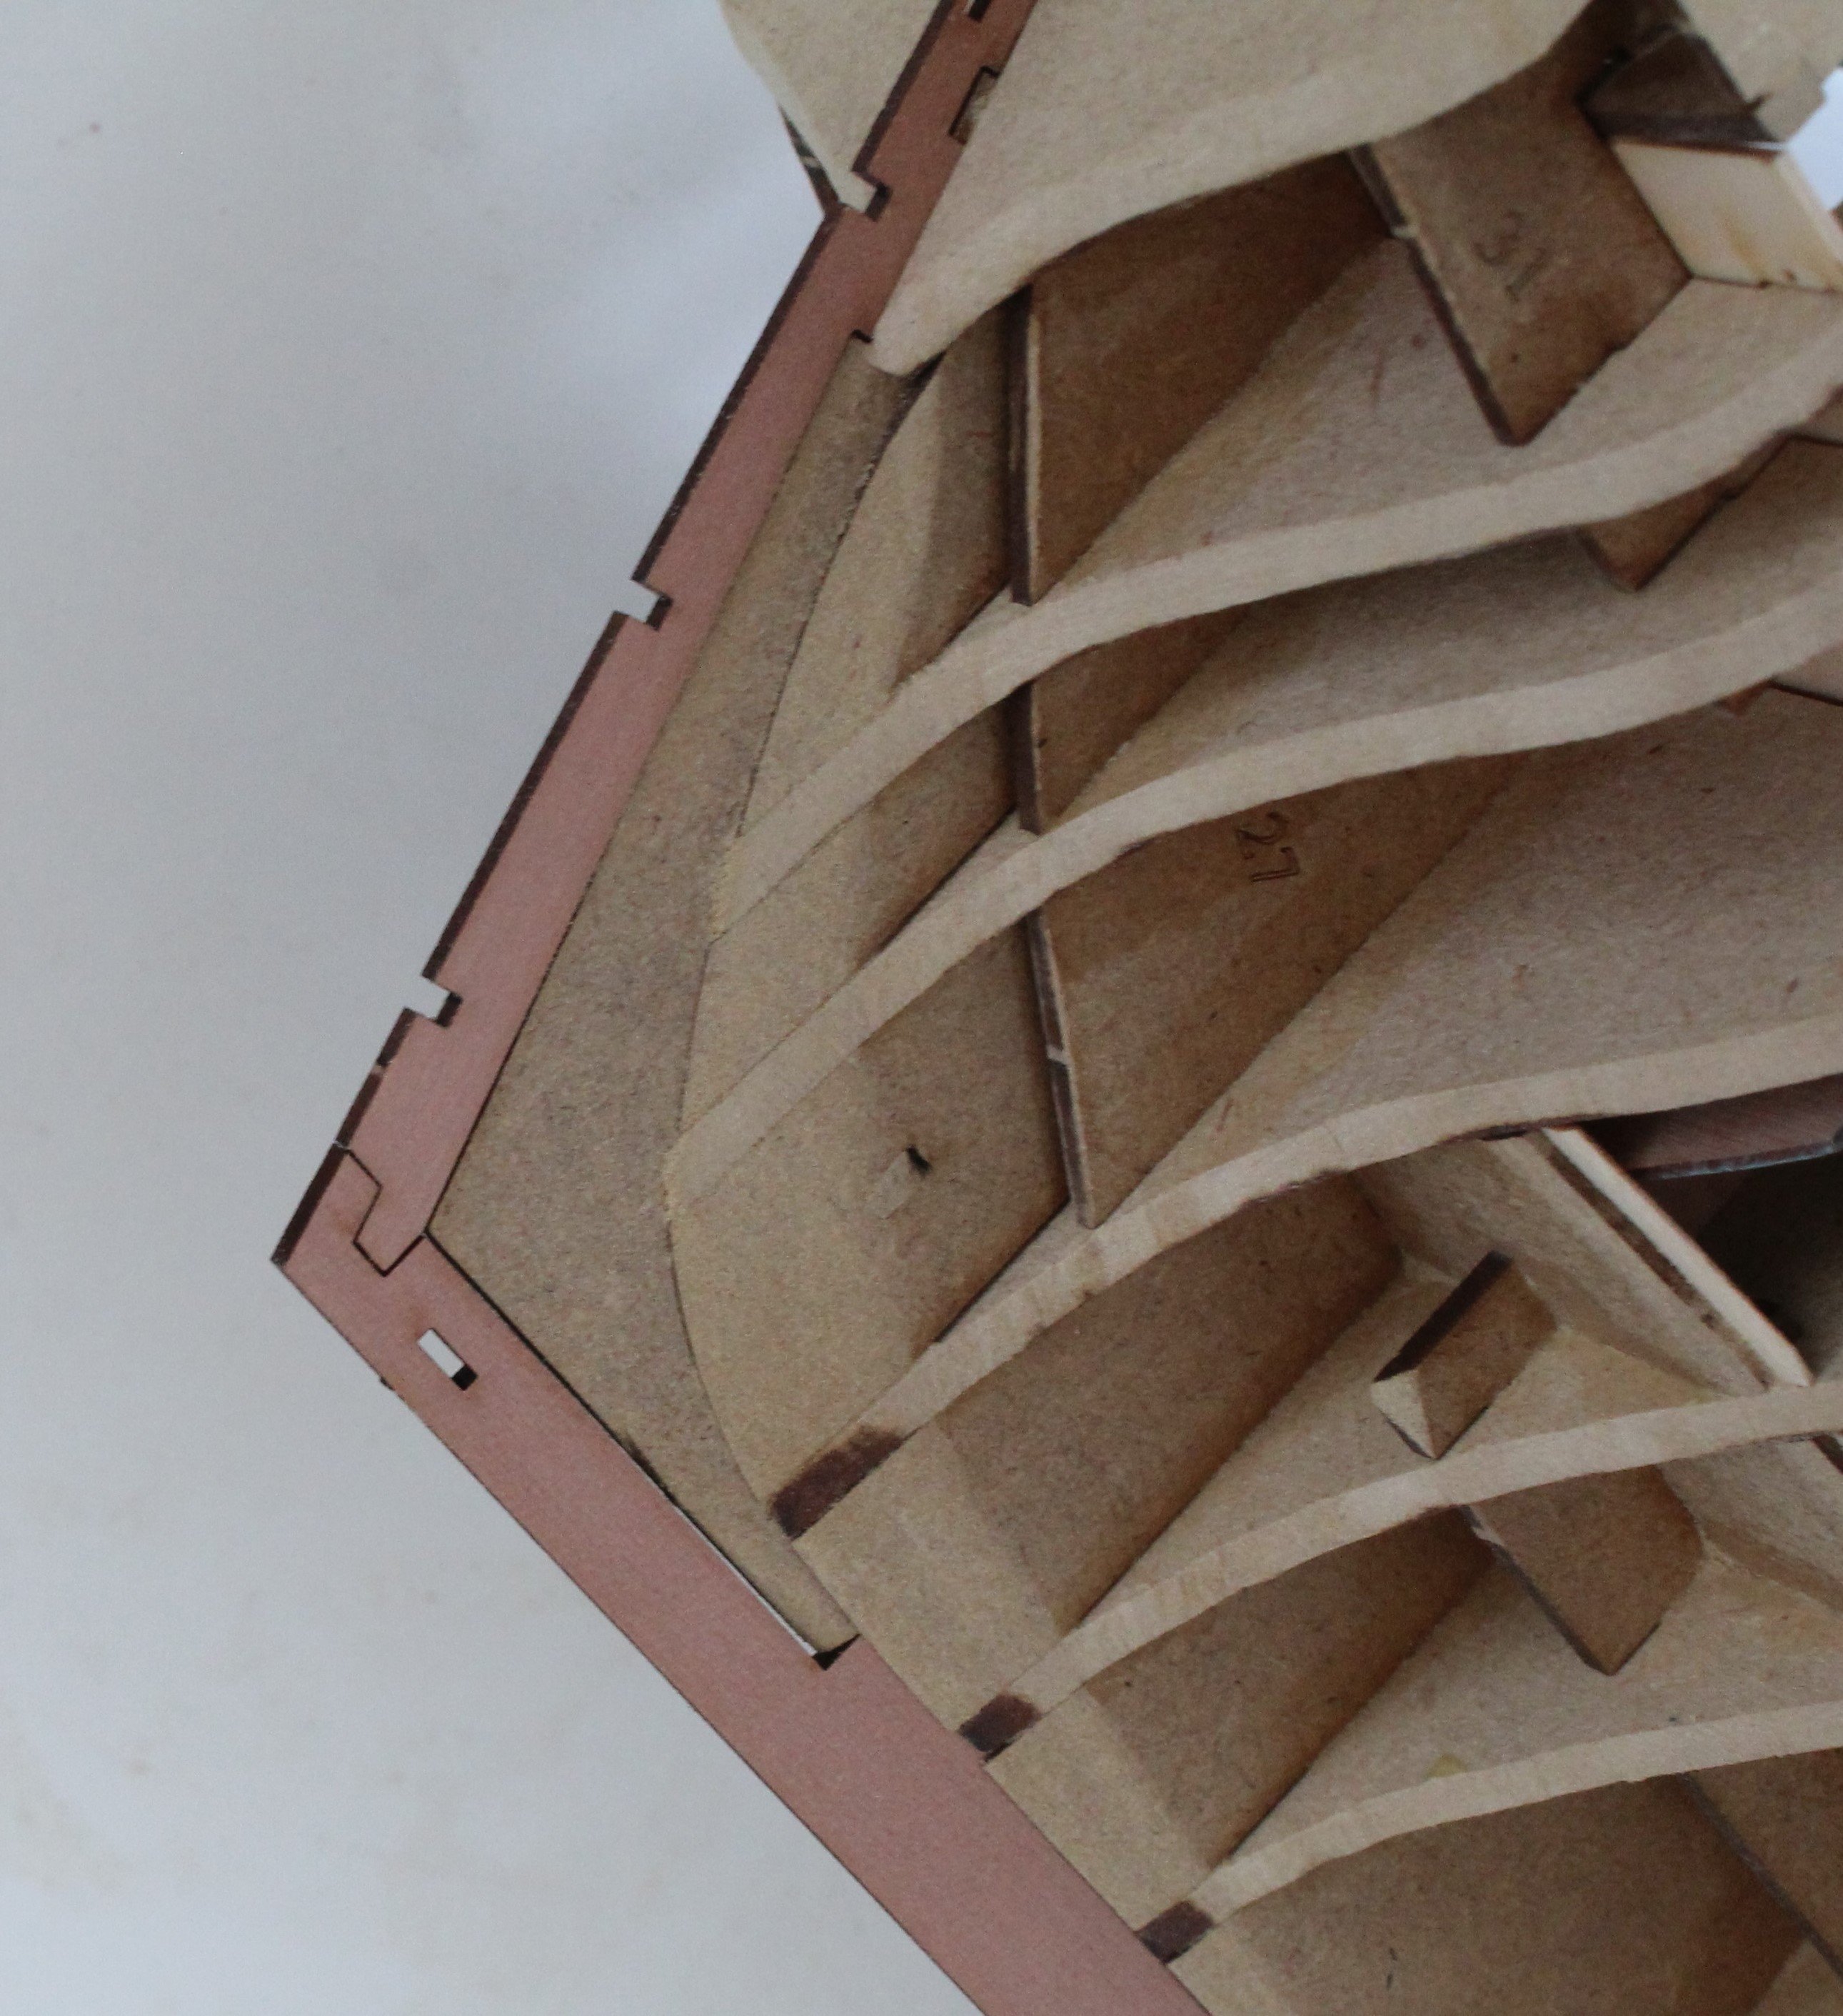
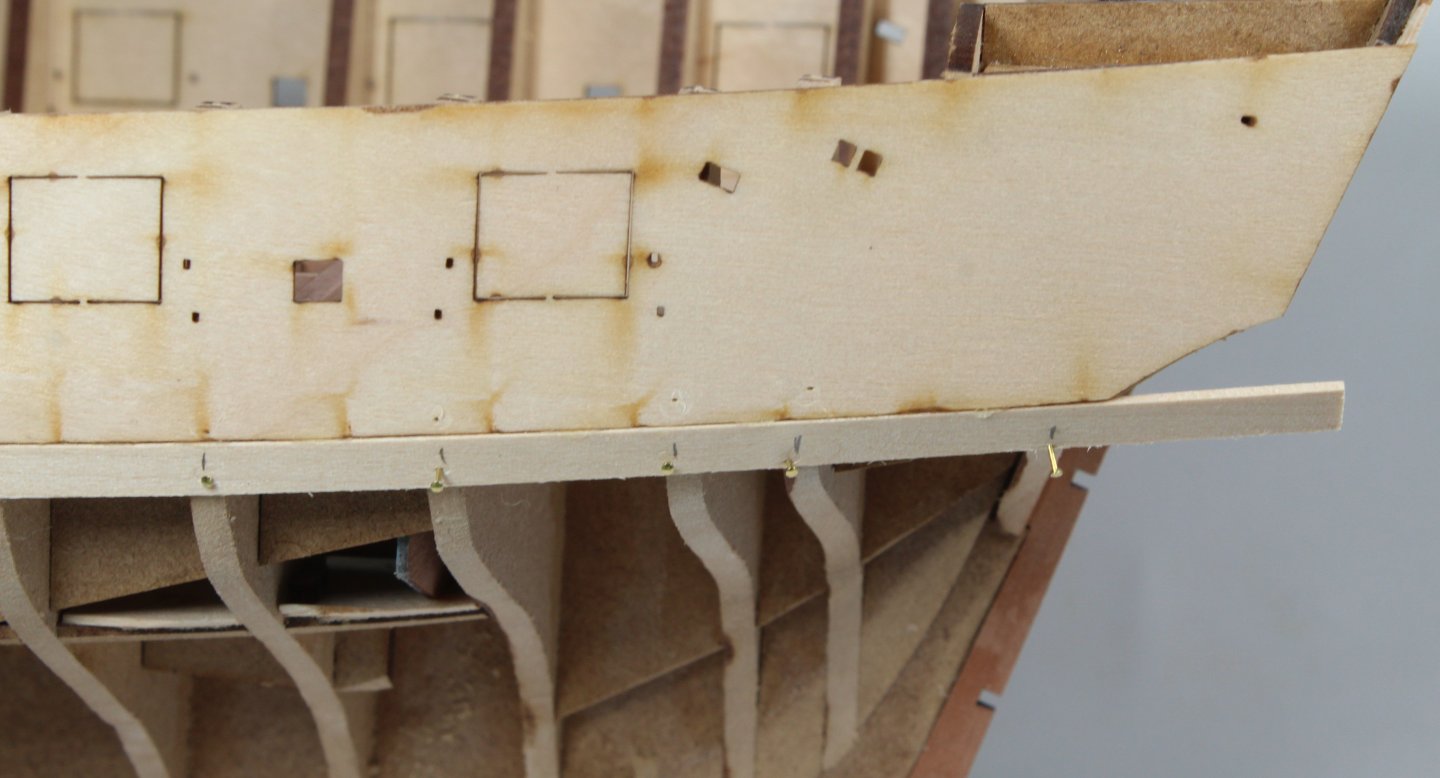
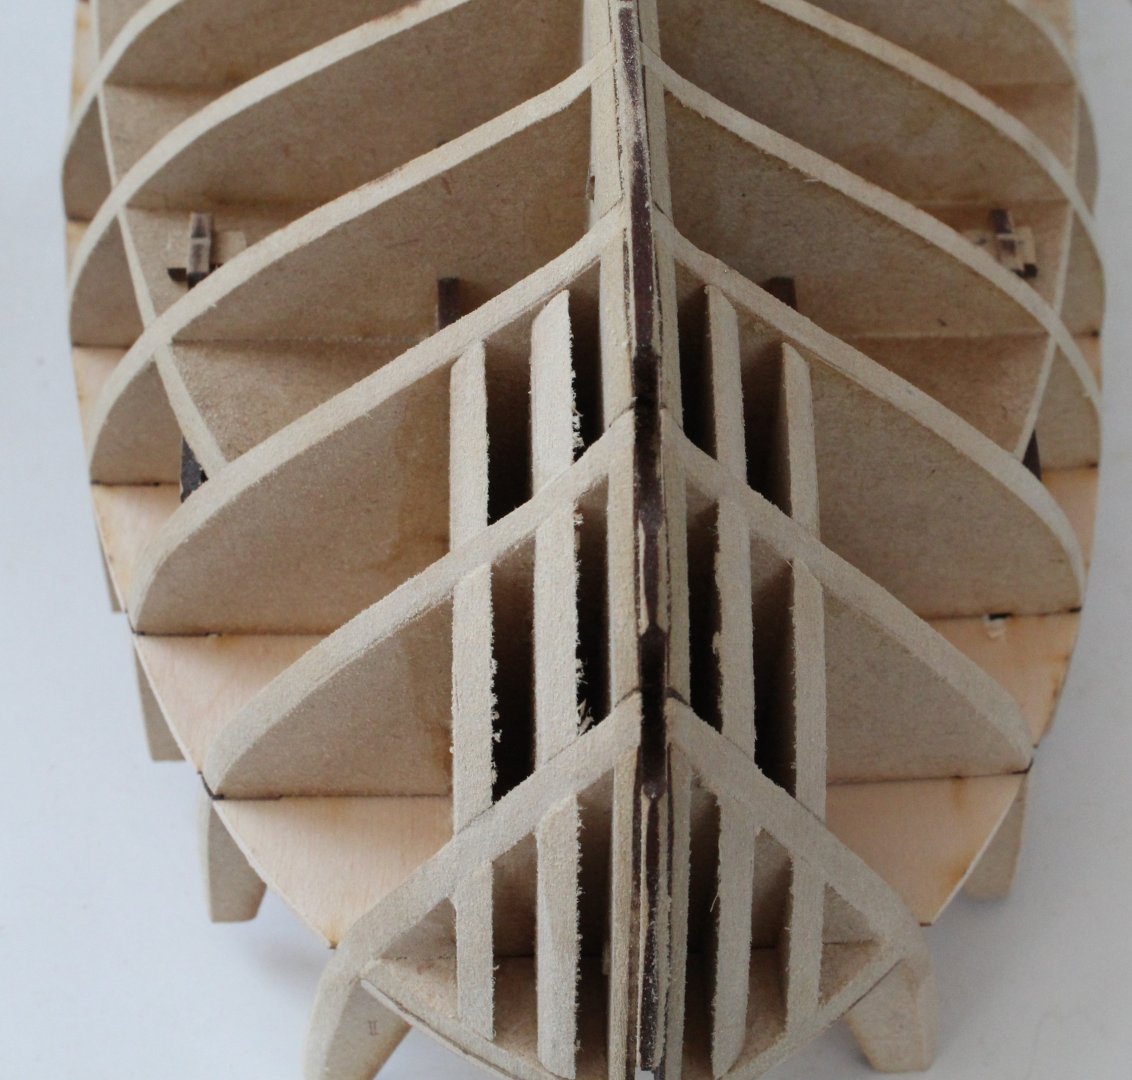
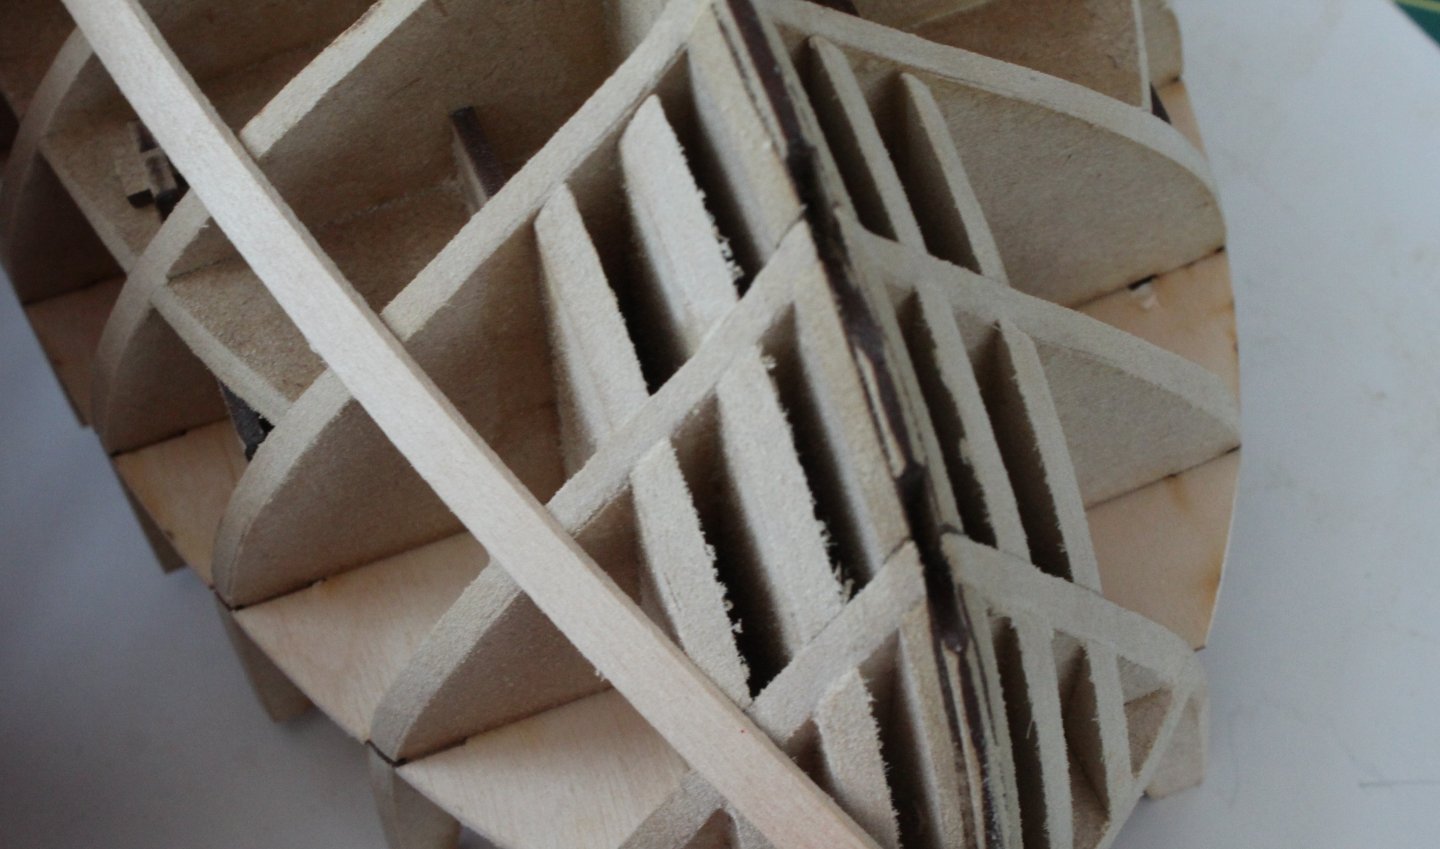
My main objective today was to fair the hull. This was a fairly painless exercise and did not take too long to complete approx. 90 minutes in total. I started by using my Amati sanding block (loaded with 120-grit sandpaper) on the bulkhead ears. Once I was happy with how they were looking I moved to fairing the mid ship ship sections, using a mixture of my Amati sanding block and Infini sanding sticks (100-grit, 150 grit and 220 grit). Next I moved on to fairing the stern area. For this I used my Infini sanding sticks (100-grit, 150 grit and 220 grit), my thin standing sticks and 120 grit sandpaper. This took a bit more time and effort and once completed I was happy that there was full contact with a test plank. It was then time to fair the bow area. Once again I used my Infini sanding sticks (100-grit, 150 grit and 220 grit), my thin standing sticks and 120 grit sandpaper. Once completed I was happy that there was full contact with a test plank. I did smooth the sanded hull using a 400 grit sanding stick. Next I did a quick test fit the prow, keel and stern post and was very happy with how they looked. If I get time later today I will glue them in place as it is now time for my daily afternoon run.


- 241 replies
-
- 13
-
-
- Vanguarrd Models
- Harpy
- (and 1 more)
-
What do you mean by the term Syn? It is akin to a clinker effect?
-
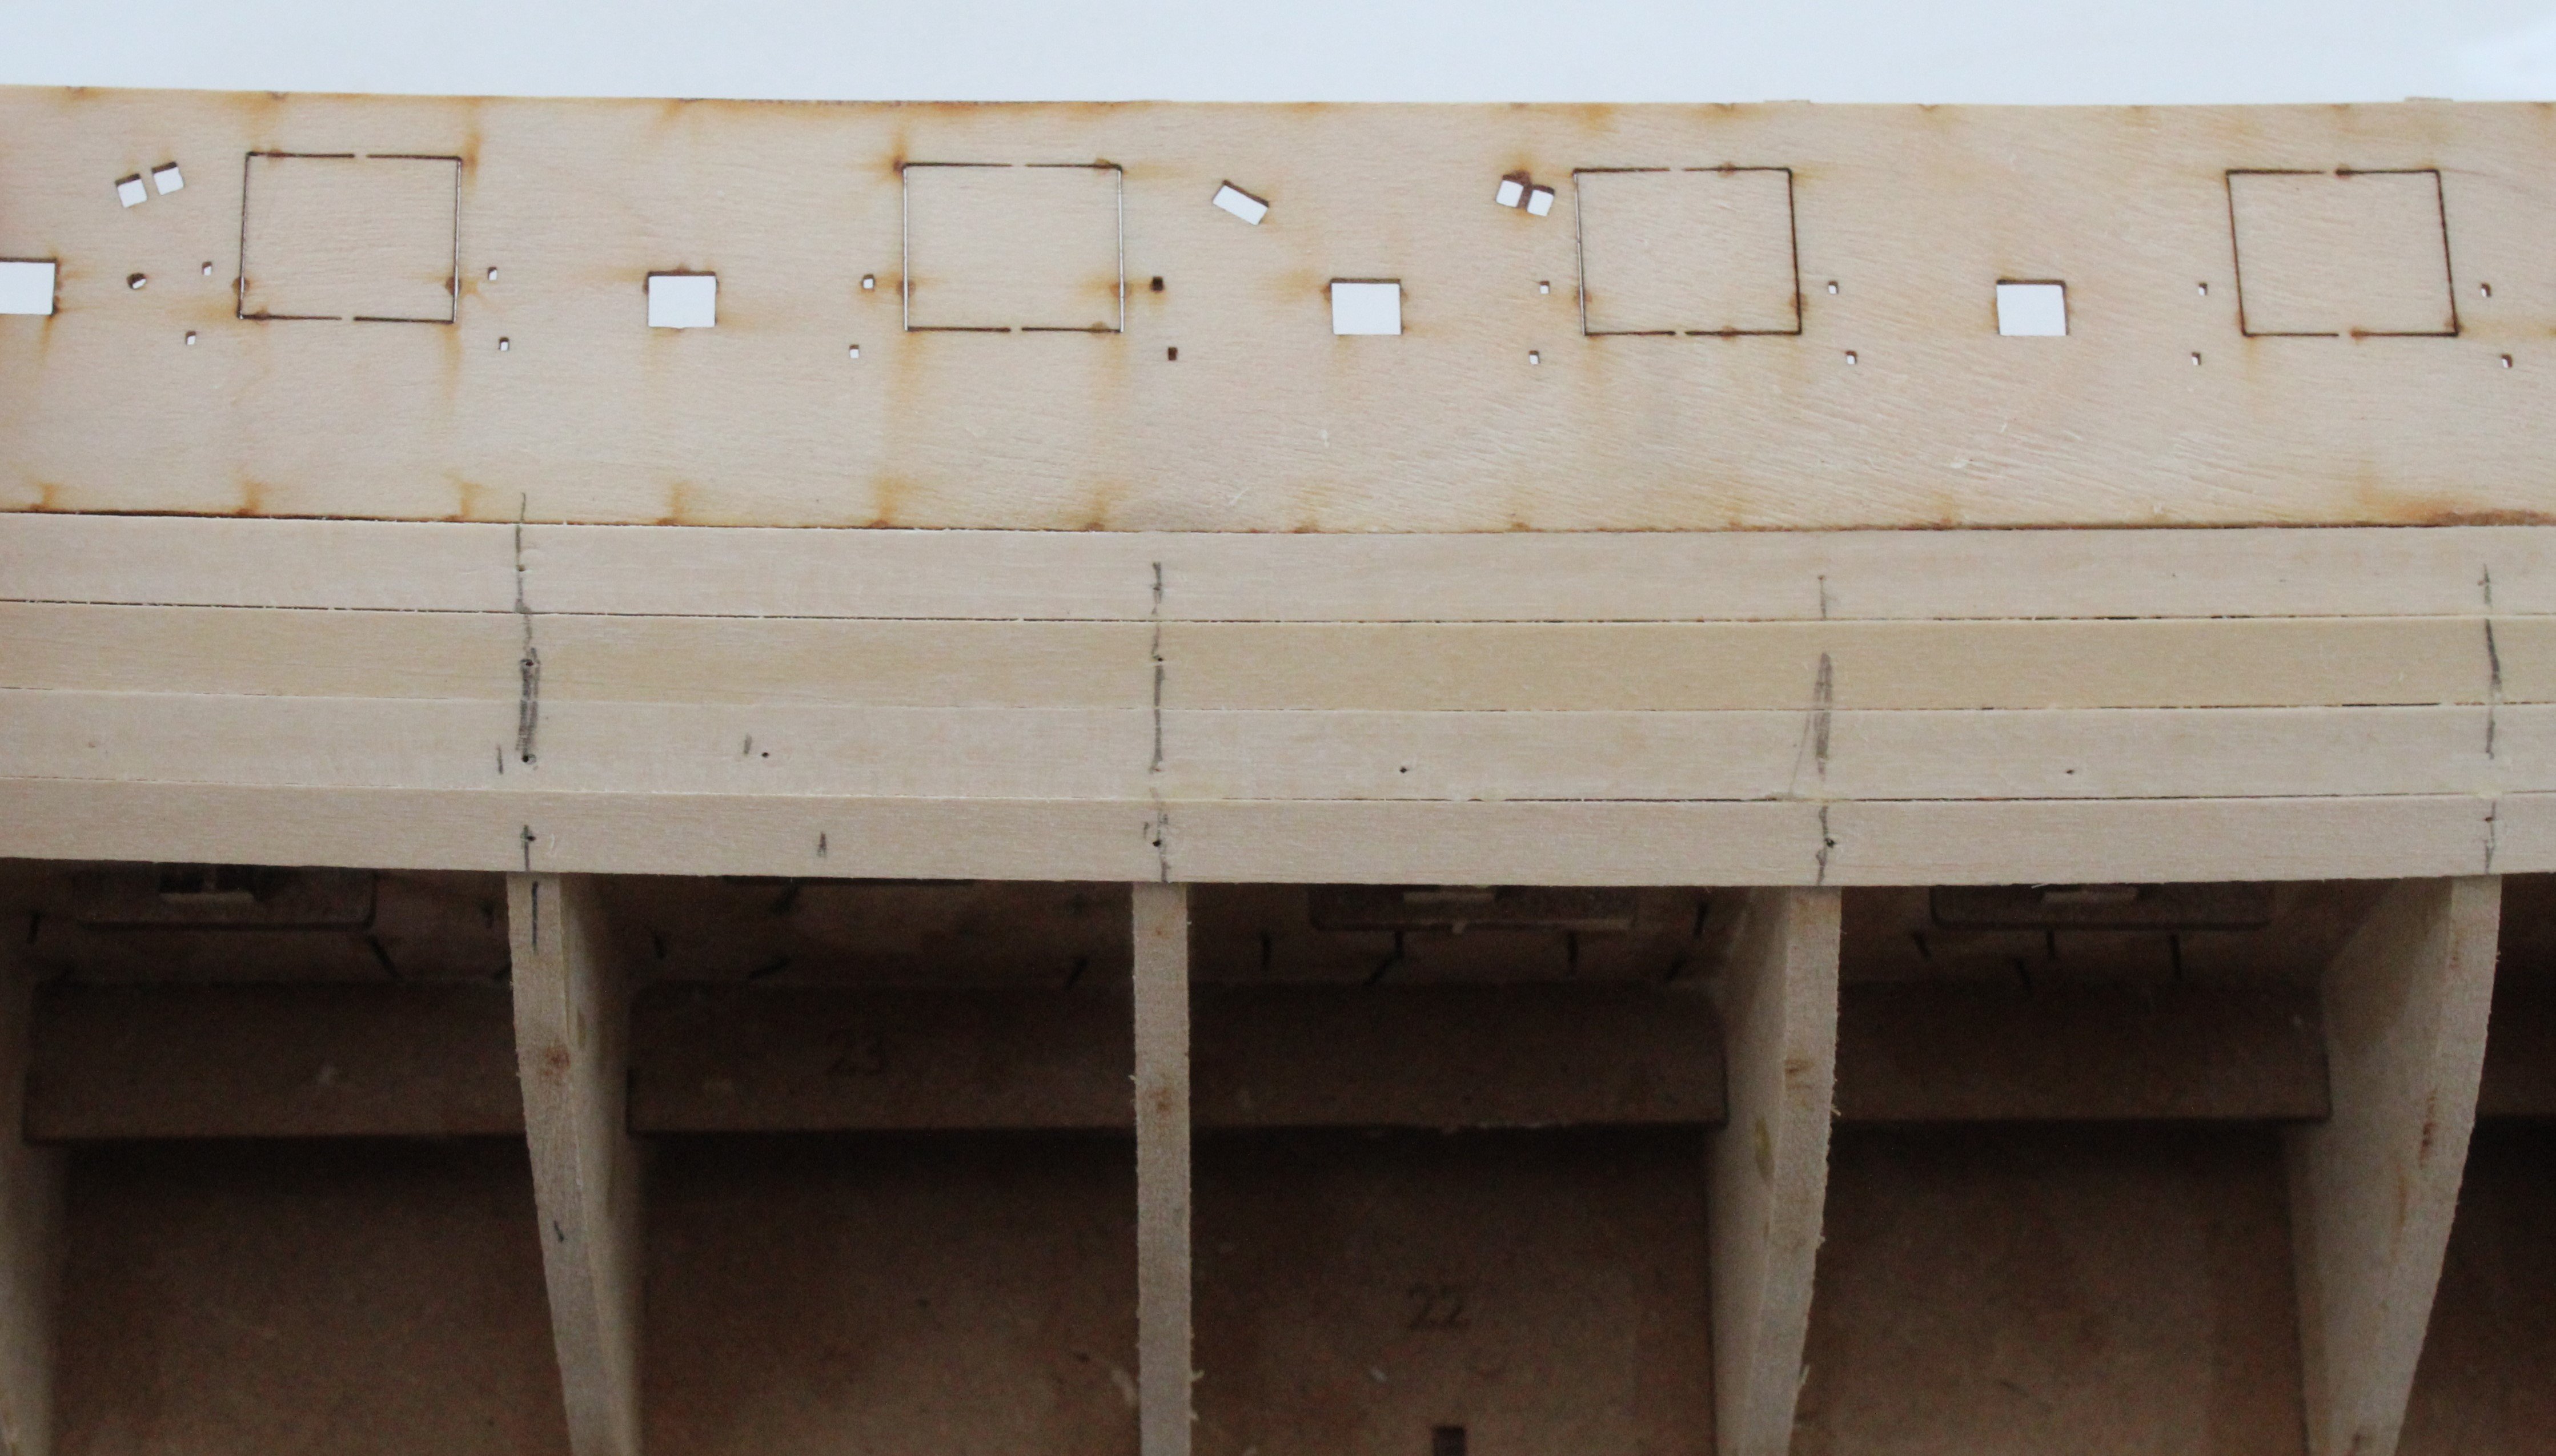
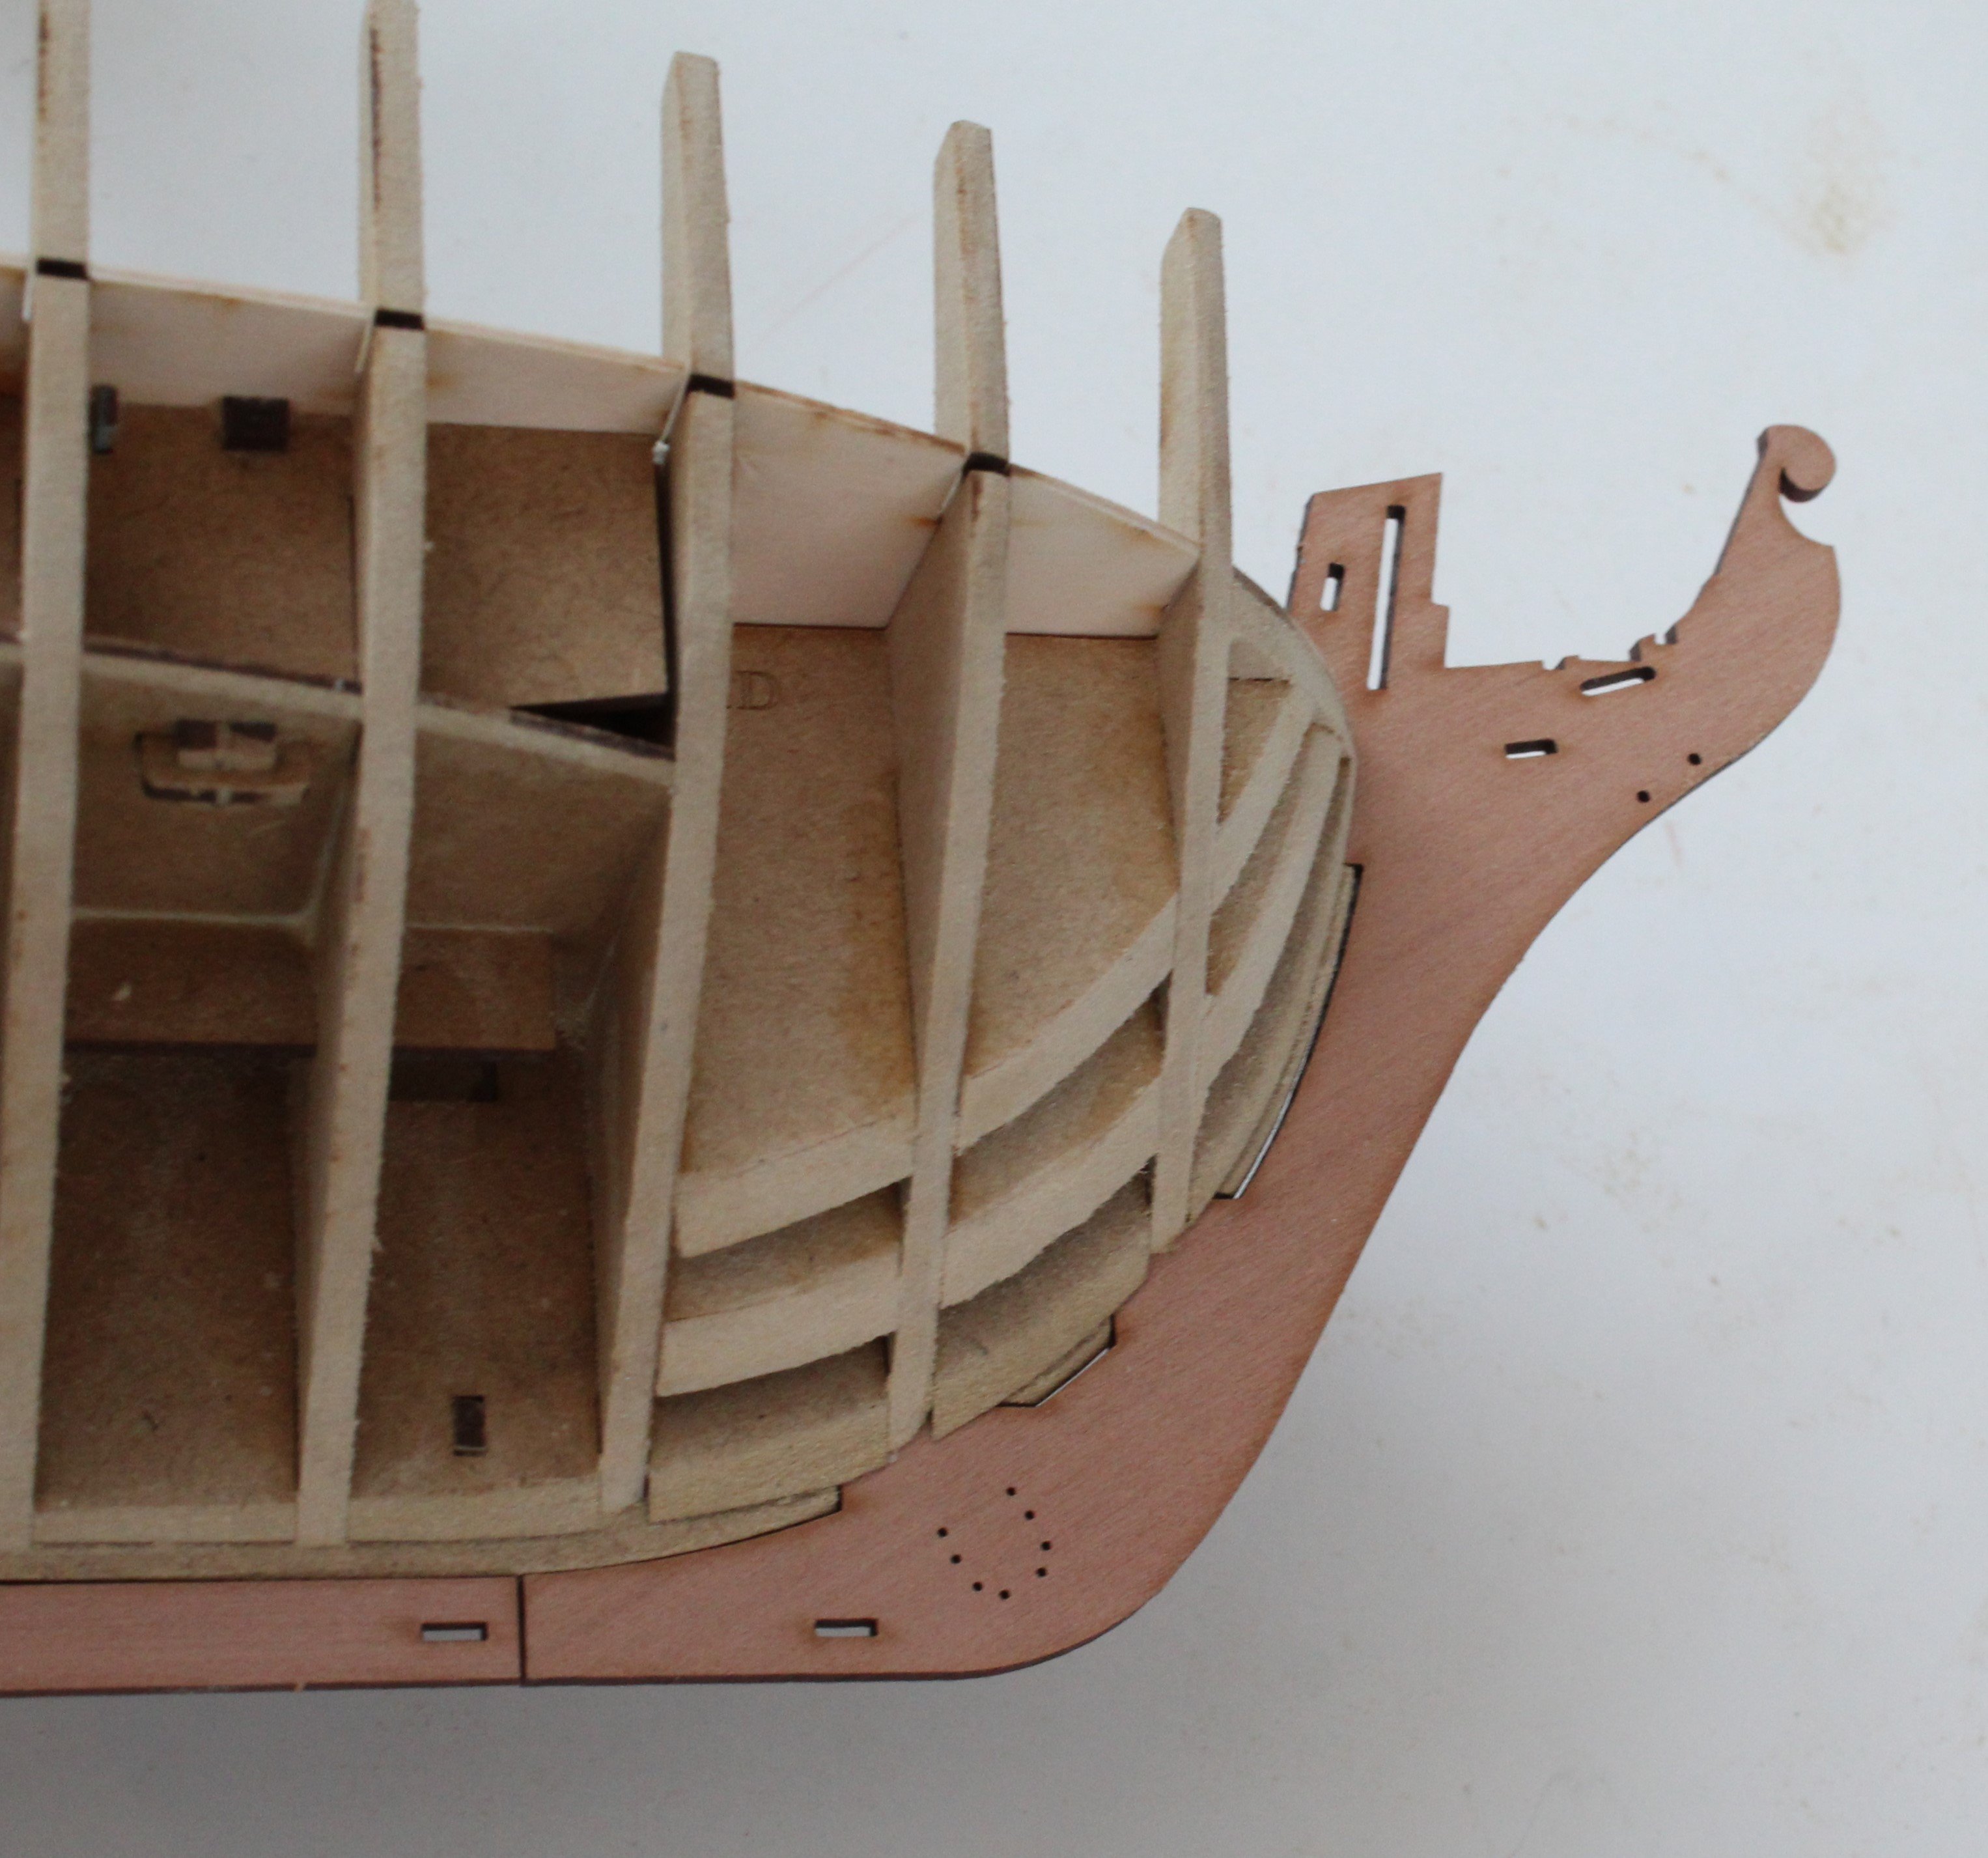
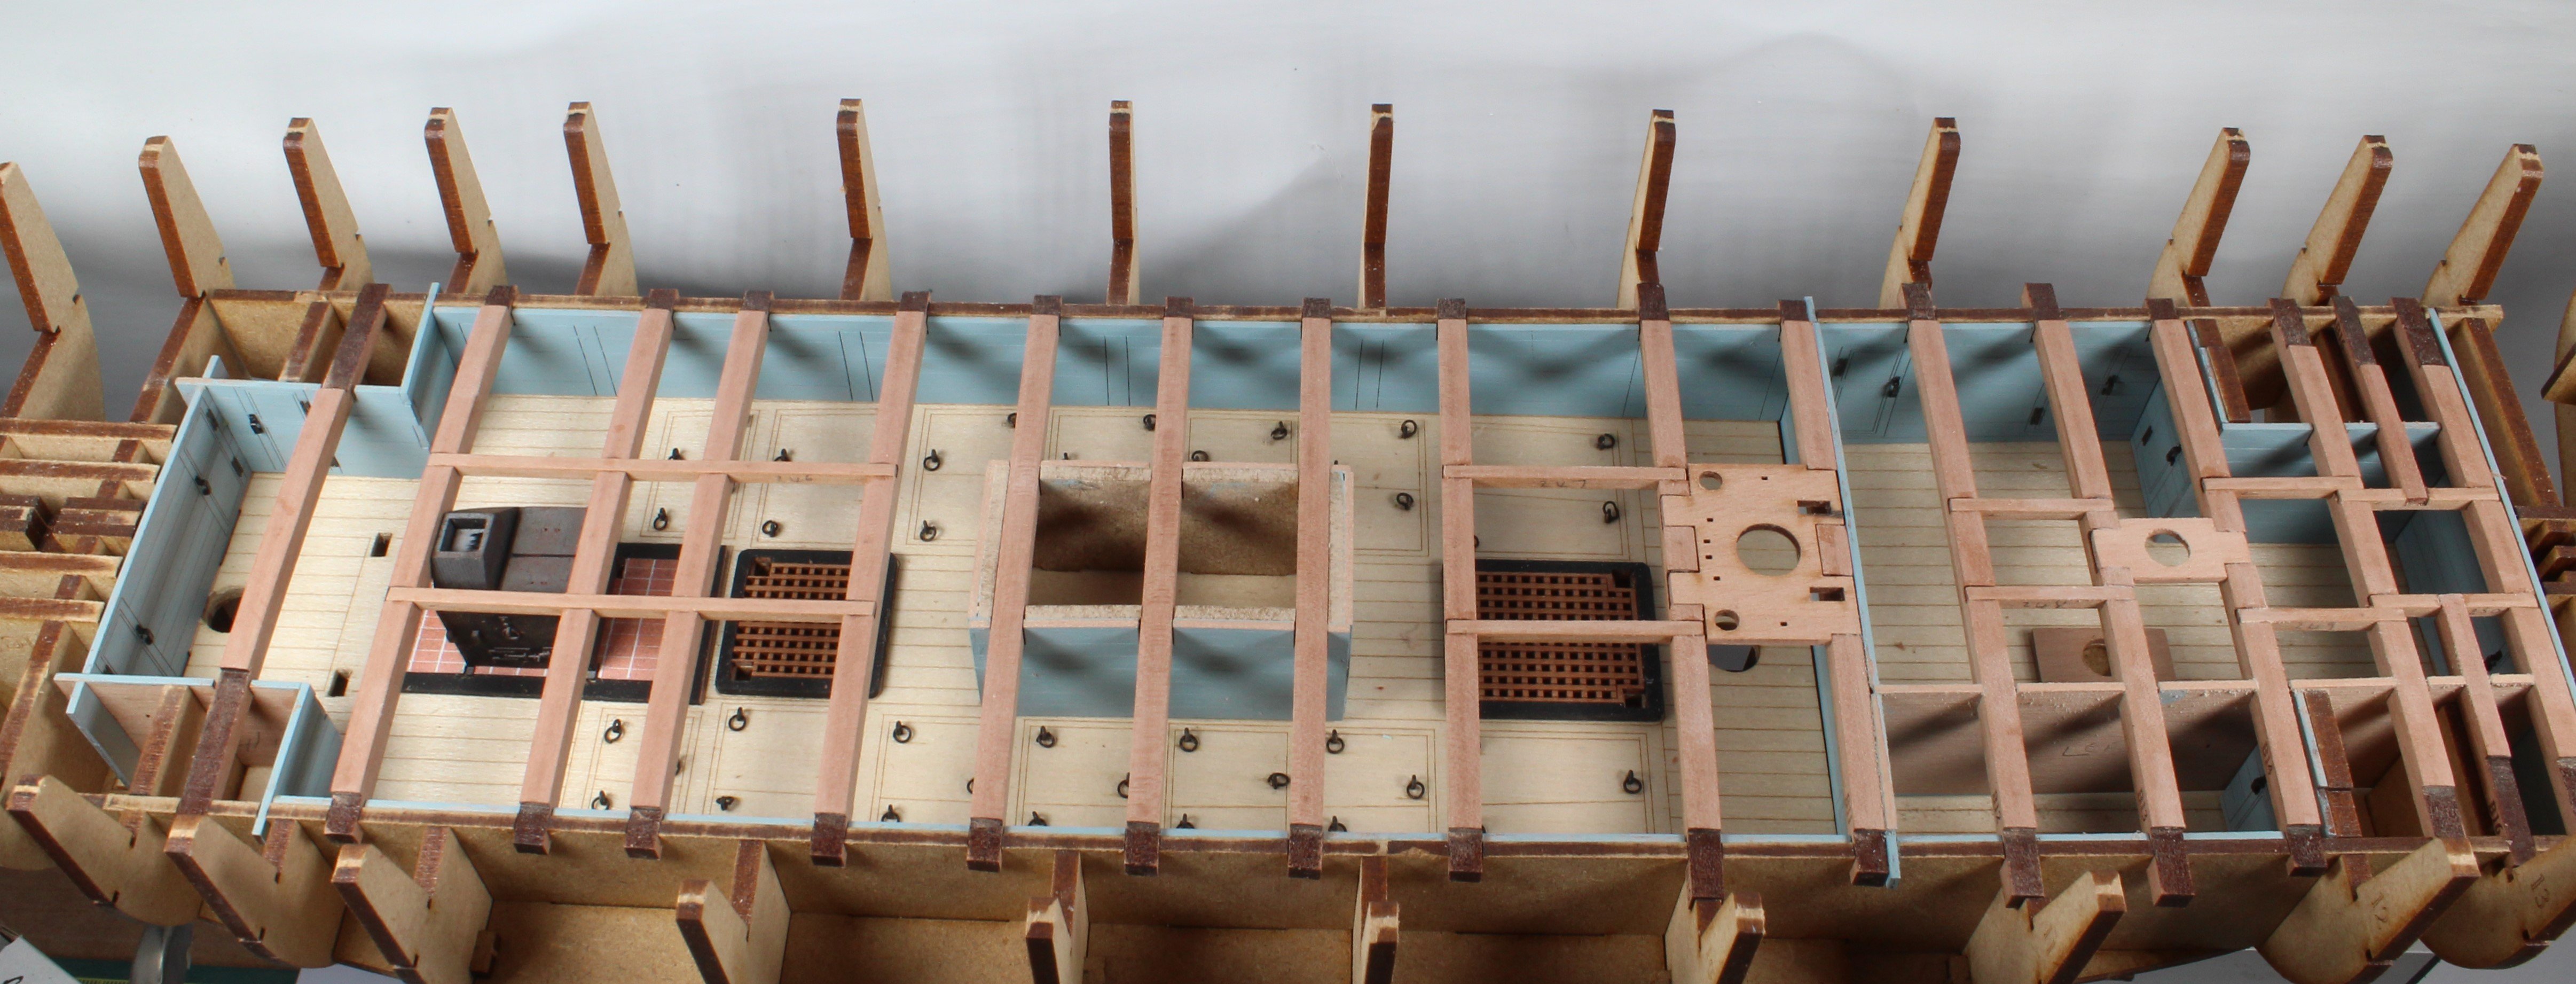
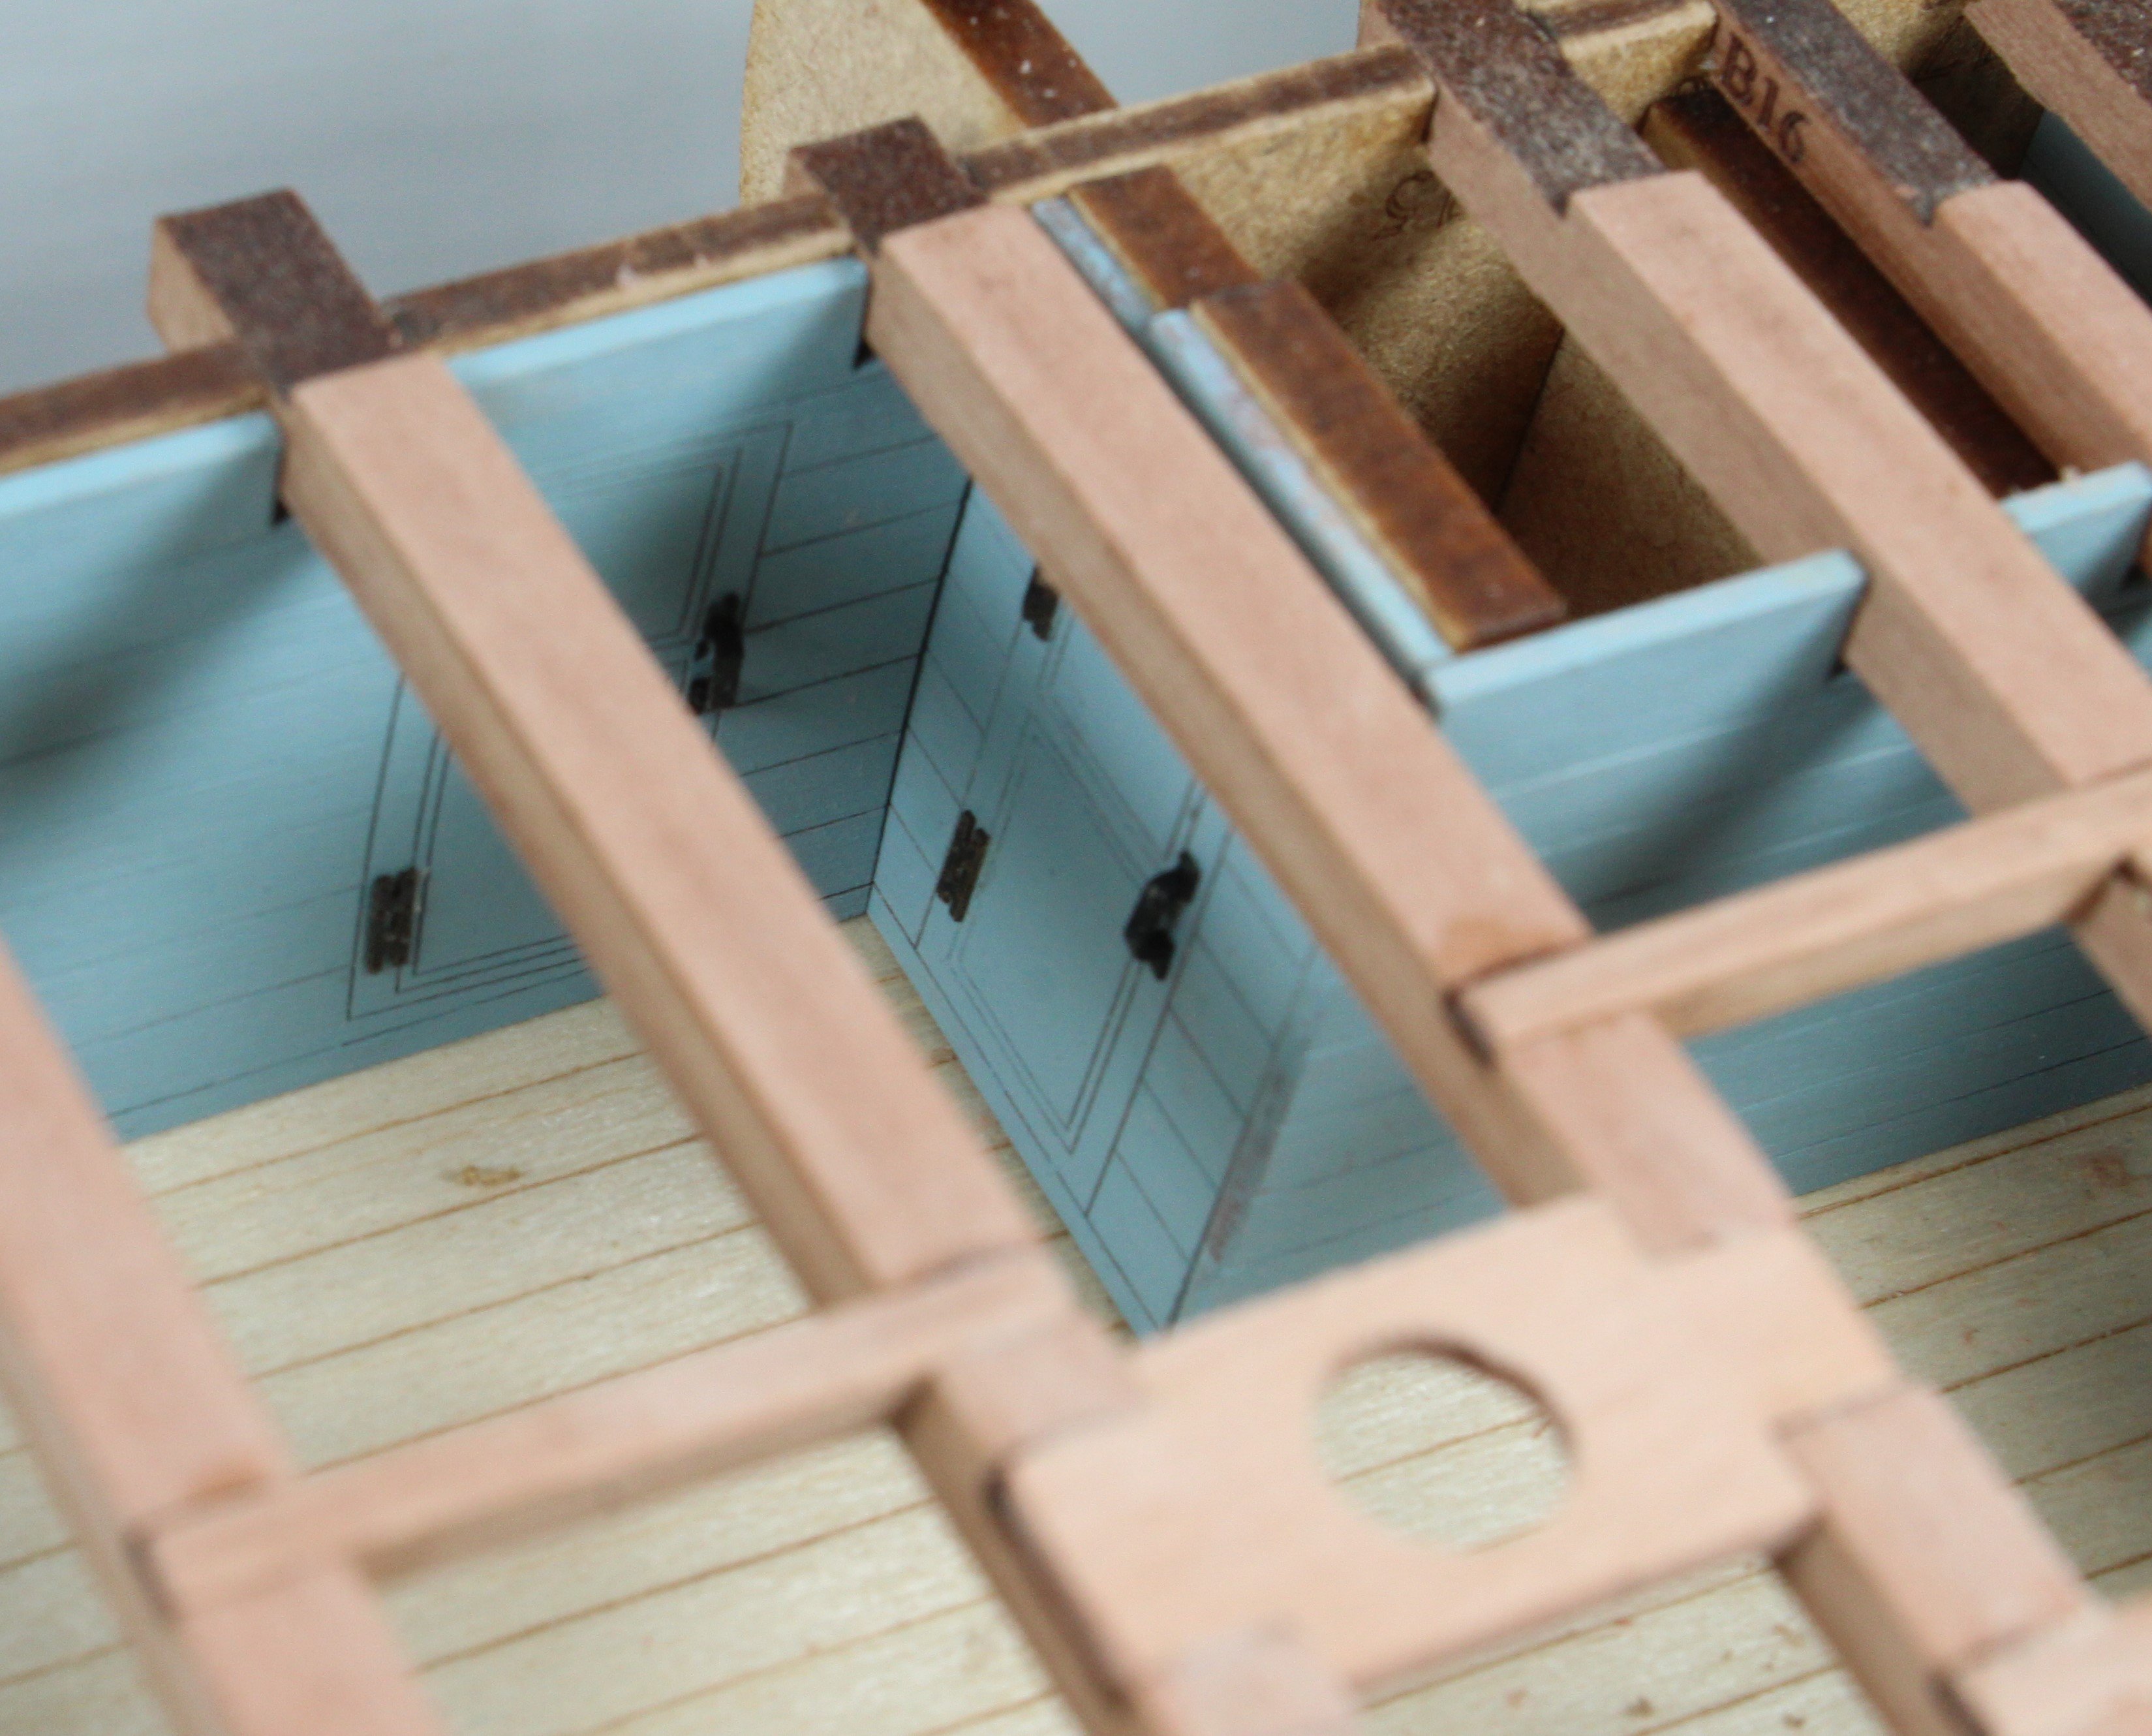
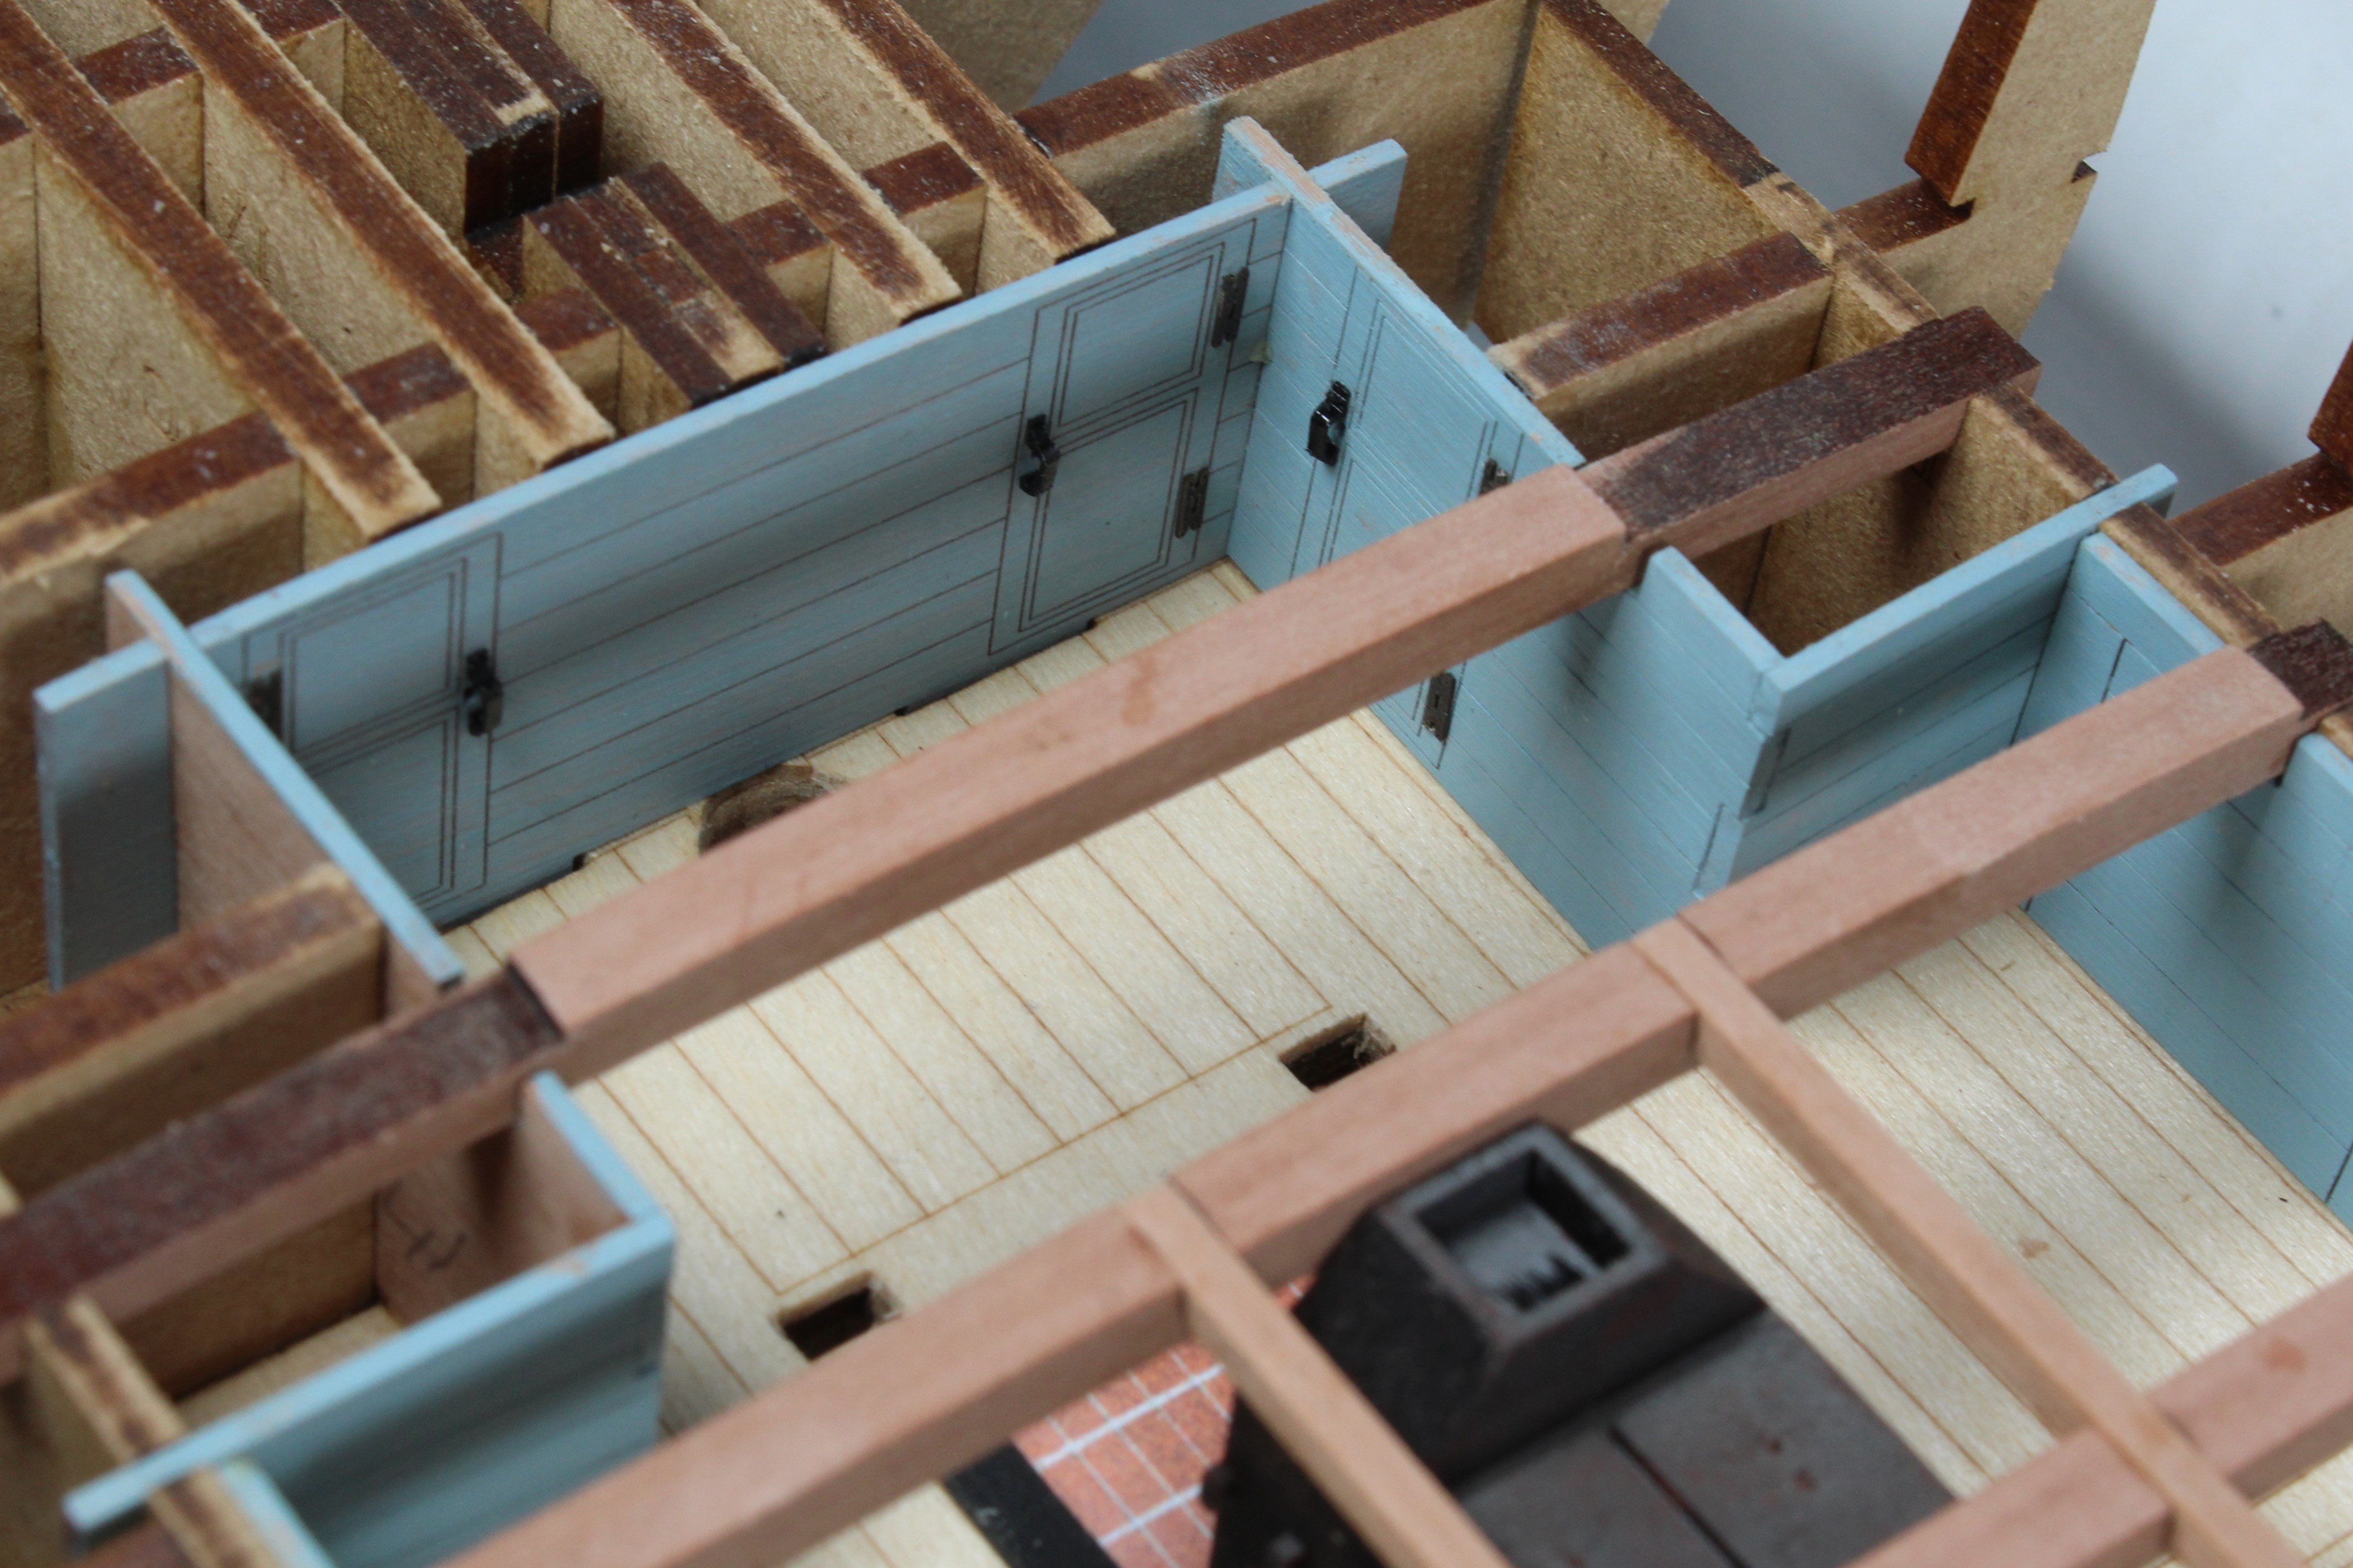
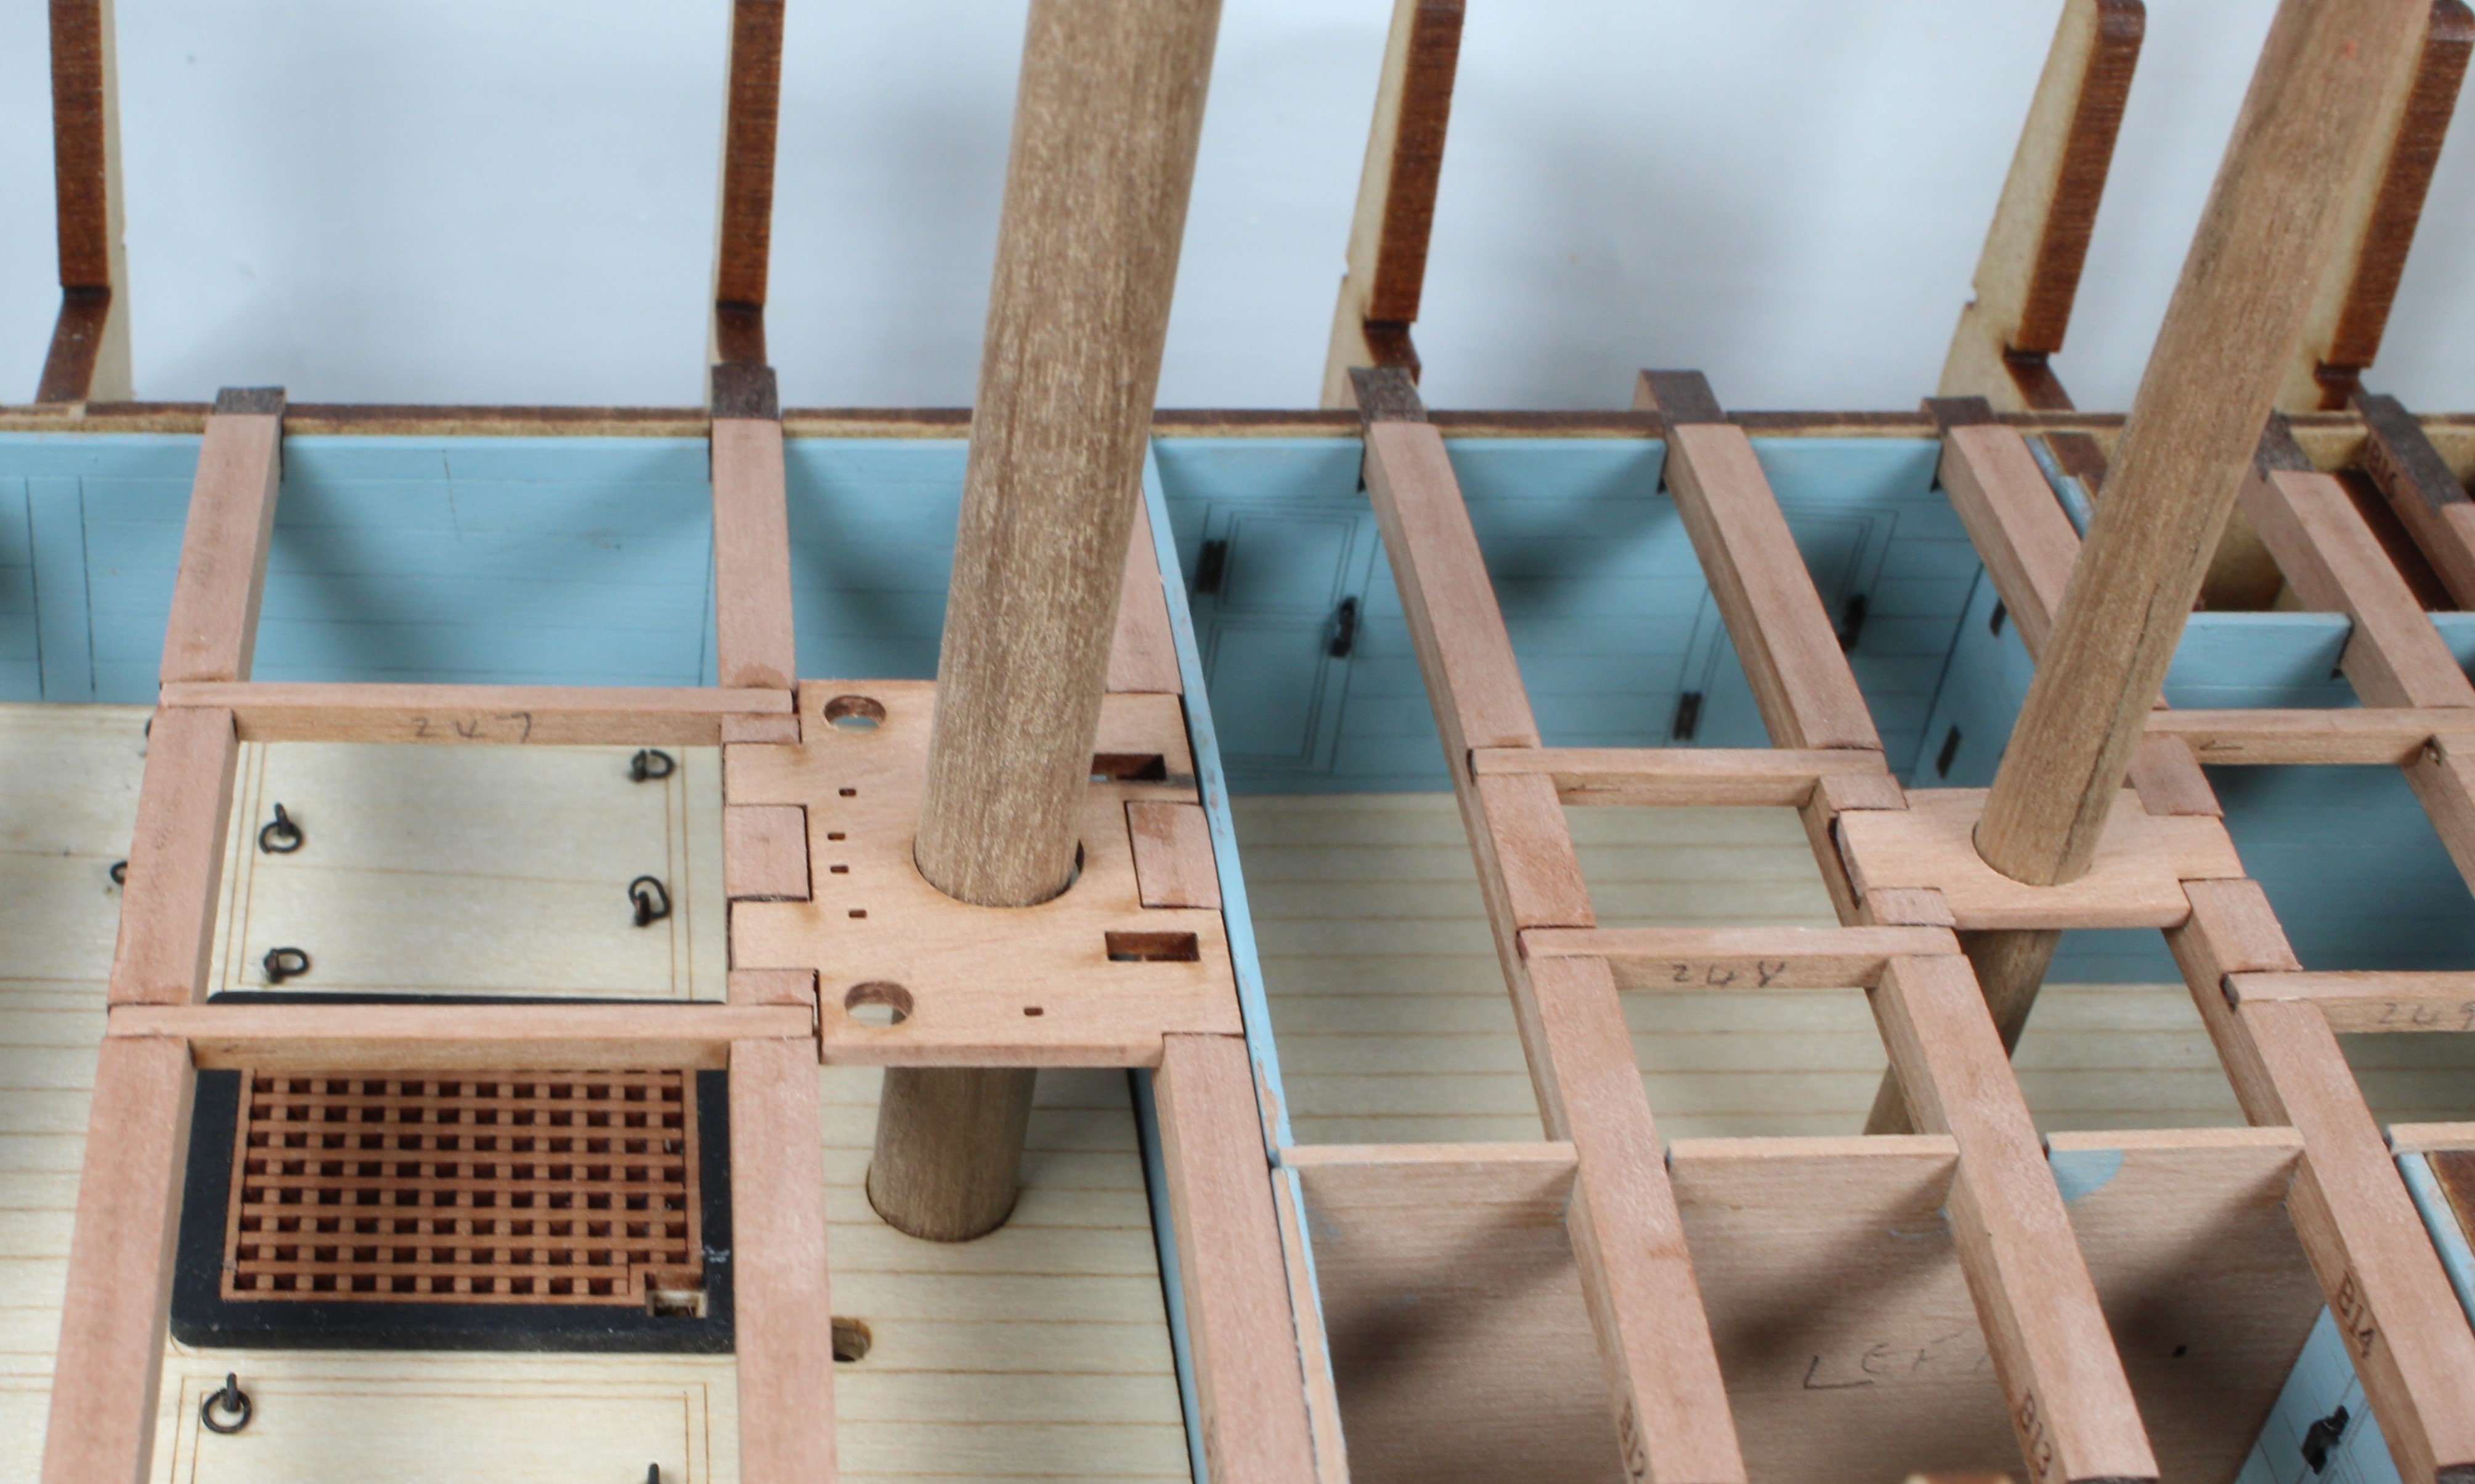
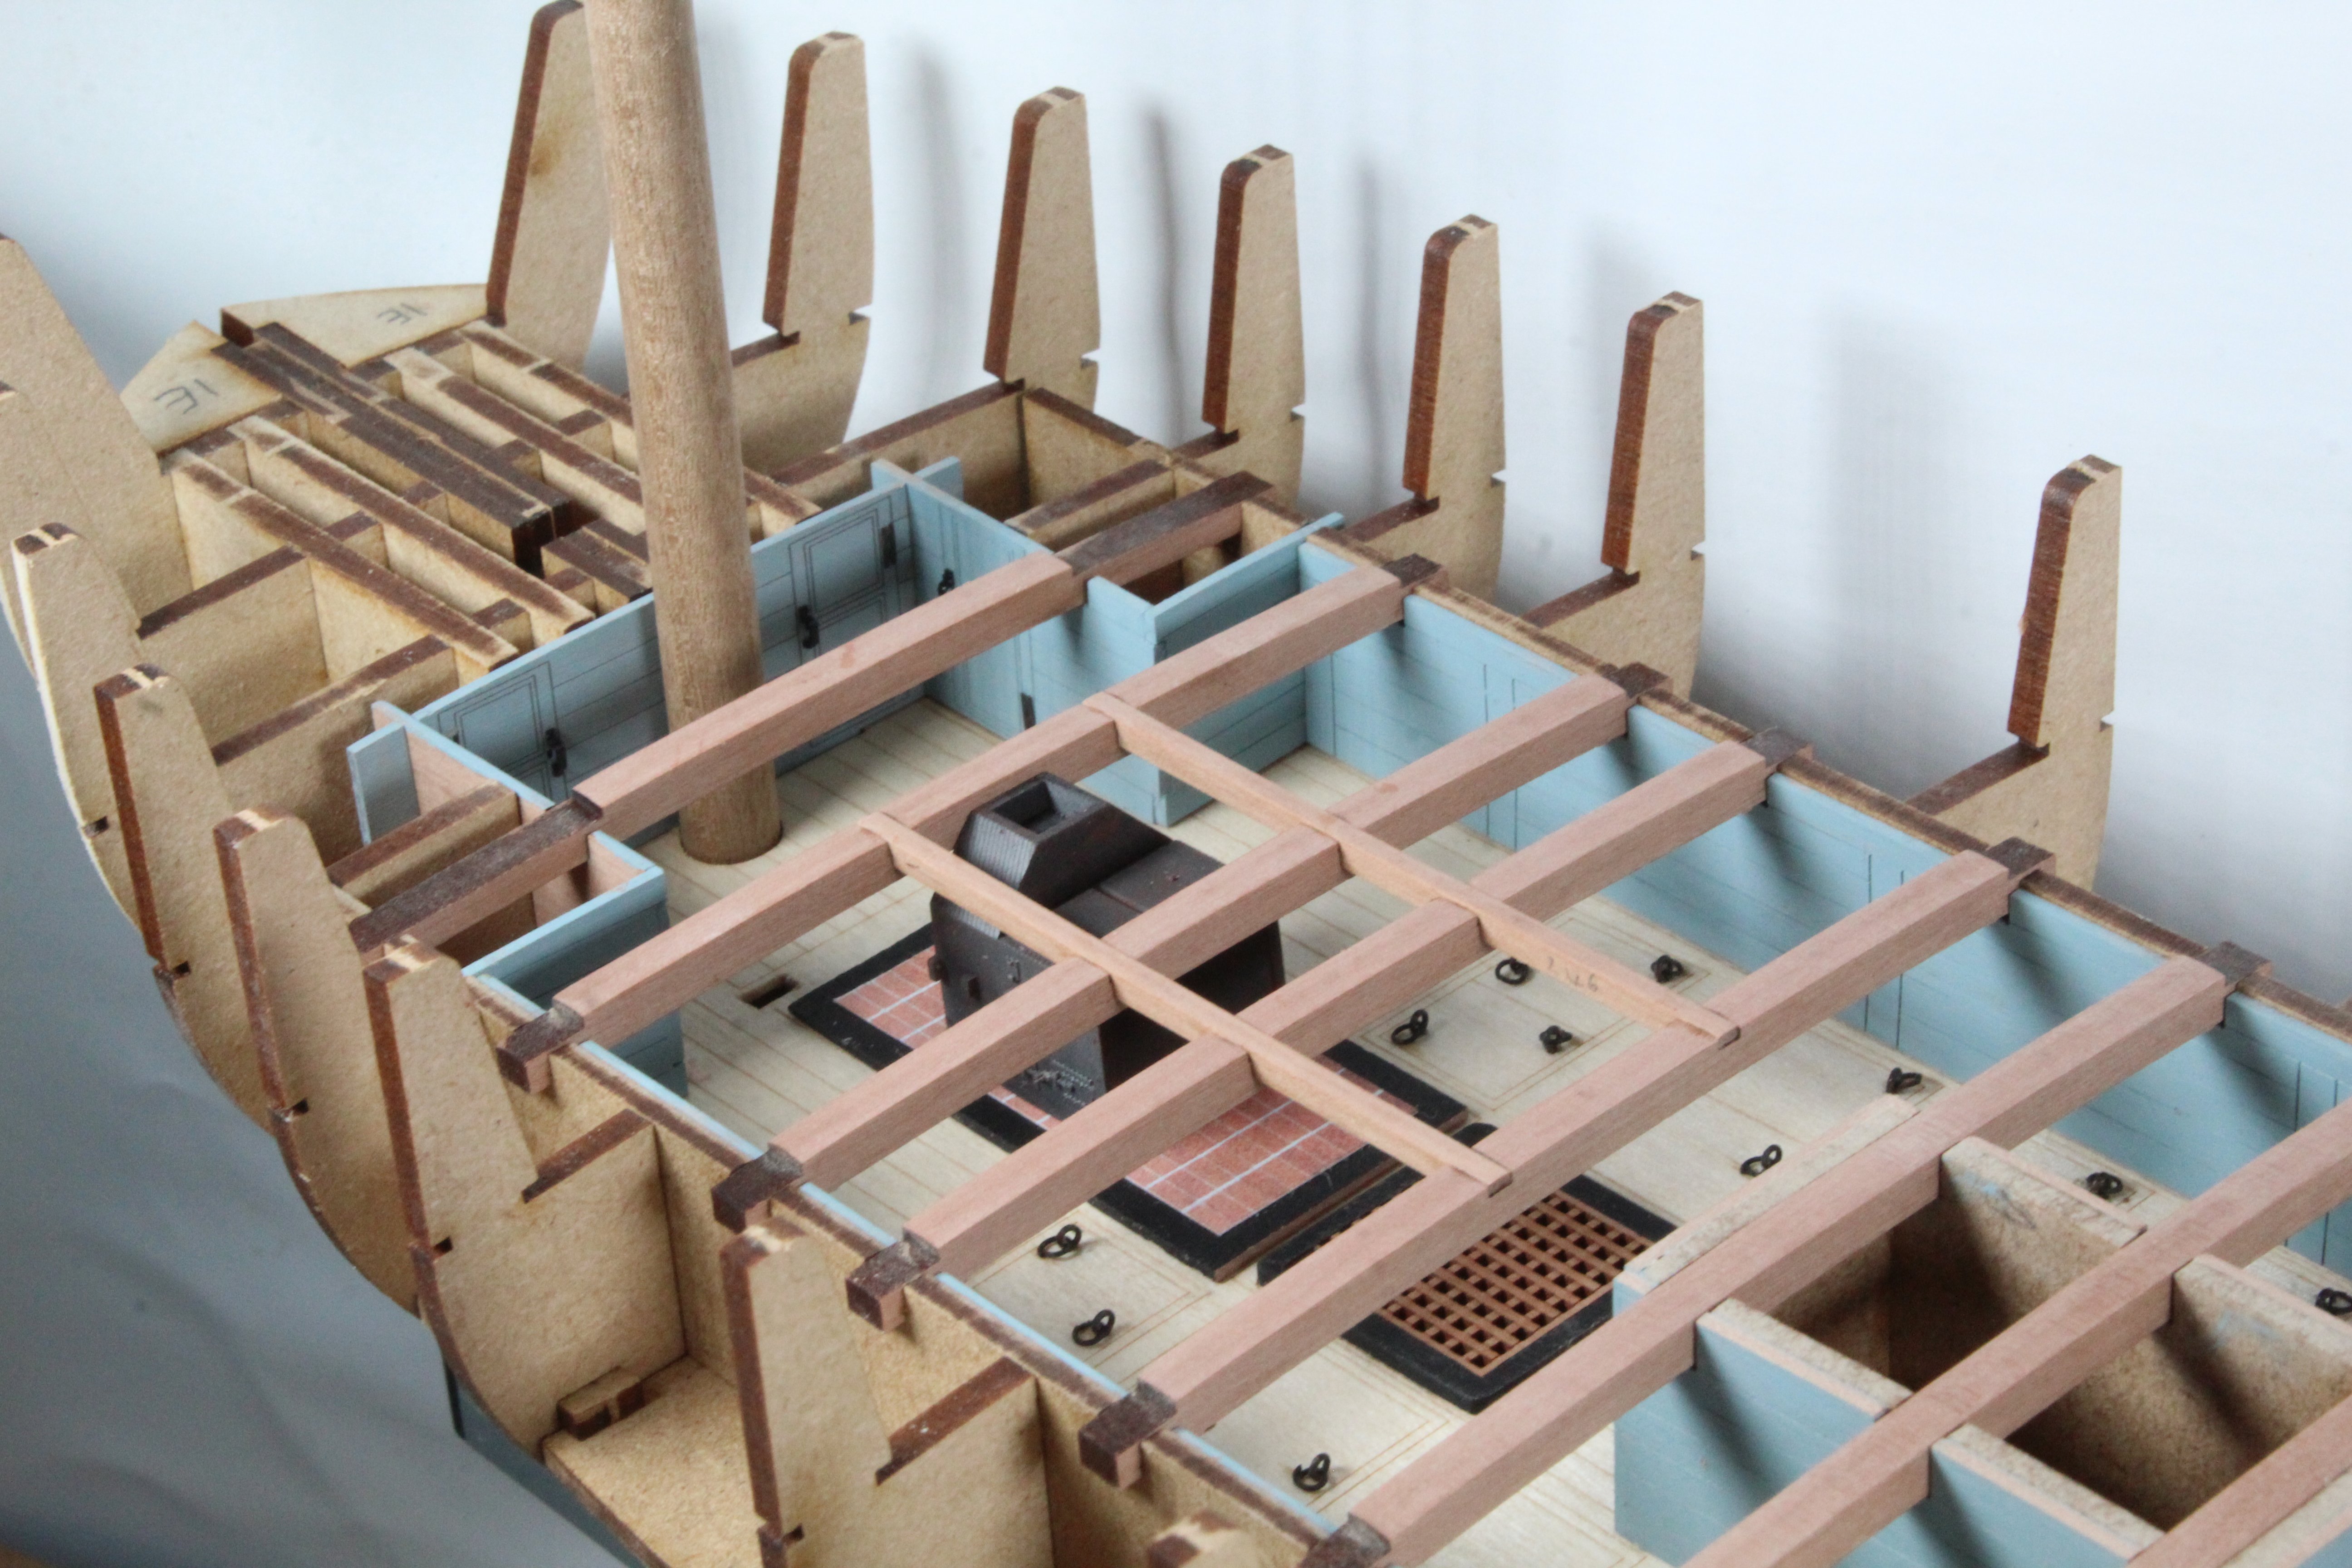
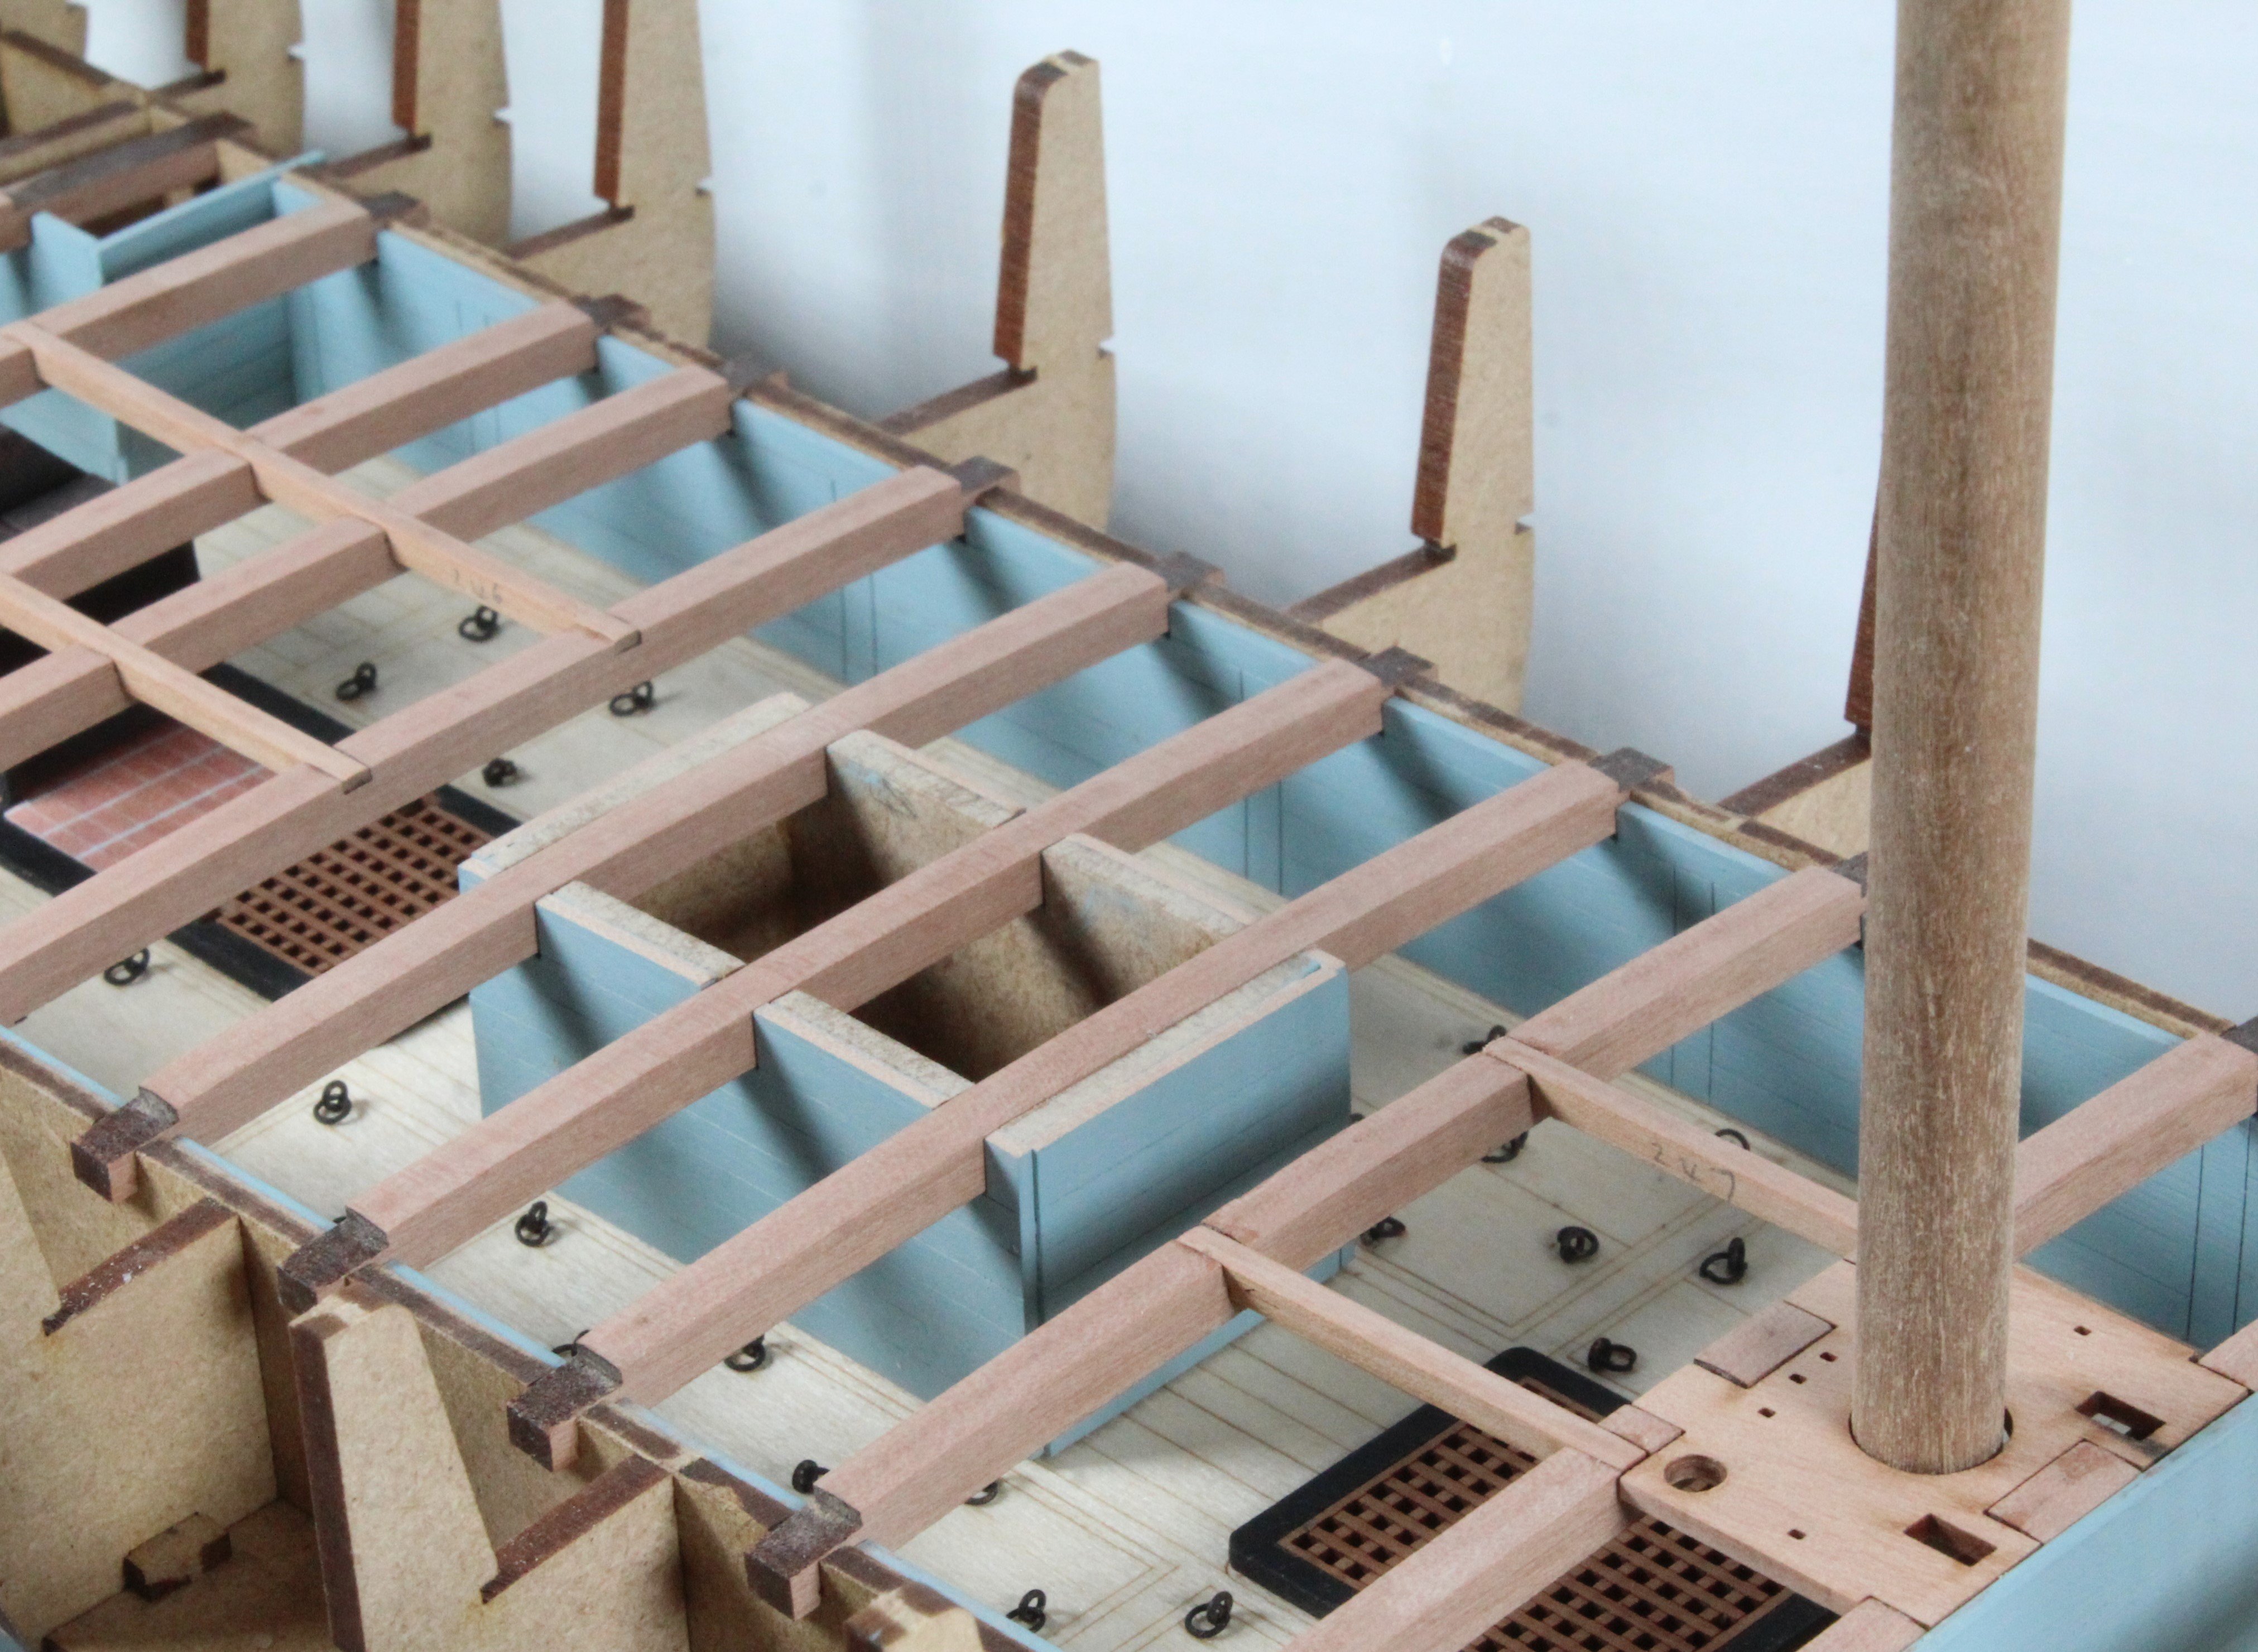
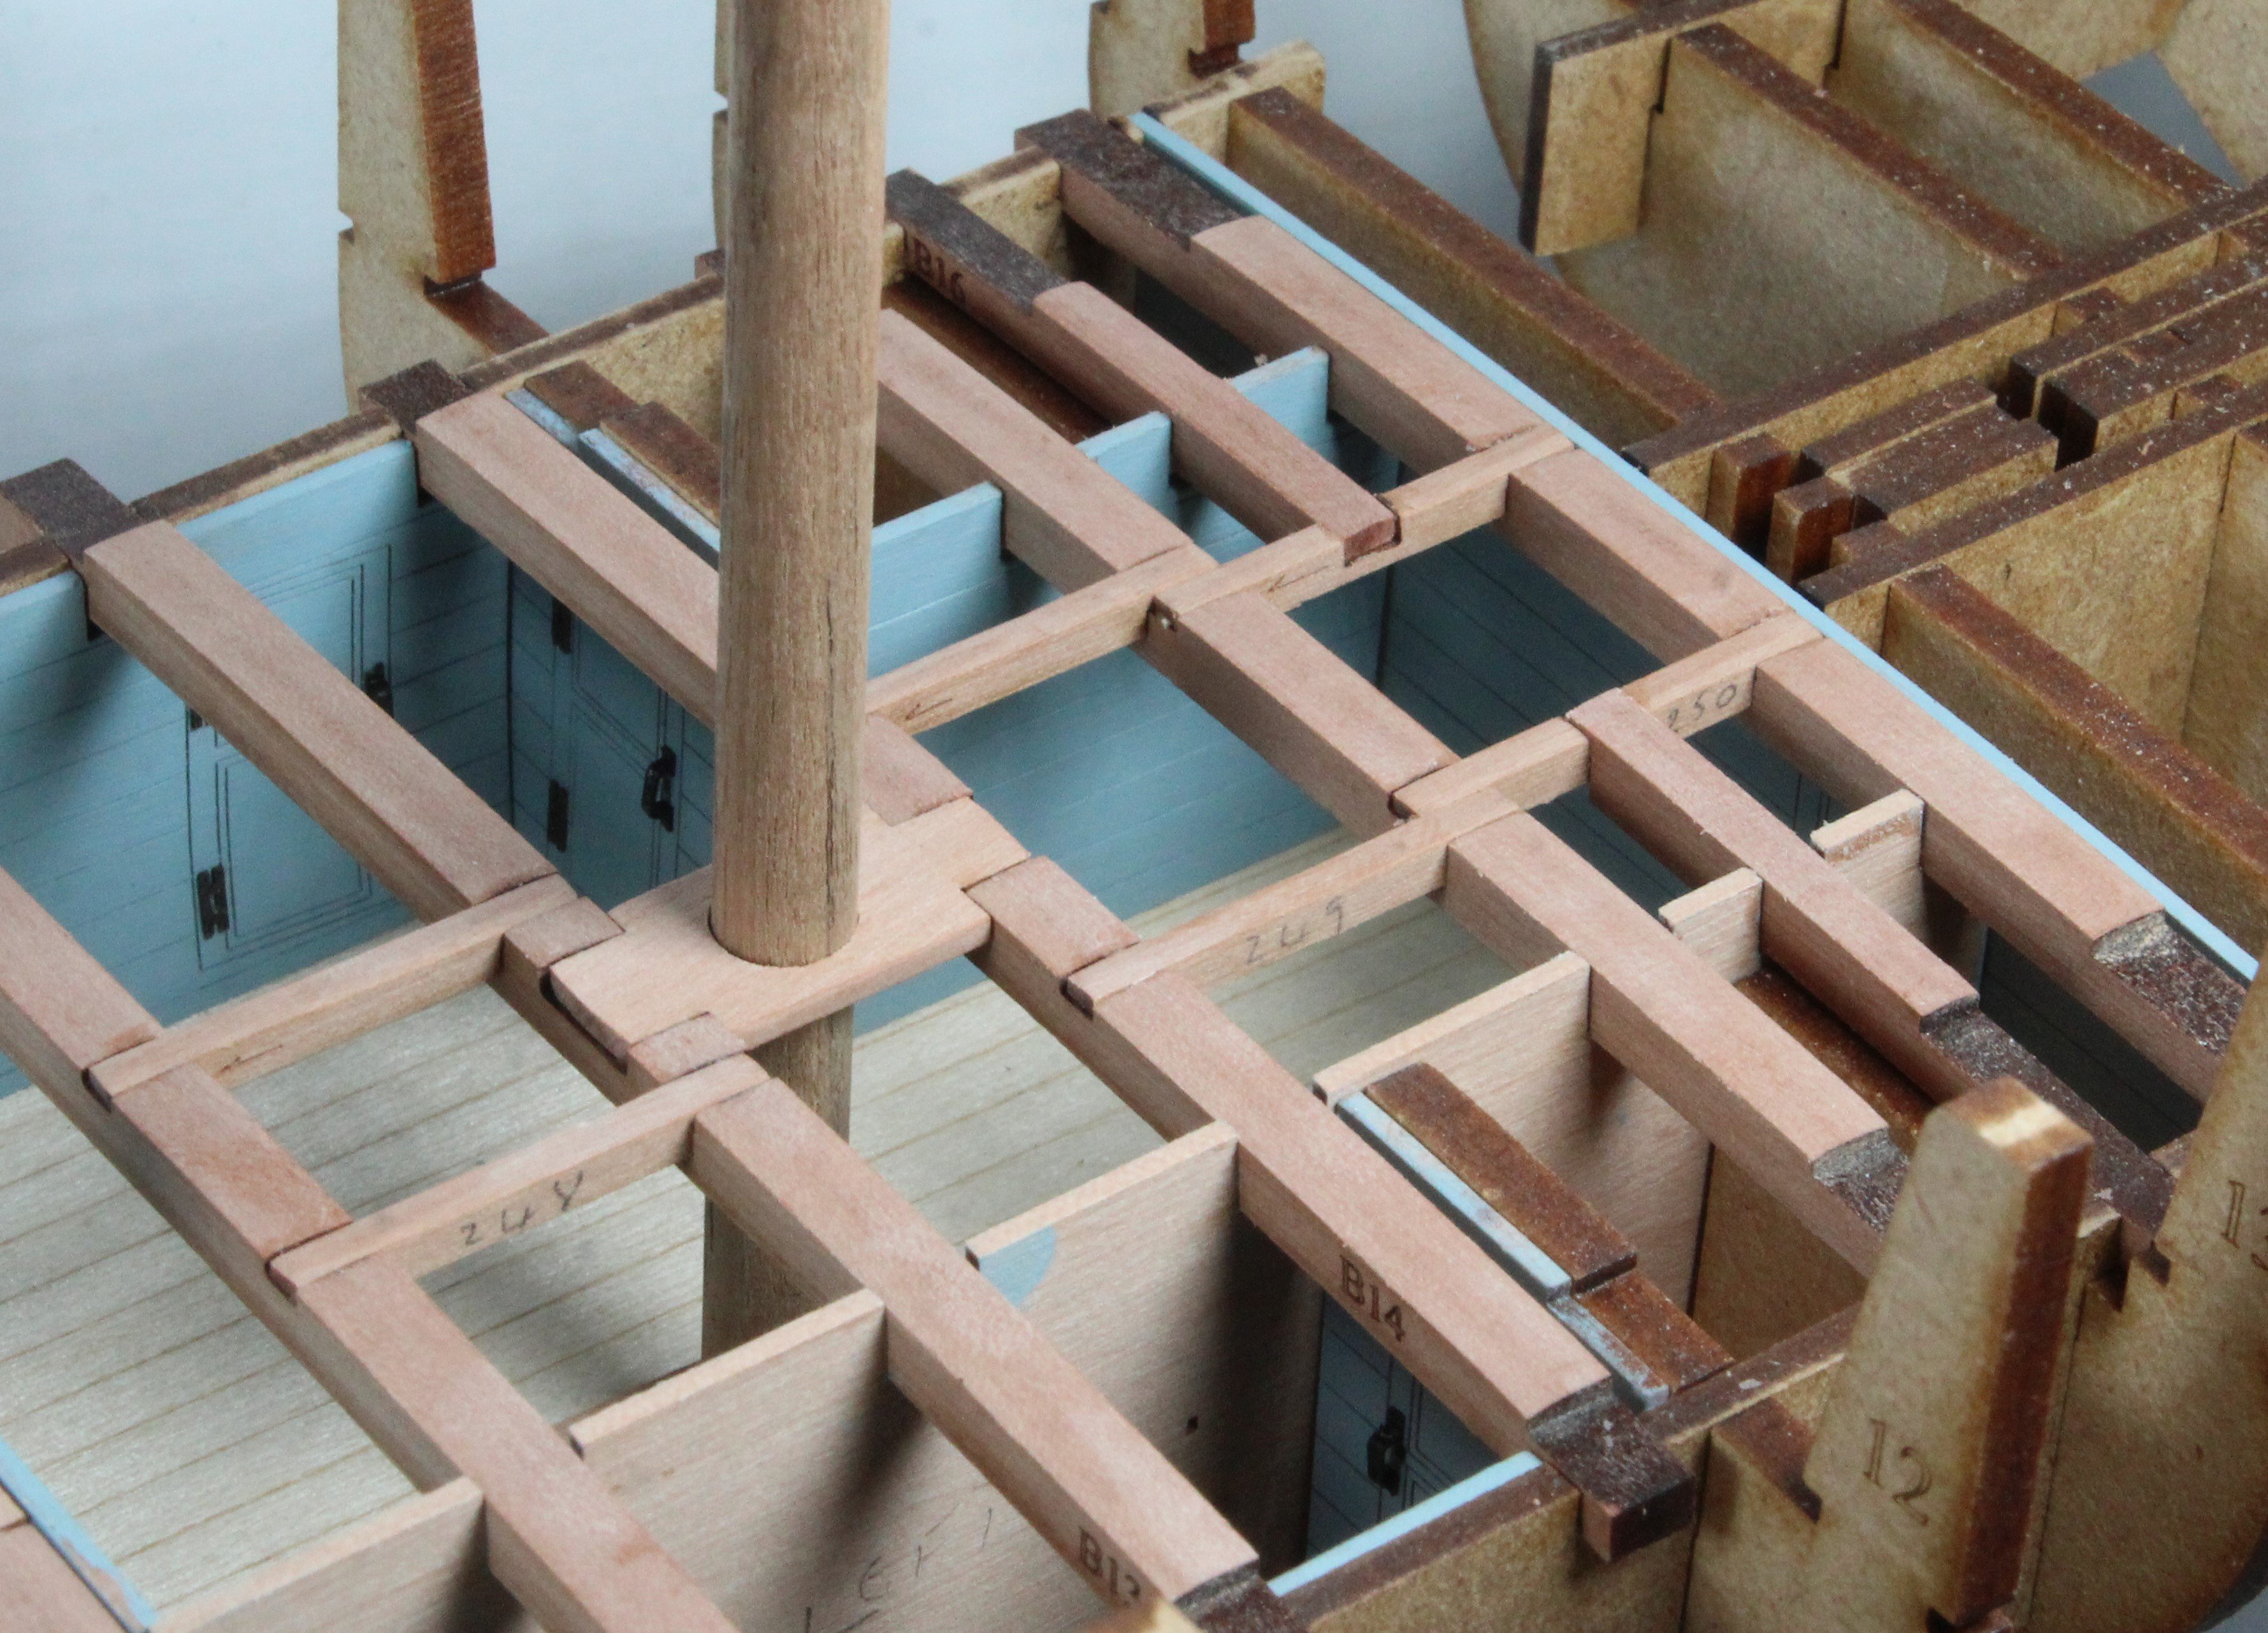
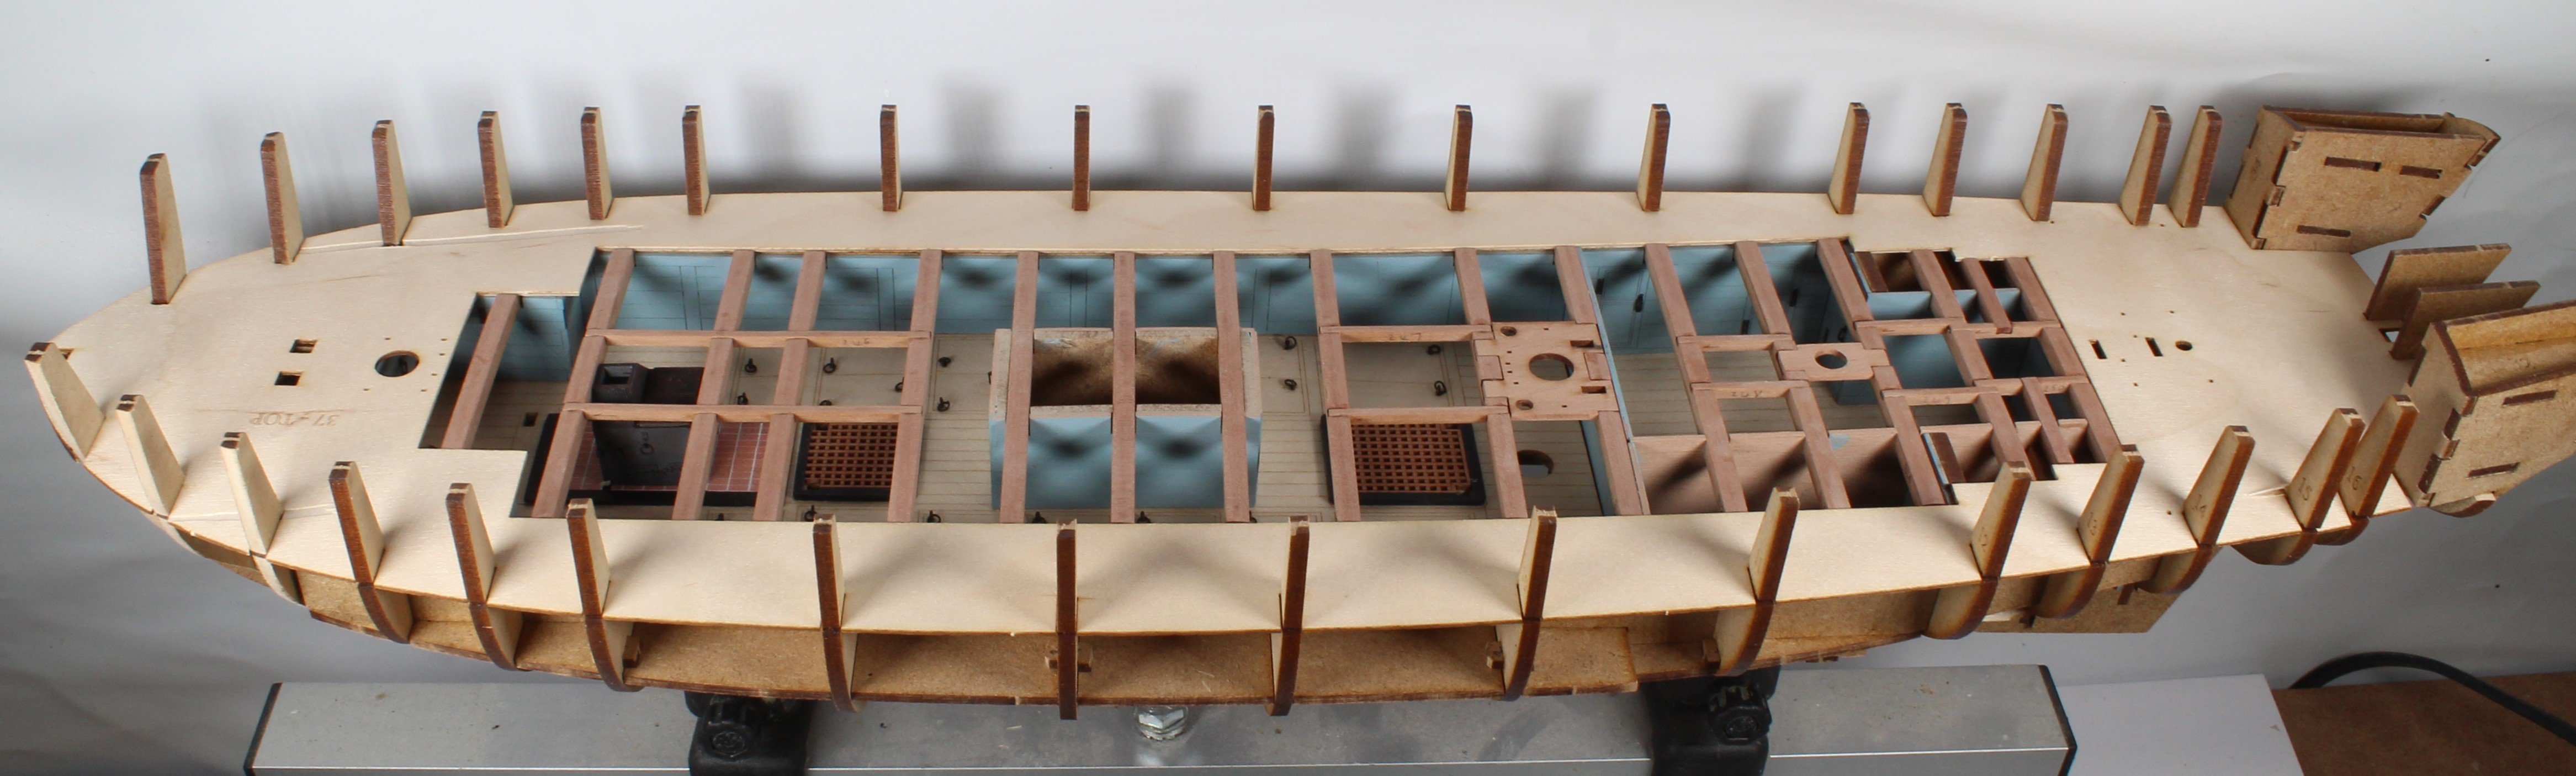
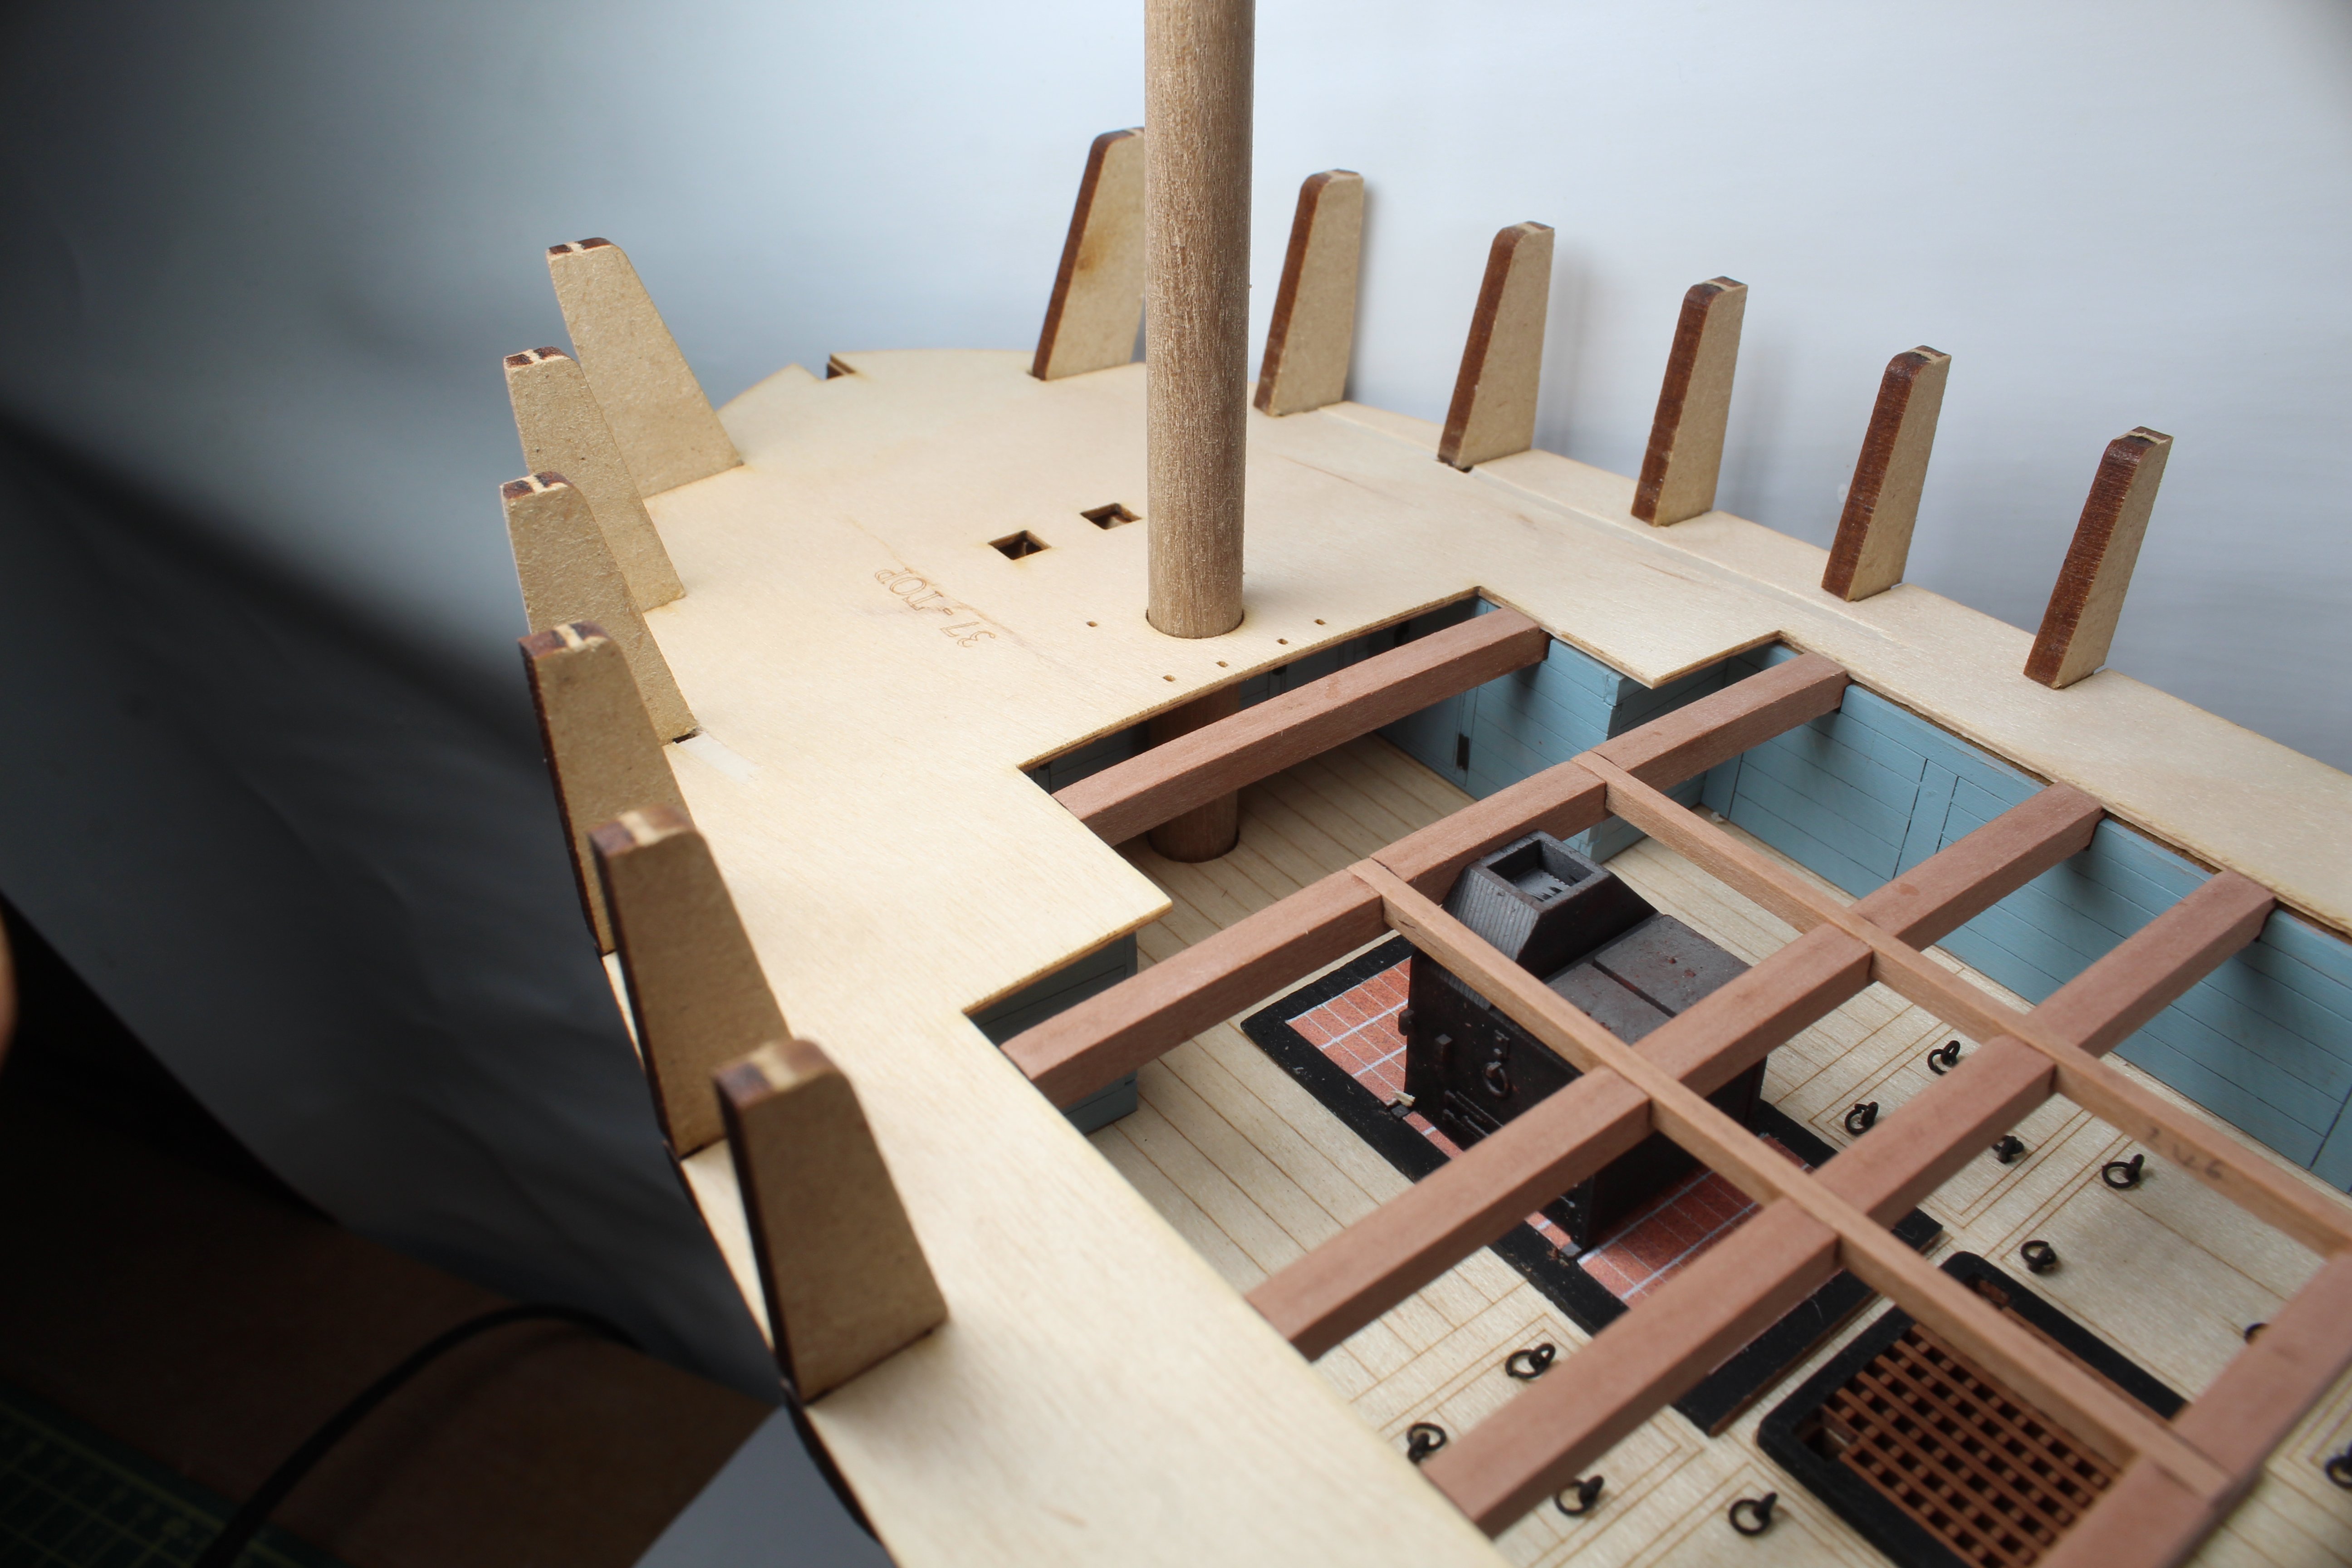
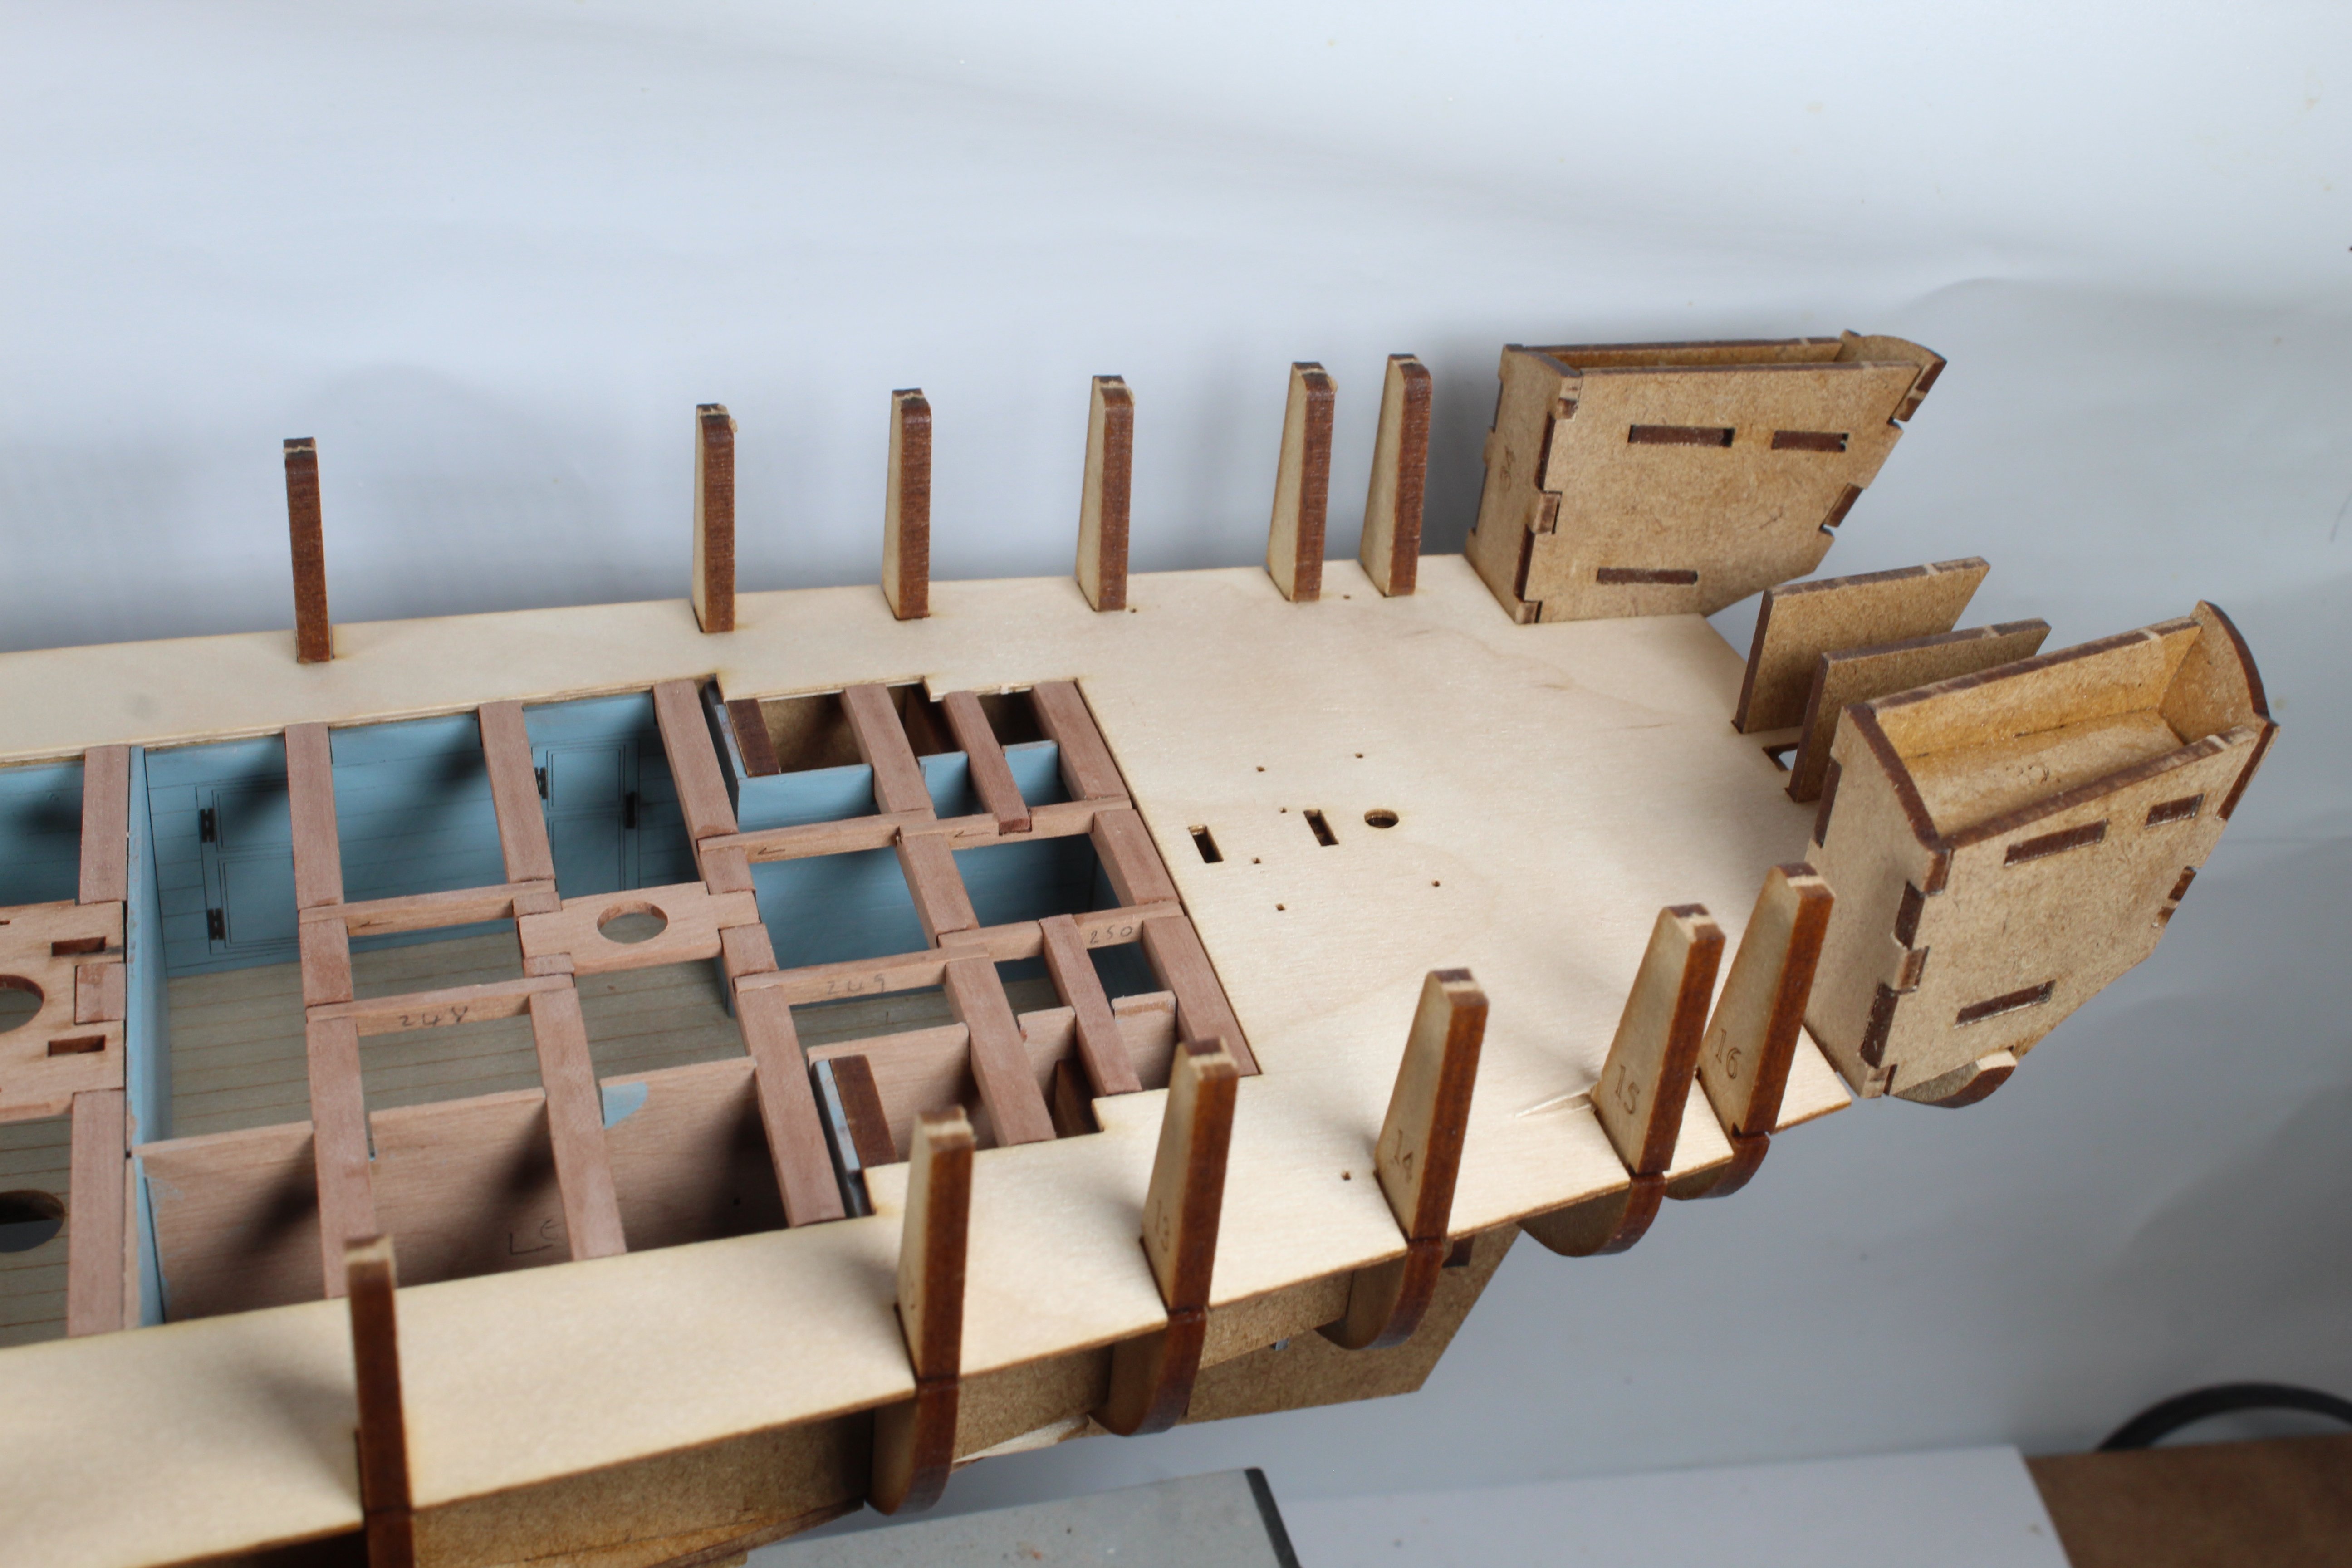
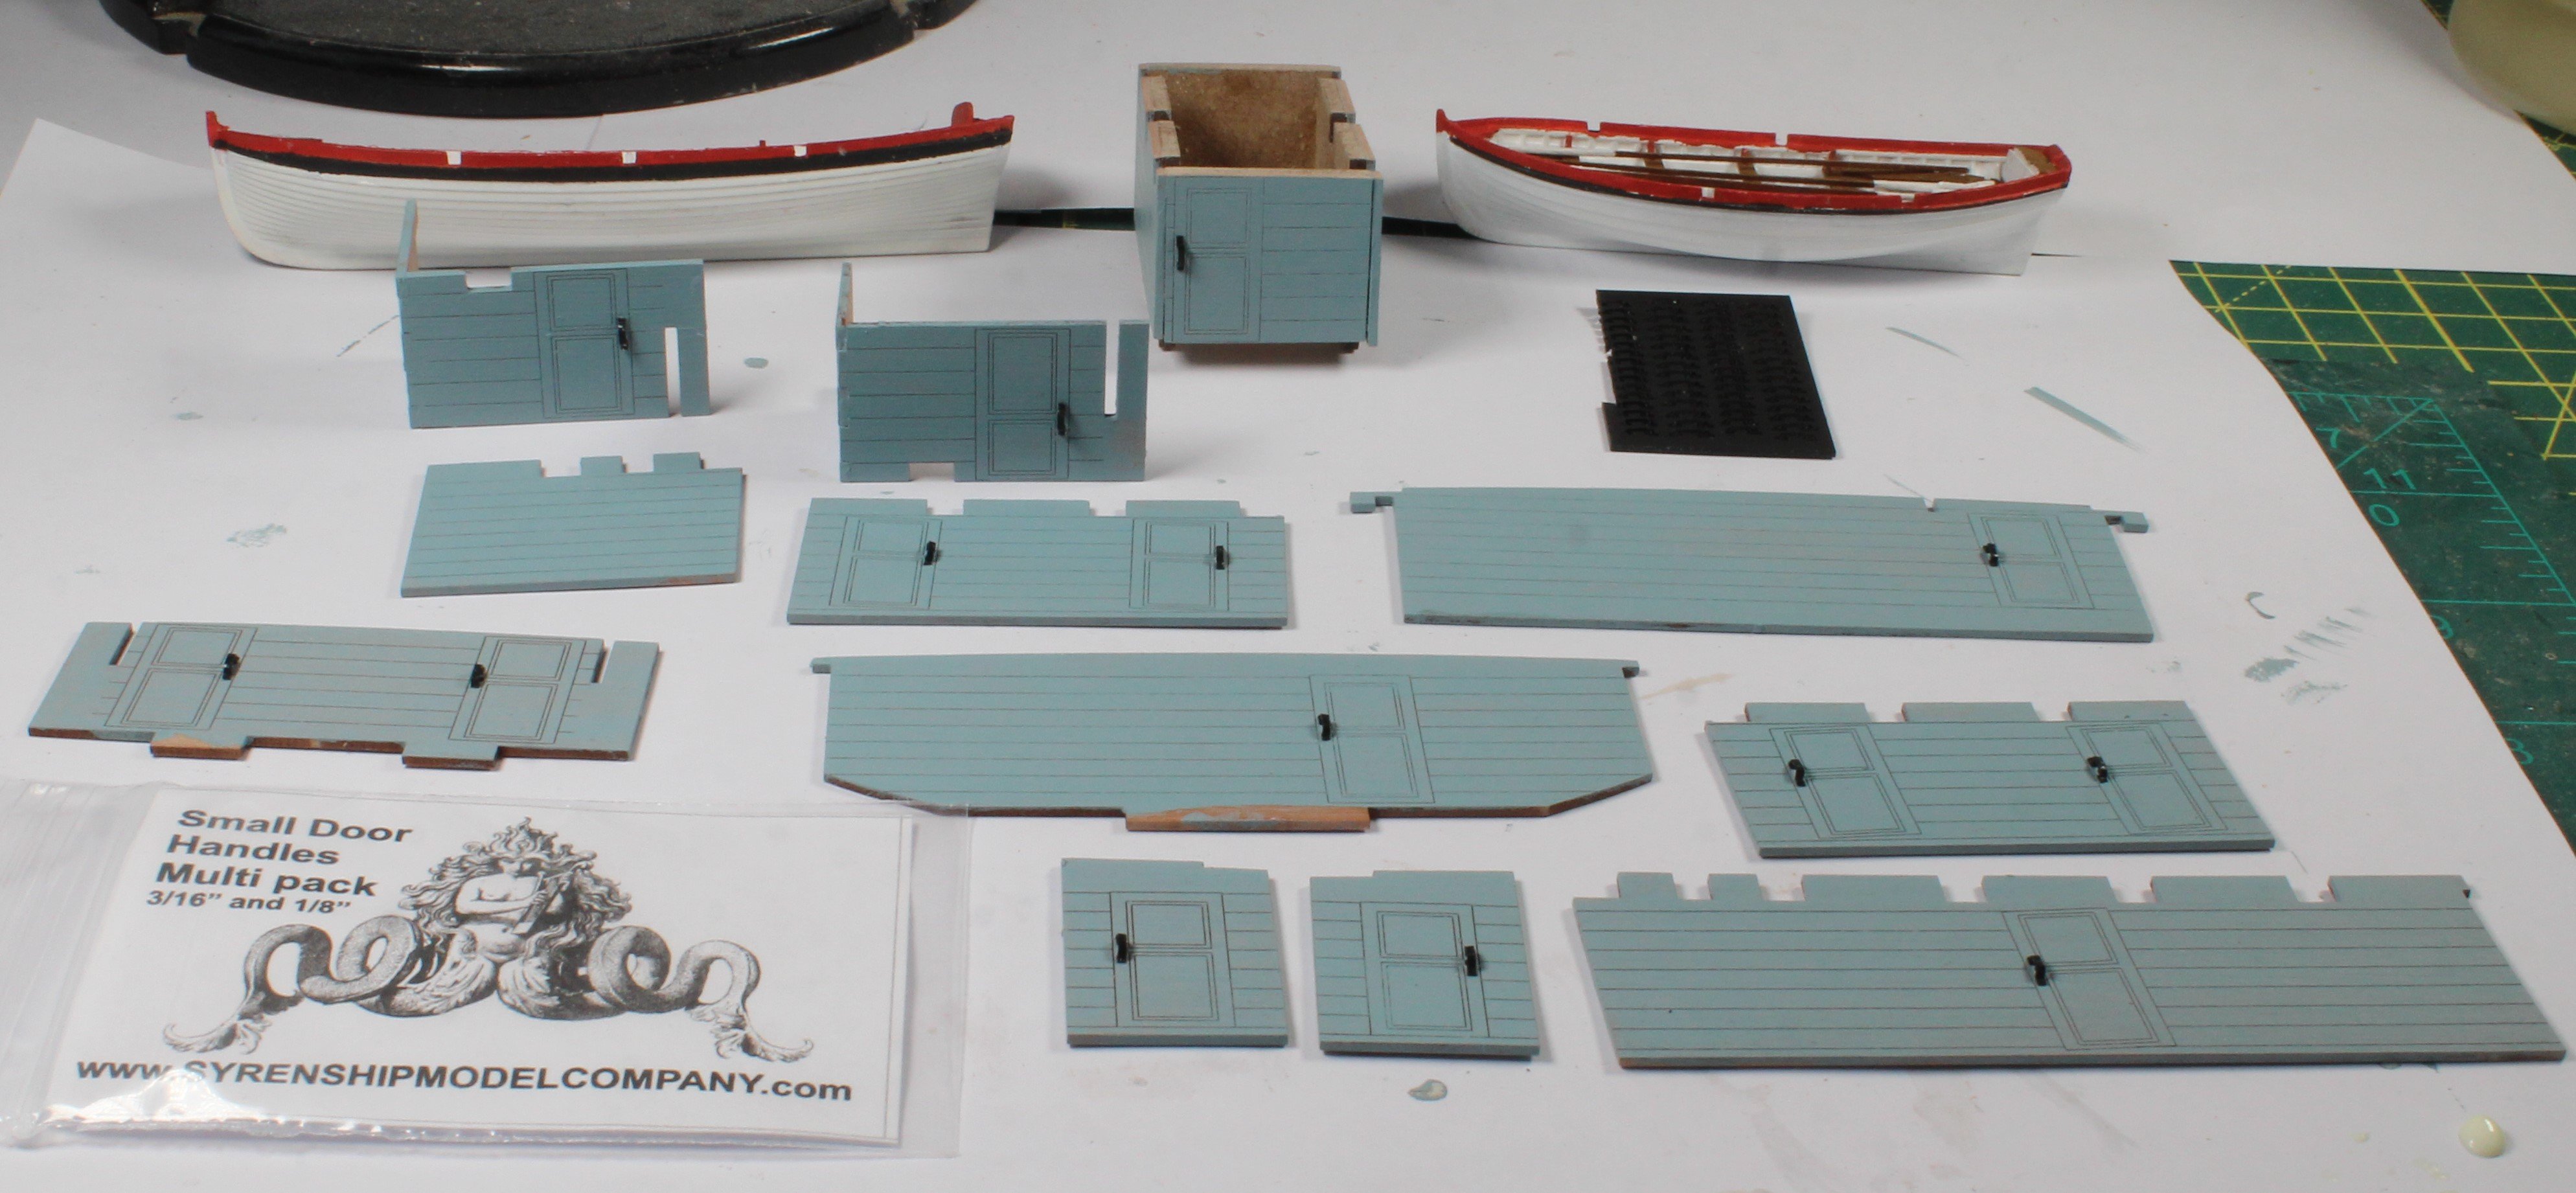
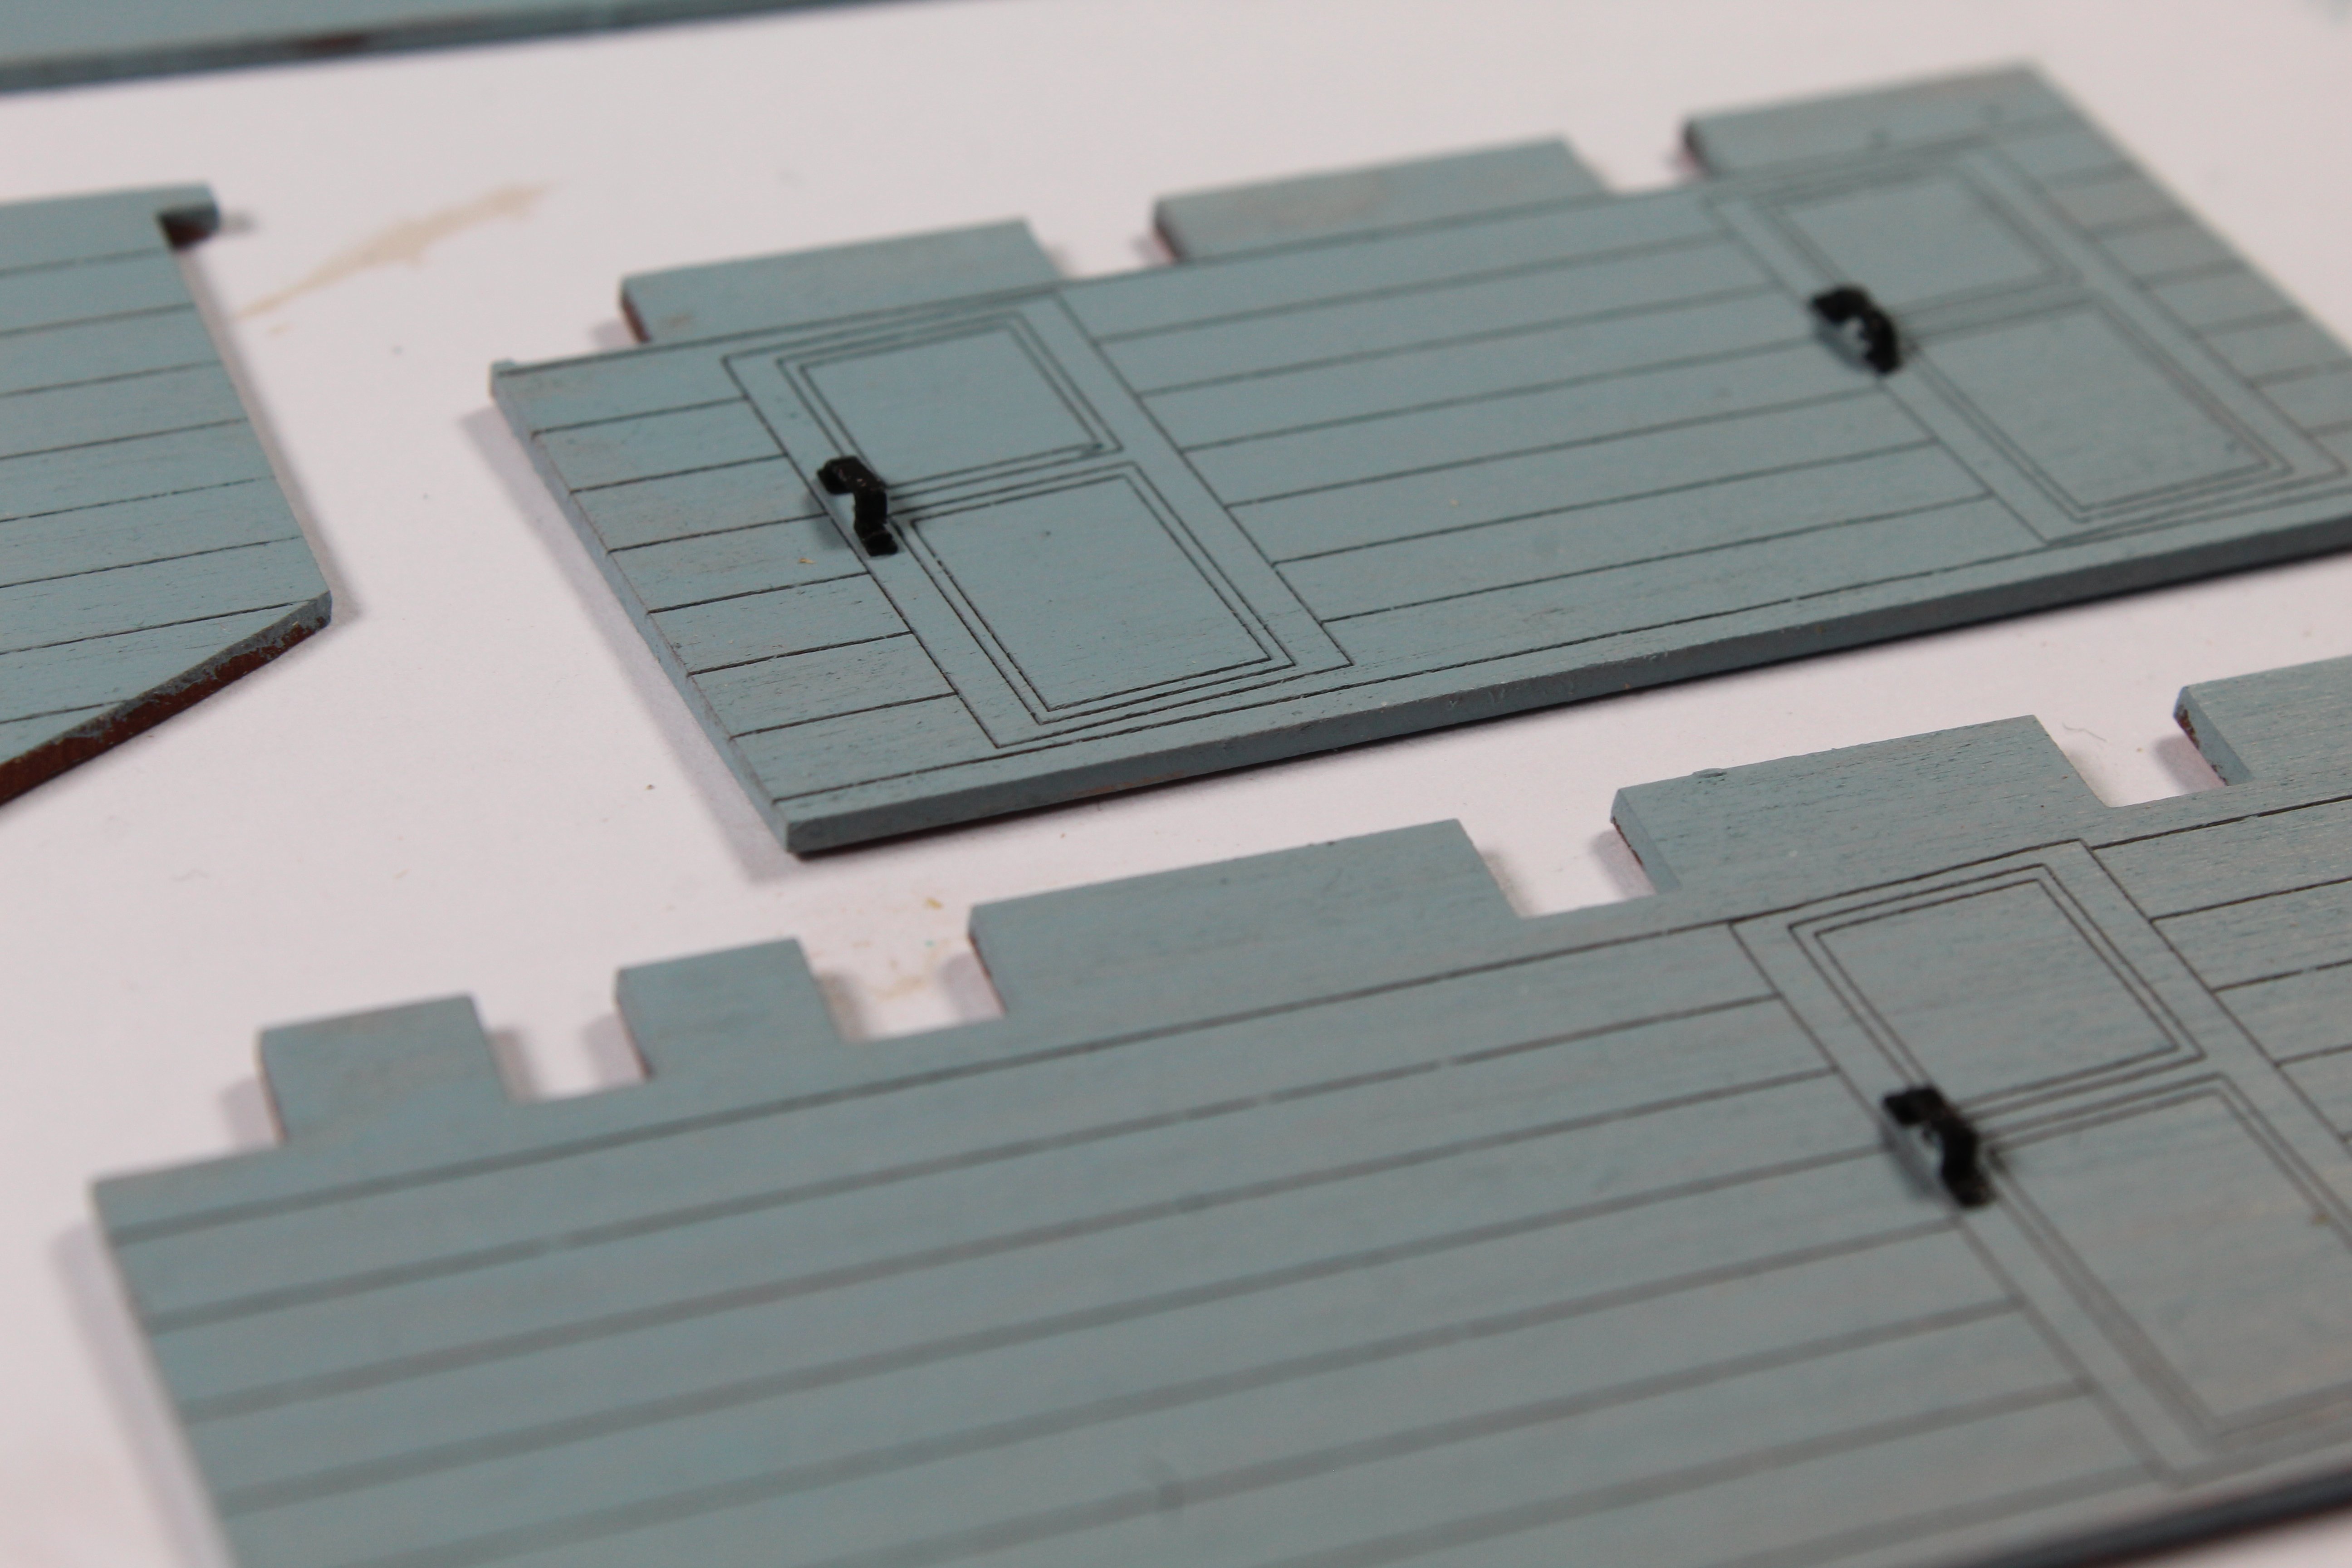
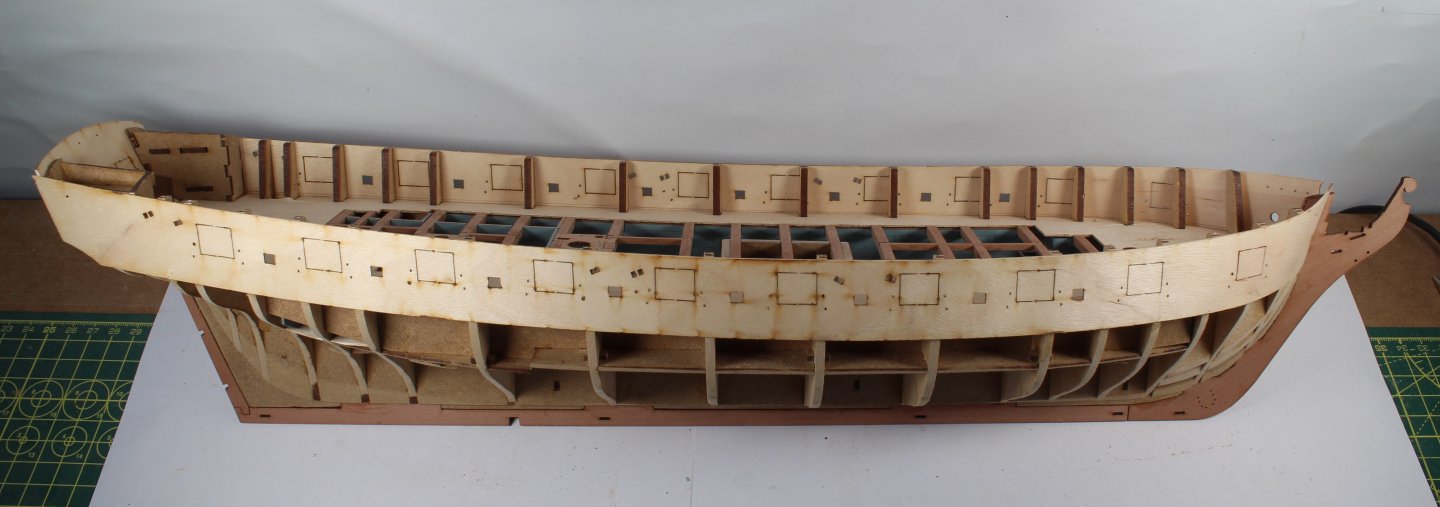
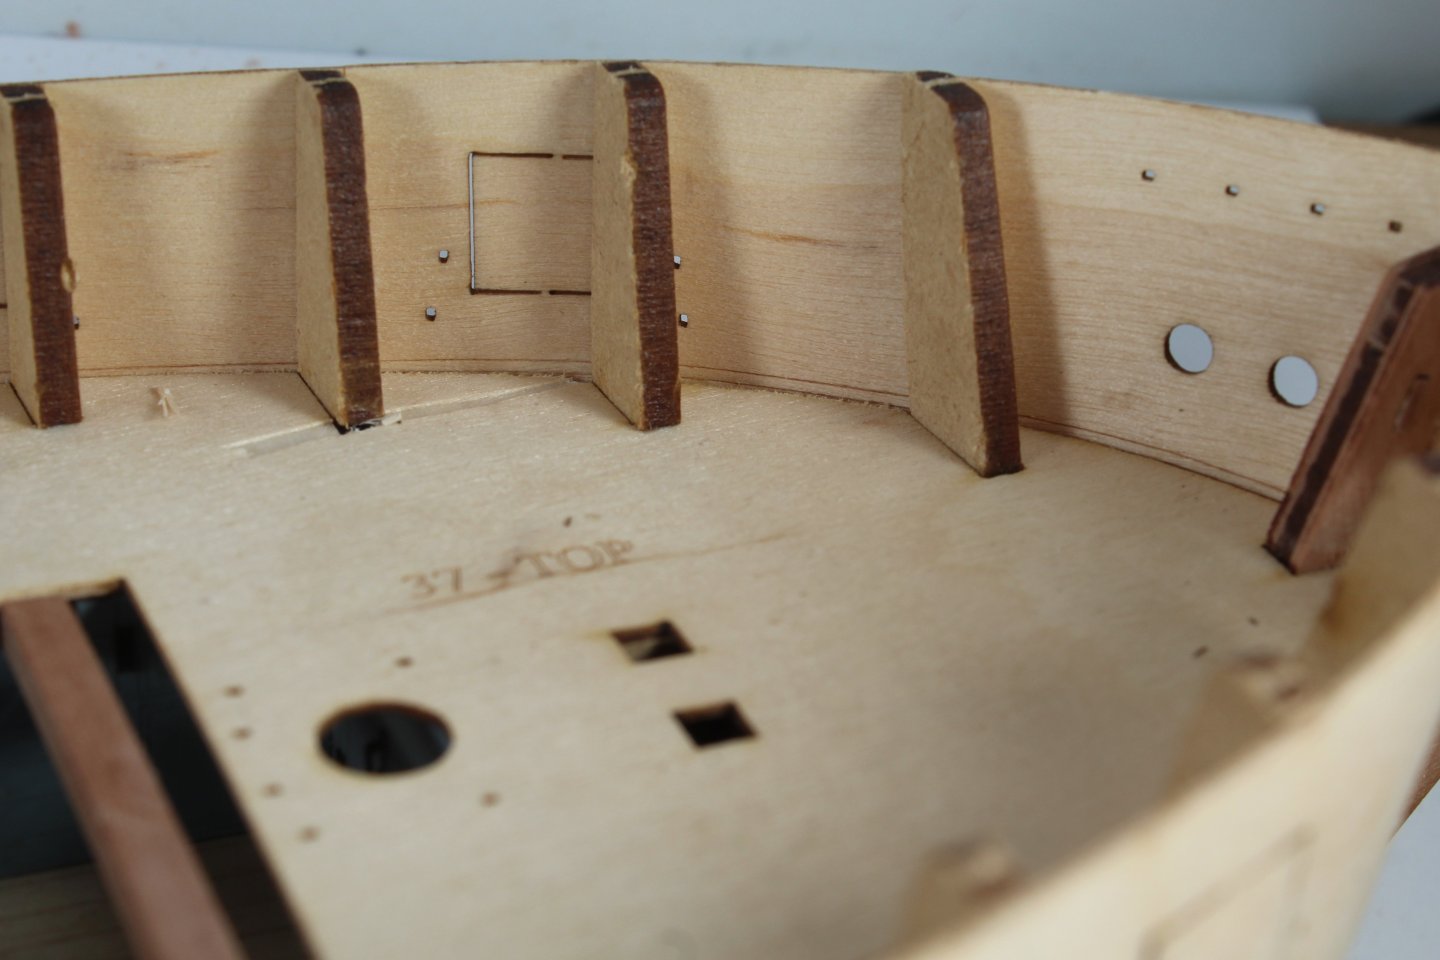
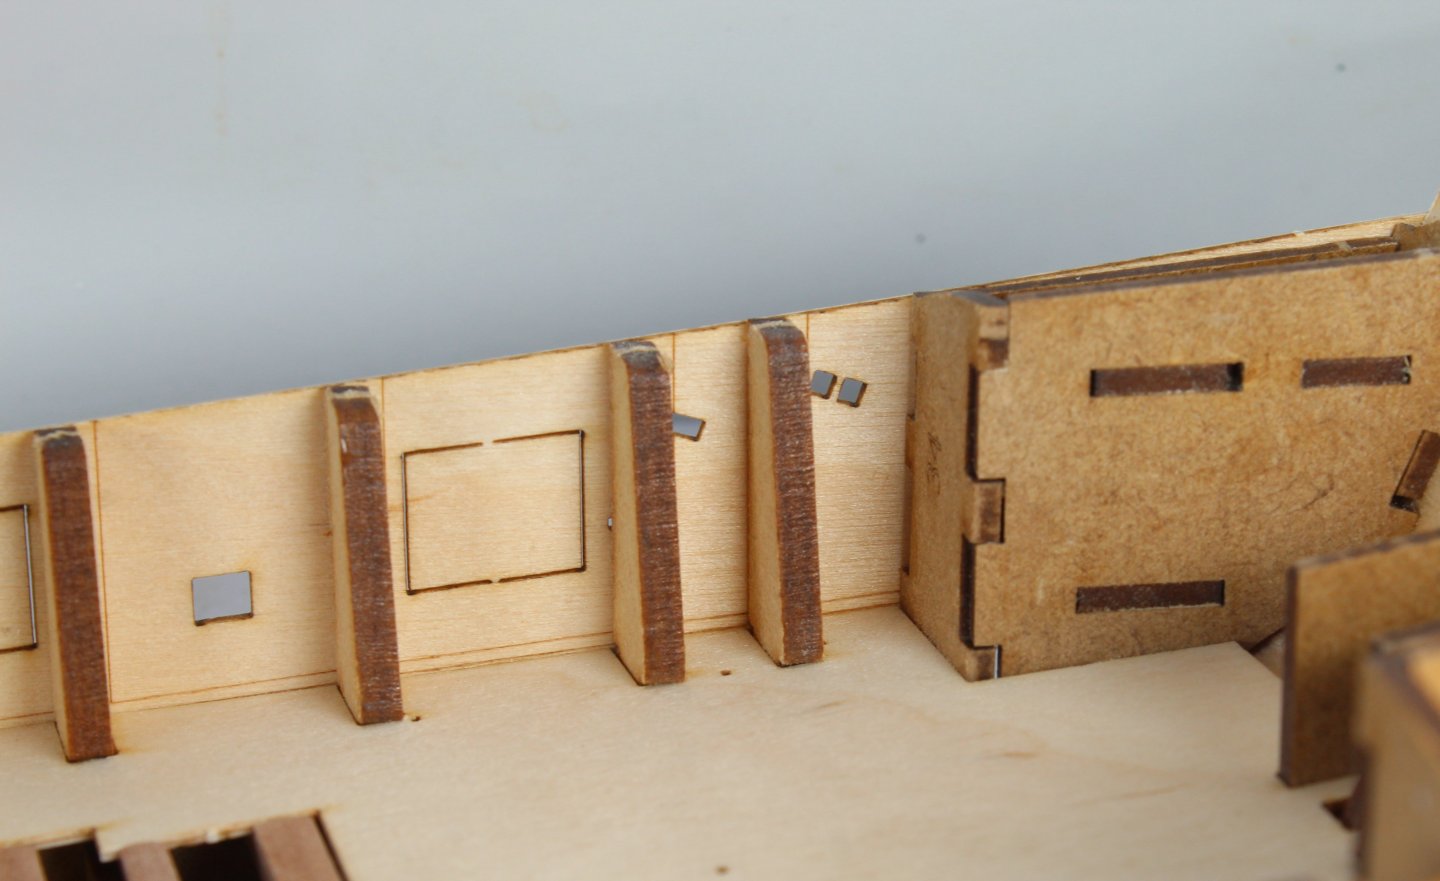
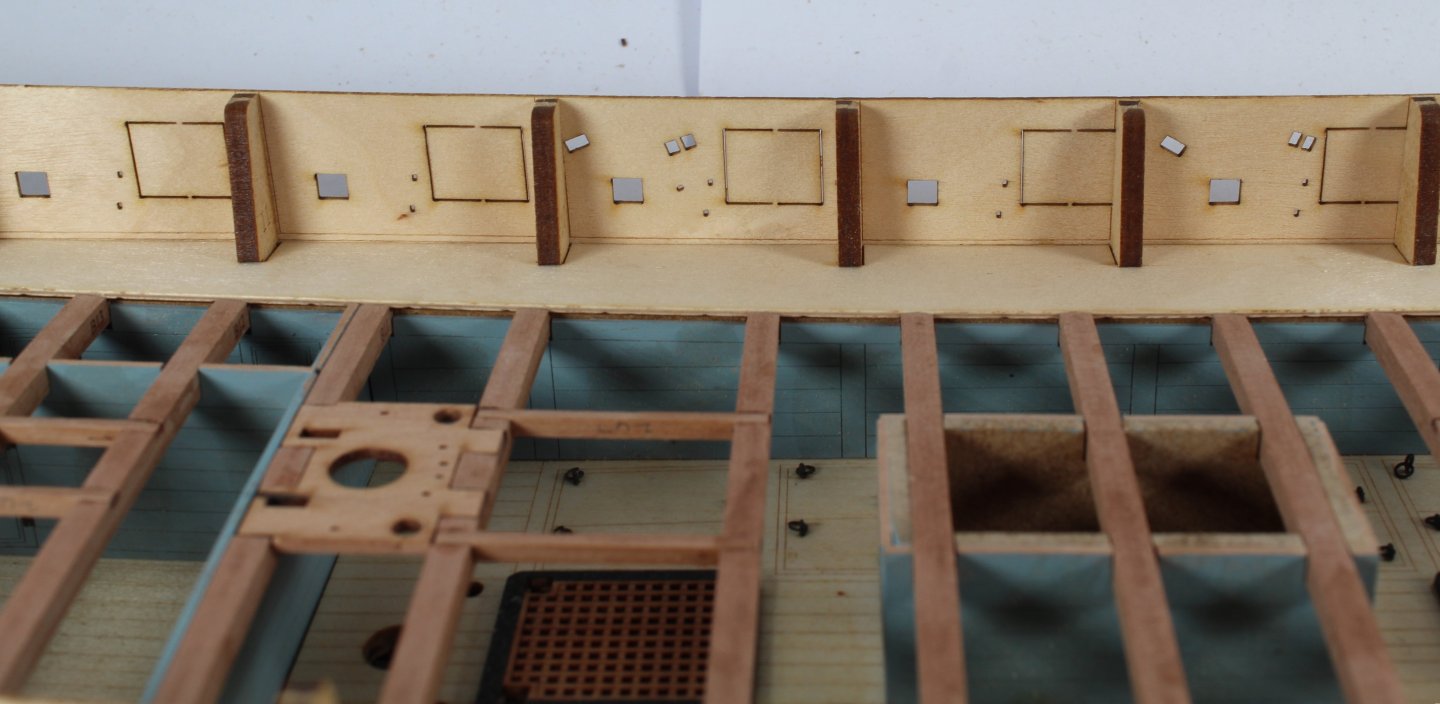
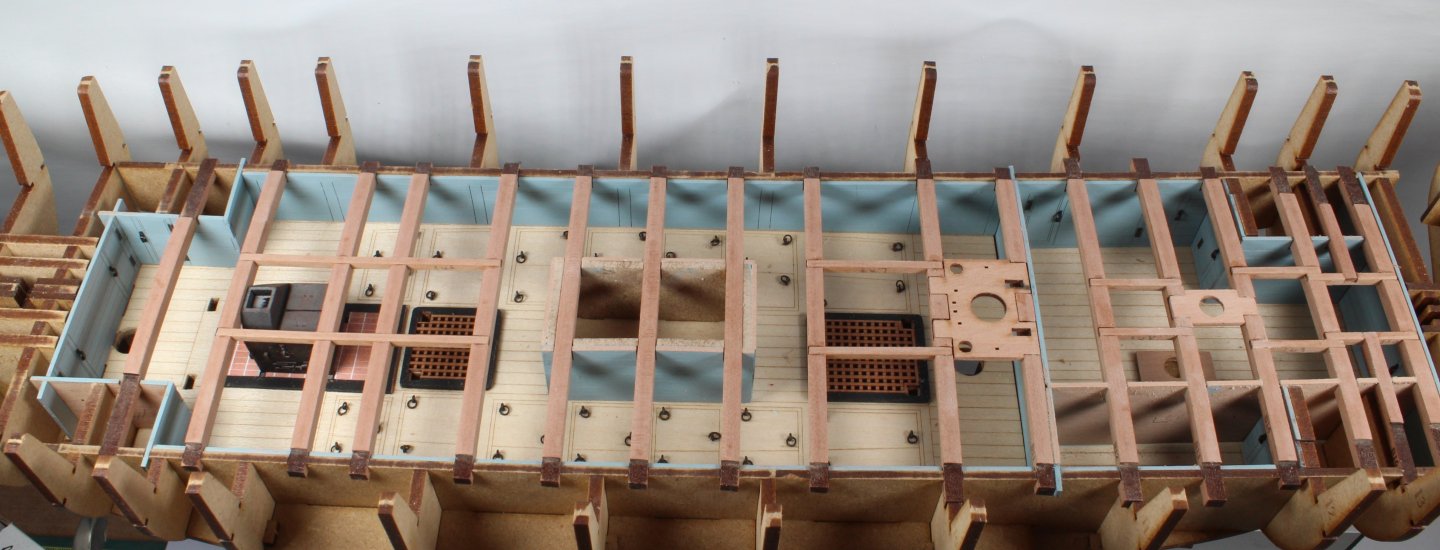
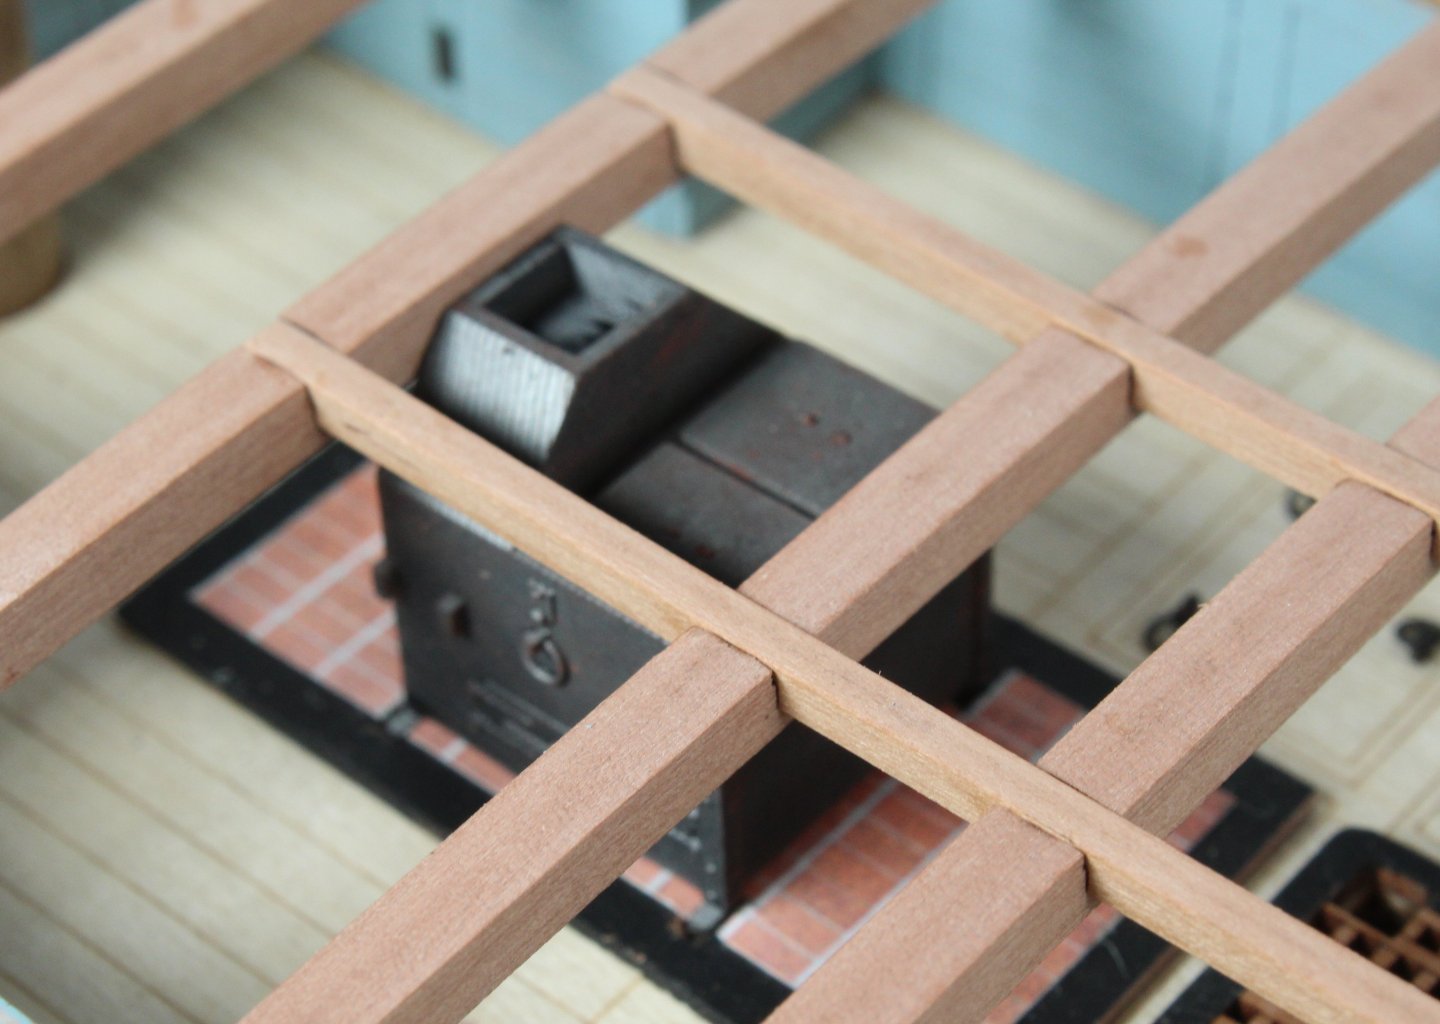
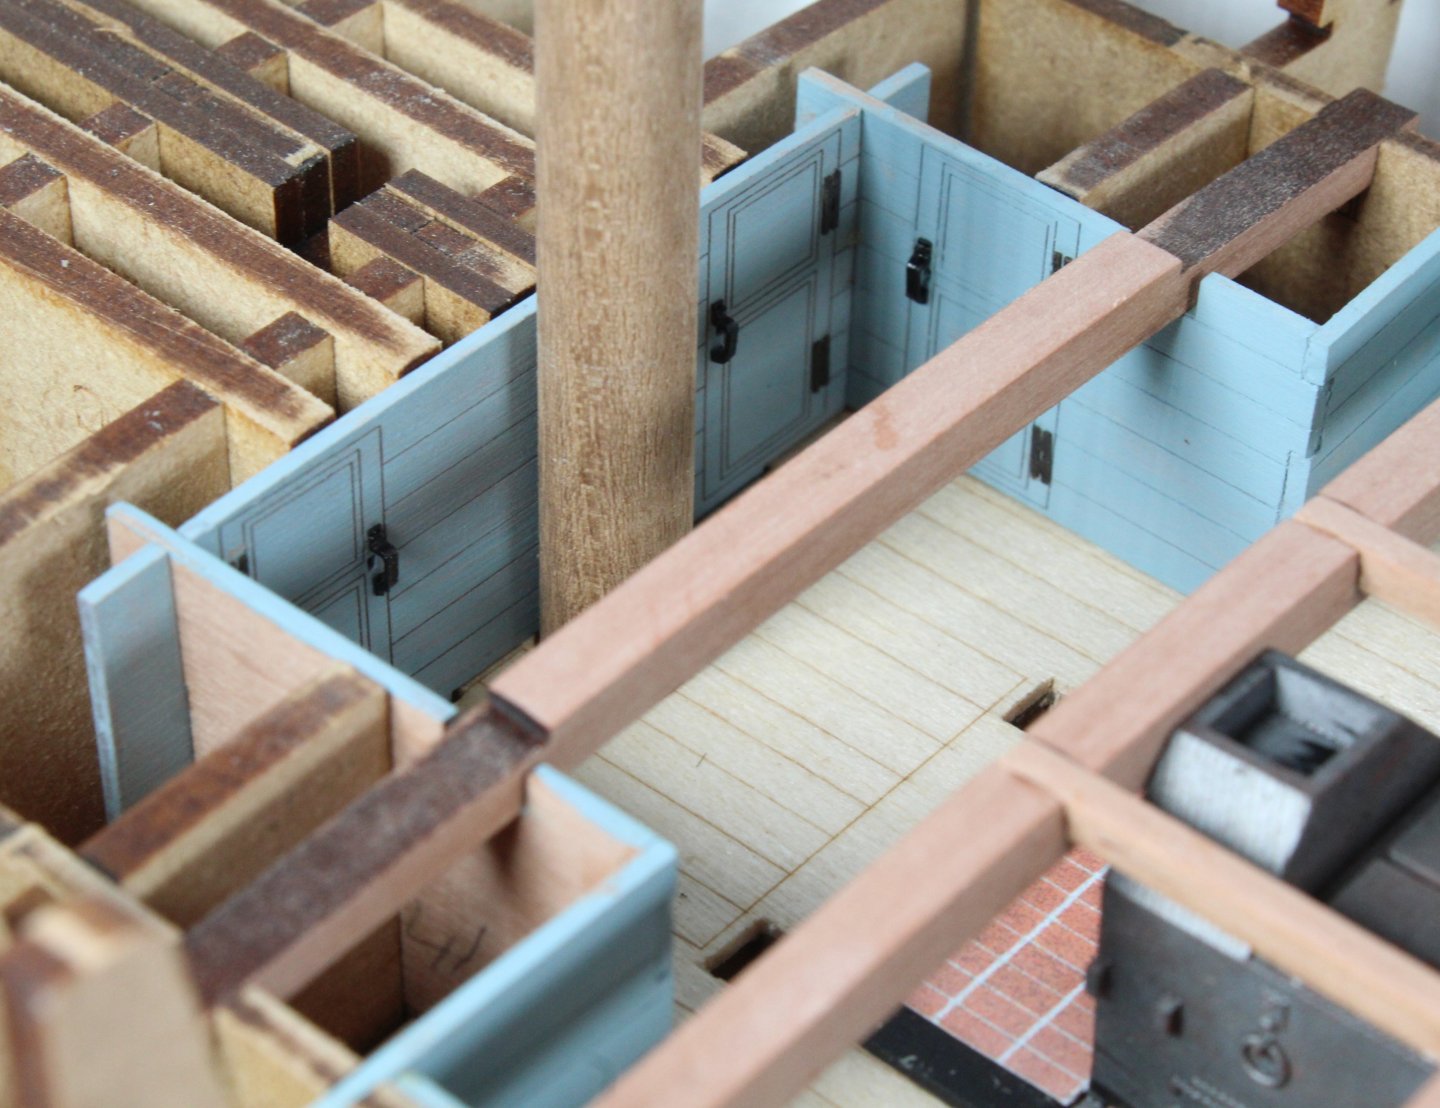
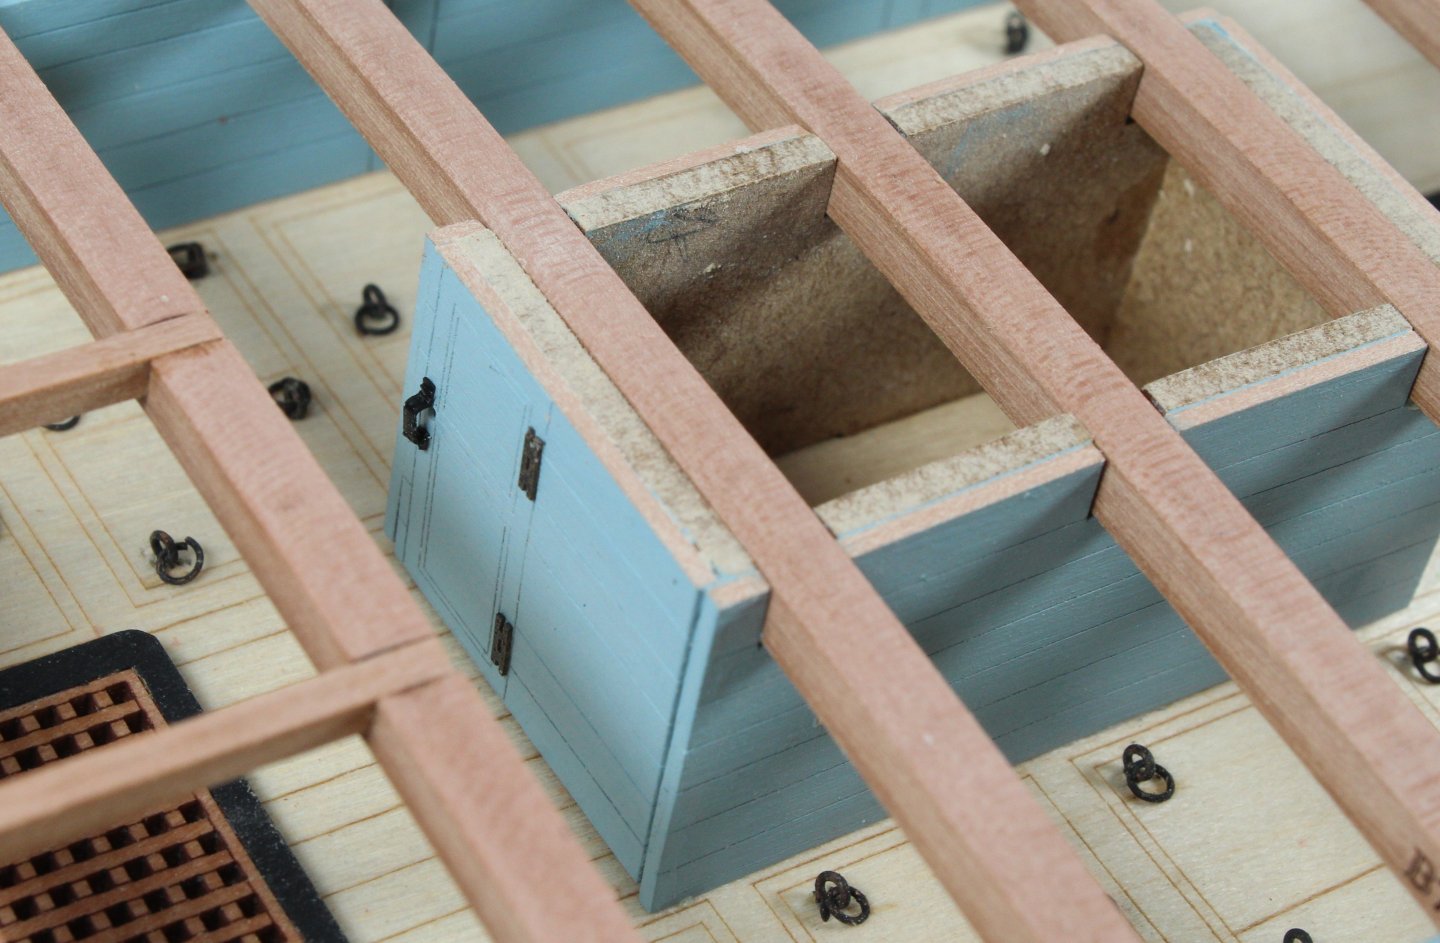
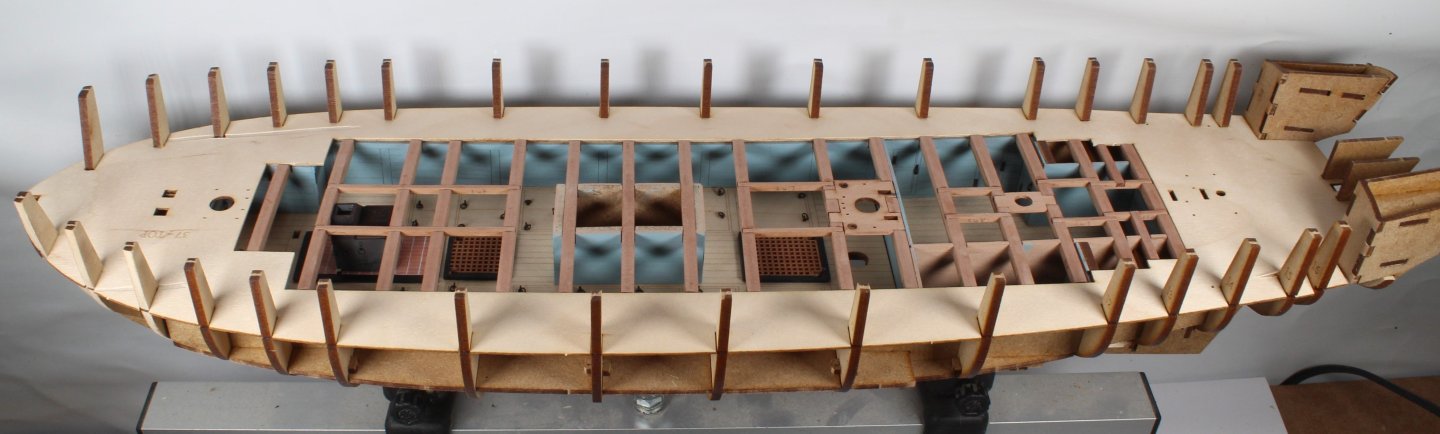
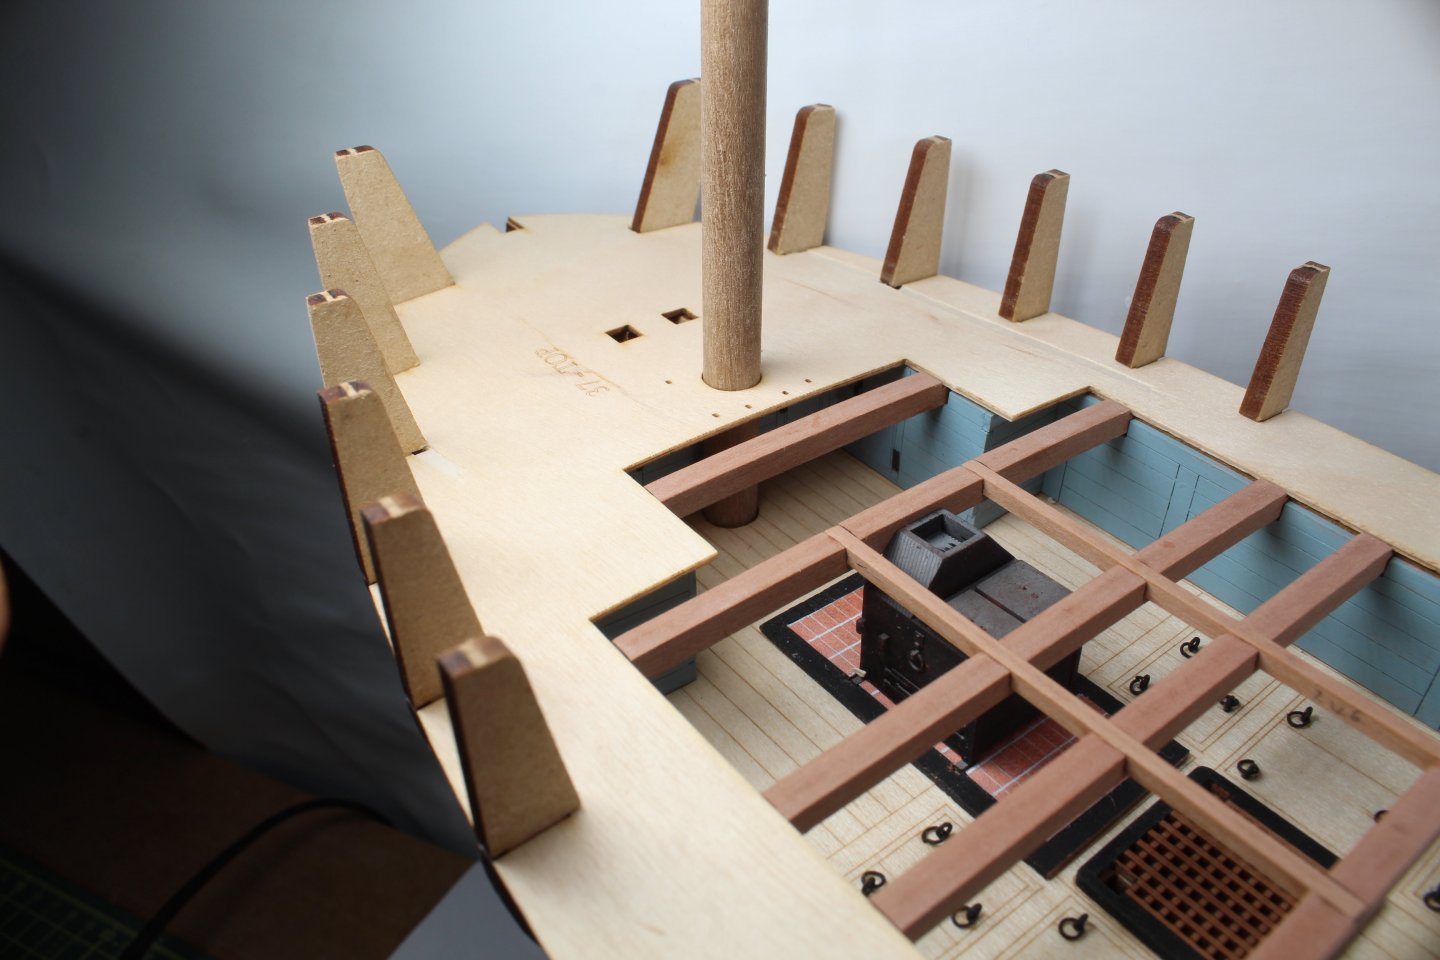
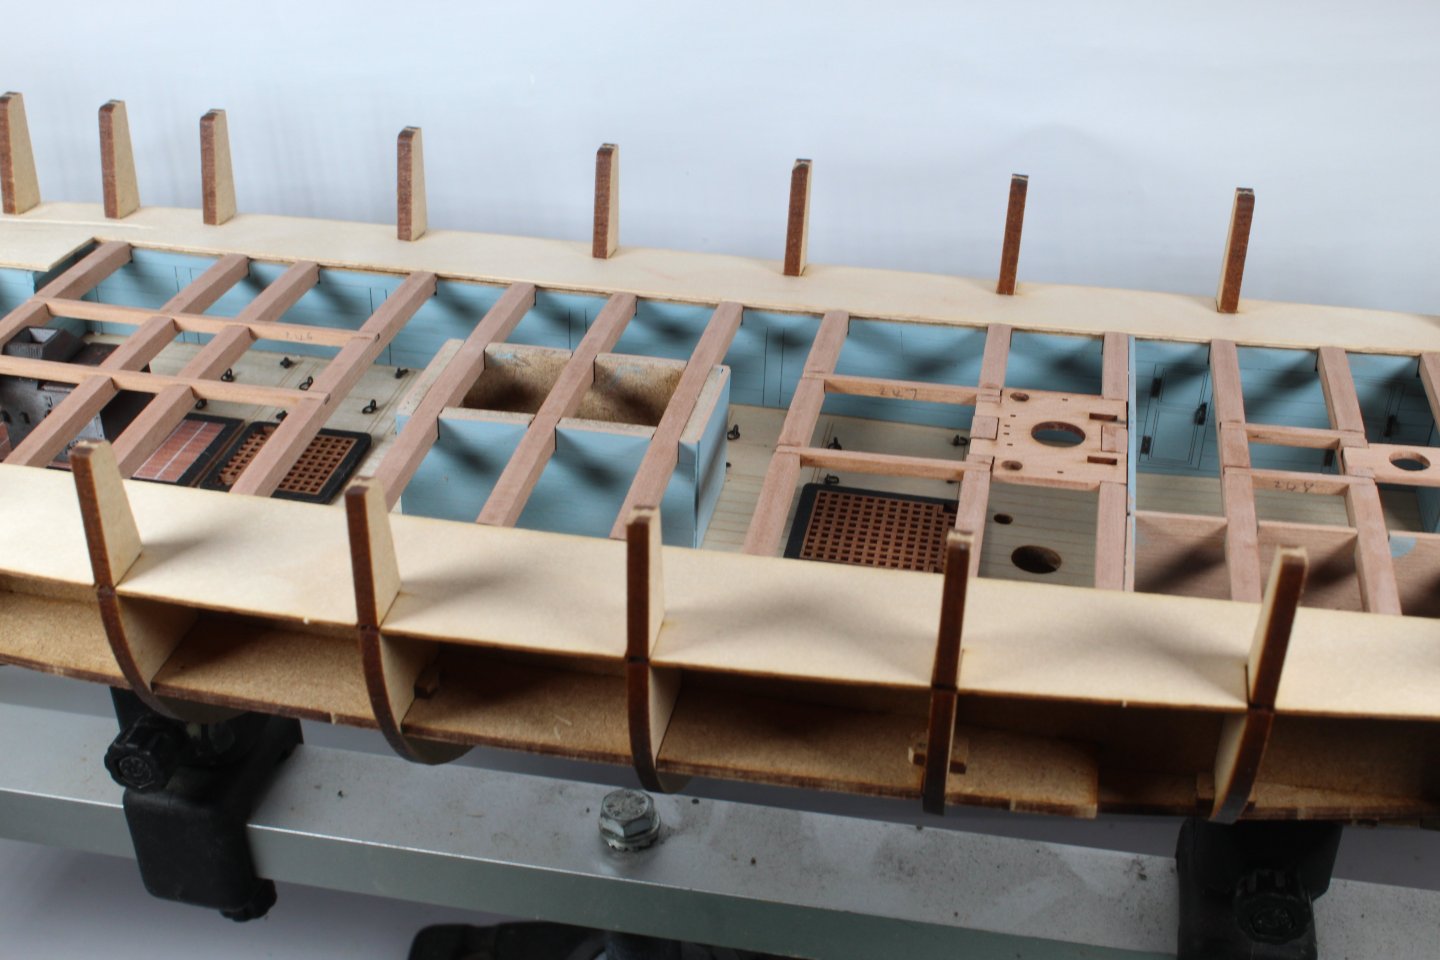
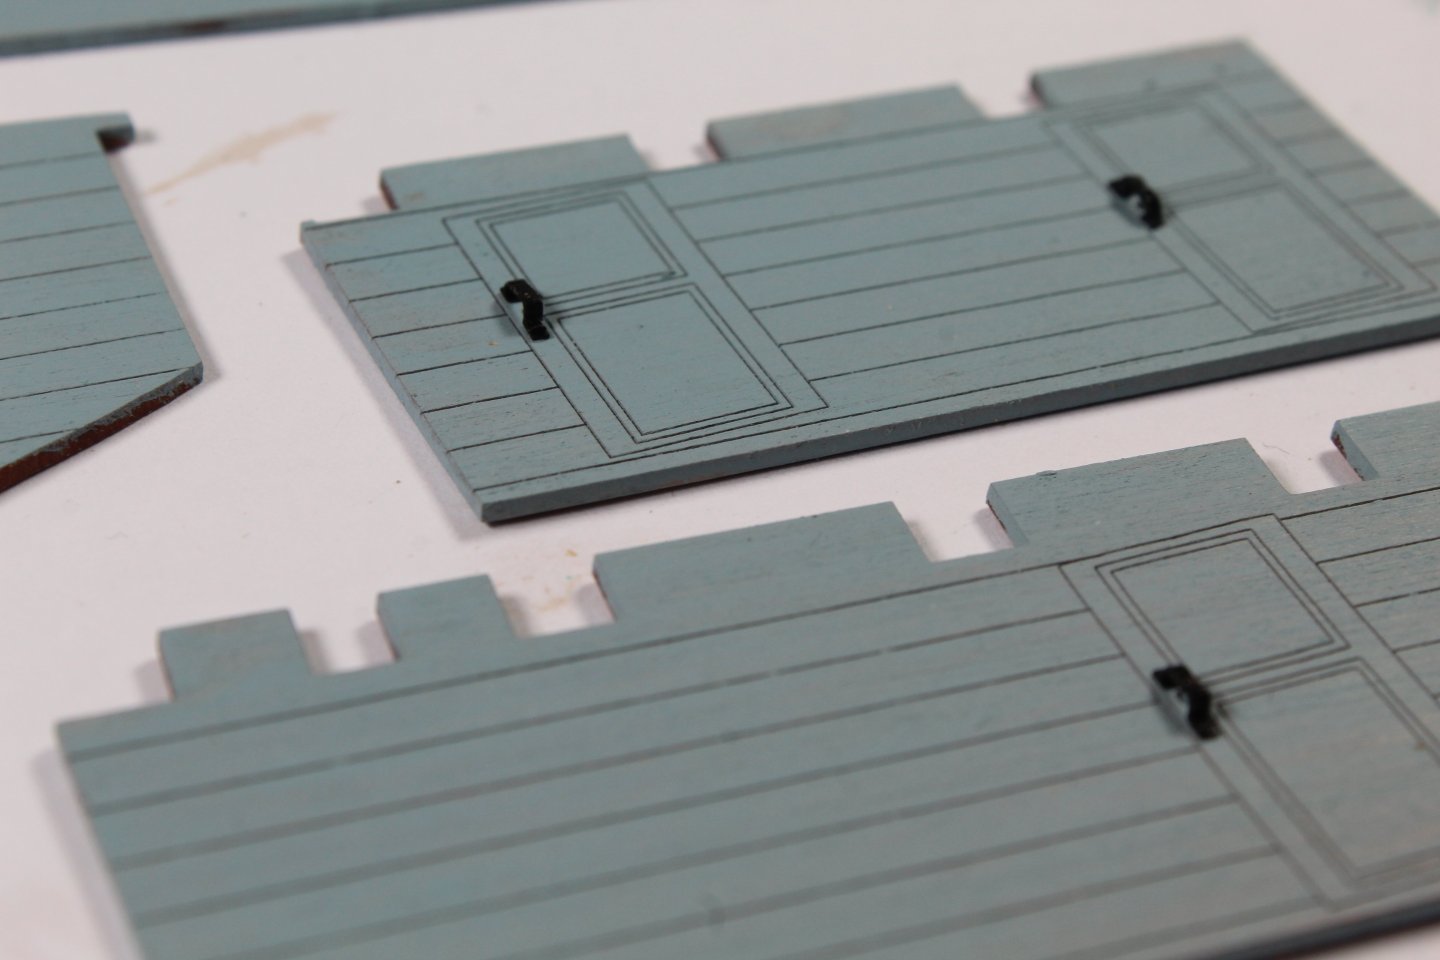
Today has been a very productive day in the shipyard. The hinges, ordered from Syren in the USA, arrived today so I was able to add them to the inner panels. The door handles and hinges from Syren do add an extra dimension to the model. The inner panels were then secured to the hull, quickly followed by the deck beams and carlings, as can be seen in the photo below. I much prefer using @Chuck hinges and handles compared to photo etched equivalents. They look great, they do not require blackening and they are very easy to fit. The next photo shows one of the inner door panels complete with hinges and handles. I did follow @Blue Ensign build and removed the right-angle part from the upper hinges. The following selection of photos shows some different aspect of the deck beams, carlings, deck fittings and panels. You will note that I test fitted the various dowels to ensure there is no alignment issues. The next task was to slot the upper deck base pattern into place. On my first fitting there seemed to be a very slight issue with fitting bow area. With the deck fully engaged in the bulkhead notches the bow area was not sitting flat across the bow deck beams. After removing the laser char from the edges of the upper deck pattern bulkhead slots it was a perfect fit, as can be seen the final set of photos.


- 241 replies
-
- 14
-
-
- Vanguarrd Models
- Harpy
- (and 1 more)
-
Many thanks Mark, much appreciated
-
Thanks Bob. It is very time consuming to get the Carronades to look presentable, but the end justifies the means. I am slowly learning that taking ones time does yield much better results.
- 241 replies
-
- 2
-
-
- Vanguarrd Models
- Harpy
- (and 1 more)
-
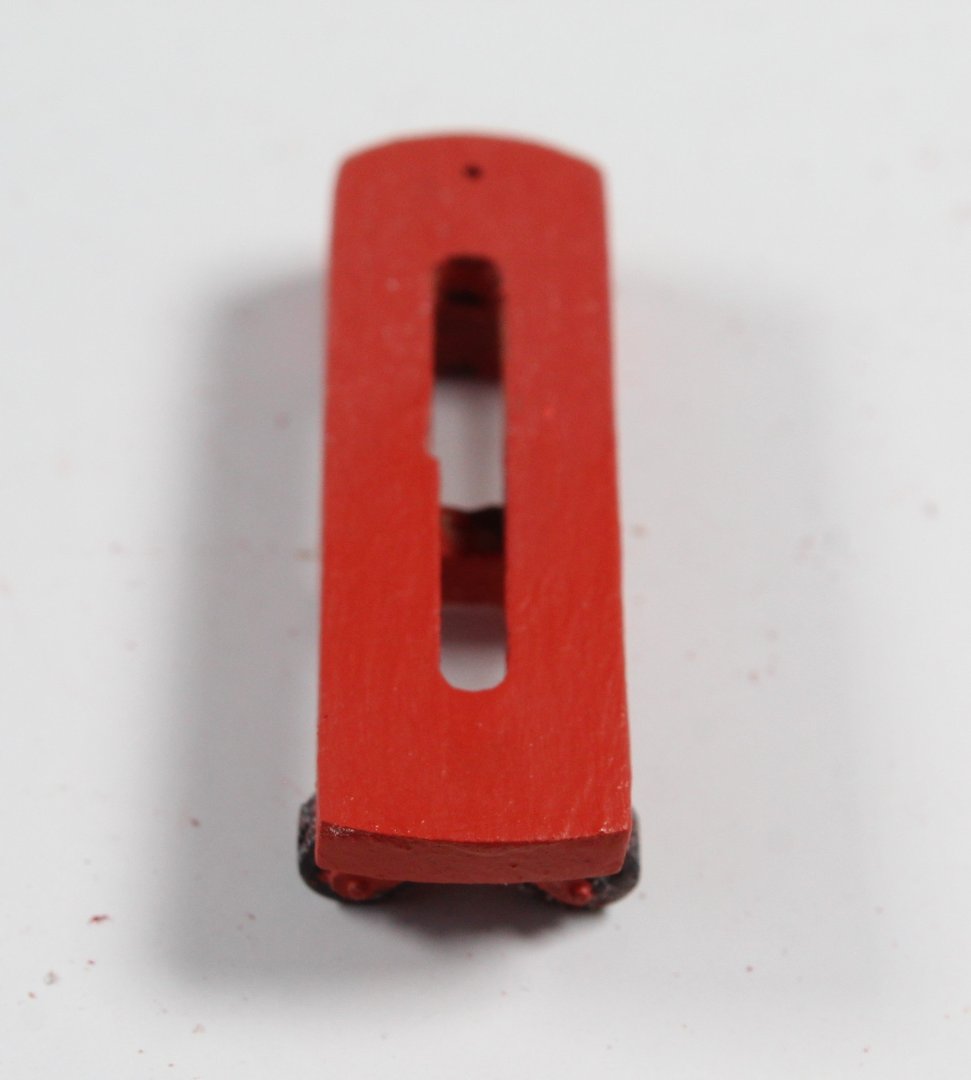
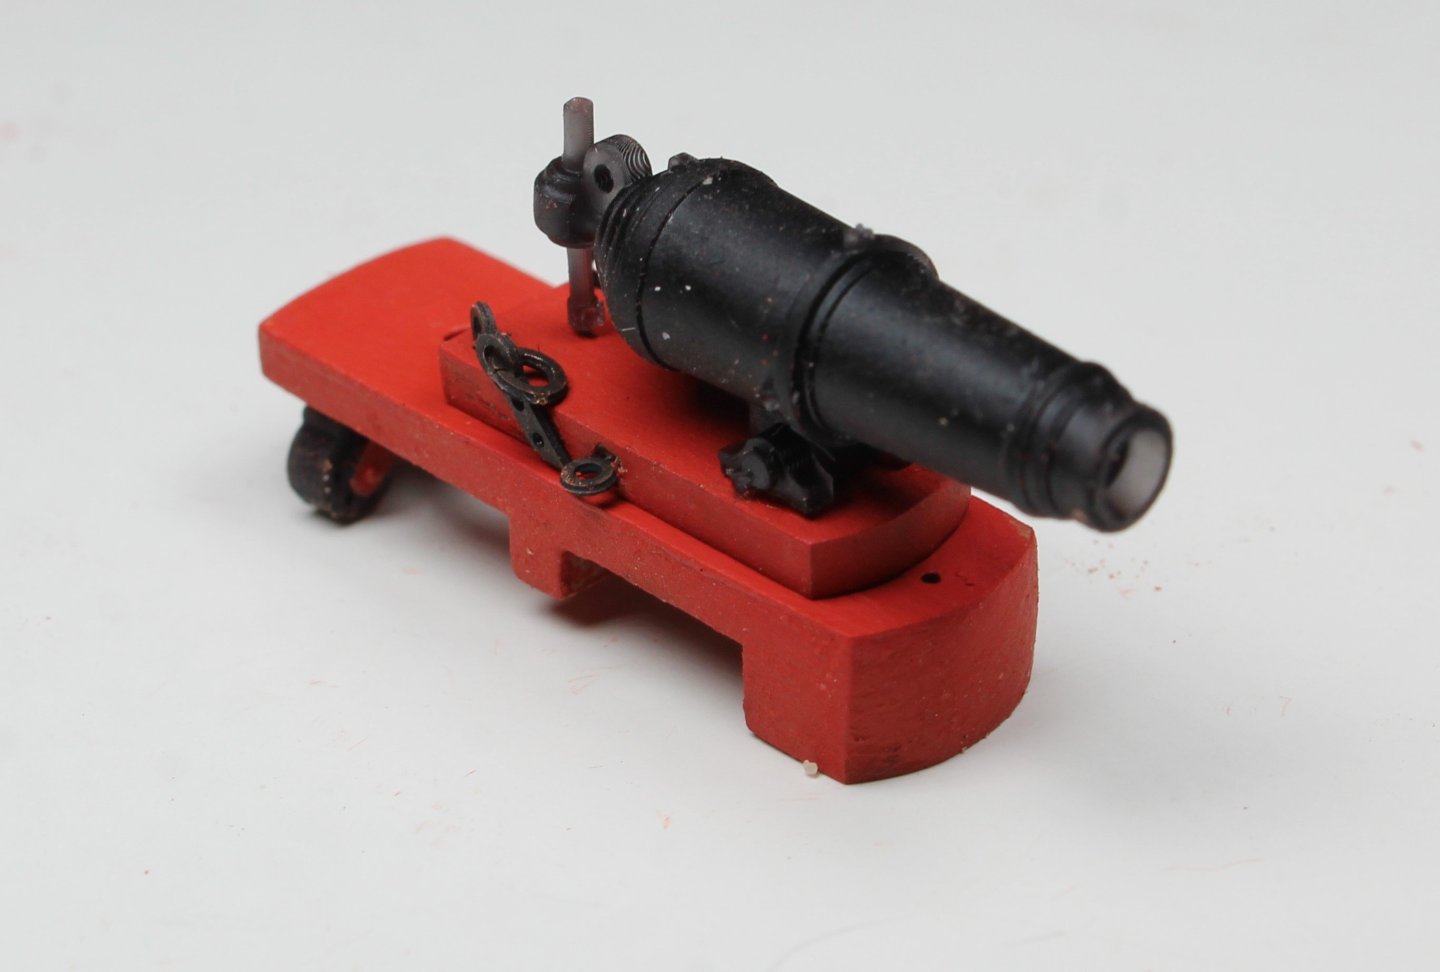
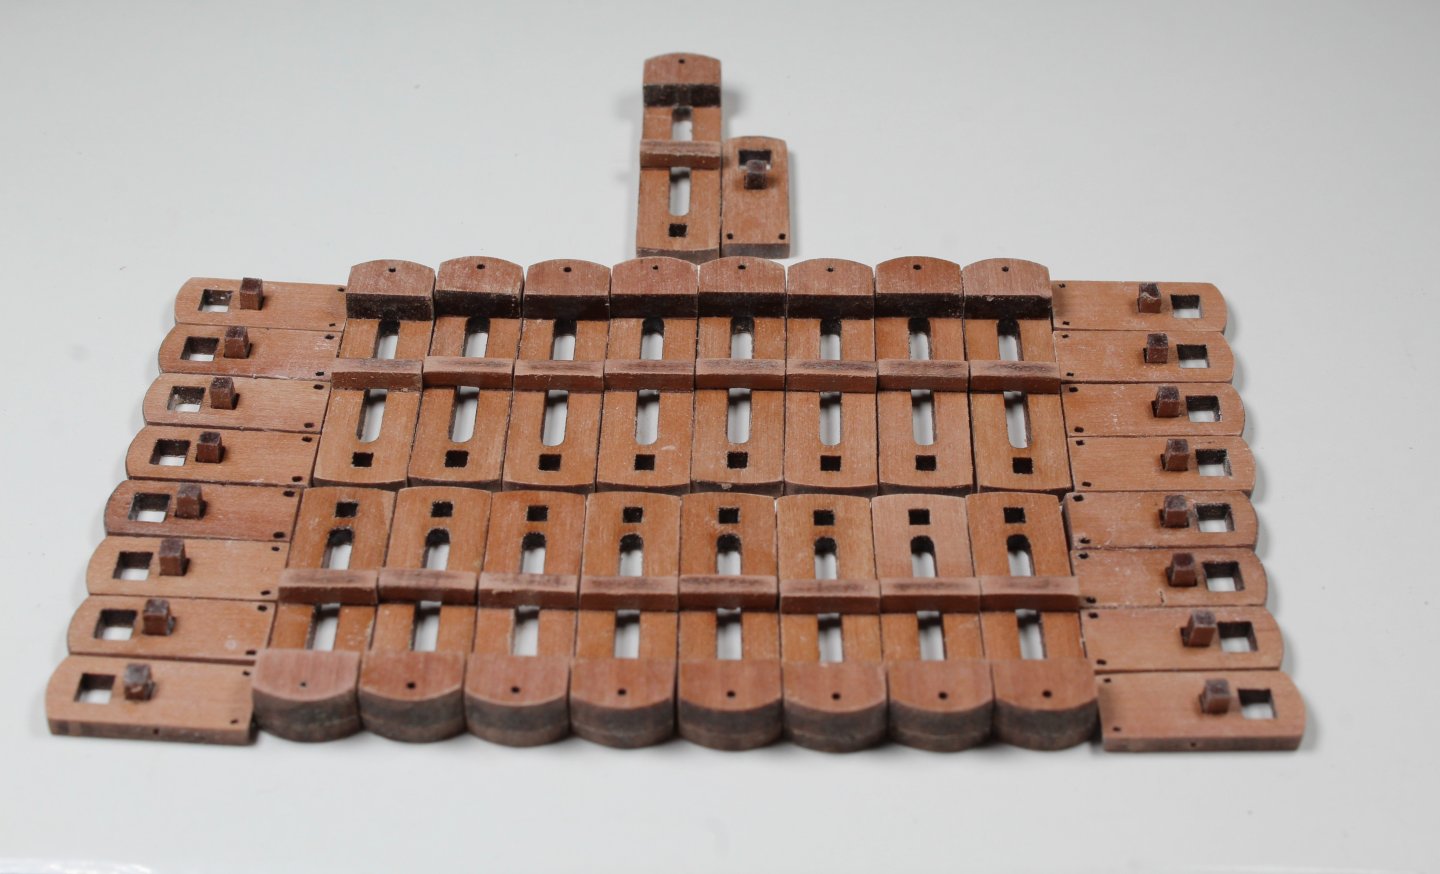
The wheels for the carriage bases are supplied on a very handy base which makes painting them much easier. I did touch up the wheel base shown in the photo below as I missed a bit. The wheels were then added to the 16 off carriage bases, as shown below. The black top of the wheel base can be seen on the upper surface of the carriage base. It does not look very appealing so some work is required to make it more presentable. The excess wheel base material was then sanded away, using a flat needle file. Next I applied a coat of diluted wood filler to the wheel base top area. Once that had dried it was sanded smooth, using a 400 grit sanding stick, and then painted red. And as if by magic the wheel base top is no longer visible. The final task was to add the PE parts and carronade cannon to the slide base. I found it easier to add the rings to the ring strap before the straps were glued in place. I found adding the ring straps to be a very fiddly task but by taking my time I am reasonably happy with how the rings straps look. In the photos below the slider has been added to the carriage base but they are not glued in place, which I will do when positioning the carronades on the deck.


- 241 replies
-
- 11
-

-
-
- Vanguarrd Models
- Harpy
- (and 1 more)
-
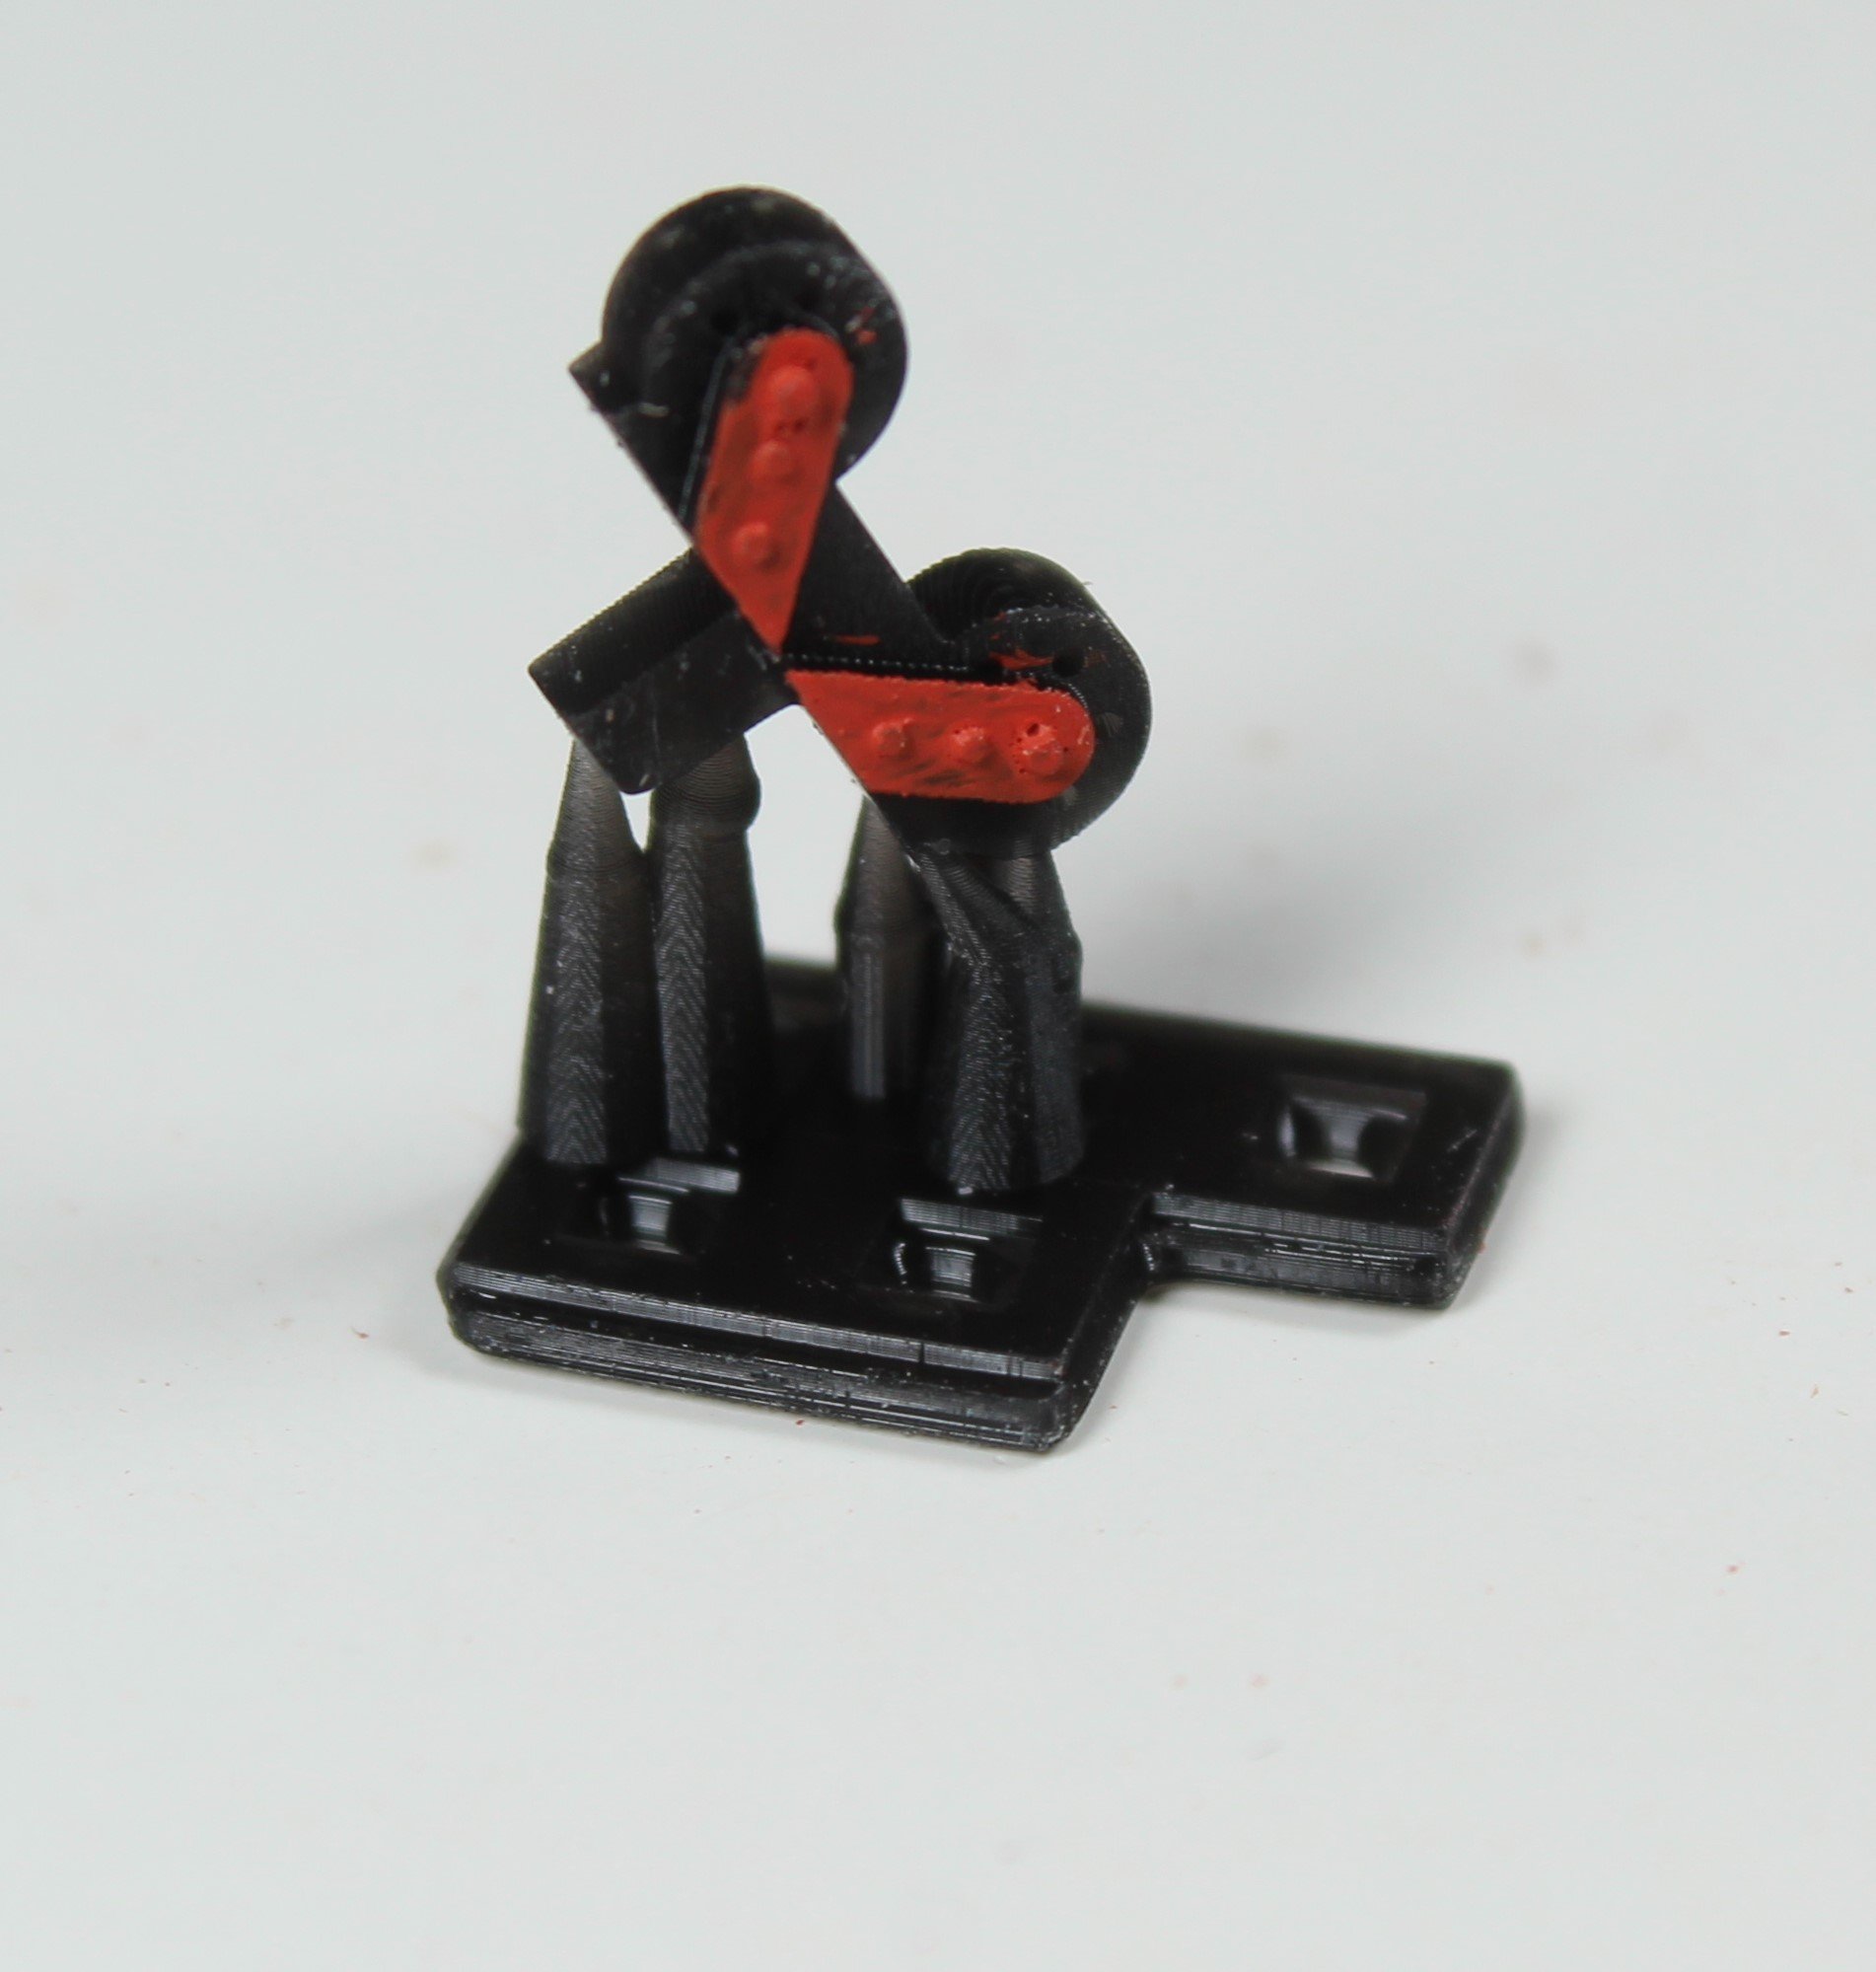
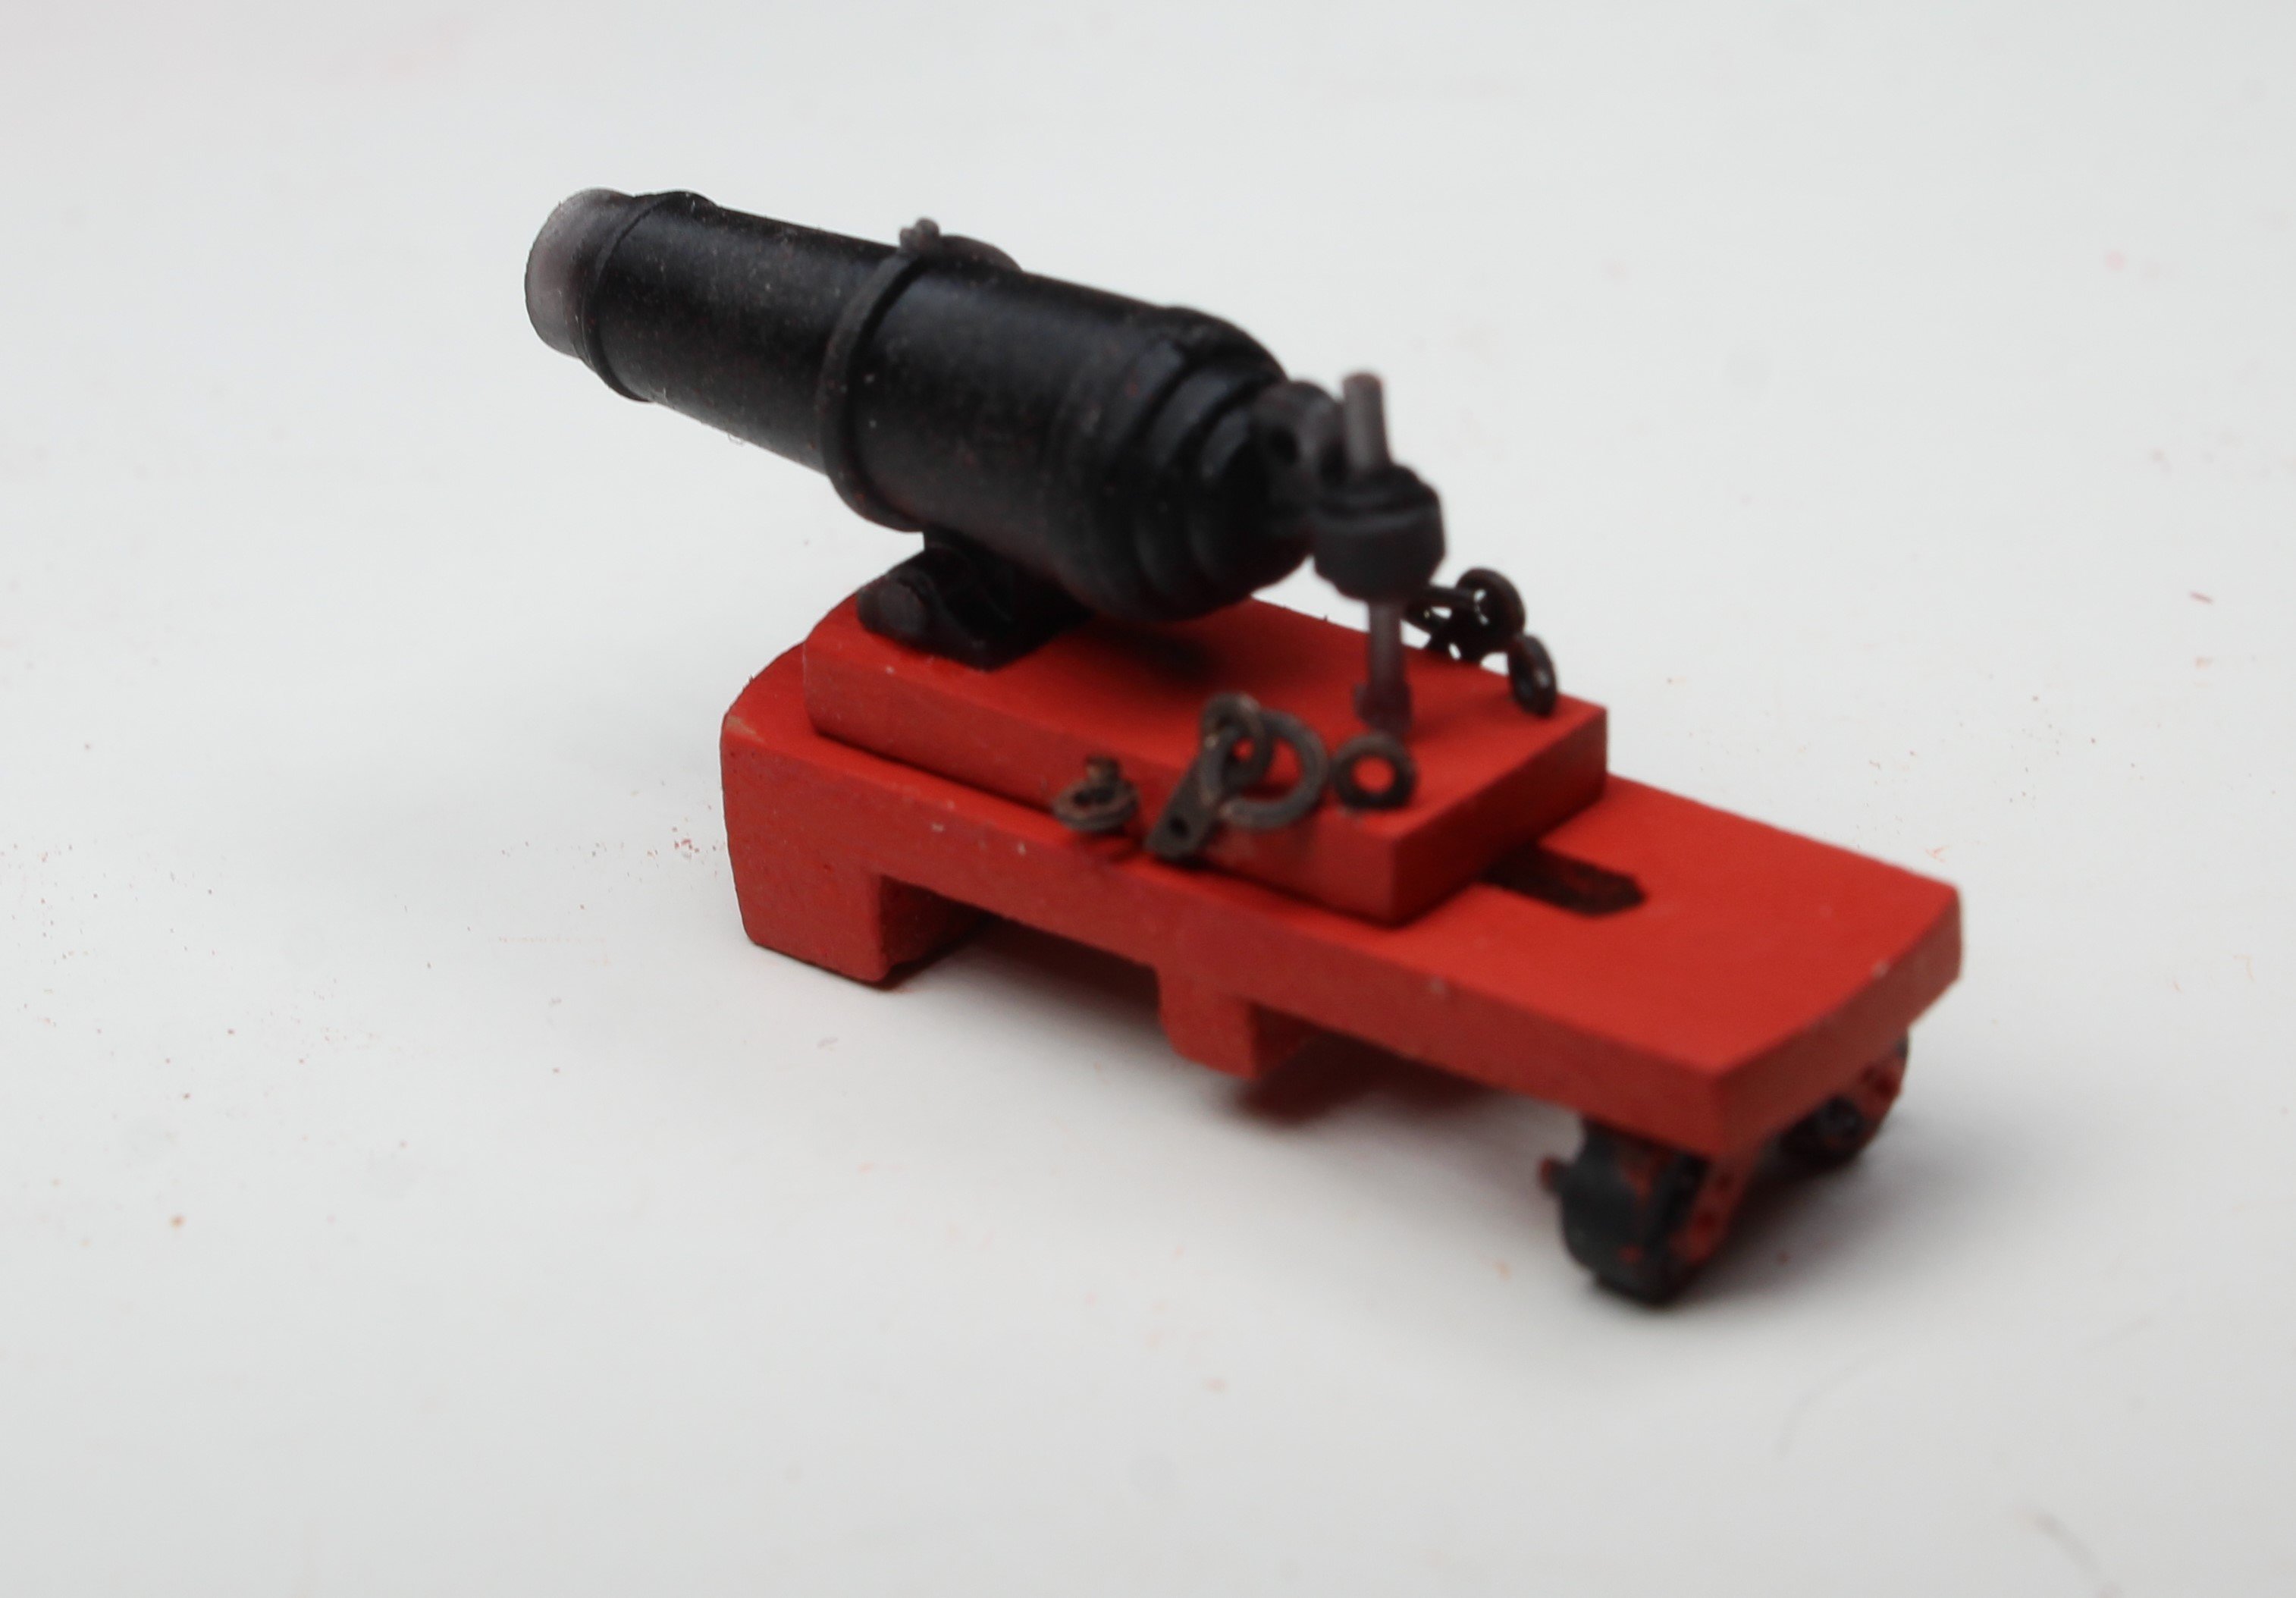
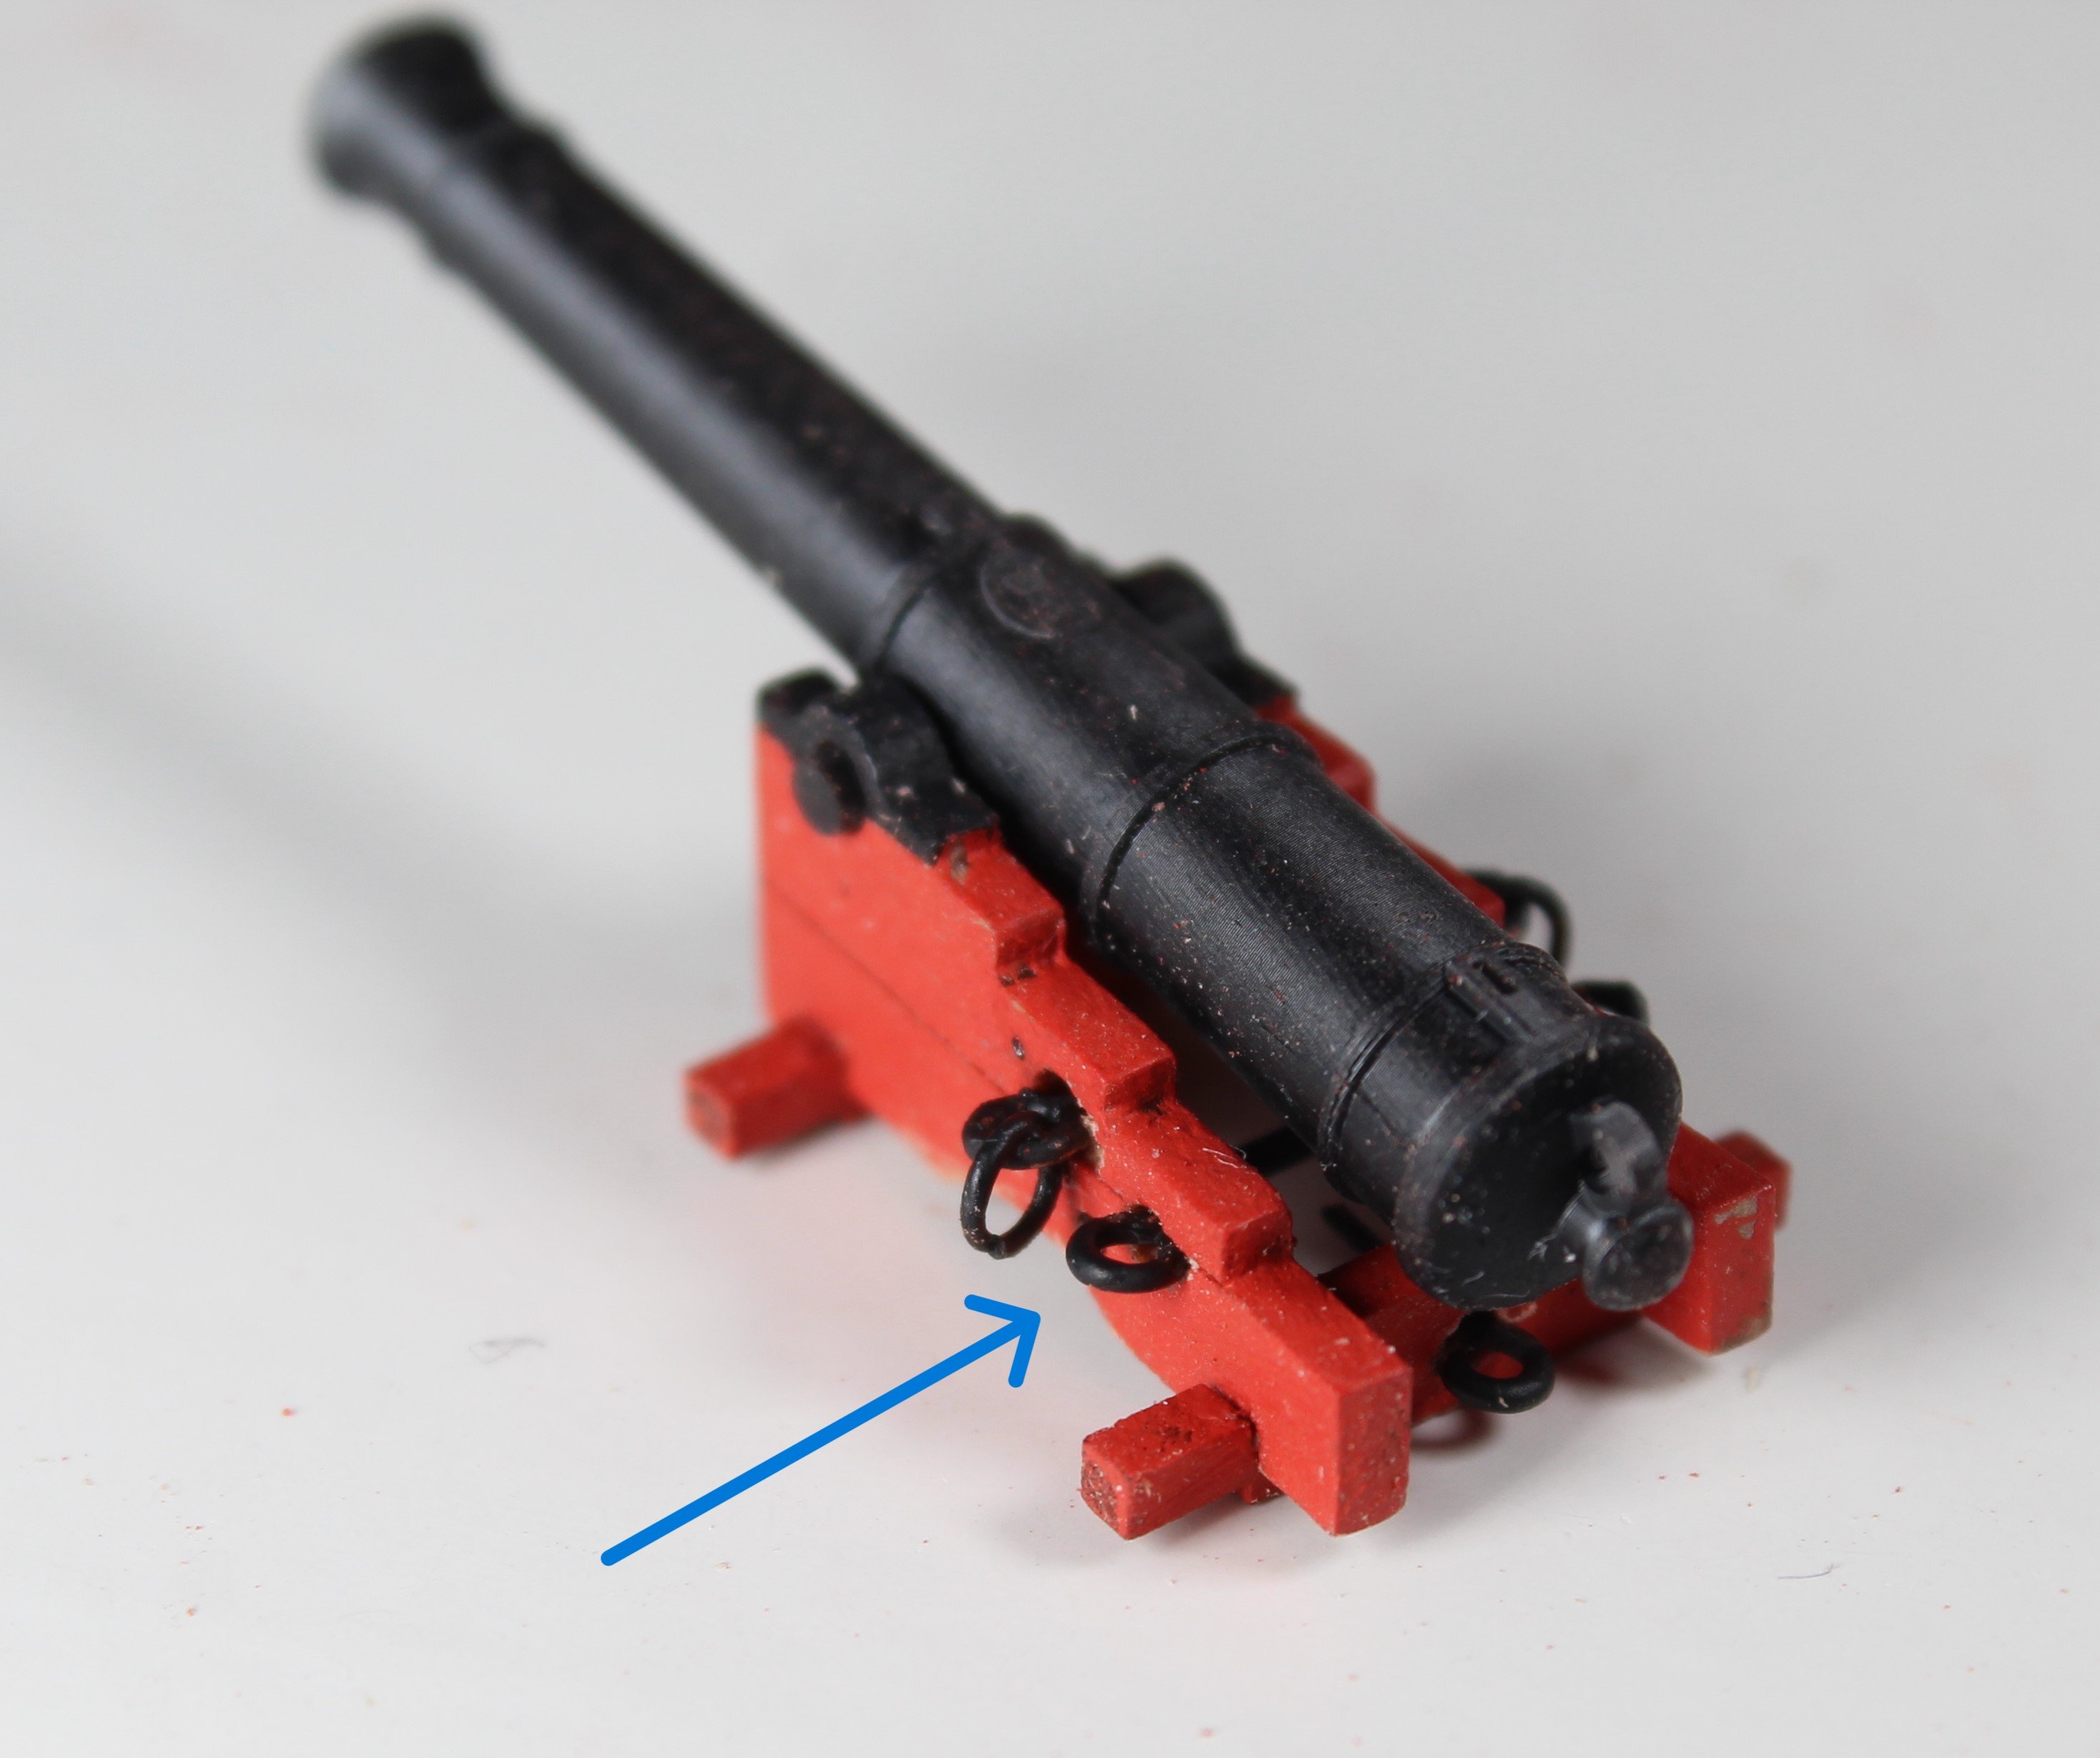
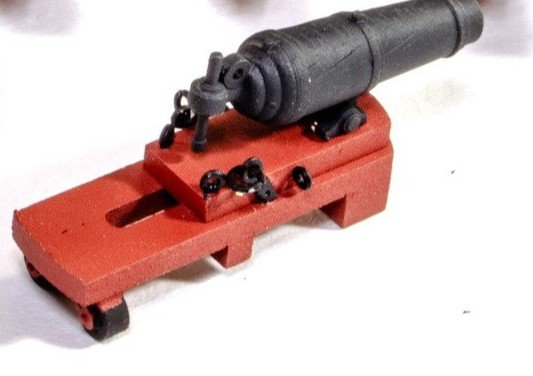
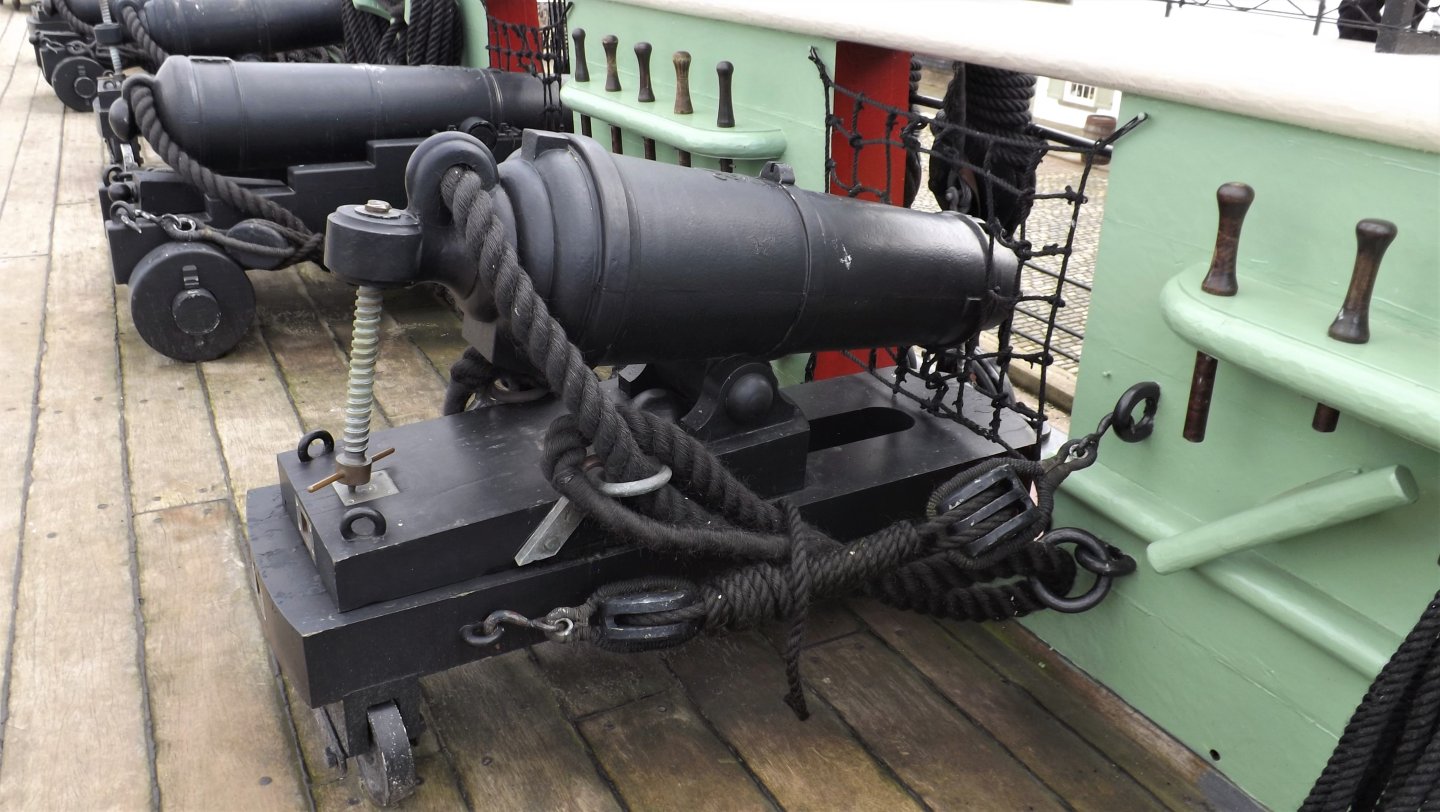
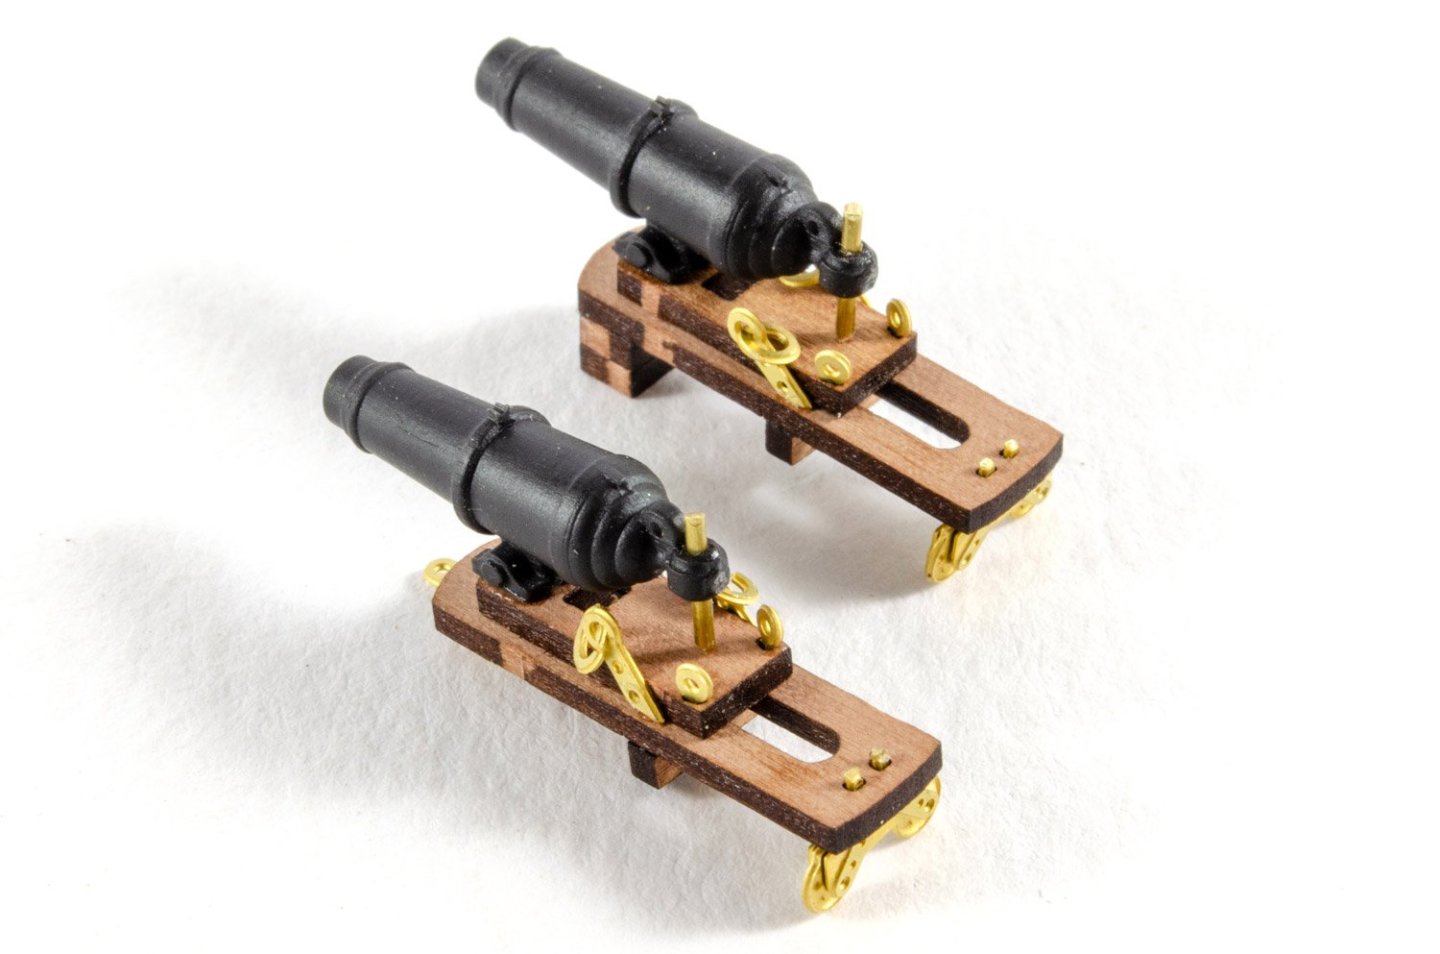
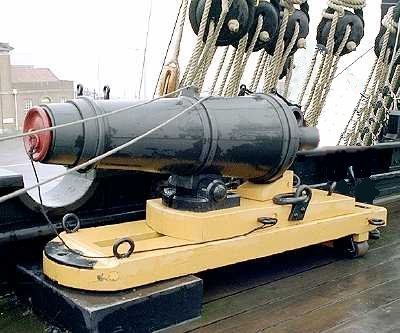
32-Pounder Carronade Eye Ring Strap Considerations I have been pondering how to fit the eye ring strap for the 32-Pounder carronades. When doing a little bit of research it would appear that these straps can be angled either forward facing or rear facing. I thought it might of some interest to some readers of my build log to follow my thought process in this and the conclusions I have reached to see how they should be positioned on the Harpy. Some Rear Facing Examples Referring to the prototype build log and the 68 pounders on HMS Victory these straps are angled to be rear facing, as can be seen in the two photos below. Forward Facing Examples Both the HMS Trincomalee carronades and the ship fittings offered on Vanguard Models web site are angled to be forward facing, as shown in the next two photos. Conclusion The ring strap on the HMS Victory carronade is positioned aft of the tackle eyebolt so it makes sense to angle the ring strap rear facing. The ring strap on the HMS Trincomalee carronade is positioned forward of the tackle eyebolt so it makes sense to angle the ring strap forward facing. On the Harpy carronades the ring strap is positioned aft of the slide bed tackle eyebolt therefore, as per prototype build, I believe it needs to be fitted as rear facing. I will position the slide bed tackle eyebolts so they are in line with the slide bed (as per both Victory and Trincomalee examples) rather than being at 90 degrees as shown on the prototype.
- 241 replies
-
- 8
-
-
- Vanguarrd Models
- Harpy
- (and 1 more)
-
Bob Though all you trial and tribulations you have built a fabulous model. Well done 👏 and many thanks for the mention.😀 Glenn (UK)
- 207 replies
-
- 2
-
-
- vanguard models
- Duchess of Kingston
- (and 1 more)
-
Hello Mark I found a nice routine of doing multiple identical tasks. I am being more critical of my work and I can see the improvements. Fingers crossed I can improve my planking.
- 241 replies
-
- 1
-
-
- Vanguarrd Models
- Harpy
- (and 1 more)
-
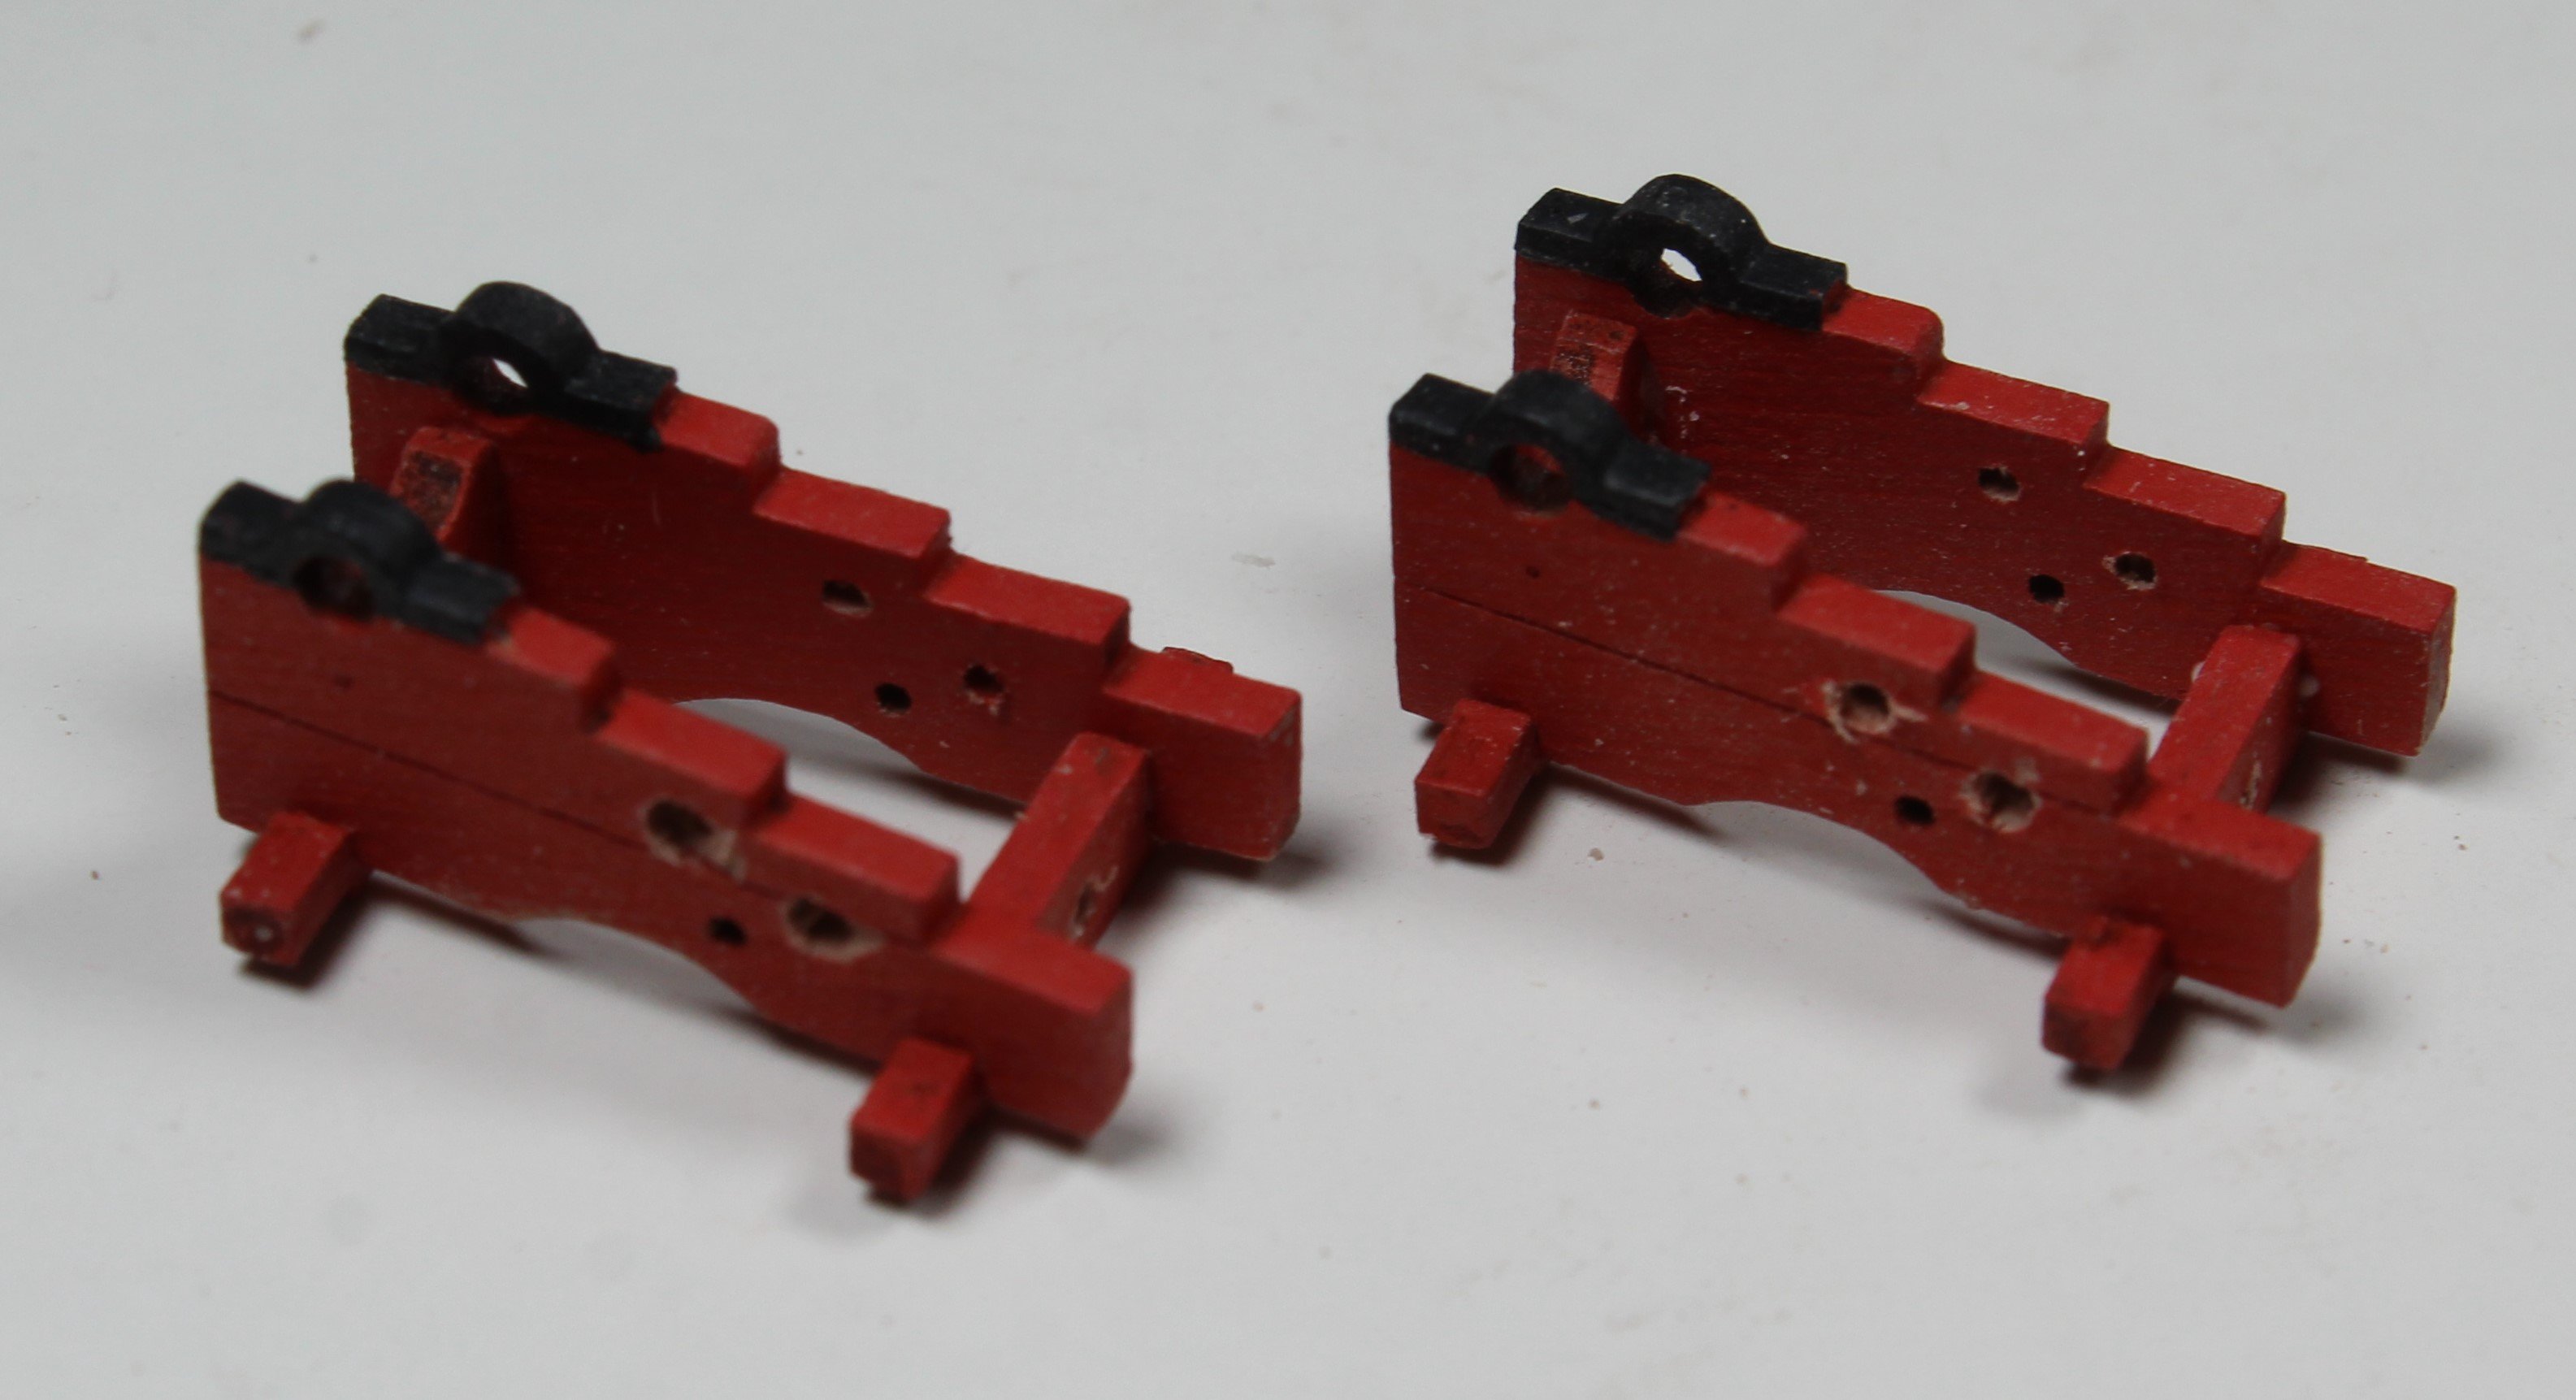
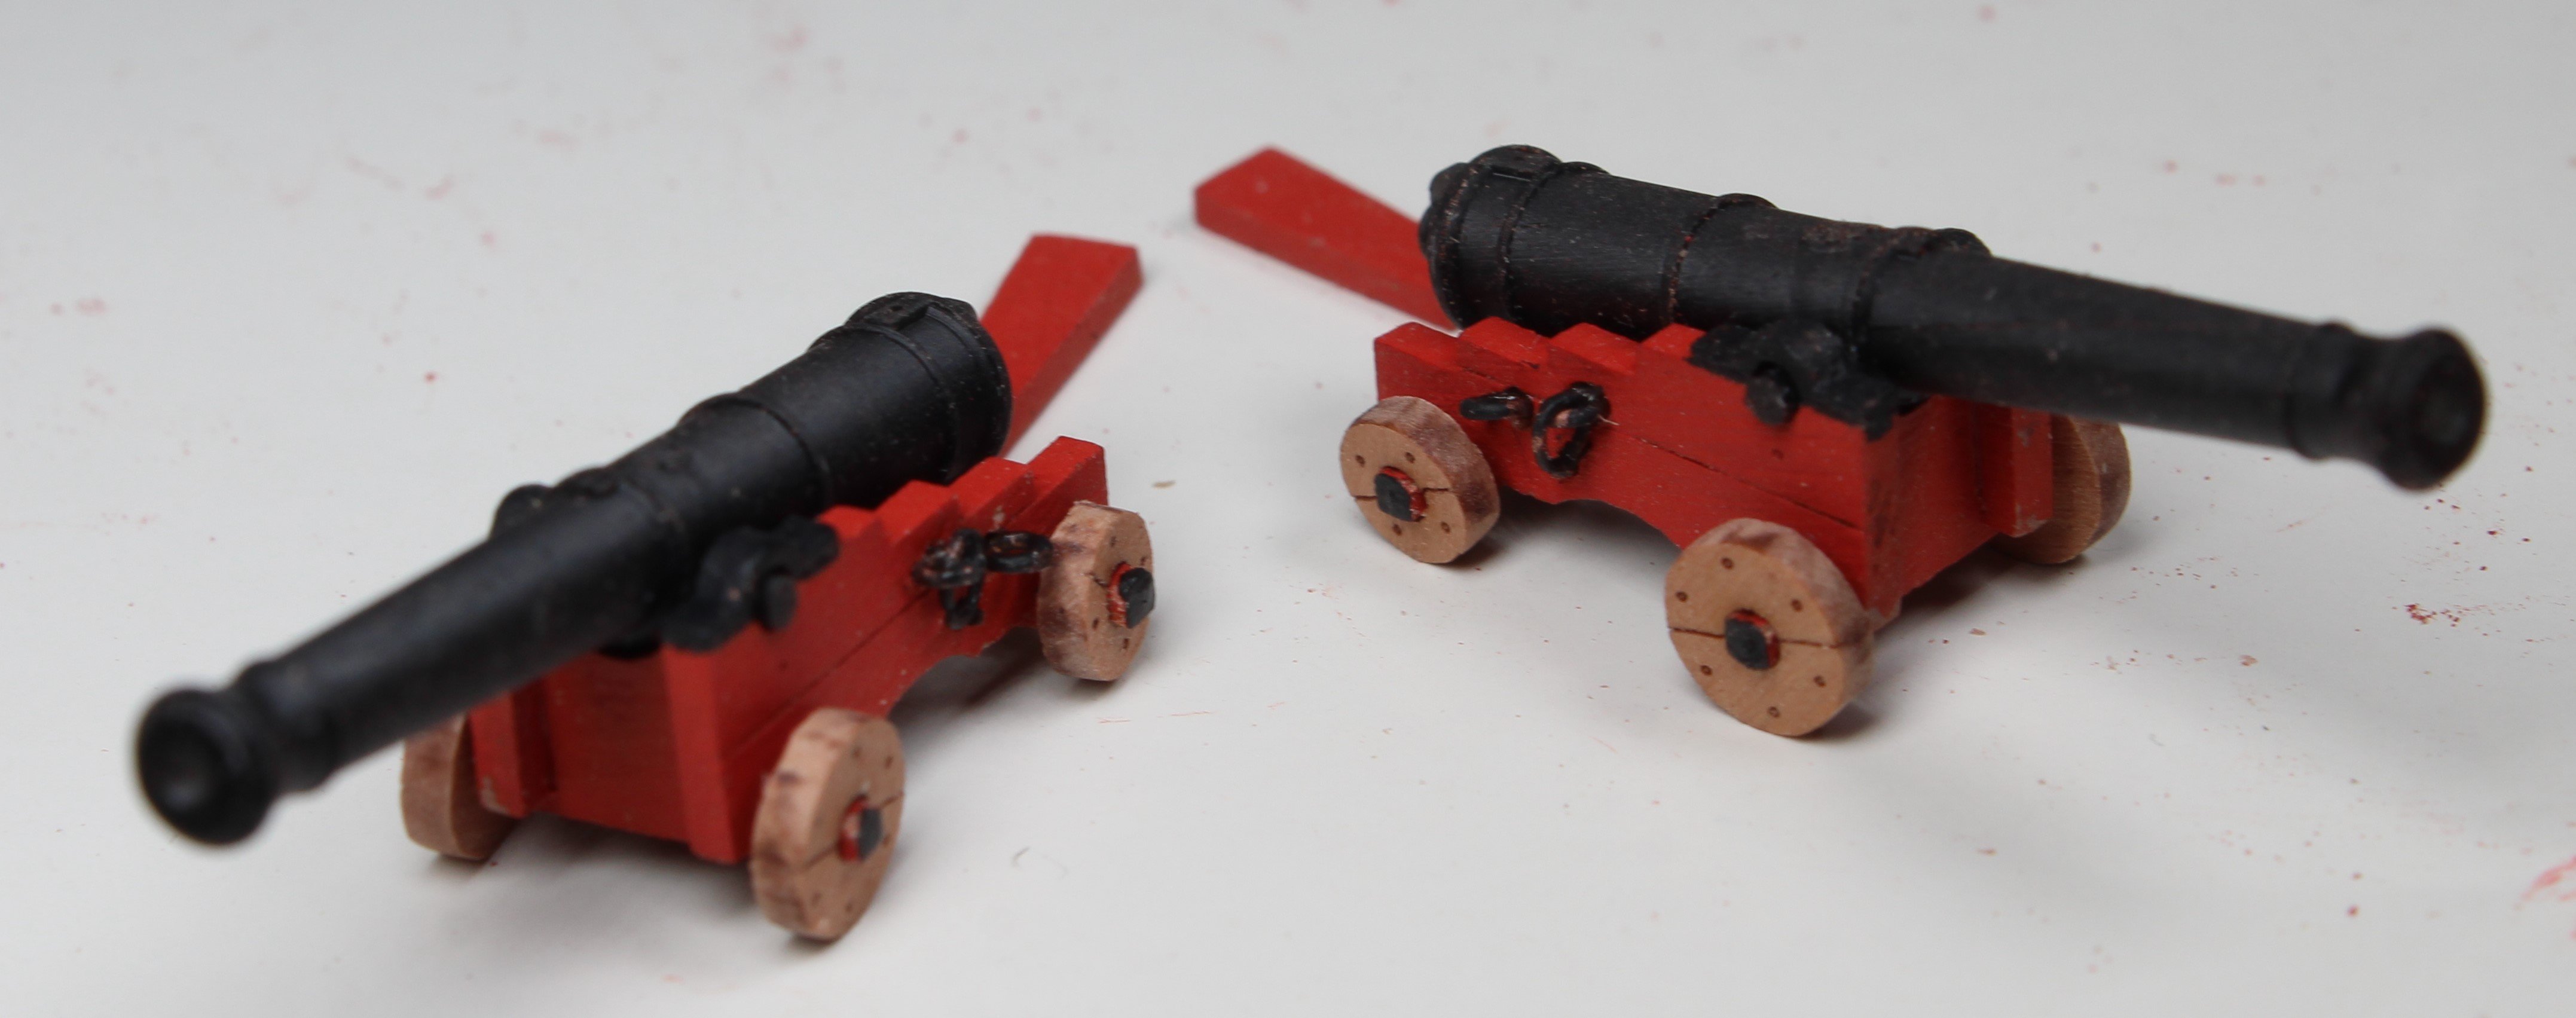
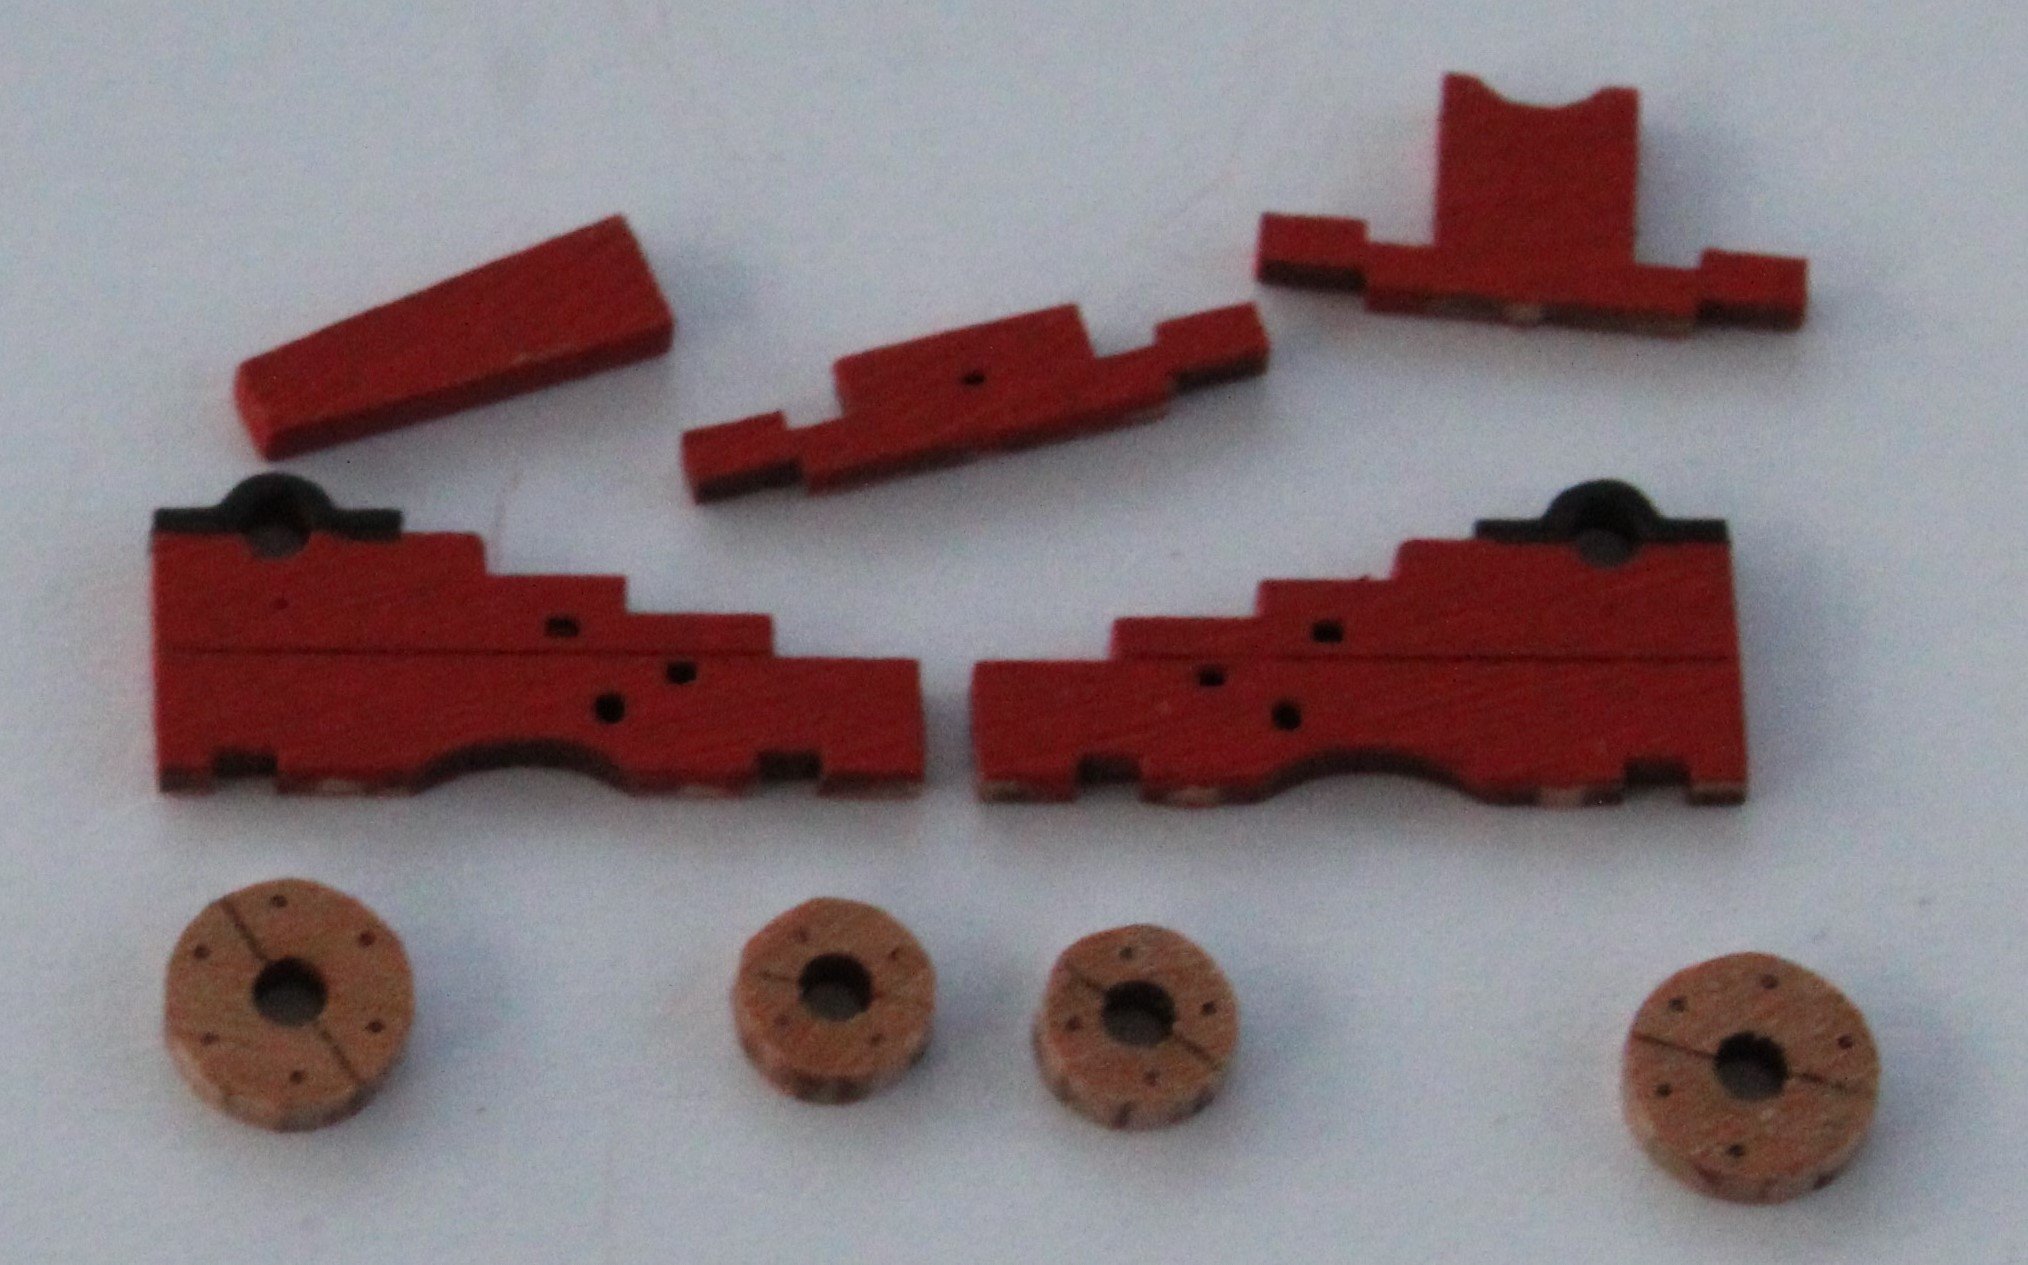
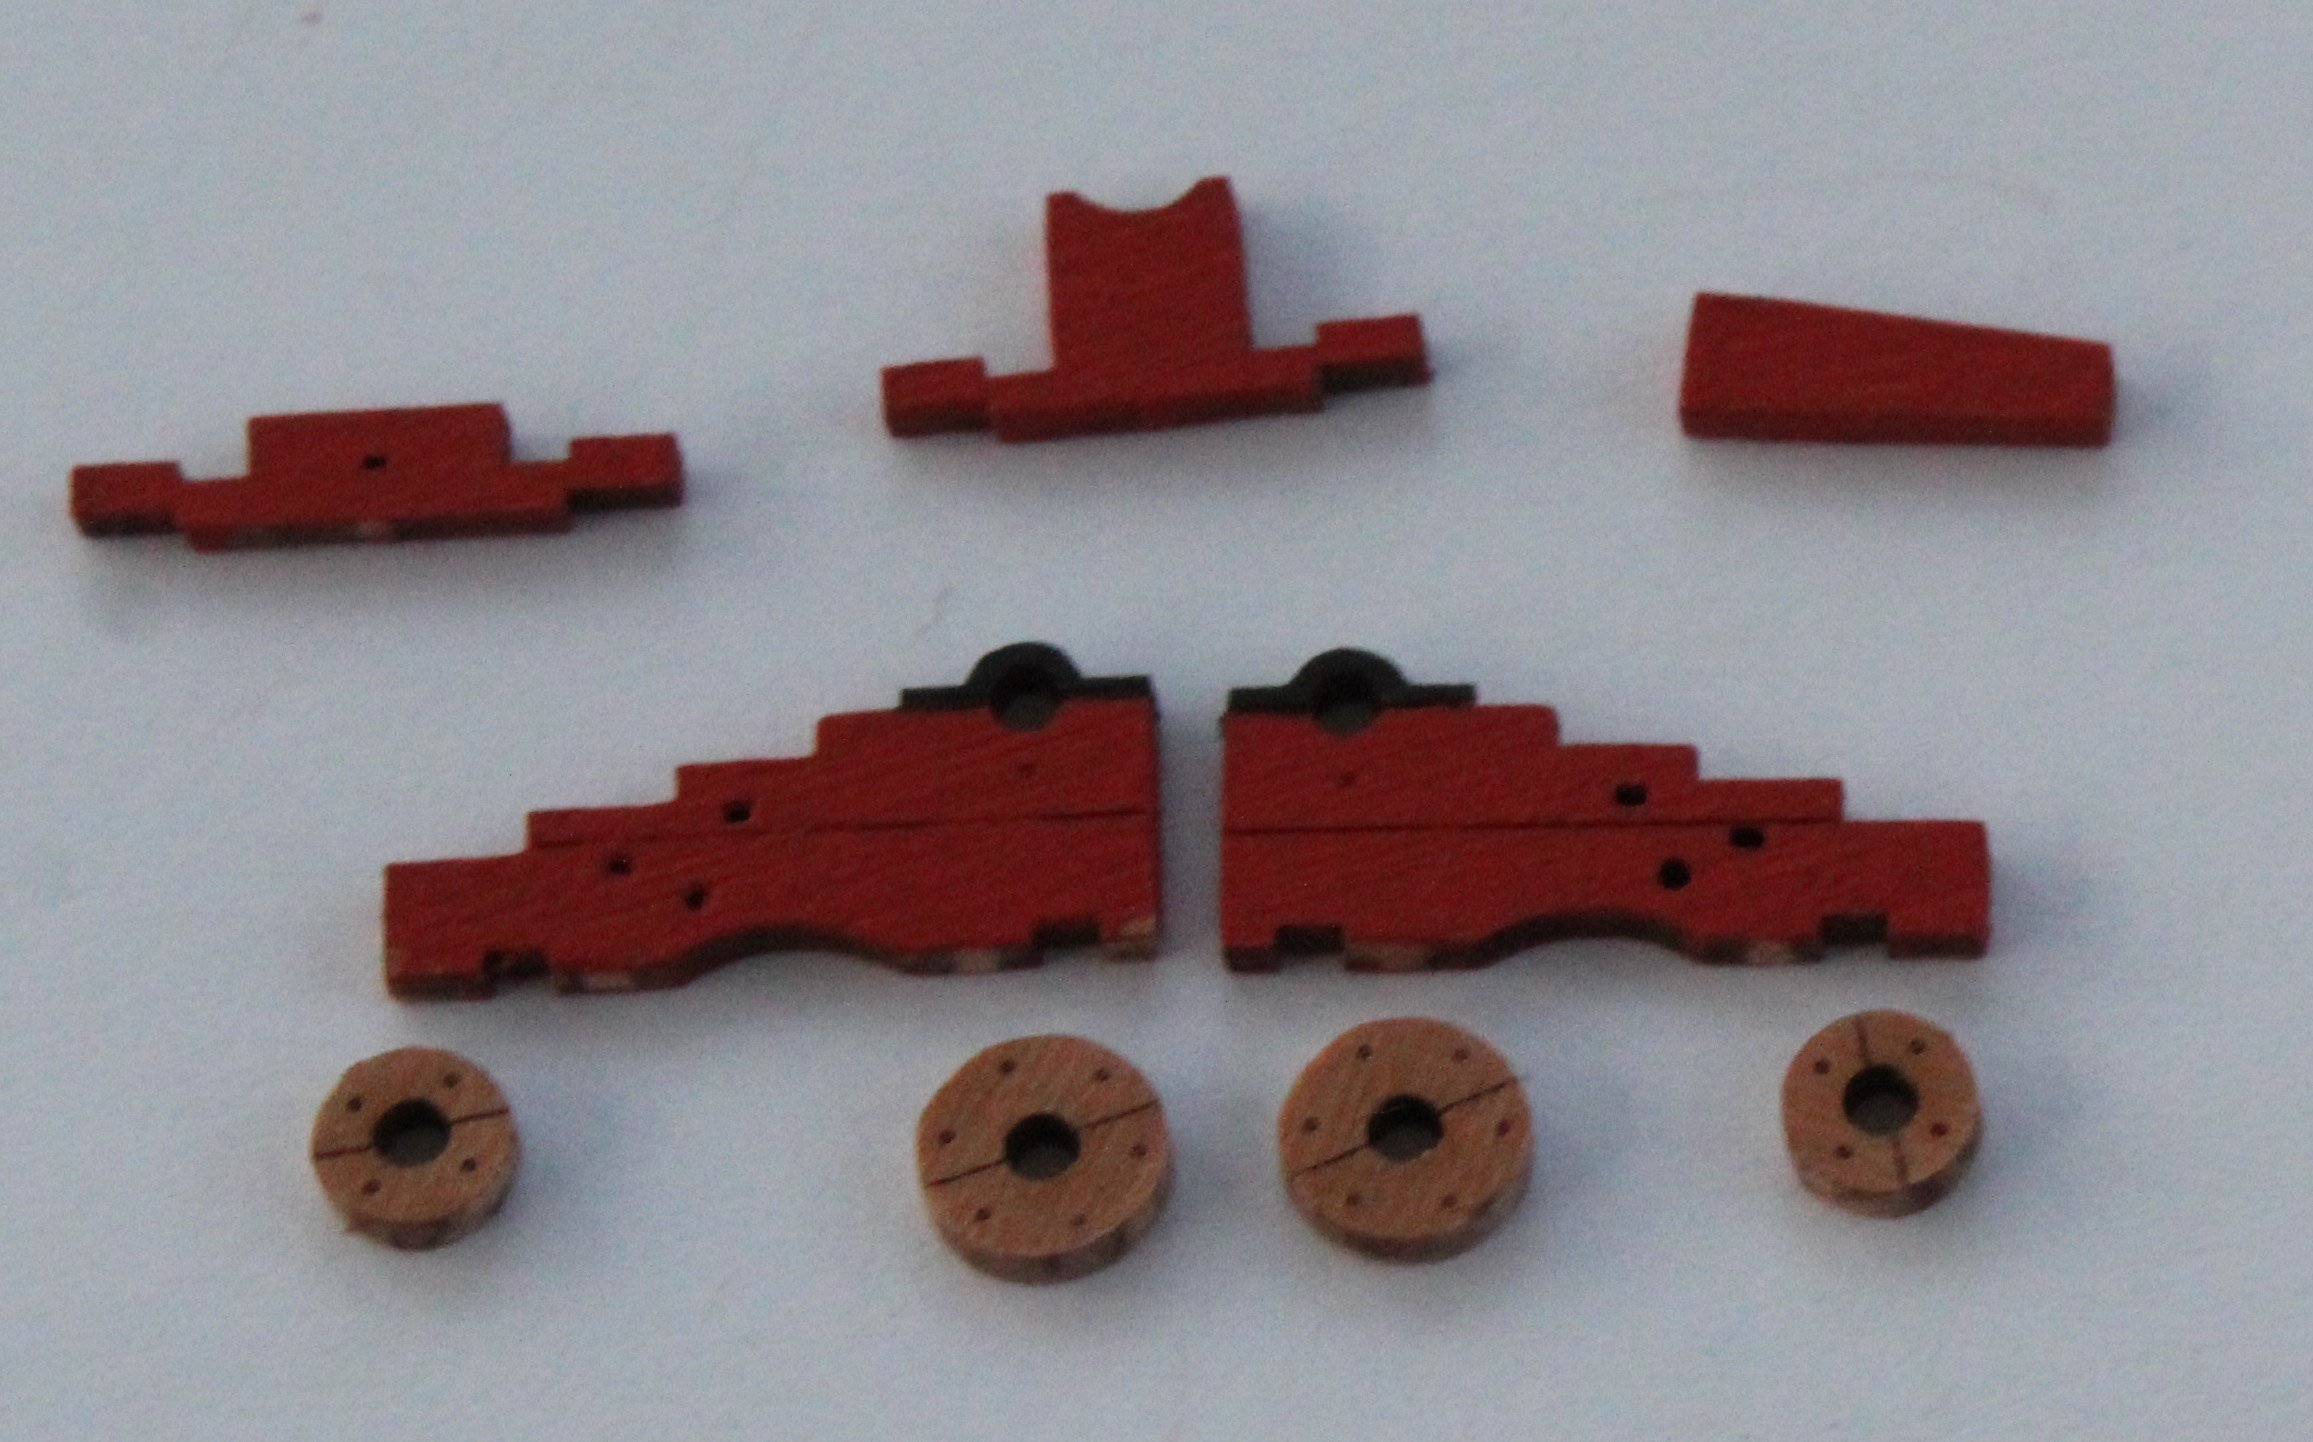
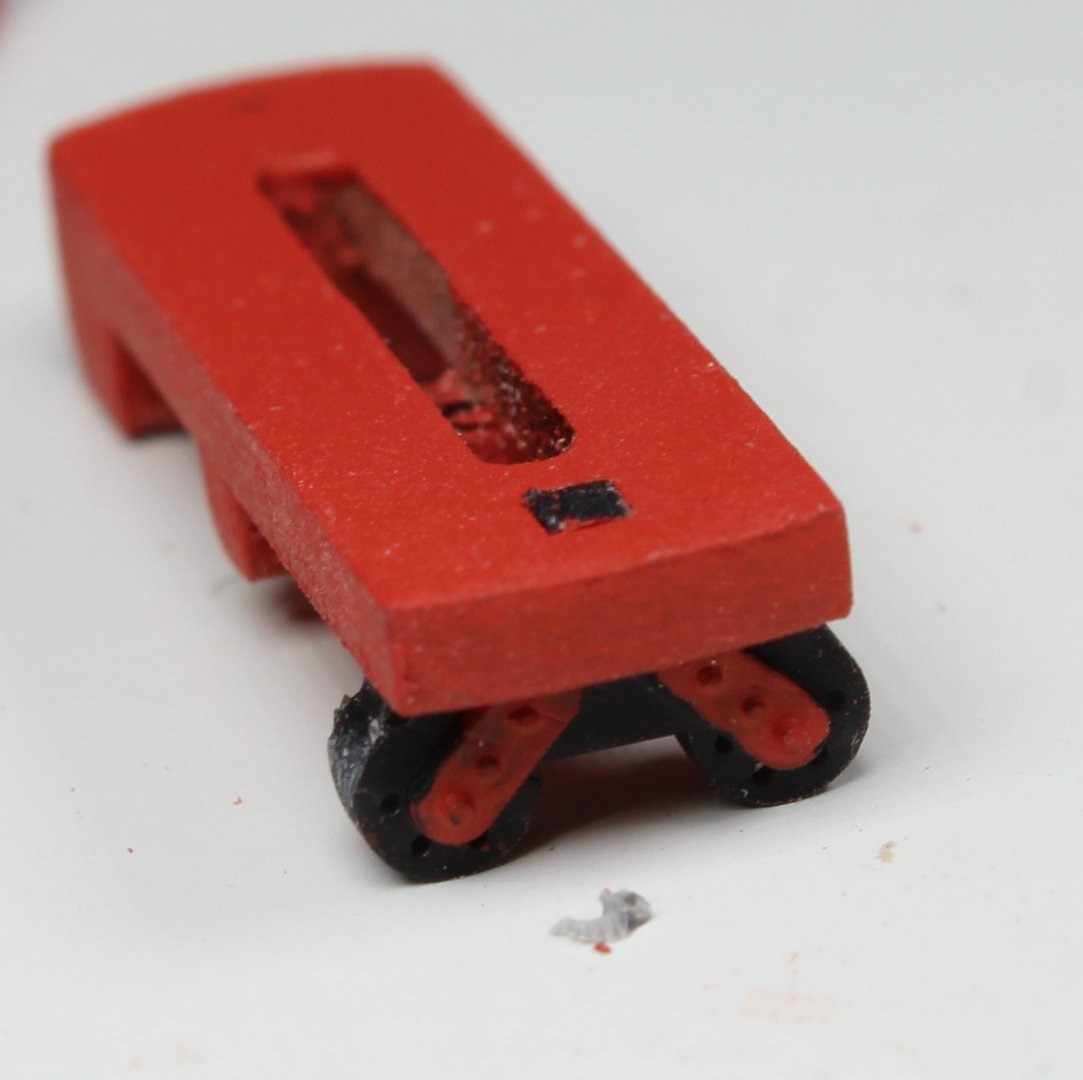
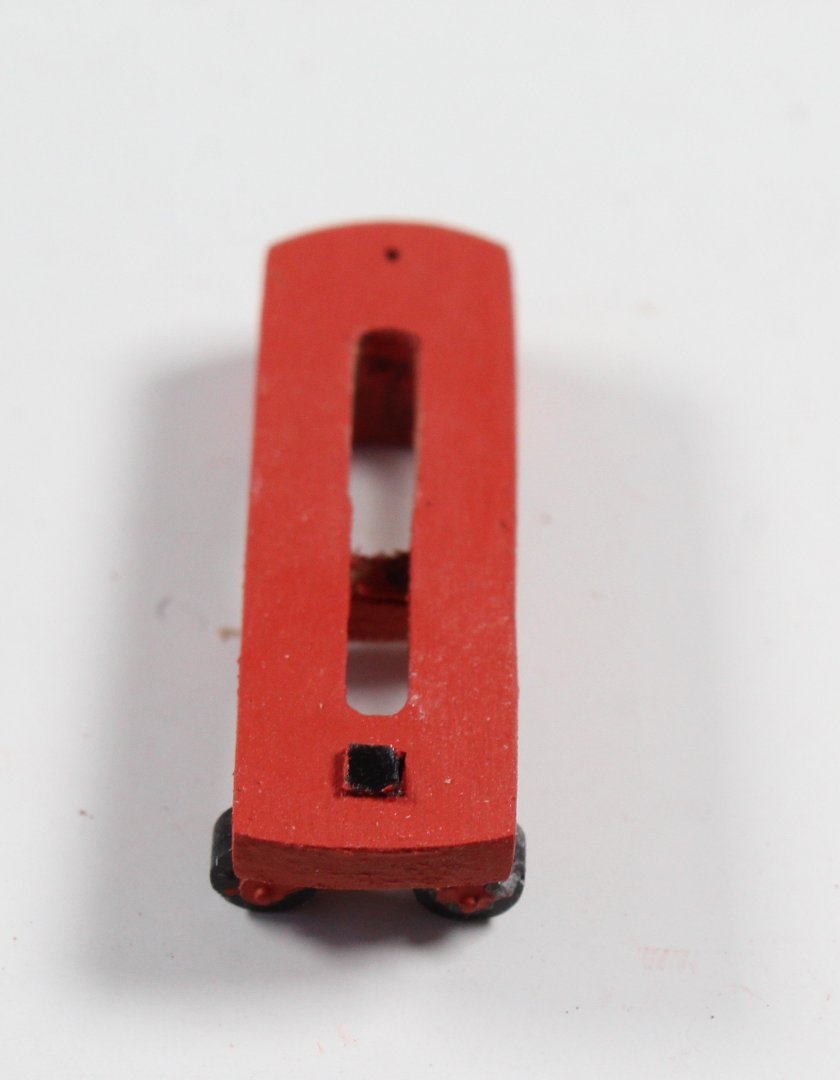
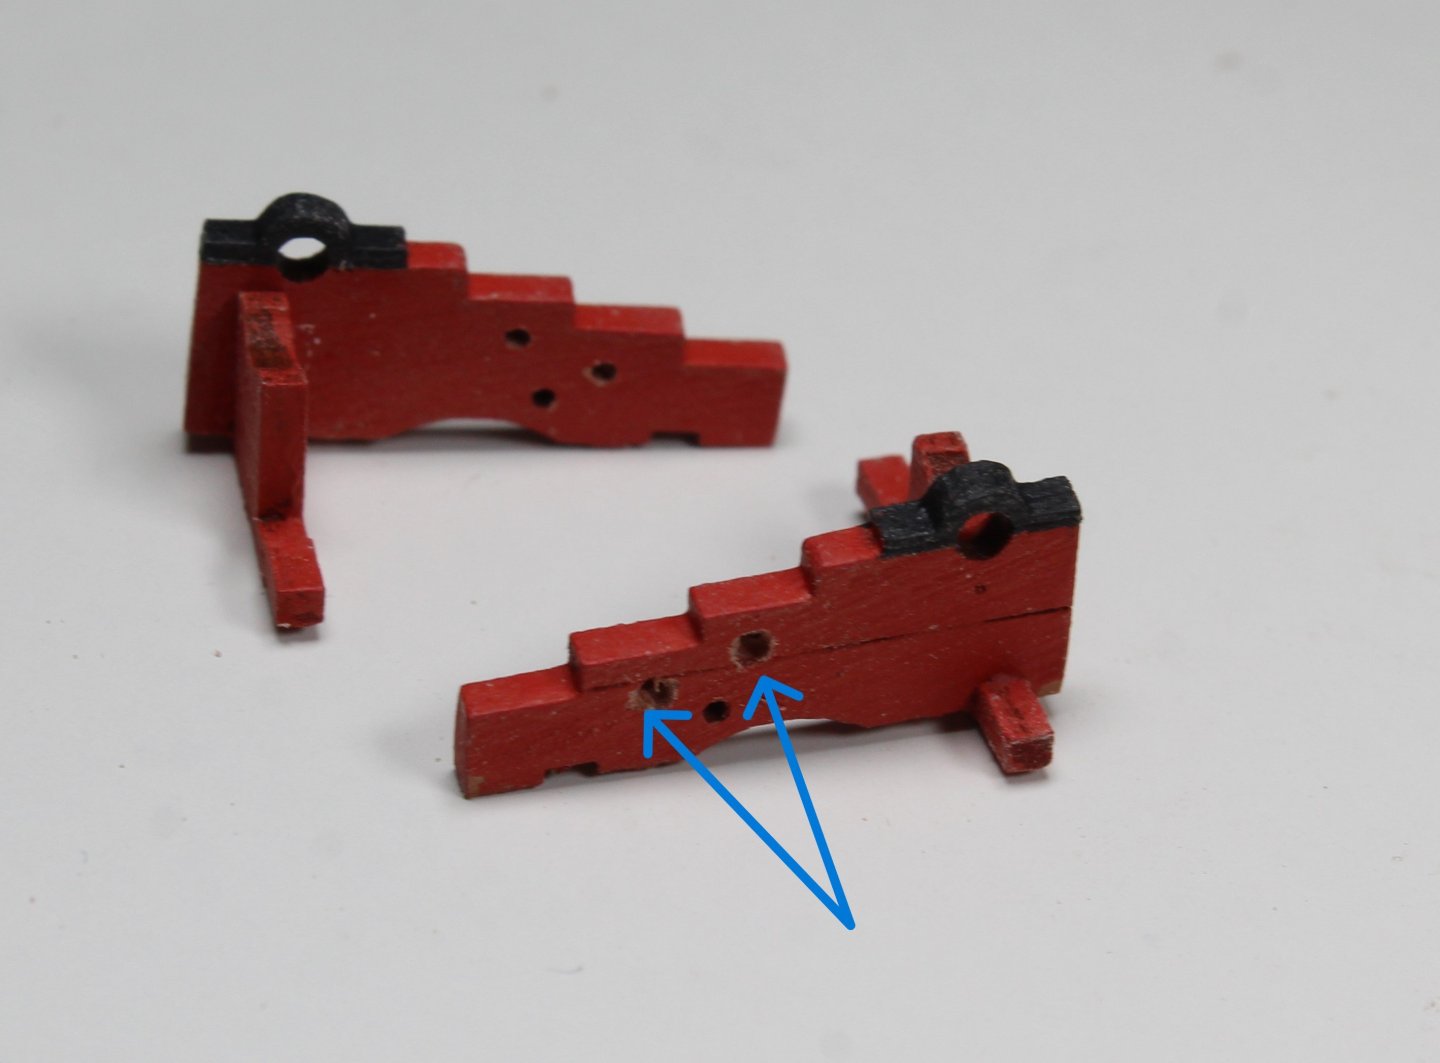
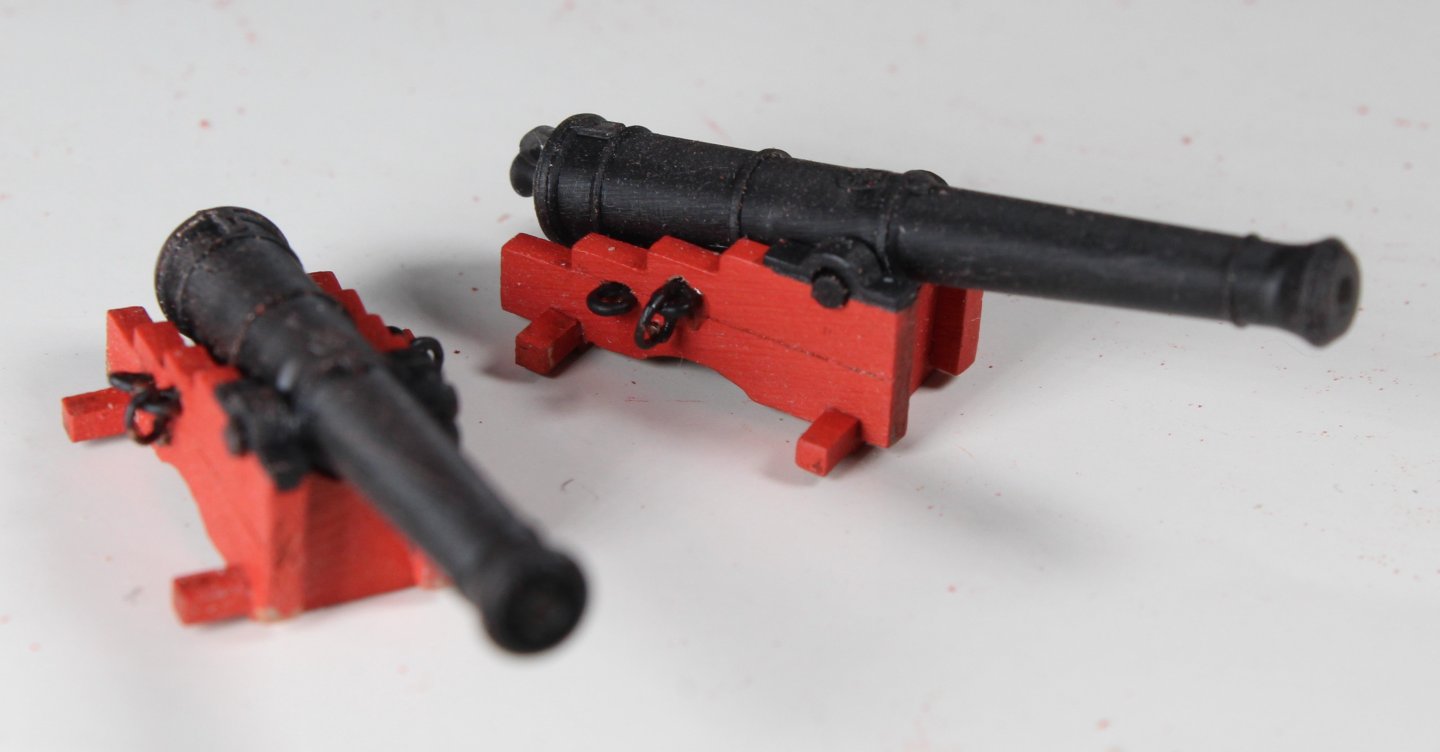
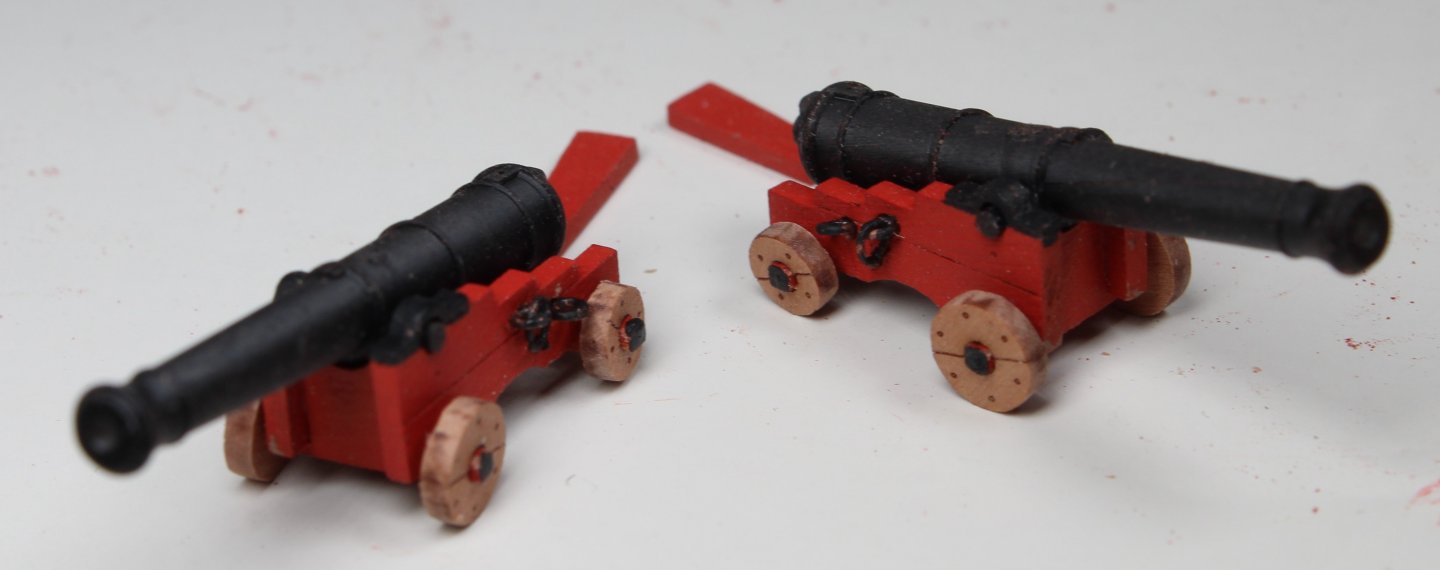
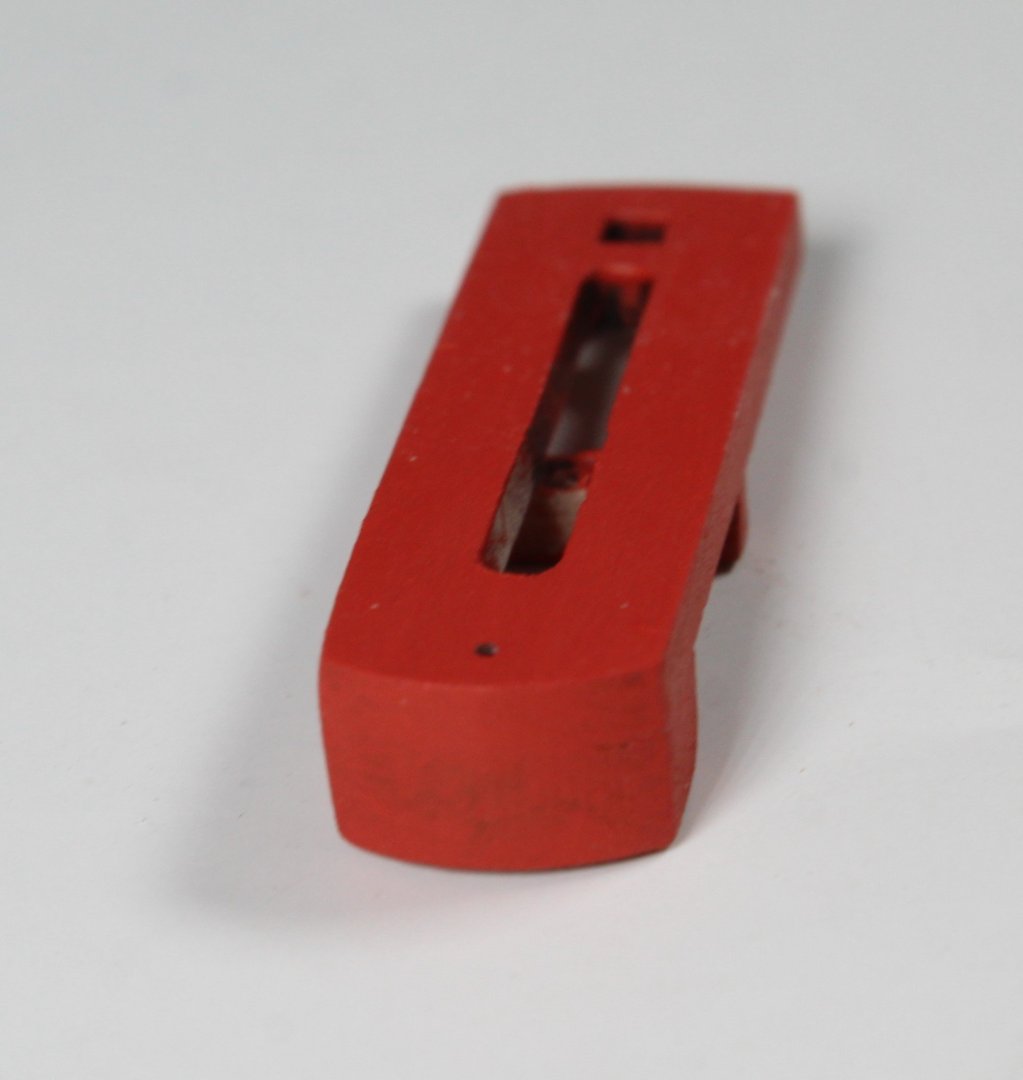
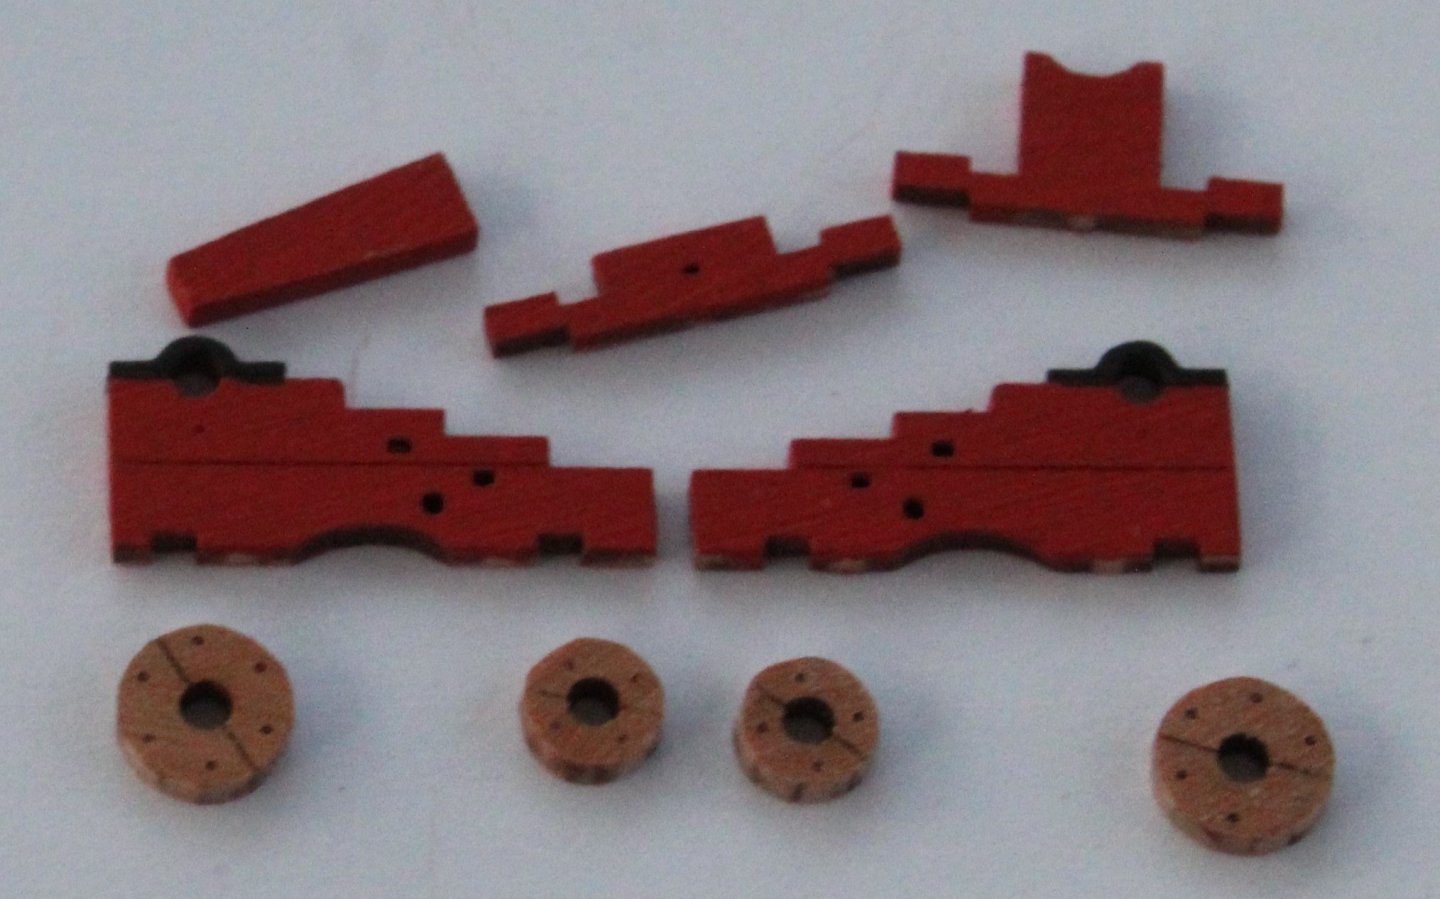
Today I have continued working on the 2 off 6 pounder cannons and the 16 off 32 pounder carronades. The first task today was to glue the right-hand carriage sides to the front axle. In the photo below you will note that the holes for the eyebolts have been opened up. With thanks to @Blue Ensign I have noted that these eyebolts are actually metal loops which set in the carriage sides. In the next photo I have competed the basic cannon carriage assembly. As can be seen in the next two photos the Amati eyebolts have been set in the carriage sides and I have added 2mm rings to the leading loops for the breach rope. To complete the work the wheels have been added, noting I have added a touch of black paint to the end of the wheel axles. I have not added the quoin's as I need to set the cannons on the deck, once fitted, so I can set the cannons to the right level of elevation. Moving in to the carronades the basic assembly of the carriages and slide beds has been completed, as shown in the next photo. Once the laser char had been removed the carriages and slide beds were painted flat red. As can be seen in the photo below I have very happy with this carriage. After a closer inspection of all the carriages there is a little bit of sanding work required to get a neat finish on some of them. When looking at the slide beds I am very happy with the majority of them, but there are one or two which will require a bit of filling and sanding. In the final photo I am making sure the slide beds locate in the carriages, noting I have not sorted out the tops of slide beds.


- 241 replies
-
- 13
-
-
- Vanguarrd Models
- Harpy
- (and 1 more)
-
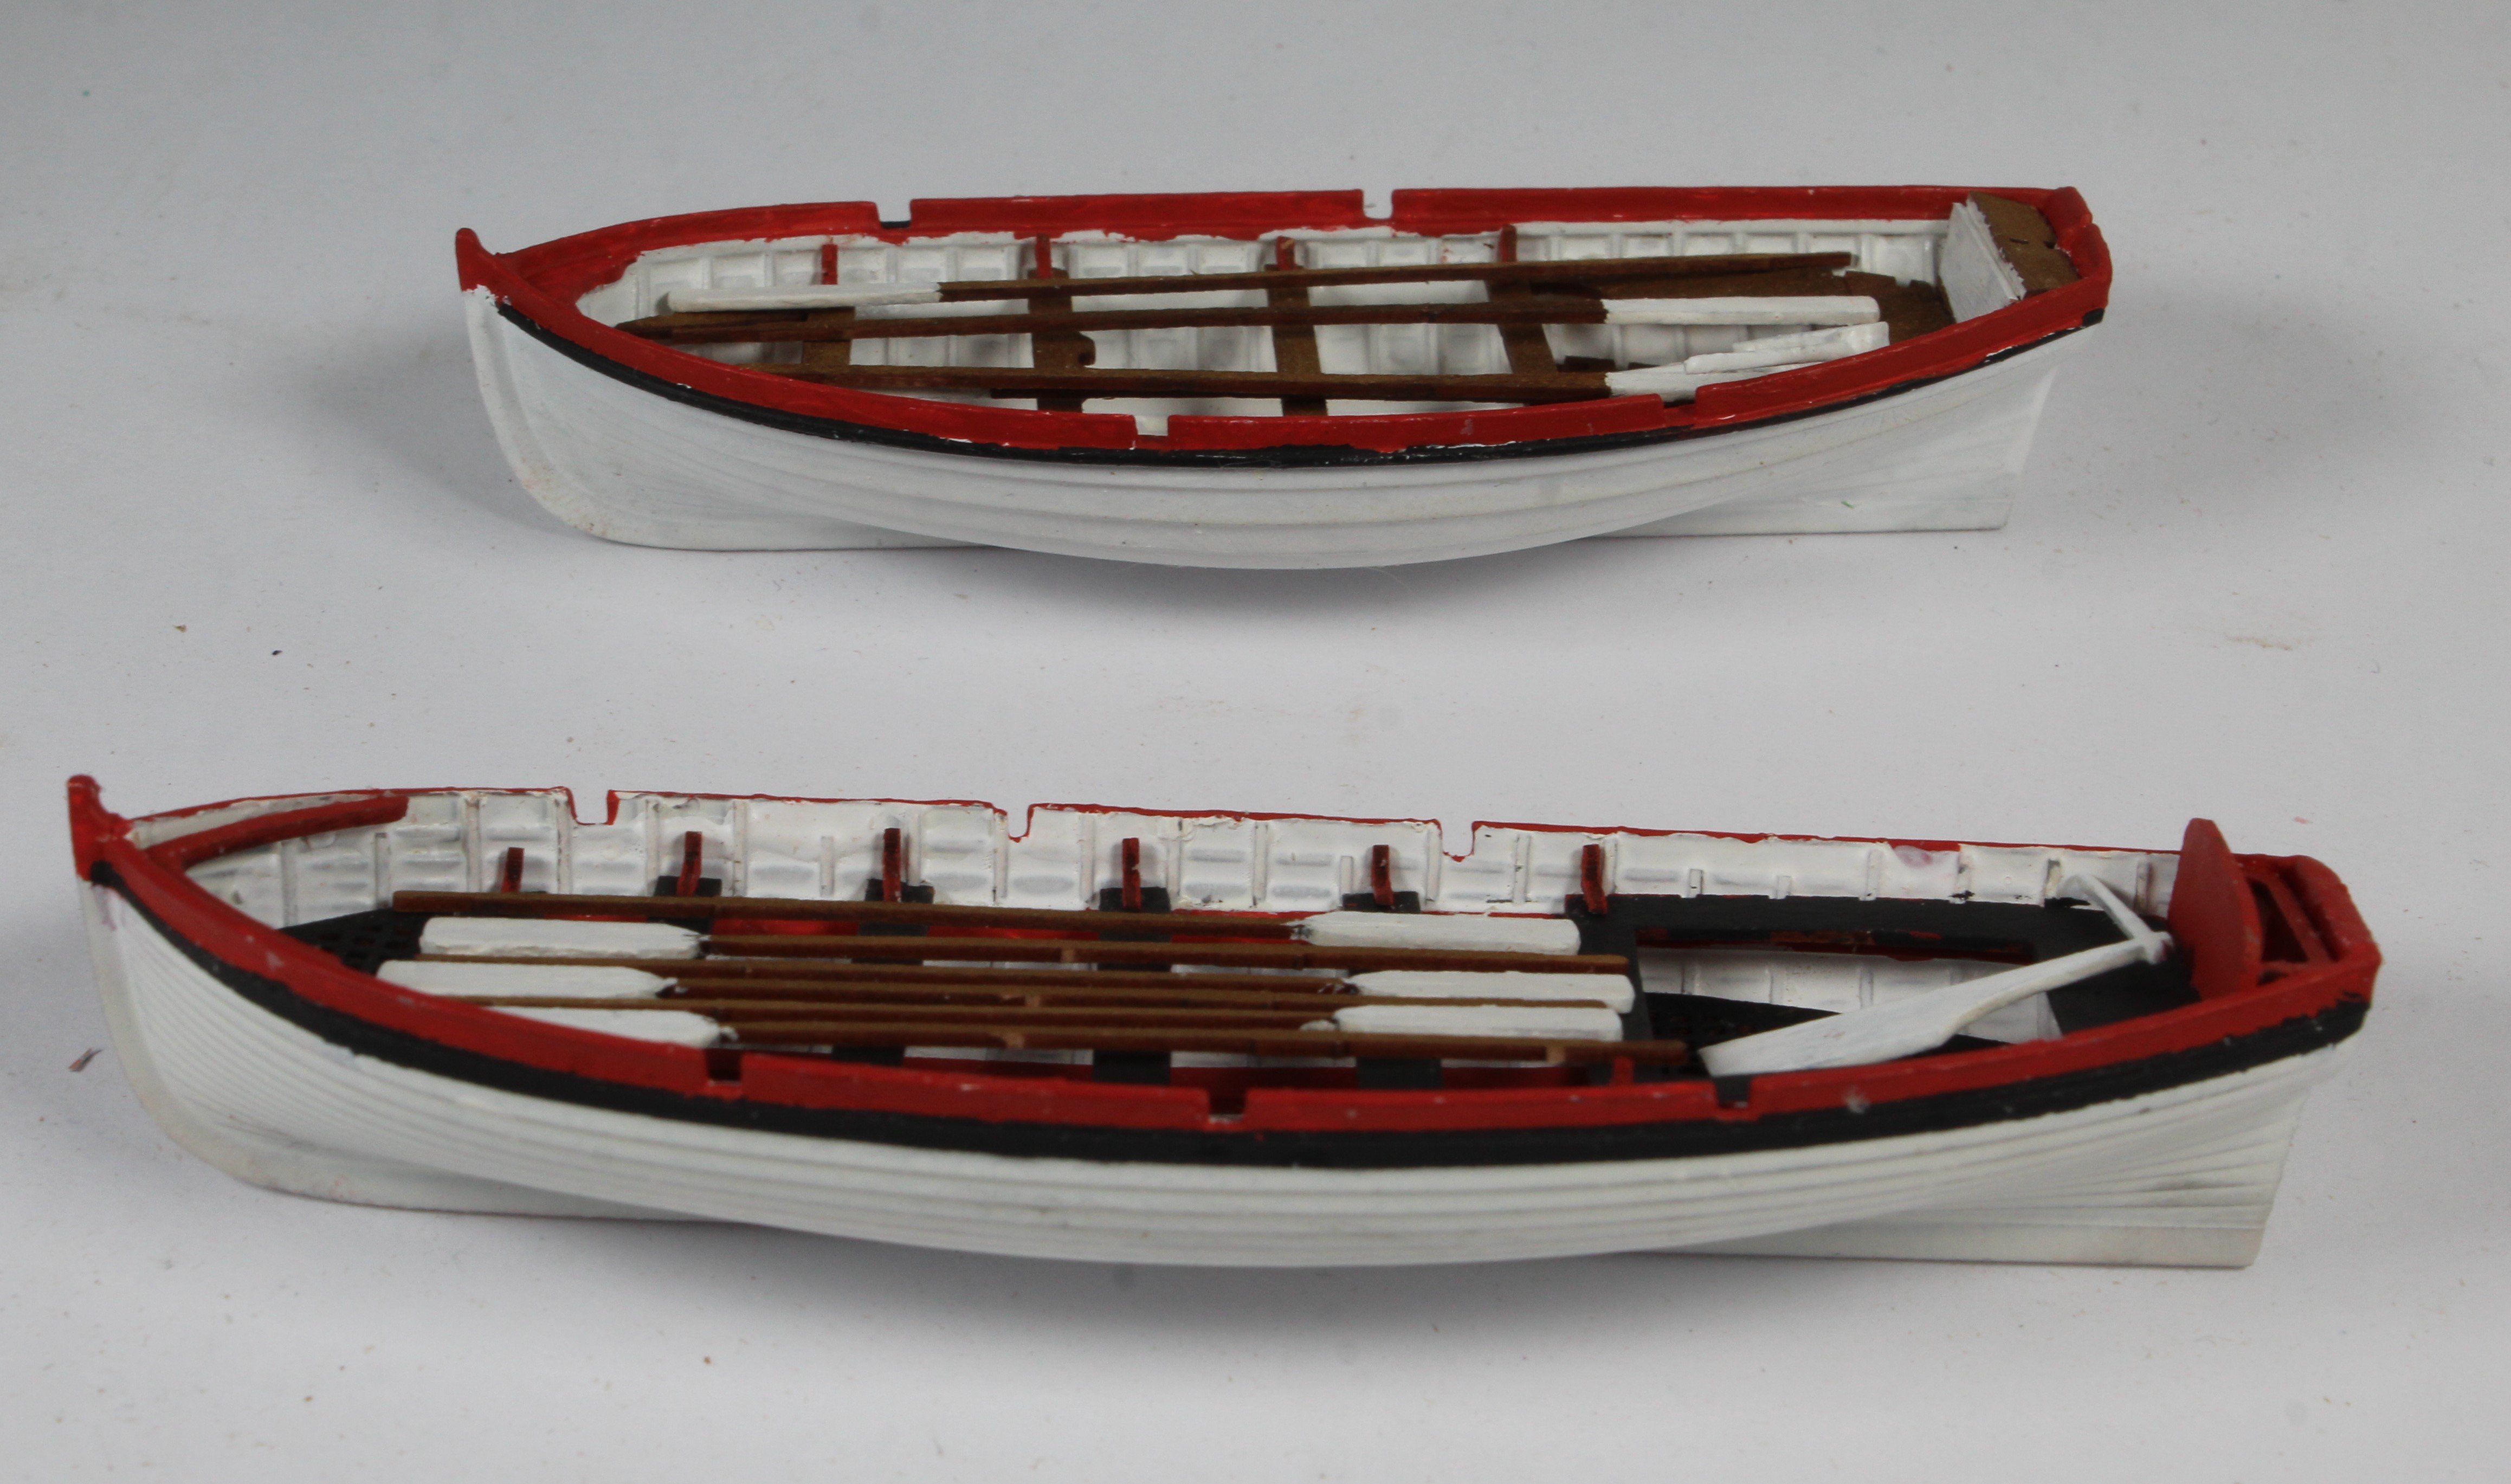
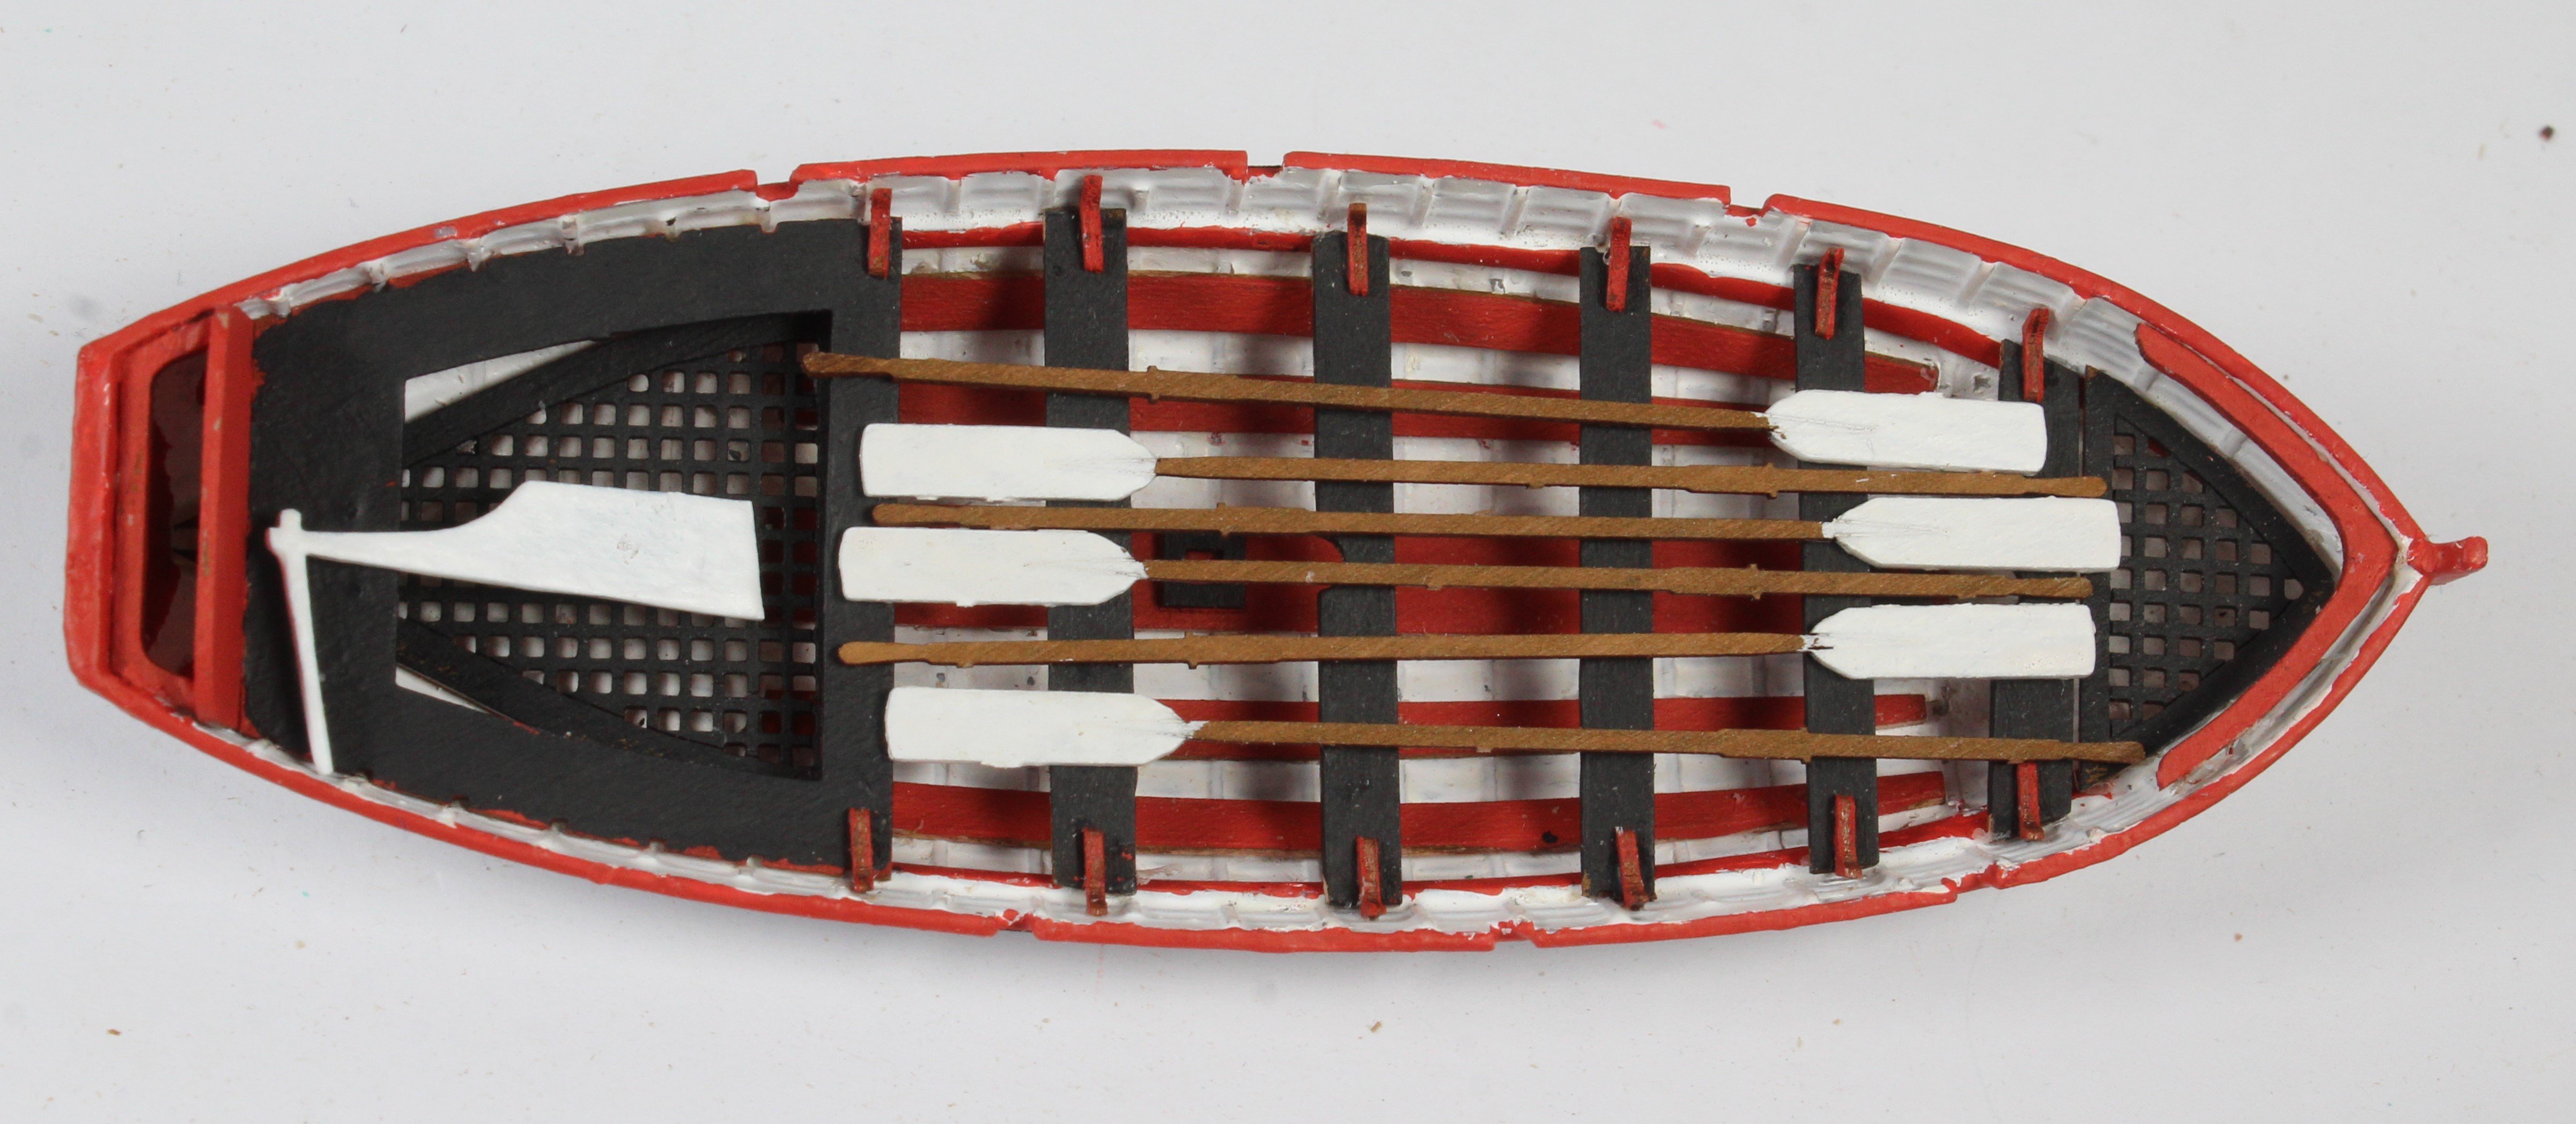
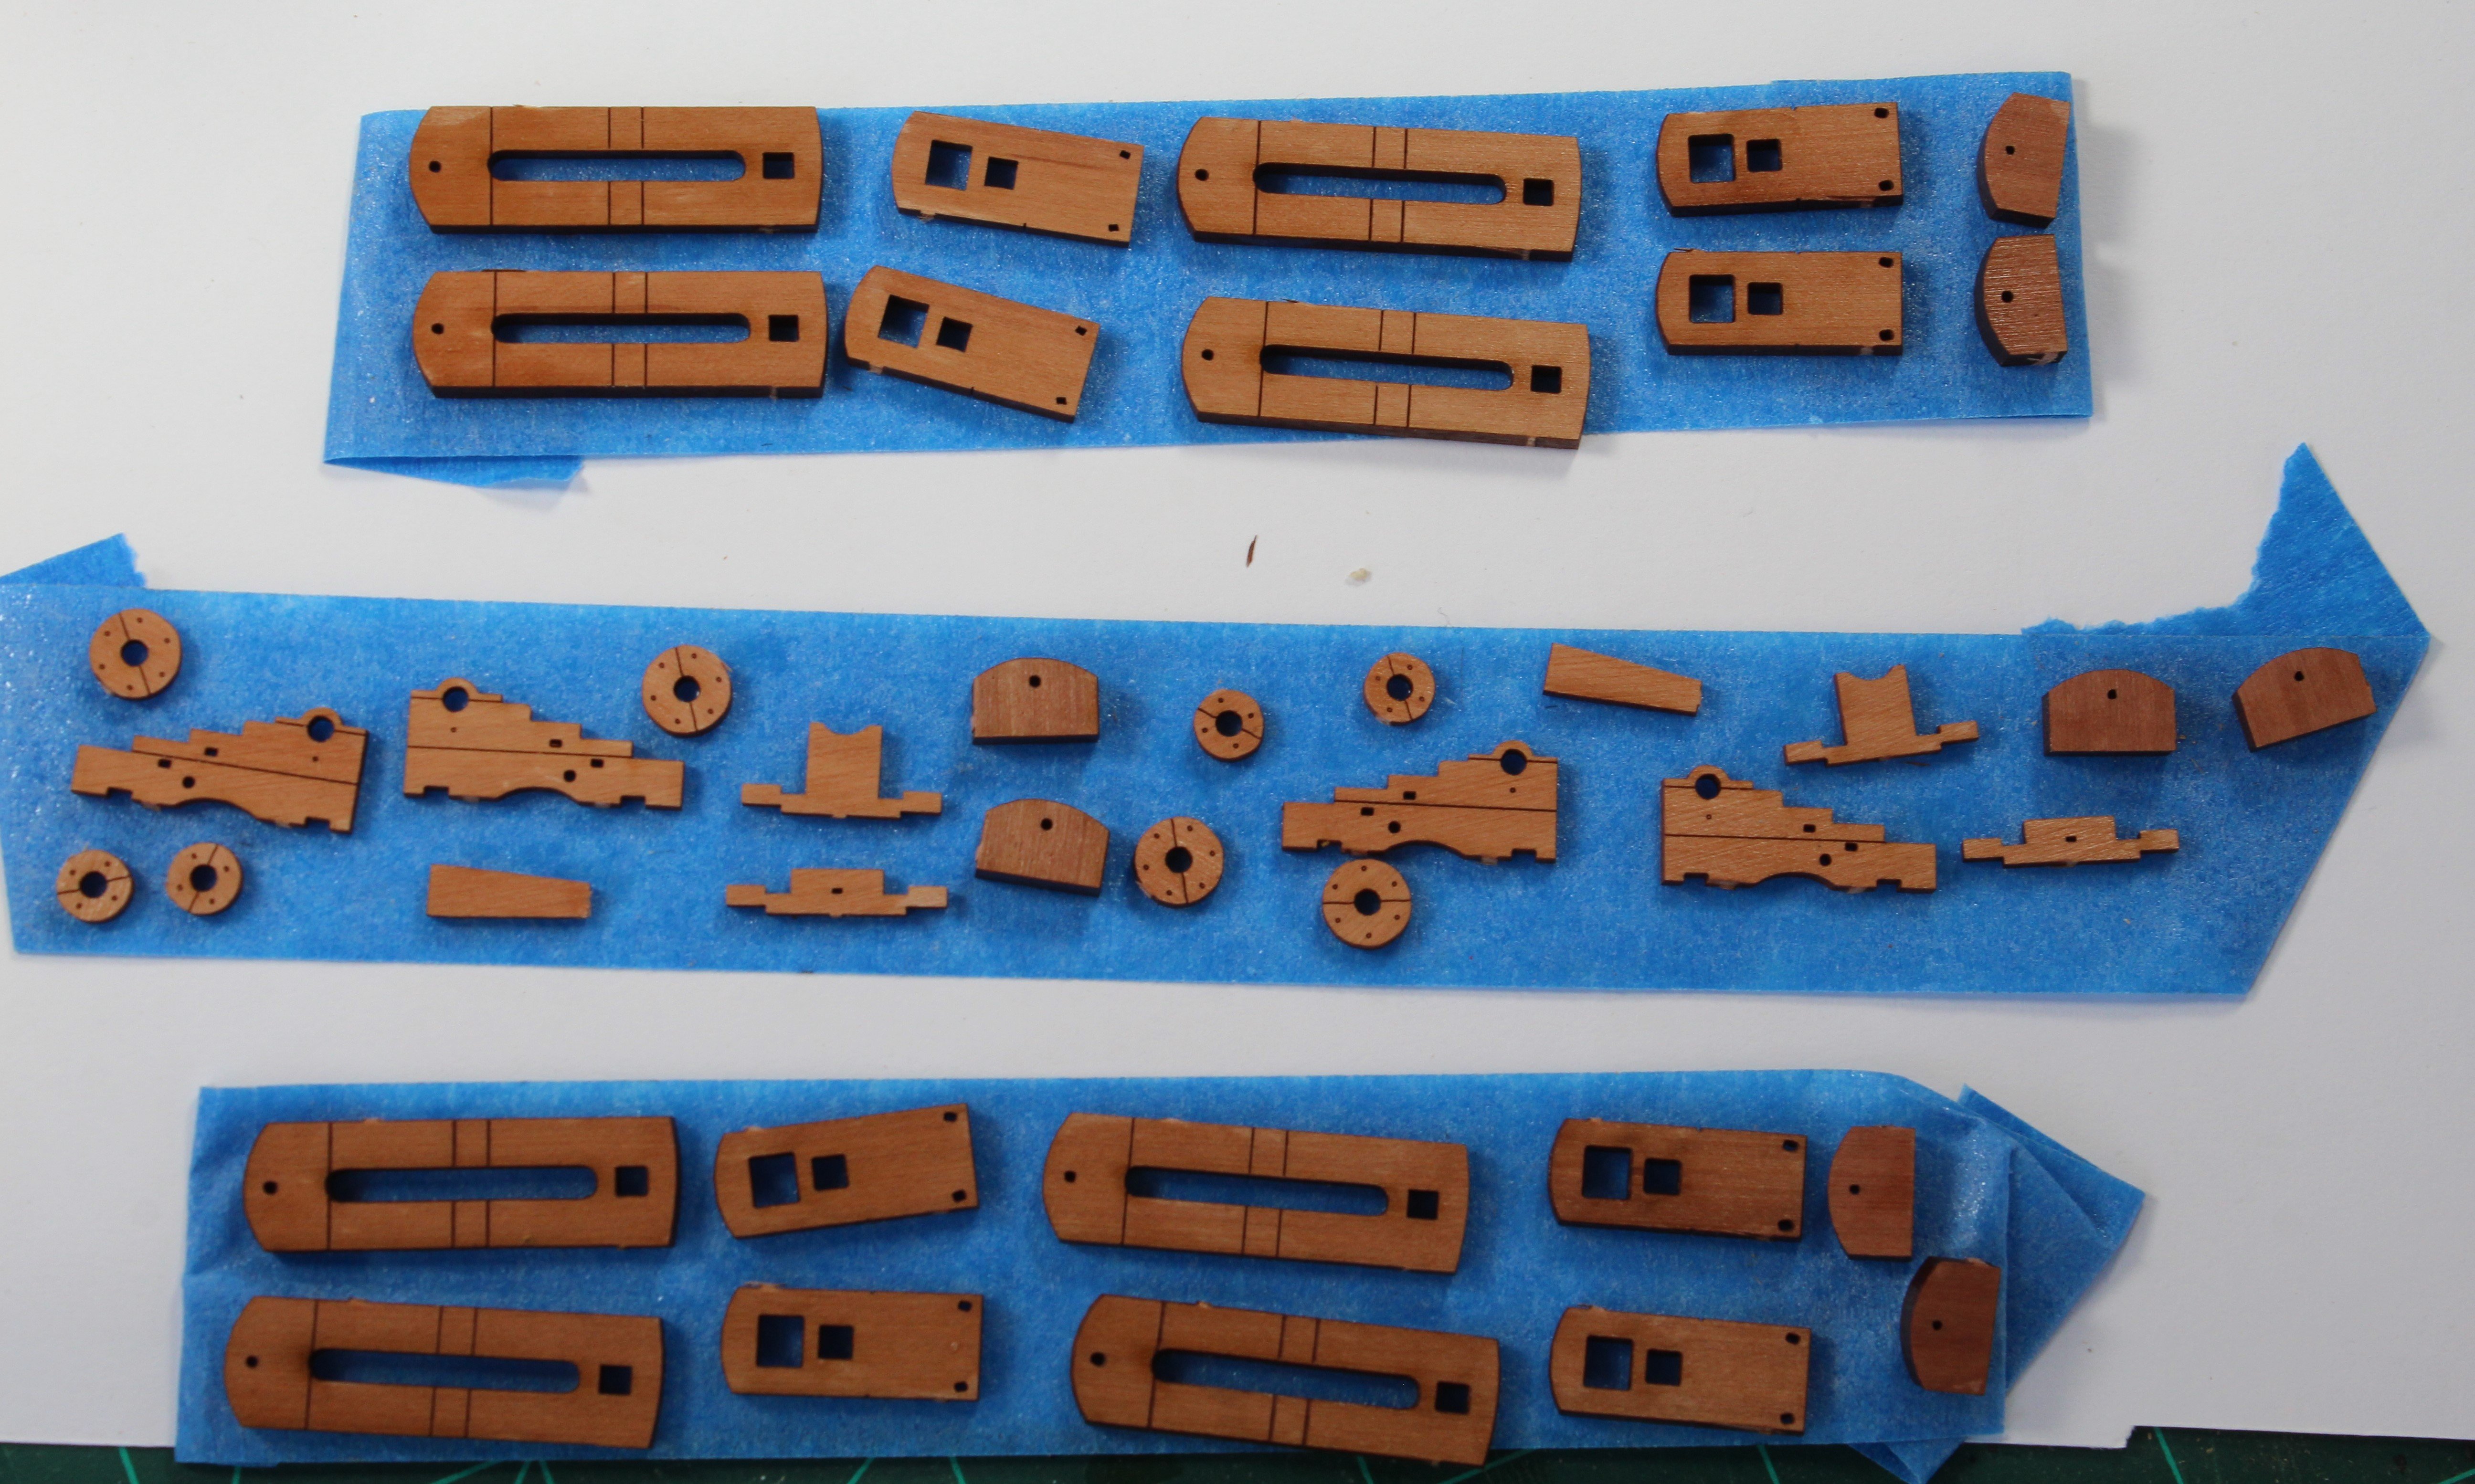
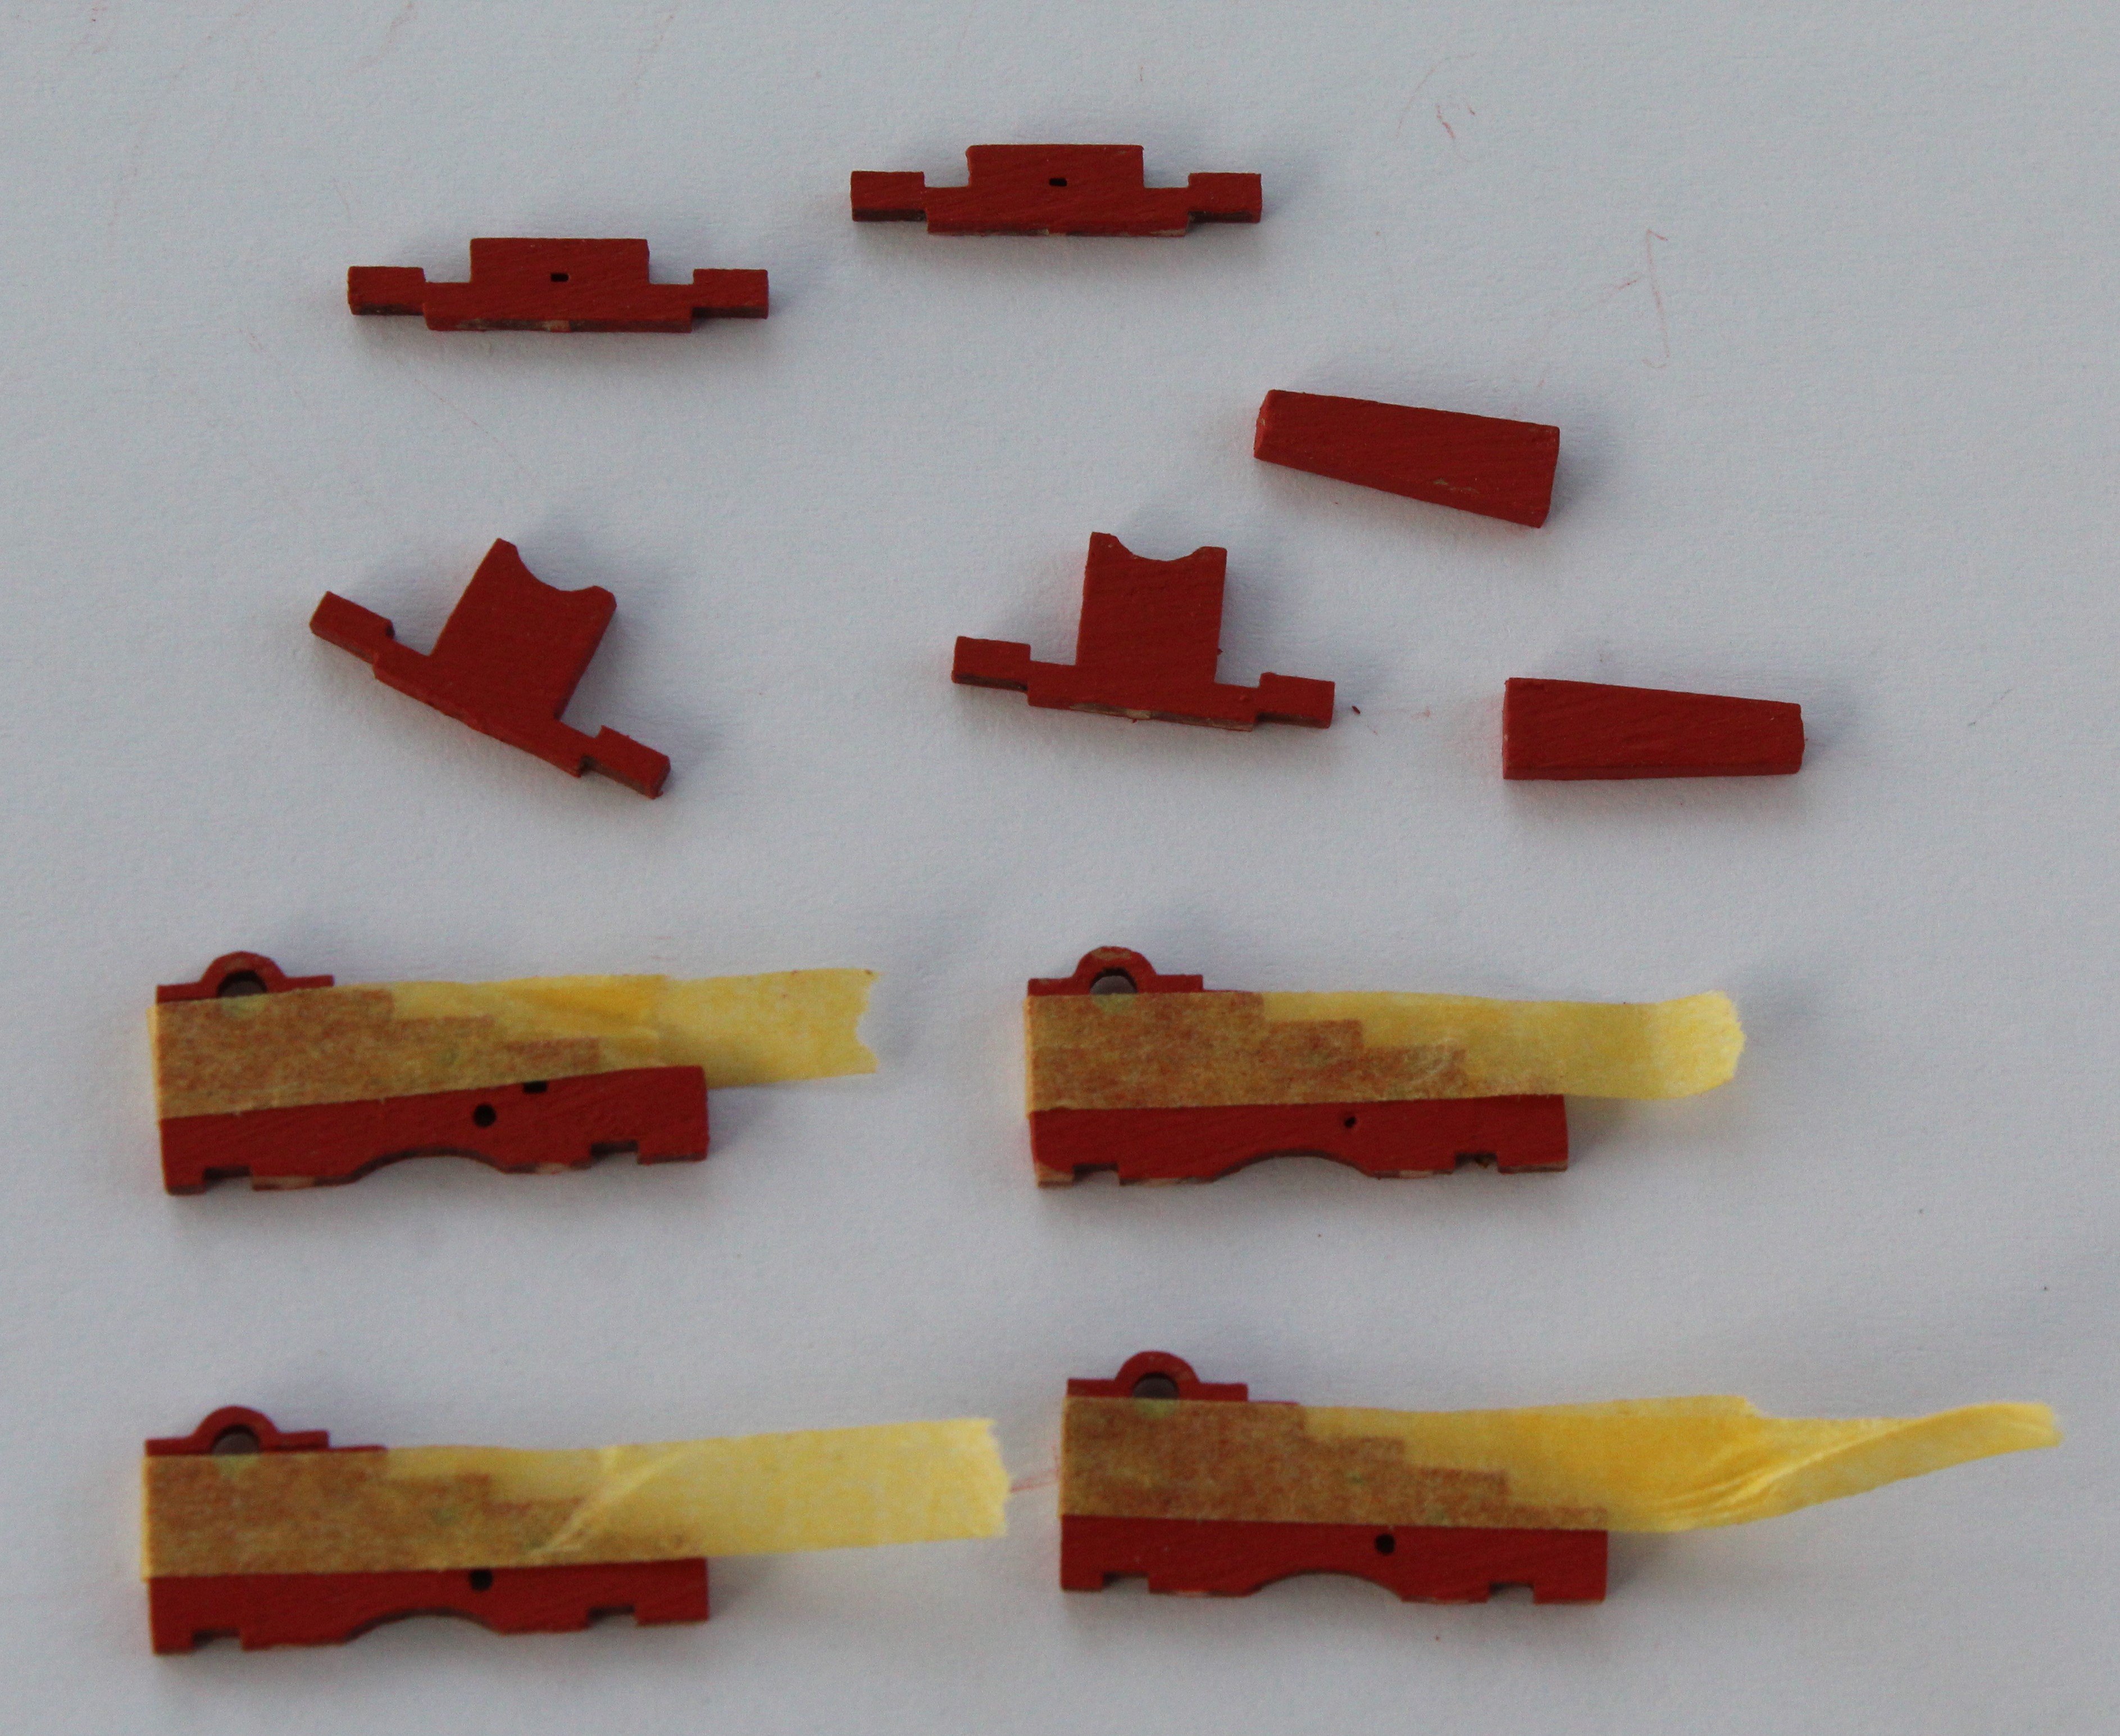
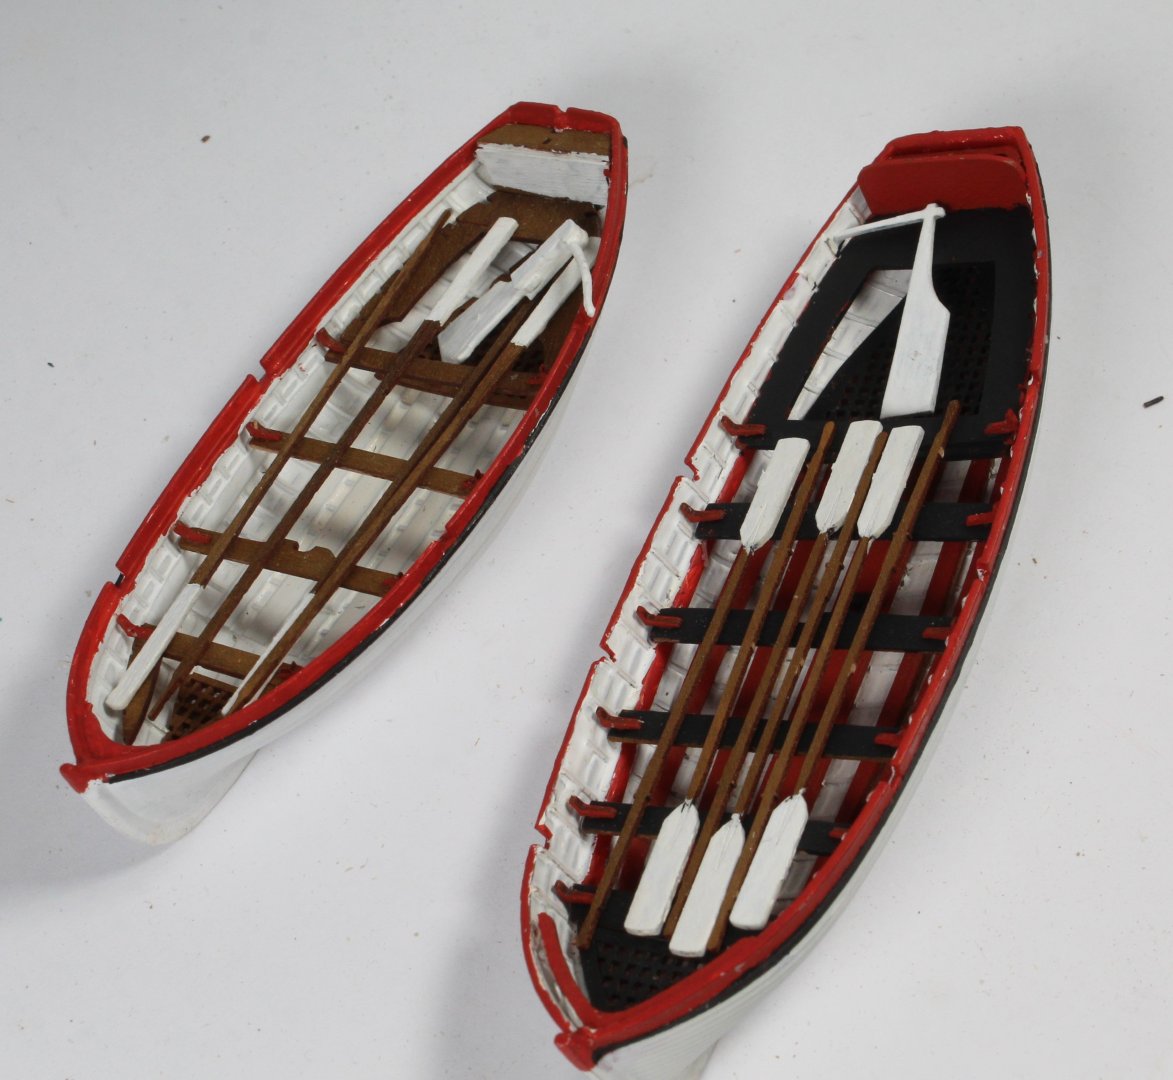
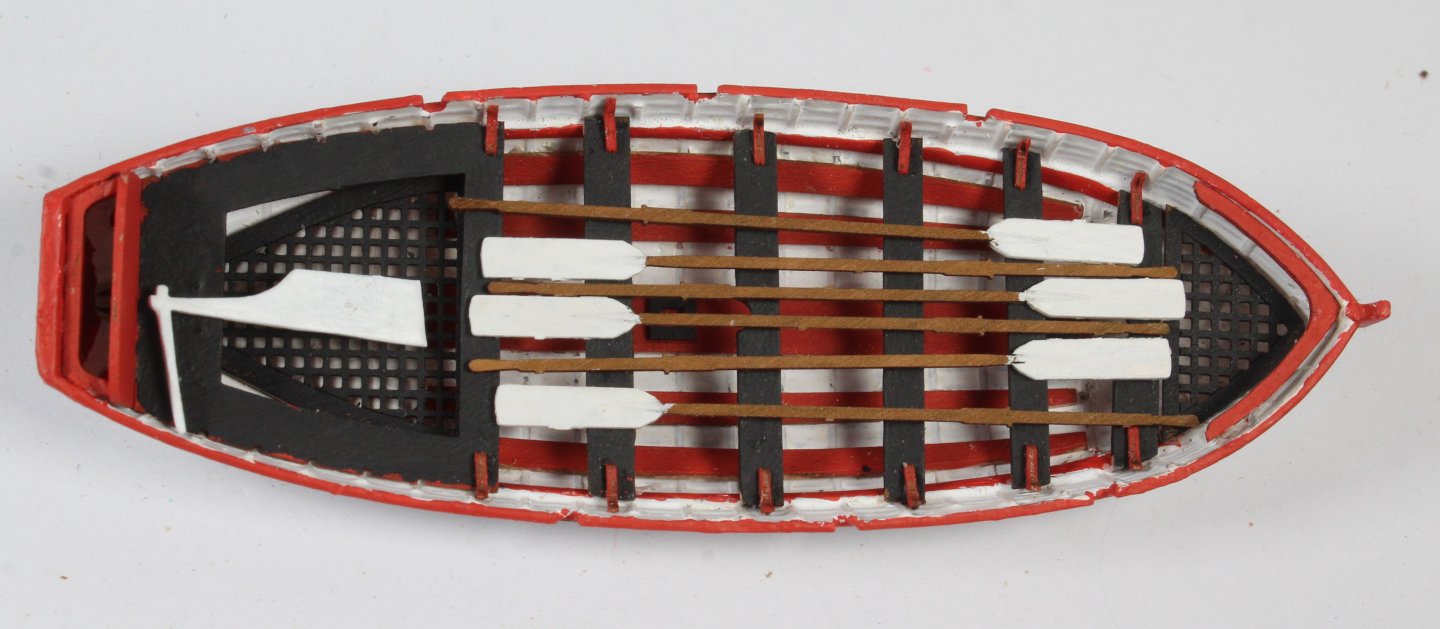
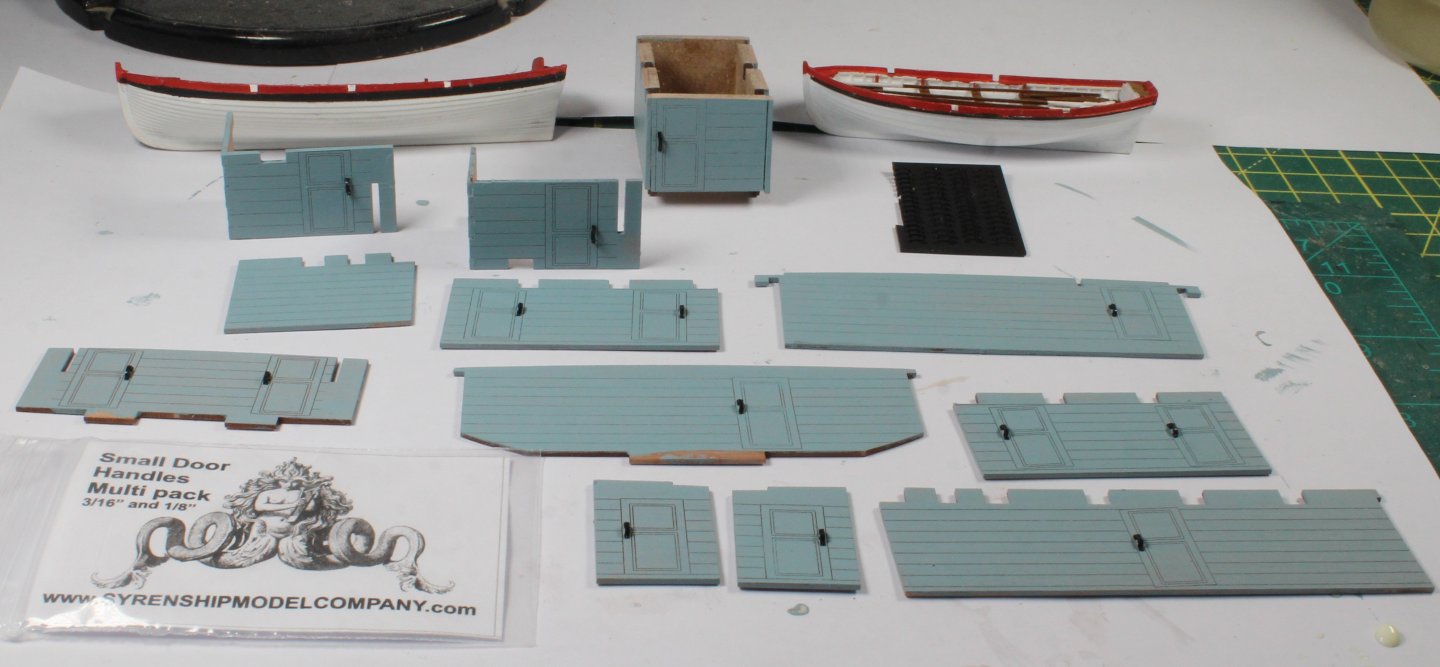
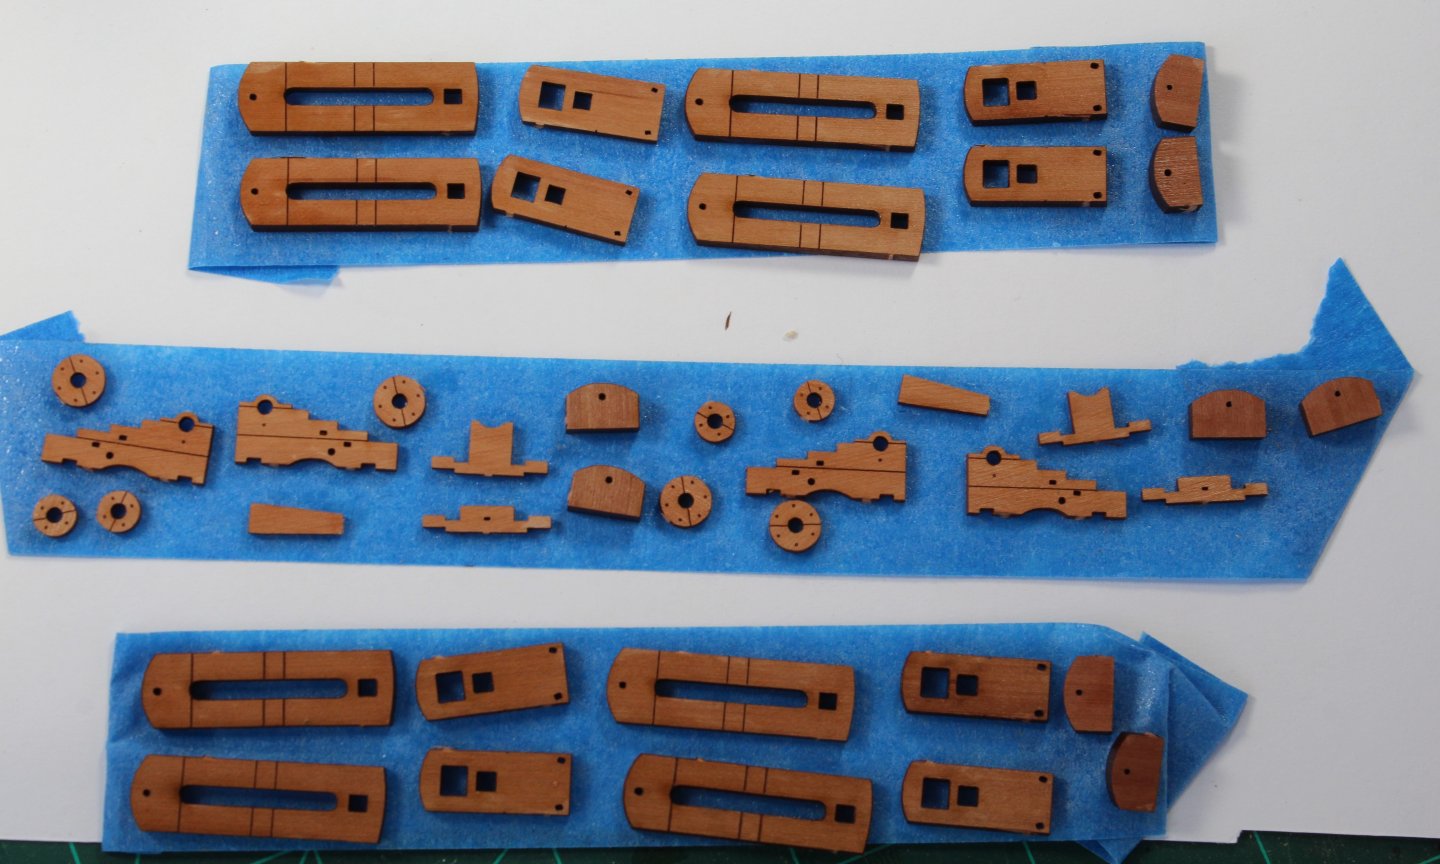
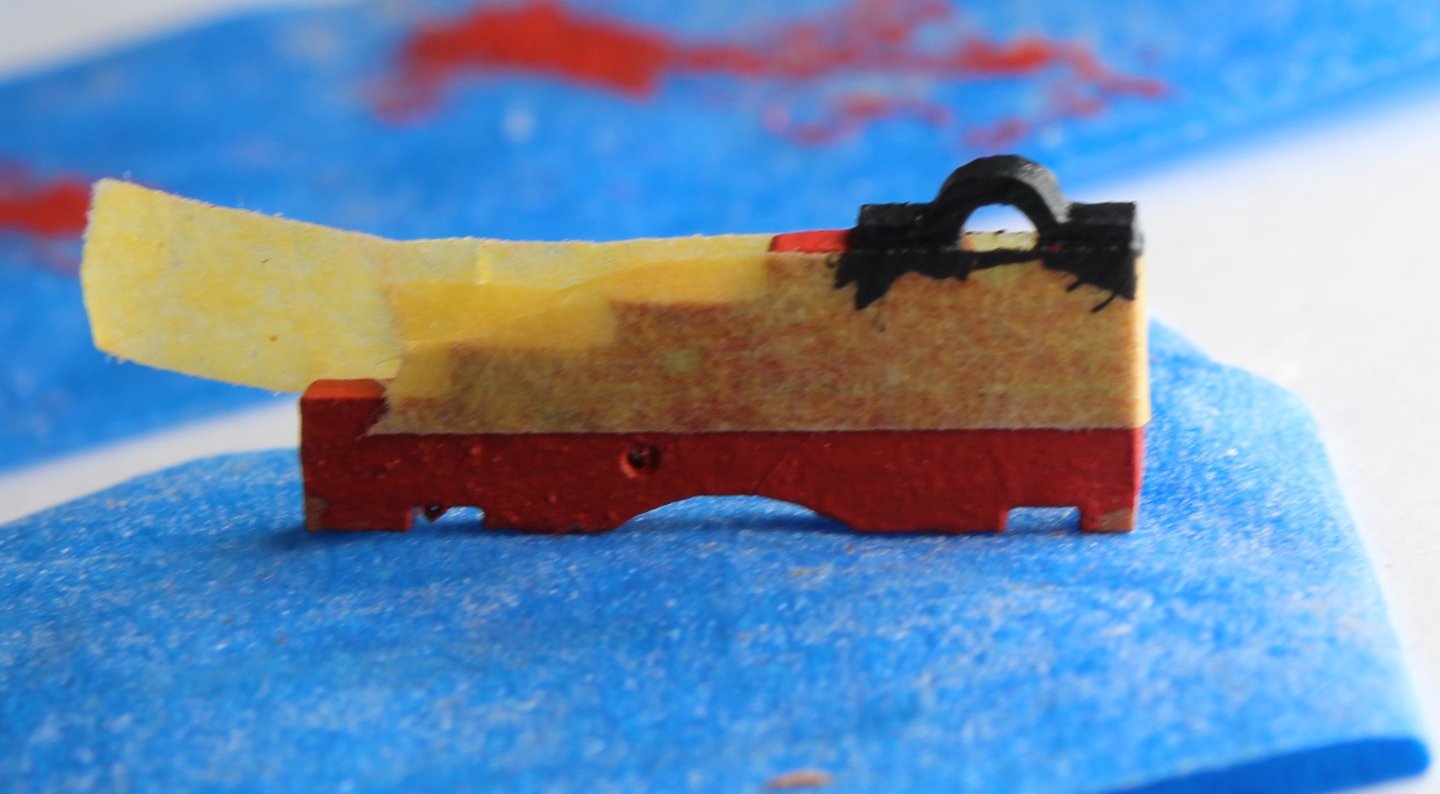
Whilst waiting for the door hinges and handles parts I have ordered to arrive I decided to build the two small boats. After painting the both hulls white (internal and external) I added a black wale and a red top band. I also added a small red band on the inner top edge of the smaller cutter. The hull painting is not perfect but passes muster for me. Next I applied an oak wood stain to all the wooden parts. I liked the natural wood effect for the smaller boat inner fittings. I thought the larger cutter would look better with a coloured internal paint scheme. I opted for flat red for the internal ribs and matt black for all the other wooden internal parts. Both rudders were painted white. With regards to the both sets of ships oars I kept the oak stain for the shafts and white paint for the scull oar ends. The package from the USA arrived and I was pleased that I could continue on with the main ship build. Unfortunately I did not check what I was ordering. I mistakenly thought the hinges and handles were included in the parts I was ordering, In actual fact I had only ordered the handles. Thankfully Chuck was able to help me out and the hinges are now being shipped over to the UK for me. I did fit the handles to the panels and I really like the effect. Now that I have more time to kill whilst I wait for the hinges to arrive I decided to move on to building the cannons and carronades. After removing the wooden parts I applied a coat of wood sealer Concentrating on the two cannons the various wooden parts were painted red. Tape was then applied to the four carriage sides and the cannon caps were painted black. The cannon wooden parts are now ready for the assembly phase.


- 241 replies
-
- 13
-
-
-
- Vanguarrd Models
- Harpy
- (and 1 more)