


Glenn-UK
-
Posts
3,004 -
Joined
-
Last visited
Content Type
Profiles
Forums
Gallery
Events
Posts posted by Glenn-UK
-
-
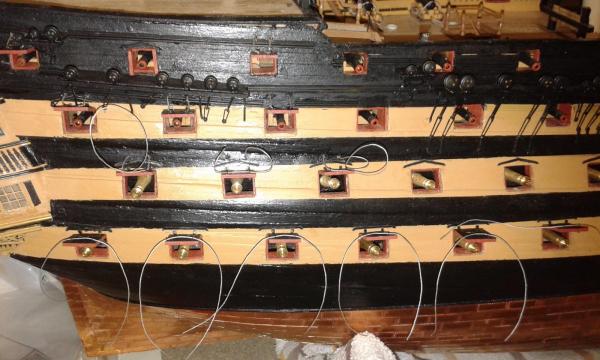
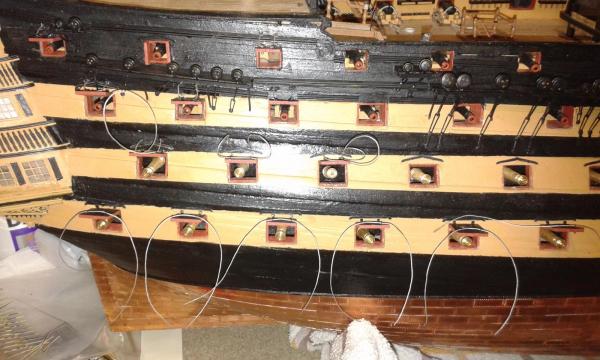
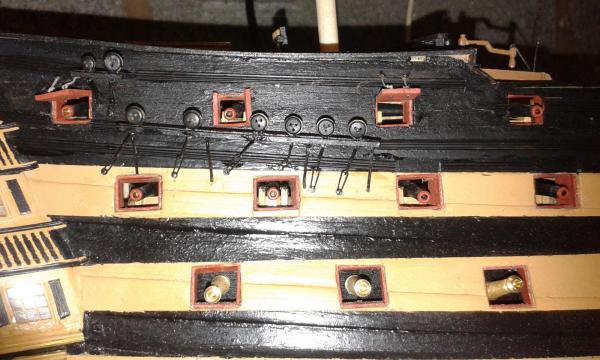
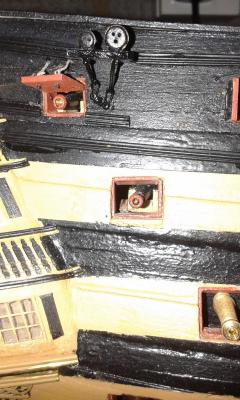
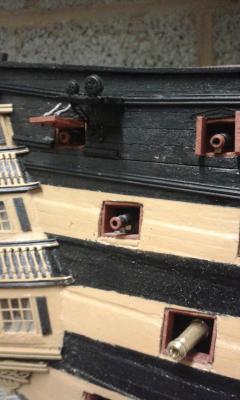
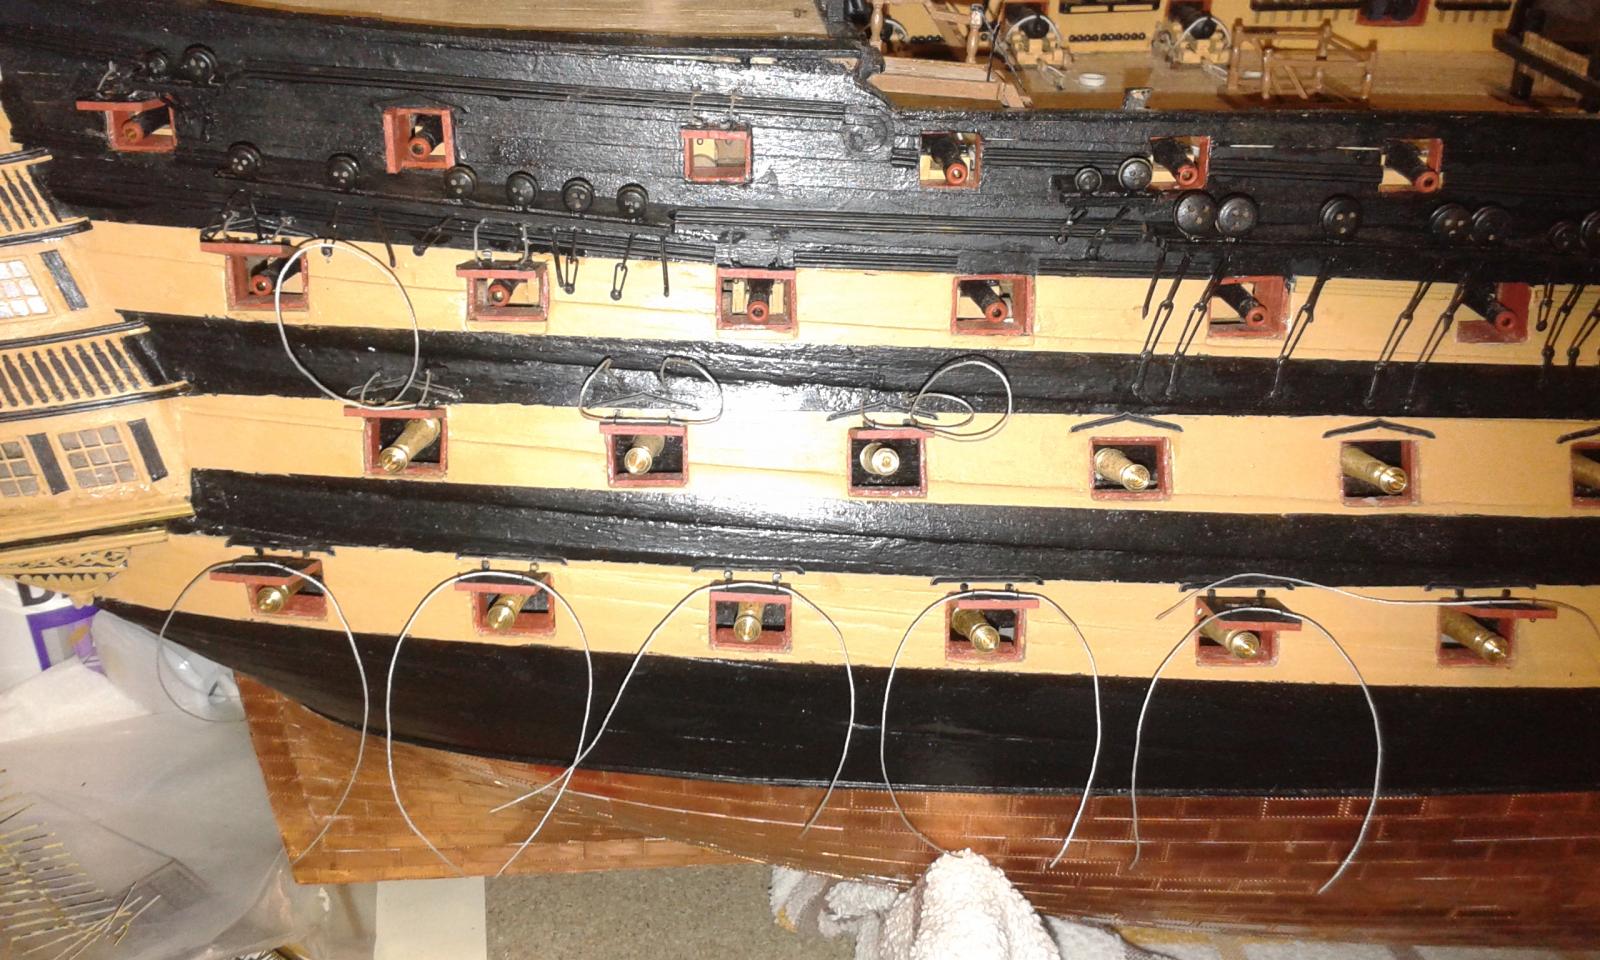
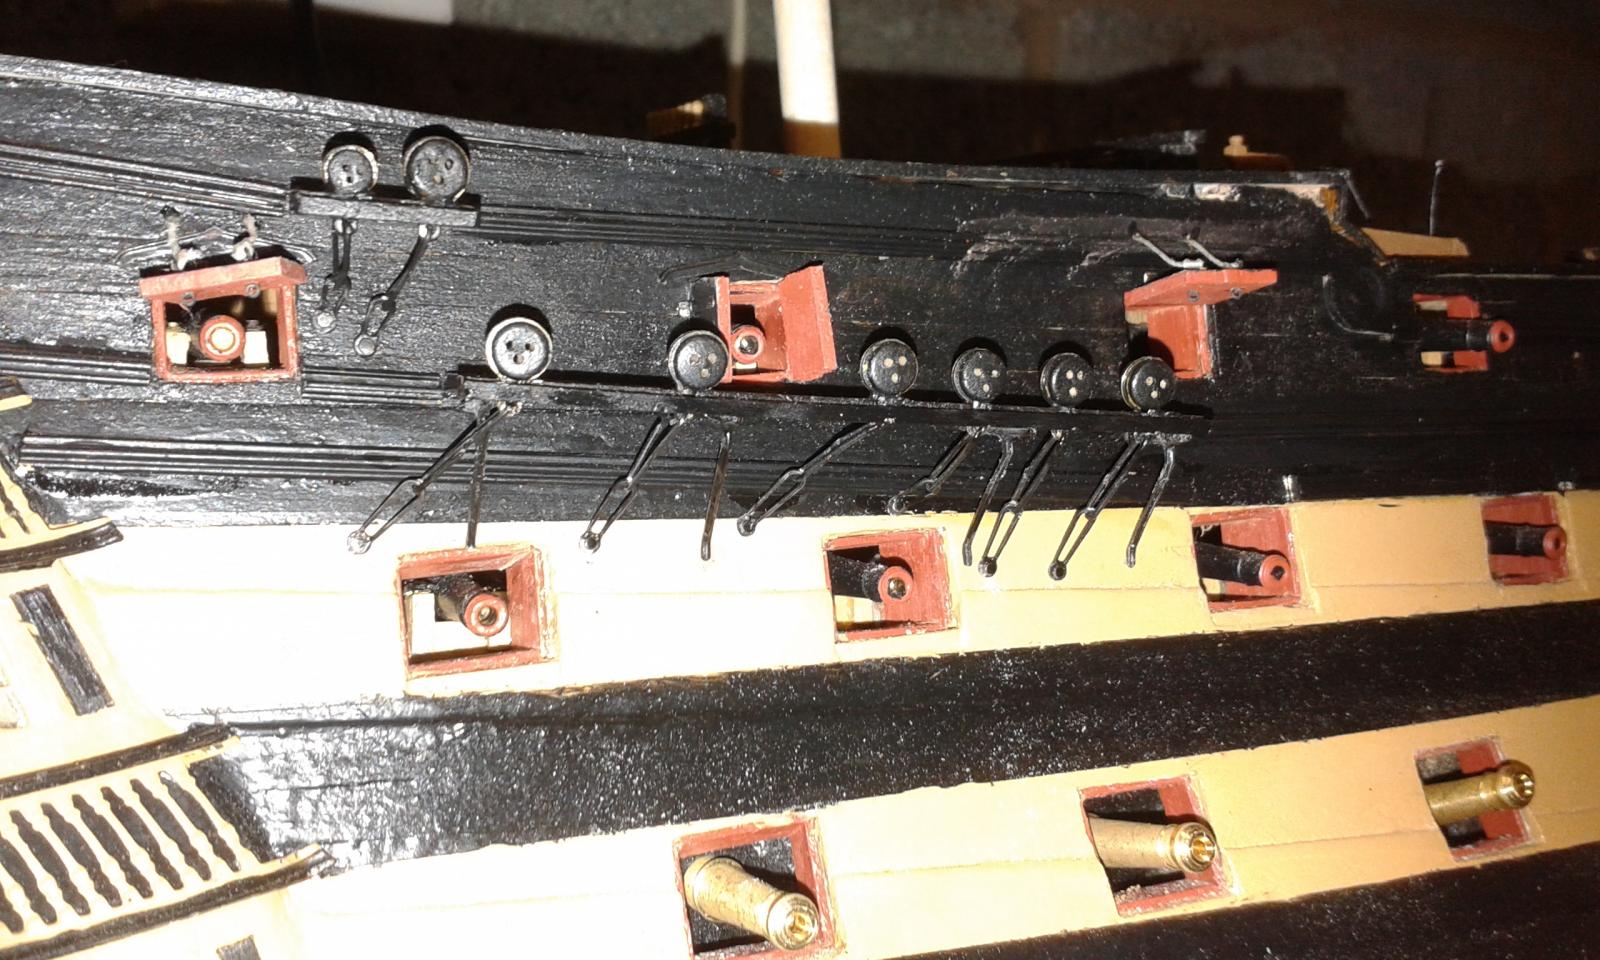
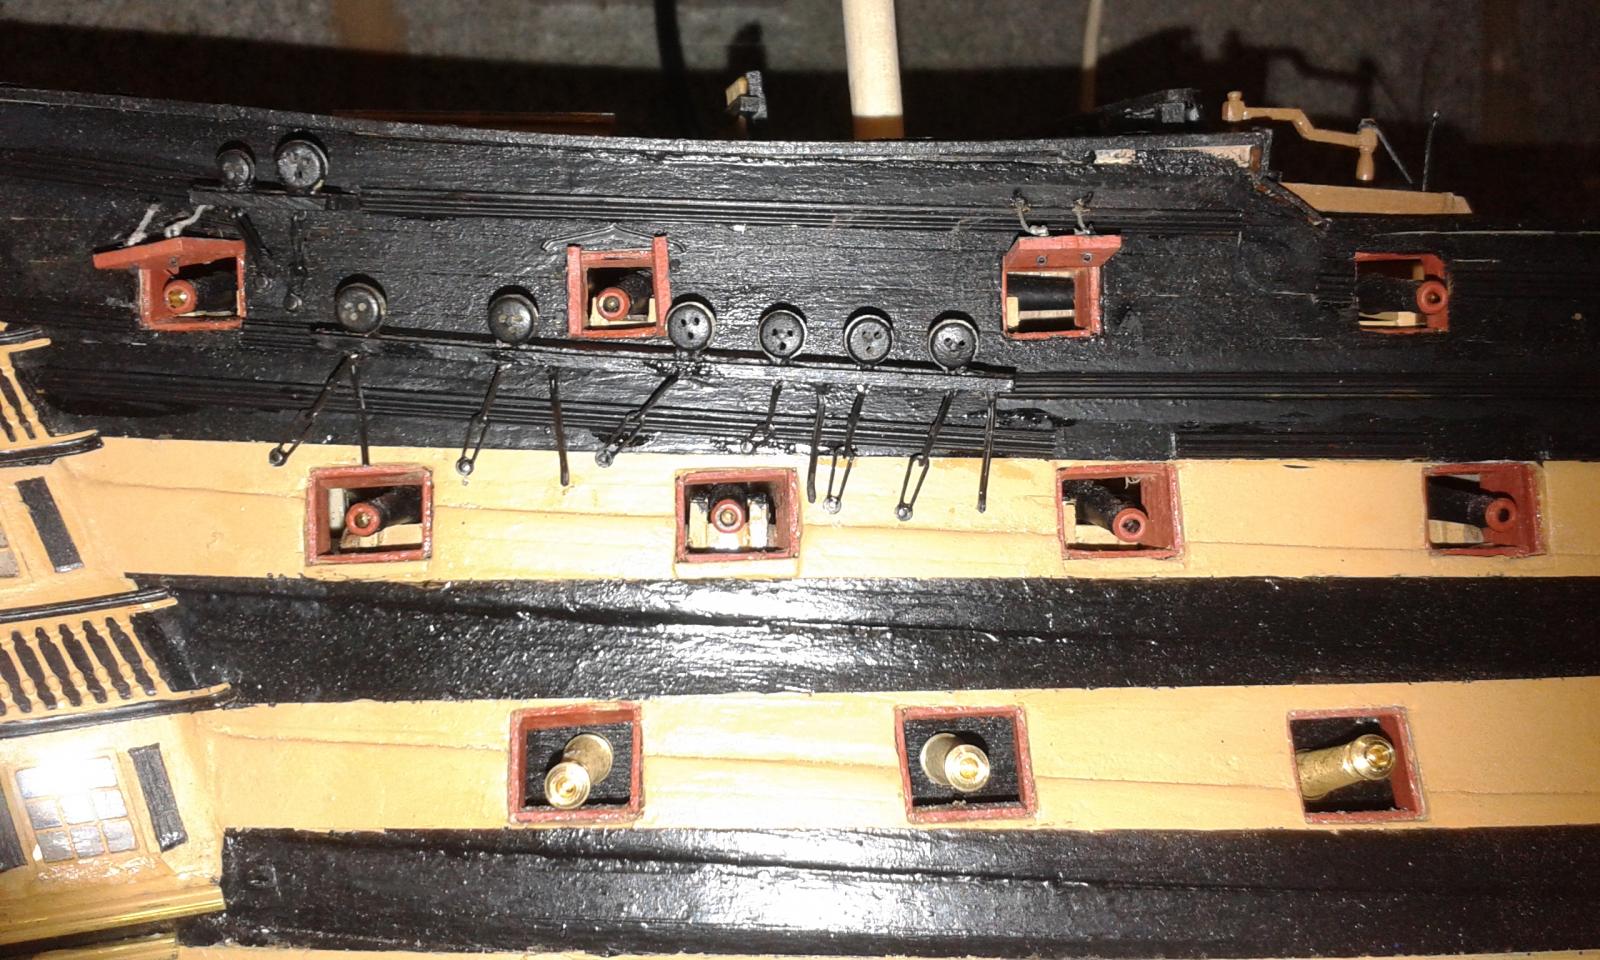
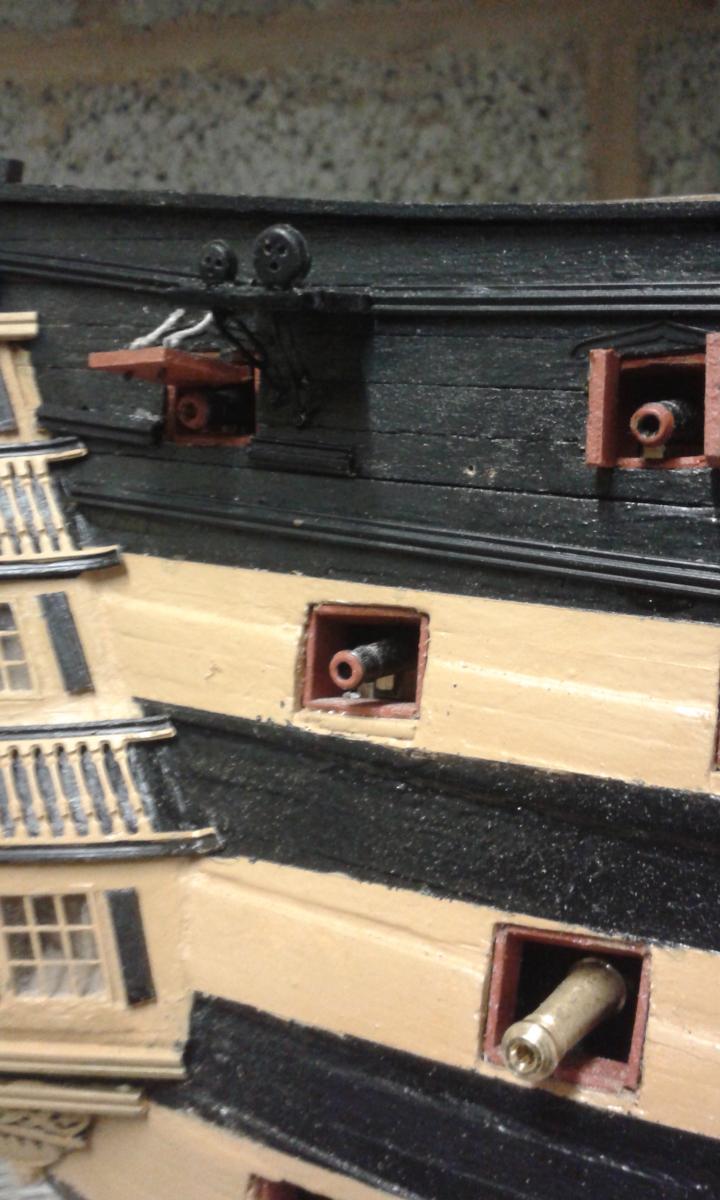
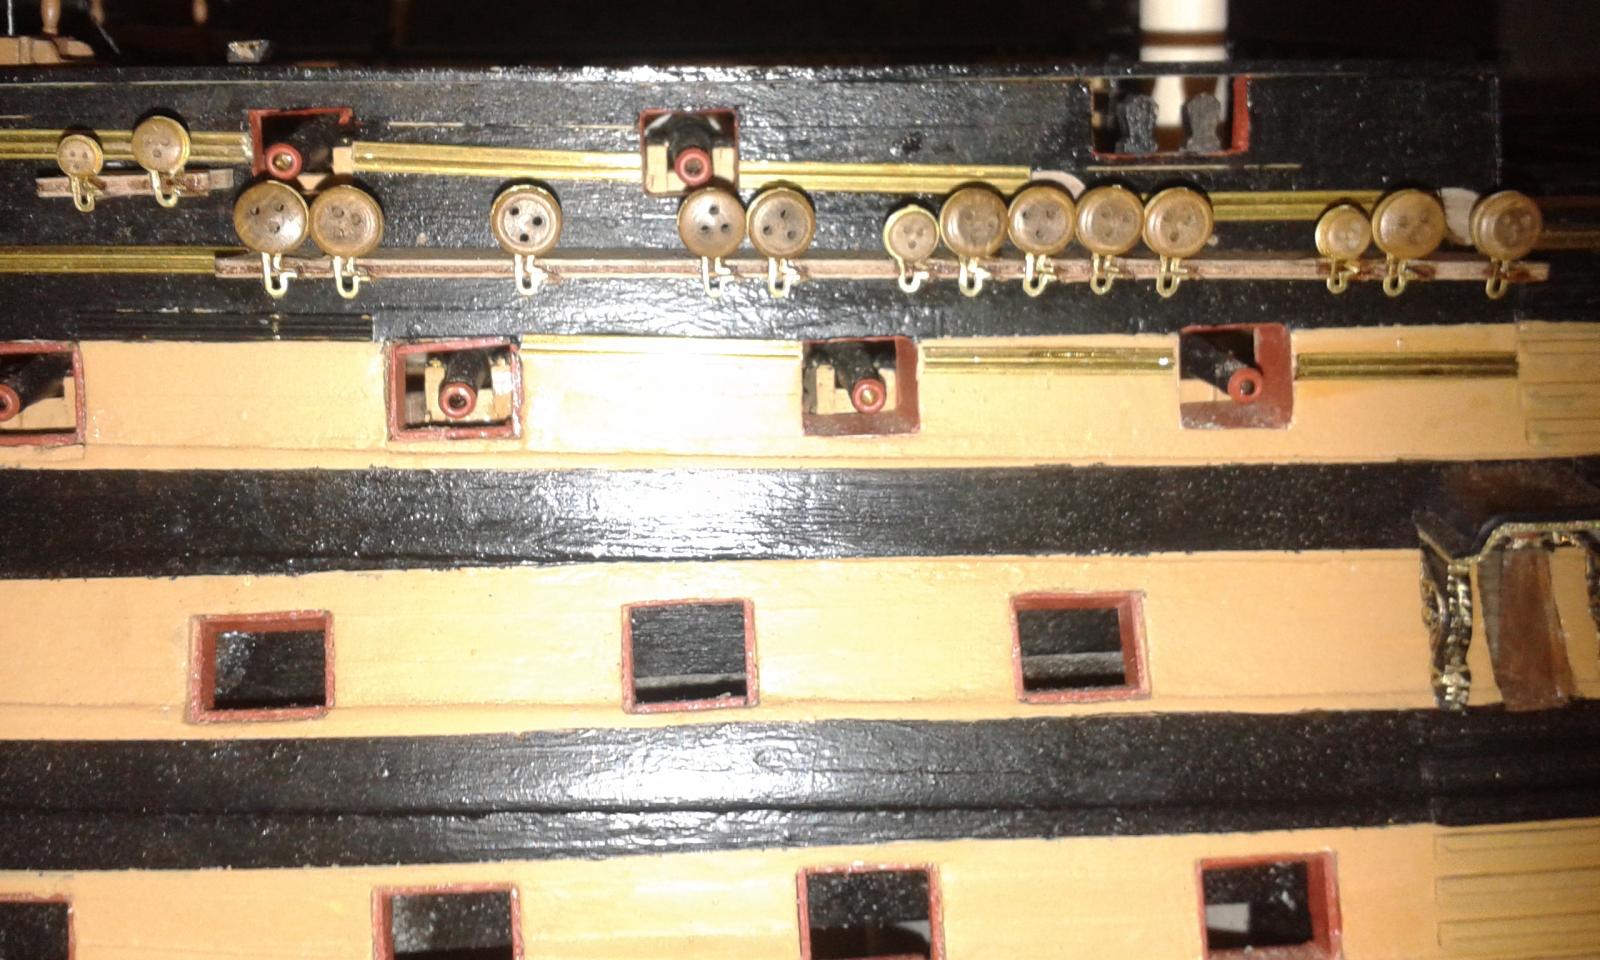
I have been installing and rigging the gun port lids. The actual installation and rigging is not too bad, what seems the most time time is fitting the eyelets to the gun port lids prior to the installation
I have also been fitting the rigols to the hull as well.
Pictures of current state of play, I'm waiting 24 hours to allow the glue to dry before i complete the rigging.
-
Good to see you're on the rigging phase and having completed the Victory rigging this should be a cakewalk for you.
-
Hi Jerry
It is interesting have two builds on the go and so far I have the discipline to stop work on one to move on the other build.
-
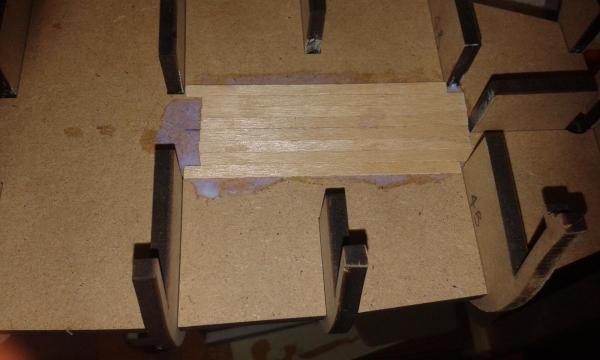
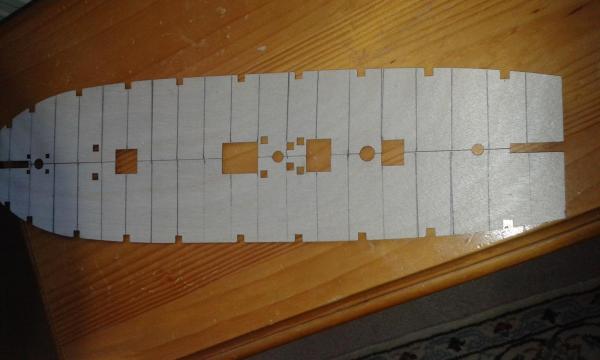
I added a few more strengthening planks to the underside of the two half's of the lower gun deck near the bitts and mast holes but didnt take any pictures.
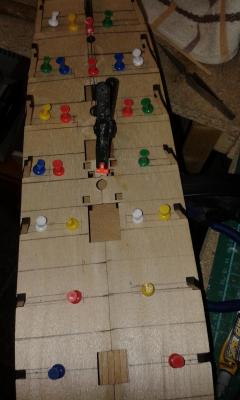
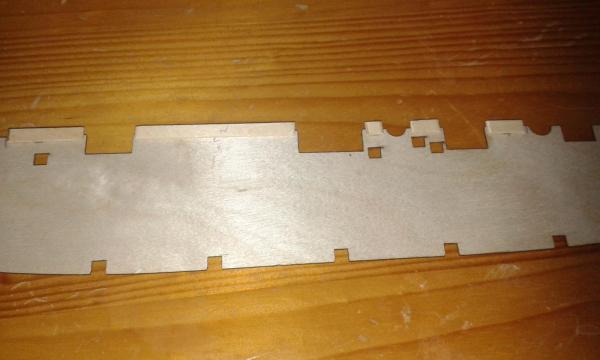
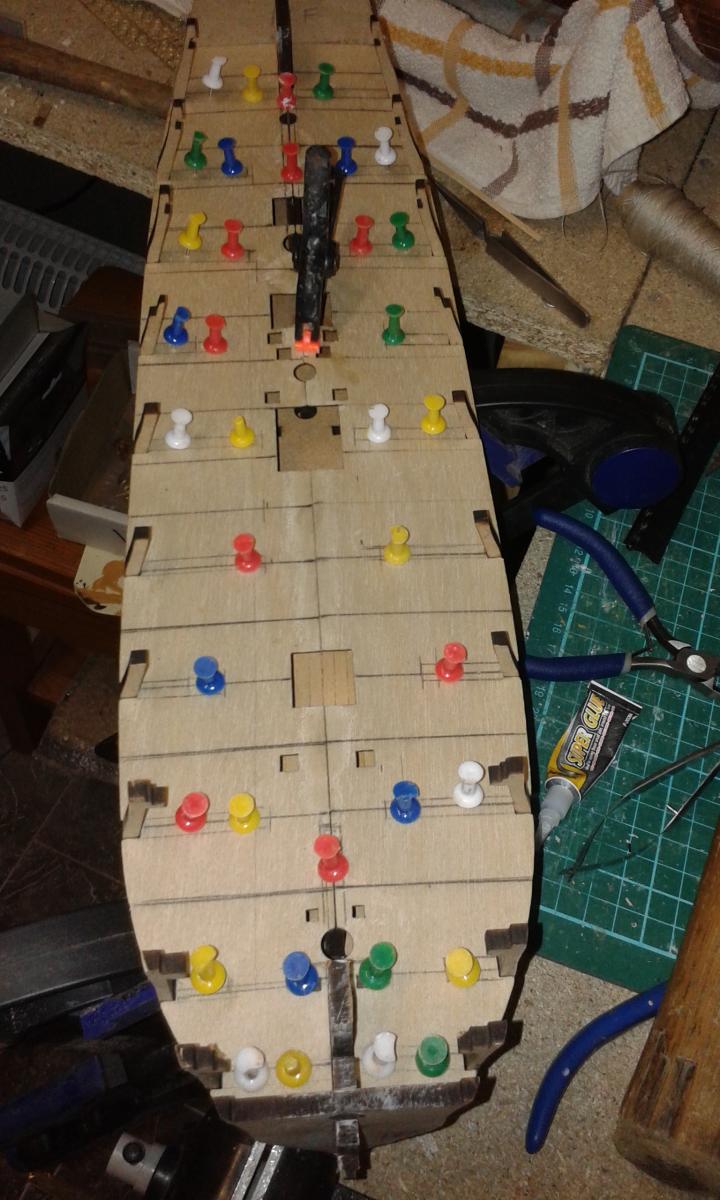
I then marked out the lower gun deck fixing points and then glued into position, using map pins to secure the deck as the wood glue cures.
The complete lower gun deck pin and glued

Close up of the bow end, the deck planking is visible through the companionway opening.

Picture showing midships
Not much more work planned for today as I will leave the lower deck deck glue to cure properly before I start with the deck planking next weekend, I may make the companionway coaming later today, using a simple box joint again.
-
Build log index on page 1 of this log has been updated for easy reference to each build step undertaken, hyperlink link provide below.
I did manage small amount of time working on HMS Pegasus today.
The first task was to plank the lower deck which may be seen through the main gun deck companionway opening.
As this is a small area I did not bother with any special effects (caulking, treenails, etc.) or any shift patterns.
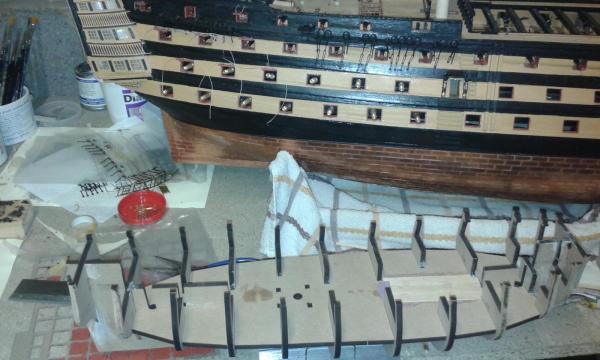
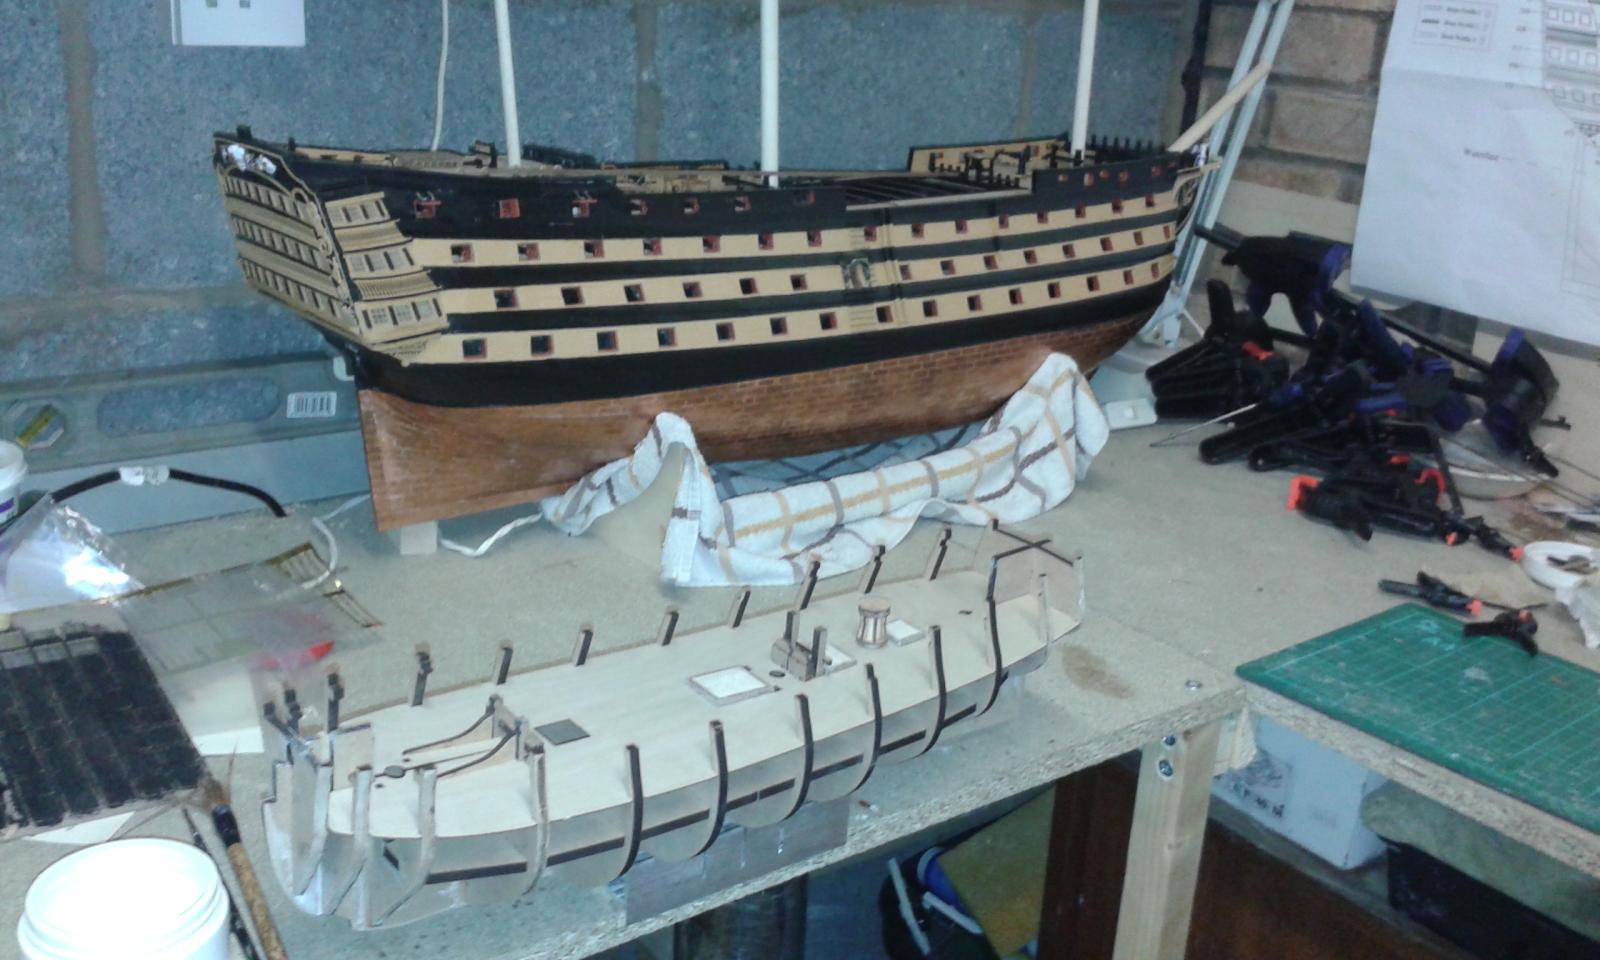
HMS Victory, with all guns out, is protecting the HMS Pegasus from unwanted invaders. As can be seen I'm currently rigging the gun port lids on HMS Victory.
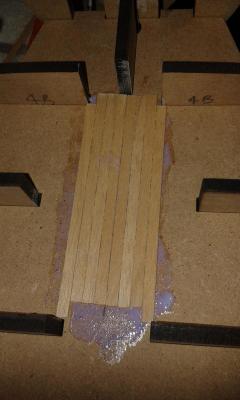
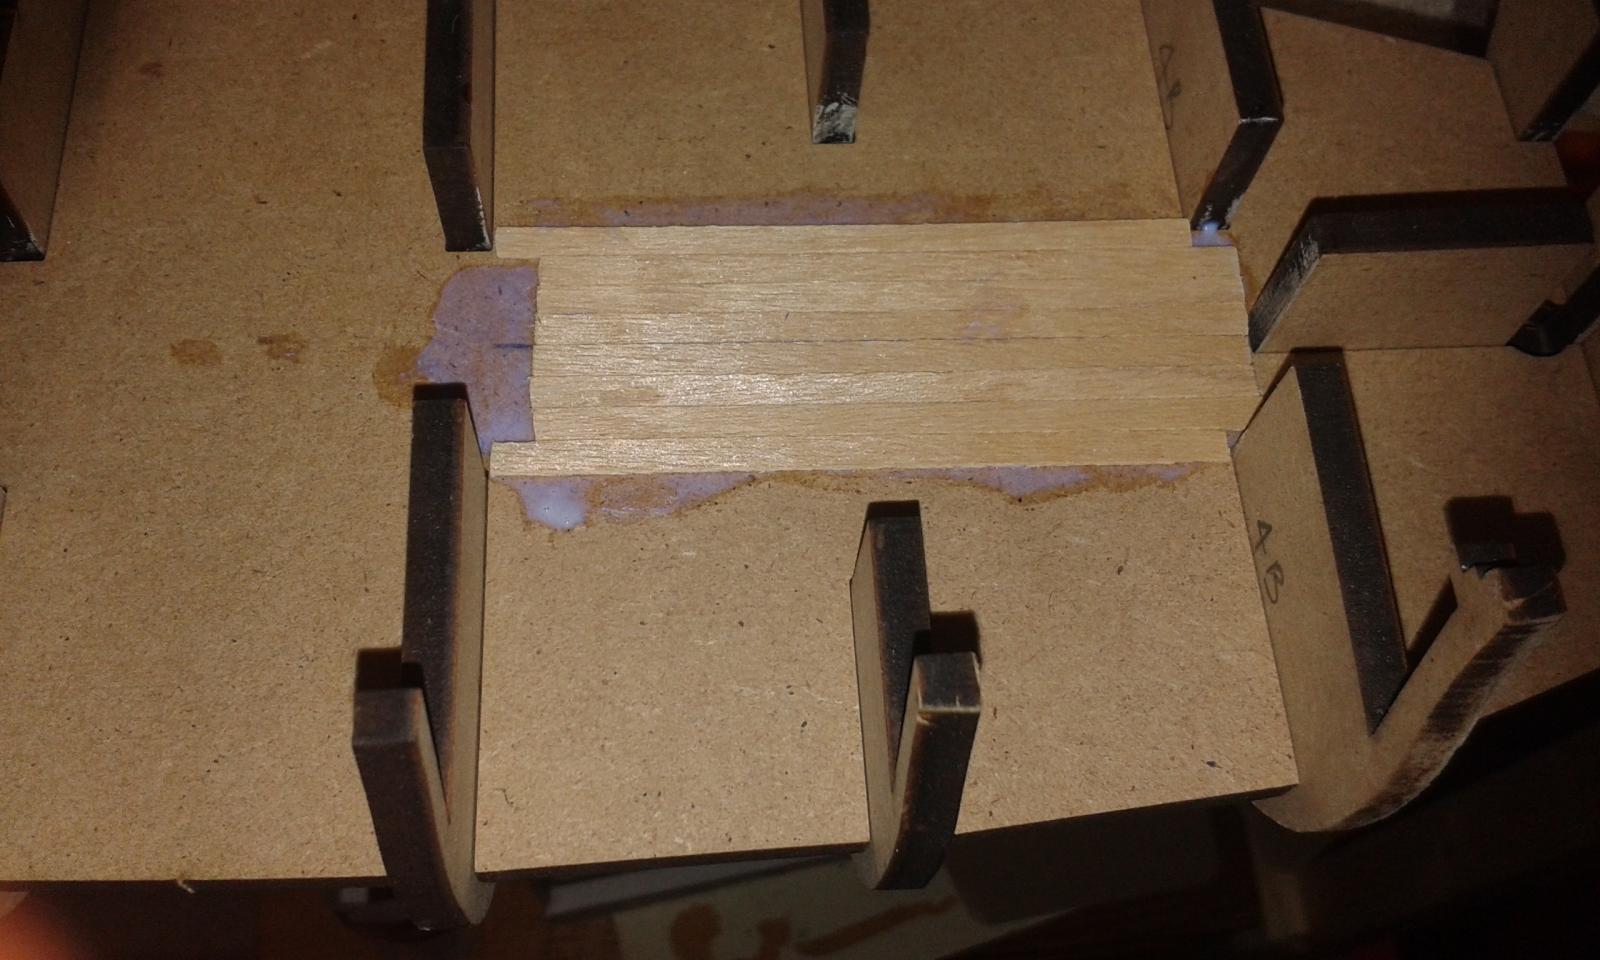
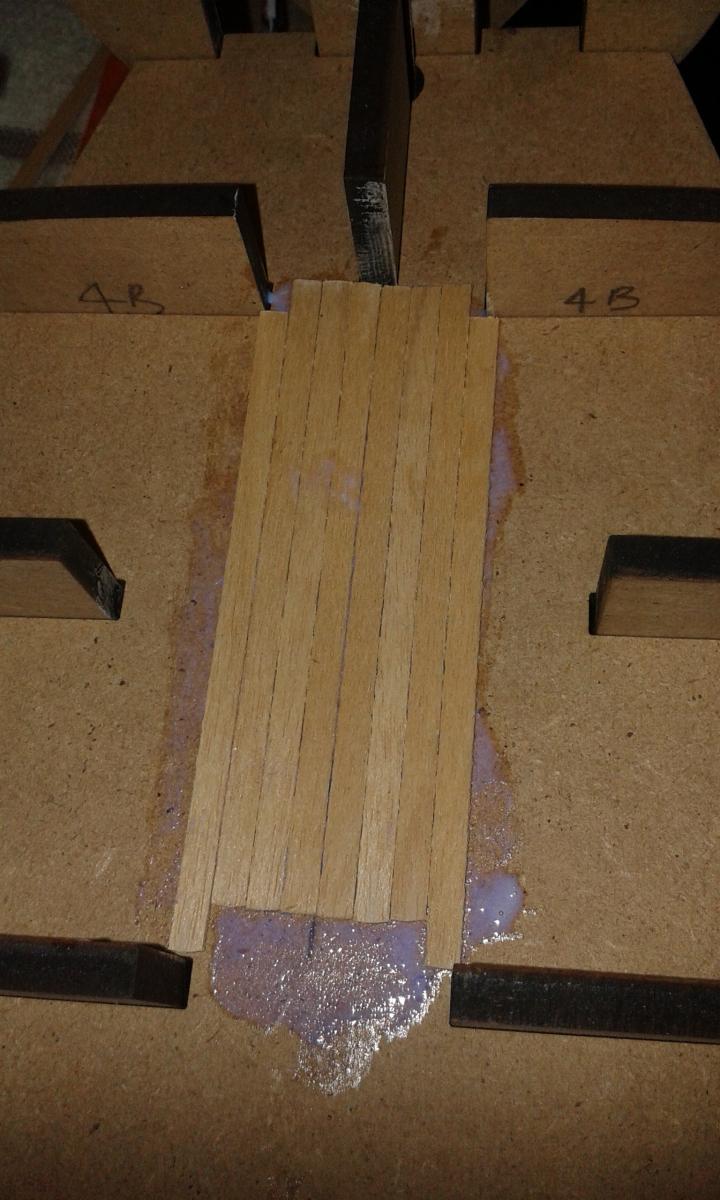
As the gun deck is quite thin I decided to add some strengthening strips under the center line in the unsupported areas using some 5mm wide by 1mm thick strips.
Underside view
Top View
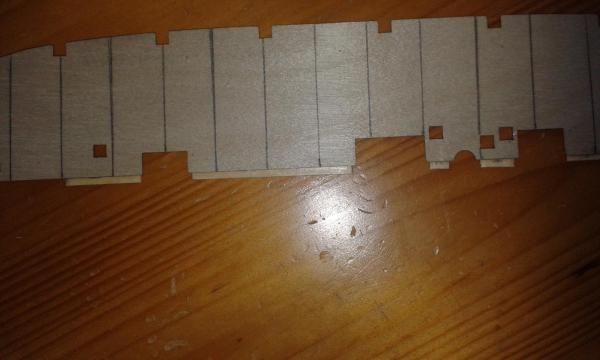
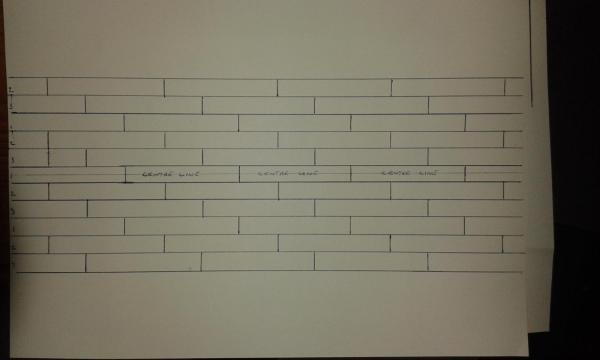
I understand, for this build, each plank length for a 3 butt shift pattern needs to be 66mm long, with a 22mm offset between each run. I have therefore drawn the necessary guide lines on the deck prior to fitting, looking for the best place for the deck plank joints with respect to the gun deck openings.
Once the two half's of the gun deck has been installed I will fit the first deck plank over the joint to add additional strength. I plan to adhere to using 66mm long planks over the center line,
Picture showing a drawing on the 3 butt shift arrangement and center line. For the sharp eyed you'll note I did draw one line in the wrong place!
- Landlubber Mike and Martin W
-
 2
2
-
Nice work on the strops and the deadeyes look good where you've installed them too.#
Have a great weekend
-
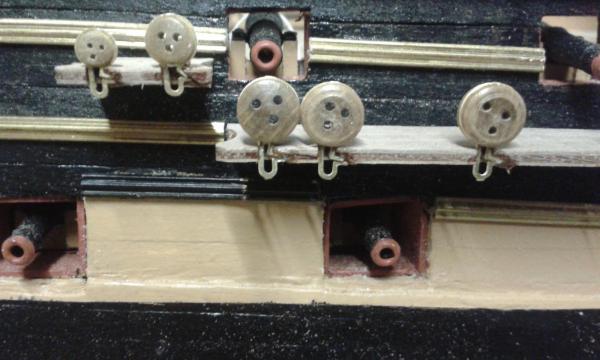
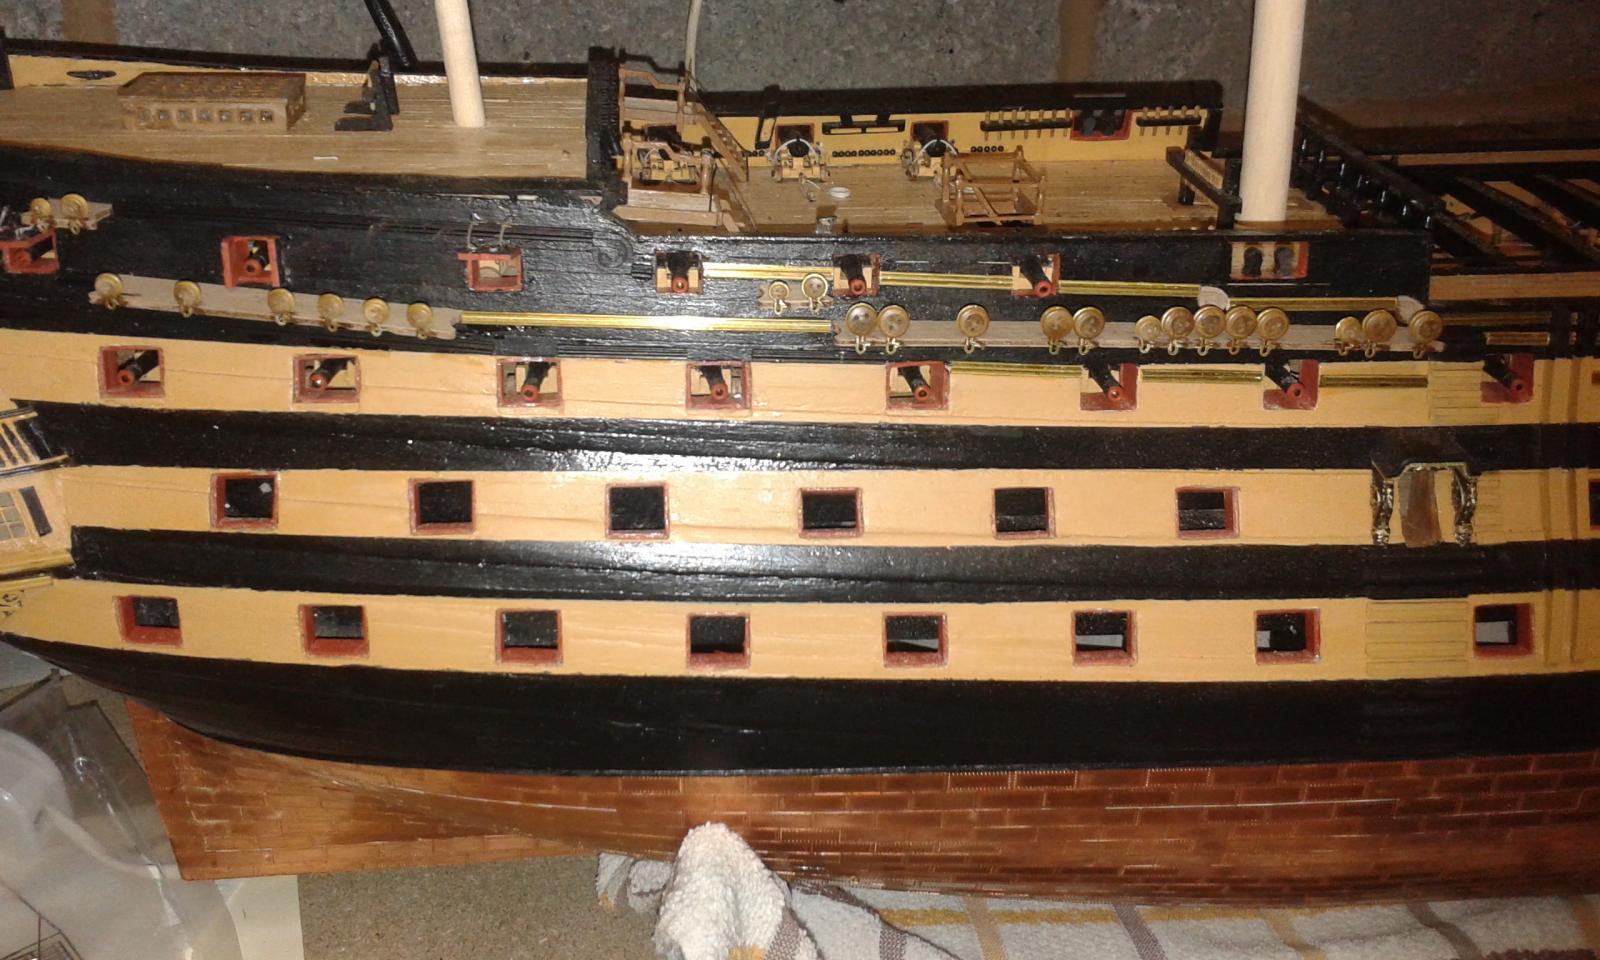
Second channel fitted with chain plates and channel supports. This went much easier than the first channel. I think I have found a workable method.

-
Fugols, not sure what those are, do you mean Rigols or the channel bottom supports?
-
Hello Jerry
Very good news the goods finally arrived and the end result looks really good.
Have a great day.
-
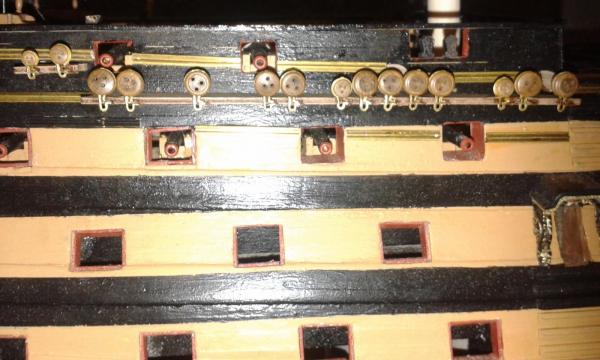
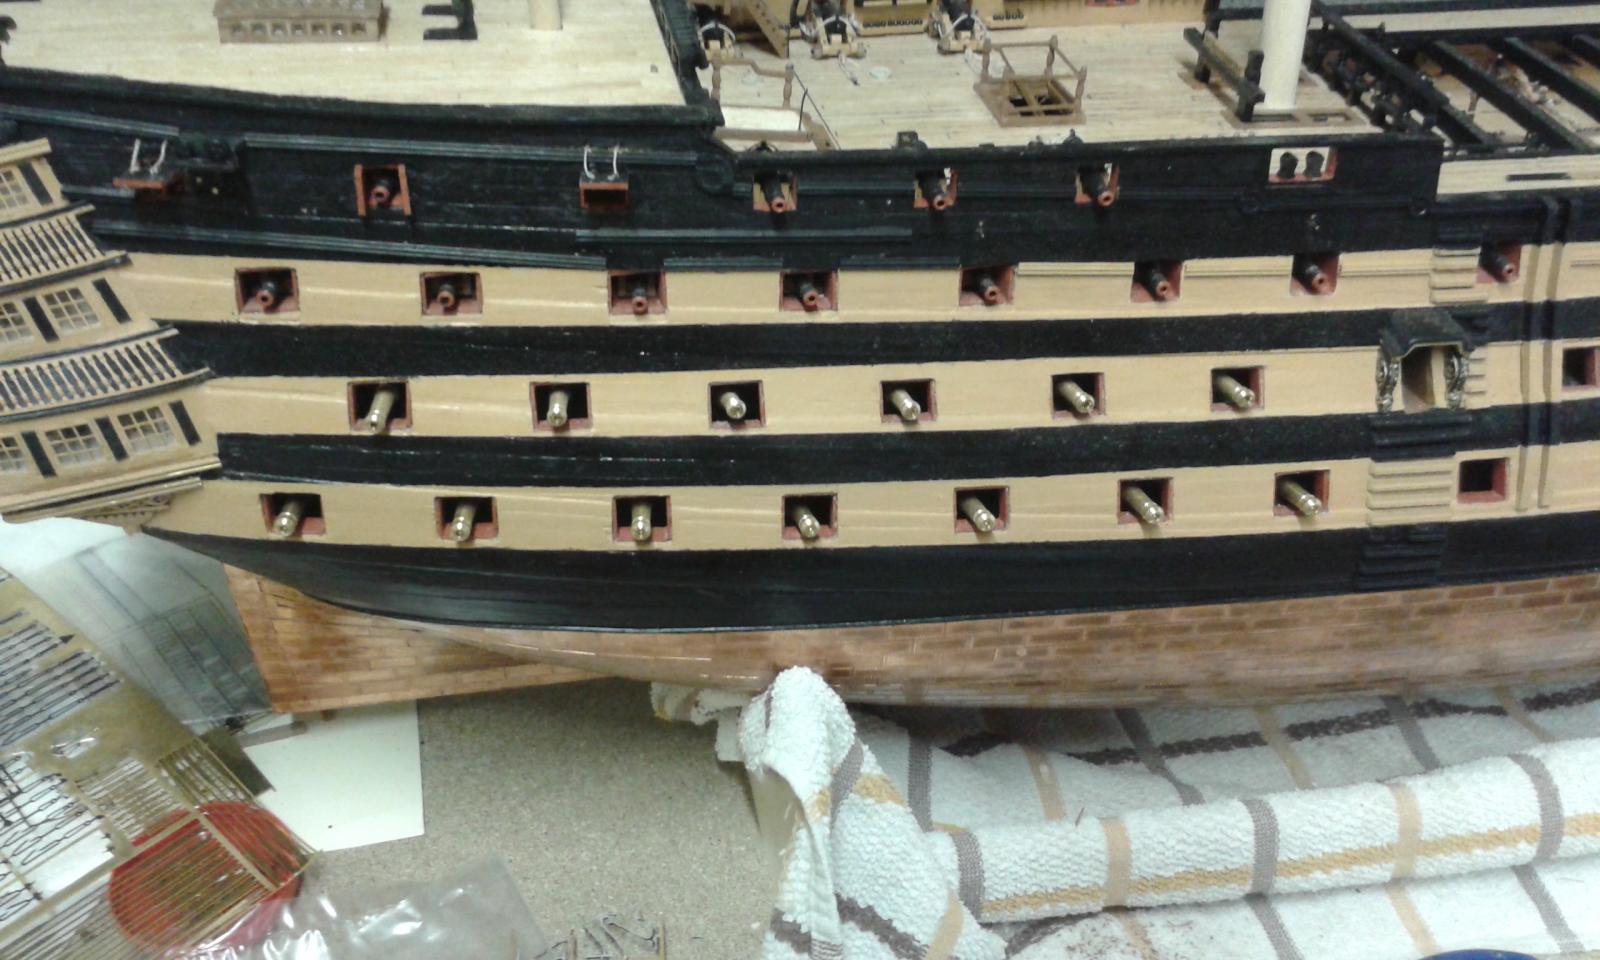
Fitted the first channel tonight. It was much harder task to fit the chain plates than I was expecting. I even managed to knock of the gun port lids - I now know it is better to get the channels fitted to hull before the gun port lids.
I have also drilled some of the holes in readiness installation of the remaining cannons which I have dry fitted
Picture of work in progress

-
I'm sure you already what I'm going to suggest.
I found a smear of wood filler and a light sand before adding a coat of paint generally does the trick.
If not a simple light sand so that some of the sawdust fills the holes followed by a coating of sanding sealant also works well.
The build is coming along very nicely.
-
Nice bit of wood bashing, fingers crossed the package from across the pond arrives soon. I didn't manage any time in shipyard over the weekend and have spent tonight painting the starboard channel assembly.
-
Yeap and will be at next home game also which is a cup quarter final game. Was an easy win today
-
Great use of your Victory left overs, good to be able to tick over whilst waiting for your material.
-
-
Nice steady progress, I always like to see your build progressing, you seem to be in control and making a pretty good model.
-
Hi Jerry
I lost two day this week with having to go away on business this week, but plan to finish the starboard channels tomorrow.
Once all this work is complete I'll have all to do again on the port side - Arggggg!
Not much time planned on Pegasus this weekend as I'm going to Manchester for the weekend
-
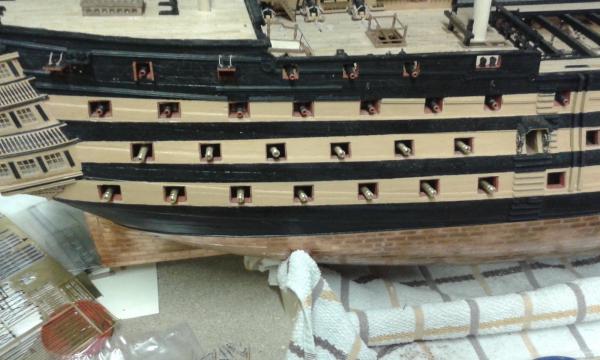
Work still progressing on gun port lid assembly, channel assembly and brass profiles (starboard side)
All channel strips (starboard side) have now been dry fitted, and I only have one channel left to install the dead eyes. I have about 15 more gun port lid assemblies to complete.
Picture showing brass profiles with channels dry fitted (using 0.7mm brass pins)

I have been using the method suggested by Shipyard Sid for installing the dead eyes, that is to make a diagonal cut to secure the dead eye strop in place. Once I have completed all channels I will add a small amount of epoxy (belt and braces) before adding the 1.5mm capping
-
We had a minor blip last weekend, but I will be in Manchester for Saturday's game so I'm expecting a win
-
Looking good Jerry
I'm sure the wood will arrive soon, the masts look very nice
-
Hello Jerry and David
I think Jerry will win hands down with his Half Moon build, this Pegasus build will be done in slow time (for me).
I hope to get the main gun deck installed next weekend and make a start on the planking, but my time will be very limited as I'm away all day Saturday and will be out part of the day on Sunday. I'm also away on business for a couple of days during the week so my Victory build time will be very limited also.
So far I have been very impressed with what I have seen. The main gun deck is perhaps a bit to flimsy, but once it is glued in place and planked it will be fine. I will be able to make a better judgement as the build progresses.
I'm looking forward to having a look a Chris Watton's HMS Victory model which is due out later this year and one I may think about building once I've finished the on-going projects.
-
I have now finished work for the day. I have really enjoyed making the grating assemblies today and I'm really pleased with the box joints used.
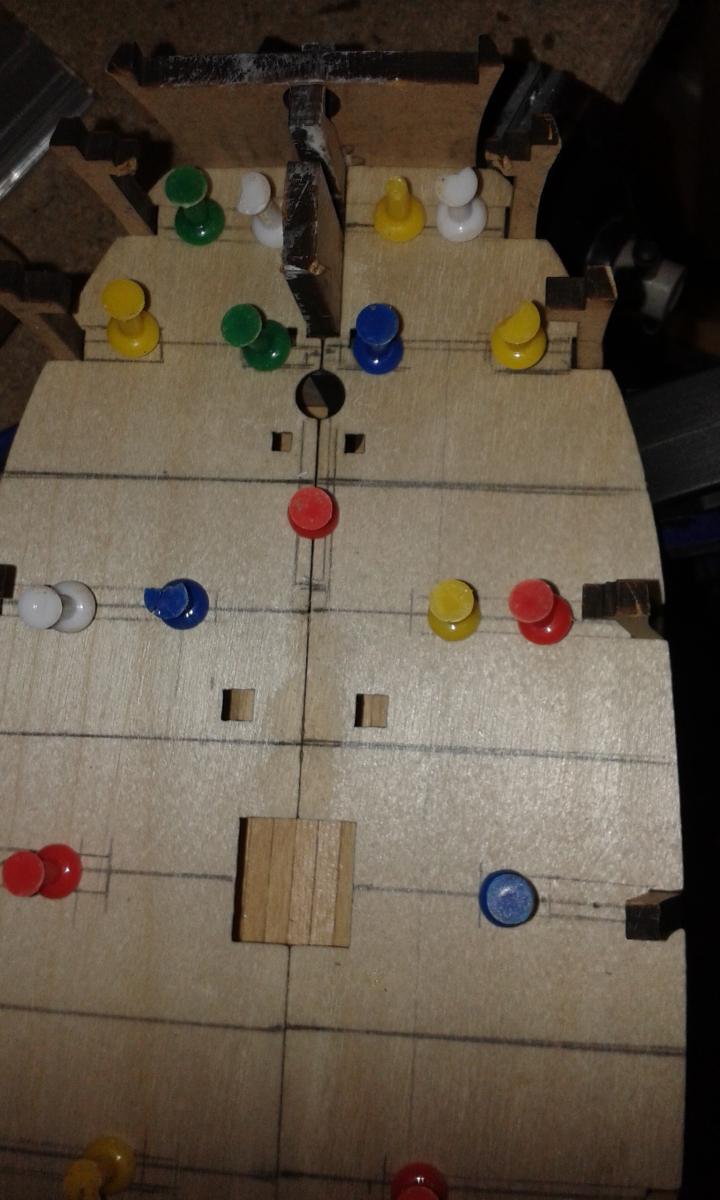
I have dry fitted the two half's of the main gun deck to hull assembly and also dry fitted the main gun deck items. I thinking of adding some 5mm by 1mm thick strips on the under side of the main gun deck sheets to provide some additional support along the central joint line.
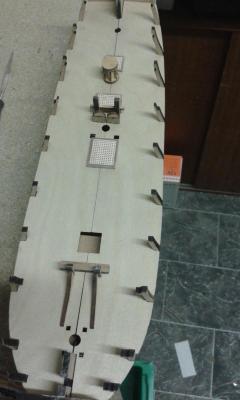
I know the rear main mast bitt has been dry fitted back to front
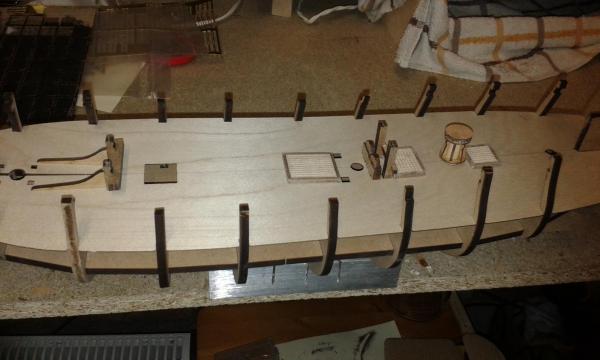
Finally another picture showing the two build in progress

- GuntherMT, Landlubber Mike, Martin W and 1 other
-
4
-
-
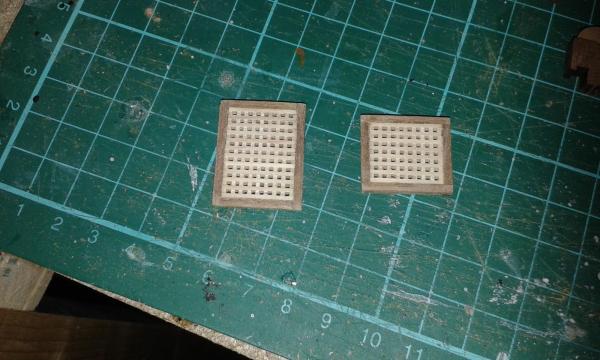
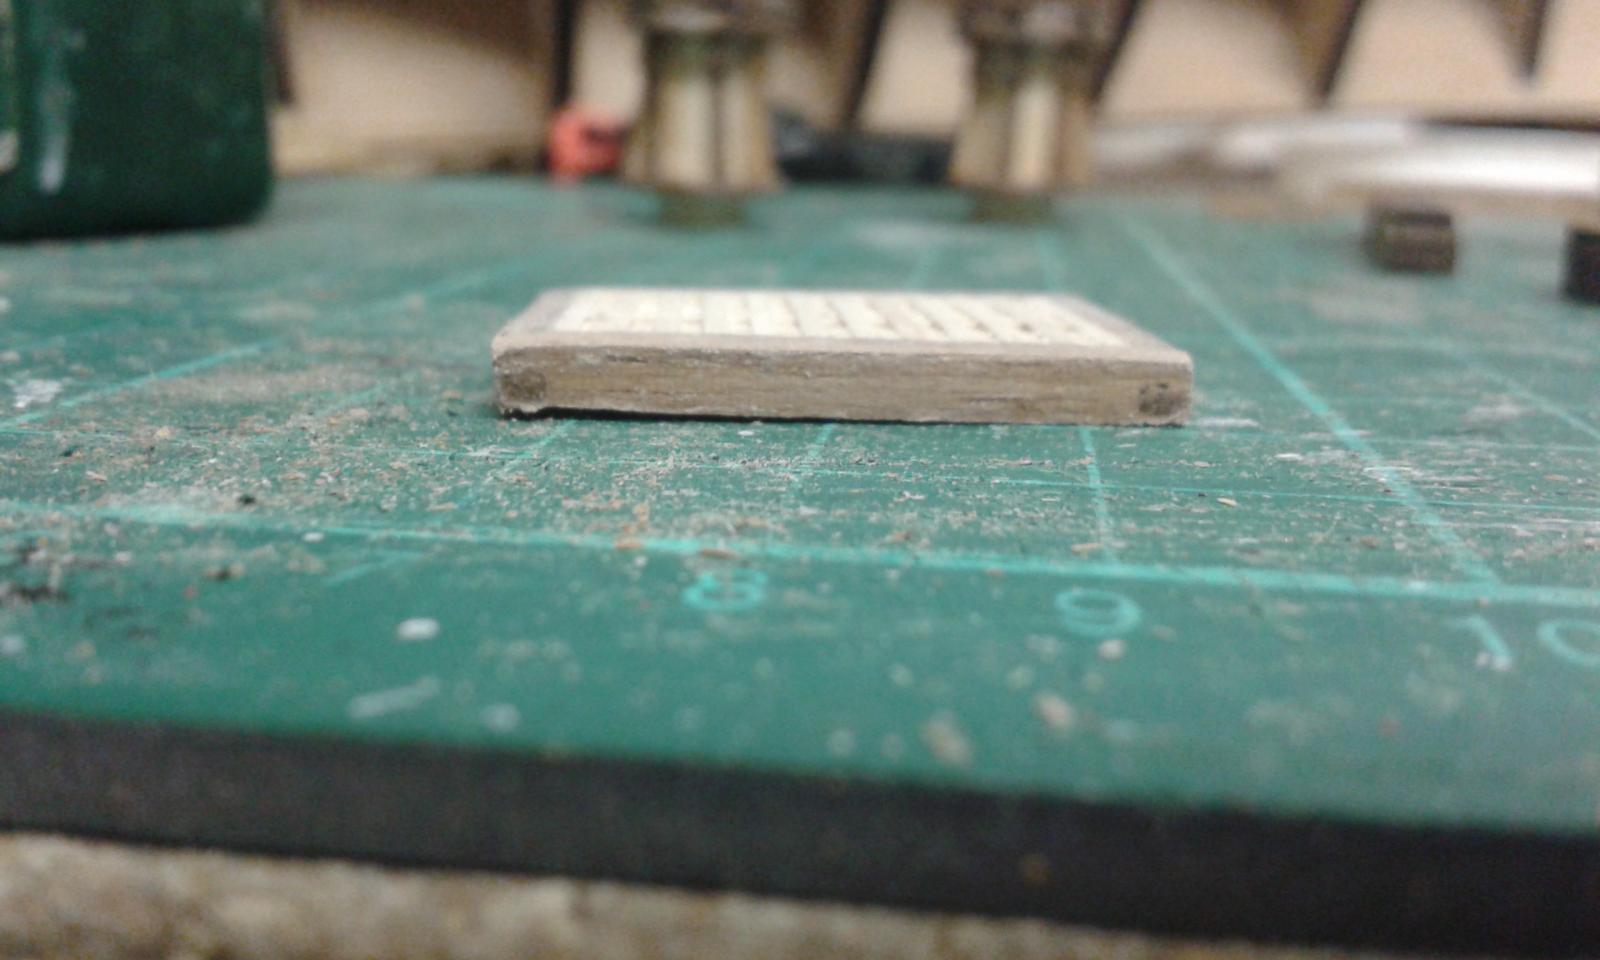
I've now cut gratings to size and filed the rough edges smooth.
I have taken note of the correct alignment (bow to stern) for the grating top member for when I fix these assemblies to the lower gun deck.
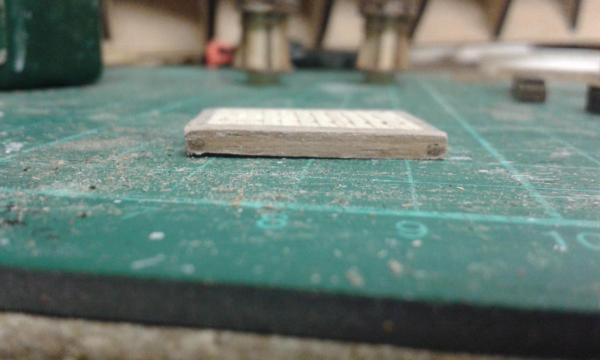
I decided to use the box joint for the coamings. This was quite easy to do with the aid of my mini vice, modeling knife and needle file.
Coamings with box joint prepared. I made the coamings lightly oversized which allowed me to file smooth, with the sawdust filling any gaps.

Started fixing the coaming to the grating. I found it best to super glue each coaming to the side of the grating working in a clockwise manner. When necessary I used my needle file to adjust the box joint to ensure a tight fit.
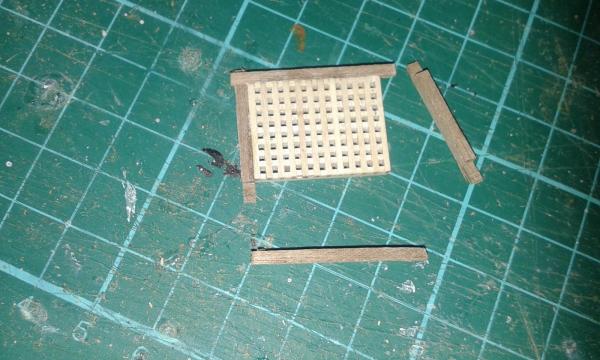
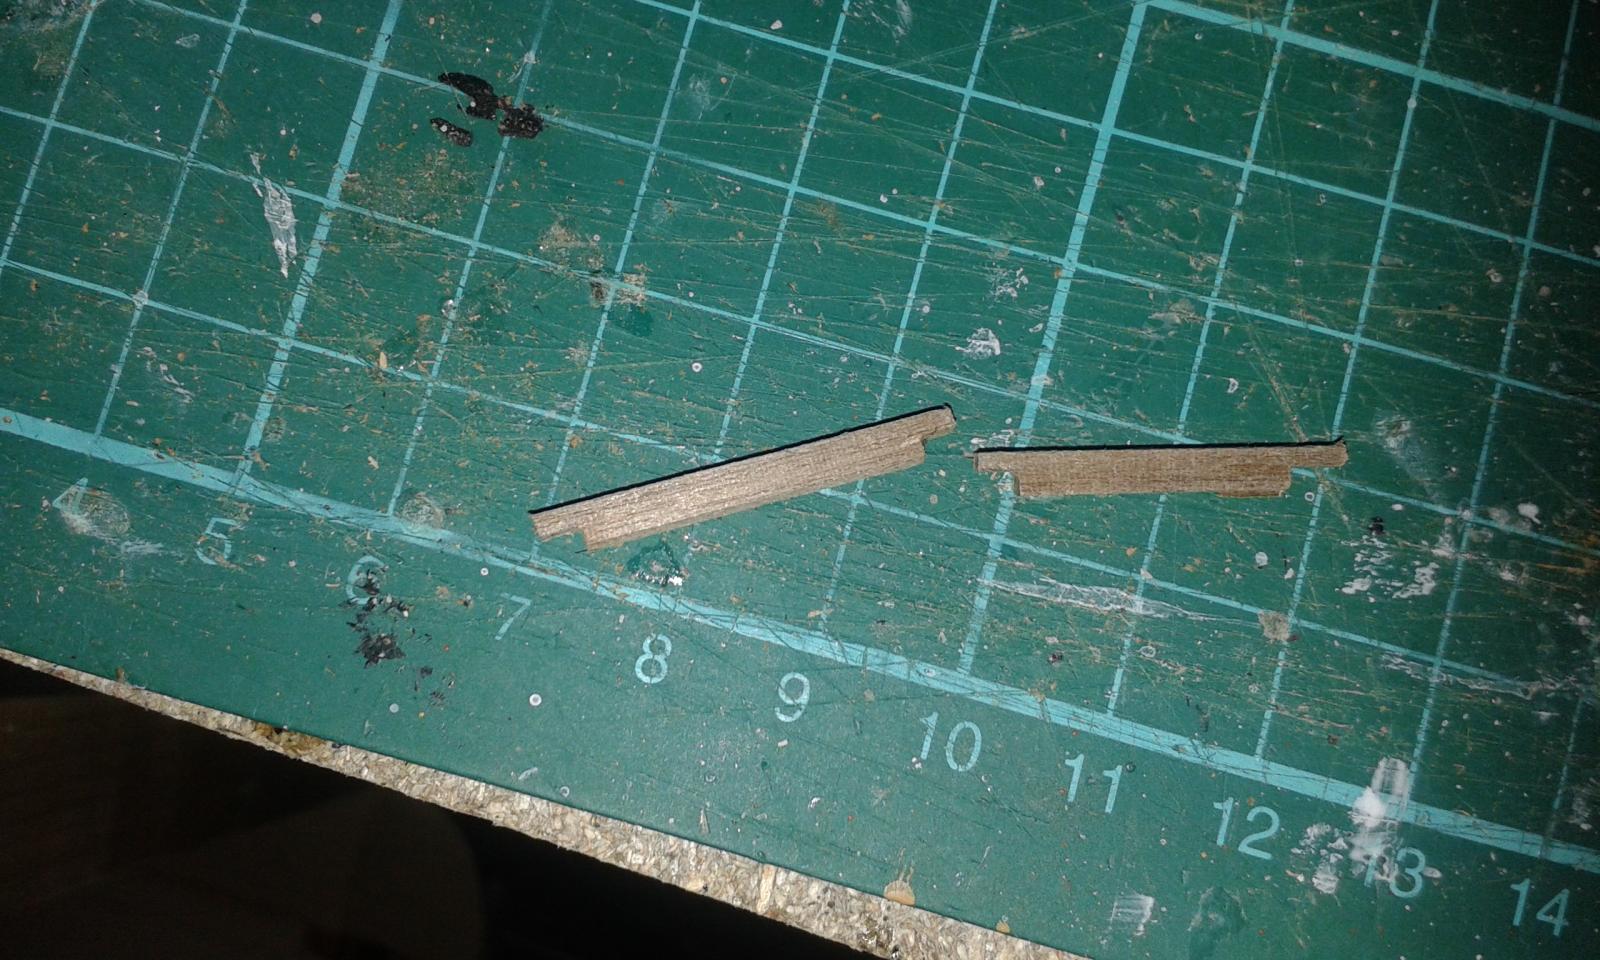
End view of box joint, I really happy with how these have turned out.
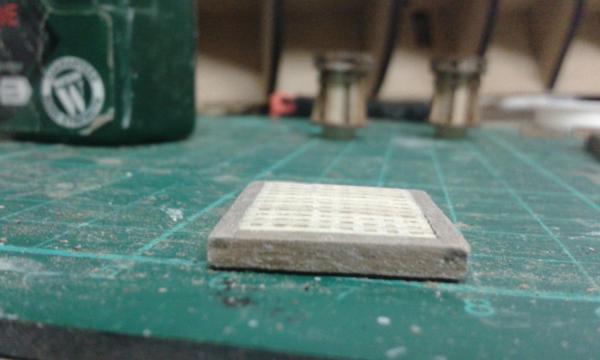
Some completed assemblies. The right hand grating is slightly to big but this will be easy to trim back, but I may leave as is as it will be hidden by the quarterdeck


HMS Victory by Glenn-UK - Caldercraft - 1/72
in - Kit build logs for subjects built from 1751 - 1800
Posted · Edited by Glennard
Hello Jerry
I'm using a method suggested by Shipyard Sid.
Before the gun port lid is fitted to hull a length of thread is fed through the two eyelets, free of ca glue
I then apply ca to the back edge of the lid and hinge and position the gun port lid and hold for a few seconds whilst the glue grabs. I then leave alone for 24 hours to ensure the glue is fully cured.
Next I drill the two holes in the hull and feed each end of the thread into these holes and secure with a dab of ca. The thread is then cut in two, between the eyelets and each thread is then tensioned in turn against the eyelet and held firm with a small dab of ca, no knots or splices are used!!!!, The excess thread is then trimmed and I move on to the next lid.
Once the gun port lids have been assembled it doesn't take very long to install and rig.