


Glenn-UK
-
Posts
2,802 -
Joined
-
Last visited
Content Type
Profiles
Forums
Gallery
Events
Posts posted by Glenn-UK
-
-
Many thanks David.
It is fiddley work cuting the end plates for stern post and bow but I'm taking time to check fit before I apply the glue. The bow has been more challenging than the stern and your pictures have helped me out. I'm also taking time to bend the plates before fitting as necessary. How is the barge build progressing? Will be interested to know where/how you fitted bulkhead 6.
-
Hi Jerry
The rigging looks amazing, what's happened to the long pointy thing?
-
Many thanks for your very kind comments. I will be very happy if my build turns out as good as yours look.
-
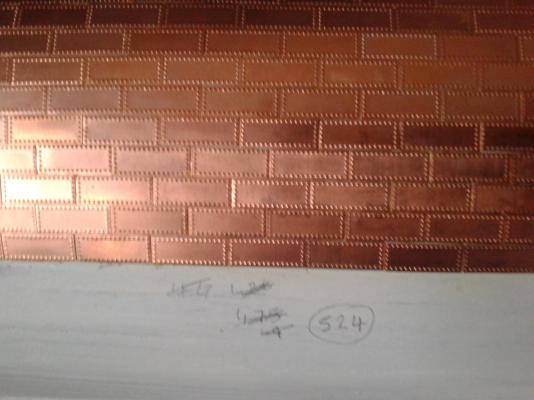
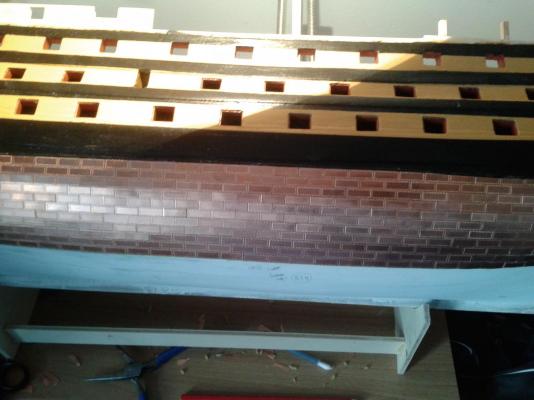
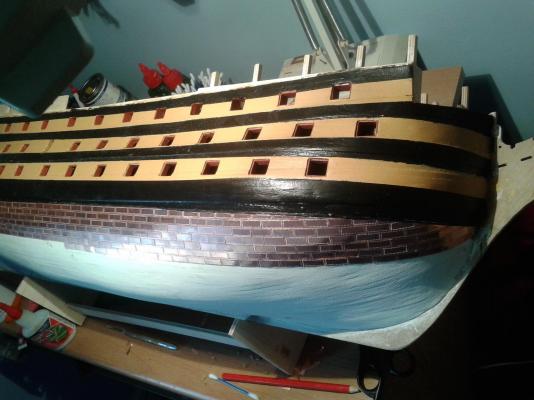
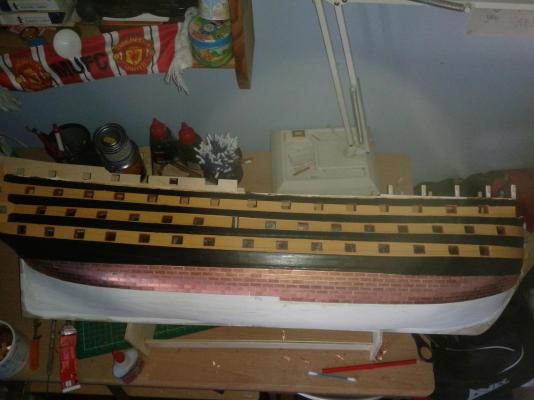
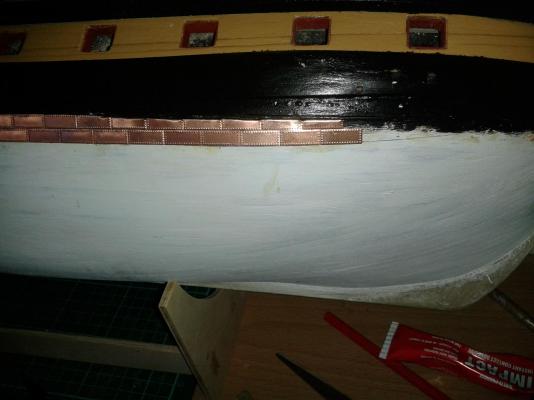
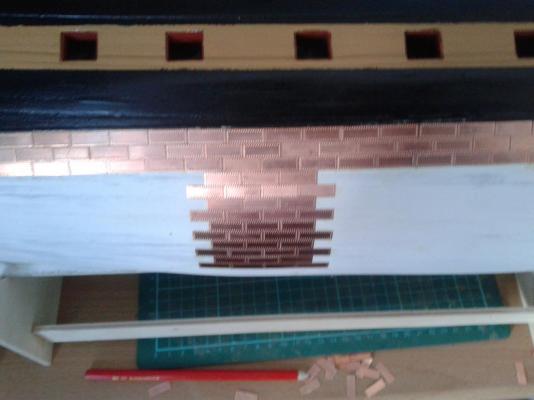
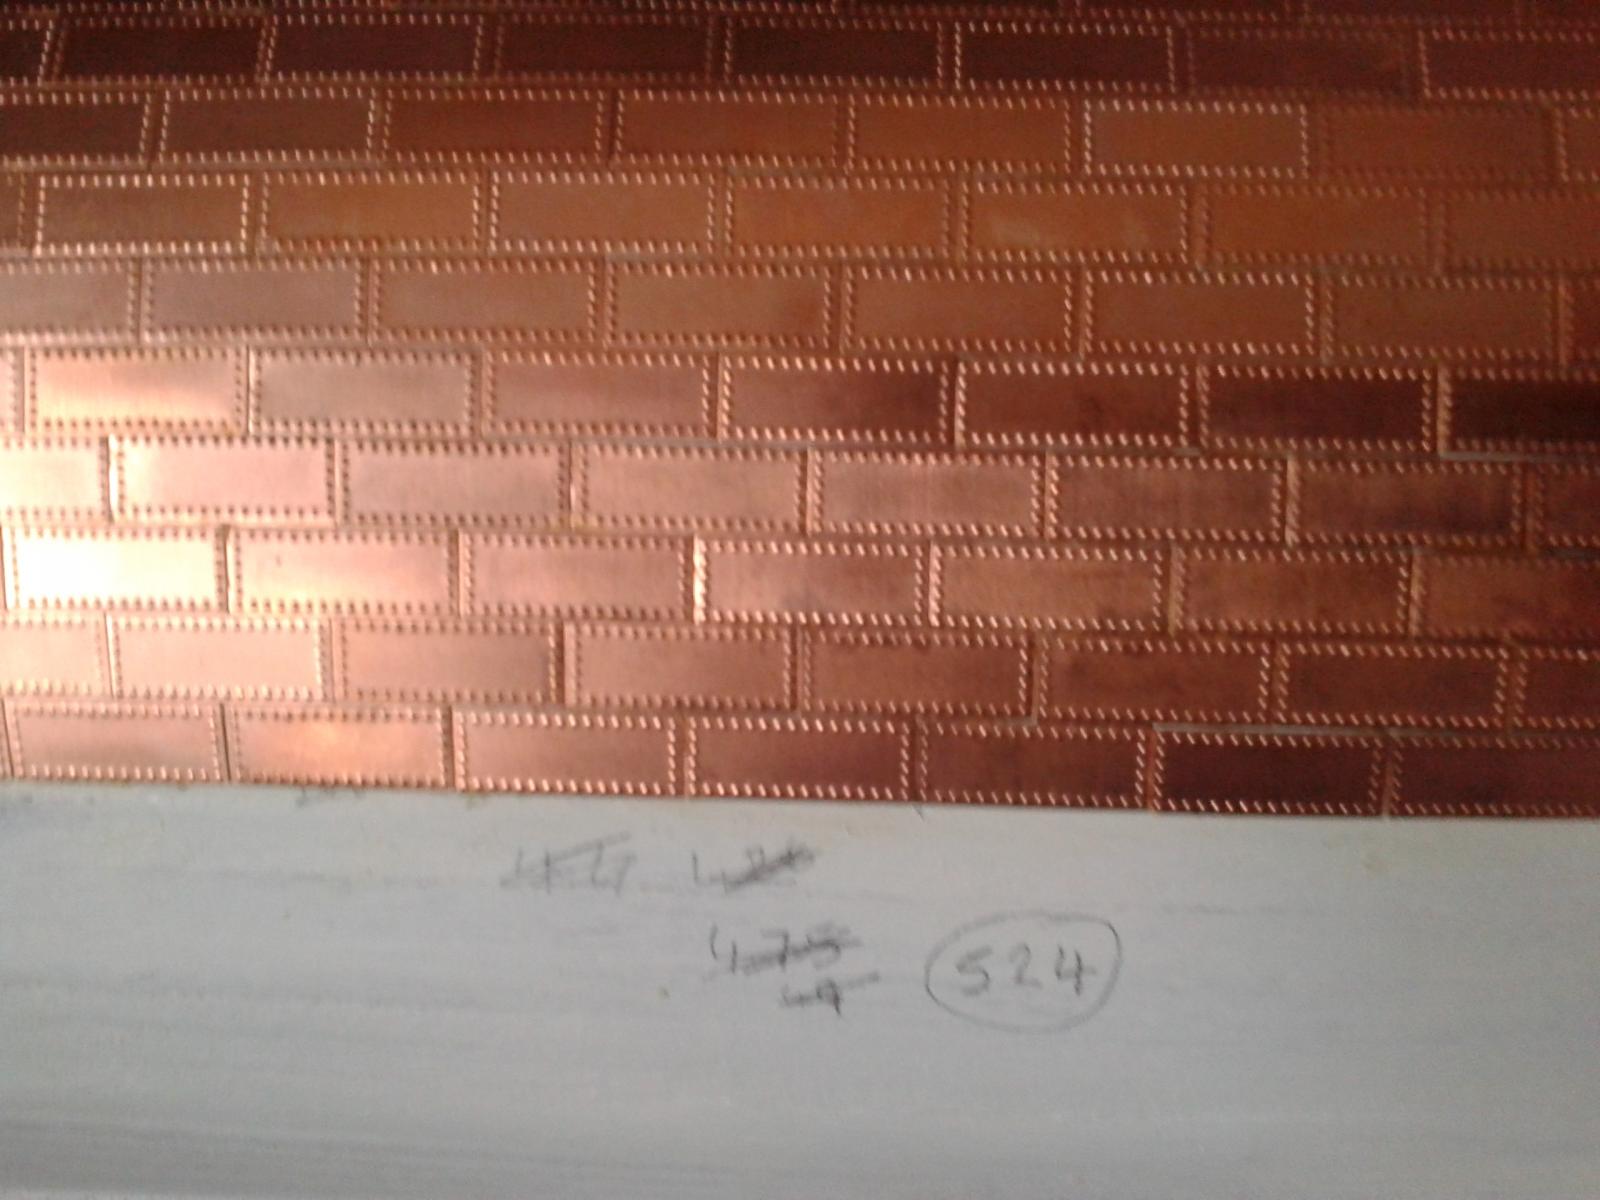
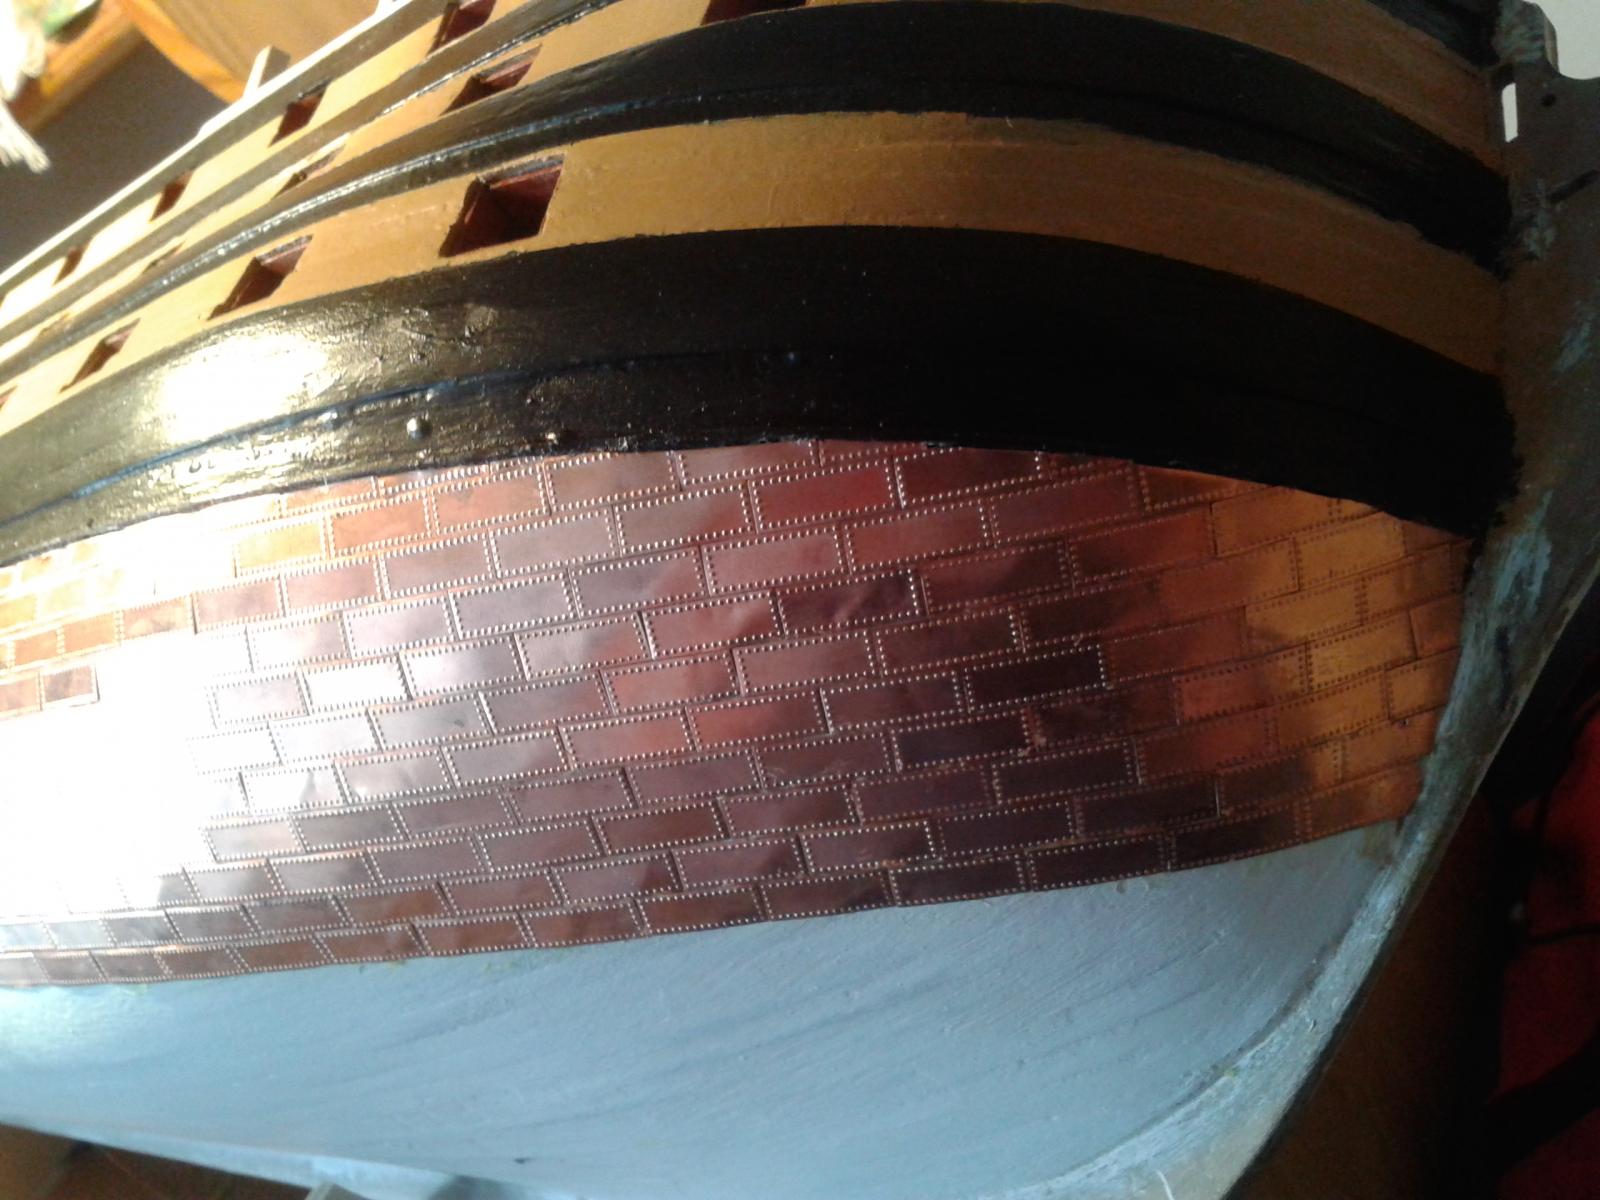
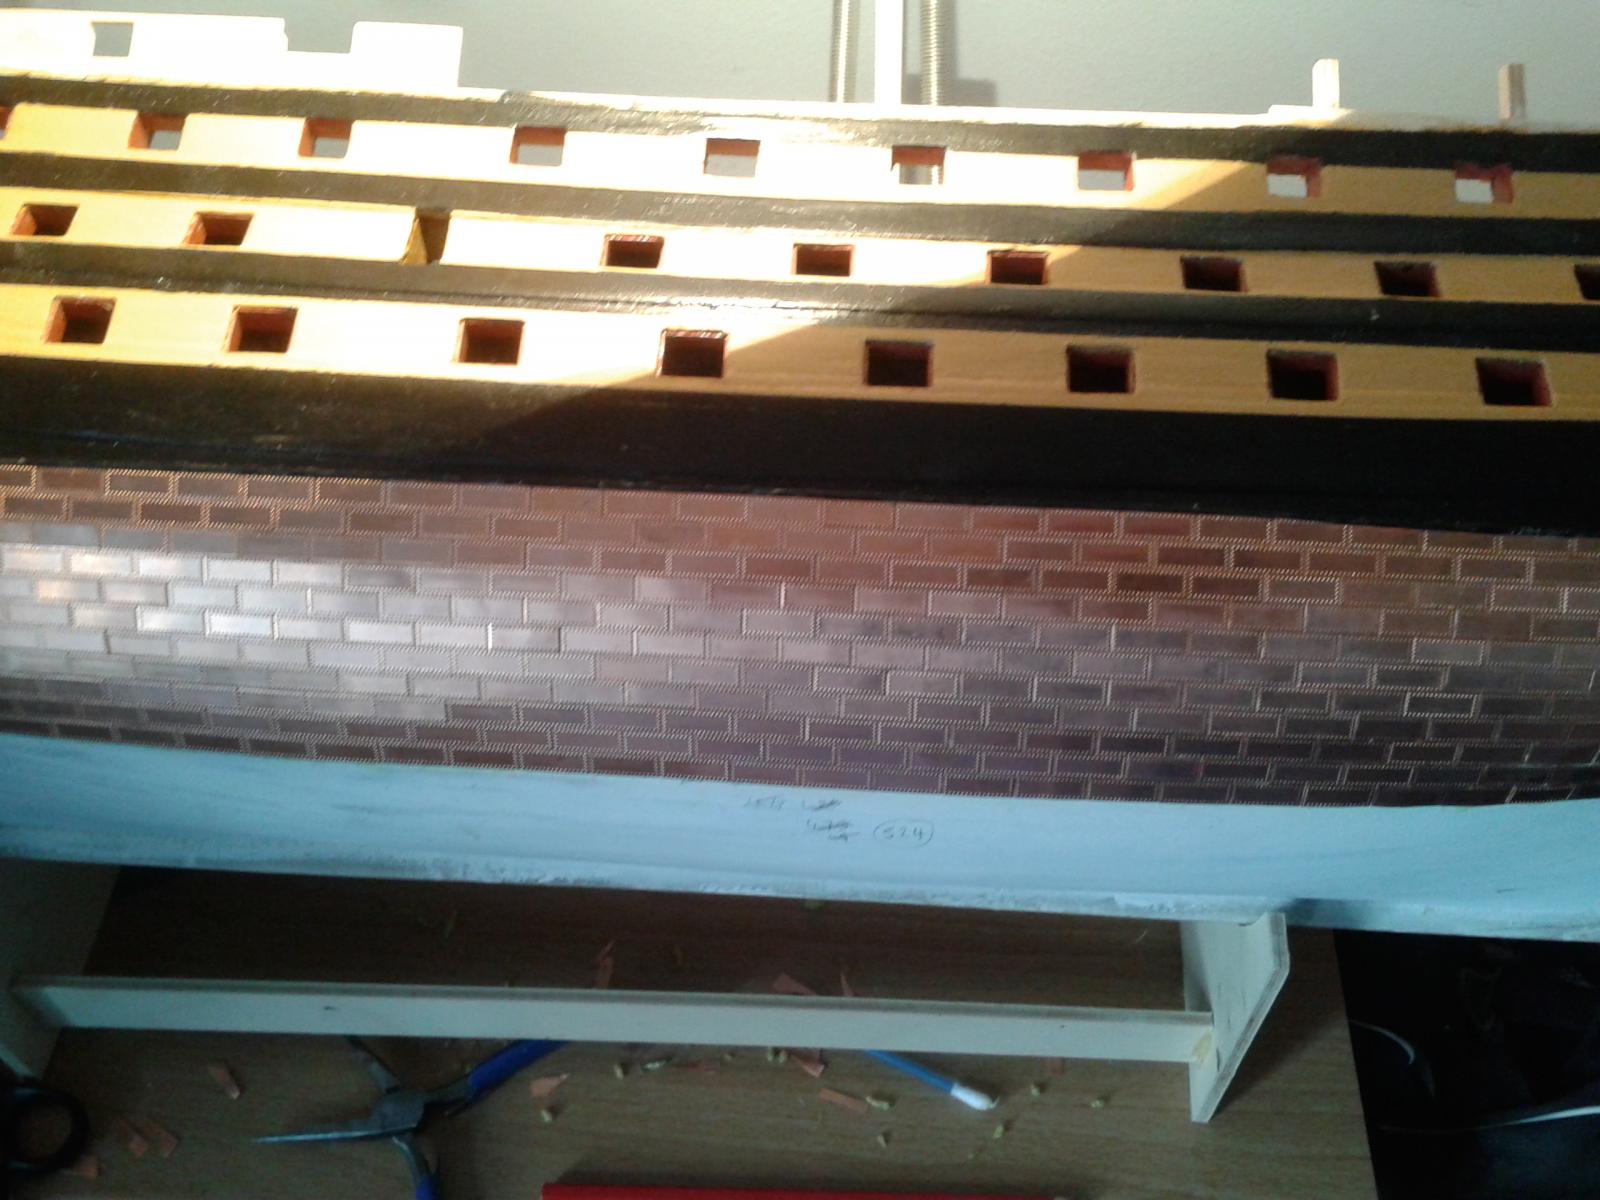
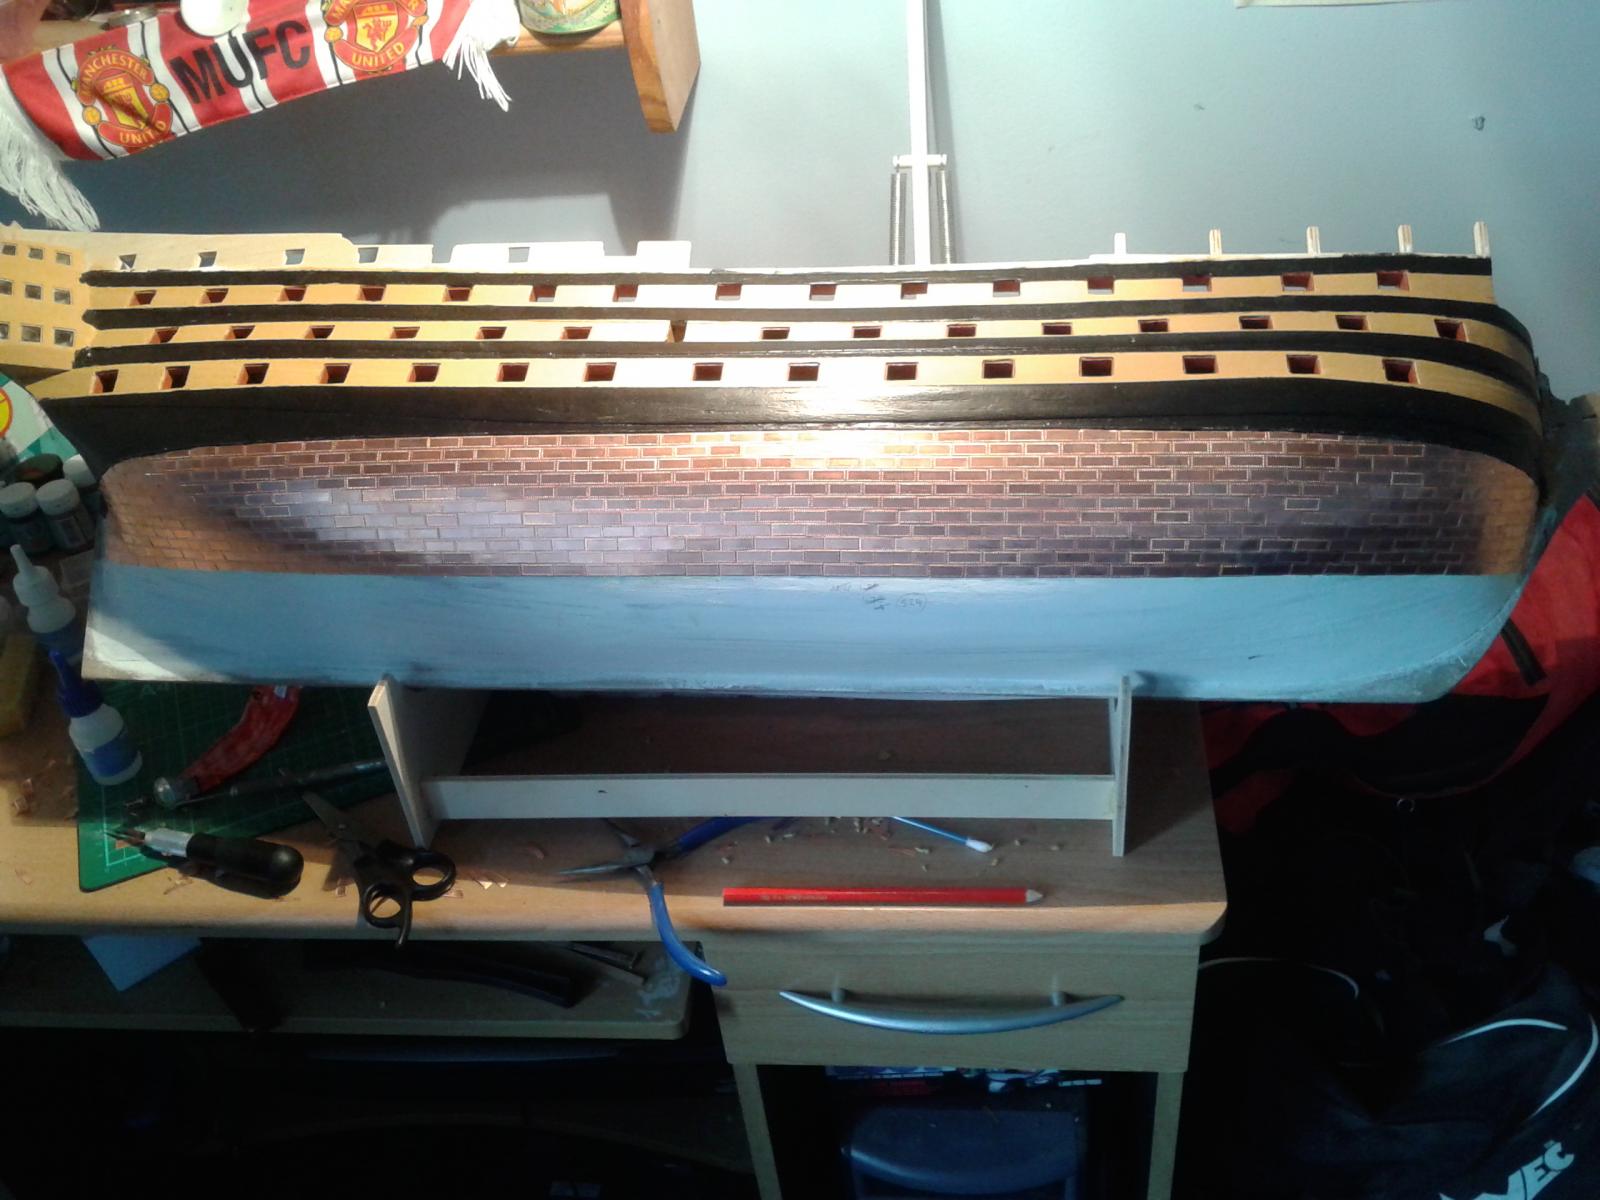
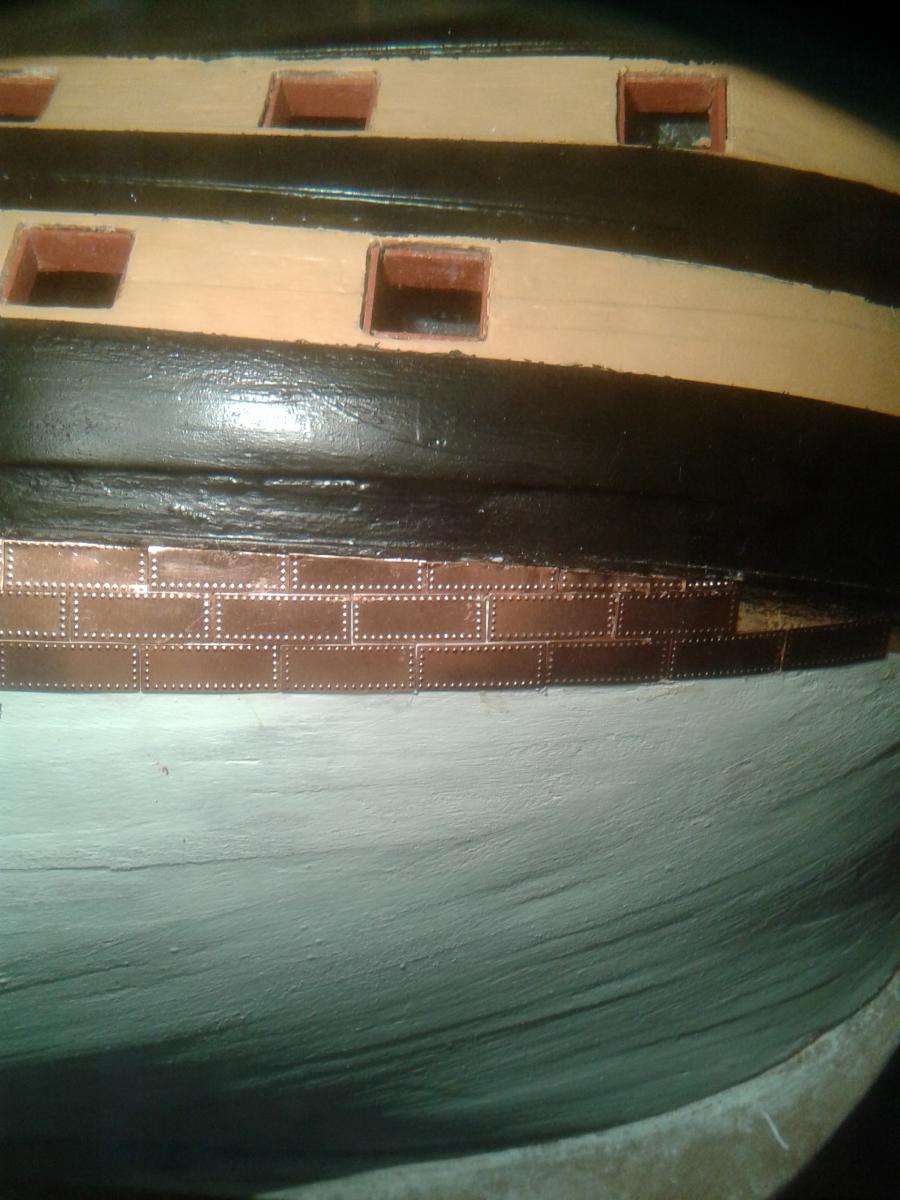
524 copper plates now fitted. I think I'm about 40% complete on the port side.
I think the Evostick instant glue, as recommended by Shipyard Ship has proven to be a sound choice, although I have found it necessary to use ca glue for the odd copper plate at stern and bow end.
My hat goes off to the builders, like Jerry, who used ca for fixing all the copper plates.
Here are some up to date pictures, I think I will replace one of the plates at the stern as I'm not totally happy with the fit.


- mort stoll, CaptainSteve, WackoWolf and 1 other
-
 4
4
-
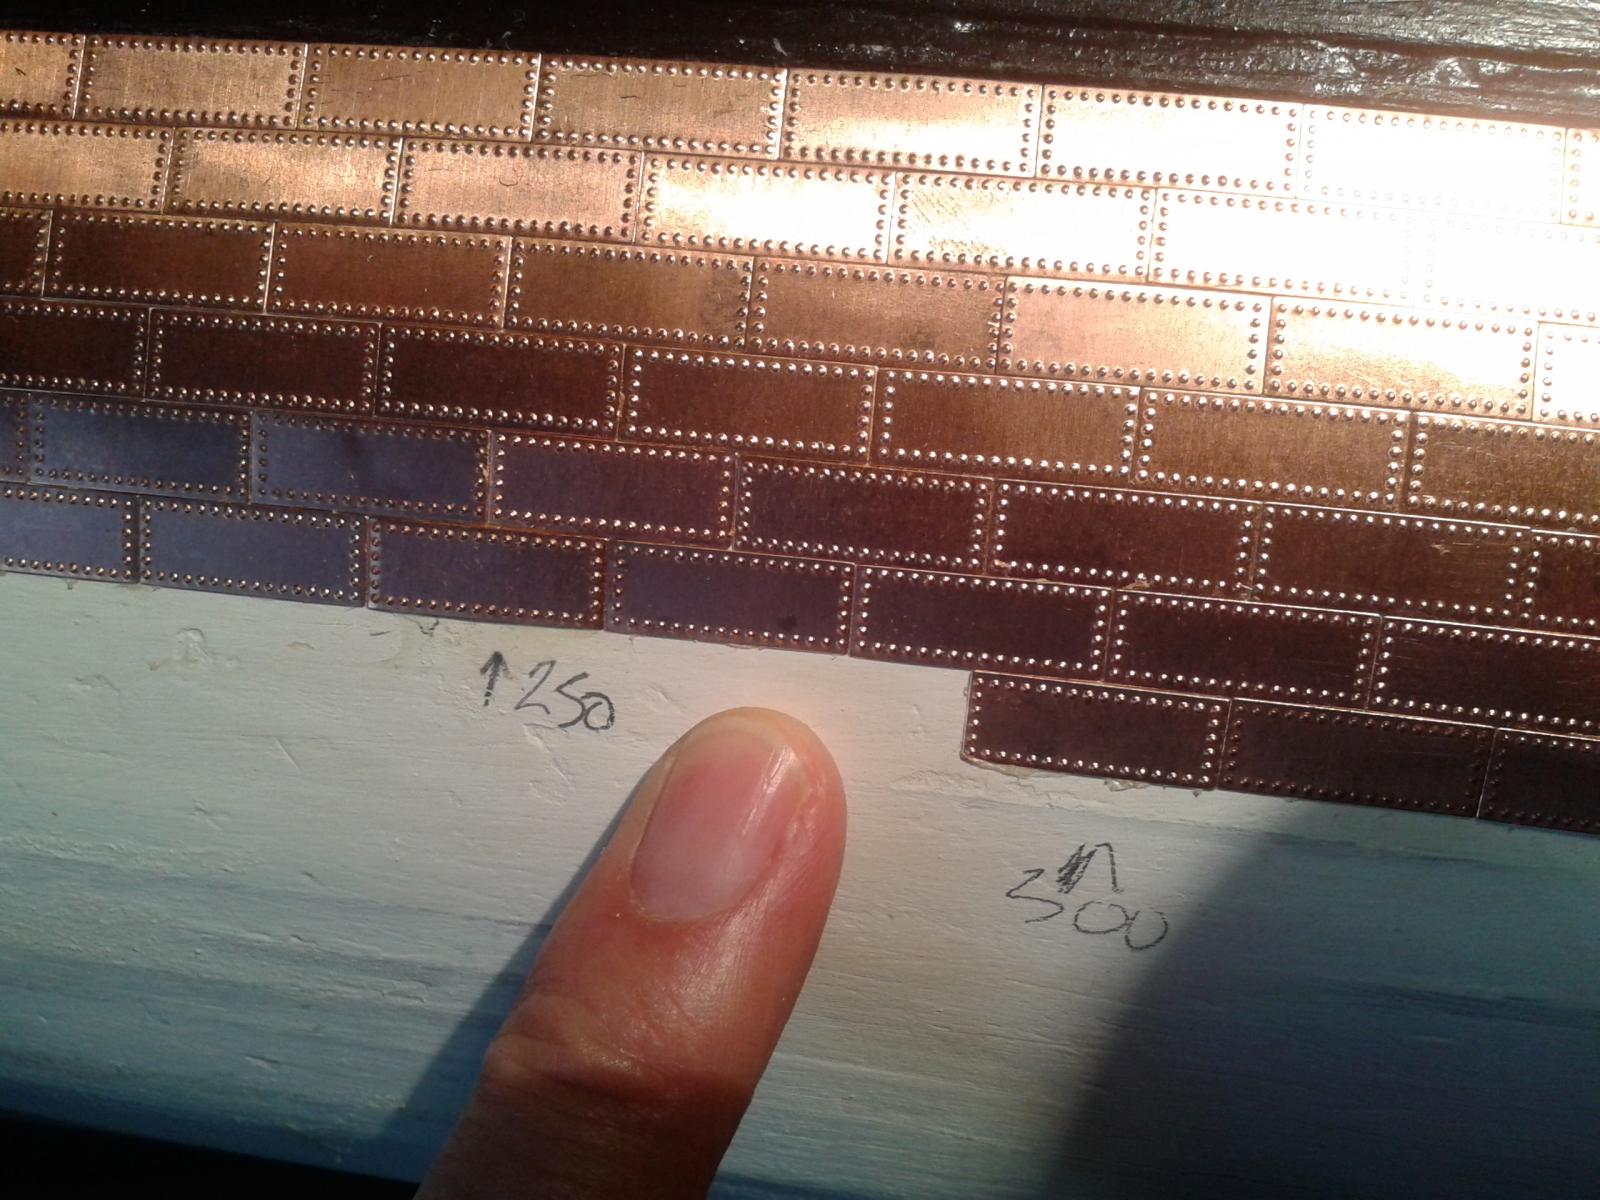
300 copper plates fitted and counting.
Hope to spend a good few hours tomorrow but will not keep posting updates.

-
As with all Victory build tasks what seems difficult in the beginning tends to get easier as we master the different techniques required for each stage. Your build is an excellent example of what can be achieved with dedication and hard work.
-
Hello Dave
I wasted 250+ plates with my false start and as they were quite cheap thought I would stock up just in case.
How is the barge build progressing?
-
Hello Tim
The copper plates are supplied with the kit, but replacement plates (of different styles) can be ordered from Cornwall Model Boats, I have ordered 500 additional plates, to cover my false start and to ensure I have a got a good spares level. Ordered them on Monday and they arrived in post on Wednesday.
Check out CMB web site for more information.
Hope this helps.
Glenn
-
-
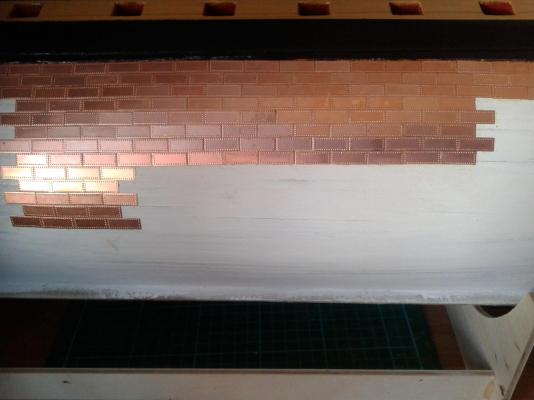
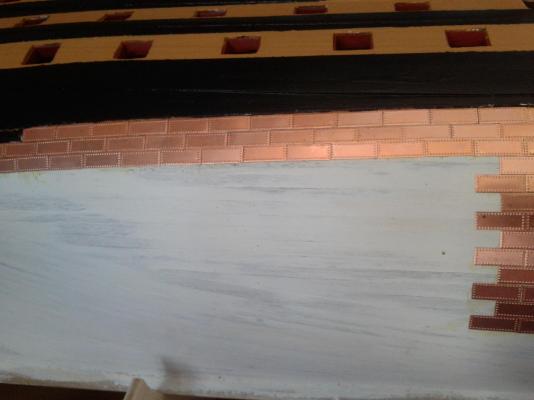
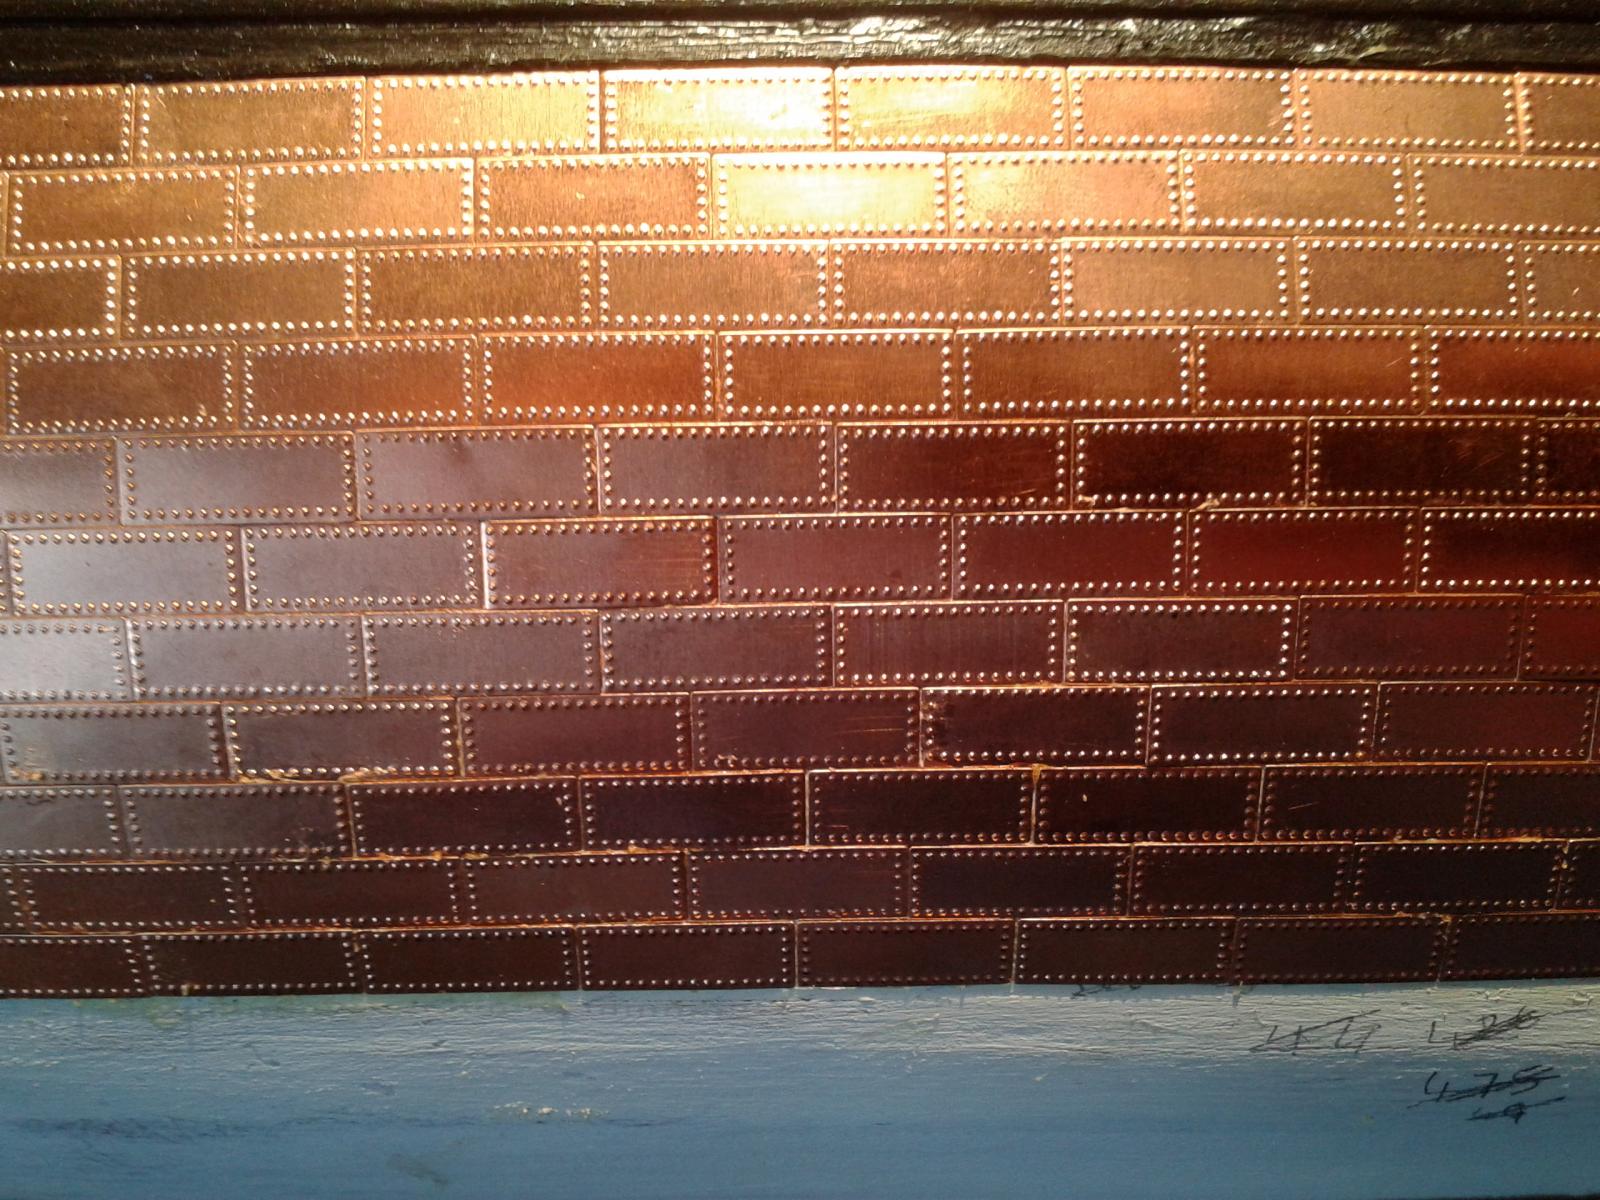
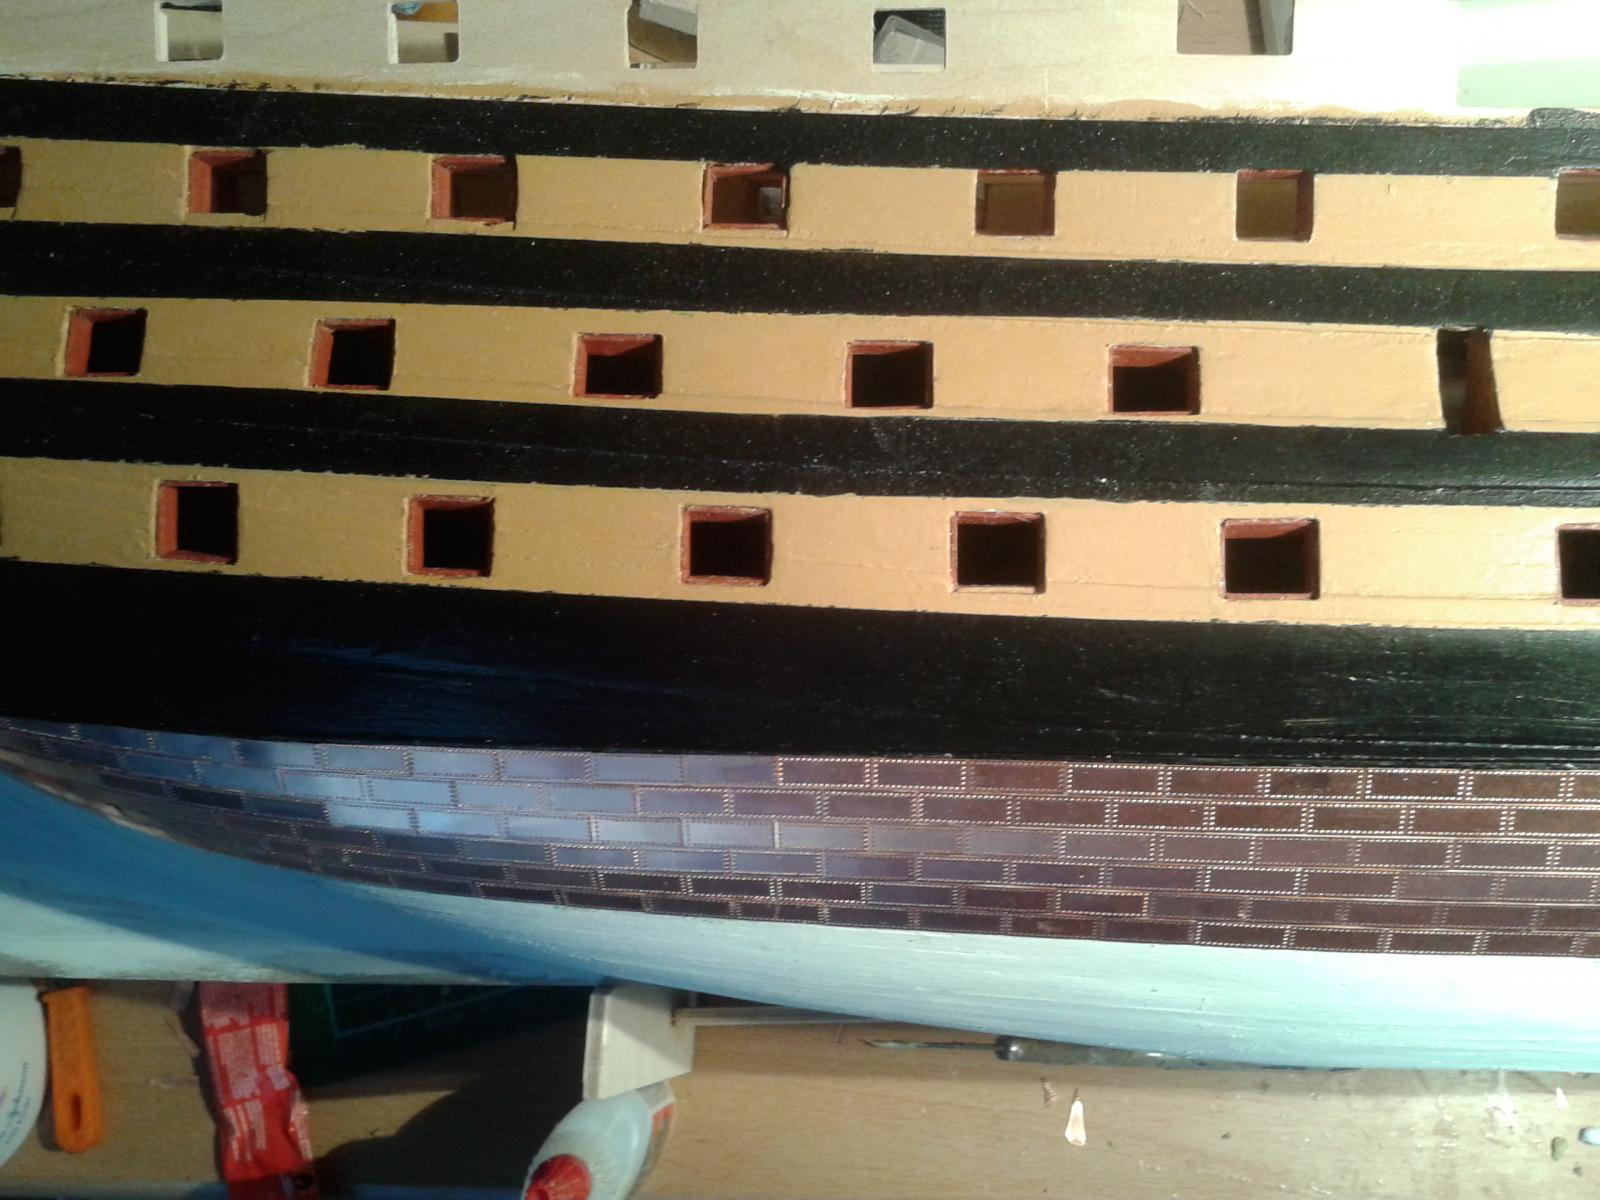
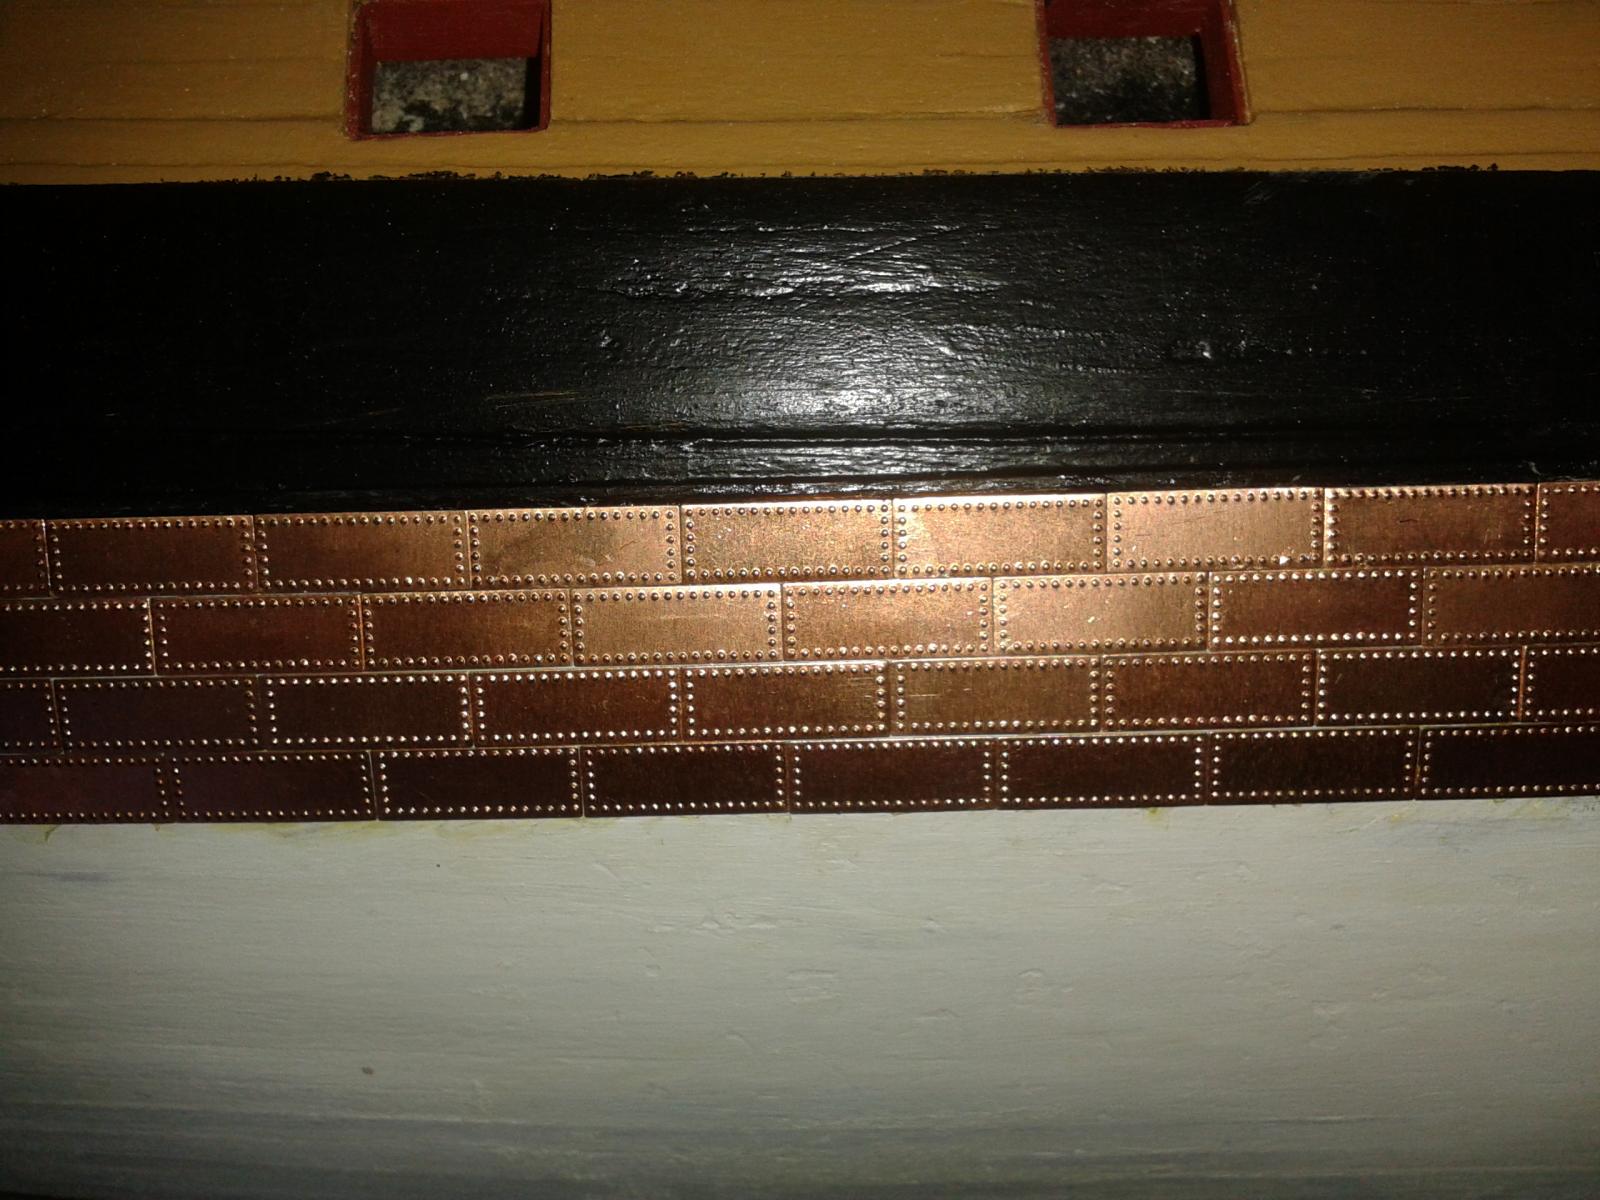
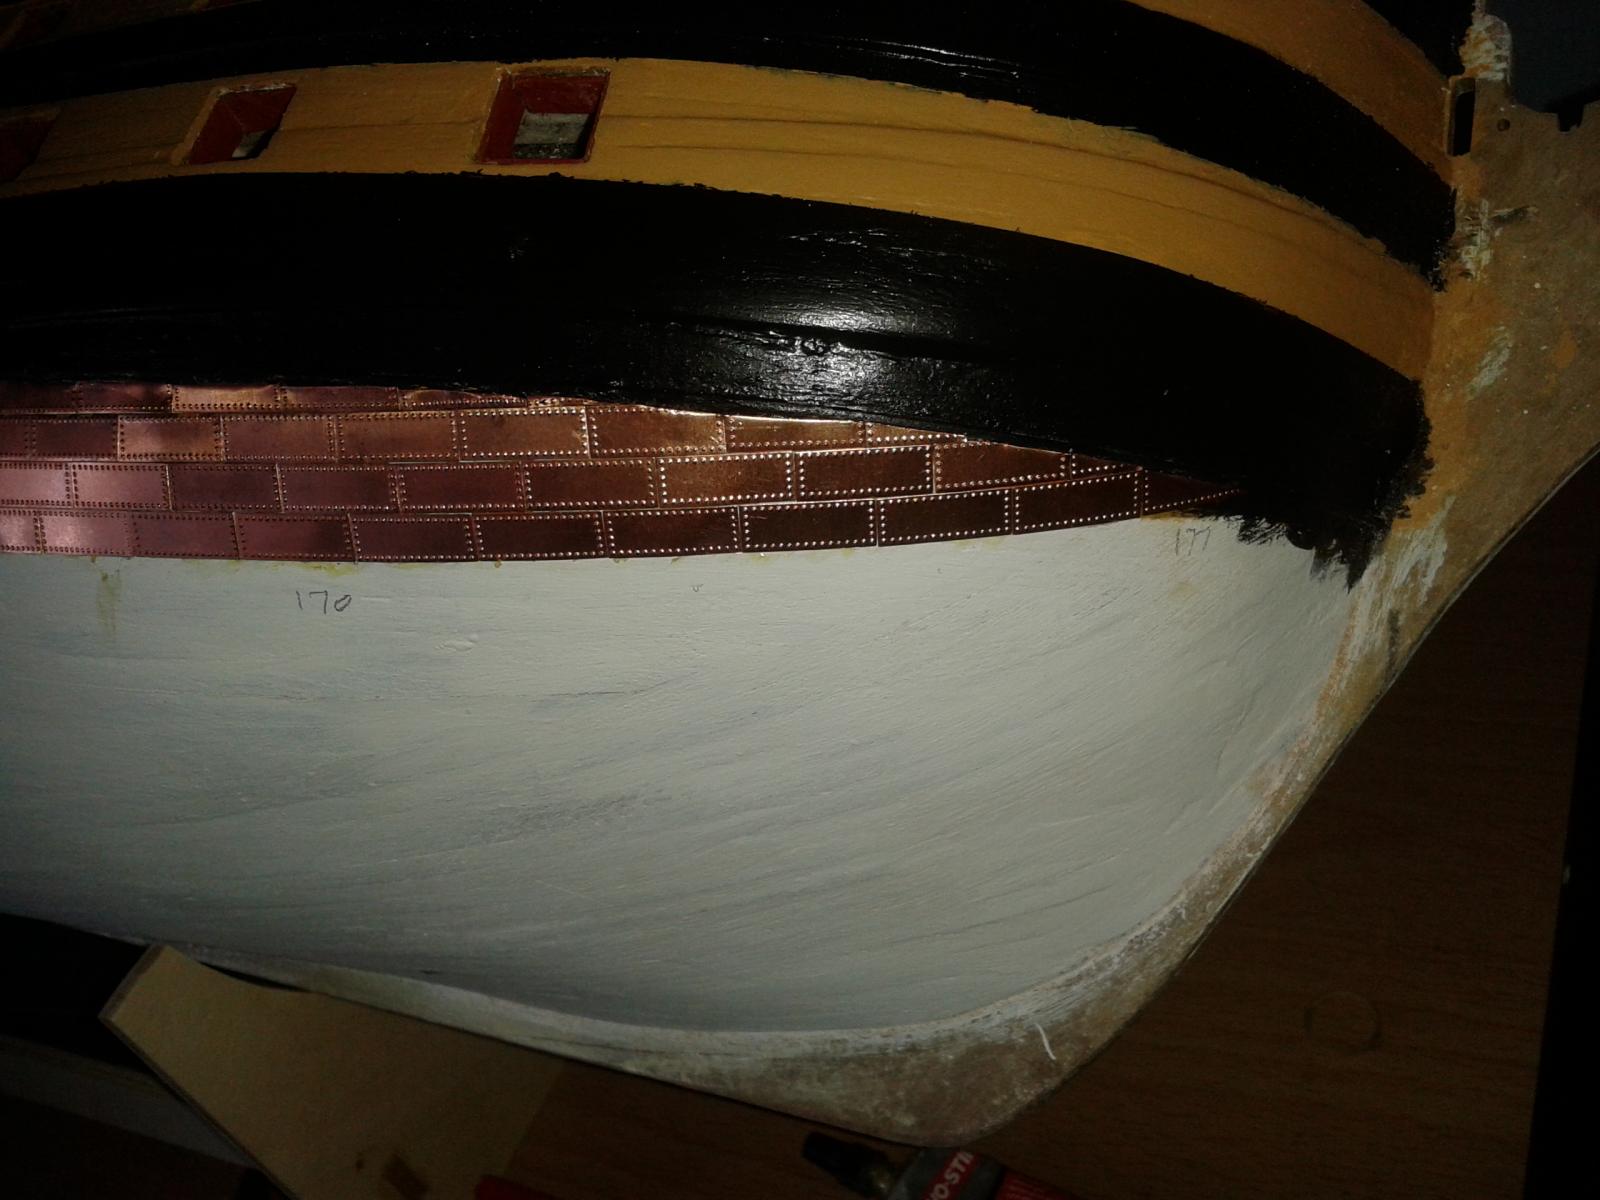
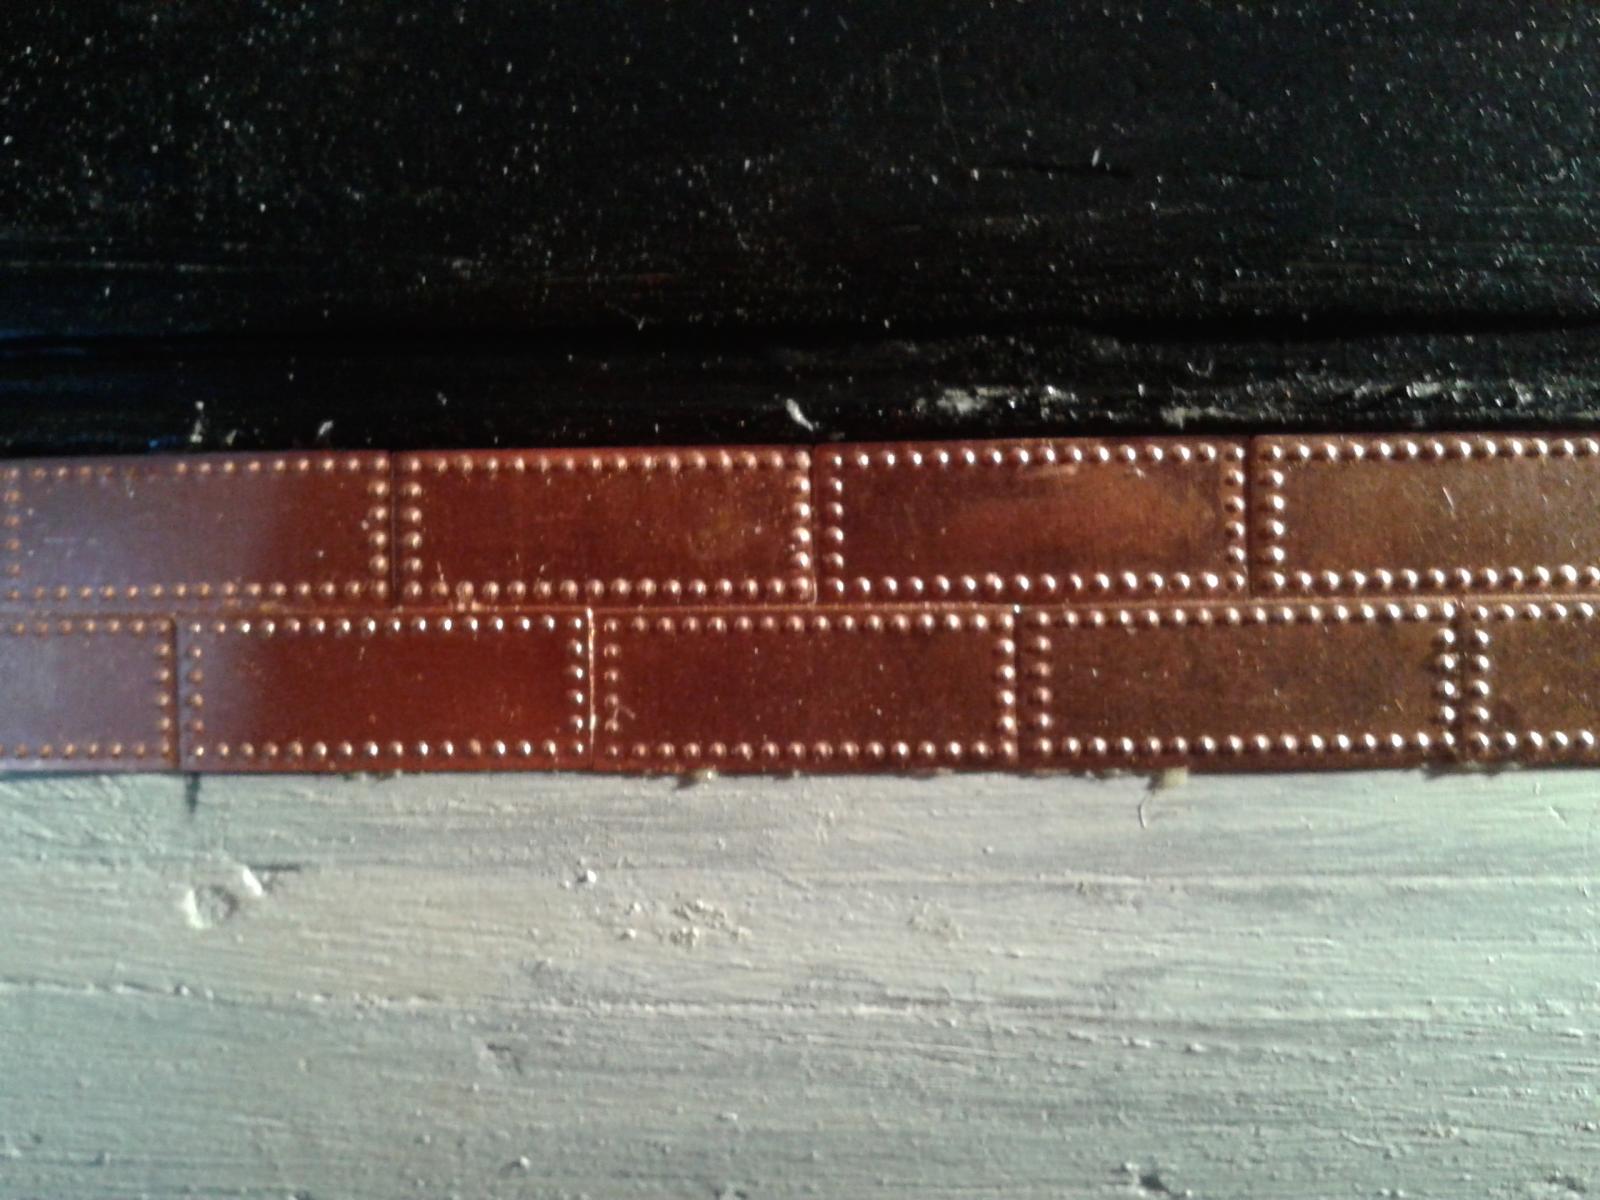
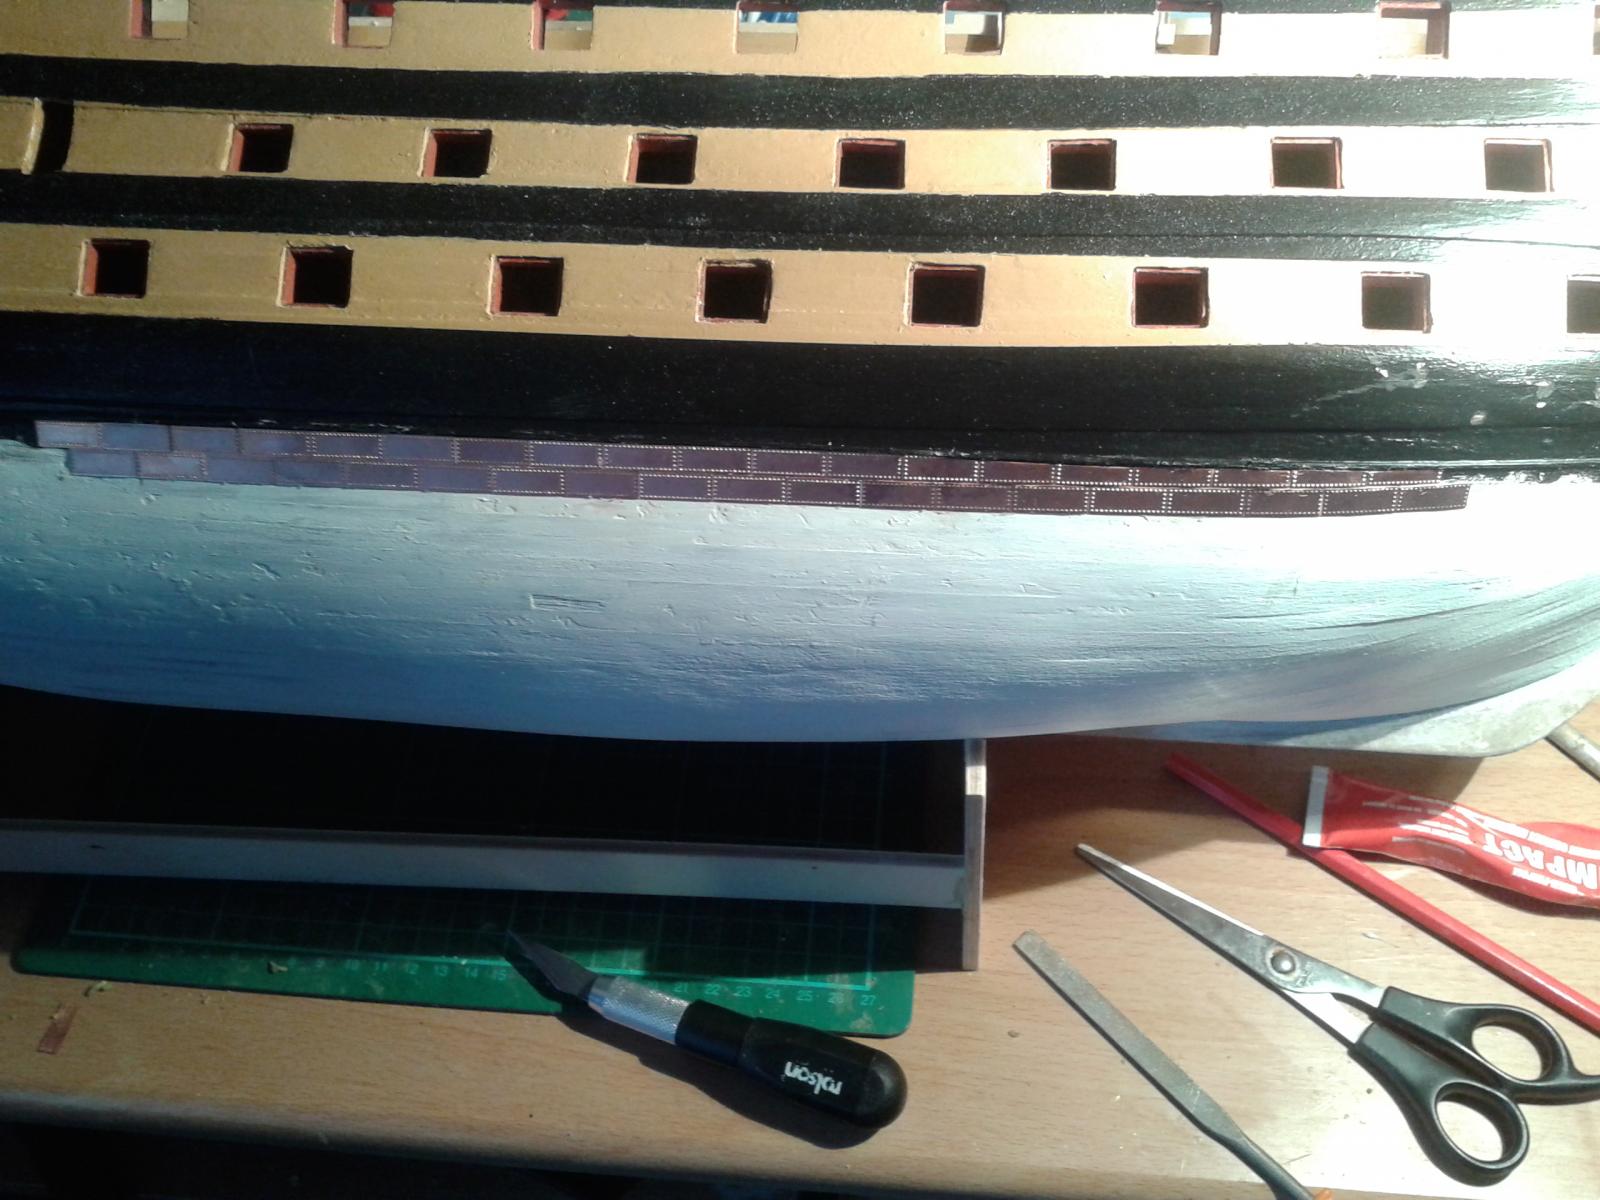
Making steady progress with the copper plating, 4 rows completed and 177 plates fitted.
Apart from the time it takes to shape the copper plates to the waterline its not taking to much time to fit the plates, and I'm not getting high the glue fumes as yet.

-
It didn't take too long to remove the copper plates and excess glue and then to repaint as necessary.
Started coppering again tonight, using the my lighted magnifying glass to check each plate. I'm very happy with the installation this time around.
It has worked out fitting time is 2 minutes per plate at the moment, which includes the shaping time of some of the tiles, this time will reduce quite a bit when I'm not having to cut the plates.
I plan to finish the first two rows completely before moving down to the next 2 rows this time and when complete move on to the next 2 rows etc.
The last tile on the 2nd row does look slightly out of alignment on the photos, but this is an optical illusion as it correct in real life.


-
Hello Jerry
I echo David's comments, that is one cracking photo, it really shows your all hard on you excellent build.
-
Hello David
I'm sure once you have built the small boats and experimented with some positions you will pick the best solution as always.
-
Thanks for you're comments, I glad I discovered the error of my ways at such an early stage and will soon have everything back to how it should be.
I should use the magnifying light more but its very old and not very user friendly so I tend to use it as a last resort. I think maybe I need to see if I can get the spring loaded adjustable arms to move in a coordinated manner. At the moment they have a mind of there own and will not cooperate with me when I need to adjust the postion.
-
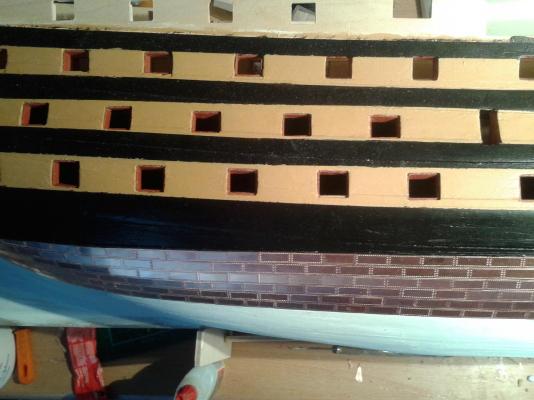
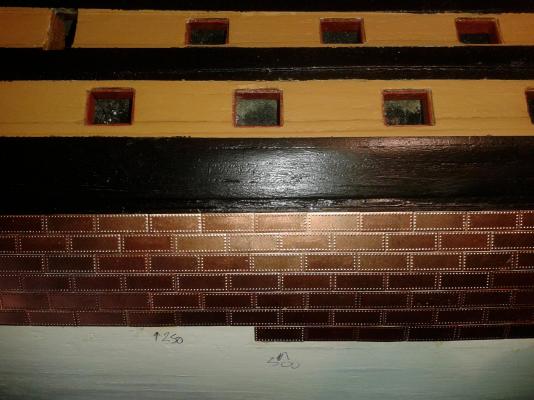
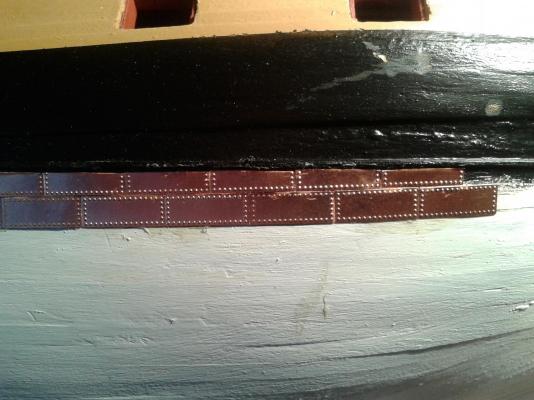
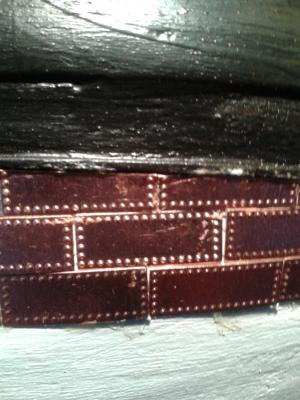
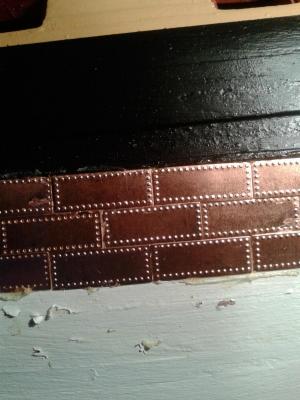
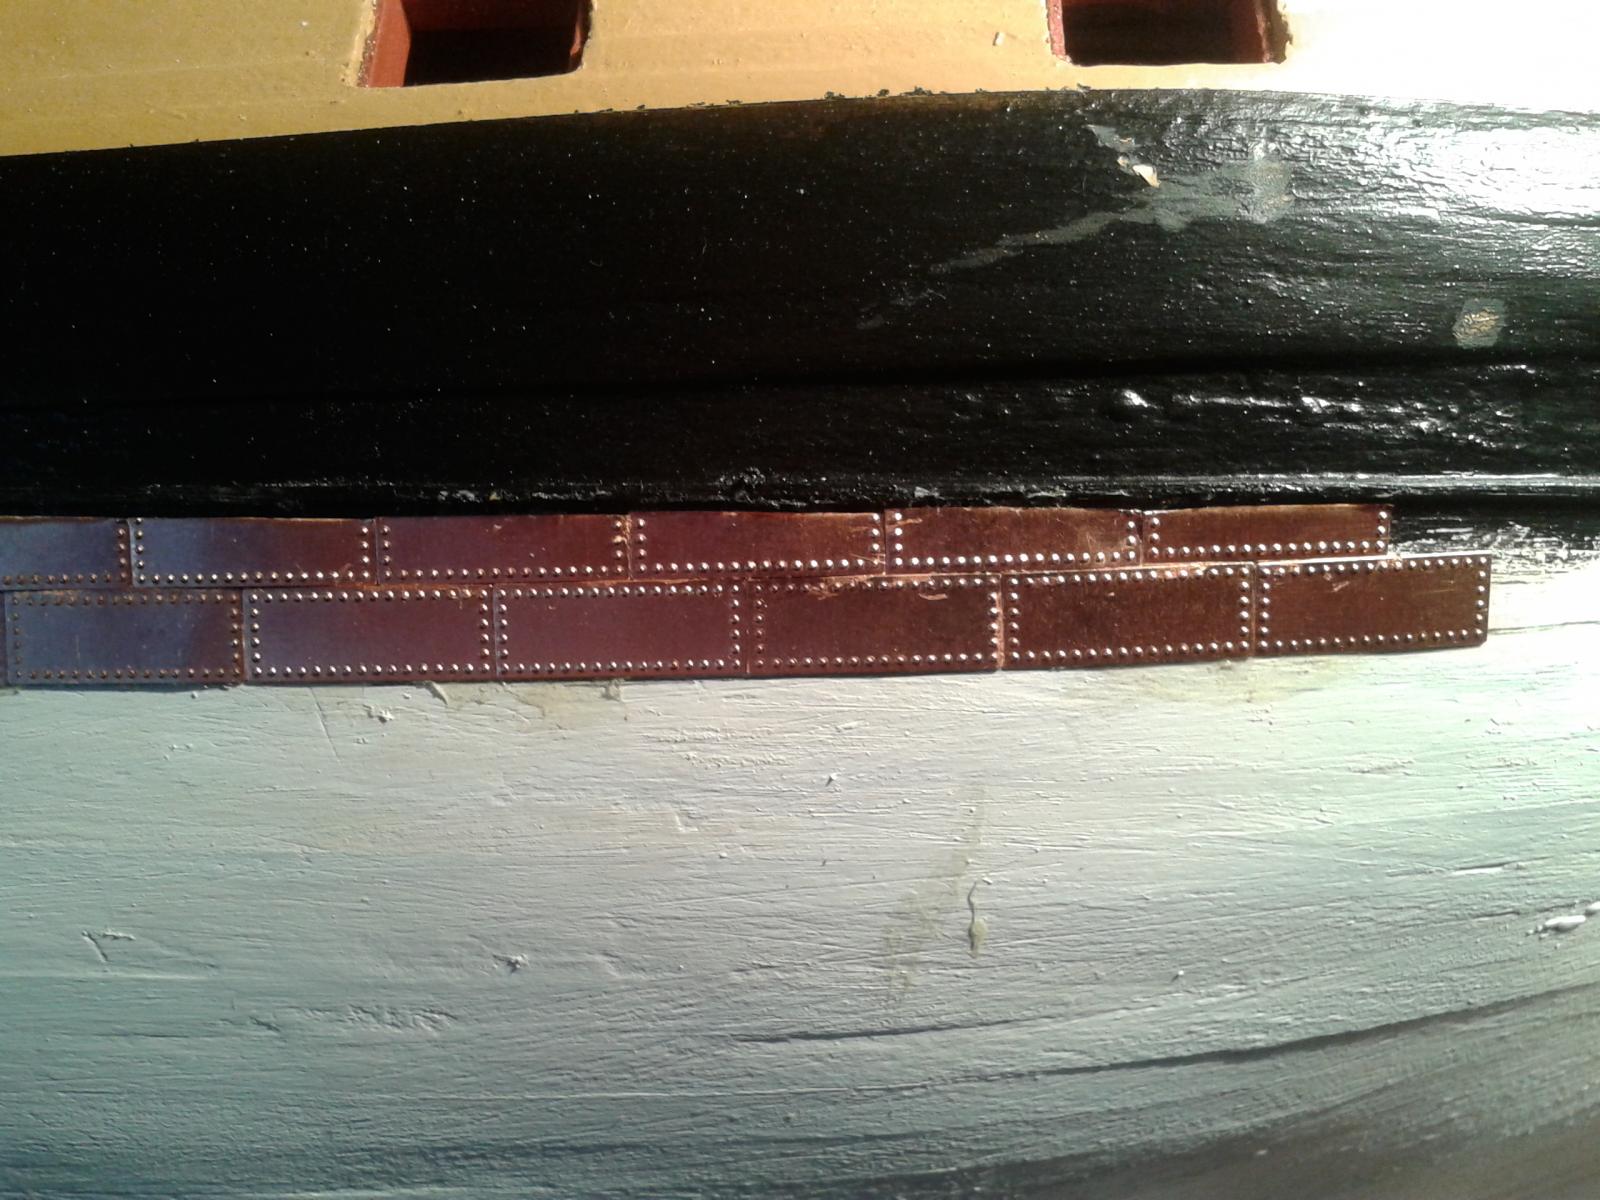
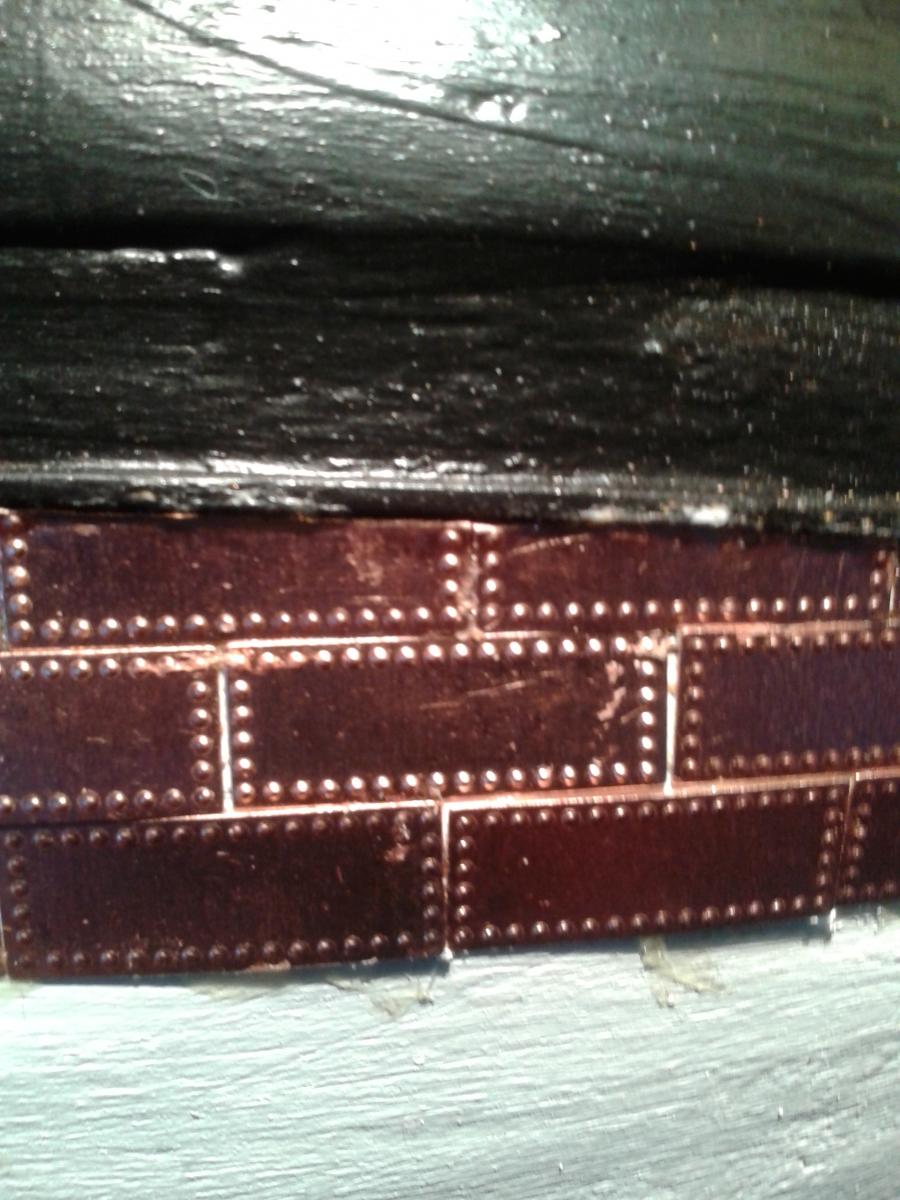
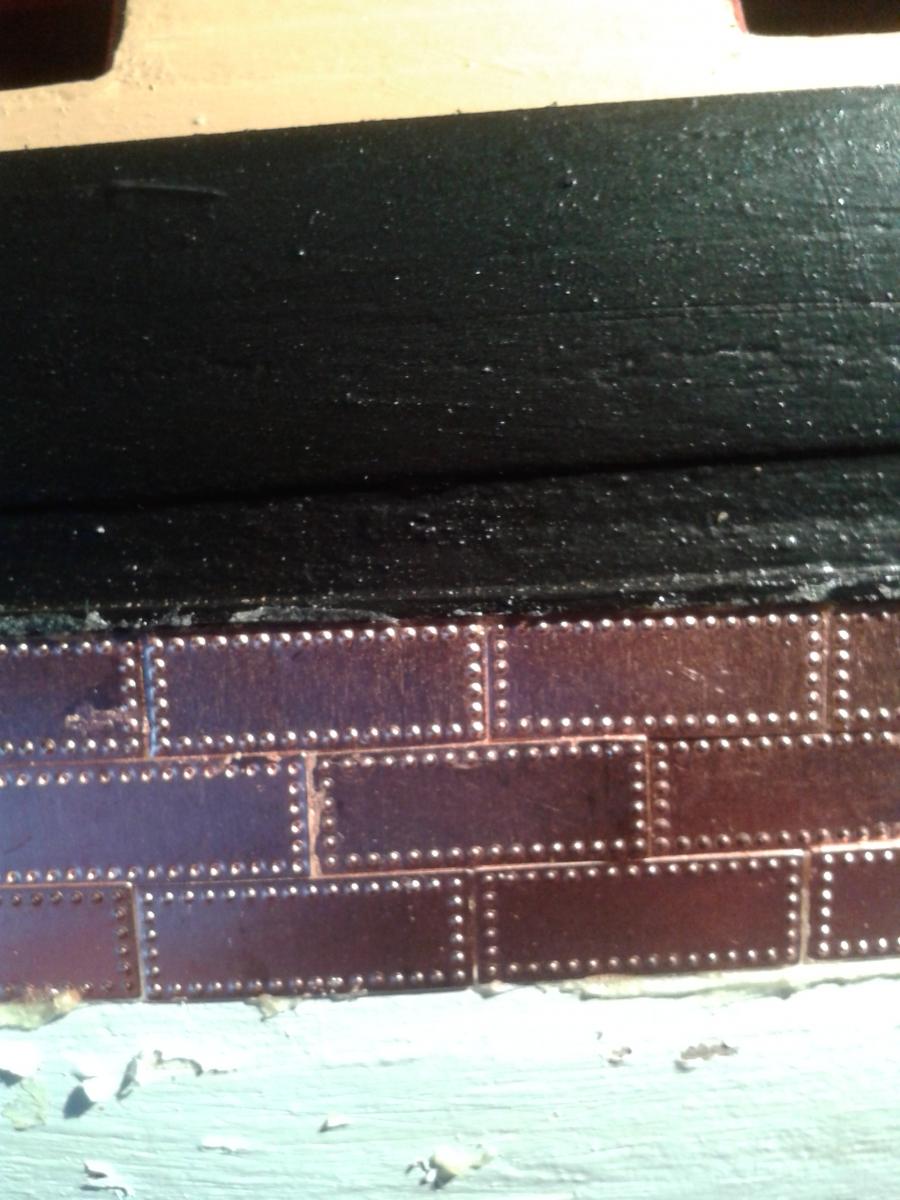
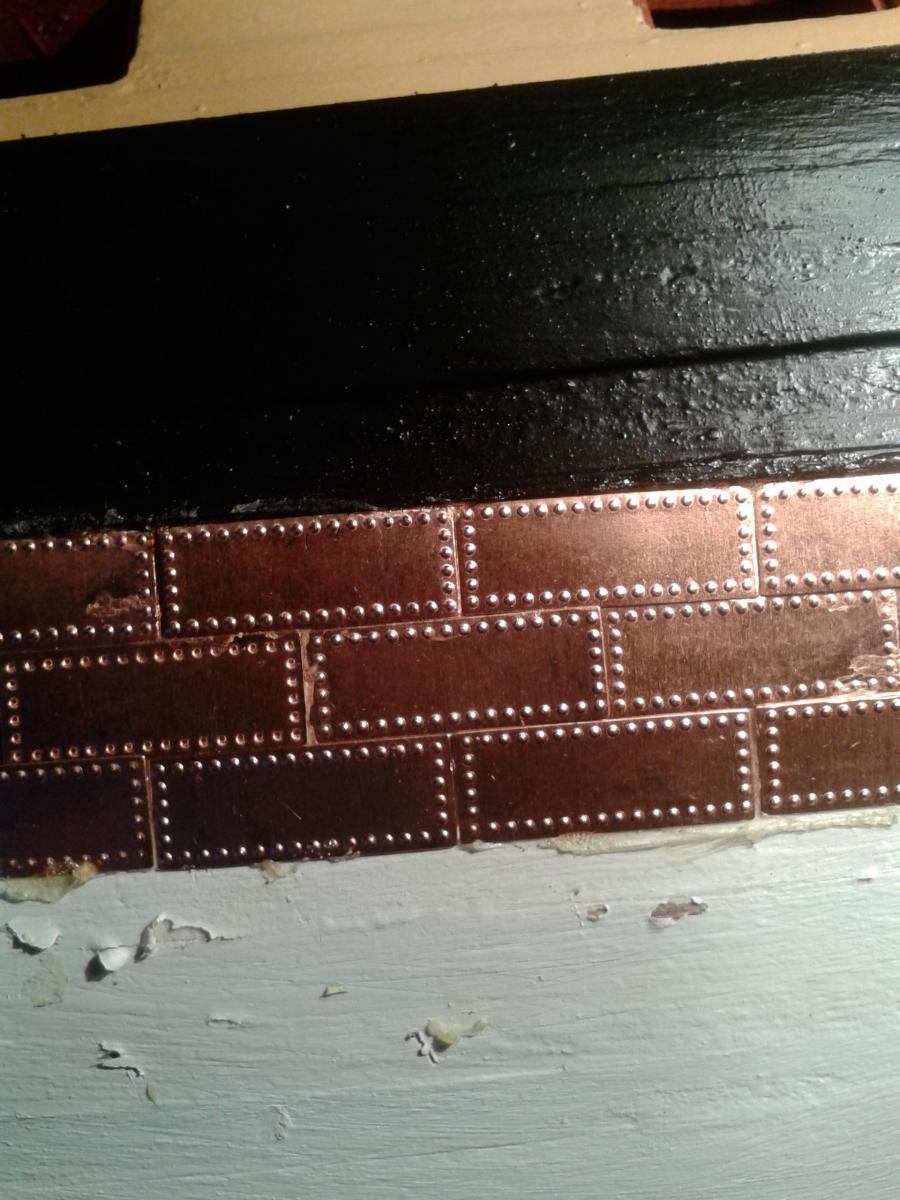
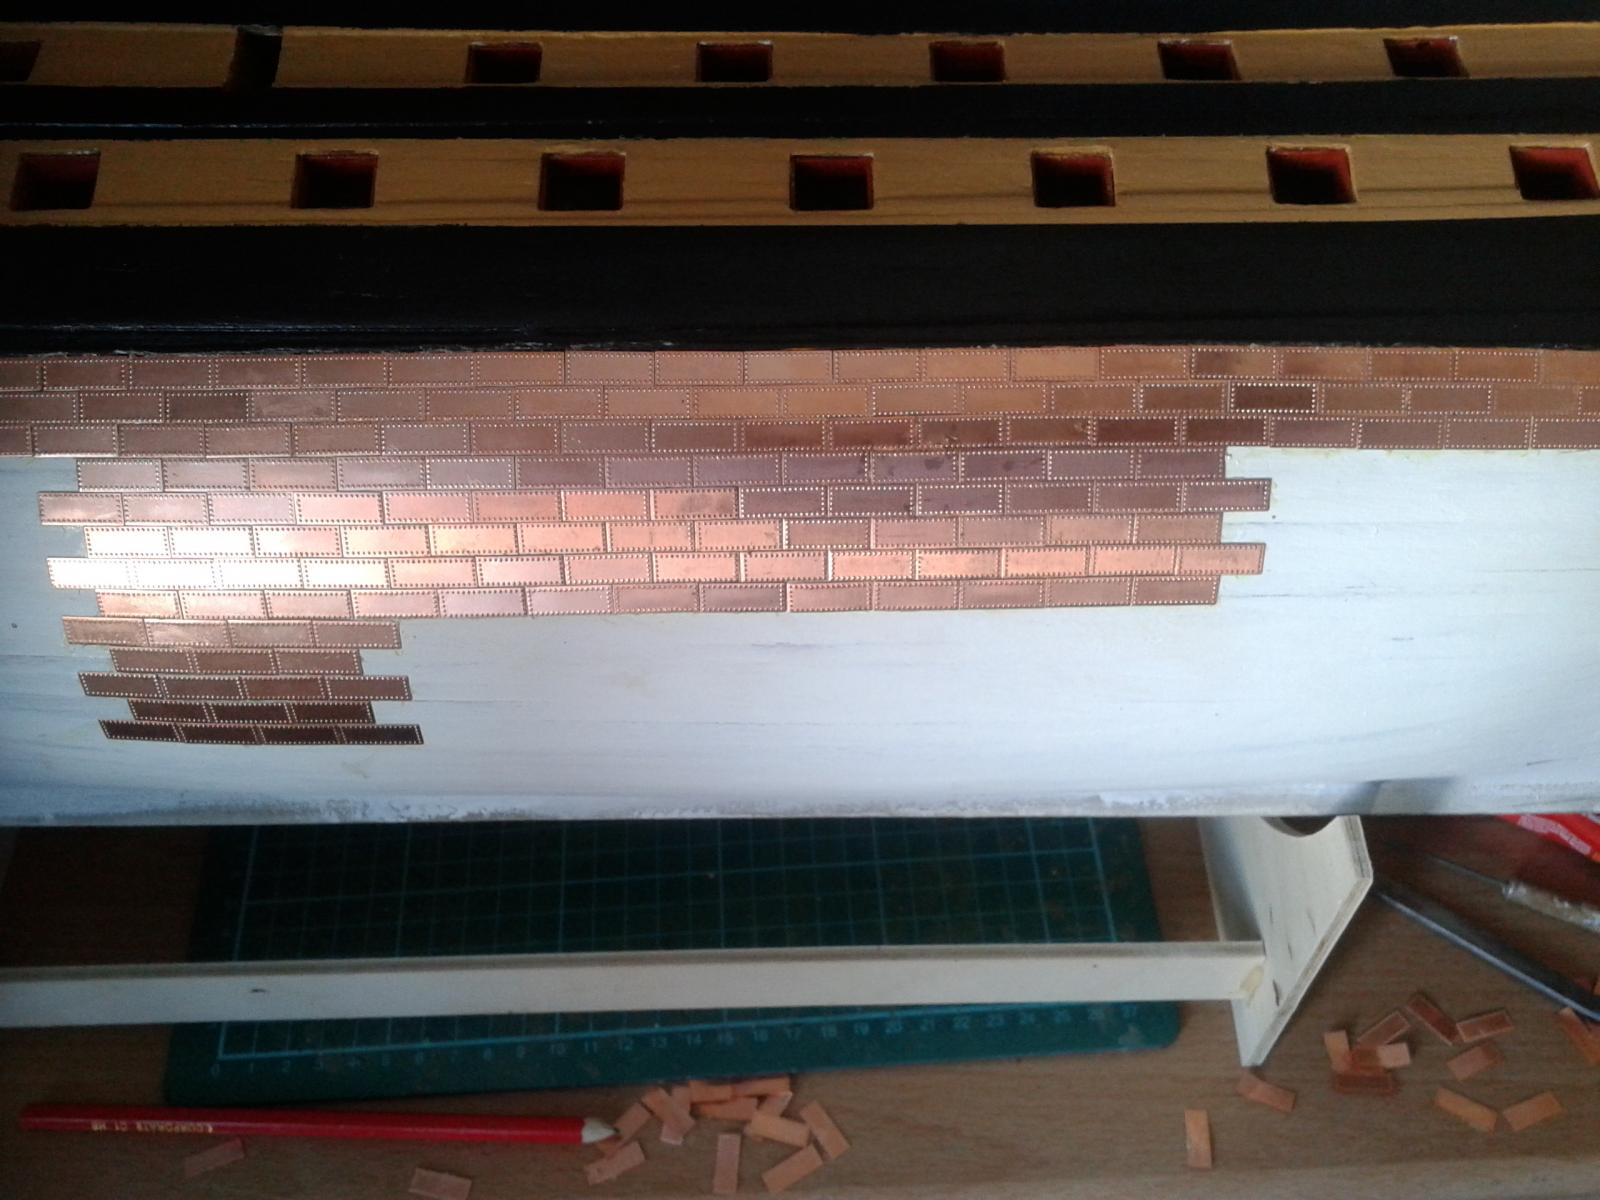
On the face of it my copper tiling looks ok, and when I came back tonight from a family day out I started to fill in the gaps, as shown in in the first photo.
I used my light with built in magnifying glass to help check the cut tile fitting. But this also highlighted some issued with the installation of some of the basic tiles, some were not butted up to the adjacent tiles and some where overlapping the adjacent tiles. This is shown the in the next three photos. The excess glue is from removed tiles, which is explained later on.
To the naked eye it would probably be ok so I decided to continue with the installation of the next few tiles but soon realised there was going to be an alignment issue which was not going to easy to correct.
I have therefore taken the decision to rip of the tiles and start again, taking much more time to ensure I get the first two layers neat and tidy, using the light / magnifying glass to confirm the correct installation of the tiles.
Thankfully the tiles have been coming off without too much effort and removing the excess glue has not been a problem. I will complete removing the tiles tomorrow and will start again, with less haste. Will also order some more copper tiles from CMB!


-
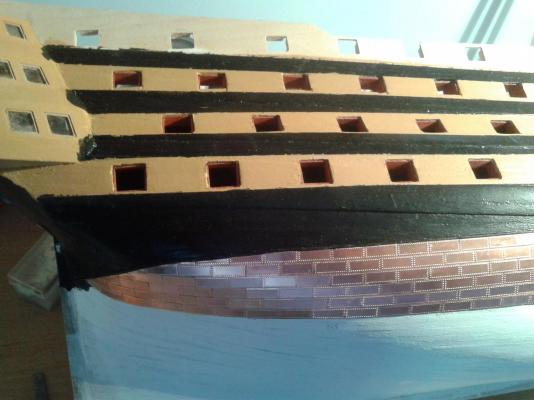
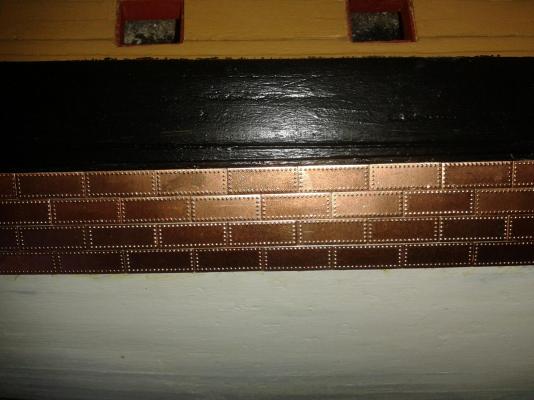
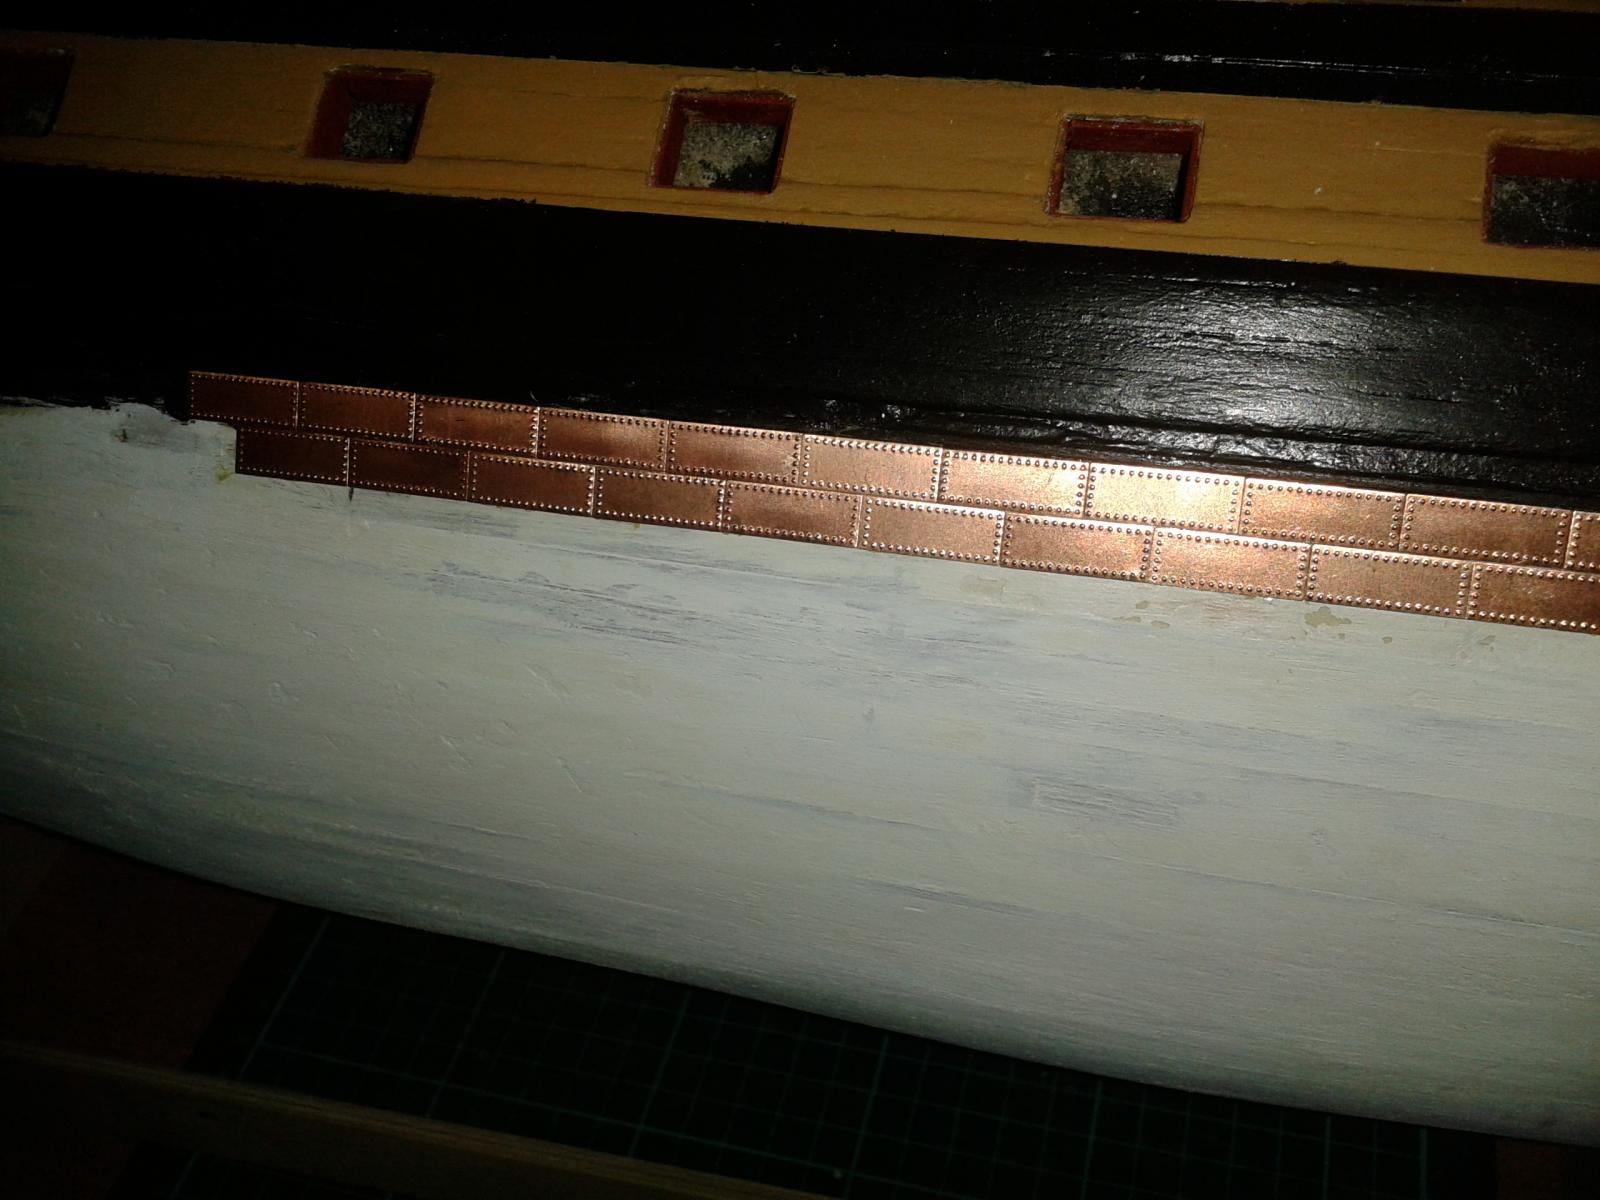
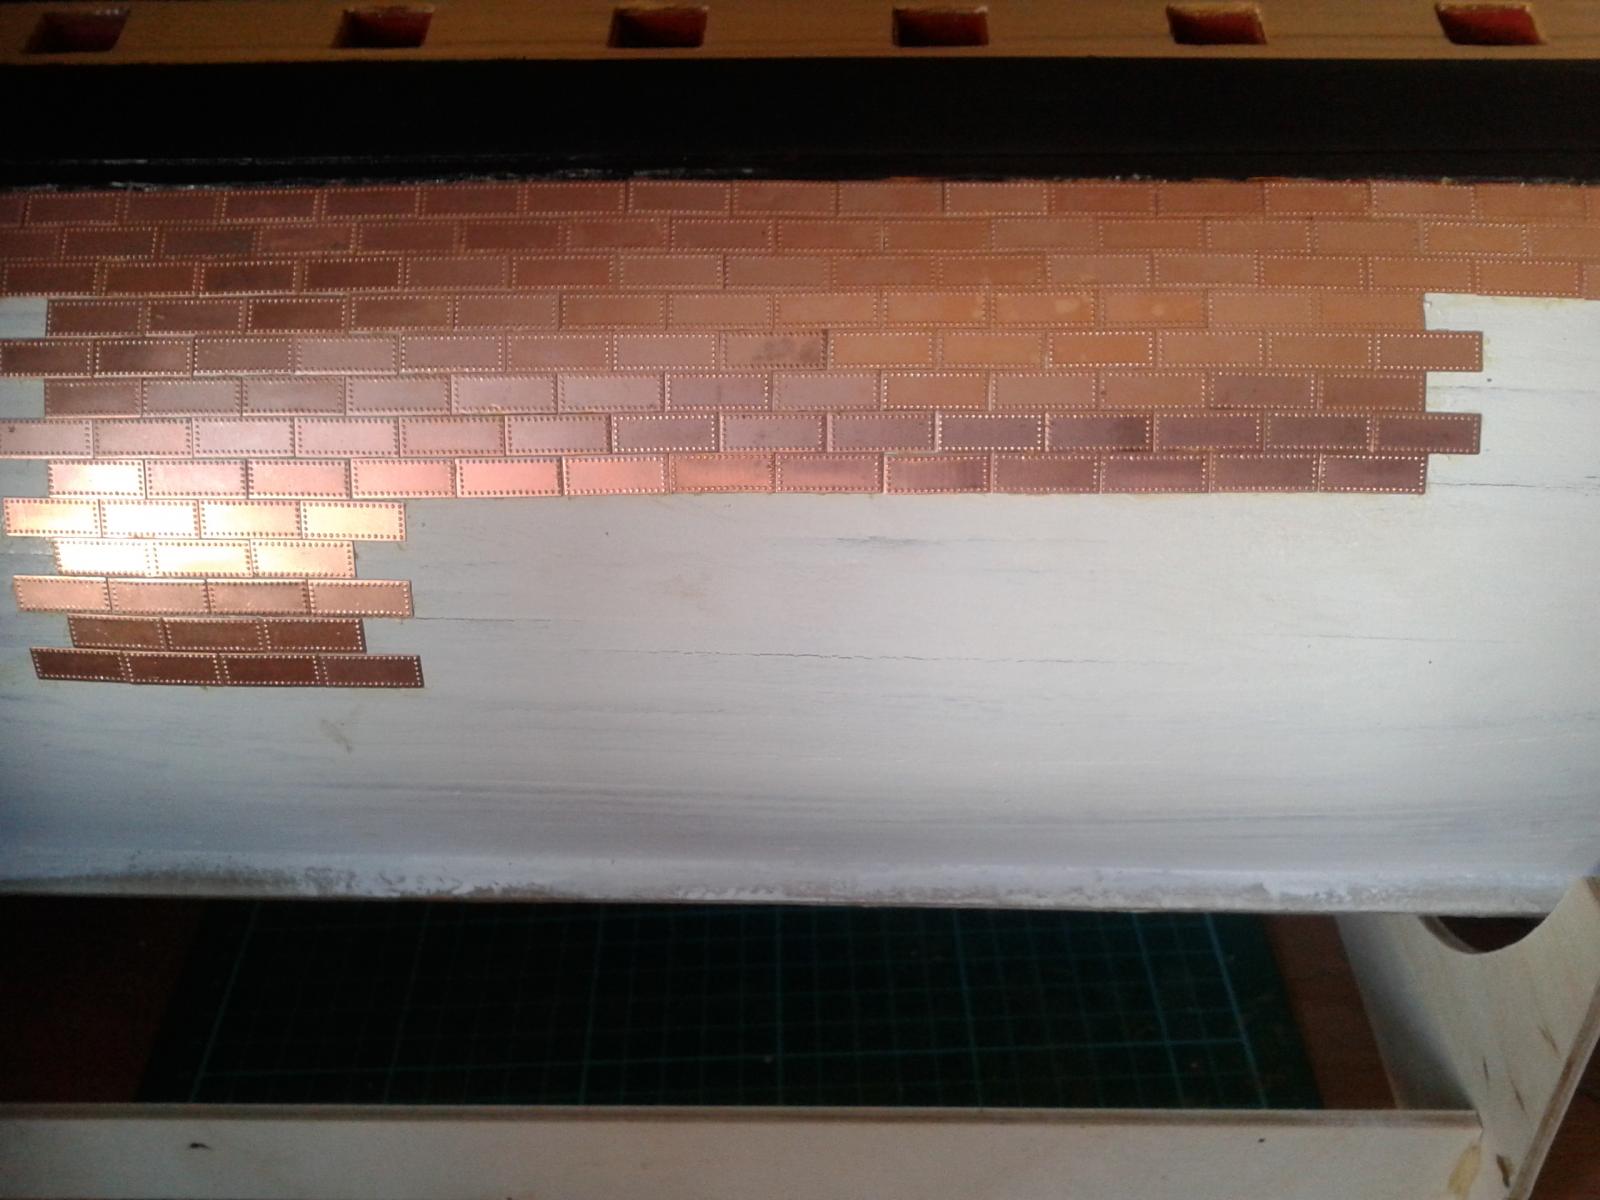
First 200 copper tiles are now fitted, took 30 minutes to fit the last 50 tiles, so maybe it will not take as long as I first thought to complete.
Will start again on Monday as we are away tomorrow for the day. The first task will be to fill in the gaps as per Dave's (Shipyard Sid's) recommendation.
A couple more pictures of my progress.


-
Started the fitting the copper tiles today, 152 fitted in first session. I'm using Evostick instant which is a very good glue for this application, as advised by Shipyard Sid. It is very easy to roll off any excess glue once the tiles are fitted.
When working along a line I'm spreading the glue for 5 copper tiles, generally taking about 2 minutes to spread and fit 5 tiles.
I don't think this task is going as bad as I feared, yes it will take plenty of time to complete, but I'm finding it strangely therapeutic.
Sorry about the poor quality of the photos.


- CaptainSteve and Rich.F
-
2
-
I used a pin pushed for the inner planks, and you also can get them with an auto stop to prevent pushing in to far (have a look at CMB web site). I then used map pins for the outer planking, and found it best to use a small panel hammer to help push in
-
Nearly time for lunch. My youngest son is flying out to Florida next week for a two week holiday with his girlfriend.
I went to the states on business a couple of time last year to Columbus (Ohio), and had some down time on way back to sightsee New York a couple of times which I enjoyed.
Normally takes 2 to 4 days for items to arrive from CMB, but as I'm based in the UK that not too bad. It took a couple for weeks for the goods to arrived ordered from micro mart.
I sure once I get in my stride I will get a better handle on the copper tiles timings. I will use either evostick or super phatic, I'm tending more toward evostick as I think the super phatic will not grab to well initially, as normally tales a minute or two to get really tacky.
-
All being well I should complete the 16mm linings tonight, just 7 top linings to fit which should take about 30 minutes.
I have painted the black lines on the hull so I will just need a some touch up work tonight also.
I must be honest I'm not totally happy with my 16mm linings, this is due mainly to an gun port alignment issue with the inner bulwarks which has created additional work to correct. However when painted up and fitted with the cannons they look OK, but would not pass muster from a close up inspection, and thankfully the quarter deck (when fitted) will also hide some of my sins.
All being well I will start the coppering tomorrow.
2500 tiles x 3 minutes to fit each tile = 7500 minutes / 125 hours. Working 2 hours per night = approx. 60 days to complete.
Given some tiles will not take 3 minutes to fit but other will take longer to cut and shape and also I probably will be not able to spend 2 hours per day I think 2 months is a reasonable estimate for the time it will take, 1 month per side.
-
Thanks for the update and great photos, it's great to have your experience to fall back on as us lesser mortals continue on with our own builds.
-
Great work Jerry and an informative set of photos, as always.
I hope to be in a position to start the coppering phase by the weekend fingers crossed.
Glenn
-
Good to see you are still working, the built looks magnificent, you must be very proud of your achievement.
-
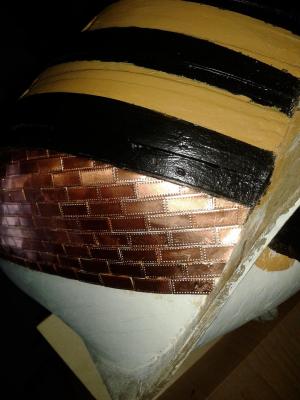
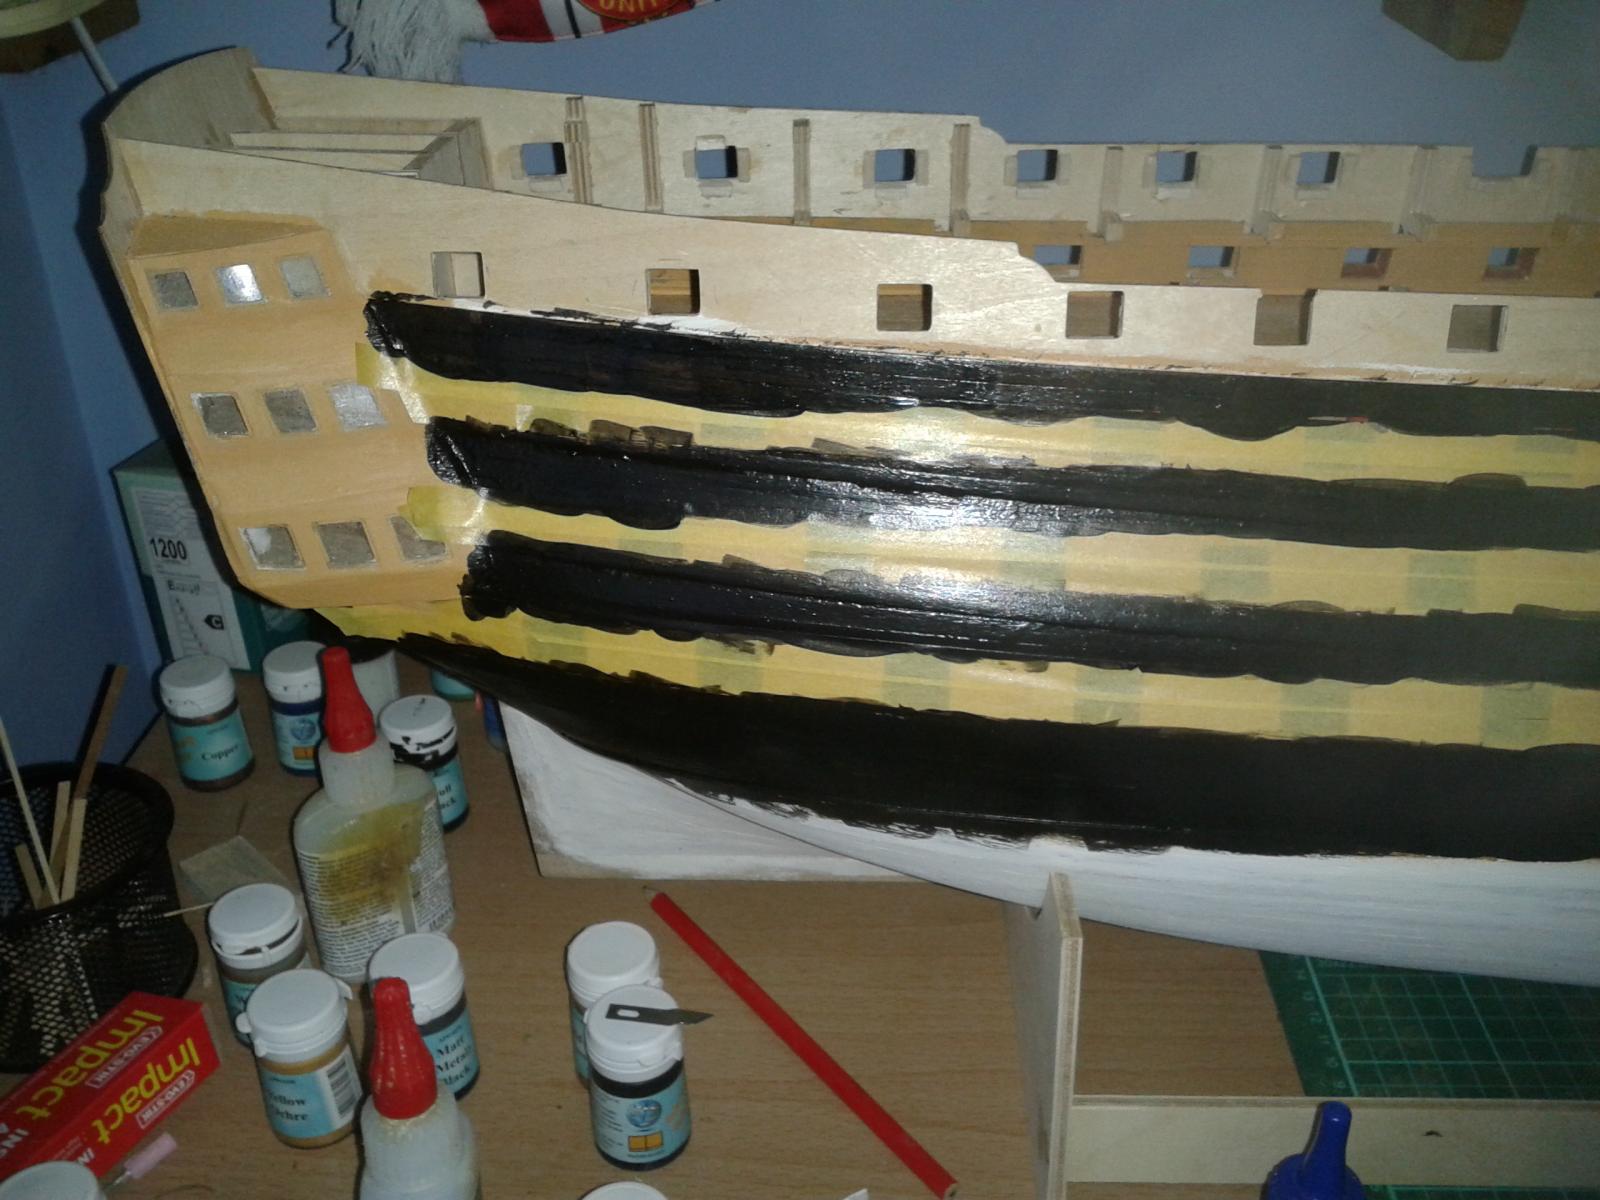
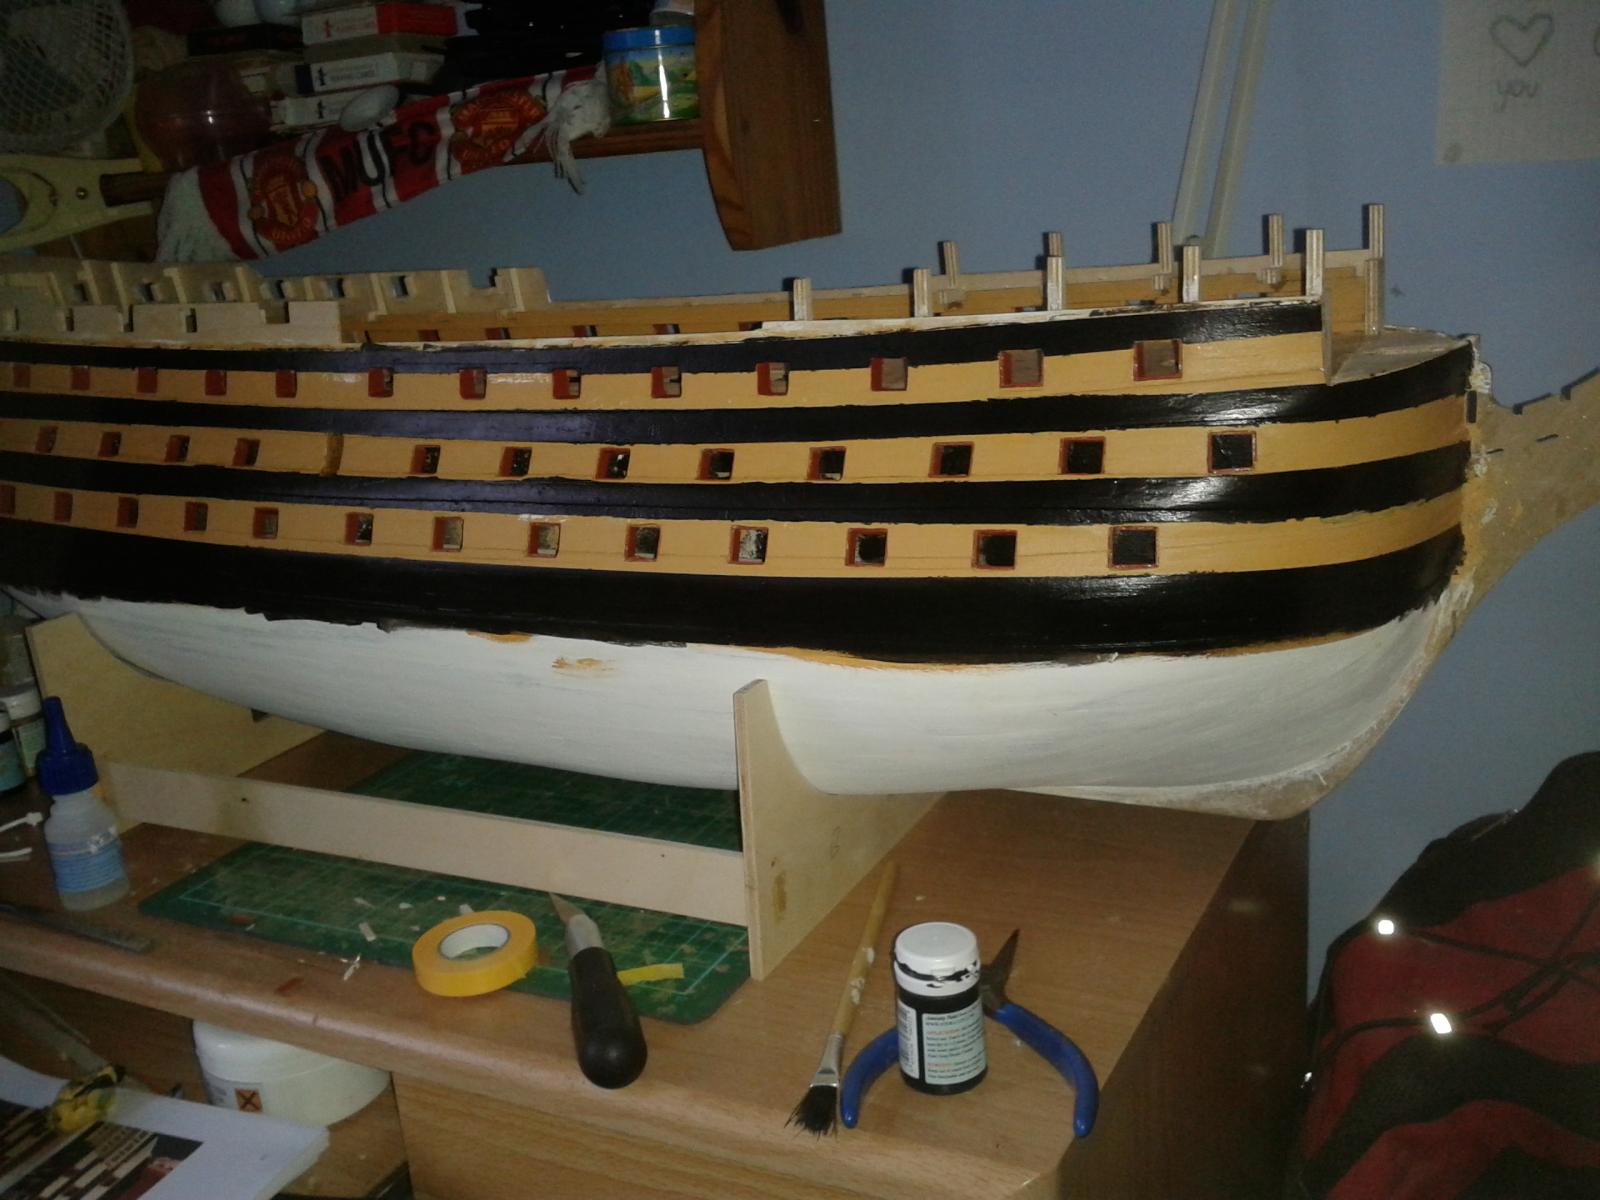
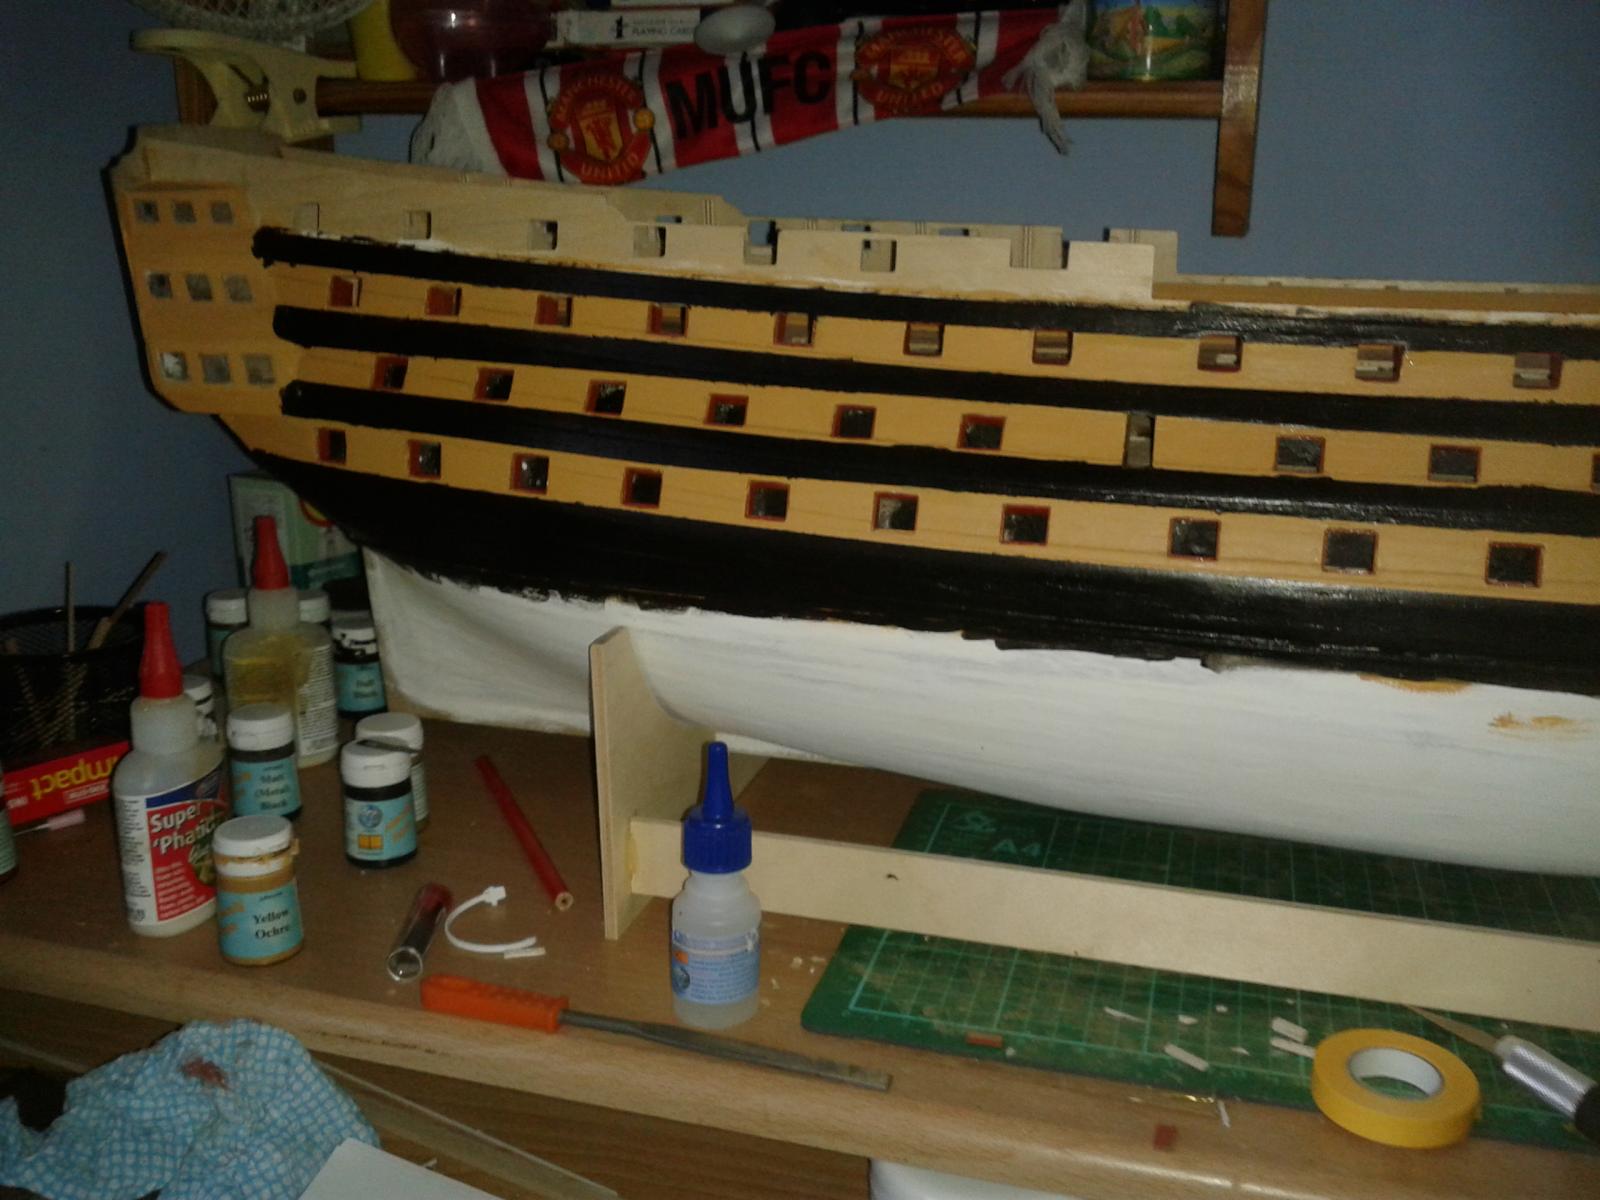
Completed port side gun port linings and painted the black strips.
I used Tamiya model masking tape in order to get good clear lines between the yellow and black paint, or so I thought!
As you will see I suffered bleed through which is a tad frustrating.
I will have to sort this out at another time, as I want to complete the starboard side over the next few days.
Taped and painted
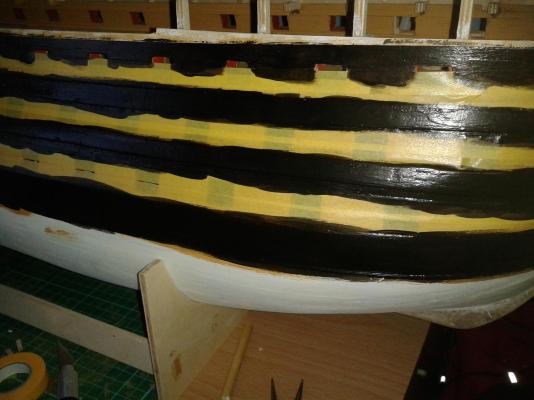

Tape off, but not good clean lines between the yellow and black paint!


HMS Victory by Glenn-UK - Caldercraft - 1/72
in - Kit build logs for subjects built from 1751 - 1800
Posted
David
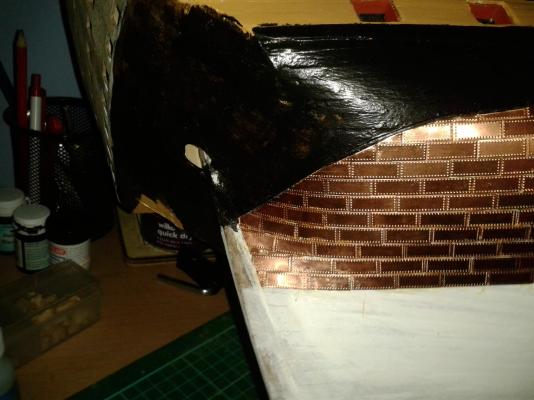
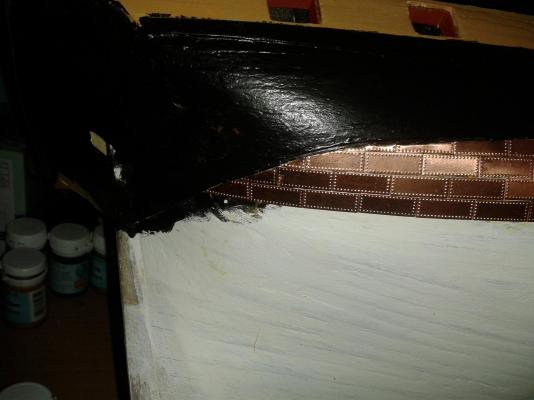
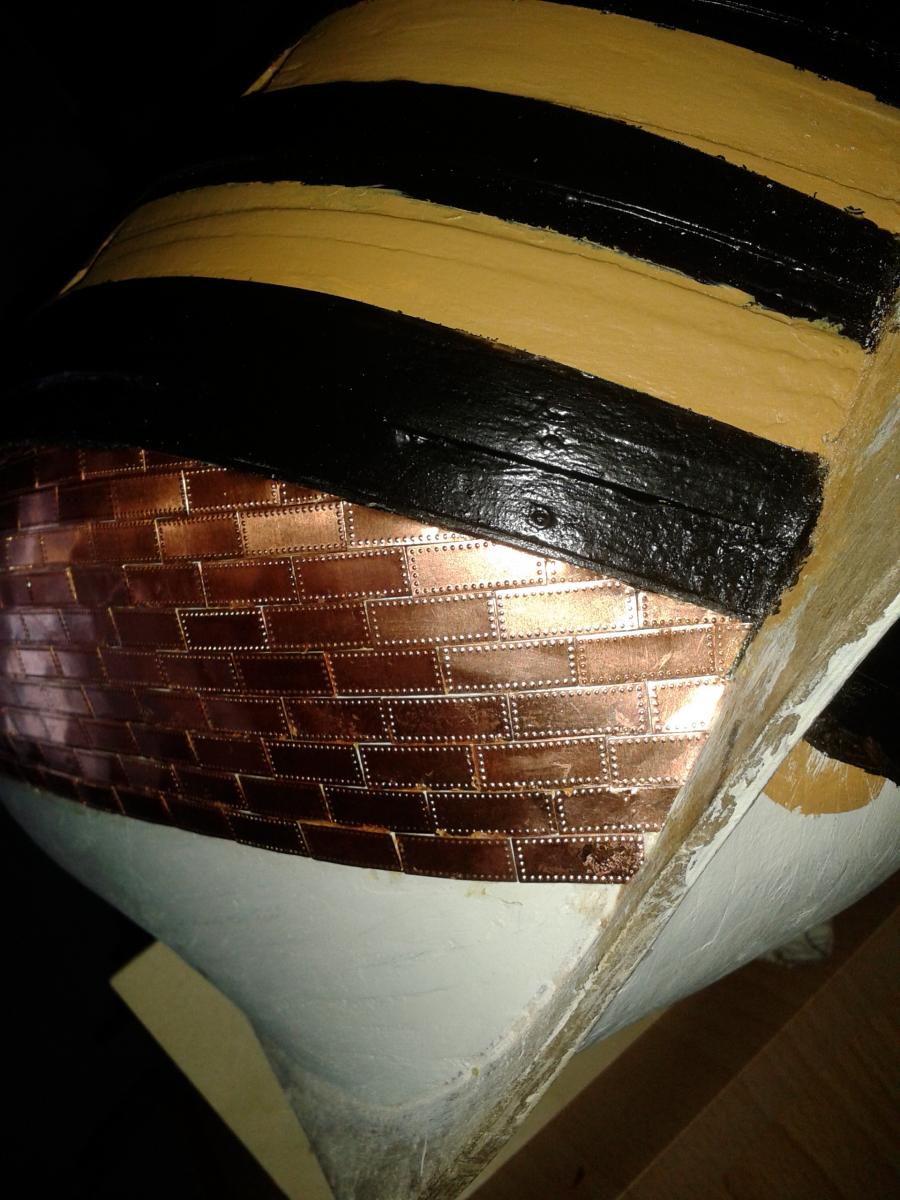
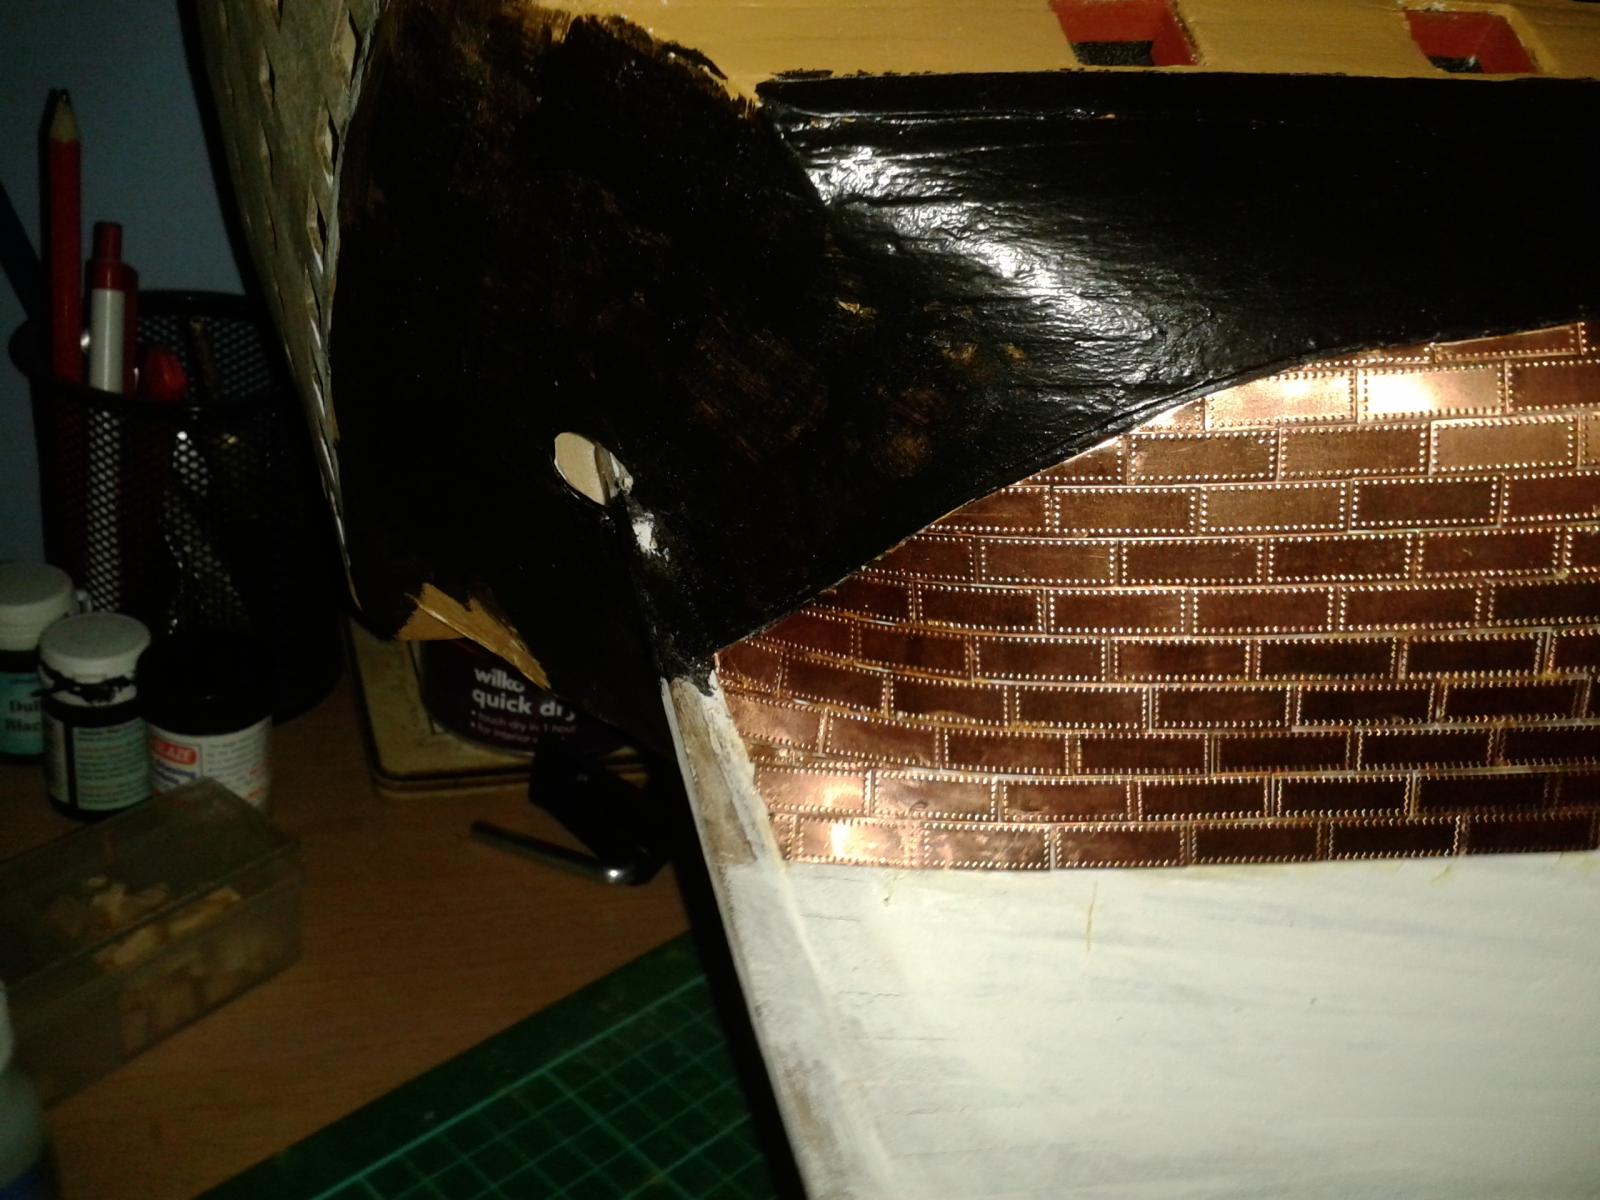
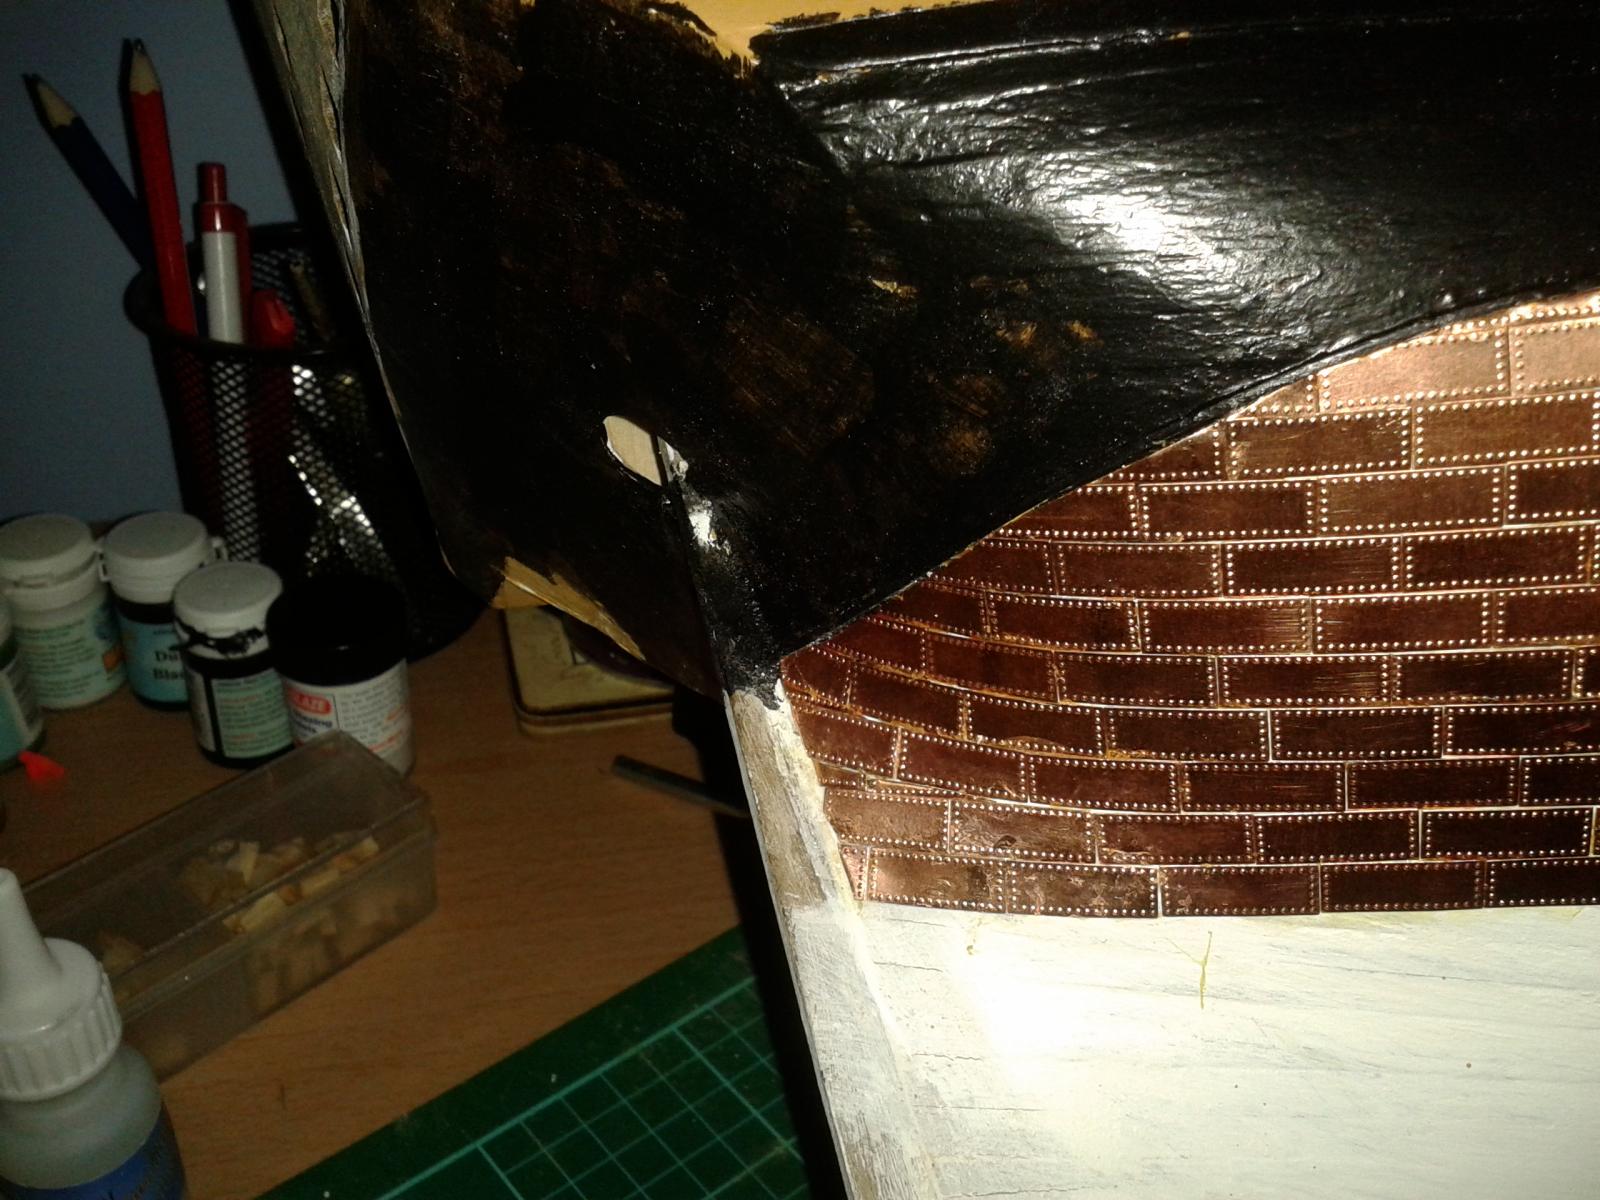
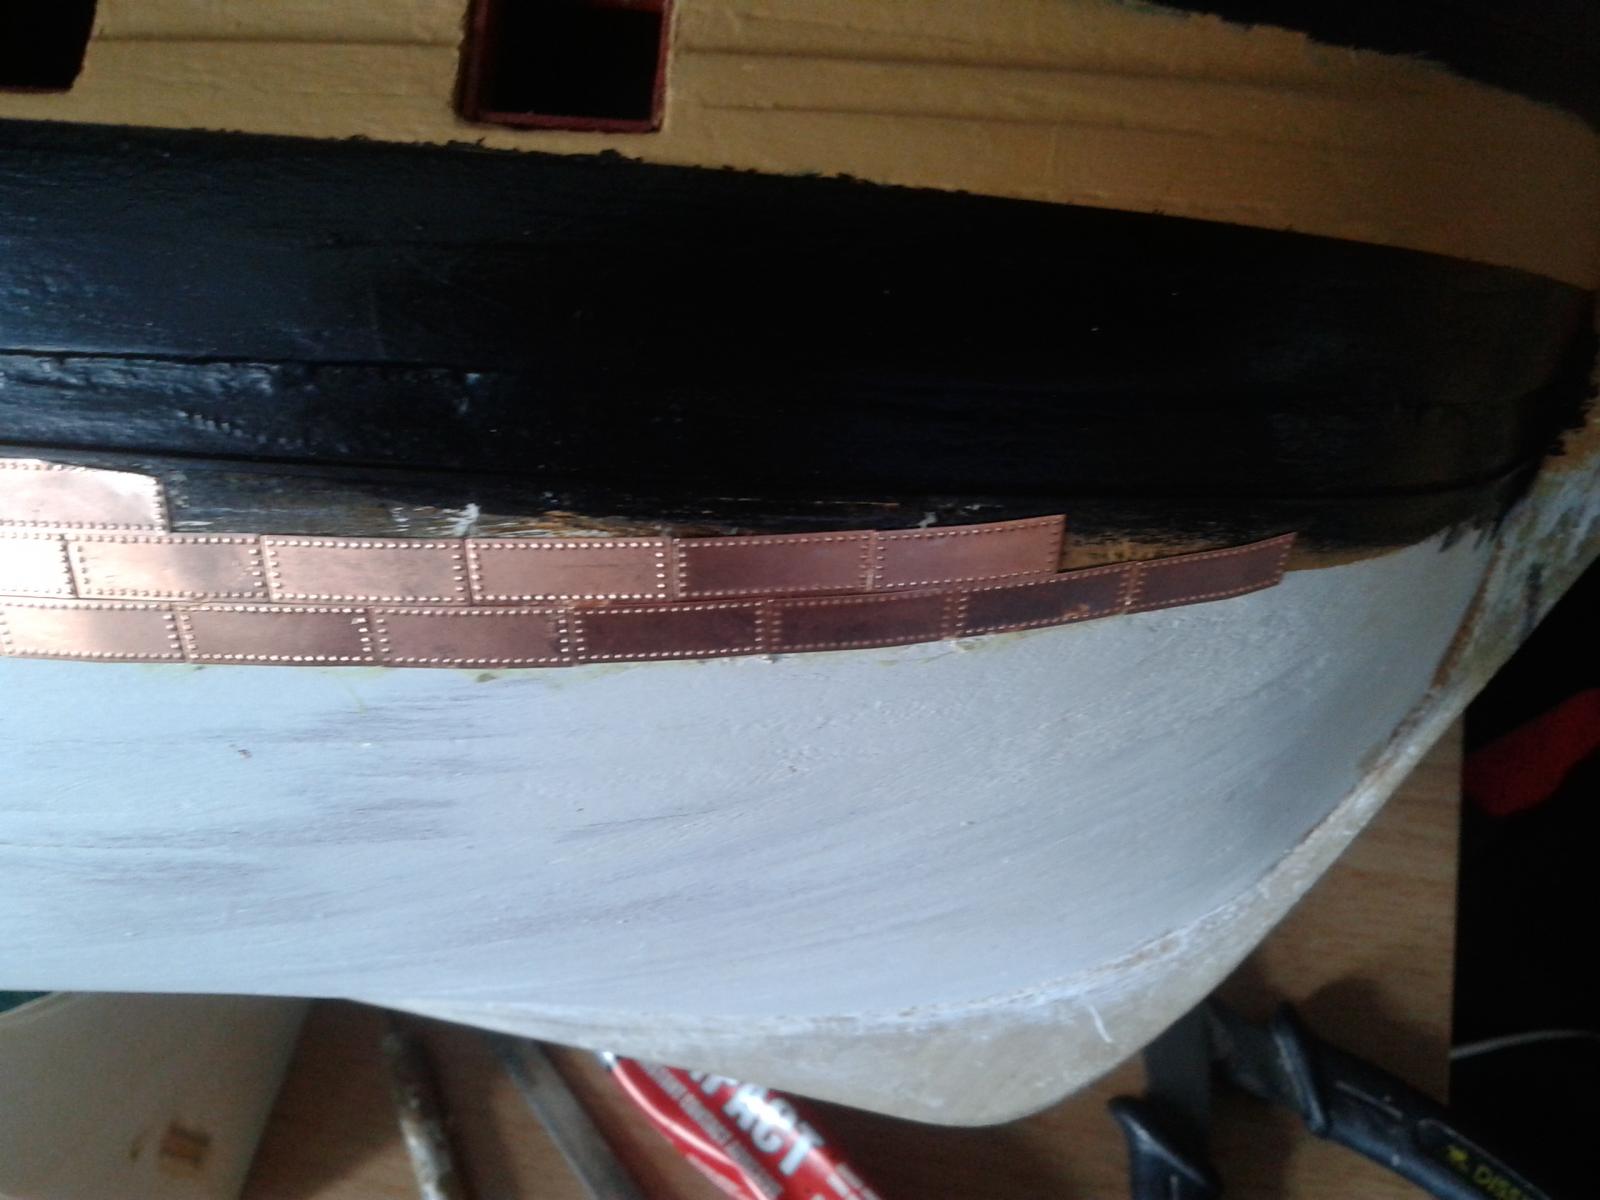
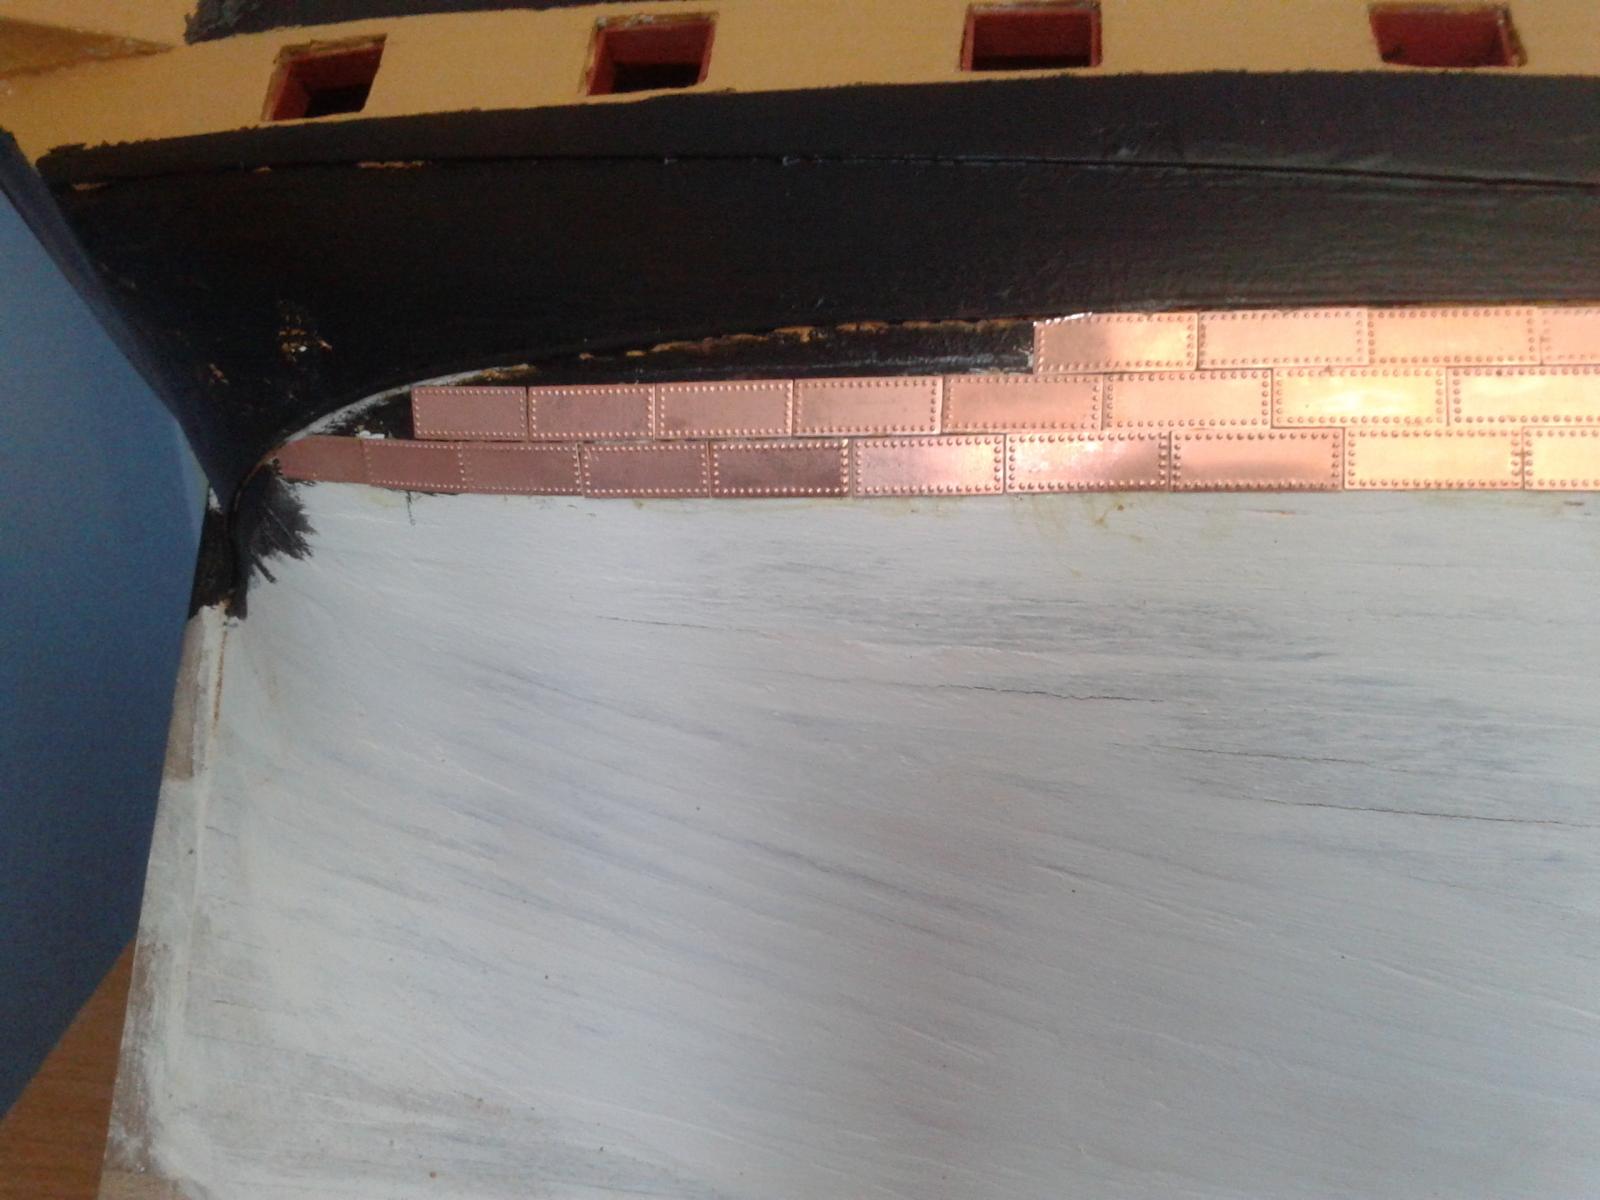
You were correct it has been a bit awkward today as I progress very slowly and carefully south toward the keel.
I have sorted out the copper plating line at stern post down to keel, so last row of plates will run true with the keel and should also be an exact plate width so no trimming or overlapping required (best laid plans of mice & men!). Also started sorting out the bow rows which will take a bit more time complete for the next three rows. I then plan to plate up a few rows from keel until I reach the completed plates at the bow. This in theory should just leave a few rows in the central area to complete.
No ship build work scheduled for tomorrow as the admiral has booked tickets to see a play in our local theatre. Build time may also slow down a bit as I understand there is a football (soccer for my Amercian friends) tournament starting later in the week in Brazil which will command some of my valuable time, but not to much hopefully as I have installed a tv in the workshop so I can multitask!