HOLIDAY DONATION DRIVE - SUPPORT MSW - DO YOUR PART TO KEEP THIS GREAT FORUM GOING! (Only 64 donations so far out of 49,000 members - C'mon guys!)
×


The Gimps Chimp
-
Posts
172 -
Joined
-
Last visited
Content Type
Profiles
Forums
Gallery
Events
Everything posted by The Gimps Chimp
-
 Hi Tom, The wood filler I use is Everbuild Multi-Purpose wood filler. Probably the cheapest wood filler there is
-
Hi Krupi, Looks like you're making good progress. I'm glad you decided to make a build log. It gives others some insight into your experiences with the kit and might give them different ideas on how to do things. I'm also currently making the same kit so I'll follow your progress with interest. Keep up the good work Chimp
-
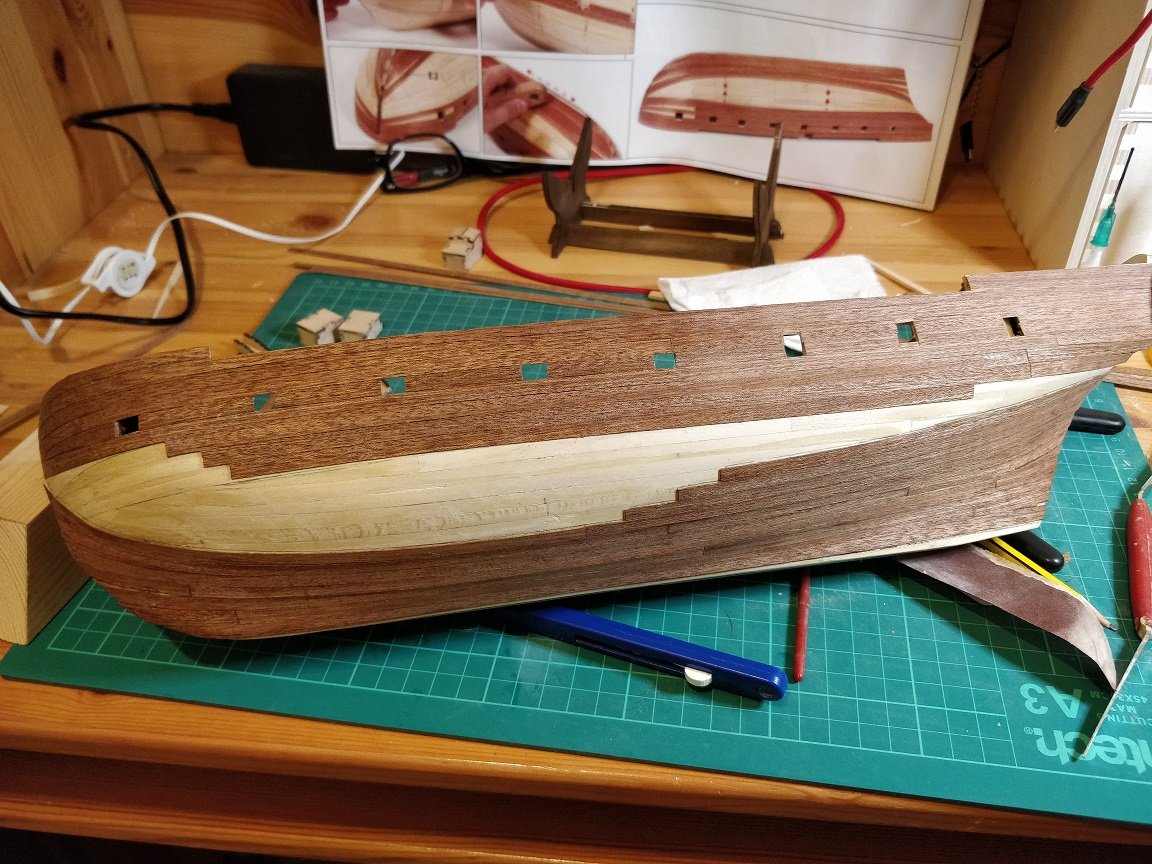
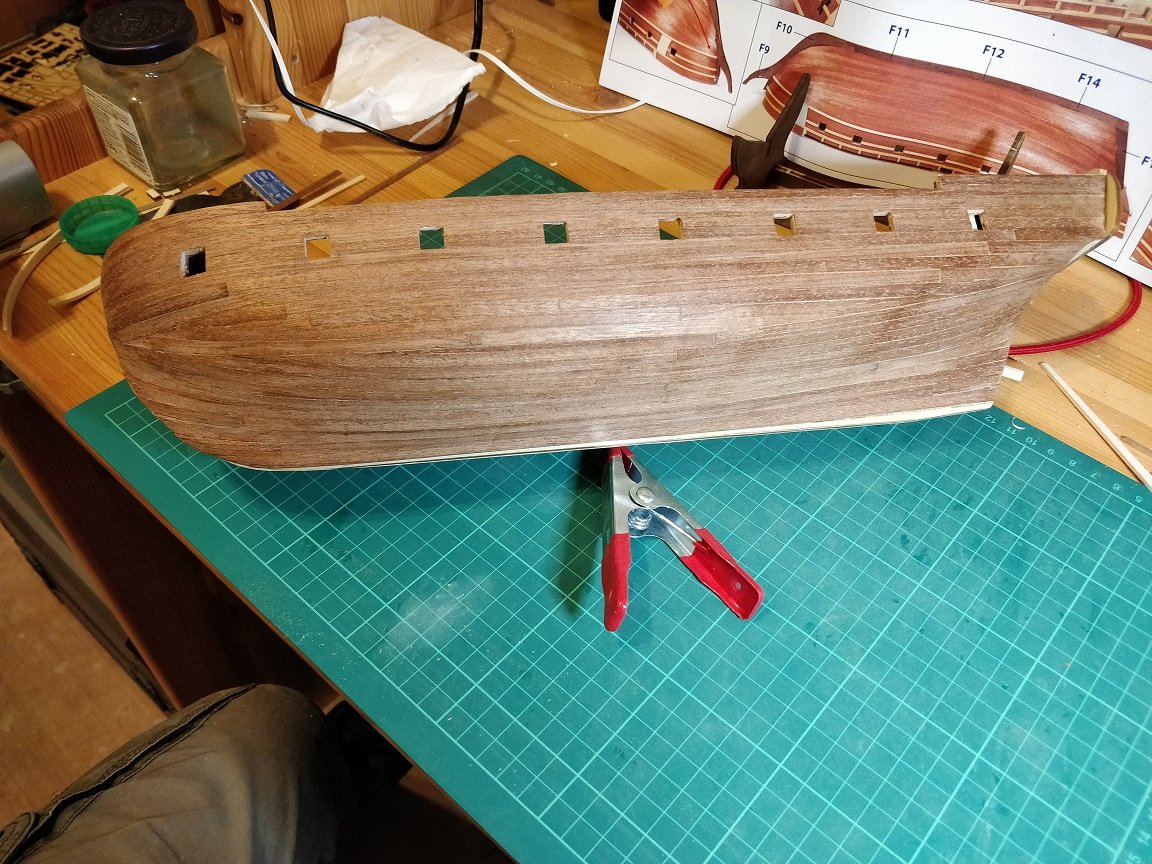
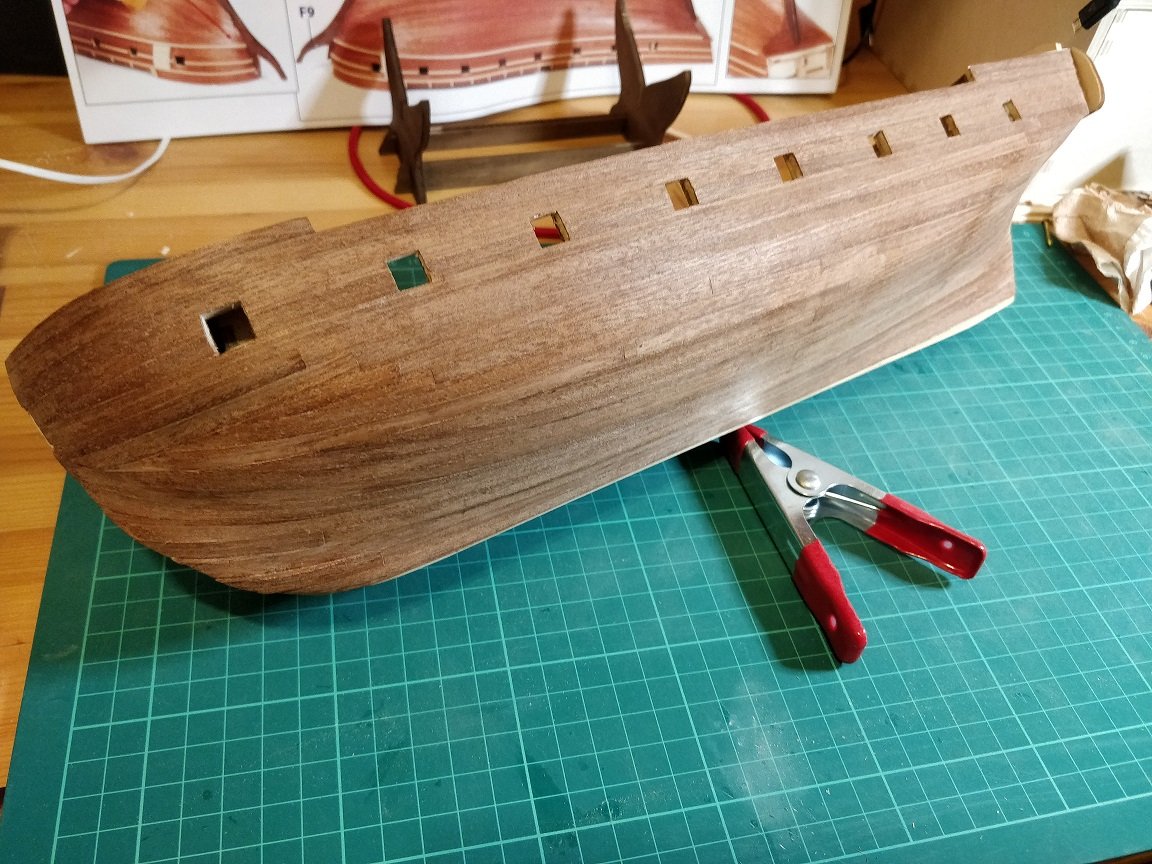
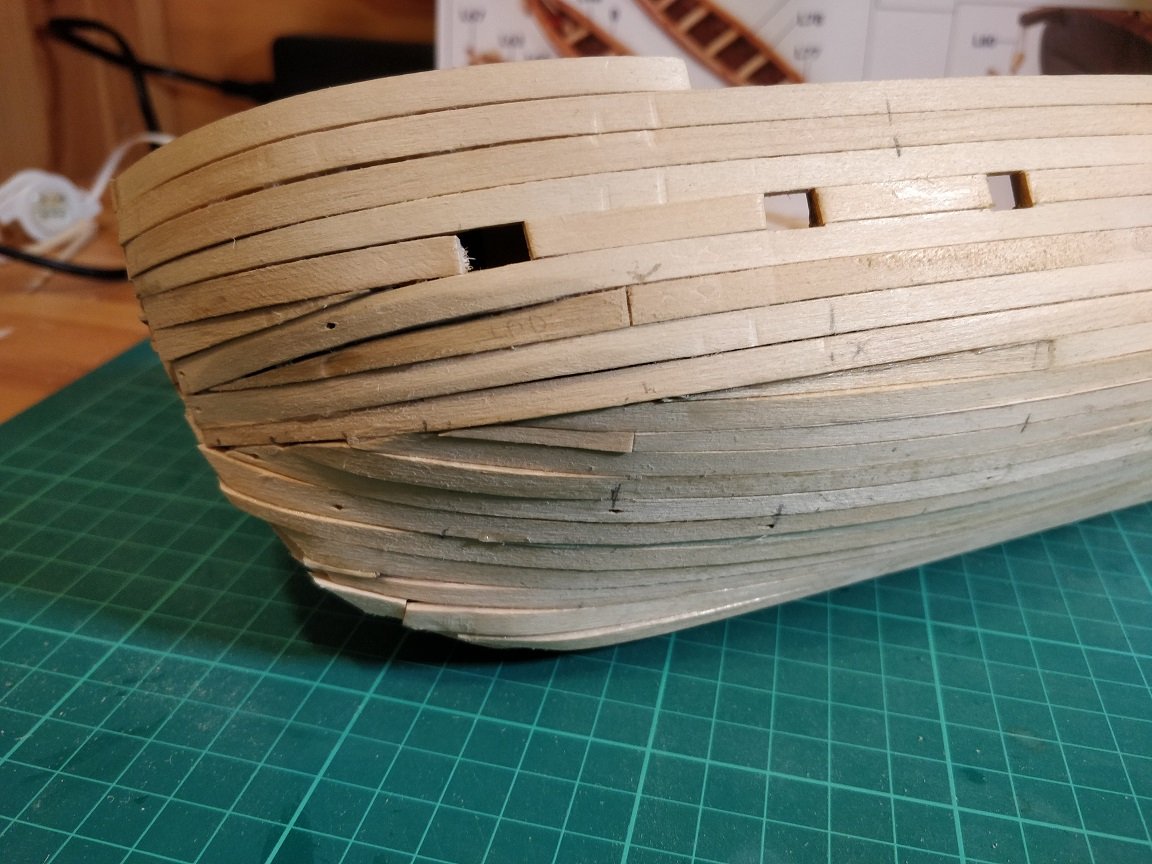
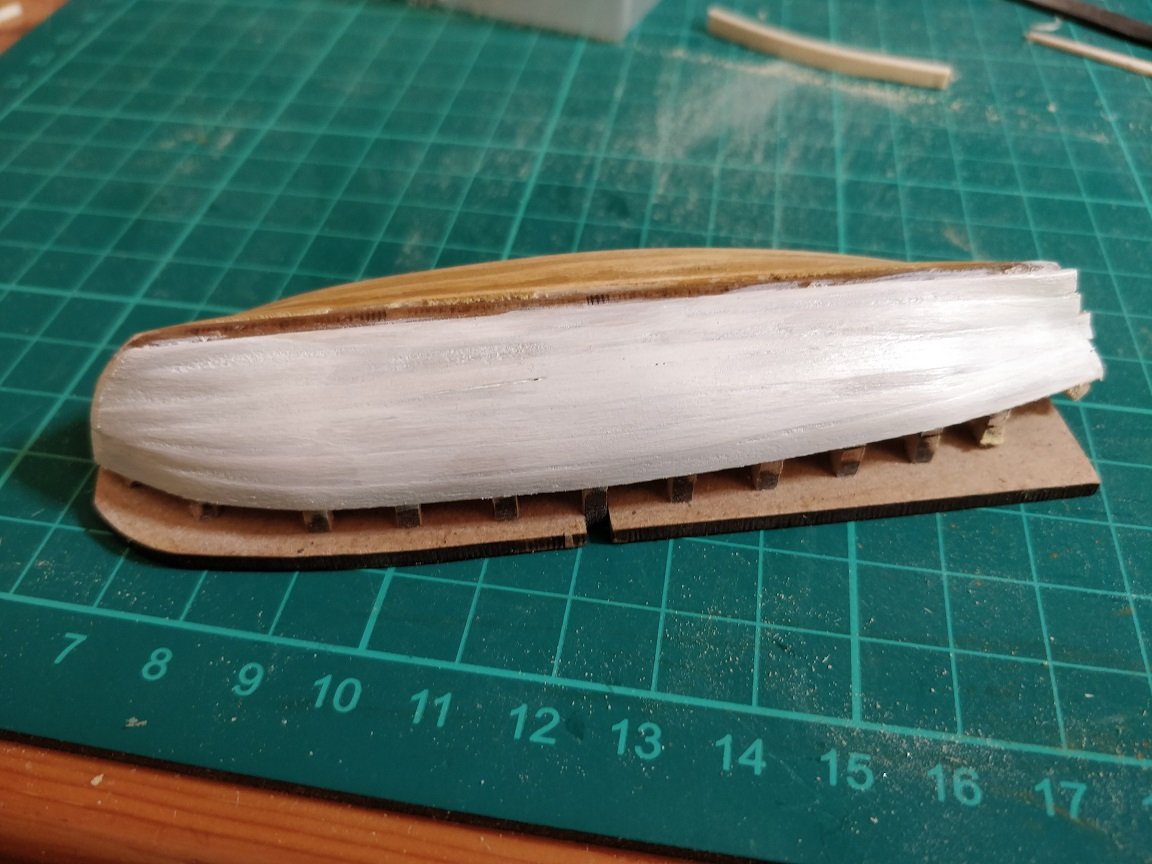
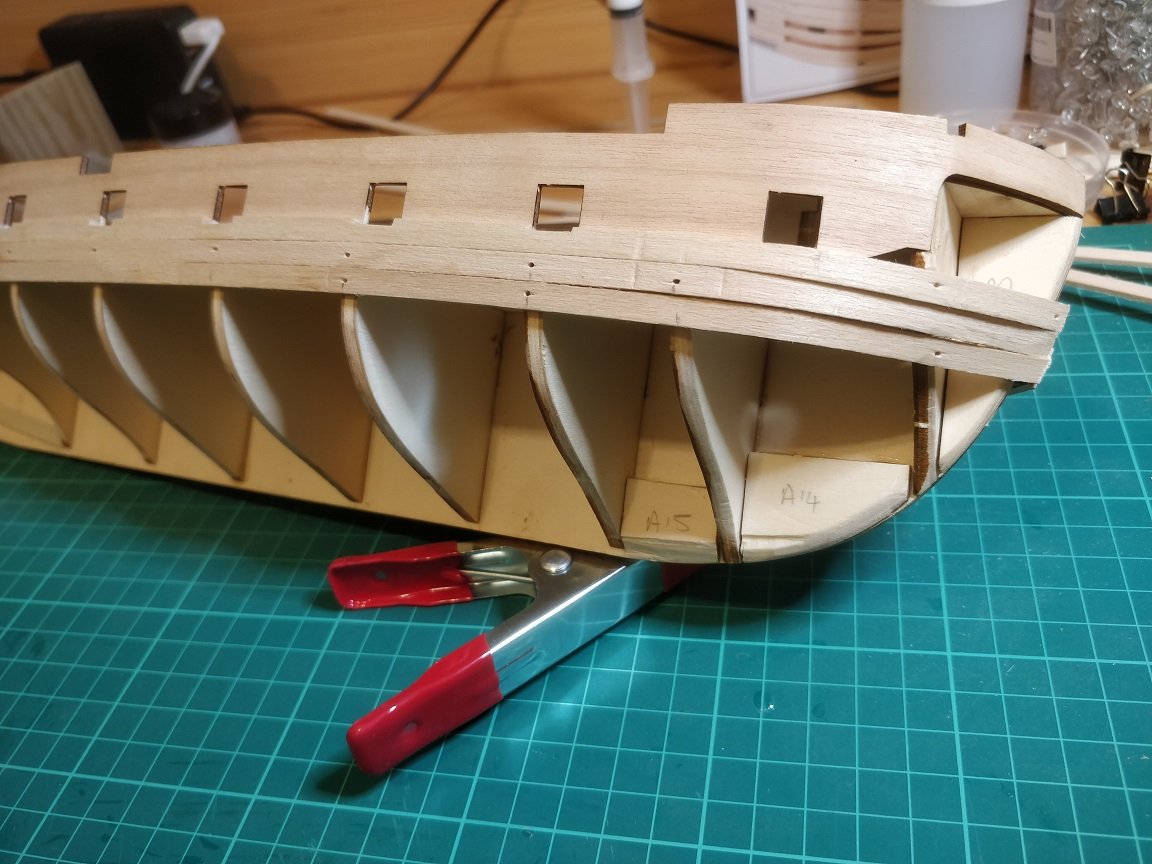
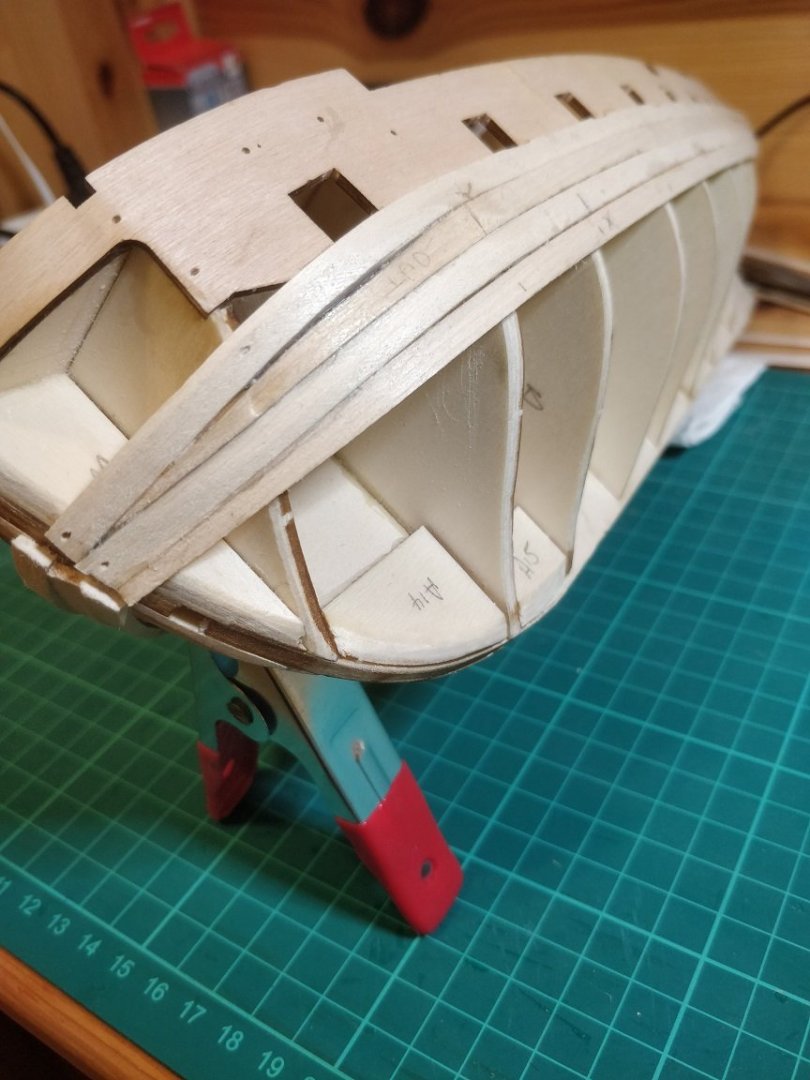
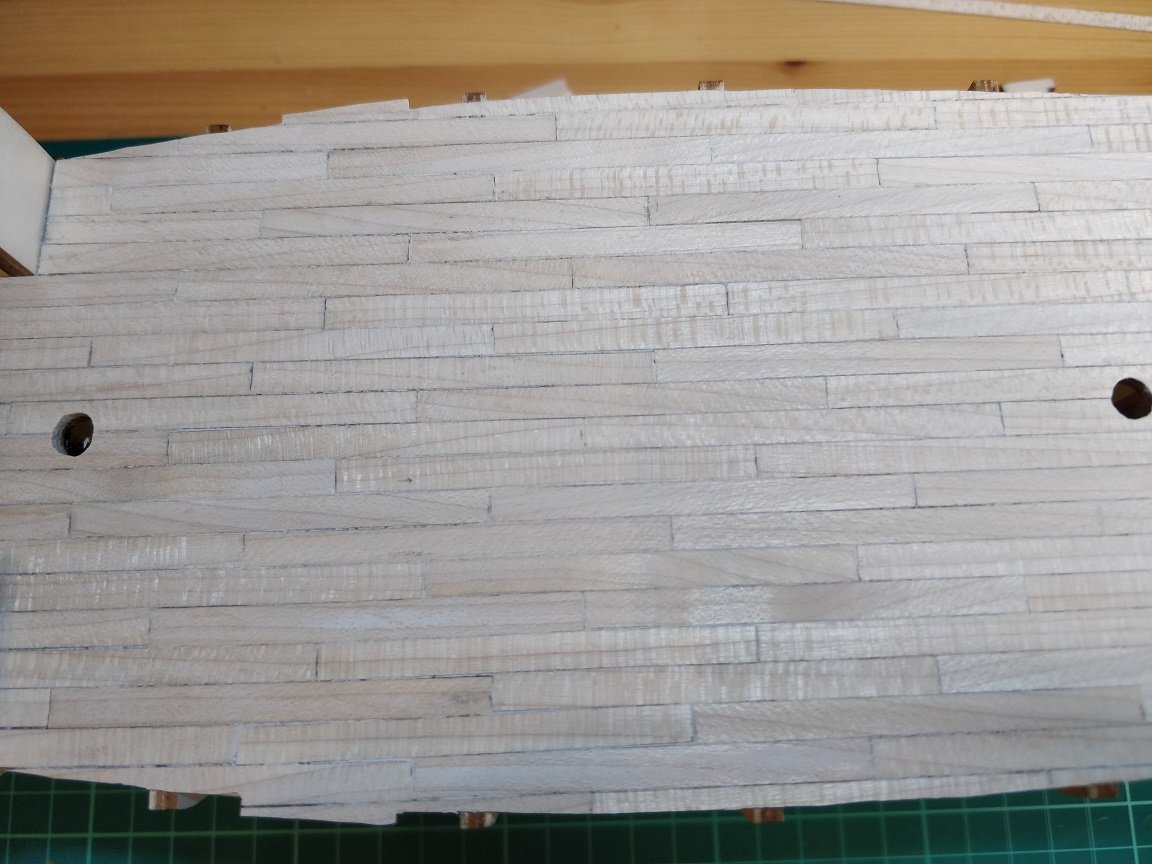
Hi guys, Here's an update on where I've got to: After being quite pleased with how the hull had filled and sanded well, I thought I would progress with the second planking. The hull isn't perfectly smooth but I considered it smooth enough. After preparing several lengths of the 0.5mm Sapele veneer I tried gluing a couple of short lengths on a block of wood first to see how it handled. I started with using just PVA along the entire length and it worked well so I moved to the hull. The first few lengths went on well and were full length as they were mostly flat and straight. I then realized that I would have to put them on in shorter lengths as the curve of the hull made the lengths deviate from a straight line. This wasn't a problem but it did make me plan out a bit more how I would progress and how I would finish off. Using just PVA made progress quite slow as I had to wait for the glue to dry a little between planks. So I changed my technique to using a blob of CA at each end of the PVA. This would allow the CA to hold the plank in position while the PVA hardened. What I hadn't considered was that the CA would easily bleed through the 0.5mm Sapele veneer. After sacrificing a couple of finger prints I had the technique sorted and progress was much quicker. Finishing off was interesting as I had to cut the veneer into carefully measured lengths and shapes to fill in the gaps between the full width planks. I was surprised how easy this was as I had been fearing this part and thought it would be so difficult. There were a couple of very small gaps but I filled these with dark wood filler and they are nearly invisible. I've now finished one side and sanded it down. I'm really pleased with how it's looking. So very different from when the first planking was finished Chimp
-
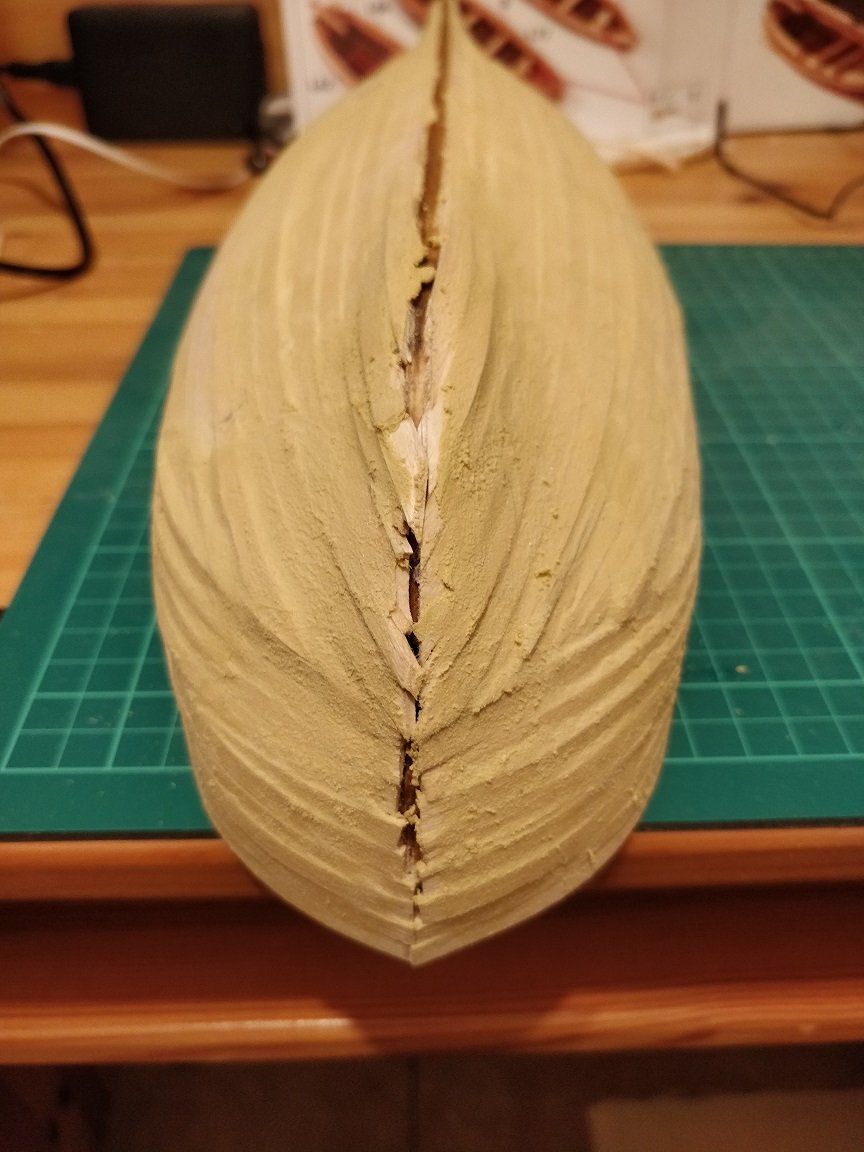
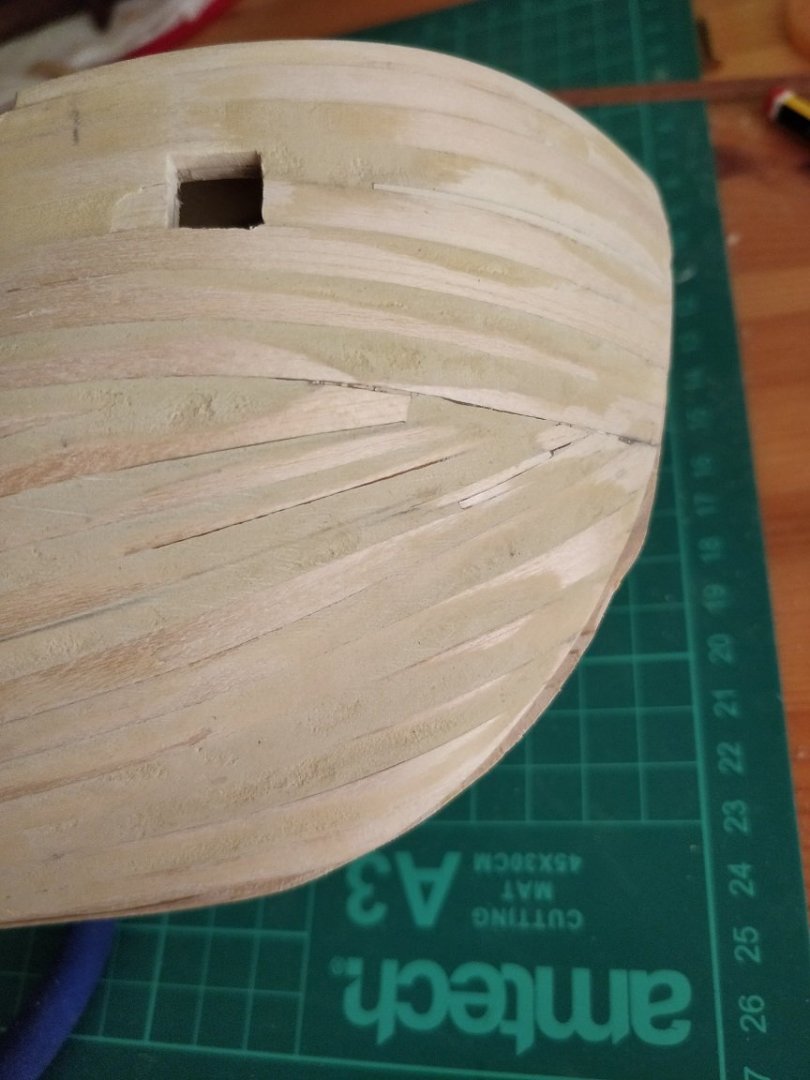
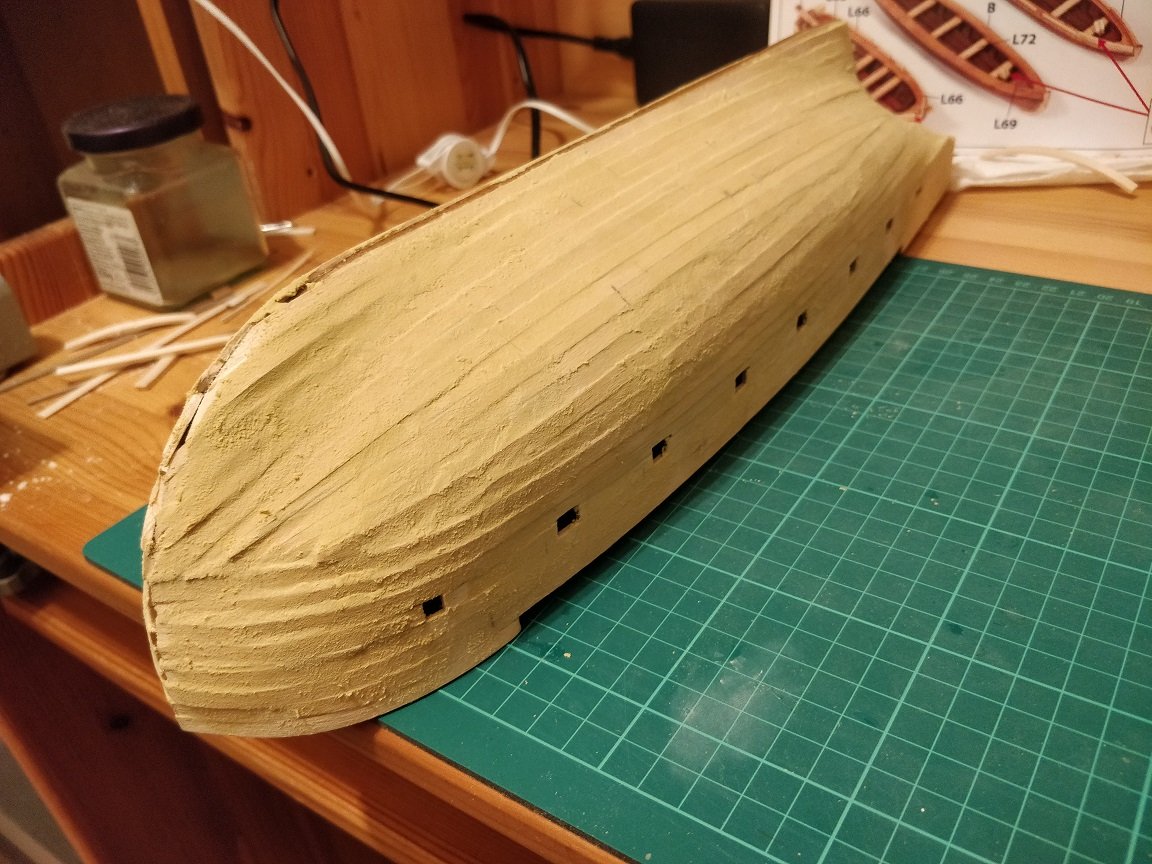
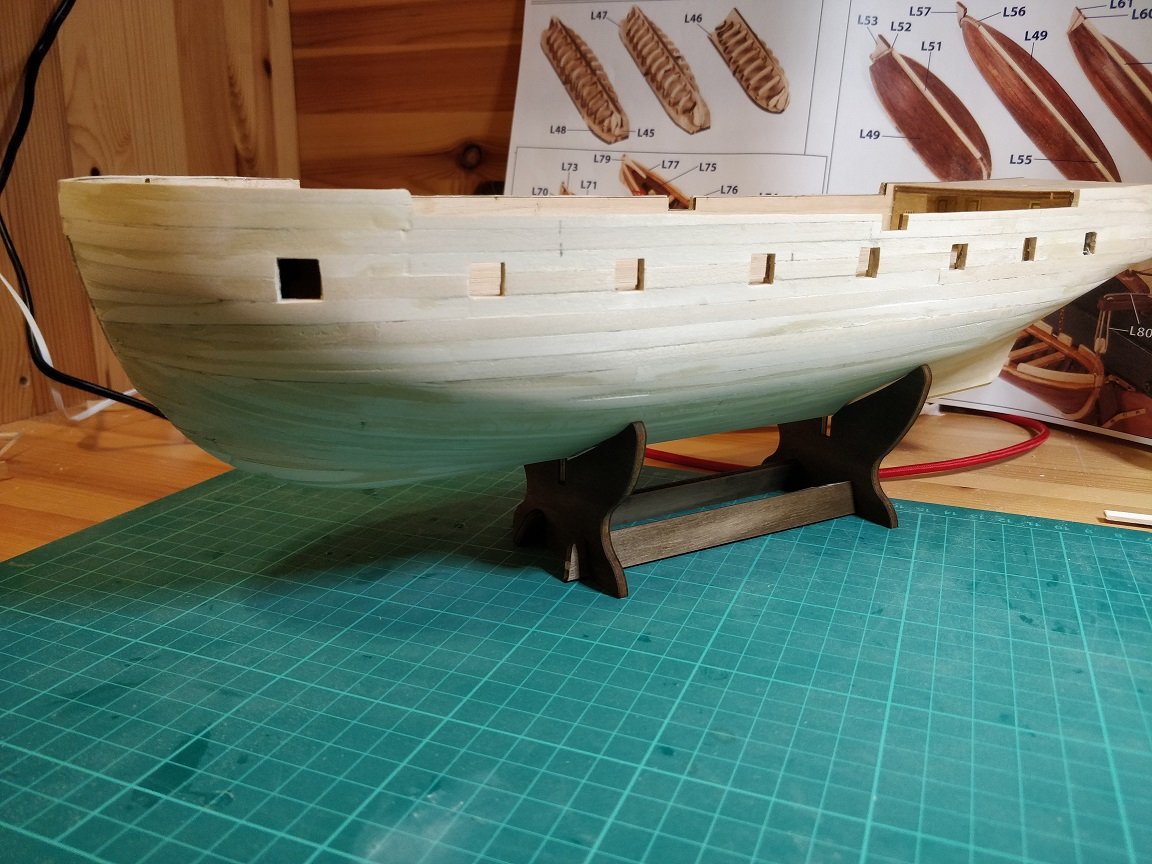
Hi guys, Many thanks for your words of encouragement, they are much appreciated. I've now progressed a bit further and things are starting to look a little better. I started with applying small amounts of wood filler to fill in the gaps between the planks, not to take out the steps. As it turned out, I ended up covering the whole hull with filler, but so be it. Then after sanding and making quite a lot of mess things were looking a whole lot better. Chimp


-
HMS Beagle by OcCre as a first kit?
The Gimps Chimp replied to Dollburger's topic in Wood ship model kits
Hi Dollburger, I'm currently building HMS Beagle by Occre. My first build was HMS Ballahoo by Caldercraft. As I'm also new to this hobby my experience is very limited. As you can imagine there is no right or wrong here and it depends on so many different variables. My initial suggestion would be to cut your teeth on a smaller and simpler model just to hone your skills before you embark on what will be a major investment of your time and effort. I dread to think how many people jump in at the deep end and not make it through to the end, which is a massive shame. I had many years experience making plastic construction kits to a reasonable standard, then took a few years break before wanting to try something different. Before taking the plunge with my first ship I made a couple of simple laser cut plywood models which can be made in a couple of days/weeks just to think about the types of skills and tools required to progress. I then started small with HMS Ballahoo. After getting through the early stages fairly quickly, things slowed down and I feared that I had jumped in too deep and wouldn't see it through to completion. The thing that kept me going was reading the excellent build logs on this forum and keeping steady but slow progress. Eventually I realised I was about two thirds of the way through and it was then all downhill from there. Once finished I had an enormous sense of achievement and was glad I stuck with it. I can see your attraction with wanting to start with HMS Beagle and the fact that there are very comprehensive videos available to guide you through the build has got to be a major benefit. To be honest, I find the videos of limited use and prefer to use them as a suggestion but then do my own thing. With regard to price and quality of the kit I don't have much experience to call upon. Everything in the kit looks to be of reasonable quality and 'fit for purpose'. When you consider the time and effort you'll be putting into building the model, the cost of purchasing the kit becomes less significant. As Jaager has previously stated, when delving deeper into researching the ship it's clear this model isn't an exact replica of the actual Beagle (if indeed that is truly known) and there are a few compromises which have been made, but then is any model ever a 100% representation of the real thing? These could be improved by an experienced modeler but maybe not if it's your first build. Would these compromises annoy you if you know the ship well? I hope my limited ramblings have been of some use to you. Good luck with whatever direction you decide to take Chimp -
Looks like you'll have it finished soon Chimp
-
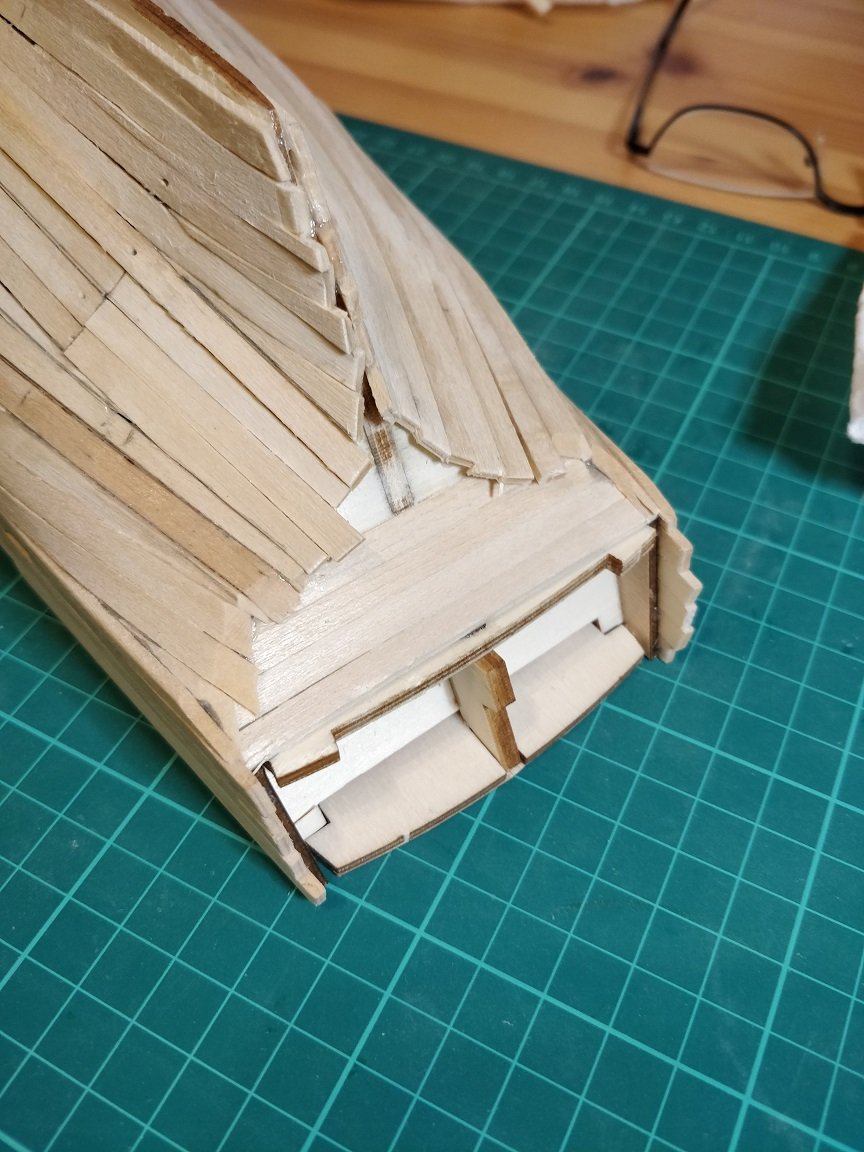
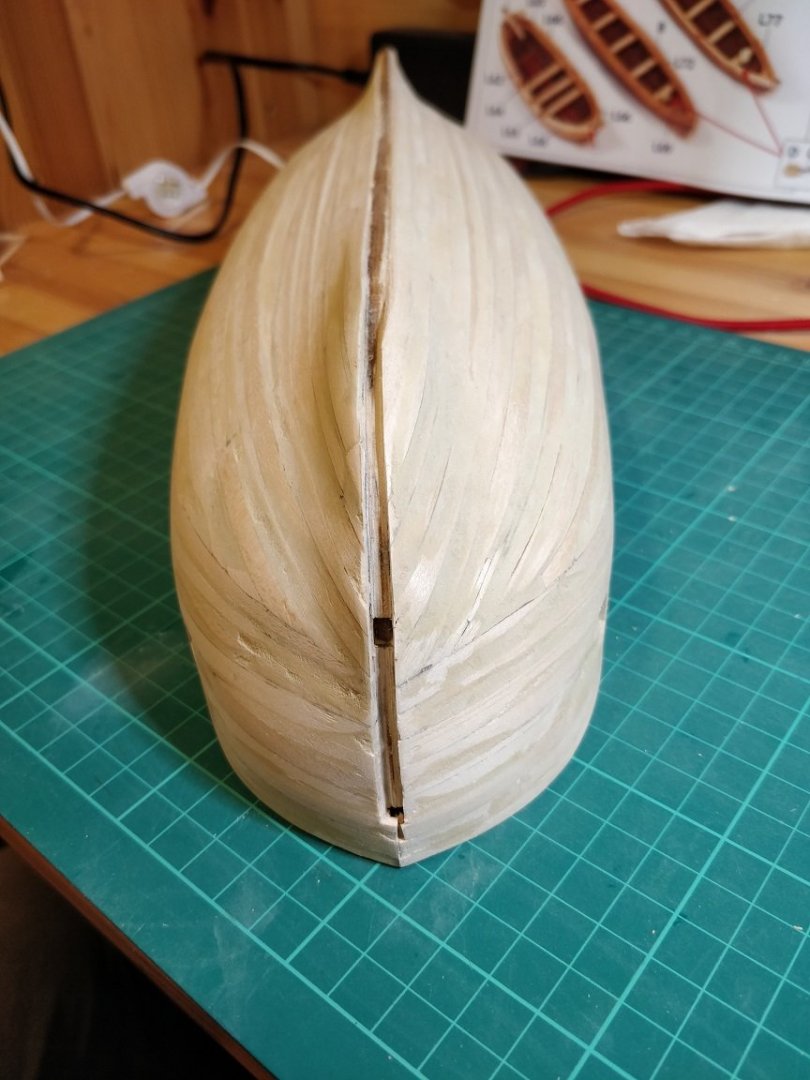
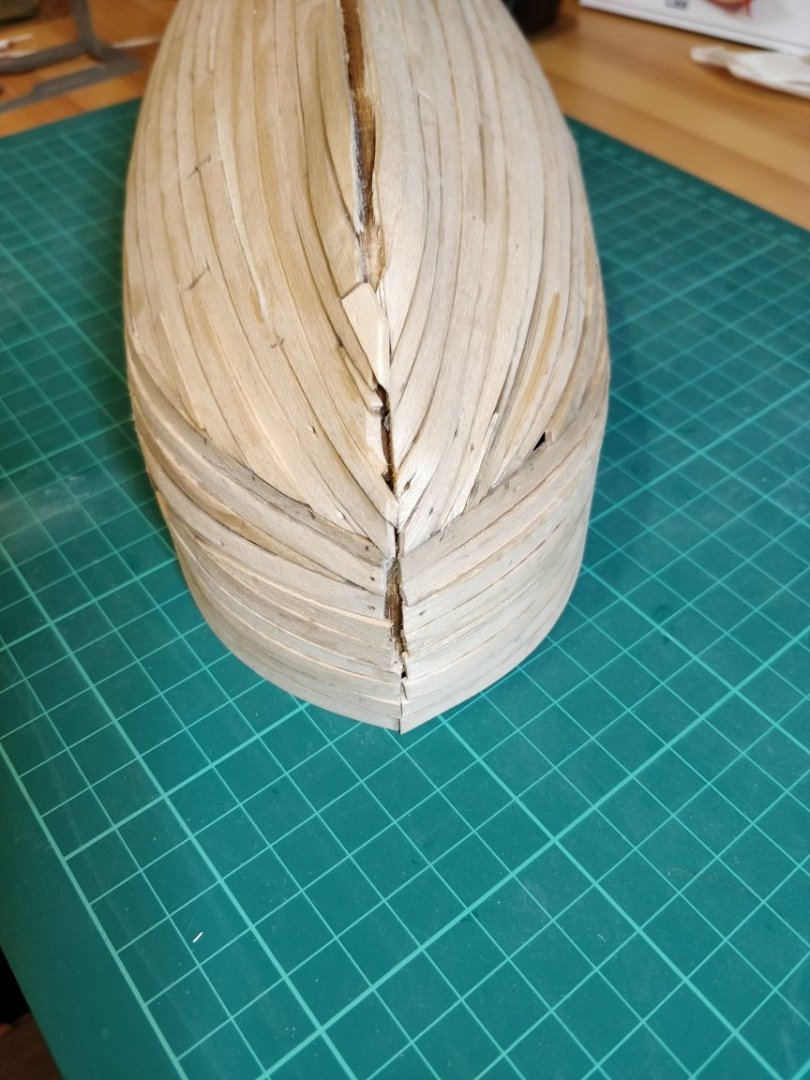
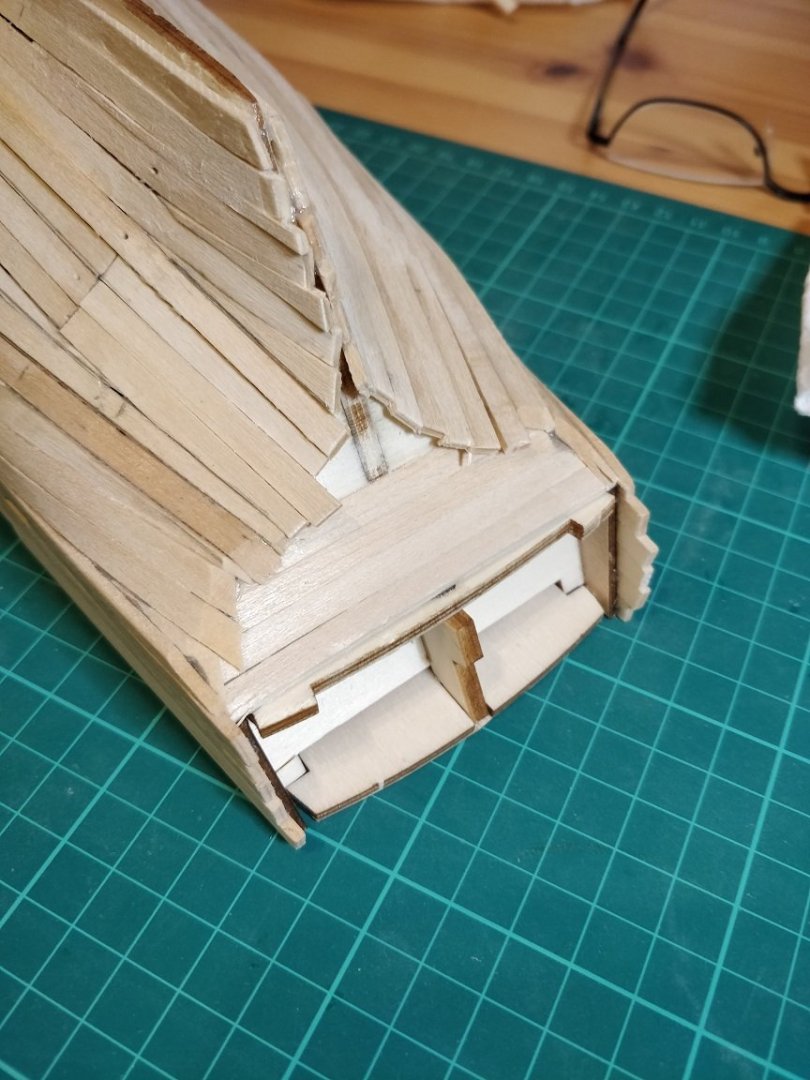
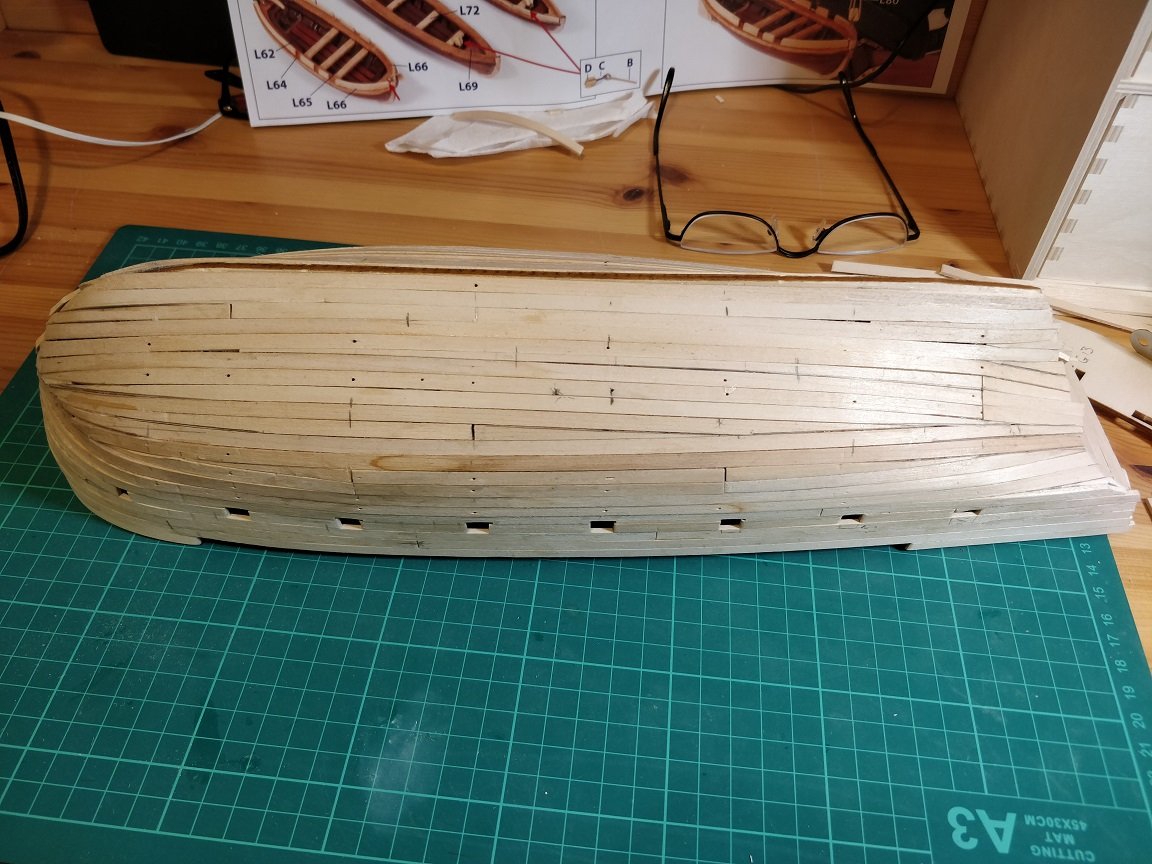
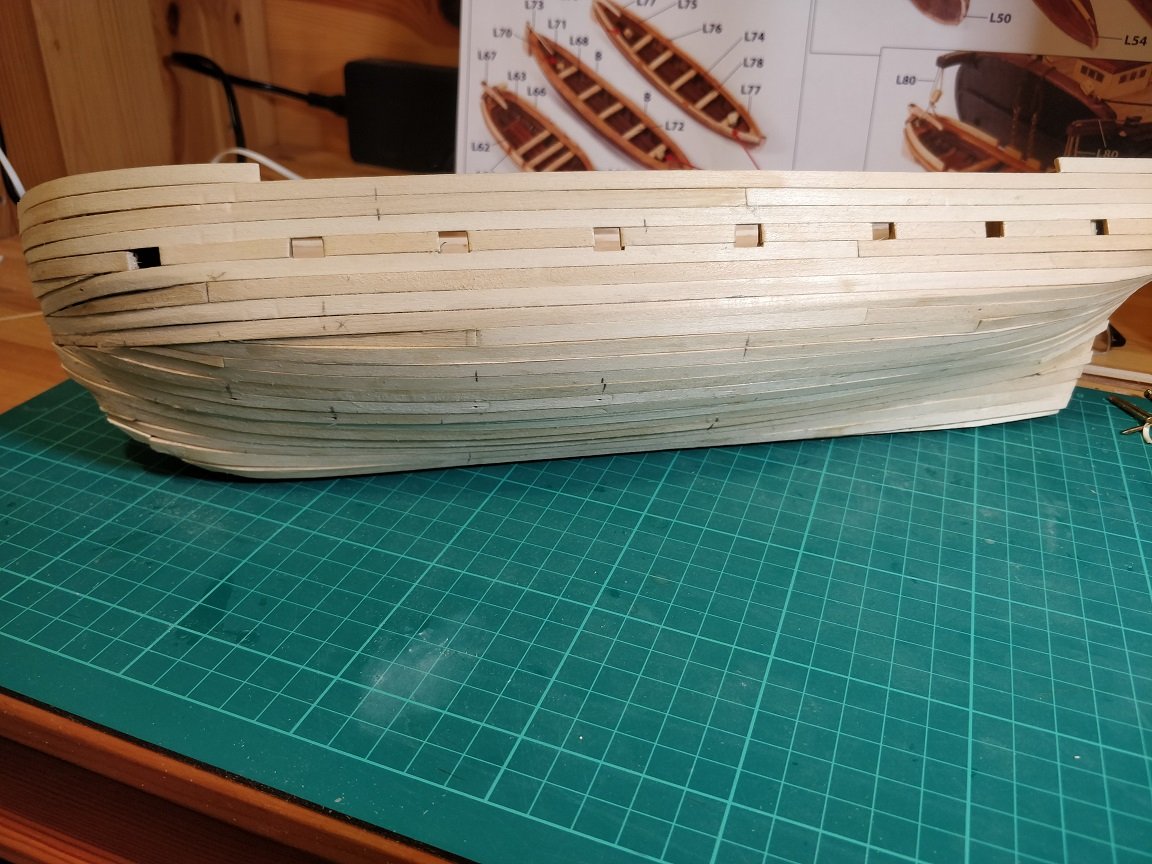
I've finally finished the first planking. It's taken a while but I stuck with it. It has been a challenge and I'm not overly happy with the result as it's now going to need some sanding work to get it into good shape. I've found the 2mm thick planks a bit cumbersome to work with but the advantage is that they will take plenty of sanding. One things for sure, she ain't pretty (not yet at least). I'm a bit embarrassed to post photos before I start the sanding but here goes... Chimp


-
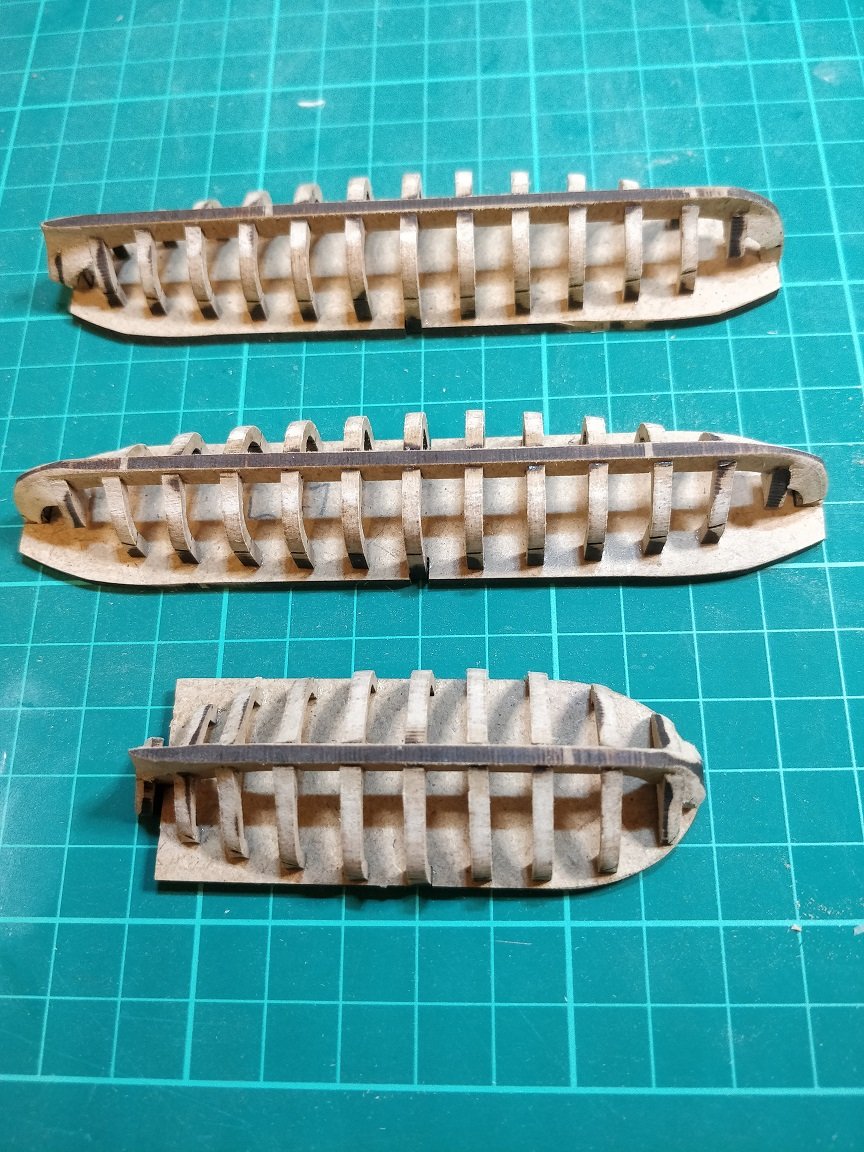
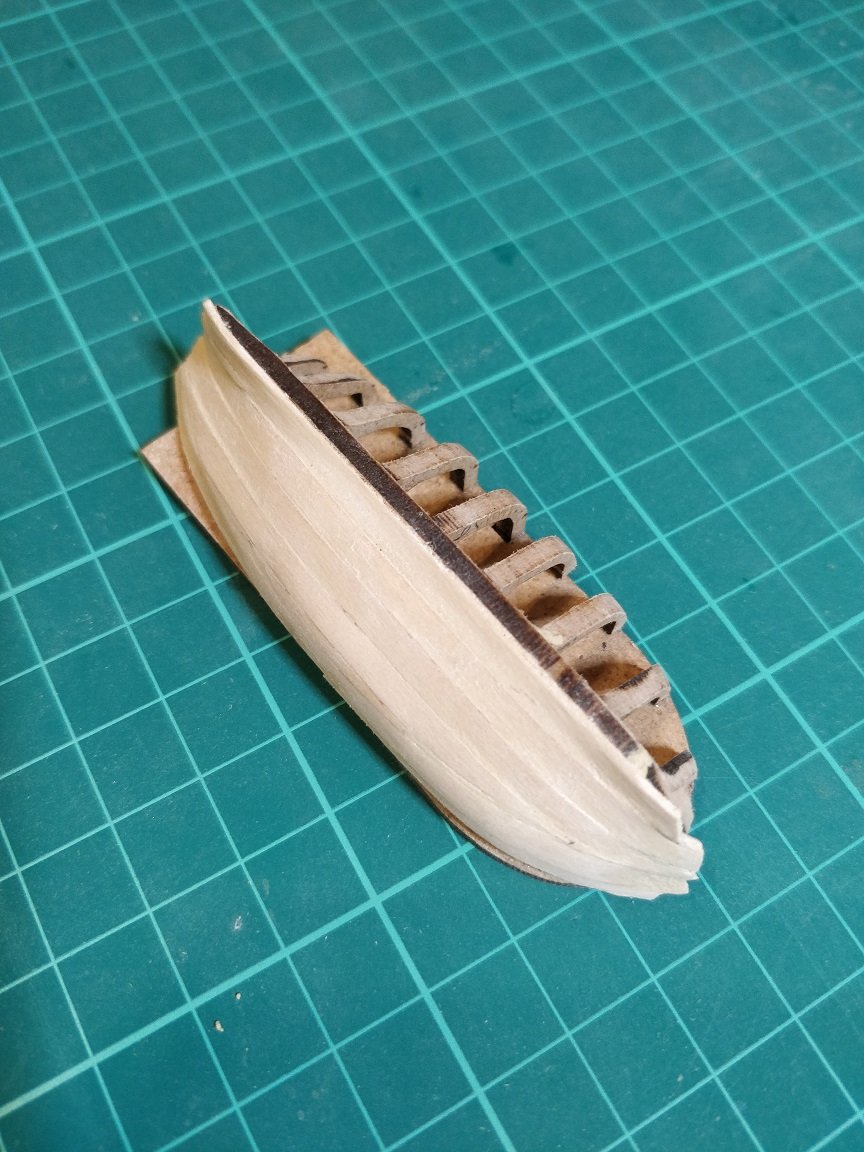
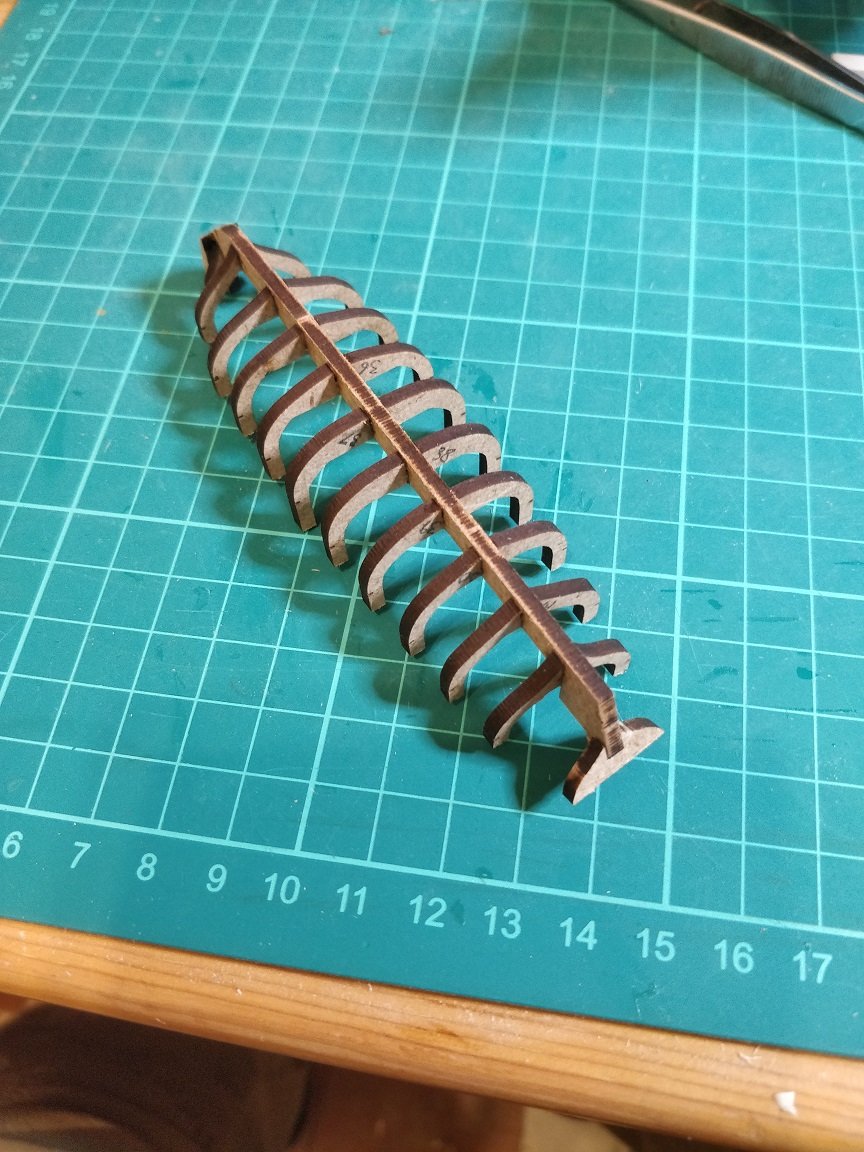
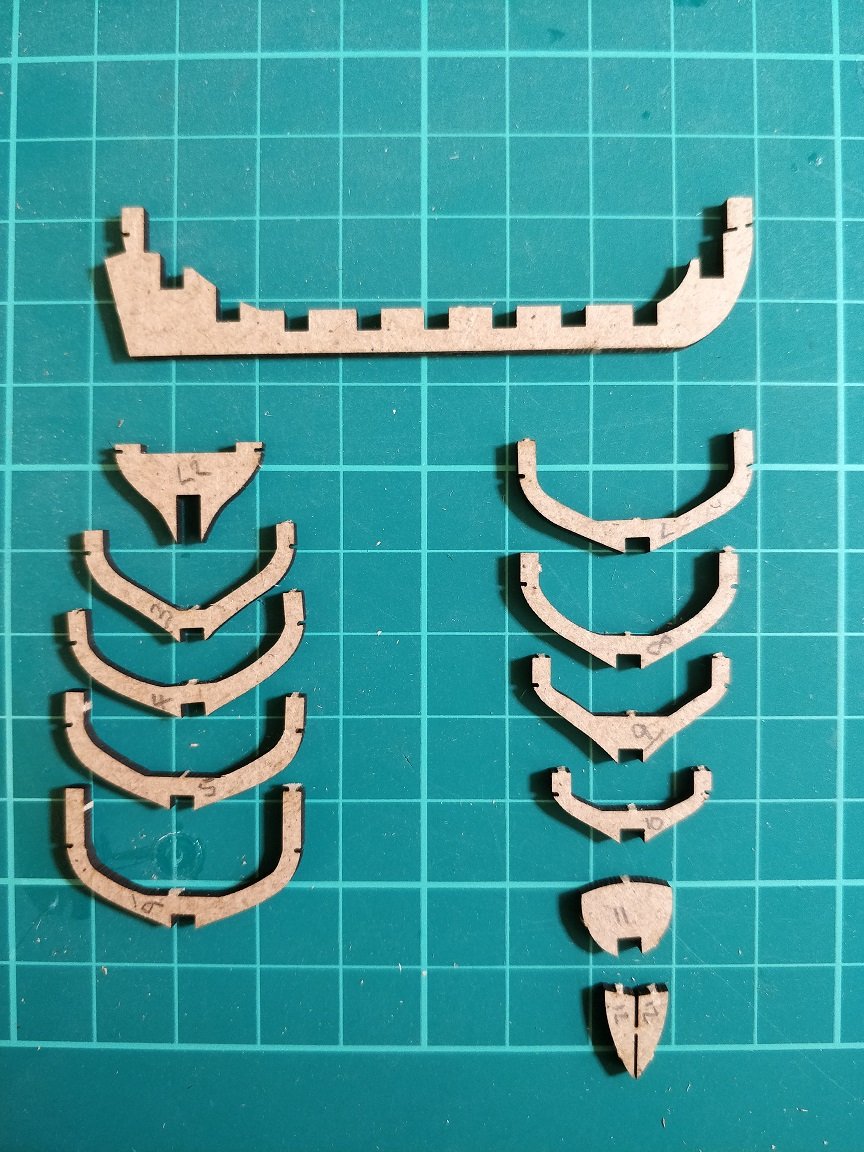
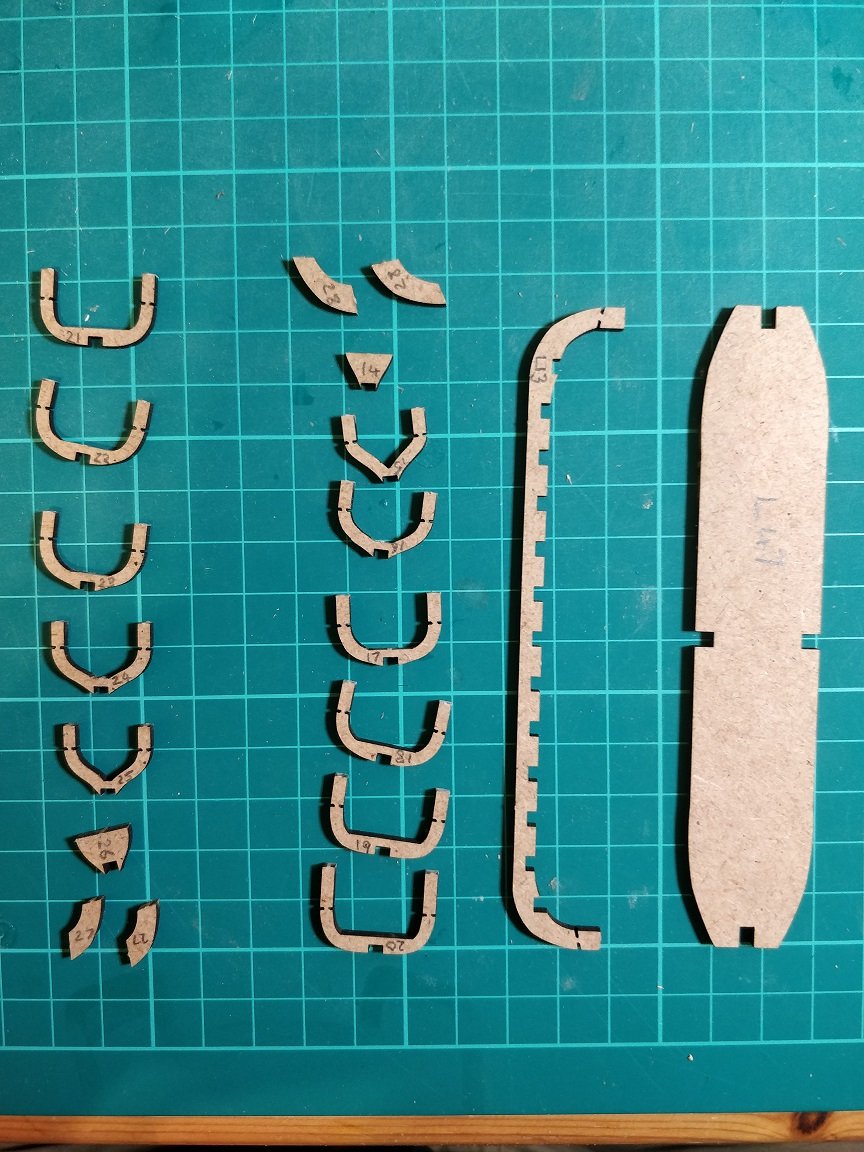
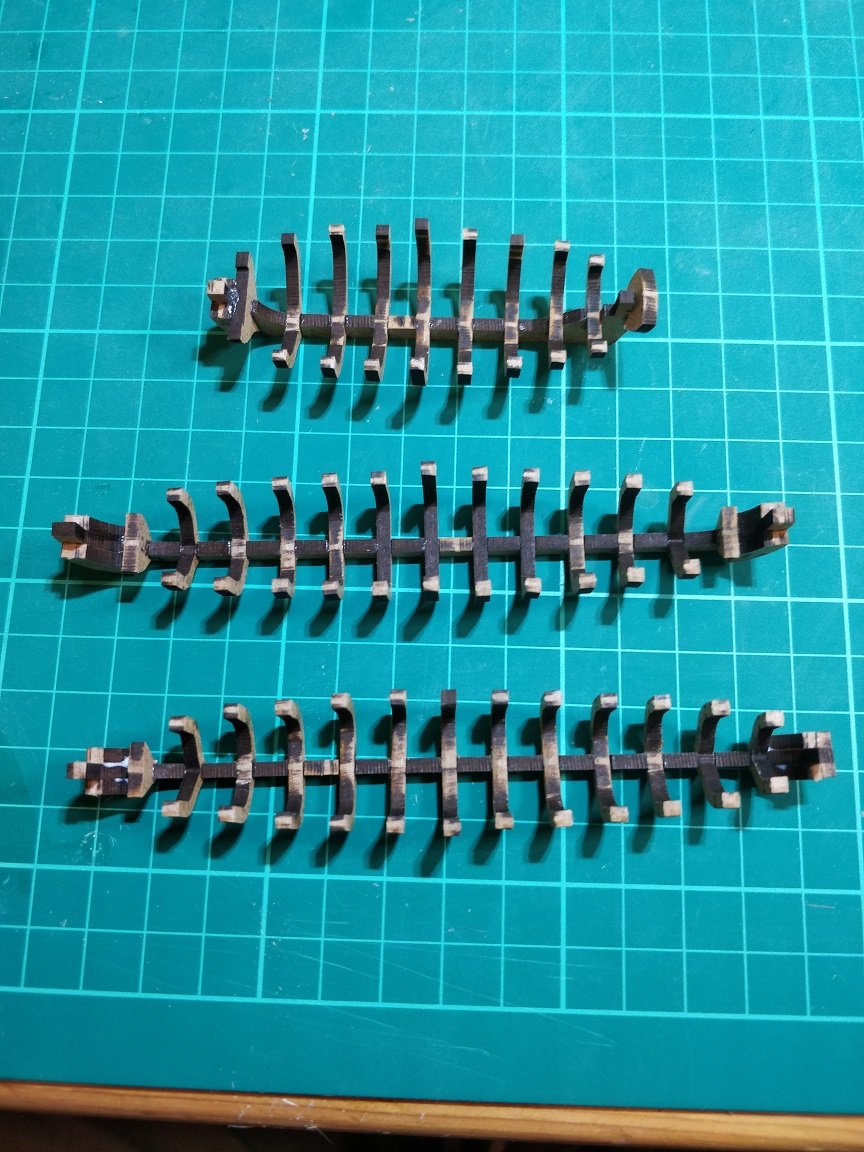
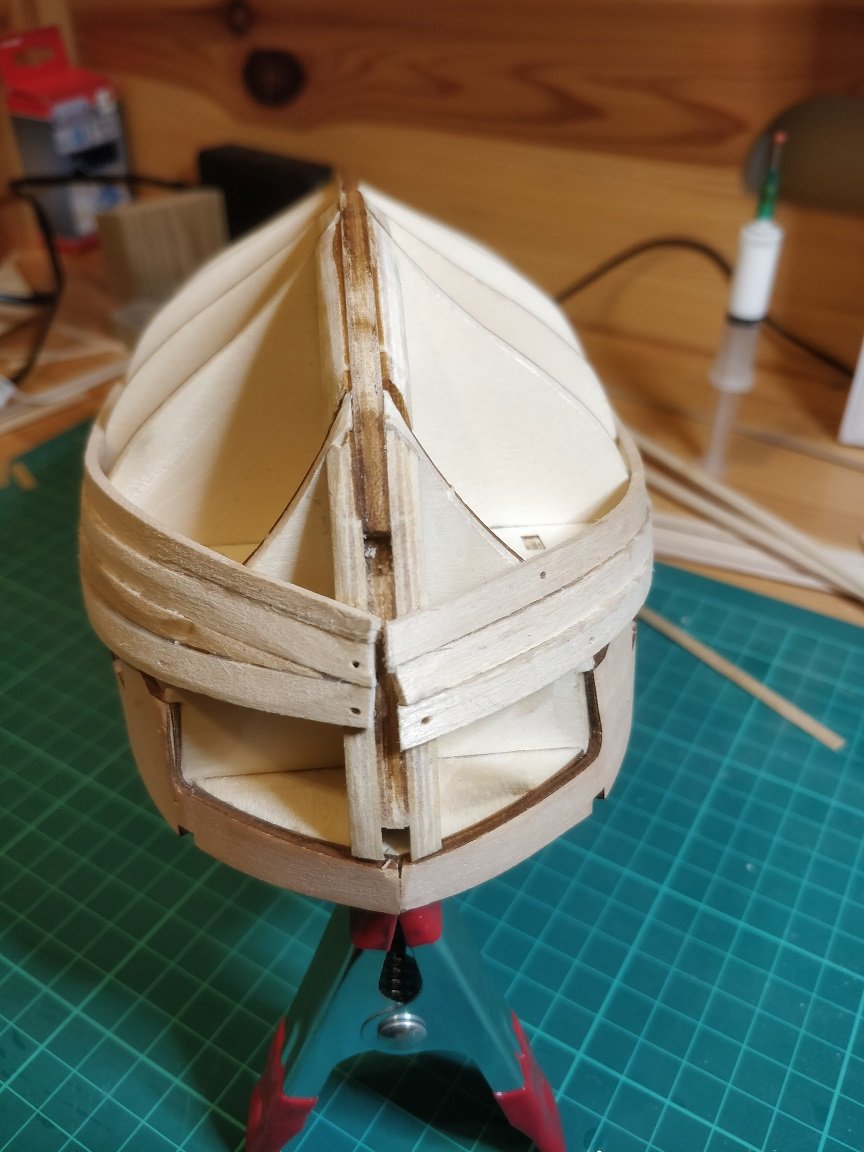
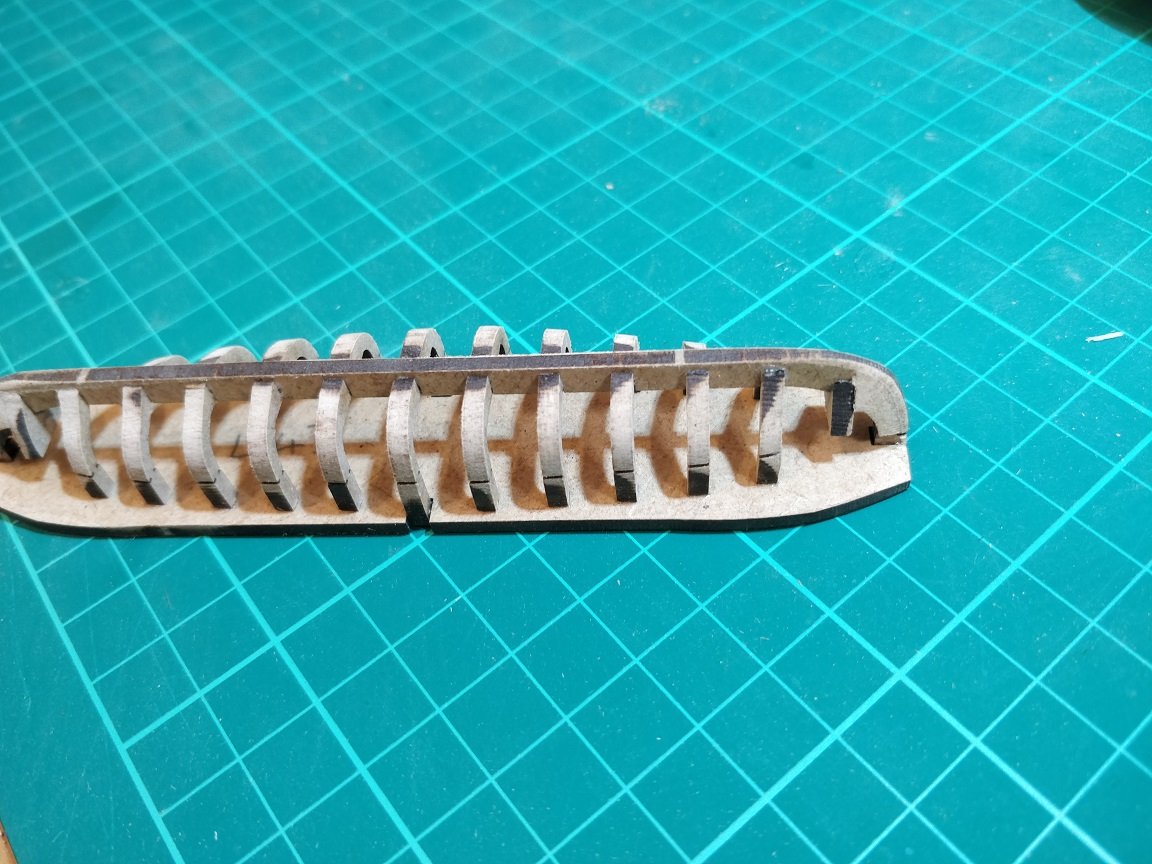
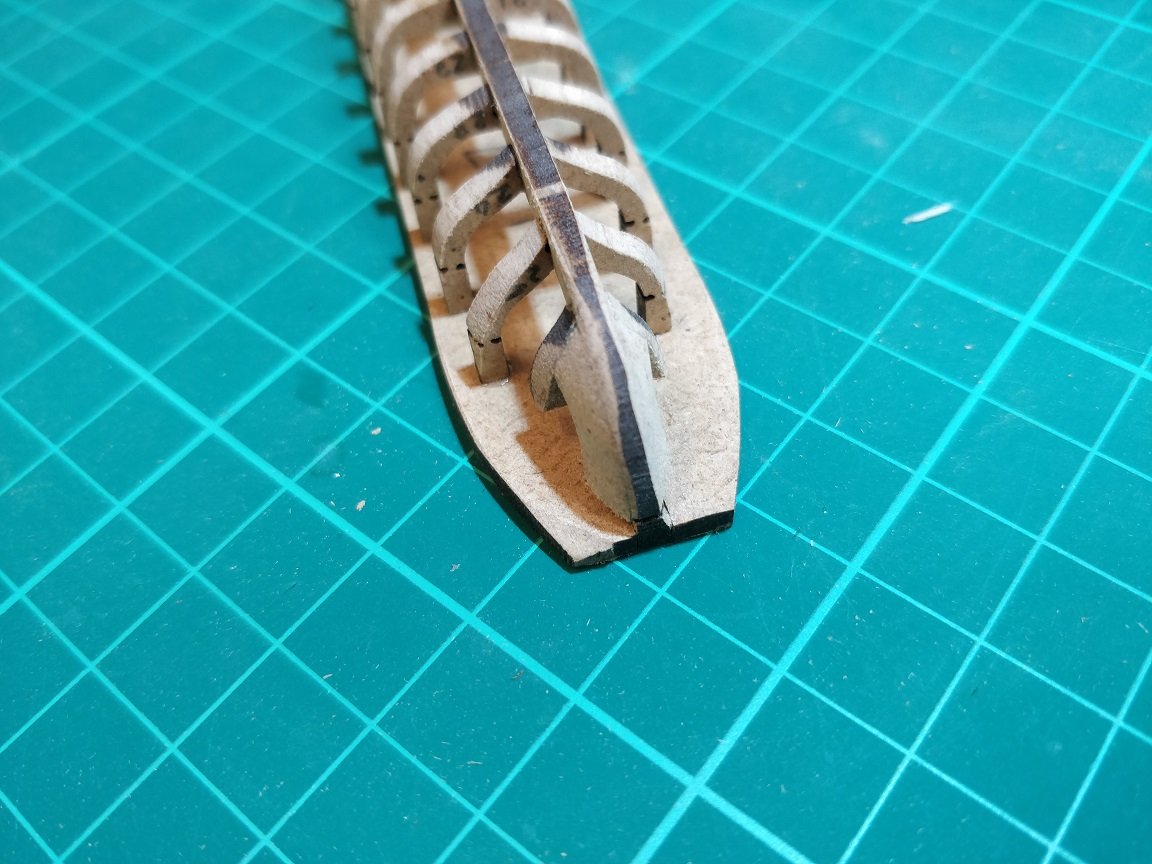
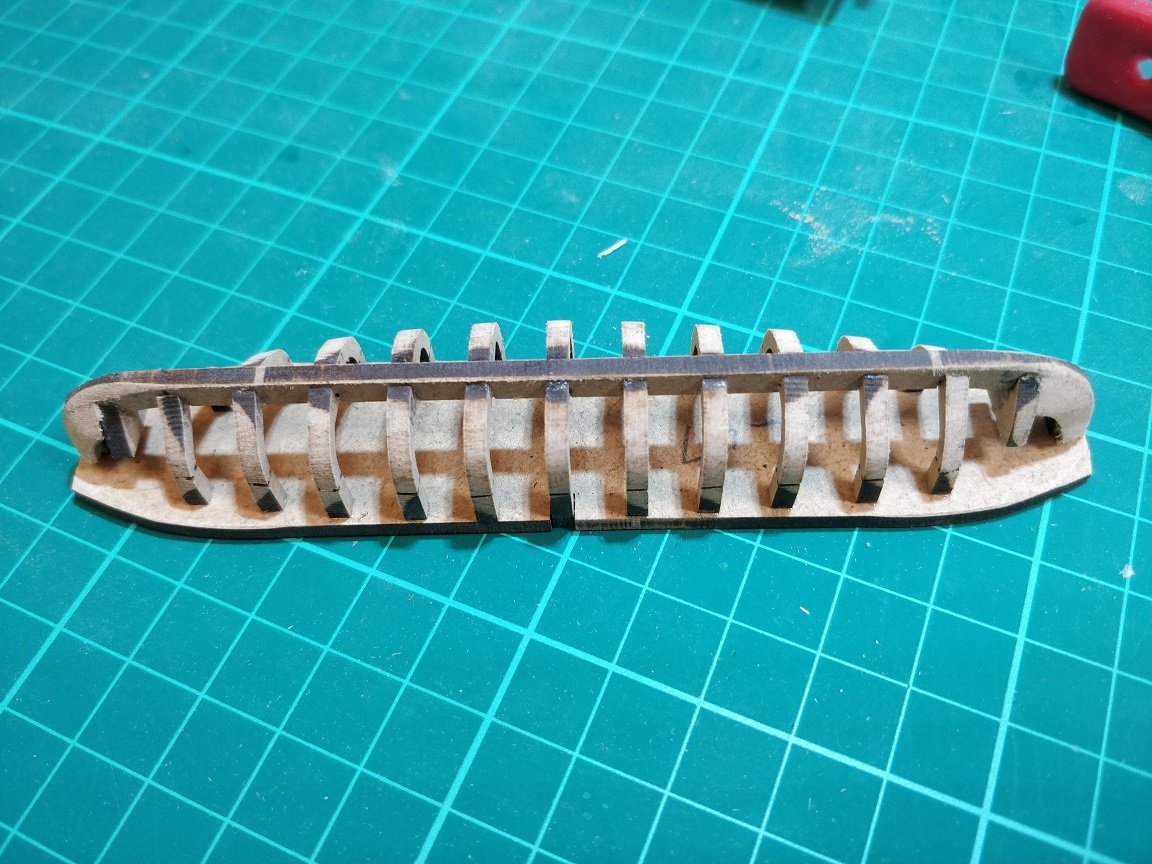
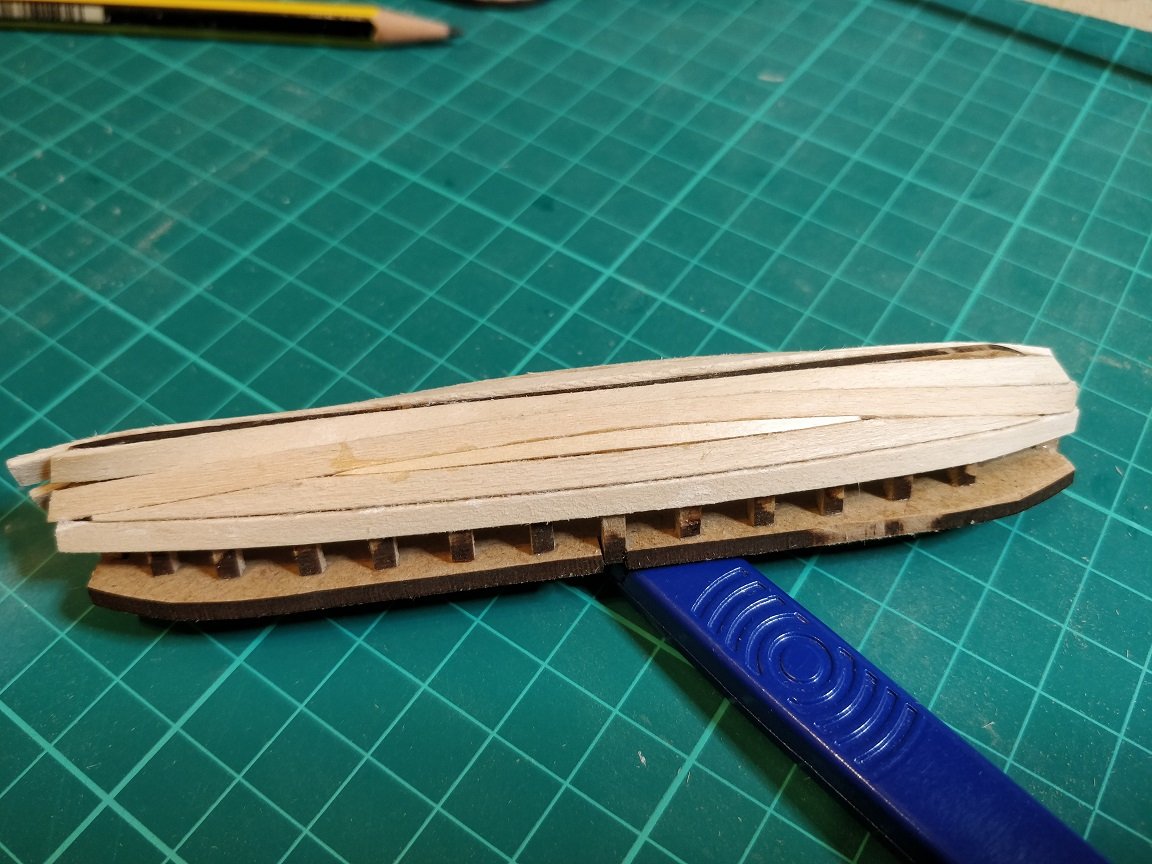
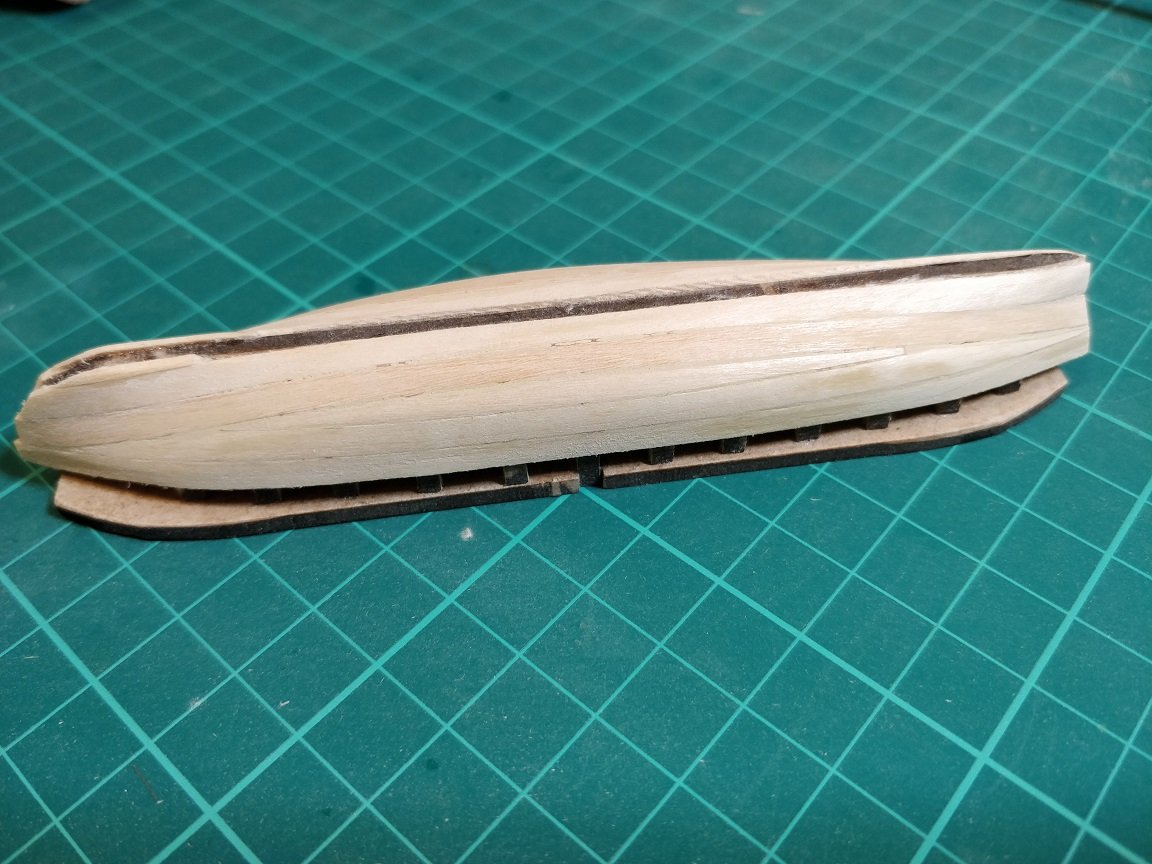
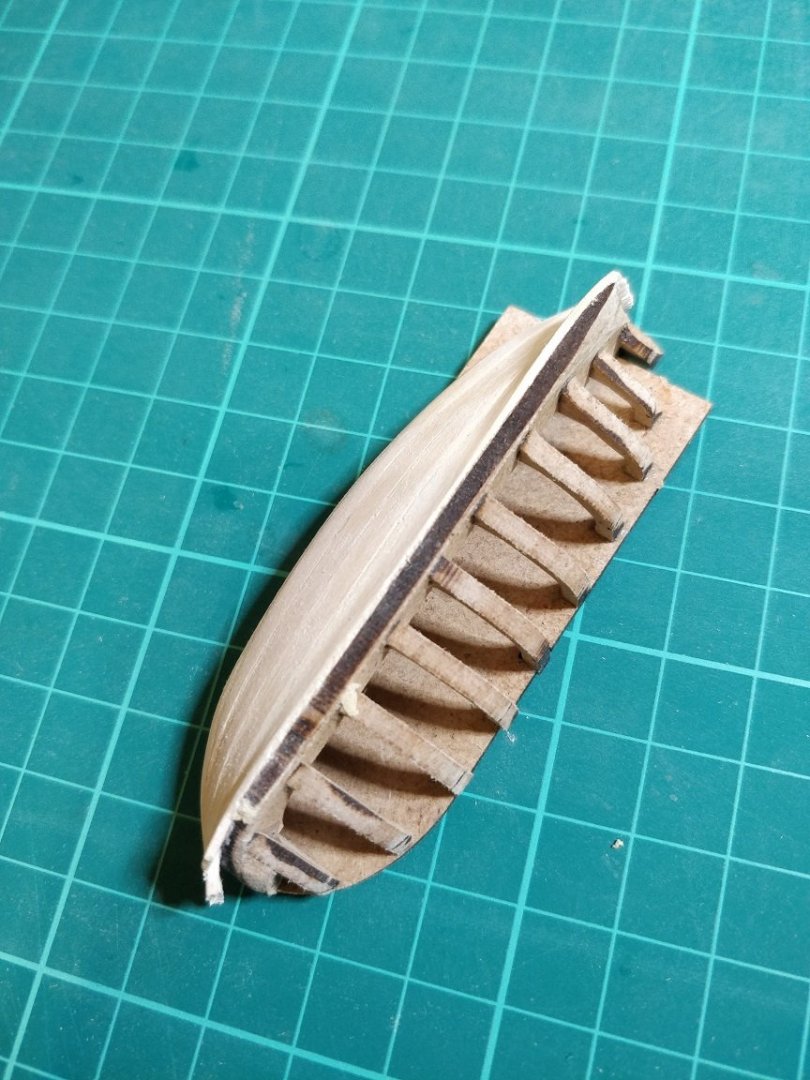
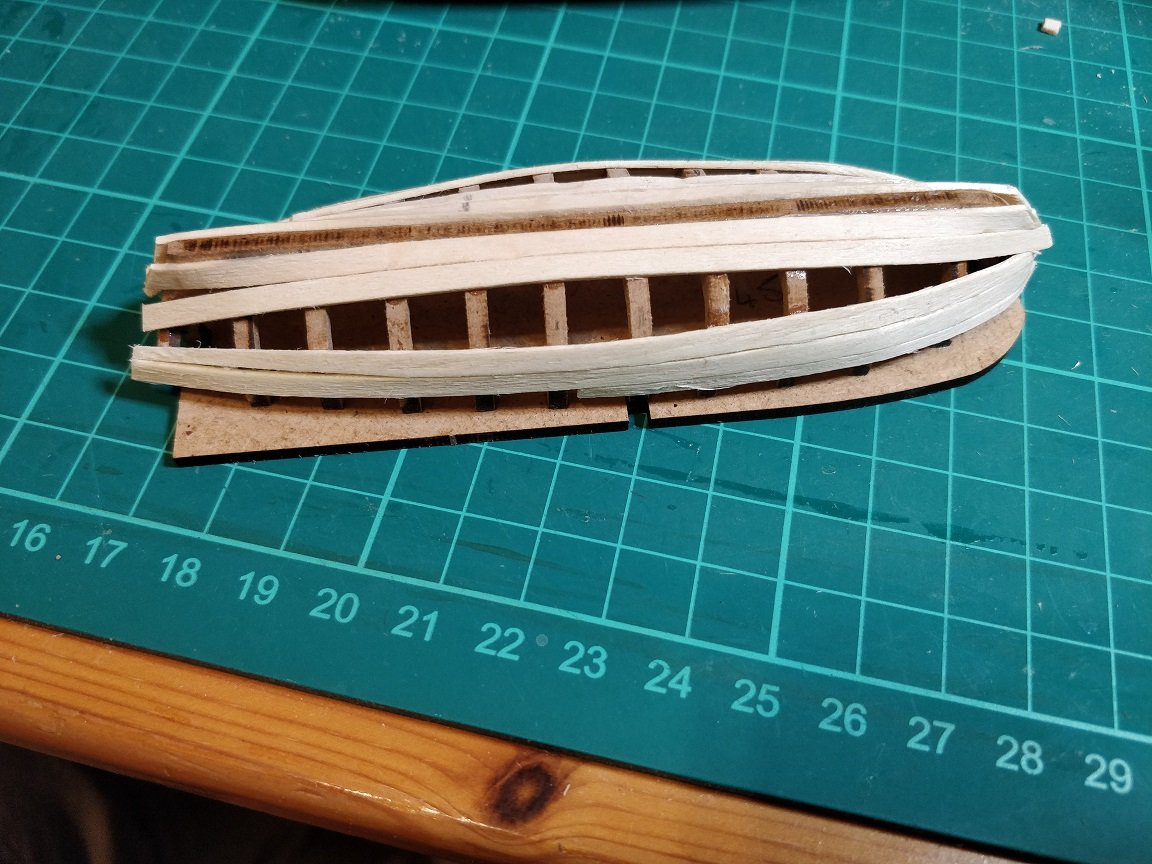
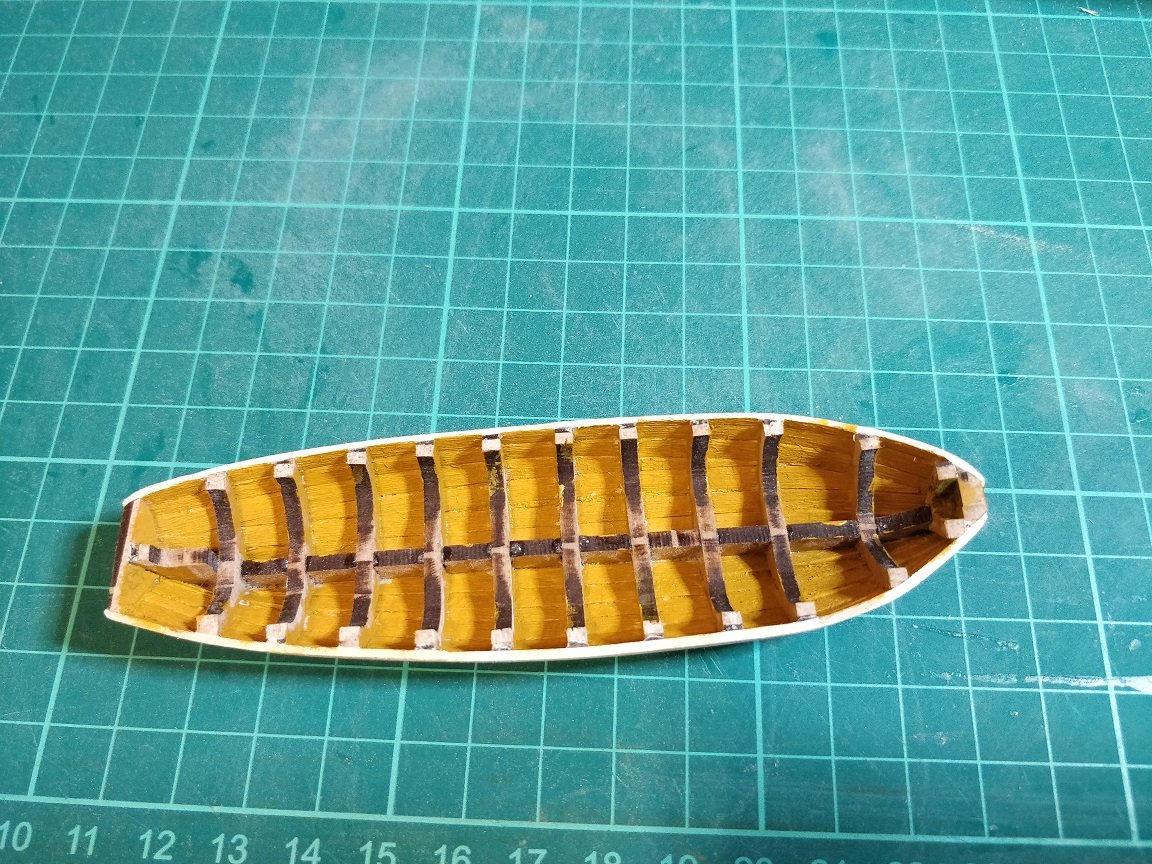
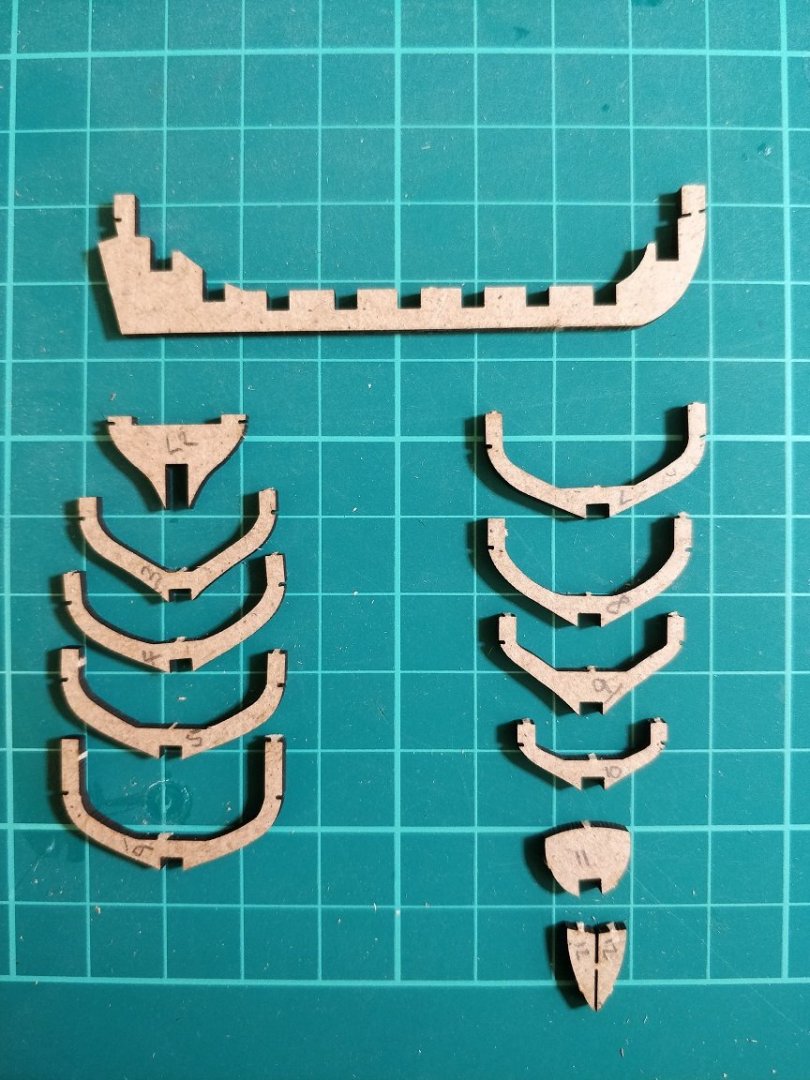
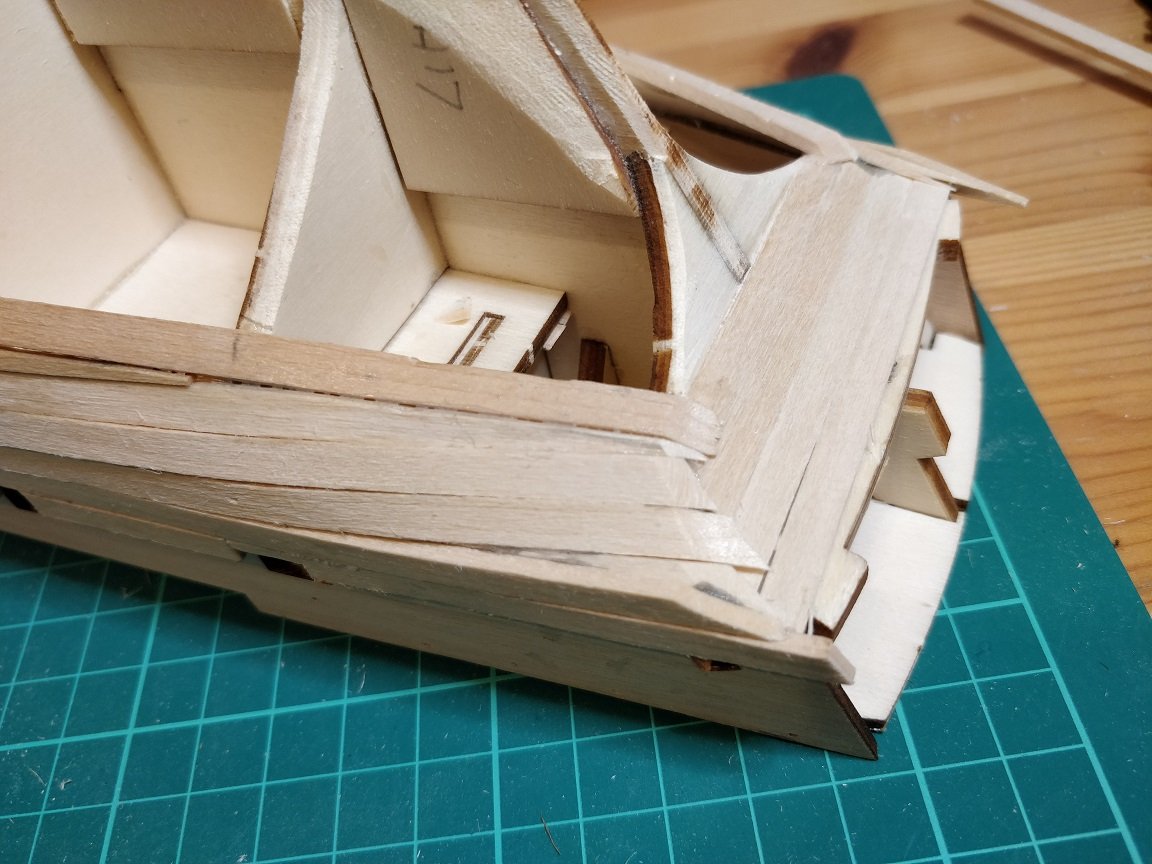
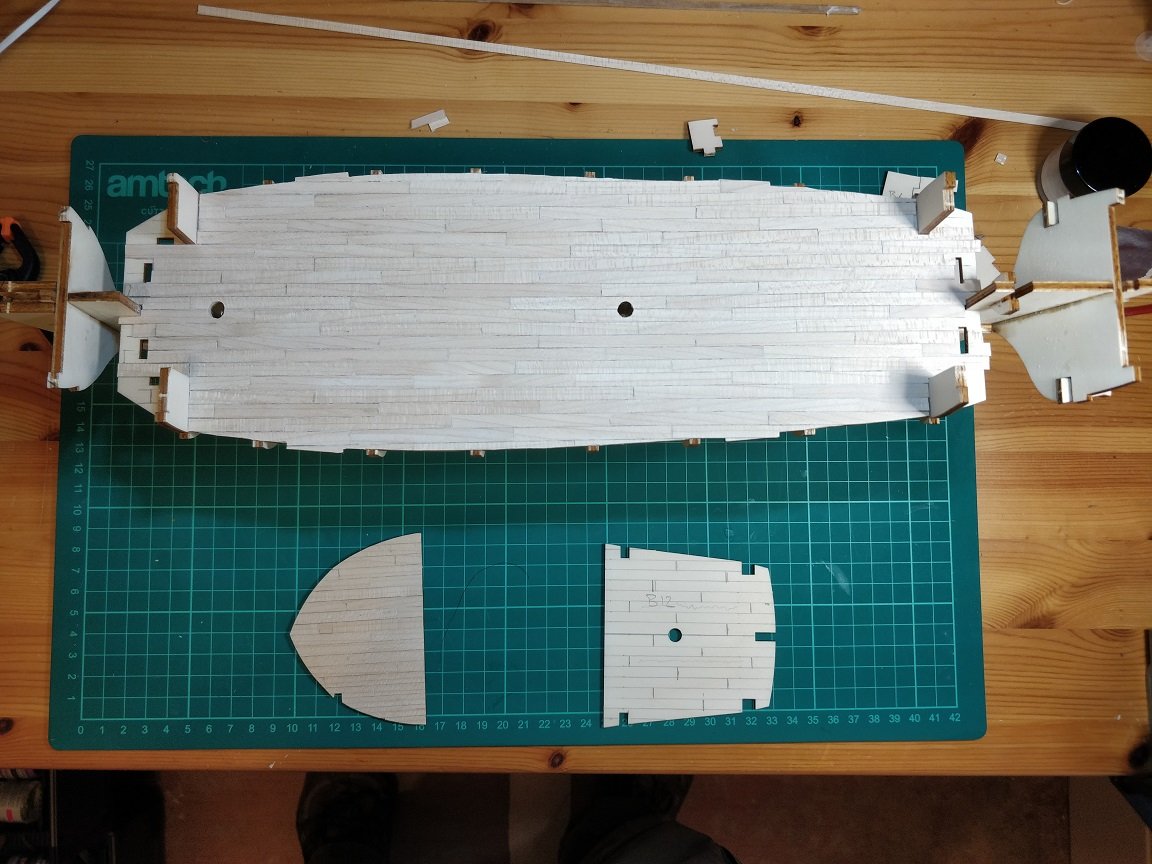
Still working on the planking of the main ship and still having issues to get a good tight fit between the planks and getting the bends to sit flat. However, the progress with the smaller boats is coming along well. Here are some photos detailing the progress so far: Chimp


-
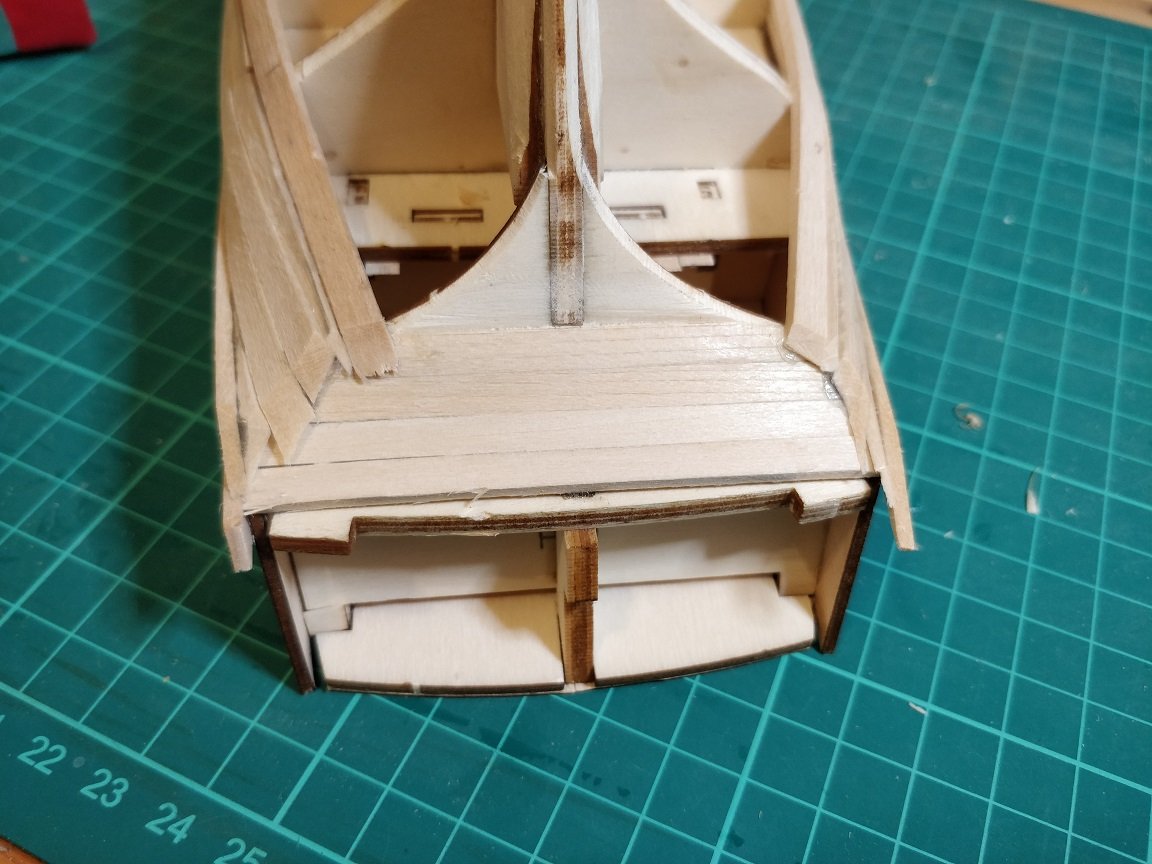
As a way of using my time more effectively, when waiting for glue to dry, I'm looking at the smaller service boats and their assembly. I thought these small boats would be so much easier to assemble than the main one, but again I was wrong. Having said that they're still fun to make. It took me a while to work out what I needed to do and how best to do it. I know I should have watched the videos available from Occre but I think that takes away some of the fun. Here are some photos showing my progress so far. Chimp


-
A little more progress with the Beagle. I'm still having problems with the thick planks and how to get them fitted without ending up with steps between planks. I think I'm getting there slowly and should have it mastered by the time I finish
-
Hi guys, I've started the planking and progress is a bit slow. I'm still very much a novice at this, so still at the lower end of the learning curve. I've managed to get a few planks on either side with limited success. You can see from the images it's not a mirror image. The odd thing is that I think I know what I should be doing but for some reason when I come to do it I end up doing it wrong. When I started this ship I said to myself I would follow the advice given here in this forum and learn from the experts. I was going to divide the hull into sections and shape the planks to fit those sections. When I came to planking I just started at the top and worked my way down with full width planks. Now, on the starboard side you can see I have ended up with stepping of the planks at the bow where I've tried to bend them around. So much for learning from the experts . However, as this is the first planking I think I'll get away with it. I really do need to take a bit more time and think about what I'm doing rather than just rushing to make progress. Chimp


-
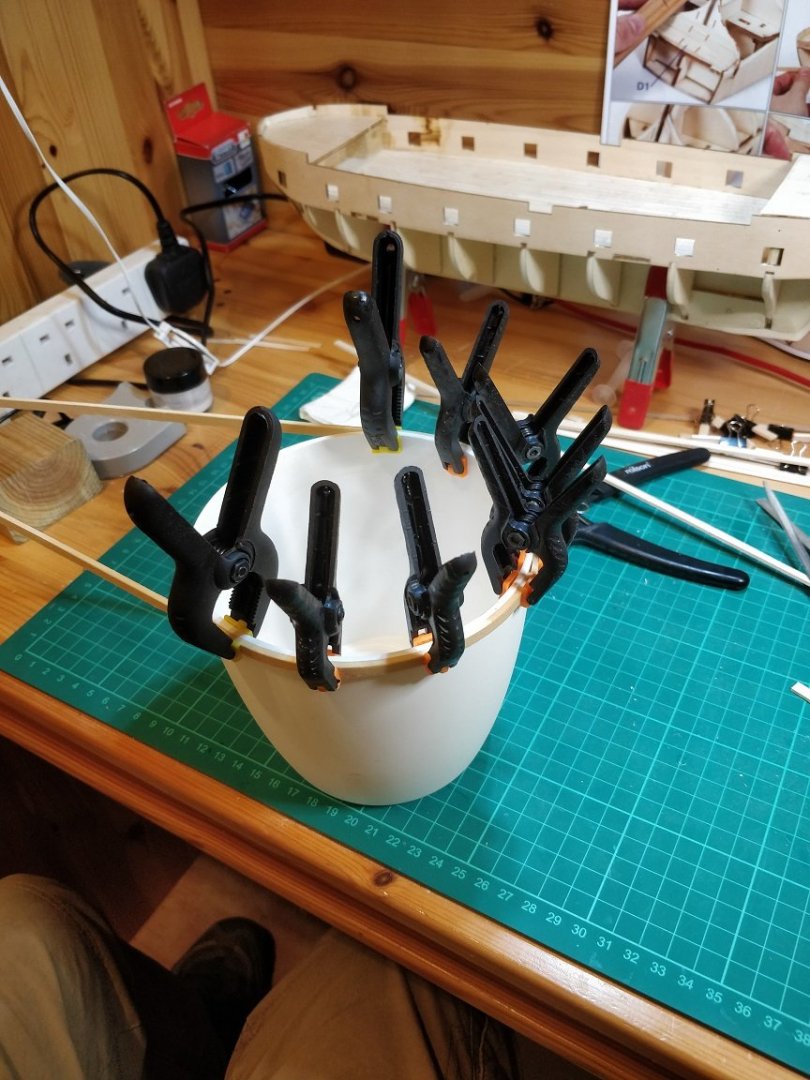
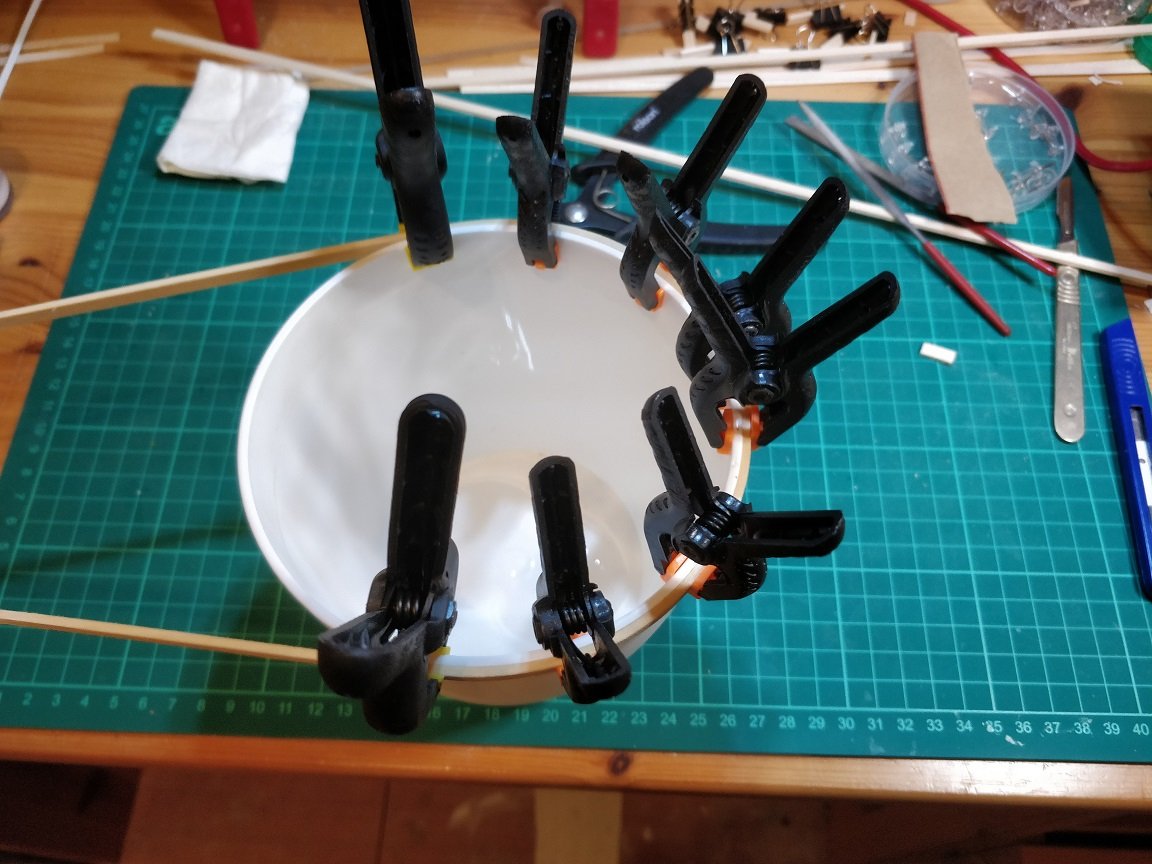
Getting the planks to bend around the horizontal is straightforward. I've found a flower pot which has the same radius as the bow. Once damp the planks bend easily to this radius and keep their shape once dry. The problem comes when trying to bend them on the vertical.
-
I've started to consider the planking, which I know is going to be a challenge. Hopefully it will also be rewarding if I can make a good job of it. The supplied planks are 5mm x 2mm limewood. I'm finding these quite difficult to bend to the required profile especially in two directions. I think I might be making things difficult for myself. The instructions don't seem to bother about getting a close fit between the planks and rely on filler and sanding once finished and the fact that the second planking will cover the first. I'm trying to get as close a fit as I can between the first planks and as a result progress is slow.
-
Looks like you've made a great start to the build and are make fine progress. I'm doing the same build but having a few issues along the way. I don't find the instruction too helpful so I tend to just use them as a pointer. I'm very interested to see how you progress so will keep a close eye on your build log. Chimp
-
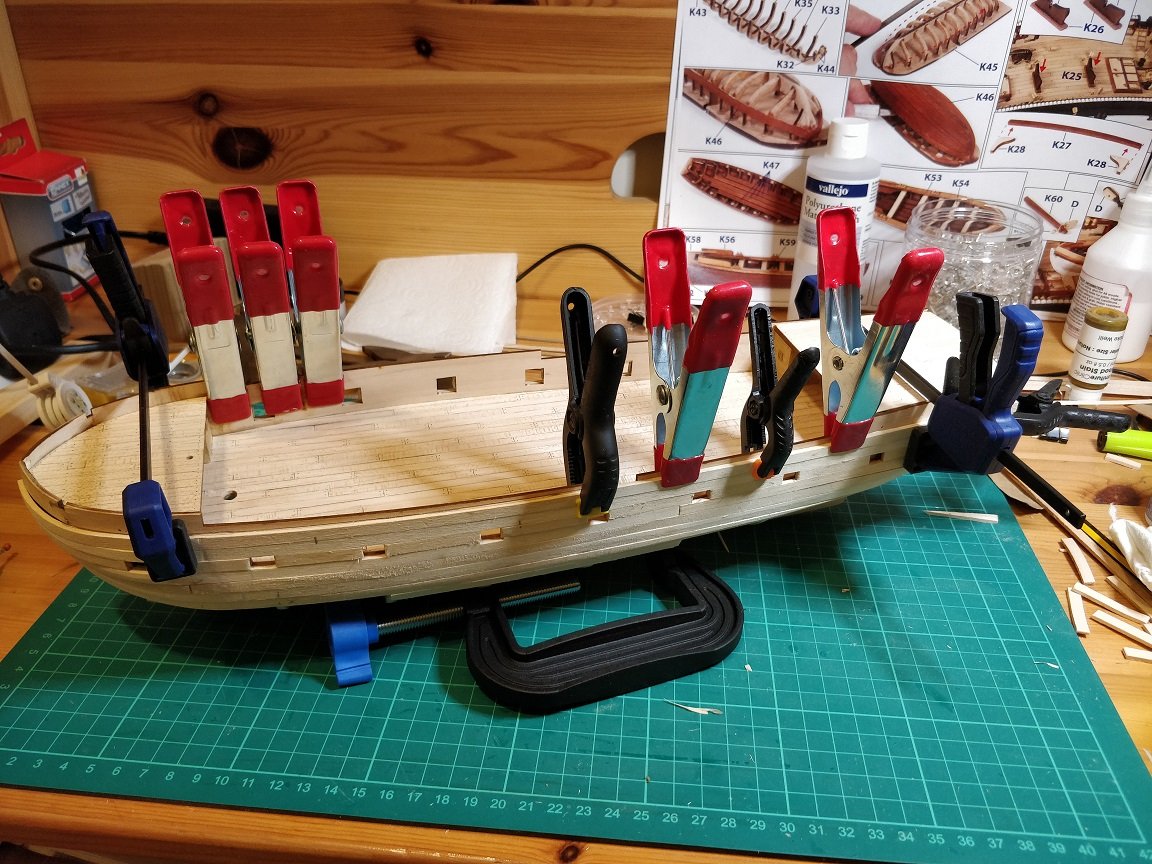
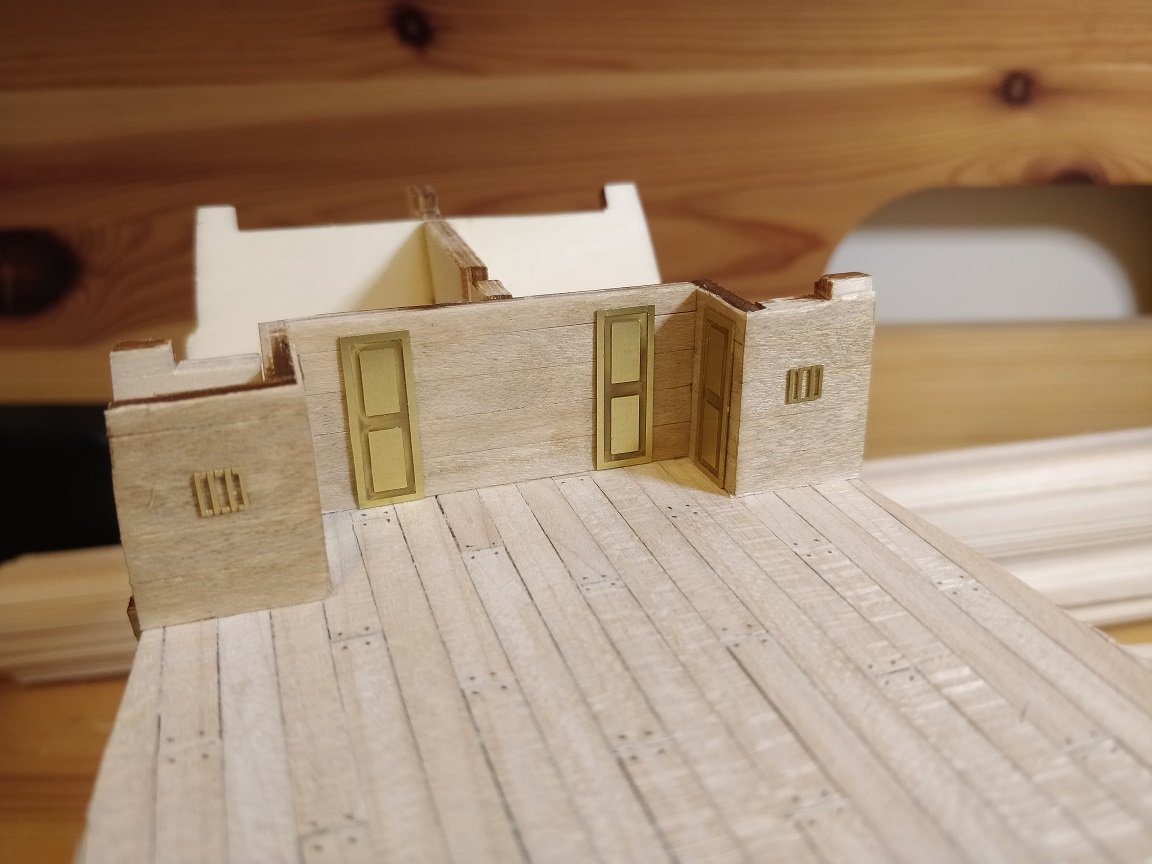
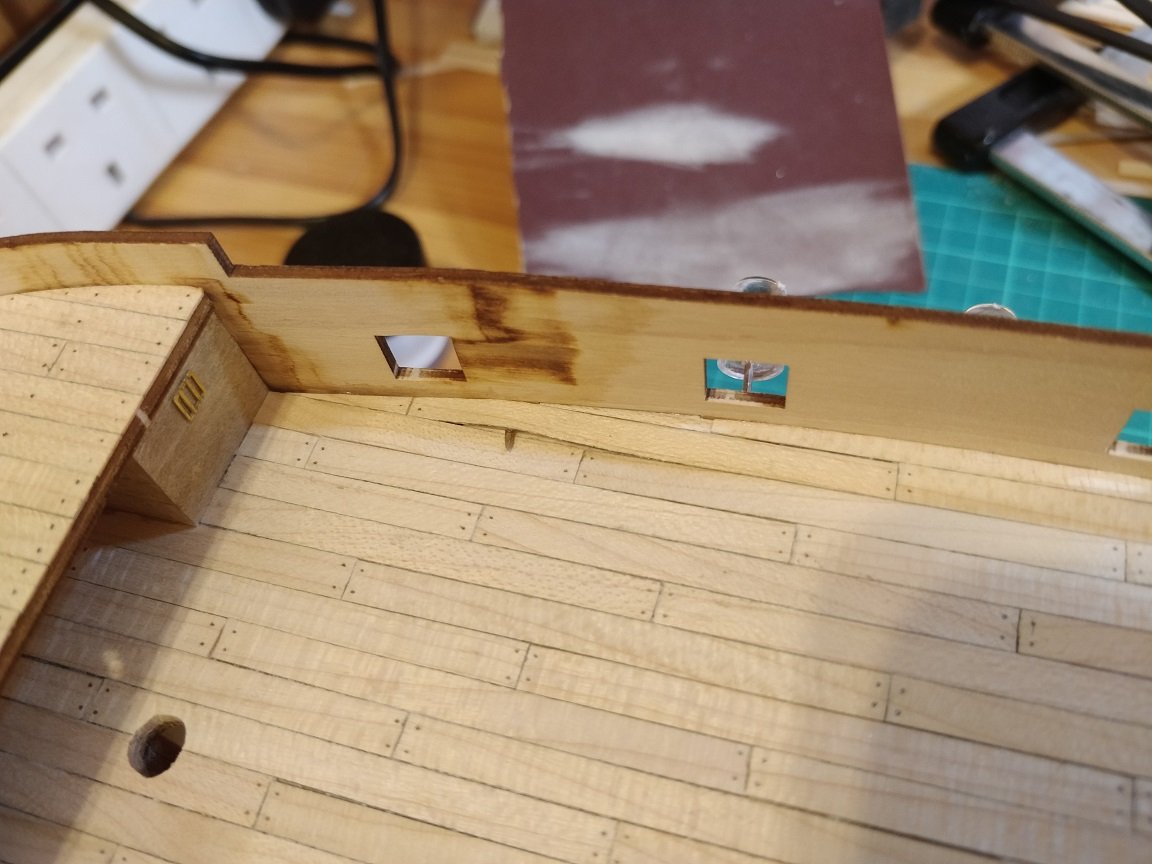
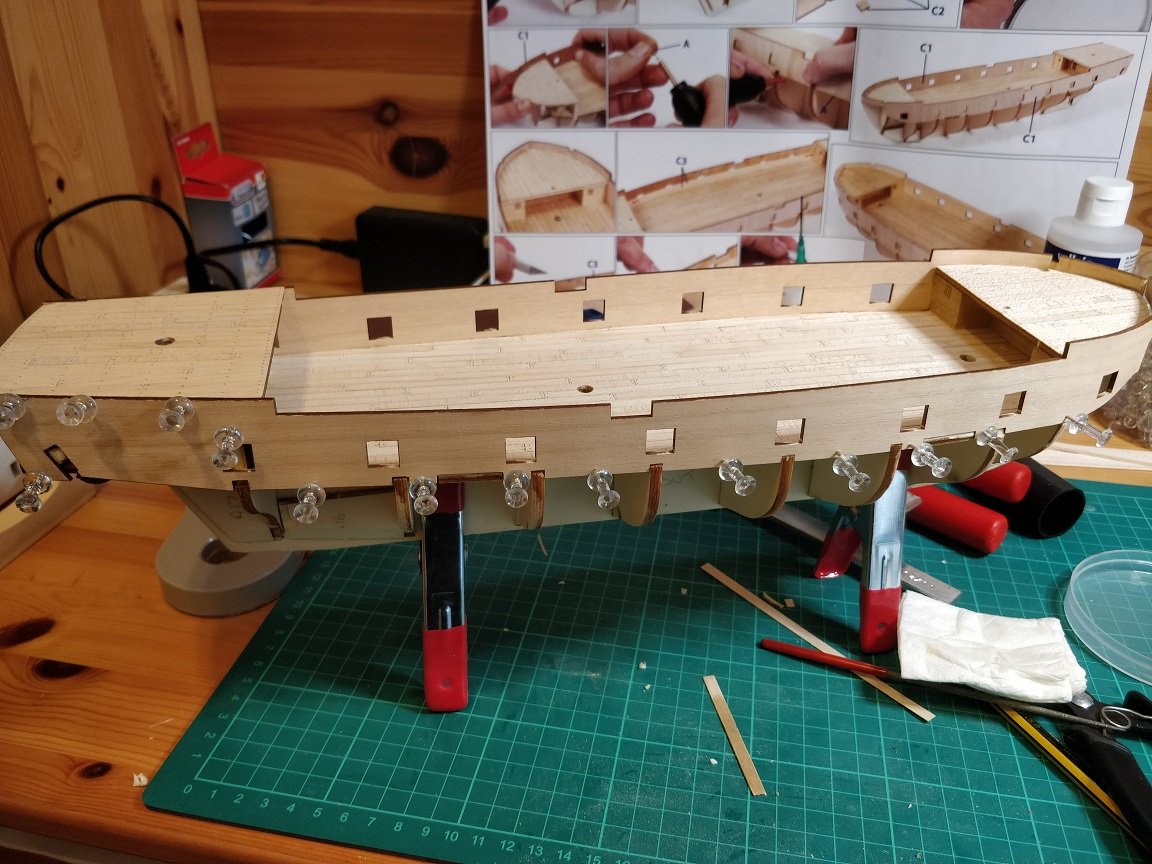
Just a quick update on the build: I got some oak stain and applied it to the cabins and it had the desired effect. It darkened down the wood and retained the grain. It didn't bleed into the deck so I was happy with that too. I decided to not paint the brass doors as it would look a bit flat and would really need some texture, I'll live with the brass. I've now fitted the forward and aft decks as well as the bulwarks. It was during the fitting of the bulwarks and pinning them I managed to get one of the pins to surface through the main deck. As it turned out this was easily repaired. I've now started the process of fairing ready for planking. As I now know from my last ship, it's worth taking the time to get this right and will save time and effort in the long run. Chimp

-
Hi Jaager, Many thanks for your response. I fear I may have lost my second gold star as the photo of the deck was taken before I simulated the trunnel pattern. Ah well, it's a learning curve and I must admit I'm still at the lower end. I was thinking of trying a weak water soluble oak wood stain on the external faces of the cabins to try and darken the colour down a little. I think the Lime wood veneer used is a little too light. I'll have to experiment with it first as I don't want it to bleed into the wood of the deck. Maybe start with drybrushing the stain on first and see how it goes. Chimp
-
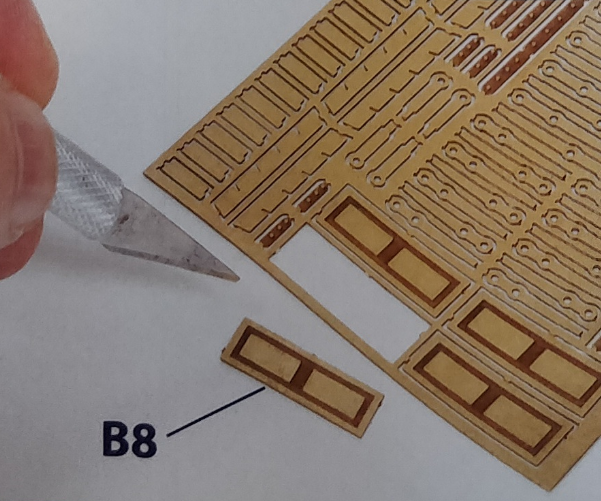
Hi guys, hopefully just a quick question here. In this kit there are four doors which are supplied as etched brass to be cut out and glued in place. I can't imagine for one minute they would have been brass doors so what would they have been, oak? So I guess they'll need painting. What would have been the wood of the cabins they are placed on, oak again? Same colour? Chimp

-
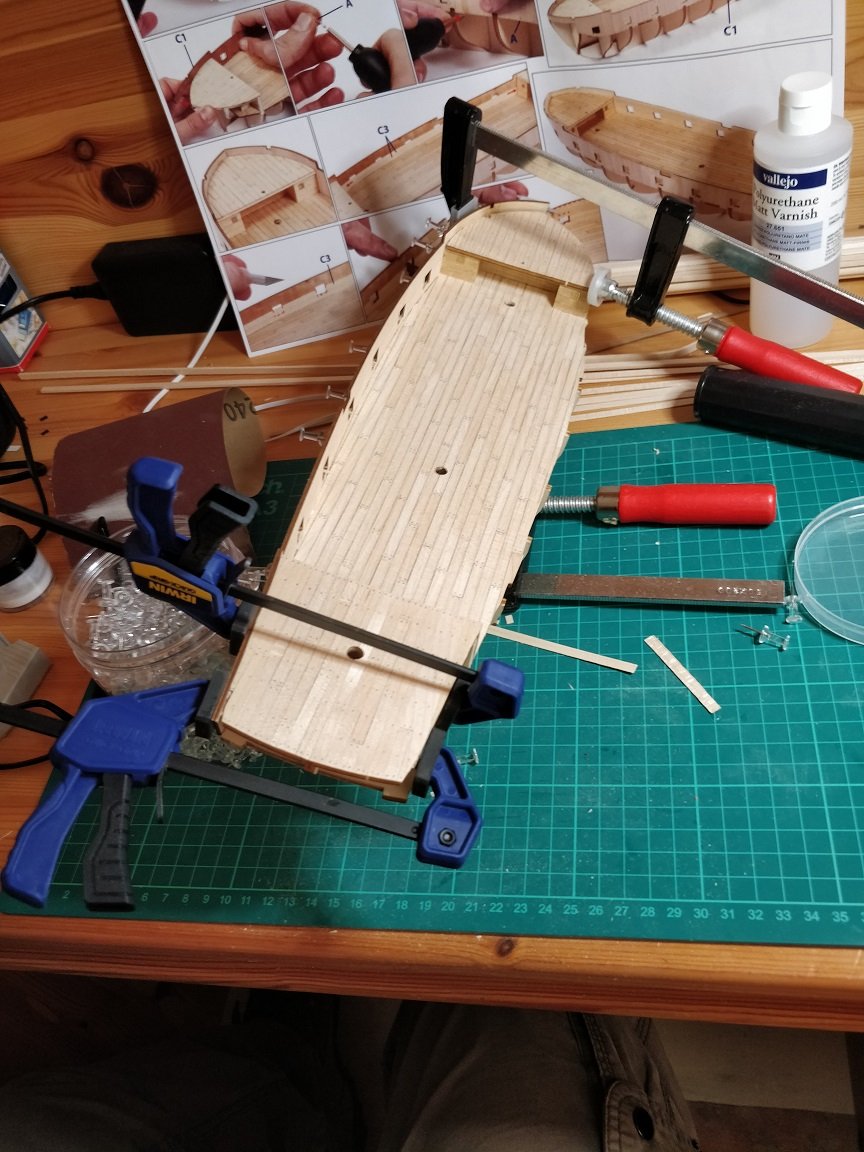
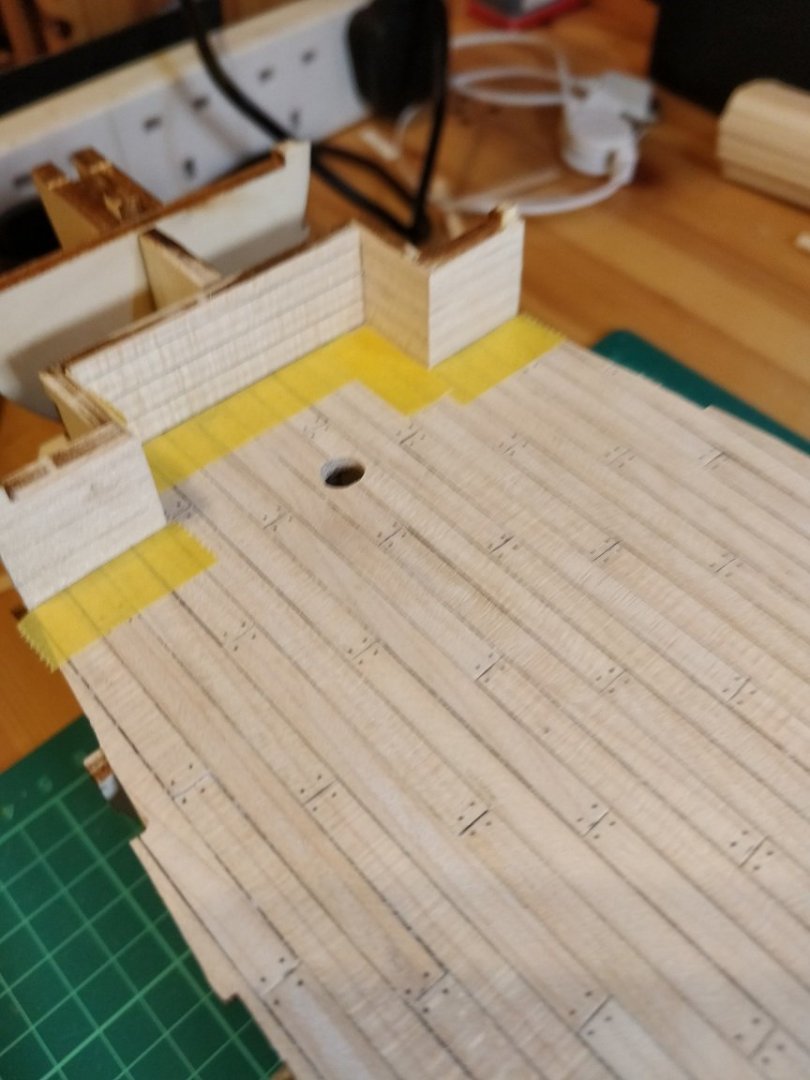
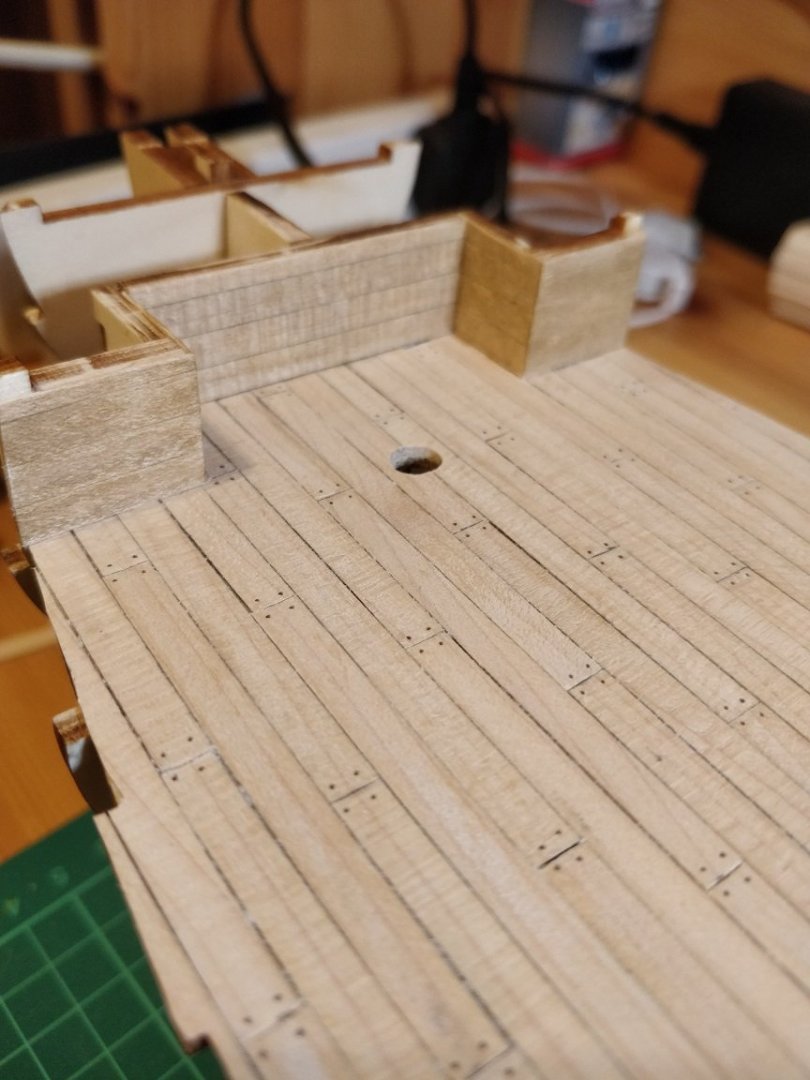
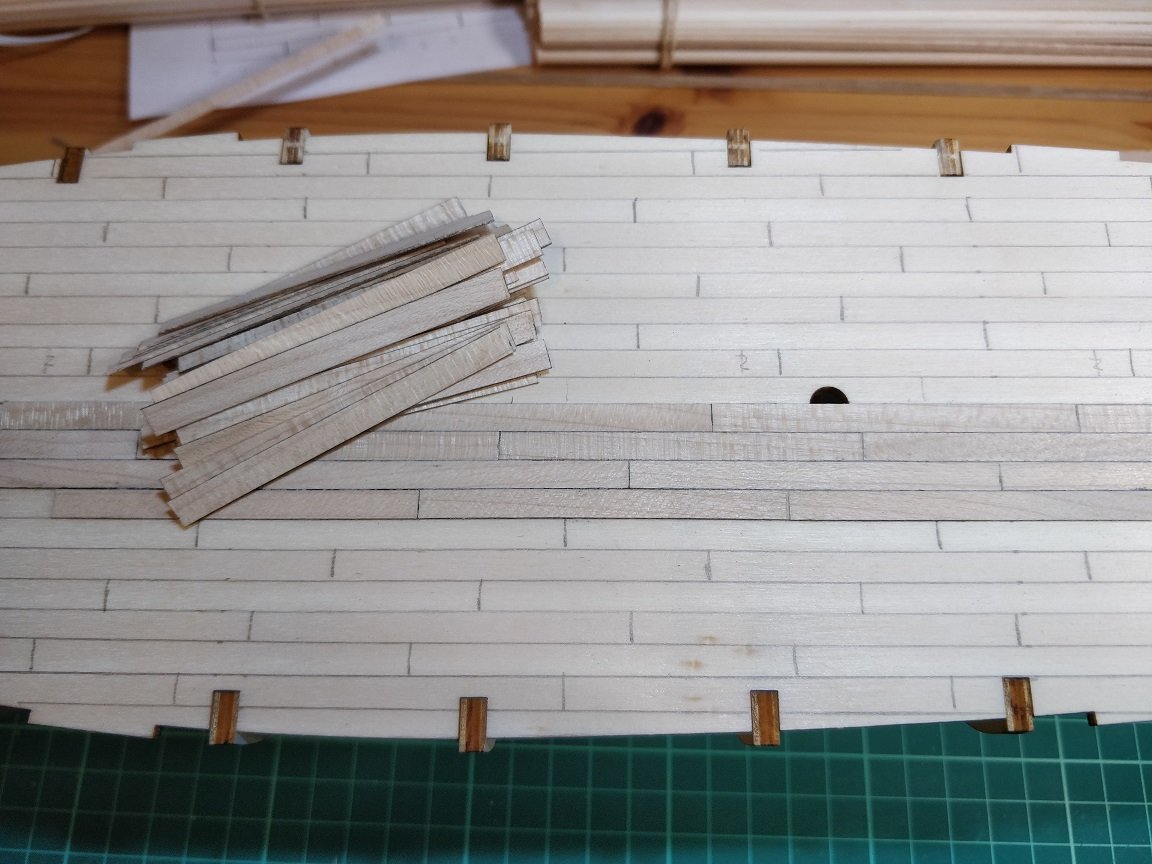
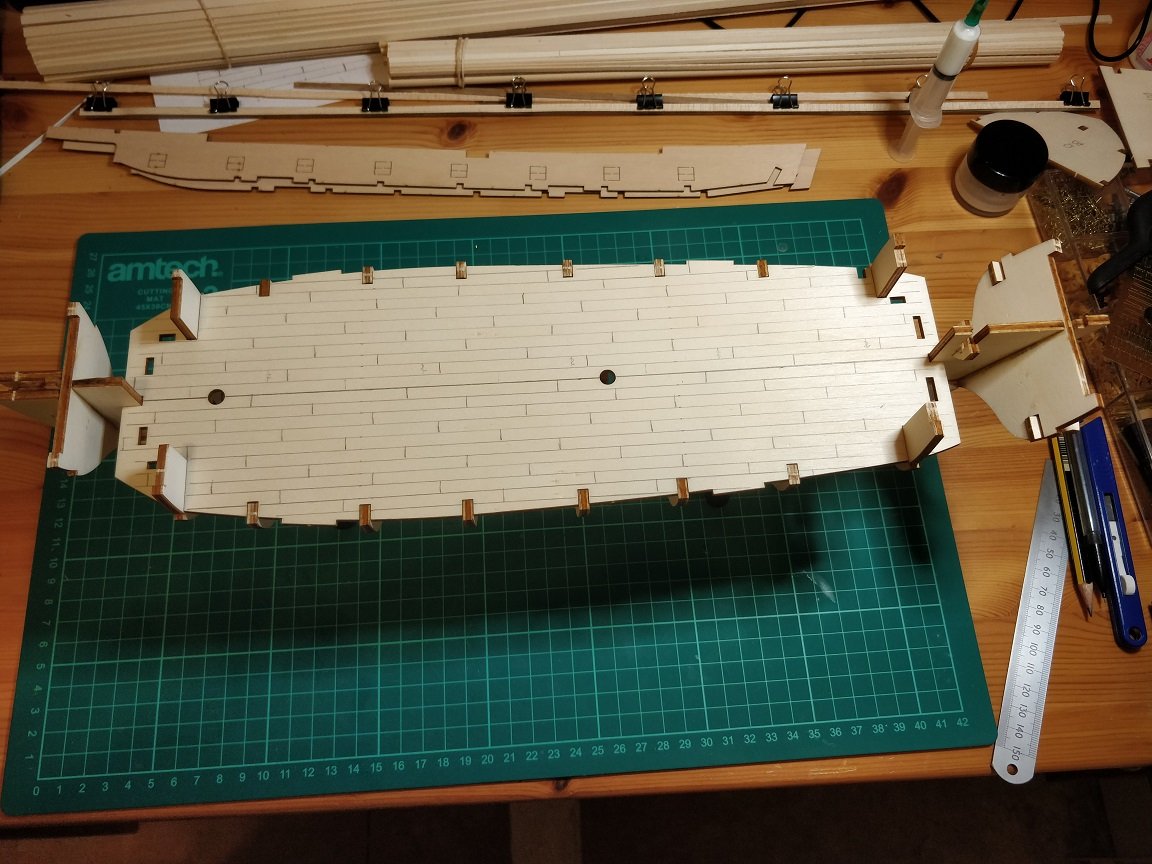
A bit more progress on the deck. I've decided to go with your advice Cathead and try the individual planks. As you say, it's more work but hopefully it will give a better and more consistent finish. After cutting the planks to size I'm ready to start fitting them. Thought I would start in the middle and work towards one edge. The first couple of rows were straightforward and went on well but then one of the planks was slightly wider than the others. Unfortunately I didn't realize this until the glue had set so couldn't swap it for one the same size as the previous planks. I guess there is a tolerance in the veneer strips which the planks are cut from. If I were applying them as whole strips you would never tell the difference because they would be consistent along the entire length. As I'm now taking random planks from a pile made up of multiple strips I can get different width planks. Fortunately the gap wasn't really that noticeable so managed to recover without it looking too bad. I've now finished planking the main deck and I think it looks okay. Chimp
-
I'm now ready to plank the deck but have a question. I've used a HB pencil to darken the edges of the planks (after sanding them smooth) to try and simulate the caulking between the planks. My question is, should I cut the deck veneer strips to 60mm lengths and fit them individually, or should I apply them as one strip along the entire deck length and mark on the plank length with pencil after fitting? Chimp
-
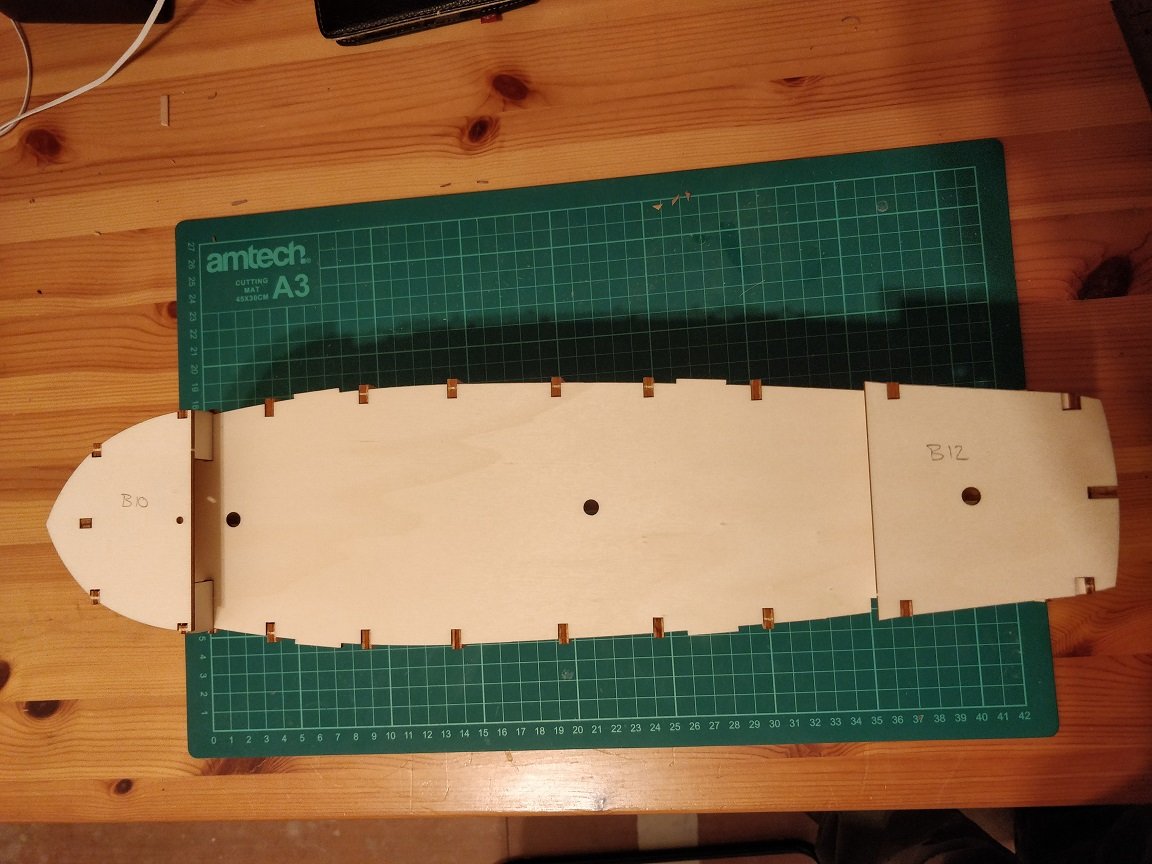
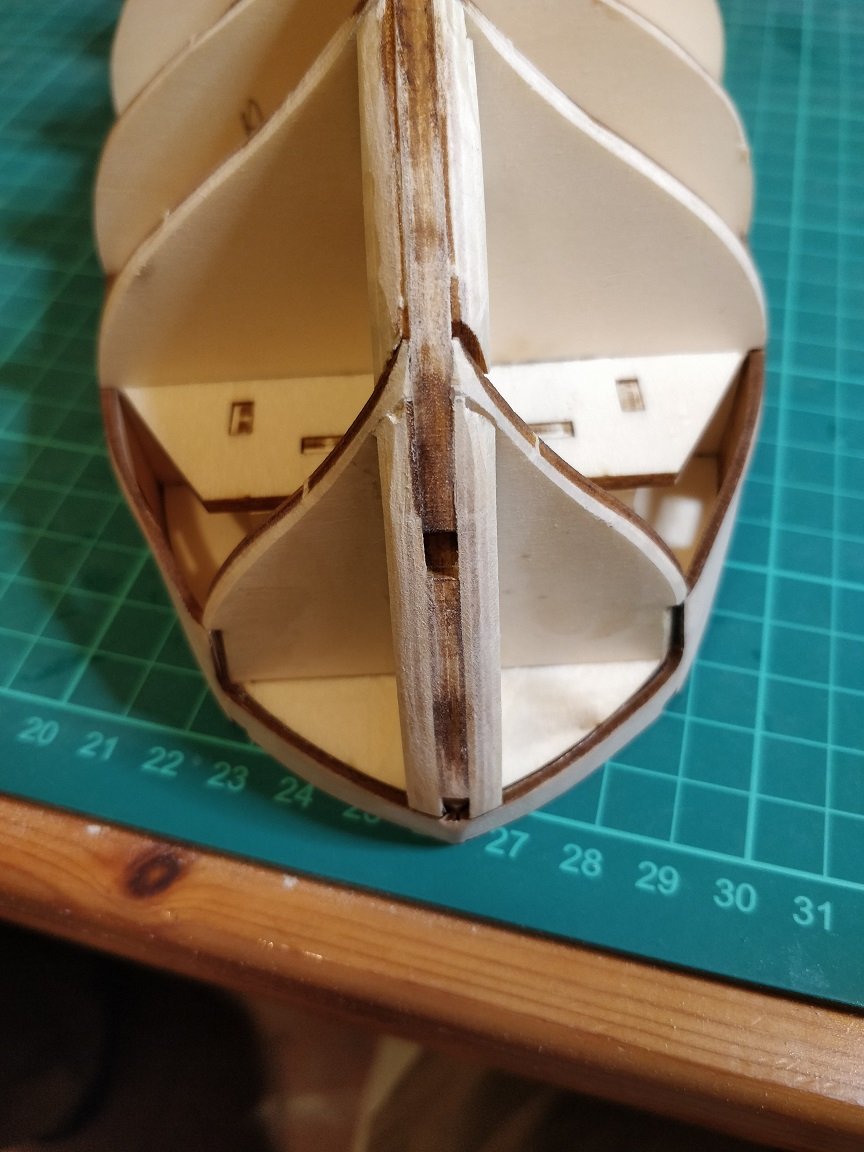
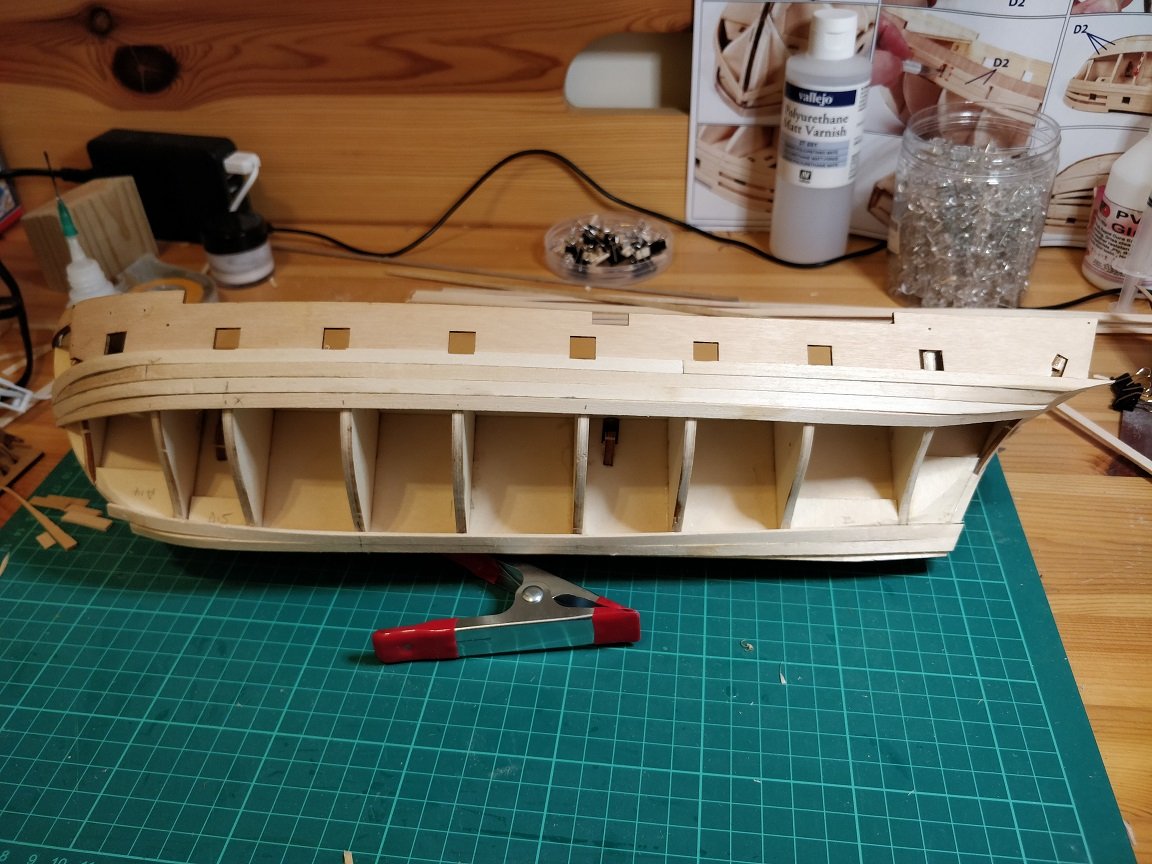
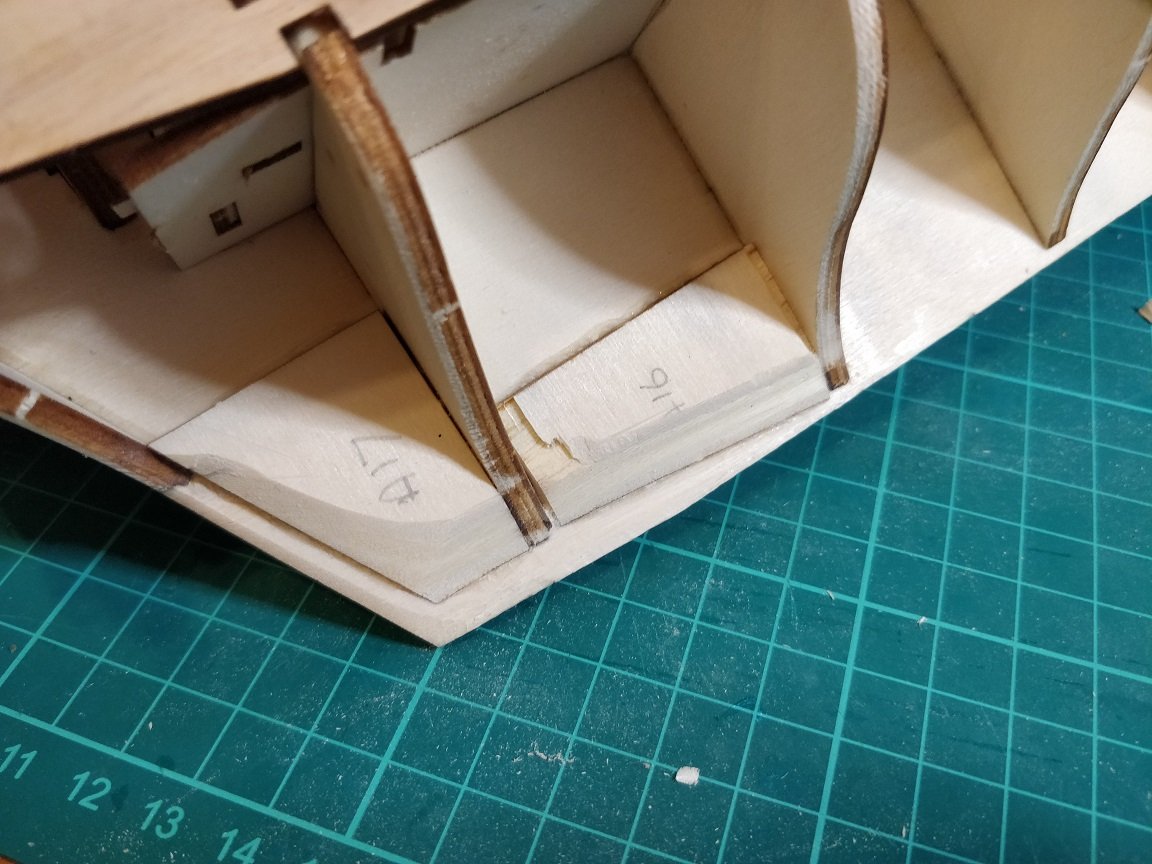
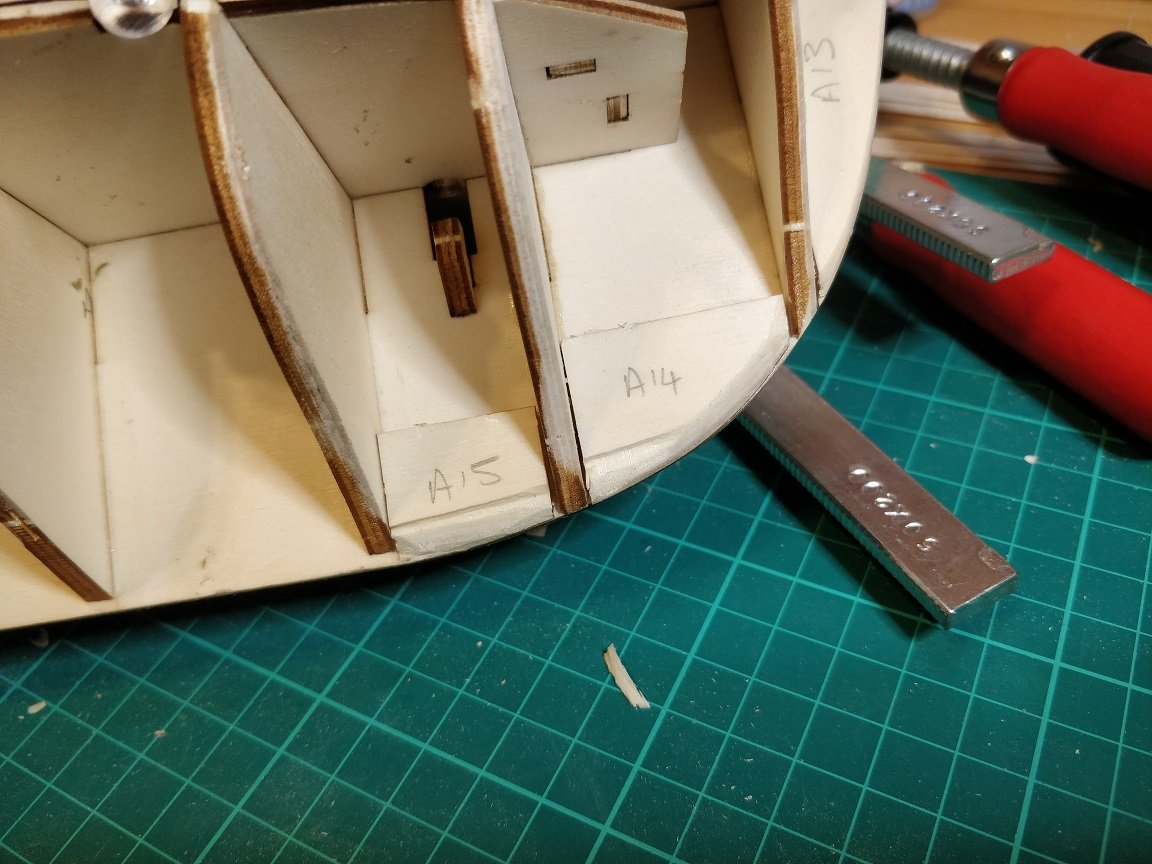
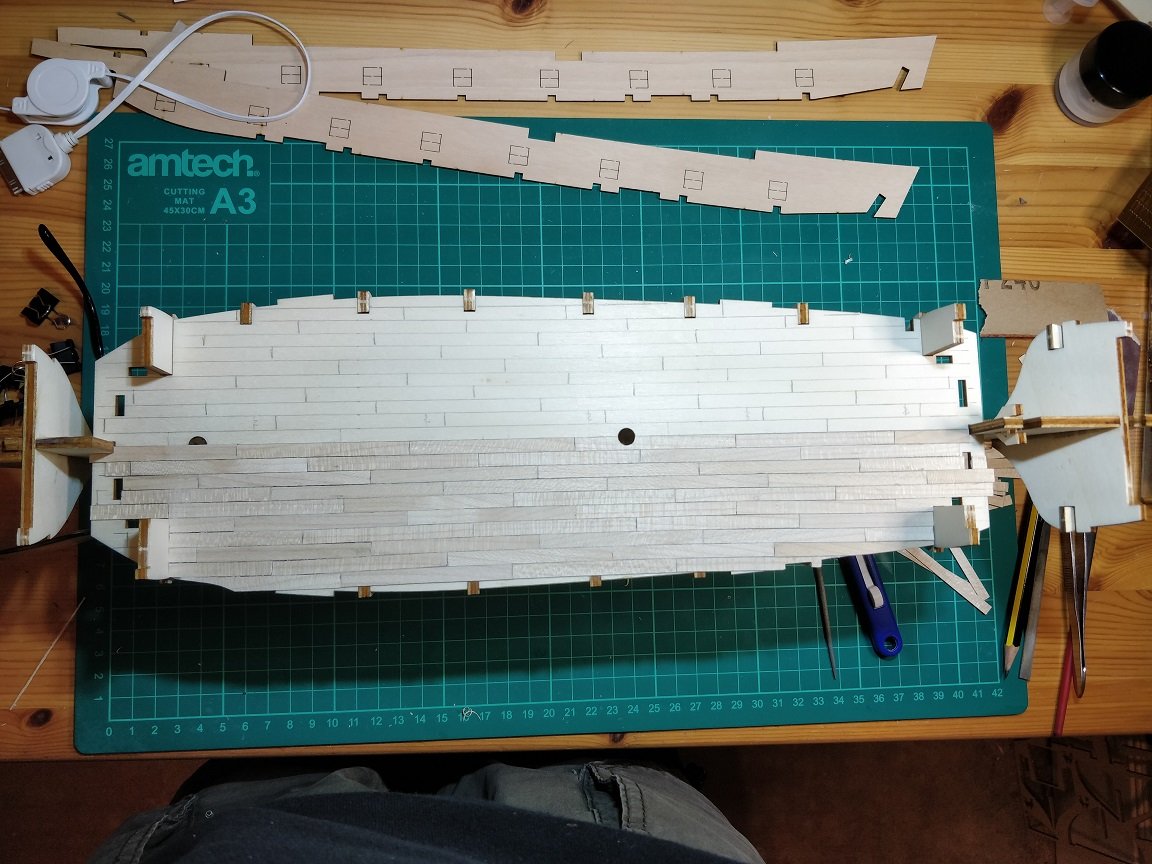
After leaving the spine to 'rest' for a couple of days to see if the bend returns, it looks like things are looking good. There is a very slight bend but nothing to worry about, at least that's what I'm telling myself. I've decided to progress with the build as is. I've now added the reinforcing blocks to the bow and stern to aid planking. I've marked out the deck with a 1-3-5-2-4 butt shift. This seems to be the most sensible sequence as far as I can tell. The kit instructions are indicating a 60mm plank length, which at 1/60 scale would equate to 11' 10" (12-foot). Not sure if this is correct but it looks okay to me (but then I quite ignorant on these things).


-
Many thanks for your suggestion Jaager, but being very much a novice at this and not having tools for metal working I think I should stick to the original plans. Looking at the spine today it's still looking very straight so I think I may be lucky with this one
-
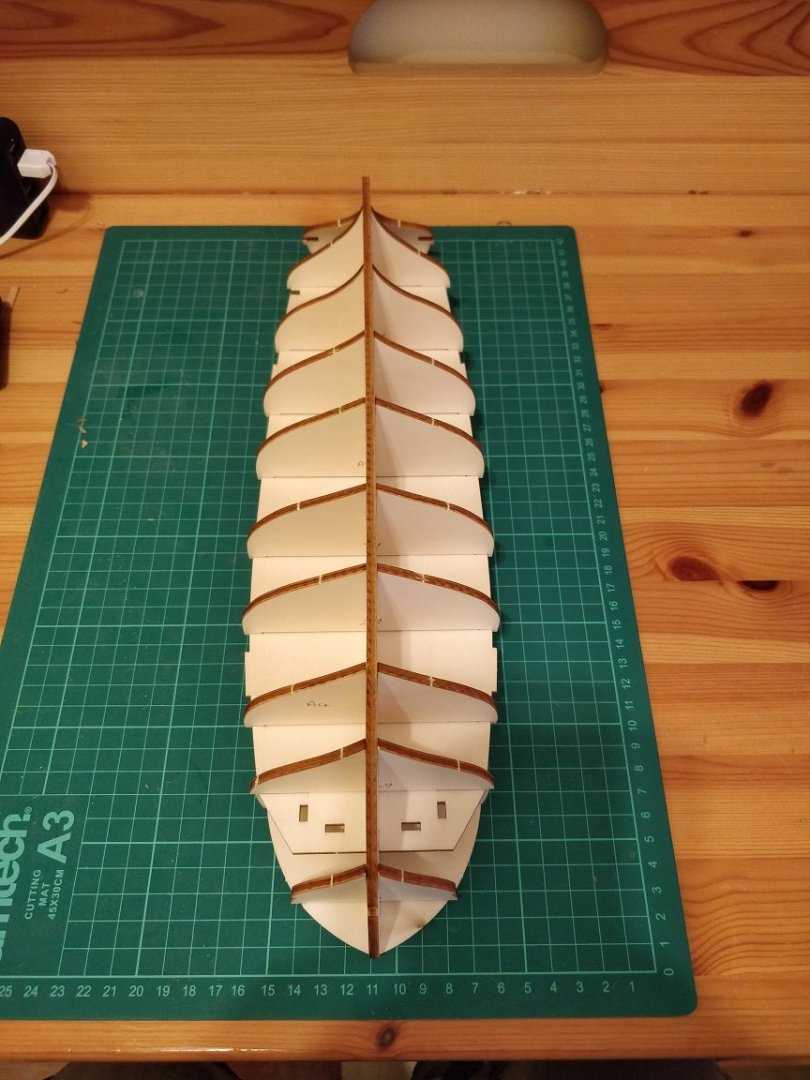
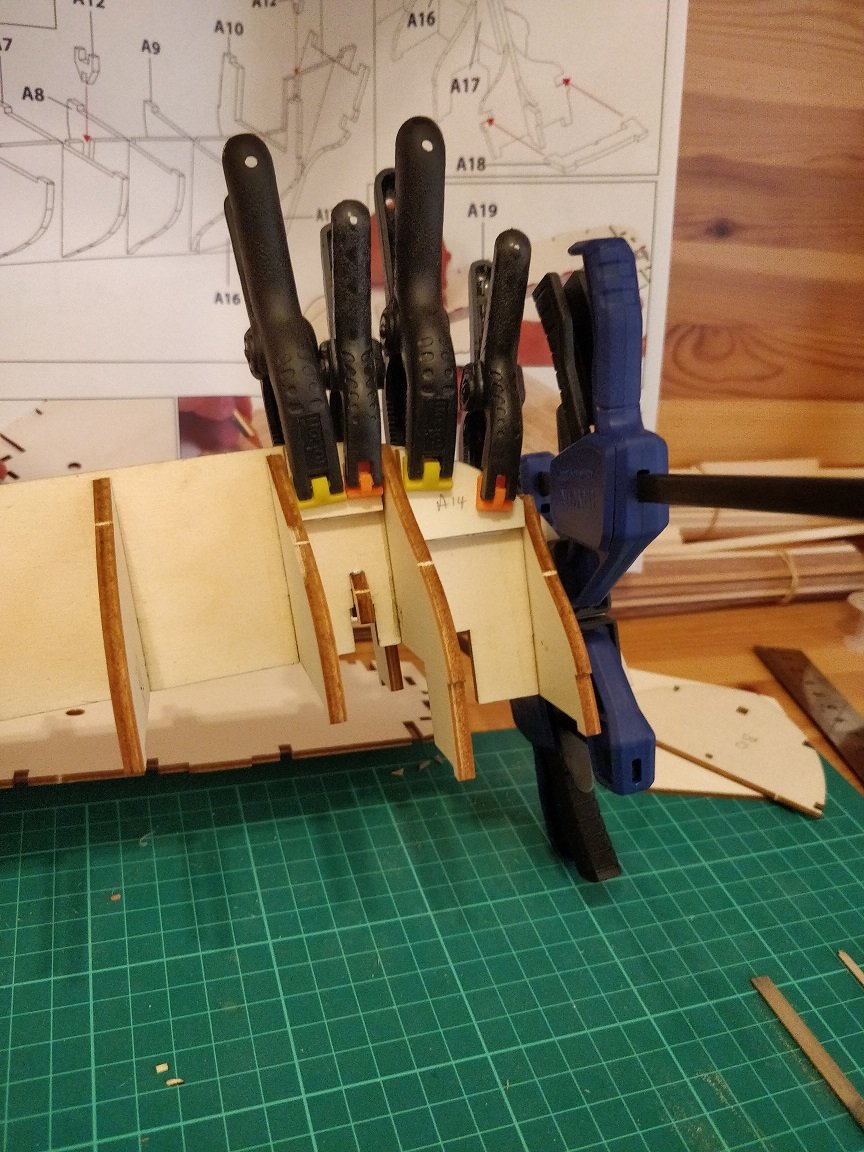
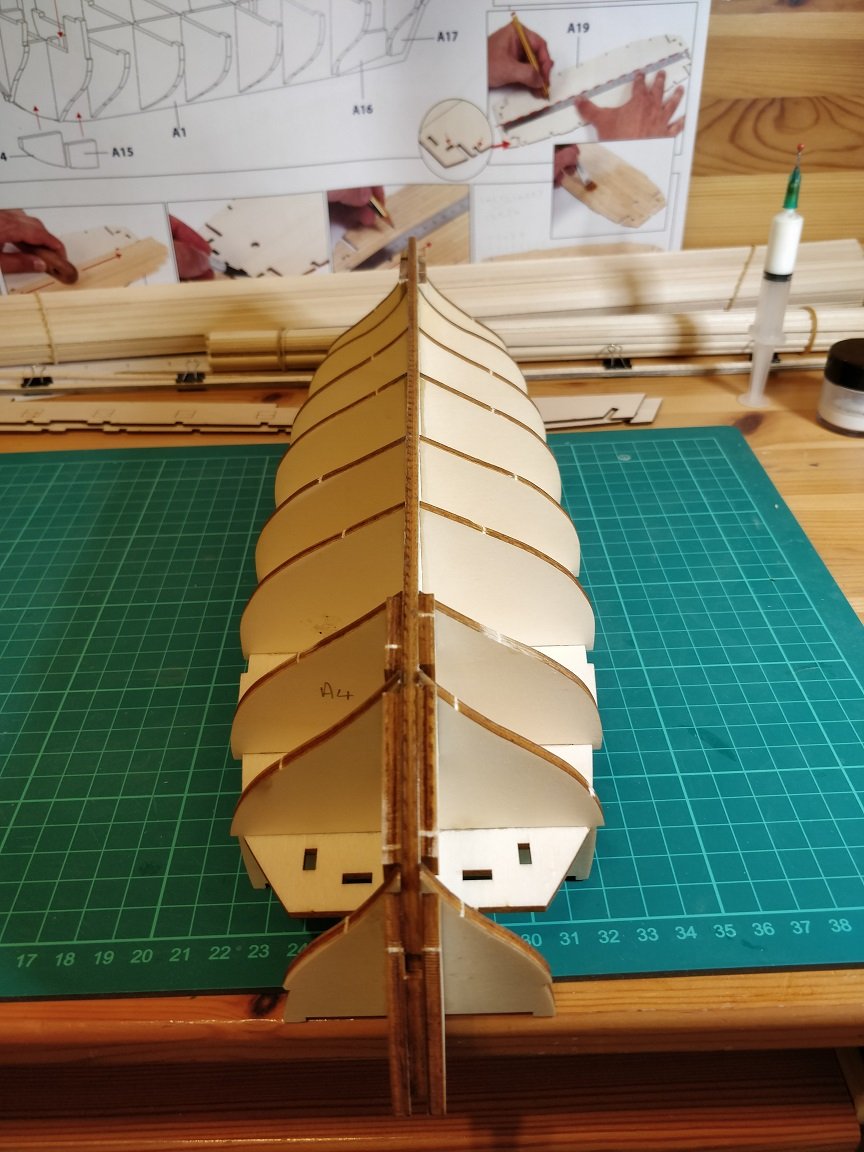
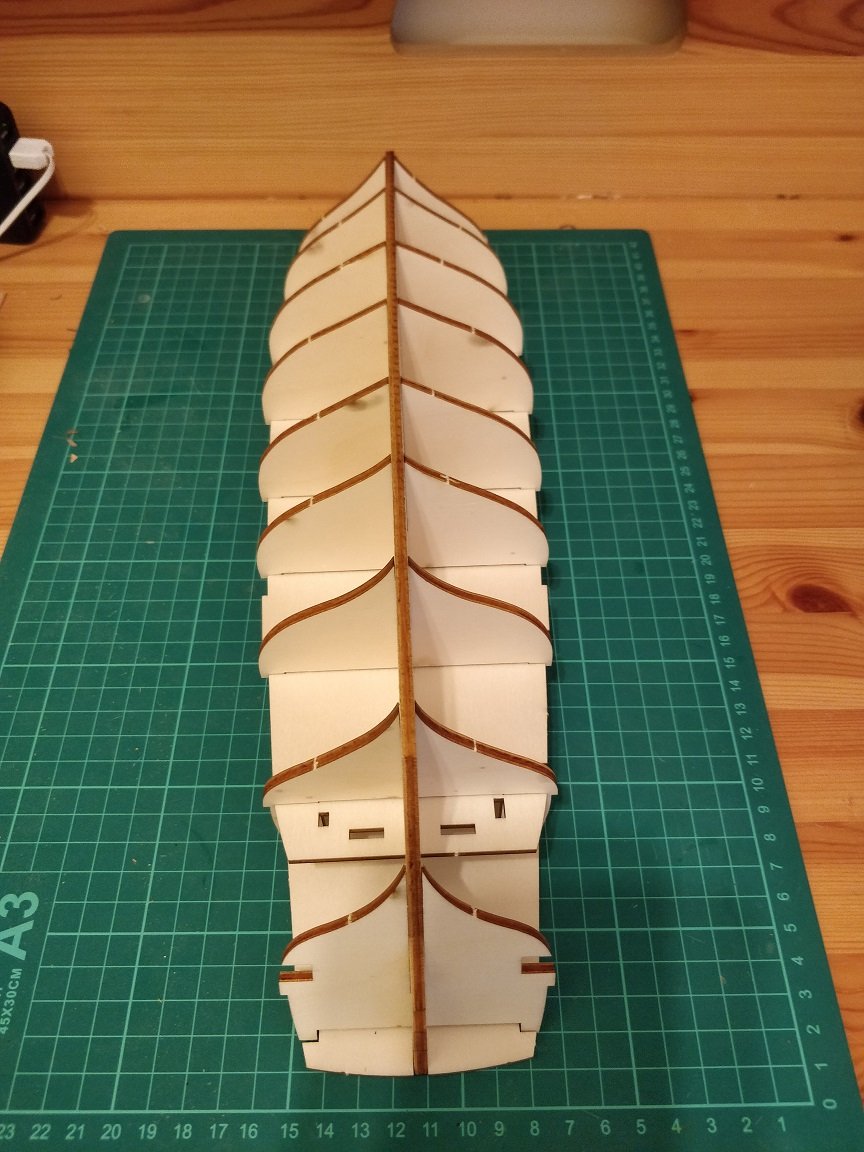
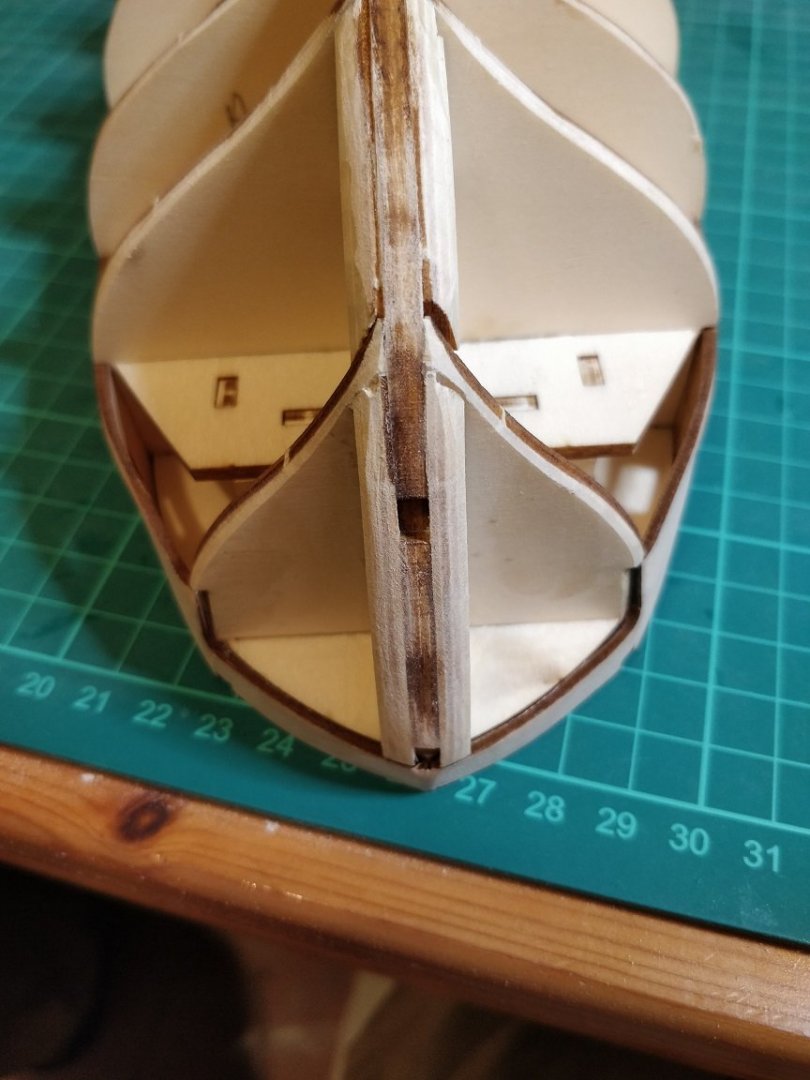
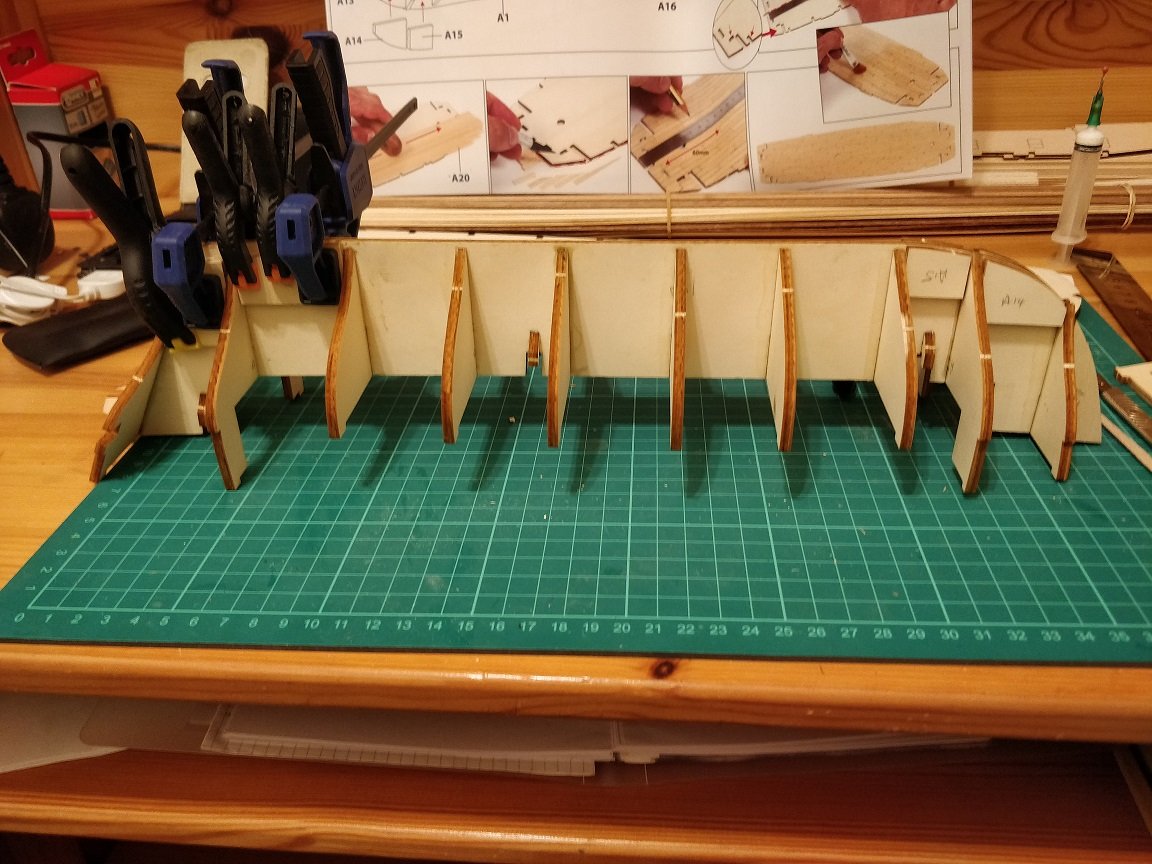
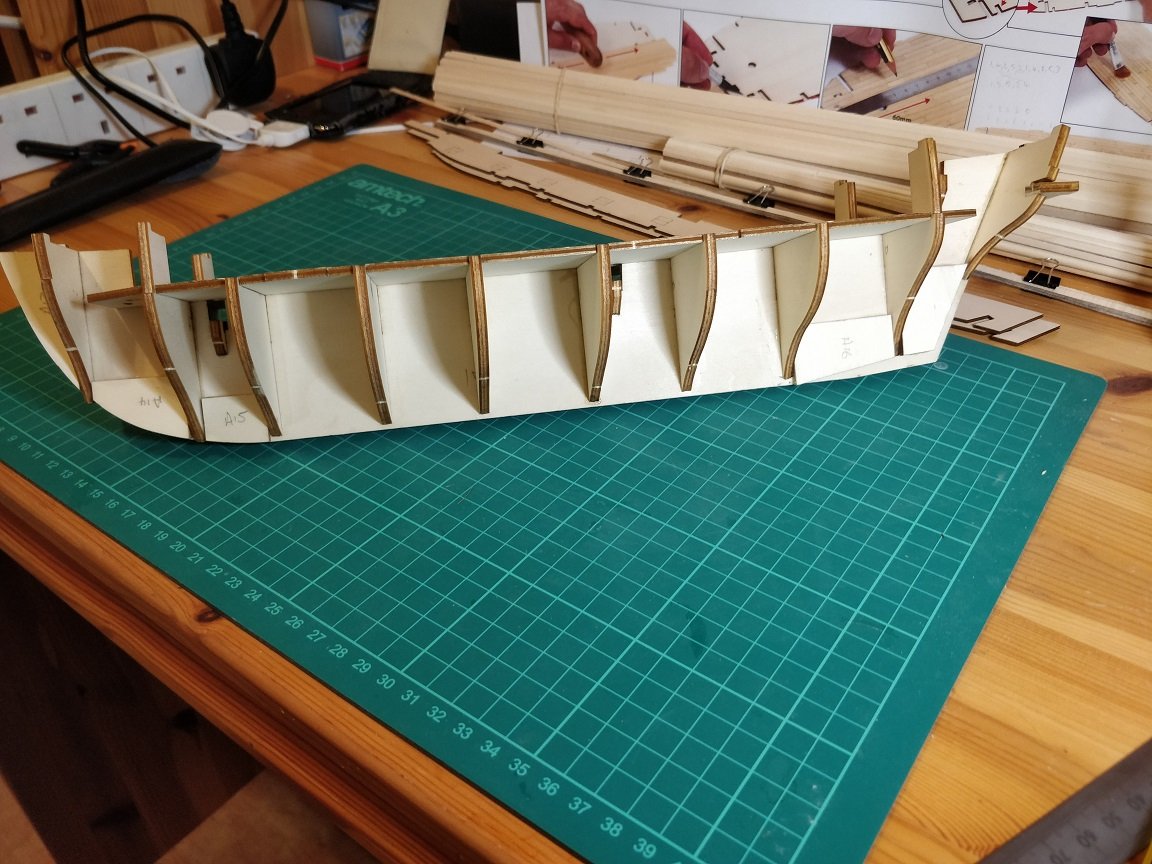
Update on the curved spine: I moistened the spine then bent it back straight and allowed it to dry. This took out the curve (albeit temporarily, time will tell). I've now cut out the bulkheads and done a trial run fitting them together. They fitted together without any forcing and when the deck was fitted the was little or no adjustment to be made. I won't get the time to fit any planks for the next few days so I won't glue anything just yet, and see if it warp returns. If it's still straight in a couple of days time then I'll glue the bulkheads and start the planking. Once the planking is started, my hope is that any movement will be constrained. Chimp