HOLIDAY DONATION DRIVE - SUPPORT MSW - DO YOUR PART TO KEEP THIS GREAT FORUM GOING! (Only 27 donations so far out of 49,000 members - C'mon guys!)
×

Karleop
-
Posts
500 -
Joined
-
Last visited
Content Type
Profiles
Forums
Gallery
Events
Everything posted by Karleop
-
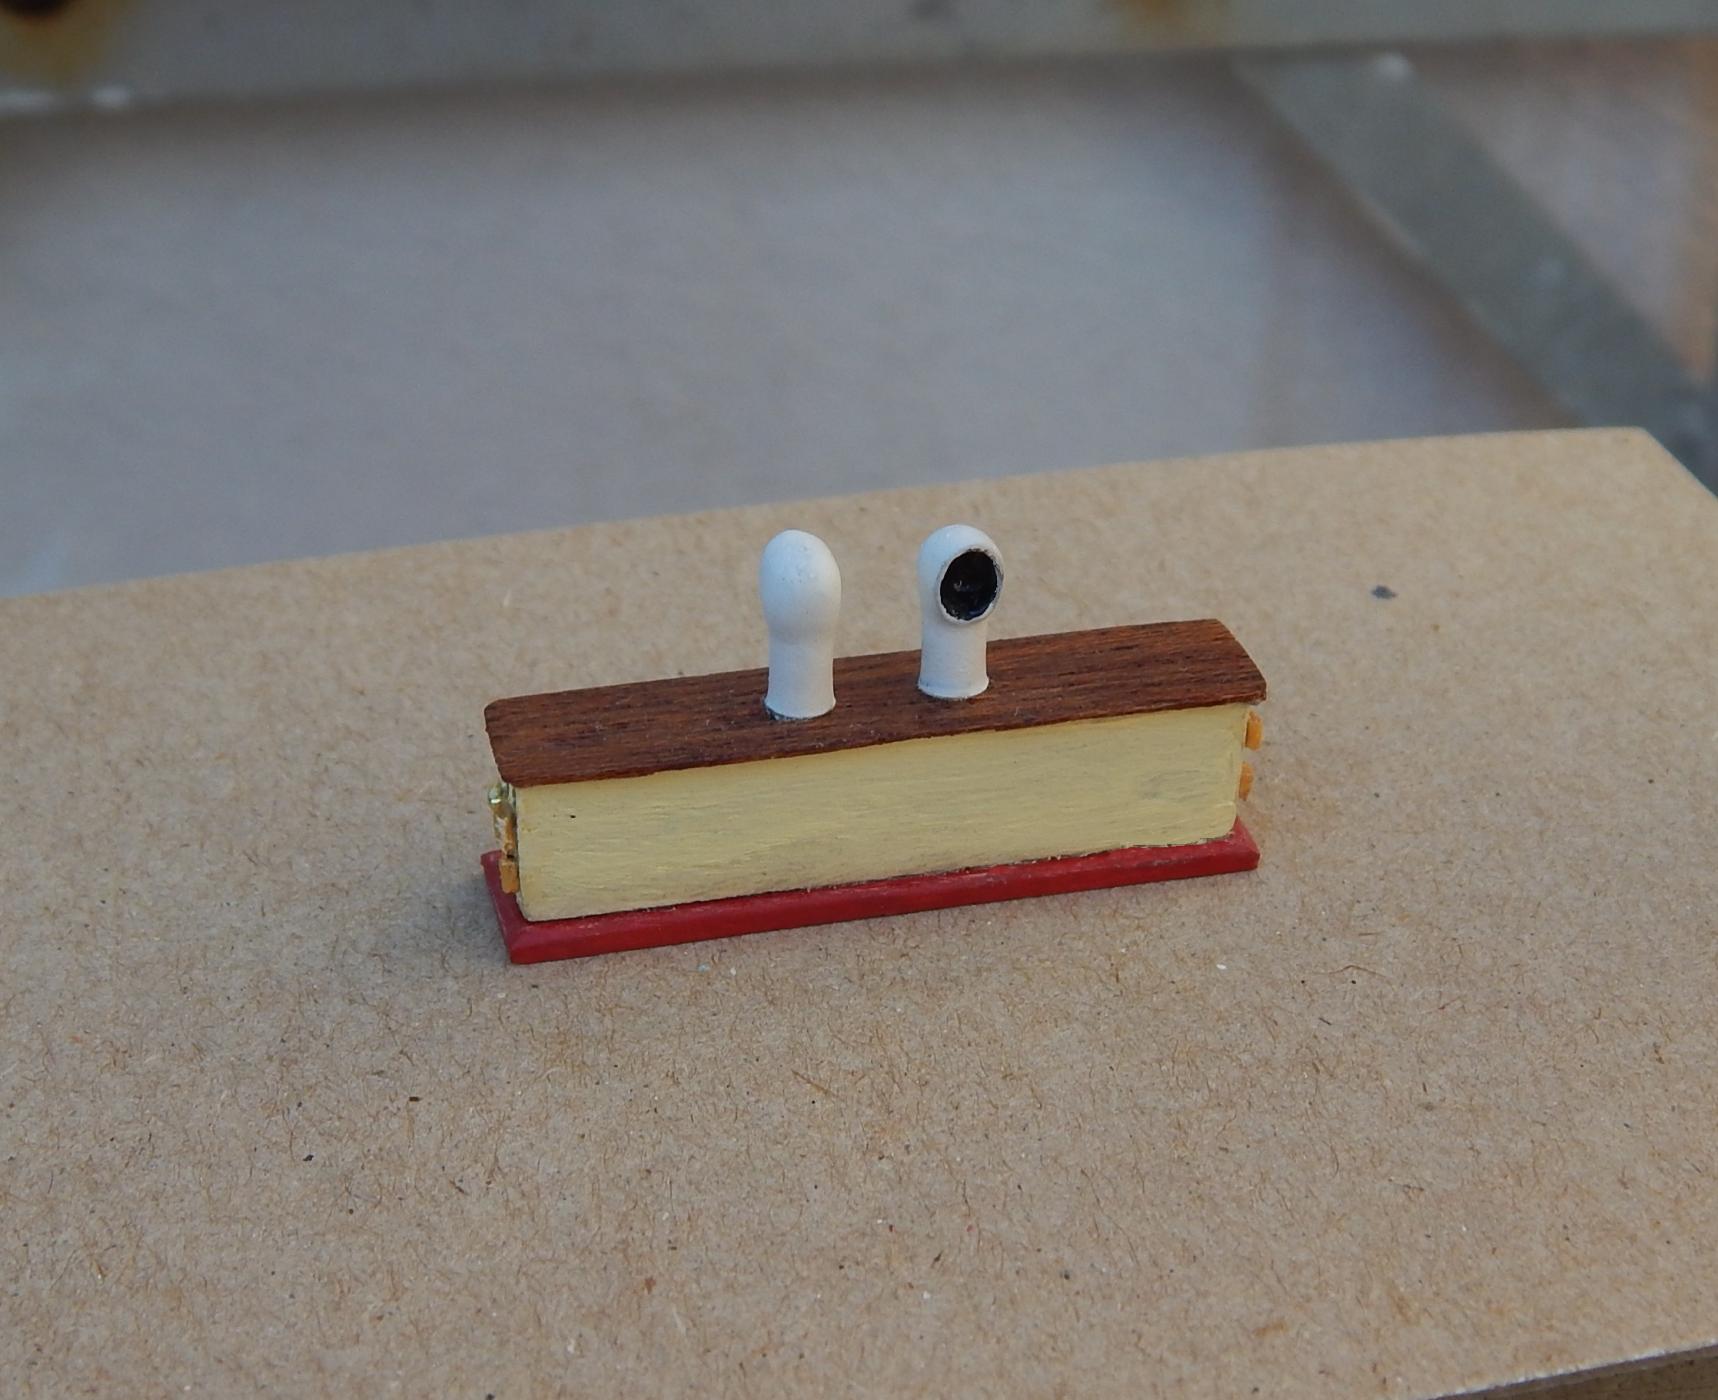
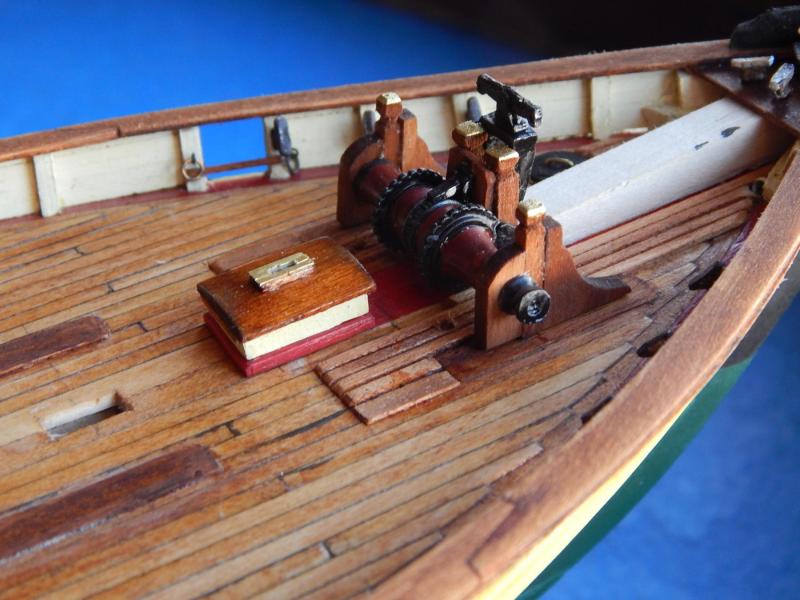
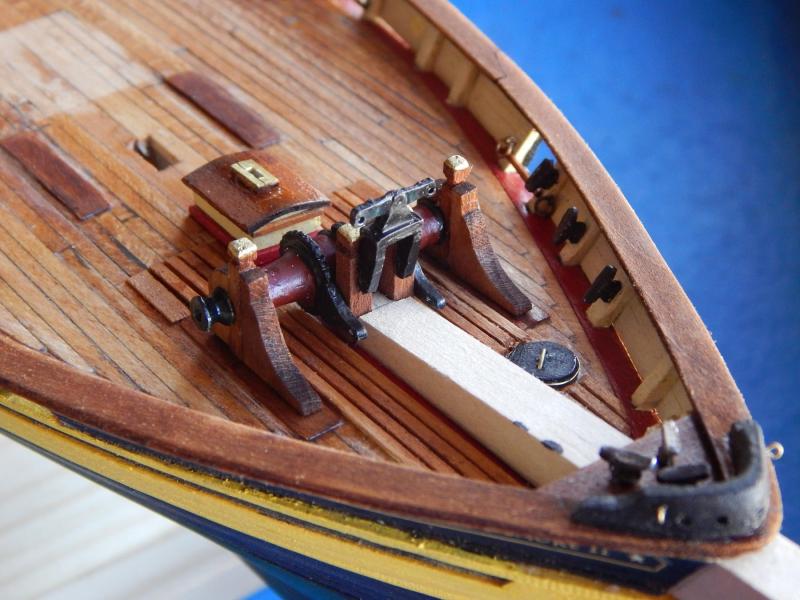
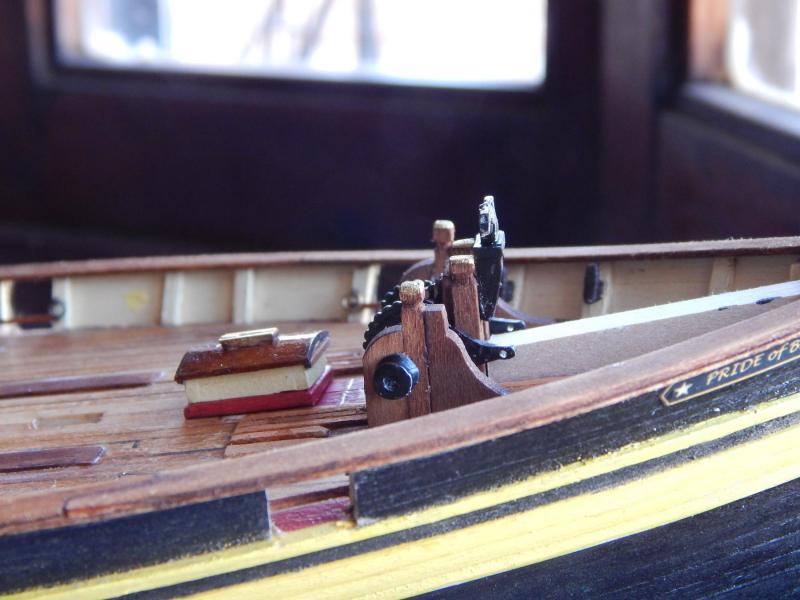
 Hola: Now I decided to assembly the Windlass. For this, the first step was to position the bowsprit (in a provisional way) to locate exactly where the Samson posts would be placed. Before assembling the different parts I painted and varnishing them: Saludos, Karl

- 164 replies
-
- 3
-

-
- Model Shipways
- Finished
- (and 1 more)
-
Hola Mike: Glad to hear that the drilling jig can be useful to somebody. Saludos, Karl
-
Hola Ulises: You are also right!! (But I must to say that my wife considered that I already have enough ships in house, so with a new model I think it twice, jajaja) Saludos, Karl
-
Hola Mike: You are completely right, the important thing is to enjoy any step of the construction and not necessarily to finish it!! Indeed, when you acomplished your model end there is some sadness. Saludos, Karl
- 164 replies
-
- 1
-
-
- Model Shipways
- Finished
- (and 1 more)
-
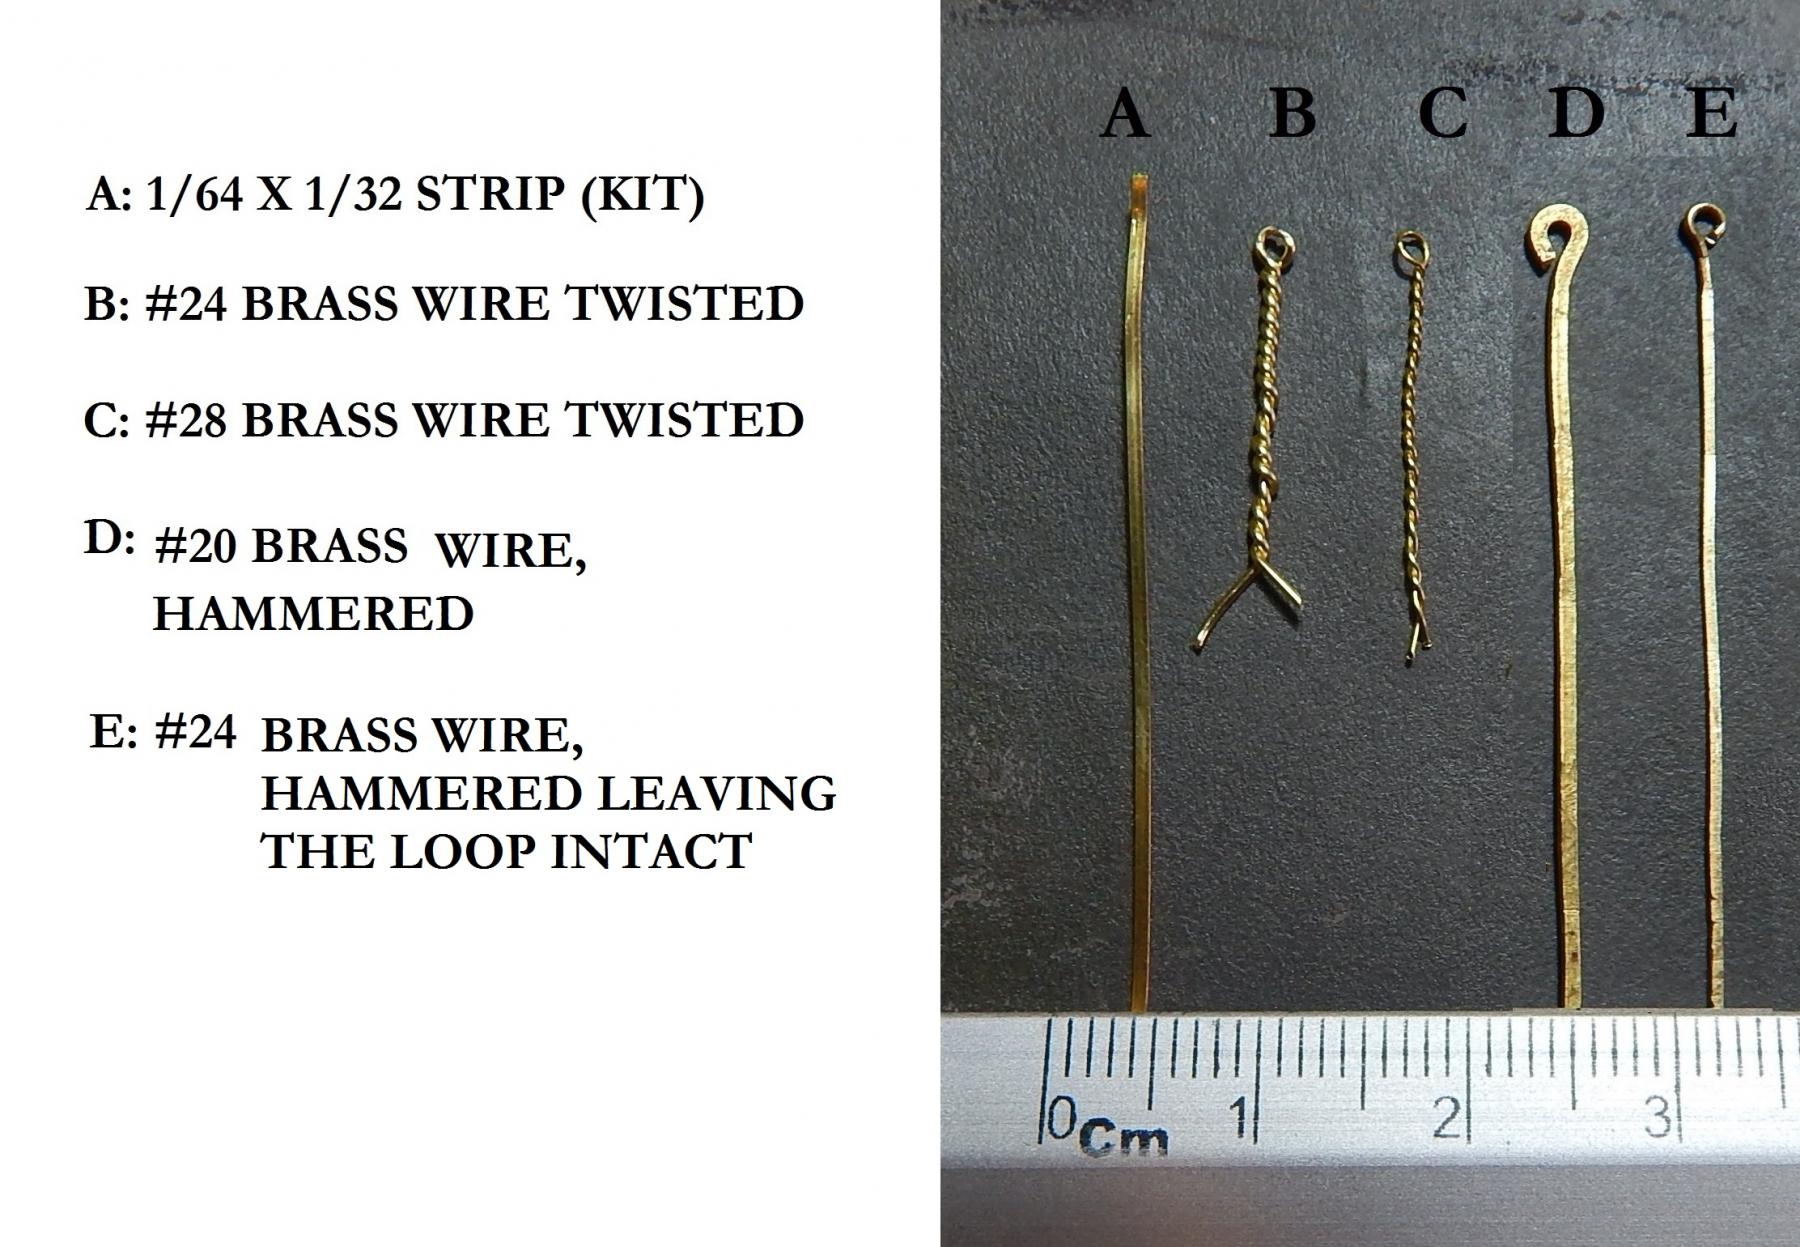
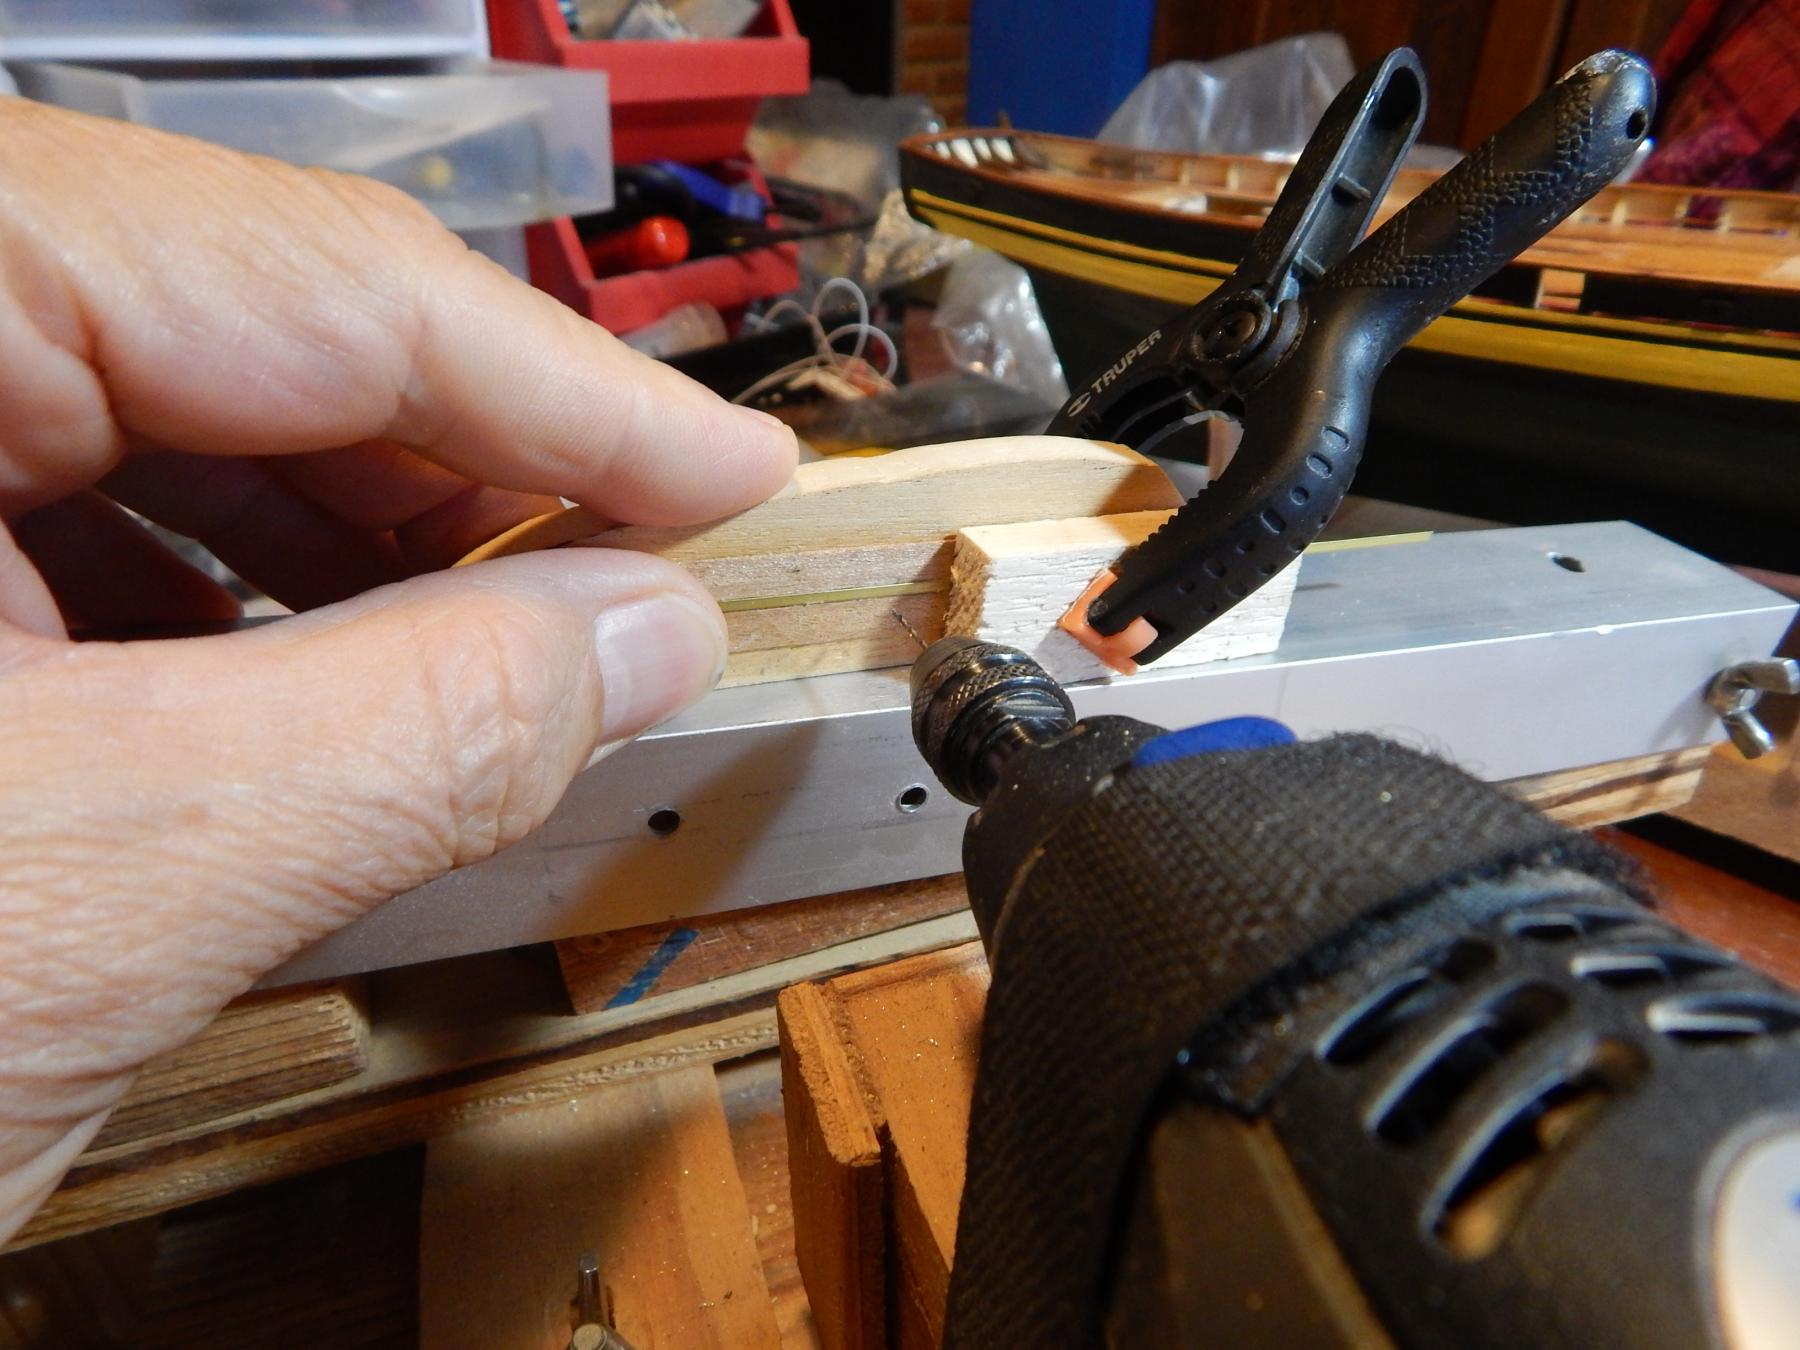
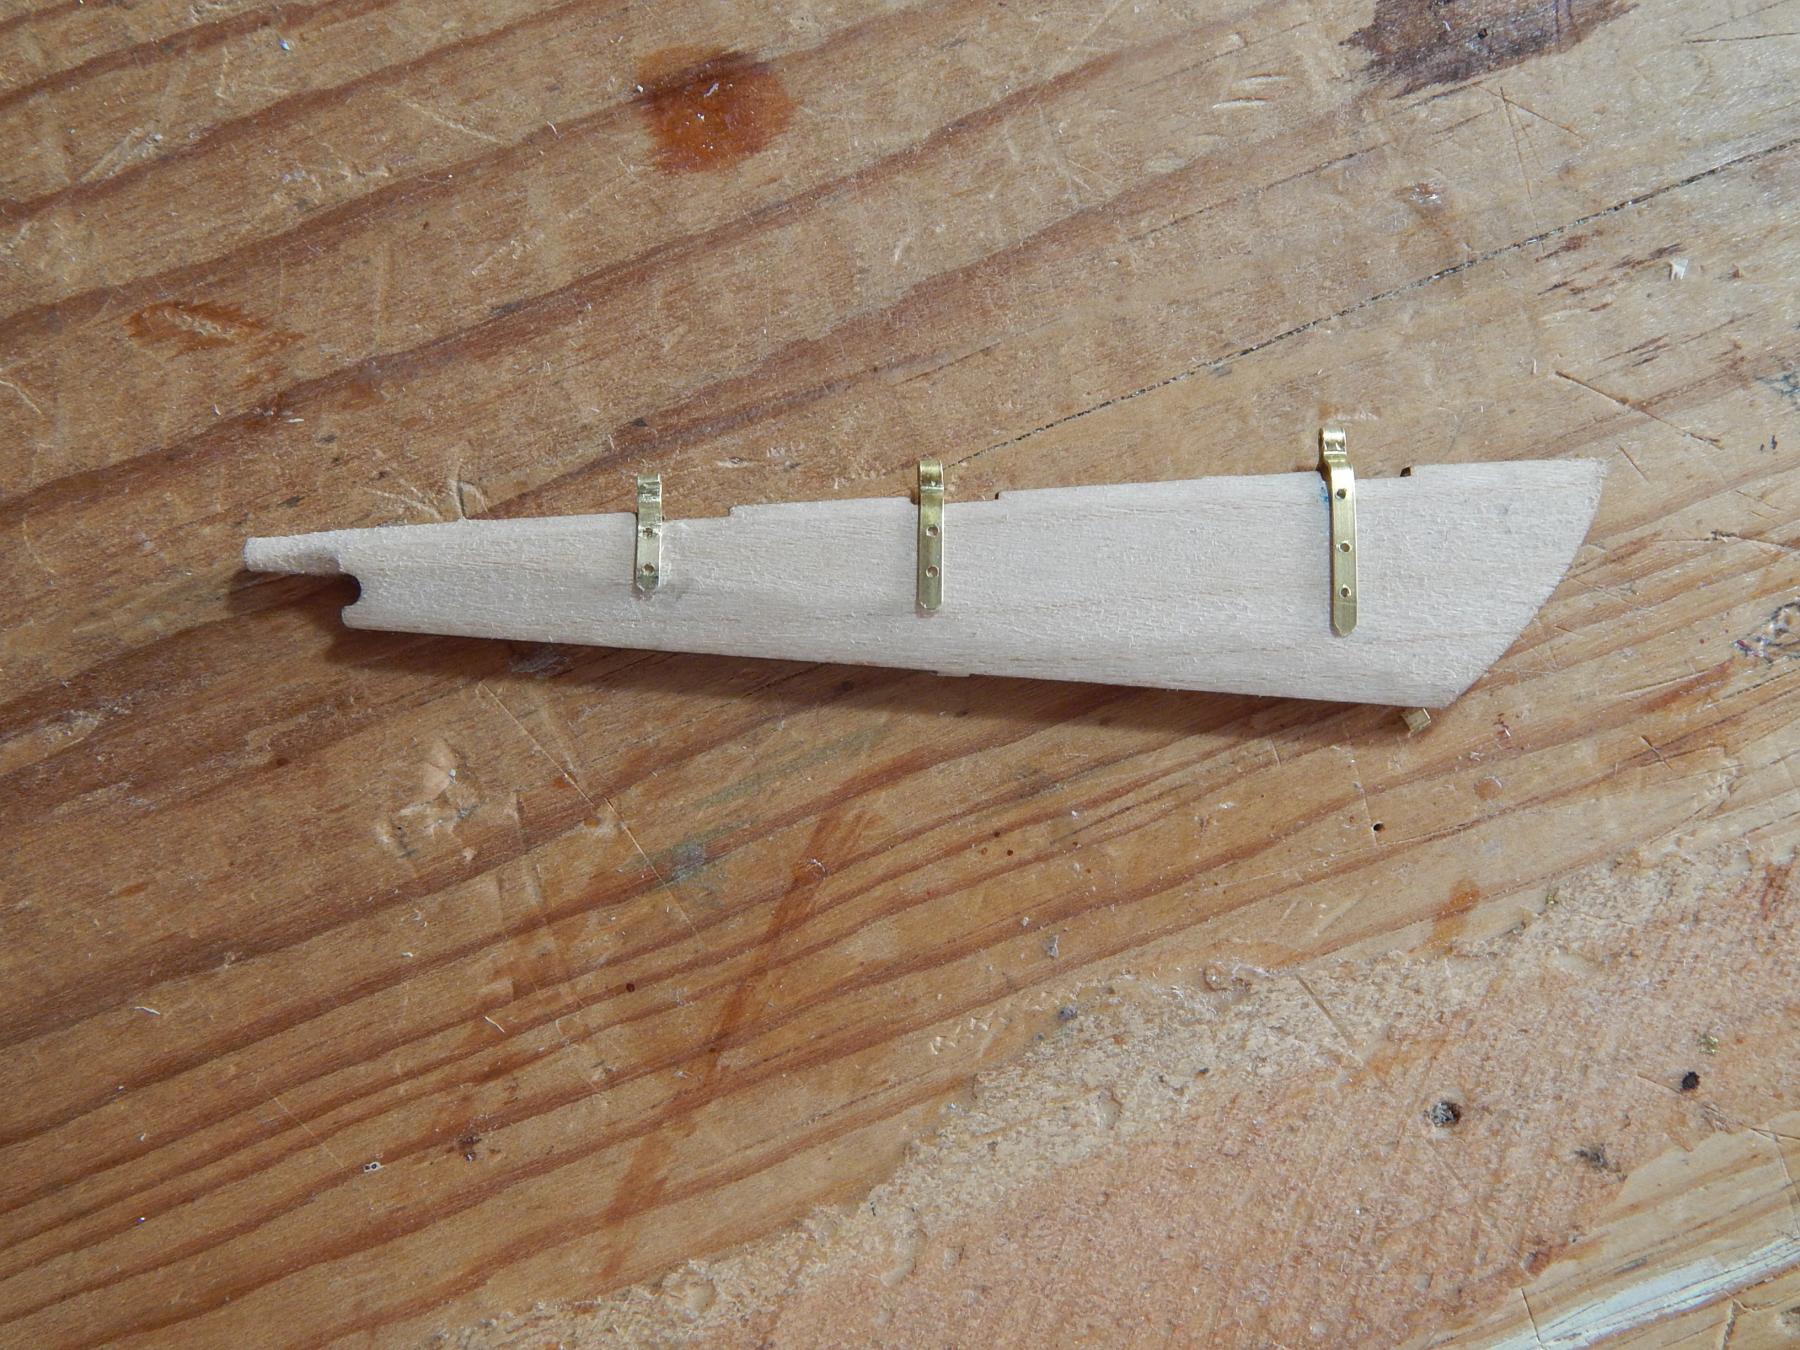
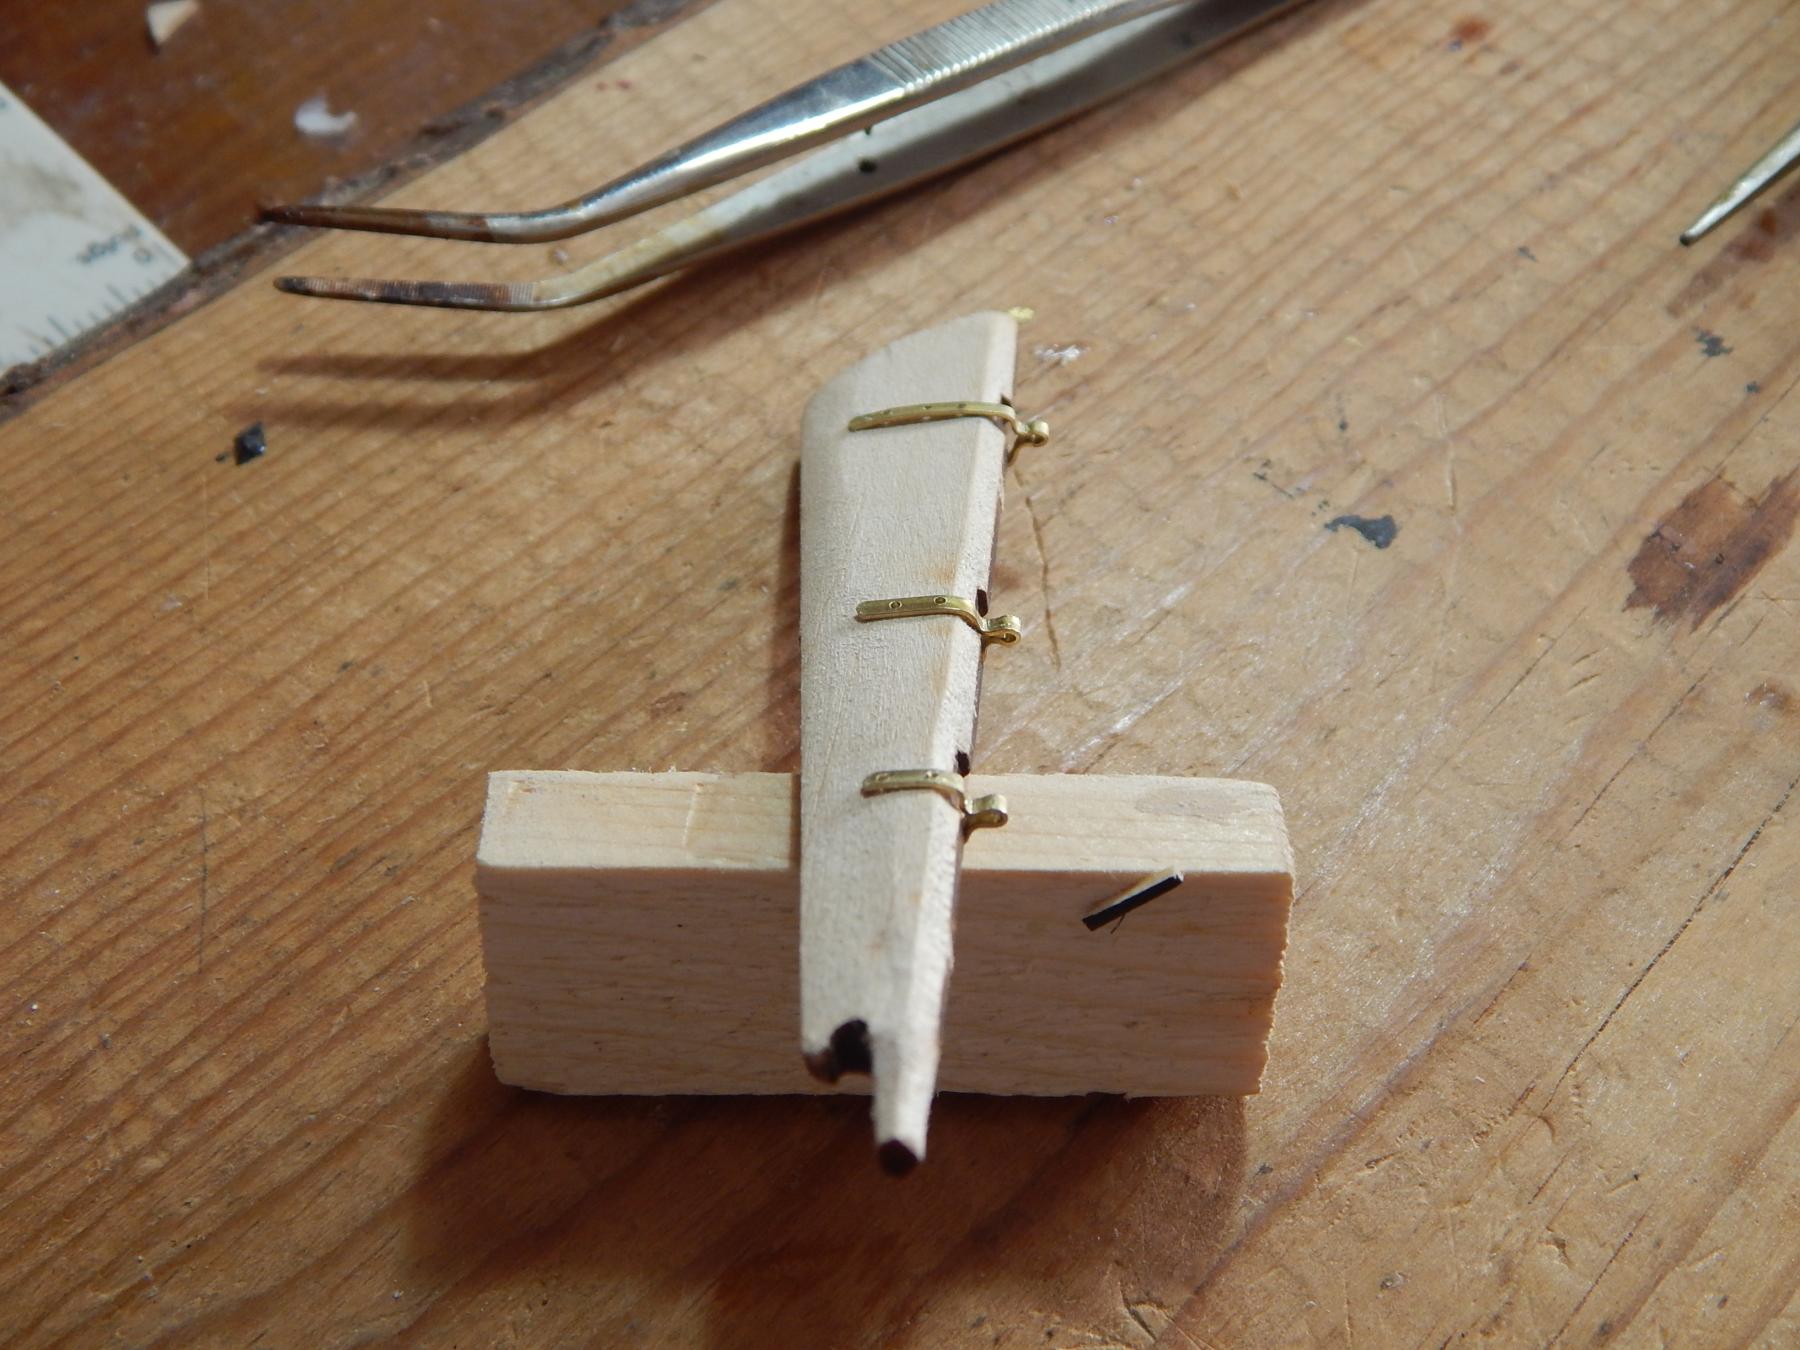
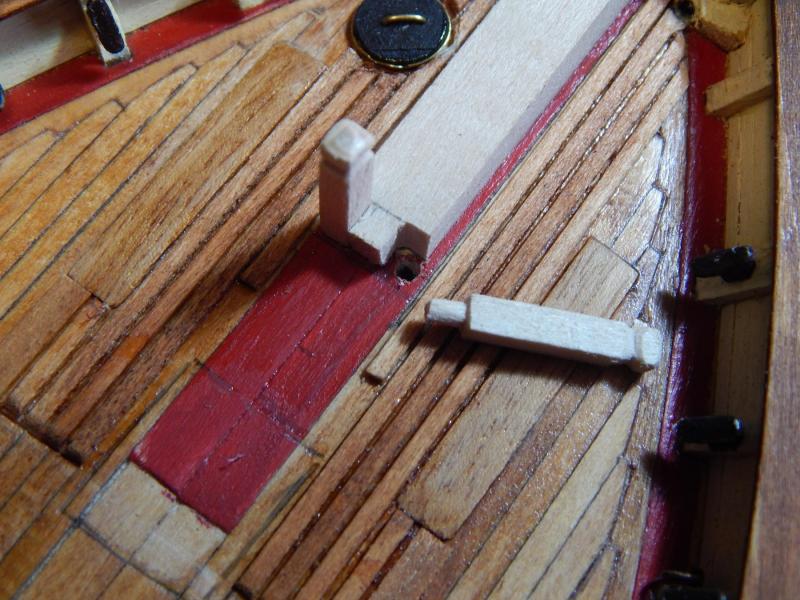
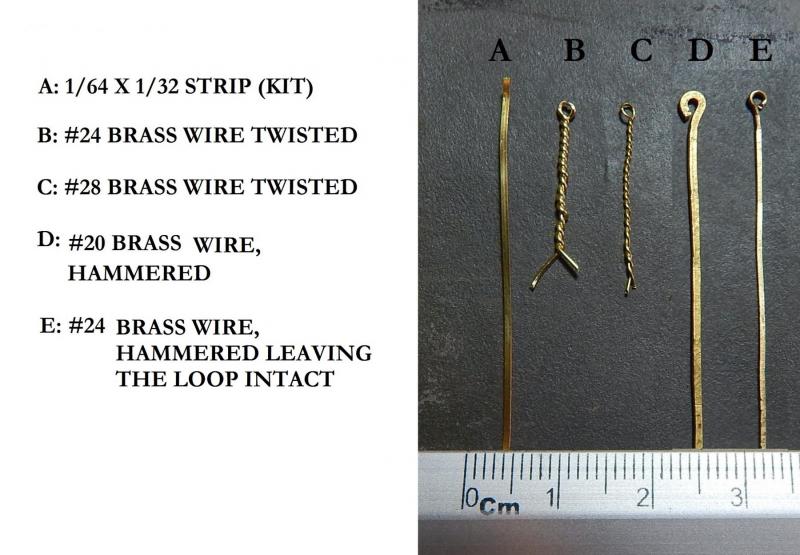
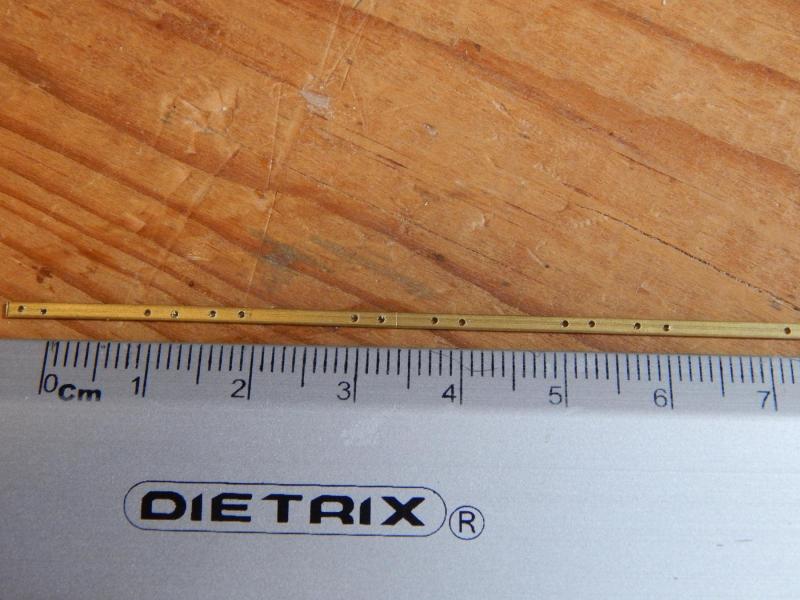
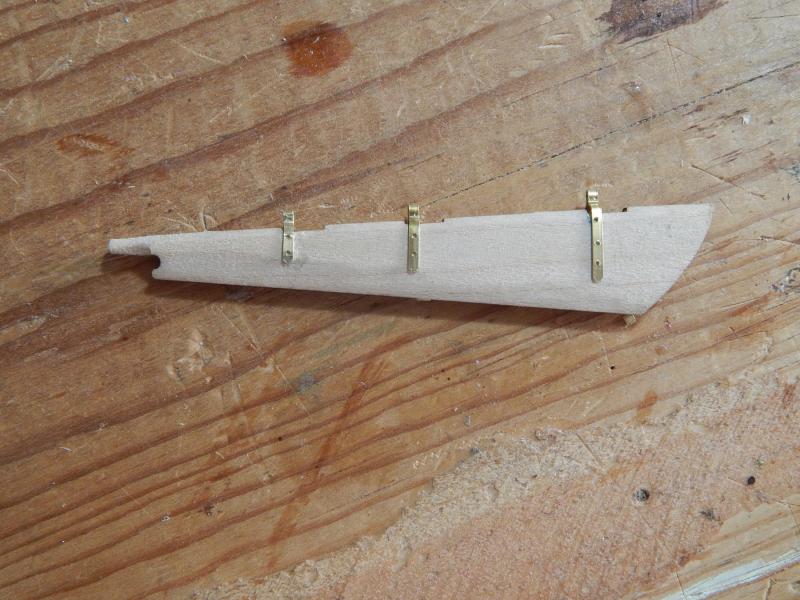
Hola: Now I decided to change a little the activities, from wood to metal, so the first challenge was: what to do the with the chain plates. Supposedly they must be drilled and fixed on the hull with a couple of nails, but this is almost impossible to make due to the small size of the metal strip (1/32"). After several tries I decided to use brass wire, with a little loop on the side to insert a nail and hammered the wire to obtain the desire chain wide. Here you can see the channels and different chain tries: . Another challenge was to make the rudder hinges. To do this it is also necessary to drill the metal strip with small holes to place the nails. In this case, the strip of metal is 1/16" brass and the bit to use is the number 75 (0.020 "). To fix the metal strip I had to make a wooden base where it was fixed. Also use a base for the Dremel that I had already done since my first models and which allows to adjust the height in a very precise way. To know exactly where to do the holes and seeing that the sizes on the blueprint were useless, I made some aluminium strips from a soda can and bend them over the rudder and the stern post, marking the place where the holes should be. Then flatten the strips and transfer the marks to the brass strip. Thank´s for watching and for the likes. Saludos, Karl


- 164 replies
-
- 3
-
-
- Model Shipways
- Finished
- (and 1 more)
-
Muchas gracias ian_a y Don: I really appreciate your nice words!! Saludos, Karl
-
Hola harlekin: You really got a bargain buying this model for 10.00 pounds!!! Actually this was my first wood model and as far as I know Constructo discontinued doing this ship around five years ago. It was a big challenge to me but I learned a lot about modeling and constructing my own tools that help me a lot since now. If you need some advice probably I can help you. By the way, you can see some pictures of my Pandora following the link in my signature. Saludos, Karl
-
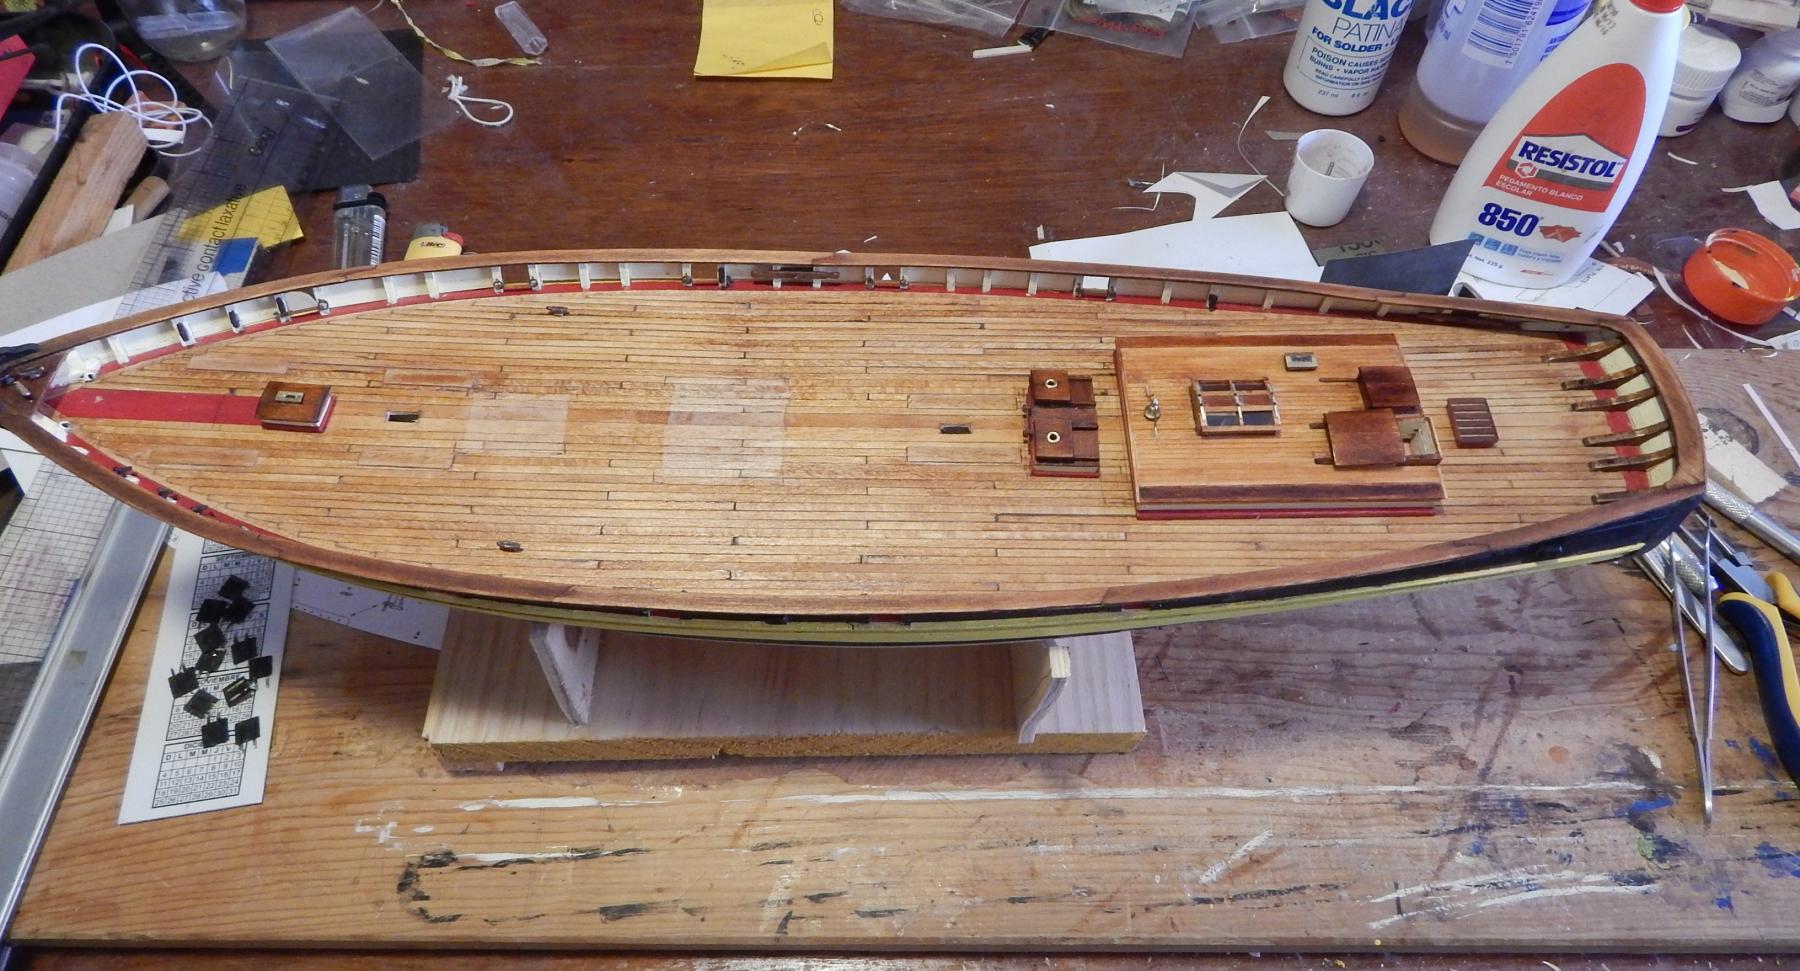
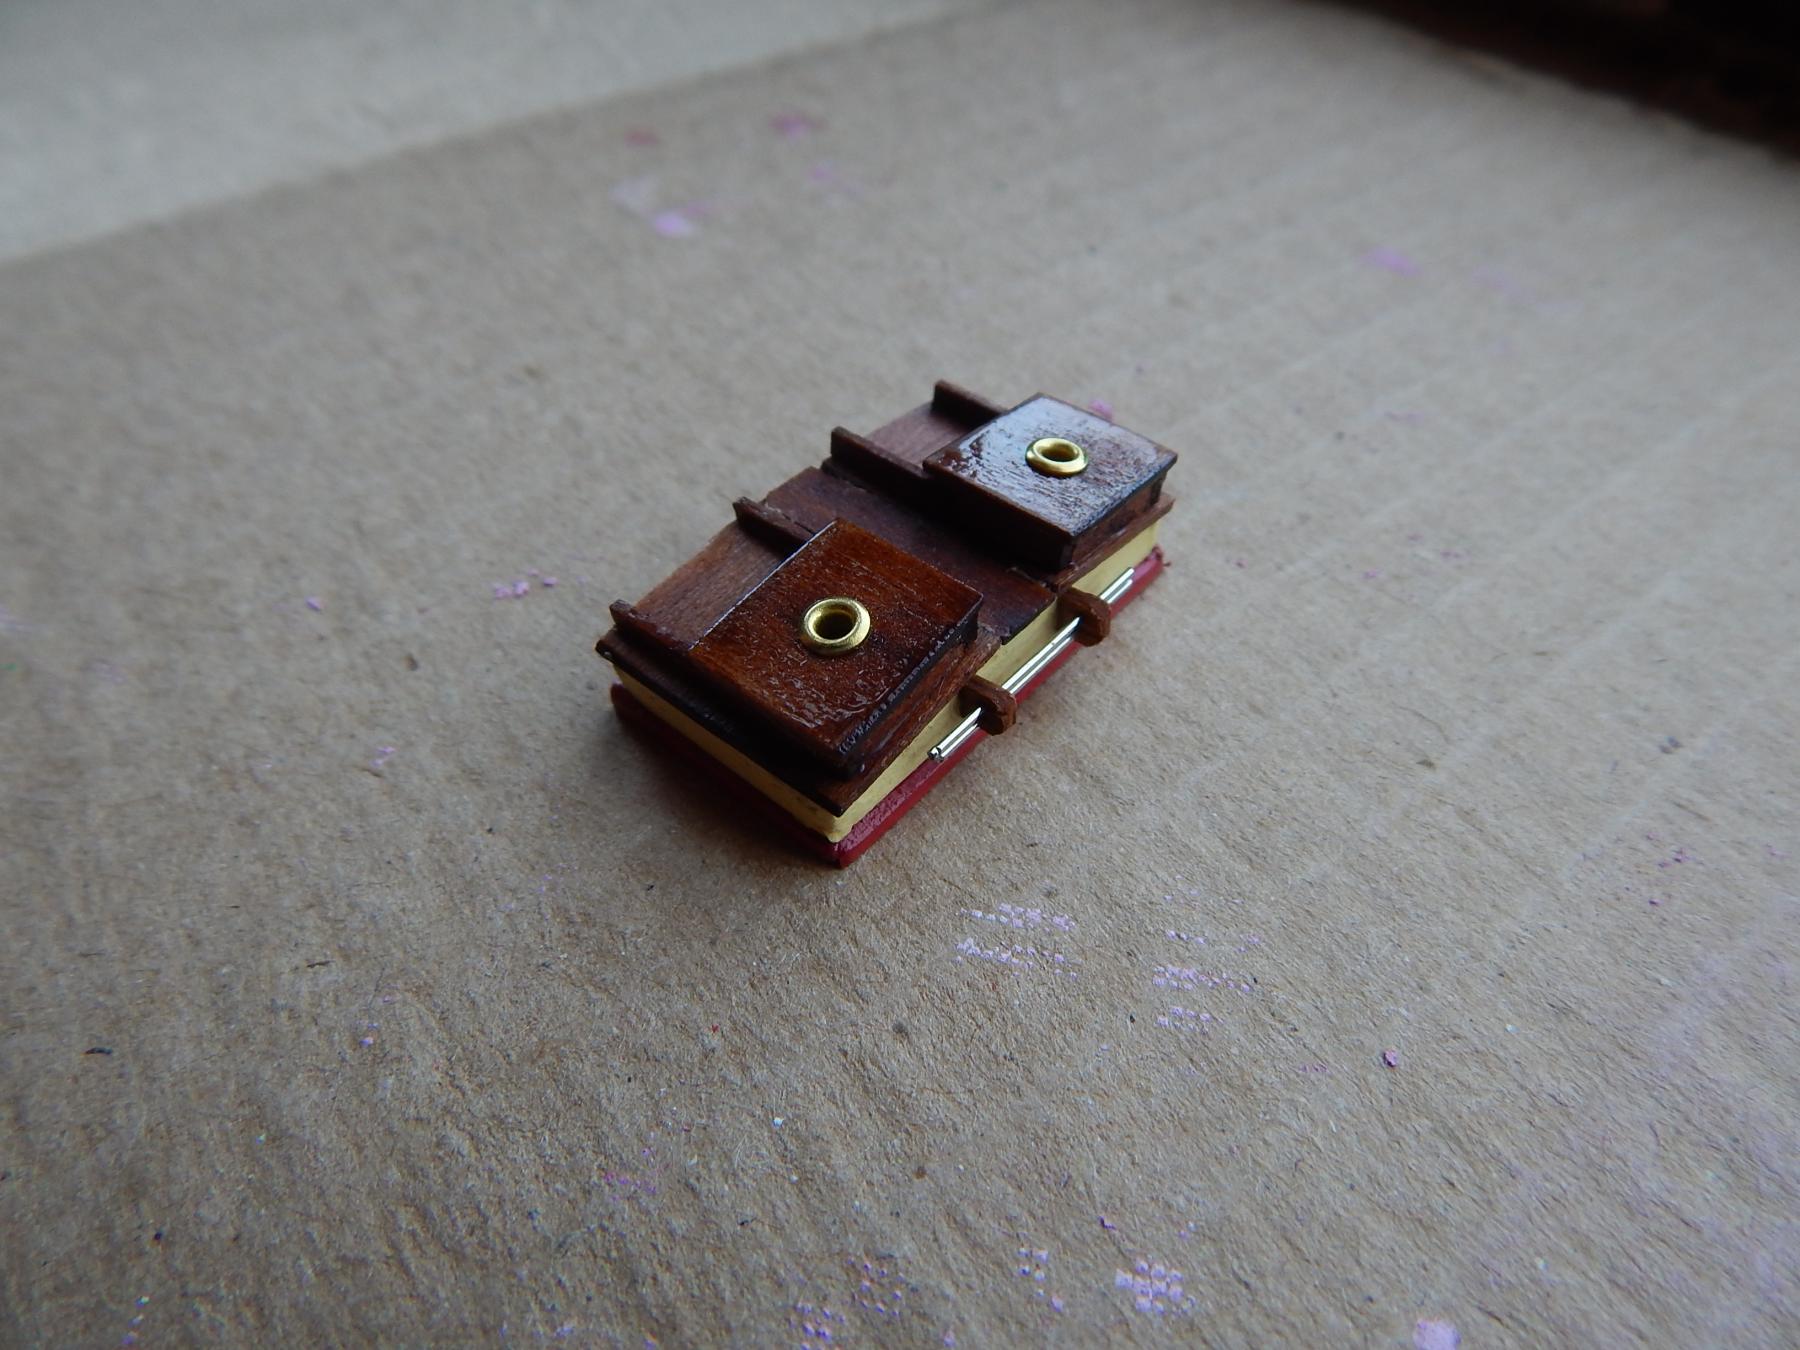
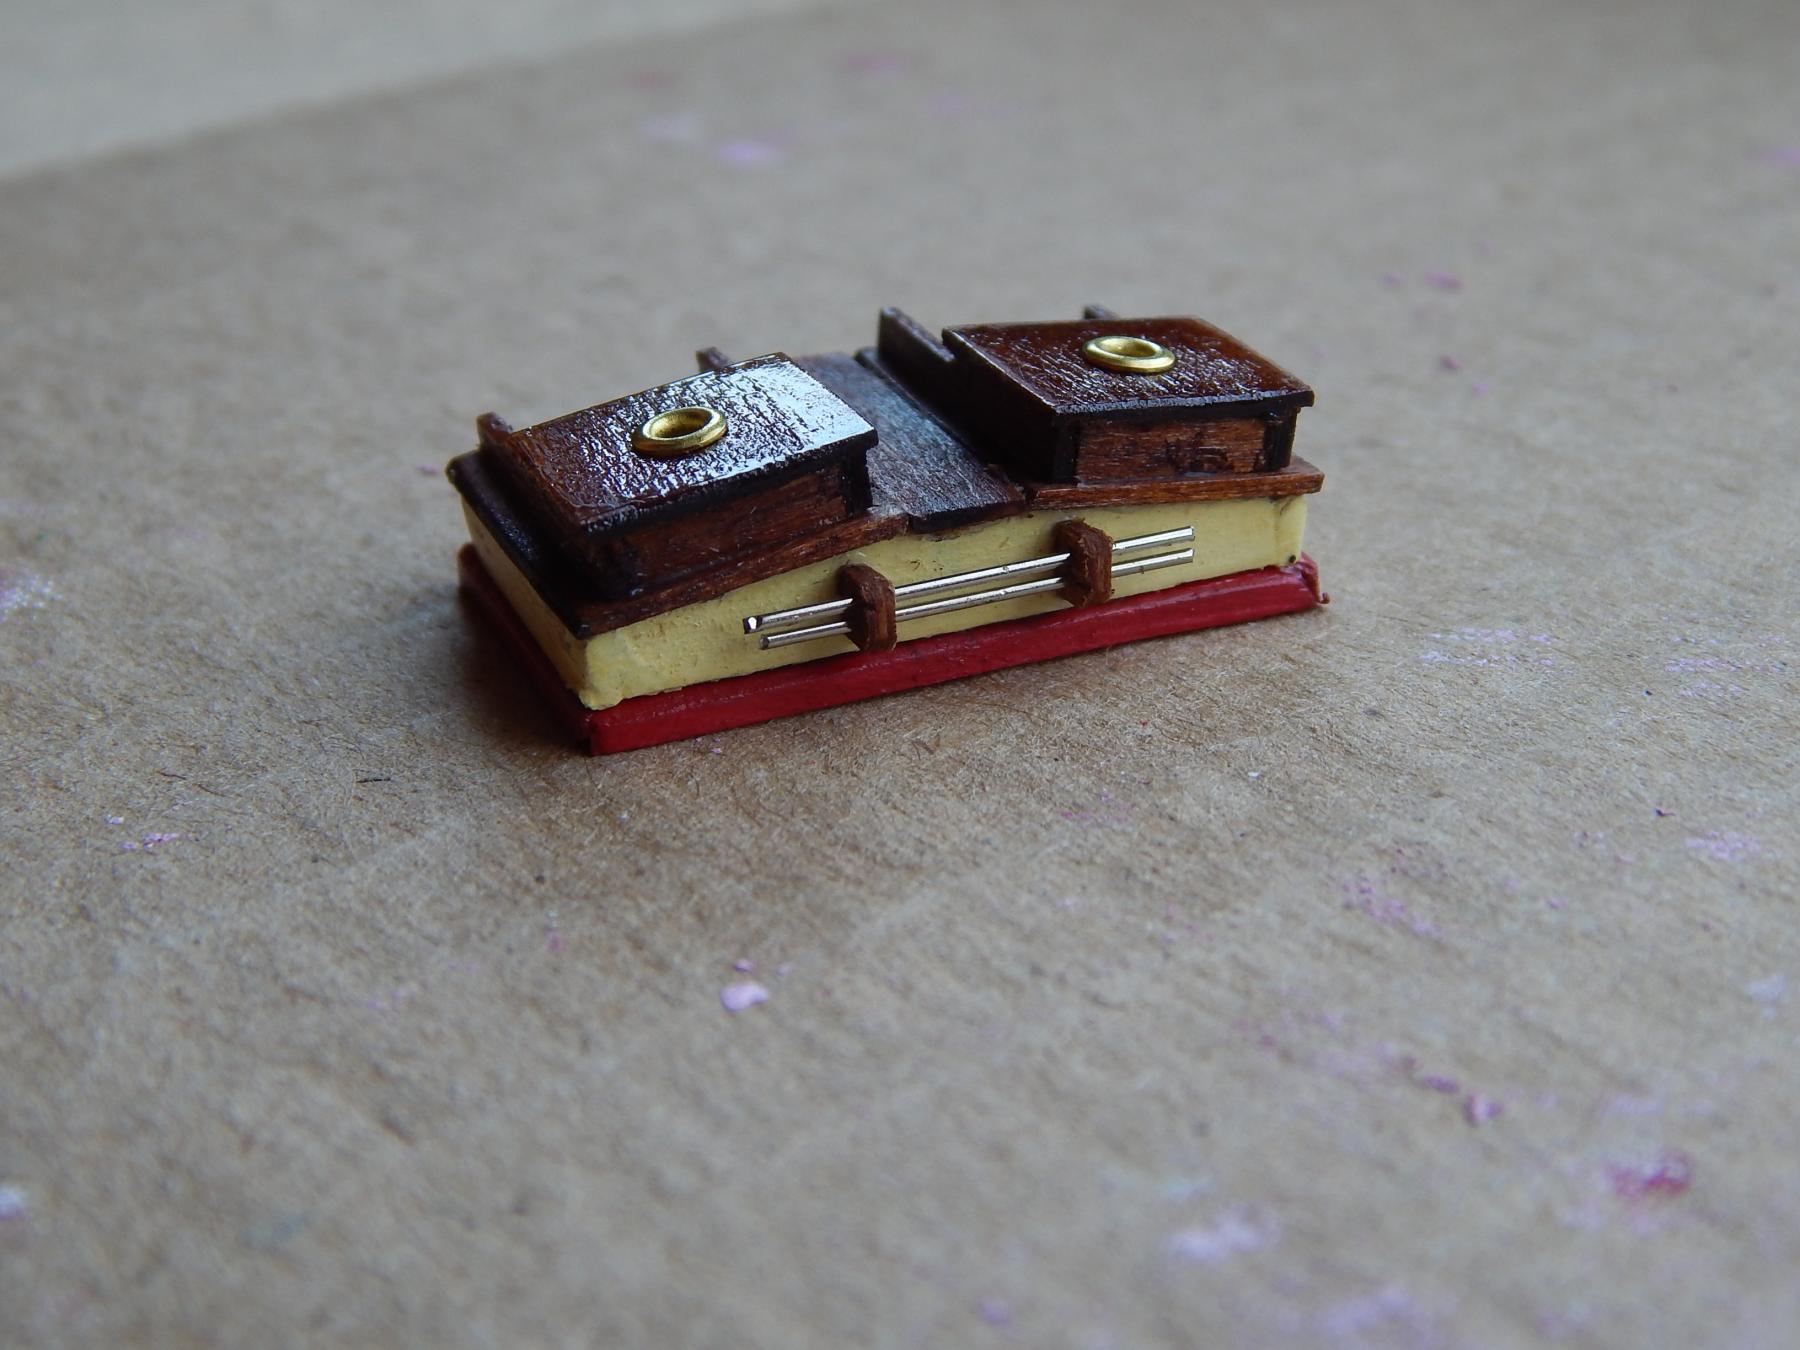
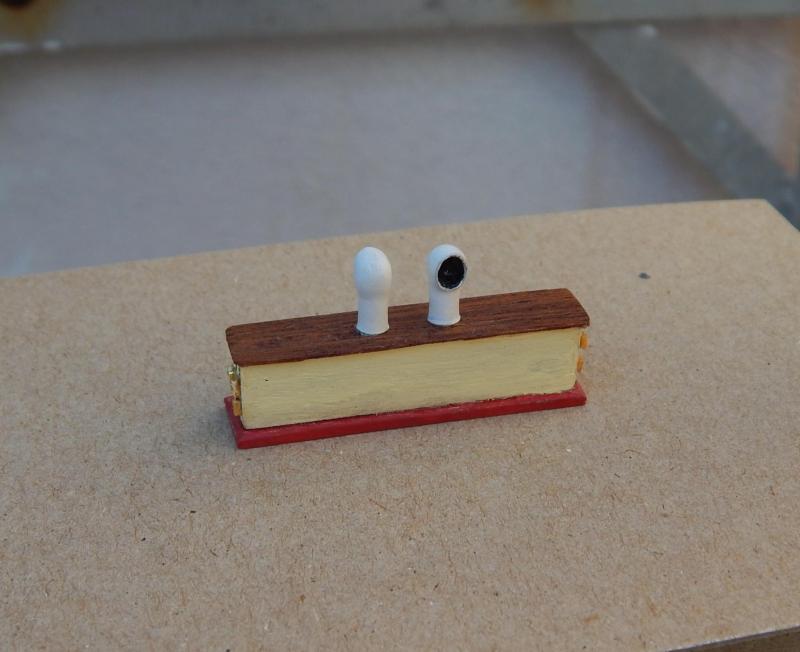
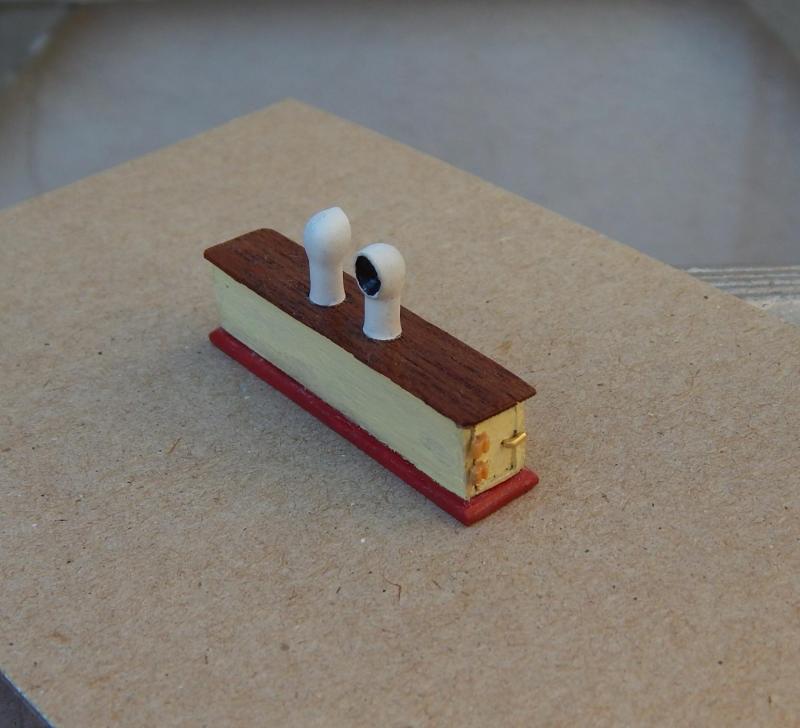
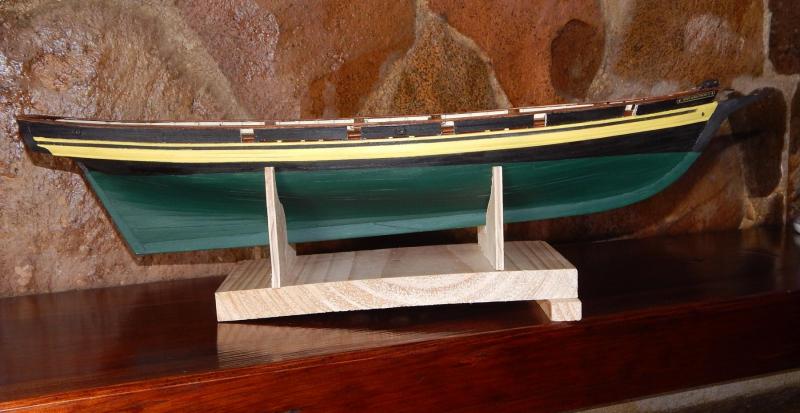
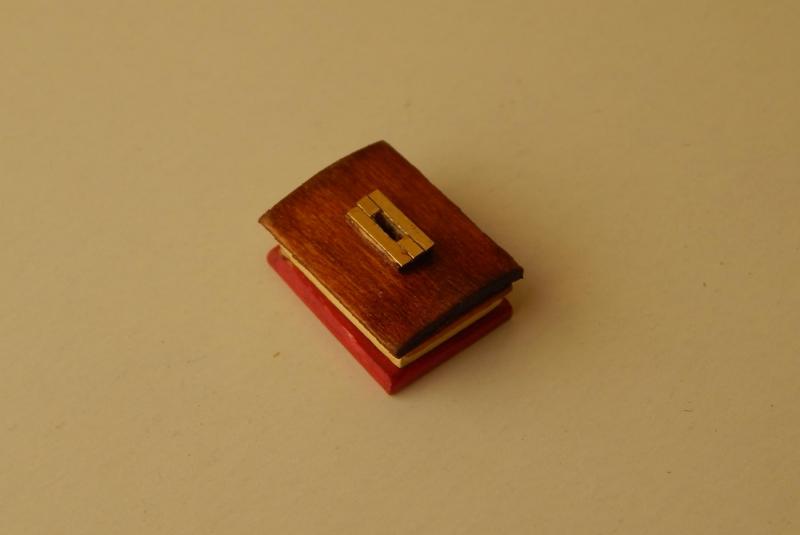
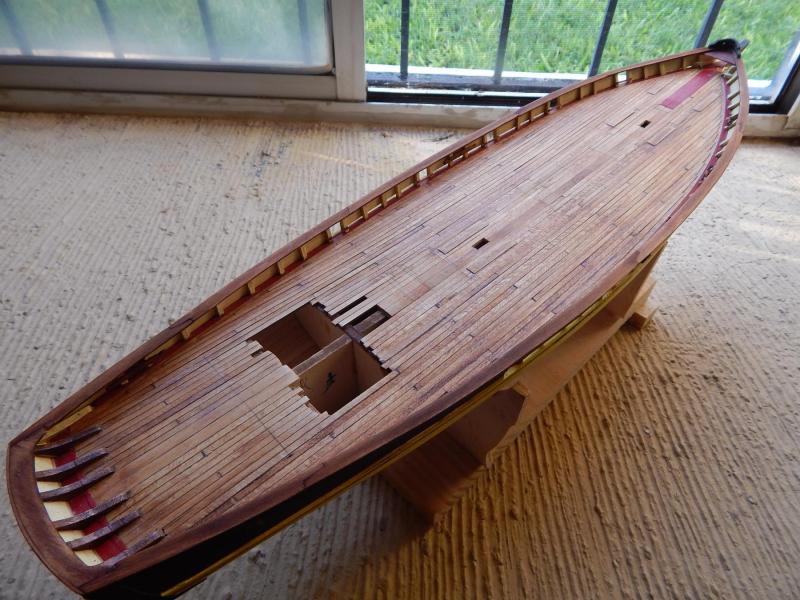
Hola: Now I finished one of the Vent Box.According to the instructions these boxes have no pre-installed coamings instead they are bolted to the deck having only a couple of transverse wood strips. But seeing pictures of the actual modern ship they have coamings so I put them. Also, and to change activity, I painted the lower part of the hull using a combination of dark green with forest green and a little blue acrylic paint. Now it has two layers of paint and only need to apply the layers of satin varnish. Saludos, Karl
- 164 replies
-
- 5
-
-
- Model Shipways
- Finished
- (and 1 more)
-
Hola Andy: Answering your question: the solution was simple I only sand the middle section to accomplish the desire curvature. probably is better if you see a picture: Saludos, Karl
- 164 replies
-
- 1
-
-
- Model Shipways
- Finished
- (and 1 more)
-
Hola Steve: Thank´s for your comment Saludos, Karl
-
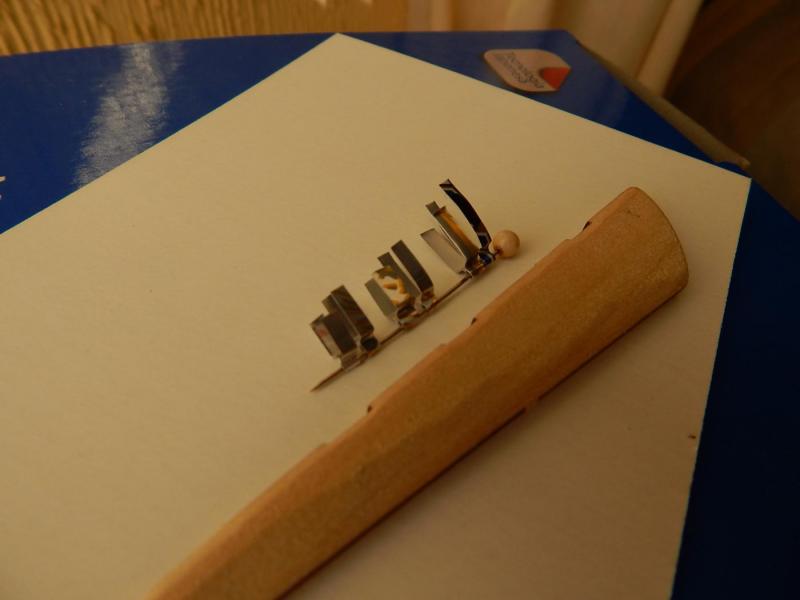
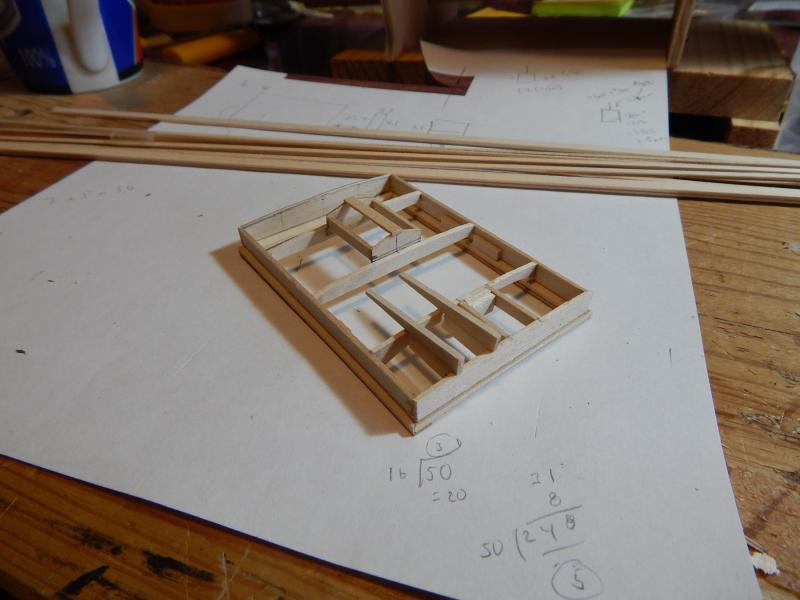
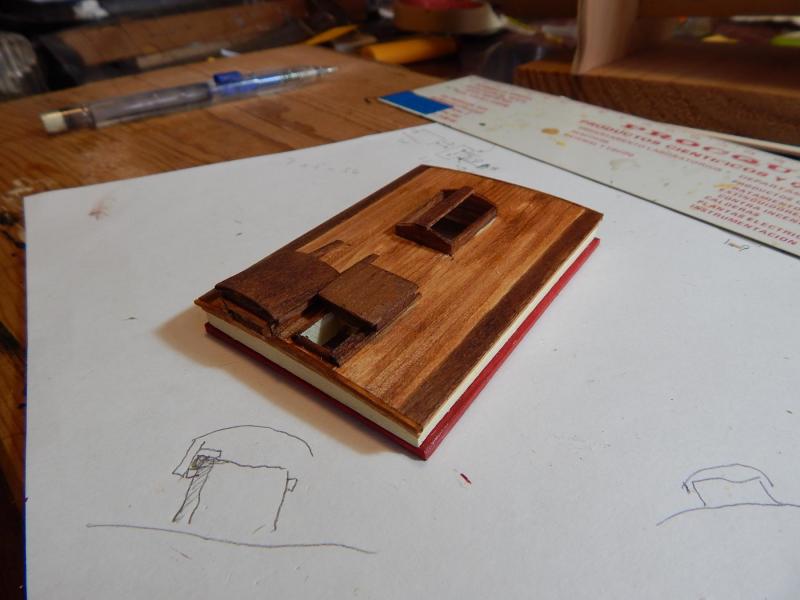
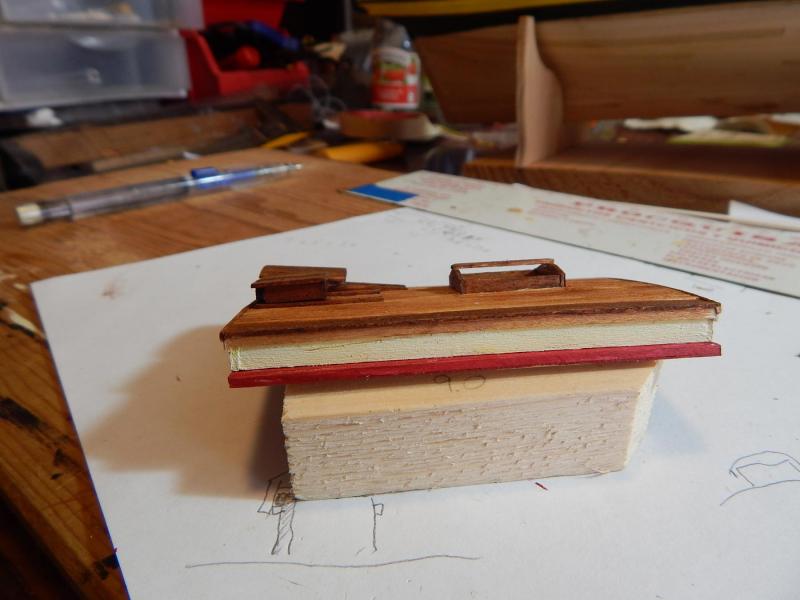
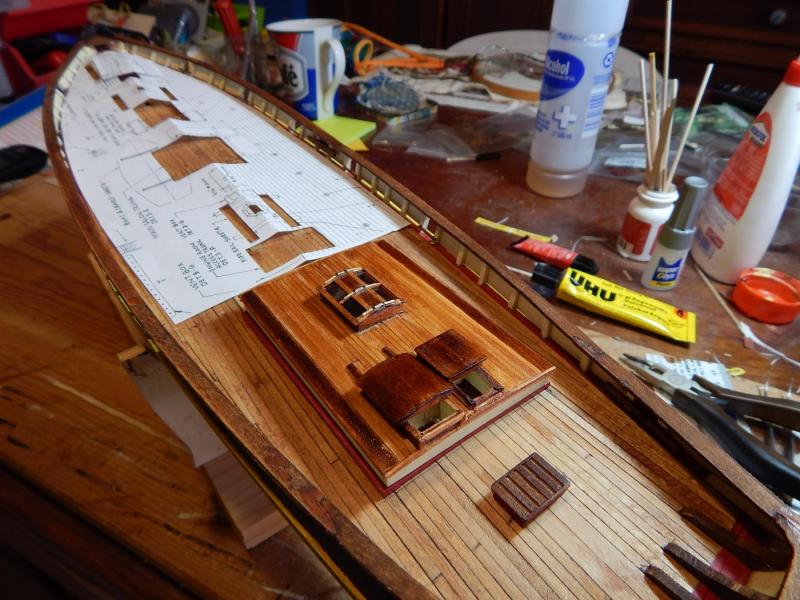
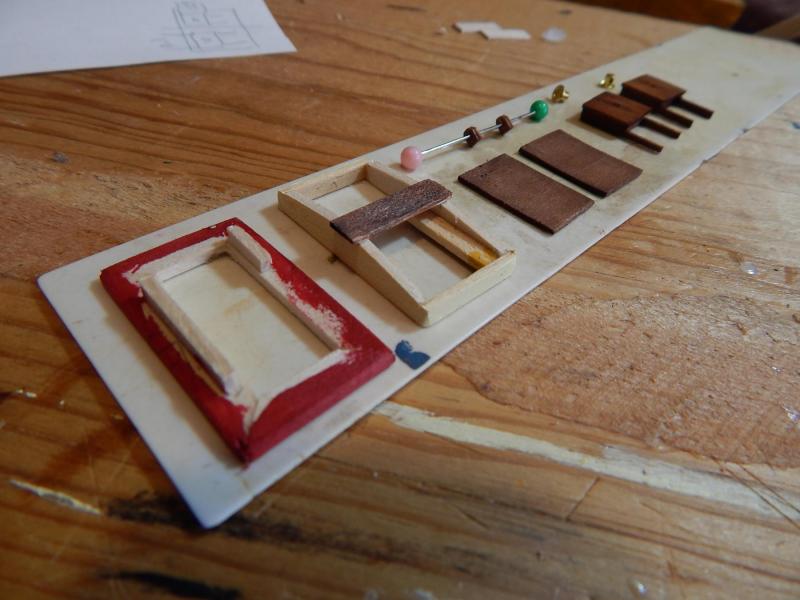
Hola: Following with the deck furniture I already make the After cabin Trunk: the more challenging part was the making of the windows hinges and the Foc´SL hatch: and here in its provisional position on deck: Saludos, Karl

- 164 replies
-
- 7
-
-
- Model Shipways
- Finished
- (and 1 more)
-
Hola Bill: Thanks for liking my deck furniture, some of them are really difficult to made because of the small size. By the way, in other brand kits some of the tinniest parts are included or already done, in here they supplied only the materials, for example for the pintle & gudgeon you must to make the little holes to fix it on the rudder and the brass strip is only 1/16 wide, the same for the chains that are only 1/32 wide!! Good luck with your conversions, for me is difficult to understand the fractions of an inch in some measurements and in others thousands of an inch. It is much more simple to use the metric system!! Saludos Karl
- 164 replies
-
- 1
-
-
- Model Shipways
- Finished
- (and 1 more)
-
Hola Don: The colors I choose where Acrylic "multi- surface" by FolkArt and then a couple of layers of Satin polyurethane varnish. Thank´s for following my posts. Saludos, Karl
- 164 replies
-
- 1
-
-
- Model Shipways
- Finished
- (and 1 more)
-
Hola Per: Thanks for your nice comments. Saludos, Karl
-
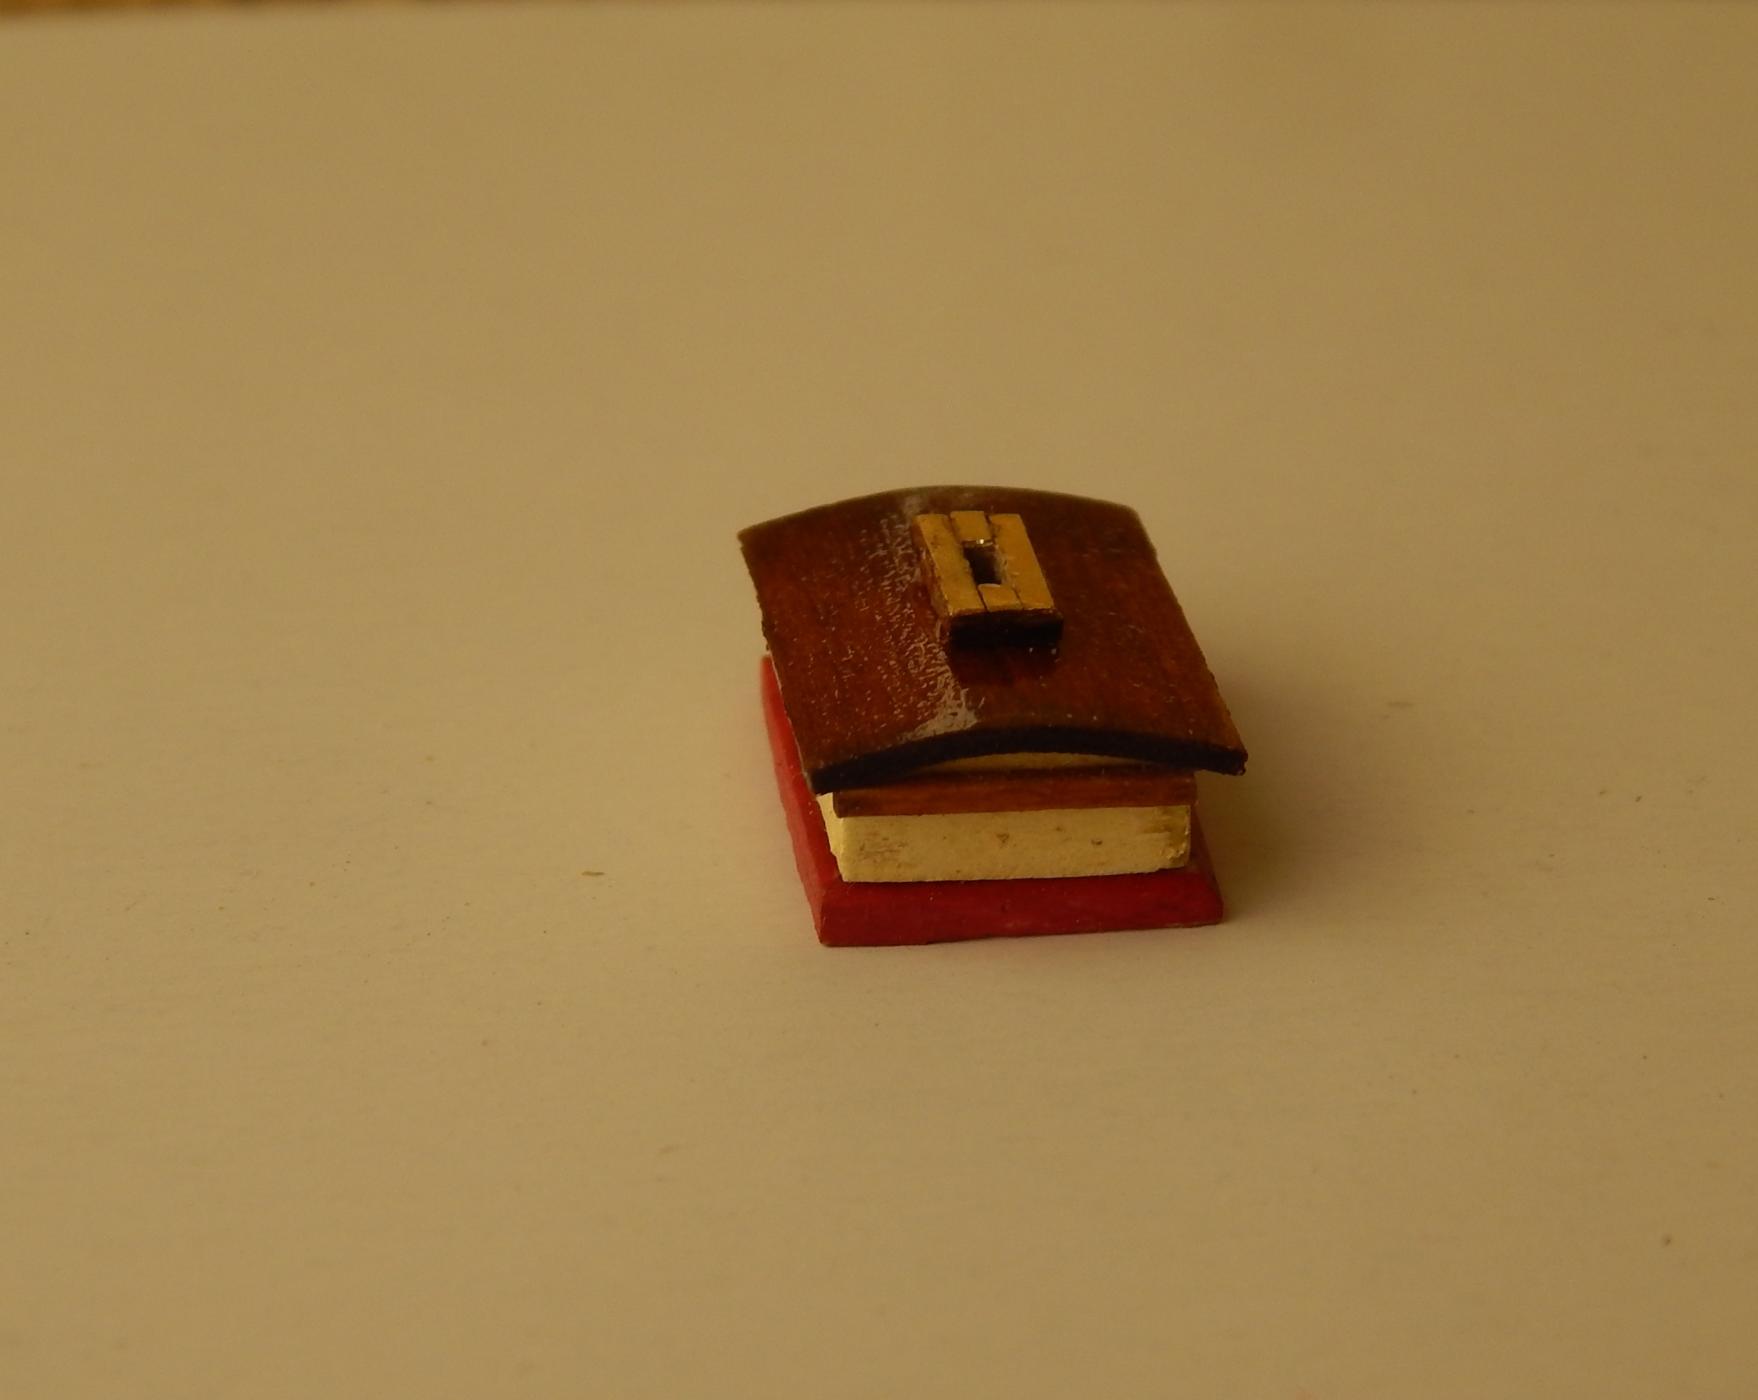
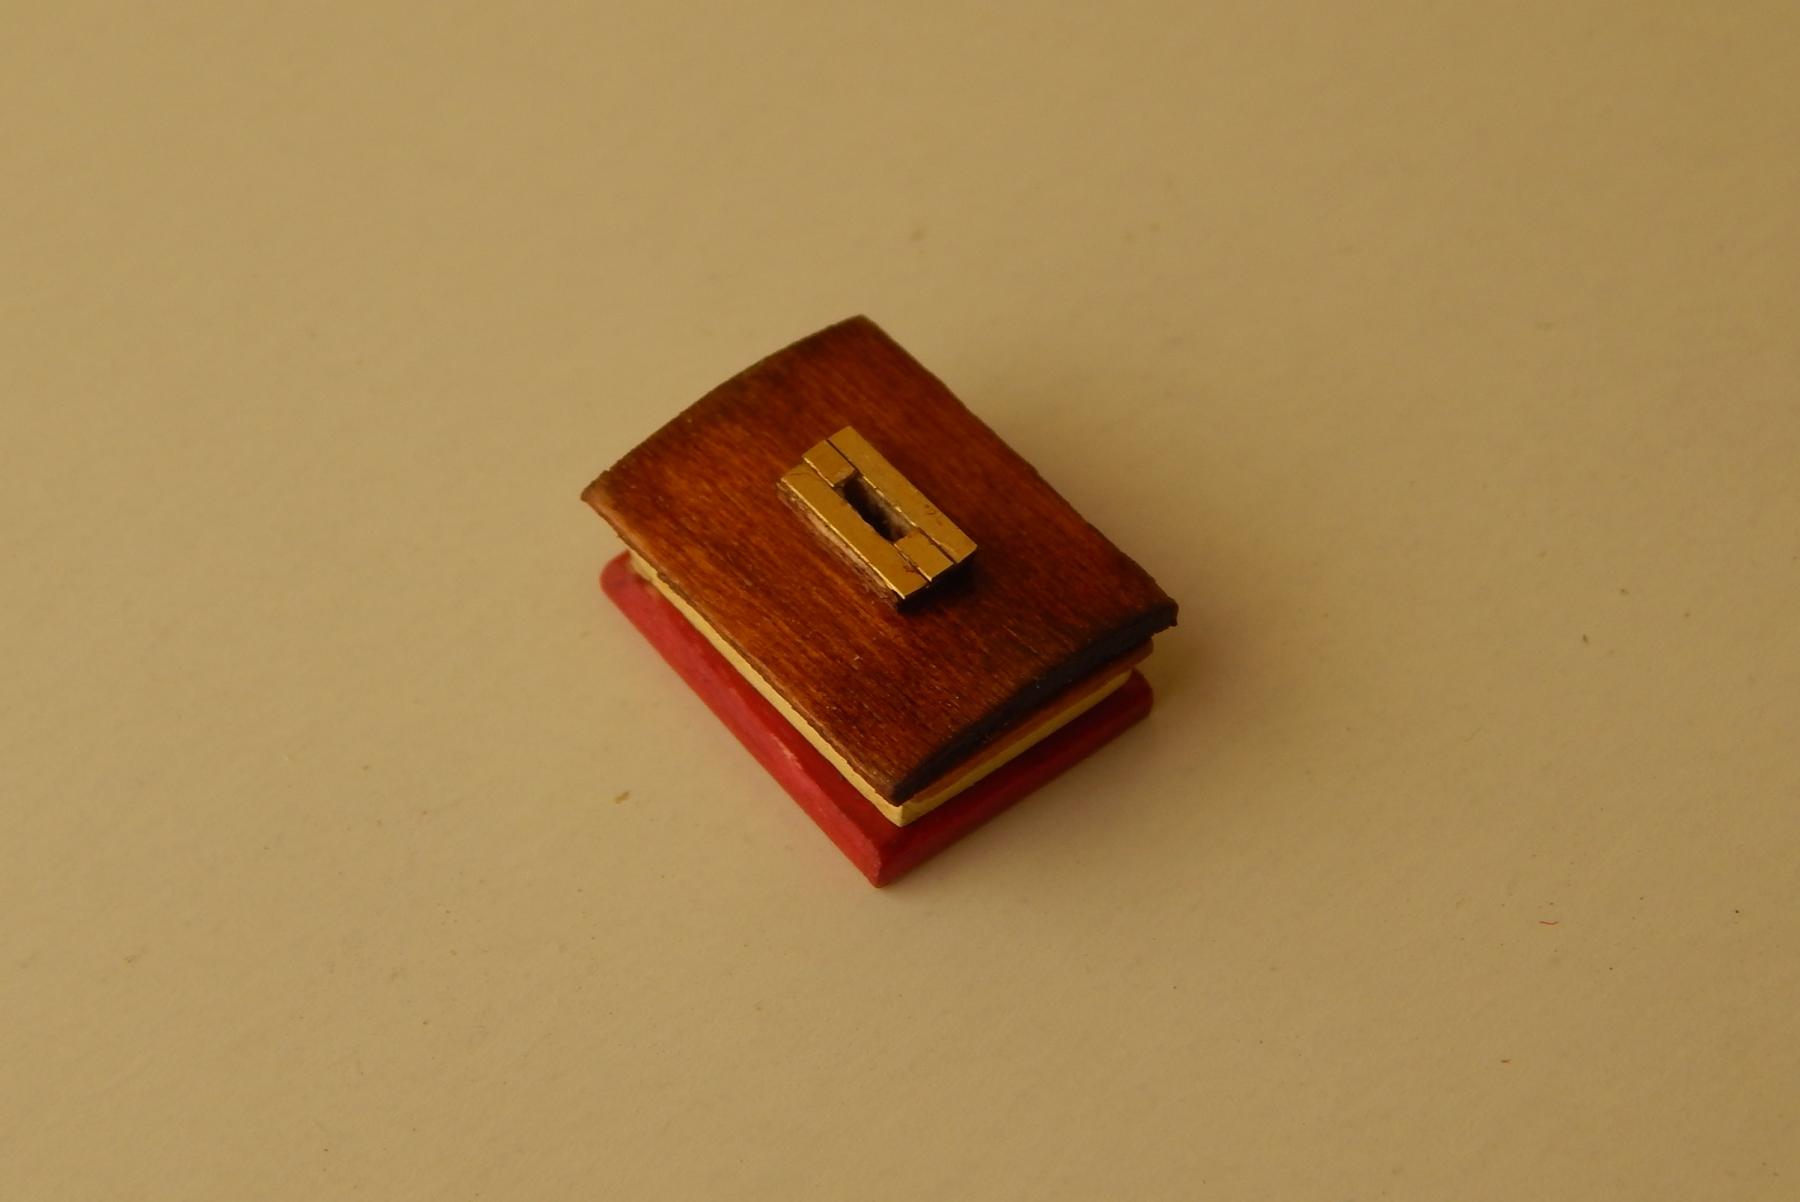
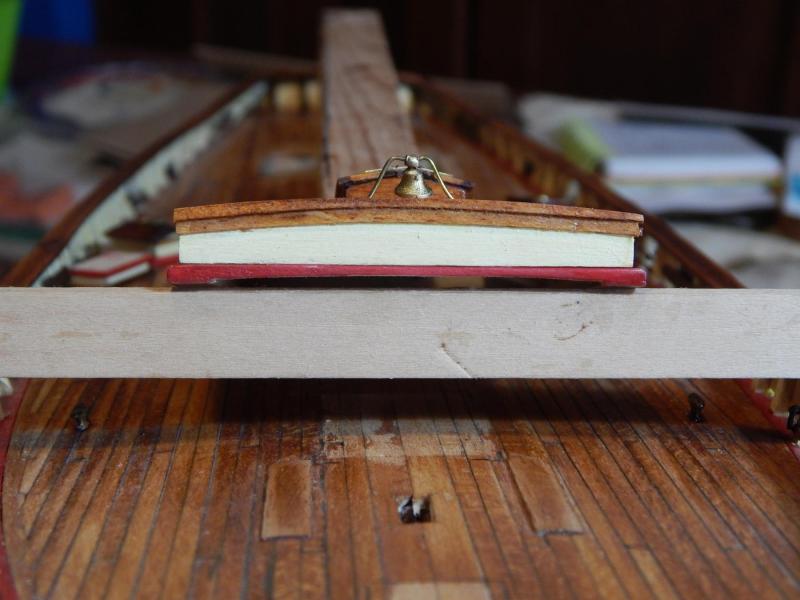
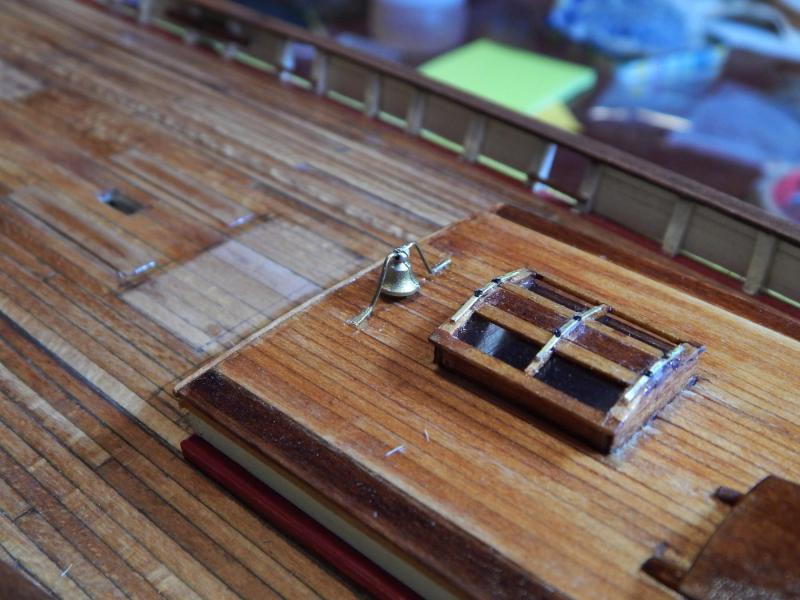
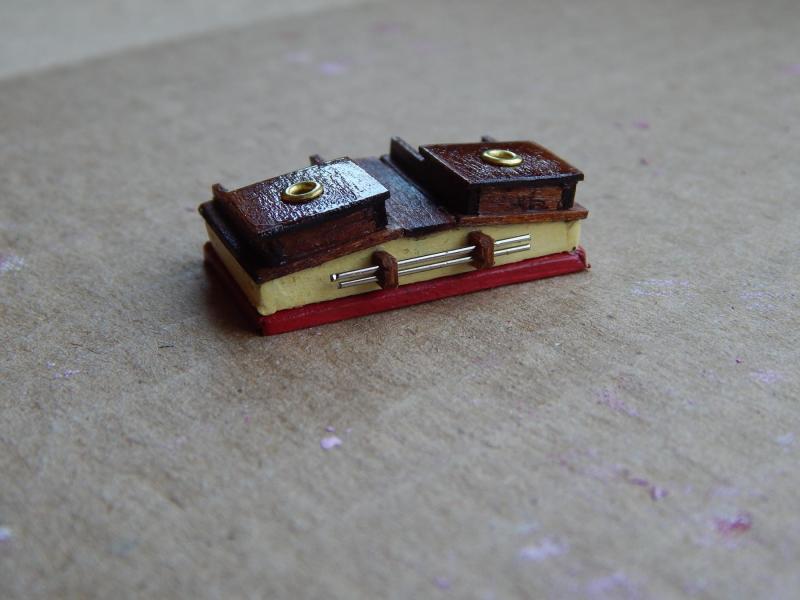
Hola: I just finished doing the Engine Room Access trunk. As you can see I used two types of varnish: one Satin and other glossy as are in the modern real ship. Saludos, Karl

- 164 replies
-
- 3
-
-
- Model Shipways
- Finished
- (and 1 more)
-
Hola Andy: Your engine room access looks very nice, I just make mine following your steps Saludos, Karl
-
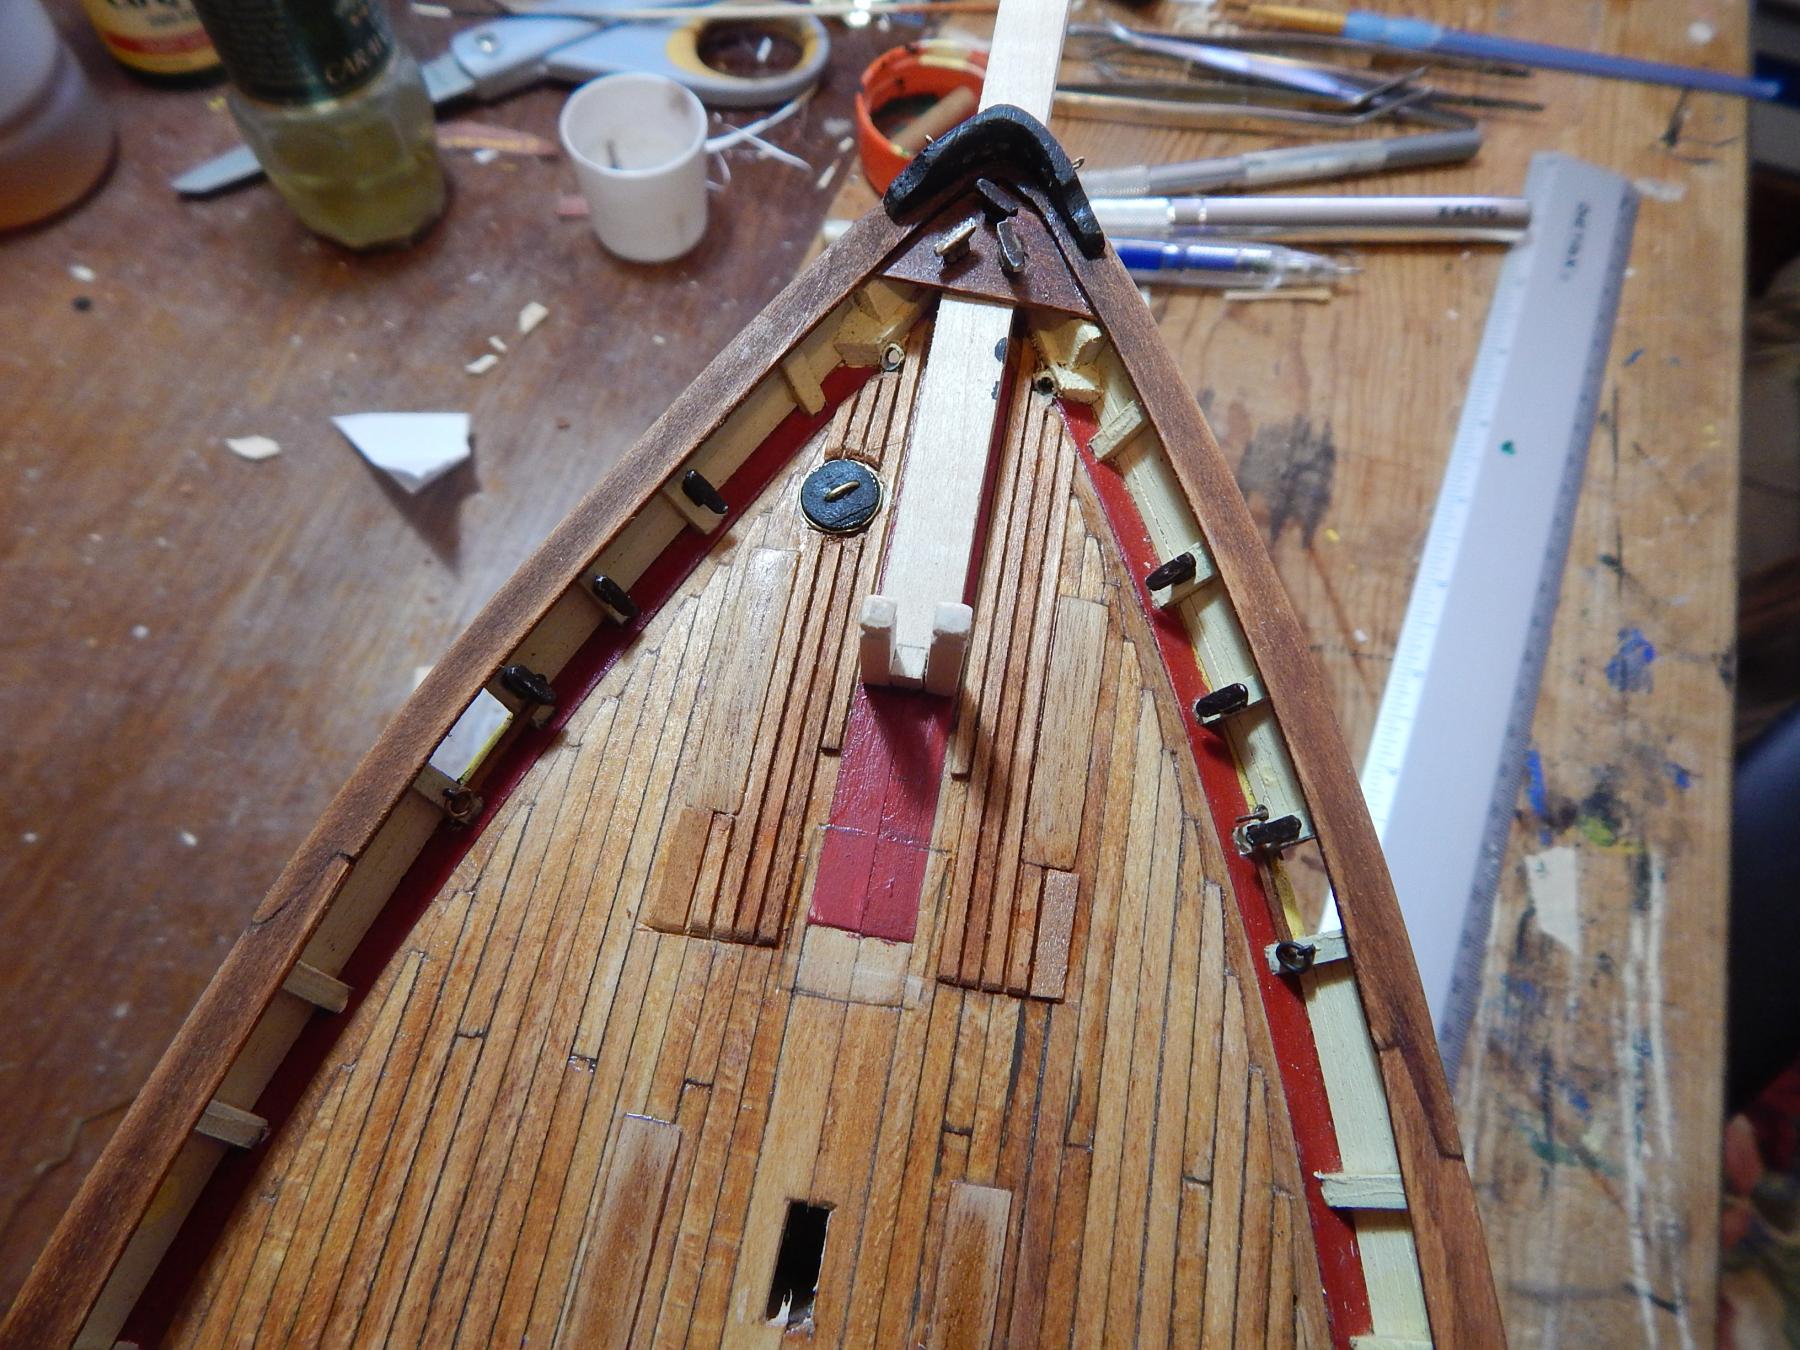
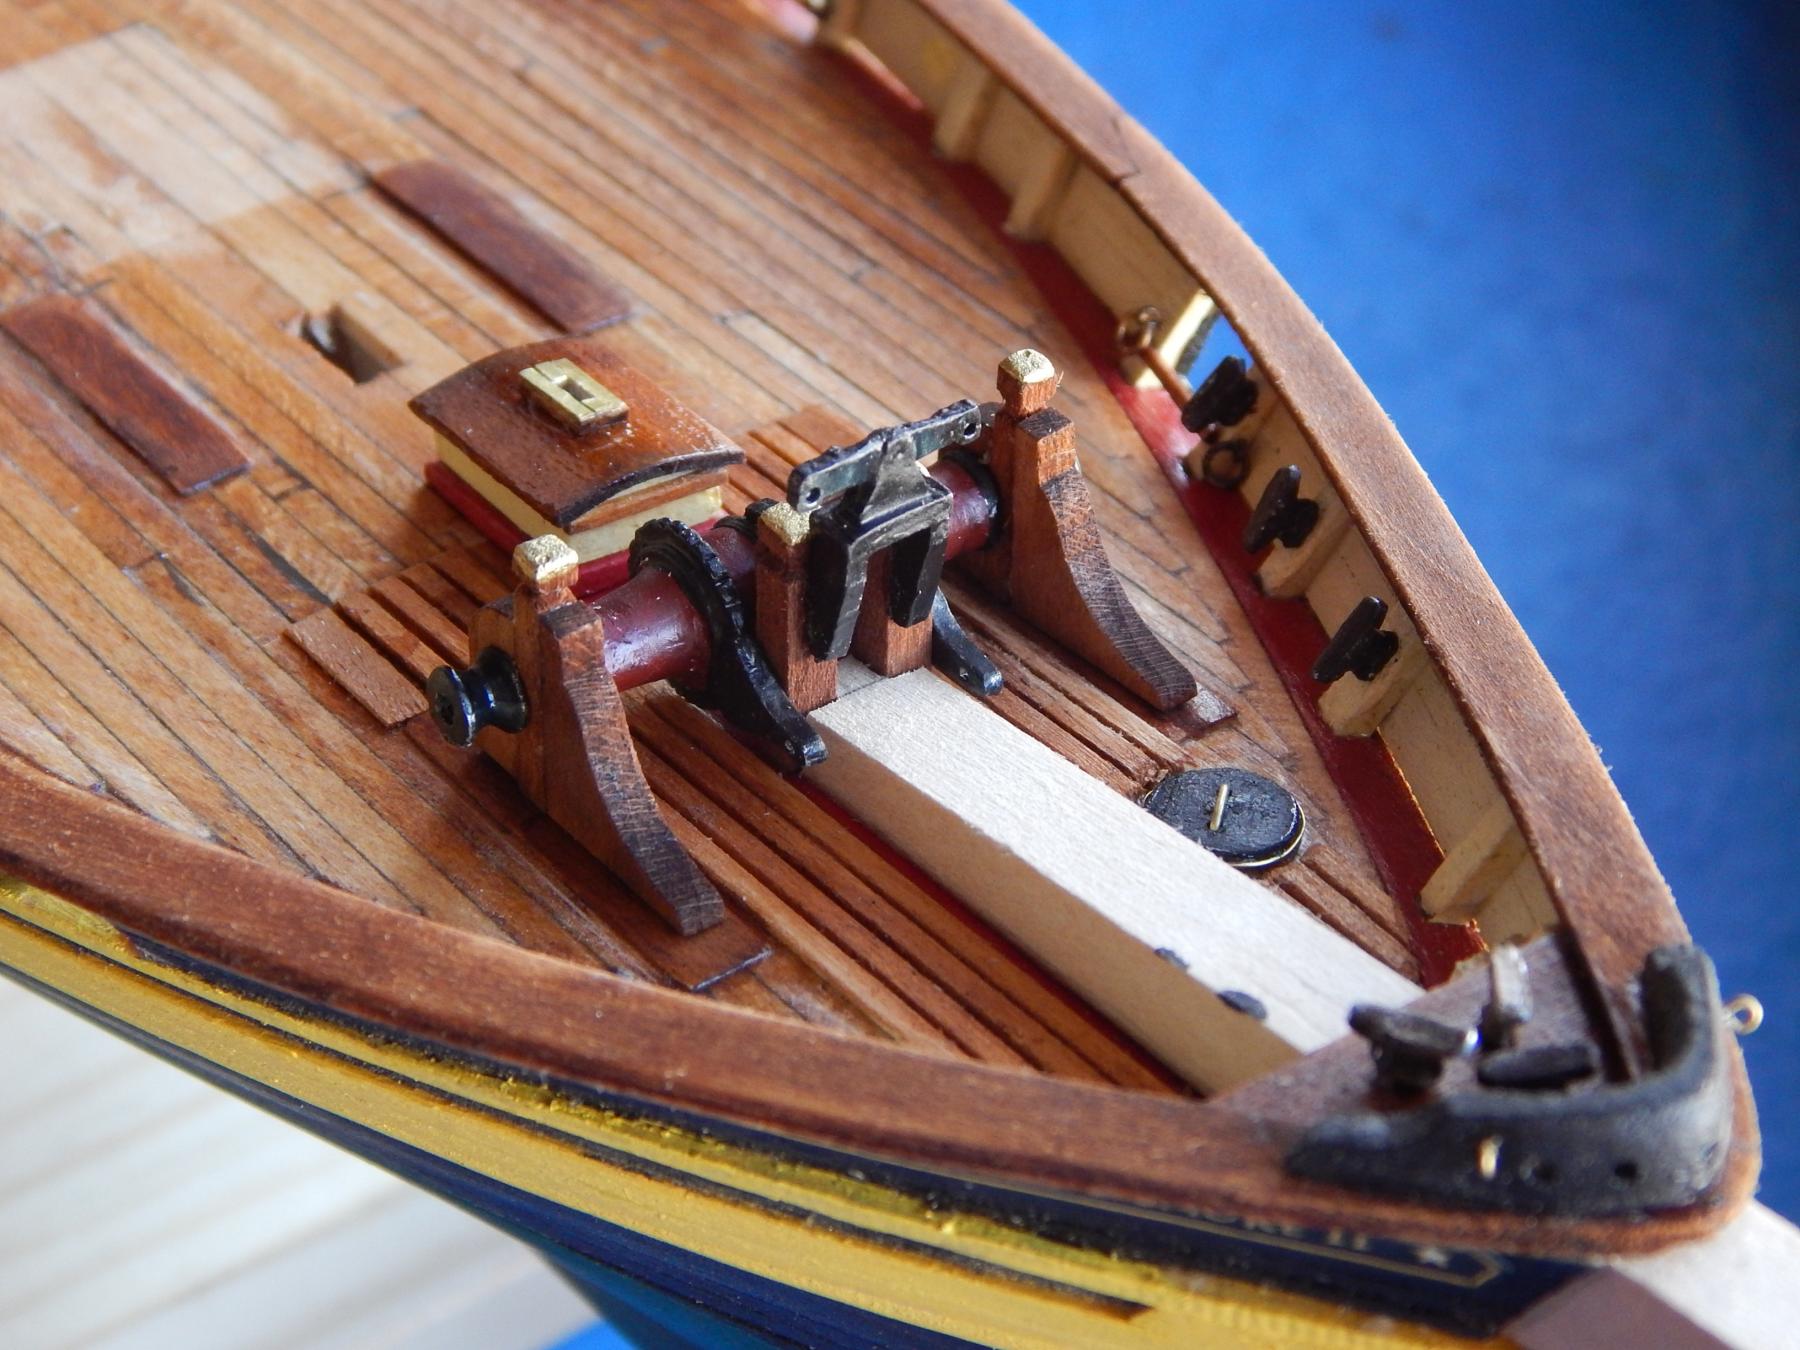
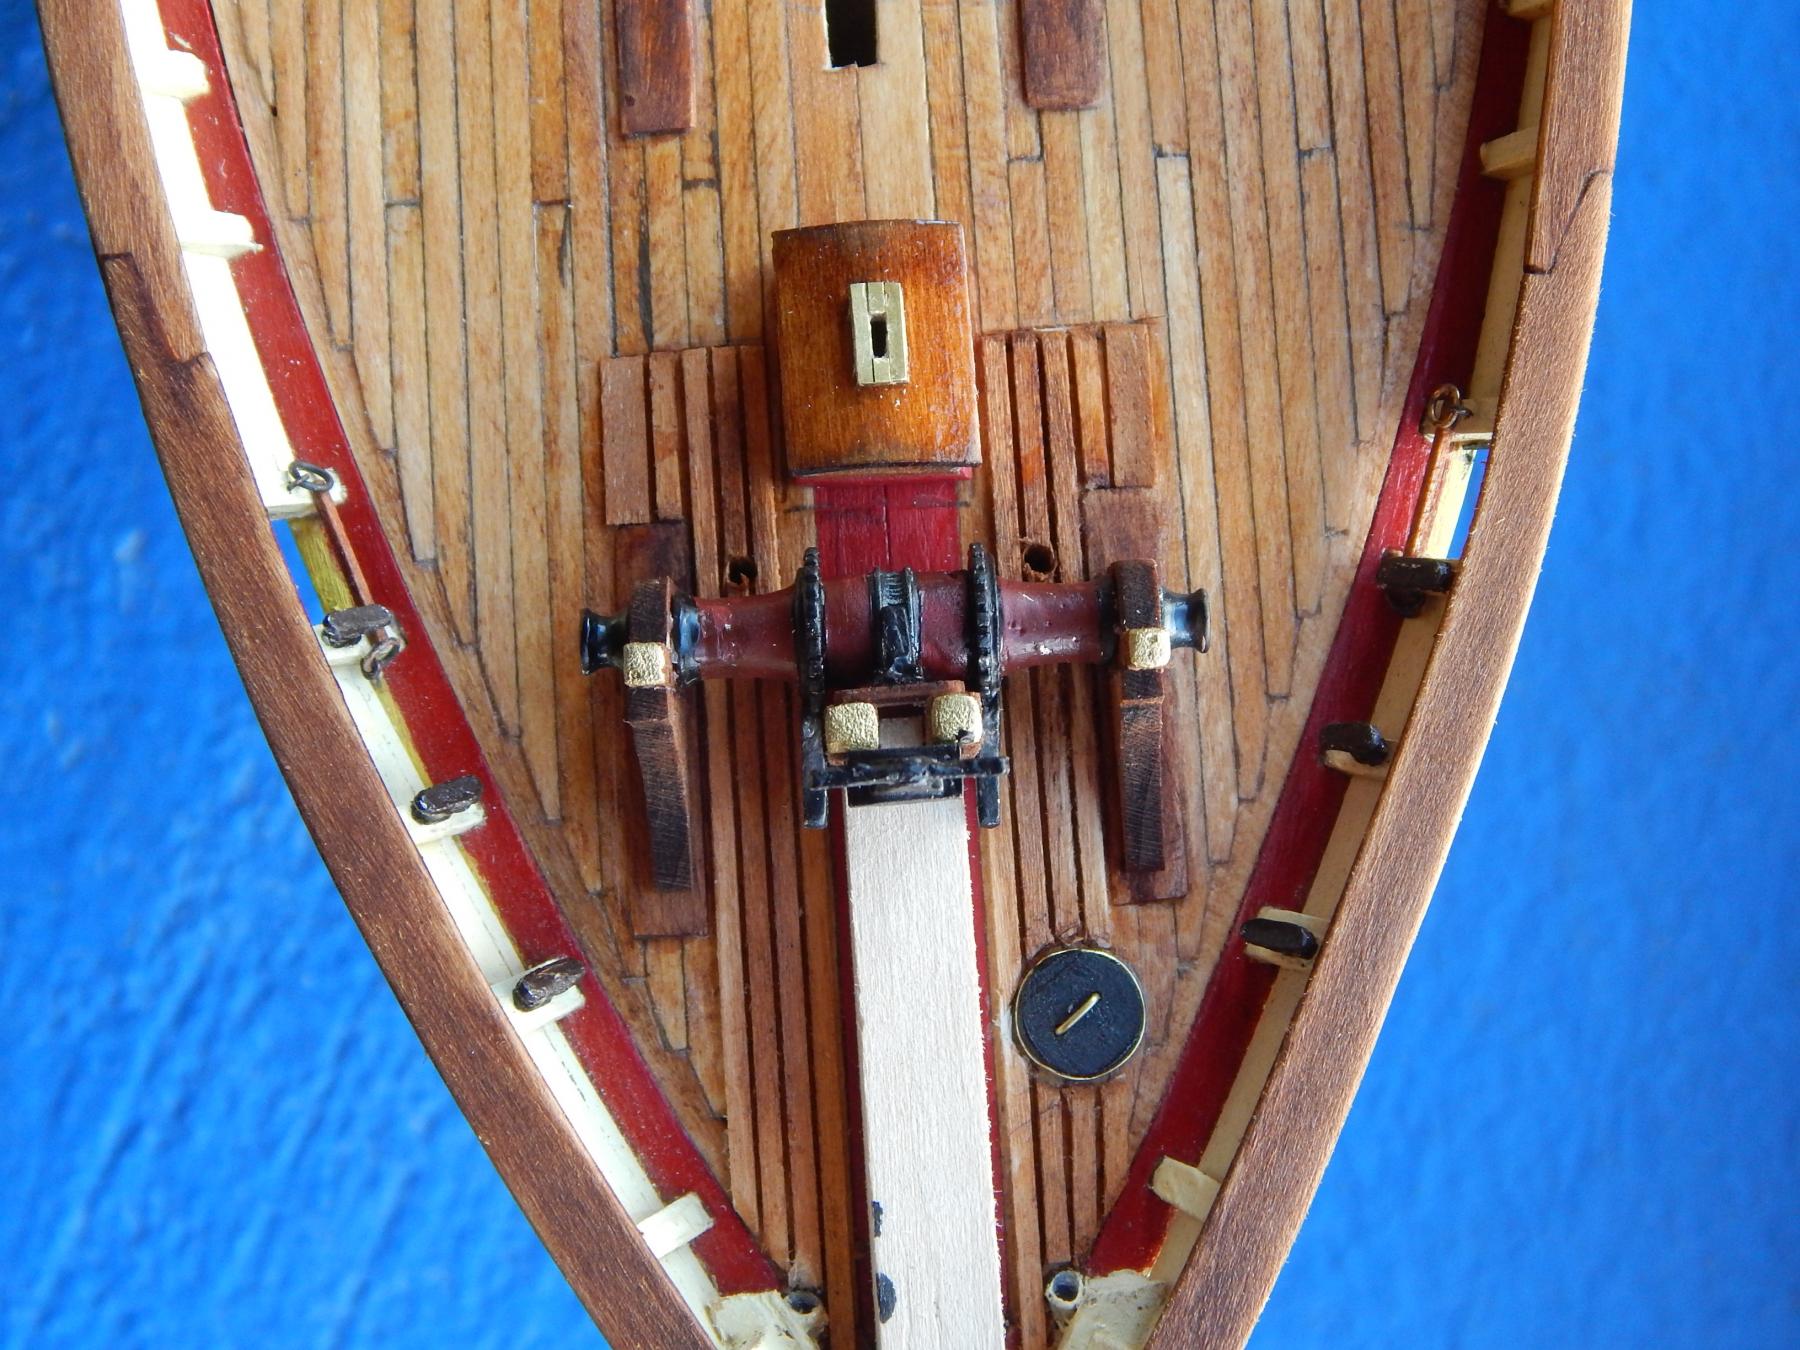
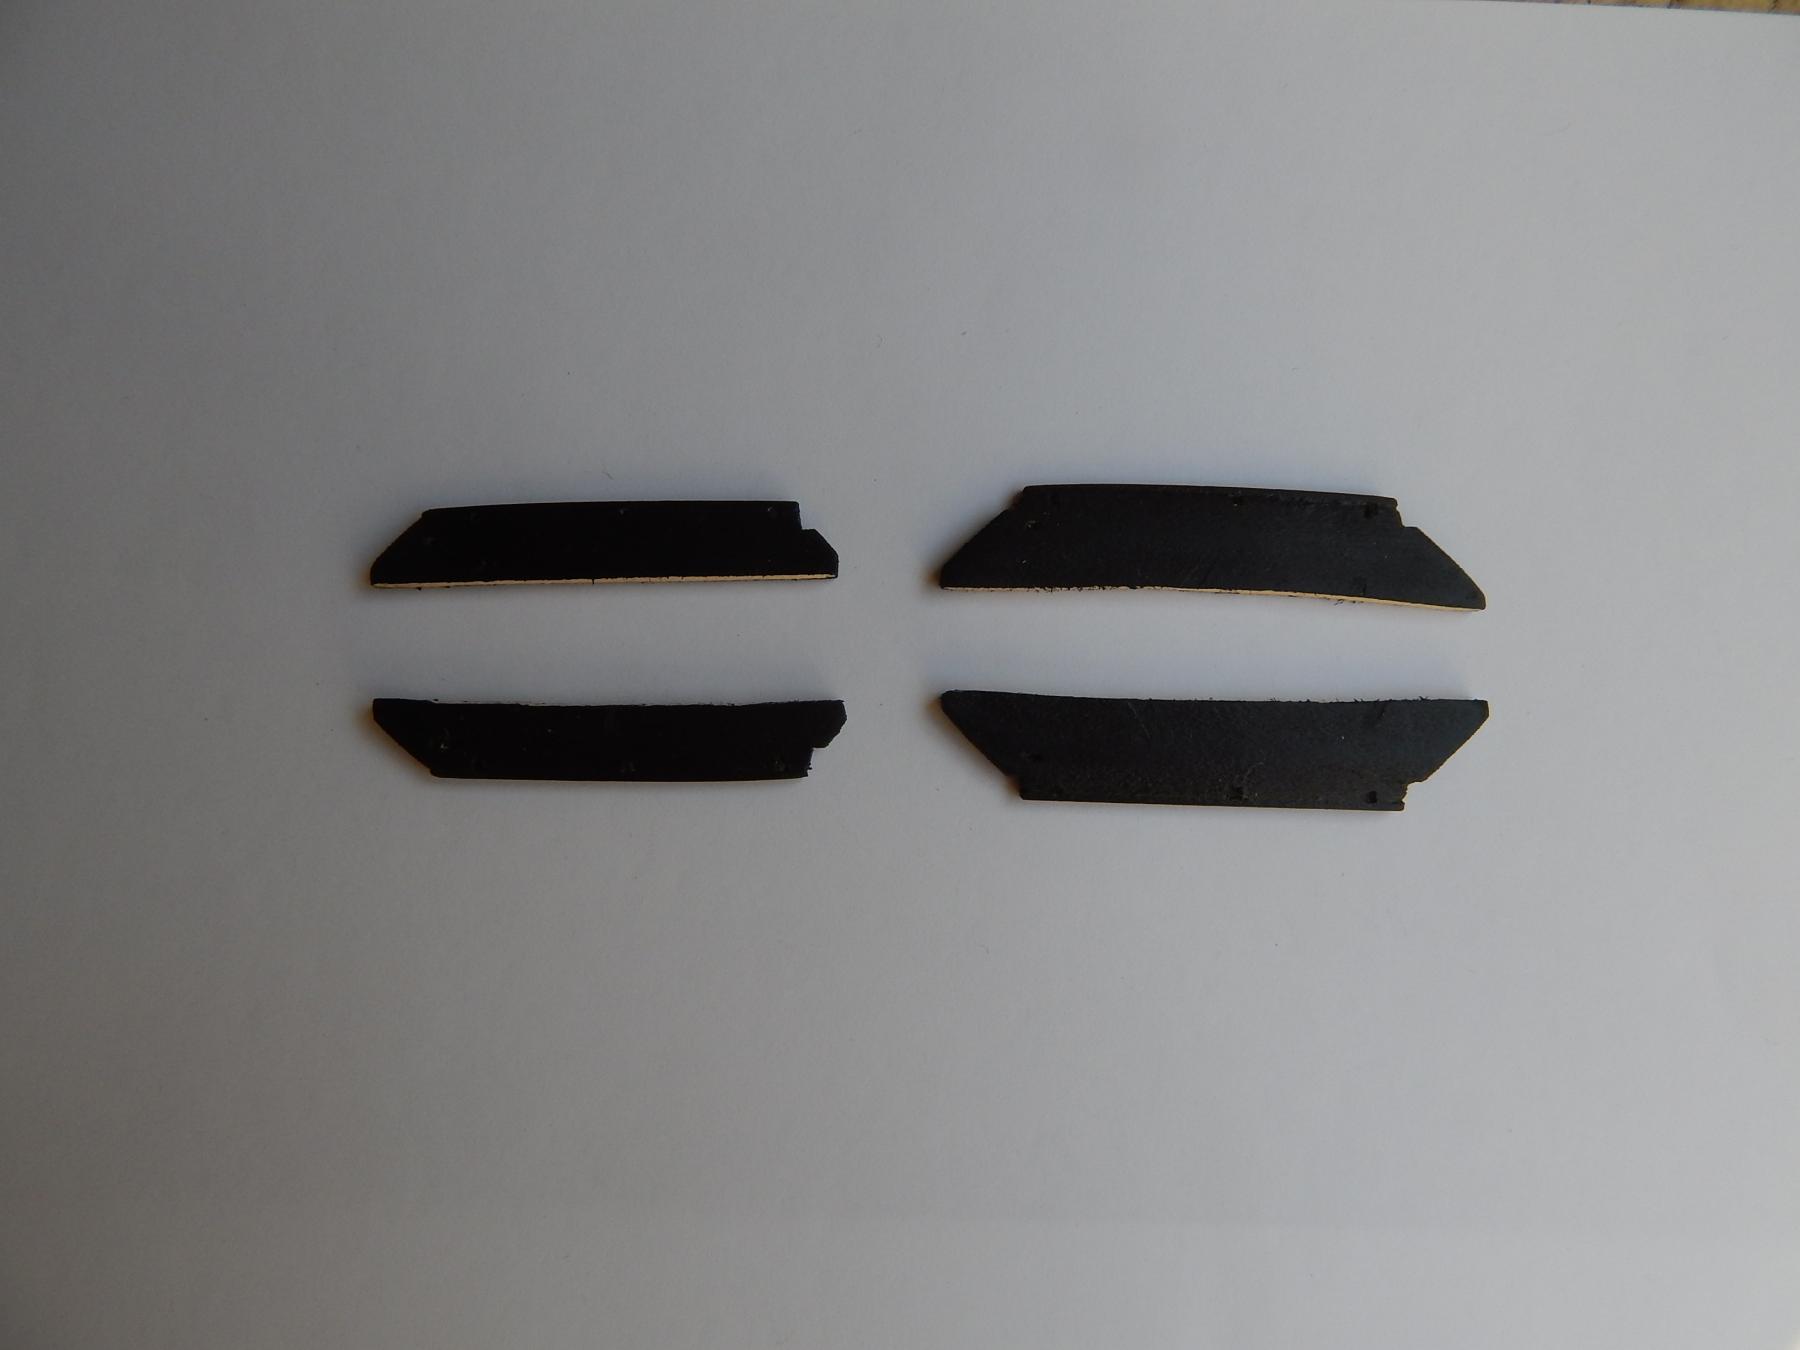
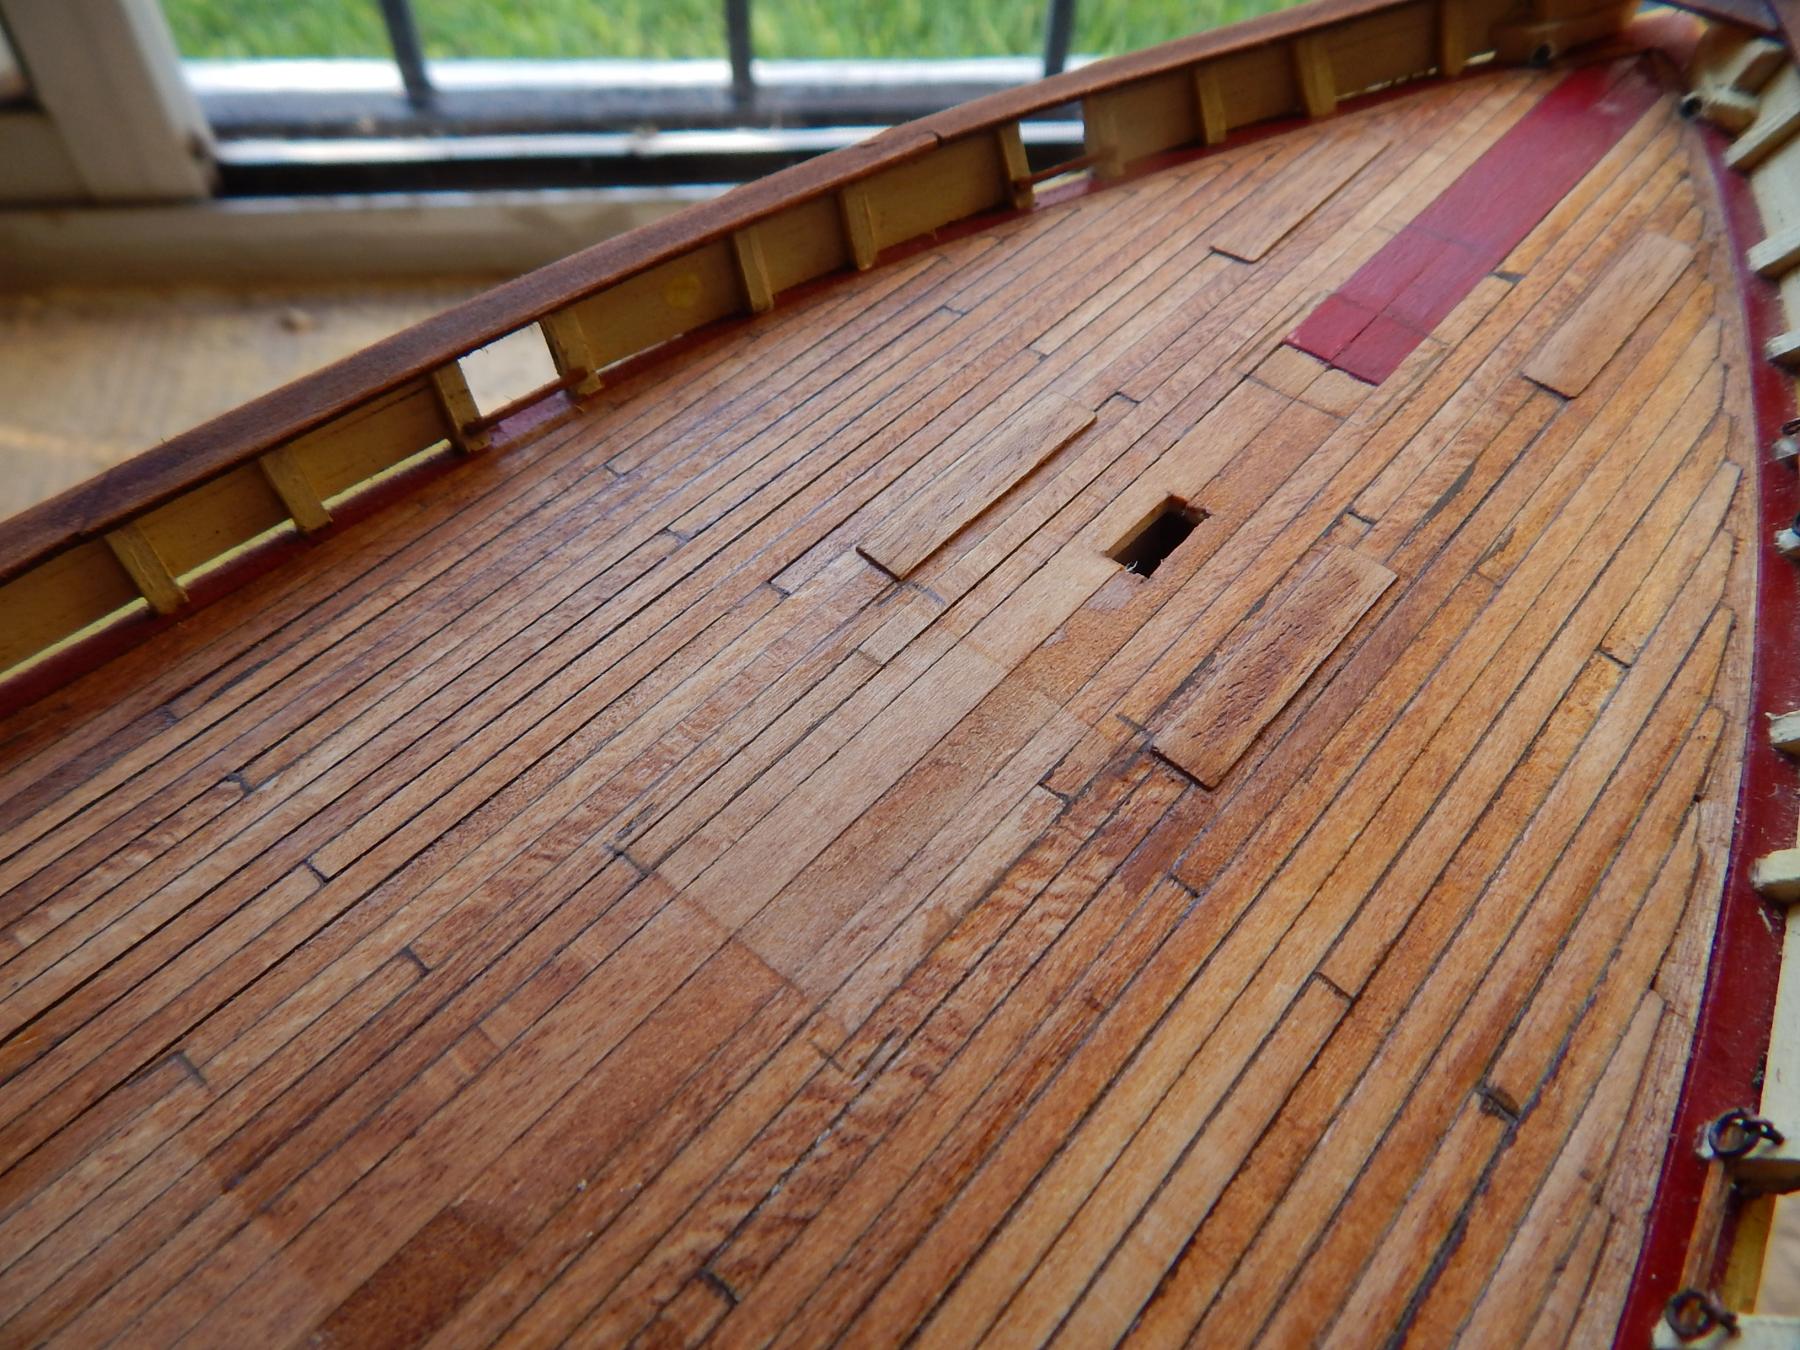
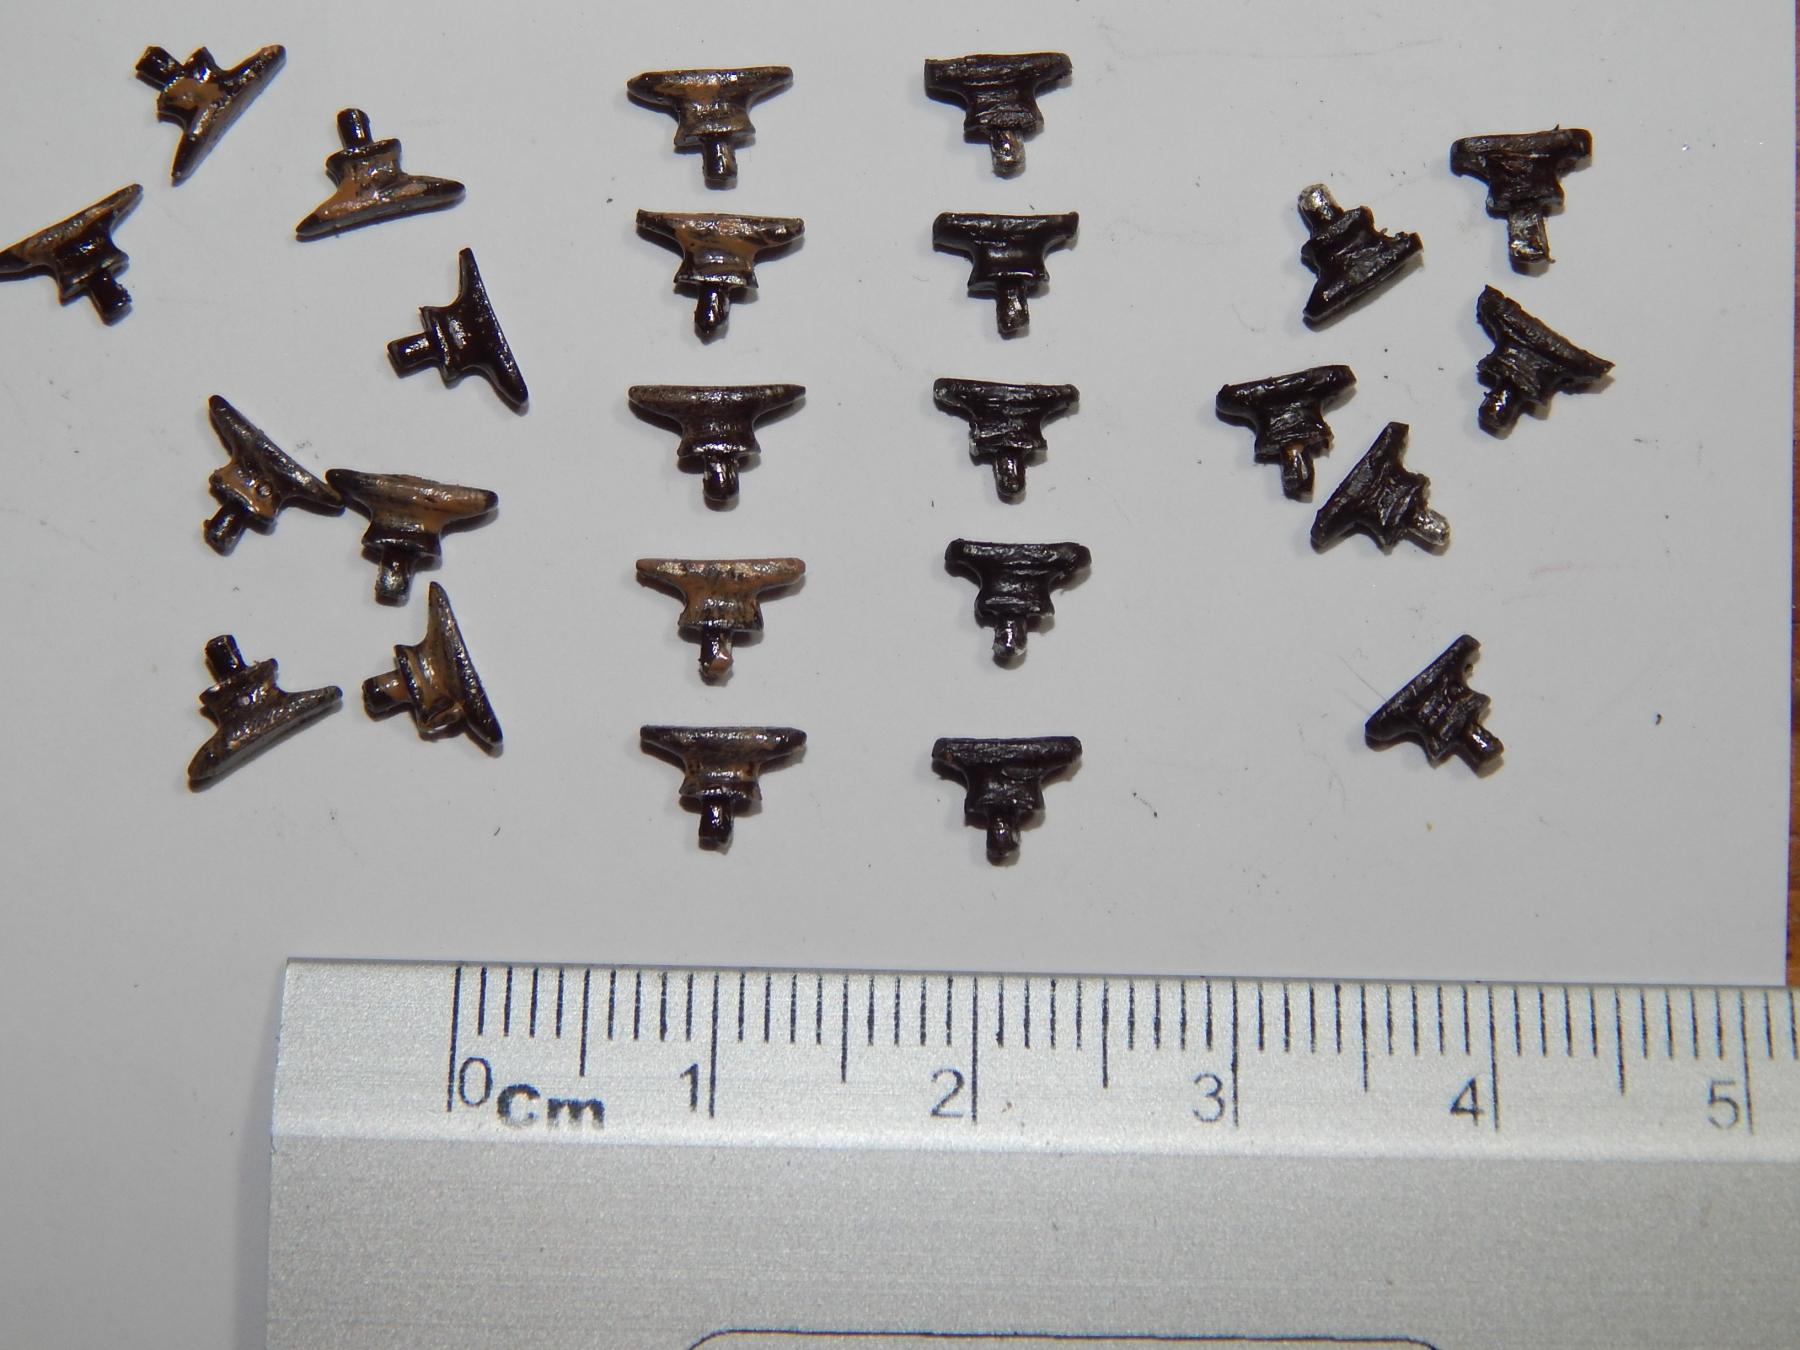
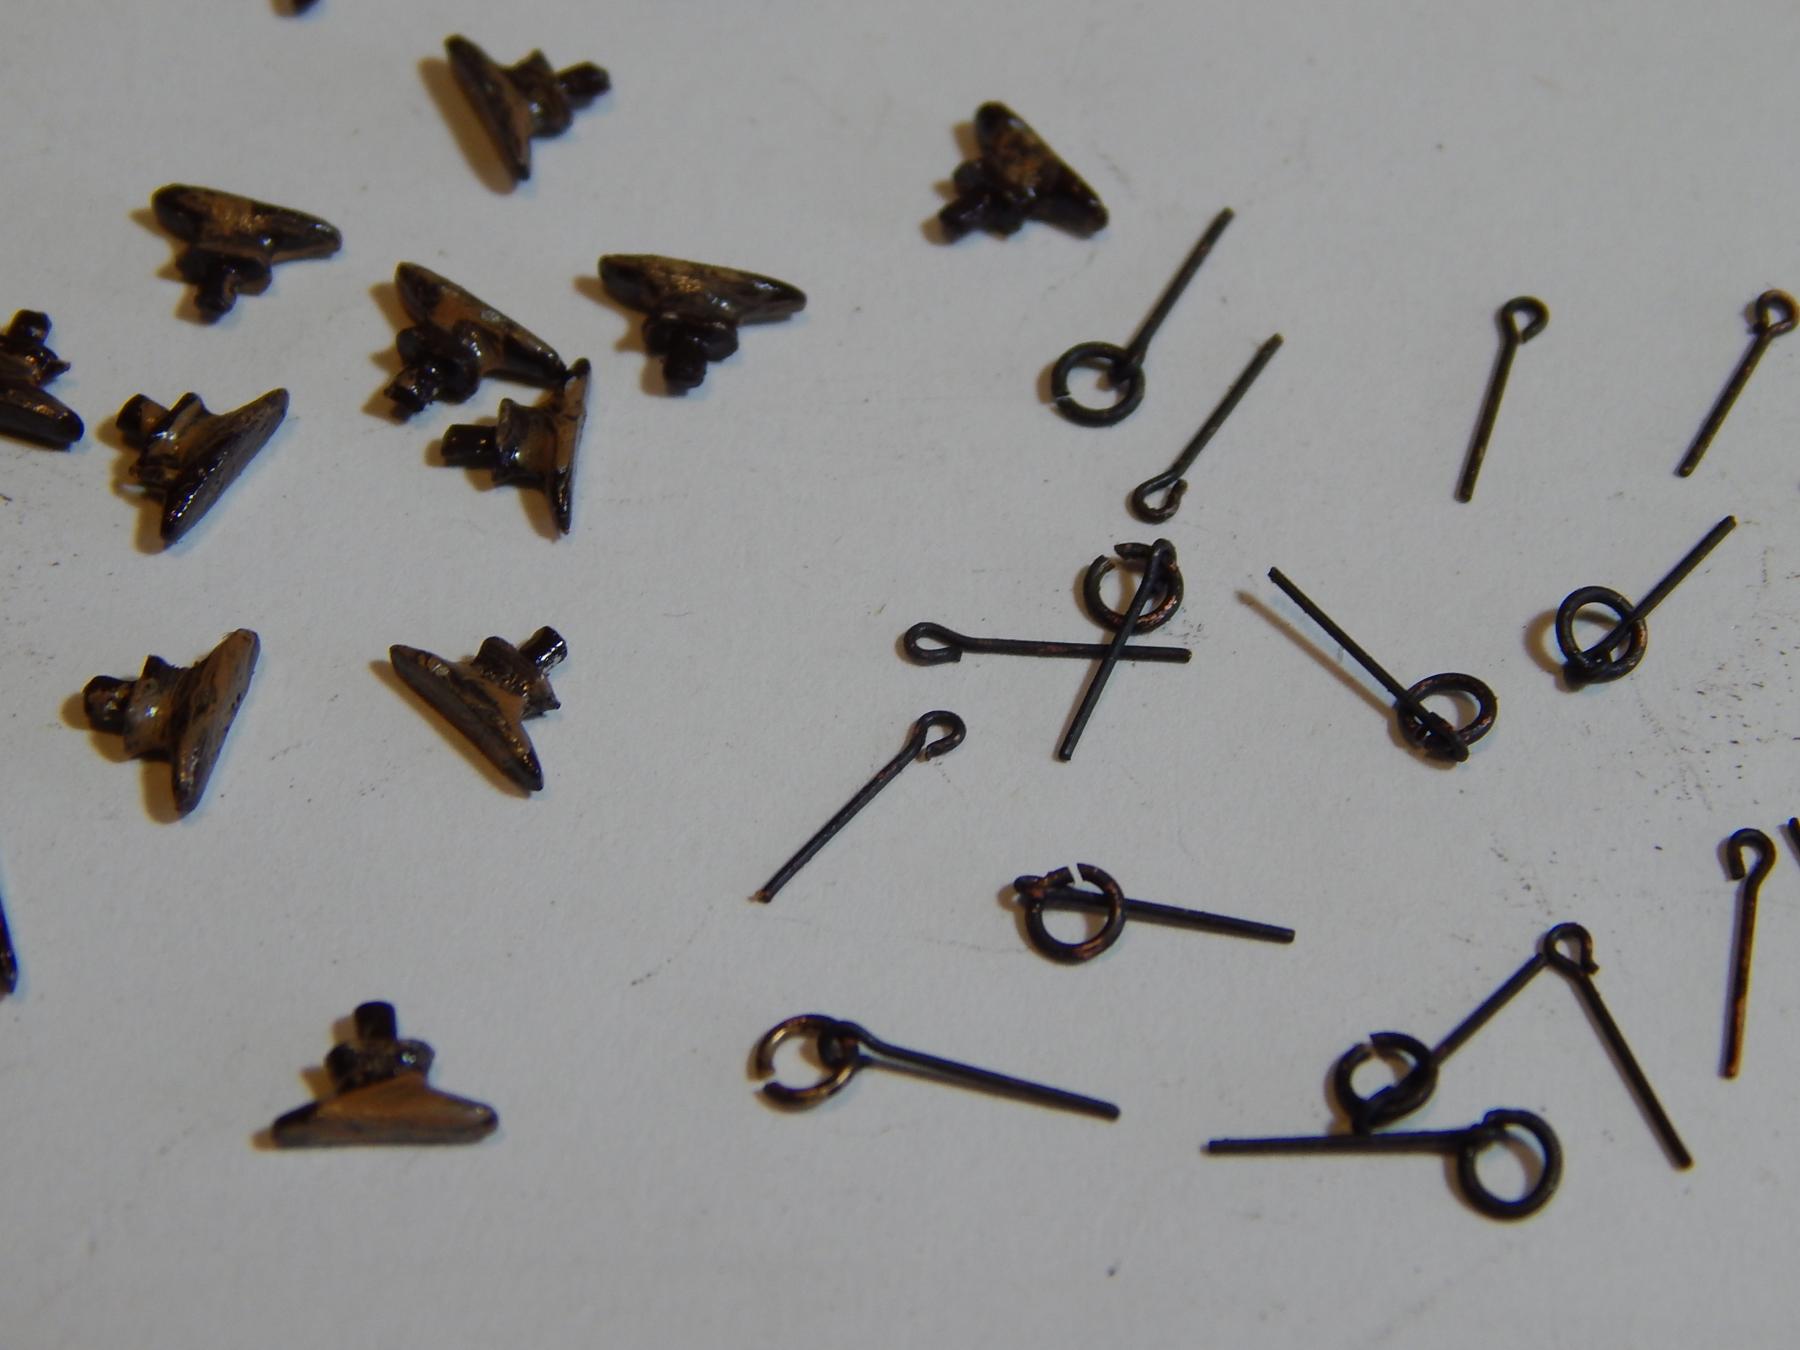
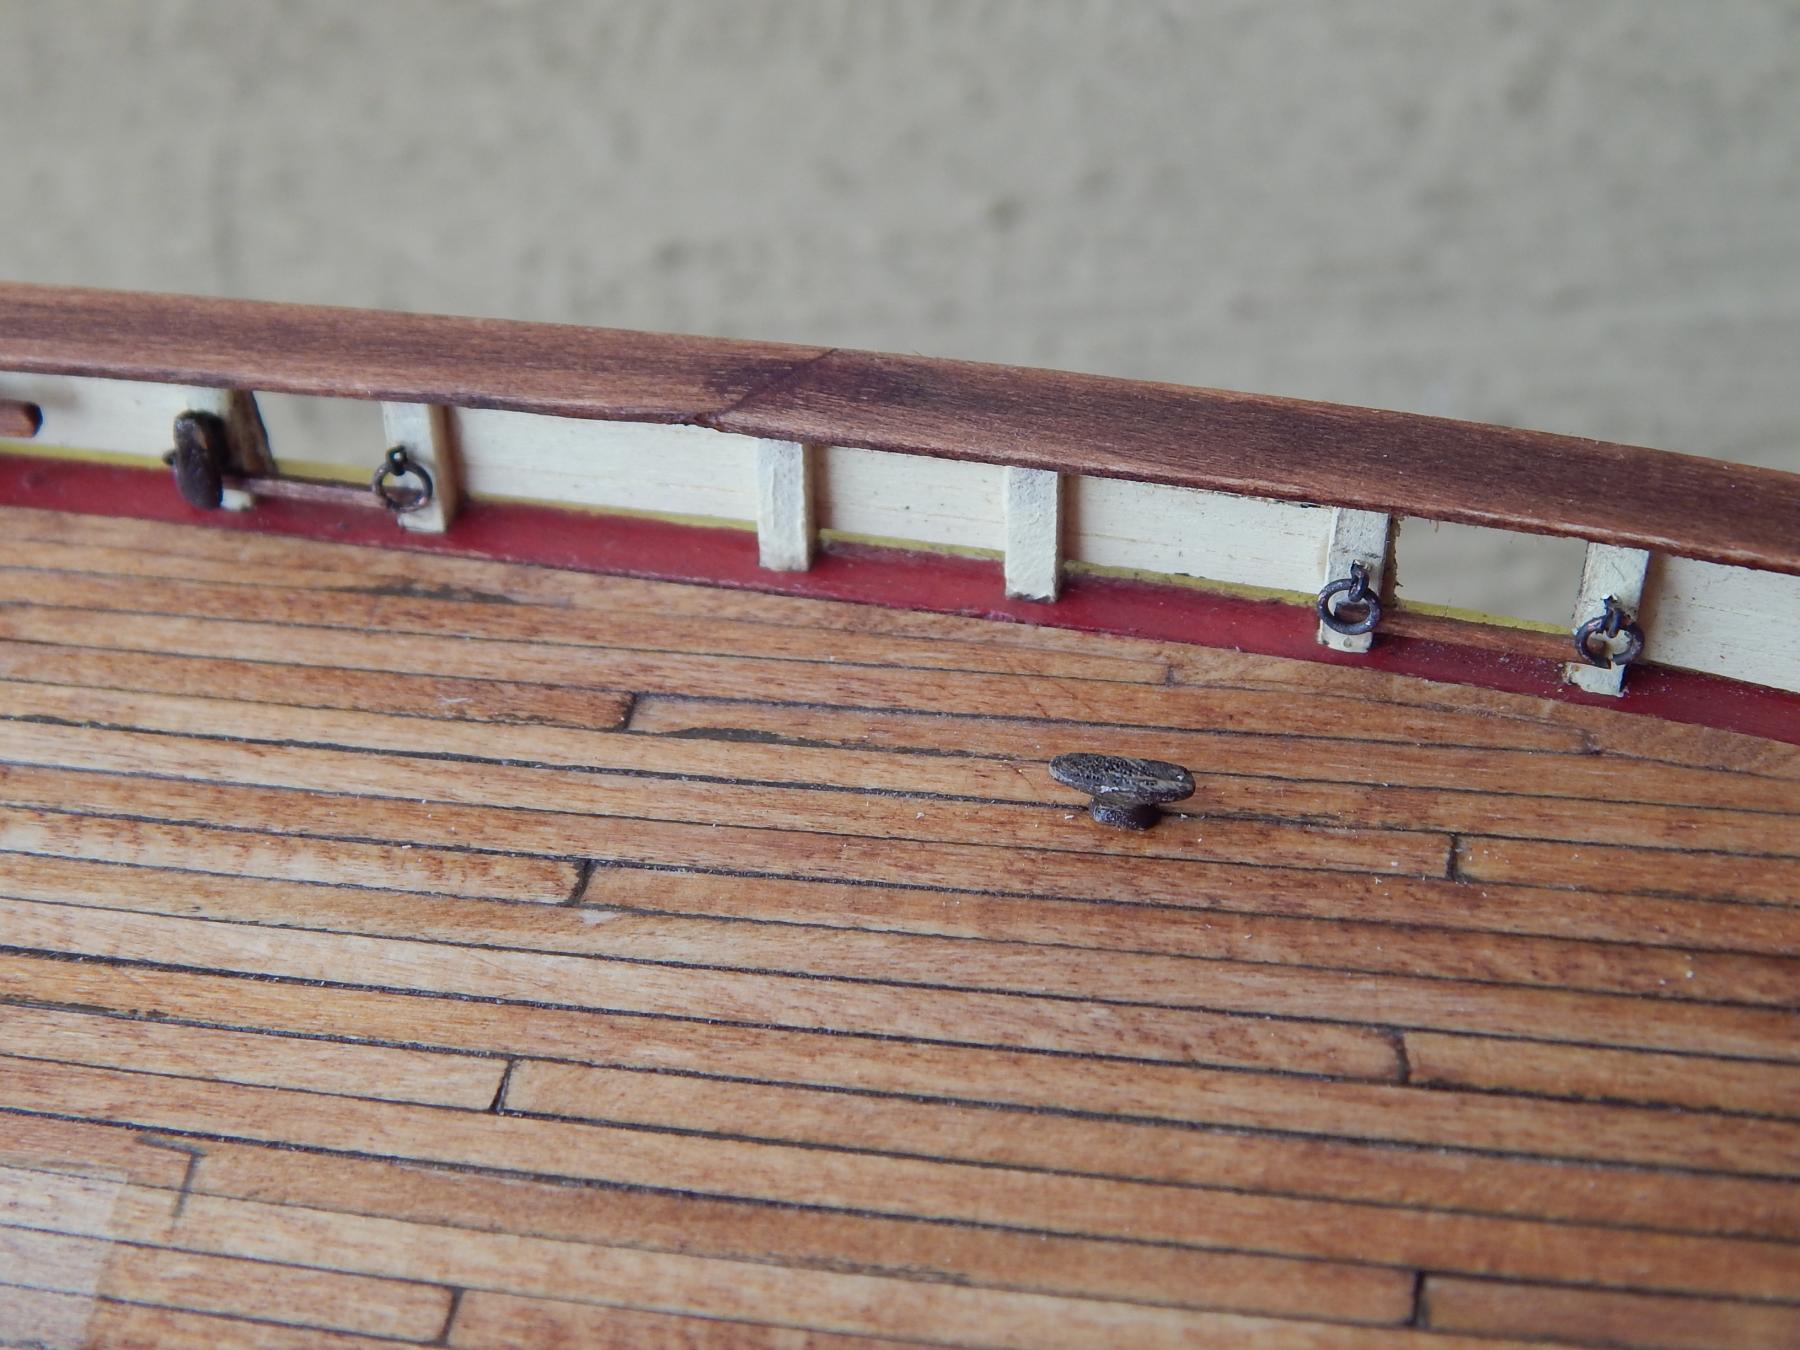
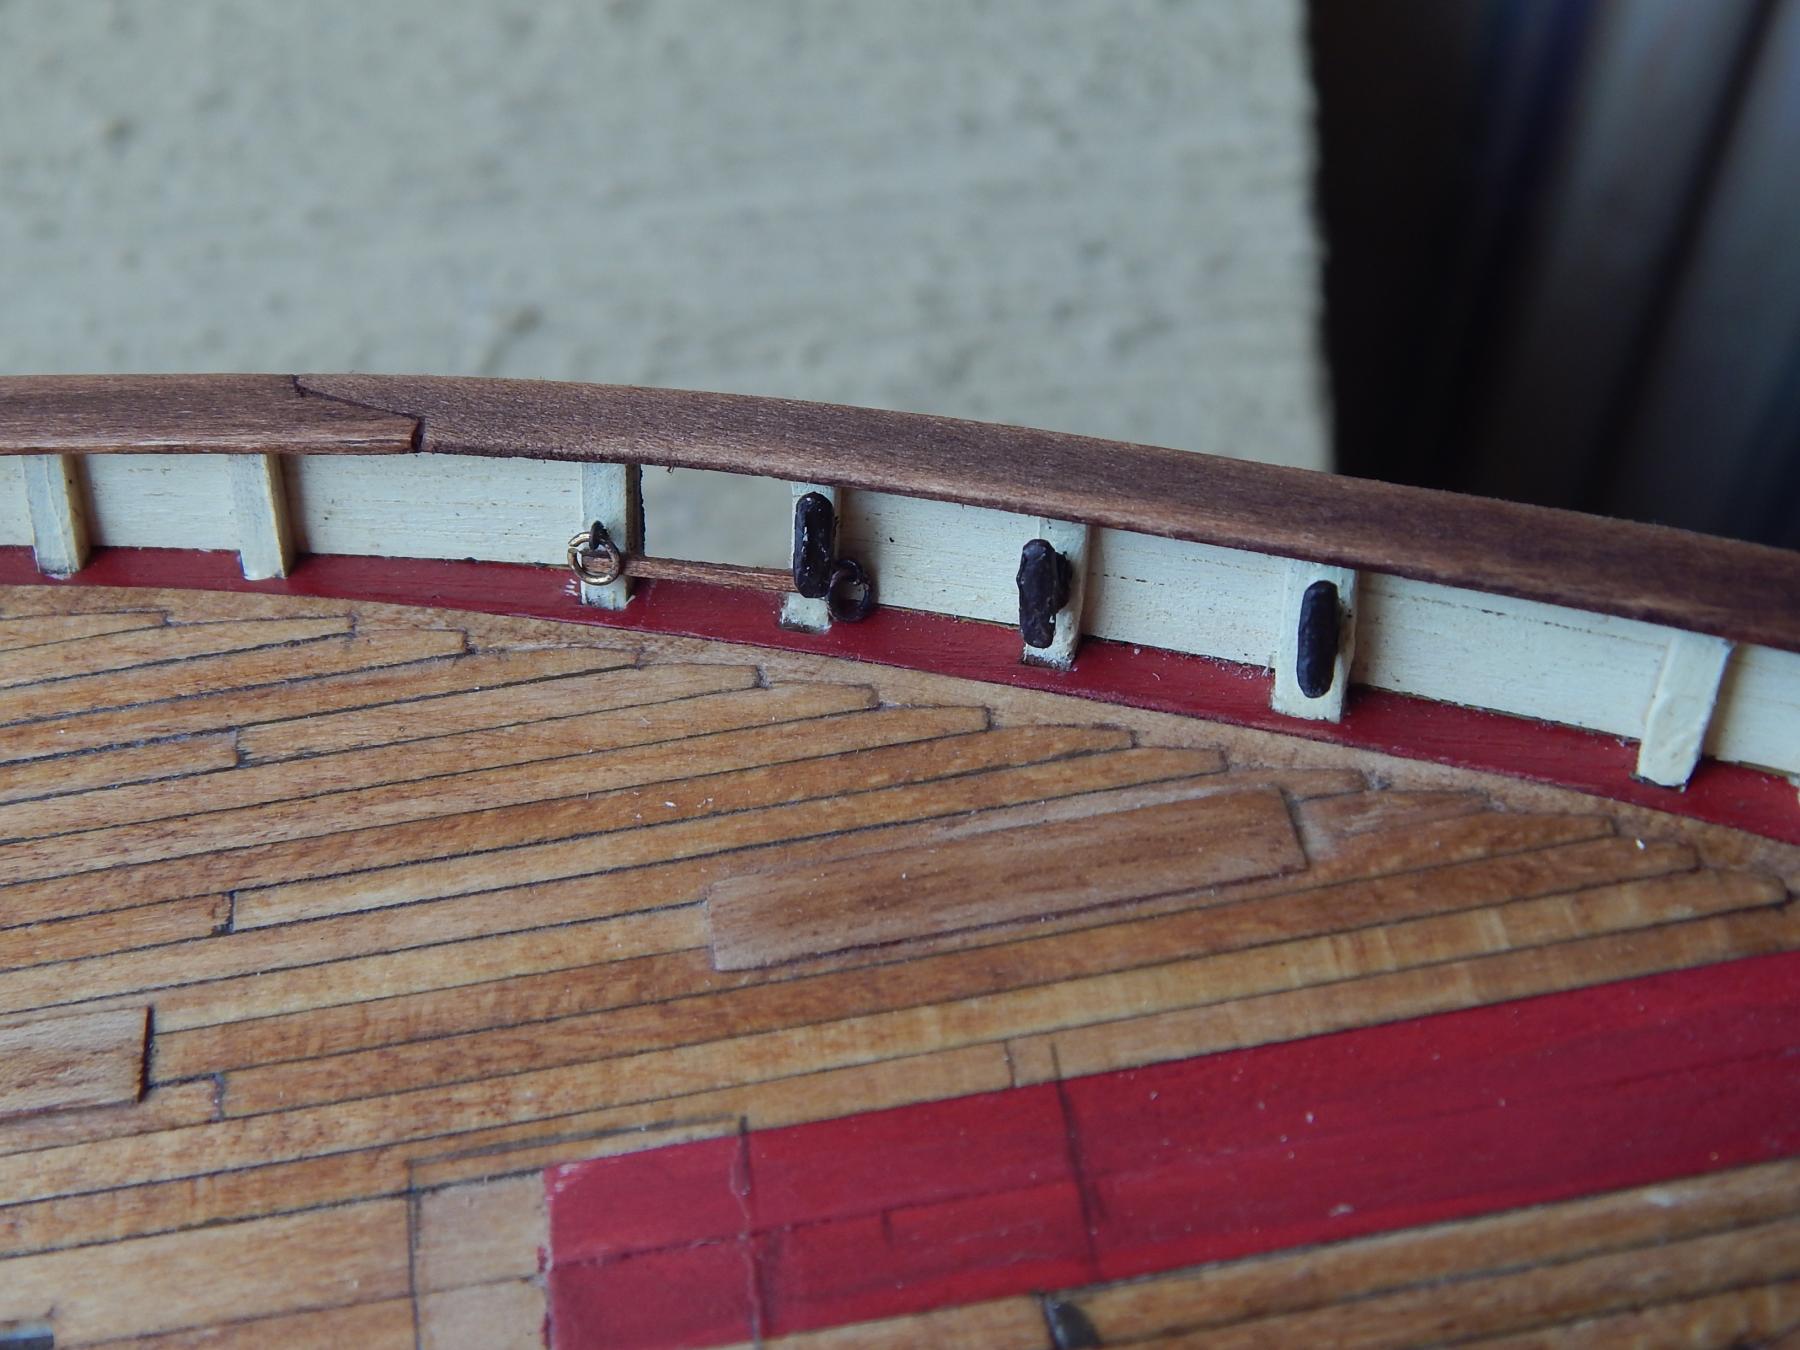
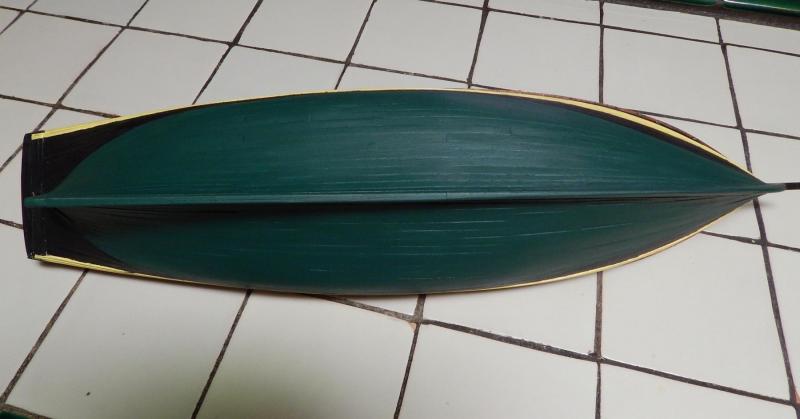
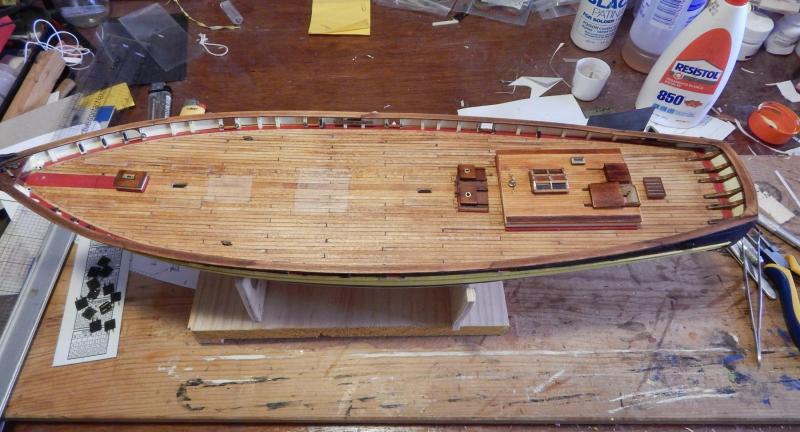
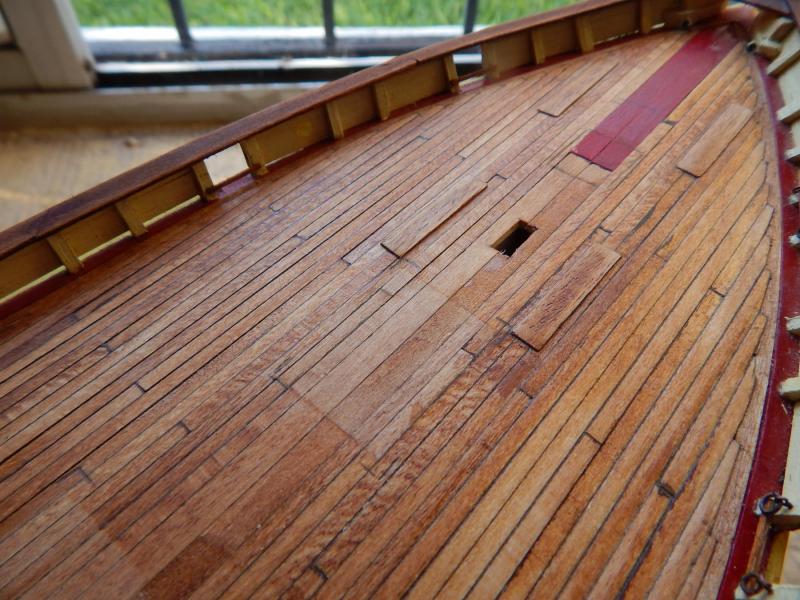
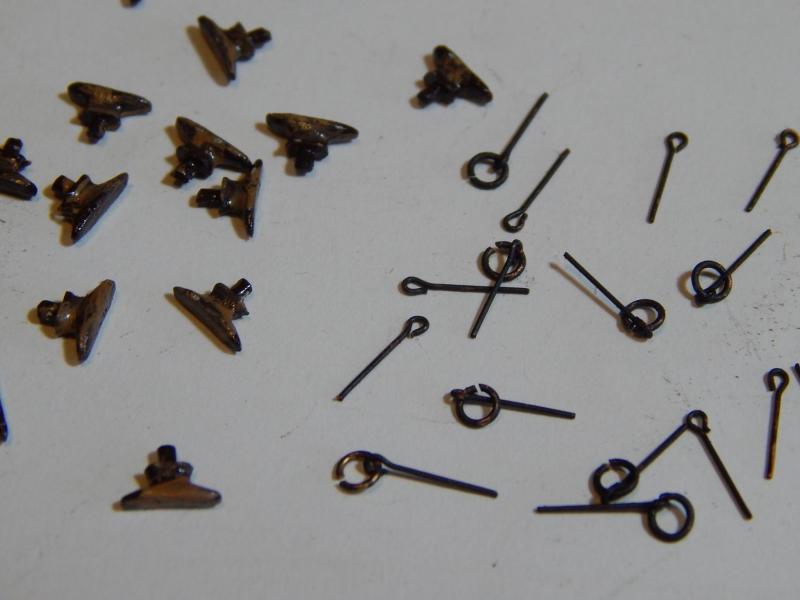
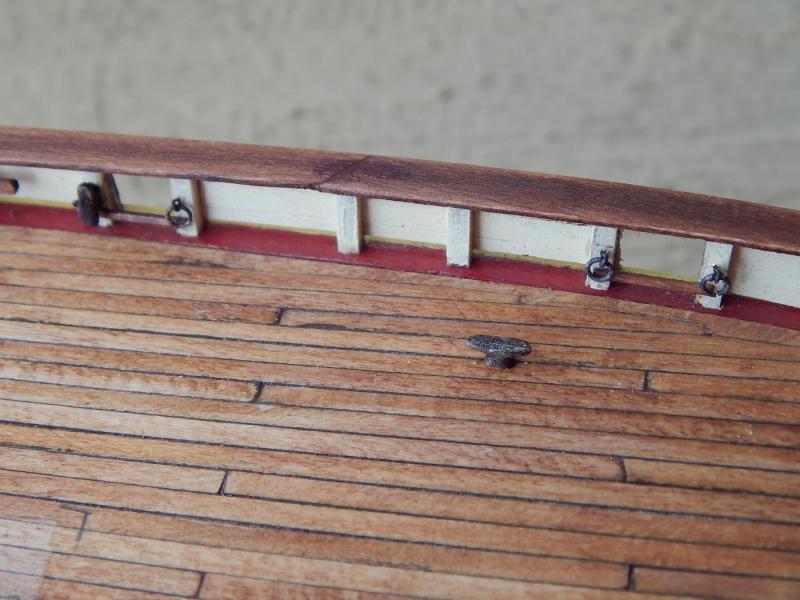
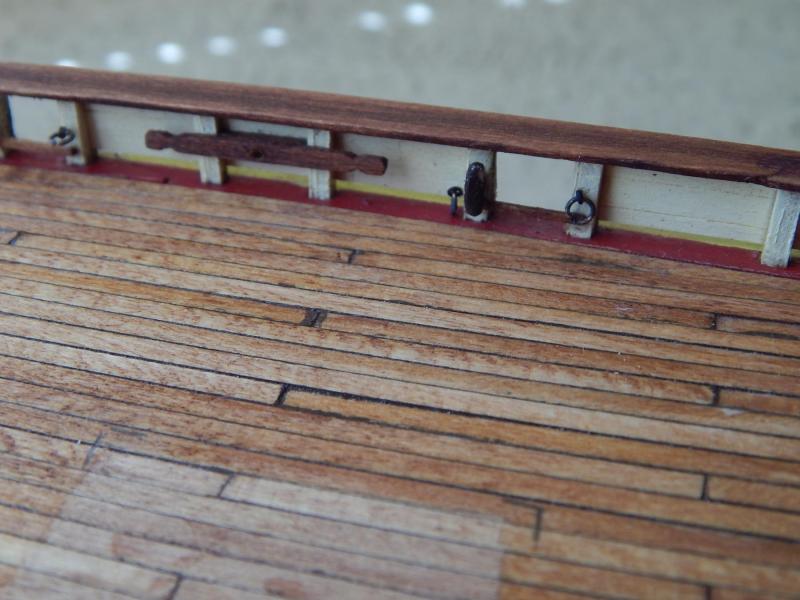
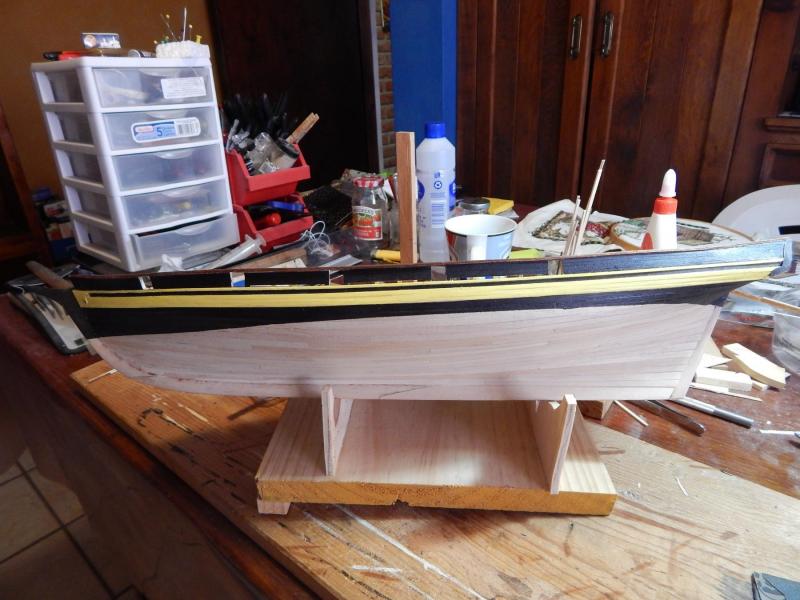
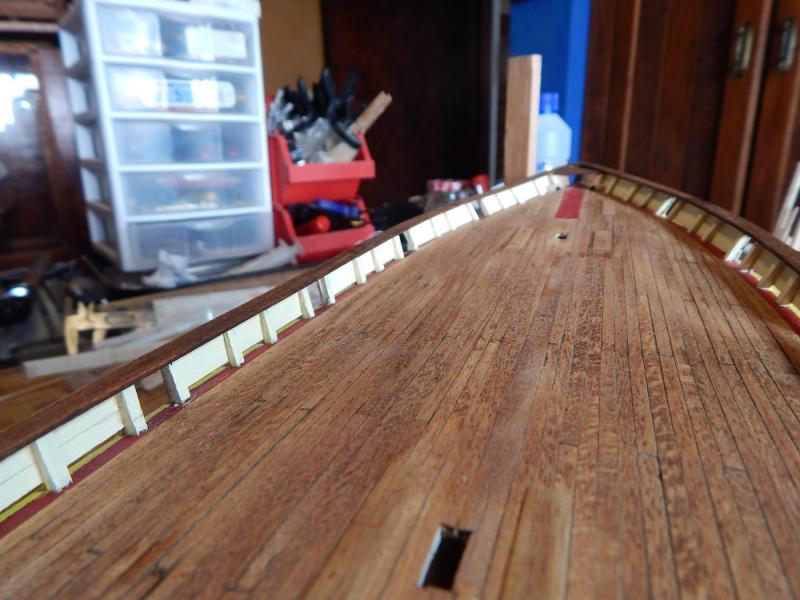
Hola: Before going further I decided to varnish the deck and inside of bulwark with Satin Varnish. In doing so, it is easier to sand between coats of varnish if there are no objects to interfere: After varnishing the deck, proceeded to put some of the eyebolts and cleats, but first I obscured the eyebolts using Black Patina (the one used for stained glass) and painted the cleats dark brown. but then, I realized that cleats were quite large, so I reduced the size of them in a couple of millimeters (left:original size, right: reduced size) Here you can see eyebolts, cleats, chocks for mooring lines and rails to close ports: Saludos, Karl


- 164 replies
-
- 5
-
-
- Model Shipways
- Finished
- (and 1 more)
-
Thanks for watching my posts and for all the likes: Don, marktiedens, Altduck, GuntherMT and Andy. Saludos!!!
-
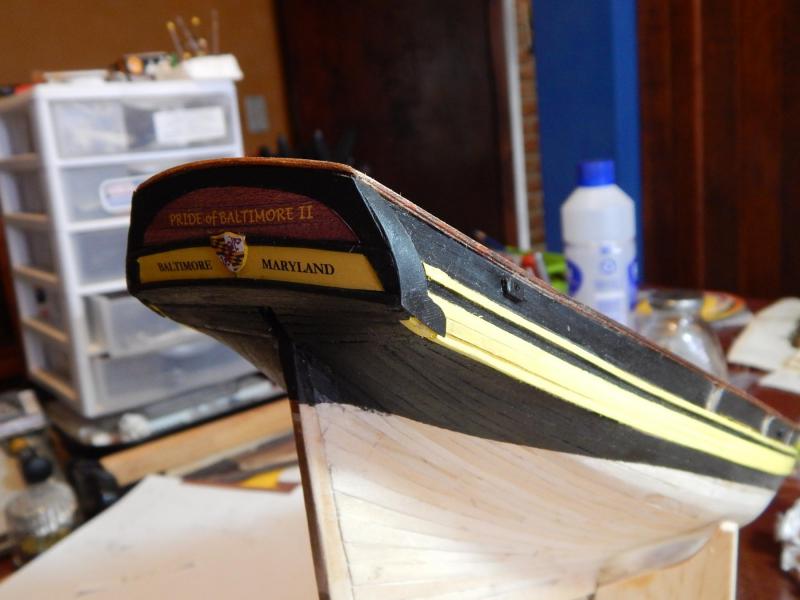
Hola Andy: Well, I really didn´t match the wood color, I take a picture of the planks and write over using the Paint program, then cut the picture exactly the size of all the Transom and glue it over the actual planks. At first I tried to cut only the lettering but was not as good. Saludos
-
Thanks Don: It is always good to have several options for the same problem Saludos, Karl
-
Hola Andy: To make the lettering I used the Paint program that comes with the Microsoft Office, there you can write in several types of letters and sizes, the steps are the following: 1) Select a kind of background color: for the lateral signs I used black, for the lower part of the transom, yellow and for the upper part of the transom I cheat a little and copy a picture of the planks that are there 2) Select the type of letter and size, for example for the latter the size must be a little smaller than a plank wide 3) Copy the Paint result and paste it on a MS Word page. In this manner you can get the appropriate size you want or making copies in a very easy way. 4) Print using an ink jet Matte Photo quality paper 5) Cut and glue them with white glue Hope this information can help you, Saludos!!

- 164 replies
-
- 3
-
-
- Model Shipways
- Finished
- (and 1 more)
-
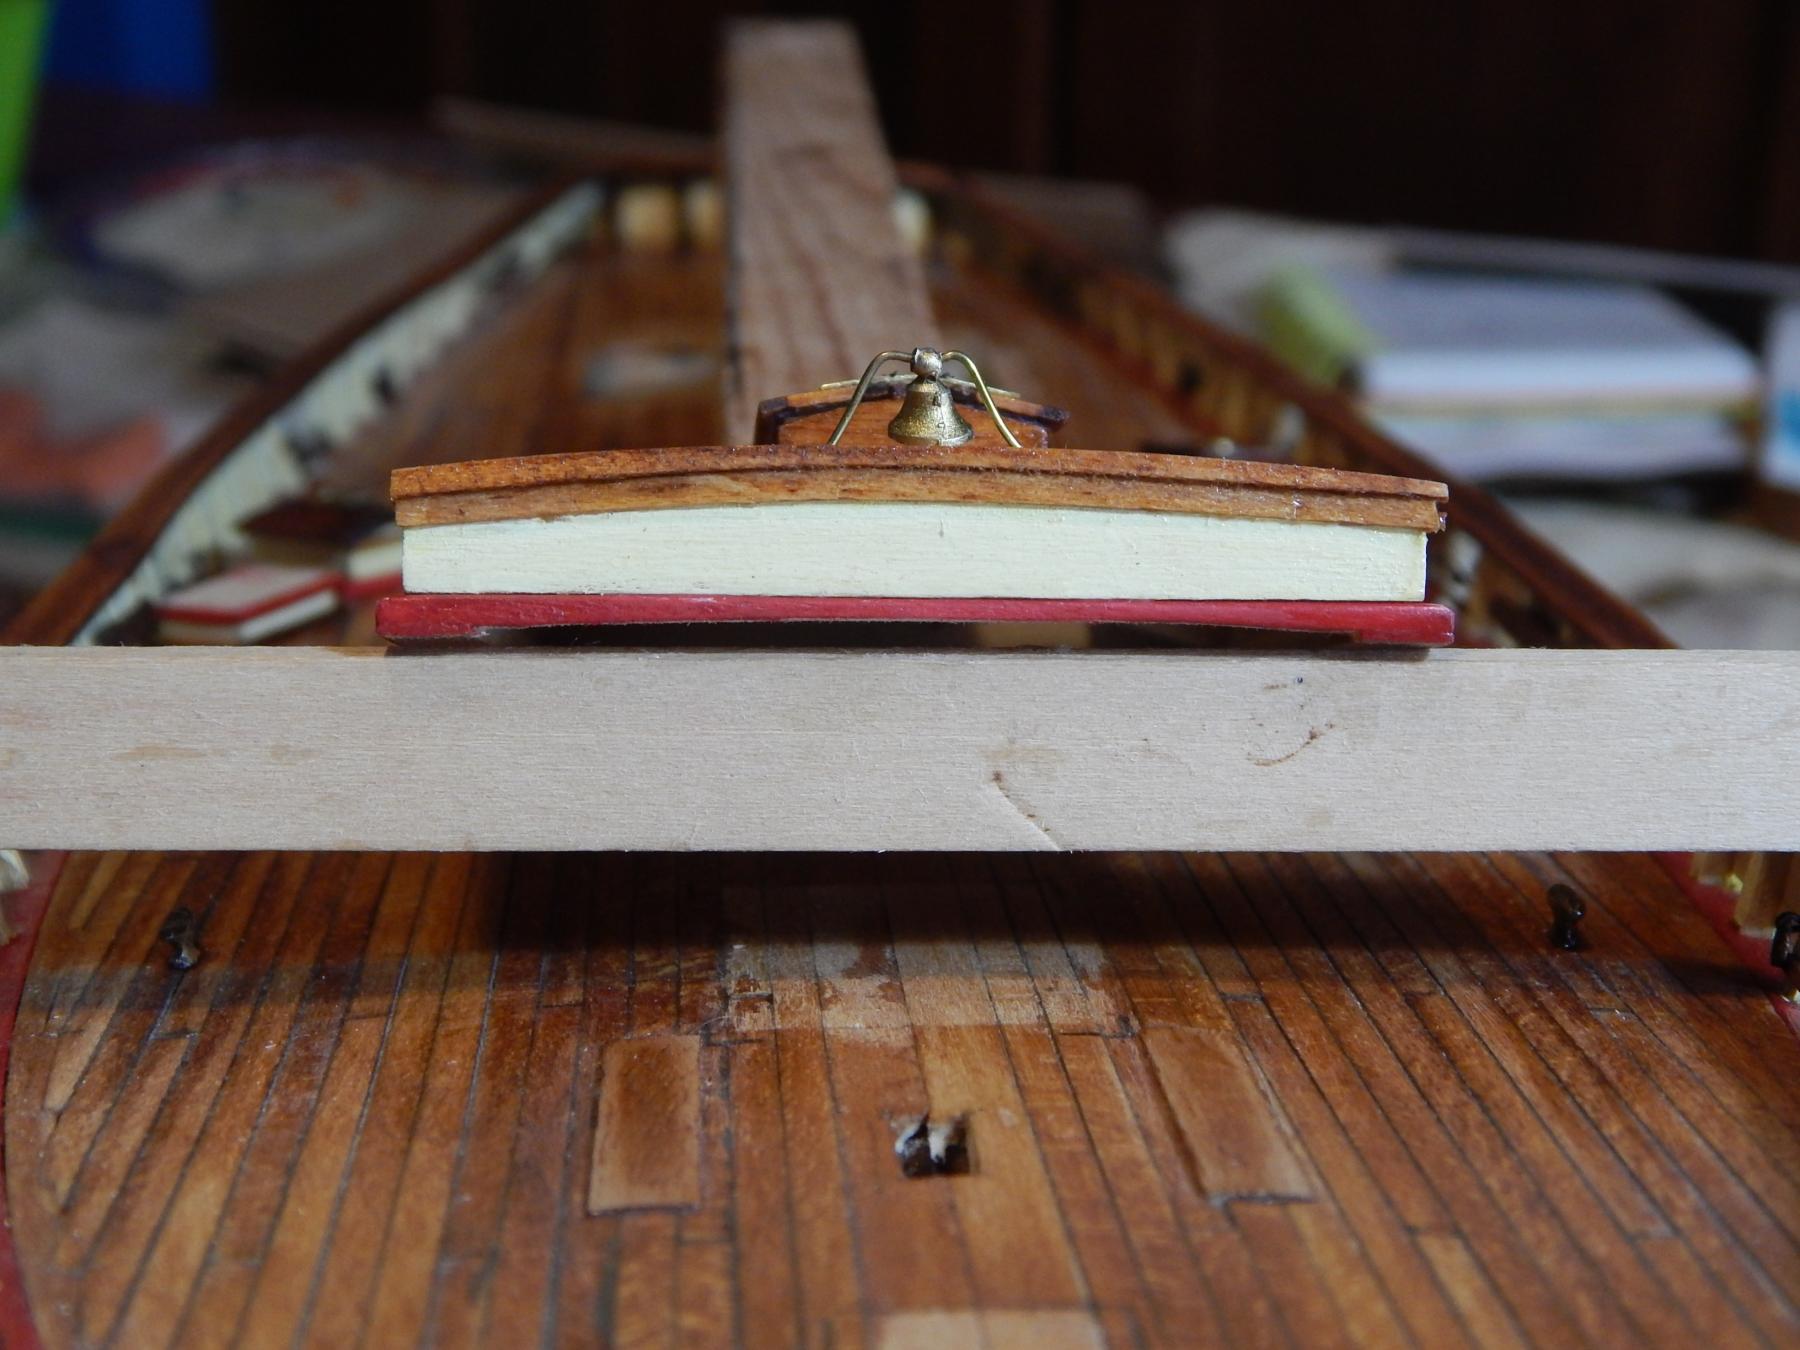
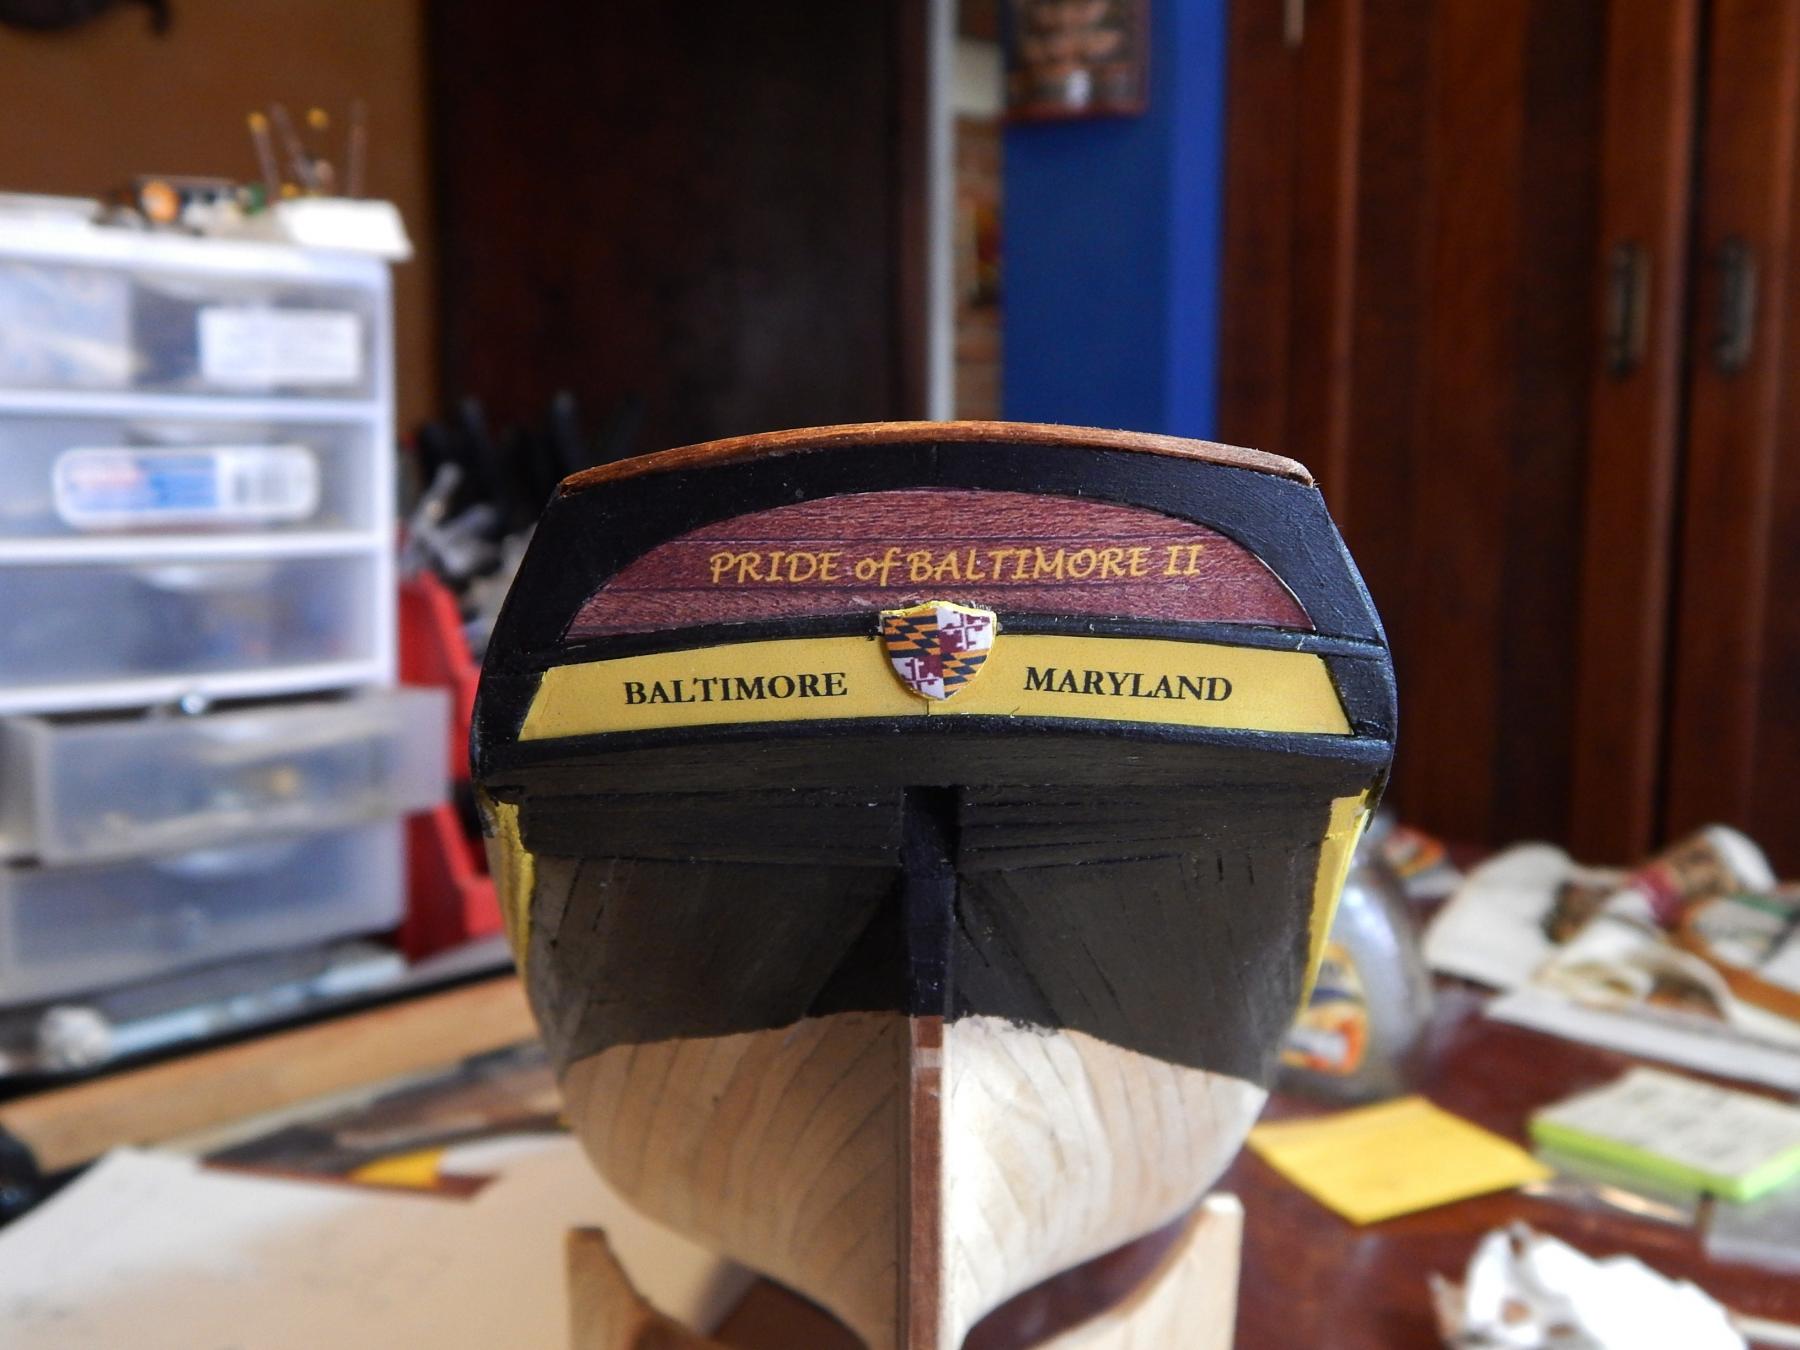
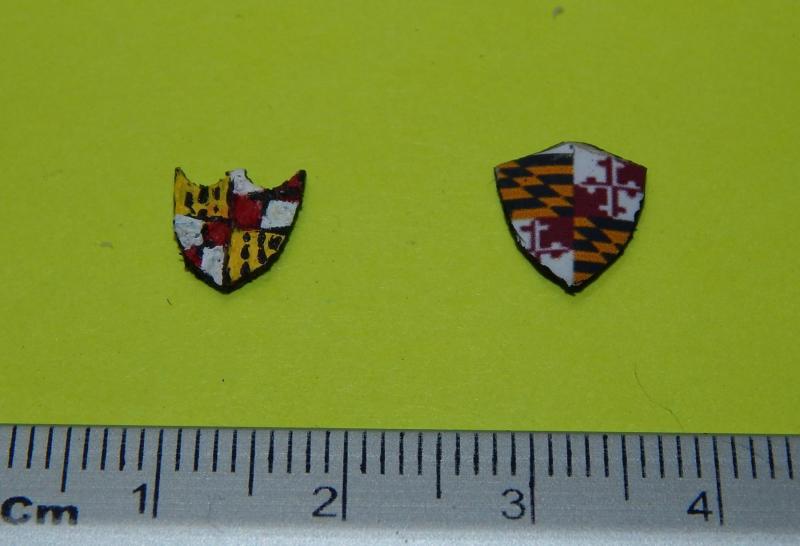
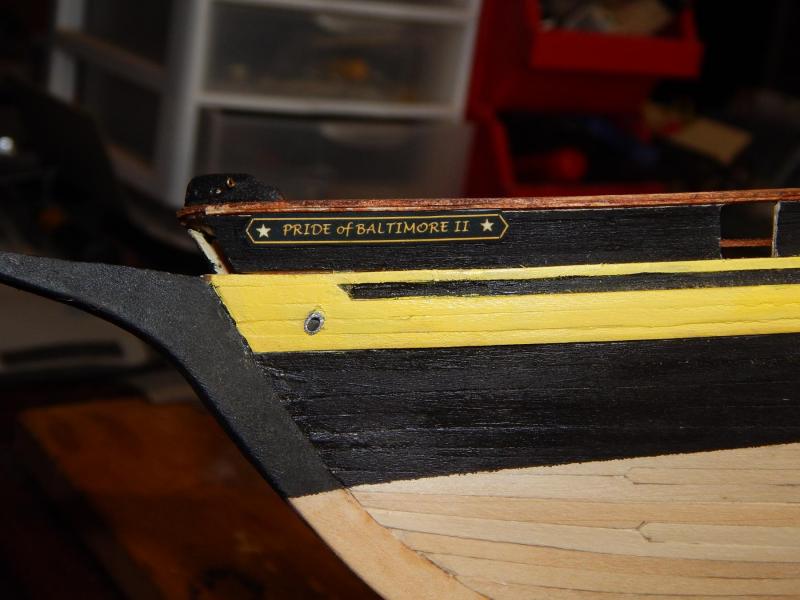
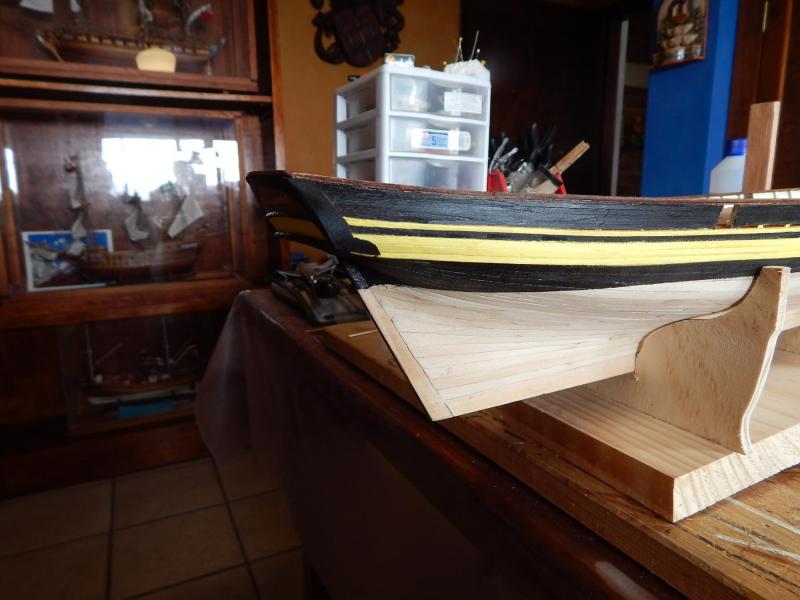
Hola: Continuing with some details: Modeling, painting and installing the Fairlead: Later I made some tests to paint the Baltimore´s Emblem that are laid on the transom, but it's really difficult to work in detail on this scale. Therefore I got the idea to do it on the computer: copying the shield and reducing it to the appropriate scale. And after several tries I obtained an acceptable result. Here you can see the hand made try and the printed one attached on the wood form Because Guaymas is a little city, it is quite impossible to obtain the appropriate dry transfer letters to make the ship´s names, so, following the same procedure I used my computer to do them: Saludos

- 164 replies
-
- 9
-
-
- Model Shipways
- Finished
- (and 1 more)
-
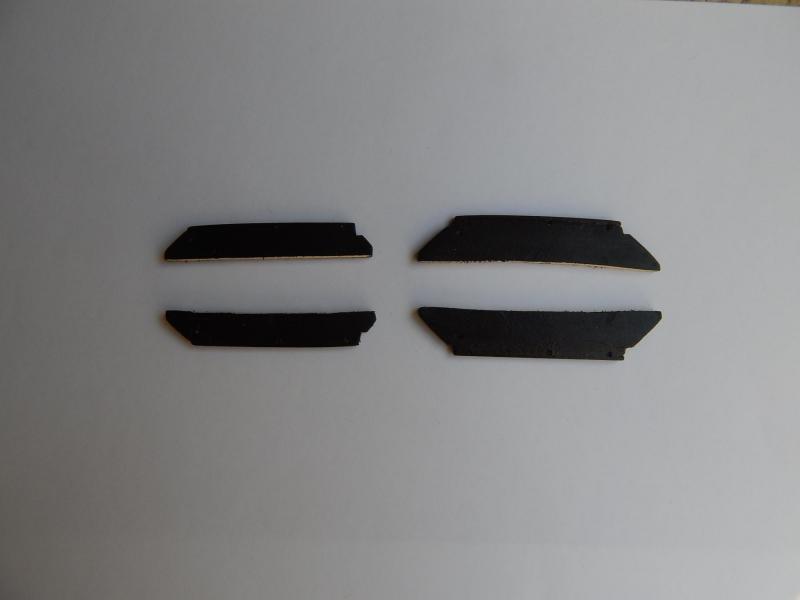
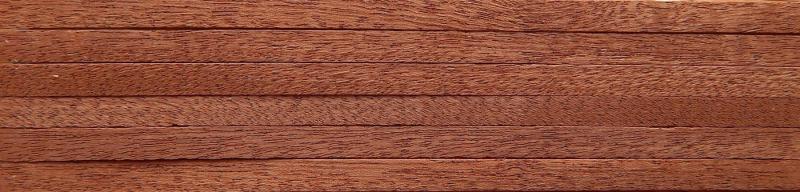
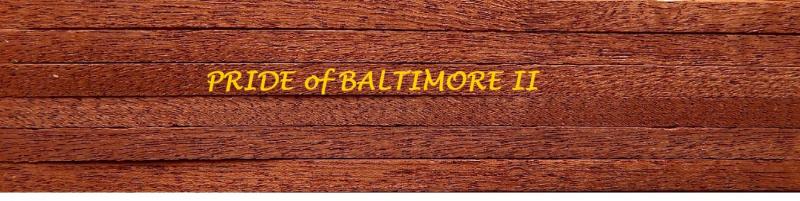
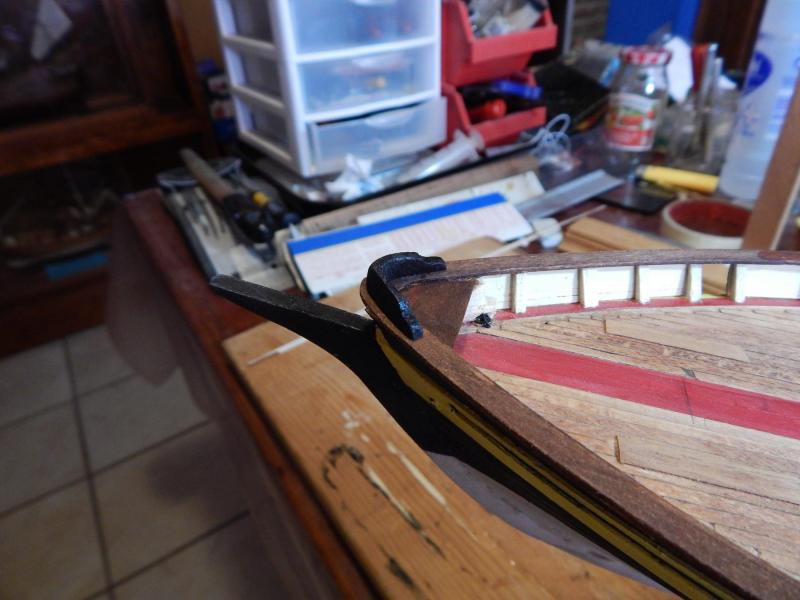
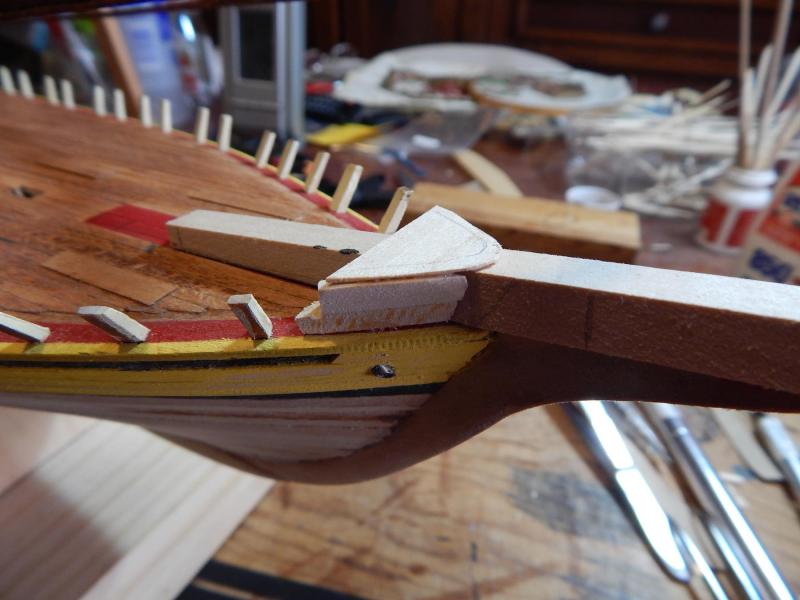
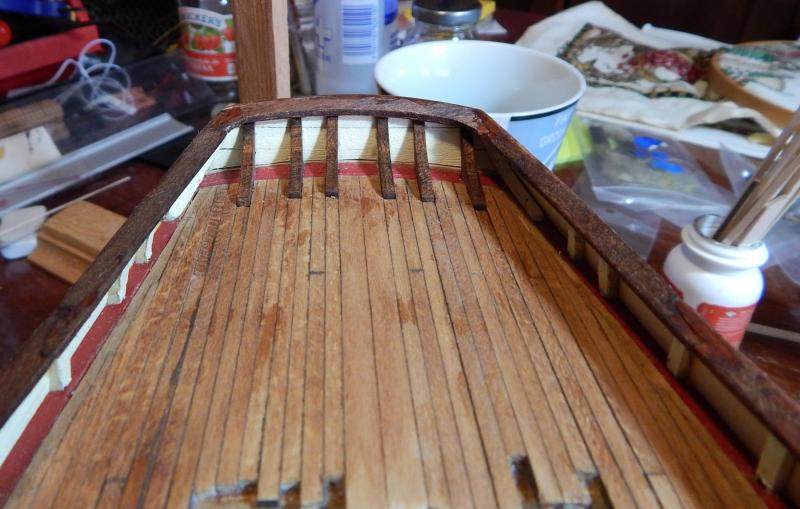
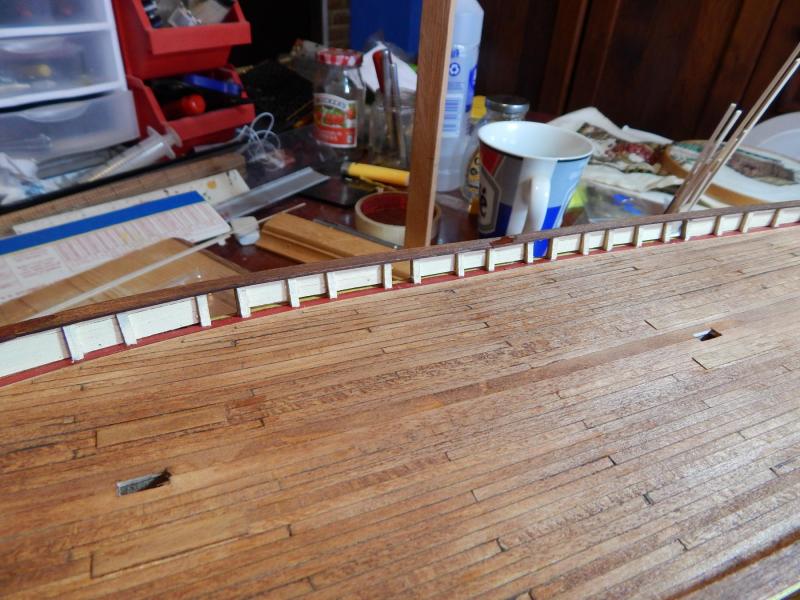
Hola: Before gluing the main rail I made the cleat platform and see how it fits. Here is important to mention that the main rail at the stern must have enough space to accommodate the transom pieces including the fashion pieces. Next step was preparing the bulwark planks. For this the five planks needed are clamped together and painted all at once painting them, one side black and the other cream white. Doing this facilitates gluing them to the stanchions: Here you can see the bulwark done: Finally I do the the transom including the fashion pieces. For these I used 1/64" strips instead the 1/32 that mention the instructions because I think they fit better: Saludos, Karl

- 164 replies
-
- 6
-
-
- Model Shipways
- Finished
- (and 1 more)
-
Thanks Don: I saw your log of the Trabakul and it is getting very nice. Also I saw the picture of the snow you are getting there, today we reach 95 F here at Guaymas!!! Saludos, Karl
-
Hola Bill: Thanks for your compliments, and seeing your log I´m sure your POB will be much better than the 1:64 kit. As you, I am not very happy with the materials and would prefer more exotic and nicer woods, anyway I would proceed and see what happen. By the way, I actually begin this model the last days of July but decided to show it in the Forum almost 2 months later. Saludos, Karl
- 164 replies
-
- 1
-
-
- Model Shipways
- Finished
- (and 1 more)