DONATION DRIVE - SUPPORT MSW - DO YOUR PART TO KEEP THIS GREAT FORUM GOING!
×

Karleop
-
Posts
500 -
Joined
-
Last visited
Content Type
Profiles
Forums
Gallery
Events
Everything posted by Karleop
-
 Dont worry about the mess while everything may go well, there will be time to show your model in a perfect enviroment. As usual your work is outstanding! Felicidades!!
 -
Seems to me a good idea, also I would put "restoration" as a tag, Saludos, Karl
-
Hi Danny, you made a terrific job with this model, its hard to believe the way you change the "original" to this new Victory. Really is a VICTORY for you!! Also I am trying to restore and finish a model Vasa gived to me by a friend who could not build it. Because these reconstructions have their special challenges probably could be a good idea to create a special category in the forum dealing with this cases. Saludos!!
-
Thanks, I'll do the same. Although I must say that this picture intrigued me and I thought you'd know what it was. Saludos
-
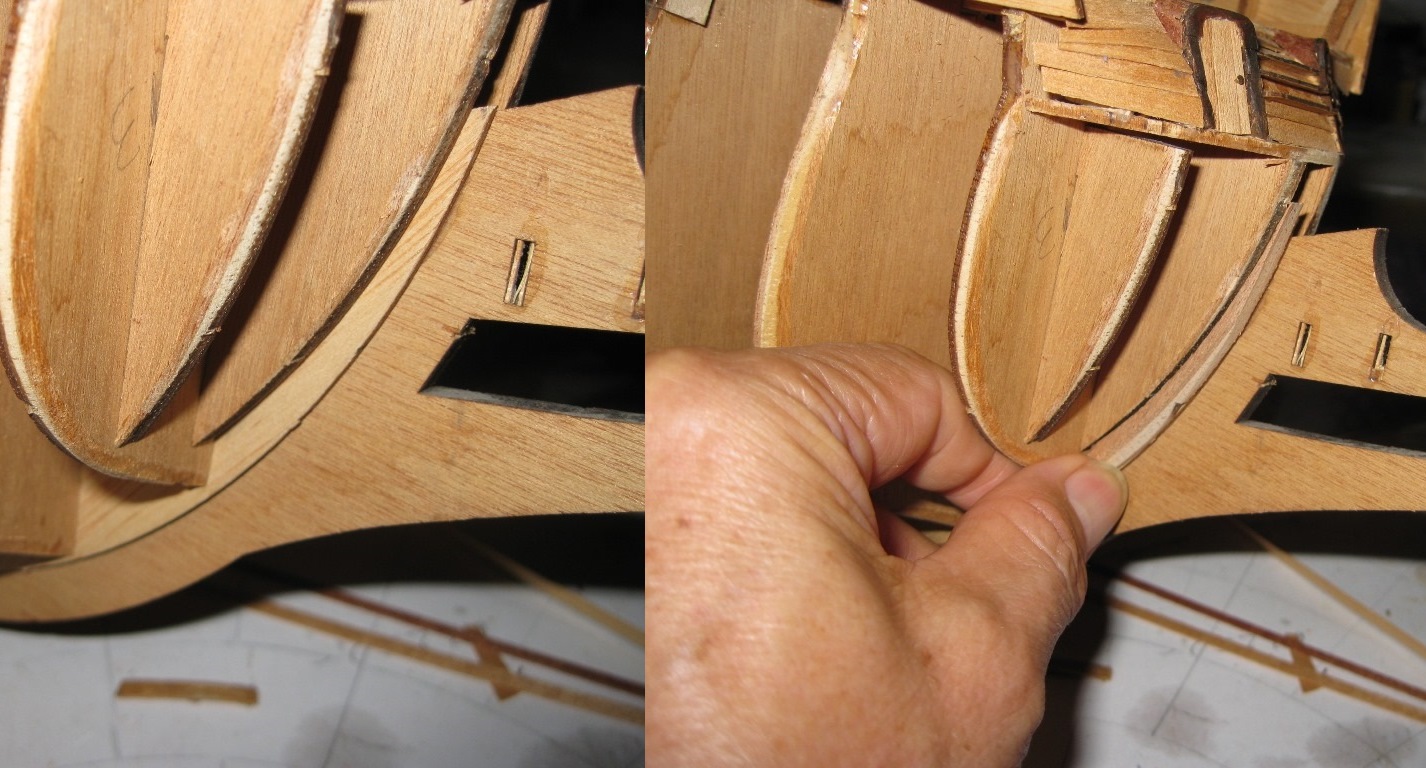
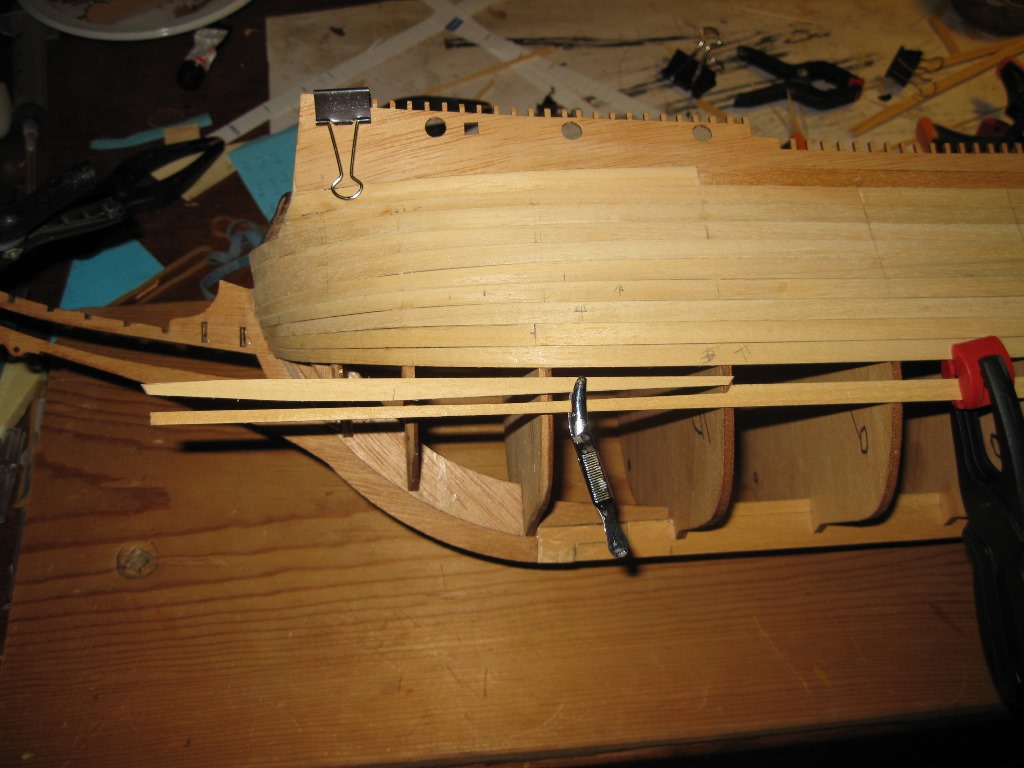
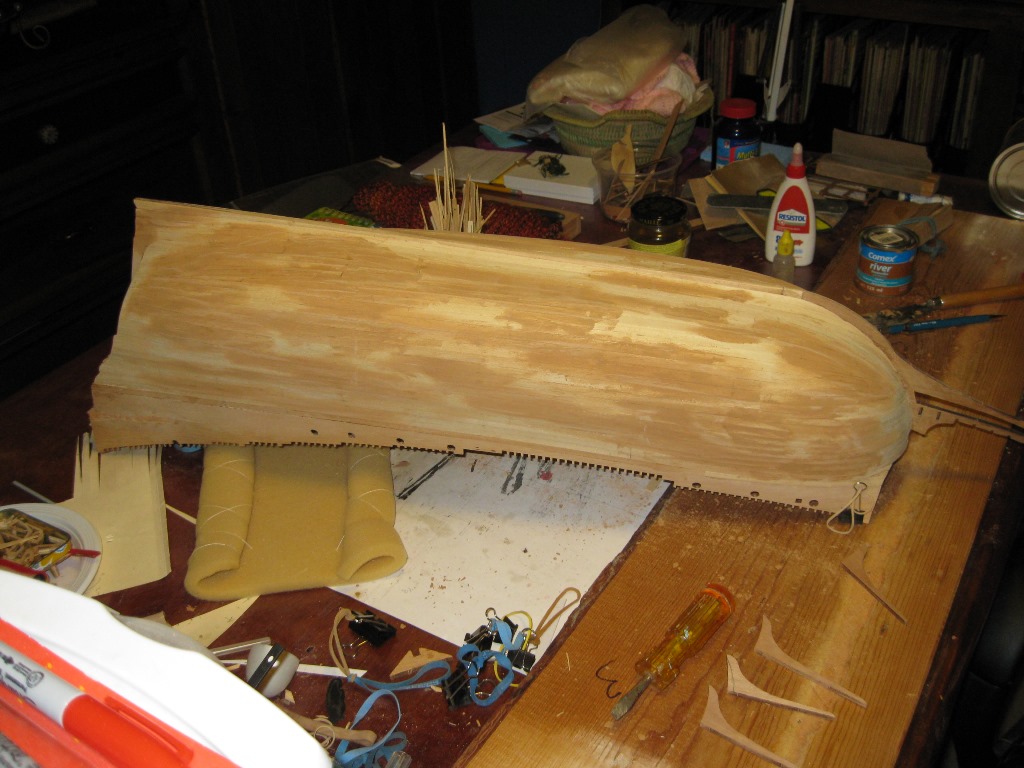
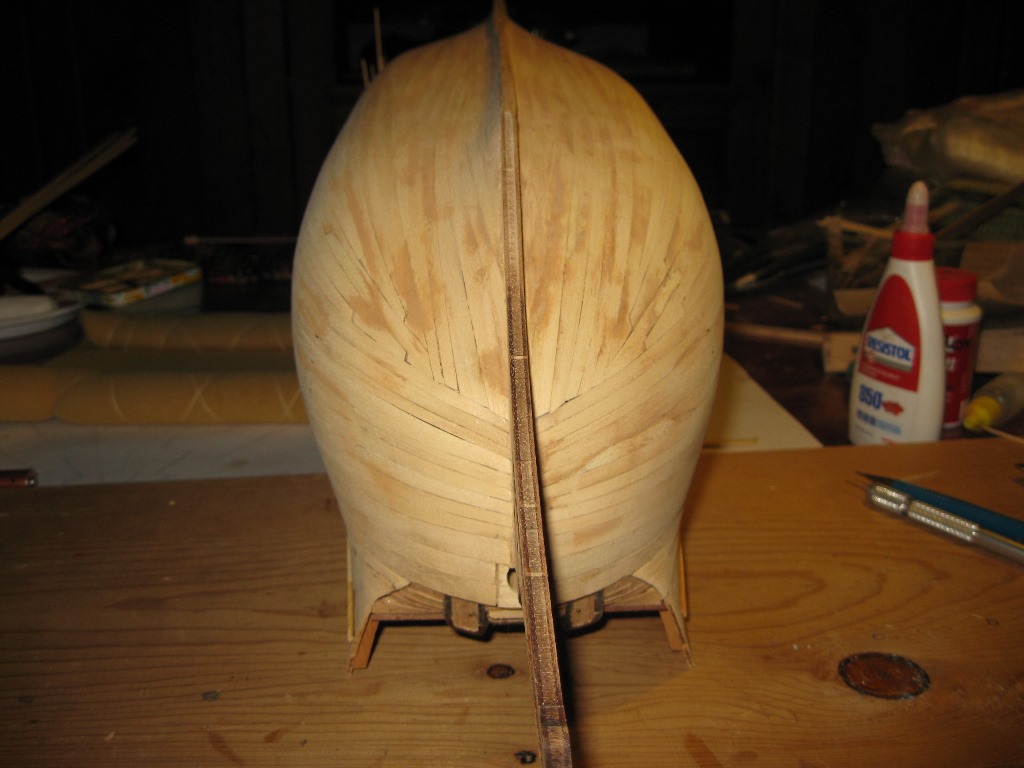
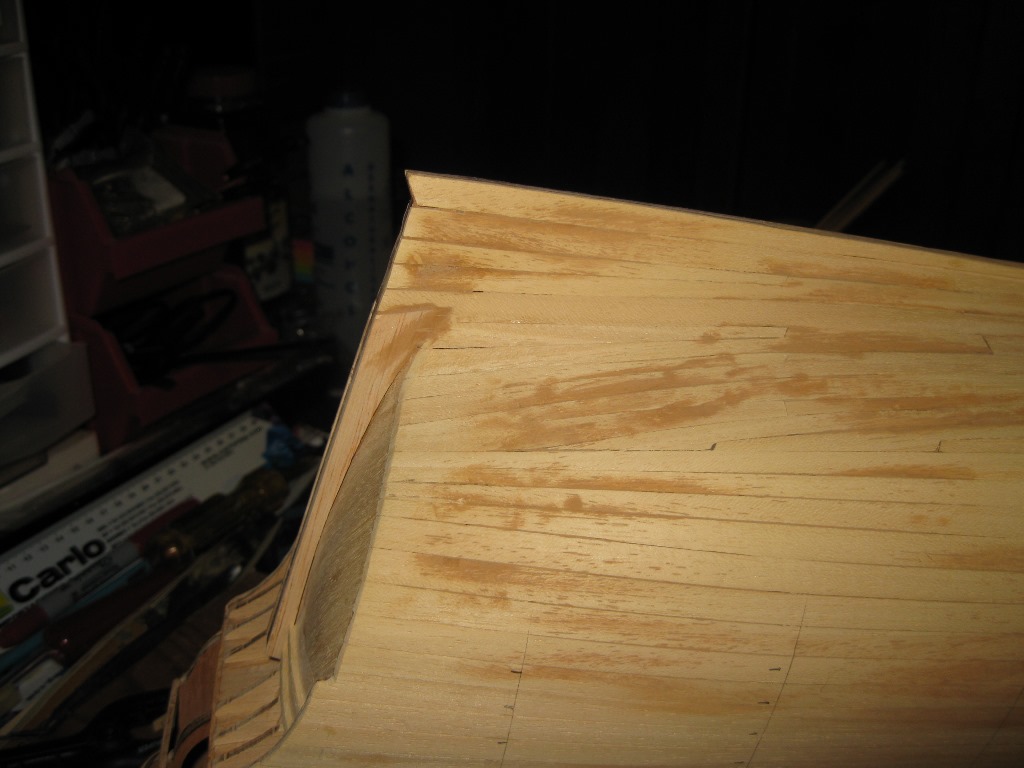
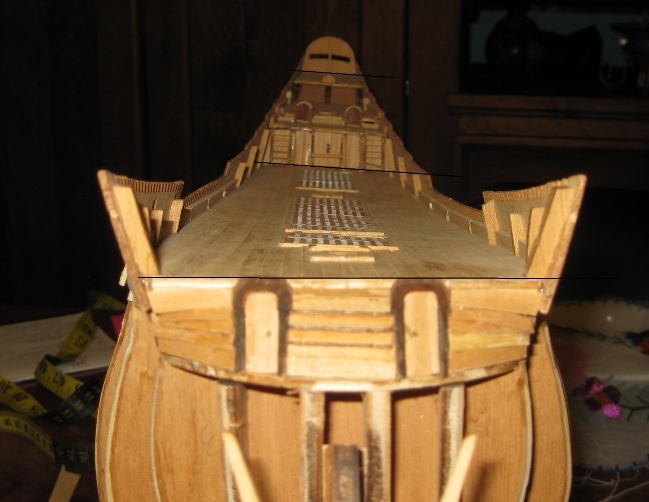
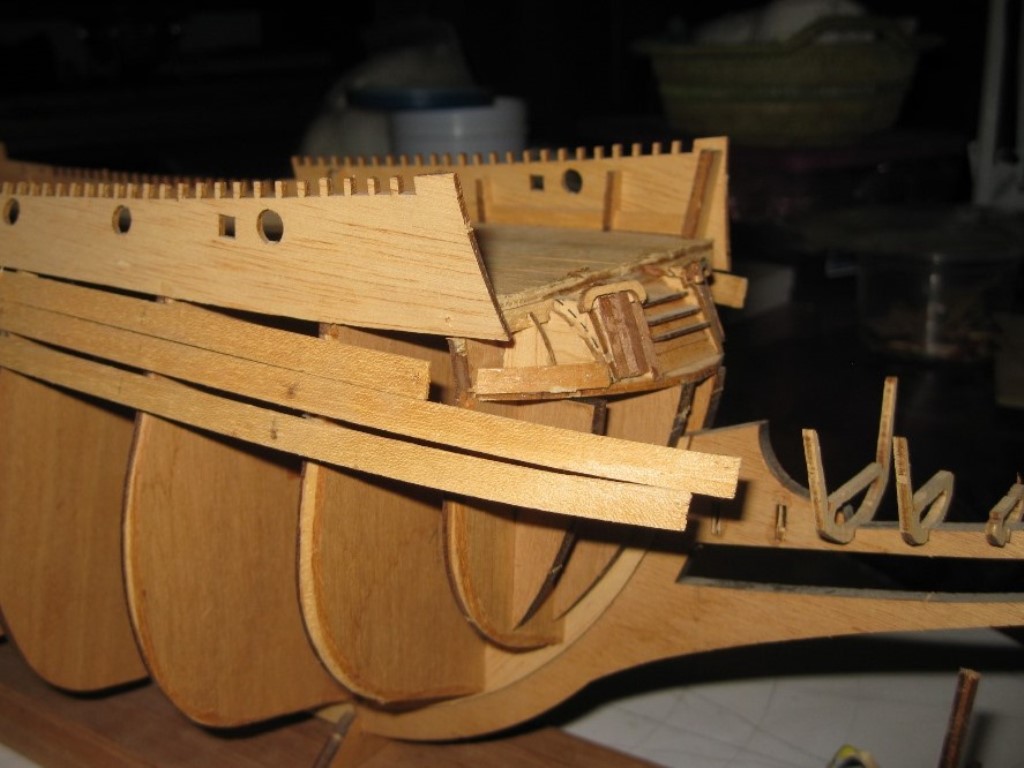
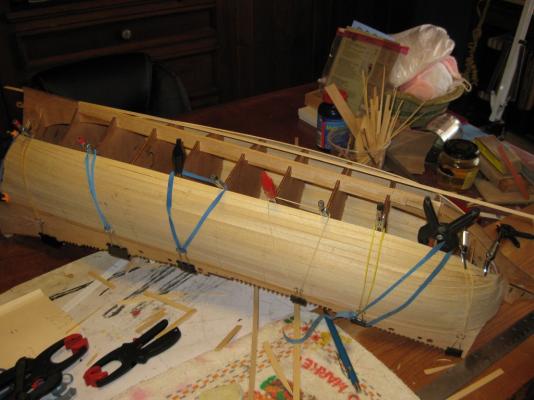
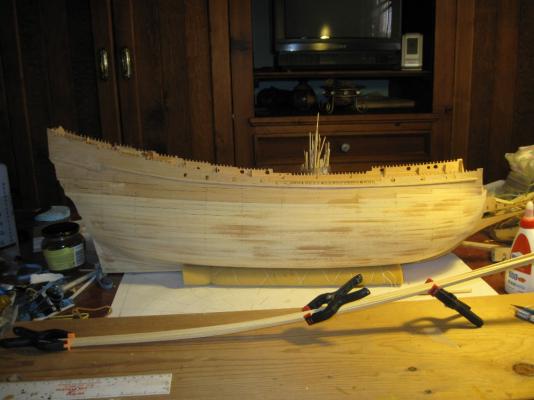
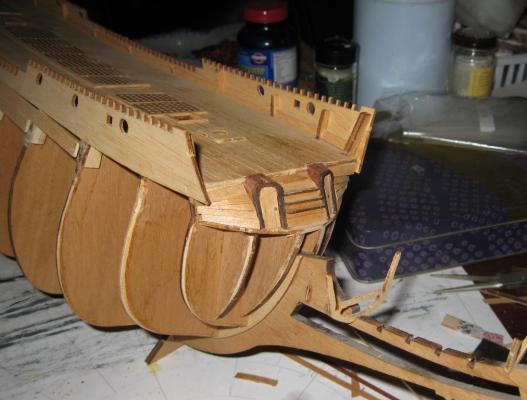
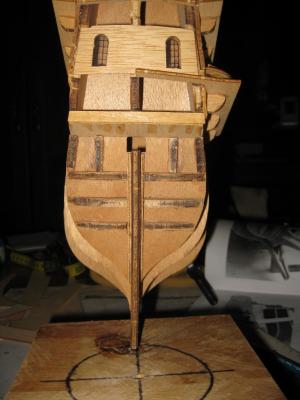
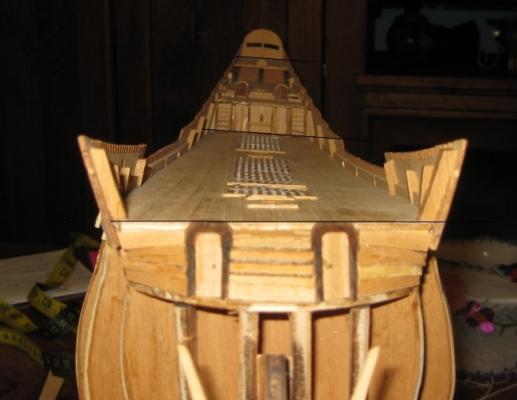
Hi everybody. After removing almost all the parts that were misplaced or wrong I begun with the hull plancking. For that it was necessary to make some adjustments in the bow adding a little piece in order to fit the plancks. The next step was to correct and rebuilt the stern. After making the stern and the bow adjustments I proceed with the hull plancking.There were few problems placing the first plancks, but below the water line it was a little tricky because the hull made a sharp curve and the plancks at the stern, and mainly in the bow area, must be cutted and bevelled.


-
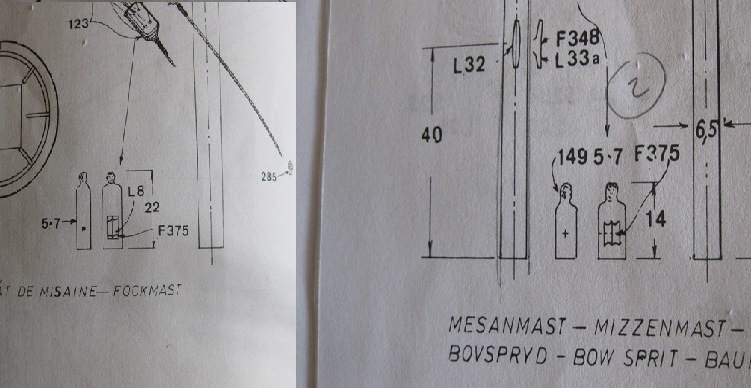
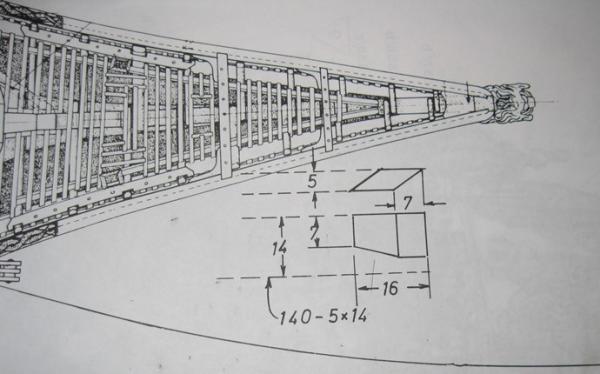
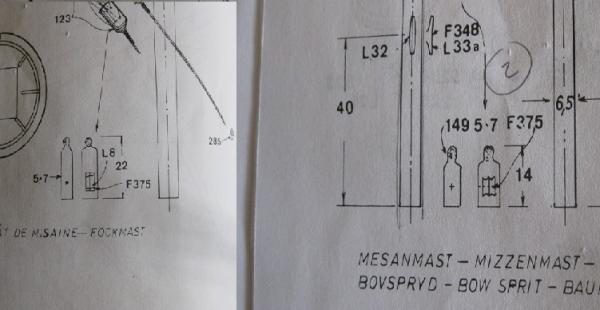
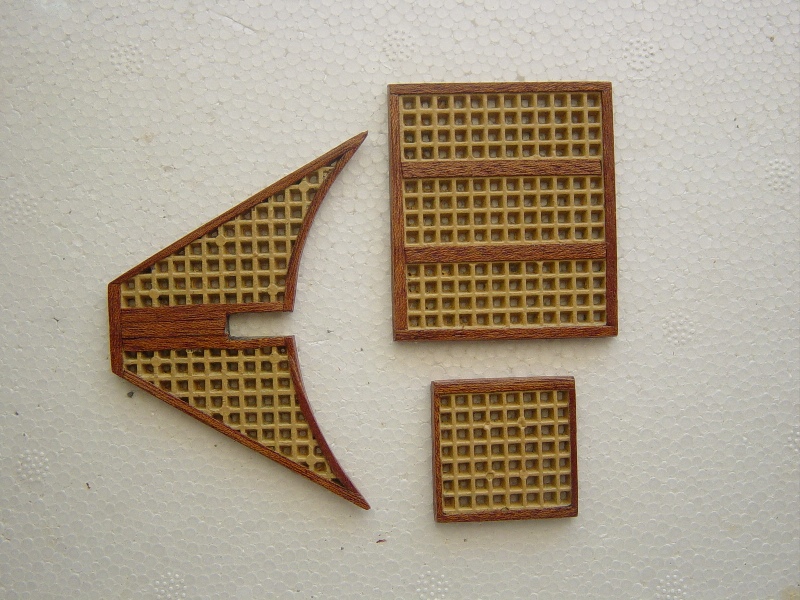
Hi Matti: Now I are beginning with the bow and seeing the instructions and drawings there is a piece that I have tried to figure out where it belongs, and although I have carefully reviewed your photos (page 38-40) in the forum I could not identified it. There is a little arrow almost in the extreme right of the upper drawing but I dont thing it corresponds to it. Can you be so kind to tell me where it goes? Thanks
-
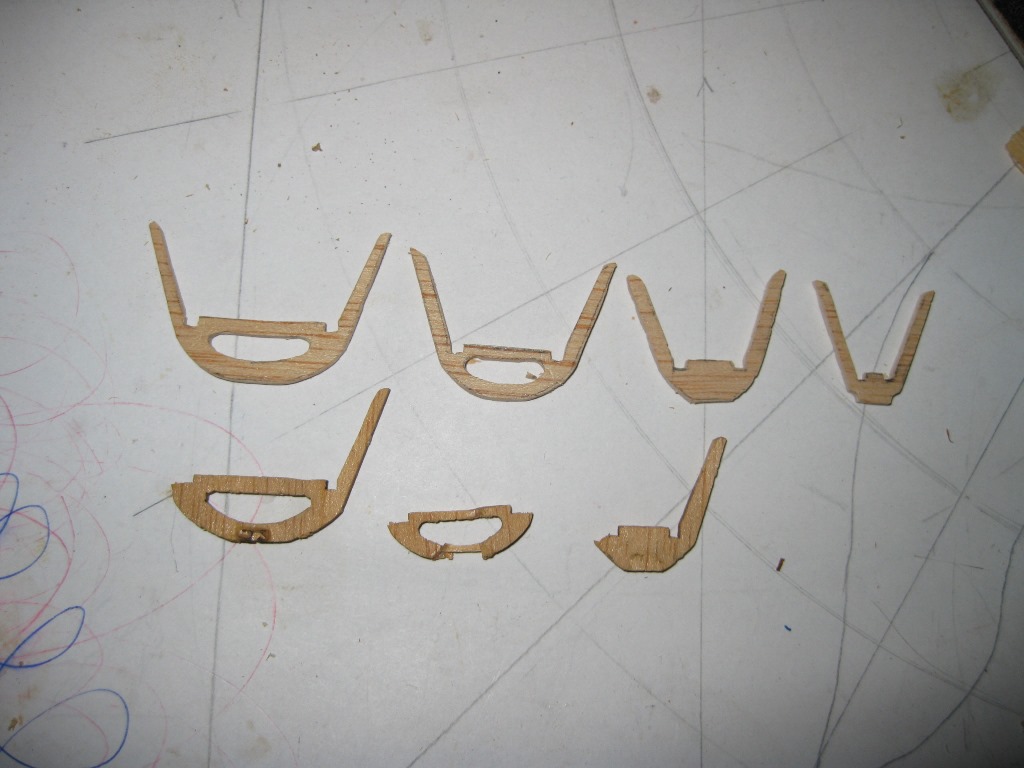
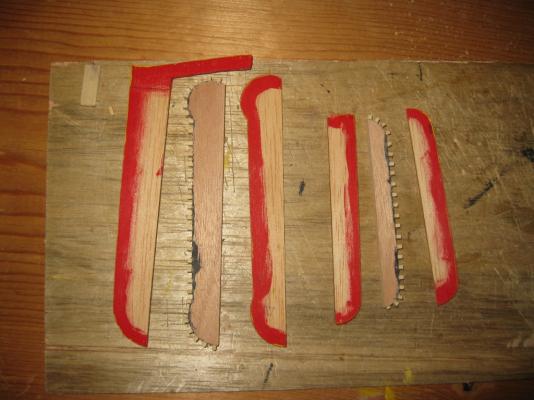
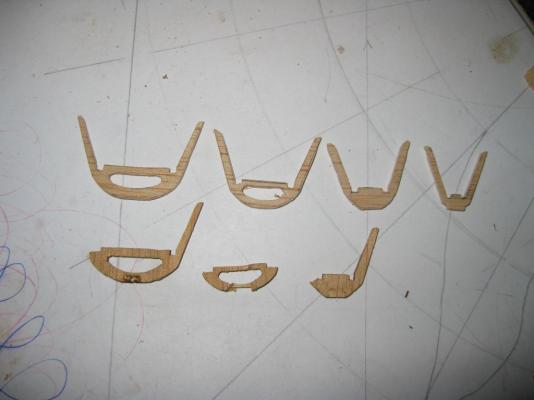
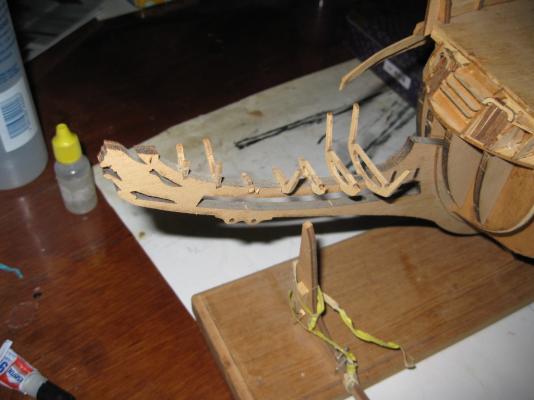
Thank you for your welcome and surely I will ask for your support in these forums to clarify doubts. Although I will show the progress of the building, I think the forum from NAZGUL (Matti), Ulises and others shows the details of the VASA construction at a level of excellence. Following with the Vasa, after analyzing what must be done, I started with the task of removing the parts that were wrong. Although I thought that the problem would not be great because they were stuck with white glue, it was not so easy and some parts suffered damage, especially the ones of plywood. What I did was wettting the unwanted parts with a combination of water and ethanol but not turned out so well. After that, I read that it was better to use a mix water- vinegar but I did not try it. In the following pictures you can see some parts after the detachment process And here some pieces that I had to redo:

-
Thank you very much Ulises for your confidence in my skills Muchos saludos!!
-
Hola Ulises. Finnaly I decided to begin a New Topic in buildings log so you can see my progress with this "unfortunate" Vasa, Saludos
-
Hi everybody!! First of all forgive my poor English, hope you can understand what I want to tell. The story of my VASA started about 10 years ago, when the son of a friend visited the museum in Sweden and bought the model thinking that he could do with her dad, who has some experience in woodworking. Shortly after, they gave up trying to do it, and stay abandoned for about 8 years. One time I visit him and seeing the model he told me the sad story and asked me if I wanted to try doing it, which I promptly accepted. After reviewing the boat I noticed several errors and that it will be difficult to assemble. Here in Mexico we say that It is always easier to start something than to repair it! This boat represents three challenges: 1) Undo many of the laid parts, redo some parts, either already broken or broken when I tried to take them off. 2) It is a boat complicated to assemble, rated for experts and additionaly with many plastic figures that must be painted with much detail. Also with poor instructions and drawings (but fortunately with much information in forums like this). 3) Many of the pieces were loose and detached from its original panels, so it was like a puzzle to find parts. Therefore, at that time I decided not to start it, partly because I was doing the Endeavour ship, so stay on hold just over two years. Finally, about 6 months ago I decided to build it. Initially without much hope because it had some irremediable things that were complicated to repair (like alignment of lateral panels or deck). So I thought to build it more for practice, that a model to show. However, over time I change my mind and now it’s getting pretty good.


-
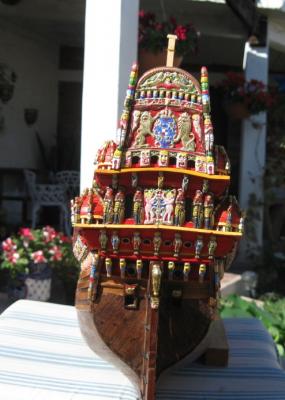
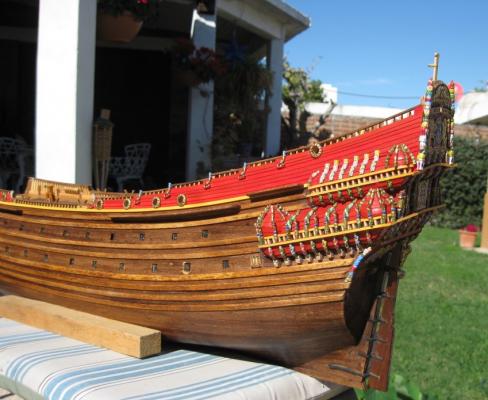
Hola Ulises!! I didnt see your log for a time but your work, as usual, is fantastic. I continued with my Vasa and just finished the galleries and stern. It was a new experience trying to color the plastic figures with detail, at first I though of painting all gold, more or less as your model, but seeing the marvelous work that Matti (Nazgul) did, I decided to go to the colored version, although at first they seem to be unreal or like a Disney version. I tried to paint the figures with the original color as can be seen in the Vasa museum page, but many others were by my own because they dont appear in that page. Saludos
-
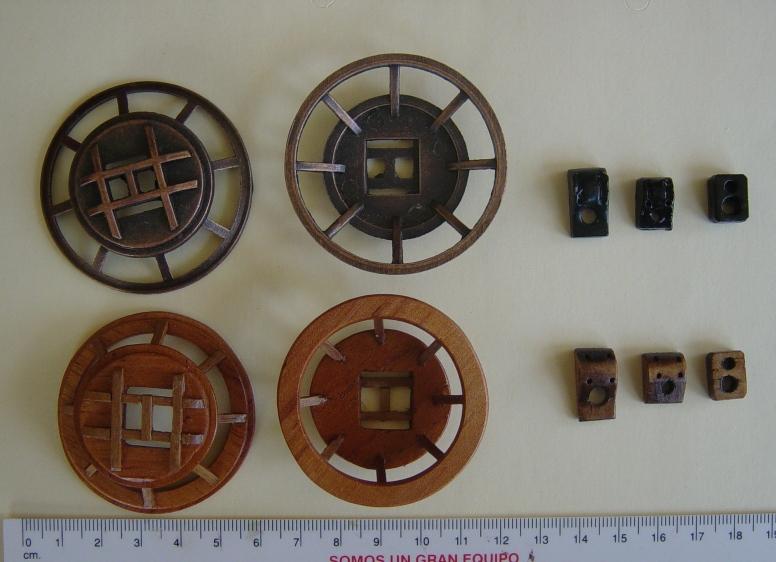
Hi Matti and Mark: Thanks for your suggestion Mark, Now I must to considered how to distribute the pulleys in the bitts because the number of pieces. By the way, I see your Wasa model in the gallery and looks very nice. Matti, anyway will be interesting to see what you will do when you get to this point. Knowing your interest in having the most accurate model probably you will modified the bitts because in the museum pictures they appear with four (the 3 singles ones) and two (the 2 doubles) pulleys per bitt instead of two and one in the model Thanks both of you for your suggestion to begin a new log. Muchos saludos!!

-
Hi Matti: After two years deciding if I would continue the VASA kit that a friend gave to me because he couldn’t do it, and the work done was wrong and must be undo, finally I decided to begin with it and I think it’s getting pretty well. Although the instructions are very poor, the pictures of the VASA museum and especially your posts in MSW forum, that I followed since the beginning, have been invaluable. Great job you're doing. From your pictures on the forum I see you didn’t get already to the deck pulleys (?). Anyway, I would appreciate your opinion about this. According to the Manual blue prints and photos there are 3: apparently 2 equals (between mizzenmast and main mast) and another near the foremast, all of them with the same pulleys (F375, 6mm) so that should be 6 and the kit have only 4. By other part the kit contains 12 pcs of 5 mm (F565) and checking the Manual and Drawings I see that only 8 are used. Can be that the one near the foremast are intended to use this 5 mm pulleys? Regards from the Gulf of California (Mexico), Karl
-
kit review 1:85 HMS Pandora - Constructo
Karleop replied to Erik Nyren's topic in REVIEWS: Model kits
Hello Erik. I agree with all your comments about the Constructo HMS PANDORA. When I made this model about 5 years ago I realized many of the errors and lack of clarity that you mention in instructions and drawings . So I gave myself the task of writing all my comments and sending them to the Company in the eagerness to improve that. The answer was very kindly but I was told that this model will be out of the market. However, despite the problems, the construcction of this model gave me great satisfaction andthe results where quite acceptable.

-
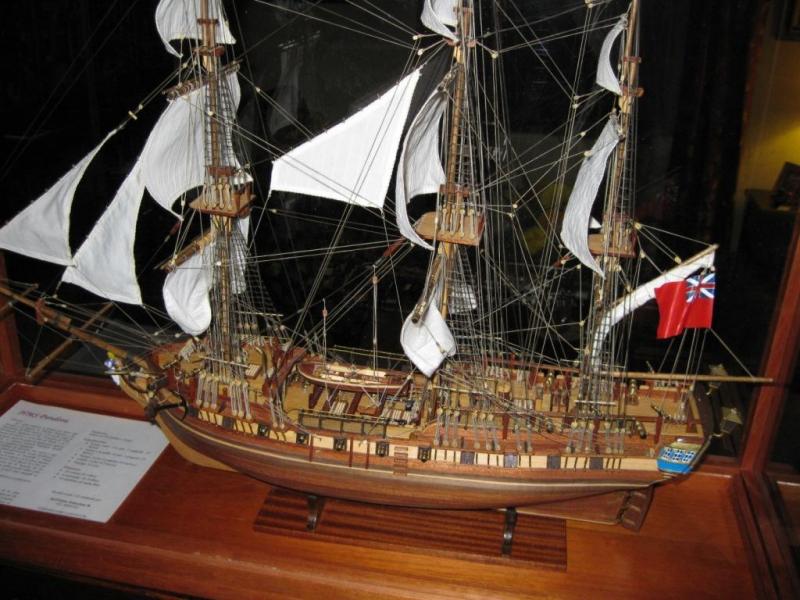
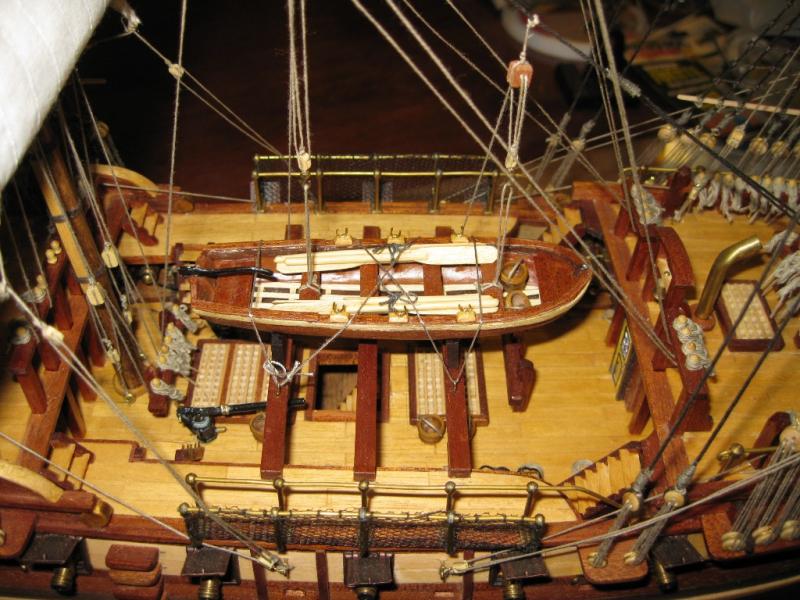
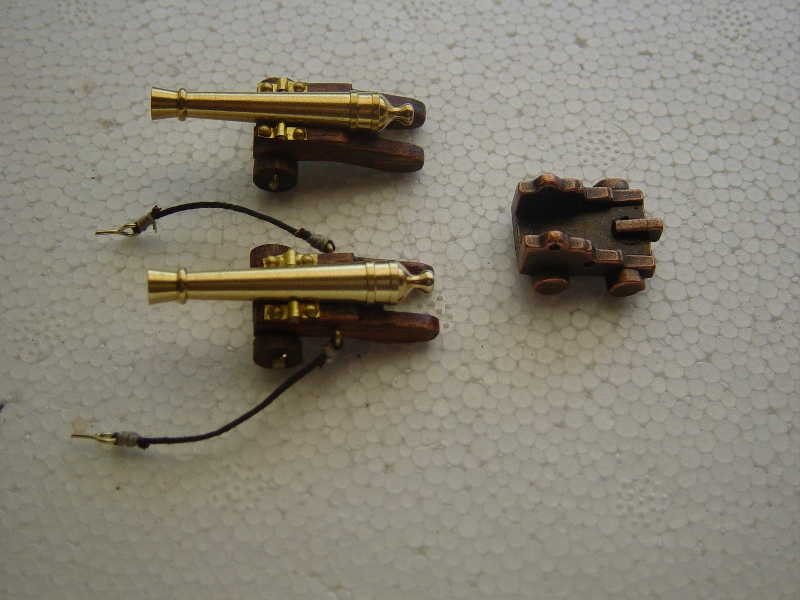
Hi msberkman, you are doing a nice job. I made the San Francisco a couple of years ago and also substituted some of the metal parts, some because they were not right (for example: the carriages of the guns where 2 wheels not 4 in those ships) and others because they did not look good. I tried to improve another ones by supplementing them with additional pieces, eg. the lifeboat. Additionally I substitute the banners and flags printing them with my computer in order to give them more "flexibility". I attached some pictures of these changes.


-
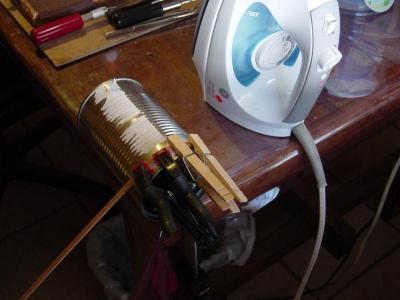
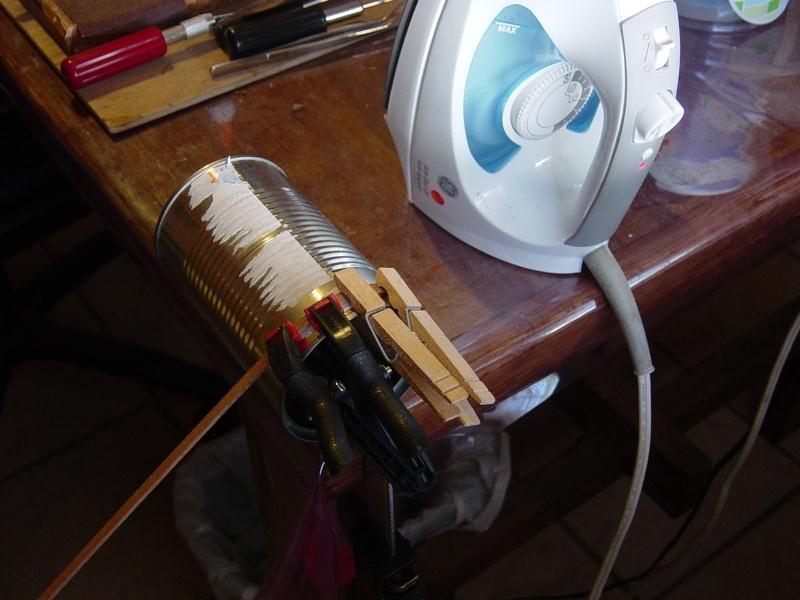
Hi Philo, I also use PVC pipe, 1 inch diameter or so and with a rubber stopper in one end. I filled it with plain water and soaked the planks for an hour or so. Then I bend and dry the planks using an empty can with a little candle inside and also using s steam iron. Depending of the curvature I want I have different sizes of cans. It works very well.