HOLIDAY DONATION DRIVE - SUPPORT MSW - DO YOUR PART TO KEEP THIS GREAT FORUM GOING! (Only 75 donations so far out of 49,000 members - C'mon guys!)
×

Karleop
-
Posts
500 -
Joined
-
Last visited
Content Type
Profiles
Forums
Gallery
Events
Everything posted by Karleop
-
 Dear Mike: Thank you for the compliments, but your level for the details is outstanding and I´m sure your finished ship will be an example to follow. Saludos Karl
 -
Hola Frank: Undoubtedly it looks much better with sails than without them. Congratulatios, very fine work. Saludos, Karl
-
Hola Jean-Luc: Although they were not black they look good. I use the solution that is used to obscure the leaded strip that is used with stained glass. It's called Patina and it work pretty good, the tone depends on the time you put the guns in the solution. Saludos, Karl
-
Really nice Rich, you made an astounding job with your Cony. Saludos, Karleop
- 1,756 replies
-
- 2
-

-
- constitution
- constructo
- (and 1 more)
-
Hola Matti: Thank you very much for your words, specially coming from you. I appreciate your help in the different aspects of the construction and your comments about the famous Vasa. Saludos and see you in our next projects, Karl
-
Hola Frank: I'm sure you are going to do a great job with the sails and your idea of partially folded them seems very good. About the fabric: BB kit came with a bit stiff material so I recommend getting the thinner fabric you can get and starching it a bit before cutting (also could be a good idea to dye it a little with fabric colour or tea). This will help with the stitching and folding. Muchos saludos, Karl
-
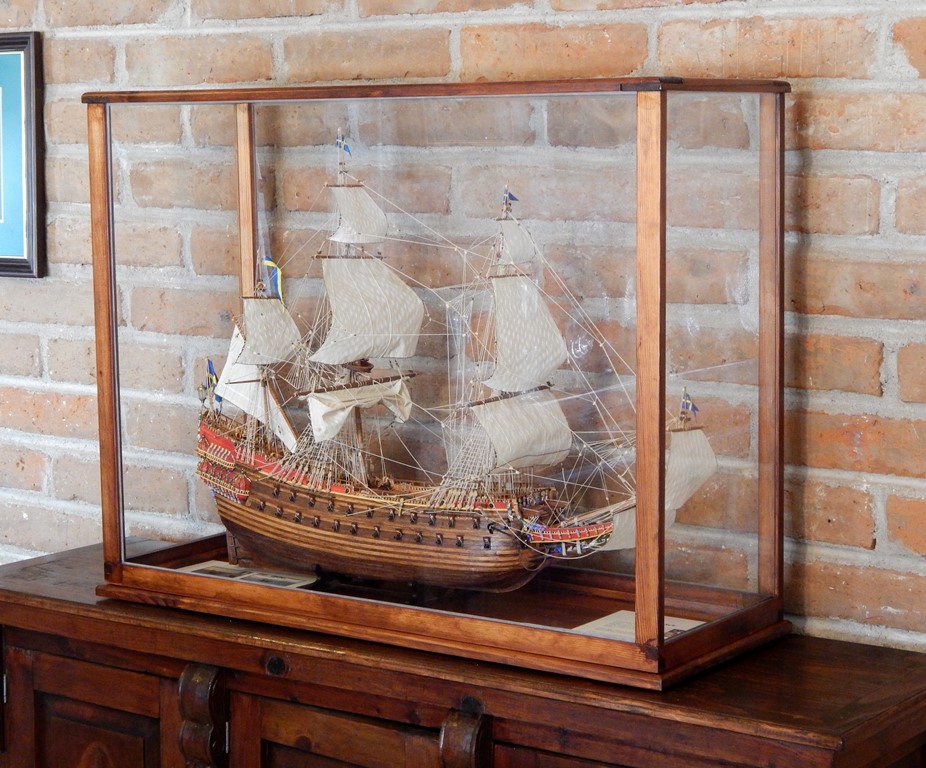
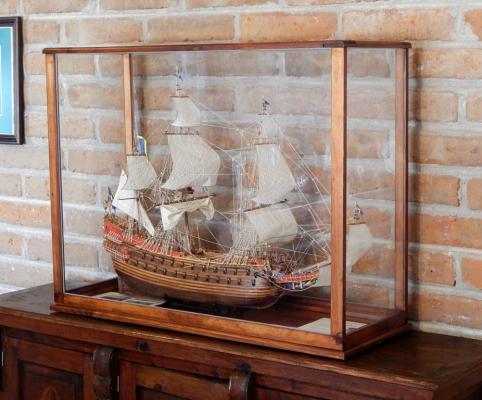
Hola: To completely finish my Vasa I made the display case to protect it from dust. Now is in the place where I had the HMS Pandora, which I returned to the hobby room. Saludos, Karl

-
Hola Rich: One thing that have been very helpful for me in finding little things that were dropped on the floor is using a good flashlight. Put the room lights off and use the flashlight to "explore" the floor. Its incredible the things you can find. Saludos, Karl
- 1,756 replies
-
- 4
-
-
- constitution
- constructo
- (and 1 more)
-
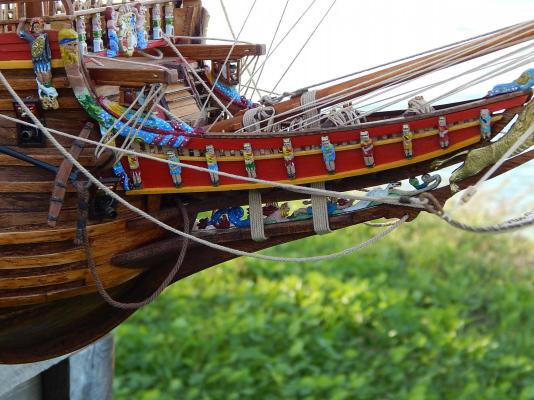
Hola JM: Thanks for the compliments. As you can see in my post #12 (page 1 of this log) I used Acrylic paints and for the first coat for the plastic figures a white undercoat. The colors are: Red Cardinal, Hauser dark green,Classic green,Daffodil yellow, Licorice black, Cobalt blue and Wicker white. Saludos, Karl
-
Hola Ulises: I suppose you are buying the filler by gallons!! jajaja Saludos
- 786 replies
-
- 6
-
-
- Royal Louis
- Finished
- (and 1 more)
-
Hola Matti: Thanks again for your explanation. By the way,somehow I missed your last pages of your log and I didn't realize that you already finish your model until I saw it in the display cabinet. Your version, like the original ship in the museum looks splendid!!! Congratulations, Karl
-
Hola Matti: Thank you for your explanation about the origin of the name Vasa. Interpreting your explanation I understand the origin of the name comes from the word vasakärve probably to show the abundance of wealth and prosperity that gives "bundle of seeds" and so become as a symbol of the King. Is that so? Saludos, Karl PS. Nice display cabinet. I must to do one to protect the model.
-
Hola Frank: For my part there is no problem in letting the pictures and all the log but I don't known if the moderators allow. Anyway I will upload photos of Vasa finished in the gallery. Saludos, Karl
-
Hola: I am honored by all your comments and likes, especially because you are true experts in modeling and know the work involved in each step of the construction. Thanks again, Karl
-
Hola Matti: I just finished my Vasa model, and I realize I do not know the meaning of Vasa (or Wasa?). Try to look at Google as well as the Swedish translators but without result. Maybe you can satisfy my curiosity. Saludos, Karl
-
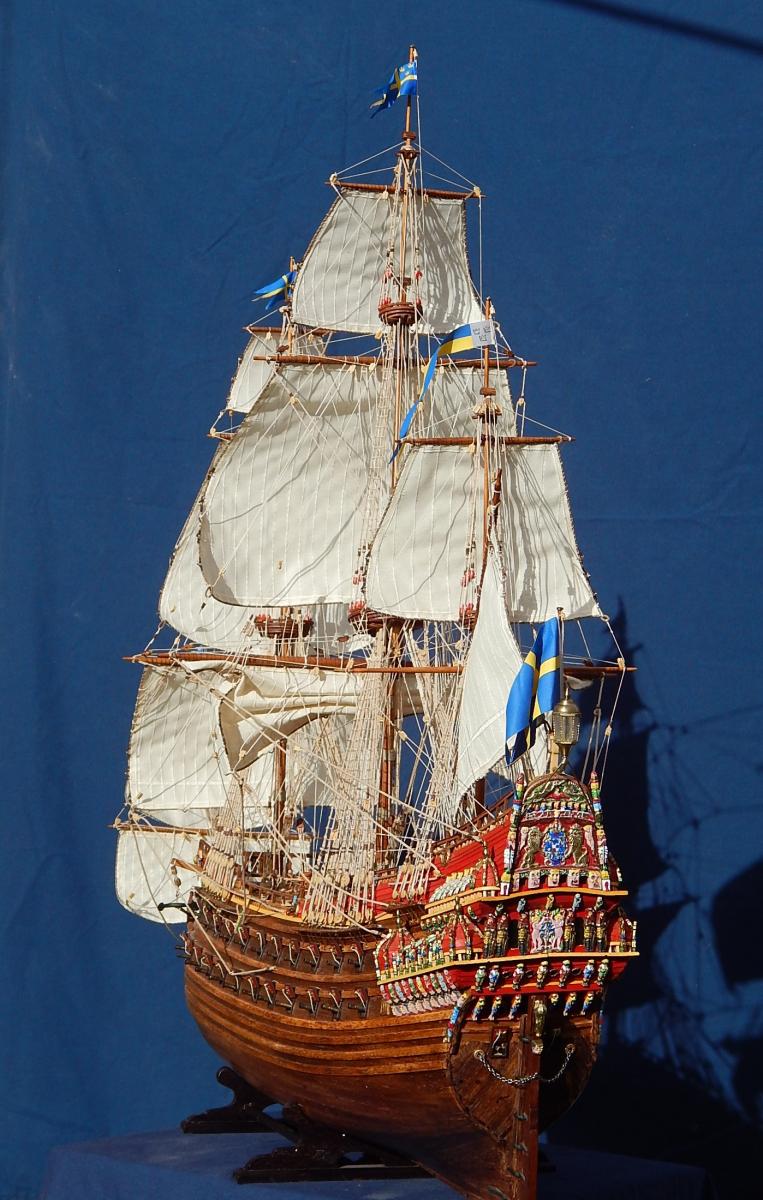
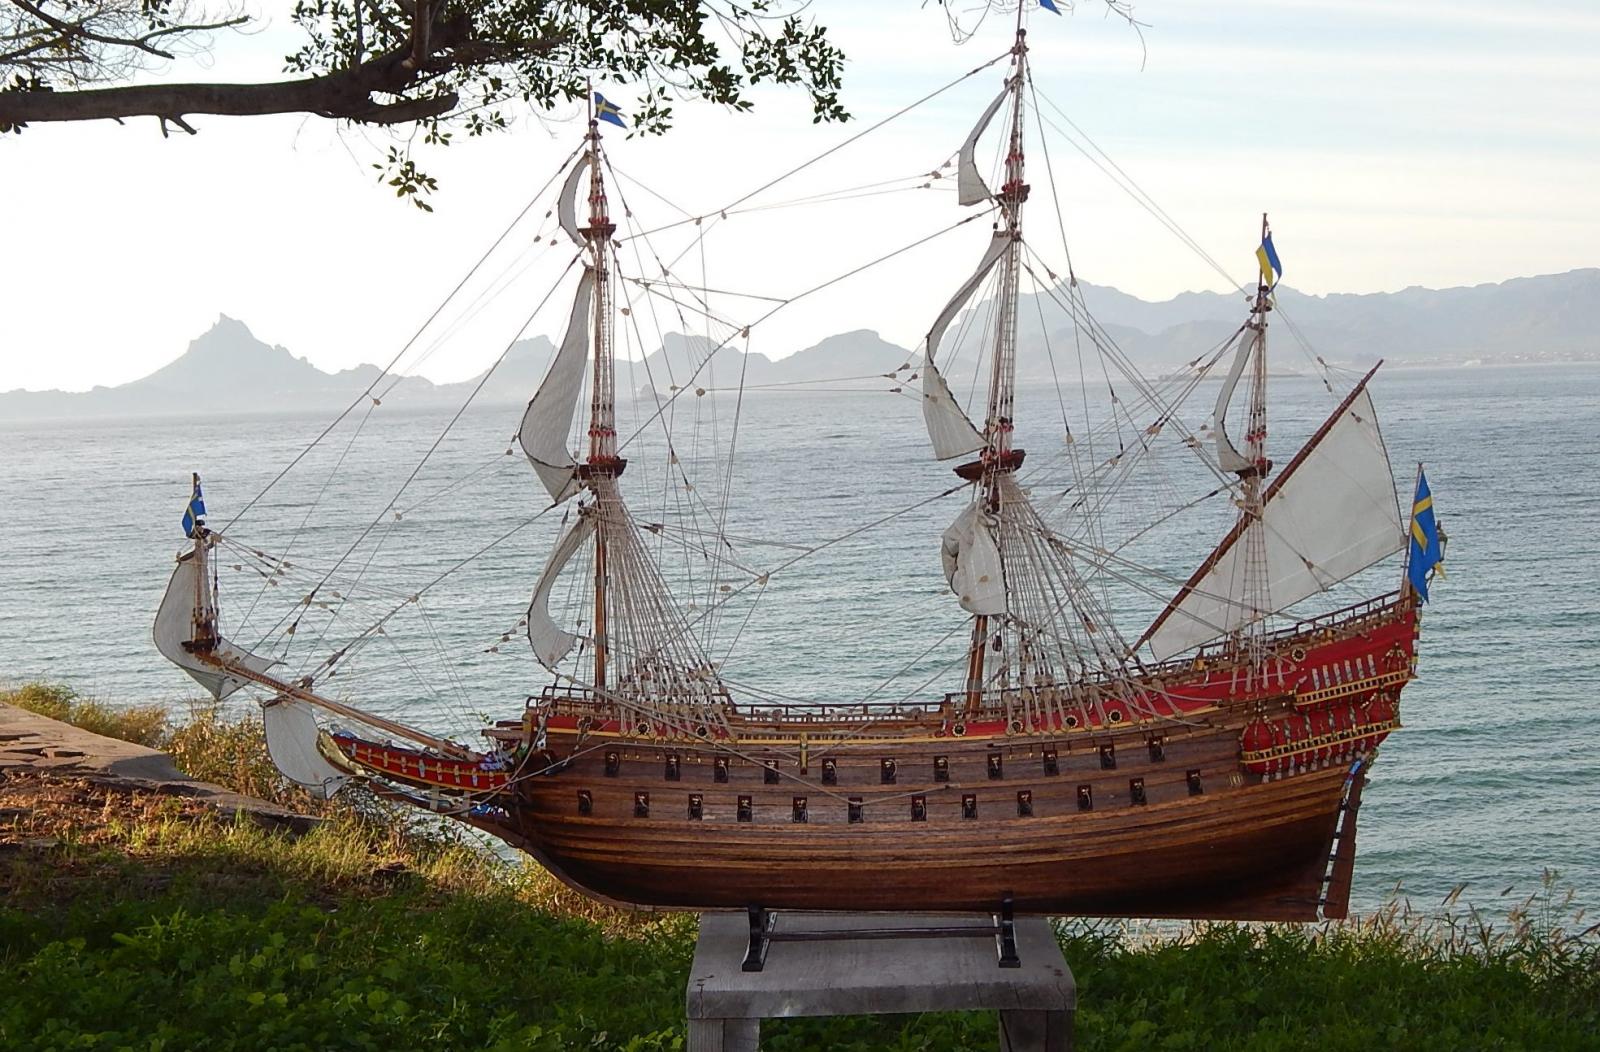
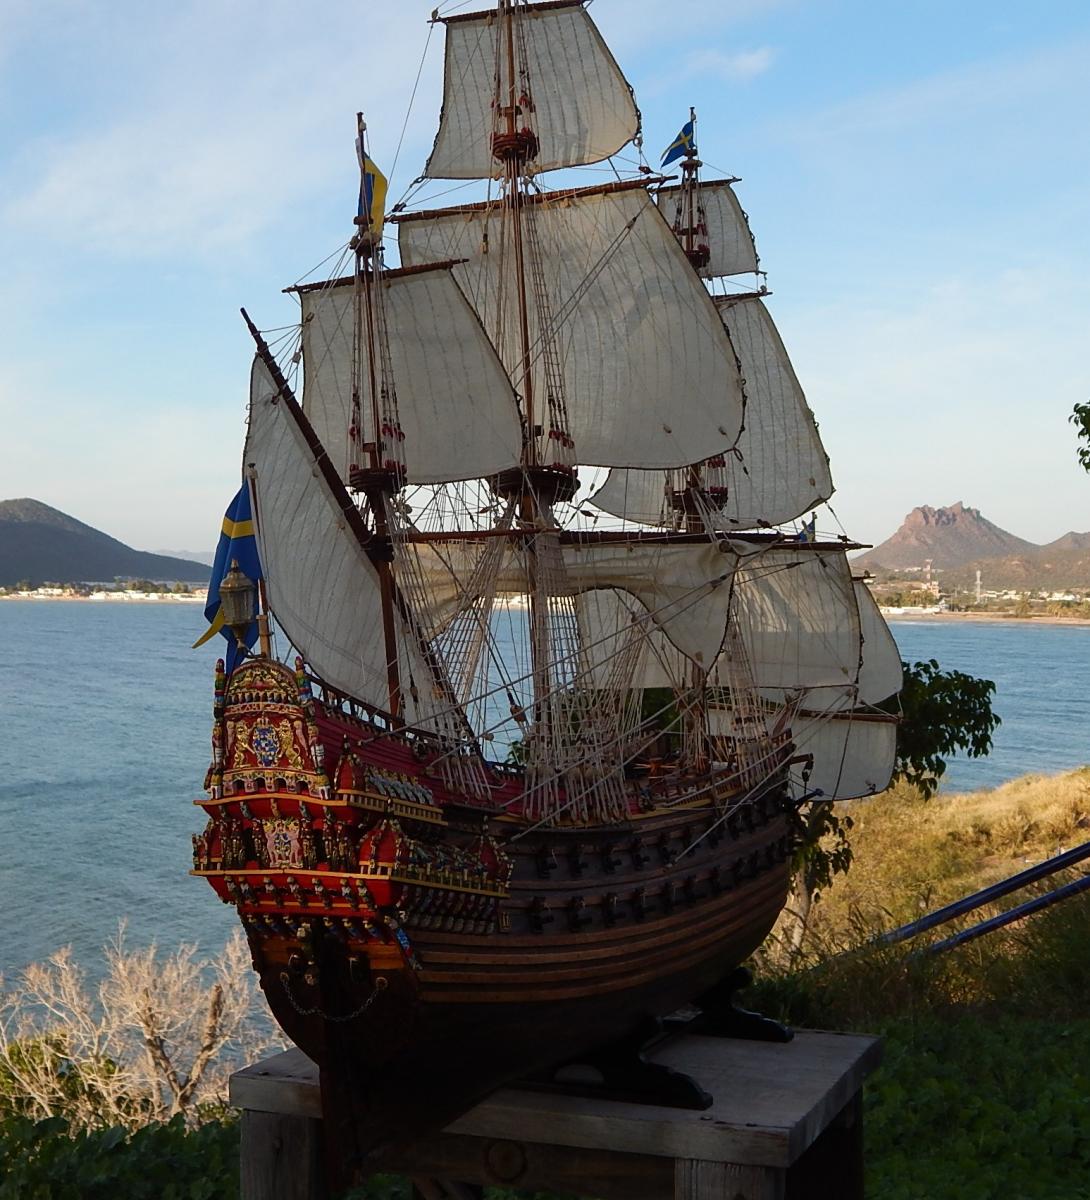
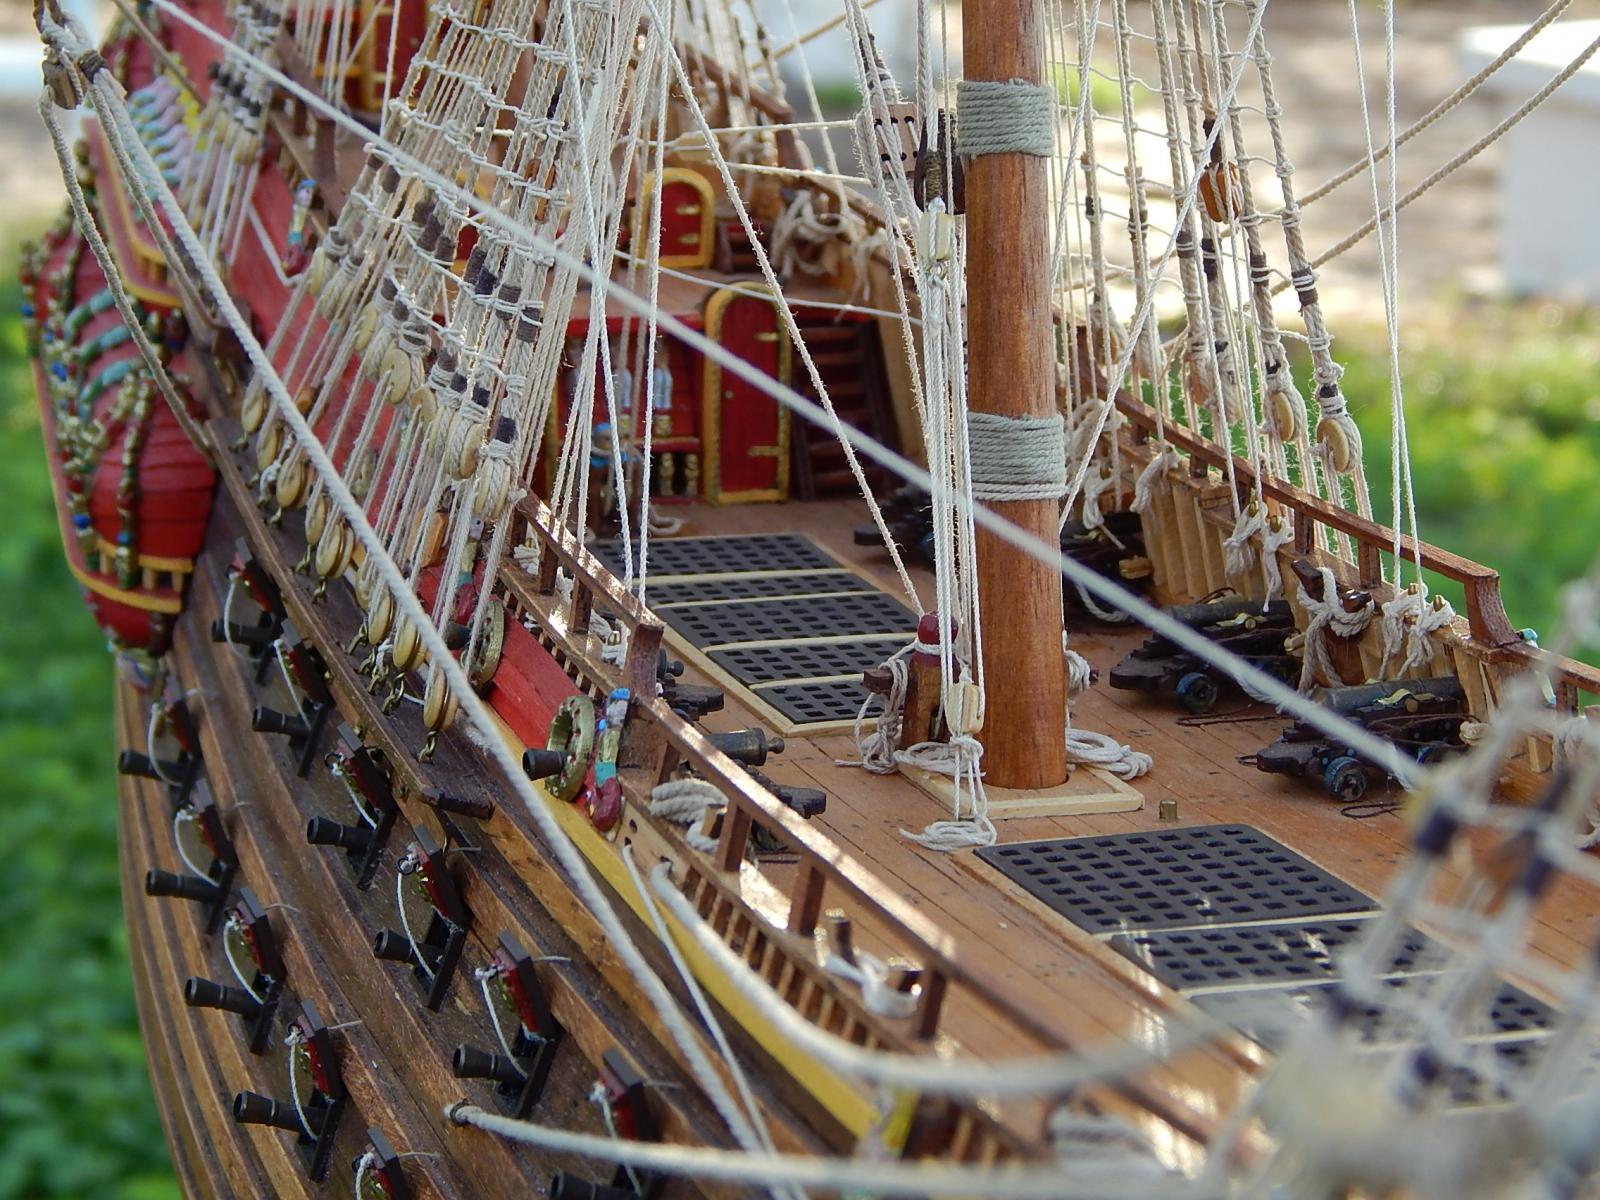
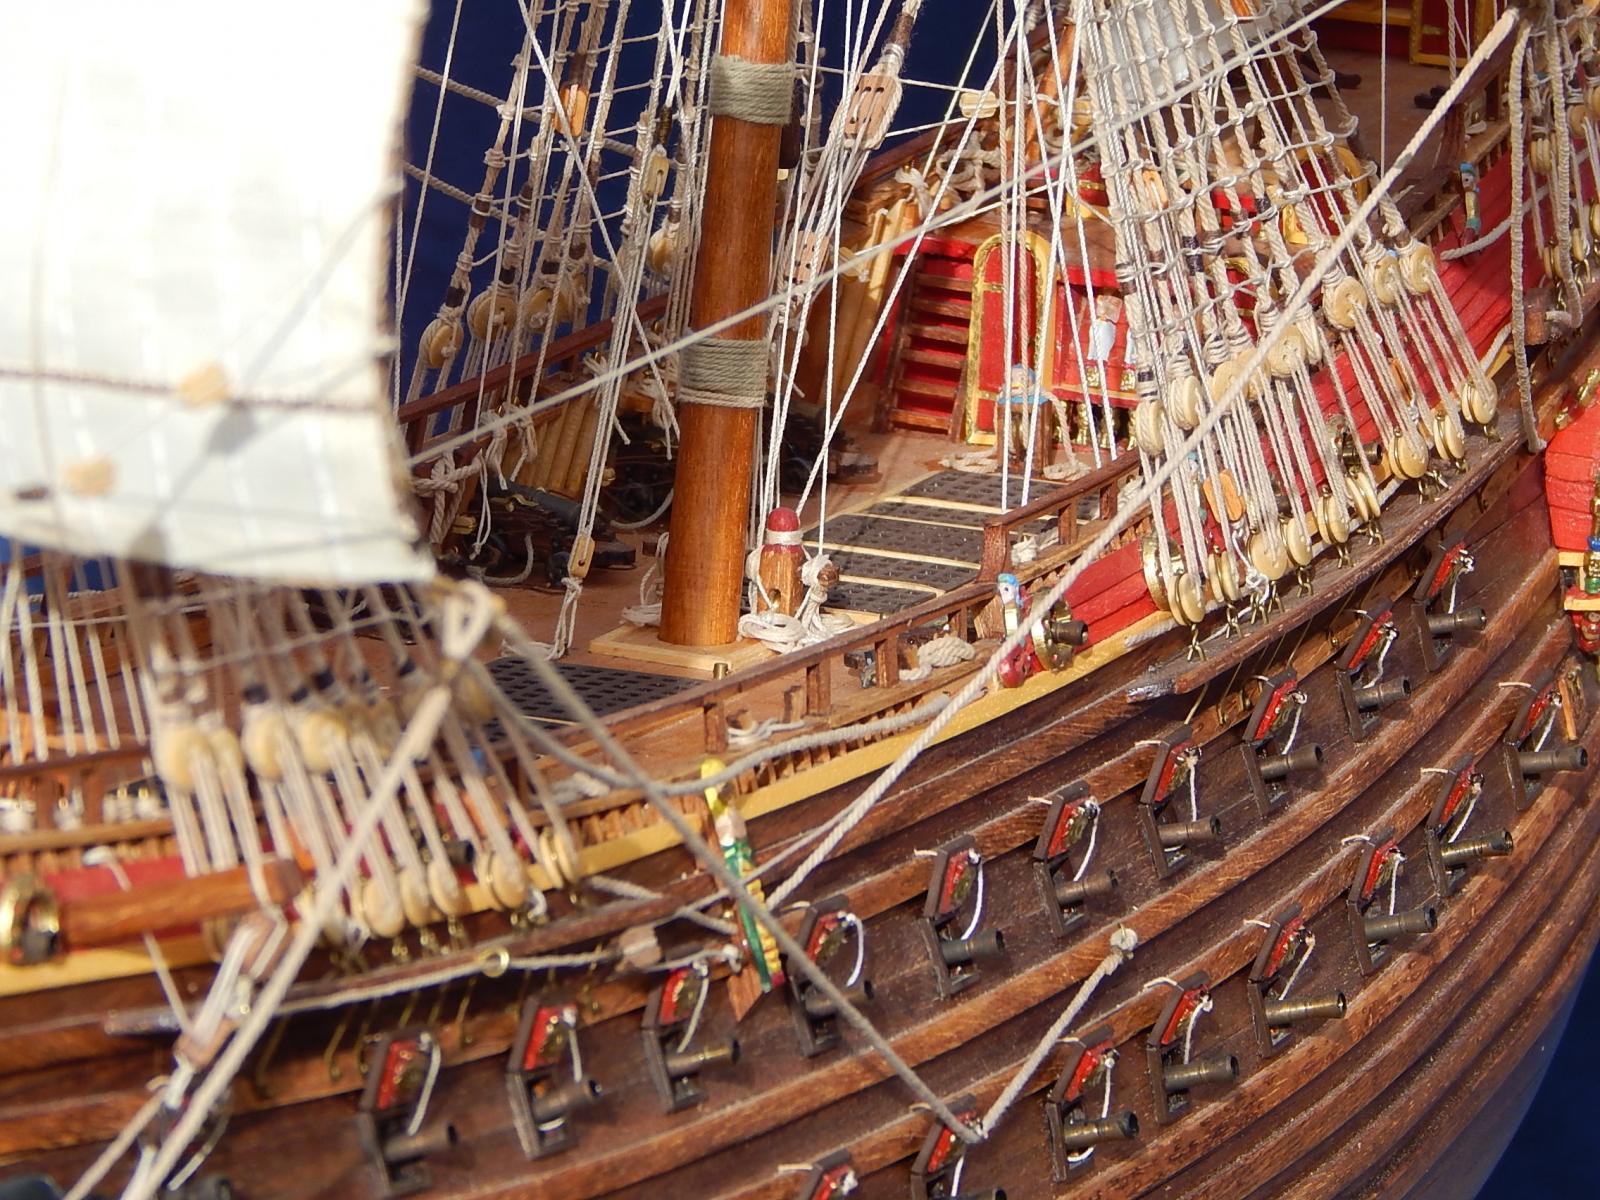
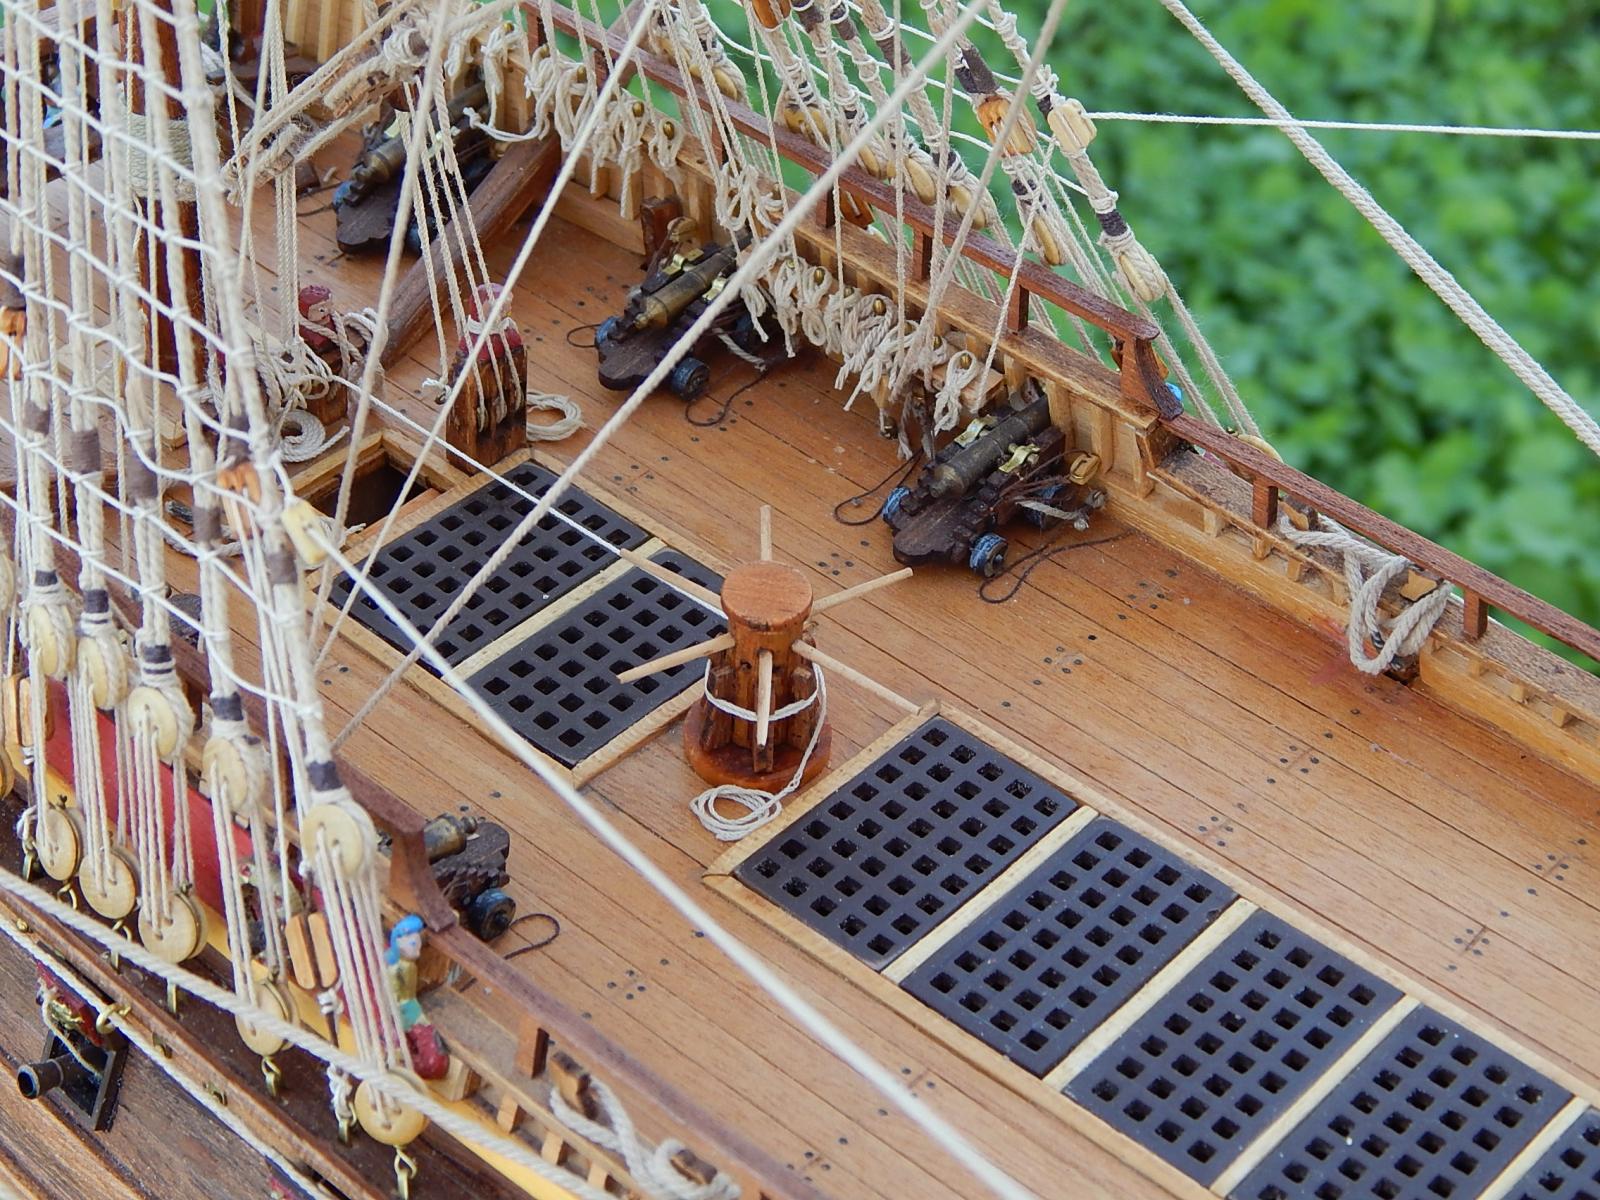
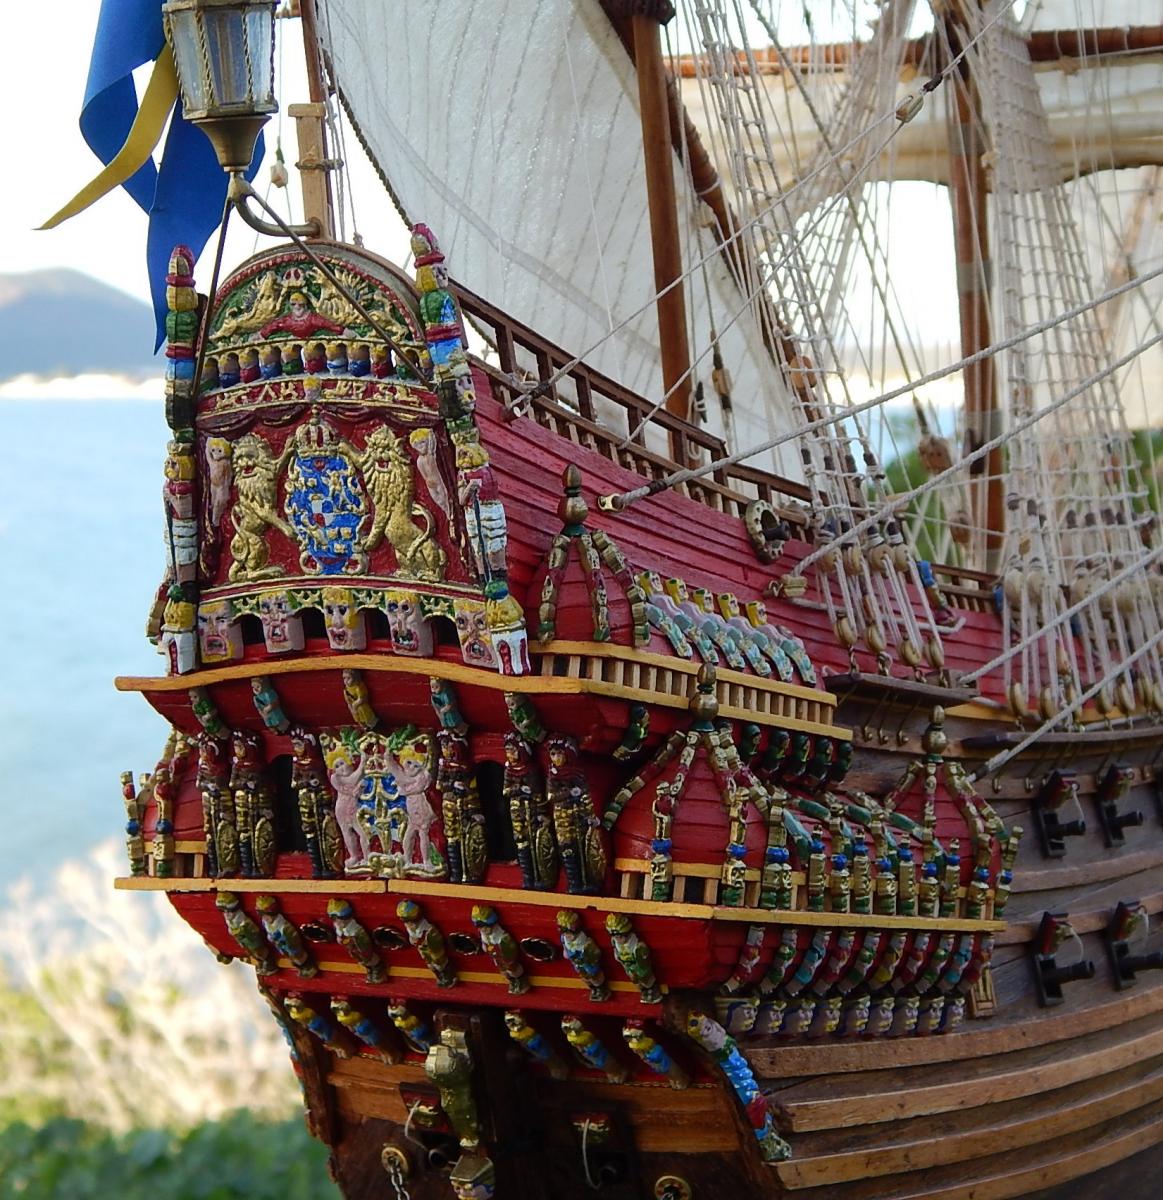
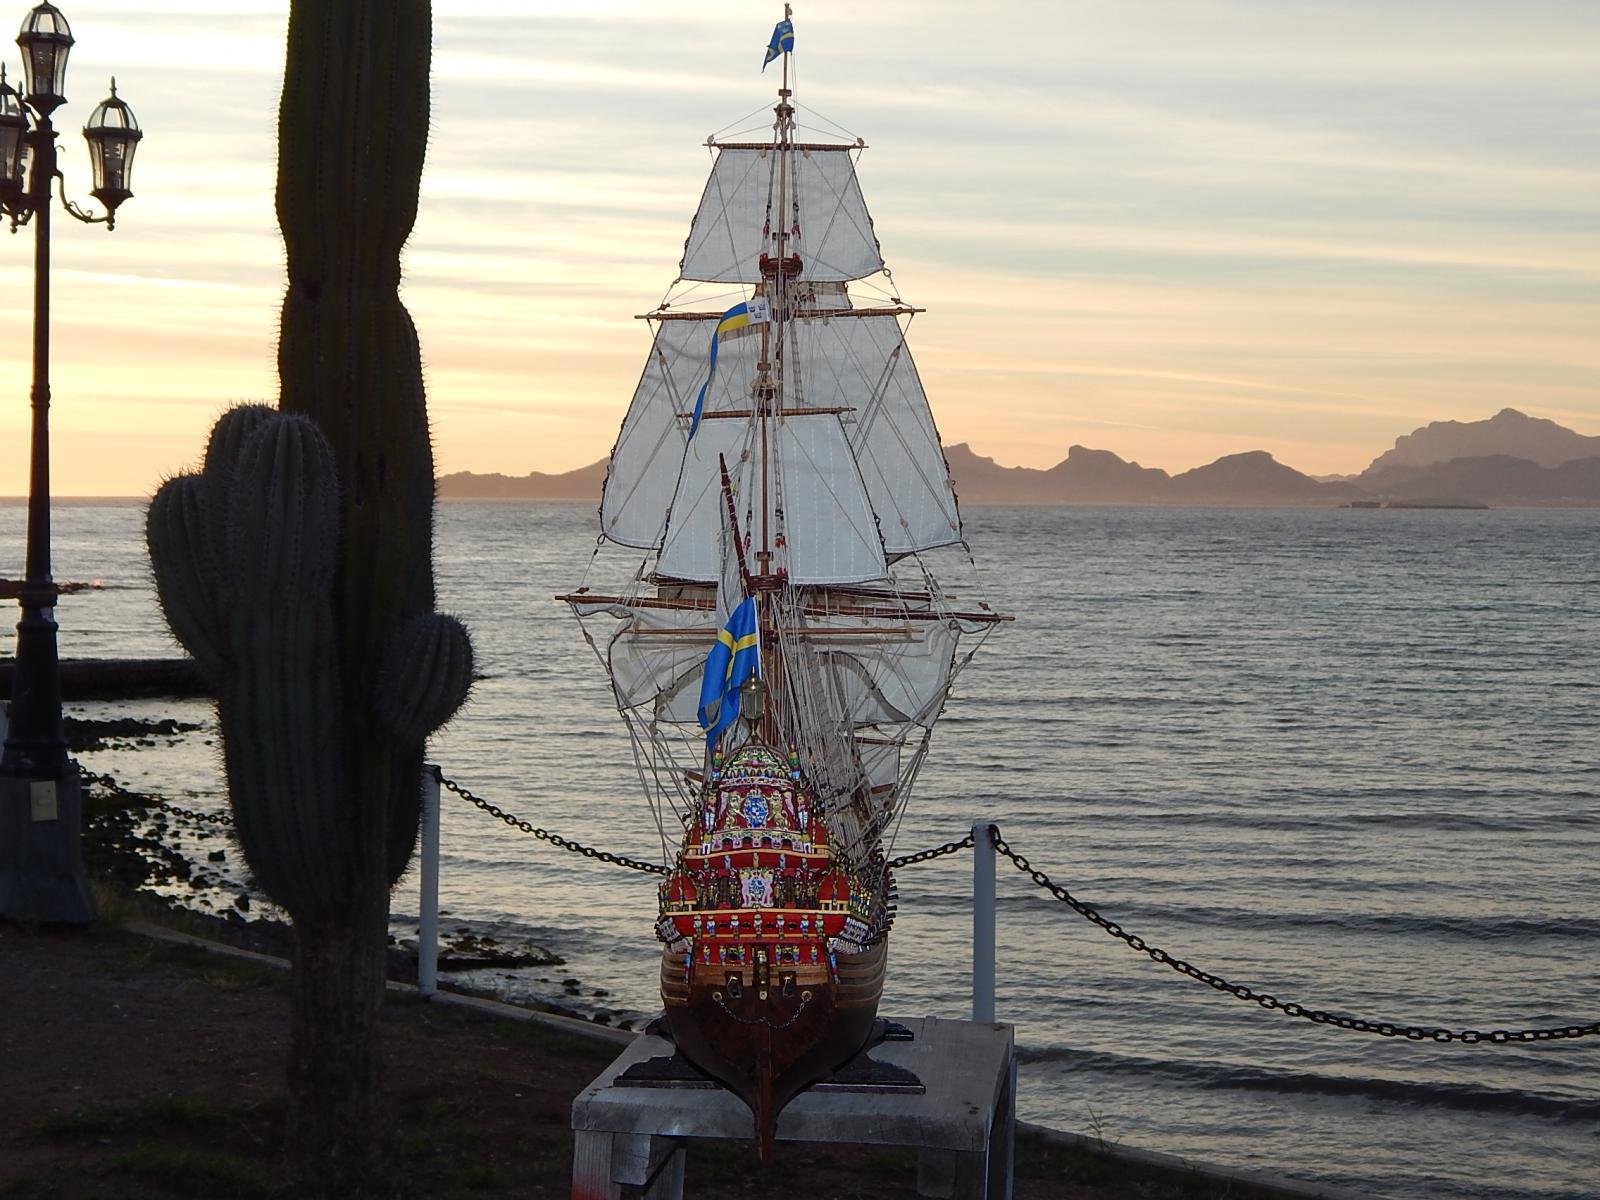
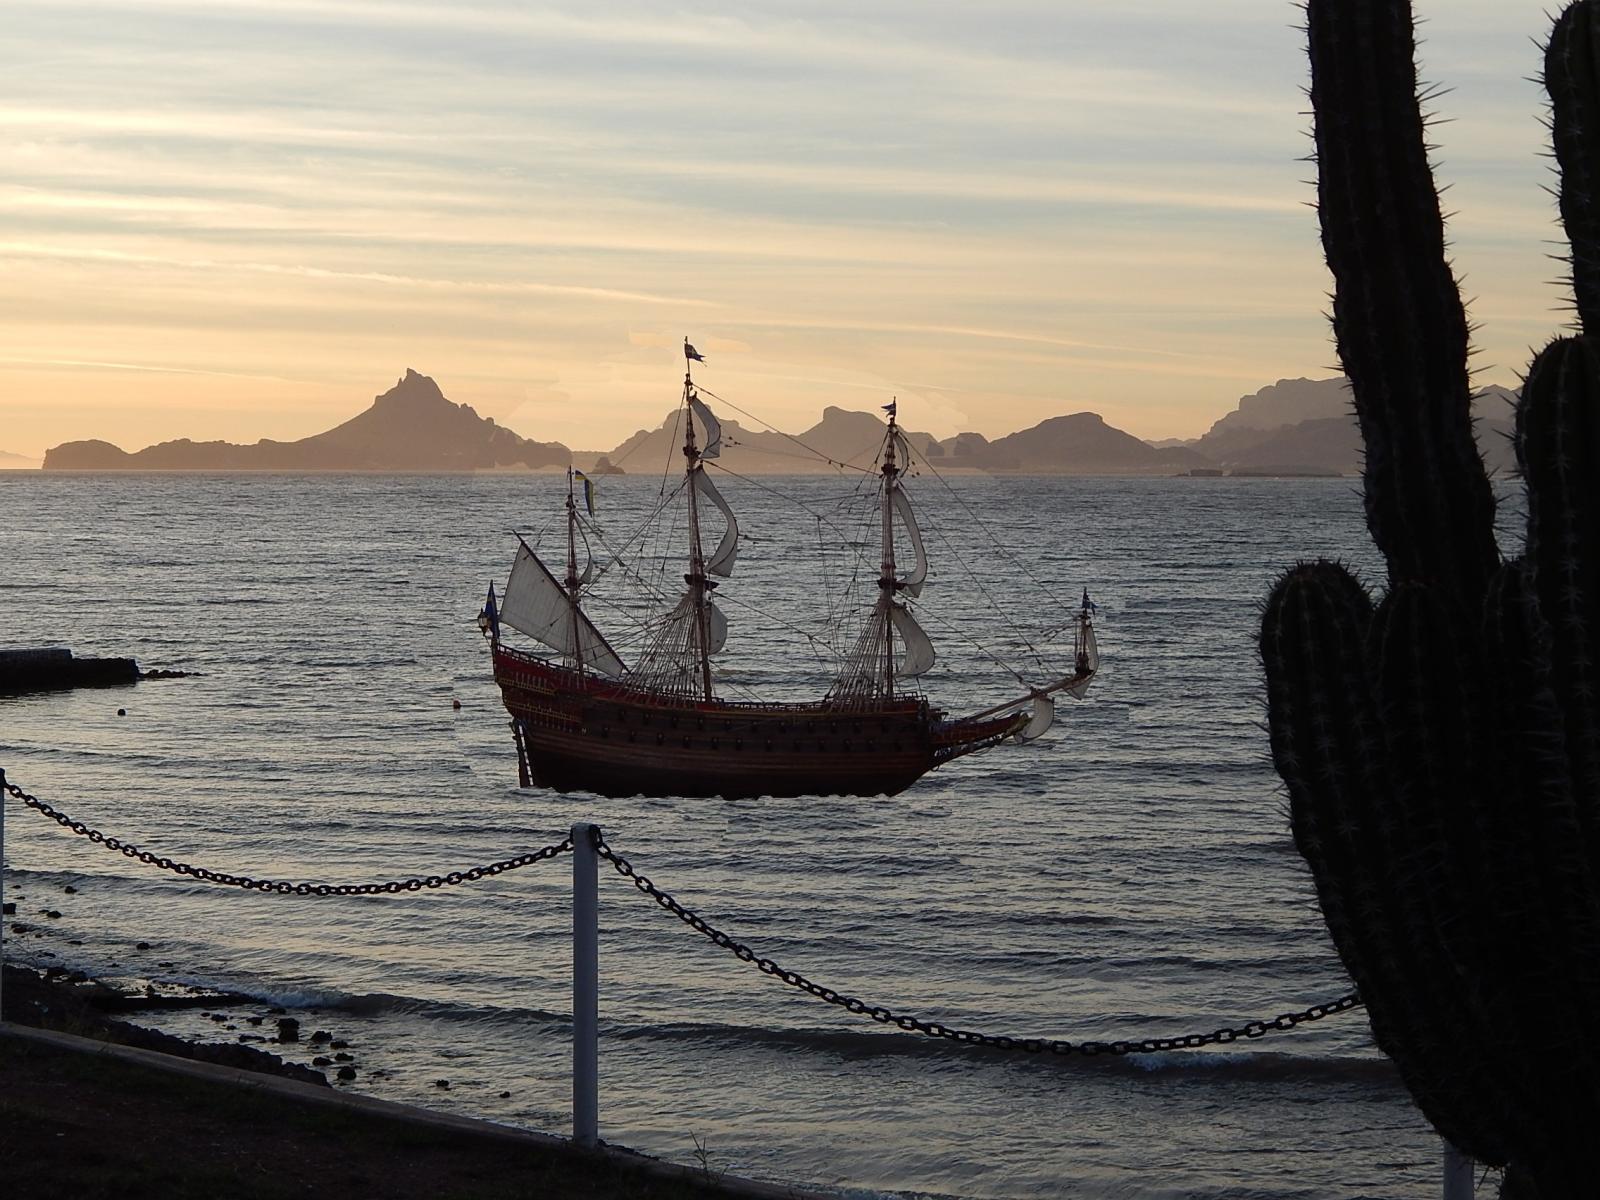
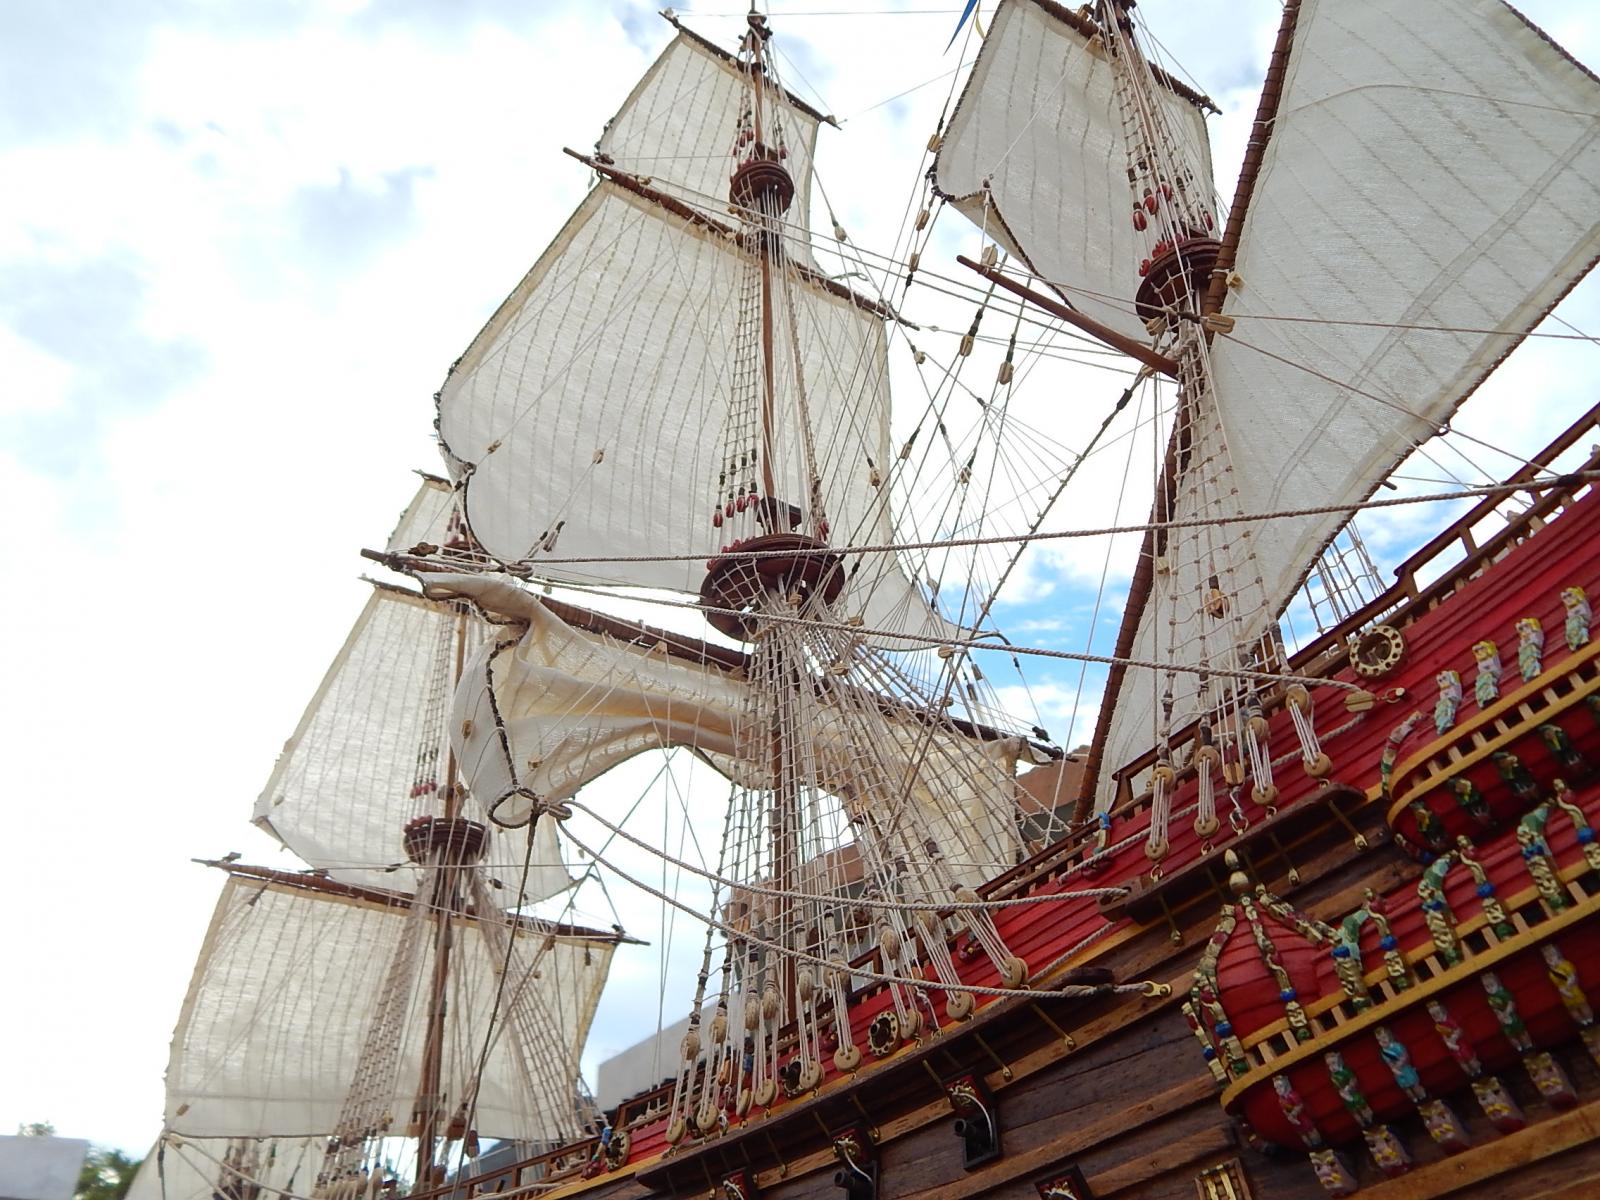
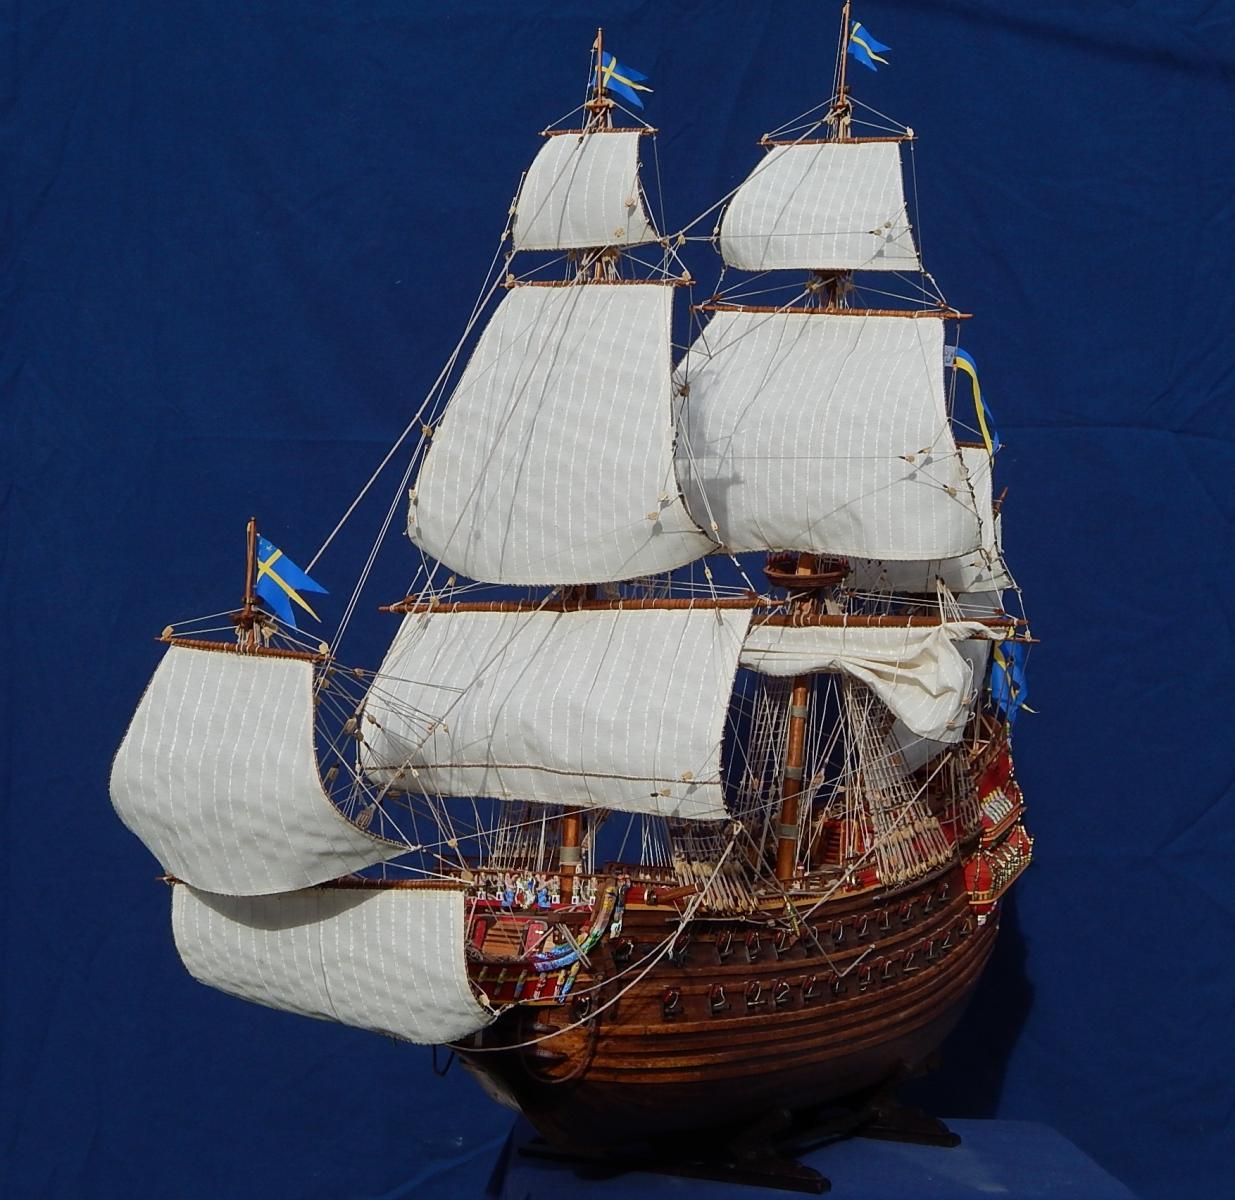
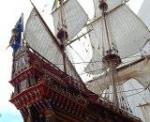
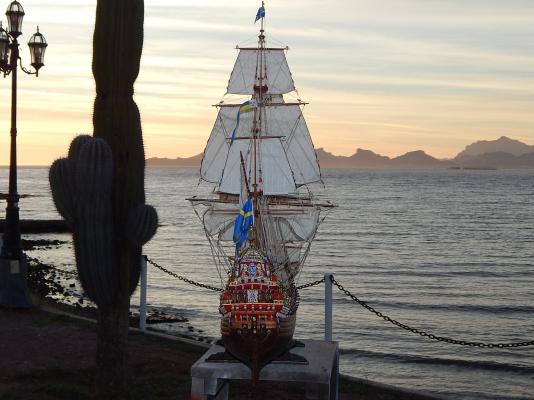
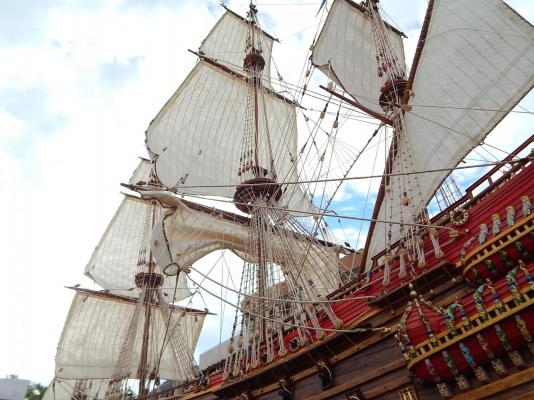
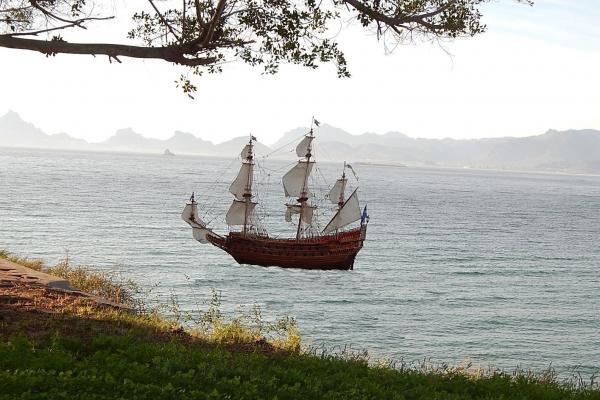
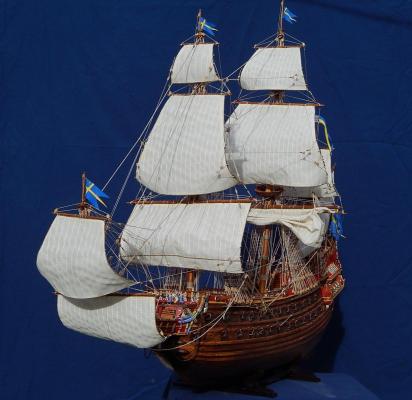
Hi friends: Finally the time has arrived. After 15 months of spending many hours of fun with the construction of Vasa, yesterday I finished placing flags and banners and also the hand railings. Today, a little sadly, I have started to save and organize tools and materials as well as the workbench. I decided that before starting with the new project, the "Pride of Baltimore", I have to design and make a display cabinet for the exhibition of some of the models, since I have no place in the house to place another ship individually. Here some pictures of my finished model. Some having as backround the bay where I lived: Some details: And some simulating that it is a "real" ship on the Miramar Bay at Guaymas: Saludos and see you in my next project. PS: I want the opportunity to thank all the people that follow my log and specially to my Vasa mates for they encouragement and help. Also for all the likes I received throughout my work.


- 234 replies
-
- 16
-
-
Hola Frank: Your last point is that worry me (and probably many of us) is where to put another model: 2 ships and 1 stagecoach in the living room, 1 ship and the Albatros plane in dinning room and 2 more in my hobby room and every time my wife urged me to sell at least one of them. Thinking about making a special cabinet to place about 4 models in the hobby room, let´s see!! Saludos, Karl
-
Hola Frank: You're doing an excellent job and your Vasa is comming great. On the other hand, I am pleased that my photos serve you as an additional guide to include some blowing sails. By the way, I almost finish my Vasa and I must to say that I feel pretty sad, so I am trying to delay as much as possible the last steps. Saludos, Karl
-
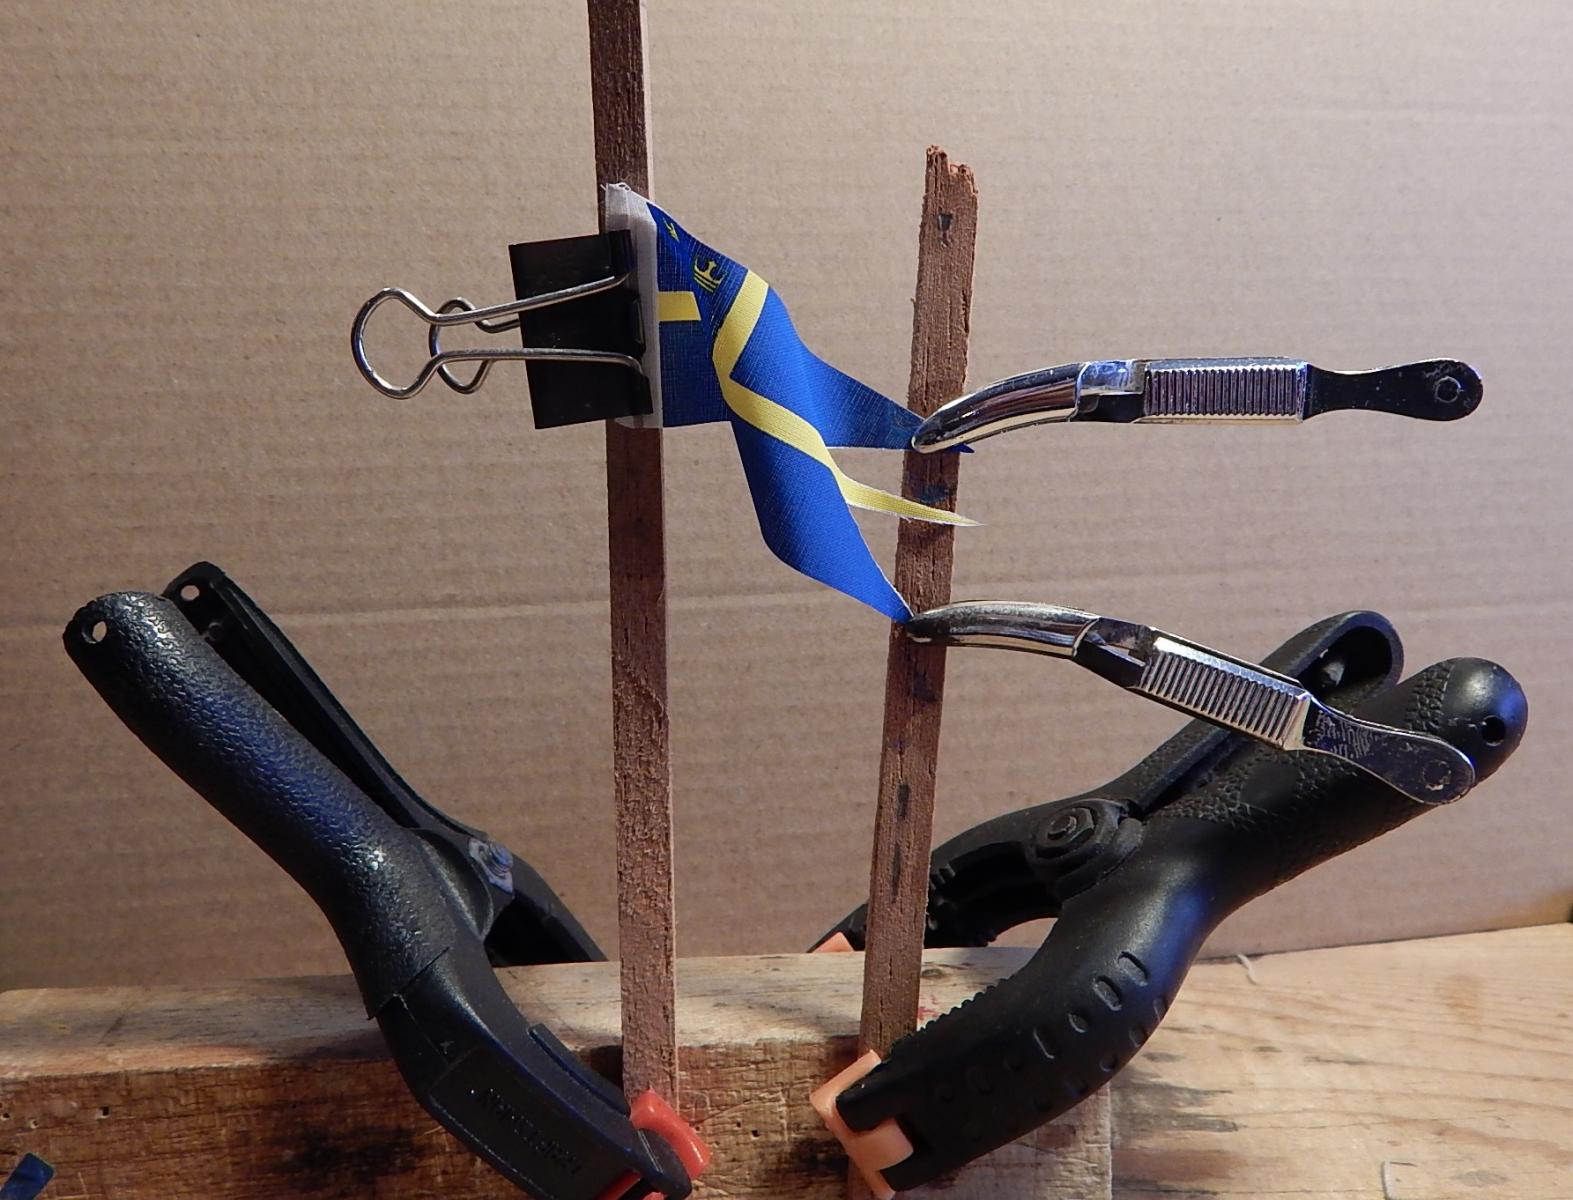
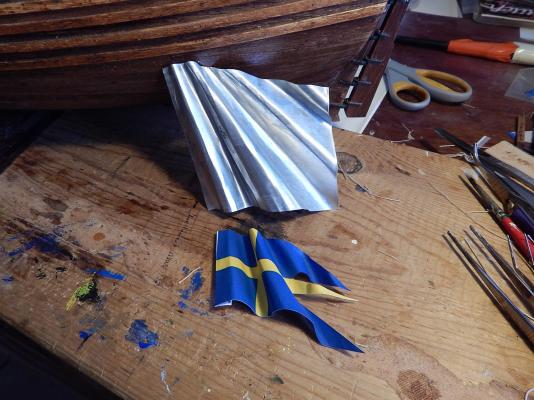
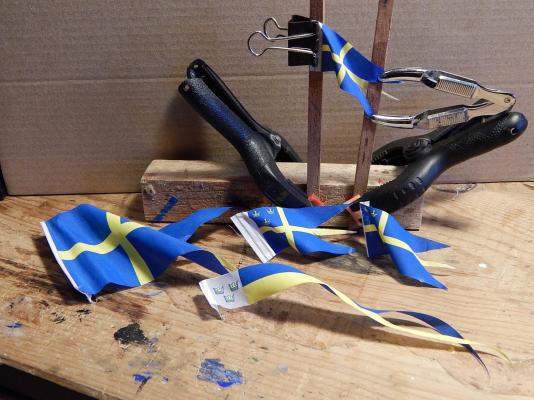
Hola: As part of the last steps in finishing my Vasa I proceed to cutting and bending the flags. At first I used the method described by Matti and Denis Pink using an aluminium can and shaping it to look as a flag in the wind, wetting the flag in a mixture of white glue and covering the aluminium shape with it. Matti mention that the inner surface can have a glossy finish due to the contact of the glue with the shiny surface of the can, but that it can be fixed spraying it with a satin acrylic varnish. (Nazgul pp 62). As expected I got the unpleasant glossy finished. To avoid it, I tried another and simpler method. After wetting the flag with the white glue mixture I shape it using clamps and strips of wood as you can see in the pictures. From my point of view it works great. Saludos, Karl

-
Hola Frank: Probably I will take a break and have some time painting and doing other things. Nevertheless I have already in my shelf the "Pride of Baltimore" from Model Shipways. In contrast to the Wasa BB, with almost NO instructions this have plenty of them. Muchos saludos, Karl
-
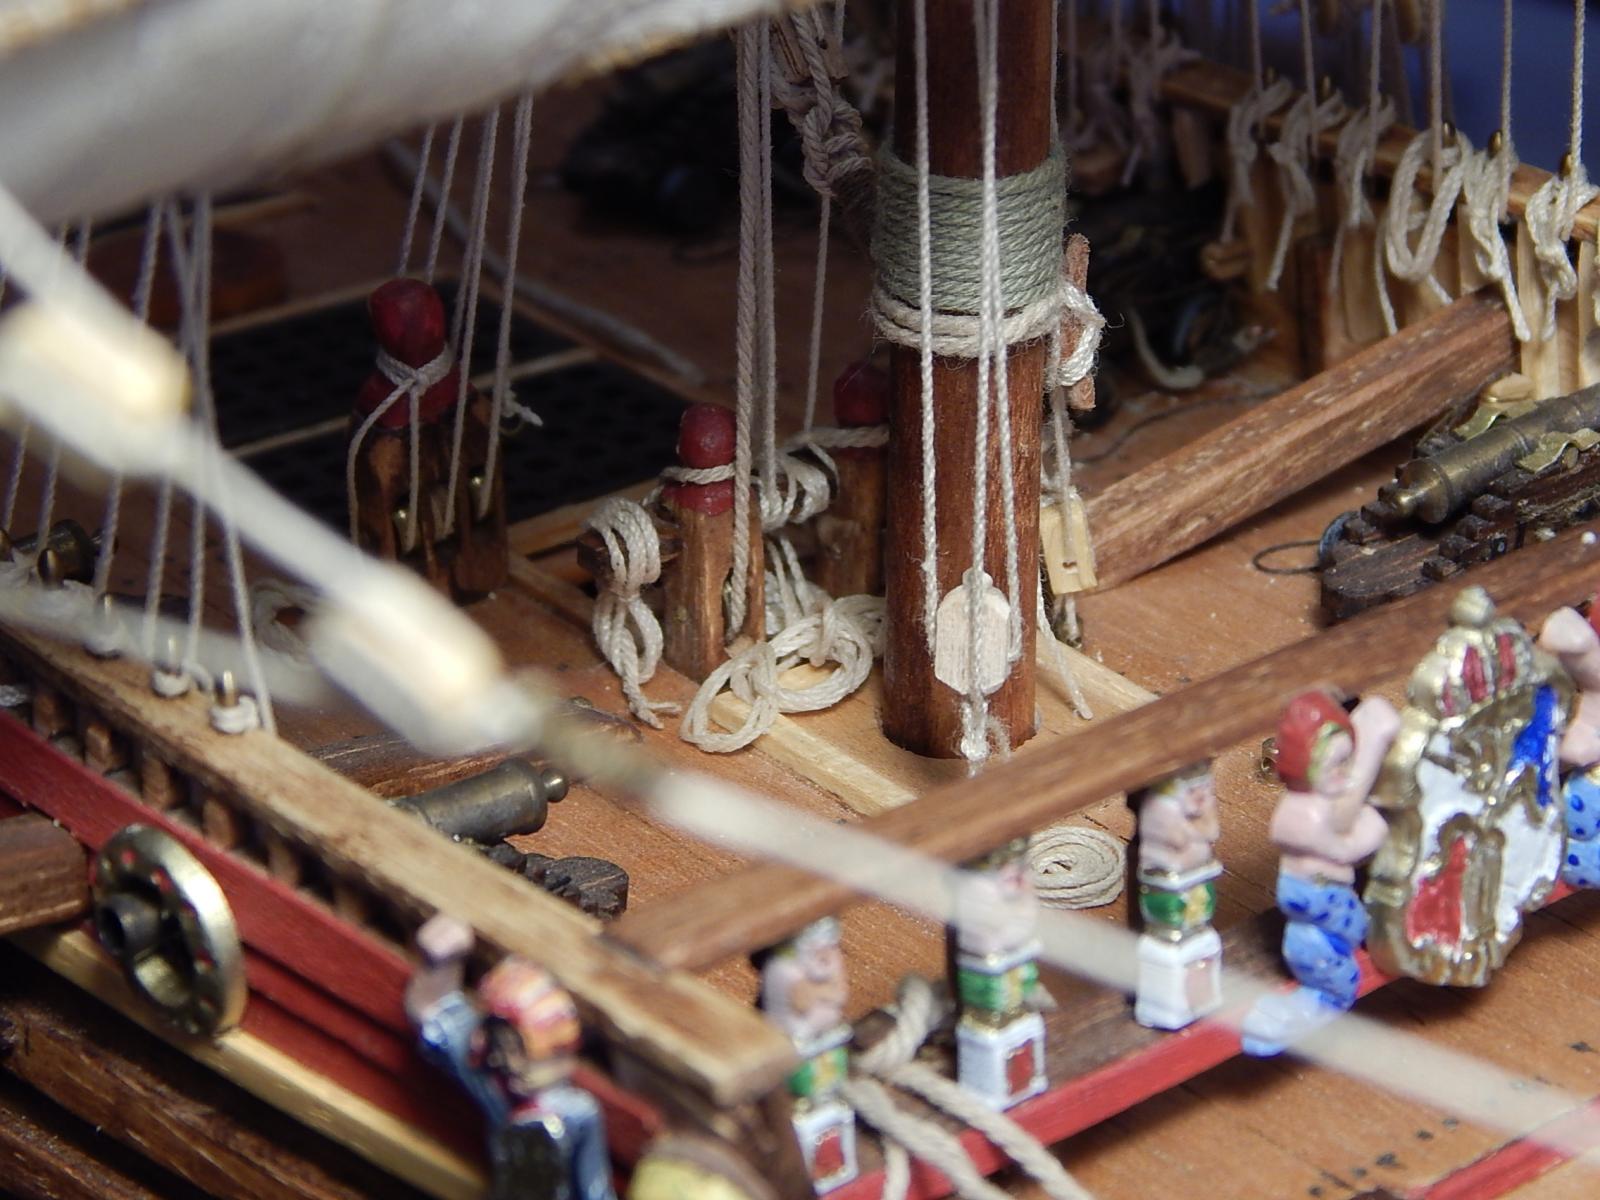
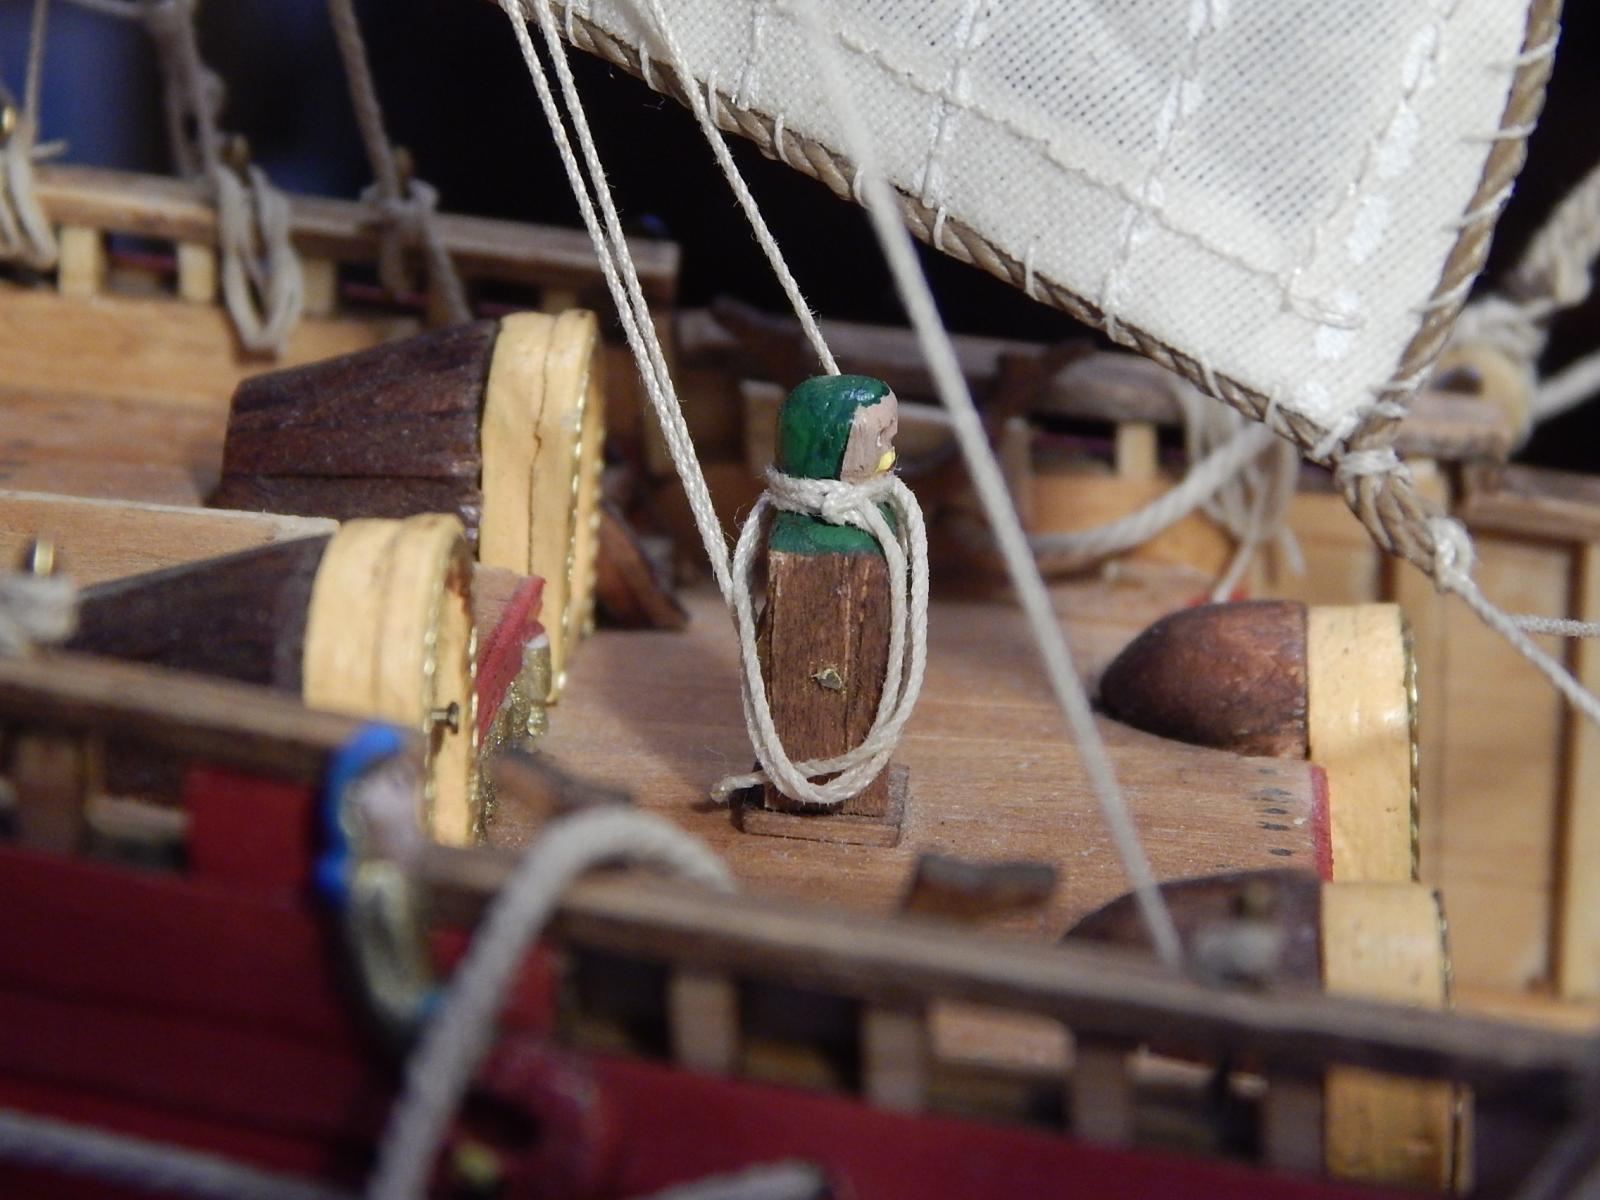
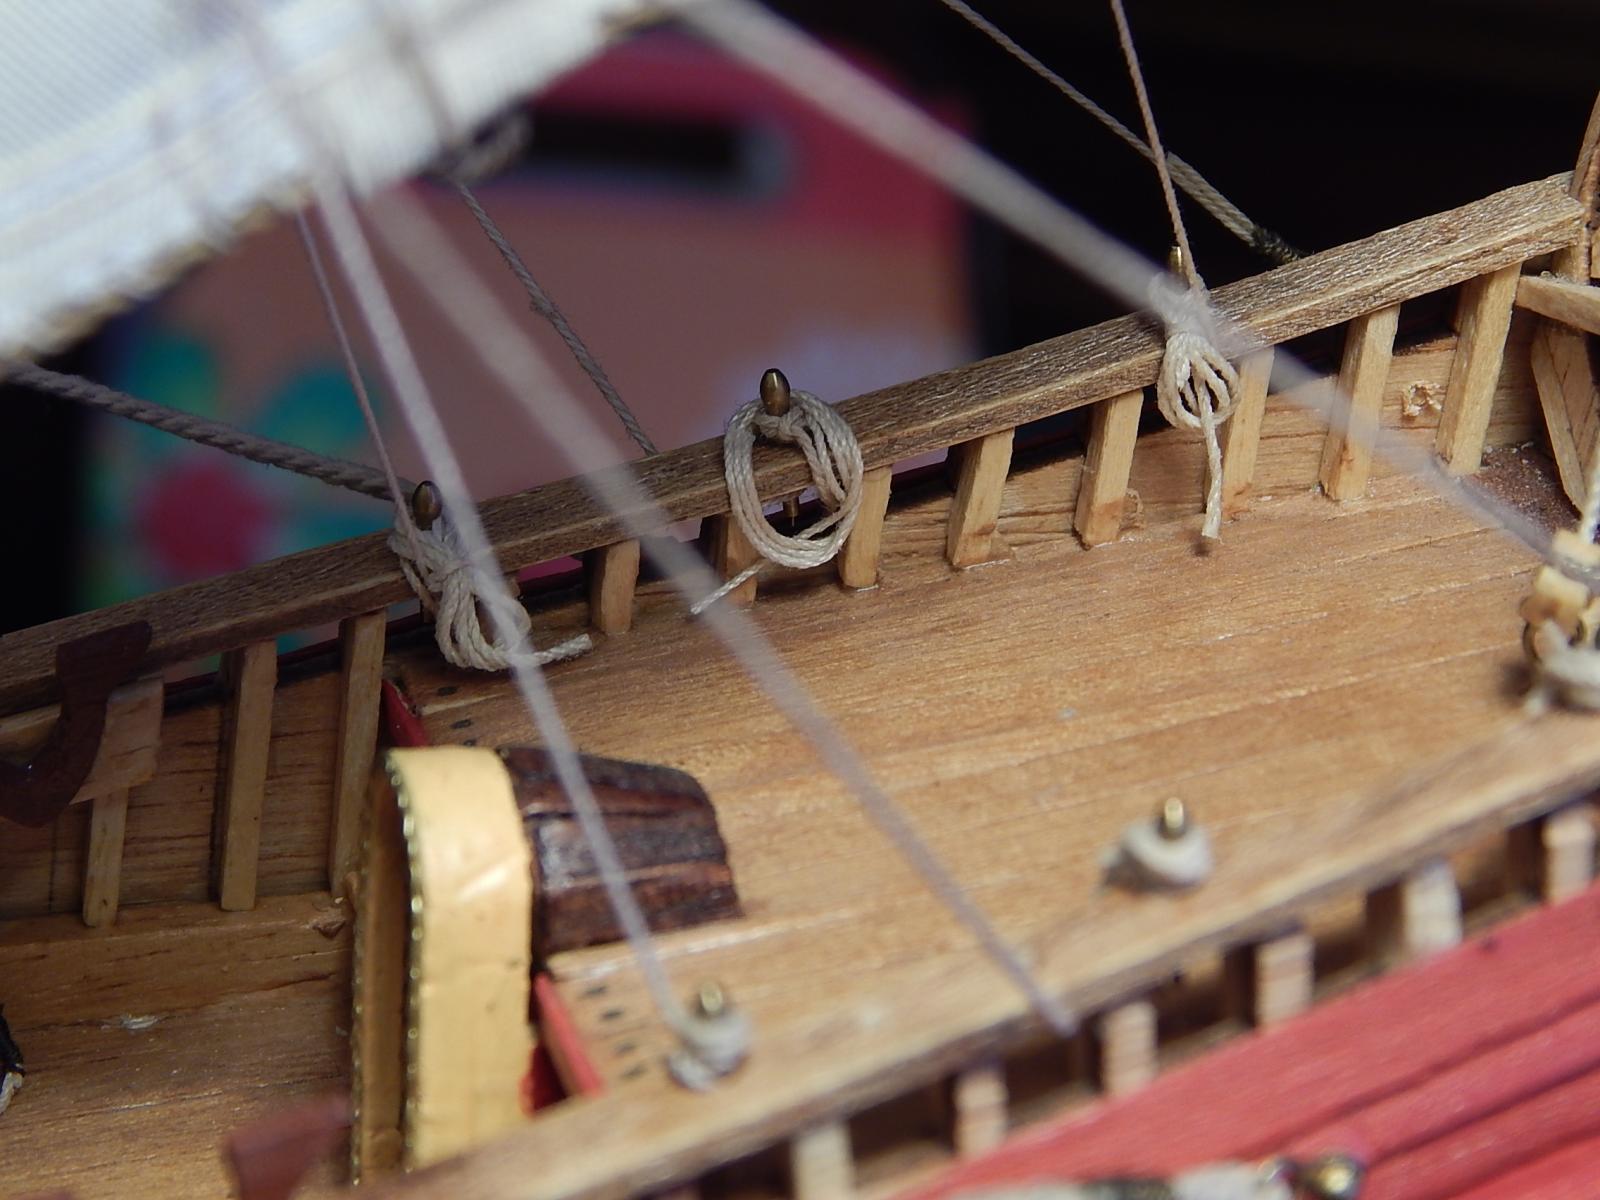
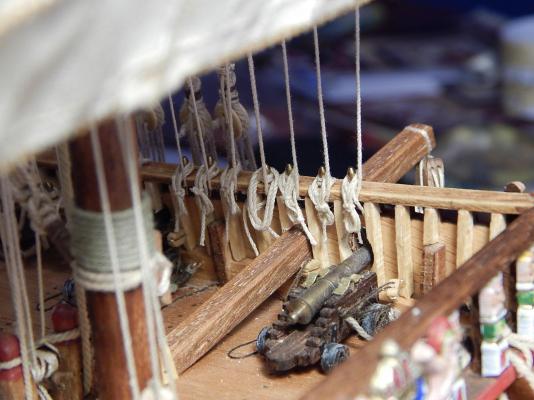
Hi guys: After just over two weeks I am back putting some of the advances in the forum. This is because I've been working on coiling ropes, a painstaking work and a bit boring. To do it it was necessary: first to adjust the tension of the standing and running rigging, fixing them with diluted white glue to its corresponding place, cutting the extra lengths and finally making and fixing a fake coiling rope to put over the belaying pins. I hope to finish it soon to follow with banners, railings and other details. Saludos, Karl


- 234 replies
-
- 11
-
-
Hola Rich: The fabric that comes with the kit was already a little stiff, maybe you can achieve the same stiffness using very diluted white glue or starch. Also the billowing can be achieved by the tension of the rigging lines. Saludos, Karl
-
Hola Rich: The outer piece is only as a guide (it is not tight so there is no friction), you really hold the piece with the sandpaper Saludos Karl
- 1,756 replies
-
- 2
-
-
- constitution
- constructo
- (and 1 more)
-
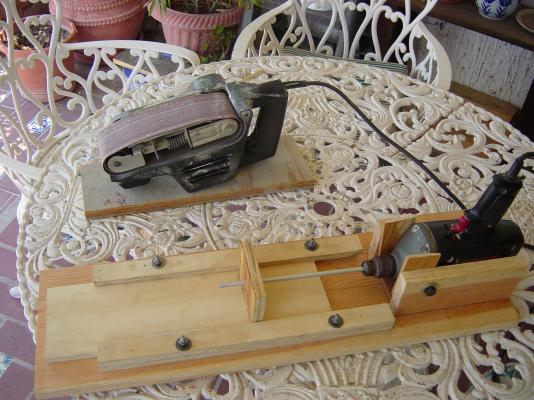
Hola Rich: I dont have a lathe either but I used instead a hand drill fix to a support to shape the spars and other pieces: Hope it can be useful. Saludos, Karl
- 1,756 replies
-
- 5
-
-
- constitution
- constructo
- (and 1 more)
-
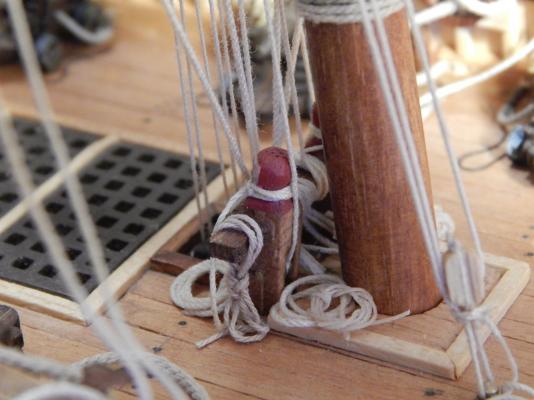
Hola Friends: Yesterday I begun knotting the threads to the belaying pins and after putting some of them I finished with my eyes red and crying. This due that the difficulty to discern where is the thread you are looking for in between all the web of lines and at the same time not disturbing the lines that were already done!!! But well, thats part of the hobby. Frank, thank you for your words and I am waiting to see your work on the sails. Saludos, Karl PD: I really appreciated all the likes you give me. Thank you all. .