HOLIDAY DONATION DRIVE - SUPPORT MSW - DO YOUR PART TO KEEP THIS GREAT FORUM GOING! (Only 24 donations so far out of 49,000 members - C'mon guys!)
×


rvchima
-
Posts
697 -
Joined
-
Last visited
Content Type
Profiles
Forums
Gallery
Events
Everything posted by rvchima
-
 Hi Augie, I am glad to hear that you are home, feeling better, and back to work. I do have a question about the case for your Syren. The dimensions of my Syren are 32"L x 11 1/4"W x 26"H. The dimensions of the GM7W are 34"L x 12"W x 28"H. The width dimensions are pretty close. Do you have enough clearance for the width of your model? Rod
 -
Shameless Spousal Promotion My wife, Cinda Williams Chima, is a New York Times best selling author of young adult fantasy novels. When I'm not building models I build her web site. http://www.cindachima.com/ Her first series of books, The Warrior Heir, The Wizard Heir, and The Dragon Heir, are contemporary fantasy set in Ohio. Her second series of books, The Demon King, The Exiled Queen, The Gray Wolf Throne, and The Crimson Crown, are high fantasy. Think Game of Thrones without the sex and lower body count. Most of her books have been published in Dutch, German, Portuguese (for Brazil), Spanish, and French. And English. If you, your children, or grandchildren enjoy reading fantasy, please check her website. Rod
-
Thank You MSW! I really enjoyed building the Syren, but interacting with all of you made it that much better. Many thanks to Chuck Passaro for designing such a magnificent kit. I couldn't have done it without Chuck's awesome instructions. Thanks also to Model Expo for producing the kit and convincing me to buy it at the Cleveland hobby show last October. And finally special thanks to Augie and Dirk and everyone else for helping with all my dumb questions. Rod
-
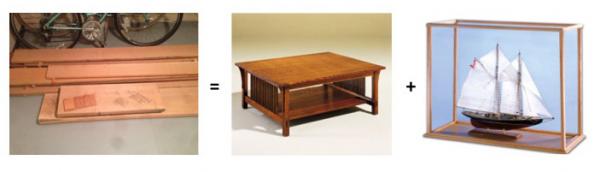
Next Build That's a pile of quater sawn white oak, a Stickley table, and a case for the Syren. I designed a case for my Flying Fish (see page 1 of this log) and will scale it to the Syren.
-
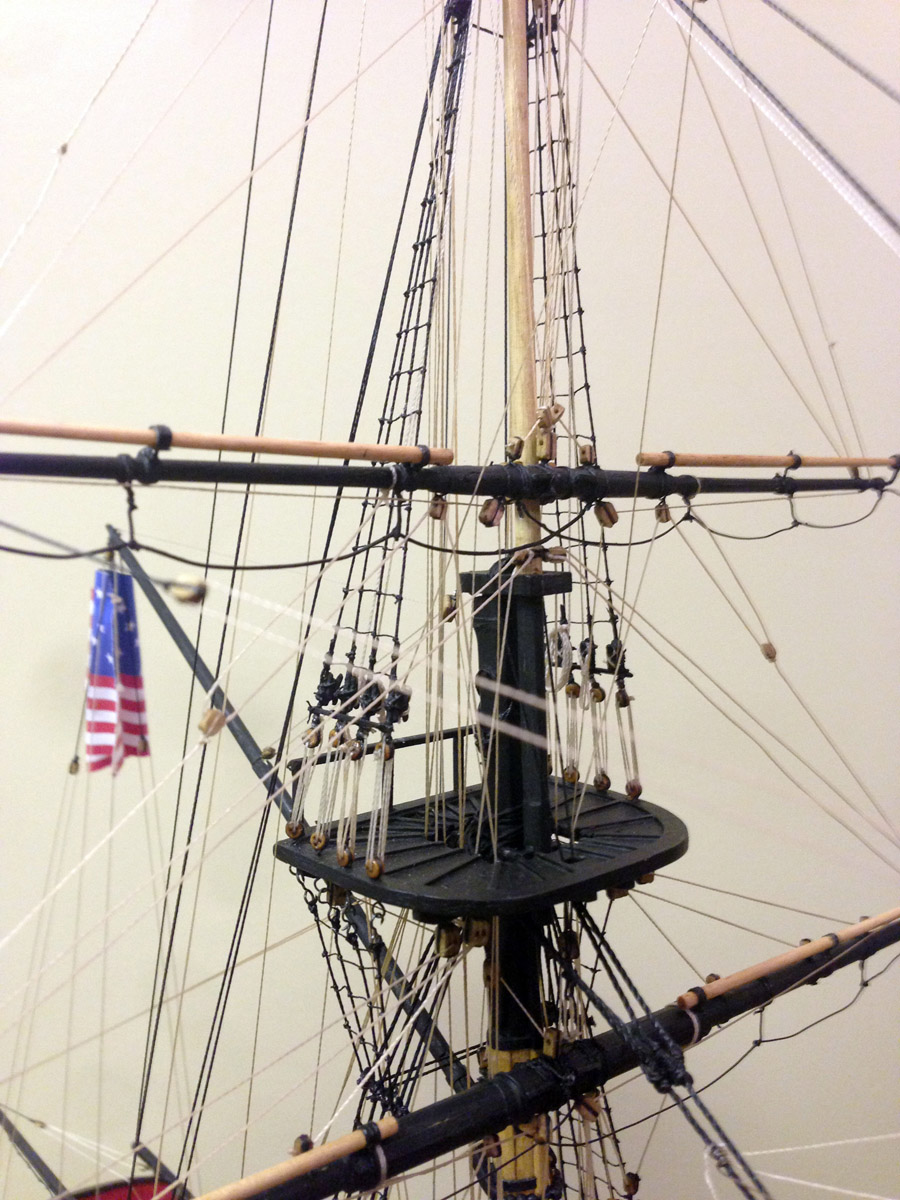
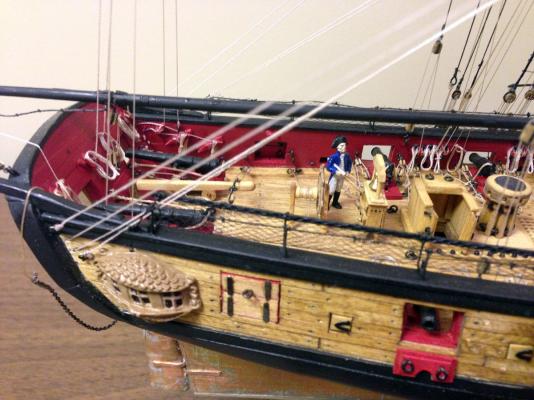
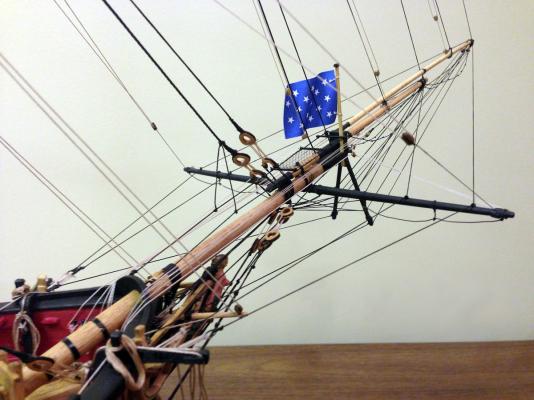
Details from Above Fore top. Weren't they from Motown? Main top. Gull's eye view of the Syren.


- 127 replies
-
- 3
-

-
- model shipways
- syren
- (and 1 more)
-
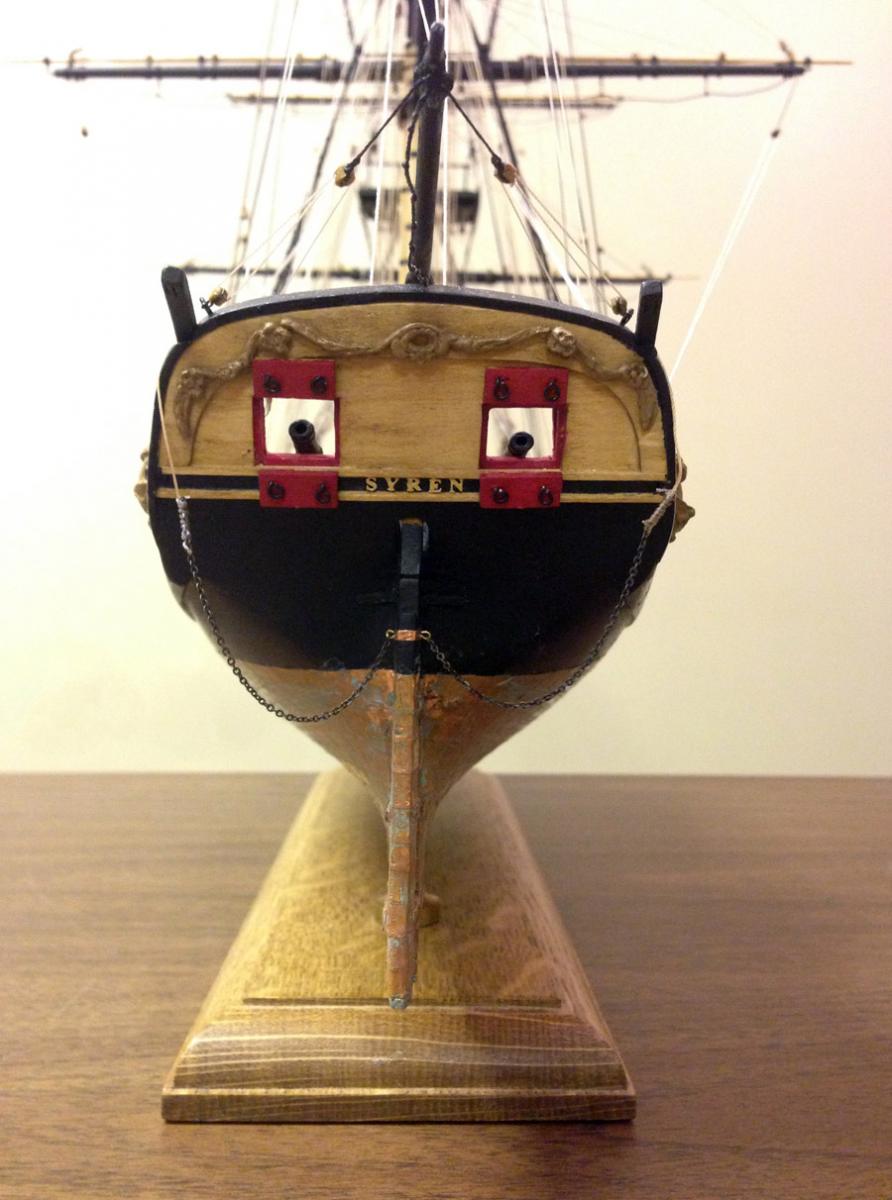
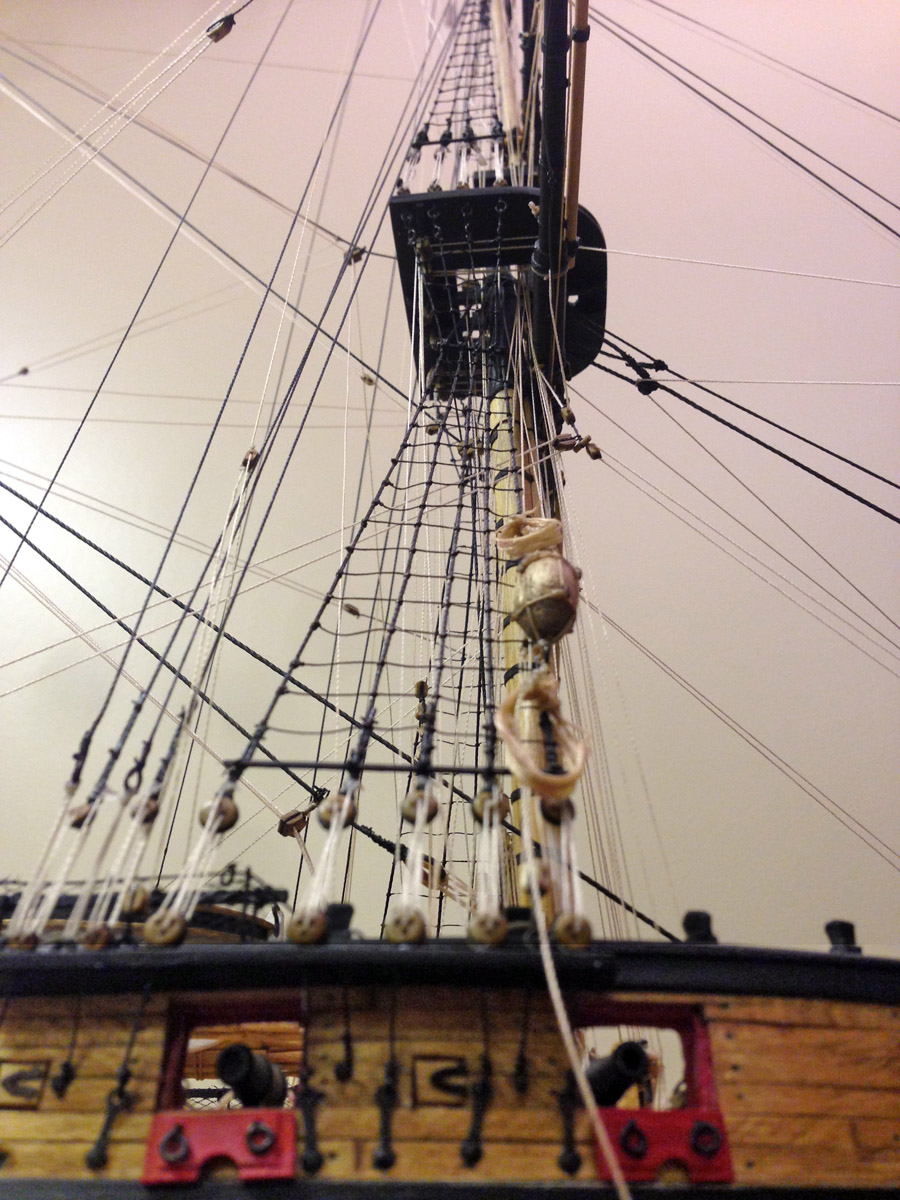
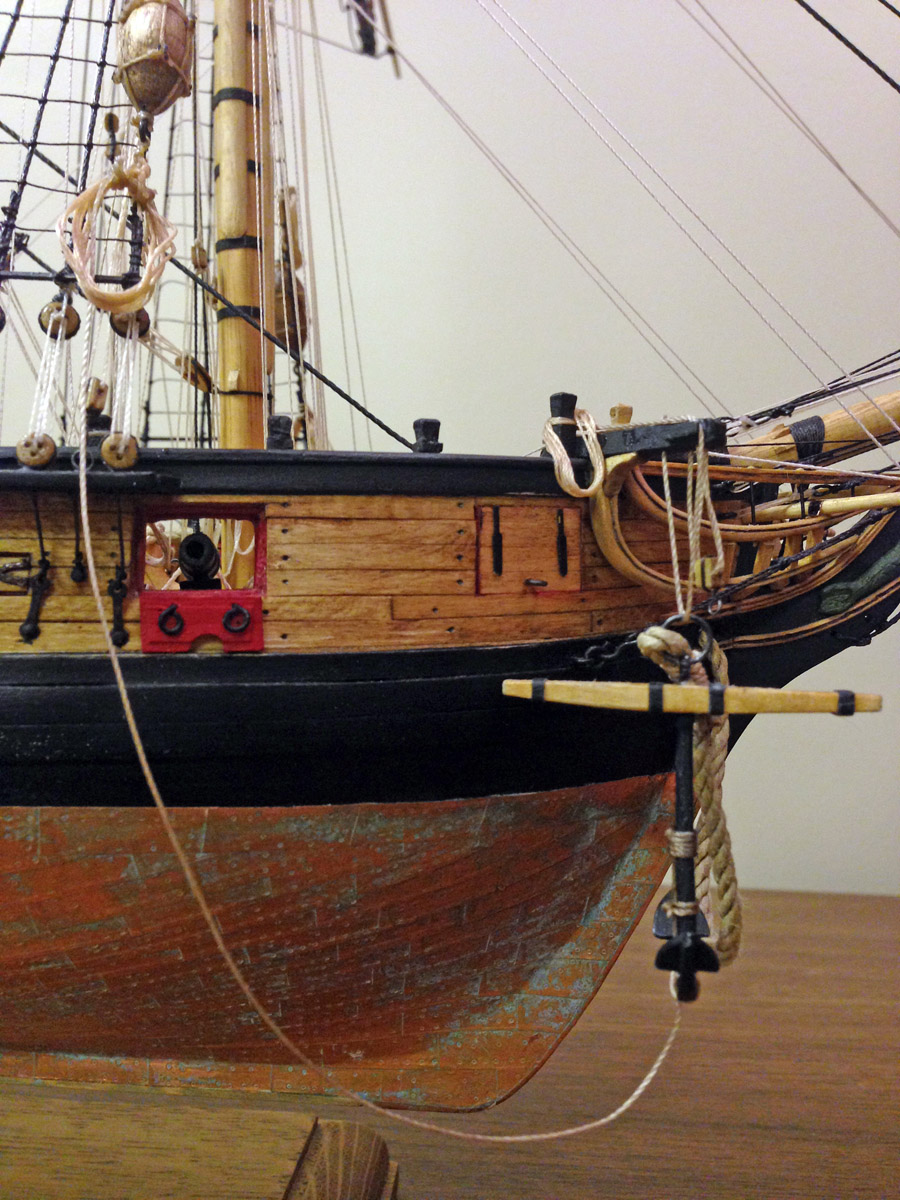
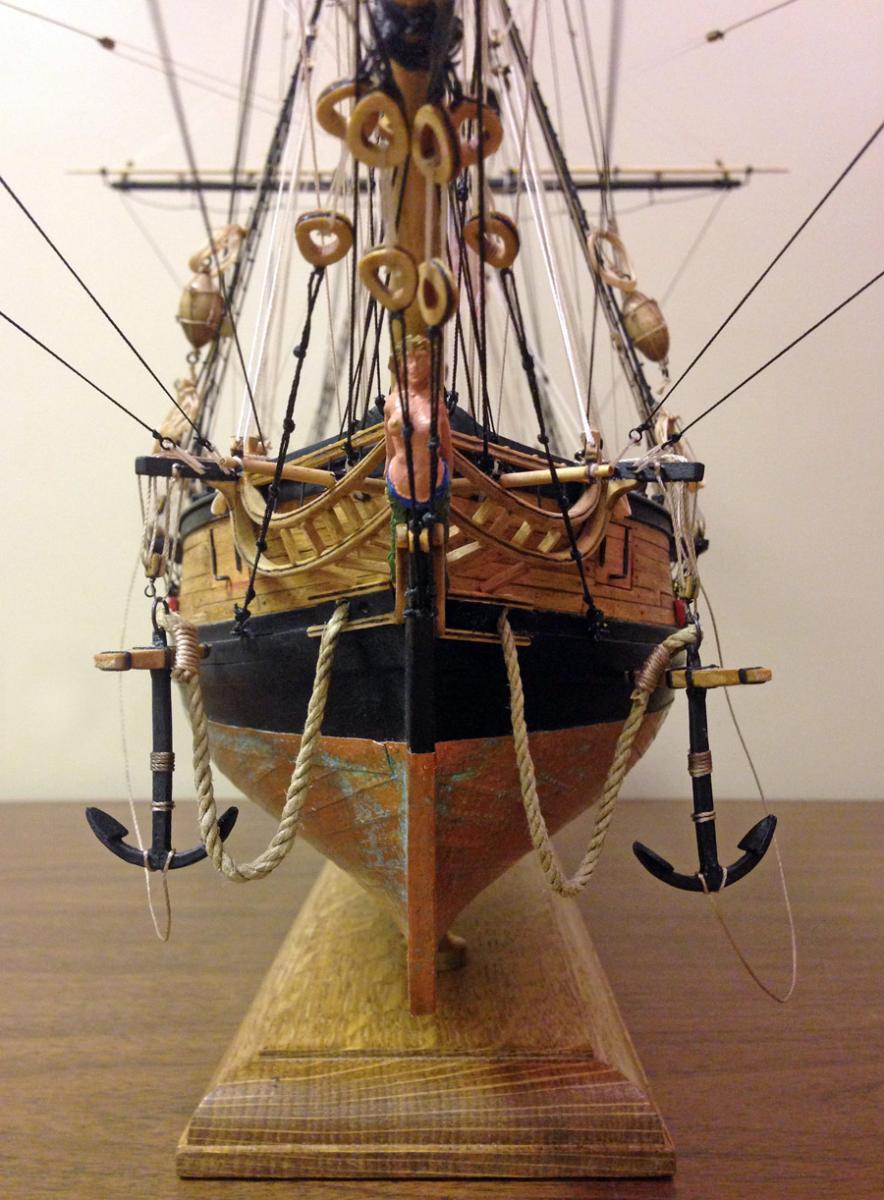
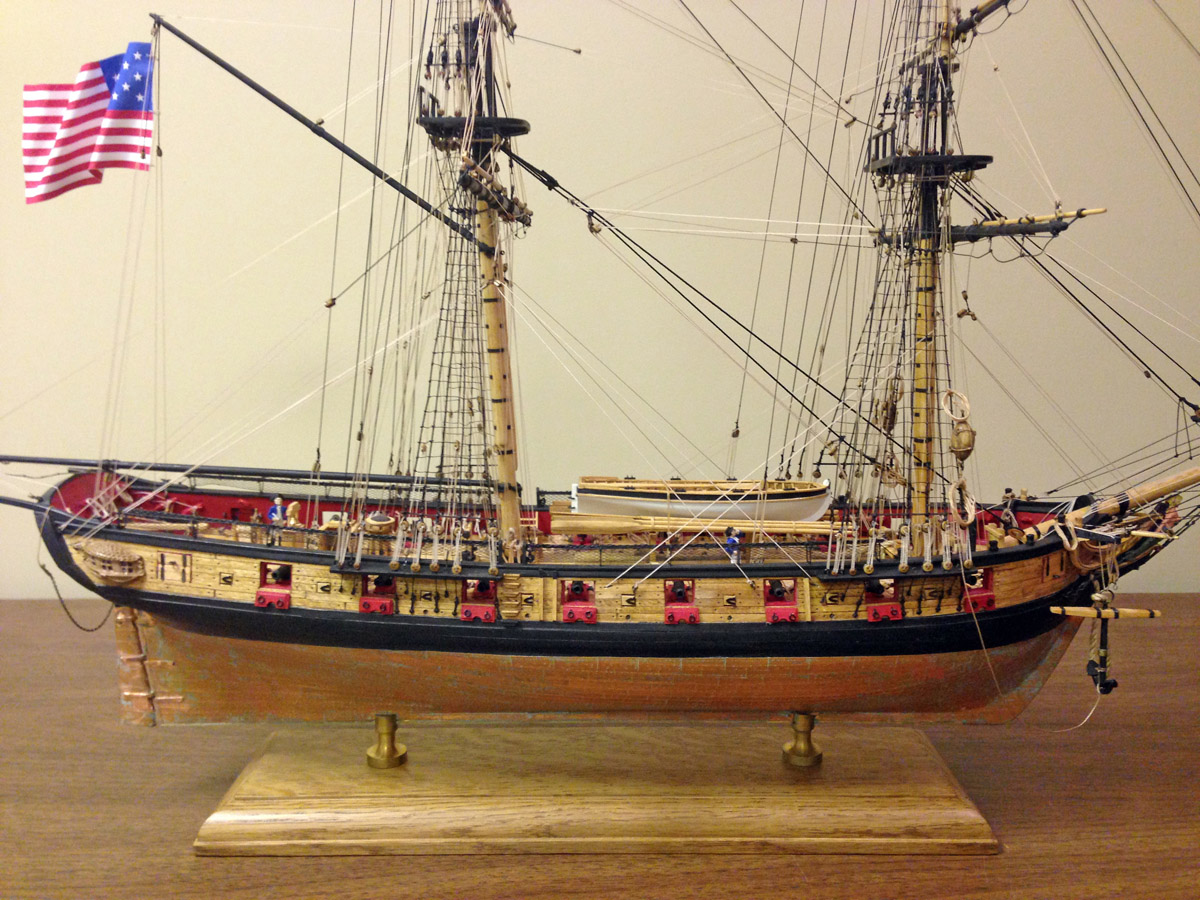
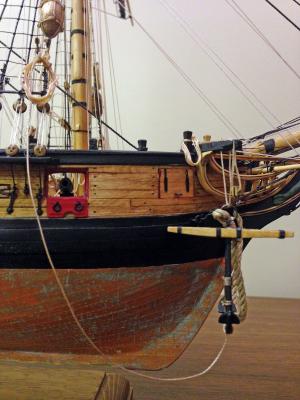
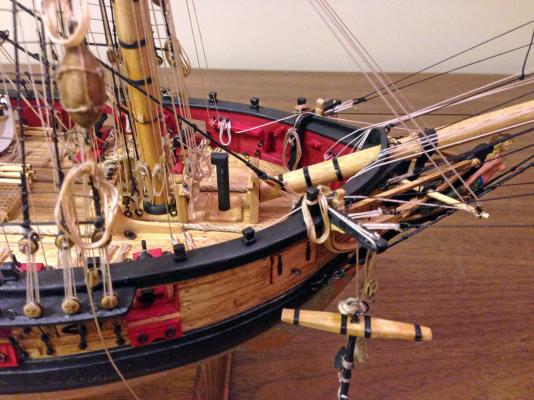
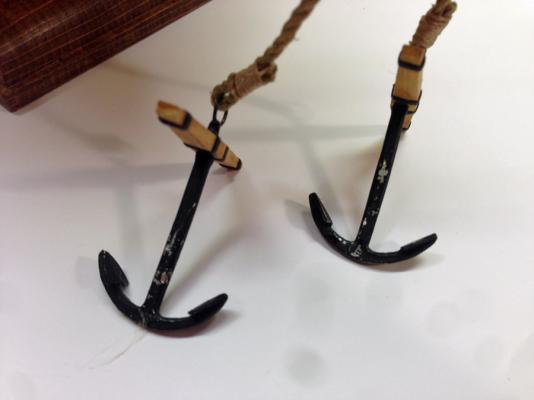
Details from Below Dolphin's eye view of the Syren. Reconstructed hanging anchors. Dirk - I did not redo the knots on the anchor cable. None of my other knots are historically accurate. Why start now? I did use your salt and vinegar patina on the hull, and I love it! Don't you want to climb up there?


- 127 replies
-
- 4
-
-
- model shipways
- syren
- (and 1 more)
-
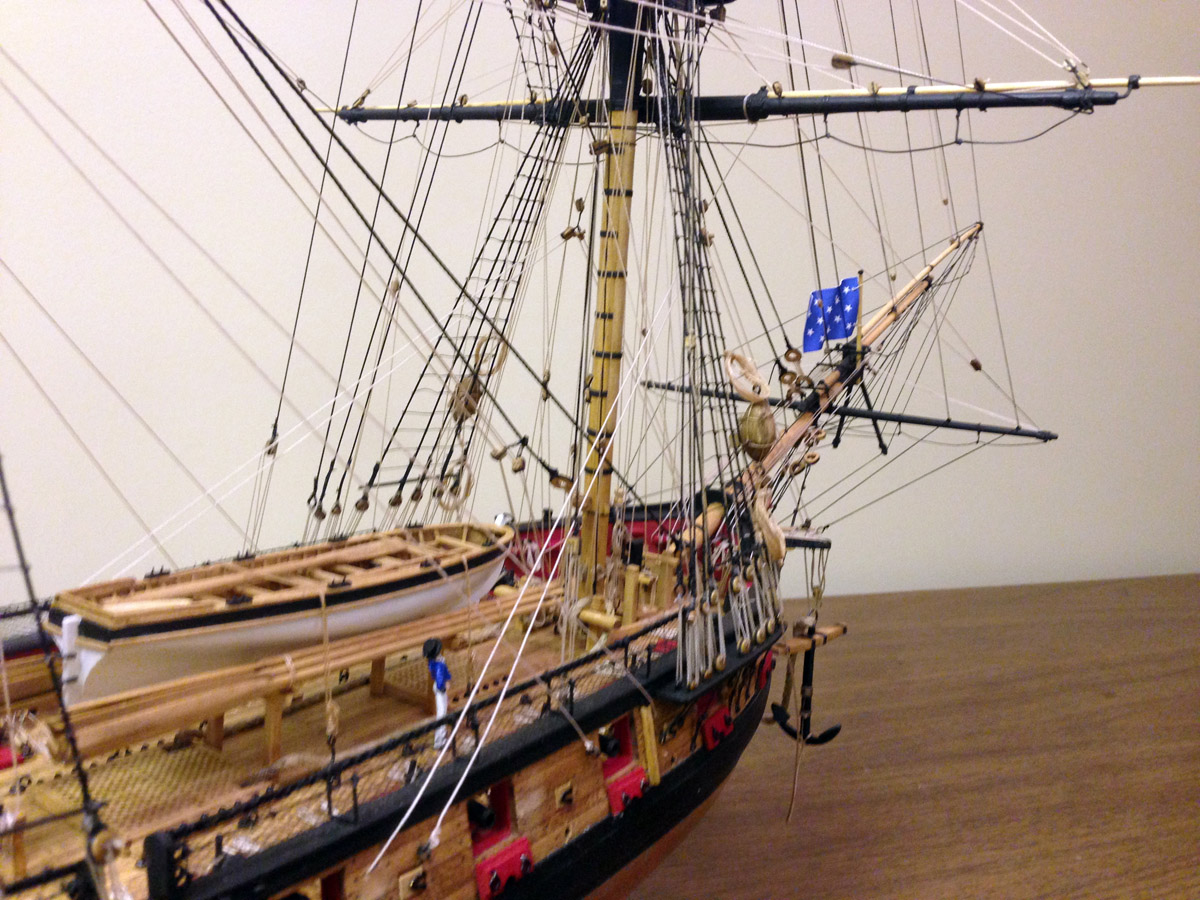
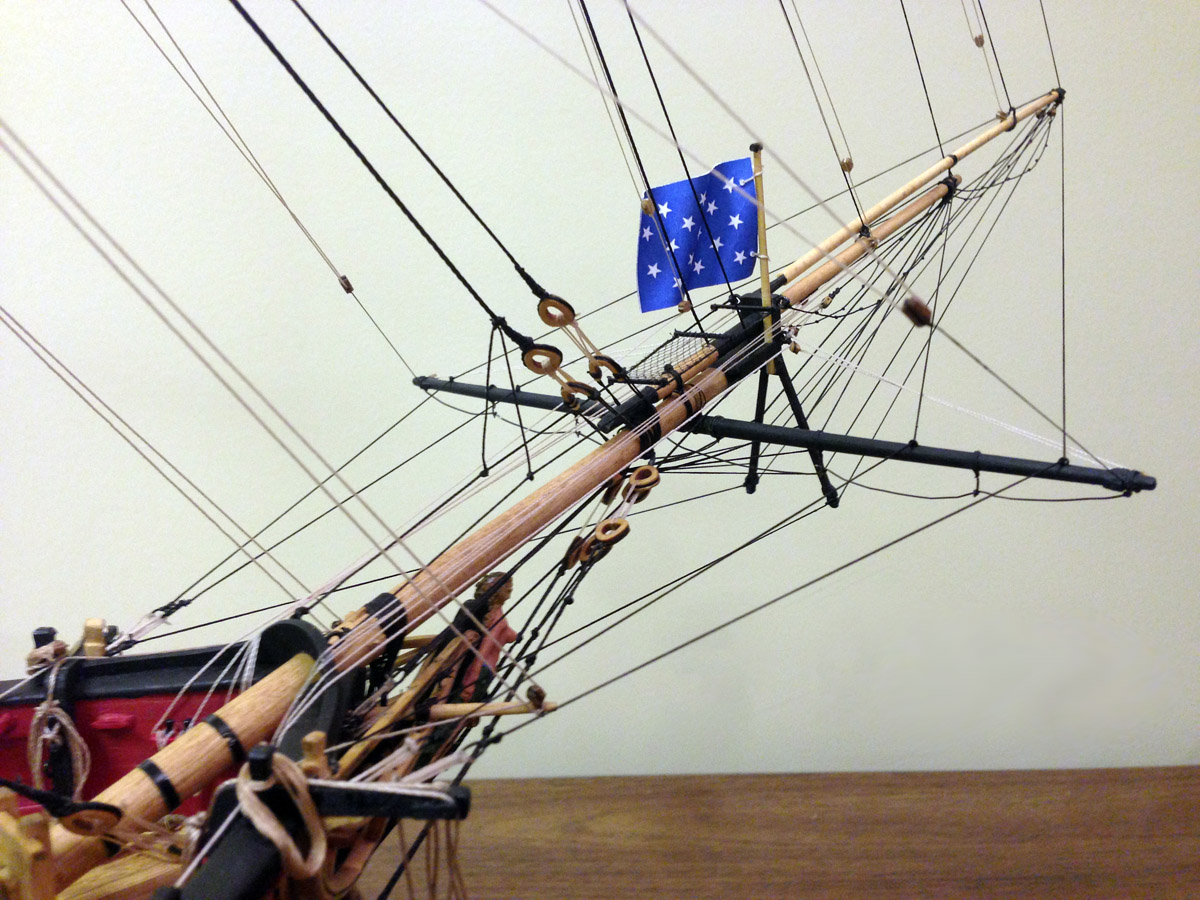
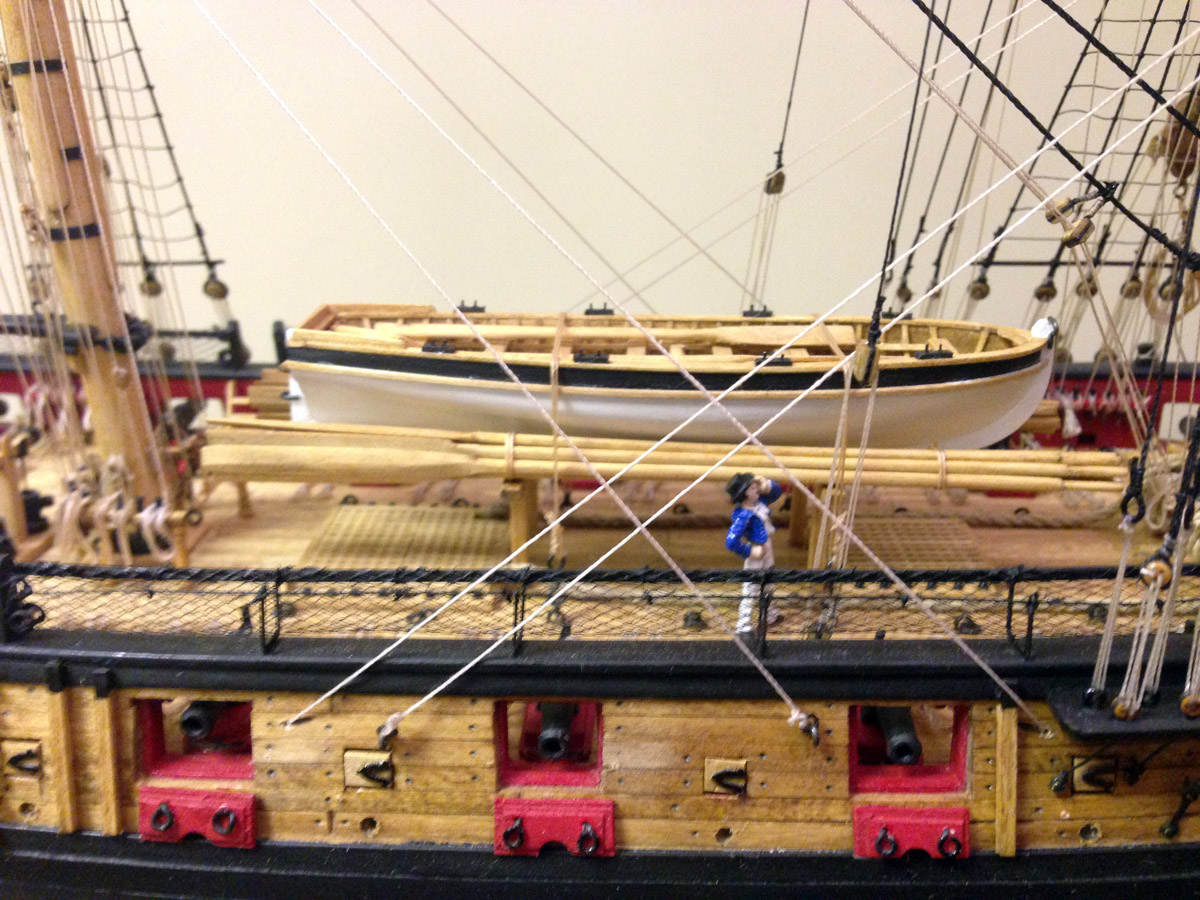
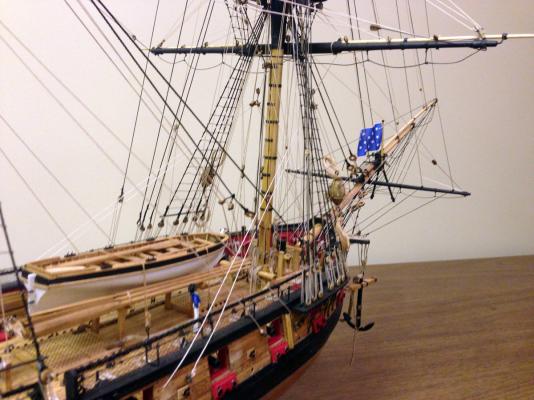
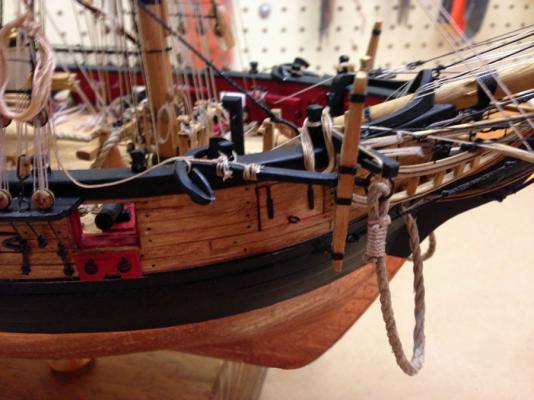
Fore to Aft You just gotta love the jib with all those lines! The longboat was one of my finer pieces of work. I copied Augie's mount for the bell.

- 127 replies
-
- 6
-
-
- model shipways
- syren
- (and 1 more)
-
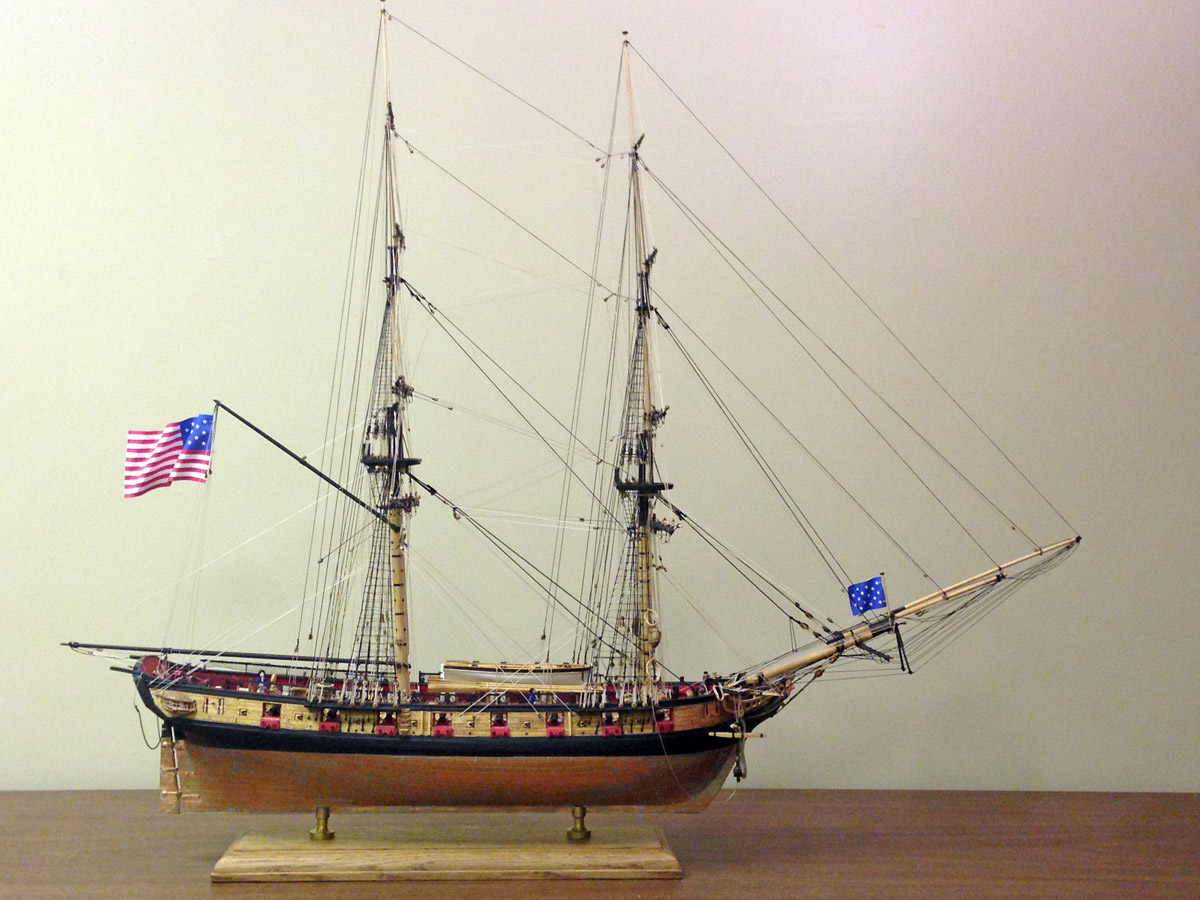
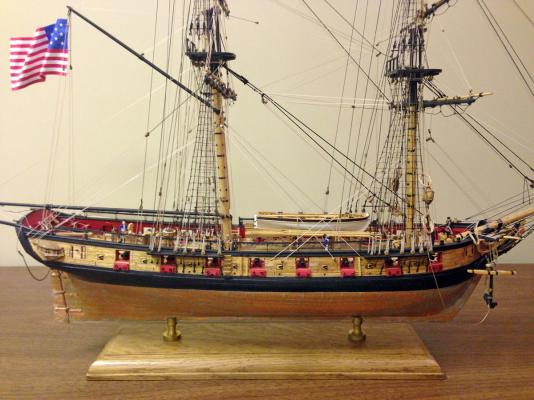
Another Syren Hits the Seas I'm finished. 526 hours. 217 days. I actually finished Wednesday after a marathon 10 hour anchor reconstruction, but yesterday was my wife's birthday and I didn't have time to take photos. Happy Birthday Cinda! I'm back. I just read in Wikipedia that the real Syren was launched on August 6, 1803. I completed my model on Aug. 7, 2013. Dang - I missed her 210th anniversary by one day! I had my doubts about the paper flags, but I love the splash of color aloft. I had to add a tiny wire to the gaff to hold the flag. 526 hours. You probably can't build this model much quicker than that. I wasn't trying to rush but I do have other projects in the queue. I could have knocked 30 days off by skipping my vacation and my son's wedding.

- 127 replies
-
- 4
-
-
- model shipways
- syren
- (and 1 more)
-
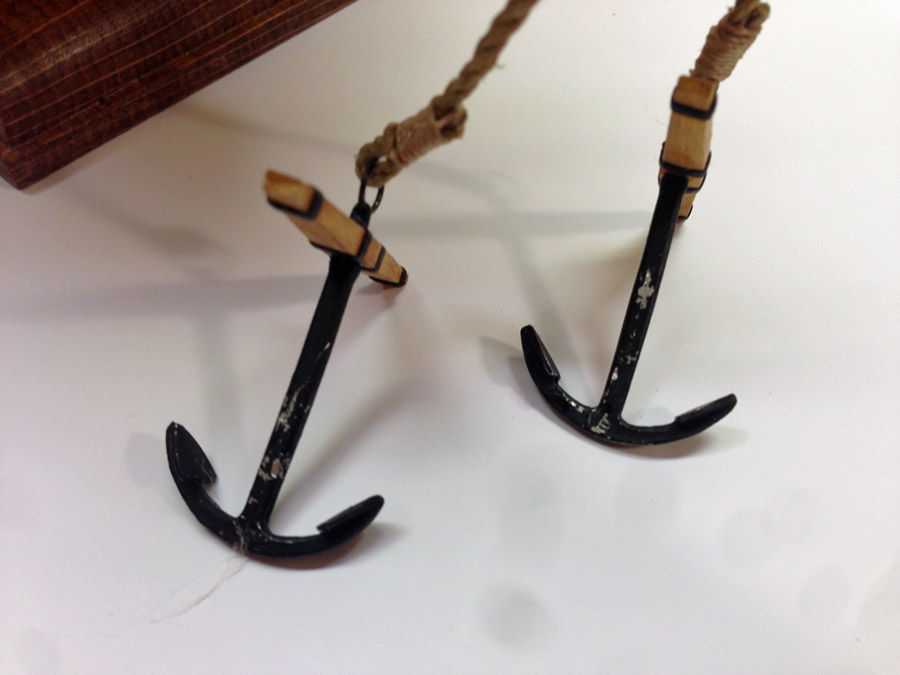
Anchors Aweigh While waiting for extra parts I jumped ahead and built my anchors. I installed them as shown in the photos in the manual - right up against the catheads. Then I read ahead and realized that there was no room to add the double block and line that the anchors are supposed to hang from. So as Dirk always says, "deconstruction!" A line drawing in the plans shows the anchors hanging from the cathead. I plan to redo them that way.
- 127 replies
-
- 3
-
-
- model shipways
- syren
- (and 1 more)
-
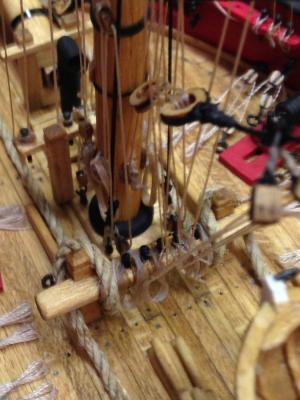
Belaying Lines in Yellowstone If you've ever been to Yellowstone National Park, you know that the first time you see a bison (buffalo,) you stop along with 50 other cars for that perfect photo, and create a huge traffic jam in the process. After several days you've seen dozens of bison and just want to yell "Get out of the way so I can get to the lodge for a bison burger!" That's what belaying lines to pin racks is like. You do the first pin perfectly. Down to the left, up to the right, repeat, make a twist, over the top, add a rope coil. On the last pin there are 10 lines in the way and you think "Ill just glue this string to anything that doesn't move."
- 127 replies
-
- 6
-
-
- model shipways
- syren
- (and 1 more)
-
Parts Shortage Update Model Expo The other day I sent an e-mail to Eric Snow at Model Expo explaining my shortage of blocks and rigging line. Eric responded immediately, apologized for their backlog, and offered to help. I told him that I no longer needed the parts (see below) and offered to send him a list of parts shortages and surpluses for the Syren, so that they can fine-tune the parts list in the future. Ages of Sail I e-mailed Roger Jeya at Ages of Sail again. He responded immediately, saying that they sold a lot of fittings lately (probably from all of you) and were having trouble getting enough Amati fittings. Today I received a package priority mail with 3 huge packages of beautiful Amati blocks. I think there are enough to rig another Syren. Thanks Roger! Rod's Model House In the meantime I made a bunch of 3/32" blocks. They weren't as bad as I expected. I also bought sewing thread that almost matches the 0.008" tan line supplied with the kit. It's not quite the same, but it's all on lower yards and looks OK. I'm almost done rigging. Photos tonight at 11 (probably tomorrow.)
-
Augie, What are your plans for a case for your model? Did you buy a case from ME? What size did you get? I designed and built a case for my Flying Fish not too long ago and was thinking about building another for my Syren, but ME has a big sale going on .... Rod
-
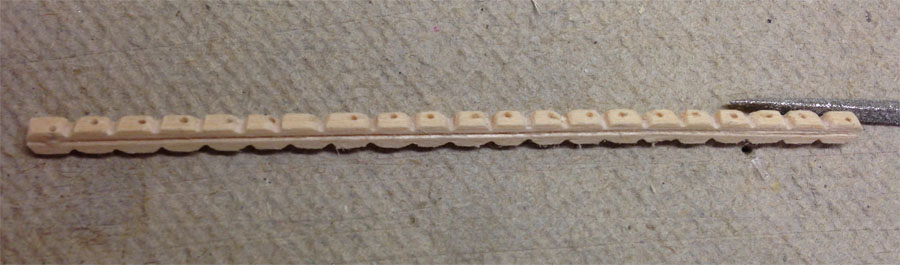
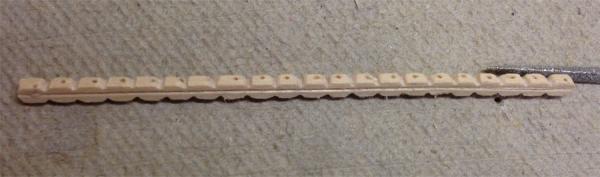
Mail Order Blues I ordered a selection of rigging line from Model Expo. It took 15 days to arrive. When I realized that I would run out of blocks I decided to hedge my bets and ordered from three different companies. Here's how that turned out. Model Expo I used their on-line Tech Support form to request replacement parts. The <send> button echoed my input to a new window but didn't seem to send anything. After a week with no response I tried again, and the same thing happened. I think their site is not working correctly. I called them yesterday and the woman on the phone told me to send a request by e-mail. (Their are no e-mail addresses posted on their site.) No response yet, but it's only been 24 hours. Ages of Sail On July 14 I ordered 3 sizes of blocks, hoping that 2 would match. $14.75 for the blocks, $18.20 postage and handling. I got an immediate e-mail saying that my credit card had been charged and that I would get another e-mail when my order had been shipped. After 9 days I checked their on-line order tracking feature and saw that my order had been canceled. I e-mailed the company and got a response saying that they were not sure why the order had been canceled and would let me know. Yesterday I still had not heard anything so I e-mailed them again and asked to have the order canceled and my credit card refunded. No response yet, but it's only been 24 hours. Bluejacket Shipcrafters On July 23 I ordered blocks from Bluejacket Shipcrafters, and offered to pay extra for priority shipping if available. The next morning a very helpful woman called to tell me that next day air would be very expensive, but that they would ship the blocks priority mail for the standard $10 shipping charge. They arrived two days later. The bad news is that they are cast metal. Caveat emptor. Rod's Model House A few days ago I decided to make my own 1/8" blocks using a leftover basswood strip from the kit. I made about 30 at a time in one long strip. I used Dirk's trick to score grooves down the center, filed little notches every 1/8" to round the corners, drilled between the notches, and finally separated the blocks with a razor blade. I stained the blocks with some walnut stain. The results were "acceptable," and allowed me to rig some hallyards that have been hanging loose for a month. The only problem is that the basswood blocks tend to split when I wrap a wire hook around them. Here's a row of blocks ready to be cut apart. I still have a ways to go and hope that Model Expo sends replacement blocks soon. I am not looking forward to making 3/32" blocks.
-
Bob, When I built my Flying Fish in 1969 I made a cradle for it. Forty three years later it had been bumped off the cradle several times and was looking pretty sad, so I decided to switch to a pedestal stand. I built and finished the base, drilled and countersunk the holes, and clamped the base to saw horses with the bottom exposed. I balanced the ship on the pedestals and base, and my wife held it while I lay on the floor and drilled into the hull. The old Flying fish had a solid hull so two long screws held it securely to the base. The attached base gives me something to safe to hang on to when I have to move the model, so I like it a lot better than the cradle. Rod
-
Congratulations Augie! Your Syren is magnificent. Thank you for sharing your build log with all of us, and thank you for all the help you've given me. Rod
- 1,668 replies
-
- 1
-
-
- syren
- model shipways
- (and 1 more)
-
Your Syren is looking great Thomas. I like your well-used building board too! Did you take painting lessons from Jackson Pollock? At this stage you don't really need a vise anymore. Make a stand with a cradle or a couple of brass pedestals and just use that.
-
Dolphin Striker Modification I think I've broken my dolphin striker 4 times now. Reach for something under the bow on my bench, bump a line, and SNAP! Today I reinforced my dolphin striker by gluing an inverted V of music wire to it. Don't know if it will help, but I'd recommend it to anyone else building the Syren. Do it early and maybe you can hide it better.

- 127 replies
-
- 1
-
-
- model shipways
- syren
- (and 1 more)
-
More Extra Parts My kit included 15 13/32" single blocks that were also listed in the parts list. The photo below puts these blocks into perspective - they are huge! These must be included by mistake. Or did I miss something major? Update According to Chuck, the 13/32" single blocks were added to the kits by mistake, and that ME is aware of the error.

-
I've already contacted twice them about missing cannon balls and shortages of deadeyes. They did replace both for free, but it took 2-3 weeks to get the package. I ordered the deadeyes specified in the kit and received a scribbled note asking me to order from the catalog, which didn't match.
-
Beautiful work on your Syren, Thomas. I love the little ring bolts on the gun port lids. I used bent eyebolts, but some of them look too much like bent eyebolts. You will be glad that you made the rings. Rod
-
I'm Out of Everything My lower yards are lofted and mostly rigged, but I have run out of all kinds of supplies: 28 gauge black black wire 0.008" black line 0.008" tan line (almost out) 0.012" black line 3/32" single blocks (I might have exactly enough but it sure is hard to count ahead) 1/8" single blocks I ordered blocks and wire from Model Expo, but their parts descriptions on-line are completely different from those in the kit. They don't seem to have the right size blocks at all, so I ordered those from Ages of Sail. I hope they match when they arrive. The weird thing is that I have enough boxwood strips left over to build another boat! Has anyone else run into shortages or surpluses with the Syren kit?
-
Tip of the Day - Needle Threader or Instant Needle? When I have to thread rigging line through a block I'm always tempted to grab for my needle threader. But sometimes it's hard to see or reach the back side side of the block. In that case I dip the end of the line in a drop of CA glue, wipe it with a paper towel, and wait 10 seconds for it to stiffen. Then the line becomes an instant needle that I can push through the block from the front.
-
Beautiful work Augie! I can hardly wait to see you Syren completed. Do you plan to get a case for her?
- 1,668 replies
-
- 1
-
-
- syren
- model shipways
- (and 1 more)
-
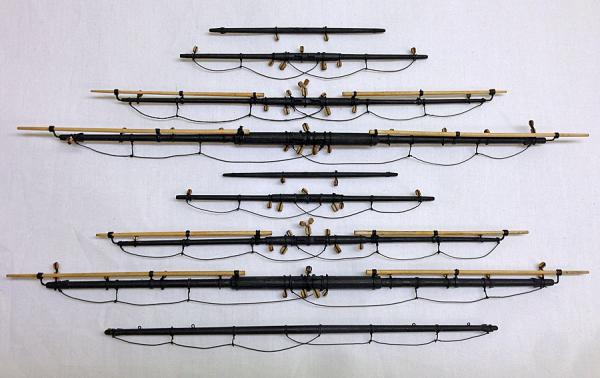
Yards Complete 28 weeks, 448 man-hours Saturday I returned from a two-week vacation in Alaska. Now the grass is cut, the laundry is done, and the weather is terrible - a perfect excuse to stay inside and complete the yards for the Syren. The yards took 33 hours to build and are shown in the photo above. You can compare them to Augie's yards at this link: http://modelshipworld.com/index.php?/topic/46-us-brig-syren-by-augie-ms-kit-164-18-gun-brig/page-40#entry42019 Augie's entry was dated April 21 and he's almost done, so I figure I'll be done by the end of September. I decided to paint my yards black like Chuck's prototype. It seemed like a good idea until I realized that I had installed my boom and gaff unpainted. Luckily there wasn't too much rigging in the way and I was able to paint them in place. Maybe I'll be done by Halloween
- 127 replies
-
- 3
-
-
- model shipways
- syren
- (and 1 more)
-
USS Syren vs. the Diamond Princess Approximtely to scale. They just don't make ships like they used to. Posted from Ketchikan, Alaska. My cabin is on deck 10 of 15.

- 127 replies
-
- 3
-
-
- model shipways
- syren
- (and 1 more)