rvchima
-
Posts
710 -
Joined
-
Last visited
Content Type
Profiles
Forums
Gallery
Events
Everything posted by rvchima
-
 Phil, Beautiful work on your Seguin! I love the crew and all your little details - the ice chest with spilled ice, the coal pile, ladders, etc. Congratulations on a job well done.
 -
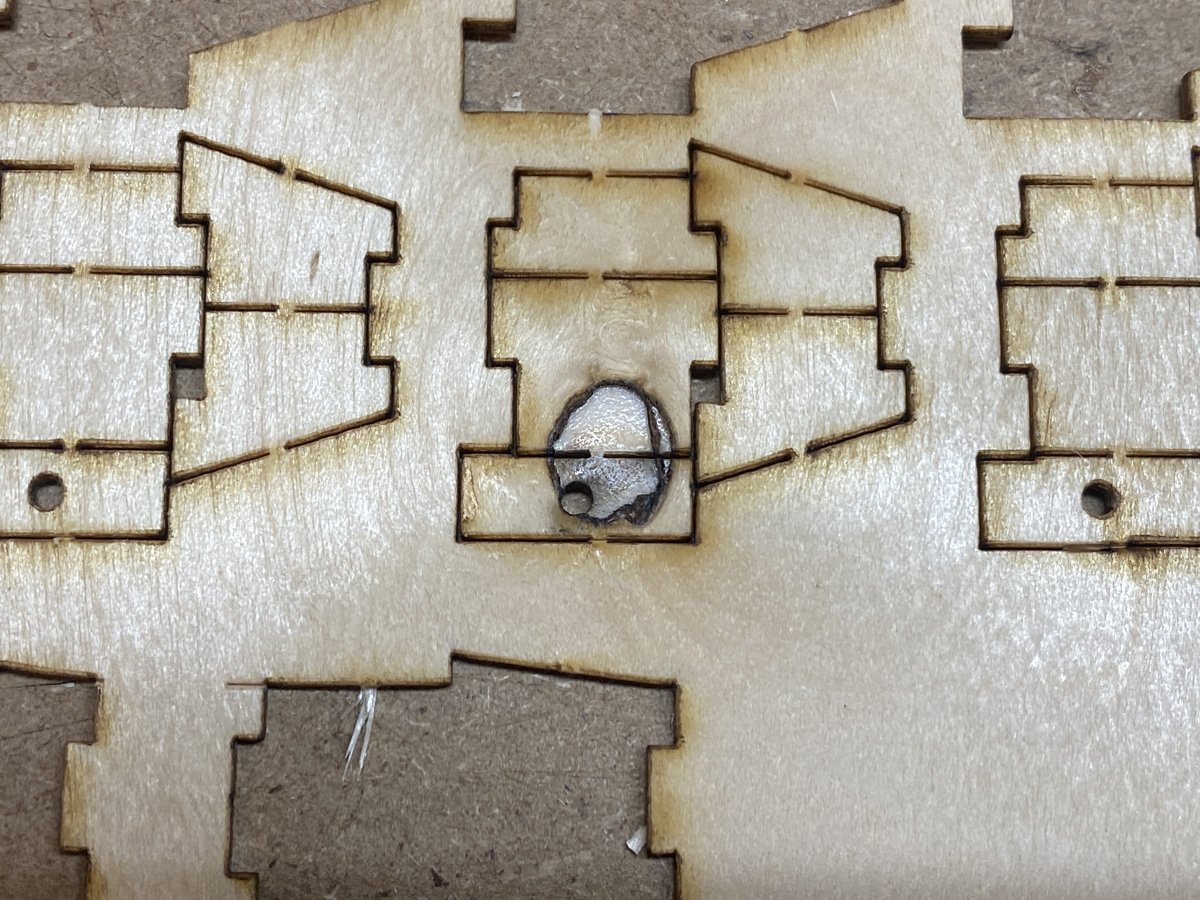
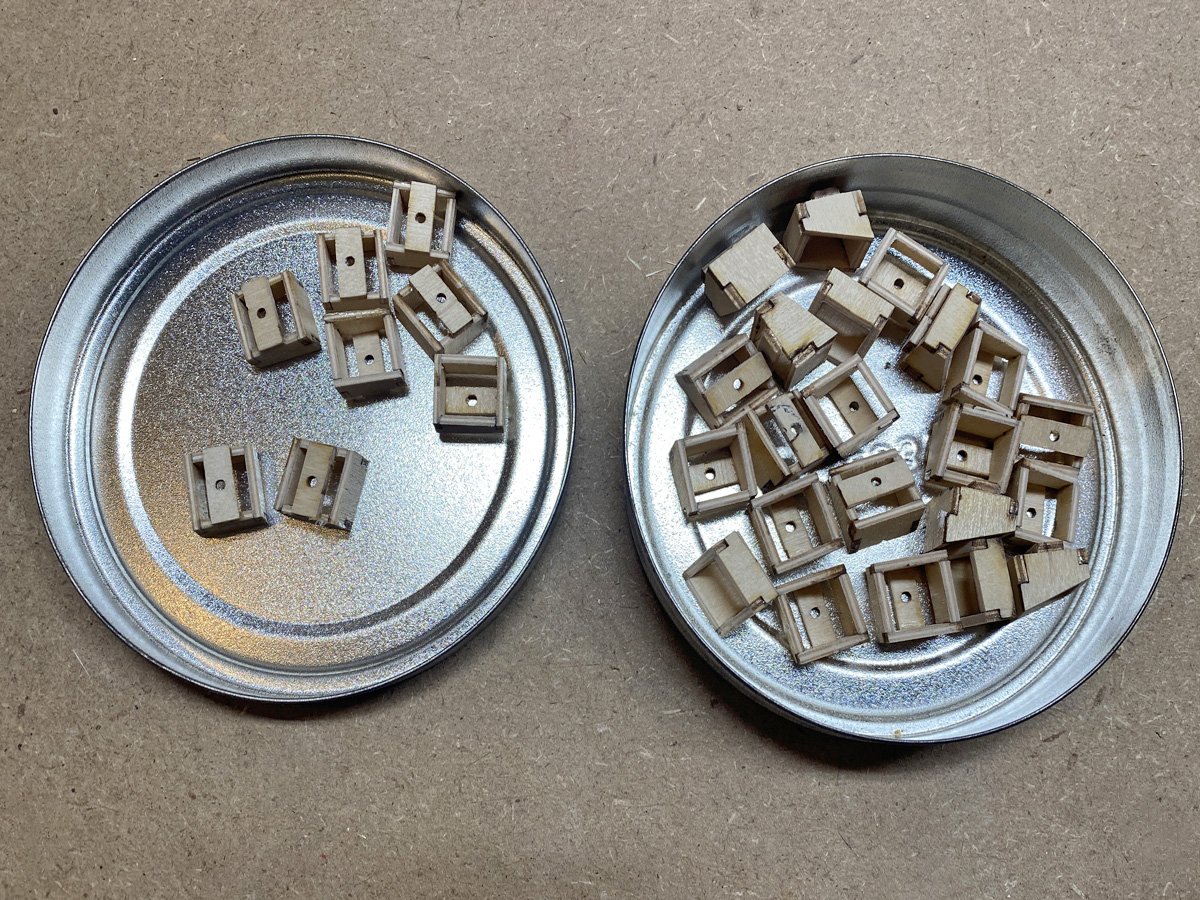
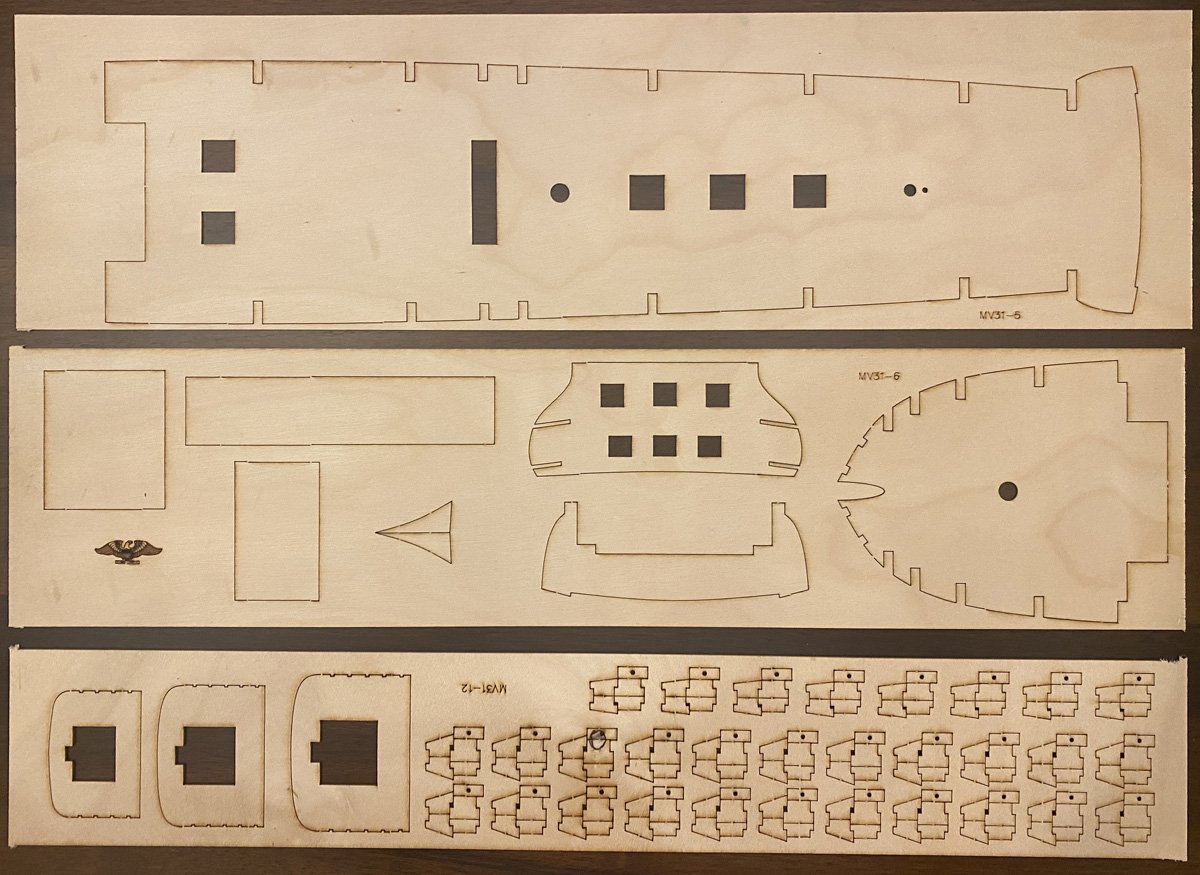
Gun Ports The old Mamoli kit had cast metal gun ports that apparently required a lot of clean up. The Dusek kit has 30 gun ports in 2 sizes that are built up from thin ply. I thought that it would be tedious to build 30, but I got them done in a few hours over 2 days. The ply had a couple of laser burn marks that I fixed with filler. The parts are held in the ply with tiny tabs that are not on the glued edges, so you can assemble the ports without sanding. I dabbed the pieces with CA accelerator on a small brush, and glued them with medium CA. Then I sanded the fronts and backs with a small disk sander, and added the small back piece that holds the gun. It seems like that back piece should cover the whole port, but you probably won't see it on the finished model. Next up: sanding all the bulkheads to shape before planking.
-
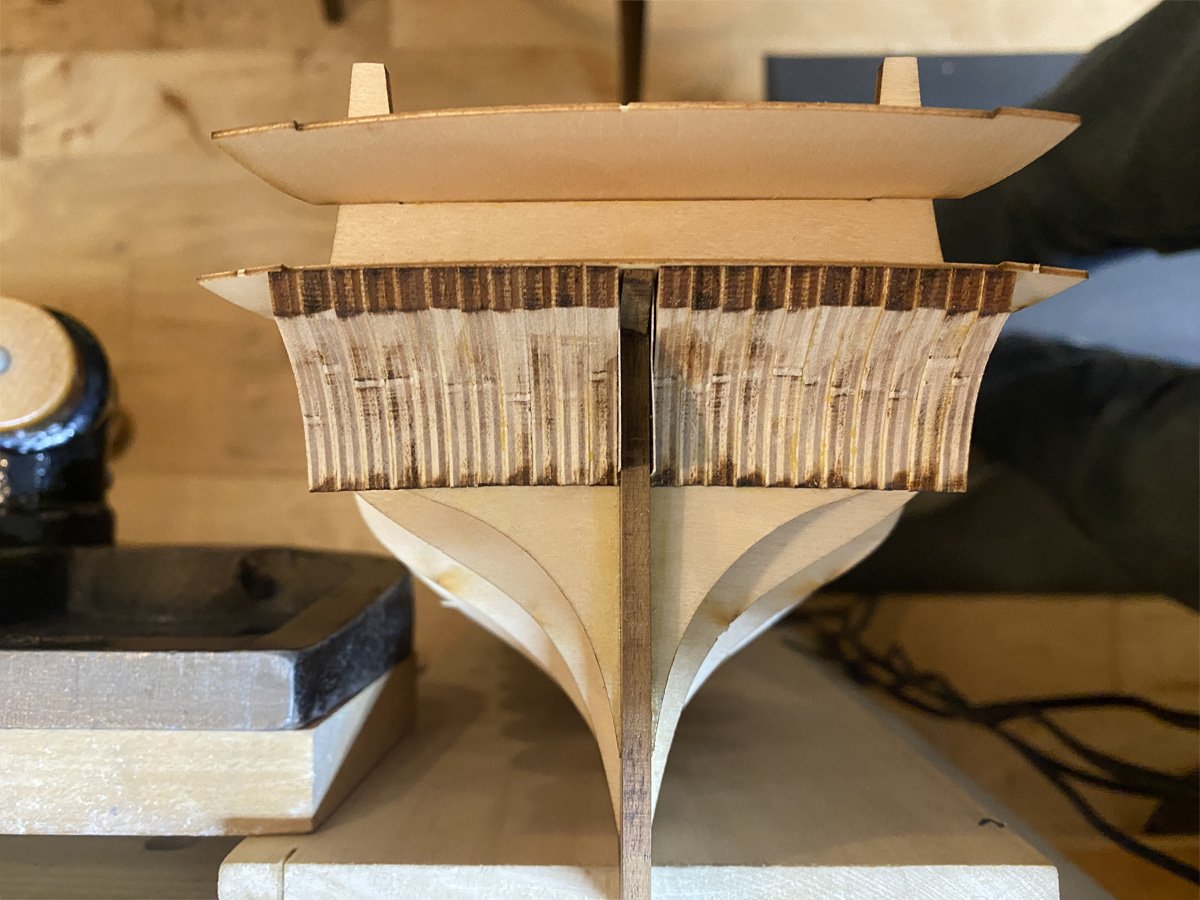
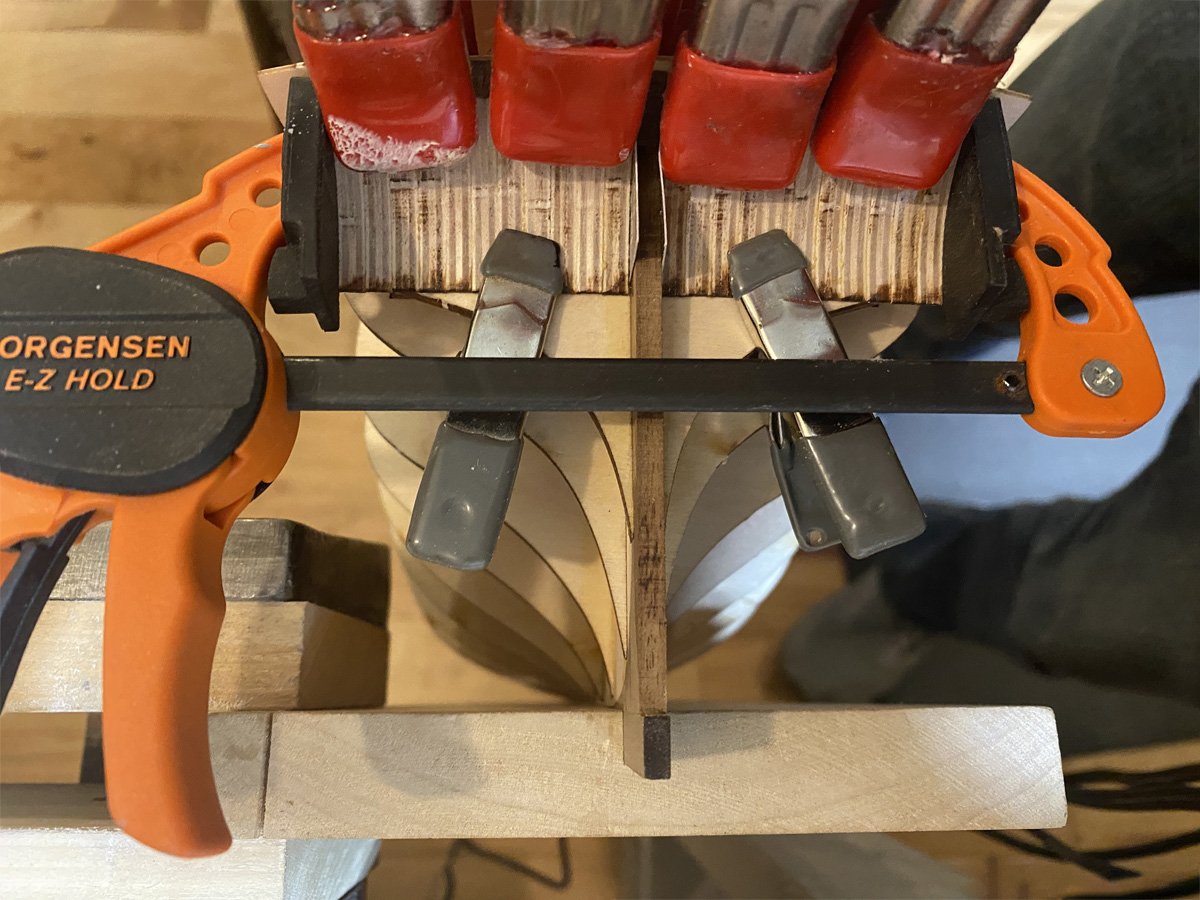
Stern This was an area where the instructions made no sense at all. The stern is filled in with 22 pieces of ply shaped roughly like quarter-round moulding. The instructions have the wrong part number for the pieces, and say that they should be separated from the deck with some unspecified strip wood. The pieces fit almost perfectly below the lower deck, so I just glued them in place. I suspect this is another modification to the old Mamoli kit that did not get corrected in the instructions.
-
Hi Jon, I searched through most of the Constitution builds on MSW before I decided to take a chance on the updated Mamoli kit, and I have skimmed through all of the ones that you mentioned. Maybe it wasn't obvious that I was being sarcastic about the clown reference. Although the new, laser-cut parts are a pleasure to work with, the old instructions are extremely confusing and have not been completely updated to the new parts.
-
Frank, I just skimmed your build log. First, I am surprised what all you have had to rebuild/replace on an expensive kit. But second, I am amazed at the clever things you have come up with do do so.
-
Frank (g8rfan) and Don (Kelp), I will keep an eye on your work. aIt will be interesting to compare the different versions of the Mamoli kit to the Bluejacket kit.
-
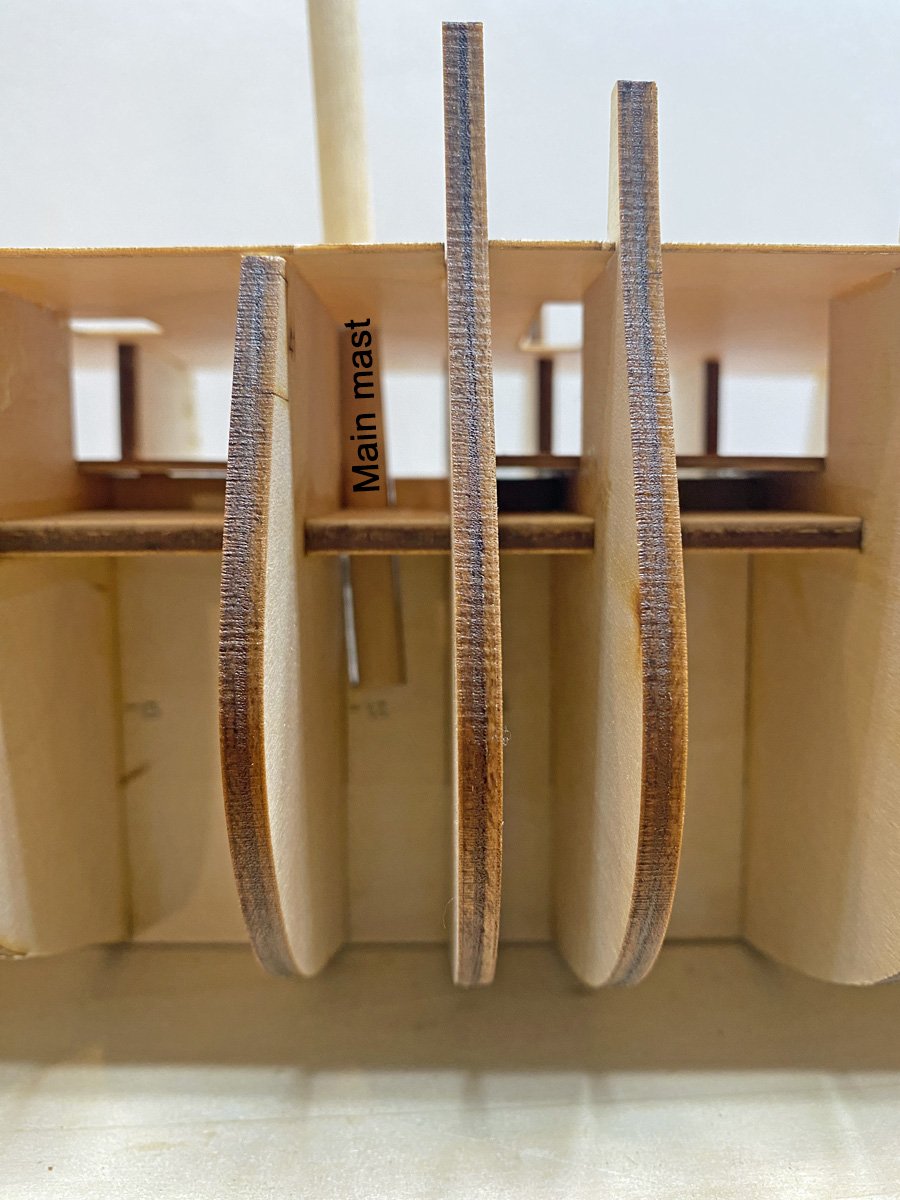
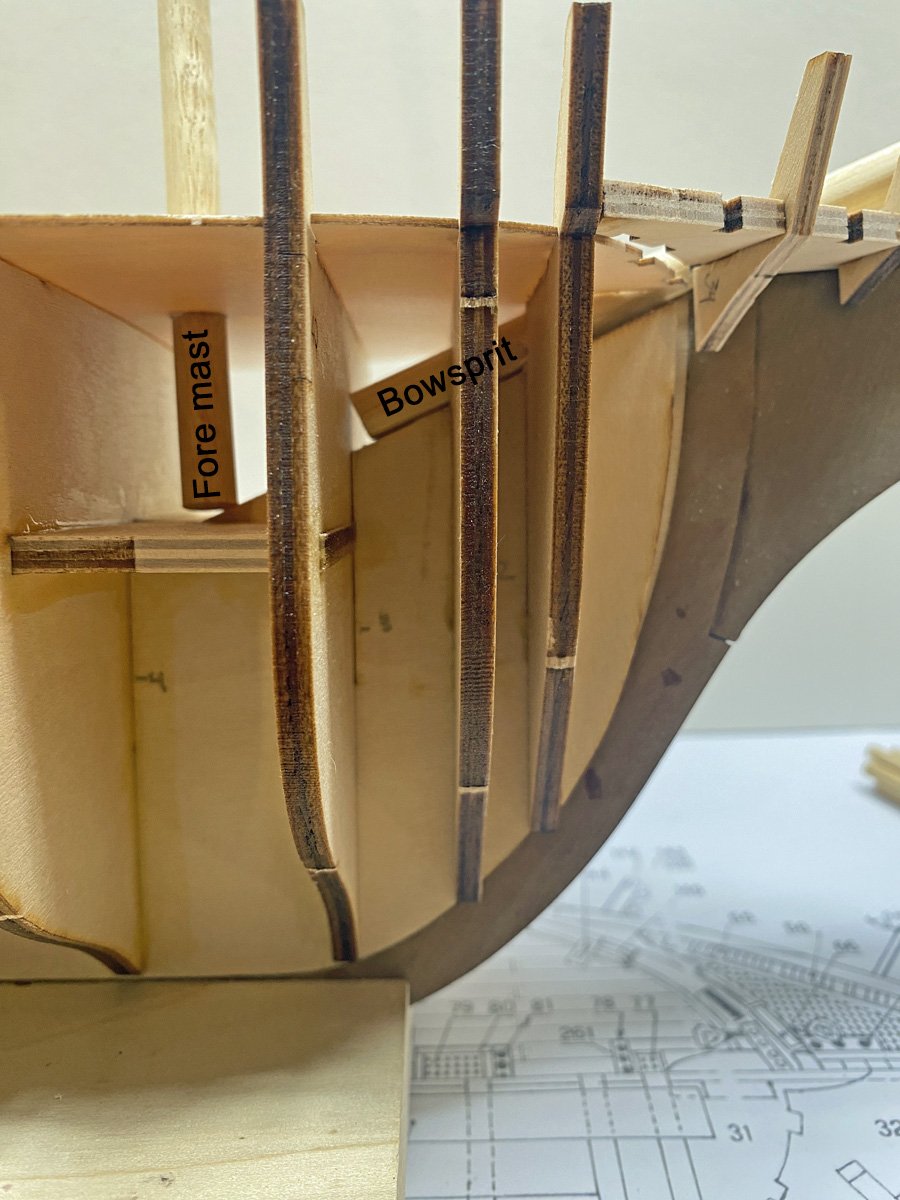
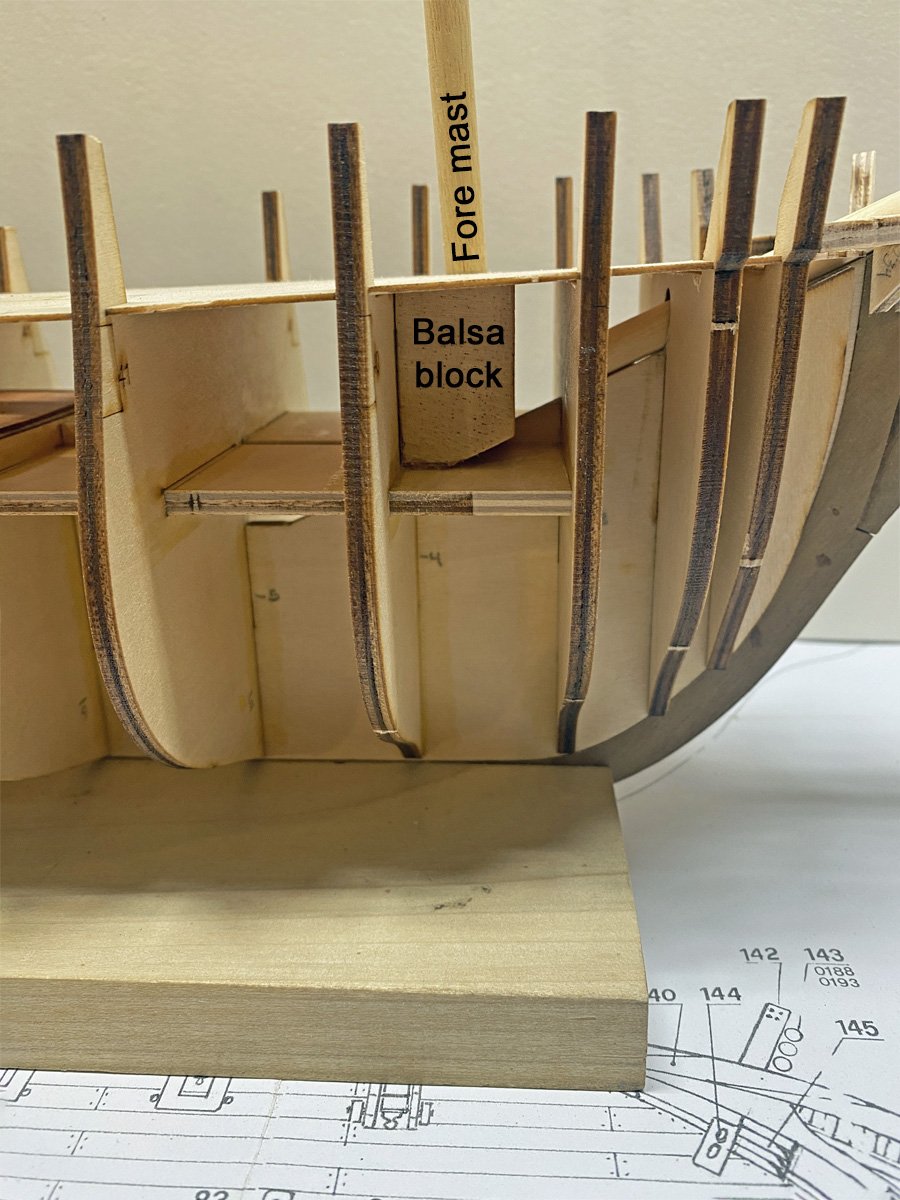
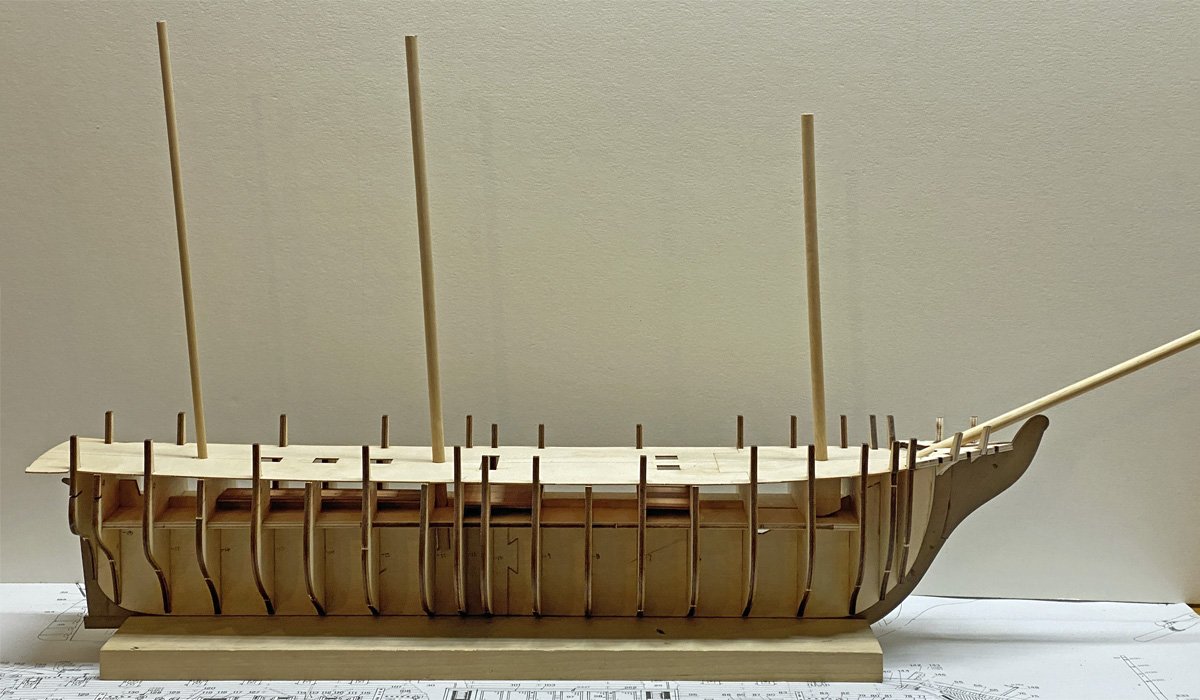
Checking the Masts Although kit instructions never mention this, I learned a long time ago that this is a good time to check that the bowsprit and masts fit and are well supported. The bowsprit, main, and mizzen masts fit perfectly with just a little enlargement of the holes in the deck. They all extended into notches in the keel and are nicely supported. But there was no absolutely support for the fore mast. This seems to be an oversight in Dusek's revision of the kit. I added a block of dense balsa and drilled a hole at the same angle as the main mast. Now the masts are all aligned and solid.


-
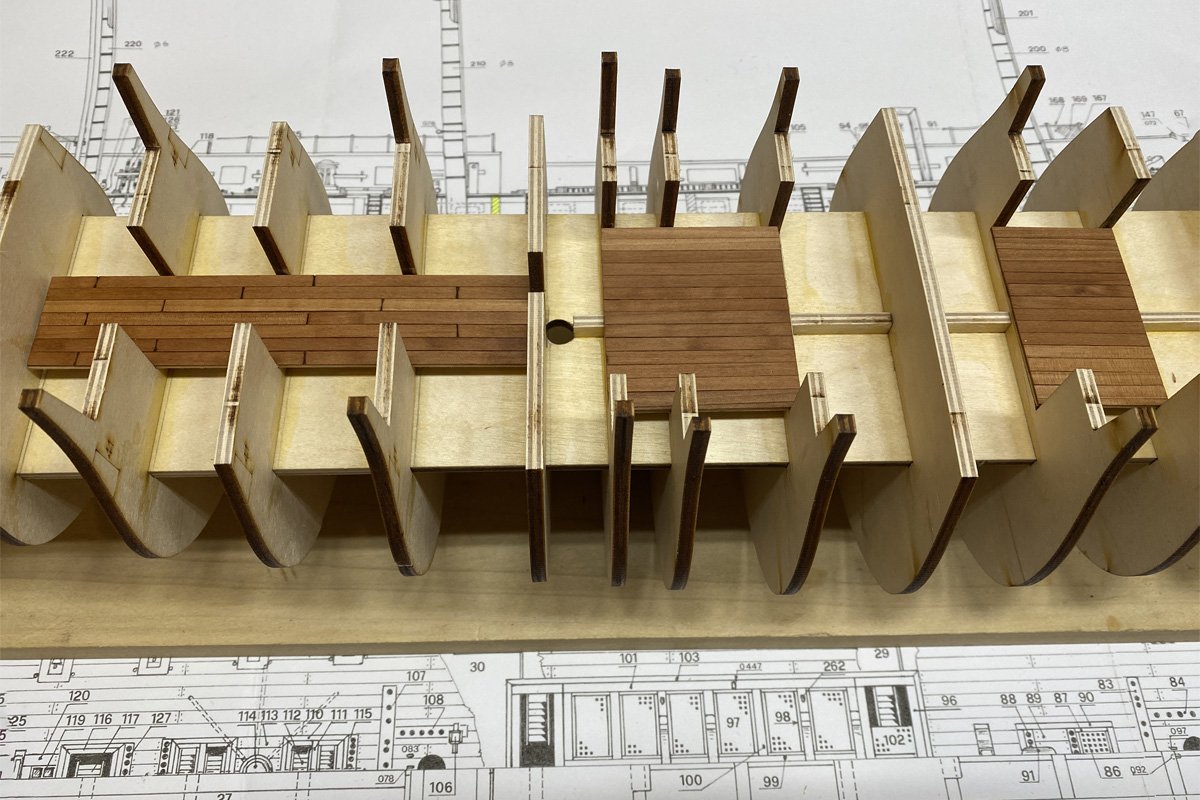
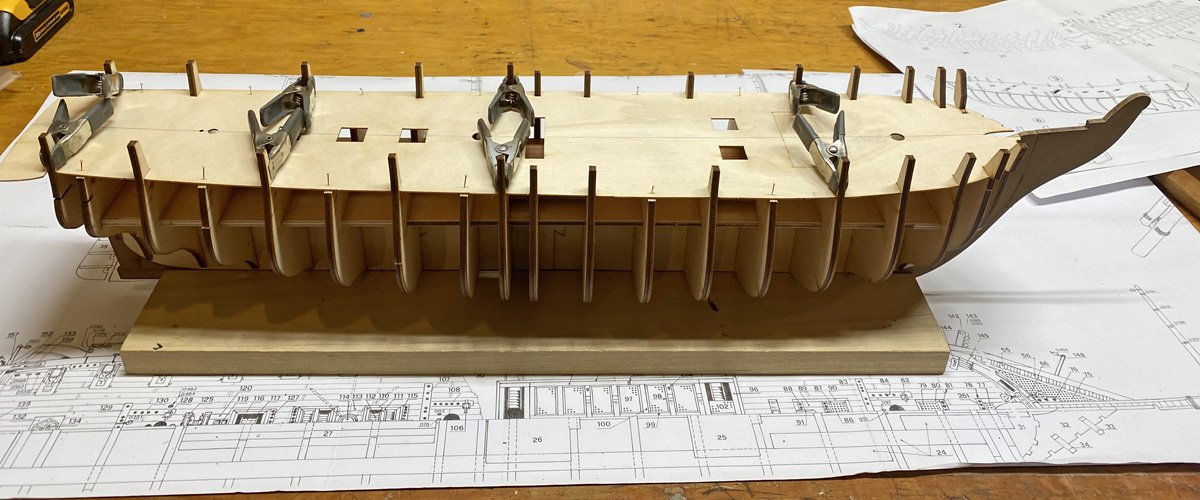
Decks The planked areas in this photo are false sub-decks that will barely be visible through multiple, tiny hatches in the main deck. The instructions didn't say anything about planking them, but why not? Just to illustrate how good the laser cutting is on this kit, the main deck pieces fit on perfectly with absolutely no cutting, fitting, or sanding. See all the tiny hatch openings? I'm SO glad that I planked the sub decks. 😜
-
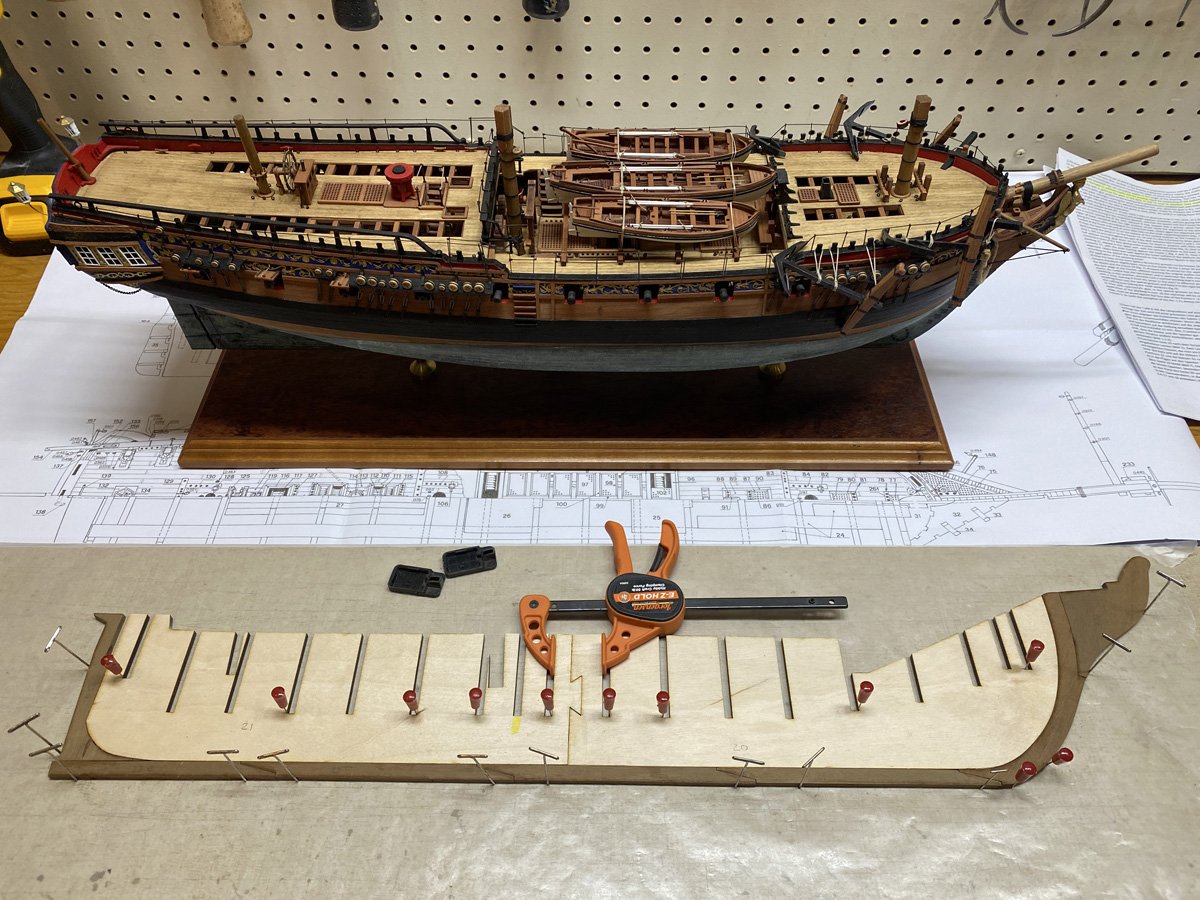
Keel The first few words on page 1 of the instructions say: "Pin clown on a flat wooden board ..." I looked unsuccessfully through all the parts for the clown, but finally realized that the instructions have some errors in translation. So I pinned down the keel parts and thought "That's still going to be a big model." But not much bigger than my Sphinx, at least until I add the bowsprit. Incidentally, the actual Sphinx ship was about 167' long, while the actual Constitution is much bigger at about 305' long. I added the 19 bulkheads and two longitudinal supports. The laser cutting was perfect but I did have to file the laser char out of all the slots for the longitudnal supports. It's pretty clear that Dusek has modified the internal structure but not updated the drawings.

-
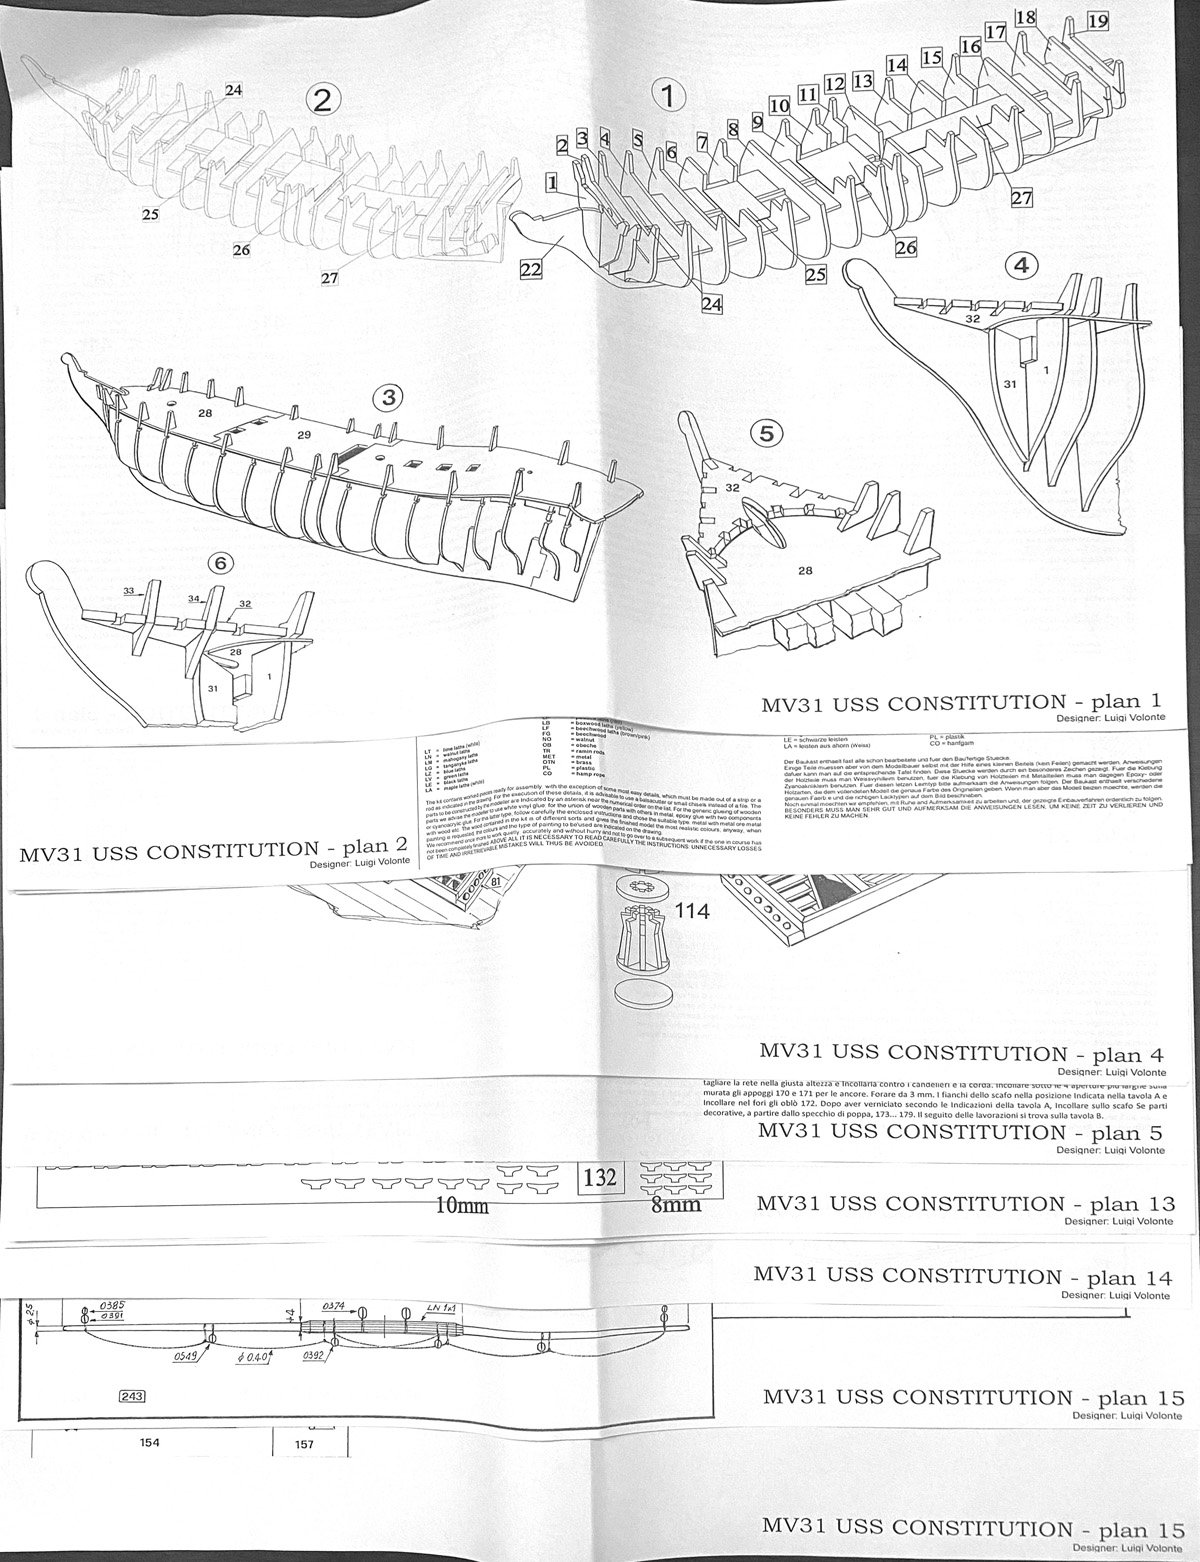
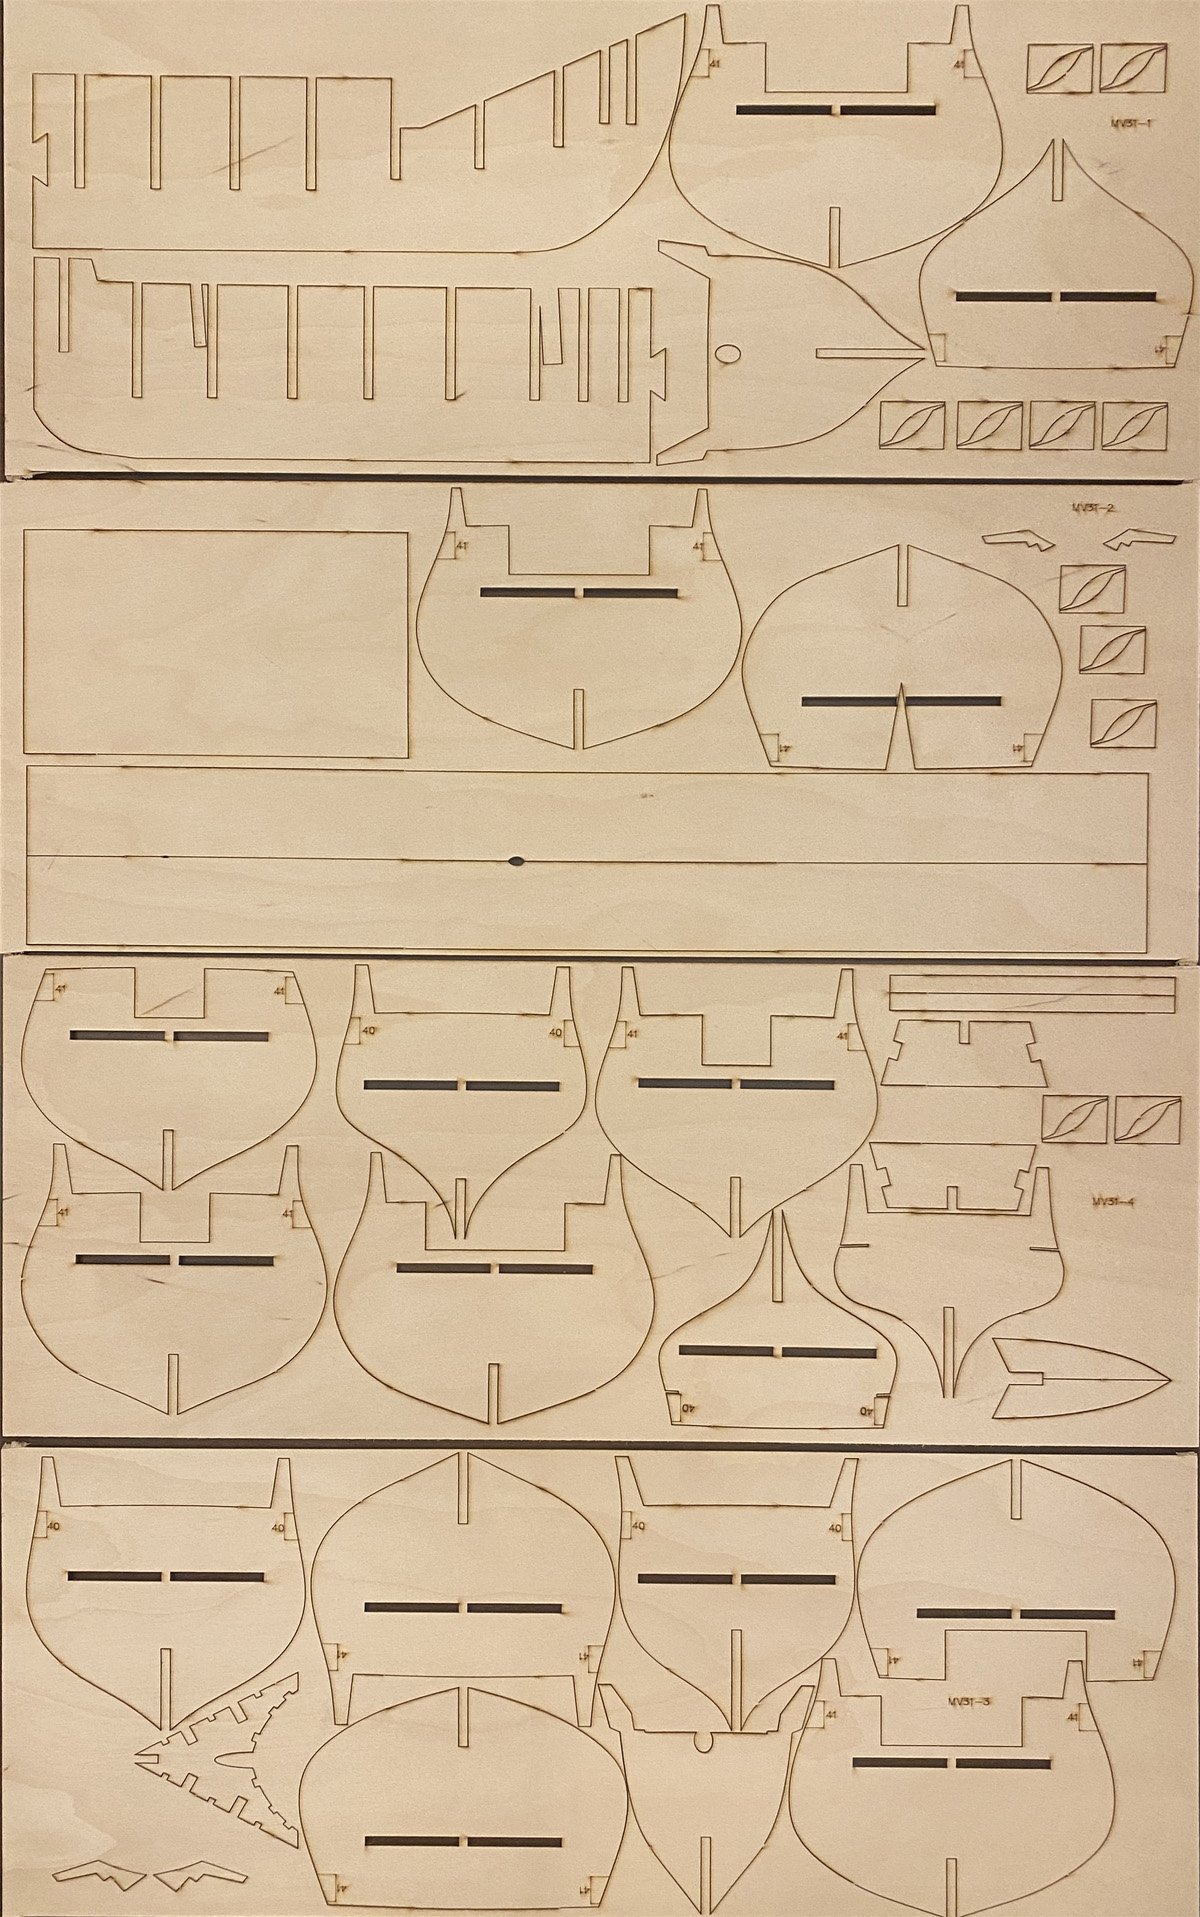
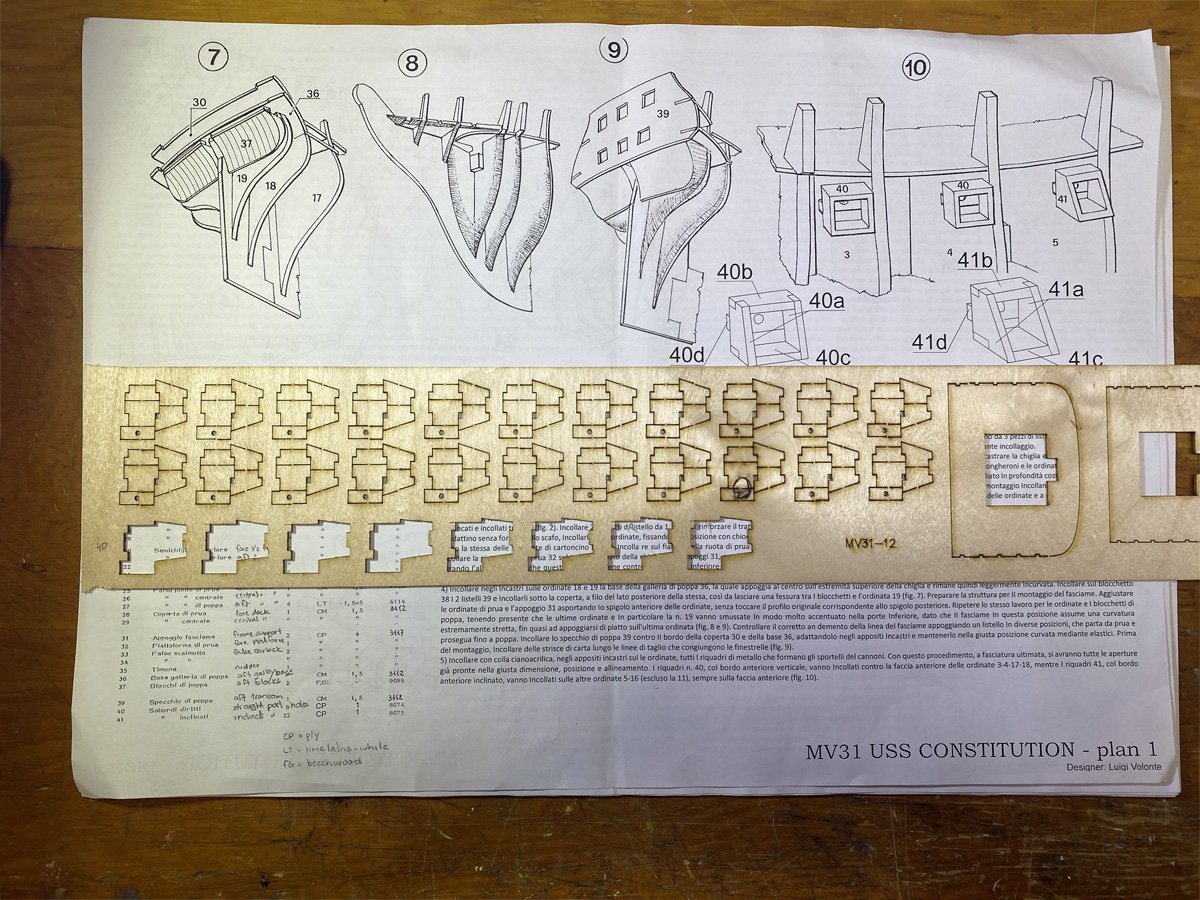
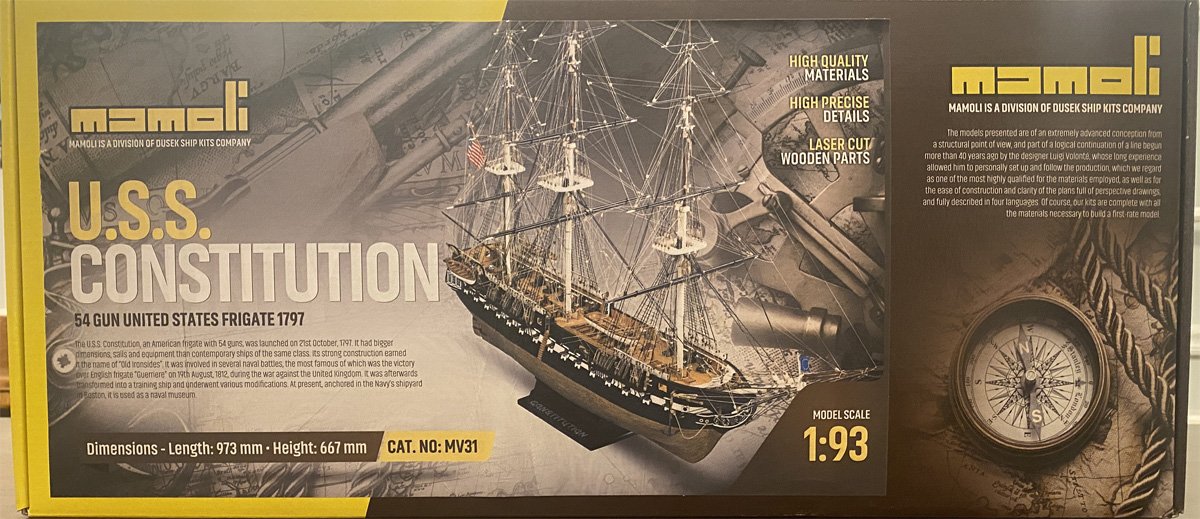
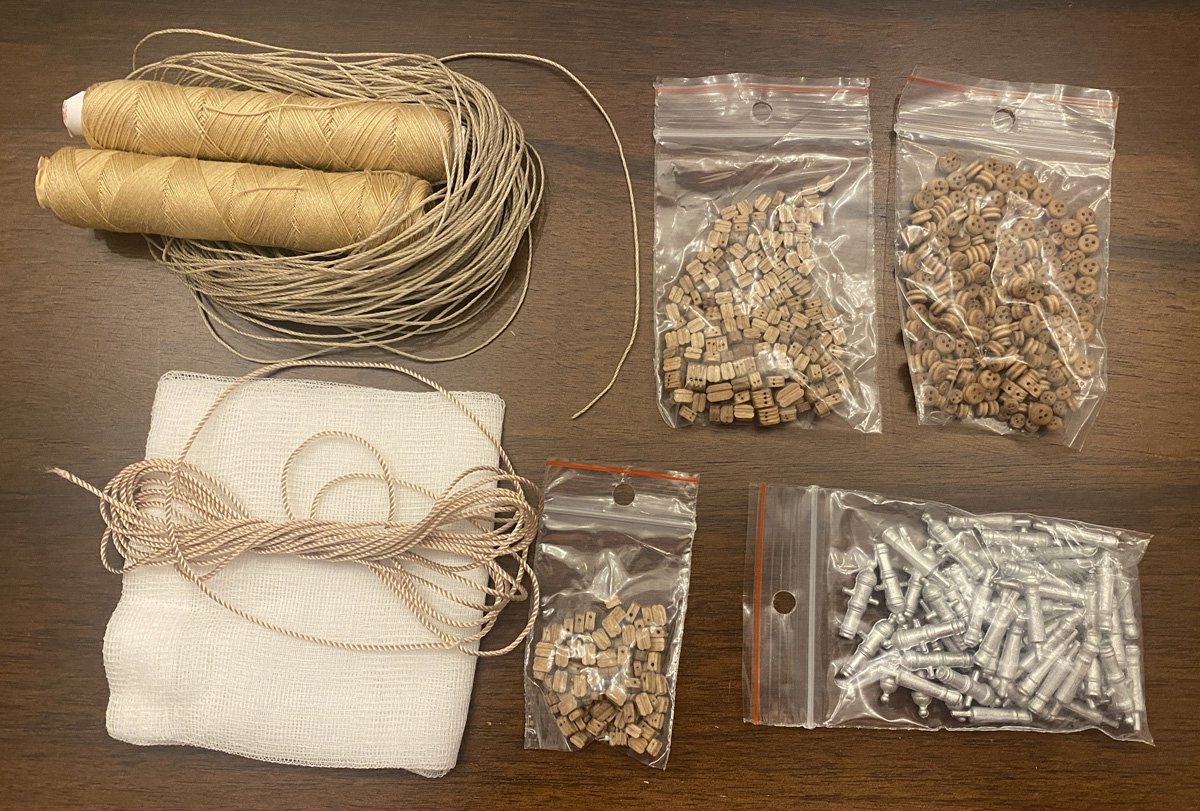
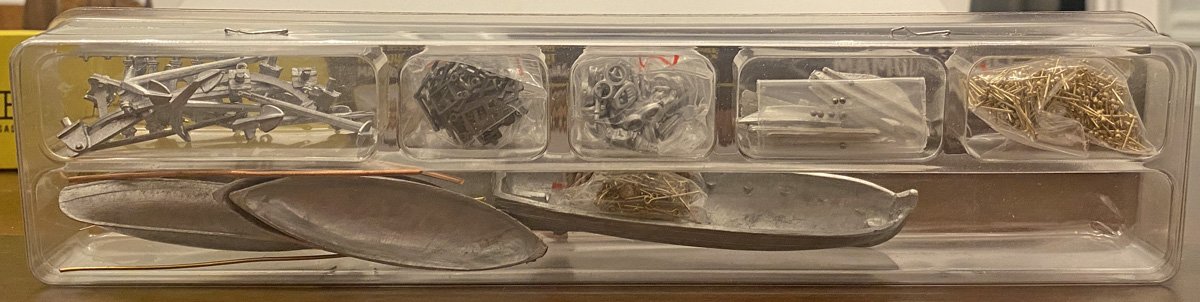
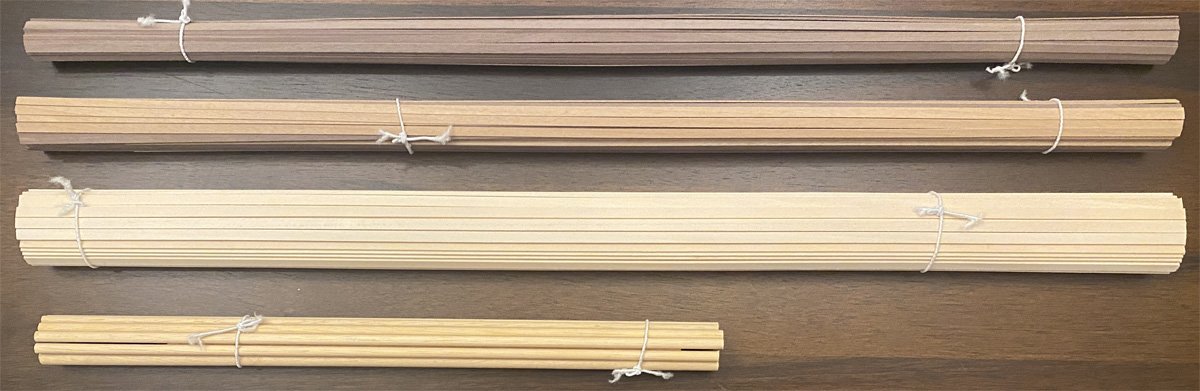
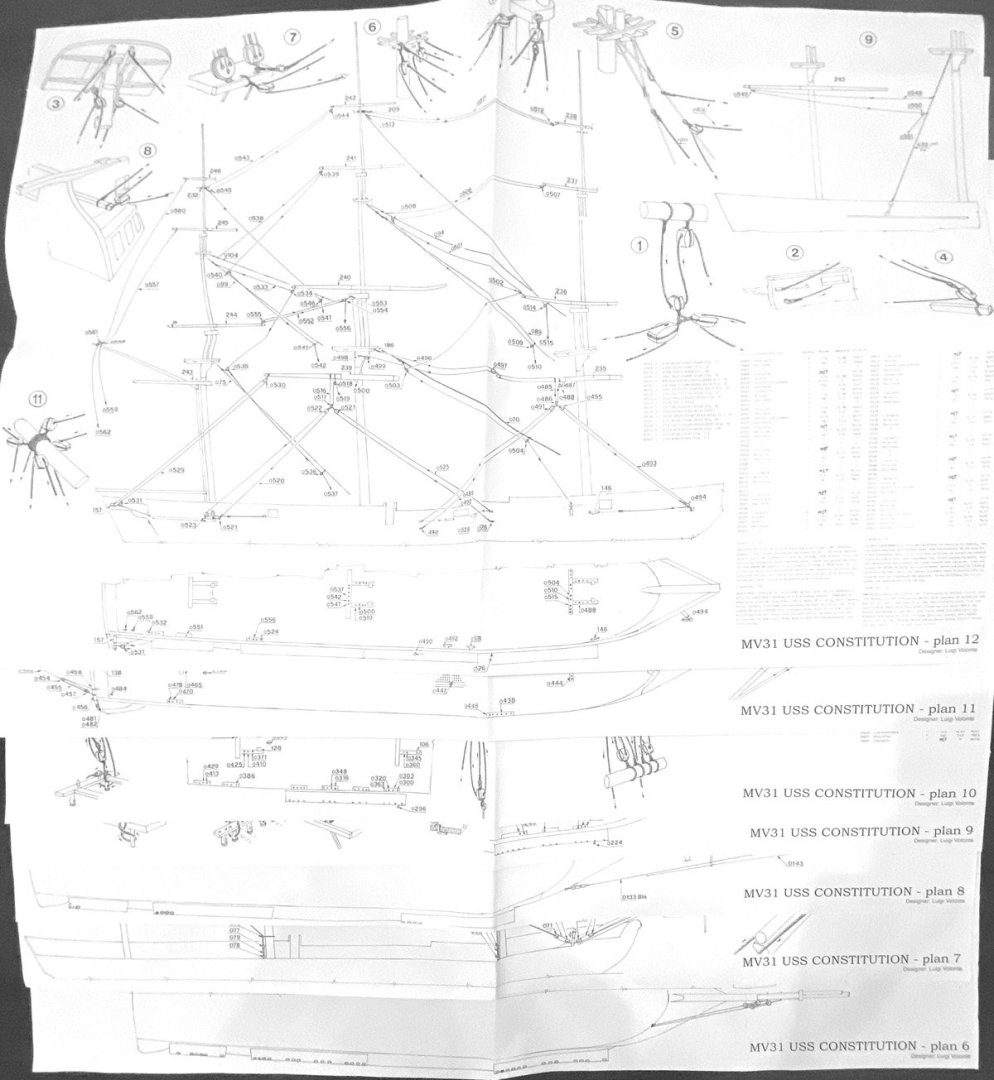
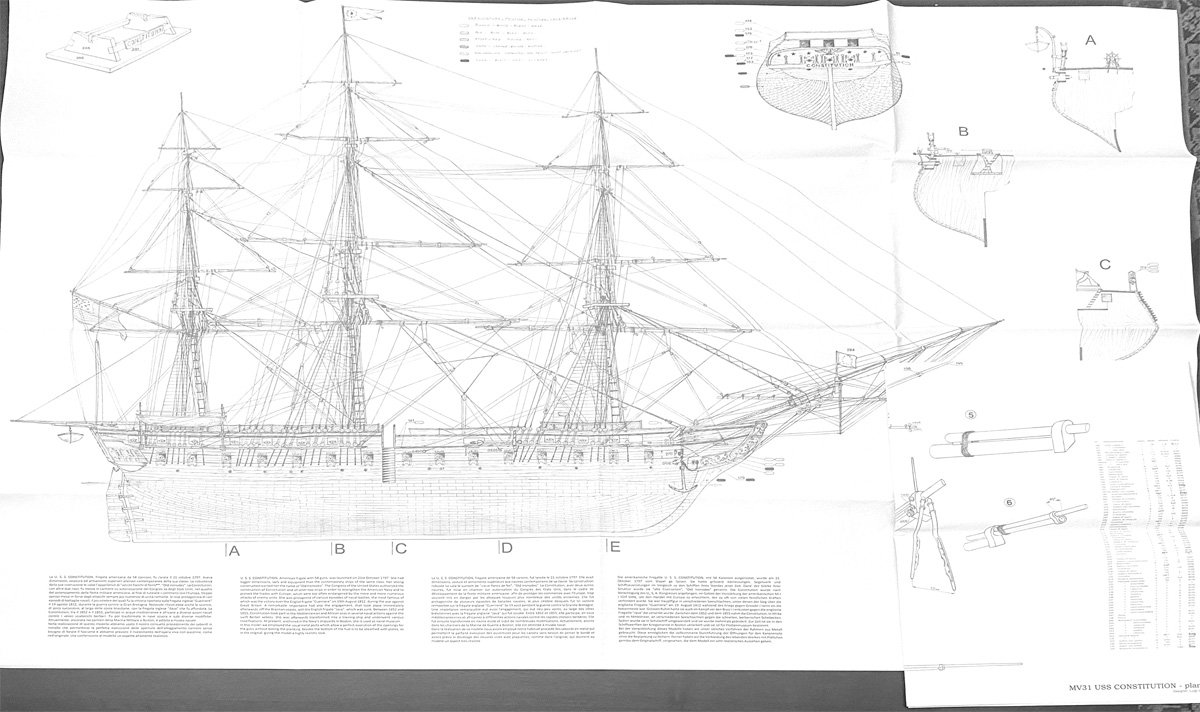
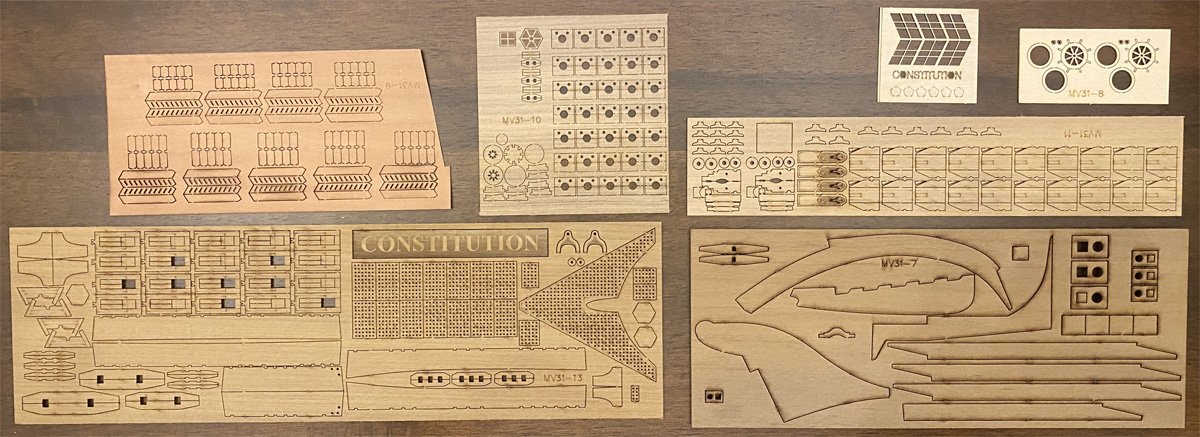
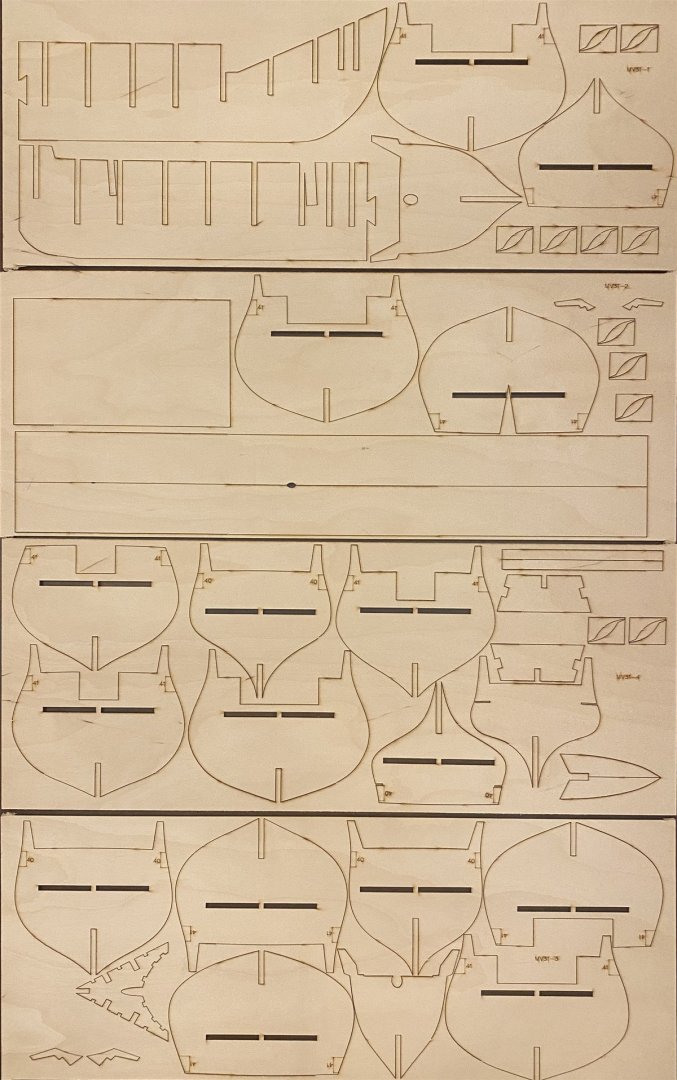
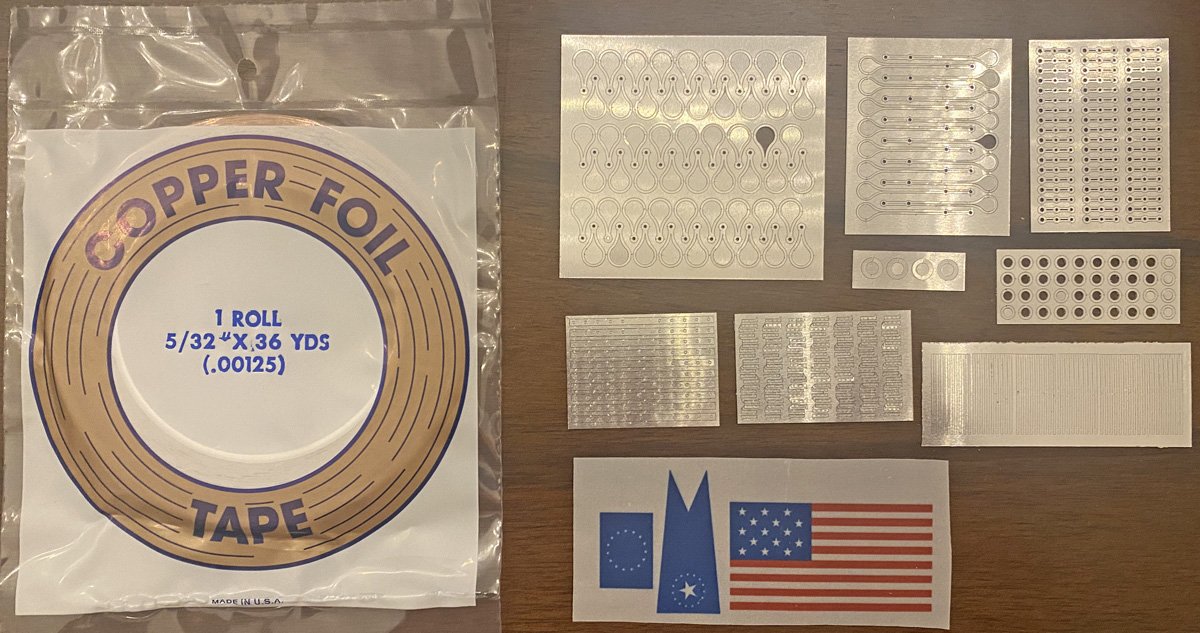
What's in the Box There aren't many build logs of of the Mamoli/Dusek Constitution on MSW so it might be useful to show some details of what's included. Everything is tightly packed in a sturdy box with a nice photo on the front. 14 pages of double-sided plans and instructions, 16.5" x 11.75" 7 pages of single-sided plans 16" x 23" 2 full-sized drawings plans 46" x 33" 4 sheets of heavy laser-cut plywood. I've already used some and the laser cutting is perfect. 3 sheets of lighter laser-cut plywood. I think that the 30 small parts on the bottom board will make up into gun ports. The older Mamoli kit had cast metal gun ports which were unpopular with builders. These ports should be easier to work with, and cheaper for Dusek to manufacture. Several sheets of miscellaneous wooden parts 4 bundles of planks and dowels A box of cast parts including the ships boats Rigging line, blocks, deadeyes, and cannon. Here's my first concern - there is no black line for the standing rigging. Looks like I will be ordering black line eventually. I don't know what the gauze is for. Some photo etched parts, flags, and a roll of copper foil. The older Mamoli kit came with a bag of green wood chips that were supposed to look like copper plates but looked more like shingles. The copper foil will look much better, but I already have three rolls of copper foil with printed nail patterns like I used on my Sphinx.

-
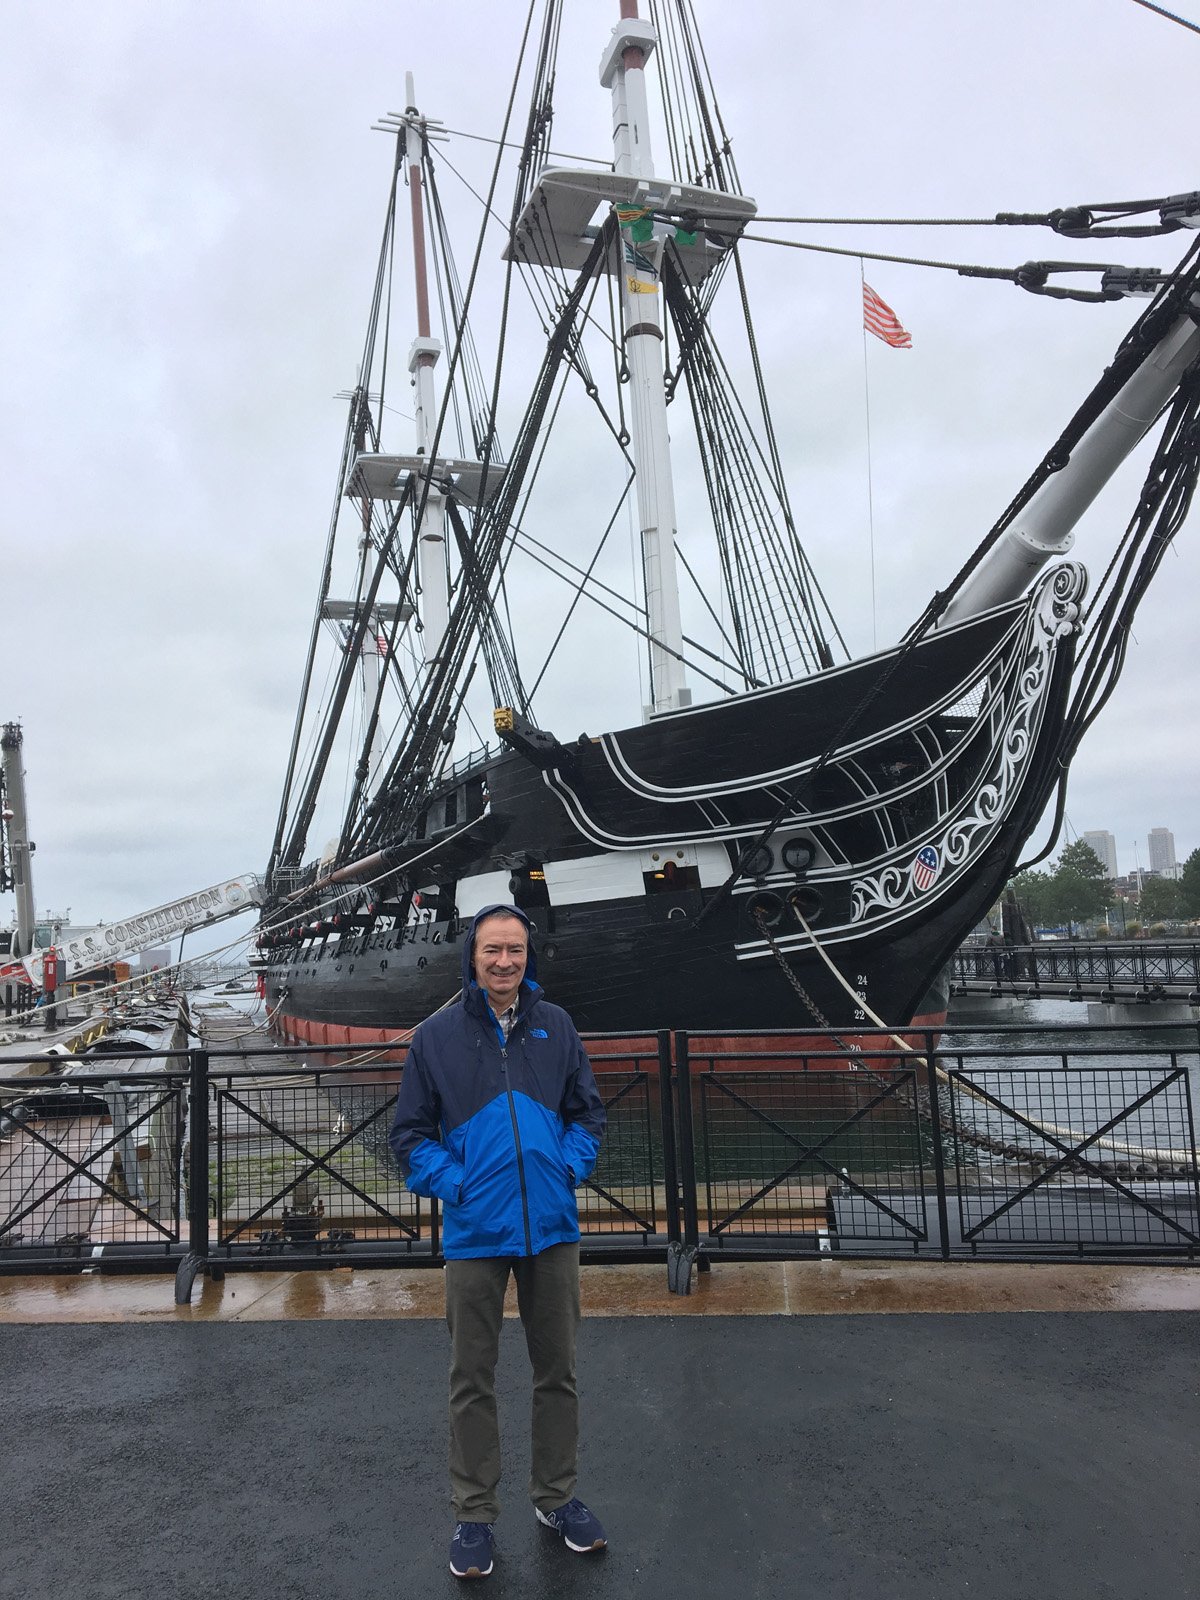
I visited the USS Constitution ship and museum in Boston Harbor in 2017. I knew then that I wanted to make a model of the ship, but it took me a while to get around to it. There are a LOT of Constitution builds on Model Ship World representing kits by several companies in different scales. Company Scale Length Billings boats 1:100 36” Bluejacket Shipcrafters 1:96 40” Mamoli/Dusek 1:93 38” Model Shipways 1:76 48” I know, the scales x lengths don't quite add up. The Bluejacket numbers give a longer ship than the rest. Most of the build logs on MSW are for the Model Shipways kit. It looks like an excellent kit, but I just can't deal with a 4 foot long model that would need an even bigger case. I decided to go with the Mamoli/Dusek kit, which was offered by Model Shipways but unavailable when I started looking. So I got on their daily email list. The Mamoli kit popped up eventually, and then before Christmas they offered all imported kits at half price. I snatched one up and gave it to myself for Christmas. For your information, Mamoli models was a well-know Italian producer of model ship kits from the 1980s through 2014, when their company was completely destroyed by fire. Daniel Dusek from the Czech Republic acquired the license to produce all Mamoli kits in 2016, starting with the Mini-Mamoli line. There is an interesting thread by Mr. Dusek here. Model Shipways / Model Expo recently took over production and distribution of the Mamoli/Dusek line in the US. Since Model Shipways already has their own kit of the Constitution, It will be interesting to see if they convert the Mamoli version to their own line.

-
Thanks Chris. I was thinking about you and all your card models while I tried to enclose the nose and cockpit. I used canopy glue like the Pros do!
-
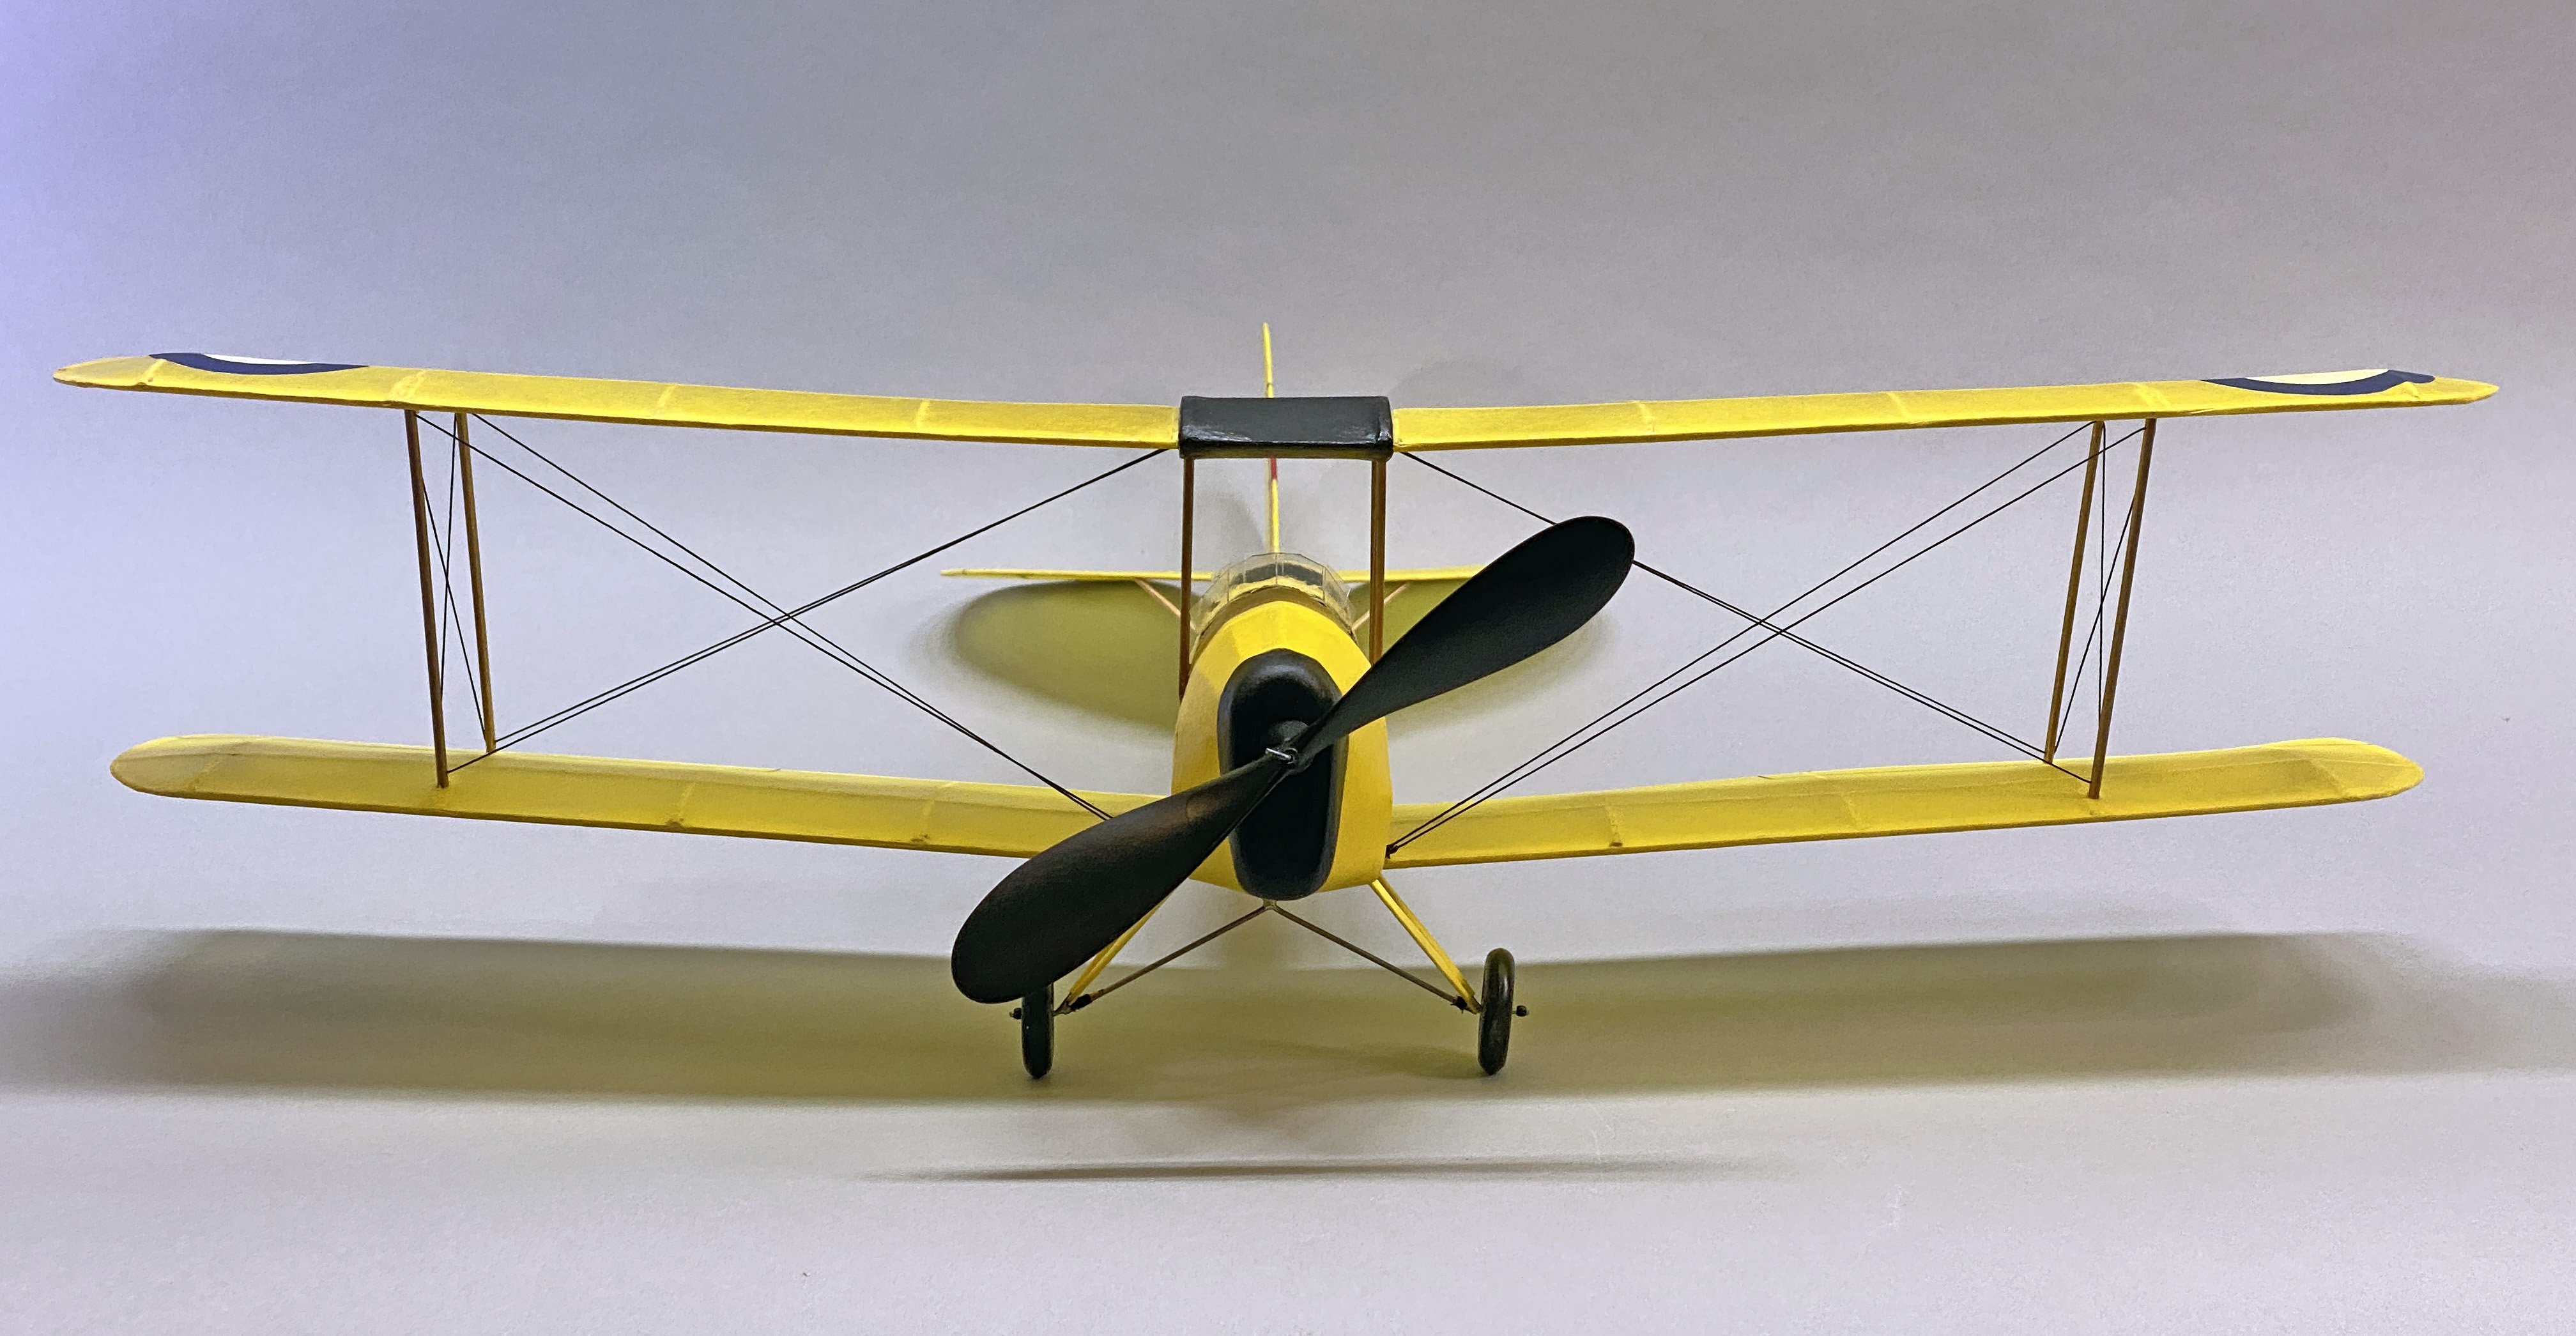
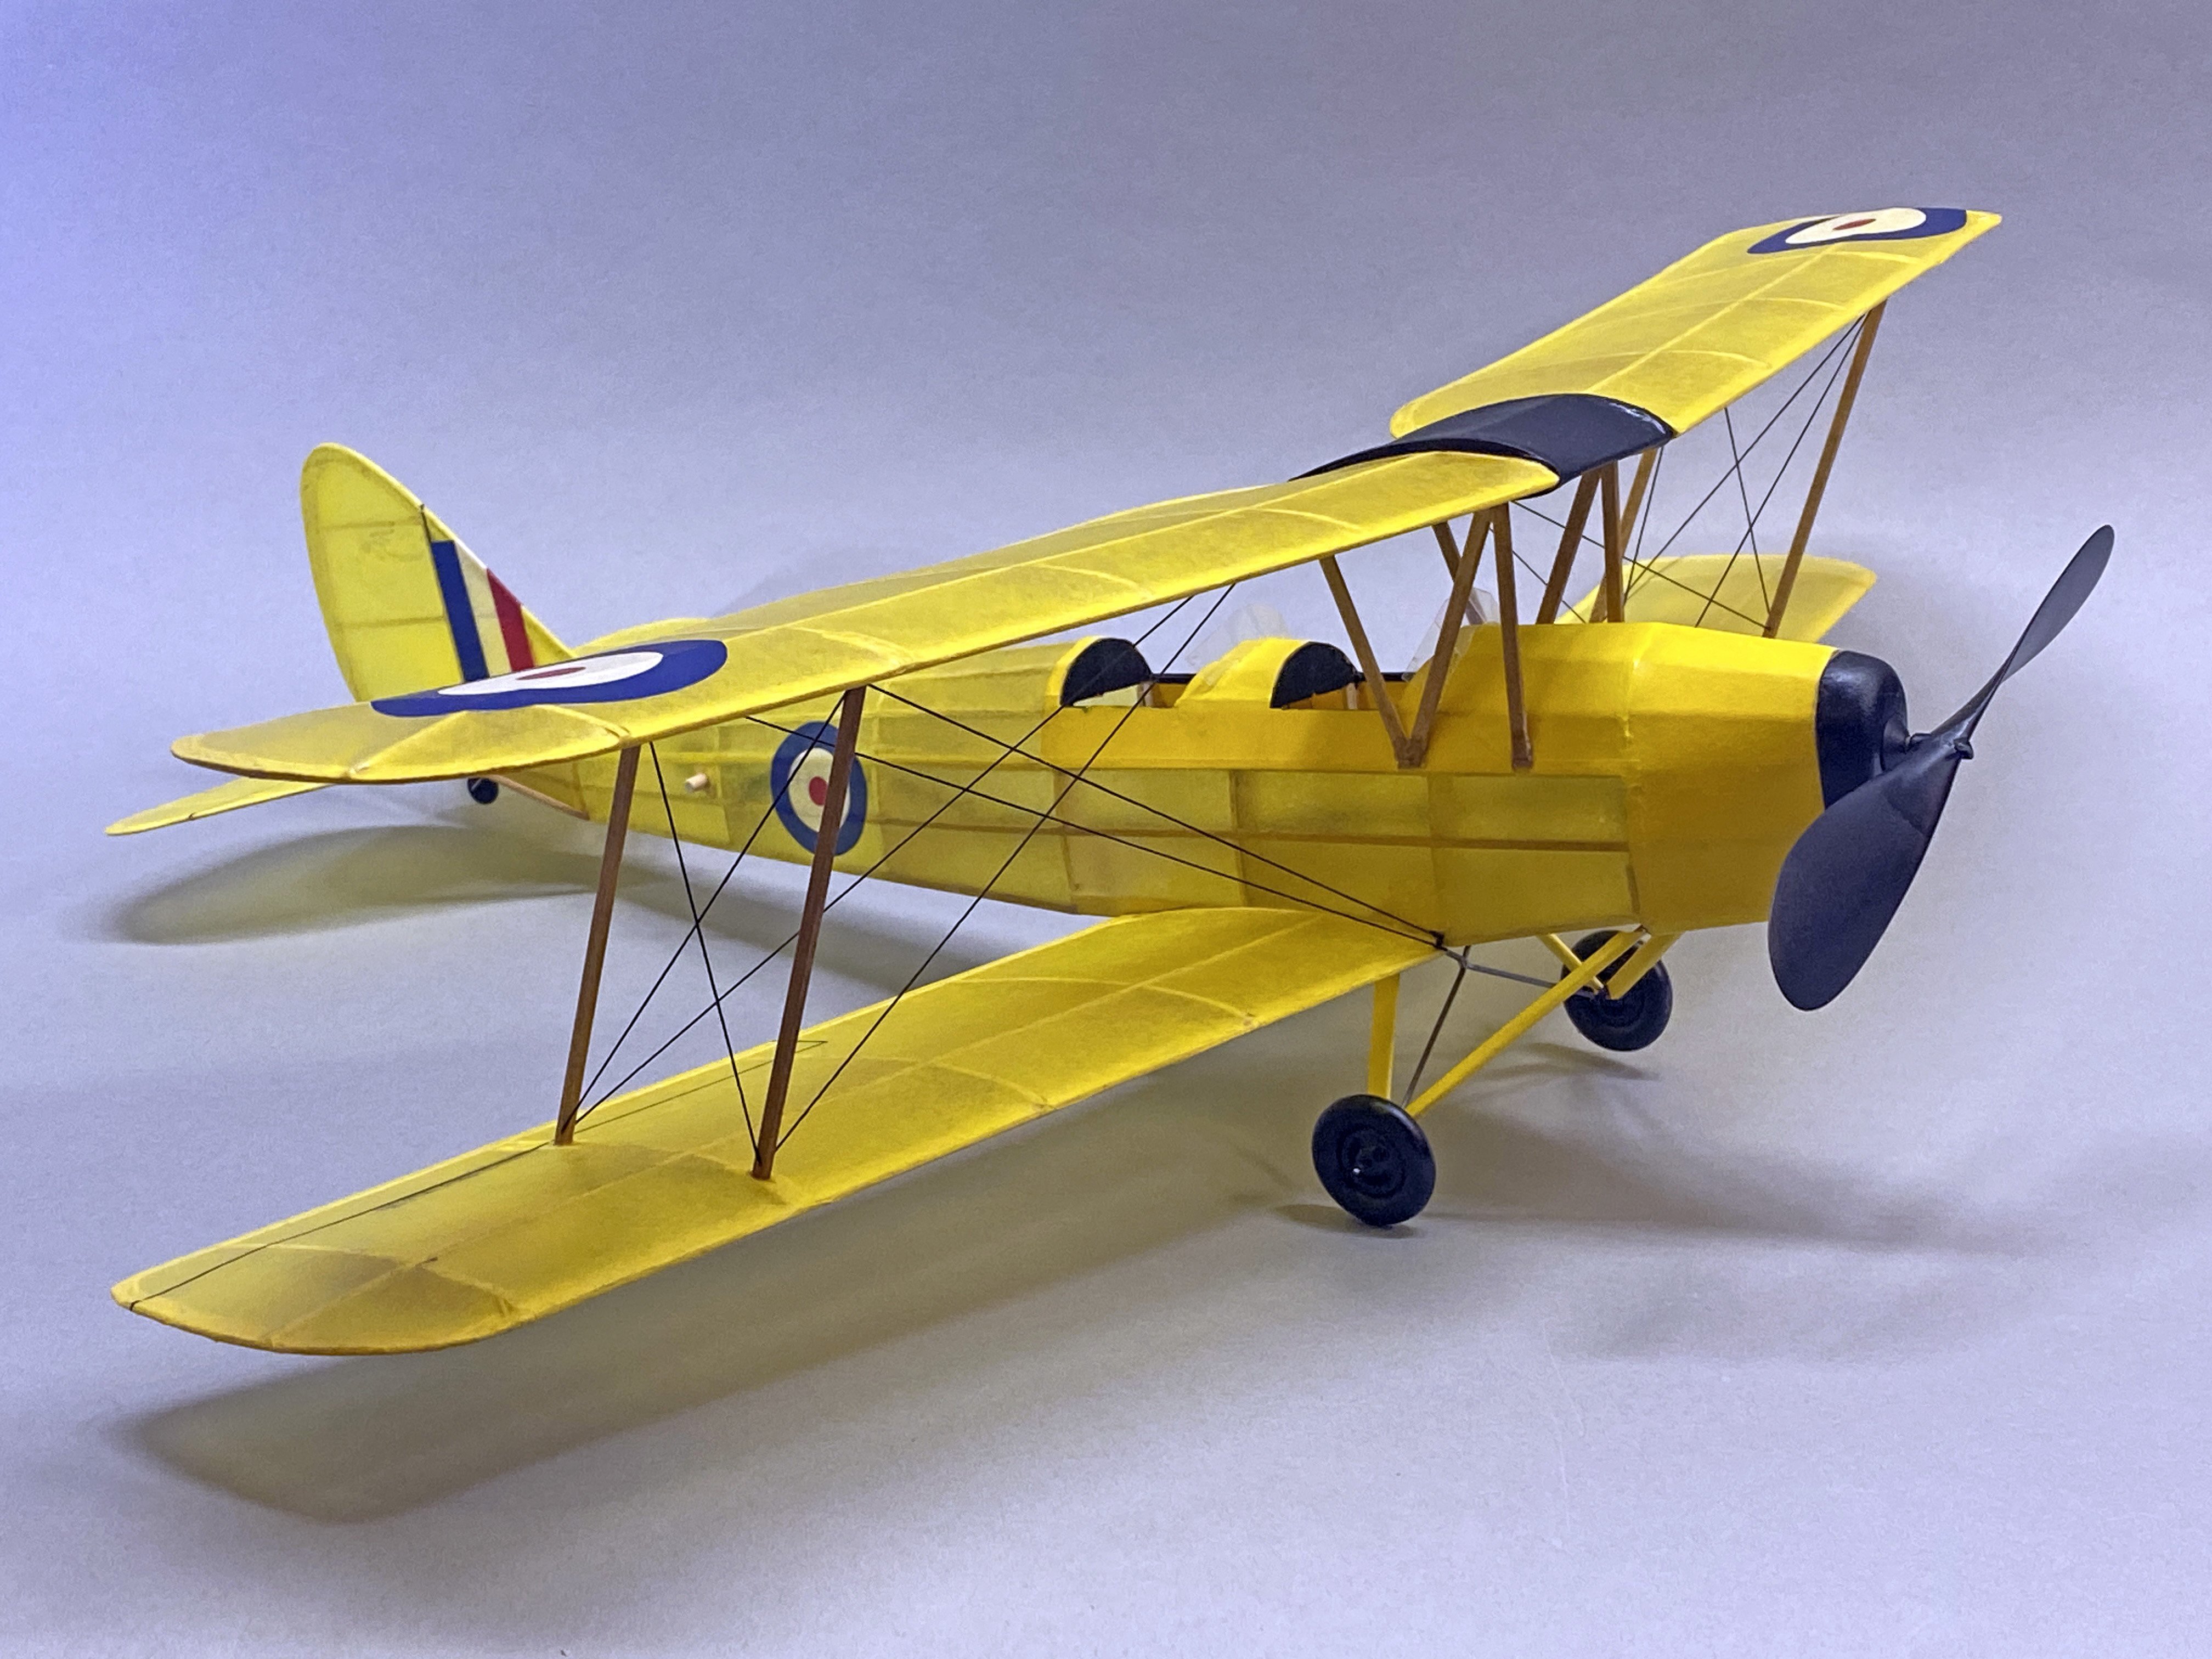
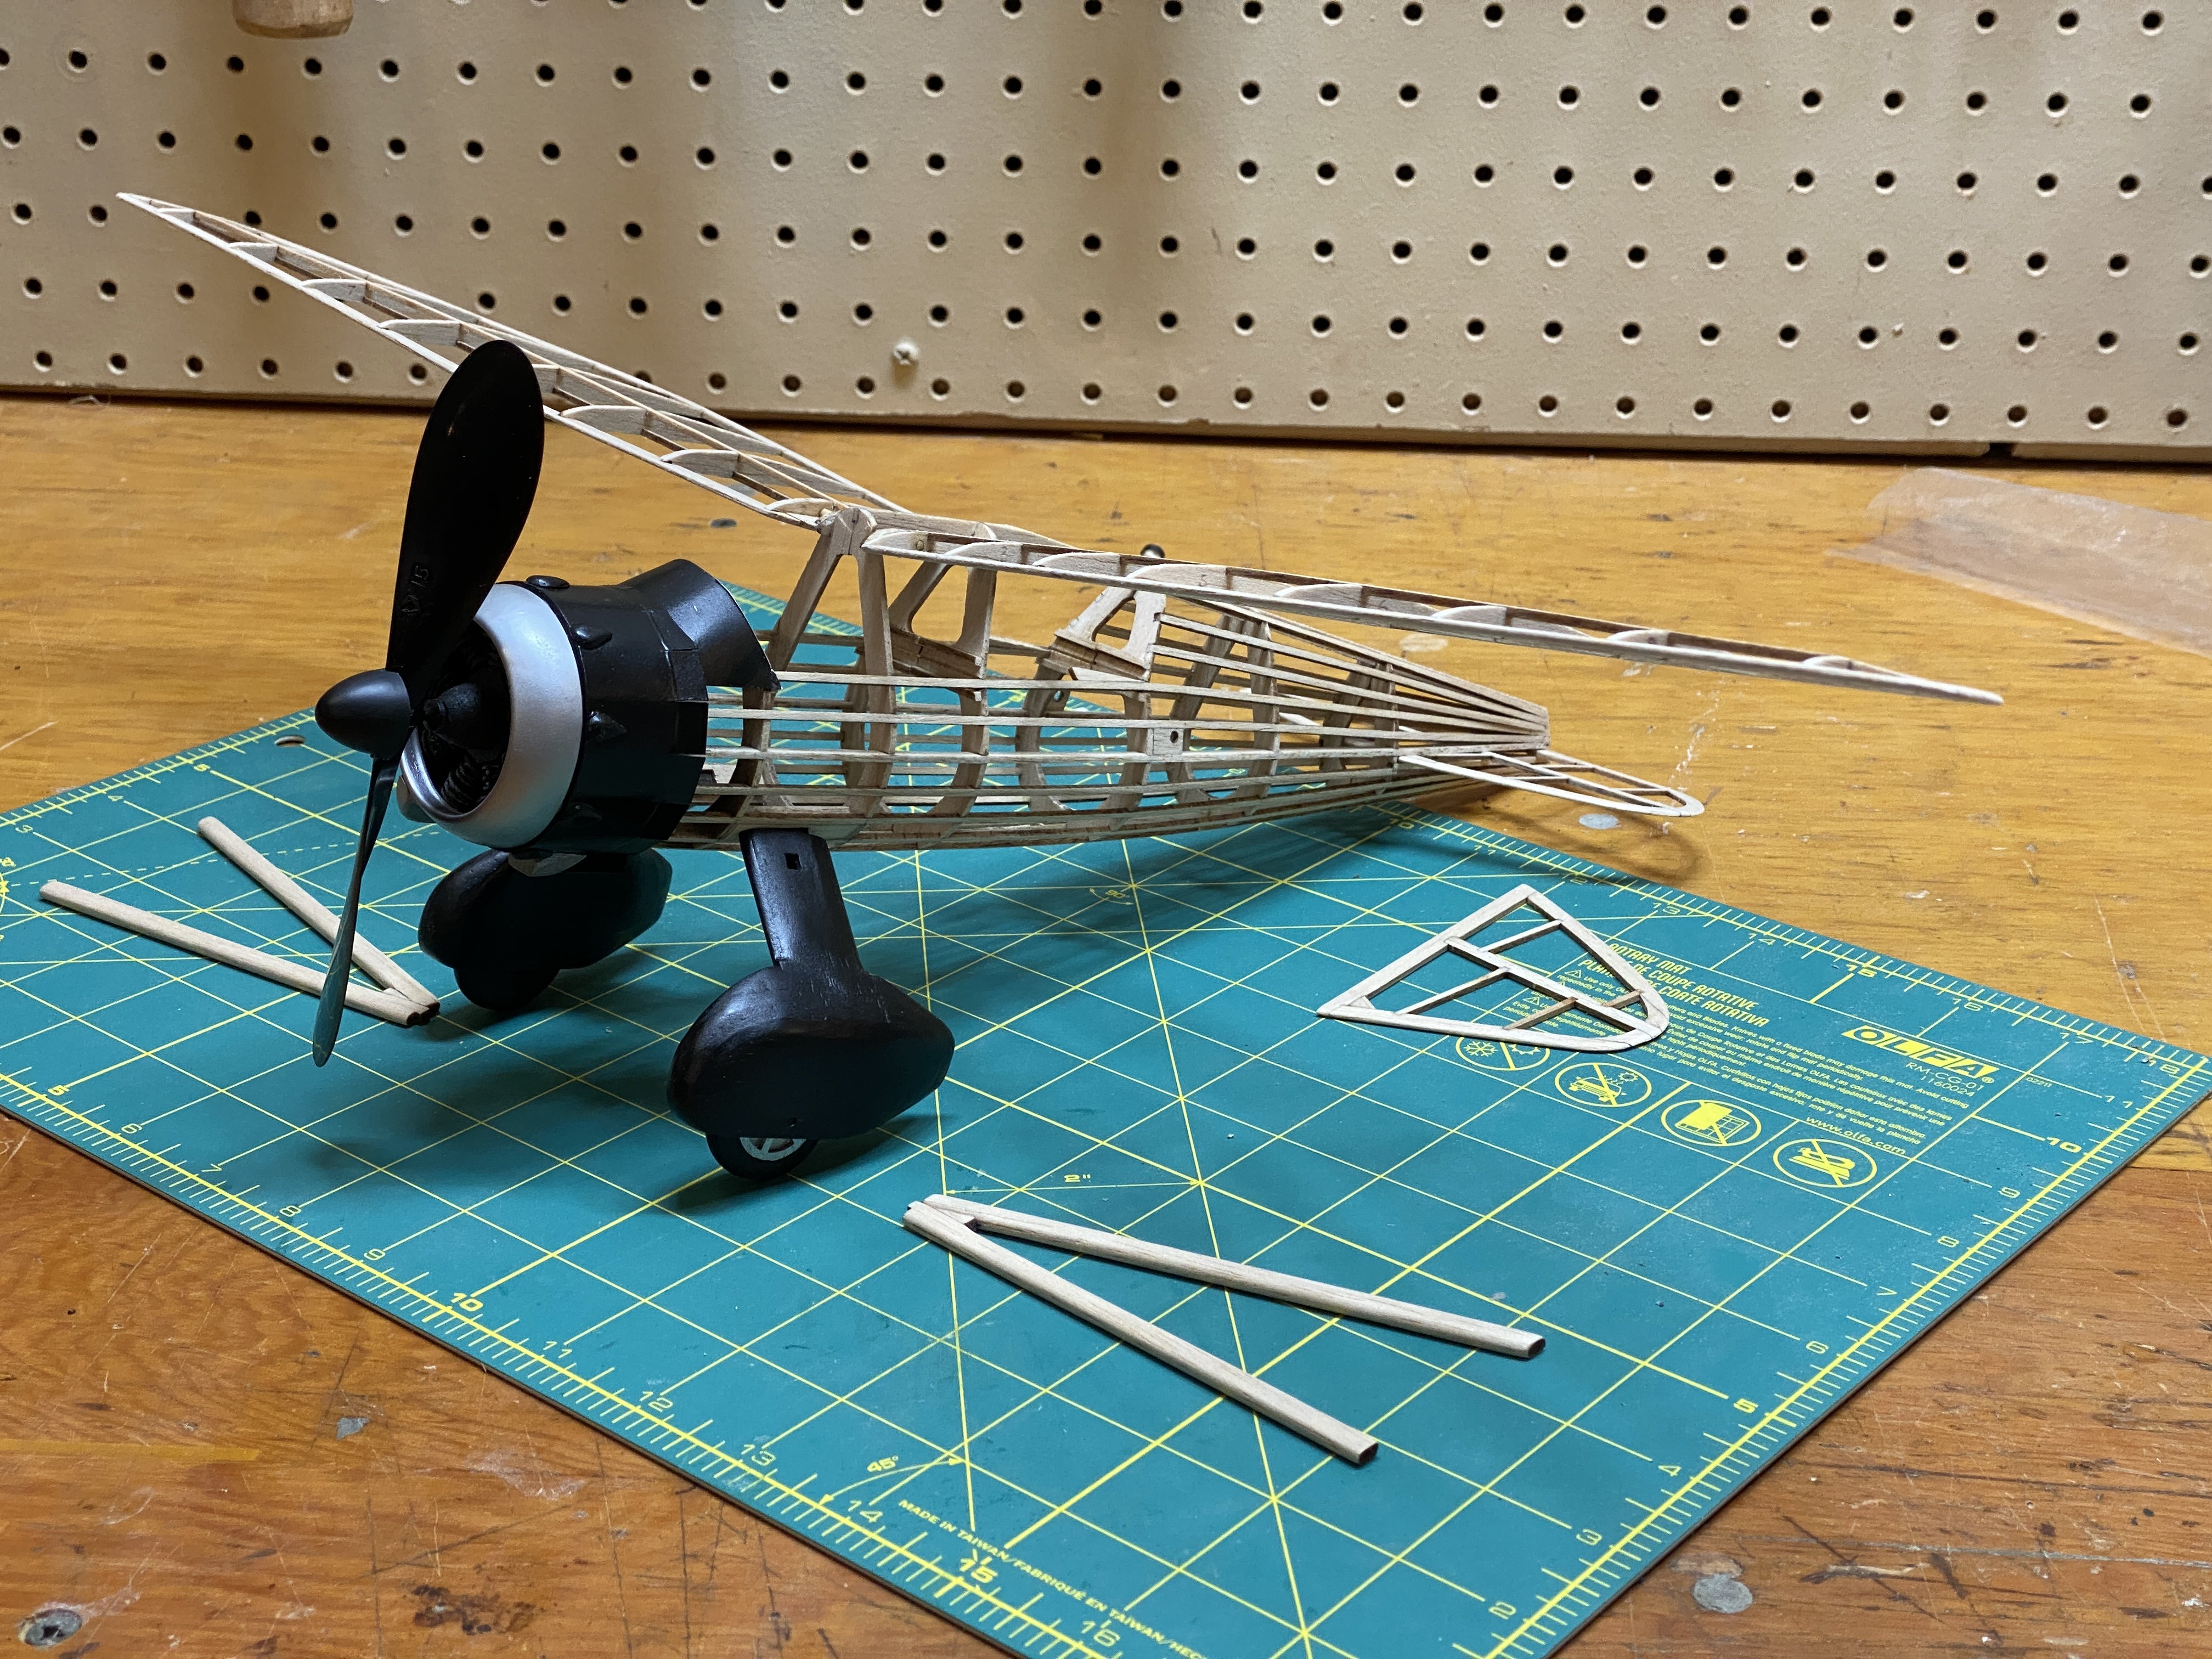
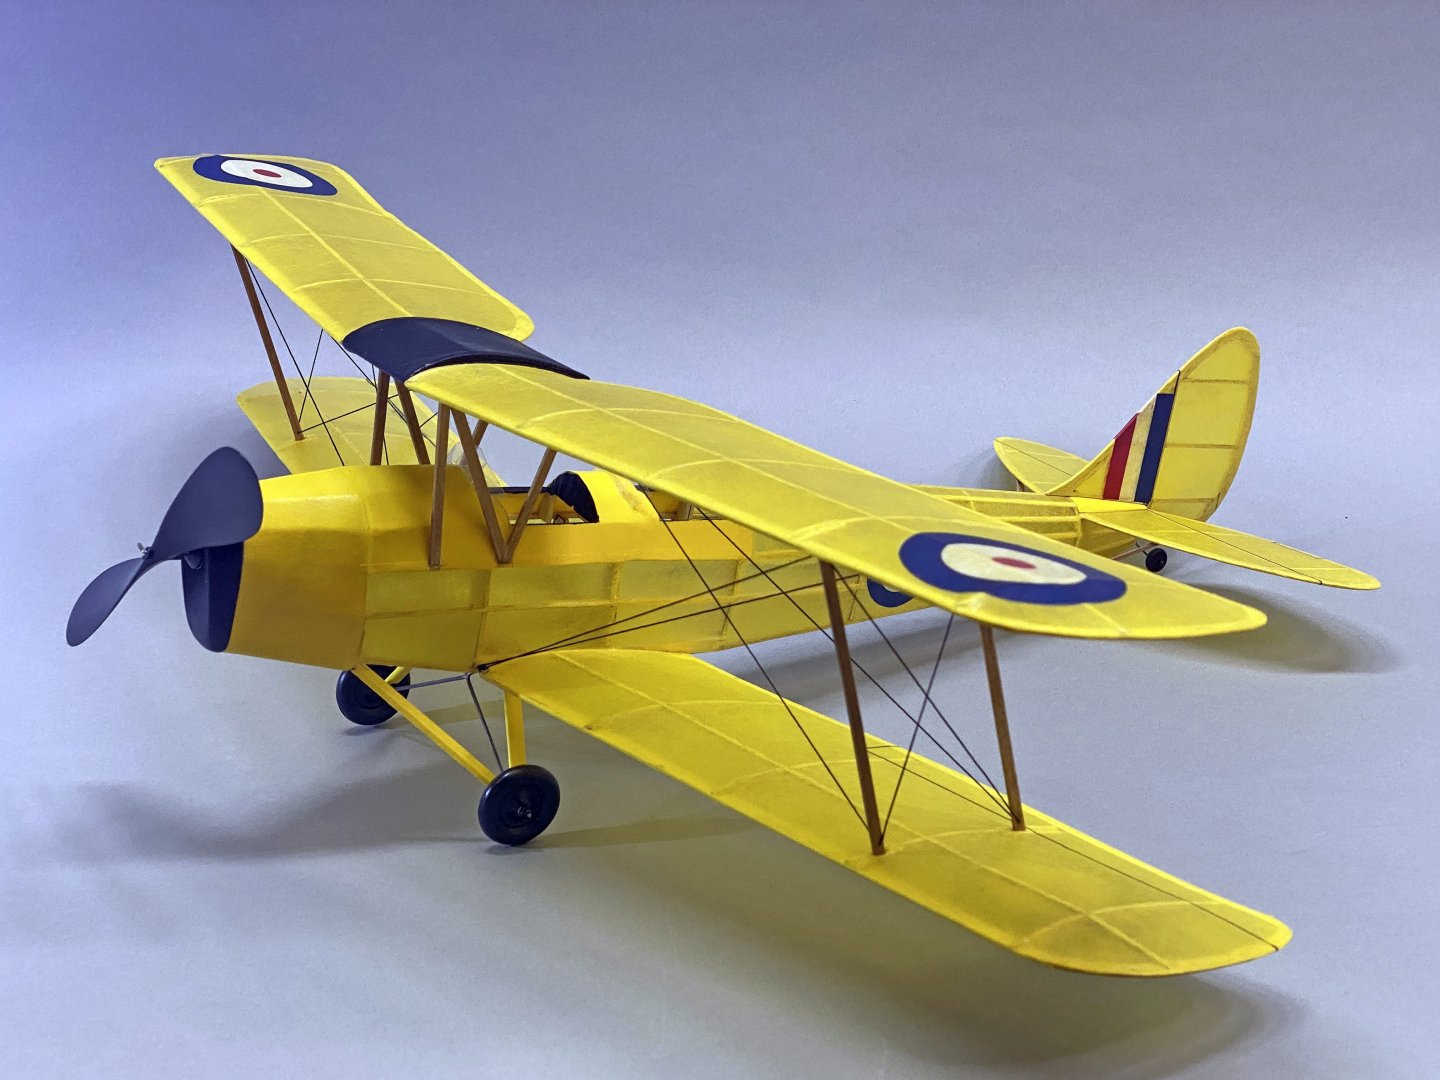
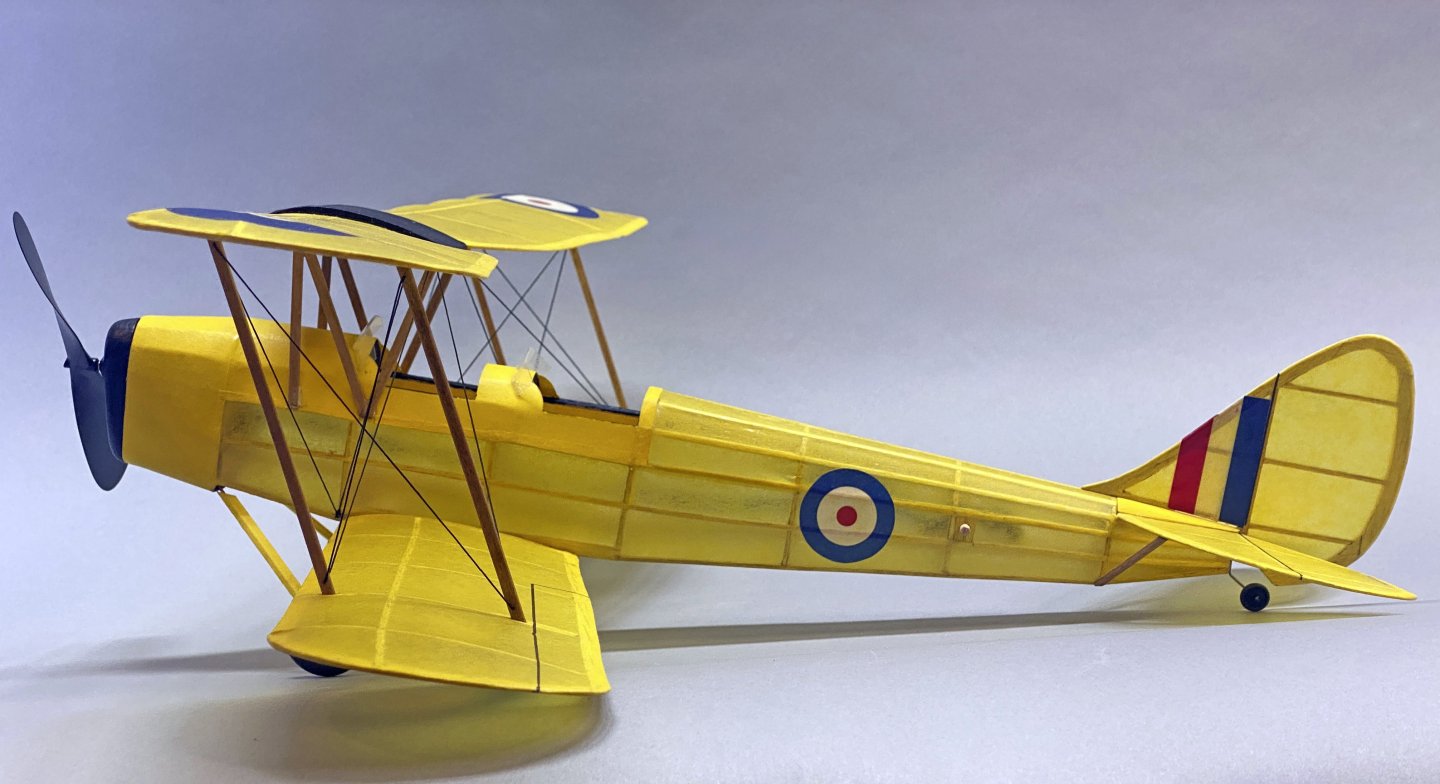
I just completed yet another stick-and-tissue airplane model, a de Havilland Tiger Moth. The Tiger Moth was an aerobatic trainer biplane built in the 1930s and used as a primary trainer by the Royal Air Force until the early 1950s. The model has a 20" wingspan and took 7 weeks to build, with Christmas in the middle. The kit is made by Easy Built Models, which is one of the most misleading names for a company ever. The kit included some of the softest balsa I've ever used. Simply pressing a part into place often broke the matching part. I had to replace many of the wing spars and fuselage stringers with stronger wood. The parts in this kit were not laser cut like most kits today. That's OK by me - I've made plenty of models from scratch - but the lines printed on the balsa were too wide, and thus hard to cut to the correct size. The black ink showed through the yellow tissue and had to be sanded off. The plans, dated 1986, showed a general outline of the wings, fuselage, and tail, but no details of how to attach struts or anything else. Luckily I've made enough model airplanes in the past that I knew to build mounting points for everything. The plans vaguely show a covered nose and cockpit area, but do not include patterns for any of those pieces. I found some yellow card stock and basically made a card model of the forward fuselage from scratch. The landing gear construction is quite complicated and not at all obvious from the plans. Thank goodness for Google. The kit did not include enough wire for the landing gear, but did include some terrible vacuum-formed wheels. I used some beautiful 100 year old aluminum wheels from my grandfather instead. It is always difficult to align the wings on a biplane model. It was especially hard on this one since the plans do not show the distance between the wings or the length of the interplane struts. I made some complicated jigs by trial and error to get everything right. The rigging was also not obvious from the plans, and Google saved the day again. The plans do not show the location of the center of gravity, but I suspect that mine is much too far aft. I'm not sure where to hide any weight at the nose. I usually enjoy building old stick-and-tissue model airplanes, but this one was very frustrating. There are at least two other companies that sell balsa models of the Tiger Moth, and I would recommend either of them over this one.


-
Technically it's a rubber-powered model. Practically I can't find a place to fly it around here so it will be a display model.
-
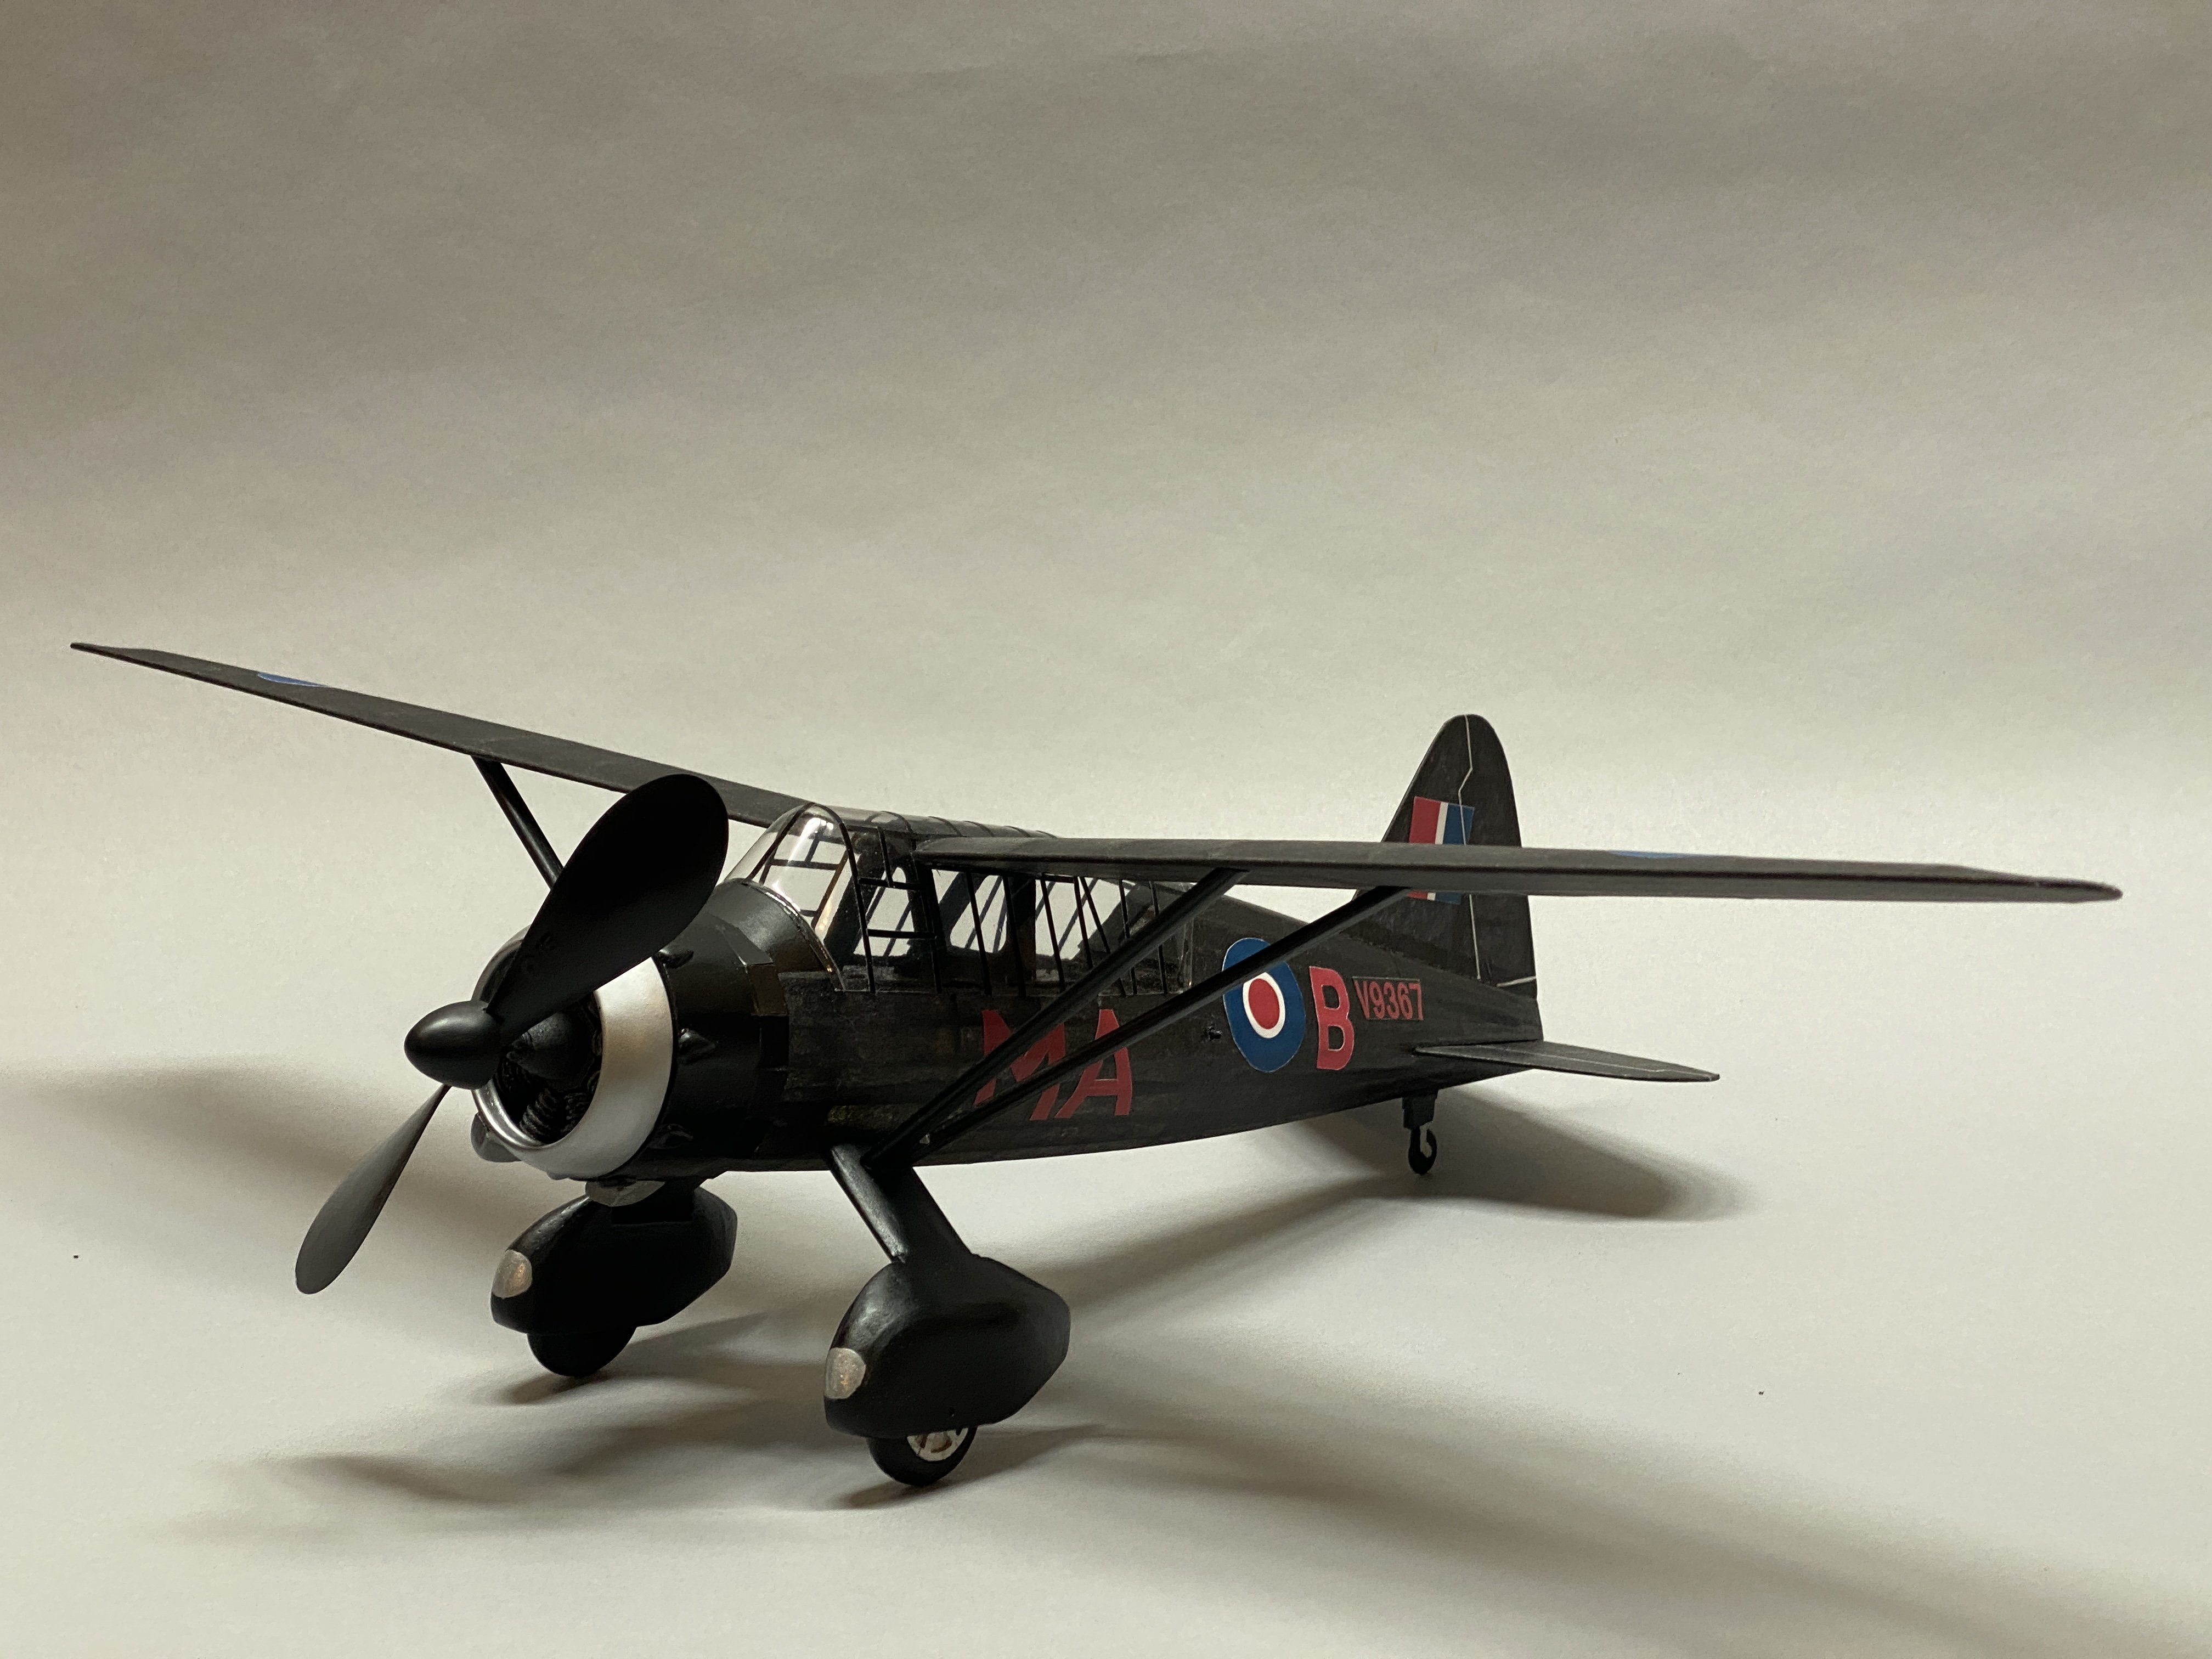
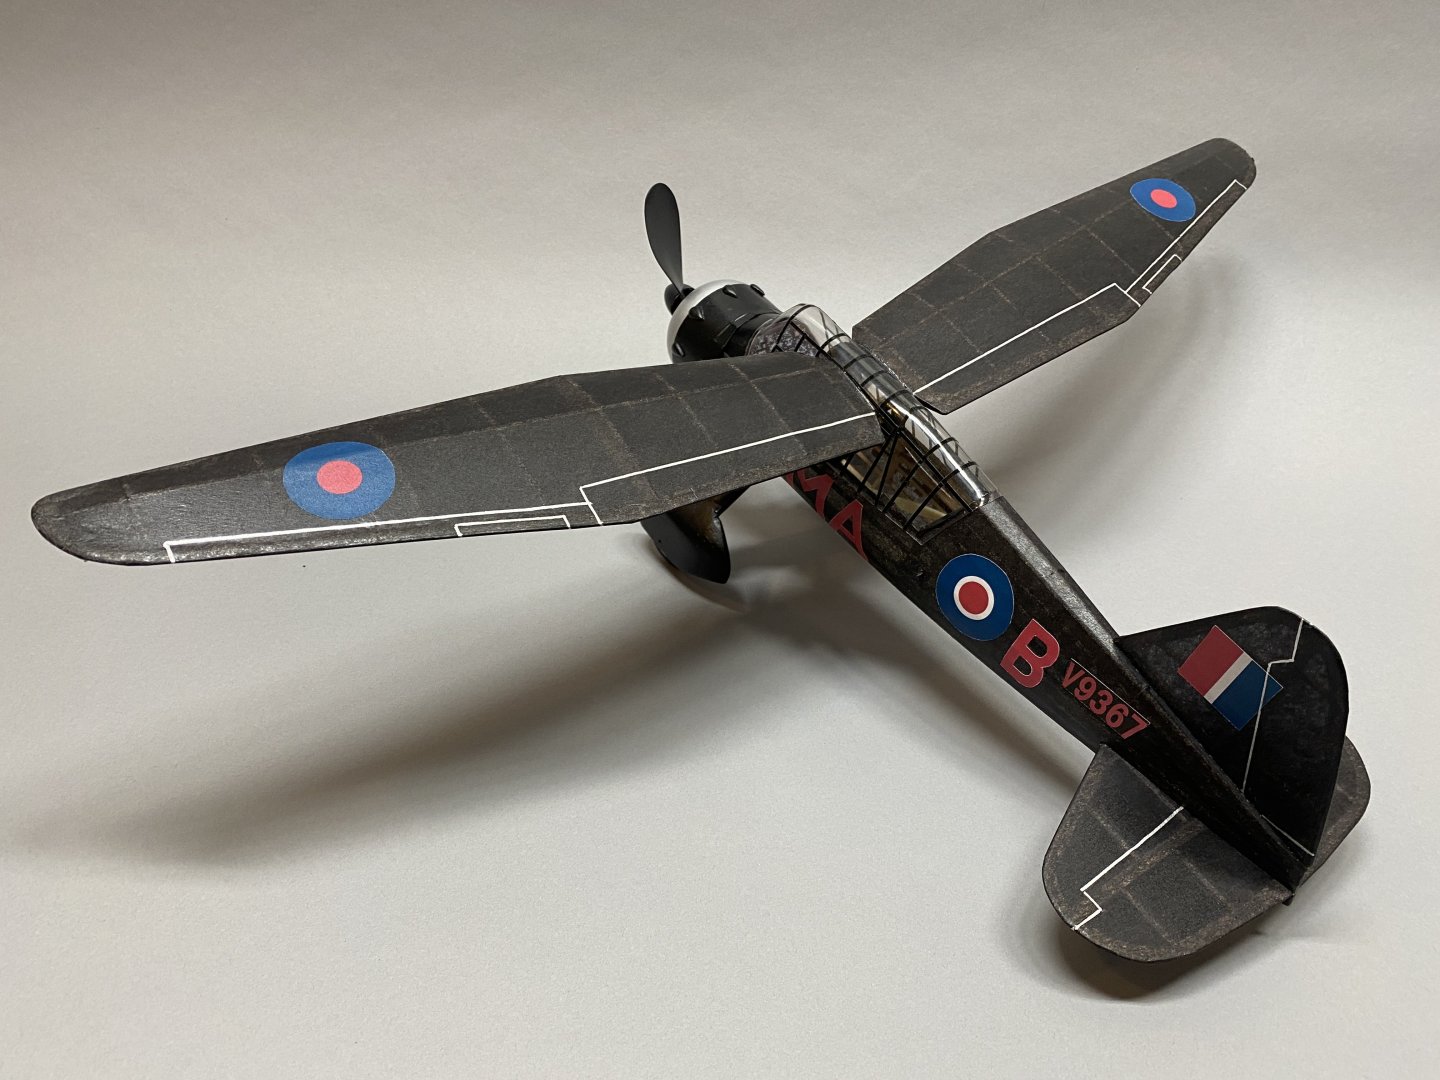
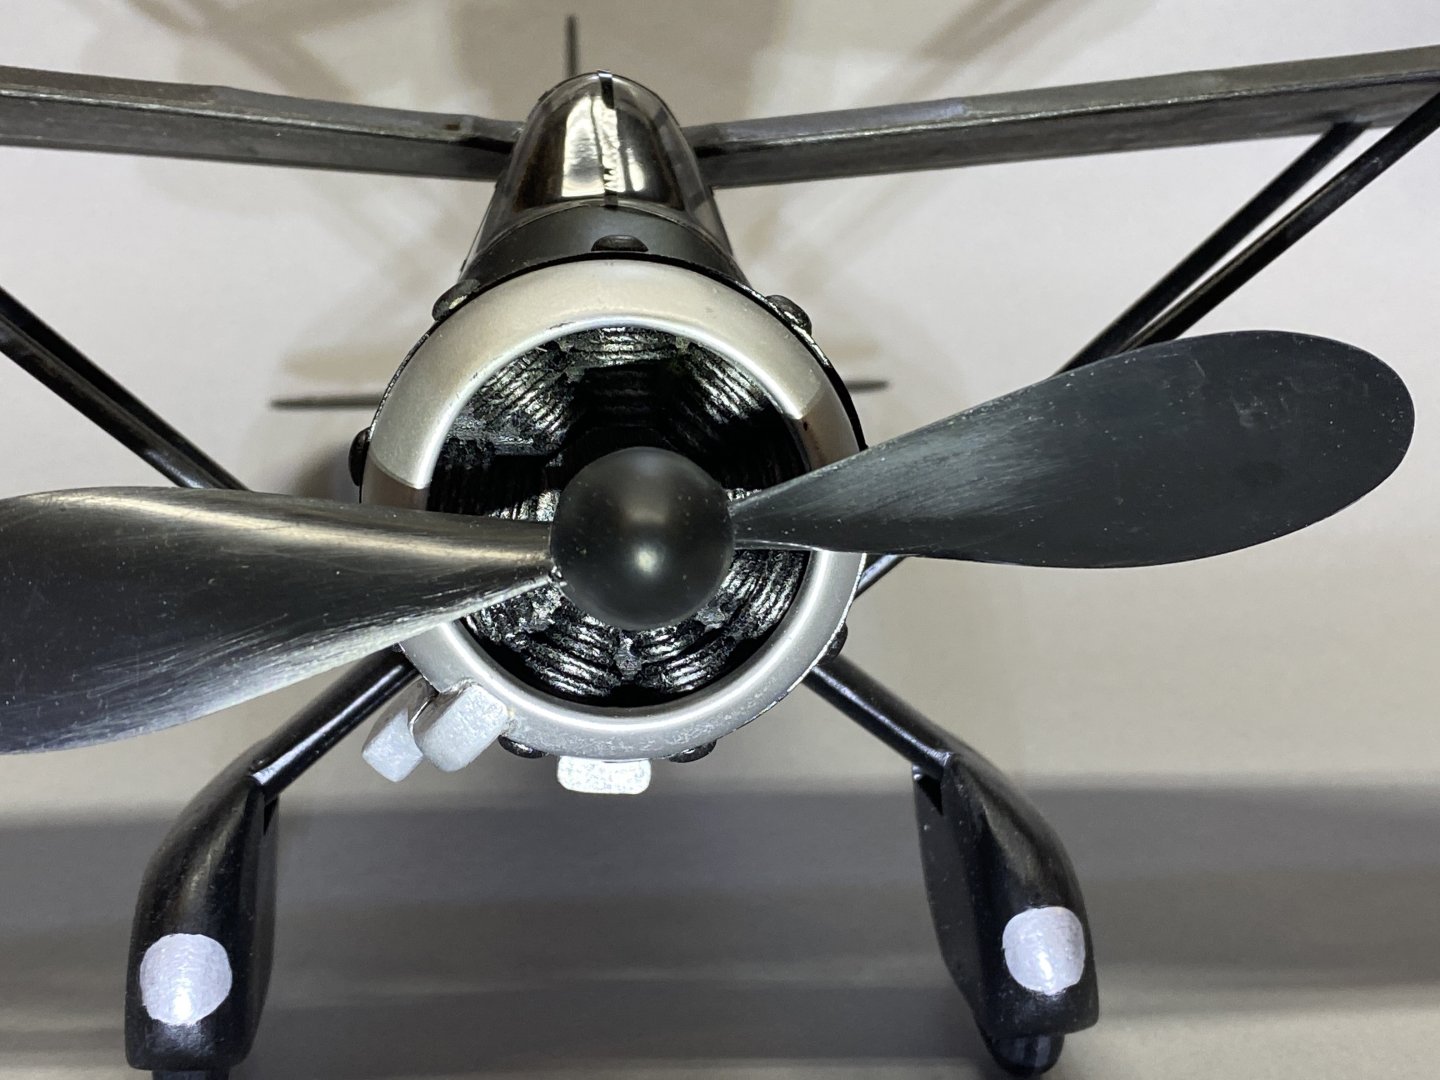
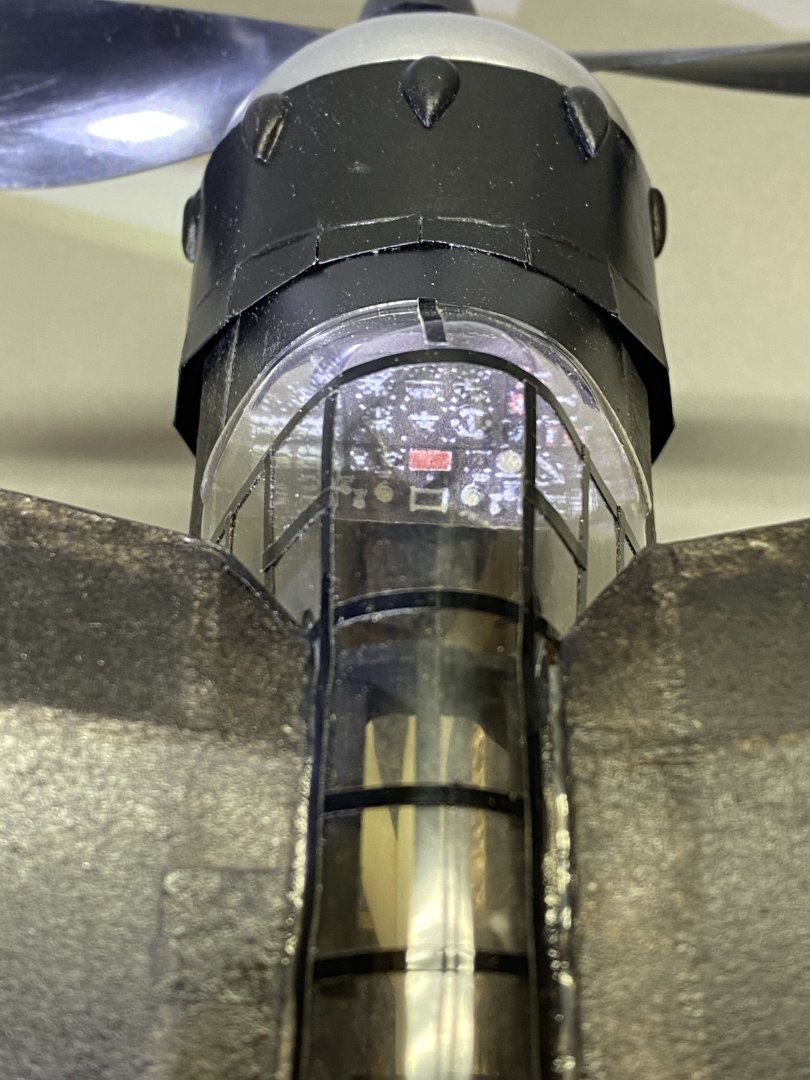
I recently completed this stick and tissue model of a Westland Lysander. The original aircraft were built in the late 30s and were used by the British for search and rescue. The model kit is made by The Vintage Model Company. It is approximately 1/27 scale and has a wingspan of 22". It's a beautiful little model that was a challenge to build. My only complaint is that the supplied black tissue is very fragile when wet and too transparent when dry. I'll look for better tissue if I do another VMC kit. One photo of the structure. The parts are laser cut and fit together perfectly. The wheels, struts, and pants are laminated from many pieces and require a lot of carving. and sanding. The silver cowling is vacuum formed but the black cowling is card stock over a built up frame. No decals - the lettering comes as a printed sheet that you literally cut and paste. I used a silver marker to outline the control surfaces. Black did not show up. Engine cylinders are made of a balsa dowel wrapped with thread, covered with CA, and sliced in half. Lots of work and very hard to see. I found an image of a Lysander control panel online, printed it, and pasted it in the cockpit.


-
Very clever with the doors and windows over the vertical siding. It looks perfect and no one will ever know. I just looked up your location in Landis, NC on Google maps. You are close to the NC Transportation Museum in Spencer. Have you visited it? It's a must for train enthusiasts.
-
Phil, I don't have trains of my own but I do volunteer at the NC Arboretum running a G-scale model RR. The layout is two concentric ovals about 70'x30' around a model town that represents Biltmore Village around 1880. We are in the middle of the Winter Lights program so I was there last night running trains in sub-freezing temperatures. I was running a 4-6-2 pulling the Polar Express - very popular with the visitors.
-
Hi Phil, I just noticed that you had started your build, and I will follow along. That hull is really hard to plank, with only a few frames and one layer. It looks like you're off to a good start. Rod
-
Thank you to everyone for all the kind words! I hope that my posts might help someone else considering this kit.
-
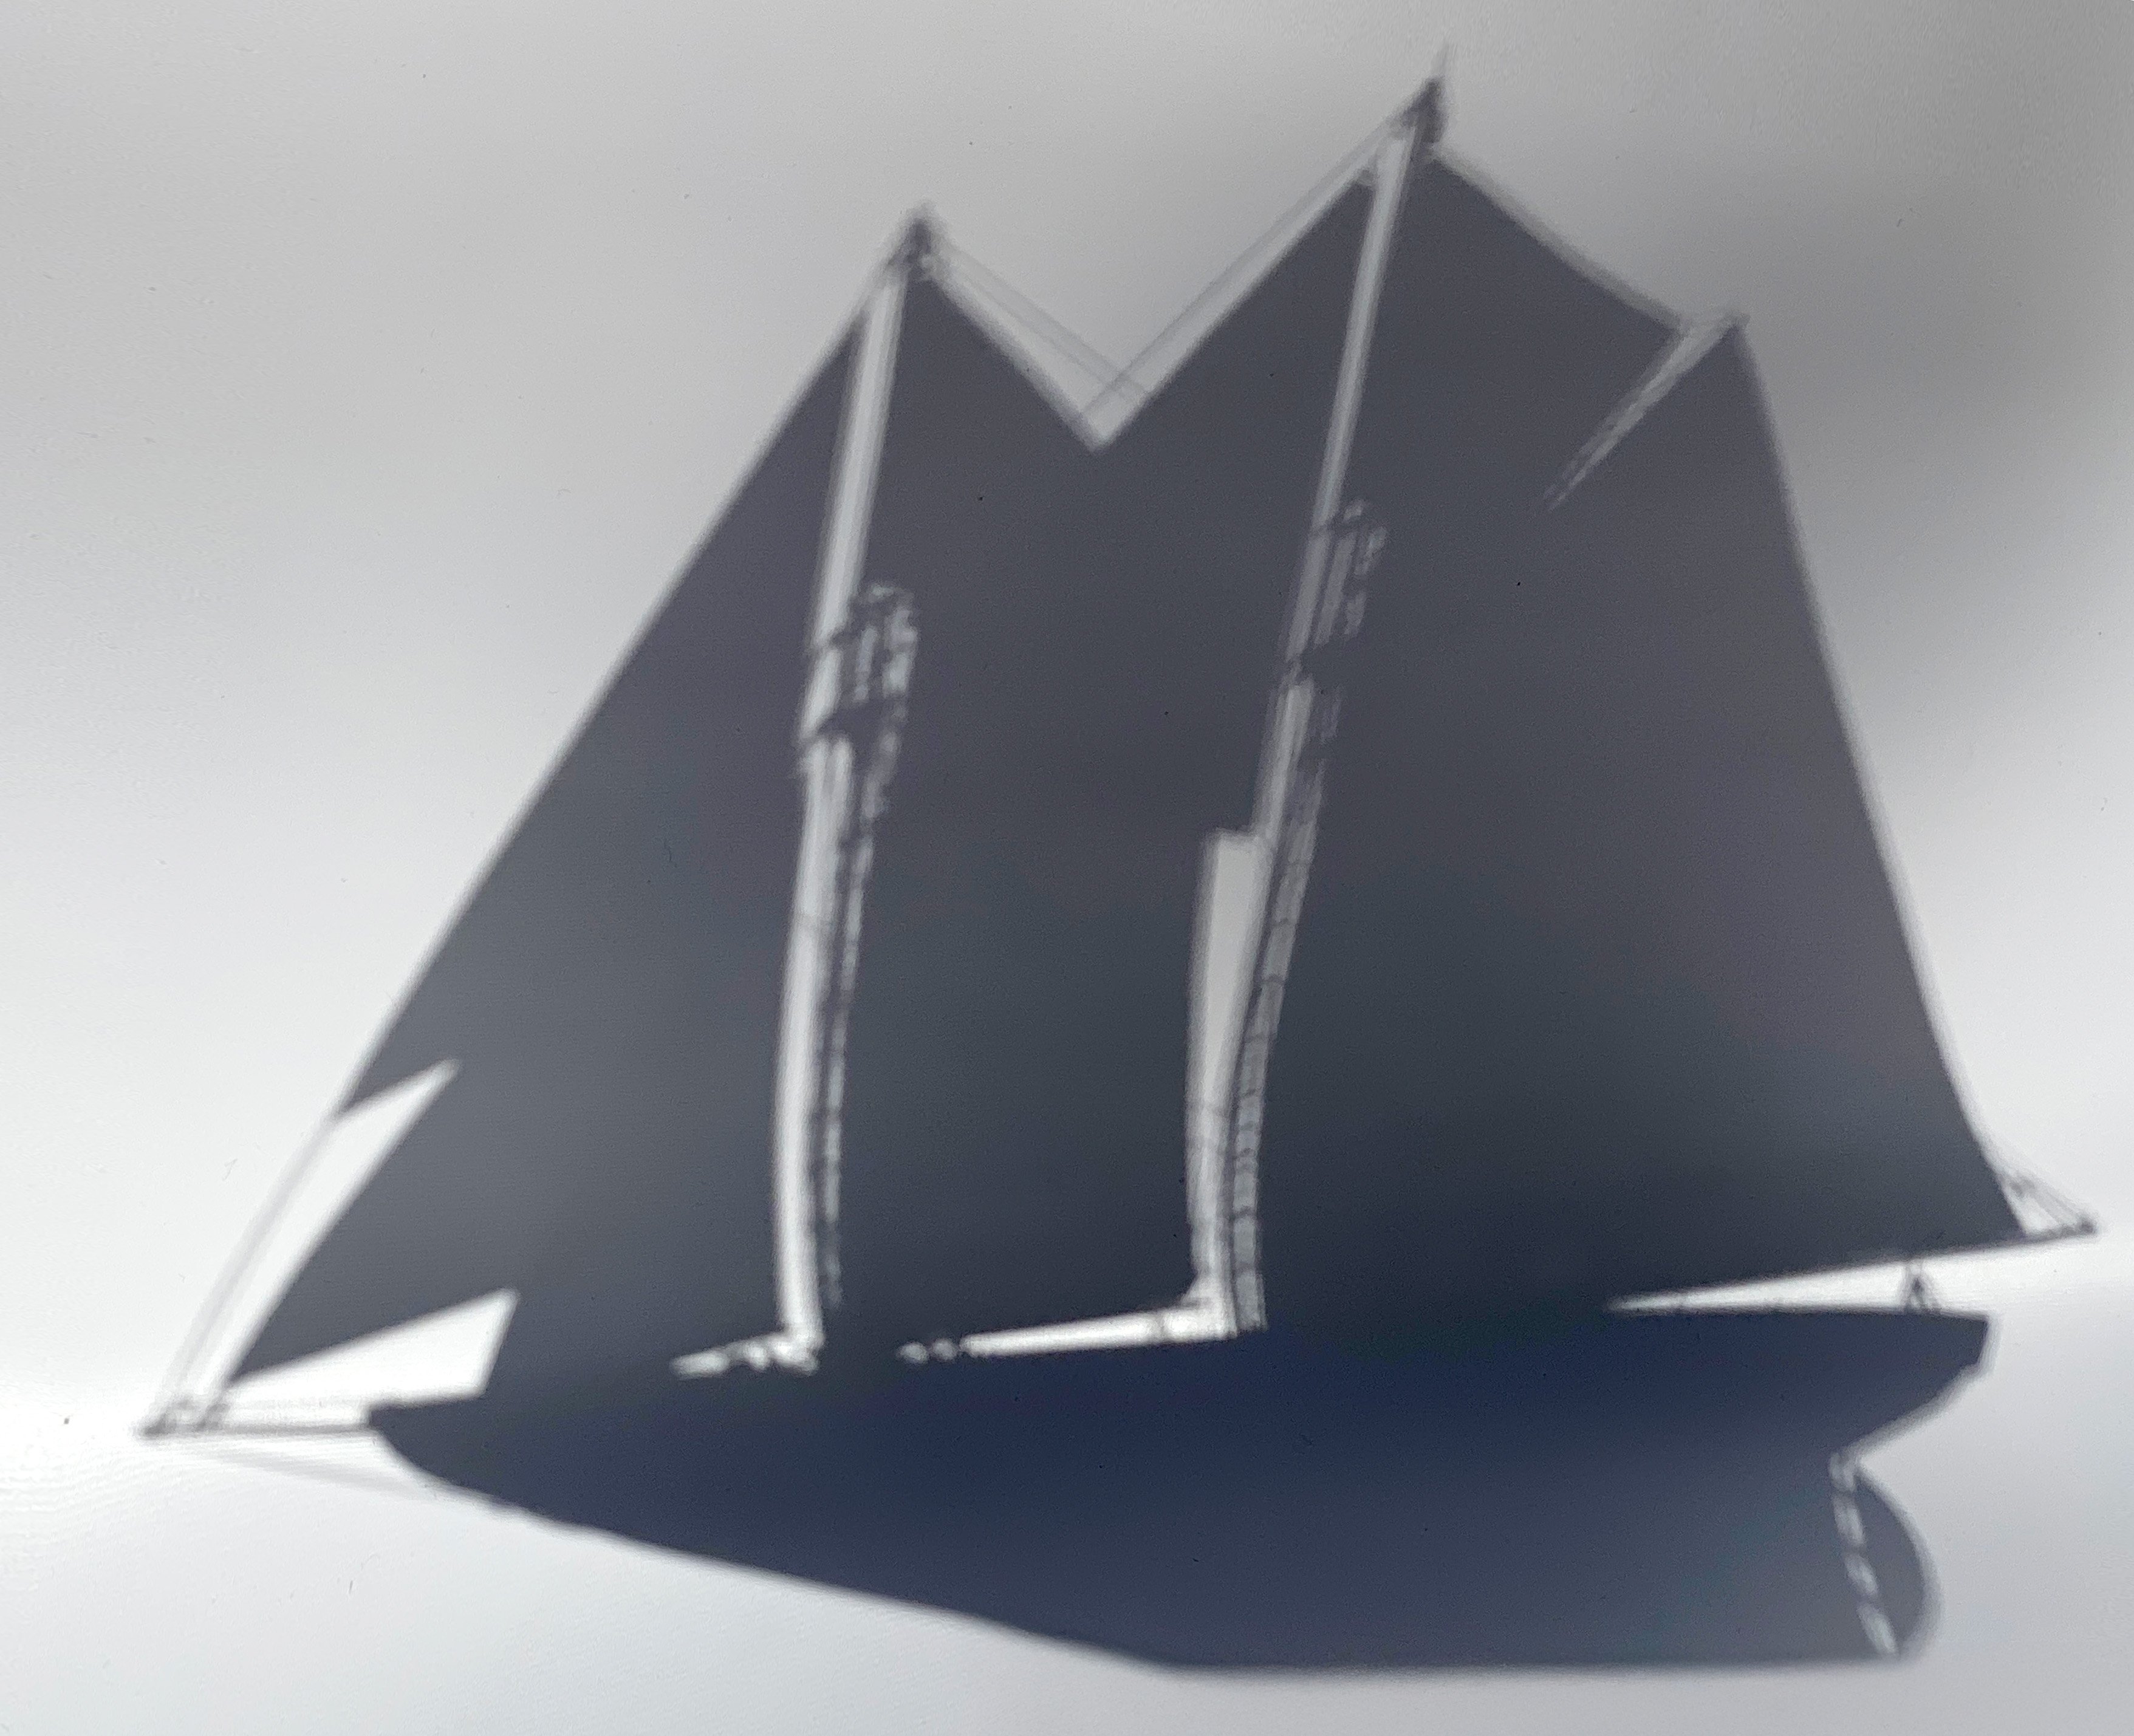
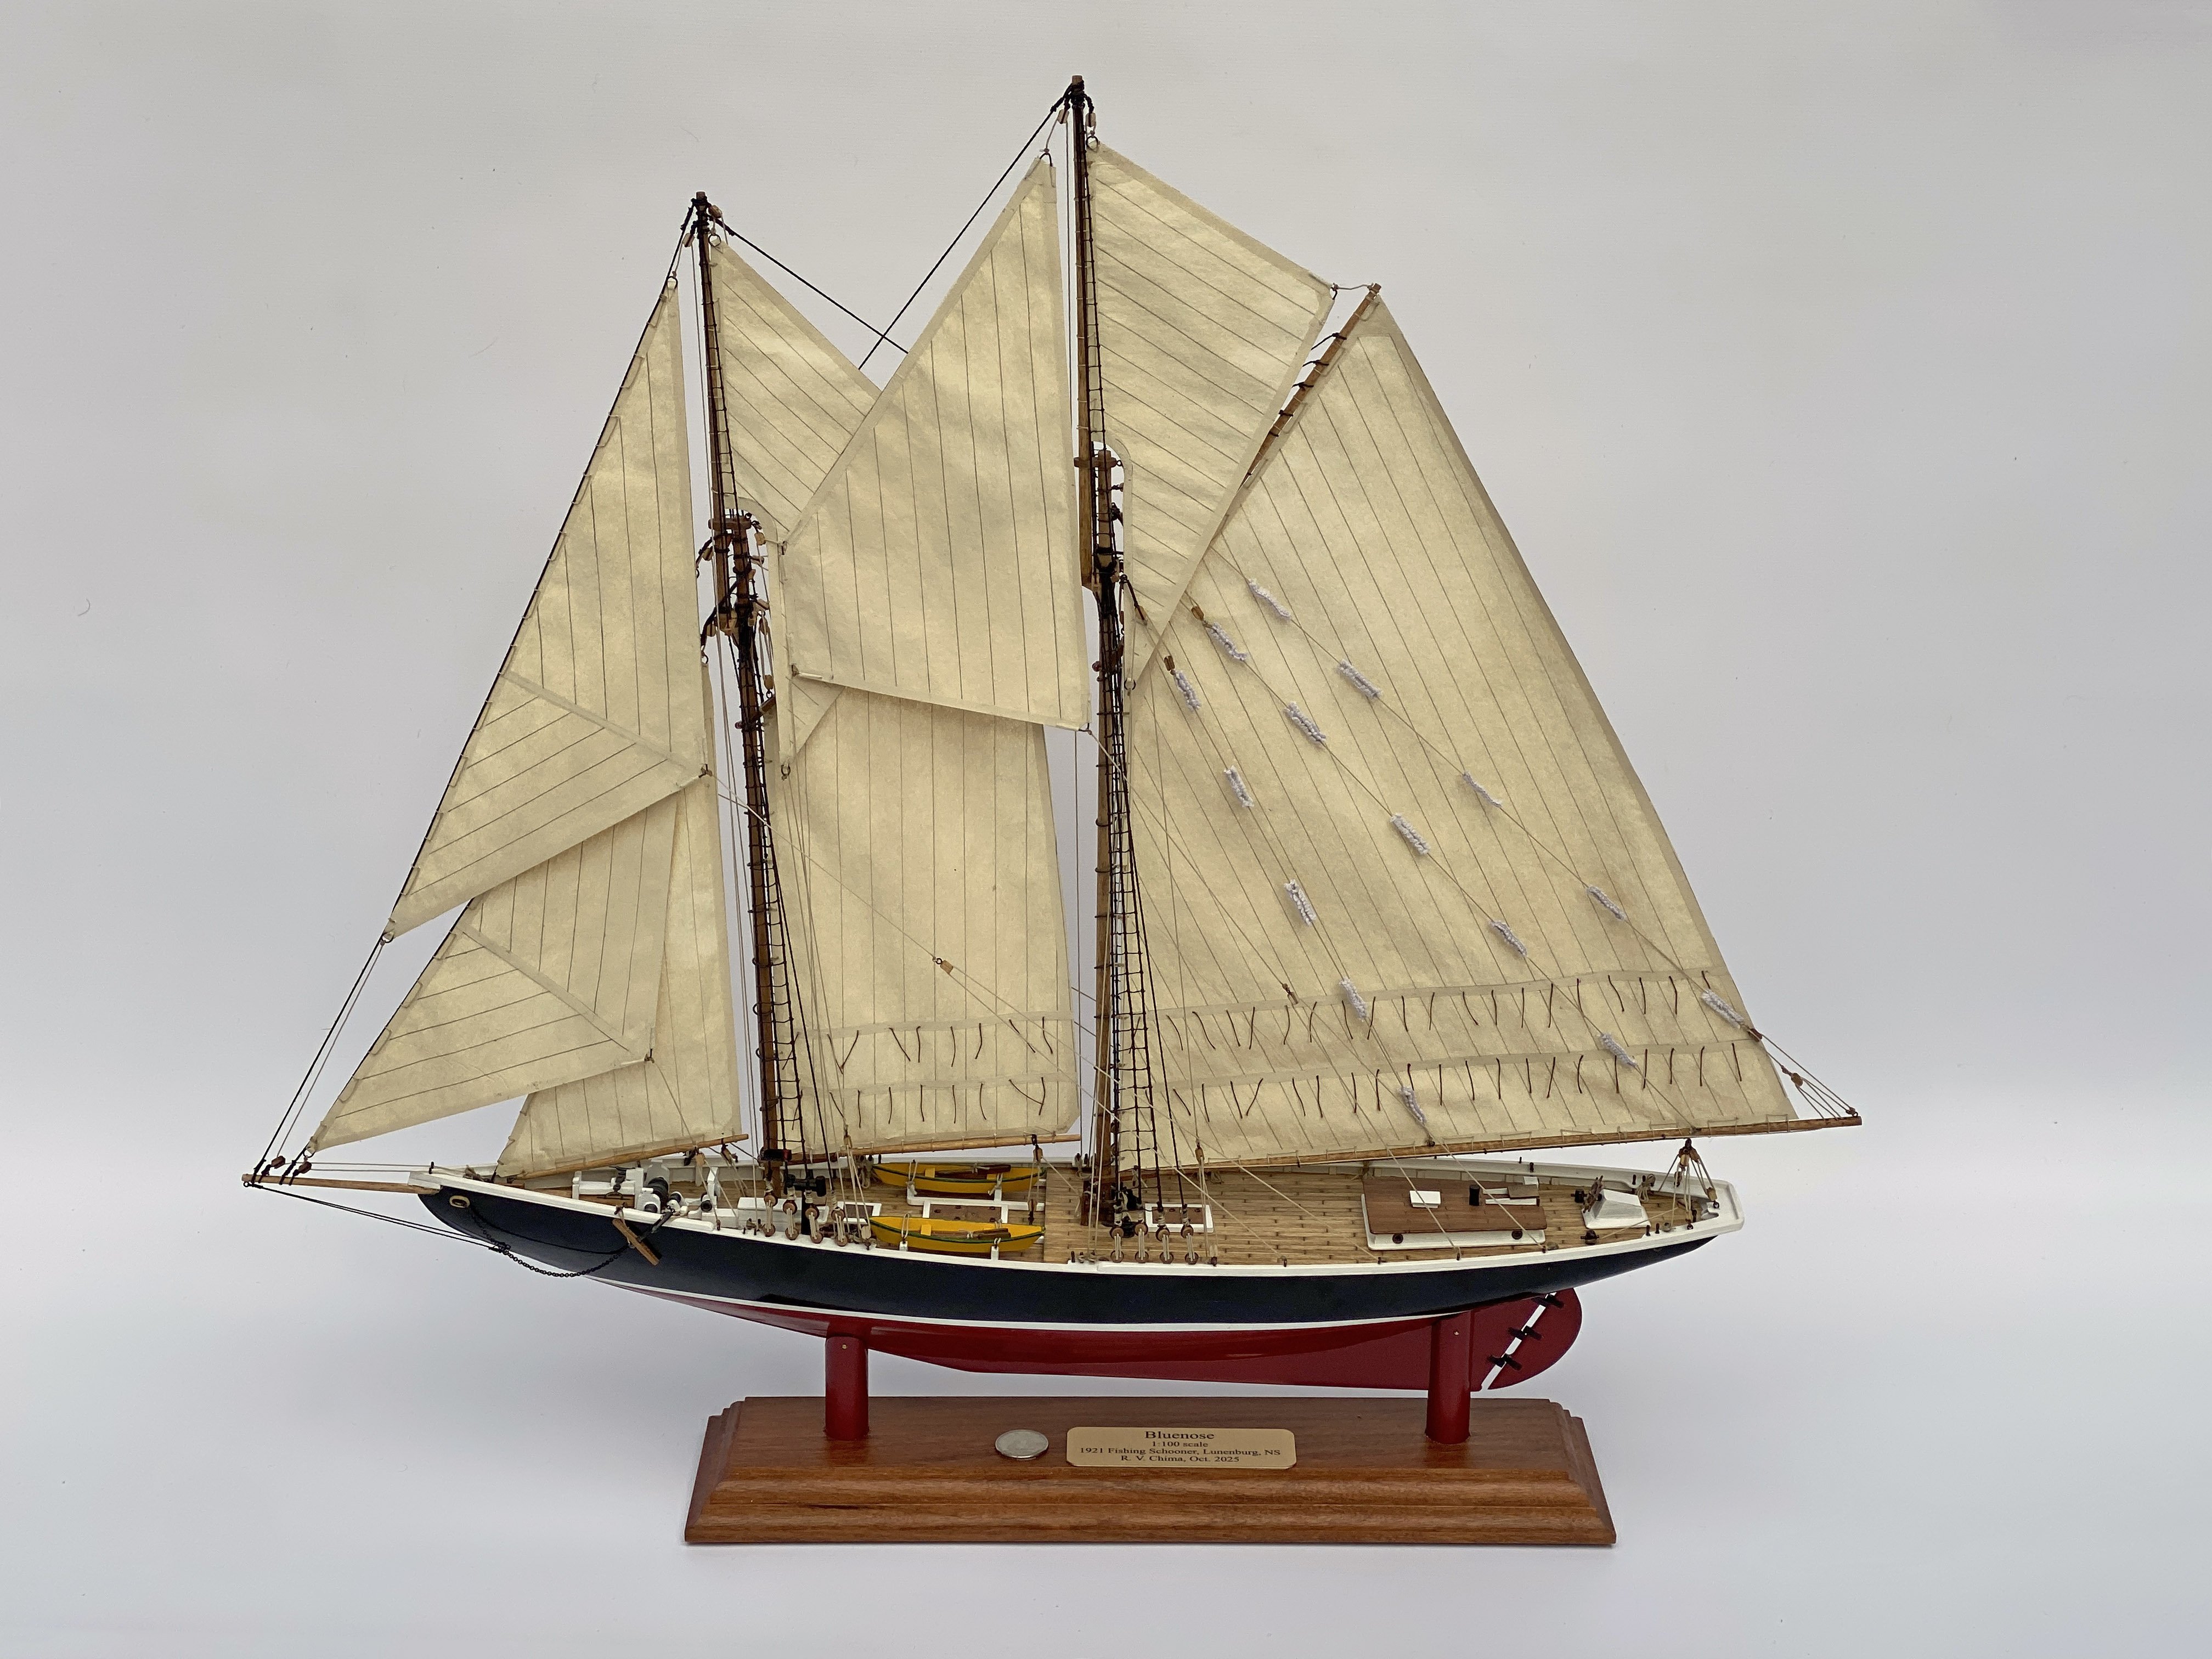
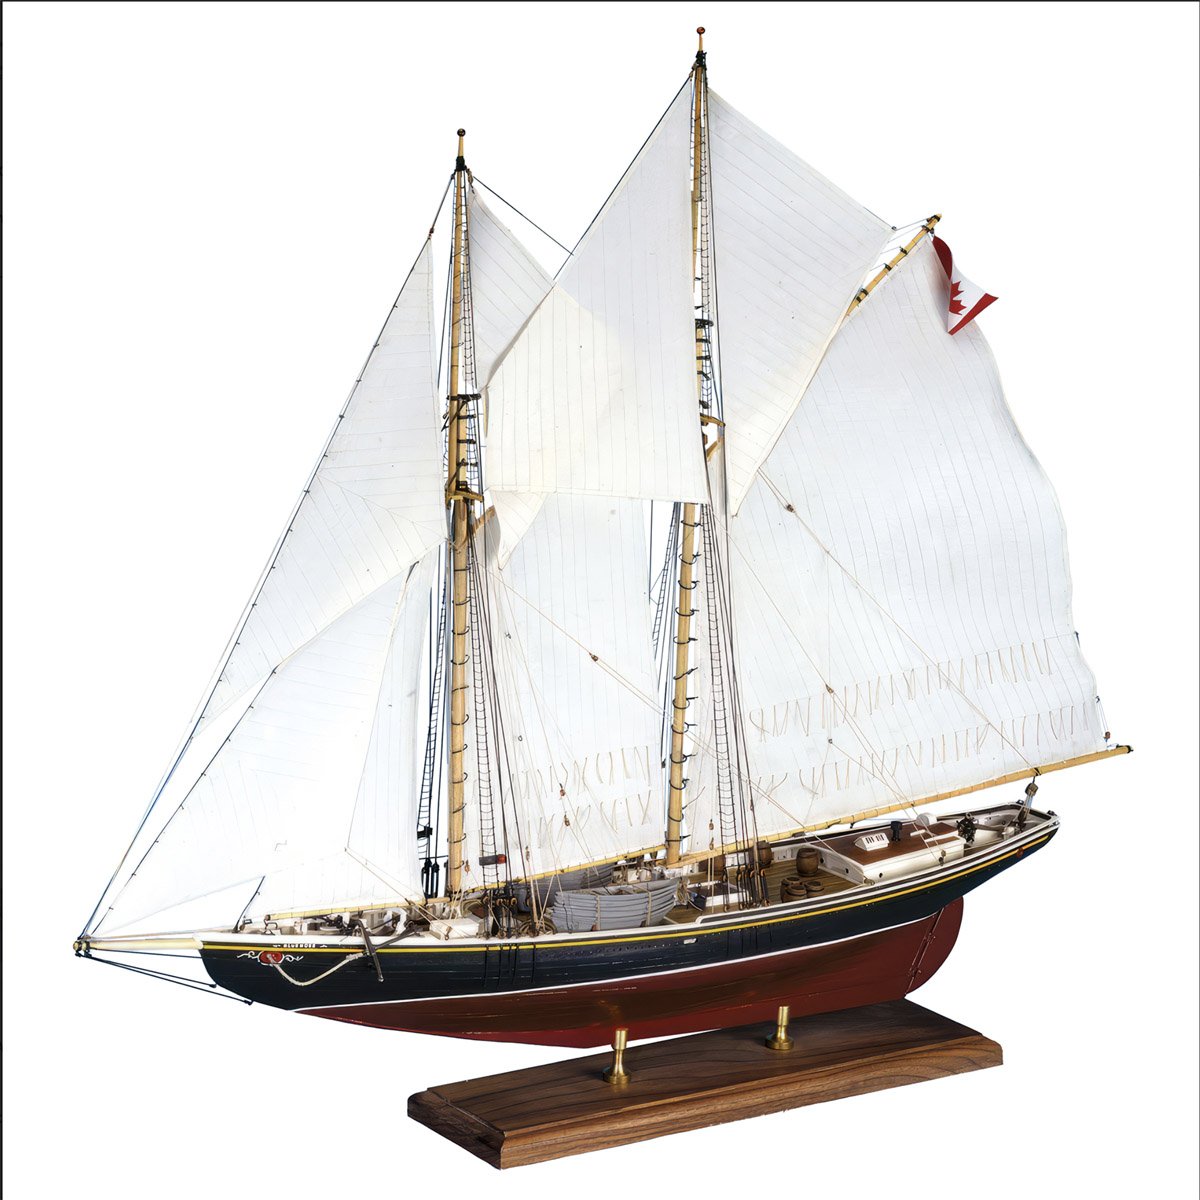
Bluenose Finished - 121 days, 253 hours I finished my model yesterday and have my bench cleaned off. I would especially like to thank Trevor (Kenchington), David Lester, Ggibson, and several other contributors who helped me with so many questions on this model. Full disclosure I omitted a lot of rigging on the sails. I tried to include all the hallyards and tacks, but omitted many of the clew lines and sheets. They are all omitted on Amati's plans so I don't know where they go and I don't have anything to belay them too anyway. Kit Review, Amati Bluenose, 1:100 scale Back on June 18, I posted "What's in the Box - Seems like not much for €106.99" The kit included: Plenty of wood planking. Two spools of rigging, all tan, and all way too thick. Some brass wire for rings, way too thick. Two historically incorrect Canadian flags. Some unusable cloth for sails. Some wooden single blocks at about 2x scale, but not nearly enough. The kit did not include: Usable rigging line. Double blocks. Eye bolts. Belaying pins. A decent stand. Plans & Instructions The three full-sized plans are somewhat helpful, but the instructions are terrible. The last two steps basically say "Build the masts and sails," and "Attach the standing and running rigging." The instructions do not show any of the upper shrouds or ratlines. The plans show an image of the deck with dots where belaying pins should be. They do not correspond to anything I've seen anywhere else. The rails on the model all seemed too close to the deck. That made it very difficult to belay lines. The rails also seem to be too narrow. When I tried to drill to add my own belaying pins I often ended up drilling to the outside of the hull. There are no eyebolts on the rails or deck, but Jensen's book and the MS kit has many lines tied off to such points. The instructions show a drawing of each sail with a number on each corner. The numbers correspond to a deck plan with numbers on the rails where, I guess, you're somehow supposed to tie the line from the sail. But many of the connections just don't make sense - they cross to the wrong side of the ship or go way too far aft. Many thanks to Jensen's book and to my followers for helping me get some of this right. Final Comments and Photos I chose the Amati kit because it is small, and I am running out room for model ships in my house. The model was very frustrating because of the poor parts and terrible plans. I pre-rigged all the masts, booms, and gaffs according to the plans, and ended up re-rigging almost everything, usually in place, to get the rigging somewhat correct. I still know that so much of the rigging is incorrect, but just couldn't fix any more at this point. Anyway, my model looks pretty good if you don't know enough to spot the errors. Unfortunately I do, but I won't tell anyone. Rod Here's what I go through for my 7 followers. I took some early photos, and then the sun peeked out from behind the trees. I did get a nice image of the shadow.


- 80 replies
-
- 14
-

-

-
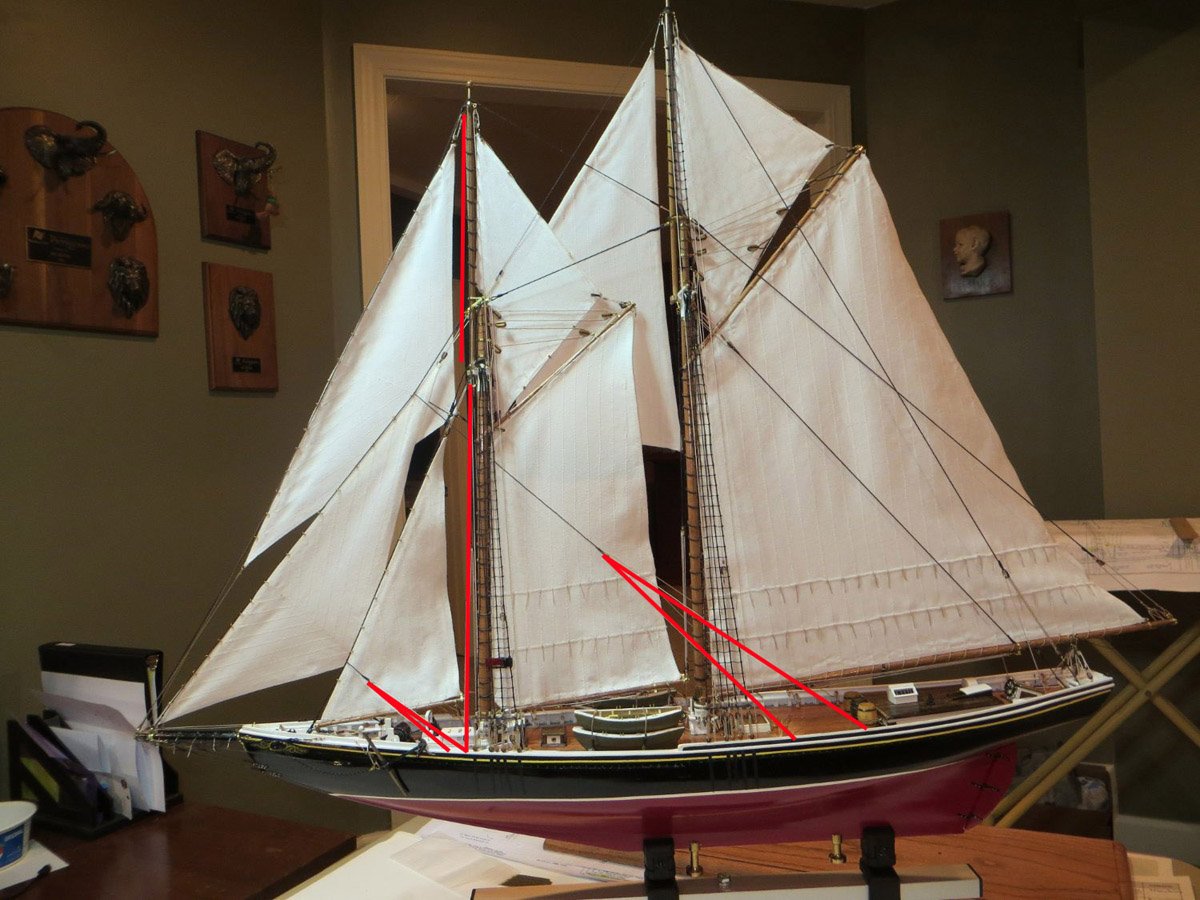
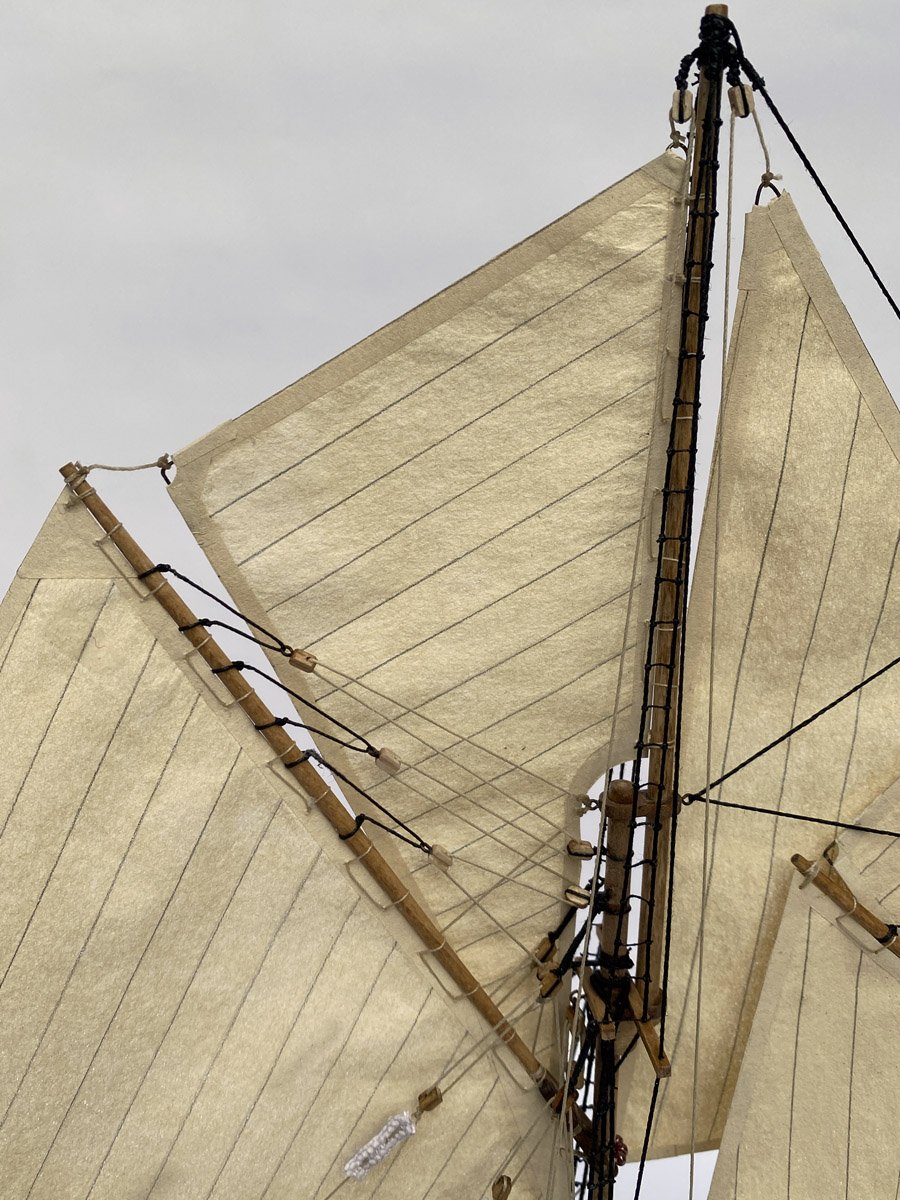
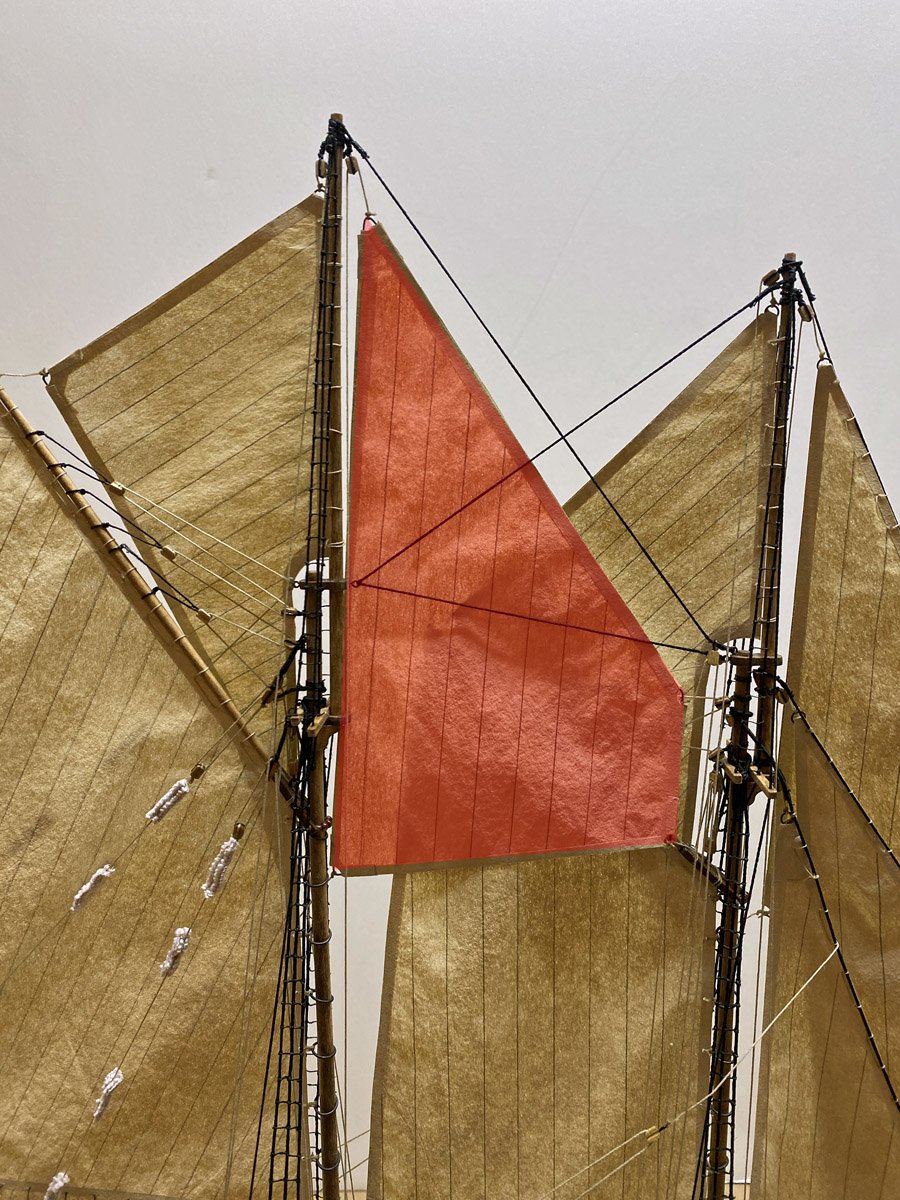
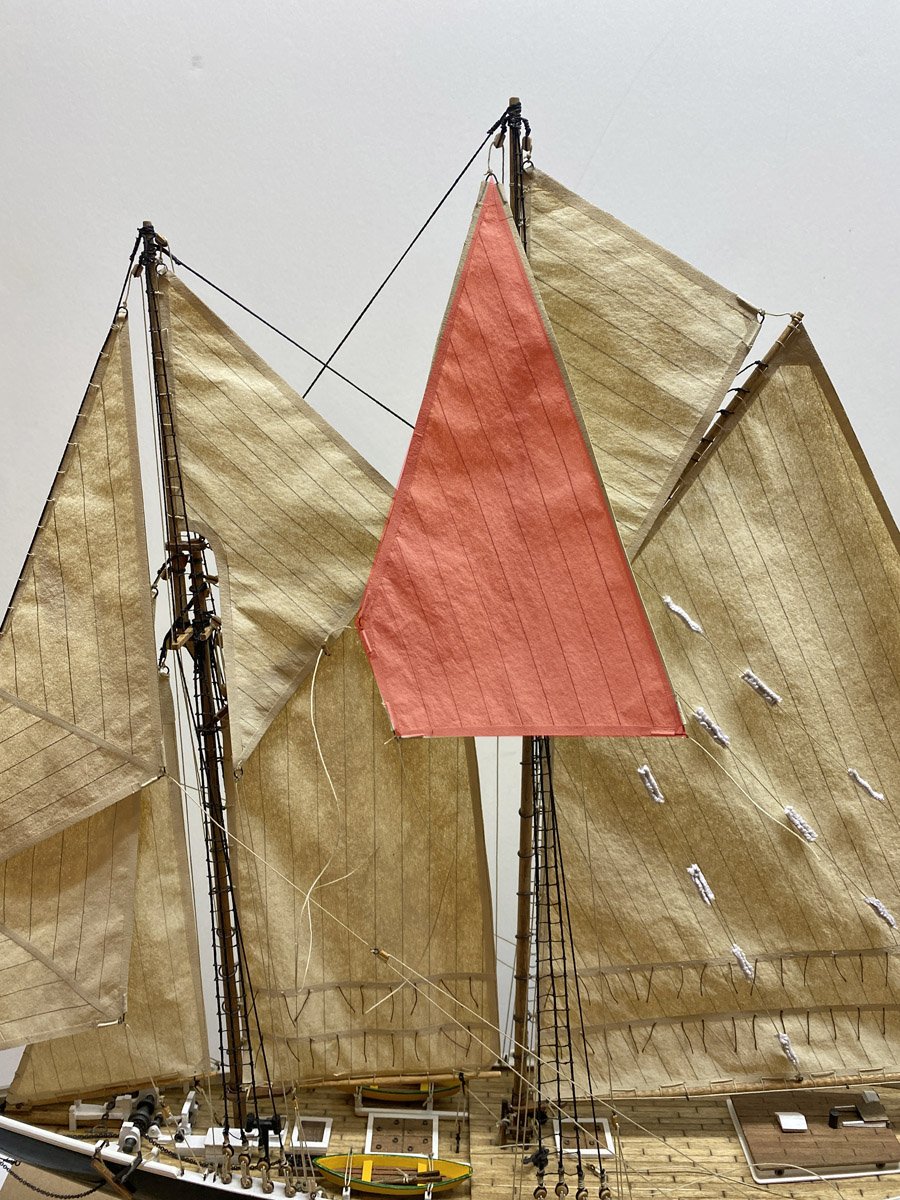
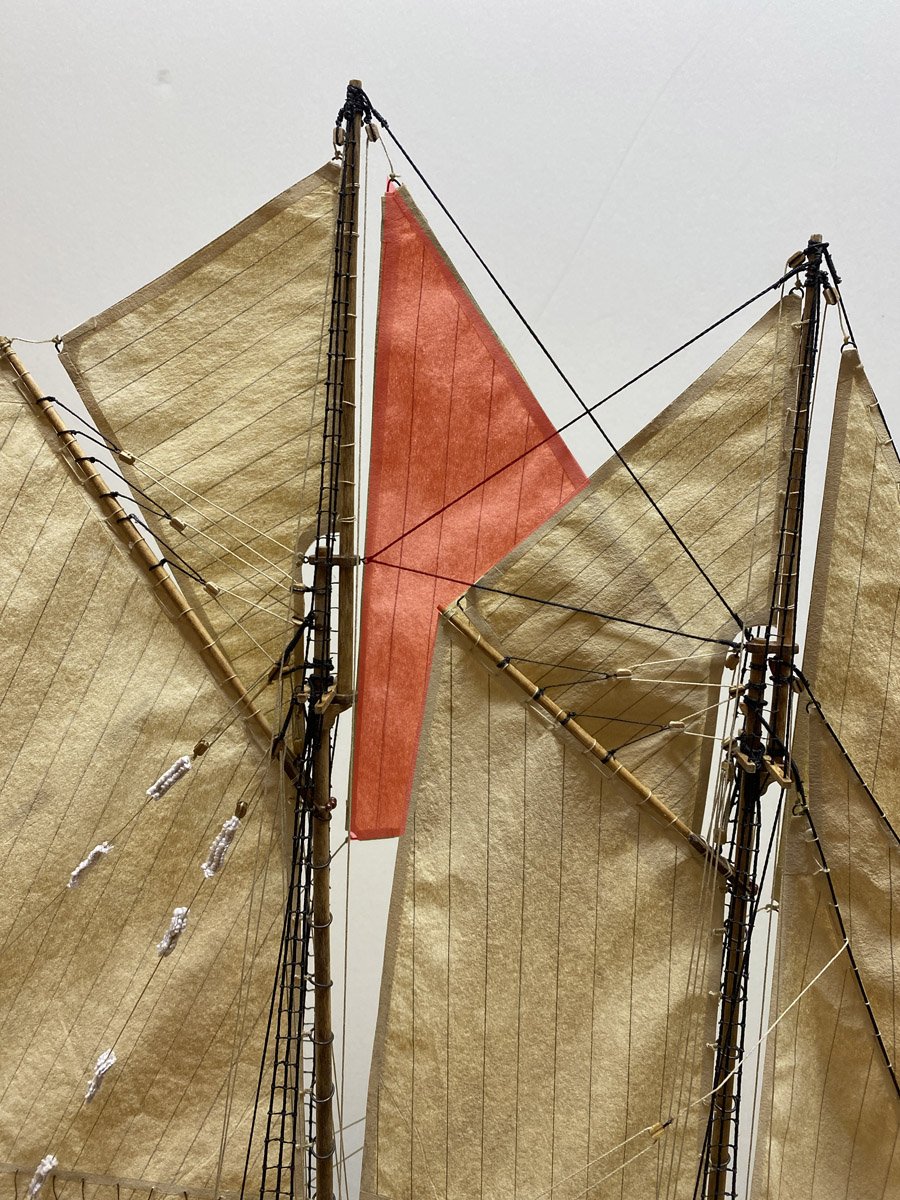
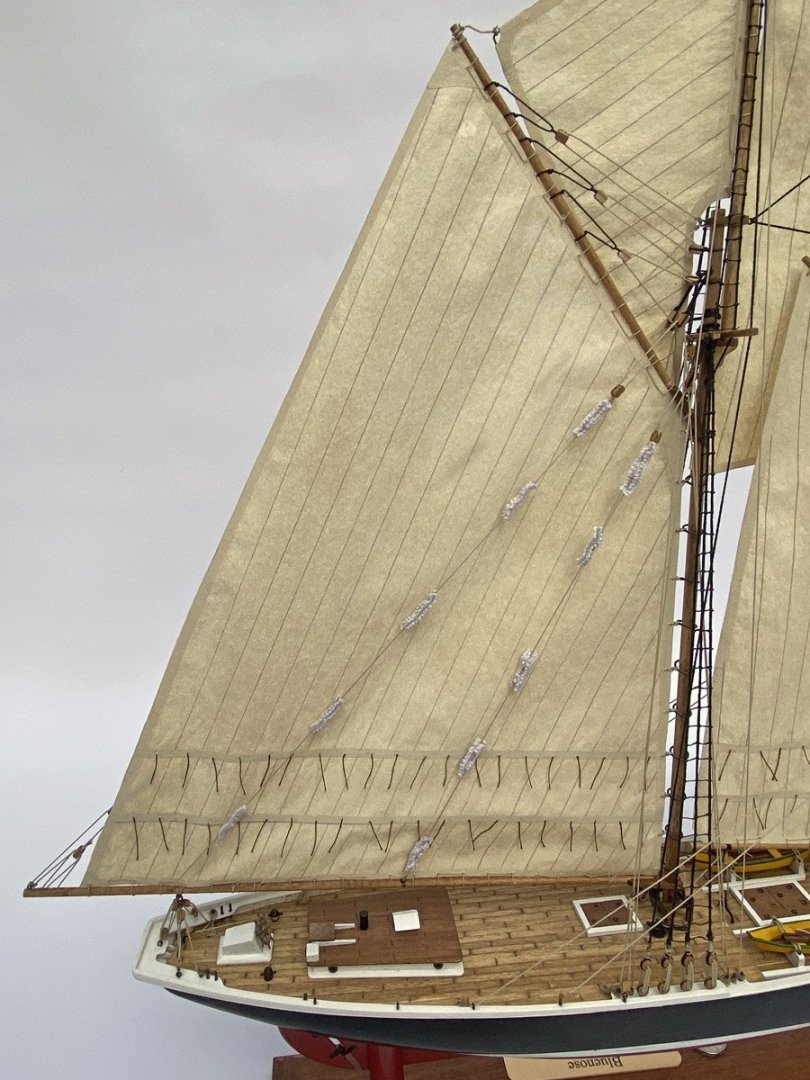
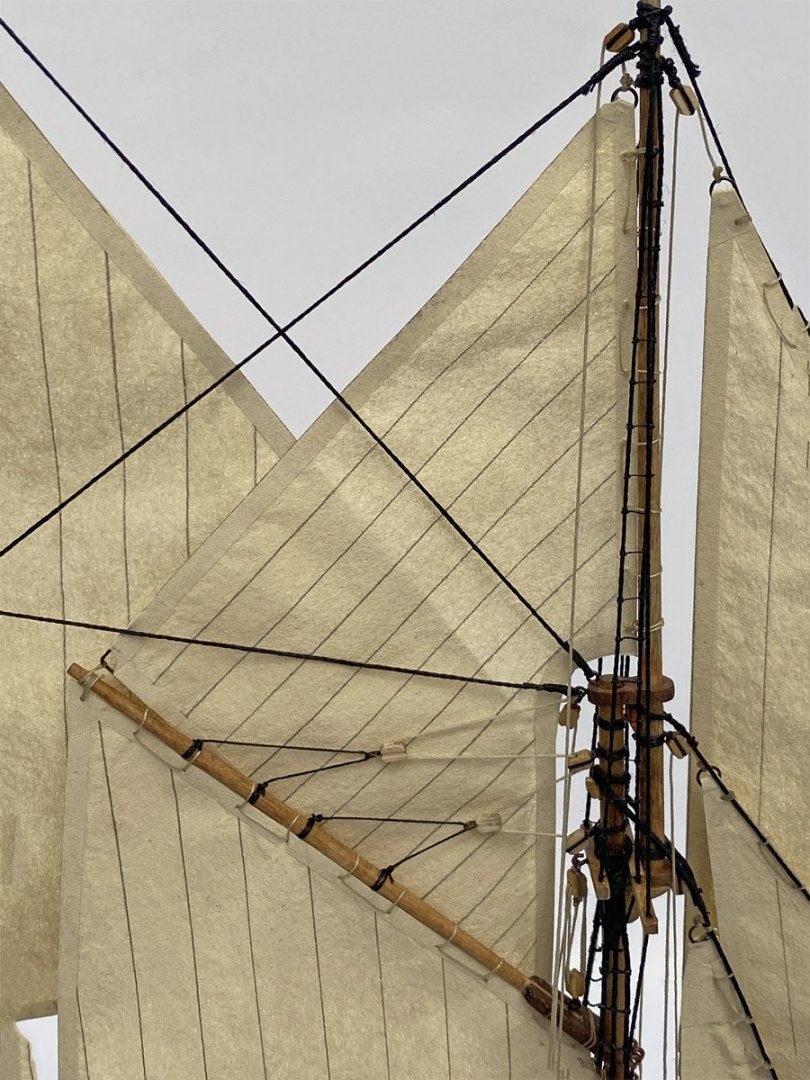
More Problems with the Fisherman's Staysail A few days ago I wondered whether the fisherman's staysail should be on the windward or leeward side of the foresail & gaff topsail combination. It seems that both locations were used, so I opted to rig mine on the windward side as shown in Jensen's book. That looked good, until I turned the model around and saw that the staysail completely hid all intricate rigging on the fore gaff. And so, deconstruction. It only took about 1.5 hours to re-rig the staysail on the leeward side of the foresail, etc. and now all the rigging on the fore gaff is visible again. So the location of that sail turned out to be a question of model aesthetics rather than proper sailing.


-
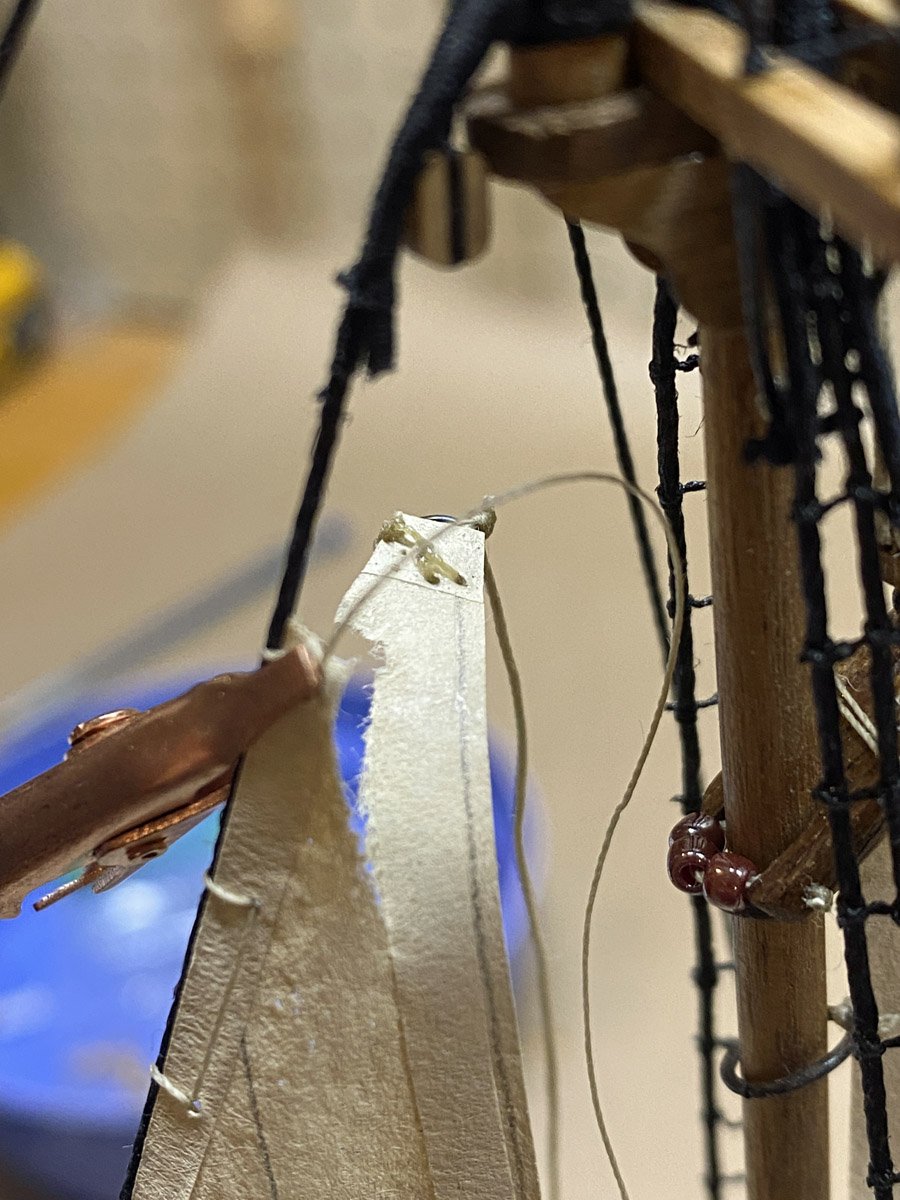
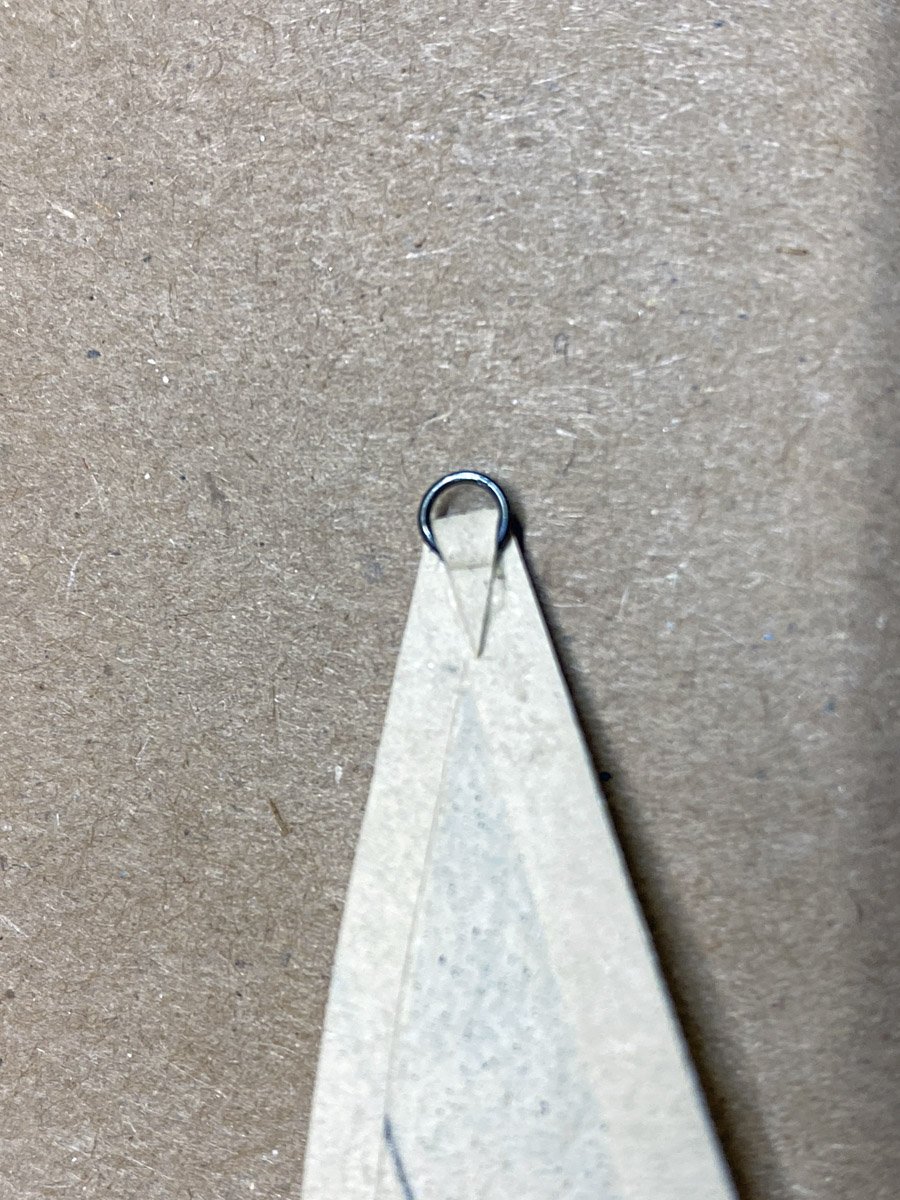
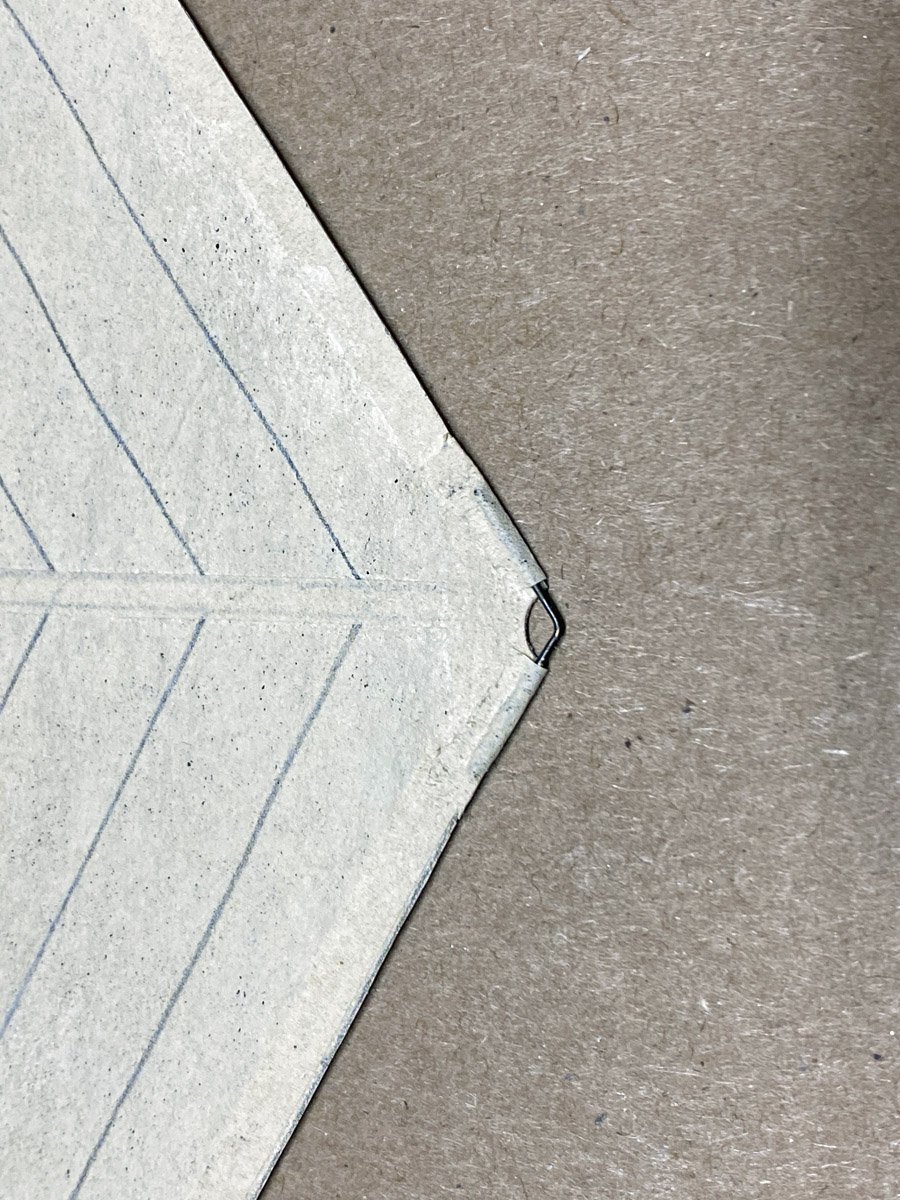
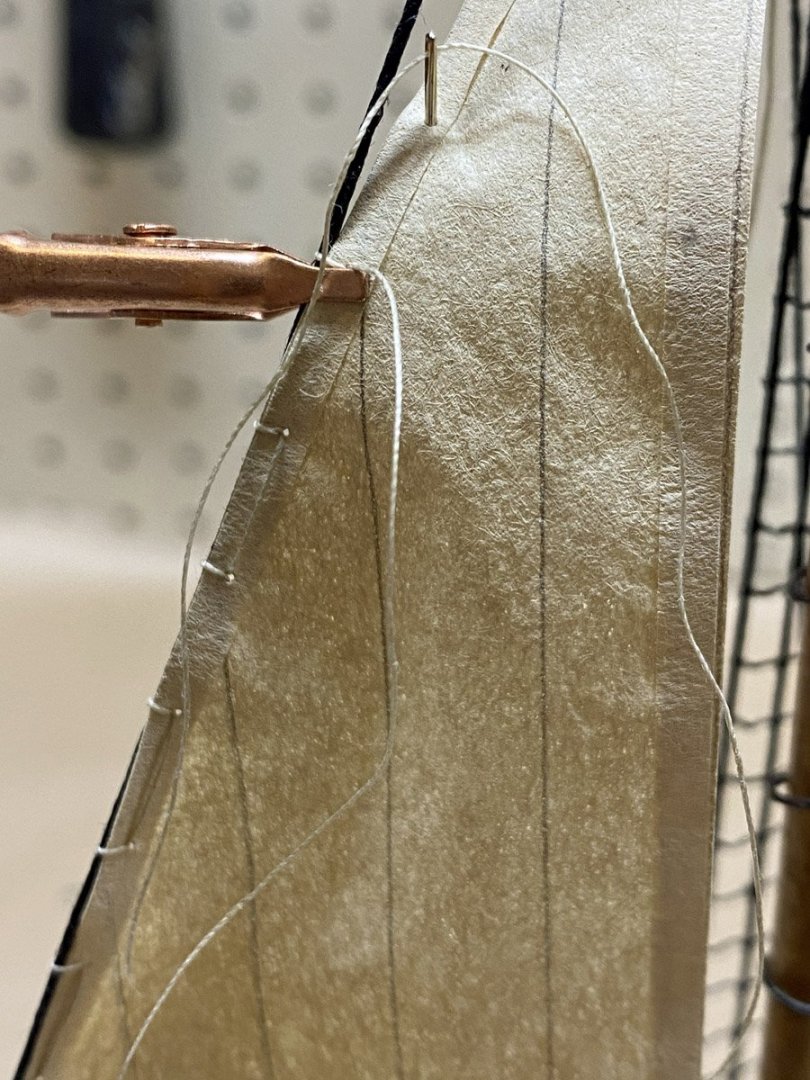
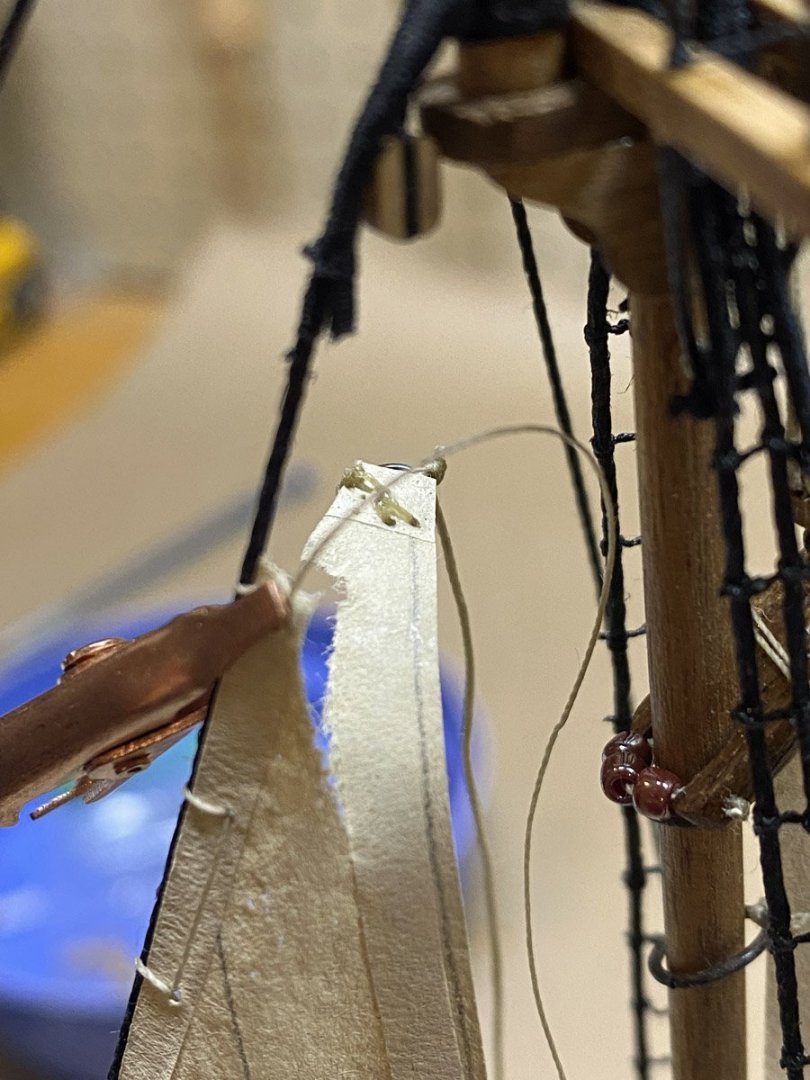
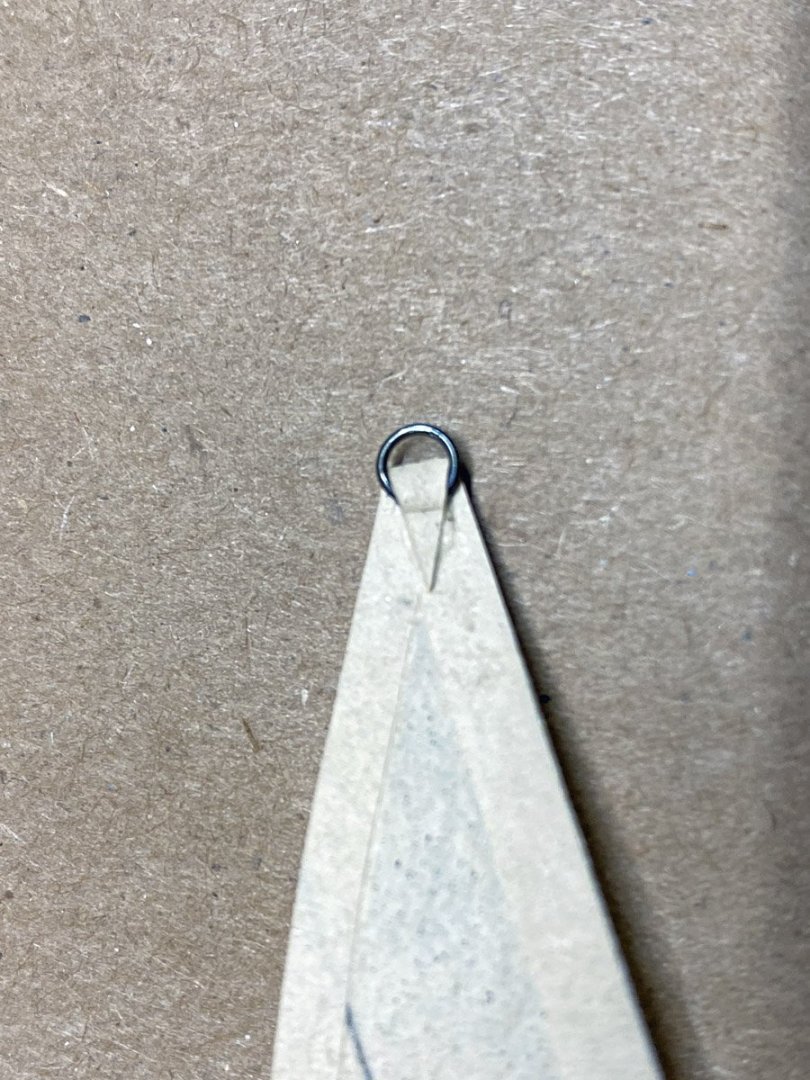
Attaching Sails I pre-punched the edges of my sails every centimeter. I attached them with a stitch that loops around the boom or stay and then moves up the sail to the next hole. I made attachment rings by wrapping brass wire around a brass rod in a tight spiral, and then cutting off individual rings. But the wire supplied by Amati was 1 mm in diameter and the rings looked like fat little donuts. I re-made them with 0.5 mm wire. I tried to stitch rings to the corners of my first staysail, but the attachment failed as soon as I put some tension on it. After that I just folded the vertex of the triangle through a ring and glued it down. That worked well for sharp corners. For blunt corners I bent a short piece of wire and glued it in place with some silkspan over it. Both methods work well.

-
Trevor, That video is amazing. I really enjoyed it at about 30 seconds when the crew is just enjoying the ride, and then suddenly everyone jumps up to grab a line! Very exciting.
-
Trevor, Thank you so much for your help with this question. It seems like I can't go wrong no matter where I position the staysail. I am not a sailor but I do enjoy making models of beautiful ships. I usually rely on a kit with good plans and instructions to get the details right. This is not one of those kits, so your help is greatly appreciated.
-
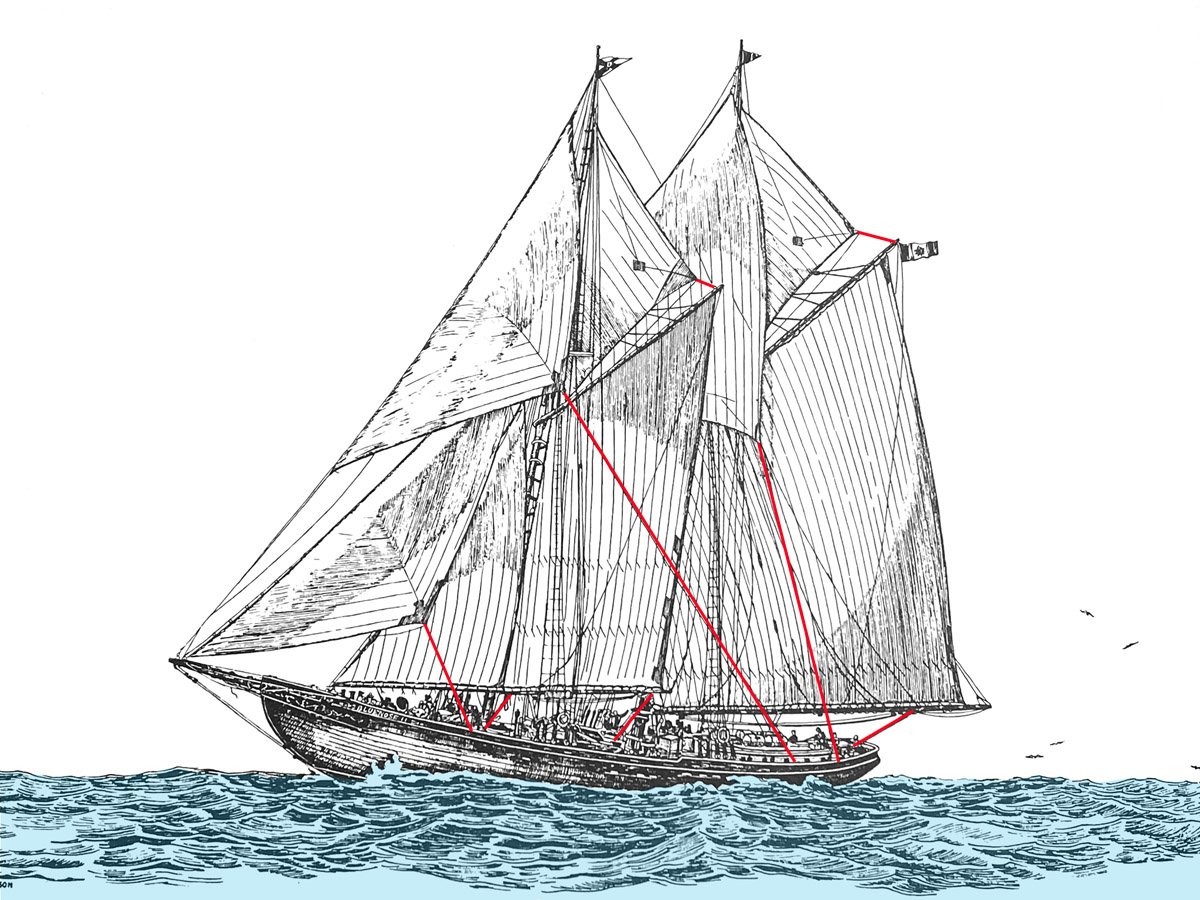
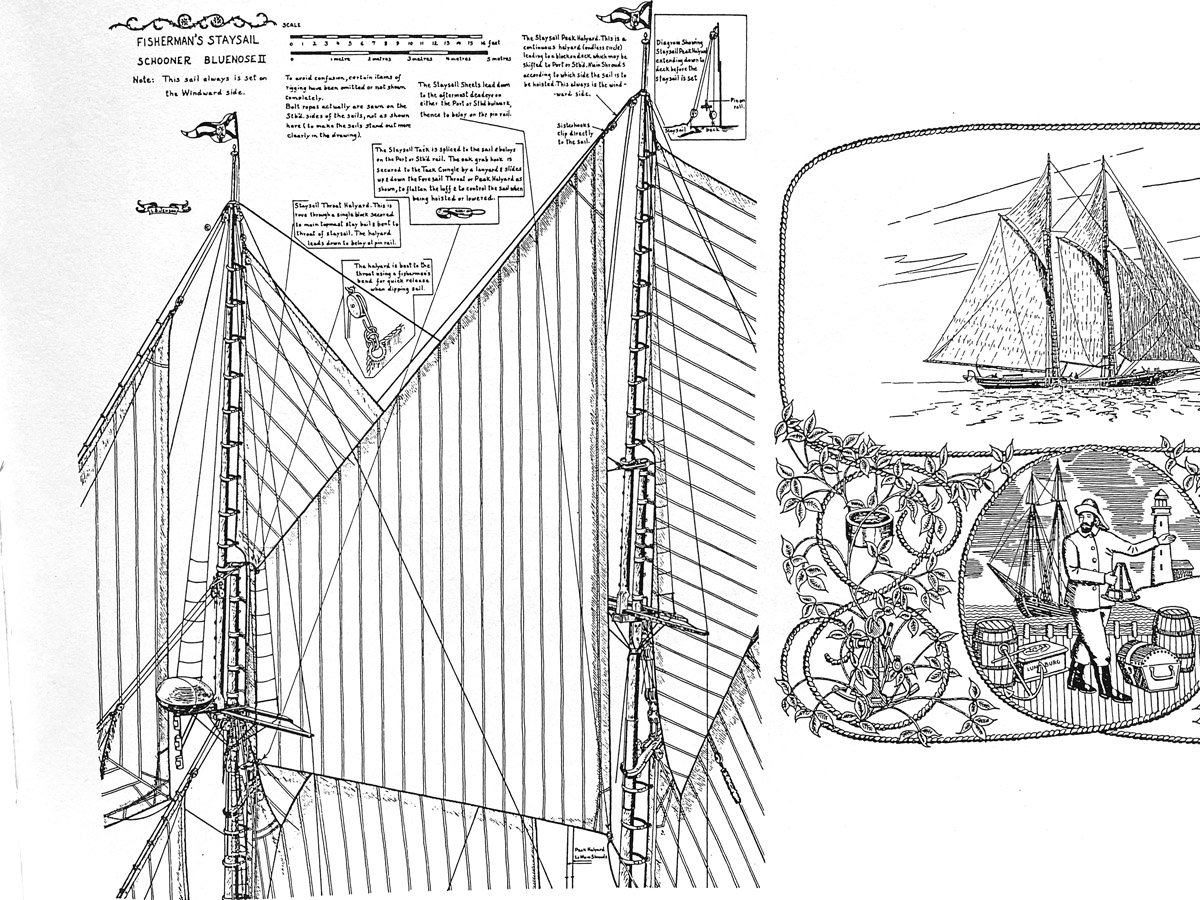
Location of Staysail & Gaff Topsail I am behind on posts but ahead on construction, and have run into a question of where to rig the Fisherman's staysail relative to the gaff topsail & foresail. The instructions by Amati below show the staysail between the foresail and the gaff topsail. This is impossible because those two are rigged together with a clew line. Another Amati error. The two following images from Jensen show the staysail rigged inside the gaff topsail & foresail. The two following images from EdKu20 and Model Shipways online show the staysail rigged outside the gaff topsail & foresail. Rigging the staysail outside the other two seems more intuitive. It leaves the staysail free to fill as it wants to without pushing the other sails. But I sure could use some advice on this.