


rvchima
-
Posts
645 -
Joined
-
Last visited
Content Type
Profiles
Forums
Gallery
Events
Posts posted by rvchima
-
-
Question about thread supplied with the kit
The thread supplied with the kit is wound tightly around plastic "bobbins," and ends up kinked when you unwind it. Should I use it as-is, or soak it in water to straighten it out?
-
Question about seizing a line
A couple of places in the instructions have said to seize a line with thread. I think I could do it full scale but it sure is hard in miniature. Does anyone have any tips on how to hold two threads while wrapping them with a third?
-
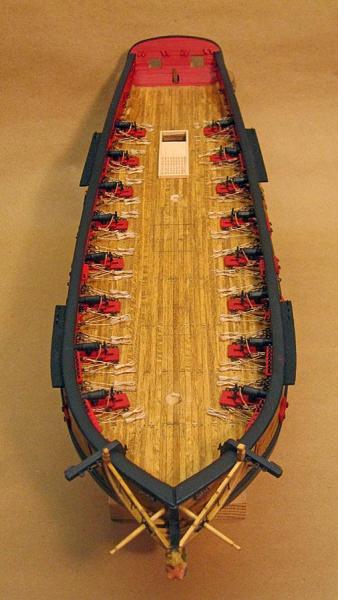
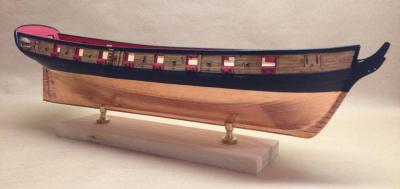
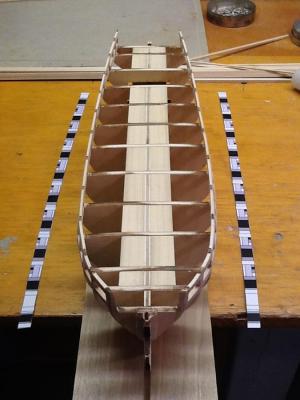
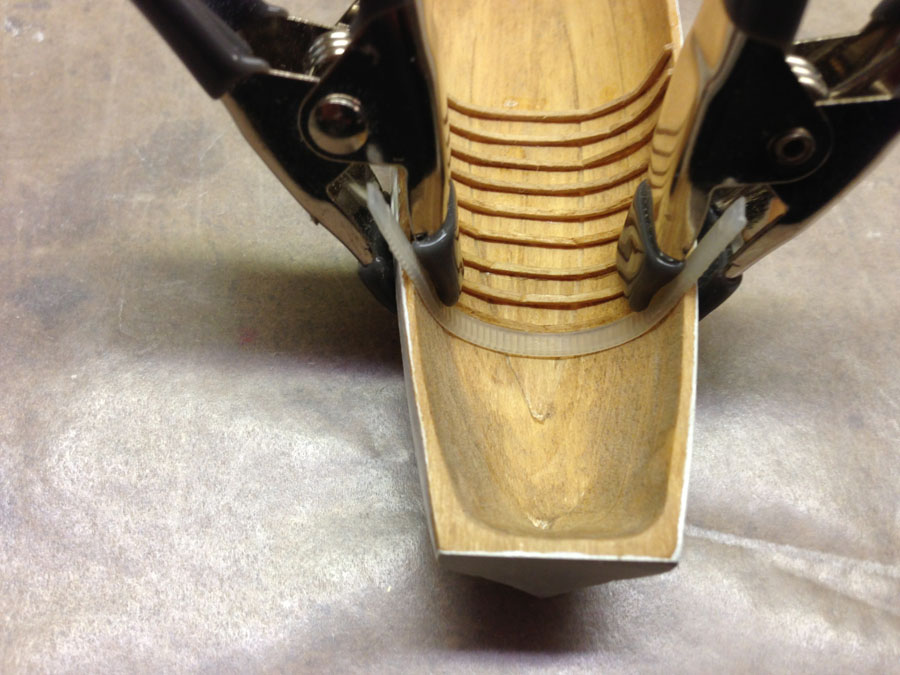
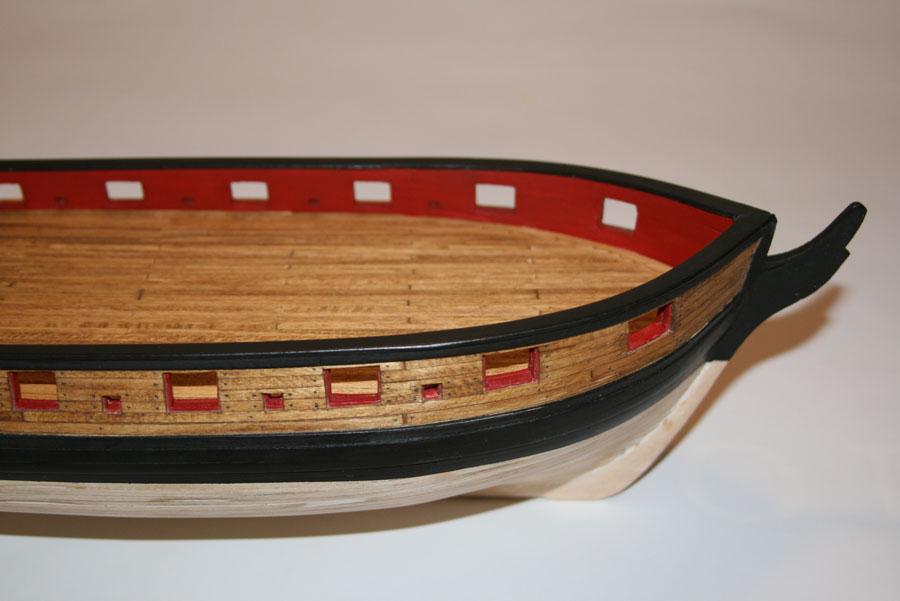
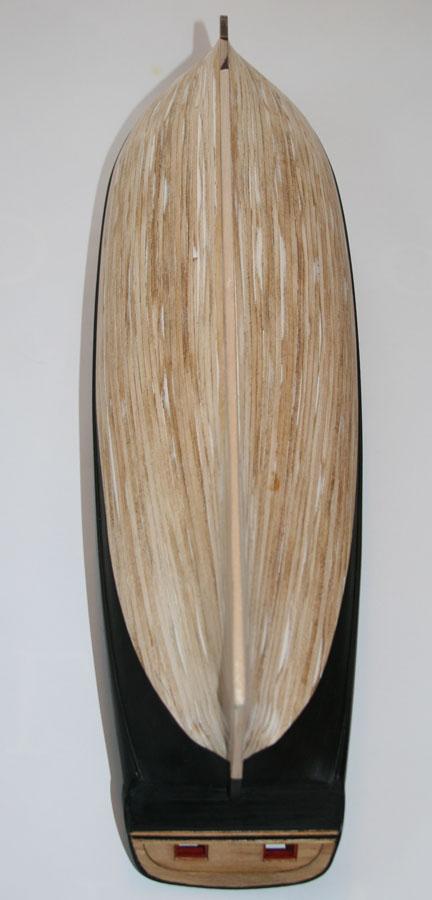
Longboat completed

13 weeks, 255 man-hours
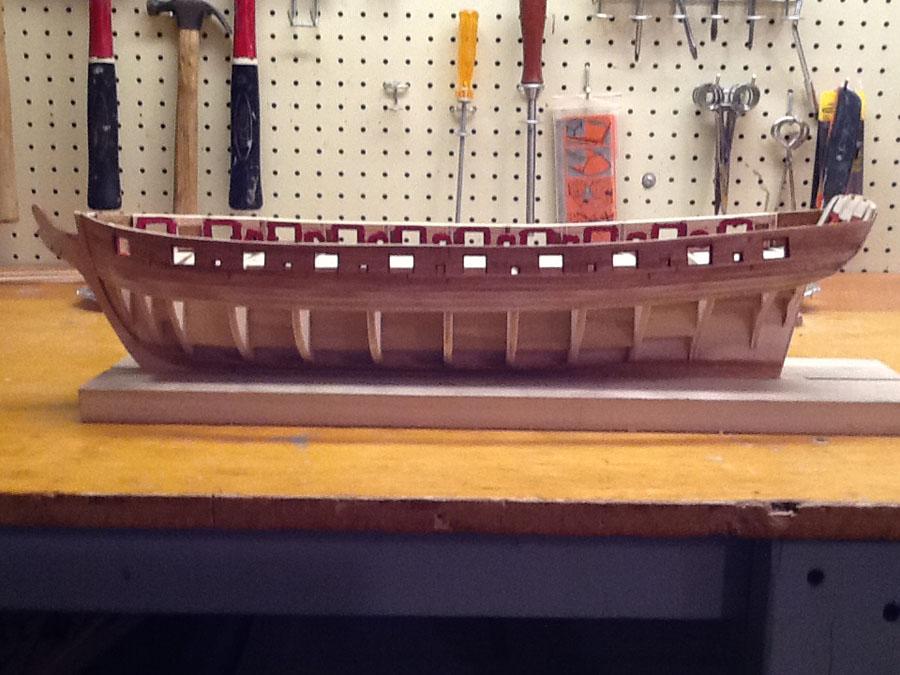
The longboat took about 1.5 times longer than it should have because of two major mistakes. I mentioned my first mistake in my last post - I sanded through the hull. It patched up OK with wood filler but the stain was blotchy. My second mistake was to try to line up the ribs by eye. I measured carefully but the result looked terrible, as shown below. I ended up starting a new longboat from scratch. This time I held it up to the light periodically as I sanded. When I could see light through the wood I knew it was time to stop.
Left: What happens when you sand through the hull, then try to line up the ribs by eye.
Right: New hull with ribs aligned with a jig.

How I aligned the ribs
First I eliminated the center keel strip. You can't see it under the floorboards anyway. Then I used a 1/8" nylon cable tie to align each rib parallel to the last. I used spring clamps to hold the cable tie. CA glue barely sticks to the nylon. The second hull looked SO much better than the first that I'm glad I started over.
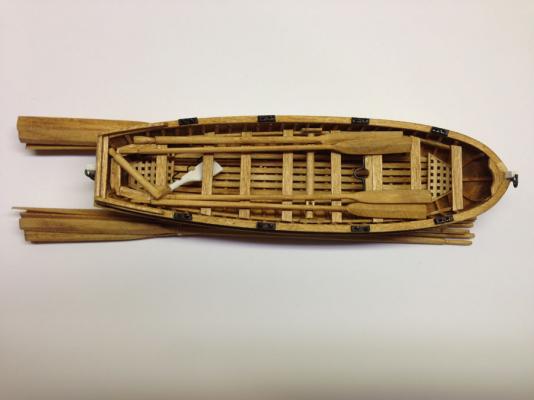
The longboat took 27 man-hours to build but it's one of the best tiny models that I've ever built. Maybe I'm finally getting the hang of this precision work.

I did start on the bowsprit. Only a few hours of work so far, but it makes a big difference in the look of the ship.
-
-
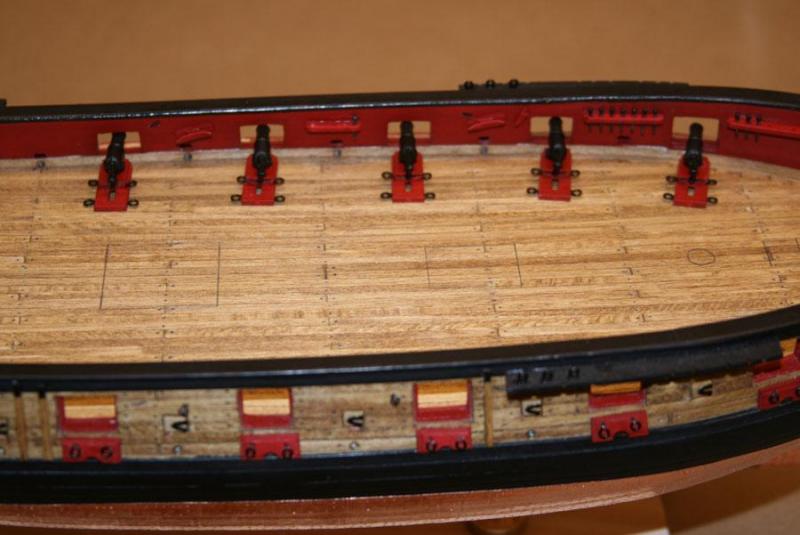
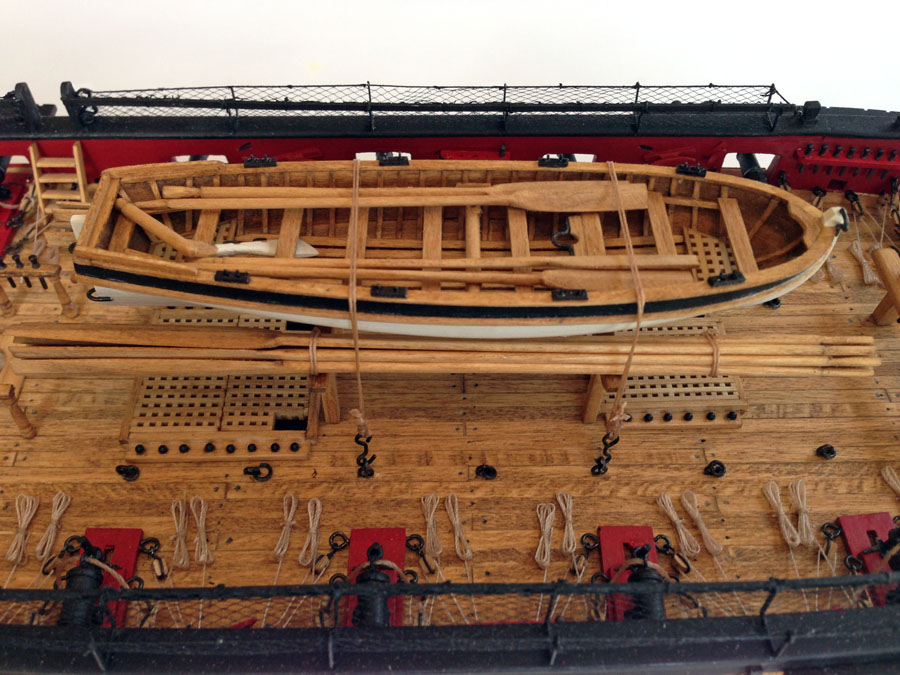
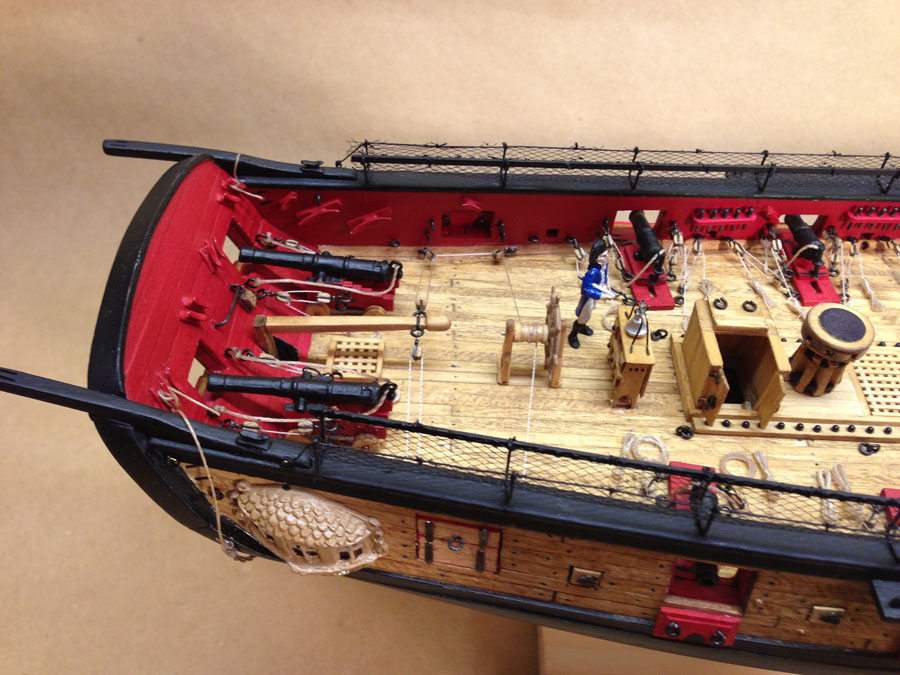
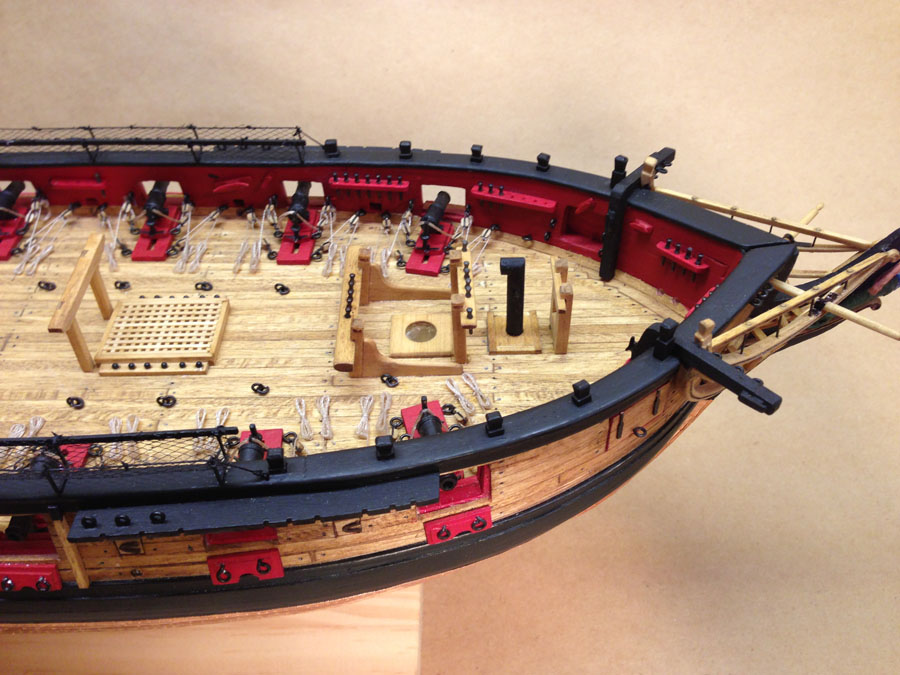
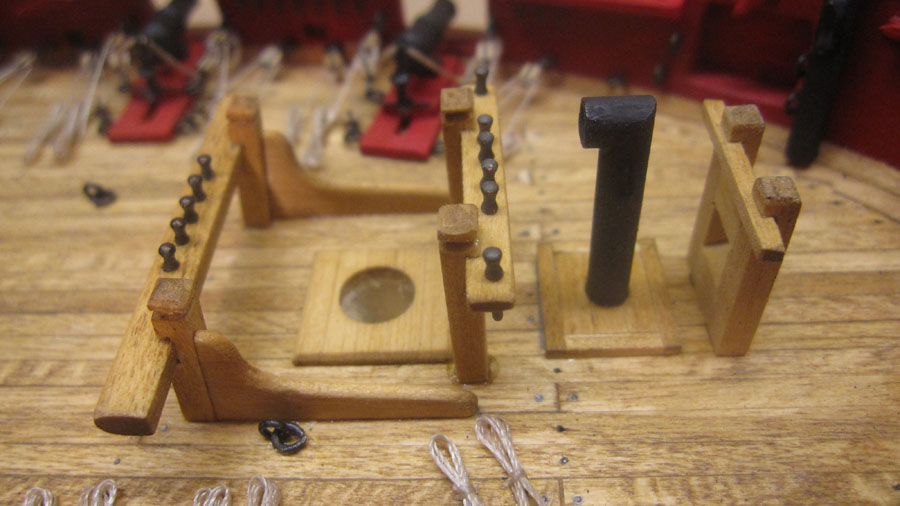
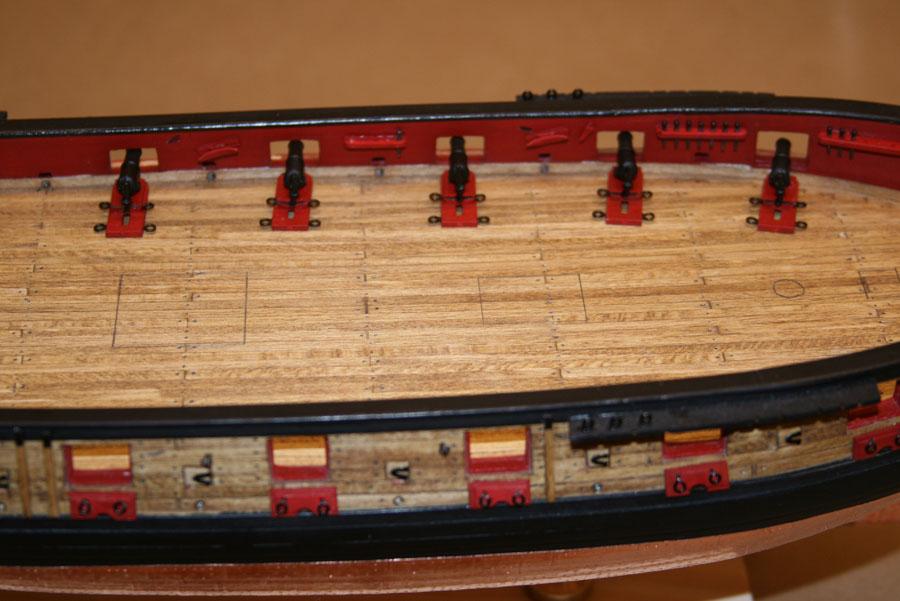
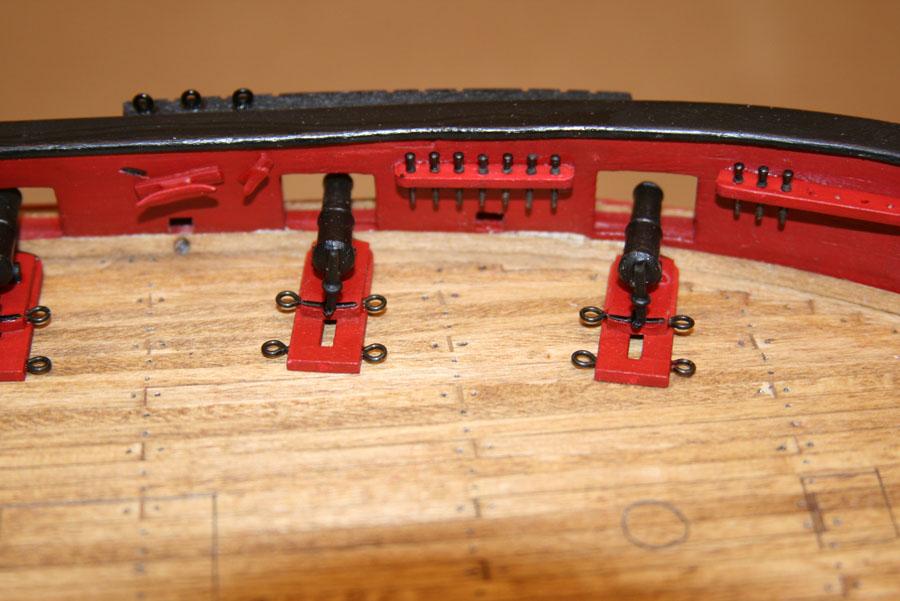
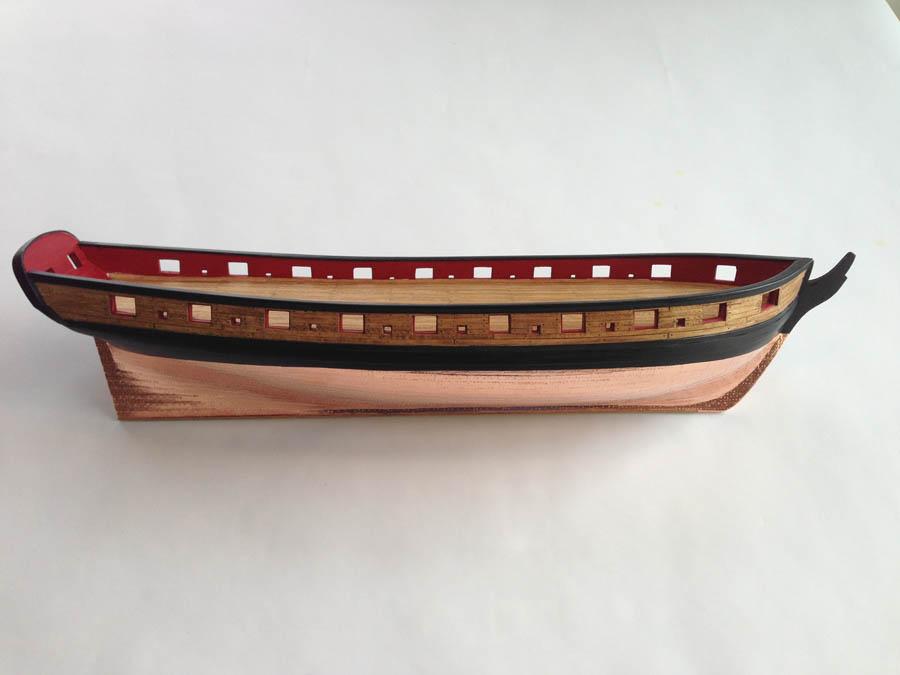
Hull complete except for longboat
I spent the last couple of weeks working on deck fittings, so my hull is complete except for the longboat. Augie's build log shows the hull, longboat, and bowsprit, jibboom, and flying jibbom complete at about 800 hours. I figure that I am building 2.5 times faster than him at about 1/5 the quality!

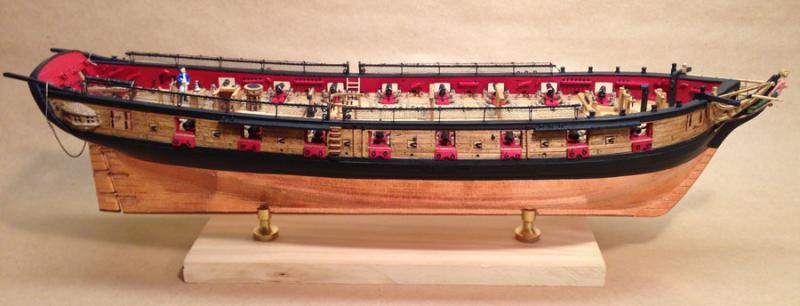
10.5 weeks, 226 man-hours
Here are some detailed views>

The stern cannons were fun but the companionway was a pain. It is thin, flimsy, and didn't want to stay square. It could be better.
The hammock cranes seemed very flimsy, but when I got the 1/16" x 1/32" rail pressed into place it firmed up. Tying the netting in place was literately a pain in the back. I had to stick my face right into it to see what I was doing. And the photos show every thread that I didn't cut clean off! Guess I need to go back for the nail cutters.
The main fife rail was hard to make by laminating 1/32 " stock. It would be better to cut it from 1/16" ply. The stanchions were easy to turn in a Dremel tool, but I wish they had been supplied as castings with pins on the ends.

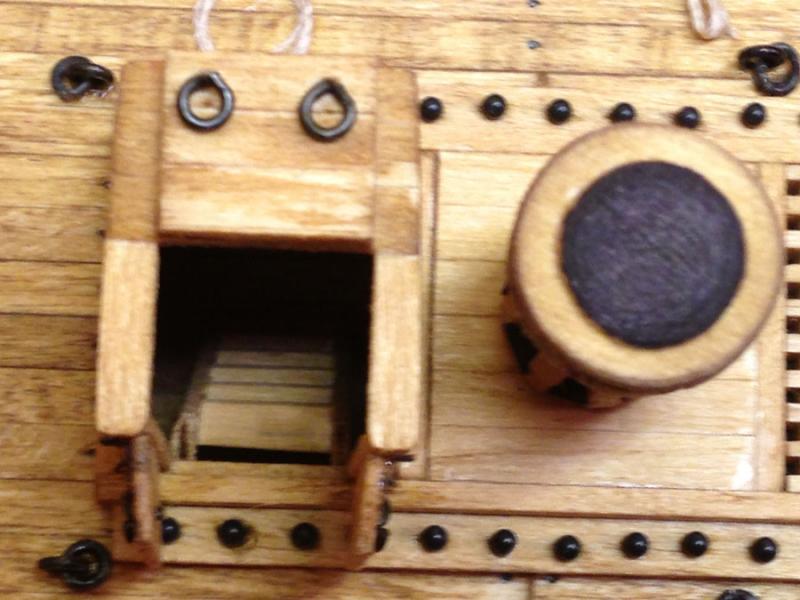
The gratings were fun. The pieces fit together perfectly.
If I ever have granddaughters I can start making doll houses.
Lots of trip hazards on this ship. It would never pass OSHA standards.
I can't believe that I built a ladder to hide inside this thing! If you're building the Syren, just build the companionway with the door closed.

I never expected a periscope on the Syren.

Now I get to put the Syren aside and build the 25' longboat, a kit within a kit.
-
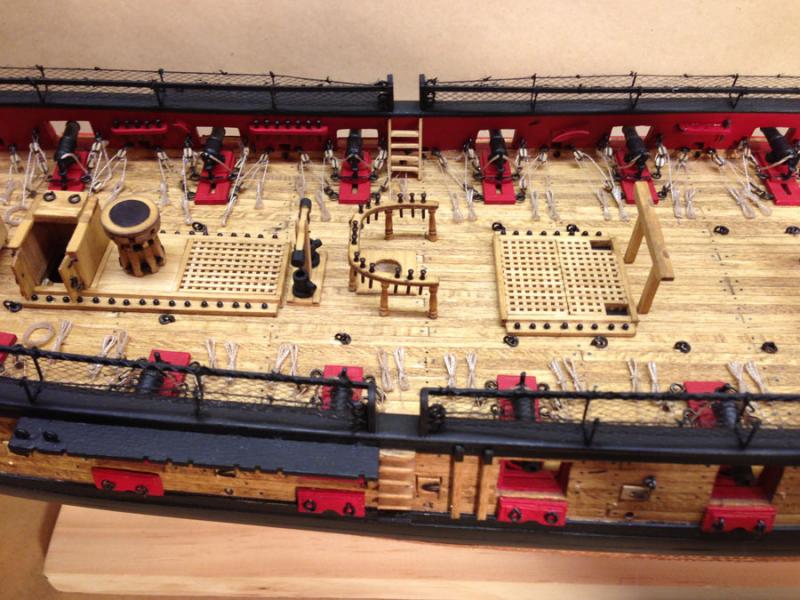
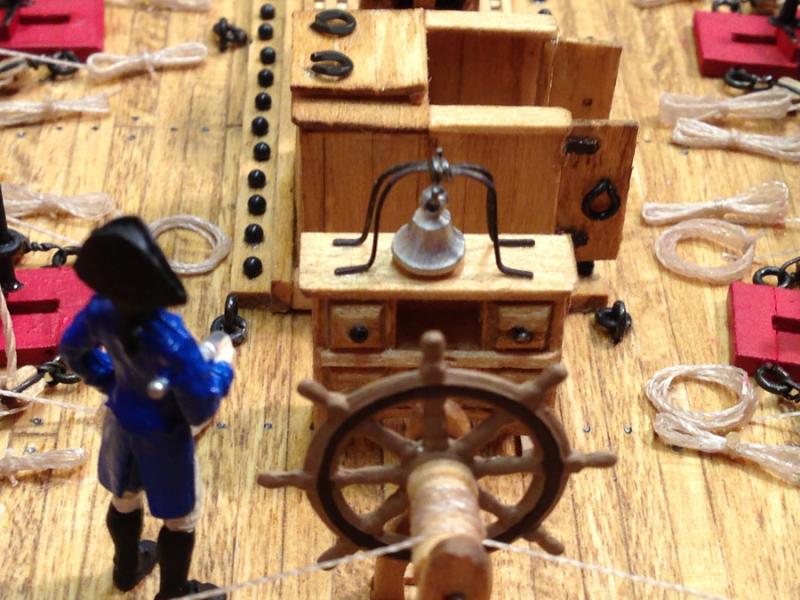
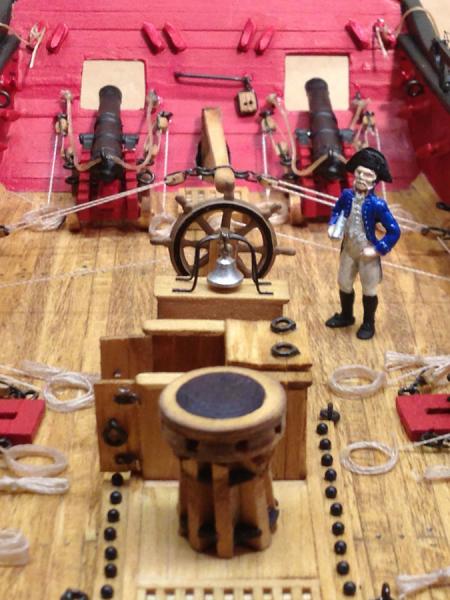
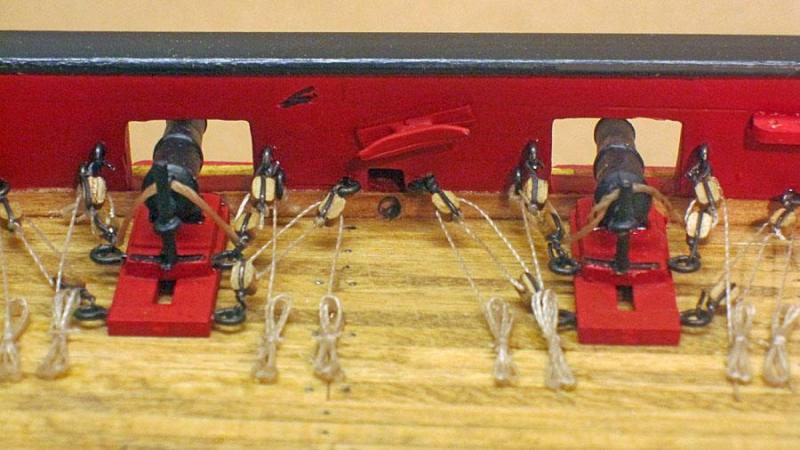
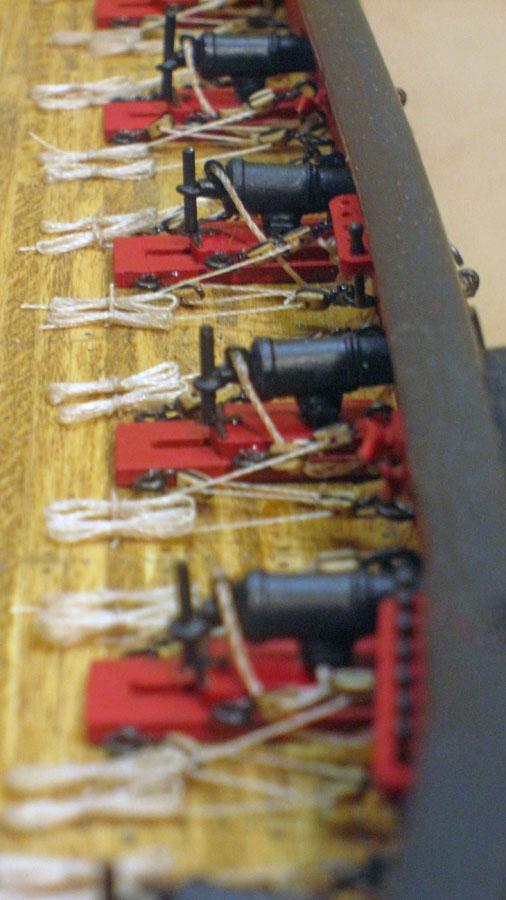
Completed Cannonades
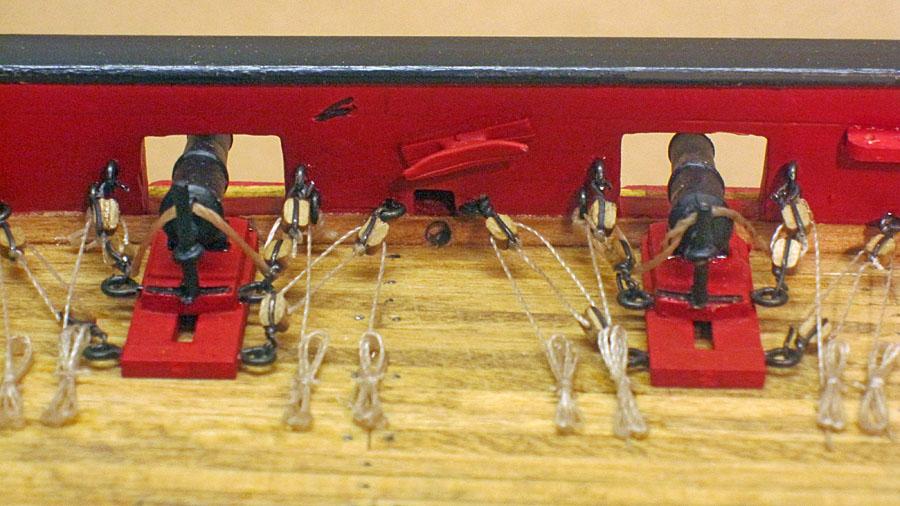
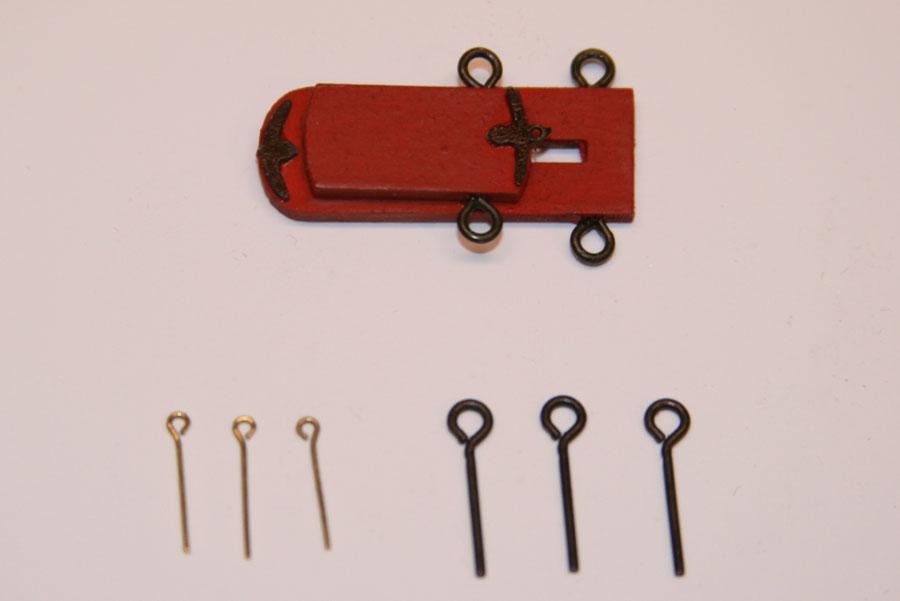
Well, the cannonades are built, installed, and rigged. You can see that I ignored most of your cries for historical and scale accuracy by using the larger eyebolts, by placing the sleds on the deck without wheels, and by notching the waterways so that the gun barrels would protrude outboard a little more. Thank you for all the excellent suggestions, but I doubt that anyone who ever sees the model will know the difference.

9 weeks, 182 man-hours
I bundled the ropes on deck instead of making the coils shown in the plans. The bundles looked better to me. It took 18 hours to rig the cannonades after they were built and installed
-
My first major SNAFU
I ran into a very unplesant surprise when I completed my first cannon and set it on the deck - it didn't fit! Somehow I cut the gun ports too close to the deck. I even cut out the little paper gun and checked it on the rear ports, but never on the side. I should look back in the instructions to see how it happened, but it's too late now.
The only solution is to omit the swivel brackets from the front of the cannon sleds, and the wheels from the rear. The guns end up centered in the ports. The front of the sleds hit the waterway, and the end of the guns end up about flush with the outside edge of the ports. Can anyone tell me how far the guns should extend beyond the edge of the ports? Should I notch the waterways and push the guns up to the rails?
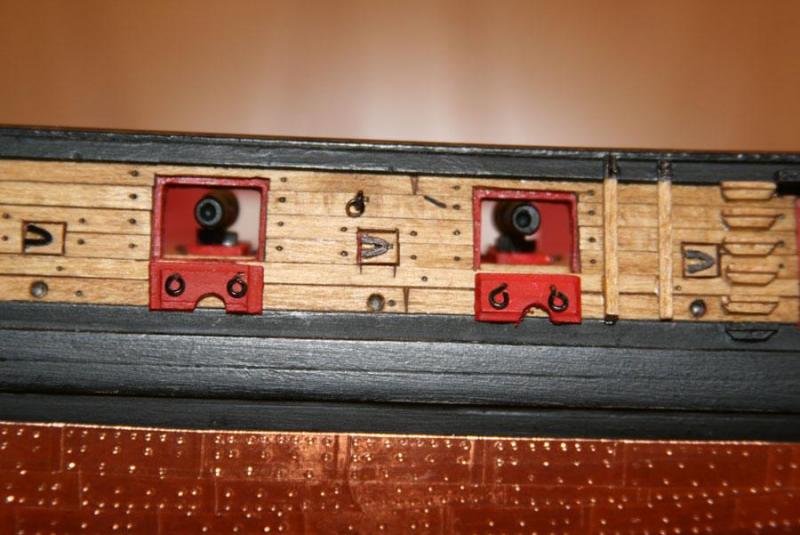
8 weeks, 162 man-hours
-
-
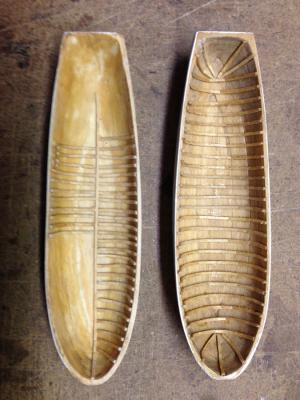
More on eyebolts
In an earlier post I asked if anyone thought that the brass eyebolts supplied with the MSW kit were too small, and asked for suggestions about painting them. Augie recommended Blacken-it. I tried using similar chemicals that are used to patina stained glass but had problems with the patina flaking off the eyebolts. I ended up ordering the only black eyebolts I could find from http://www.modelshipyard.com.au/
You can see them compared to the MSW eyebolts in the photo, They are beautifully made, but just a little bigger than I would like. I decided to use them anyway.
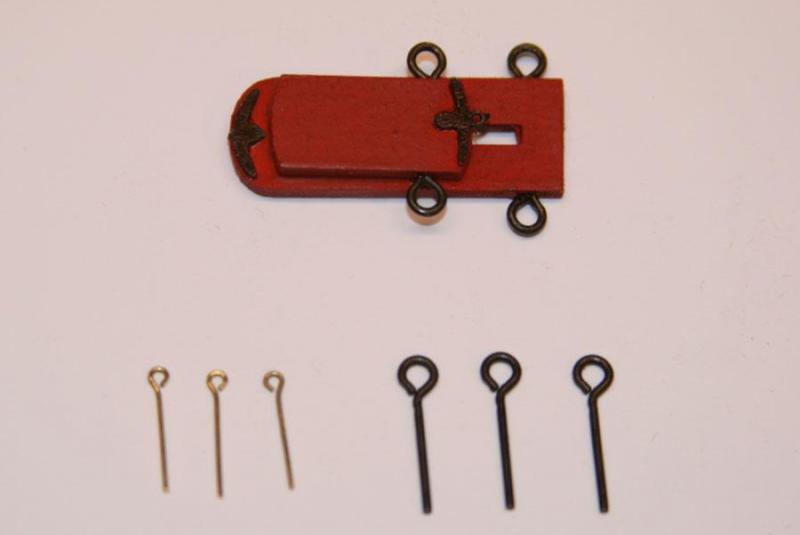
Left: eyebolts supplied with the kit
Right: eyebolts ordered from Modellers' Shipyard
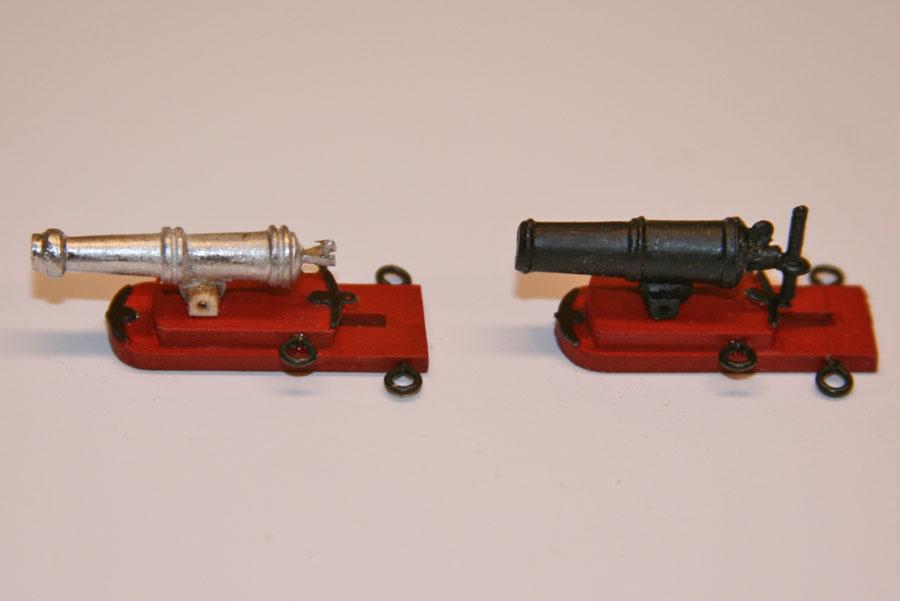
Cannons (Cannonades)I don't know if the discussion on cannons has been reposted but I'm glad that I saw it earlier. Alert builders realized that the cannons suppled with the MSW kit do not look quite like those on the plans. I went ahead and ordered 16 appropriate cannons from Bluejacket Shipcrafters.
They were expensive but I like them a lot better than the originals.

Left: cannon supplied with the MSW kit
Right: cannon bought from Bluejacket Shipcrafters
-
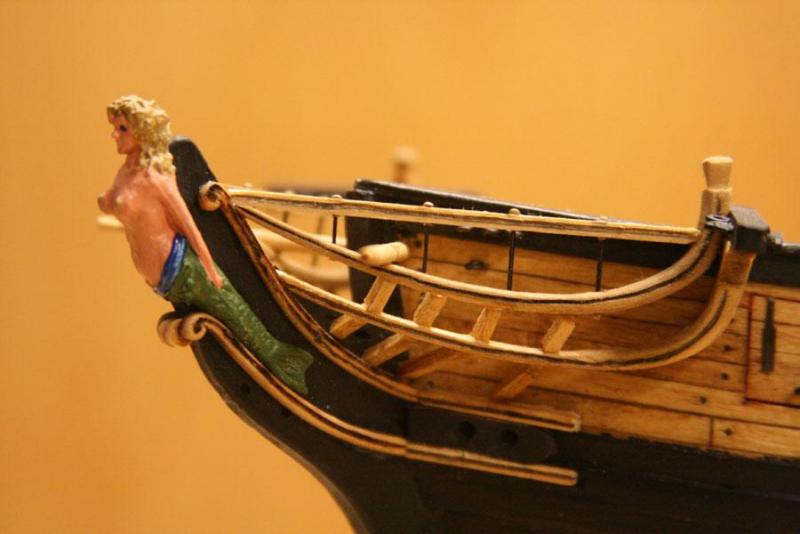
It's been a while since my last post. I finished the headrails and the exterior of the ship. The headrails were hard to build. I tried carving double mouldings on the upper rails like Chuck showed, but gave up and used single mouldings on the lower rails. I decided to paint my figurehead. She looks like she has a black eye in the photo, so I suppose she needs some makeup!
6.5 weeks, 136 man-hours
-
Question about eyebolts
The eyebolts supplied with the MSW kit seem to be a much finer gauge than those shown in other build logs. They are also a pain to paint. Is everyone else rolling their own from wire, or is there somewhere that I can order 350 nice black eyebolts?
-
And that's where I left off before the site went down. Since then I have built a rudder, sweep port lids, gun port doors, and a temporary base. I am now working on the head rails, which are impossibly small to carve.
6 weeks, 125 man-hours
-
Here are some views of the plated hull. In extreme close up the nail patterns aren't as precise as some of the others I've seen in the MSW forums, but in general I am very pleased with the way the model looks.
I have several kinds of chemicals used to add patina to stained glass leading. I could easily change the look of the hull, but I kind of like the shiny copper. Please let me know if this this is unrealistic practically or historically, and I will reconsider.
Now - off to build a rudder.


-
I can't believe I have finished copper plating the hull already. It only took 15 hours, start to finish.
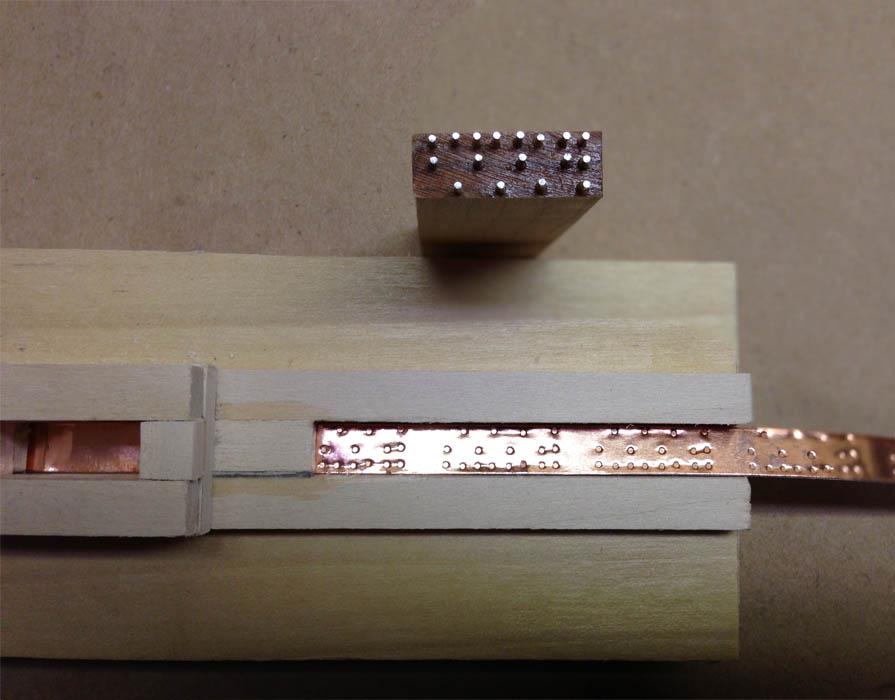
I made the stamps by pounding tiny brass pins directly into the end grain of a block of 3/4 inch cherry. The plans call for 11/16 inch, but 3/4 is so much easier. I clamped a metric ruler to the block, and spaced the pins every 2 mm. I rough clipped the pins with the wire clippers mentioned above, flooded the end grain with thin CA, sanded the pins to the same length with my disk sander, and sliced the block to size on a band saw. 2 hours per stamp.
I made a stamping jig pretty much like Chuck described in the kit instructions. One tap with a tack hammer, pull, tap again. 45 min. to tap 375 plates and another 45 min. to cut them apart with scissors. 1.5 hours per side of the hull.
Grab a plate, pop an X-acto knife into the long edge, stick the copper to the end, peel off the backing, and place lightly on the hull. 5-10 sec. per plate. This was the most fun I've had on this model so far - just like playing with Legos.
After laying down an area of plates I burnished them with the rounded piece of balsa shown in the second photo.


29 days, 110 man-hours
-
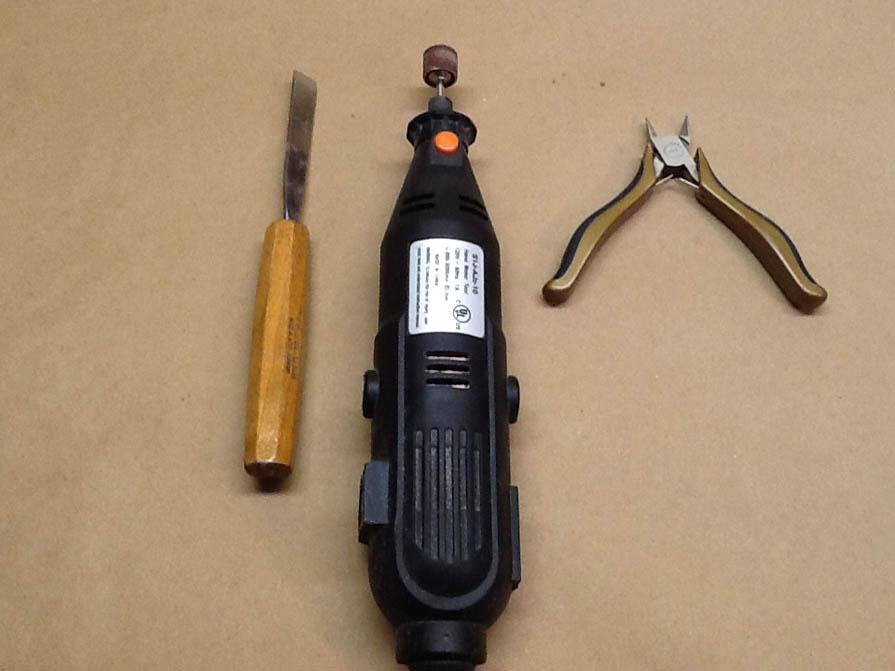
Here I added a note on the tools that I have found most useful so far. I have since discovered other forums to share information about tools, so hope it's OK to digress here.
Wood carver's chisel
At first I tried cutting my planks with an X-acto razor saw, but that was slow and left a rough edge. Then I realized that I could chop them to length in one motion with a wood carver's chisel. It works perfectly on 1/8 inch strips.Dremel tool with sanding drum
How do you thin out the inside of the bulwarks? With a Dremel tool and sanding drum. It also worked well for trimming extra material off the transom.Fine wire clippers
Need a quick and dirty way to cut a 1/8 inch plank? Use these clippers from Sears, then clean up later with sandpaper.Proxxon disk sander
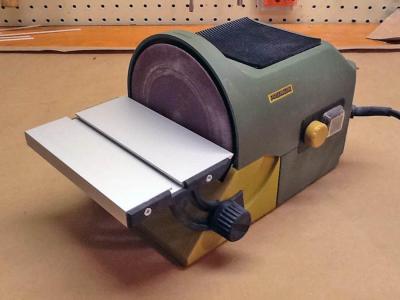
You can get his neat little disk sander from Woodcraft or Amazon. It is pricey, but great for cleaning up cuts on thicker stock. Be careful with parts smaller than the gap between the table and the disk.
-
Paint
I have used Testor's Model Master enamels for everything so far. Their Insignia Red seems to be a good match for the inside of the hull.Noted added later - the enamels chip off easily. I have completely switched to Testor's acrylics, except where I need to match the original red.
In the photo below the deck is planked and stained. I marked the tree nails on the outer hull with a mechanical pencil, and I think they look pretty good. I still have to mark the deck and add the waterways.
Today I was Googling for "ponce wheel" to find a shortcut for the copper plates. Then I spotted Thomas' build log with his beautiful stamped plates. Now I think I'll have to give that a try. I have used a lot of that copper foil for stained glass projects, one of my other hobbies. With stained glass the copper foil all gets soldered together. On the bottom of a ship model it is totally exposed. Is anyone concerned about it falling off in 40 years? - Not that I'll be around that long :?
Note added later - I have since found many posts attesting to the durability of the copper foil, although I did manage to tear a couple of plates when I added a brass pedestal base.

27 days, 95 man-hours
-
Here the hull is planked, sanded, and filled. I thought I had done a good job of sanding but I filled the wood with 2 coats of Behlen water-based grain filler (available from Woodcraft.com) anyway. This stuff has the consistency of yoghurt, it dries quickly, and it sands off easily. I was amazed at how many cracks and depressions it found! You can see the white areas in the photo. The black paint above the waterline is very smooth, and I am sure that the copper foil will look great below.
27 days, 95 man-hours
-
Glue
All of my construction has been done with gap-filling cyanoacrylate (CA) glue. I use the replaceable Teflon nozzles, make a thin bead, and hold pieces in place with my fingers. If you don't wait too long you can always peel your fingers free and clean up with acetone later. (My wife has a HUGE bottle of pure acetone for removing nail polish.)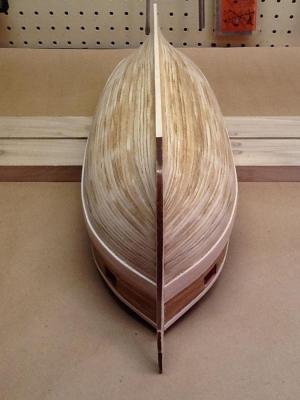
-
I cut some corners by making parts of the railings with larger solid pieces instead of using all the little pieces shown in the plans. They just get covered up anyway.
13 days, 44 man-hours
-
I bought the Syren kit in mid October, and told my wife it was my Christmas present from her. I started building after the holidays on Jan. 2. It is now 28 days and 95 man-hours later, and I have a planked hull and deck.
I will add a few intermediate photos below, and try to touch on topics that other builders have overlooked.
I made the base and filler blocks out of 3/4" basswood.
6 days, 21 man-hours
-
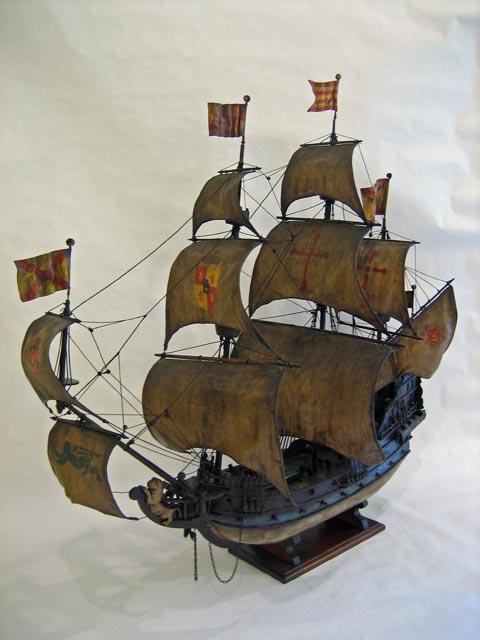
Hi, my name is Rod Chima. I started building the Model Shipways Syren back on Jan. 2, 2013, and started posting a Model Ship World build log about a month later. I was learning so much by reading other build logs, and I hoped that my postings might help someone else. It sure was disappointing to lose all that information with the recent hard drive crash, but I did find my posts cached on Google and will try to recreate them here.
I am a rocket scientist recently retired from NASA Glenn Research Center in Cleveland, Ohio. If you are interested in computational fluid dynamics you can check out my work web site,
http://www.grc.nasa.gov/WWW/5810/rvc/
I have built stick and tissue model airplanes since I was 8 years old, and a few ship models when I was in high school and college. But the ship models were SO much work that I swore that I would never build another. Then I went to a hobby show at the Cleveland International Exposition Center and saw Chuck's magnificent Syren kit. The guys from Model Expo made me an offer that I couldn't refuse, and here I am.
I am about 90 hours (over 1 month) into the kit, and have the hull and deck planked. More on that soon, but first some previous builds.

I wish I could take credit for this model, but it was built by my Grandfather in 1933. I still have his original plans and construction article from Popular Science. I did some major restoration work on the model when I inherited it about 10 years ago.
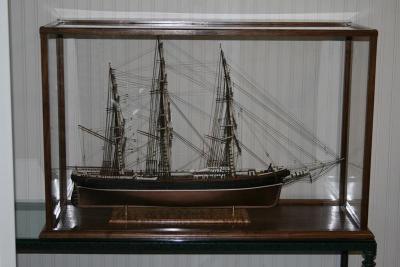
I received the Flying Fish kit by Model Shipways as a high school graduation gift in 1969, and I was working on it when Neil Armstrong walked on the moon. It got pretty banged up over the years, so last summer I made some repairs and replaced most of the running rigging. I also built the display case shown in the photo. It is my own design and is built from walnut and plexiglass.

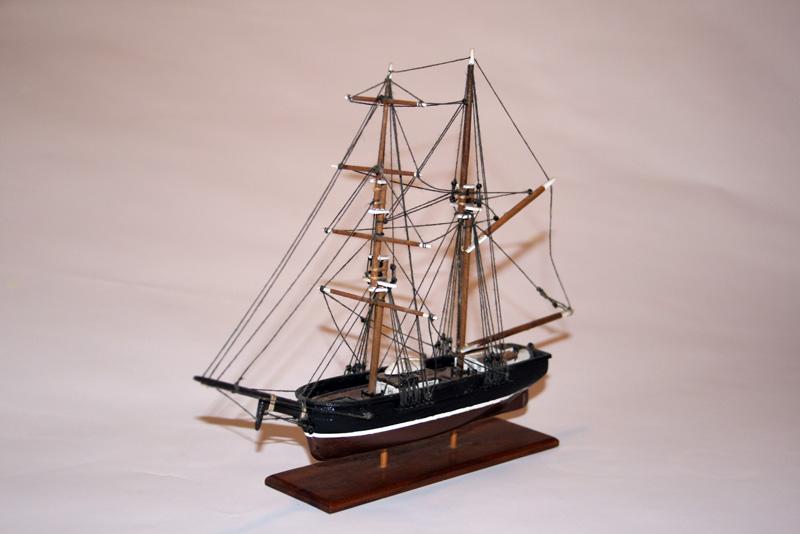
My girlfriend went to New England in 1970 and brought me this kit of the brig Hurricane Bird by Hobbies at Home. It must have been the right gift because we've been married for 38 years.
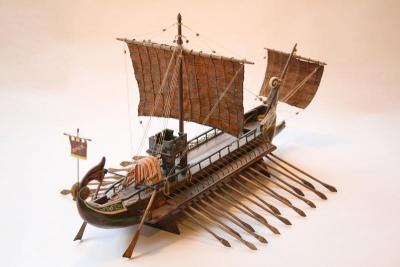
The plans for this Roman bireme ship by Mantua Models clearly shows an open stonework castle on the deck. I could never figure out why you would want one there, but I dutifully followed the plans. This was the only planked hull that I had made before I planked the Syren.- russ and Landlubber Mike
-
 2
2


US Brig Syren by rvchima - FINISHED - Model Shipways
in - Kit build logs for subjects built from 1801 - 1850
Posted · Edited by rvchima
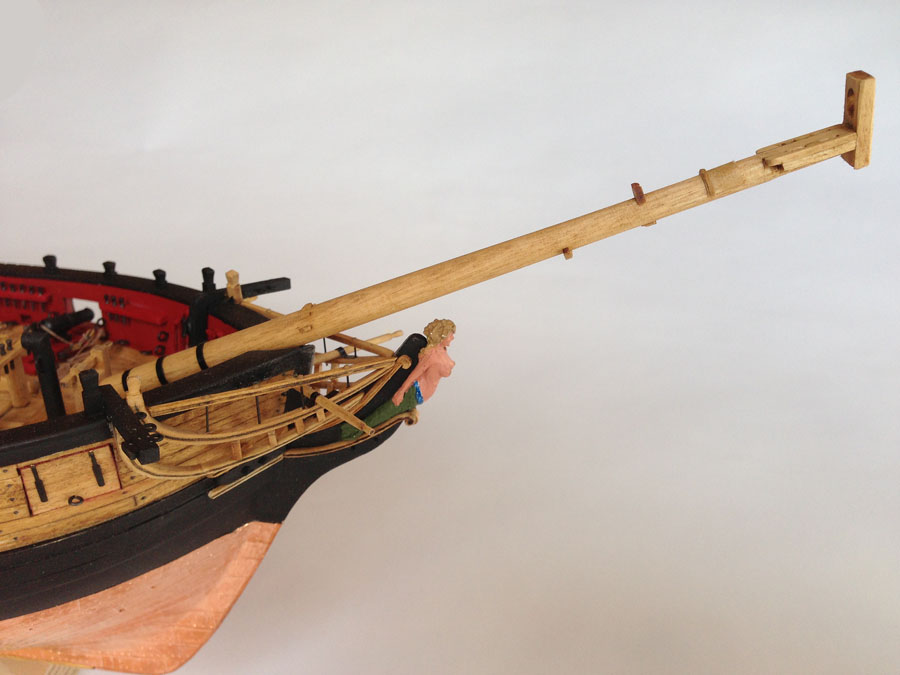
Bowsprit, Jibboom, and Flying Jibboom Complete
14 weeks, 277 man-hours
It took 23 hours to build and rig the Bowsprit, Jibboom, and Flying Jibboom.
The Syren has almost doubled in length since my last post. I've had to revise my situational awareness - I kept bumping parts that weren't there before and broke the dolphin striker twice.
I shaped all the booms, etc. in a drill press. I left an extra inch to go in the chuck, spun the part at 1600 rpm, and tapered them with sand paper. Pretty easy.
I rigged most of the blocks to the booms with thin wire instead of thread. That's not realistic, but it is a lot easier and looks OK to me.