Kevin
-
Posts
7,036 -
Joined
-
Last visited
Content Type
Profiles
Forums
Gallery
Events
Everything posted by Kevin
-
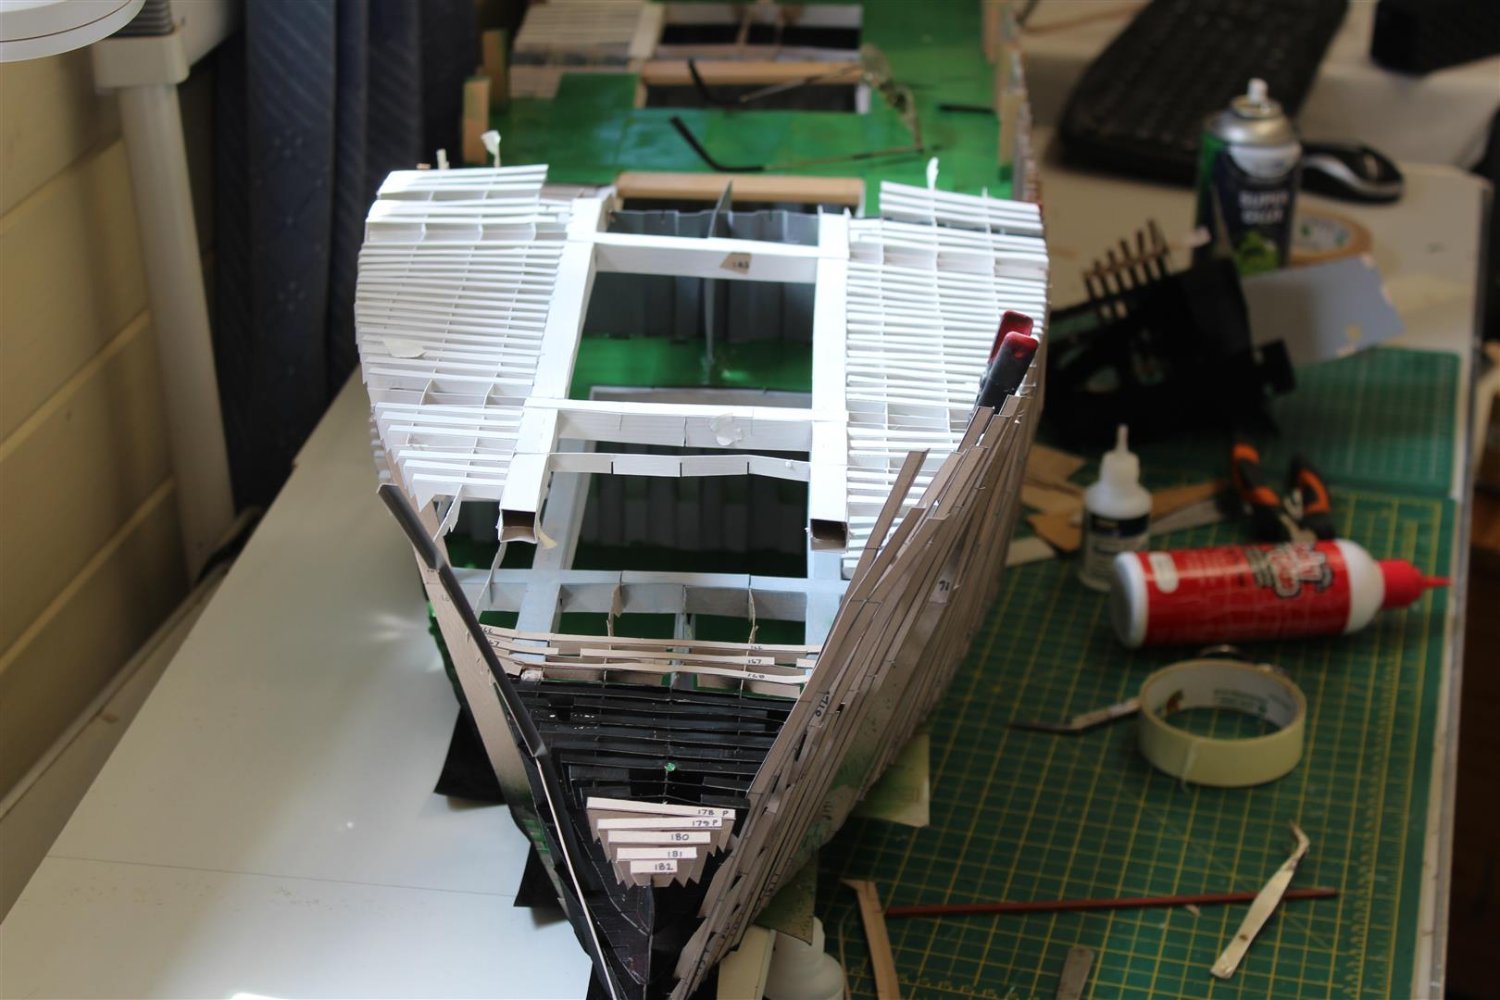
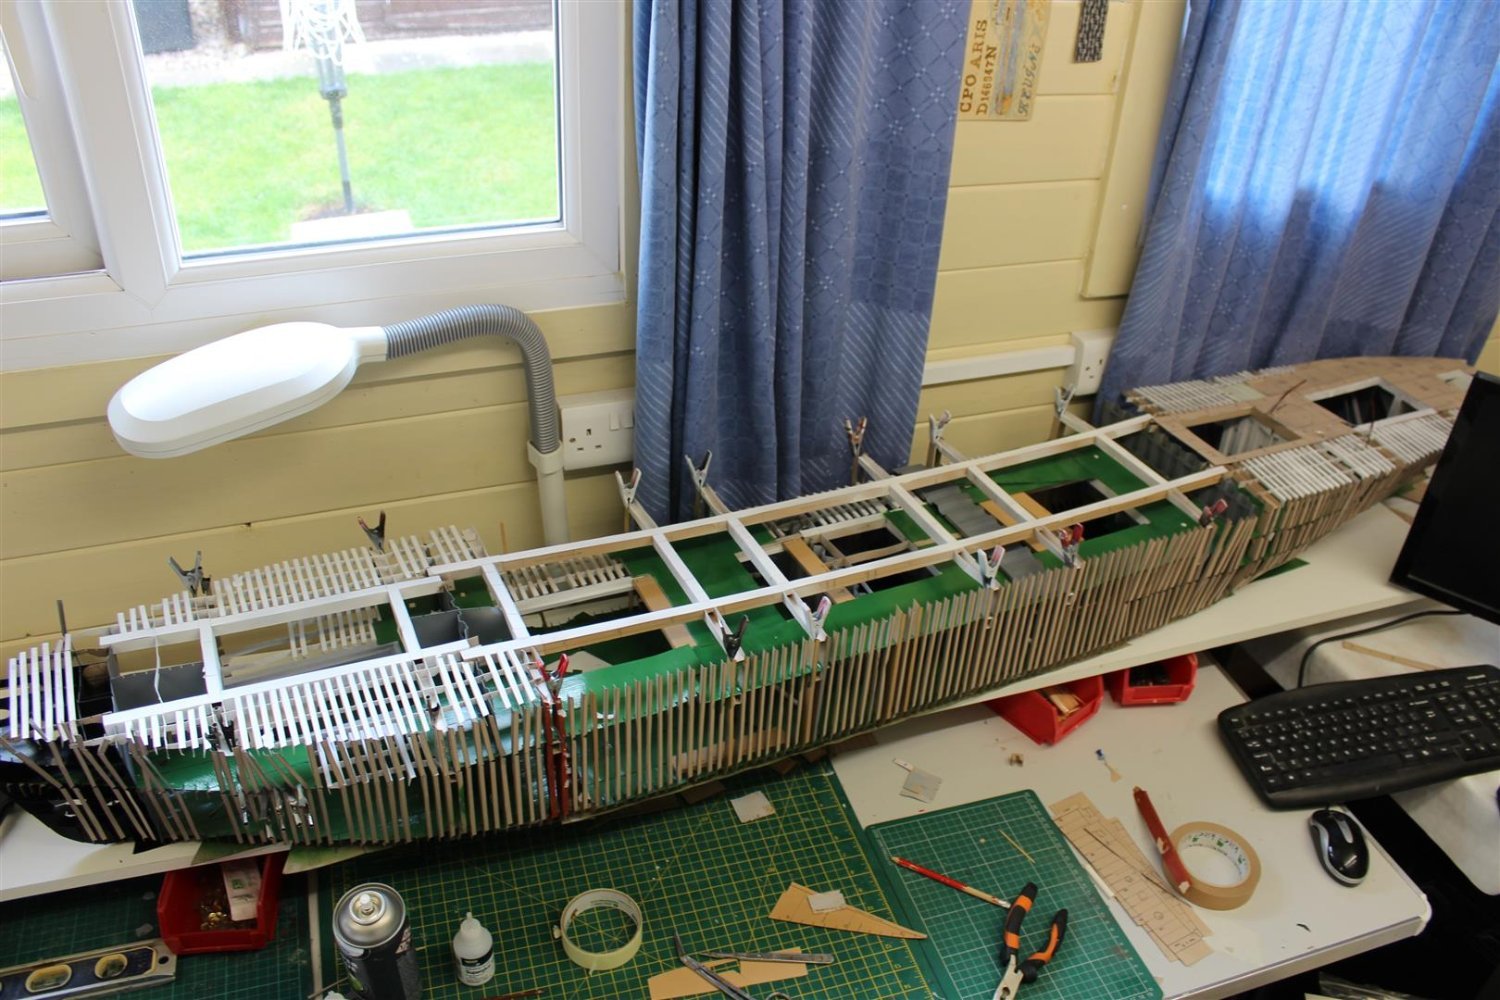
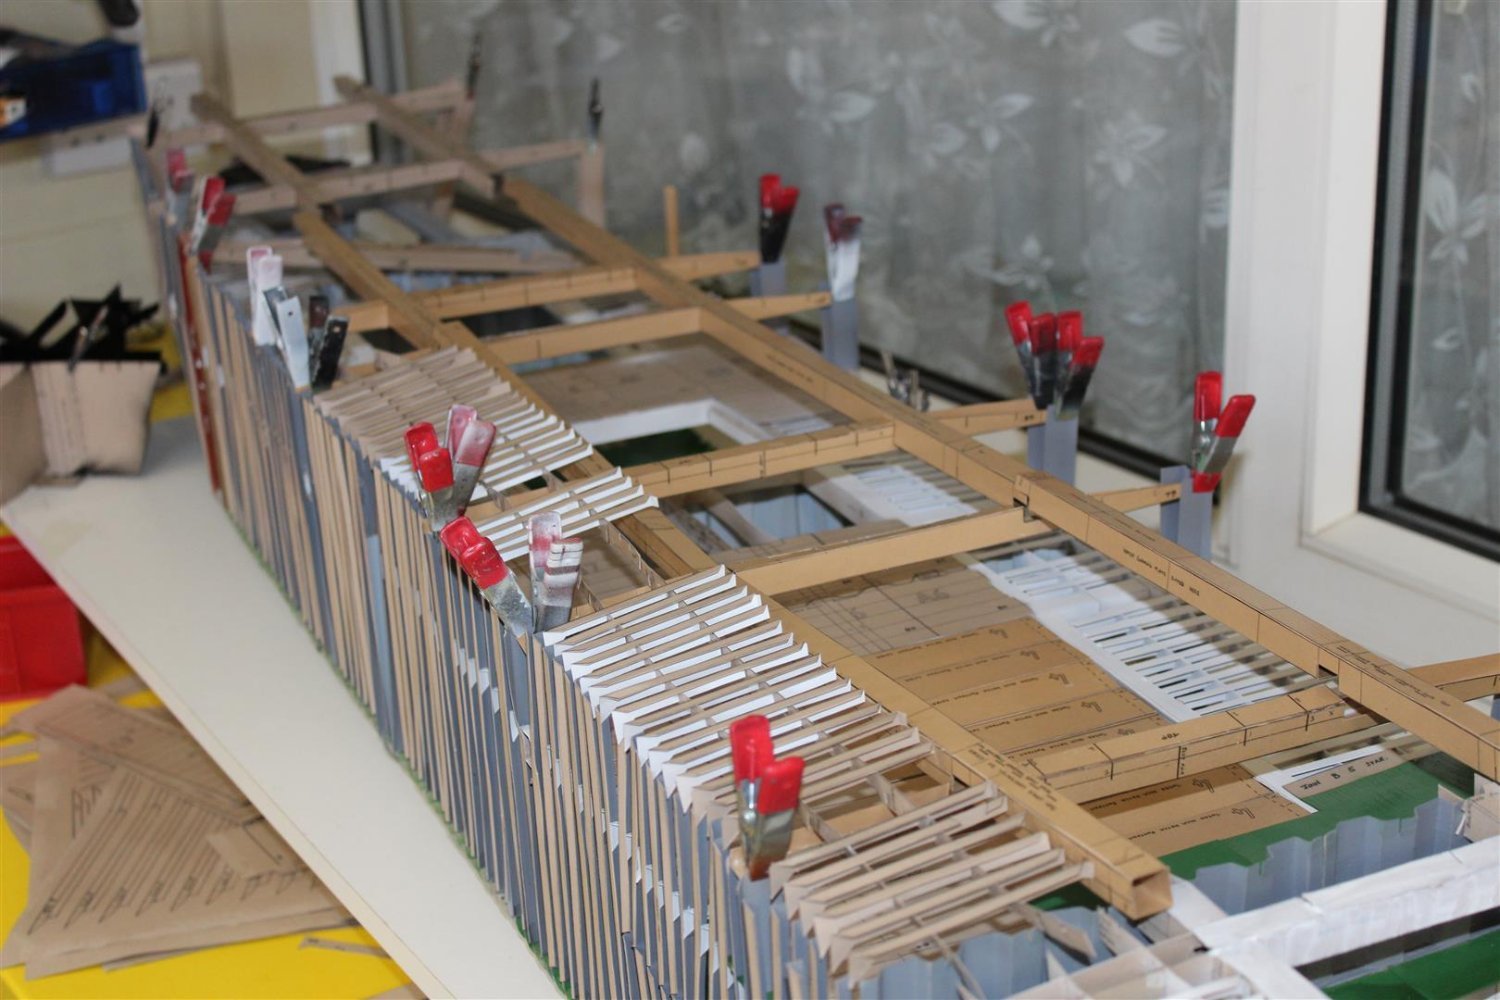
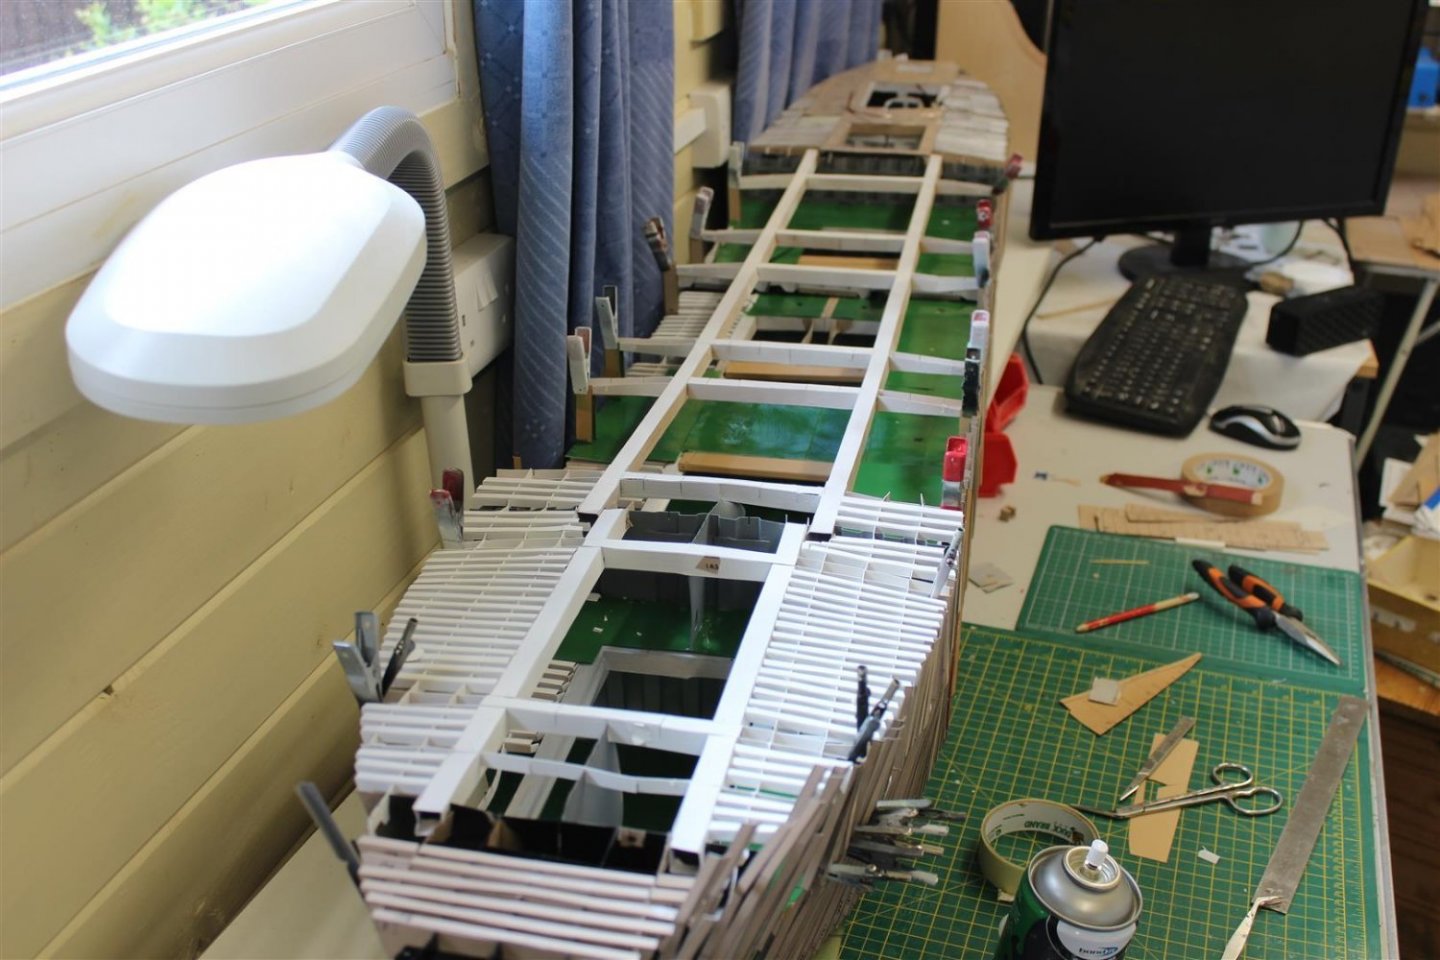
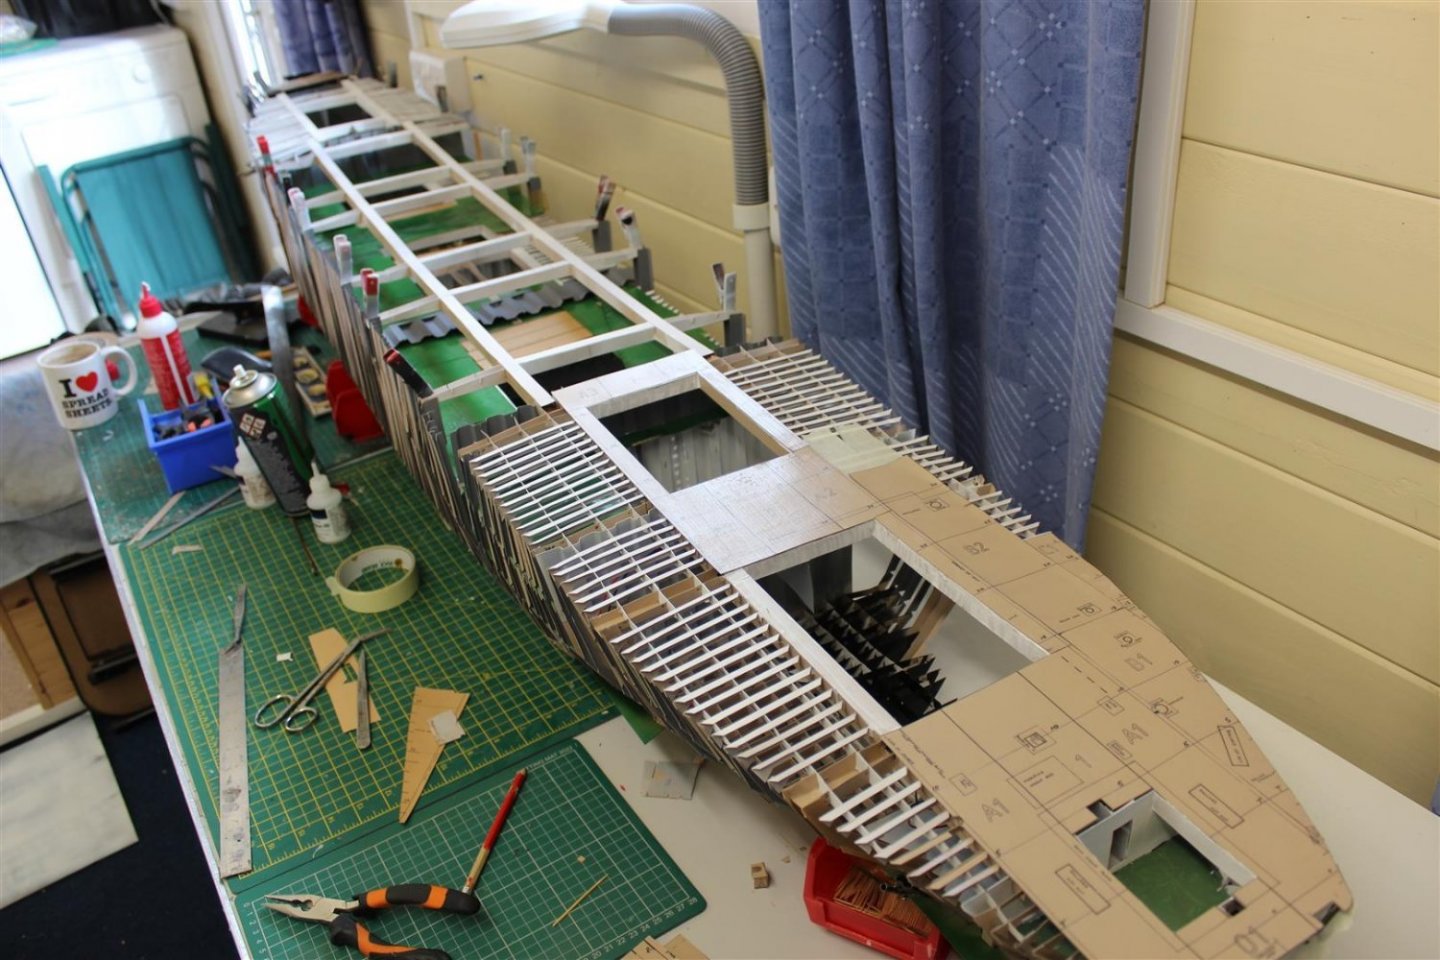
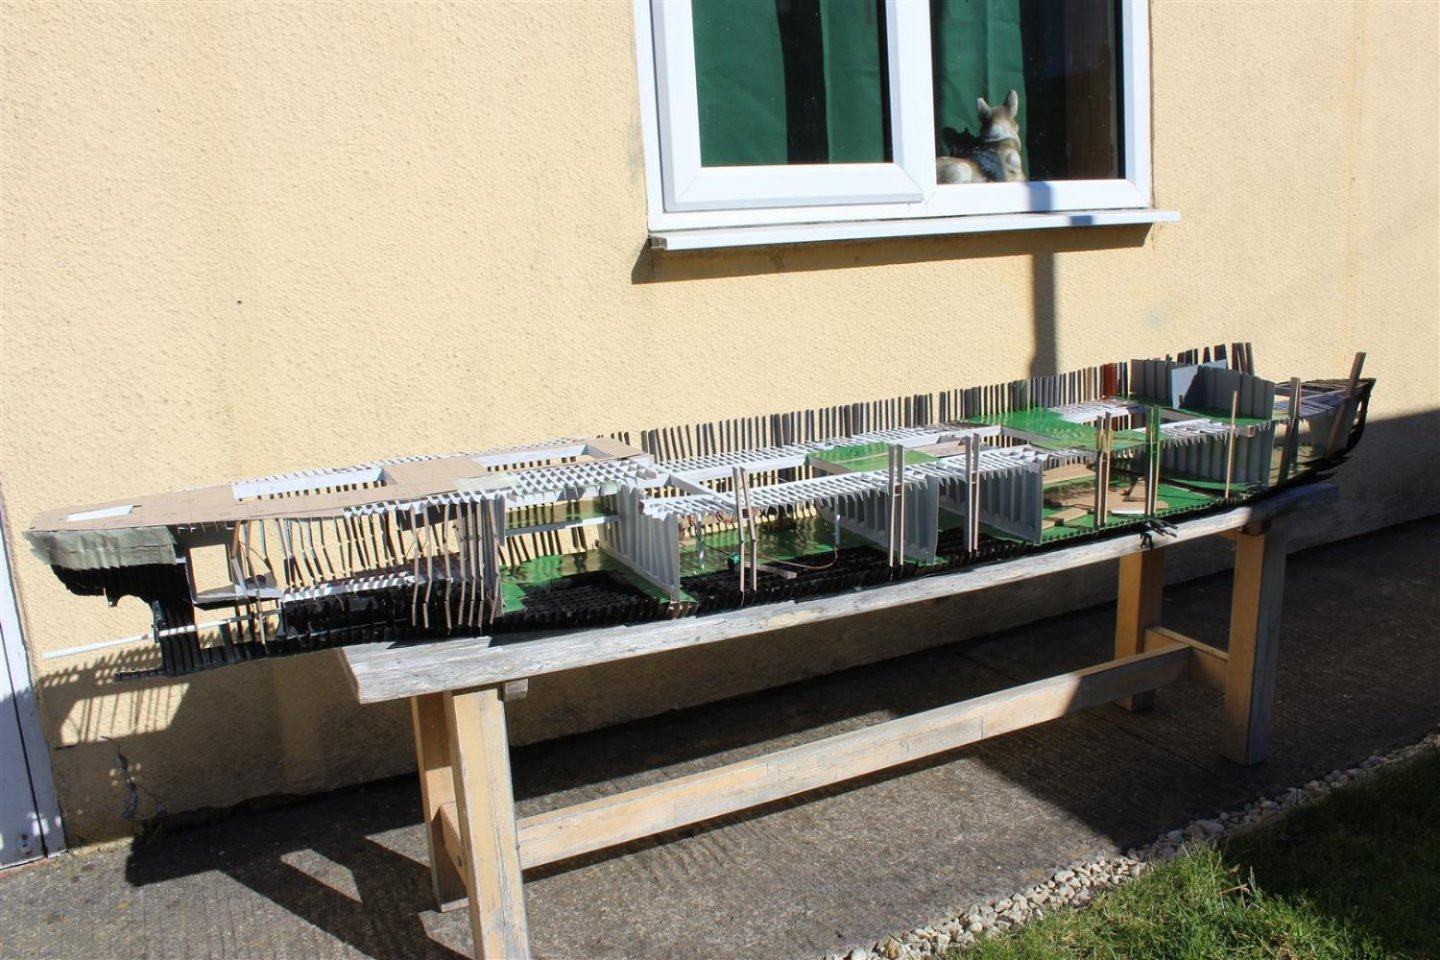
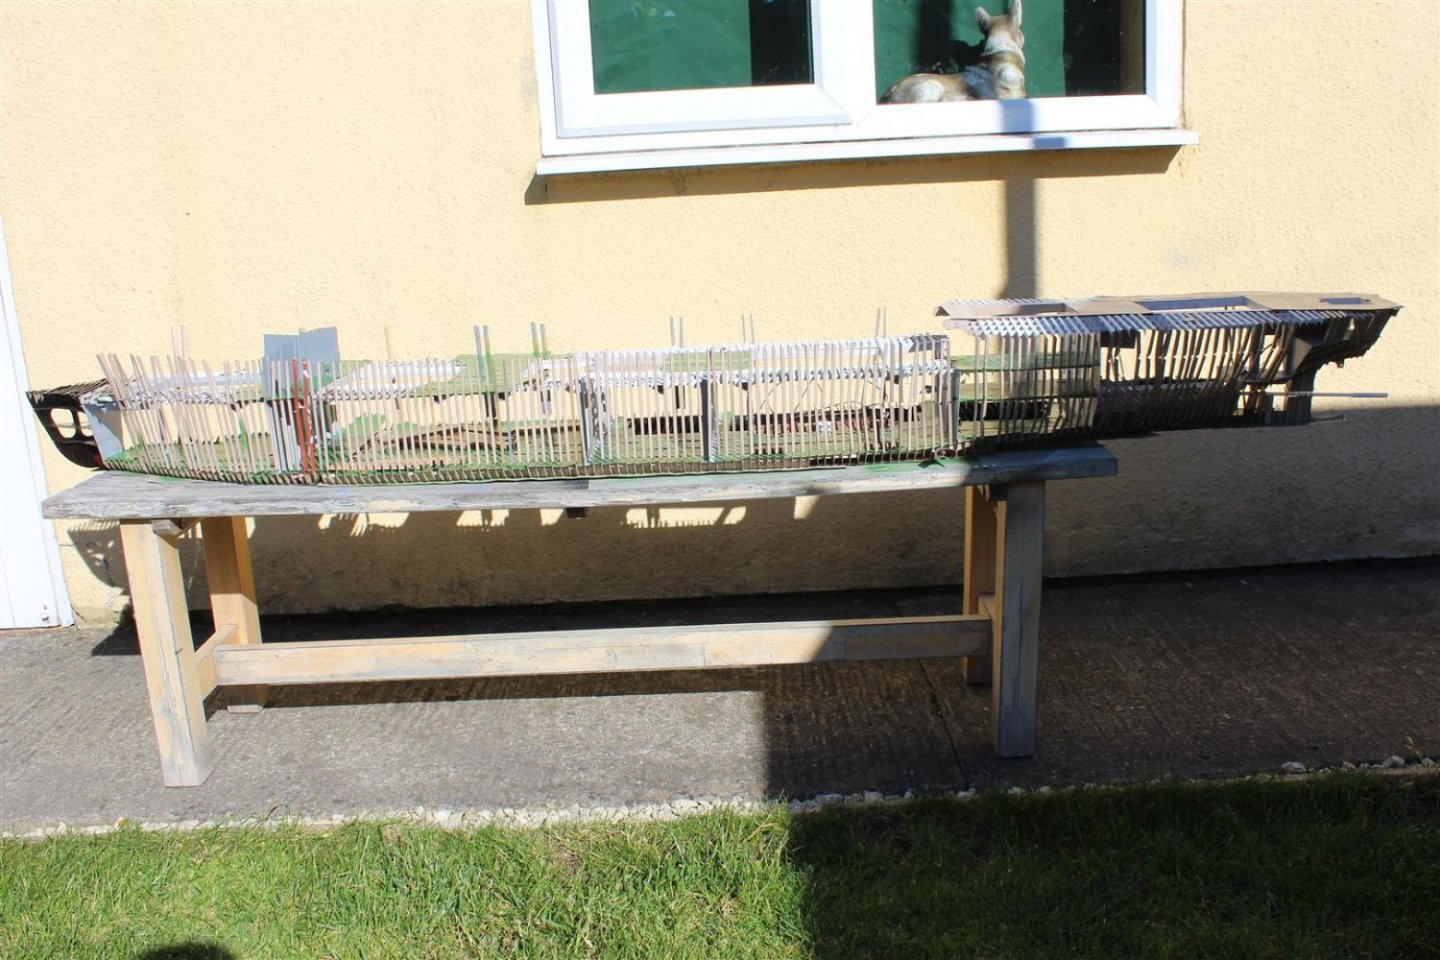
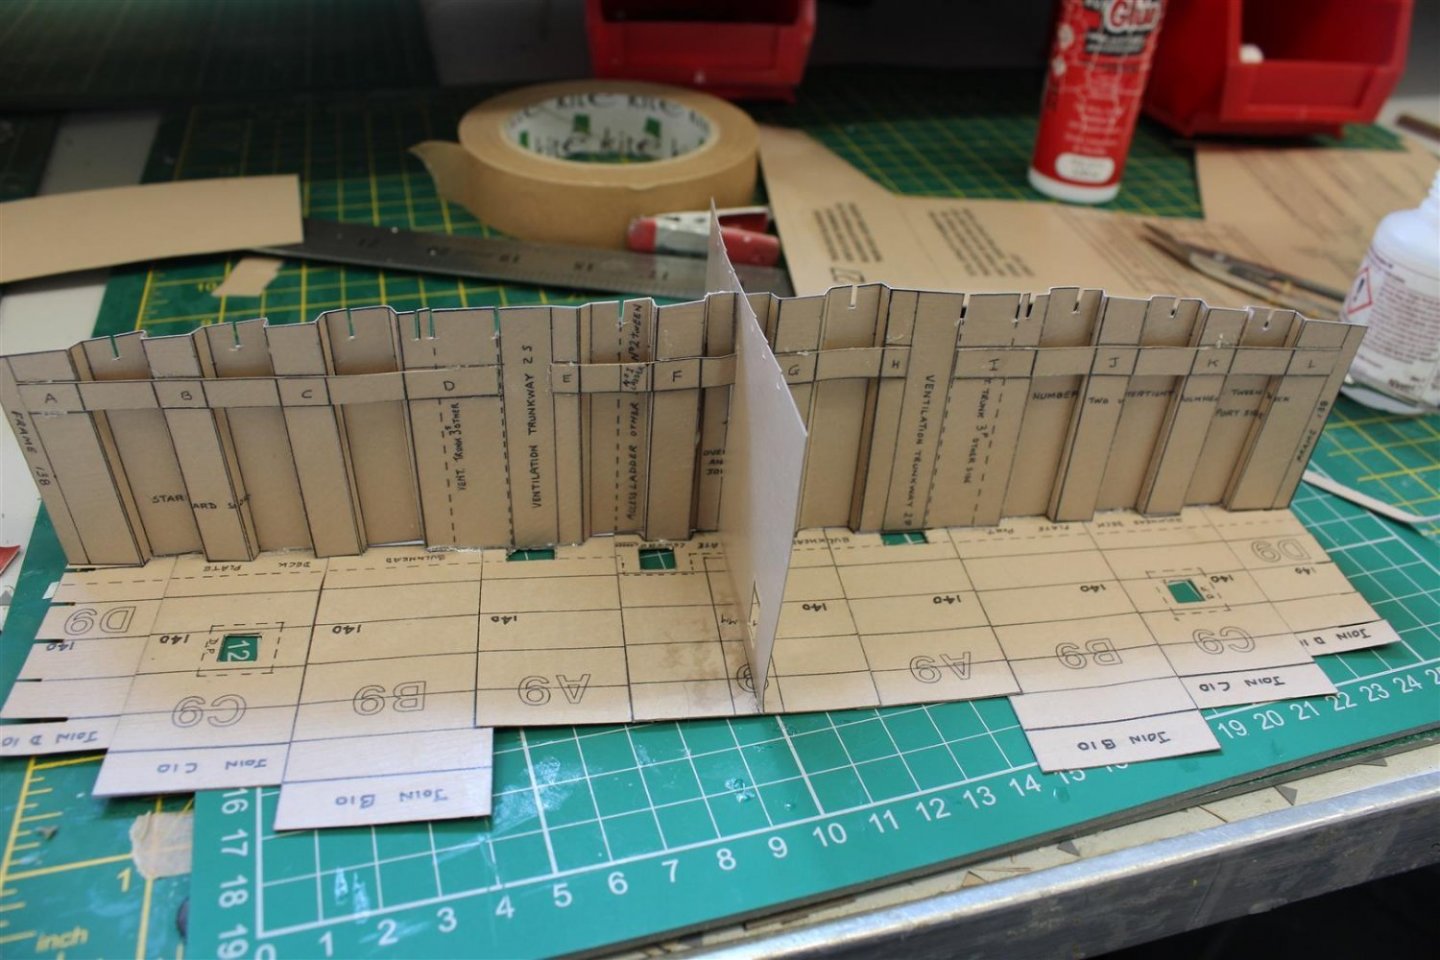
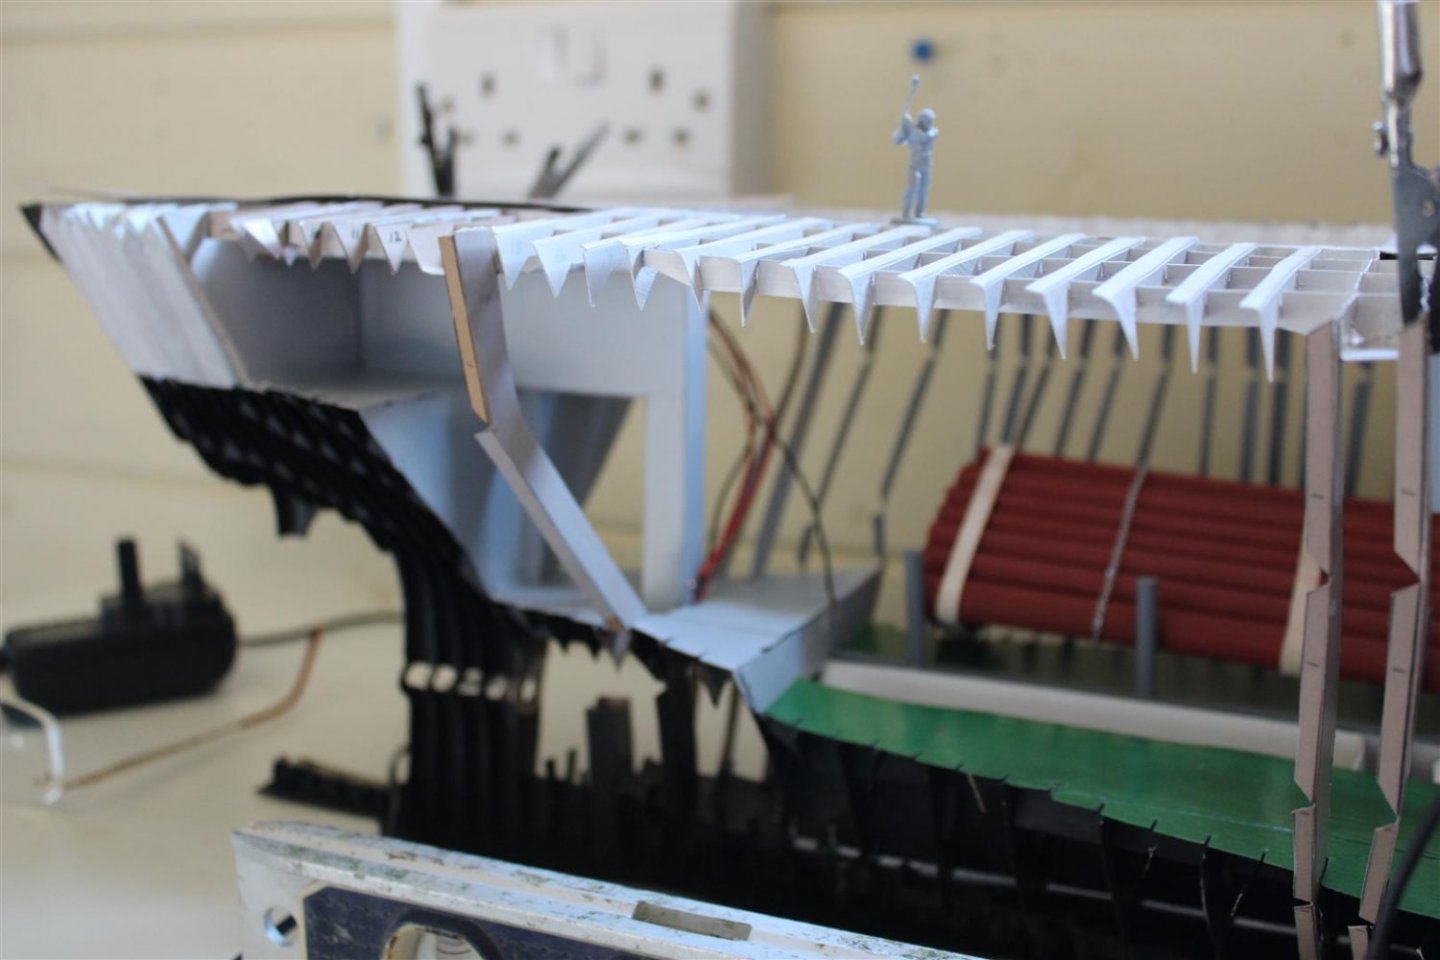
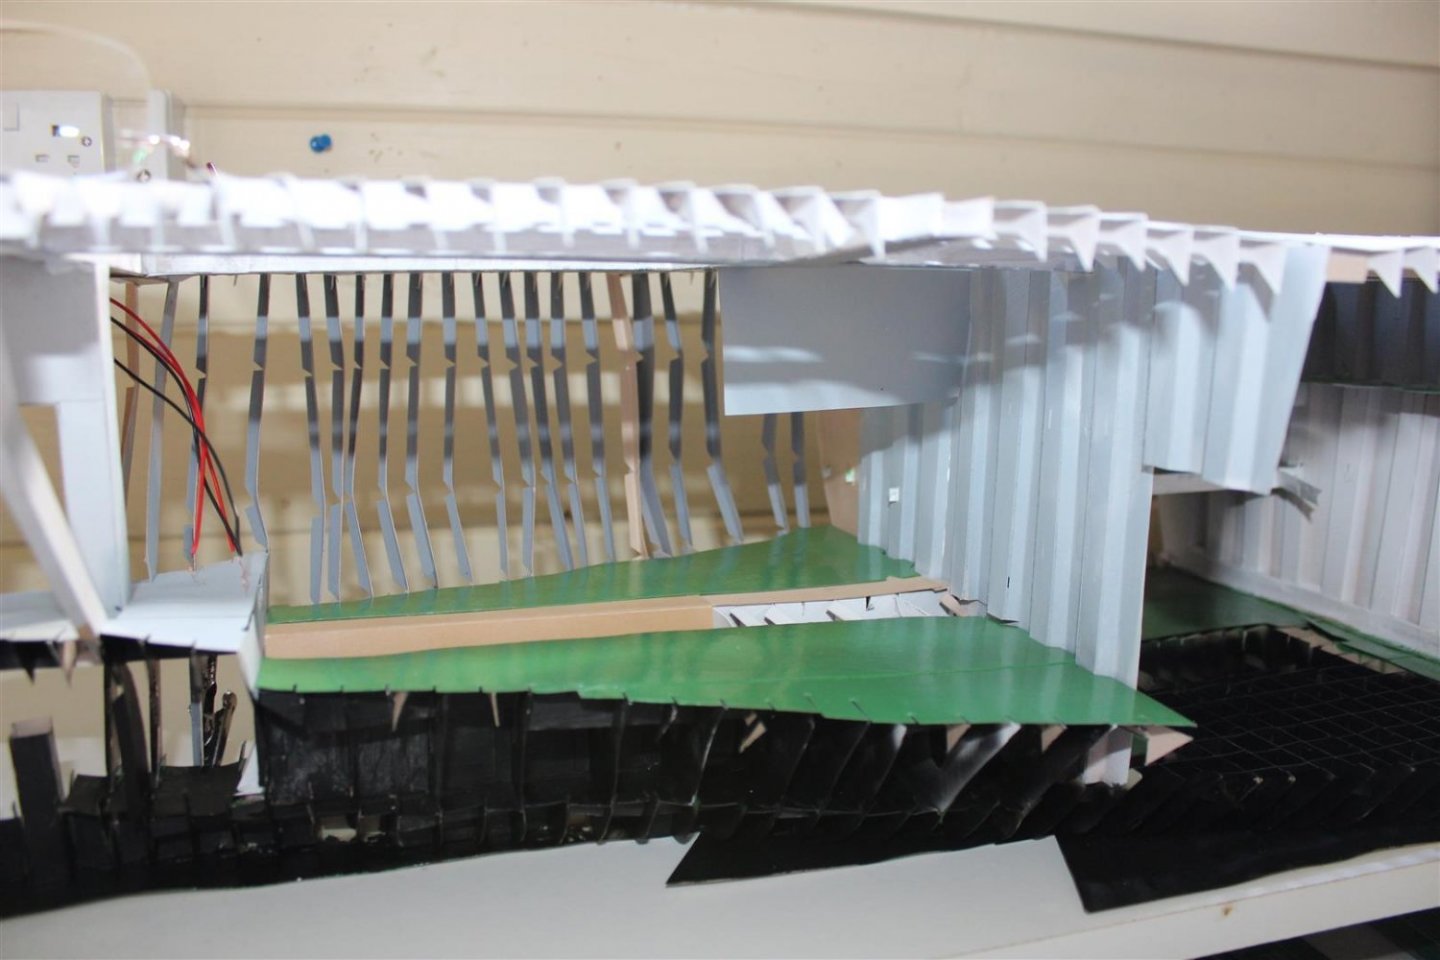
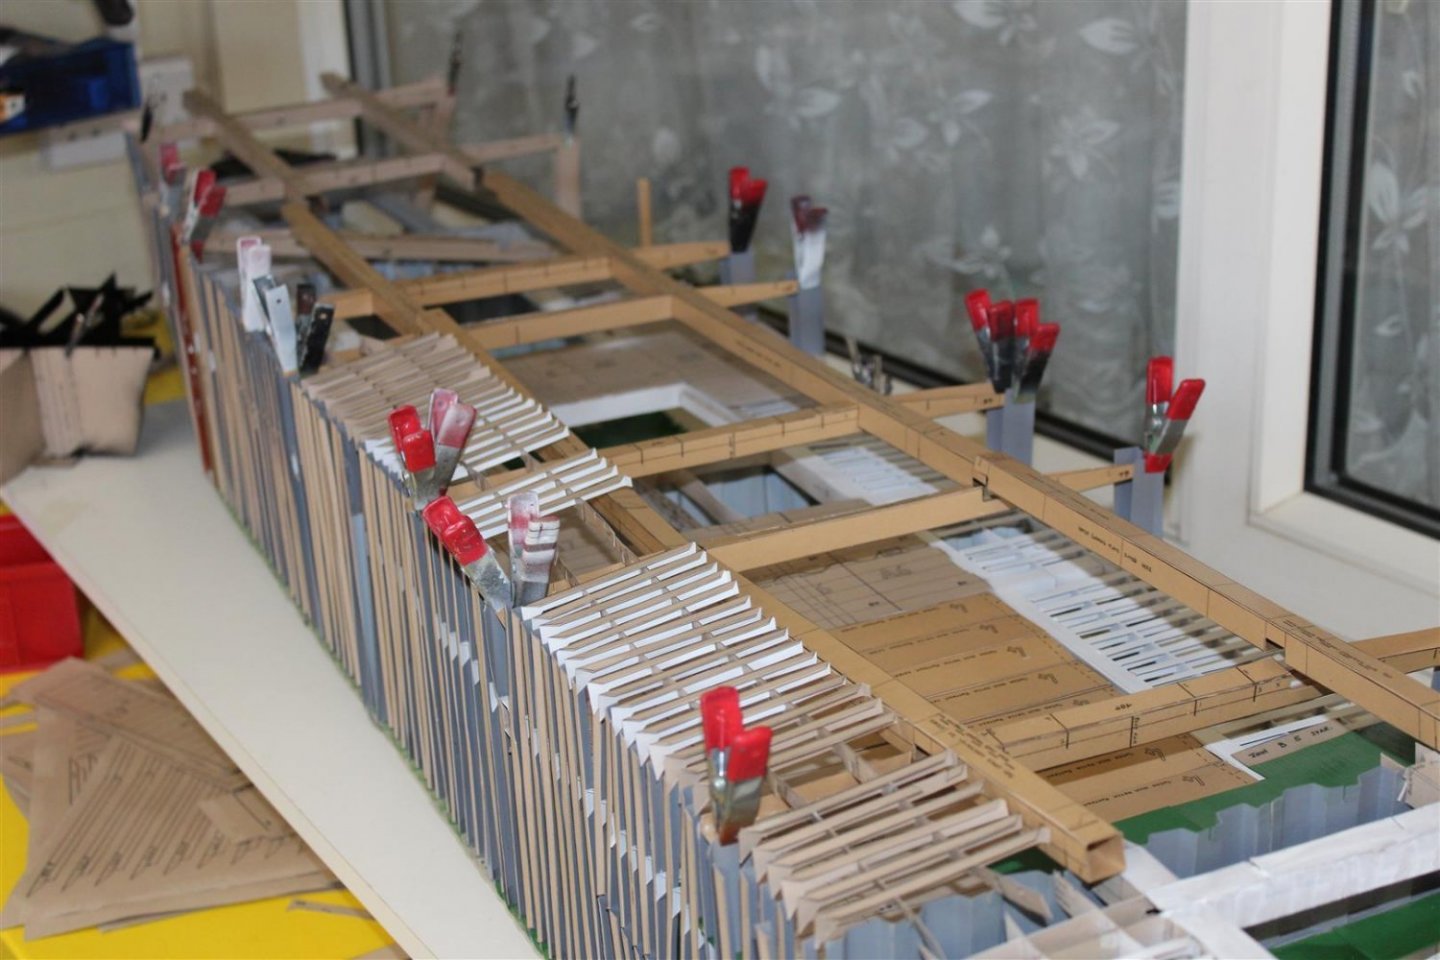
 Good evening everyone thank you for comments and likes Day 76 fwd and midships top deck although only in temporary for now the midships box girders and the upper forepeak are rechecked for final fitting, a few deck plates, lighting and fitting points for cargo to sort out oh and another bulkhead im quite pleased with the way the build is going forepeak frames


- 201 replies
-
- 14
-

-

-
- SD 14
- Marcle Models
- (and 1 more)
-
very nice, looks great with the figures bringing it to life, might find mine out again one day
-
come along and try @chris watton LOL when the Indy is ready
- 201 replies
-
- 5
-
-

-
- SD 14
- Marcle Models
- (and 1 more)
-
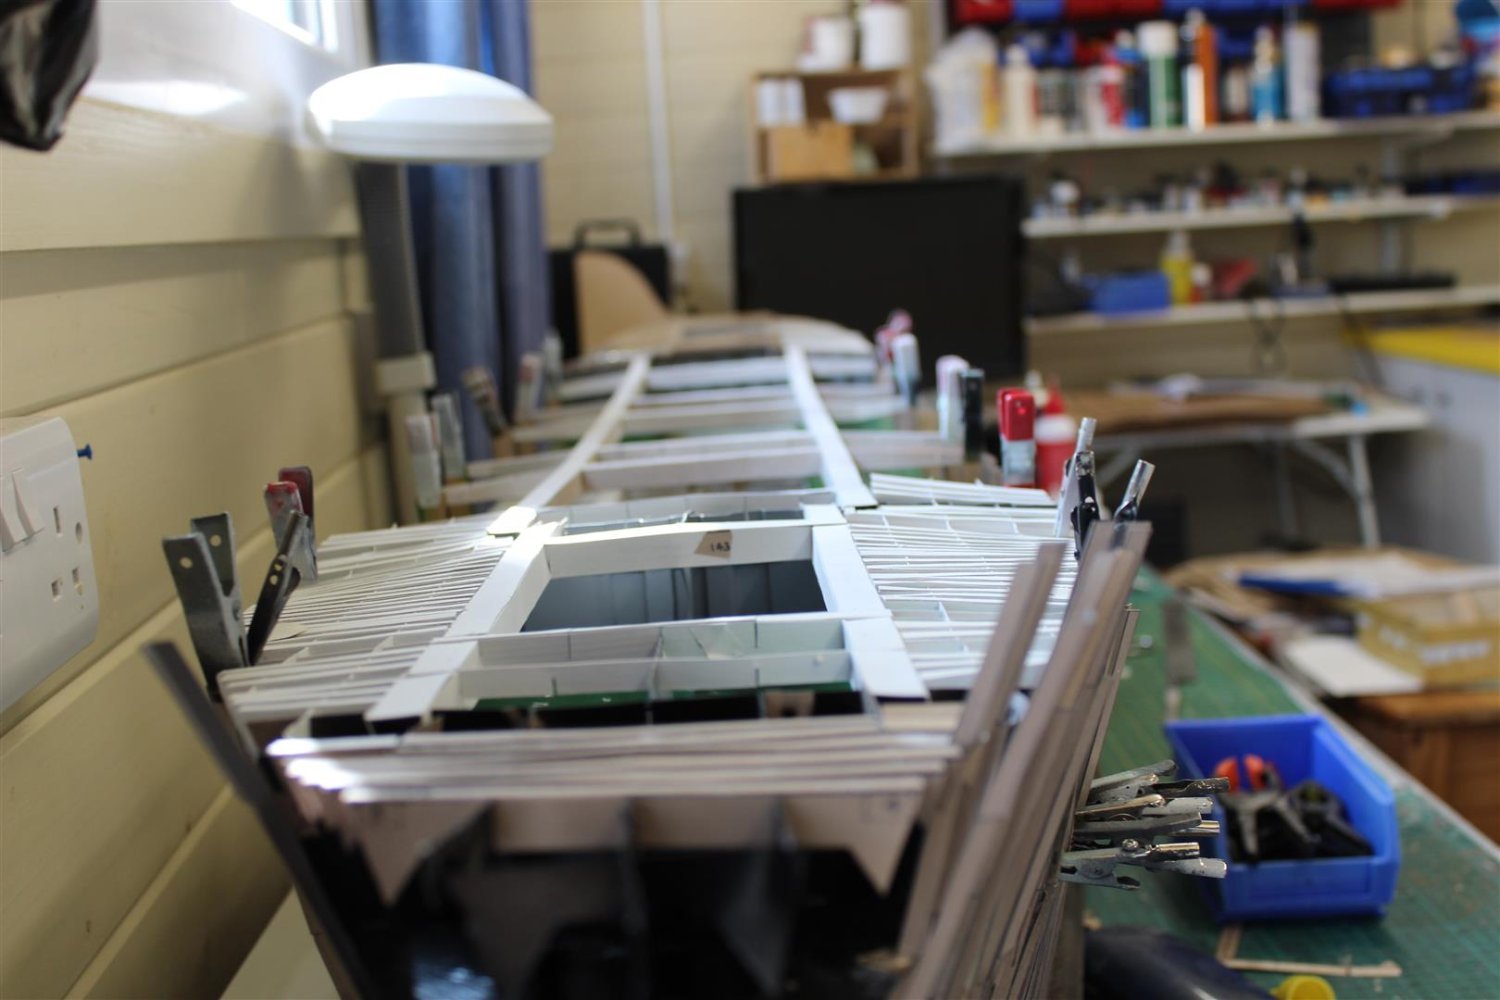
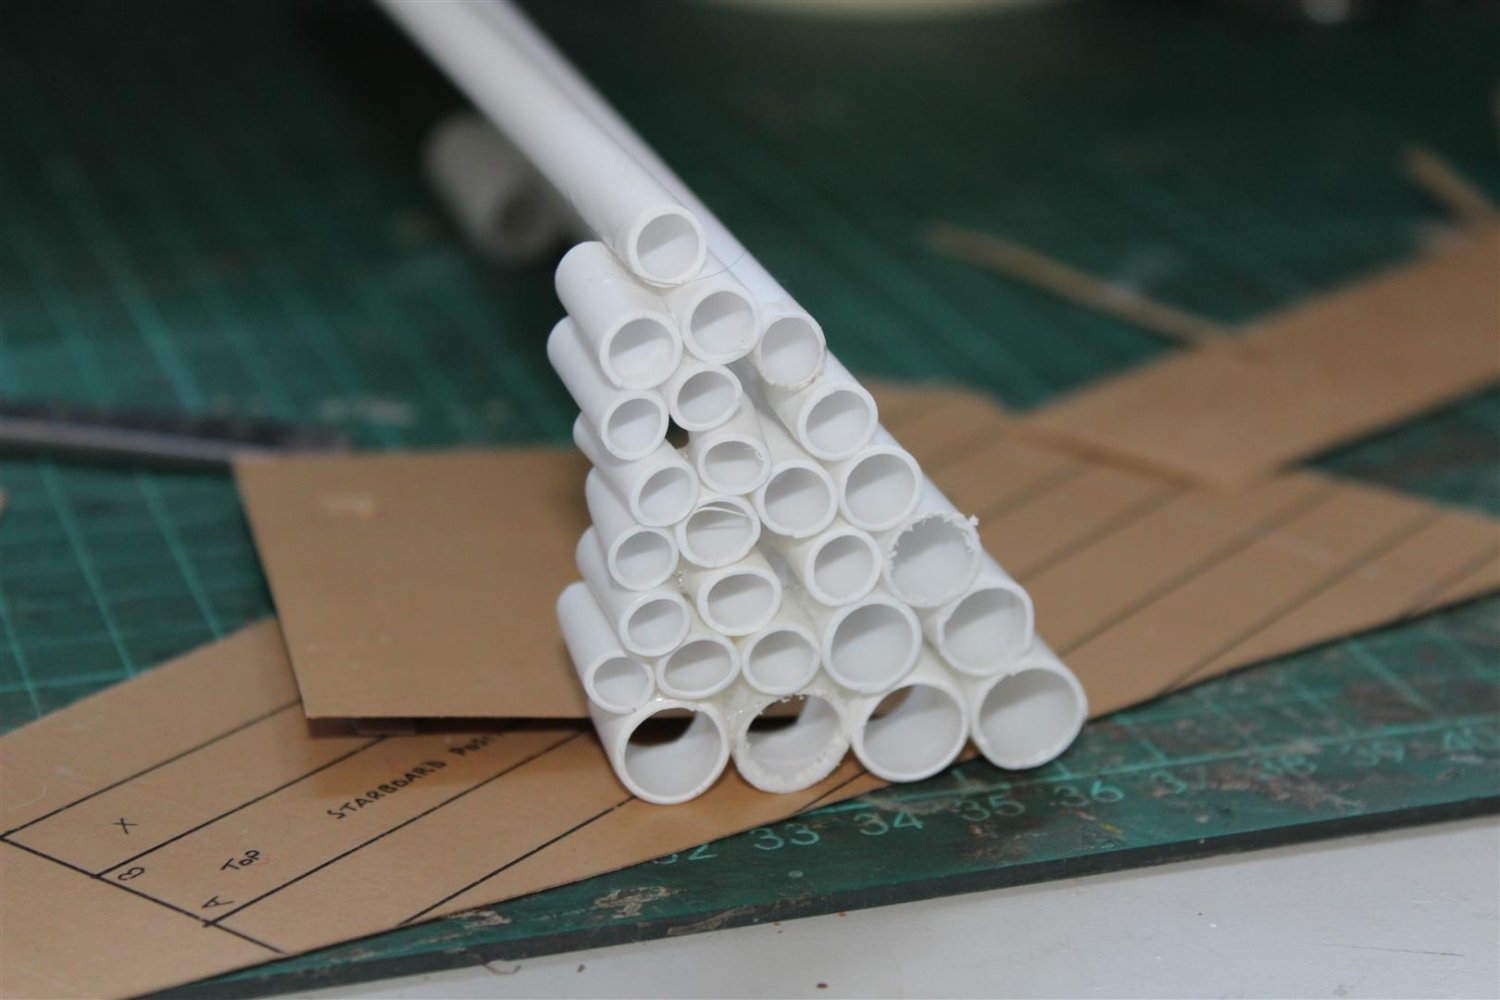
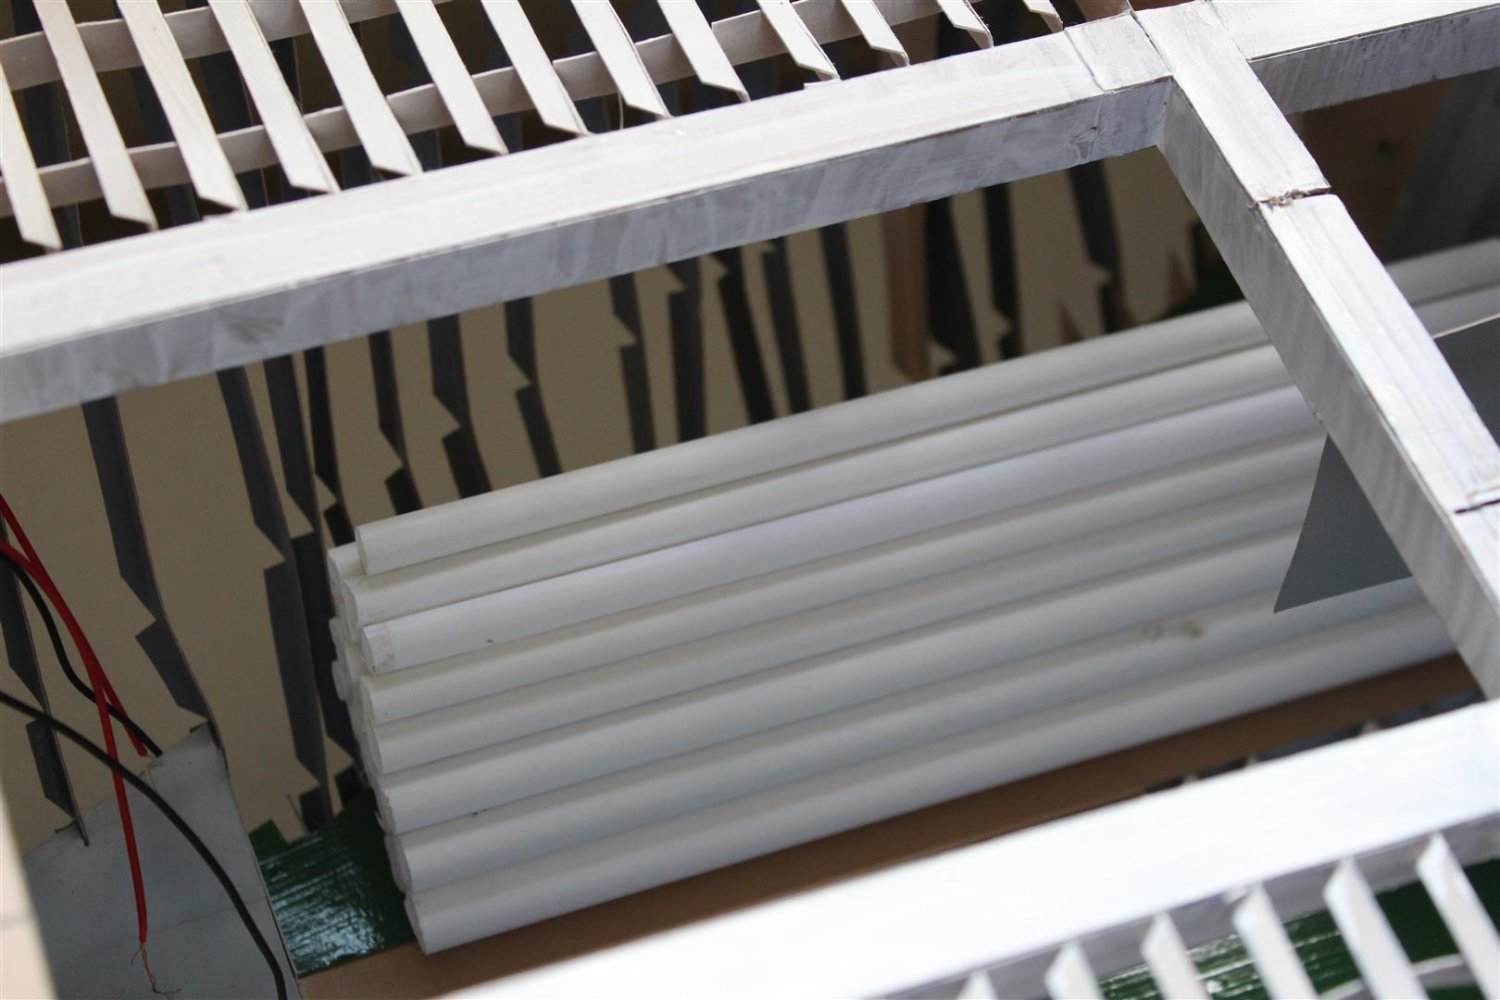
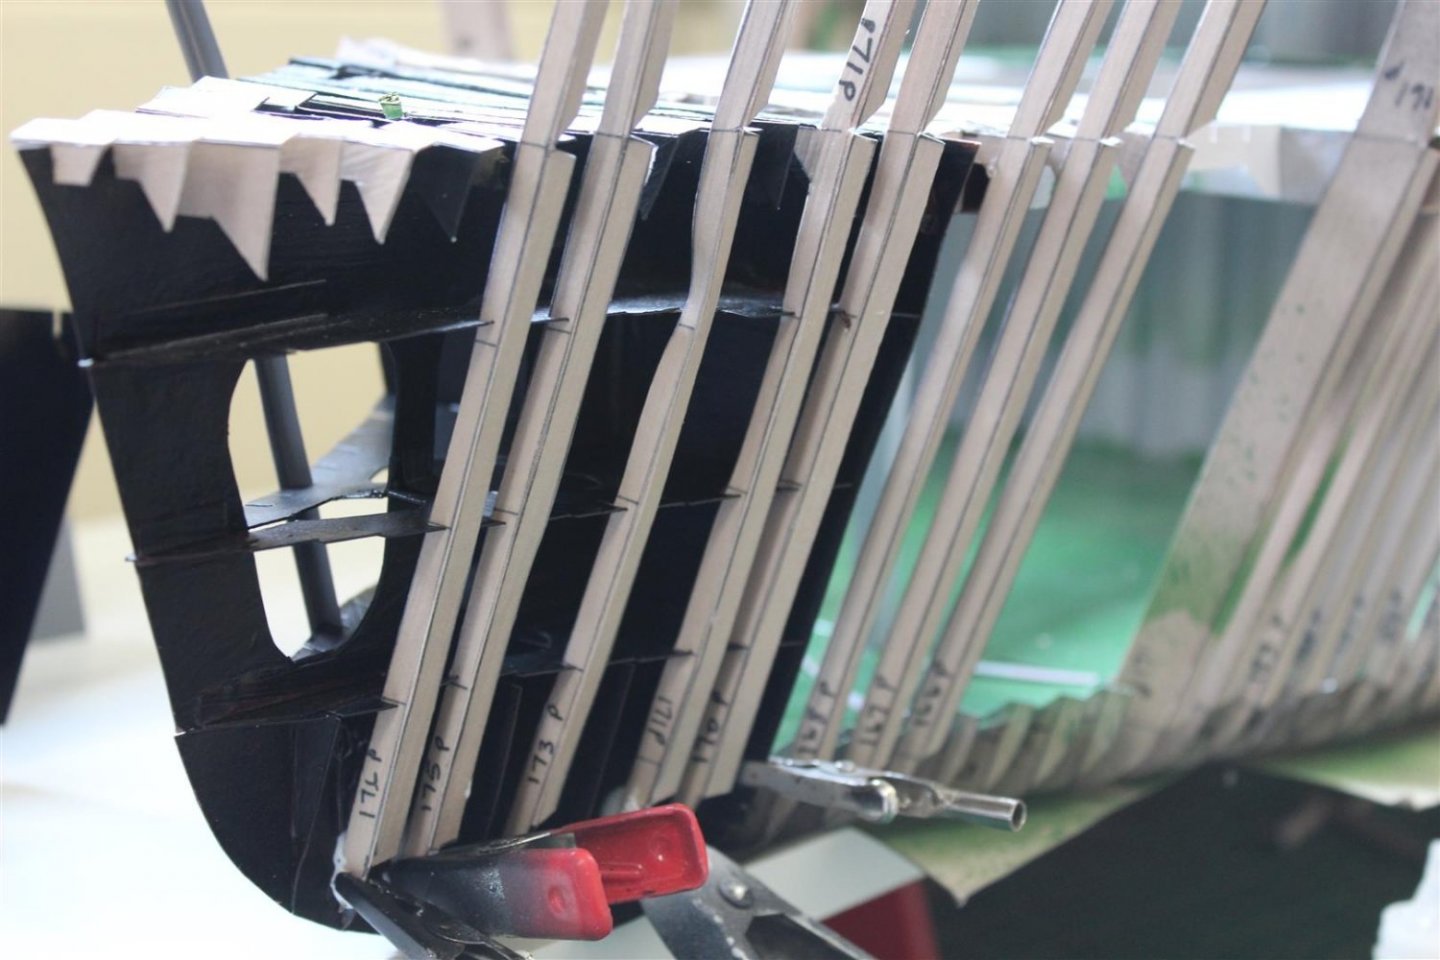
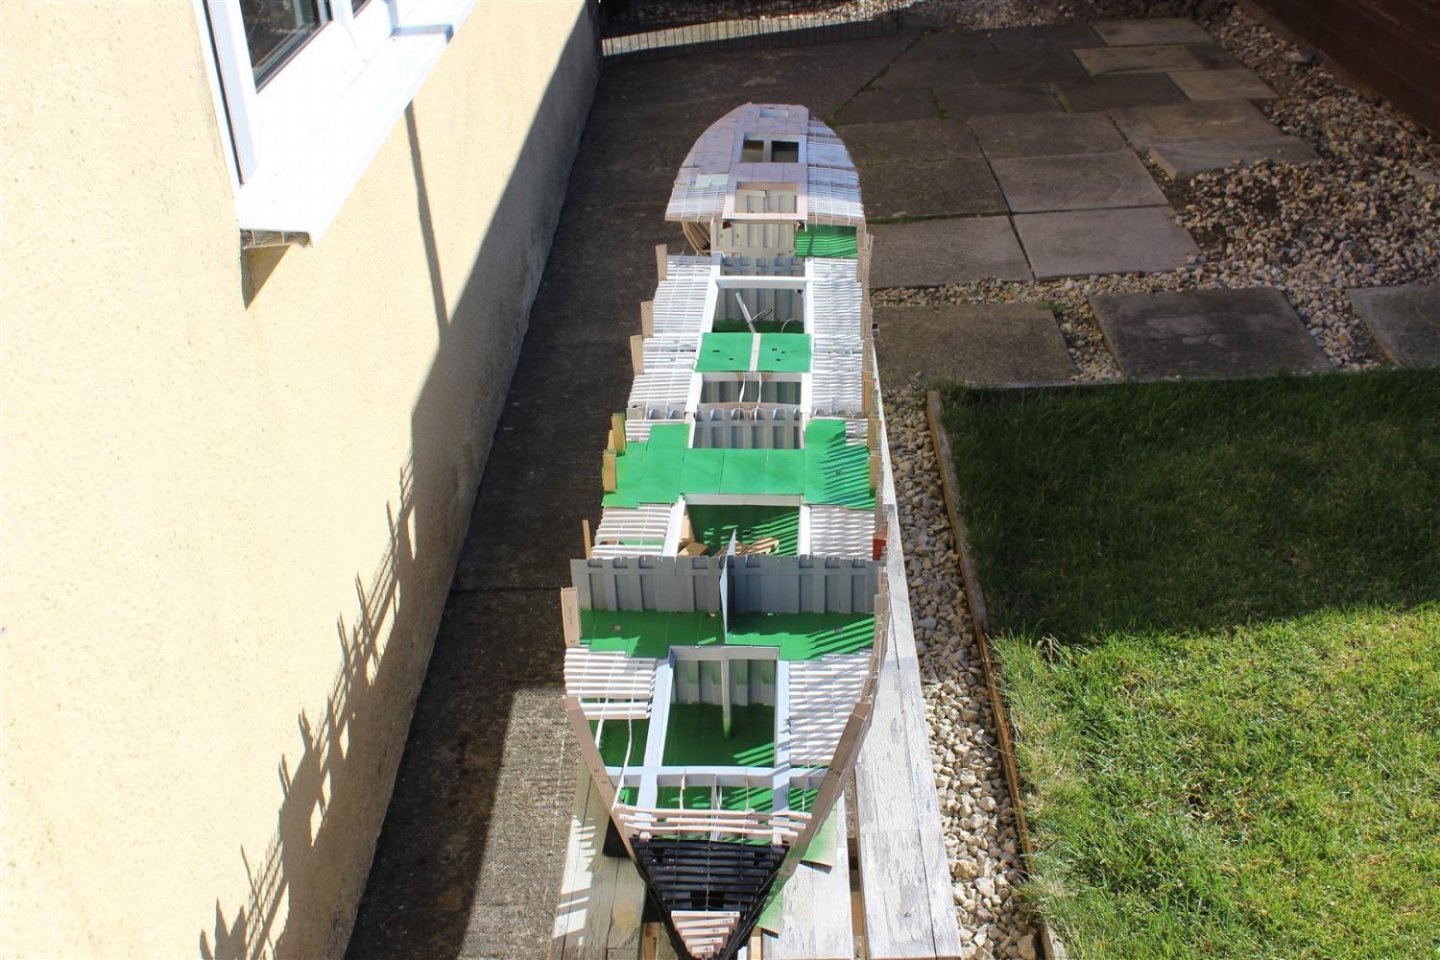
Good evening everyone Day 74 cargo experiment failed well i am on day 74,but not a lot has changed since my last update, part of the reason is the last update i dont know why (it happens every build,) doing the cargo completely threw me out of my happy routine, it was about Tuesday when i took pipes and bricks out and told myself to get on with the build. instant mojo back, i know what i want to do, just not thought hard enough about how i want to achieve it, today the tween deck is going in, im sure photos will follow tomorrow out yesterday for a drop of sunshine Tween deck Bulkheads
- 201 replies
-
- 15
-
-
-
- SD 14
- Marcle Models
- (and 1 more)
-
i broke the news to her this morning that this would be the next build, the compromise took less than 10 seconds, the 1/200 Titanic and KA mk1 will have to go
- 488 replies
-
- 12
-
-
-
-
- Indefatigable
- Vanguard Models
- (and 1 more)
-
so overall length will be about the same as the 1/72 Jotika Caldercraft Victory
- 488 replies
-
- 6
-
-
- Indefatigable
- Vanguard Models
- (and 1 more)
-
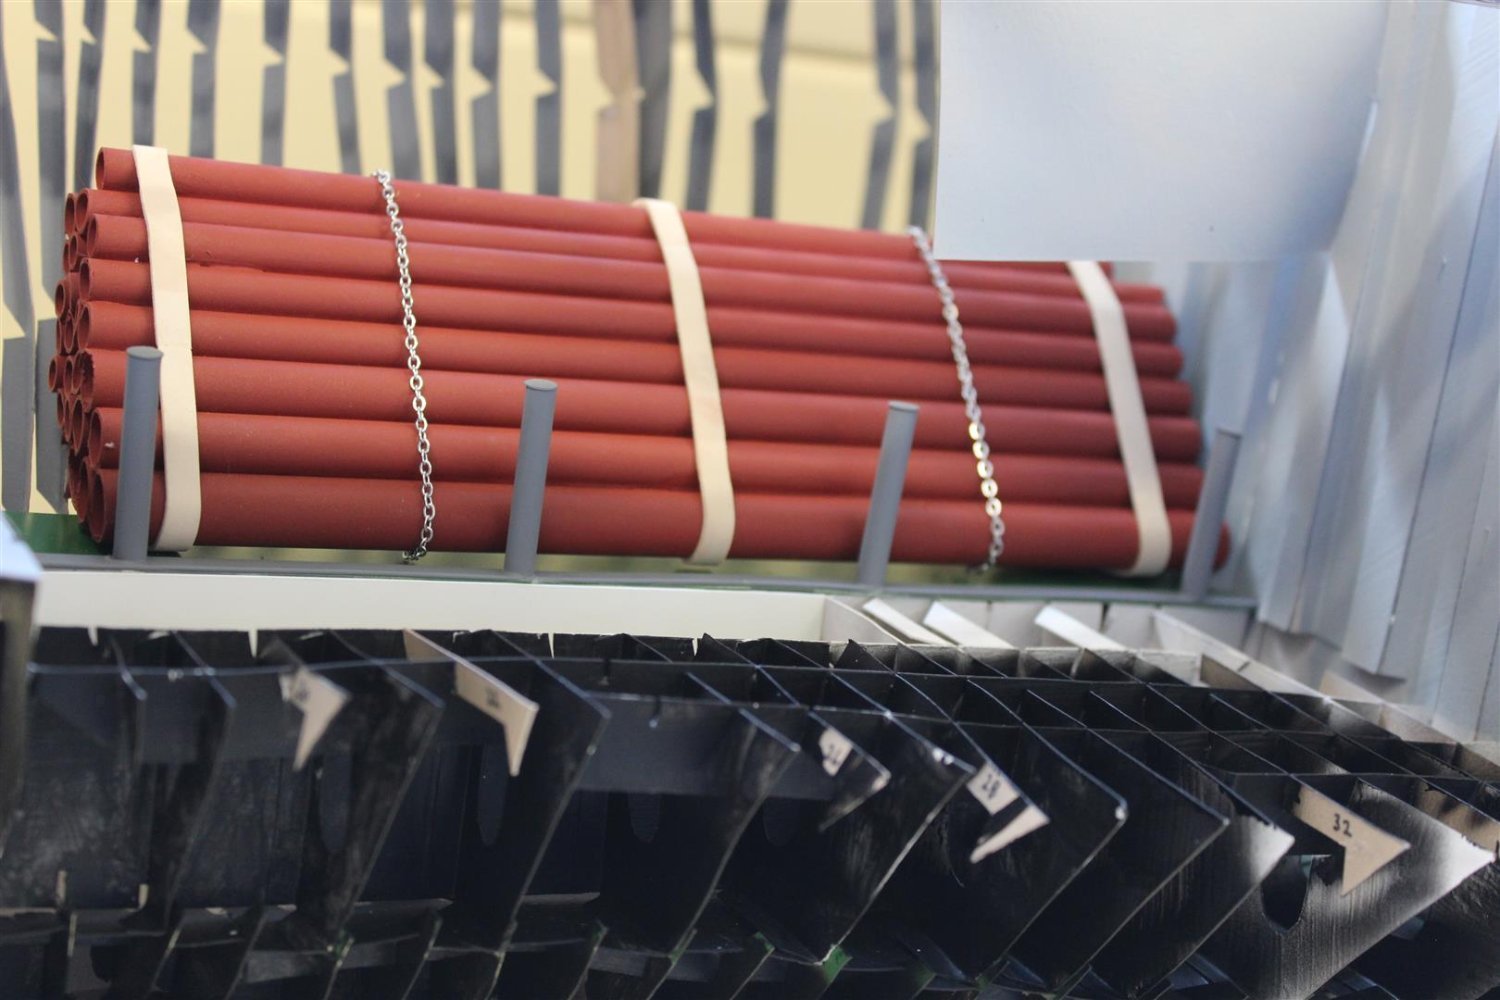
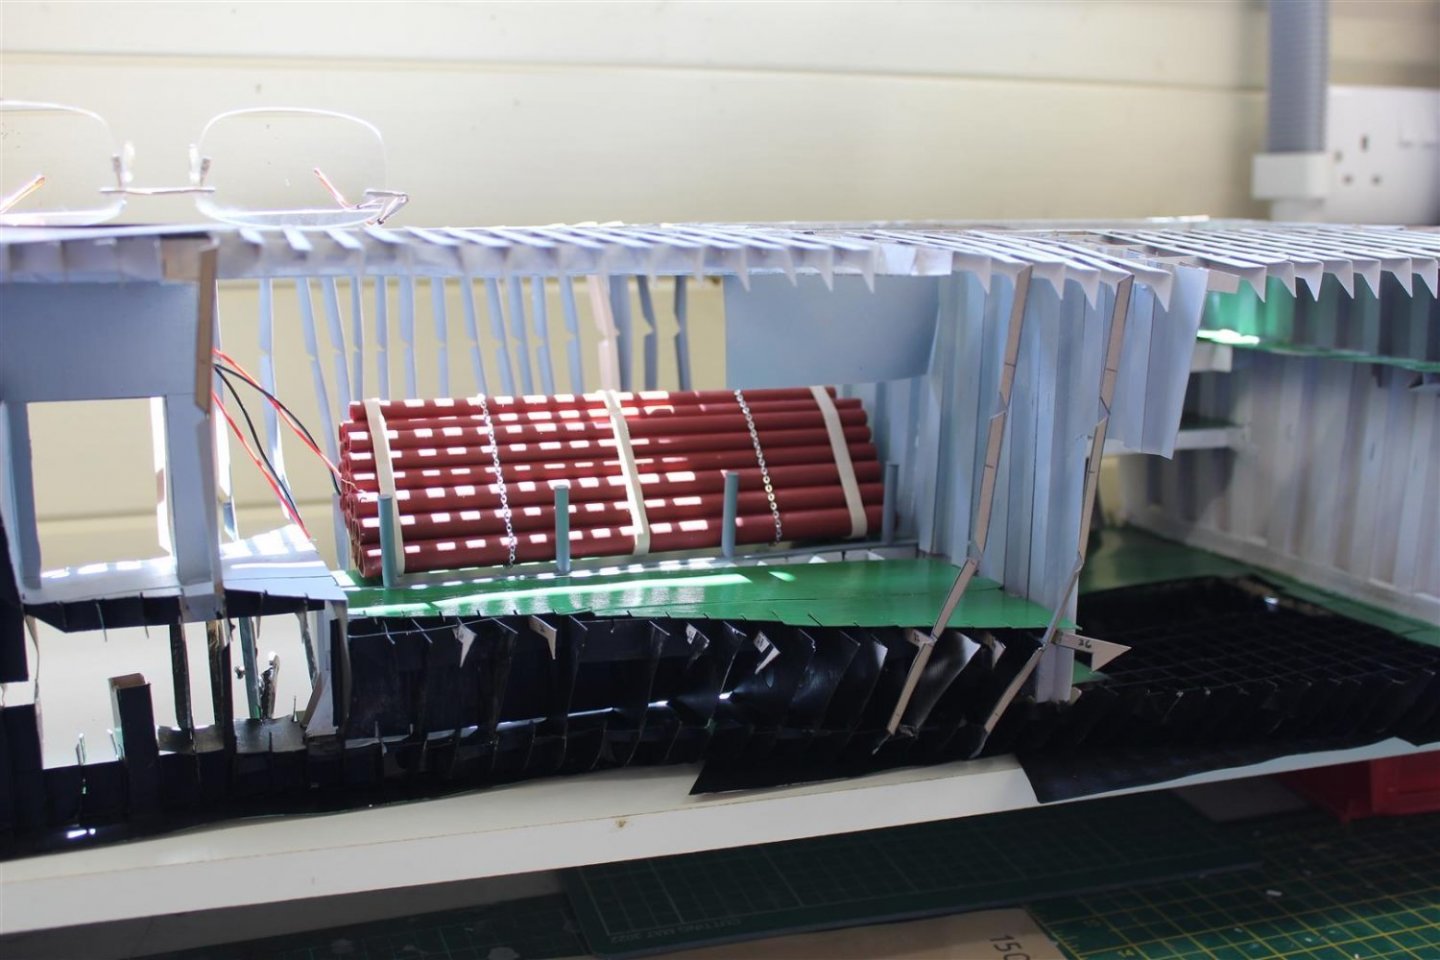
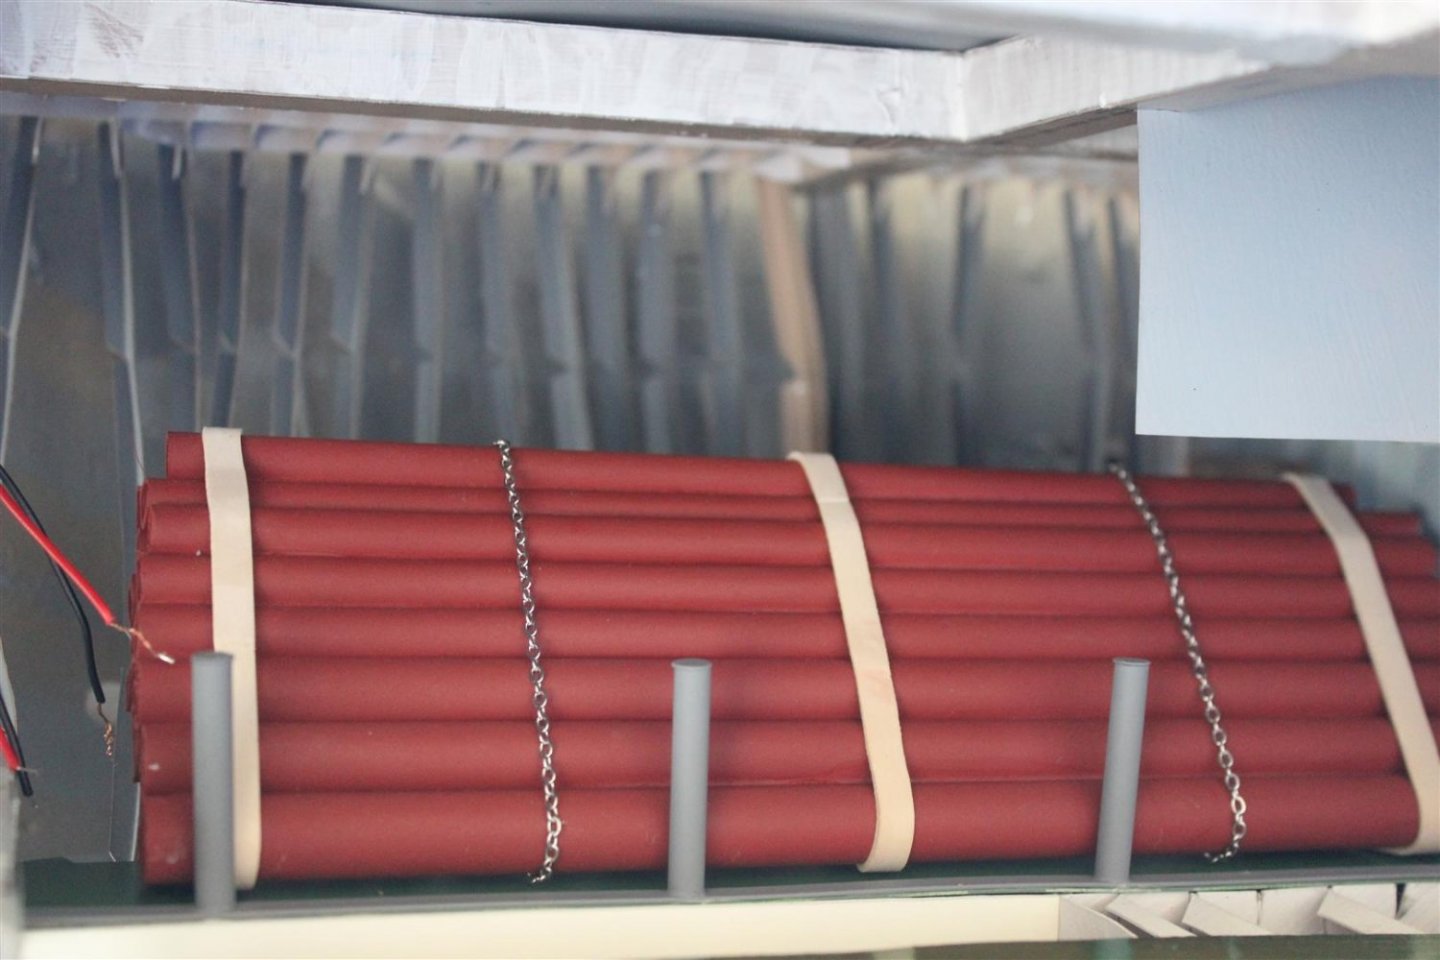
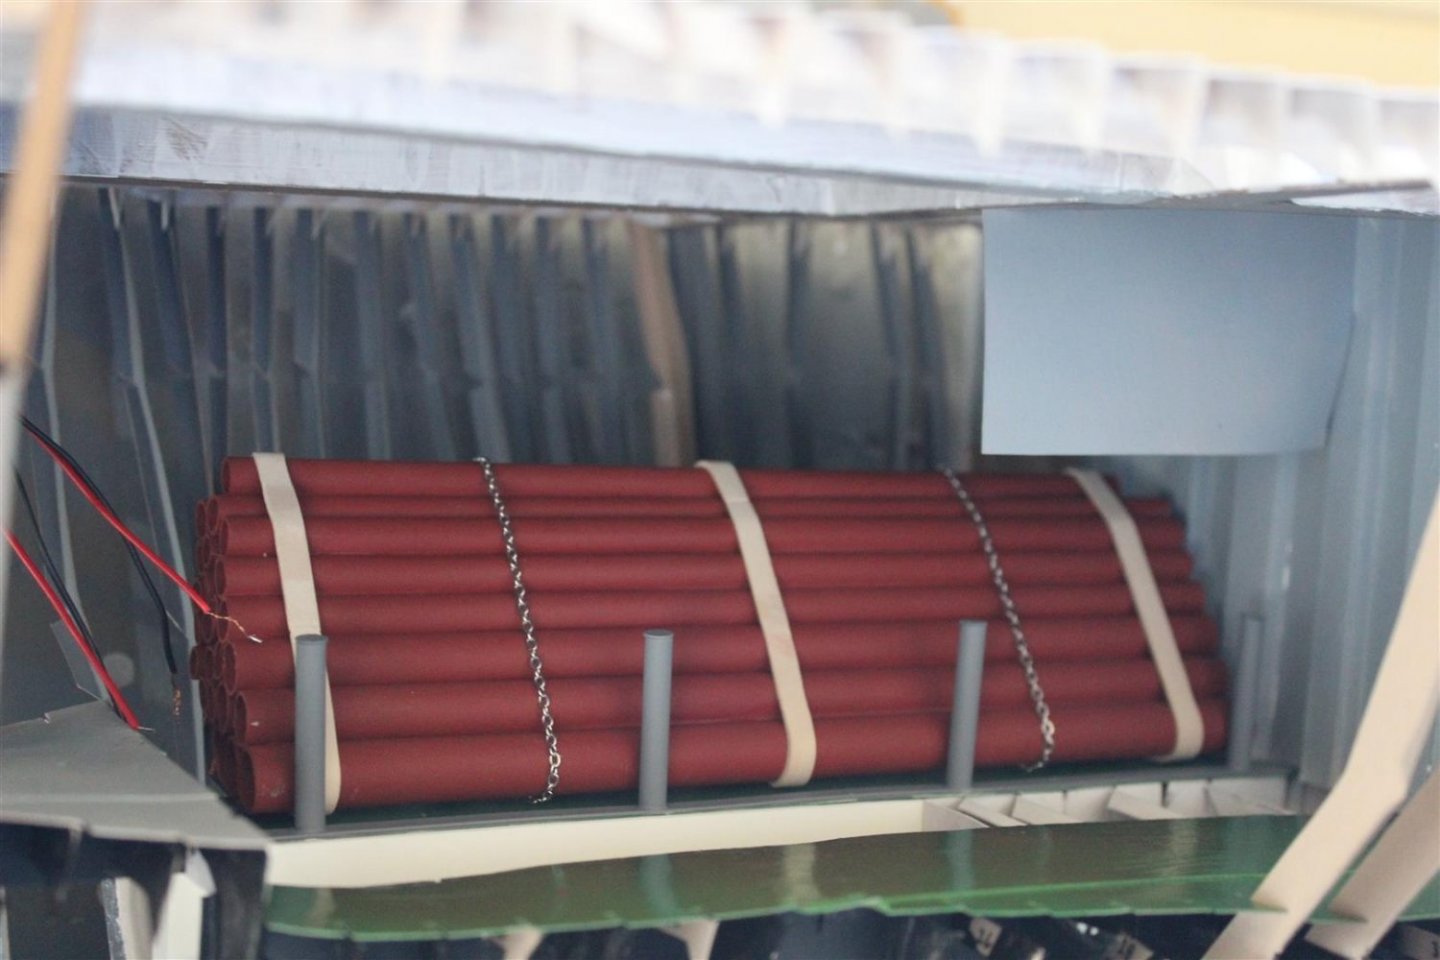
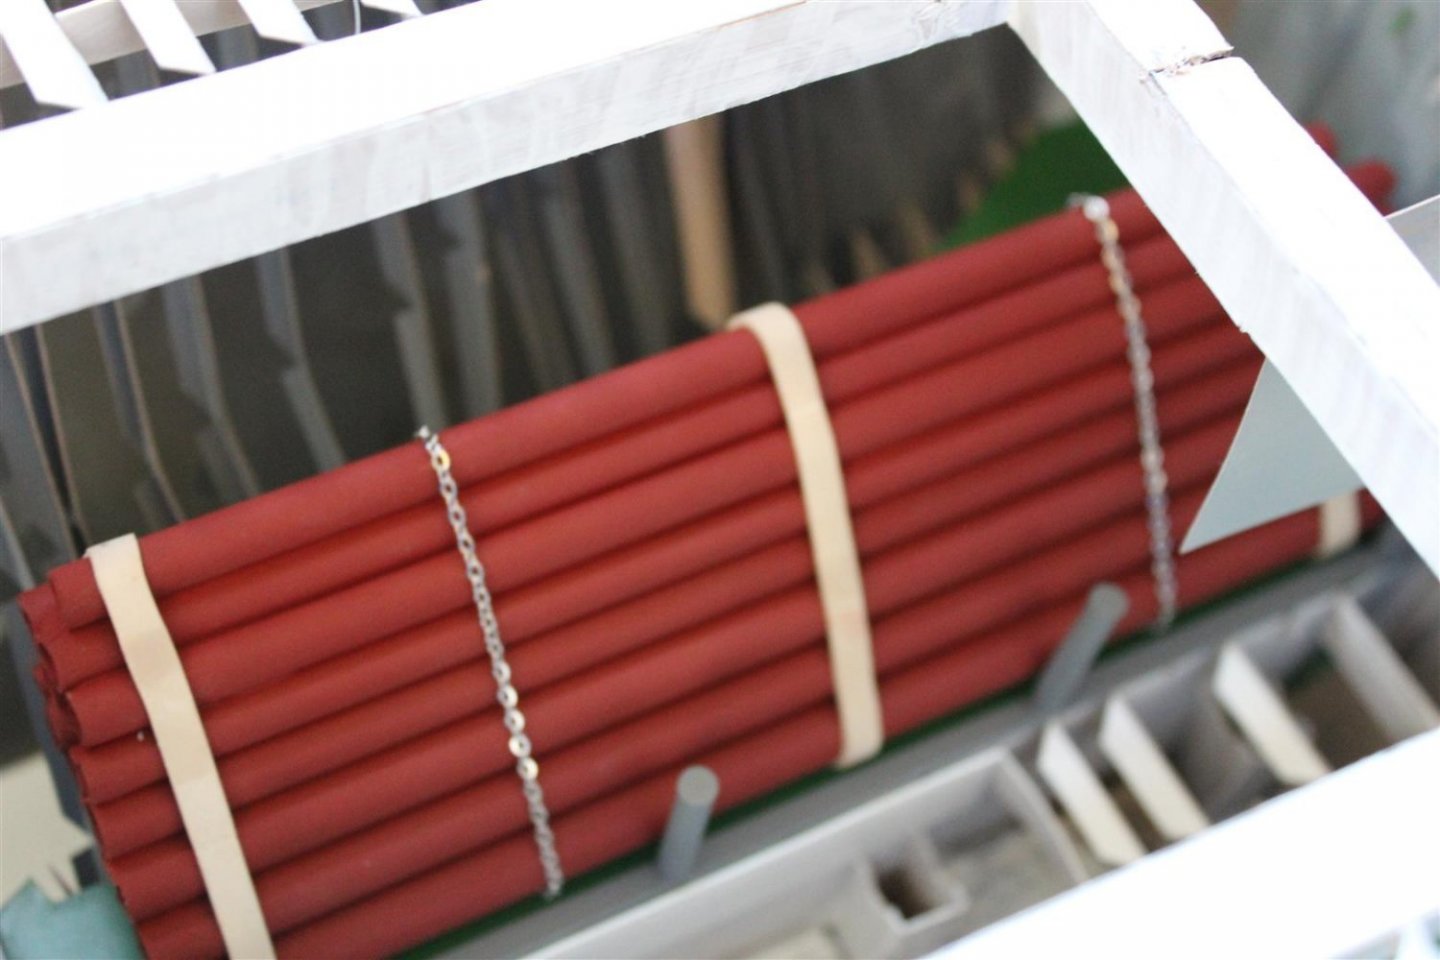
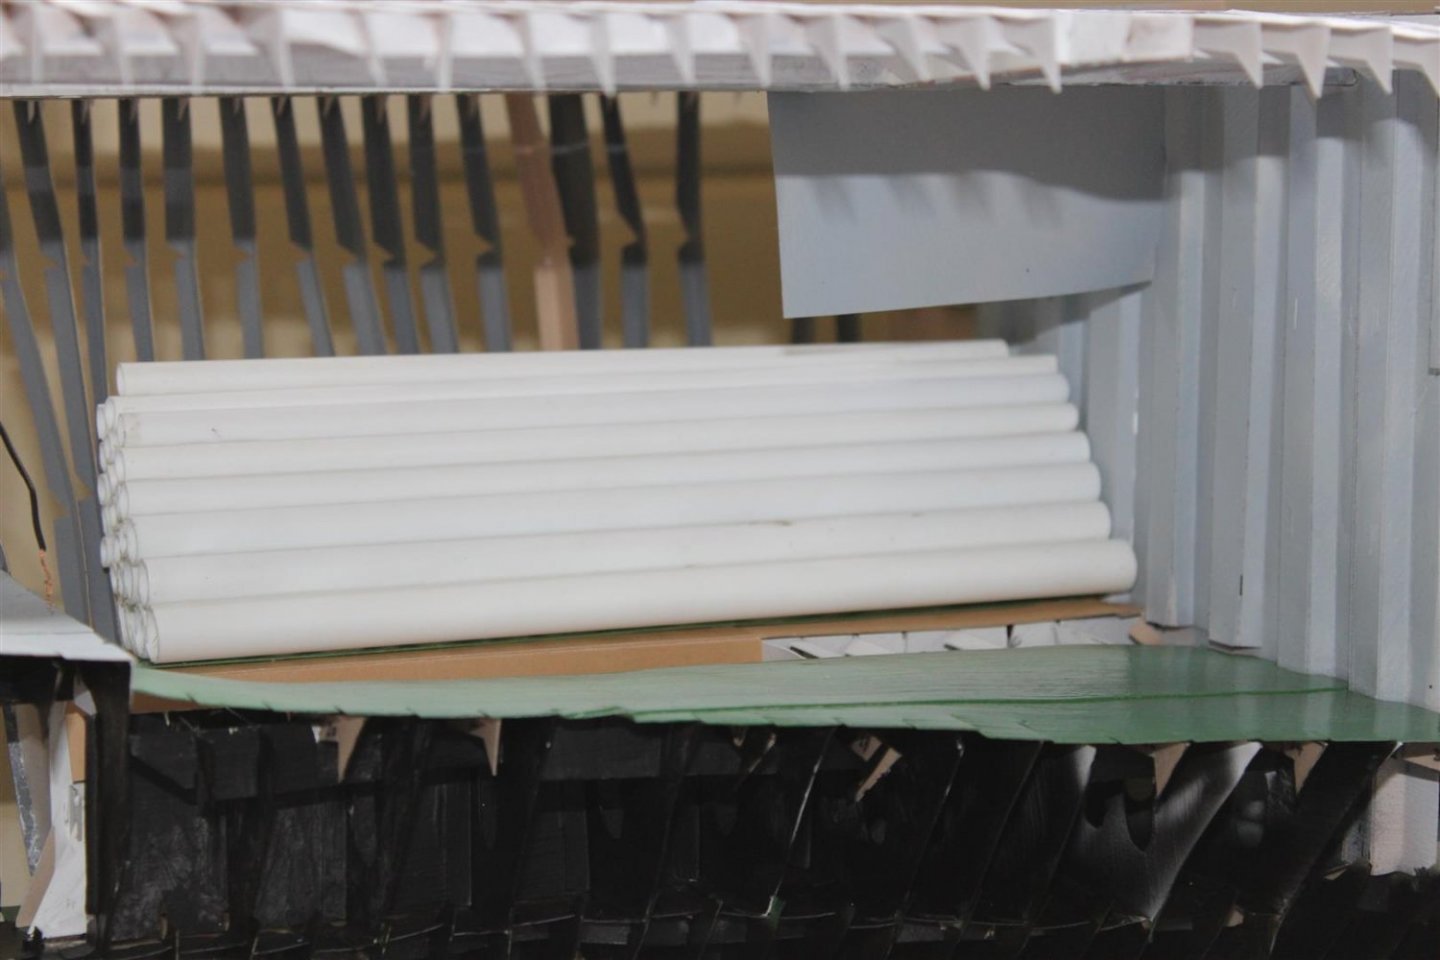
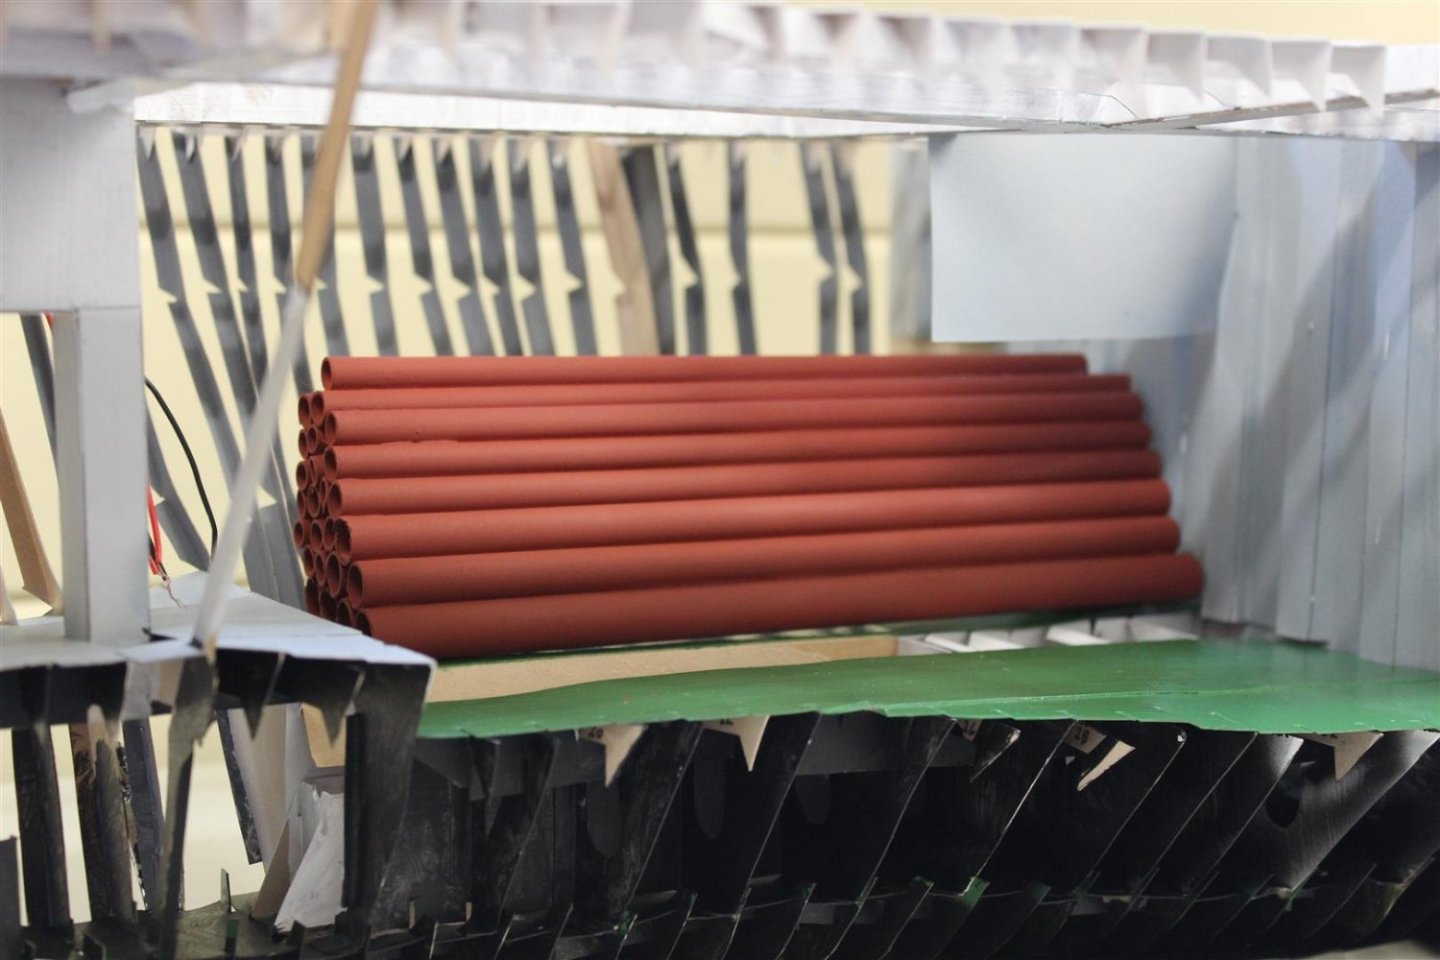
i certainly need to make straps up but also need to possibly redo the load/fill gaps, and give it some more depth, but i need to get my head around how much needs to be left open to actually see inside. at the same time i need these load out made now to ensure they fit, i seam to be in a catch 22 position (but a nice catch 22)
- 201 replies
-
- 5
-
-
- SD 14
- Marcle Models
- (and 1 more)
-
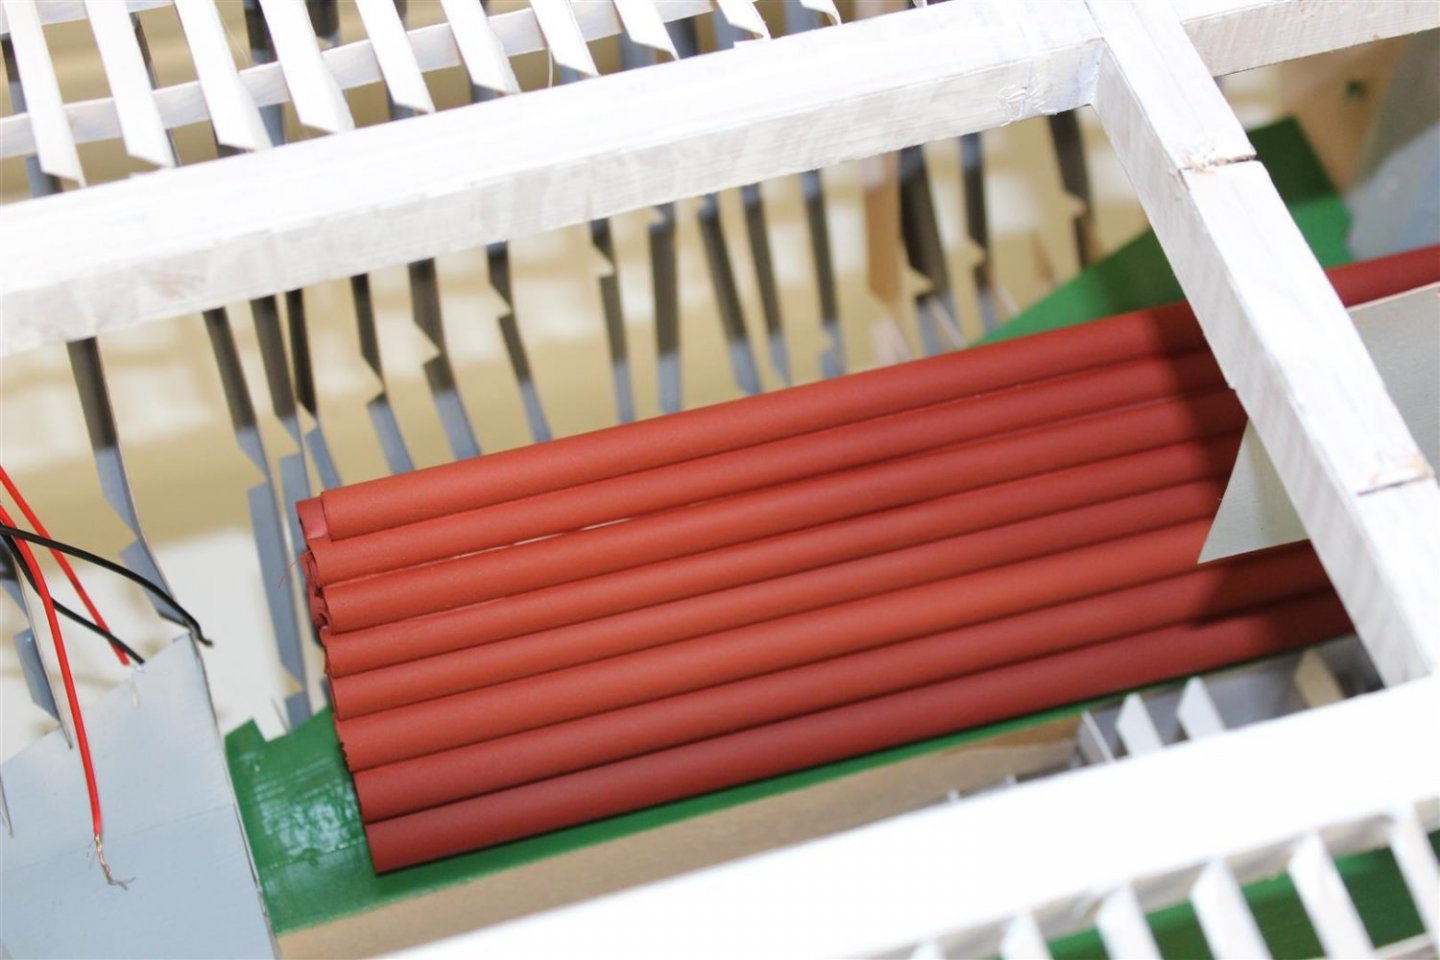
They will be repacked and strapped John it was mainly an exercise to see if it could be done
- 201 replies
-
- 5
-
-
- SD 14
- Marcle Models
- (and 1 more)
-
his job is to repack them tonight ready for load masters inspection in the morning, otherwise he will be on your pile of bodies lol
- 201 replies
-
- 7
-
-
-
- SD 14
- Marcle Models
- (and 1 more)
-
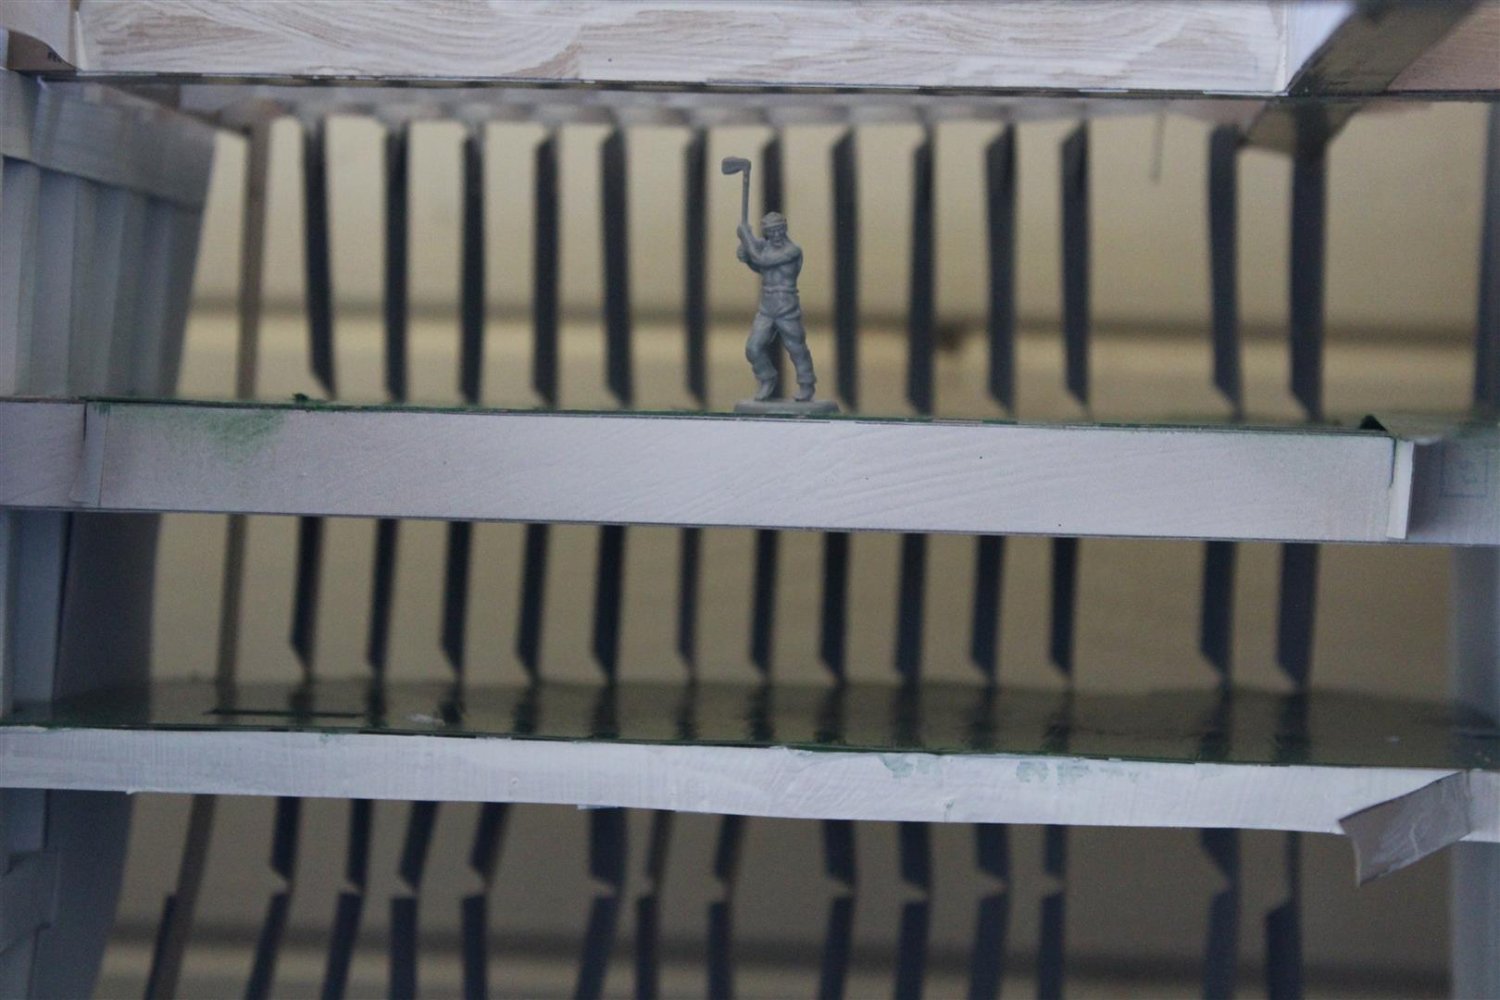
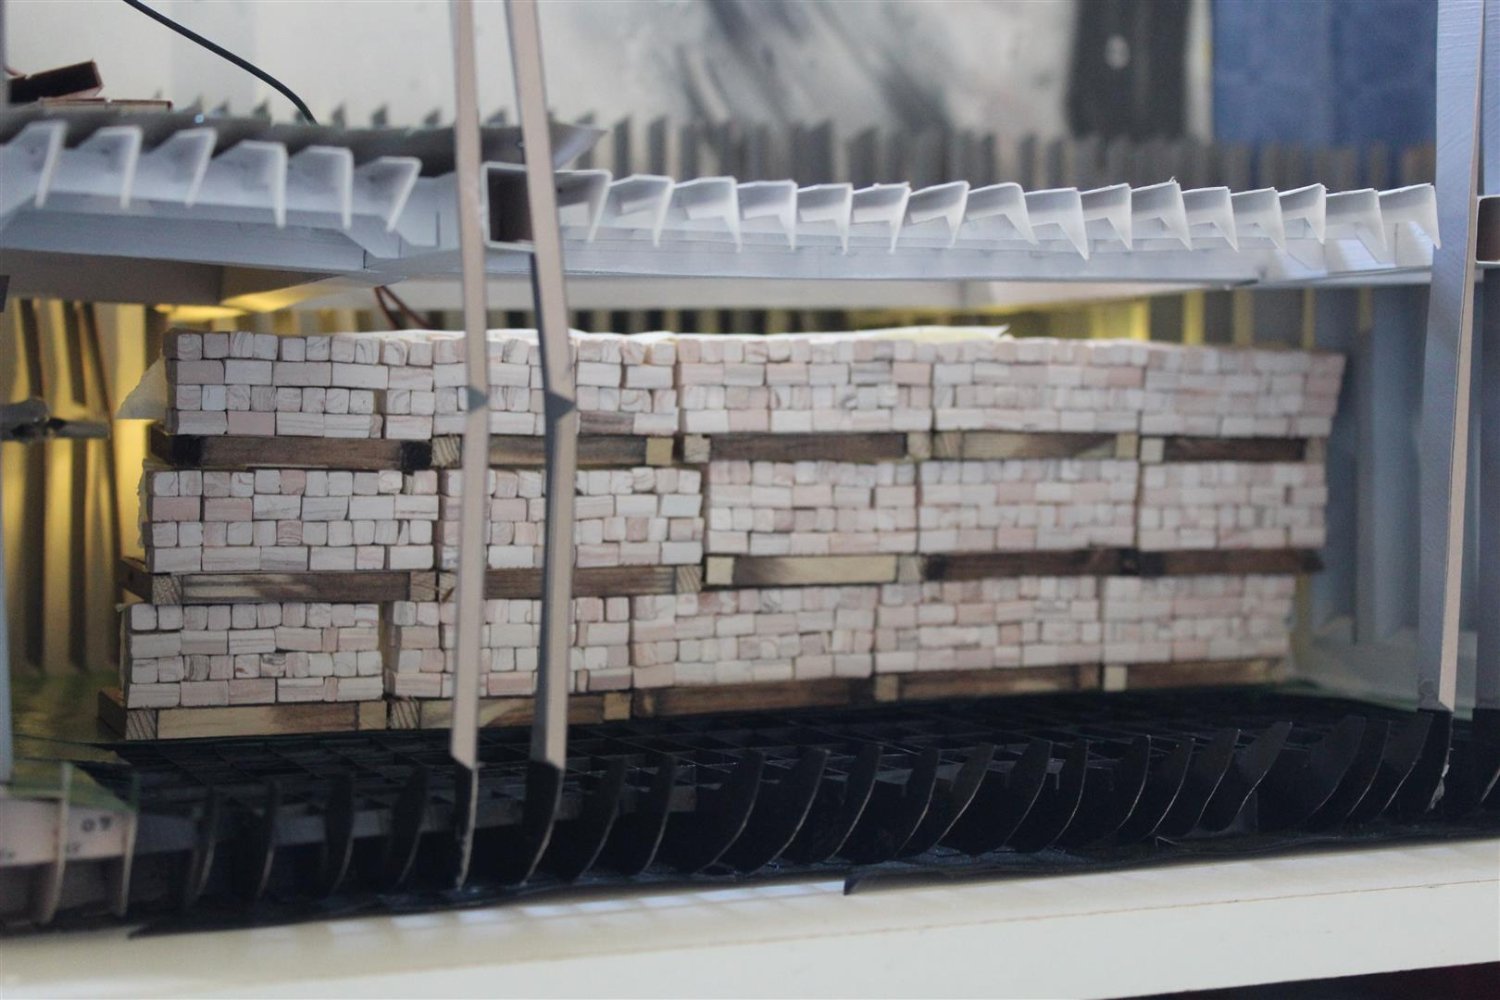
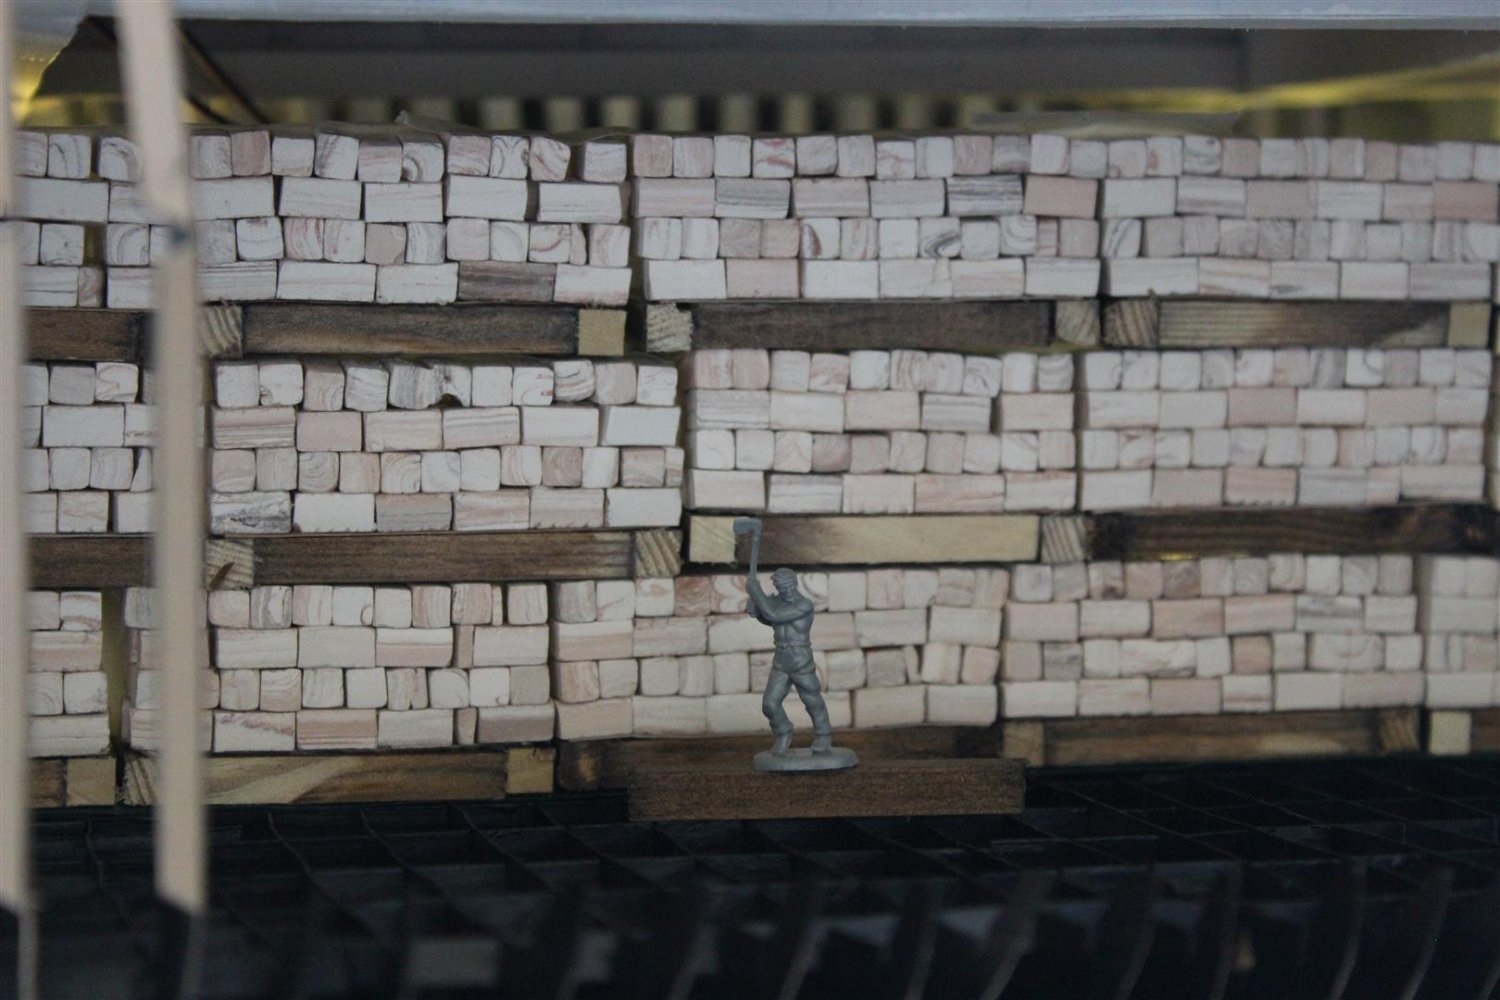
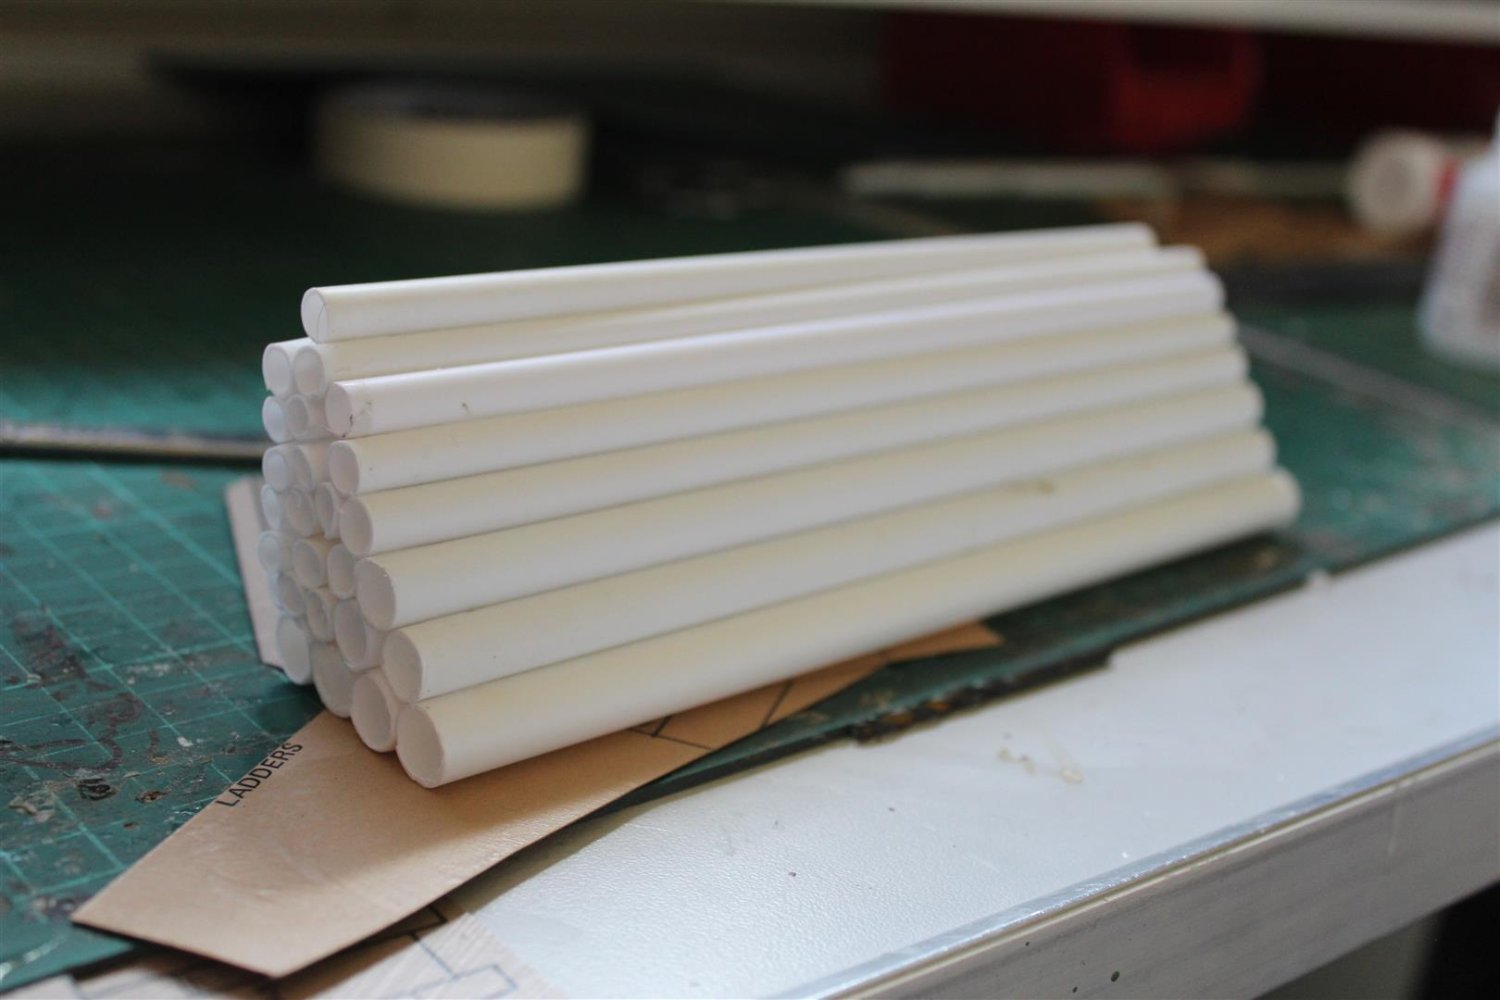
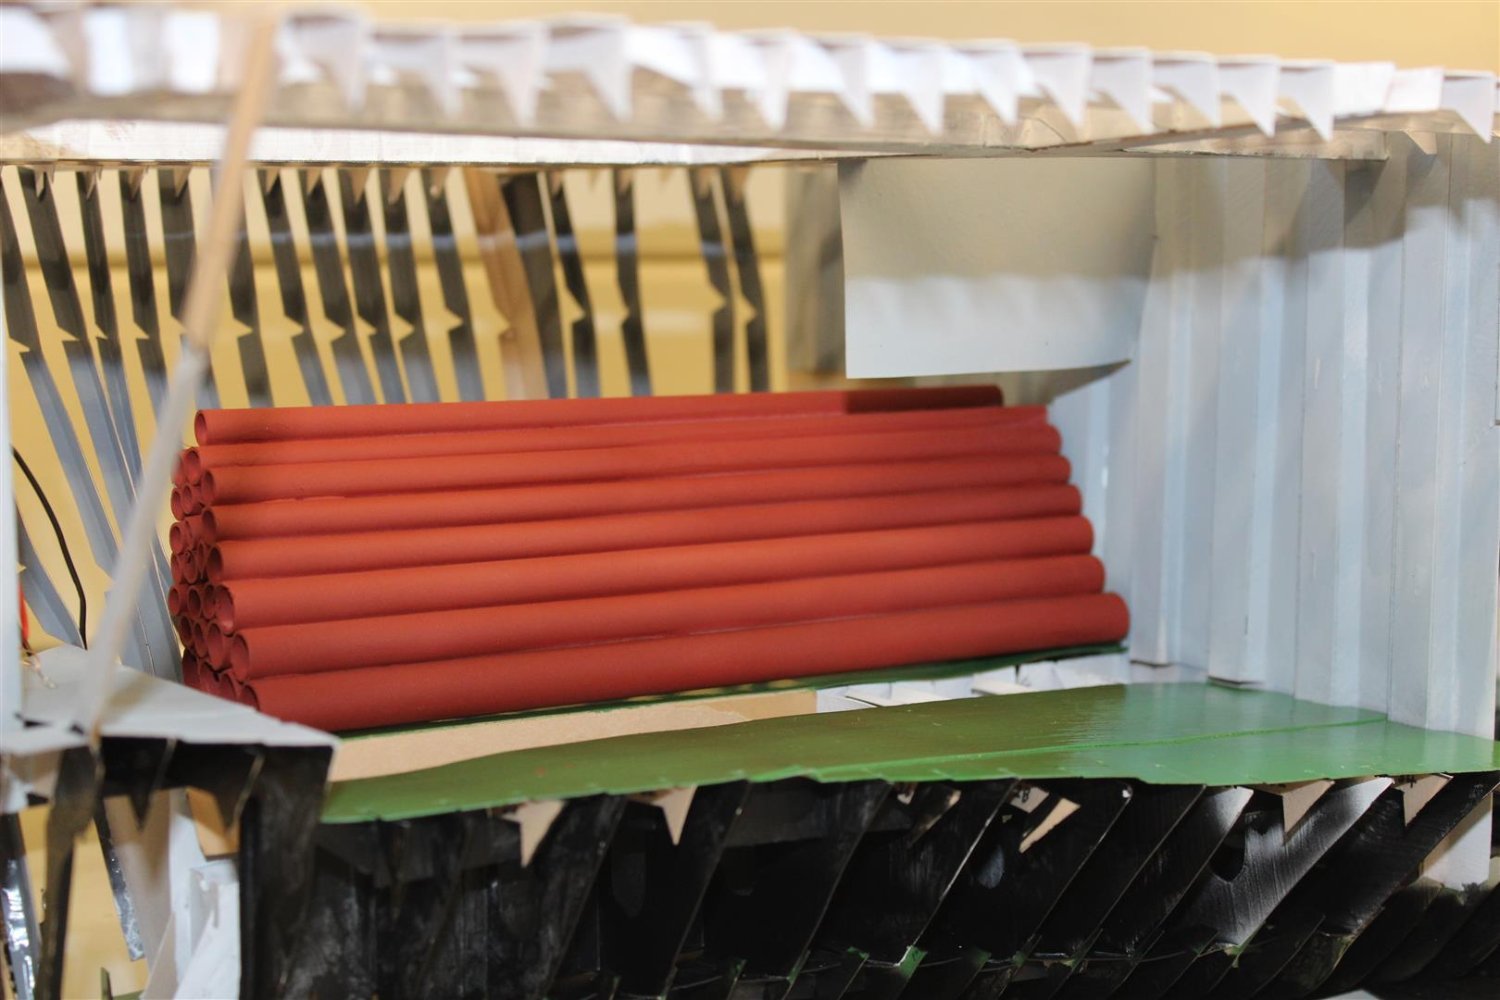
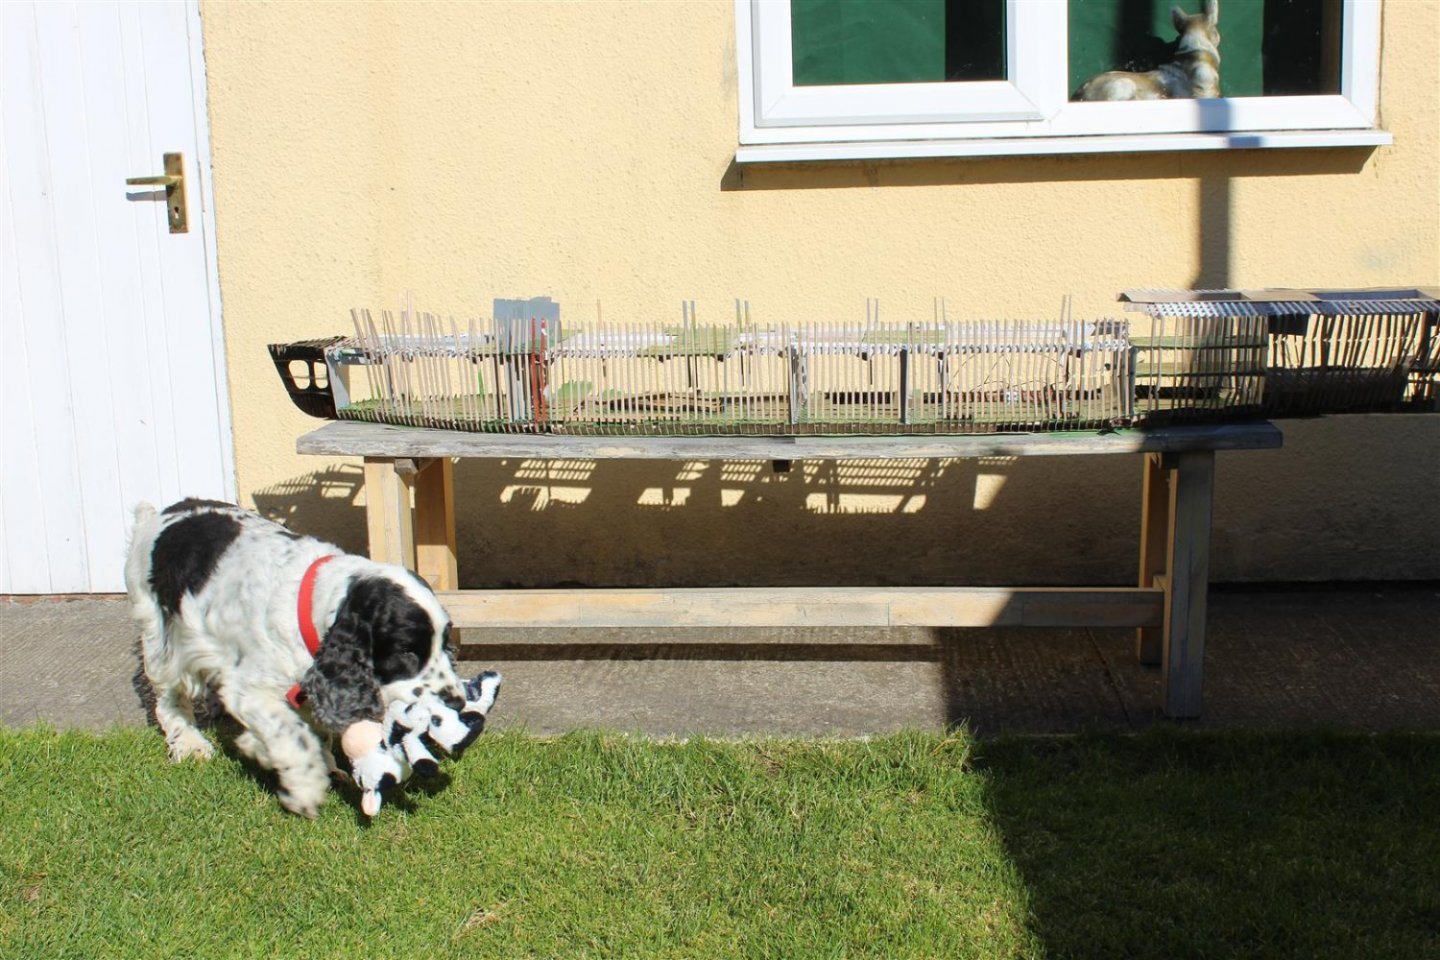
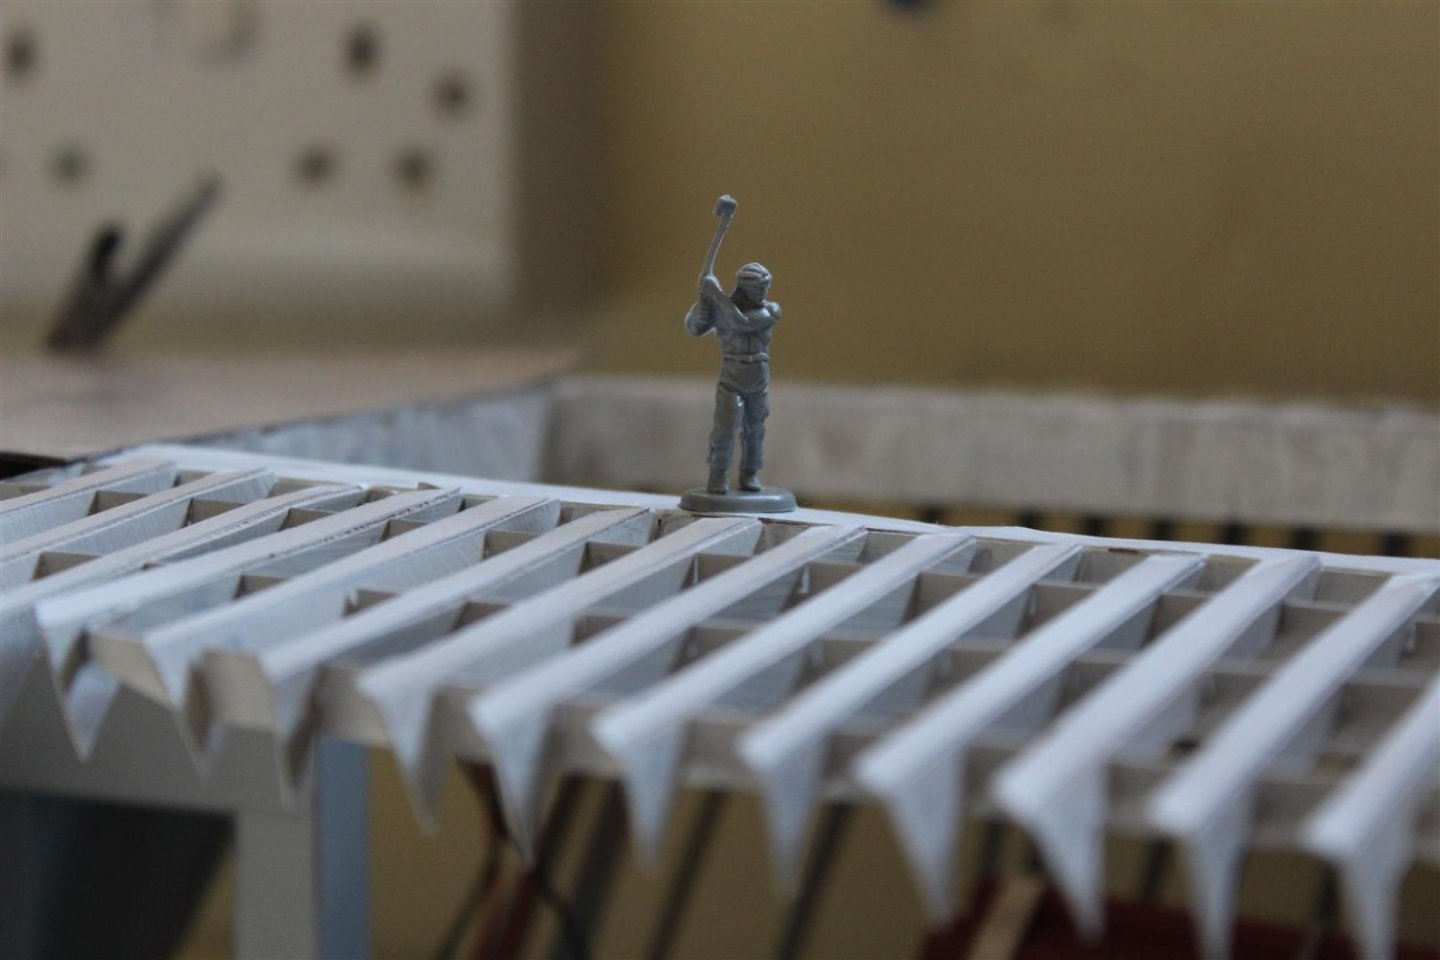
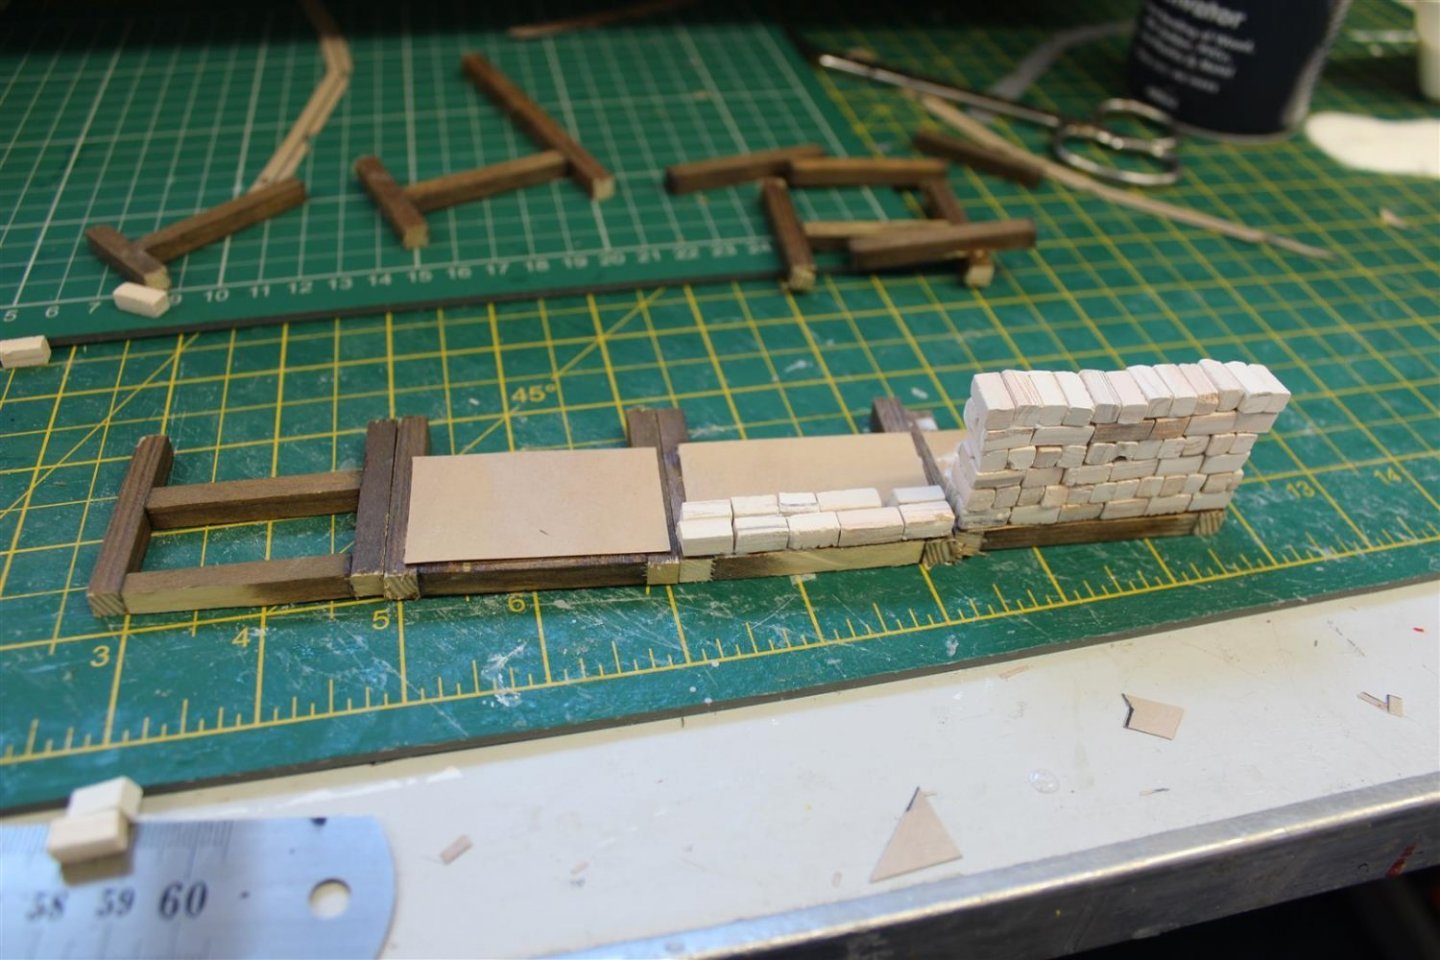
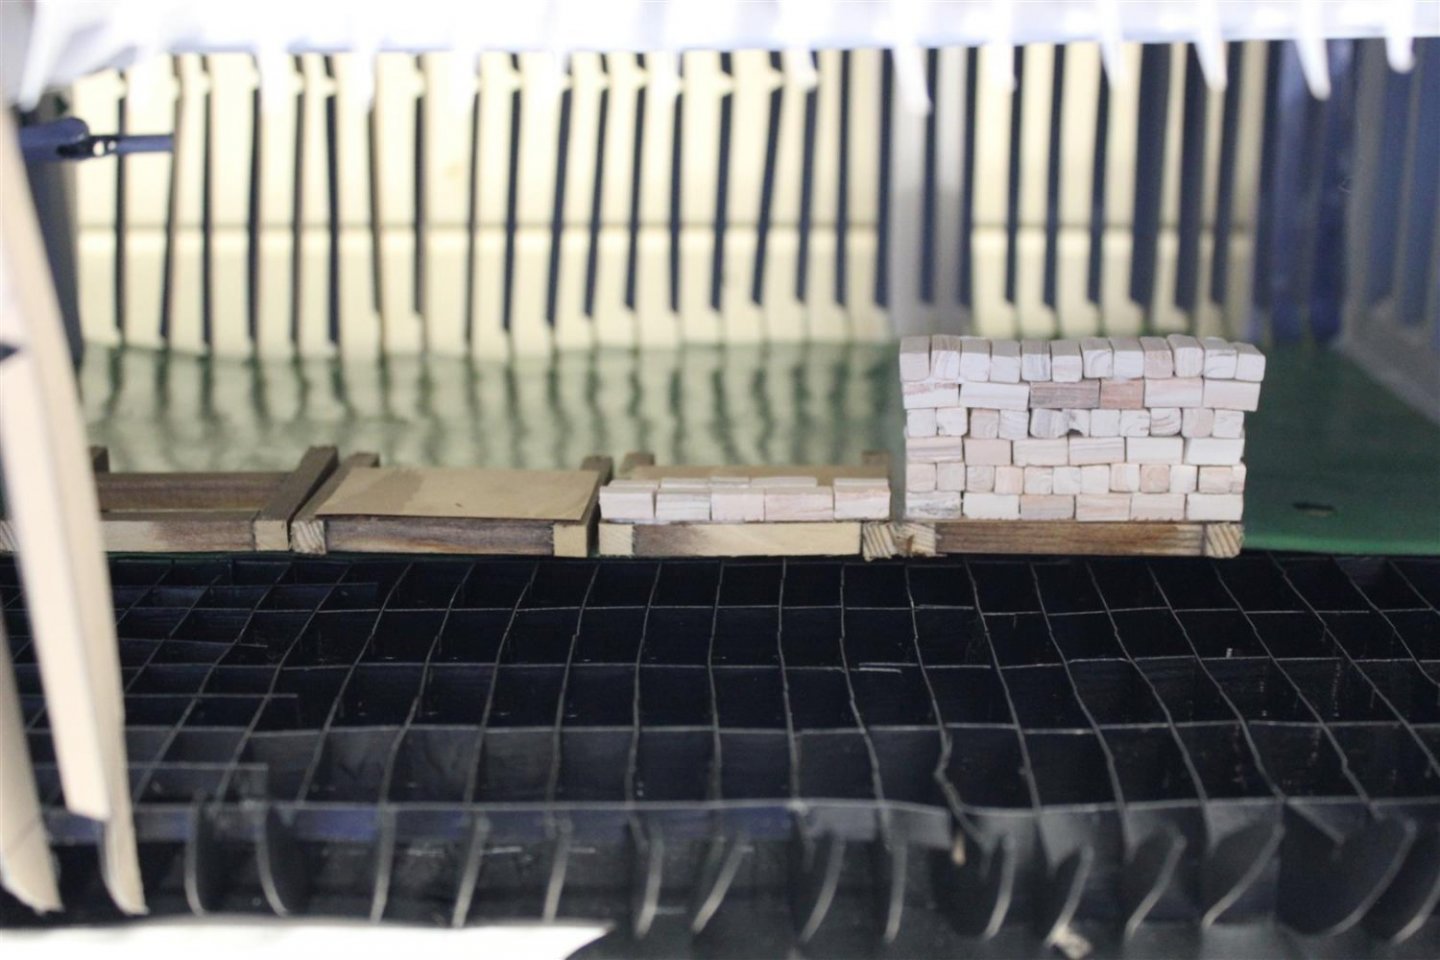
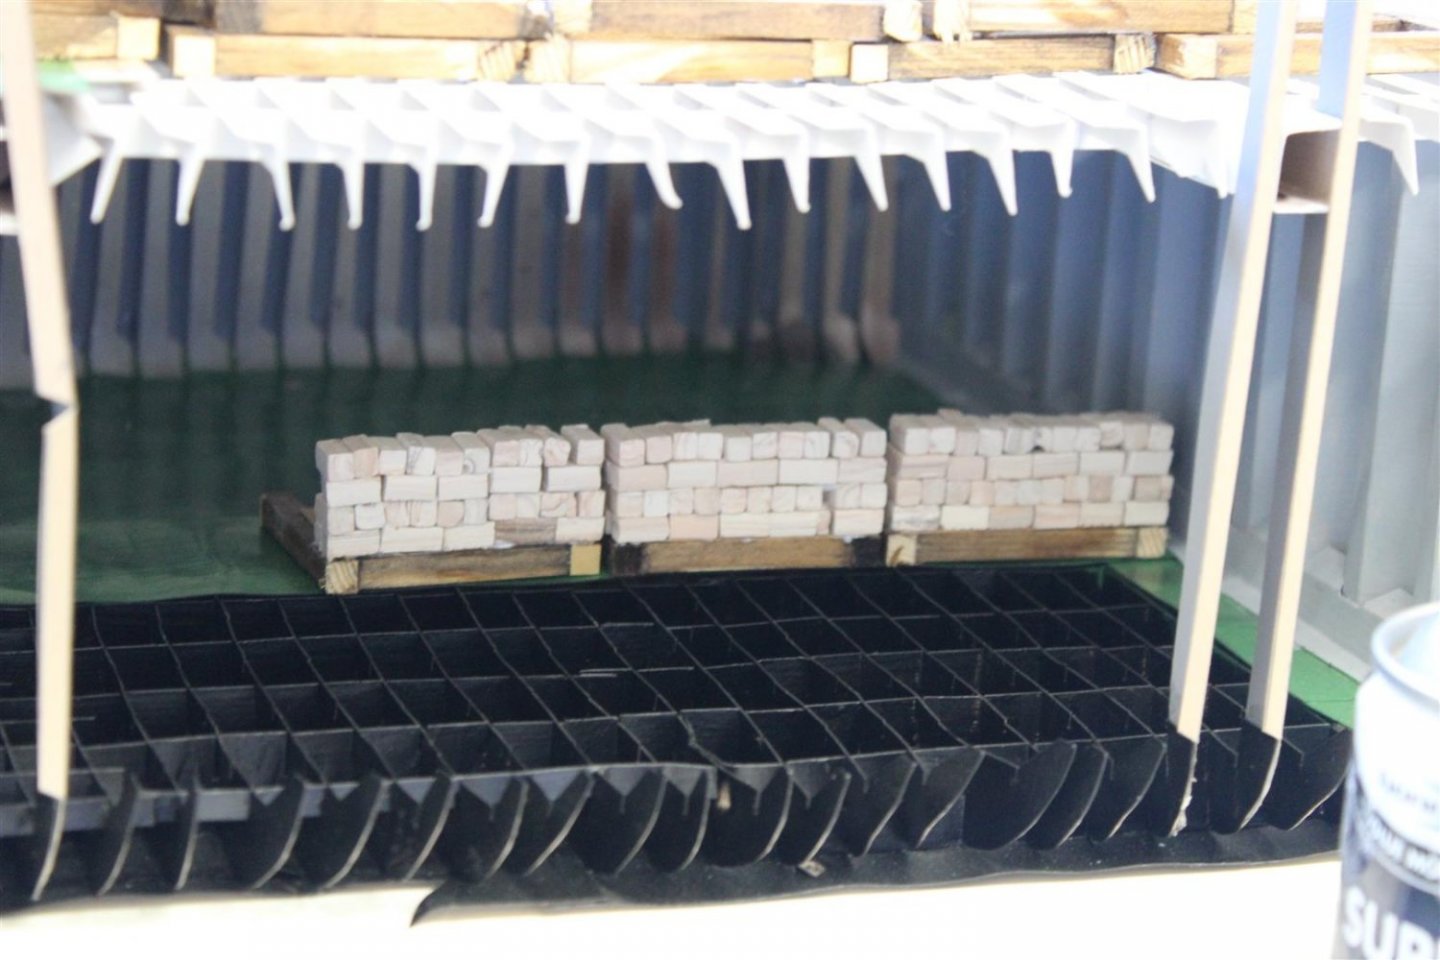
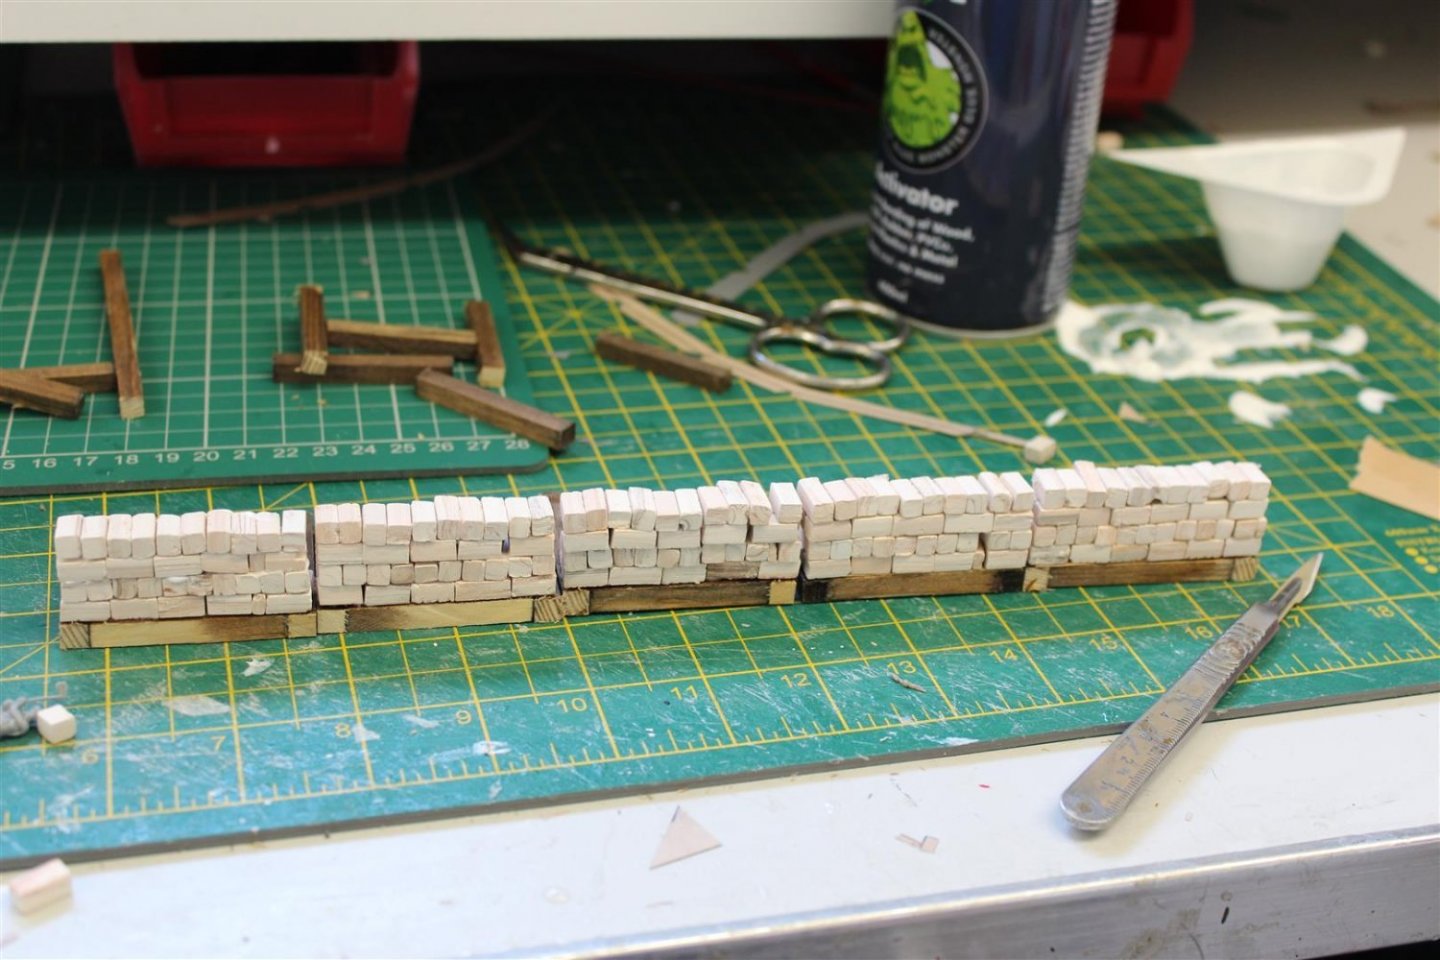
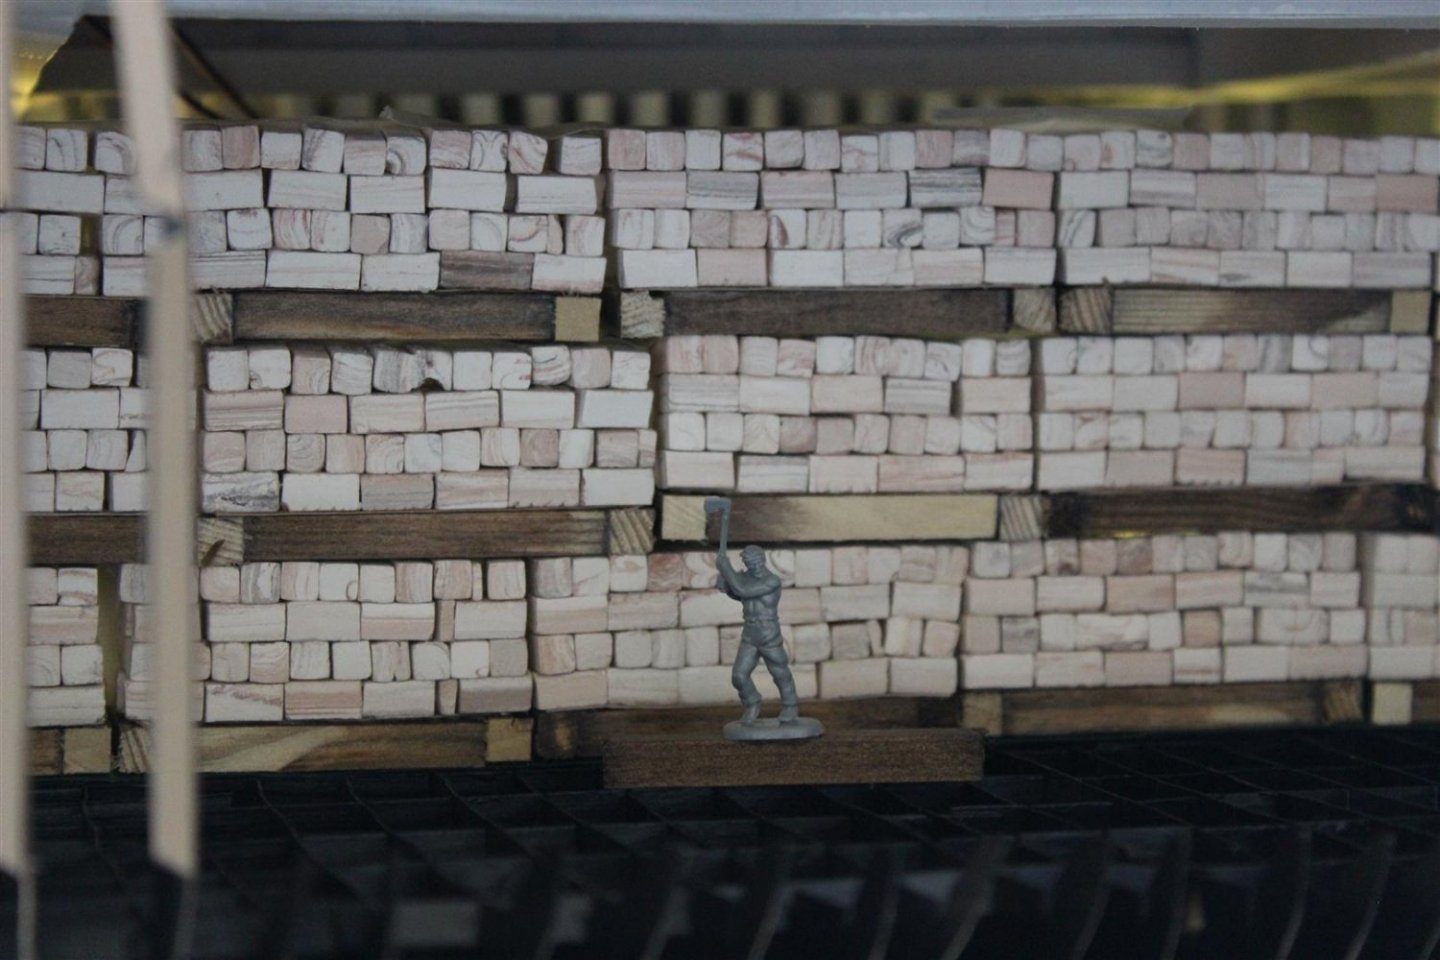
good evening everyone, thank you for comments and likes day 69 illusions continue and reality check time 1/70 thats what im building, but only today did it sink in how big these vessels were, i now appreciate why model builders put figures into builds please meet Wilber, you will be seeing a lot more of him (Wilber is from the HMS Victory crew and at 1/72 scale) on the upper deck by the after cargo hold Engine room tween deck level today we have a brick loadout, these and the pipes may never get used, but has given me a welcome break from paper cutting everyday for the last 9 weeks using bricks from the Ardes Ars kits and the wooden Balcony from a 1/12 dolls house i have attempted to make a loadout of bricks these are not finished and need banding etc the top of the brick piles will not bee seen as a wooden loadout will sit of the hatch cover pontoons this is all very much work in progress comments are more than welcome


- 201 replies
-
- 12
-
-
- SD 14
- Marcle Models
- (and 1 more)
-
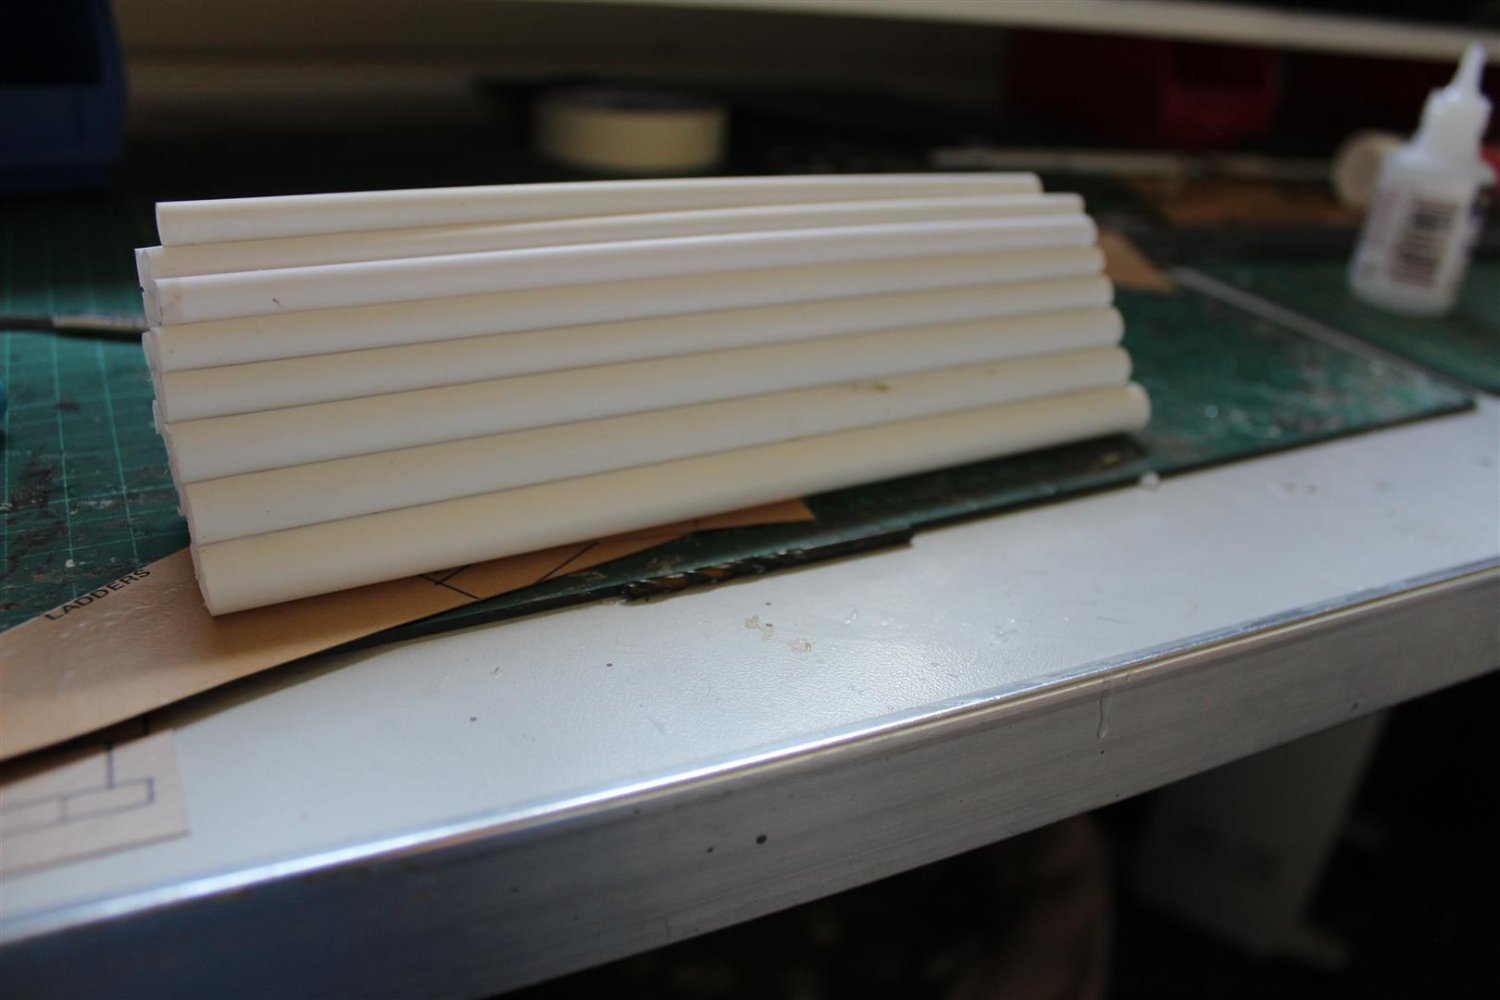
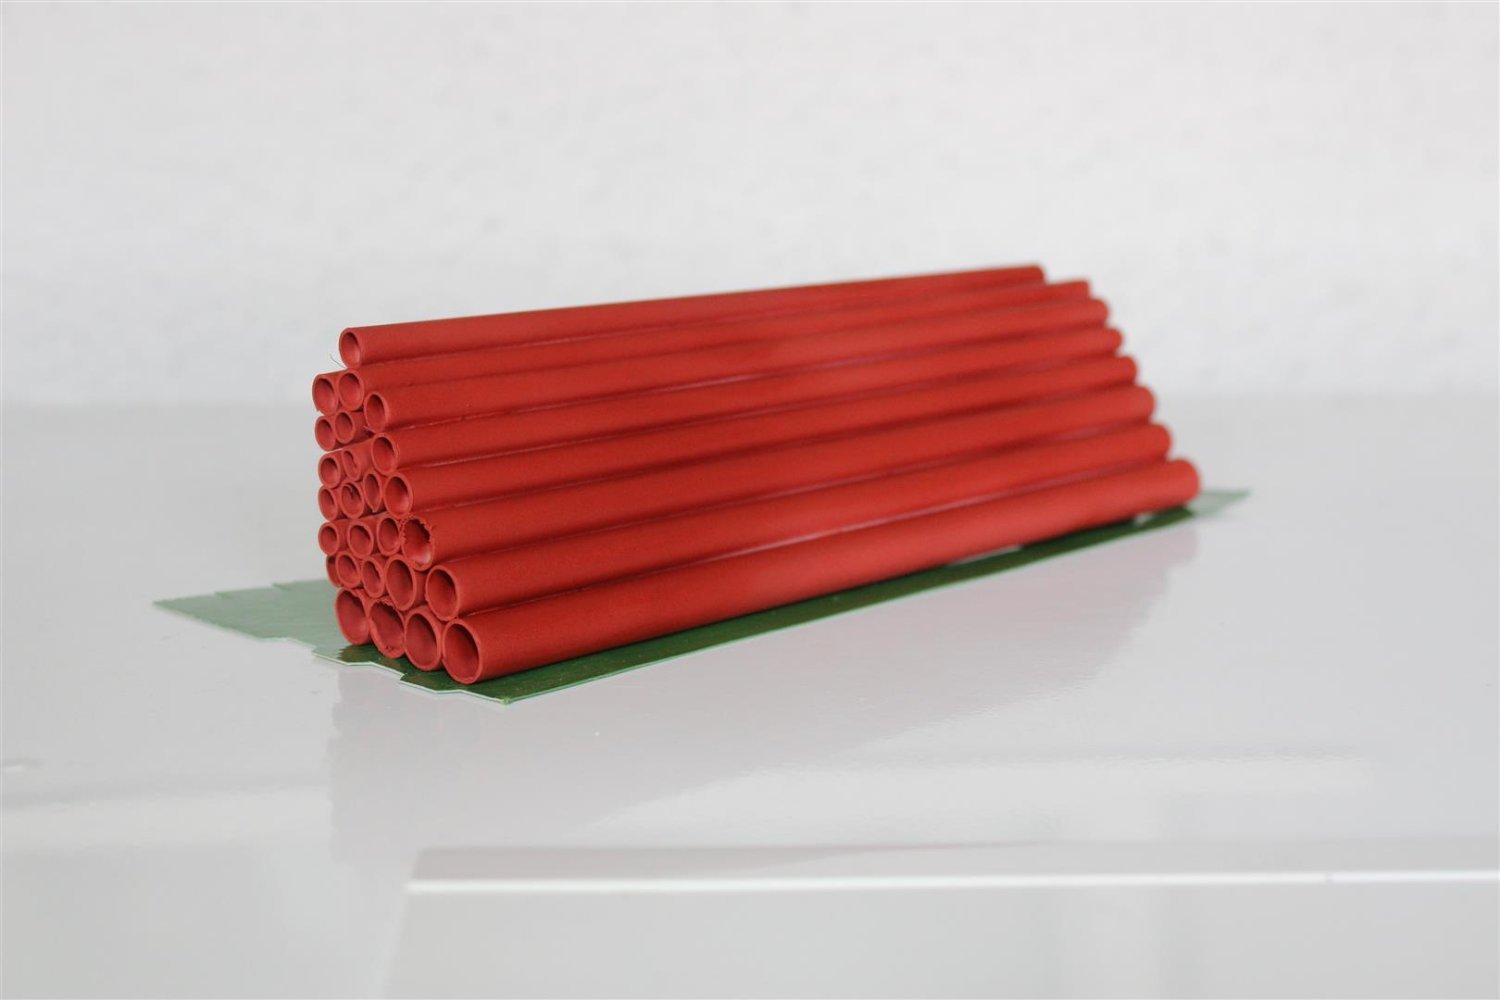
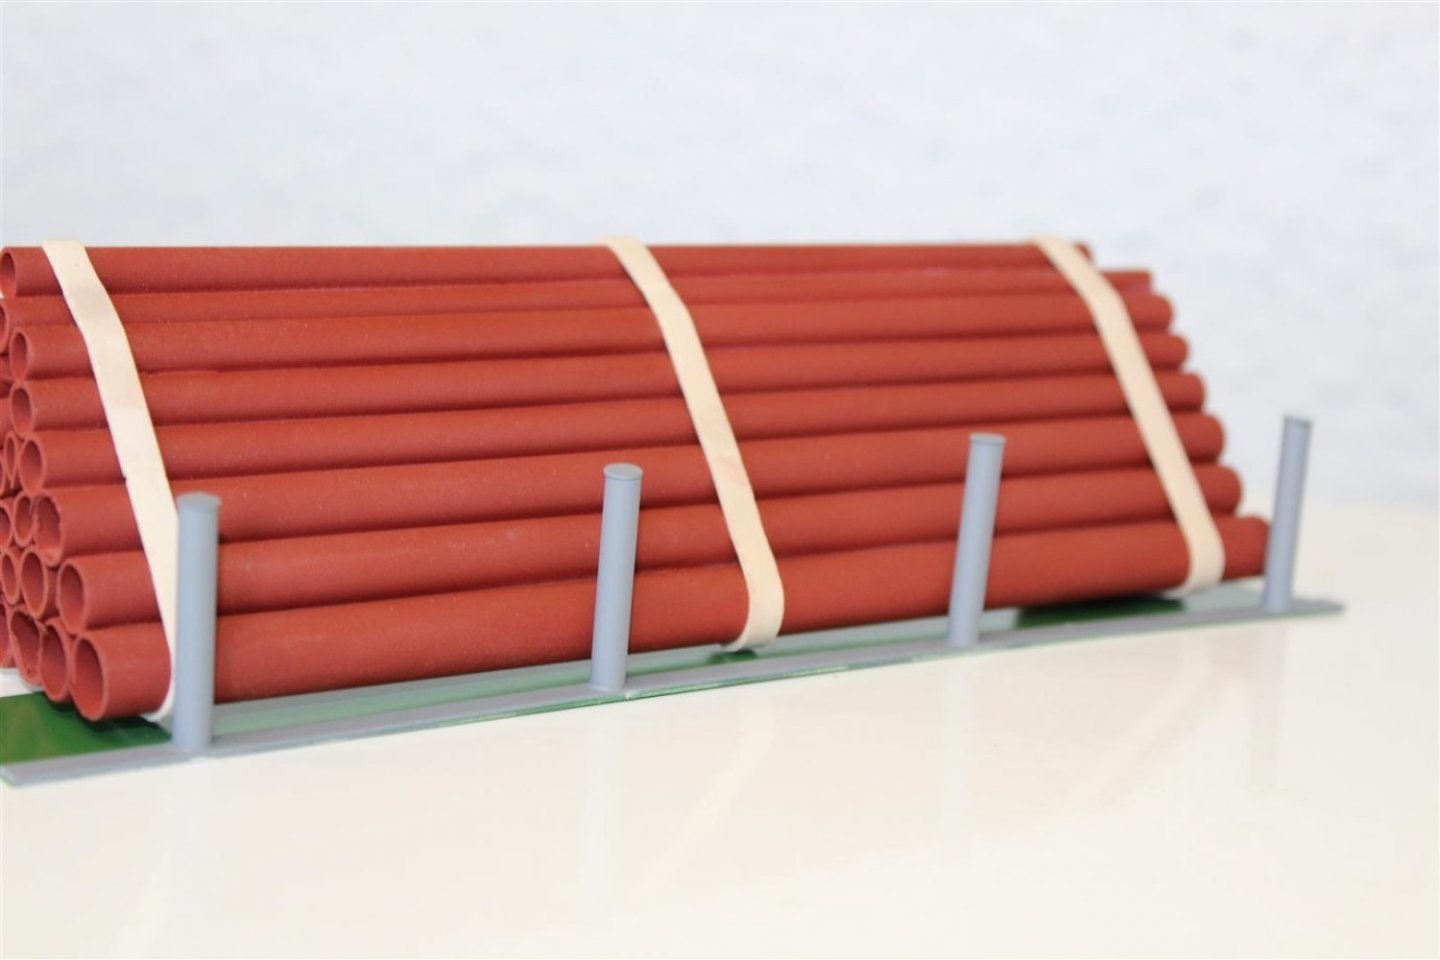
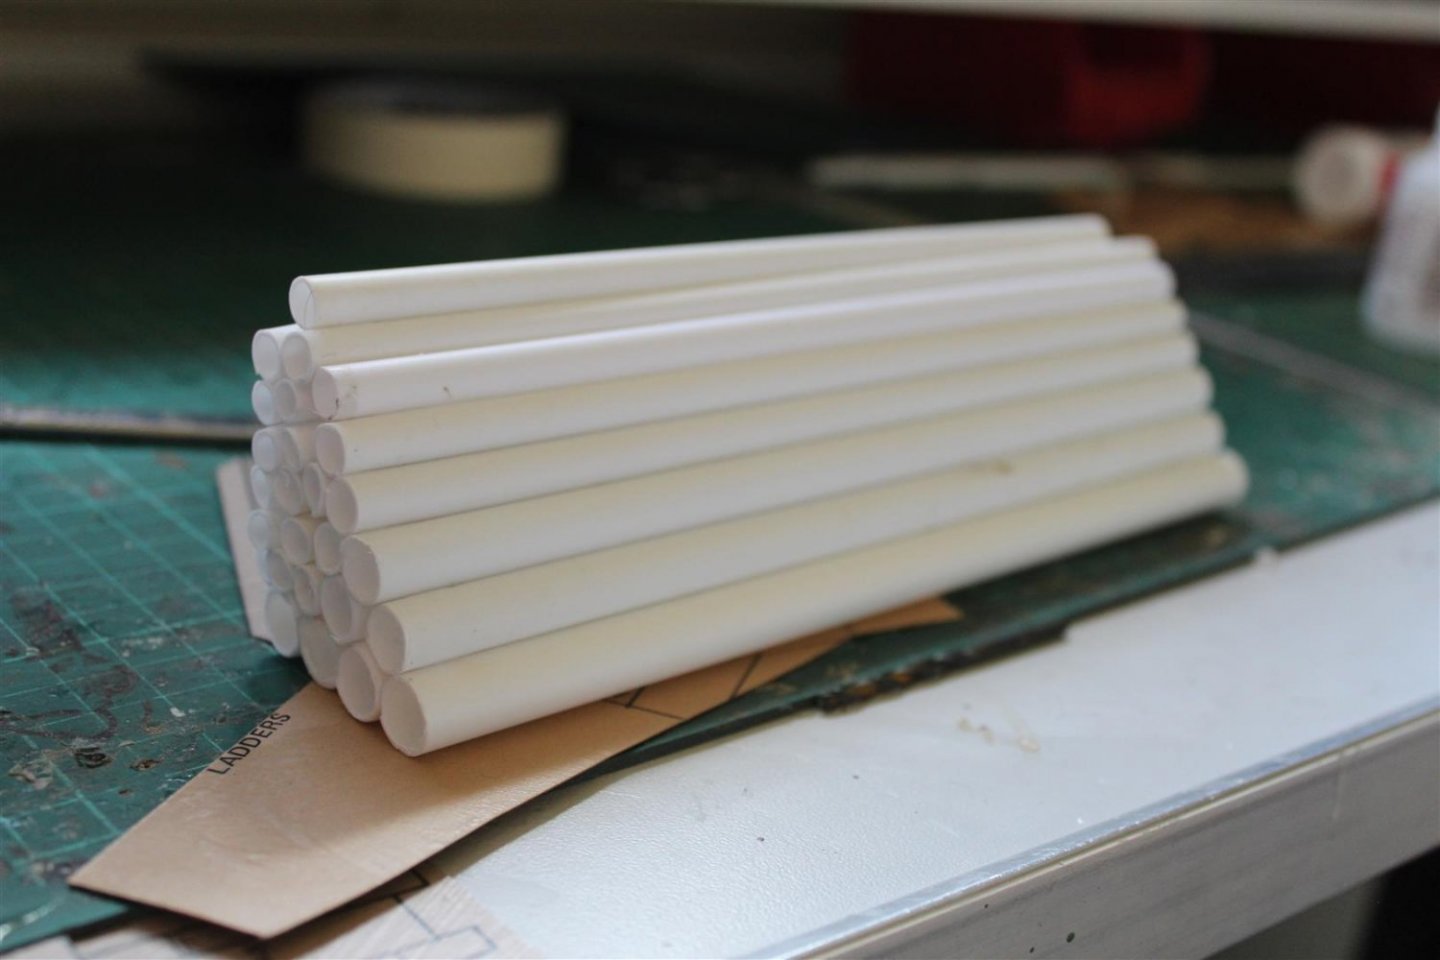
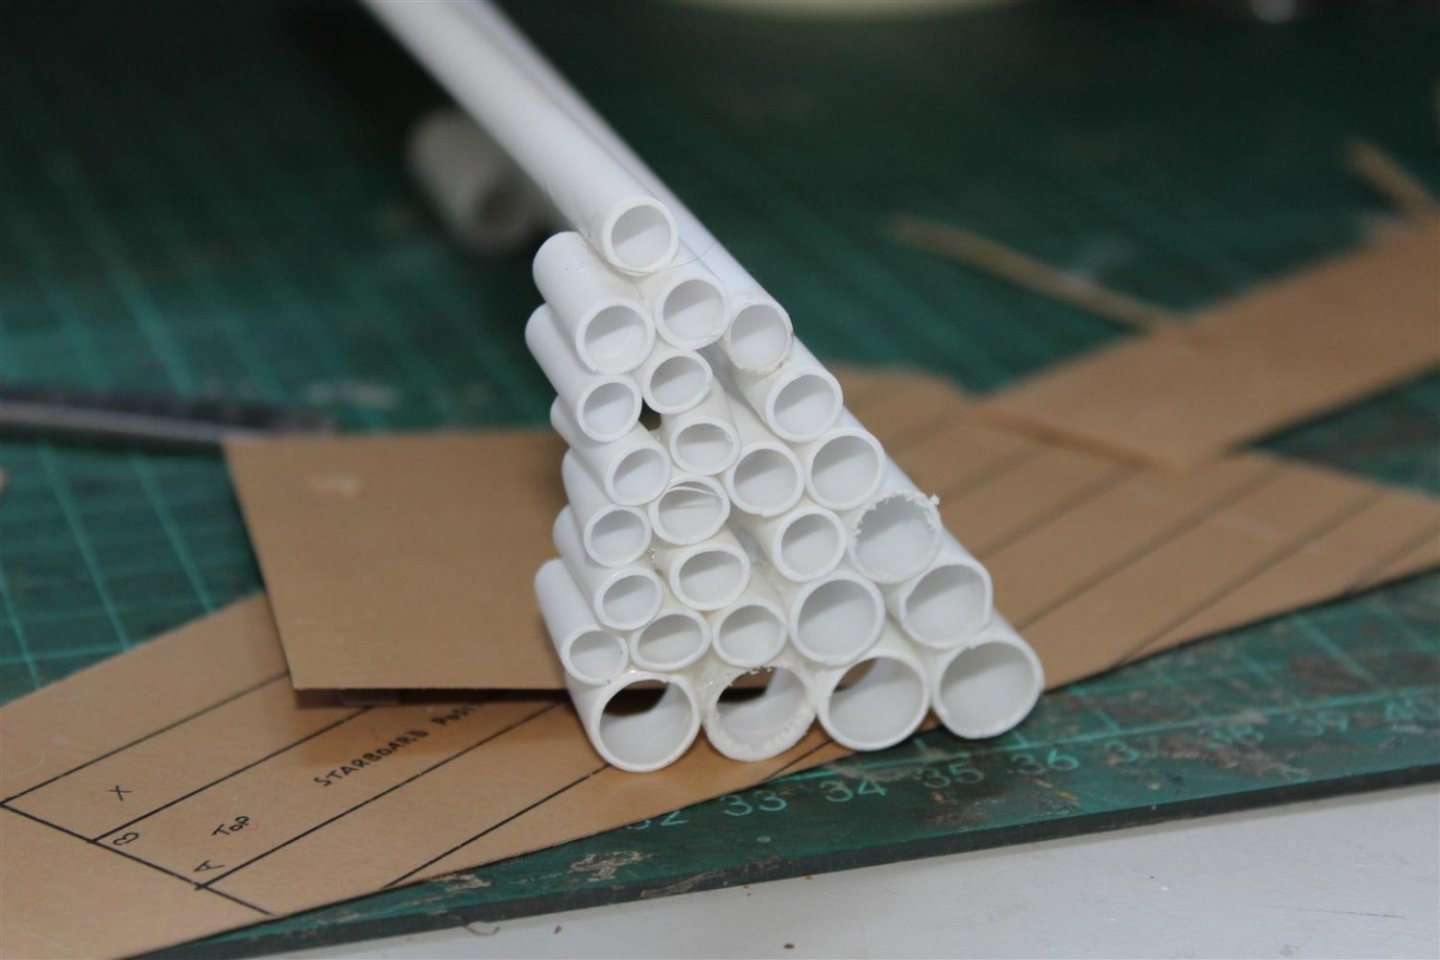
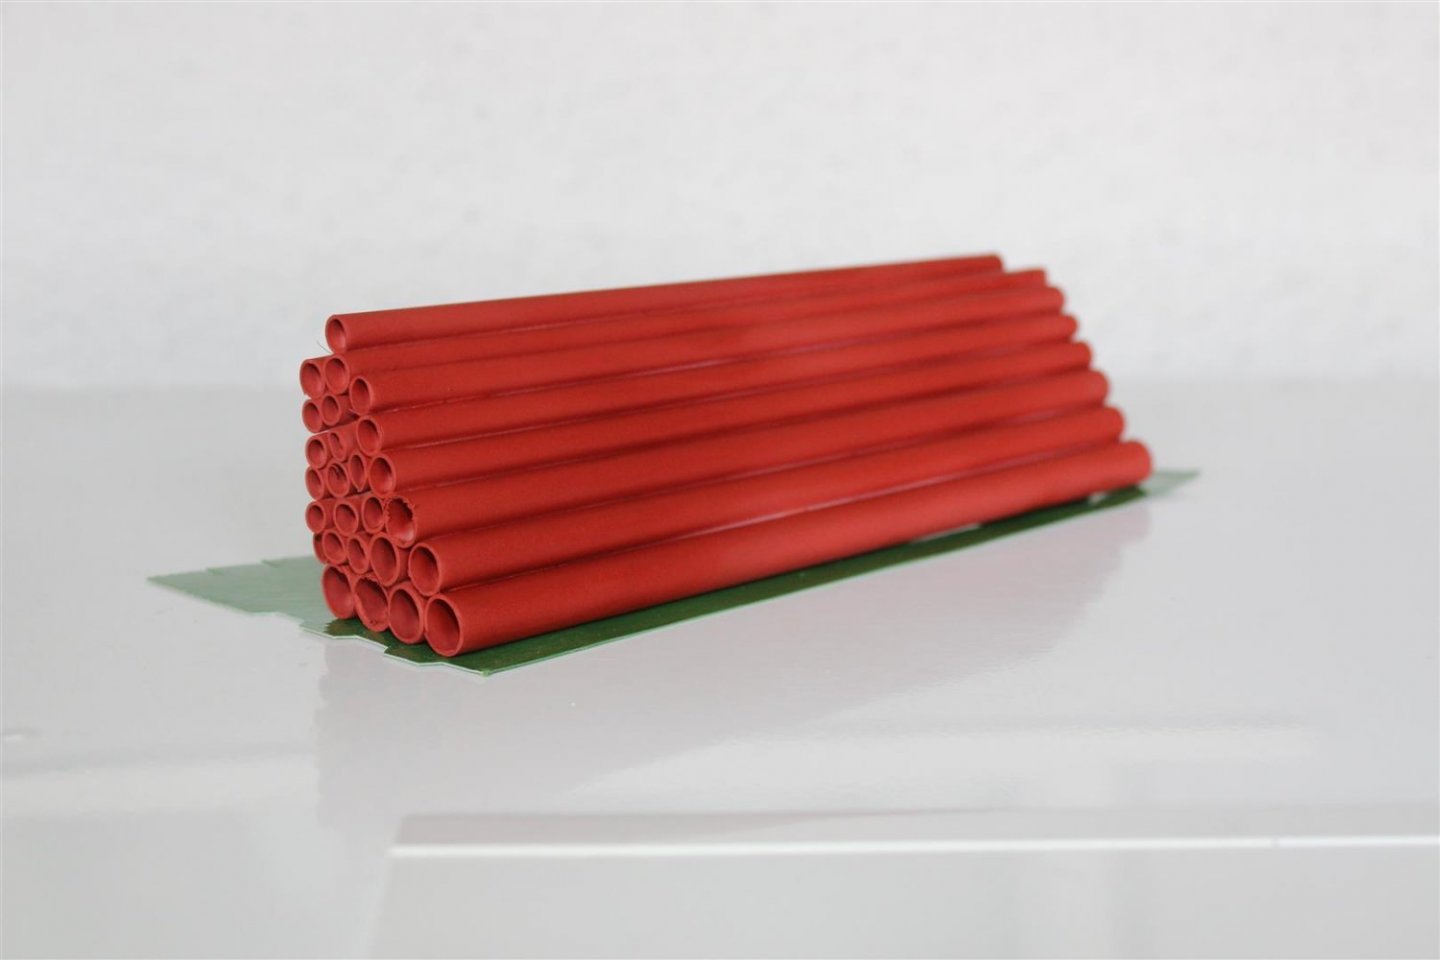
good evening everyone thank you for comments and likes day 68 the illusion continues the pipe loadout continues and I now have something that resembles a image i had in me mind so now the frames for the port side can go in straps are elastic bands styrene rods with the glass from the Amerigo Vespucci port holes as post caps

- 201 replies
-
- 11
-
-
- SD 14
- Marcle Models
- (and 1 more)
-
Thank you Ziggy
-
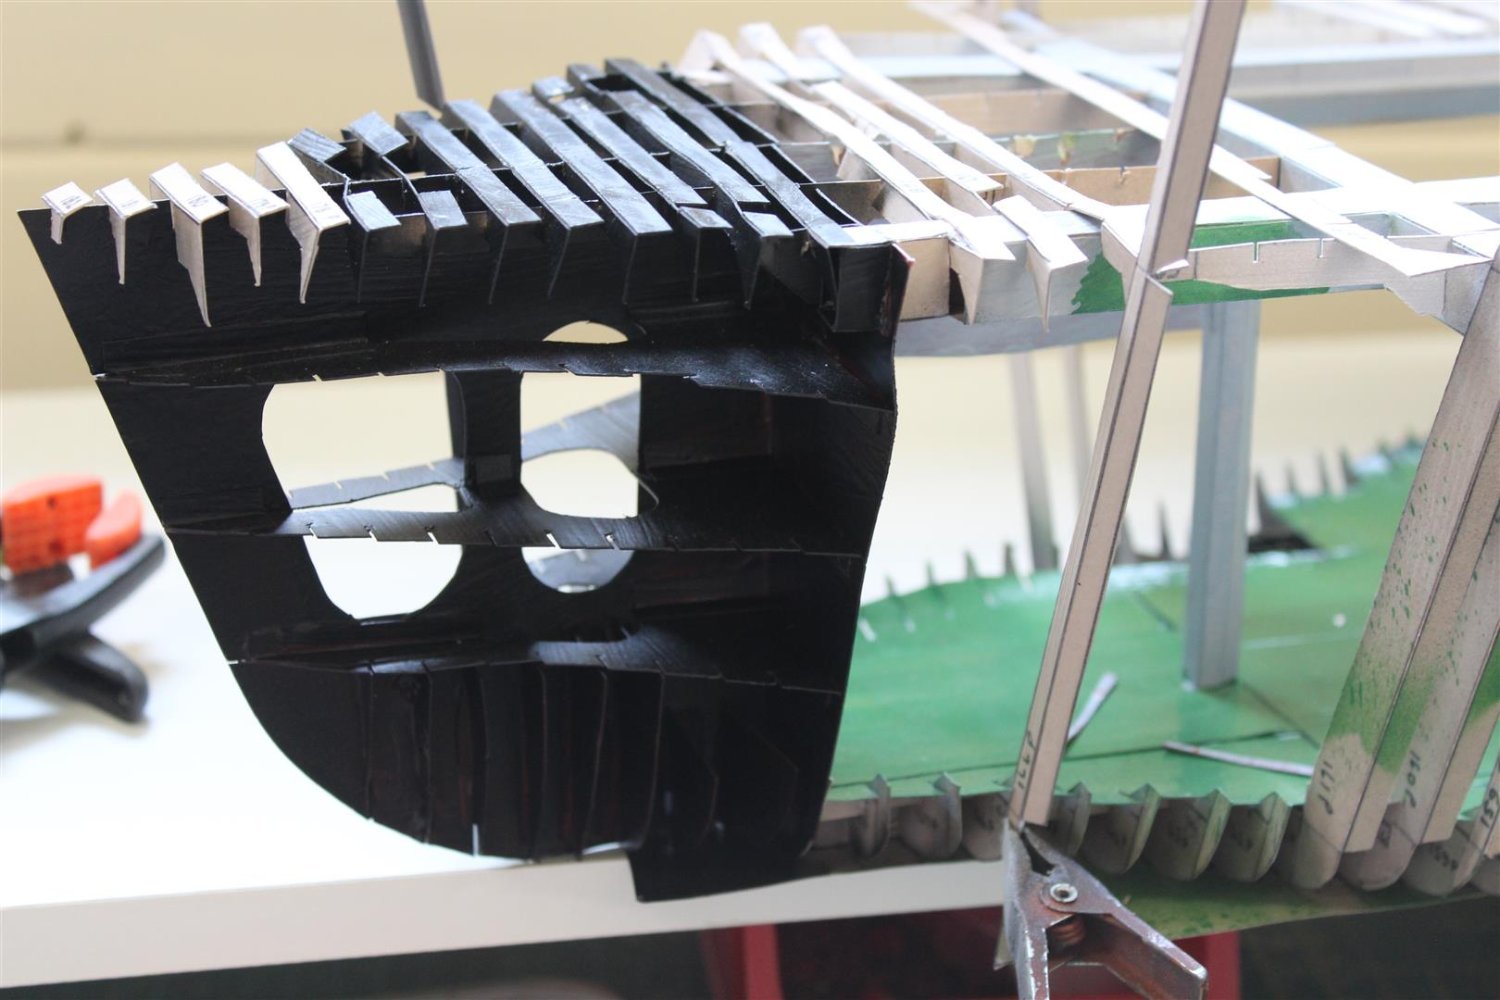
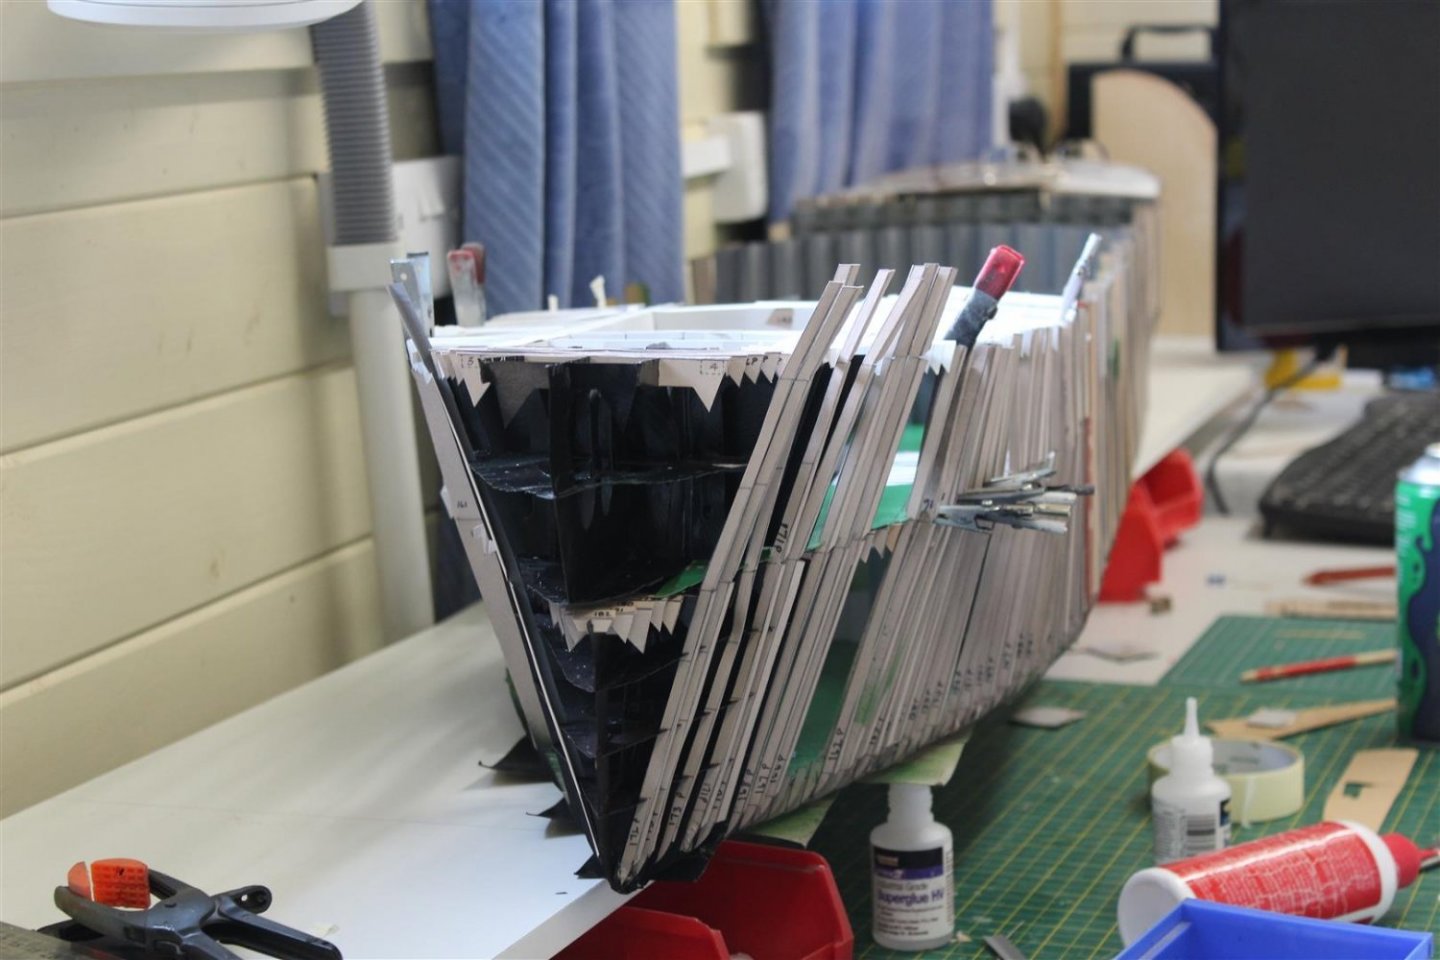
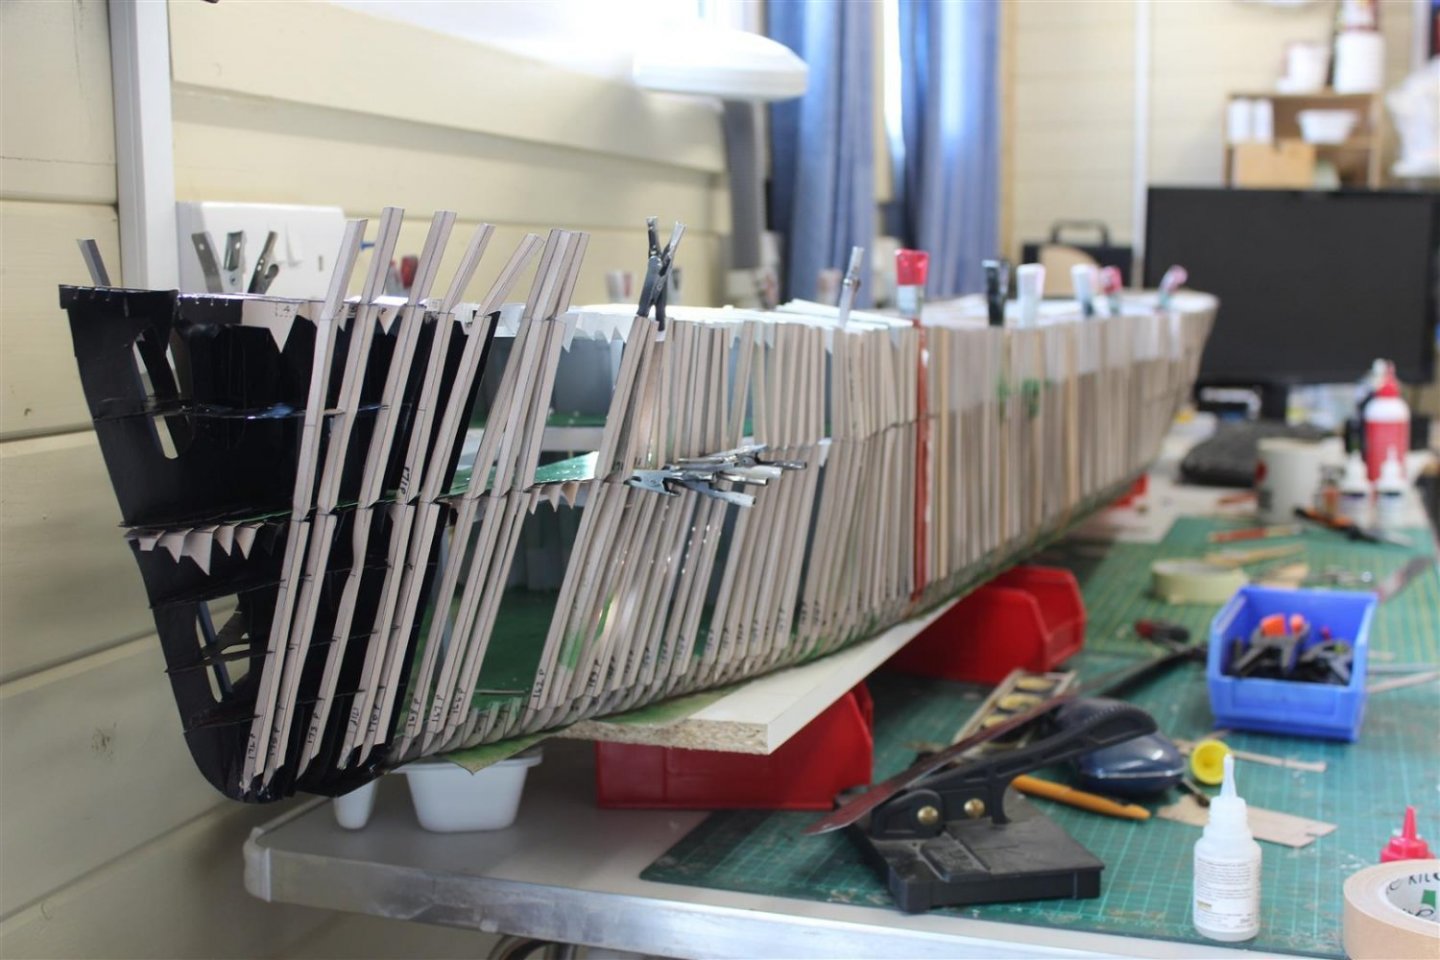
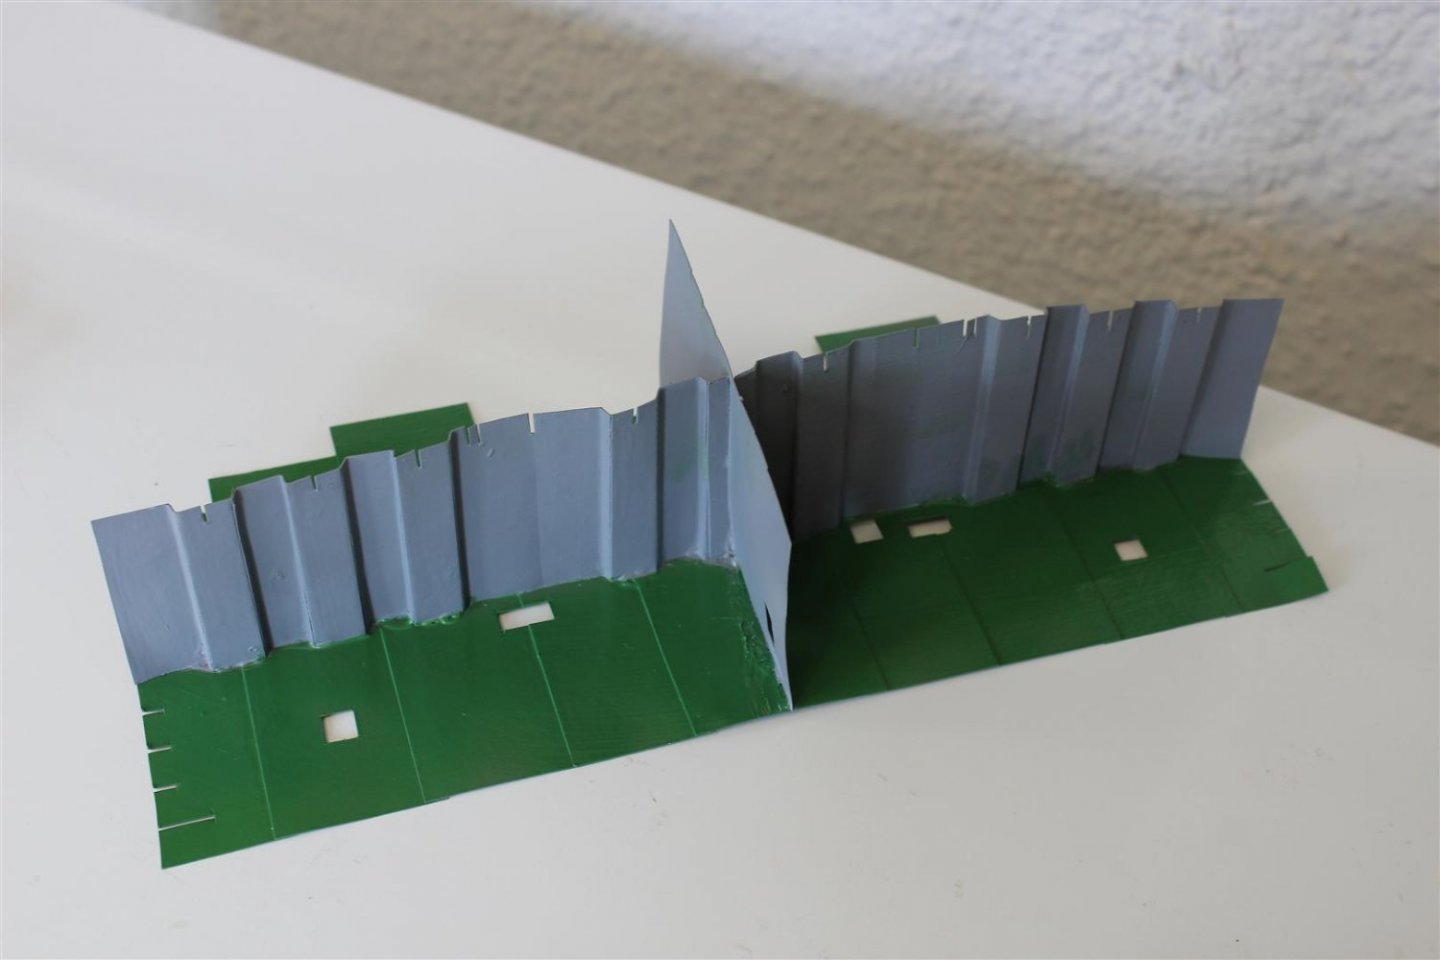
good evening everyone thank you for comments and likes day 67 its just an illusion having completed the after and midships section web frames (port) i need to start closing in the stbd side, i am not sure how to do this, in the cutaway format however before that CARGO last night i decided she would basically be a builders merchant carrier, and carry items of that nature, so to keep the weight down aft i went for pipes leaving the shaft tunnel free, as i want that to be seen this is the best i can think of for now
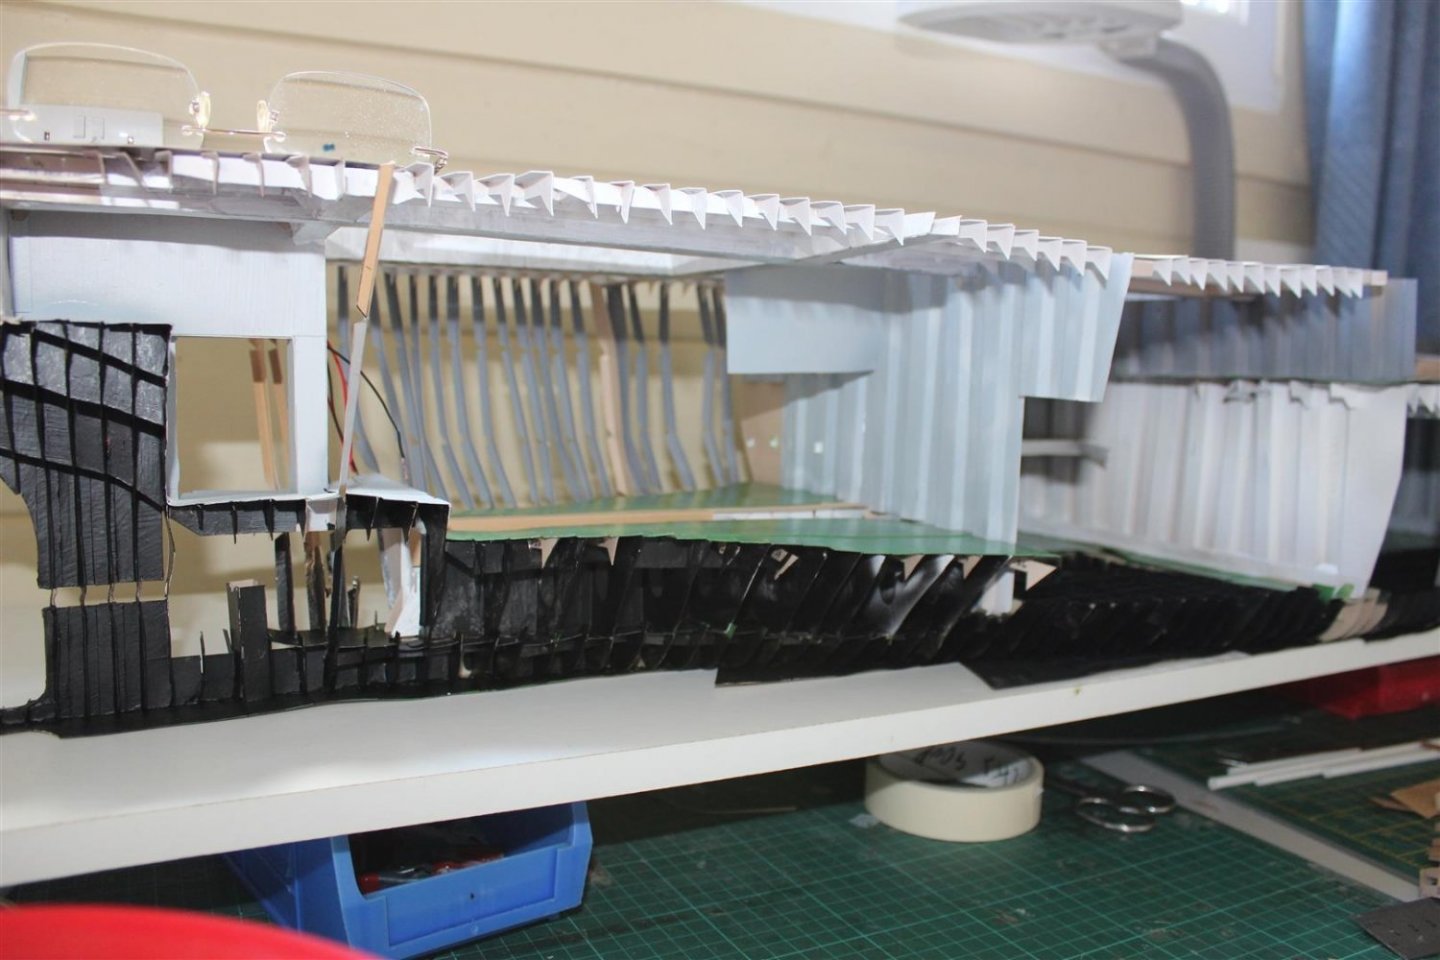


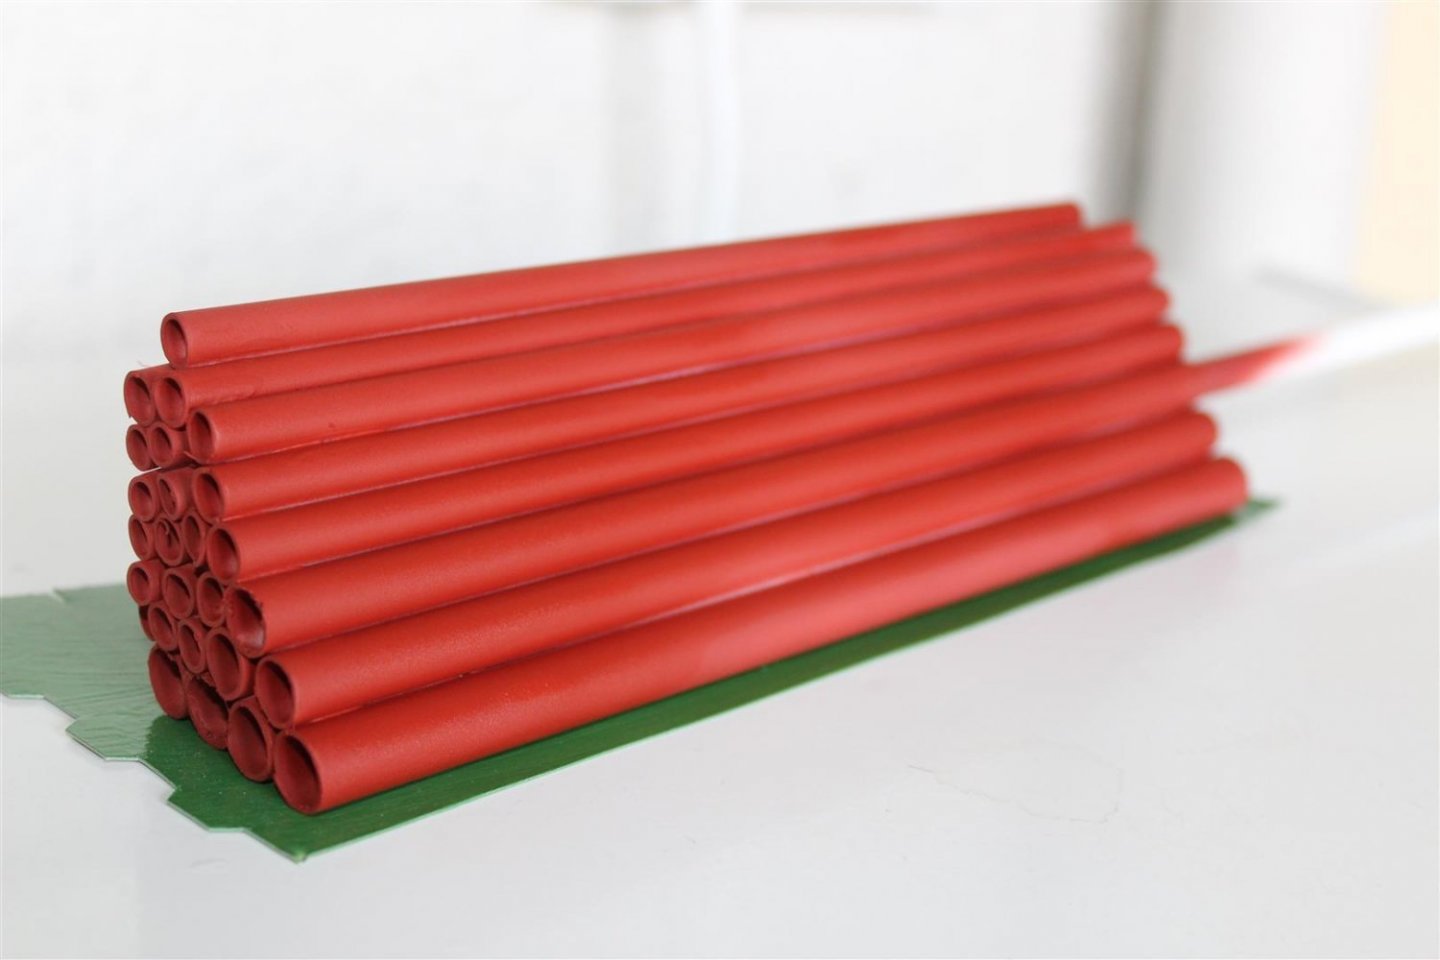

- 201 replies
-
- 10
-
-
- SD 14
- Marcle Models
- (and 1 more)
-
i love guys who work in 1/350 much more variety out there in that scale, but to small for me, but my preferred scales are to large for diorama's as a rule and yes it is expensive, that link i sent
-
Hasegawa 40082 IJN Submarine DEPOT Ship Heian Maru 1/350 Scale Kit for sale online | eBay
-
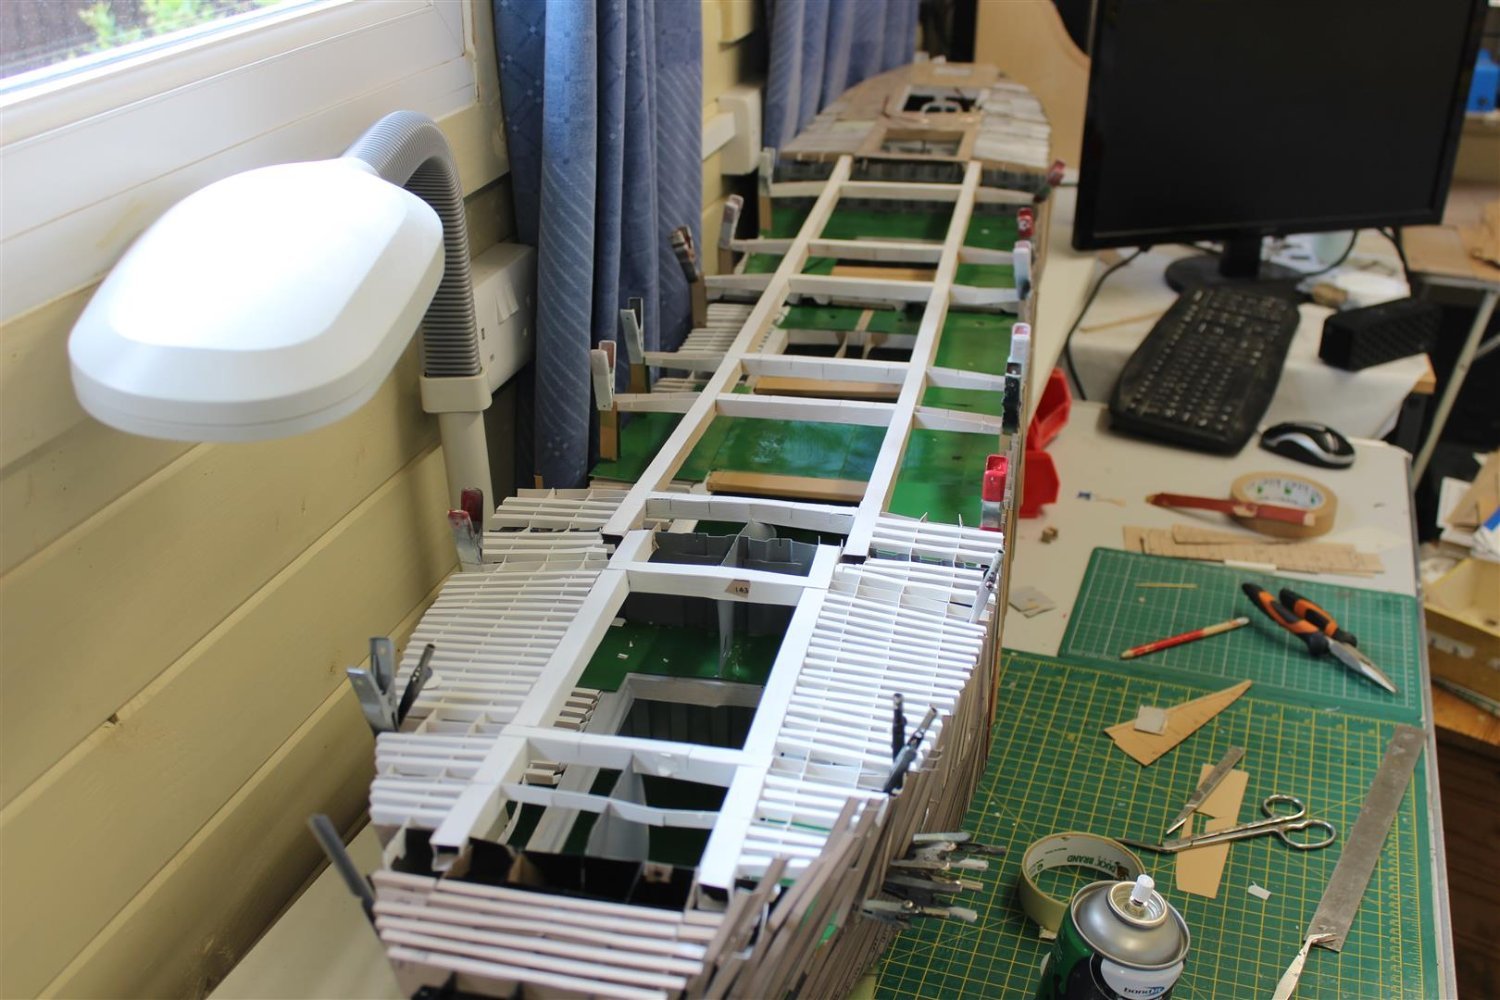
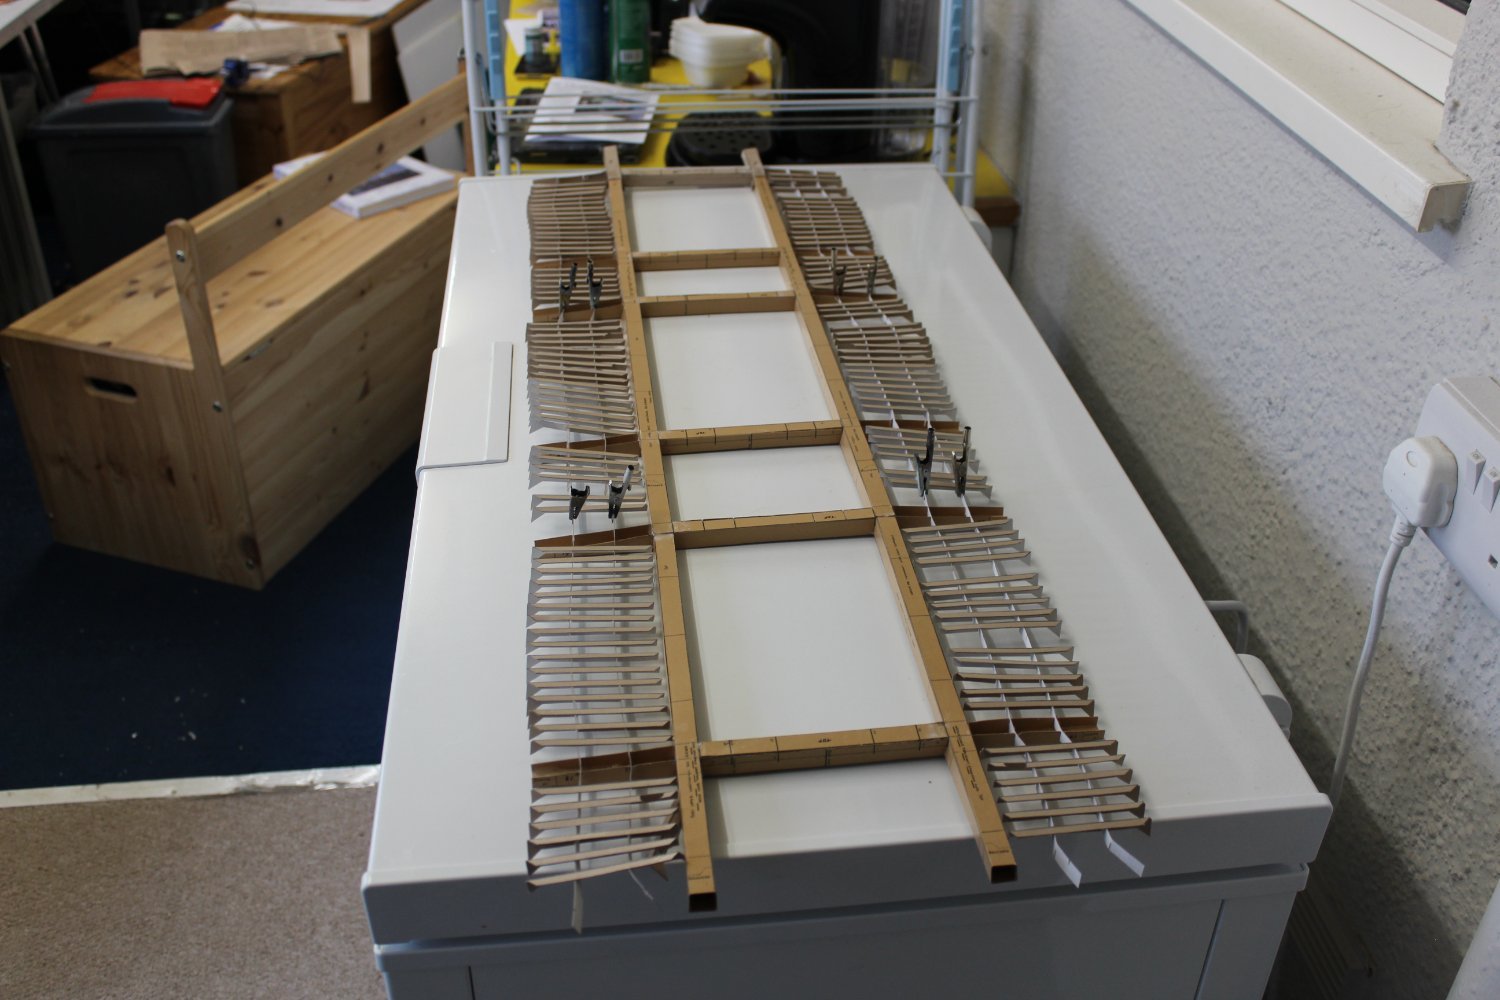
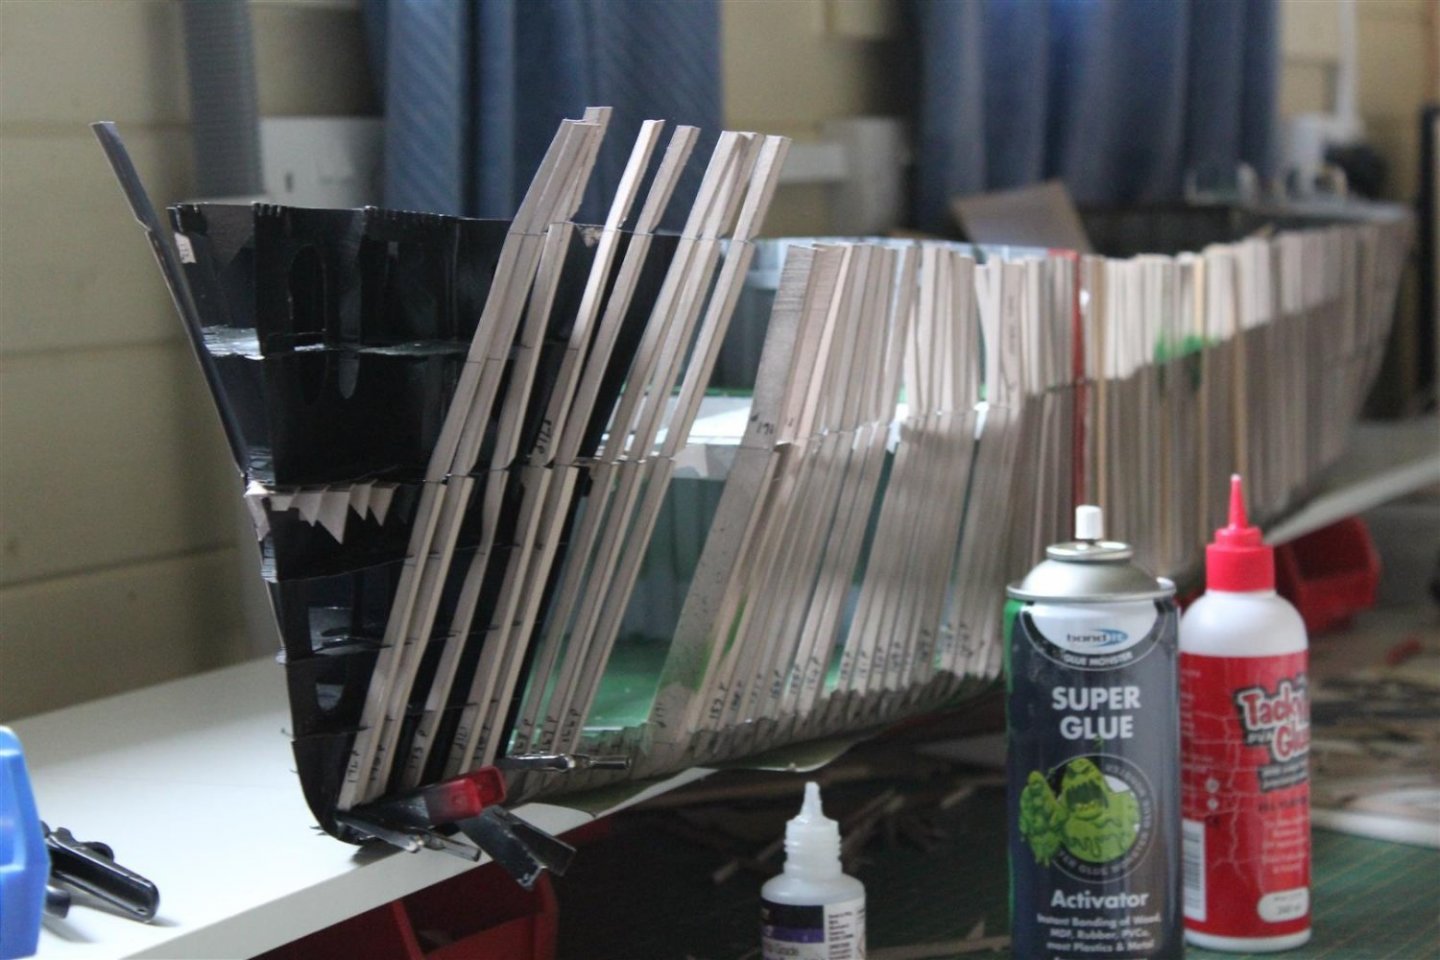
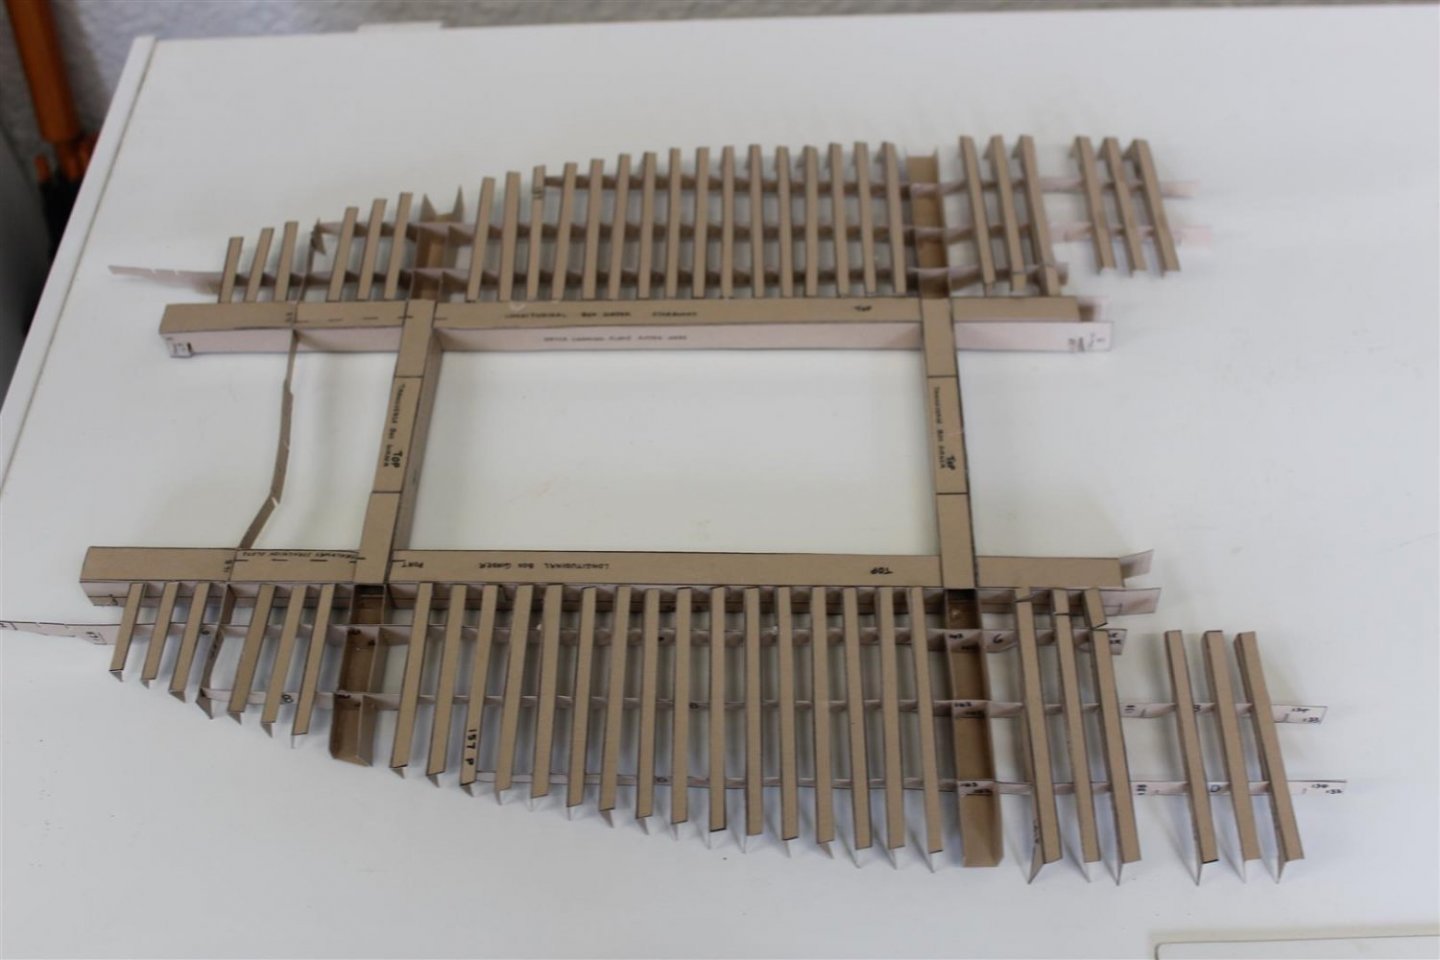
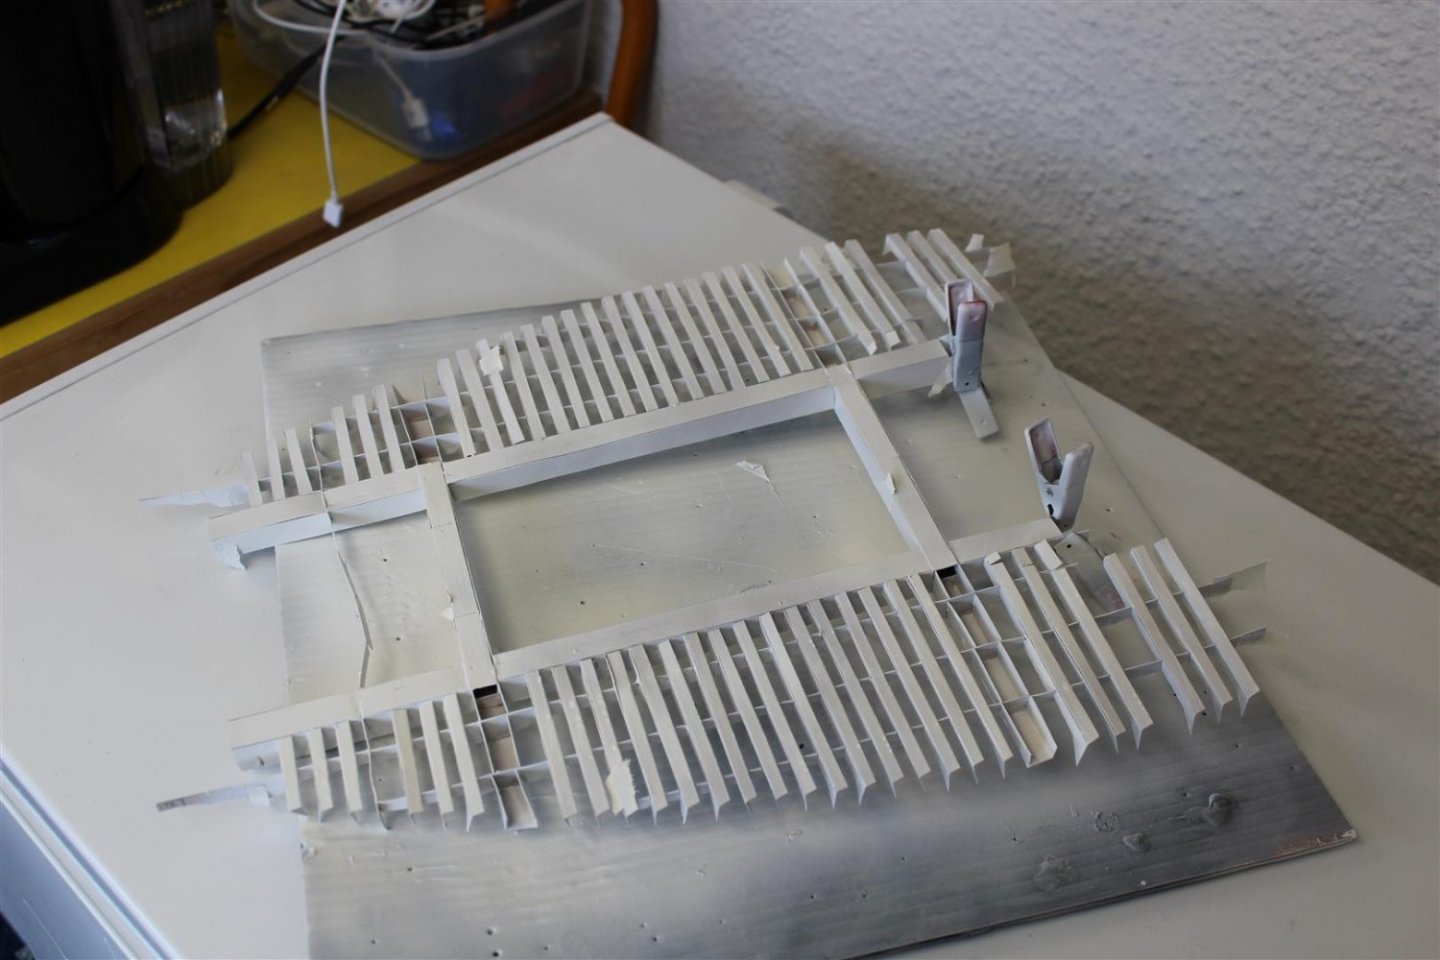
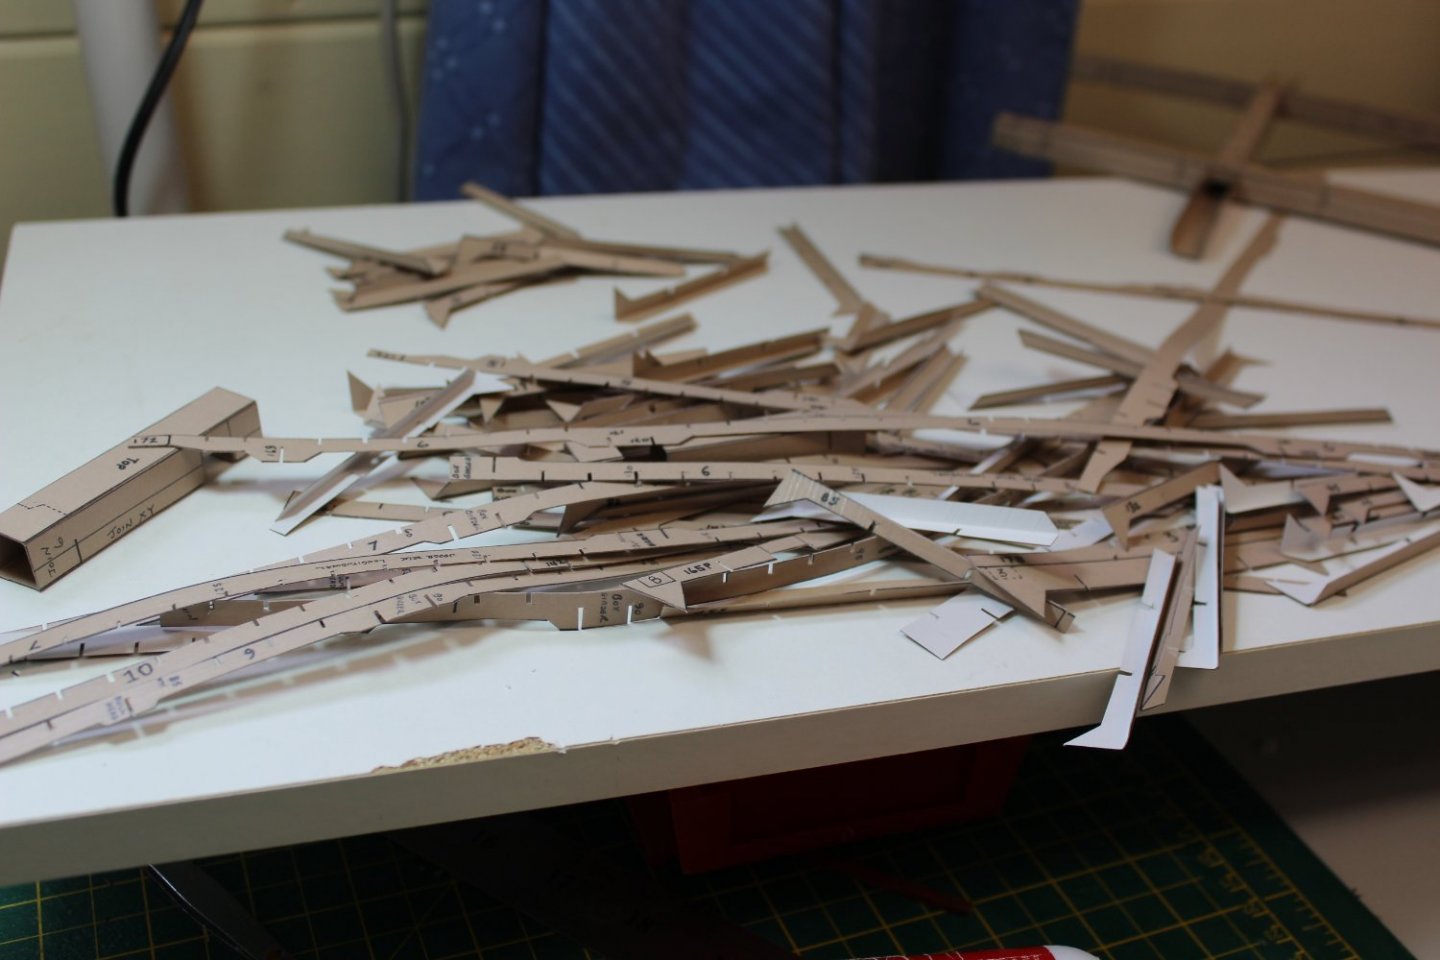
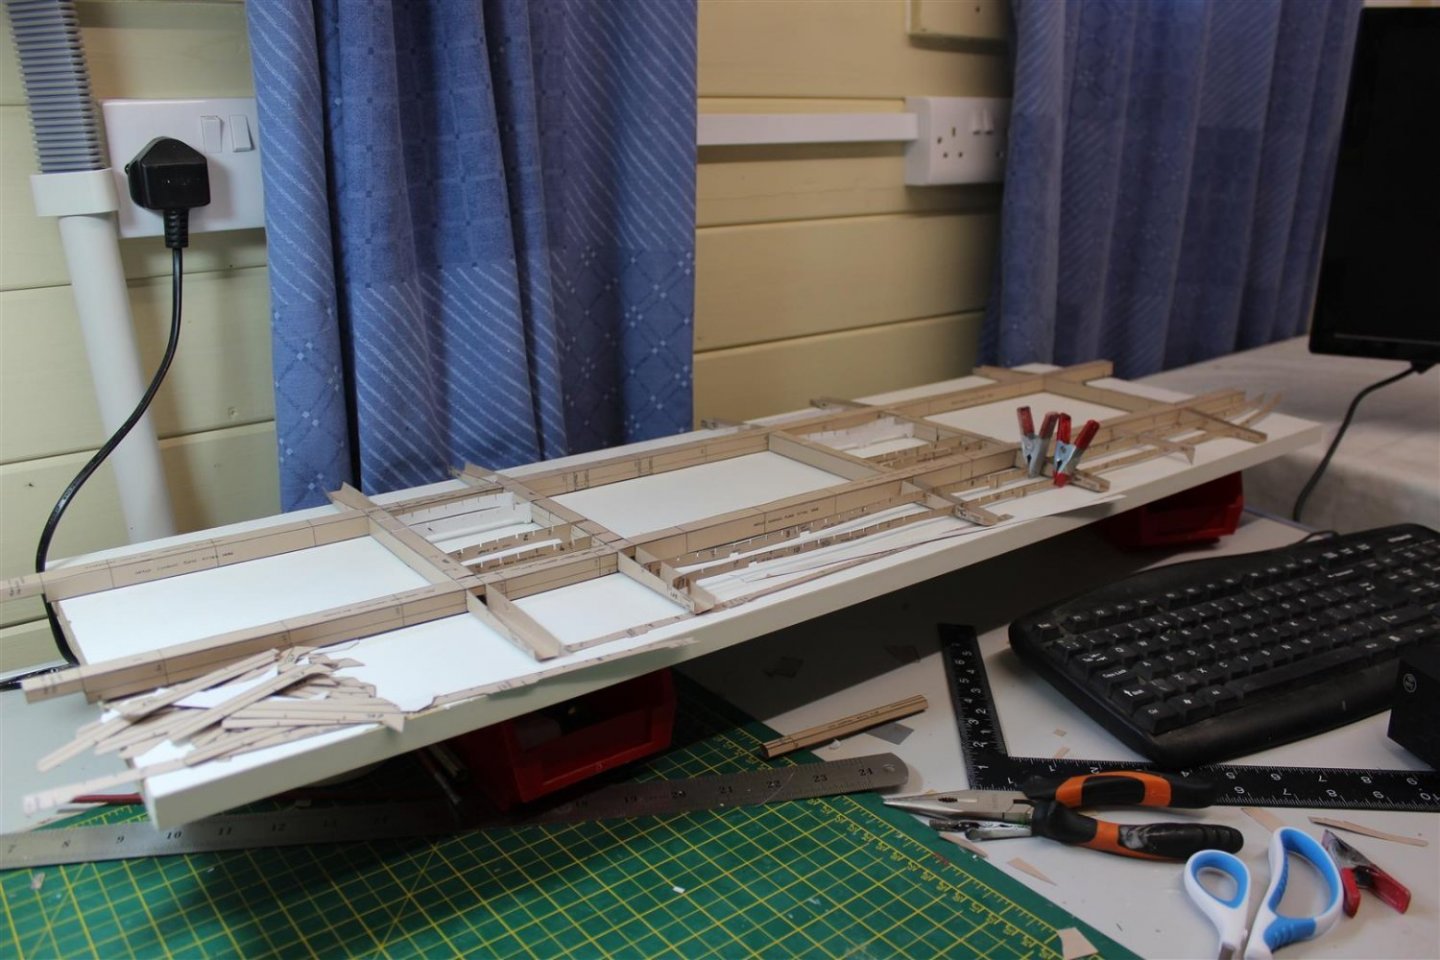
good evening everyone thank you for comments and likes i was trying to reduce my updates to every other day, but i miss the being part of the community (if that makes any sense), yep i miss someone to talk to other than the wife or the dog, one of them is not that interested in what im building, the other one is asleep under the desk day 66 midships upper deck box girders with port and stbd transverse beams done 3 hours cutting out, cutting slots and folding the upper deck consists of about 180 pieces and took me two days build time (about 8 to 10 hours)

- 201 replies
-
- 12
-
-
- SD 14
- Marcle Models
- (and 1 more)
-
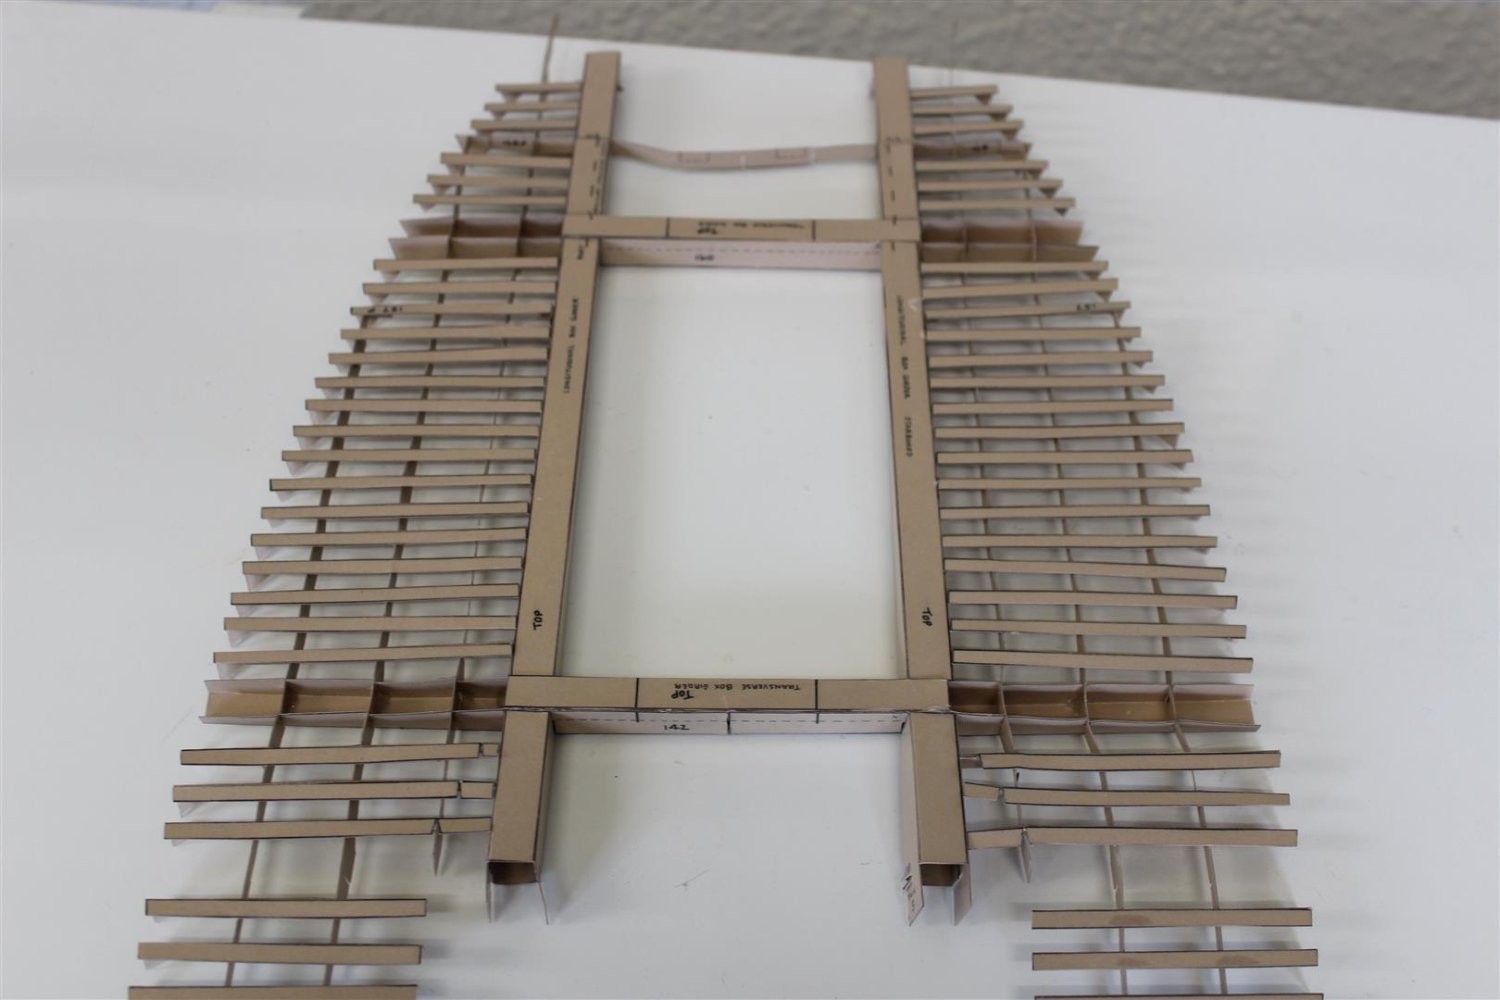
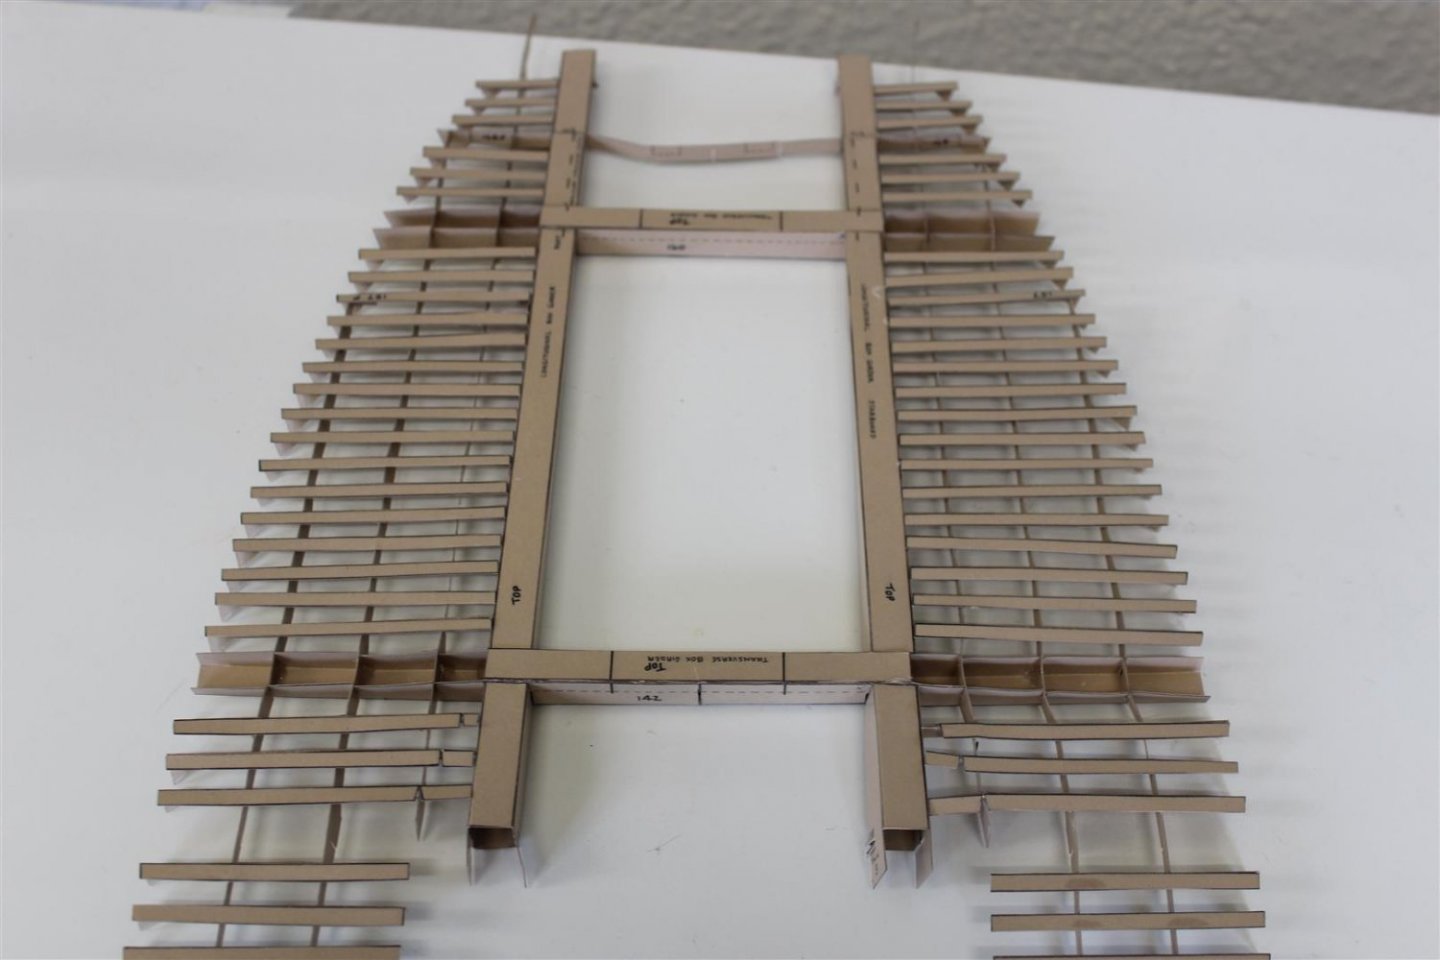
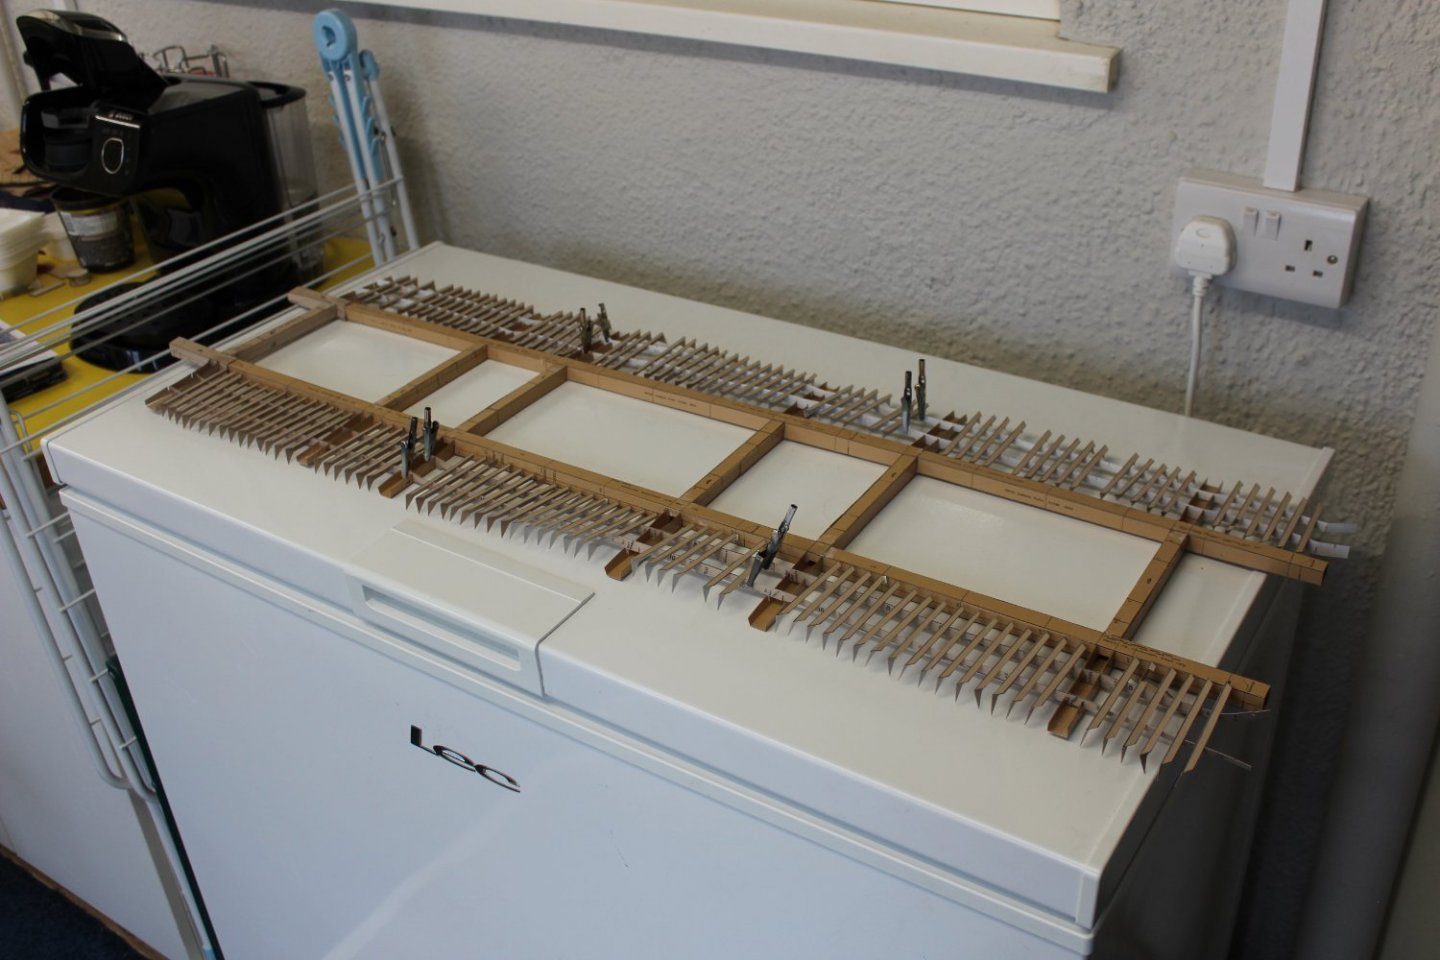
good evening everyone Day 65 upper deck box girders and port side transverse beams quite pleased with progress made today, even though the box girders had to be remade, as i mixed port and stbd in error, take 1 box girders Take 2 with some of todays made up transverse beams , noting glued and not very well presented for you

- 201 replies
-
- 10
-
-
- SD 14
- Marcle Models
- (and 1 more)