
MORE HANDBOOKS ARE ON THEIR WAY! We will let you know when they get here.
×


harvey1847
-
Posts
528 -
Joined
-
Last visited
Reputation Activity
-
 harvey1847 reacted to Mirabell61 in HMY Royal Caroline 1749 by Tarjack - 1:50 - bone model
Robert,
your work is fantastic, the bone-shipmodelling is such an admirable handcraft, and your skill in doing so is unbelievable
Well done !!
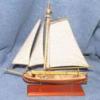
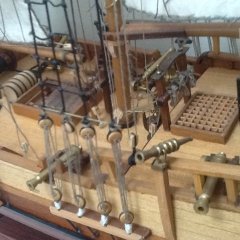
By the way I had a Chance to peep into the secret bone-ship building Hobby room of the Hamburg Maritime Museum recently, here two pics for you...
Nils
-
harvey1847 reacted to Tarjack in HMY Royal Caroline 1749 by Tarjack - 1:50 - bone model
Continuation of #197
The blanks now filed
Now the self-made holding tool is used http://modelshipworld.com/index.php?/topic/5248-holding-tool-for-holding-small-parts/
The result looks like this
and so in wood
have fun
-
 harvey1847 got a reaction from WackoWolf in DKM Scharnhorst by Paul Salomone - 1:72nd Scale - German WW2 Battlecruiser
Paul! we miss you! Where are you??
Hope everything it´s fine and see you and your Scharnhorst soon...
Best wishes,
Daniel.
-
 harvey1847 got a reaction from the learner in HMS Triton 1773. POF. 1:48. Daniel
Hello Juergen,
I guess it could be but the probrem is that the pine wood piece I have been using for all the gun ports simply do not fit on that way. I´ve seen other models and they just put it with that angle. Indeed on the sheer plan you can see the bevel on the frame and is more or less on the half of forest single frame. On my case and with that bevel I saw no necesity of cutting a long ceiling piece to conform the gunport and I decided not to "weak" the frame more than necesary.
Hope it helps. How does it work this first gunport on Leopard? Is it the same? Maybe you can "extrapolate" it to the hMS Triton.
Keep going!
Daniel.
-
harvey1847 reacted to jaerschen in HMS Leopard 1790 by jaerschen - 1/64 - POB - 50 gun ship
Much thanks for the nice comments.
@Daniel
No problem my friend. The Leopard is to be on hold. Currently I'm fitting the afterwards Frames at my Triton
-
 harvey1847 got a reaction from Mirabell61 in HMS Triton 1773. POF. 1:48. Daniel
Hello All!
Thanks Juergen, Beatiful progress you´re making on the Leopard. I progress slower than you. Are you going to drop the HMS Triton or is it temporary "parked"? It´s the only one "as designed", please don´t do it! (leave it)
After the big discover about the number of gunports I have decided to leave it there, glue the ceilings and plank the whole area. I was thinking about planking it anyways.
I have been all this morning with gunport no.#1 and I´m pretty sattisfied with the result. It is beveled on both frames aft and fore... quite tricky.
Here are the pics! I know there is a lot of them for a single detail but it took me a while and as I said it´s tricky and the plans don´t show it in its complexity. The next days I will sand the wale and paint it. I´ll make some trials with srap wood first, we´ll see...
Daniel.
-
 harvey1847 got a reaction from jaerschen in HMS Leopard 1790 by jaerschen - 1/64 - POB - 50 gun ship
Hey Juergen! Hello!!
Sorry about all the "likes" but it was me... nothing wrong with MSW 2.0!
I just went from page one from 4th of may through all the log. Don´t know why I was missing your new log. Anyway the follow button has been clicked so I´ll be here waiting for your updates.
Best wishes and happy modelling!
Daniel.
-
harvey1847 reacted to Piet in Hr. Ms. O 19 1938 by Piet - FINISHED - scale 1:50 - submarine of the Royal Navy Netherlands in service 1939 - 1945
Hello all,
This morning I made a new sketch for the boarding ladder. I did this more for my own build archive then a plan to work from. Once I have the idea in mind with the basic measurement I just work on "the fly." Reminds me how our friend Popeye works
So after lunch I started cutting the parts and pieces for the boarding ladder. This was easy enough but in trying to jig them up posed a problem. Making the treads or rungs from 0.2 mm brash shim turned out too thin and flimsy. I'll have to make them from 0.4 mm brass shim.
I also need to make a jig to bend the small "feet" at the ends of the rungs so that each one is of the same length. Not much of a set-back but I should have known before trying it. Being impatient I guess.
Holding the parts of the ladder together for soldering is like trying to hold a house made from cards together. So, I'll have to make a better soldering jig to get everything square and evenly spaced. It'll work out, I hope.
You know, working on this little ladder model reminded me of my father taking me to see his boat. That was early January, 1941, when he was promoted and had to get off the boat and was transferred to the cruise Hr. Ms. Java. He wanted to visit the O19 one more time and say goodbye to the crew. It also happened to be an open day like bring your kids to work.
This was in Surabaya, the Dutch Navy base in the Colonies. I remember that the boat was tied to a floating like dock and we had to first get down a gangway, cross this wooden dock and then up onto the O19 by means of this steel ladder.
Let's see, I was six going on being seven that April and my father wanted to help me. Hmmmm, wrong thing to do with a seven year old boy. I had to jump first from the wooden dock onto the mine tube lids and grap the handhold, then just climb on board, no problem. Hey, I used to climb in the tall kanarie trees in front of our house and the tjimara trees (cimara = Malay spelling), this little ladder posed no problem for me. My father was just smiling.
Okay, enough reminiscing. It's close to my bedtime and I need to put an end to this. Here are a few pics of my efforts of today.
I have already decided to make two changes. One is the size of the step rungs from 0.2 to 0.4 mm and the other is the size of the two small hooks that hold the ladder to the deck from 0.8 to 0.4 mm brass rod. I'll amend the drawing later with red ink
Here are all the parts laid out. You can see how flimsy the rungs are and not even. The deck hooks will also be remade. The railing handhold is not finished yet. It has to be pushed through the two stanchions first before I can bend the lover hook on it.
I will secure it to the handhold to the stanchions with epoxy and I am making it removable - as you can see I have soldered pins to the bottom of the stanchions that'll fit into the sockets that'll be soldered to the ladder side.
Cheers,
-
harvey1847 reacted to marsalv in Pandora by marsalv - FINISHED - 1:52
Probably the last work before saving Pandora to hibernate - deck in the officers cabin, gluing the main deck beams.
-
 harvey1847 got a reaction from sonicmcdude in HMS Triton 1773. POF. 1:48. Daniel
Hello All!
Thanks Juergen, Beatiful progress you´re making on the Leopard. I progress slower than you. Are you going to drop the HMS Triton or is it temporary "parked"? It´s the only one "as designed", please don´t do it! (leave it)
After the big discover about the number of gunports I have decided to leave it there, glue the ceilings and plank the whole area. I was thinking about planking it anyways.
I have been all this morning with gunport no.#1 and I´m pretty sattisfied with the result. It is beveled on both frames aft and fore... quite tricky.
Here are the pics! I know there is a lot of them for a single detail but it took me a while and as I said it´s tricky and the plans don´t show it in its complexity. The next days I will sand the wale and paint it. I´ll make some trials with srap wood first, we´ll see...
Daniel.
-
 harvey1847 got a reaction from cog in HMS Guadeloupe by jack.aubrey - 1:48 scale - ex French Le Nisus - Brick de 24
Yes indeed, BUT there is something spectacular on shots like "02" and "05" (specially the "scafolding" holding the ship). I wouldn´t mind to go that way. Specially with that dummy piece of wood which is more evidence on pic "04".
Were this model intended to be on a shelve on the Admiralty rooms or were made to show the cadets or the man of war how these ships actually function?
Here for example, I do not know how many times I have posted this shot but in my oppion It´s the "ultimate" extreme of what a POF model should be. (I know yours It´s a POB one) I am now much concern about plank on frames models but I´ll probably shift to pob´s on my next project.
Good luck Jack, and thanks for the research photos!
Daniel.
-
harvey1847 reacted to Cap'n Rat Fink in The Batteau by Cap'n Rat Fink - FINISHED - 1/24 - War of 1812
HI EVERYONE,
IT'S BEEN A WHILE SO I HOPE I STILL KNOW HOW TO POST PICTURES...
Hello,
Well I’m trying to get back into the modeling mode, since I have been away for a while. Because of work getting crazily out of hand. Well they implemented a new system that is making us work at a snails pace now. Which is a good thing. Cause sometimes enough is enough. When MSW switch to this new site. I did a model that I never added back to the new site. So I got a little time right now. I built this boat back in April 2012.
MARIO
Hello Friends,
Well I have started. I downloaded the plans to my flash drive. Jumped in the truck. Drove down to the neariest print shop. I had 2 copies of the plans on 17x11 printed up. I ran out the door with plans in hand with a big stupid smile on my face.
So last night I was able to cut out the frames, cleats, stem n stern posts, boat bottom from the plans. They are now glued to the material and ready to be sawed out tonight.
MARIO
I cut out my frames, stem n stern posts, the fore n aft knees, and the boat bottom. Now I will spend the rest of the day sanding the items cut out and ready them for install. Plus I will experiment with my rove creating. I will show my results later this evening....
So now I'm going to go back at it. Just stopped long enough to finally show some progress my friends
Still have a bit to sand on the frames and cleats. But did not get to my testing the look of the roves.
On the plans it shows a butt seam of two planks running down the middle of the boat floor. I figured in real life this should not be. Because since the stem n stern posts will reside in their respective positions. Wouldn't this create a week joint? This is just me using assuming things again. So I drew a center line on the floor bottom and repositioned the plank seams.
cheers Mario
So here is a little more progress on the Batteau....
-
 harvey1847 got a reaction from wangshuoliurui in HMS Triton 1773. POF. 1:48. Daniel
Hello All!
Thanks Juergen, Beatiful progress you´re making on the Leopard. I progress slower than you. Are you going to drop the HMS Triton or is it temporary "parked"? It´s the only one "as designed", please don´t do it! (leave it)
After the big discover about the number of gunports I have decided to leave it there, glue the ceilings and plank the whole area. I was thinking about planking it anyways.
I have been all this morning with gunport no.#1 and I´m pretty sattisfied with the result. It is beveled on both frames aft and fore... quite tricky.
Here are the pics! I know there is a lot of them for a single detail but it took me a while and as I said it´s tricky and the plans don´t show it in its complexity. The next days I will sand the wale and paint it. I´ll make some trials with srap wood first, we´ll see...
Daniel.
-
 harvey1847 got a reaction from mtaylor in HMS Guadeloupe by jack.aubrey - 1:48 scale - ex French Le Nisus - Brick de 24
Yes indeed, BUT there is something spectacular on shots like "02" and "05" (specially the "scafolding" holding the ship). I wouldn´t mind to go that way. Specially with that dummy piece of wood which is more evidence on pic "04".
Were this model intended to be on a shelve on the Admiralty rooms or were made to show the cadets or the man of war how these ships actually function?
Here for example, I do not know how many times I have posted this shot but in my oppion It´s the "ultimate" extreme of what a POF model should be. (I know yours It´s a POB one) I am now much concern about plank on frames models but I´ll probably shift to pob´s on my next project.
Good luck Jack, and thanks for the research photos!
Daniel.
-
harvey1847 reacted to jaerschen in HMS Leopard 1790 by jaerschen - 1/64 - POB - 50 gun ship
The Port Side is at the same progress as the Starboard Side.
I don't make many words because the procedure is the same.
Here some photos of the current progress.
-
harvey1847 reacted to jaerschen in HMS Leopard 1790 by jaerschen - 1/64 - POB - 50 gun ship
Hi Chris,
Much thanks, your interest pleases me very well.
I used a scroll jigsaw at first that I put in a jig as you can see at the following photos.
On the second photo is the power button that I can press with my foot.
After I sanded with a belt sander
Oh my english, I hope that was what would you like to know
-
harvey1847 reacted to jaerschen in HMS Leopard 1790 by jaerschen - 1/64 - POB - 50 gun ship
Thank you so much for looking and the kind comment B.E.
Here's a little update. The planking include the rails at the starbord side are finished so far as possible at the moment.
The ornaments at the end of the rails (I don't no the right term) were uncharted waters for me. I decided to do the rail and ornament at one piece.
I made a simply stencil because it needs several of that ornaments.
The shape of the rail is done with drawing plate and the ornament with cutter and curving tools
here you see it at the model
I desided to close the spaces between the bulkheads at the port-side based on some trubble during the planking
That's looking so
I believe the planking will be much easier at this
-
harvey1847 reacted to jaerschen in HMS Leopard 1790 by jaerschen - 1/64 - POB - 50 gun ship
Much thanks for the kind comment Timmo.
It's going on with the build. I added two rails during the last days.
But I want to display how make the planks above (or under) the gunports at first.
First step is to mark the position where the plank must be wider
Then I saw the plank with the bandsaw
and sanded it
Thereafter it must be fitted to the other planks. I did that with a chissel. That's the easiest way to do it for me.
Here you can see the result.
And now some photos of the current progress.
-
harvey1847 reacted to jaerschen in HMS Leopard 1790 by jaerschen - 1/64 - POB - 50 gun ship
Thanks very much Alexander.
Slowly but constant. Here's a new update.
I added the Channel Wale and planks between the Main Wale and the Channel Wale.
-
harvey1847 reacted to jaerschen in HMS Leopard 1790 by jaerschen - 1/64 - POB - 50 gun ship
Could you tell me the result please. It's very interesting for me-
And now to the idea from Mark
I sanded the Main Wales about days and following this I used black stain.
How shall I put it?
You are right Mark, it looks mutch better. Thank you, the effort paid off.
In fact it's much better to seen as at the photos.
And also I planked the Lower Counter
-
harvey1847 reacted to jaerschen in HMS Leopard 1790 by jaerschen - 1/64 - POB - 50 gun ship
Hi Niklas and Adam, thanks for the kind words.
It's going on with the Main Wale. I done it in the same manner as John McKay is shown at his plans.
I made two templates at first because I must produce many equal pieces.
Also it must drawn the postion of the Main Wales to the Frames.
Thereafter began the agony
Here's the result
Juergen
-
harvey1847 reacted to jaerschen in HMS Leopard 1790 by jaerschen - 1/64 - POB - 50 gun ship
Hello,
after I put off my Triton build I started a new project. Now I want to build the 50-Gun Ship HMS Leopard 1790 (POB) ,1/64 scale
Therefor I bought the book The 50-Gun Ship from Rif Winfield. At this are the plans of the Leopard drawn by John McKay.
I don’t make many words about the build of the frames because that’s often described here on MSW.
Instead I show some photos.
Juergen
-
harvey1847 reacted to Piet in Hr. Ms. O 19 1938 by Piet - FINISHED - scale 1:50 - submarine of the Royal Navy Netherlands in service 1939 - 1945
Hello everyone,
I started making sketches for the boarding ladder by using the photograph of the O19 when docked in Alexandria, Egypt. First I thought that it seemed to have a fold-down lower section to board over the mine bin section. So, I designed a ladder with a foldable lower section that would work just fine. However, when I blew the picture up (no, not with dynamite i.e. enlarged it) I realized that they stuck a board under the lowest rung, at least according to the shadow on top of the mine bins. So, all my efforts of this morning are for naught, at least for the foldable part. It will make it a lot simpler for me, which is welcome.
With the boat not fully loaded she'll naturally ride a lot higher and being clever Dutchmen they improvised. I also have a nice photo of the KVIII with the crew posing and there is also a boarding ladder. I think that I have enough info to make a passable ladder
Well, while we must wait for pictures of the building process I figured I'd "bore" all yuns with some pictures of the O19 snorkeling. You may have heard it said that this system was a German invention but that would be wrong. They copied this innovation and used on their U boats.
This also reminds me of a story my father told me about what happened during one of the proving runs.
They were coming up to surface and as is customary the CO peeked through the periscope and to his horror he saw a close and very speedy Navy vessel boring down on them. There was no way avoiding a collision! So he yelled "dive, dive, emergency dive." They got the boat down real fast but not quite fast enough because that eager beaver Navy ship thundered right over them, with a goodly down bubble and full ahead, even shaking the boat by the turbulence. Fortunately it didn't hit the boat just hit the periscope the CO was looking through Talking about one shook-up CO.
That was a close call but excellent performance of the crew.
I made a picture this afternoon of the O19 in snorkel mode and add a few pics of her actually snorkeling. Hope you like them.
This is a copy about "trimmed dieseling" as it's officially called, from a book by van Jalhay. I have translated the Dutch text so all you non Dutchies can understand what it says.
"An invention by a Netherlands Navy officer, Lieutenant Commander 1st Class J.J. Wichers, that would play a great role in the Second World War. The officer of the Navy Steamship Service 1st class J.C. van Pappelendam tasked himself with the technical execution and the result was a pipe through which air was sucked in so that the boat could use the diesels when sailing under water and the batteries would thus not have to be used. Naturally the boat was committed to a specific depth but she could practically remain submerged continuously. The sniffer or snorkel did its entry.
This shows my model of the O19 that I configured in snorkel mode. Sometimes they would leave the communications antenna up but I elected to retract it and the battle periscope into the boat. I have annotated the exhaust and intake pipes. I didn't stow the dingy loading boom and tackle, too much trouble for now. Will do that when I'm making the "official" photographs. I love it when I can do a show and tell with this model.
This shows the O19 at the builder, Wilton-Fijenoord in Schiedam, the Netherlands in 1939. The reason for the Dutch national flag on the con is that the Kingdom of the Netherlands declared neutrality as in the first world war. They had all ships in Dutch registry paint the national flag on the sides. This didn't help because Herr Hitler had other ideas. In any case, you can see the exhaust pipe extended in this shot.
This is one of the action pics of the sub snorkelen.
Here is another action shot of the O19 snorkelen.
Cheers,
-
harvey1847 reacted to EdT in Young America 1853 by EdT - FINISHED - extreme clipper
Young America - extreme clipper 1853
Part 85 – Middle Deck Binding Strakes
The binding strakes provided an additional reinforcement to the connection of the deck beams to the hull frames. These 8” thick members, placed against the inboard face of the waterways, were bolted vertically into each beam and horizontally – edge bolted – through the waterway and each frame. On the model I represented this bolting with monofilament – one down through each beam and one edge bolt above each ledge between beams. There were probably twice this many bolts used on the real ship.
The first picture shows the forward section of binding strake on the starboard side being glued in place.
The binding strakes were joined with hook scarphs as shown in the photo. They were also rounded over or beveled down to the deck planking on the inboard side.
In the next picture the joint measurements are being transferred to the end of the next section.
The length of the hook is being marked here, The piece was cut back to the angle first. The next picture shows the last section on the port side at the stern being fitted.
The next picture shows the binding strakes installed at the bow – ready for bolts.
The holes for the horizontal bolts were drilled before installation – those for the vertical beam bolts after. In the next picture a length of monofilament is being glued in to represent one of the beam bolts.
After installation of the binding strakes the deck was given a final leveling with 220-grit paper as shown below.
This was followed by final sanding using 220 then 320-grit paper – by hand and using the detail sander shown in the last photo.
Next will be installation of the side inboard planking, starting with the heavy 10” x 12” standing strakes over the waterways. Hatch coamings and some decking can also be started.
Ed
-
 harvey1847 got a reaction from janet bode in HMS Triton 1773. POF. 1:48. Daniel
Hello Hello!
The gunports are almost completed. Two more to go one on the aft and another on the fore... I managed myself to build a shelf for the ship. My workshop is quite small and it´s a way of having the ship always tidy and my table clean to work with other things plus more room for the machines.
I was looking the plans and counting the gunports... and I was counting fourteen on the ship and thirdteen on the plans...Of course I thought to myself the plans were wrong not My Triton. 13 vs 14teen, 13, 14, 14, 13... And the plans ARE RIGHT!! I have had tue gunport cut since post #170 18th June. No small mistakes here in this hobby.
Remember! Thirdteen gun ports!!
Here´s a bunh of pics...
You can see obiously there´s is something odd with the gunport but I just thought... I do not know what I thought, I was having fun cutting the scarfs and the ceilings. Back to cut with the scroll saw.
Best wishes!
Daniel.