harlequin
-
Posts
746 -
Joined
-
Last visited
Content Type
Profiles
Forums
Gallery
Events
Everything posted by harlequin
-
Hamilton I used a base layer first to cover the brass then a couple of coats of yellow ochre from both from admiralty paints.
-
Those two windows will not be visible in the finished model. They will be obscured from view by a lot of rigging and deck furniture. I could try using a very fine brush to paint the windows but unless you are a contortionist you wouldn't see the finished article.
-
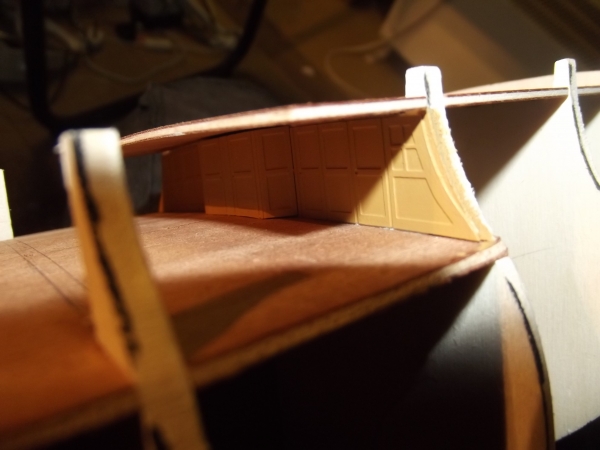
Hi Ferit Kutlu, there are no windows in the port or starboard side for any of the photo etched parts but there are quite a number for the transom area where another colour will have to be used.
-
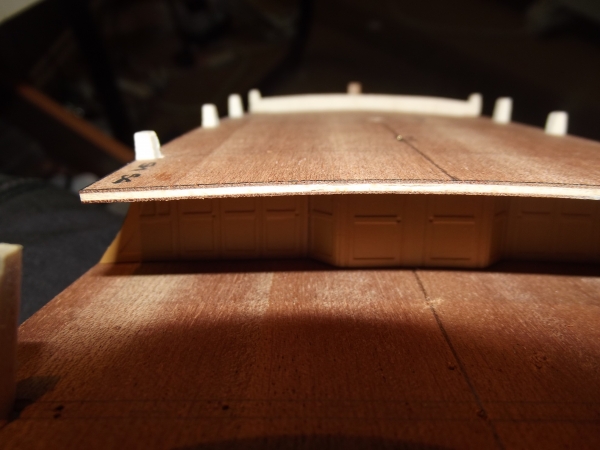
A second plank added to facilitate the first of the blind gun ports. Will be painted black on the interior later.
-
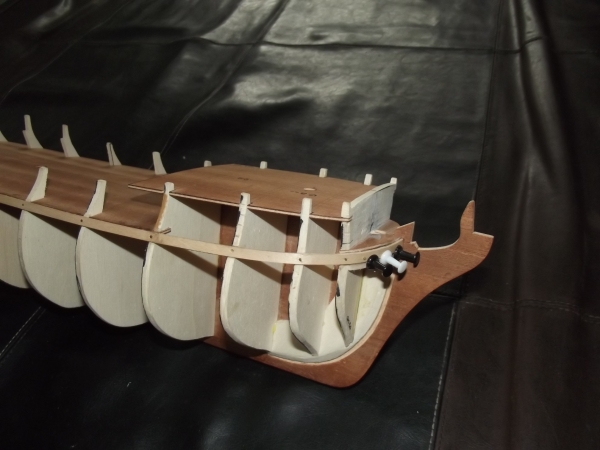
Let the planking begin
-
Photo etched bulkhead has been painted yellow ochre and now fitted. Although not much of this will be visible on the finished Bellona the shiny photo etched parts were too bright for my liking so a light yellow ochre paint was applied.


-
Are there any 1:98 copper plates available?
-
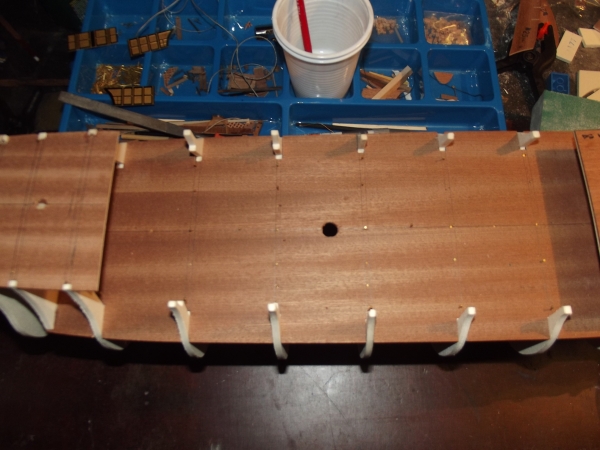
Cheers Hamilton. I think yours will be a great improvement on my build. Bellona has had her decks fitted and a cabin bulkhead fitted (photos to follow soon) and is now undergoing a lot of prep work for the first planking to start, which will be in the next couple of days or so. I have decided against any sort of colouring to the Bellona's hull and will add touches of colour to the gun carriages only I think.
-
Spent the entire day reading the whole instruction book and examining the drawings.....they are so much better than the Greyhound instructions. Not going to add colour to the hull but may add some red to the gun carriages and the inside bulwarks and maybe a bit on the transom decoration. There is so much detail on this build, its certainly going to take some doing. It is going to be an amazing looking ship when completed.
-
The transom on my Greyhound isn't good but I have not got the inclination to start carving. Hands shake too much anyway.....hic, hic
-
I'm trying to decide whether or not to colour Bellona or to leave her all wooden. I'm not going to copper plate her but may add colour to other parts of the hull /masts and yards.
-
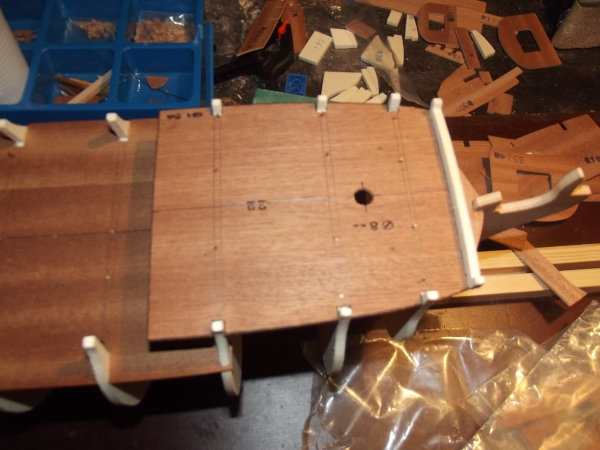
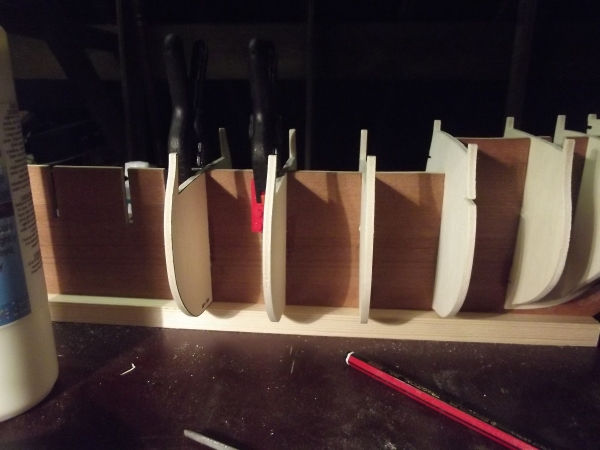
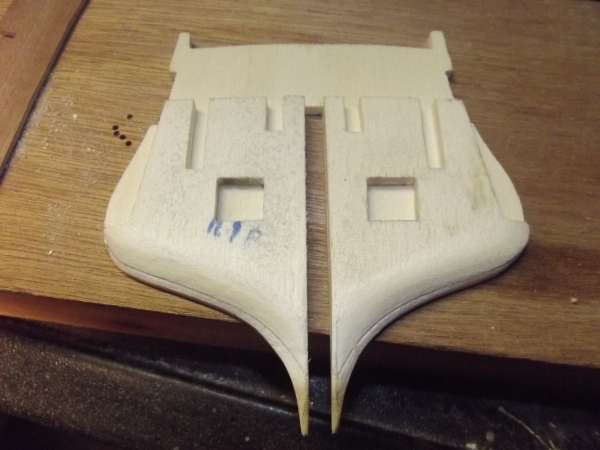
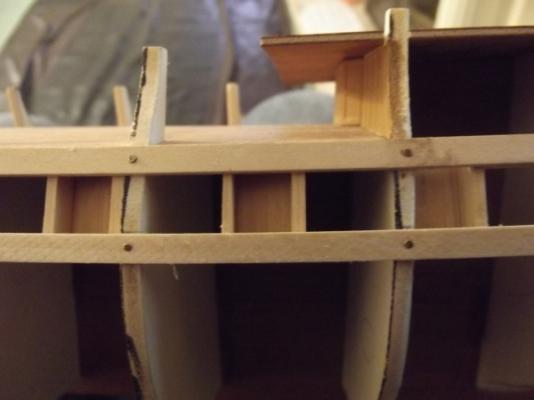
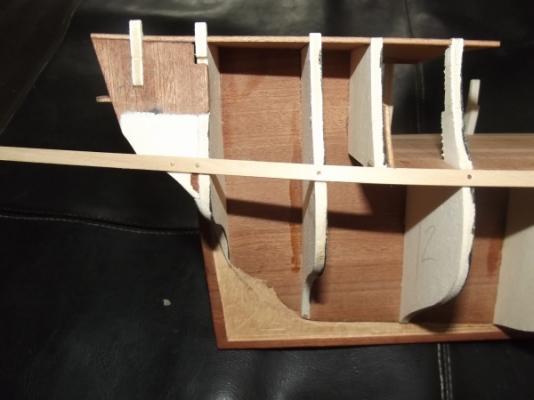
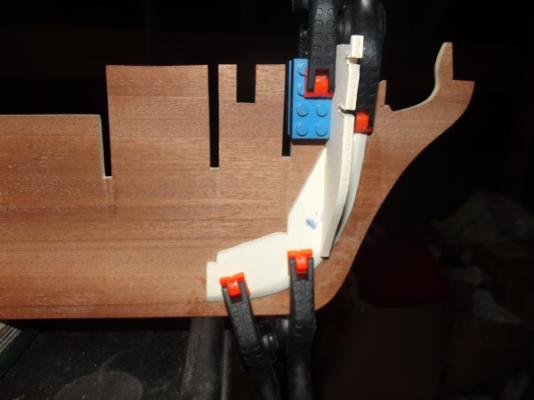
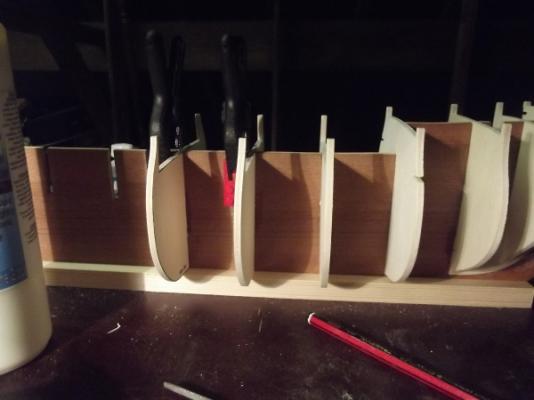
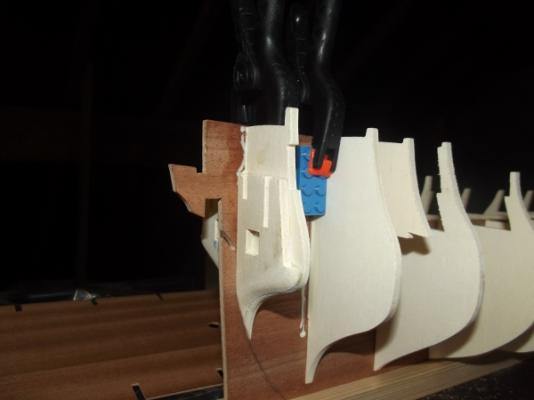
framework underway finally the glueing has started. the old lego comes in handy. frames 15 and 16 glued together and shaped before being attached to the keel. frames 15 and 16 now attached to the keel.

-
bulkhead1 is only slightly visible on the finished model and is covered too by the belay pin rack, however I did plank mine too as the lighter colour of the bulkhead would still stand out.
-
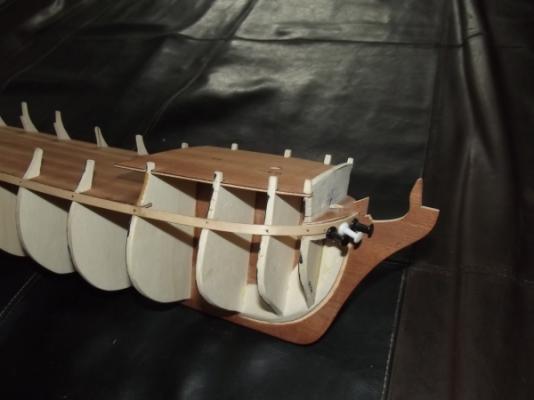
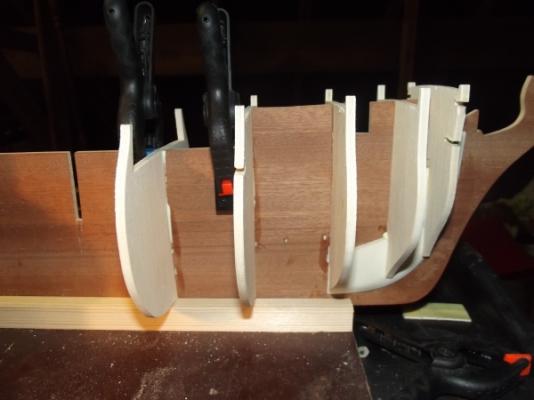
hi Augie.......HMS Bellona is following on close behind. Her frames have had their first dry fitting and pics will follow. I'll post some better pics of Greyhound in the completed forum soon.
-
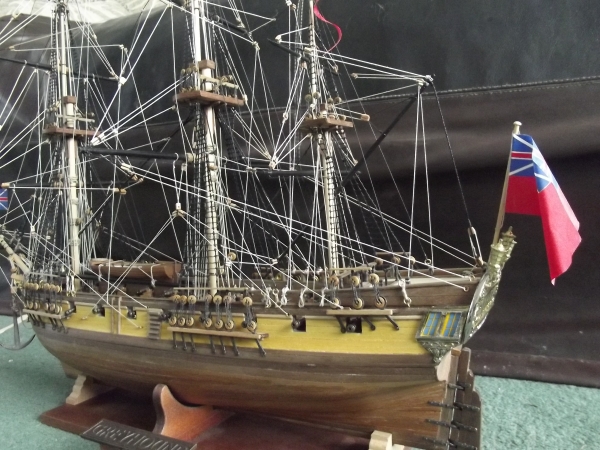
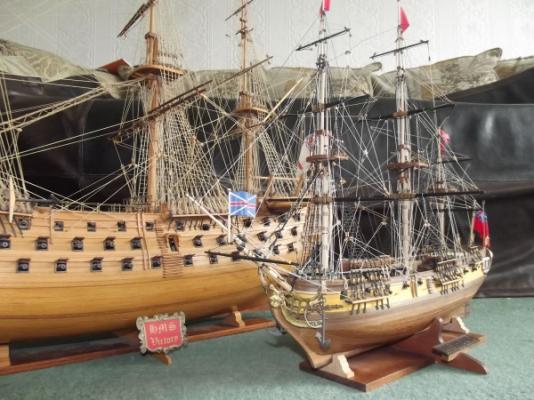
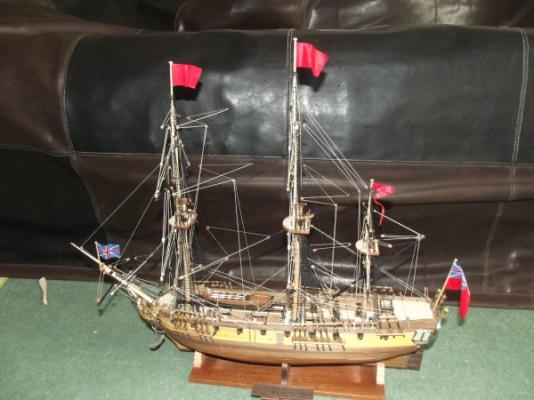
Well she is completed. A very frustrating but ultimately rewarding HMS Greyhound. So many times she nearly ended up getting launched against the nearest wall, but retaining enough charm to prevent me from doing so. I'll post some more pics soon in a more attractive surrounding. I must say she looks great. Lots of historical inaccuracies and some of the running rigging belayed in odd places but when all is said and done she doesn't look too bad.


-
HMS Greyhound has been completed...........pics to follow when I have finished my bottle of lagavulin
-
Hi Ferit......the black rigging rope is by caldercraft, and many thanks for the compliments. The Greyhound should be finished tomorrow.
-
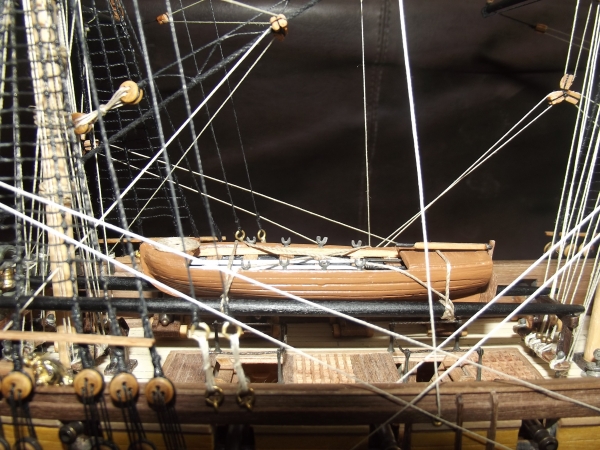
finished ships boat. Hi Hamilton..this is the supplied ships boat with a little modification. I.ve added some oars by amati and I don't think it looks too bad.Very near completion now, next couple of days will see it home IF I decide to use the supplied flag set. I may change those.
-
Blue sky in England Hamilton is a rare thing....but I will do that if ever summer arrives.
-
thanks Augie I shall try that product.
-
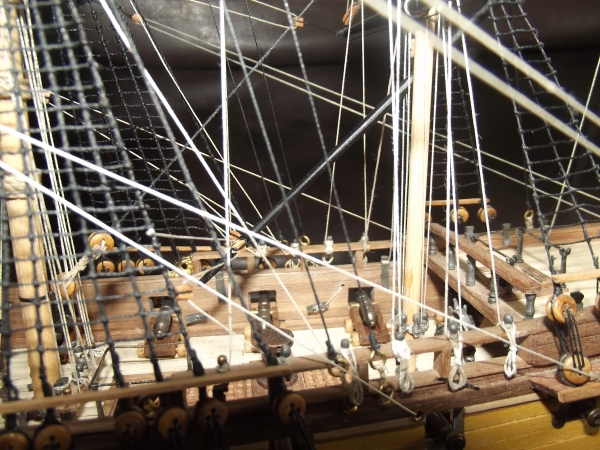
Hi Hamilton, regarding the rigging colour. I purchased caldercraft black rigging instead of dyeing the corel line. It is a great rigging line the only drawback is that the caldercraft line doesnt take up PVA very well. I use a super glue first on the knots then a very dilute PVA mix afterwards to take away the shine the superglue leaves. Just the main mast yards to go now along with finishing the ships boat, the anchors and flags and she will be there. I havent done anything else yet on Bellona because if i get started on that I know I will neglect the rigging on Greyhound. A good week should get me there. Also the belaying pins with Greyhound aren't the best, you may wish to replace those, but most of them are covered with rigging anyway so they have done the job ok. I look back now on Greyhound with a mix of frustration and pleasure and also wish i'd added extra colour to the gun ports but that was the decission I made at the time. She is looking great and I would recomend this kit to anyone despite all the faults. I have grown to love the little devil and actually the sense of achievement at overcoming the faults in this kit is great. I look forward to your continued success in your Greyhound build.