MORE HANDBOOKS ARE ON THEIR WAY! We will let you know when they get here.
×


CaptMorgan
-
Posts
164 -
Joined
-
Last visited
Content Type
Profiles
Forums
Gallery
Events
Everything posted by CaptMorgan
-
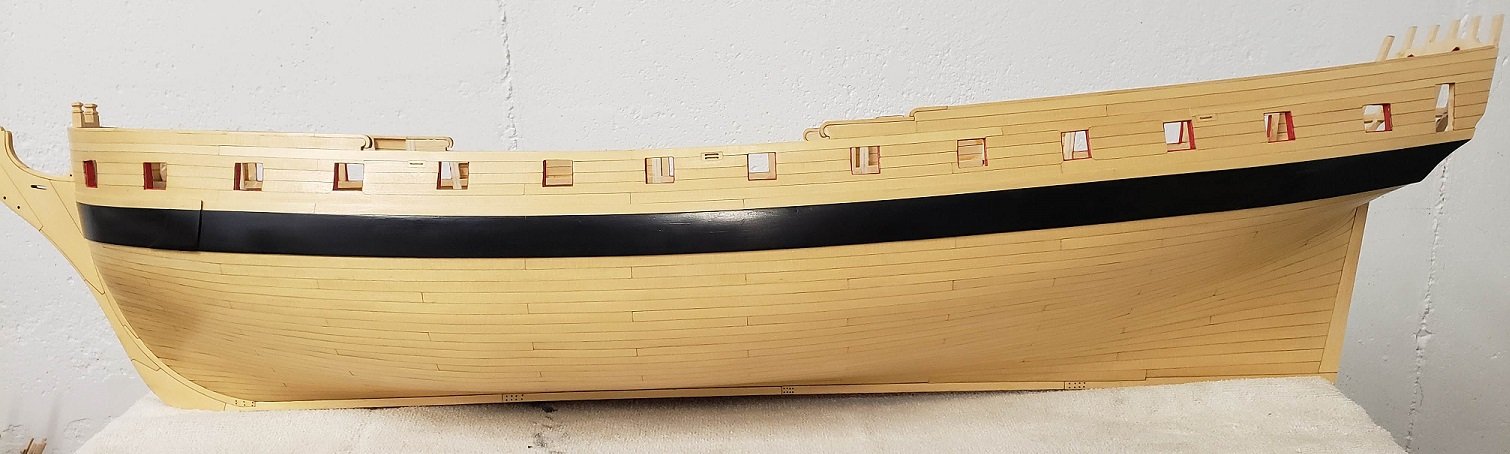
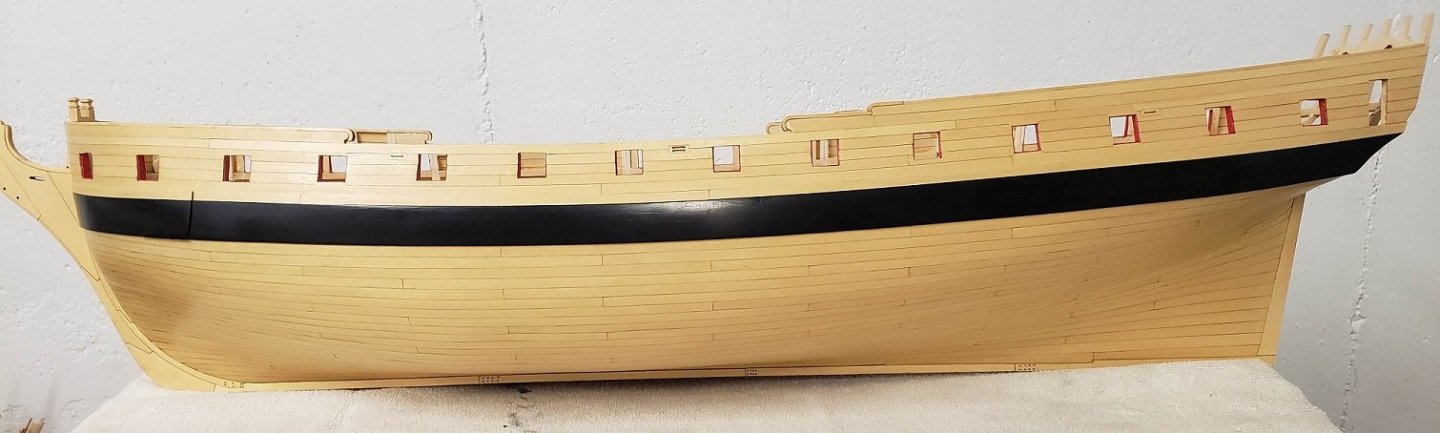
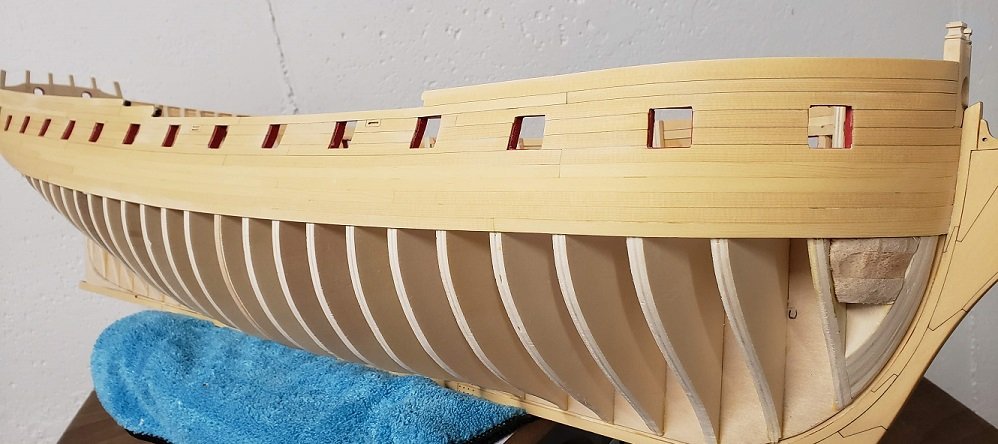
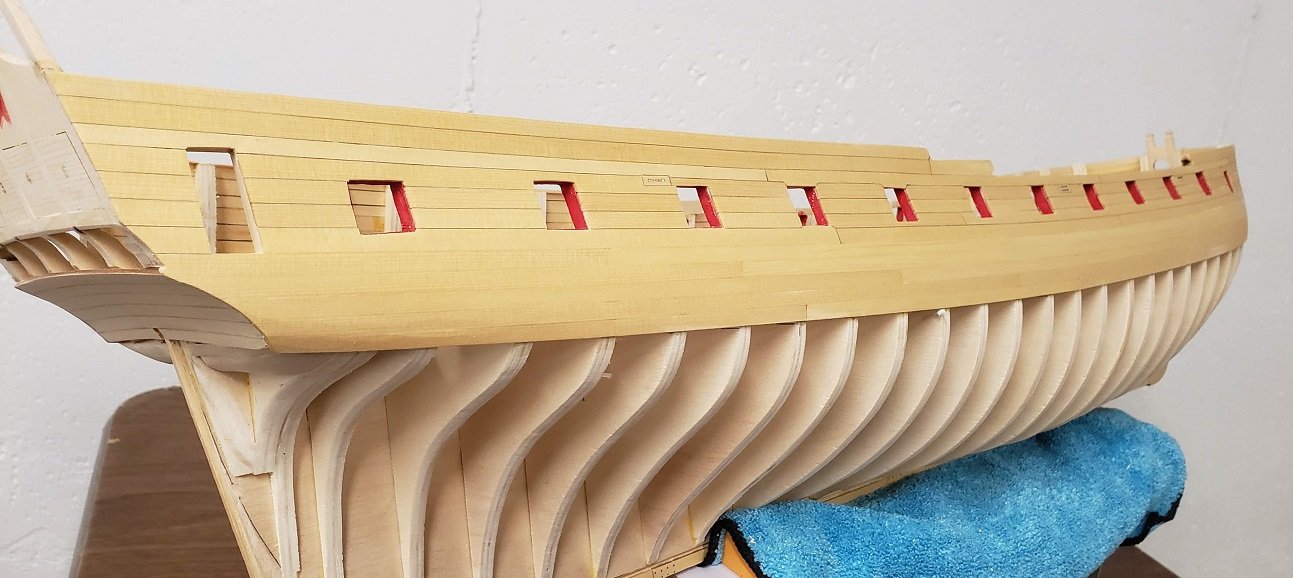
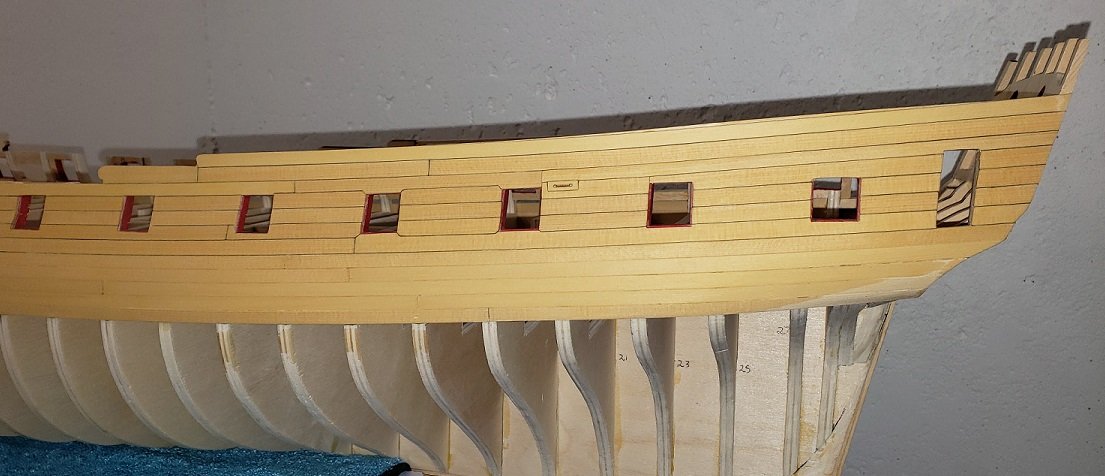
 Chapter 2 is now complete. I broke/ruined my fair share of planks but I think everything turned out pretty good. I preferred a little darker seams so I ran a pencil on both sides of the planks. Below are a few photos to show where we are currently. Now it is time for a small break and do a review of Chapter 3. It will be a nice change of pace from the planking for a while.... I hope everyone out there is doing good and dealing with this virus. These are indeed strange times but we will get thru it.....
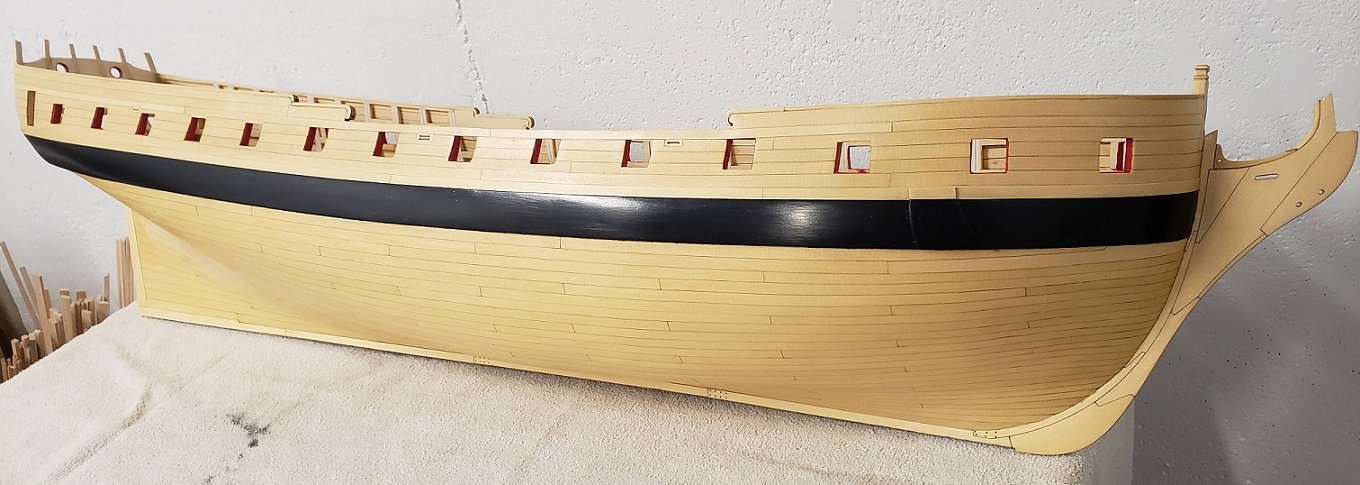
- 99 replies
-
- 19
-

-
- winchelsea
- Syren Ship Model Company
- (and 1 more)
-
Hey Ben. I see you decided to do the framing on the other side. Everything looks really good. This is going to be a beautiful build. Keep up the great work....
- 399 replies
-
- 2
-
-
- winchelsea
- Syren Ship Model Company
- (and 1 more)
-
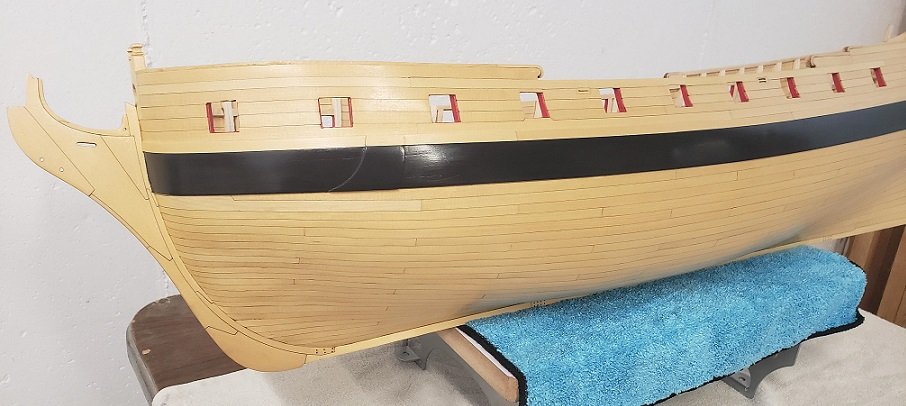
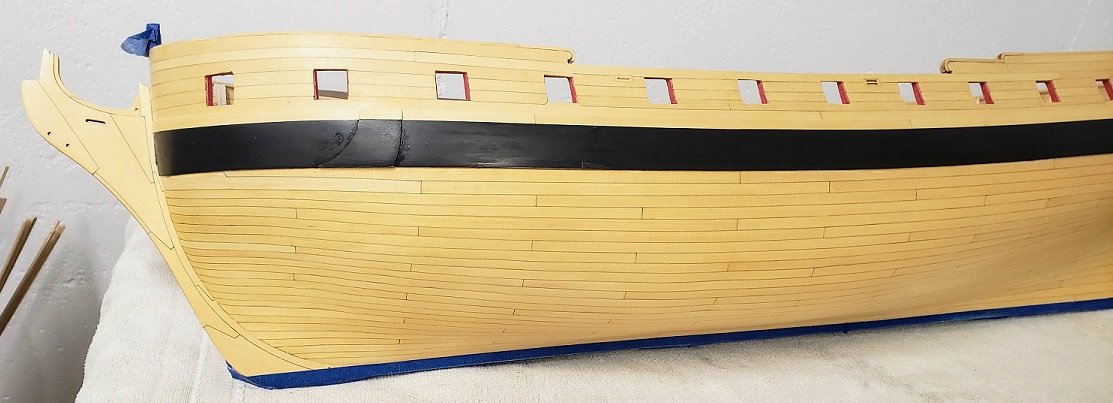
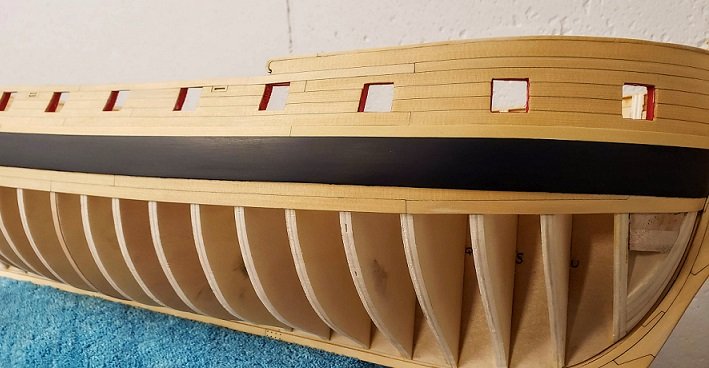
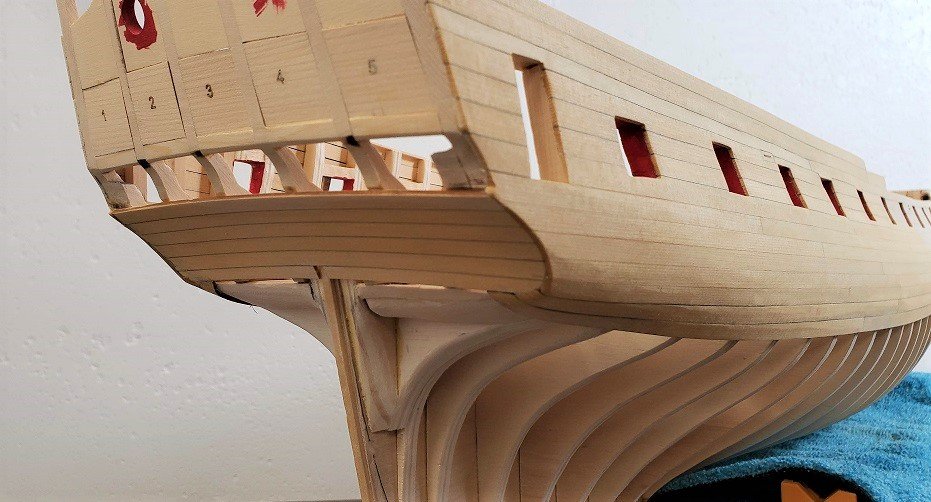
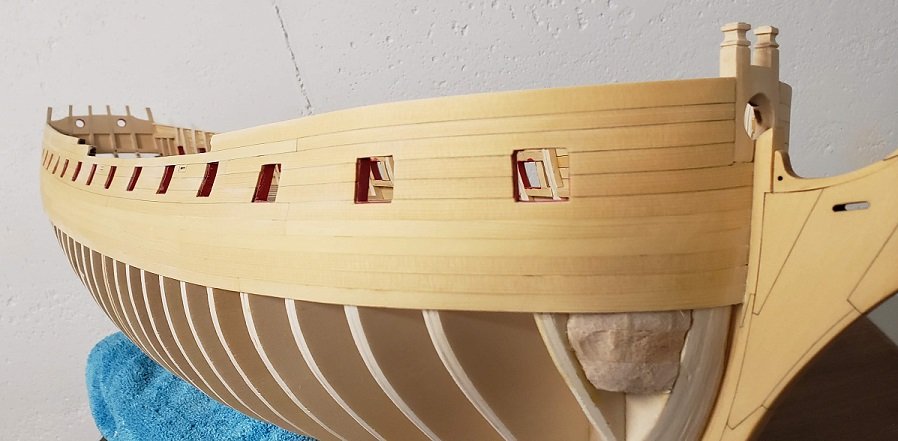
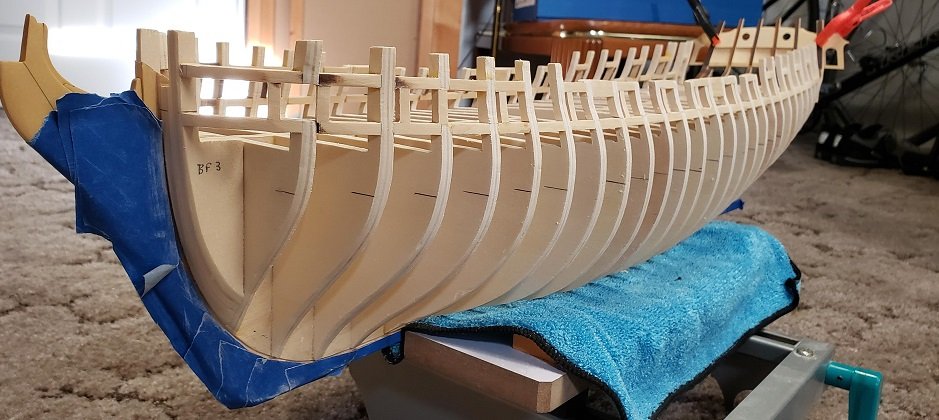
Hello everyone. I hope this post finds everyone happy & healthy and dealing with this virus OK. I think it has touched all of us in one way or another. I've been plugging along and got one side of the planking finished up yesterday. It turned out pretty good and I've learned some lessons to apply to the other side. Mostly pay more attention to my seams and the tick marks.... The paper clips are there to protect the stern frames. Yes, I snapped one off but thankfully it was a clean break so not a big issue. Those clips do a great job protecting them. Question about using the wipe-on-poly. How often does everyone apply it?? I like the way it looks and protects the wood but I always seem to have issues with glue sticking to it down the road. I have not applied it yet. It's just wiped down with a damp rag to see how it looks and help locate any areas that need more attention.... and there are quite a few... I have a little more sanding to do and then some paint touch-up on the wales but I'll hold off till I get the other side finished up. Be safe out there!!!
- 99 replies
-
- 15
-
-
- winchelsea
- Syren Ship Model Company
- (and 1 more)
-
Looking good Rusty -- I have to agree with nzreg & Chuck. I love the look of the Cherry and your planking looks great. Keep up the good work....
- 642 replies
-
- 2
-
-
- winchelsea
- Syren Ship Model Company
- (and 1 more)
-
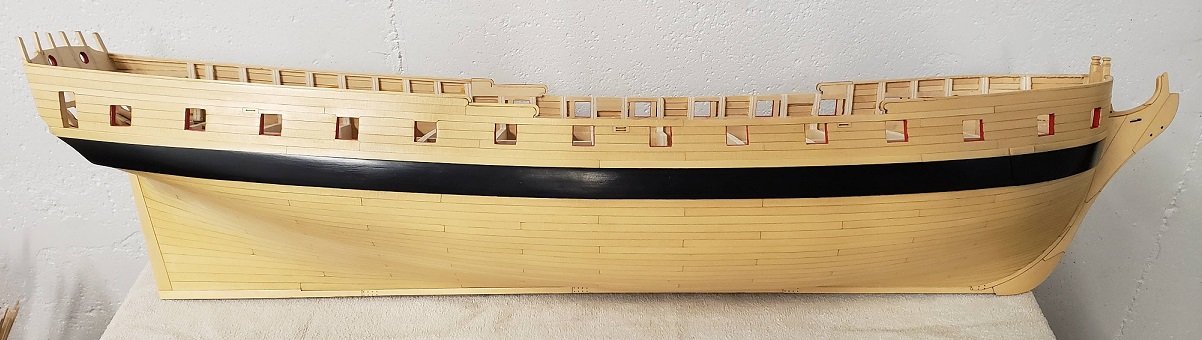
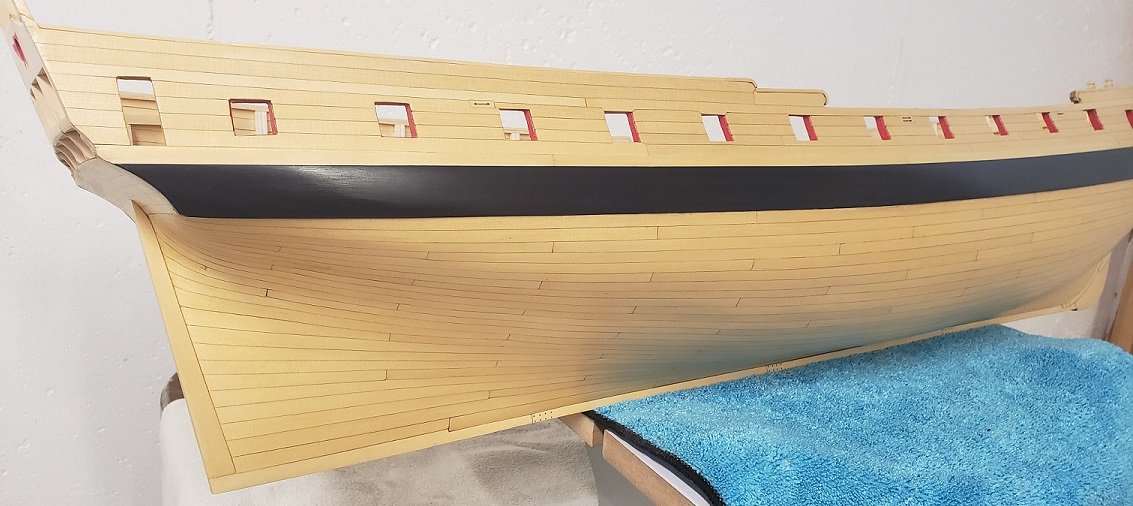
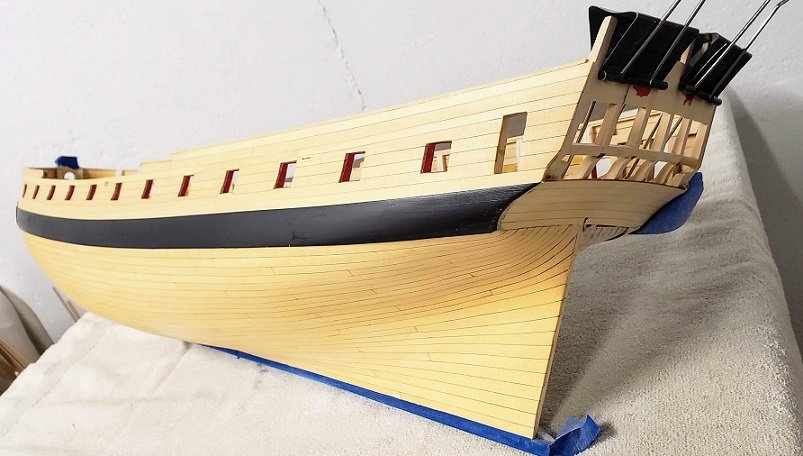
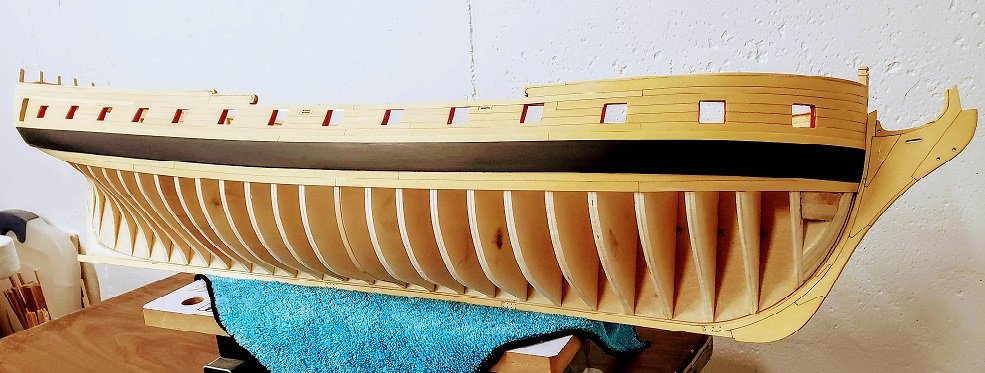
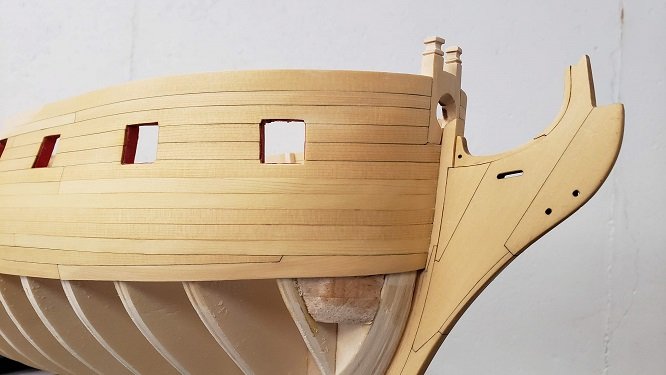
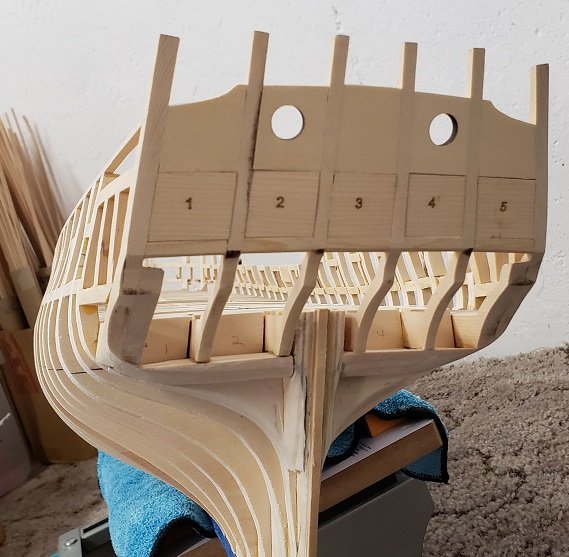
Hello everyone: Another little update. I got the wales and black strake finished up and about 90% of the interior bulwarks sanded down to the correct thickness. I still need to get the anchor linings attached, painted,. Then I will finish up the interior bulwarks. Then I can use Chucks tick strips to line off the bulkheads and see how everything really lines up. I'm getting to the point I don't like my camera to much anymore (just my phone). It shows way too many of the little details I don't see or miss. I don't think you all will be seeing any close-ups for a while..... I might have to use it after each row of planking to see how things REALLY look.... Moving right along --- one plank at a time.....

- 99 replies
-
- 15
-
-
- winchelsea
- Syren Ship Model Company
- (and 1 more)
-
That looks pretty darn awesome. Time to sit back, have a drink, and admire a job well done!!!! 🍺🍺
-
Wow Ben - That looks awesome. I love the wood choice also. It is going to add some nice contrast. You really have me wondering if I should give it a try on one side. I think it adds a lot to the model and draws attention. Beautiful work.....
- 399 replies
-
- 1
-
-
- winchelsea
- Syren Ship Model Company
- (and 1 more)
-
Beautiful work Mike... Looks flawless... 😀 Great job....
- 607 replies
-
- 2
-
-
- winchelsea
- Syren Ship Model Company
- (and 1 more)
-
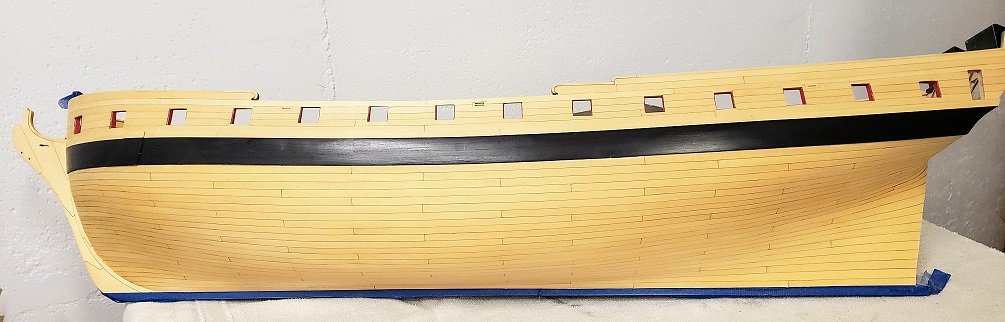
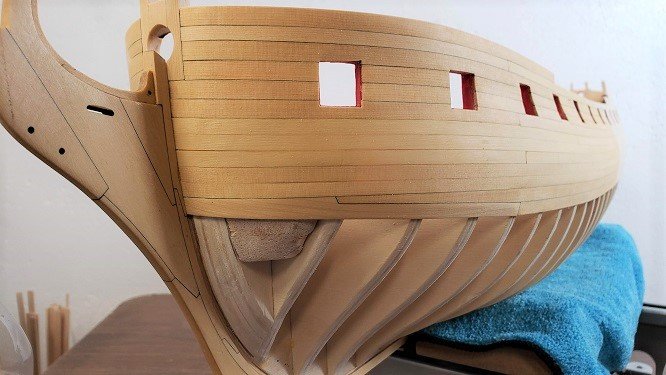
Just a quick update - I got the 2 strakes added below the wales. They were a challenge to get them looking decent. Time to do a little finish sanding to get things in order and then figure out how I'm going to do those wales and black strake. One at a time!!! 👍
- 99 replies
-
- 13
-
-
- winchelsea
- Syren Ship Model Company
- (and 1 more)
-
Thanks Chuck - and everyone for all the likes... I have finished up the other side above the wales and got everything rough sanded. Below are a few pictures of the current state of affairs. Time to review Chucks videos about bending the planks and getting a good fit. I have to keep telling myself to be patient and not get in a hurry. Sometimes that's the hardest part !!!

- 99 replies
-
- 14
-
-
- winchelsea
- Syren Ship Model Company
- (and 1 more)
-
Well I got the planking done above the wales - only on the port side. Here are a few pics of where we stand as of today. Going to take some lessons learned from this side and make use of them on the starboard side. I don't think this side turned out too bad but hoping for better results on my "show side". Moving right along.....
- 99 replies
-
- 15
-
-
- winchelsea
- Syren Ship Model Company
- (and 1 more)
-
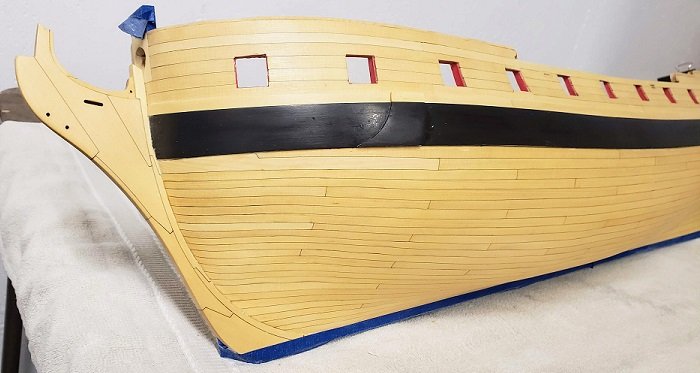
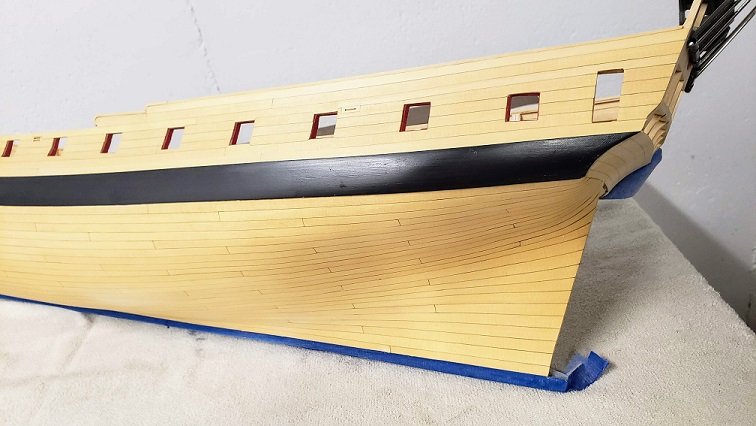
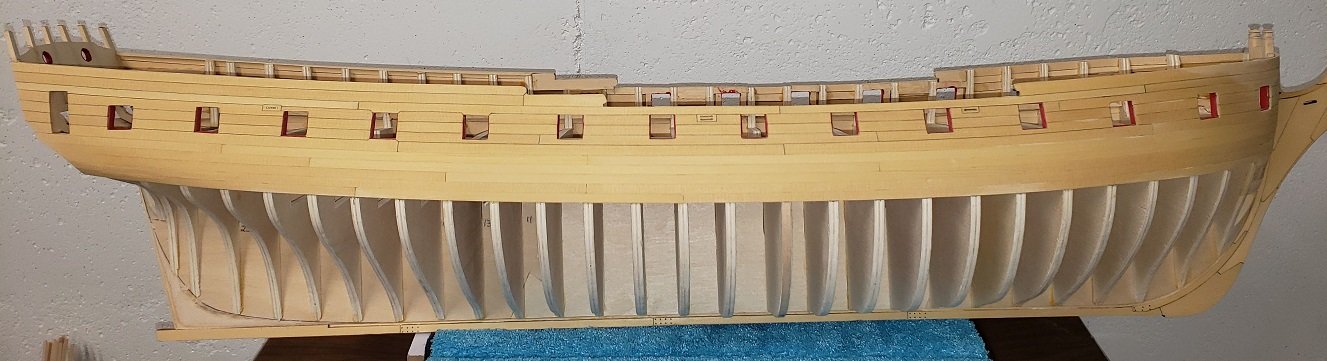
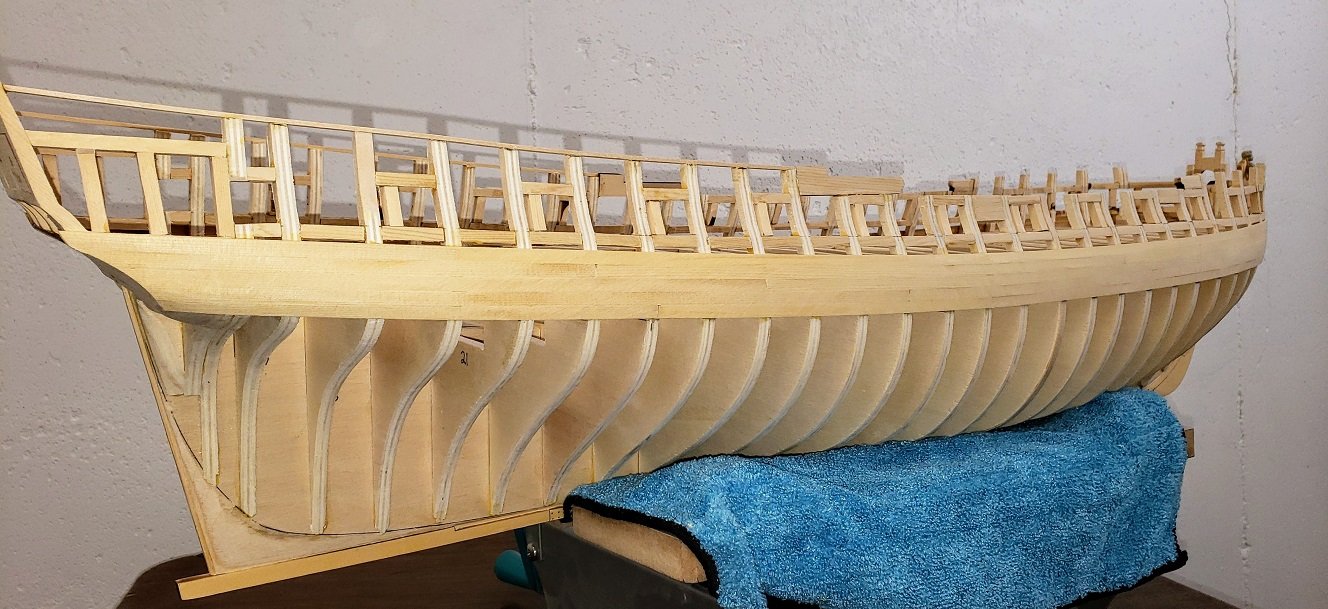
Well, after a little hiatus away from the shipyard I have had some time to get things going again. As you can all see I have got the wales and black strake attached and ready to go. The photos show the current state of affairs. Things have been rough sanded and still a little tweaking is necessary. Also have to work on some of the port openings a little bit and get them painted so they are ready to go. I also had to do a little de-construction and then some re-construction to get the run of the wales correct. Hopefully they are close now and the rest of the planking will flow into place..... And now its time to make some dust and cut some 1/4" strips to get ready to plank above the wales. Feels good to get back into the shop again..... Time to get serious now!!!!
- 99 replies
-
- 17
-
-
- winchelsea
- Syren Ship Model Company
- (and 1 more)
-
Looks pretty darn good to me. I'll be very happy if mine turns out somewhere near that. Great work!!!
-
This sounds really interesting. The frame reveal was one it the first things that caught my eye when I was looking at the Confederacy. I will definitely continue to watch. I think it will be well worth the time and effort as it adds a lot to the model. Great stuff, good luck Ben.
- 399 replies
-
- 2
-
-
- winchelsea
- Syren Ship Model Company
- (and 1 more)
-
Wow, that is some awesome stuff. Its going to be a big challenge to work with those small pieces and make everything come together. Yours looks absolutely fantastic !!!!
- 1,784 replies
-
- 2
-
-
- winchelsea
- Syren Ship Model Company
- (and 1 more)
-
I have to agree with all the other comments posted here. Your planking looks fantastic. Great job!!!!!
-
LOL - I have lots of room too - it's the admiral that's having an issue with it. She has nowhere to find a home!!!
- 1,784 replies
-
- 2
-
-
- winchelsea
- Syren Ship Model Company
- (and 1 more)
-
Beautiful work Chuck. You continue to raise the bar.... 👍
- 1,784 replies
-
- 4
-
-
- winchelsea
- Syren Ship Model Company
- (and 1 more)
-
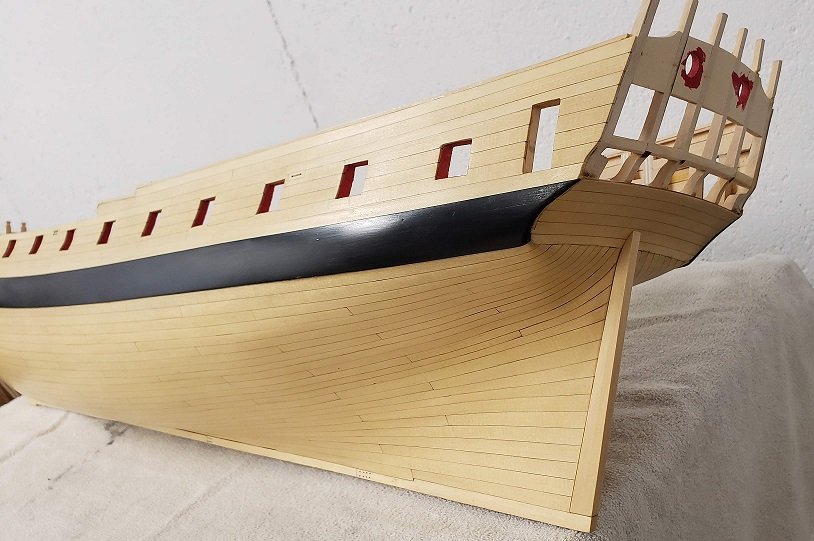
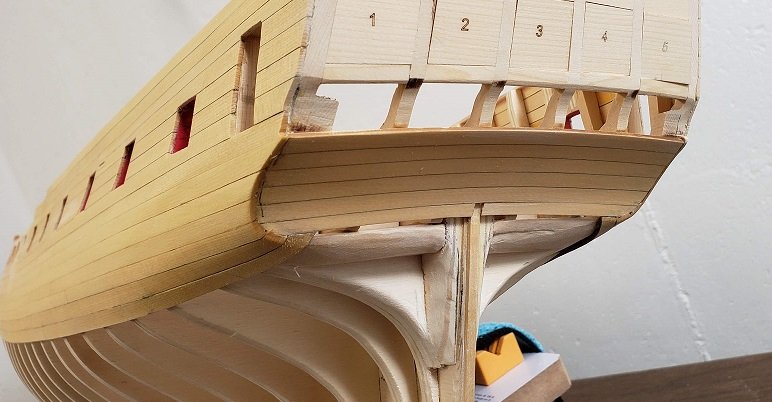
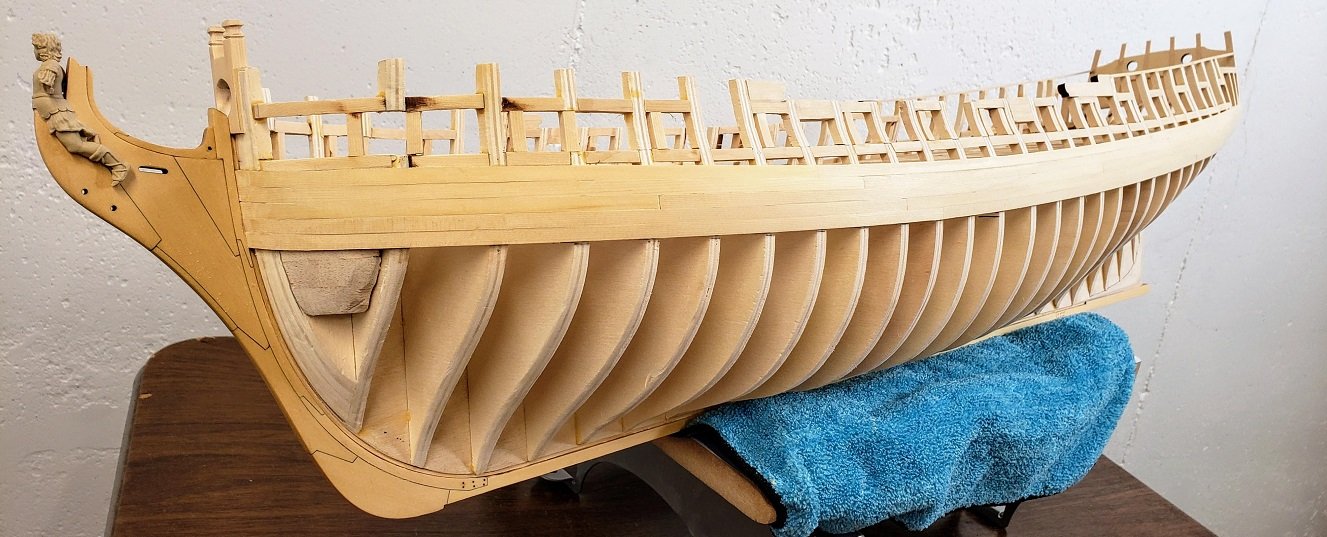
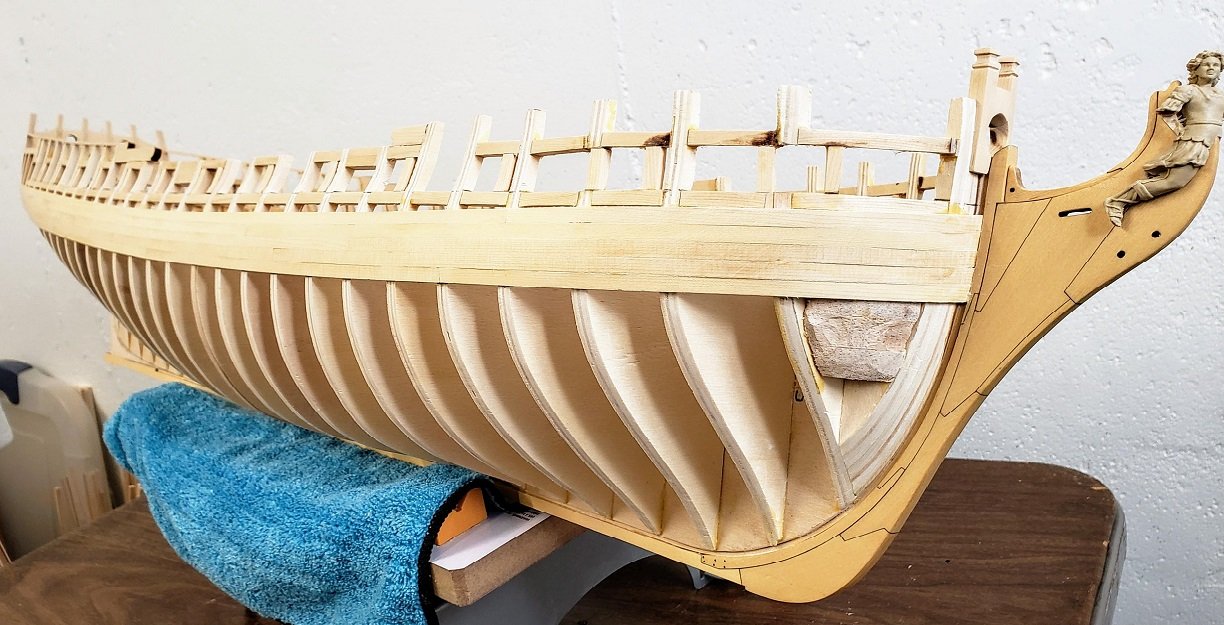
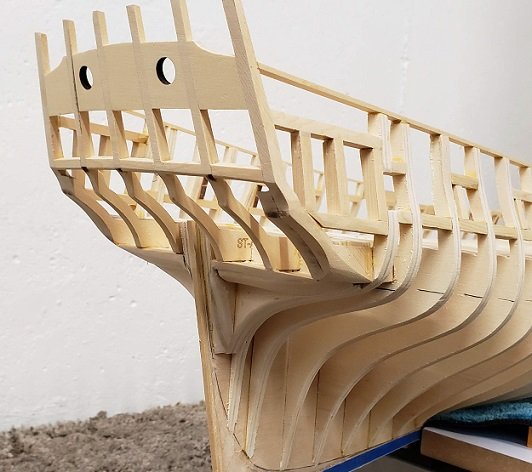
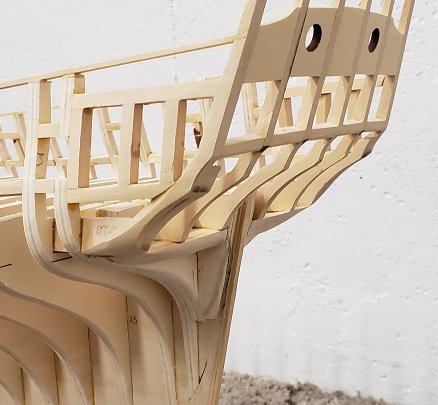
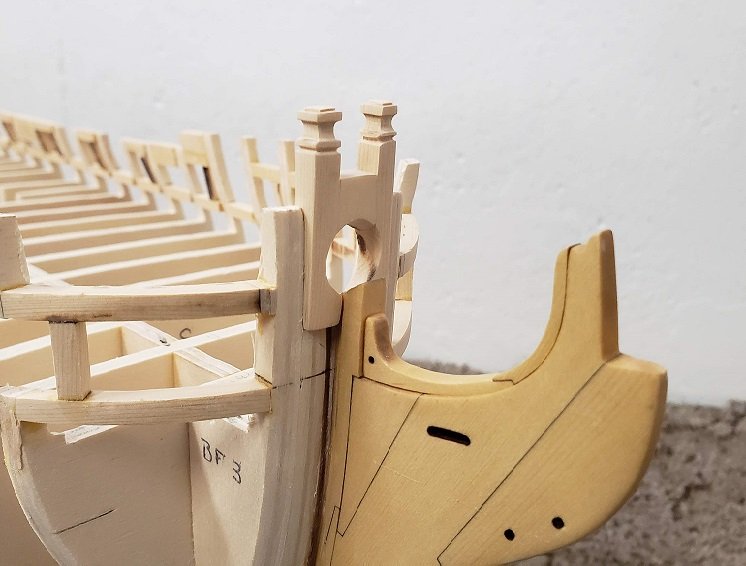
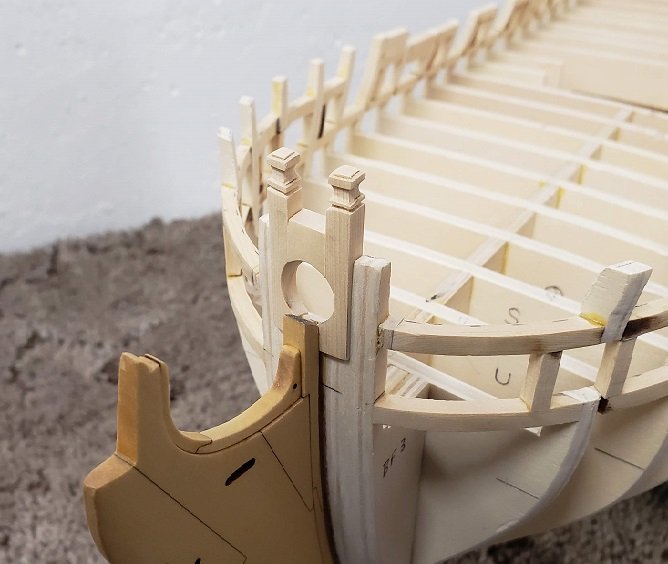
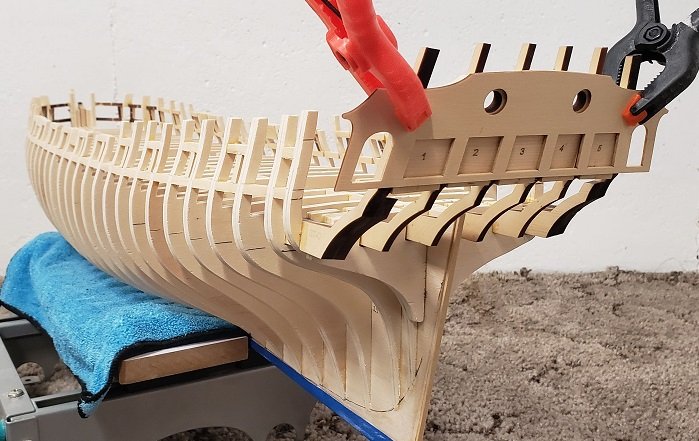
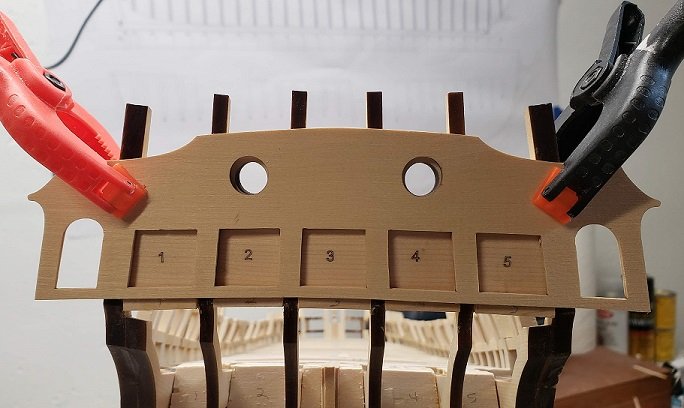
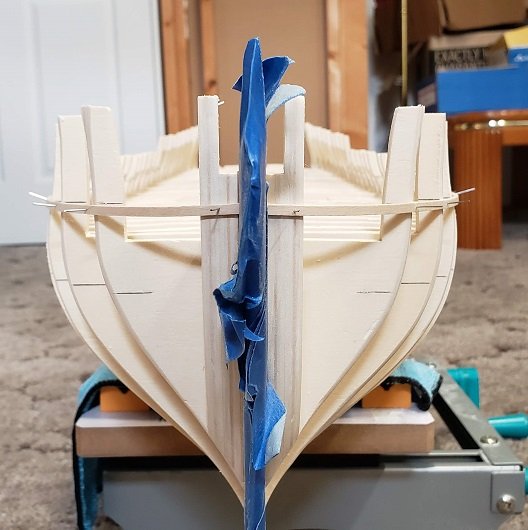
Finishing up Chapter One. Got the stern framing finished up and rough sanded. I'll still have to tweak a few things to get it ready for the stern planking in Chapter Two. Looking forward to that!! I used all 3 sets of the bollards and the one below is probably the best of the 3. They are not glued in place yet, keeping them free in case I need to tweak them a bit later and prevent any damage. I won't be getting much else done for a while as work is calling me. I'll be in Florida till February. It will be nice to get out of Michigan!!! Merry Christmas and Happy New Years to everyone. :^) 🎅

- 99 replies
-
- 15
-
-
- winchelsea
- Syren Ship Model Company
- (and 1 more)
-
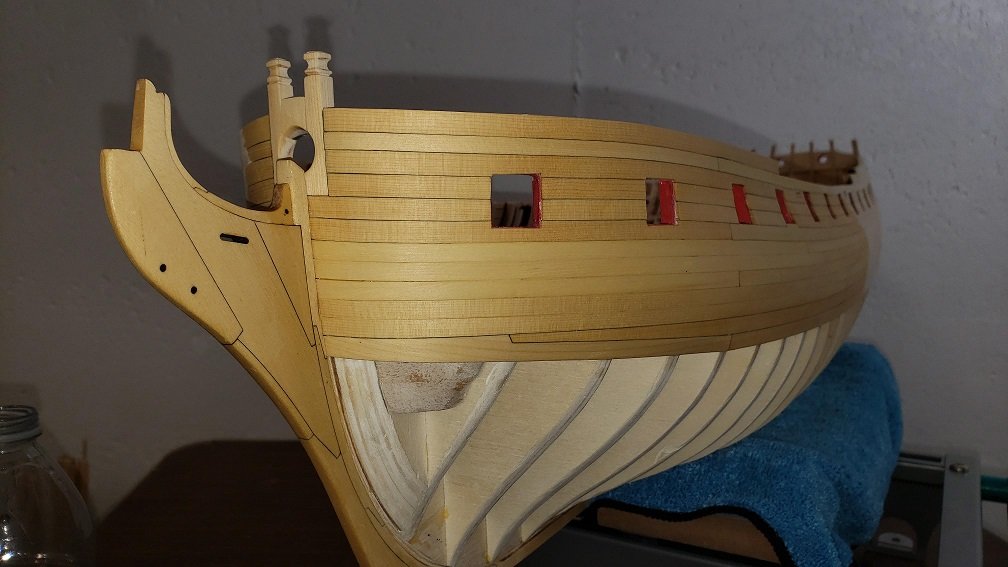
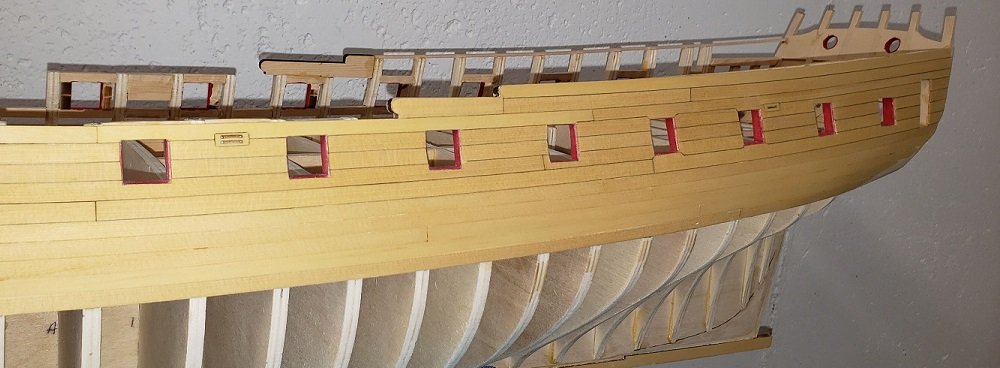
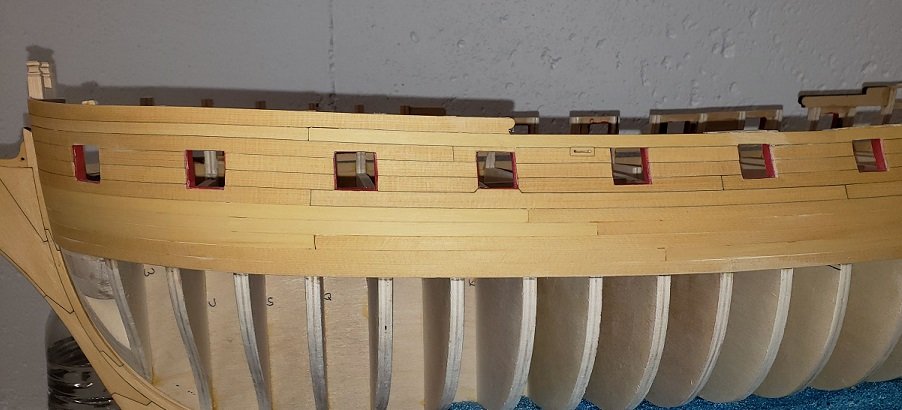
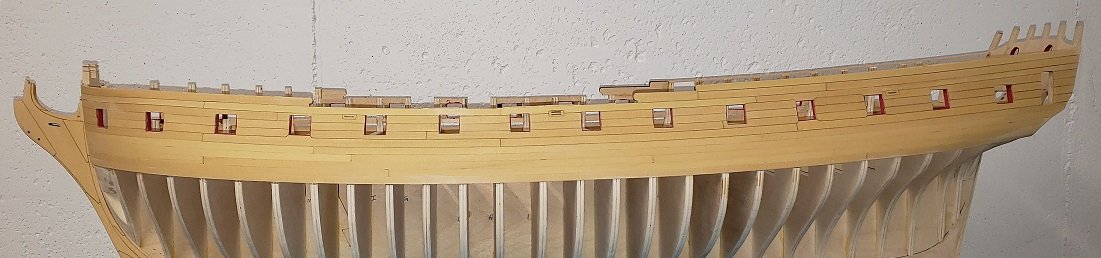
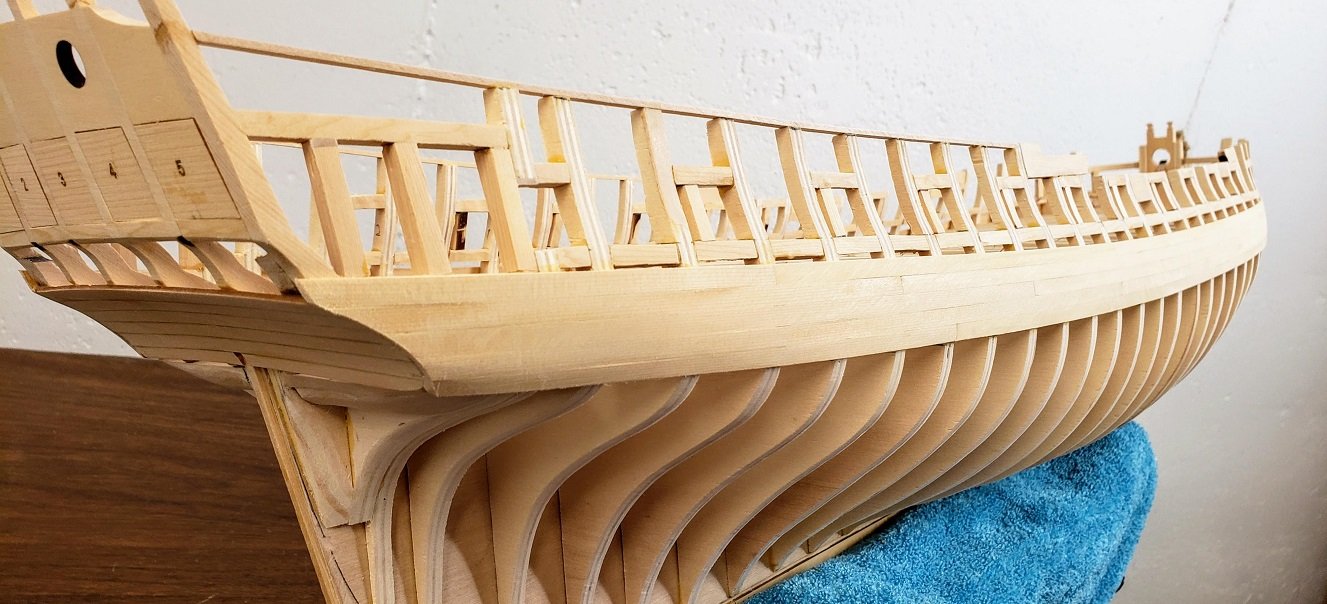
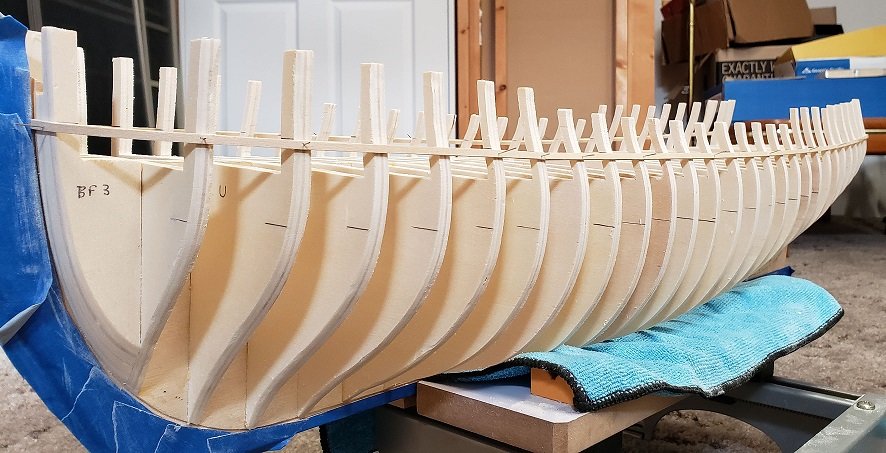
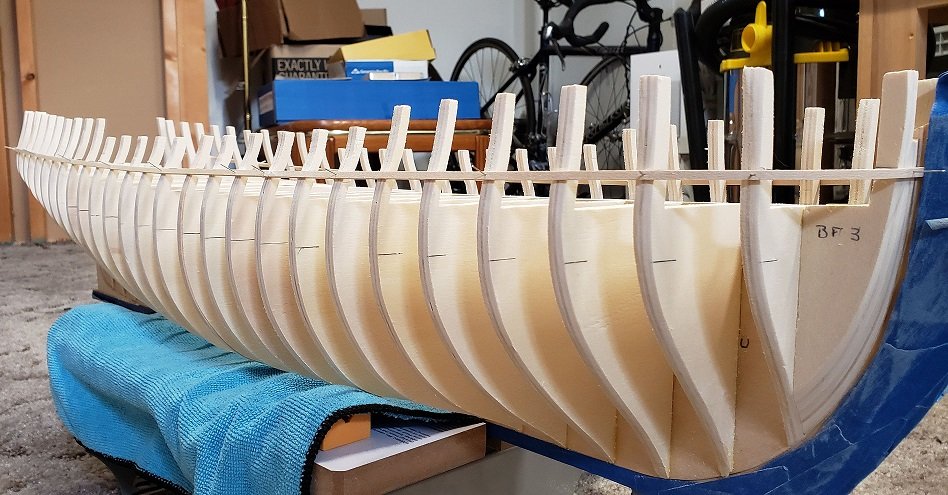
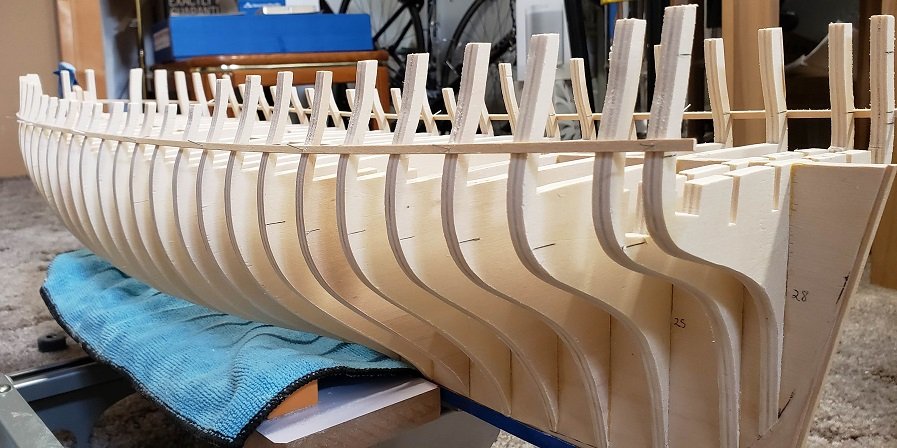
Just a quick update. I finally got the upper & lower port sills added along with all of the sides. The last couple days I have been working on the stern framing. I think it turned out pretty good. Chucks templates really help a lot in getting things to line up and make sure the openings are the right size. Definitely made things a lot easier.... Time to so some more sanding and some more faring so I can get moving along with the quarter gallery framing. One step at a time......
- 99 replies
-
- 10
-
-
- winchelsea
- Syren Ship Model Company
- (and 1 more)
-
Thats awesome stuff. Looks good... Hope everyone has a good Thanksgiving!!!! 🦃🦃
- 1,784 replies
-
- 2
-
-
- winchelsea
- Syren Ship Model Company
- (and 1 more)
-
Fabulous stuff Chuck. Looks fantastic... I'm not sure about me milling a 1/64" strip. Right now I'm not sure I can make a decent 1/8" strip. However I think I will be getting a lot of practice in the future...... Always looking forward to your updates.... Steve
- 1,784 replies
-
- 2
-
-
- winchelsea
- Syren Ship Model Company
- (and 1 more)
-
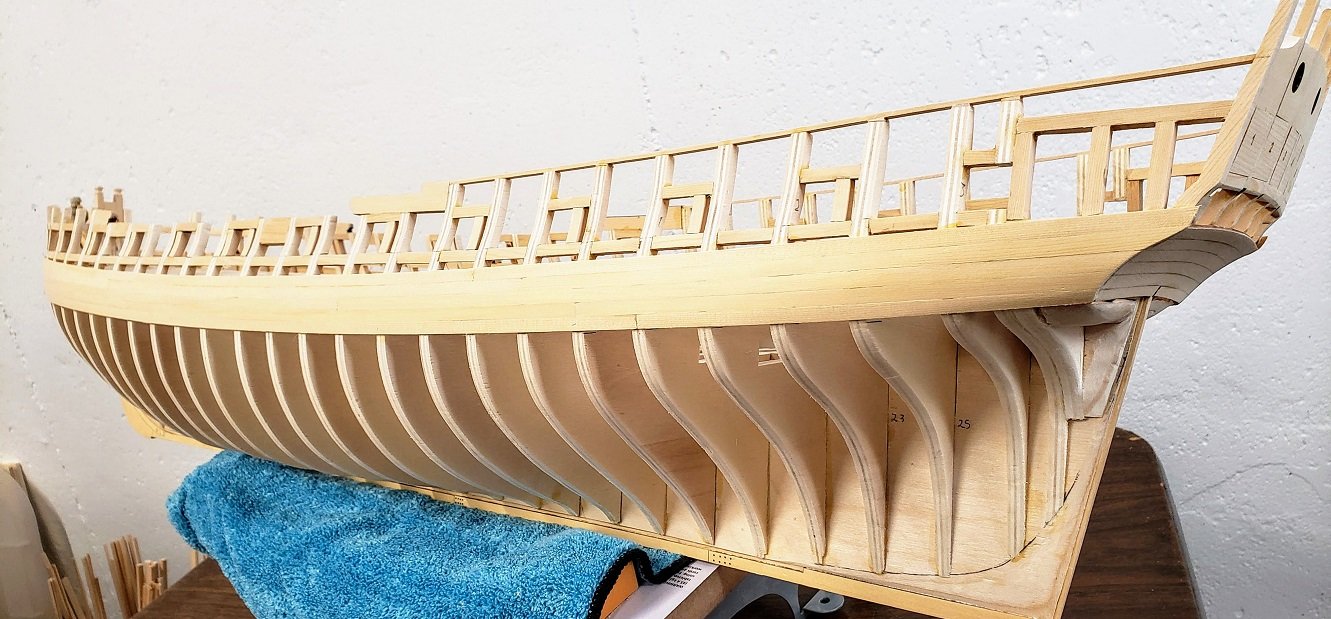
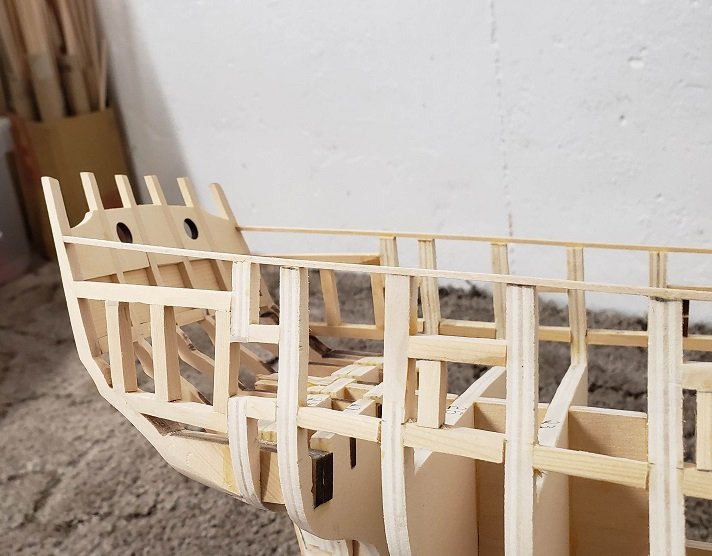
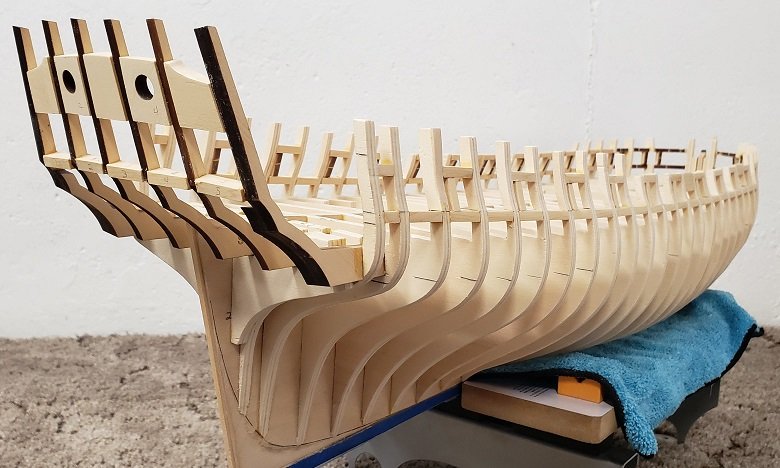
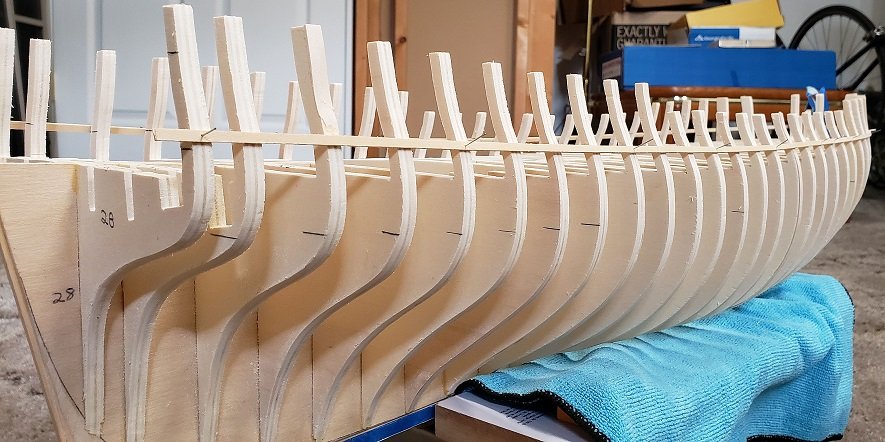
Just a quick update to show where things are as of this afternoon. Not much has changed but got most of the faring done over the last few days and the batten looking pretty good. I've been stressing about that lately because so much rides on how that batten is positioned. It seems like everything else on this build depends on how they are positioned.... I still have a little more faring to get done on the lower part but really want to get those lower port sills in to help strengthen the hull. Plus I have a new saw that is calling my name every time I go into the shop... Thoughts & comments are welcome & appreciated...
- 99 replies
-
- 13
-
-
- winchelsea
- Syren Ship Model Company
- (and 1 more)
-
There are no words.... Your talent, artistry, and attention to detail is simply amazing.... awesome stuff !!!!
- 589 replies
-
- 2
-
-
- le gros ventre
- cargo
- (and 1 more)
-
Awesome stuff Chuck. I really like the contrast of the colors - I know it won't stay that way but it does look pretty sweet. The flow looks great -- I'm always looking forward to your updates....
- 1,784 replies
-
- 2
-
-
- winchelsea
- Syren Ship Model Company
- (and 1 more)