HOLIDAY DONATION DRIVE - SUPPORT MSW - DO YOUR PART TO KEEP THIS GREAT FORUM GOING! (Only 24 donations so far out of 49,000 members - C'mon guys!)
×

Diver
-
Posts
402 -
Joined
-
Last visited
Content Type
Profiles
Forums
Gallery
Events
Everything posted by Diver
-
I have been puttering around with this build. Having fun with my airbrush, mistakes and all.


- 2 replies
-
- 10
-

-
When I arrived in Halifax in 1970 as a brand new Ordinary seaman the Bonny was still tied up in the dockyard, all though she was De-Commisioned. I was doing a Explosive Demolition course out at Portugese cove the day she was towed out on her way to the razor blade factory. It was a sunny but sad day. I think this would have been spring of 71, or maybe 72.
-
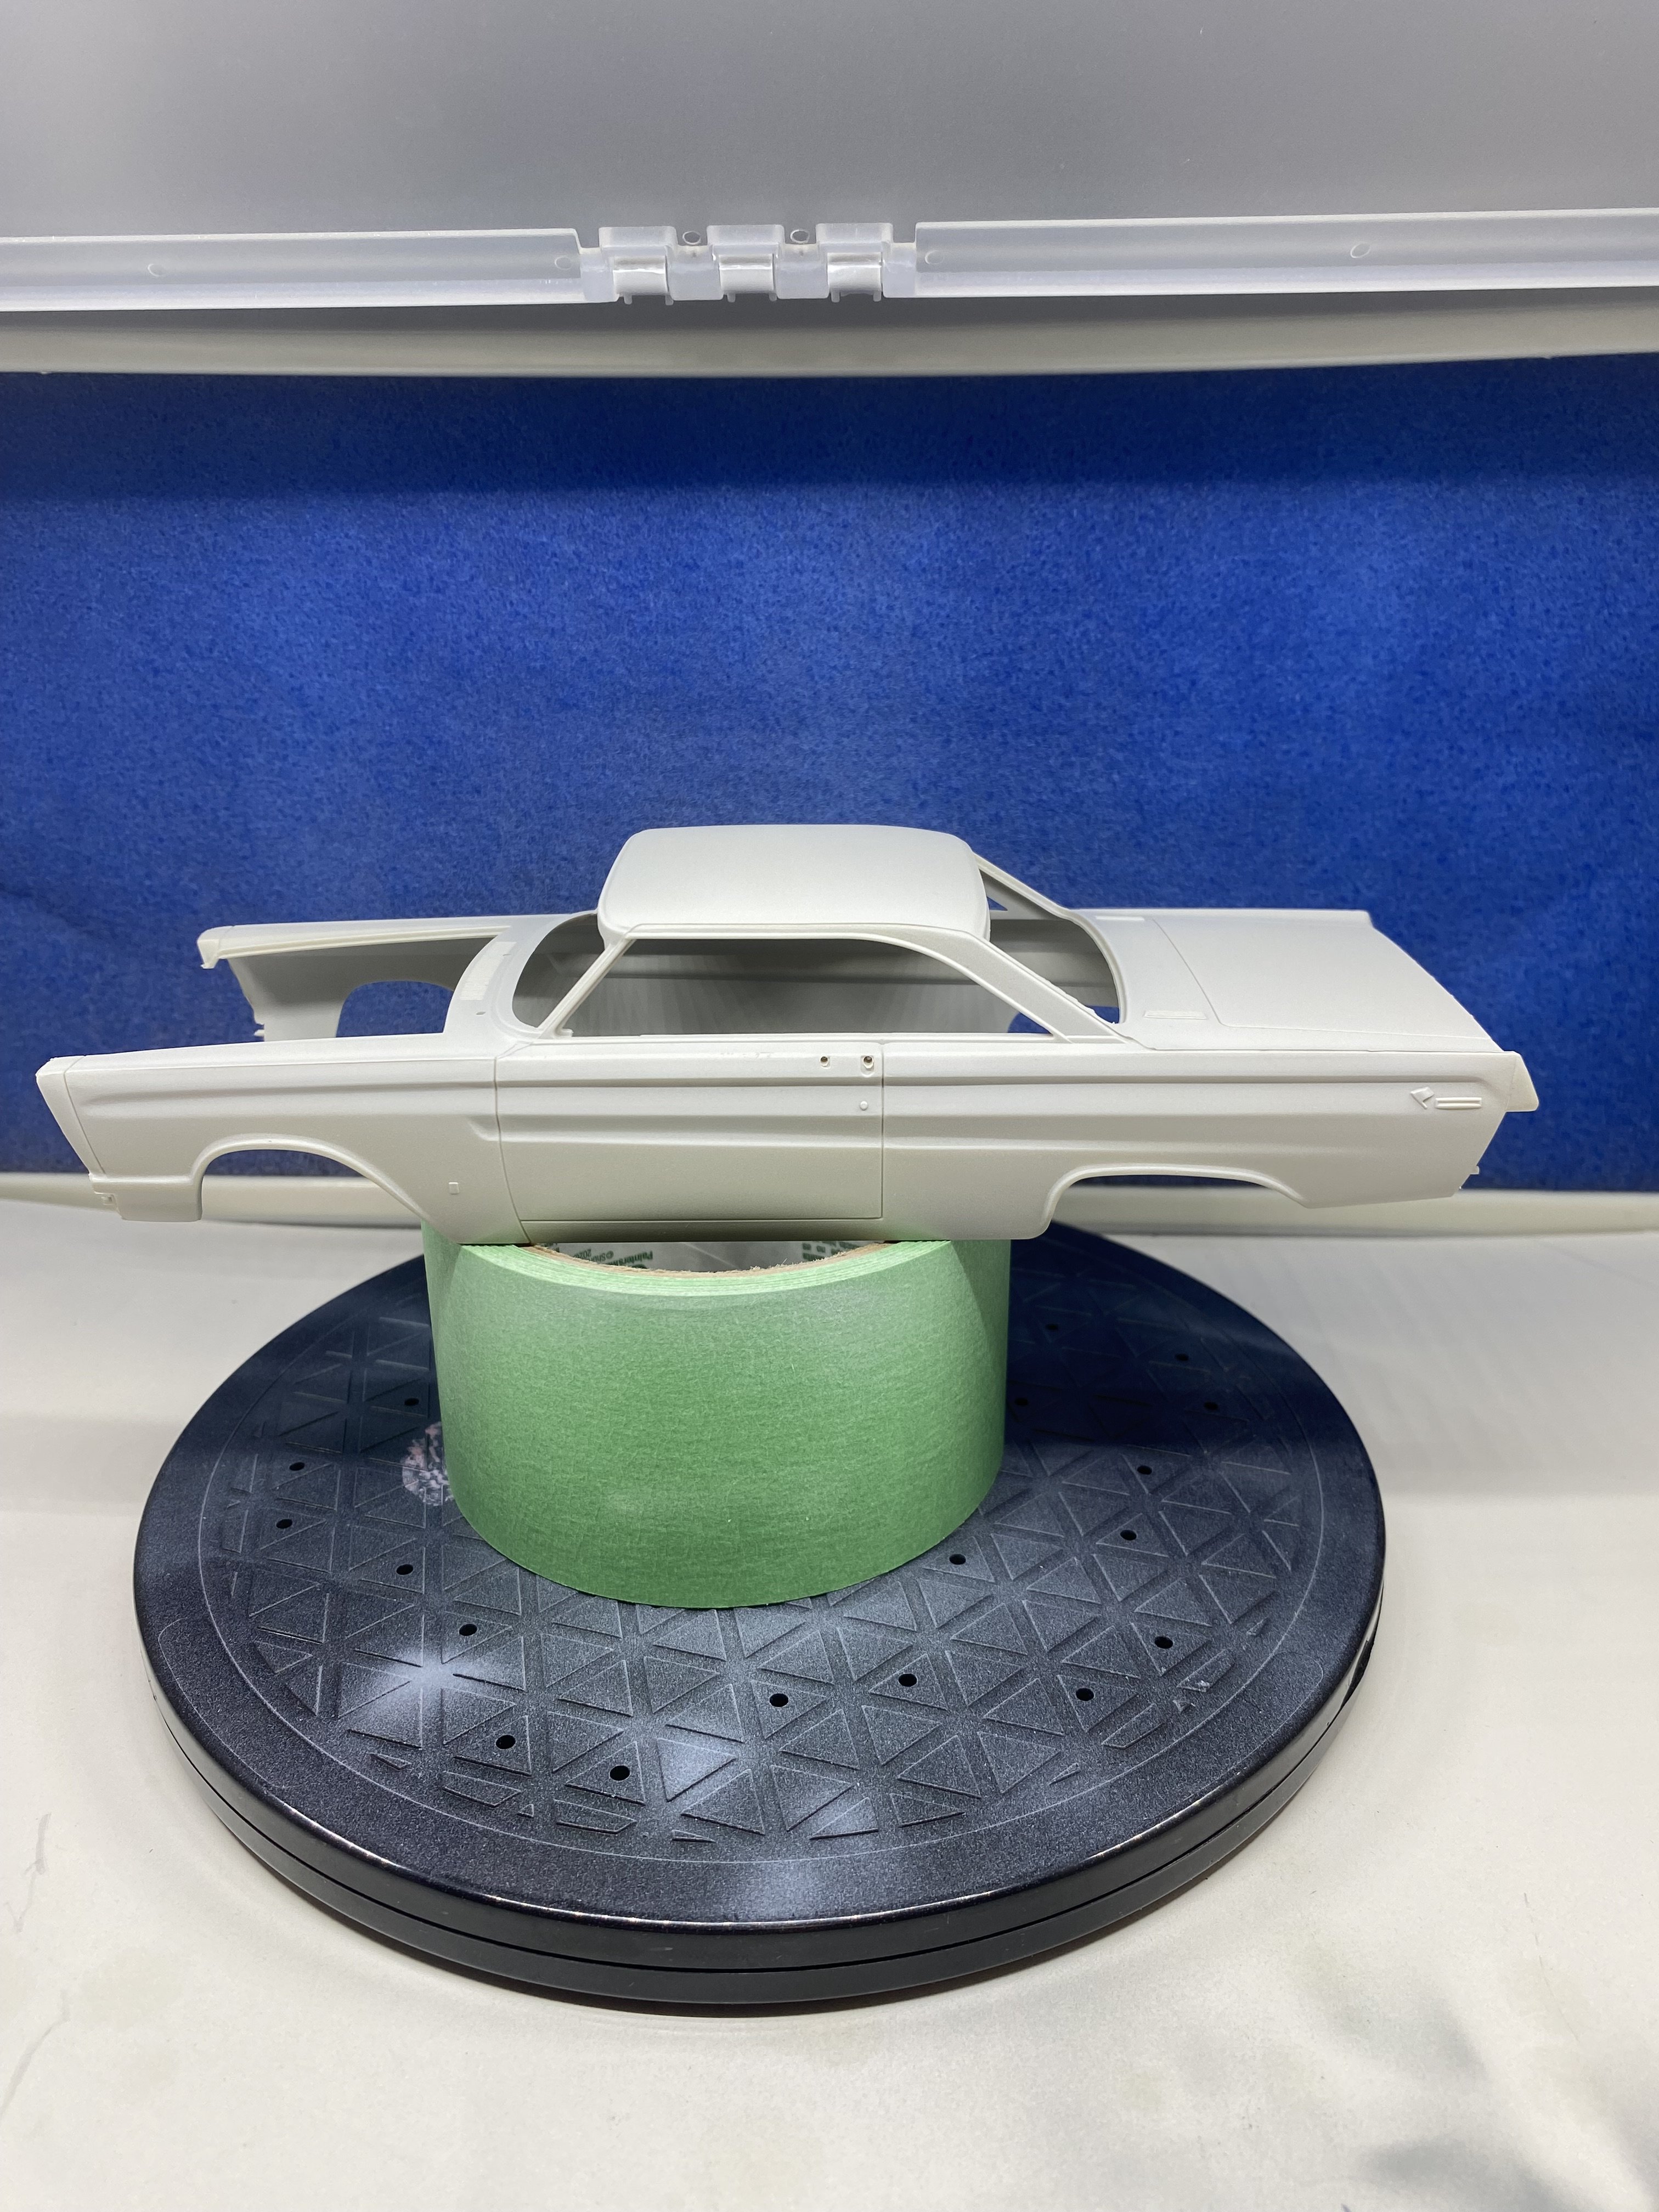
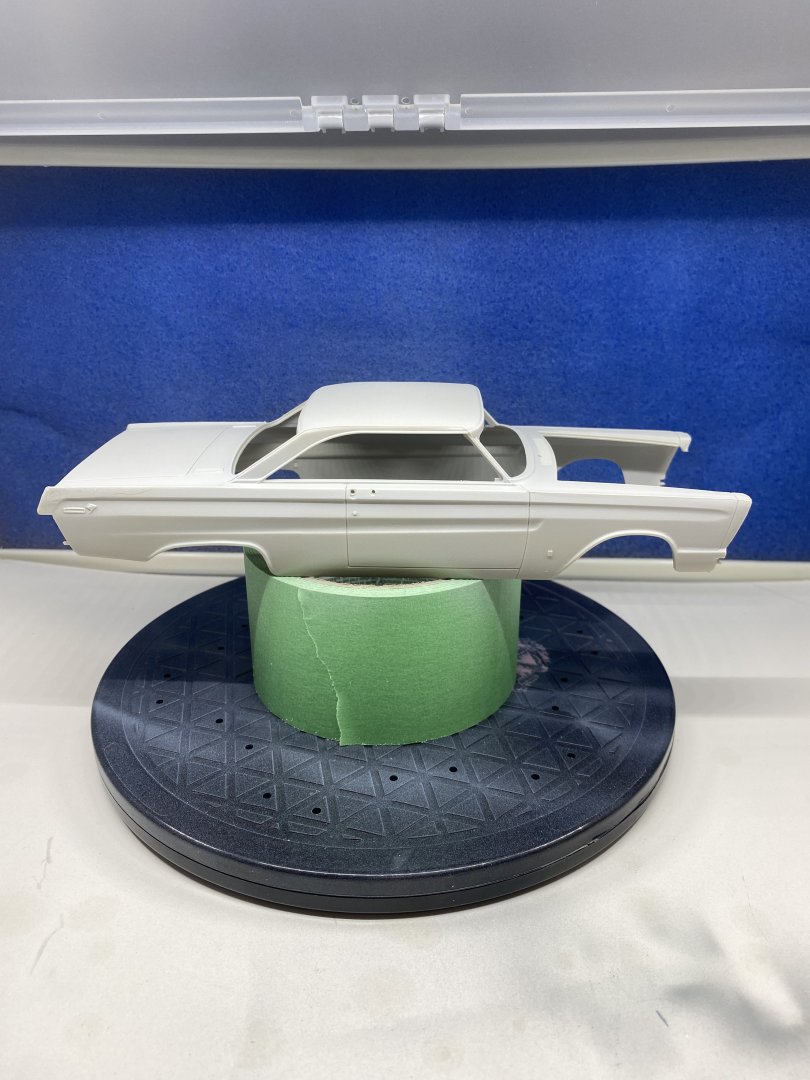
Put my new airbrush and paint booth to the test. A lot of trial and error to get the correct paint mixture and air pressure to spray an acceptable coat. I tested on some scrap before moving to the car body. I am happy with the results. I will let the primer cure for a day and then on to the colour coats.

- 2 replies
-
- 10
-
-
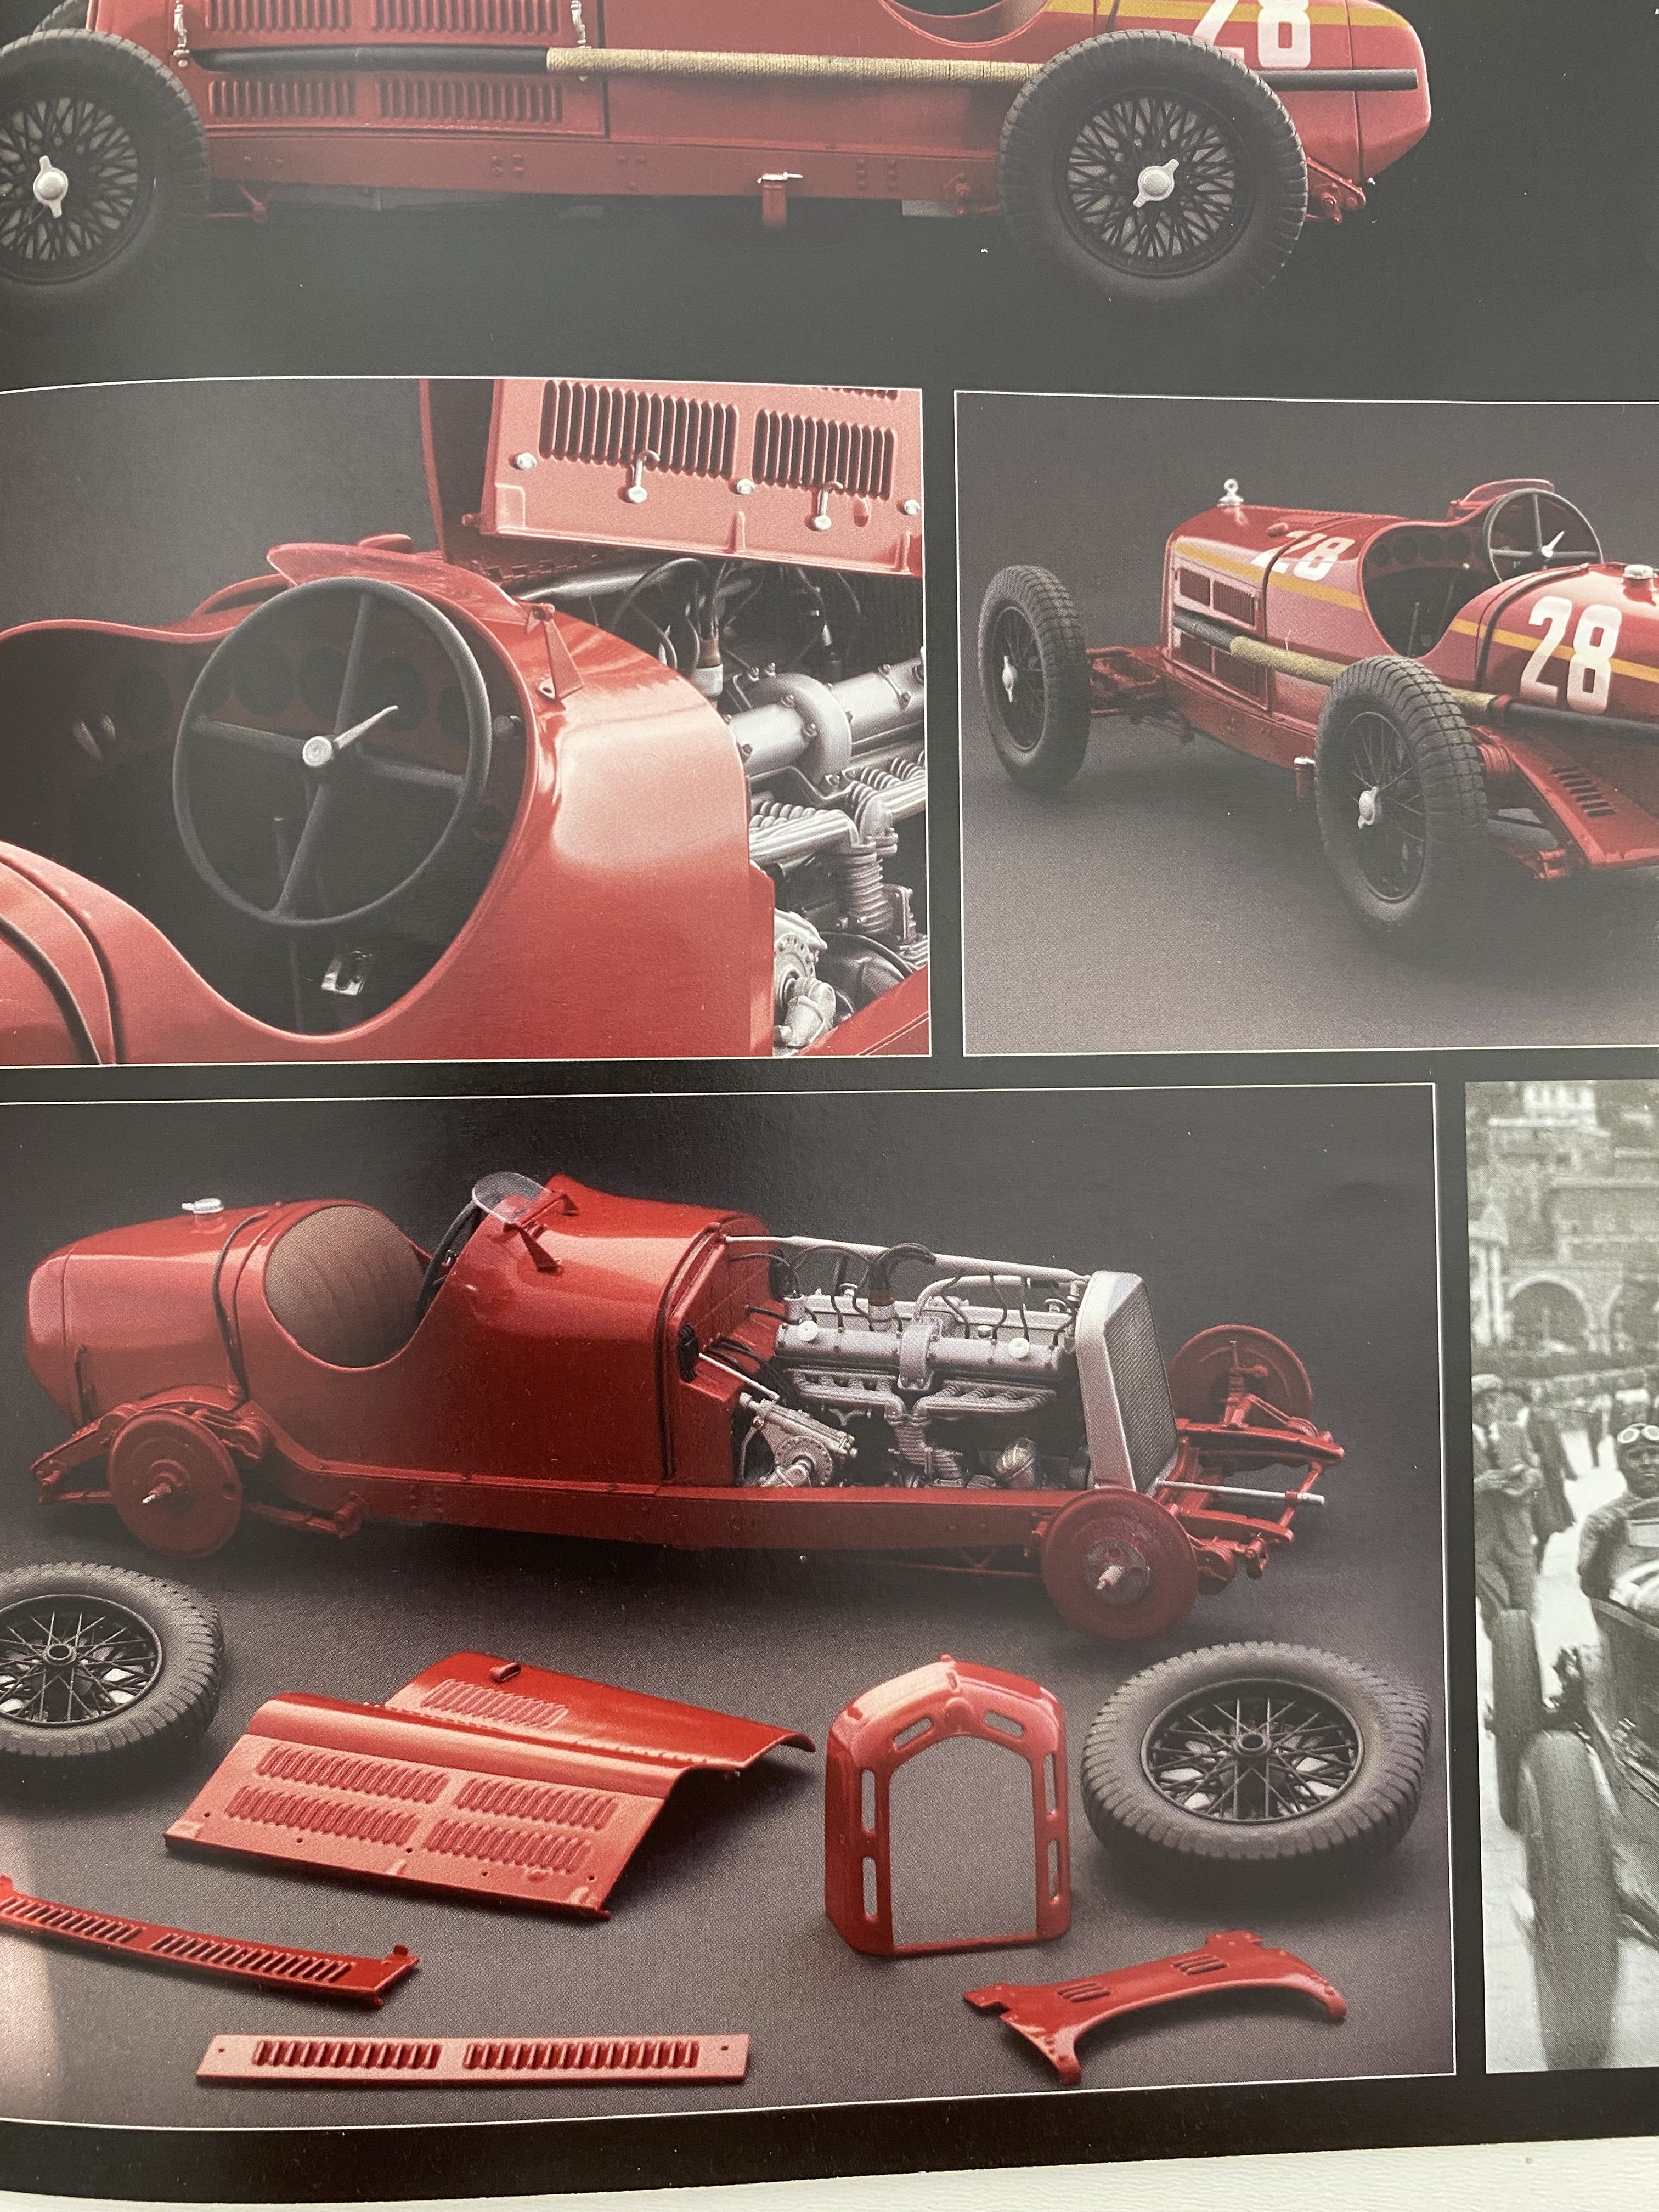
To improve my skills in dealing with small painted parts I purchased this kit from Echelon hobbies in Brighton Ontario. This will be used as a learning curve before Continuing with my 1/12 scale Alfa. The colours used may not be accurate but they are what I have. At this stage I am not ready to attempt spark plug wires but that will come later. The kit is a 1/25 from Moebius models.


-
Worlds finest navy, Must have been the RCN.. LOL
-
Bristol Bulldog by Danstream - Airfix - 1/48 - PLASTIC
Diver replied to Danstream's topic in Non-ship/categorised builds
I believe that Douglas Bader was flying a Bulldog when he crashed and lost his legs. -
Thats great news. It is so easy for a country to lose its history due to lack of funding. We can not always rely on private funding and donations.
-
Work area pictures only
Diver replied to Johnny Mike's topic in Modeling tools and Workshop Equipment
I have the luxury of using the second bedroom in our Condo.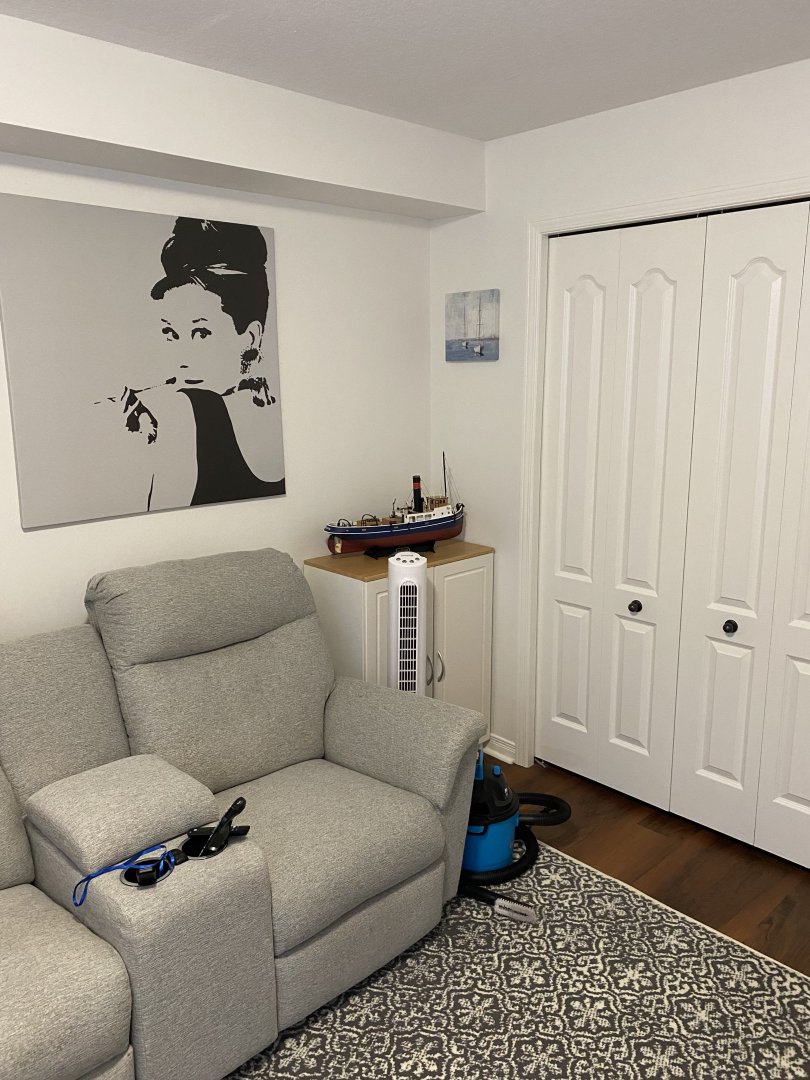

- 47 replies
-
- 12
-
-
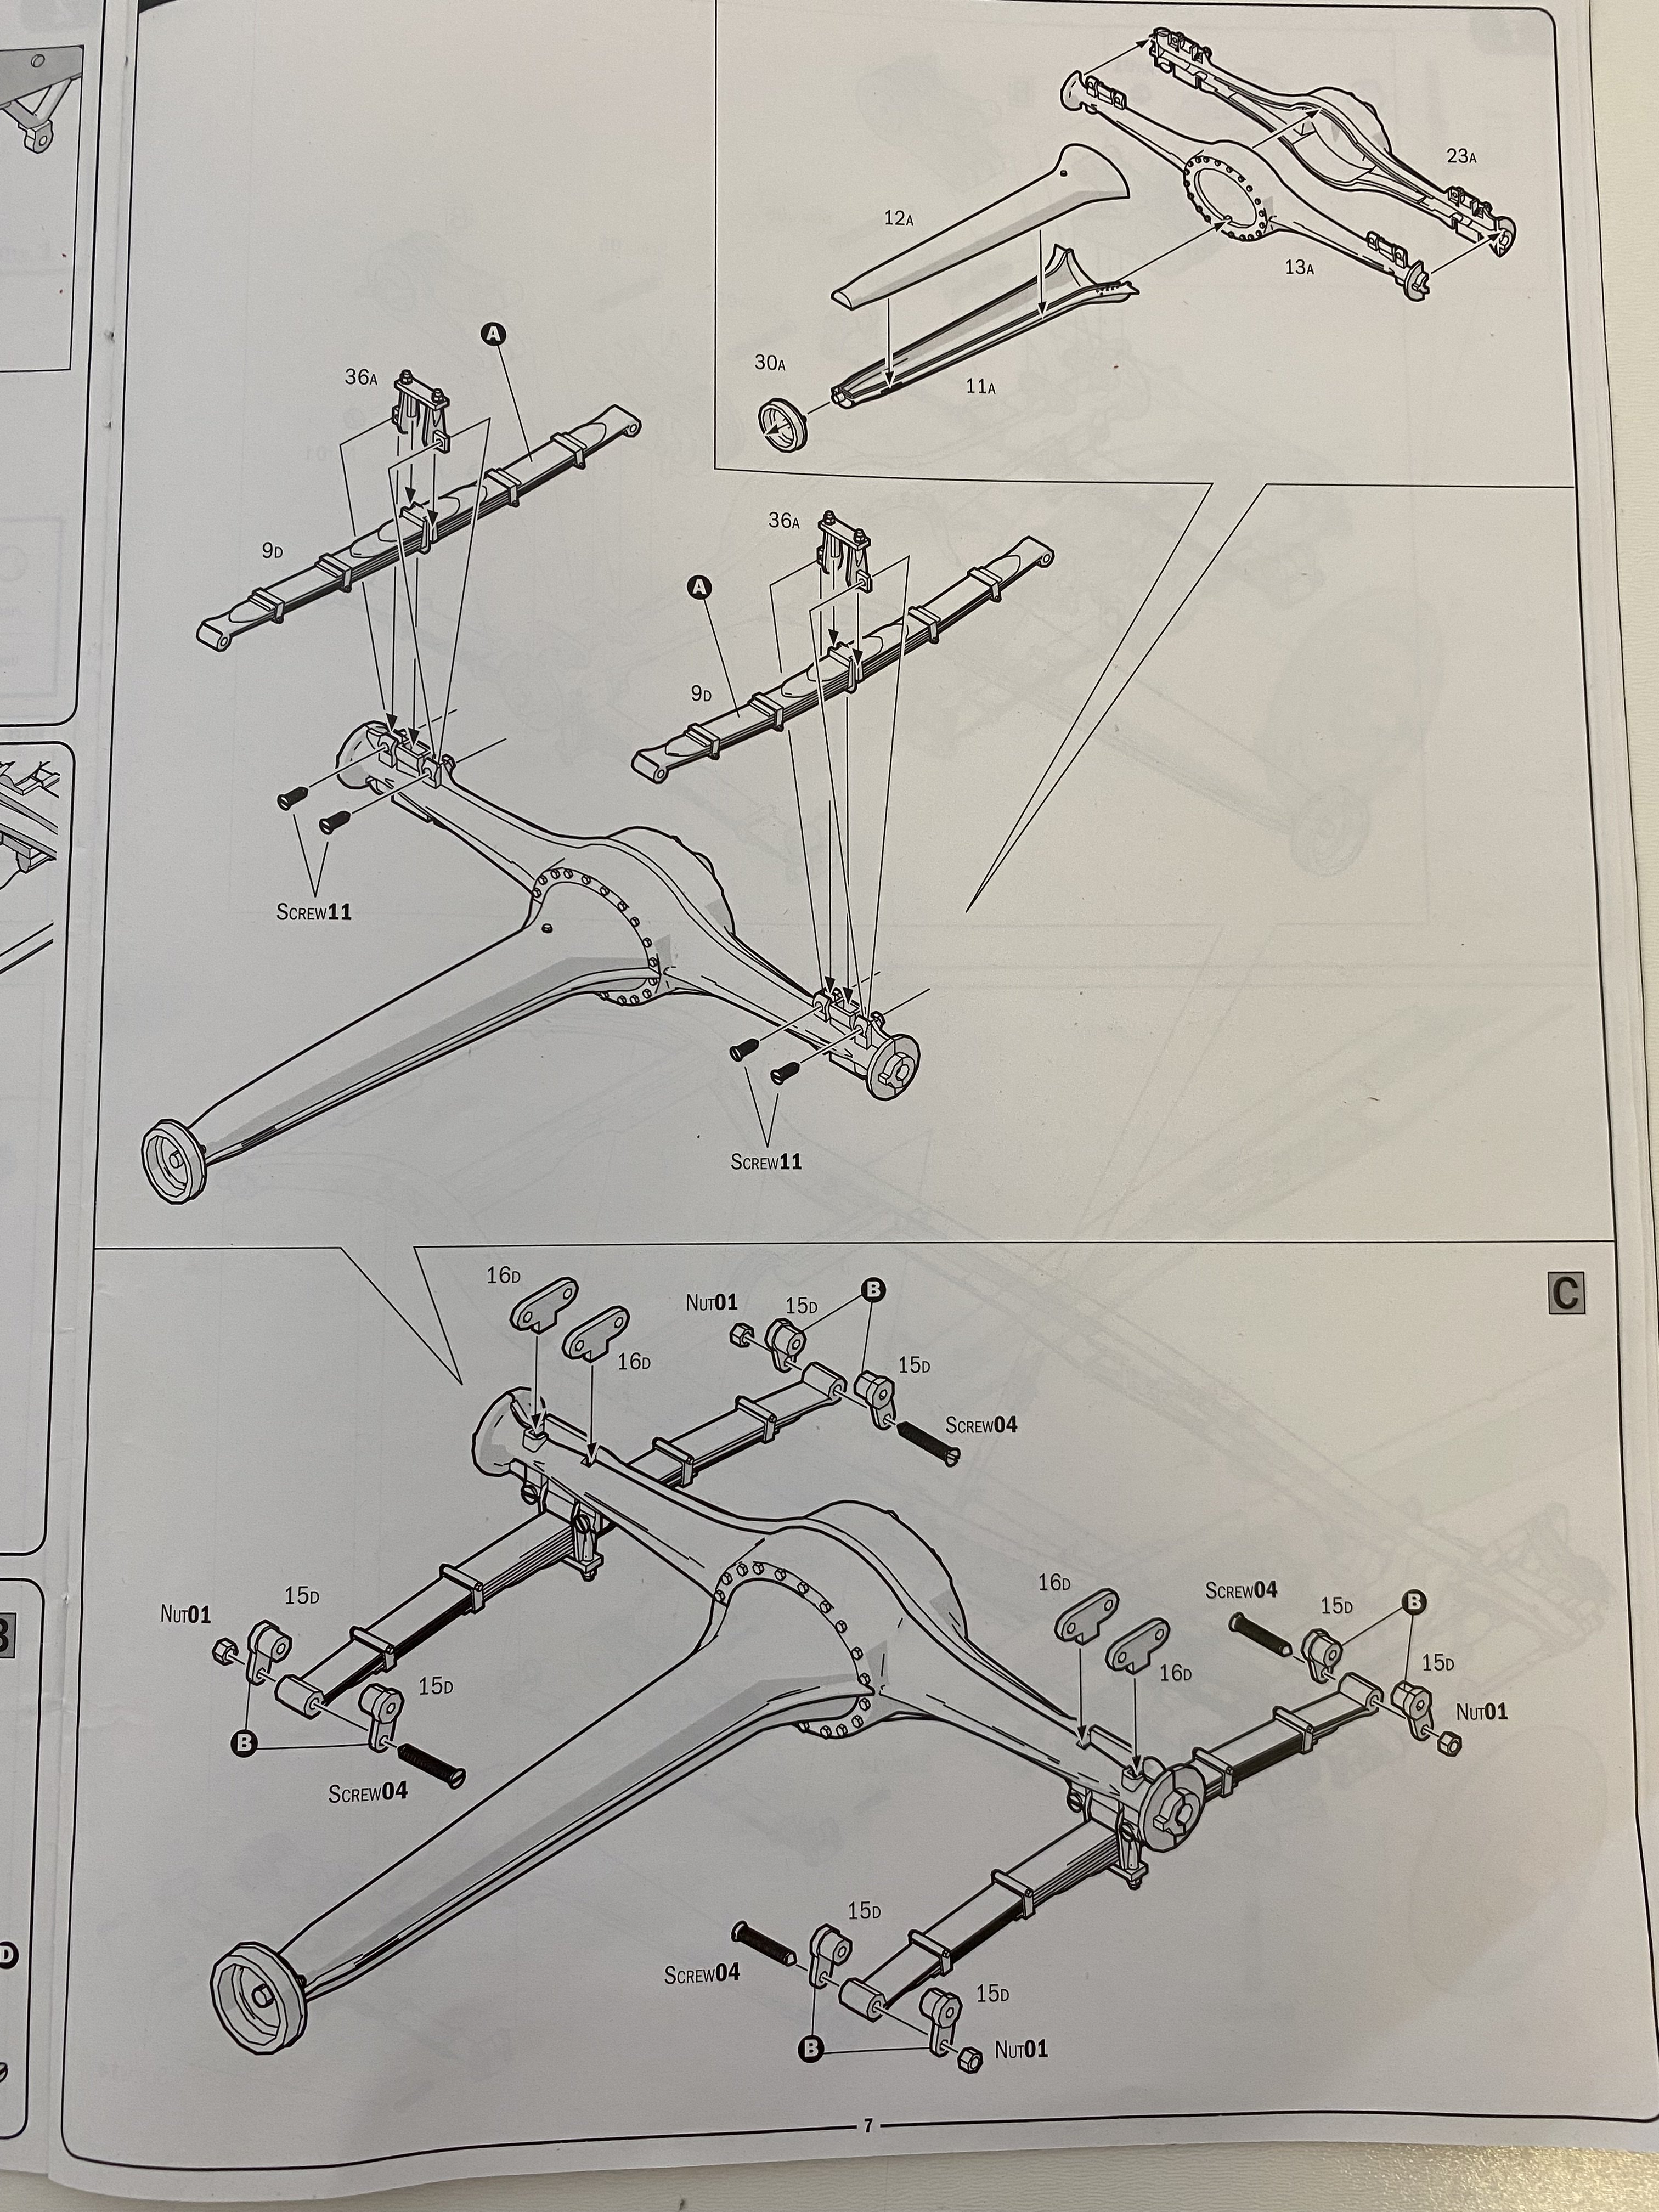
Steps 5, 6, and 7 complete. I now will wait for my airbrush set up before going any further. I will start on the engine but will only do main pieces and hand paint smaller items like hoses, distributor etc. This kit is all produced and have not run into any problems , yet. I do require my back kit magnifier for the tiny nuts and bolts.

- 9 replies
-
- 12
-
-

-
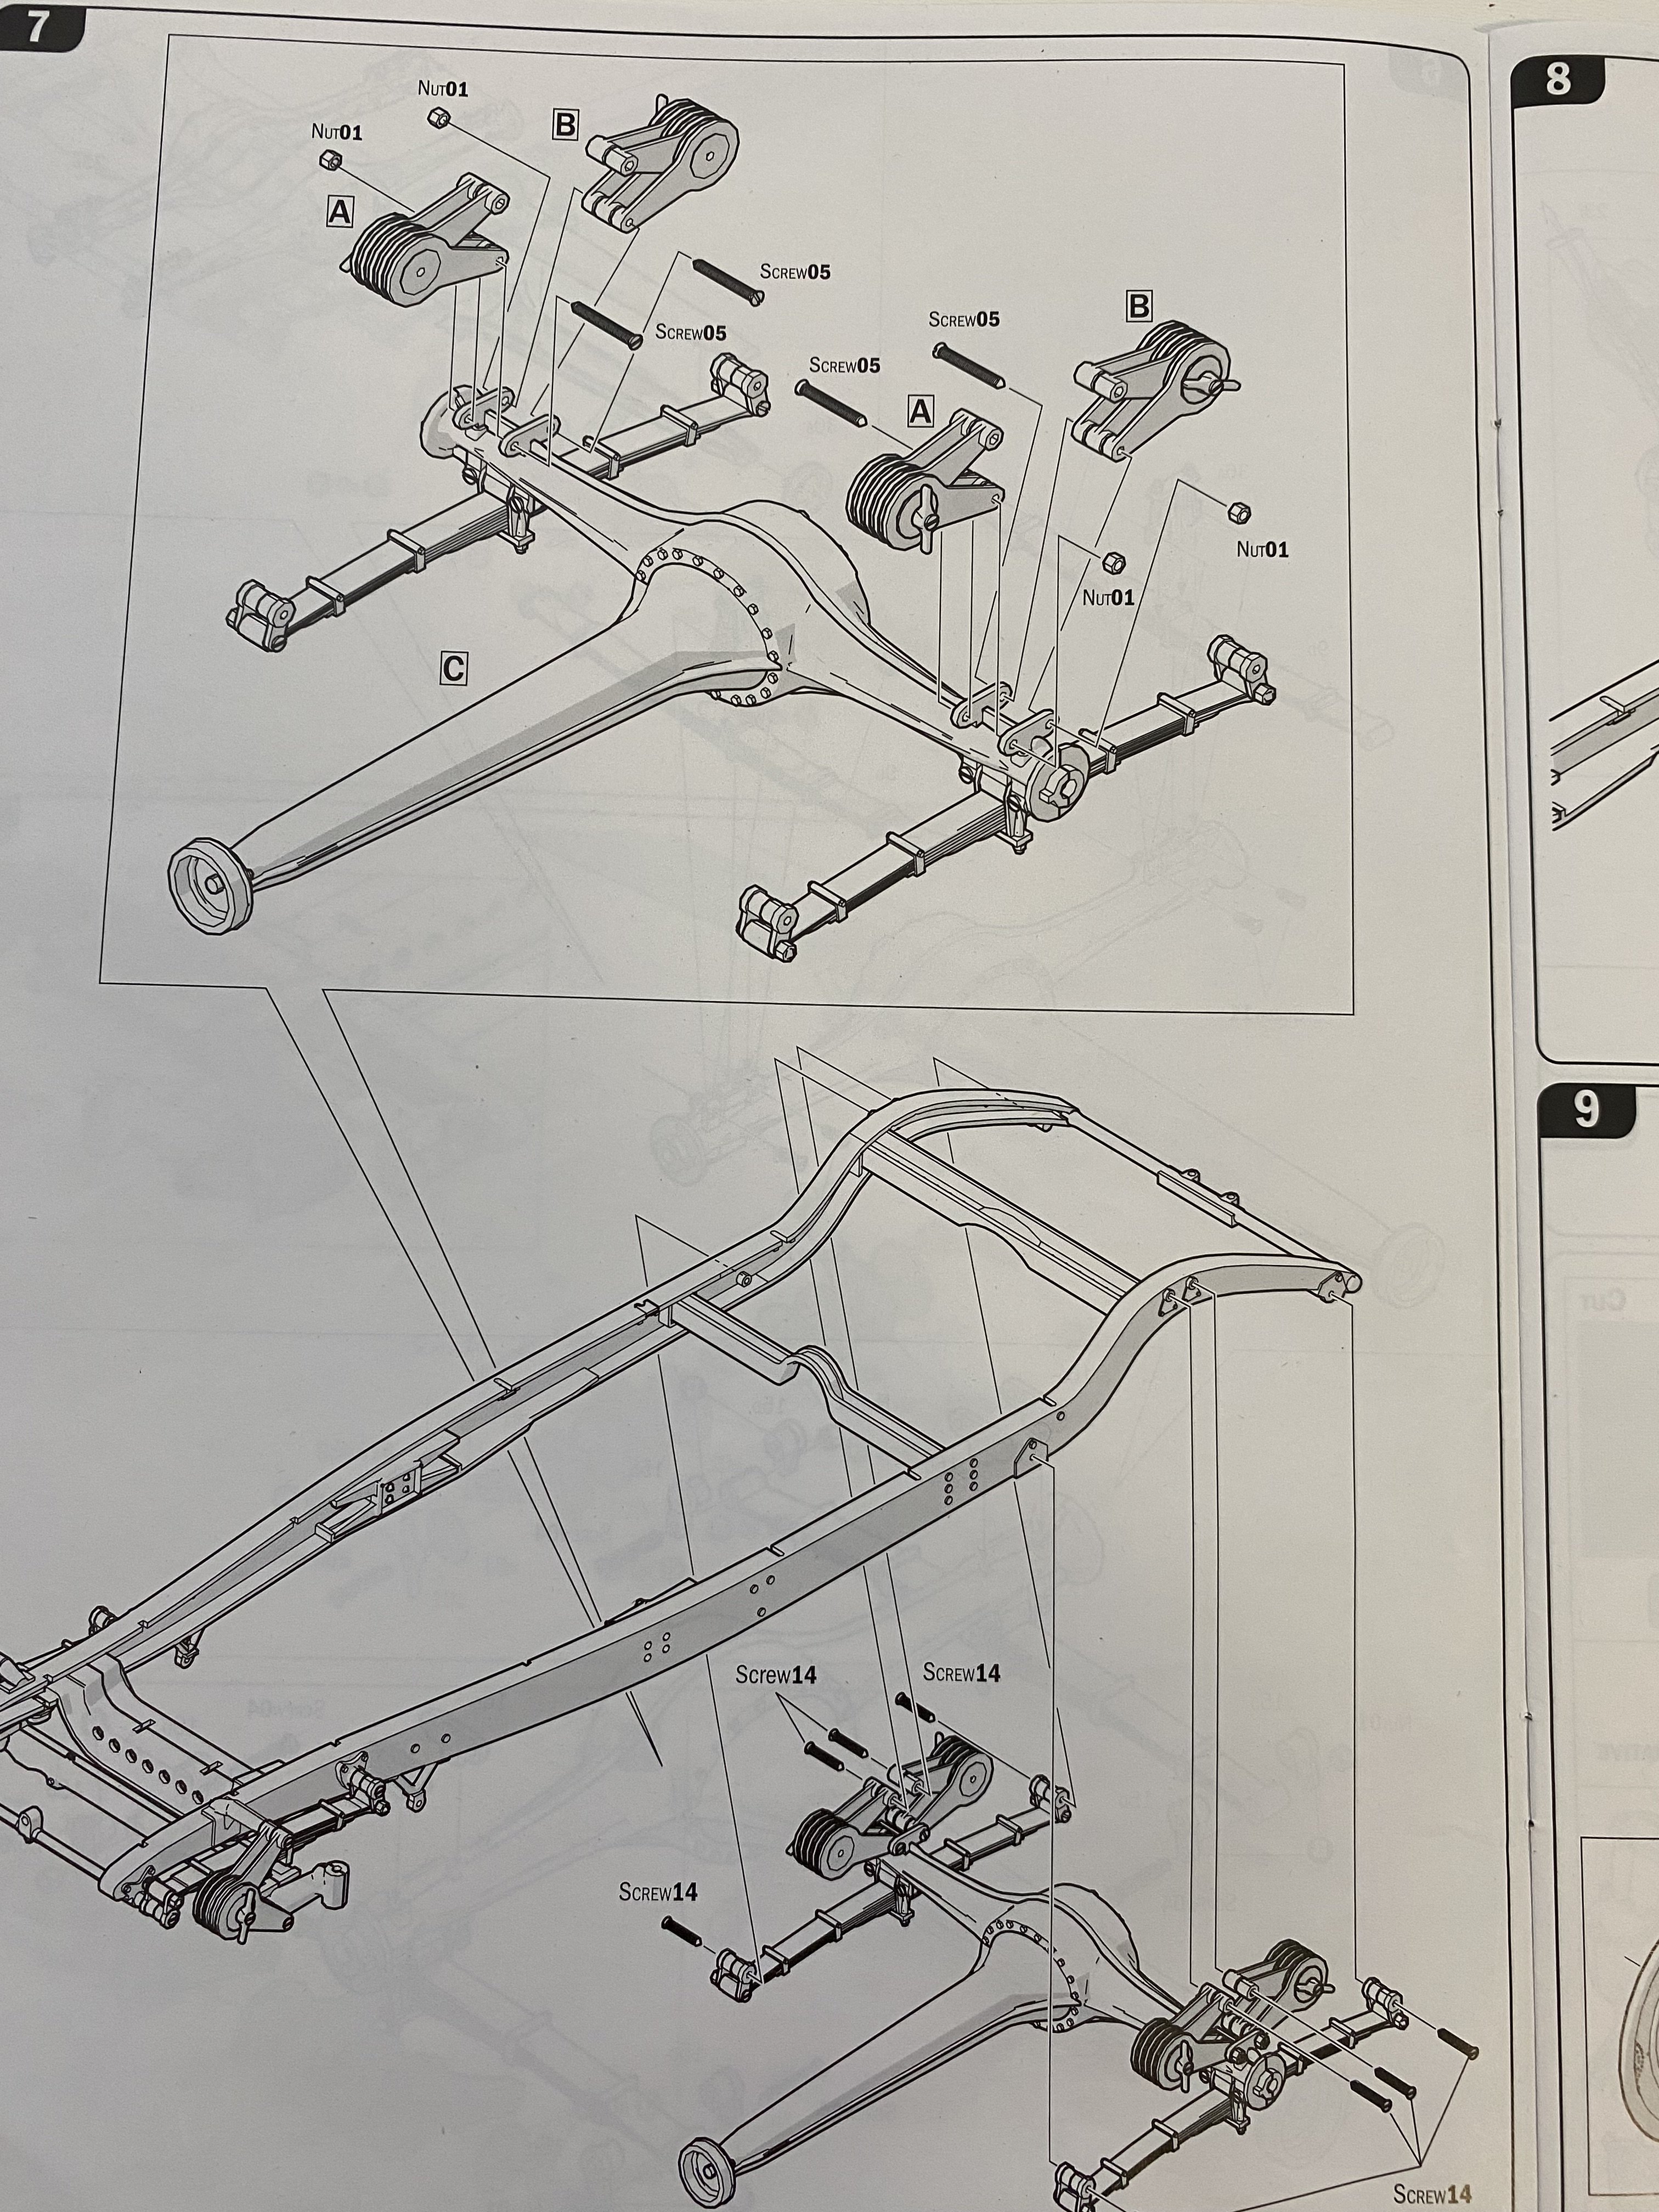
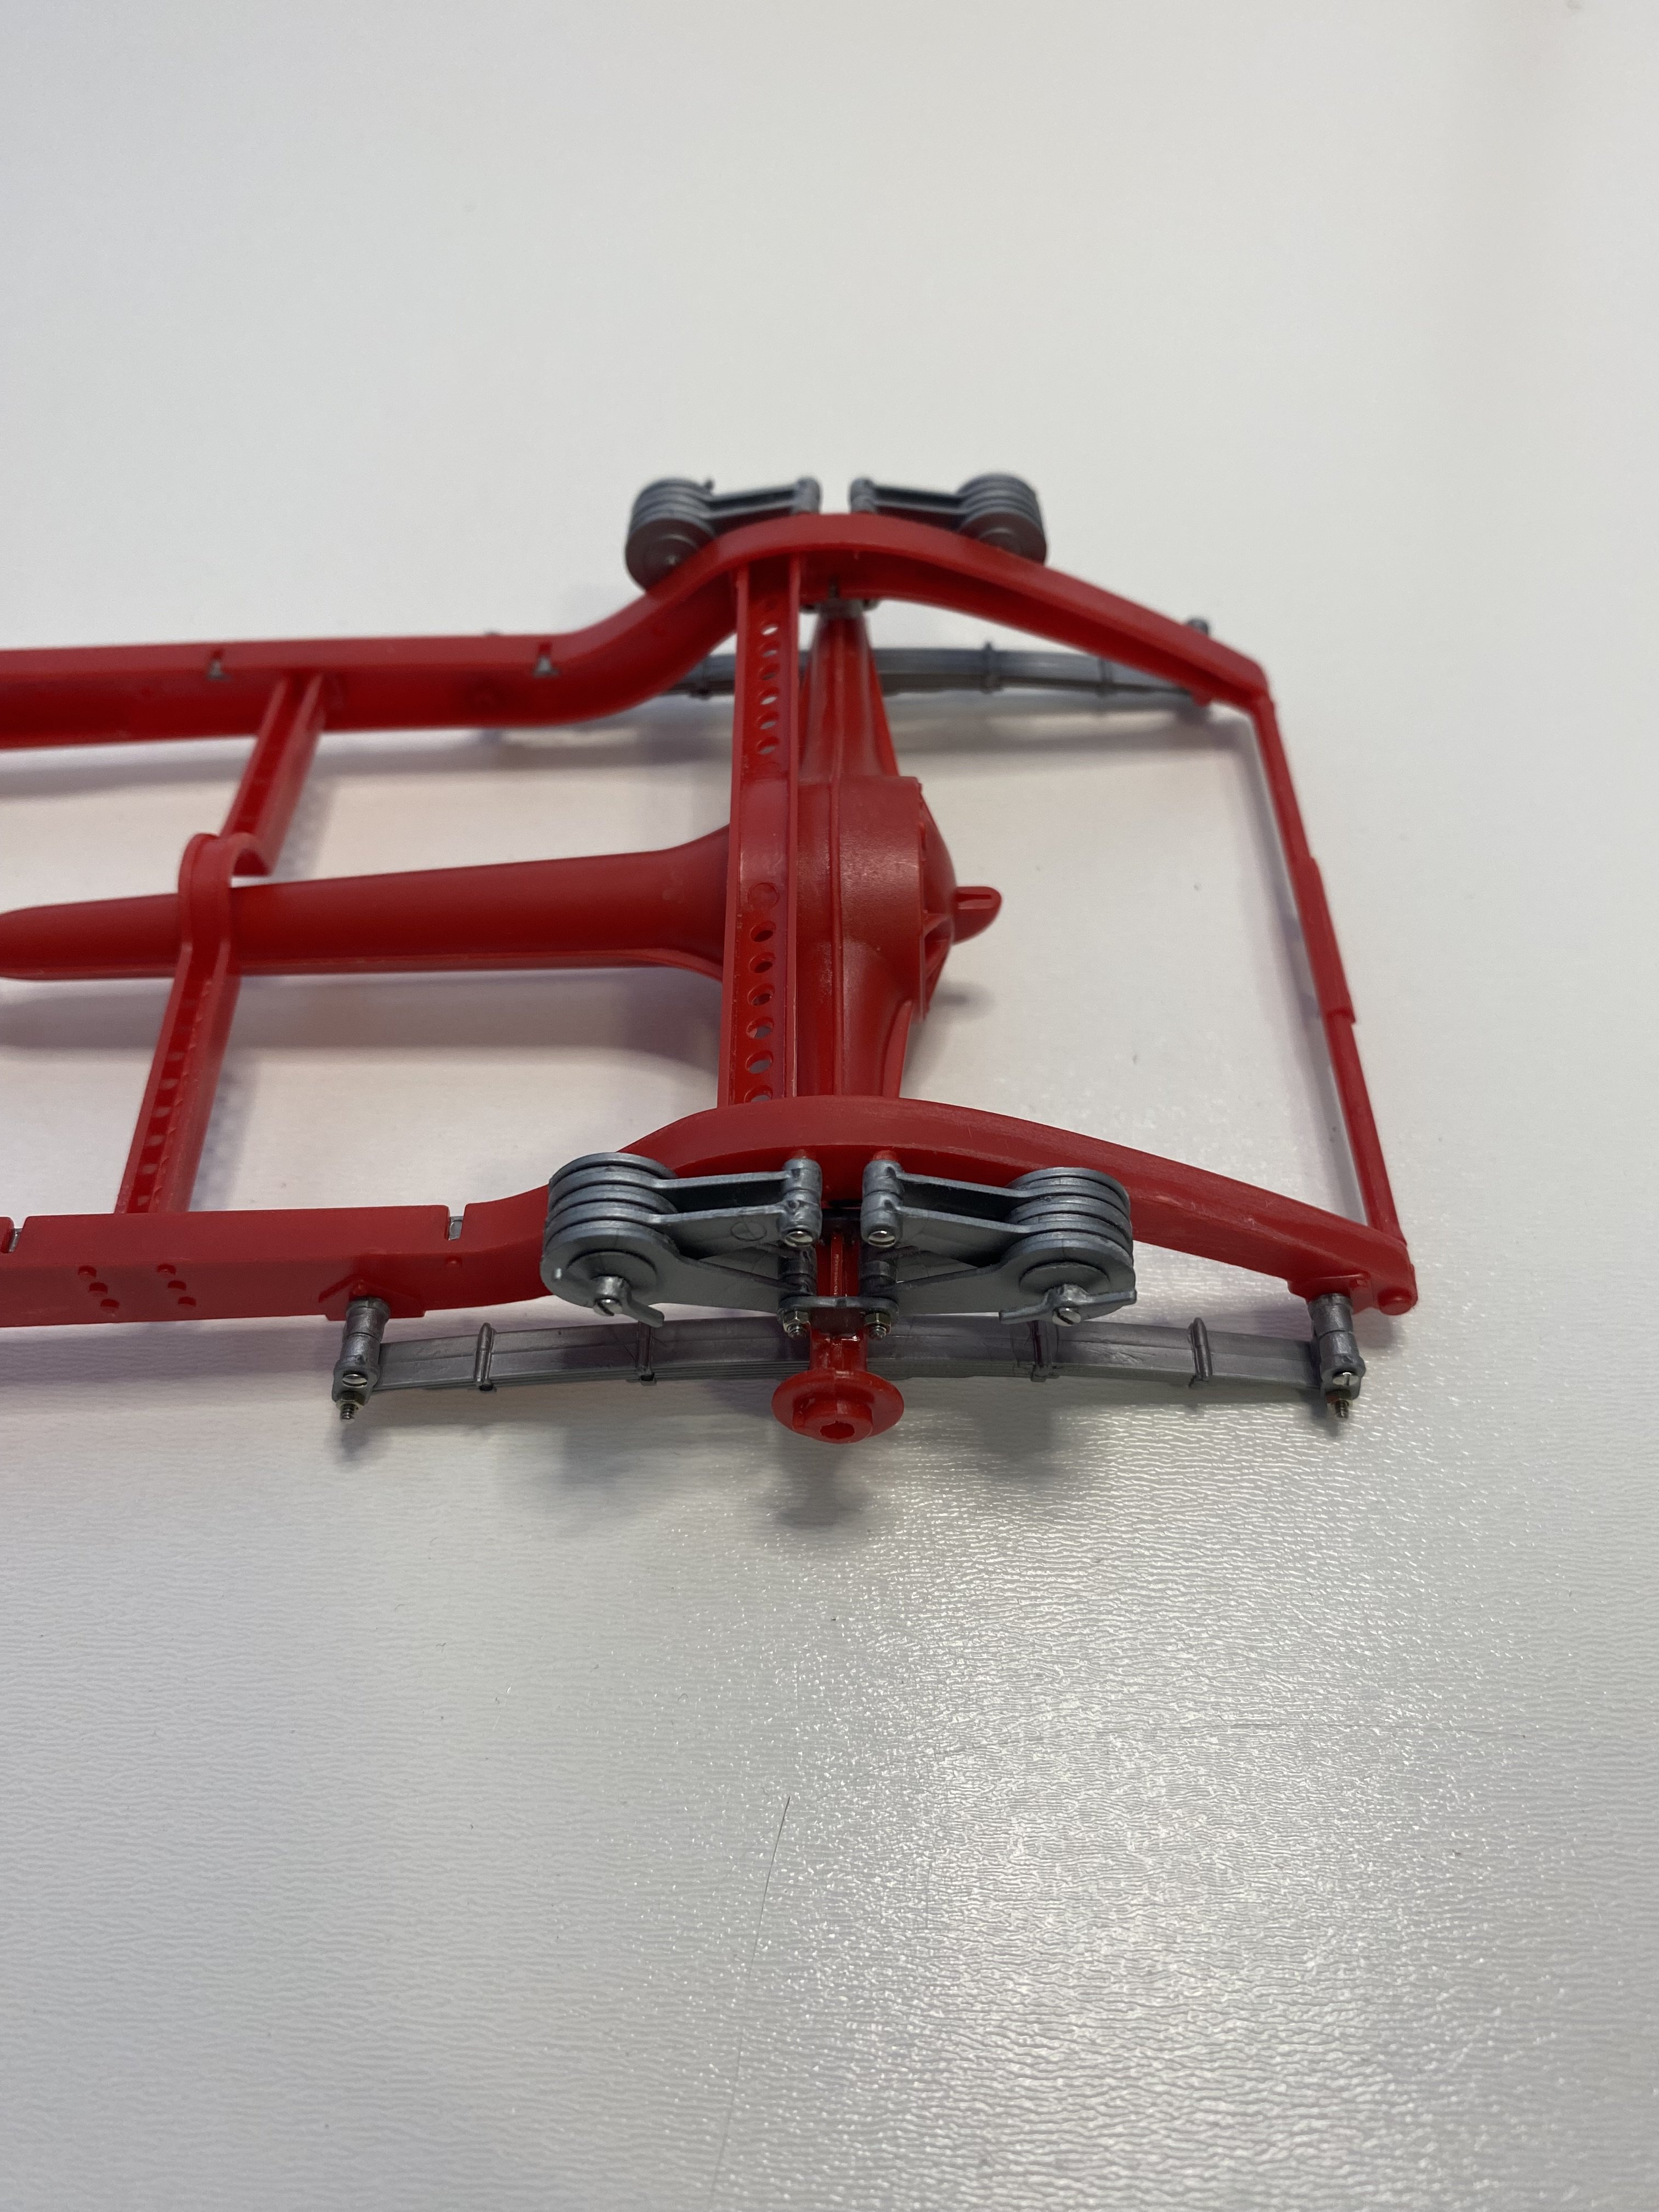
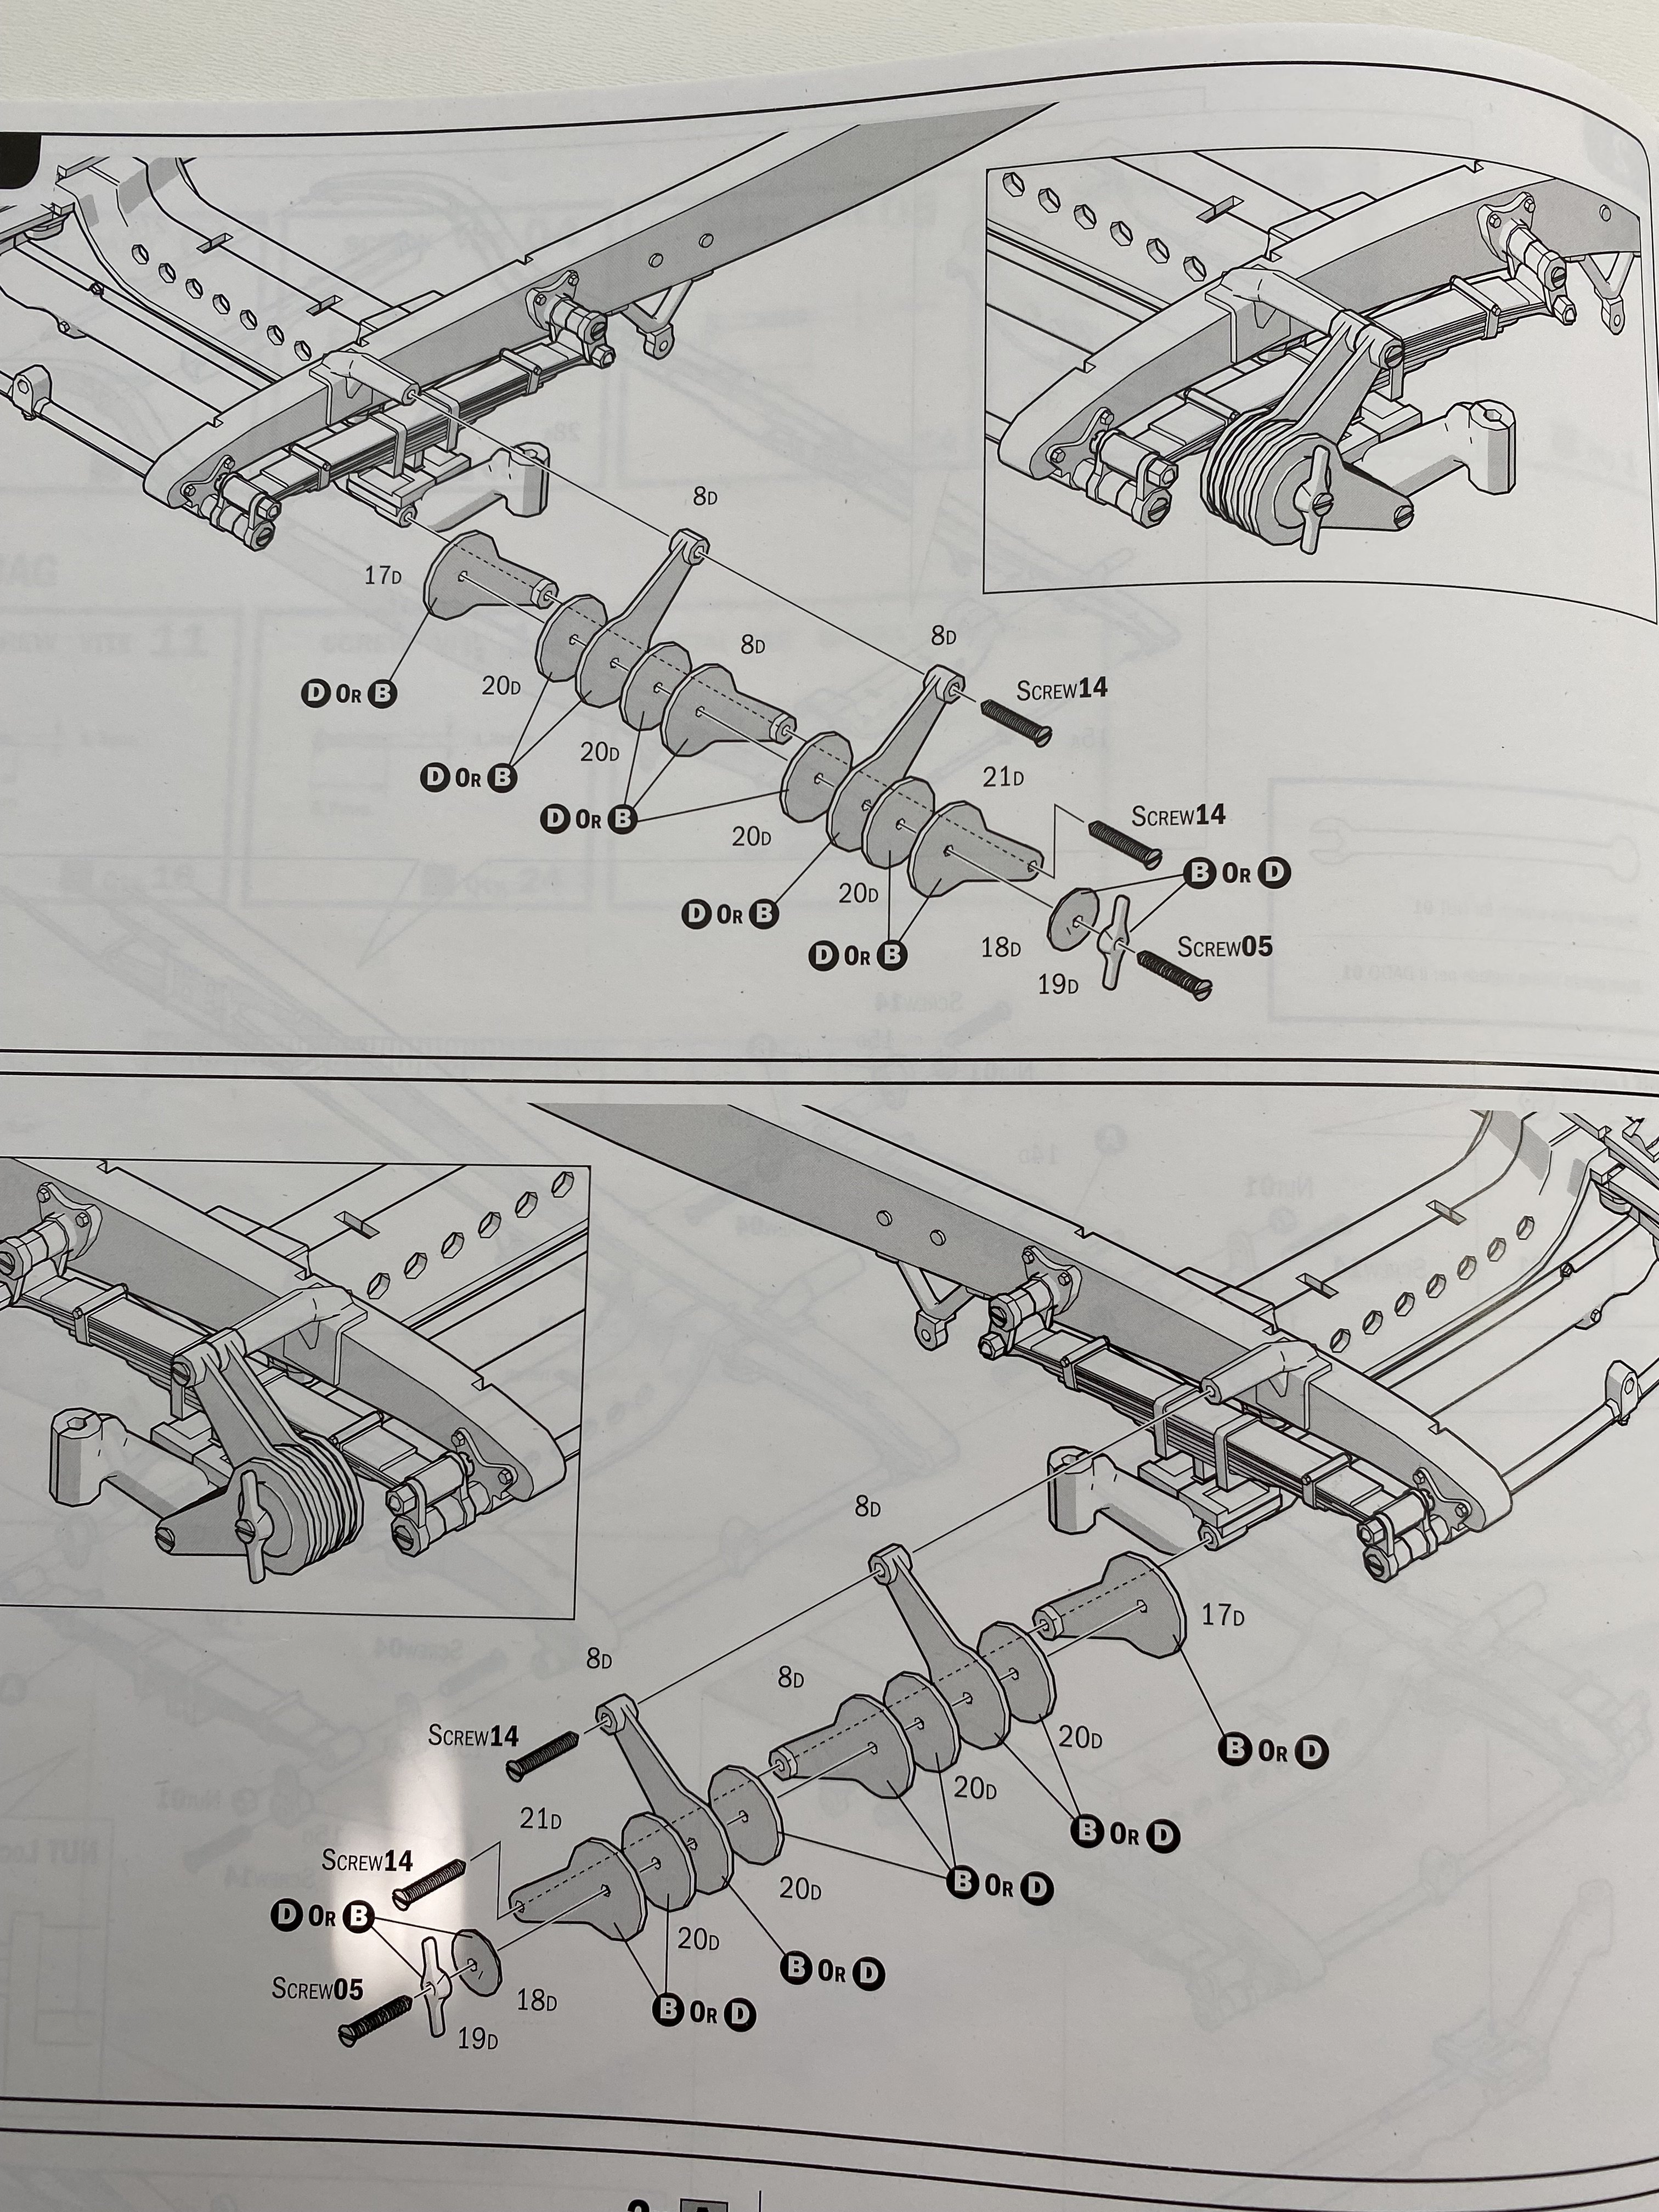
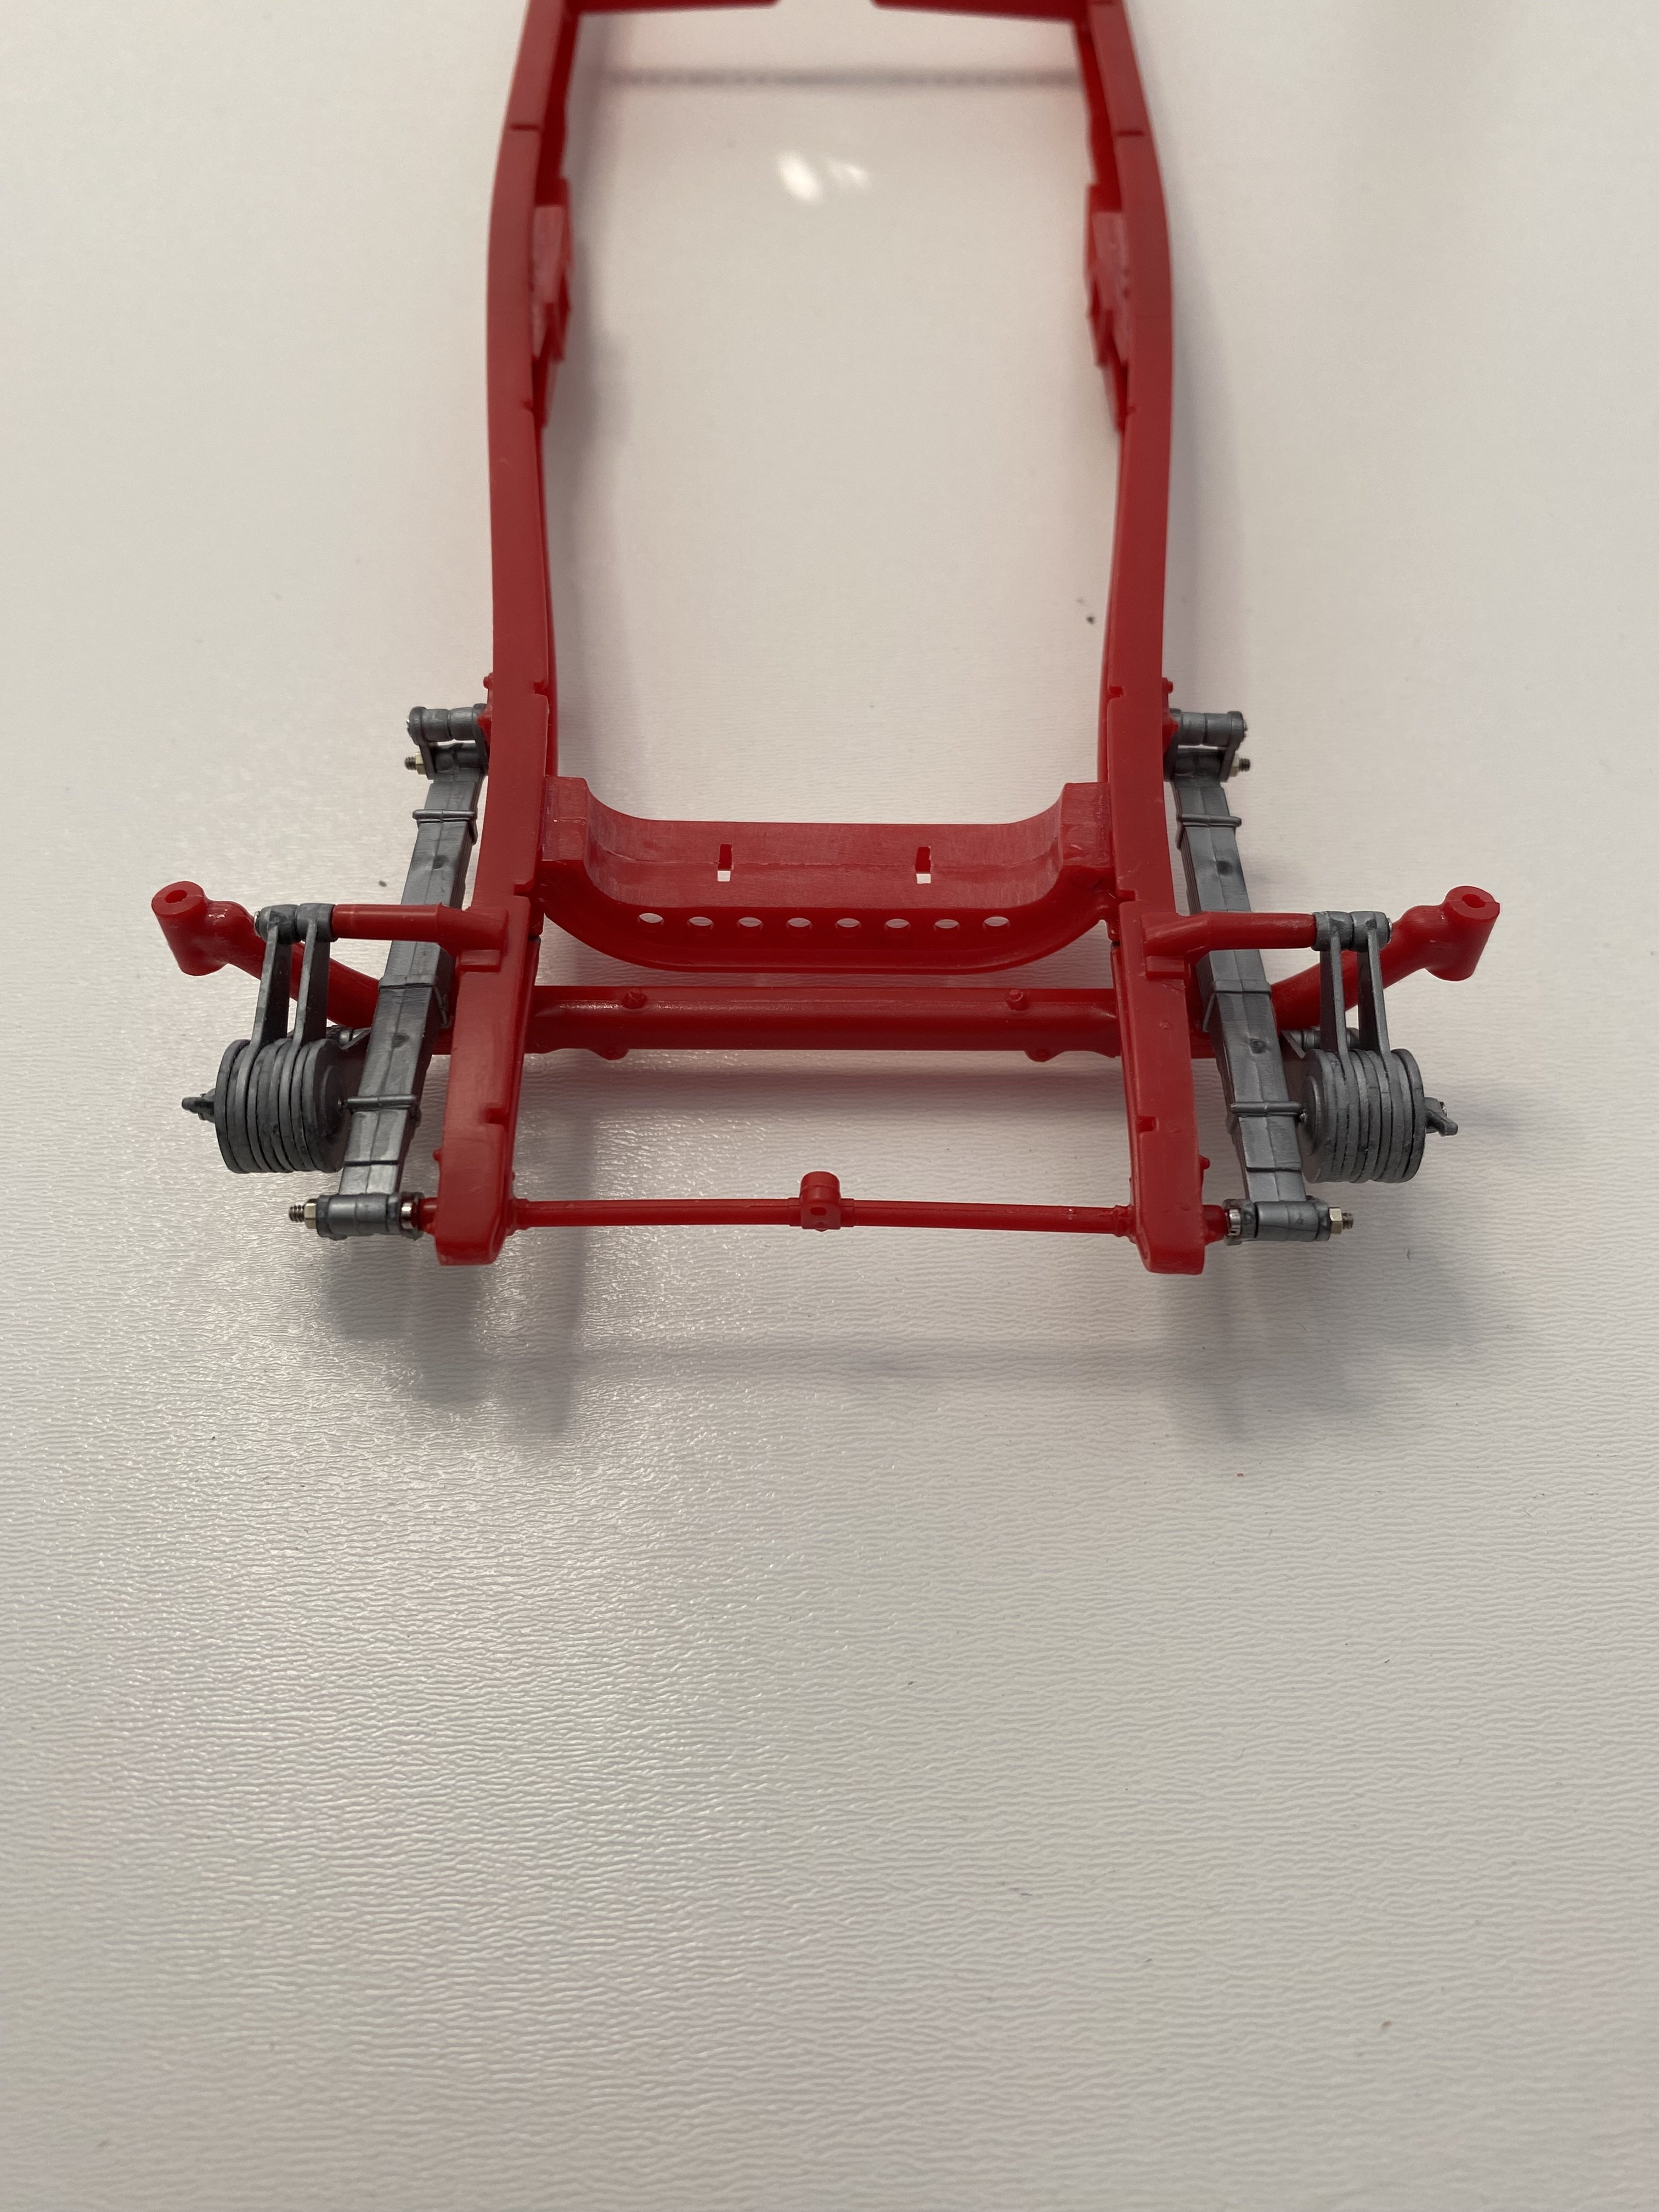
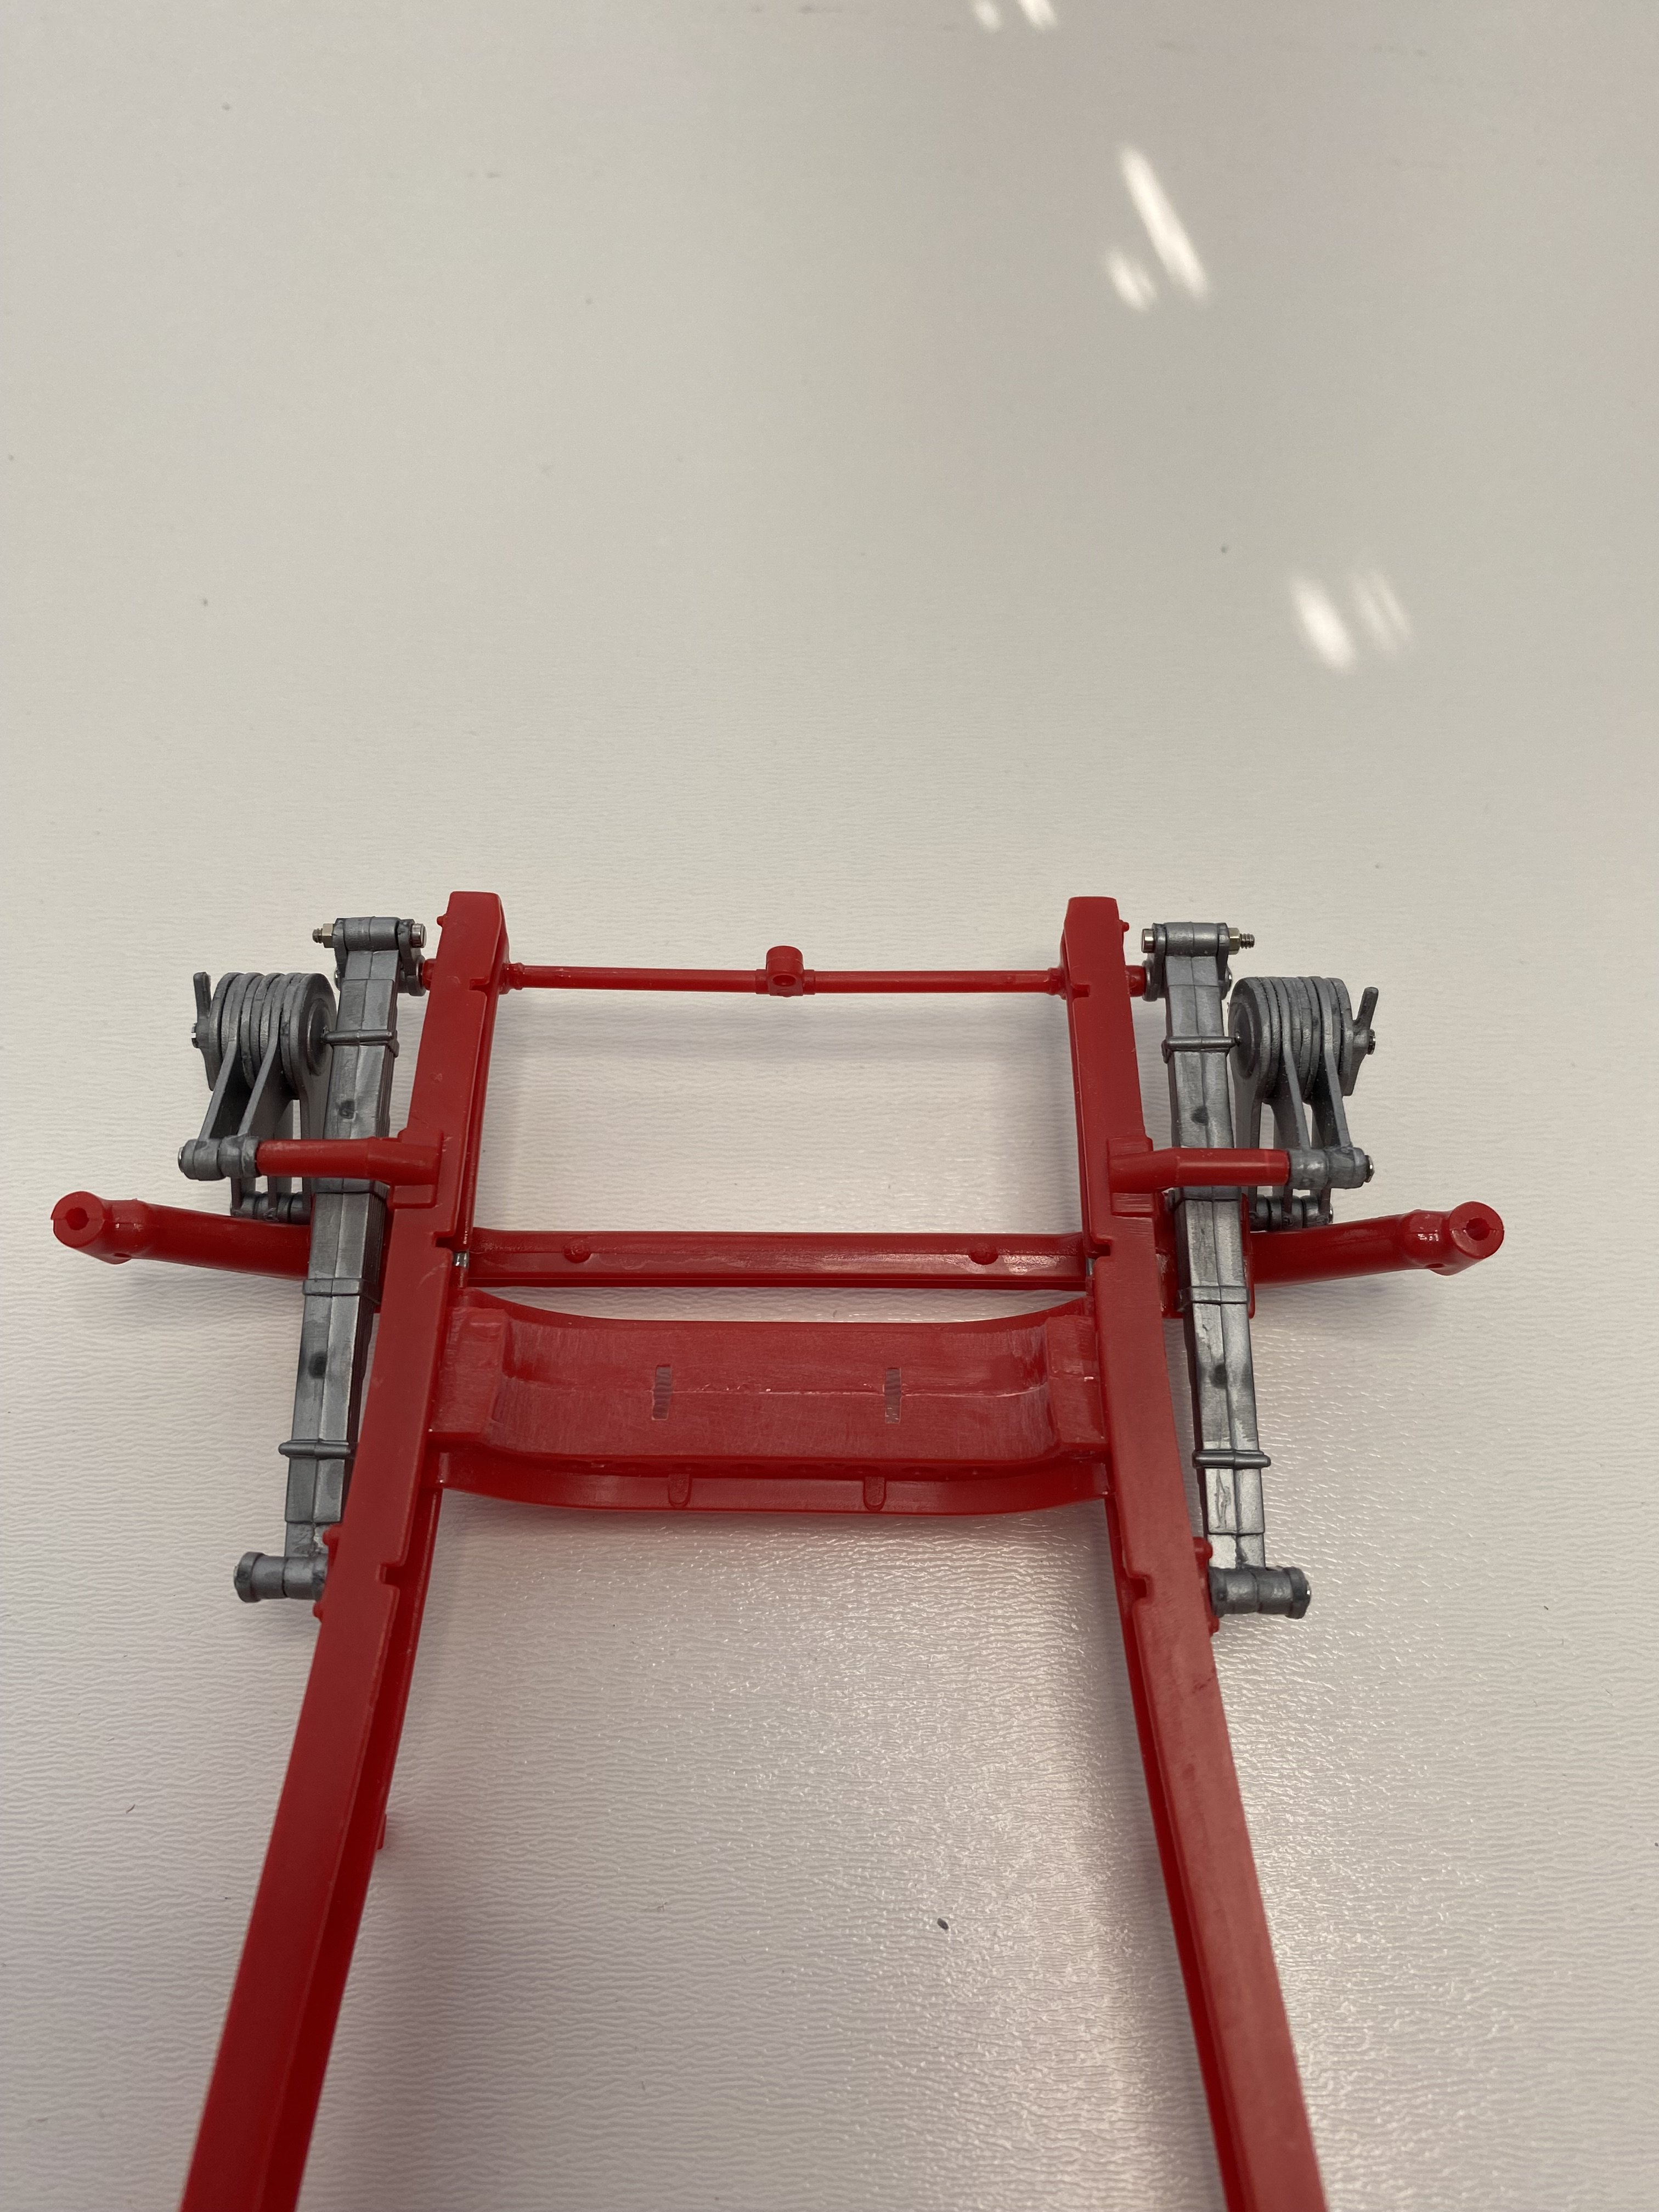
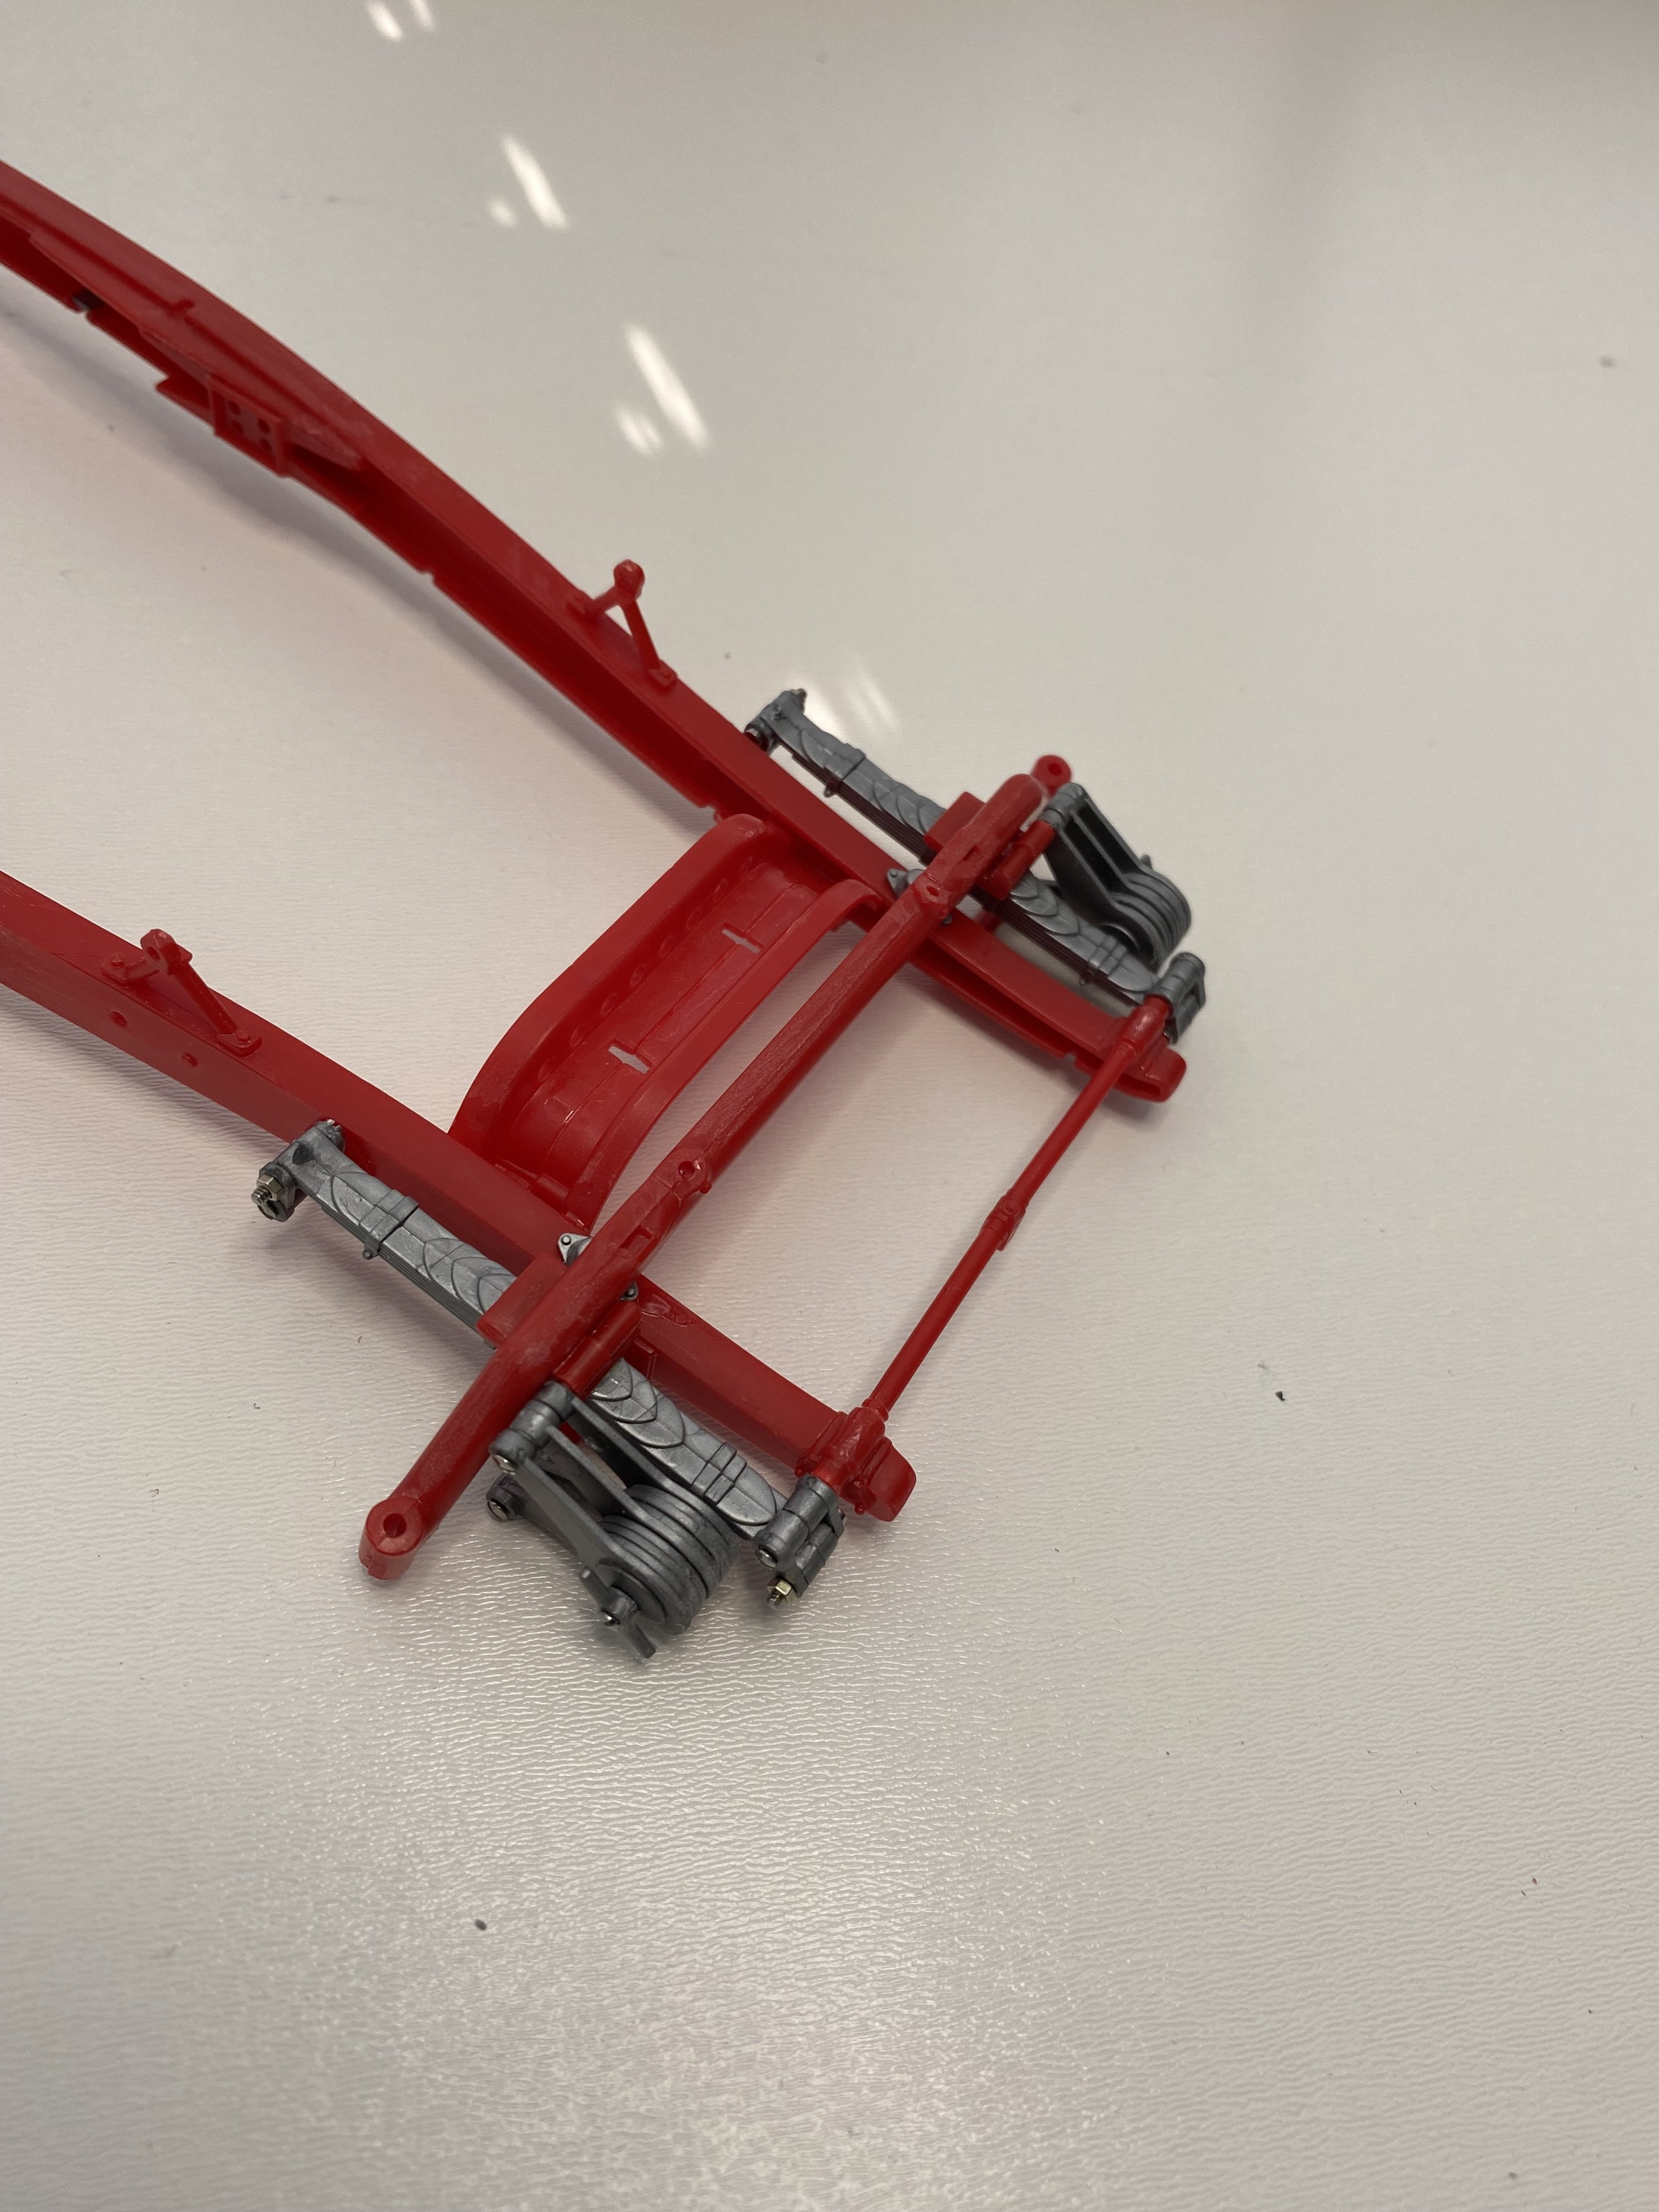
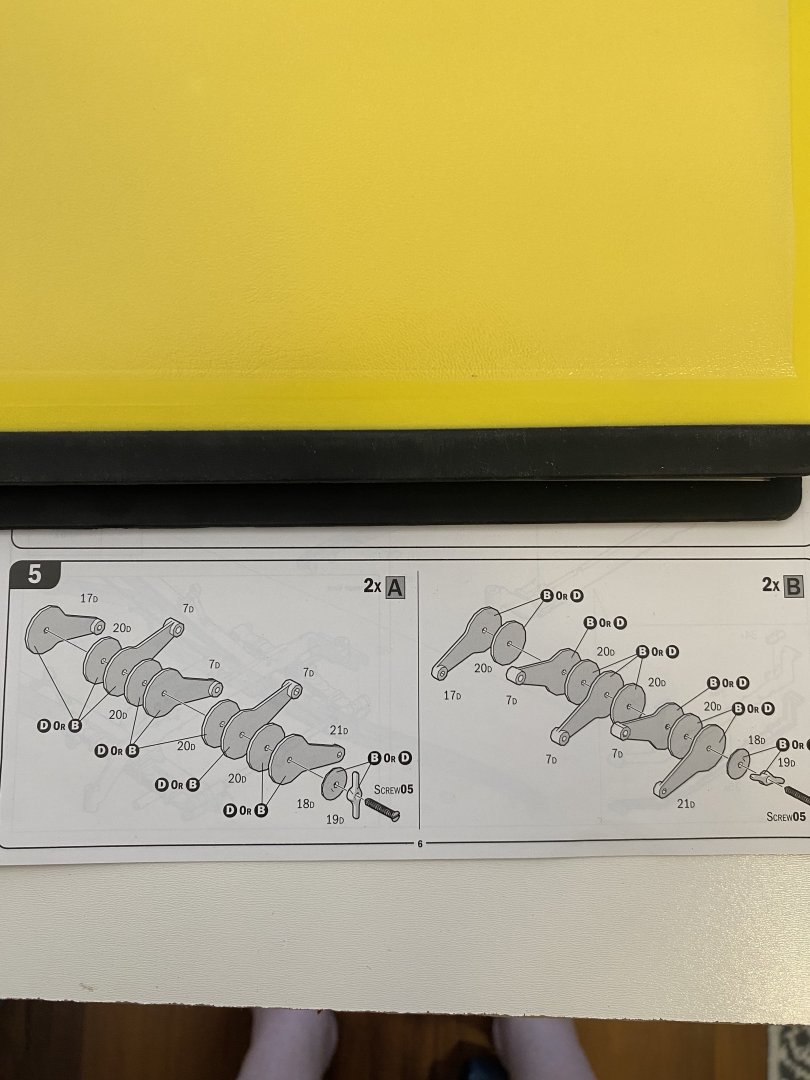
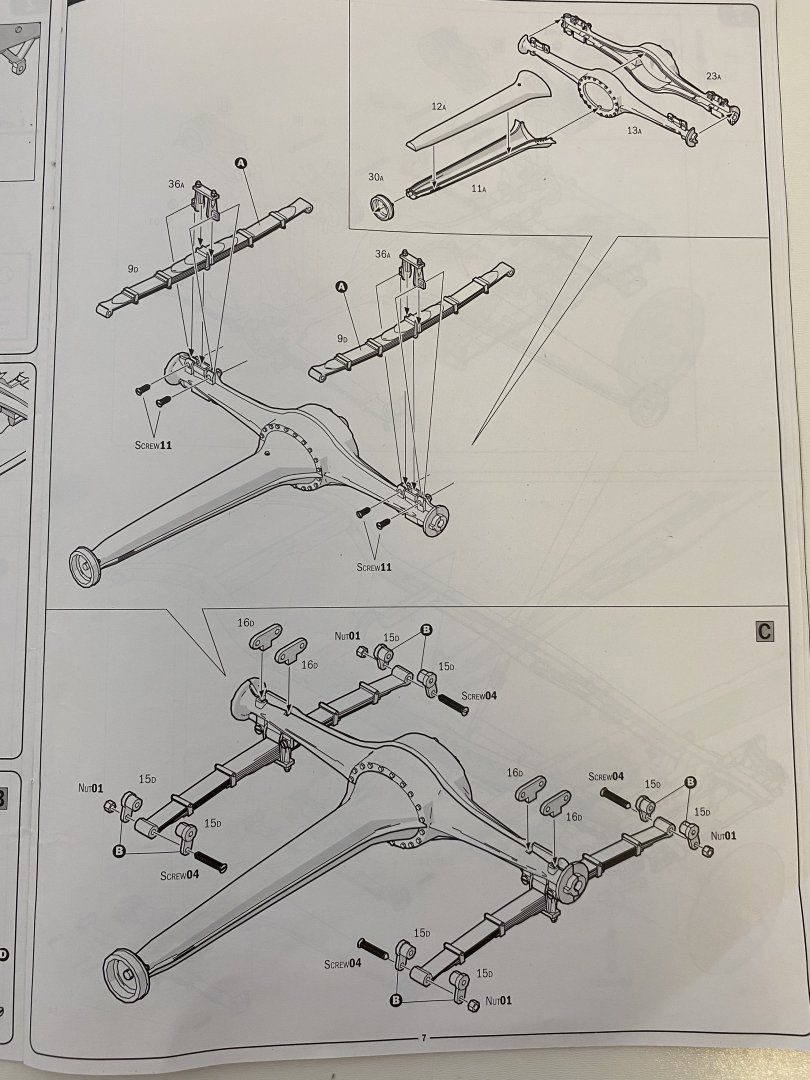
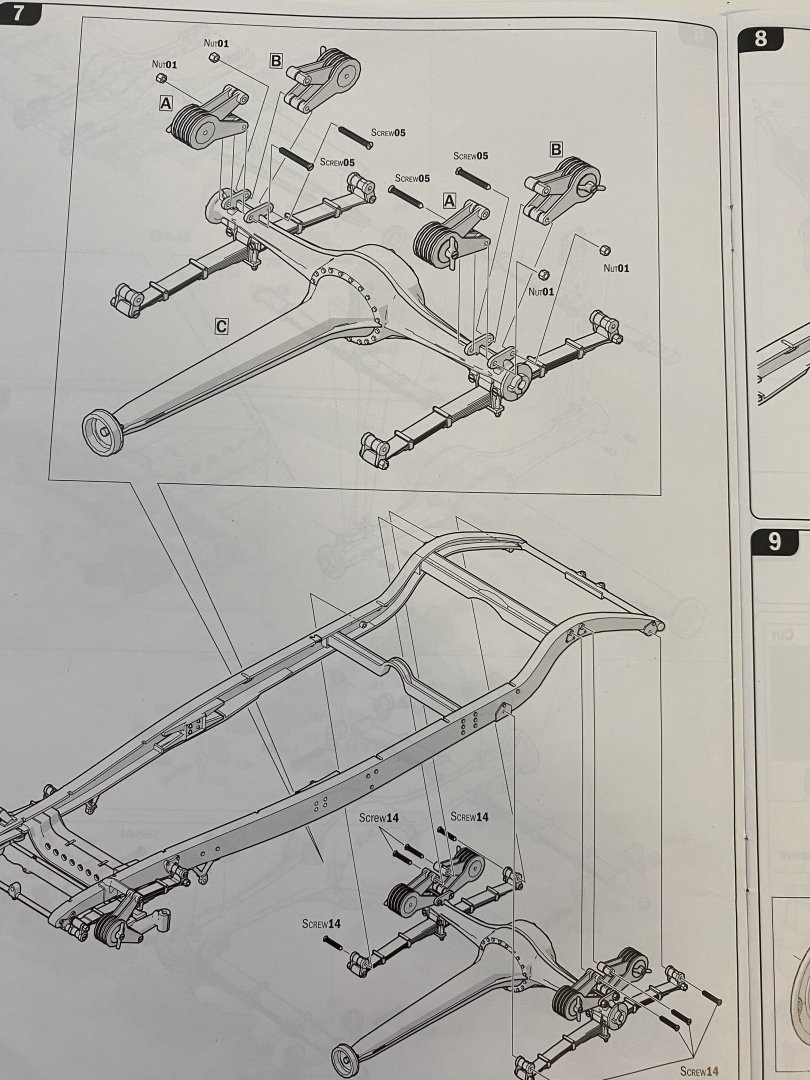
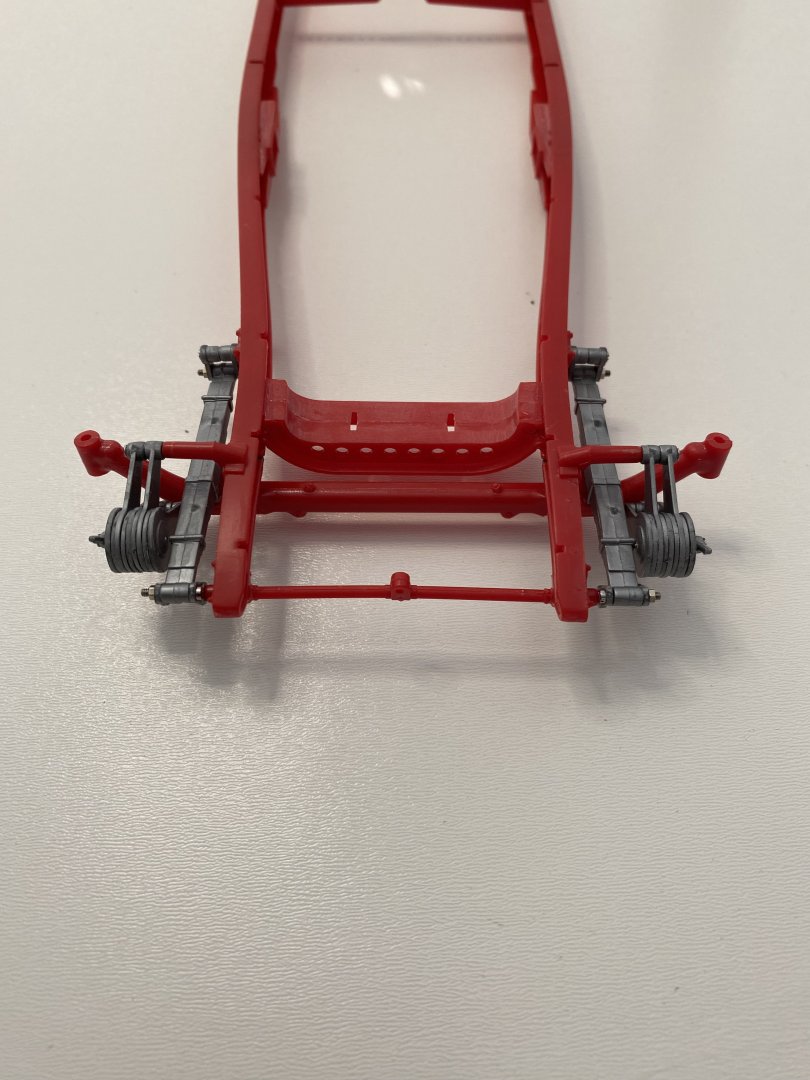
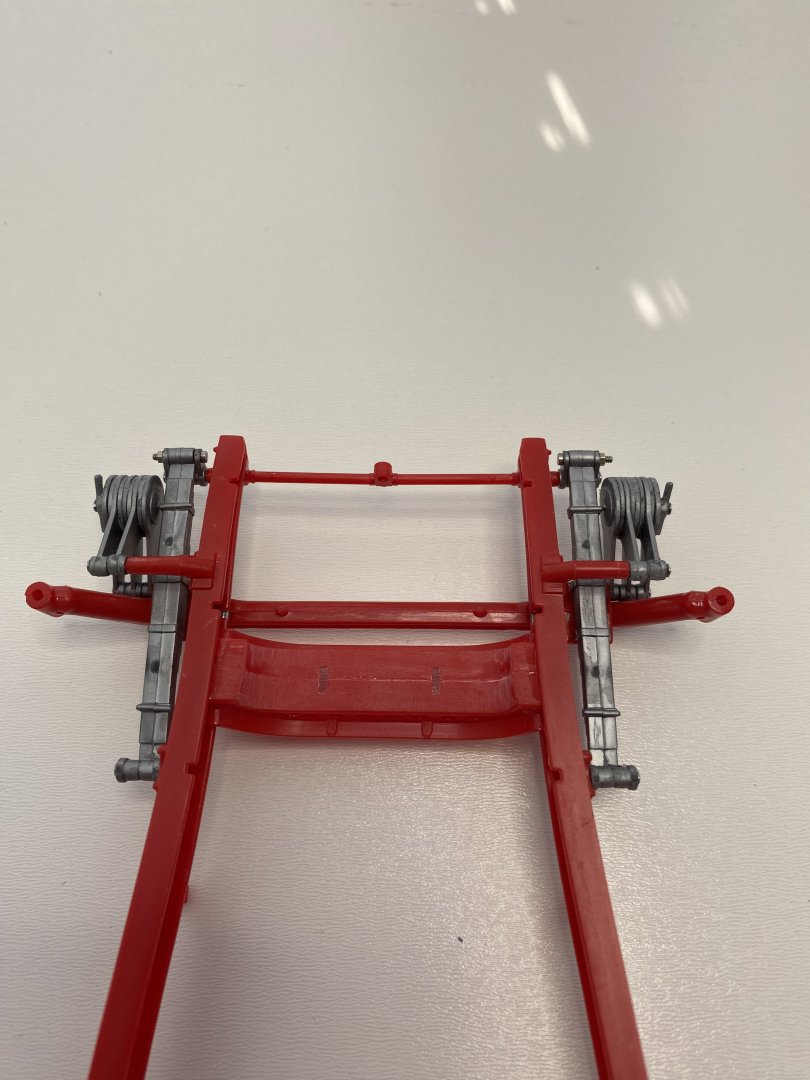
Thanks for pointing this out. I have disassembled the front suspension and scraped the mould lines. I have started on the rear springs and scraping was much easier before assembly. Once the rear suspension is installed the build comes to a halt as I wait for my airbrush set up. Will be picking that up in Ottawa in early September.
-
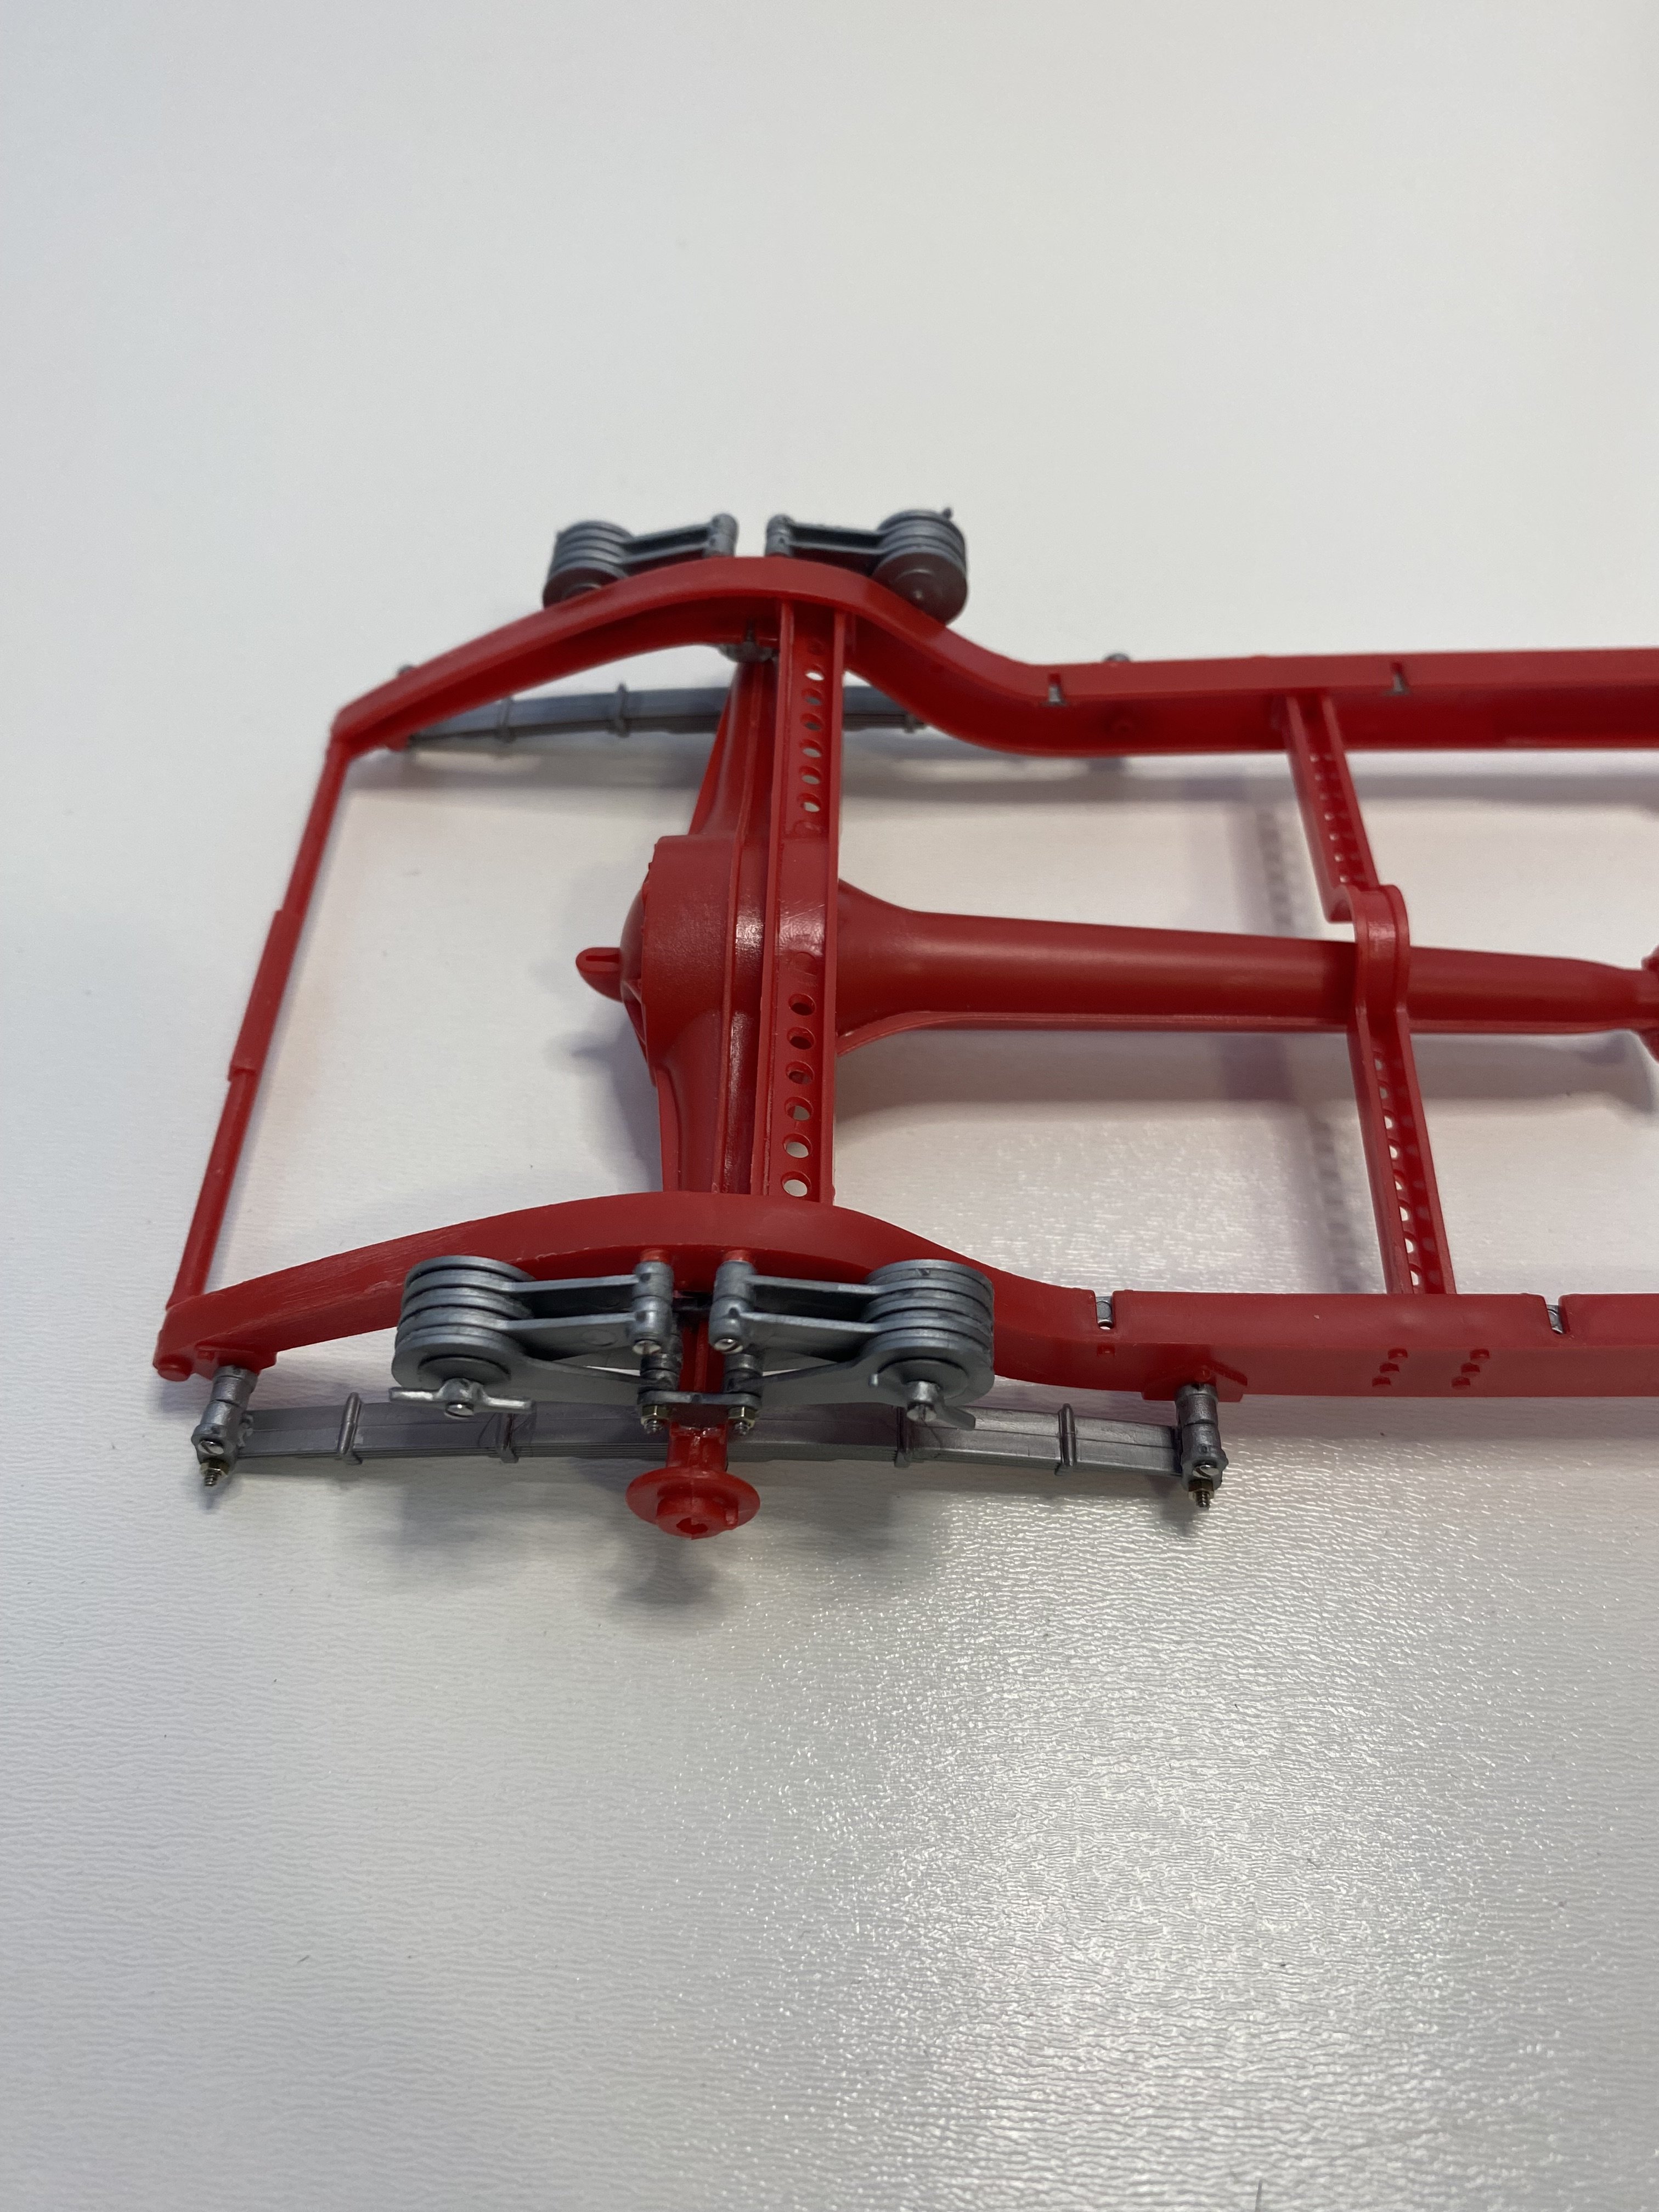
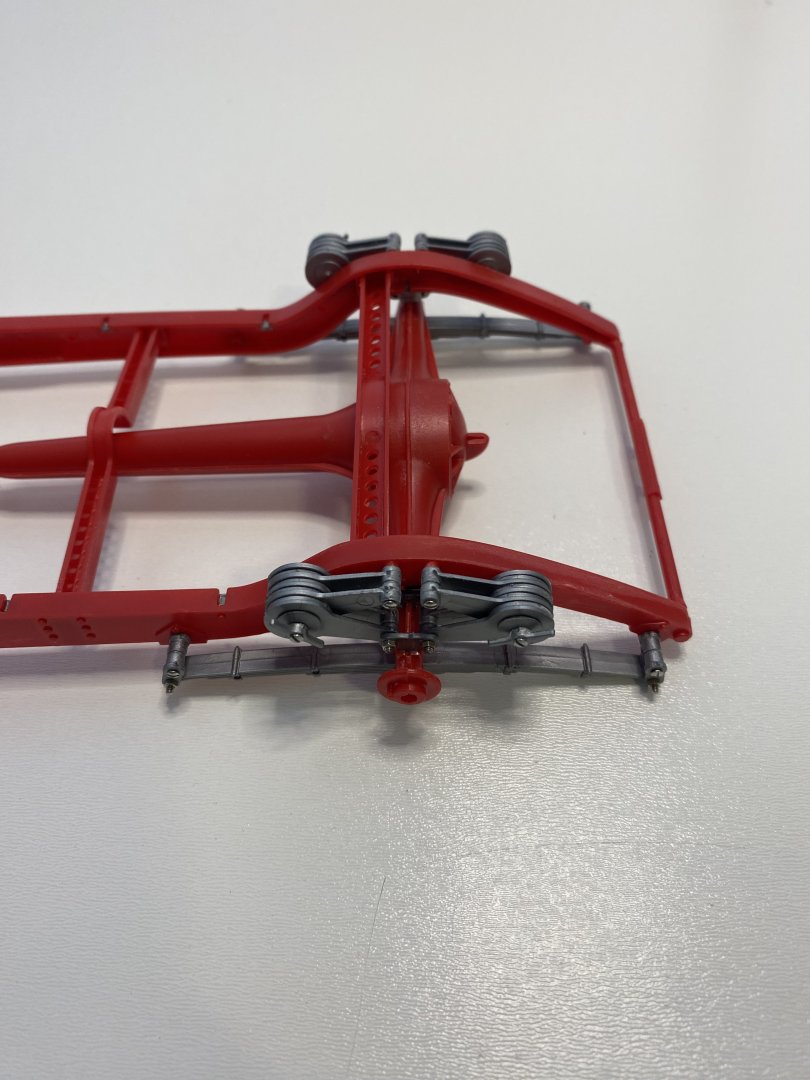
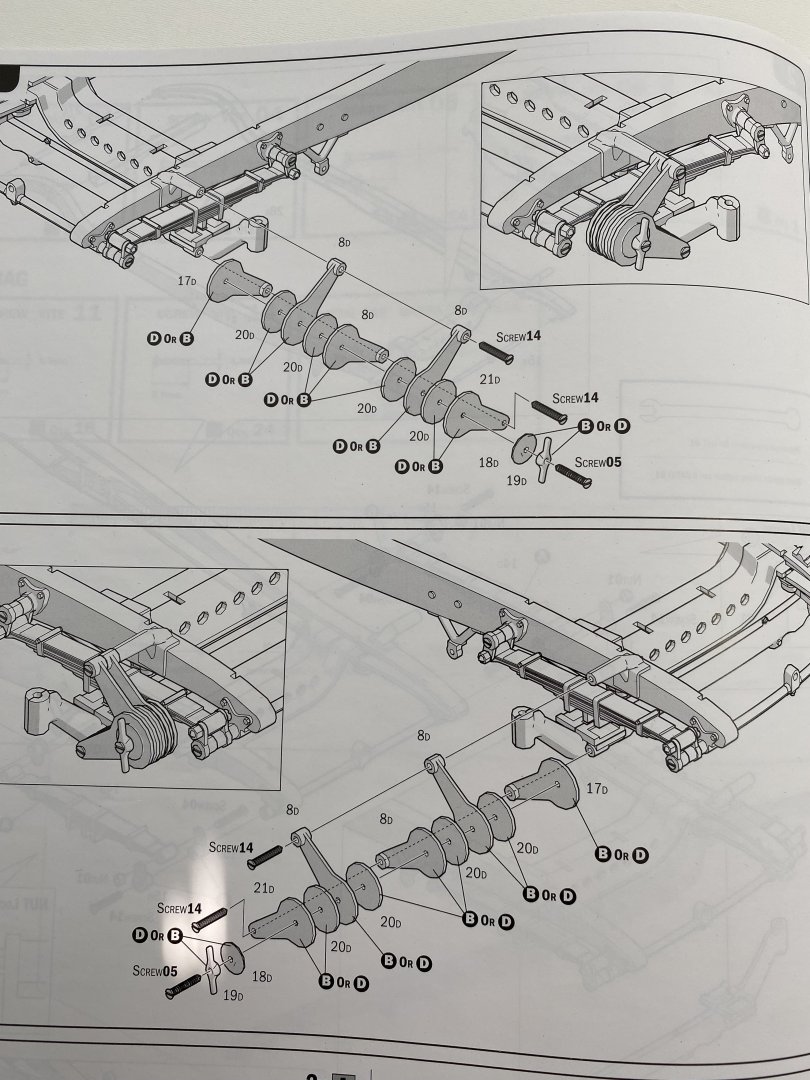
I was initially going to paint different colours on the suspension but I have not yet received my airbrush system. I am going to paint the model as per photos in the build manual. Front friction dampeners added.


- 9 replies
-
- 10
-
-
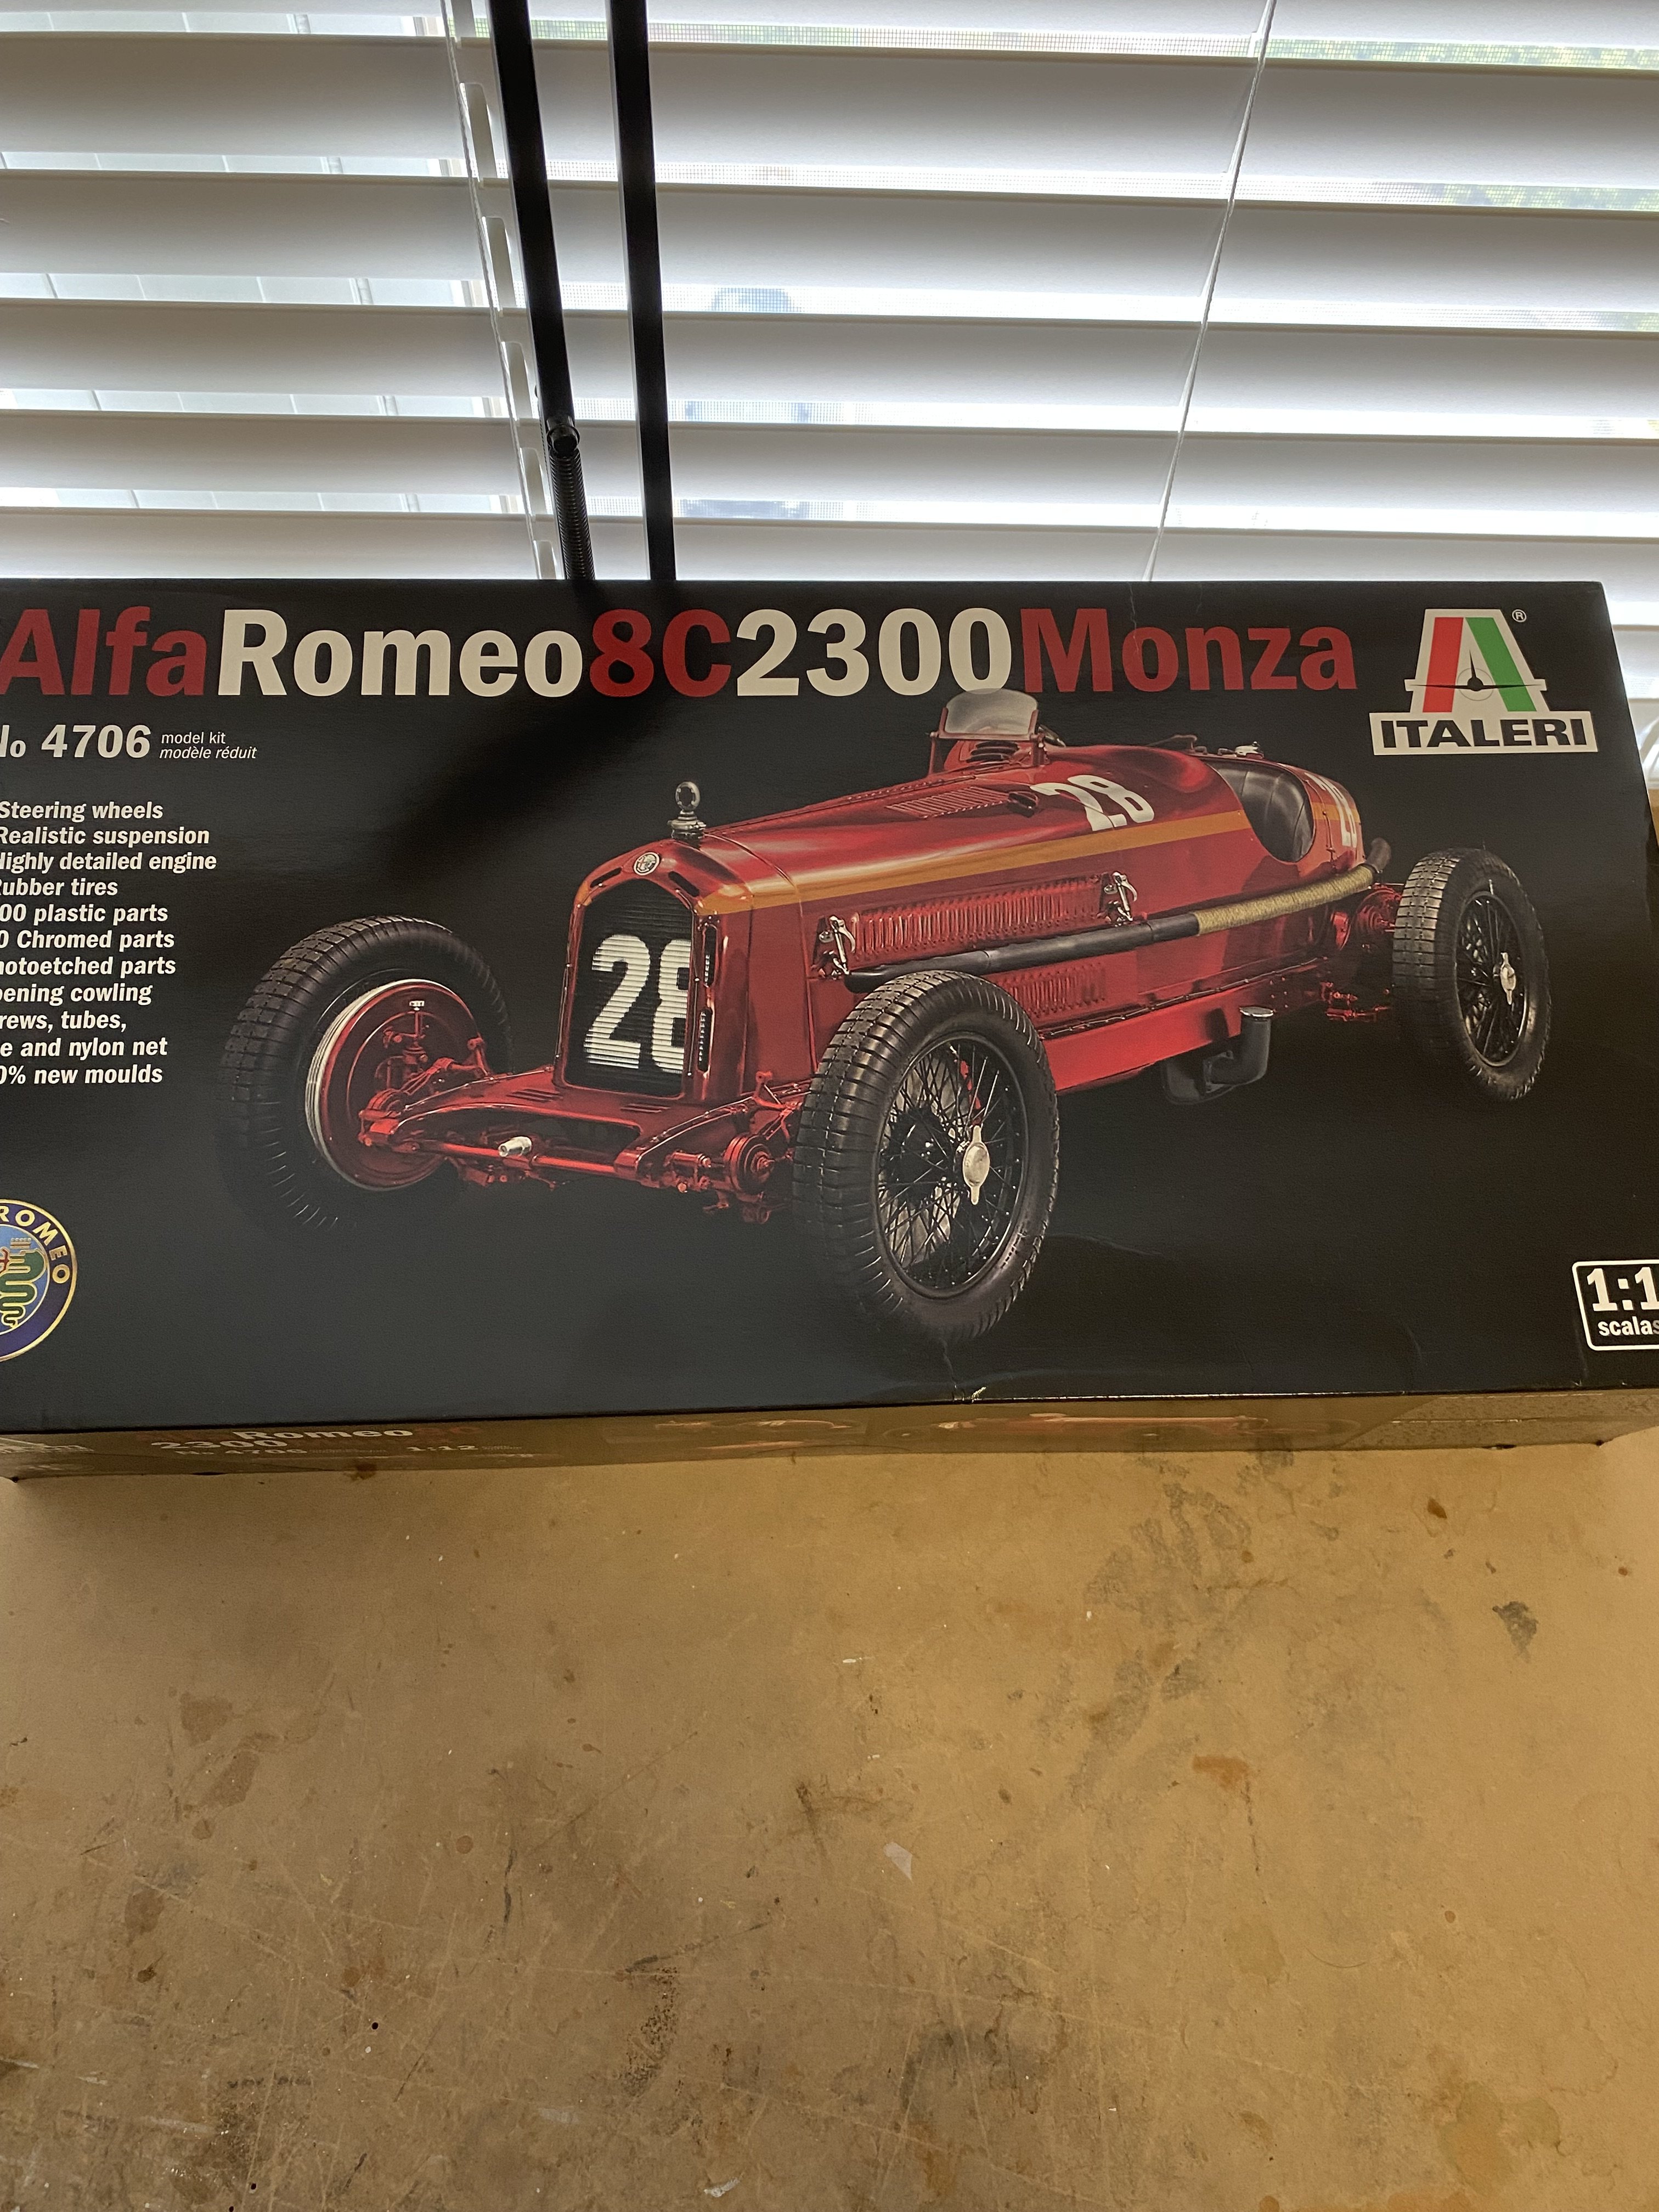
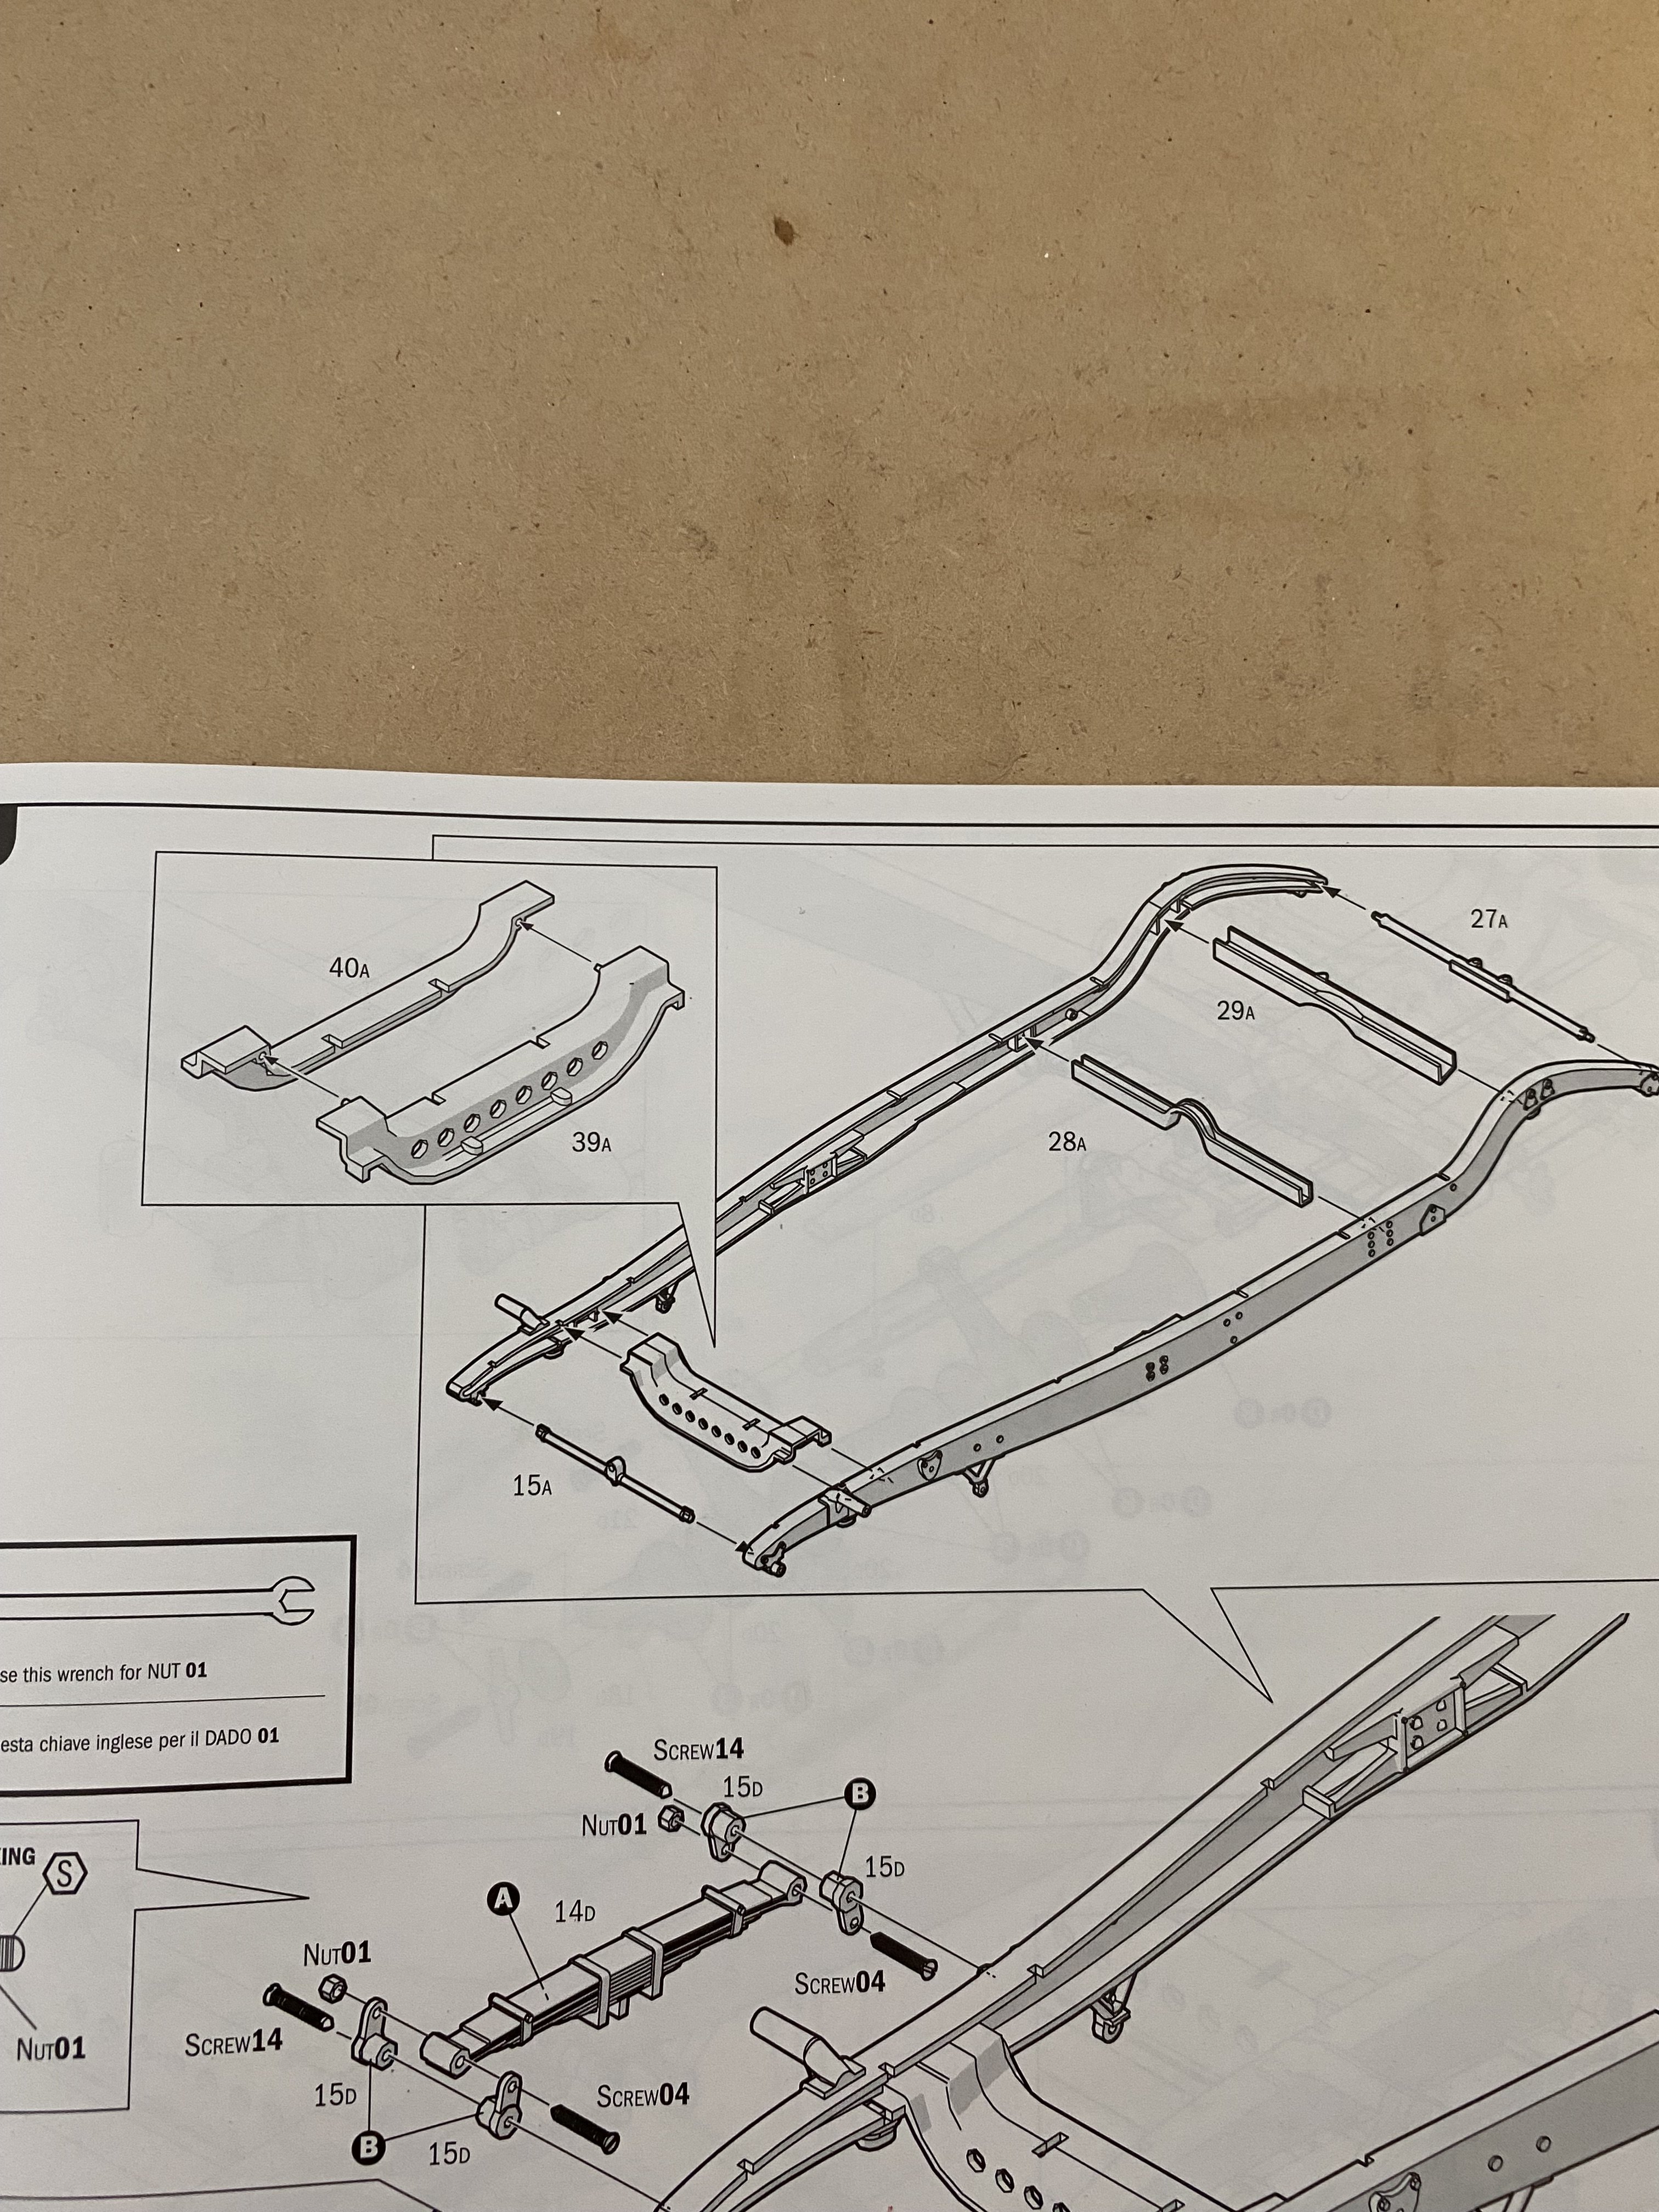
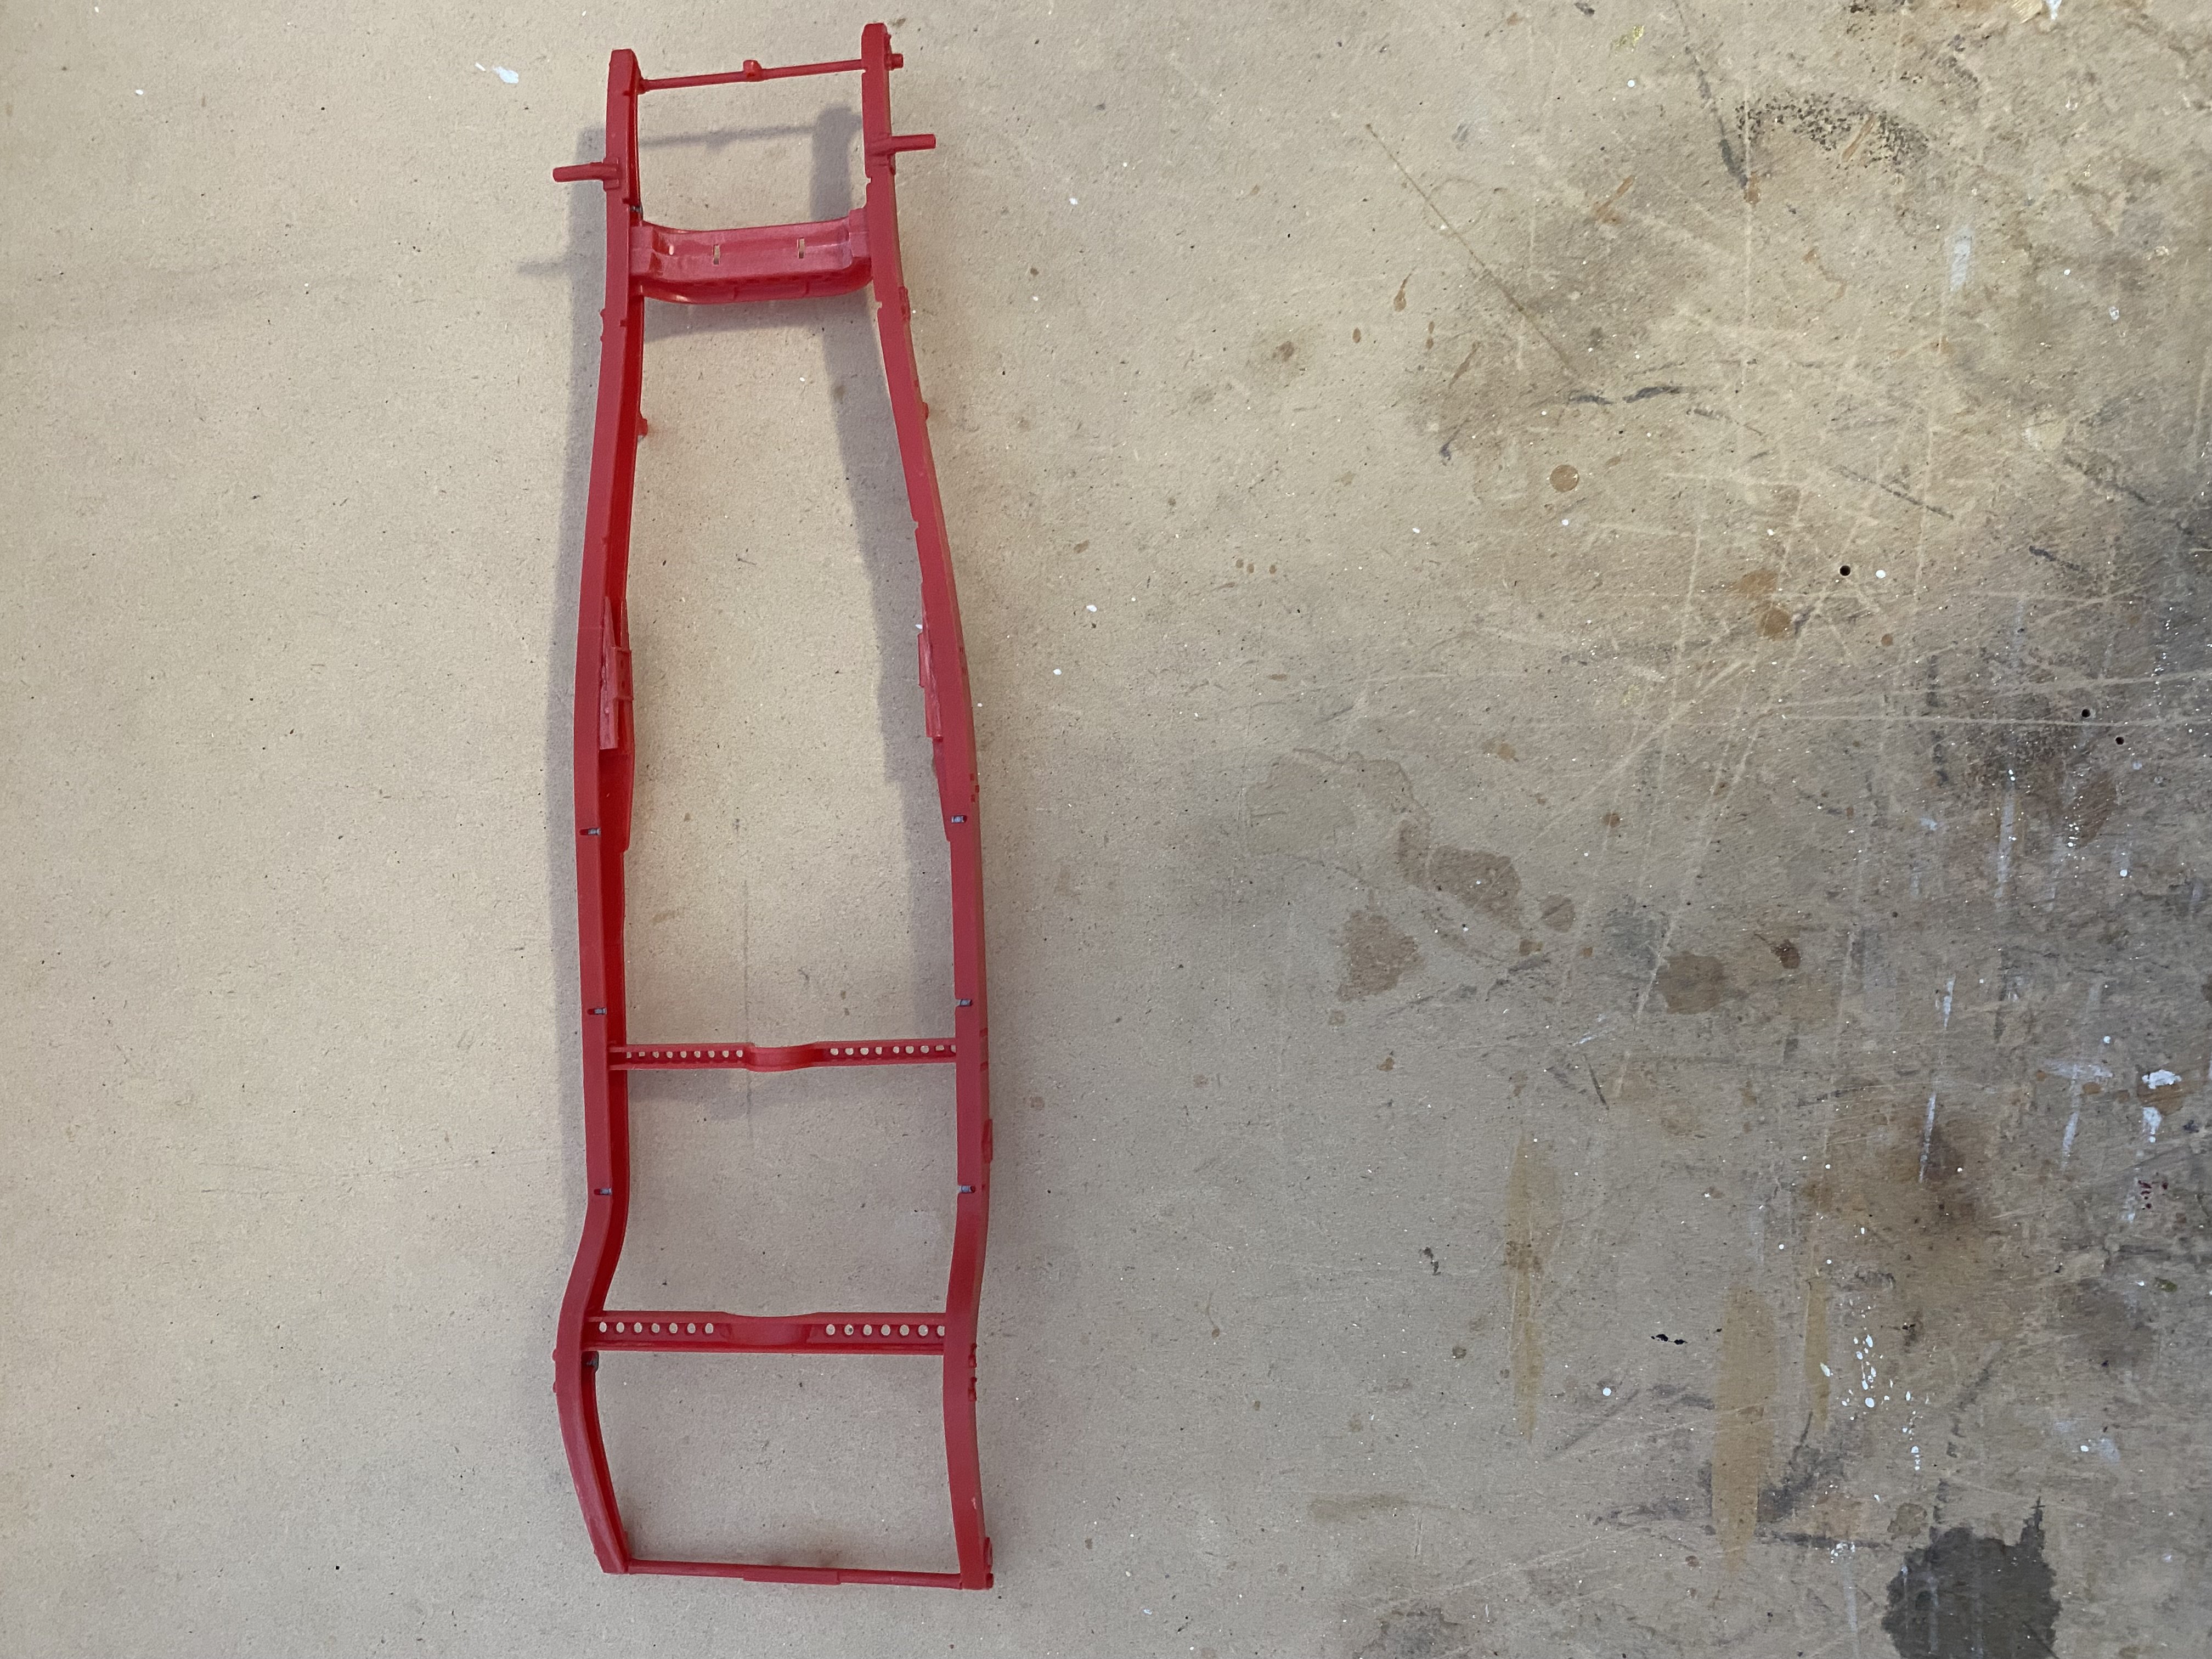
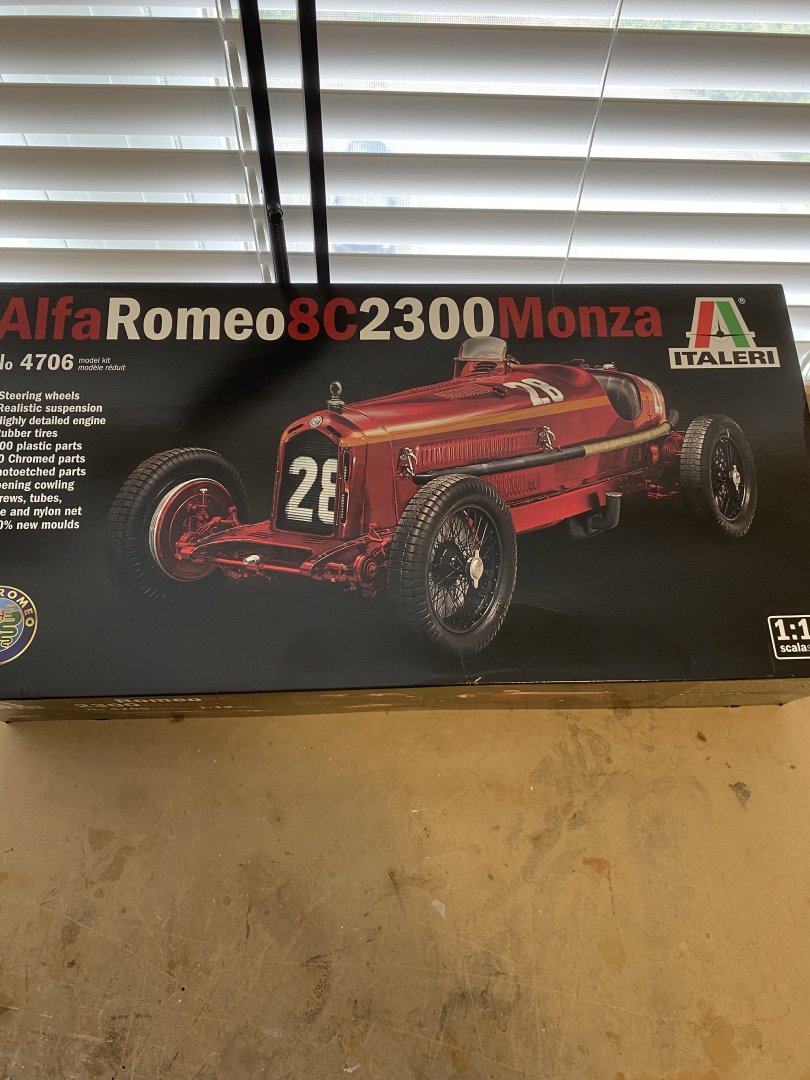
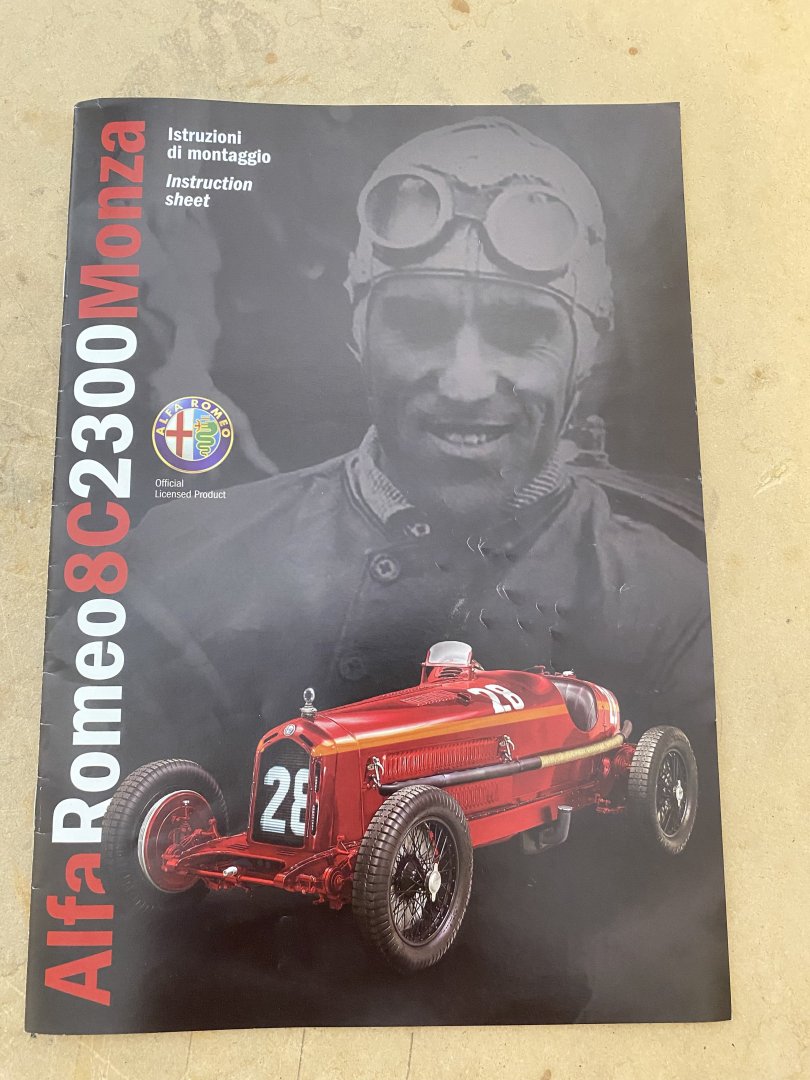
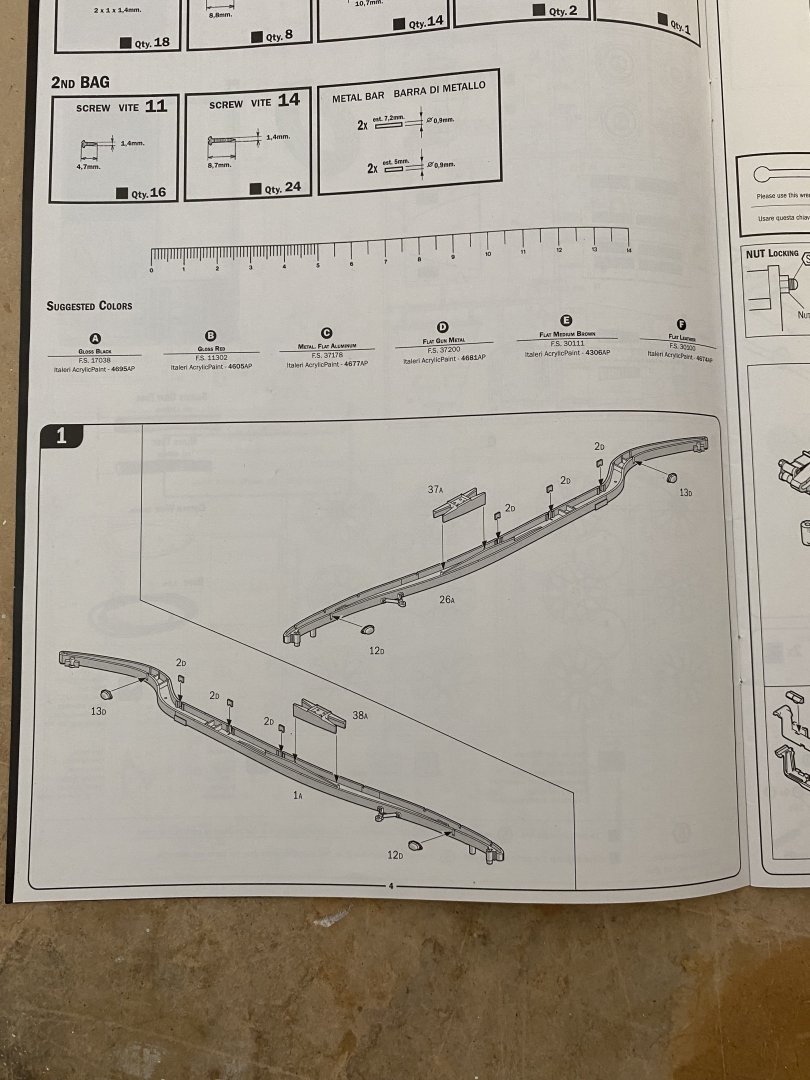
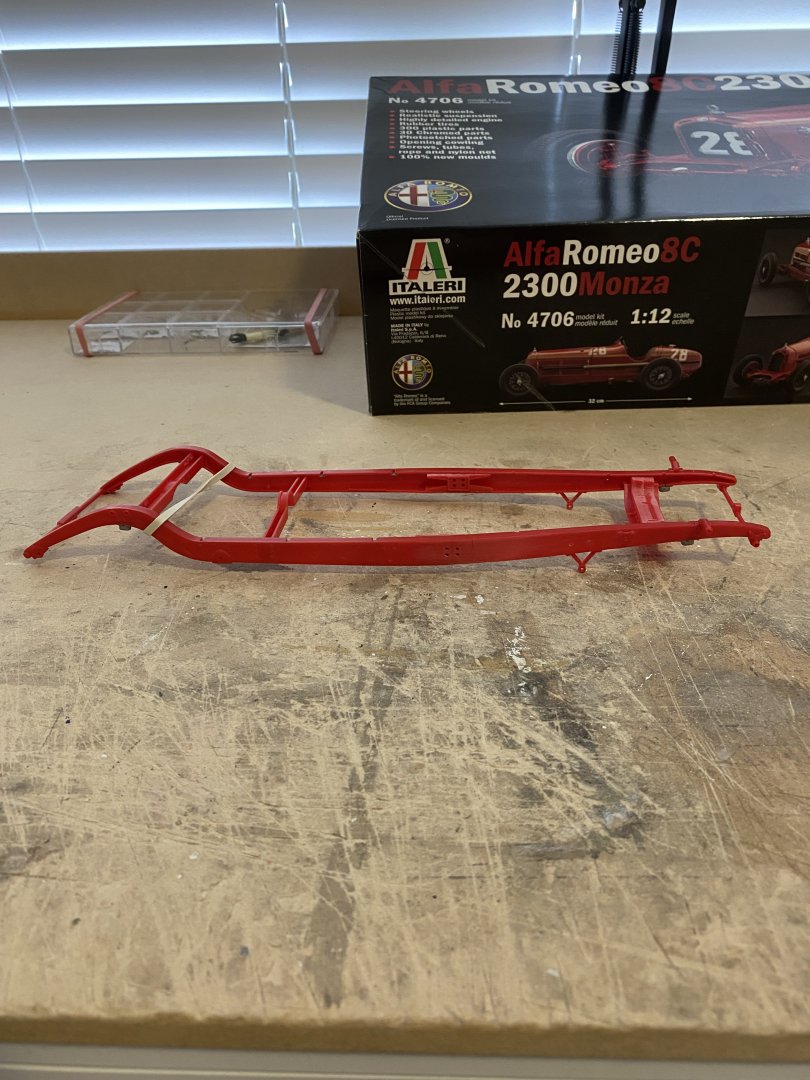
I have started on this build, my first car in over 50 years. It will be a slow build as I am still waiting for my airbrush set up. There will be a learning curve and lots of practice before putting paint to the model. Step 1 and 2 complete


- 9 replies
-
- 11
-
-
-
I am going to call this build Finished. The small boats ended up in the garbage, new ones will be ordered from AL. I started this build with great enthusiasm but that was lost when I ran into problems with some of the materials, and lack of drawings. The videos are a great help but drawings would be better in my opinion. No mast lights are provided with the kit so I used plastic thumb tacks. This build gave me great frustration at times and complete joy at others


- 68 replies
-
- 12
-
-
- Sanson
- Artesania Latina
- (and 2 more)
-
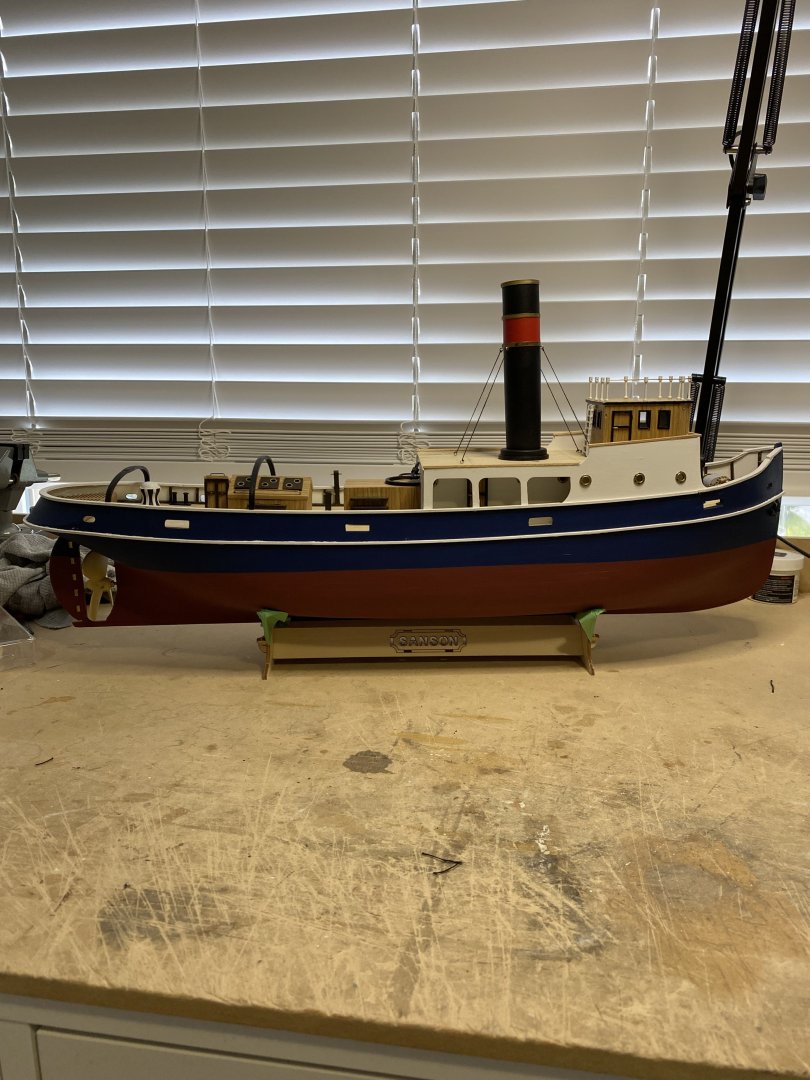
Just about finished. Only the mast and fenders to complete. The small boats ended up in the garbage so I will order a new set from AL. All the parts for the boats are on one small sheet so it should not be a problem. I have lots of material for planking.


- 68 replies
-
- 3
-
-
- Sanson
- Artesania Latina
- (and 2 more)
-
Making some slow progress. I will finish everything but the small boats. More on that later
- 68 replies
-
- 5
-
-
- Sanson
- Artesania Latina
- (and 2 more)
-
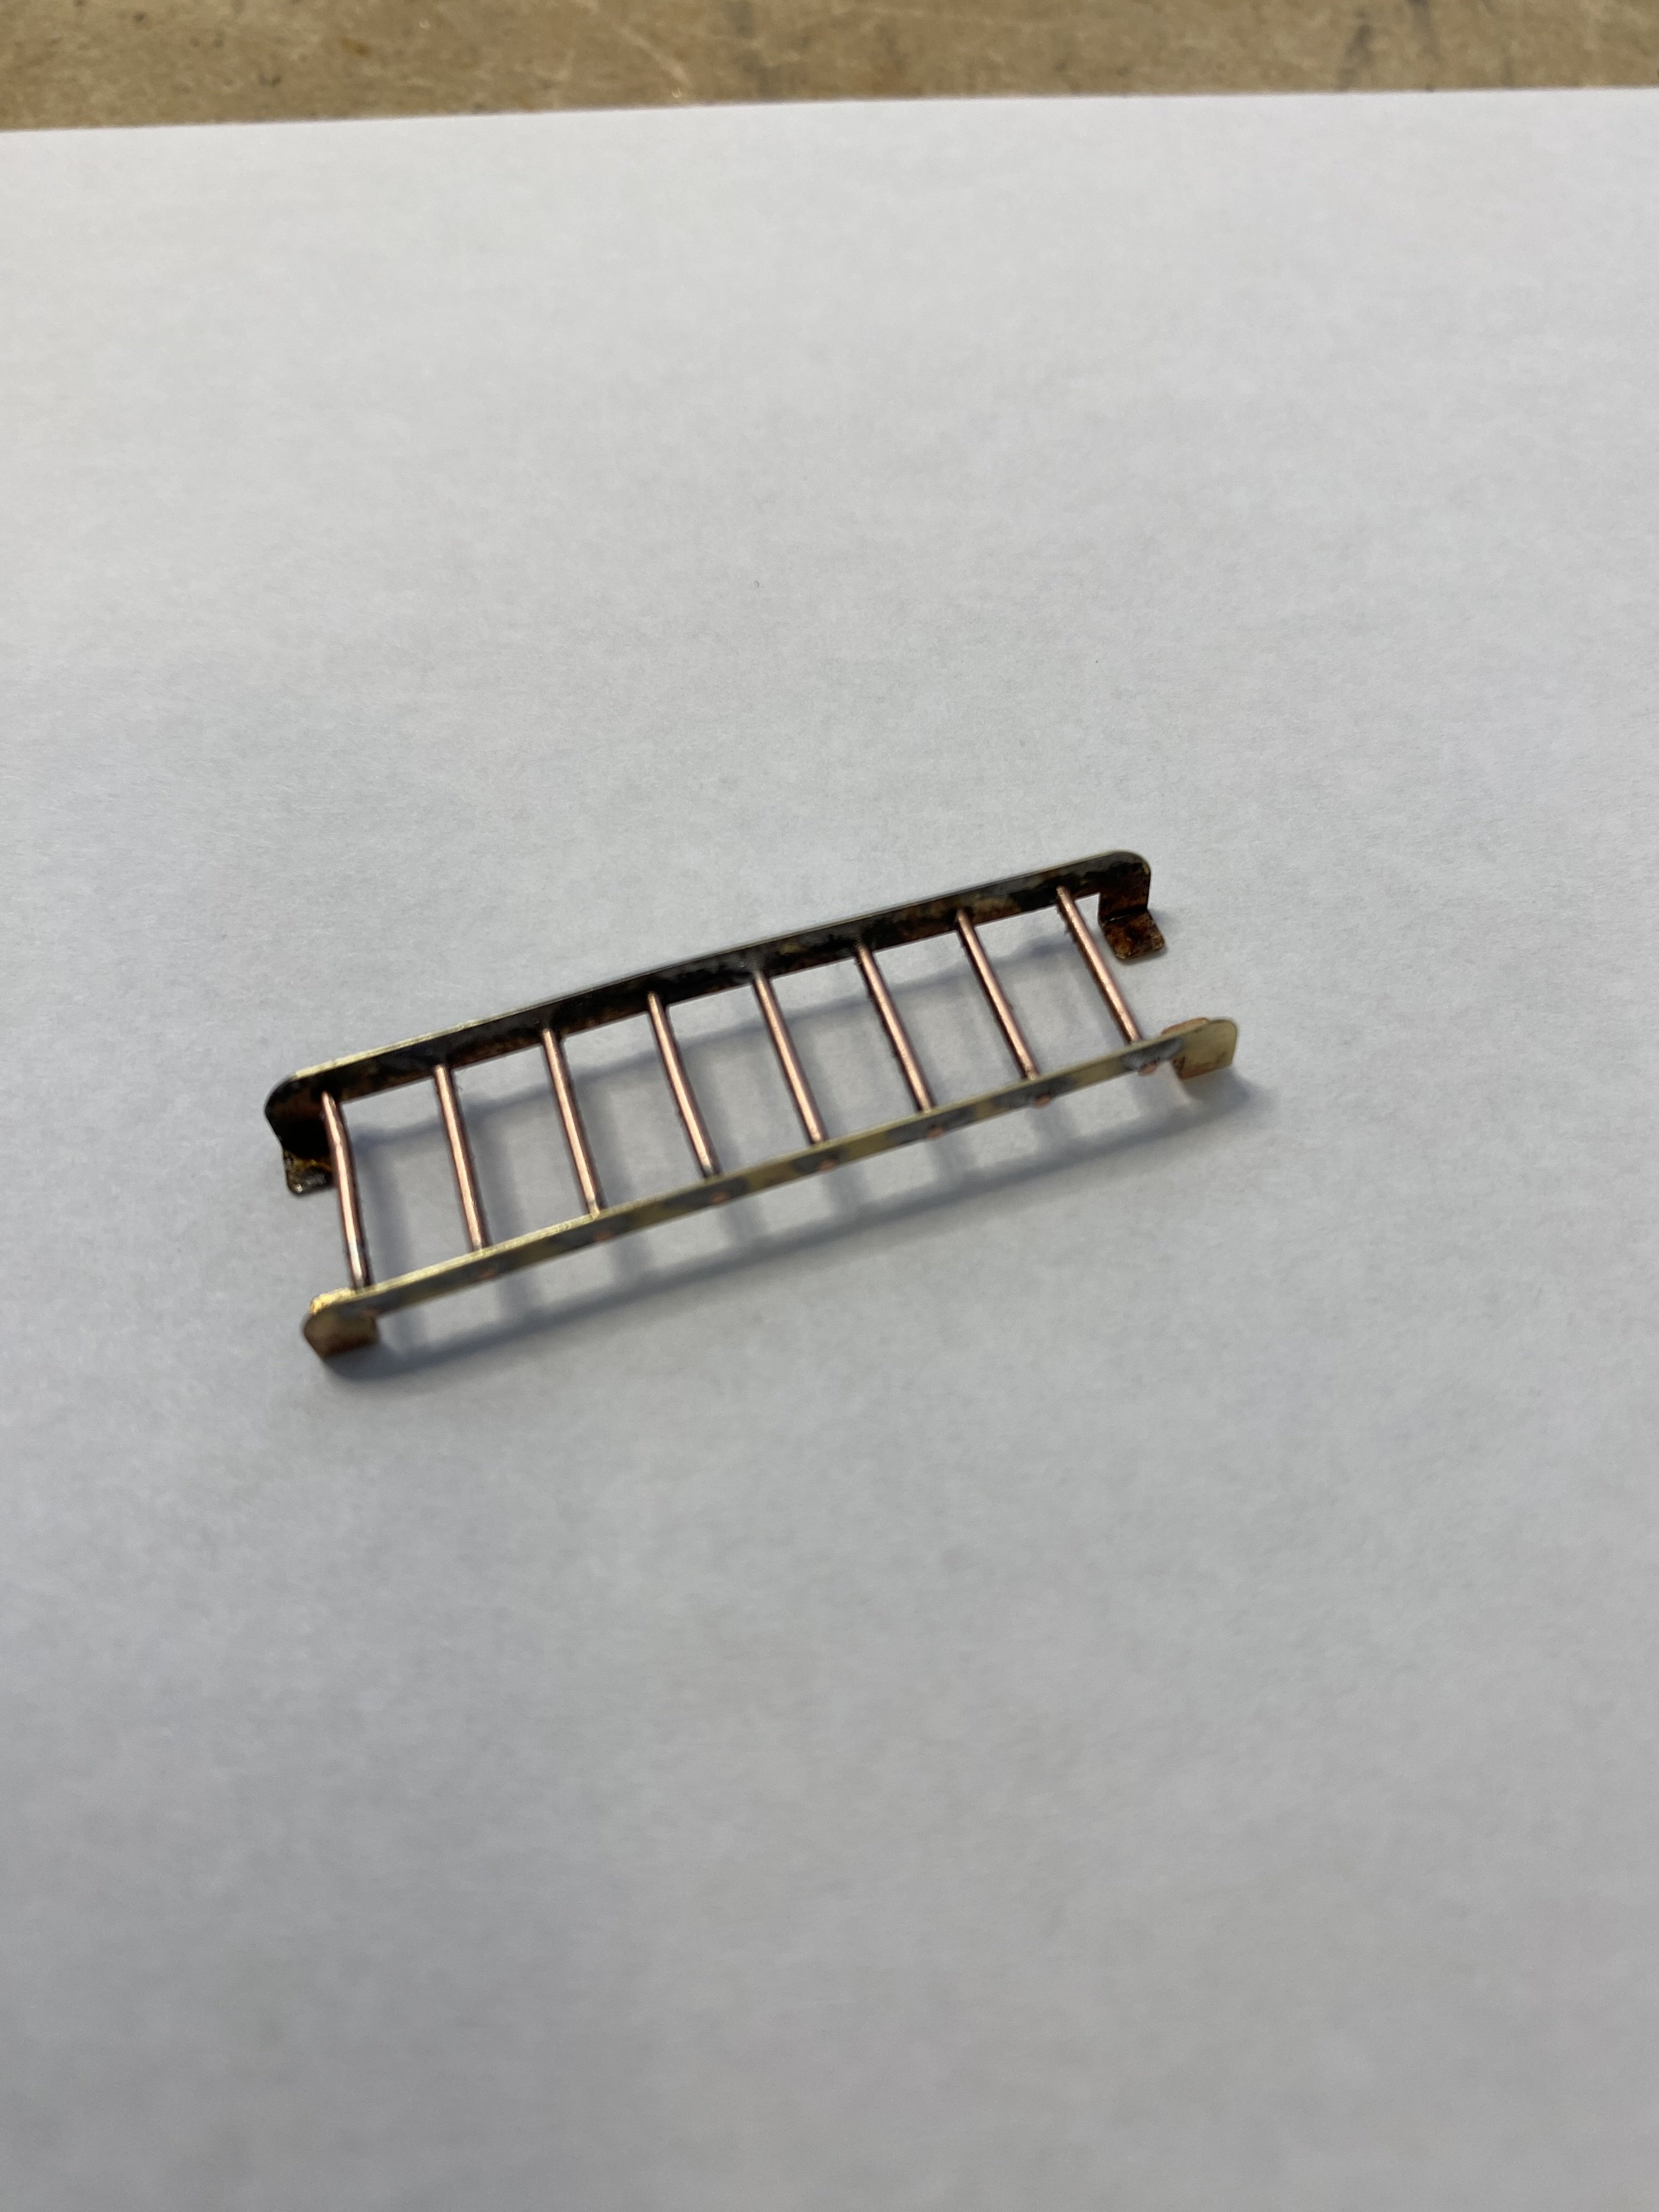
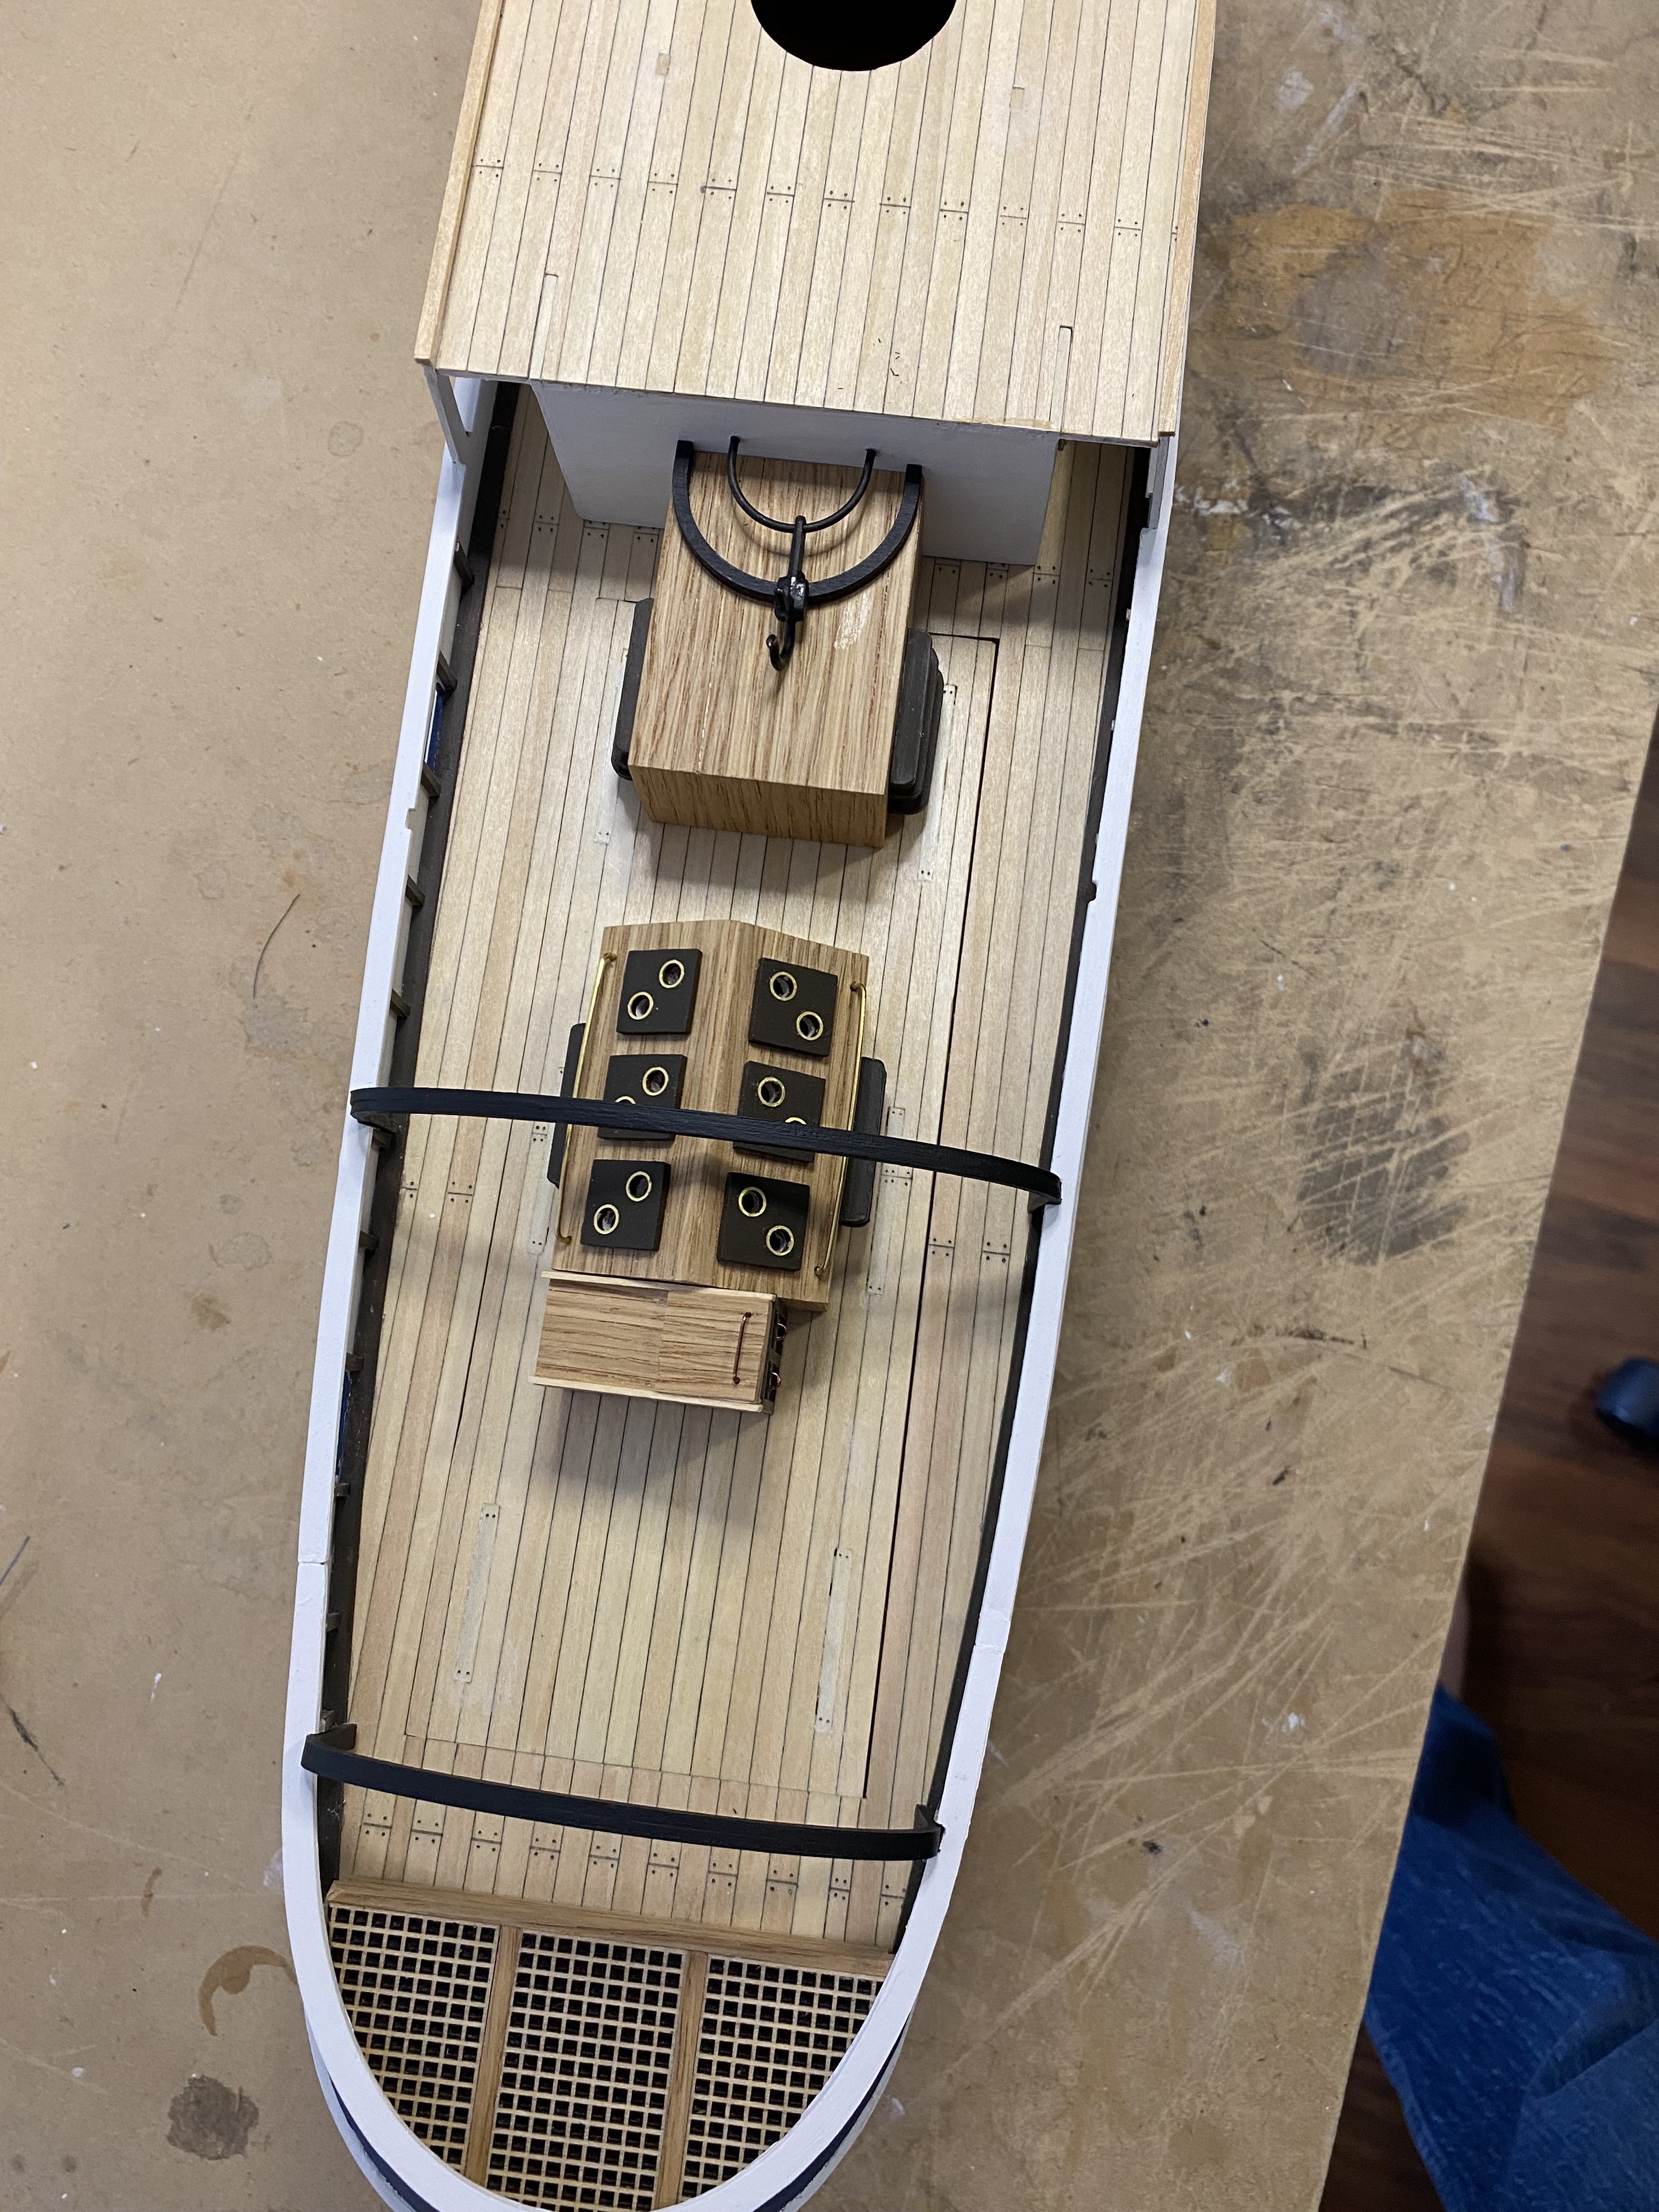
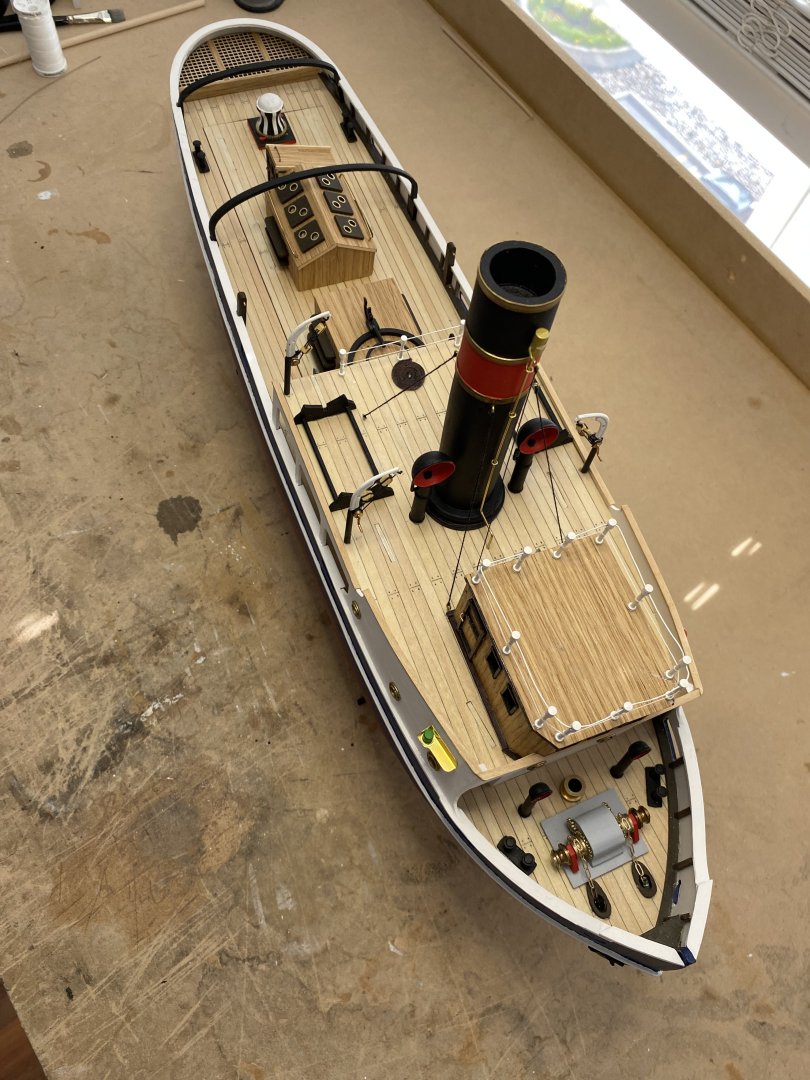
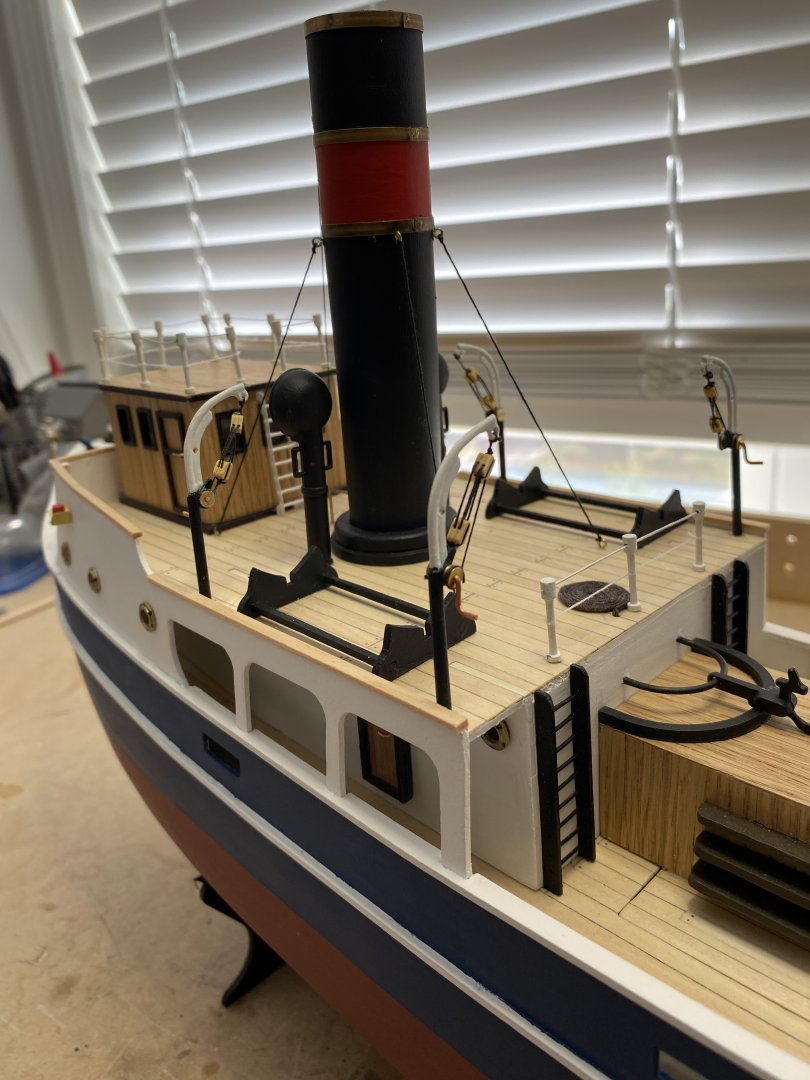
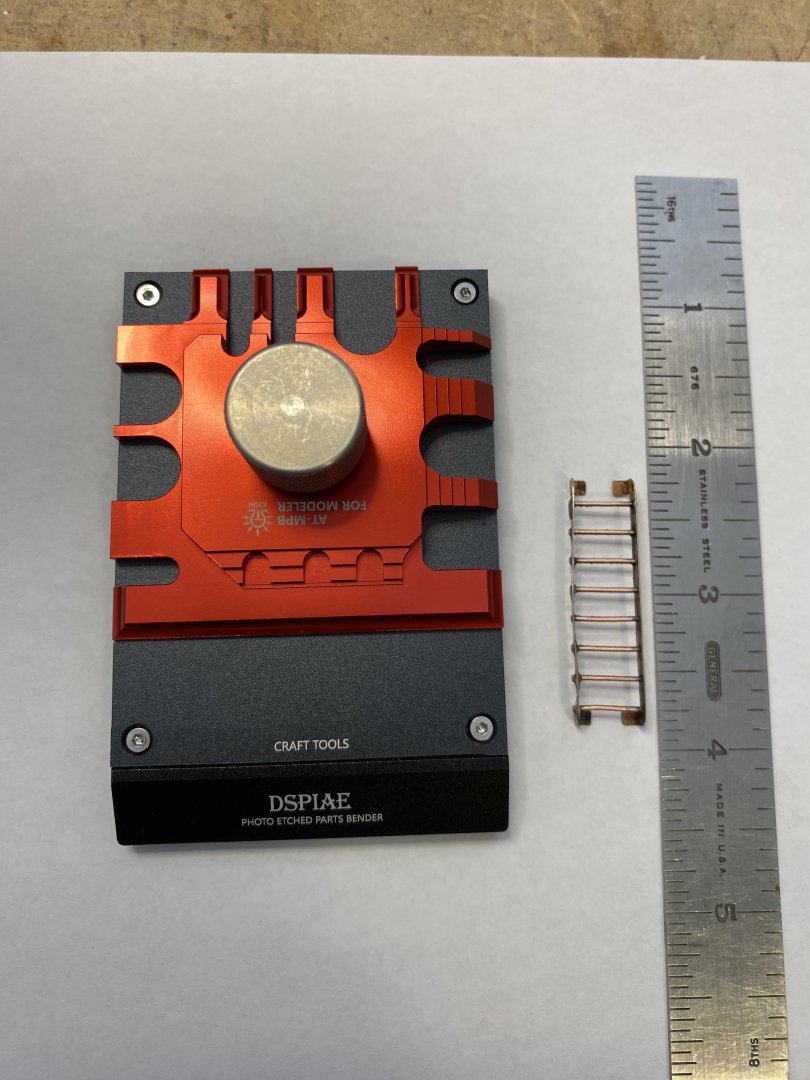
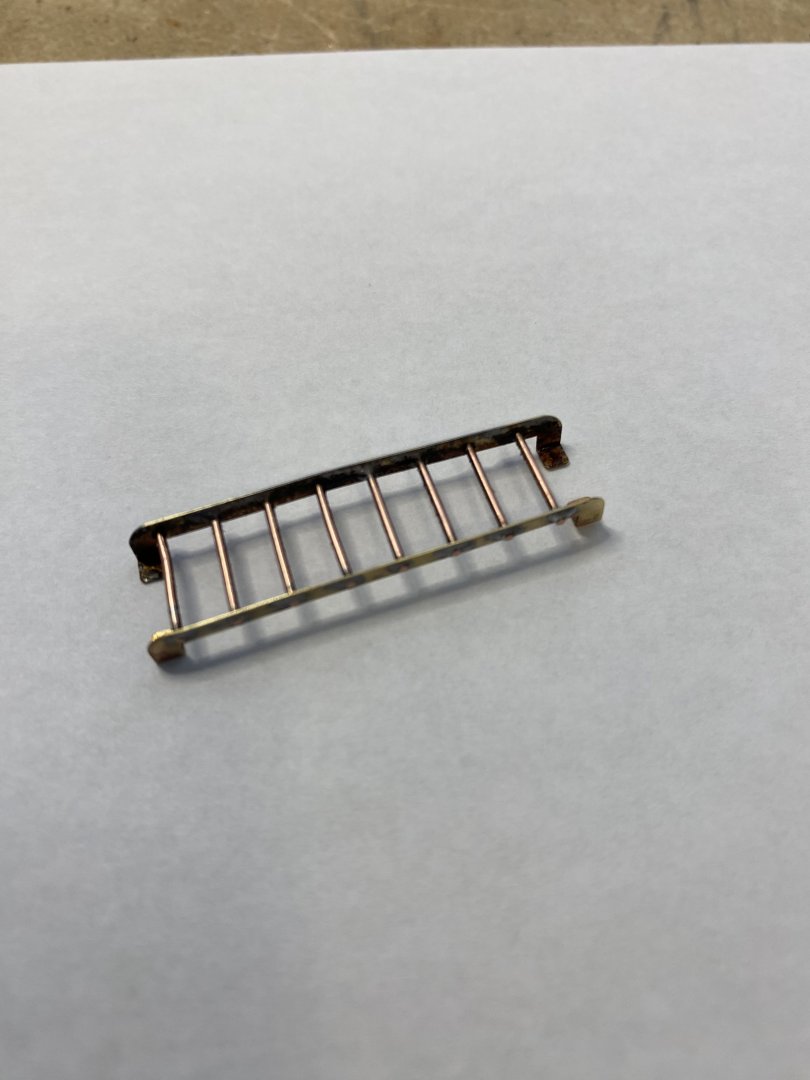
I just purchased the DSPIAE photo etch bending tool so the ladders and other parts could be shaped . The tool is well made and worked very well. Unfortunately the operator not so good. After bending the ends of the ladder I twisted the steps in the wrong direction. When trying to correct this the steps broke off. The sides were drilled and some copper wire cut and soldered in. It’s not perfect but with some paint it will be acceptable. The towing deck of the tug is pretty much complete, now it’s onto the boat deck.


- 68 replies
-
- 3
-
-
- Sanson
- Artesania Latina
- (and 2 more)
-
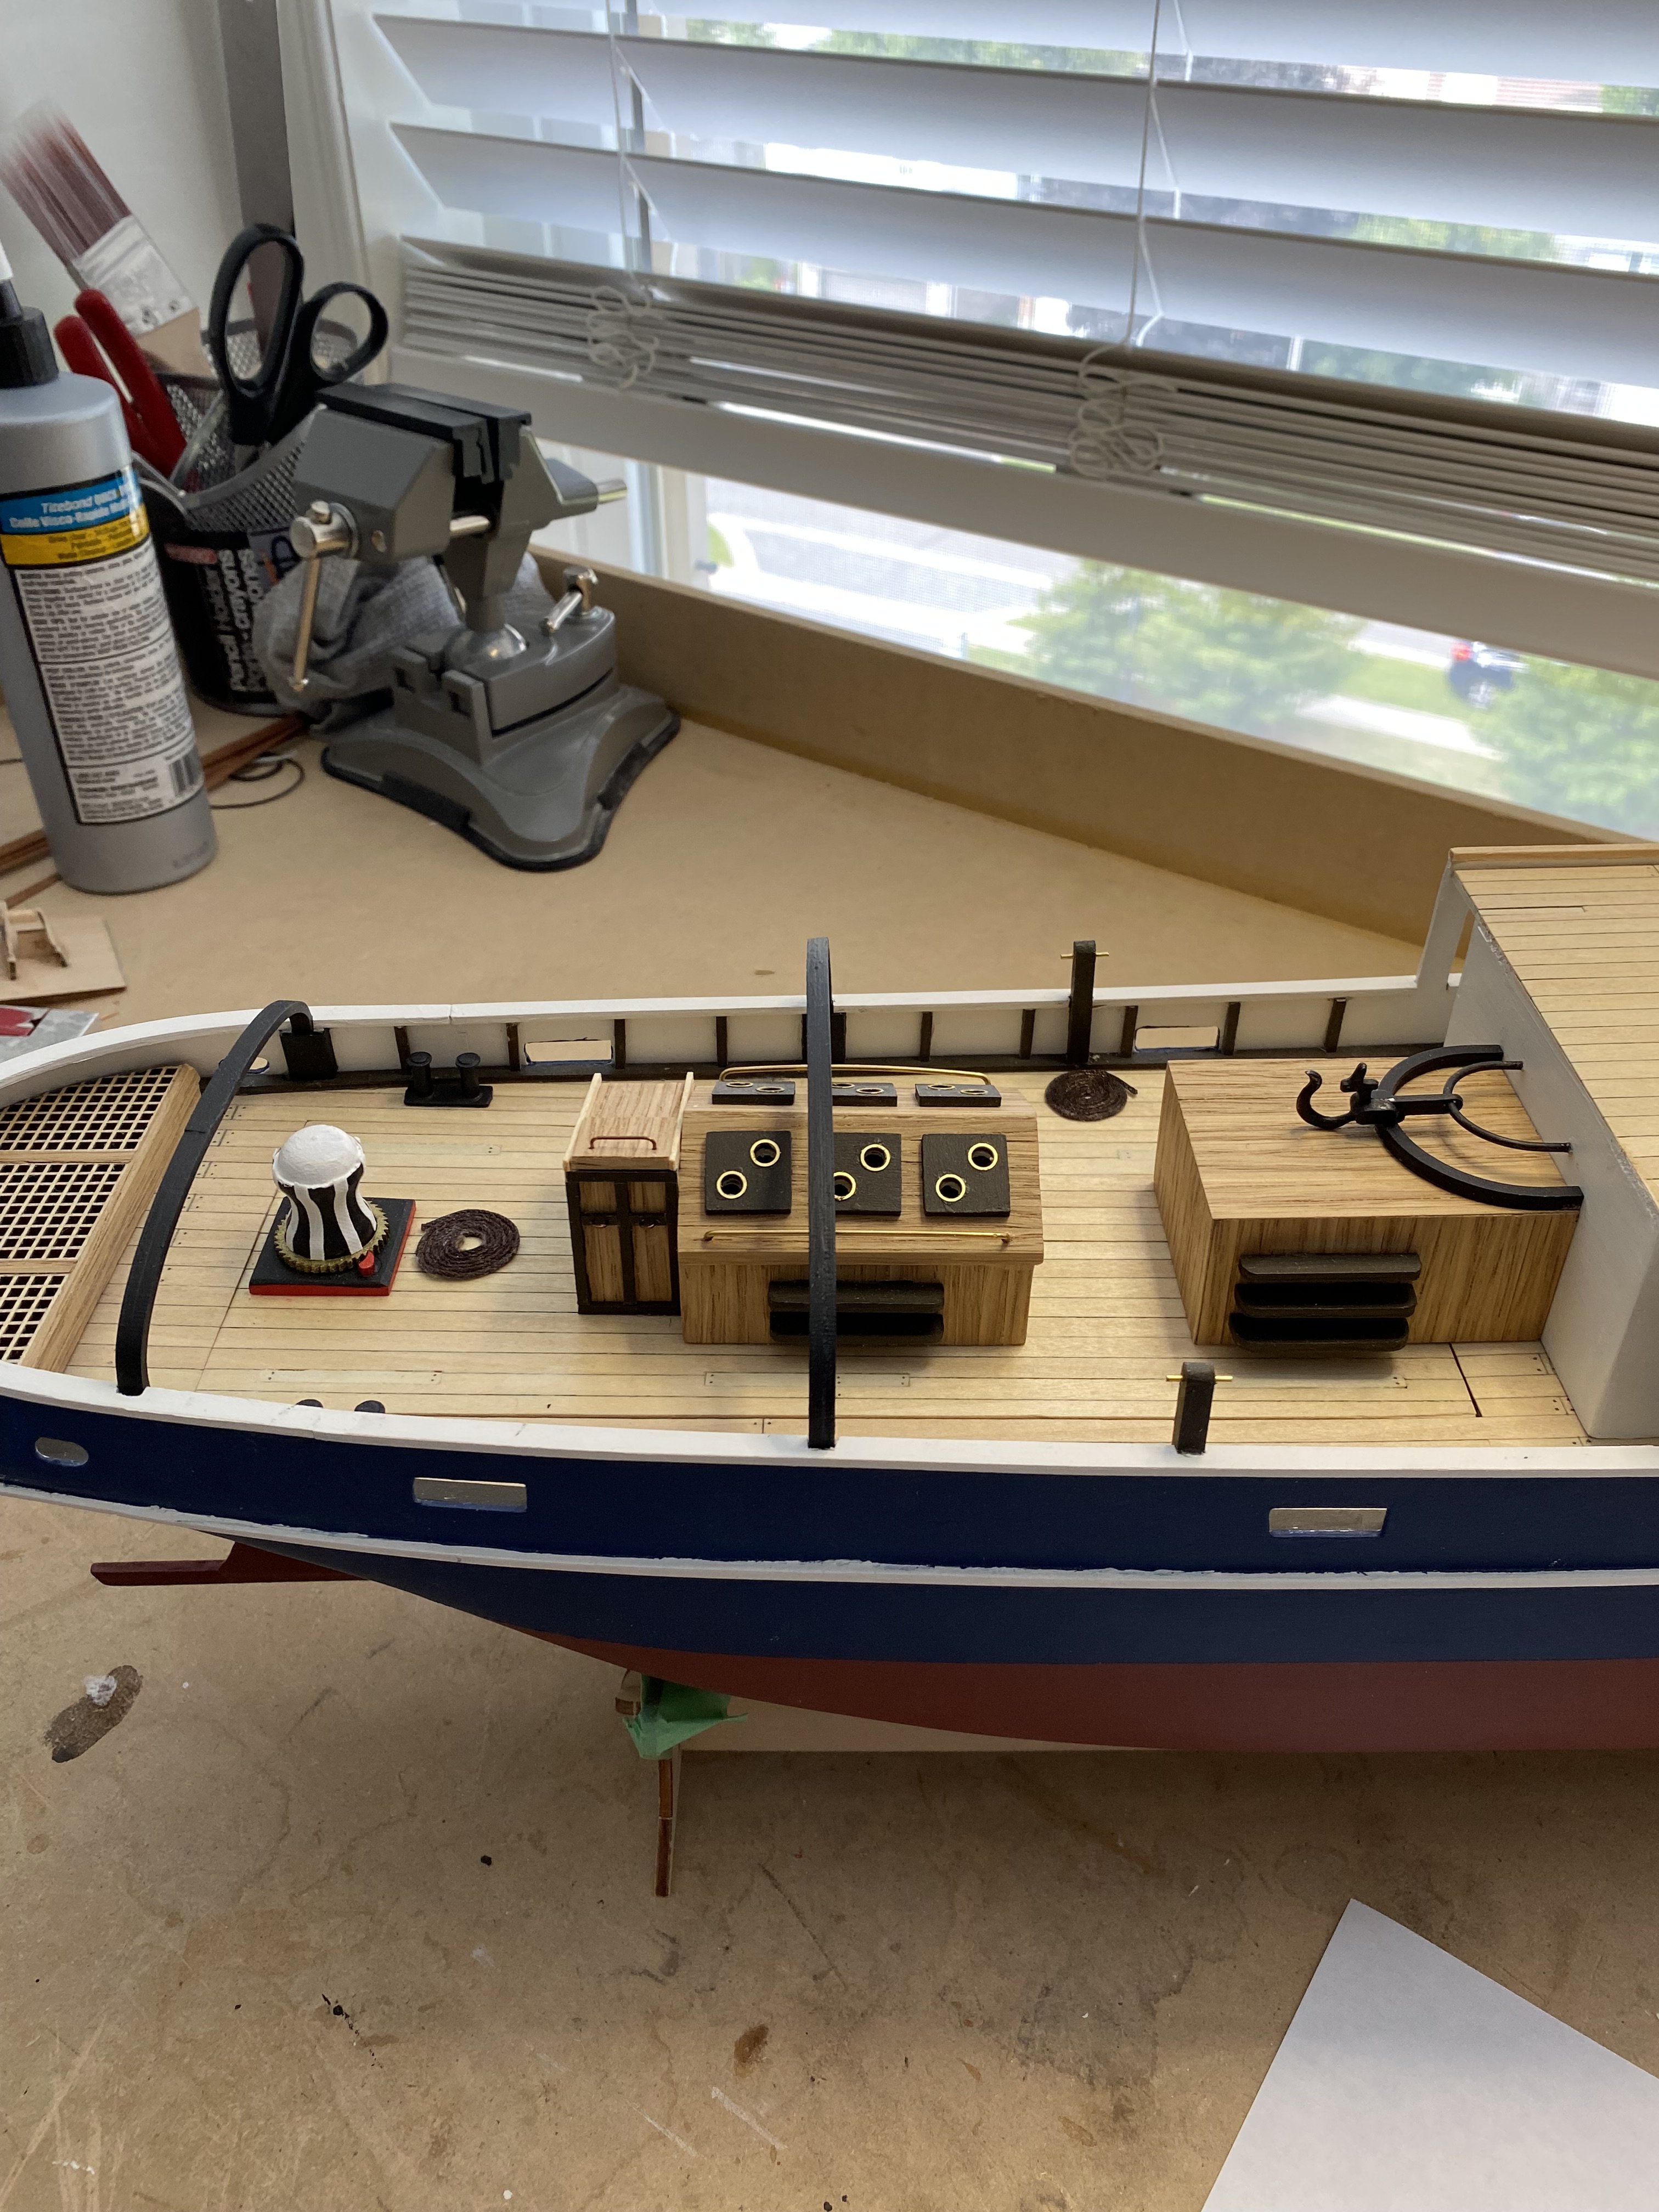
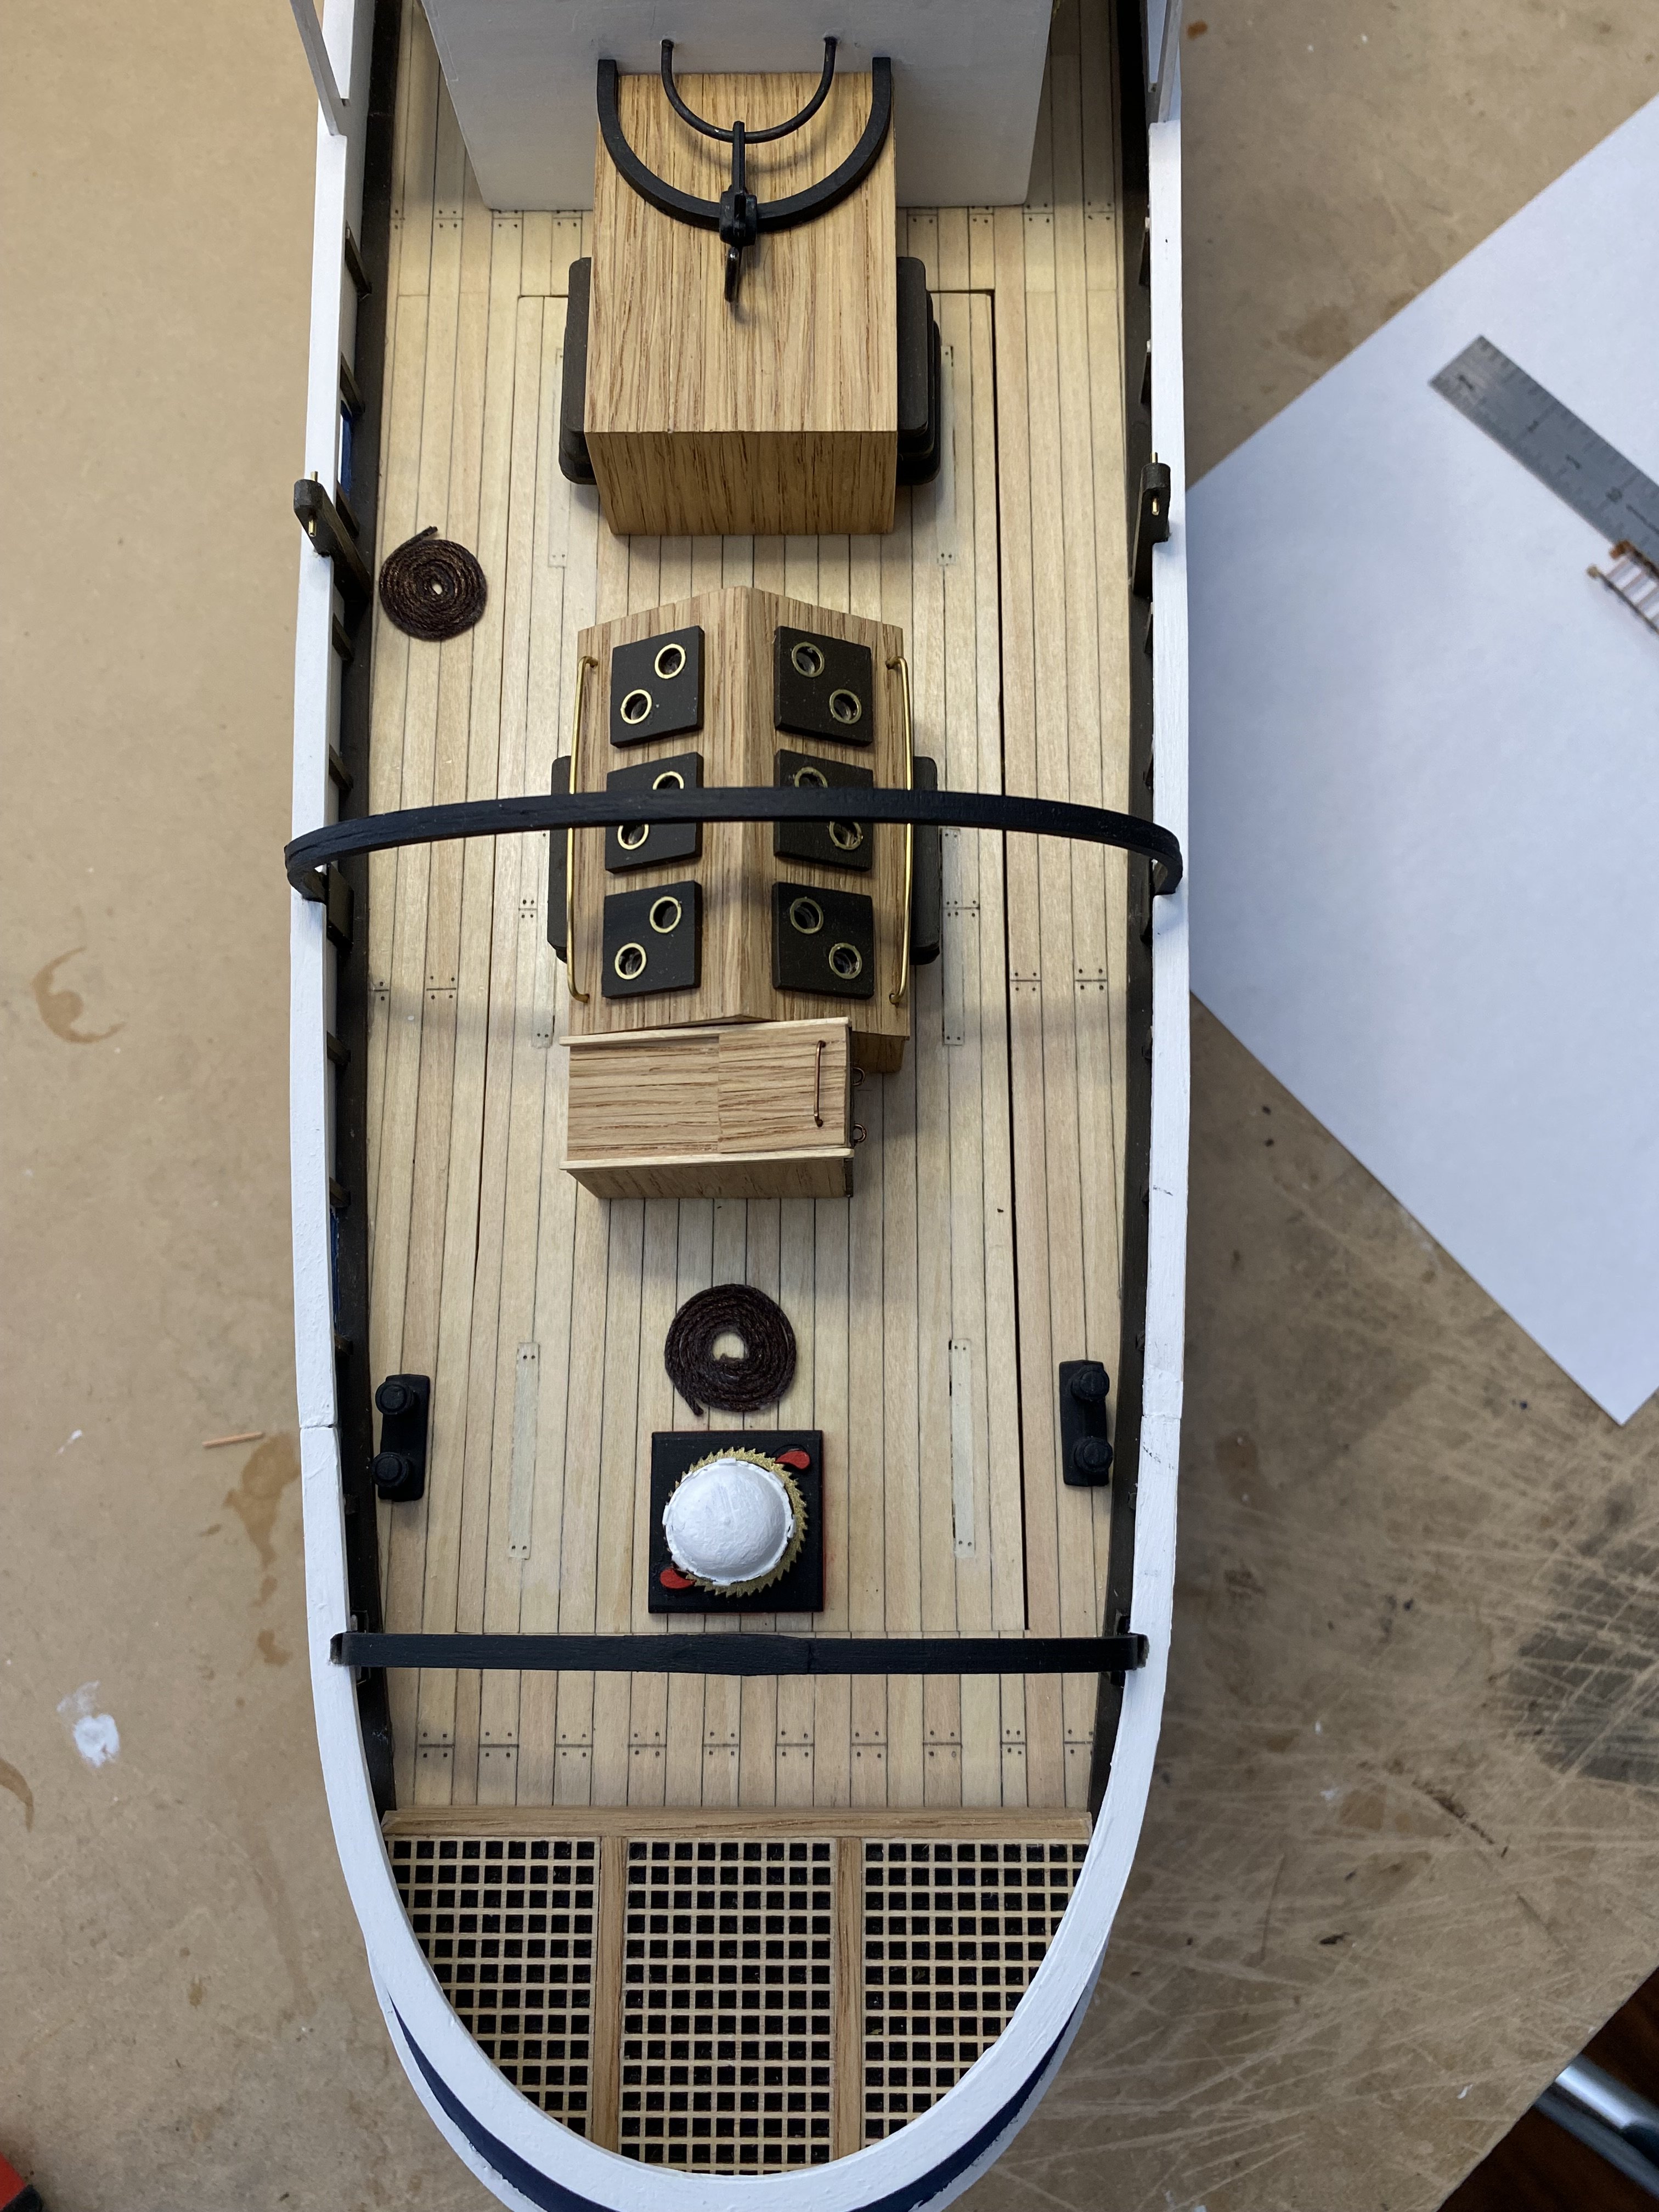
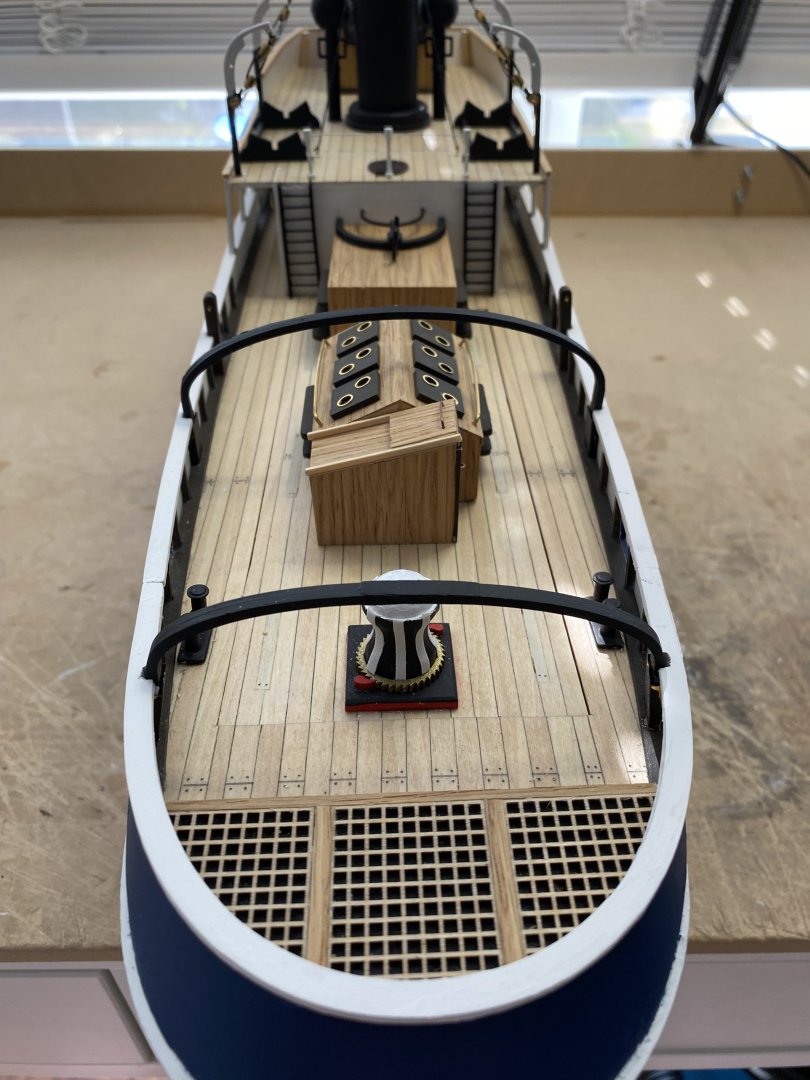
Looking at these photos it appears the capstan shifted when I glued it down. I used CA and Titebond so I don’t think it can be moved


-
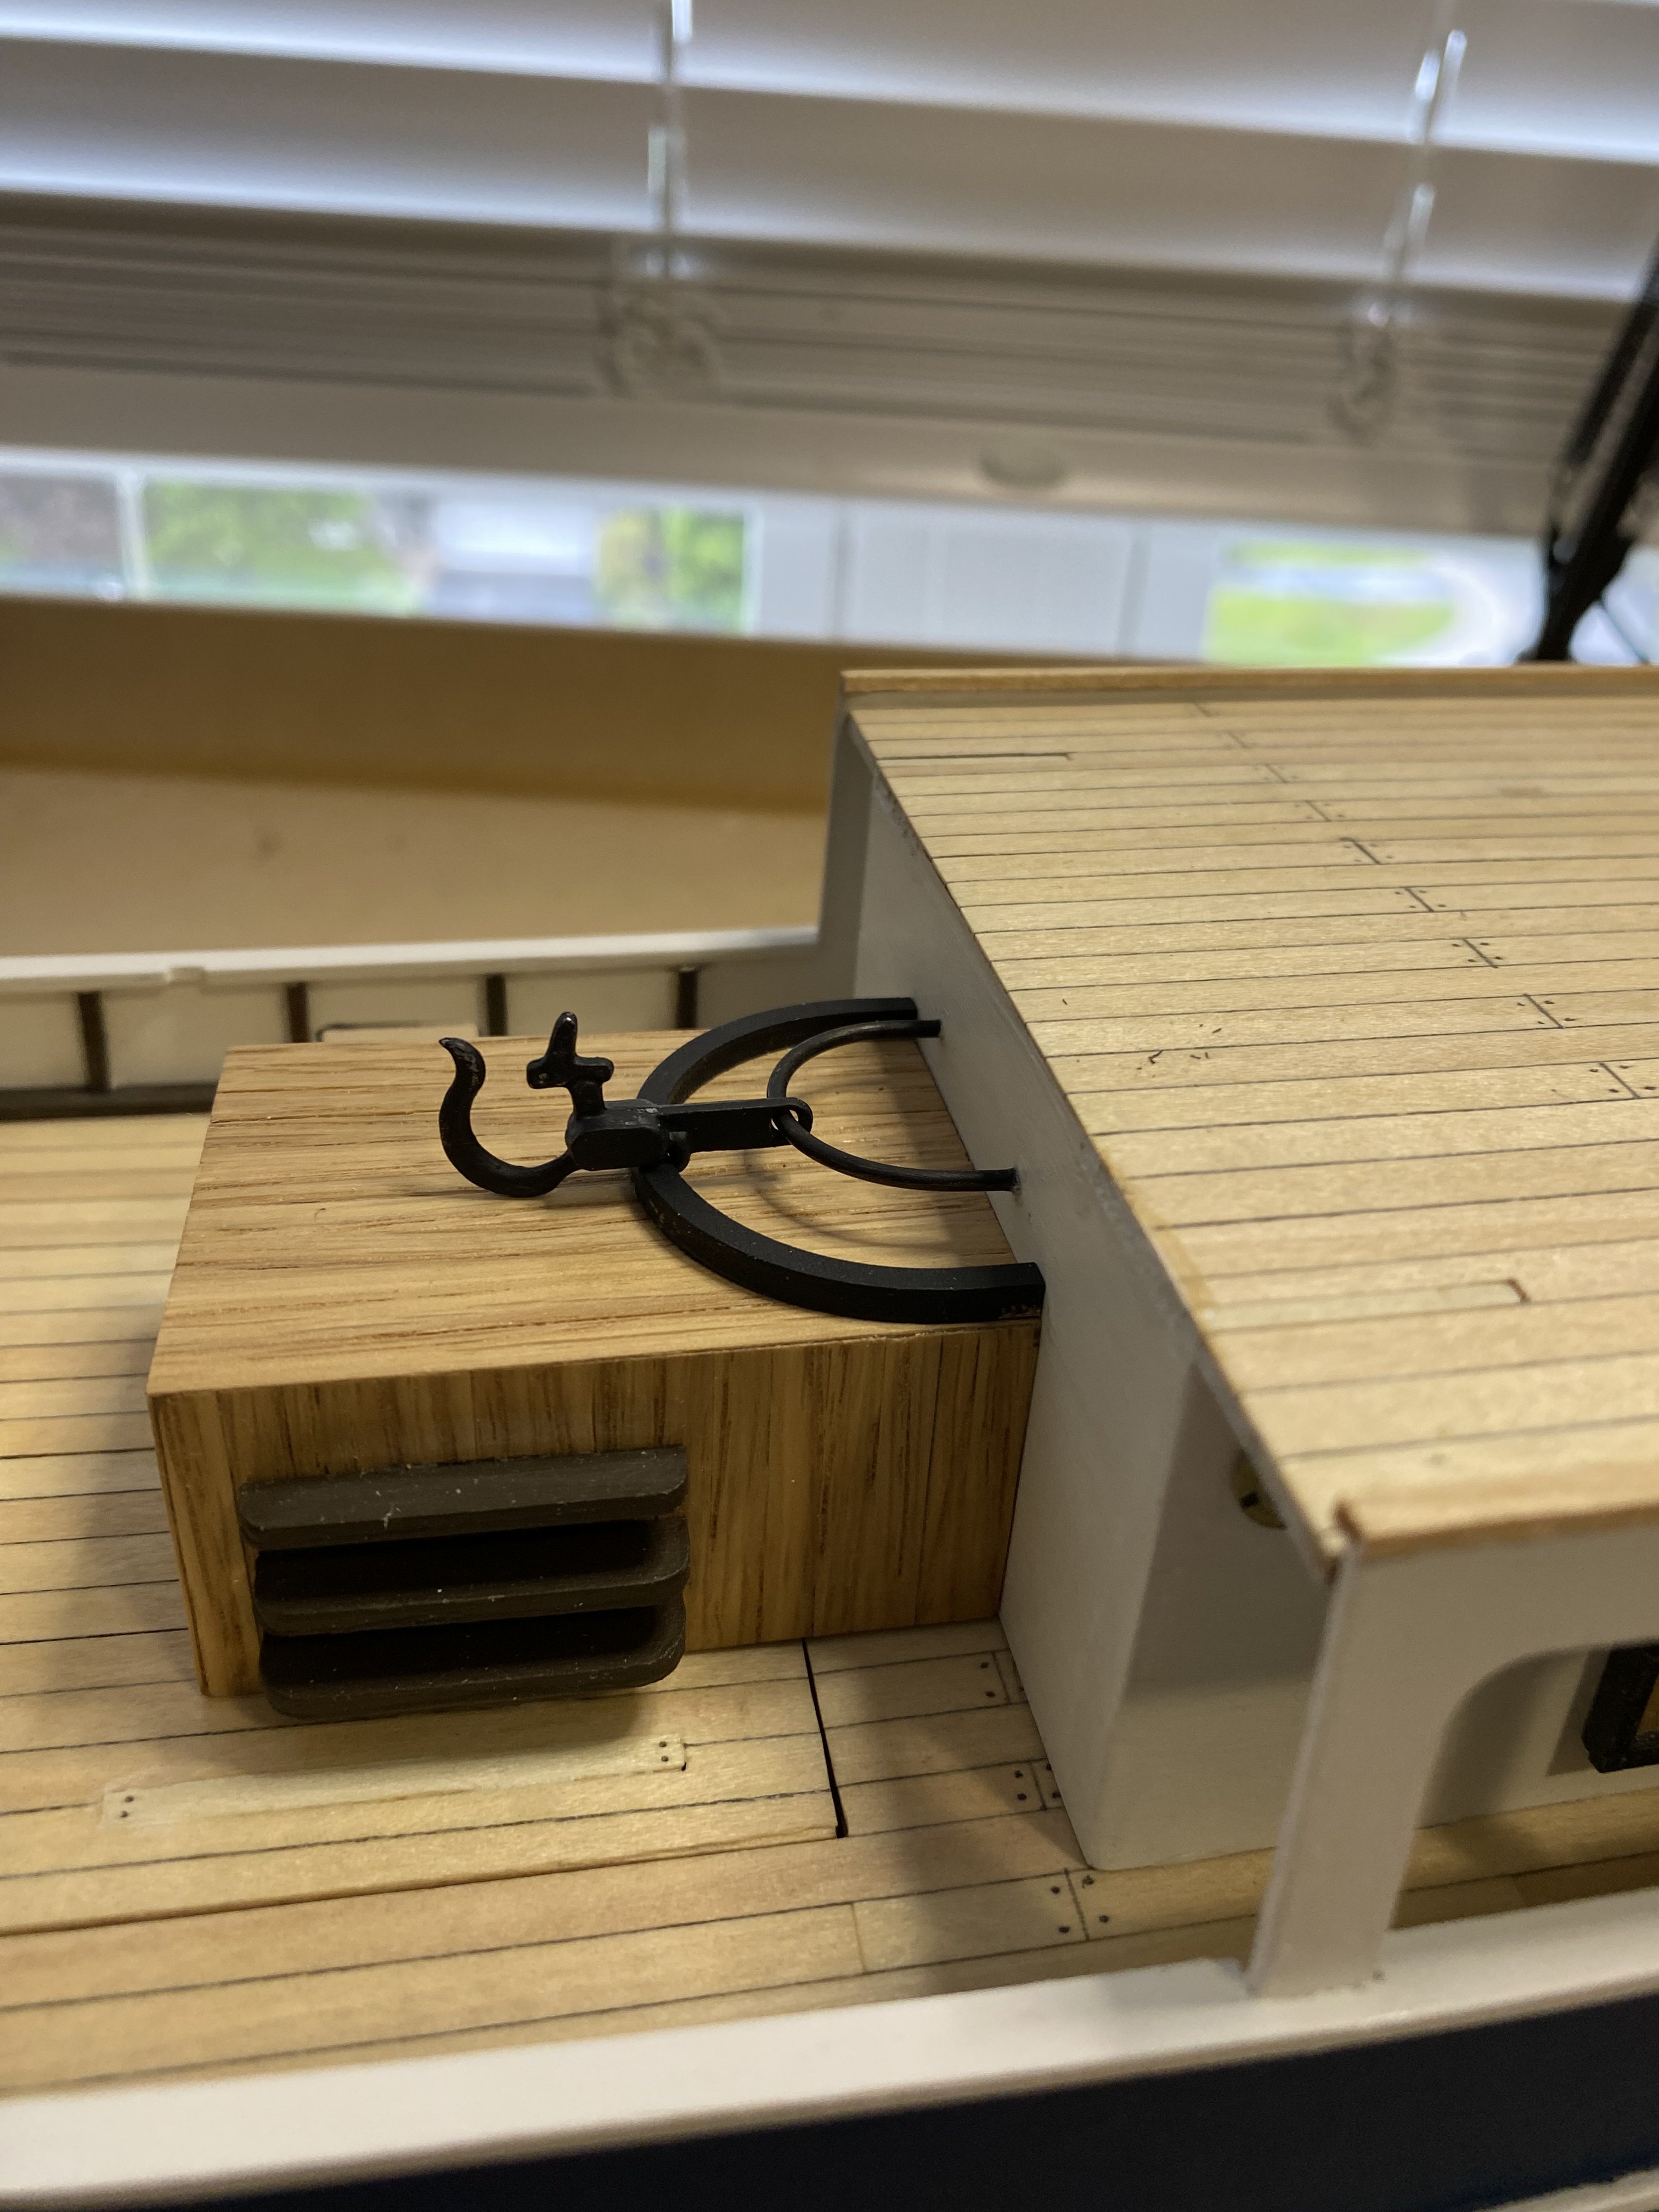
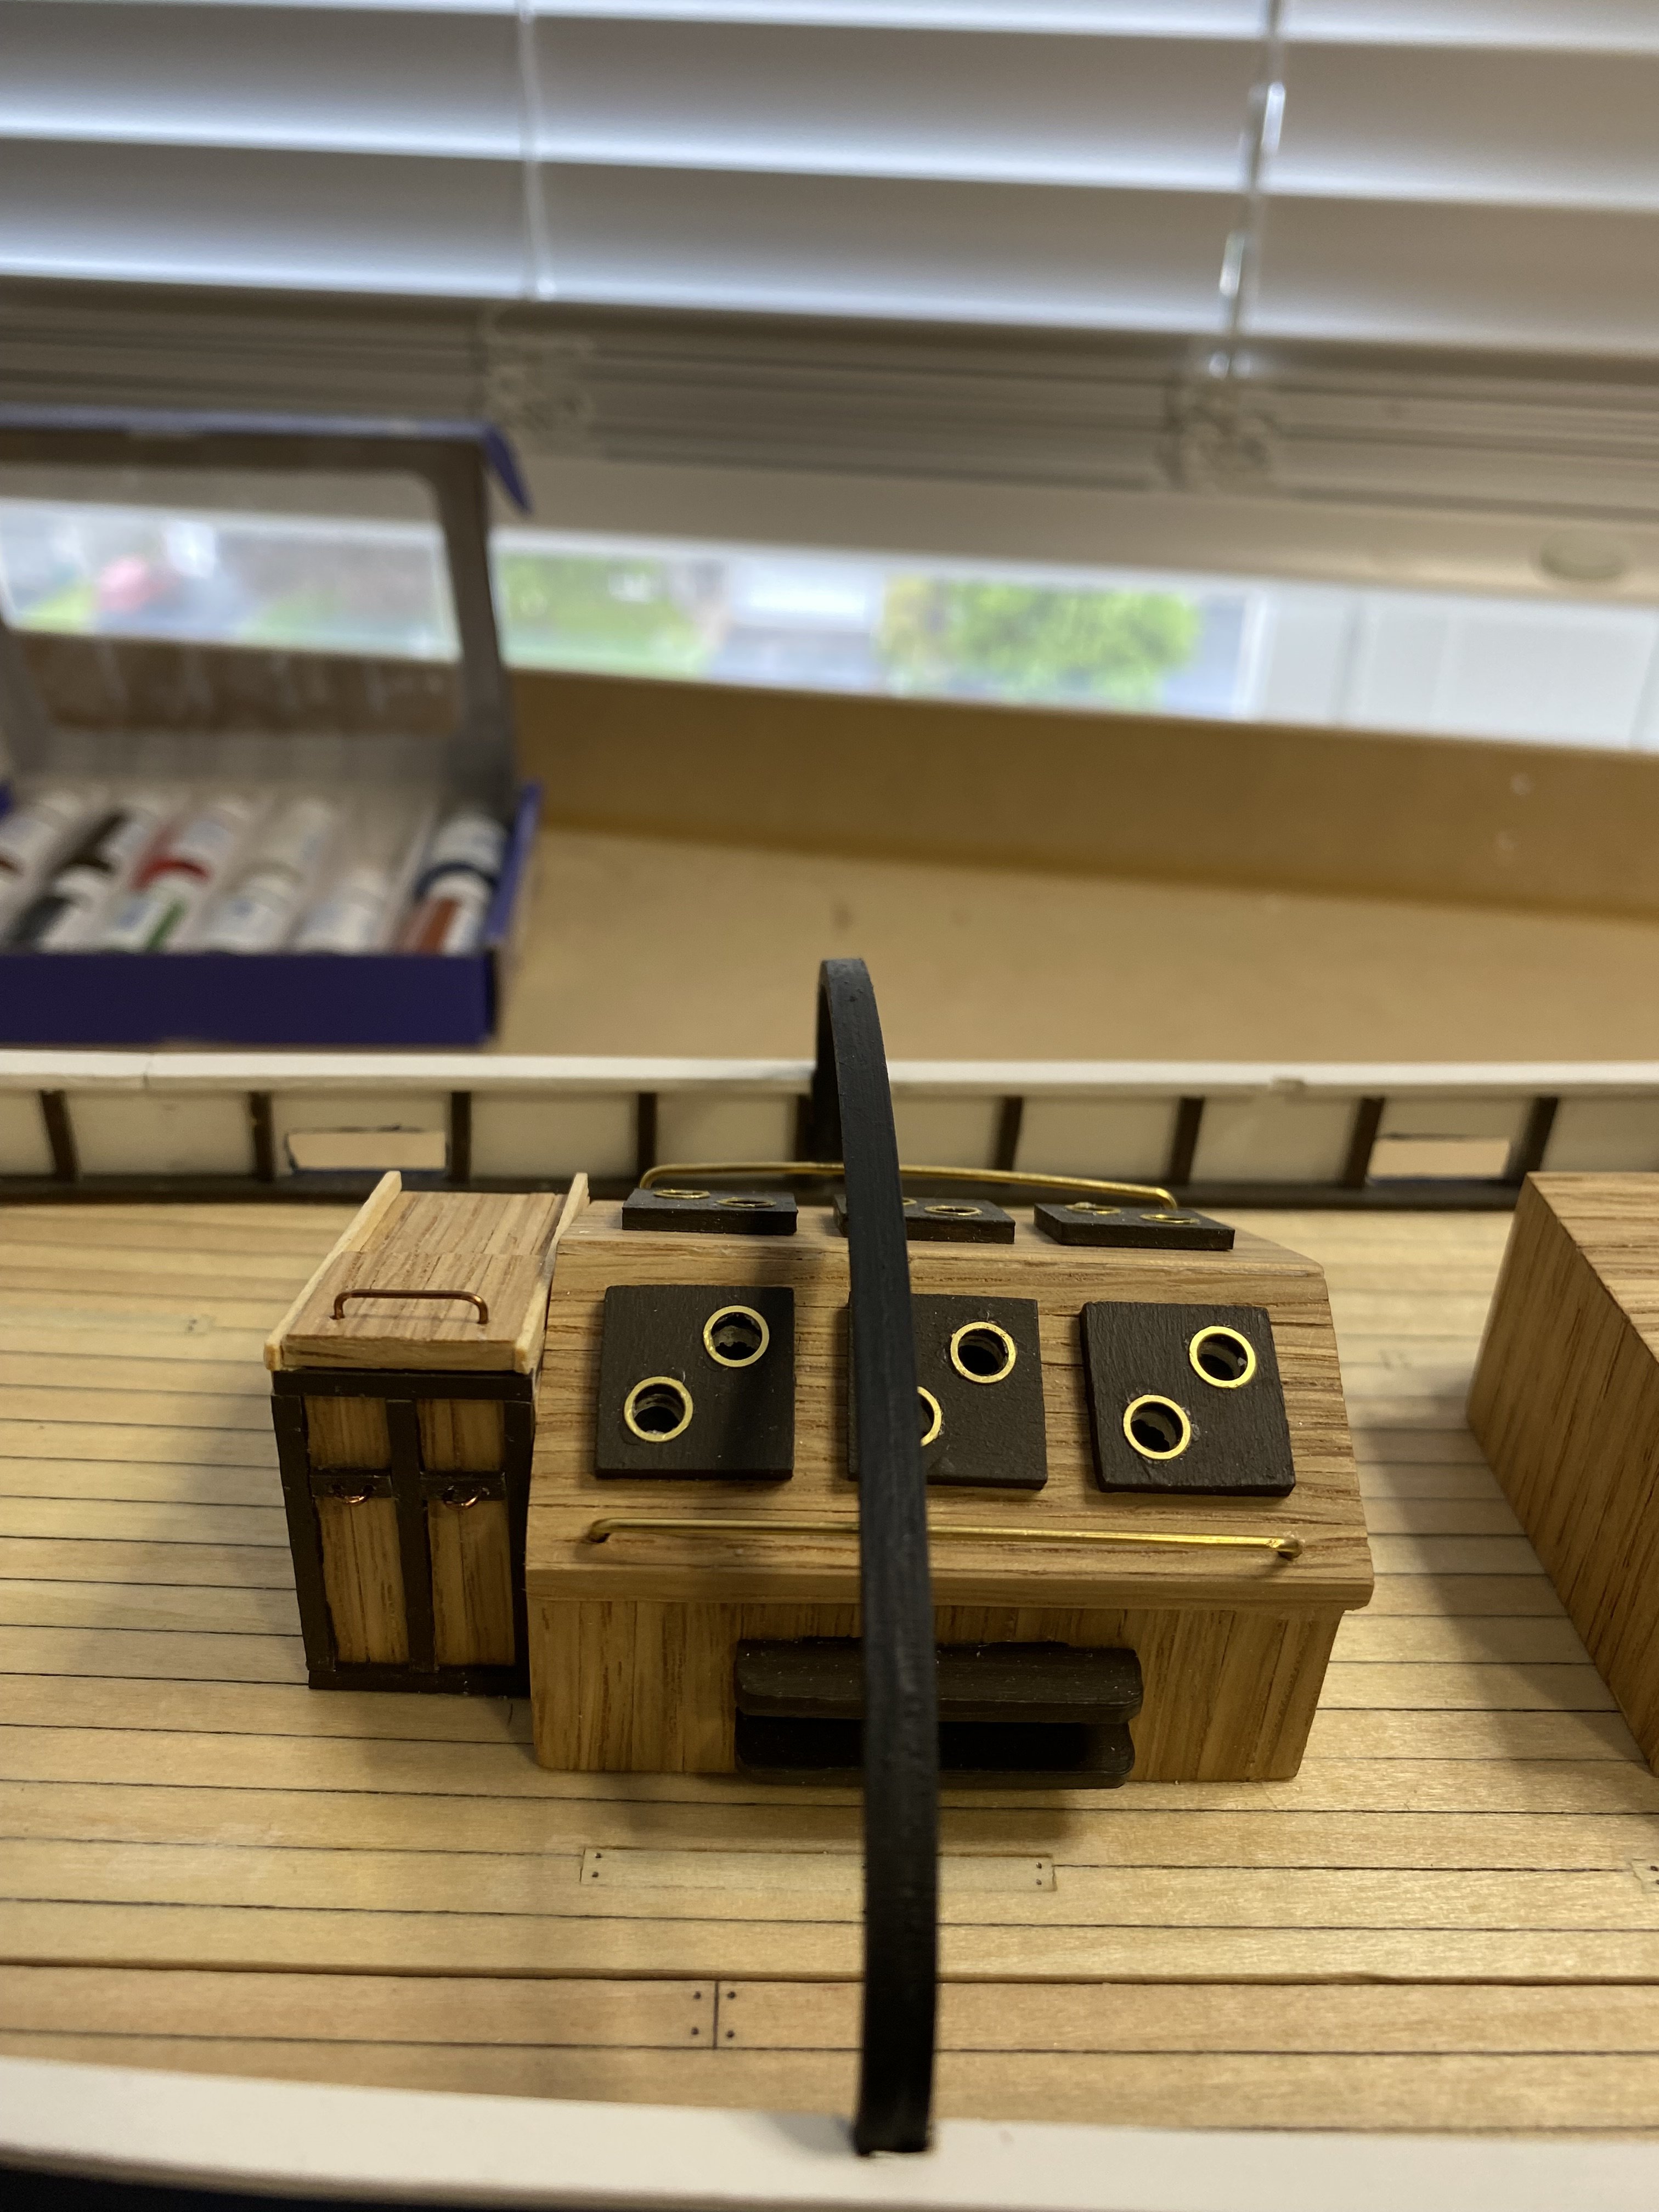
I have started on some of the fun stuff. The capstain and anchors are secure, the ventilators require a bit more work before they are glued in
- 68 replies
-
- 6
-
-
- Sanson
- Artesania Latina
- (and 2 more)
-
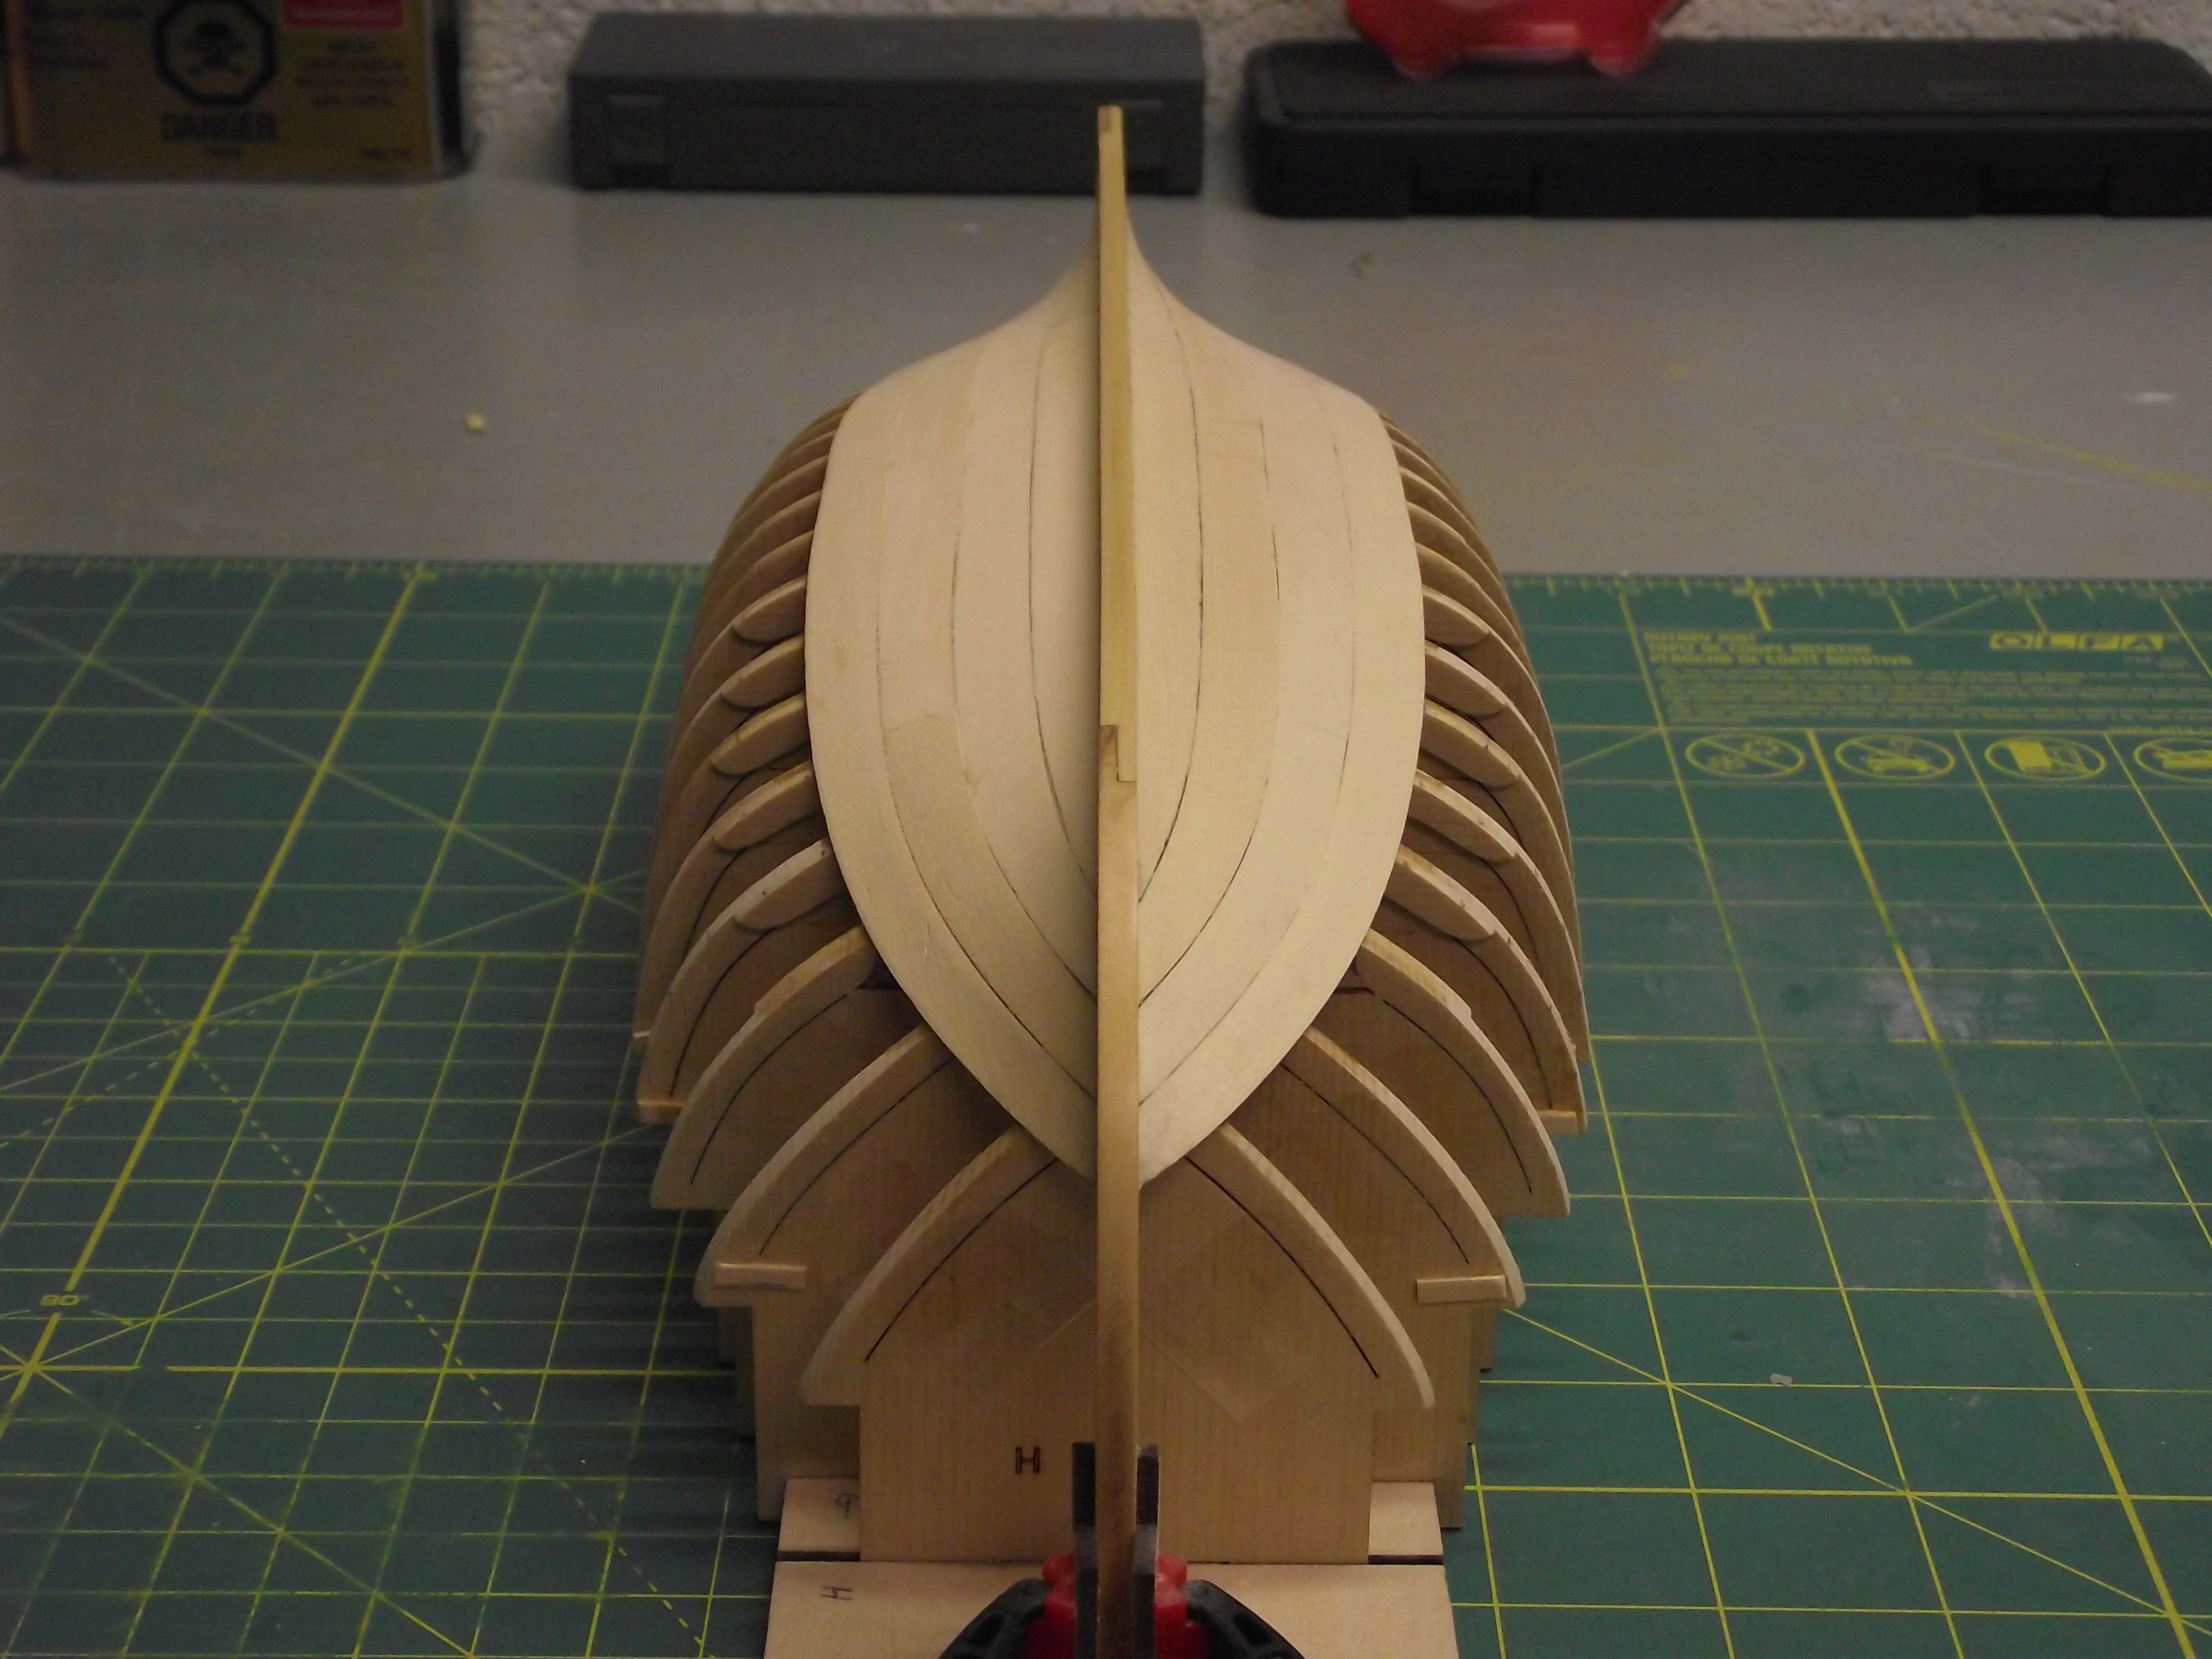
Welcome aboard. I am a novice builder having completed the Medway Long boat by Syren and am in the process of doing the Sanson Tug by AL. What I have found with the video instructions is that they leave out some important steps. An experienced builder would think of these. In my case it was bevelling the planks on the hull. If I had not built the Longboat that came with very detailed instructions I would not have known to do this. In hind sight I would have viewed the videos numerous times to to see if the steps were in a logical order, case and point, the gunwales and deck/pilot house would not have been installed til after the hull was planked. Good luck with the build.
-
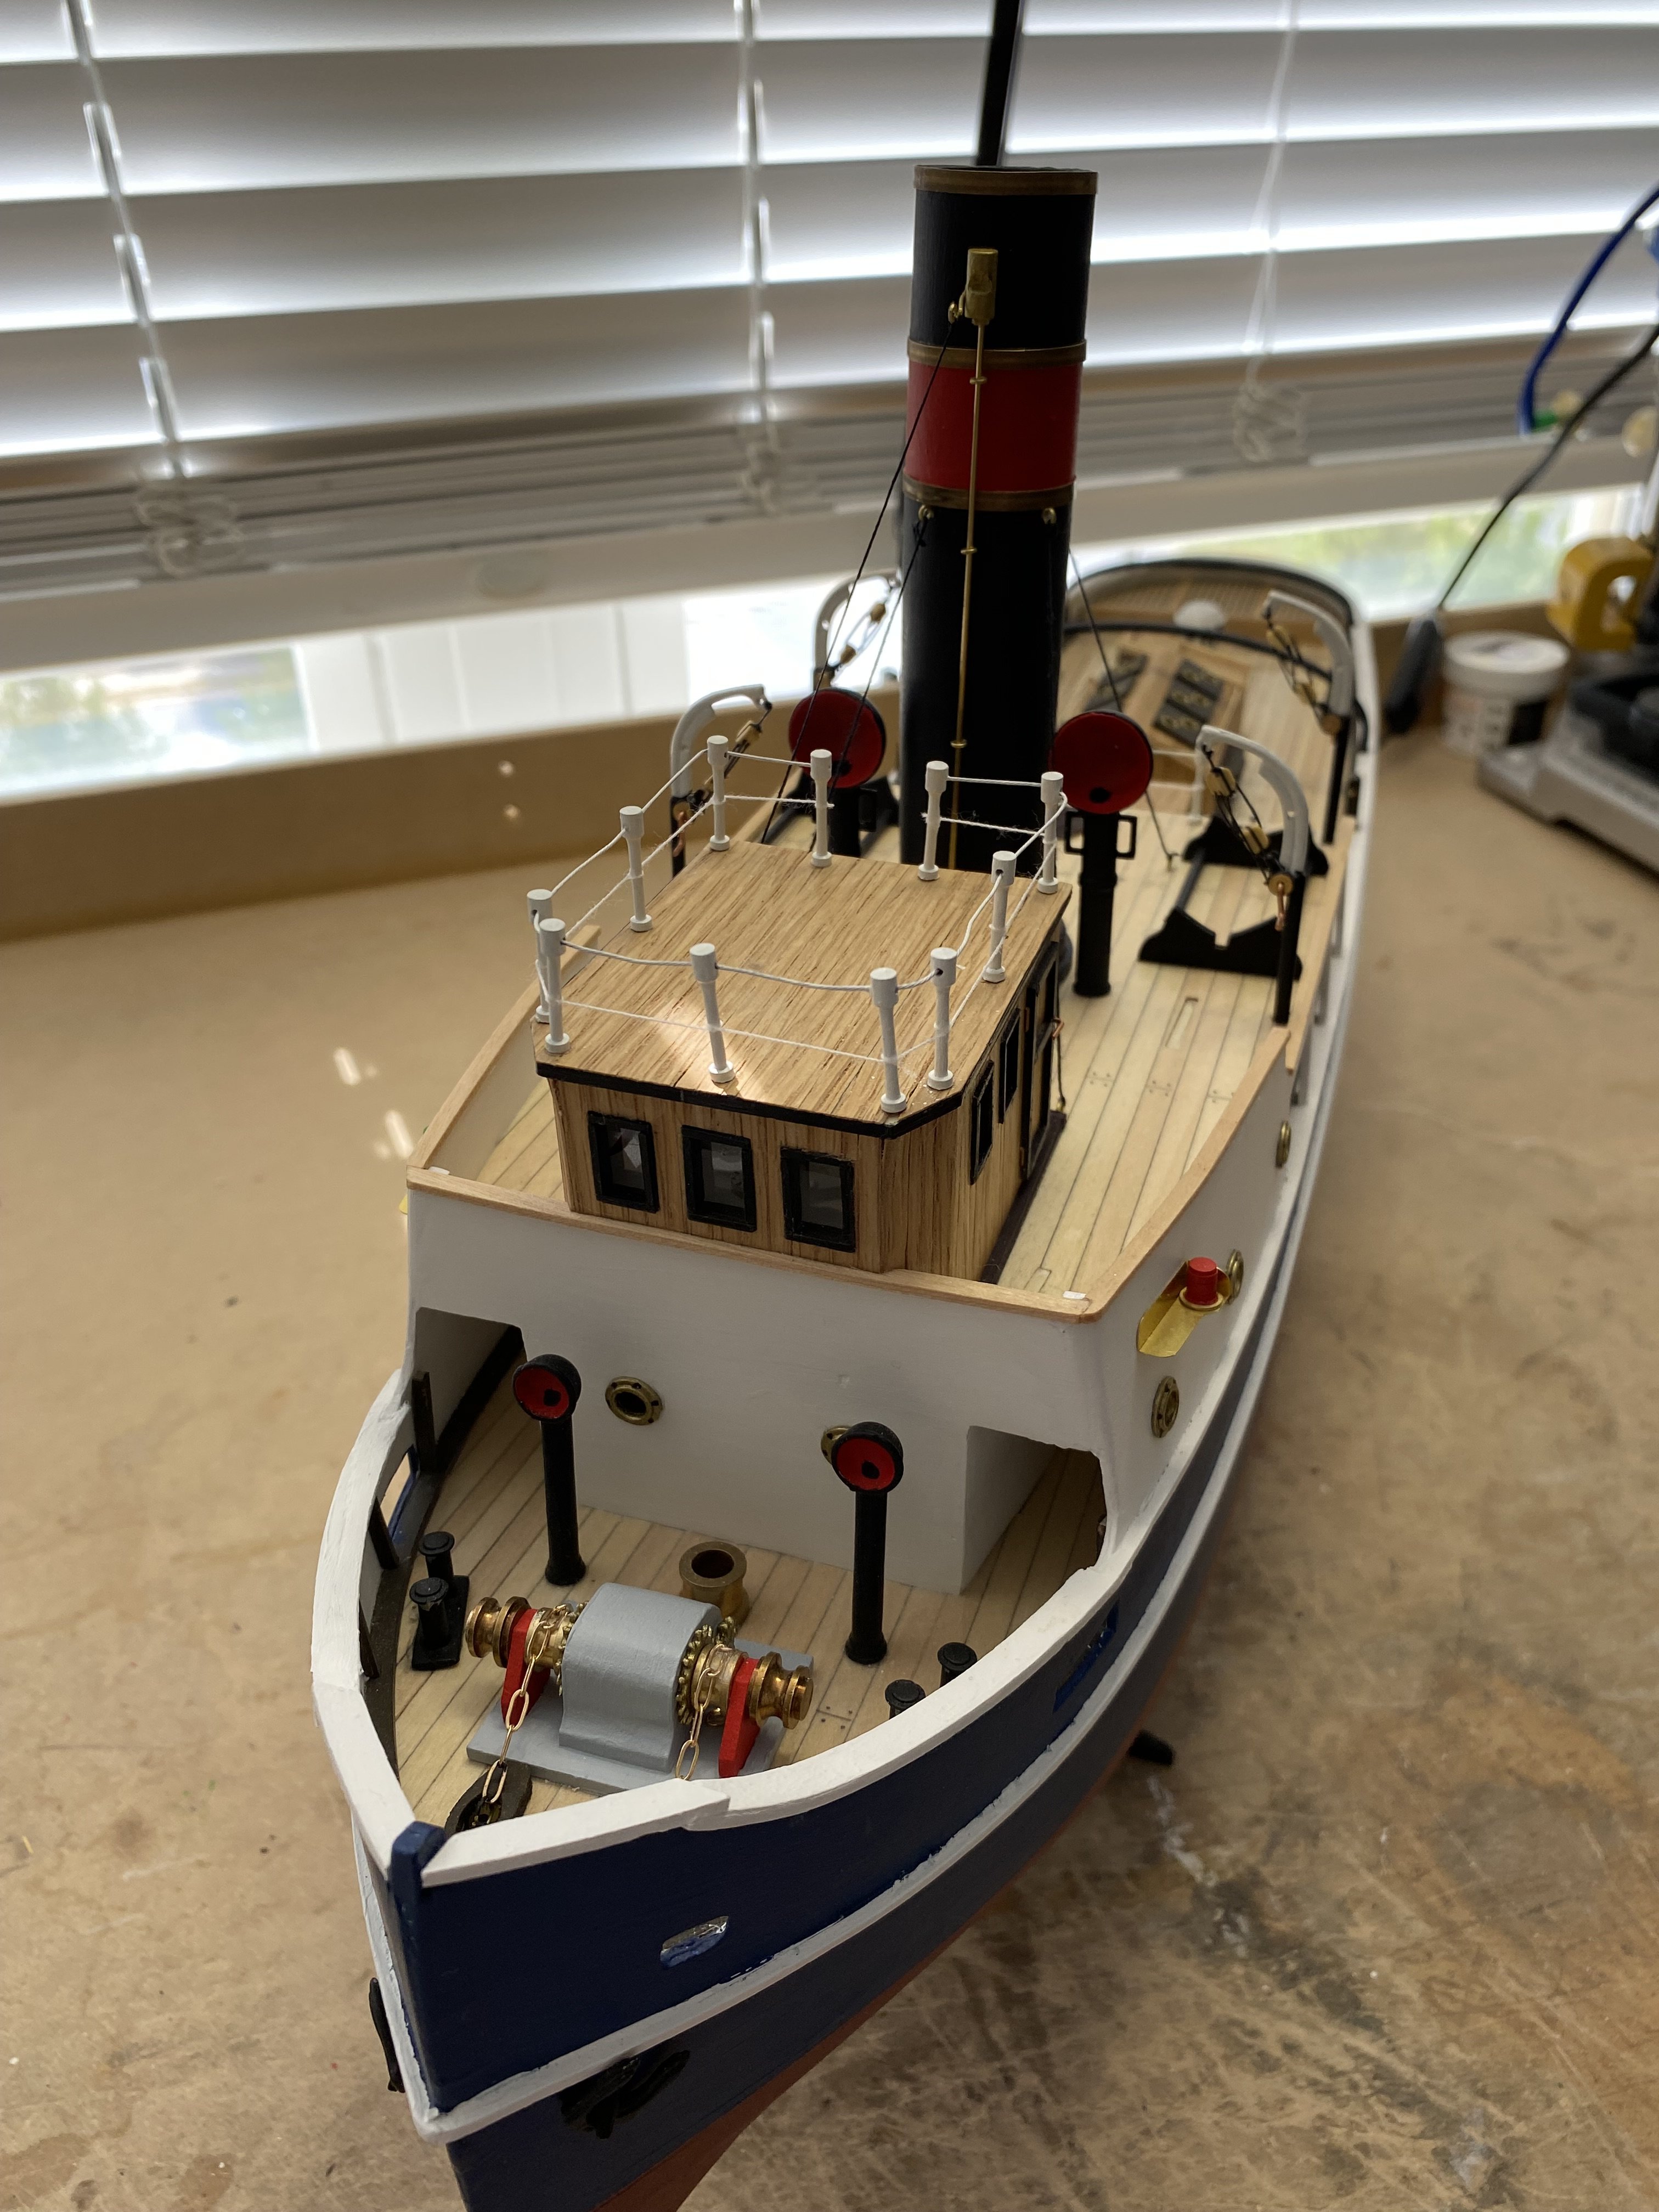
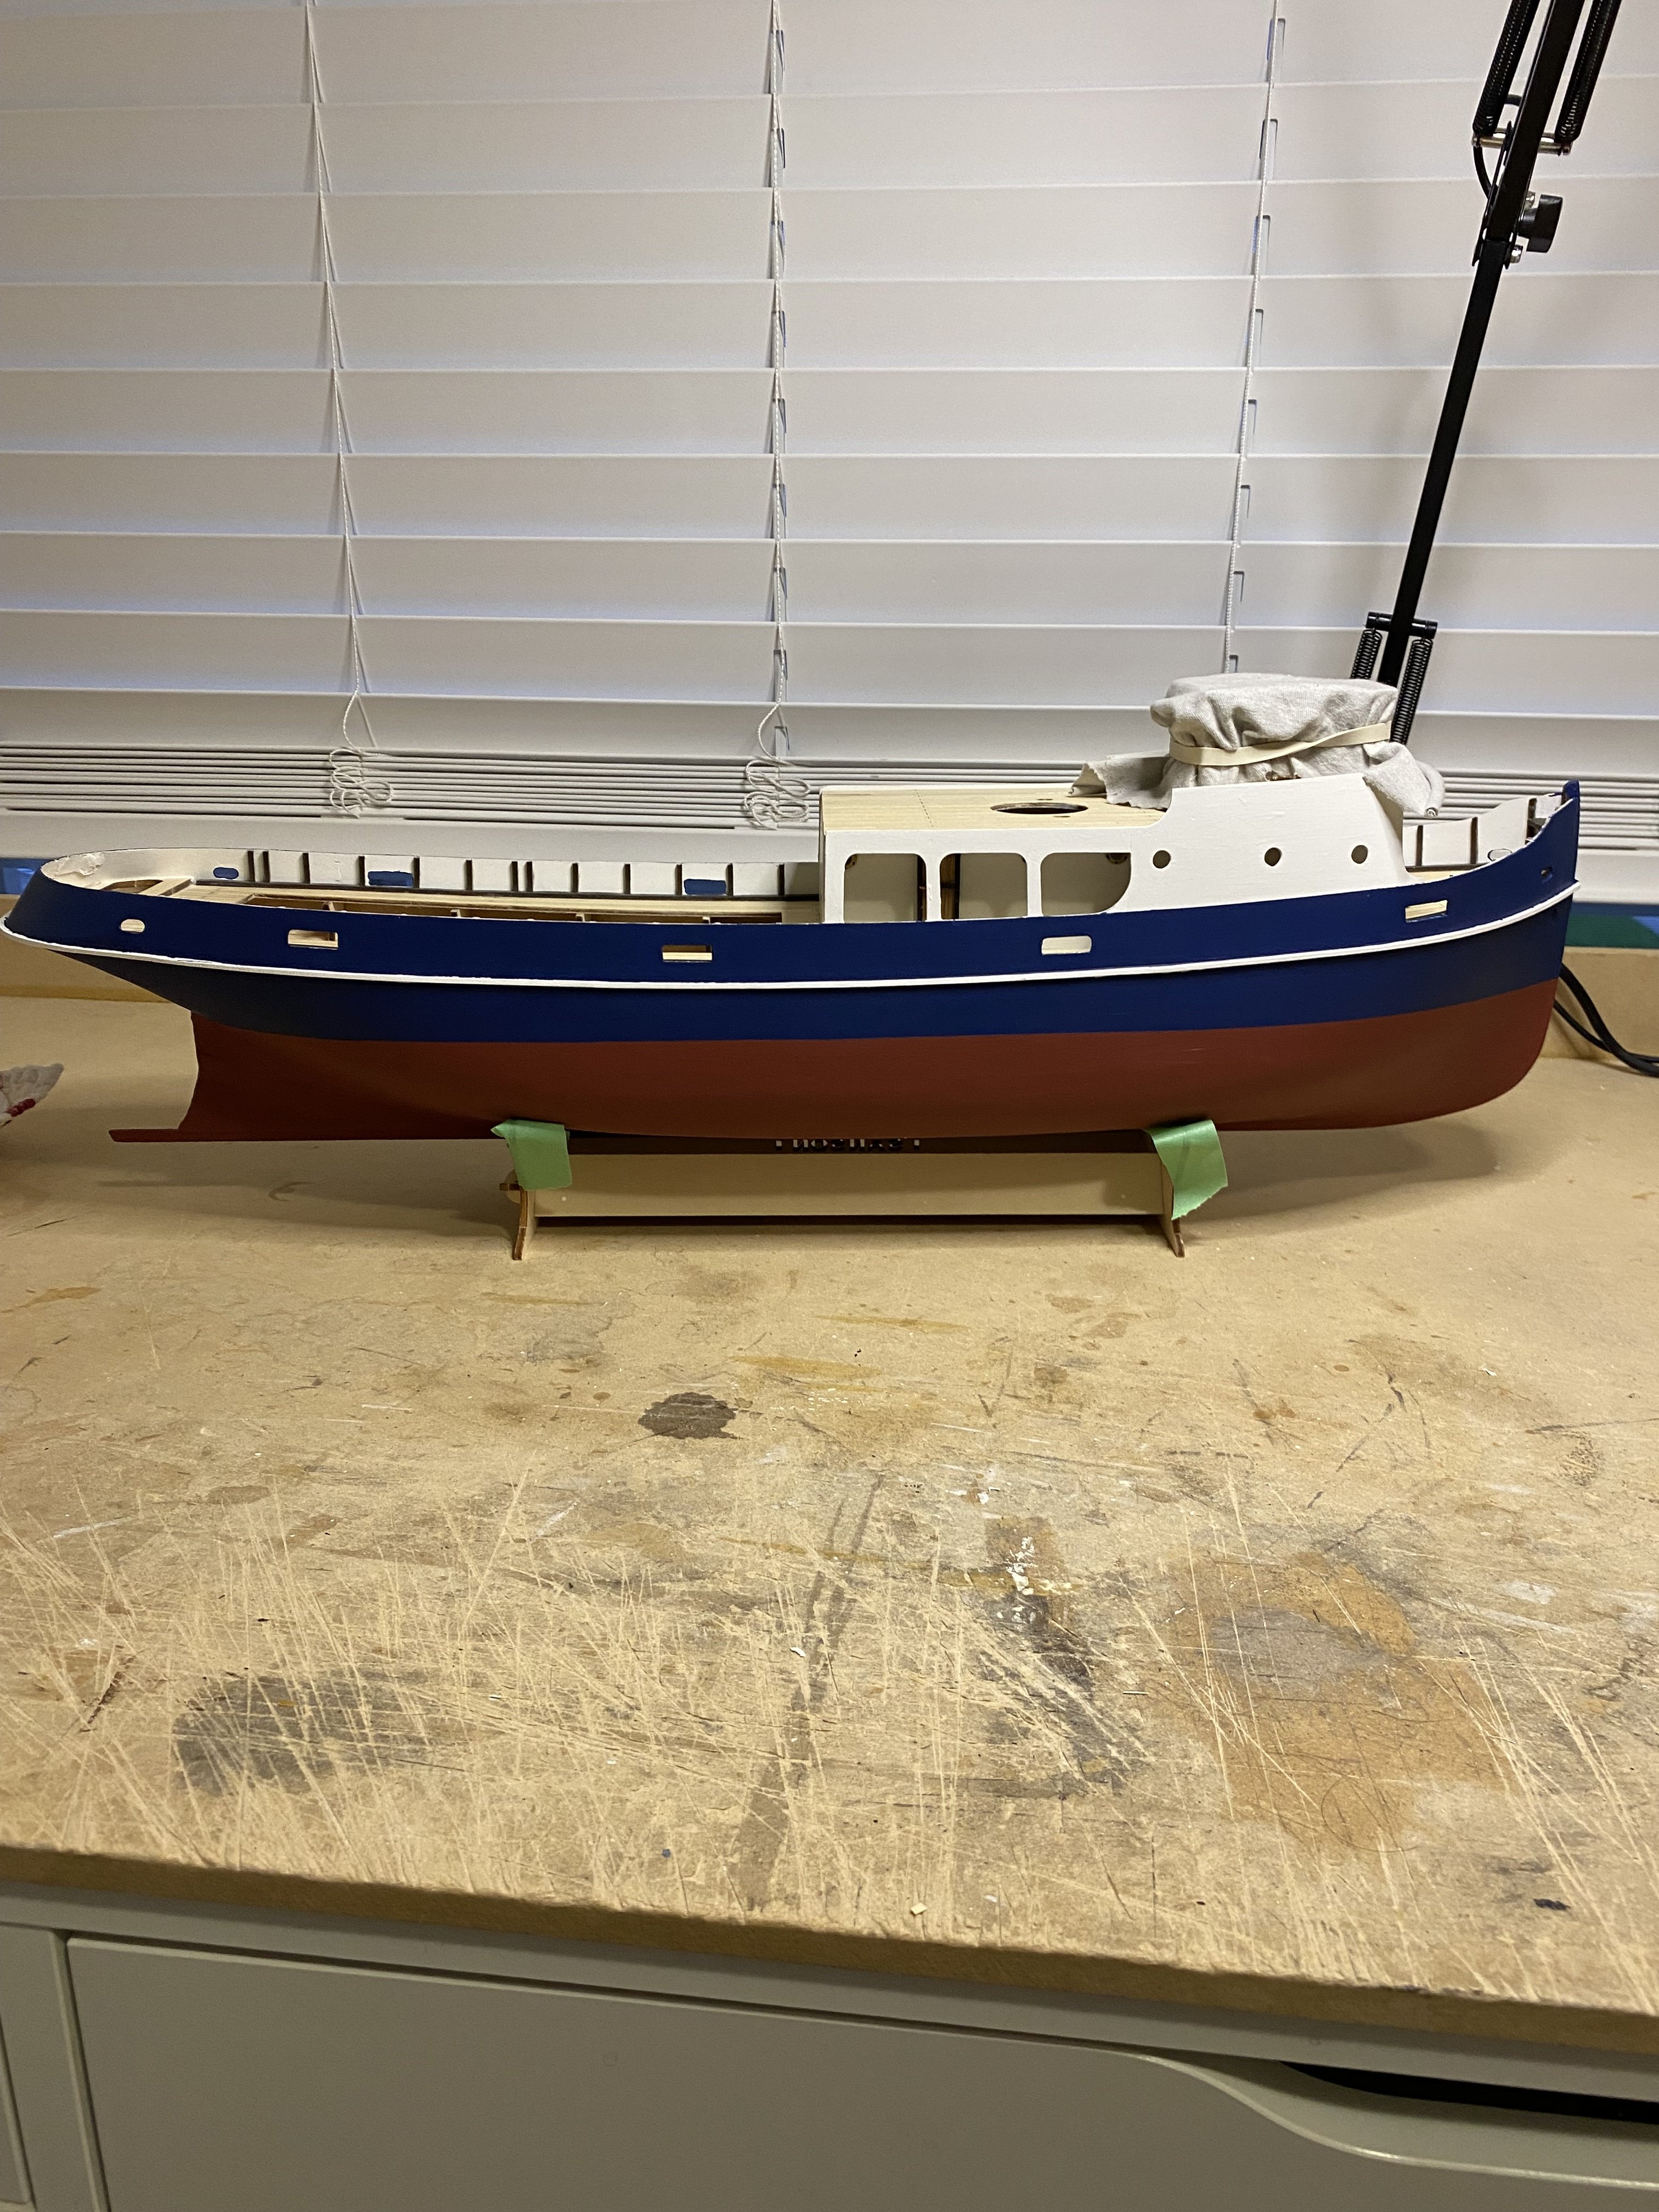
Two coats of blue on the uppers. Had a bit of bleed through on the rub rail. Should be an easy touch up with a small brush and more masking tape. I am pleased with the Taniya tape for doing curves. Starting to look like the photo on the box.

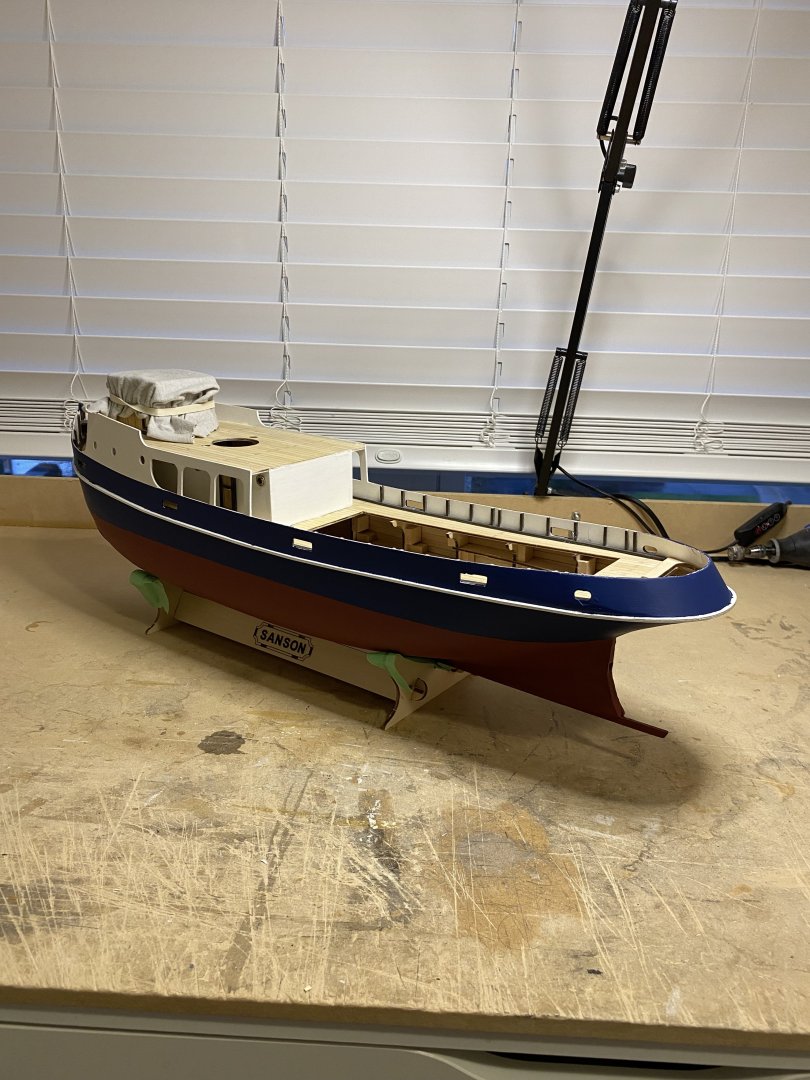
- 68 replies
-
- 6
-
-
- Sanson
- Artesania Latina
- (and 2 more)
-
I am using the AL acrylic water based paints on my SansonTug. The paint is quite thick and does not seem to flow very well. If you brush on paint in one direction and then come back with the brush it pulls the paint away. The hull is well sanded with a primer sealer applied. Is there away to thin the paint to slow drying time and help it flow better? Thanks
-
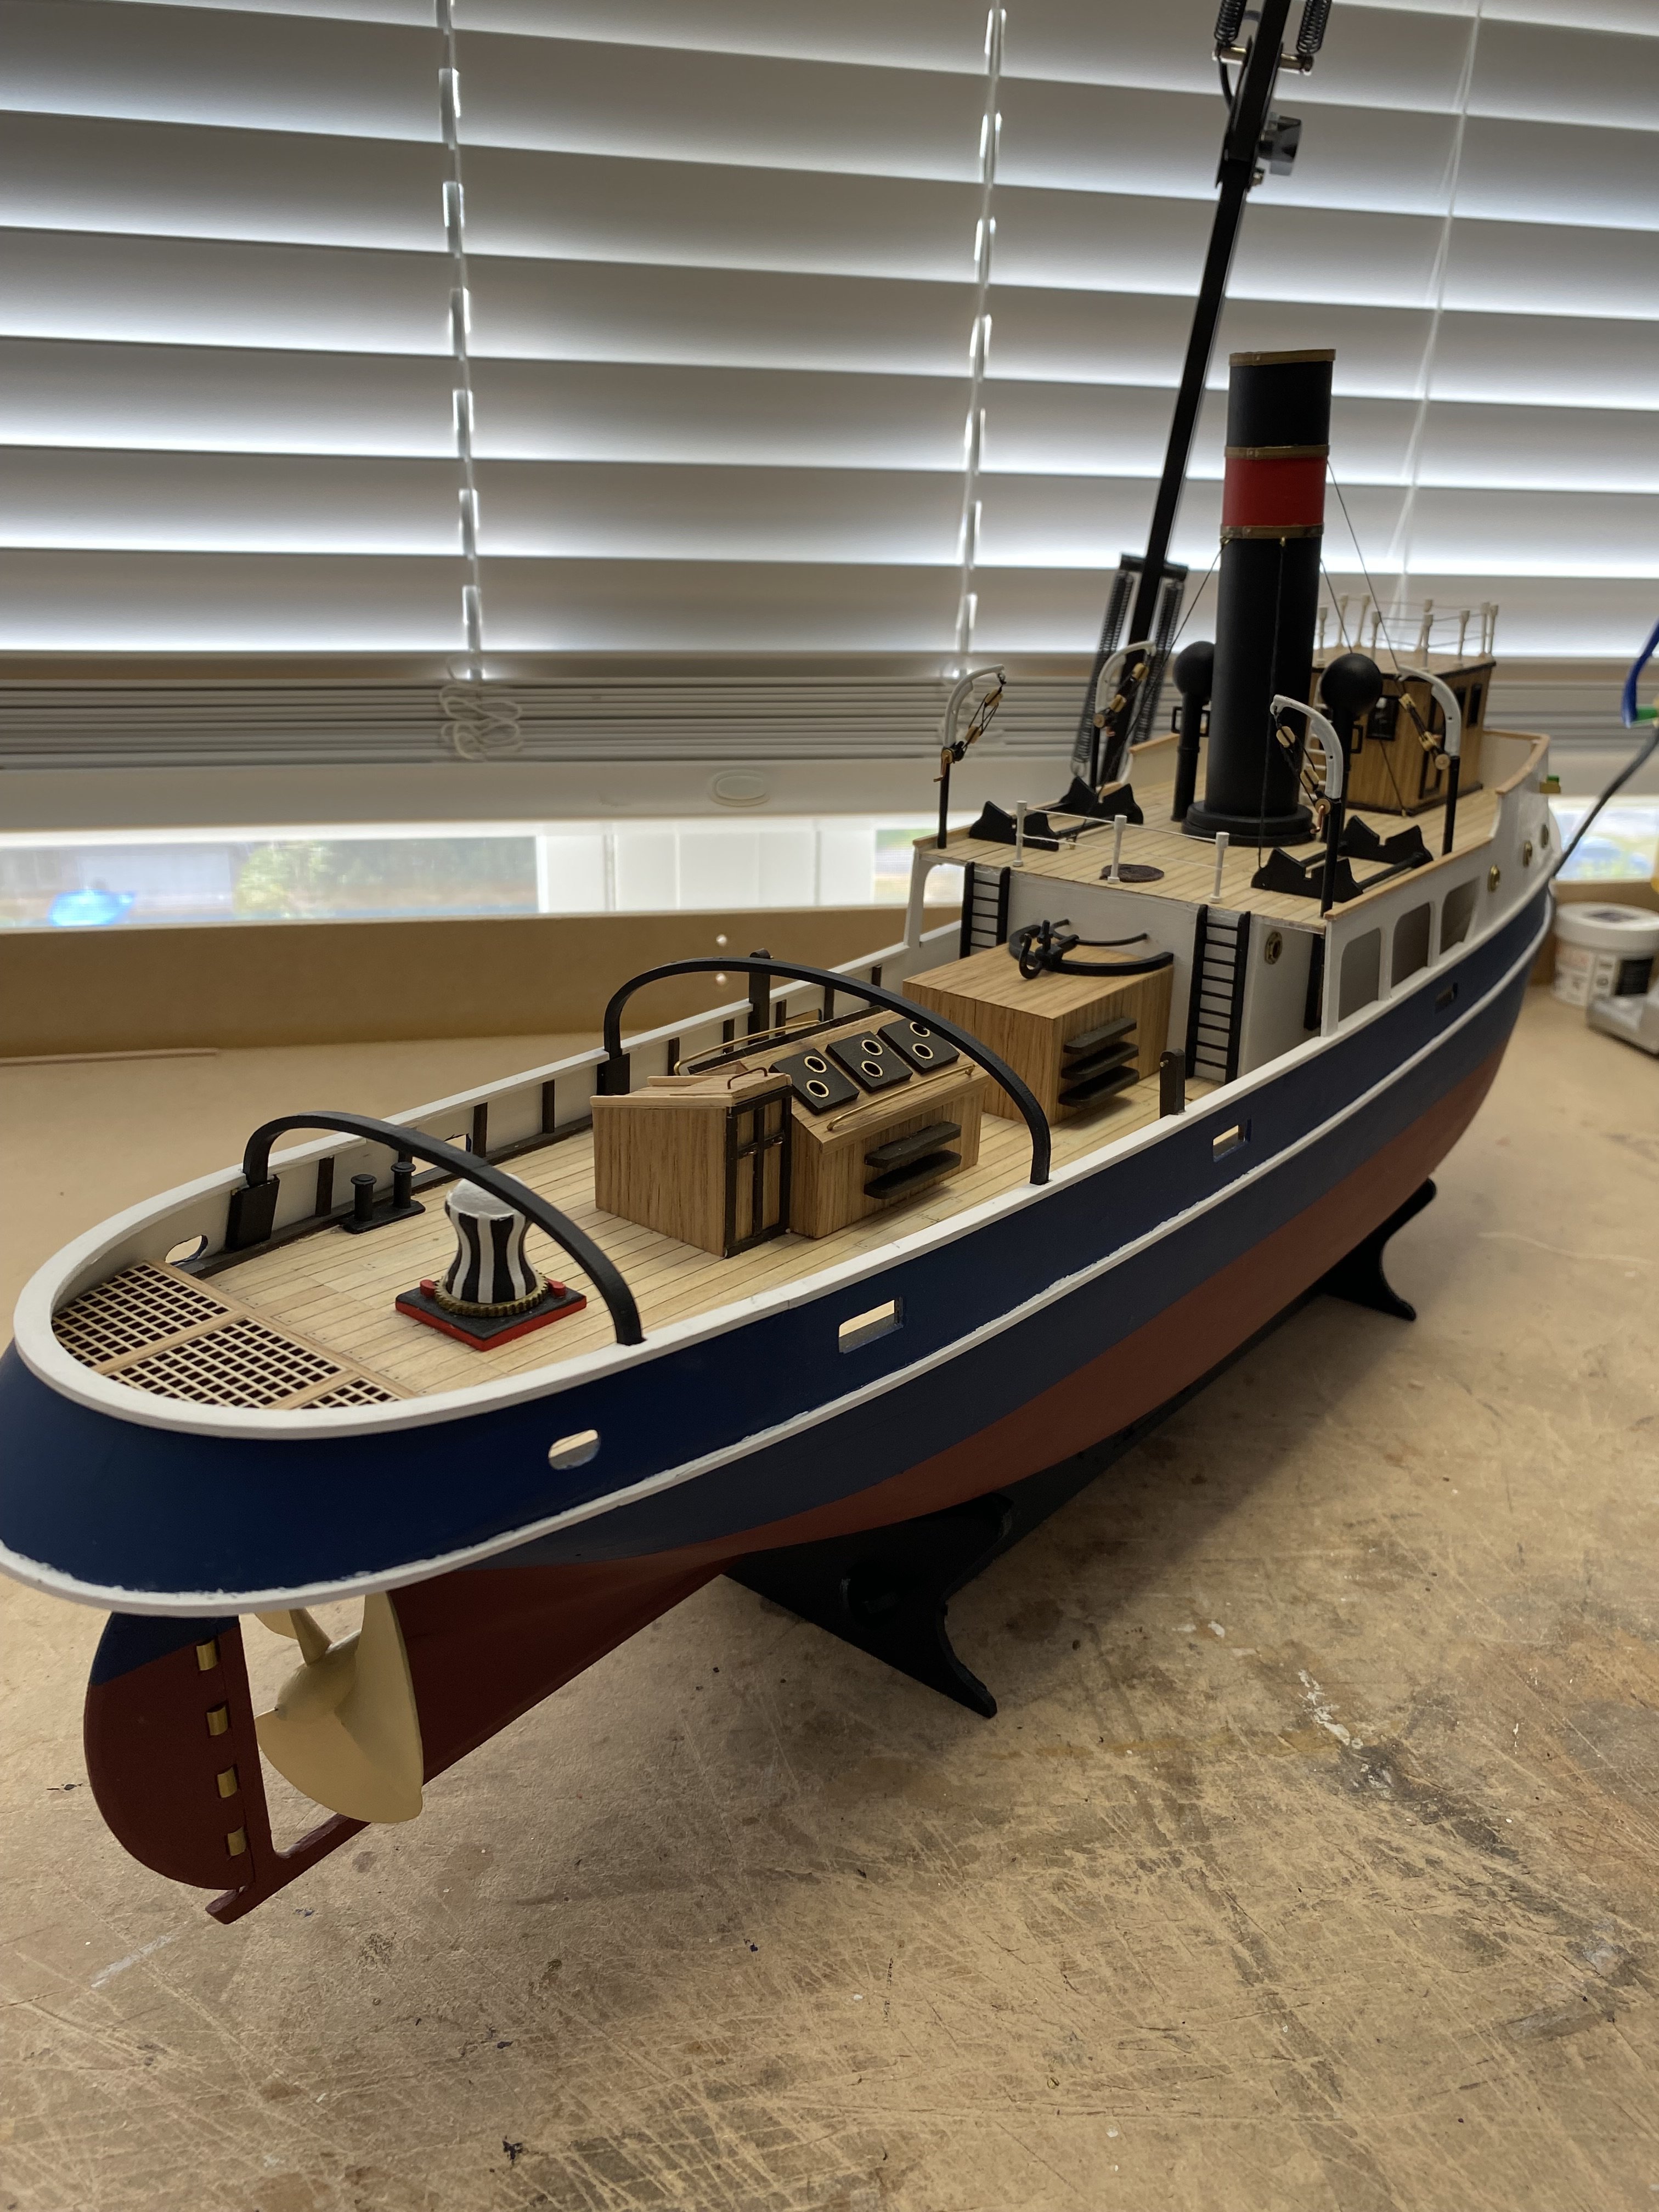
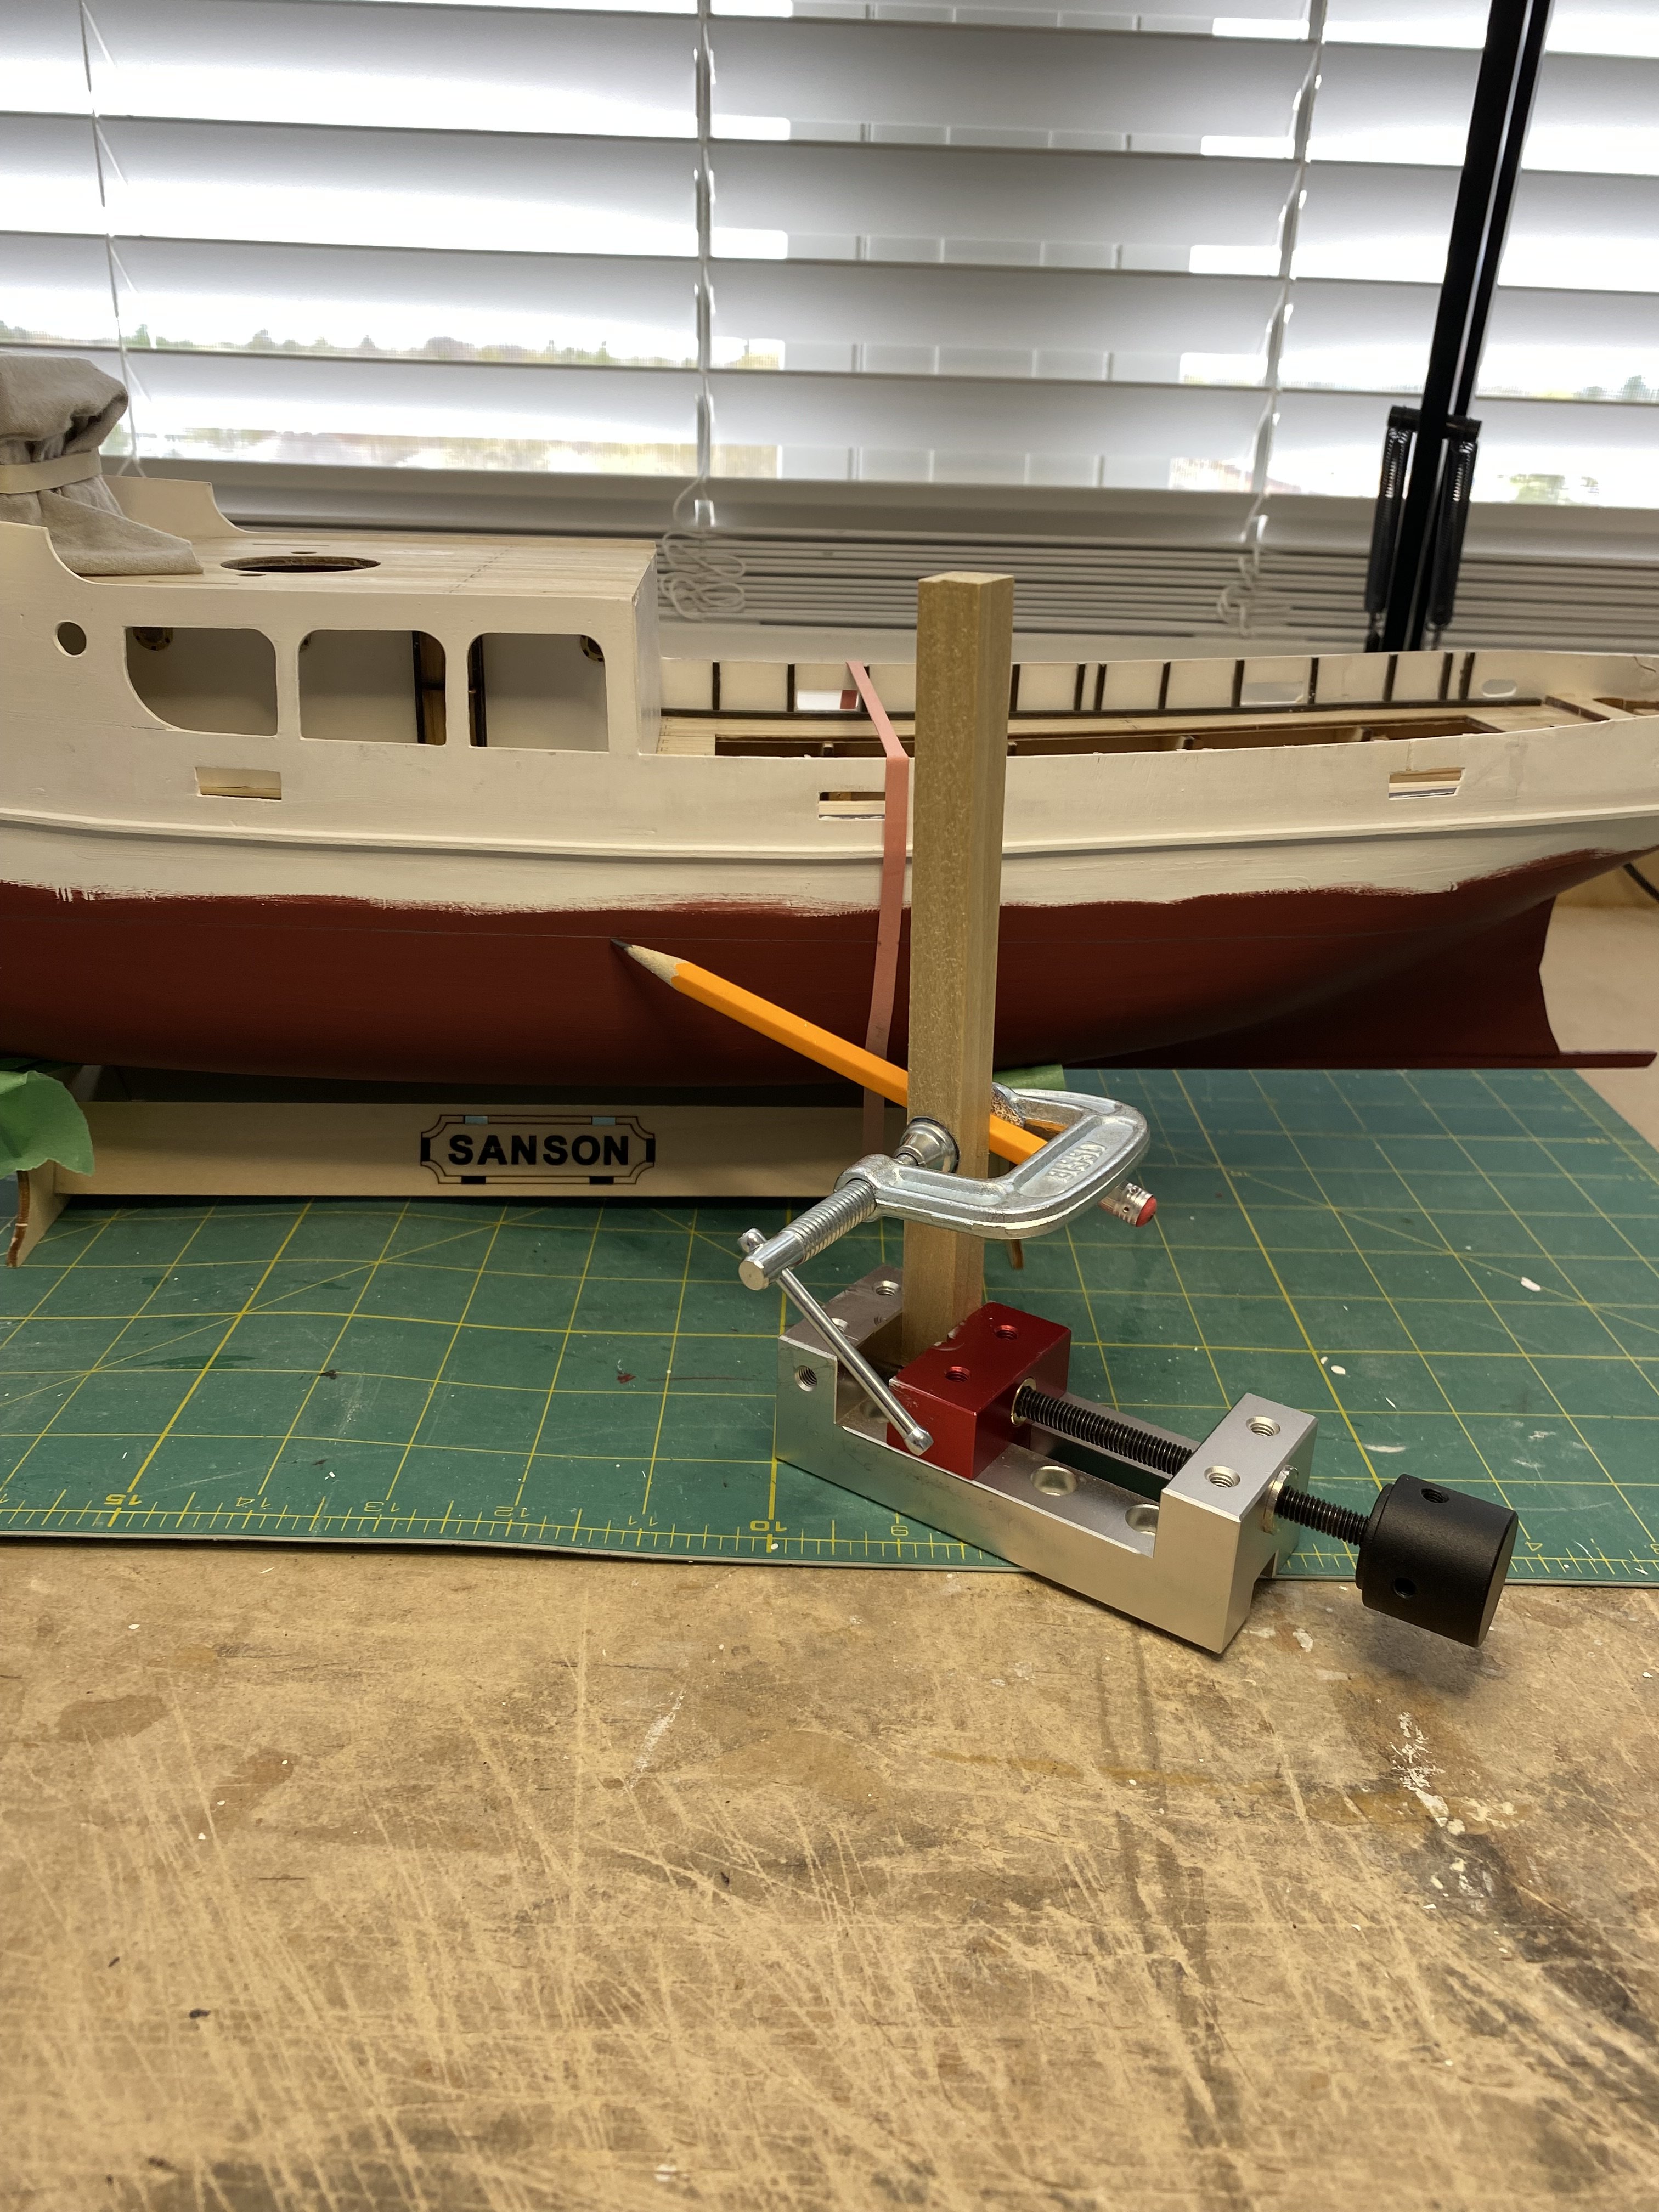
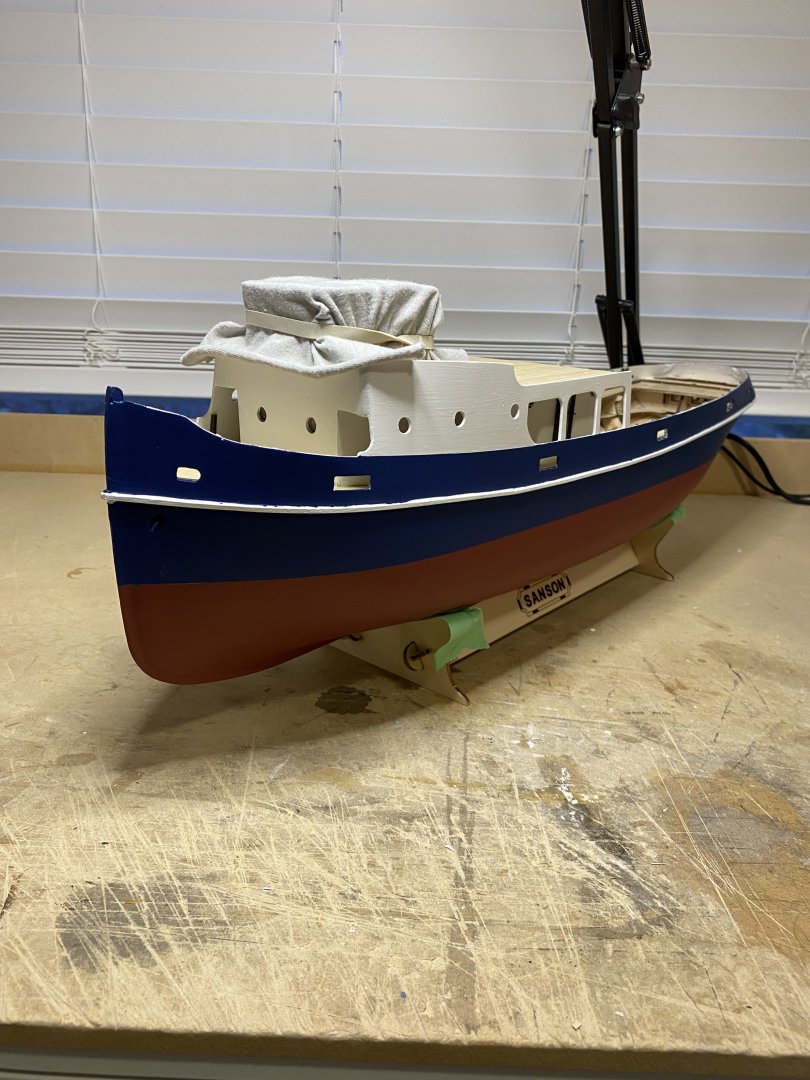
Two coats of Red Hull paint applied. Levelled the hull in display cradle, fore and aft, and port to starboard and applied the water line marking with my cobbled up contraption. It worked out well. Next I will mask of the water line and apply the blue hull paint
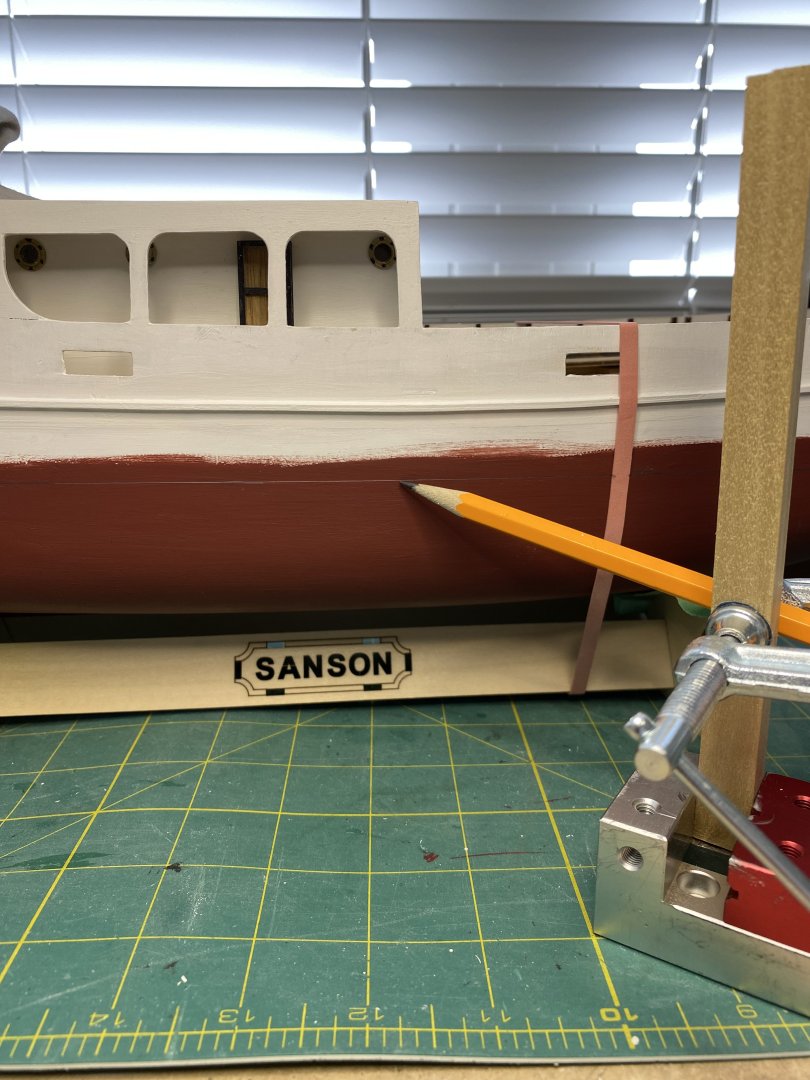

- 68 replies
-
- 3
-
-
- Sanson
- Artesania Latina
- (and 2 more)
-
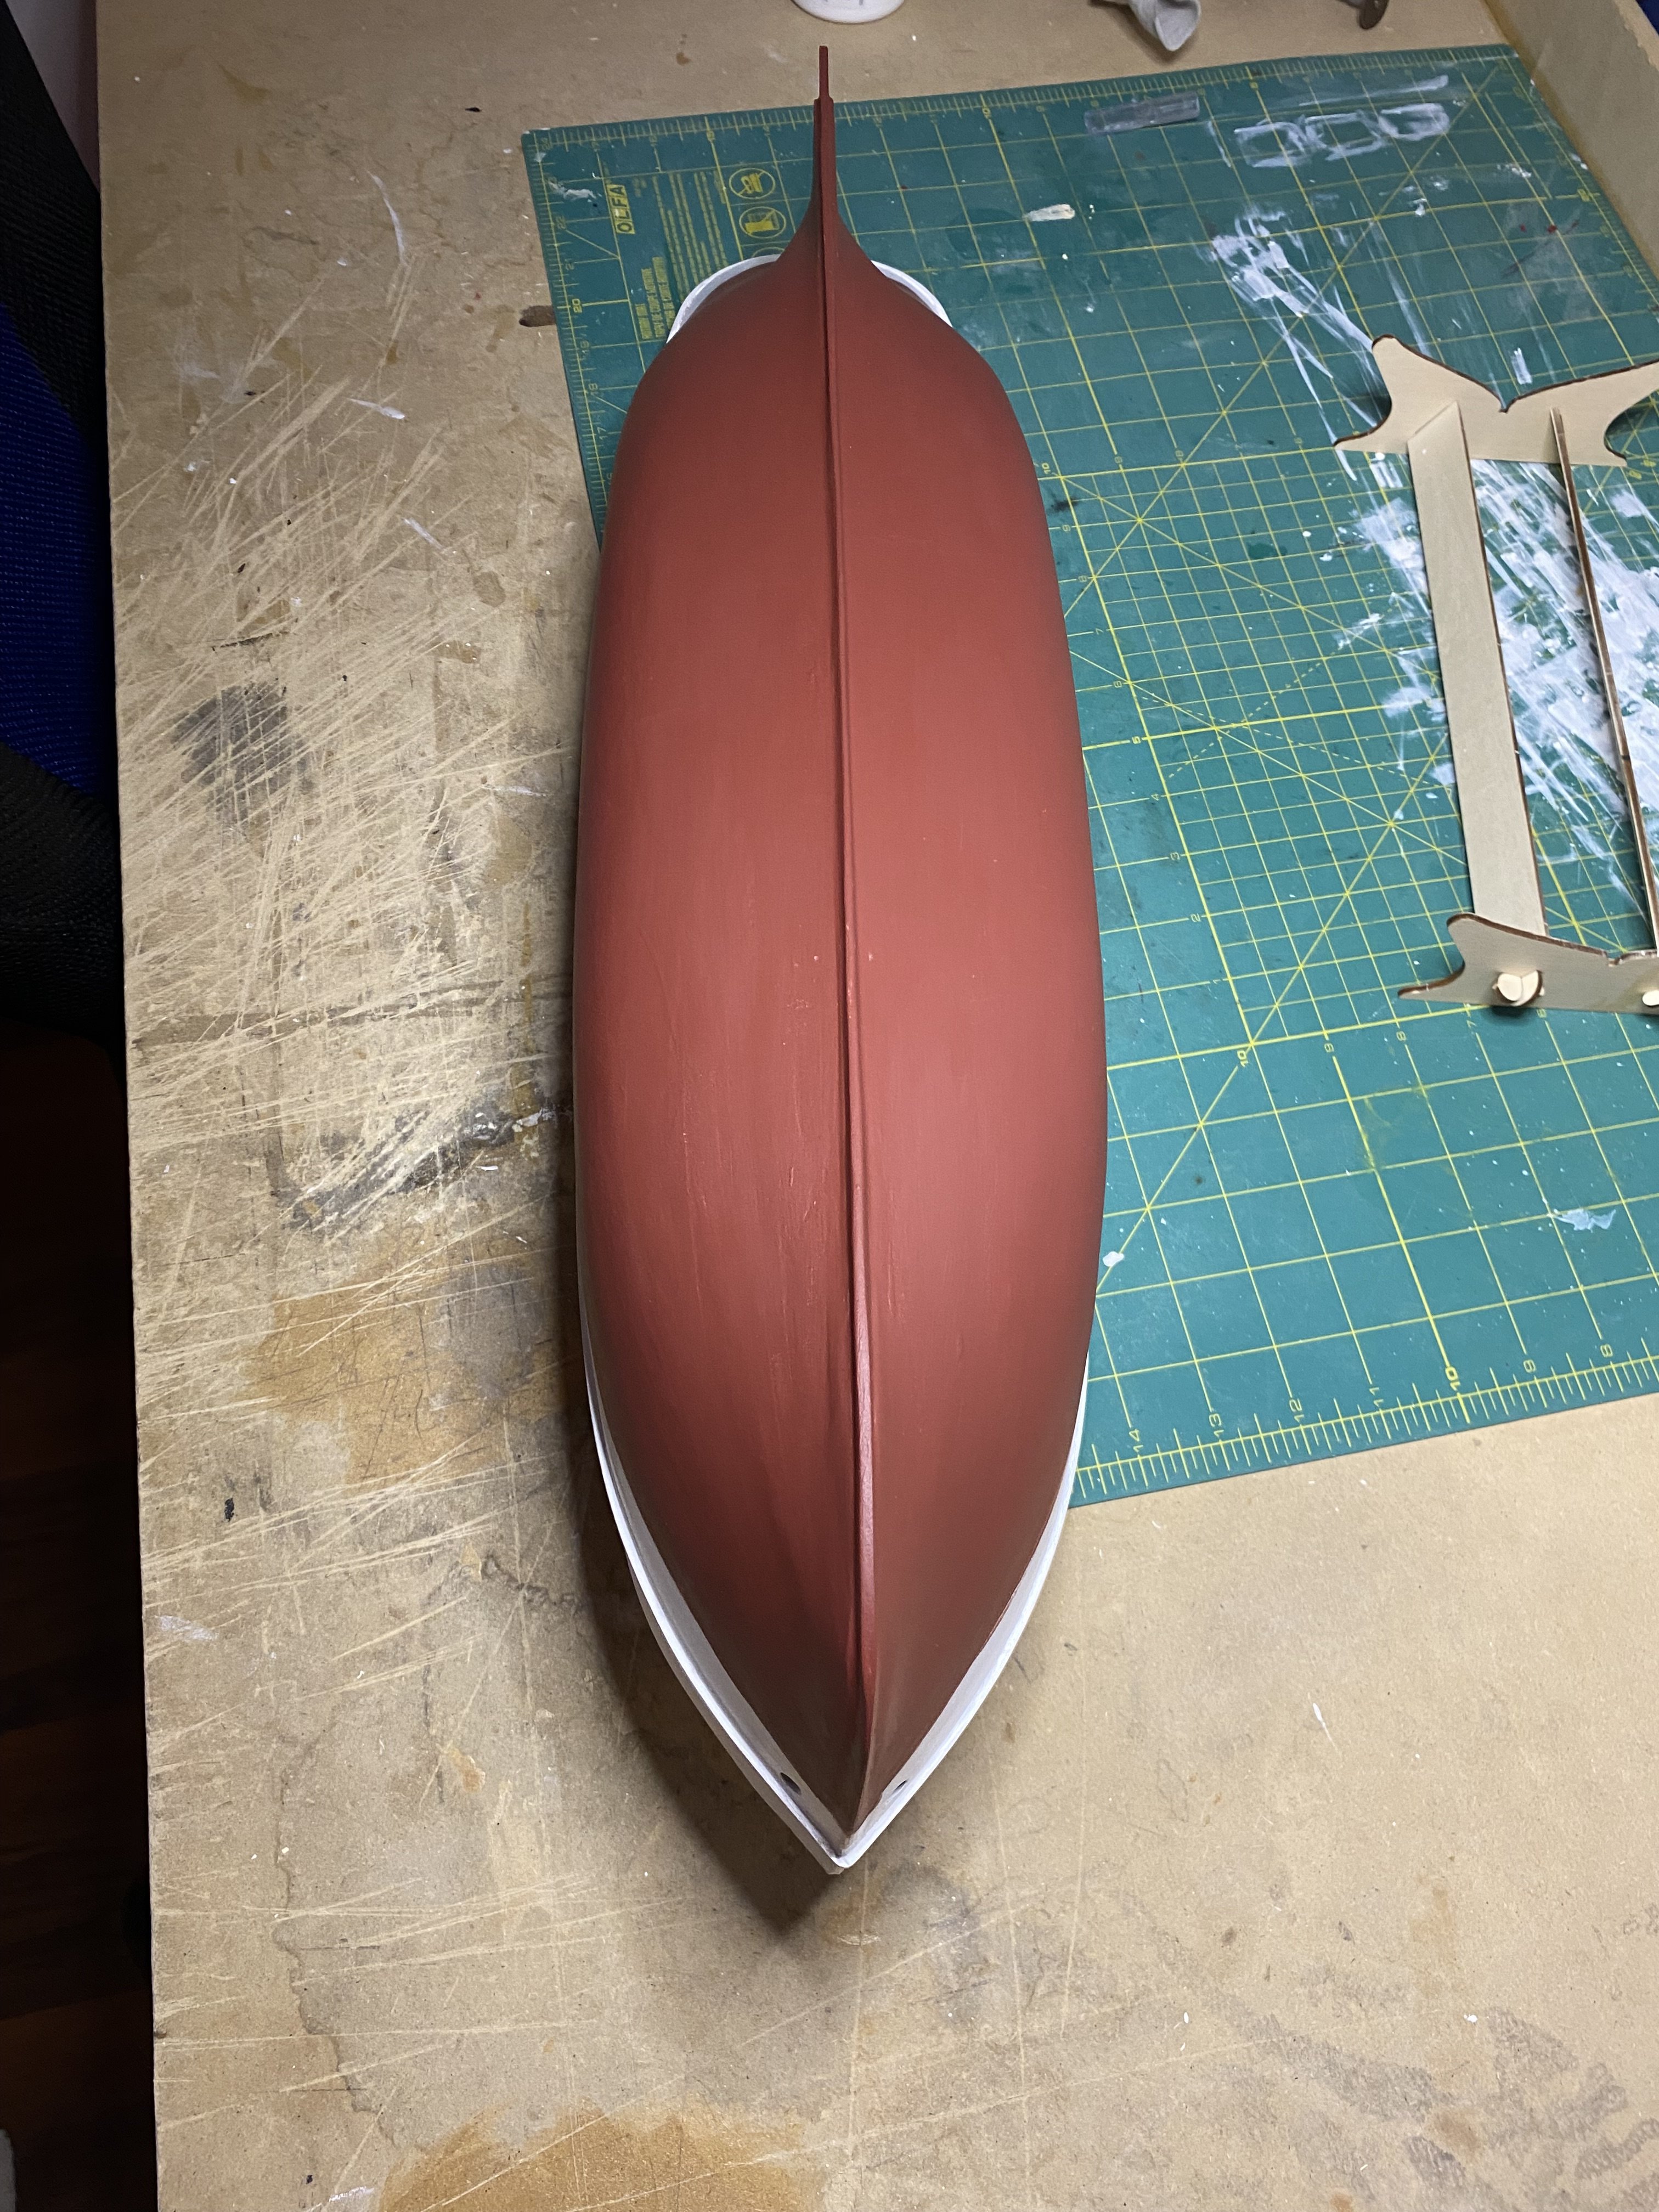
Put the Hull Red on this evening. There are a few areas that will need some more attention. I am pleased with the progression so far.
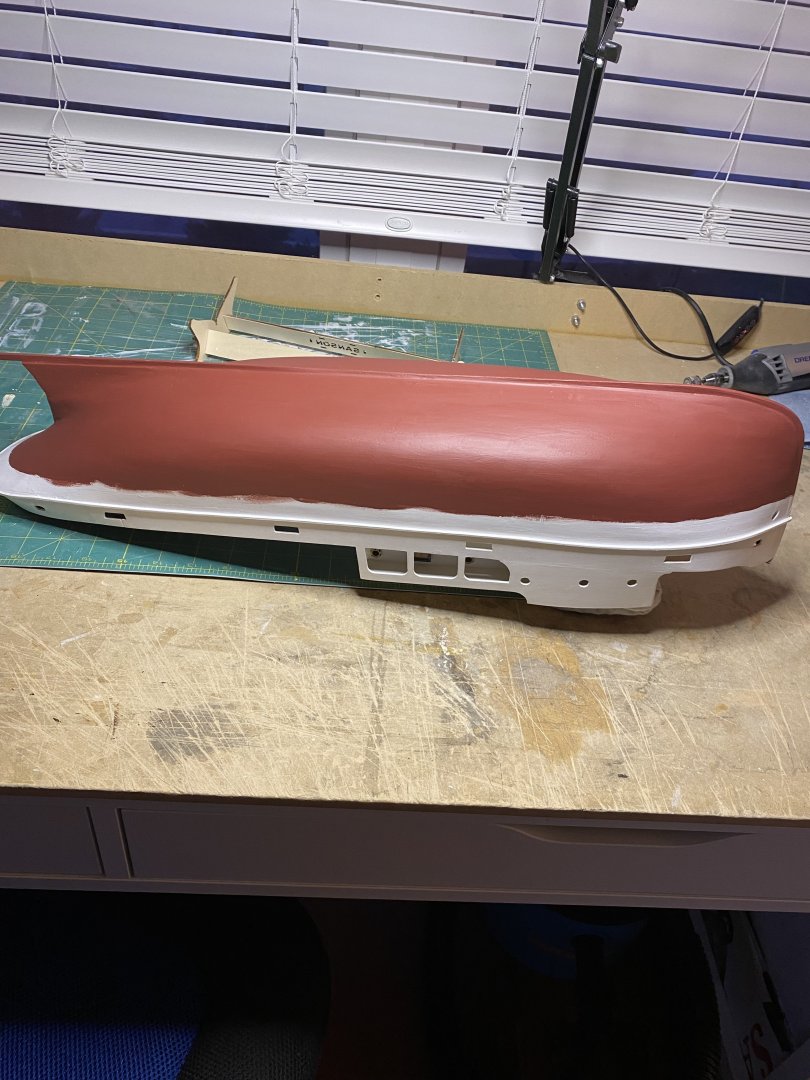

- 68 replies
-
- 2
-
-
- Sanson
- Artesania Latina
- (and 2 more)
-
I have a question about painting. I am using the AL paints and put the first coat of Hull Red on. It seems to dry too quickly, when a second brush stroke is done over the area just covered it seems to pull the paint away. Is there a way to thin these paints to extend the drying time? The AL paints are water based acrylics.