JerryTodd
-
Posts
879 -
Joined
-
Last visited
Content Type
Profiles
Forums
Gallery
Events
Everything posted by JerryTodd
-
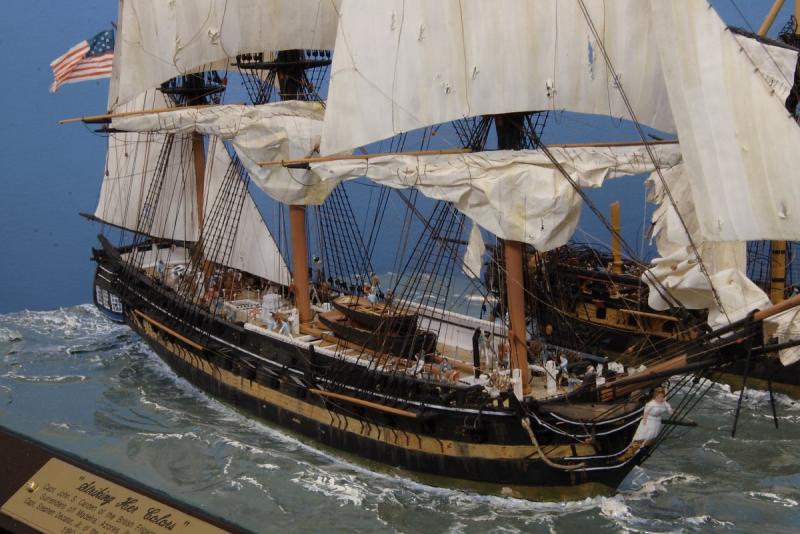
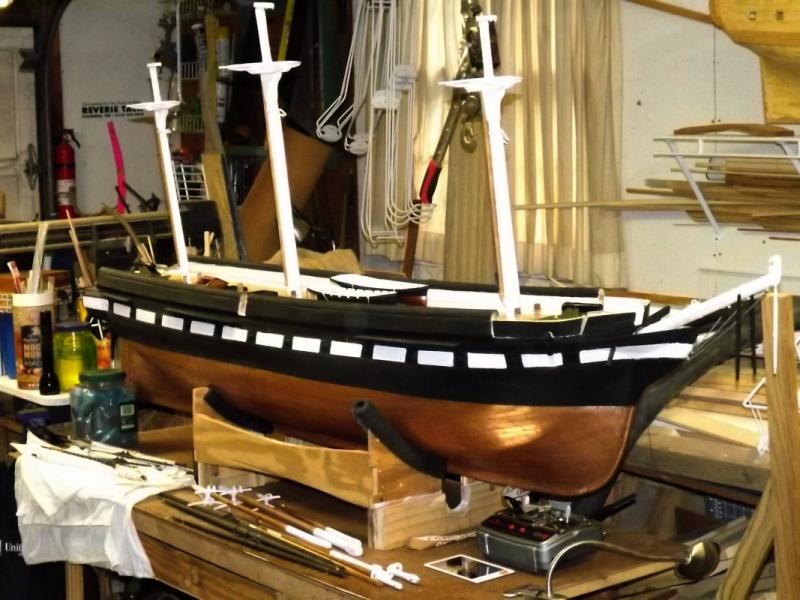
 Hi Jim, thank you for the kind words. Did you check out the Constellation log? She got wet again, but this time she really sailed, no bumping the bottom in a pool - it was great! Still making boards into sticks on this one. I'm dyin to get Mac painted and in the water. With Pride photo-bombing in the back.
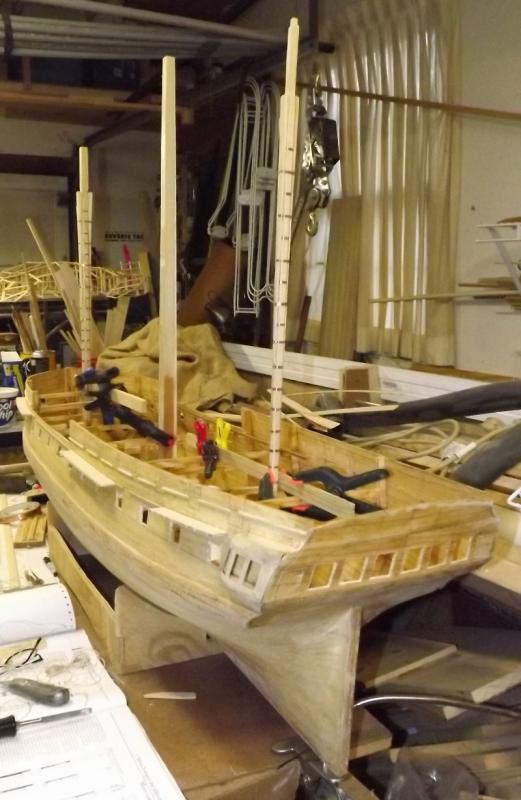
- 97 replies
-
- 4
-

-
- macedonian
- frigate
- (and 2 more)
-
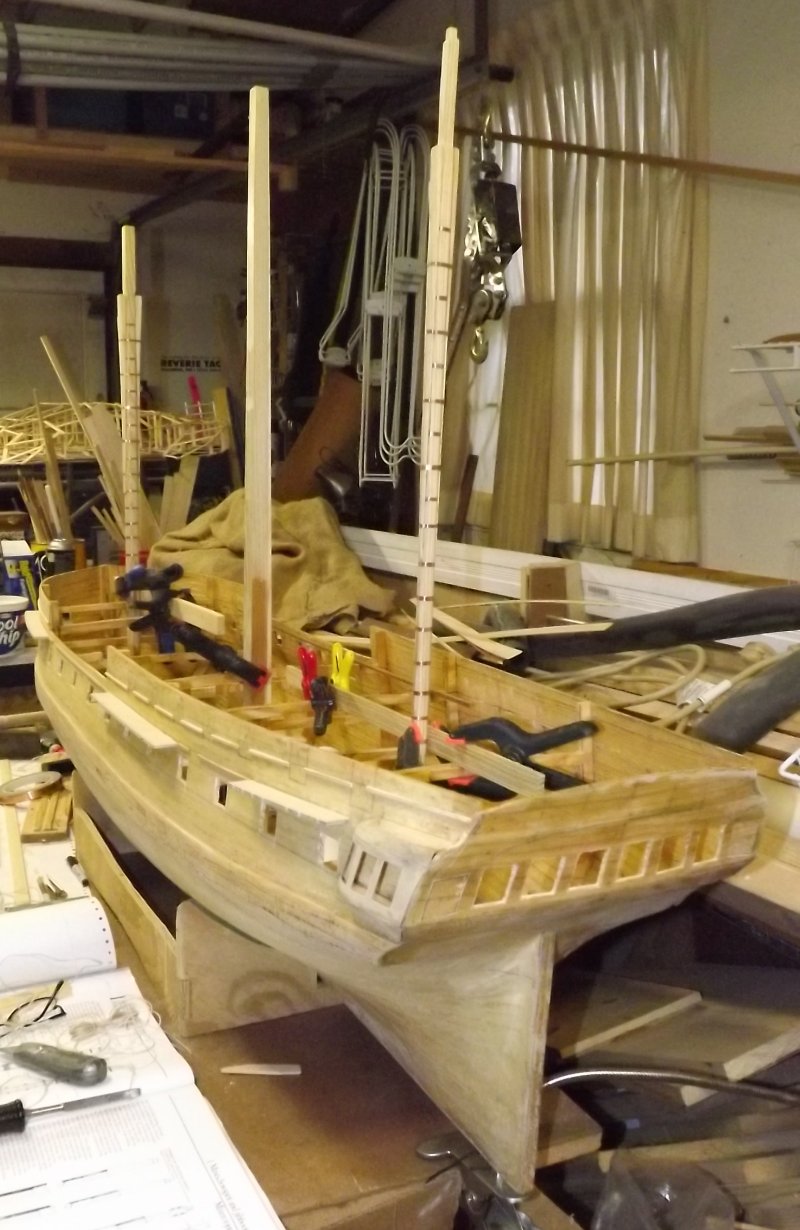
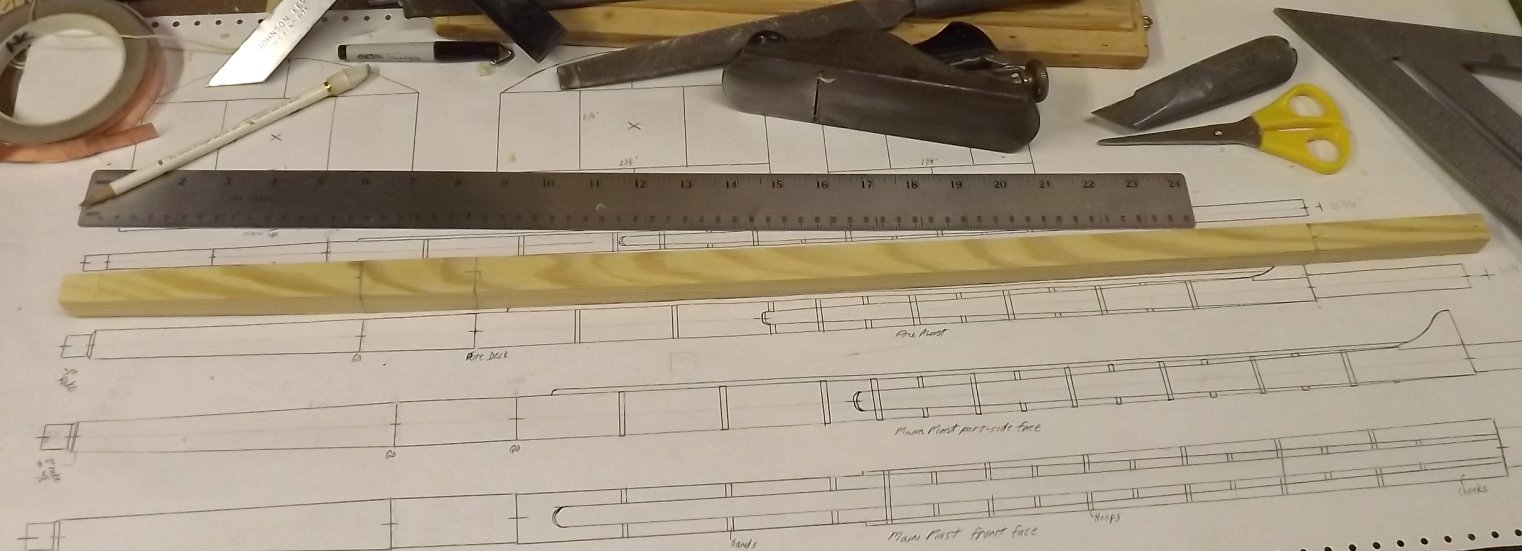
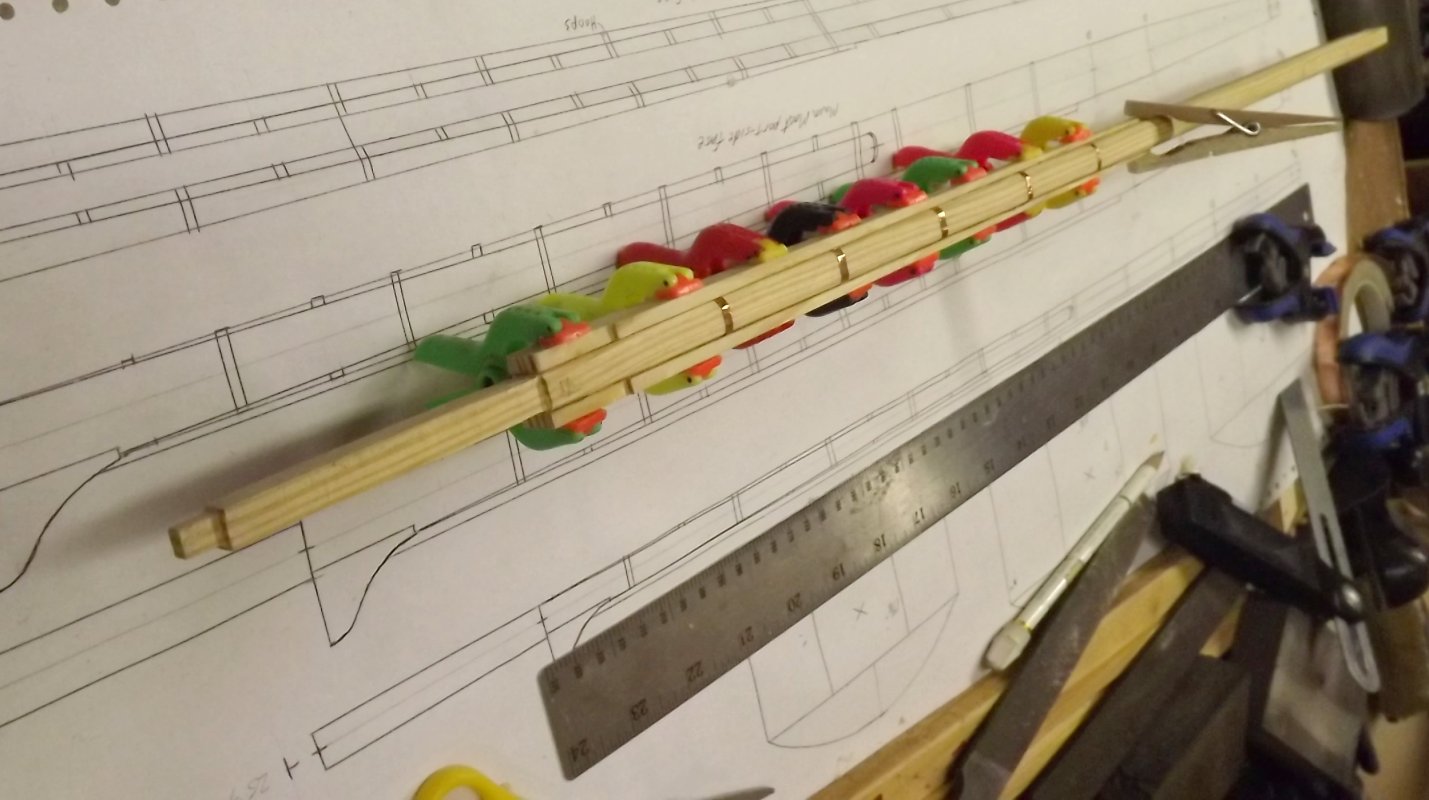
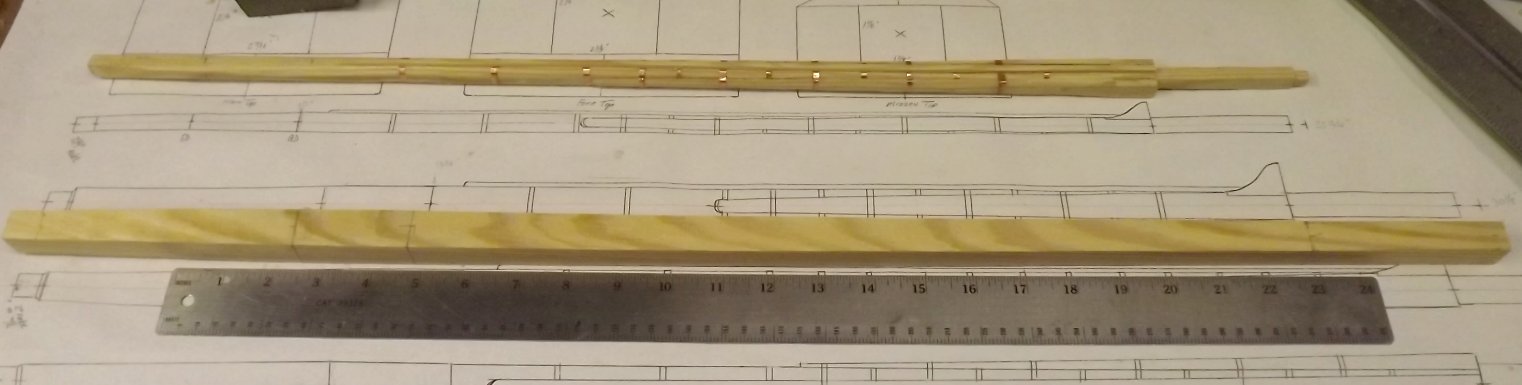
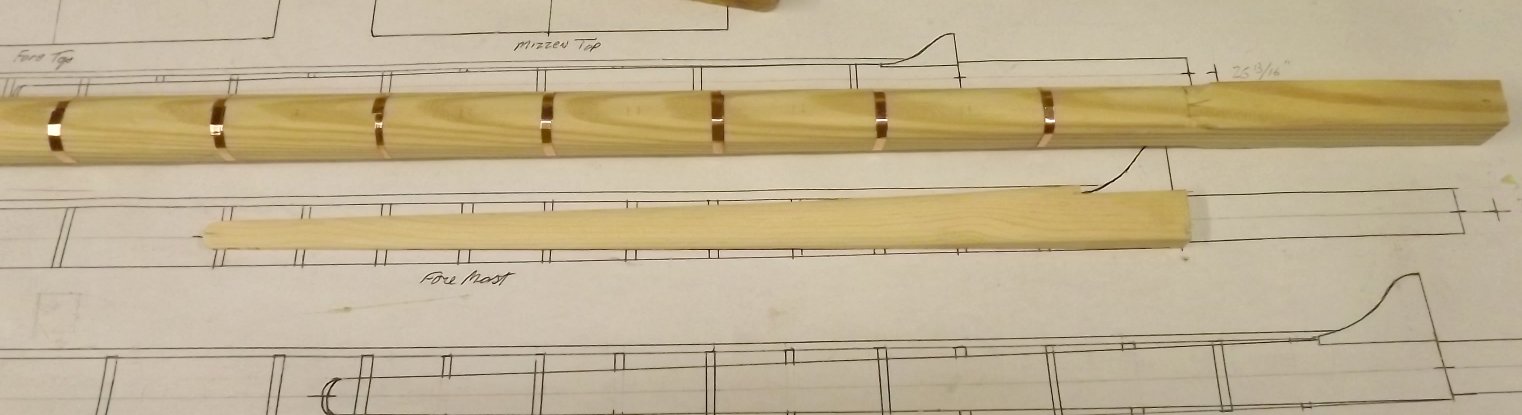
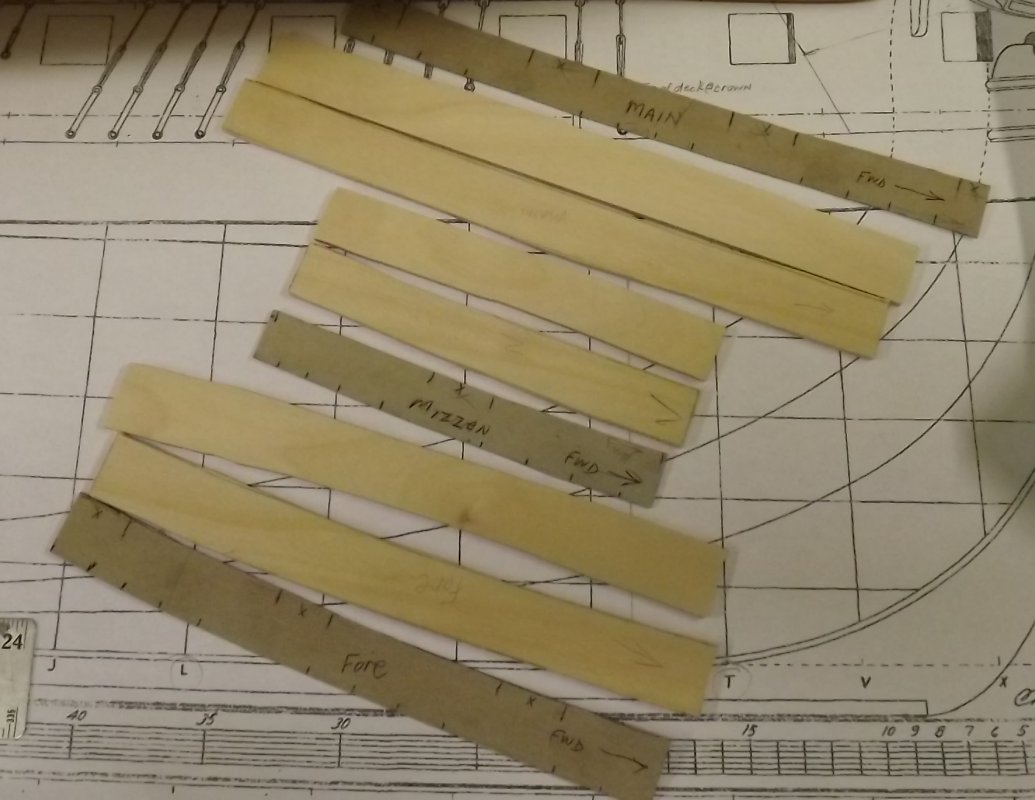
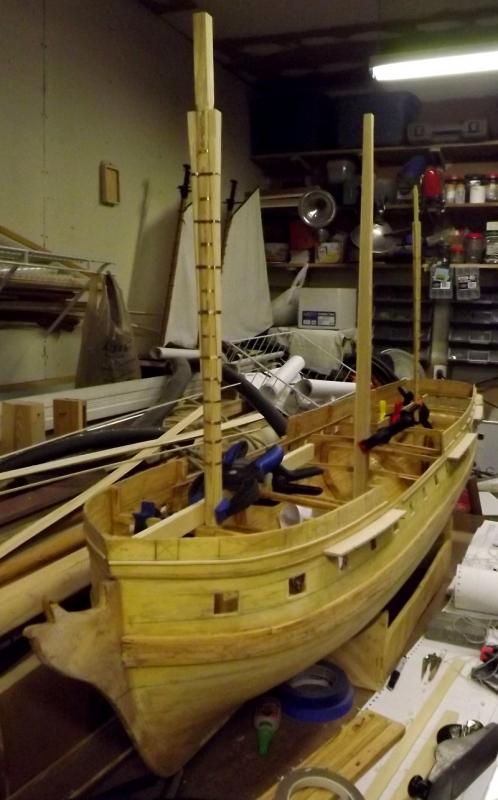
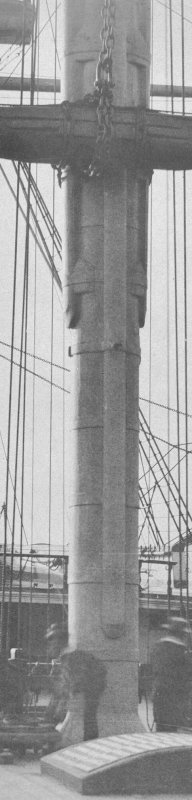
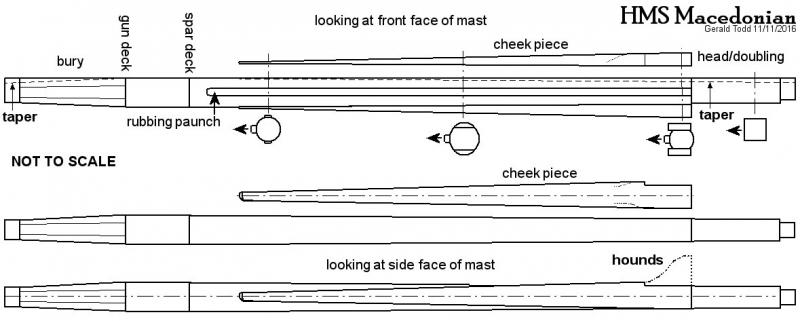
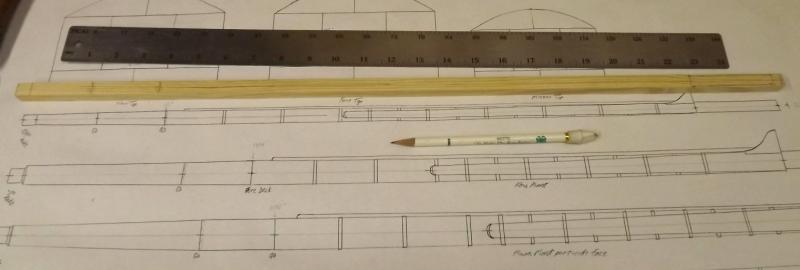
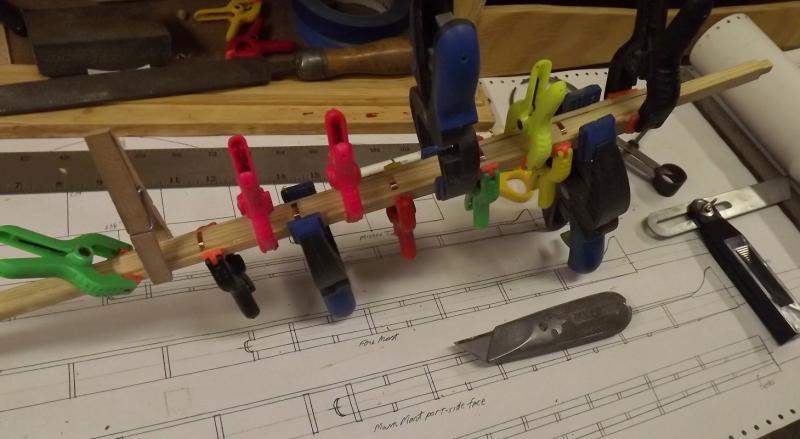
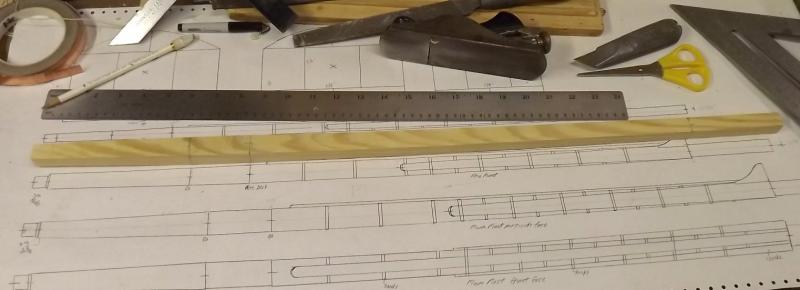
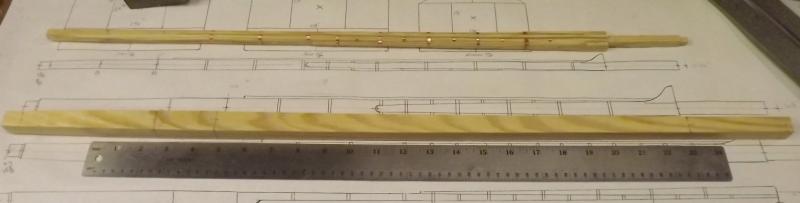
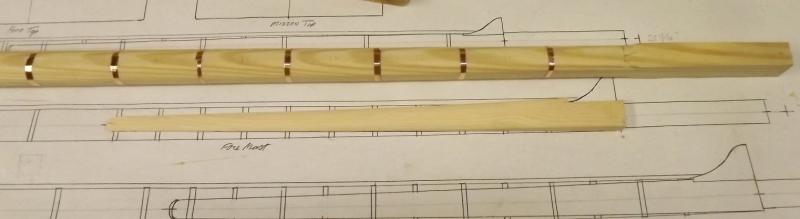
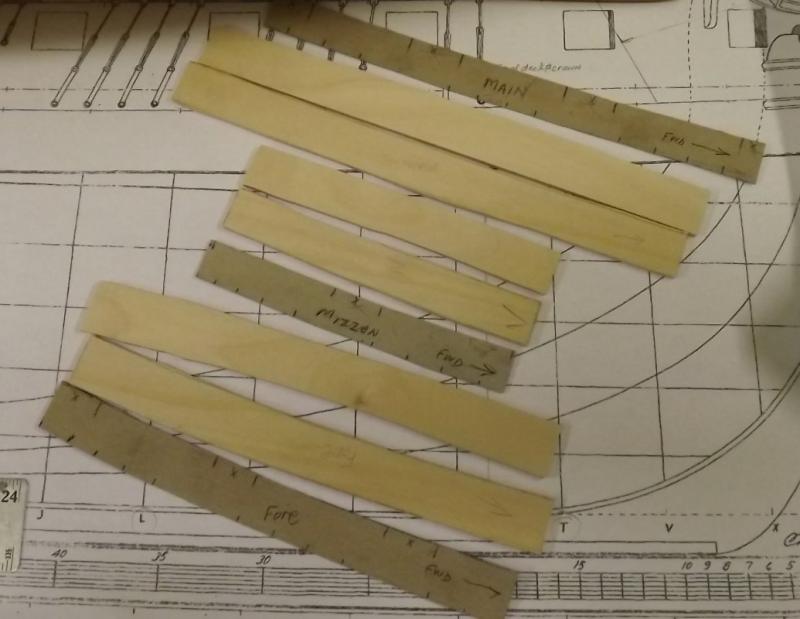
To make Macedonian's lower masts, I looked at various sources. This forum, Internet searches, period pieces like Steel's. Photos of models. But while I could see the end product, it was hard for me to visualize what was going on, or how it got to that point. Lee's Masting and Rigging was, in some ways, the clearest and easiest to comprehend; my problem with Lee's is trying to pick MY time-frame from the stew of data he presents. Often only parts of things change, so you have to piece it together; checks from 1800-1816, hounds from 1770-1820, rubbing paunch from 1810-, brains from Abby Normal, and that sort of thing. For my 1812ish frigate it seems, if I interpret all this correctly, The mast can be a single piece with cheeks and rubbing paunch (used to be the front fish) added on. It tapers from the deck to the top end. From the top of the cheeks/hounds down, it's round except it's left flat on the sides where the cheeks attach. The cheeks are rounded themselves to nearly blend into the mast, but there's a bit of a step or channel formed so they don't taper down to nothing at the sides. The real hounds are a separate piece scarfed onto the cheeks. I found it better to actually do this so they weren't in the way or getting damaged. Lee's gives the proportions of these parts; for instance, the rubbing paunch is 1/3 the width of the mast. I didn't put any taper in the space between decks, and the bury below the gundeck is 8-sided. After shaping the core of the mast, I used strips of copper tape left-over from Constellation's bottom to make the banding. Every-other band where the cheeks are is under them and need to go on before the cheeks. It's not as clean and simple as Constellation's 1850's mast and spars, but it's not as complicated as it first appears. My drawing of how I'm constructing Macedonian's masts. The side views don't show the rubbing paunch. Mainmast of HMS Impregnable showing cheek pieces and rubbing paunch. There's filler blocks next to the cheeks for the banding that goes over the them - I don't see this for my 1810-1812 period. Mizzen tapered Fore tapered Mizzen cheeks glued on Mizzen banding over cheeks applied, and rubbing paunch attached. Upper part of fore mast shaped and banding applied. Port-side cheek piece is cut and shaped.

- 97 replies
-
- 5
-
-
- macedonian
- frigate
- (and 2 more)
-
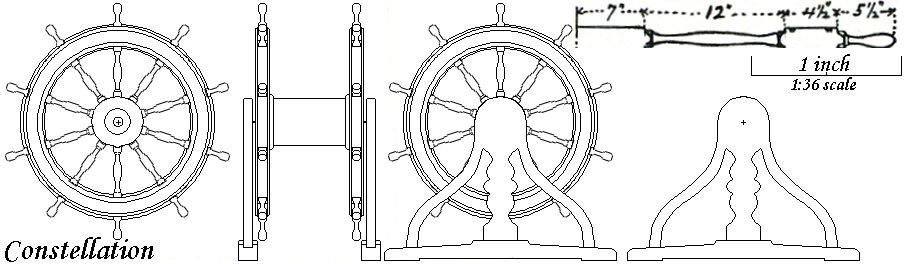
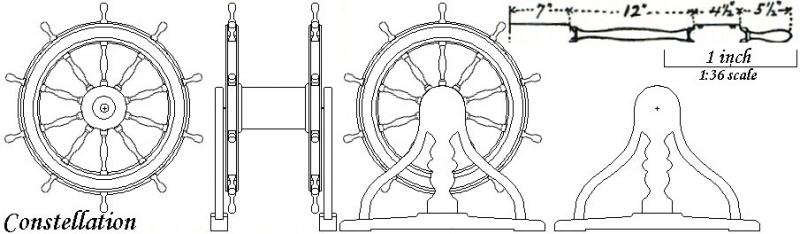
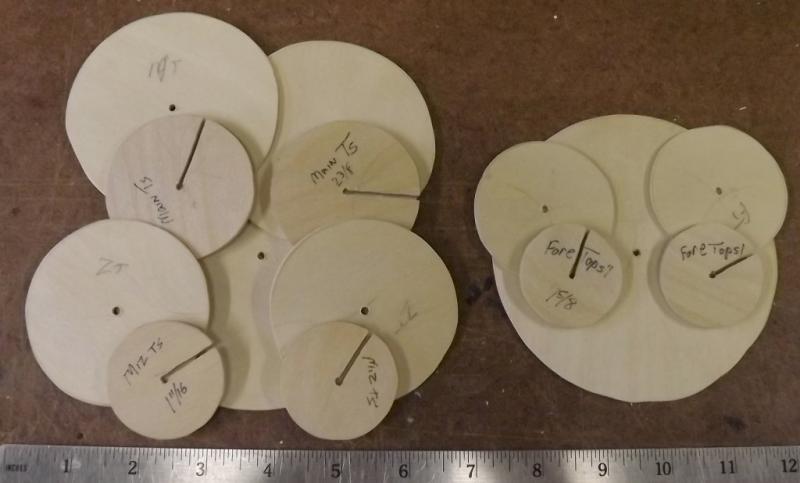
How much for four wheels; not the drums, stand, etc - just the wheels?
-
I work in 1:36 scale
-
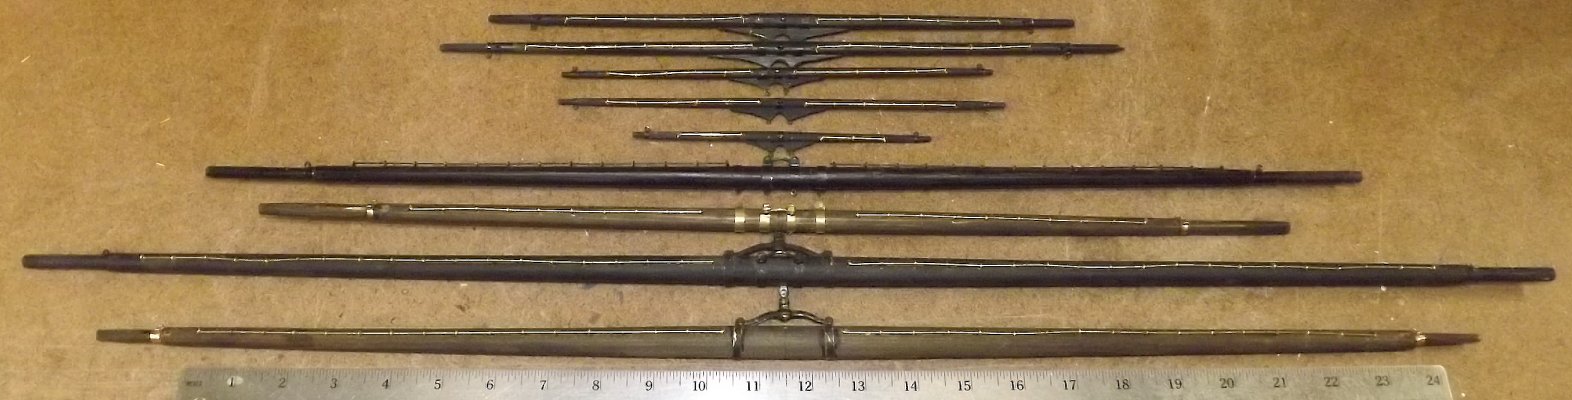
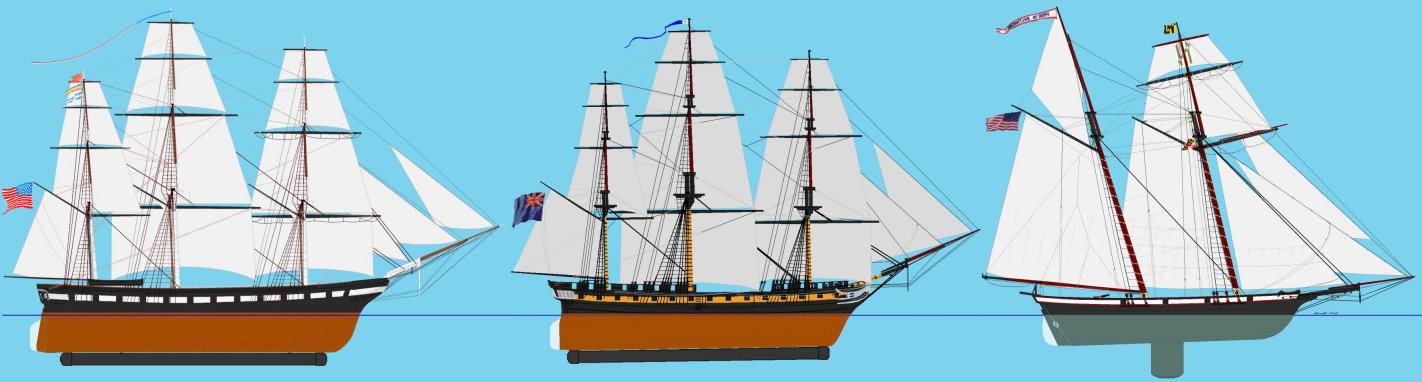
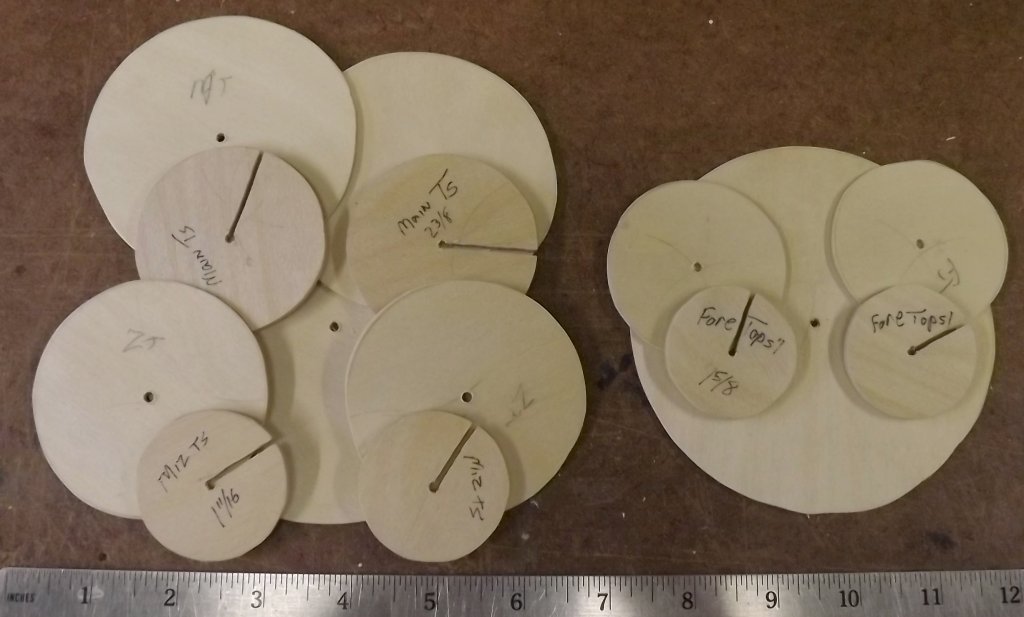
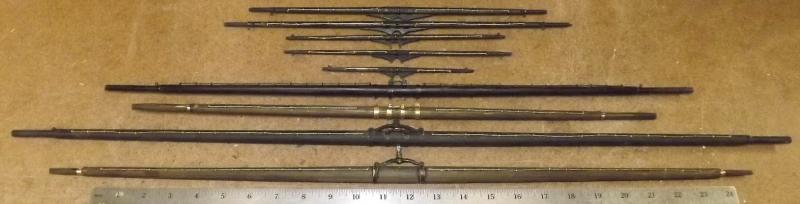
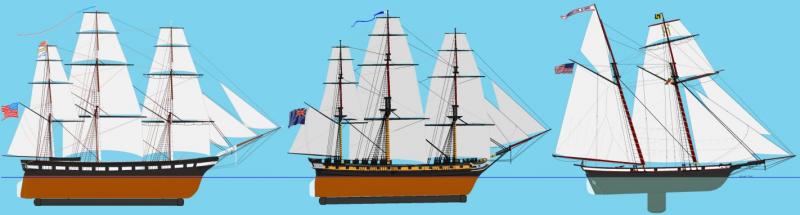
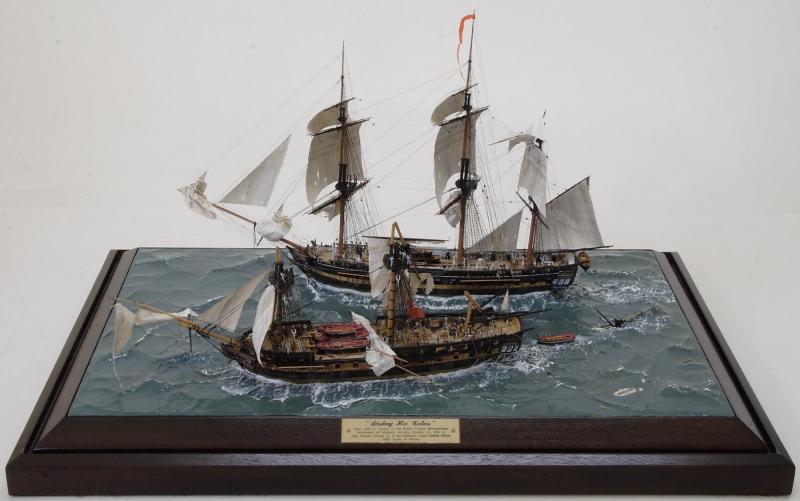
All but three yards have jackstays now. I ran out of eye-pins and had to order some more. 11/15/2016: 144 More eye-pins arrived yesterday and the last three yards got their jack-stays today! And all three models to scale relative to each other:
- 553 replies
-
- 5
-
-
- sloop of war
- constellation
- (and 3 more)
-
There's photos and video online of them up-rigging and down-rigging Niagara, you could sort of diorama a scene from one of those, hauling a bundled sail up, or down, people aloft bending, or unbending another sail. Gives you a reason to only have a few sails and some bare poles mixed.
- 648 replies
-
- 2
-
-
- niagara
- model shipways
- (and 1 more)
-
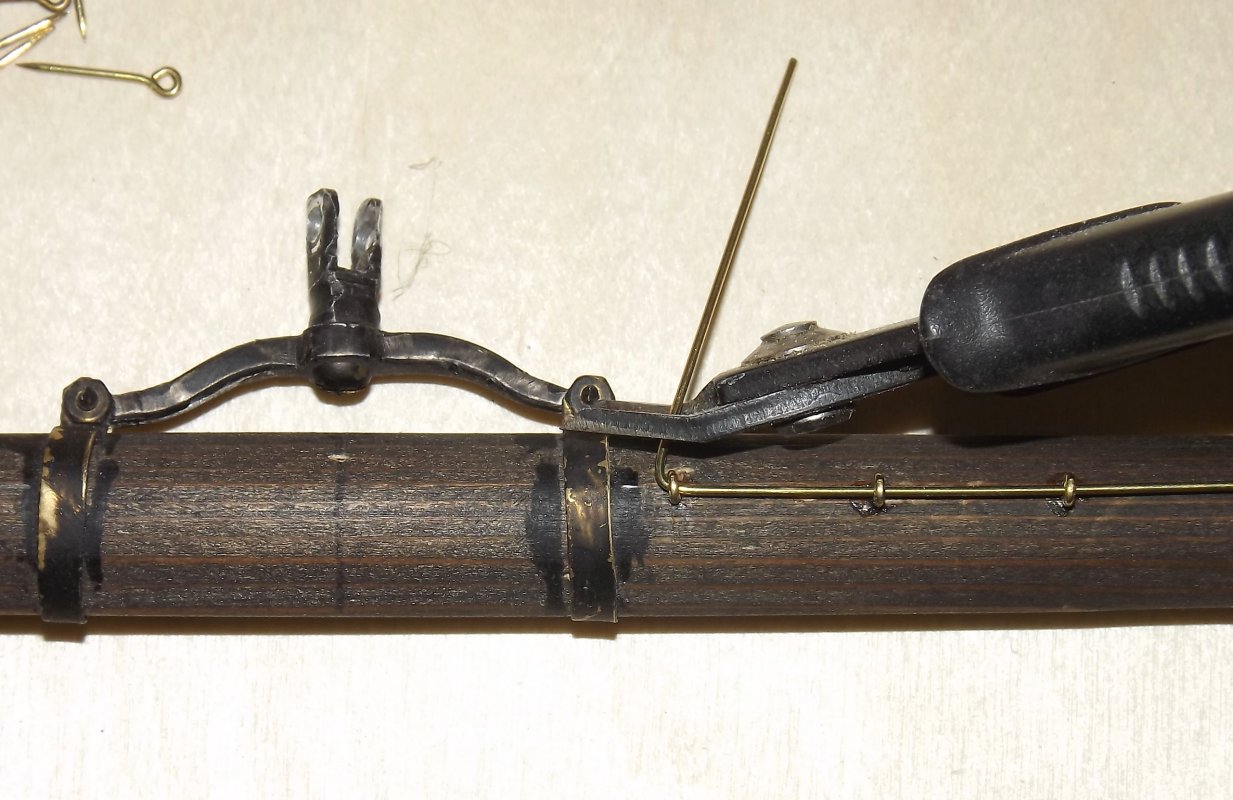
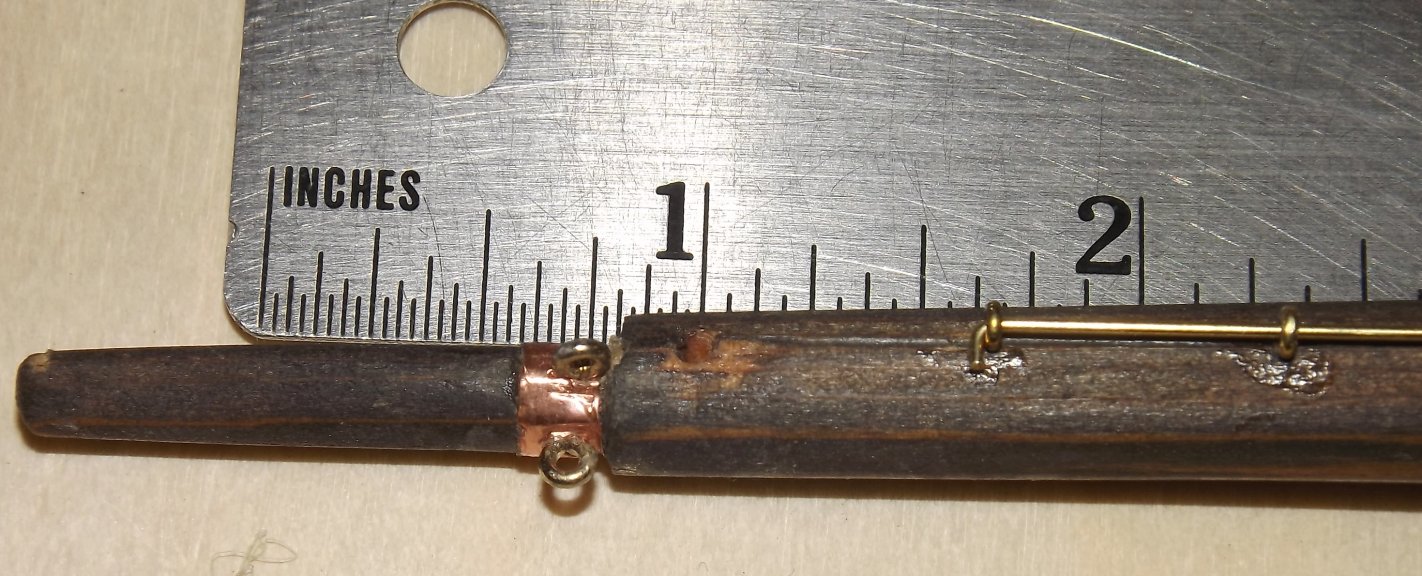
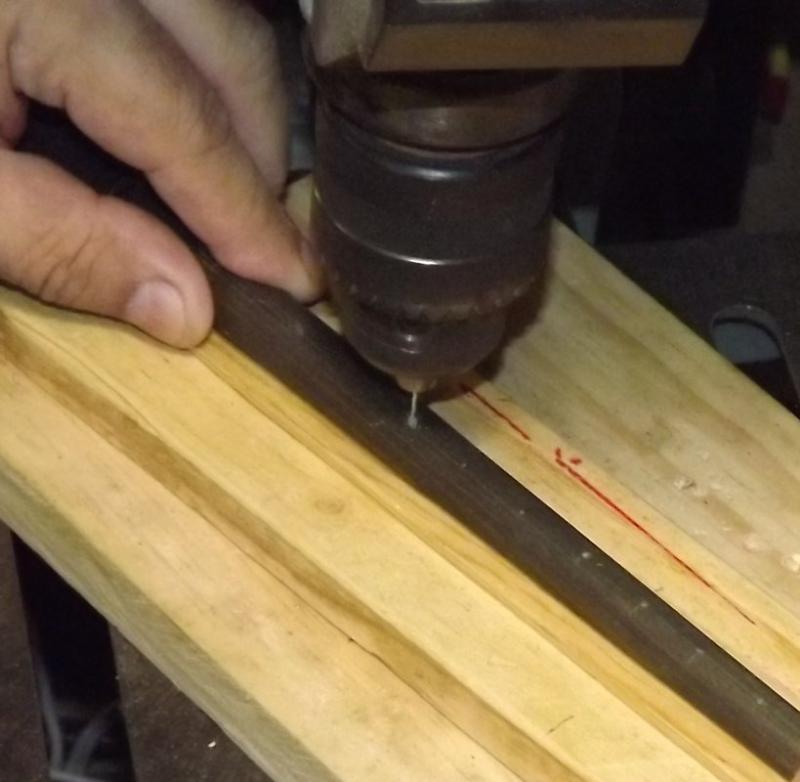
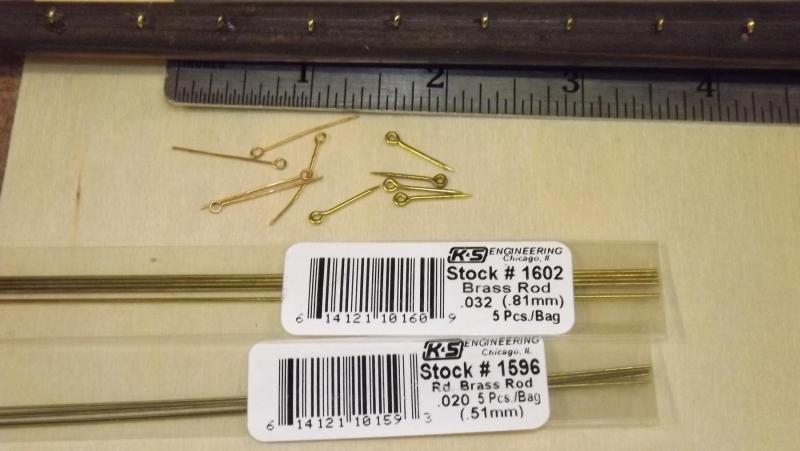
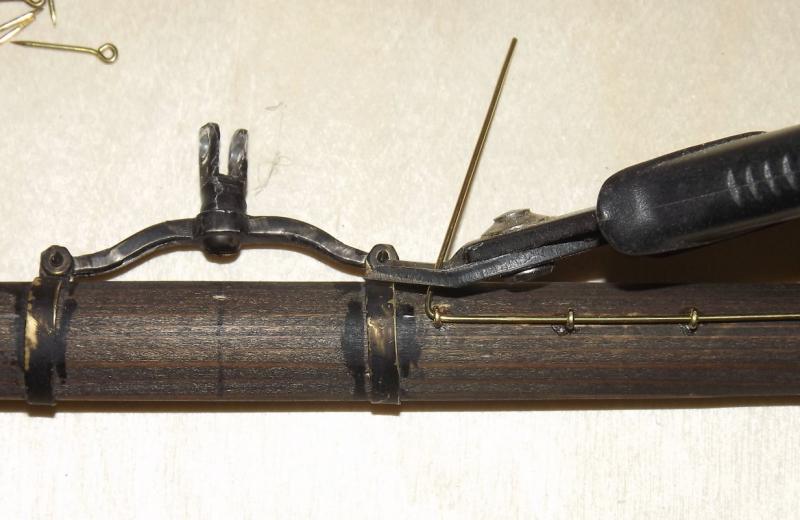
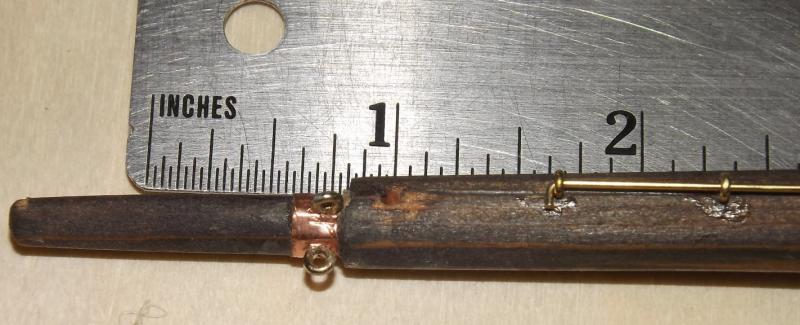
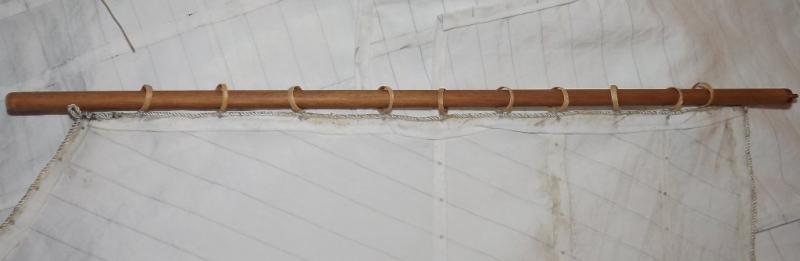
I know, she dresses up, goes out for a sail, and gets ignored. Not so, you see I made a new set of winch drums, and while the glue sets up on Macedonian I've been installing jack-stays on Constellation's yards. The main tops'l yard was already done, I've got the both course yards done, three tops'l yard, and two t'gallants done so far. Drilling holes in the yard for the eye-pins on the drill press. I use a shooting board with a V-groove I use for planing the spars when I'm making them, to hold the yard for drilling. Line up the bit with the bottom of the groove and the mark on top and you're drilling right through the center. The "eye-bolts" on the left are finer gauge copper and I don't think are up to the task so I use the eye-pins on the right that I get from Bluejacket. I use the .032 brass rod for the jack-stays. It's a little over-scale for Constellation but not too awful, and it does the job. I put a 90° in one end, thread the rod through the eyes, which are about 24" apart in this scale (5/8"), bend the other end back, and snip off the excess with flush cutters.
- 553 replies
-
- 3
-
-
- sloop of war
- constellation
- (and 3 more)
-
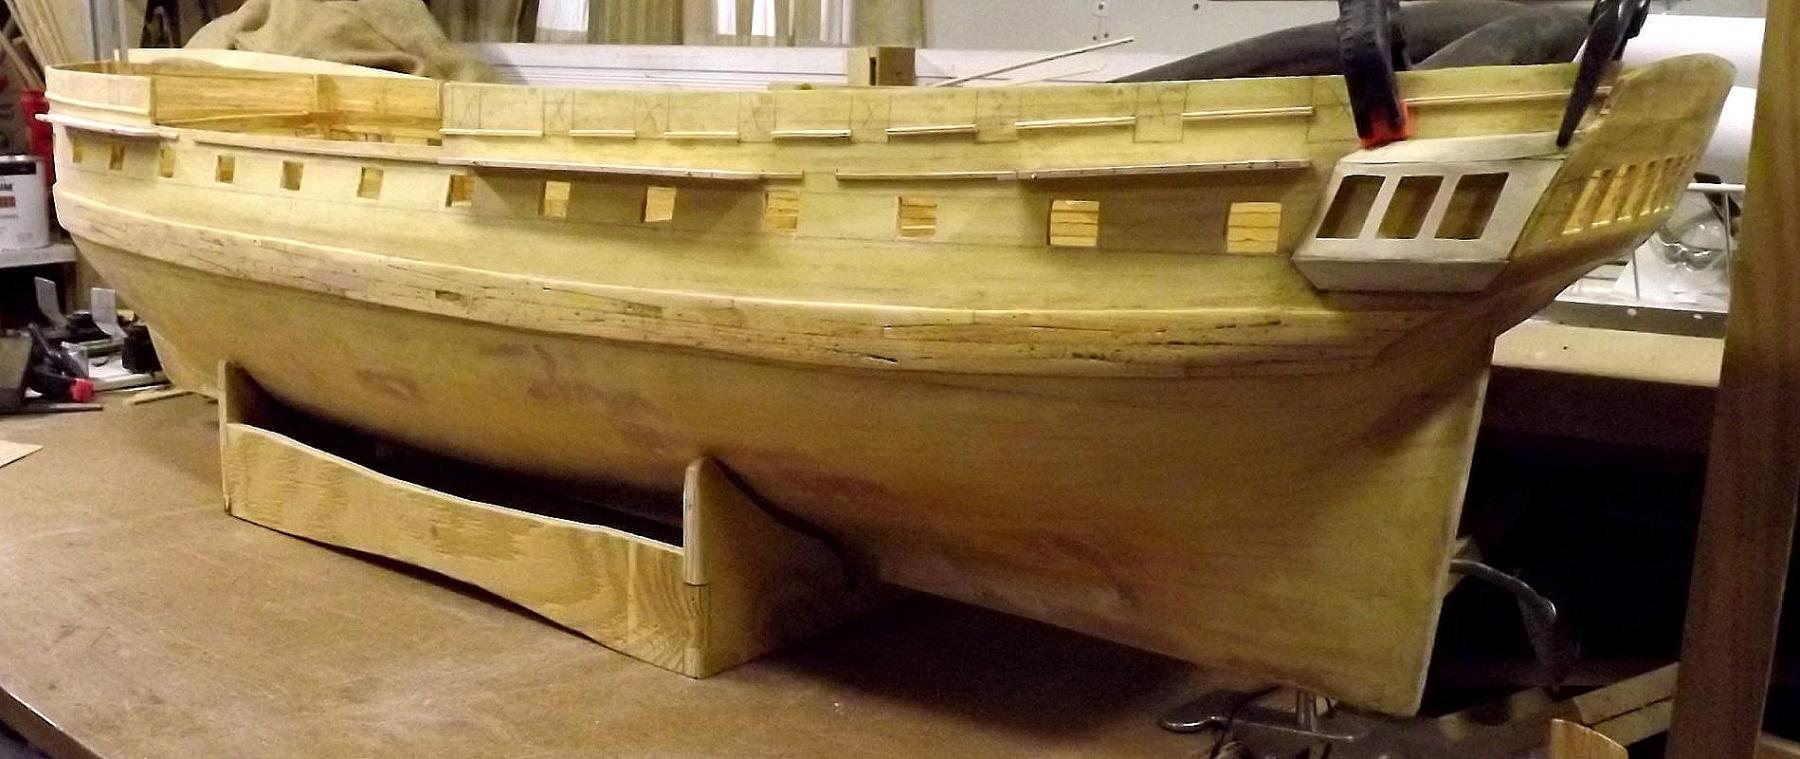
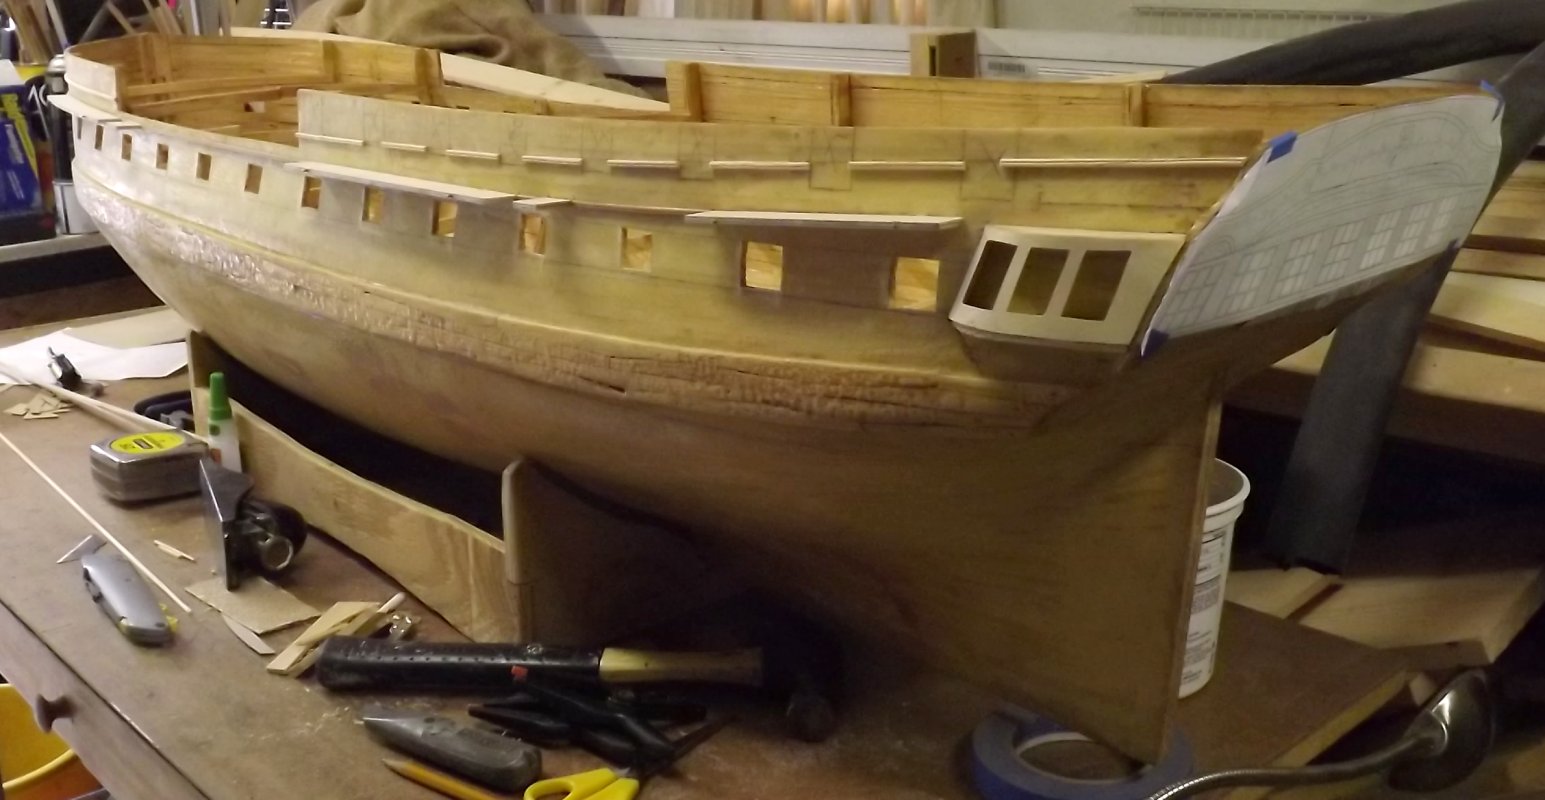
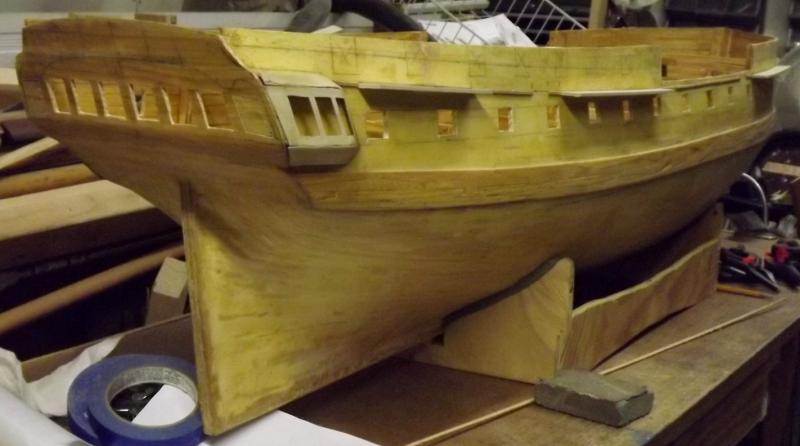
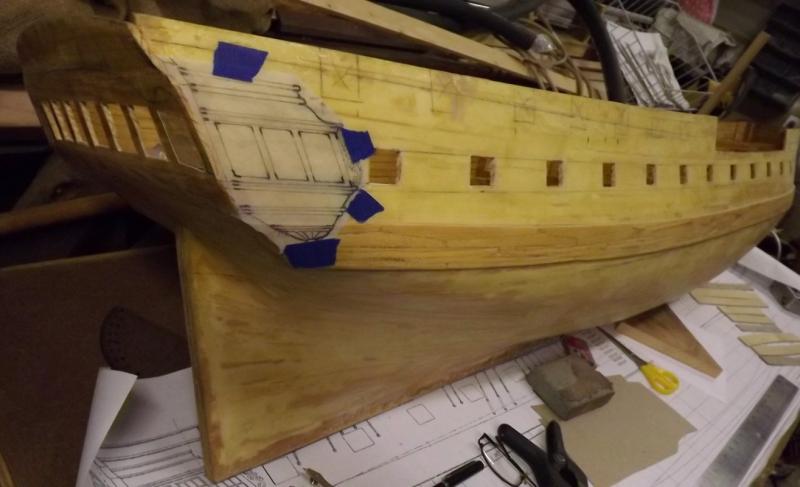
The port side is caught up with the starboard side now, and I did a LOT of sanding of the clumpy epoxy on the port side. There's some filling to do, and the rest of the quarter galleries to do. I also need to notch the channels before I permanently install them. Still more to do, but I'm much closer to getting some paint on her.


- 97 replies
-
- 5
-
-
- macedonian
- frigate
- (and 2 more)
-
Please, Omega, try not to be so critical of my work - you'll give me a complex. Assembling the port side gallery, and moldings. I also rough cut those little channels for the t'gallanet/royal back-stays. The epoxy on the port-side wale set kind of lumpy and is gonna take some major sanding effort, like belt-sander effort.


- 97 replies
-
- 6
-
-
- macedonian
- frigate
- (and 2 more)
-
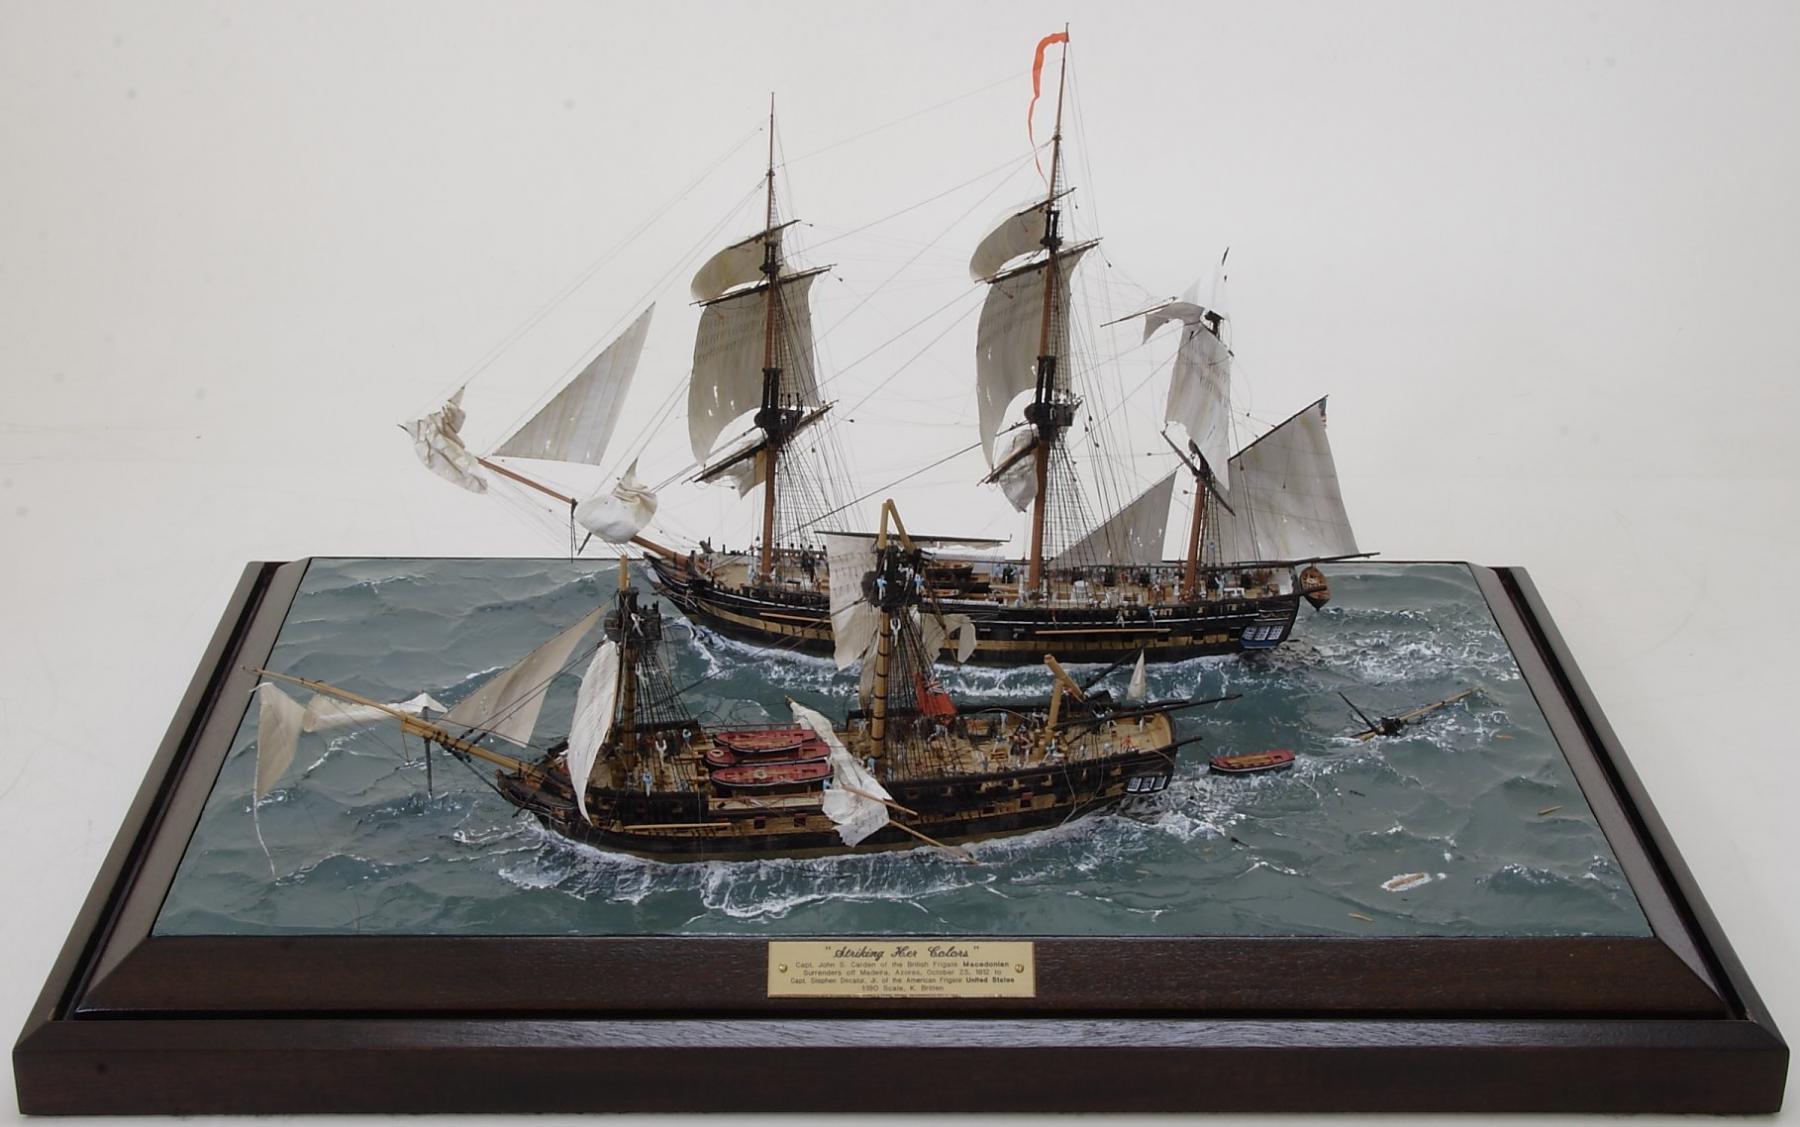
There's whole books on hydro-statics and stability, but to put it as simply as possible, on a scale model, internal ballast is not enough, as this fellow learned: You simple can't get the center of gravity low enough within the hull. The more weight you add, the higher the CG moves as you're stacking weight up inside. Because Macedonian and Constellation have long flat-ish keels, the best form of external ballast is a bar or tube. I use a tube and would gladly use a lead bar instead if I could gather the gumption to cast such a beast. Some folks use fins. A fin moves the weight further down, like moving the skinny kid further from the balance-point to balance the fat kid on the other end of the see-saw. Here's Stad Amsterdam a model comparable in size to mine. She uses a fin keel that you can see being installed in this video. https://youtu.be/Yj3EBwU6Elo?t=152 If you watch her sailing you see she still heels way over despite the fin; because she's showing too much sail in what are basically scale storm conditions. When it's blowing 20+, you're pushing into scale hurricane winds! Fins are deep. In that video they're launching at a bulkhead, and it takes two people to do the job. I'm launching most of the time at a shoreline or ramp. With a fin like that I'd have to wade out to water deep enough to launch the model. By using a ballast tube, my launch-cart is basically a boat trailer and I hardly have to get into a foot of water to launch, as you can see at the beginning and end of my video... I can also launch and retrieve all by myself, without help. Whatever sort of external ballast used, there's one common feature that sells it hands-down; it's removable. By unscrewing two threaded rods, I can easily detach the model from 42 pounds of ballast. I can lift the model and move it around alone, and safer for me and the model. Constellation still needs about 15 pounds of ballast added internally to get her to her waterline and trim her or she sits about 2 inches too high. I also have easily removable t'gallants and royals, the courses can be bunted up, and the model can essentially be under tops'ls and jib in a few minutes if the wind's too much for her plain sail suit.
- 97 replies
-
- 11
-
-
- macedonian
- frigate
- (and 2 more)
-
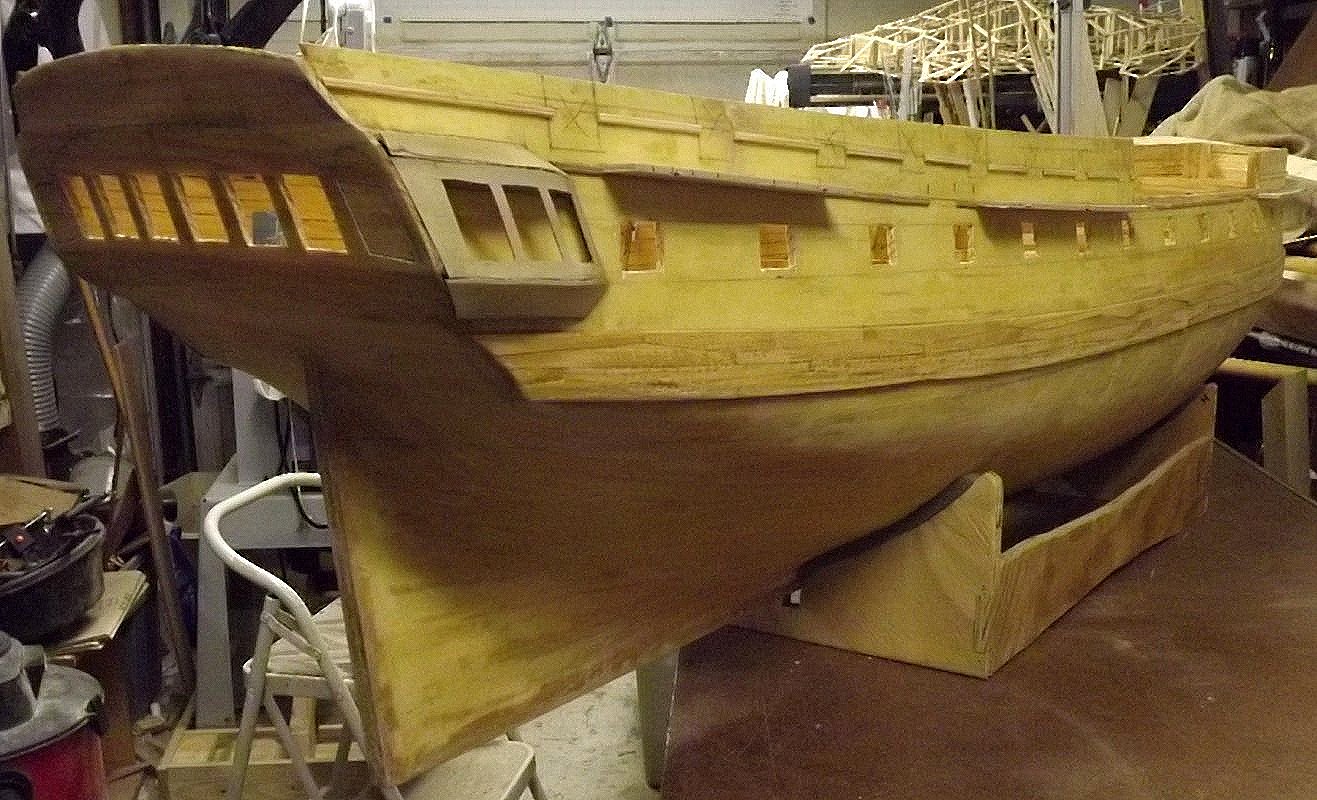
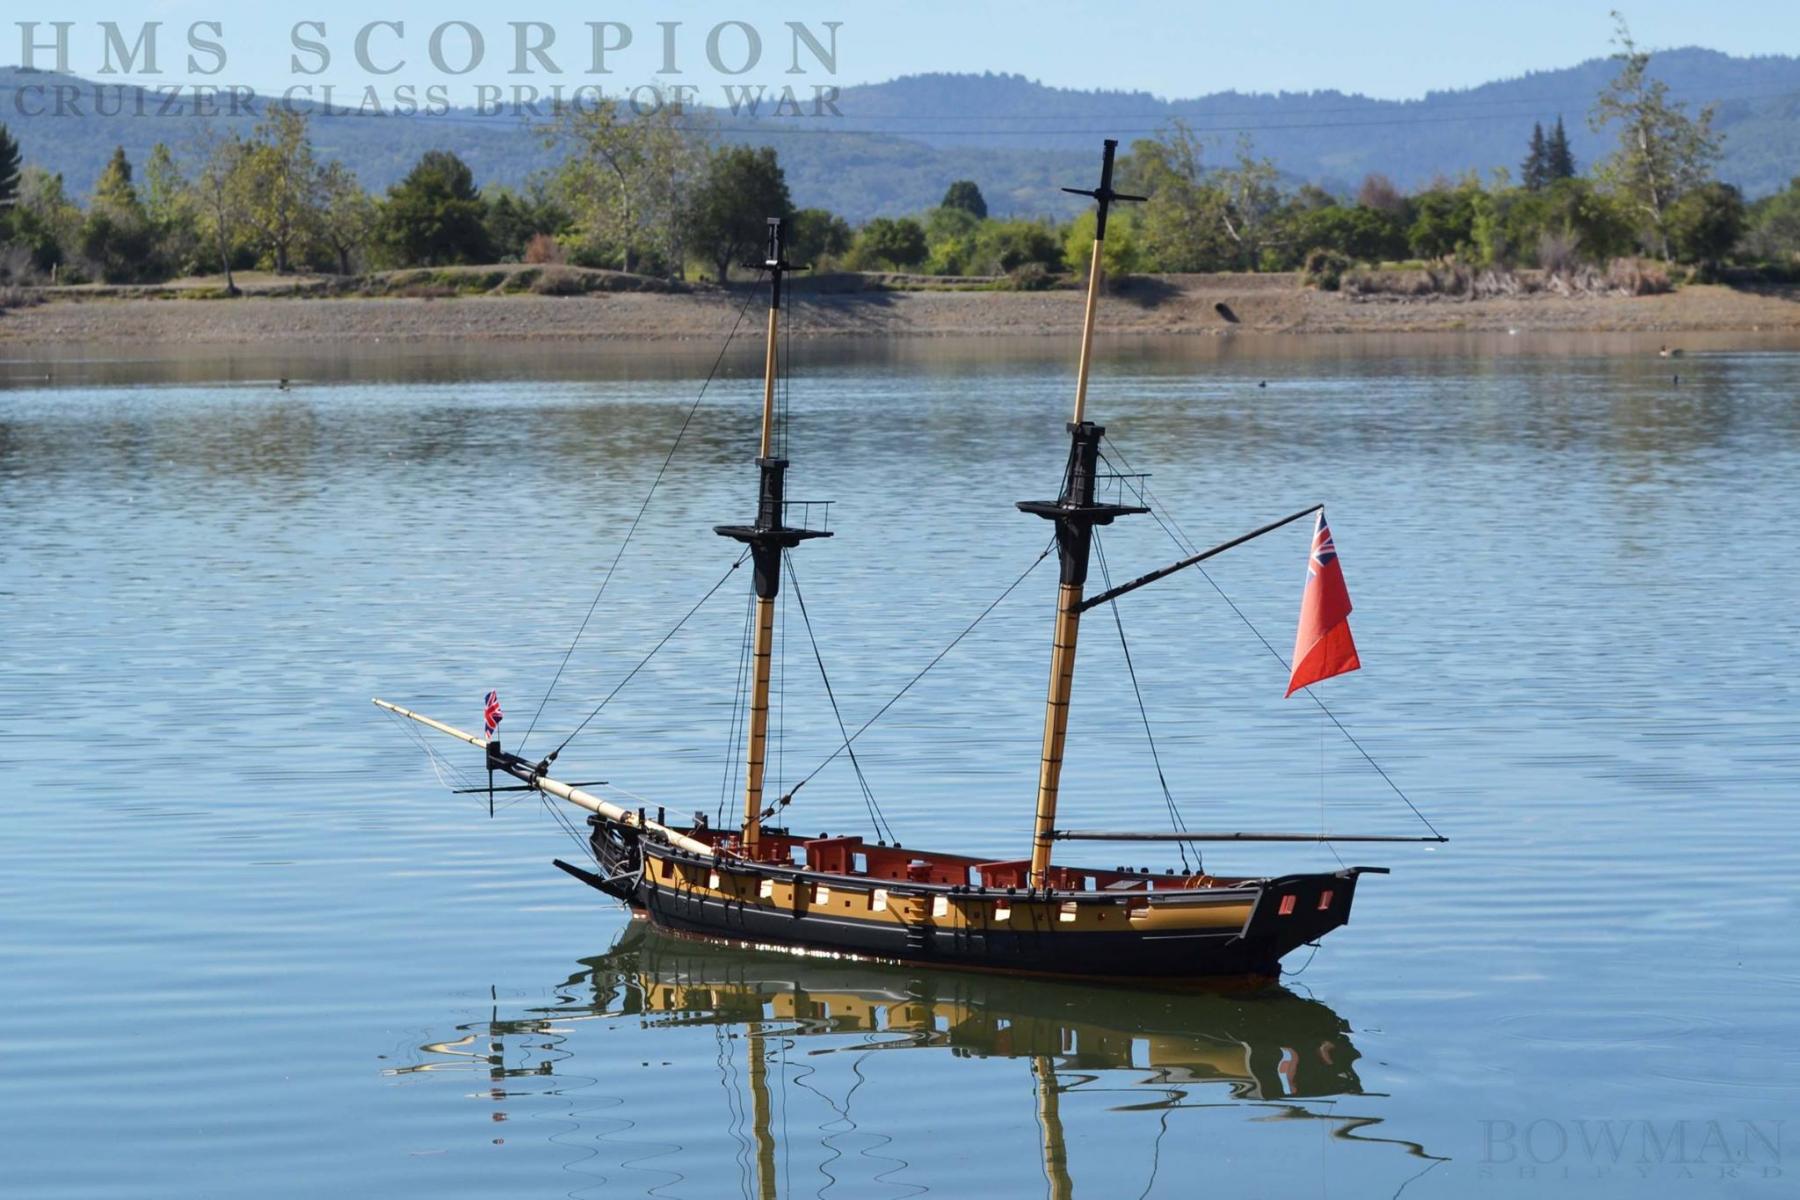
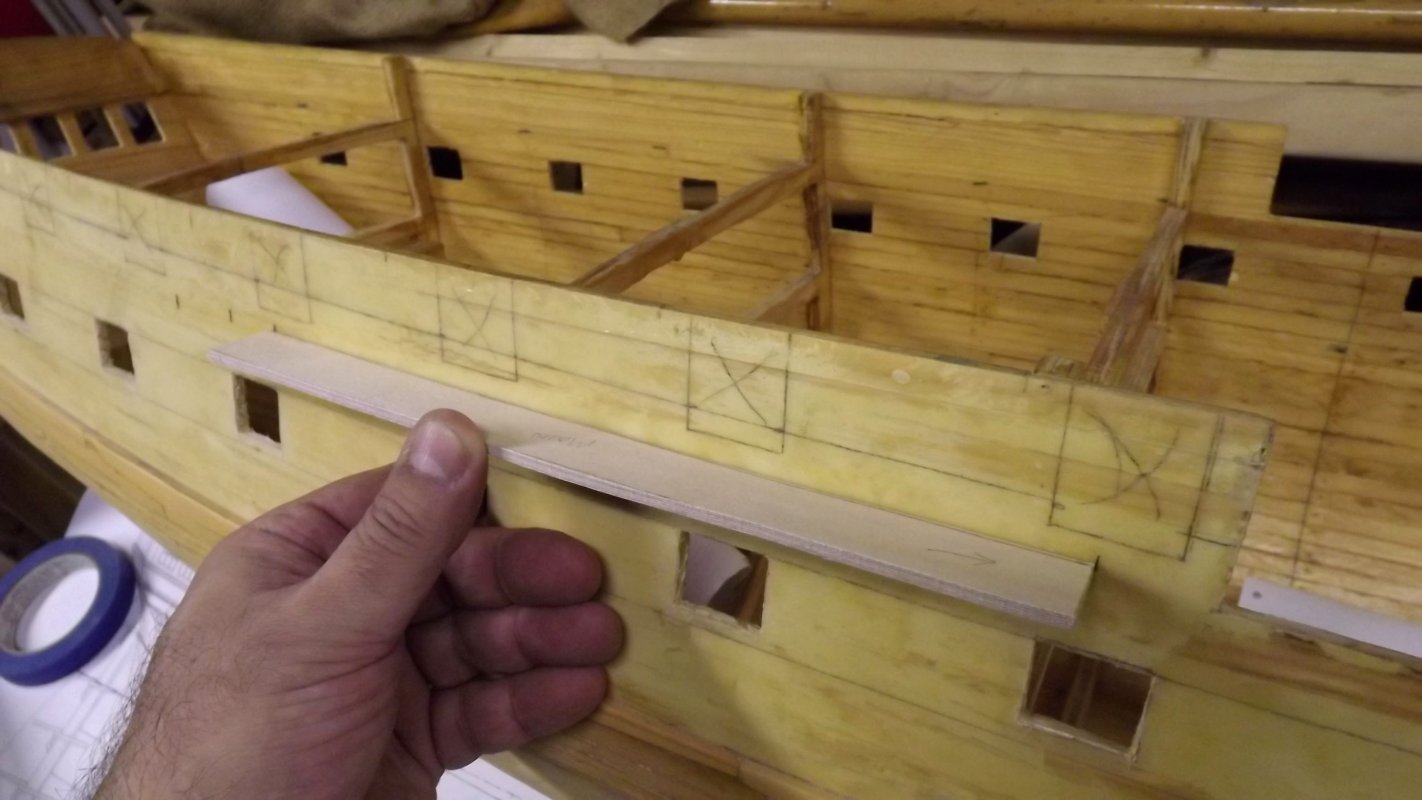
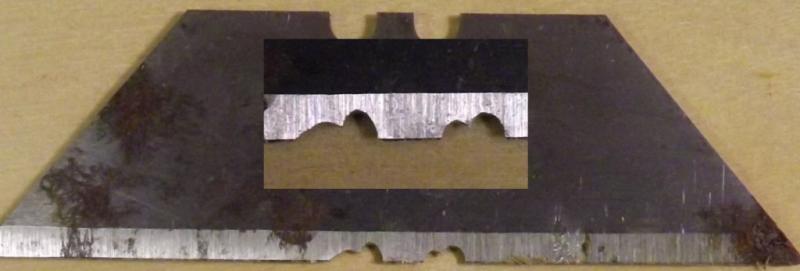
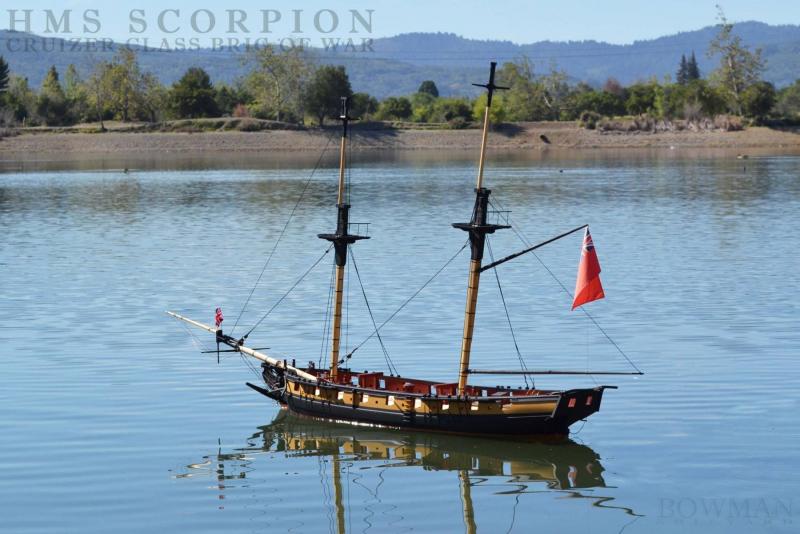
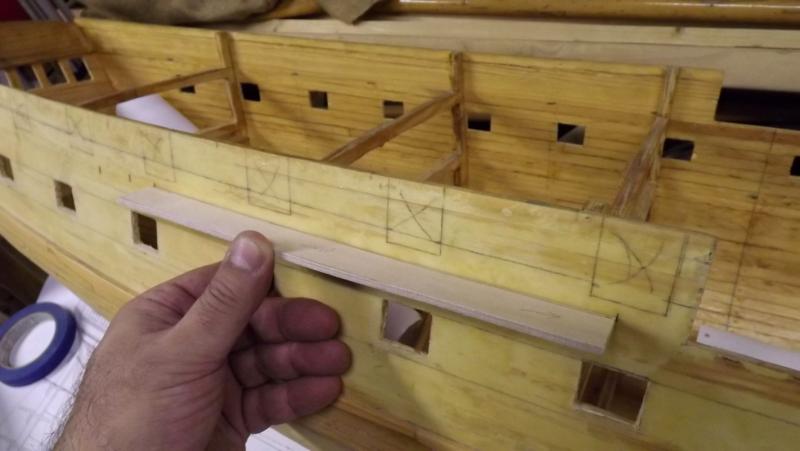
Maybe not in 1:24, but your diorama's been built. I'm working in 1:36, I don't have a vehicle I could fit a 1:24th scale version into. The fellow that printed the masters for my guns is building one of the SC&H Cruiser class brigs as the Scorpion, and intends to build another Lively class frigate, the Spartan, in 1:24 scale. That will have a 77 inch hull compared to my 59 inch hull. Scorpion in her first in the water test Back to Macedonian... I really want to get some paint on this girl before I take her down to the creek for her first dip, but I need to get molding and such on her first. I save old utility knife blades just for making molding scrapers. This one I made today with two patterns. The molding was applied along the sheer-line, with gaps for the channels. There's another line of molding above that. Here the channels are friction fit and sanded to fit tight against the hull.

- 97 replies
-
- 10
-
-
- macedonian
- frigate
- (and 2 more)
-
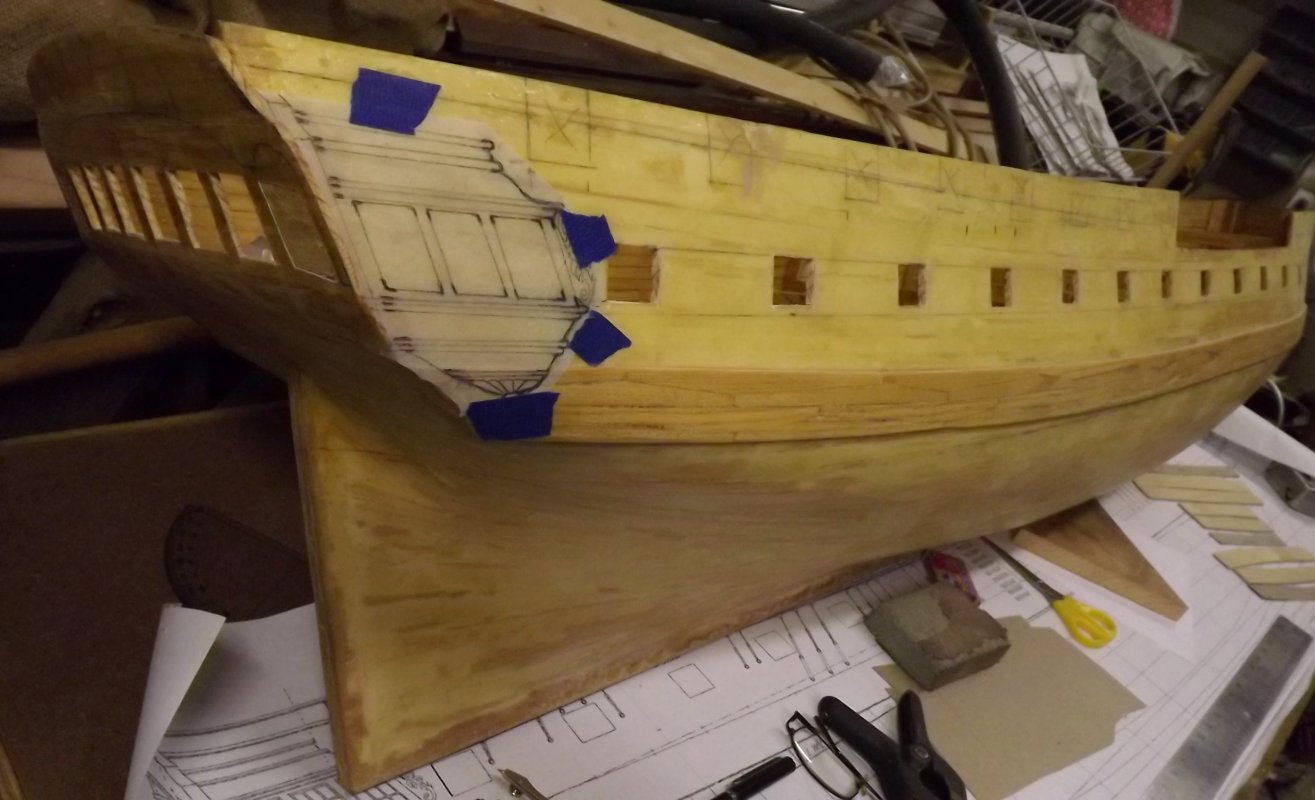
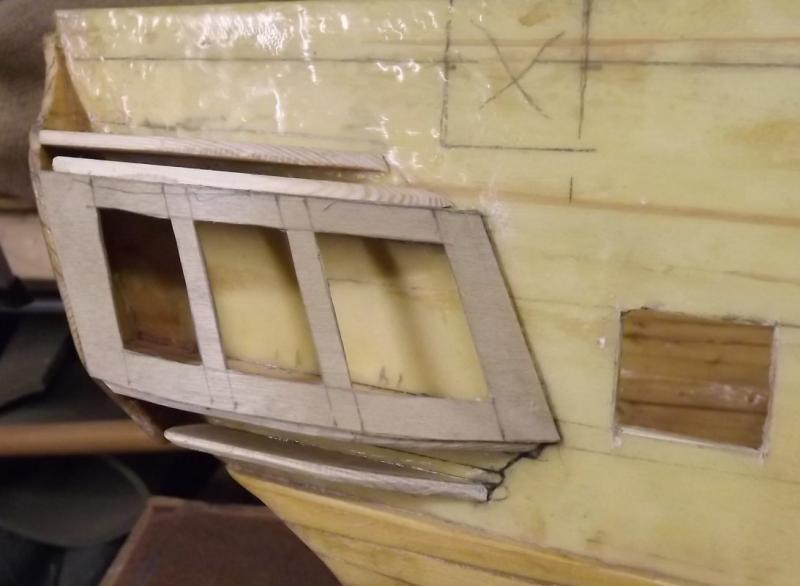
Sheathing commences on the starboard quarter gallery. Don't worry, I have cardstock patterns for everything so I can duplicate all this on the other side.

- 97 replies
-
- 9
-
-
- macedonian
- frigate
- (and 2 more)
-
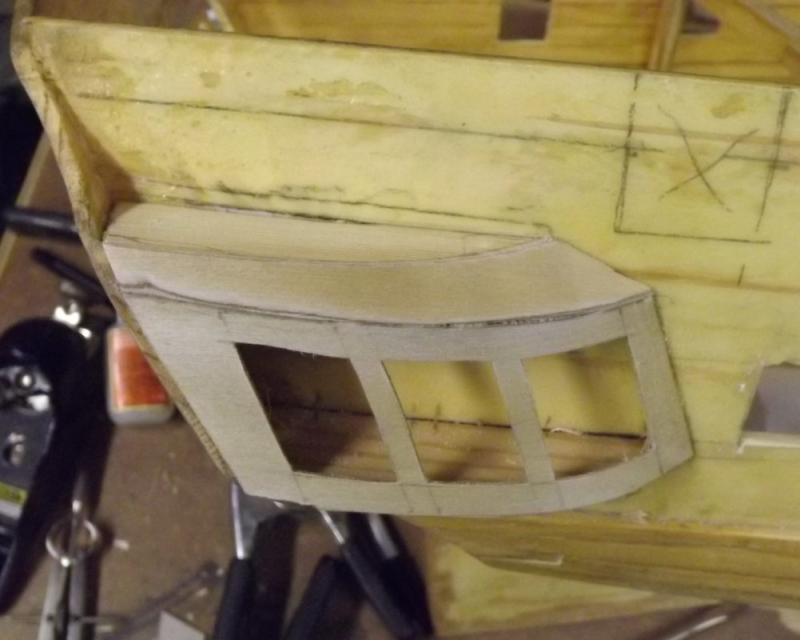
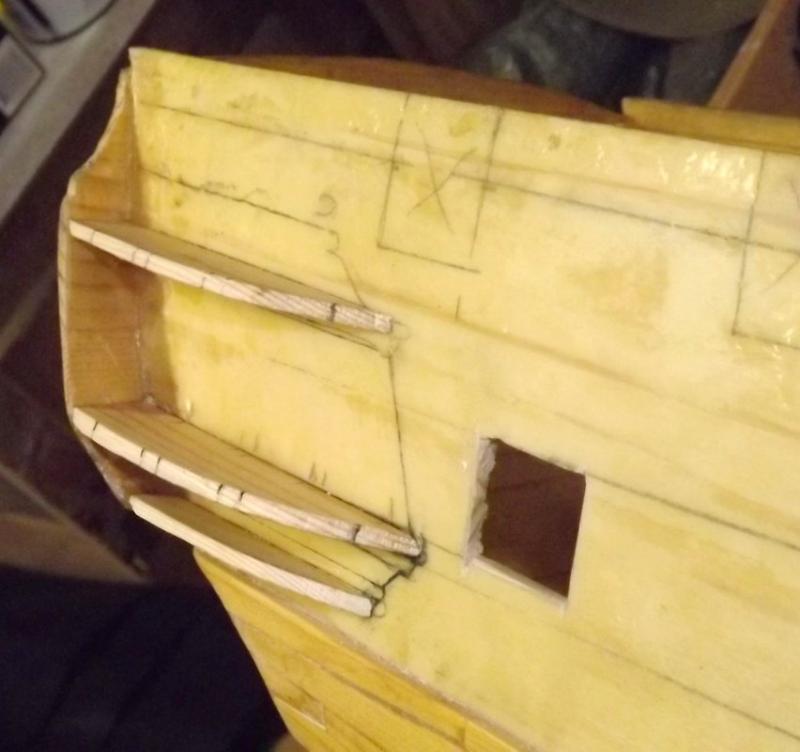
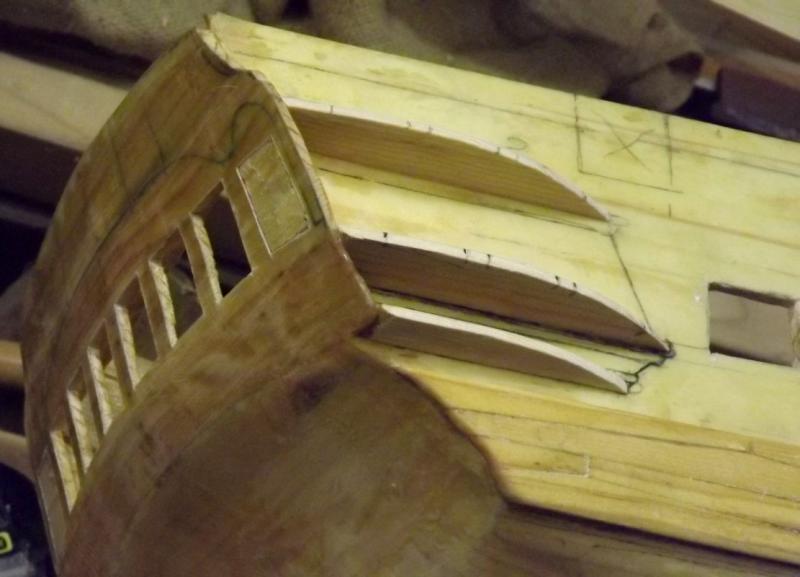
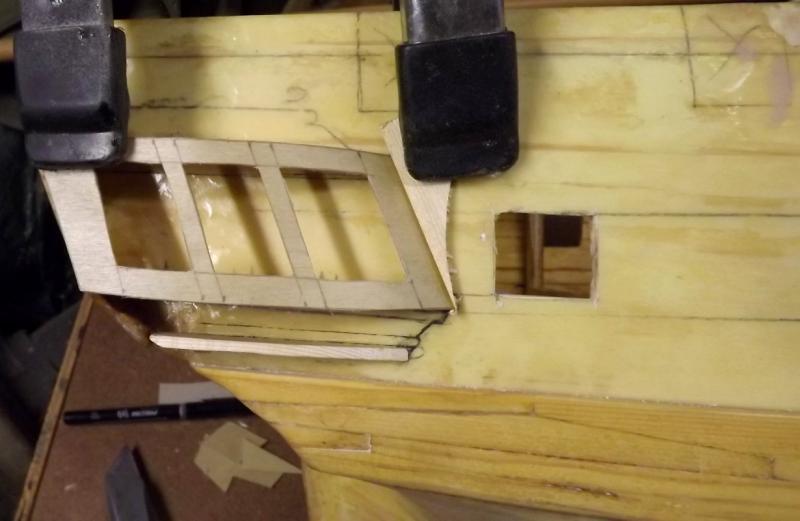
Framing out the quarter galleries They'll be sheathed in 1/32" plywood
- 97 replies
-
- 5
-
-
- macedonian
- frigate
- (and 2 more)
-
Rough cut channels and laying out the quarter galleries.
- 97 replies
-
- 5
-
-
- macedonian
- frigate
- (and 2 more)
-
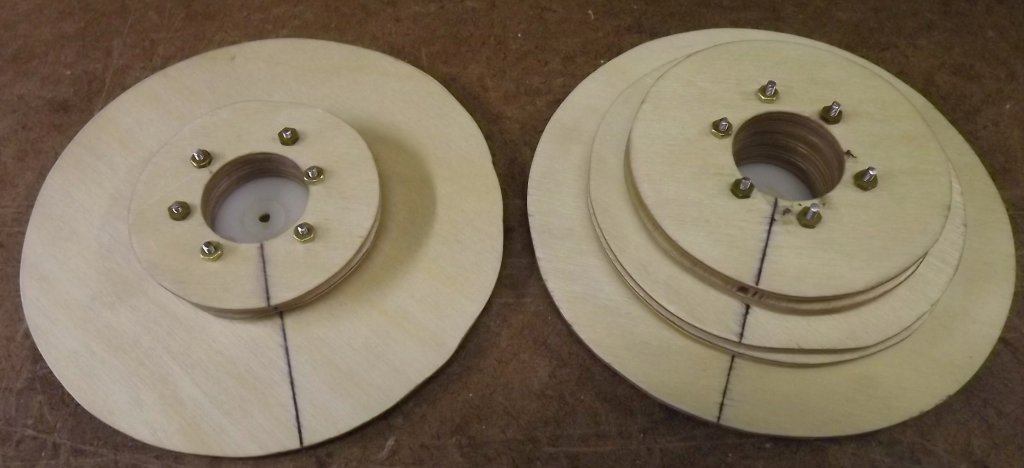
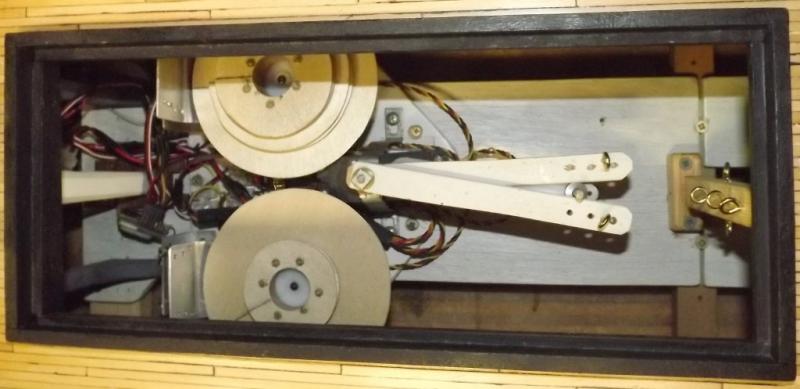
Entrance of the Queen of Sheba and a couple of others I'm actually not familiar with. I spent more time searching for music that fit and that YouTube wouldn't get all wadded up about, than I did editing the video. My aircraft ply order finally arrived so I got right into making a new pair of winch drums: The drums are 1/8" ply, the flanges are 1/16" ply. After gluing them up, they got a couple of coats of spray lacquer for good measure. I reused the plastic servo attachment disks and threaded rods from the last drum failure using the existing out-of-whack holes. Set in place waiting for a rig to grow around them again.


- 553 replies
-
- 3
-
-
- sloop of war
- constellation
- (and 3 more)
-
I almost feel bad for down-rigging her already, but there's bolt-ropes to sew, chain plates to make, and rope to walk so that next time she sails it'll be with a permanent rig; shrouds, stays, etc.
- 553 replies
-
- 2
-
-
- sloop of war
- constellation
- (and 3 more)
-
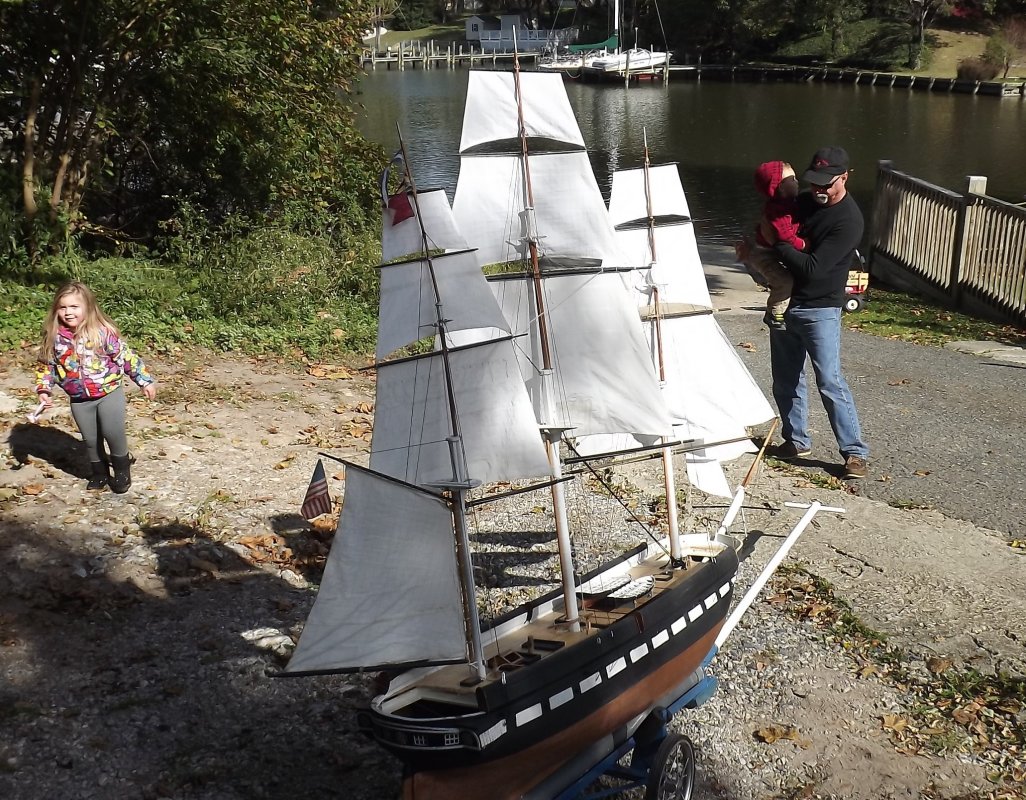
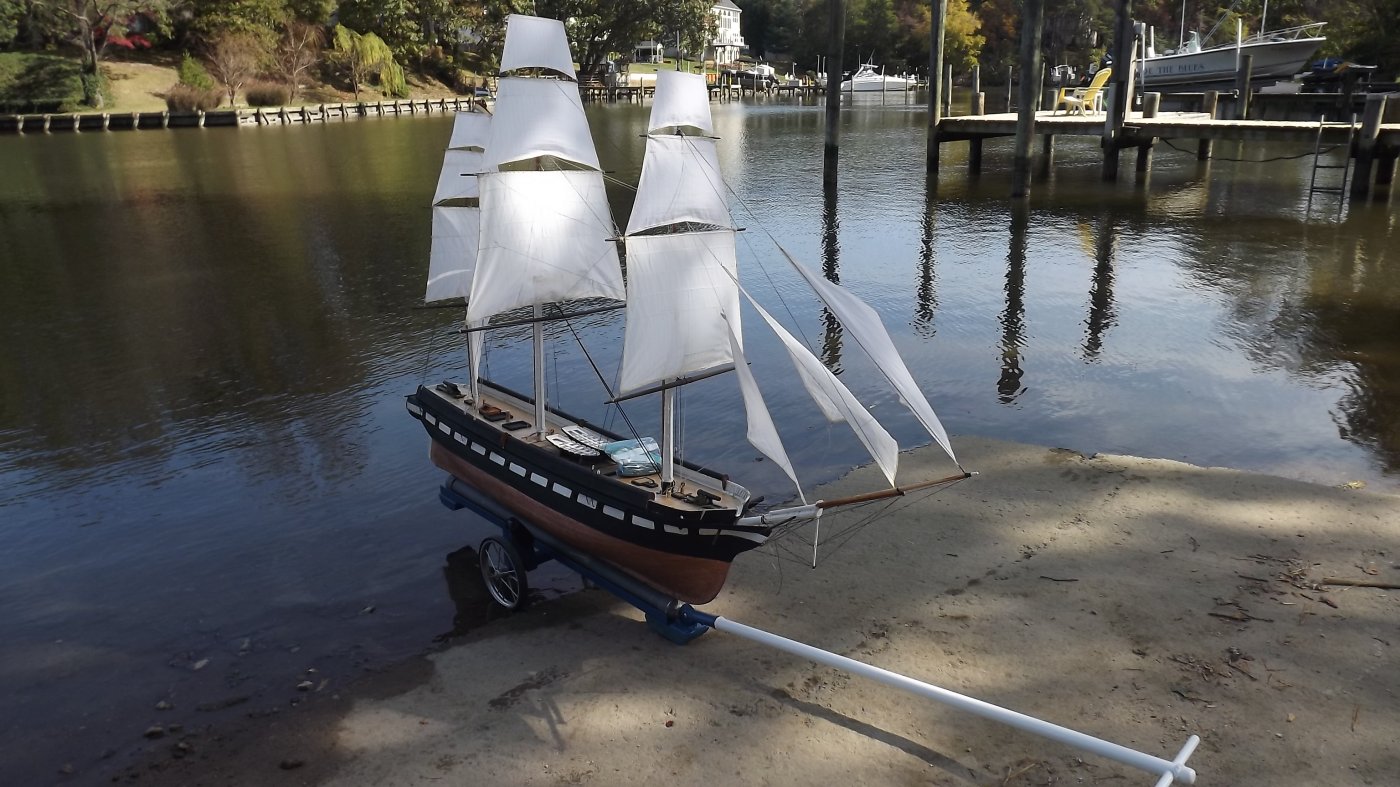
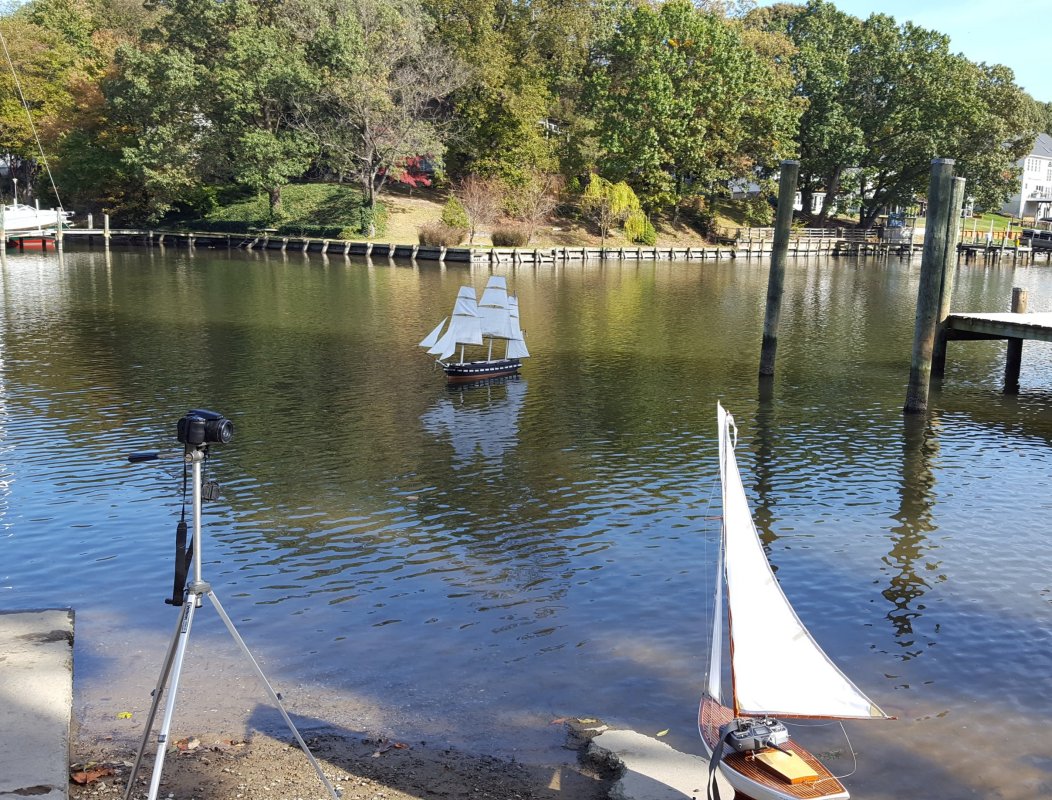
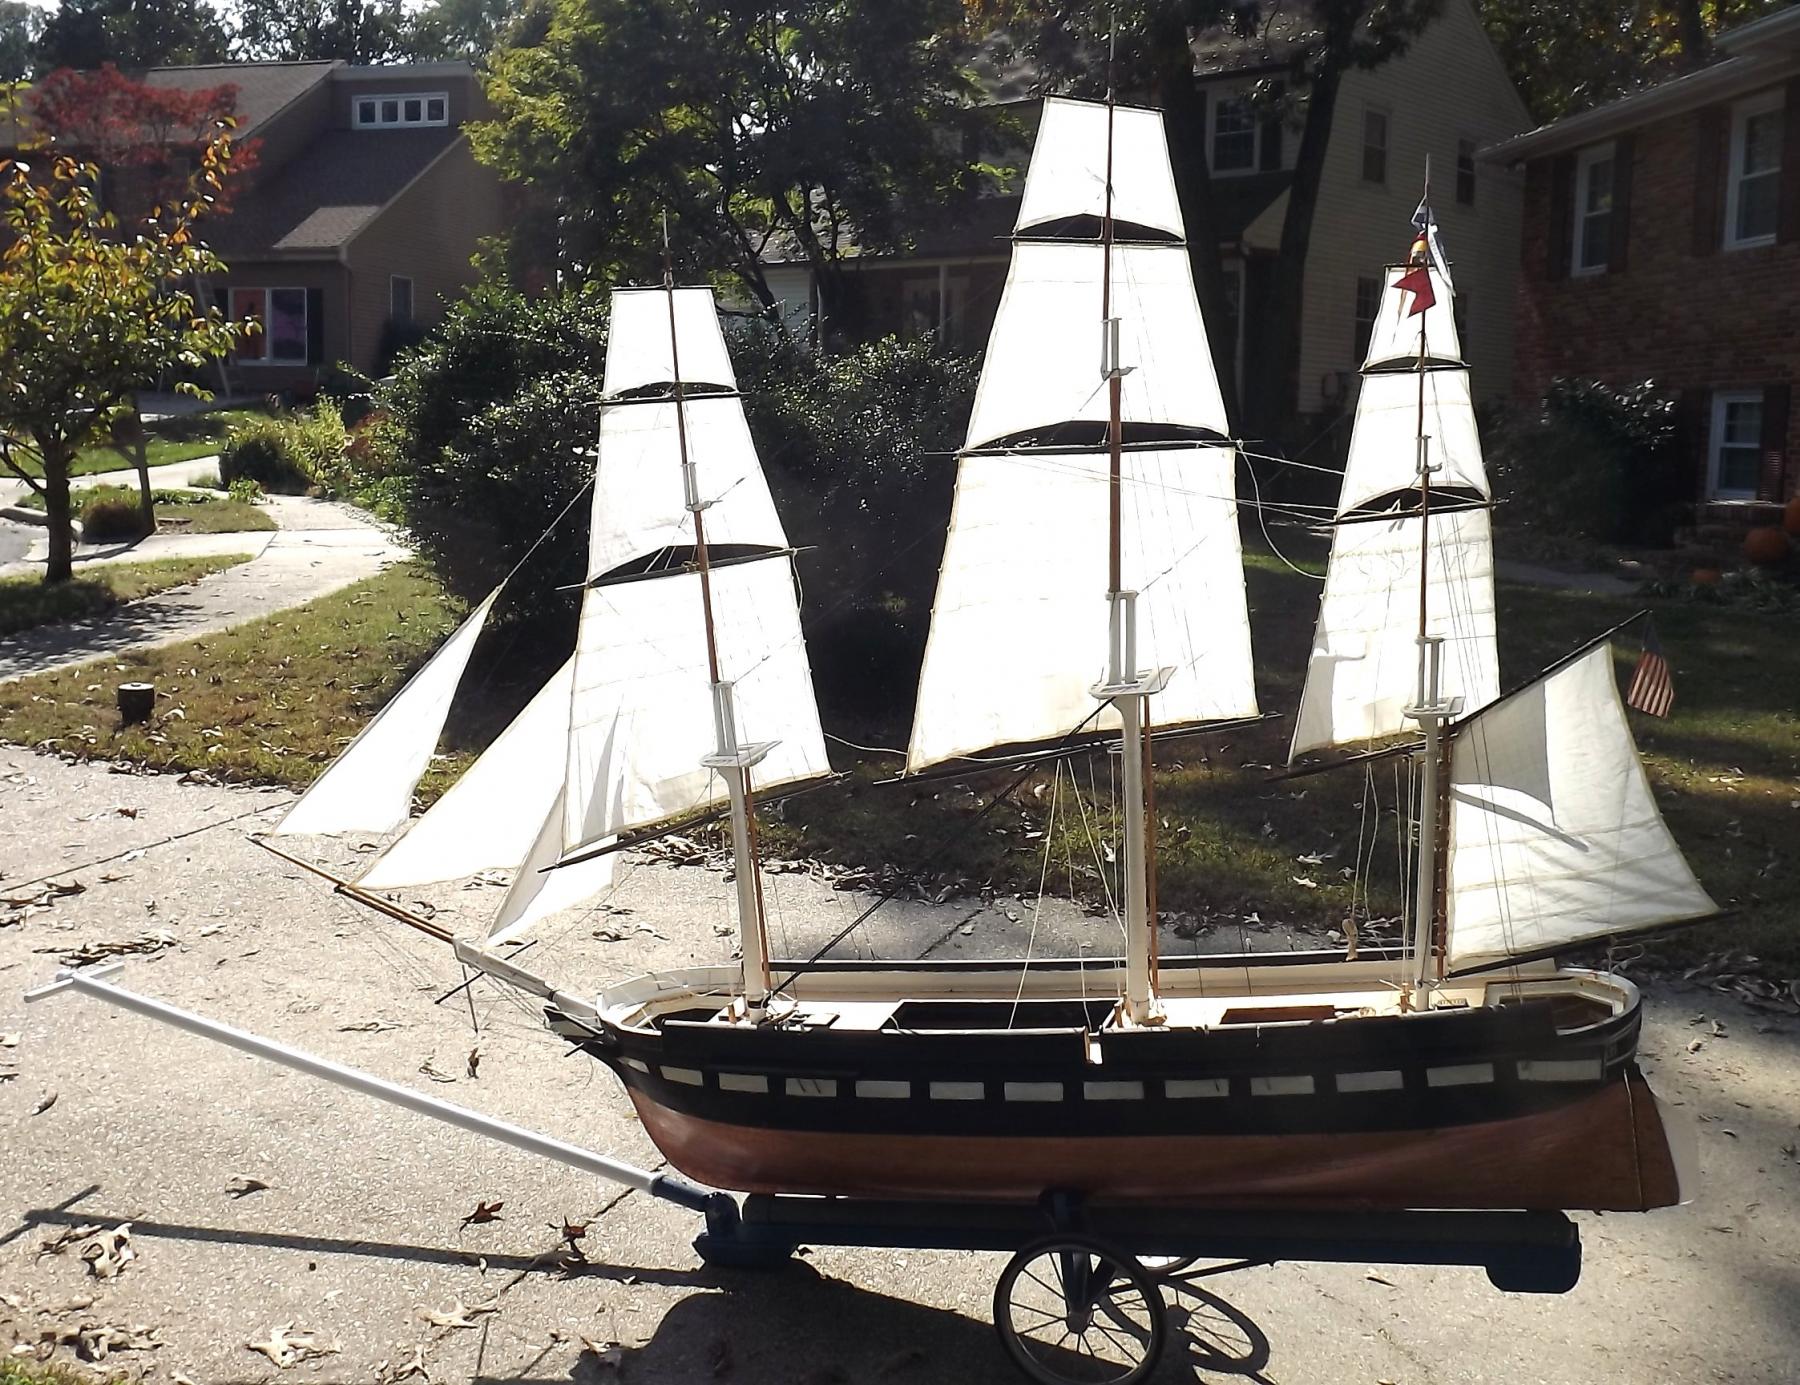
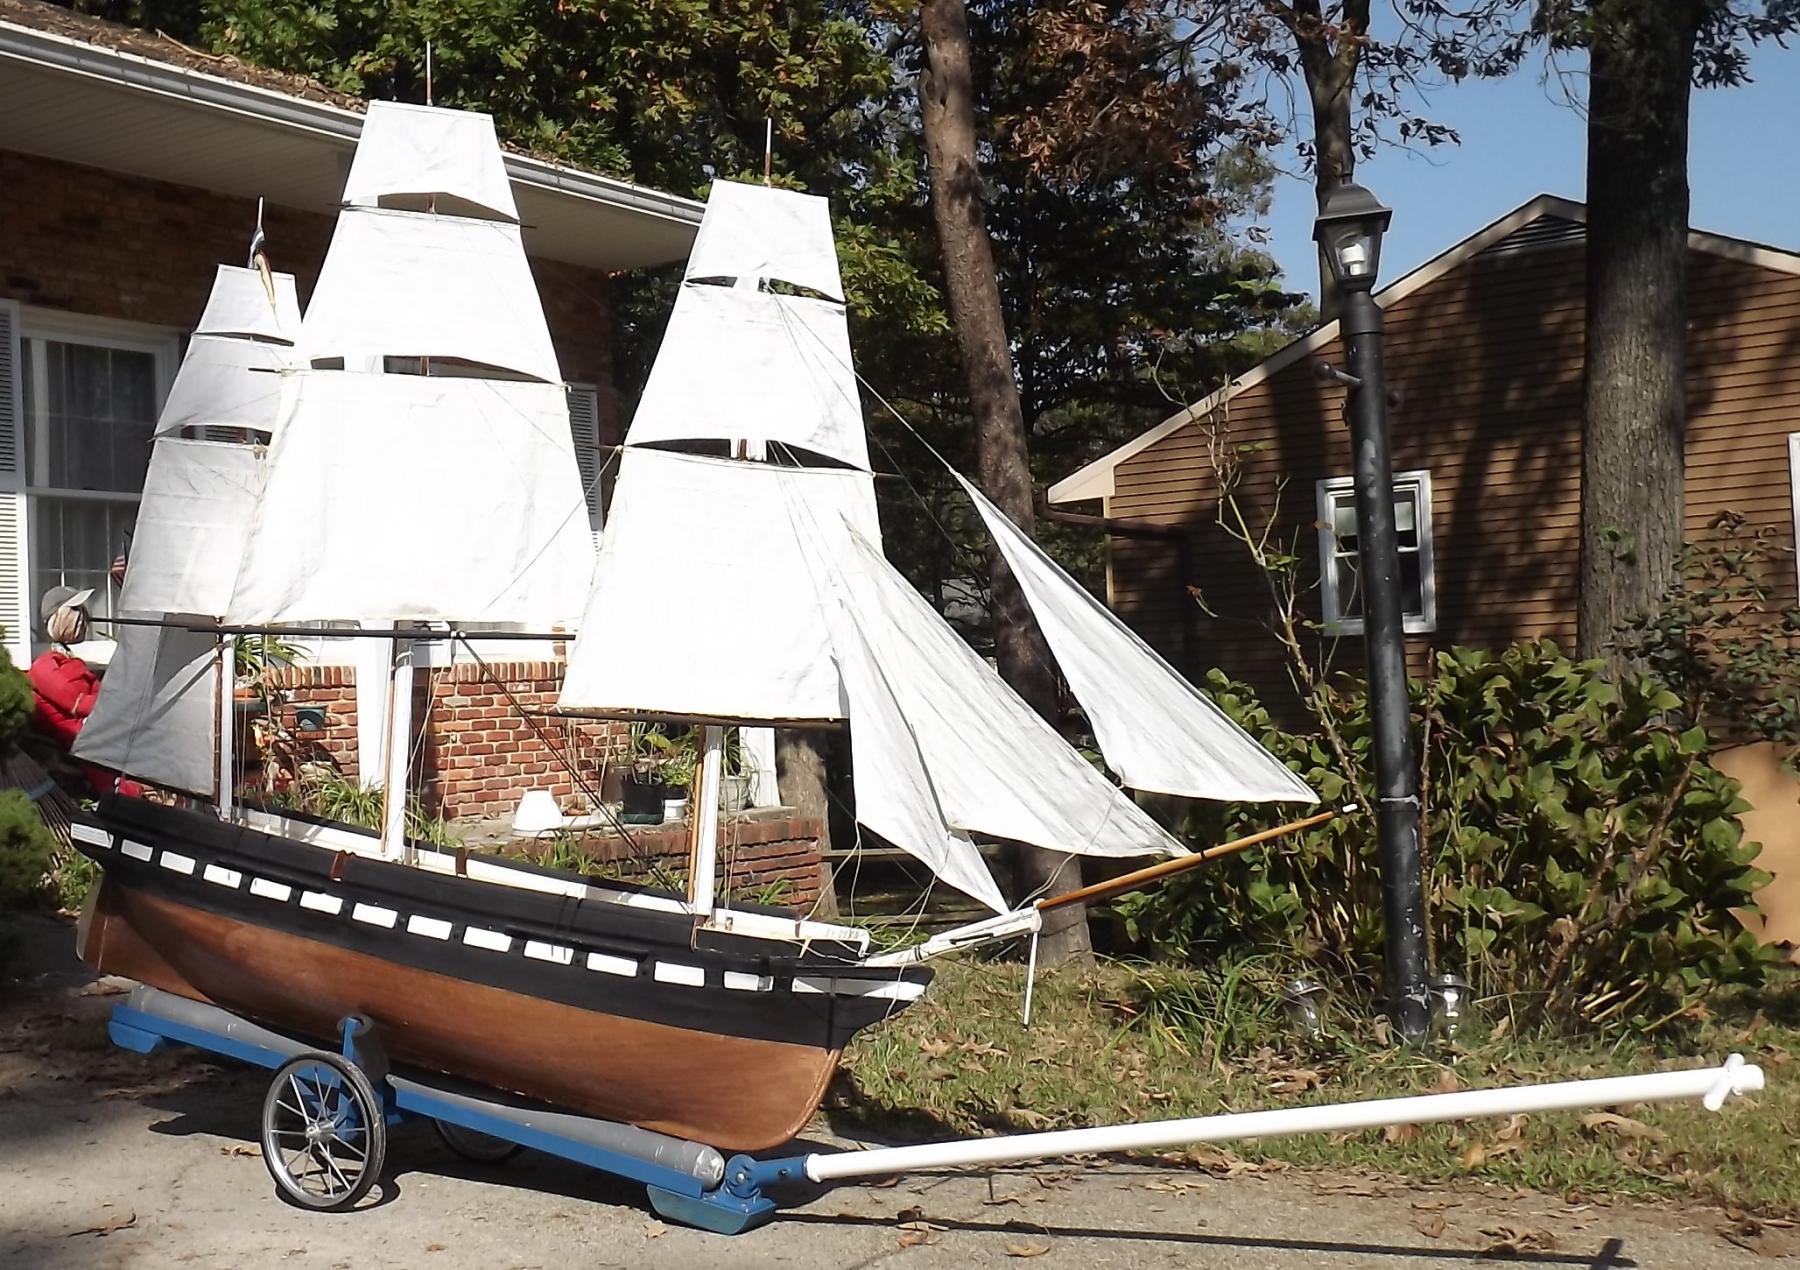
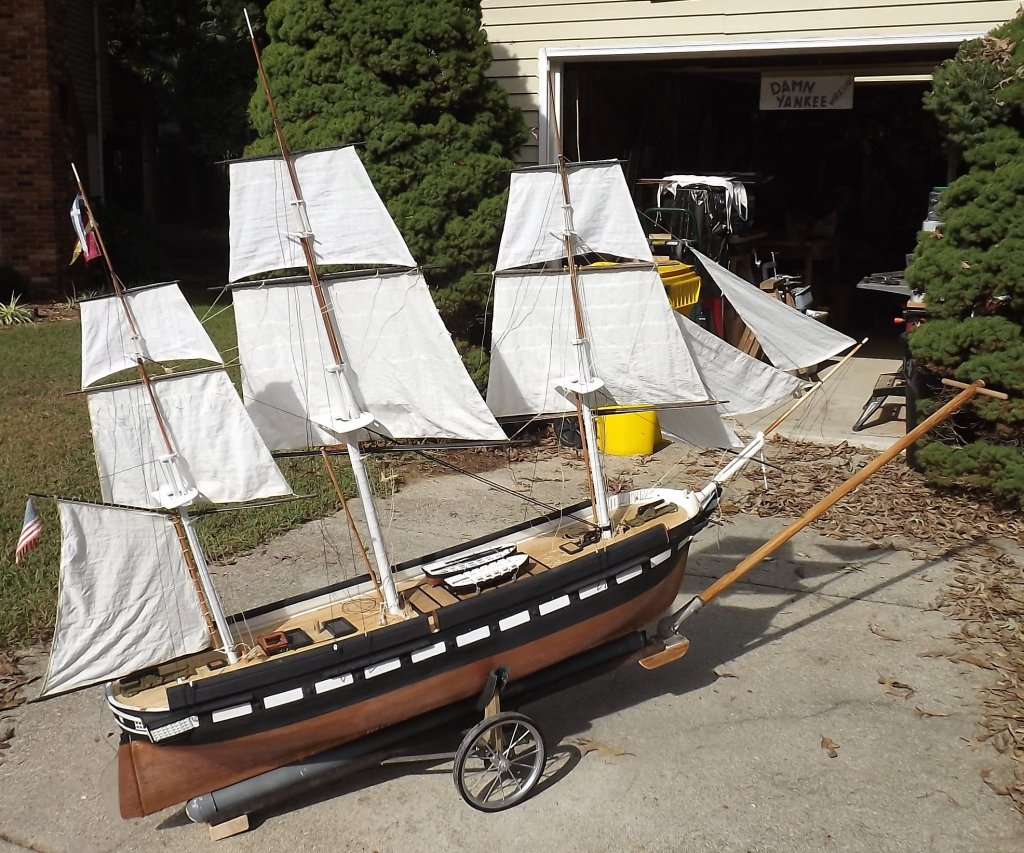
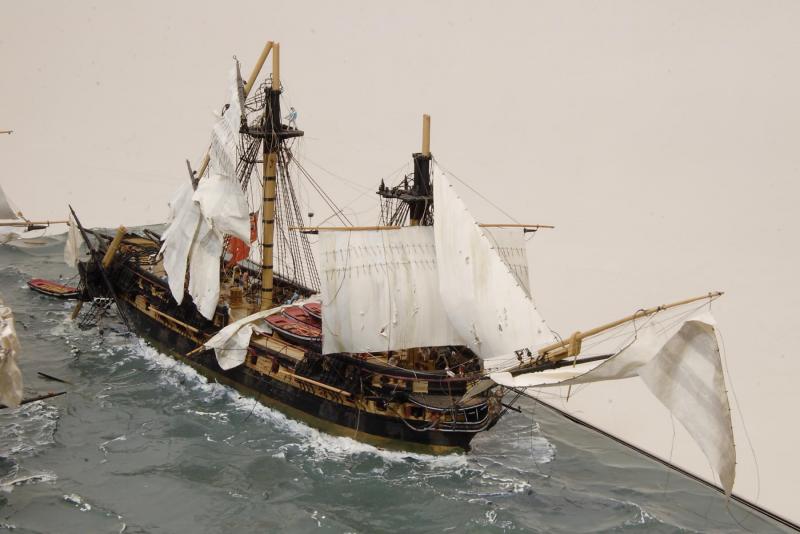
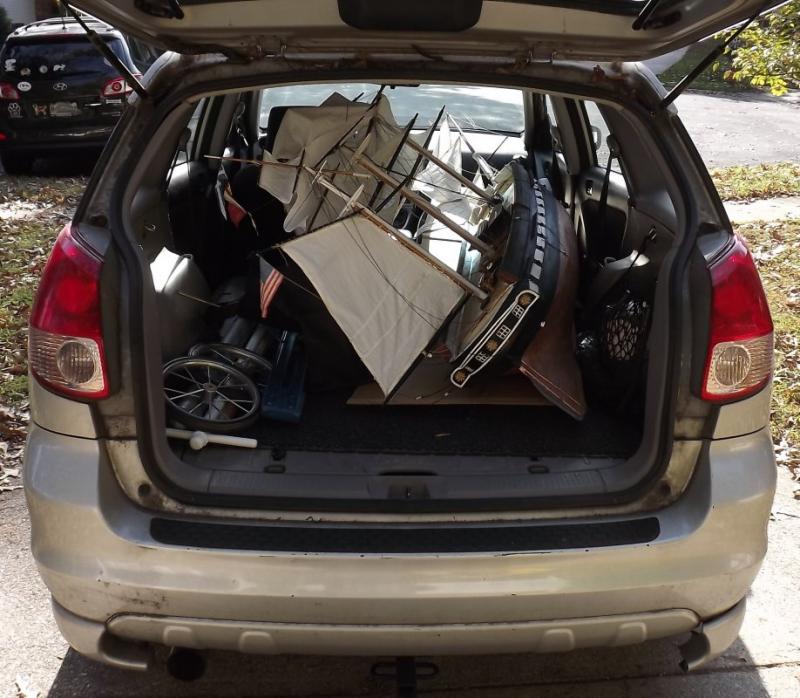
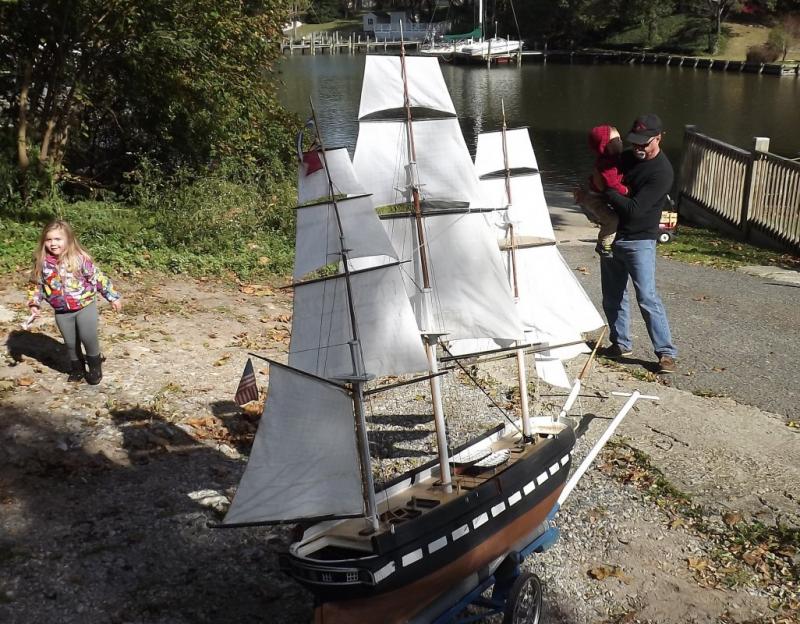
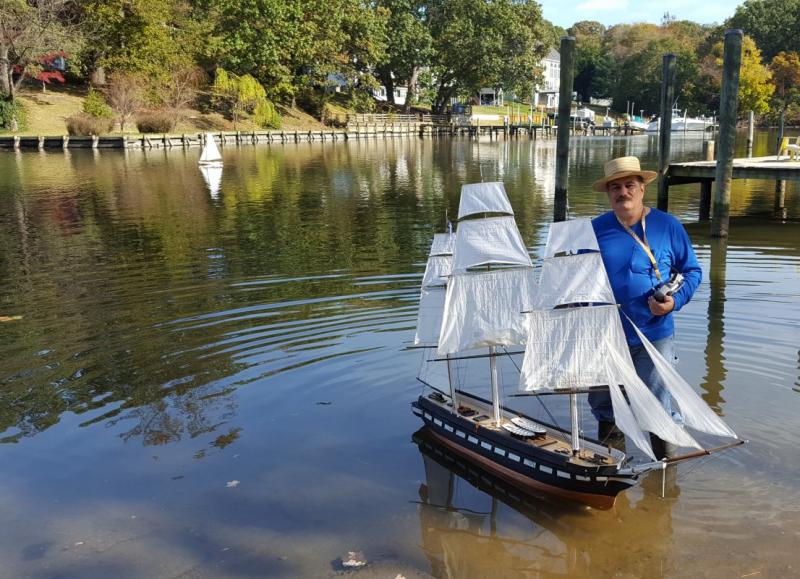
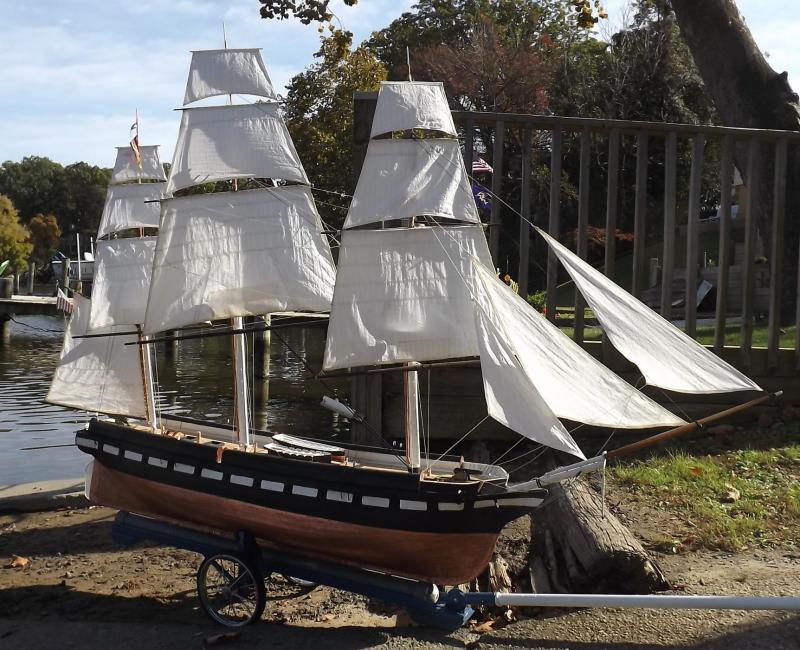
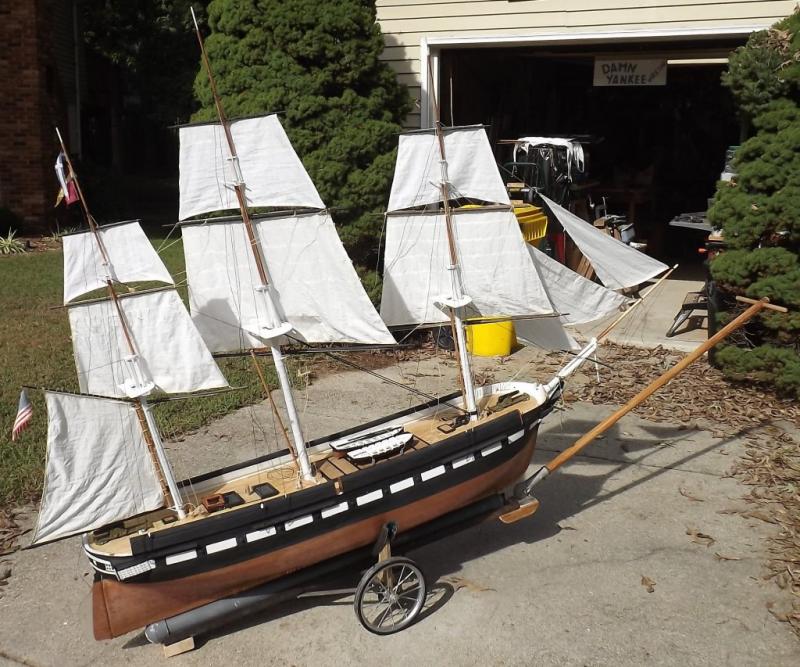
Well, I managed to get a sail in before it got cold. I had a short list of items to "test" with this expedition... Boat will fit in my Toyota Matrix. Launch trailer worked well, needs some tweaks to keep the boat from sliding off the end before you want it too, and there's too much slop in the flag-bracket handle holder. Self-tending bowlines worked well. Bracing only the tops'l yards worked well. Jib-sheeter worked well despite not being adjusted as best it could have been. Finally sailing in open water again where she was intended to be since I started her in 1999. I held my breath every time a gust made her heel. She did great. Remember to bring extra batteries for the camera next time. I brought tools, line, tape, glue, reading-glasses, tripod, and the camera batteries died. Fortunately Captain Rooney was on hand and took some stills and video with his phone, while sailing Son of Erin and keeping an eye on the two grand-kids - but he's a tug captain and used to multi-tasking. Here's some pics from today's outing. and 16 minutes or so of video...


- 553 replies
-
- 11
-
-
- sloop of war
- constellation
- (and 3 more)
-
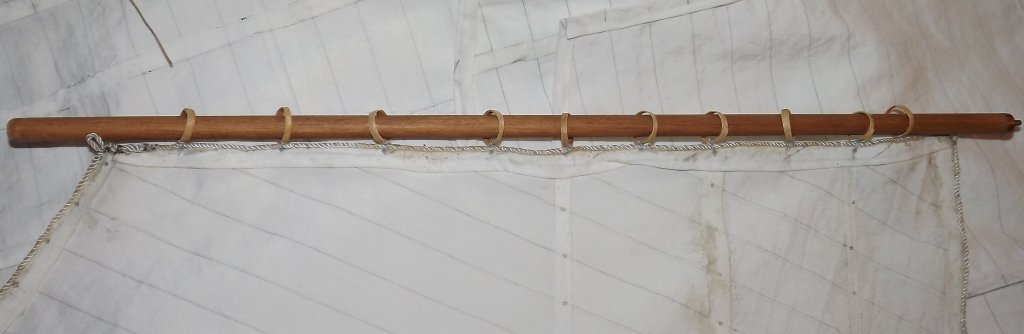
I've seen several servo hacks designed to have them run continuously, such as you might want for a winch. If I did this to a pair of cheap servos, I could Y them off the brace winch servos and they should operate together. This is something I'll experiment with down the road. Today I dunked sticks in ammonia and wrapped them around a tube to make hoops for the two trys'ls. While that dried I went to a friends and helped him eat the crabs he caught this morning. 26 more hoops like these for the driver It's been running in the 80's here for the past week, temperature-wise; that just broke this evening with rain, wind, and dropping down to 60° (f). Ready or not, when the these winds blow out, I'm hauling the boat out and putting her in the water. I want some pictures of her afloat with all her sail's aboard, and I want to test launching and retrieving with the new cart a few times.
- 553 replies
-
- 6
-
-
- sloop of war
- constellation
- (and 3 more)
-
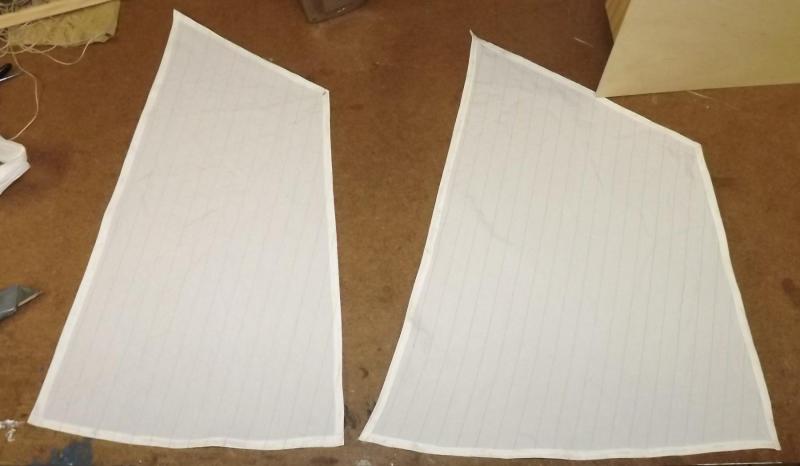
I hung the courses (with clothespins) after hemming them. While in hemming mode, I did the last two sails in her suit; the main and fore trys'ls. I burned all the grommets in with a soldering iron since this pic was taken. These sails (courses and trys'ls) will be brailed up as I don't have a good way to control them via RC. The courses I hope to figure out eventually, but the trys'ls won't be happening. I'll shake them out for static displays. I want to use the tacks to haul the clews forward as the best control when close-hauled. The best way to do that is with a trolley system, like a clothesline, with a winch running a continuous loop and the tacks attached to that loop. The sheets just run through the model from one clew to the other. There's a couple of problems here. The main and fore sails are controlled separately, so I'd need TWO of these set-ups inside the model, which accents the second problem; space (room, accessibility through hatches, and the spider's web of control lines already in place. A more compact solution would be a "linear actuator" or basically a threaded rod spun by a motor with the tacks attached to a shuttle that travels on the rod. Either way, the trolleys or actuators would have to be as long as at least half the length of tack I need to haul, which would probably be around 6 to 10 inches. The real thing here is, besides adding two more electric motors to the load and dealing with directional control, etc; syncing it with the winches that control the braces for the same mast. Another much simpler way of dealing with the courses, is the "Bentinck-boom," which is simply a yard at the bottom of the sail. The foot of the courses gets pulled around like the rest of the yards not directly controlled. Rather than an actual yard, it would be a rod set into the foot of the sail to have the same effect. This is ok if it's in a pocket and I can remove it easily to clew up the sail when I want to. Another version of this is to use stiff wire or rod made to appear like the clew-lines, that hold out the clews as the boom would. This seems it would be more difficult to make removable when I want clew up the sail than the boom version would. Soooooooo.... I guess I'll wind up going with the "Bentinck-boom" rod in the foot of the sail idea, but I'm not going to worry about it until I get the rope-walk operating and can get down to properly rigging this beast.

- 553 replies
-
- 5
-
-
- sloop of war
- constellation
- (and 3 more)
-
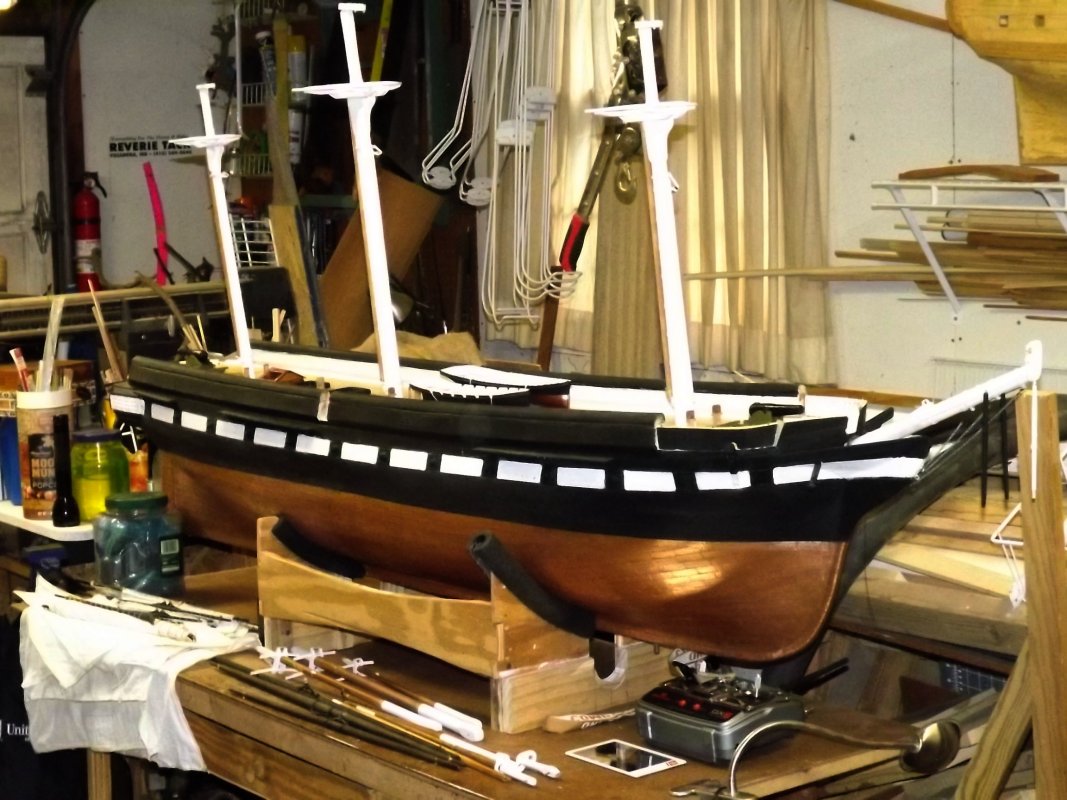
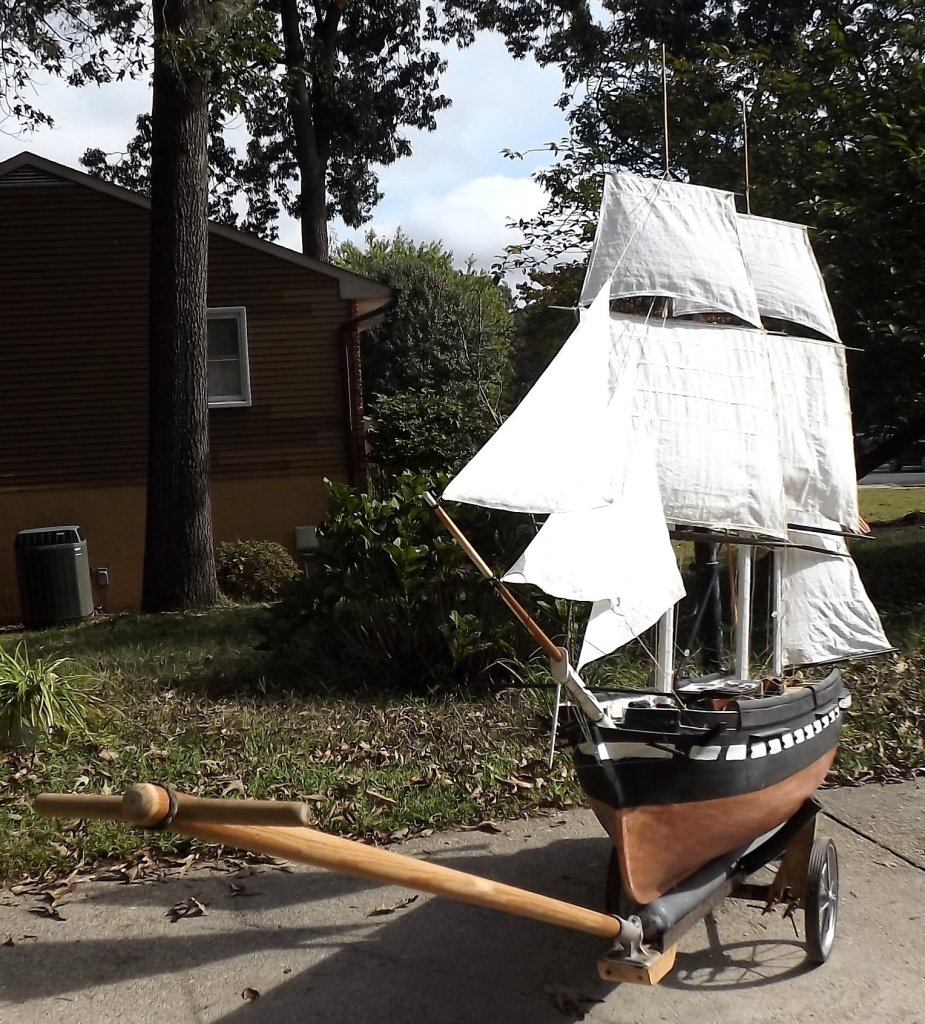
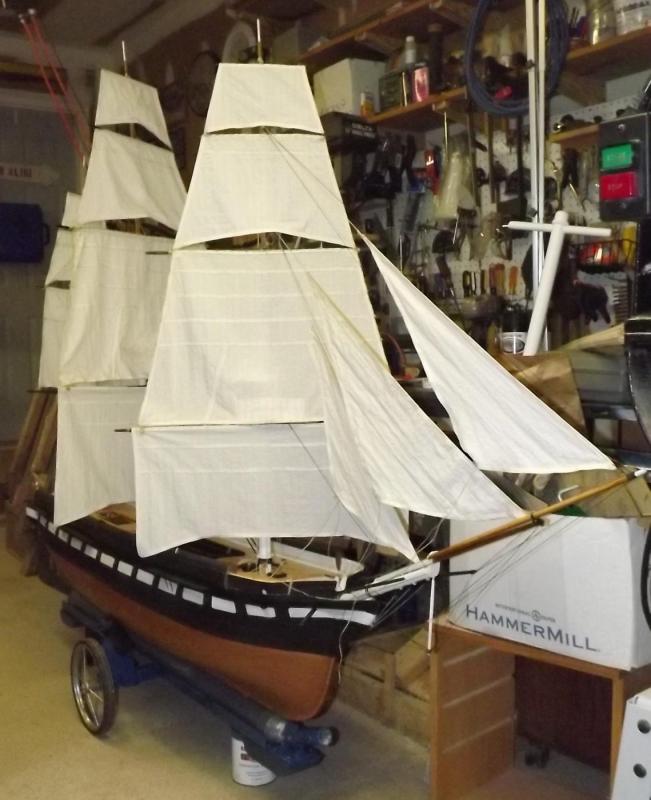
Put the boat back on the cart and added the royals. Still working on controls before I take her down to the creek and see if all this effort was worth the effort.


- 553 replies
-
- 9
-
-
- sloop of war
- constellation
- (and 3 more)
-
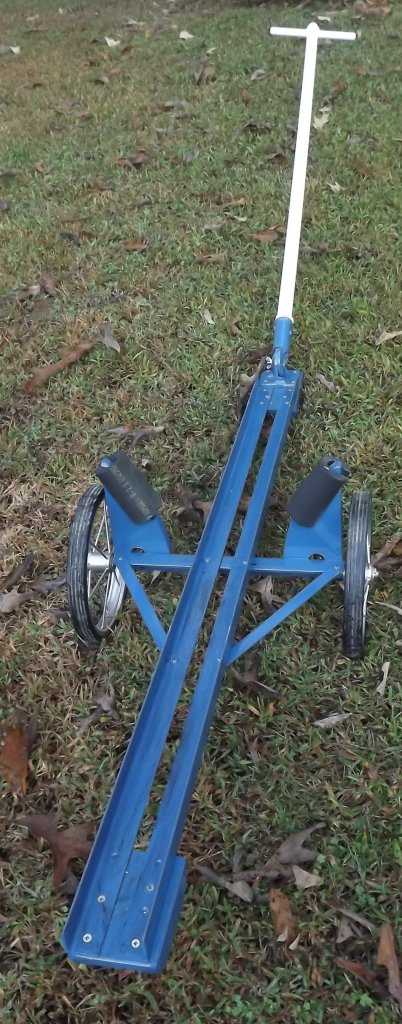
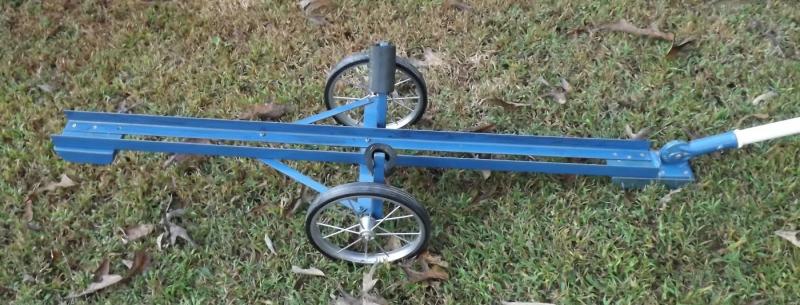
I had royal blue paint, so much for light blue. I opted for white on the handle as a safety thing; visibility and all that.

- 553 replies
-
- 5
-
-
- sloop of war
- constellation
- (and 3 more)
-
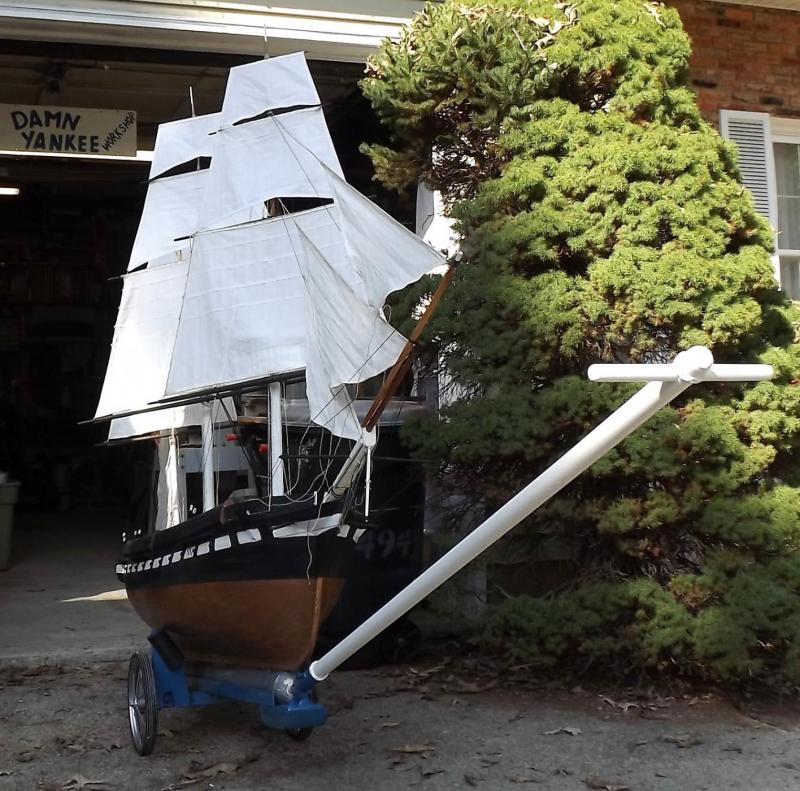
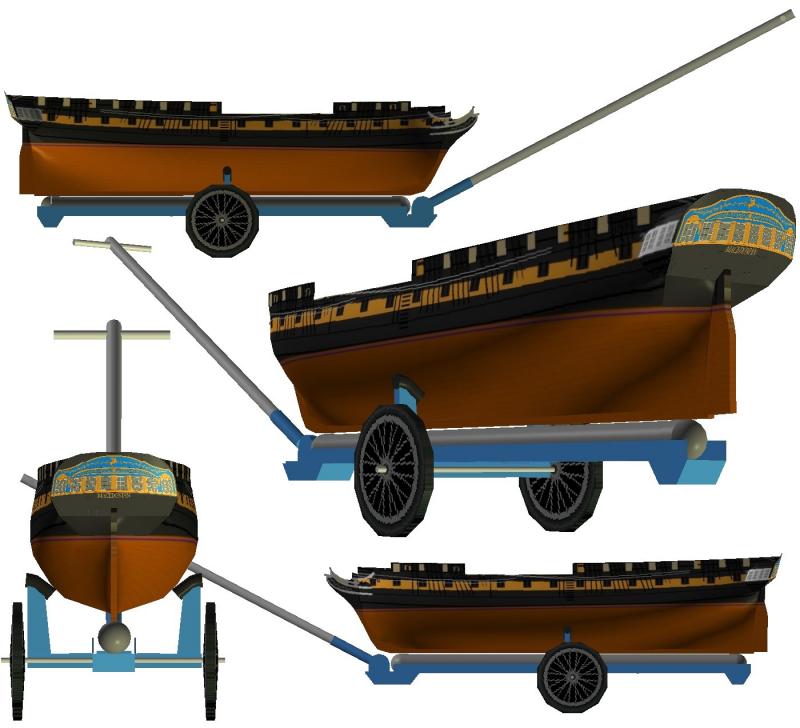
The cart I built in Constellation's logs will also be used for Macedonian, here's a little artist's rendering...
- 97 replies
-
- 7
-
-
- macedonian
- frigate
- (and 2 more)
-
I was thinking I could mount a caster on the back, connect it to the rudder, and sail her down the street.
- 553 replies
-
- 3
-
-
- sloop of war
- constellation
- (and 3 more)
-
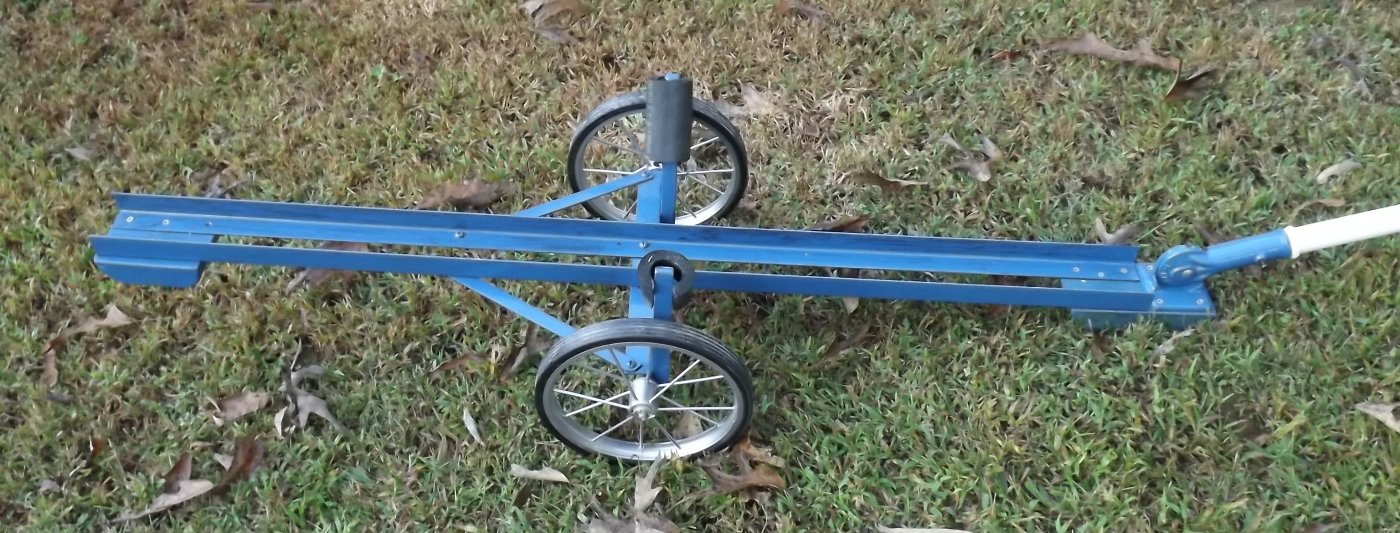
Still have to finish the side supports. the first attempt is mounted with C-clamps here - but this looks like it's gonna work.


- 553 replies
-
- 5
-
-
- sloop of war
- constellation
- (and 3 more)