JerryTodd
-
Posts
879 -
Joined
-
Last visited
Content Type
Profiles
Forums
Gallery
Events
Everything posted by JerryTodd
-
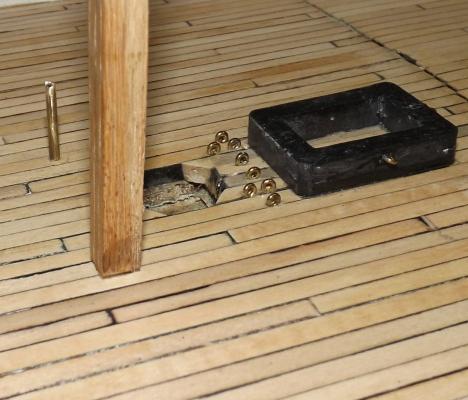
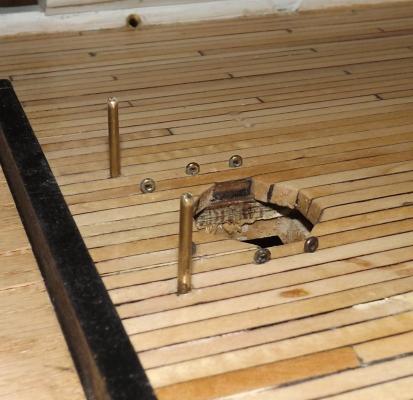
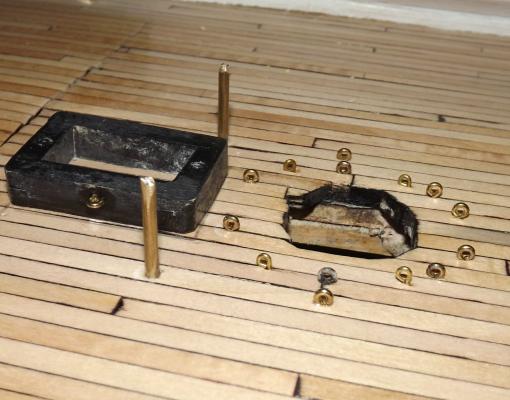
 Hammocks were covered with tarps probably as long as there were hammock nettings to store them in. Constellation's hammock cranes were originally meant to be covered with "weather cloths" ie: painted canvas tarpaulins outboard just as the original six frigate were originally designed with open bulwarks on their spar decks. I'm not sure why the hammocks weren't covered in those images, and I'm not sure yet how I'm going to deal with it. I kind of like the hammocks exposed, so I experimented with some hammock sized bits of cloth rolled and bent into a yoke. They seemed awfully small and lead me to think they were put in in two rows inboard and outboard. I could make a cap piece with the hammocks all protruding out of the top and cast several in resin. I think that would bend and curve enough to take the shape of the rails, save a great deal of work, and be a little tougher than gluing a bunch of bumps on the rail cap piece. Anyway.... The fixed bulwarks forward are shorter than they ought to be, so I started building them up. First I epoxied a sheet of 1/16" bass to the inside. When that was set-up I added another layer outboard and on top of the existing bulwark. Once this sets overnight I'll add more layer to get it to the correct thickness, then trim it to size and shape. I began installing eye's in the deck at the base of the masts according to the 1888 spar deck plan. Most of these are brass screw-eyes, but the two that will anchor the main stay are eye-spikes set into the deck at an angle roughly 90° to the stay. The forward and aft hatches also got three eyes each as shown in the plan. The images are: mizzen, main, and fore and forward is to the left in each. The brass rods standing nearby are for the bitts a rough-out version can be seen in the mizzen image.
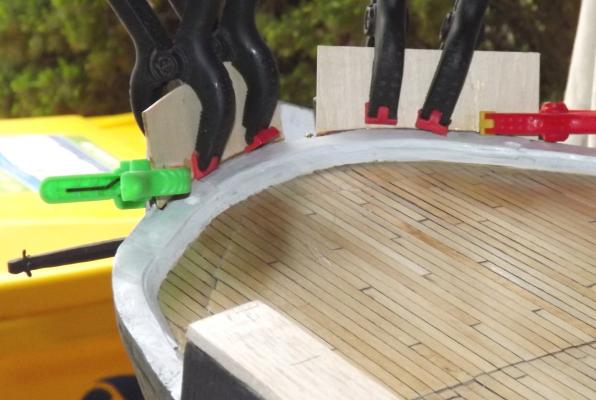

- 553 replies
-
- 5
-

-
- sloop of war
- constellation
- (and 3 more)
-
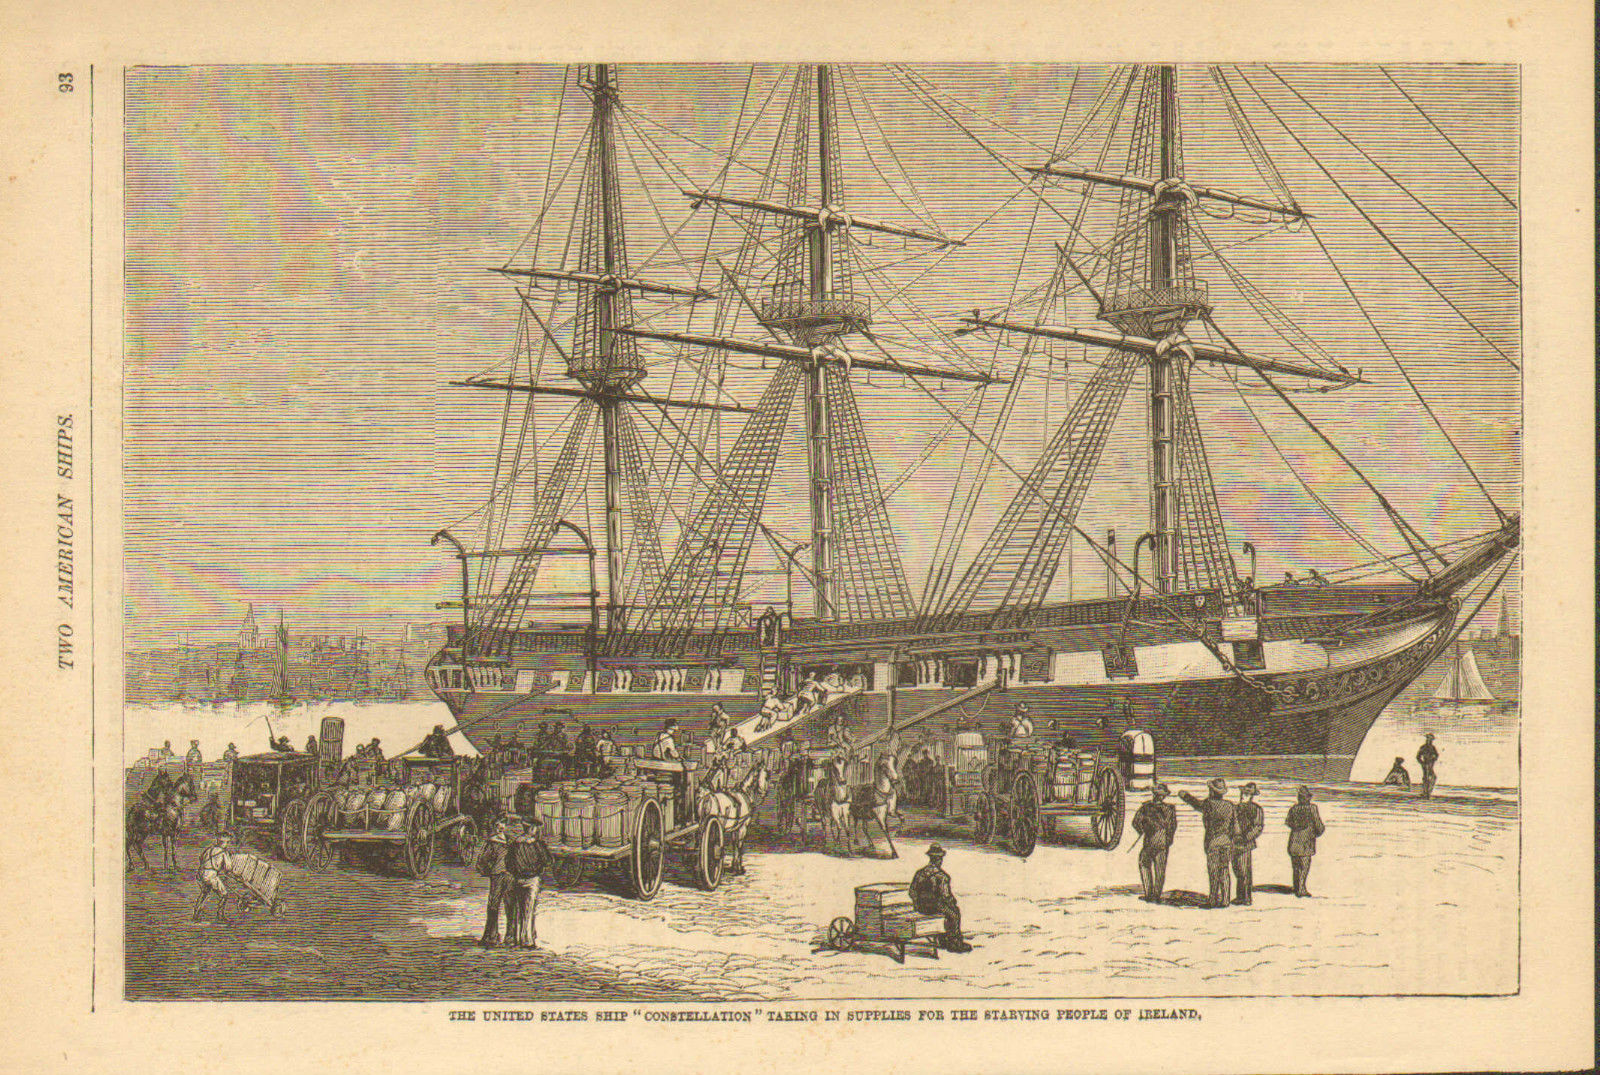
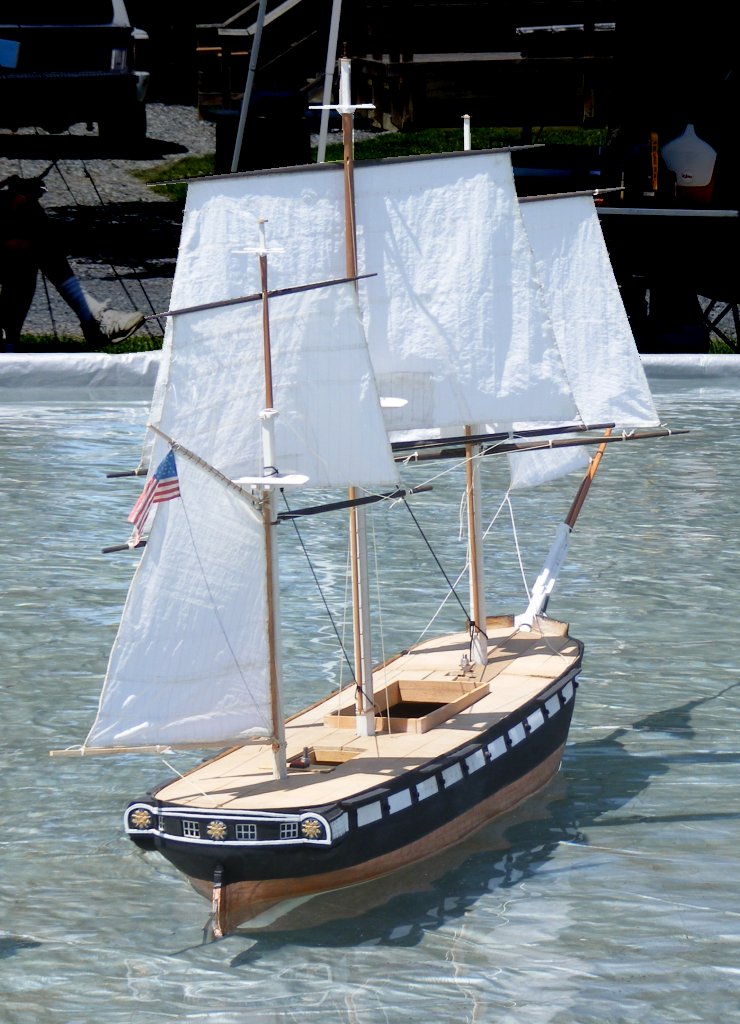
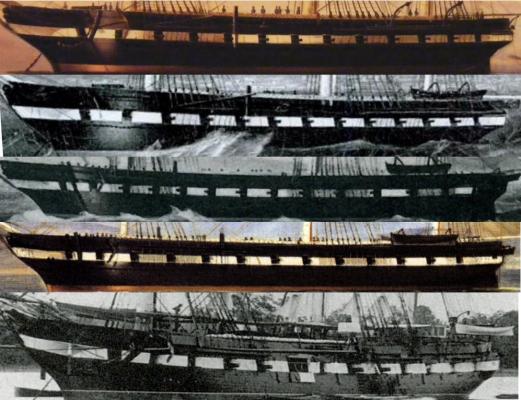
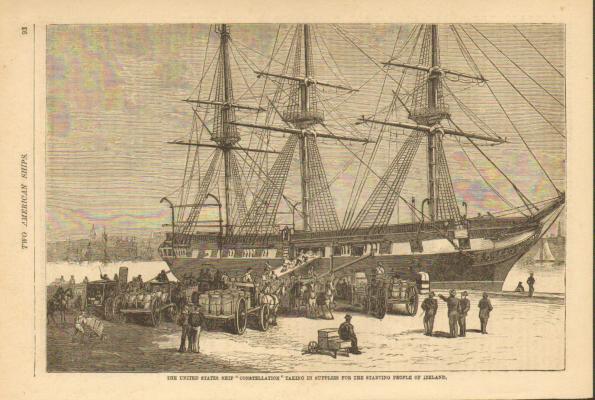
So, as I often do with this model, I've run into something of a dilemma. Looking through my images with the intent of figuring out what color the tarps over the hammocks should be; black or white; I found no tarps. The image shows the ship at various points in time pertinent to my depiction of her. Top to bottom they are, chronologically: Naples 1856 by deSimone (The painting my model is based on primarily) Naples 1856ish maybe by Roux - often misIDed as the Levant (I leveled and flipped the image to correspond to the others) Naples 1856ish another deSimone? Naples 1862 by deSimone Chesapeake 1871 earliest known photo In each of these images there are no coverings over the hammocks. In #3 and #4 she is underway, though in the harbor; in the other 3 she's at anchor. Interestingly, the hammocks lean different ways in the images (remember #2 is mirrored). I'm not aware of any other contemporary images of the ship other than an 1859 engraving where she's in dry-dock with nothing in the hammock rails, and an 1864 sketch, also in dry-dock. At any rate, I suspected the tarps were black and now I'm thinking I need to show uncovered rolled hammocks instead. PS: There is one more contemporary image that depicts the ship after 1871. There are no tarps, or even hammocks here.
- 553 replies
-
- 3
-
-
- sloop of war
- constellation
- (and 3 more)
-
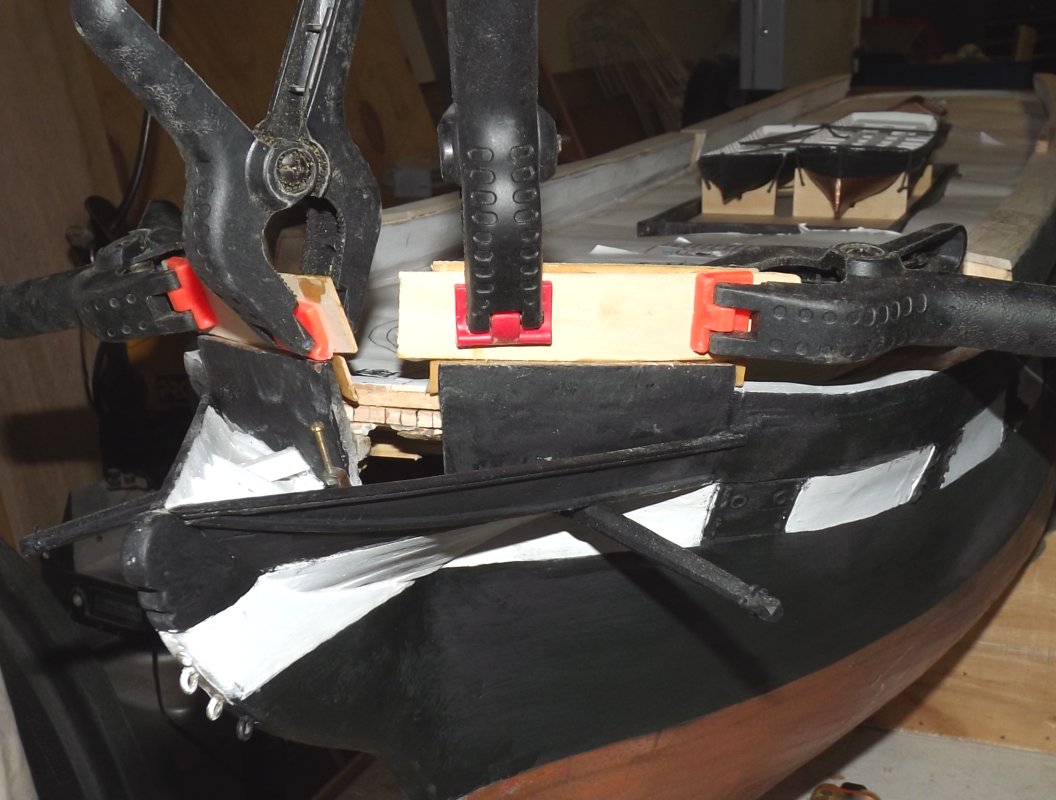
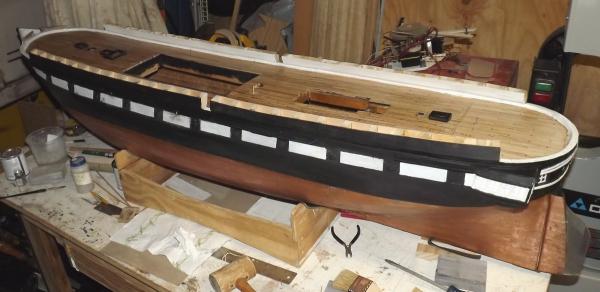
These hammock rails require a lot of work! Yesterday I added the mainsheet fairleads through them, and polyurethaned inside each compartment. I also extended the forward channels a bit. I made them too narrow years ago when I put them on, they're the right depth now. Today I added blocking to give the covers more glue surface and solidify the panels between the blocks. The first layer of balsa went on all around, capping off the hammock rails at last. And for kicks I sanded and polyed the deck again.


- 553 replies
-
- 7
-
-
- sloop of war
- constellation
- (and 3 more)
-
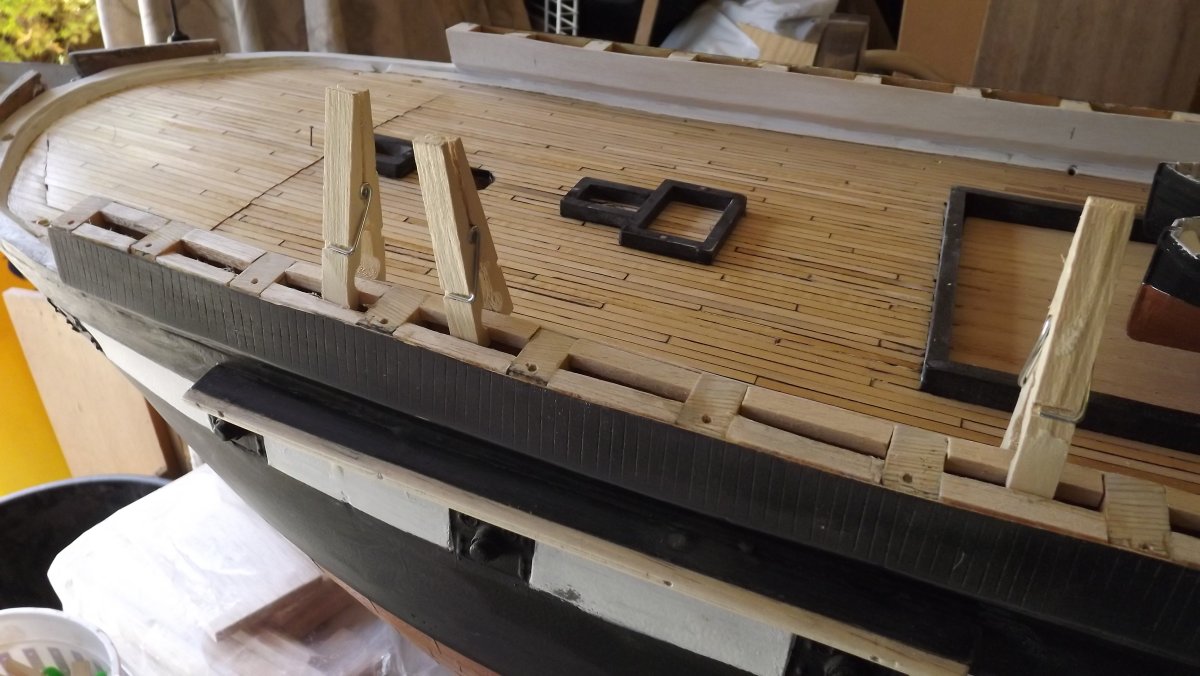
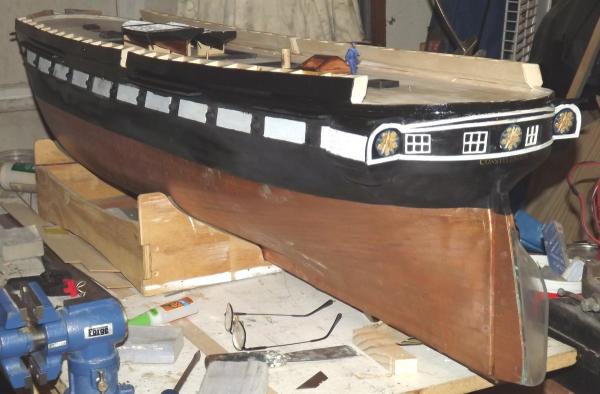
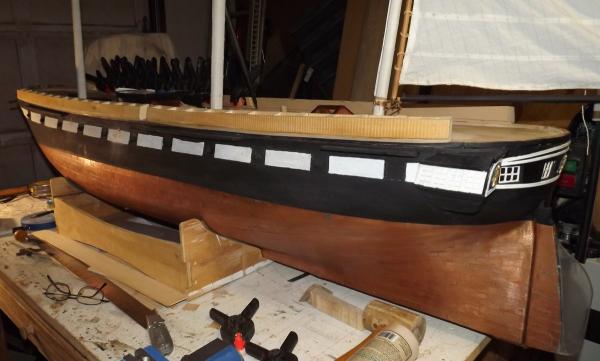
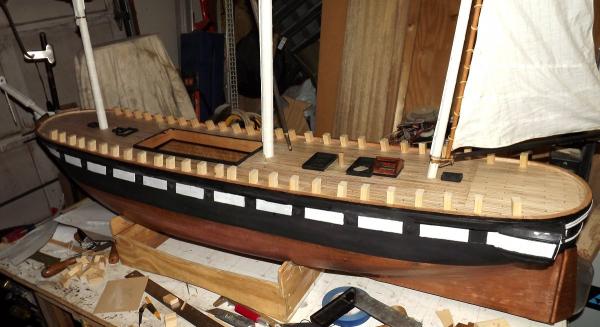
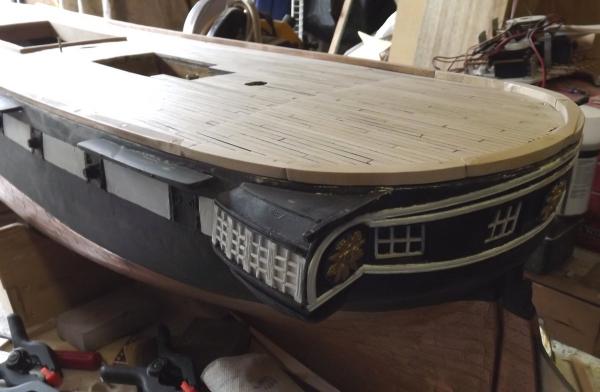
So, I gave the deck a sanding and a coat of oil based poly. This reacted with the marker ink in the deck seams making them bleed a bit. It did give the deck a nice color though. When the poly dried I gave the inboard side a coat of white, including the waterways.

- 553 replies
-
- 6
-
-
- sloop of war
- constellation
- (and 3 more)
-
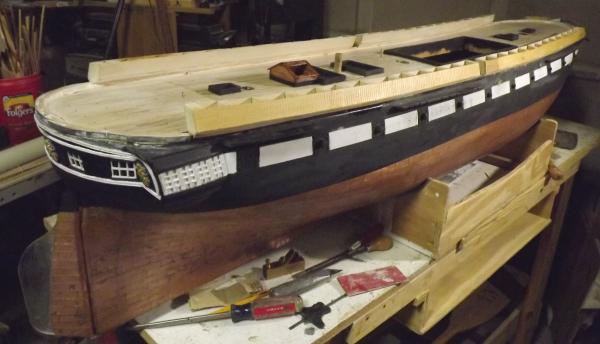
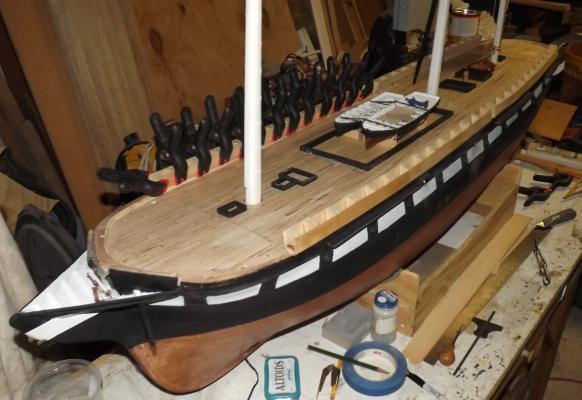
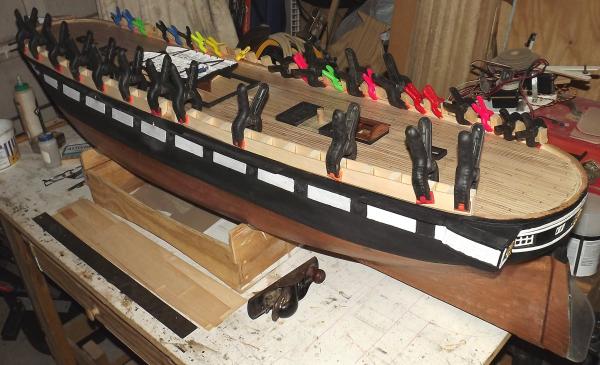
Break time! All the hammock rails are installed, puttied, sanded, scribed, and even given a coat of paint.
- 553 replies
-
- 4
-
-
- sloop of war
- constellation
- (and 3 more)
-
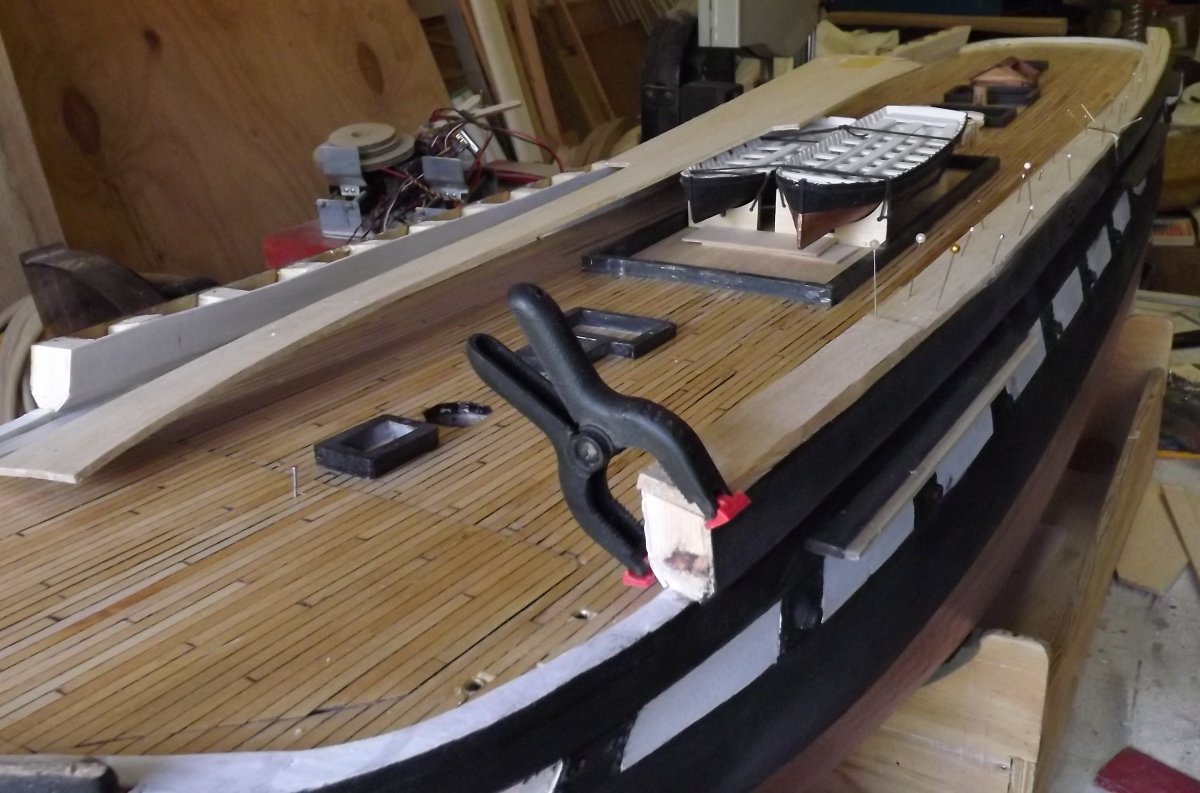
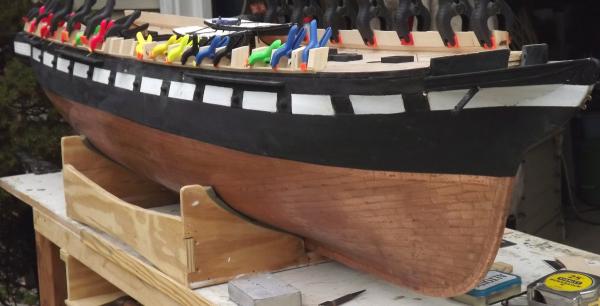
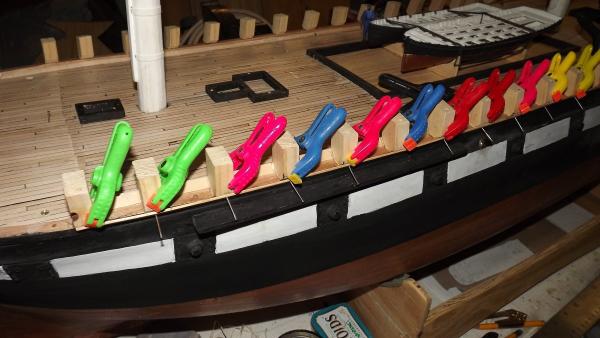
Still three weeks to water time Bob. I hope to get some very provocative poses then, and some video too. Today though, I plugged along on the hammock rails. I'm going ahead with closing up inboard and outboard sides, instead of leaving them open to paint inside. The uncut panels are clamped in place and marked inside. Then they're cut, trimmed, beveled, and glued in place. I put a coat of poly on the outside to harden the wood a little and scribed the vertical staving on. The port side is all together, trimmed, and scribed. There's some little gaps to close up, then I'll actually poly rather than paint the insides. Here the starboard outboard panel just got glued on.

- 553 replies
-
- 6
-
-
- sloop of war
- constellation
- (and 3 more)
-
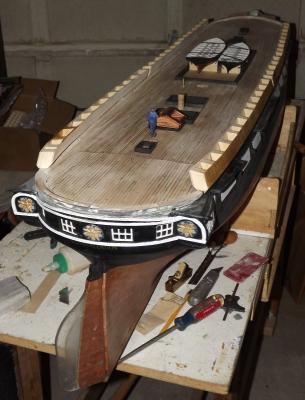
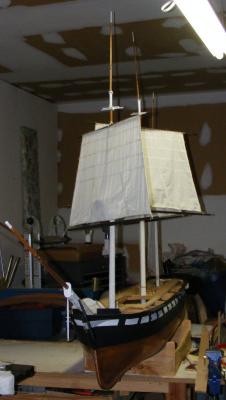
I've heard Lenthall took some pointers from the merchant ship builders who had been building world class ships for a decade by 1854. When Stad Amsterdam was in town I could almost see them side-by-side and see some of that clipper ship influence in Constellation. A couple more sexy poses for ye


- 553 replies
-
- 6
-
-
- sloop of war
- constellation
- (and 3 more)
-
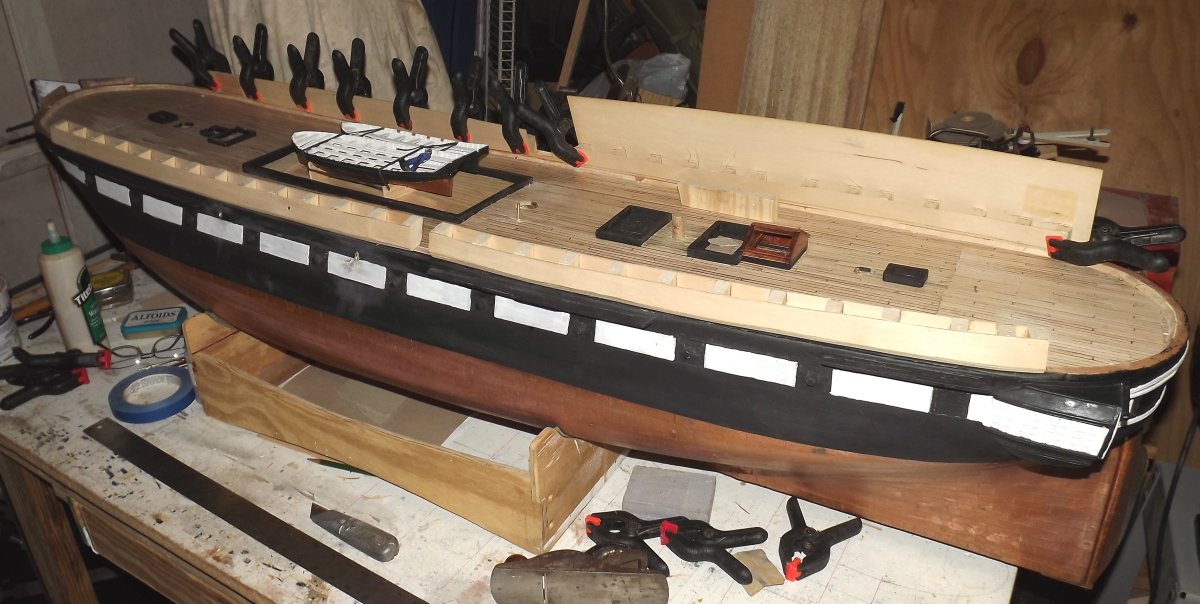
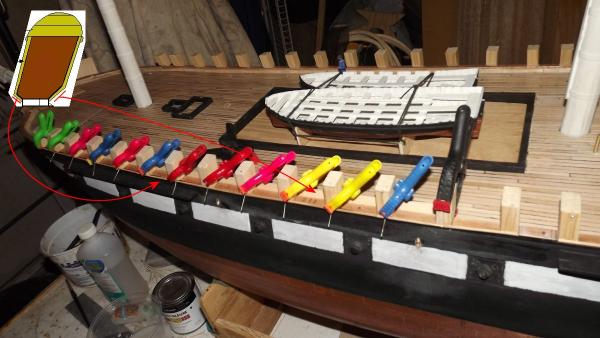
Continued on the hammock rails. Would have gotten more done, but I only have so many clamps that will work. All the lower panels are in, the inboard upper panels on the port side, and the outboard port side ones are fitted, ready to install.
- 553 replies
-
- 4
-
-
- sloop of war
- constellation
- (and 3 more)
-
Kit-bashed is better said to use a kit as a base, using other kits parts, not kits parts etc..to make a model other than that the kit was meant to be. For instance, I could bash the Revell Arizona kit into the Arizona as she appeared in the photos when the pres was aboard; as she appeared when built with cage masts, etc; as she appeared on 12/7/41, even as she appears now, at the bottom of Pearl Harbor. All those kit-bashings are still making the kit's original subject, Arizona, but different versions that that kit does not allow for out-of-the-box.
-
Next topic: "Museum Quality"
-
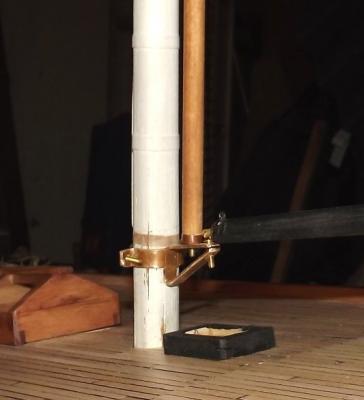
Took off the clamps this morning. The tube is the guide that routes the fores'l sheet below. All this will get painted inside before I put on the outboard panel.
- 553 replies
-
- 5
-
-
- sloop of war
- constellation
- (and 3 more)
-
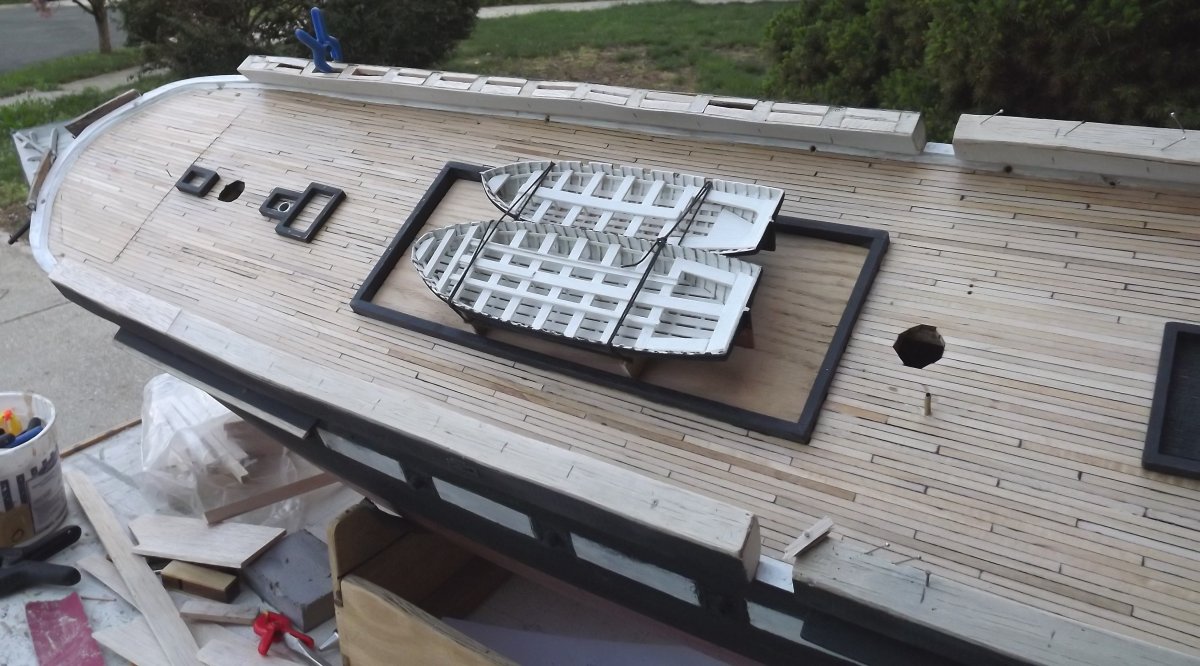
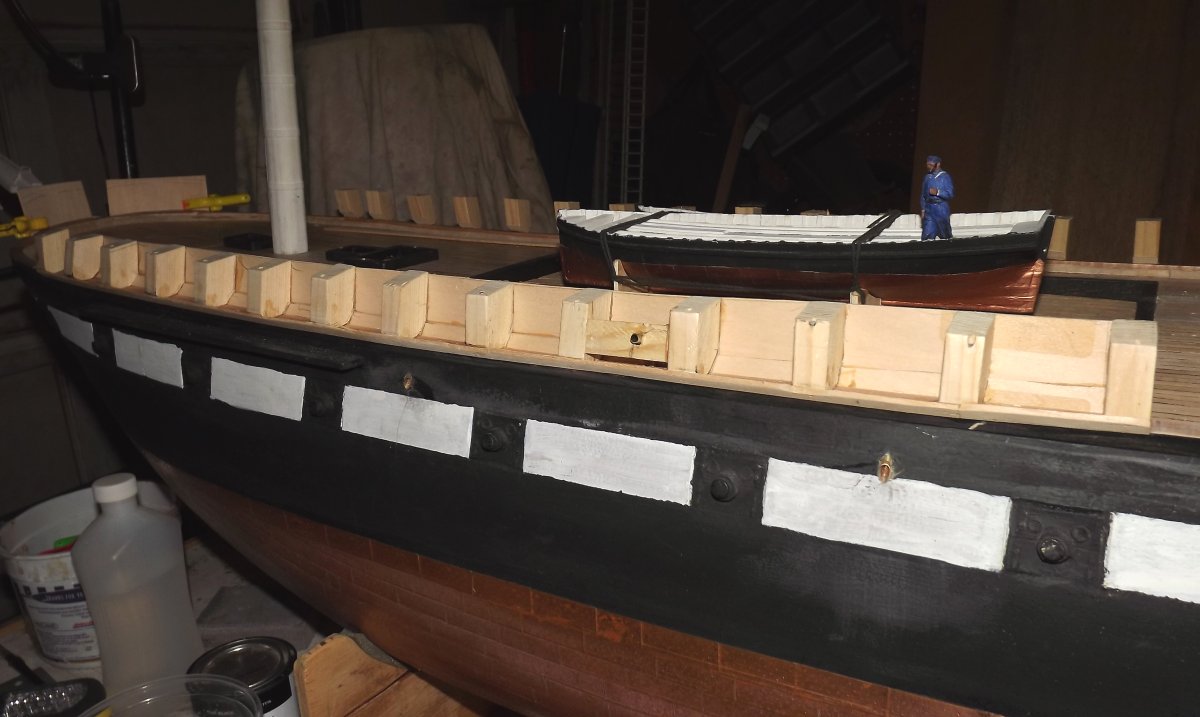
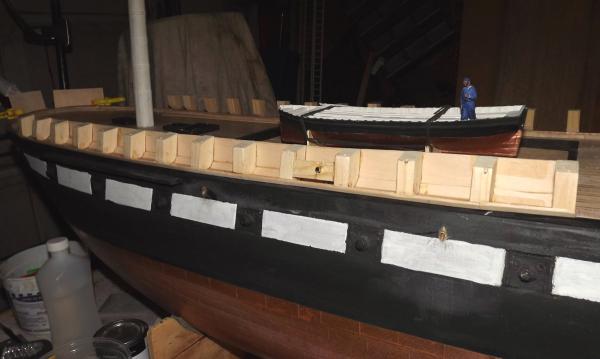
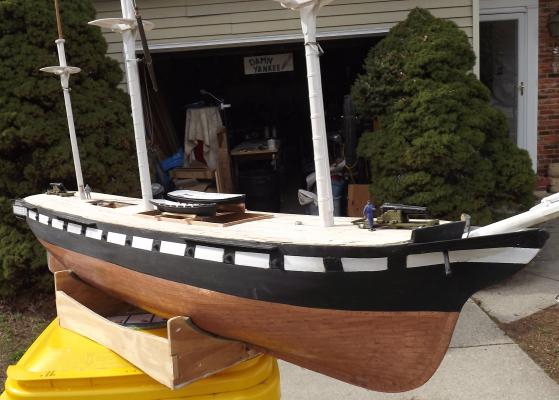
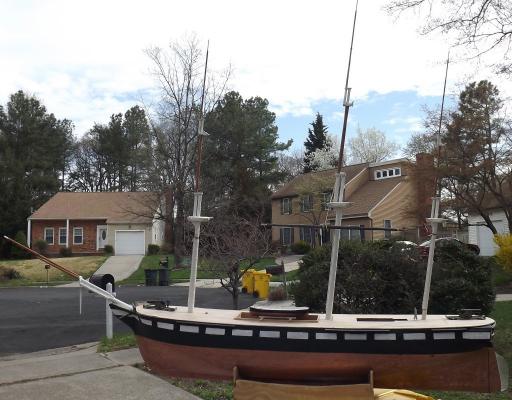
I don't think I'll have grating figured out in time for her next sail at the N.S. Savannah on May 17th, so I made a temporary cover for the main hatch yesterday, and today made chocks to hold the boats. This is just so she'll look a little better on display. I began installing the covering boards on the hammock rails, starting with the lower ones first, inboard and outboard. Once these are set, I'll install the next panel up inboard. I need to put some blocking and brass tubing in where the through blocks for the fore and main sheets come through the bulwark. I'll also paint the insides before putting the outboard cover on. They look a bit like feed troughs with stalls for farm animals at the moment.
- 553 replies
-
- 4
-
-
- sloop of war
- constellation
- (and 3 more)
-
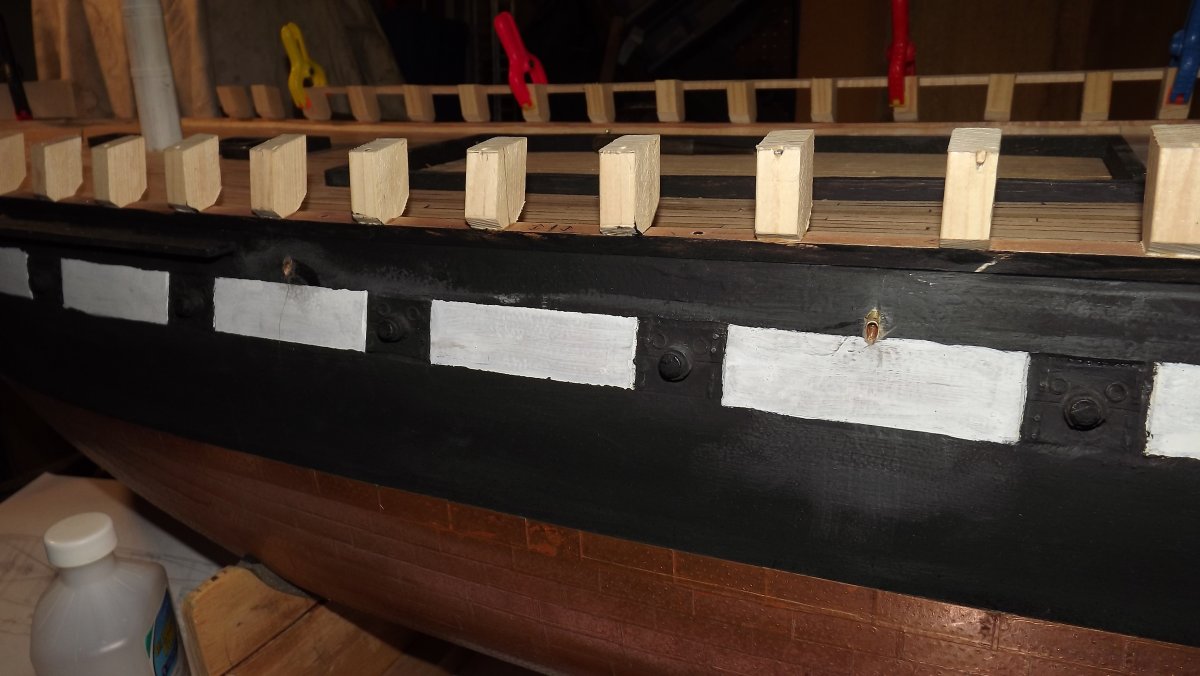
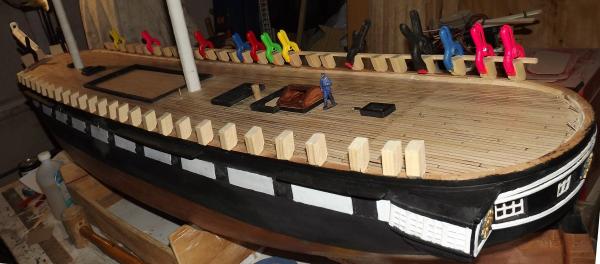
Waterways and scuppers installed and all the bulwark blocks in place


- 553 replies
-
- 4
-
-
- sloop of war
- constellation
- (and 3 more)
-
3D printing tests (Form1+)
JerryTodd replied to iMack's topic in CAD and 3D Modelling/Drafting Plans with Software
Ye know while you're melting all that plastic you could be making a Macedonian figurehead in 1:36 scale. -
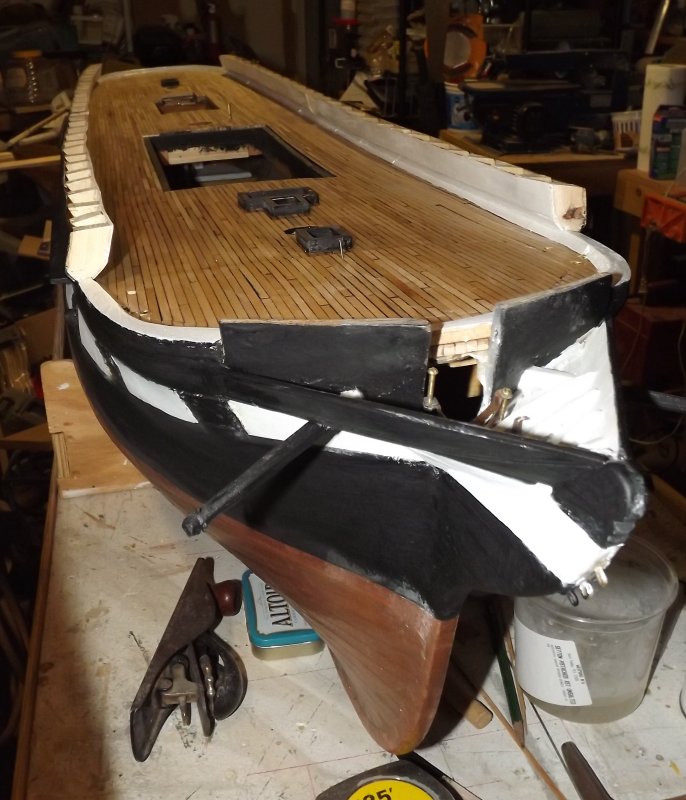
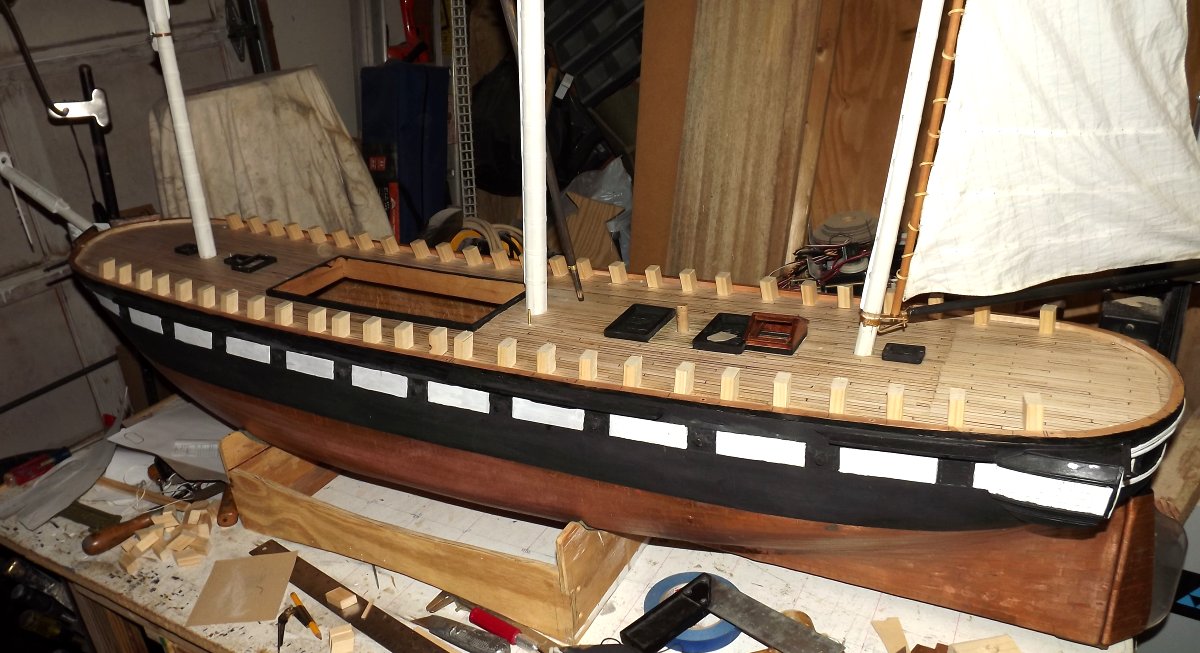
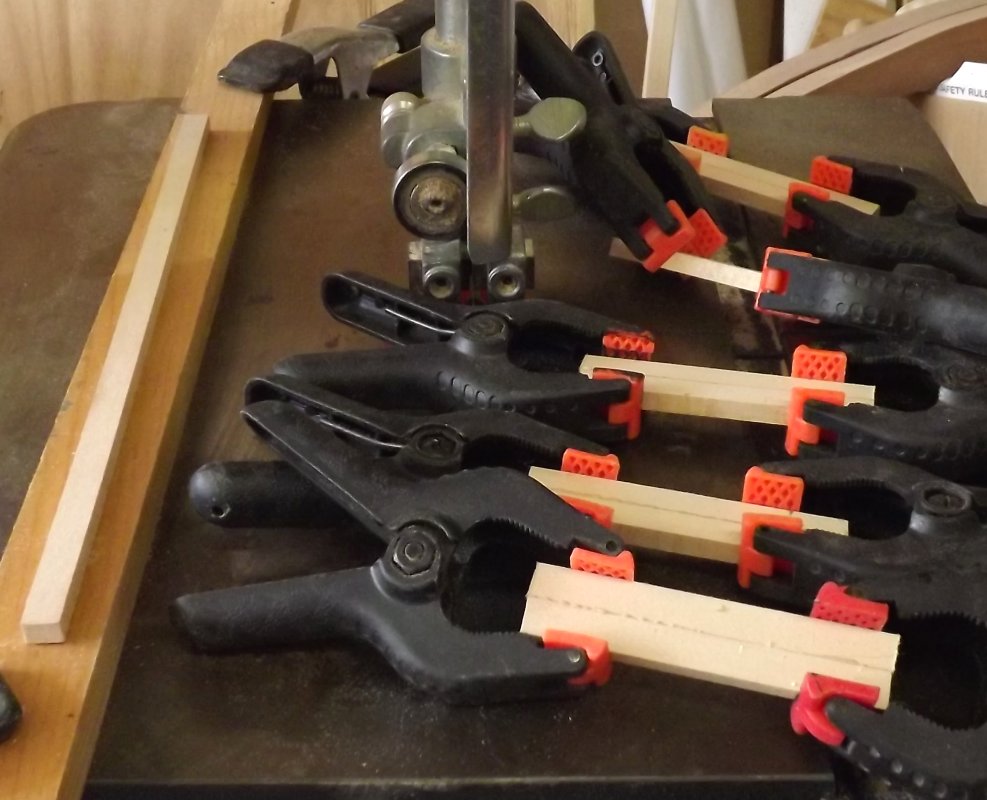
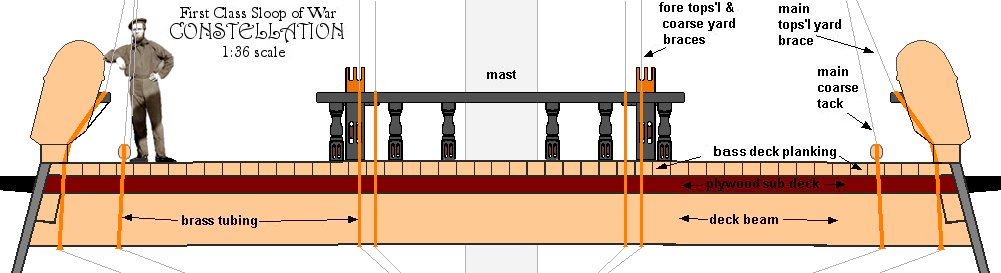
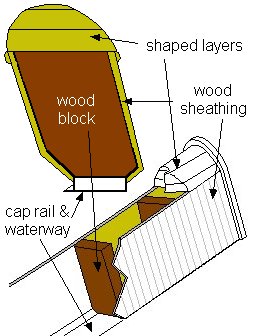
The cap rail at the bow was installed: And I started making the blocks that will make the bulwarks. Here they're just sitting on the deck near where they'll be installed, and a sketch of how they work:
- 553 replies
-
- 5
-
-
- sloop of war
- constellation
- (and 3 more)
-
Only got a couple of hours in the shop today and managed to turn out this little item:
- 553 replies
-
- 6
-
-
- sloop of war
- constellation
- (and 3 more)
-
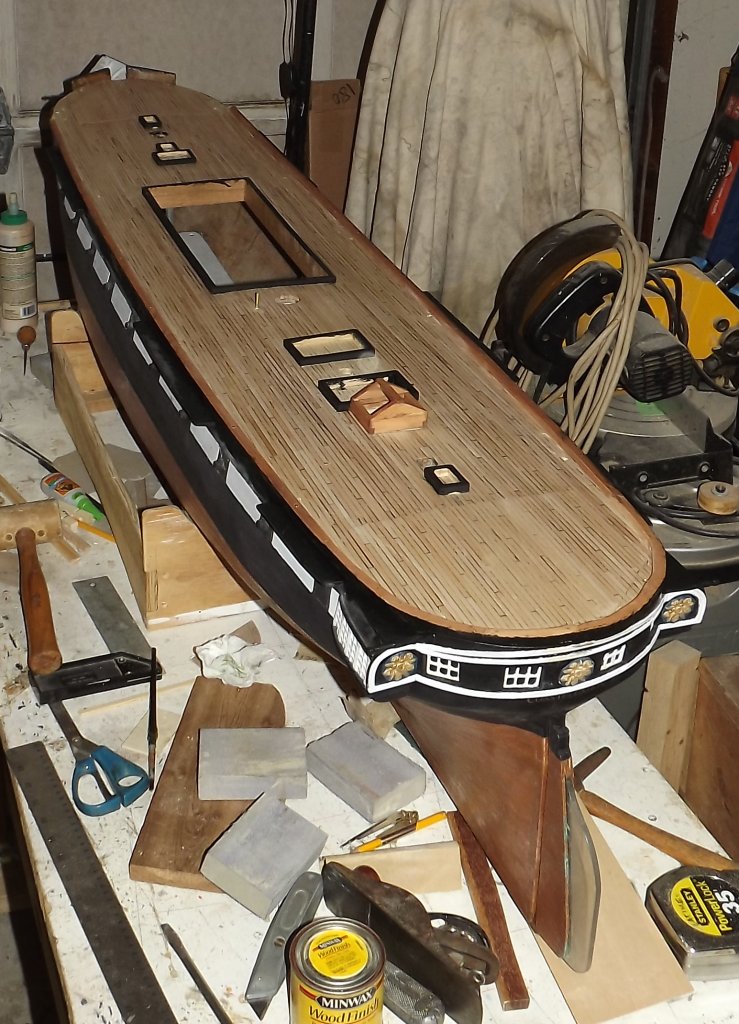
Ah spring time. The air is full of fumes from glue, paint, and mineral spirits.... not to mention the neighbor's lovely smelling fertilizer. Today I continued on the hatch coamings; trimming, fitting, and building the battery hatch cover. Everything, and the hull got some paint to spiff things up a bit. I really need to figure out making hatch gratings with what I have.


- 553 replies
-
- 7
-
-
- sloop of war
- constellation
- (and 3 more)
-
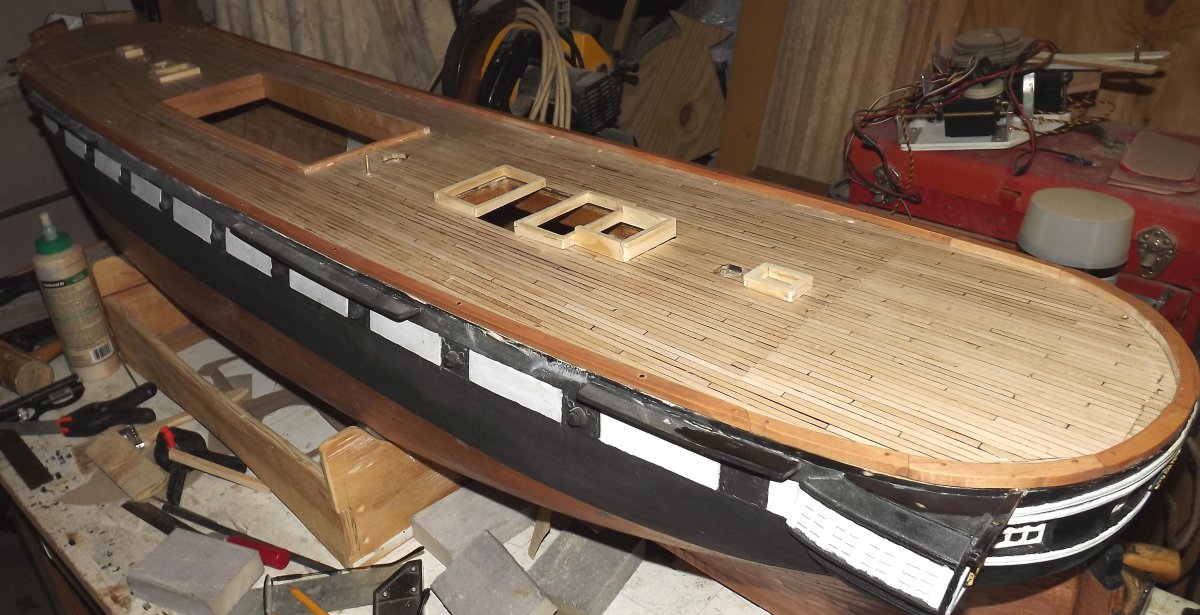
Started on the hatch coamings before finally calling it a day


- 553 replies
-
- 6
-
-
- sloop of war
- constellation
- (and 3 more)
-
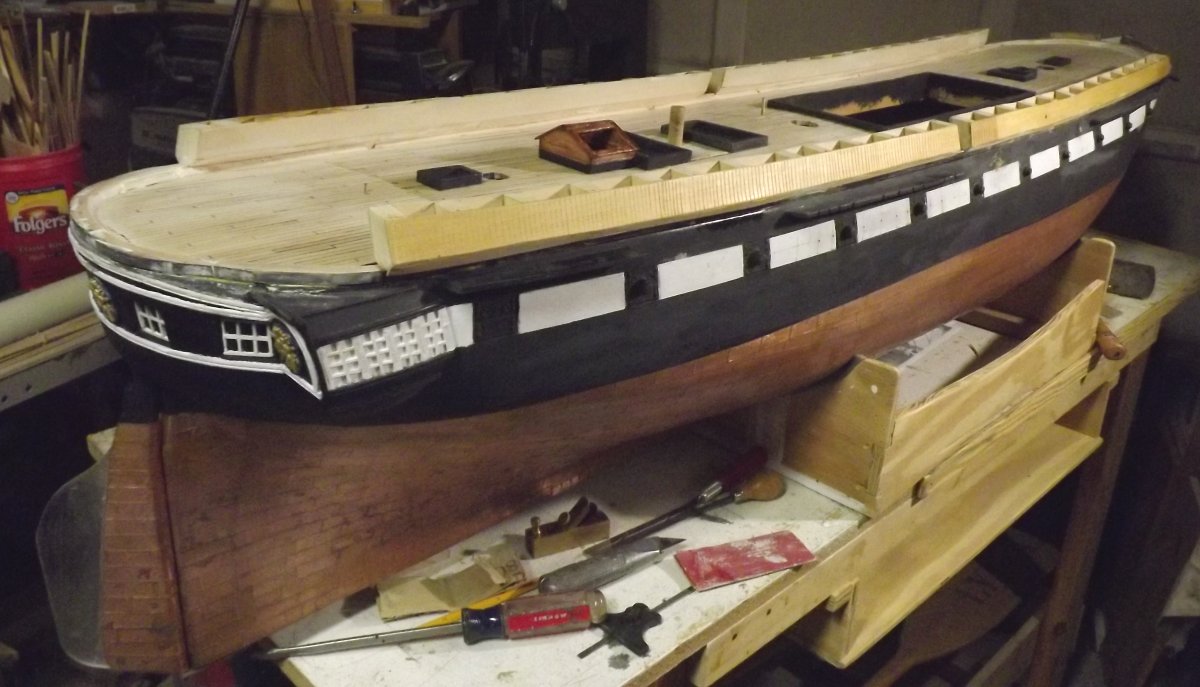
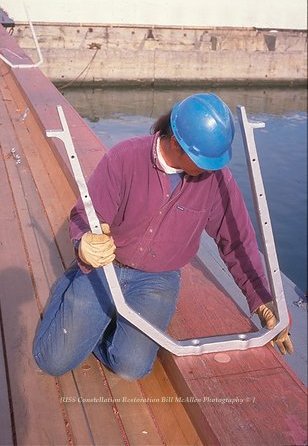
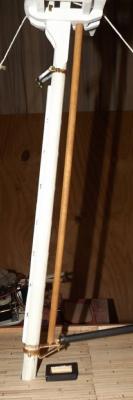
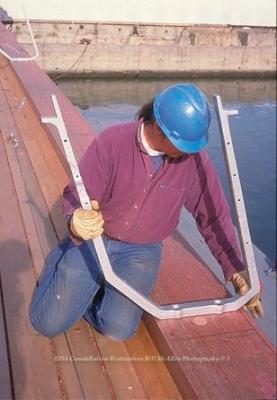
I installed the cap rail, or cap log as I call it. It covers the perimeter of the whole deck. An angled piece will go inside of it as the waterway, but we're not that far along yet. Here a fellow's setting a hammock iron on the real cap rail. I got 4 3/8" x 1/4" x 48" bass strips and two of them were simply spring into place port and starboard. Tren'led every 6" with round toothpicks, and since I couldn't clamp it down very well, I put in copper nails between each tren'l. I wiped a little cherry stain on the strips before fastening them down. I cut one of the remaining 2 strips into 3-1/2" lengths and glued them up side-by-side to make 6 1/4" x 3/4" x 3-1/2" blocks A made a card stock template of the stern and used that to shape the blocks and piece together the cap rail around the stern.


- 553 replies
-
- 5
-
-
- sloop of war
- constellation
- (and 3 more)
-
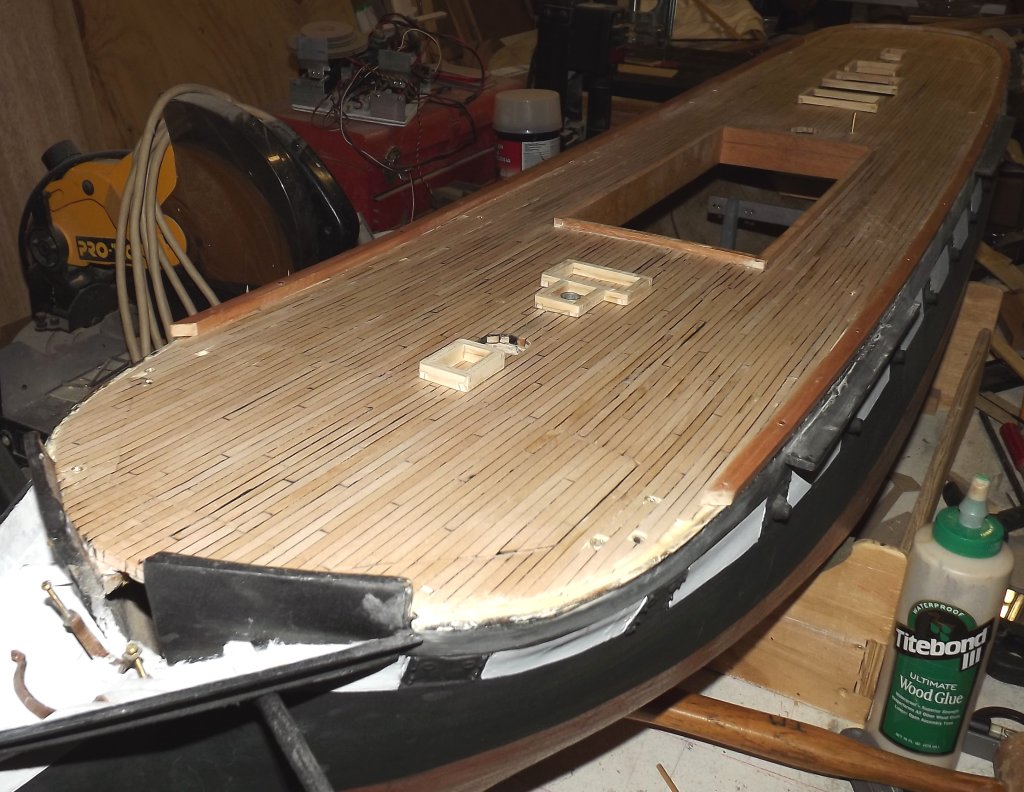
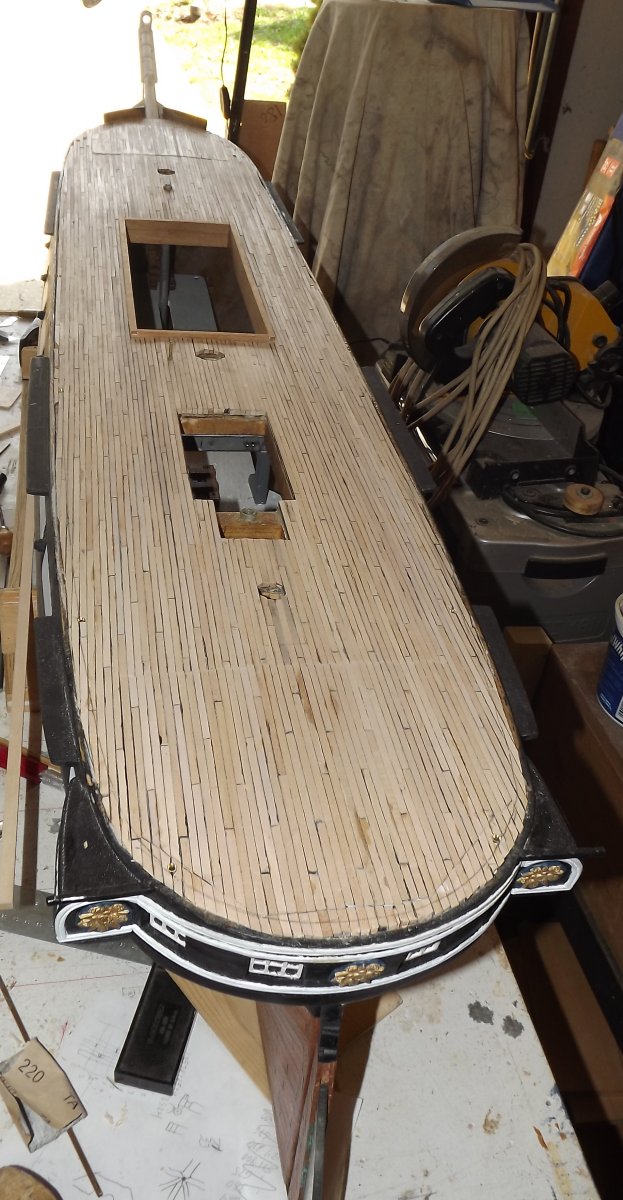
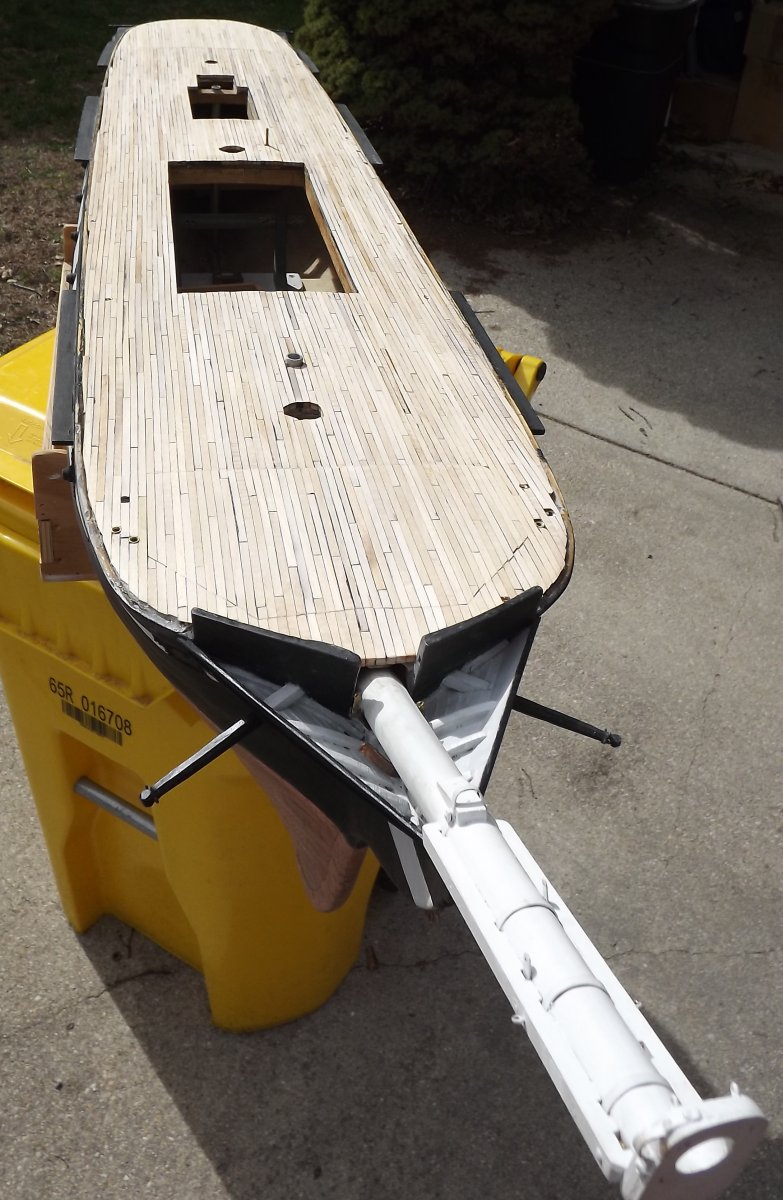
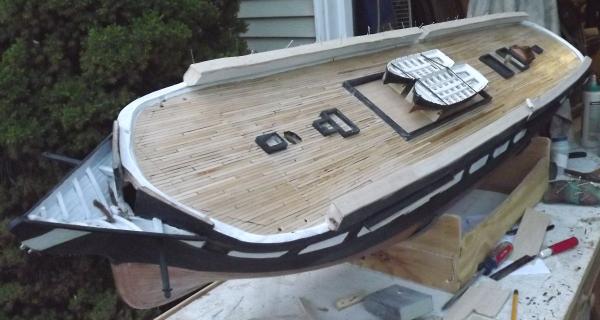
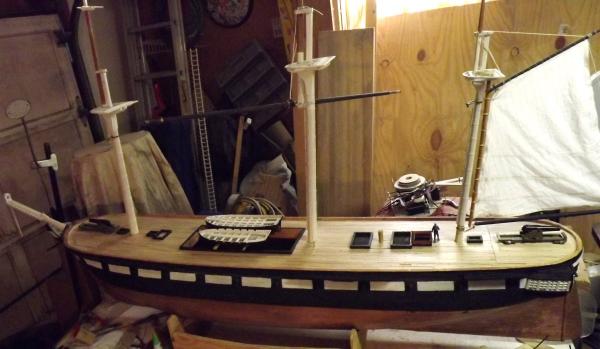
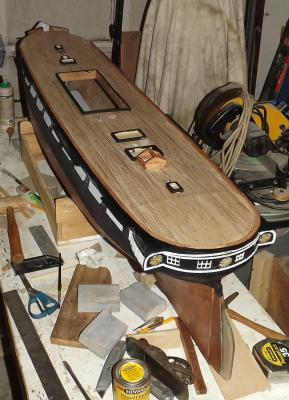
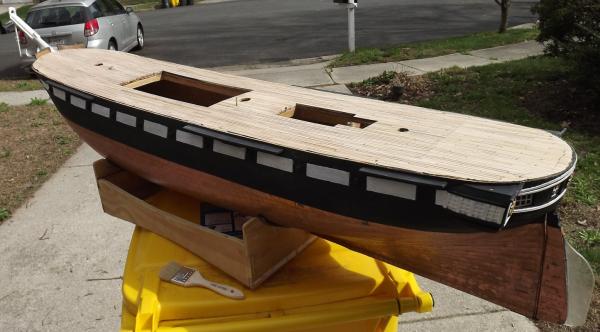
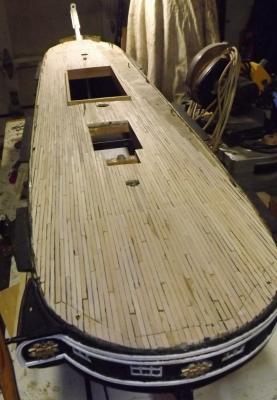
The deck is down, even scraped, sanded, and given a wipe of satin poly...


- 553 replies
-
- 9
-
-
- sloop of war
- constellation
- (and 3 more)
-
I'm not too concerned with it falling a hundred feet and shattering. To me it's sailing a boat with a really long invisible tiller.
- 553 replies
-
- 2
-
-
- sloop of war
- constellation
- (and 3 more)
-
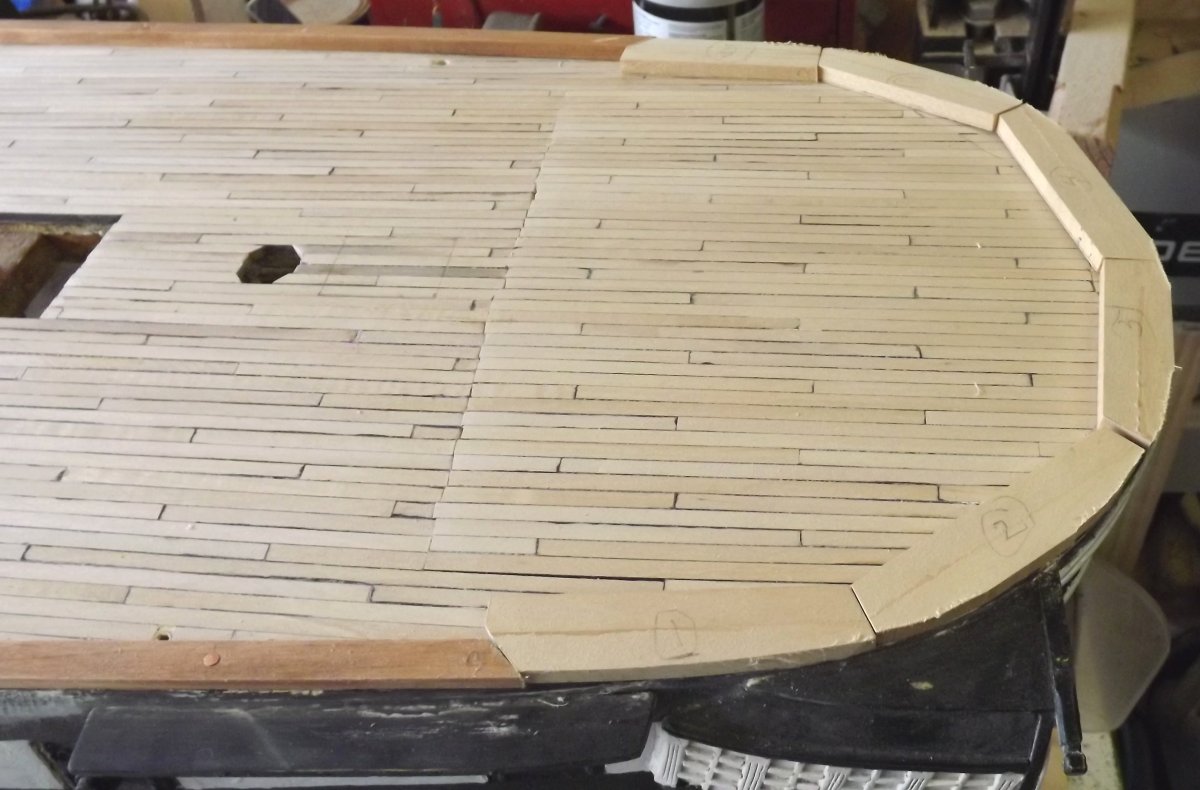
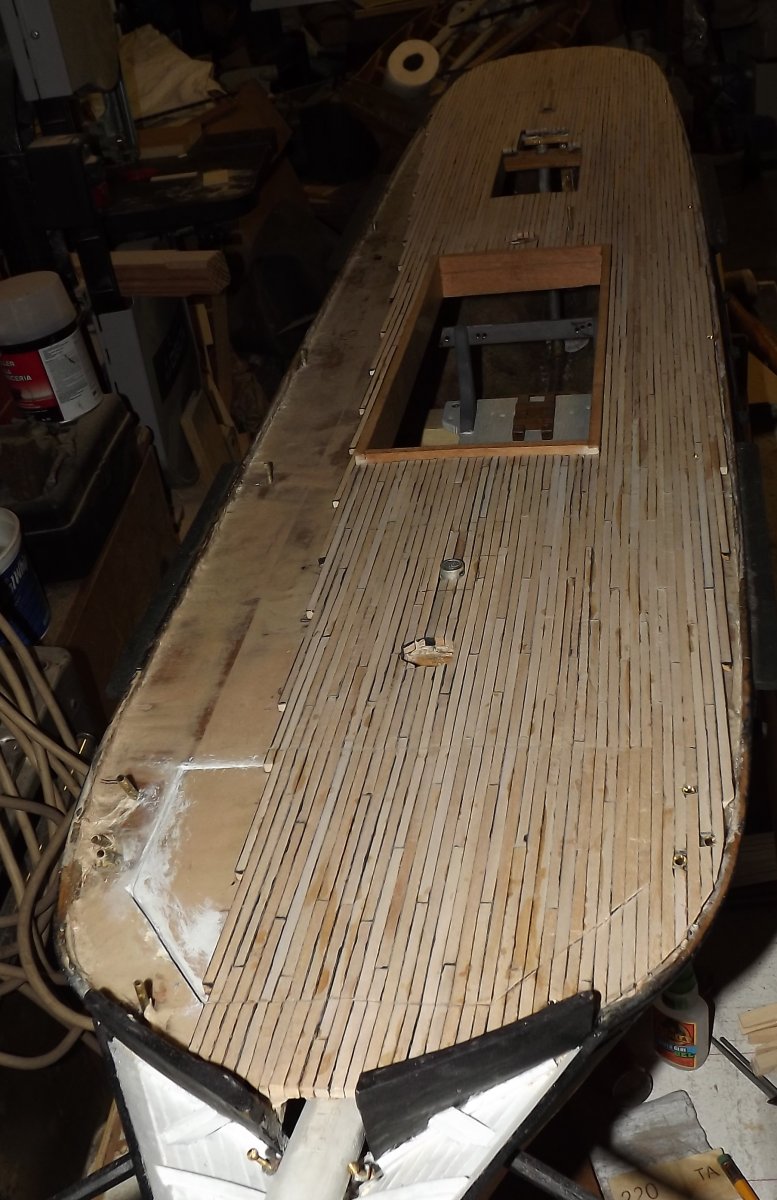
Got the port side planked up except for some "corners" to fill in. Didn't get to finish the whole deck - such are the best laid plans of mice and men. But then, there's tomorrow.
- 553 replies
-
- 4
-
-
- sloop of war
- constellation
- (and 3 more)
-
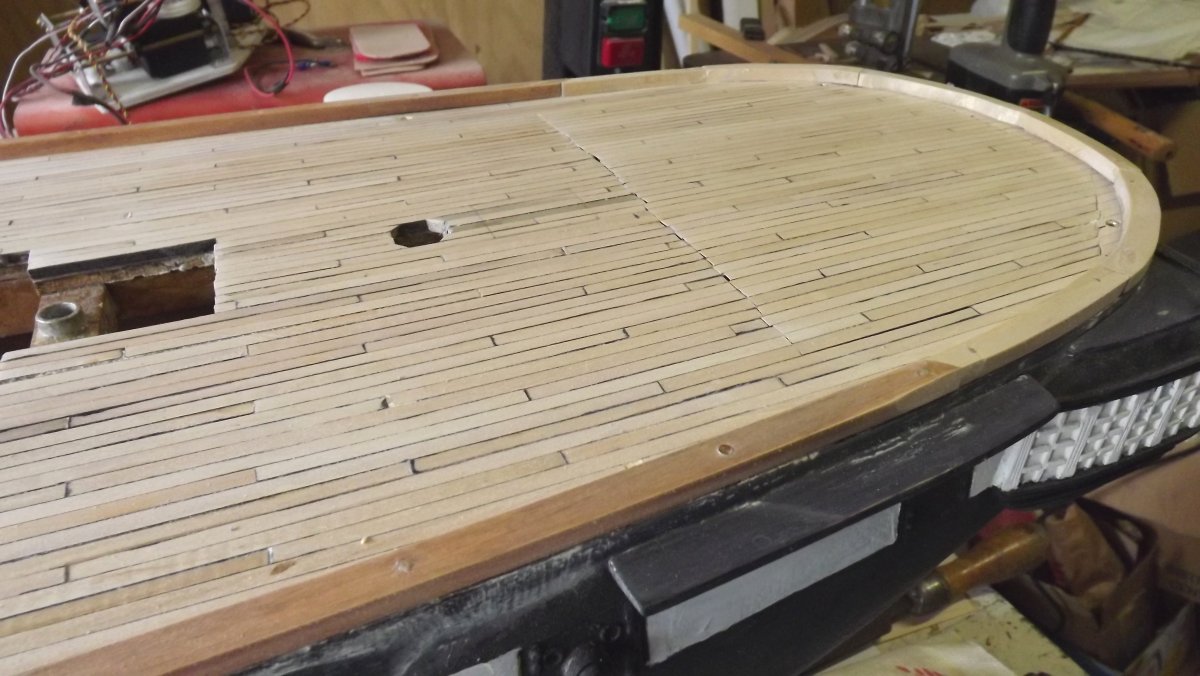
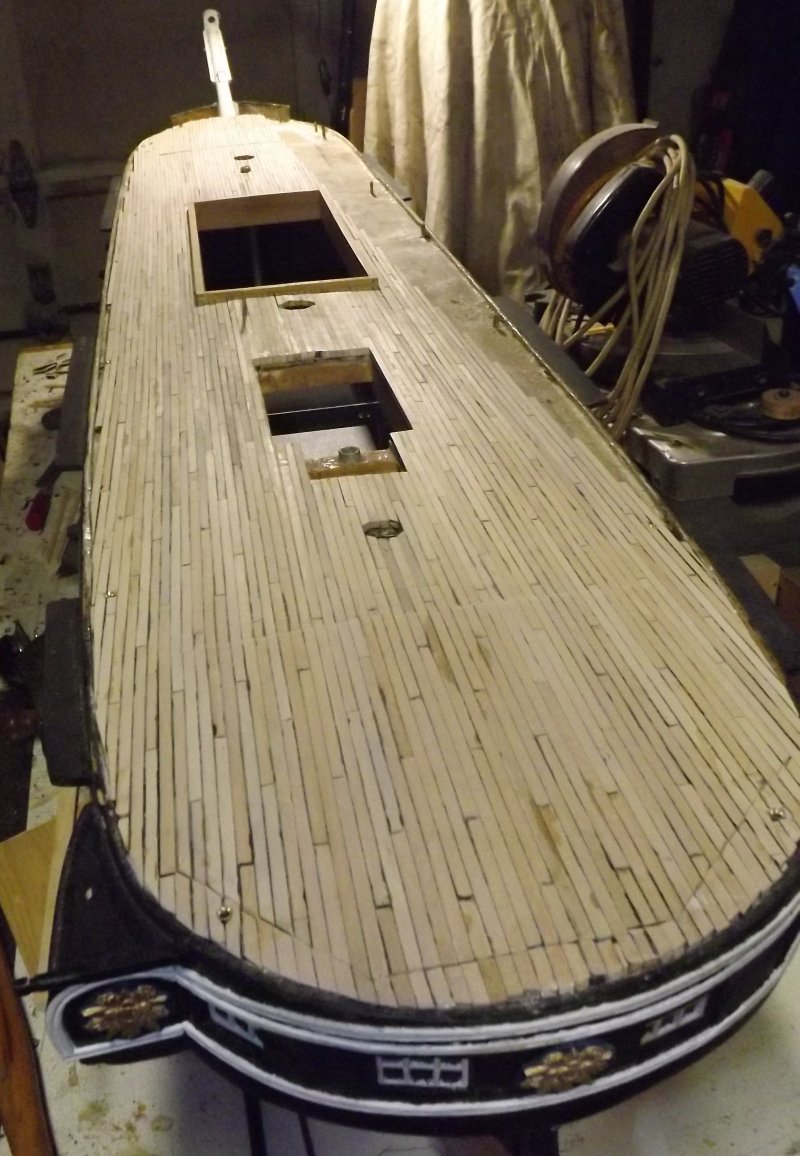
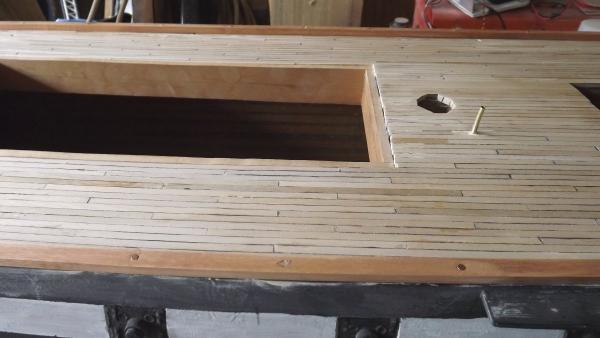
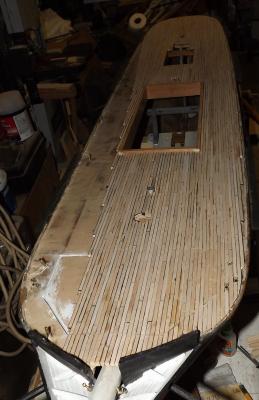
I got a bit more done. The forward access hatch is nearly covered and that will finish all those fiddly bits dealing with it's seams. The aft hatch is done and there's decking from stem to stern, now it's filling in the bow quarters. If the glue and the wood hold out, I should have it done tomorrow.


- 553 replies
-
- 5
-
-
- sloop of war
- constellation
- (and 3 more)
-
I ain't touching that till there's a sealant of some sort on the deck
-
There will be a bit of gasket material in there - there's some card stuck there now to take up the space while I fit the decking. I'm not going for "water-tight" more like "water-resistant." Today I hope to get the aft end planked and work up the port side. I'm thinking it'll all be down by Wednesday. There's a cap that goes all around the edge of the deck, it's more like a log. I have to piece that together around the bow and stern, the sides are simply a nice long piece that springs on. I got a bag of bamboo skewers I'm going to use as tren'ls to anchor that down. While she won't be "finished" at that point, she'll look more like she is. I need to turn the spokes for the wheel and those bowling pin stanchions, but none of the wood I have handy is working out for that. I had a little boxwood which I think will do great, but I haven't been able to find it.

- 553 replies
-
- 3
-
-
- sloop of war
- constellation
- (and 3 more)