JerryTodd
-
Posts
879 -
Joined
-
Last visited
Content Type
Profiles
Forums
Gallery
Events
Everything posted by JerryTodd
-
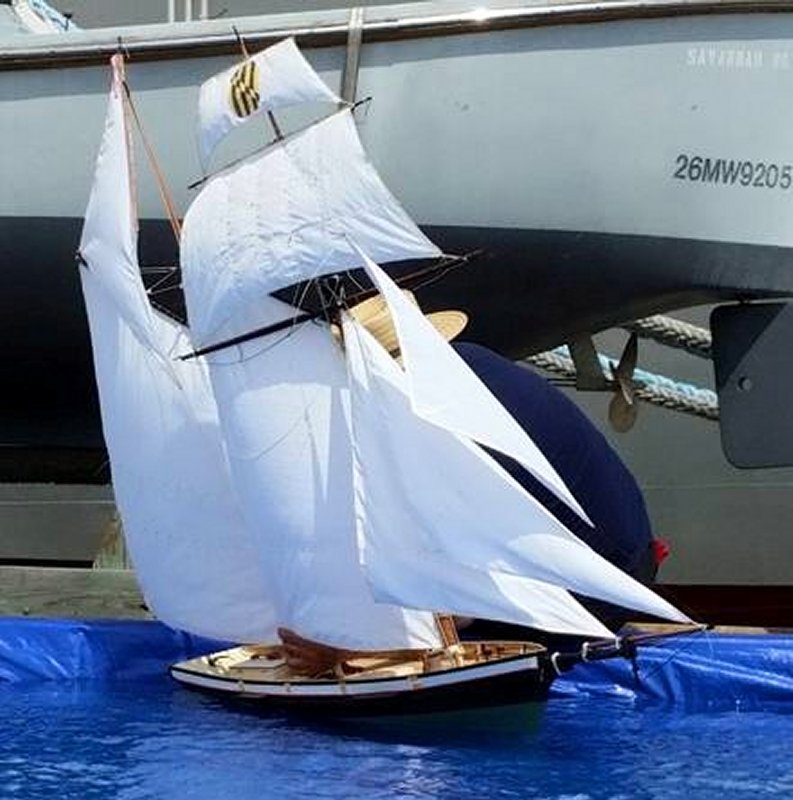
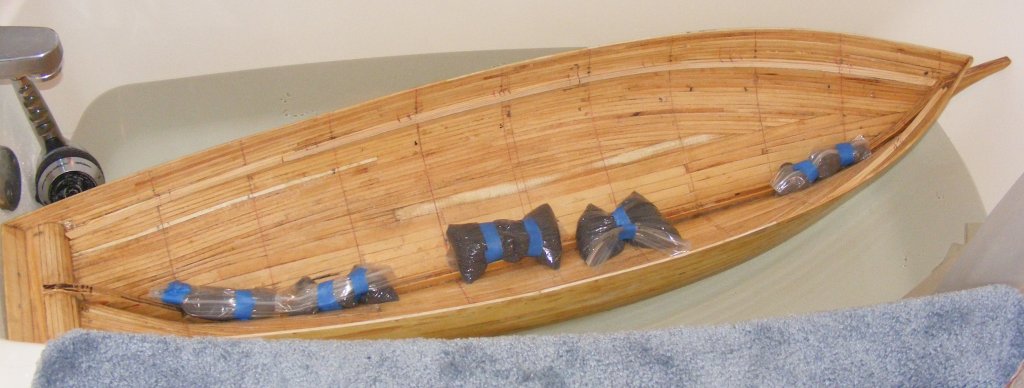
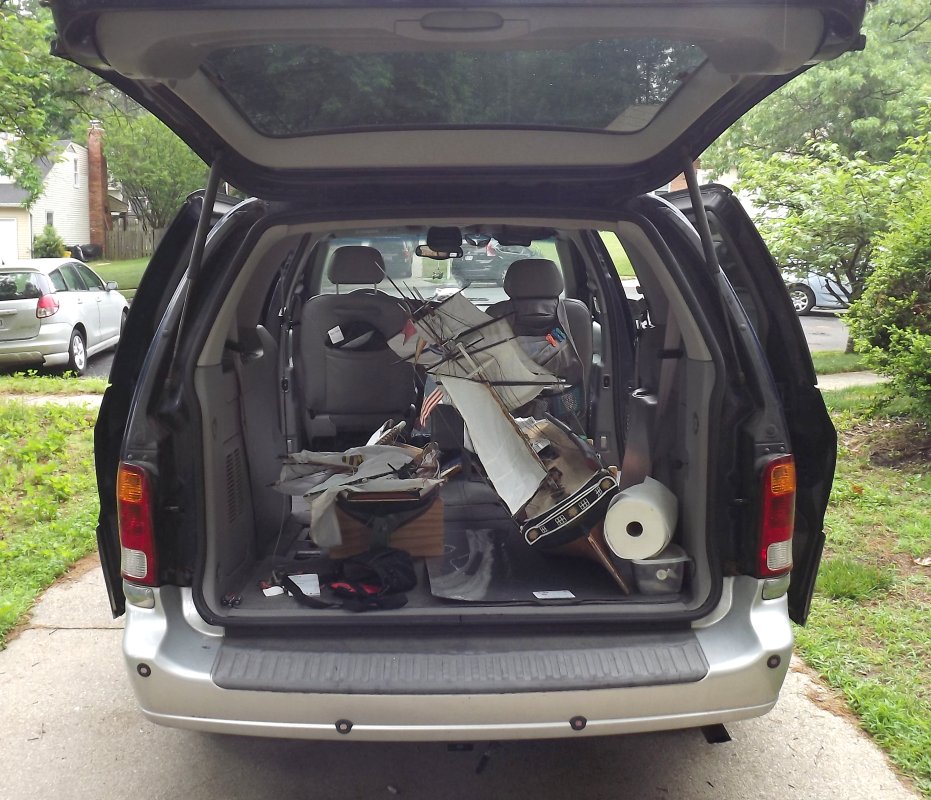
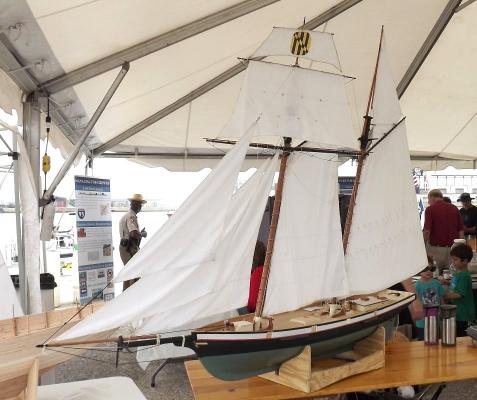
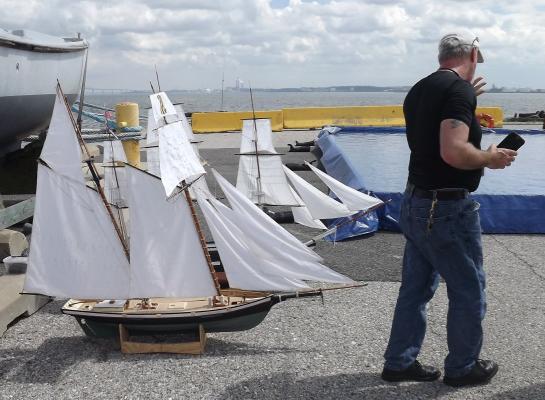
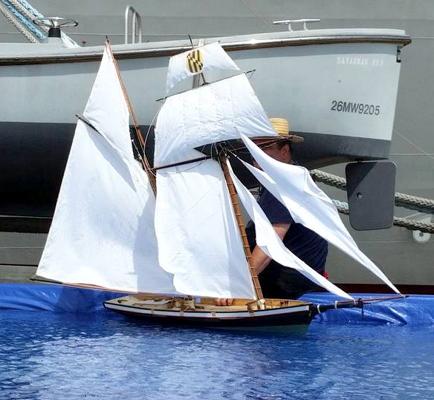
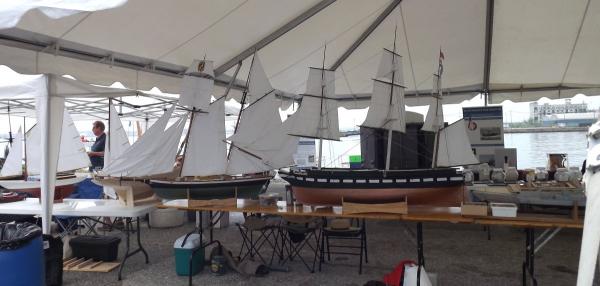
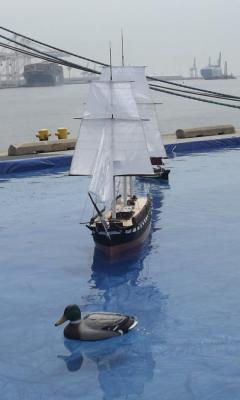
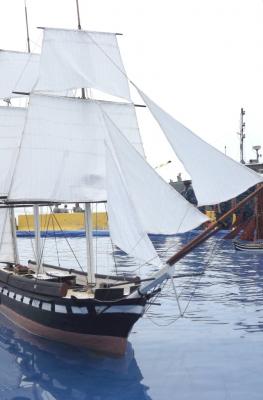
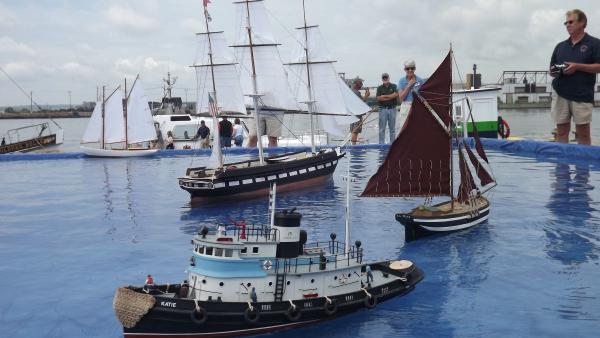
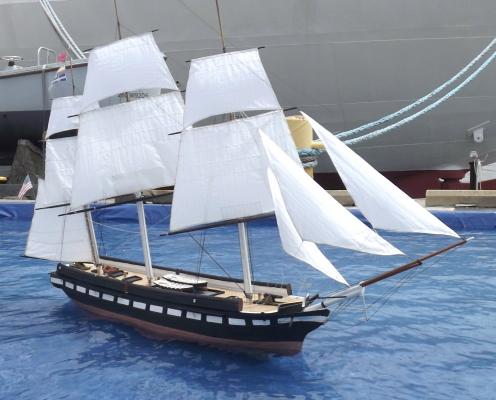
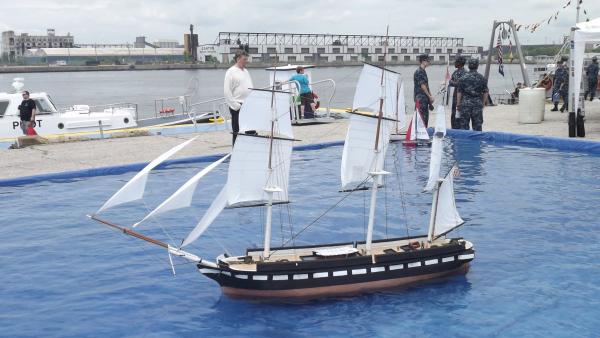
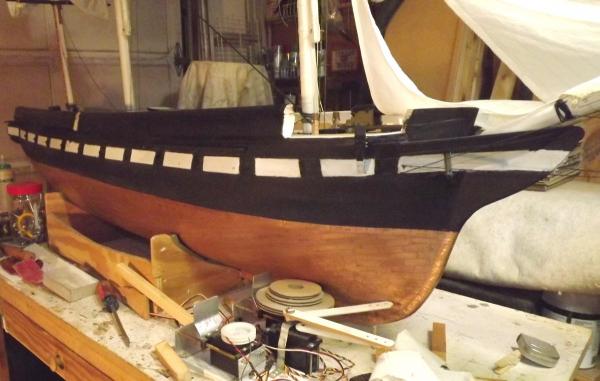
 Pride went to the Baltimore Port Expo this last Sunday (May 17) and was on display. I finally got to show her to the director of Historic Ships Baltimore, who I sailed with on Pride in '81 - the period the model depicts. First she was stuffed into the van with Constellation. She spent the day on display under the tent. At the end of the day, the boats were moved so they could start breaking things down. She hasn't been in the water since she was floated in the tub way back in 2012... So, although she didn't have her fin, and only 10 pounds of ballast in her, I let her swim a bit before we left.


- 79 replies
-
- 8
-

-
- pride of baltimore
- privateer
- (and 3 more)
-
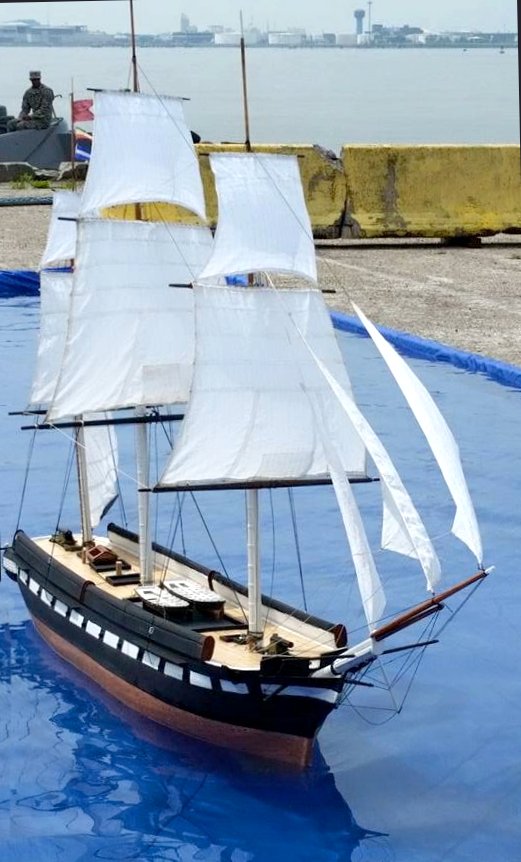
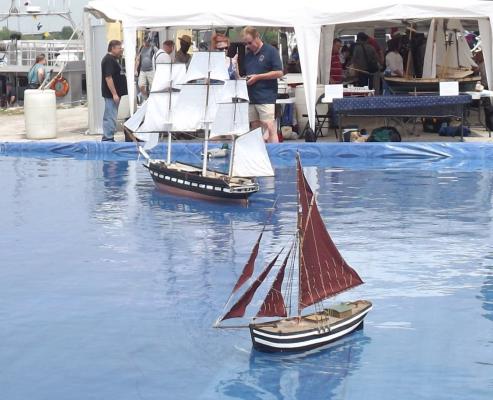
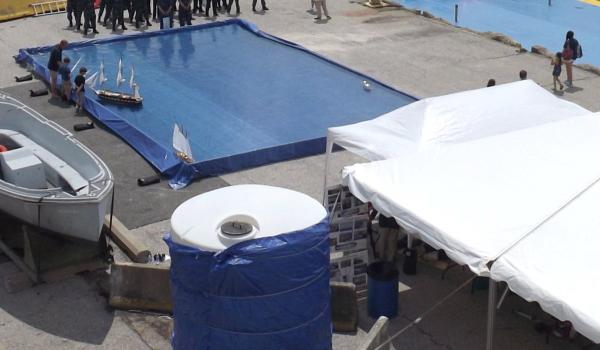
Here's some pics from Baltimore's Port Expo for National Maritime Day. Constellation and Pride of Baltimore both went. Most of the pics show Costellation with no more ballast than her bolt on torpedo because the pool was still too shallow. Later I added about 12 pounds of lead shot in baggies inside which brought her down to within 1/2 inch of her LWL. Not a lot of sailing done - she needs and likes room to stretch out - especially under her keel. Gratuitous stuffed into the van shot. Set up on the table. We were in the main tent with the other exhibitors this year. The pool was at the end of the pier, more clear of Savannah and her interference with the wind. The pools not very big, or really deep enough for a model like Constellation, but she looked nice on the water anyway. Even Pride got a little swim. I combined all the "sailing" video from the event:


- 553 replies
-
- 8
-
-
- sloop of war
- constellation
- (and 3 more)
-
Worked long and hard on getting her rigged with stays, braces, and sheets. Tomorrow is adjusting it all, touching up paint, and rebuilding her cradle to allow the ballast tube to sit on it - making attaching and unattaching it much easier.
- 553 replies
-
- 6
-
-
- sloop of war
- constellation
- (and 3 more)
-
Last year it was gusting and the wind was bouncing off everything, including the Savannah, which we were right along side of. Everything on Constellation seemed to work itself loose. A few weeks later at St Michaels, everything went much better, though the wind was still fluky and variable. So this year, I'm not too worried with "at the event" as much as getting TO the event in good order. If it's to strong, too shallow, etc, then she'll sit on the table or get "anchored" for folks to look at.
- 553 replies
-
- 5
-
-
- sloop of war
- constellation
- (and 3 more)
-
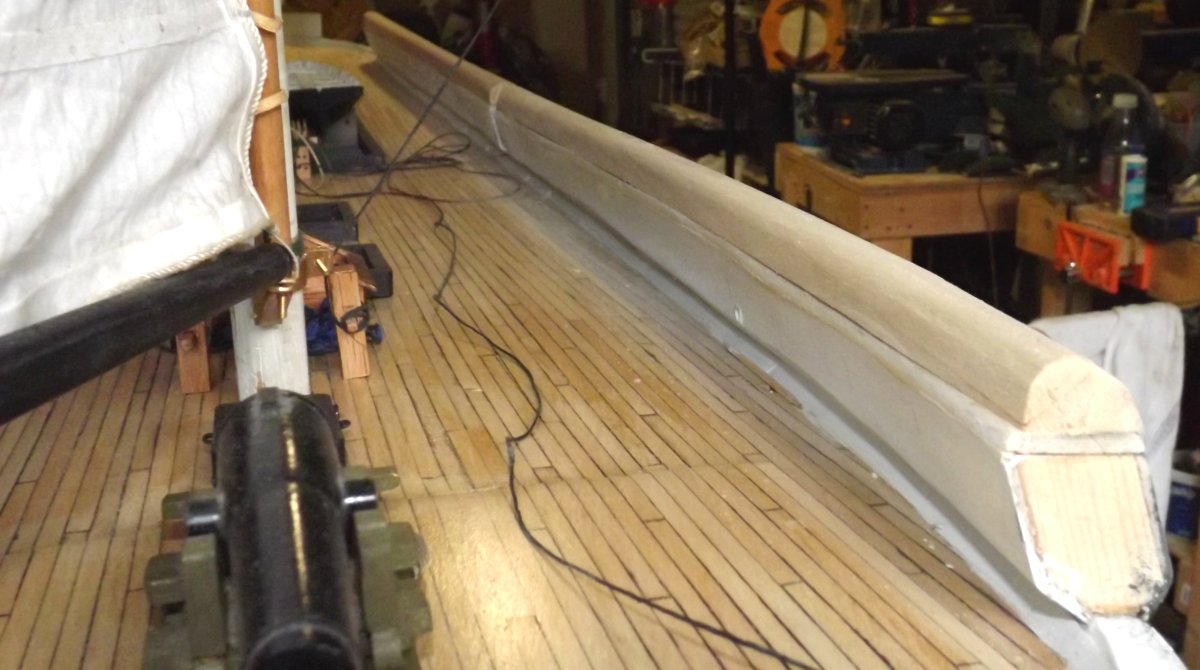
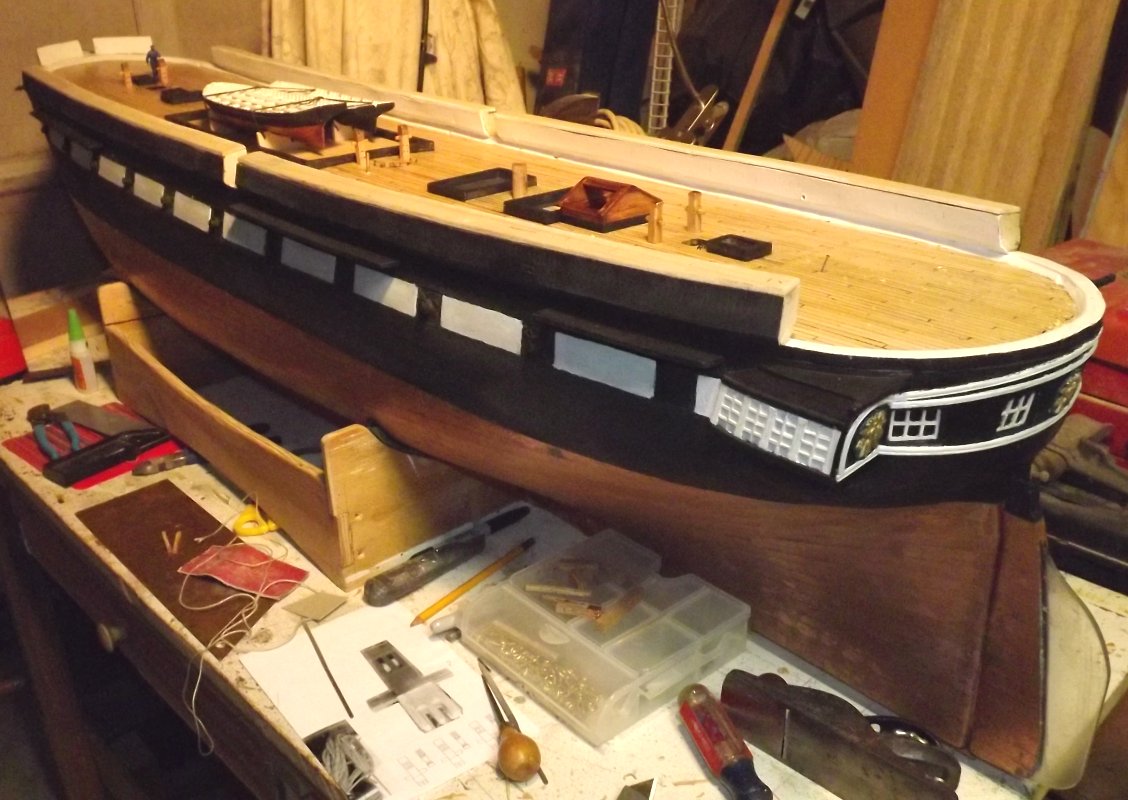
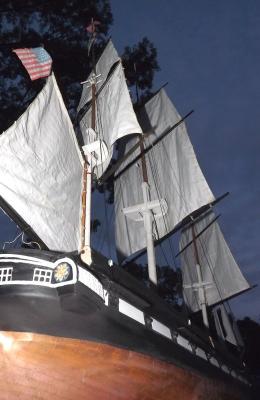
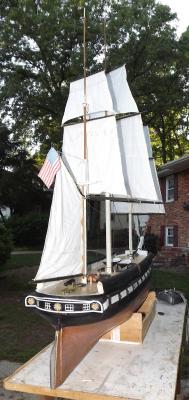
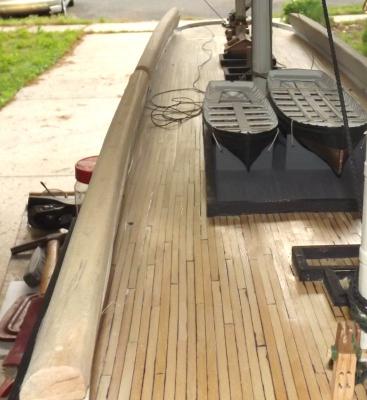
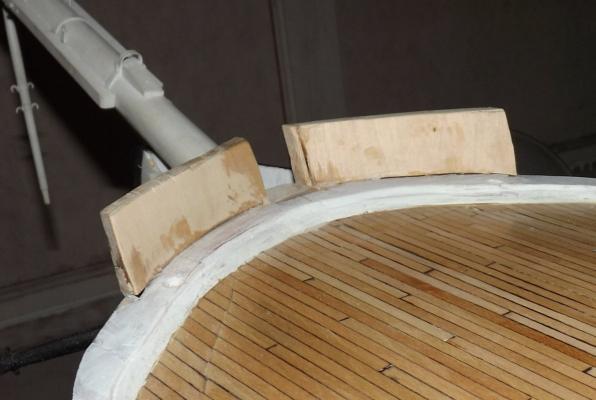
Got the port hammock rail caps in place with a first coat of paint. Getting the electronics in order and took a few "glamor" pics


- 553 replies
-
- 6
-
-
- sloop of war
- constellation
- (and 3 more)
-
Cut some 1/2" by 1" strips from a plank of balsa I have kicking about and began capping off the port side hammock rails.

- 553 replies
-
- 5
-
-
- sloop of war
- constellation
- (and 3 more)
-
Well, saying out loud that I intended to do something outside was a mistake. The entity that always ensures it will be cloudy whenever there's an astronomical event I want to see, apparently made sure it would rain today, so I couldn't move the garage/shop contents outside to bring some order to my chaos.
- 553 replies
-
- 4
-
-
- sloop of war
- constellation
- (and 3 more)
-
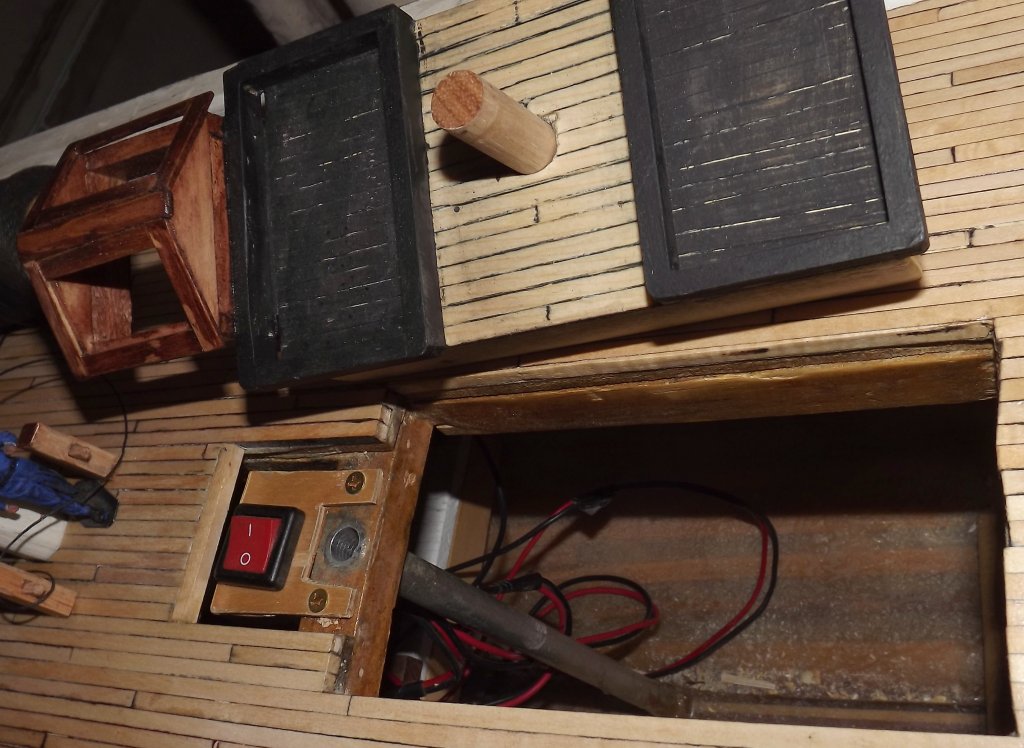
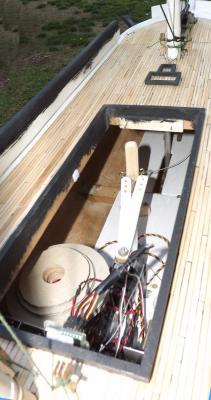
Worked a bit on getting the mechanics and electronics into her. Mounted the on/off switch under the skylight. The wires that ran from the switch charging lead harness to the servo try and Rx were cut to make the harness separate from the servo rig using a two prong plug, but the "crimp-on" connectors slipped right off as soon as I tried to separate the plug - so some time was spent trying to find the soldering iron. Tomorrow will be a drag everything in the shop out onto the driveway day and get this feces sorted or die trying. If that's the case, BTW, I won't be posting pictures.

- 553 replies
-
- 8
-
-
- sloop of war
- constellation
- (and 3 more)
-
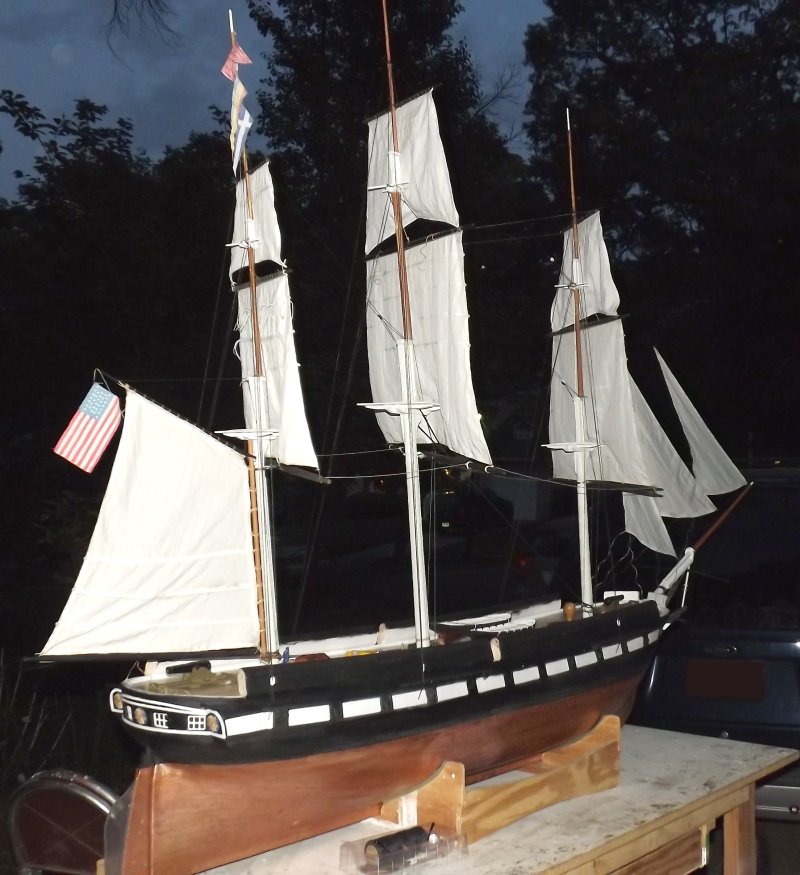
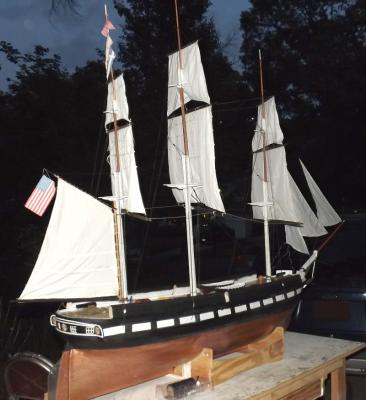
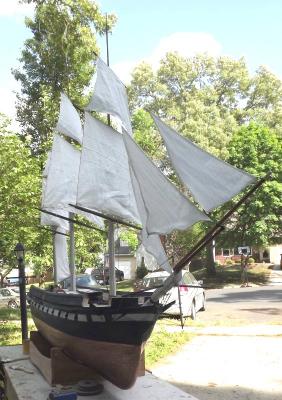
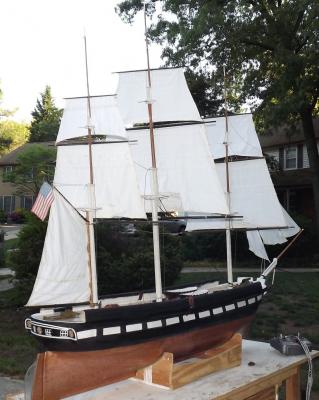
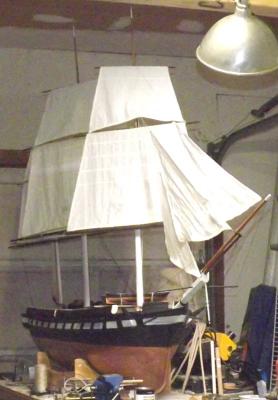
Not the best image, but the first of her with t'gallants up. This is pretty much what she'll be wearing to the ball next weekend.
- 553 replies
-
- 6
-
-
- sloop of war
- constellation
- (and 3 more)
-
Clevises - I think?
JerryTodd replied to Landlocked123's topic in Metal Work, Soldering and Metal Fittings
RBModel has shackles, some with threaded pins, some with clevis pins (pin with a hole for a cotter pin). I'm not sure if they go as small as you need, the smallest seems to be about 7mm tall. I've been dealing with these folks for years and have always been happy with their products. -
See: post #39 in this thread.
-
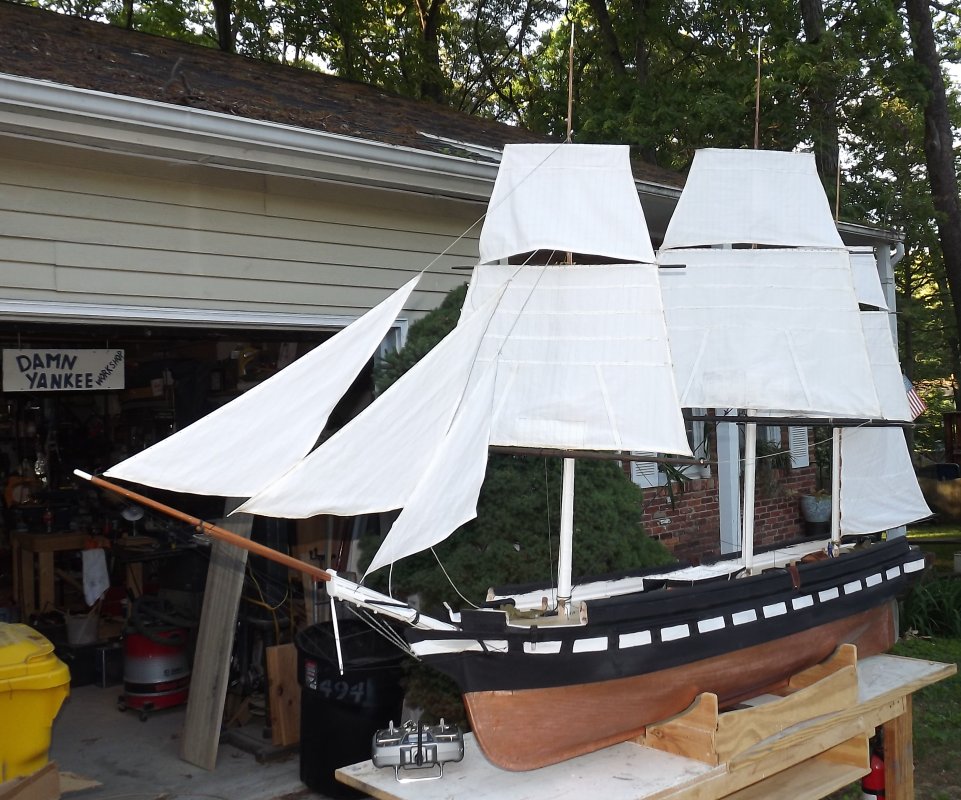
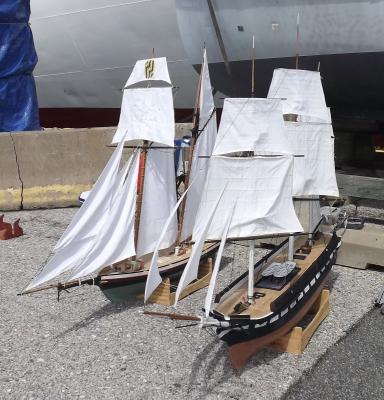
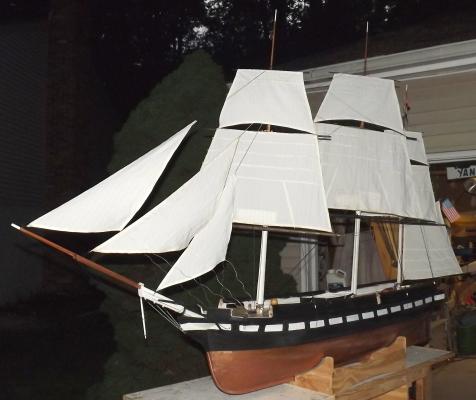
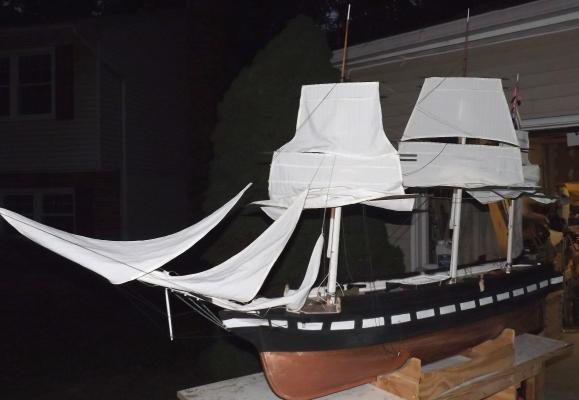
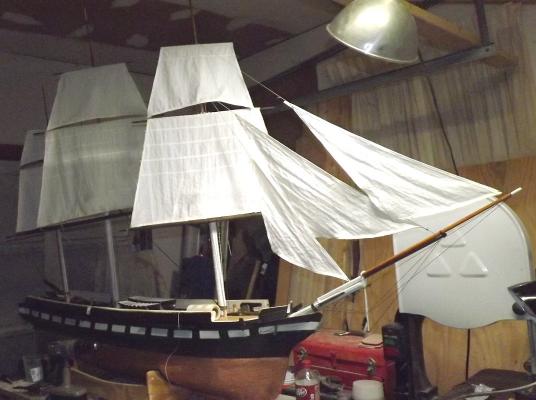
Yesterday I did some filling and paint touch-up, and began bending sails. Today I began jury rigging. So far the two tops'ls are up. Last time I did this event the sails were lifting the coarse yards, this time I ran the tops'l sheets down to deck to act as a down-haul and prevent that from happening this time. The fore-topmast-stays'l and the jib are up minus their sheets. I'll probably set the outer or flying jib as well. Because of the added sails, I'll be rigging rudimentary shrouds and stays especially for the t'gallant poles. The top masts are lowered so the garage door won't hit them - just in case. Once the sails are on I'll take a few pics outside
- 553 replies
-
- 5
-
-
- sloop of war
- constellation
- (and 3 more)
-
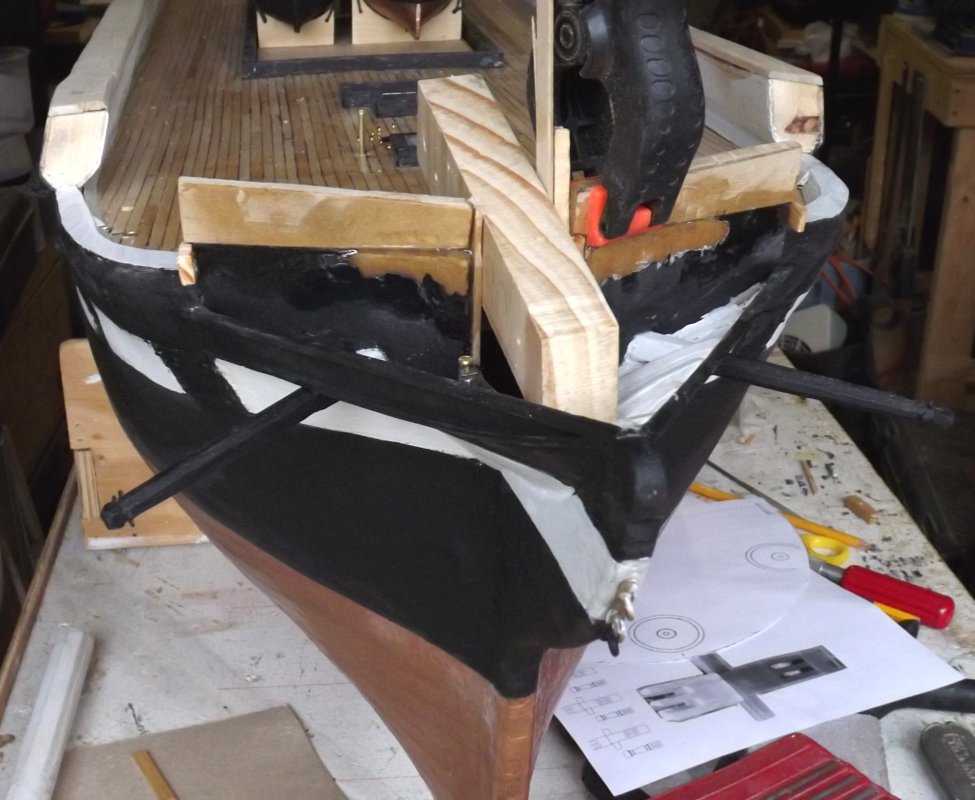
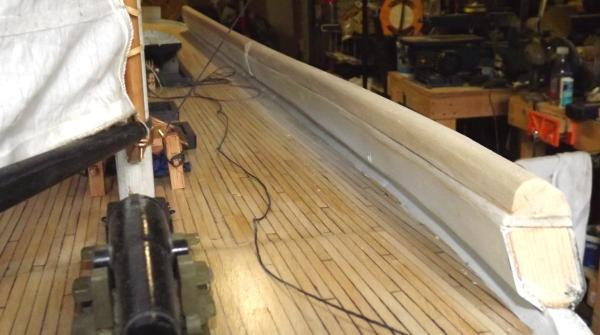
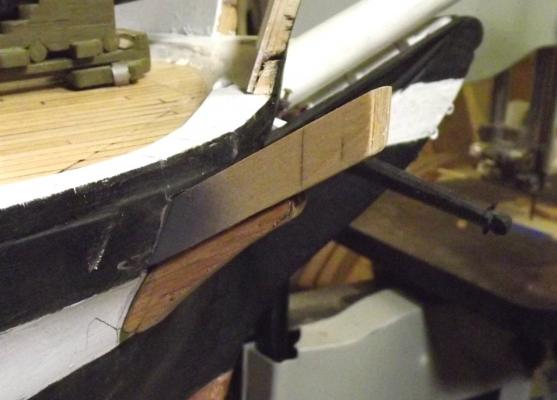
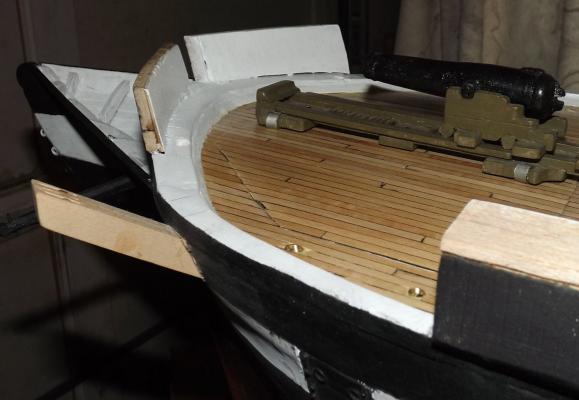
I'm pretty good with cats actually, Bob. We'll see how I do with dogs when I get to the capstan. That's a-pawling isn't it? Pat, there will be pictures, and probably some video too. This morning was spent making the starboard cathead. Seven layers were cut from 1/16" bass sheet, three of those cut short to allow for the sheave slots. The short layers were glued to long layers as well as walnut dowel sheaves, and the bass end pieces from the cut-off portions. Again the hull was pierced to make a socket for a cathead. The position marked; precut with a knife to keep the glass from tearing out; then successively larger holes drilled. The final hole was squared by roto-tool with a burr on a flex-extension and a lot of knife and file work. There's about 1-1/2 inches inside the hull and a little over 2 inches exposed. Knees were made from oak and glued to the cathead, though the cathead isn't attached to the hull as yet. Everything will be epoxied in place and pinned with brass rod; any gaps filled, and all painted black and white.


- 553 replies
-
- 6
-
-
- sloop of war
- constellation
- (and 3 more)
-
Baltimore's PortFest is May 18th - I'm going just to see that "six-foot sailing model of USS Constellation!"
- 553 replies
-
- 2
-
-
- sloop of war
- constellation
- (and 3 more)
-
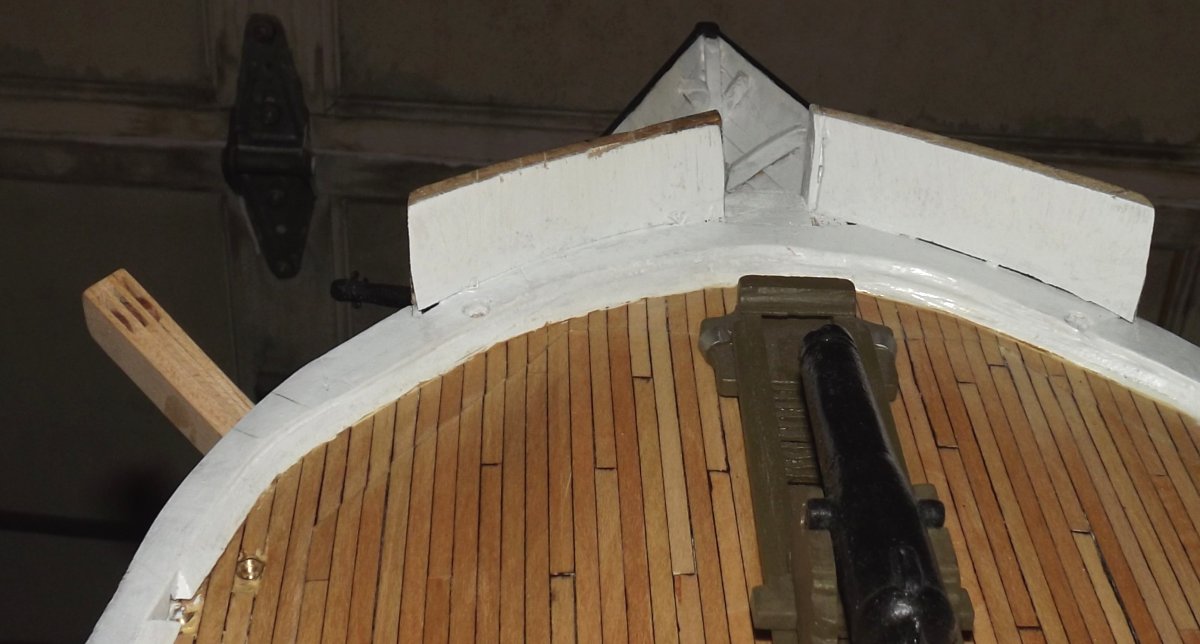
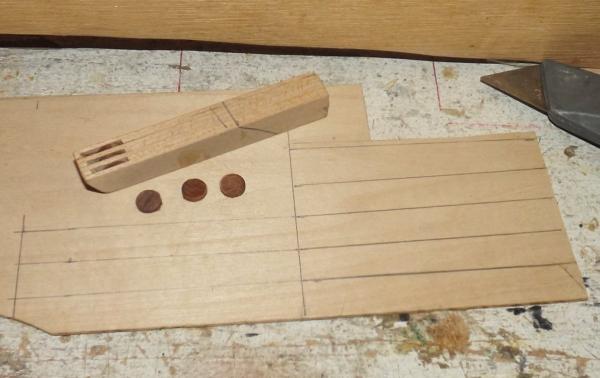
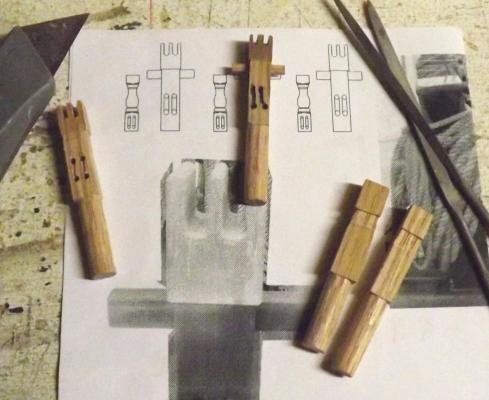
Today I focused on the catheads. Relying on the 1888 spar deck plan to tell me where it was, the angle at which it projected from the ship, and how far out; I had to rely on photos to figure out it's steave. The simplest and most accurate way to make the slots for the sheaves was to laminate it. Fortunately, it worked out to being 7/16" square in 1:36 scale which was perfect to laminate 7 layers of 1/16" bass with 3 sheave slots. I didn't put in working sheaves, but used slices of walnut 3/8" dowel glued in place instead. For those of you following along with the possible idea of learning something - here's your chance - do this somewhere long before this during the construction. In this case the catheads are set into the hull at 60° from horizontal right at the hull/cap rail seam, which means I could have simply sawed a notch for it with a razor saw and been done with it. Now I had to bore a hole, and dig it out square keeping two angles correct. Even if I hadn't set the catheads before now, the hole for it would have been there, ready for it. As it turns out; slow careful work with a bur on the roto-tool got me to a good, snug fit. Now all I have to do is make and fit the starboard cathead.


- 553 replies
-
- 4
-
-
- sloop of war
- constellation
- (and 3 more)
-
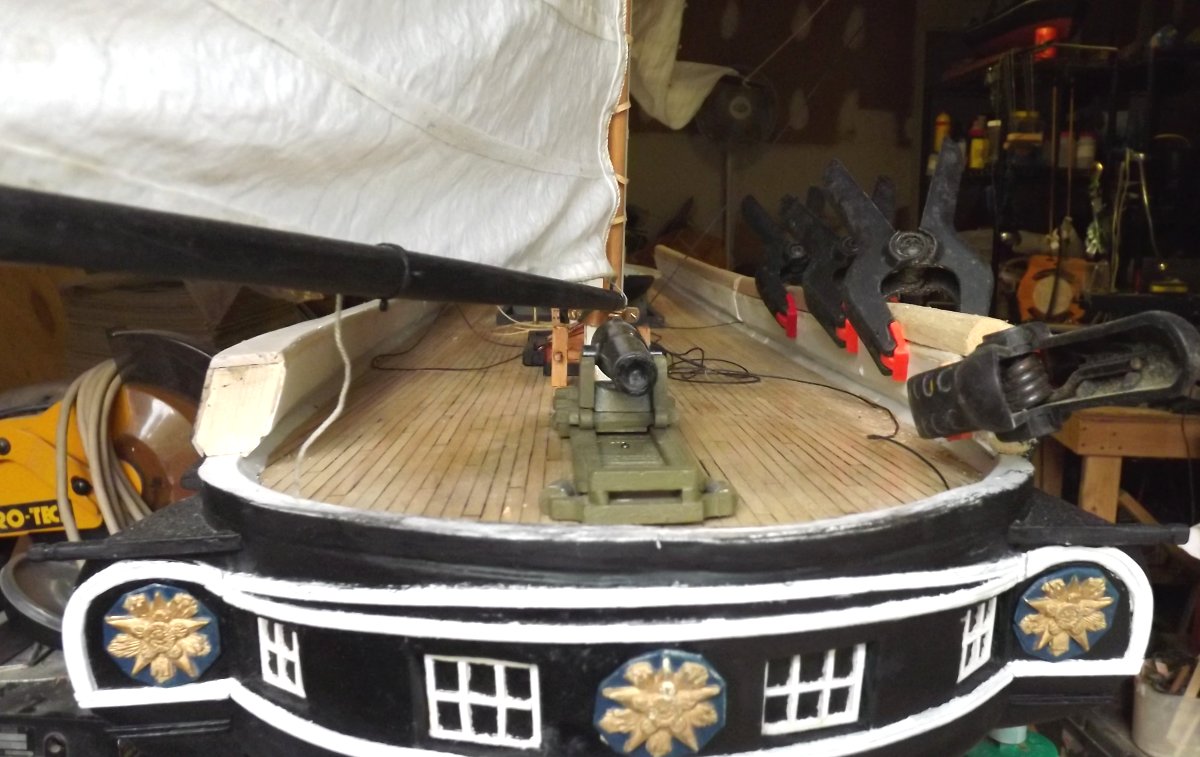
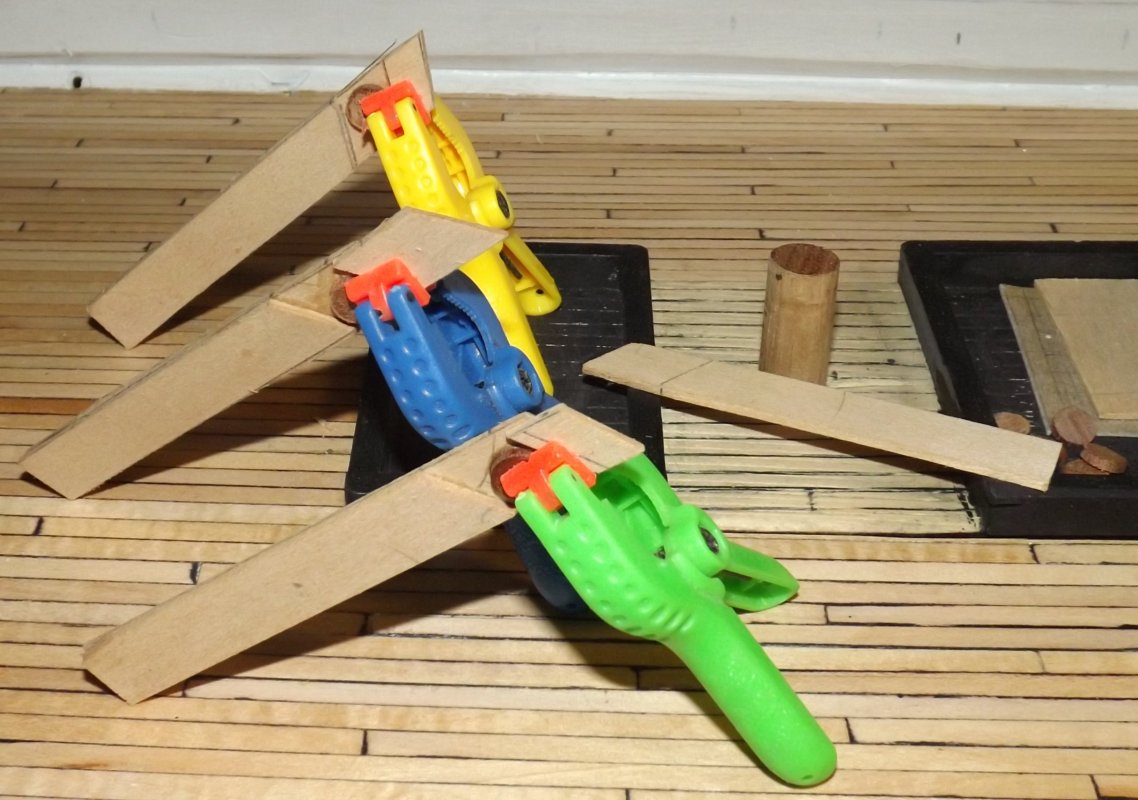
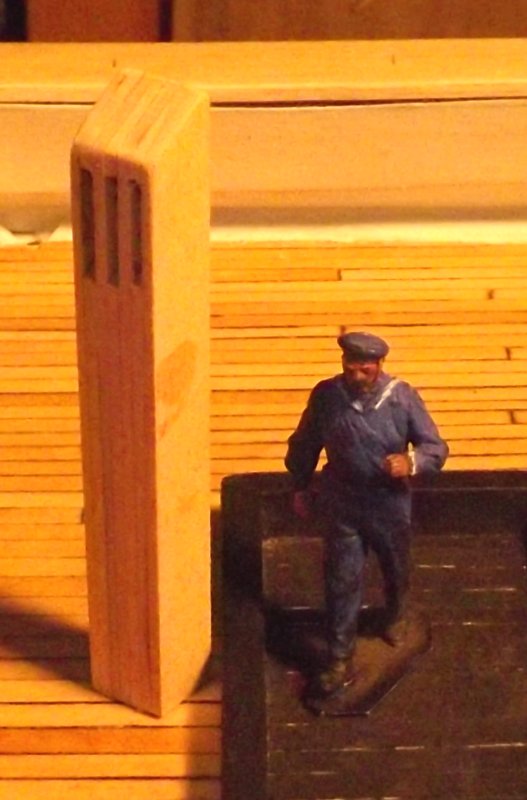
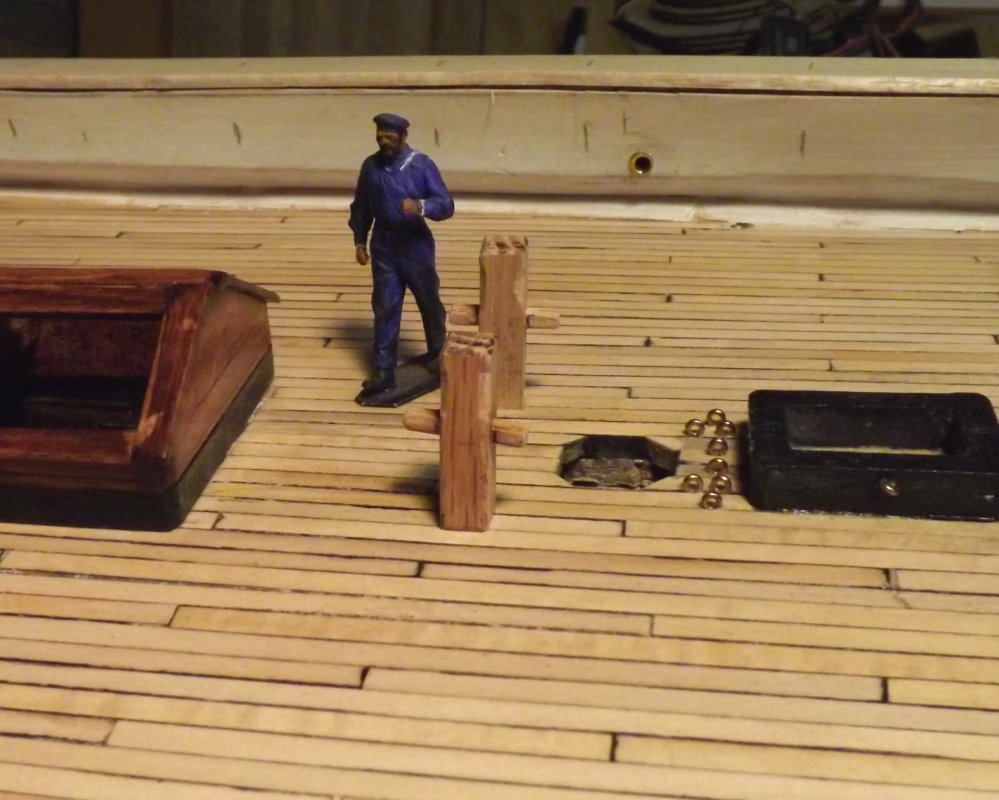
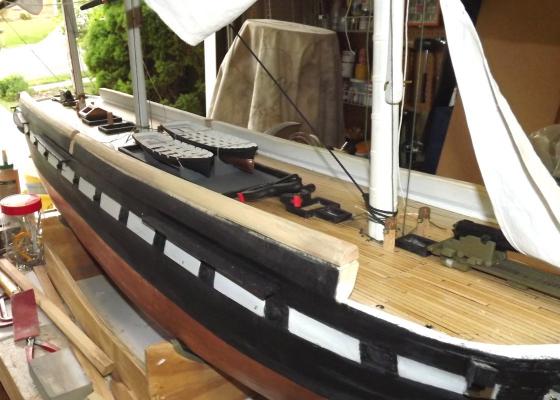
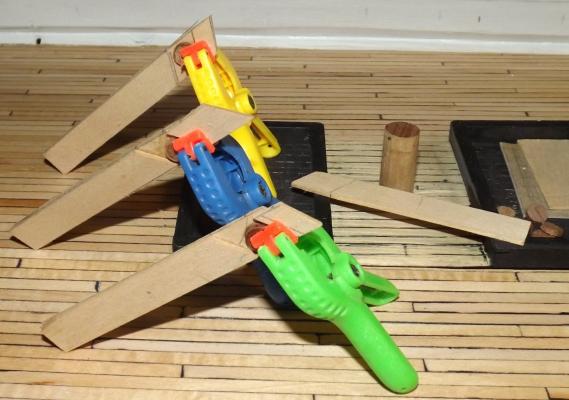
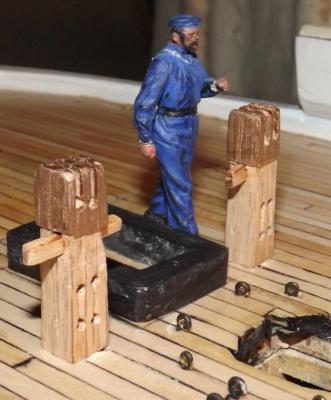
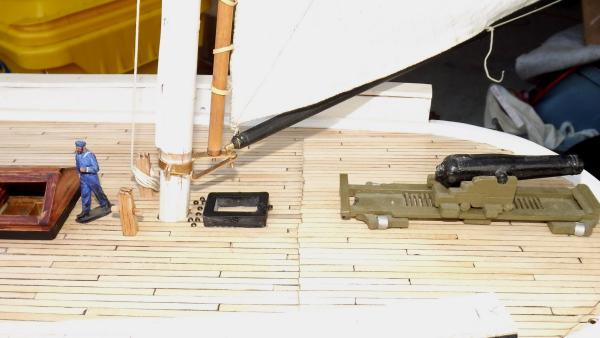
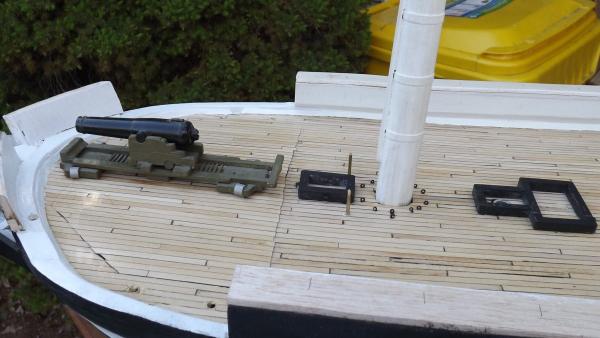
These bitts have a three pronged bronze crown on them. I'll probably wind up painting them with the green patina normally seen on bronze, but for now I just colored them with a bronze metallic Sharpie.


- 553 replies
-
- 4
-
-
- sloop of war
- constellation
- (and 3 more)
-
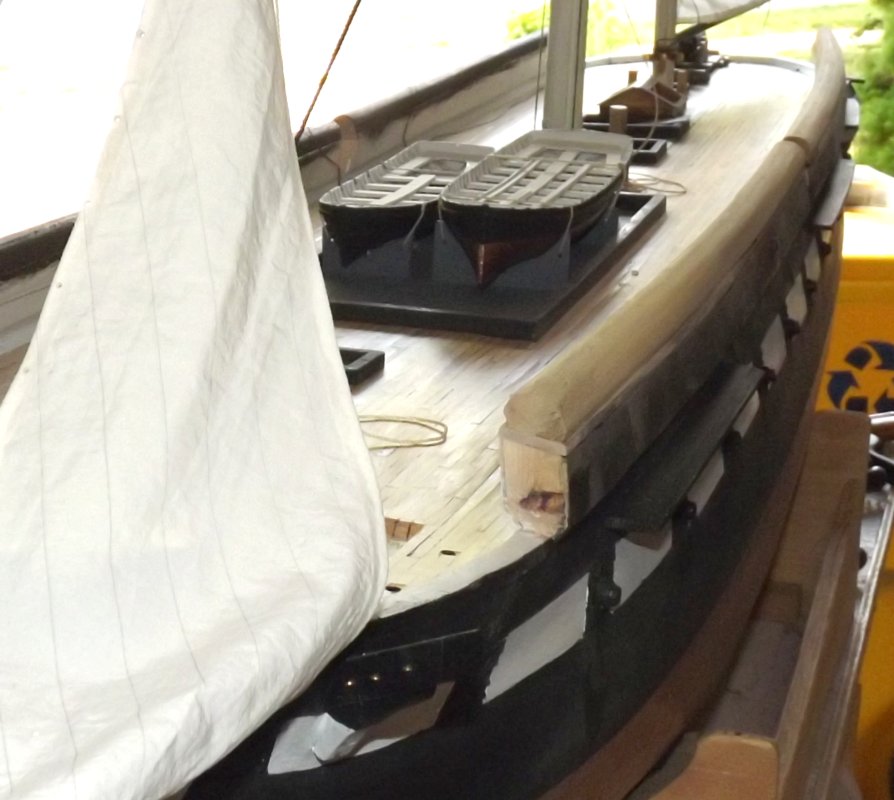
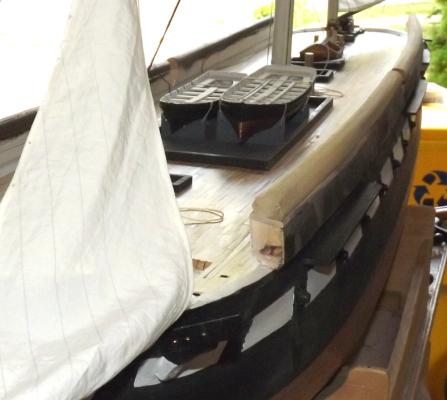
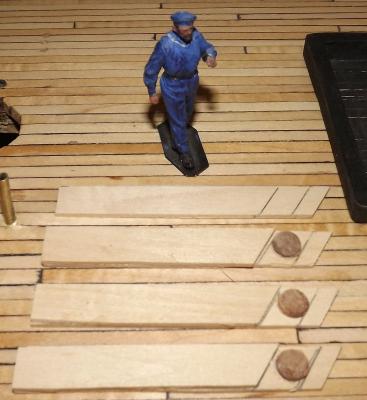
There's obviously more there than just a hammock and it's rigging - blankets makes sense. Sailors had their sea chests and sea bags to stow clothes in. Each one has a man's name and his number stenciled on it. They're not bent into the 'U' or yoke shape - I don't see that you could as fat as they are. I initially thought they were 'bent' till I realized they were set into the rails in pairs, side-by-side. Navy hammocks were 70" long, curled into a yoke would make these this about 3 foot square. I think they are shoved in as deep as they will go. If you cover them with a tarp and cinch it down snug, they would probably compress to within the height of the end boards.
- 553 replies
-
- 2
-
-
- sloop of war
- constellation
- (and 3 more)
-
Staring at the image of the Kearsarge I posted above, I realized the hammocks are not bent into a yoke, but simply rolled up into a sausage. They're put in the hammock rails side-by-side, pretty willy-nilly from the looks of things. An original US Navy hammock of the 1870's measured 39" (99cm) by 70" (178cm) so it's an easy guess at how long the rolls are. Going back to the sausage analogy, they're stuffed with something; I can't figure any other reason a simple 3 foot wide canvas hammock would roll up to be THAT bulky - they're nearly as large as a man's torso! I guess using elbow macaroni to represent the top of the "yoke" sticking out isn't going to work now. I'm thinking making the portion of these things that stick out of the rails and glue them onto the cap piece I already have installed. I can soak them with thinned resin to plasticize them and further fasten them down.
- 553 replies
-
- 4
-
-
- sloop of war
- constellation
- (and 3 more)
-
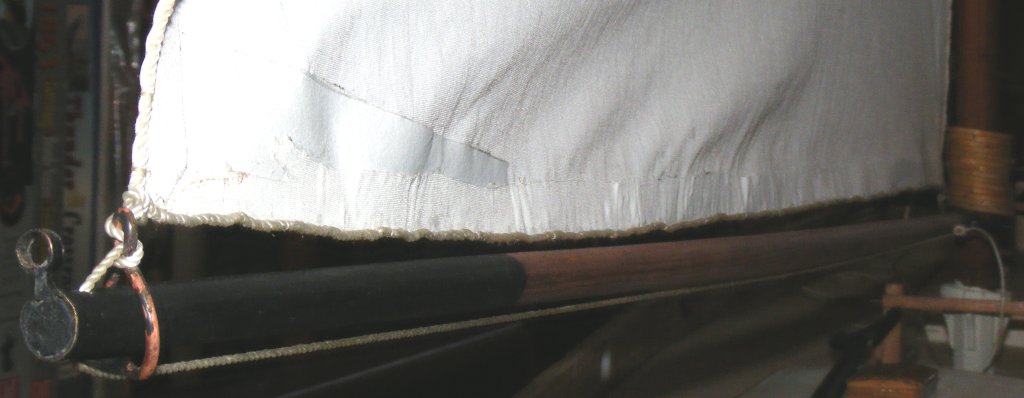
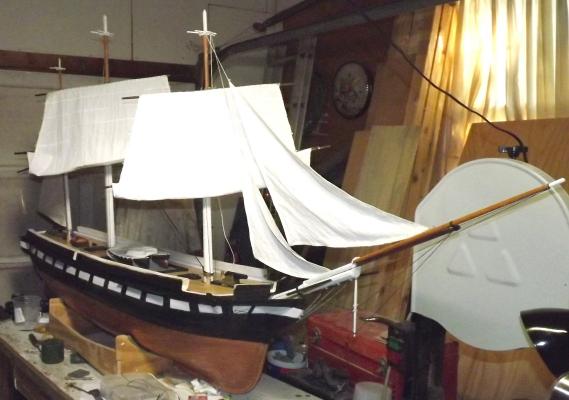
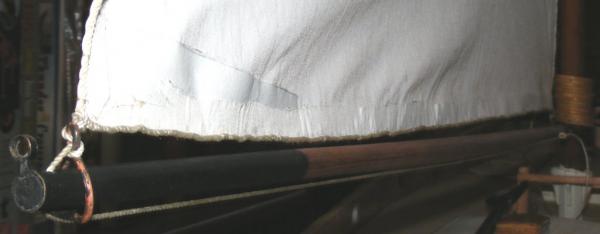
It's connected while the sail is set. It's disconnected on a sail that brails - sometimes. Here's the version Pride of Baltimore had and I recreated on my model. Her mains'l was lowered rather than brailed and except when reefing, the clew pendant was hardly touched.
- 15 replies
-
- 2
-
-
- Cutter
- Sherbourne
- (and 2 more)
-
I'd suggest meeting somewhere and sailing our 1:36 scale models together, but that might land us in Bogota or someplace.
-
Based on the original image - it's a preventer tackle, to hold the boom out against a gybe. It's not shown connected as clew tackle would be.
- 15 replies
-
- 3
-
-
- Cutter
- Sherbourne
- (and 2 more)
-
Running around town a lot today, so I only managed a little bit of paint.


- 553 replies
-
- 6
-
-
- sloop of war
- constellation
- (and 3 more)
-
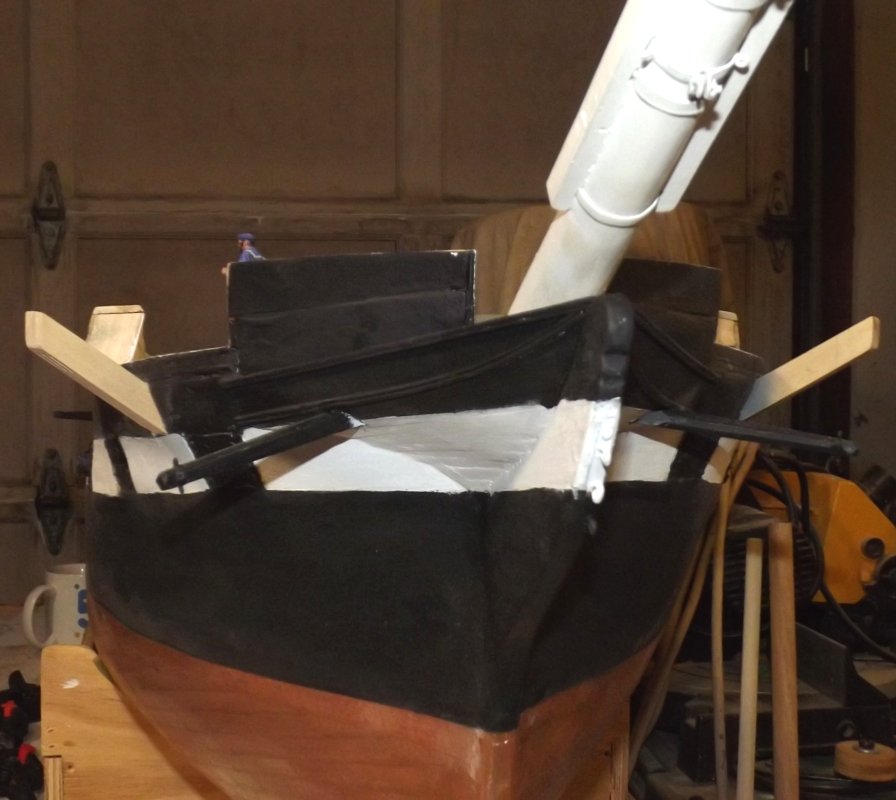
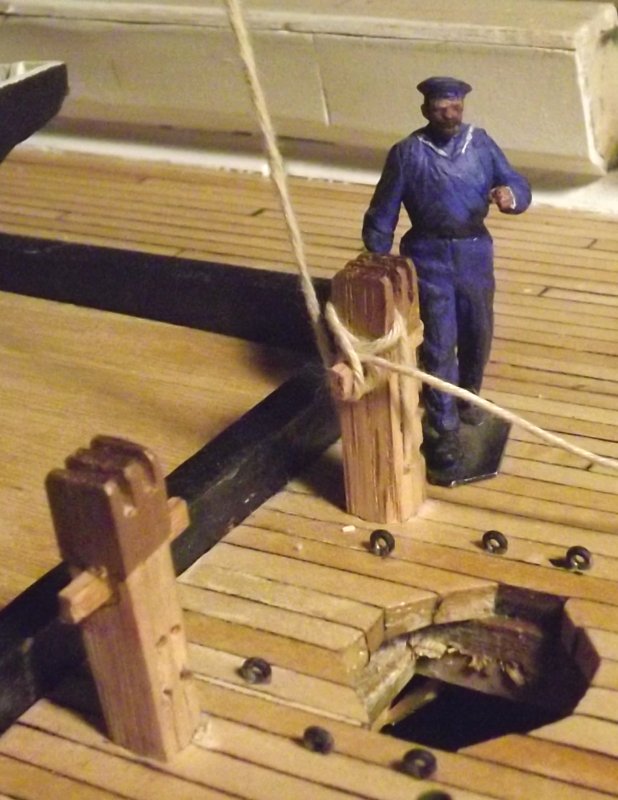
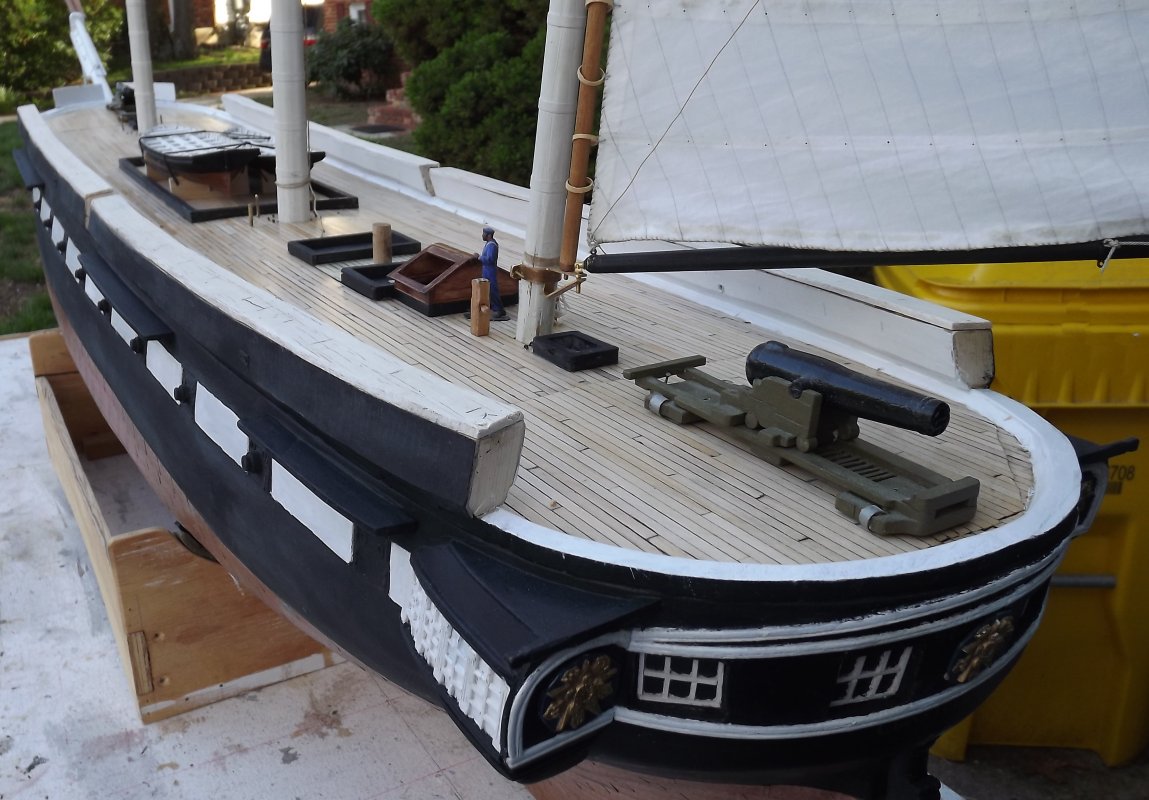
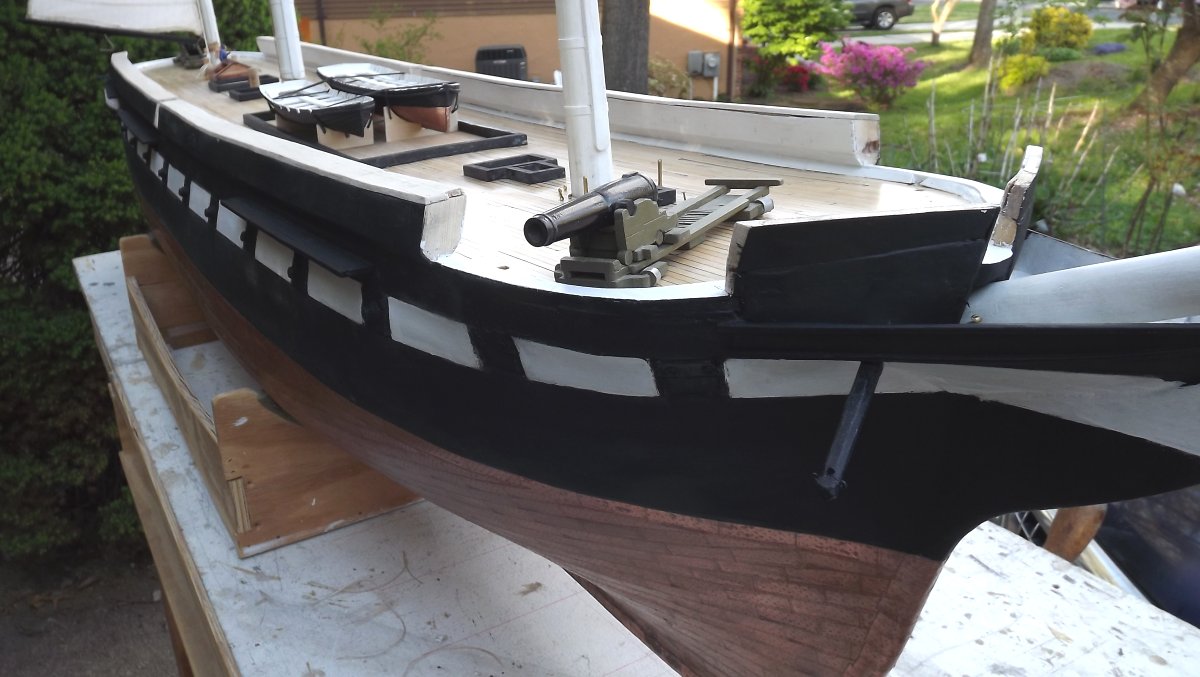
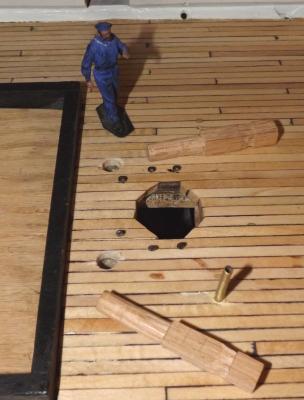
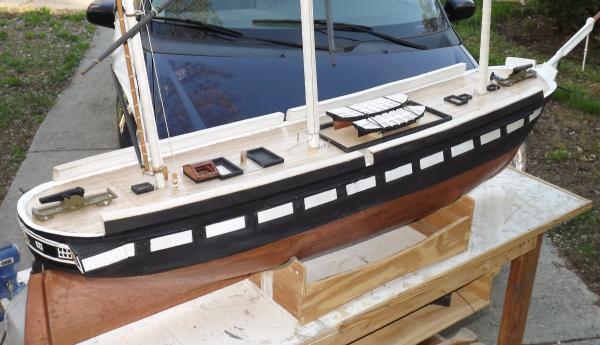
Finished making and installing the mizzen bitts. Built up the bow bulwarks and padding the bowsprit hole.


- 553 replies
-
- 5
-
-
- sloop of war
- constellation
- (and 3 more)
-
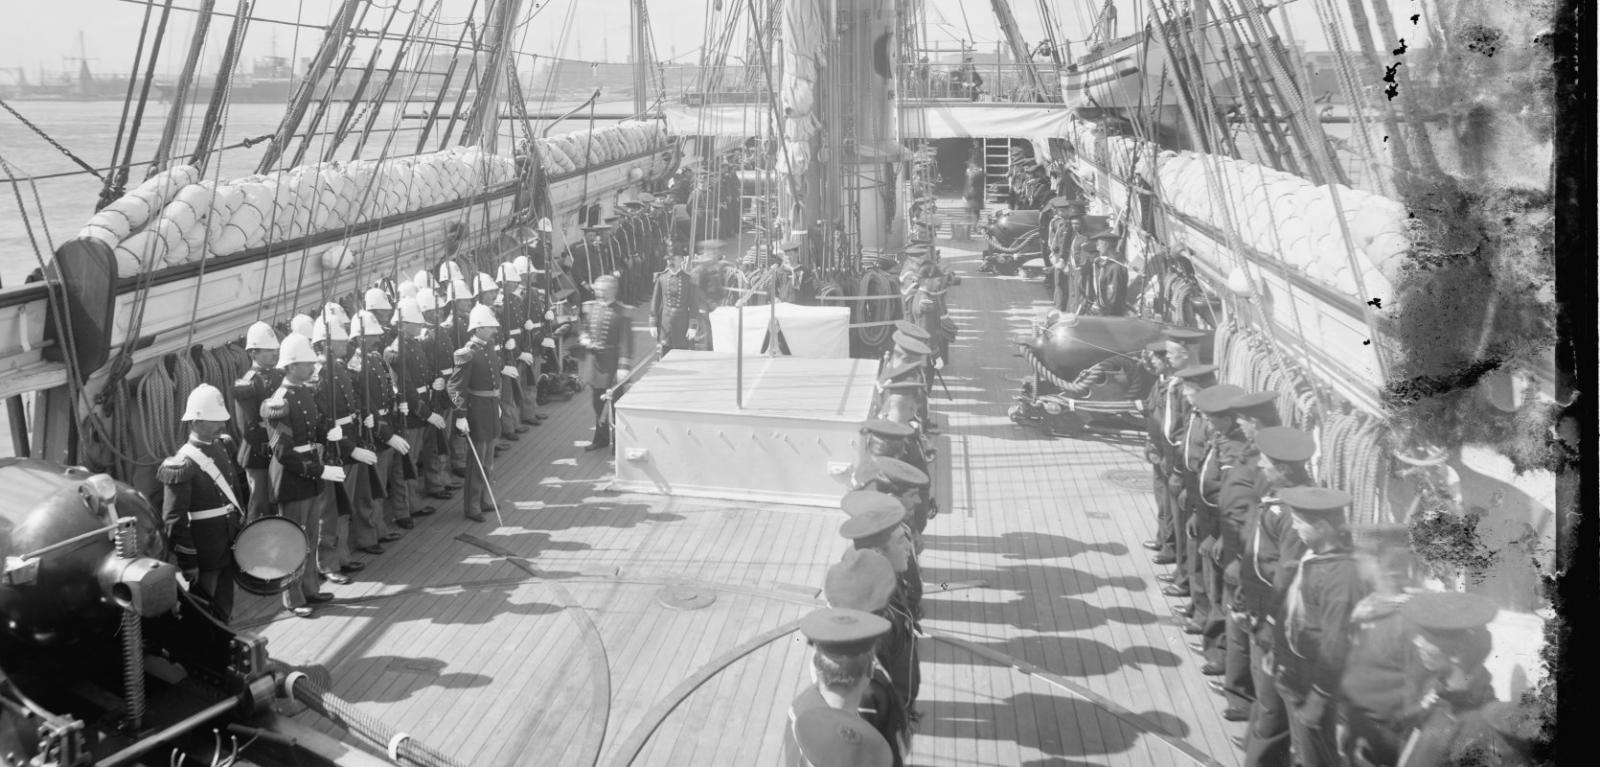
I apparently misjudged the size of the hammocks - these buggars must have been used as tents ashore as well - they're big! Kearsarge 1880's

- 553 replies
-
- 5
-
-
- sloop of war
- constellation
- (and 3 more)